JohnB
-
Posts
7,206 -
Joined
-
Last visited
Content Type
Profiles
Forums
Events
Gallery
Everything posted by JohnB
-

ZM A-1 Skyraider back on tap!
JohnB replied to JohnB's topic in LSM 1/35 and Larger Work In Progress
Agreed Carl. Tamiya has the right idea. Gimmicky "make work" stuff just makes a build more difficult and is usually useless. -
ZM A-1 Skyraider back on tap!
JohnB replied to JohnB's topic in LSM 1/35 and Larger Work In Progress
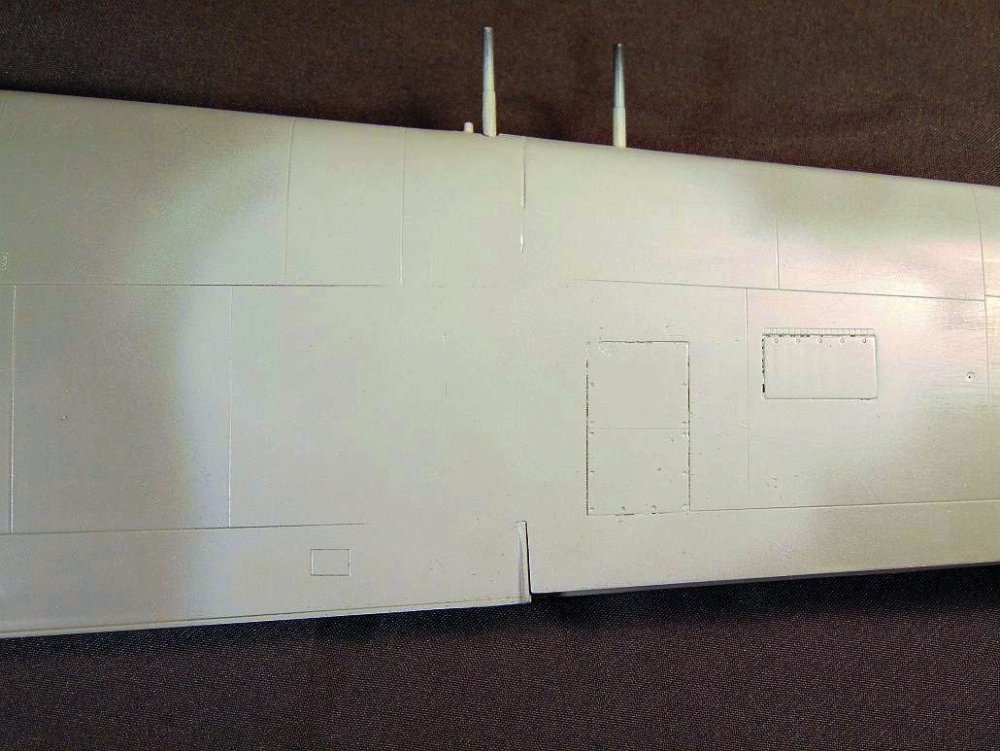
I decided to see if I could "rescue" this kit from the SOD and clean up the wing problems. I think I've gotten them to a acceptable appearance. Not even close to perfect but with a little re-scribing they should be lots better. Now I'll continue on with this build.
-
Hasegawa 1/48 F-4B finished
JohnB replied to JohnB's topic in LSM 1/32 and Larger Aircraft Ready for Inspection
Thanks Phil! I'm glad you like it. Goes to show even though a kit is old it can still be built up to look good. -
Glad to know I'm not the only ham-fisted klutz around here! LOL 😄
-
Hasegawa 1/48 F-4B finished
JohnB replied to JohnB's topic in LSM 1/32 and Larger Aircraft Ready for Inspection
LOL I guess you like it then huh Martin? 😄 -
Hasegawa 1/48 F-4B finished
JohnB replied to JohnB's topic in LSM 1/32 and Larger Aircraft Ready for Inspection
Thank you Gaz! I appreciate that very much. Glad you like it. -
Hasegawa 1/48 F-4B finished
JohnB replied to JohnB's topic in LSM 1/32 and Larger Aircraft Ready for Inspection
Thanks Paul! I'm glad you like the ol' F-4. I think it turned out just fine (really better than I expected!). LOL -
Hasegawa 1/48 F-4B finished
JohnB replied to JohnB's topic in LSM 1/32 and Larger Aircraft Ready for Inspection
Thanks for the kind words Peter. I'm happy you like the final product! Just because a kit is old doesn't mean it's not any good. Not sure about what's next. I pulled the ZM Skyraider off the SOD for another look but I'm undecided if I want to resume that one. 😄 -
All done Peter. https://forum.largescalemodeller.com/topic/17040-hasegawa-148-f-4b-finished/
-
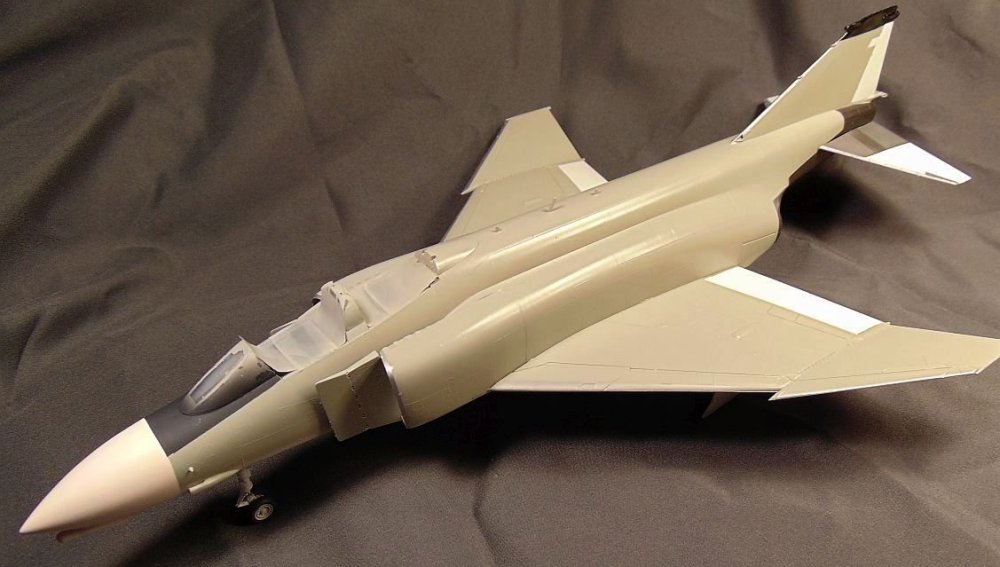
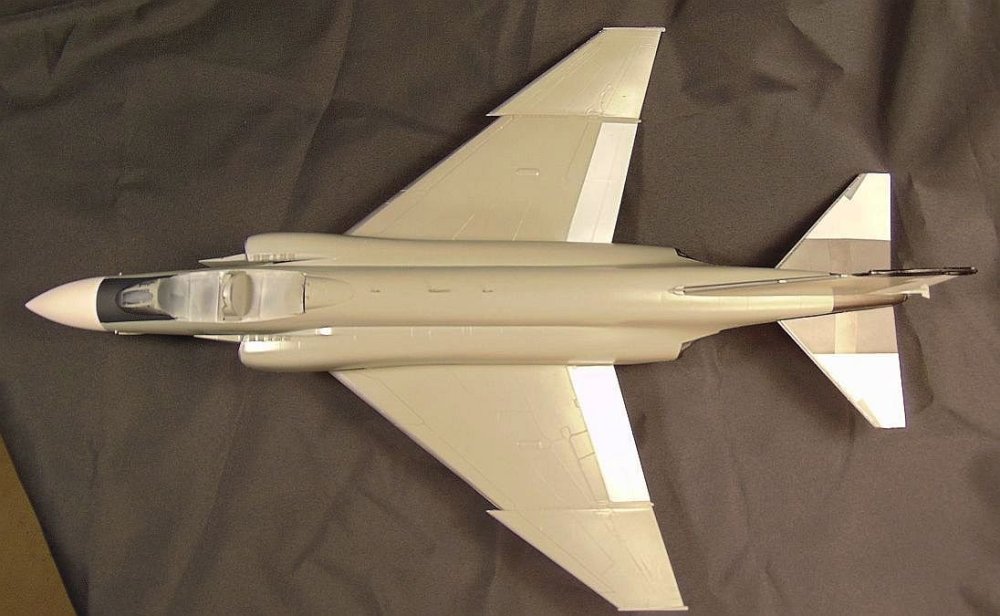
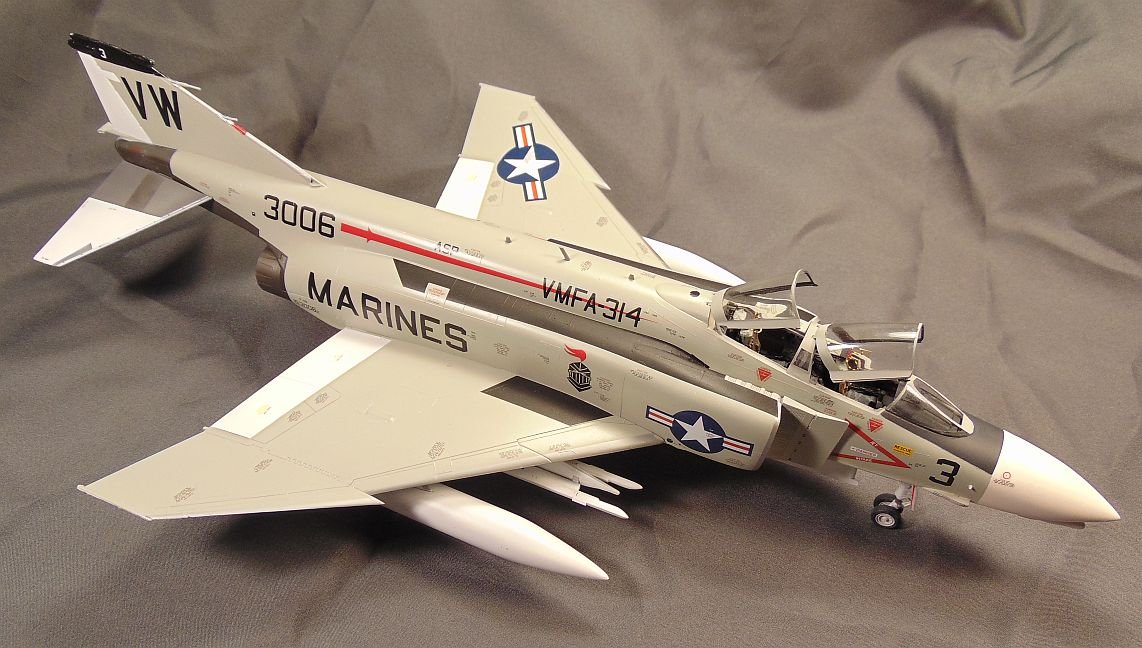
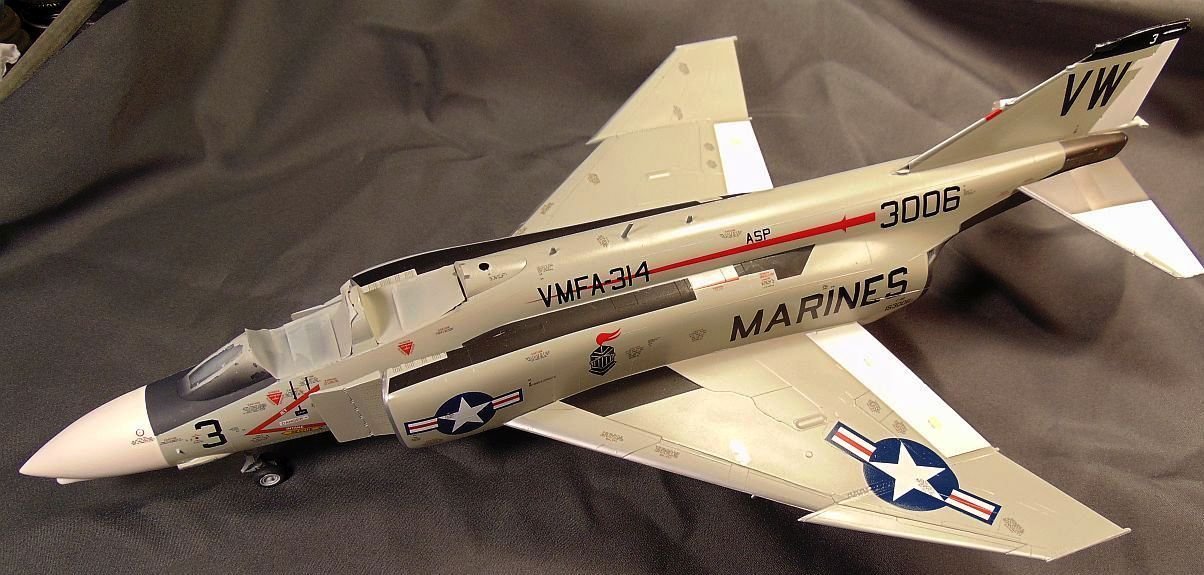
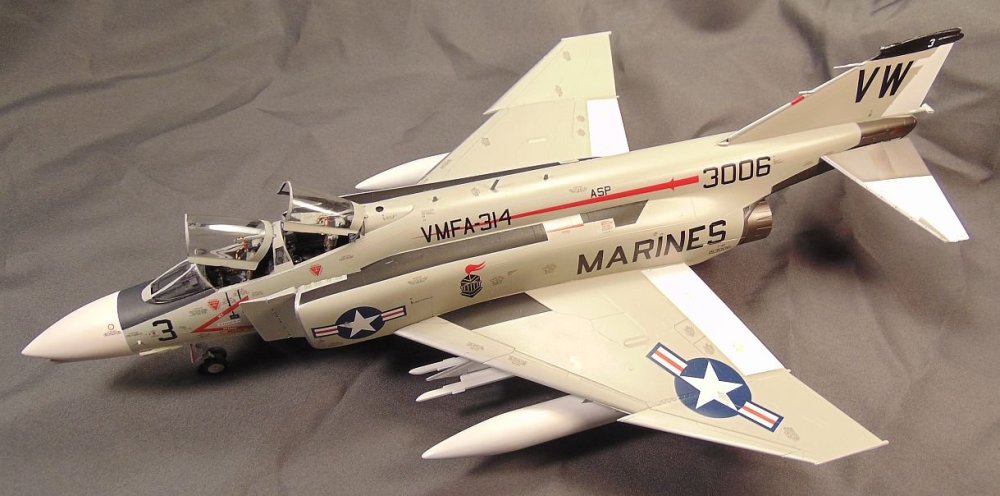
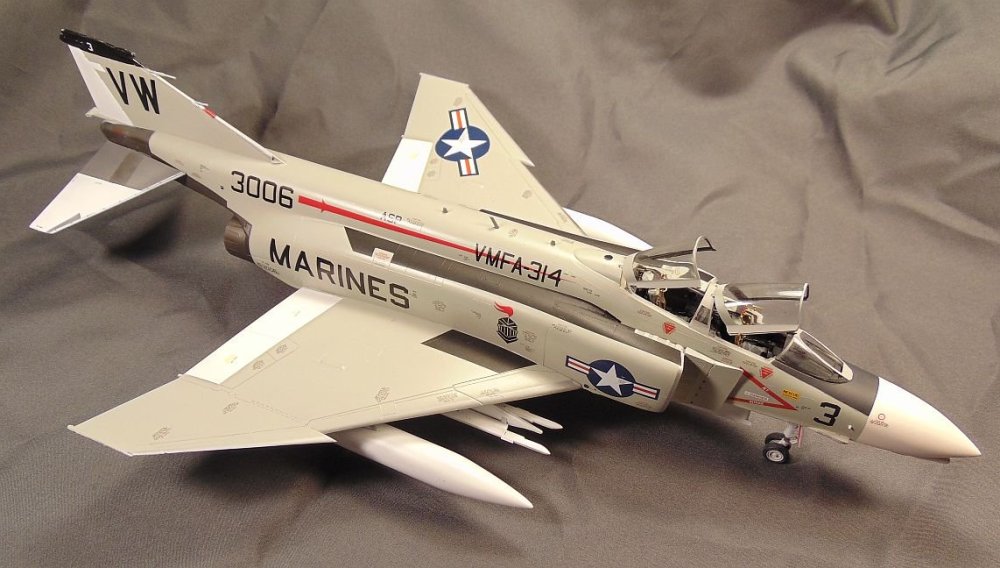
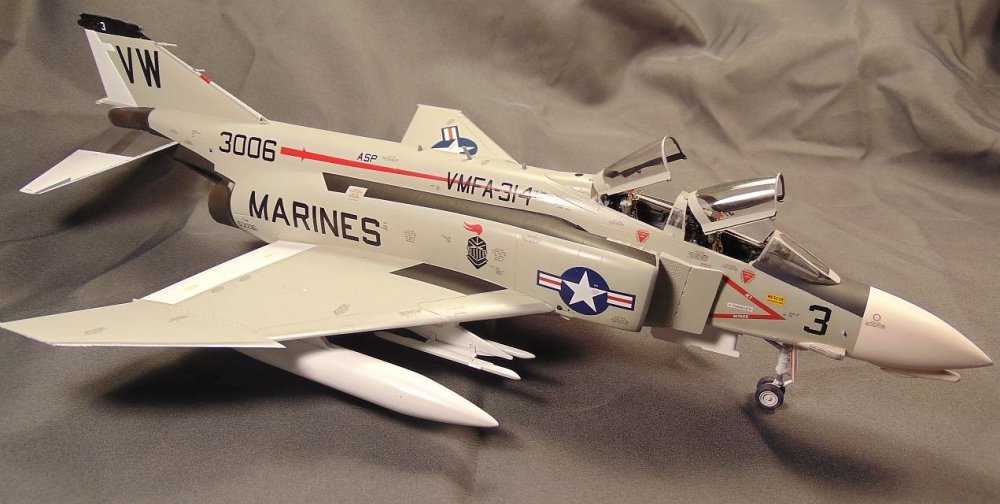
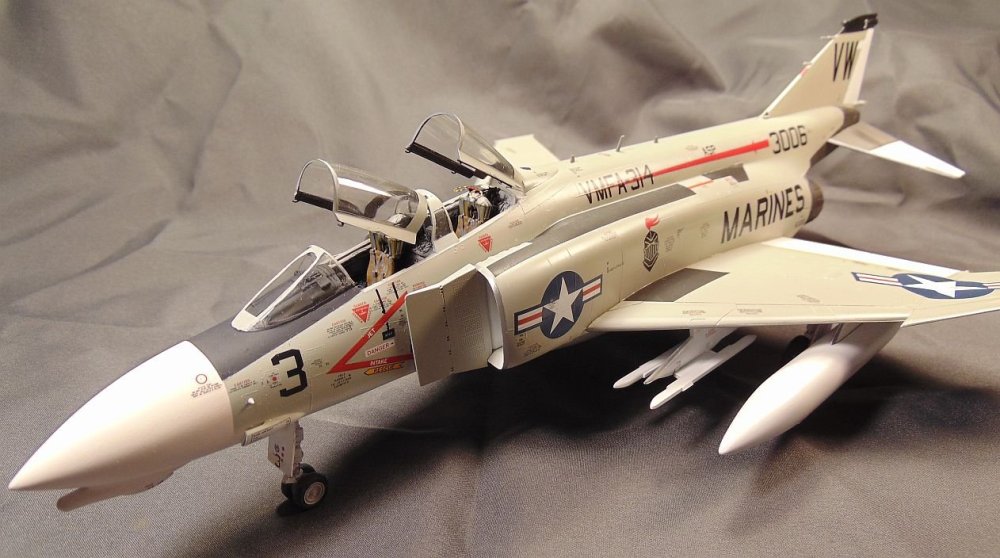
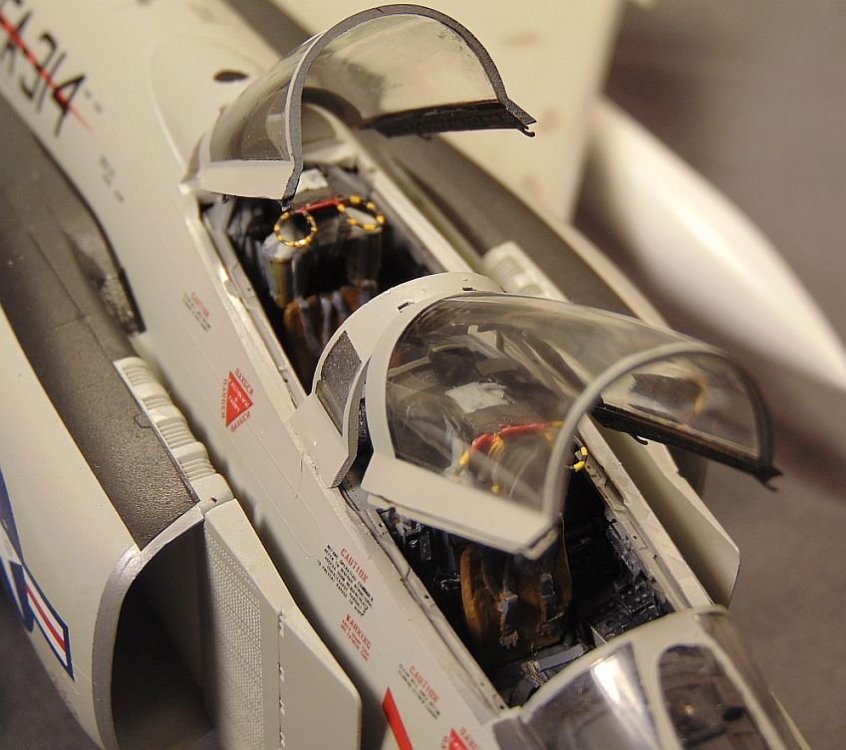
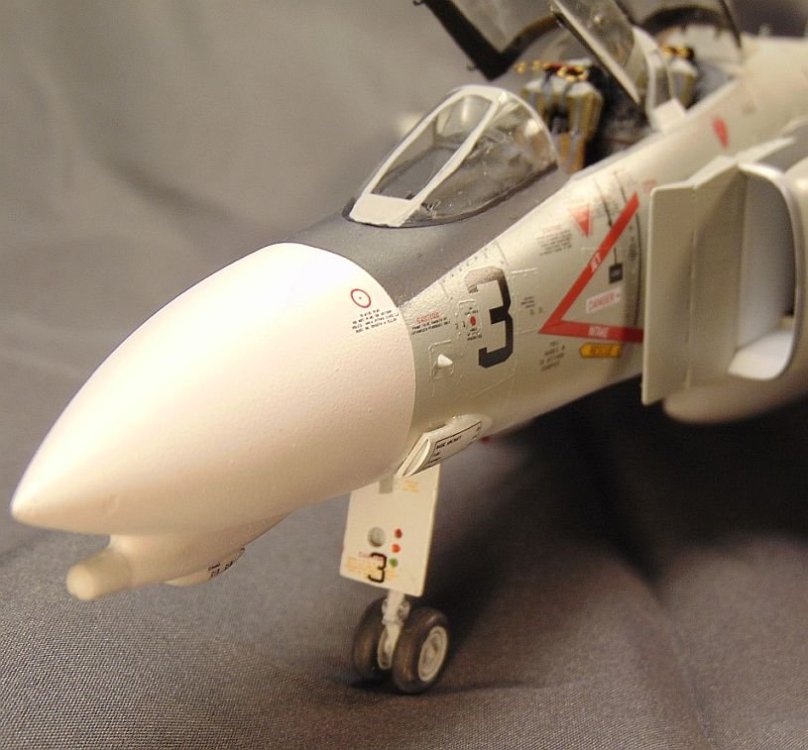
This is the old Hasegawa (1983) release of this kit. It's been on my shelf for a looong time! It's still a great kit with good detail and excellent fit. I used a Aires cockpit, Quickboost seats, and AOA decals on the build. Painted with Testor's MM throughout. This a/c was flown by Maj. John Trotti from Chu Lai Vietnam in the late 60's. His book, Phantom Over Vietnam, was the "inspiration" for this build. I hope y'all will like the results of my efforts! Remember to click on the 1st photo for best resolution and to easily view as a slide show.
-
Thank you Peter. I'm in the process of adding all the underwing stuff (doors, struts, drop tanks,etc) and should have it finished later today (with luck!).
-
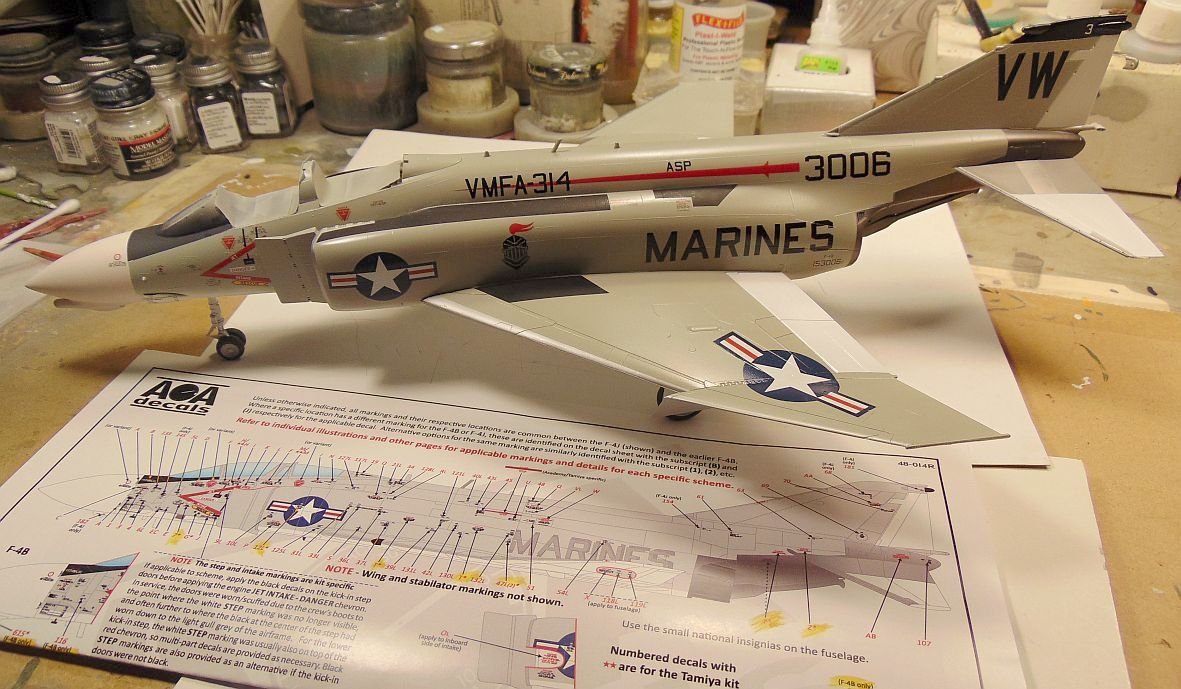
About finished with the decals. Next I'll overspray with clear semi-gloss then finish adding the rest of the pieces.

-
Thanks Gaz. They are great decals but you have to be very careful with them.
-
LOL Thanks Paul. This is a very easy kit with no real problems. Everything fits fine (a nice change from my last two builds!).
-
Thanks! Yes, they are very nice decals. Printed by Microscale. Very thin, etc.
-
Decaling coming right along. Those AOA decals are very thin and "touchy" but lay down well.

-
Thank you Gaz. The first application just didn't look "right" although it was supposed to be Lt. Gull Gray (Humbrol/Monogram). I re-sprayed it with the last of my Model Master Flat Gull Gray then oversprayed that with Humbrol Gloss Coat. Looks okay I think. Now it's on to the decaling!
-
I look forward to that!
-
Looking good!
-
Yes indeed the Mossie is a winner. As far as the Mustangs are concerned, I think they too are really good kits. The only "fly in the ointment" with them is the rivet patterns on the wings. Most '51's wings were coated (with epoxy I think) and the rivets weren't visible. Otherwise no problems.
-
I agree it's a great kit but I have to say I think the Corsairs, all 3 issues, are at least as good.
-
Great looking 'skeeter Peter! (No pun intended! LOL)
-
One Month Challenge: COMPLETED
JohnB replied to GazzaS's topic in LSM 1/35 and Larger Work In Progress
Feel better soon Gaz! Remember, feed a cold and starve a fever. When I feel a cold coming on I always take some Zicam. Works wonders! Outstanding work on the diorama! Way more work than I'd want to undertake! -
Thank you Peter. I'll begin applying decals today!
-
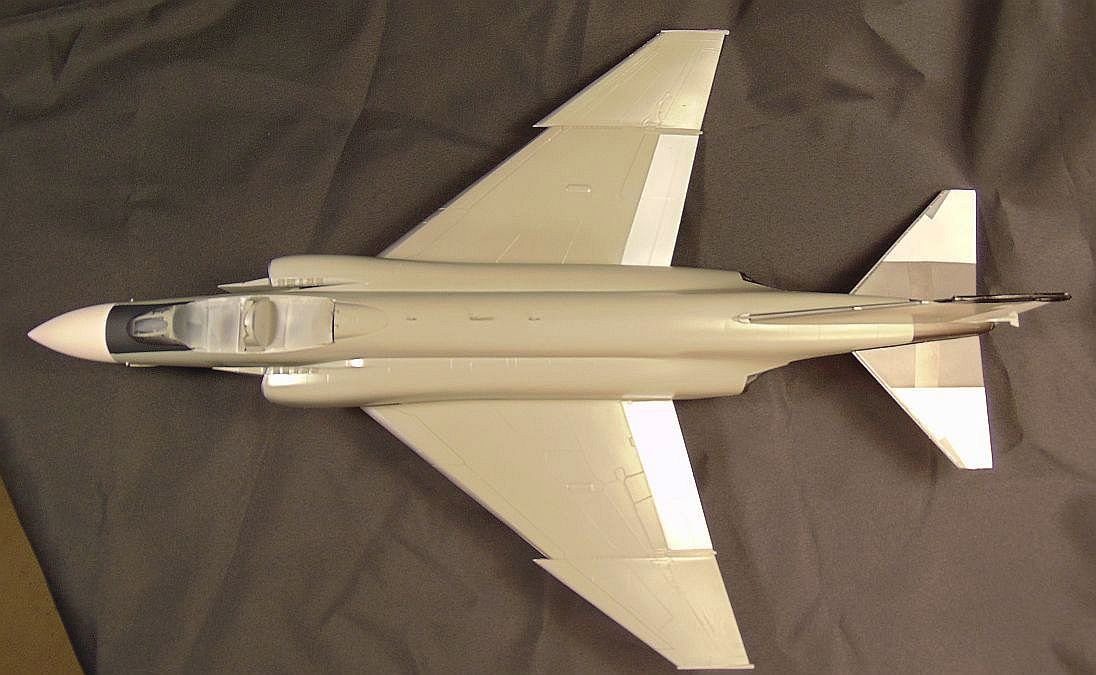
Painting complete. Decaling is next then I can attach the gear doors, etc.