JohnB
-
Posts
7,220 -
Joined
-
Last visited
Content Type
Profiles
Forums
Events
Gallery
Everything posted by JohnB
-

Ju-87G completed
JohnB replied to JohnB's topic in LSM 1/32 and Larger Aircraft Ready for Inspection
Thank you Kevin. I'm pleased that you like it. 🙂 -
Ju-87G completed
JohnB replied to JohnB's topic in LSM 1/32 and Larger Aircraft Ready for Inspection
Thanks Scott! Very much appreciated the nice comment. I'm glad you like the results of my efforts. 🙂 -
Finished! https://forum.largescalemodeller.com/topic/20445-ju-87g-completed/
-
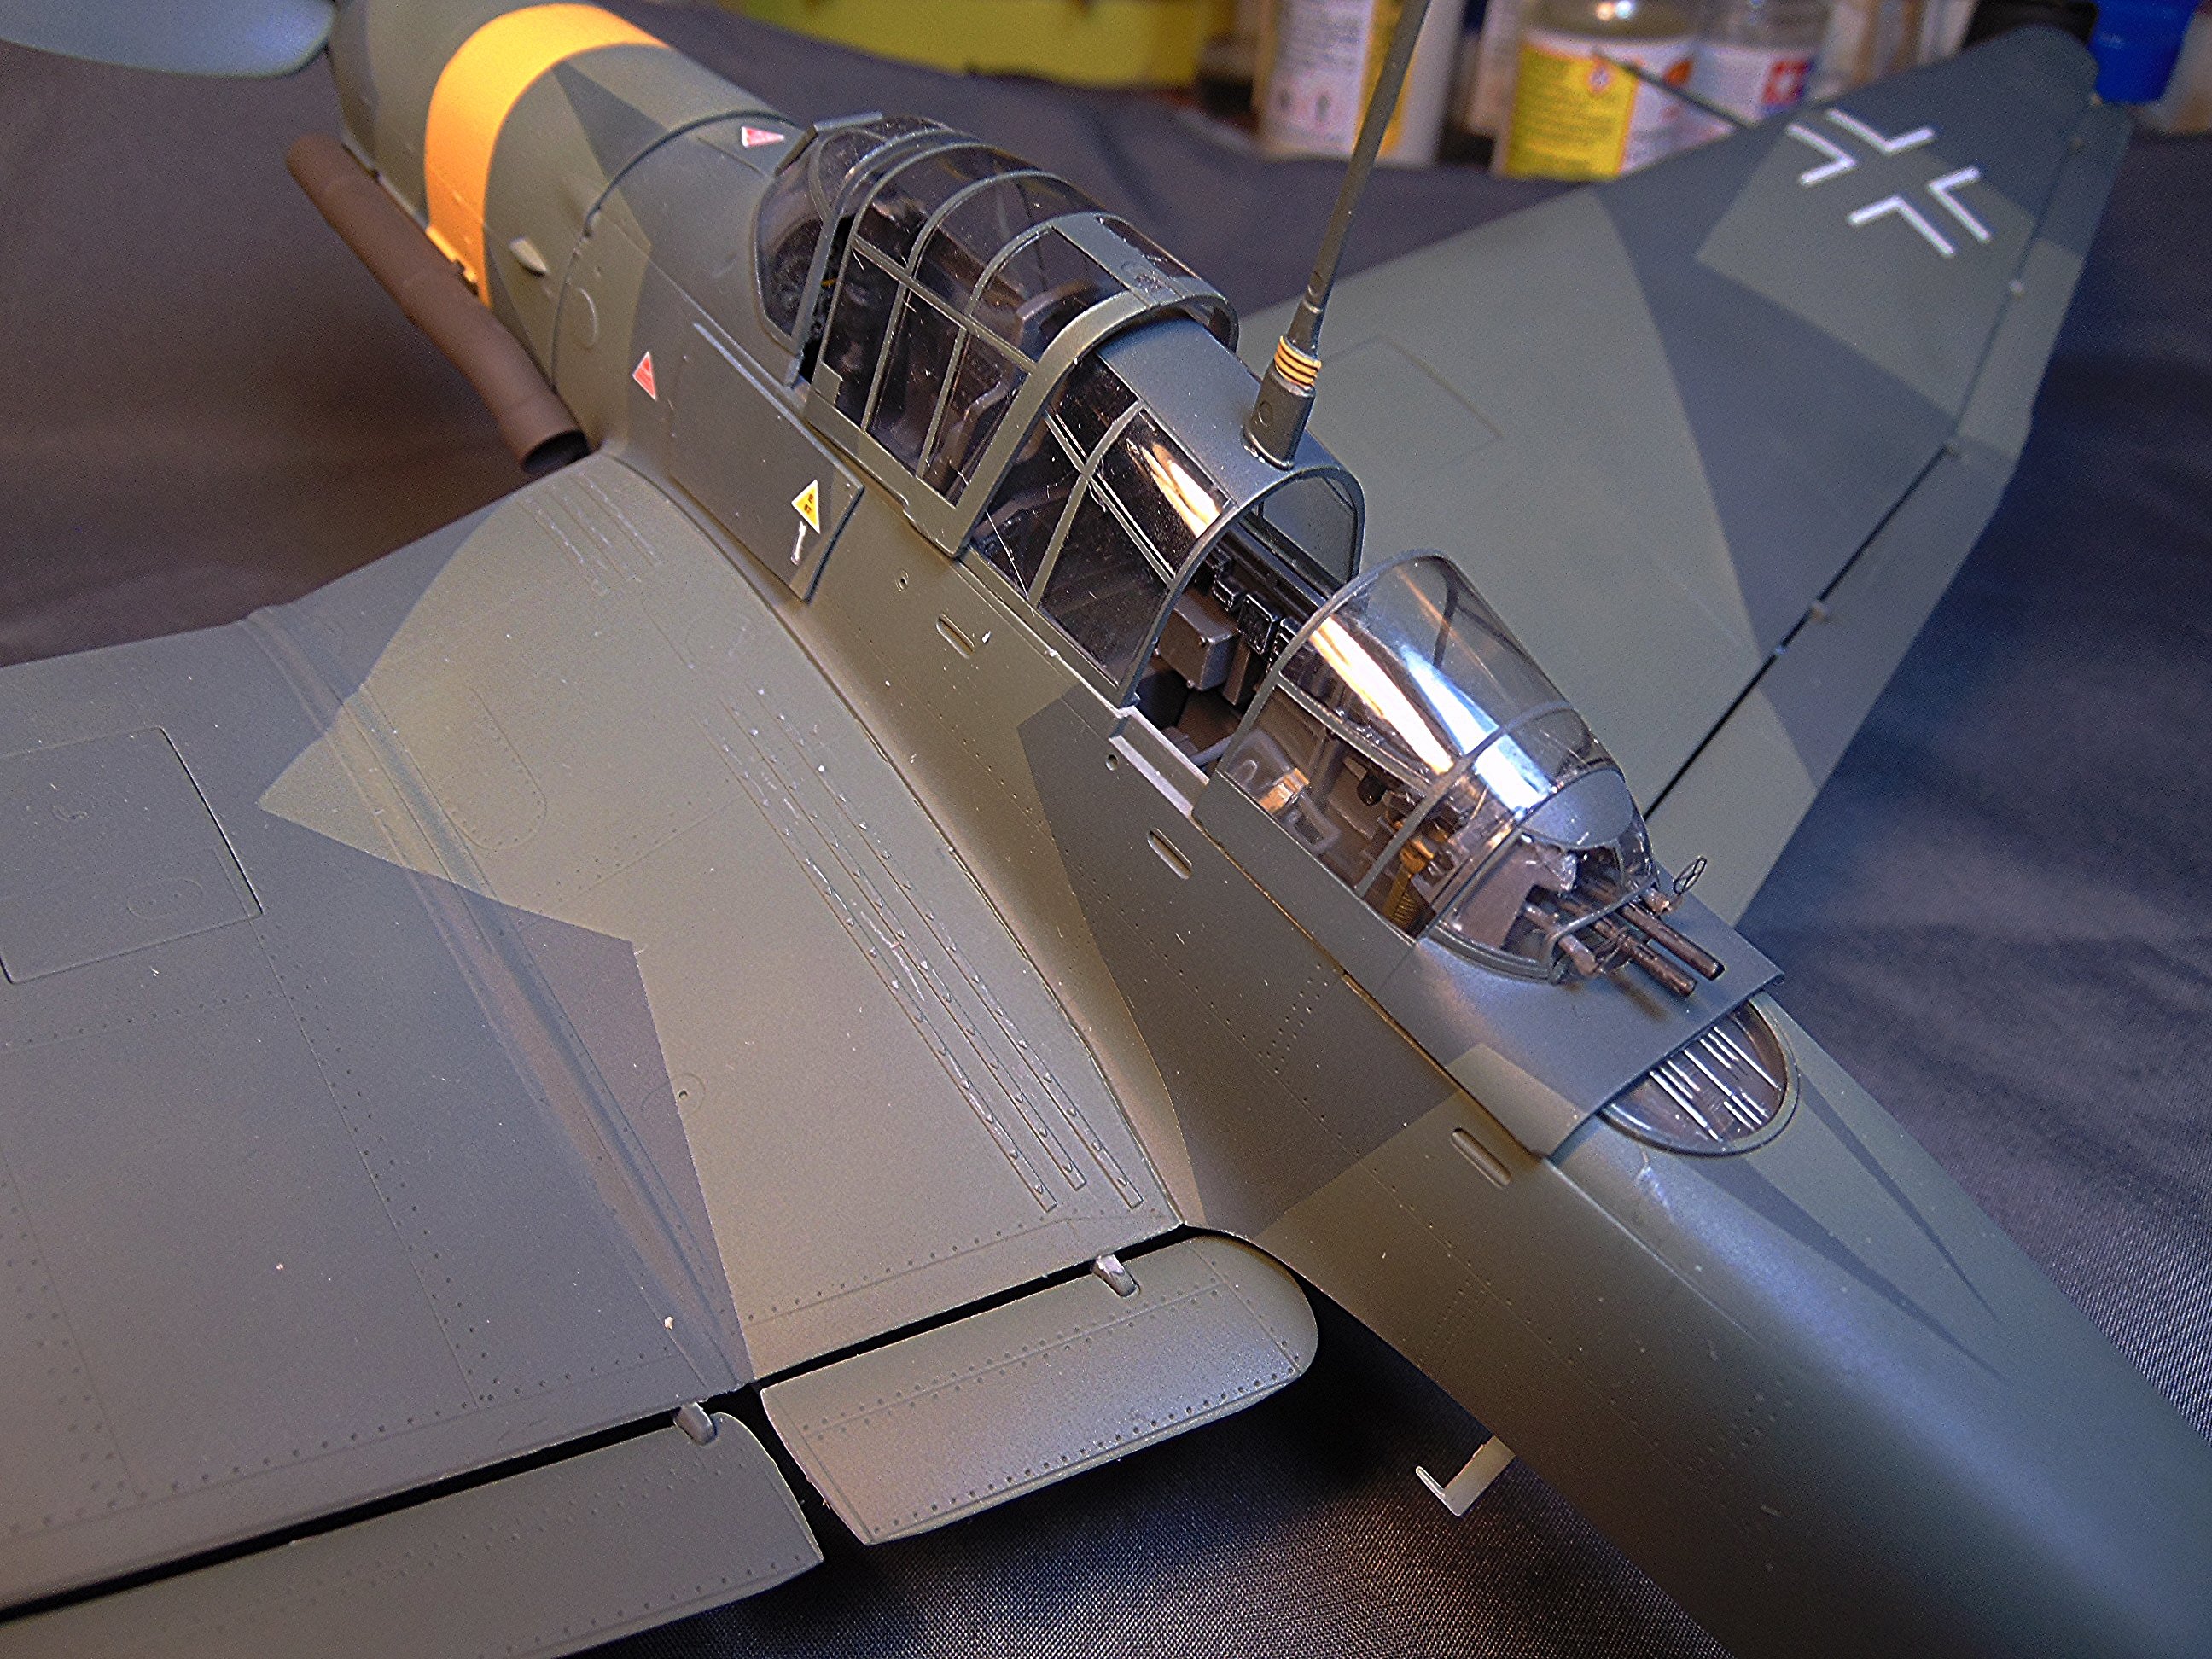
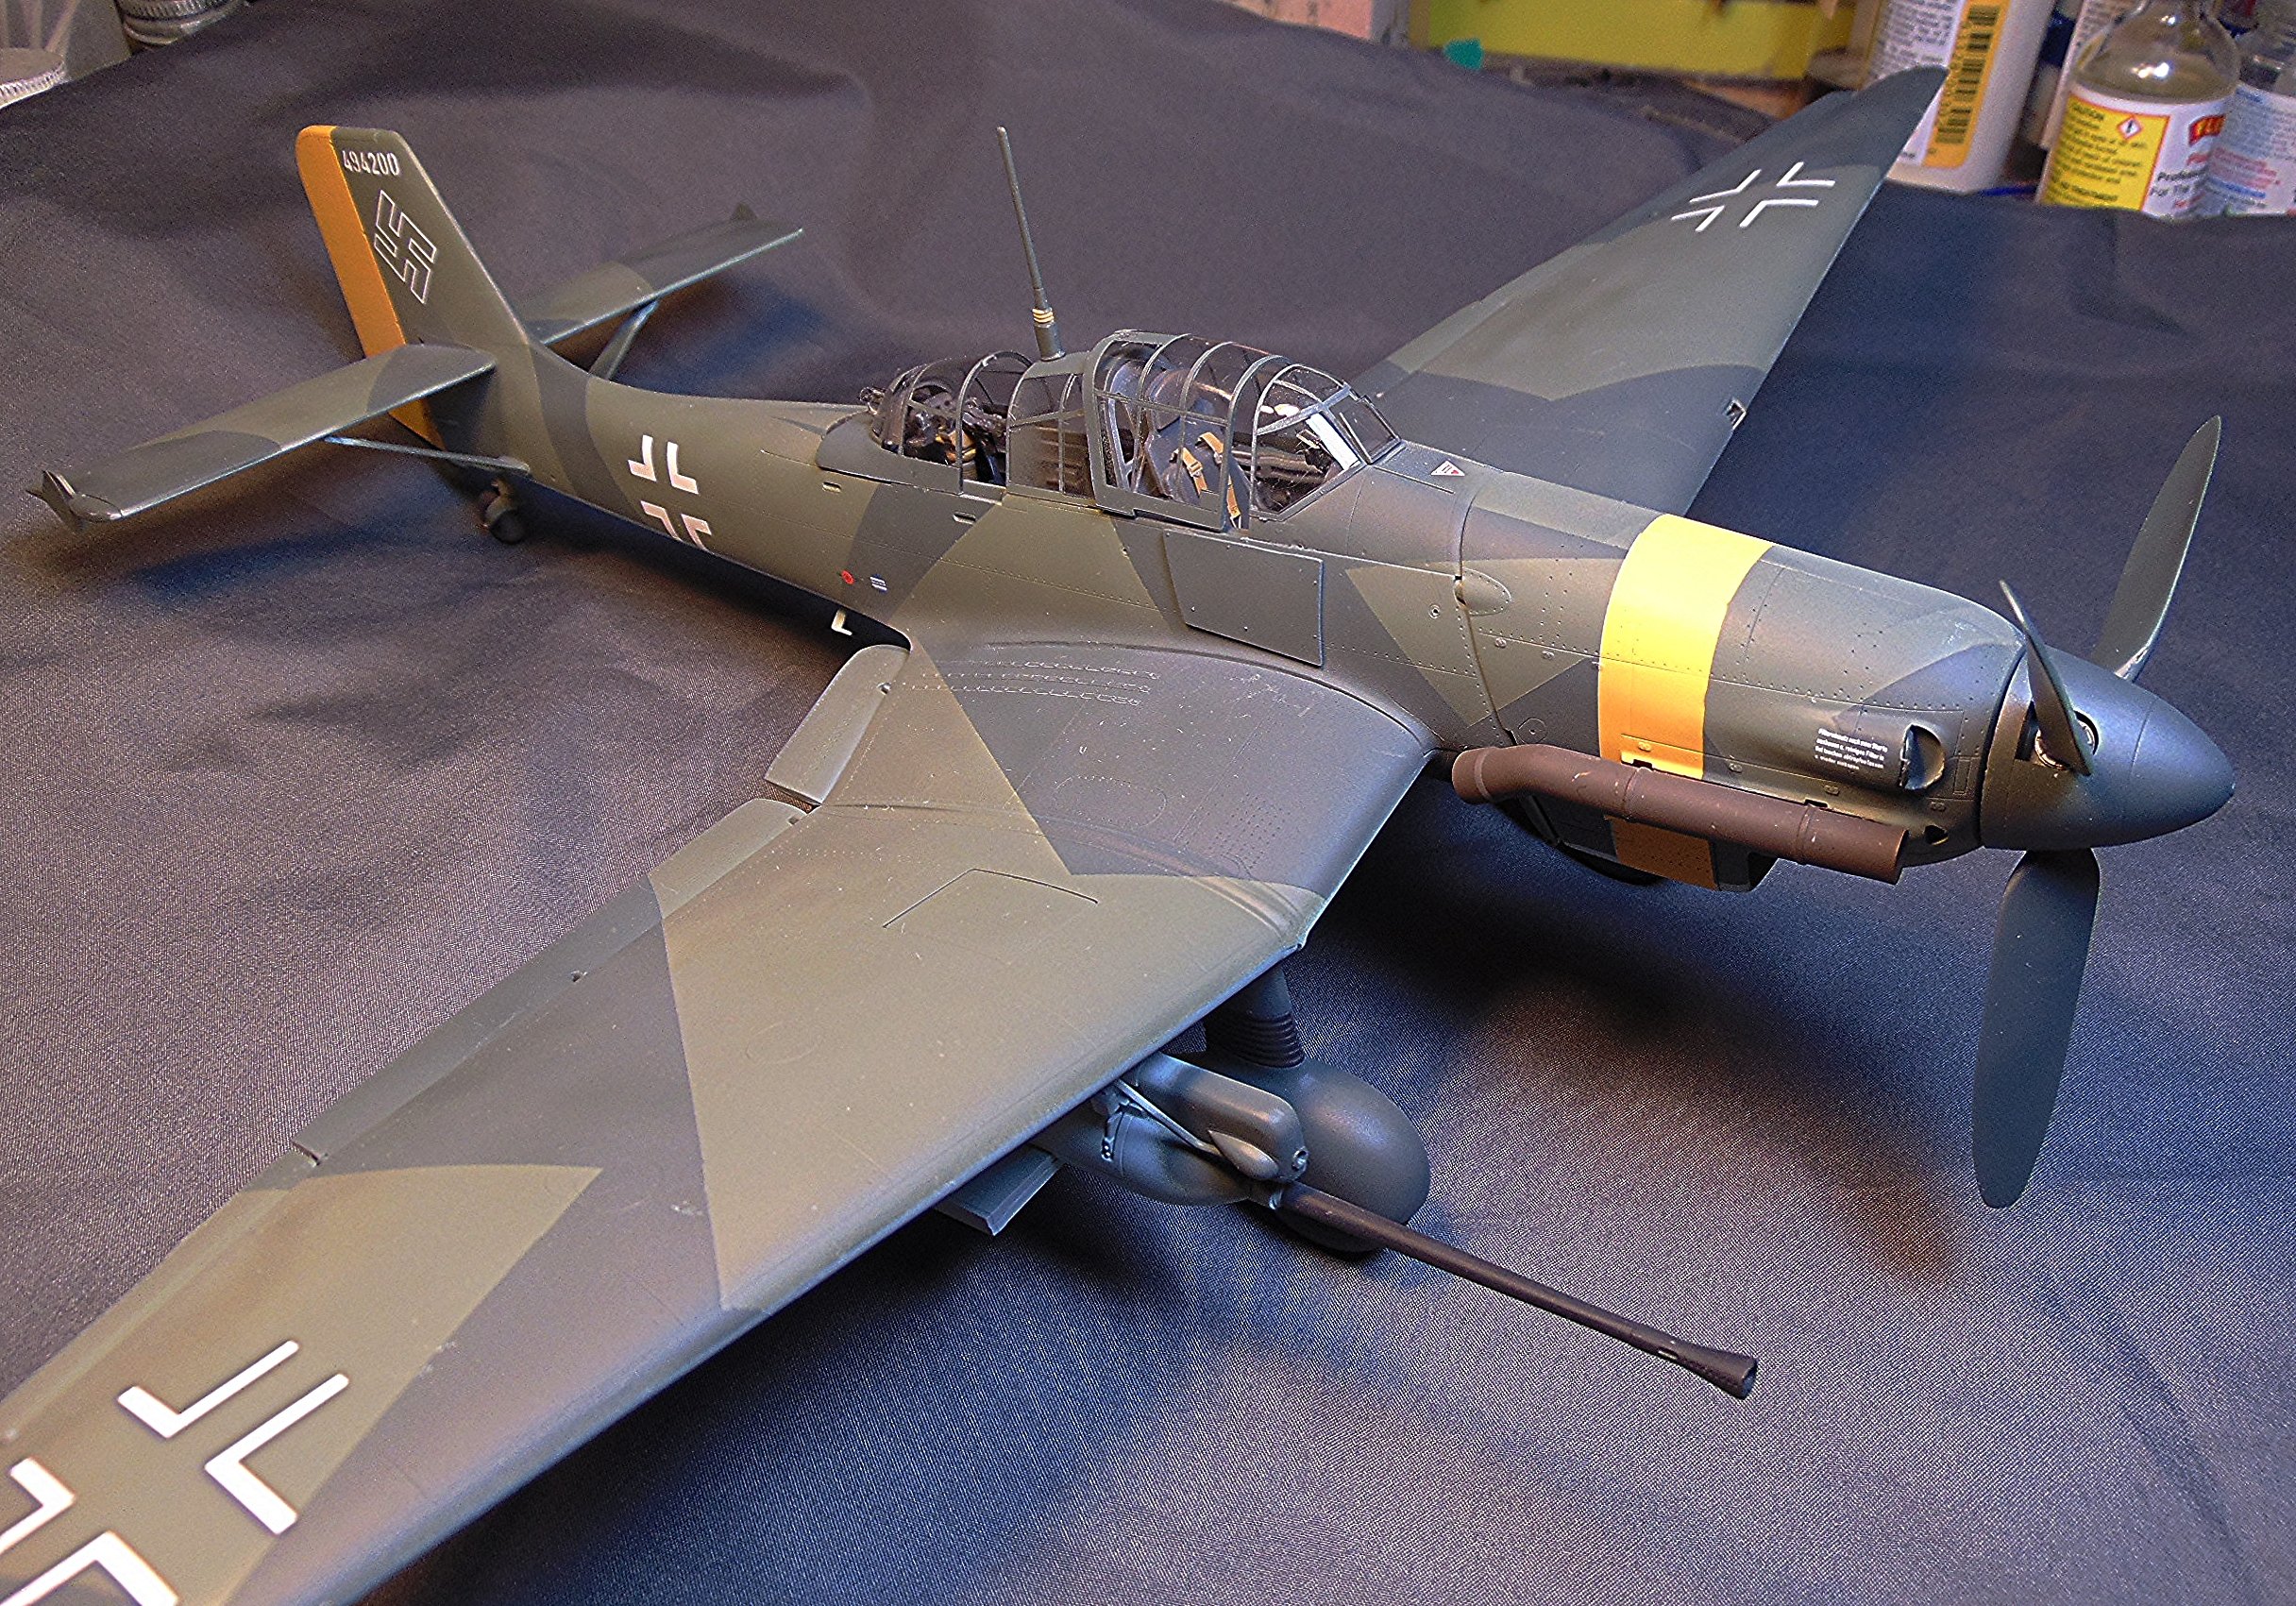
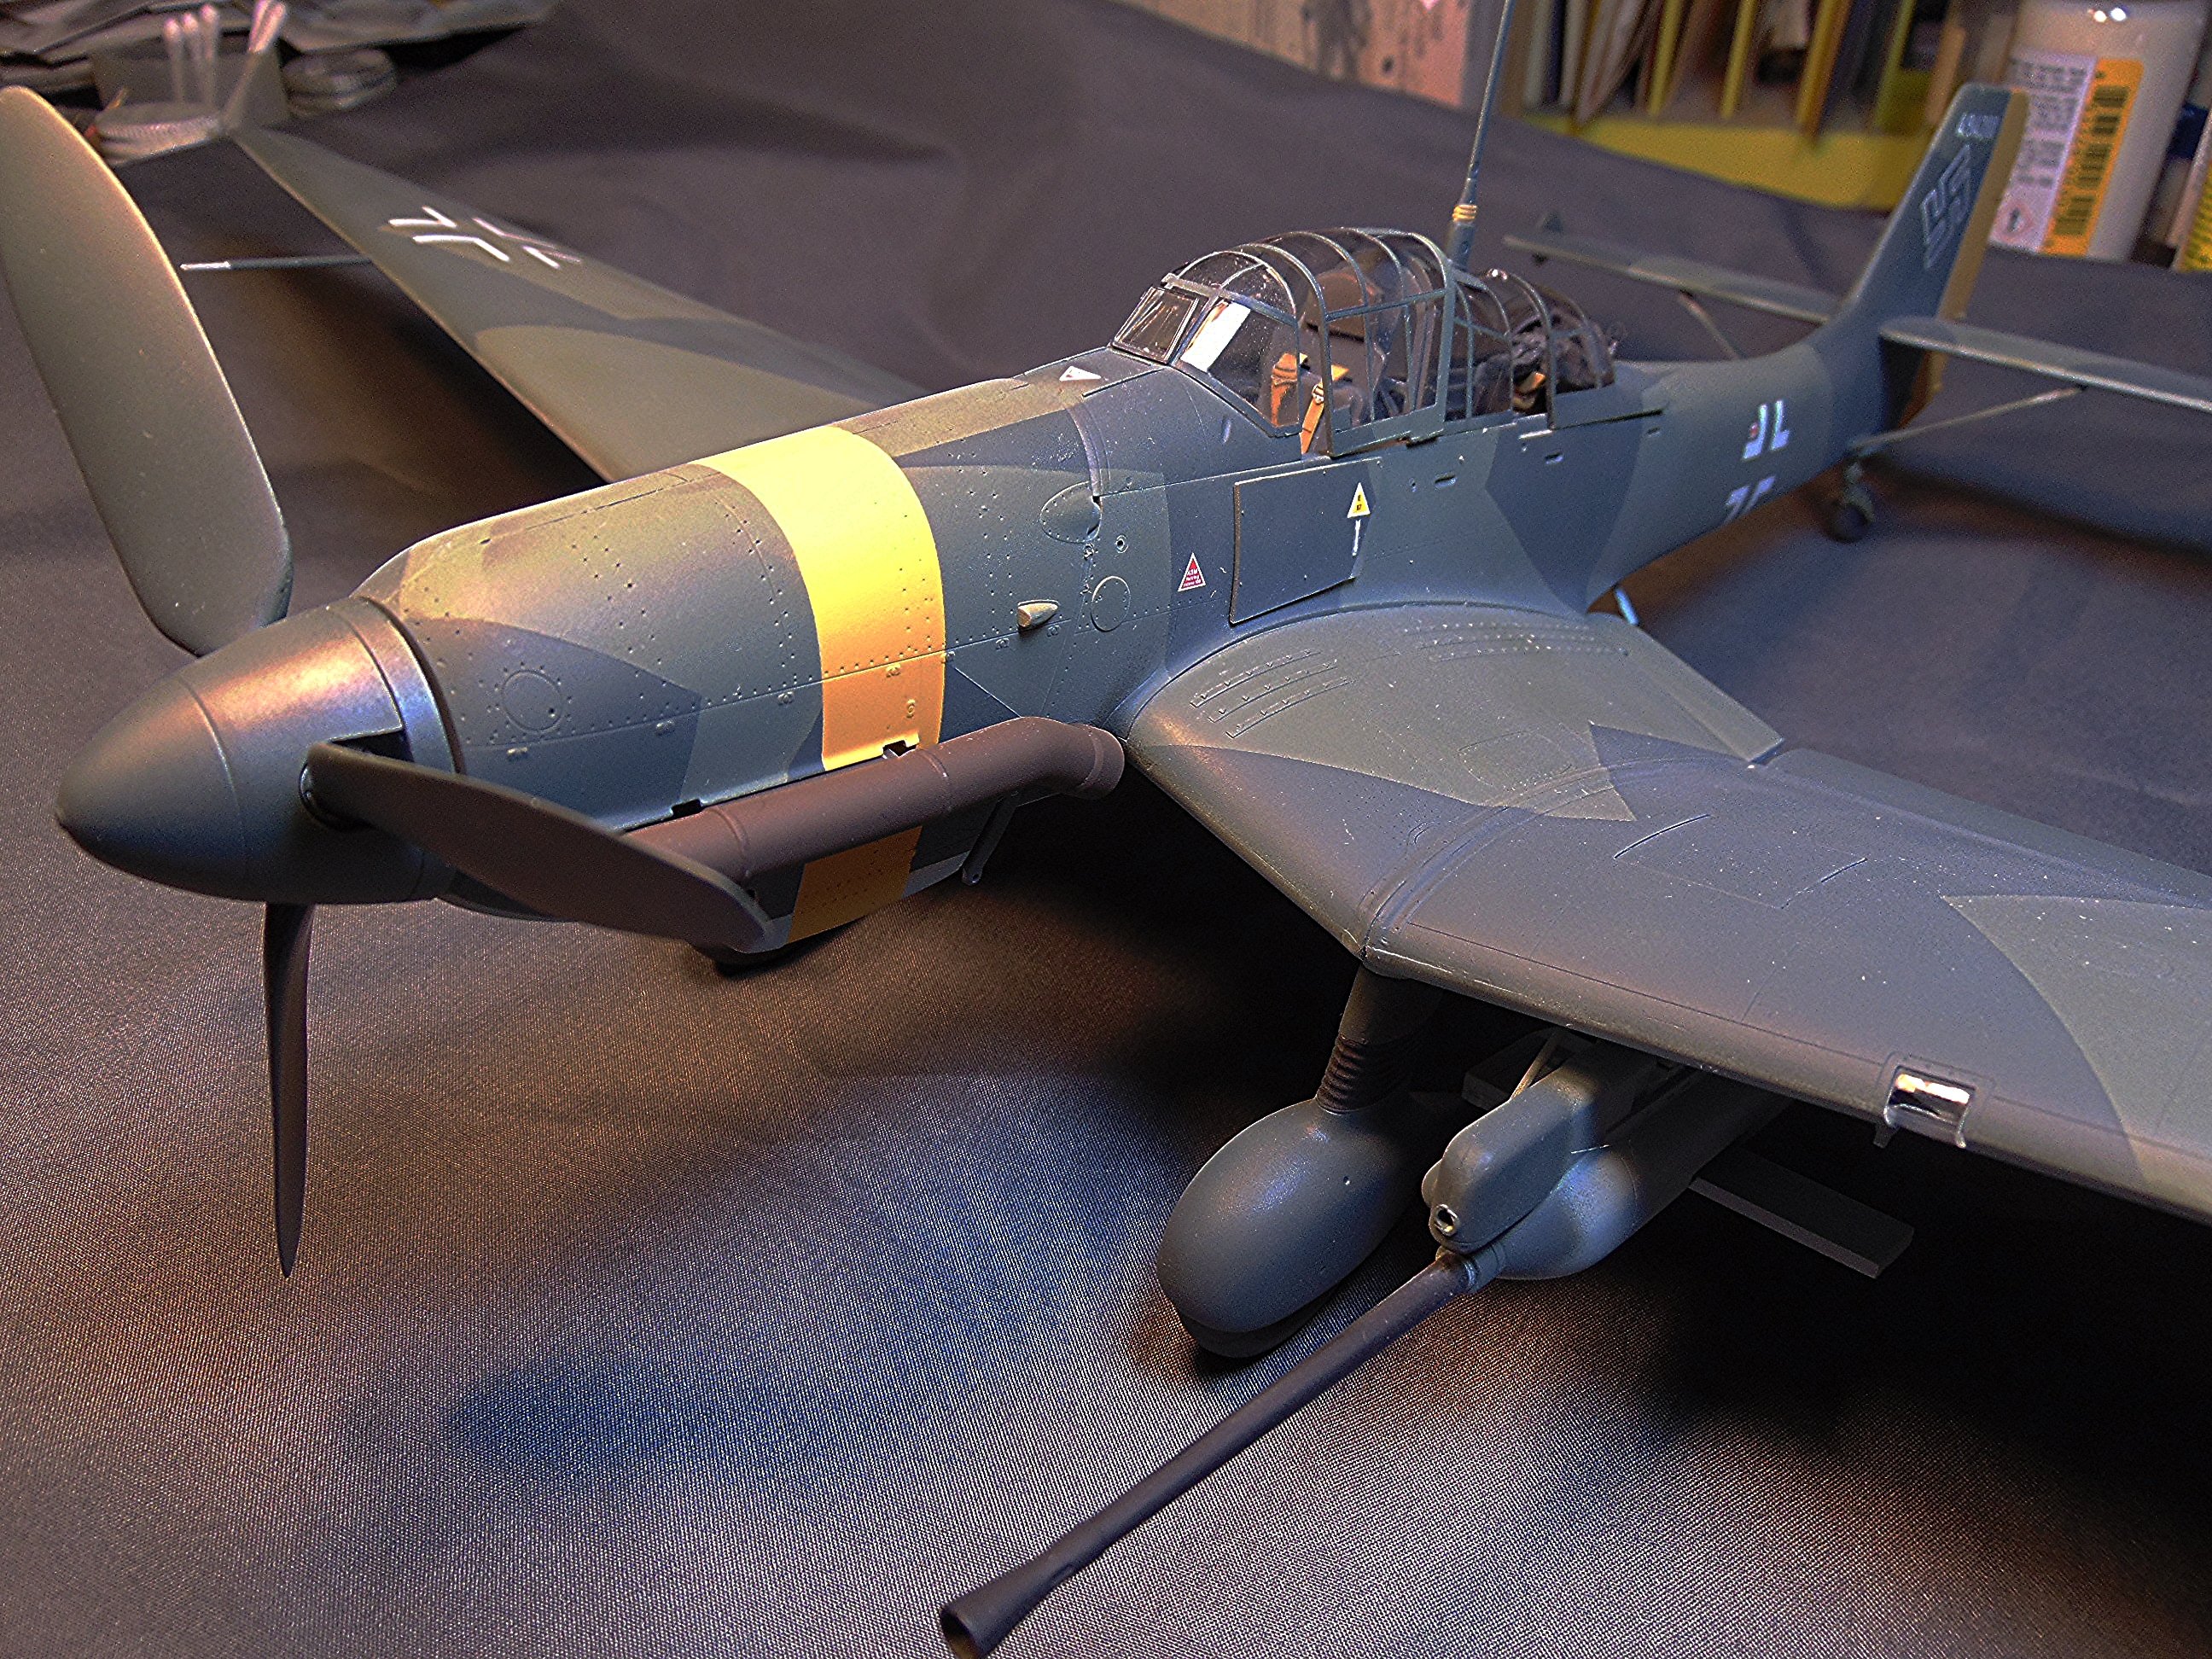
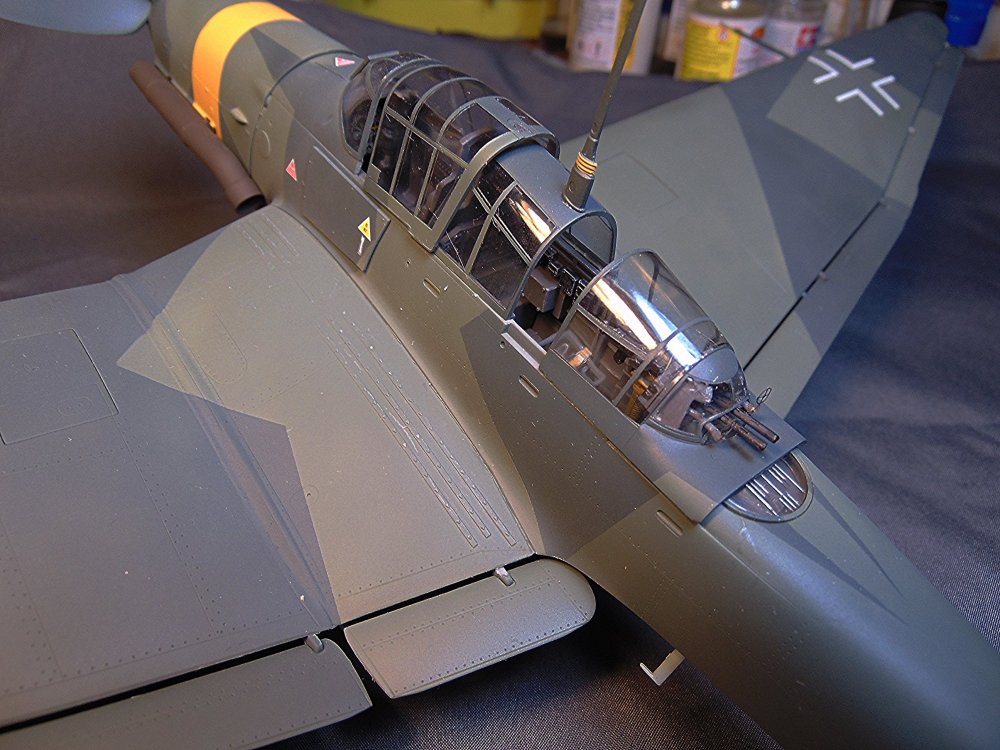
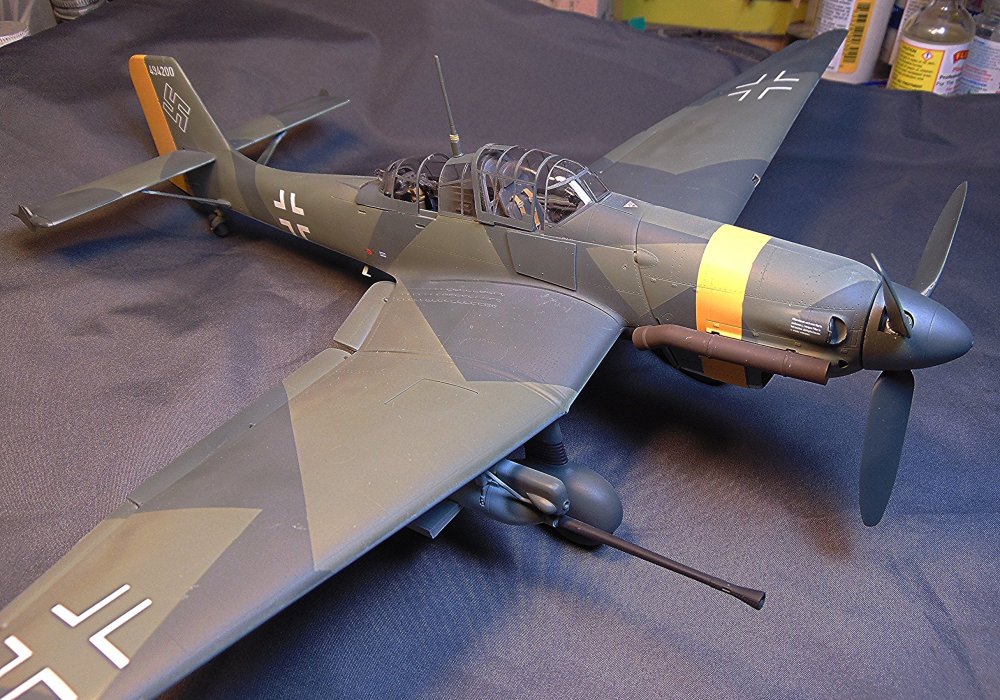
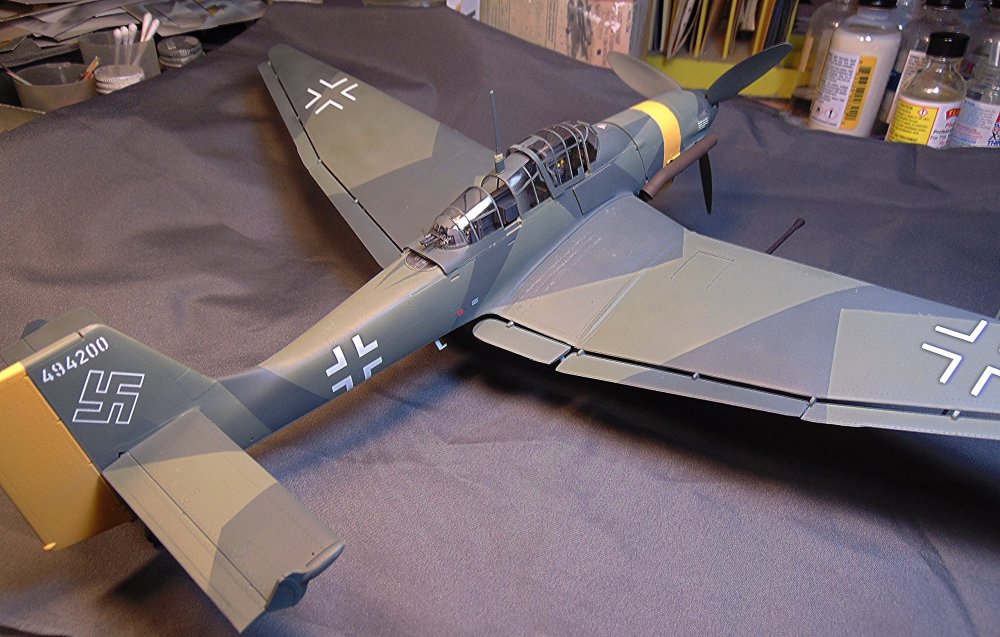
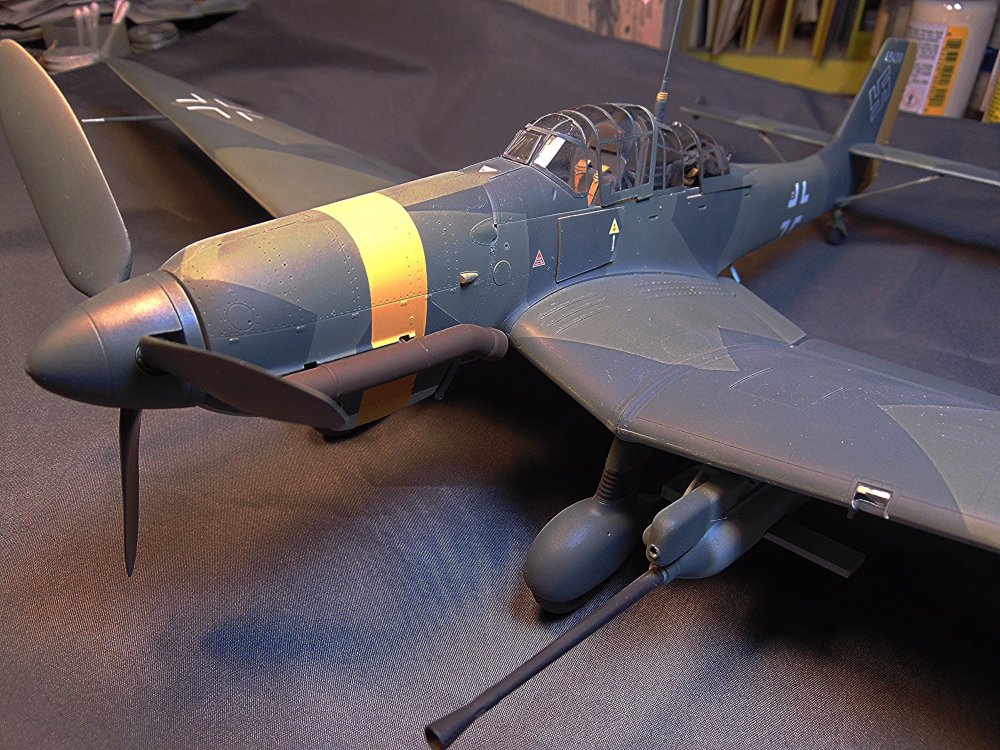
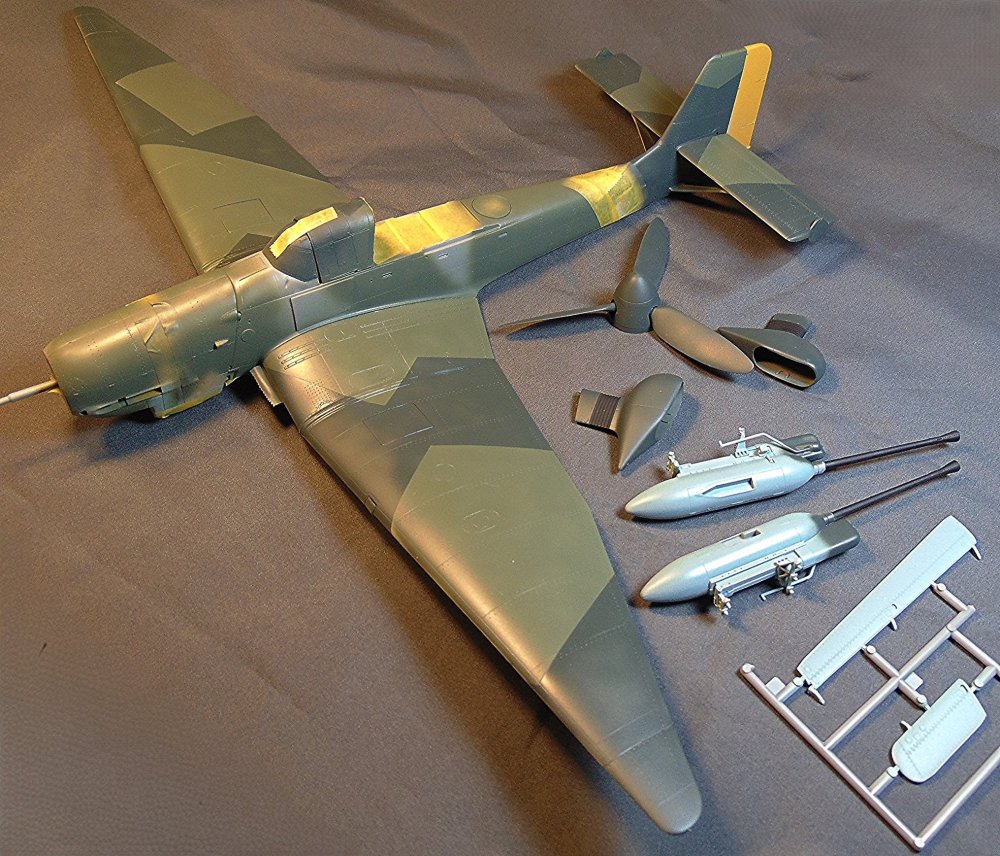
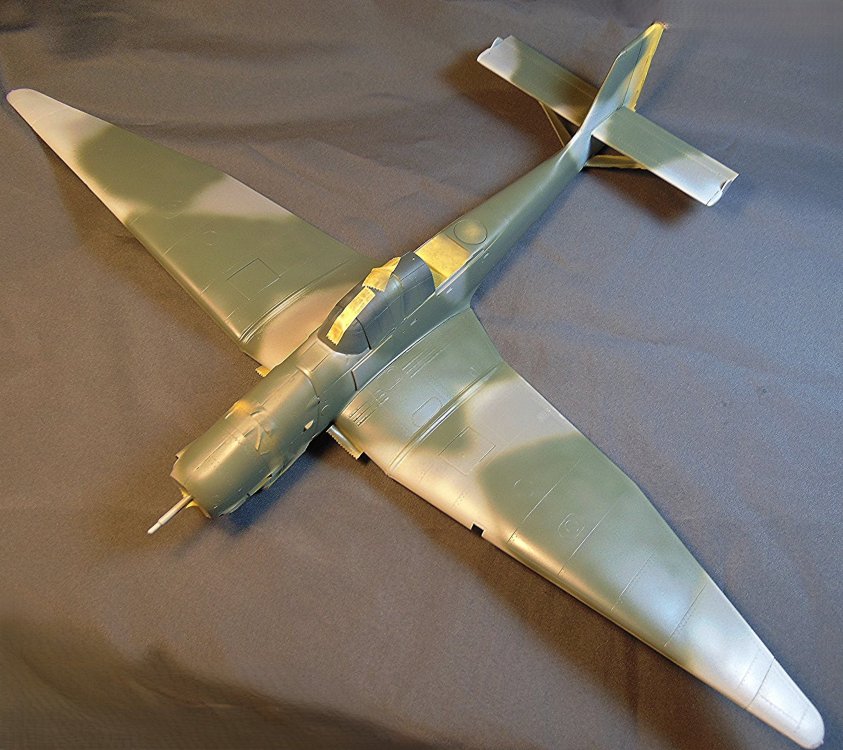
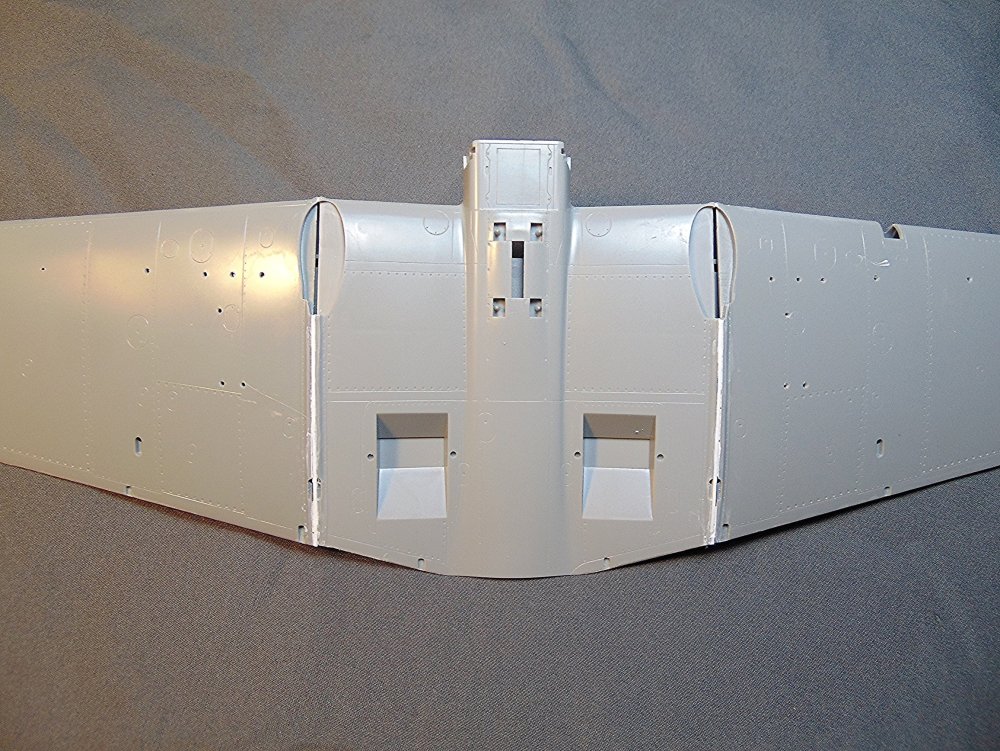
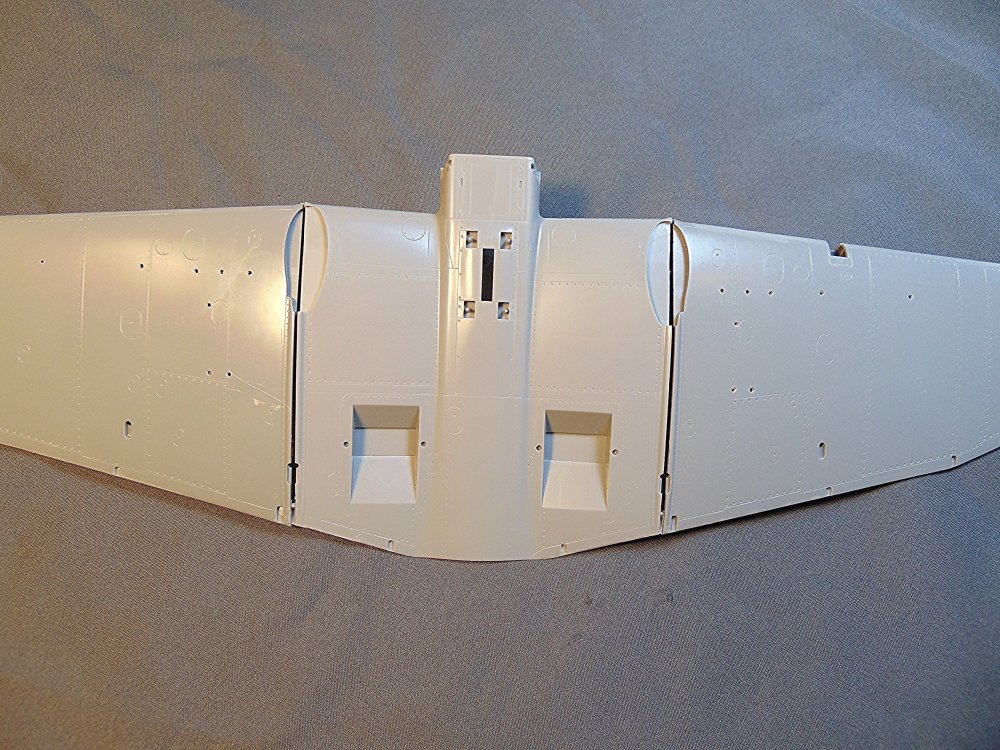
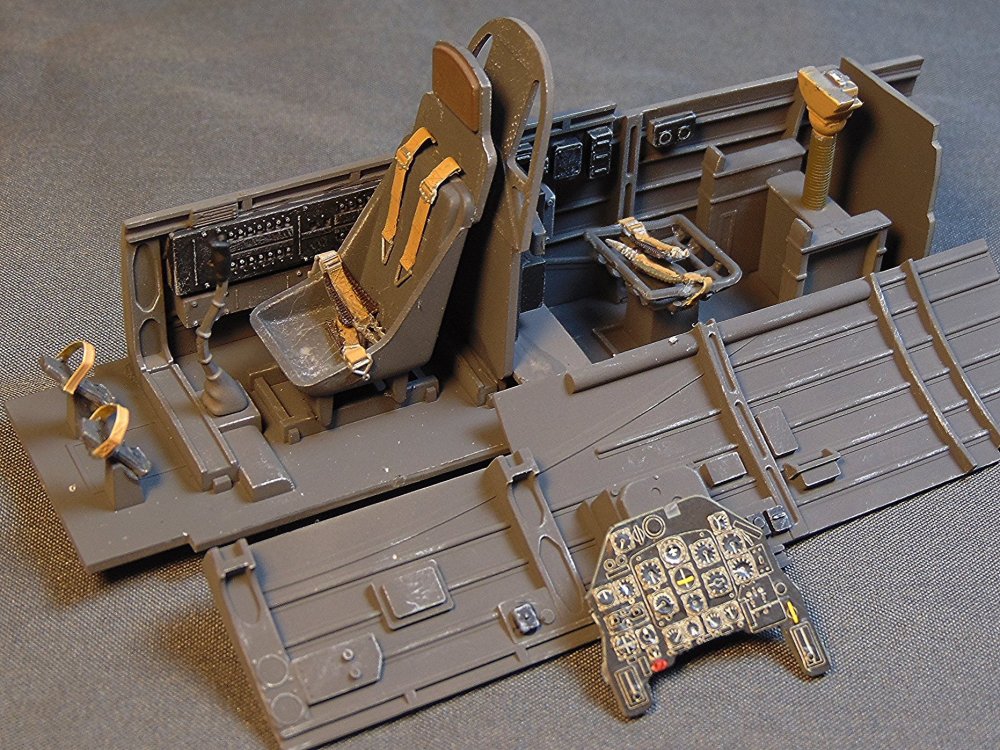
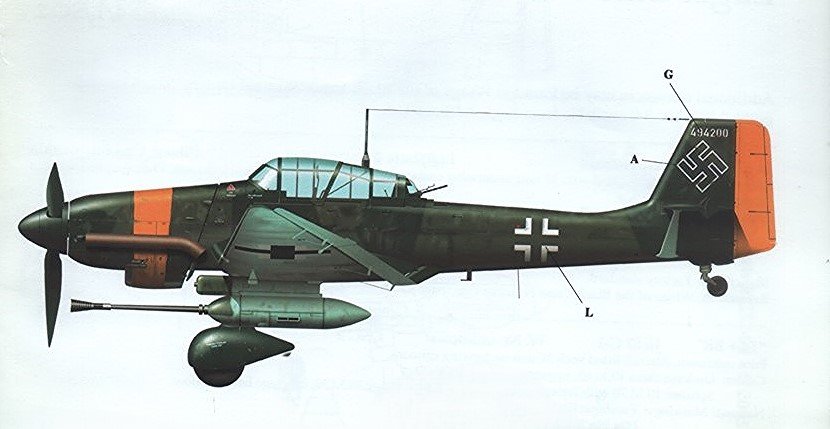
Calling this one DONE! It's a very nice Hasegawa kit that has great detail and fit. The after market items are the seat belts and the PE sights on the rear guns. Decals are by EagleCals. I painted the model with Testor's Model Master enamels, inside and out. It's a pretty big model and is awkward to handle (I kept knocking the wing tips on something!).
- 10 replies
-
- 10
-

-

-

-
Coming right along Paul. The painting has to be done in sections since it's such a big model (and awkward to handle). 🙂 Thanks for commenting! I appreciate it.
-
Painting coming right along.
-
-
Good progress today.
-
Thanks and thanks for the tip.
-
Yes indeed. The RAF fighter pilots had no problem with them.
-
-
That sounds like a good idea Scott. Let us know how well it works out.
-
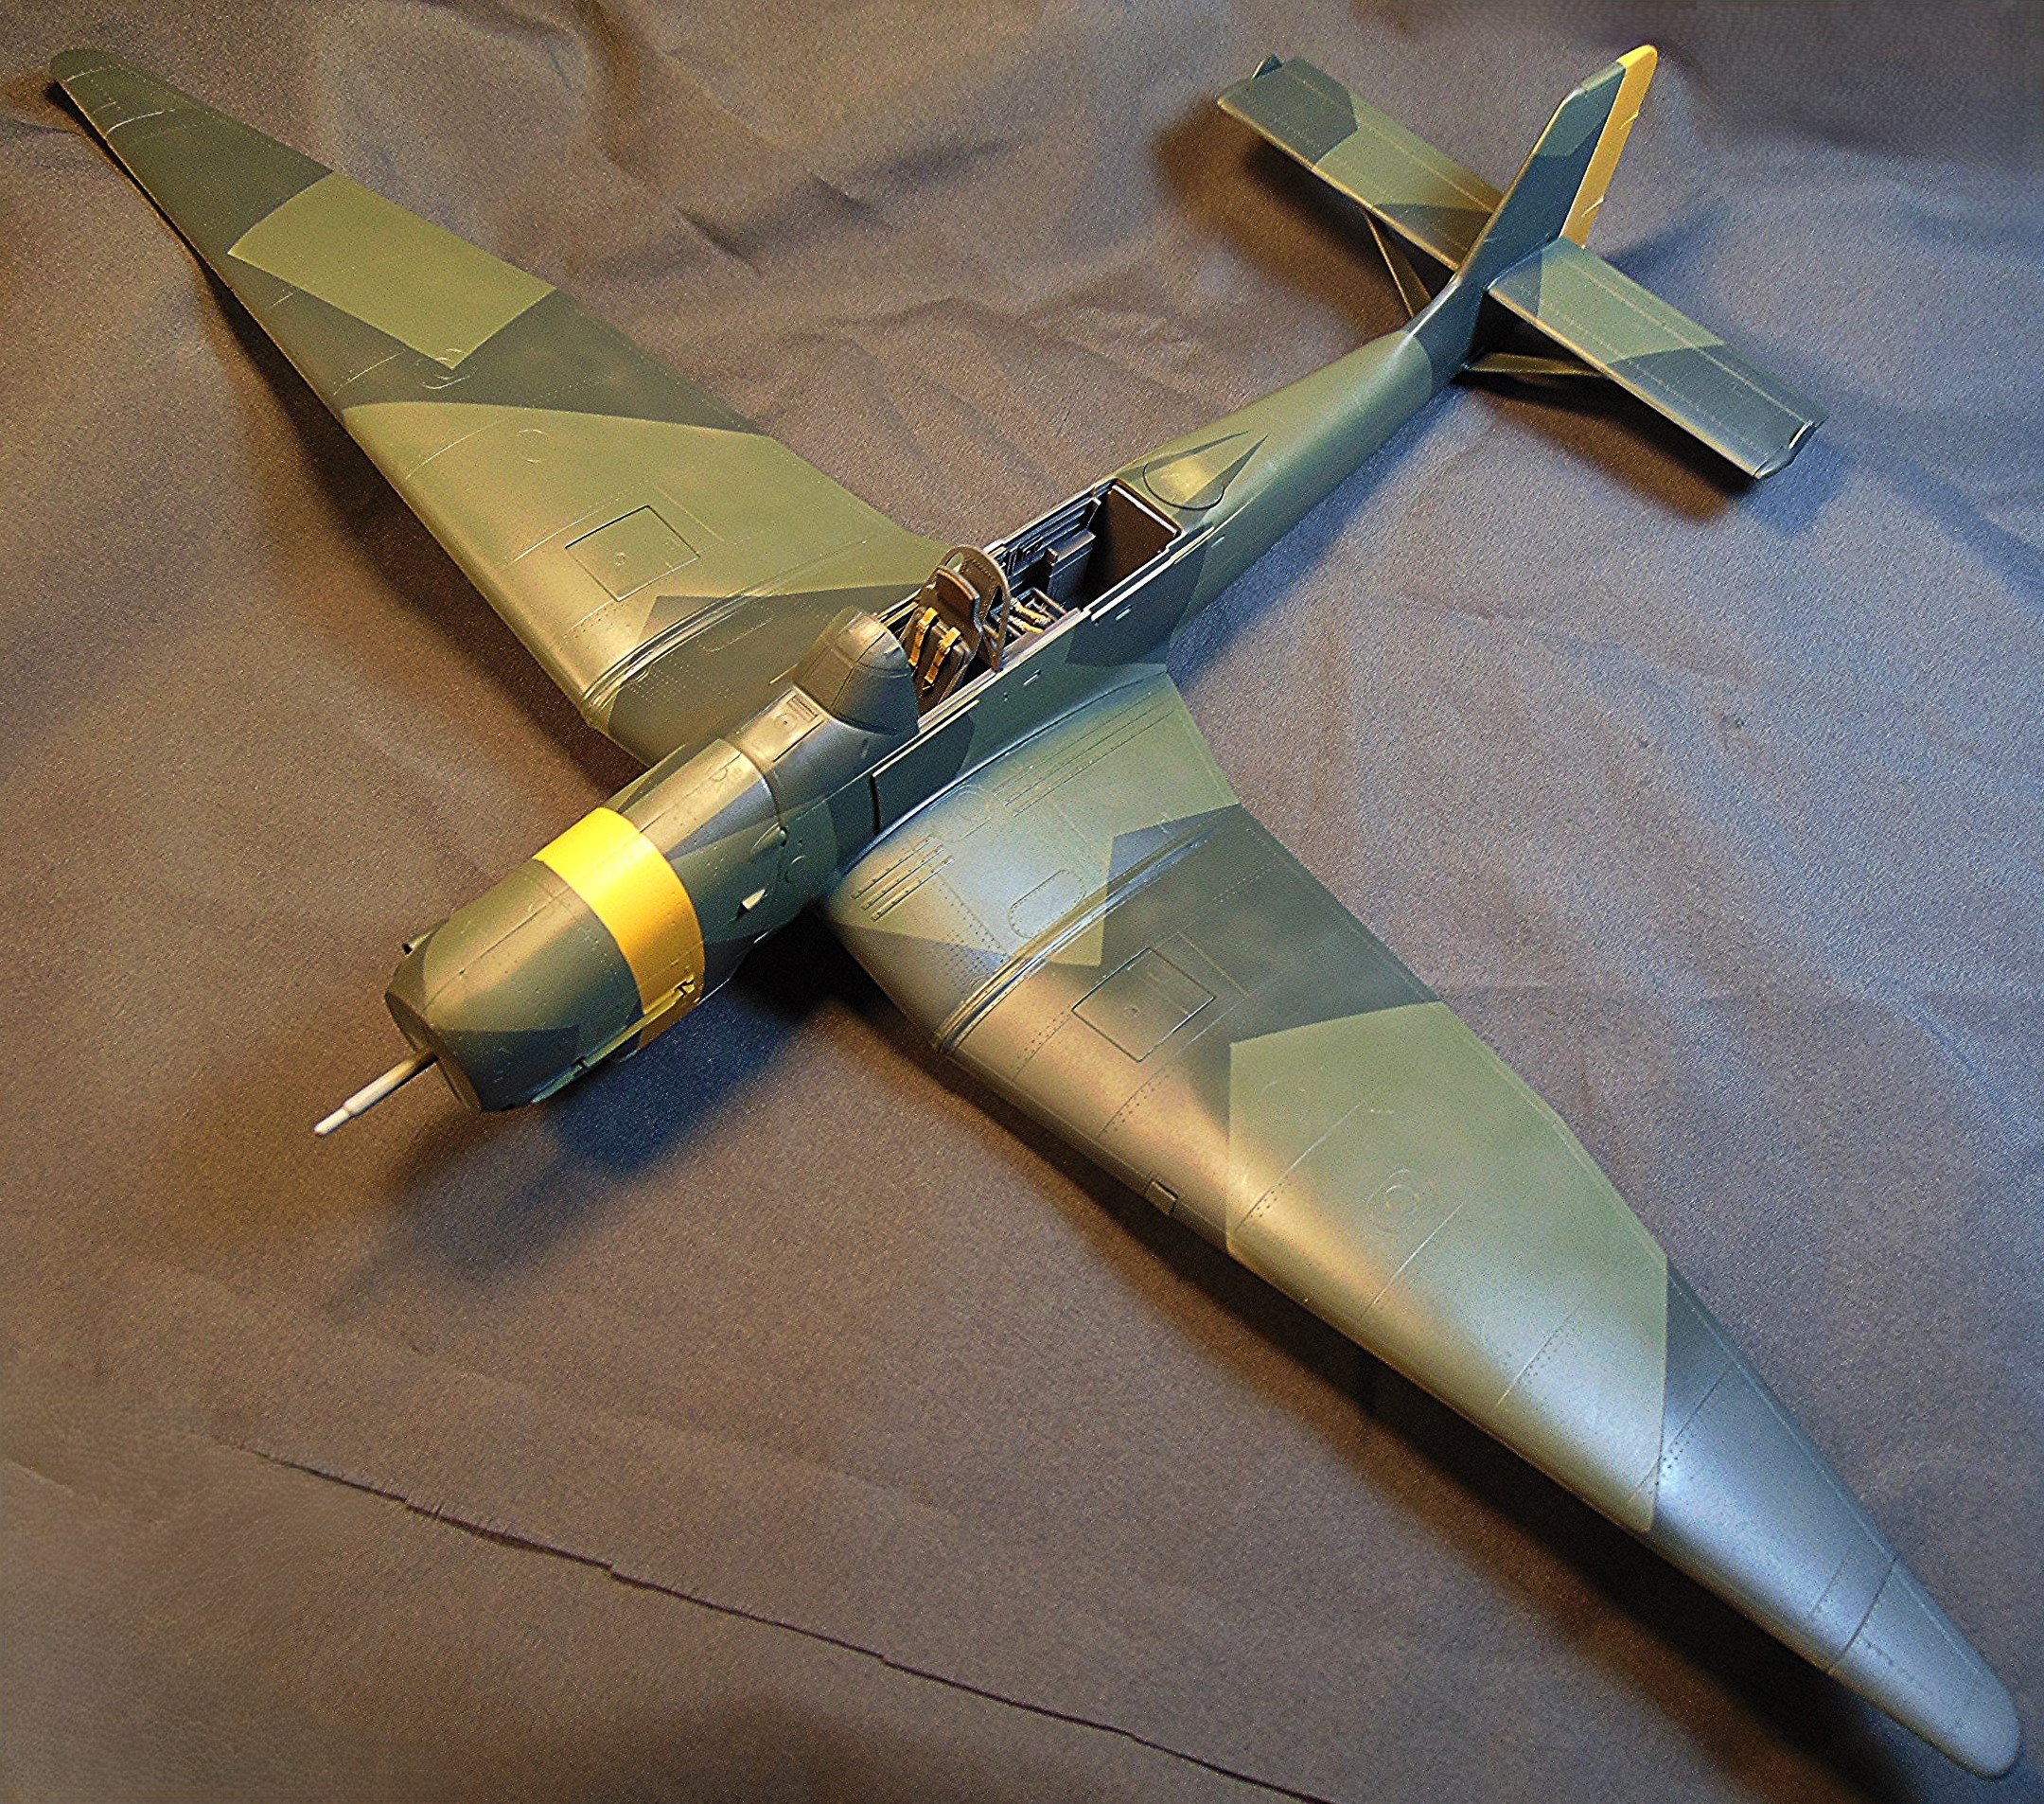
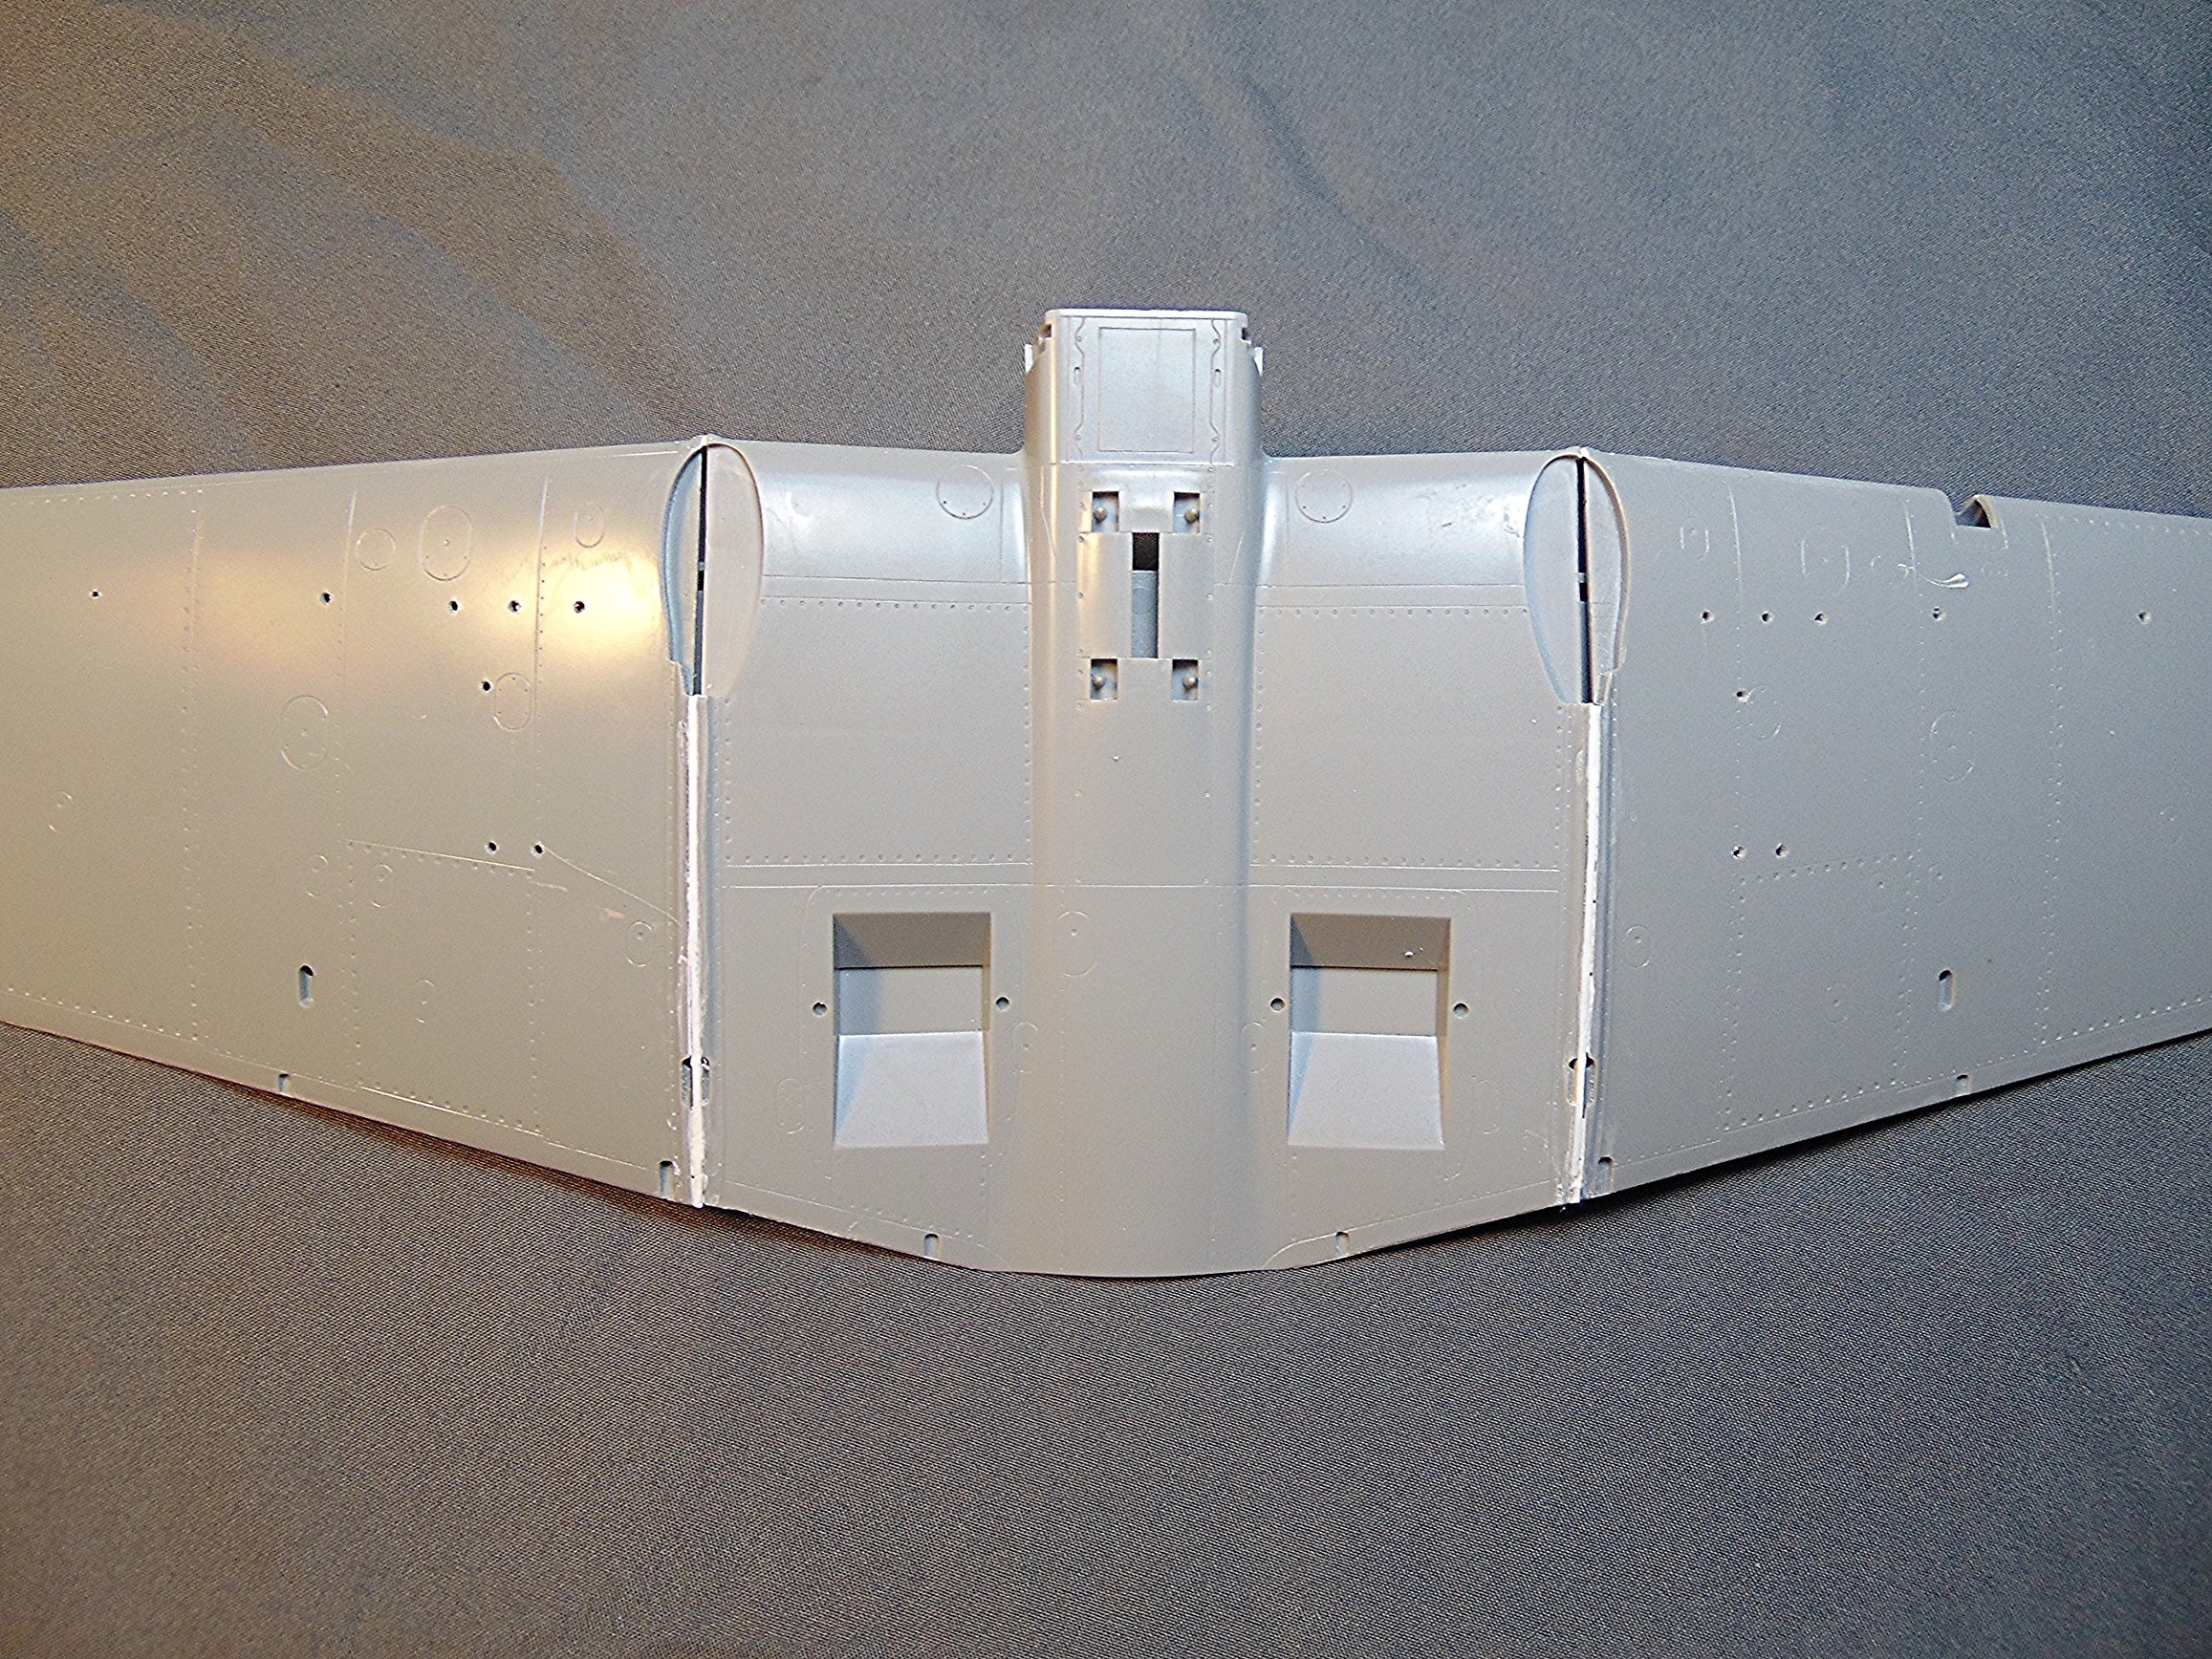
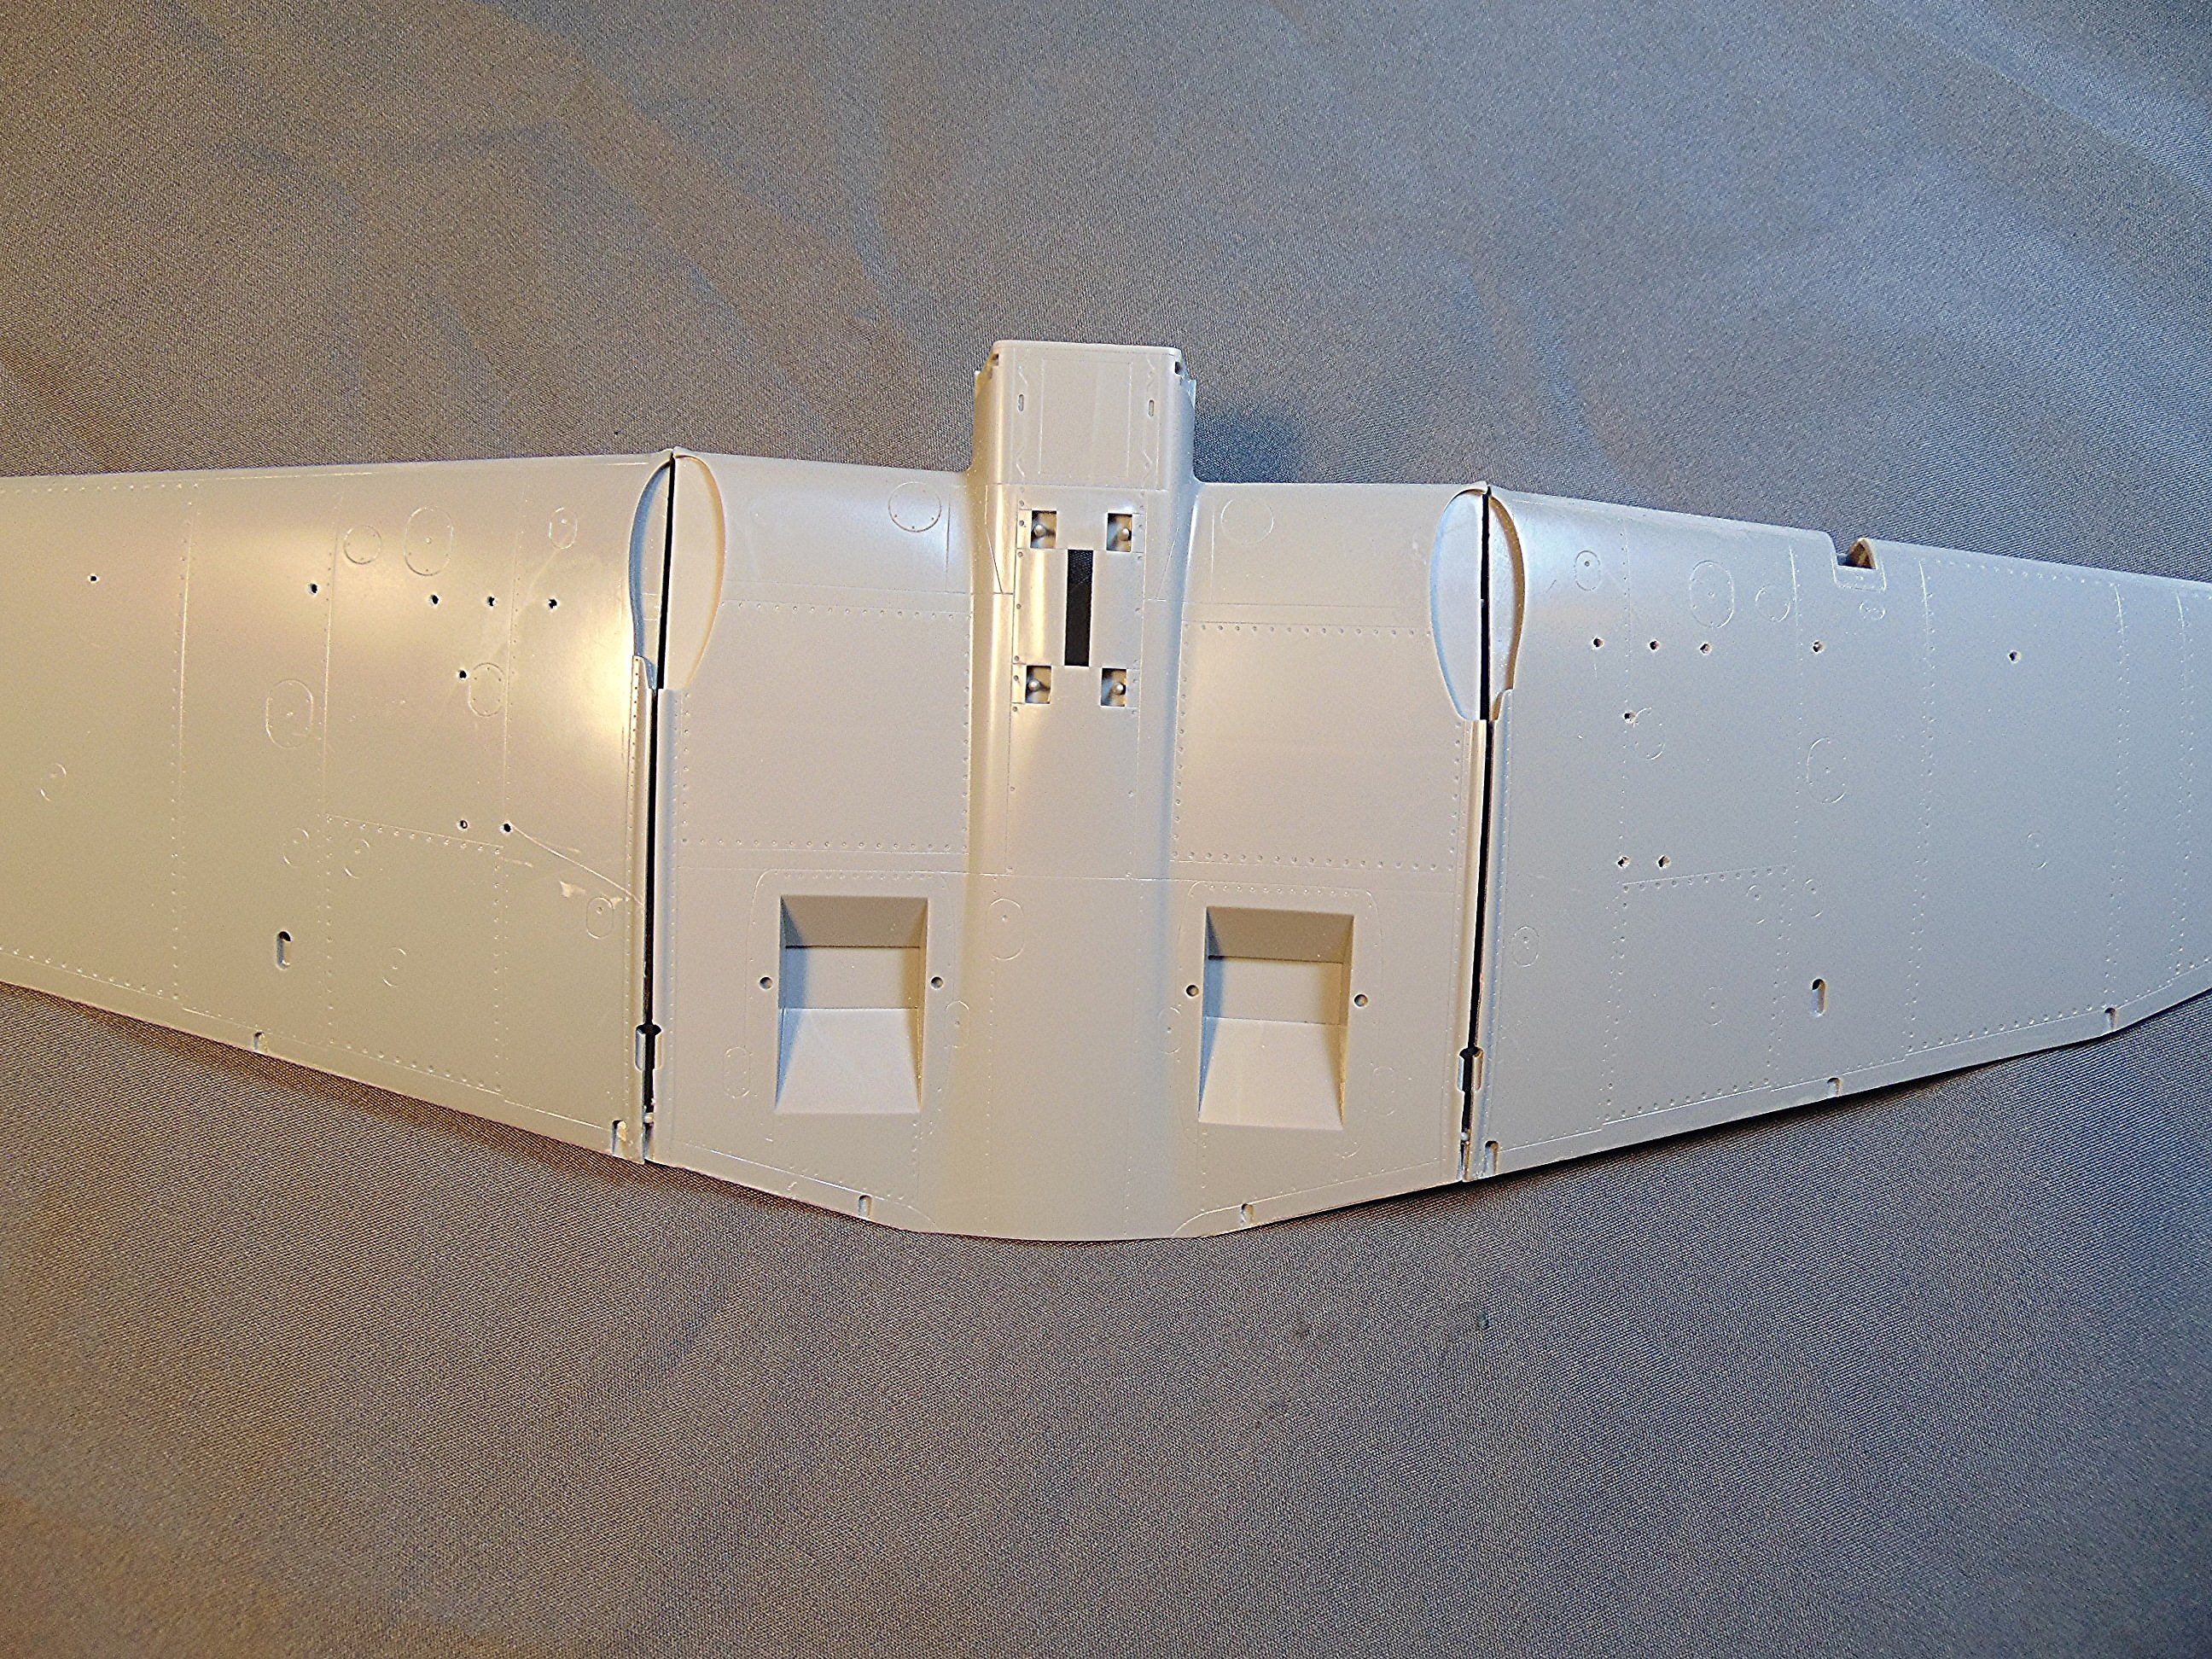
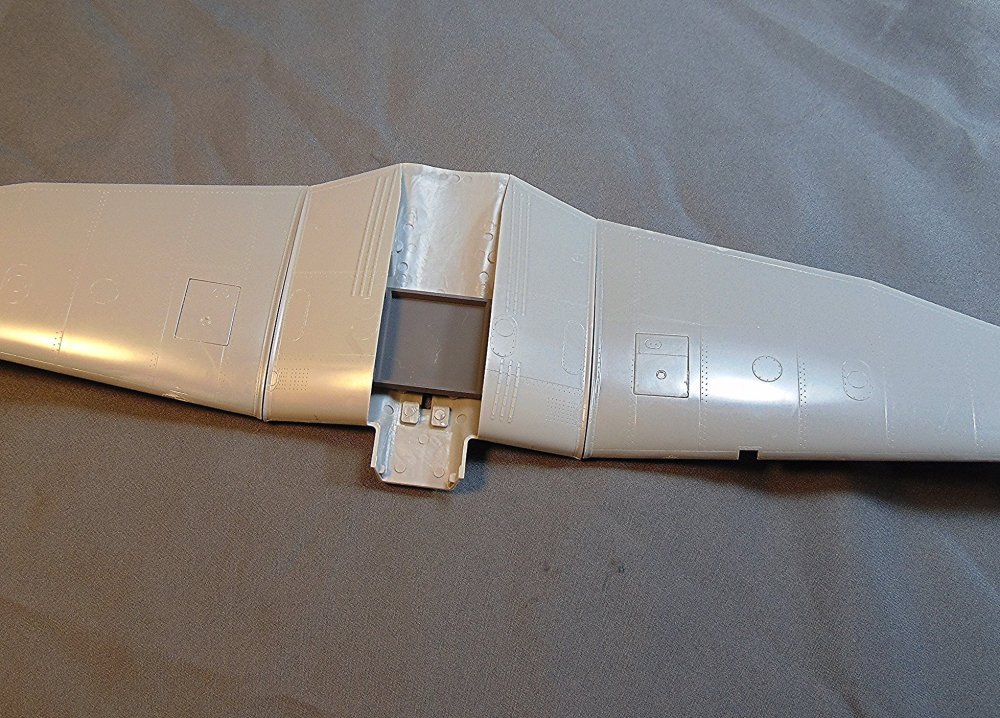
Test fitting the wings. The topsides look okay but what's with the undersides?
-
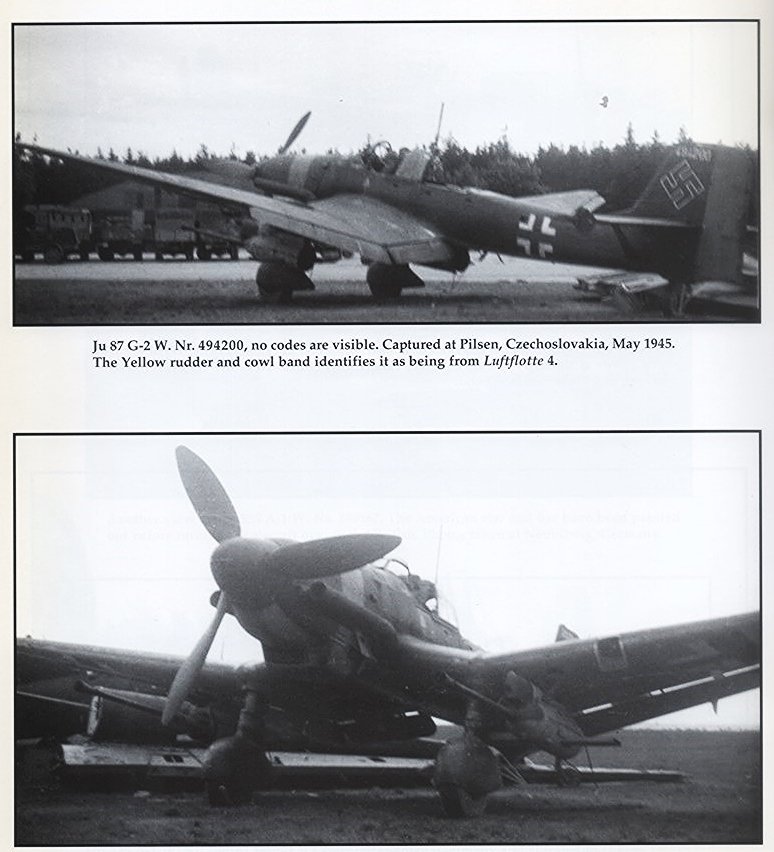
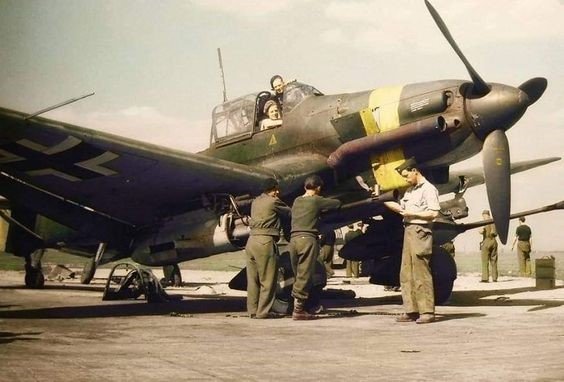
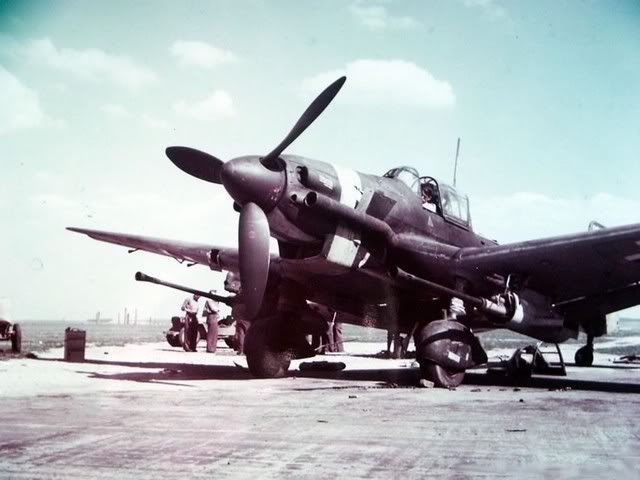
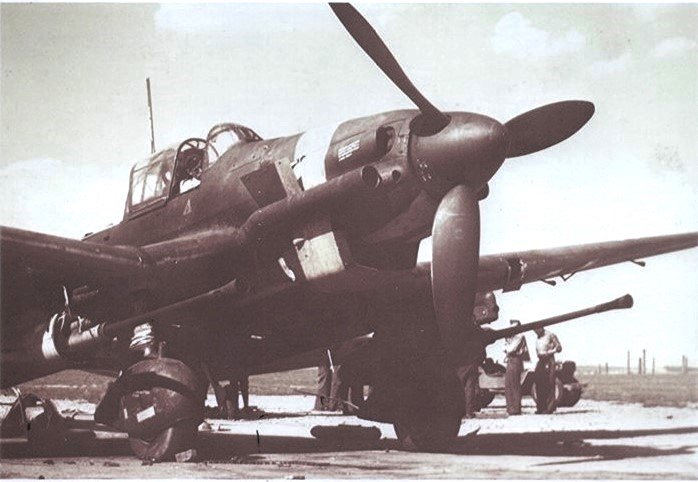
I came across these photos of the a/c I'm building. Good references.


-
Thanks Carl. I used Alclad Clear Coat. Works well but frequently requires several applications.
-


-
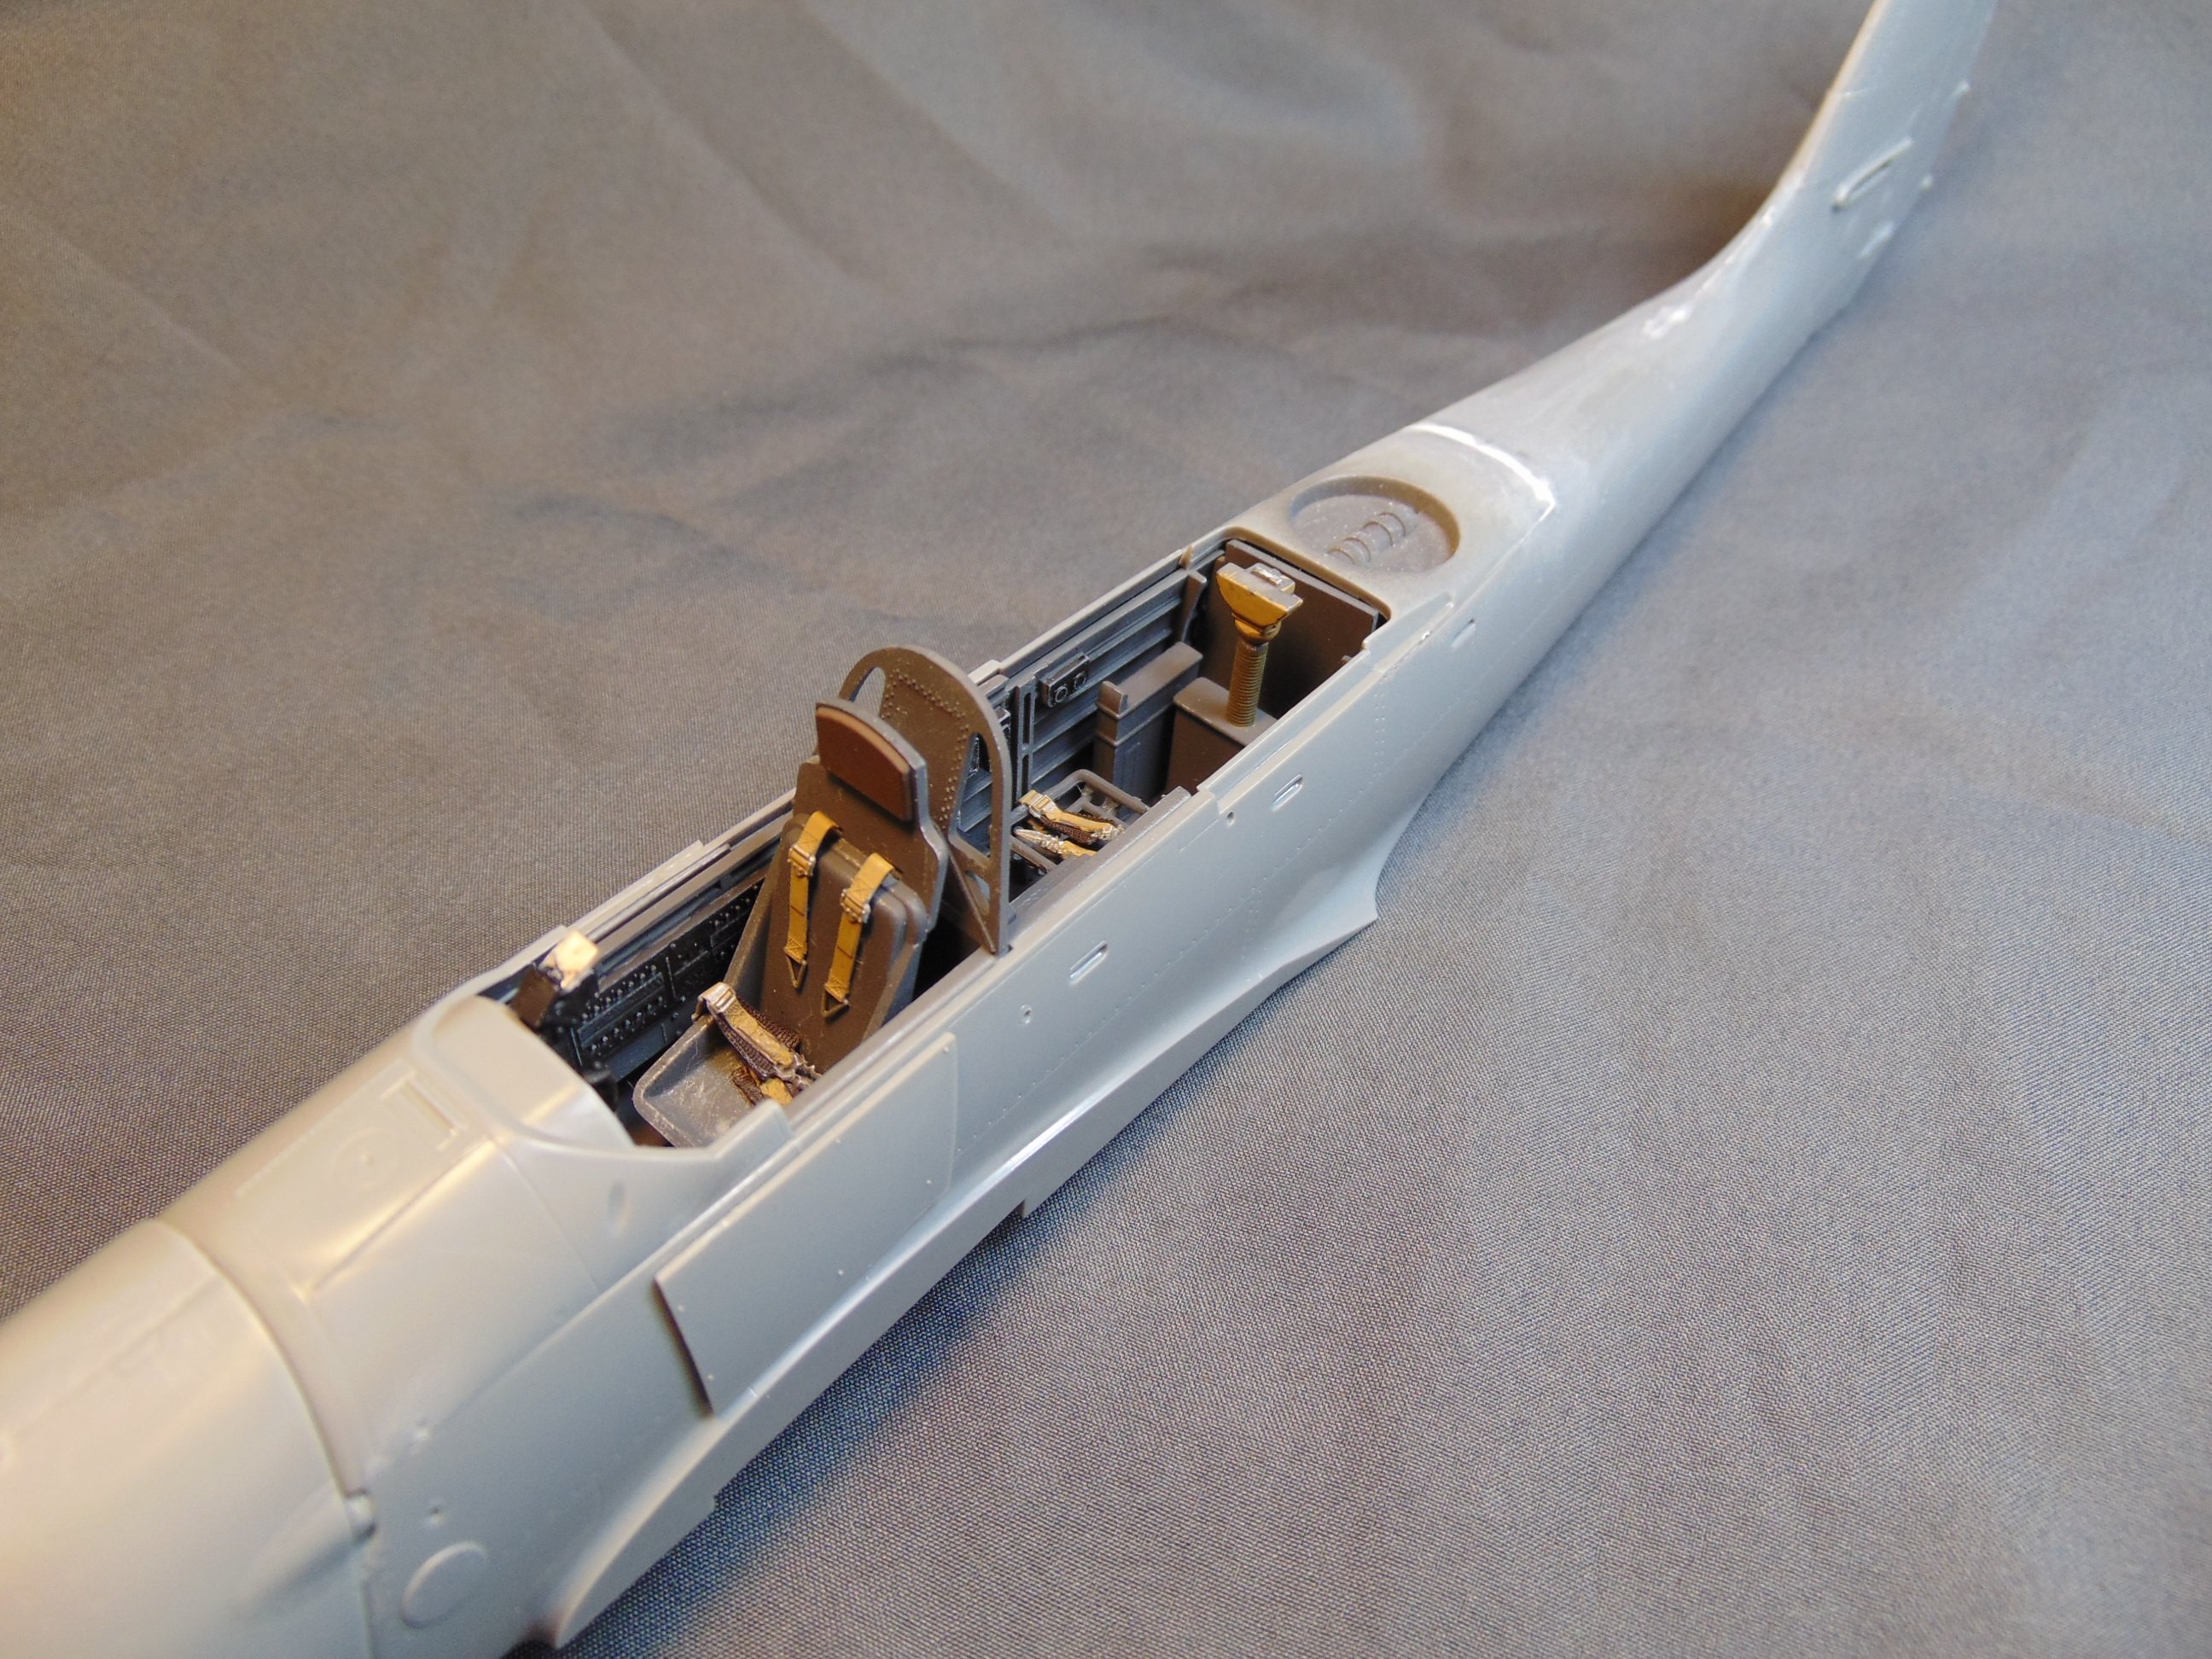
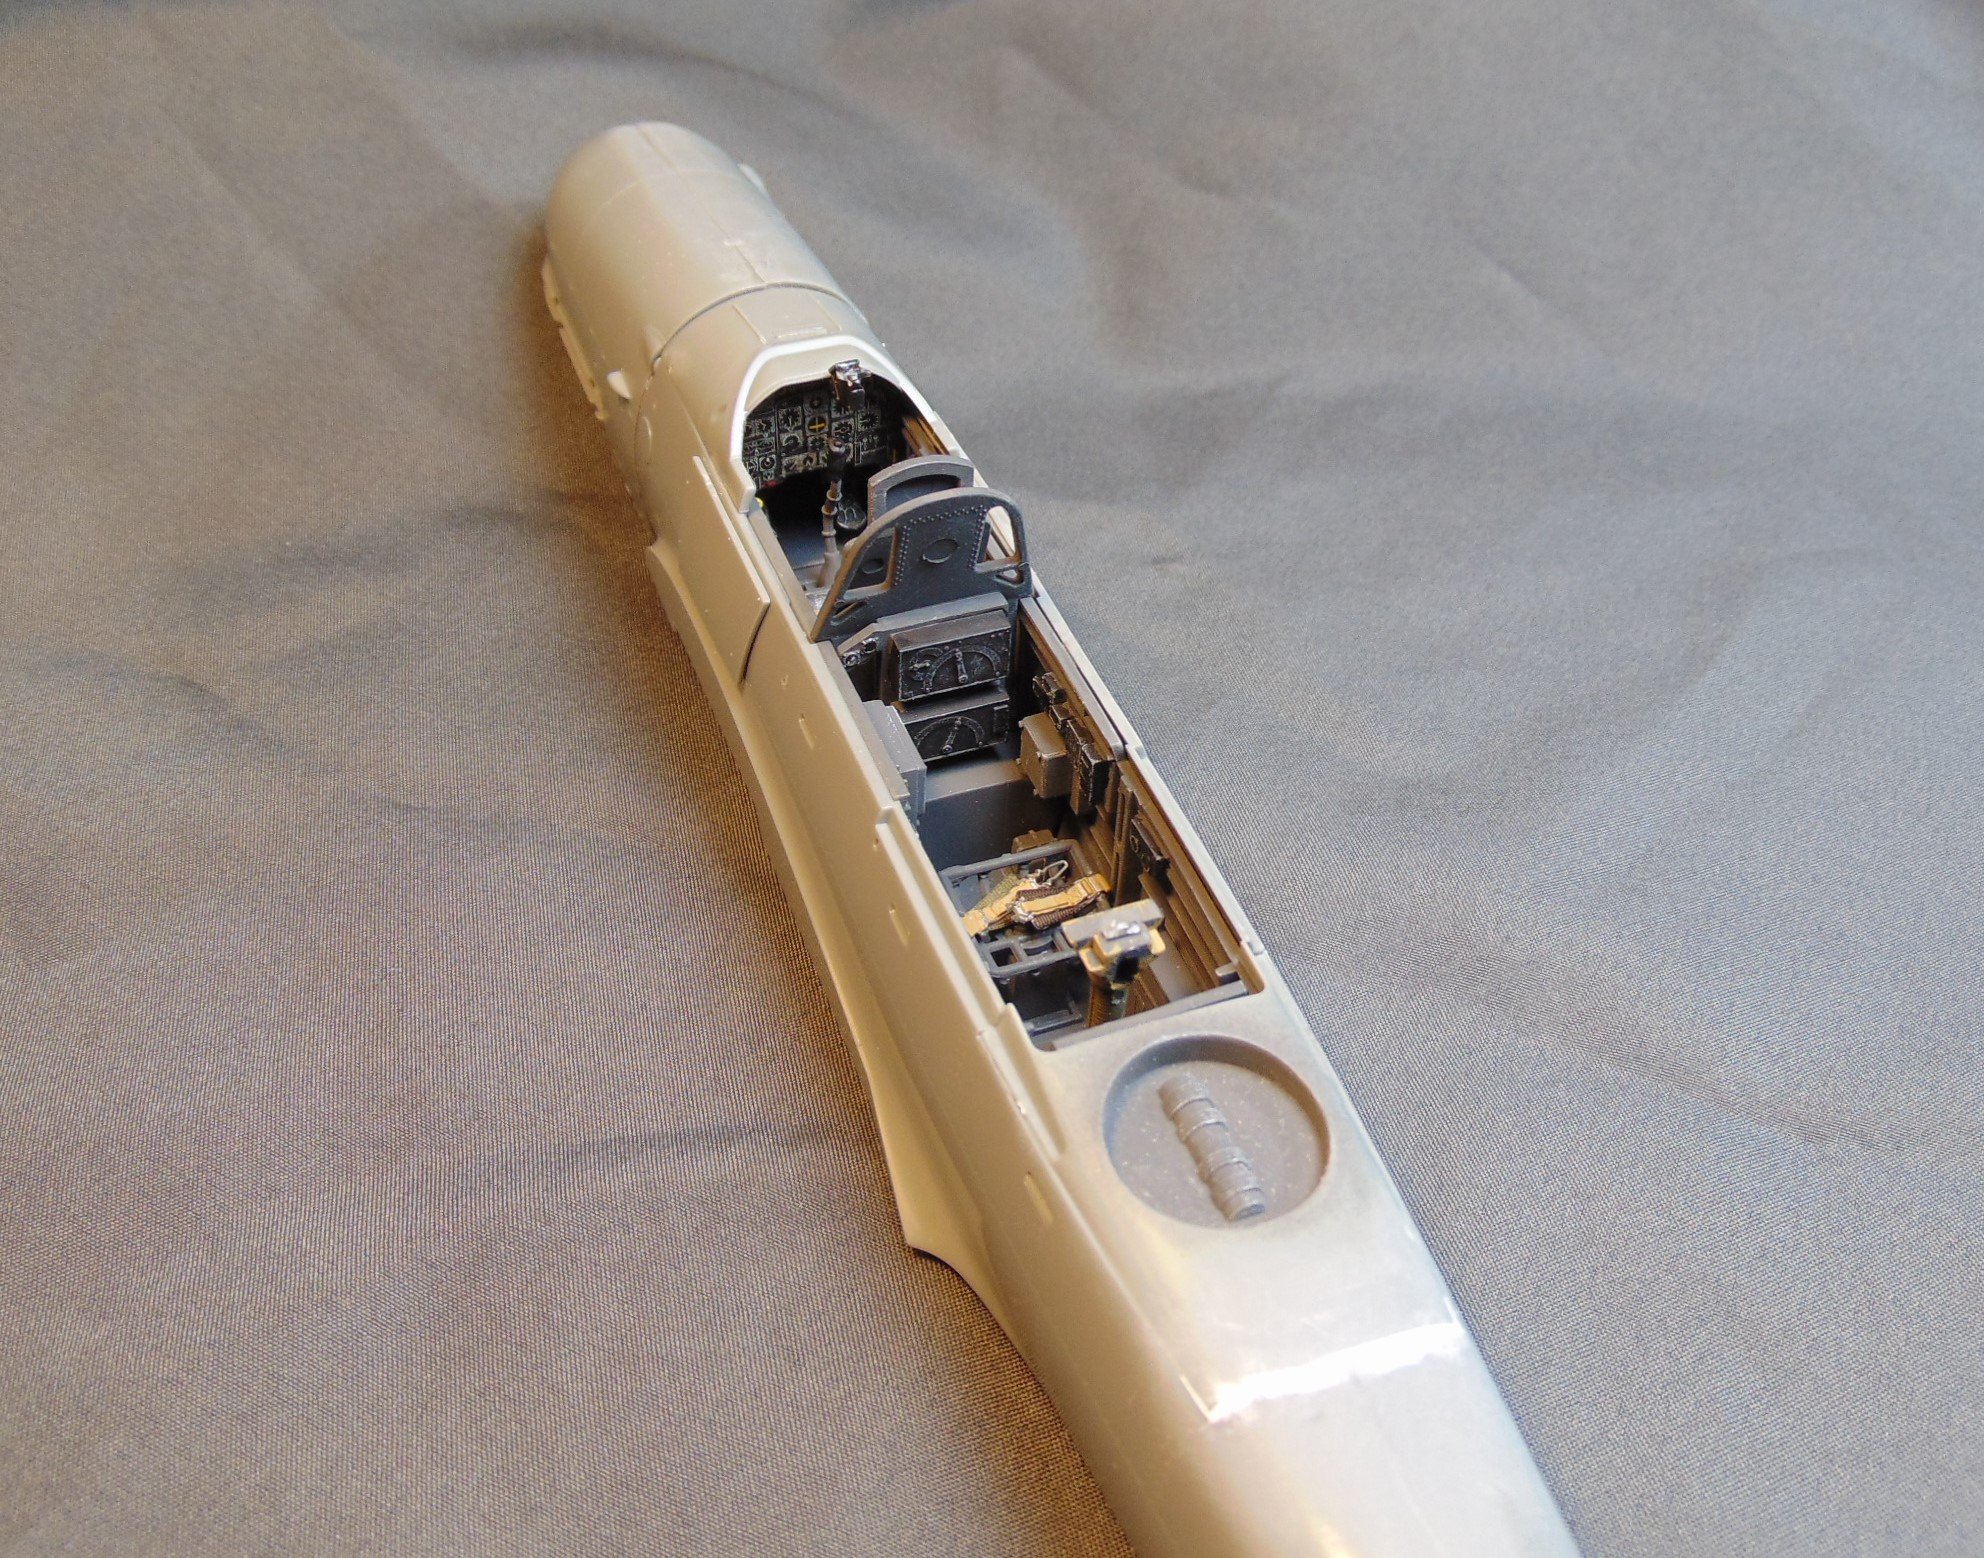
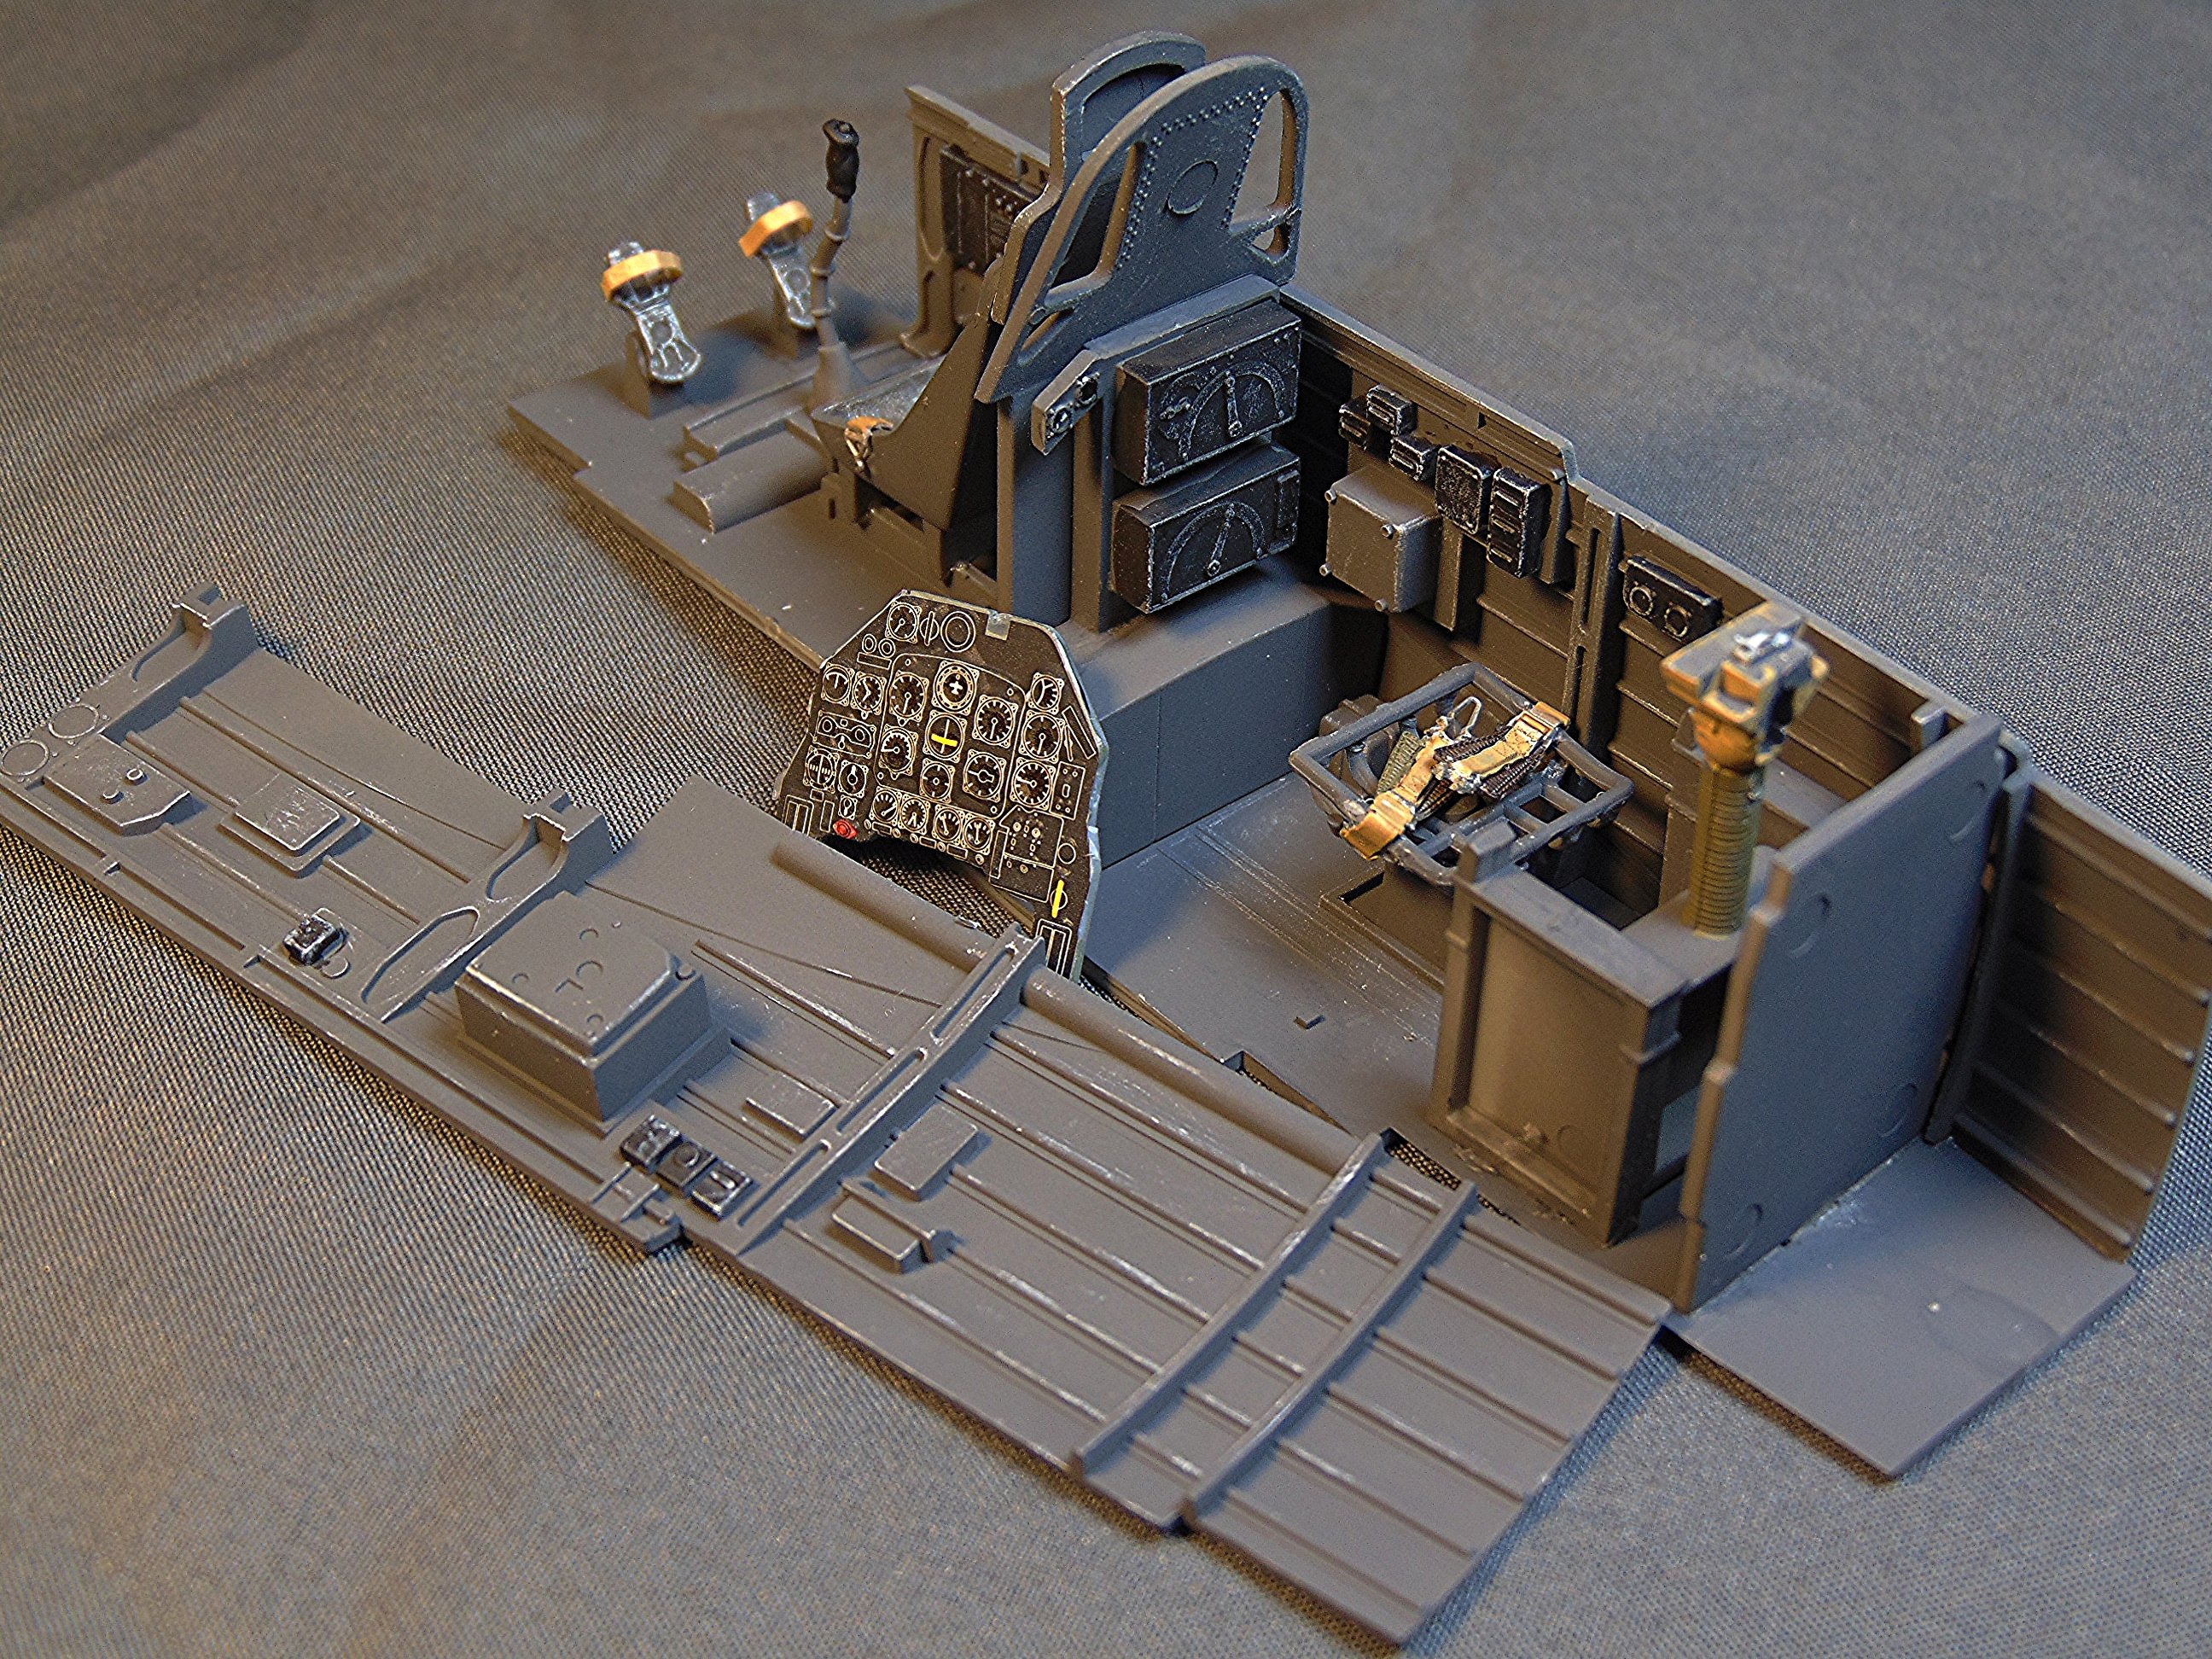
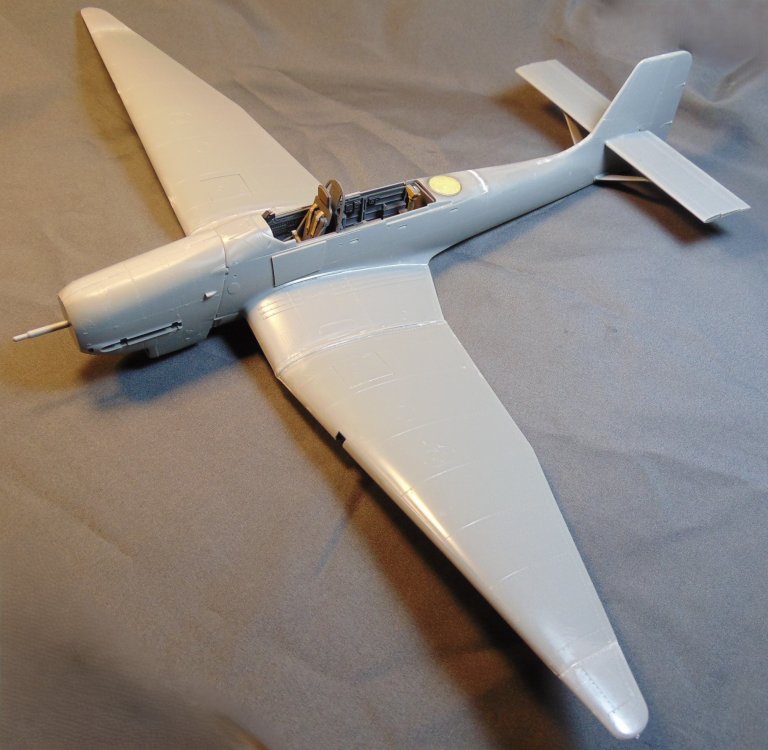
Cockpit, sometimes known as "the front office", is coming right along. Hard to tell but I painted each instrument with a dab of clear gloss. Looks like they need some more!

-
I'm only familiar with the Hasegawa kits but they are really nice kits. Great detail and fit.
-
Old mold Revell FW-190 completed and RFI
JohnB replied to JohnB's topic in LSM 1/32 and Larger Aircraft Ready for Inspection
Thanks Kevin. Hasegawa Stuka, JU-87G. -
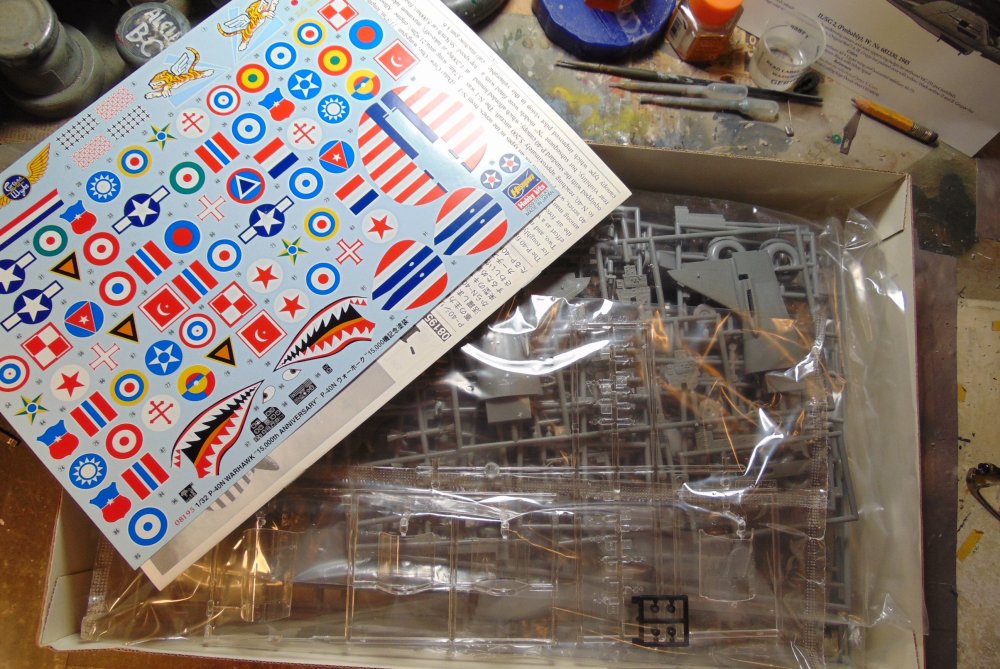
I need the cash more than the kit. If I can't sell it I'll build it at some point. Kit is complete and untouched. PayPal okay. New price. $199.00 plus shipping. I guess if no one wants it I'll build it. I had hoped someone would want it since it's a hard to find kit. I'll hold off starting on it until after the 1st to give anyone time to PM me, etc.

- 1 reply
-
- 1
-
-
This one's been in my stash for a good while so I guess it's time to build it. I have some good after market exhaust hiders and some wide prop blades that are needed for this particular a/c. I'll use some Eaglecal decals for markings. Makes a BIG model!
-
Old mold Revell FW-190 completed and RFI
JohnB replied to JohnB's topic in LSM 1/32 and Larger Aircraft Ready for Inspection
Thanks Dennis. I'm glad you like it. 🙂 -
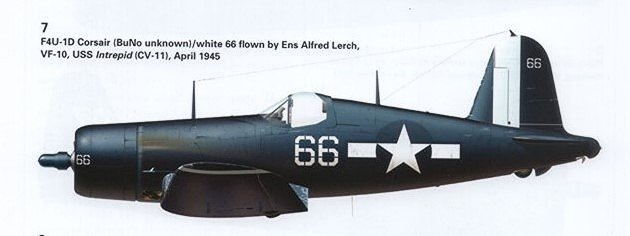
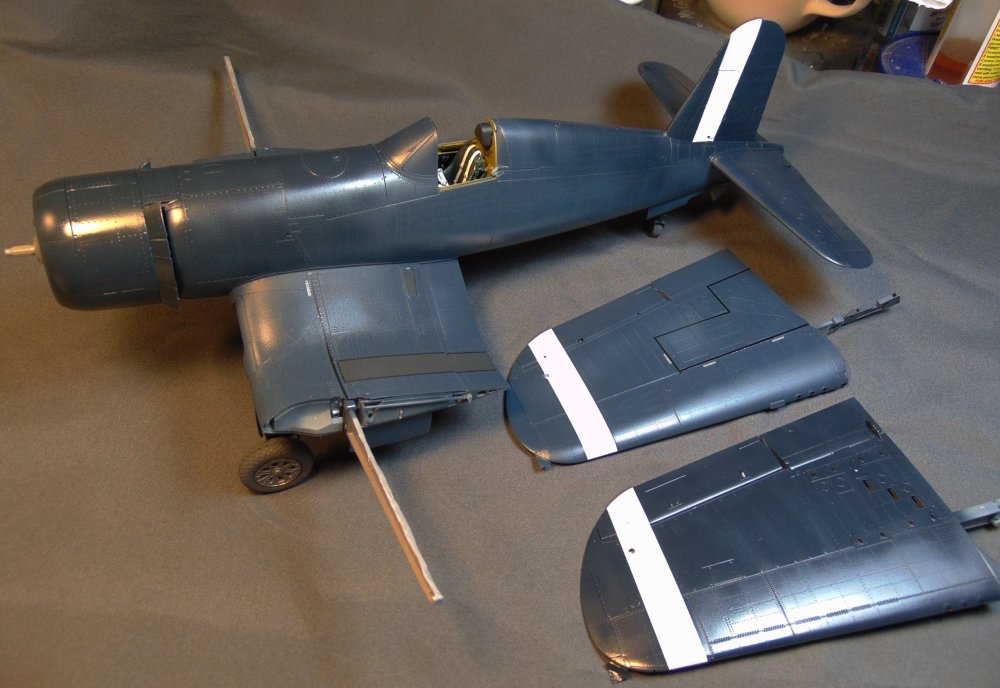
Since I wasn't able to come up with the checkerboard markings for this build I've decided to go with a different scheme. I over painted the white rudder and cowling with GSB then went back and applied the white wing and tail markings for this VF-10 a/c off the Intrepid. Now to come up with enough 6's for the side numbers, etc.
-
- 2
-
-
Old mold Revell FW-190 completed and RFI
JohnB replied to JohnB's topic in LSM 1/32 and Larger Aircraft Ready for Inspection
Thanks!! I'm pleased that you like the results of my labors! LOL Maybe you could resume work on the Typhoon now? Difficult but not impossible.