


GazzaS
-
Posts
6,396 -
Joined
-
Last visited
Content Type
Profiles
Forums
Events
Gallery
Posts posted by GazzaS
-
-
Phil,
all of that work looks great! Glad to see it coming together so well. I've never built a ZM kit so far, but that is far beyond my normal level of detail work.
-
 3
3
-
-
Rob,
That is an absolutely attractive pattern. It'll be interesting to see once you've done the chipping.
-
6
-
 1
1
-
-
That Hydraulic tubing looks pretty awesome. Never expected it.
-
4
-
-
The effects you did with those pencils look pretty awesome, Rob!
-
1
-
1
-
-
23 hours ago, Artful69 said:
So ... Who here has heard of Andy's Hobby Headquarters?? ...
Well ... I'm subscribed to this You Tube Channel ... which I find very useful for Modelling news, In box reviews and build reviews ... not to mention the cool hints and tips. The guy is about my speed - detailed but not overly pedantic. I don't have time to watch all of his videos ... but those I do I always leave a like and a comment for - because with You Tubers, this little action helps them out... Usually it's something uplifting or encouraging.
In this case Andy was giving an overview of the new Border Tiger.I kit ... Like any kit ... from any manufacturer ... I assume that it has it's deficiencies - that's always a given. Quite frankly ... looking at the RFM, Takom, Meng and Border model kits from recent times, I'm staggered at the increased level of detail available ... Compared to the "benchmark" Dragon kits of the late "noughties" there tend to be less sprue and sub assemblies - for pretty much the same result. Add to that Takom's new "Blitz" style of link-and-length track arrangement and a similar thing from Border Model and suddenly you have highly detailed kits that don't take a lot of time to build!
So I left: "We've come a long way since Dragon Tigers!! ... Waiting for this one ..."
Ok Rog ... I hear you say ... I grabbed my popcorn to watch you rant ... where is it?? ...
So ... I think there's one that pops up on every forum at one time or other ... (Radu on LSP for example) ... People who know it ALL ... and are excellent in starting S%$T-fights because they can't resist sticking their nose in to provide you with a correction or some sort of unsolicited advice ... you know the type? ... the ones that think you bought something / are approaching a task a certain way / have a certain viewpoint - only because you lack their superior level of knowledge or wisdom - which they are all to ready to provide you with all while doing their best to remind you of how inferior to them that you are ... and when you try to politely tell them exactly where they can go and shove their superior attitude ... they seem to think that you can't handle a "conversation" with someone who is trying to "help" or that you can't handle "facts" or "truth" ... all the while missing the point of your ire completely.
Well ... Thats what happened with my comment on Andy's ... Some AH who goes by the handle "Davey Byrden" decided that My Opinion was all wrong ... "My Opinion" mind!!
"Could you explain what direction we've come a "long way" in ? I don't believe you can say this kit is better than a Dragon Tiger kit in every respect. So how are you judging it?"
An innocent enough looking question yeah?? ... Just look at the way its phrased though!! ... Do I mind explaining myself (as if I had the audacity to blaspheme against his Holy Opinion) ... He doesn't believe I can say what I am saying (as if I give a rolling rats rear end!!) ... So he want's to correct my "errors" - but he can't do that without making gross assumptions you see?? - so he starts off here by trying to find out why I look at this kit the way that I do. So ... I'm happy to provide him with my judgement - which is really me just giving him my opinion.
He follows up with exactly what I expected ... trying to lecture me on what my misconceptions were and why my opinion was wrong ... Of course I can't just tell him to go forth and multiply (and believe me I sincerely wanted to!!) and that of course - is when the faeces hit the propulsion device in a big way ... and from the couple of follow up exchanges we had I still can't tell whether he just thought his opinion was right or he didn't get that his approach was all wrong - it was like he was looking for an argument ... of course the result is always the same - he wanted to blame me for his pi$$poor attitude toward someone having a different opinion. I scrolled down and looked through a couple of the negative comments on the vid - and sure enough - this idiot shows up on them agreeing the that kit is poor - but disagreeing as to why ...
I think he got the message though ...
Rog
")
Hah! I'm glad to see that I'm not the only one who has had differences of opinion with Mr. Byrden. The poor lad... he has been given so many accolades that he believes himself to be the lord and master of all Tiger tank knowledge. I will admit that he knows a lot. And has even provided information on his tiger I Info. site that I have used for a model or two.
What I cited as anecdotal evidence, he cited as the demented ravings of an old man... who just happened to command a Tiger I. Just because he never saw a photo that he agreed with.
Anyway... have a beer!
-
3
-
-
19 hours ago, Peterpools said:
Gaz
Lots of tweaking and adjusting but no question - you'll get it perfect
Keep 'em comin
Peter
21 hours ago, DocRob said:I like your approach Gaz, you base your painting and weathering on your research of the real thing. Often modelers tend to follow trotten pathes, which equally often are not to back up through research. Making it look real, is quite different from making it look good. Without judging, I have to say, I sometimes envy you a little for being so thorough. My personal way, is completely different. I use reference to start my imagination and follow this way through a build to weathering with a personal biased view, not an objective one. This forum gains a lot from these different approaches and it's always interesting, to catch up with your builds.
Cheers Rob
22 hours ago, Kaireckstadt said:Interesting topic you mention.
I add these scuffs at the very end of the build using different colors of the Tamiya Weatherine Sets applied with a shortened brush carefully on the matte surface. Works quite well and there is no risk of removing them.I also use these sets to apply oil stains and all sorts of stains (except exhaust) on the model.
If you applied too much it can be removed with water or even be carefully removed with a soft eraser.Thanks for the comments, Gents.
I'm still in the learning process. With everything, really. The ultimate goal is to build realistic and believable and interesting looking models. I have a path I've chosen which may not be the most beaten path. Photos like the one above, help in my endeavor.
I should buy more books. But bookstores don't carry the kinds of books I need. So, I have to buy most of books sight-unseen. My club does have a member who specializes in military books. The cropped pic above came in a book I bought from him. That pic was actually the clincher for buying that book.
-
4
-
-
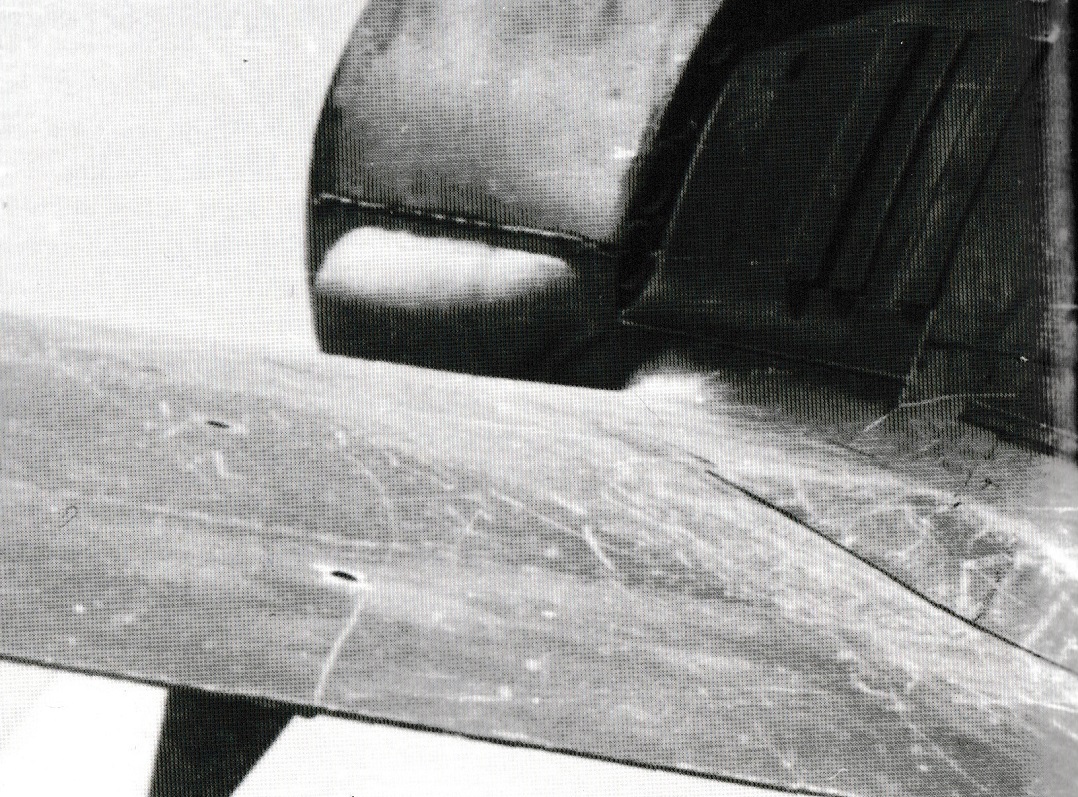
I admit that I get most of my images from the net. Of course, these images have been processed into digital format and trying to zoom-in only results in pixellation.
Anyway... long story-short... I found a book with a large image of a 190 wing root.
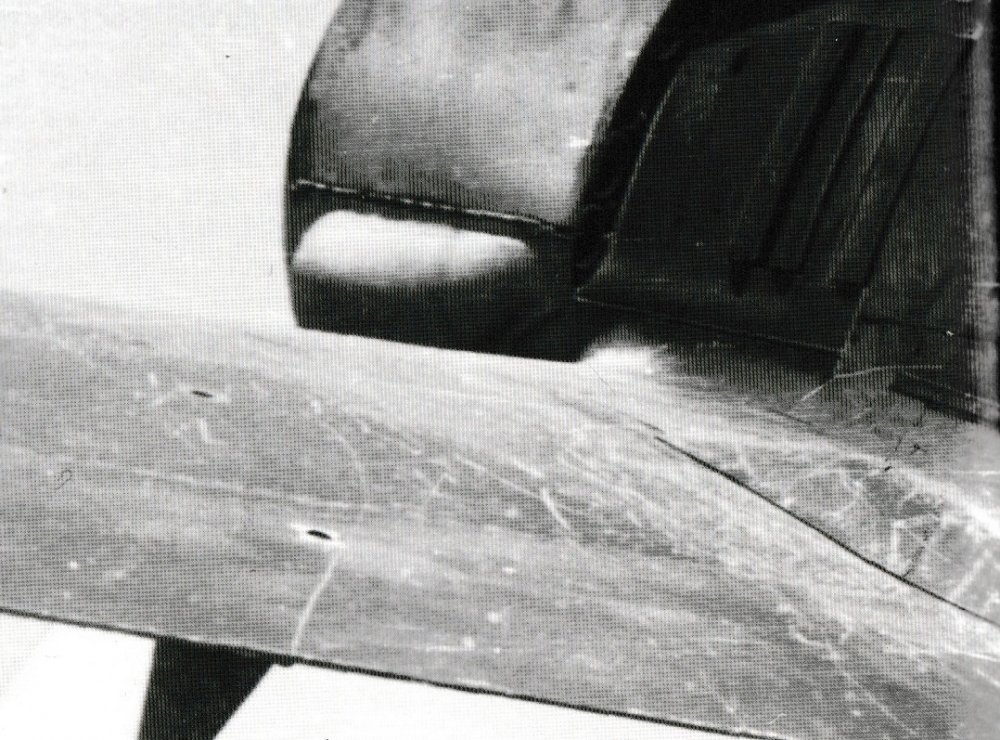
What this picture tells us is the story of the humble scuff. Not stripped paint. Not deep scratches. Just the marks left by the ground crews boots as they maintain and re-arm the bird in preparation for it's next sortie. I'm not saying that there isn't chipping involved.
But these scuffs are rarely modelled. I've done it a few times before, but not on a large scale model. I had actually done it on this one, but when I wet sanded away the excessive chipping, the scuffs went with it. It's one that I want to use more often and more deftly.
-
4
-
-
Nice, Harv!
-
1
-
1
-
-
Nice looking work, Rob! Looks like a fair amount of progress.
-
5
-
1
-
-
I love a nice, busy looking radial engine. Nice work!
-
4
-
1
-
-
-
17 hours ago, Kaireckstadt said:
Nearing completion Gaz! Looks really stunning.
I especially love how the 3-tone-upper camouflage and the exhaust stains turned out.
Can‘t wait to see it completed and with a coat of flat varnish!14 hours ago, Landlubber Mike said:Wow, that's first class work there. Very nice!
1 hour ago, Peterpools said:Gaz
Awesome - looking mighty good
Keep ‘em comin
Peter
Thank you, my friends!
-
3
-
-
4 minutes ago, DocRob said:
All your efforts payed off, Gaz. The bird looks great, with everything you did while painting and weathering just clicks.
Cheers Rob
Thank you, Rob. We'll see what happens when the matte coat goes on.
-
4
-
-
49 minutes ago, HubertB said:
Hi guys,
I hope that you and your houses have been spared by the floods in Eastern Australia.
Hang tight if its near you.
Hubert
Not near enough to flood me out. But I will say, that is is the rainiest summer in my 19 years in Australia.
-
3
-
-
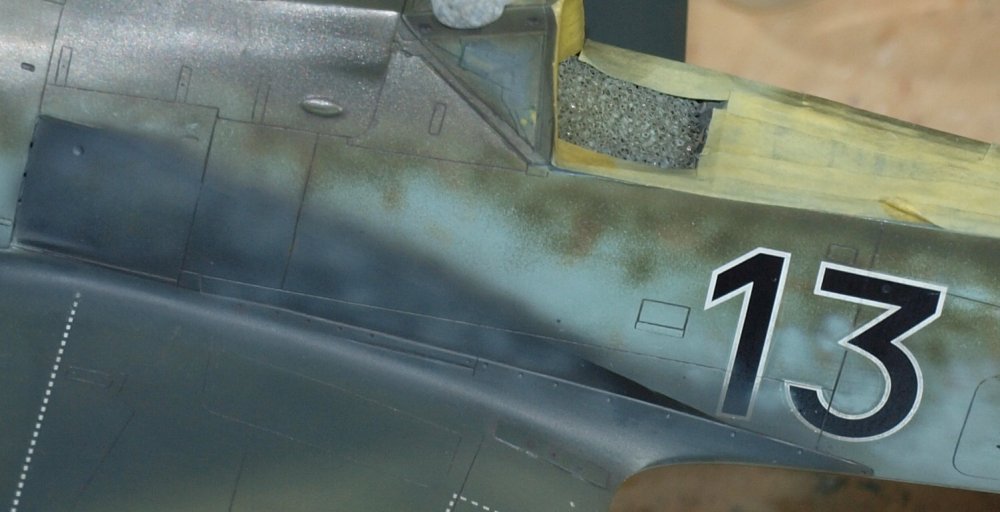
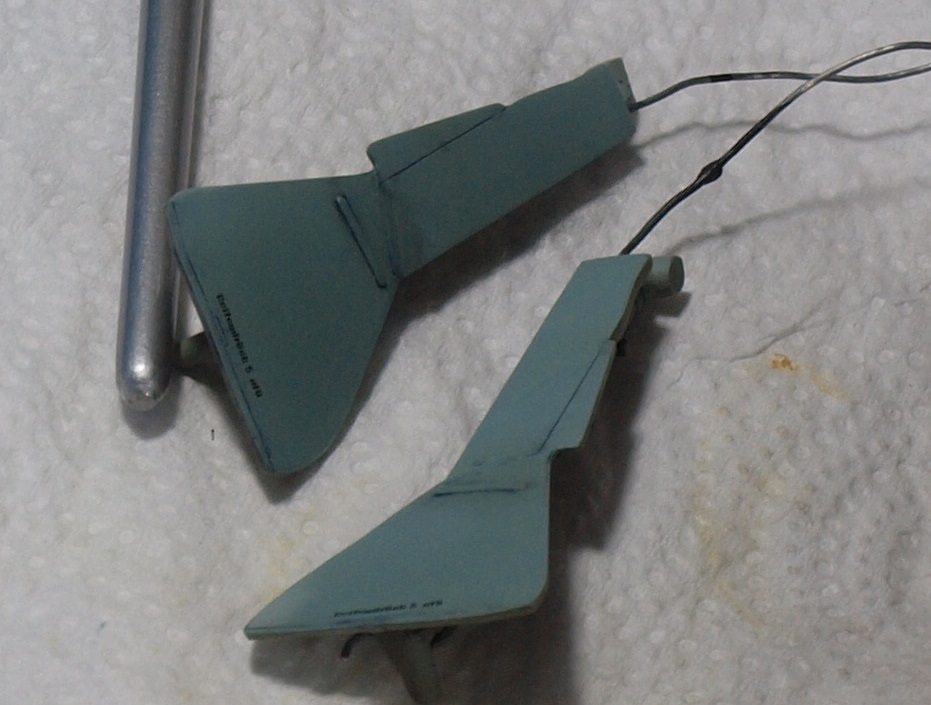
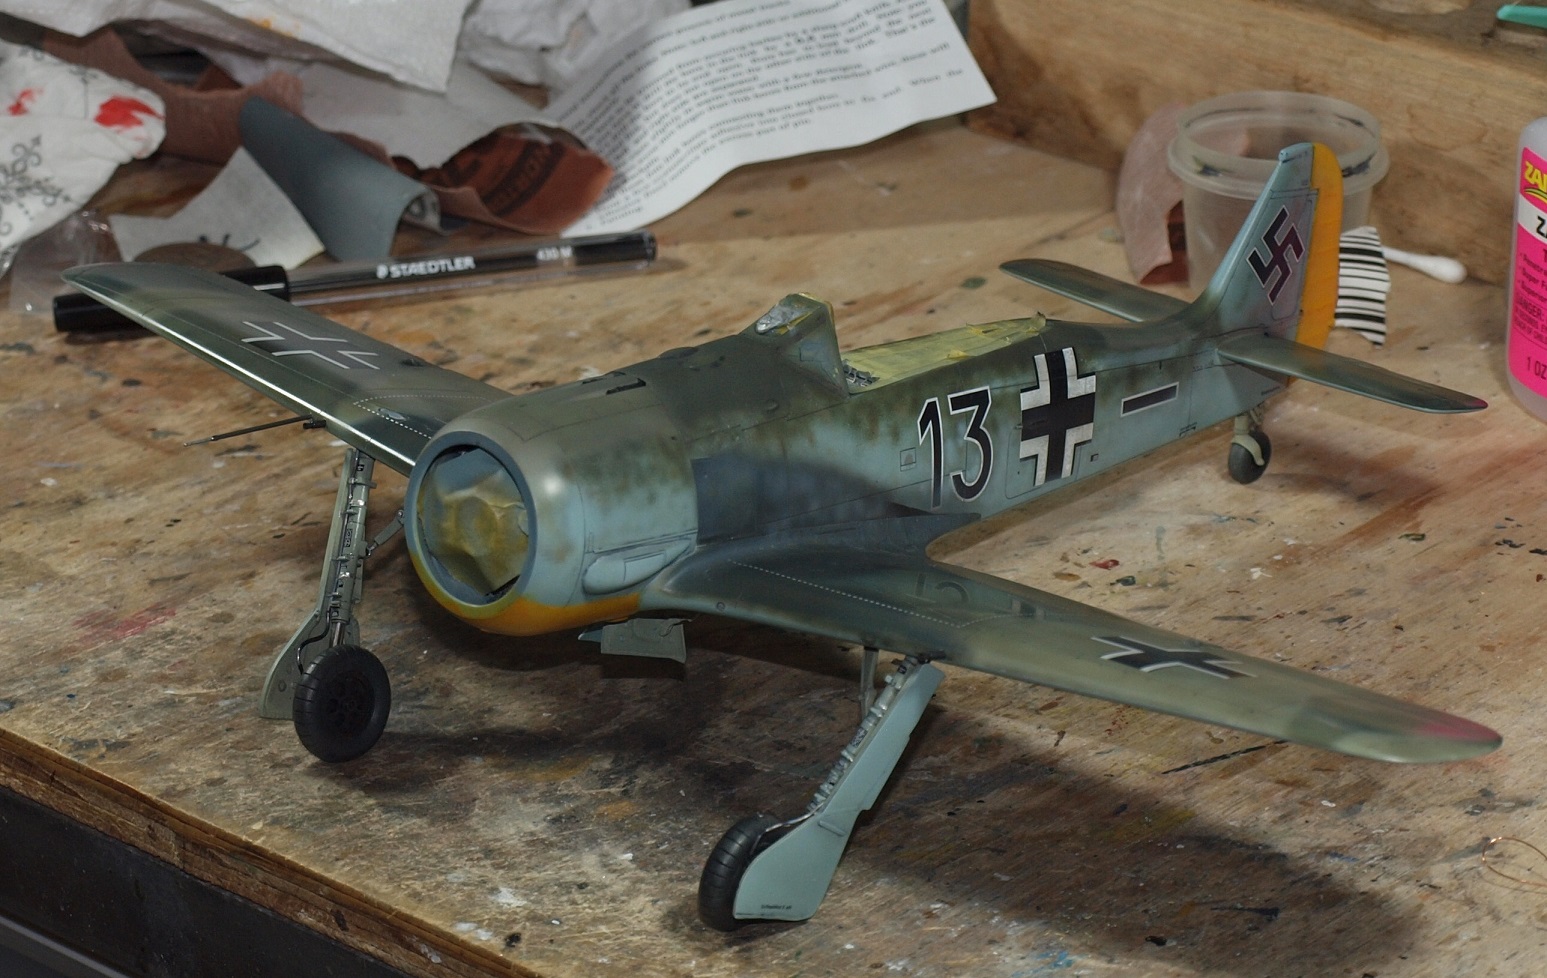
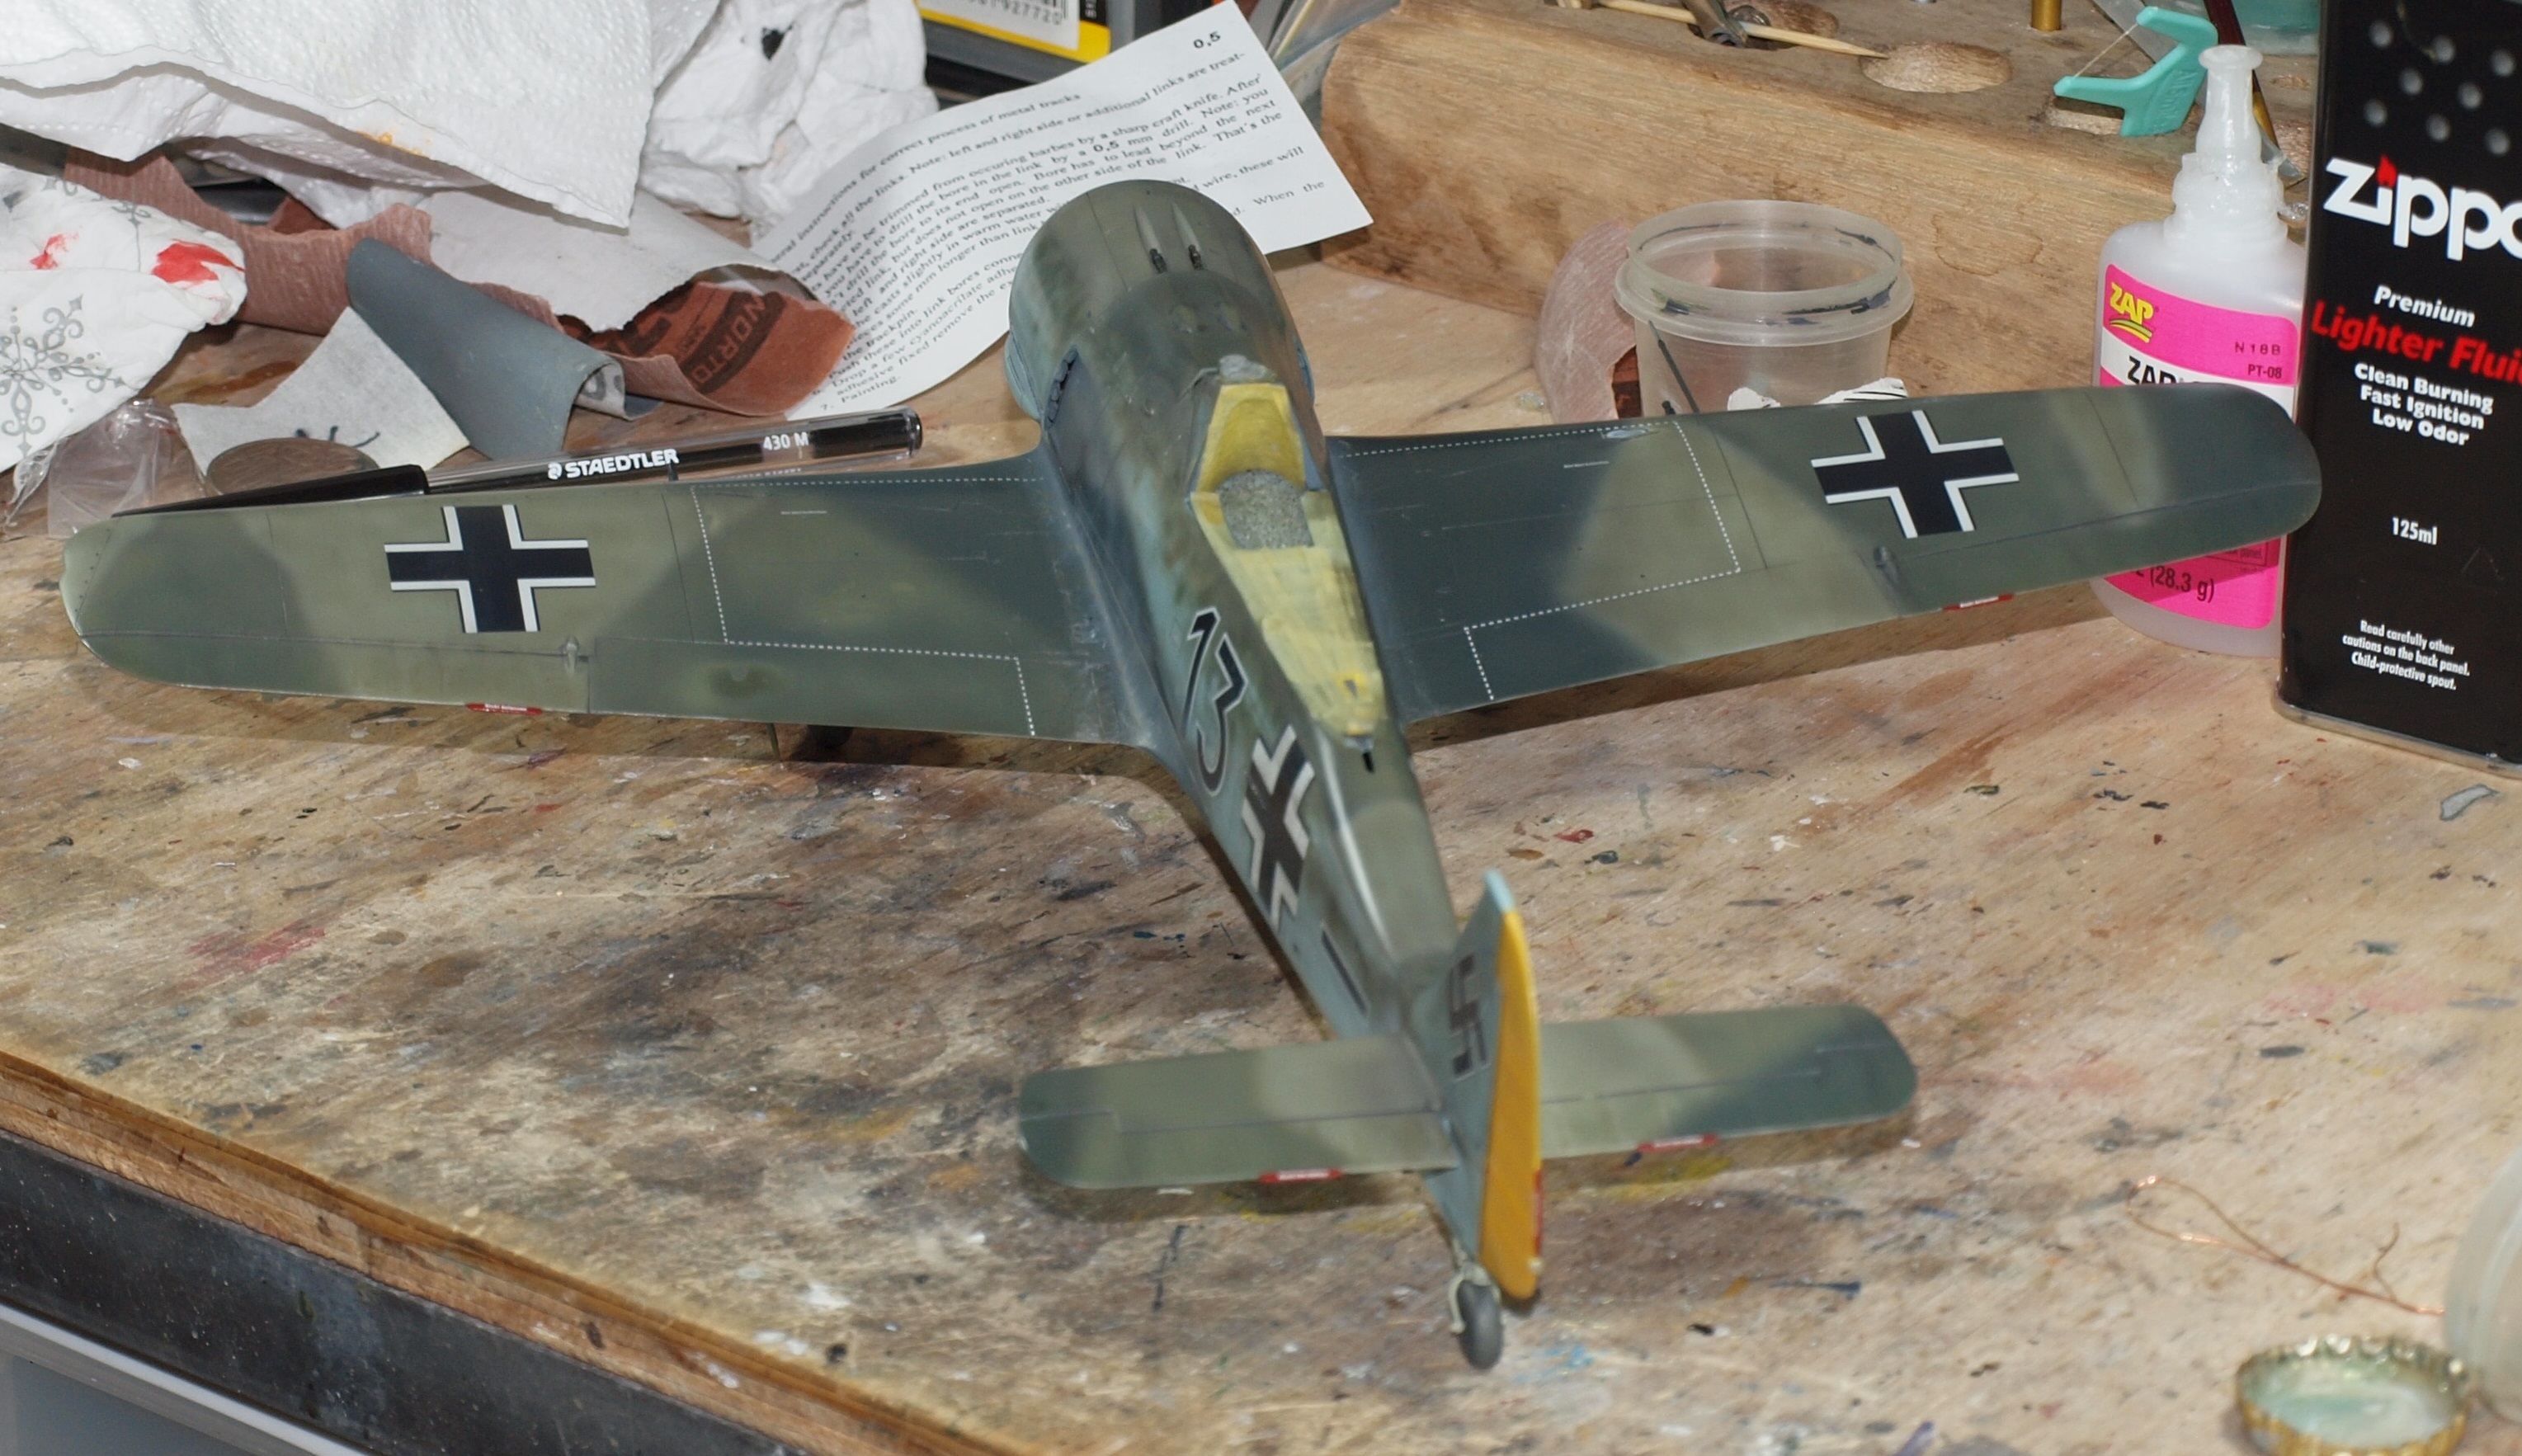
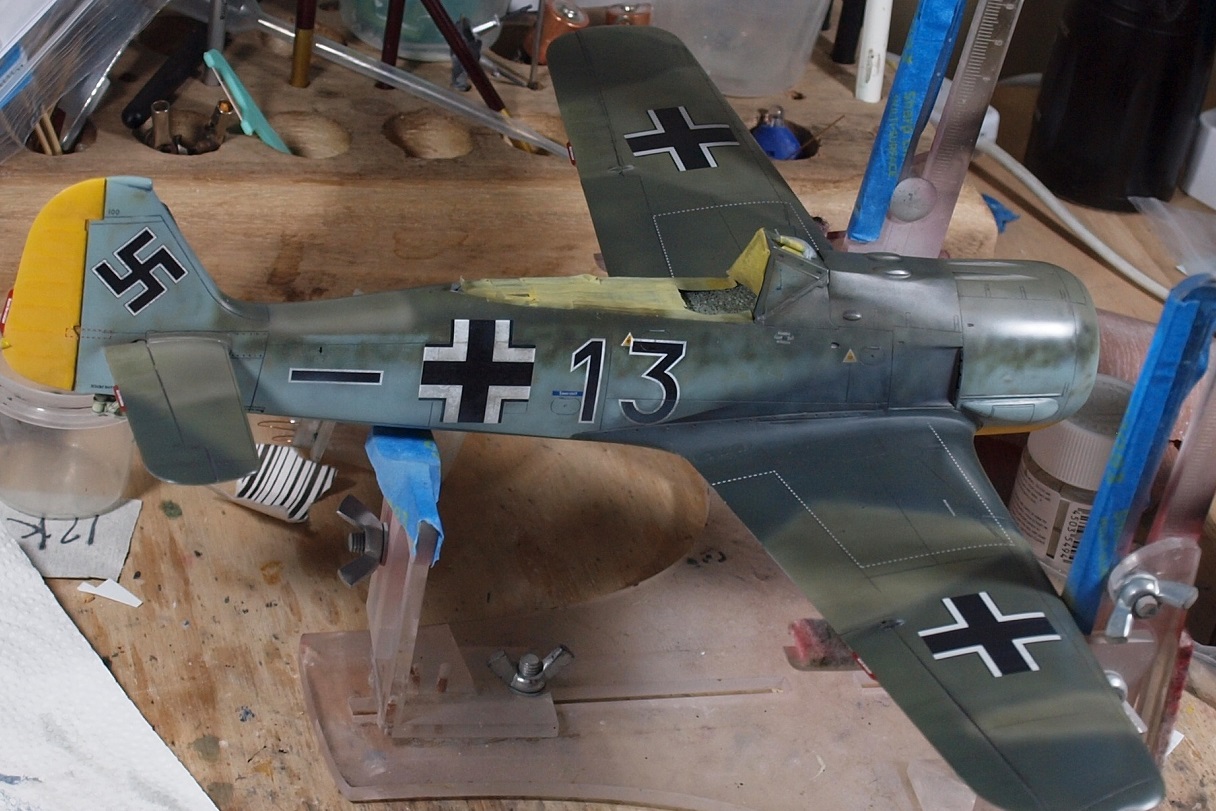
Well... a day of partial success. The Fw got it's guns and legs. And the paint job suffered.

While building this kit, I assumed that the legs would attach just like the TA 152C kit I built over a year ago. Unfortunately... this wasn't the case.

I struggled with the geometry and finally got them into a position where both wingtips were 52mm from the deck.

You can see the paint damage near the starboard MG FF/M.
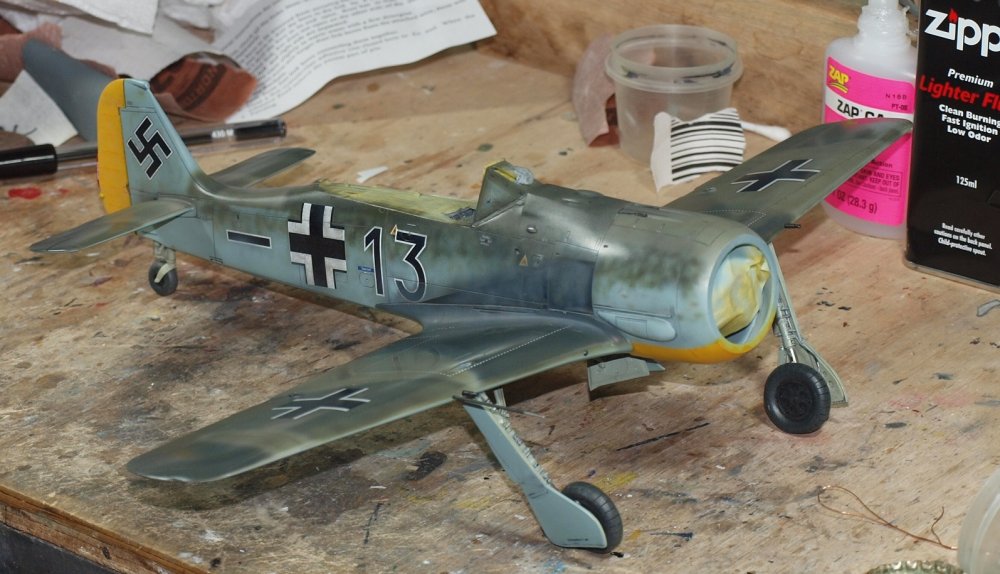
I did some light sponge chipping, but I thought it overstated and wet sanded it back a bit. Maybe back too much. That is one of the joys of having ultra fine grit abrasives. If you overdo an effect, sometimes you can get it back to acceptable with a few wet strokes, and then dry off with paper towel.
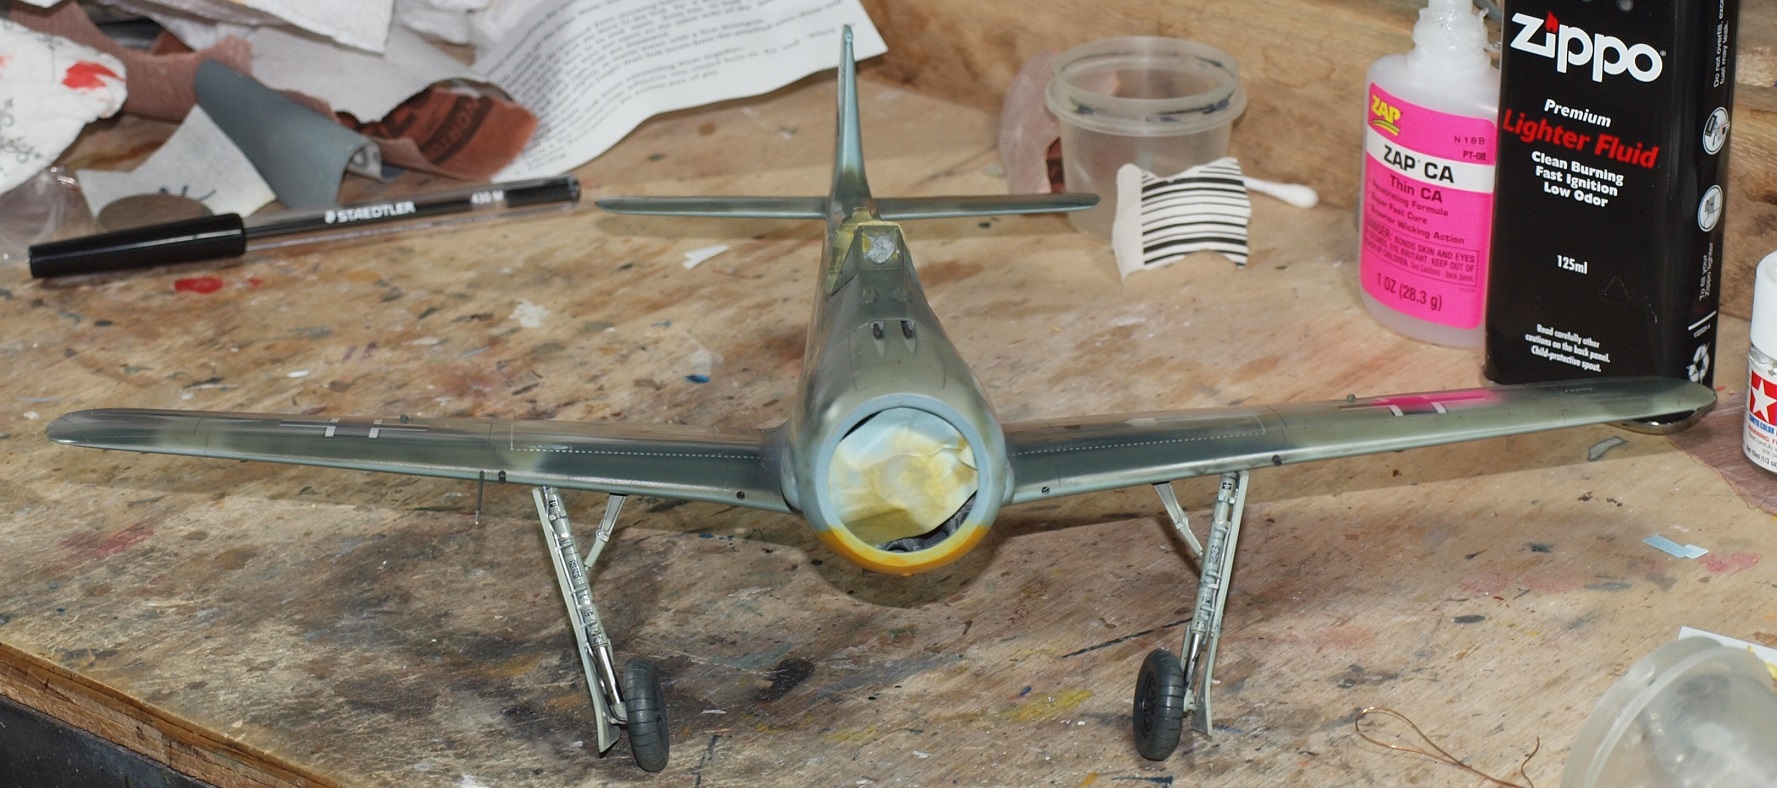
Finally I decided to compare the geometry of the LG with the earlier TA 152C kit.
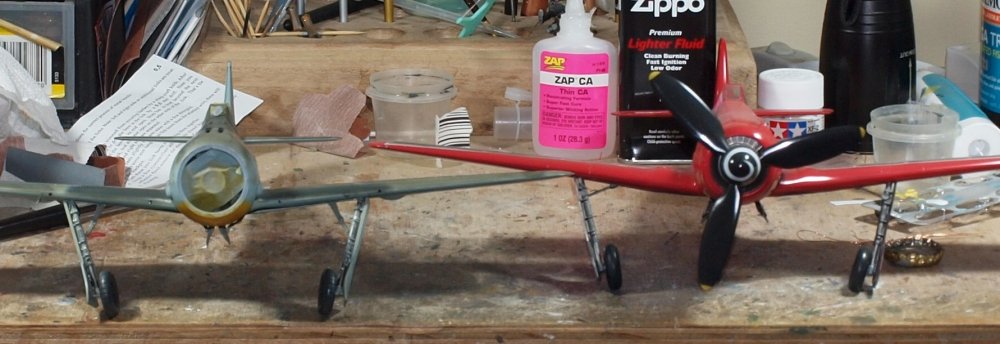
Not too dissimilar. But back to work tomorrow.
Happy modelling!
-
6
-
-
16 hours ago, harv said:
Looking good !......harh
 3 hours ago, Peterpools said:
Gaz
Paint work is awesome
Keep ‘em comin
Peter
Thank you, hombres!
-
3
-
-
-
Peter,
Your extra work has paid off, and the wings look nicely fitted.
Keep up the good work!
-
2
-
-
1 hour ago, Kaireckstadt said:
Absolutely awesome paint finish with a beautiful attention to detail painting. Wish I had the feeling for this like you.
This will be a real stunner in the end!
Thank you, Kai.
It's really all just a learning experience. Experimenting and hoping to get the right result. I'm pretty close to finished. All that remains of weathering is to do scratches where the paint hasn't been totally removed, and then sponge chipping. Then it's final assembly, matte coat, remove the canopy masking and attach the aerial.
Ugh... and the pilot and base. Neither of which I've touched yet.
-
3
-
1
-
-
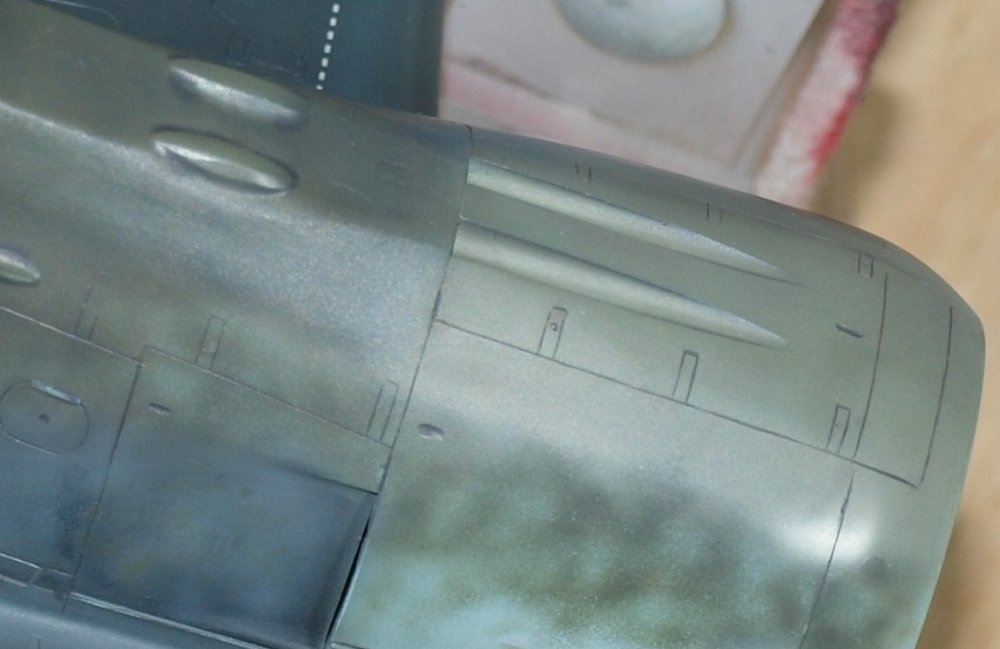
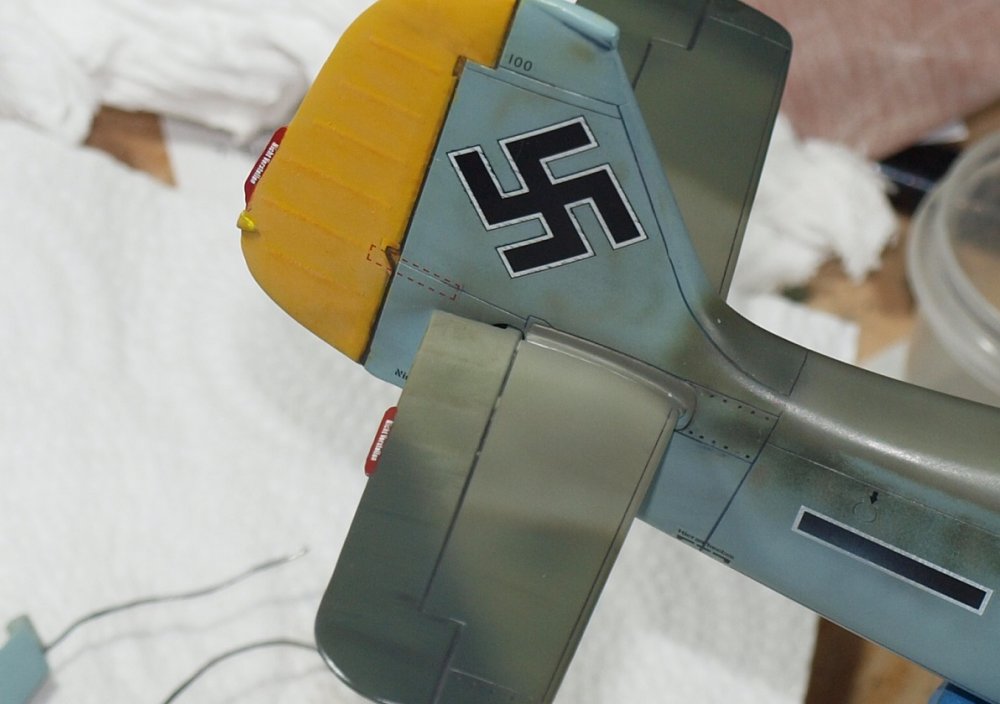
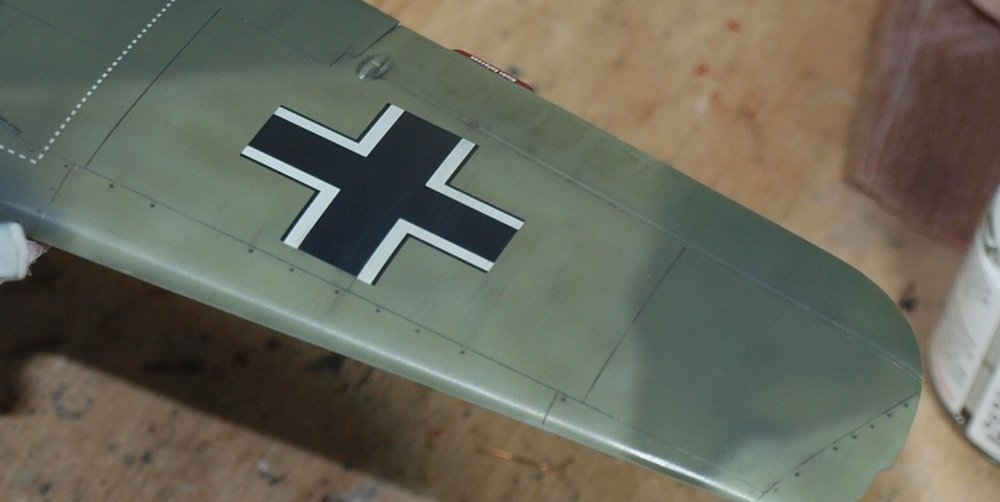
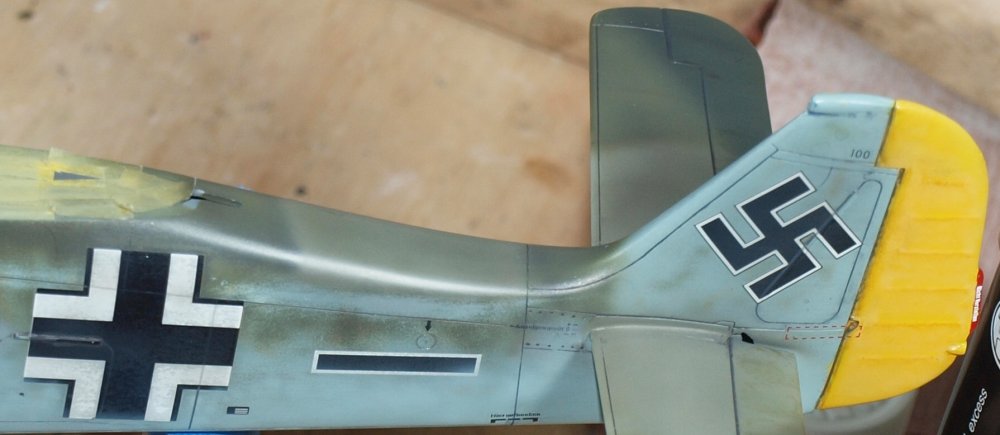
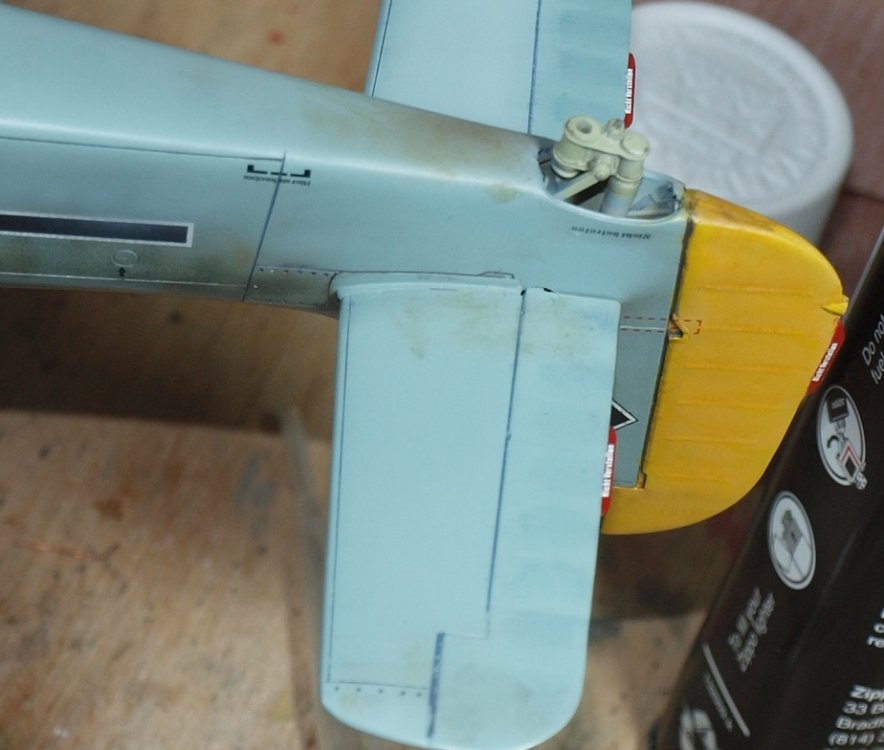
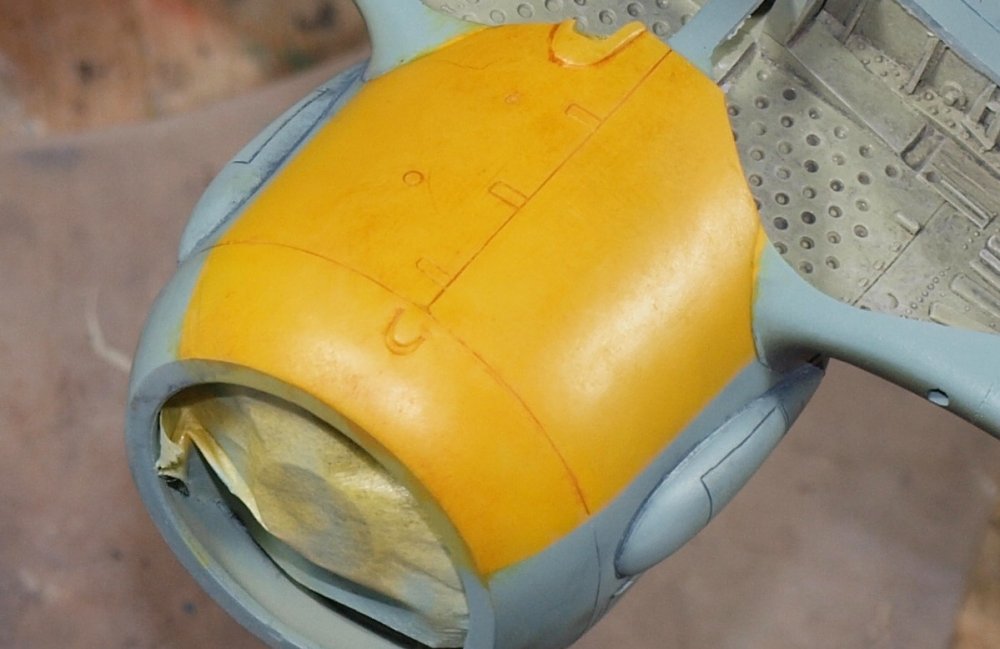
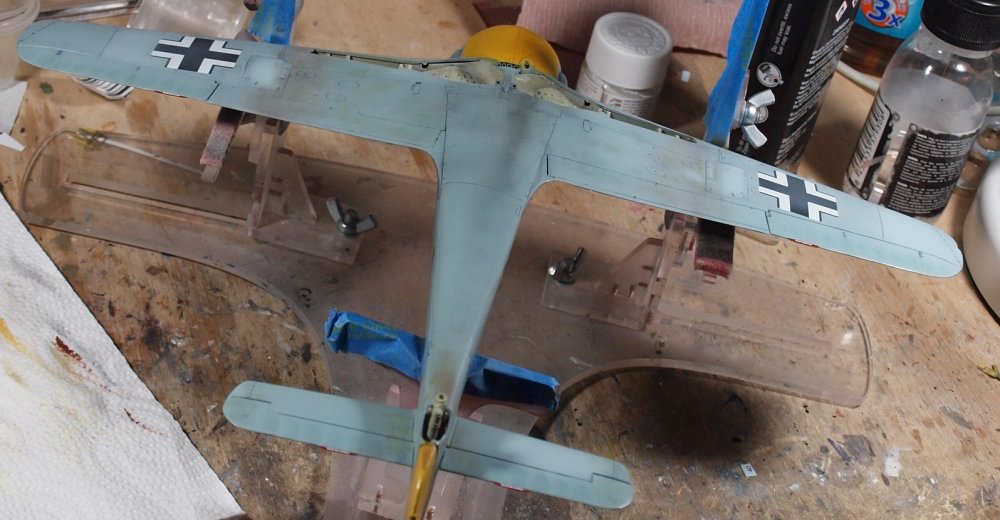
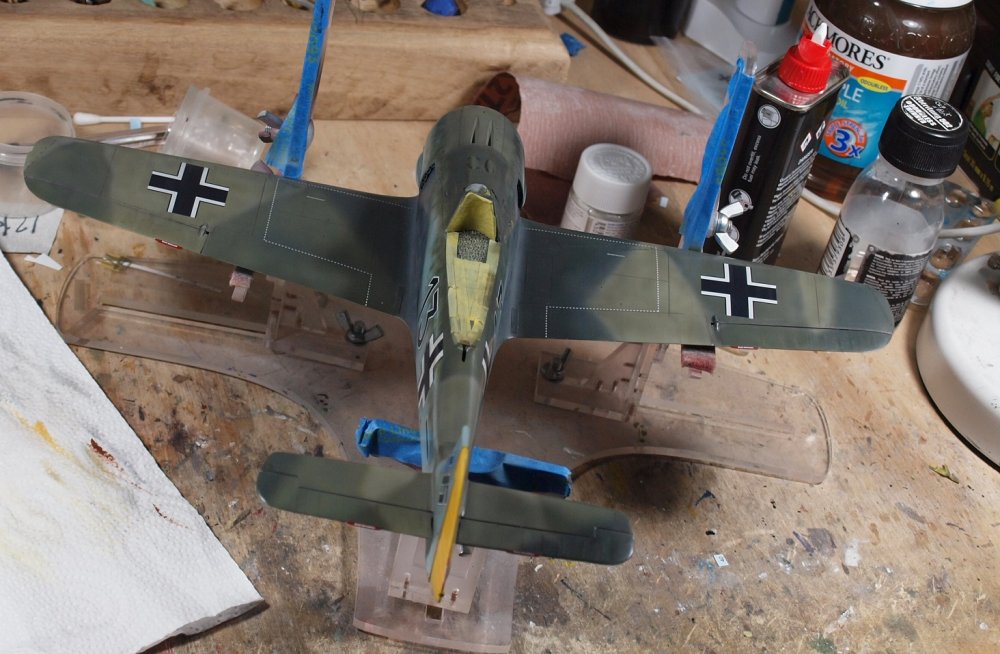
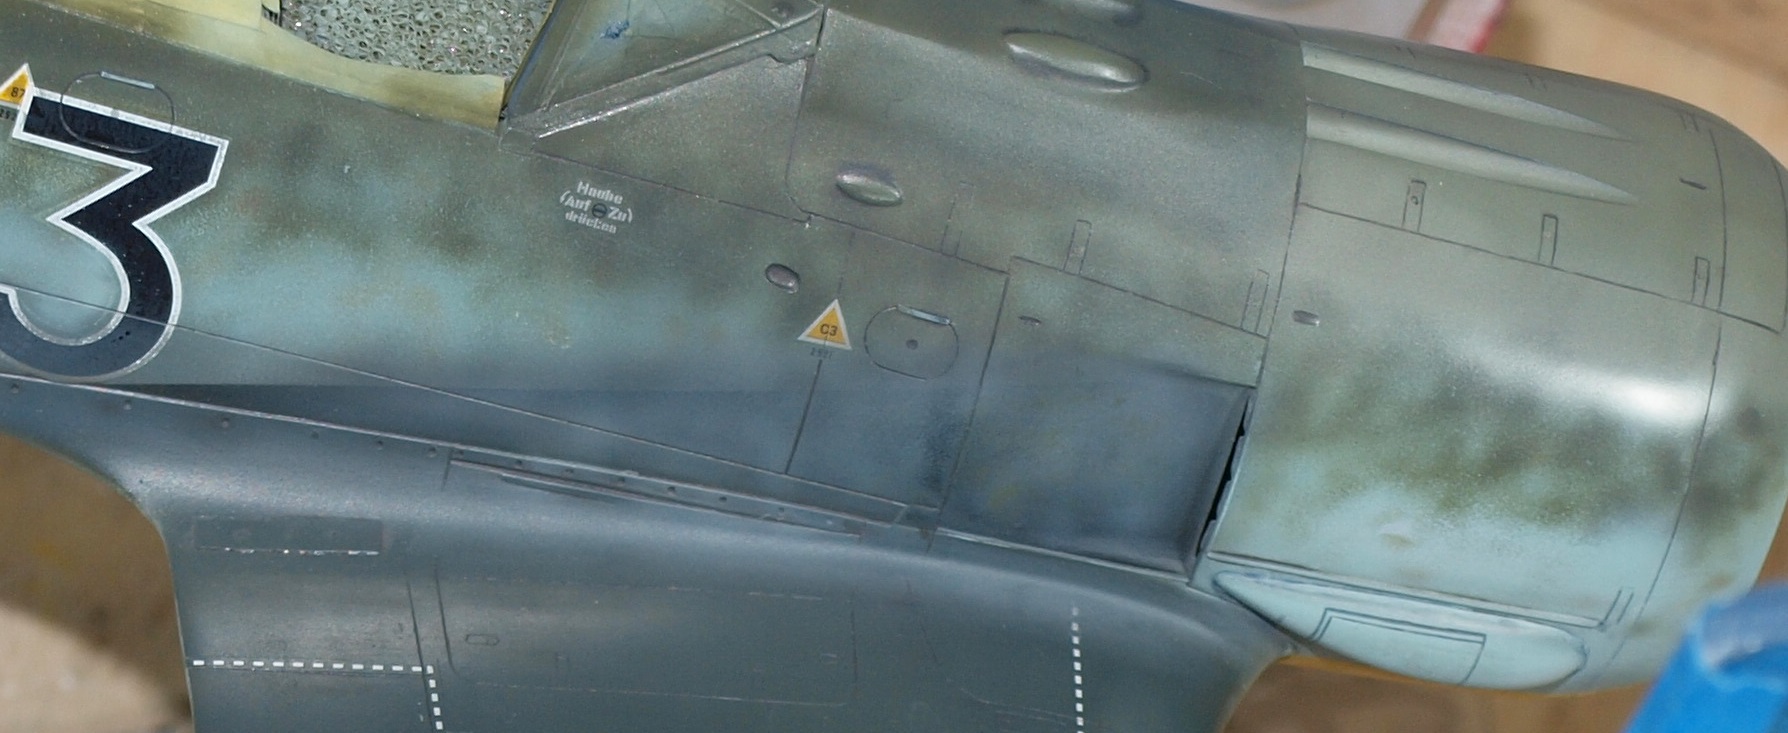
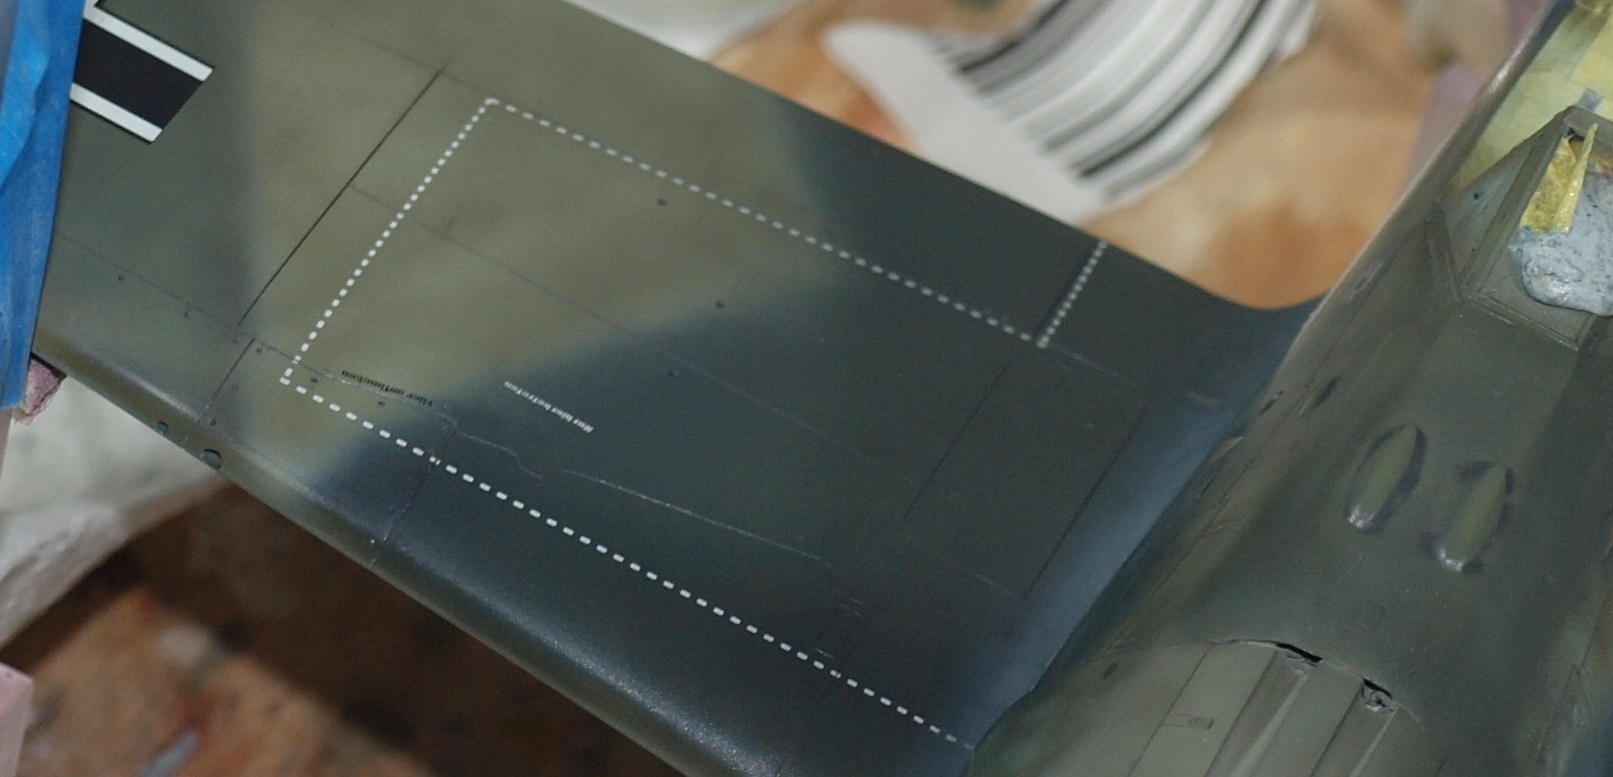
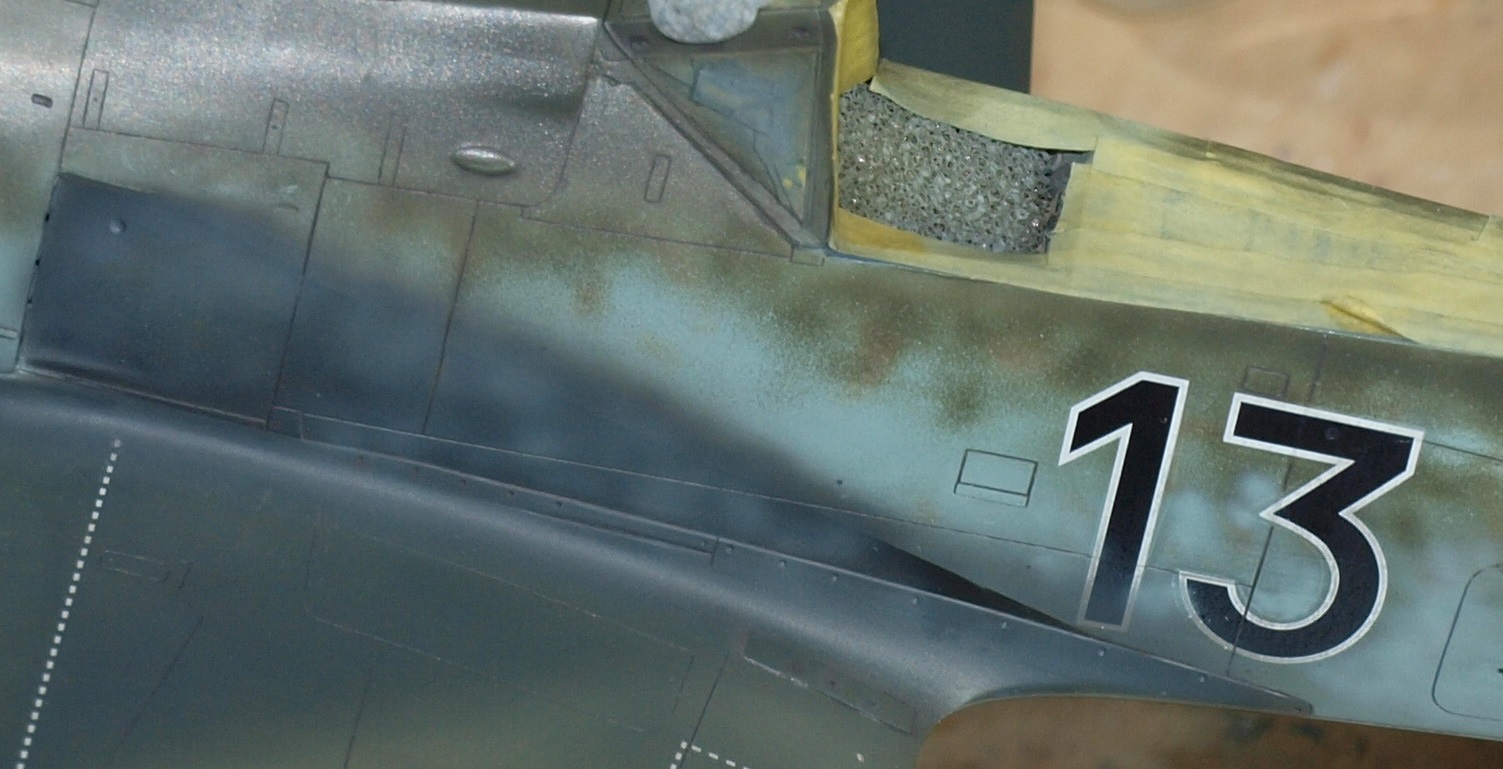
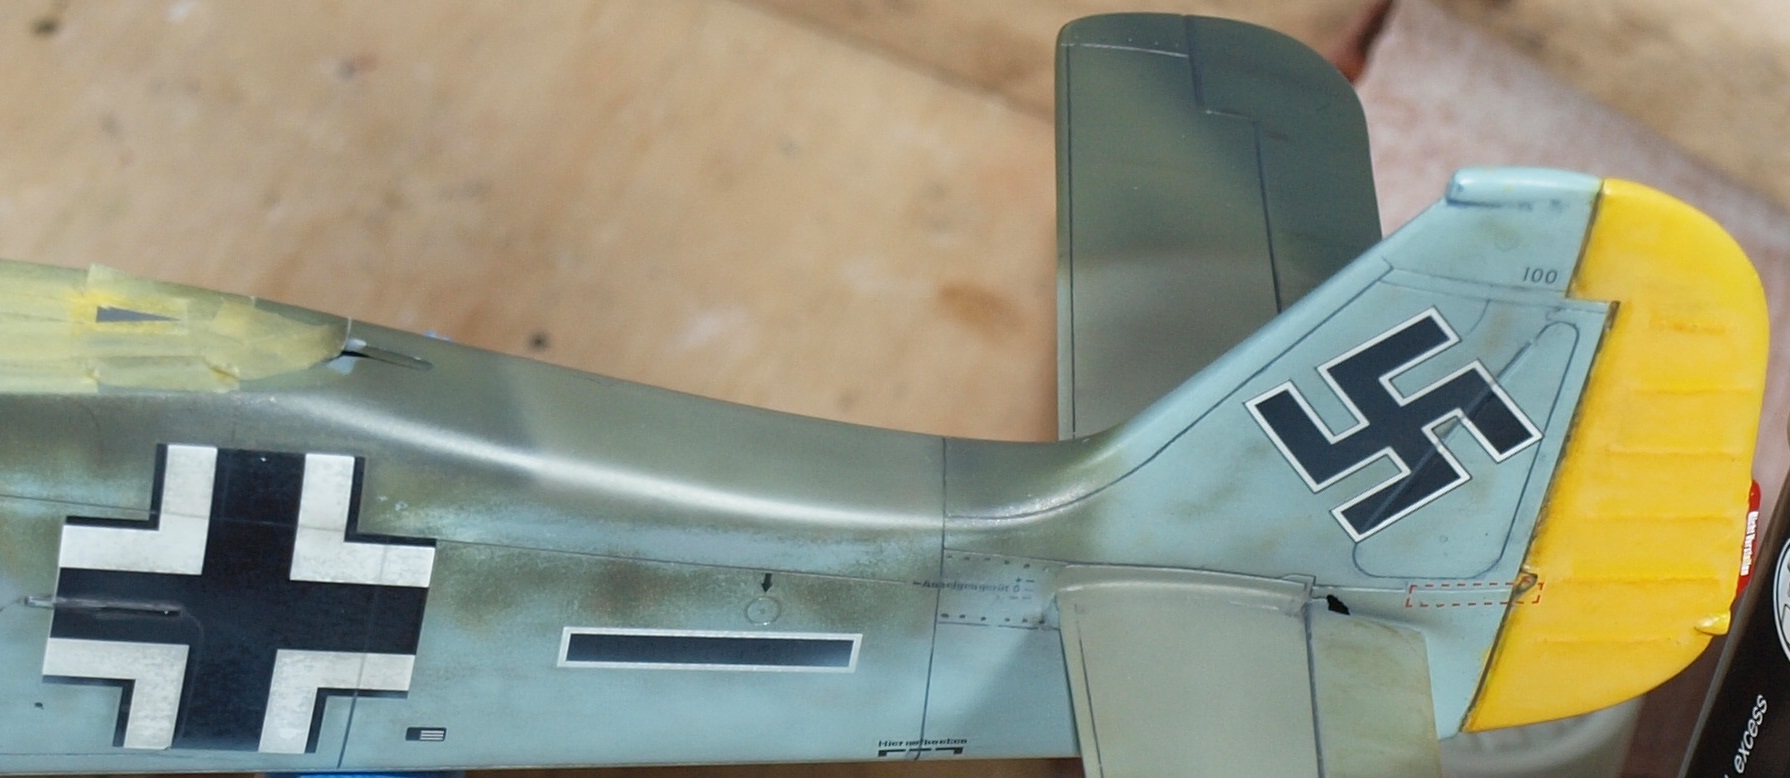
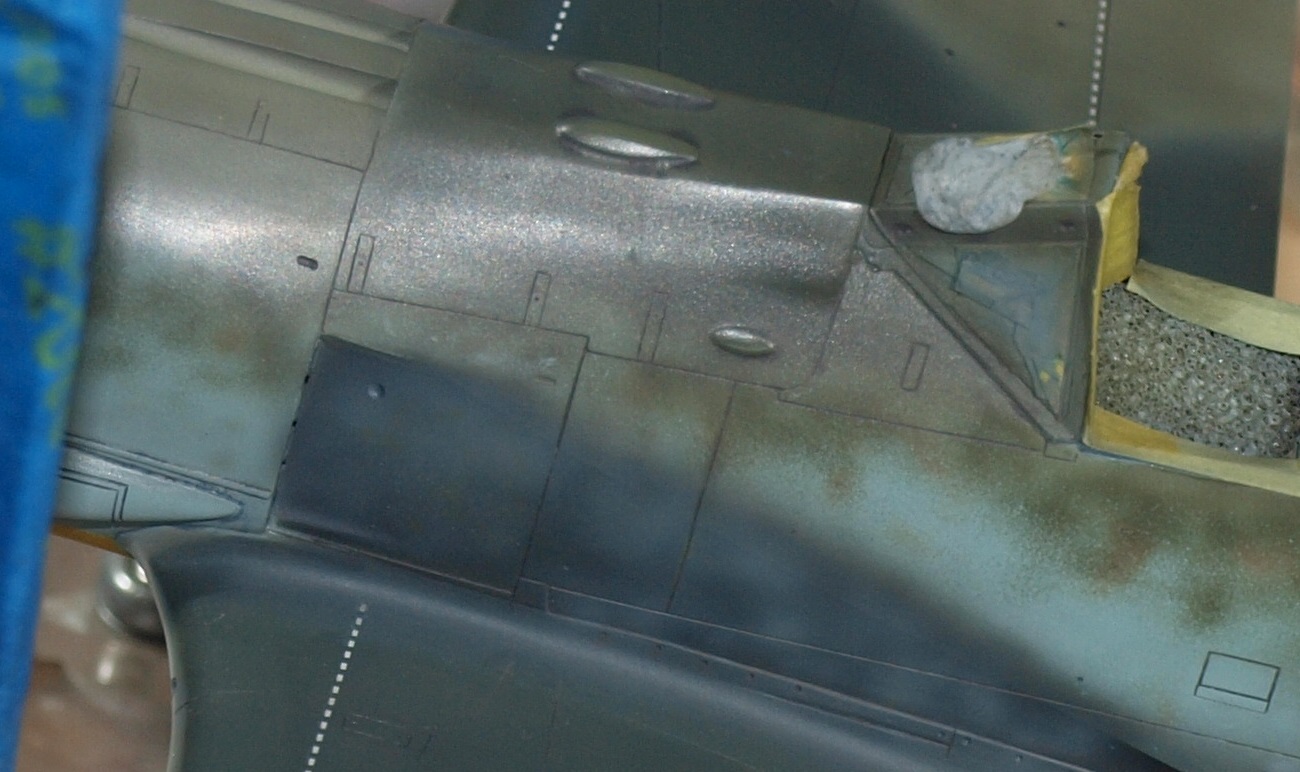
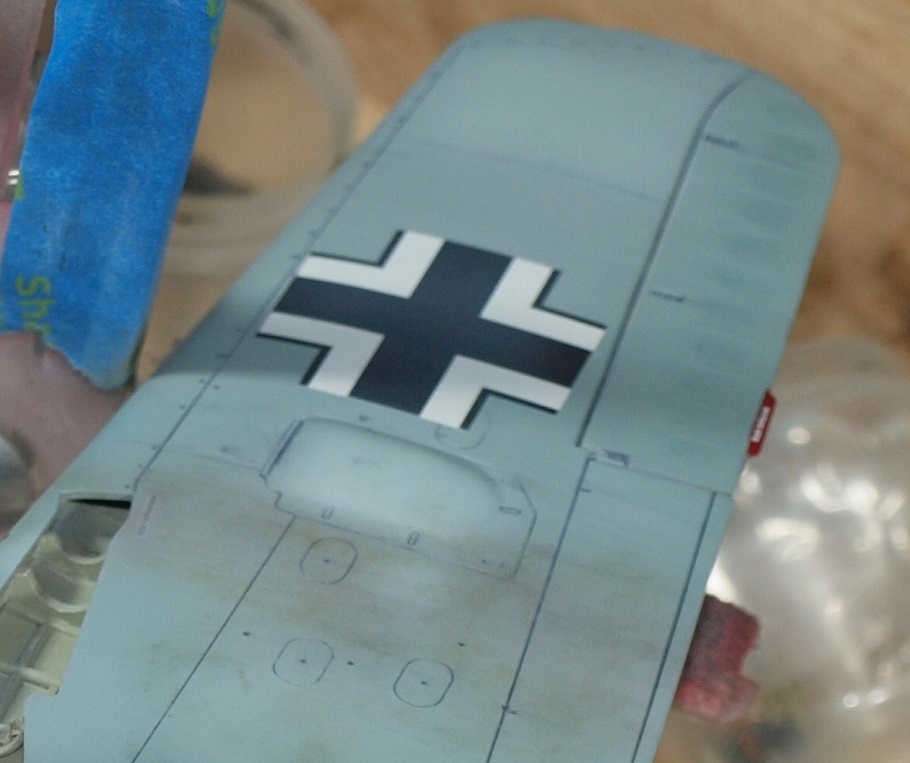
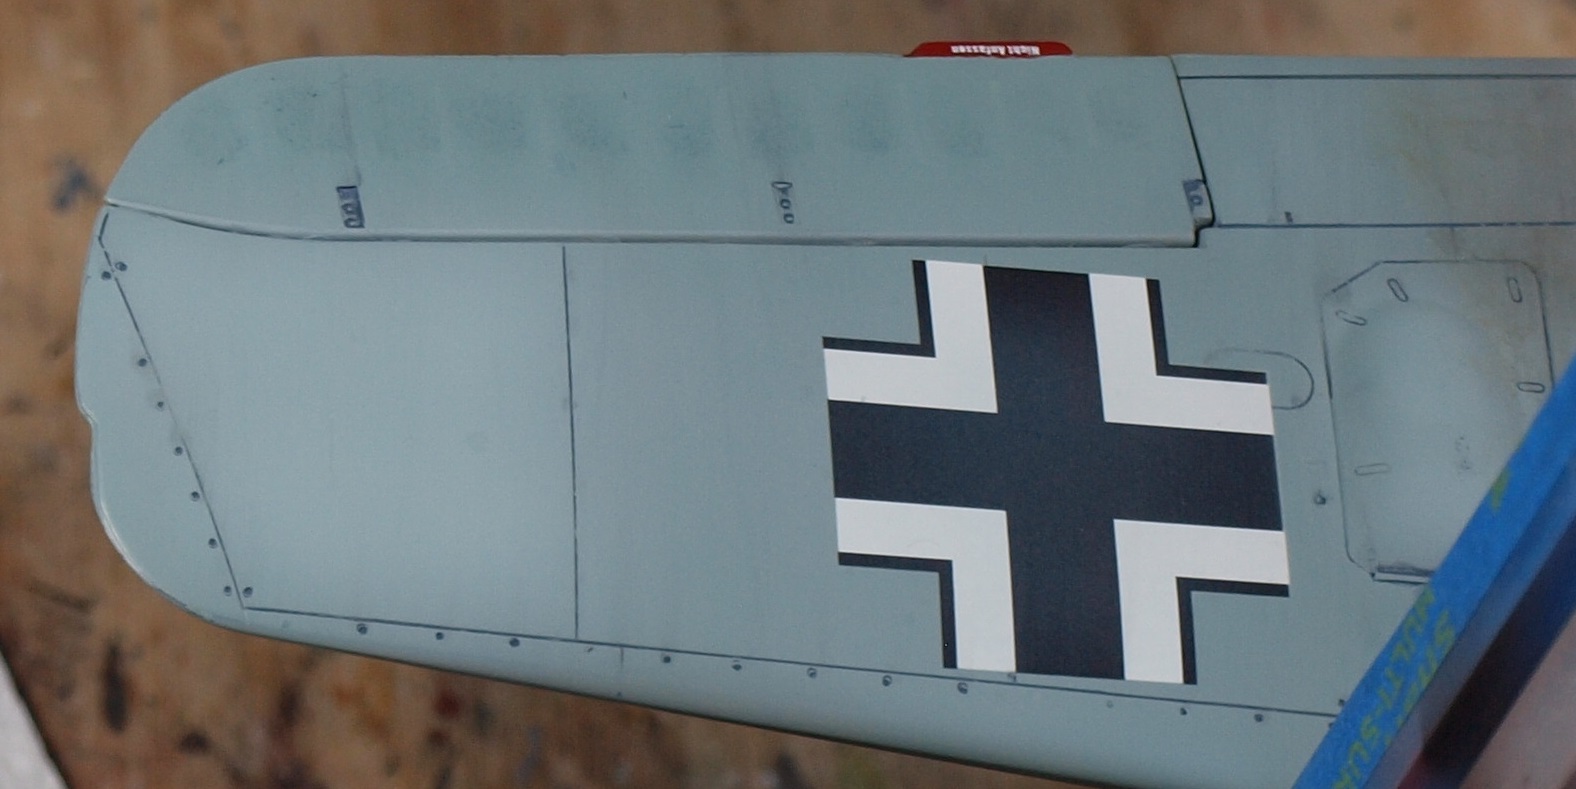
Despite the wet, lazy day, I pin-washed. I have divided the pinwash into three zones. The upper zone was done in a dark gray brown wash to blend with the camoflage colors. The light blue zone was pinwashed with a gray/blue wash. The final zone is the yellow zone which today is just the cowling in the chin area. I did that with a brown-orange color.
You will see a series of macro photos followed by three distance photos. If you have any opinions on any of the three zones, please feel free to help me correct them.


-
5
-
-
Looking sweet, John!
-
4
-
-
2 hours ago, Kaireckstadt said:
Although I‘m not an expert I love the camo Gaz. Looks much better to me than your first attempt!
The Ostketten are a nice addition.
13 minutes ago, Peterpools said:Gaz
Nice work on the cameo - you’re turning into a modeling machine
Keep ‘em coming
Peter
Thank you, Gents!
-
4
-
-
deleted
-
 1
1
-
-
Those all look great Rob! Thanks for the recommendation.
-
4
-


Very Large Type VII C/41 U-boat by Revell in 1/72nd scale
in LSM 1/35 and Larger Work In Progress
Posted
But that Flak looks fantastically detailed for the scale. You've done well!