GazzaS
-
Posts
6,396 -
Joined
-
Last visited
Content Type
Profiles
Forums
Events
Gallery
Everything posted by GazzaS
-
 Phil, on my workdays I have little time or energy for modelling. I live for my days off.
 -
I'm with you Peter. I've never had much luck with wing panels. With my latest Revell 109 build, the resin replacement parts fit worse than the ill-fitting kit parts. I really do not mind the Hasegawa approach, as I like everything closed up. To me, shape is all important. I'll never take a tape measure to the model. As long as it looks right, I'm happy to be ignorant of an errant millimeter or two.
-
Thank you for the video, Bertl! The 109 has always been my favorite.
-
That's great news, Phil!
-
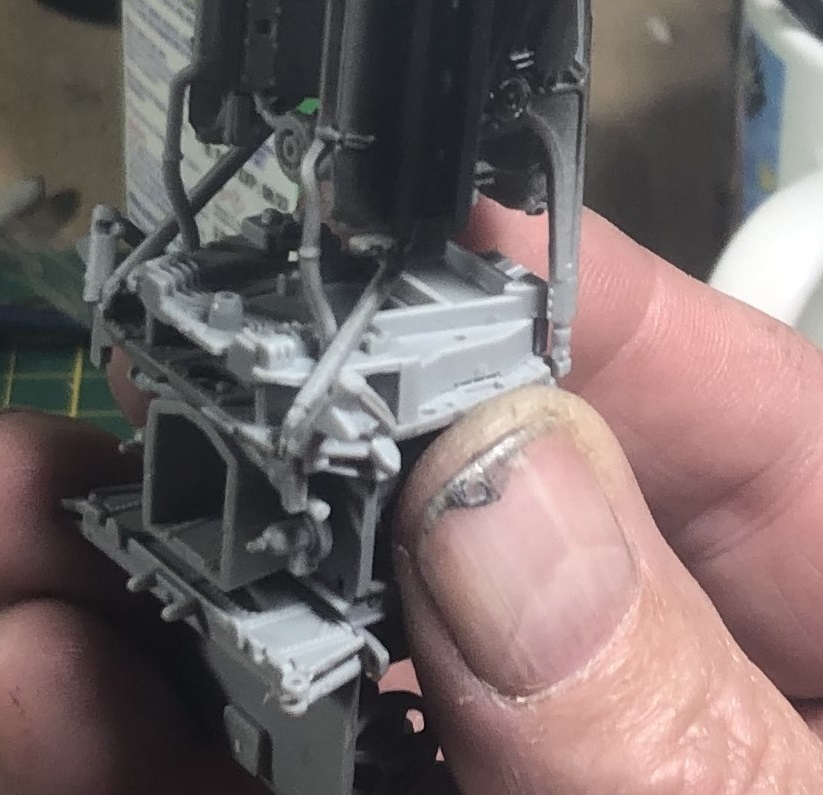
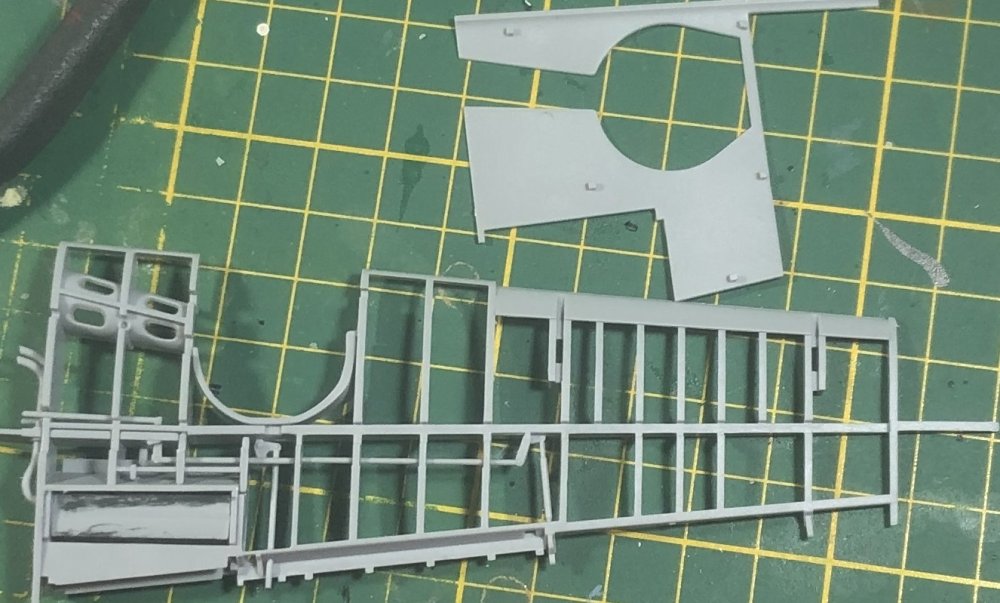
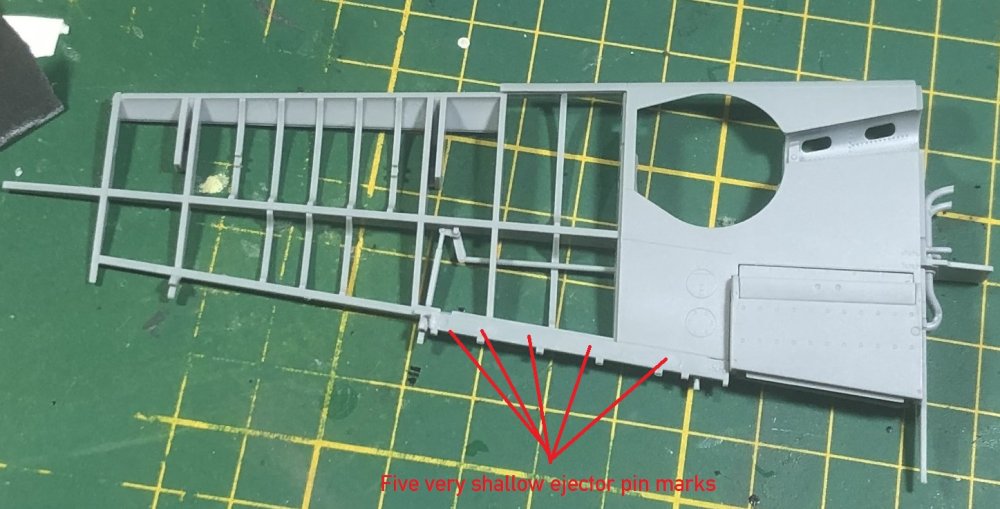
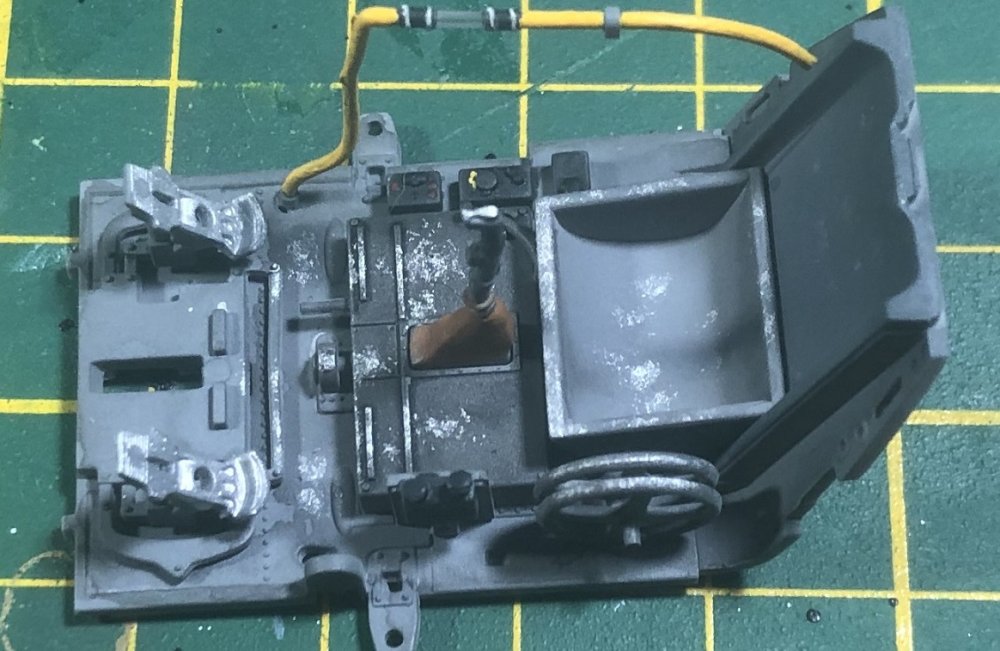
Saturday part II. Went a little further on the interior while leaving room to add the belts.... and started on a wing The engine bearers and tubing arraches to the firewall at 6 points. Here it is dry-fitted. I have never done a wing like this before. Everything fits to the inner framing. And goes on in panels and pieces. Even some of the control linkage is shown. I have decided to do the wings complete according to the directions. ZM has done an admirable job of keeping ejector pin marks out of the way. But I guess it was inevitable. I must admit that I am a bit worried about getting it together smoothly.
-
Peter, must have been a friday afternoon job,
-
Sorry... too late. Not even gonna risk pulling it.
-
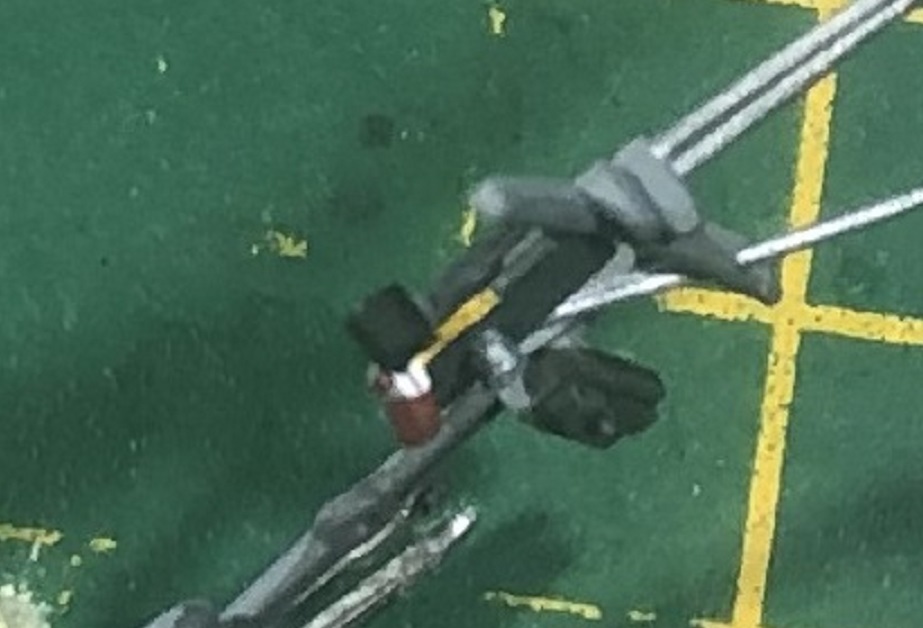
Thank you, Peter, I don't think they will be very visible once the cockpit tub is together. I've built a lot of 109's and looking into the cockpit.... you just don't see much behind the yellow fuel tube. The viewing angle just isn’t good to see it. Hey Gaz, I fixed your apostrophe in “isn’t”. You had a semicolon. Yes, the diction and phonics cop again 🤣🤣🤣
-
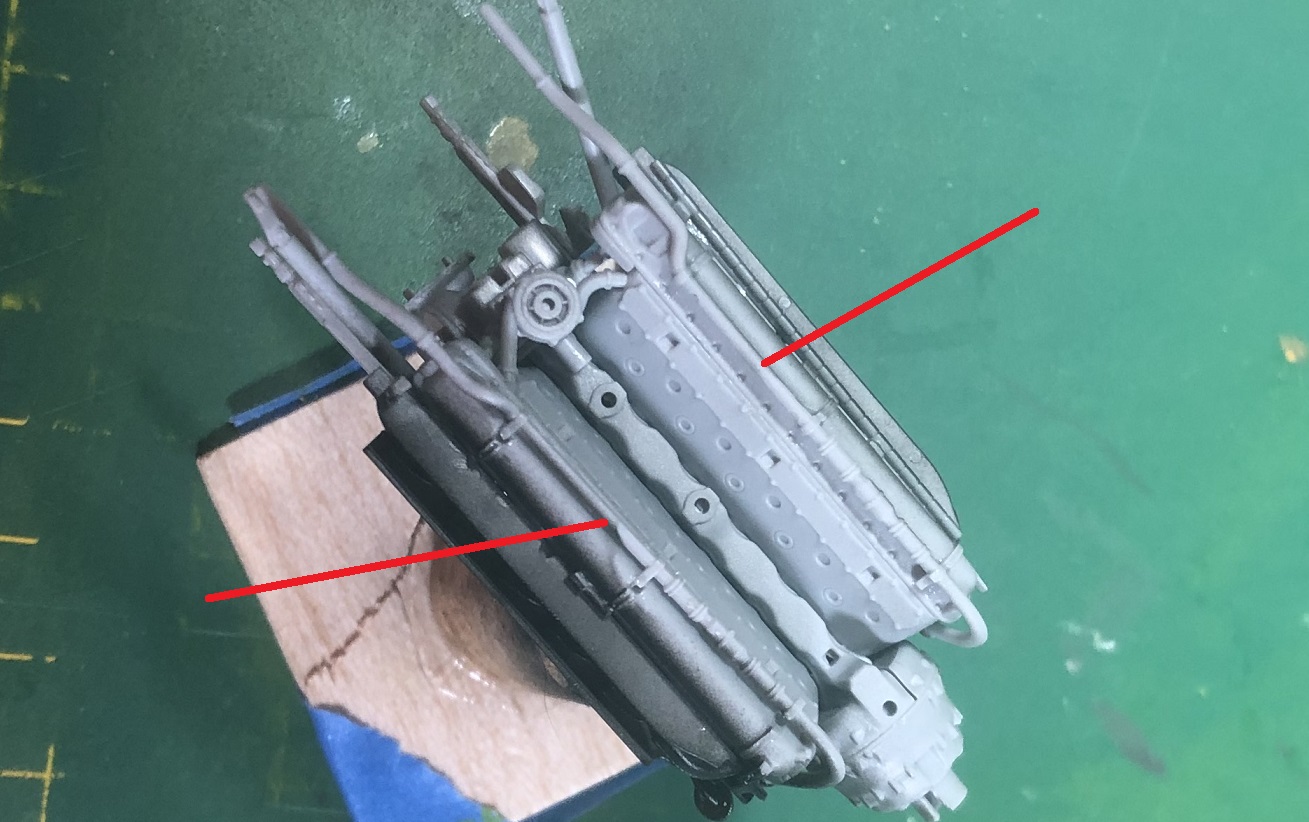
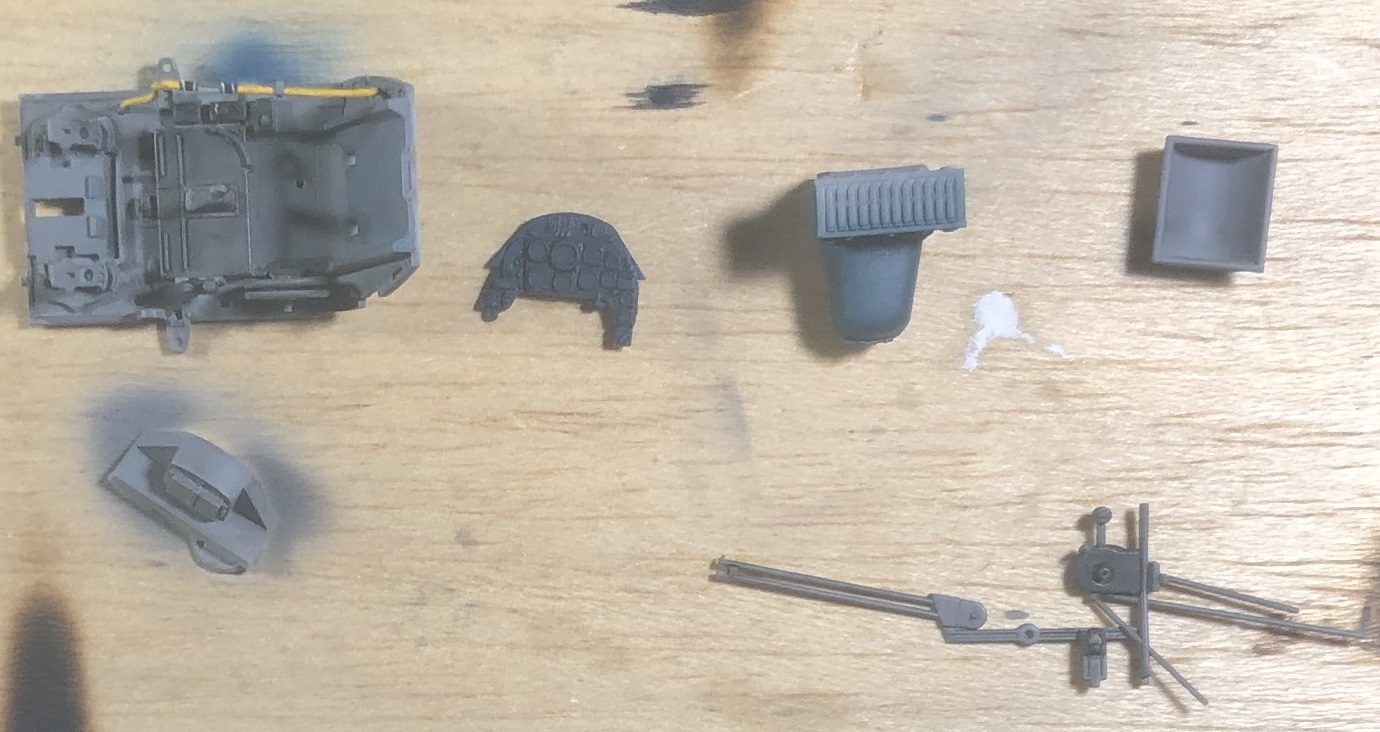
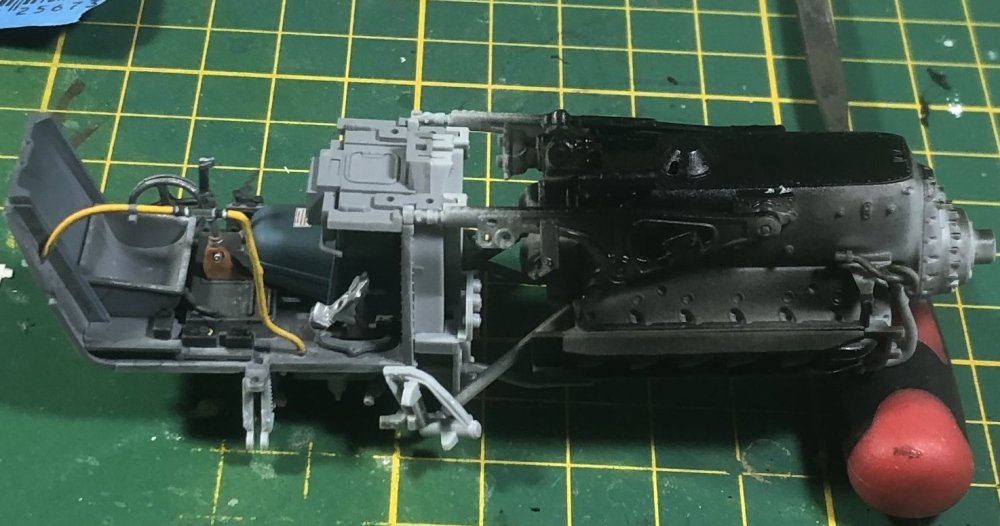
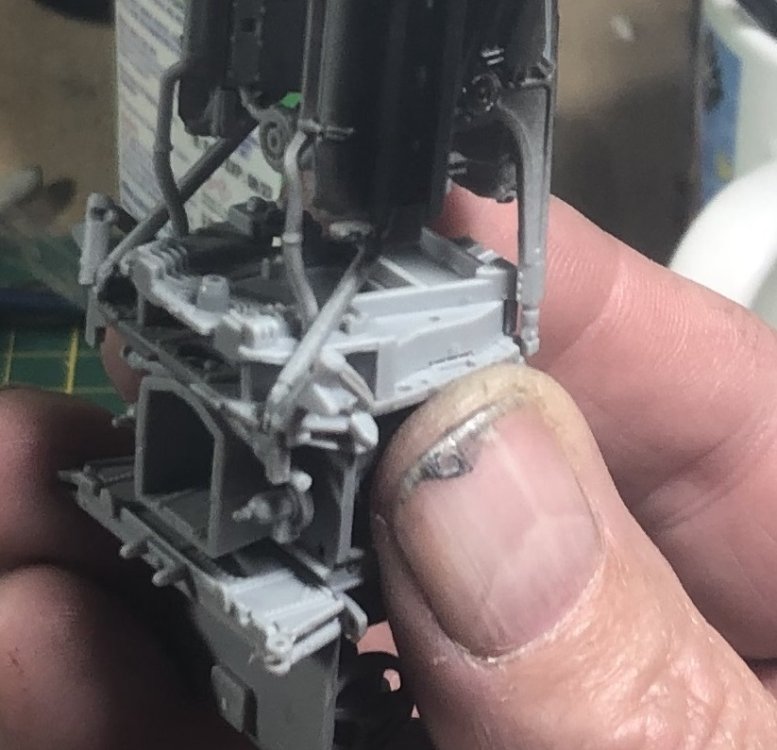
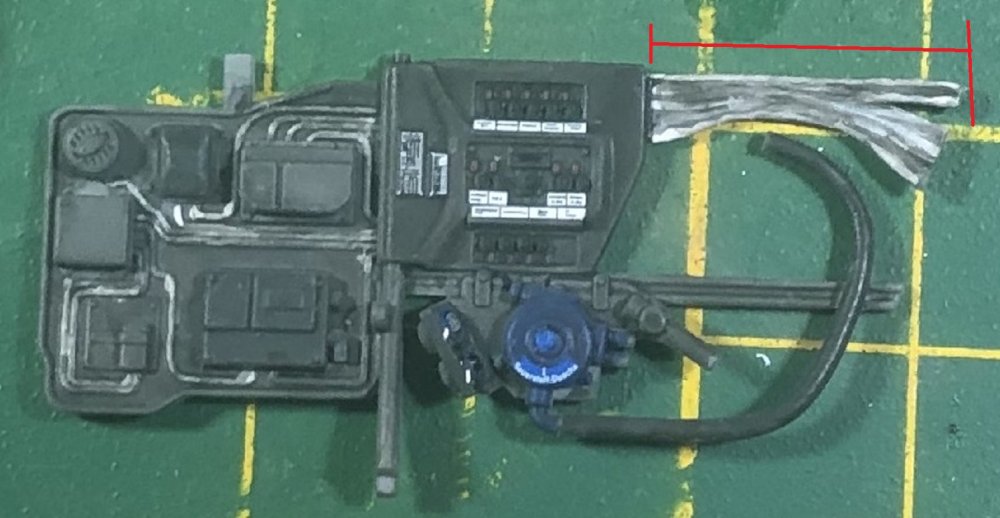
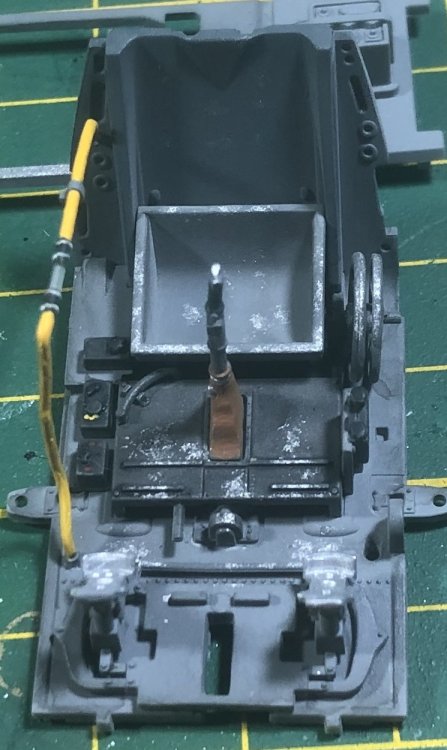
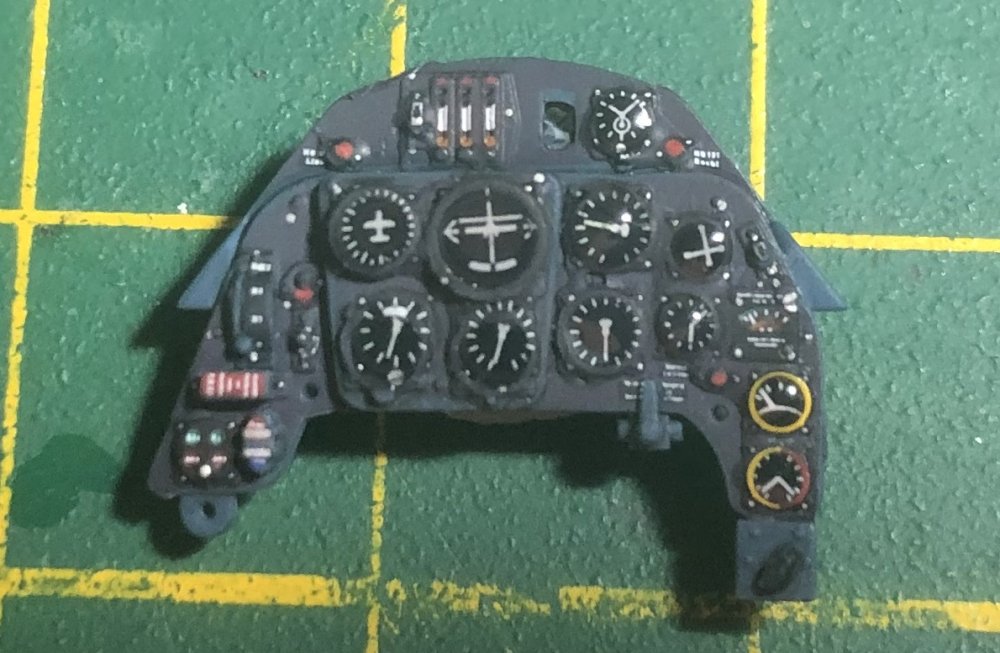
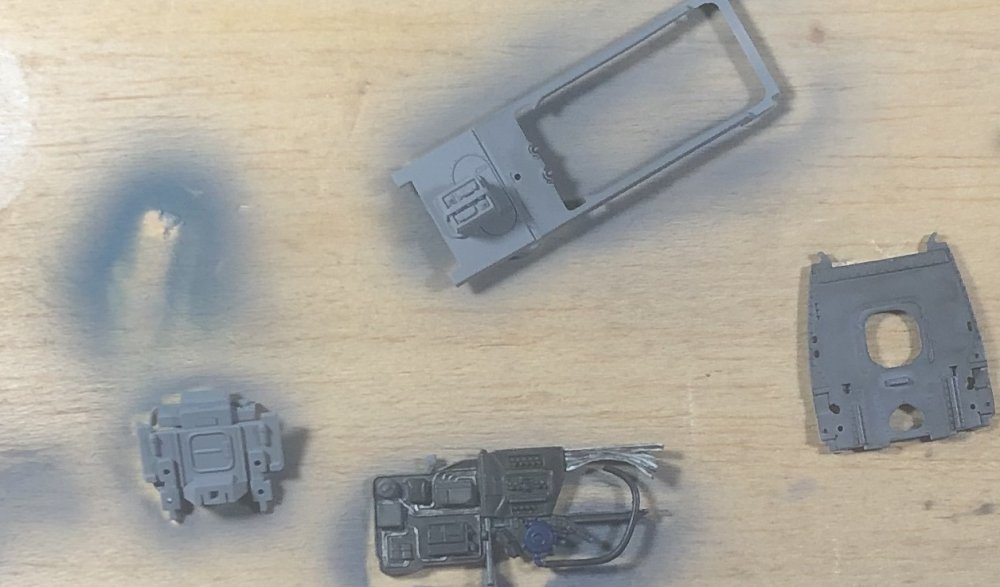
Welcome back, friends! Earlier I wrote about the need to add two more parts to the engine so that it can be cemented to the firewall. They are indicated by red lines. Also notice that I painted the exhaust stub area black. Decals... Decals are what turn this plain cockpit into something more interesting. There are red indicator lights next to each switch. But they aren't very visible. But they really shouldn't be... unless there is a problem. Notice the area with the red bracket overhead. That area is very softly molded, making it difficult to distinguish the wires in the bundle. Note here that instead of using silver paint, I'm trying the Nightshift way by using a light shade of gray. The oxygen system has it's own gauges. This is a poor photo of the throttle. It too has a decal. I'm gonna have to dig out the wife's Olympus. This phone is clearly limited when it comes to detail shots. The seat and floor. I was given some great photos of a chipped plywood seat bucket by Martin. But I didn't use the idea as I was feeling too lazy and didn't want to have to explain it every time somebody asked about it. And finally... The IP Sadly, I didn't get everything to line up correctly before it dried. I used UV gel to give the indicators a glassy finish. The kit gives you various ways to finish the IP. You can use the large decals like I have done. Or, you can use smaller decals which cover each lens and control separately, or you can paint the whole damn thing by yourself. Either way, you end up with some left-over gauge decals for another 109 project. Happy modelling!


-
Chikuma - Tamiya - 1/350 - IJN Heavy Cruiser-Finished
GazzaS replied to KevinM's topic in Non LSM 'WIP
Totally awesome! -
Ooh nice!
-
Thank you, Peter. I do like the ZM instructions. There are even small pictures of the painted and assembled sections to look at for reference. And another neat feature is the locator pins. It’s not just round hole-round peg. Each locator and hole are shaped and sized to fit only with each other.
-
Anyway... I worked on the cockpit today. There's still a long way to go. Detail painting... that's where I suck. The cockpit is typical 109. But... the ZM parts fit wonderfully giving perfect angles each time. There are some decals to add... as well as more detail painting. I'd kill for steady hands! Until next time!

-
Very nice!
-
I hate to ask the question "famous"? But I ne'er heard of it.
-
That is some interesting information, Chris. I'll be able to use some of it for sure. Thank you. Thanks for the photo, Martin! It's much better to have at least one photo of the real bird. That's a great photo. It would be cool to do if you could get scale-thick parts. FYI.... there is a short tail in this kit. As well as other G6 parts. You also get the early canopy with steel headrest armor as well as short and tall antenna masts. So there you go: Early and Late G6 as well as G14 all in one kit. I will even have to remove the umbrella blisters.
-
Revell Me262 B-1a/U-1 Nachtjäger "Red 12"
GazzaS replied to CANicoll's topic in LSM 1/35 and Larger Work In Progress
Chris, Just caught on to this. The camo looks great, and the cockpit looks good, too. I agree with you on the seatbelt decals. They really don't look very convincing in 1/48 even. Sometimes I think it would be worth it to get resin seats that have the belts molded on. -
Valentine MK.II/IV Tamiya 1/35
GazzaS replied to belugawhaleman's topic in LSM 1/35 and Larger Work In Progress
Paul, Looks good! I add texture with Mr. Surfacer and a old brush. I just keep mashing Mr. surfacer with the old brush still it starts to get tacky and makes a real rough finish. Then I give it a quick sand to knock off the highest points once dried. I have a 4 year old bottle of Mr. Surfacer that I keep reconstituting with lacquer thinner. It's pretty much all I use it for now. -
Have you forgotten the Corps drug policy already?
-
Ahh.... Martin, that one was already on page 1 of this thread.
-
Hi Chris, I have a favorite.... But it's one nobody picked. With all of the Erich Hartmann builds that are going to be 74/75/76, I thought it would be cool to go 81/83/76. I've also wanted to do one with a nose band for a long time. But who knows what else may come up.

-
OOh, I like that wing structure, too.
-
Very nice, Mark!
-
Nose surgery for a Trumpeter P-51B
GazzaS replied to JohnB's topic in LSM 1/35 and Larger Work In Progress
Looking good, John! -
Eh... Not really that interested, Hubert. I was just poking fun at Ernie.