GazzaS
-
Posts
6,396 -
Joined
-
Last visited
Content Type
Profiles
Forums
Events
Gallery
Everything posted by GazzaS
-

Valentine MK.II/IV Tamiya 1/35
GazzaS replied to belugawhaleman's topic in LSM 1/35 and Larger Work In Progress
Looks great, Paul! -
Captured French equipment served various roles. In Norway, Germany kept a large number of troops to keep the iron ore flowing, fearful of an Allied invasion. I think there were 11 divisions there at the end of the war,
-
Revell Me262 B-1a/U-1 Nachtjäger "Red 12"
GazzaS replied to CANicoll's topic in LSM 1/35 and Larger Work In Progress
Great photos, Martin. Yes, it's been spoken of on documentaries and stuff... The skin shaping on the 262 wasn't perfect. Factories were regularly combed for able-bodied men for the front, and quality suffered. But how to impart the look on a plastic model? I've pondered the question for some time. I know you can make shallow dents and sand or buff them into smoothness... but it's so easy to go too deep, or to end up with marks looking like nothing you intended. I have seen people do oil canning on ships and once a Lancaster...but to do it on a little airplane... that's another matter. As far as museum relics go... How much trust can you put in it? It's been hoisted by crane numerous times. Possibly disassembled put into a truck traveling on bumpy roads, before being put on a ship, before being reassembled and hoisted by a crane again. If you look closely at the 109G6 in Canberra, you'll see it's had a rough life after the war. You could end up doing all of that work... getting it right... but some people would never believe. -
Hasegawa F-16A -first production aircraft
GazzaS replied to ScottsGT's topic in LSM 1/35 and Larger Work In Progress
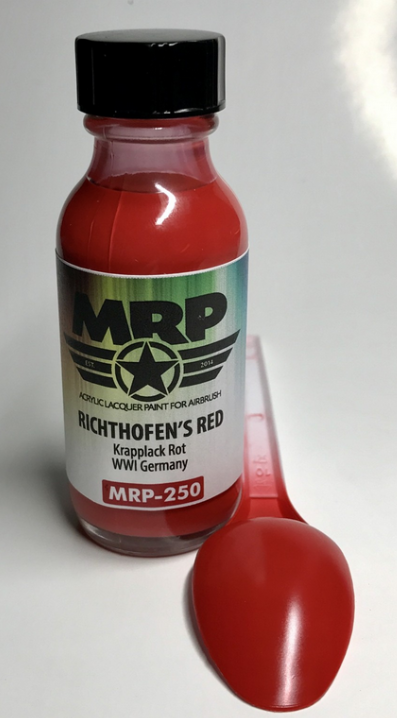
RE... Red lacquer... even if you don't need it... MRP made a Richthofens red. Painted over white, here.
-
Welcome back. Looking forward to your build.
-
Revell Me262 B-1a/U-1 Nachtjäger "Red 12"
GazzaS replied to CANicoll's topic in LSM 1/35 and Larger Work In Progress
She’s looking fine, Chris. Personally I prefer a thin, barely visible aerial and rigging wires. So I’m with you there. The 262’s were puttied and sanded, with the painting often happening at the airfield. So a smooth finish is desirable. It’s really a difficult plane to weather as there are no exhaust stains and no panel lines to highlight. And with a short service life, it’s not easy to find evidence of chipping or fading unless doing a postwar relic. -
PCM-1/32 Reggaine Re.2005-Finished
GazzaS replied to KevinM's topic in LSM 1/35 and Larger Work In Progress
Awesome! I didn’t know that PCM made this. I may have to think about getting one. I built the 1/48 Hawk Models kit a few years ago, and have always loved the airframe. I'll be following along. -
GWH Curtiss P-40B; The Flying Tigers
GazzaS replied to Peterpools's topic in LSM 1/35 and Larger Work In Progress
Yay!! You’ve already taught me something new, Peter. I didn’t know anything about the paint. Move over Hubert! You’re in my seat. -
That's yer Jeep innit?

- 2,035 replies
-
- 3
-

-

-
- car related stuff
- anything about cars
- (and 6 more)
-
Thank you, John! The IP is right under the join, Rob. Sanding the hull part will be more difficult than wresting a t-bone from a Rottweiler. Ебена мать, Martin! Can I say that? Anyway... you know what I mean... You continue to amaze. Thank you! I really hate sanding clear parts. Really!
-
HGW, my friend. And a light brown wash.
-
Special Hobby Whirlwind
GazzaS replied to Peterpools's topic in LSM 1/35 and Larger Work In Progress
Great work, Peter! I'm glad to hear that your hands are getting steadier. The fuselage band looks great as well. -
Thanks for that tip, Bill. I've never heard that one before.
-
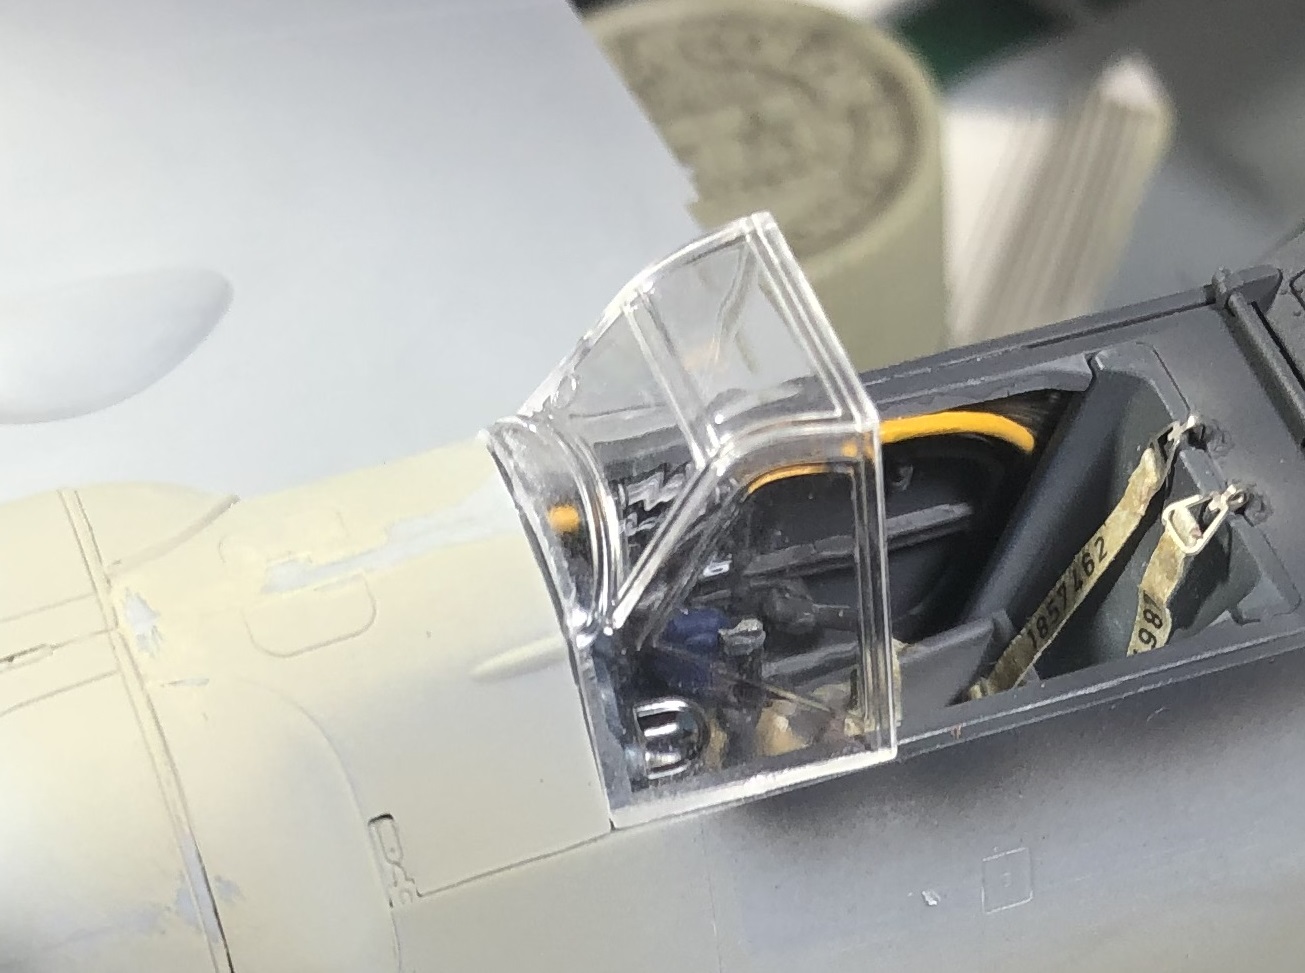
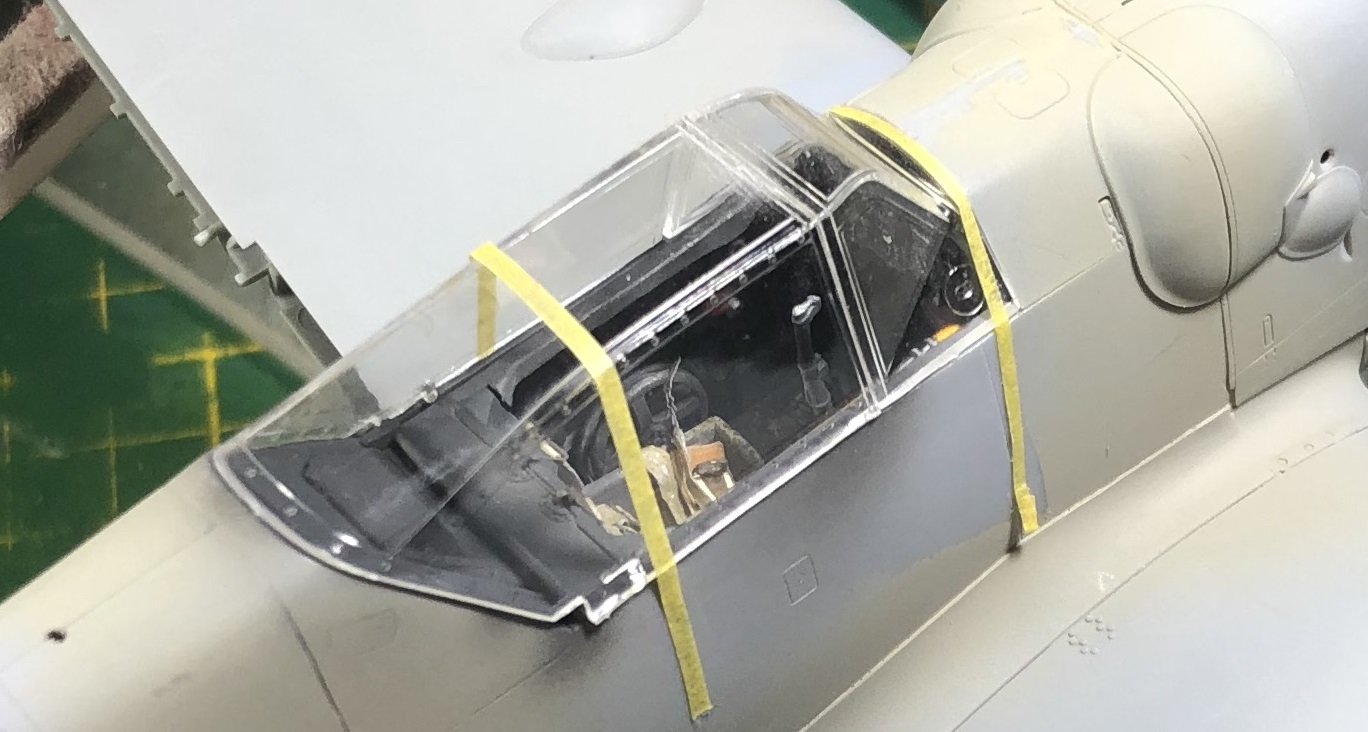
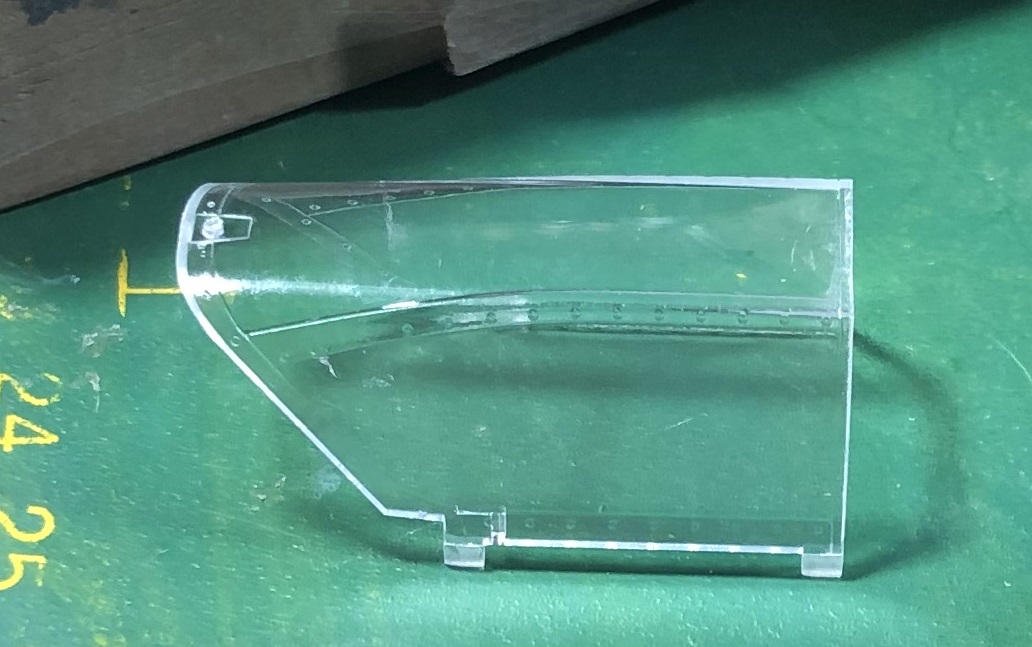
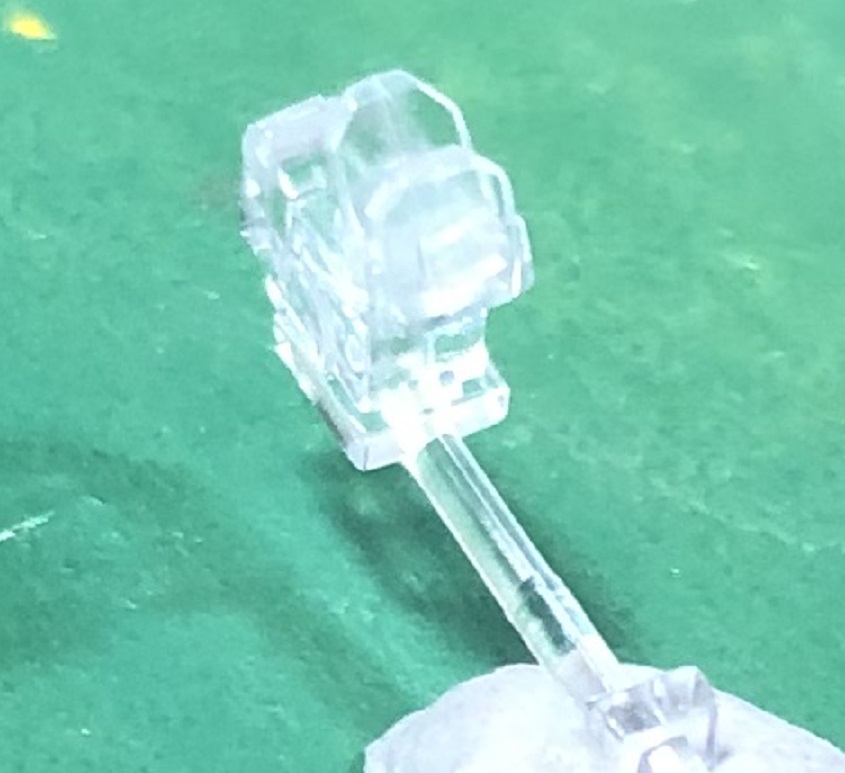
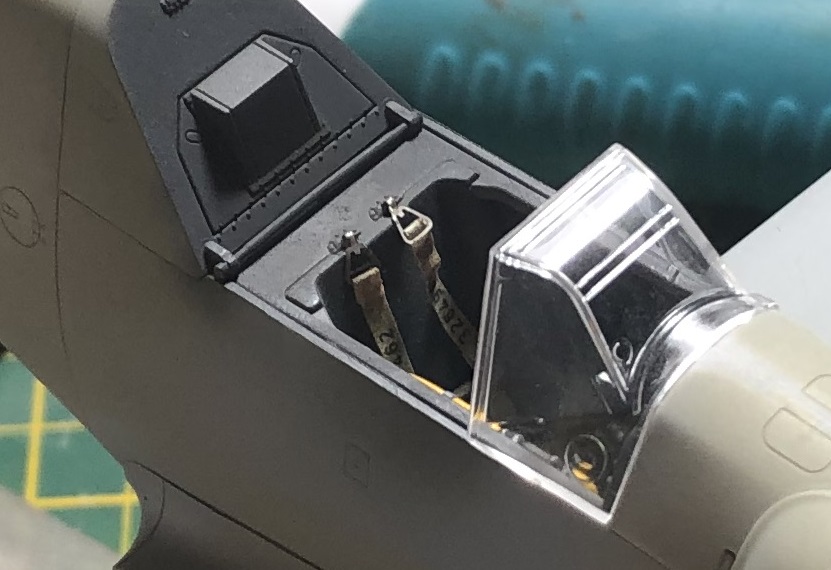
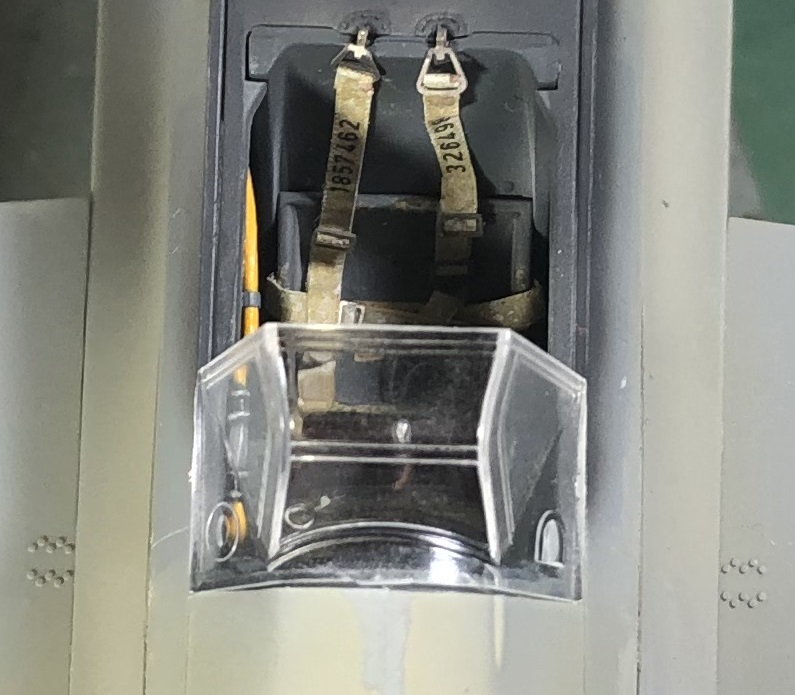
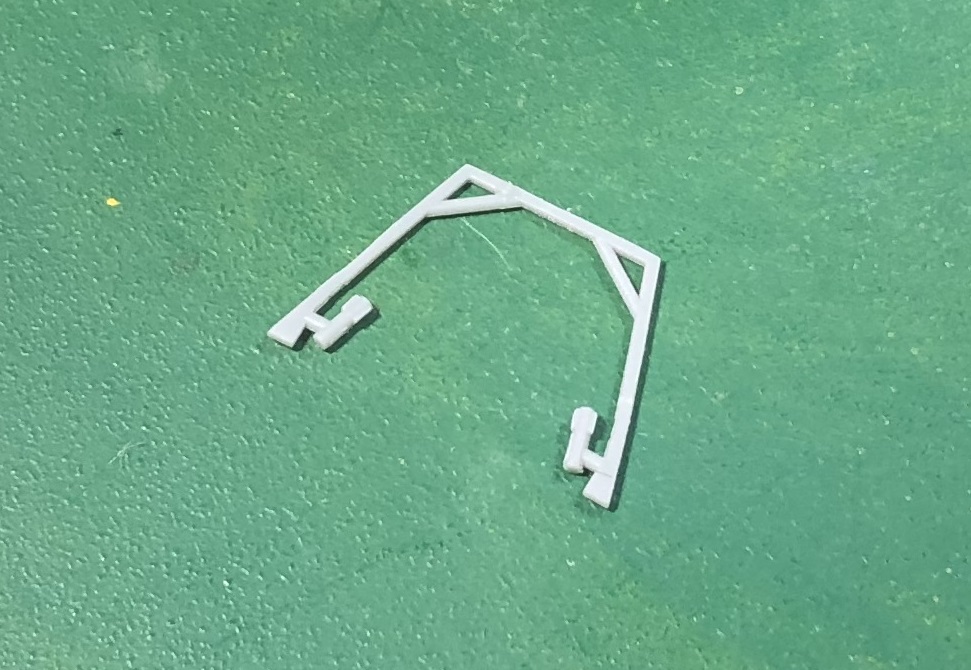
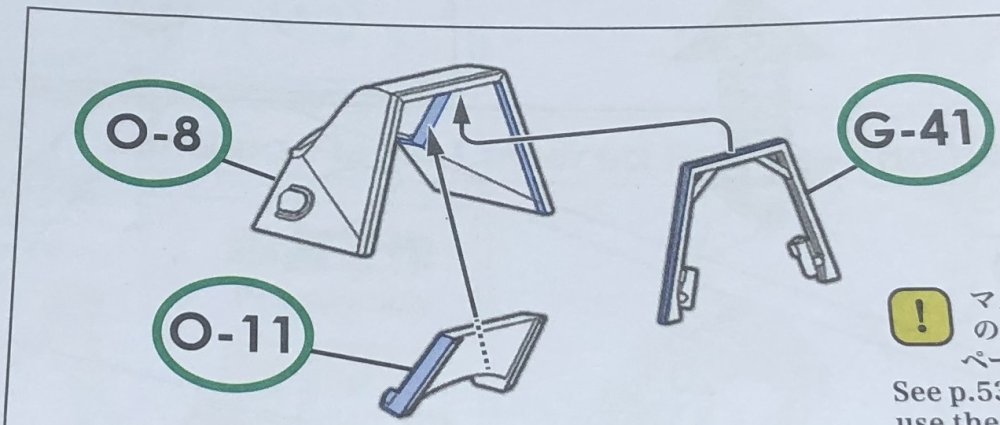
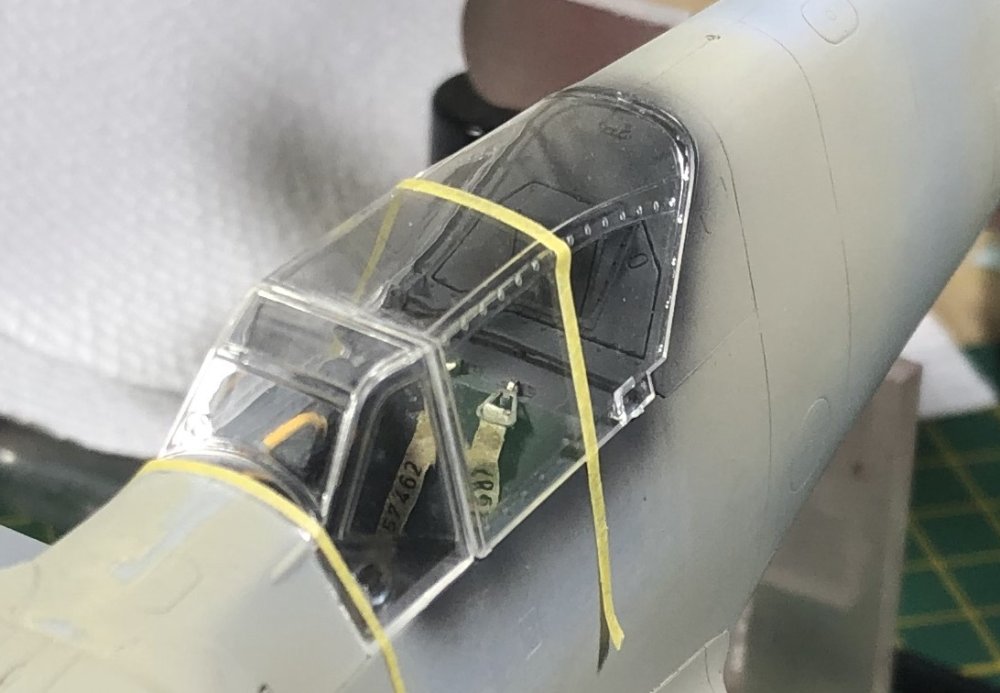
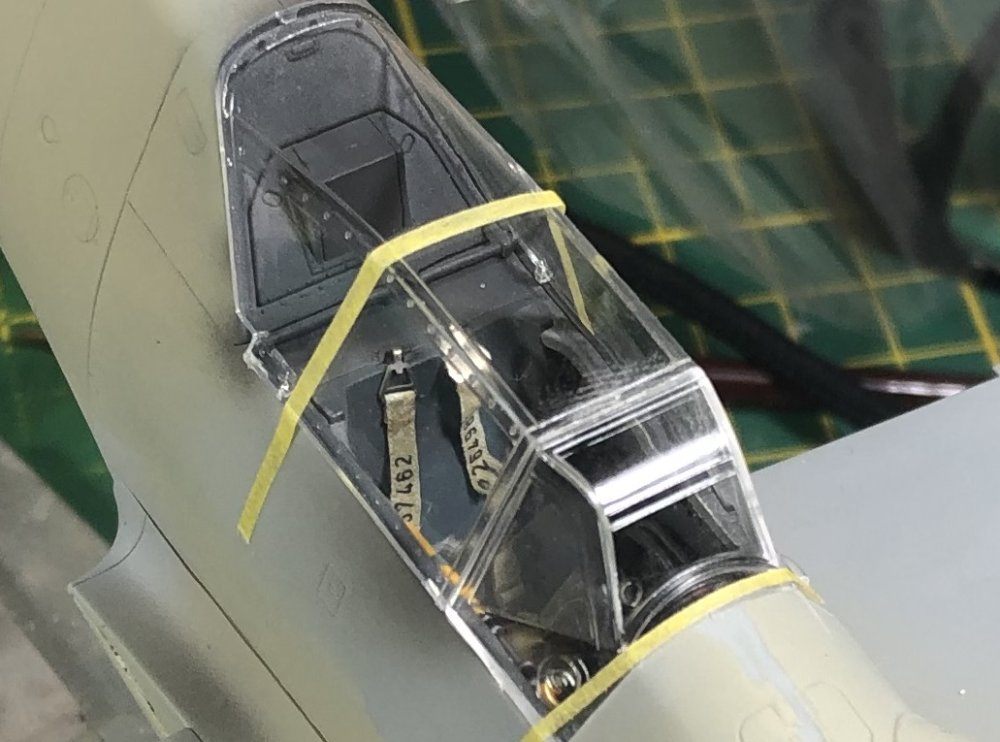
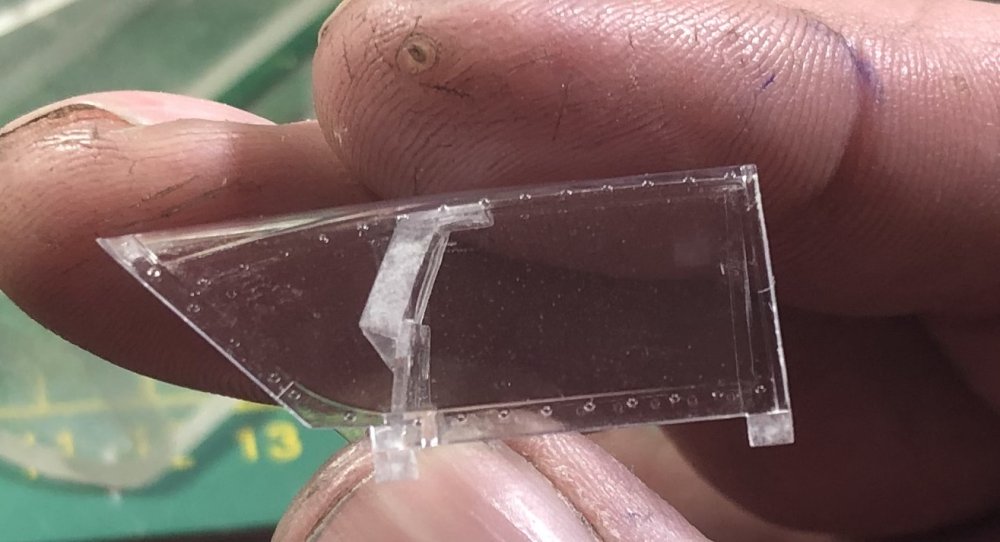
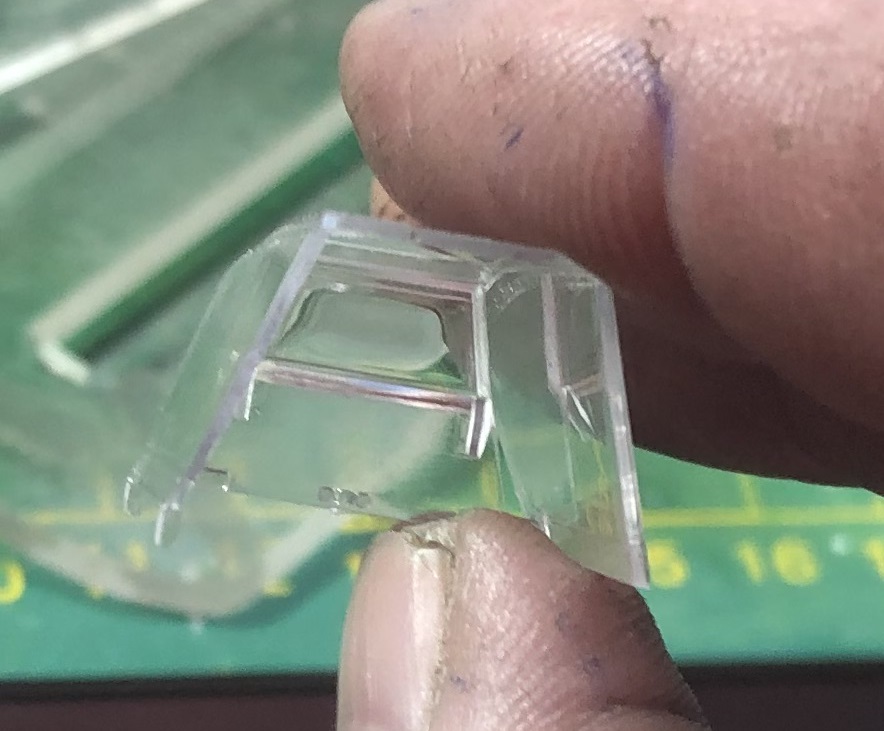
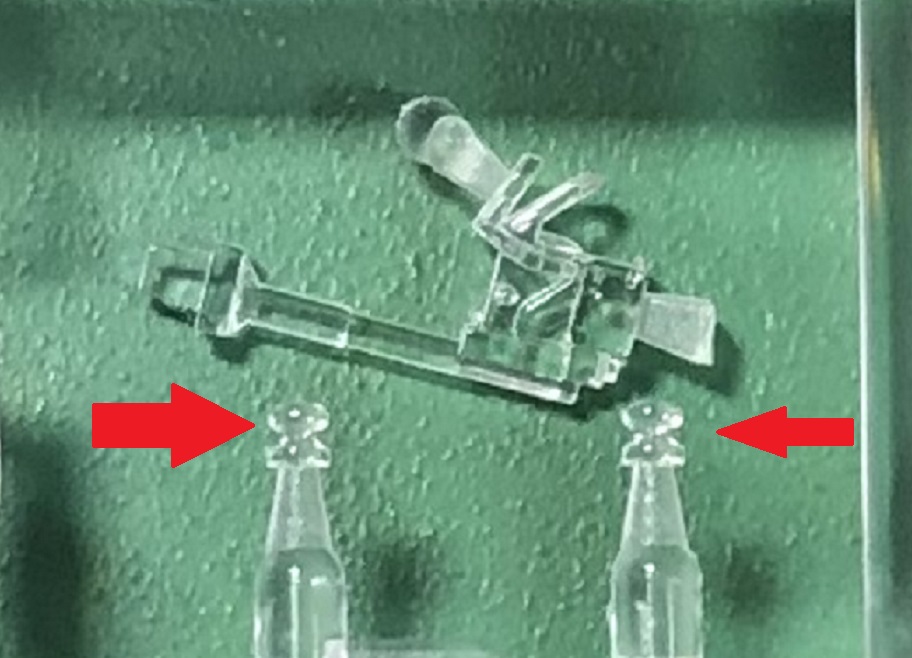
Muh Friends (use Nightshift voice) It's time to consider the canopy. To check it for fit and to begin clean up. There are a lot of sprue gates and ejector pin tabs. But that just makes for higher quality parts. I was so afraid of chipping or cracking, that I snipped them from the sprue as far away as was practical, and then sanded them down with my electric-toothbrush sander. (the best tool tip I ever got) Fit on the left: Not bad. Fit on the right: Better... Fit in the middle: Meh. What's you favorite filler around the canopy? This is the first time that any 109 model I have built has a back wall to the canopy glass as well as the cockpit lights. You may notice that I accidentally broke and then repaired this part. And... and... the armored windscreen is a separate part. This is the fit of the early hood. The antenna mast will be attached to your fuselage if you use this one. The parts are thin with some flex. Good thing I added them seat belts... the view is nice. A second shot for your viewing pleasure... OK... one more.... I... and all of you Hartmann builders will be using this later canopy. The antenna mast will be attached to it. ... oh... and you have to drill a hole for the mast. There are generous tabs representing the canopy hinges. The armored head protection fits firmly into significant recesses. I can't tell you how many 109's and 190's I've built where getting the head armor into the correct position was a chore. Yes, I did wash my hands after work today. There is some distortion in the armored glass. But I ain;t gonna worry about it. The Revi reflector sight. I think those two pieces with the arrows by them are for the canopy lights... I can't seem to find them in the directions. More research is required. Finally... a super-sized gun sight. Get our your Novus kit to polish those teenie-weenie little panes. That is all for now. There are canopy masks in the kit.


-
hahaha... love it!
-

- 2,035 replies
-
- 6
-
-
-
- car related stuff
- anything about cars
- (and 6 more)
-
IJN Shimakaze - Hasegawa + Infini upgrades and other AM - FINISHED
GazzaS replied to Landlubber Mike's topic in Non LSM 'WIP
Mike, that's beautiful! Love the water base and the details. Top notch! -
Looks good, Bill! are you going cowls open?
-
Looks awesome, John!
-
Lovely cockpit work, Rob!
-
Valentine MK.II/IV Tamiya 1/35
GazzaS replied to belugawhaleman's topic in LSM 1/35 and Larger Work In Progress
Looks good, Paul! Looking forward to the weathering. -
What is on your bench right now ? Share a picture :)
GazzaS replied to Martinnfb's topic in Modelling Discussion
That’s excellent, Martin! -
Thank you guys for the support, comments, and questionable humour. Later yesterday I sprayed all of the seams and repaired flaws to help eliminate more errors. Hopefully my HGW positive rivets arrive soon.
-
Heh…. I have interest in the P-40…. So I was hoping you could show it to us as you build.