GazzaS
-
Posts
6,396 -
Joined
-
Last visited
Content Type
Profiles
Forums
Events
Gallery
Everything posted by GazzaS
-
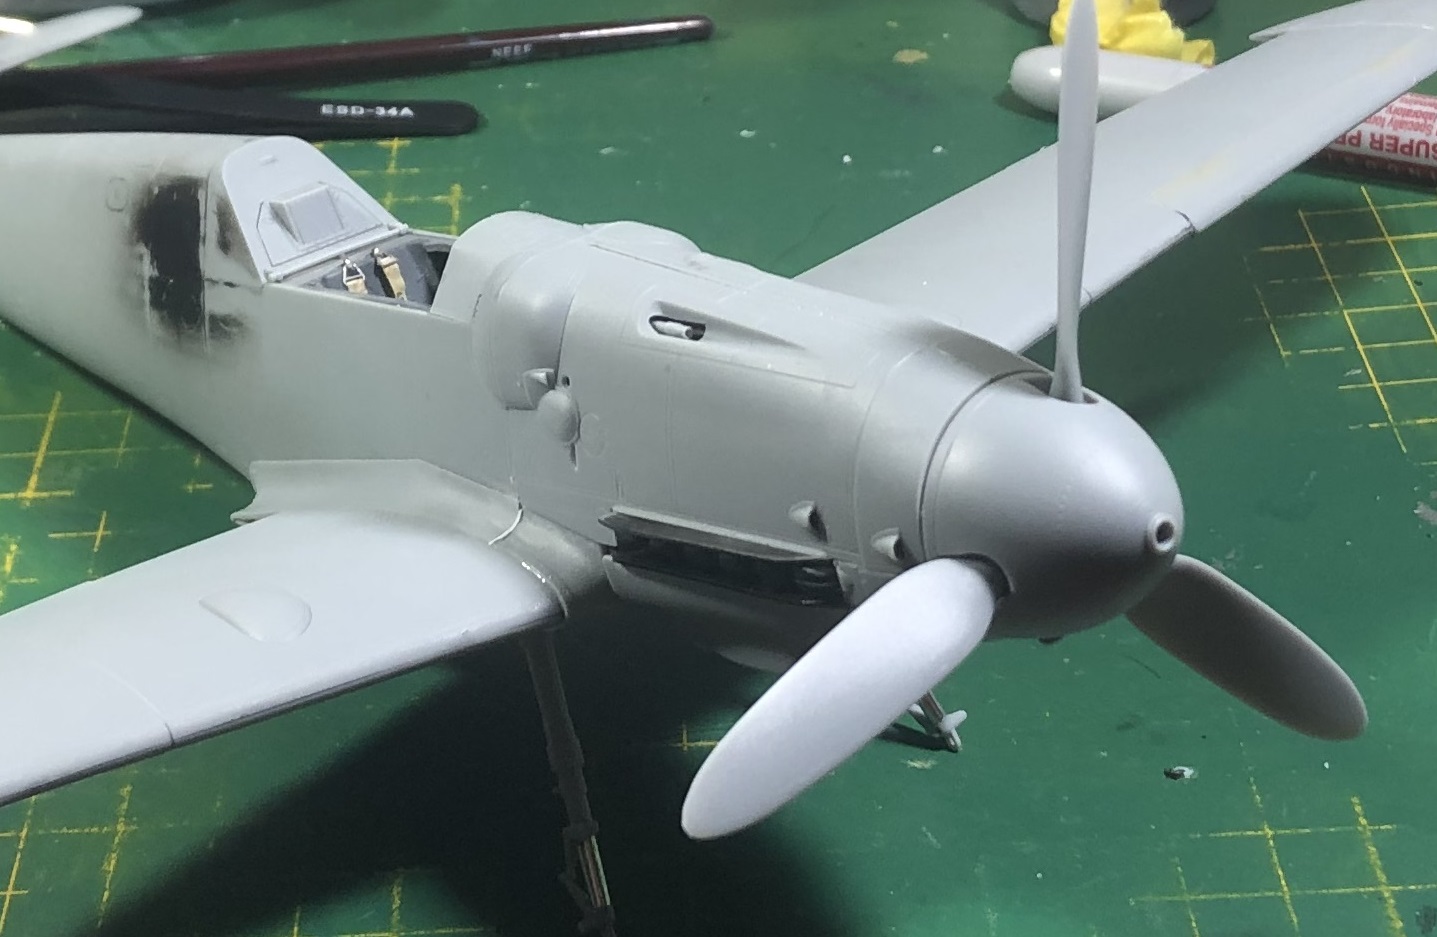
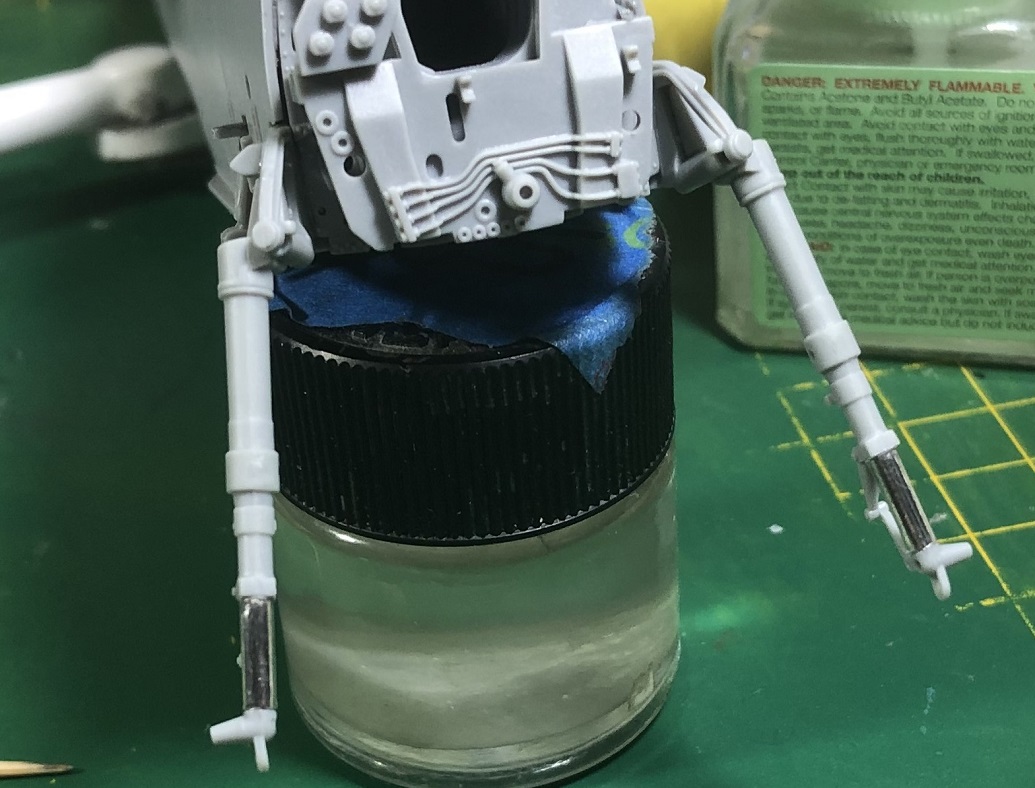
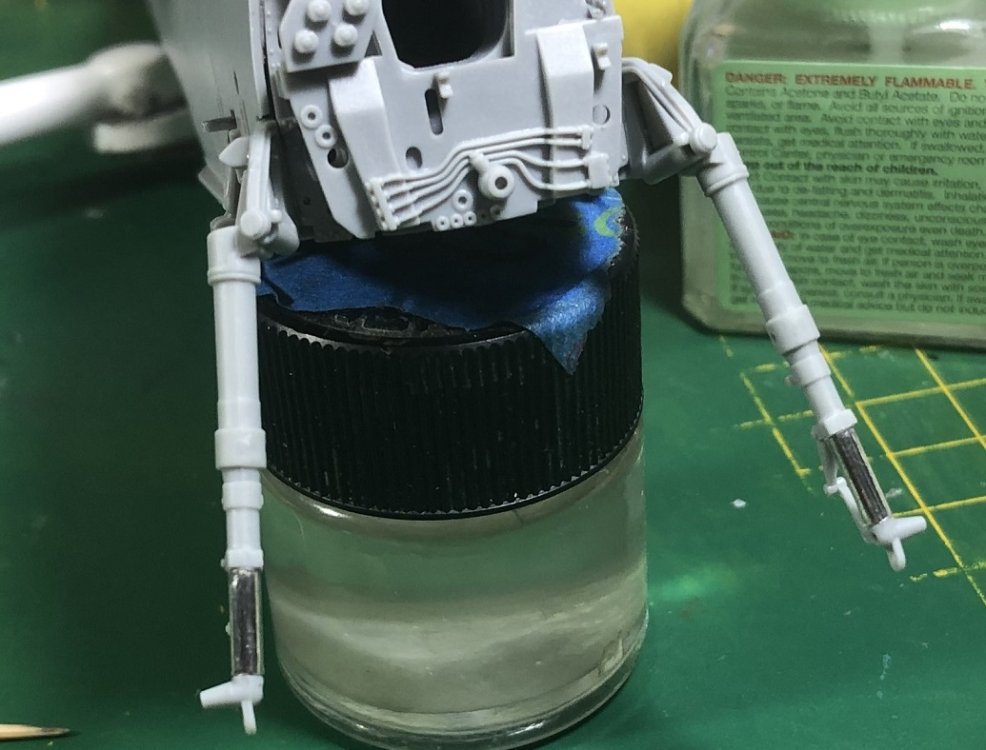
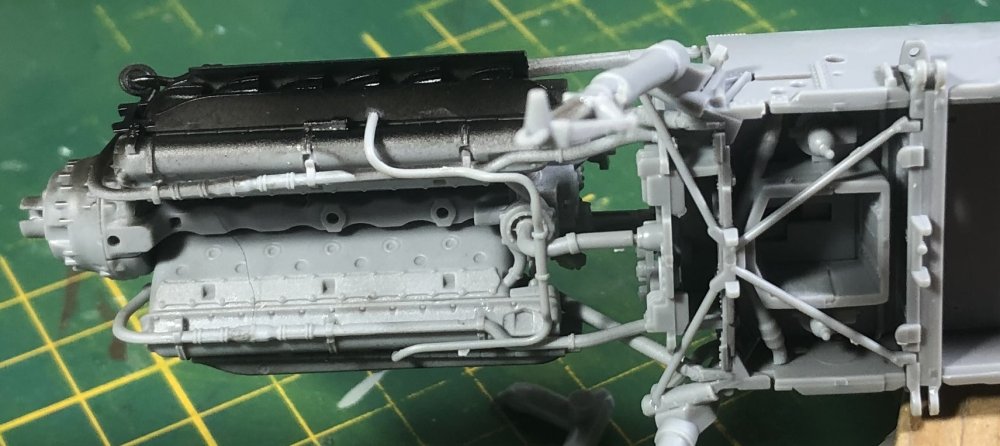
 Current progress. Seam work and sink marks next before I add any more parts. The panels are doing all of the work here. I used a big blob of blutack to hold the motor in-situ while I glued the engine where I want it. The blutack is now a permanent part of the model.
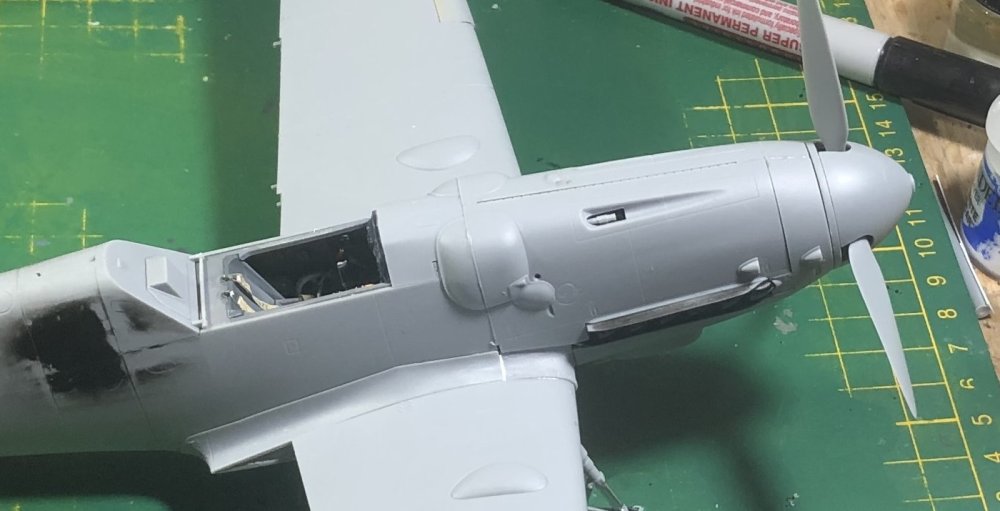

-
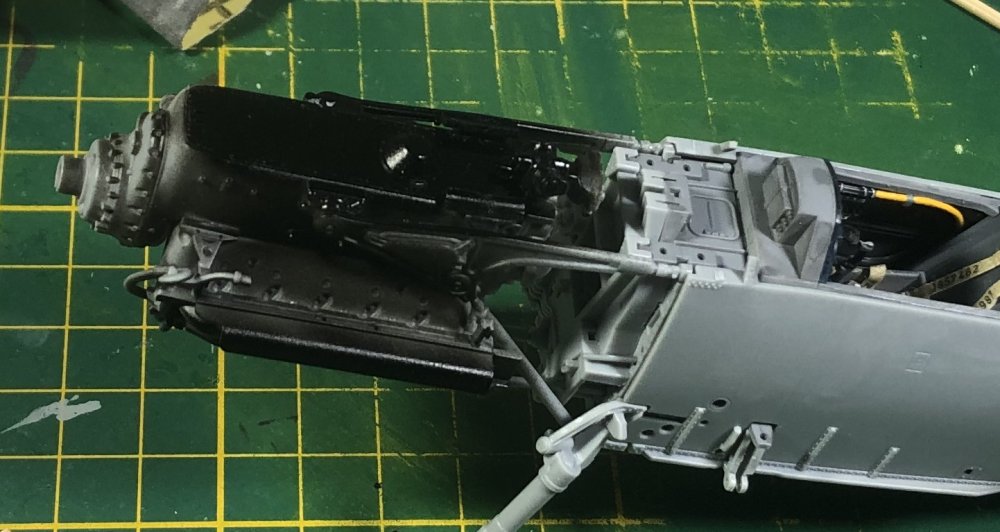
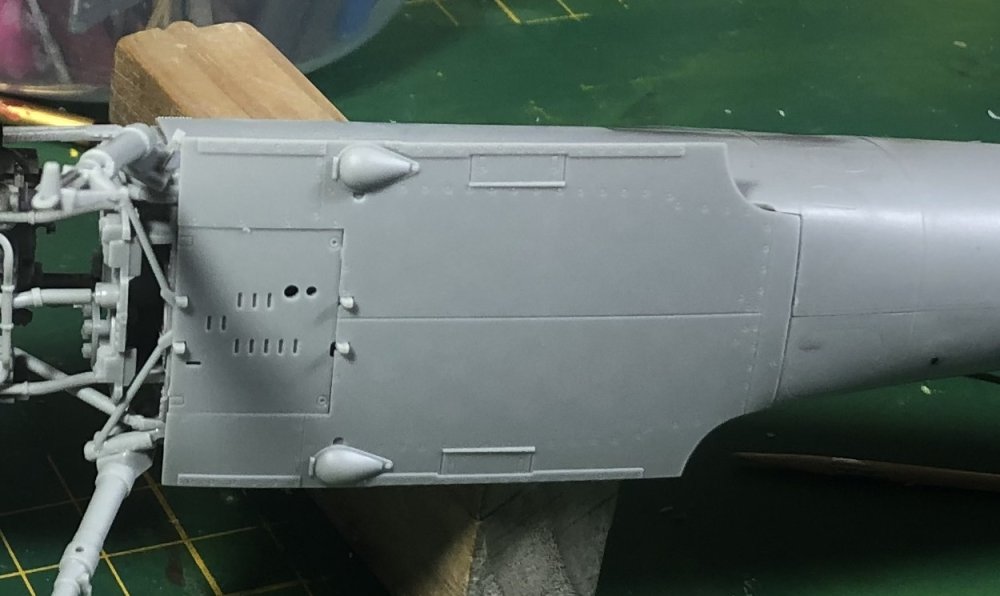
Bill, The oil cooler sits just a little proud of H30 and H31 just like photos. And the ring won't go any farther back without chopping plastic. I pressed the shit out of it, and it didn't budge a millimeter.
-
Revell Me262 B-1a/U-1 Nachtjäger "Red 12"
GazzaS replied to CANicoll's topic in LSM 1/35 and Larger Work In Progress
Chris, That looks very cool. It looks like you haven't far to go. -
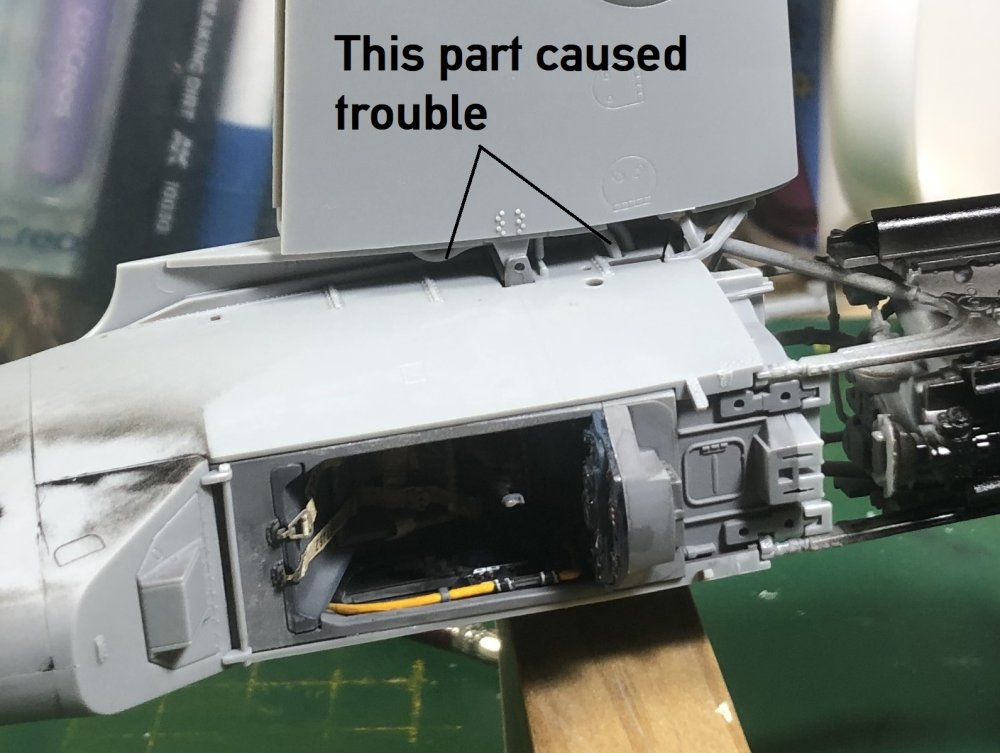
I still have a feeling that I did it somewhere. But for the life of me can't figure out where. Either way... I'm already into the fix. I just had a short nap and am waking to a coffee. But I am committed to completing it.
-
I've already disconnected the engine and began preparing for the fix. Besides... If I put the strip of evergreen at the front, it will be narrower than the oil cooler ring. If I put it at the back, there is too much detail to dick with. If I were to go that way, the spacer would have to be in the center.
-
I have pondered lengthening the cowls... or shortening the engine mounts. The first will be messy and perhaps inspire trashing it. Shortening the engine connections will make for a weaker structure. It might be doable. Although I cannot think of any place where I may have lengthened the interior... I'm prepared to accept that it's operator error.
-
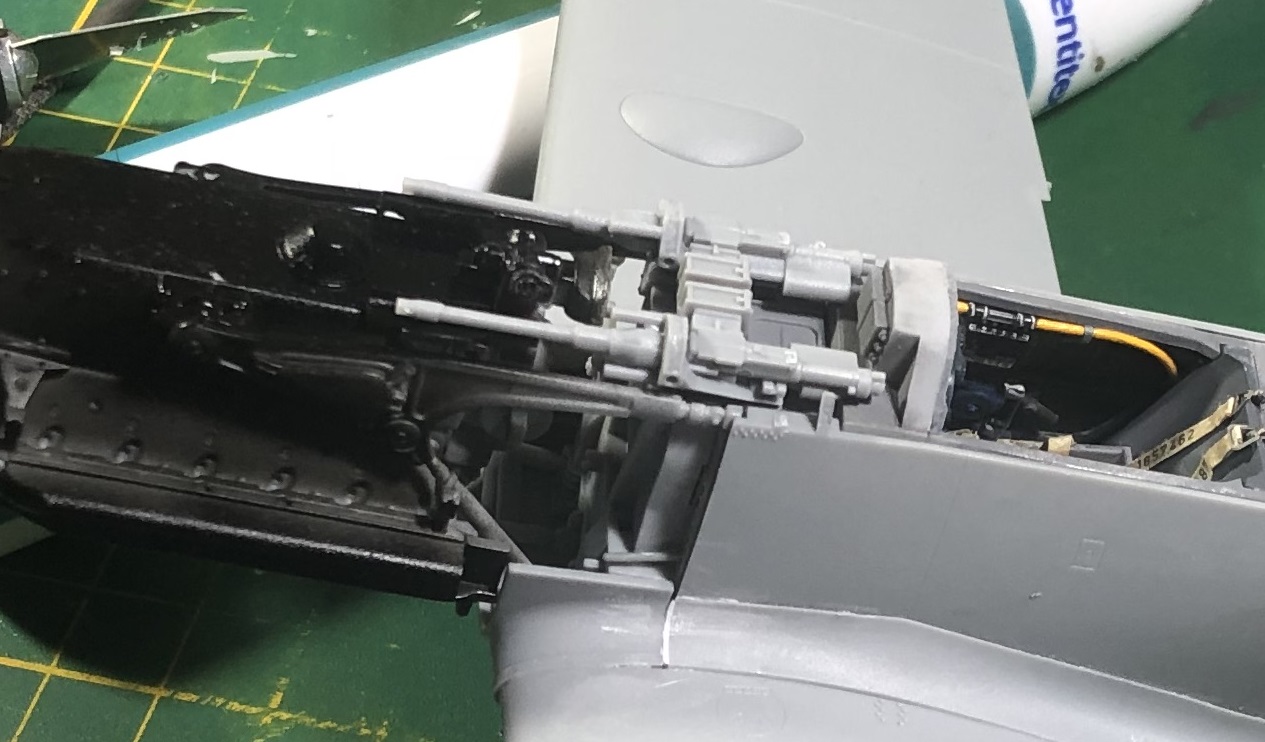
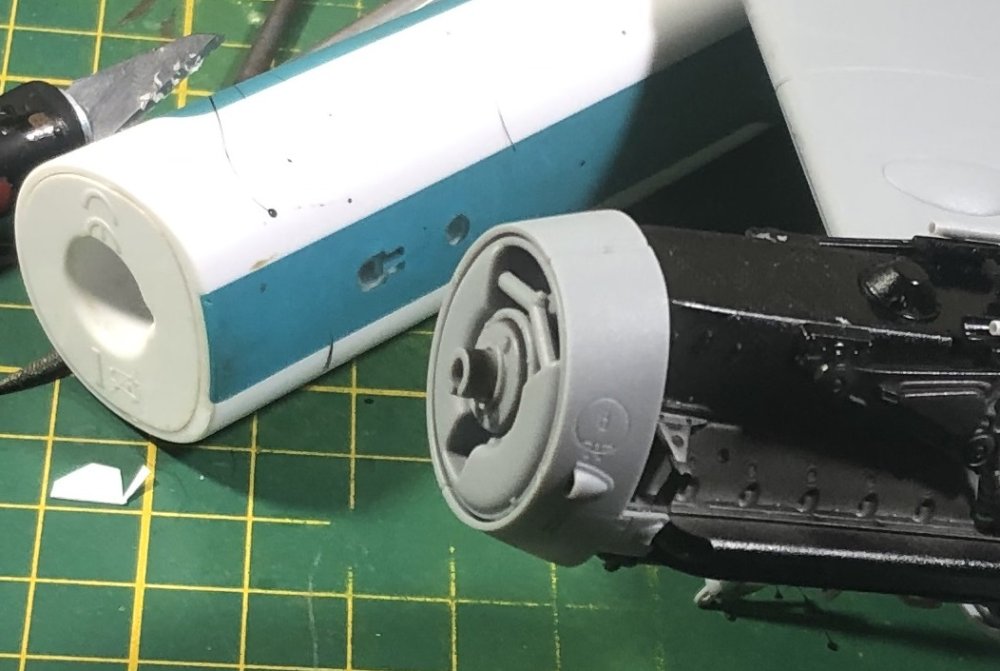
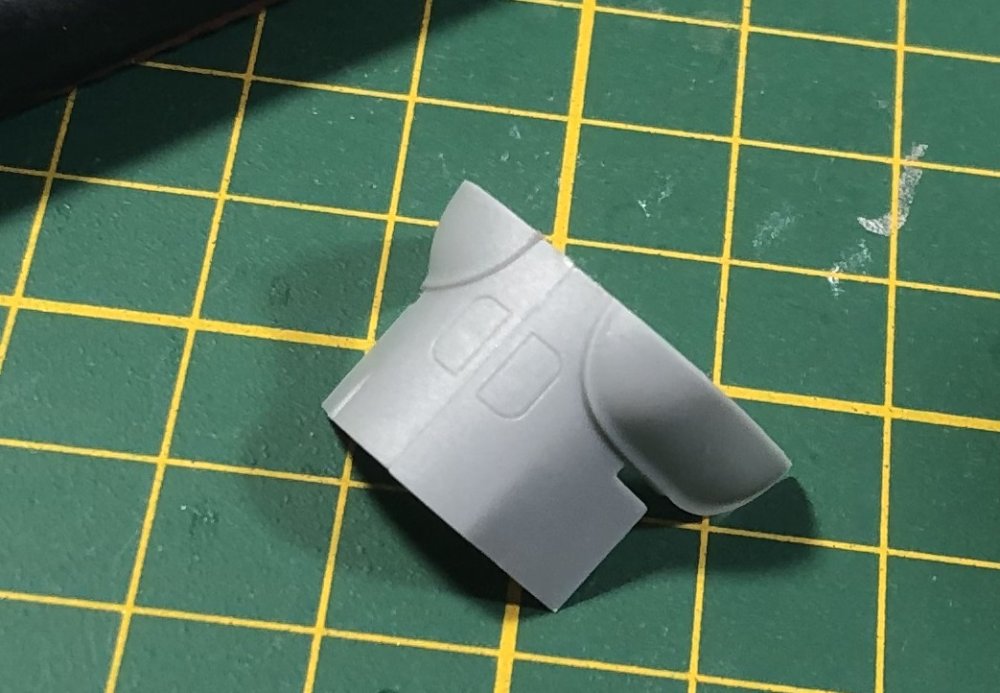
So... tucking in again... I added MG 131's. I will later have to clip the breech ends to fit the rear cowl blisters. Oil cooler... not really sure if I needed it... ..

-
Exactly. I fear the cowling. It's just too much detail and having to fumble my way forward depending on the instructions to prevent errors. Sometimes you need to buy two. One to ruin and one to get right.
-
The metal parts look good... sad about the paint lift. I hates it, Precious.
-
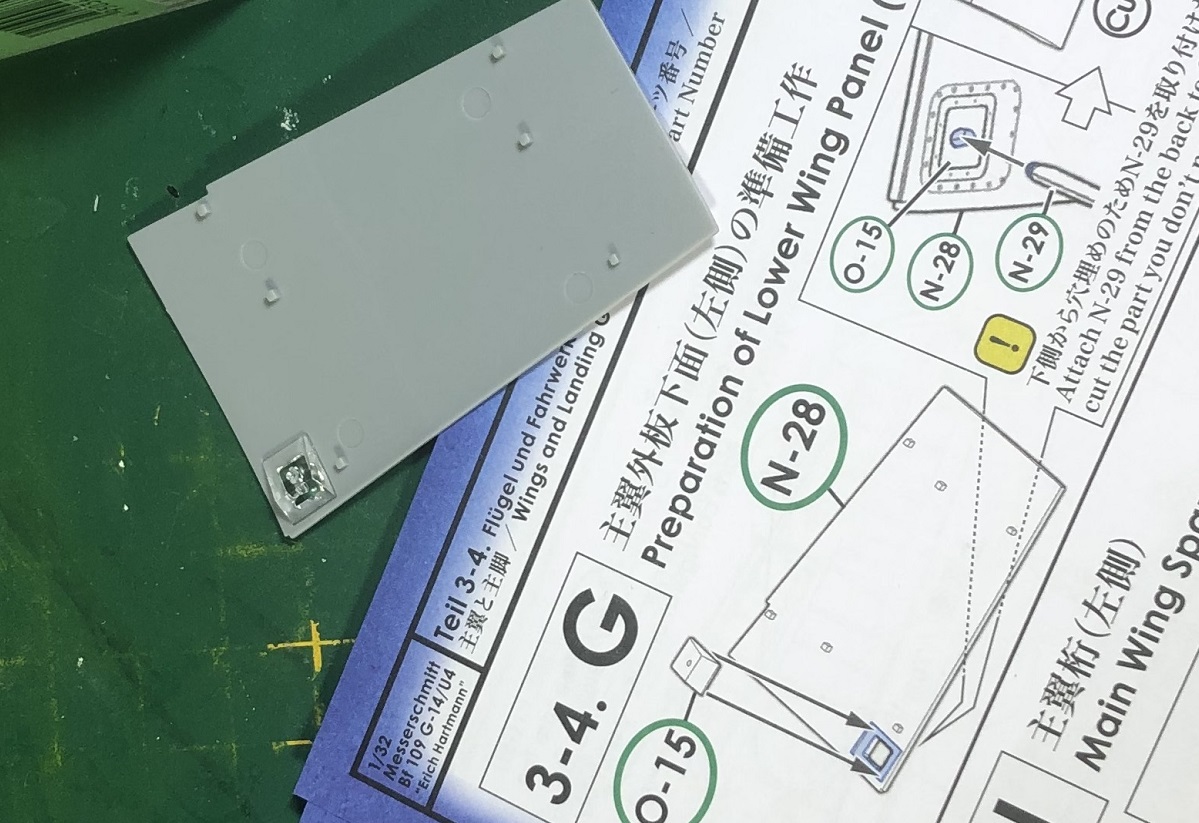
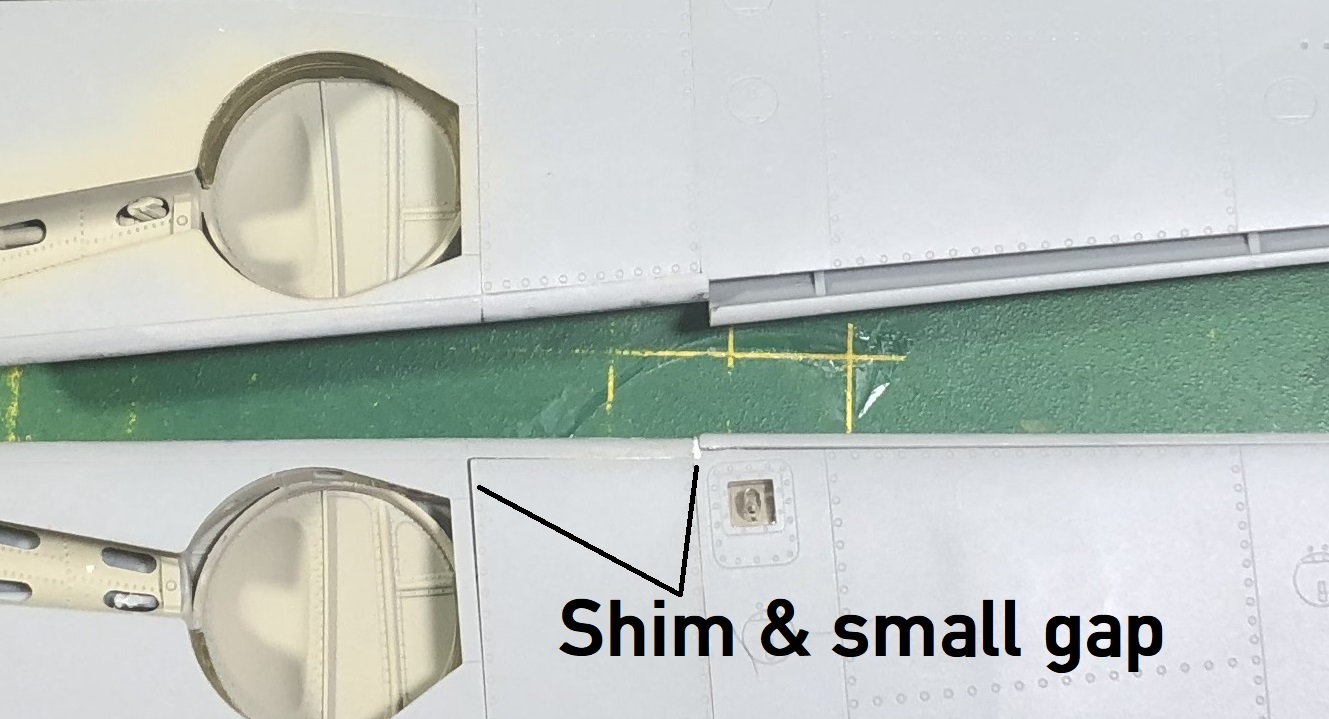
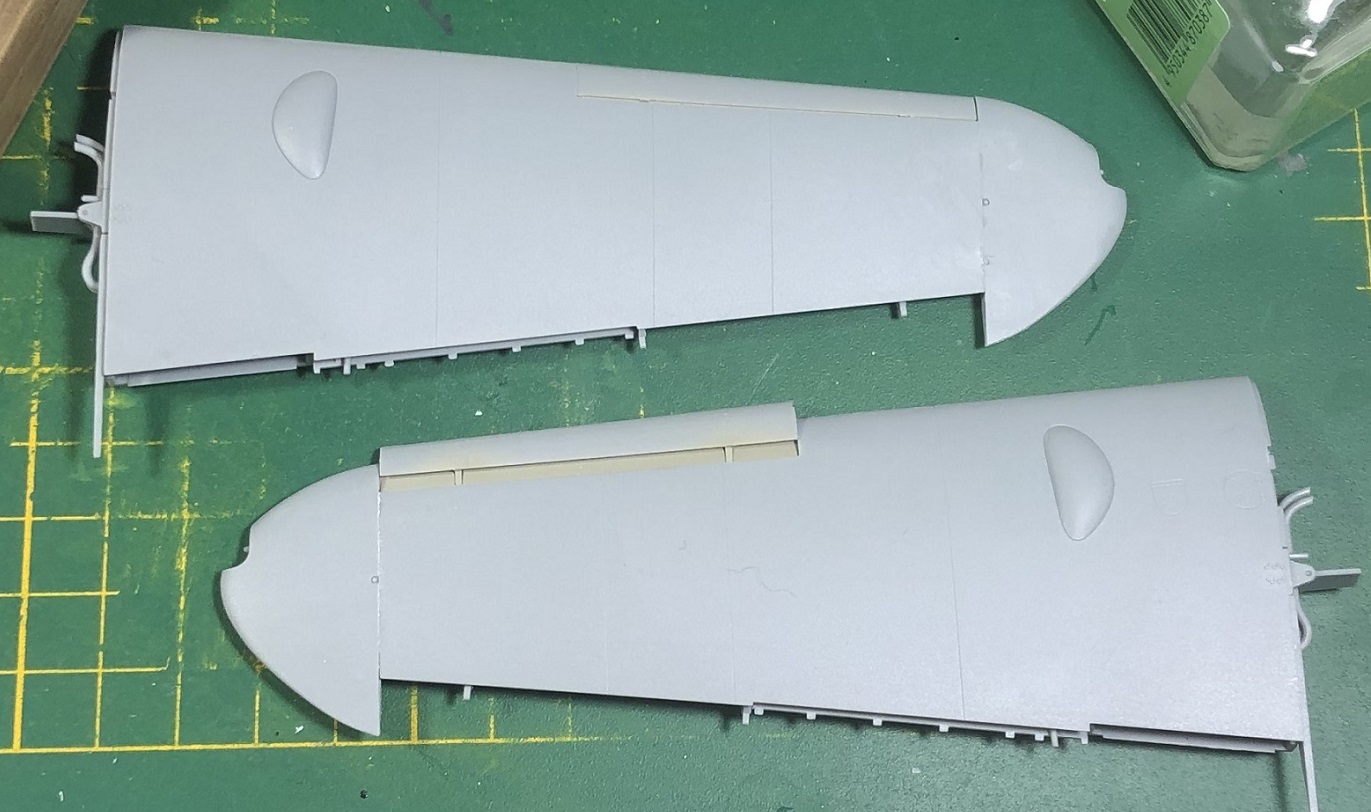
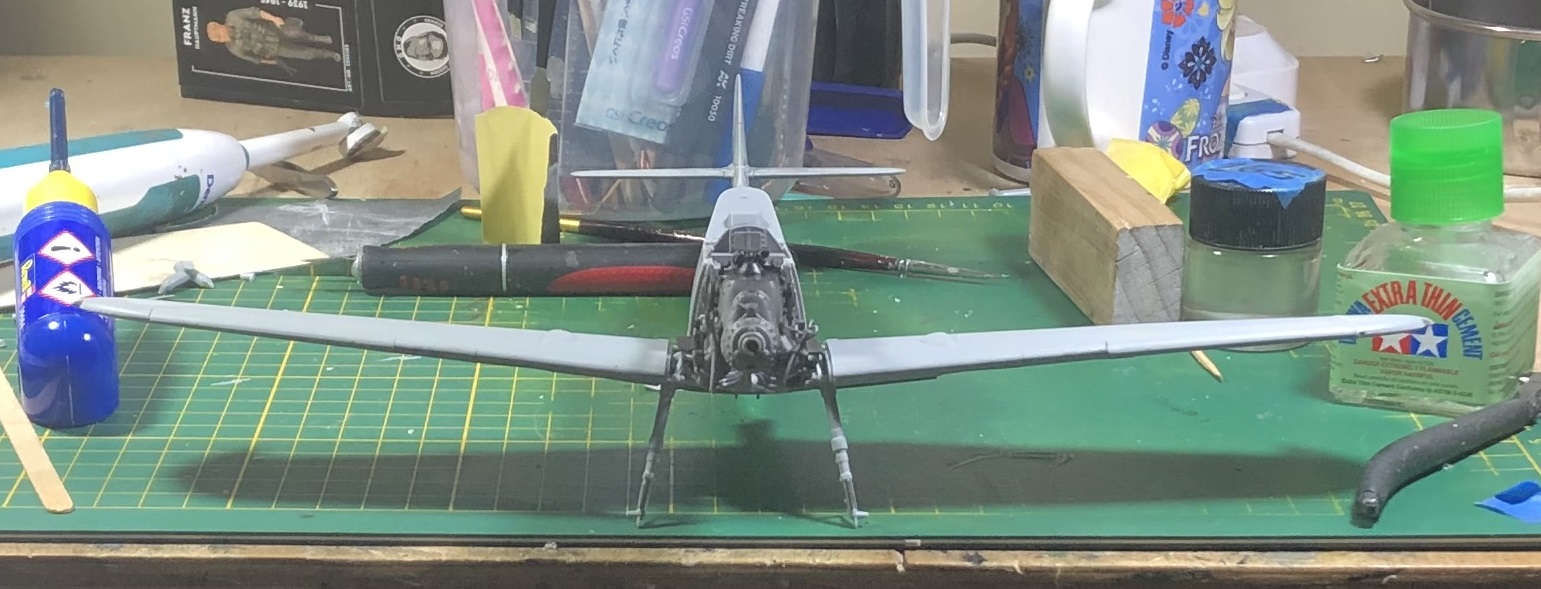
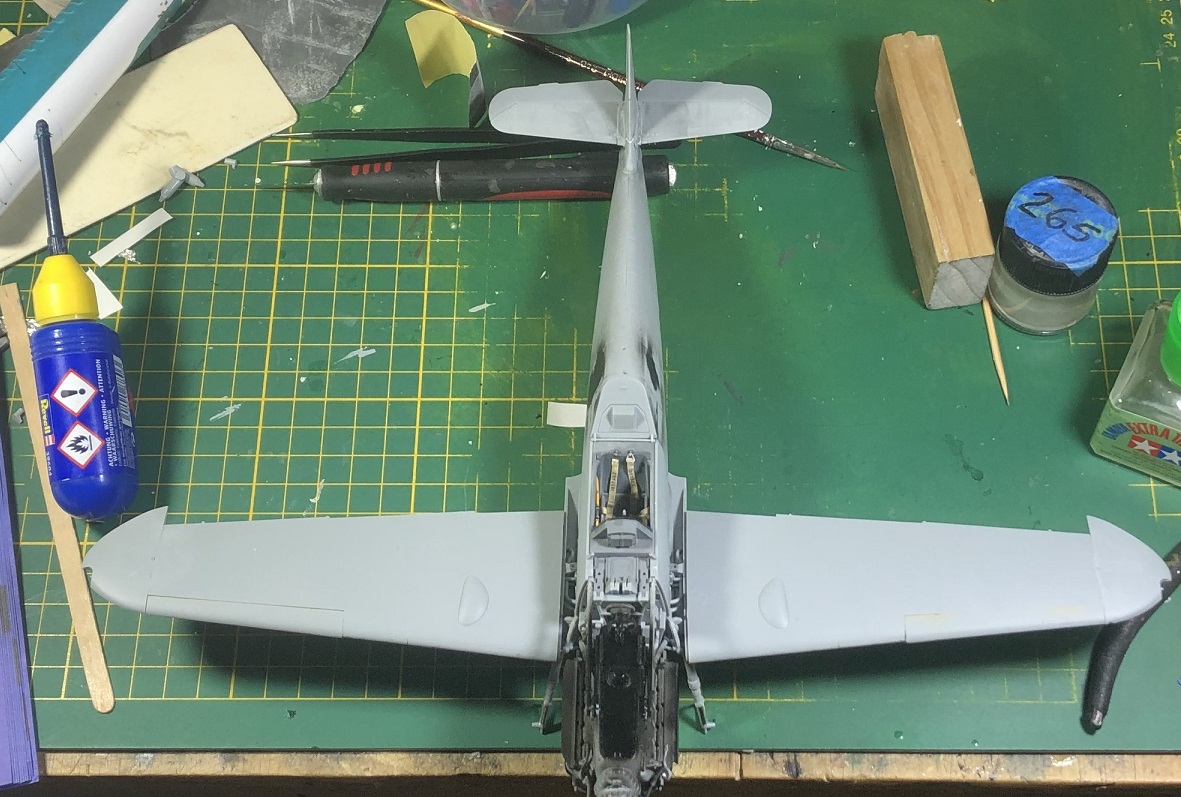
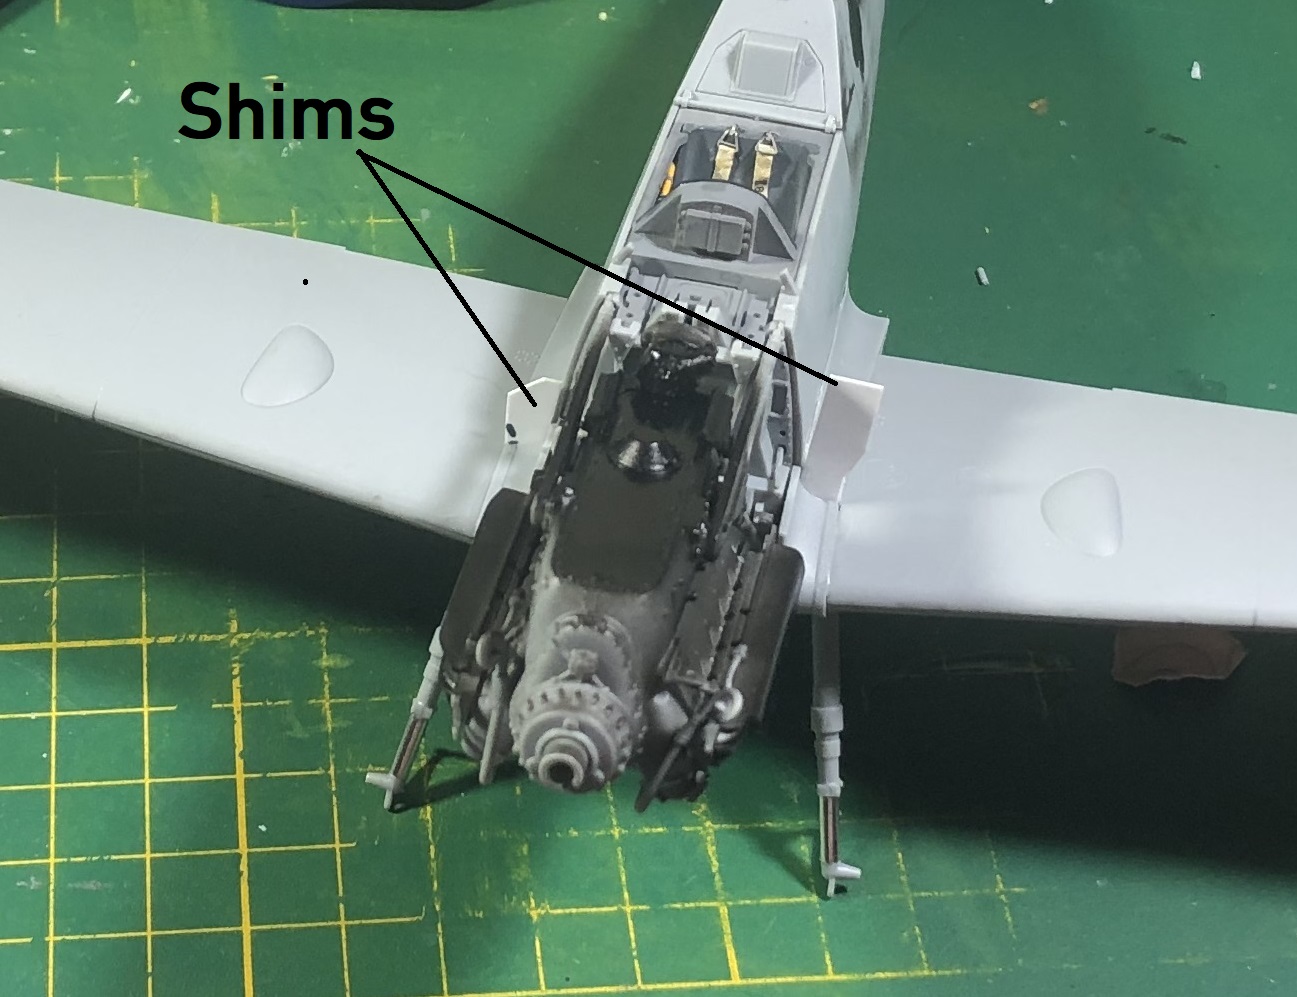
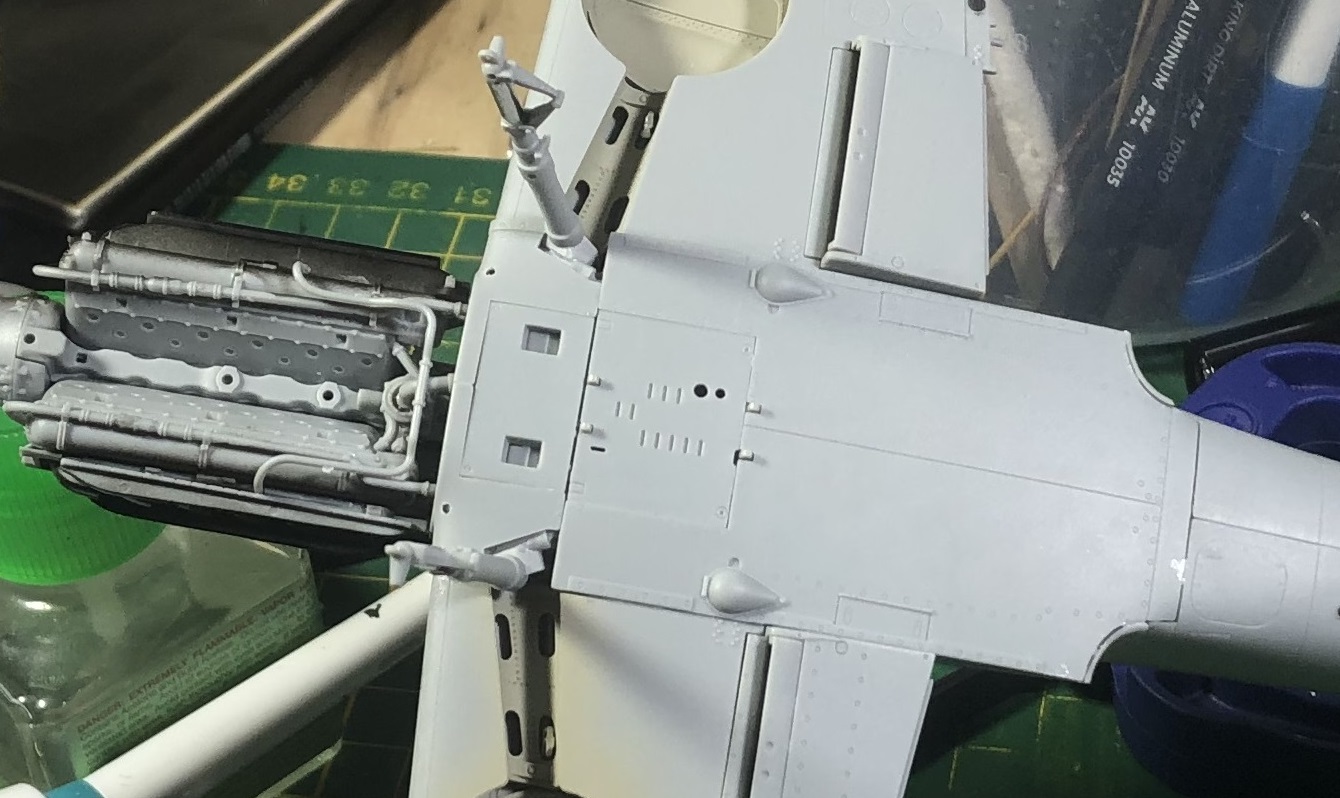
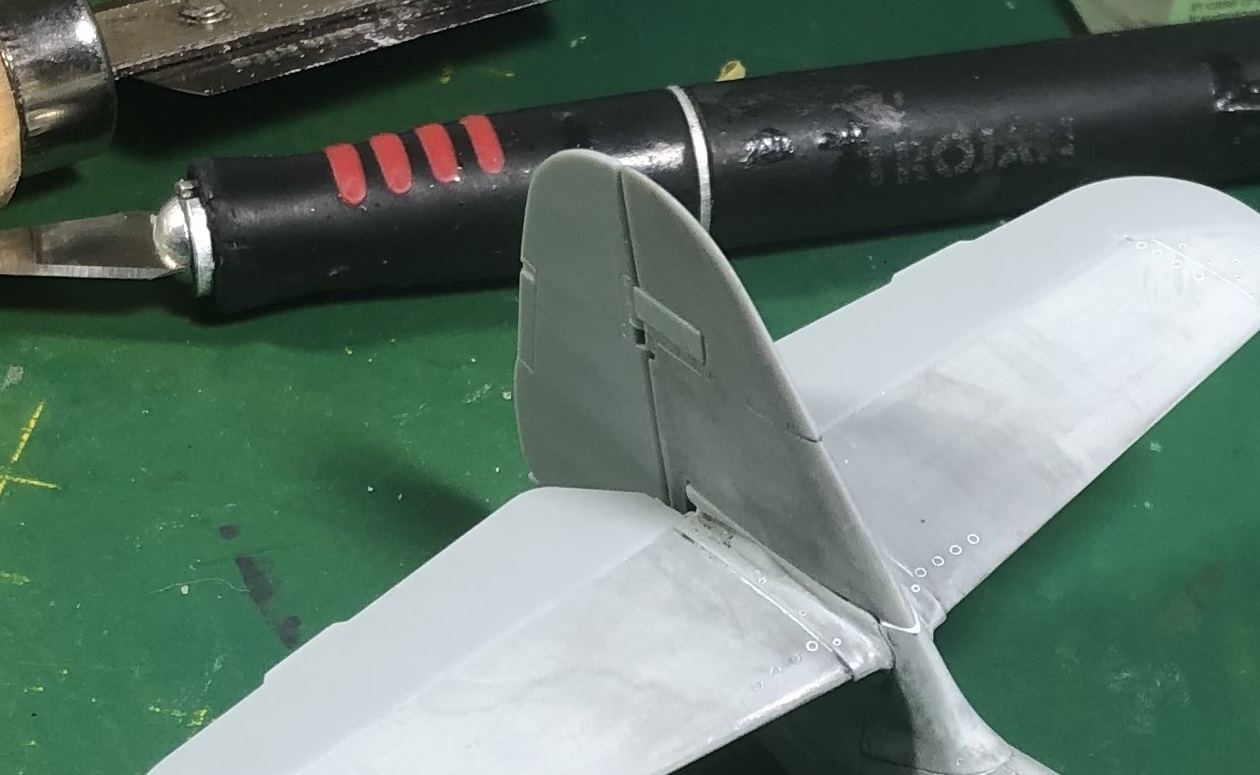
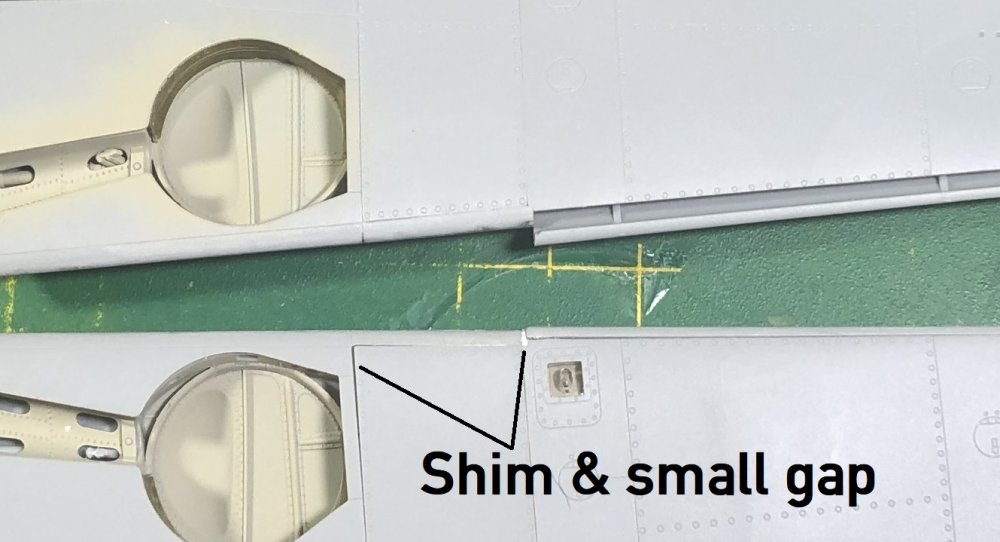
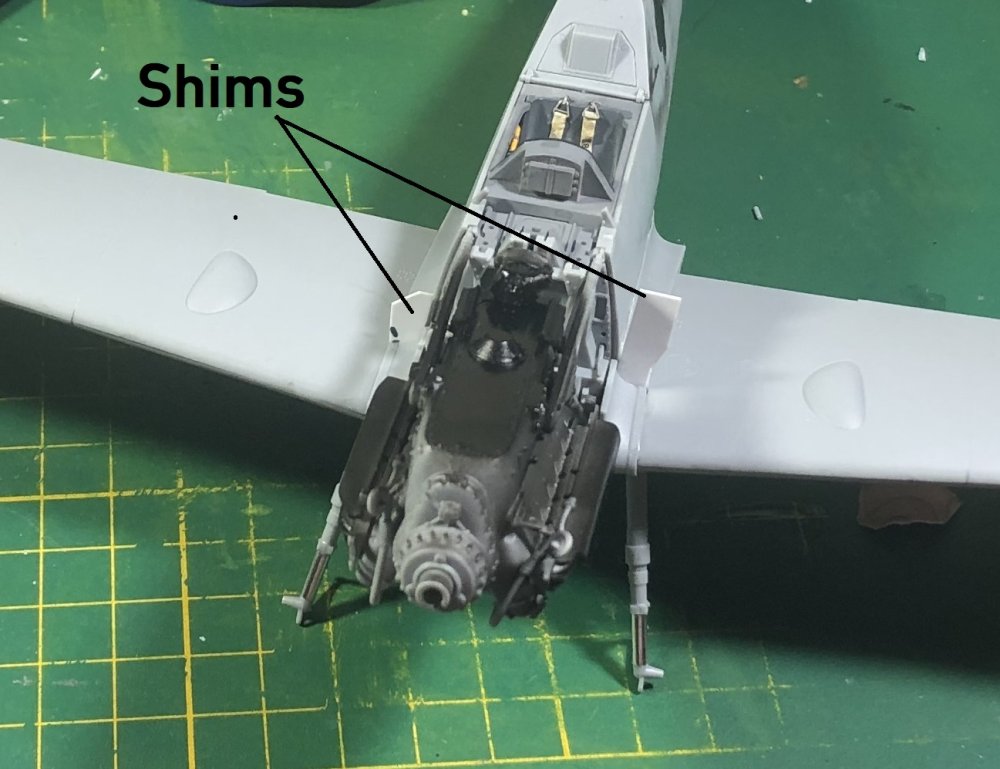
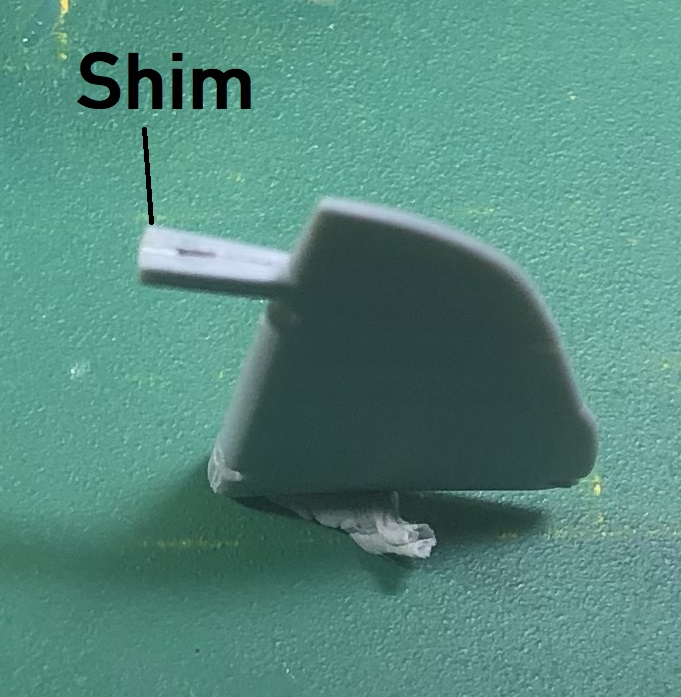
Welcome back, friends. More fun and more... other stuff. Because the original kit is a G6, you have to swap to the N sprue to get the correct panel for the FuG 18 antenna mount. Note the clear part. I painted the backside of the clear part RLM 02. I will have to mask the other side, later. Unlike the first wing, I ended up needing a shim and had a small gap. I will fill the small gap, later. I don't know if the shim would have been required with the original G6 panel. Notice the two positions of the leading-edge slats. They are meant to be assembled so they can be positioned open-or closed. But if you position them closed, some sanding will be required as the slat doesn't exactly match the profile of the wing. The upper side of the wings look serviceable. The position of the LG legs is non-negotiable. They almost lock into place, becoming wobbly if not correctly placed. I used BMF on the oleos. Added the engine. Just like the lg struts... fitment is non-negotiable. Ventral view. Next come two centerline belly panels. Fitting them left a question as to whether one might be too far forward or too far back... I really don't like ambiguity. Then the wings. Here is where it started to go belly up... I snapped the next two pictures before I knew I was in trouble. Everything looks alright. But I will end up ripping the wings off to push them in a little further after removing internal parts. This is the first kit I have ever built with separate wing root stubs. There are two sets for the front, and a single set for the dorsal. For the life of me, I could see no difference in the optional parts. When I added the forward wing root stubs, I could see that both wings were approximately 1/2 mm too far out. So, off came the wings... and it wasn't pretty as the glue had completely set. So... After letting the new wing arrangement set overnight, I added the dorsal wing root and a couple of shims... Trimming them down should be fun. Notice how prominent the forward fairings are at the wing leading edge. I don't think I can leave them like that. And finally, here is a view of the bottom. The small gaps I will fill with PPP. The larger gap, I will fill with black CA. I'll use PPP on the front gap, and then 60% of it should be covered by the ETC rack. Thanks for looking. Thoughts and comments appreciated.


-
Poor guy... Update in progress.
-
haha... more forewarning to come.
-
Chikuma - Tamiya - 1/350 - IJN Heavy Cruiser-Finished
GazzaS replied to KevinM's topic in Non LSM 'WIP
Ooh! Nice! I can see a flag waver! I once put 86 guys on the deck of a 1/350 scale destroyer. That was fun! -
They are pretty quick... and even packed newspaper around the models.... An added surprise. Prices are lower than I can get from BNA or other shops in Australia.
-
Yes... Plaza Japan gives you a little 'thank you' gift. I'll give it to my granddaughter if I remember before it disappears.
-
That looks great, Rob! The Salamander looks almost as cool.
-
Praza Japan delivers... Given the cost of good figures... These Tamiya kits are a steal. Buying eight nice figures could easily cost more than these two kits together. Link und length tracks... poly caps... What more could you ask for.
-
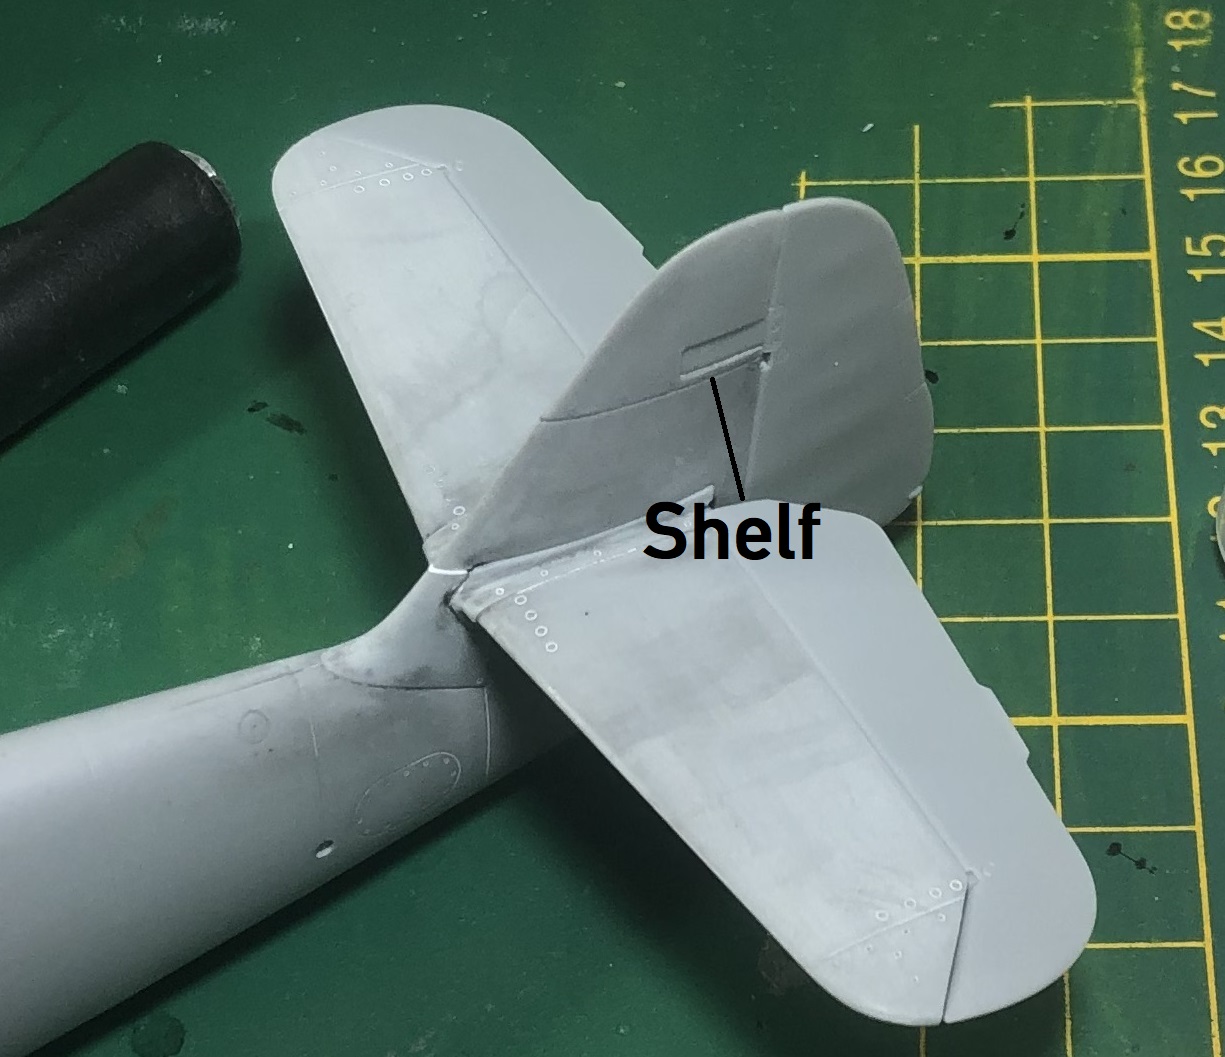
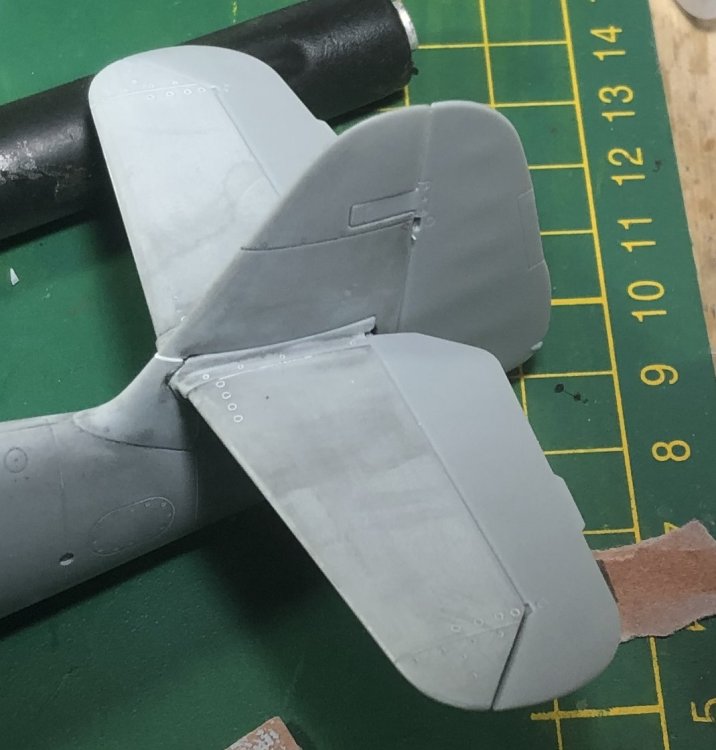
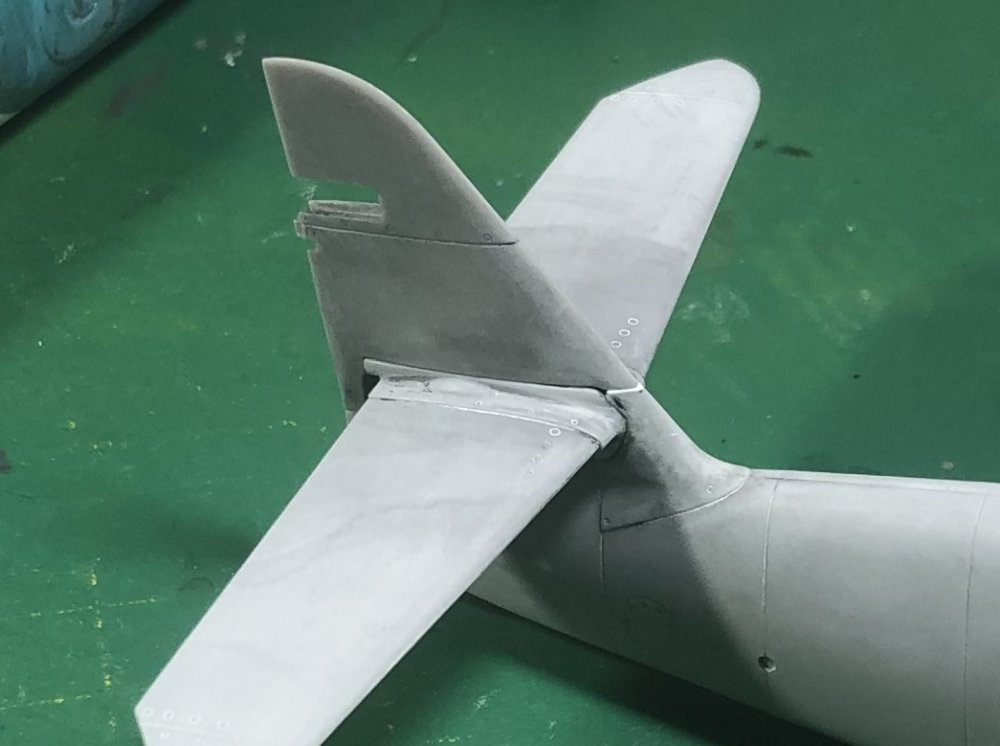
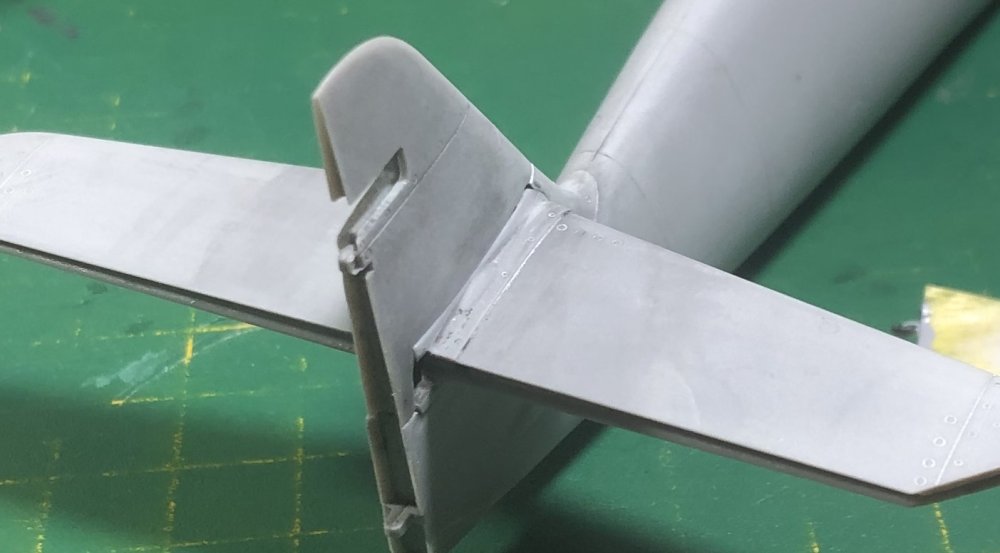
Welcome back guys... ... I present you with another mojo-sapping irritant. Yes, widening the vertical fin also makes the fit of the rudder balance wrong. So, I added a shim after sawing through the long-since-dried glue joint. This took care of the port side shelf... mostly. But now I have some weird geometry happening. Most of us know that one side of the rudder should be mostly flat. with the port side having an arc to make up for the torque caused by the rotation of the engine and propeller. So... If I had my druthers... and another un-touched rudder to assemble... instead of inserting two rounded, and tapered bits of sprue. I would have made a single piece that was flat on one side in hopes of keeping the starboard side of the vertical fin flat. The thought of tearing the vertical fin in half fills me with dread. So, I'm just going to live with it. But anyway... you are forewarned. ...and another fly in the ointment... All of the external surfaces have a fine texture. I mention this because I am going to used HGW rivets. I haven't use HGW transfers in quite a while (2-4 years). But I do remember that they only want to stick to a very smooth (faultless) surface. Are they any different, now? Good luck, fellow G-14 builders....


-
They give you three. Even one with complete 3D textures so that gifted painters like yourself can get everything looking smart. Besides... Once you assemble the cockpit tub and put the canopy lid on...even open.... It's not really highly eye catching. Of course... only FW 190 IP's are more difficult to see.
-
Thanks, Bill. Really... I didn't get the fit 100% accurate. Because of the high gloss on the decal itself... I couldn't see that I was a little bit off. Maybe some different lighting might have helped.
-
Welcome to the GB, Bill. Interesting way to set up your production line.
-
Thank you, Hubert. It's had two paintings to find errors. I'll give it another before I move on.
-
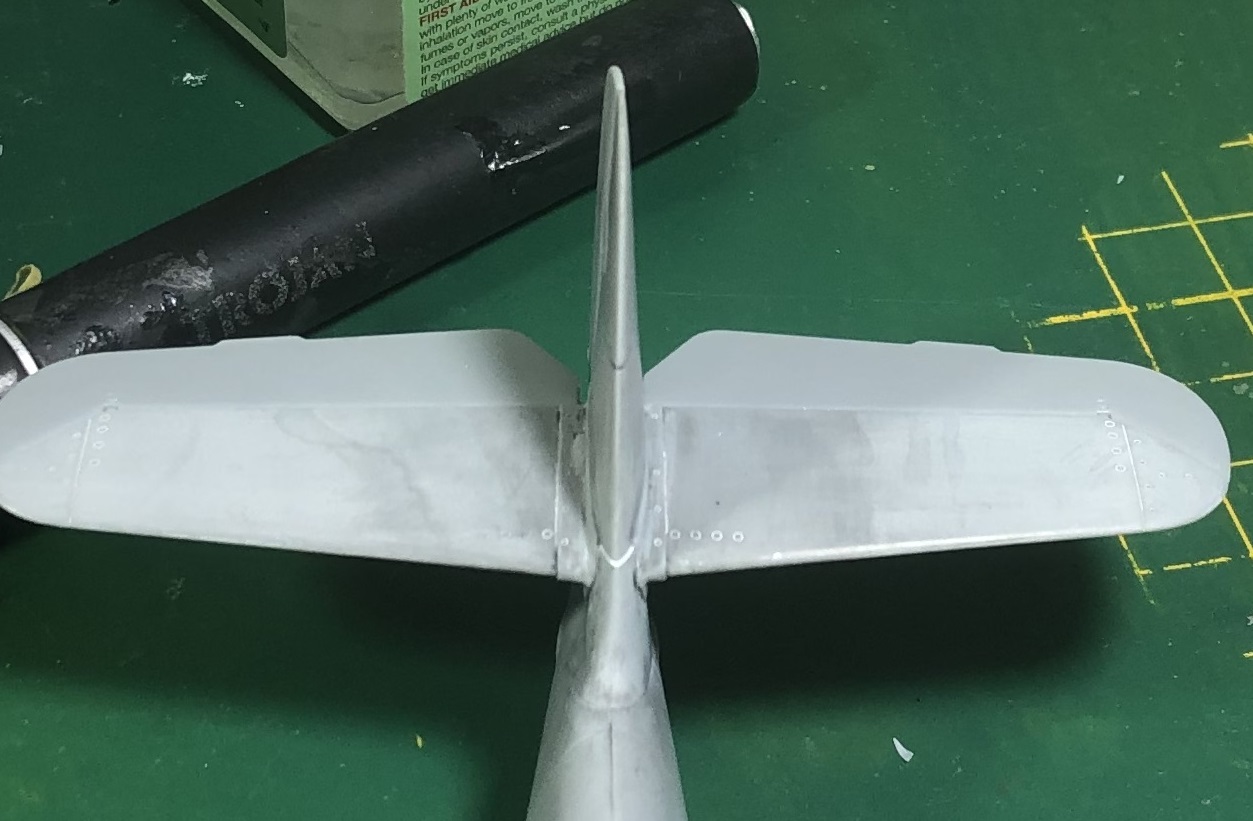
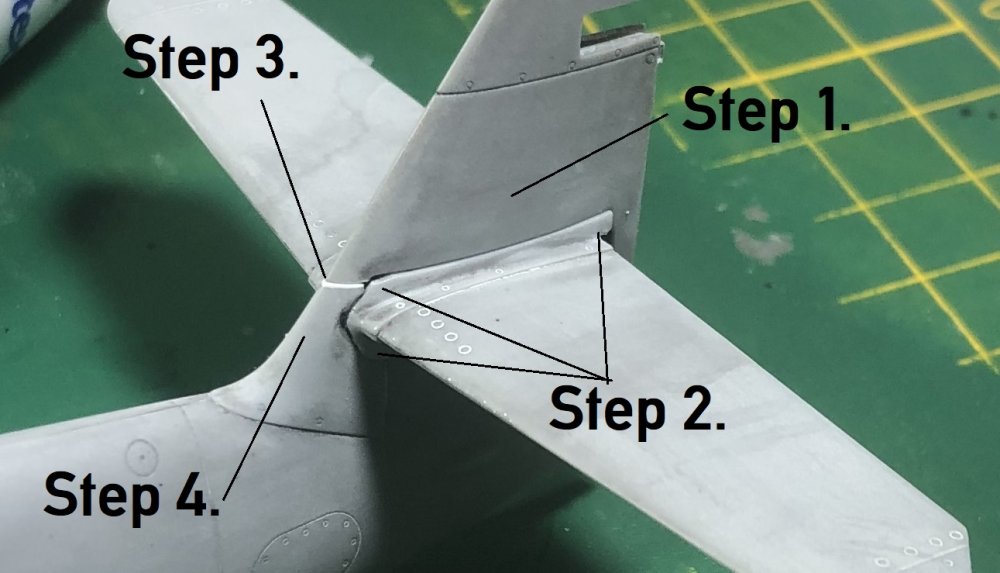
OK... so here is my rendition. Step 1: Insert sprue wedges to widen Horizontal Stab. Step 2: File, sand, and smooth fairings at inner edge of elevators. Step 3. Insert shim at front of horizontal stabilizer. Step 4. File and sand fairing to match thickness of the horizontal Stab. It may require a little filler behind the shim. I didn't have to remove the sphere parts from the fairing.... Thankfully.
- 436 replies
-
- 13
-

-

-
Those nacelles look great!
-
Fw-190 A-8/ R-2 "Sturmbock" Revell 1:32
GazzaS replied to Sasha As's topic in LSM 1/35 and Larger Work In Progress
Looks totally awesome, Sasha.