ScottsGT
-
Posts
2,767 -
Joined
-
Last visited
Content Type
Profiles
Forums
Events
Gallery
Everything posted by ScottsGT
-
Don’t expect anything from Mastercasters for 5 years
ScottsGT replied to Clunkmeister's topic in General Discussion
Yea, the world got to see what the “Good ol’ Boy” system in the deep south is really like. A couple counties over there was a Sheriff that held the record for being the youngest ever elected to that position and had something like 40 years in service. His greed finally caught up with him for making deals with criminal types that benefited him financially. Went from top cop to inmate overnight. -
Don’t expect anything from Mastercasters for 5 years
ScottsGT replied to Clunkmeister's topic in General Discussion
Same here in the states Maru. I guess even criminals have a code of conduct. The well publicized Murdaugh murderer (Dad) got put in protective custody because they know gen pop would be a death sentence. Not saying that’s a bad thing….. https://www.wistv.com/2023/03/31/murdaugh-moved-protective-custody-maximum-security-sc-prison/ -
Not sure how many here keep up on LSP, but Harold announced earlier today that due to his health issues he’s calling it quits and retiring. He trying to find someone to take over his line of products so they can continue on.
-
I can hear it now…”Honey, we have to add on a gymnasium to the house to fit my new diorama.”
-
Now you need a 1/48 Enterprise refit to go with it.
-
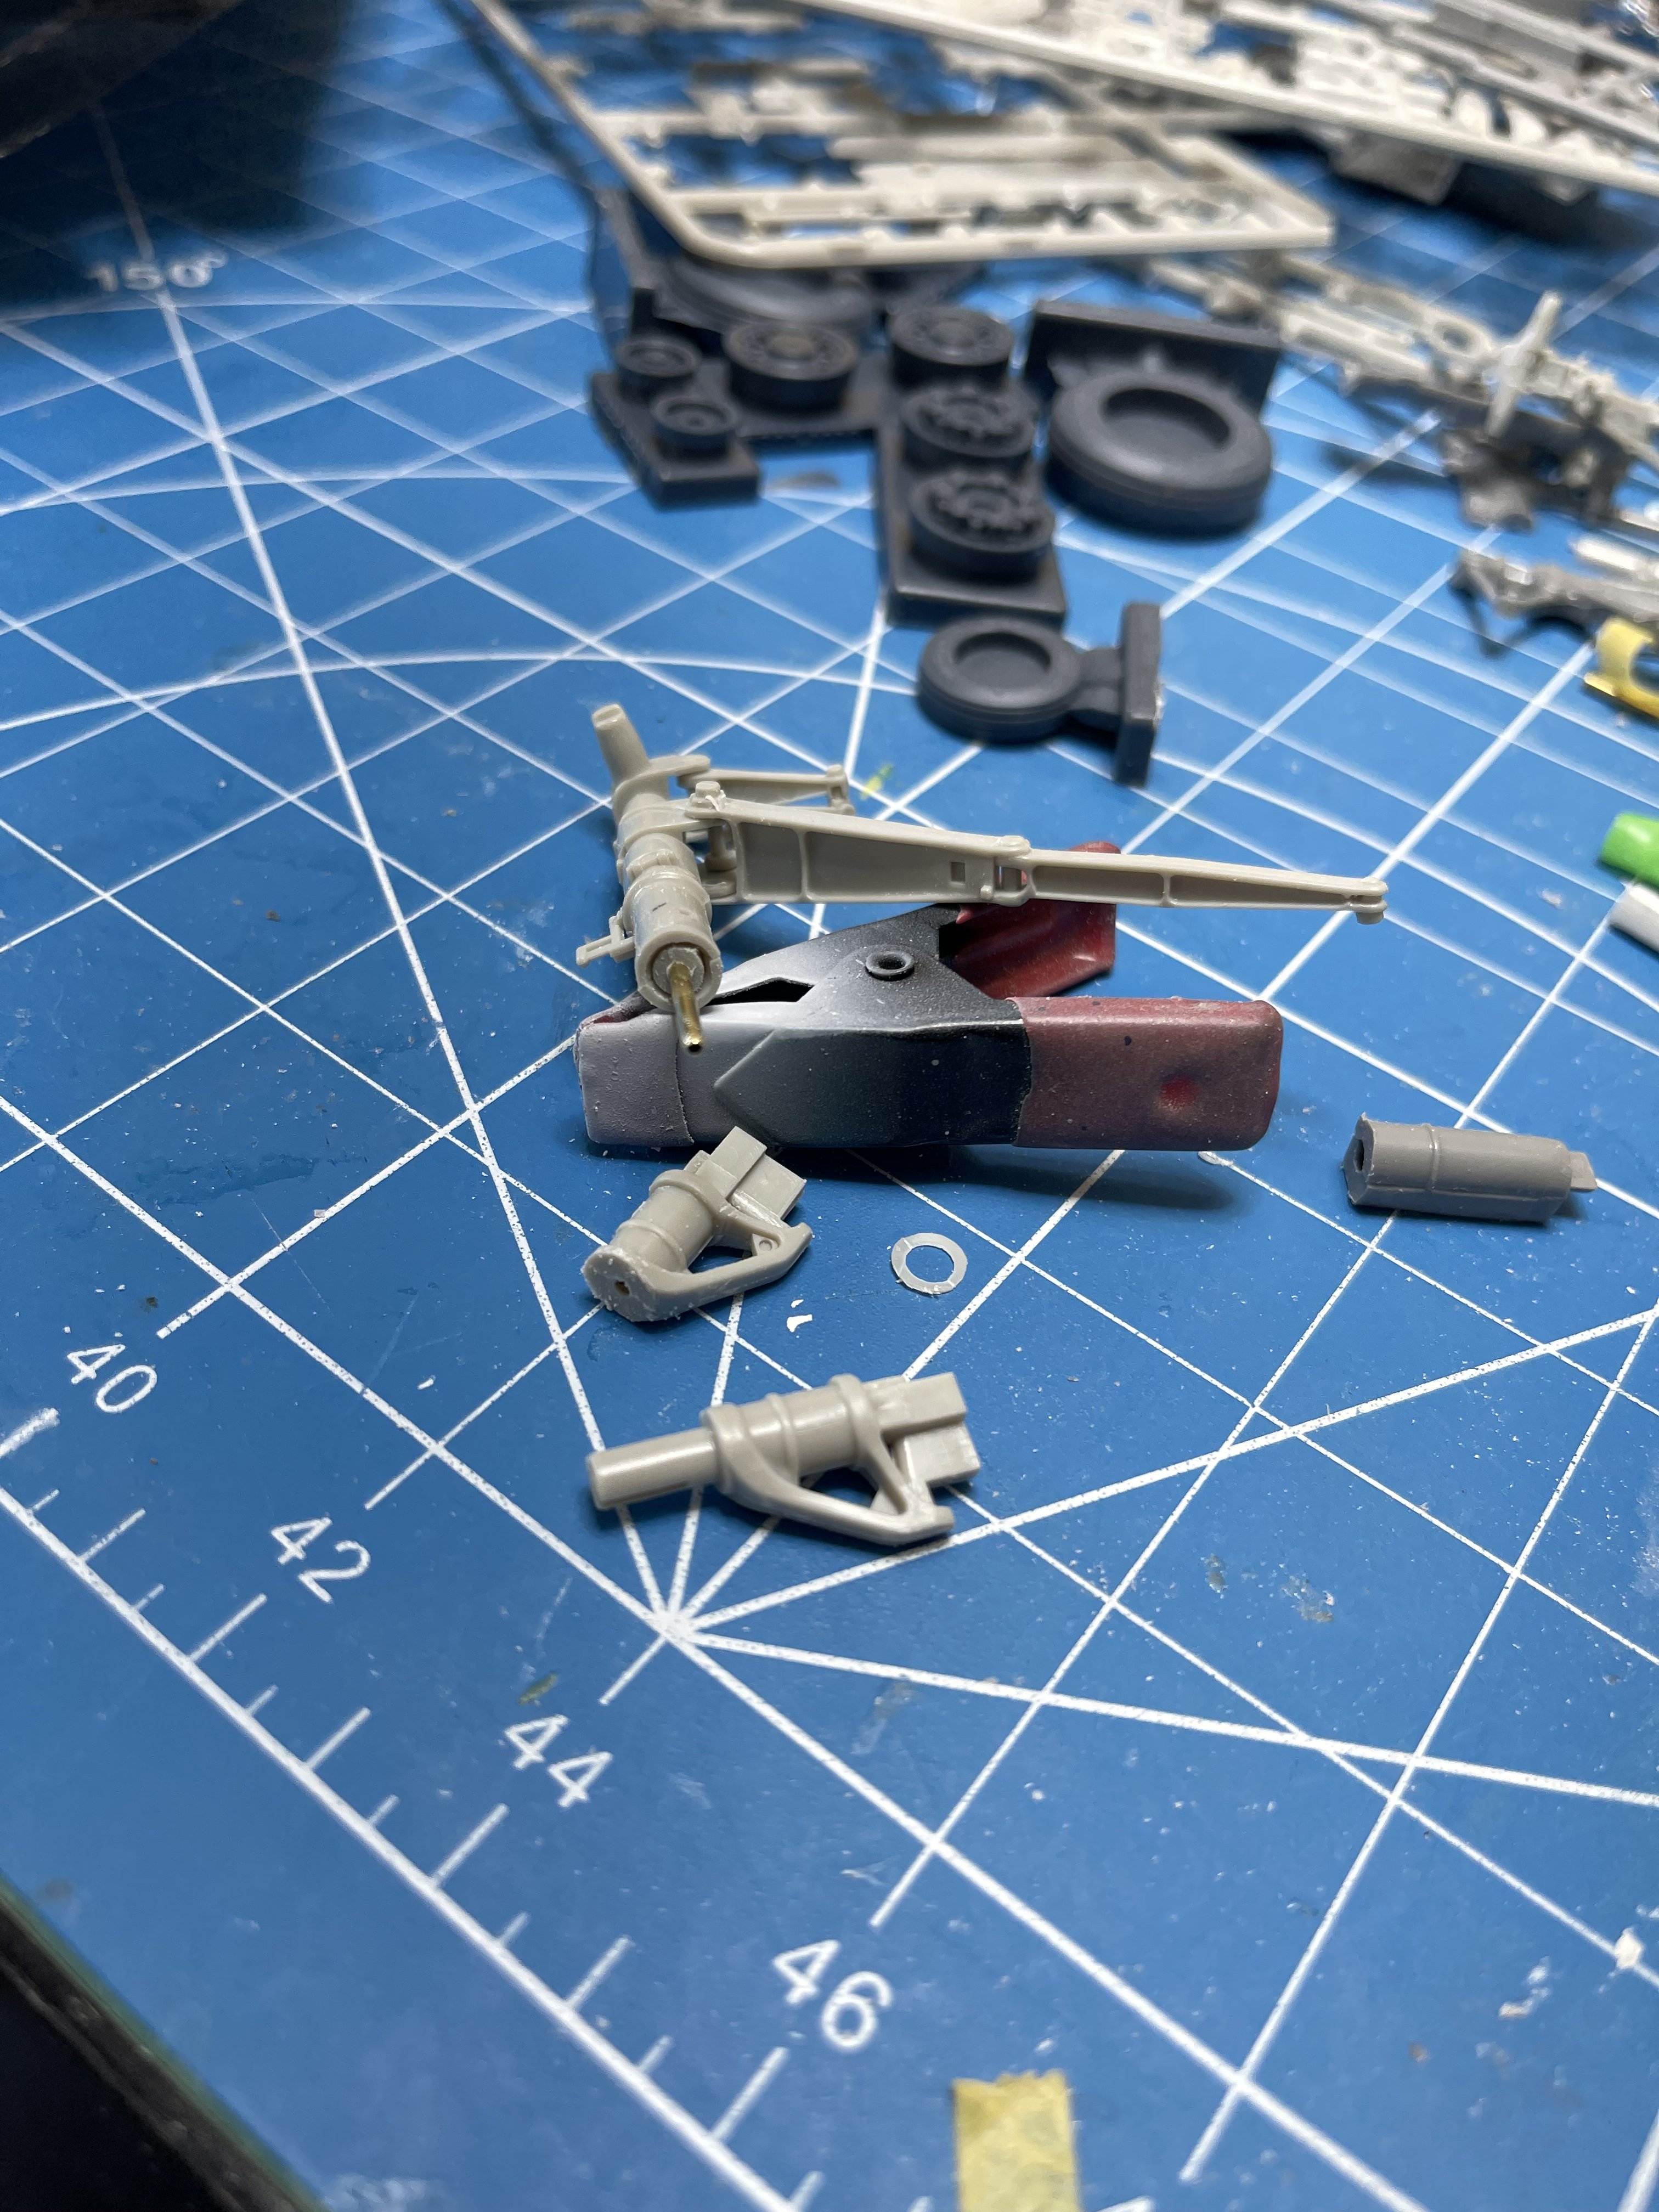
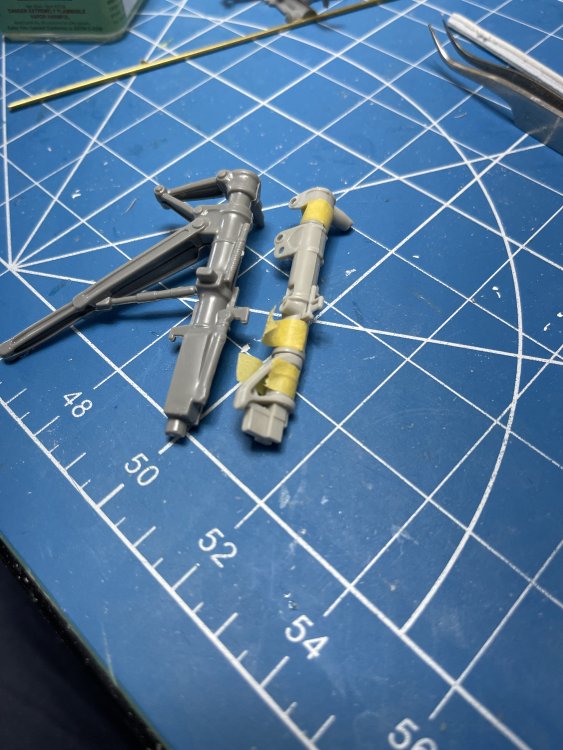
Nose gear was a little different. Tamiya gear was just too long. So I simply shortened it. I also used a brass tube insert but this time I had to hollow out the top of the Revell parts to accept the rod. glued together with brass tube. finished! Of course all the details need to be added now.


-
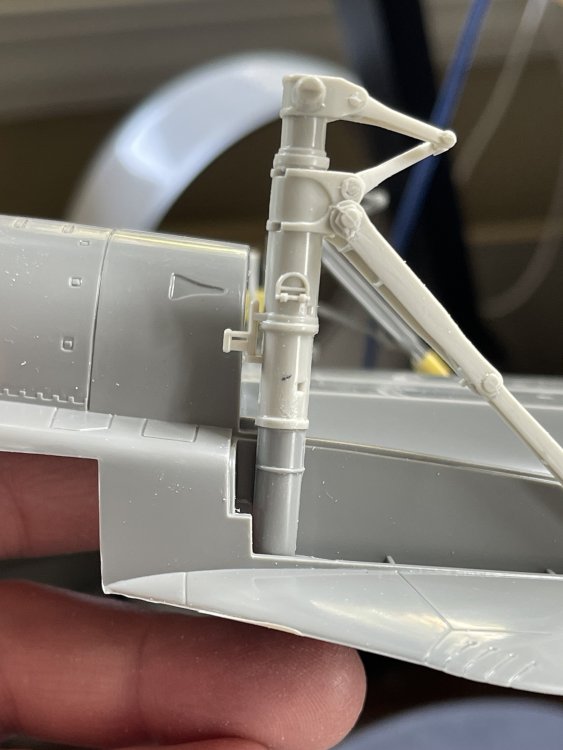
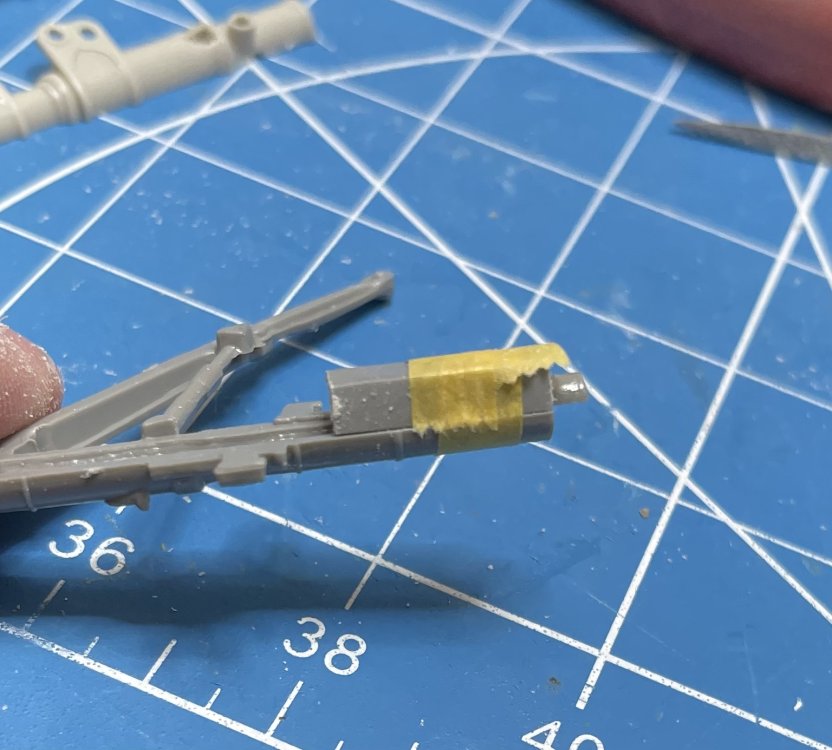
Here I used a section of brass tube in place of the metal inserts Tamiya calls for. I also cut off the part of the top of the gear that slides down into it to stabilize and center the brass rod. These were CA glued in place. you can see the top of the Revell gear next to it. This is glued together separately from the Tamiya parts. Once dry, I filled it with 5 min epoxy and slid the two parts together and carefully positioned it as the epoxy cured. The support arm will not fit in the same location as the Revell part did. It is a bit too long. But simply drilling a new hole for the locating pin in the correct location works fine.
-
Here’s the two set laid out side by side. I simply didn’t use the top section of the Tamiya legs. Well, almost. At the 36 line is where I needed to cut off the Revell top to reuse. Of course you’ll need both halves.
-
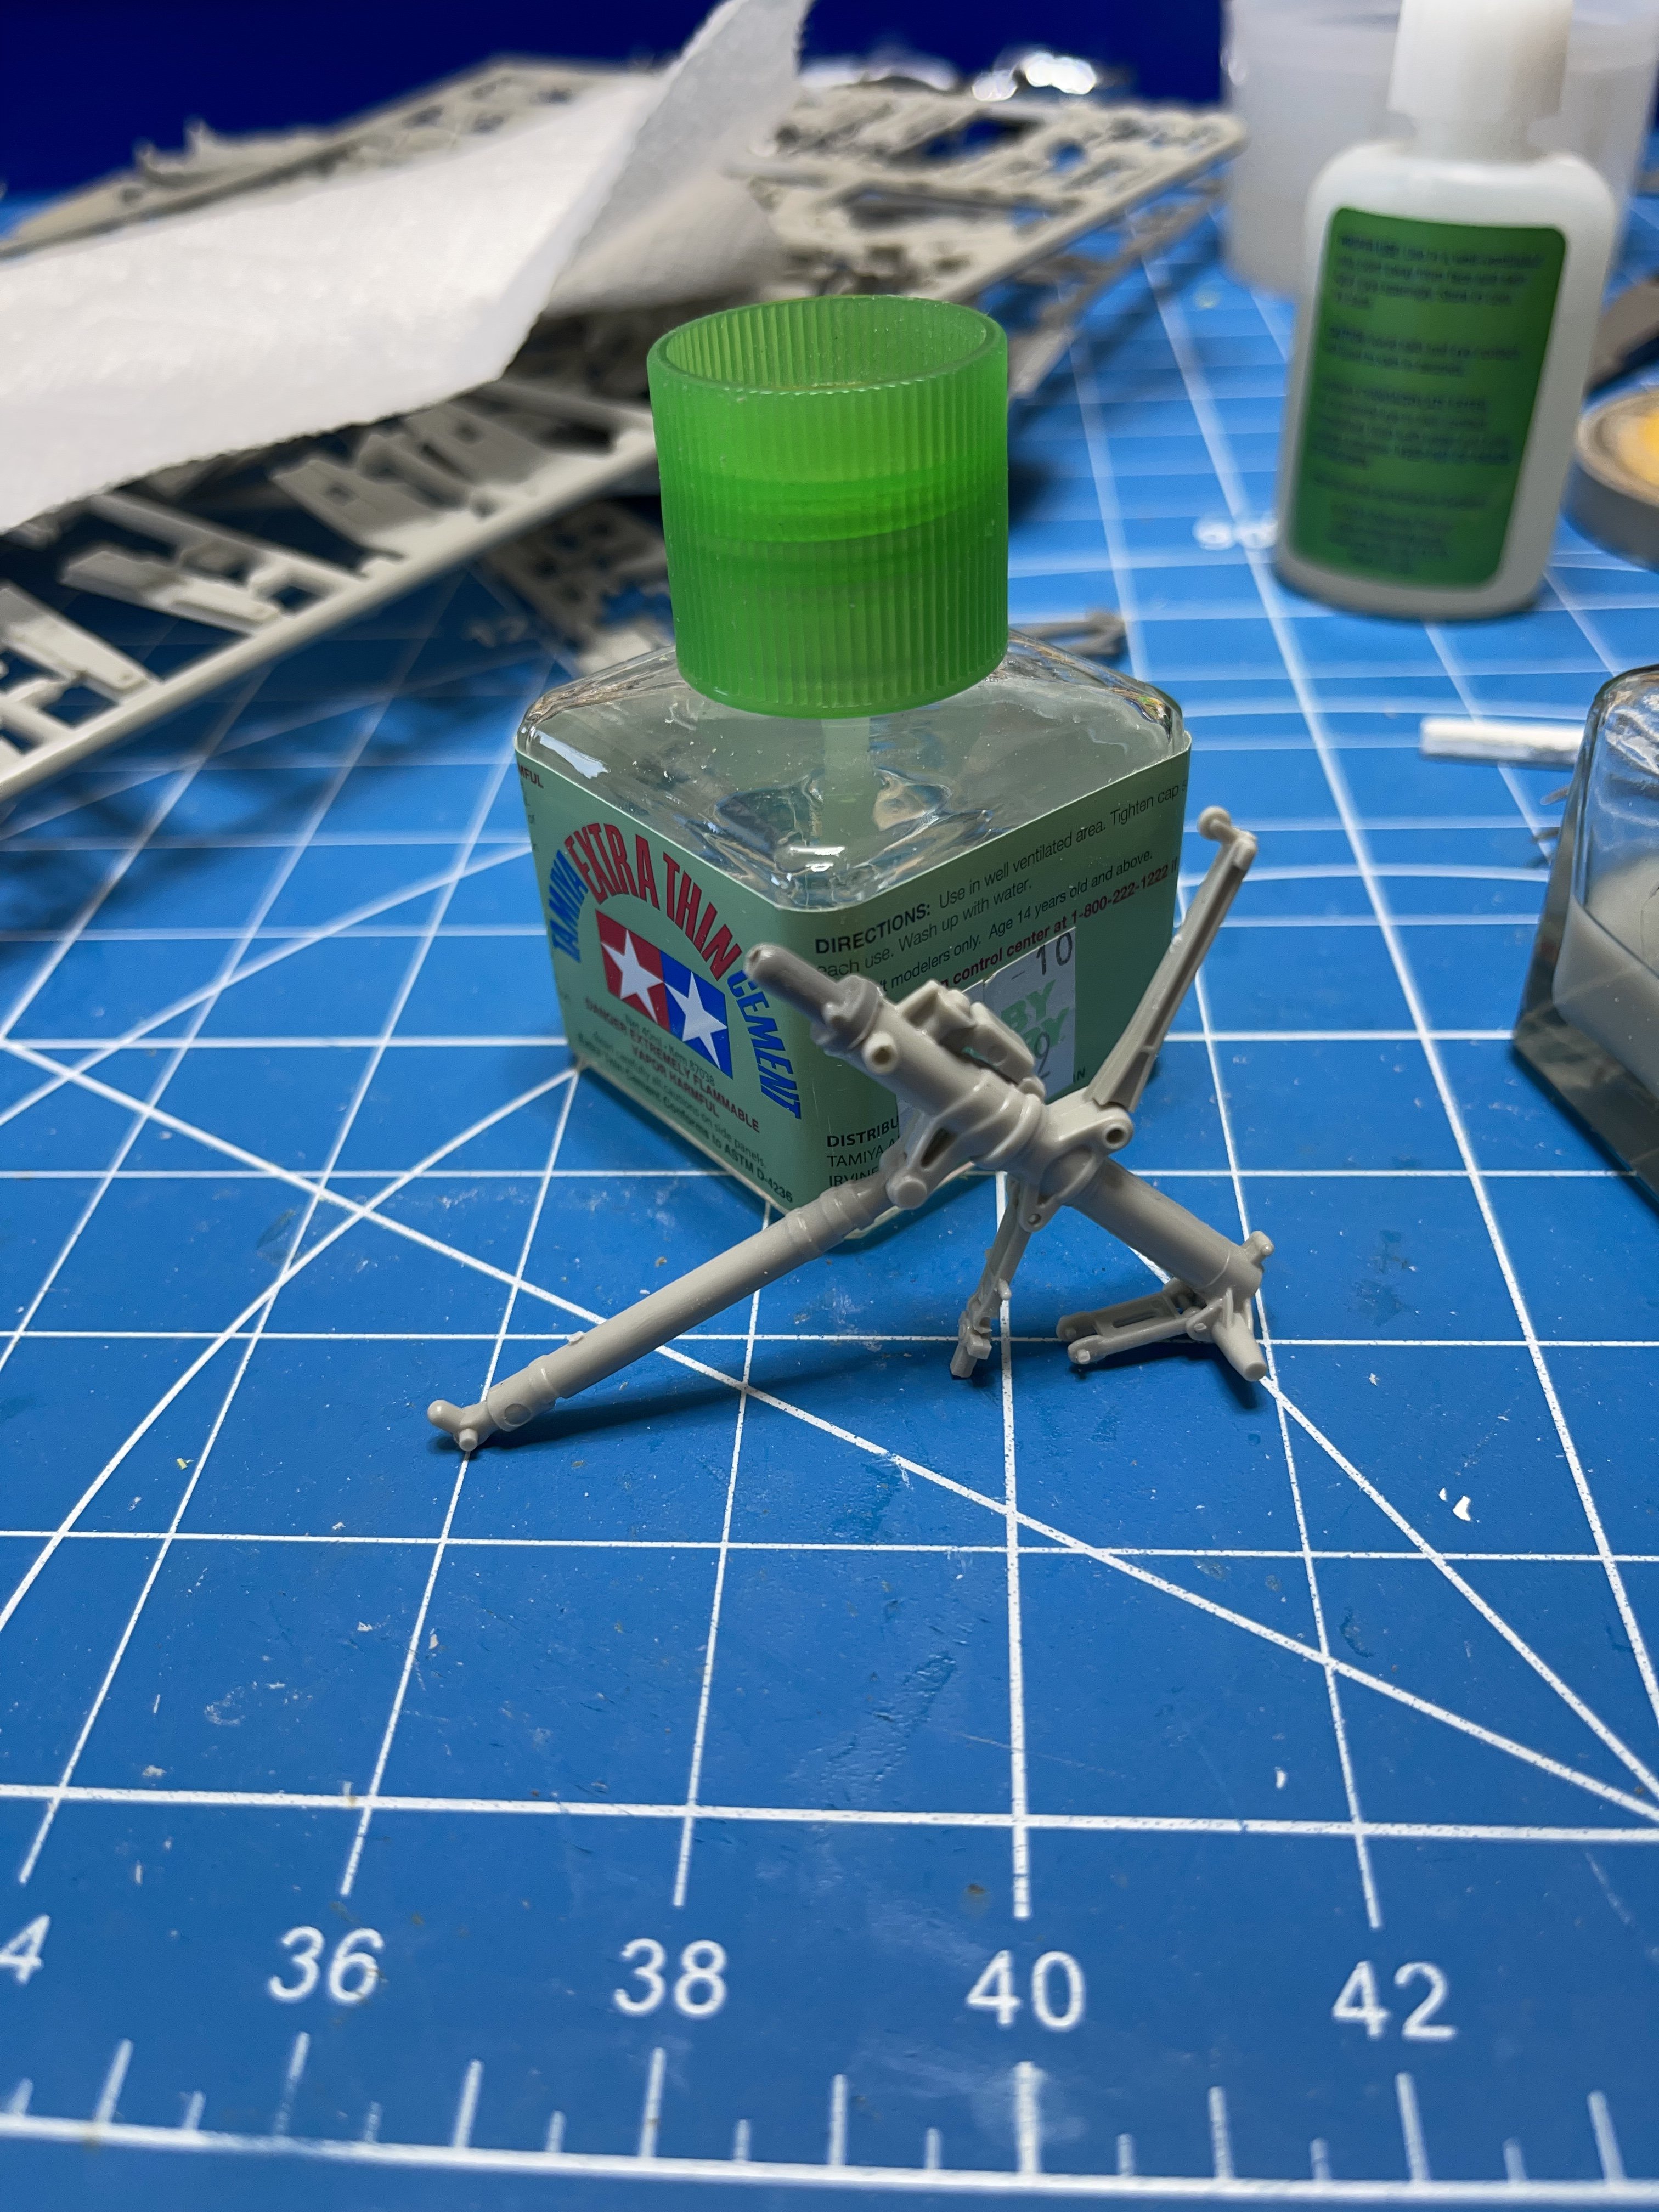
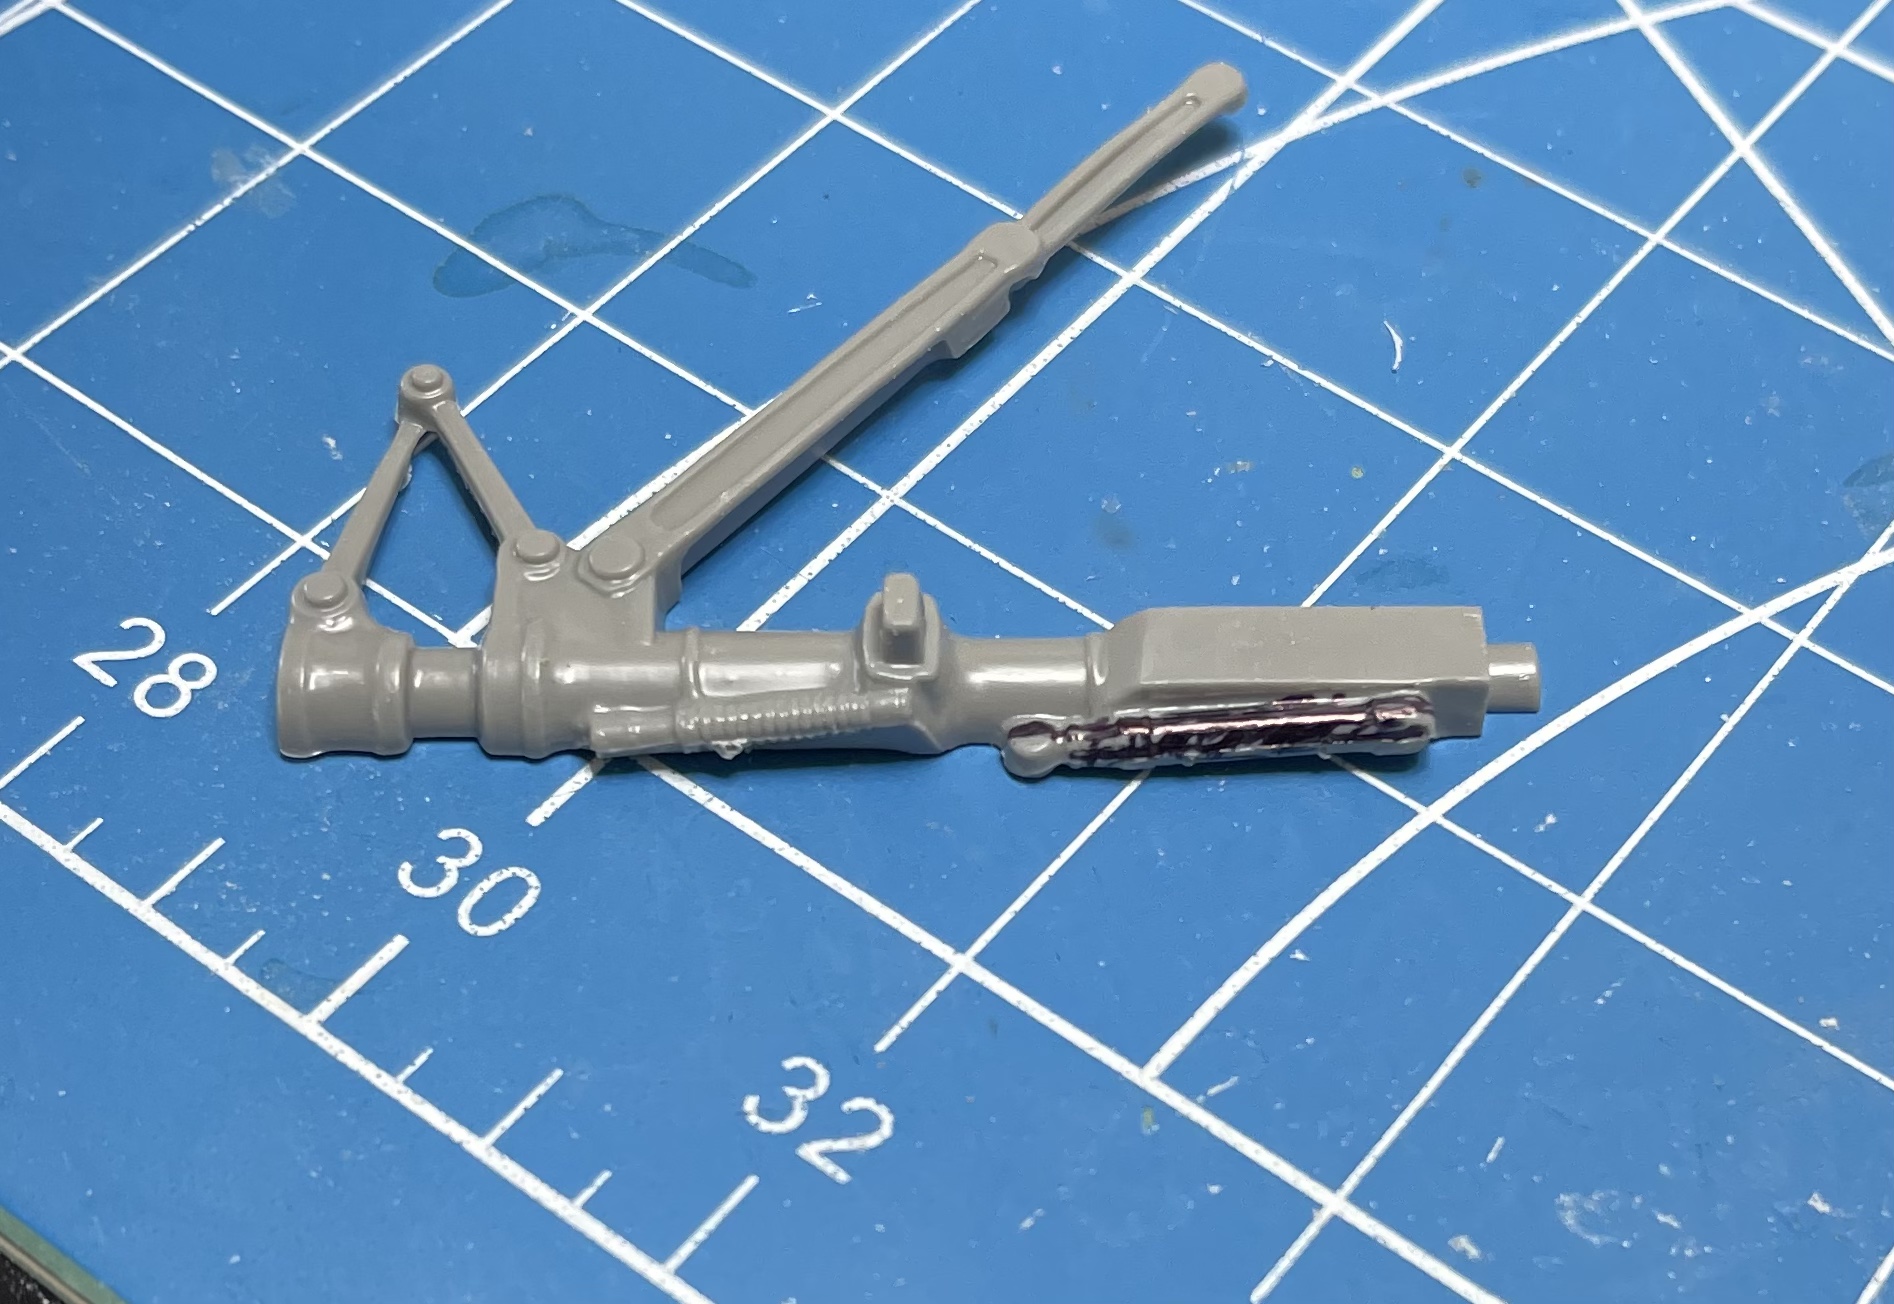
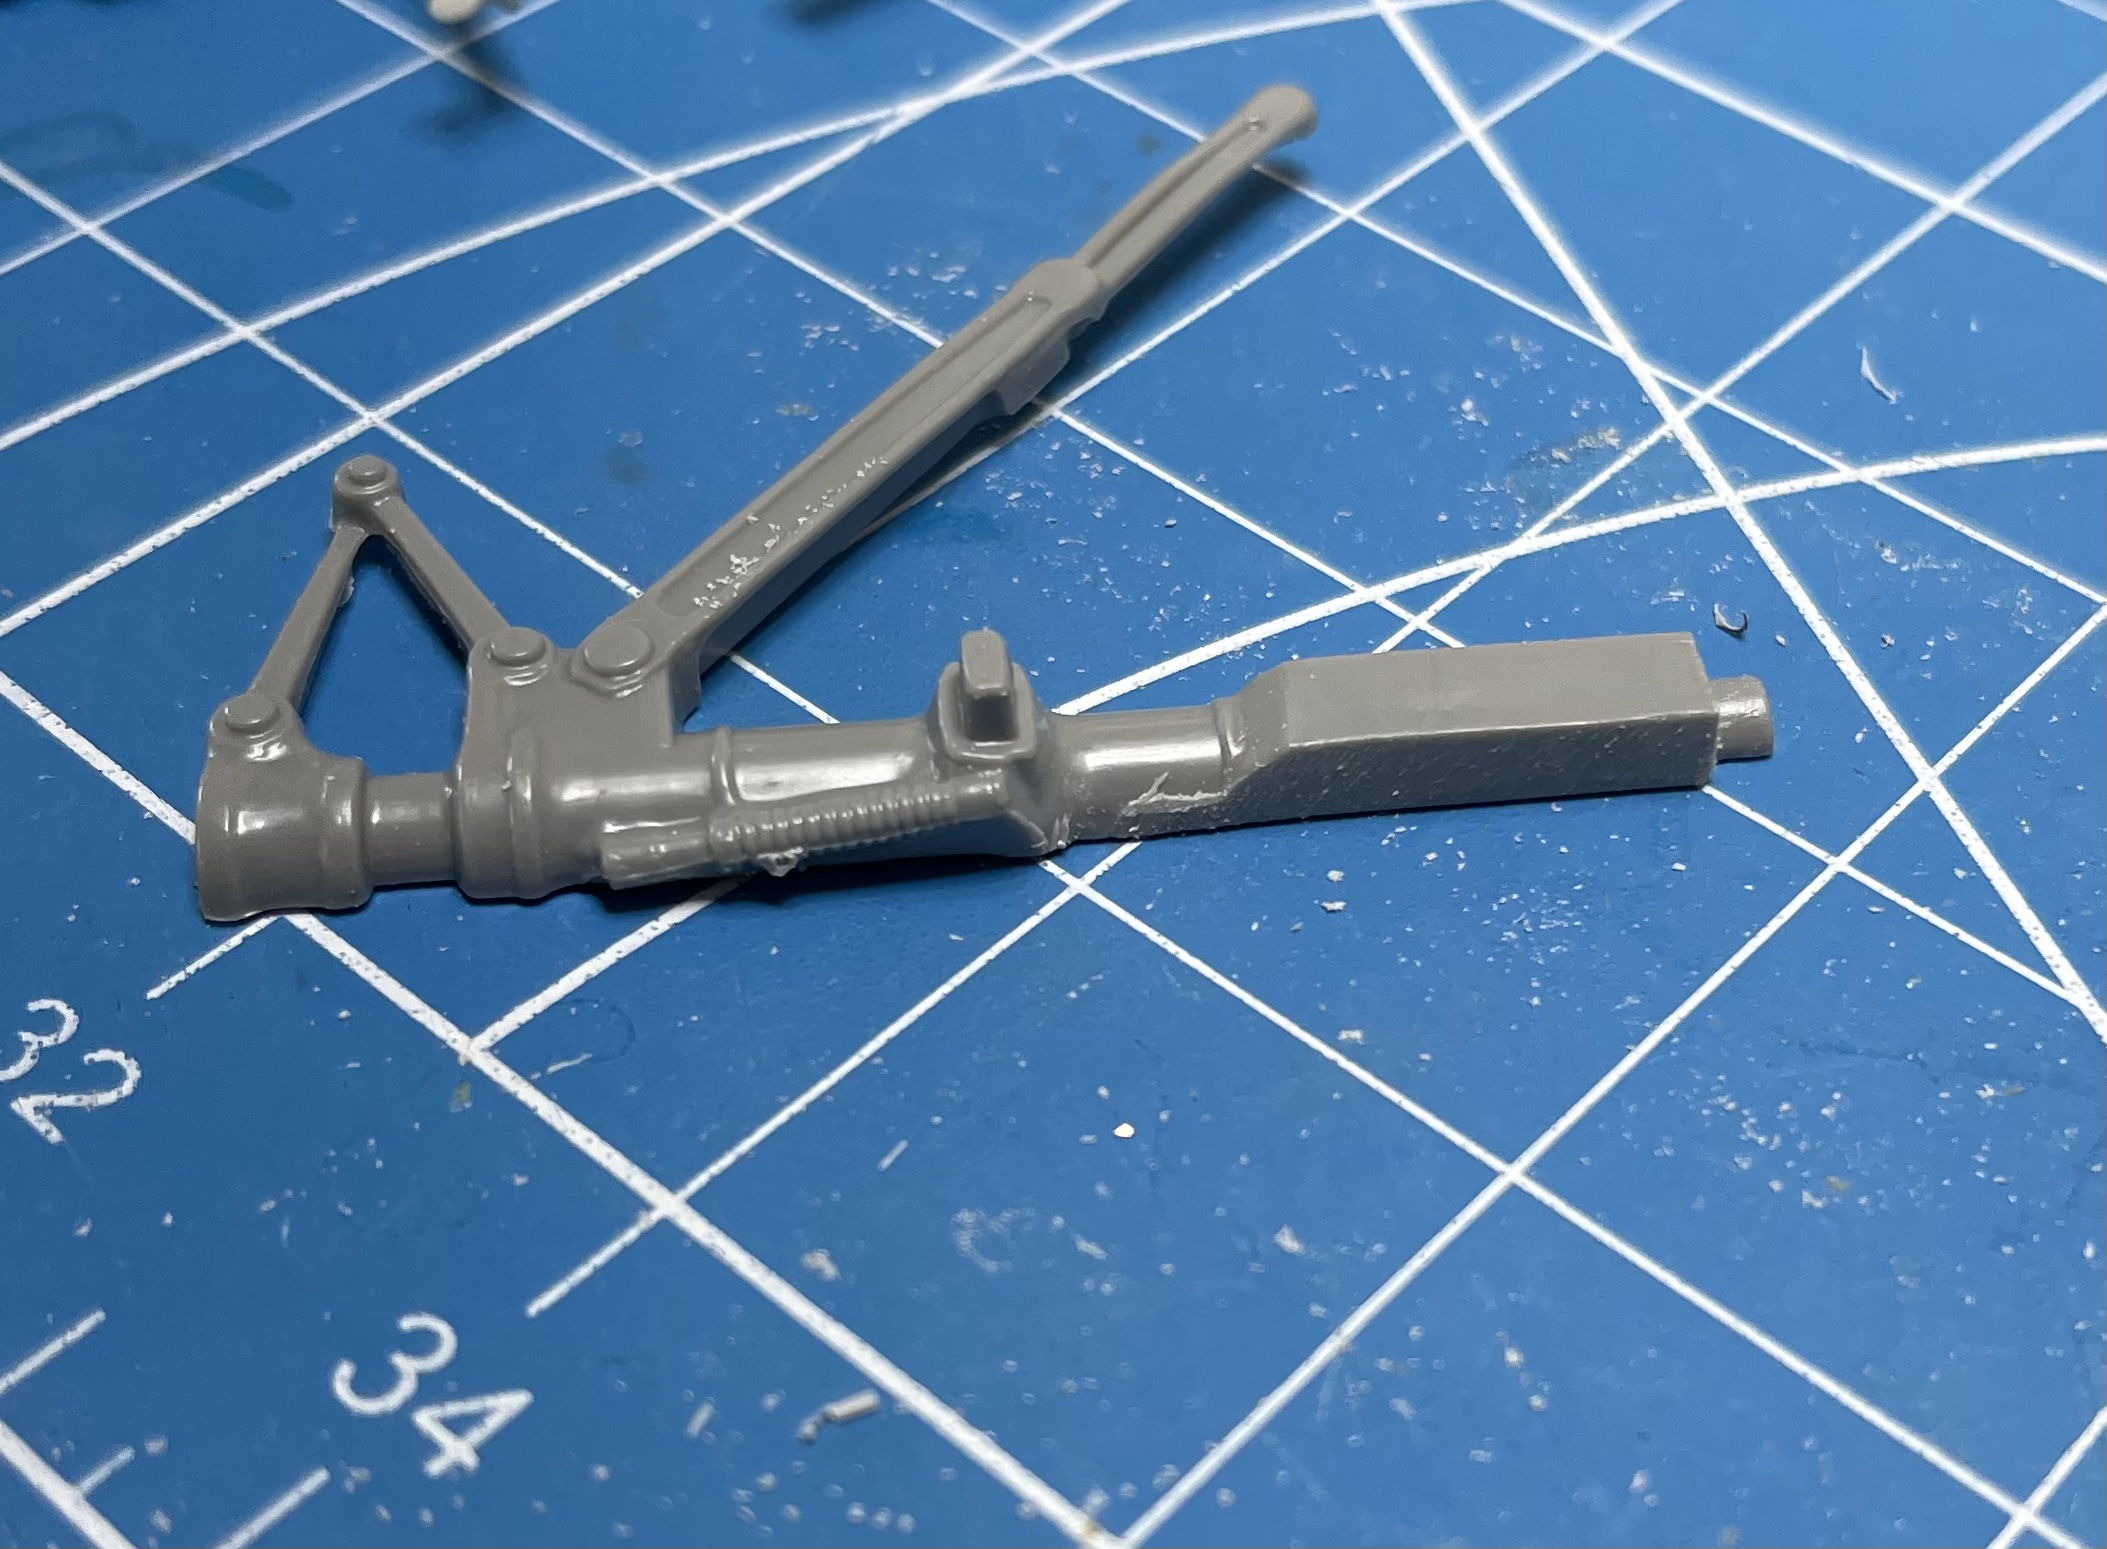
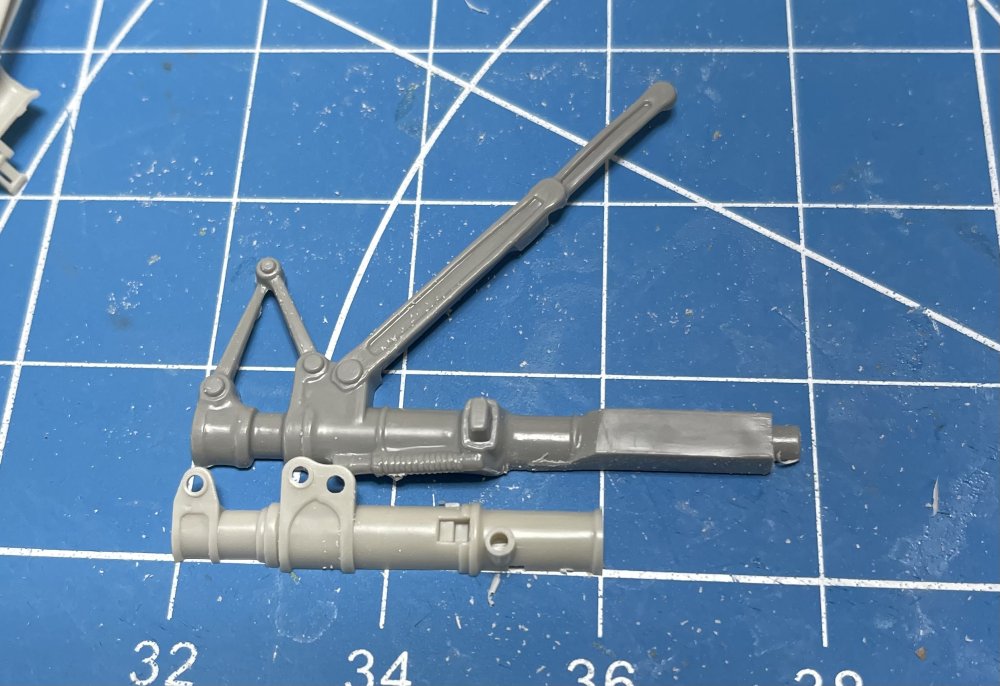
Ok, I took the original gear and cleaned them up a little first. Tamiya sprue comes with a new hydraulic cylinder so I needed to cut this blob off the part I will need. and after it is cleaned up.


-
Not going to throw this one up in the wet build since A. Carl is doing one. And B. Tis’ the season for yard work, home maintenance and getting summer toys ready for the water. I highly doubt I’ll have this one done by the deadline. I wanted to start out with the cockpit, but knowing there are 3D printed interior decal sheets, I pulled the kit out of the box and pulled up cockpit pics online of the Tamiya and the Trumpeter kits to see which was the closest to the old Revell kit. Trumpeter won out and now I’m waiting my order from Hobby Nut Models so I can morph that old Revell cockpit into something. Reading up on the kit online, one suggestion mentioned over and over was to swap out the landing gear with a set of the Tamiya legs. Well, low and behold, the used kit I got from a fellow member here included the sprues from Tamiya with all these parts. But yea, not as easy as it looks. As you can see, top mounting points are completely different. More to come…..
-
Neighborhood Kids Choice Award in modeling excellence.
ScottsGT replied to Clunkmeister's topic in Archived GB's Sub Forum
LOL! Just like my Seaview build, only a boomer would understand these builds! That Batman is from an era of us boomers watching them when we were kids. I sent a pic of the diorama completed to my 27 yo son. His response: “Badass! But what movie are those from?” -
Video started and I was like “Wow, that Harrier sounds like a diesel truck idling.” Why won’t it fly in the UK? Too modern for private ownership? How do they get it out of the UK then?
-
ProModeler 1/48 PBY-5A Catalina + Goodies, RFI
ScottsGT replied to CANicoll's topic in Let’s Get Wet Group Build.
Chris, that really looking great. I see builds like this and it reminds me why I bought my kit years ago. -
No excuses. I like that. Now get busy Harv!
-
Man, that was a horrible front with a nasty high death toll. So sad to read these things. We got the tail end of it this afternoon. Mild winds, drizzle and ugly clouds. We got very lucky.
-
It always has been one of my favorites, but then again I’m a sucker for a radial engine. I remember a story my Dad was telling us over dinner one night. He was a Loadmaster in the AF. They had a NIB (literally) Beaver they delivered up to Alaska in a C-124. All of the local Indians would show up and help un-crate them and in return they would get the crates to make additions to their houses or simply use it as a house. The locals were commenting on how big the crate was. Dad pointed to the C-124 and told them “You should see the crate that one came in!” Just a surprised look on their face because they didn’t know if they should take him serious or not.
-
A real fun throw together!

-
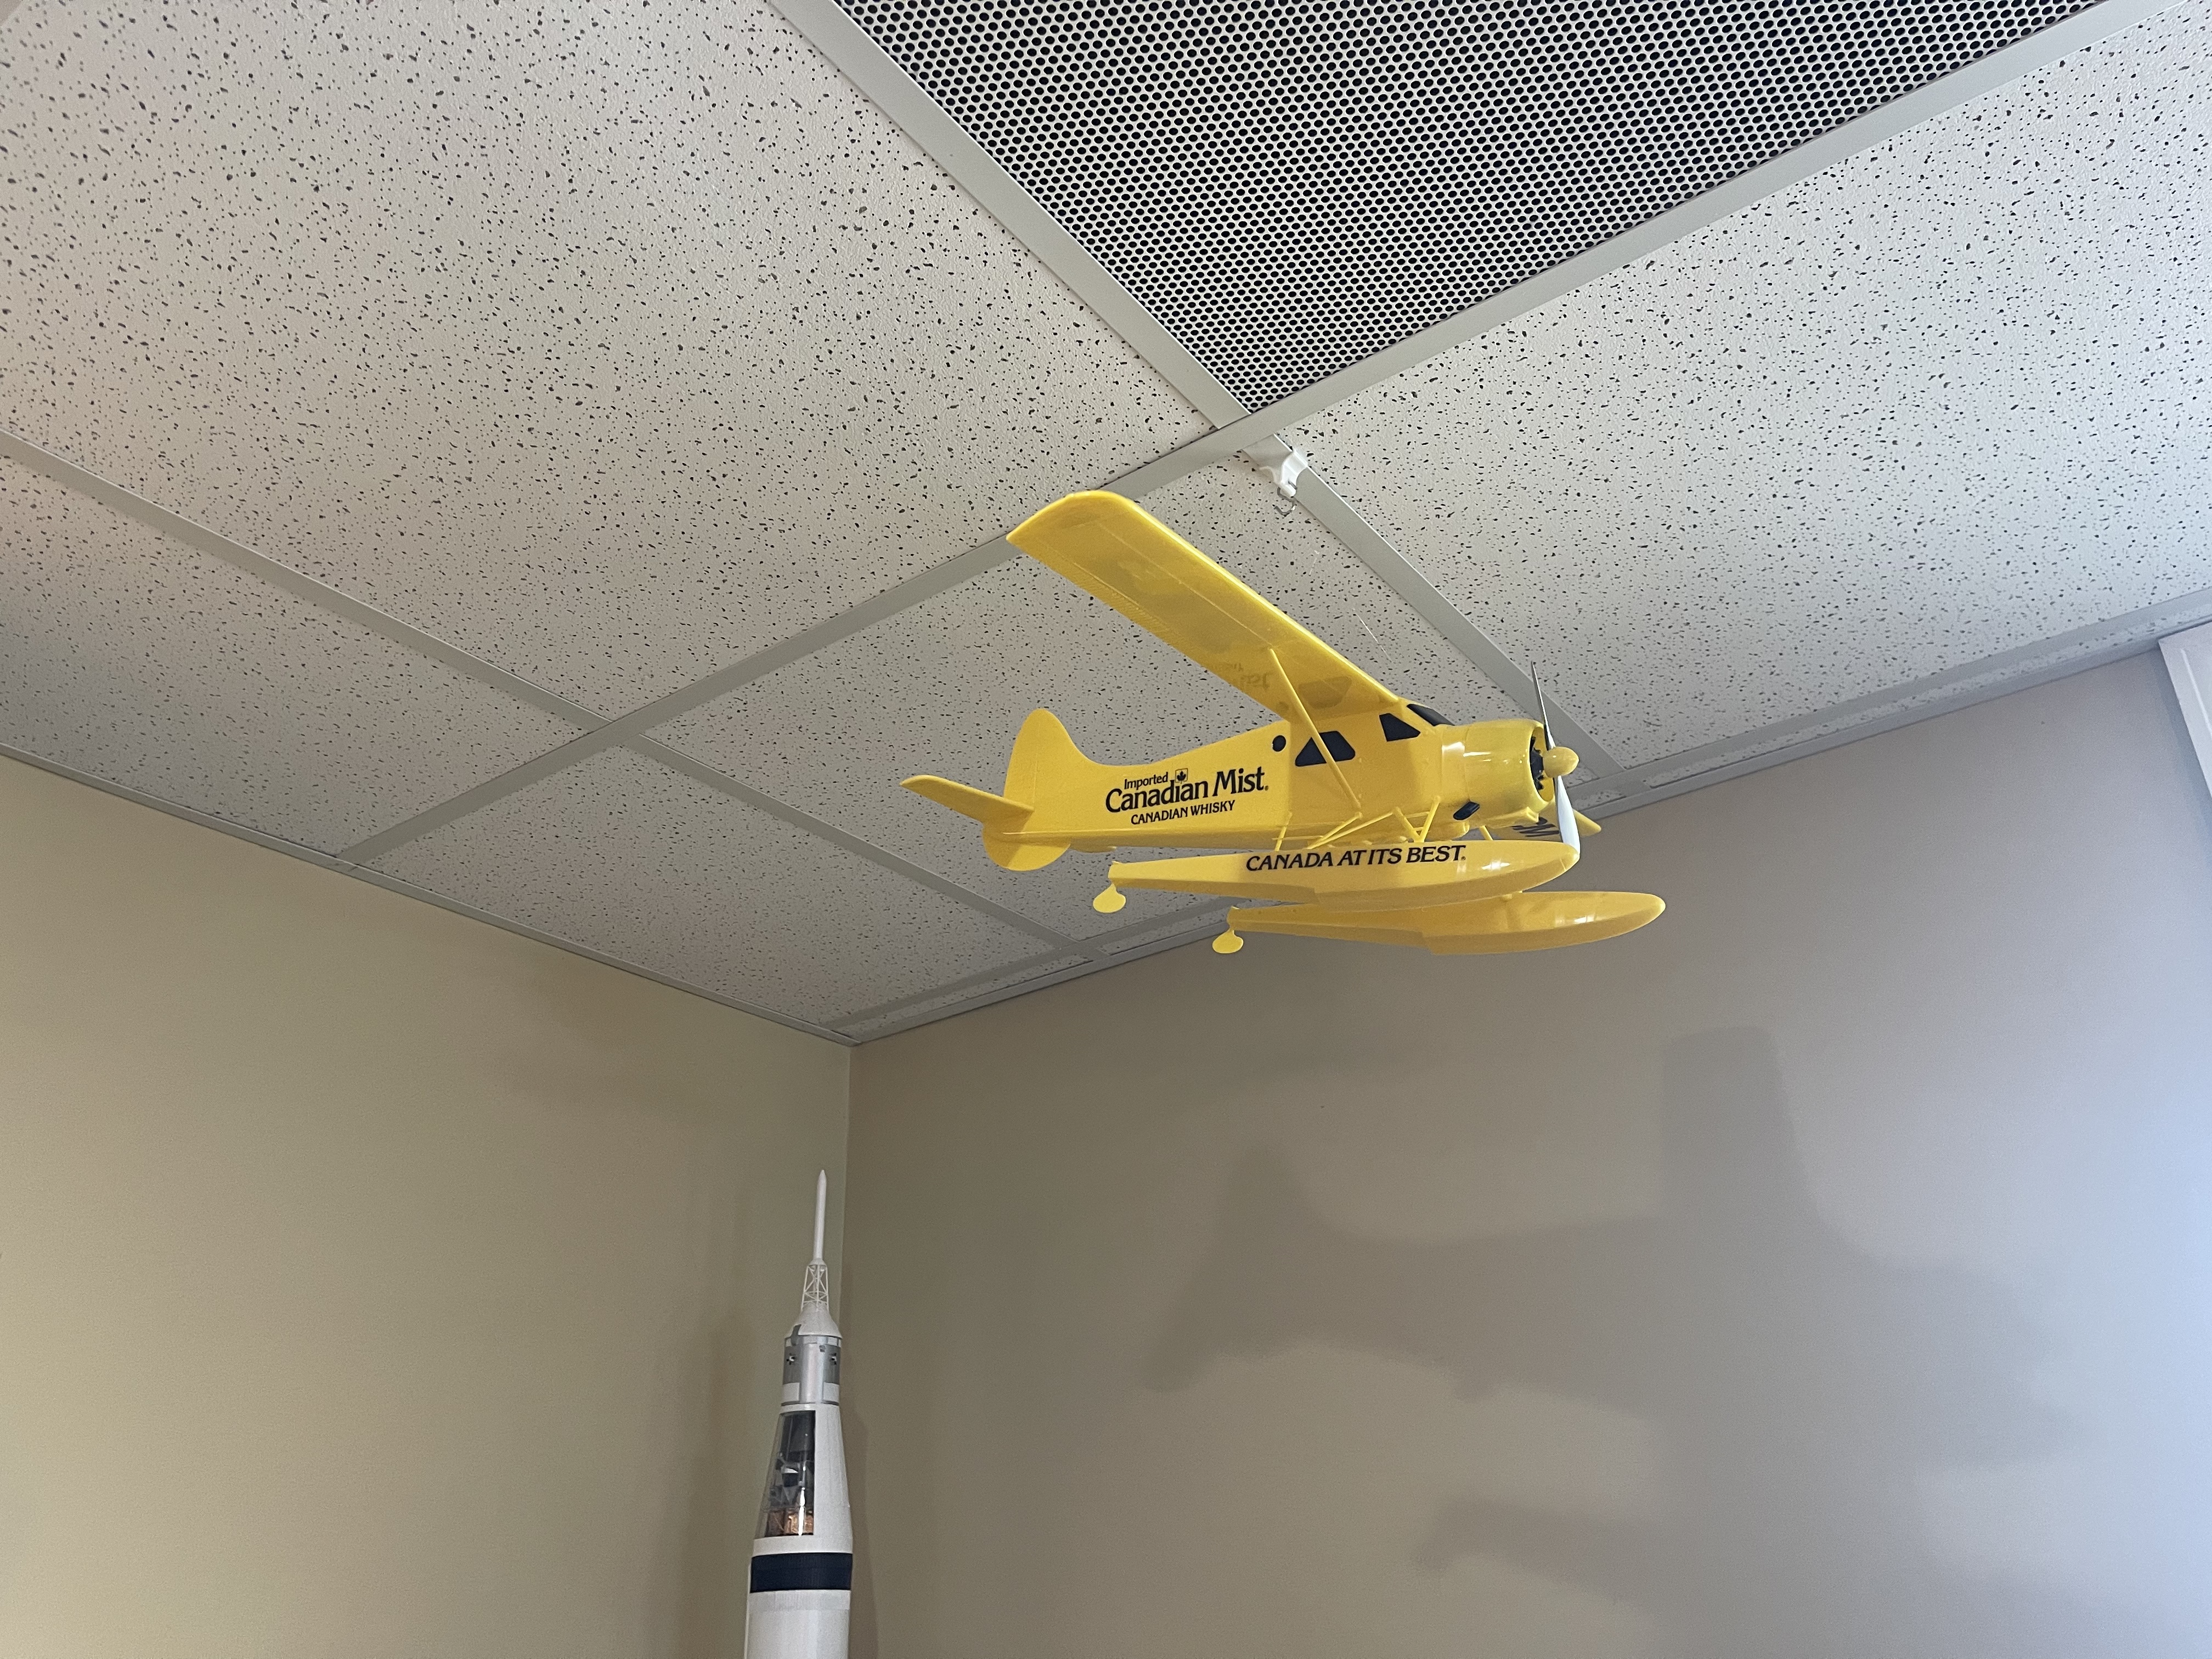
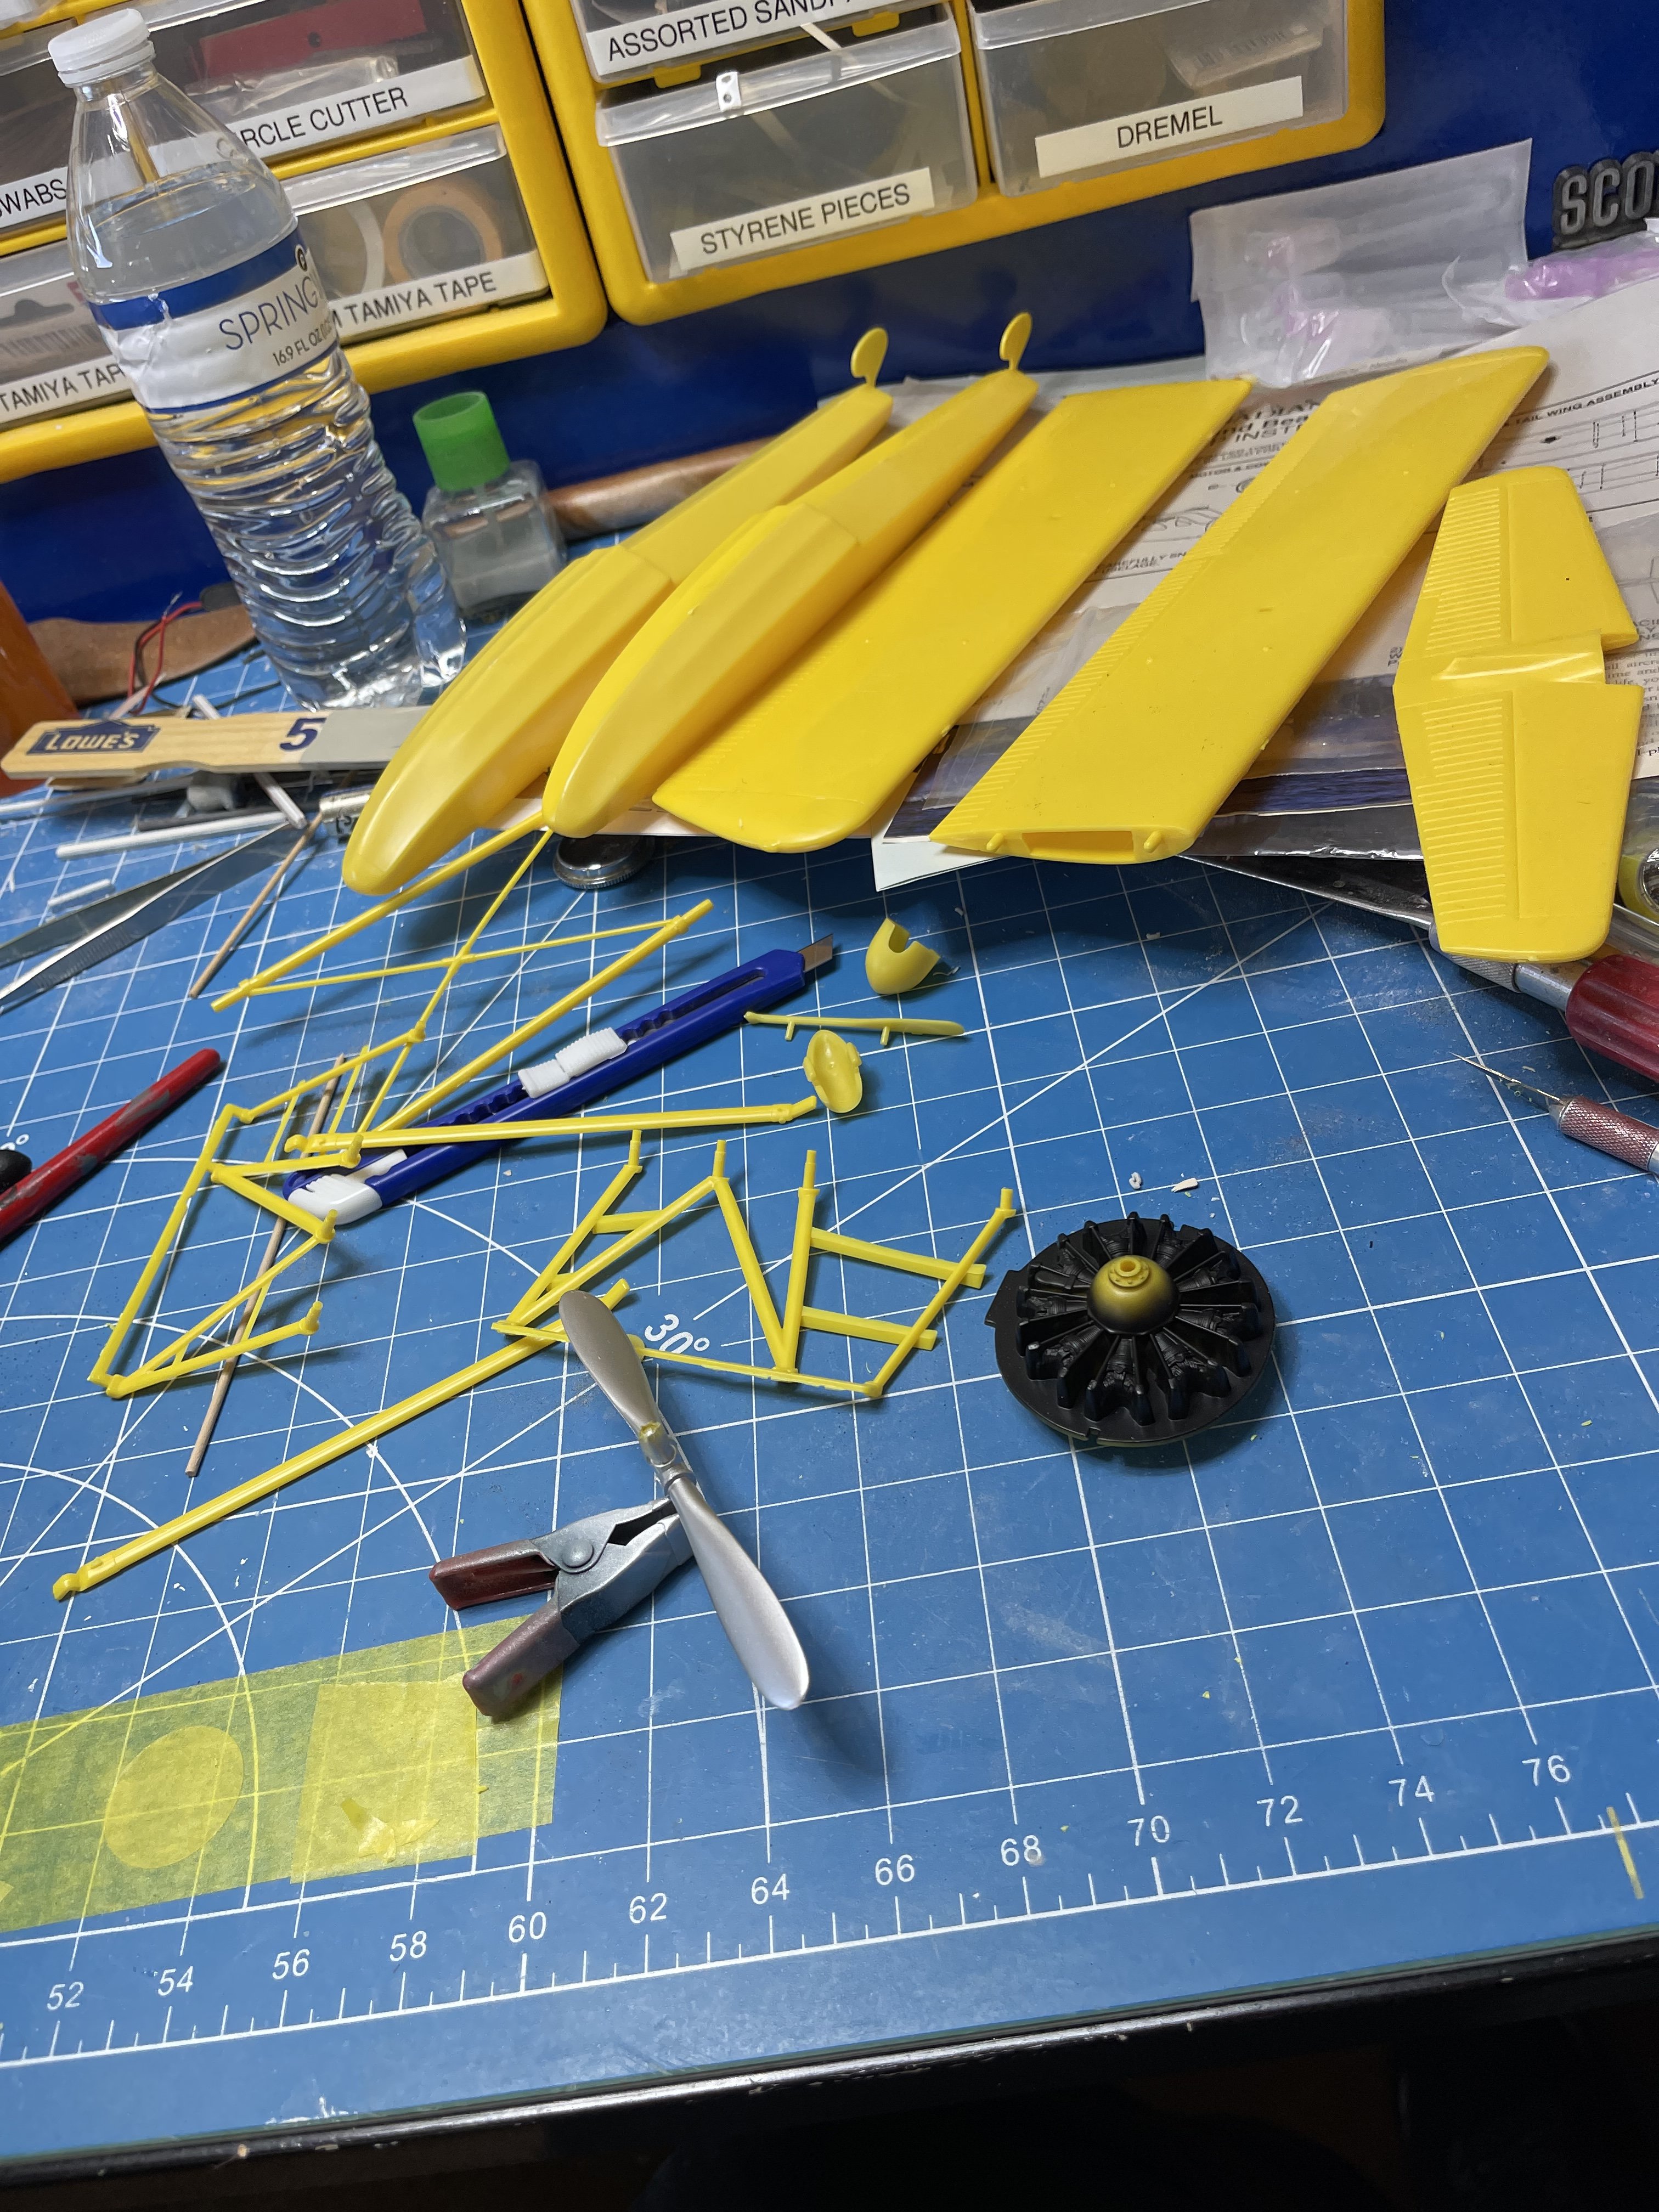
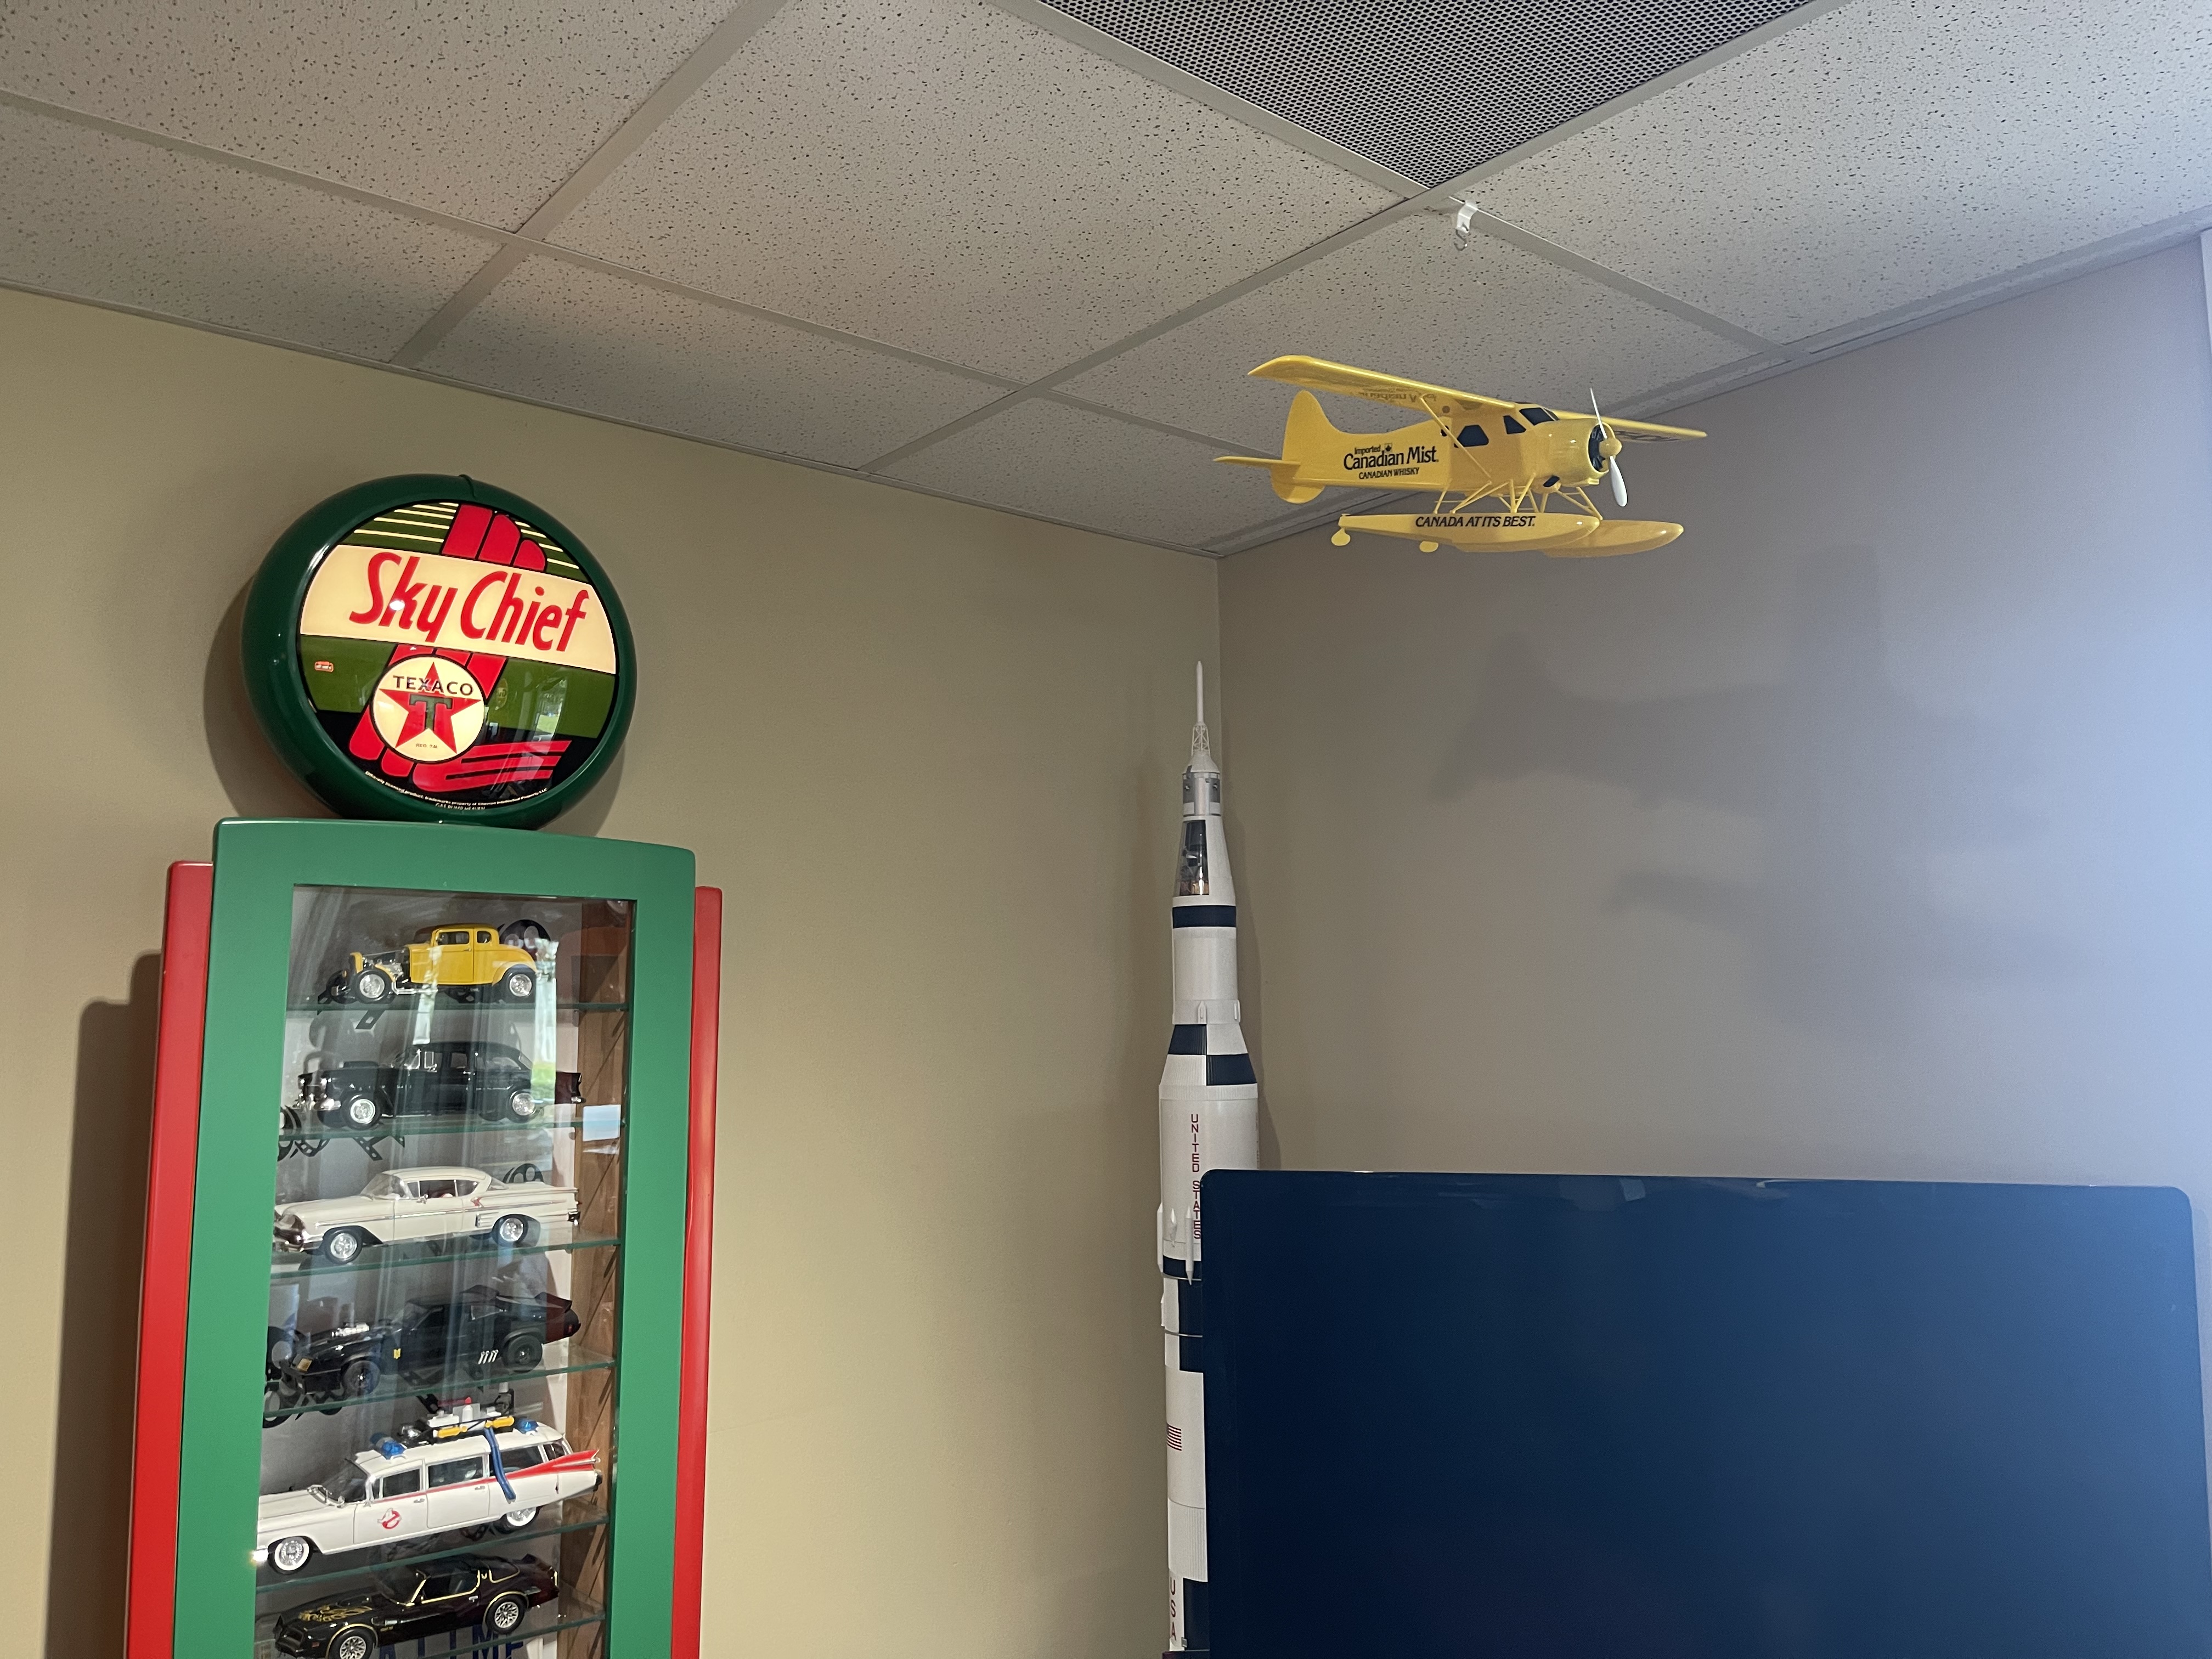
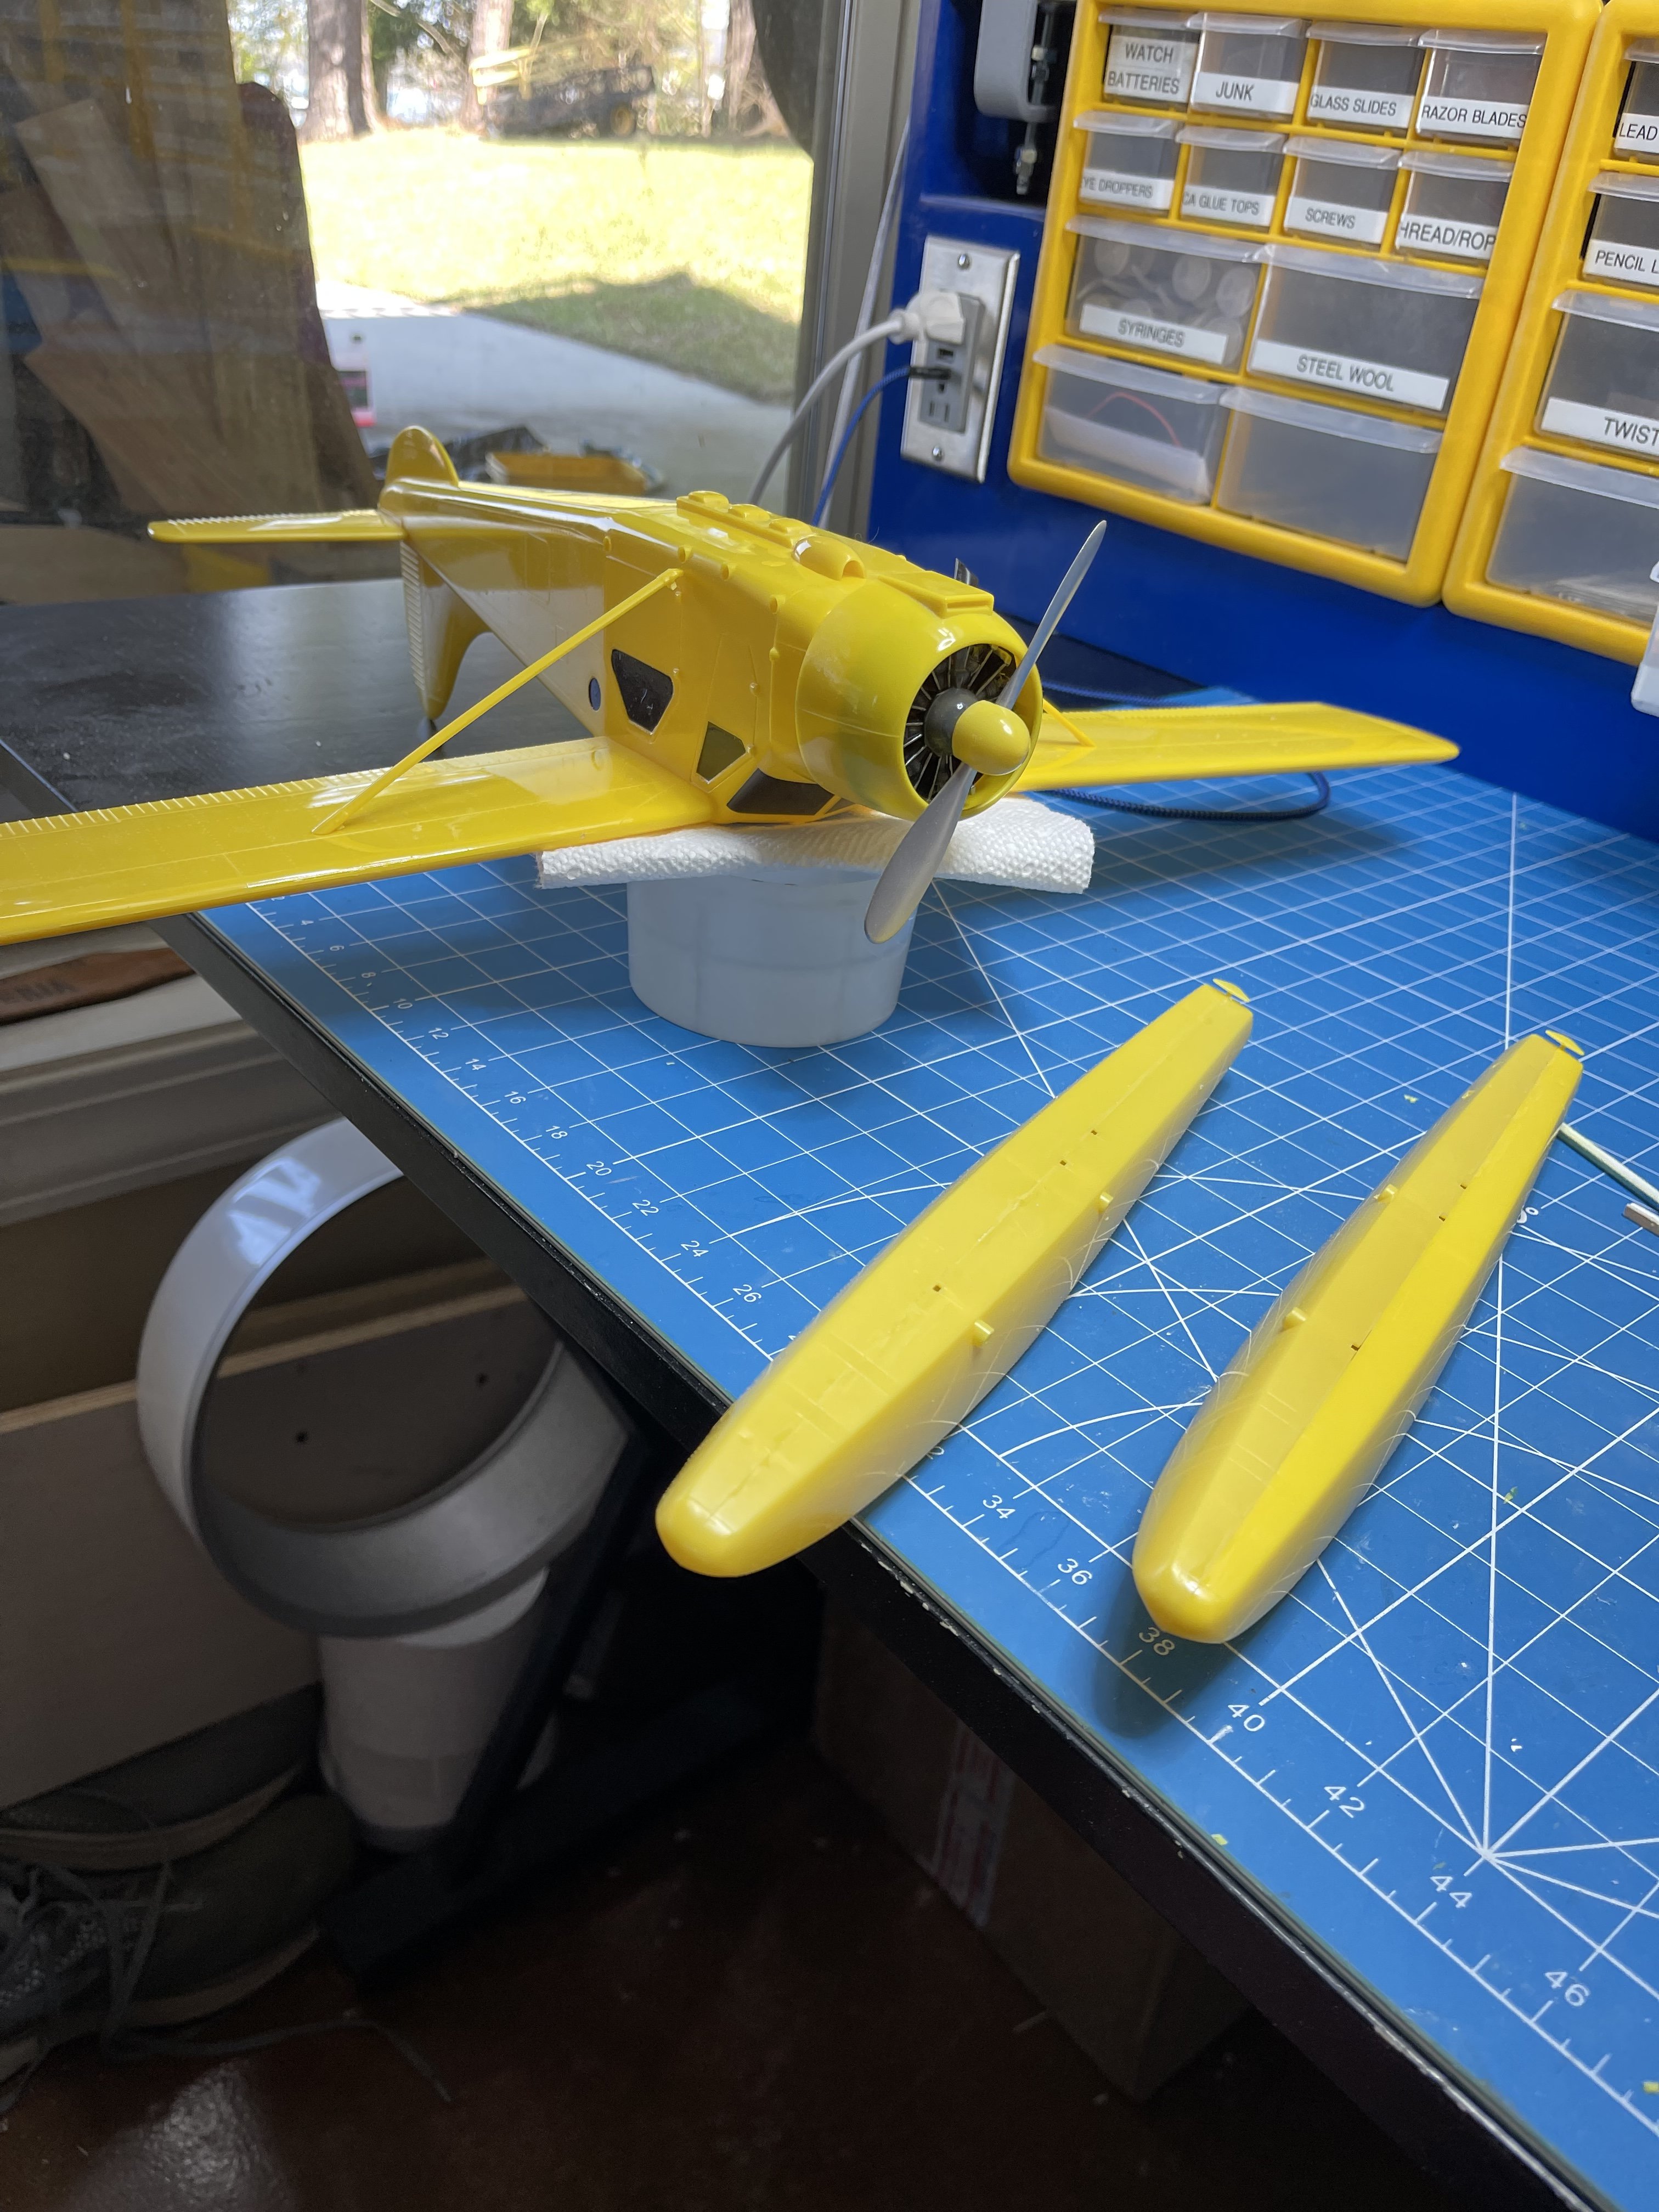
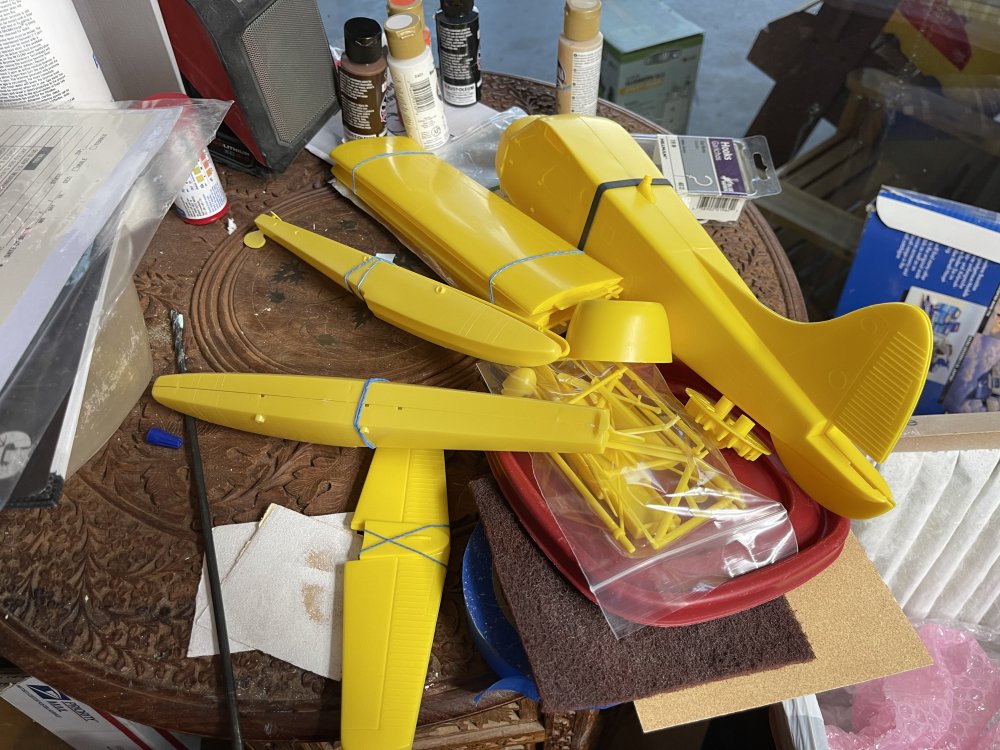
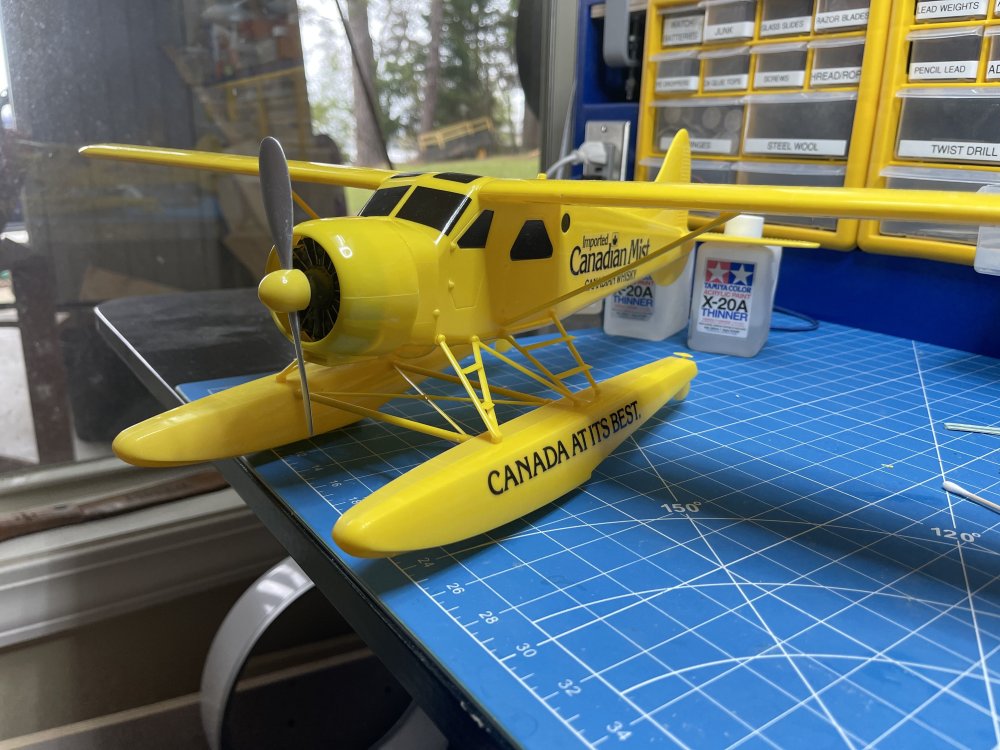
Here’s a quick throw together I thought I’d put in the wet build because it just fits the bill so well! I started this a week ago. I just wanted a simple bar decoration to go with my man cave theme. Nothing special. Always wanted one of these kits and I remembered there was one for sale on Hyperscale a while back. Difficult part was keeping with the “bartender build” and not getting carried away. Pile of parts as unpacked. some sun assemblies done. Please take note that I screwed up and didn’t build the float struts inside the floats like I was supposed to do. polishing the plastic instead of painting. Done! And done, hanging in its place. It made for an instant gratification build. I highly recommend this approach for anyone.


-
What is on your bench right now ? Share a picture :)
ScottsGT replied to Martinnfb's topic in Modelling Discussion
Done!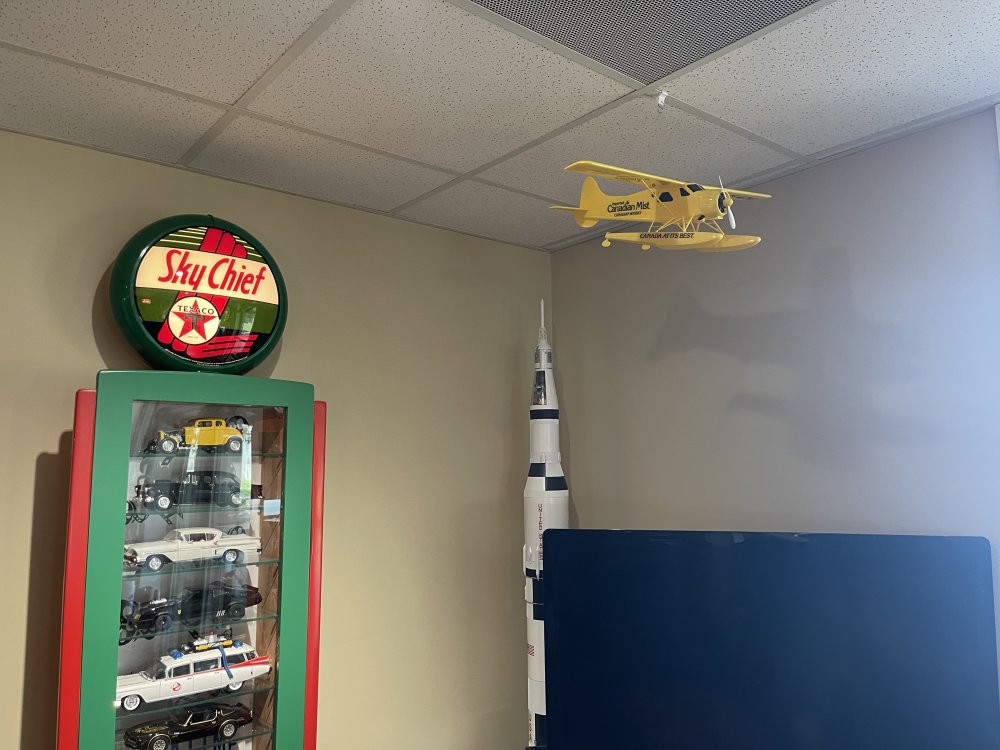
-
What is on your bench right now ? Share a picture :)
ScottsGT replied to Martinnfb's topic in Modelling Discussion
I’ll post some up once it’s hanging. I’m thinking about throwing it in the wet build just because it has floats! -
What is on your bench right now ? Share a picture :)
ScottsGT replied to Martinnfb's topic in Modelling Discussion
Too late. 😁 I stuck to my guns and did it as the bar display. All decals applied, floats glued on and letting it dry before I hang it up and call it done. -
Yea, I have the 1/350 TOS and the refit from the first movie. Of course it would have to be done with TOS ship.
-
Ah! I stand corrected! It was you Carl, not Peter. Yea, this is all your fault. …..Now off to build that NCC-1701 blasting the Death Star into oblivion.
-
What is on your bench right now ? Share a picture :)
ScottsGT replied to Martinnfb's topic in Modelling Discussion
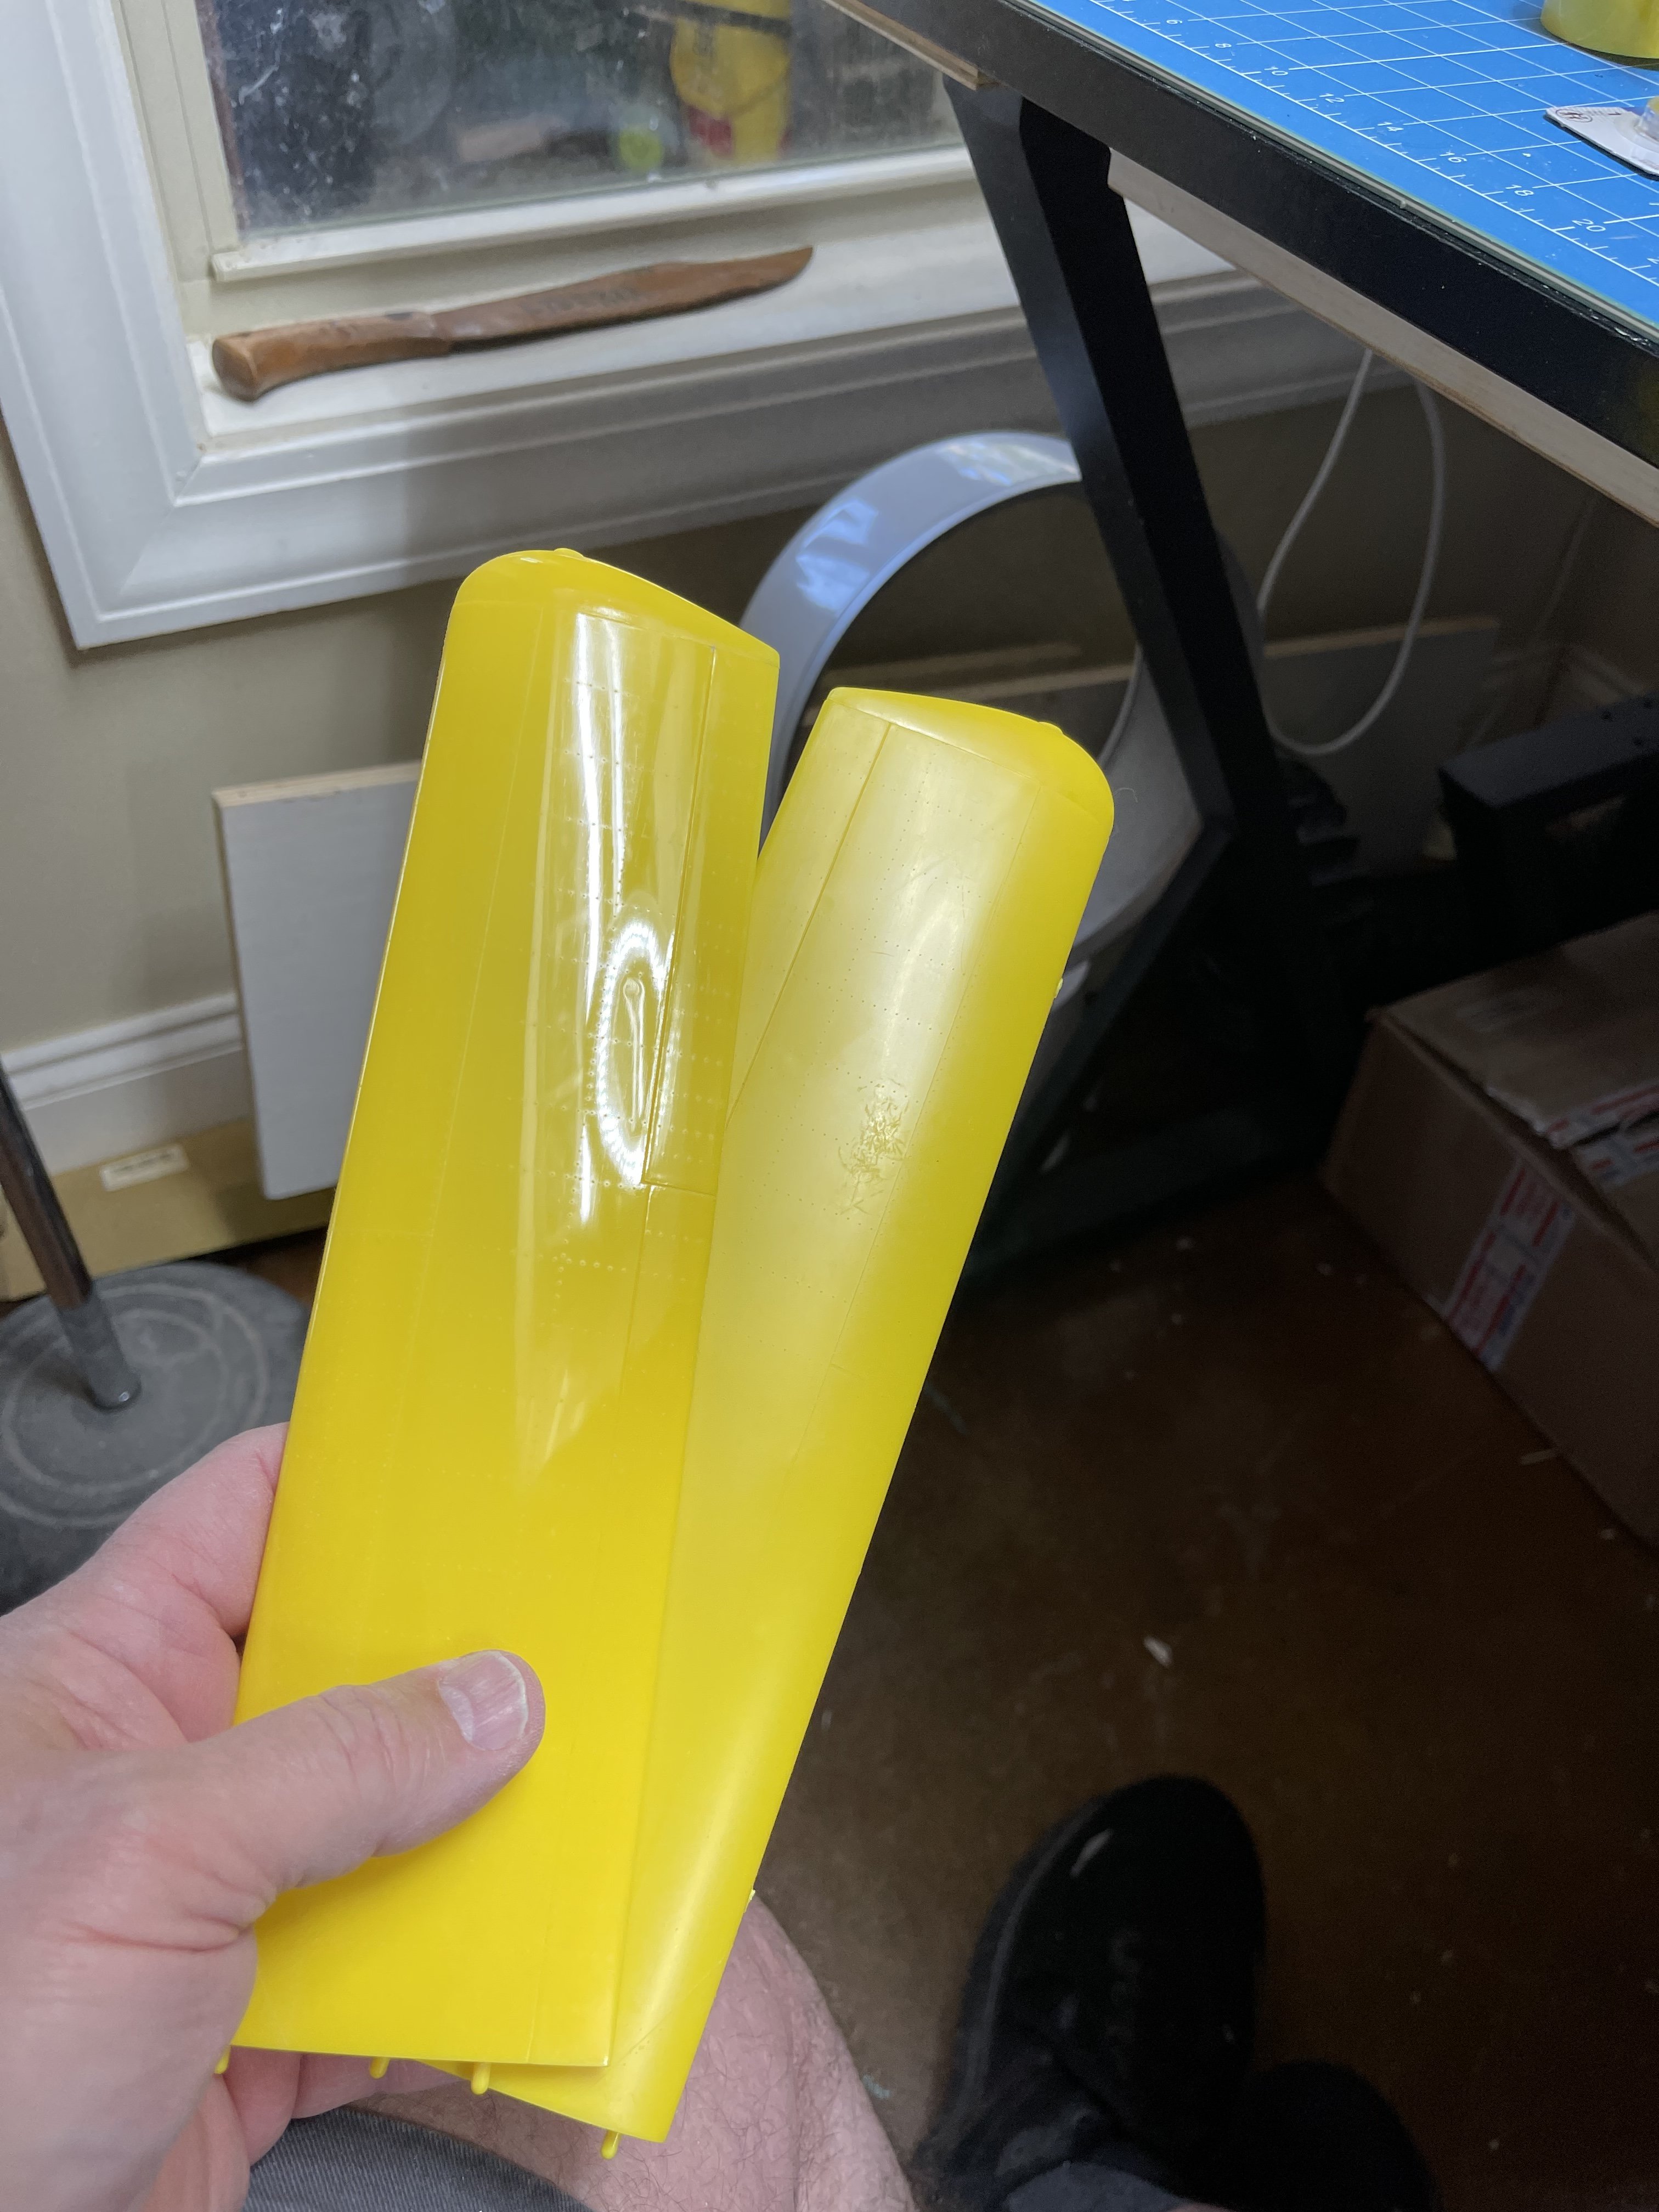
Hmmmm…what to do? I want the all yellow advertising model but the modeler in me is pushing me to paint the floats aluminum. Especially when one half is a different shade of yellow plastic. I did polish the plastic. Wow! What a difference it made.

-
What is on your bench right now ? Share a picture :)
ScottsGT replied to Martinnfb's topic in Modelling Discussion
That’s why you bring your own….