ScottsGT
-
Posts
2,767 -
Joined
-
Last visited
Content Type
Profiles
Forums
Events
Gallery
Everything posted by ScottsGT
-
LSM Modelling News 2023 merged Fran and Artful69’s threads
ScottsGT replied to Fran's topic in Modelling Discussion
There’s a thread on LSP about it. I see some minor differences, but not enough to throw the baby out with the bath water. (referring to the Trumpeter C model) -
I think so. It hit me as well when I set up my build area last year. I’m proud to say that I have not added to my SOD, but sadly have not even finished the one I pulled out to complete. Maybe soon. Maybe it’s a sign of getting our affairs in order before the day comes?
-
Perfect car for the boys to learn on. Man pedal and a pos so a minor dent won’t matter.
- 2,036 replies
-
- 2
-

-
- car related stuff
- anything about cars
- (and 6 more)
-
My X, Y, Z sale from Sprue just arrived. Of course I added a little M, T & F in too.
-
I’m too “active” at my bench for him to lay out and fall asleep. Besides, my belly takes up all the room in that chair! Now watching TV in the recliner? He’s all over one of us all the time. He’ll lay out on top of my leg and against the arm rest upside down wanting belly rubs. If he’s on the bed upside down, DO NOT TOUCH BELLY! Almost 20 lbs of cat tends to lay where he fits and when he wants to.
-
He heard there was another tomcat I was giving attention to. Had to check out the competition.

-
LSM Modelling News 2023 merged Fran and Artful69’s threads
ScottsGT replied to Fran's topic in Modelling Discussion
I’m going to have to get a girlfriend on the side just so I can get all these new kits shipped to me. 🤪 TBD, Val, A-20 and now this… Trumpeter 1/32 F-35B coming this summer of course the “It’s unbuildable” and “They got the C model so far off it looks like a Cessna” crowd is already lighting torches and sharpening their pitch forks. Close enough for me! You know, because it’s a dying scale…… -
"Alert 1 to Eagle 1, splash the Zeros!"- Tamiya F-14
ScottsGT replied to BlrwestSiR's topic in Let’s Get Wet Group Build.
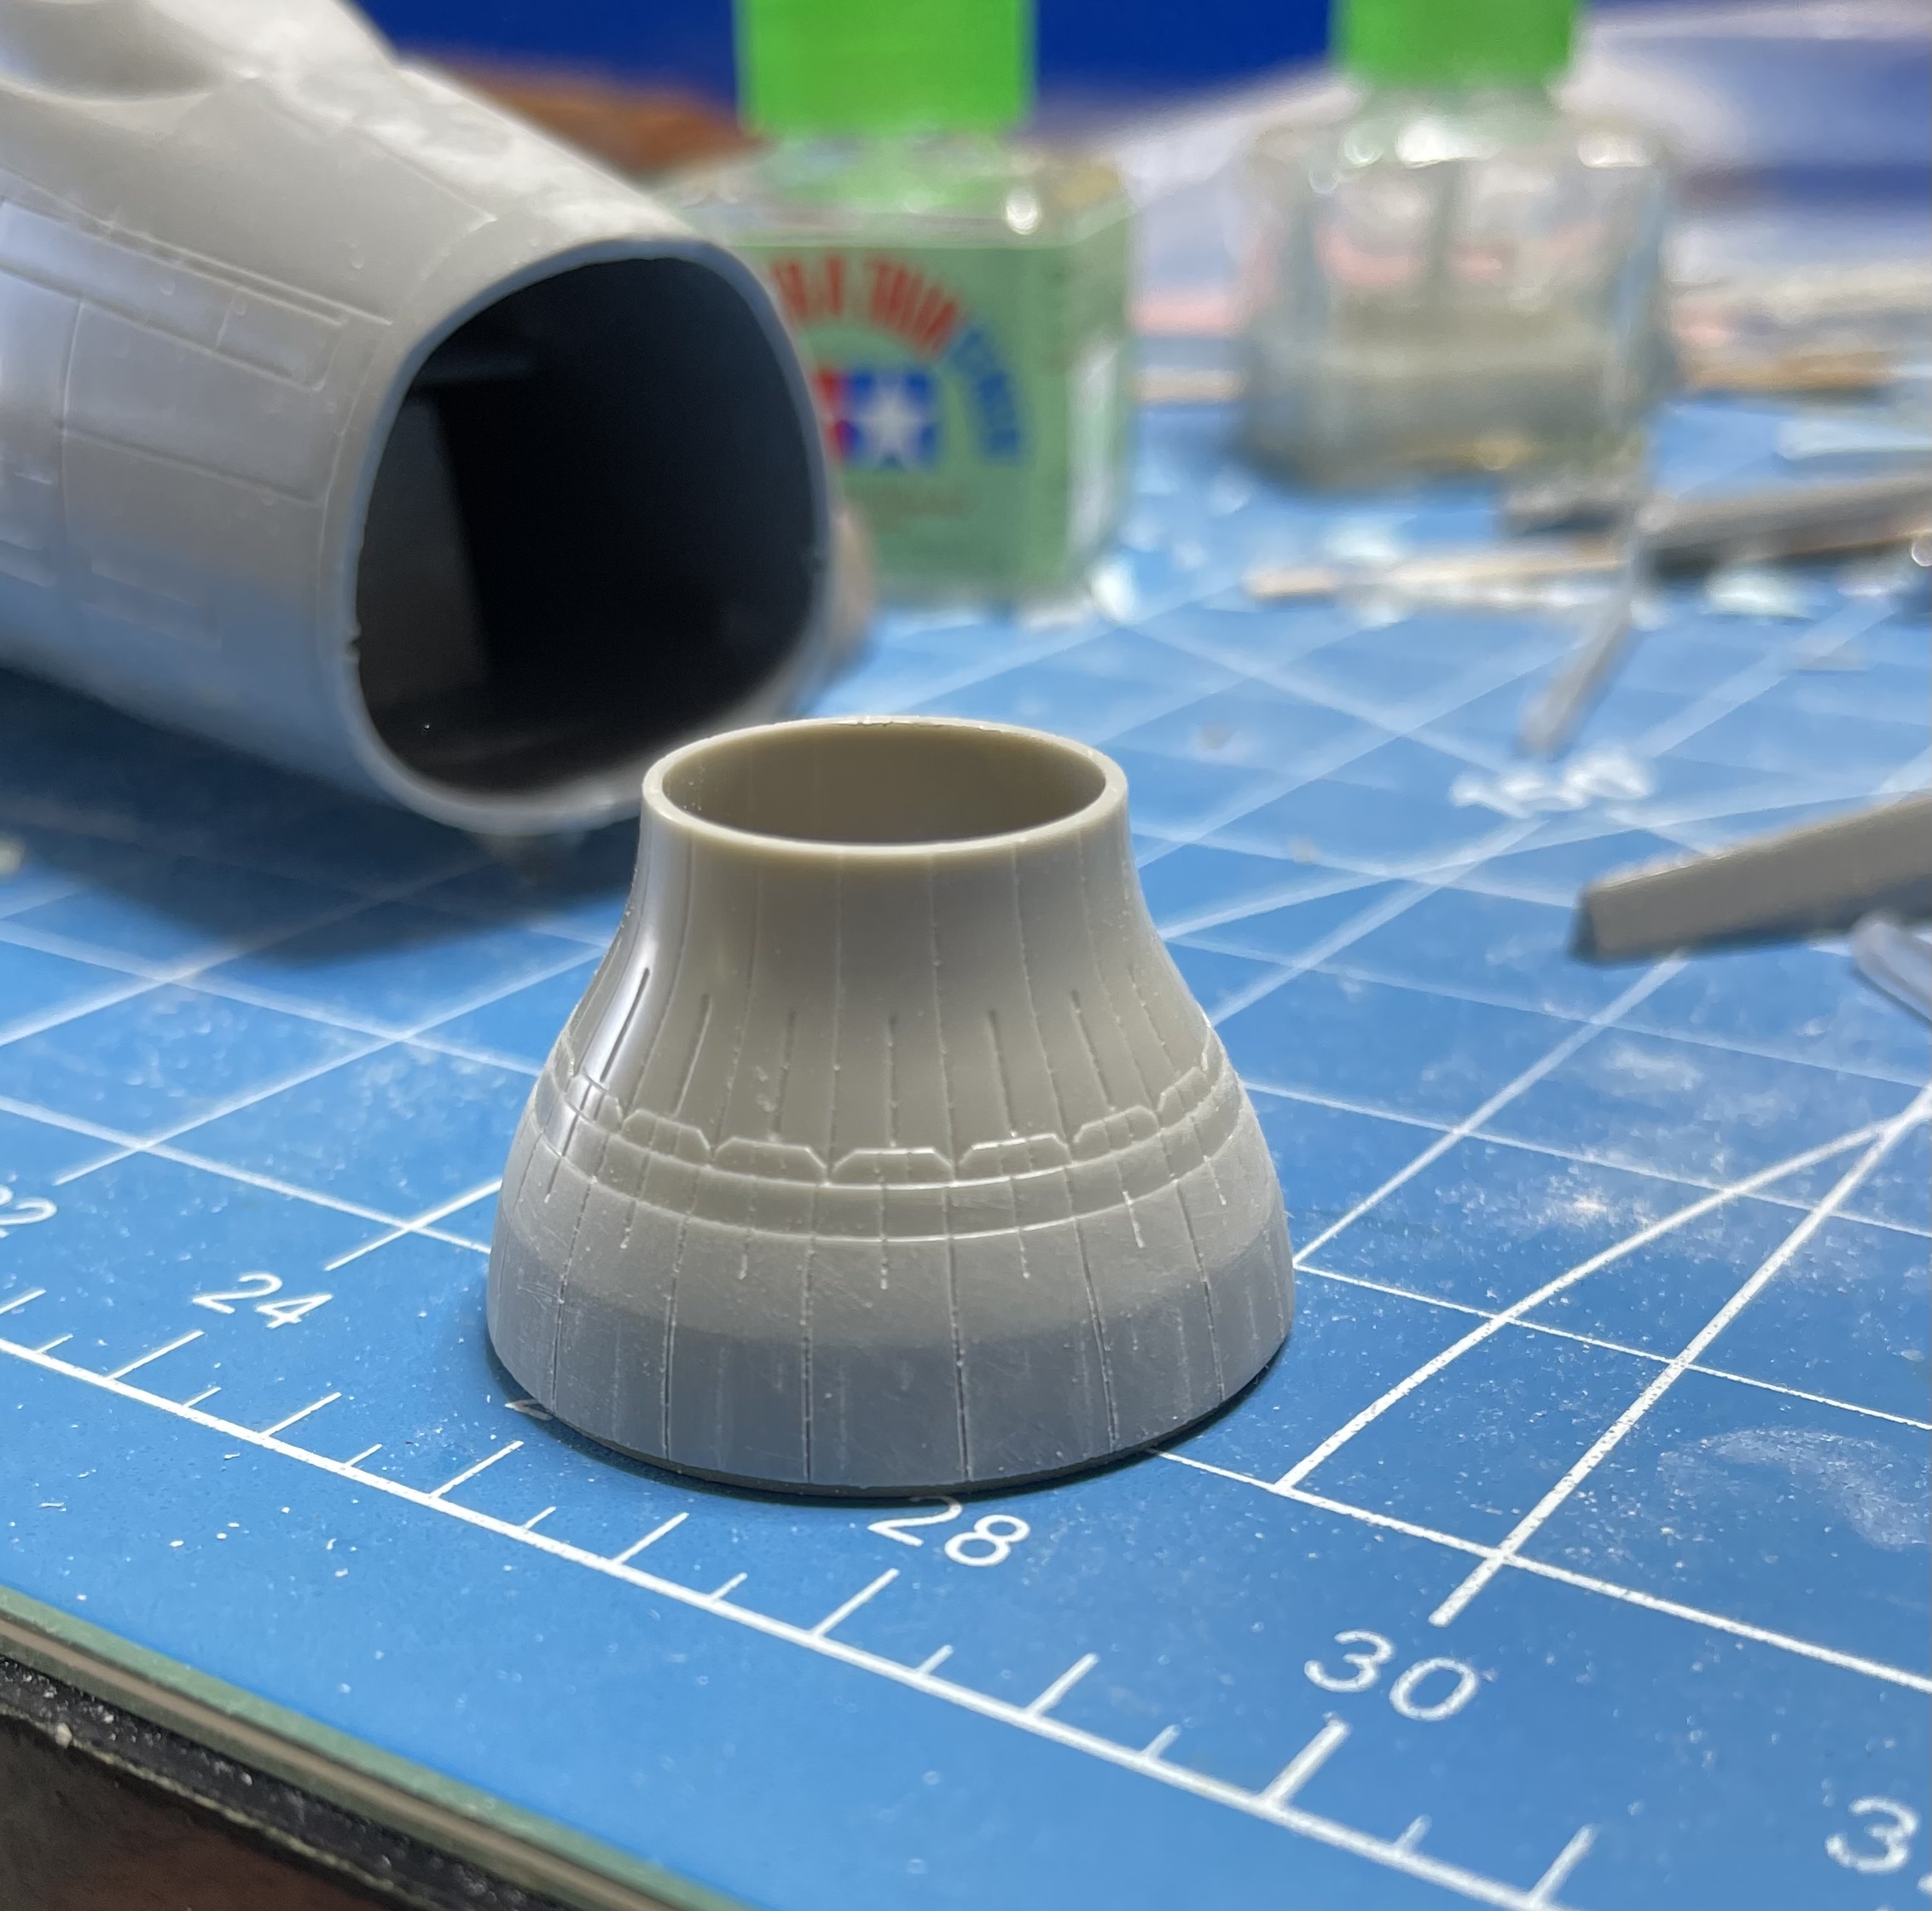
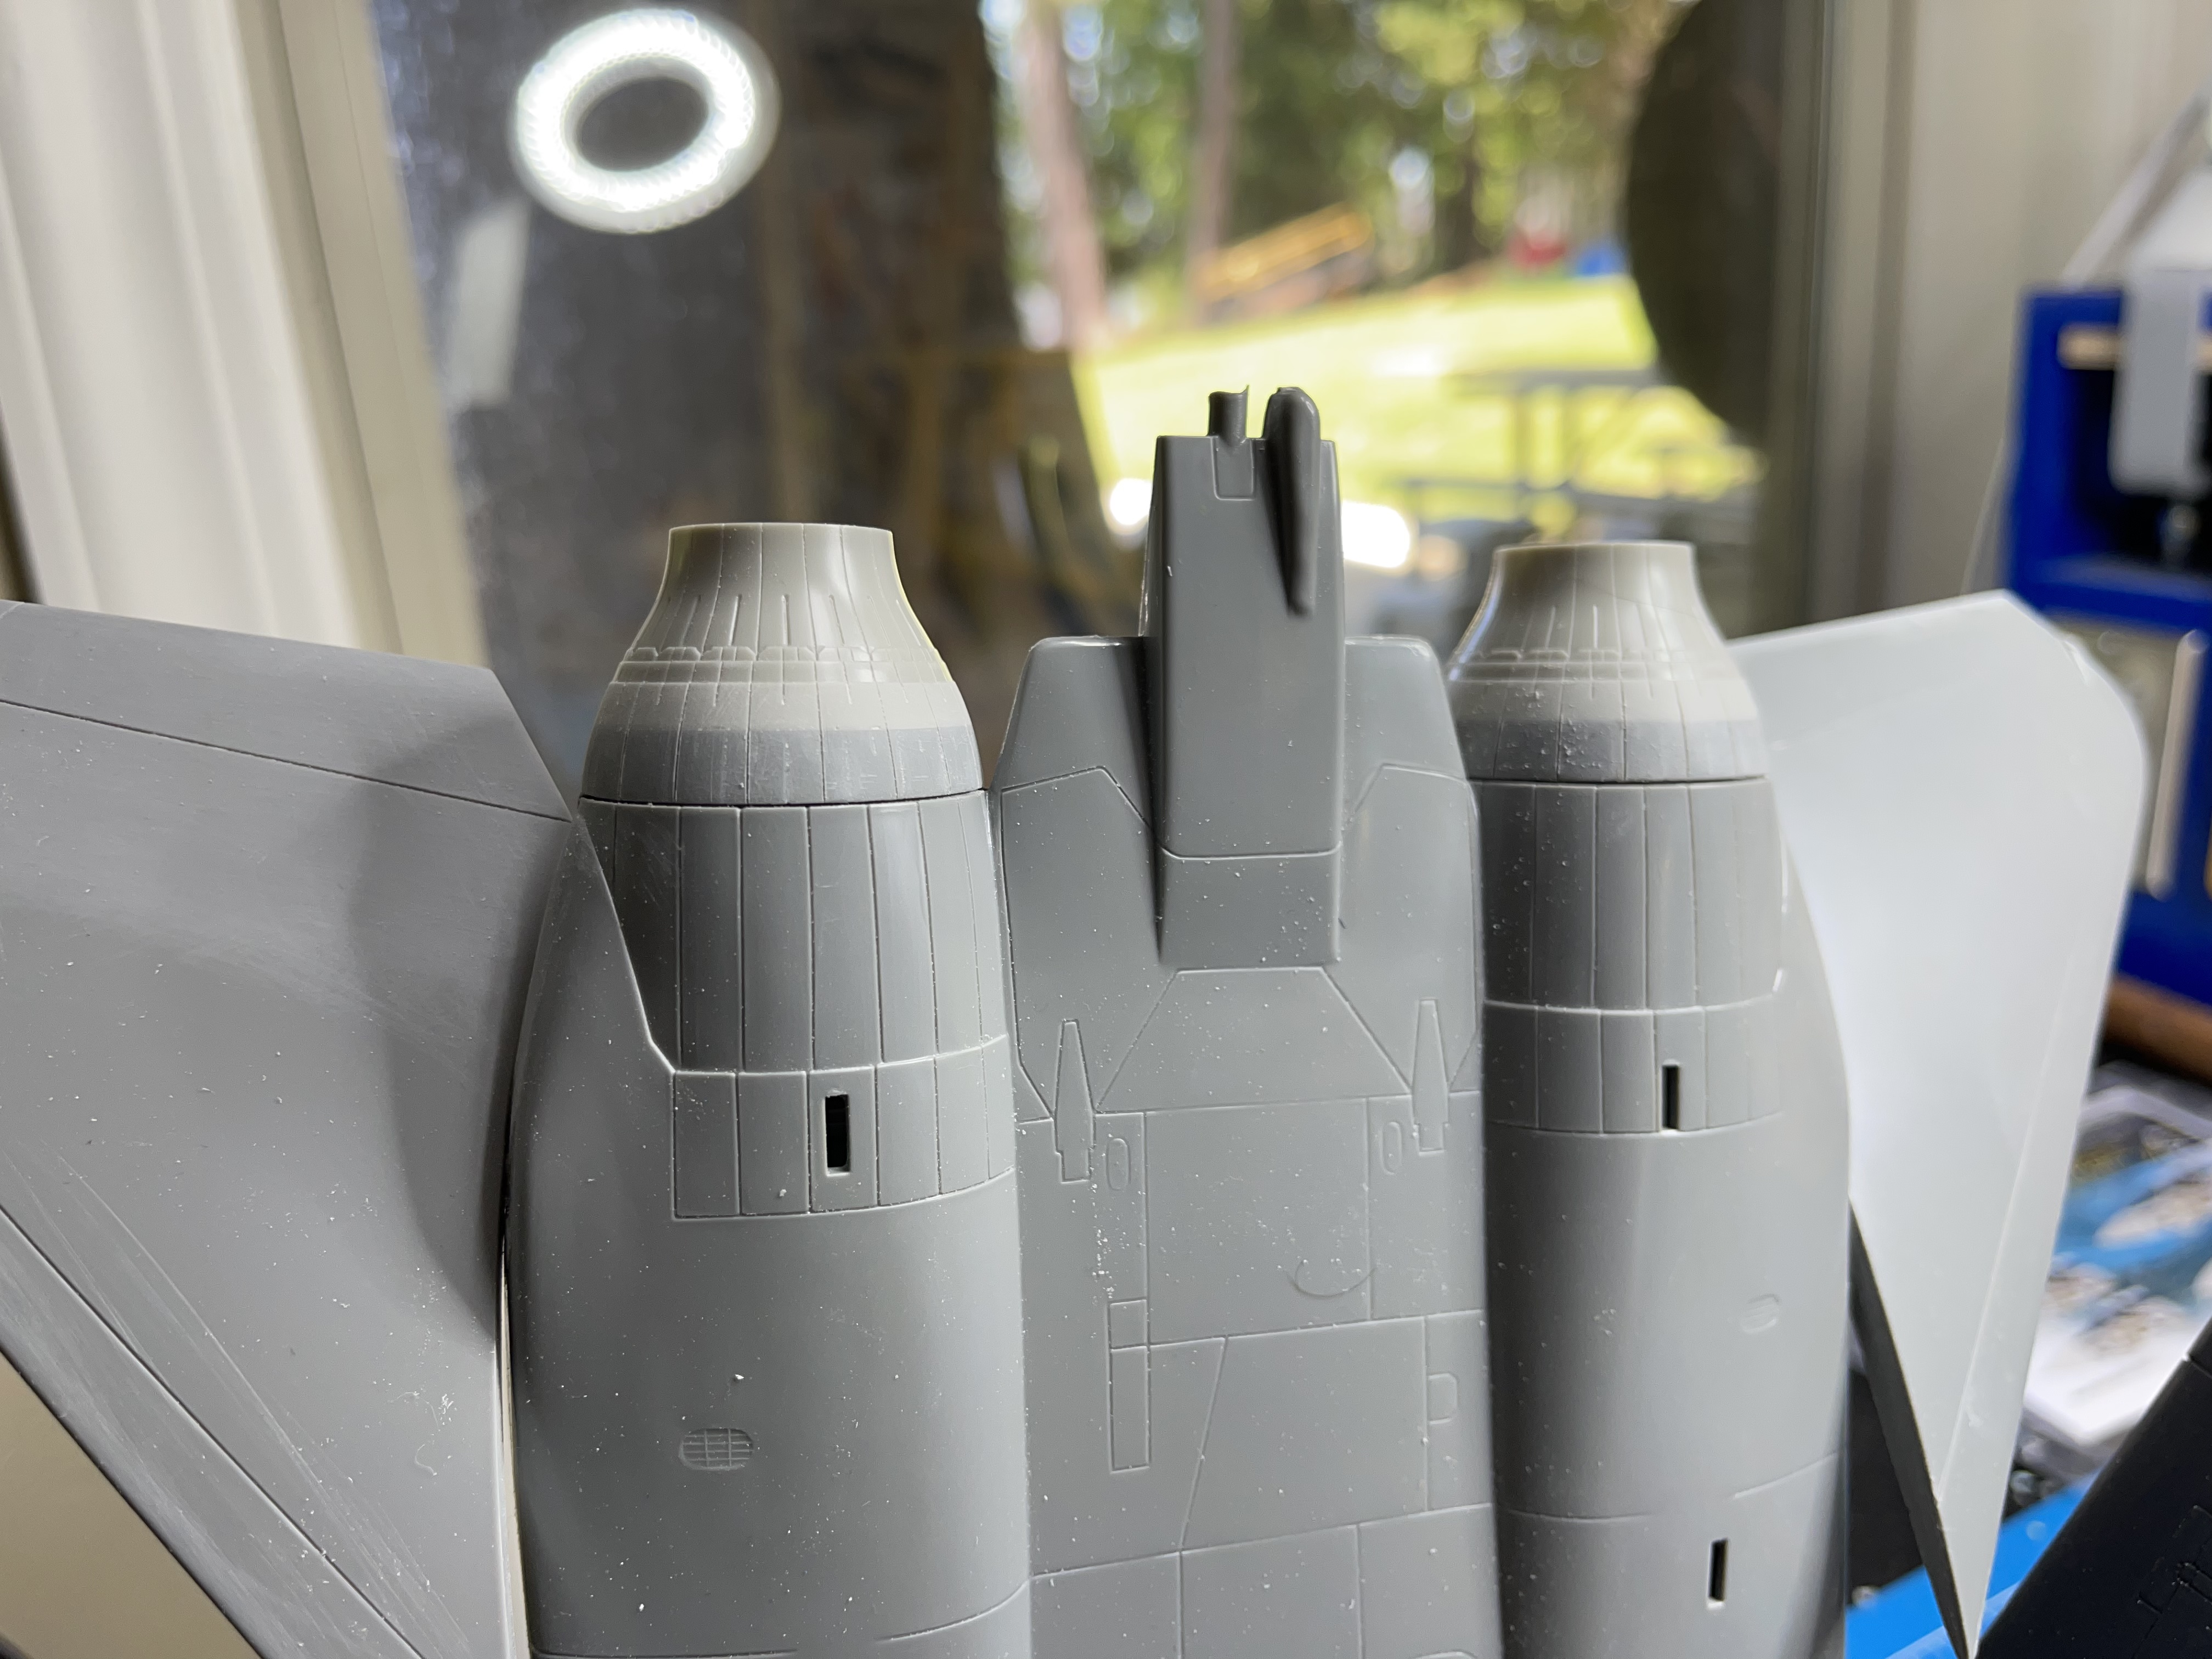
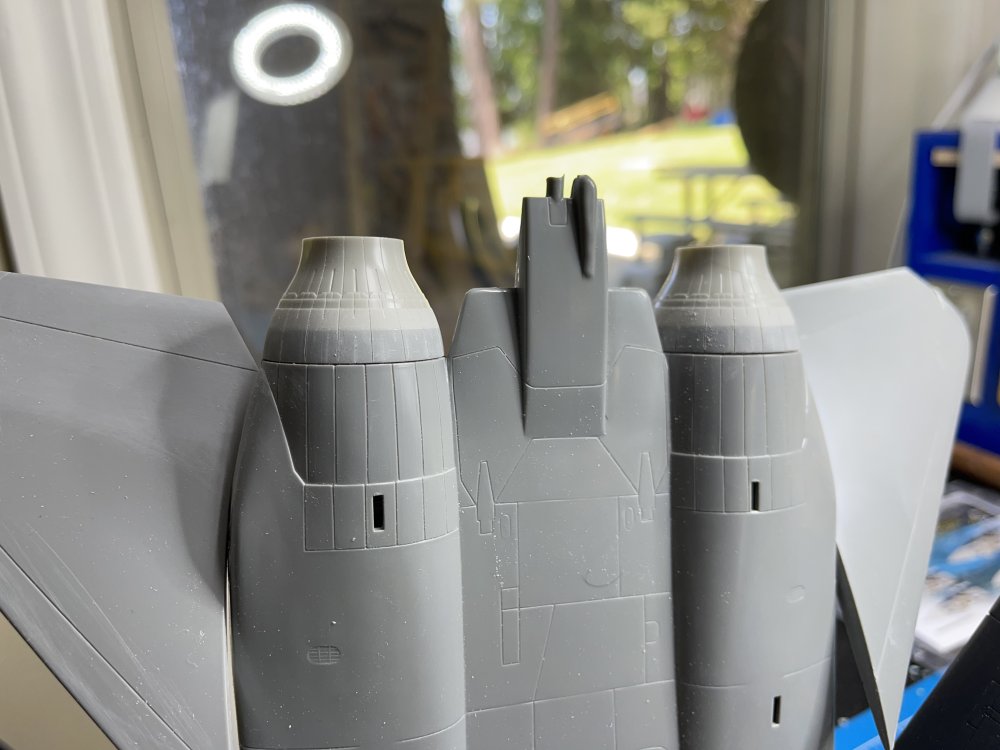
Hey Carl, here’s how I modded my Revell exhaust to fit the Tamiya parts.
-
Took my transmission shop right at two months to get me a new torque converter for my 1990 F-250 with a 351W. That was this past fall. He told me if my truck was a diesel, he could have one here overnight.
- 2,036 replies
-
- 3
-
-
- car related stuff
- anything about cars
- (and 6 more)
-
You’re supposed to build these things? I thought they were just to fill up shelf space in the garage.
-
1/350 Trumpeter Narvik Class Zerstorer Z30 RFI
ScottsGT replied to PanzerWomble's topic in Archived GB's Sub Forum
Wow! You did it justice!! You should build more of these. -
Nice MP5. I’ve got a knock off PTR 9c I’ve also got their K model as well. Both are SBR stamped.
-
"Alert 1 to Eagle 1, splash the Zeros!"- Tamiya F-14
ScottsGT replied to BlrwestSiR's topic in Let’s Get Wet Group Build.
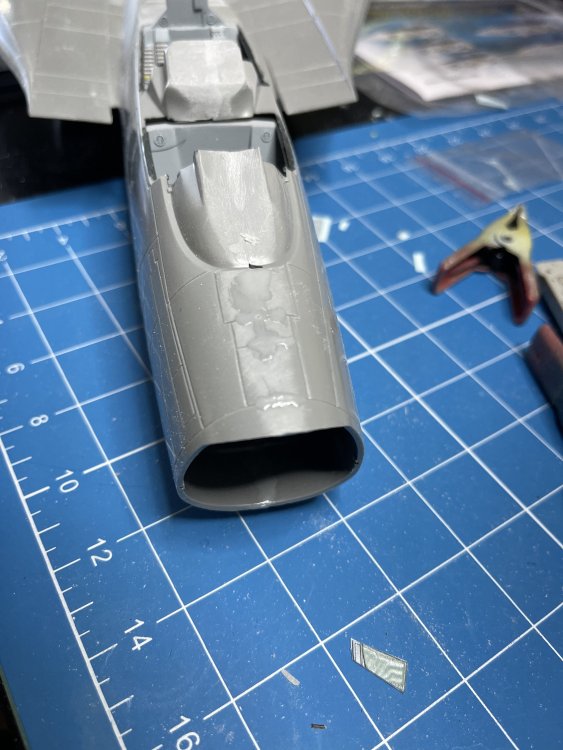
Looking great Carl! I took my open Revell exhaust and sanded them down to about 2/3 the and glued on the Tamiya closed exhausts. After sprue goo and sanding smooth and rescribing the lines, they look pretty good. Length may be off now, but I just liked the closed look for once since I got a set with my Revell kit. -
That was my thoughts as well. I’d love to hear how many of these kits hit the market since they put it out. Now way they could re-release this kit today without a complete rework of the cockpit and landing gear at a minimum to get them up to todays standards. And by that time, price point would be inline with Tamiya or Trumpeter with the old reputation of a kit from the ‘80’s.
-
Back home last night and got back on it. I’m now fully convinced Revell did some mold swapping or made a new one or something funky. The panel lines at the front of the fuselage halves were so far off I’ve had to fill them in with sprue goo and re-scribe them. Actually, the more I look at it, the alignment pins are off. I’ve had to fill in the front with sprue goo so the nose cone fits without gaps on one side Top and bottom rear fuselage halves seem to be closer. I’d really love to be able to inspect a virgin early release of one of these kits.
-
LSM Modelling News 2023 merged Fran and Artful69’s threads
ScottsGT replied to Fran's topic in Modelling Discussion
For the F-16 fans, Jmel has put out another set of large scale viper decals. Not sure if I’ll use them, but just ordered a set to help support those that support 1/32 builders. https://www.reidairpublishing.com/speed-hunter-graphics-132-decals/big-scale-vipers-part-ii -
You can do it! Close friend and old coworker is at 2.5 to go. Place is falling apart. I hope he can make it.
-
And I don’t remember working this hard in the past 10 years. 🤪 I think my model count is at 8 built in this time period.
-
Great line up of resin intakes. Seems their only presence was eBay. But they have gone radio silence in the past few years.
-
Sprue Brothers X, Y, Z discount this weekend.
ScottsGT replied to ScottsGT's topic in Modelling Discussion
Yea, I use think reasonable like that. Then when I started seeing vendors go away to retirement, health issues or fires, I grab it when I can! -
Paint it to look like an old black and white photograph?
-
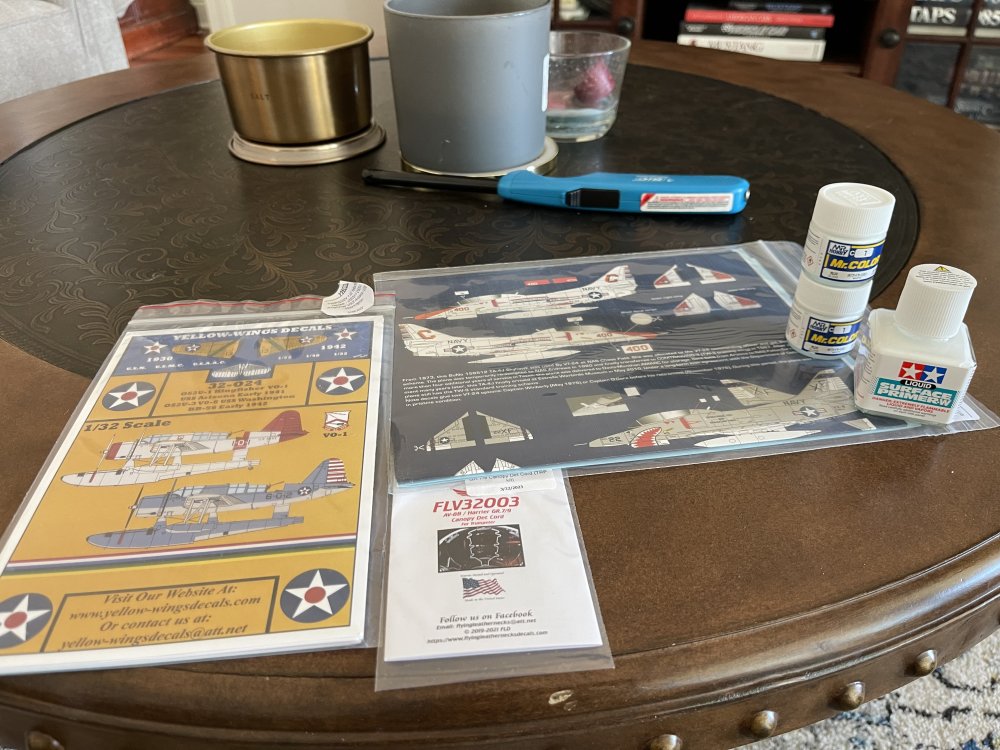
Discount on manufacturers ending in X, Y or Z. Who would ever think I could rack up $50 of stuff from X, Y and Z? But they got me again! Zotz stuff and Yellow Wings was the majority of my weakness.
-
7 gears and paddle shifter is not a CVT. Sounds like a regular automatic trans. Ahh, the old gas pedal lag…. My wife’s Honda has it really bad and it’s almost gotten me in trouble a few time in heavy traffic. I really hate her 2021 Honda Pilot. Pedal lag, lane warning alarms constantly going off, cruise control slamming on the brakes at 80 mph if a car changes lanes in front of me. If all new cars are mandated to have these “safety features “ I’ll be spending lots of money on old cars. Can’t wait to see the public’s reactions when the mandated breathalyzer you have to blow to start the car hit the market in a few years.
- 2,036 replies
-
- 2
-
-

-
- car related stuff
- anything about cars
- (and 6 more)
-
ProModeler 1/48 PBY-5A Catalina + Goodies, RFI
ScottsGT replied to CANicoll's topic in Let’s Get Wet Group Build.
Wow! Beautiful build!! -
I needed this for encouragement! Thanks. That is really turning out great.