CrankyCrafstman
-
Posts
1,350 -
Joined
-
Last visited
Content Type
Profiles
Forums
Events
Gallery
Everything posted by CrankyCrafstman
-
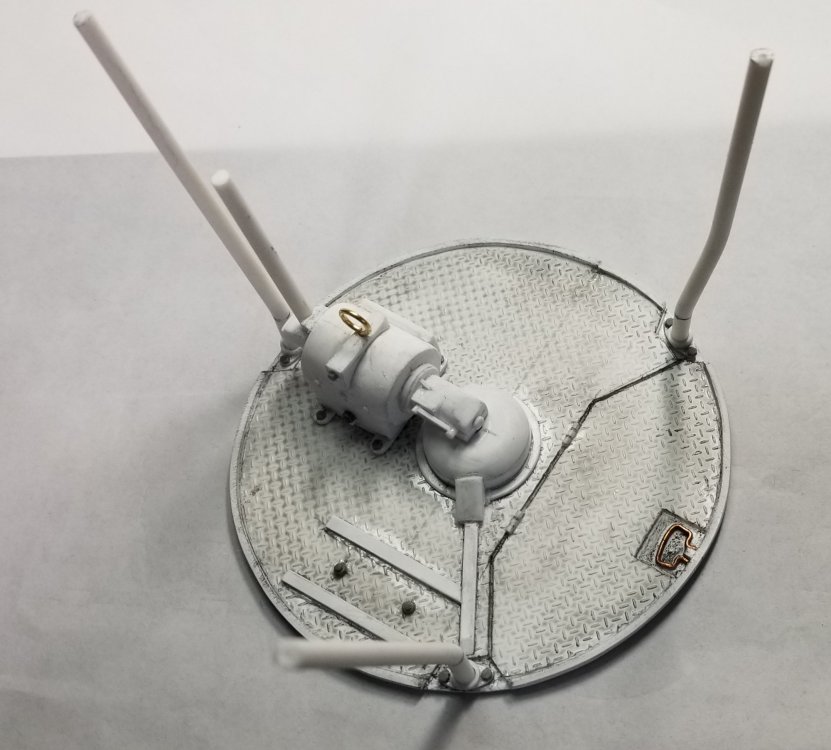
 Hey all I did a little more work on the Tiger 1. I've been trying to copy the RFM 1/35 scale Tiger 1's interior, but it ain't been easy. This view shows the 1/35 scale complete turret basket. This is a closer look at the turret drive motor. This view shows the 1/35 basket on the right and my version in 1/16 scale on the left. To do all of what is in the 1/35 basket is going to take a loooonnngg! time. A view of the 1/16 scale basket. This is a closer view of my 1/16 basket drive motor. Another view of the drive motor. This view shows what the turret basket looks like in the turret. There is a lot of stuff crammed in there. This view shows my 1/16 scale version of the same thing. As you can see I have a lot of stuff to scratch build. Well that's it for now be back with more updates soon. Ron G
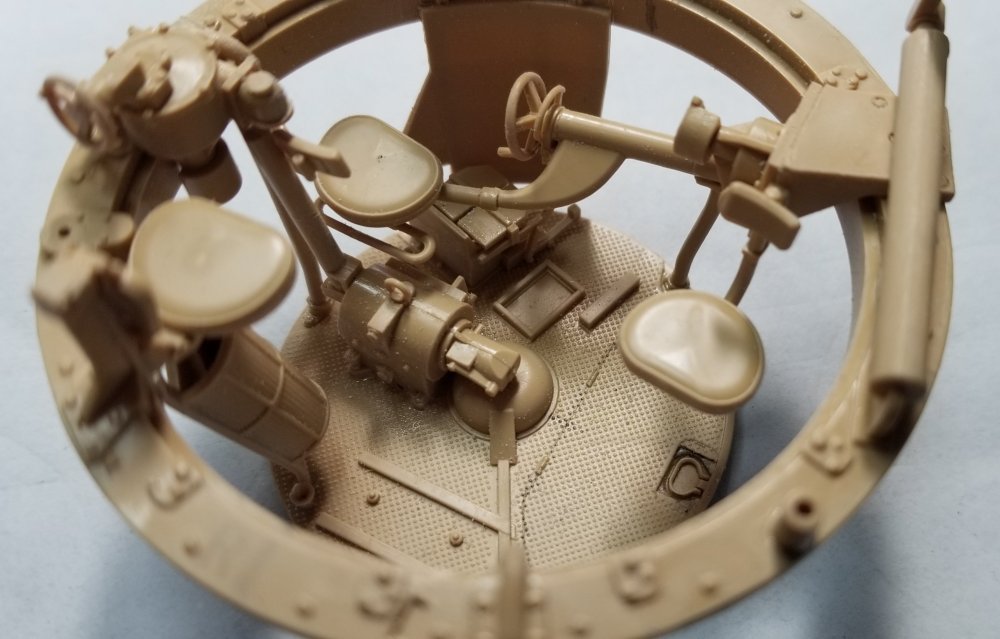


-
Thanks guys
-
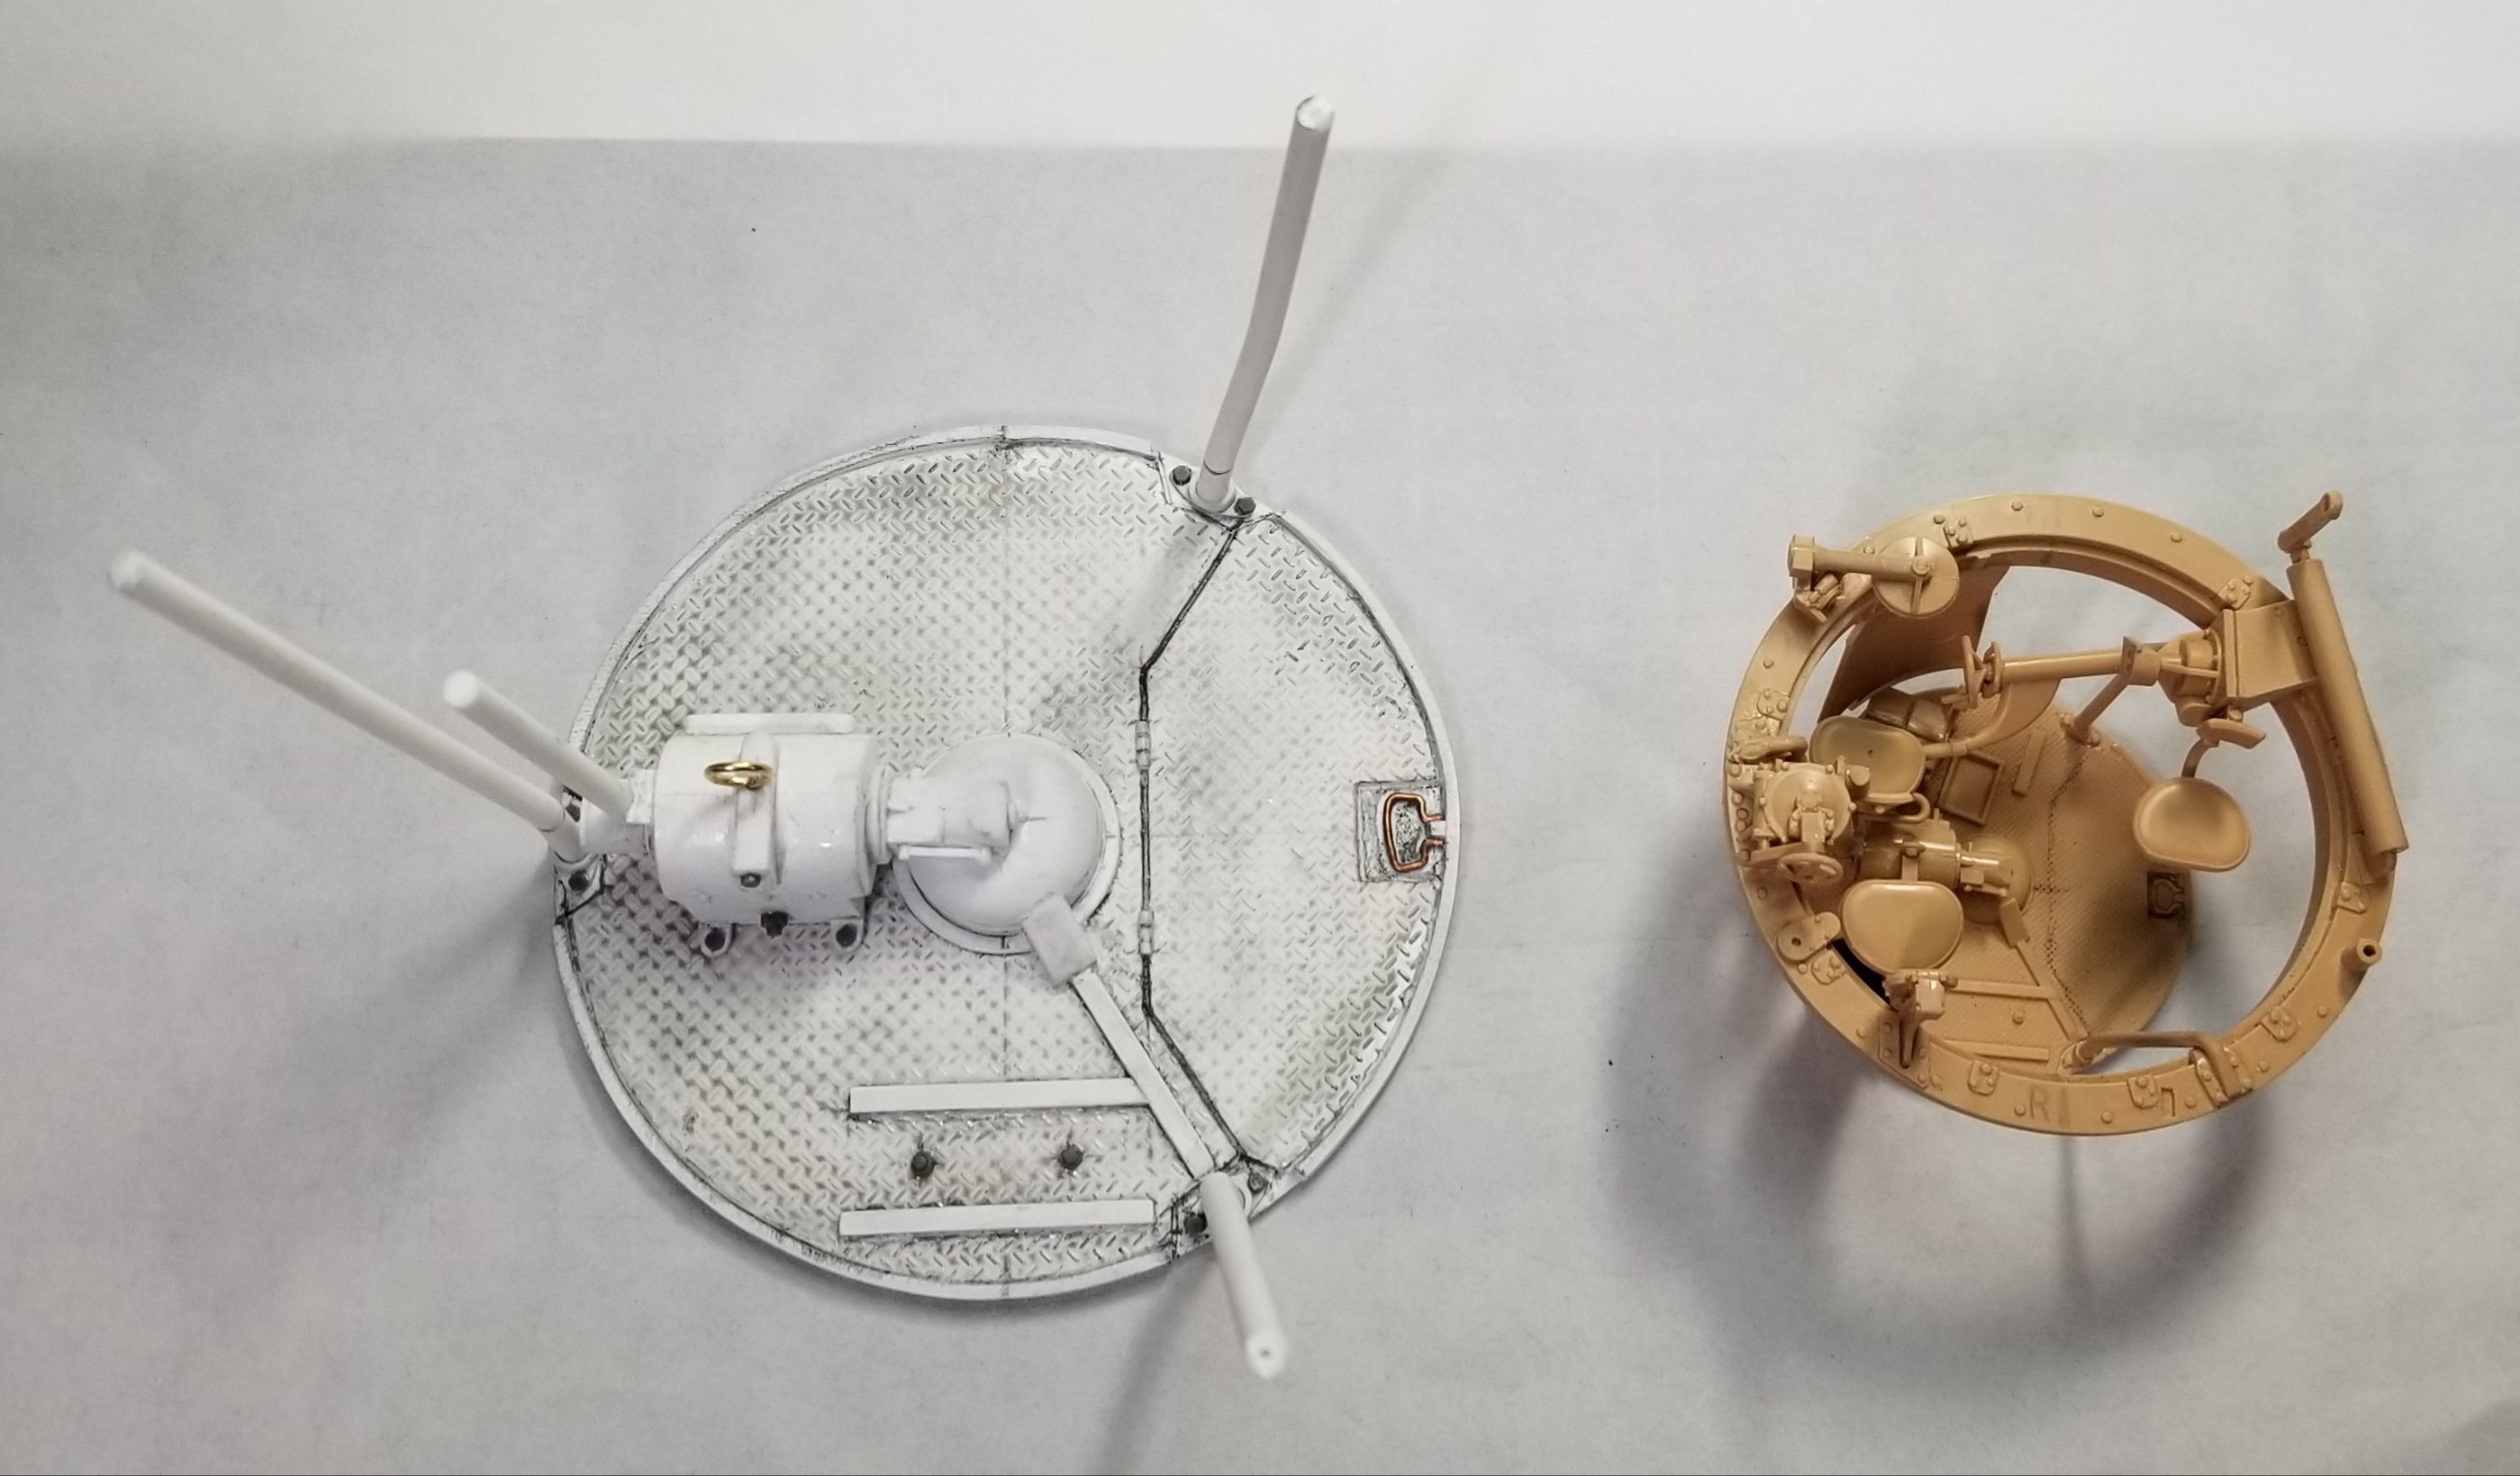
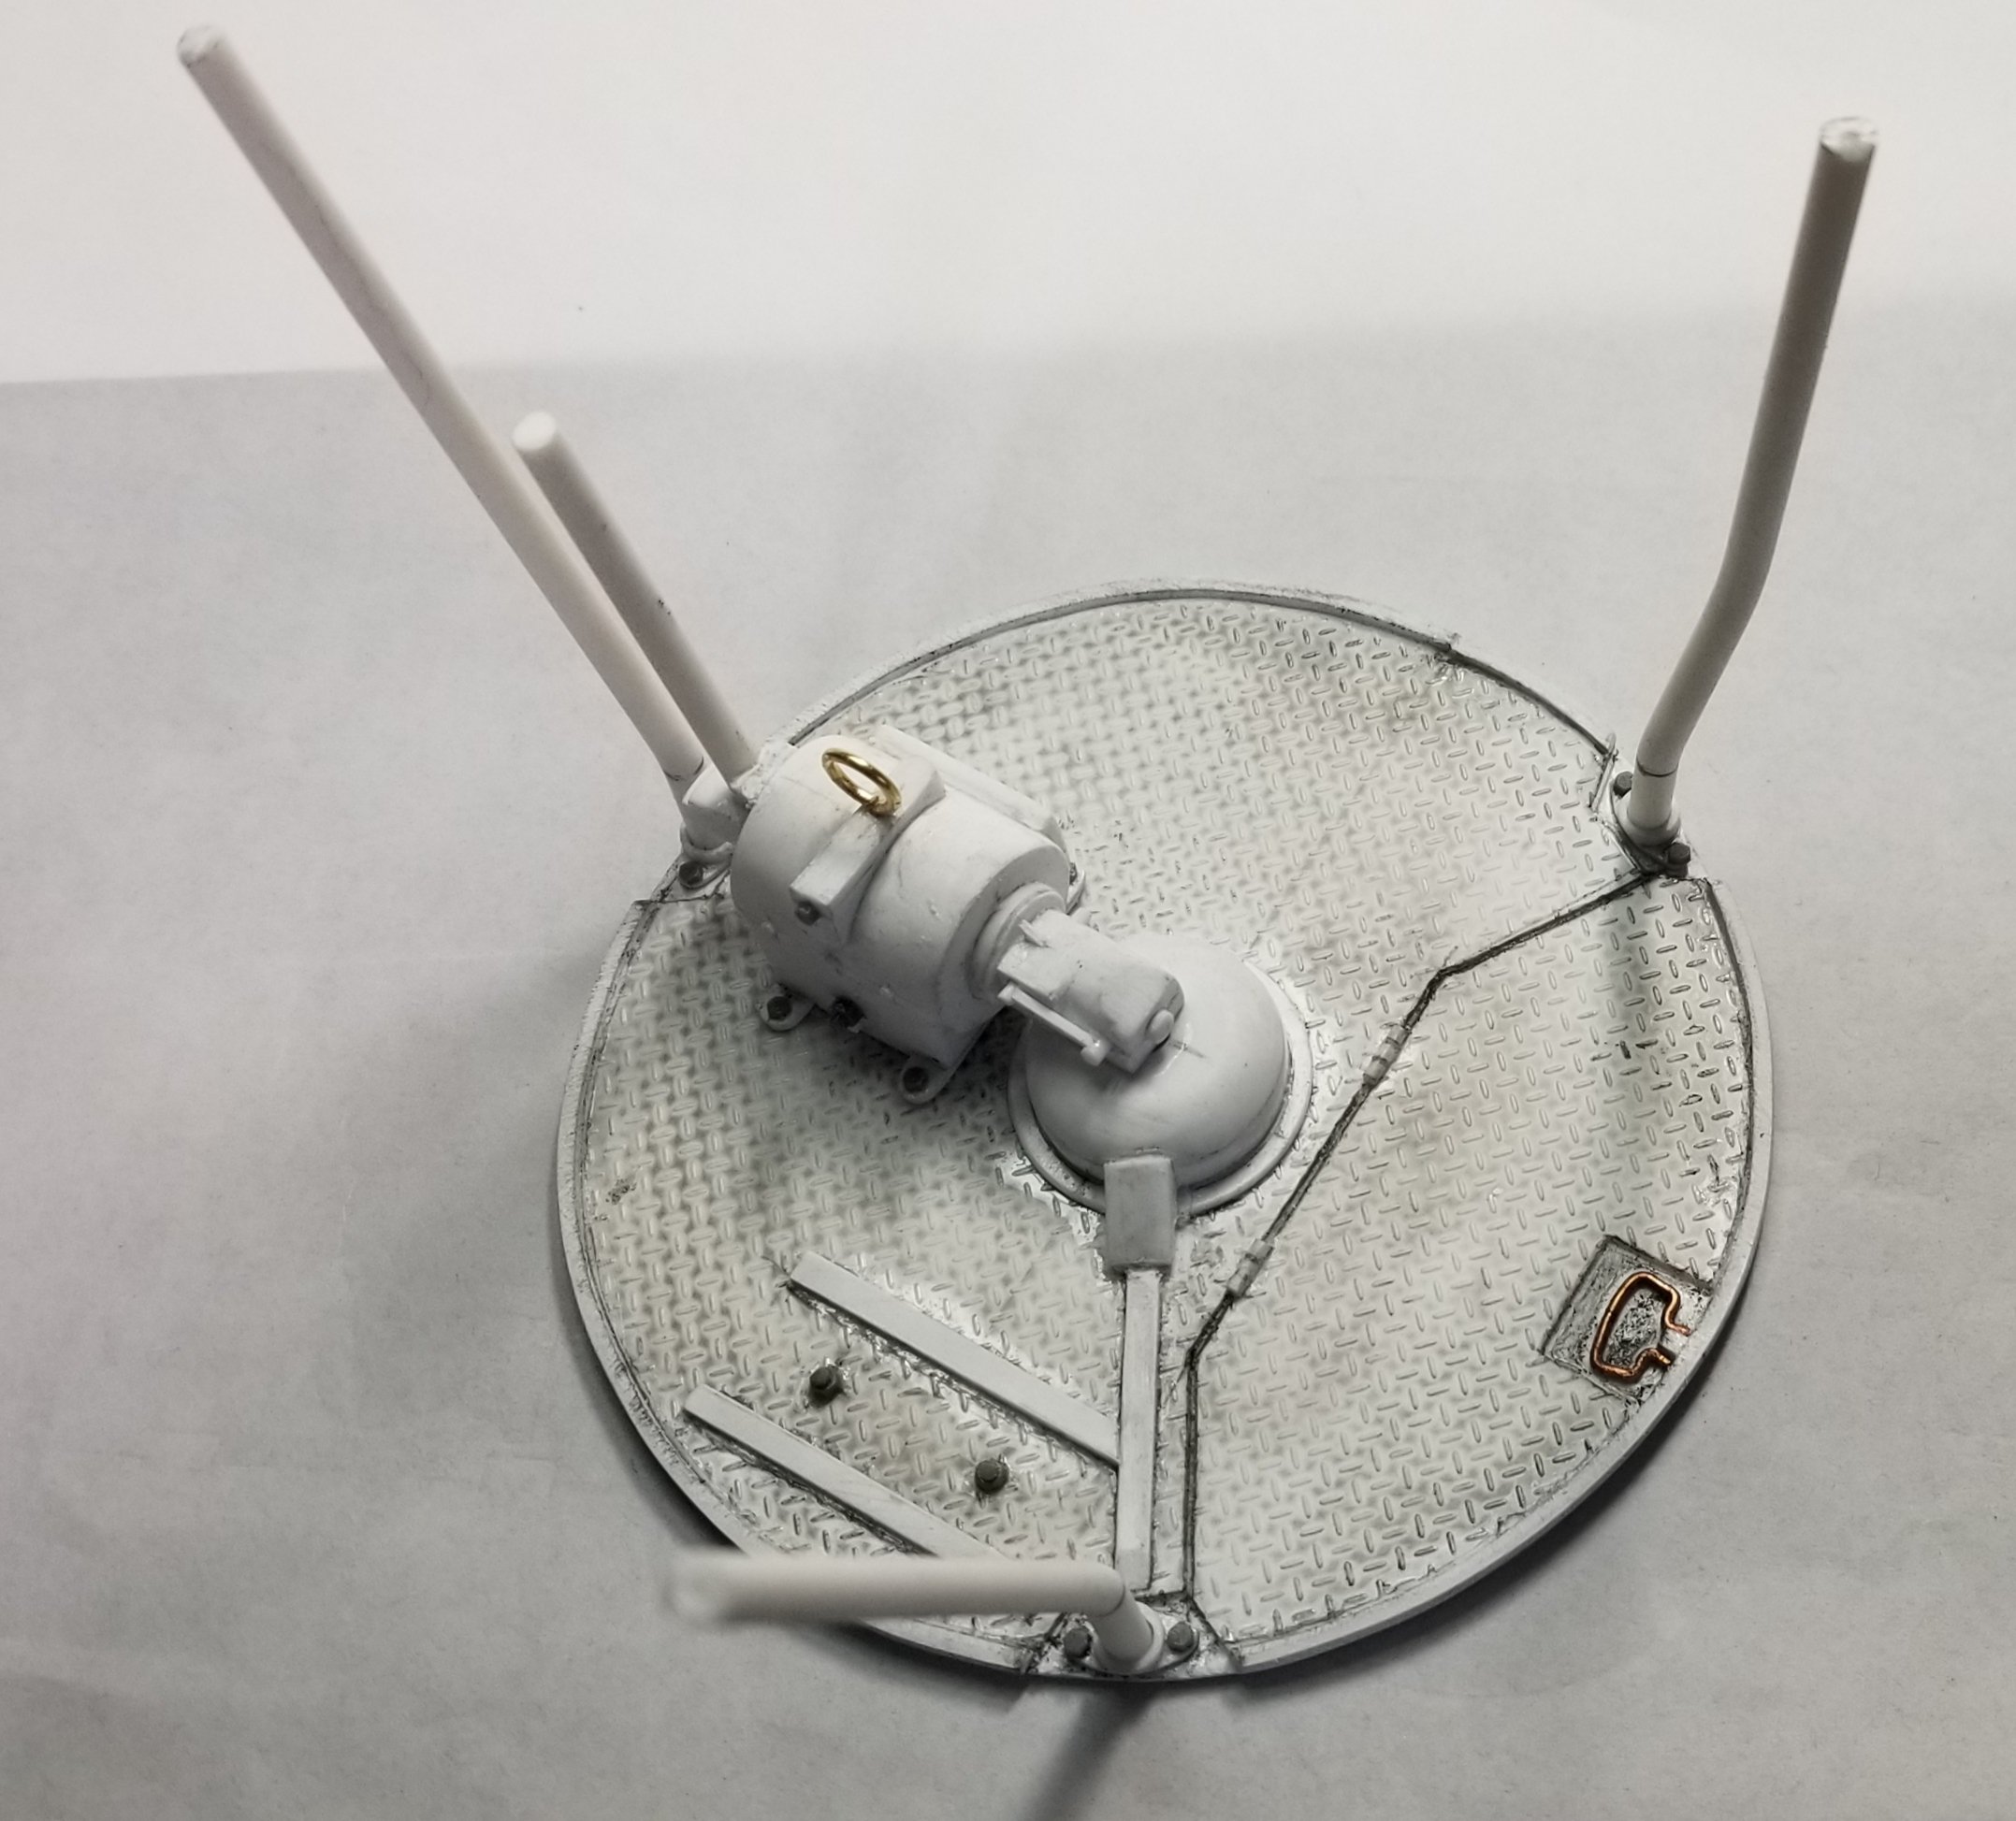
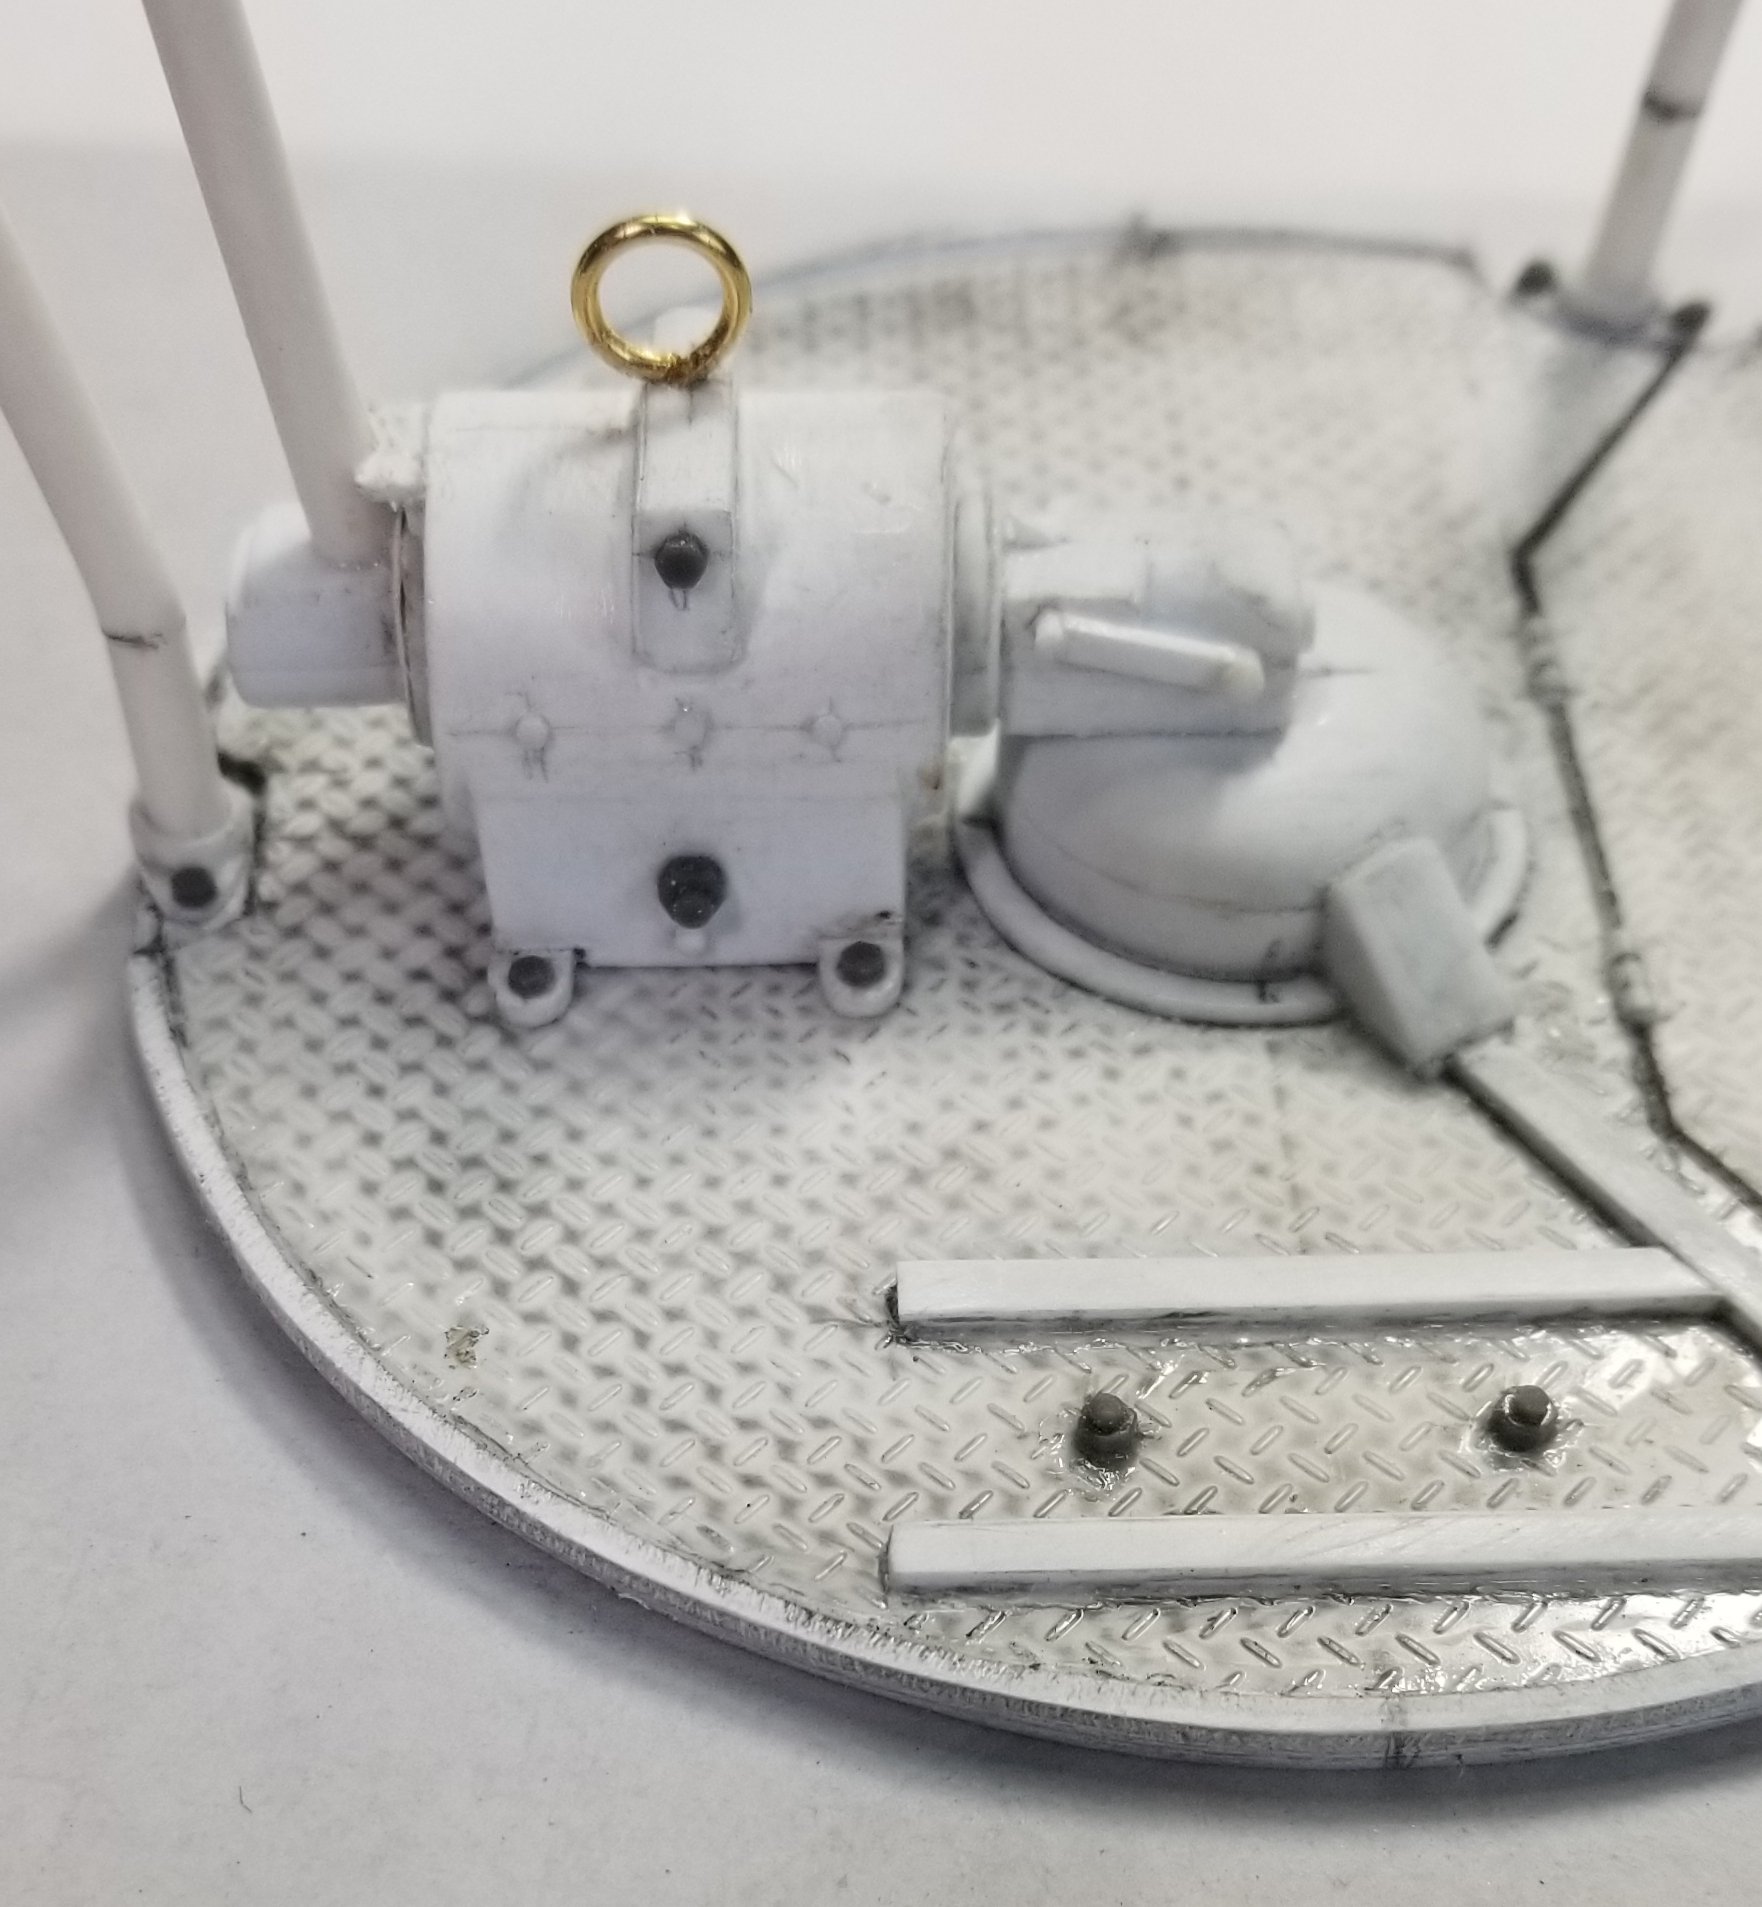
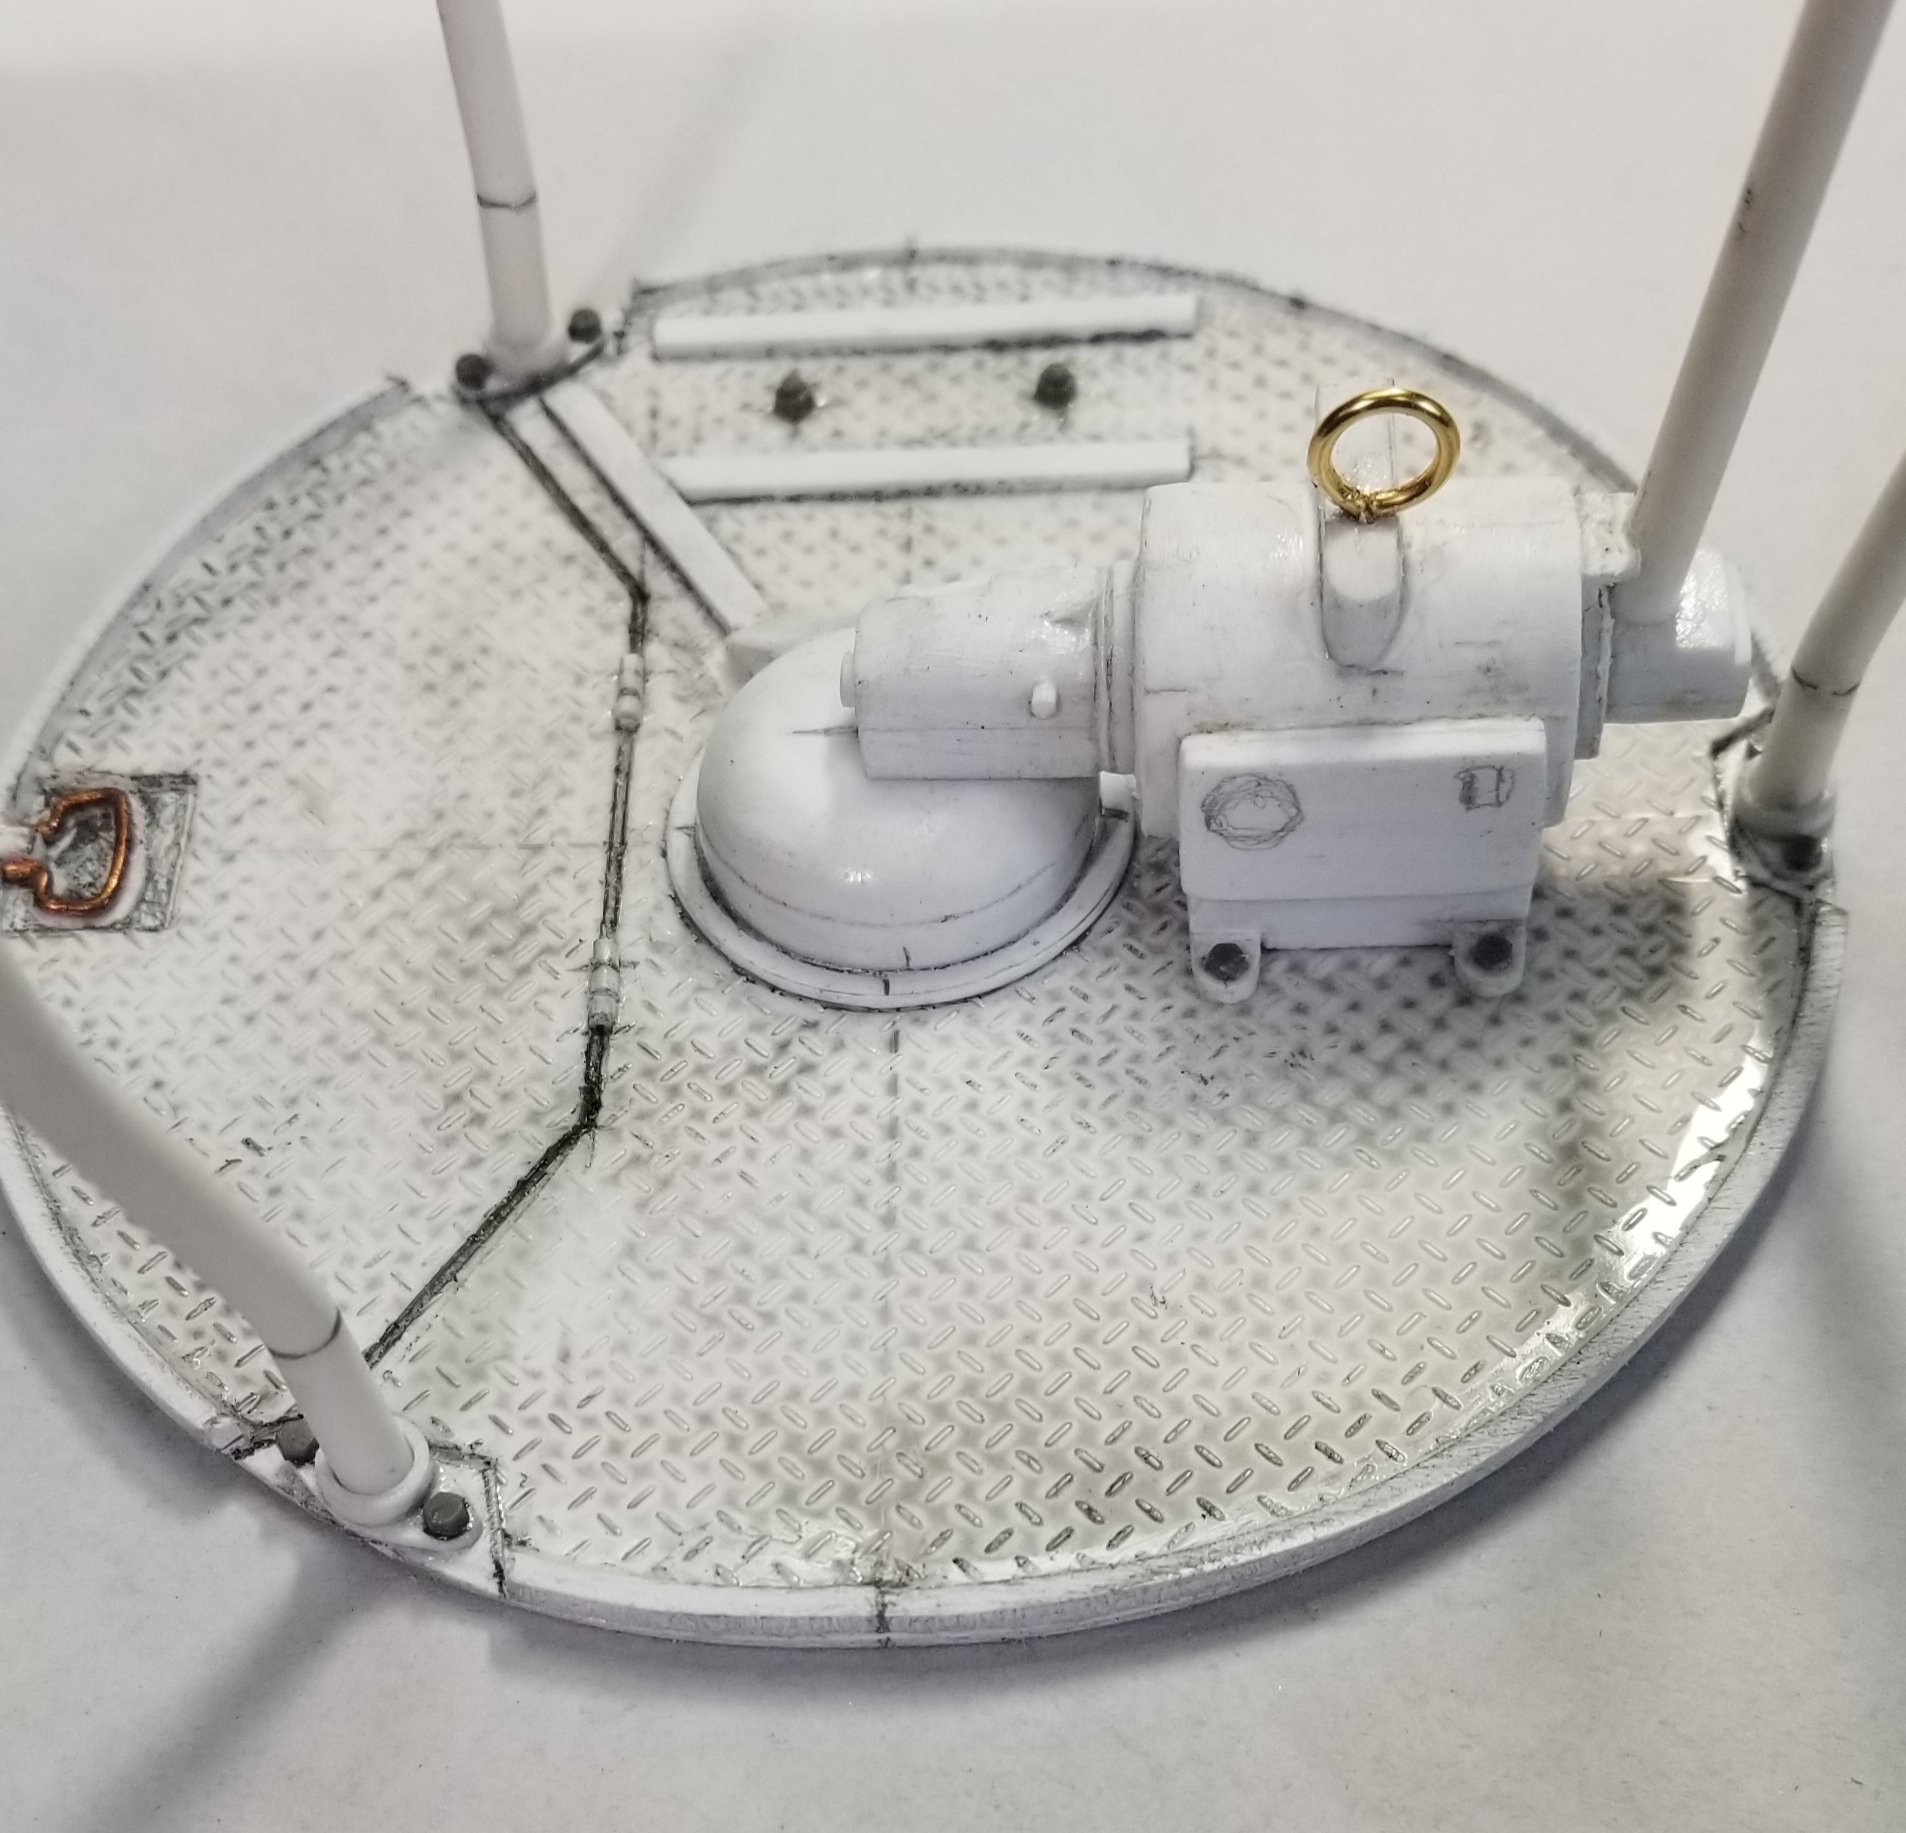
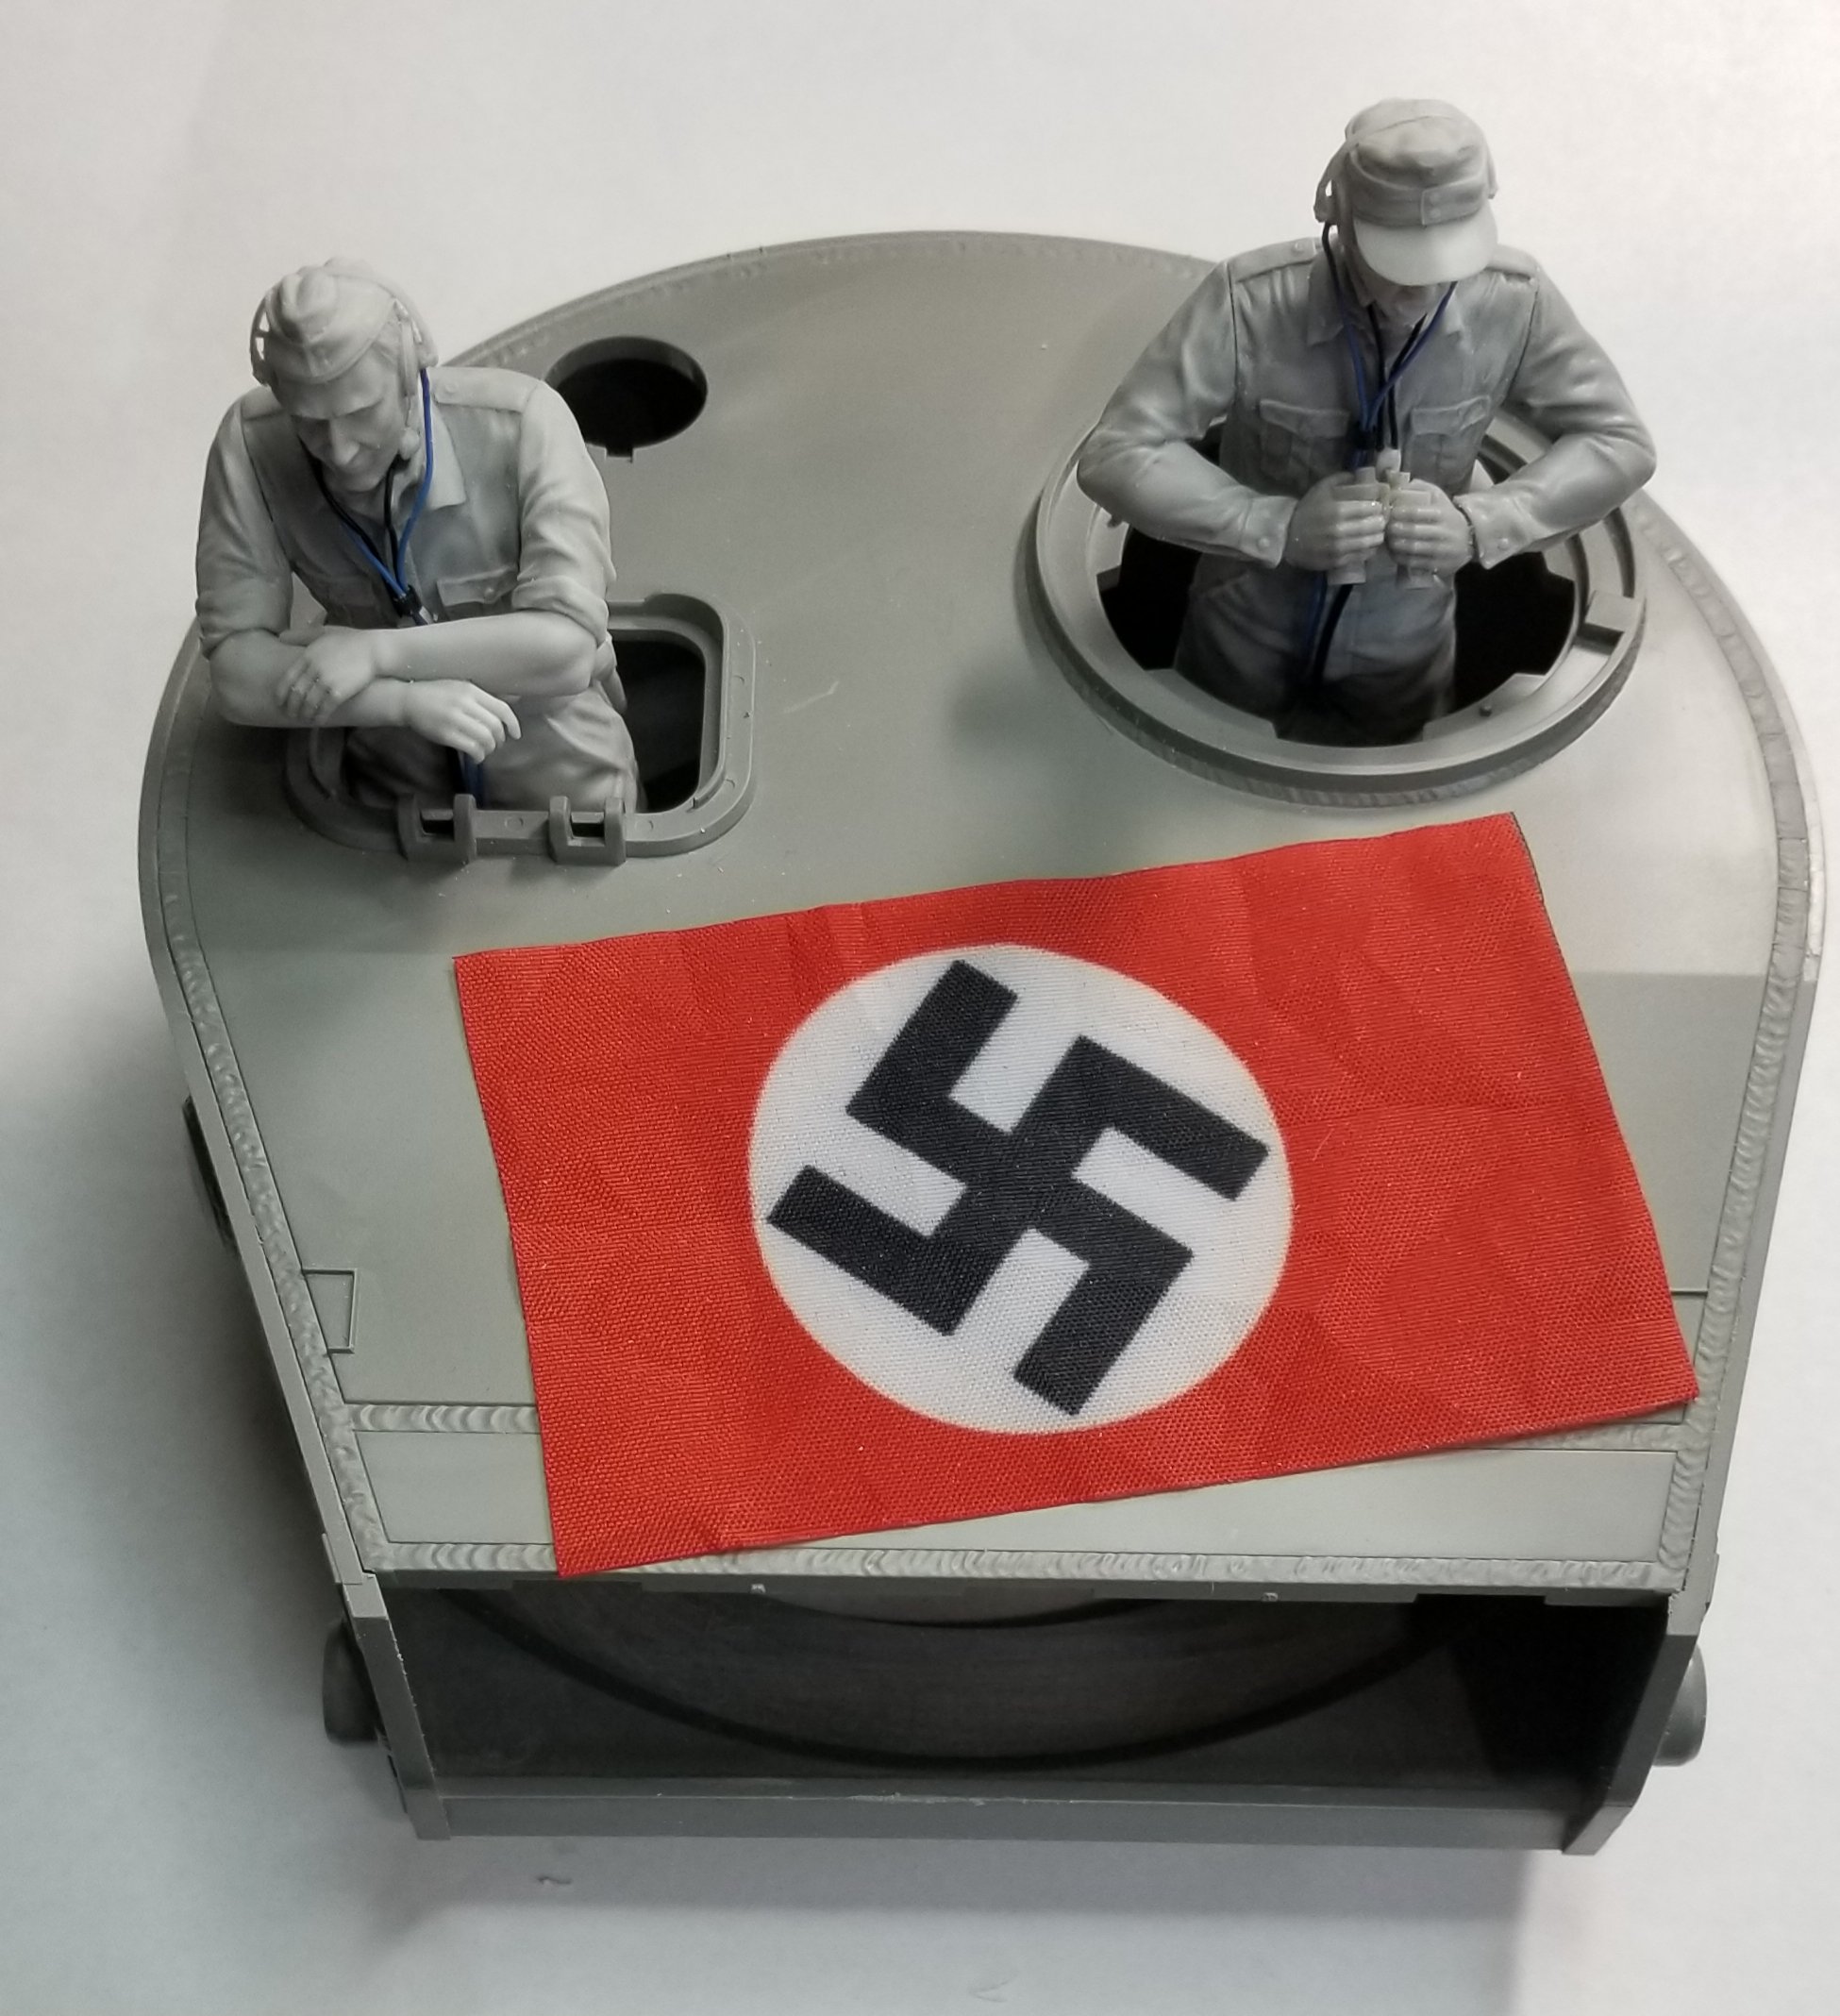
Hey all, just a little sumpin sumpin for you to look at. I got three of these one for the Tiger, Panzer III & Panzer IV. There aerial recognition flags. Ron G

-
Takom also does the Tiger 1 (AHHQ) and panzer iii in 1/16 scale
-
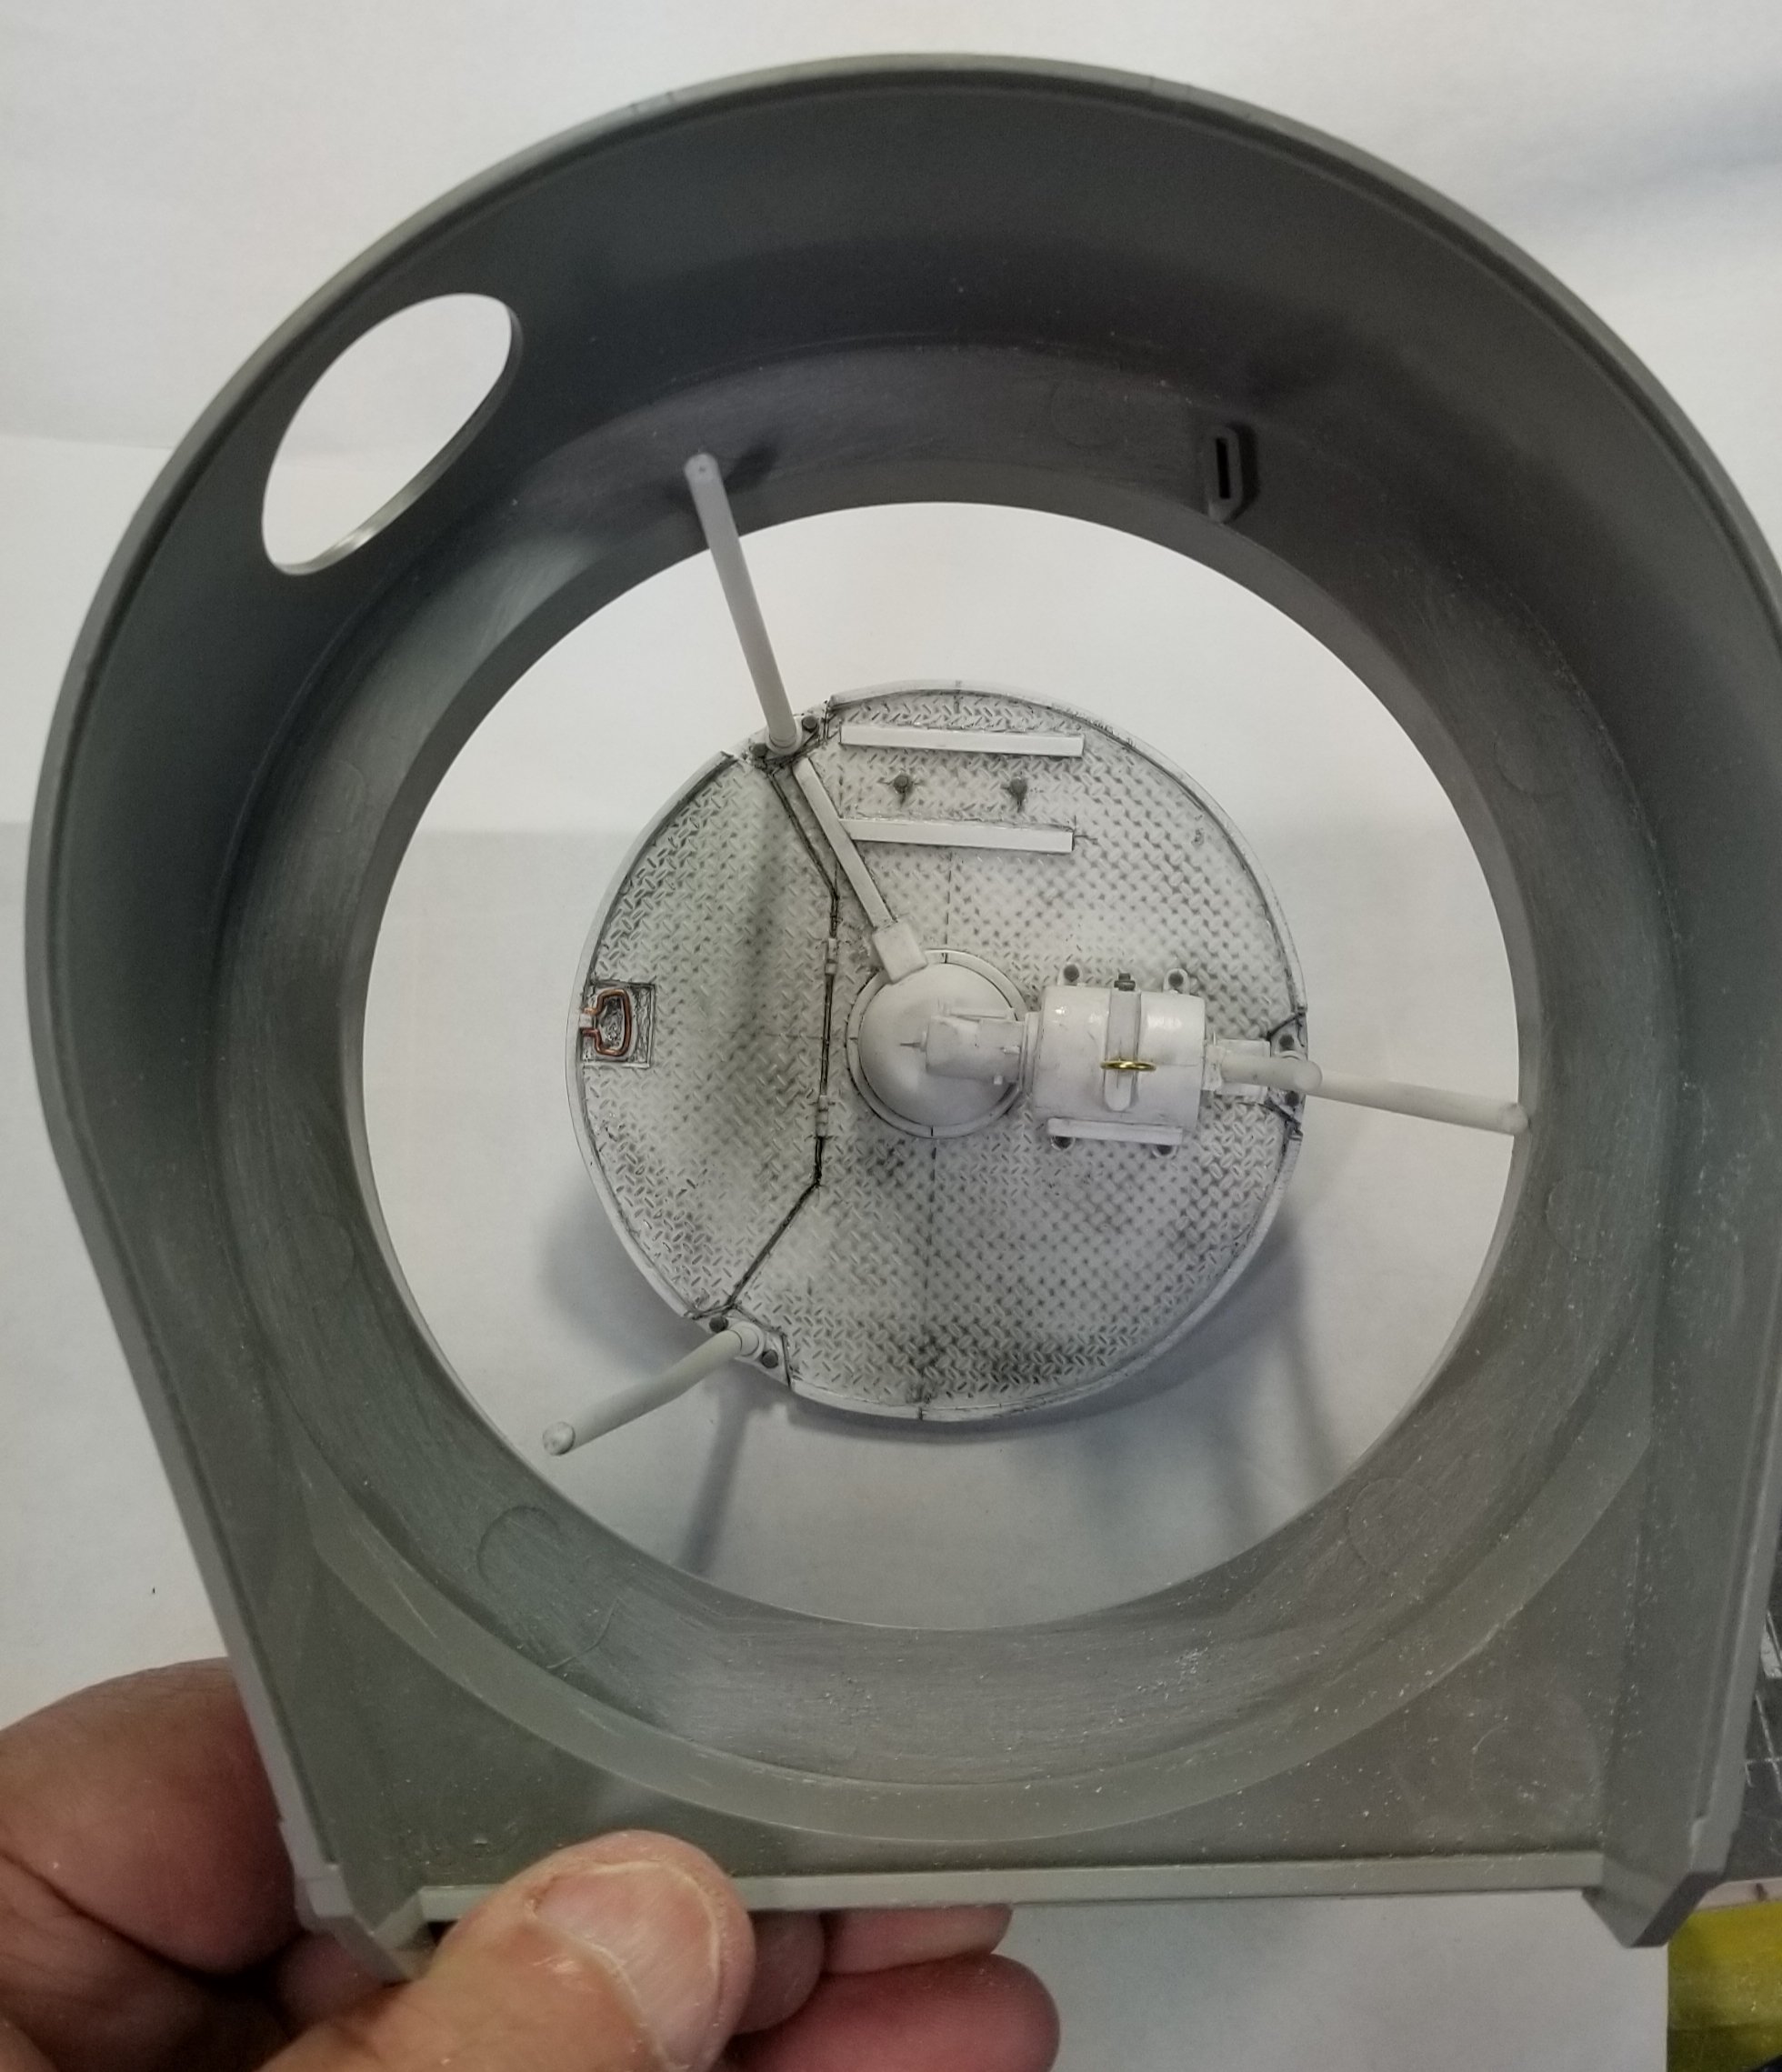
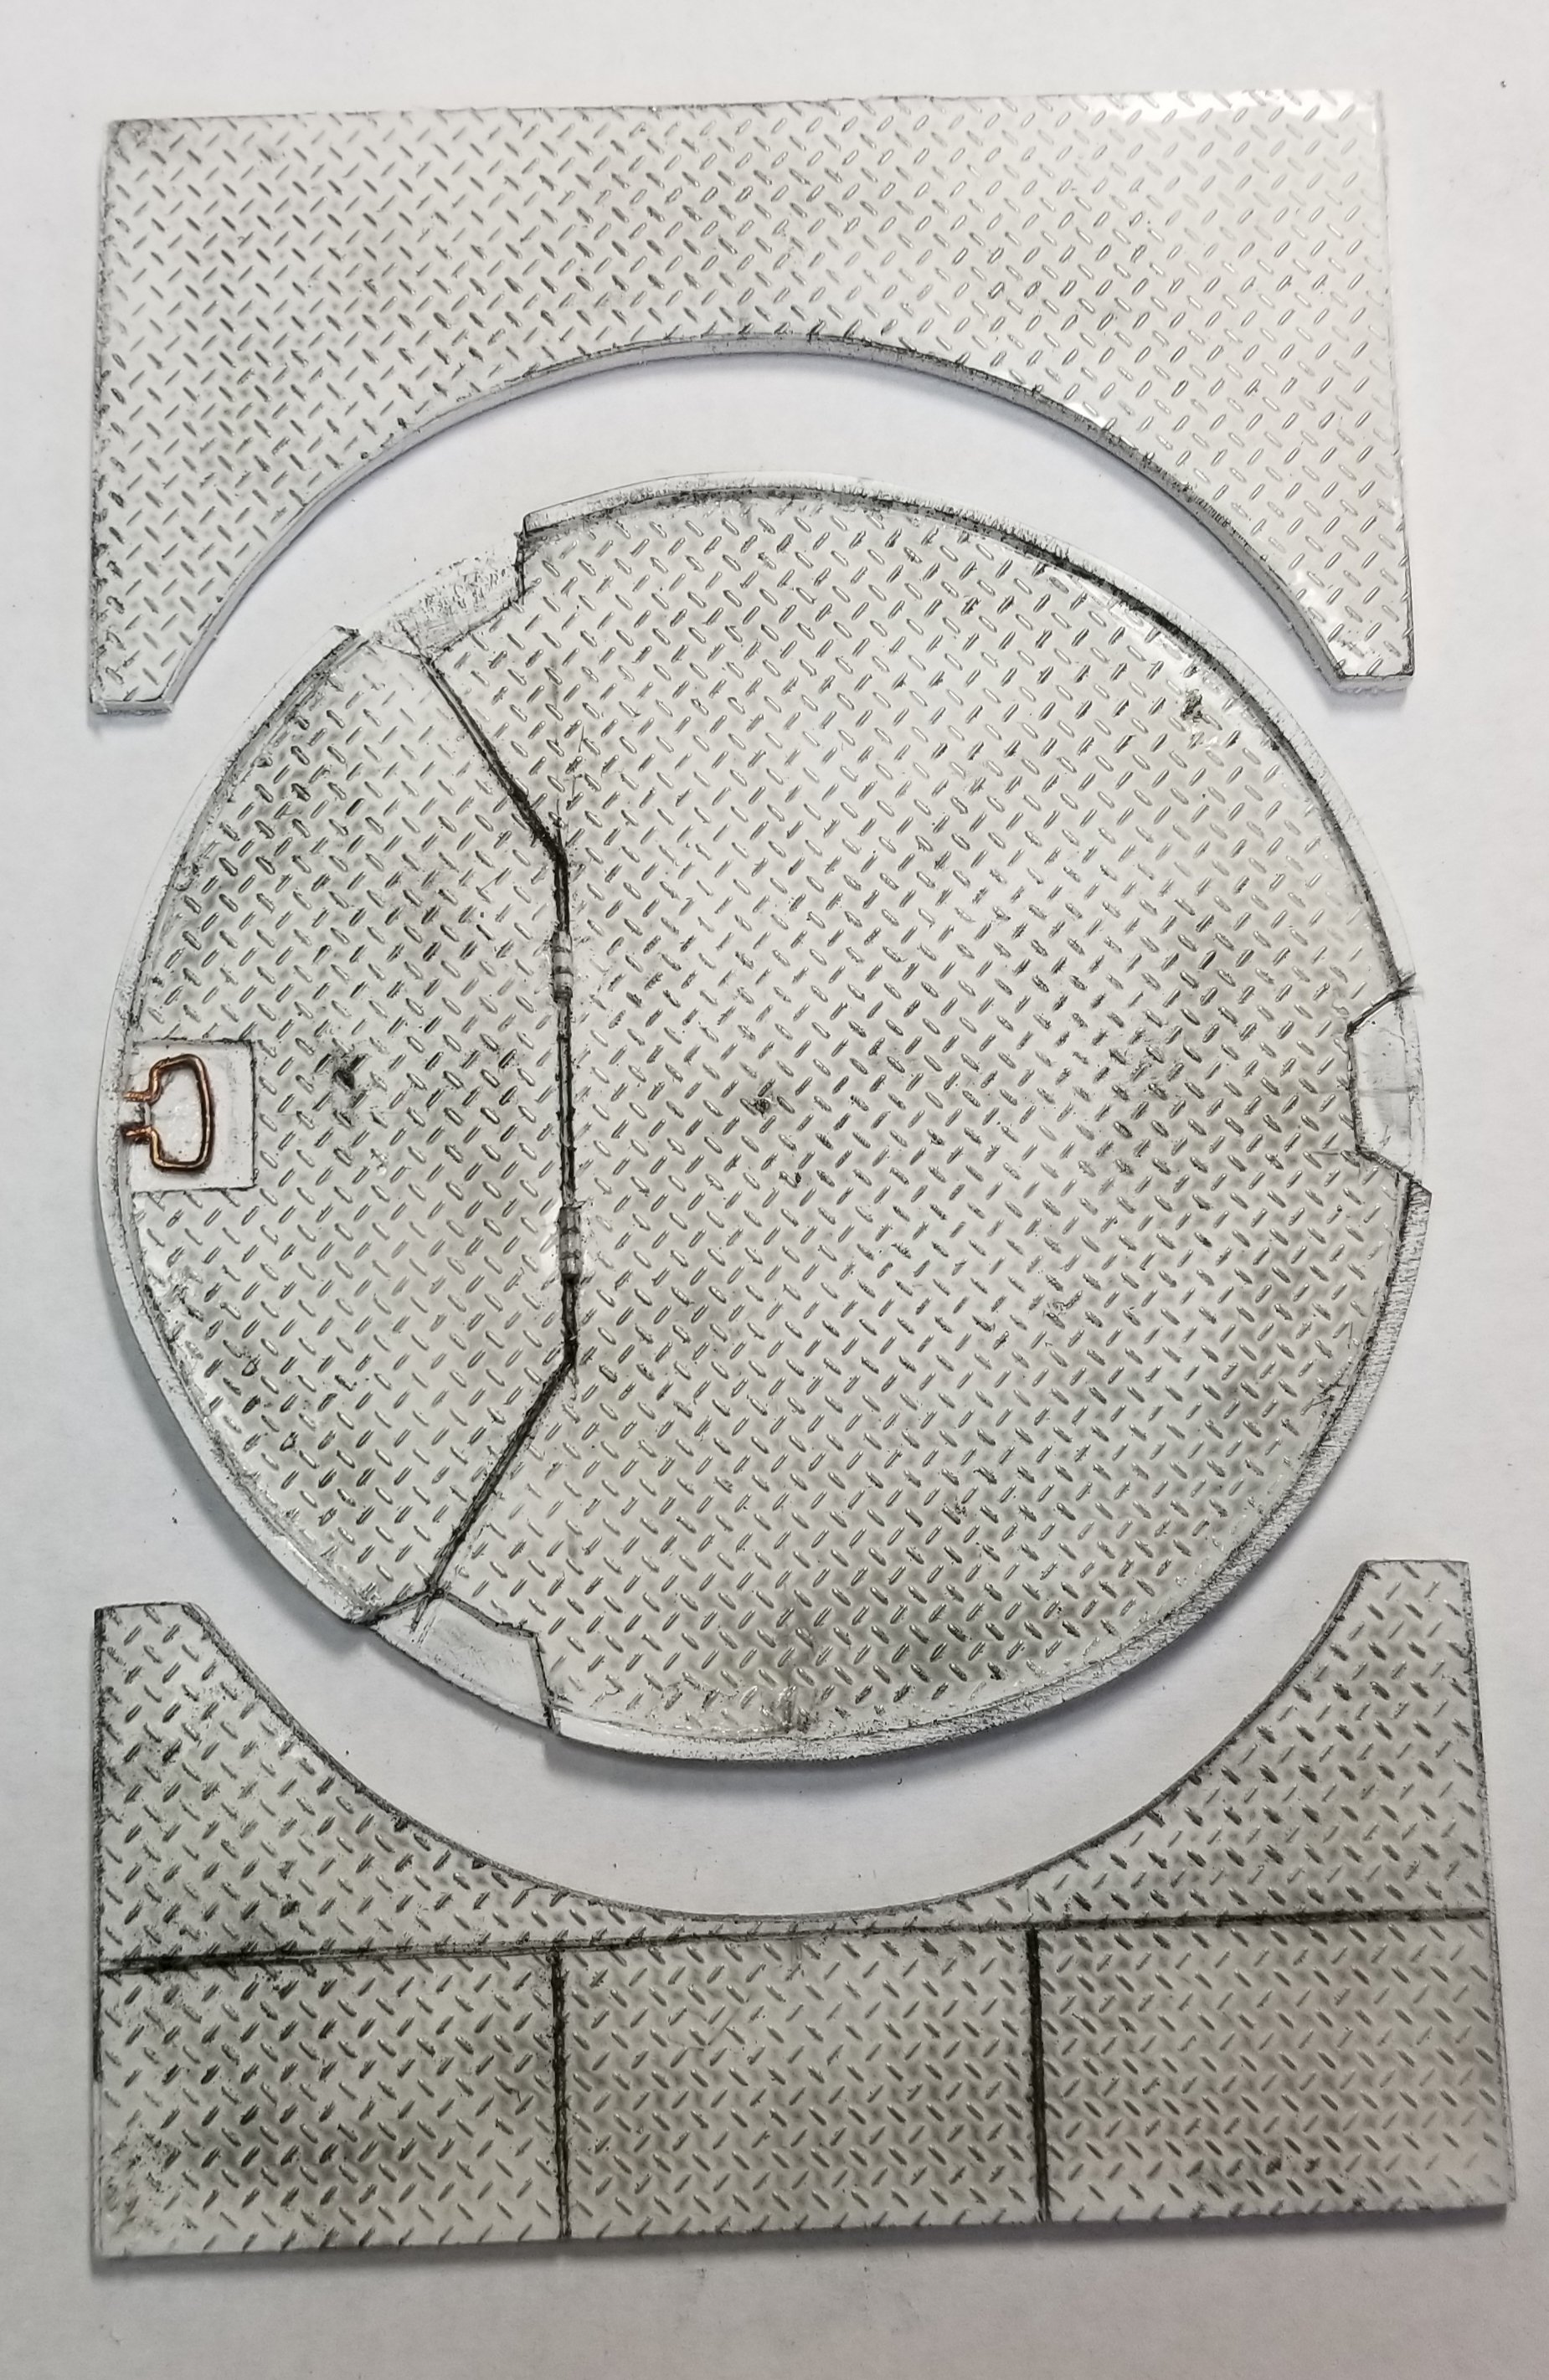
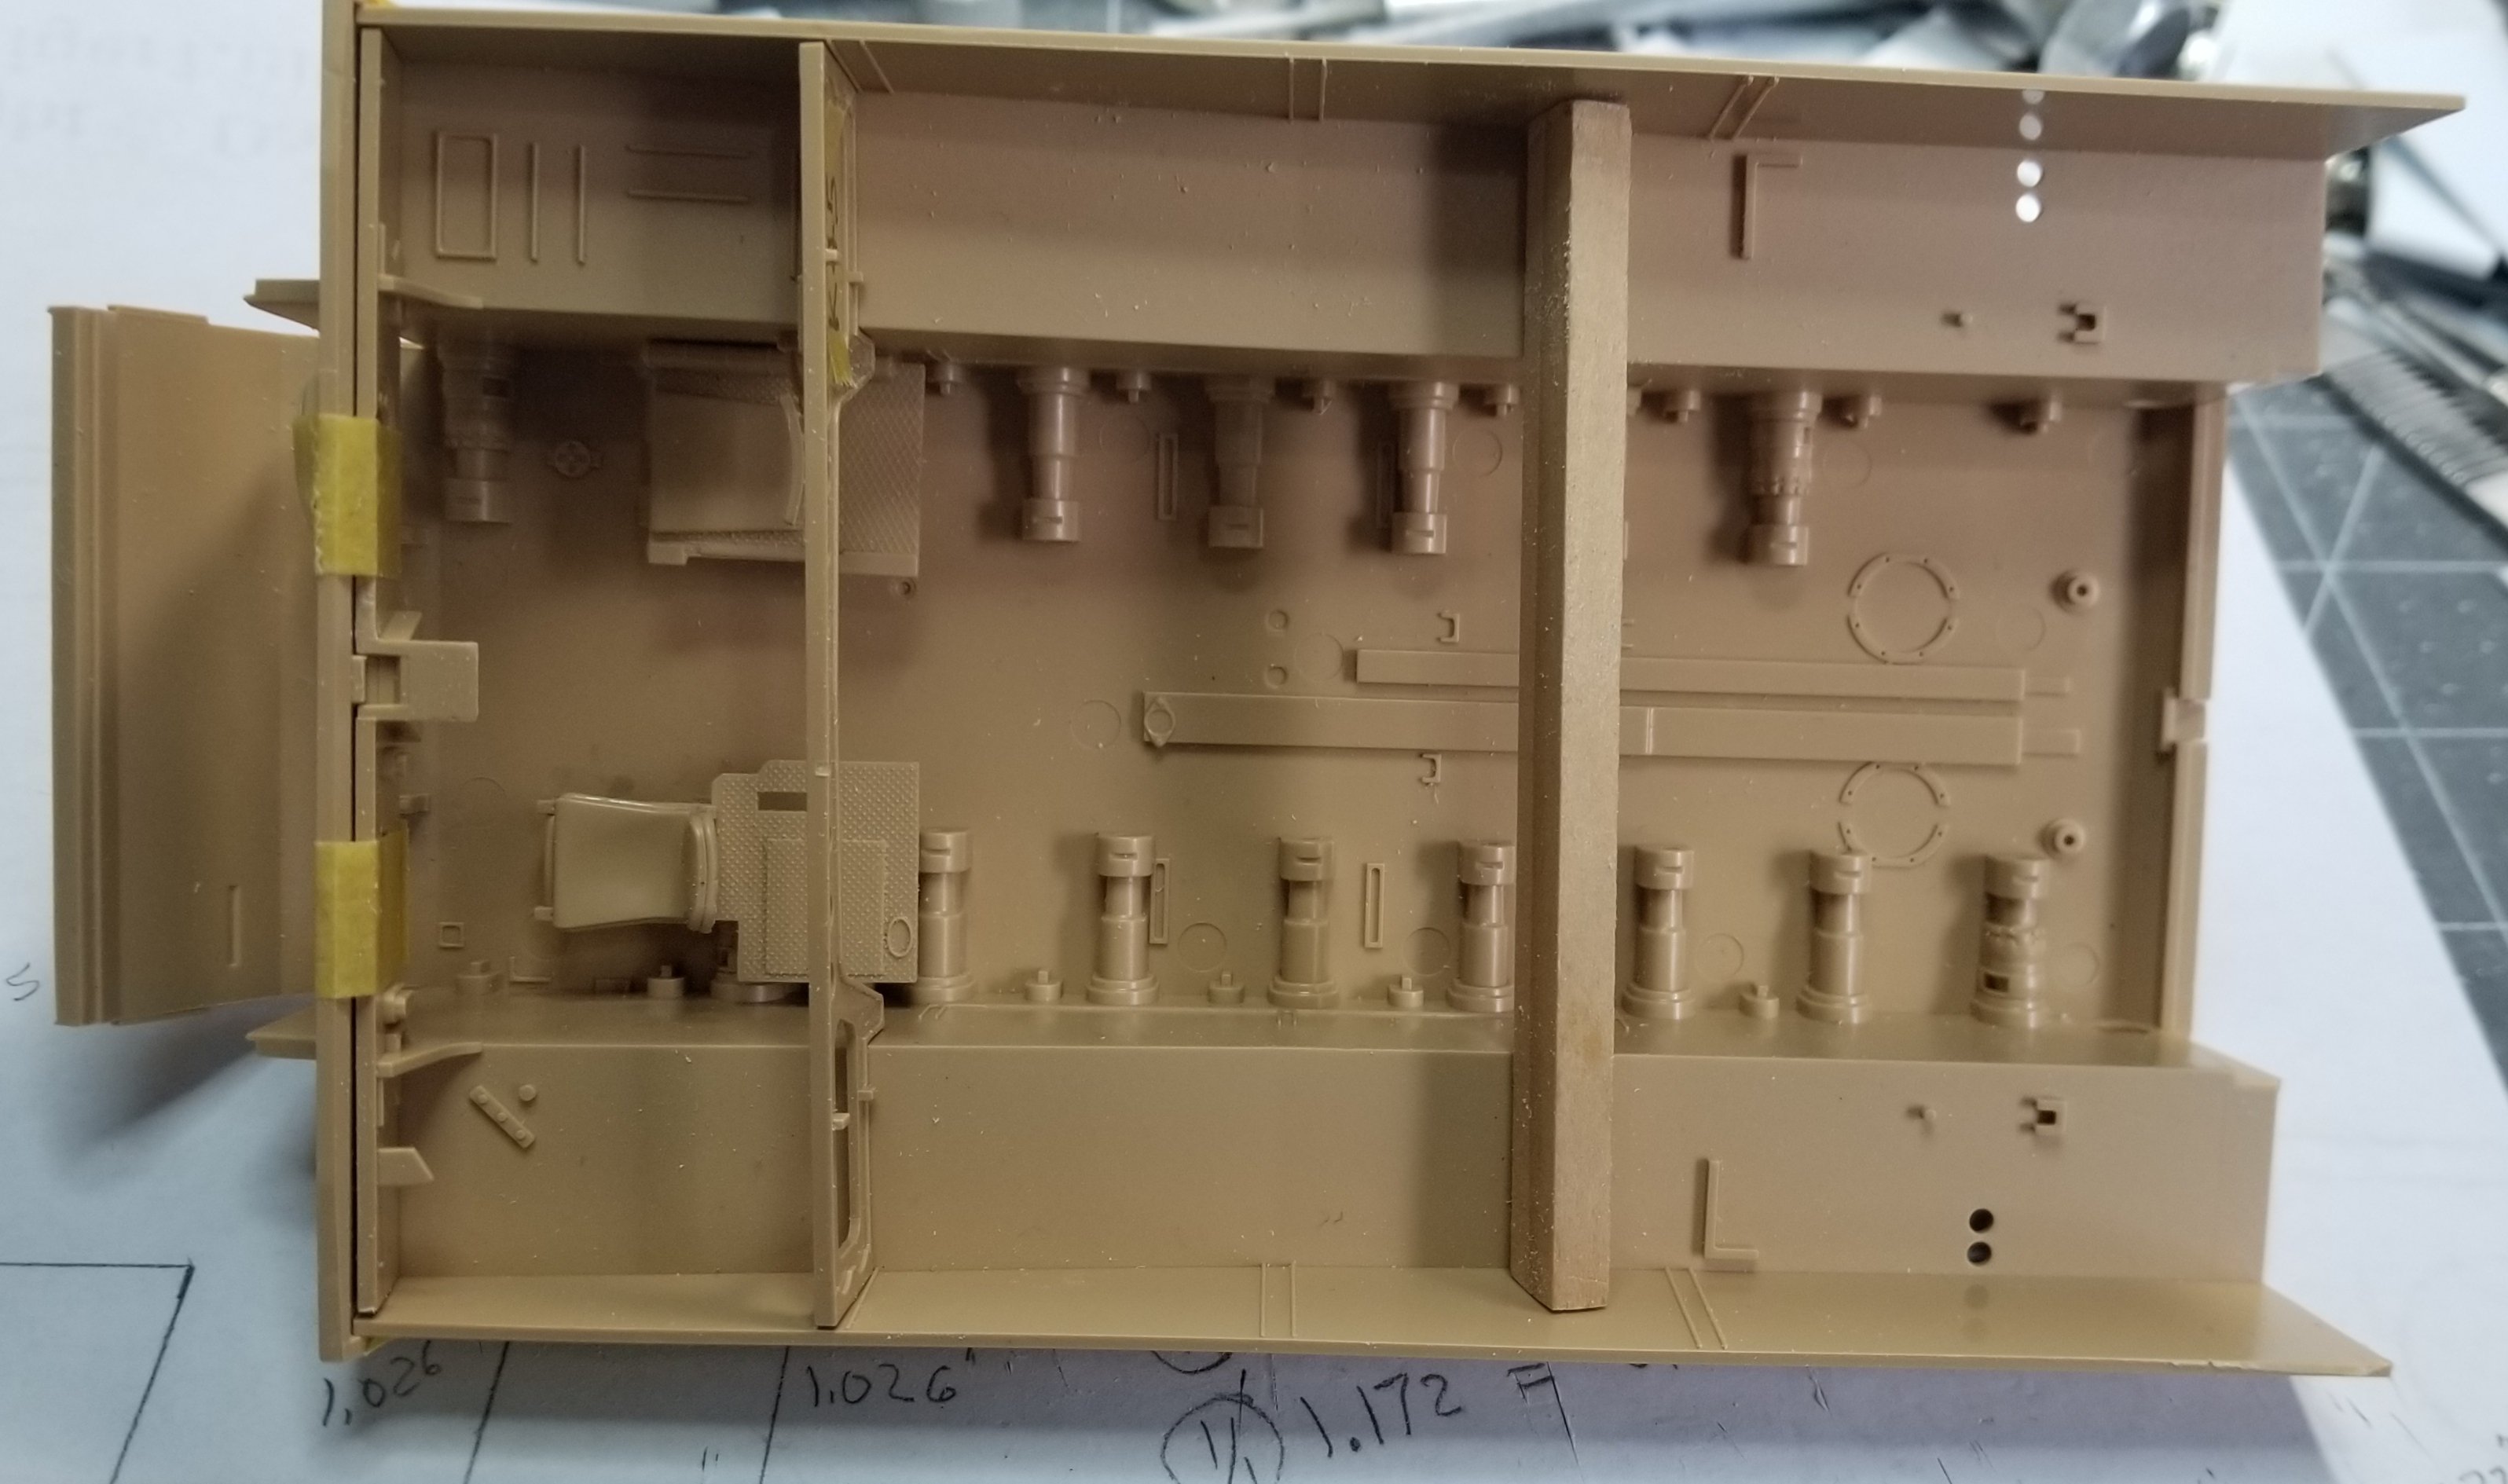
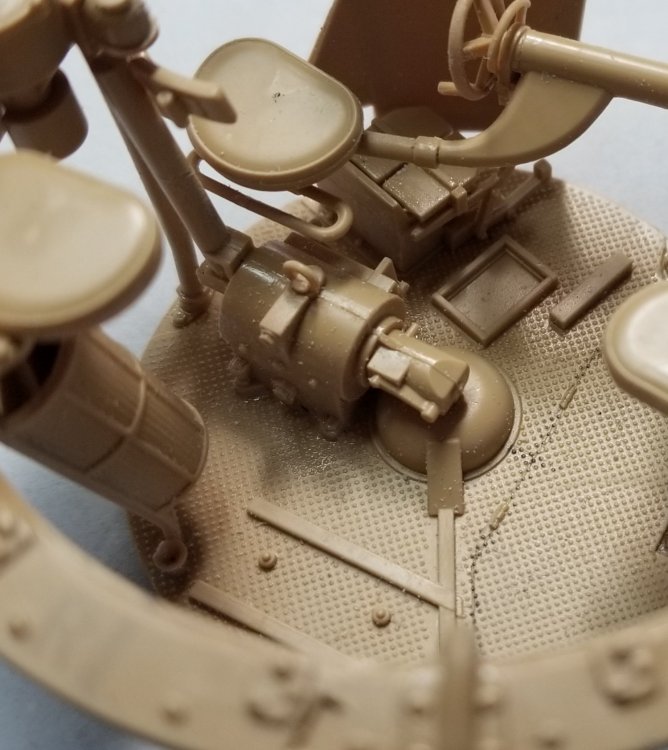
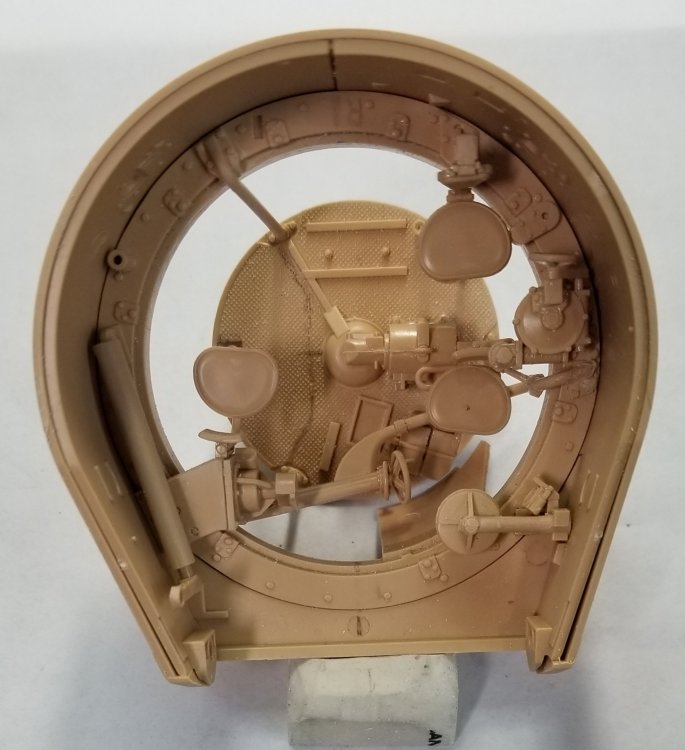
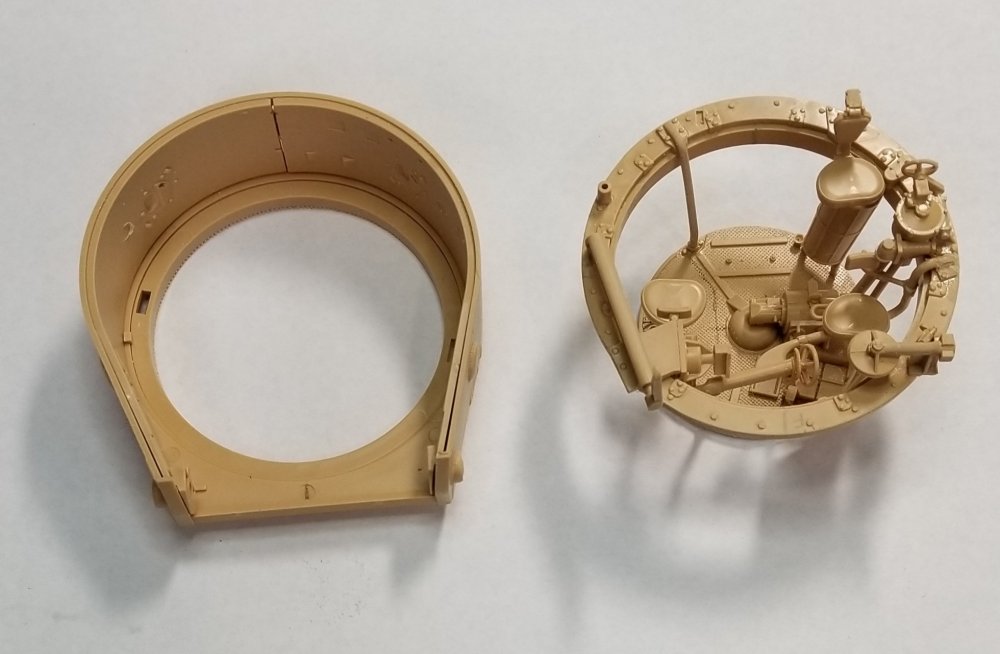
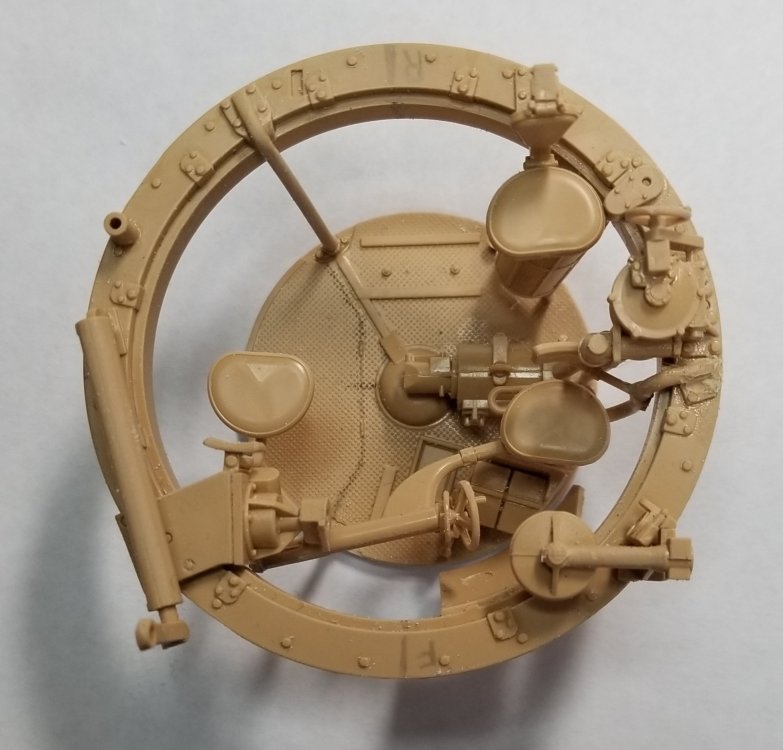
Hey all Some more work done on the Tiger. This view shows the 1/35 turret and turret basket. Closer view of the Turret basket. This is ALOT! of stuff to scratch build. This view shows the 1/16 turret and the beginnings of the turret basket. It's just the floor for now, but I'm working on it. Closer view of the fighting compartment floor and turret basket. Ron G
-
I just got this from Amazon.

-
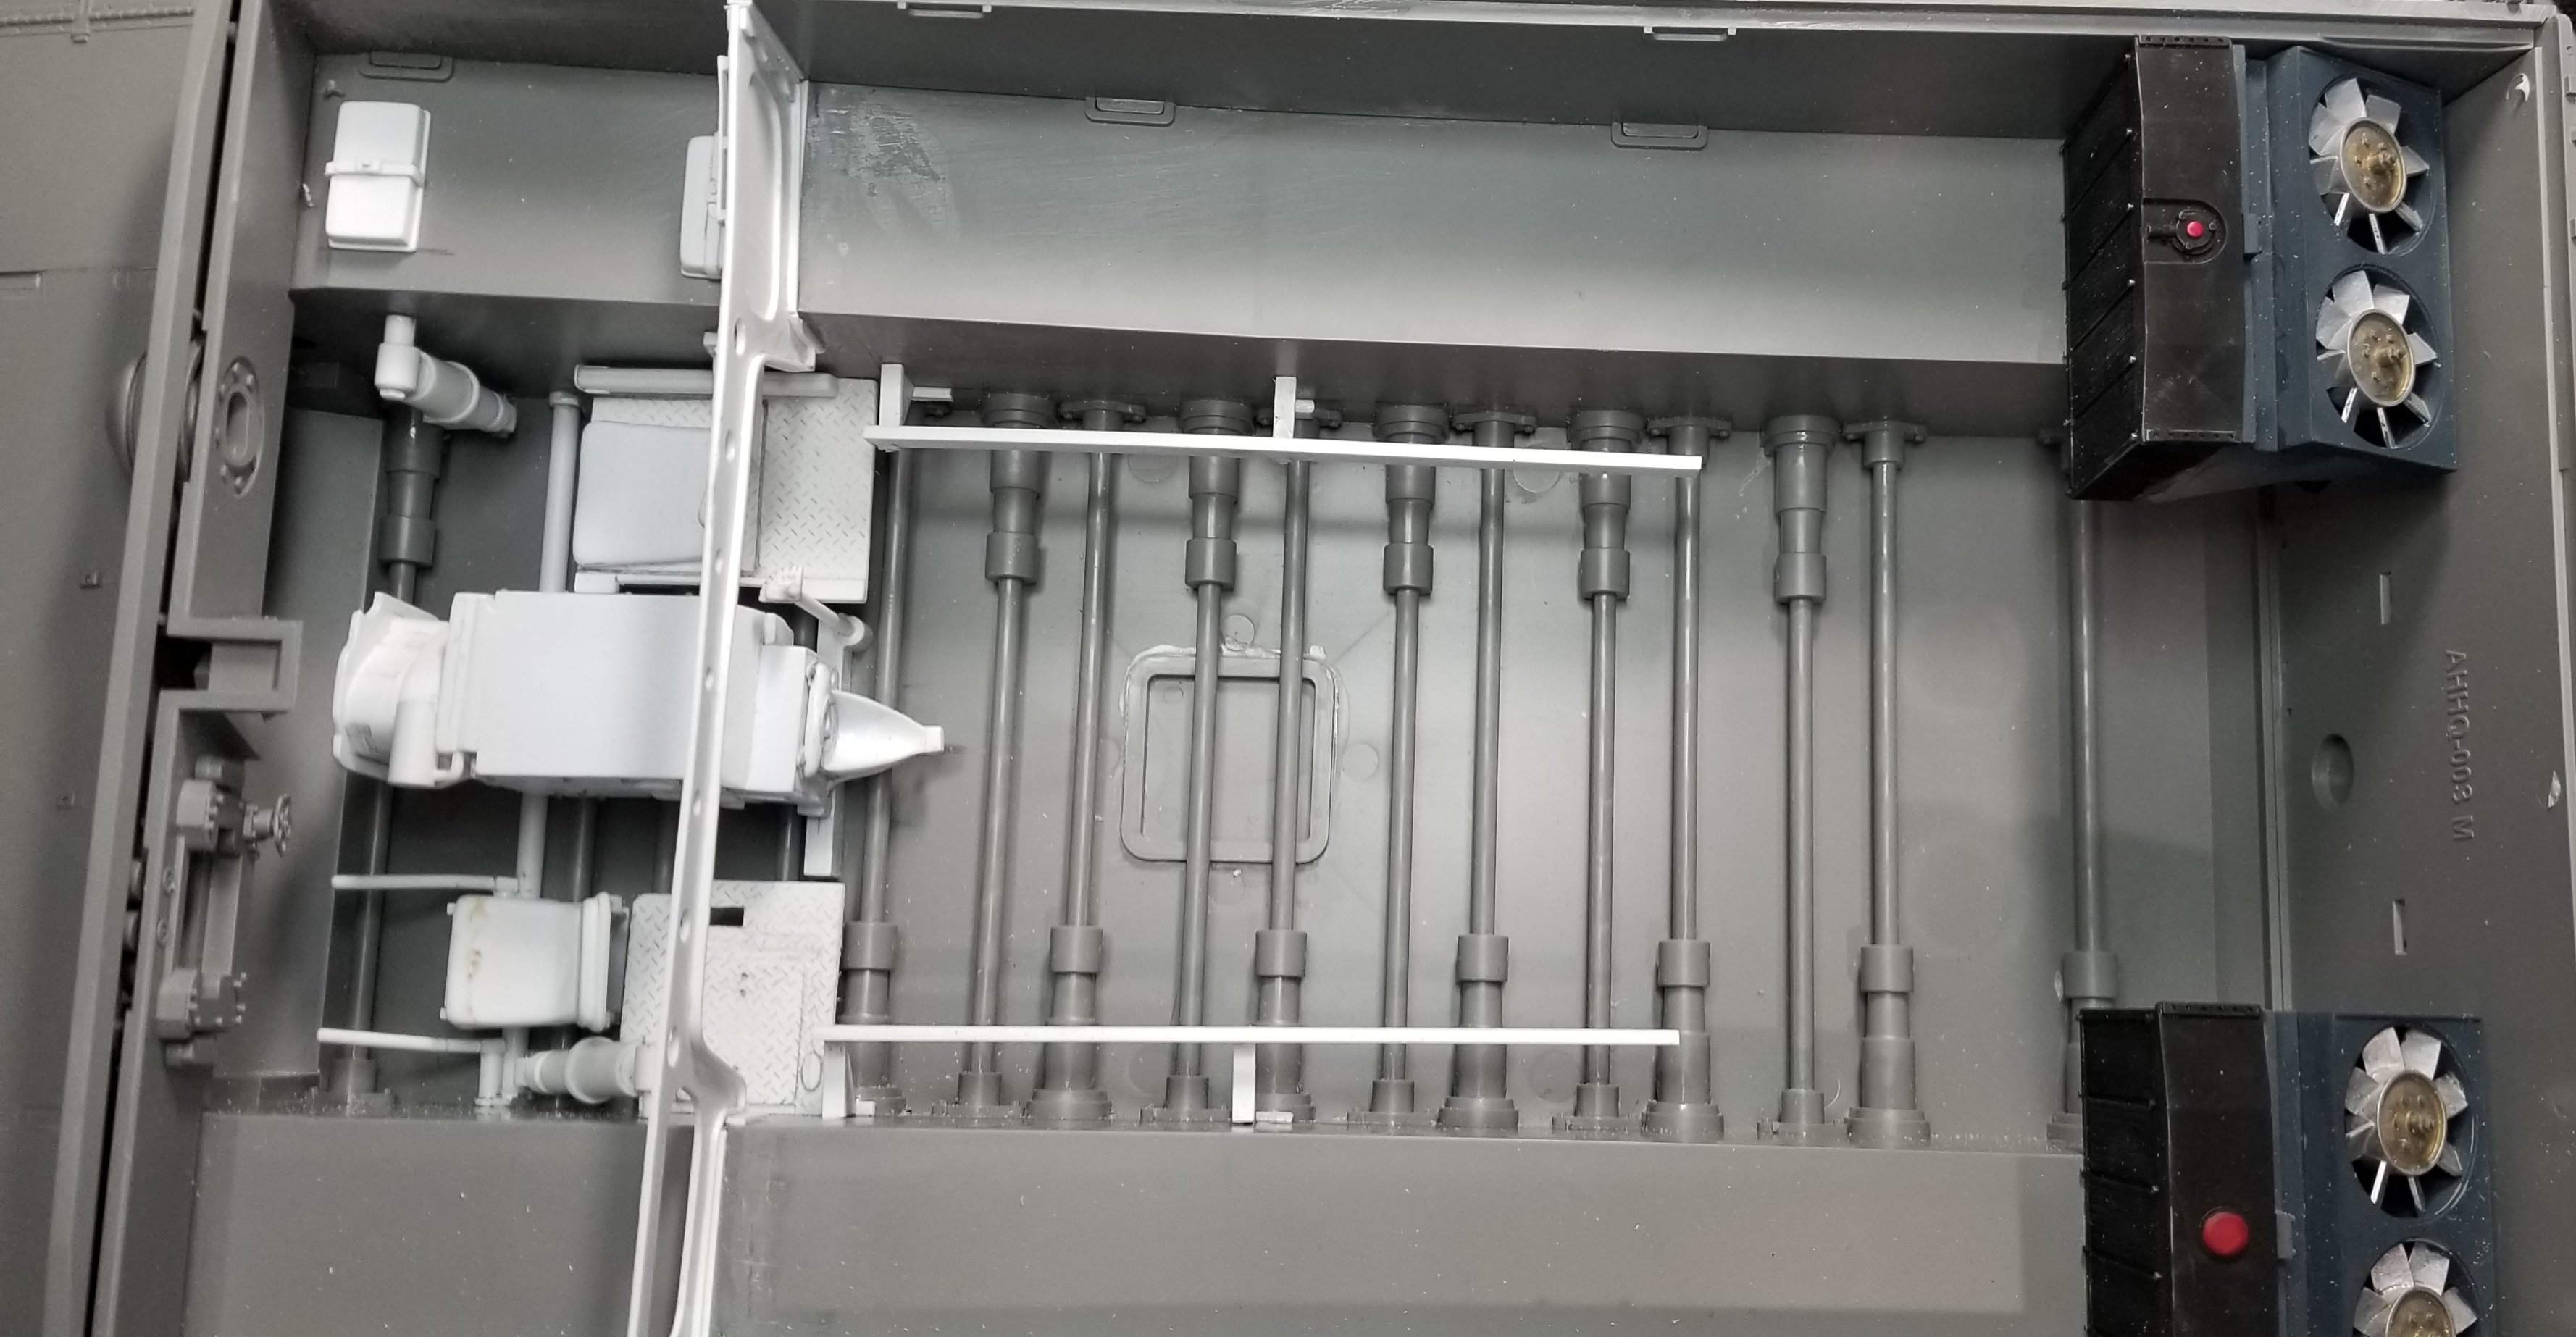
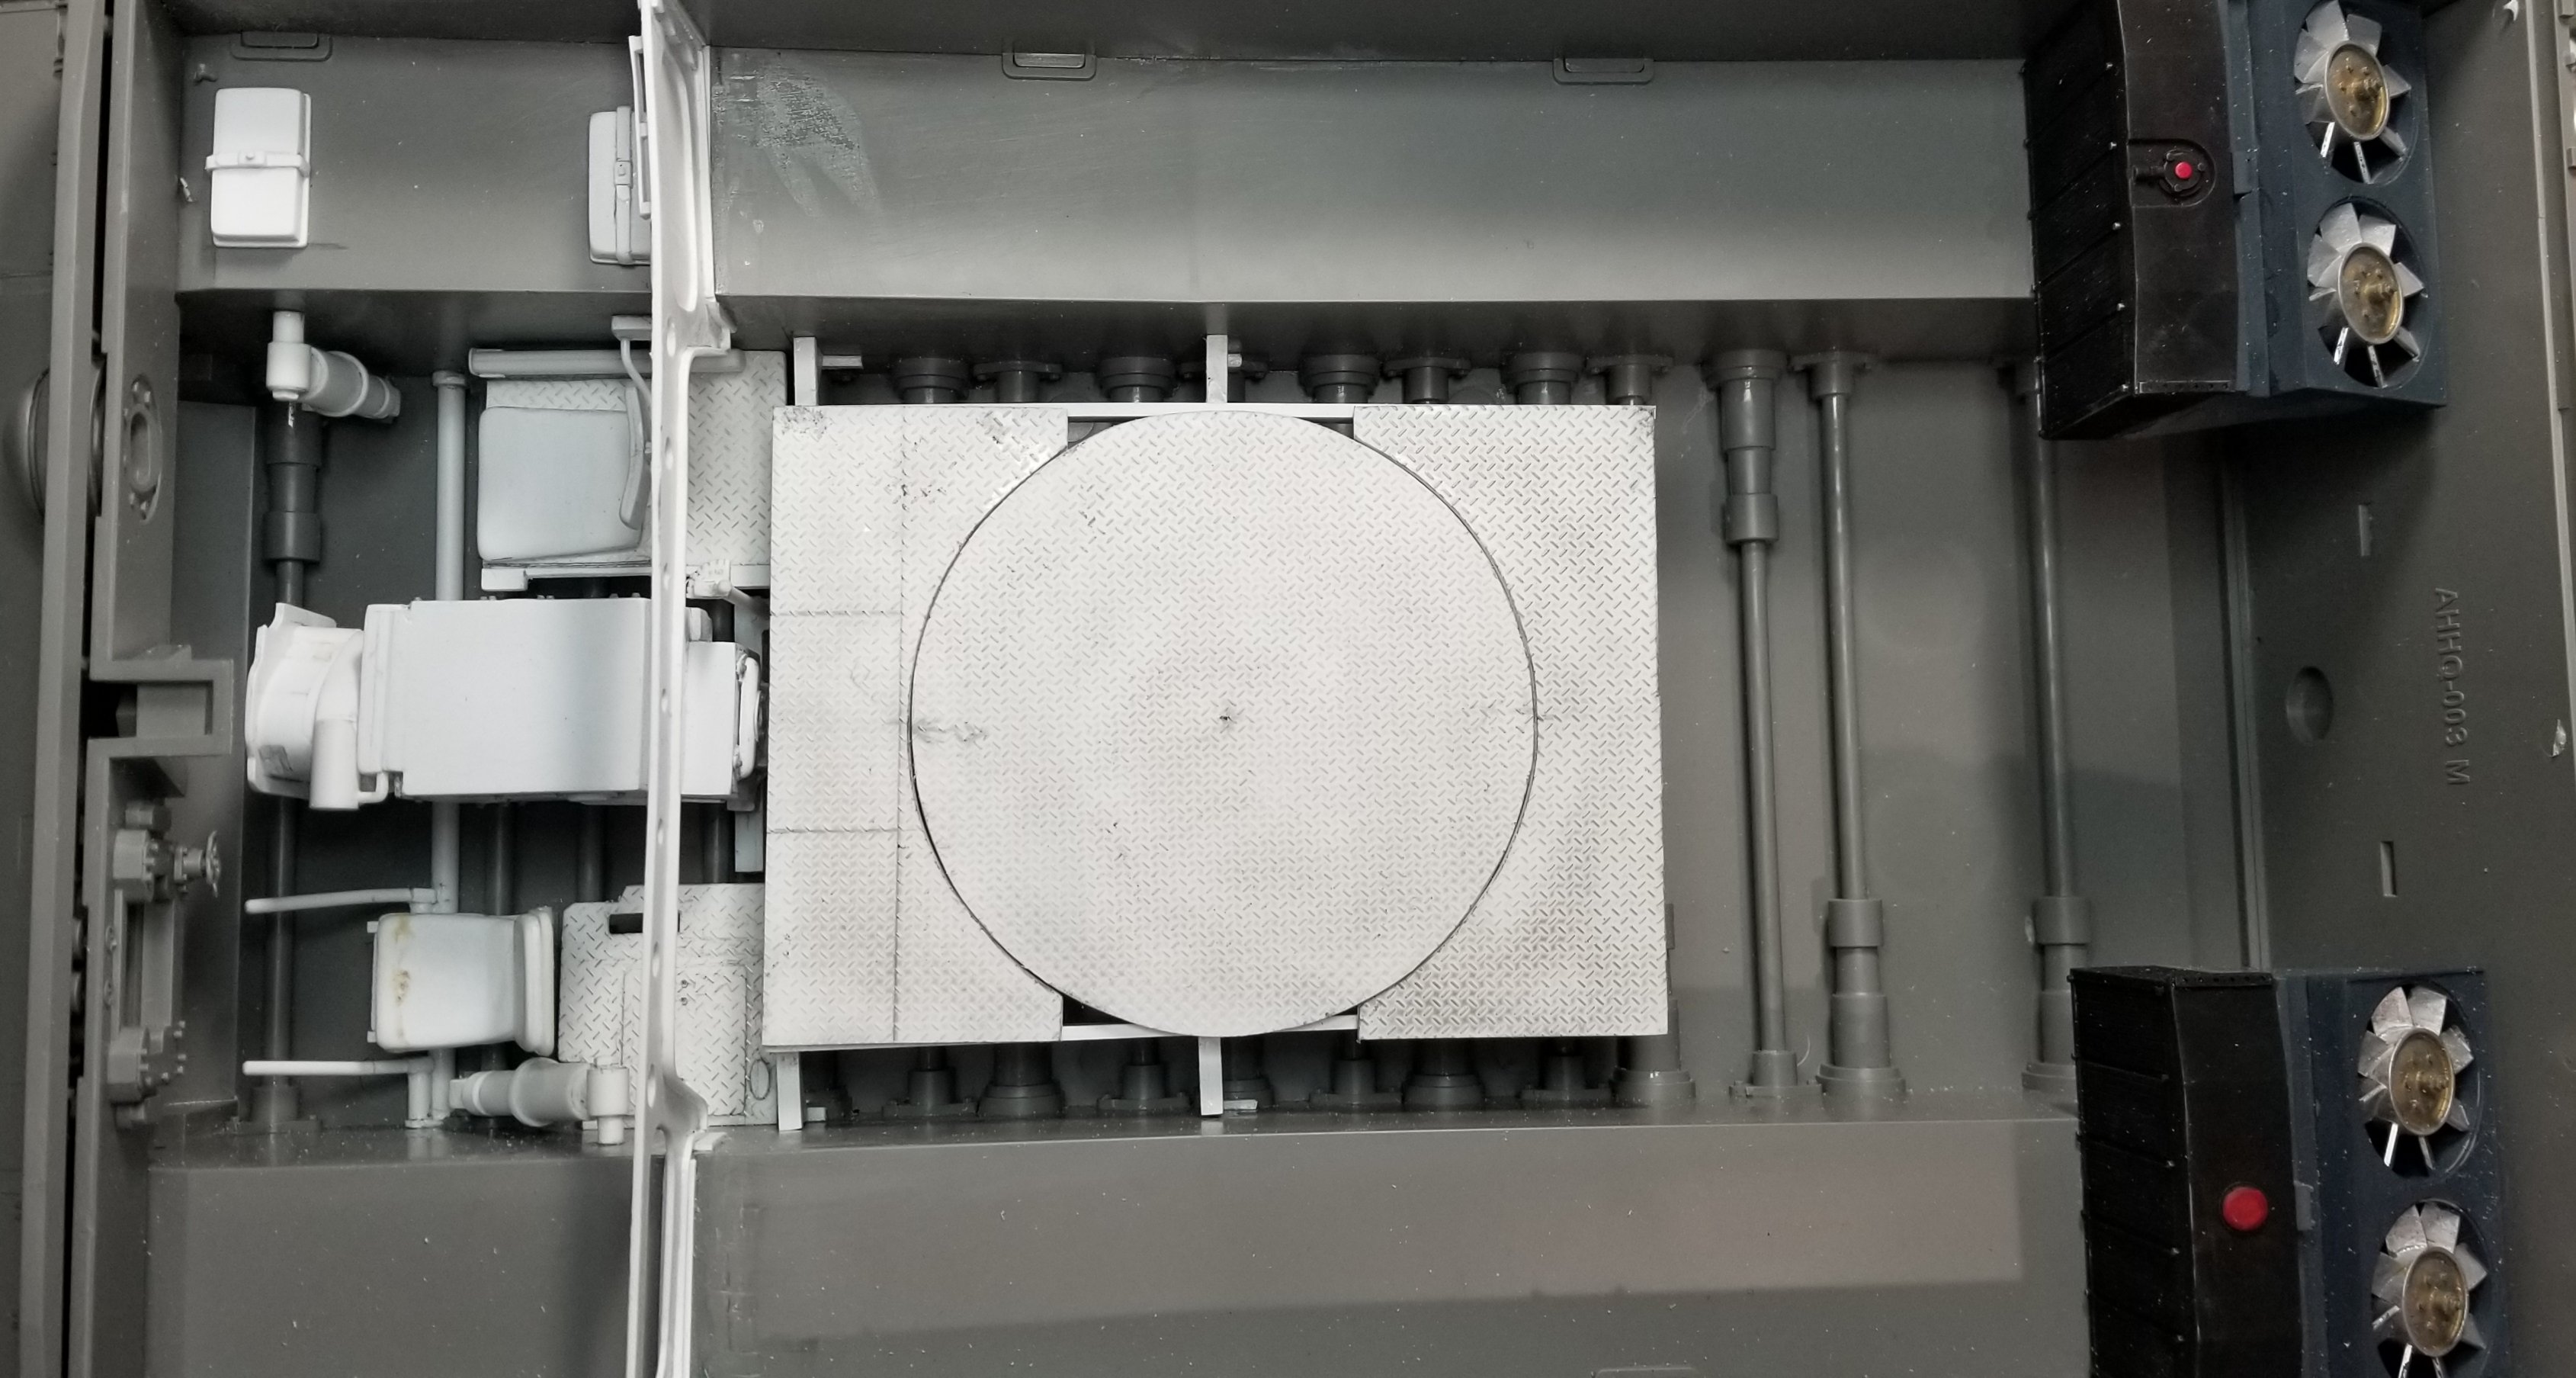
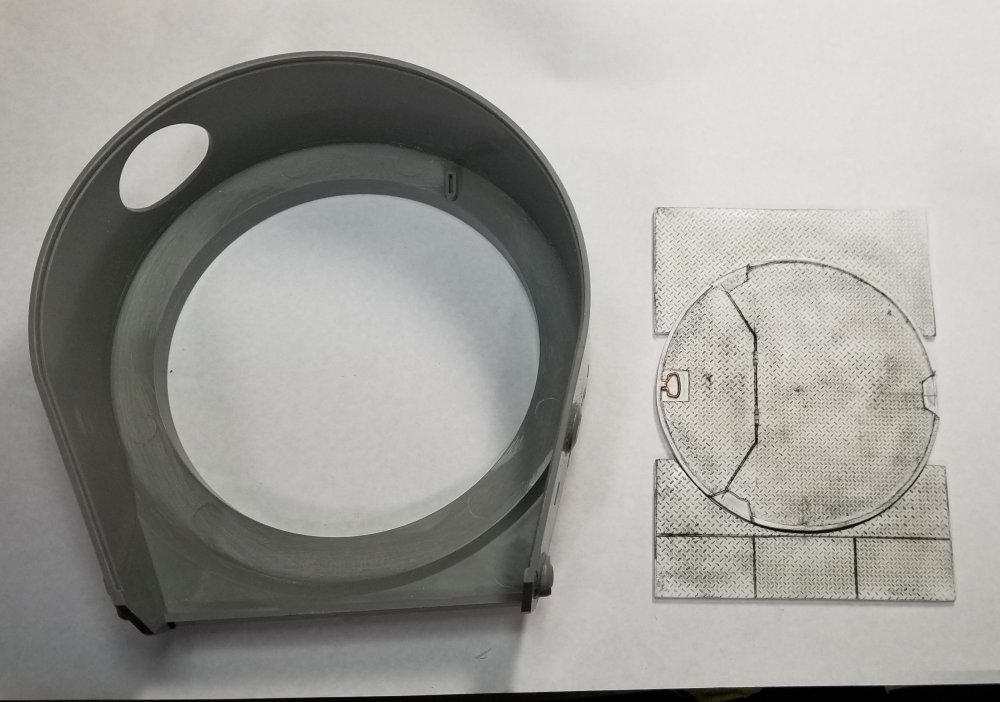
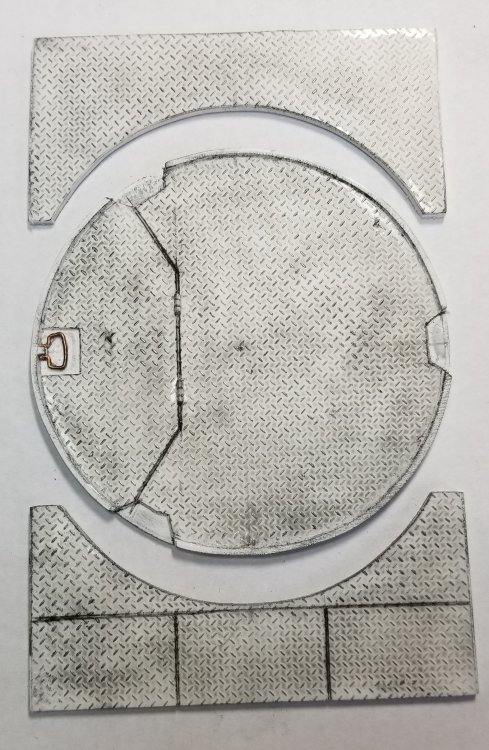
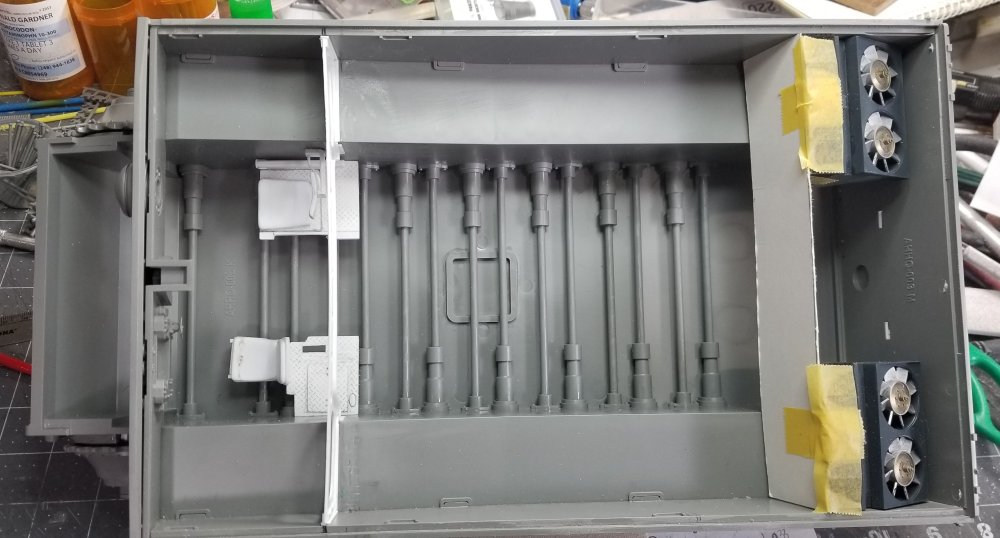
Hey all Small update for you to look at. I've started on the floor for the fighting compartment. This view shows the side supports for the floor plates and turret basket floor. This view shows the floor and basket floor in there positions. There are four ammo boxes two on each side that go on either side of the floor plates. This view shows the cargo net I made from some material I got at Hobby Lobby. I also got some stuff to make a scale date palm tree for the diorama. A scale palm in 1/16 is (they grow to 100 feet) 6' 3" tall! and approximately 24" across the leaves. Thats as big as my diorama, almost. I'm going to make mine around 18" to 24" tall with 8" to 10" long palm leaves, even thsts huge. Ron G

-
Hasegawa Fw-190A5... or 6.
CrankyCrafstman replied to GazzaS's topic in LSM 1/35 and Larger Work In Progress
That instrument panel looks amazing! Great work Gaz. Ron G -
Yup Kevin I watch them alot. Ron G
-
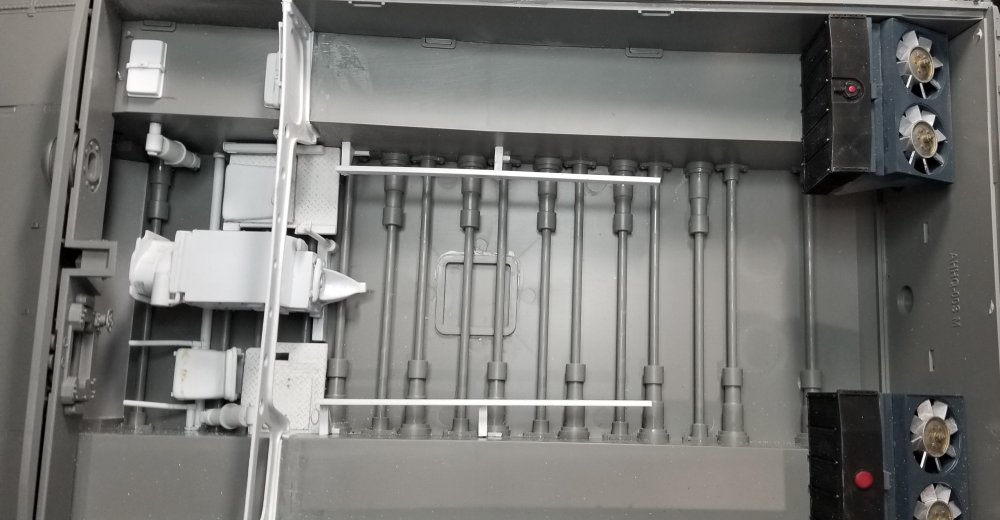
Hey all Small update for you to look at. This view shows the transmission in place in the hull. I ordered a radio set and gyro compass from AFV Modeller. Ron G

-
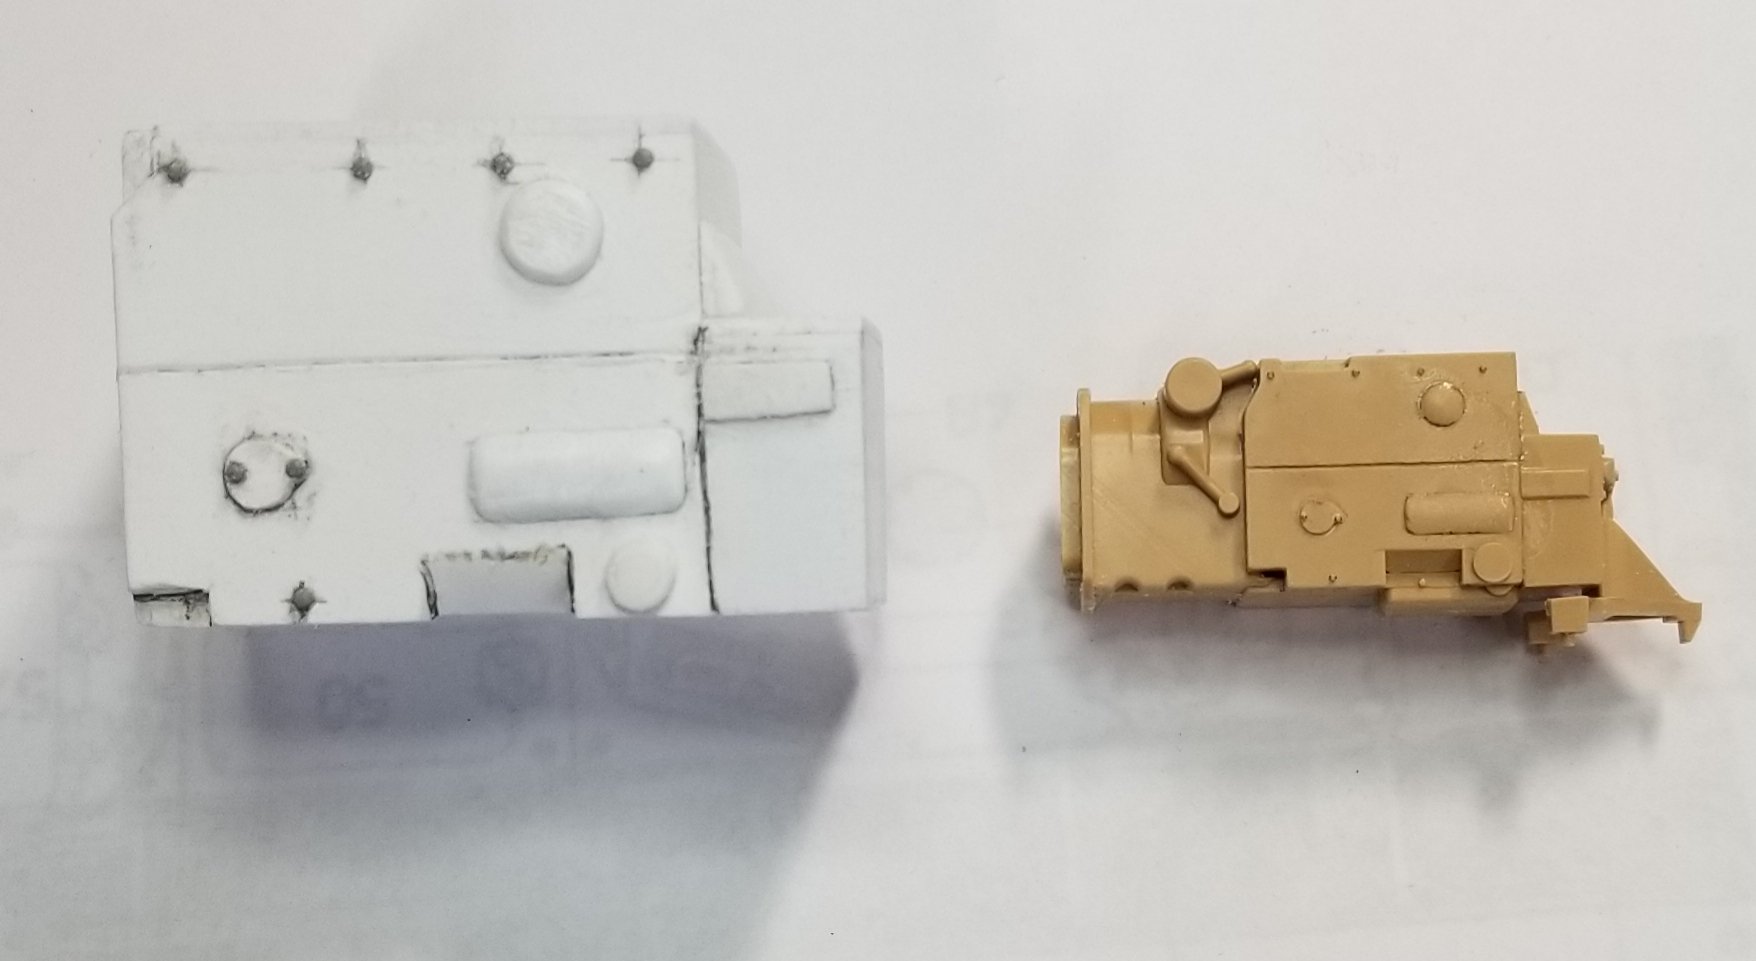
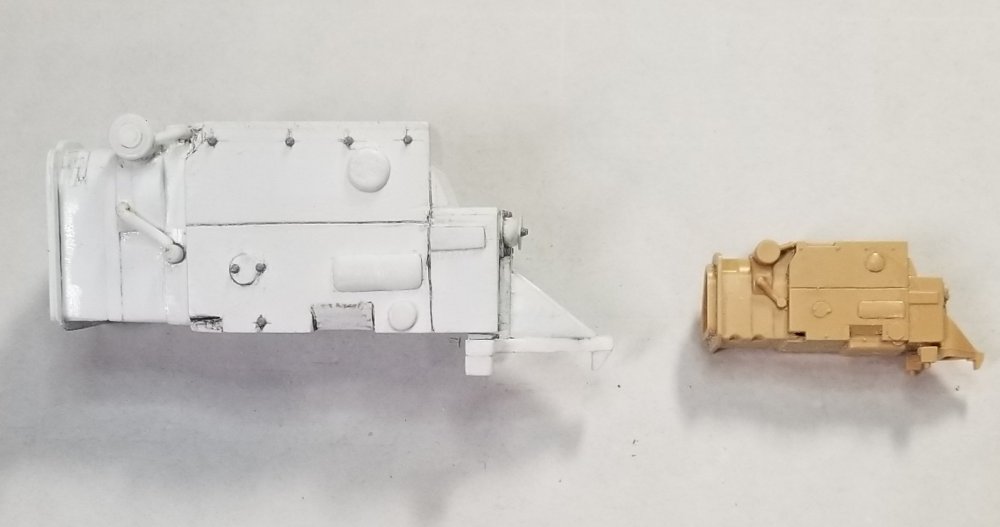
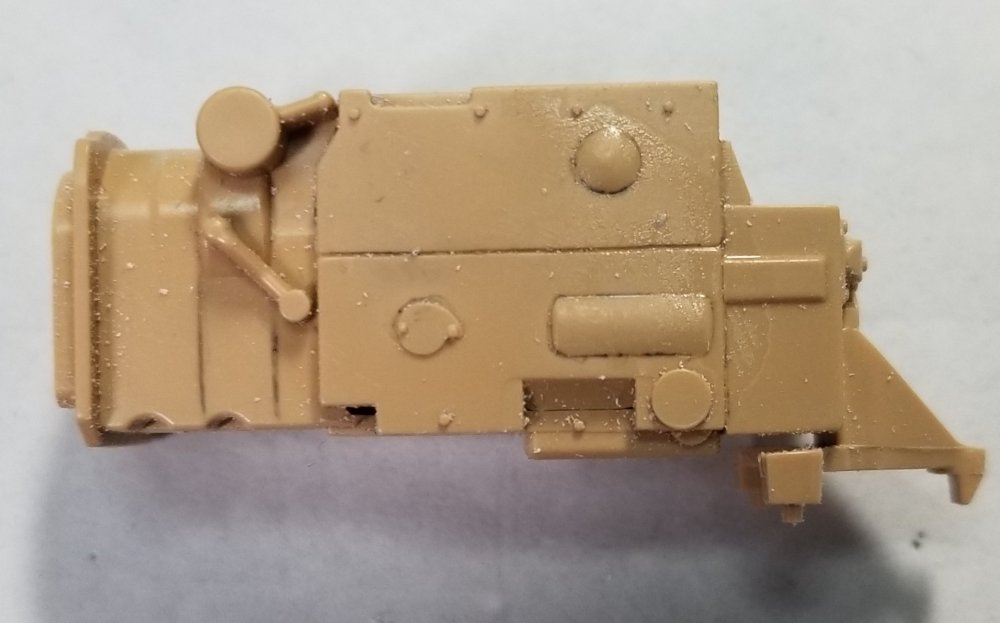
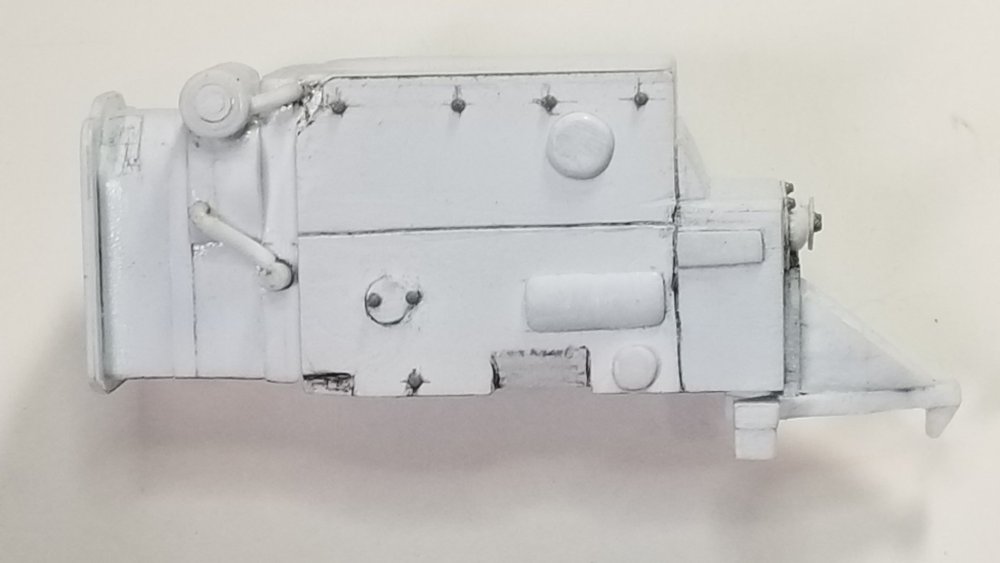
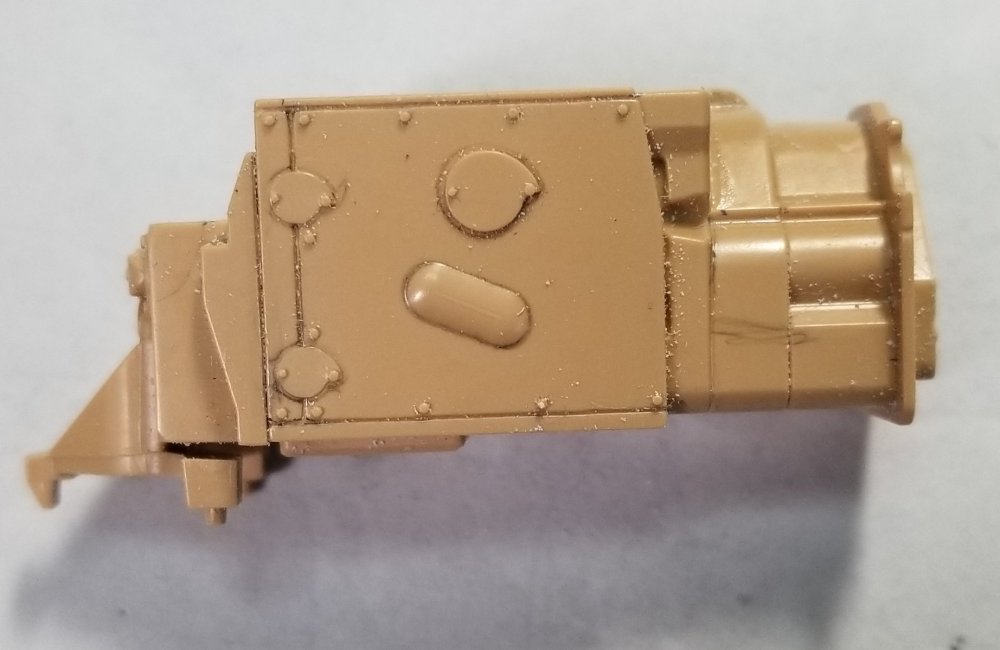
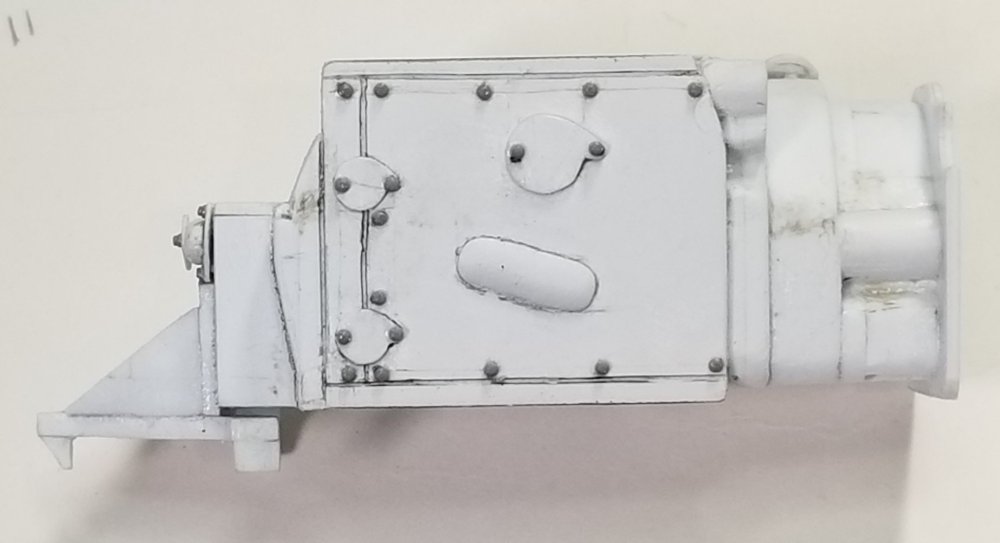
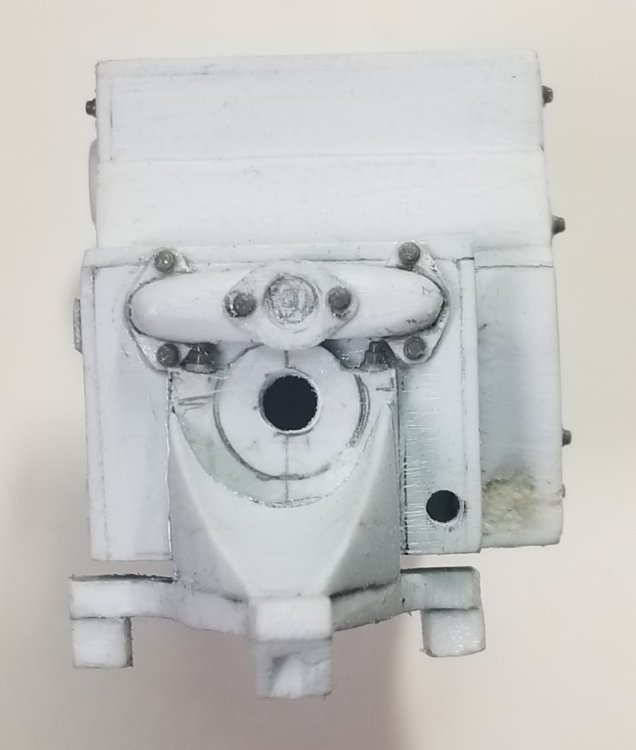
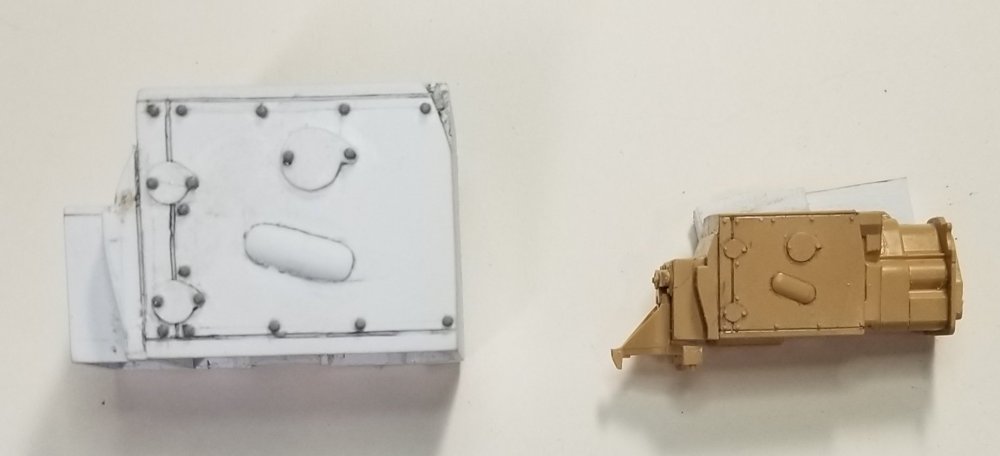
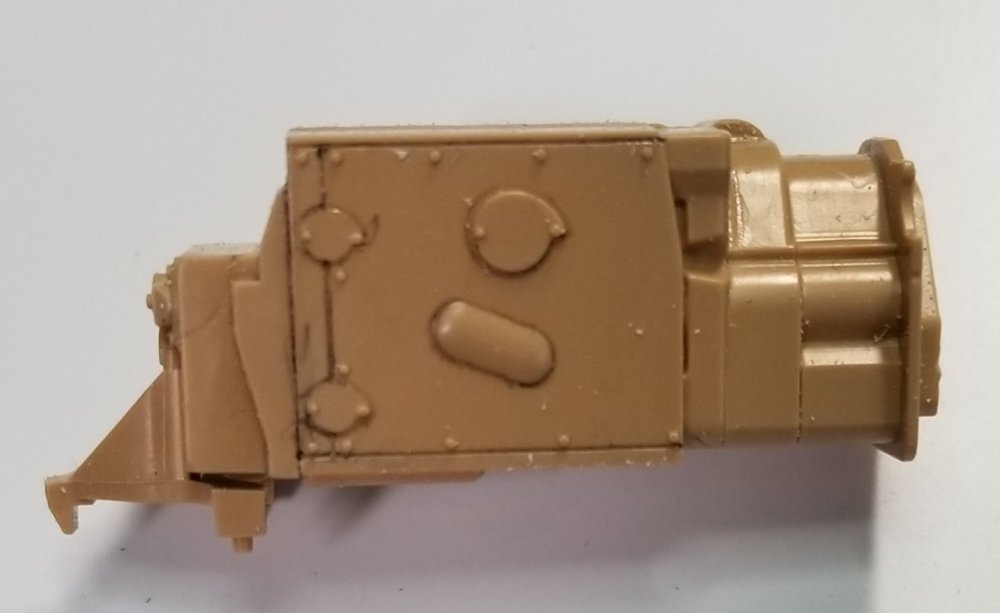
Hey guys Did some more work on the Tigers transmission housing. I think I have it done, but I my need to do the part that attaches to the front of the trans, depends on whether or not it's visible thru the driver and radio operators hatches. This view shows the 1/35 on the right and the 1/16 on the left. Drivers side of the 1/35 trans. Drivers side of the 1/16 trans. Radio operators side of the 1/35 trans. Radio operators side of the 1/16 trans. Rear of the 1/35 trans. Rear of the 1/16 trans. Well that's it for now be back soon. Ron G

-
As I said in the other post Sol makes them in DAK & winter clothing. If I remember right I think they have two figures for the Tiger, but I'm not sure if you can get them from AHHQ. Ron G
-
Thanks Carl, did you check out my panzer iii build? Those figures are real nice. Ron G
-
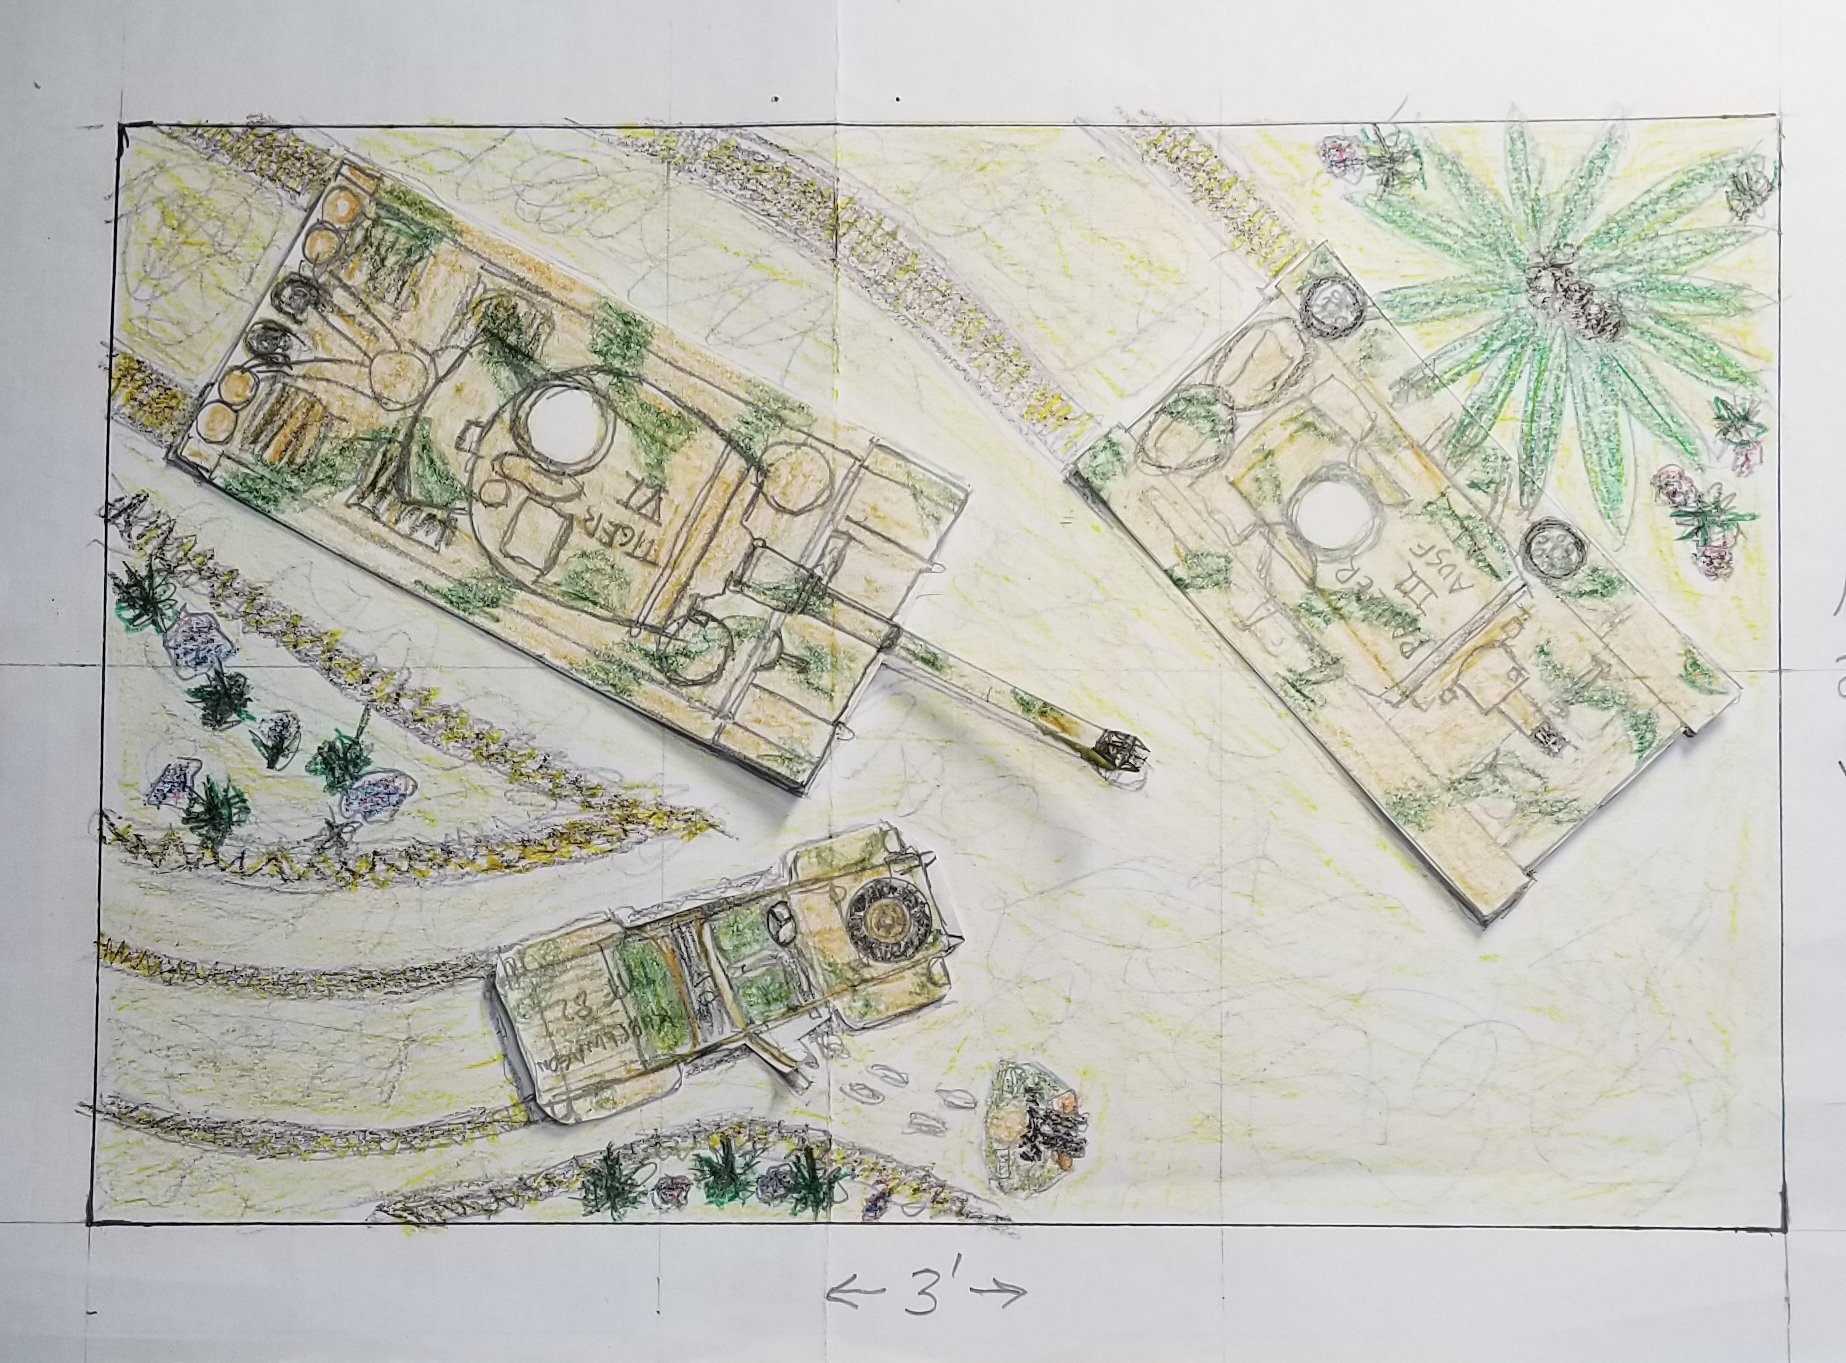
Hey all Small update for you to look at. Did some more work on the transmission housing. This view shows the 1/35 transmission on the right and my scratch built 1/16 one on the left. Closer view of the 1/35 trans. Closer view of my trans. Still have a lot of work to do on this. This is a sketch I did of the diorama I'm going to be doing of these three vehicles. My 1/16 AHHQ Tiger 1, Takoms Panzer III Ausf N and a Tamiya Kubelwagon with a Rommel figure and driver. It's going to be 3' by 2' yeah huge. Ron G

-
Hey all Andy just released a video on this about 2 hours ago. This thing looks amazing from what you can see. It has a lot of details and working items. Ron G
-
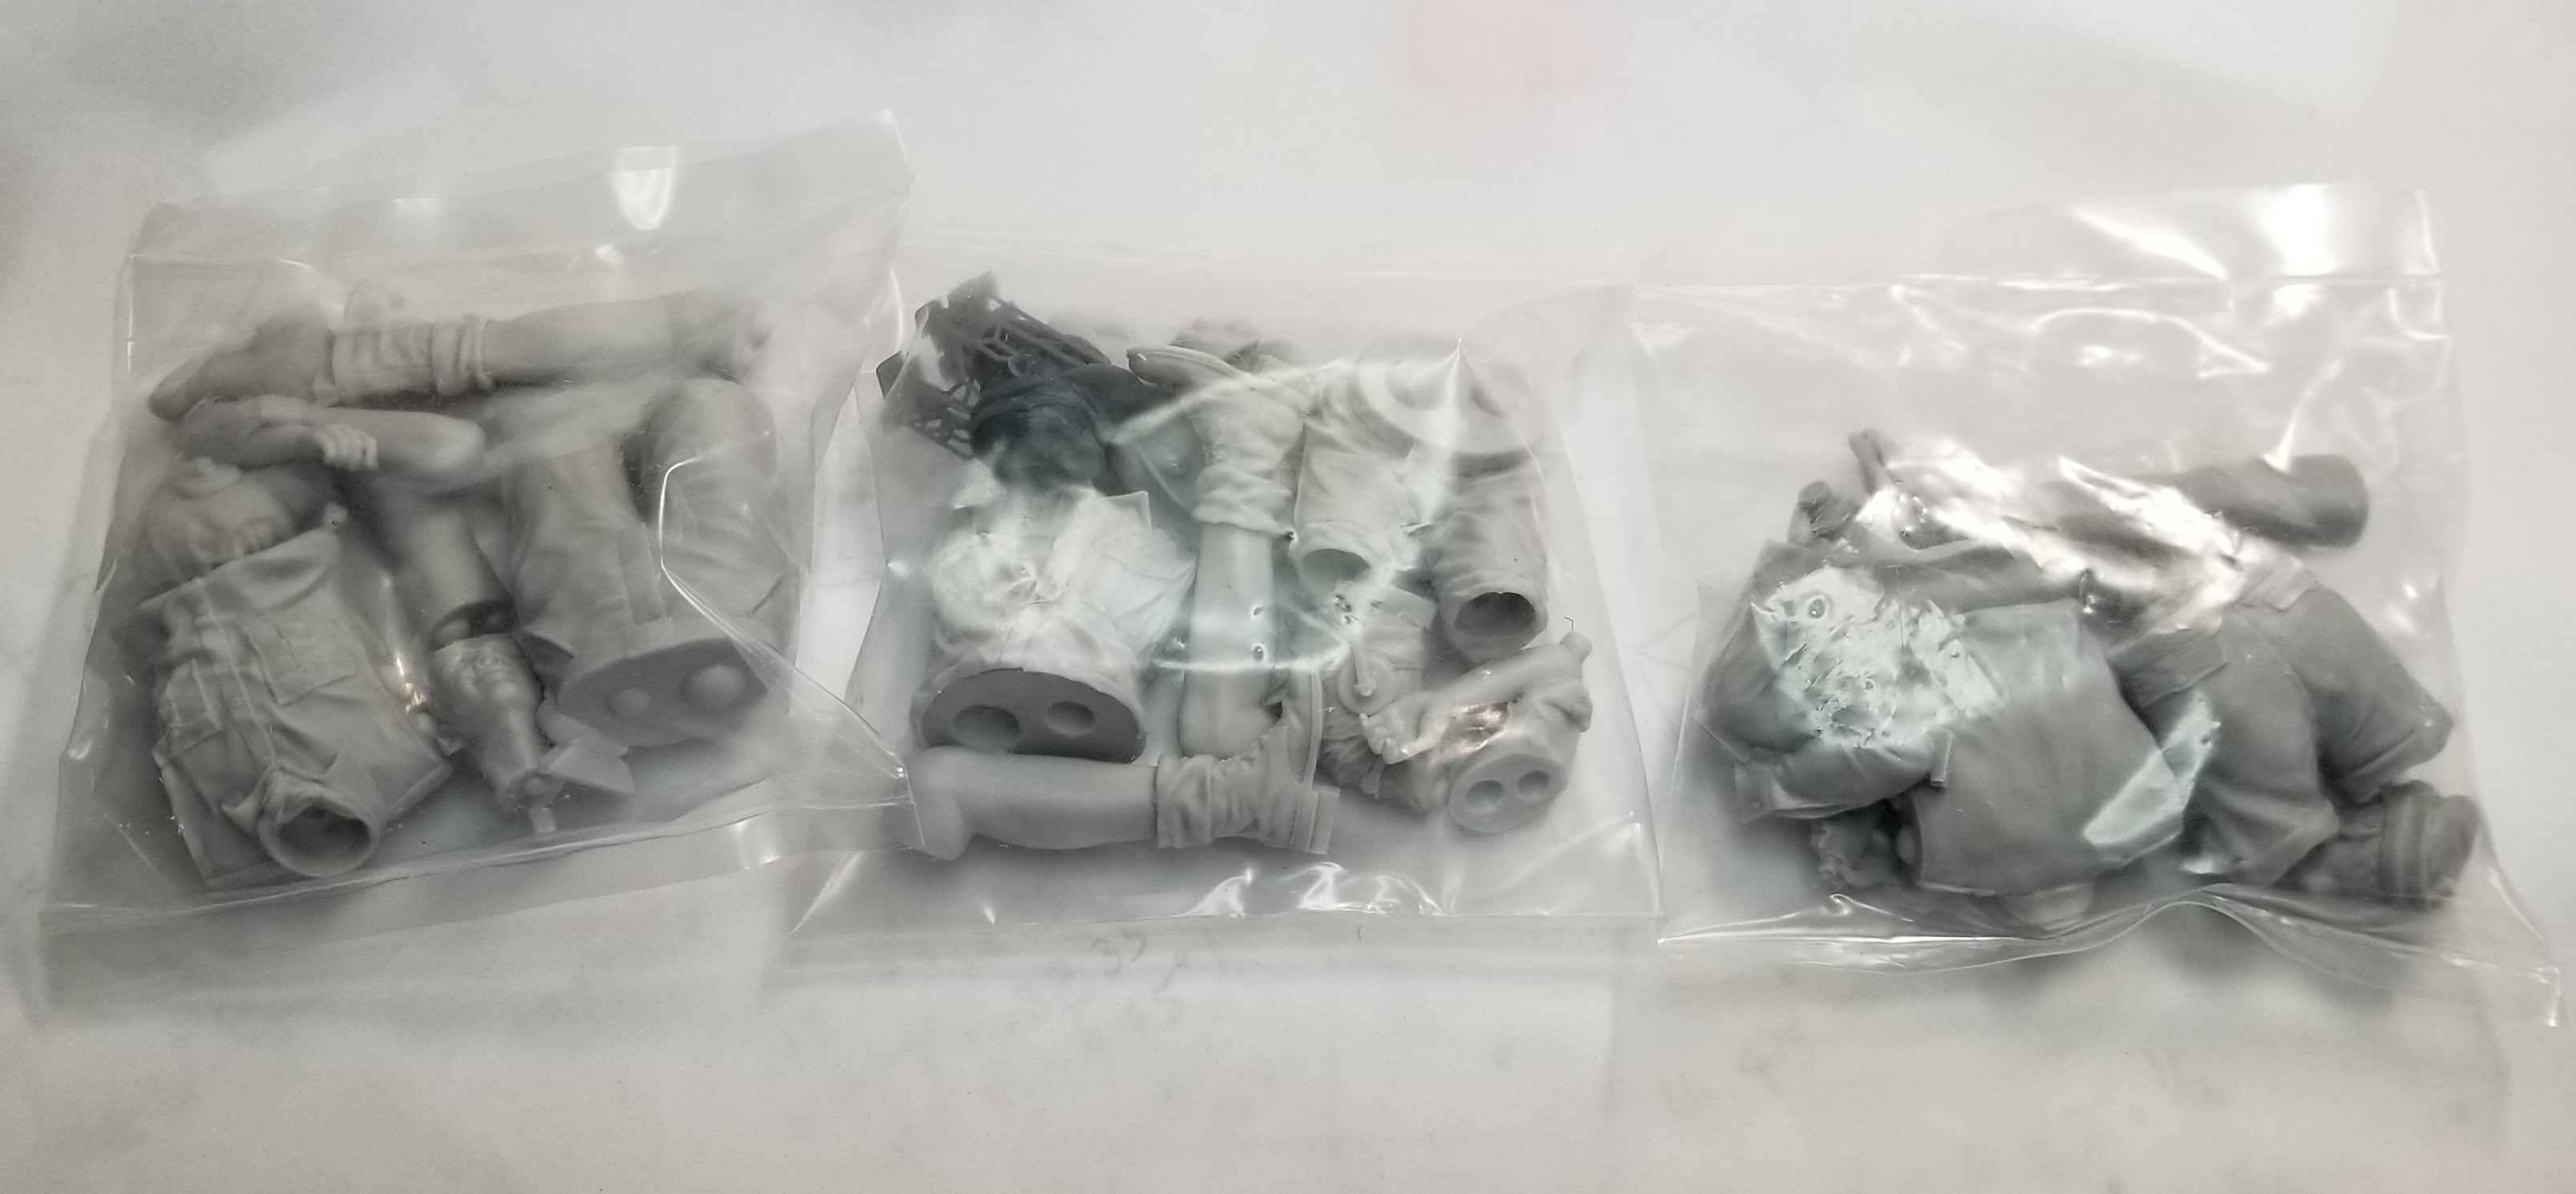
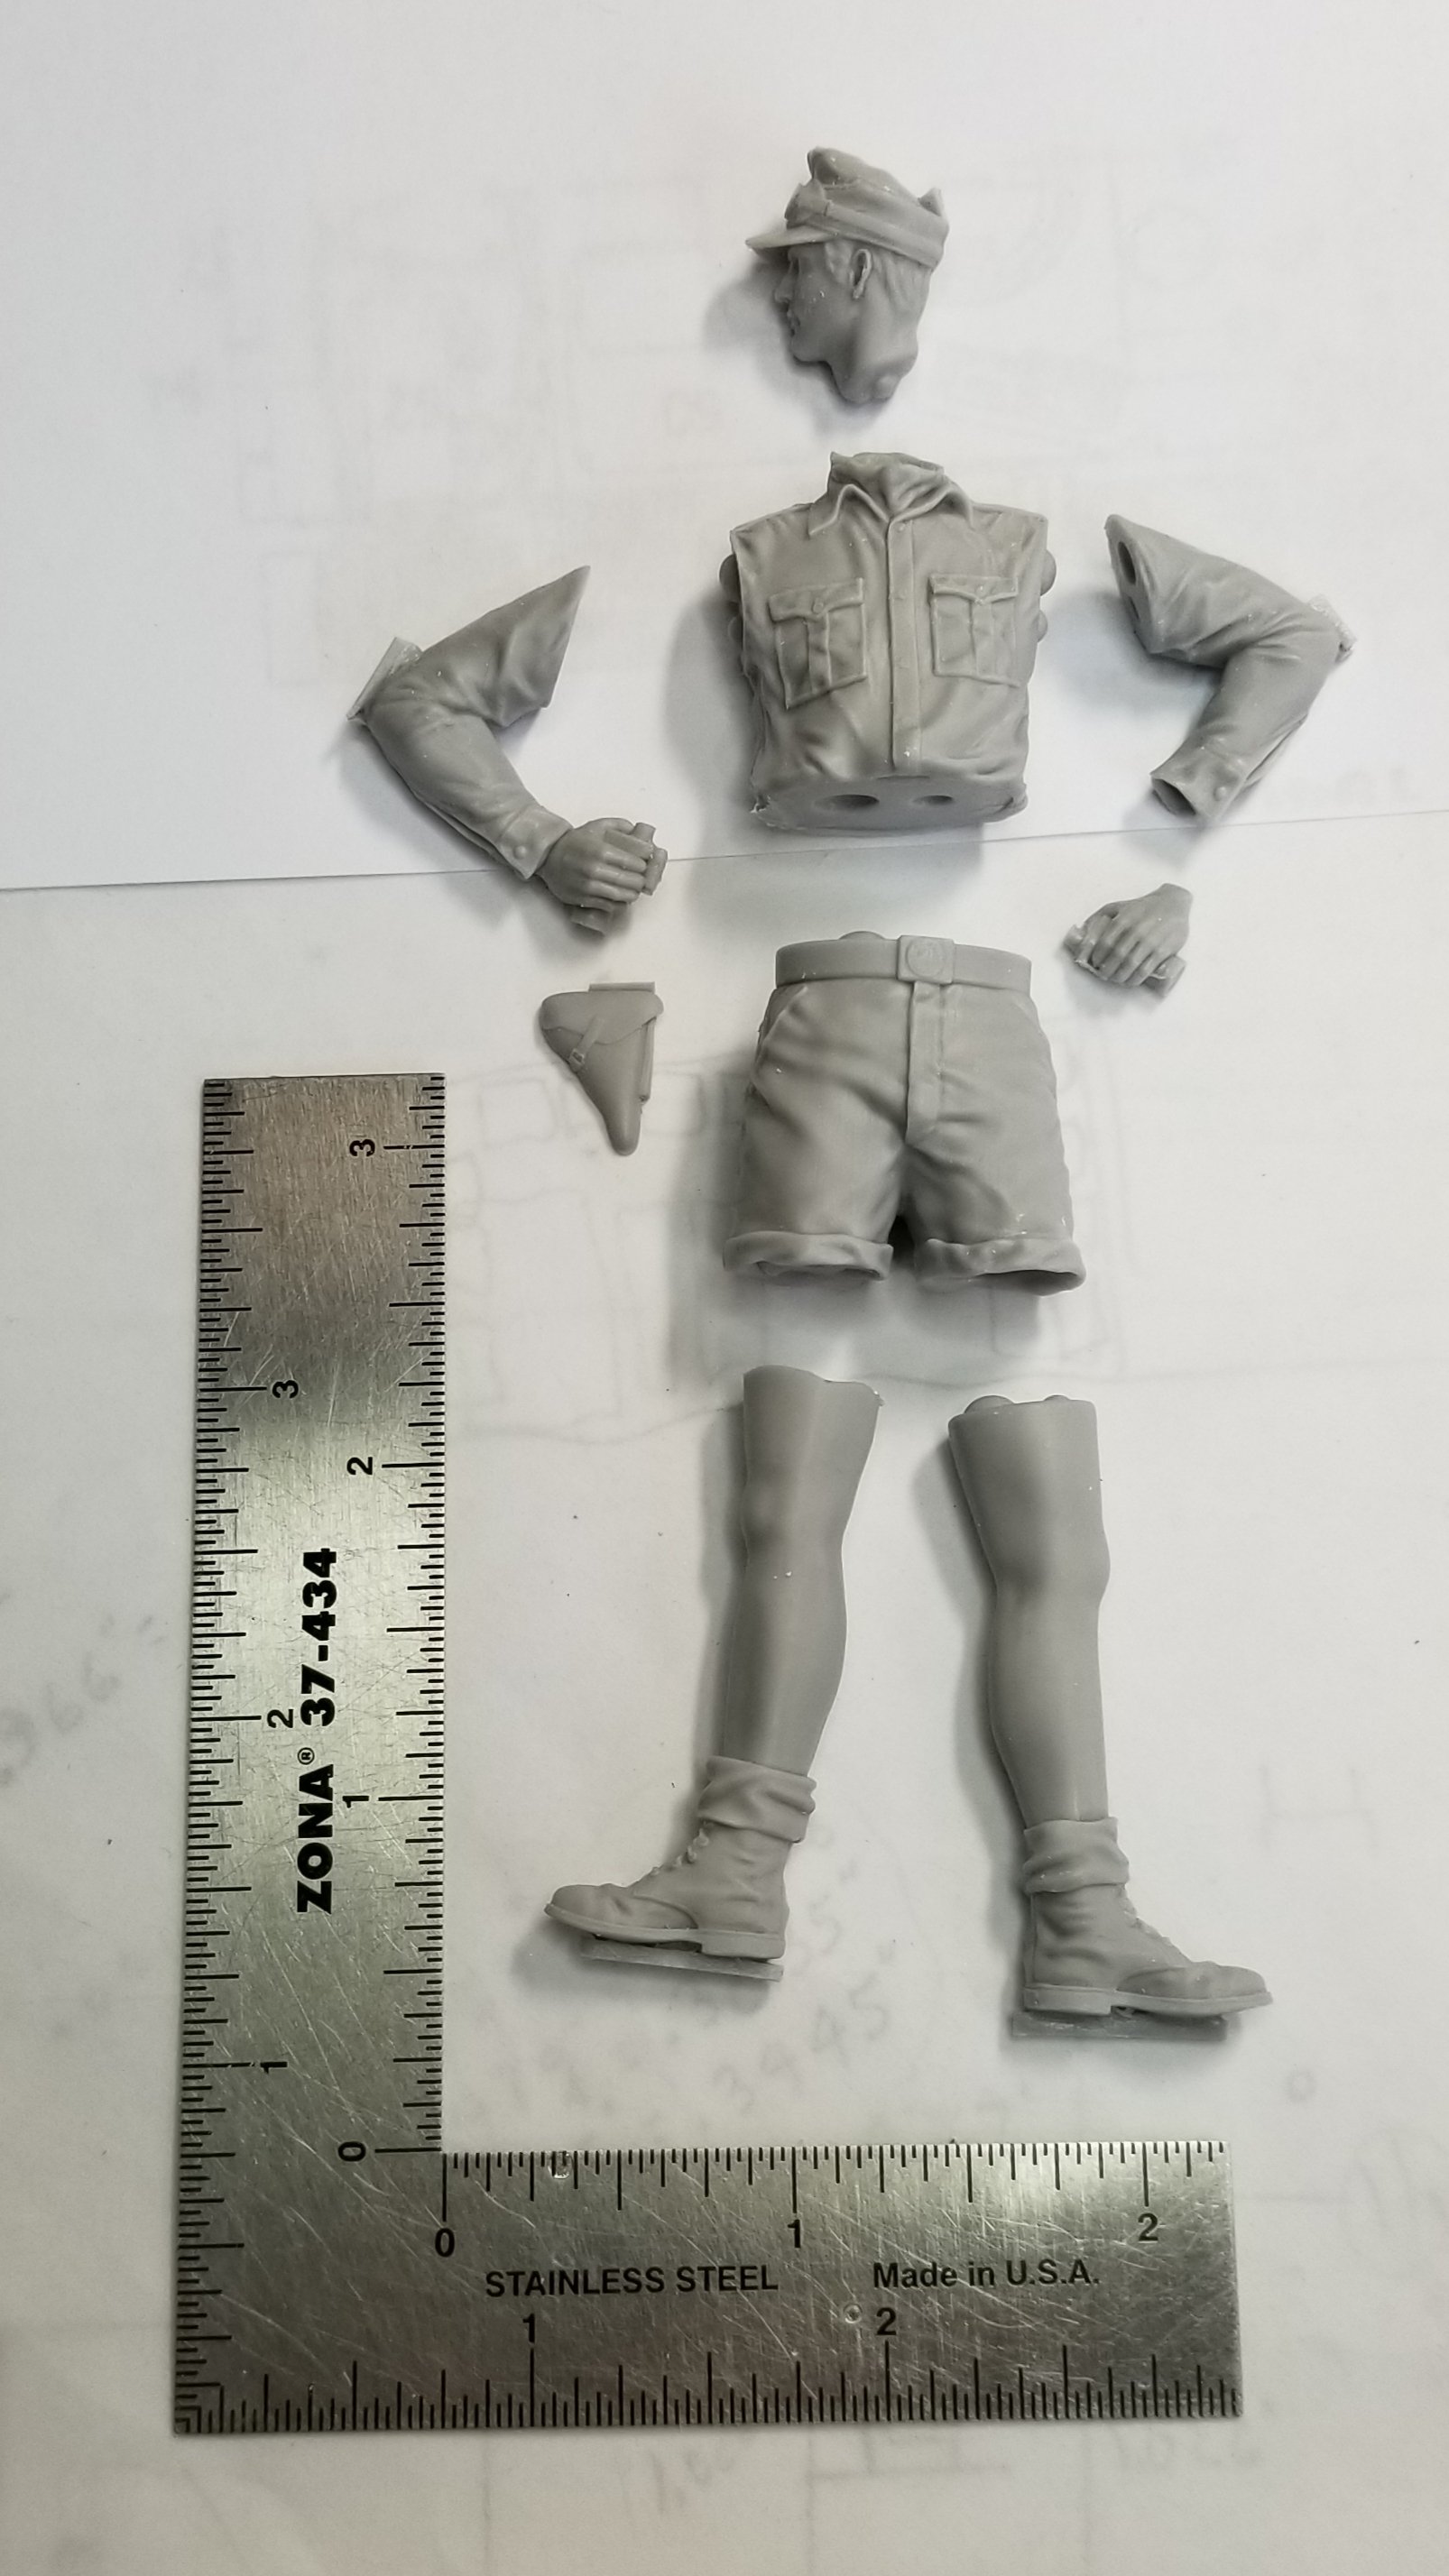
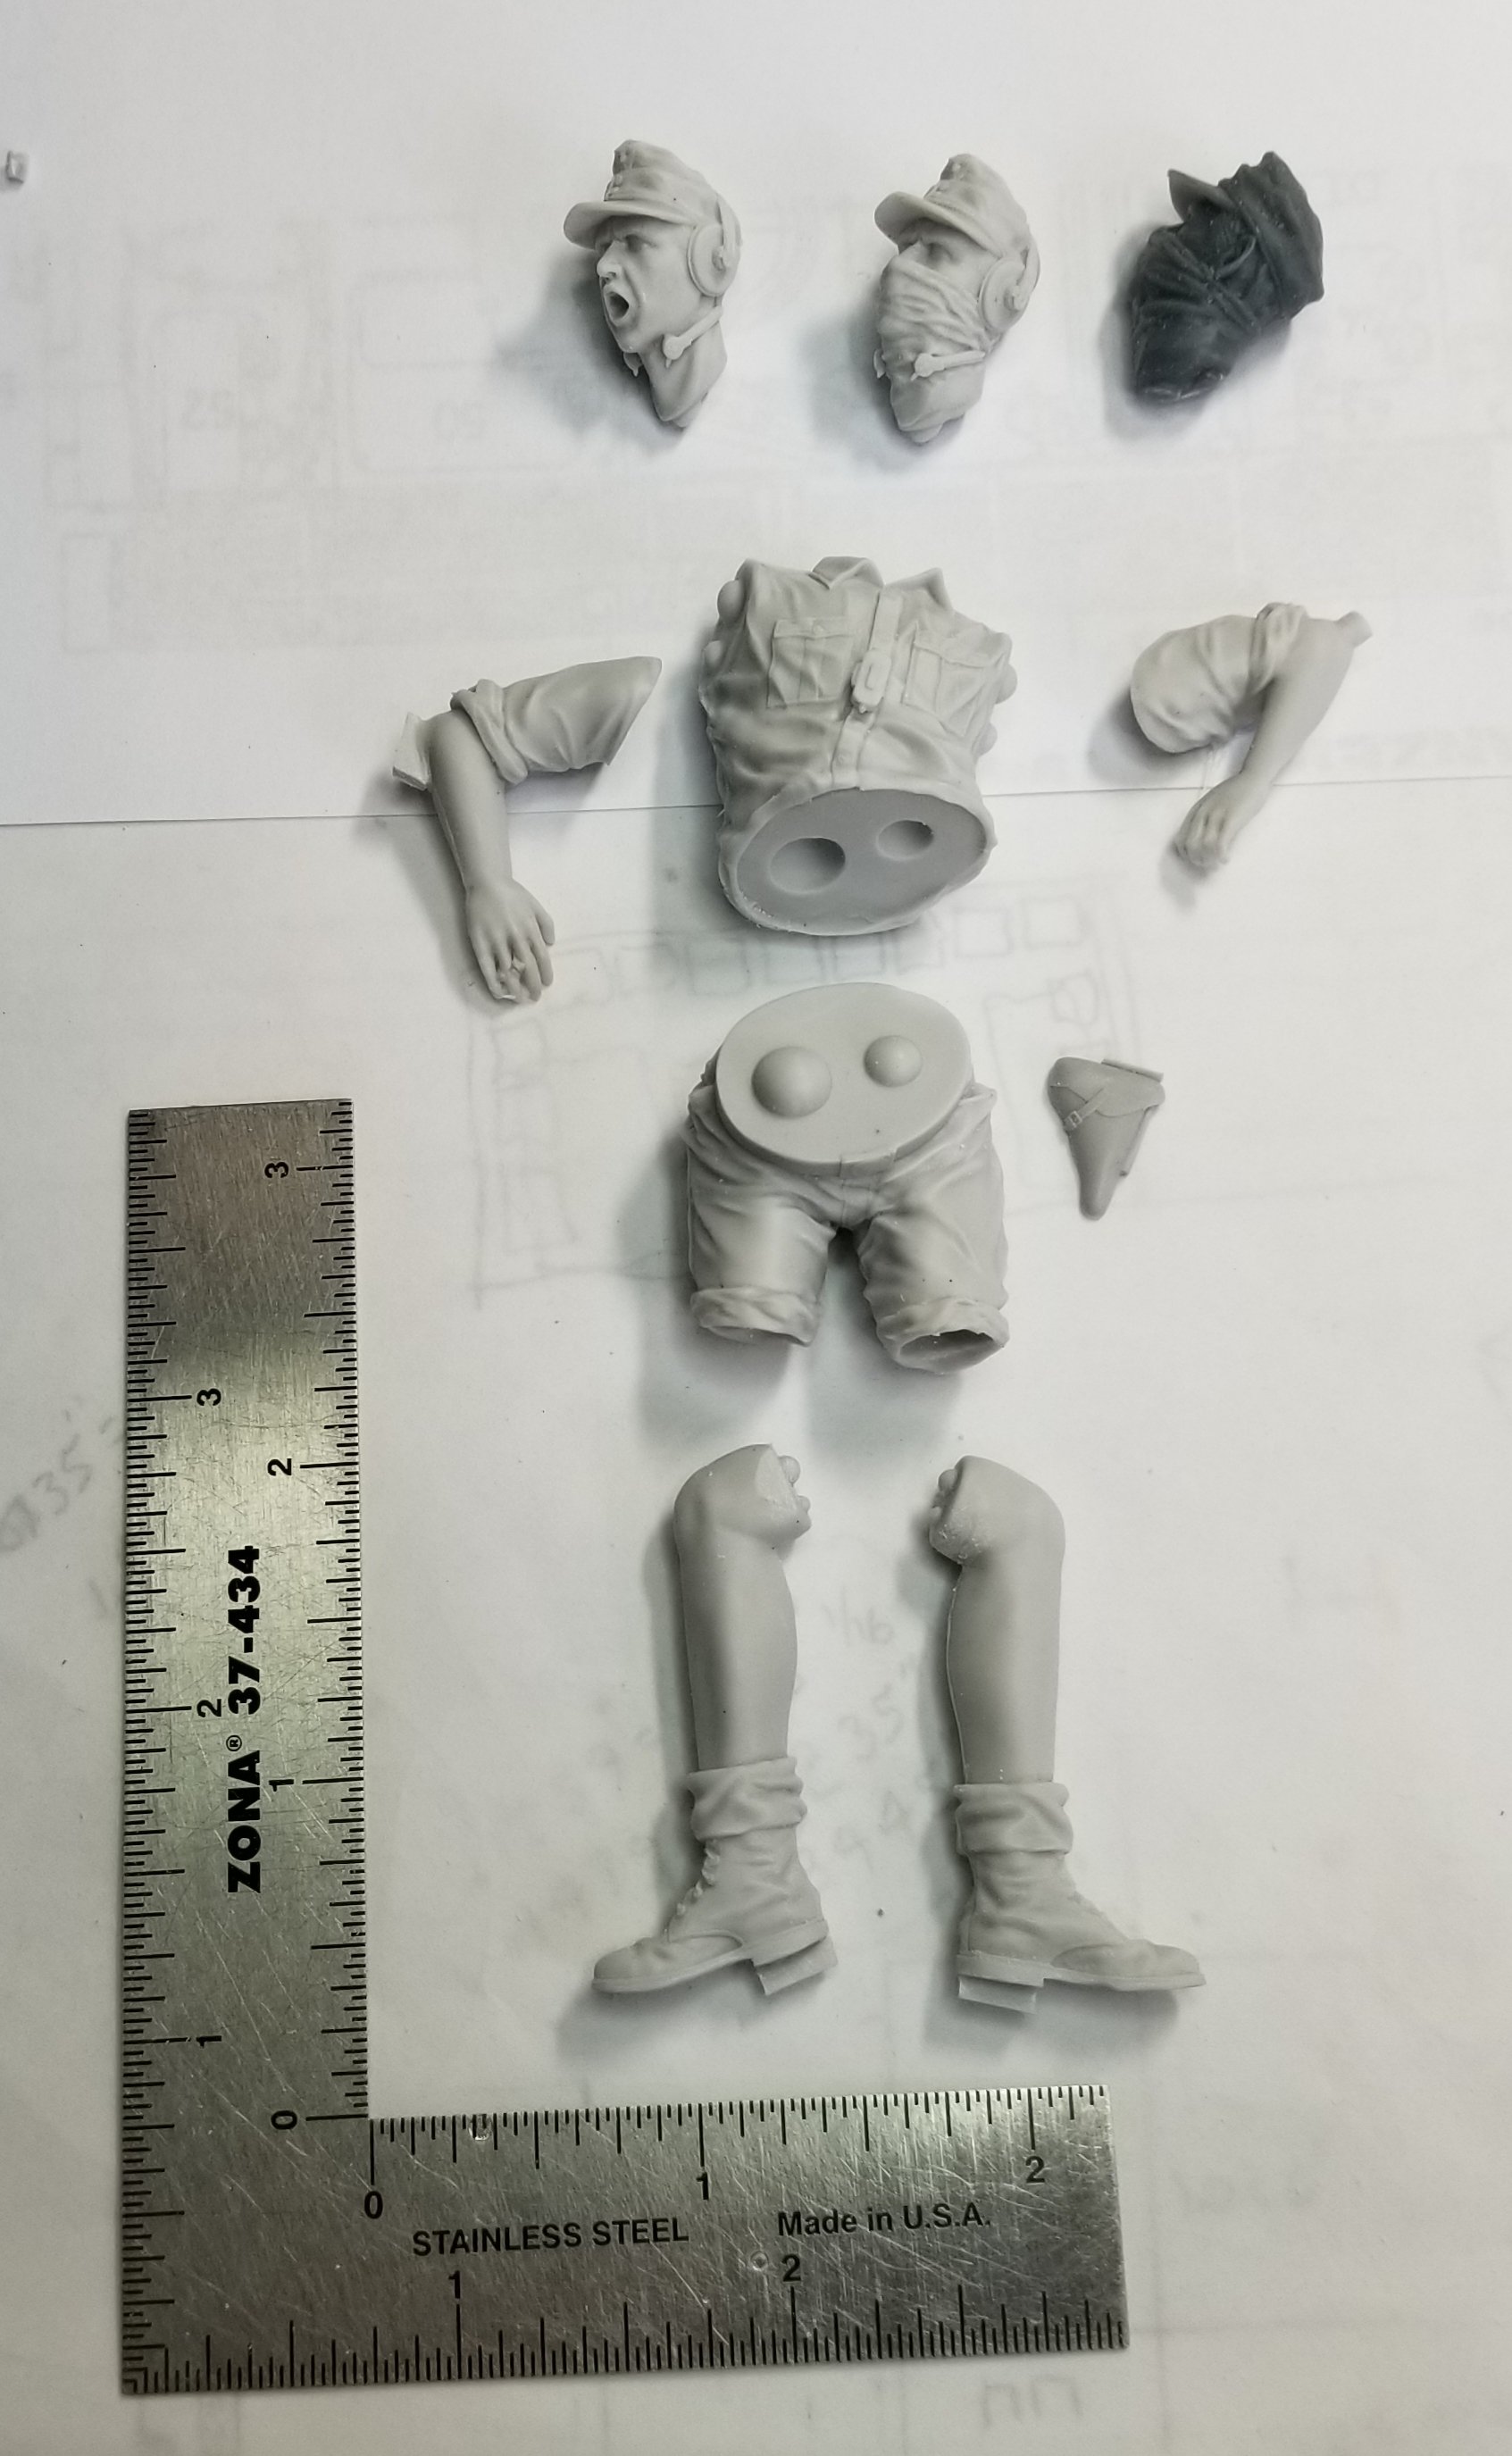
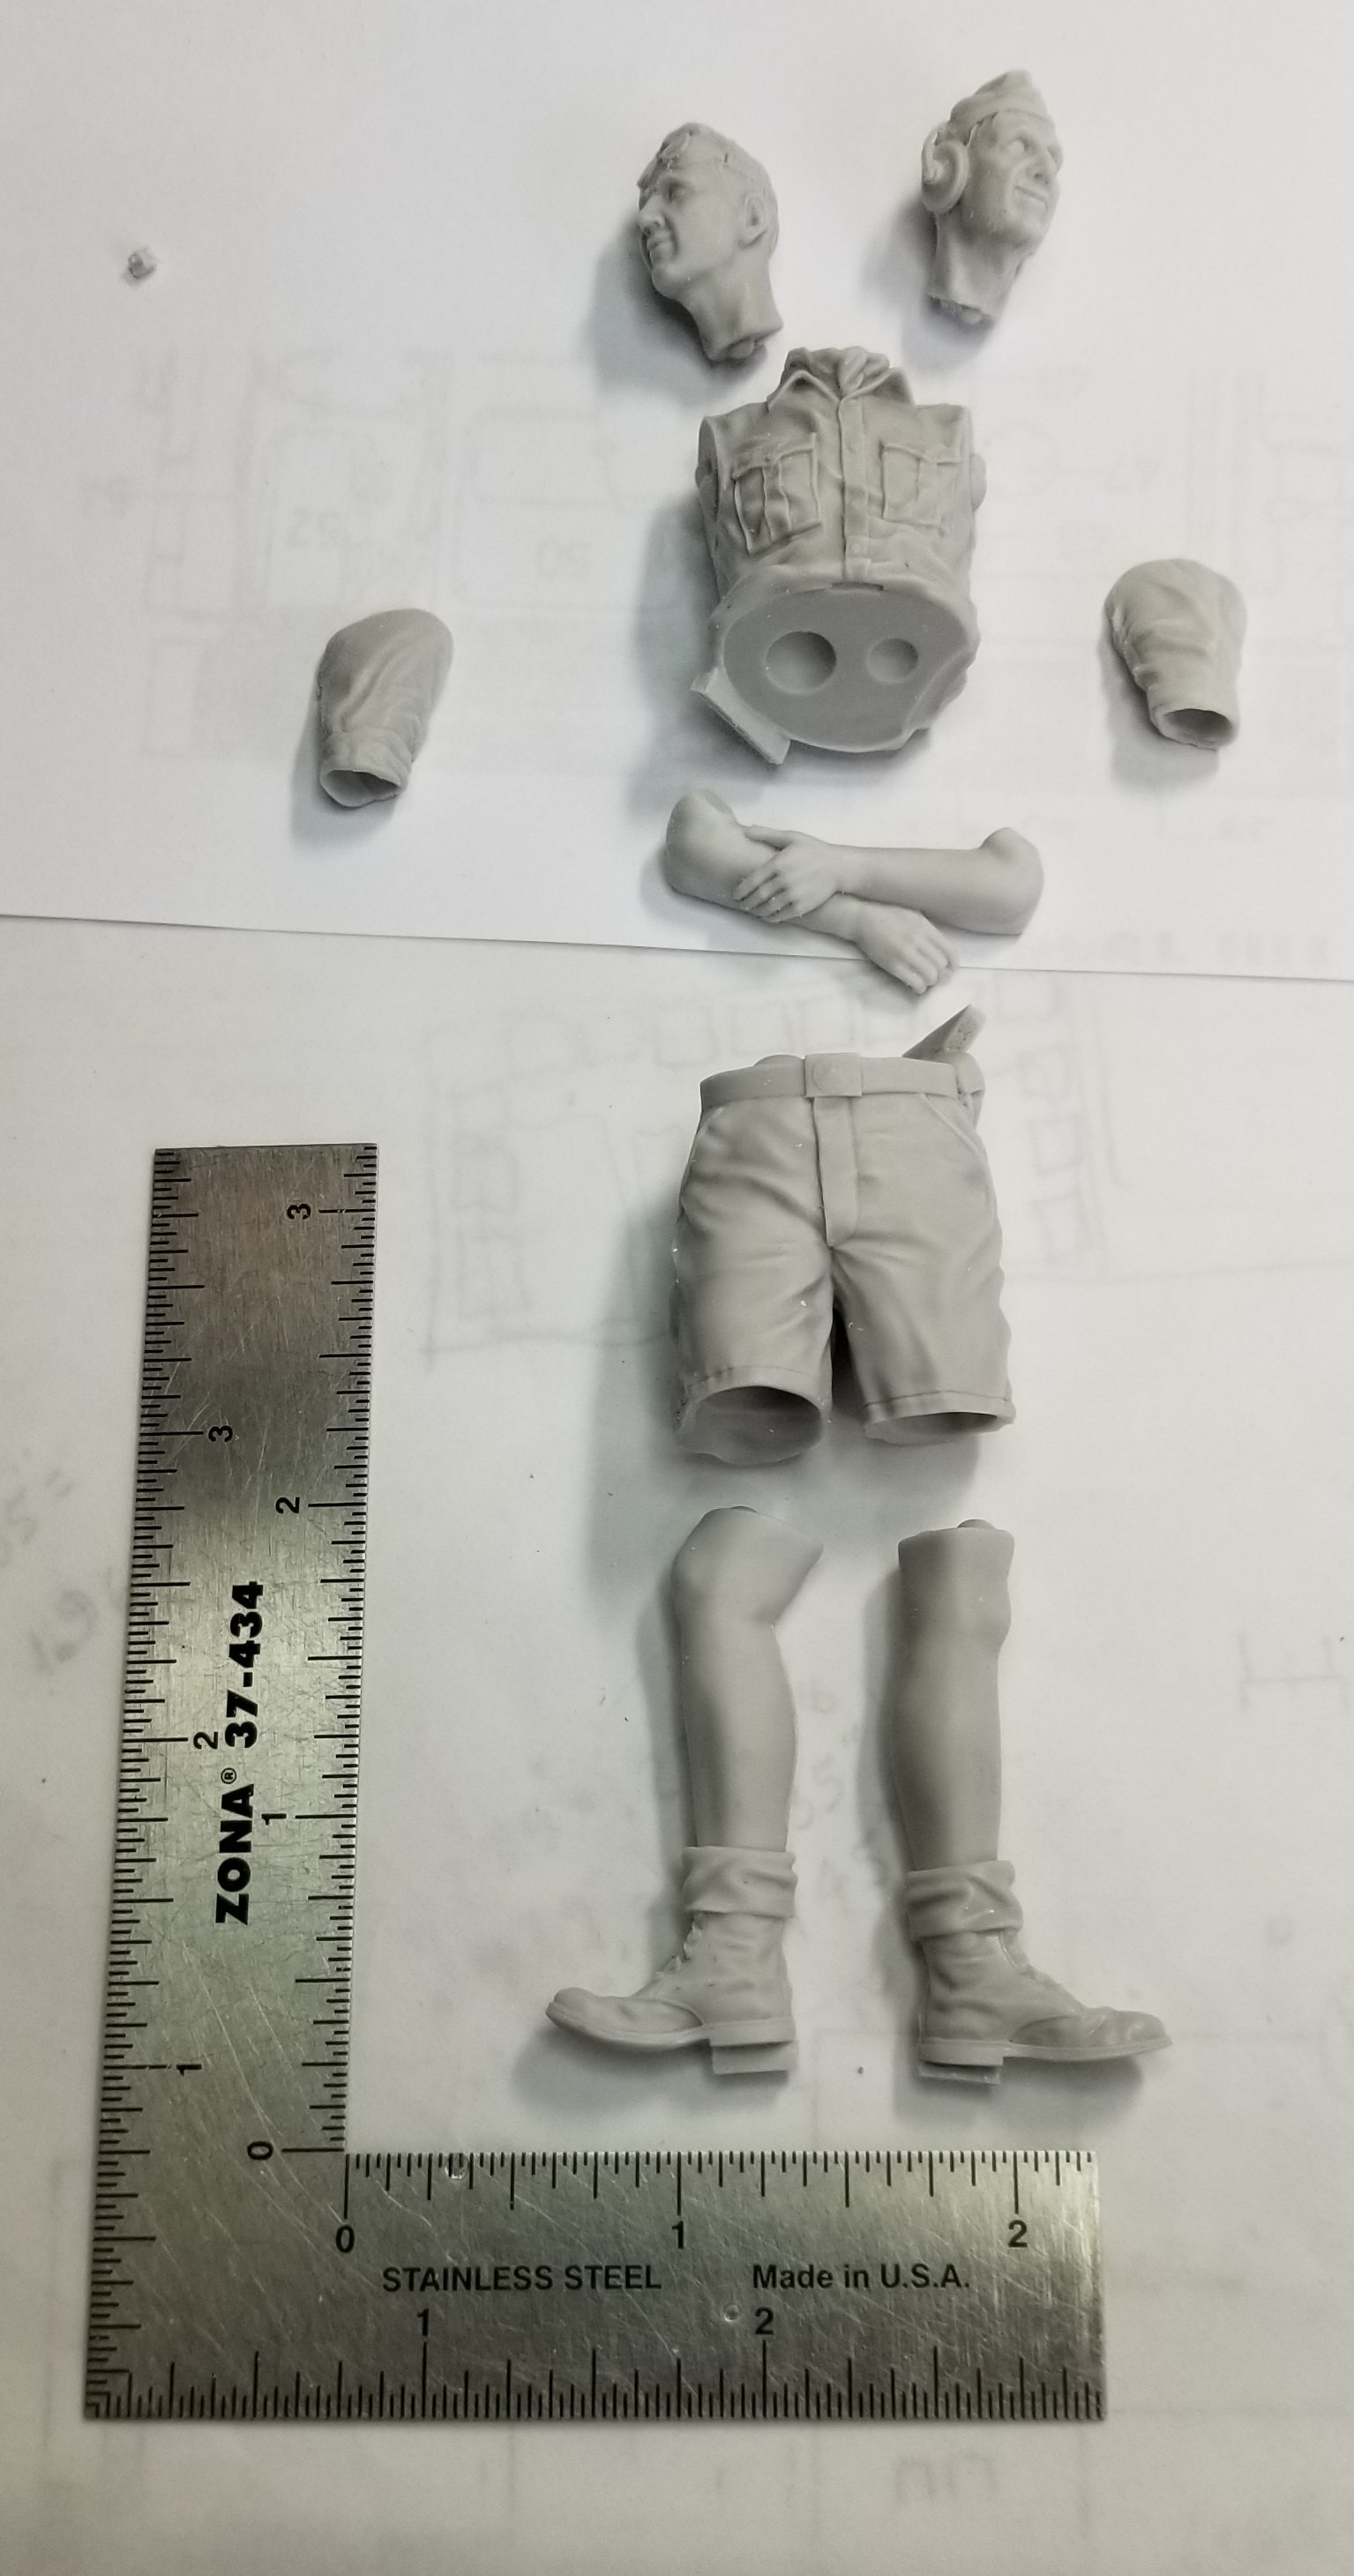
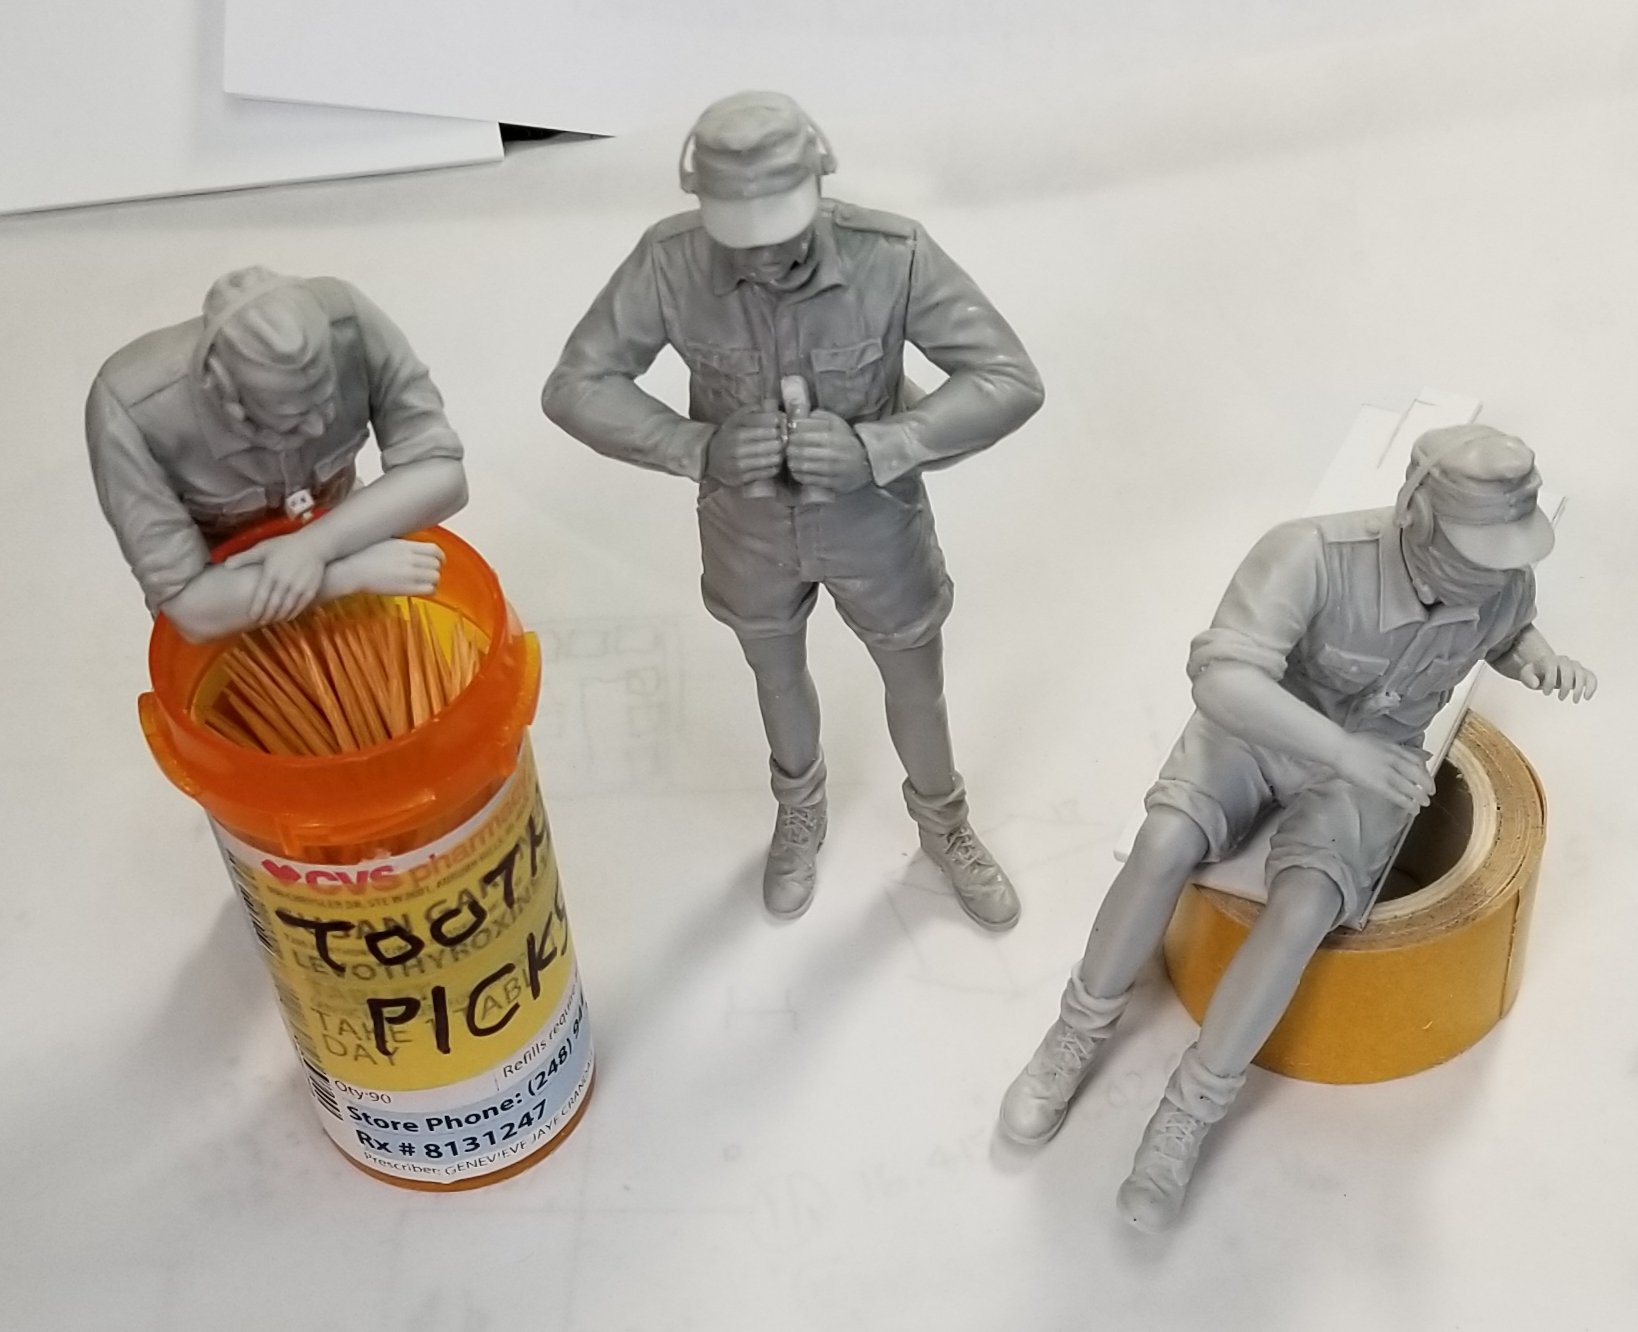
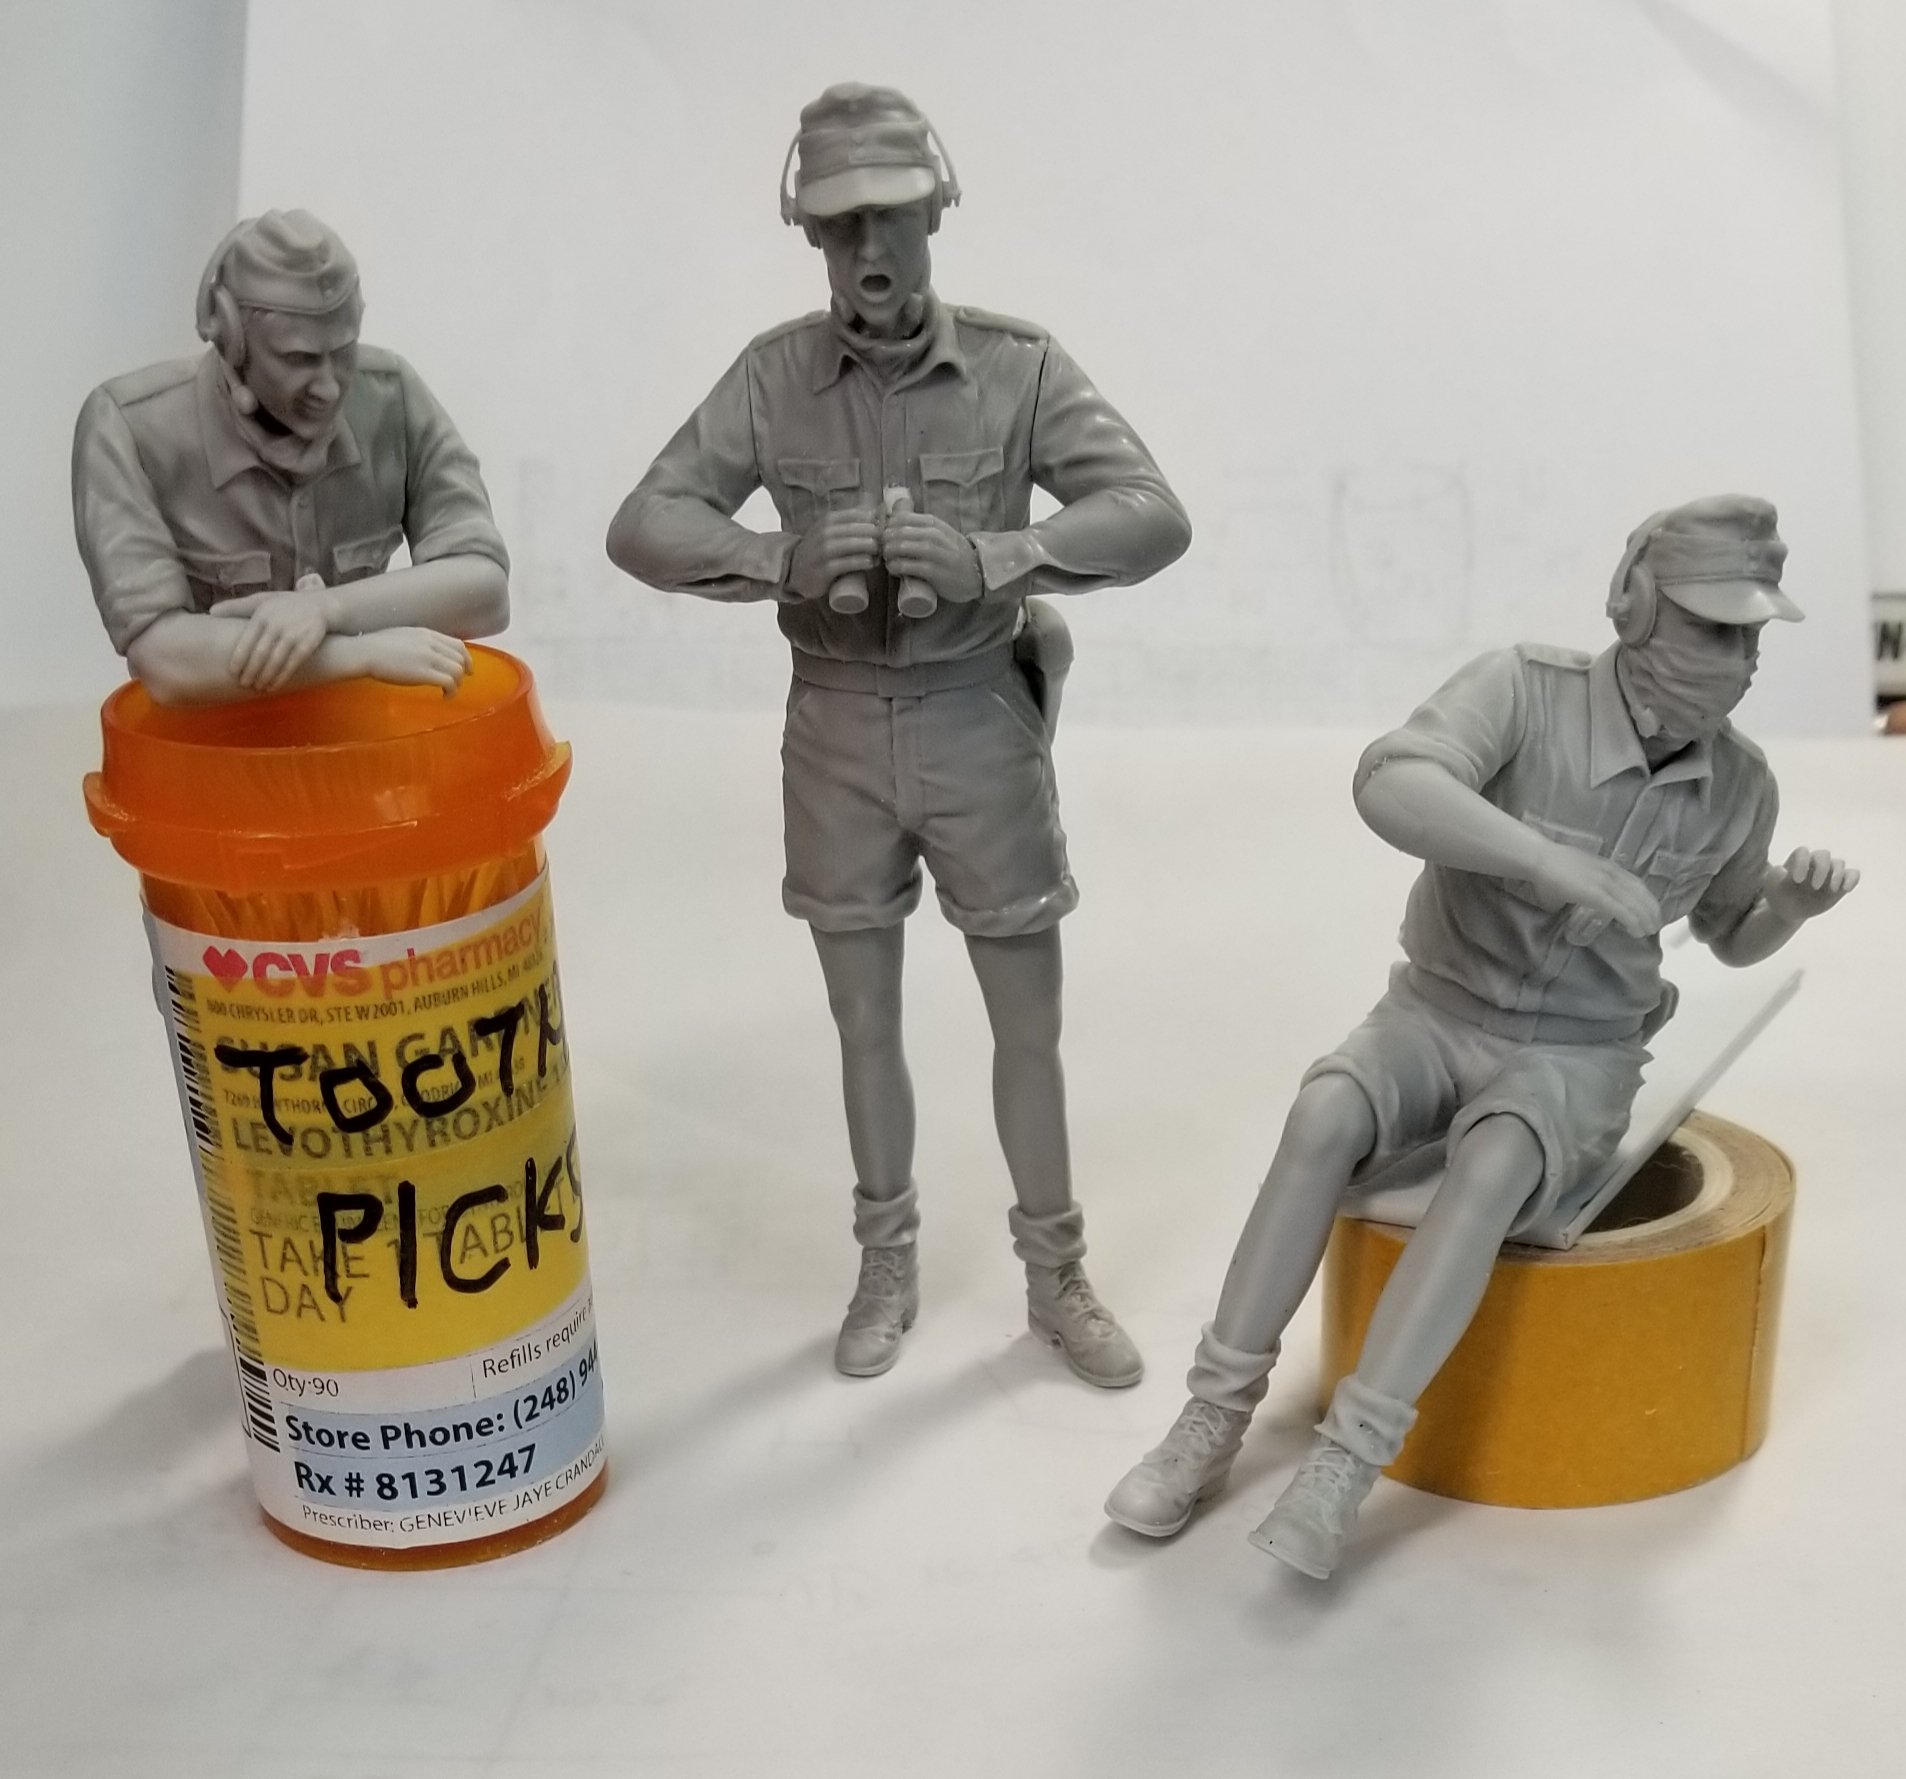
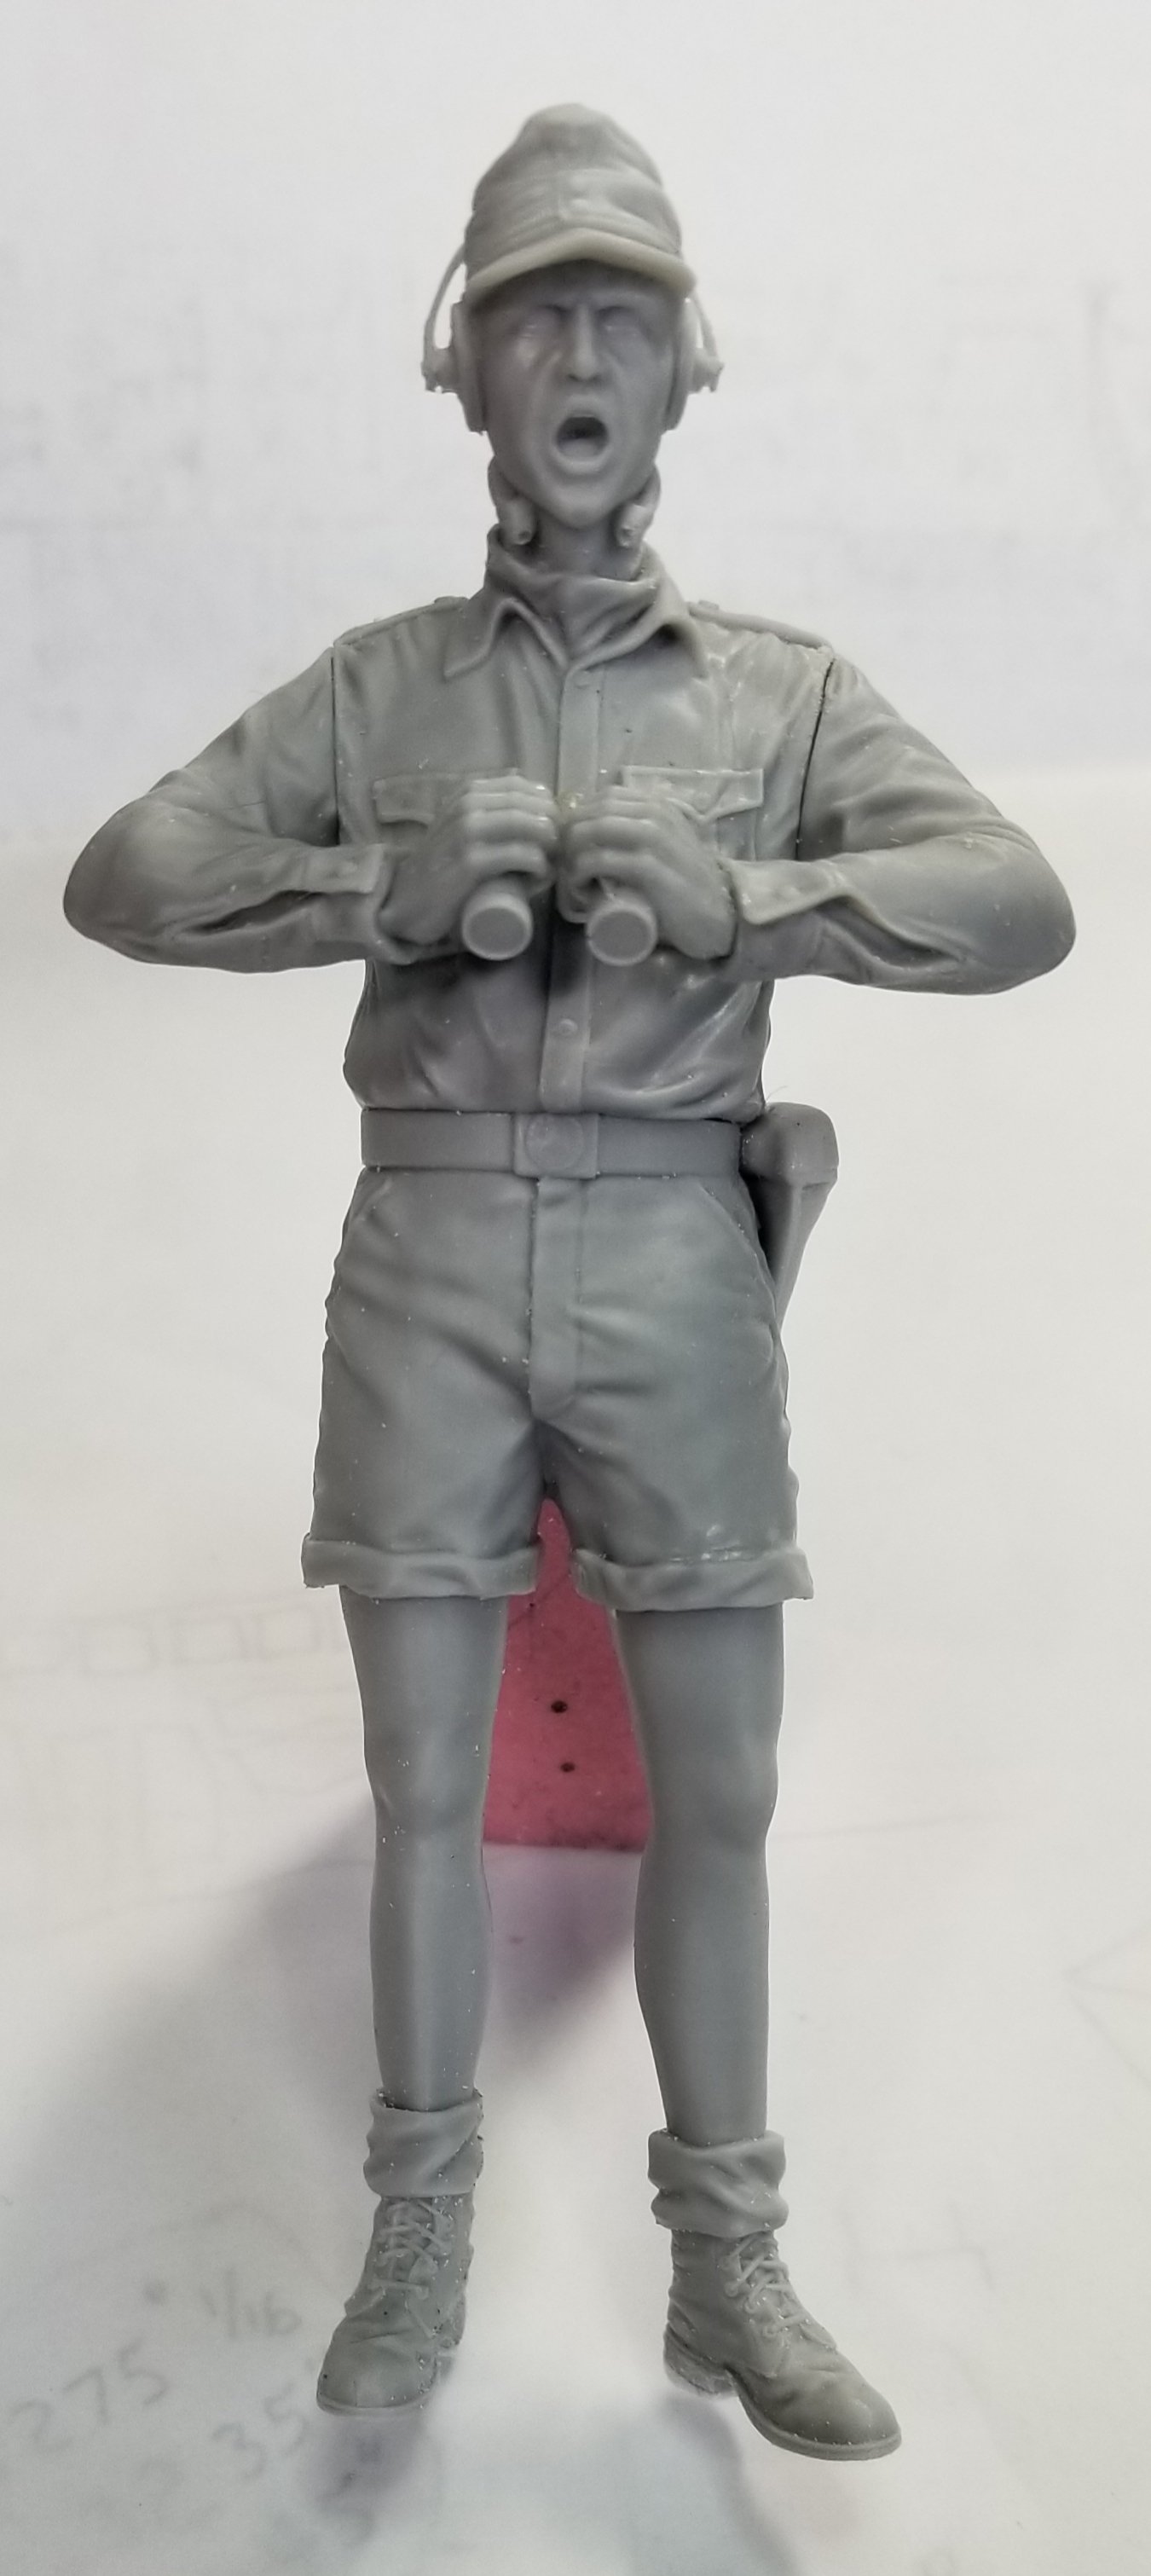
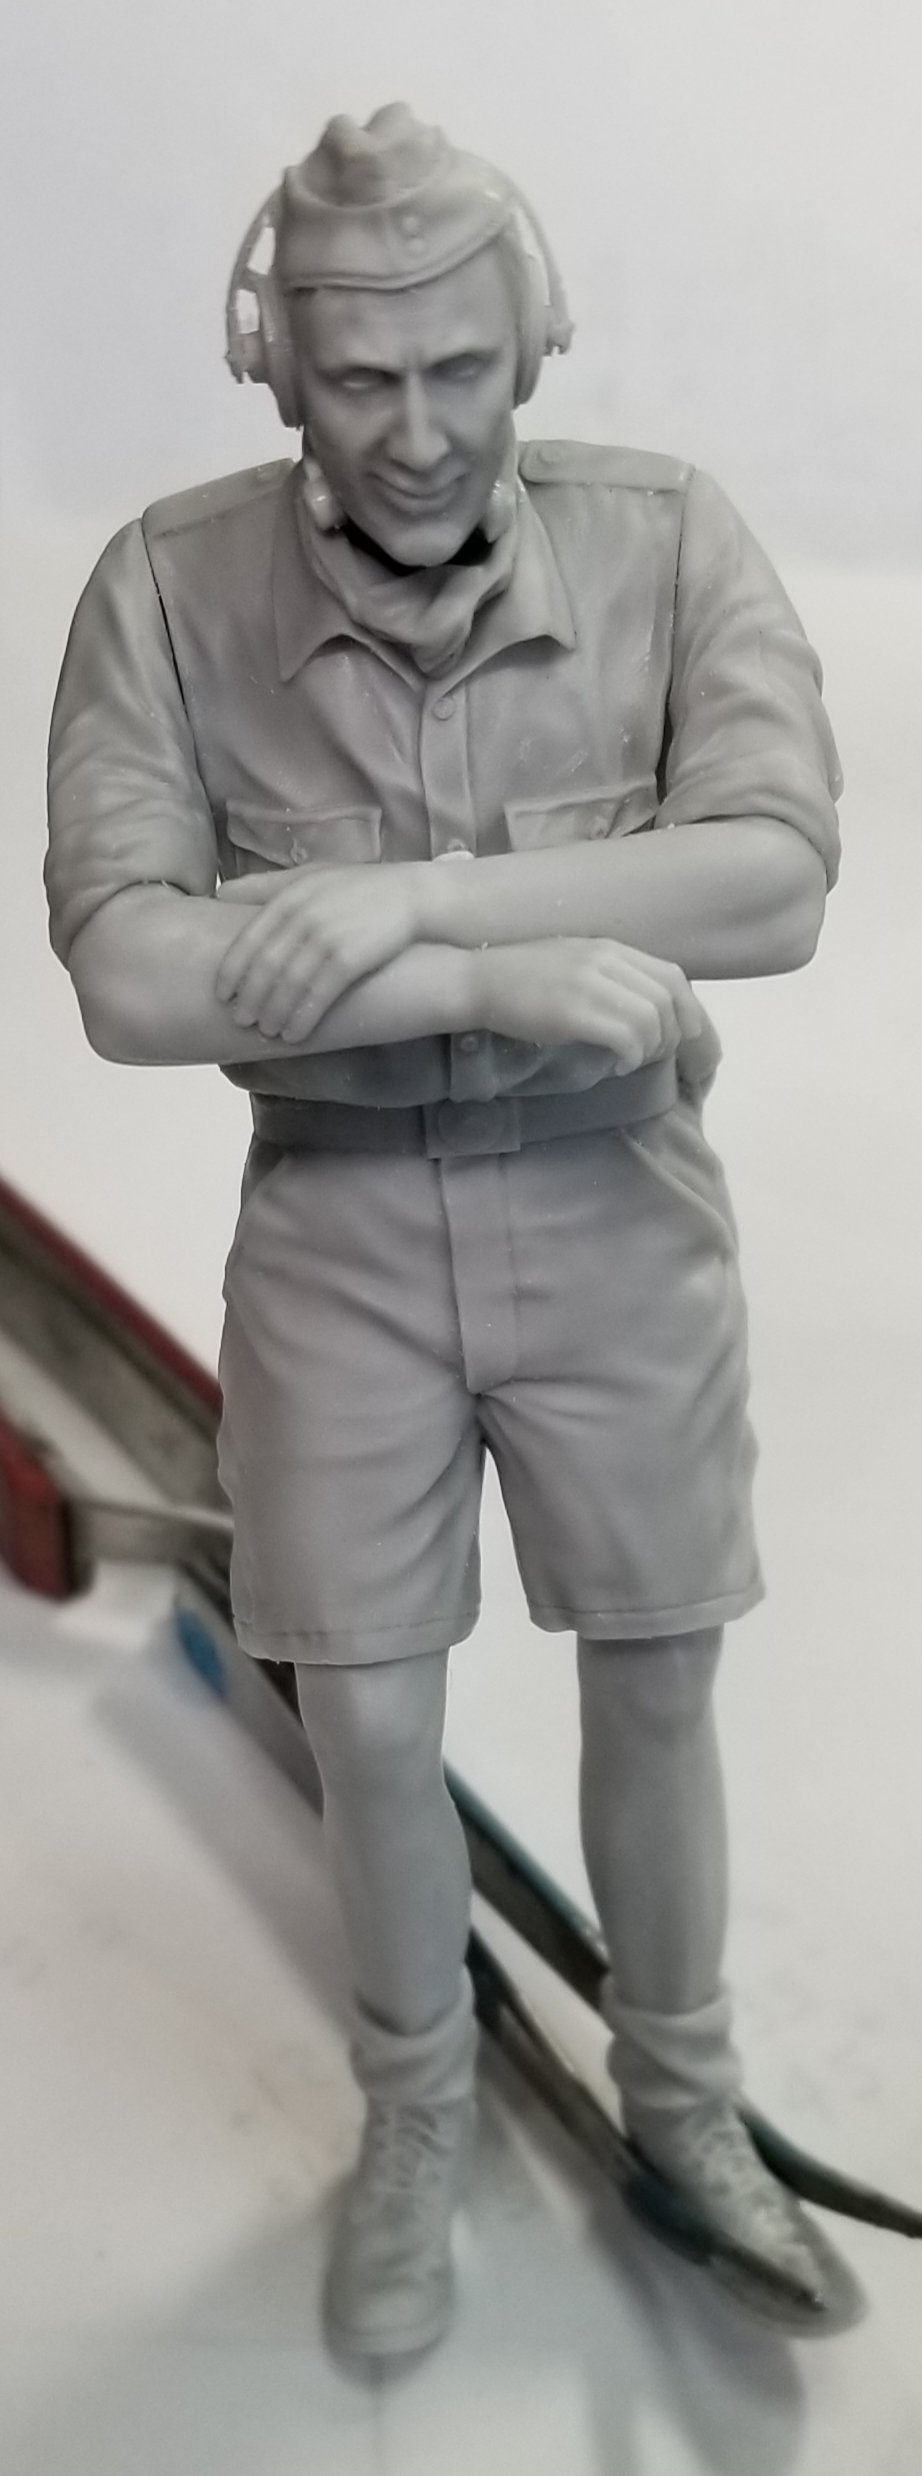
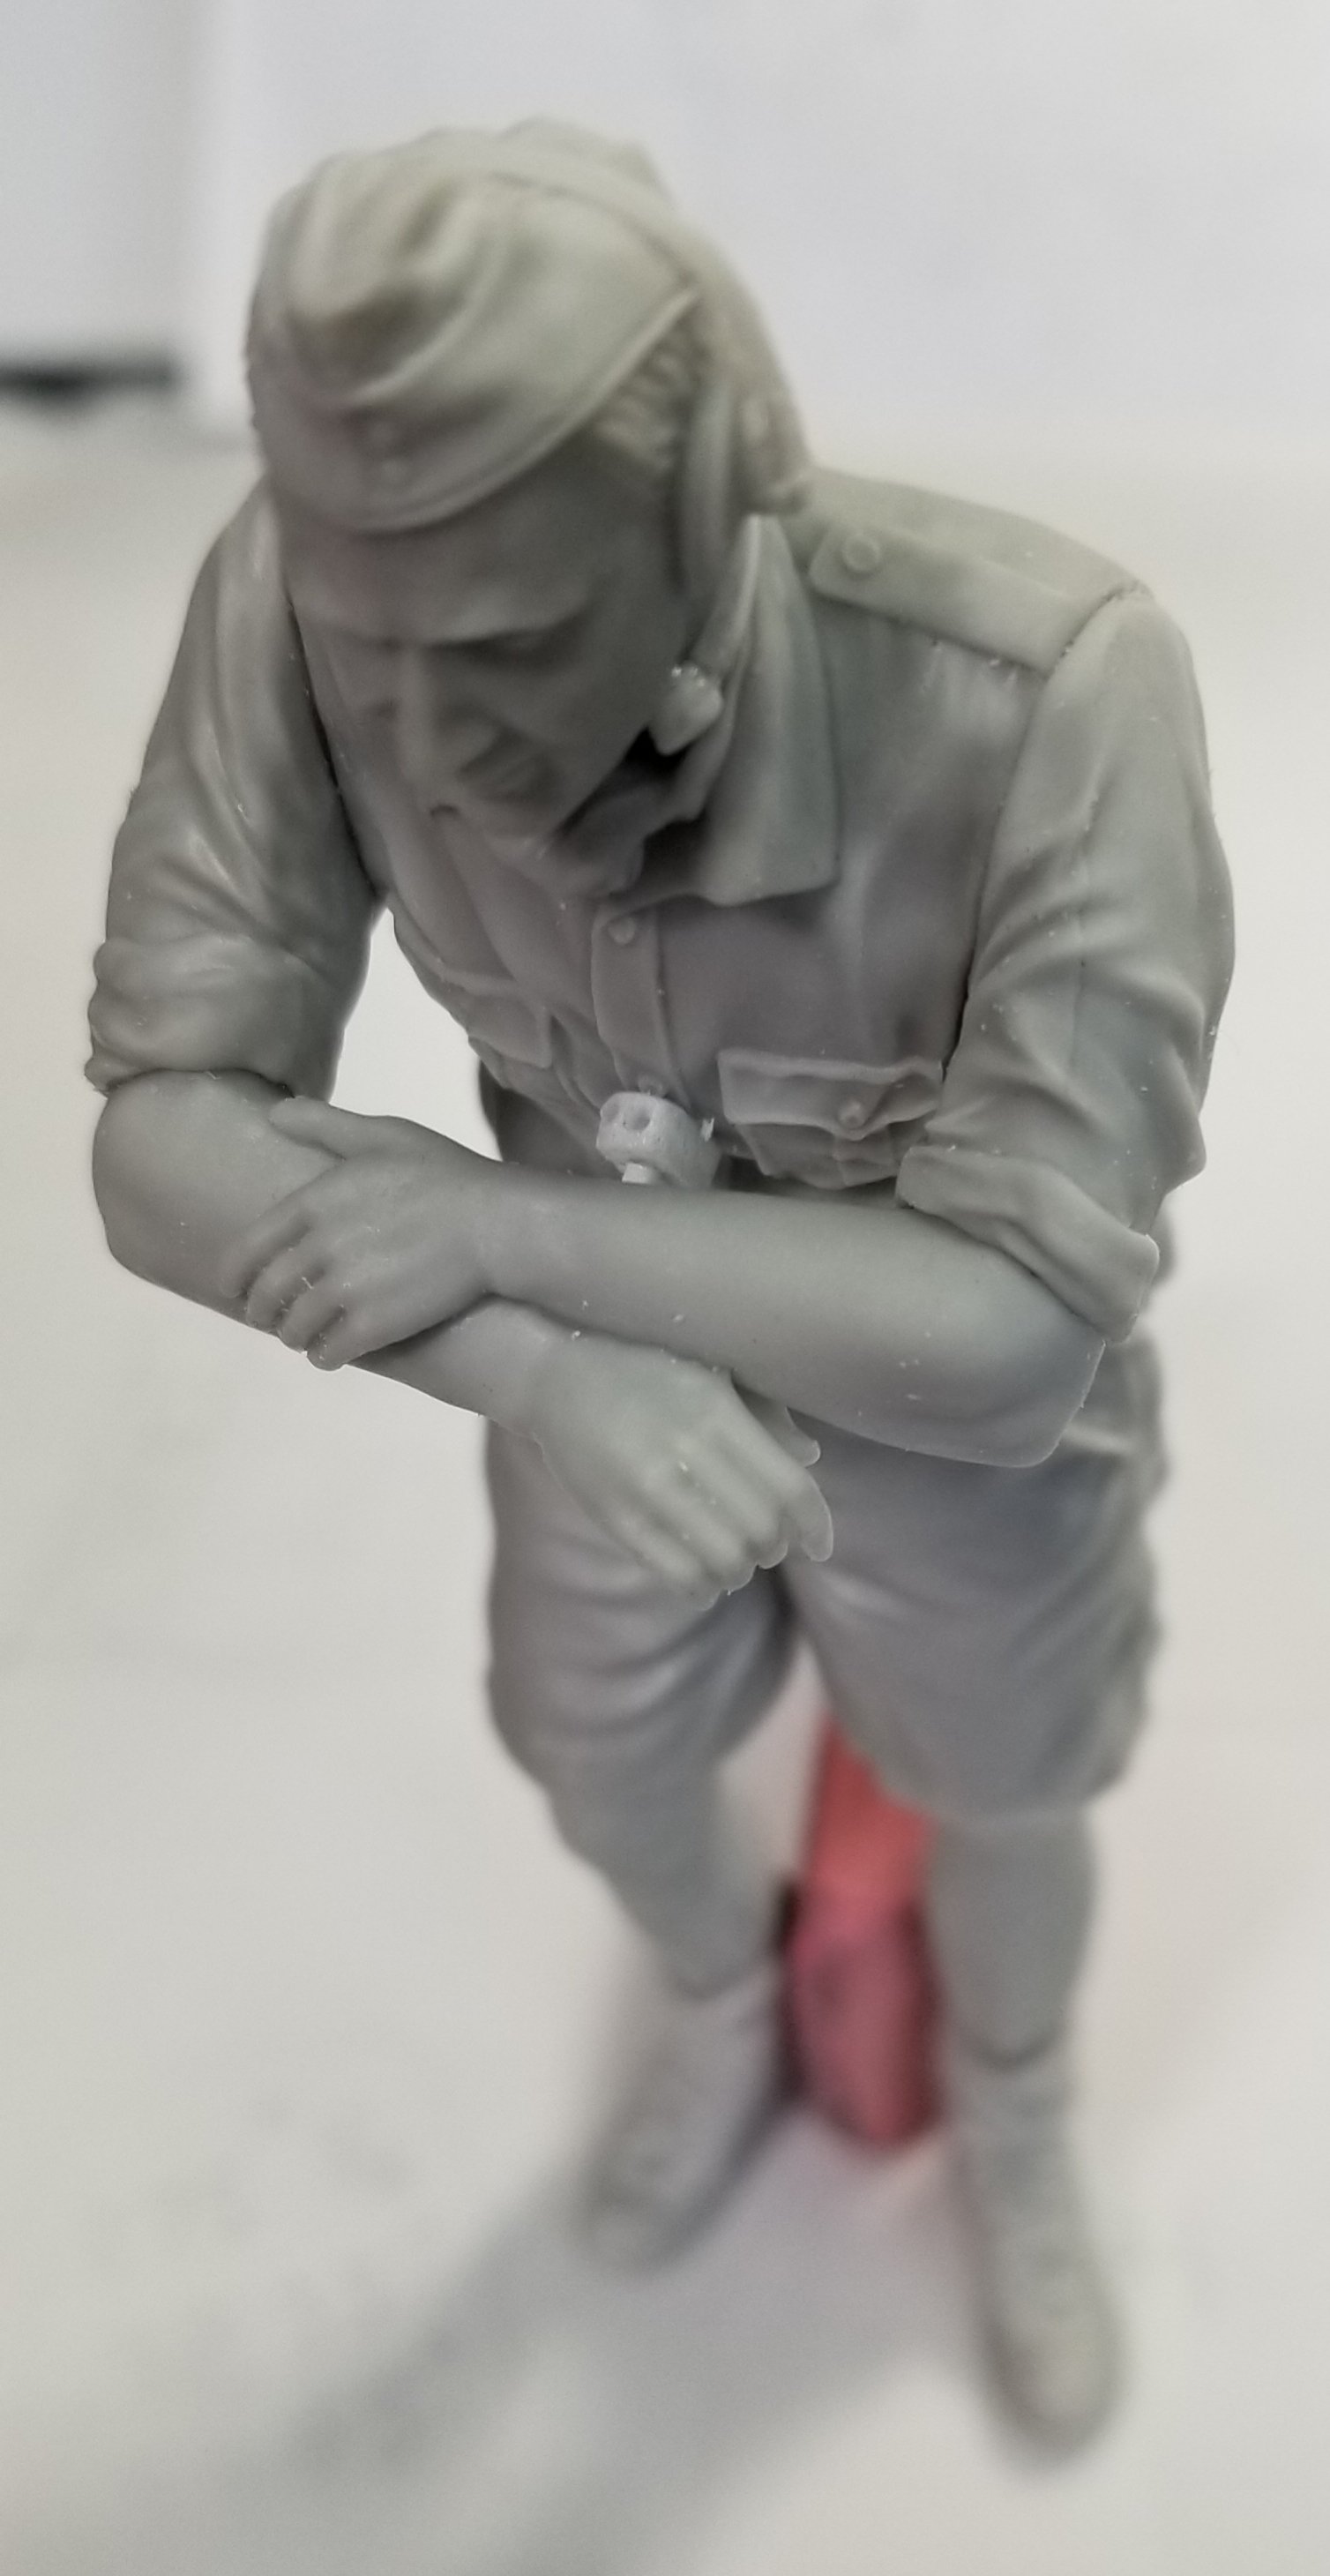
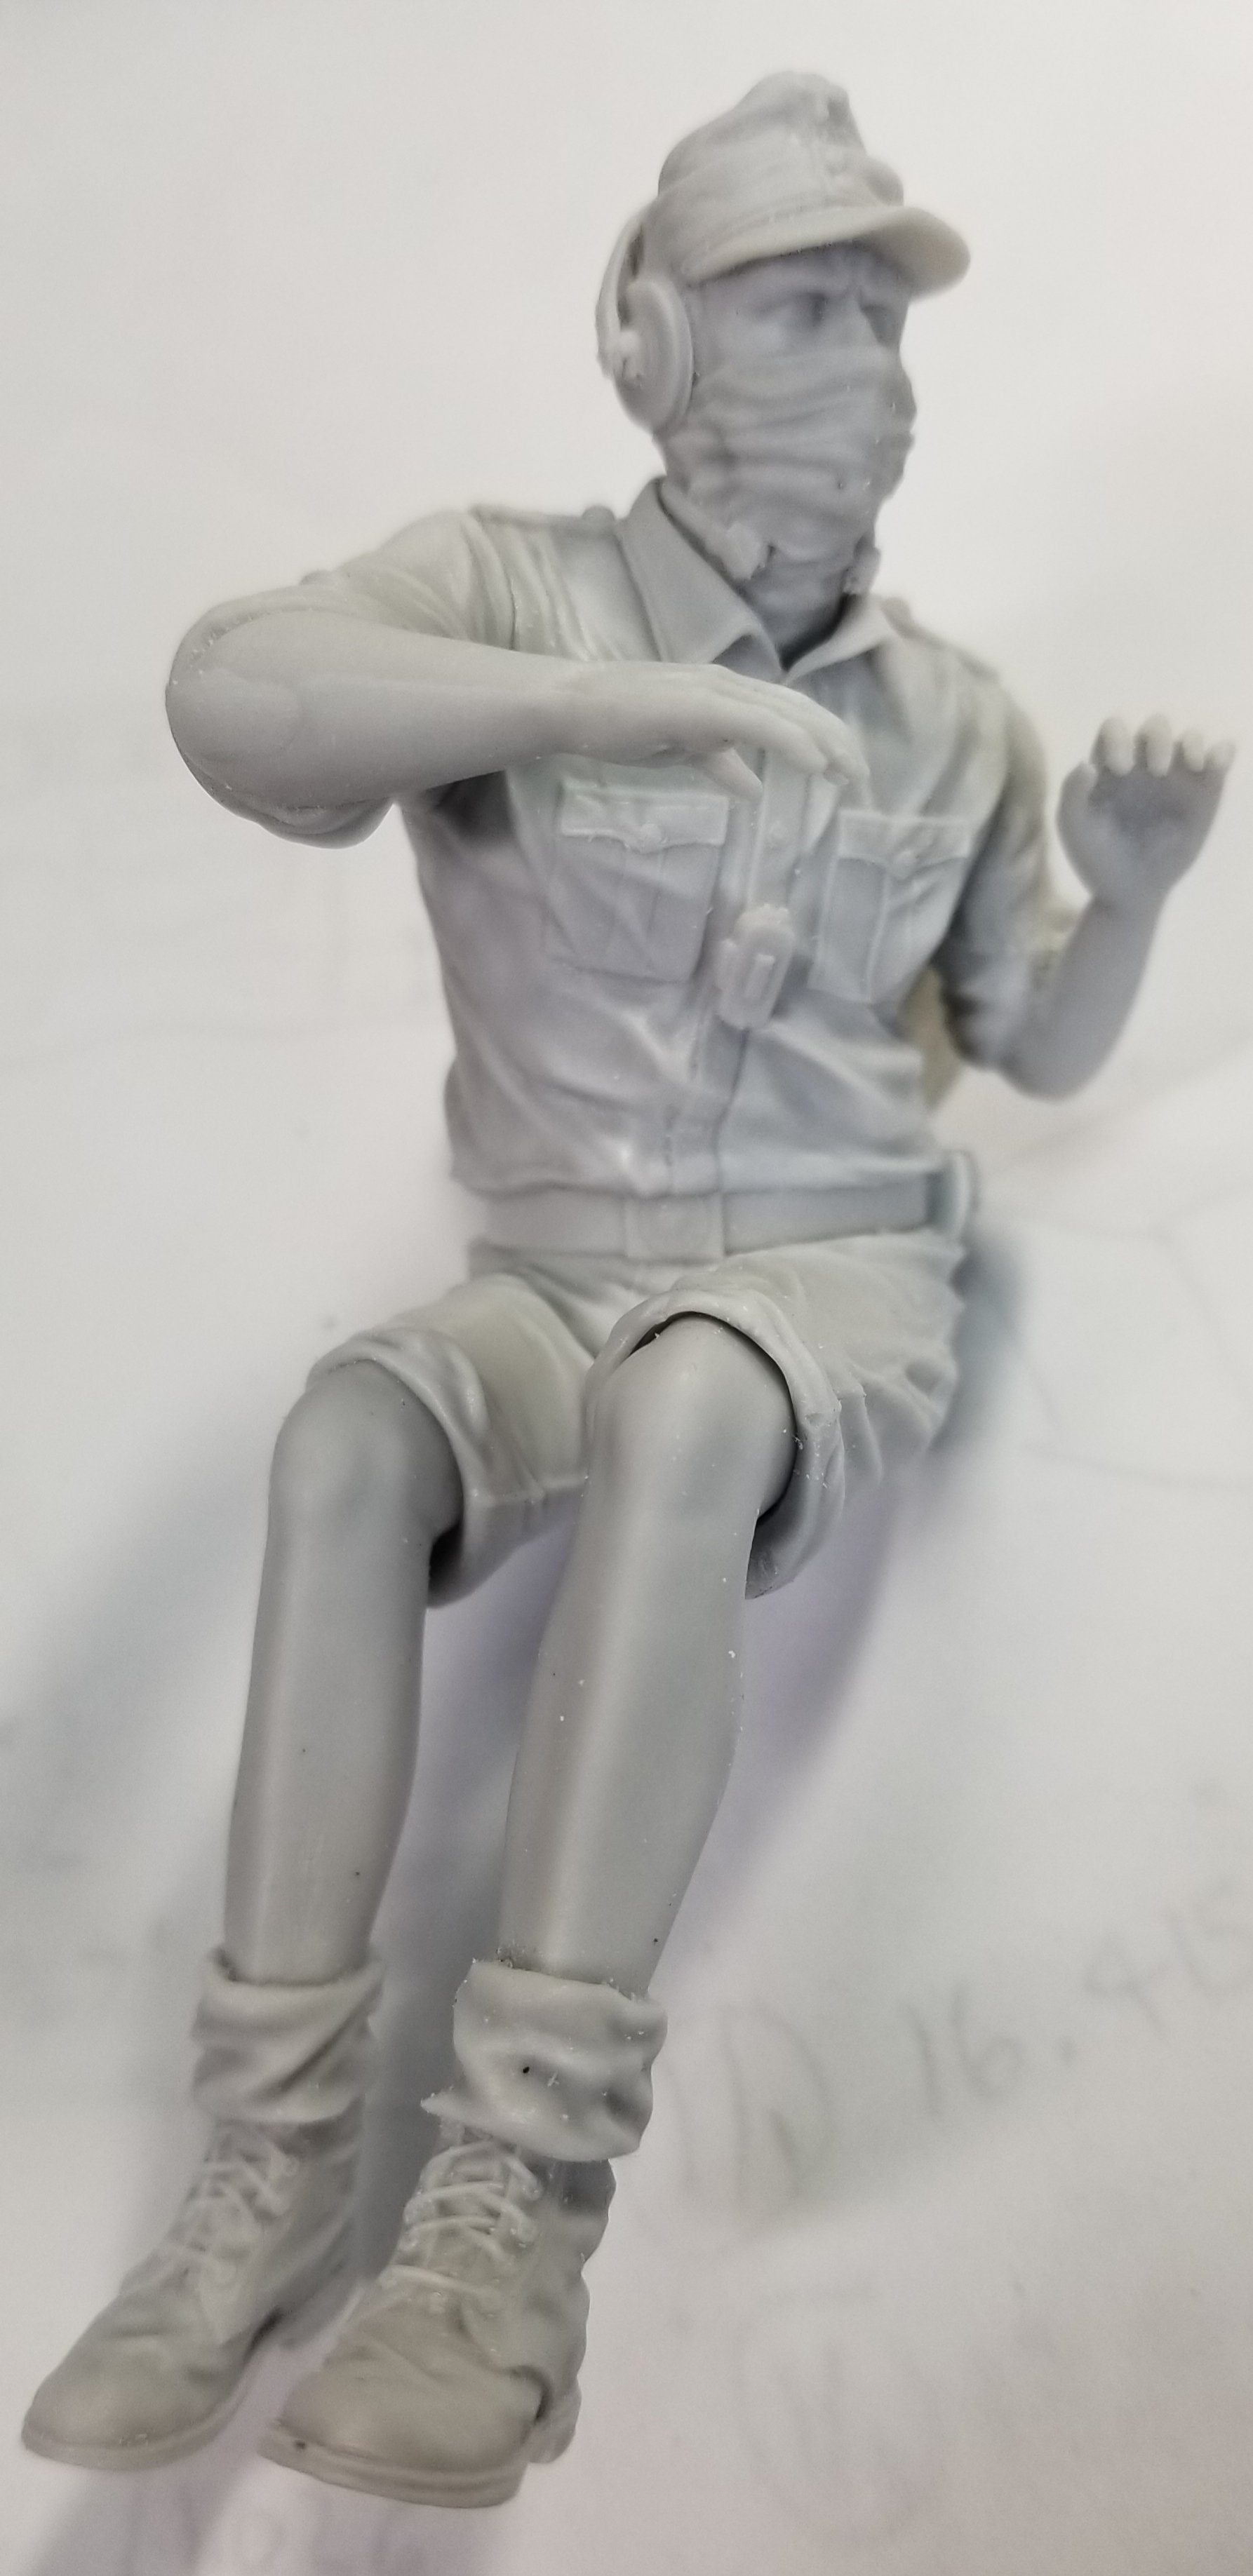
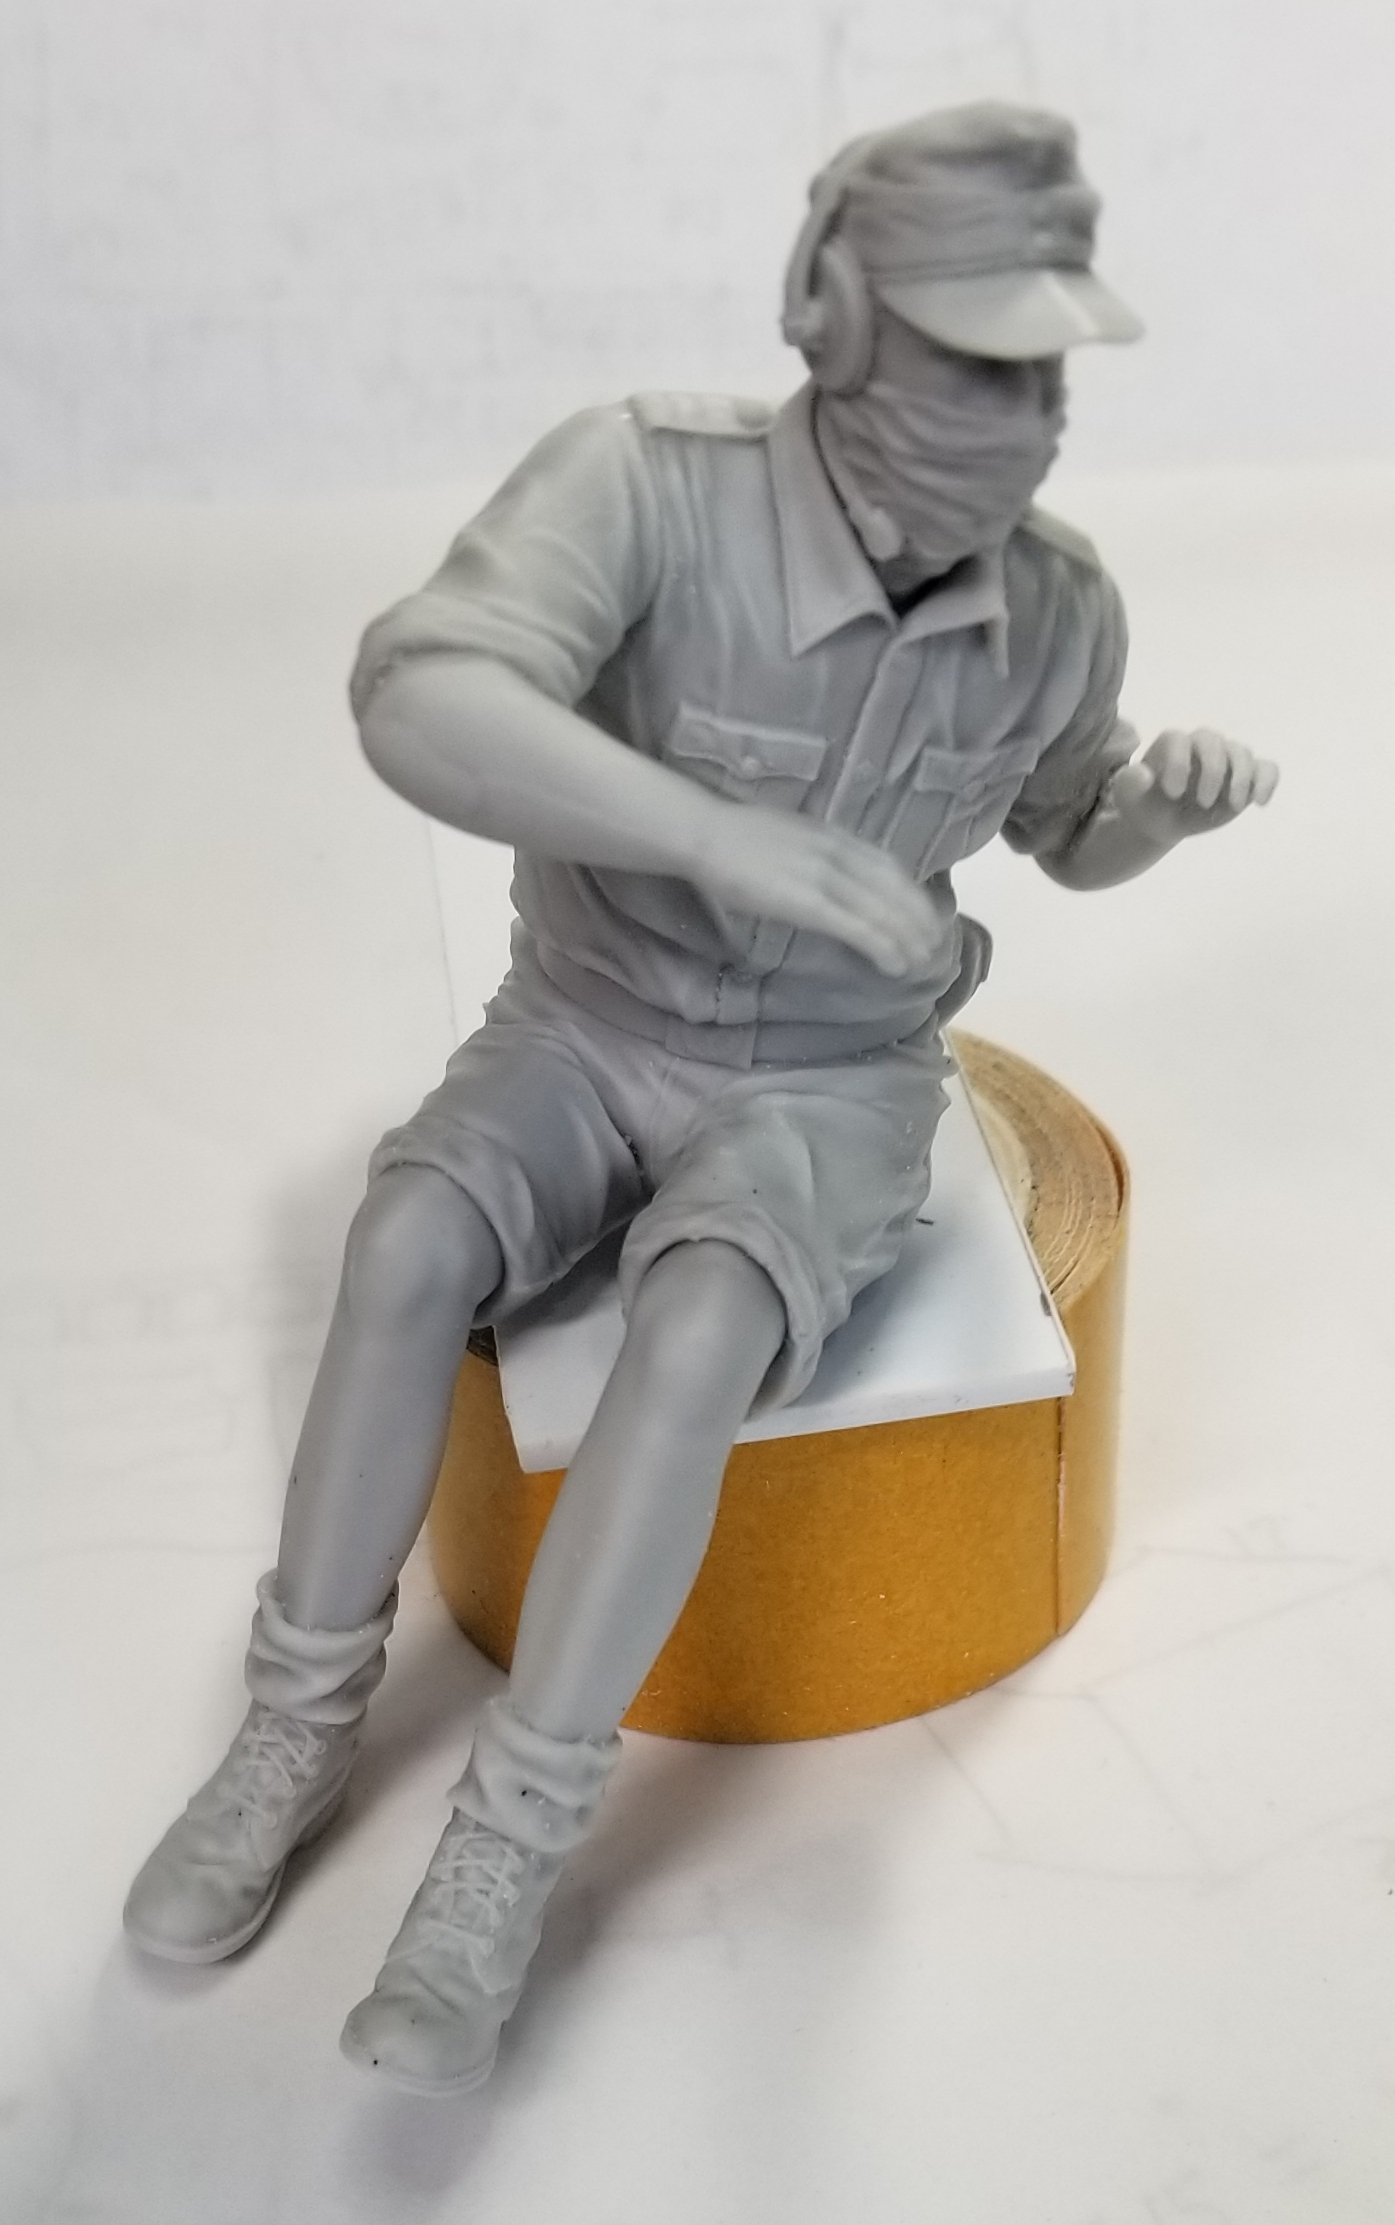
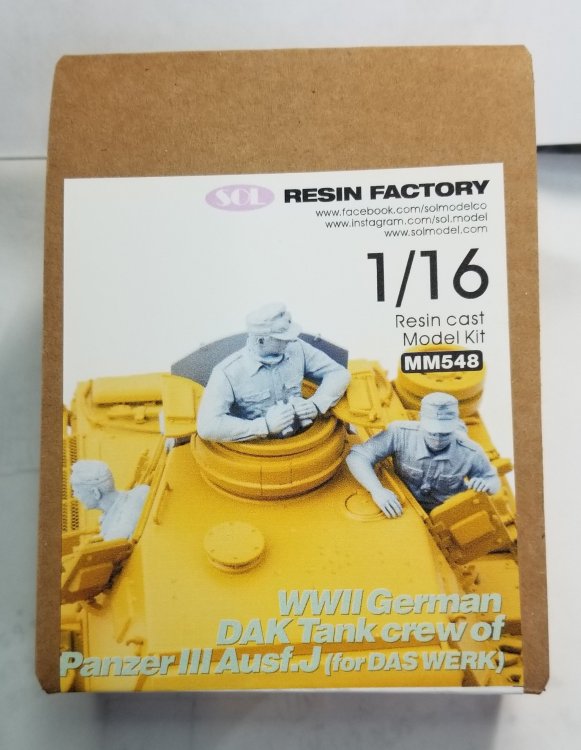
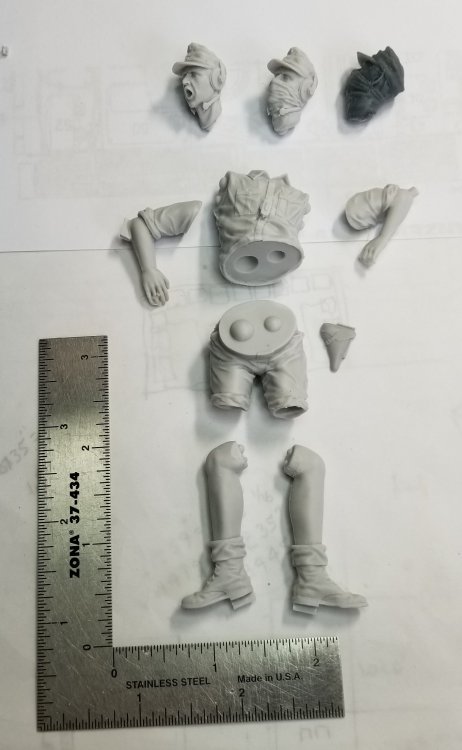
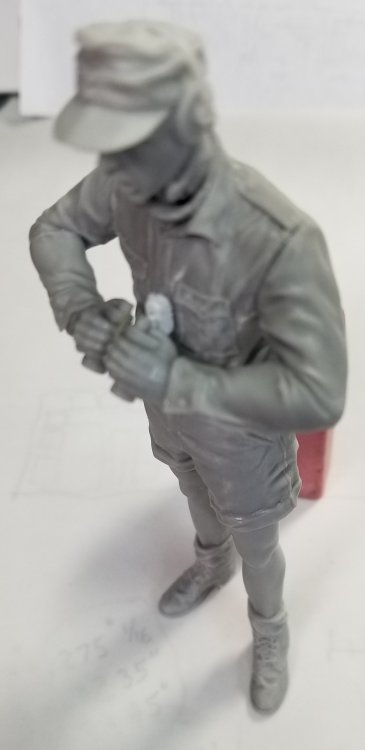
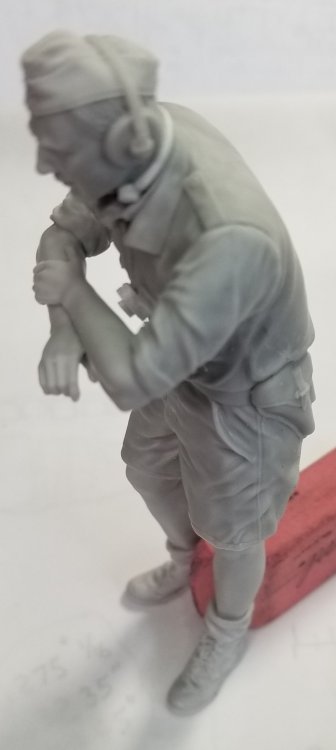
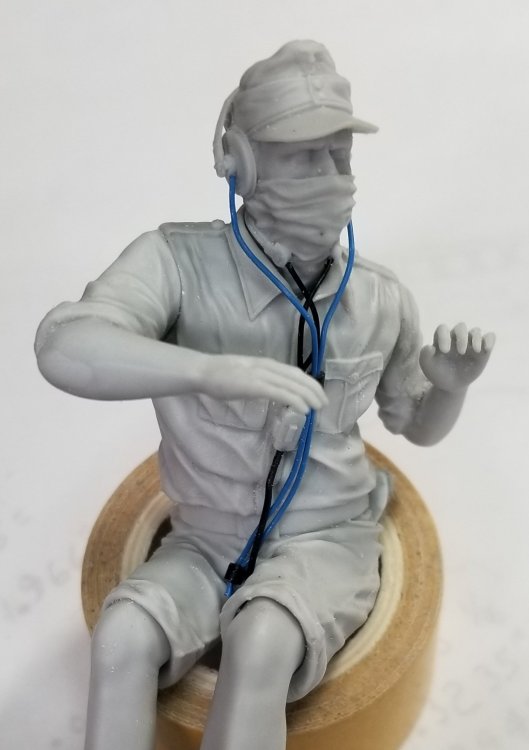
Hey all Like the title says it's kind of a new build, but not yet. Just some stuff I got for it and the diorama it will be in along with my 1/16th Tiger 1. Here's some pics to look at for you all. These are 1/16 scale resin figures from Solmodelco. I got them from Andys Hobbys Headquarters. There also is a set in Europe/Russia scheme. This is the box they came in. This is what was in the box. This is the tank commander figure. He scales out to about 5' 7"-8" tall. This one is the gunner. It came with three different heads. This one is the loader. It came with two heads. This view shows all three figures assembled. This view shows there faces better. This is a closer look at the commander figure. I used one of the heads from the gunner figure. This view shows the throat mike switch I added. It's by his binoculars. This is a closer look at the loader figure. This view shows the throat mike I added by his arms. This view shows the throat mike I added to him. This is a closer look at the gunner figure. Another view of the gunner figure. This view of the gunner figure shows the wiring I added to the head phones, throat mike and switch. These are for tge Takom Panzer III, but will probably work on my Trumpeter Panzer IV also. Well that's it for now be back with more soon. Ron G


-
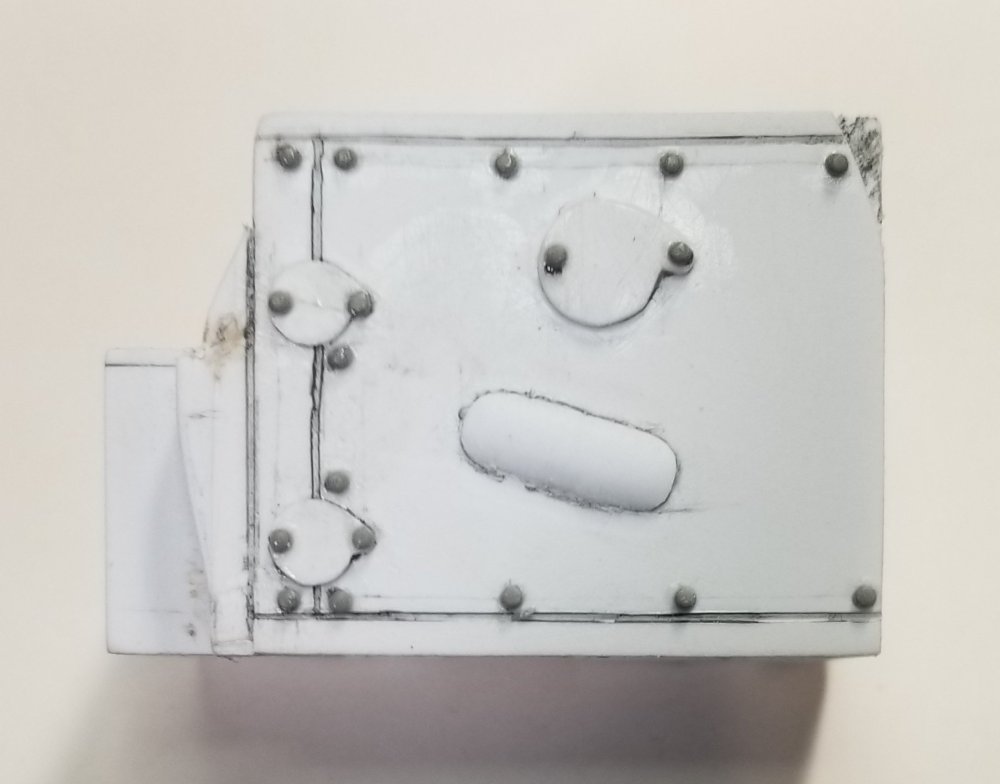
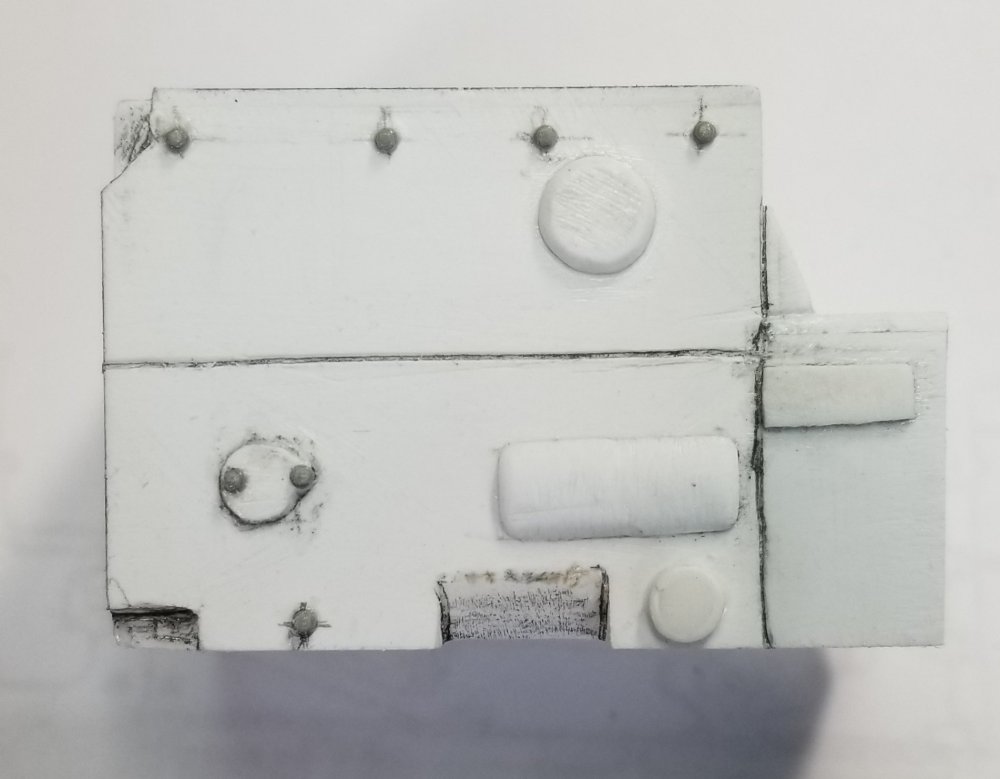
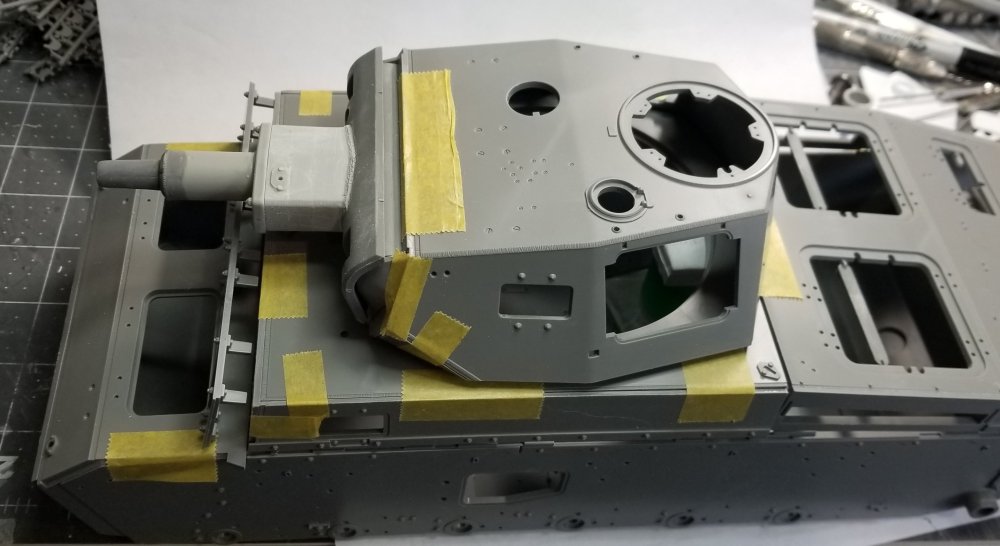
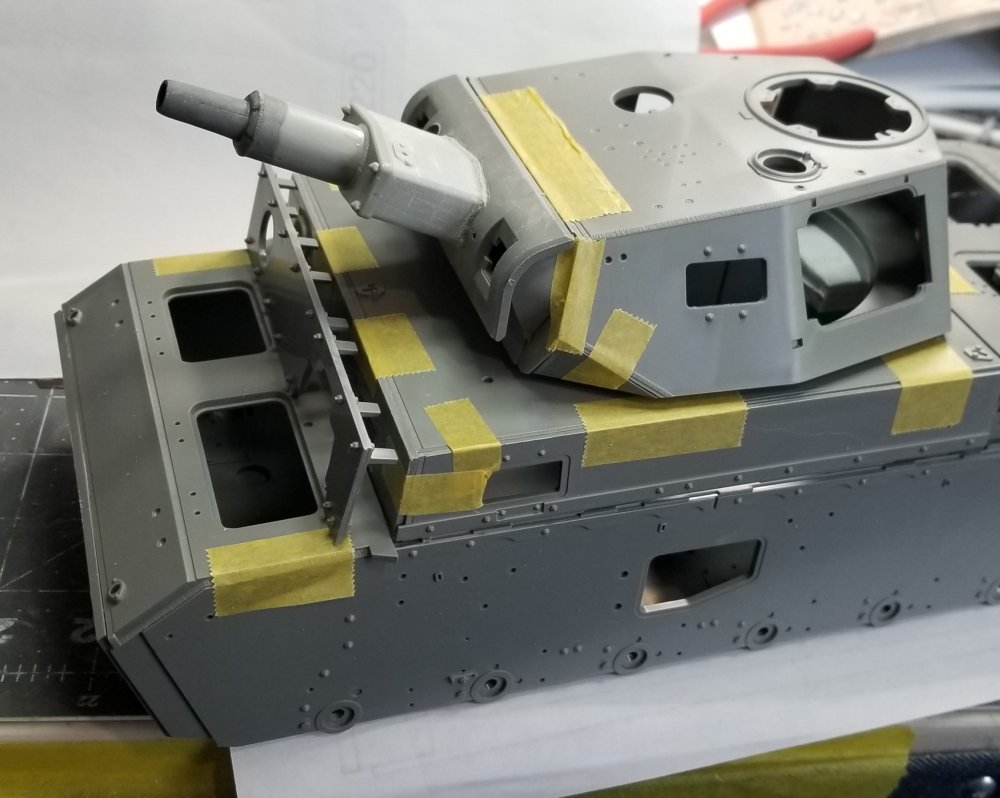
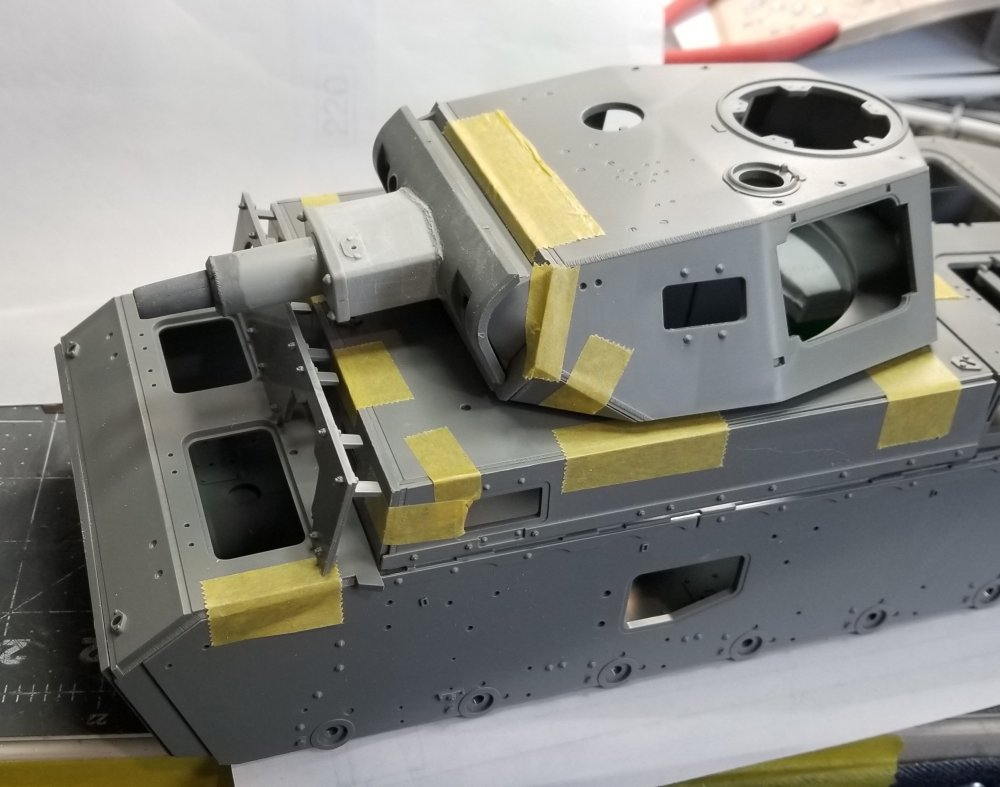
Hey guys Small update for you to look at. This view shows the 1/35 scale Tiger 1 transmission on the right and the one I scratch built on the left. There is alot more to this and it's going to take several days to get it right. This is a closer view of the one I scratch built. This is a cad picture of the real thing. This is what I'm trying to replicate. I'm not going to do everything just what is clearly seen thru the hatches. Ron G


-
Some how that doesn't look like a Tiger 1 Carl...lol. Cool kit, by the 80's I was married with two kids.😁 Ron G
-
Thanks Carl
-
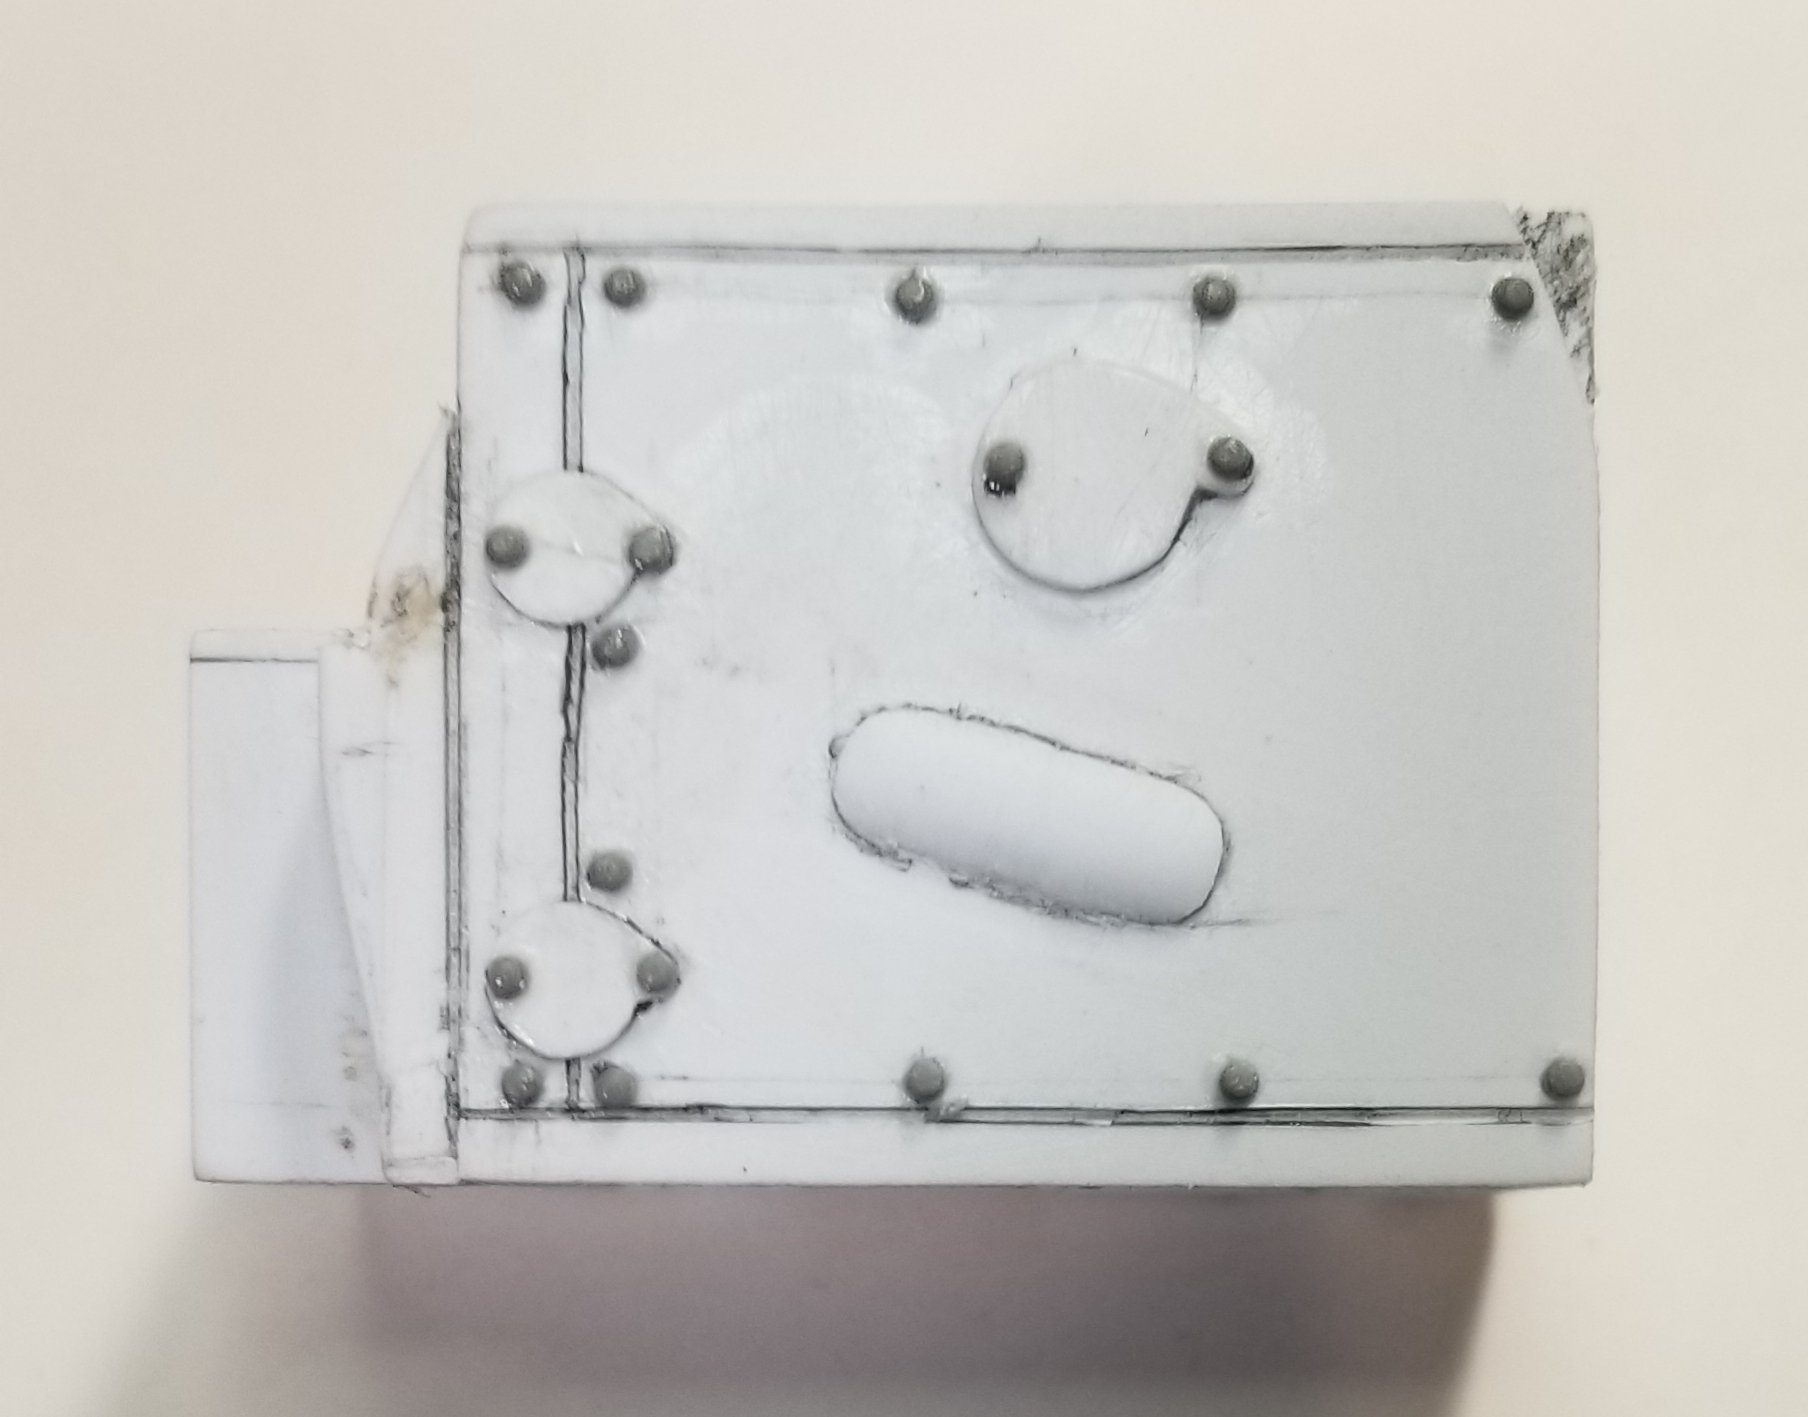
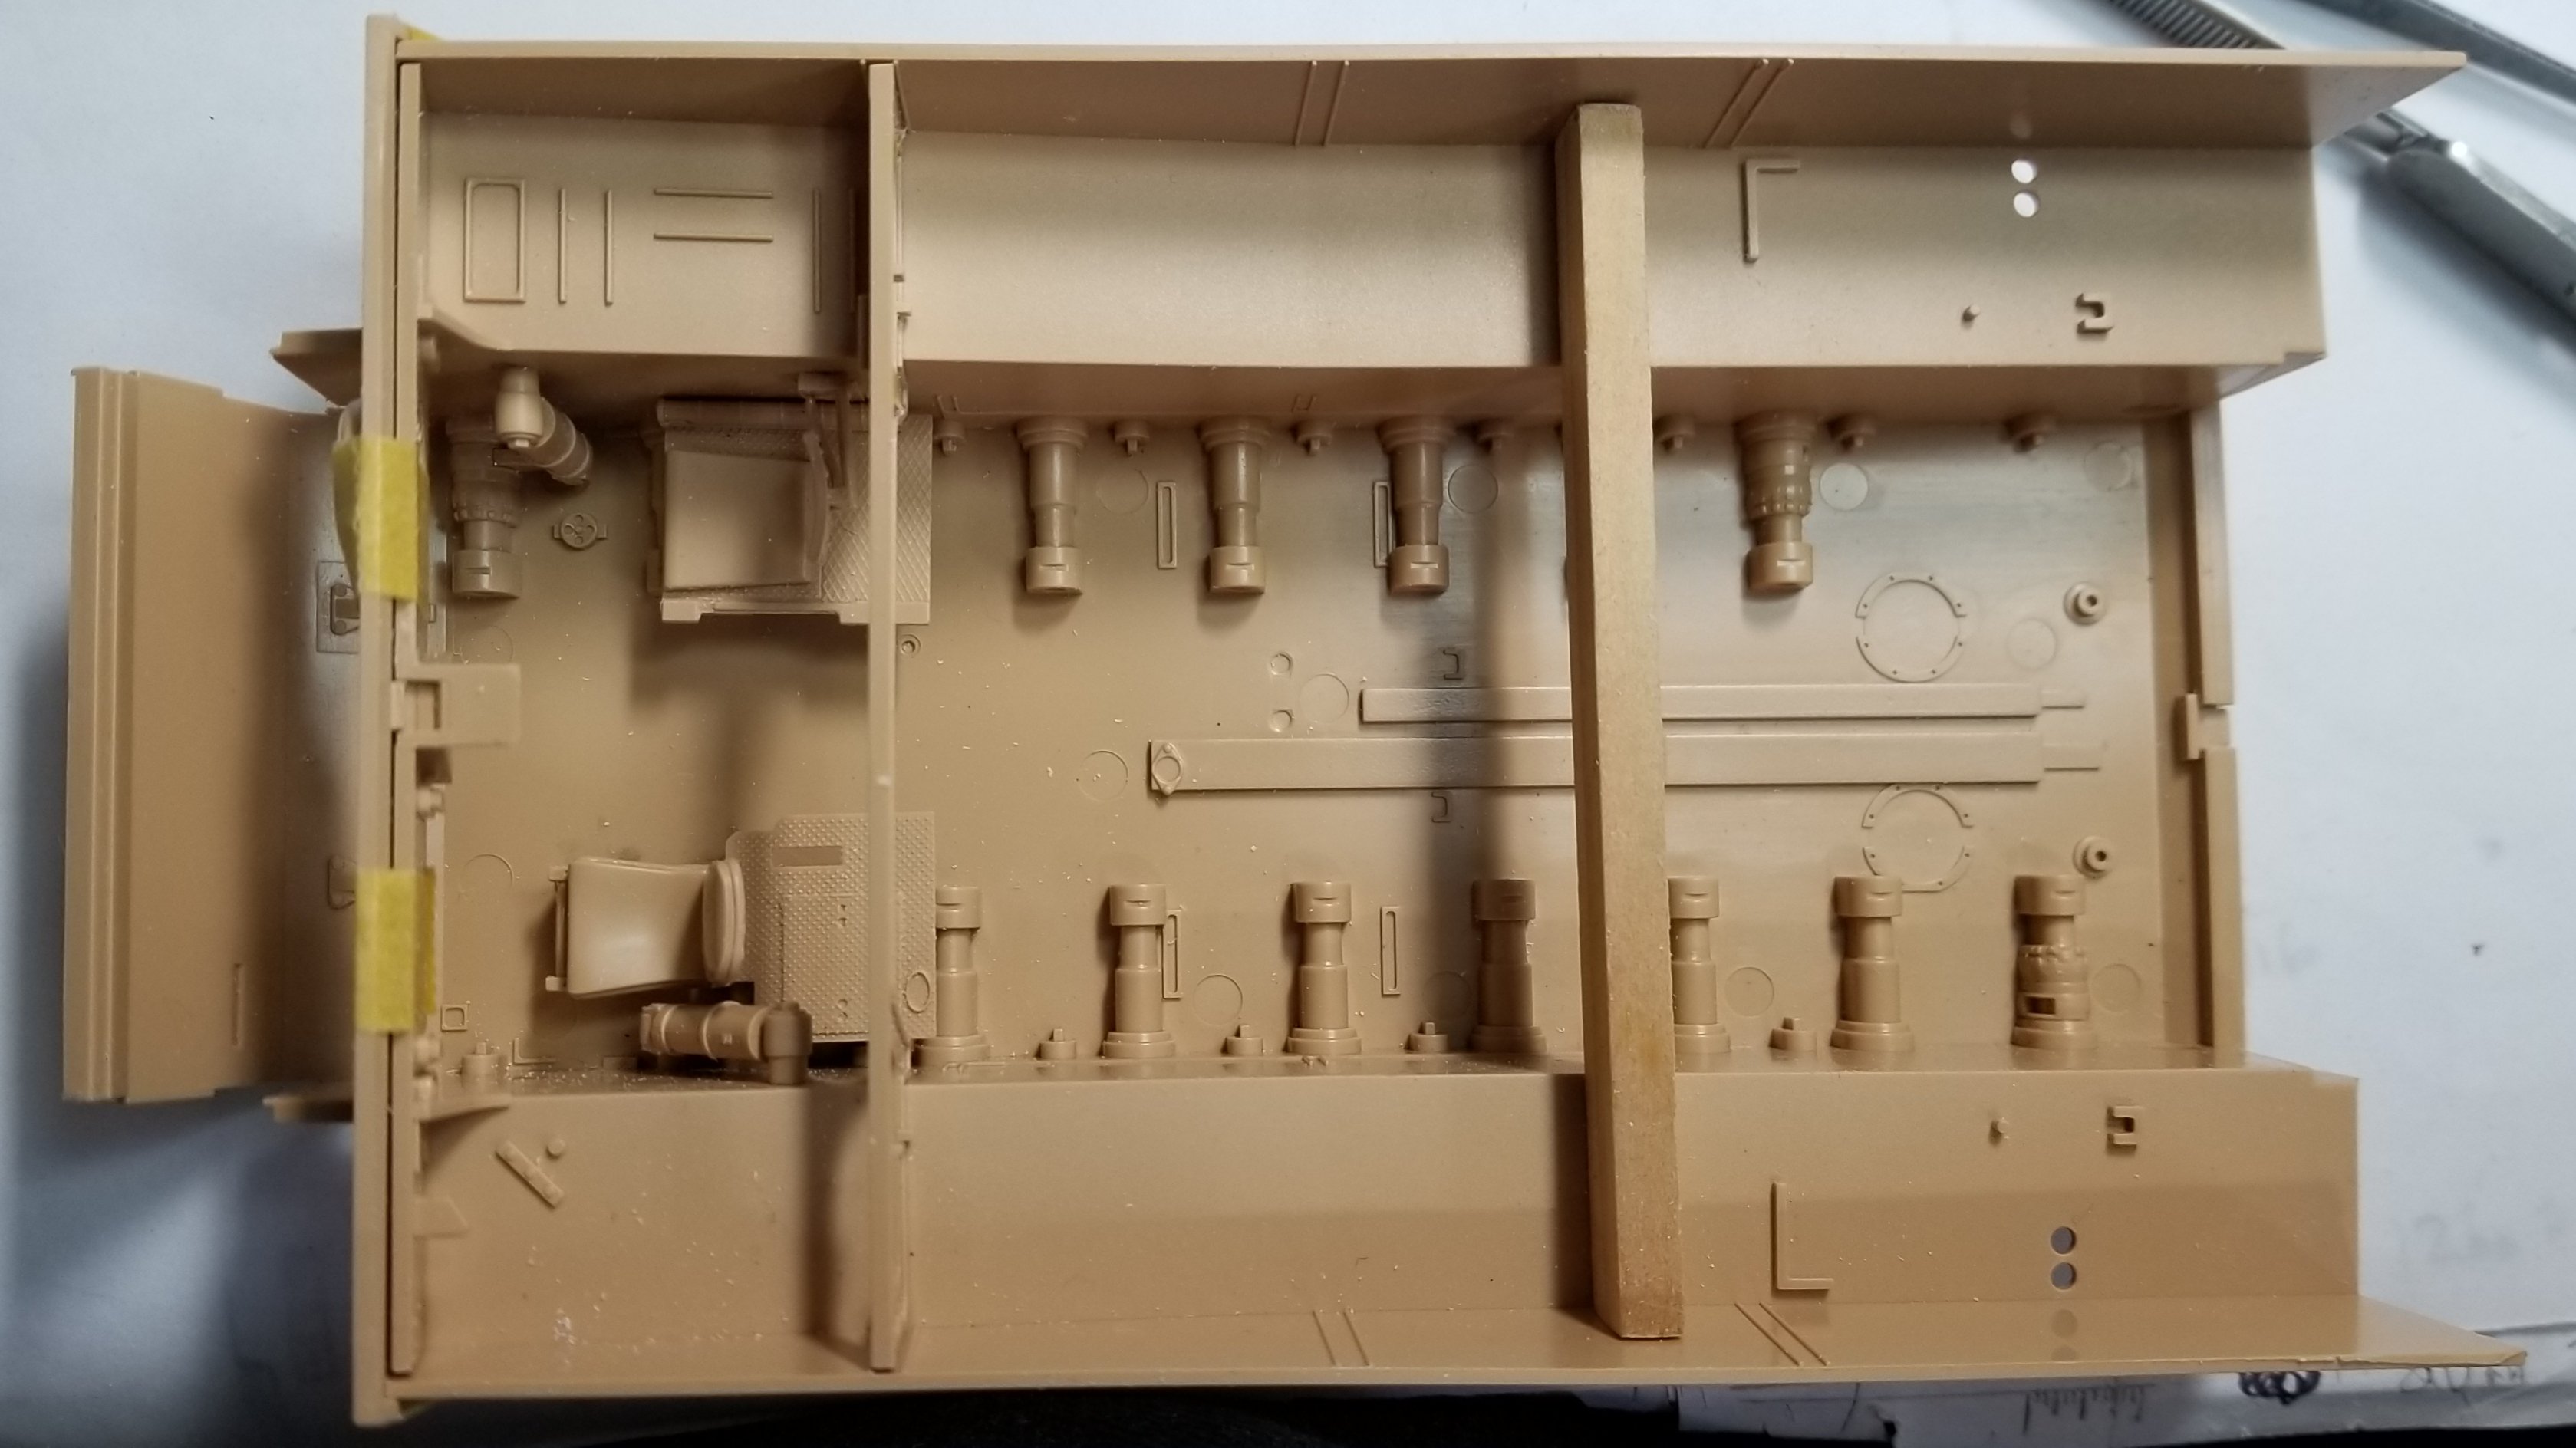
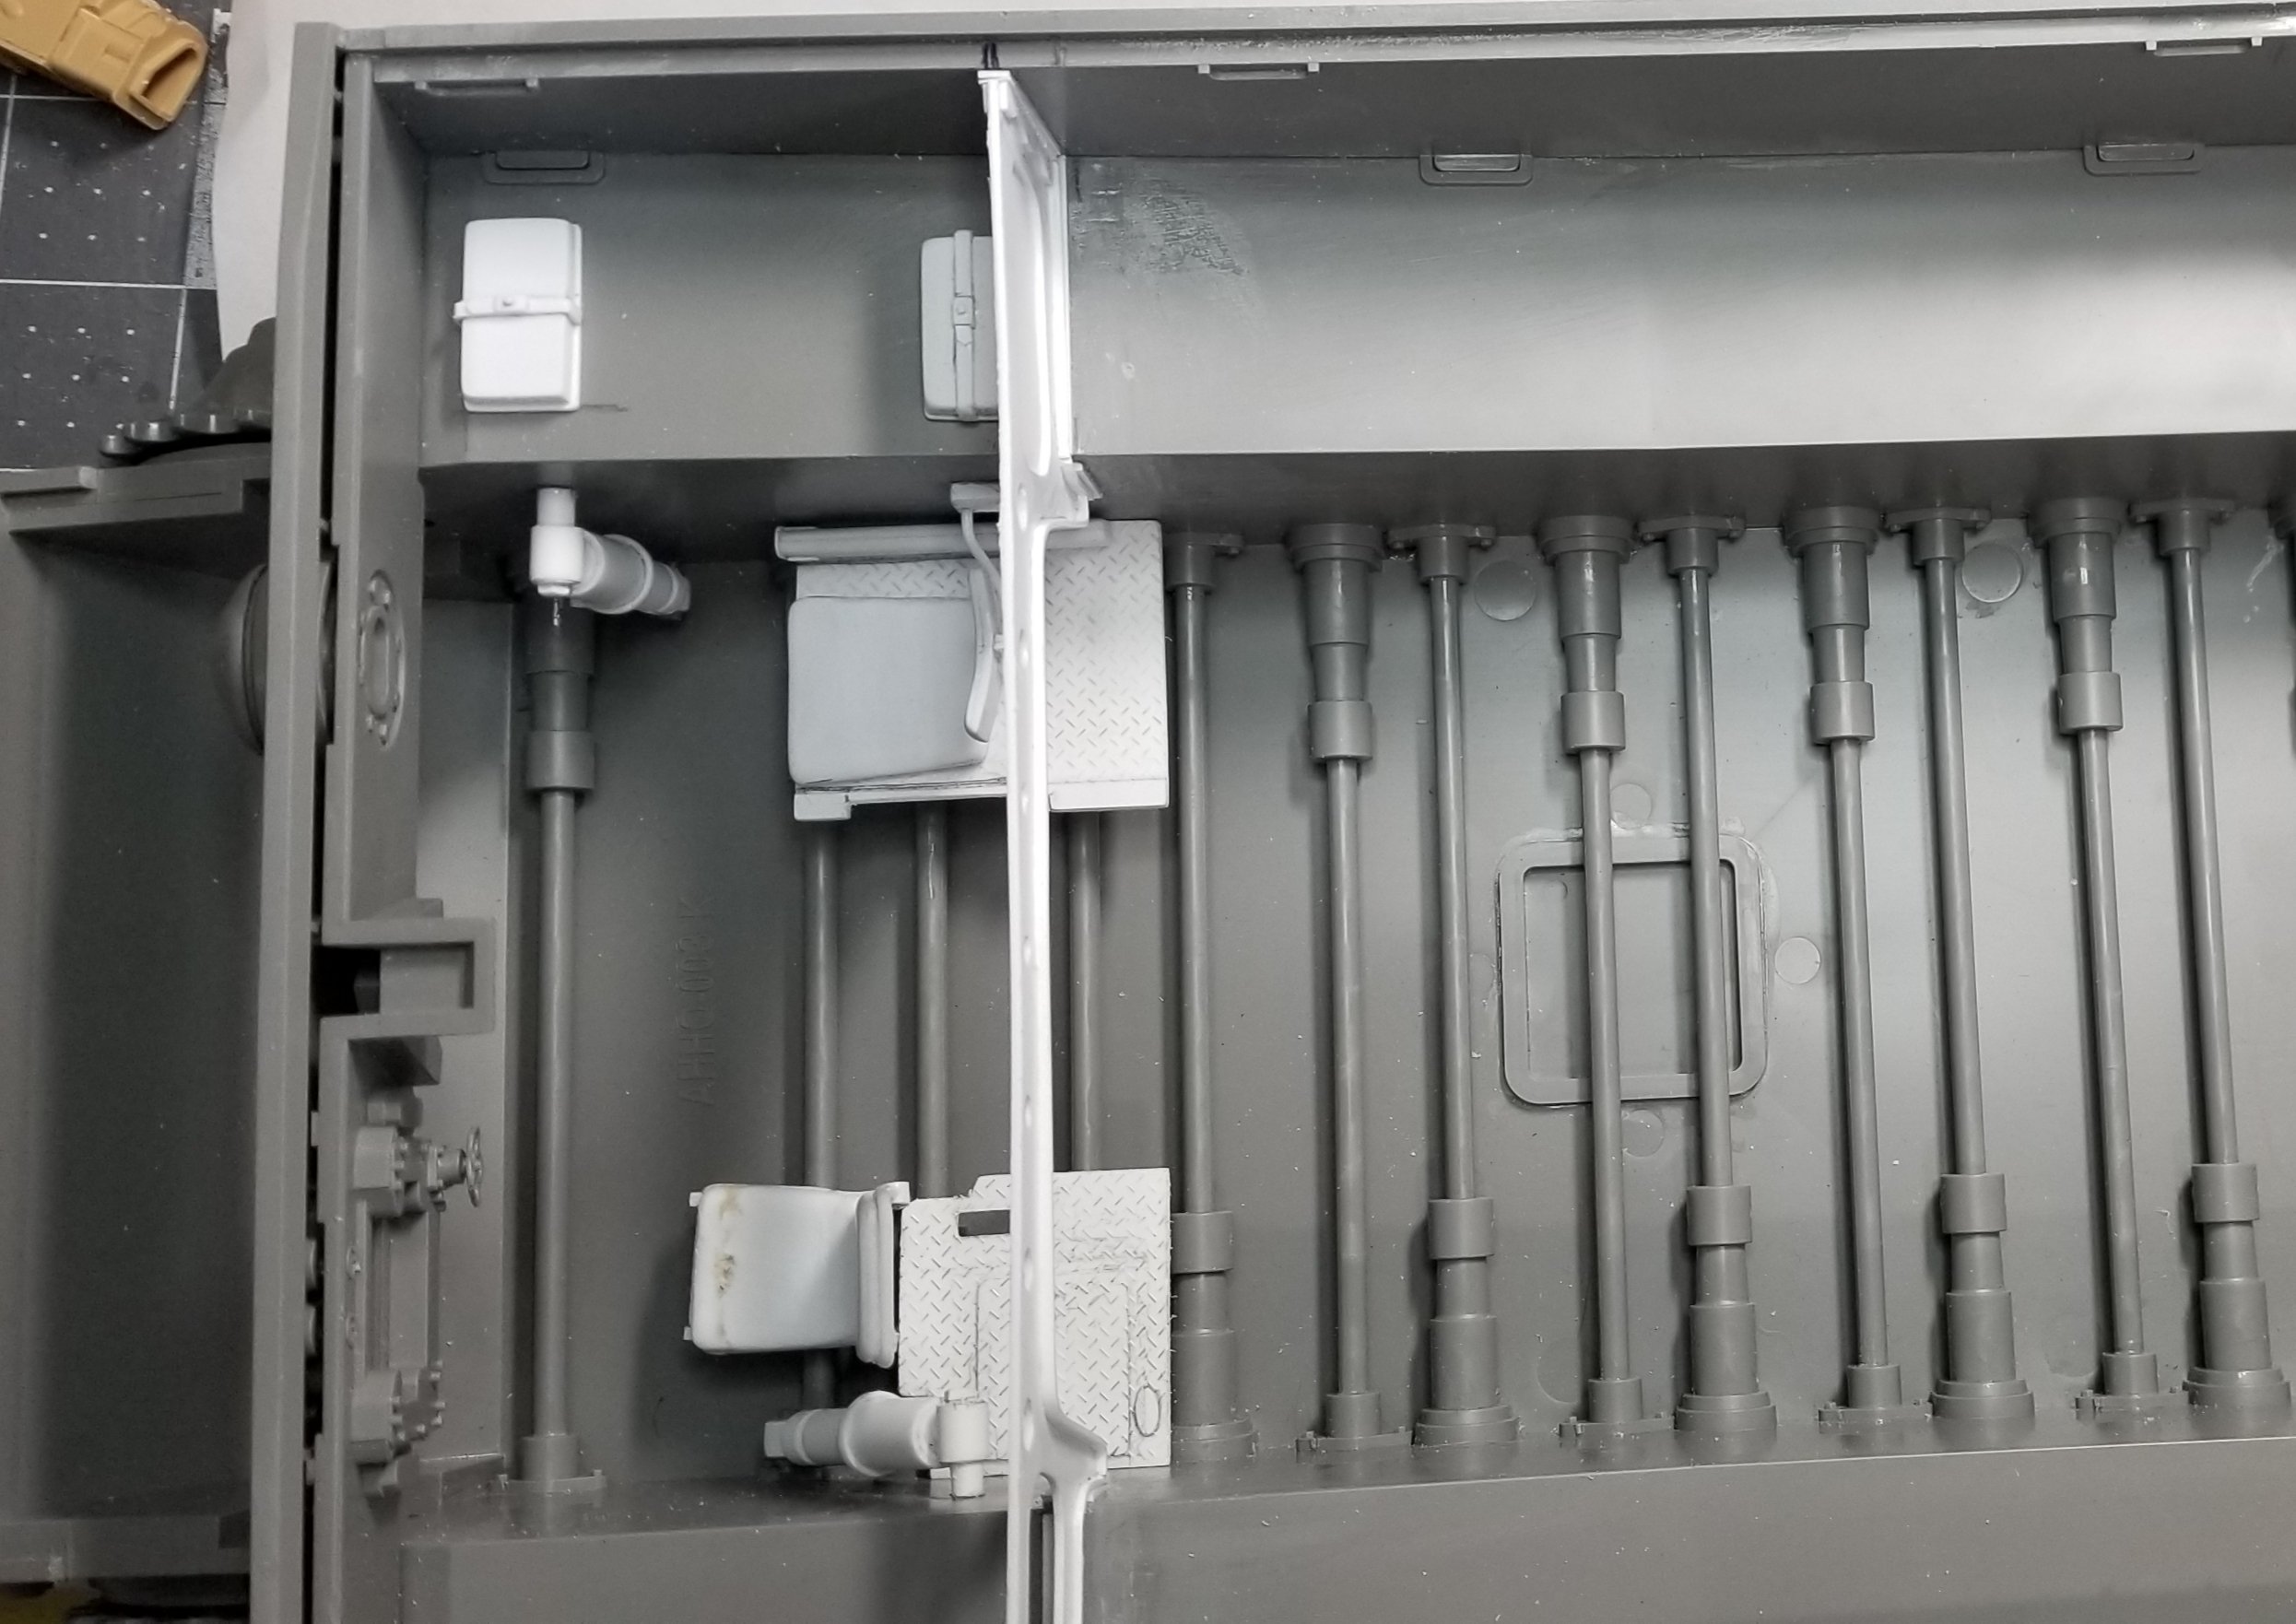
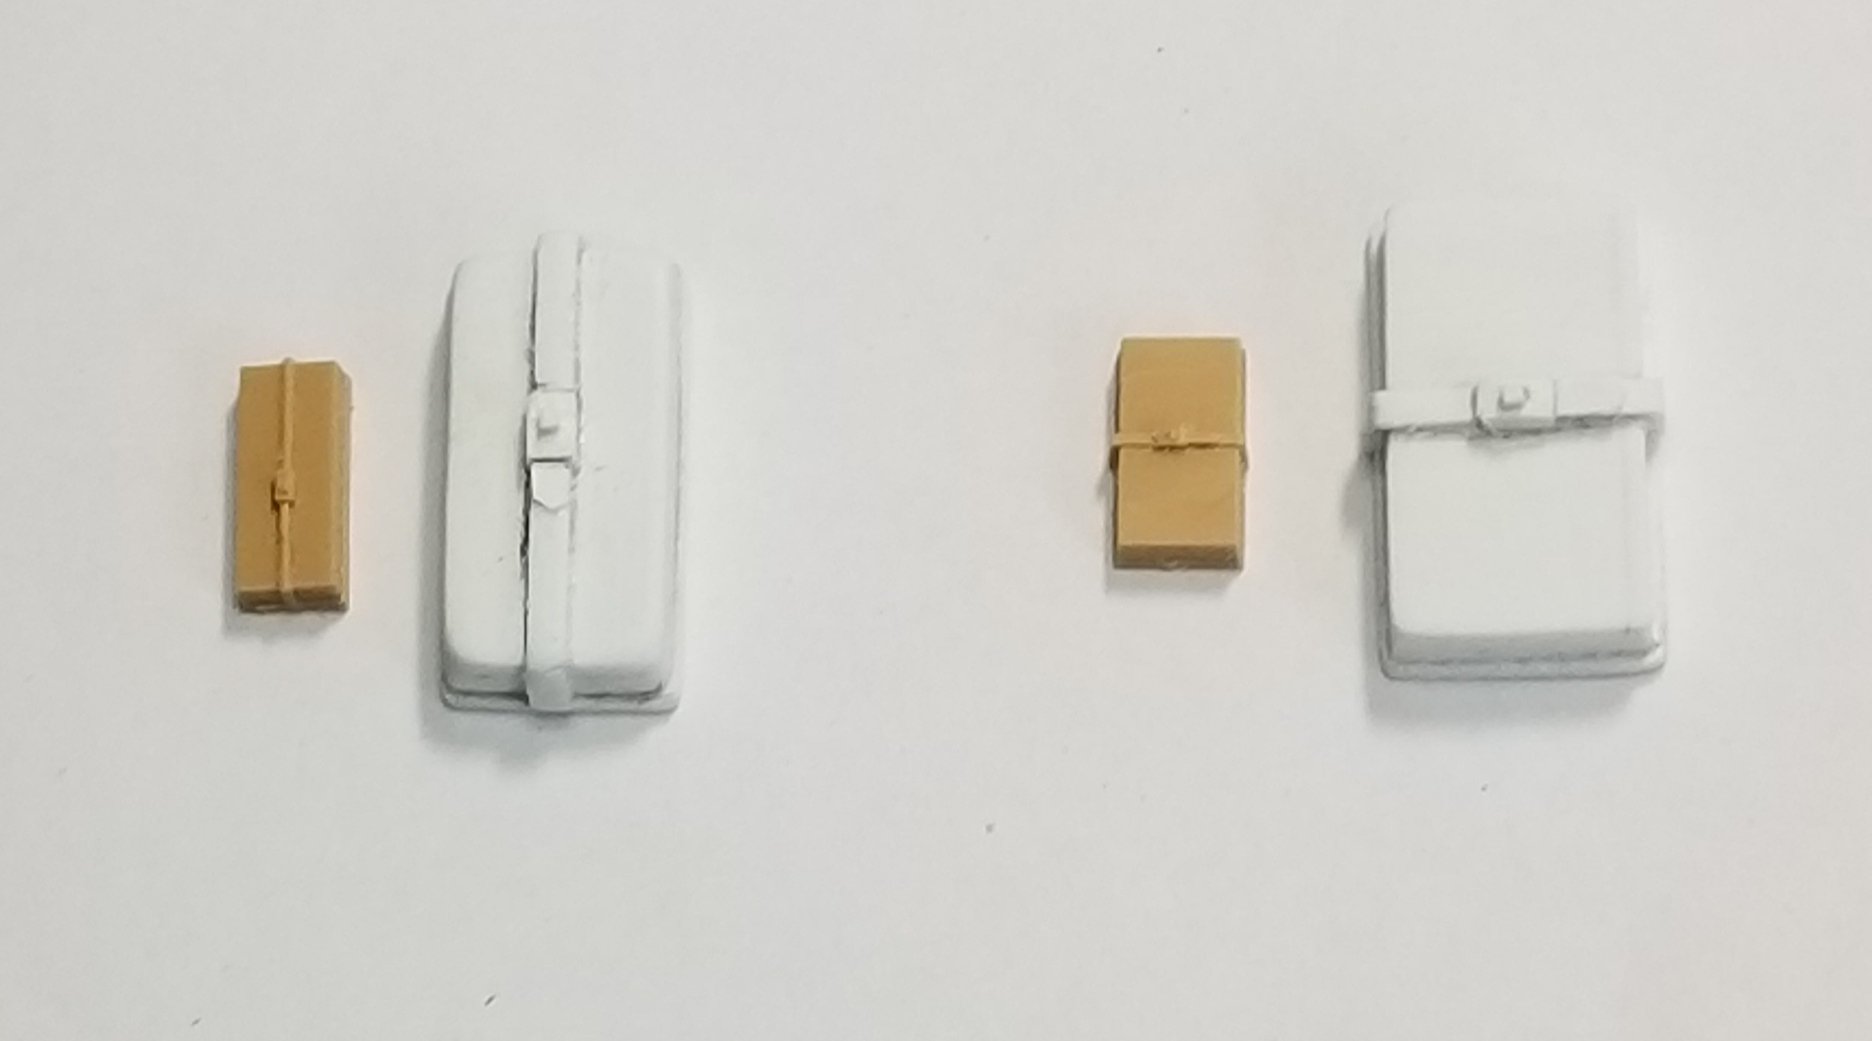
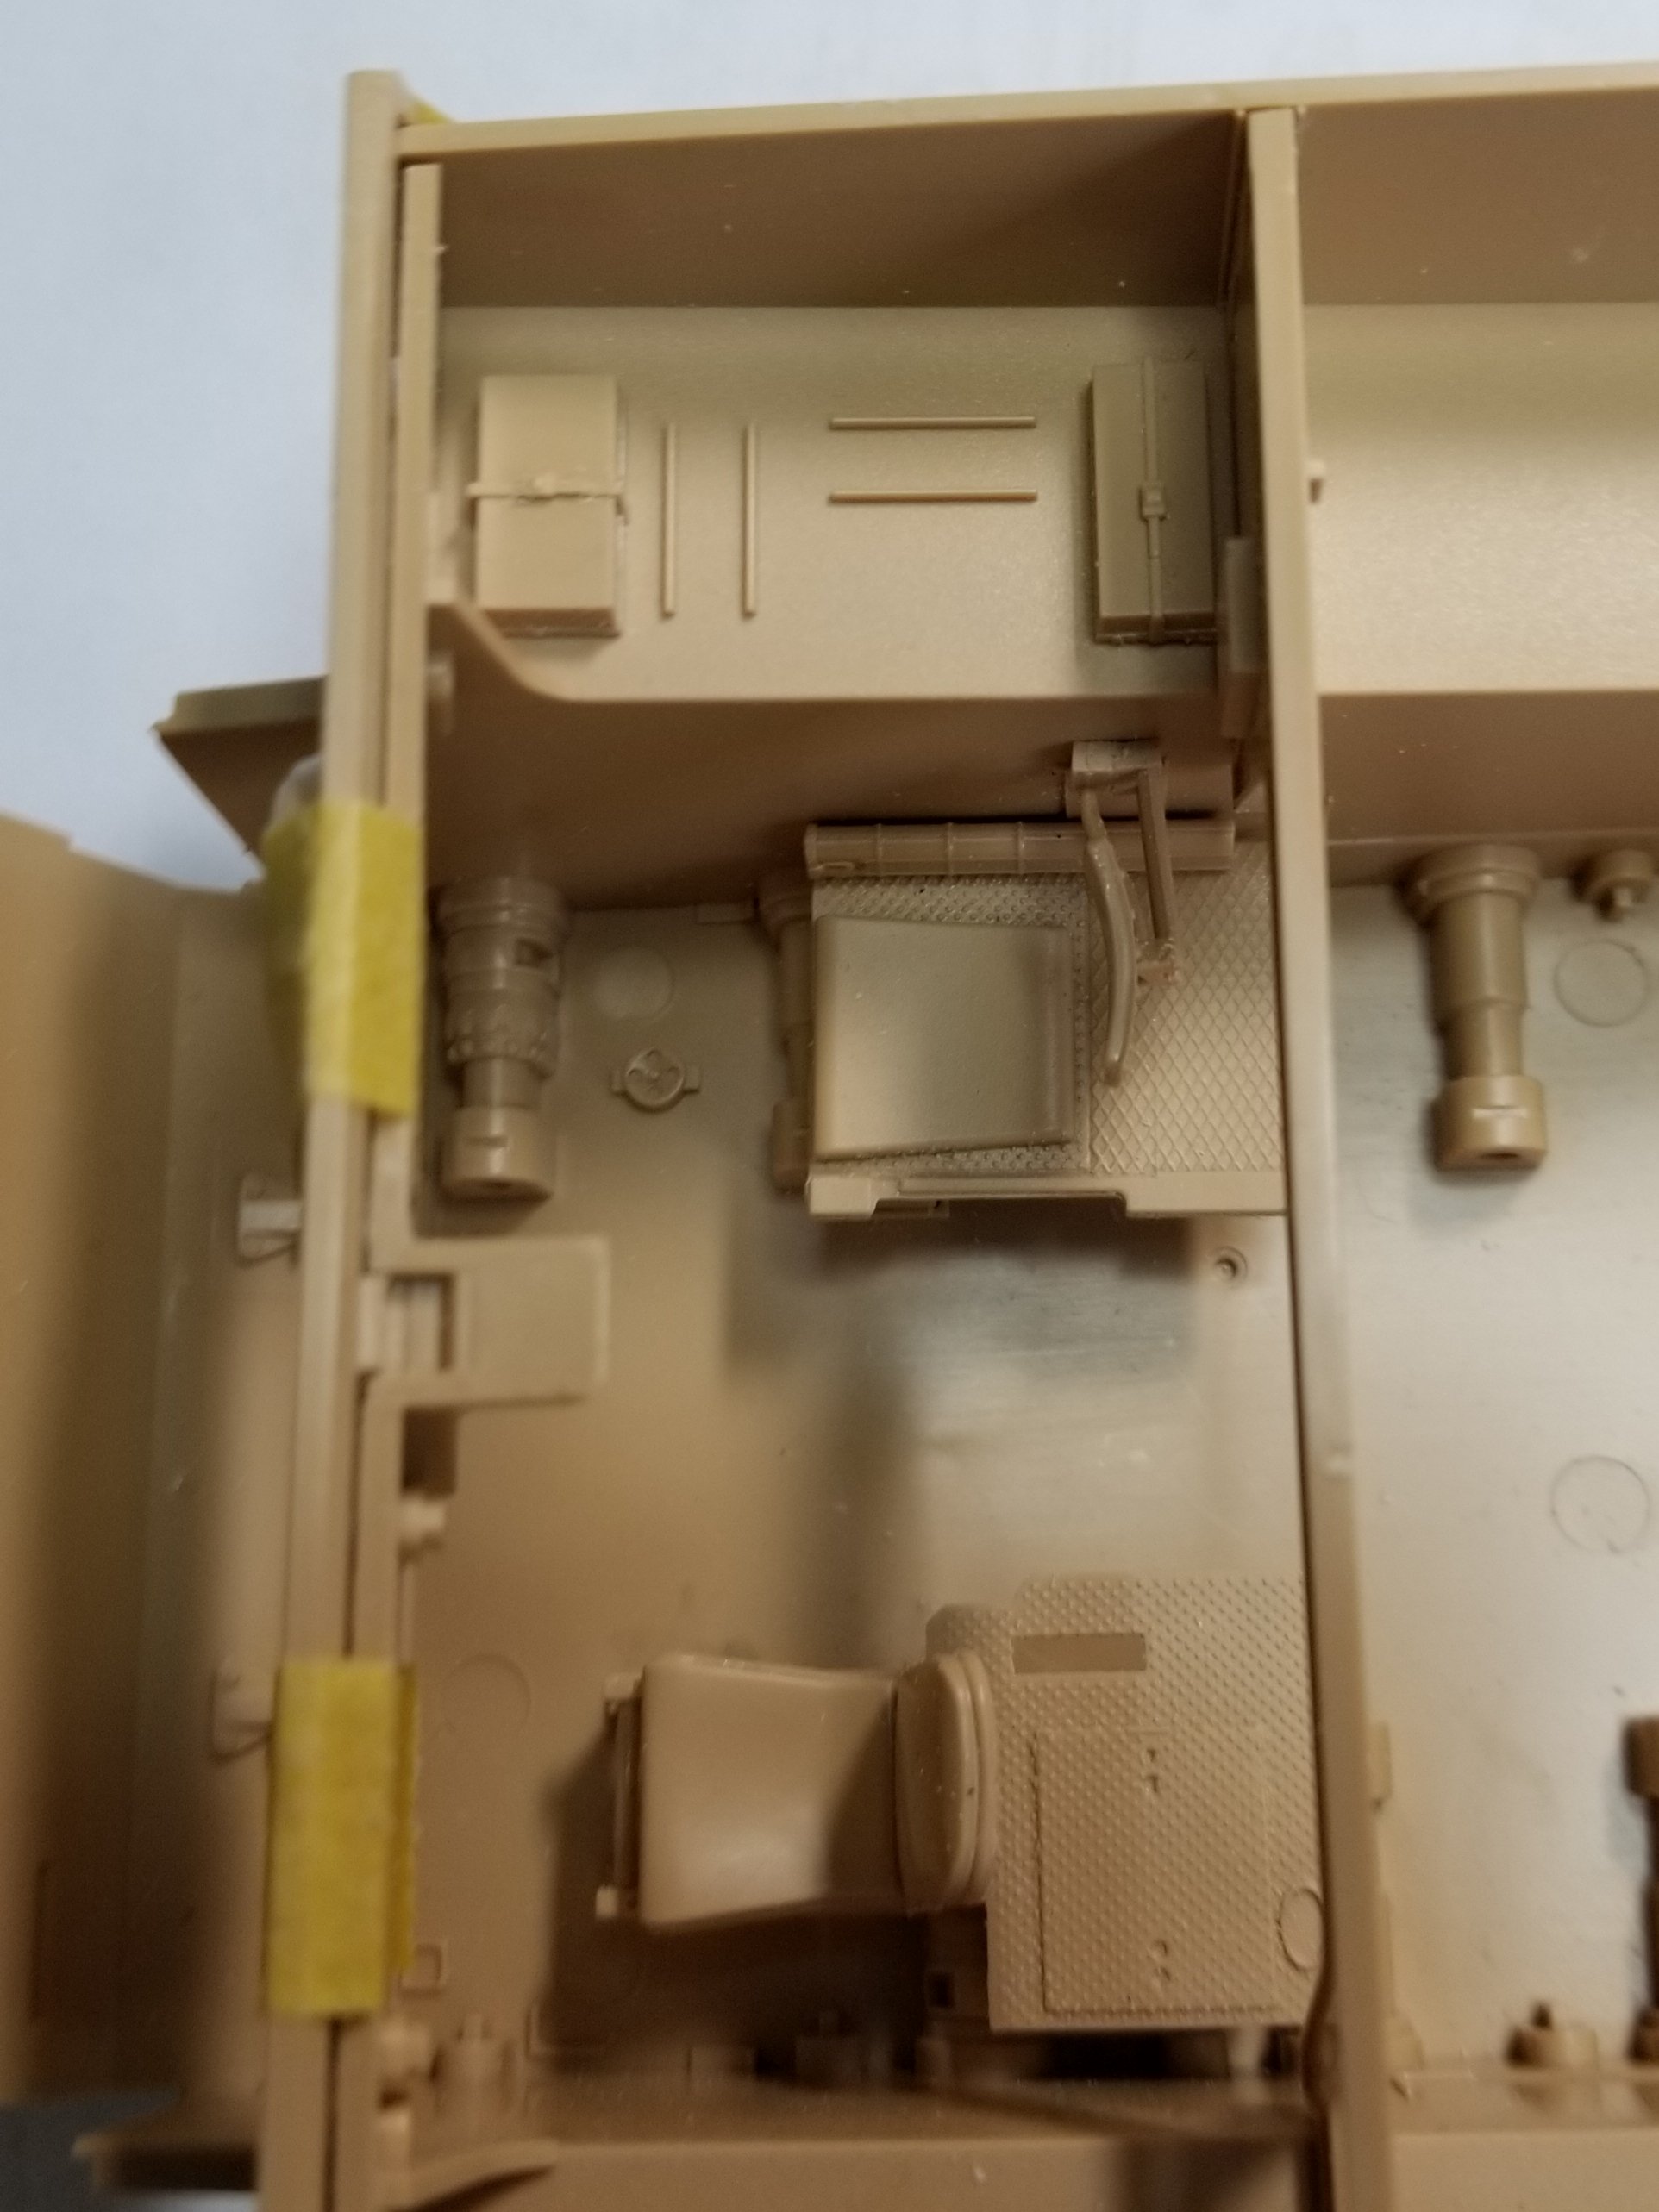
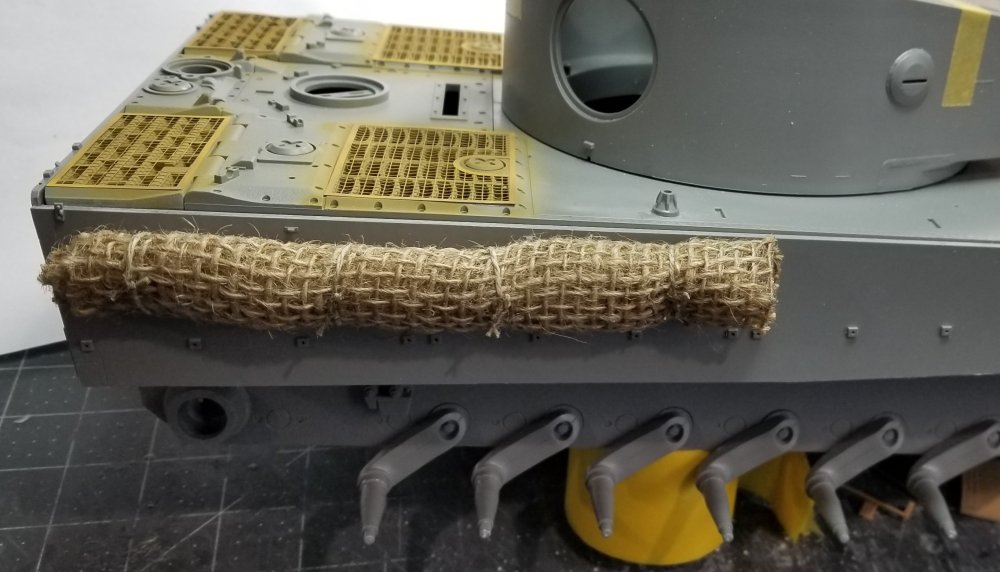
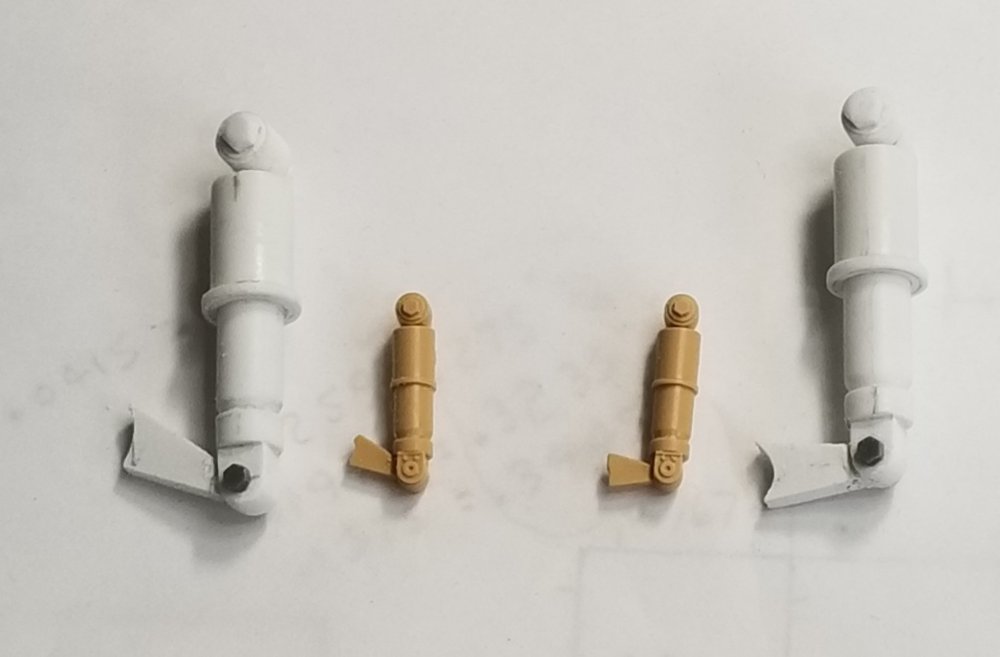
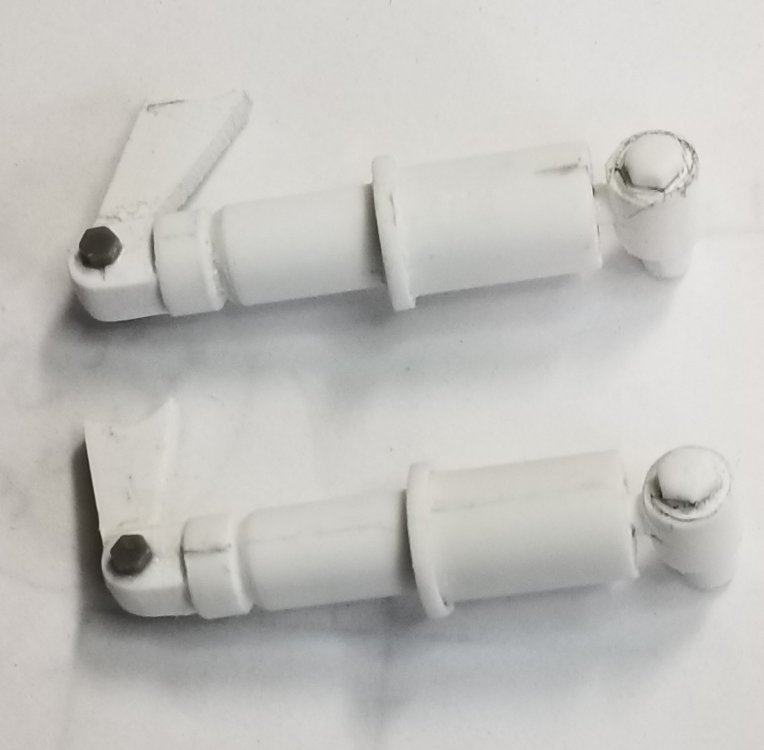
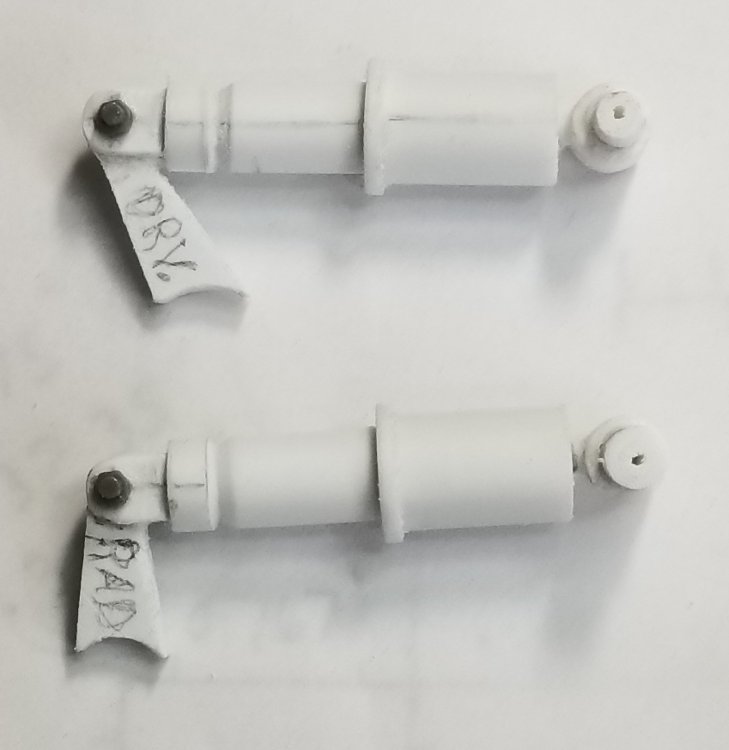
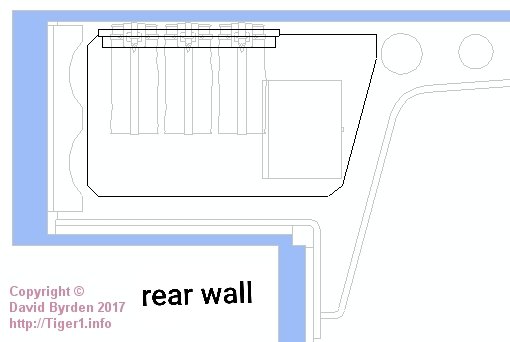
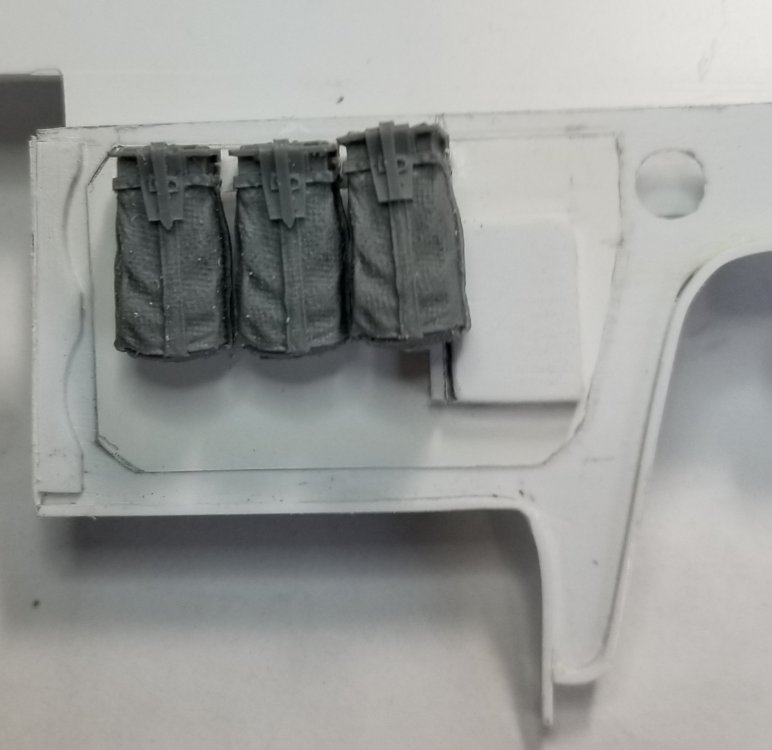
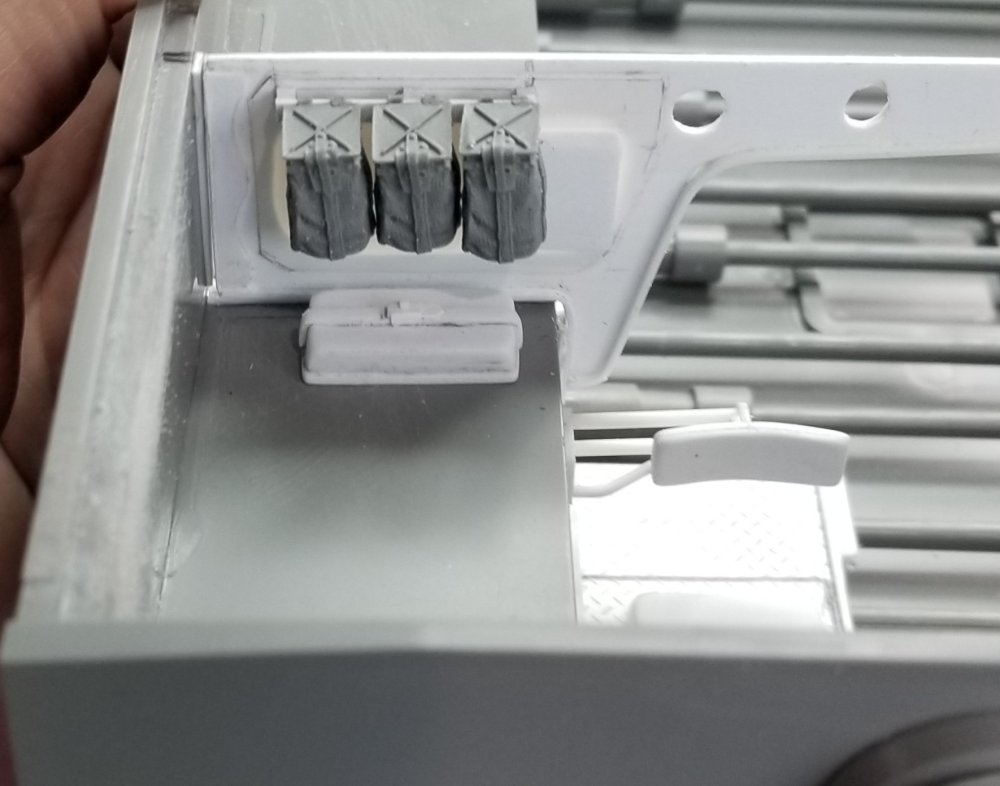
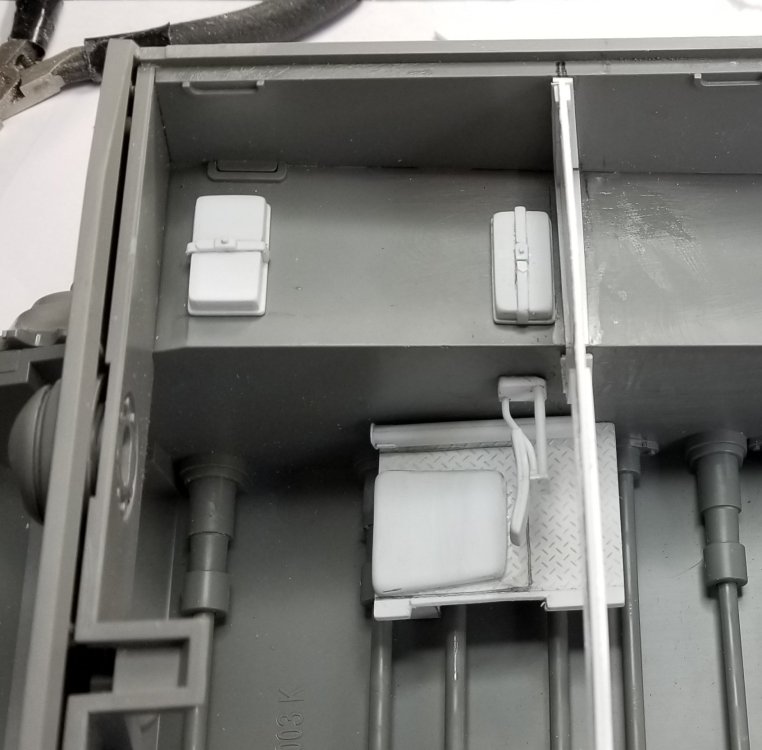
Hey all Some more work on the Tiger. I made the front shock absorbers and the control lever bar under the driver's seat. This view shows both the drivers side and the radio operators side shocks. Tan are the 1/35 and the white ones are the ones I scratch built in 1/16 scale. Another view of the shocks. Back side view of the shocks. This view shows the 1/35 scale parts in place. This view shows the 1/16 scale parts in place. This view shows the control bar that fits under the driver's seat. This is a picture of the rear wall (the roof brace) showing the 3 ammo bags mounted on there. This view shows the 1/16 ones that I got from AFV Modeller. This view is of the brace with the ammo bags mounted on it. That's it for now be back soon with more updates. Ron G


-
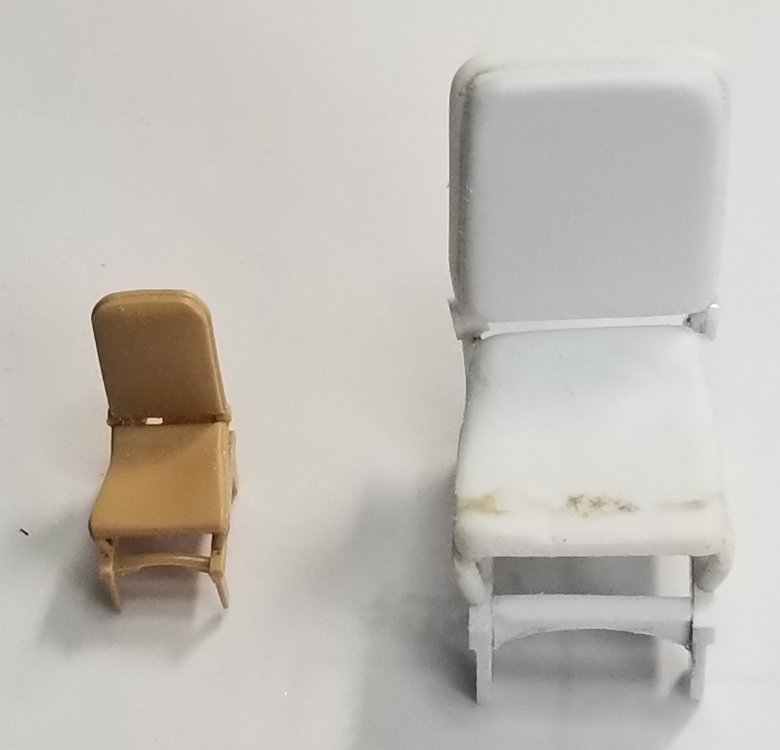
Hey guys I did some more work on the Tiger. I've been spending the last few days replicating the 1/35 scale parts into 1/16 scale ones. This view shows the drivers seat that I fixed by lengthening the bottom seat cushion. Side view of the drivers seat. Rear view of the seat. This view shows the part that goes behind the seat. Closer view of the two parts. This view shows the 1/35 parts. This view shows the 1/16 scale parts. This view shows the two boxes I scratch built to look like the tan 1/35 scale ones. This view shows the 1/35 scale one. This view shows the 1/16 scale one. This is the next thing I have to reproduce. Well that's it for now be back soon with more. Ron G


-
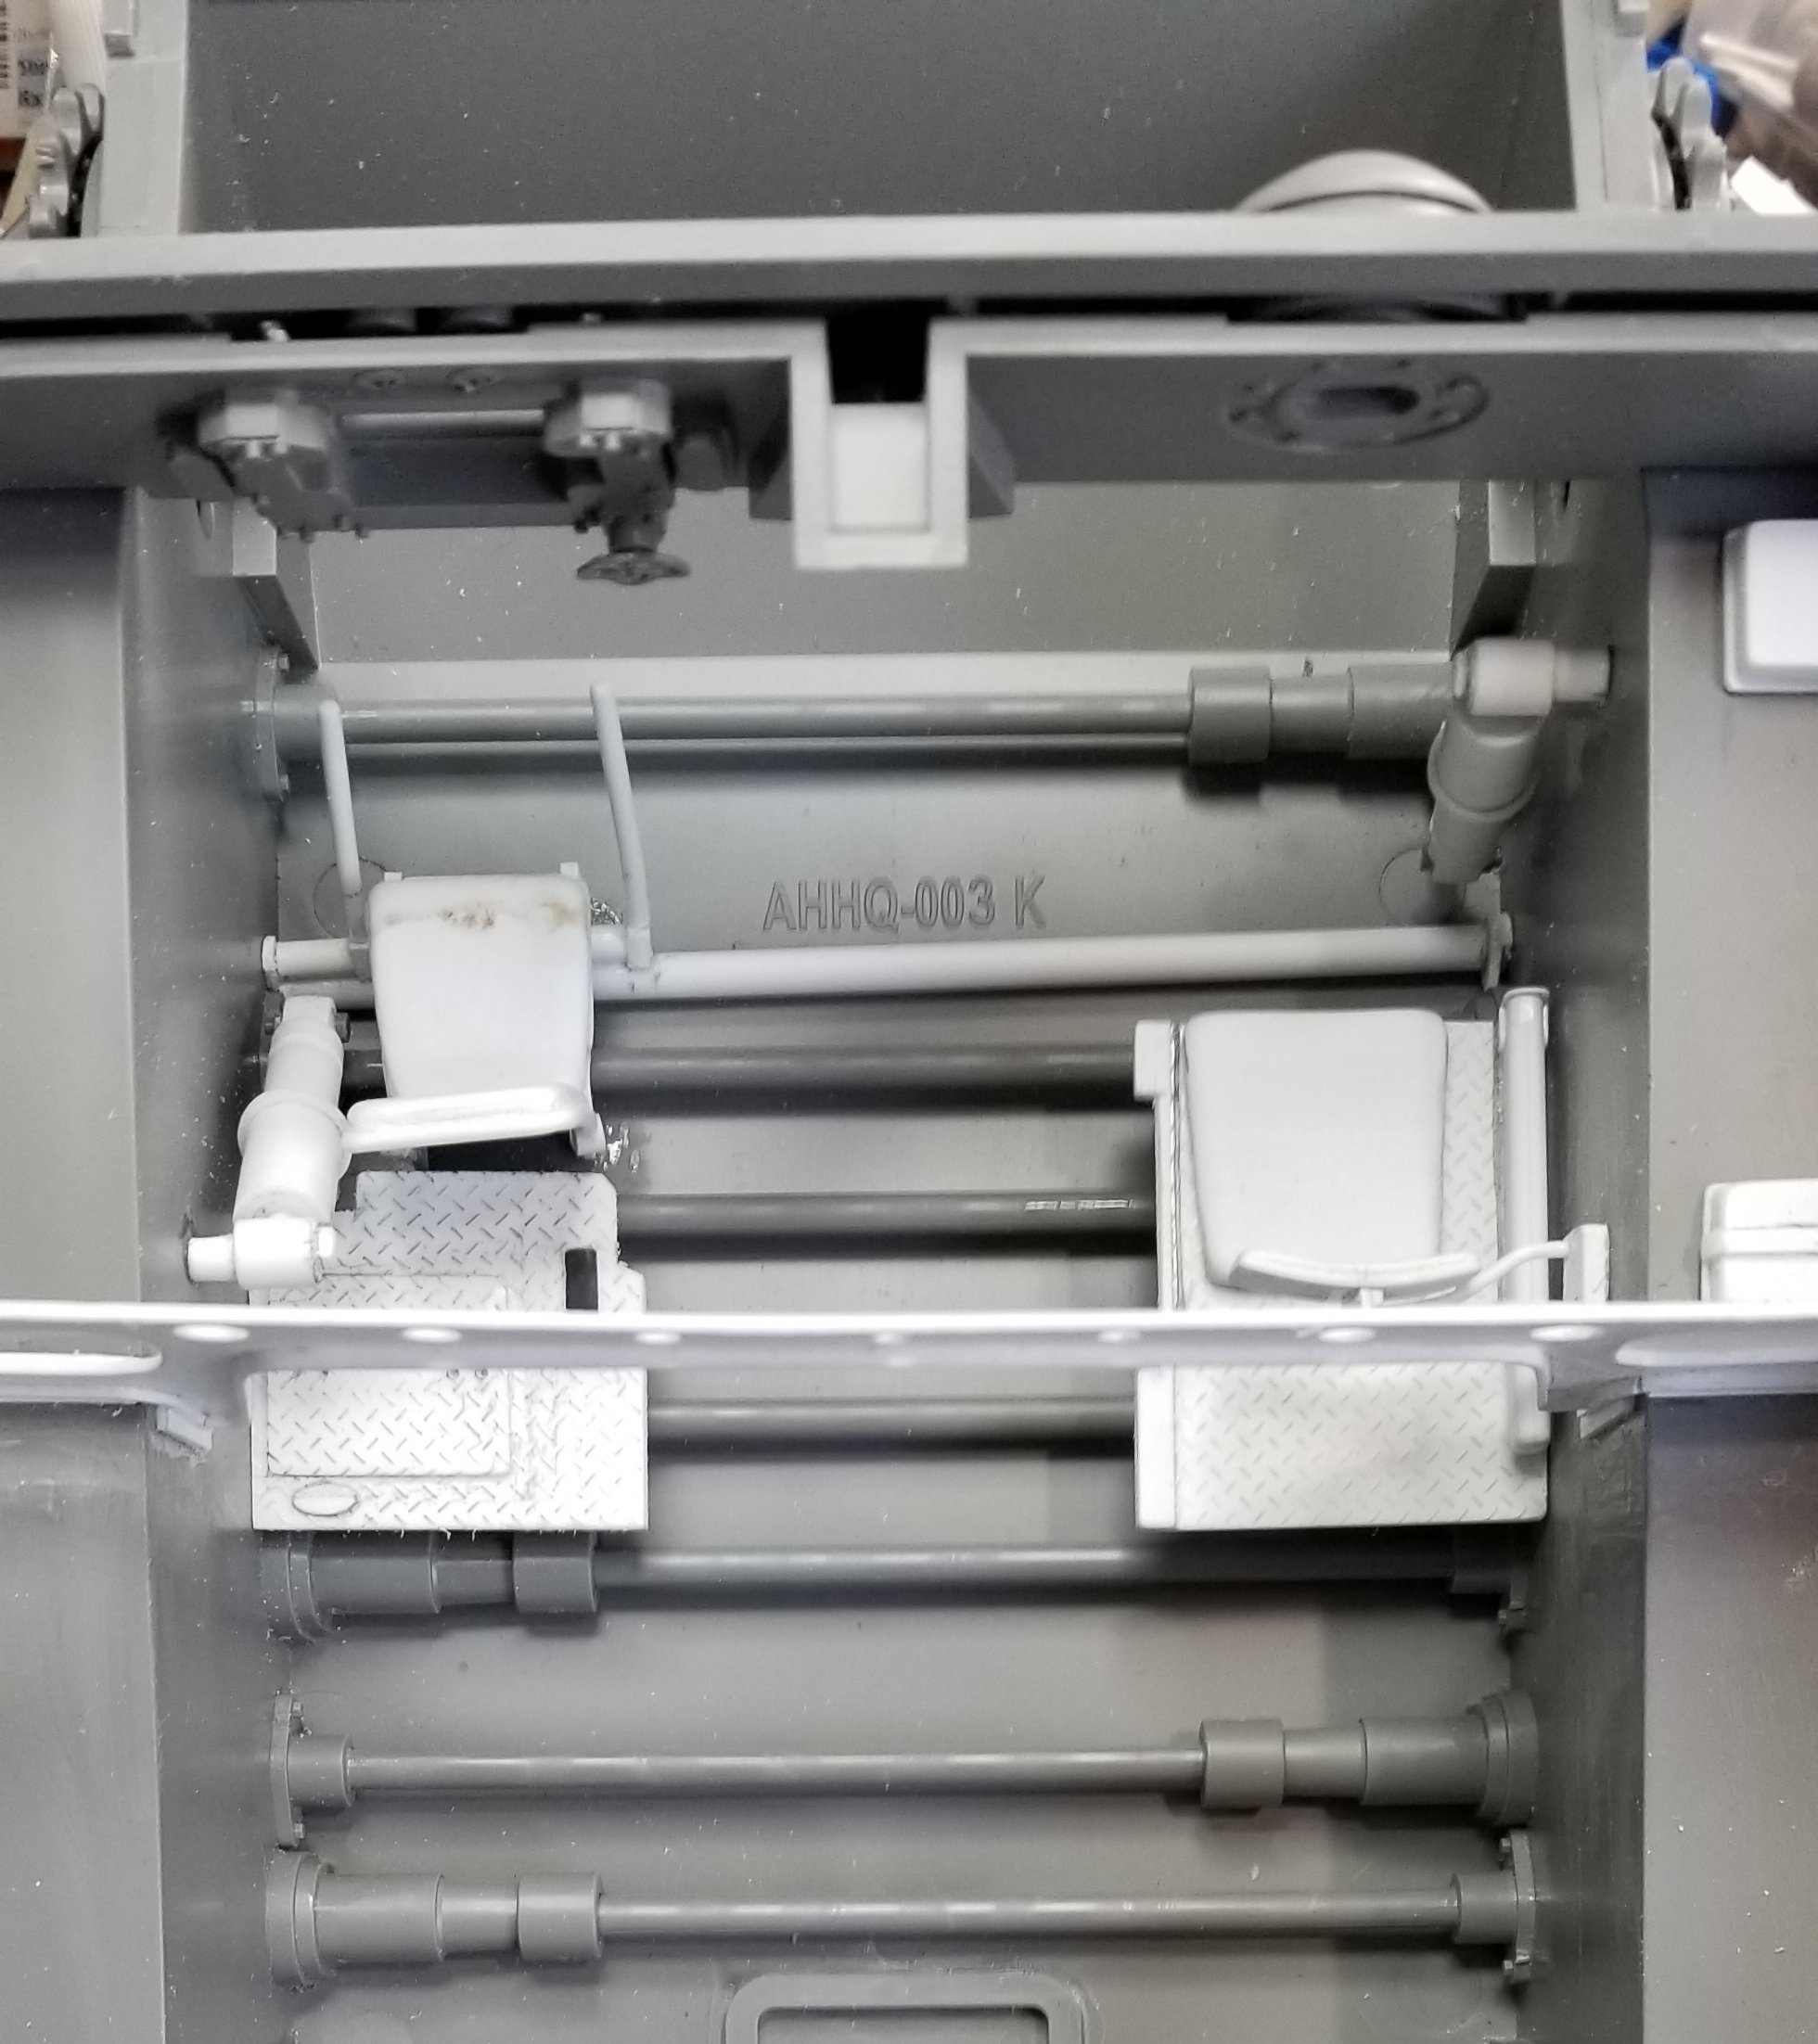
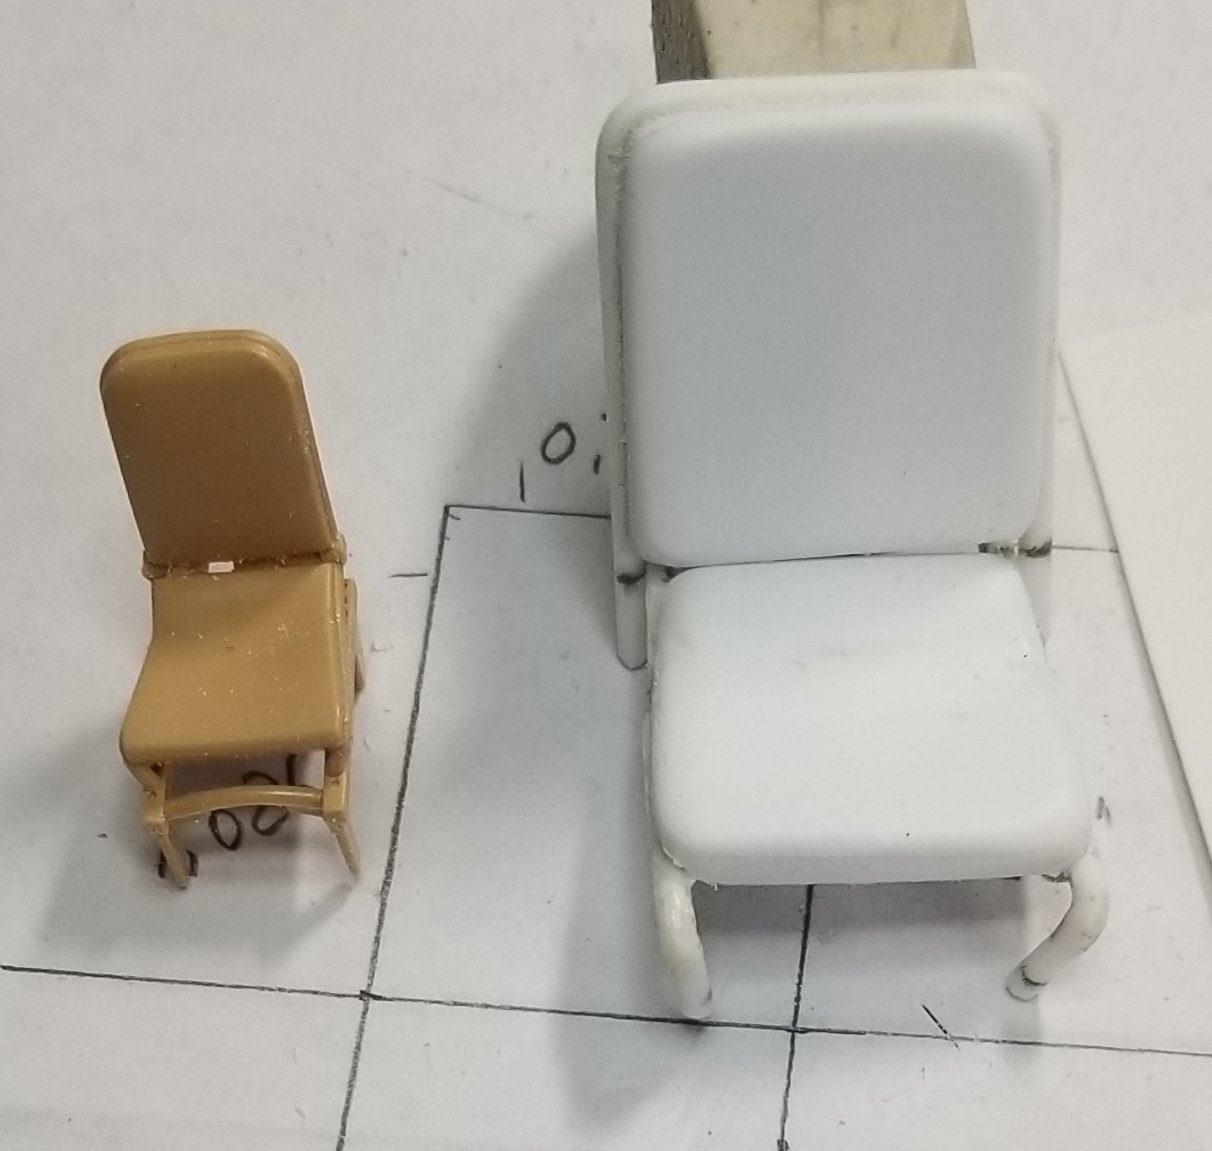
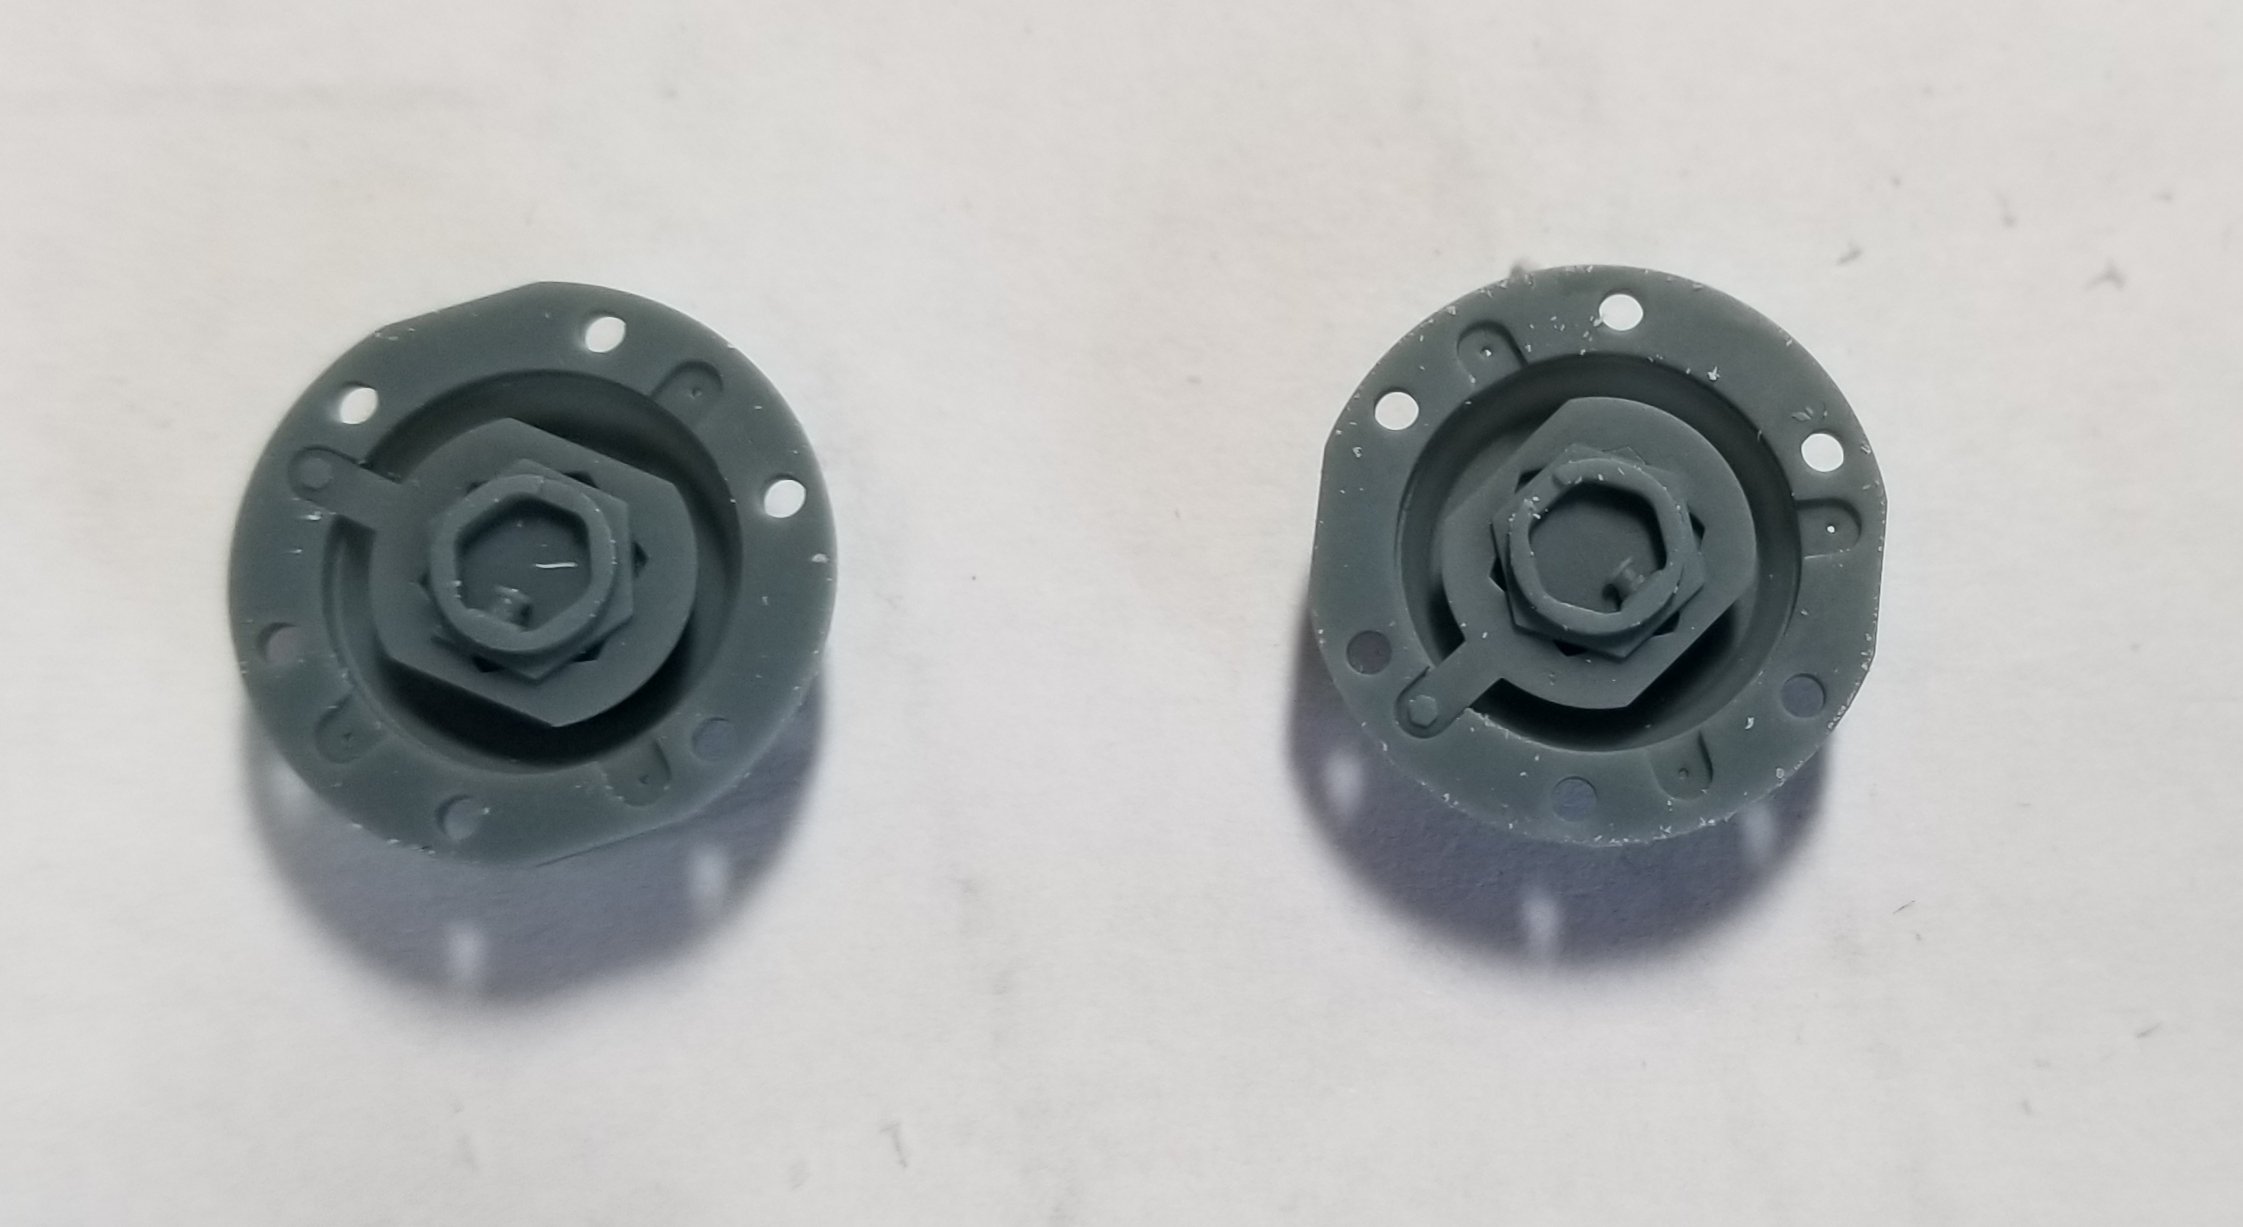
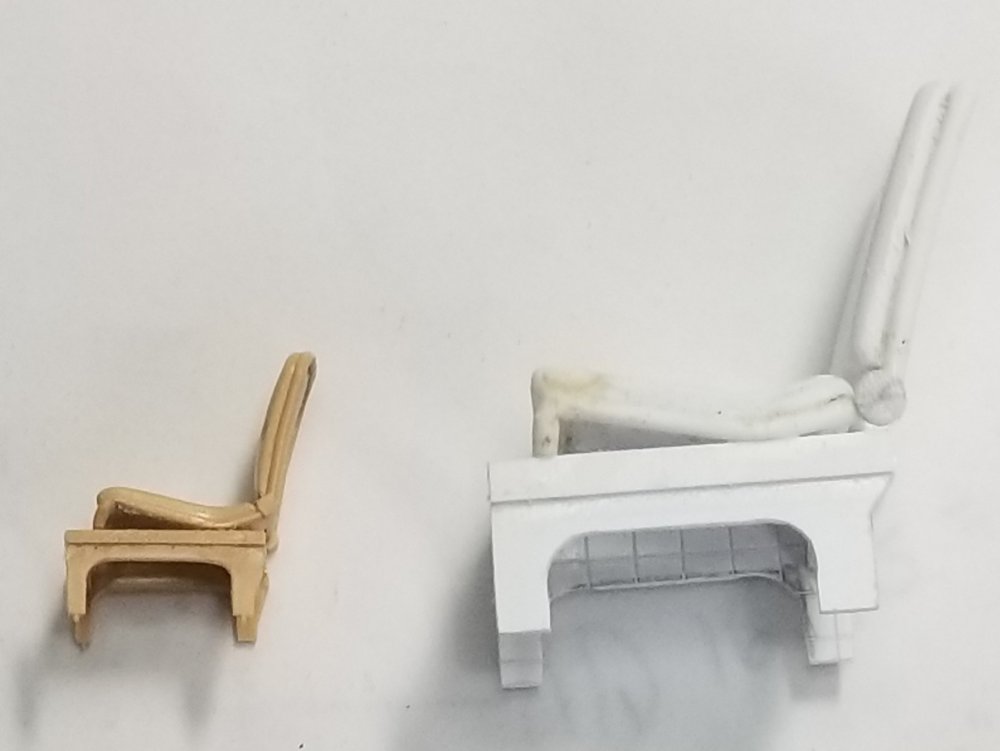
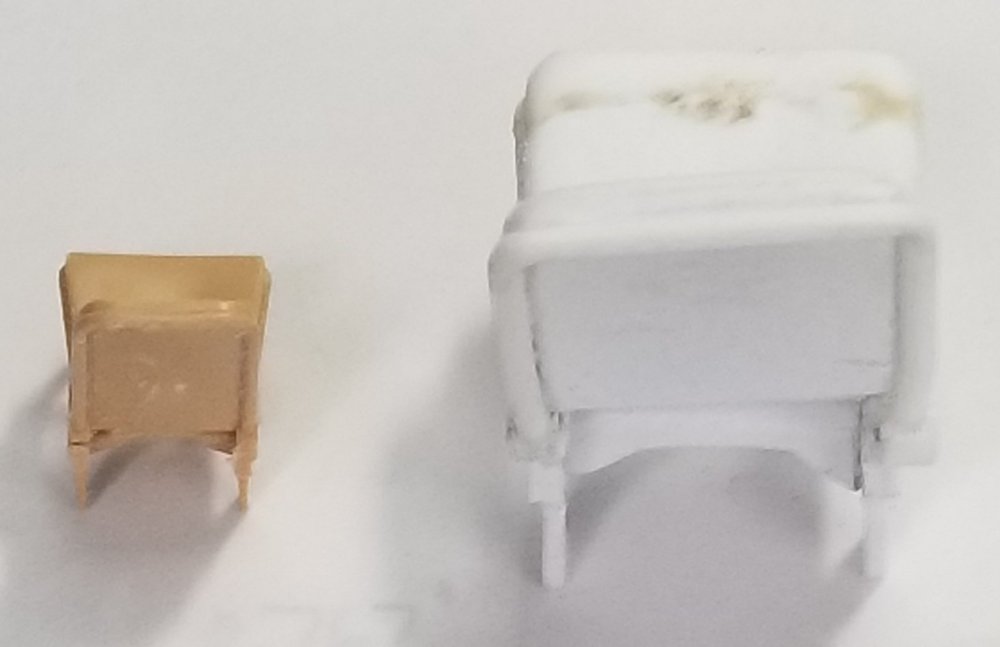
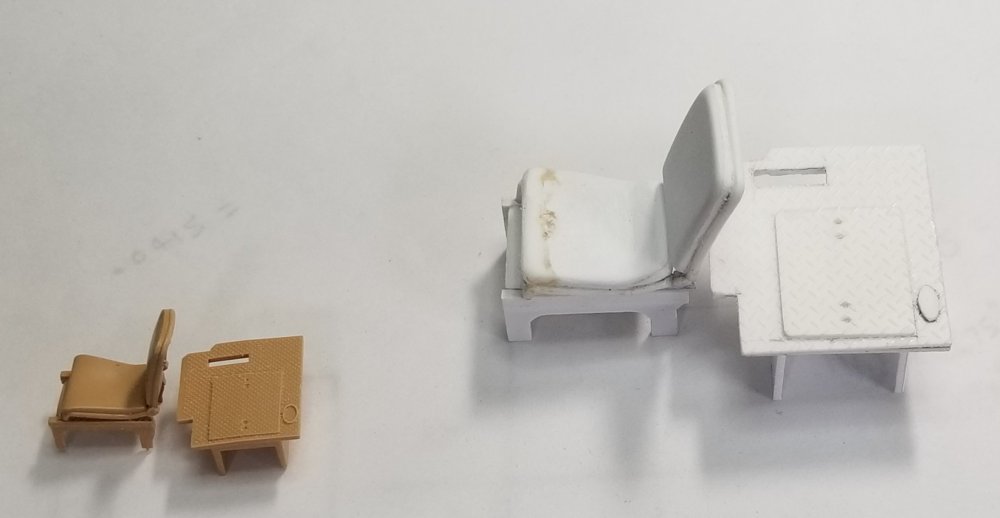
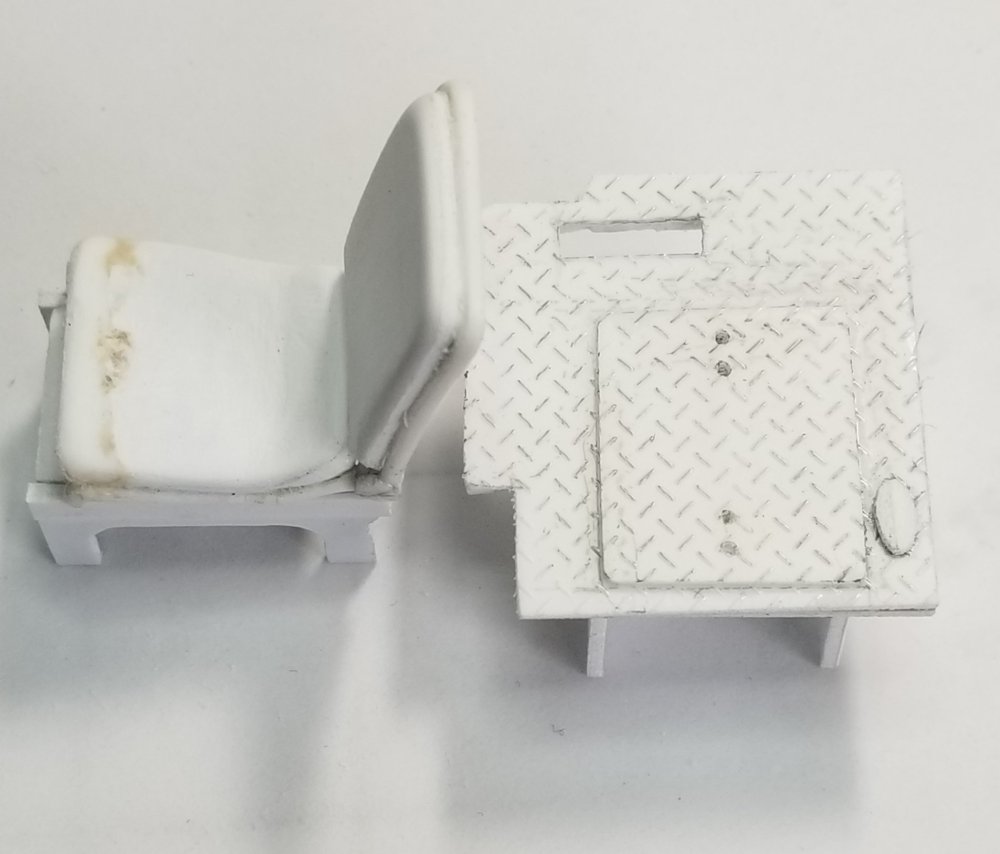
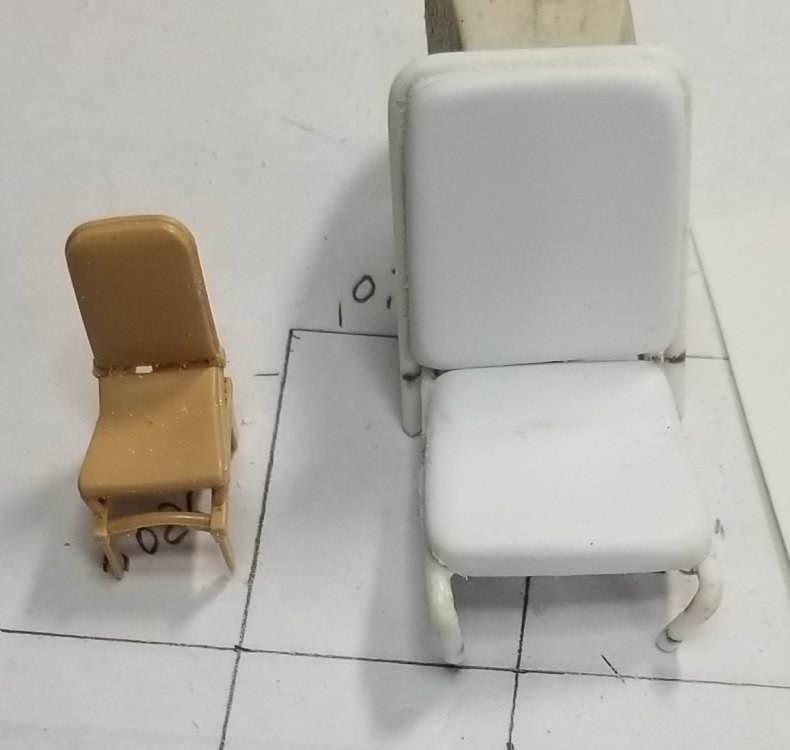
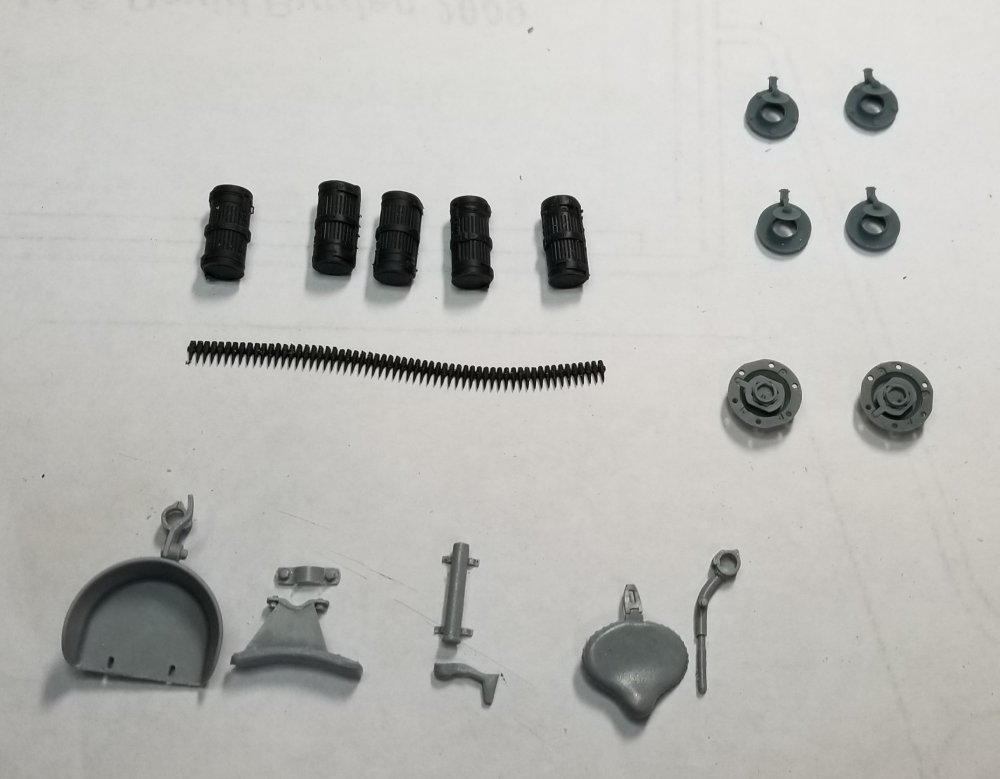
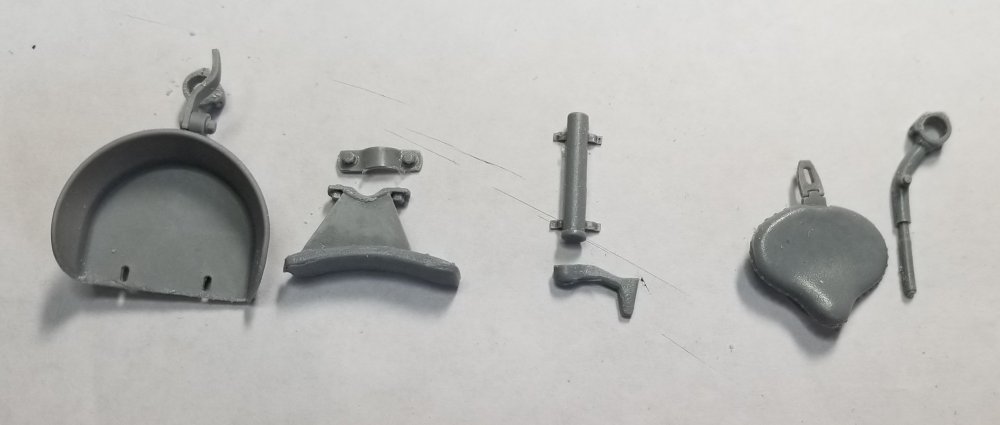
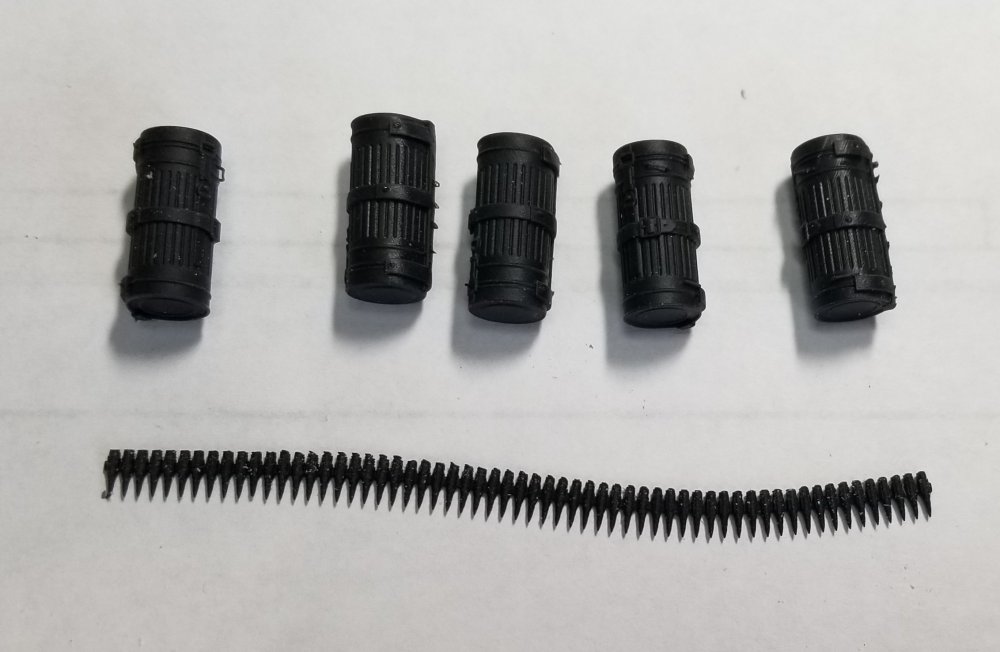
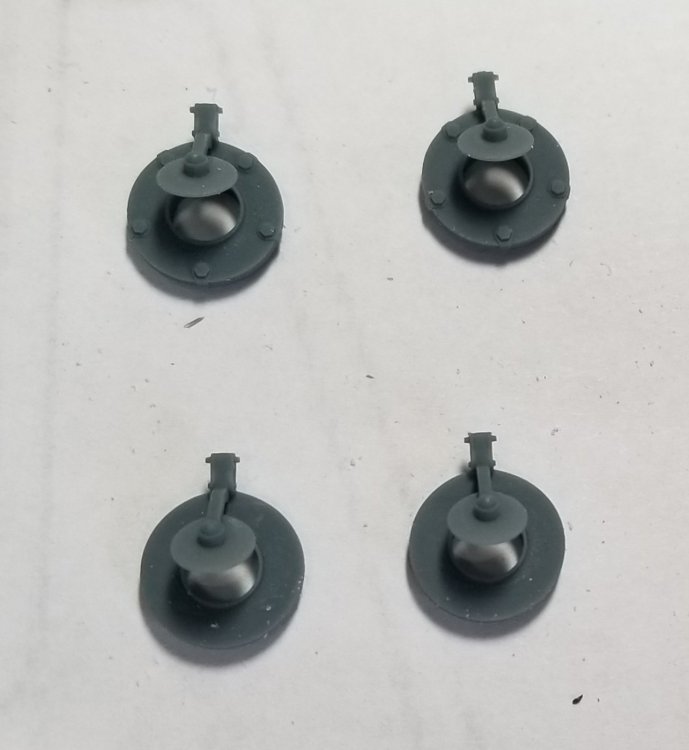
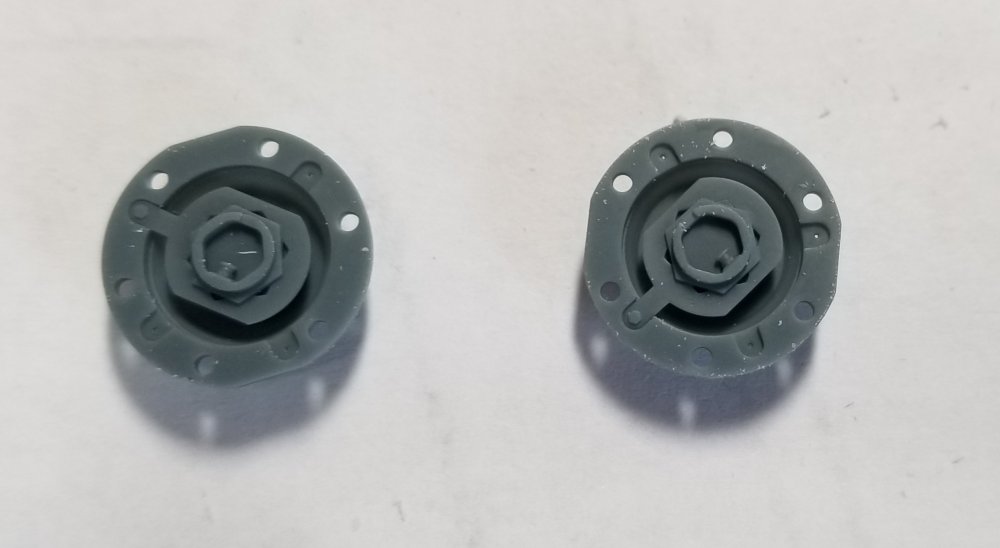
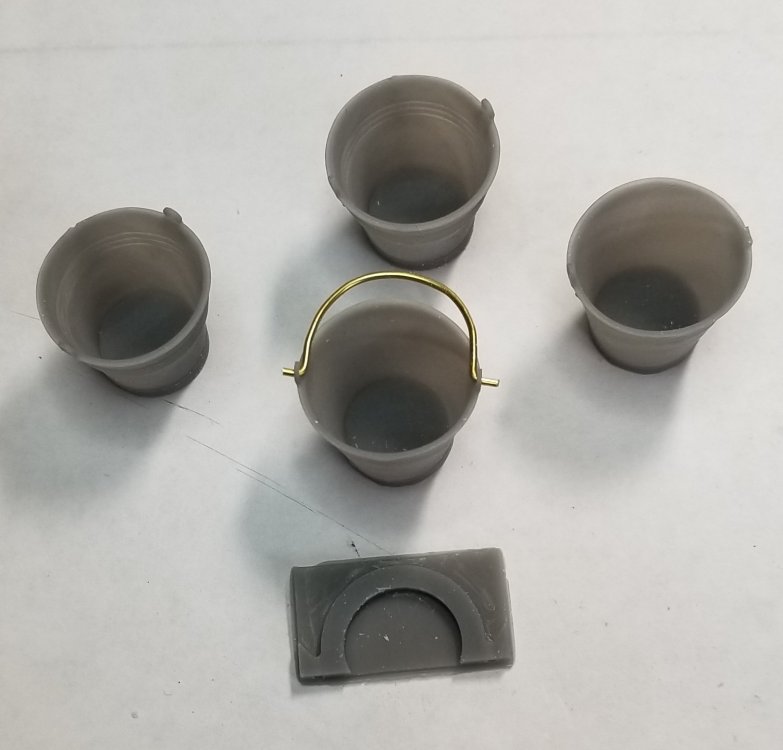
Hey guys I did a little more work on the big cat. This view shows the 1/35 scale drivers seat on the left and the one I scratch built on the right. I still have more stuff to add to it. This view shows the stuff I got from AFV Modeller for this kit. This view shows the gunner and loaders seats. These are actually ones for a Panzer IV, but I think I can make them work on the Tiger. This view shows some gas mask containers and a M34 machine gun belt of ammo. This view shows the corrected exhaust flaps in the open position. The ones on top are the ones without the extended top cover and the ones on the bottom are the ones you use with the extended cover. This view shows the mounting flanges for the two front road wheels when they are removed. I almost forgot these from AFV Modeller. 4 buckets and the jig for bending the wire handles. Well that's it for now be back with more soon. Ron G
-
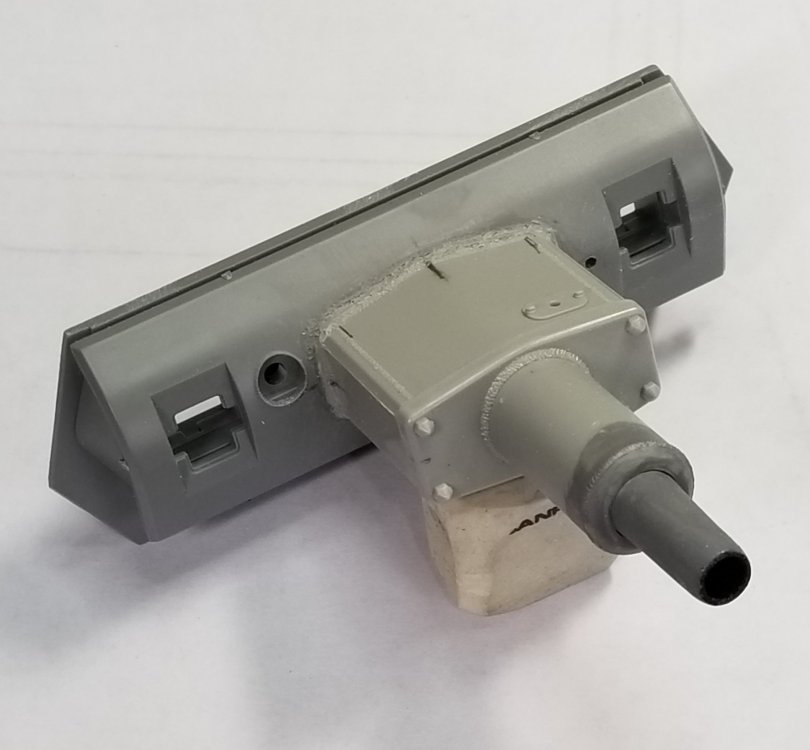
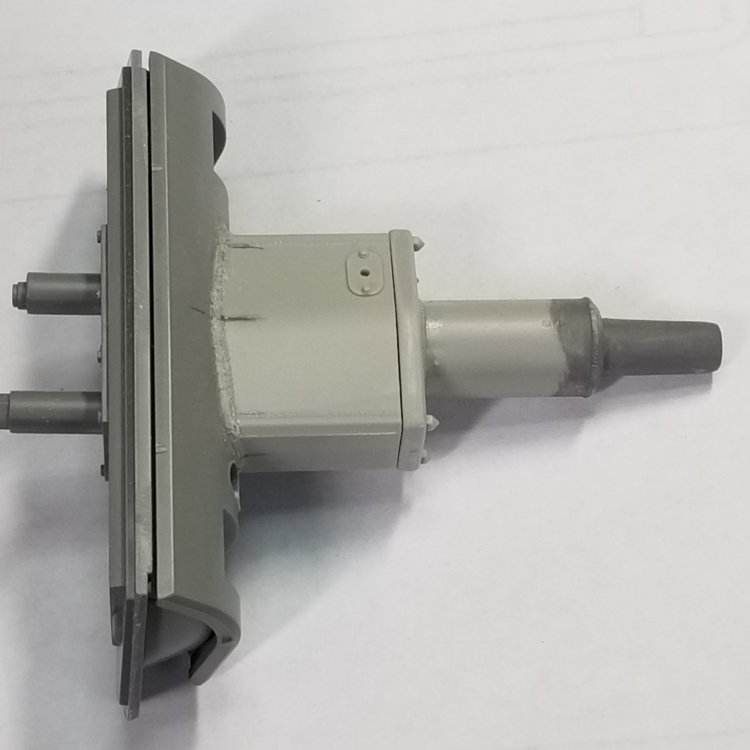
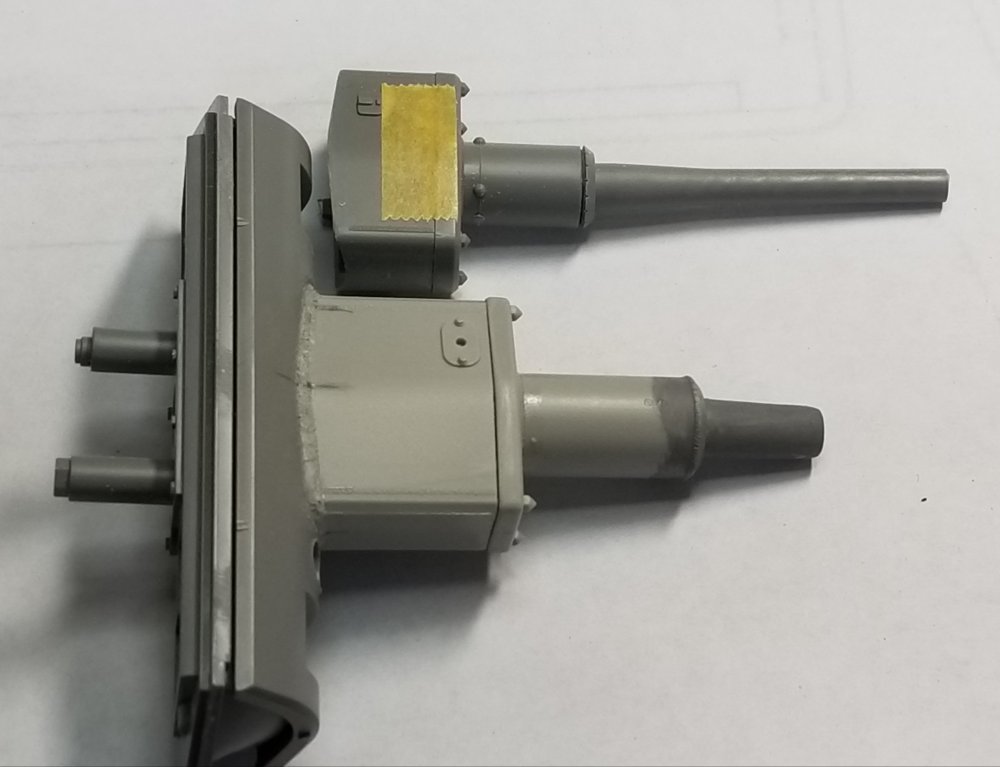
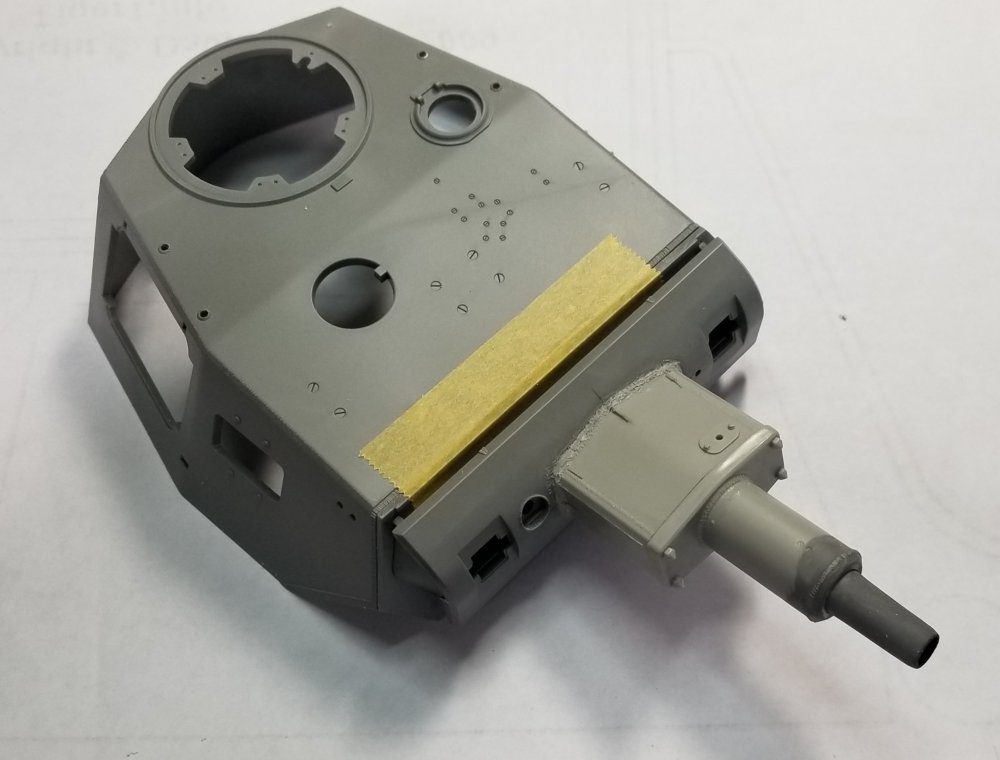
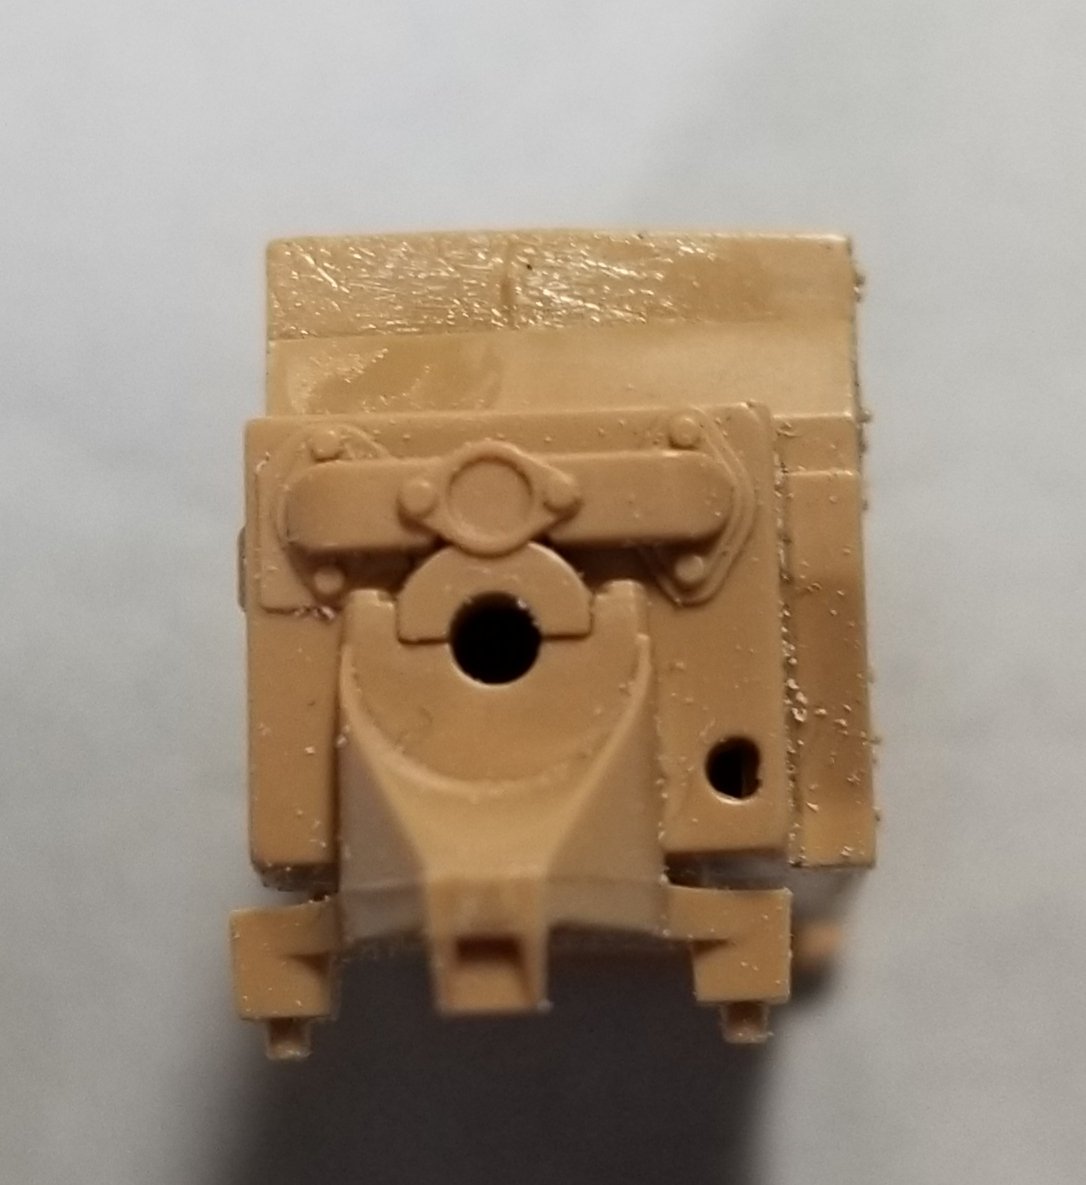
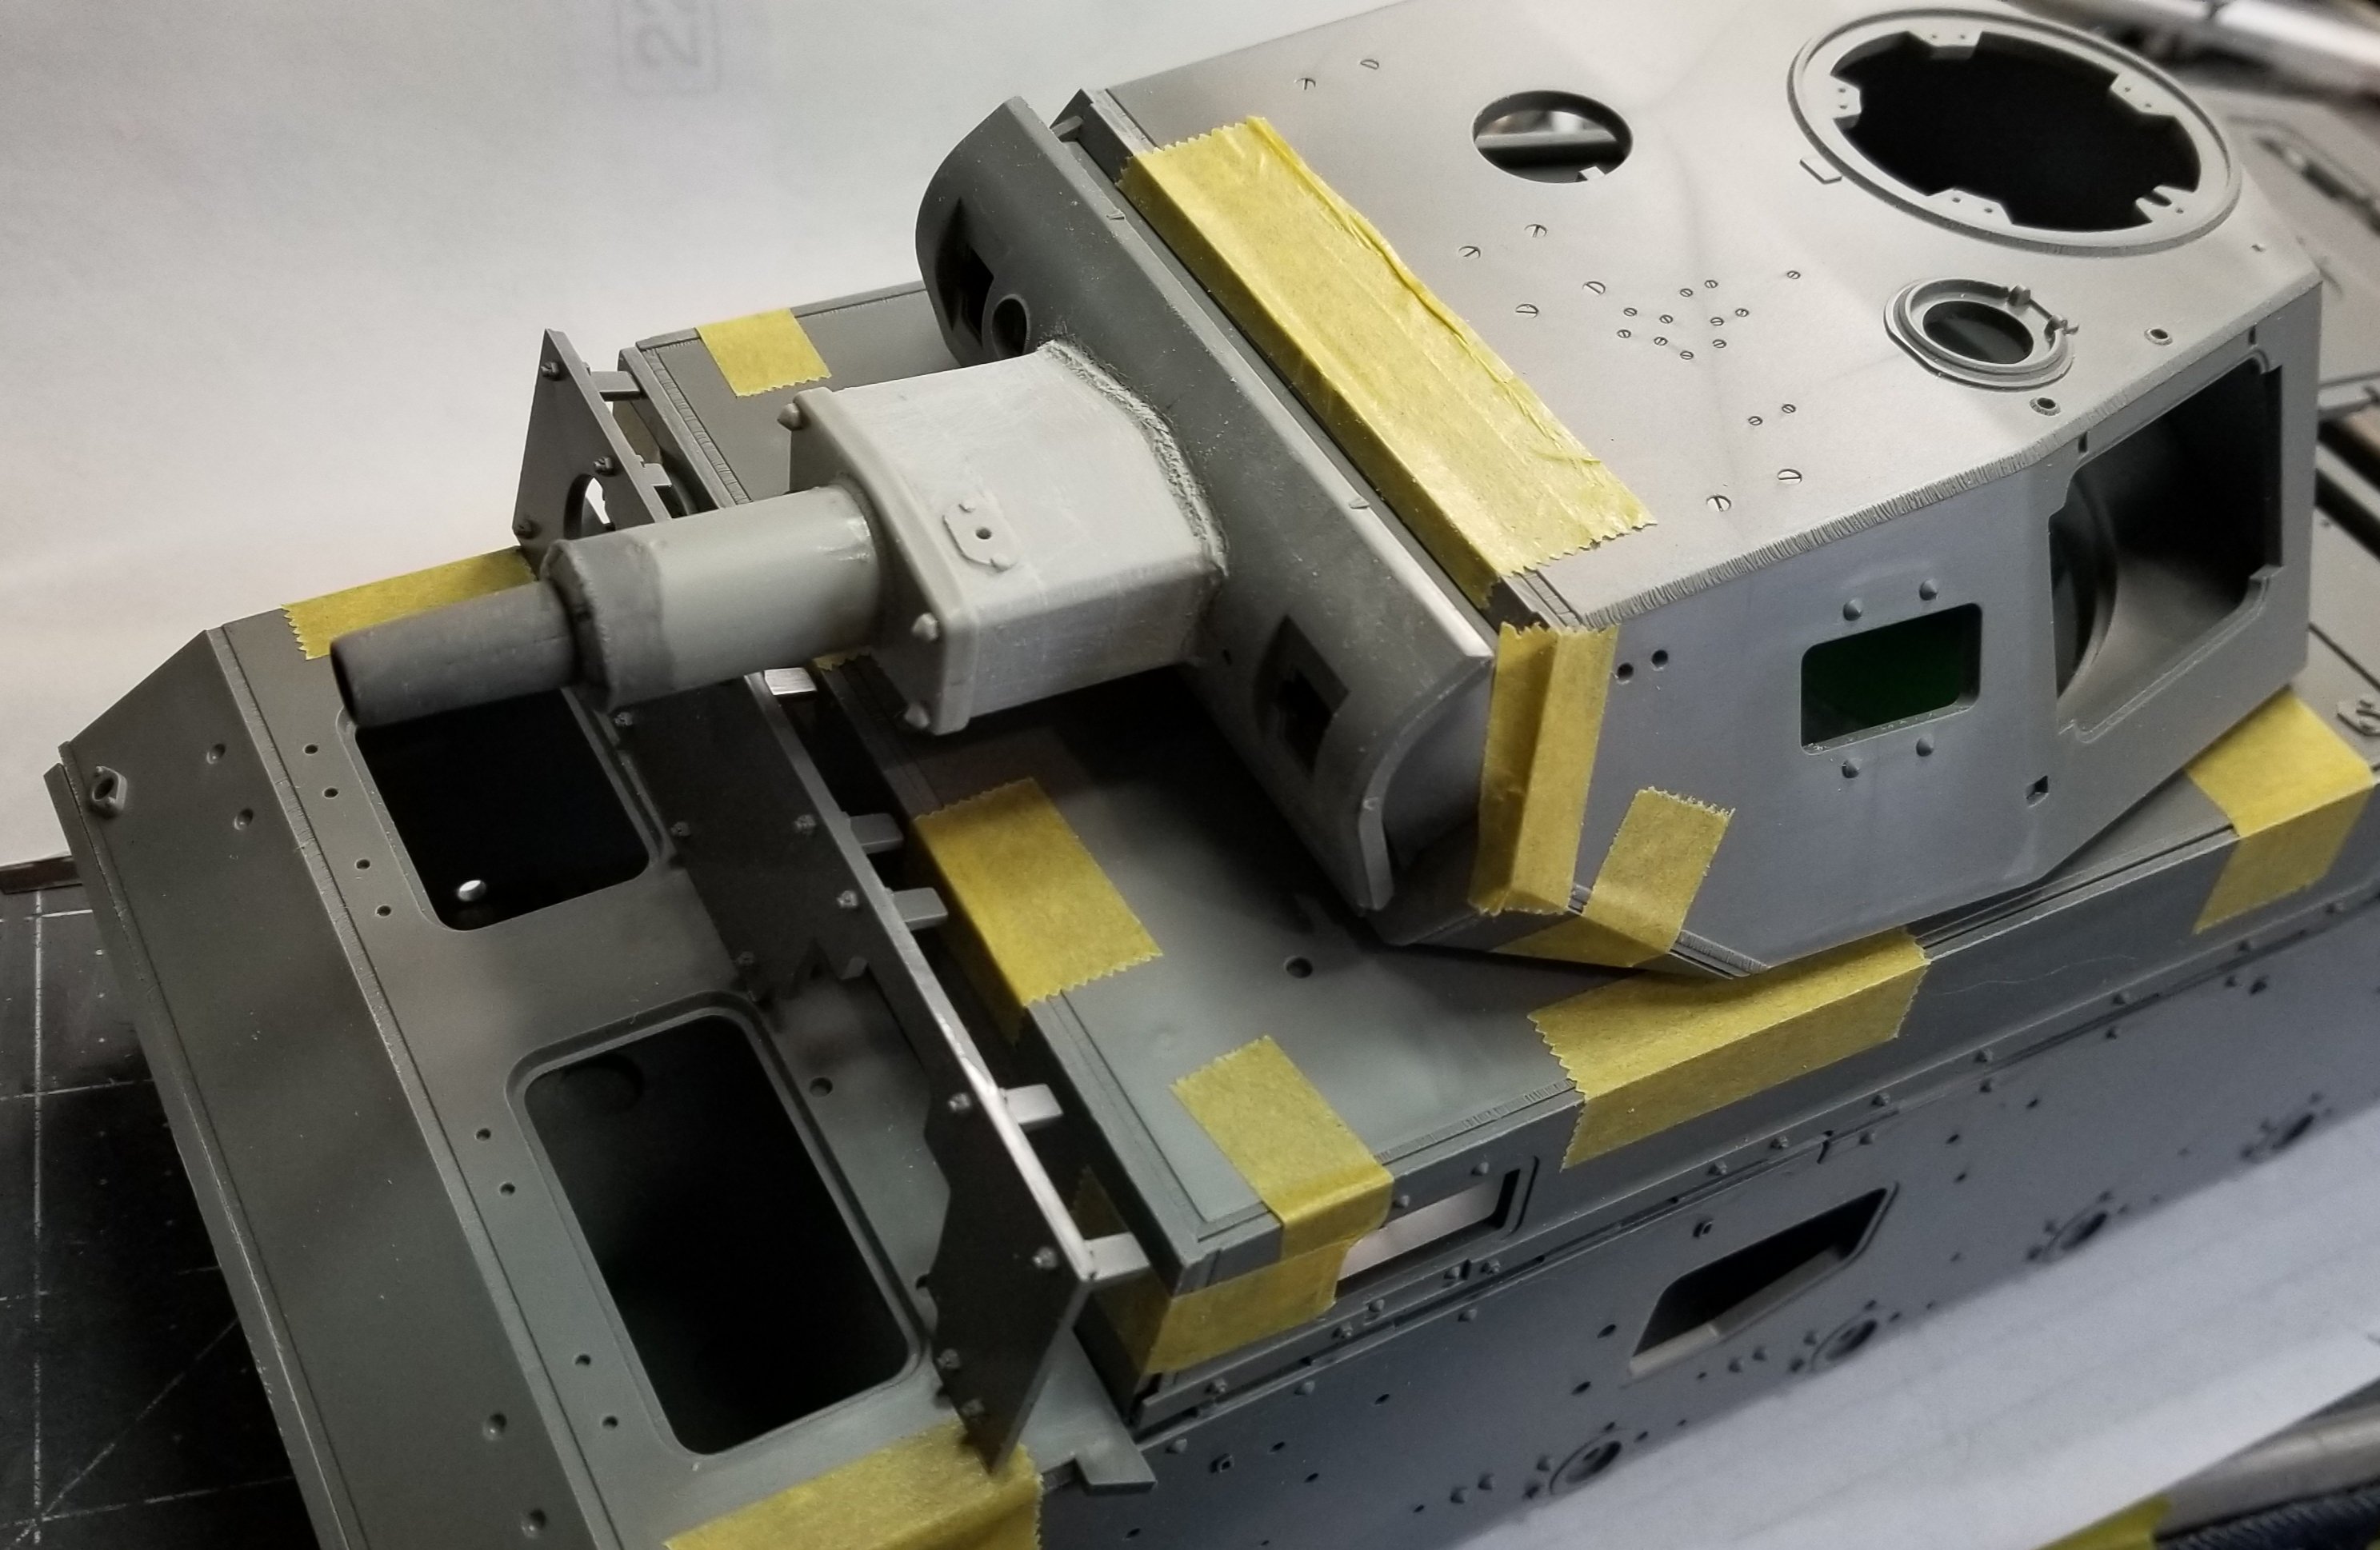
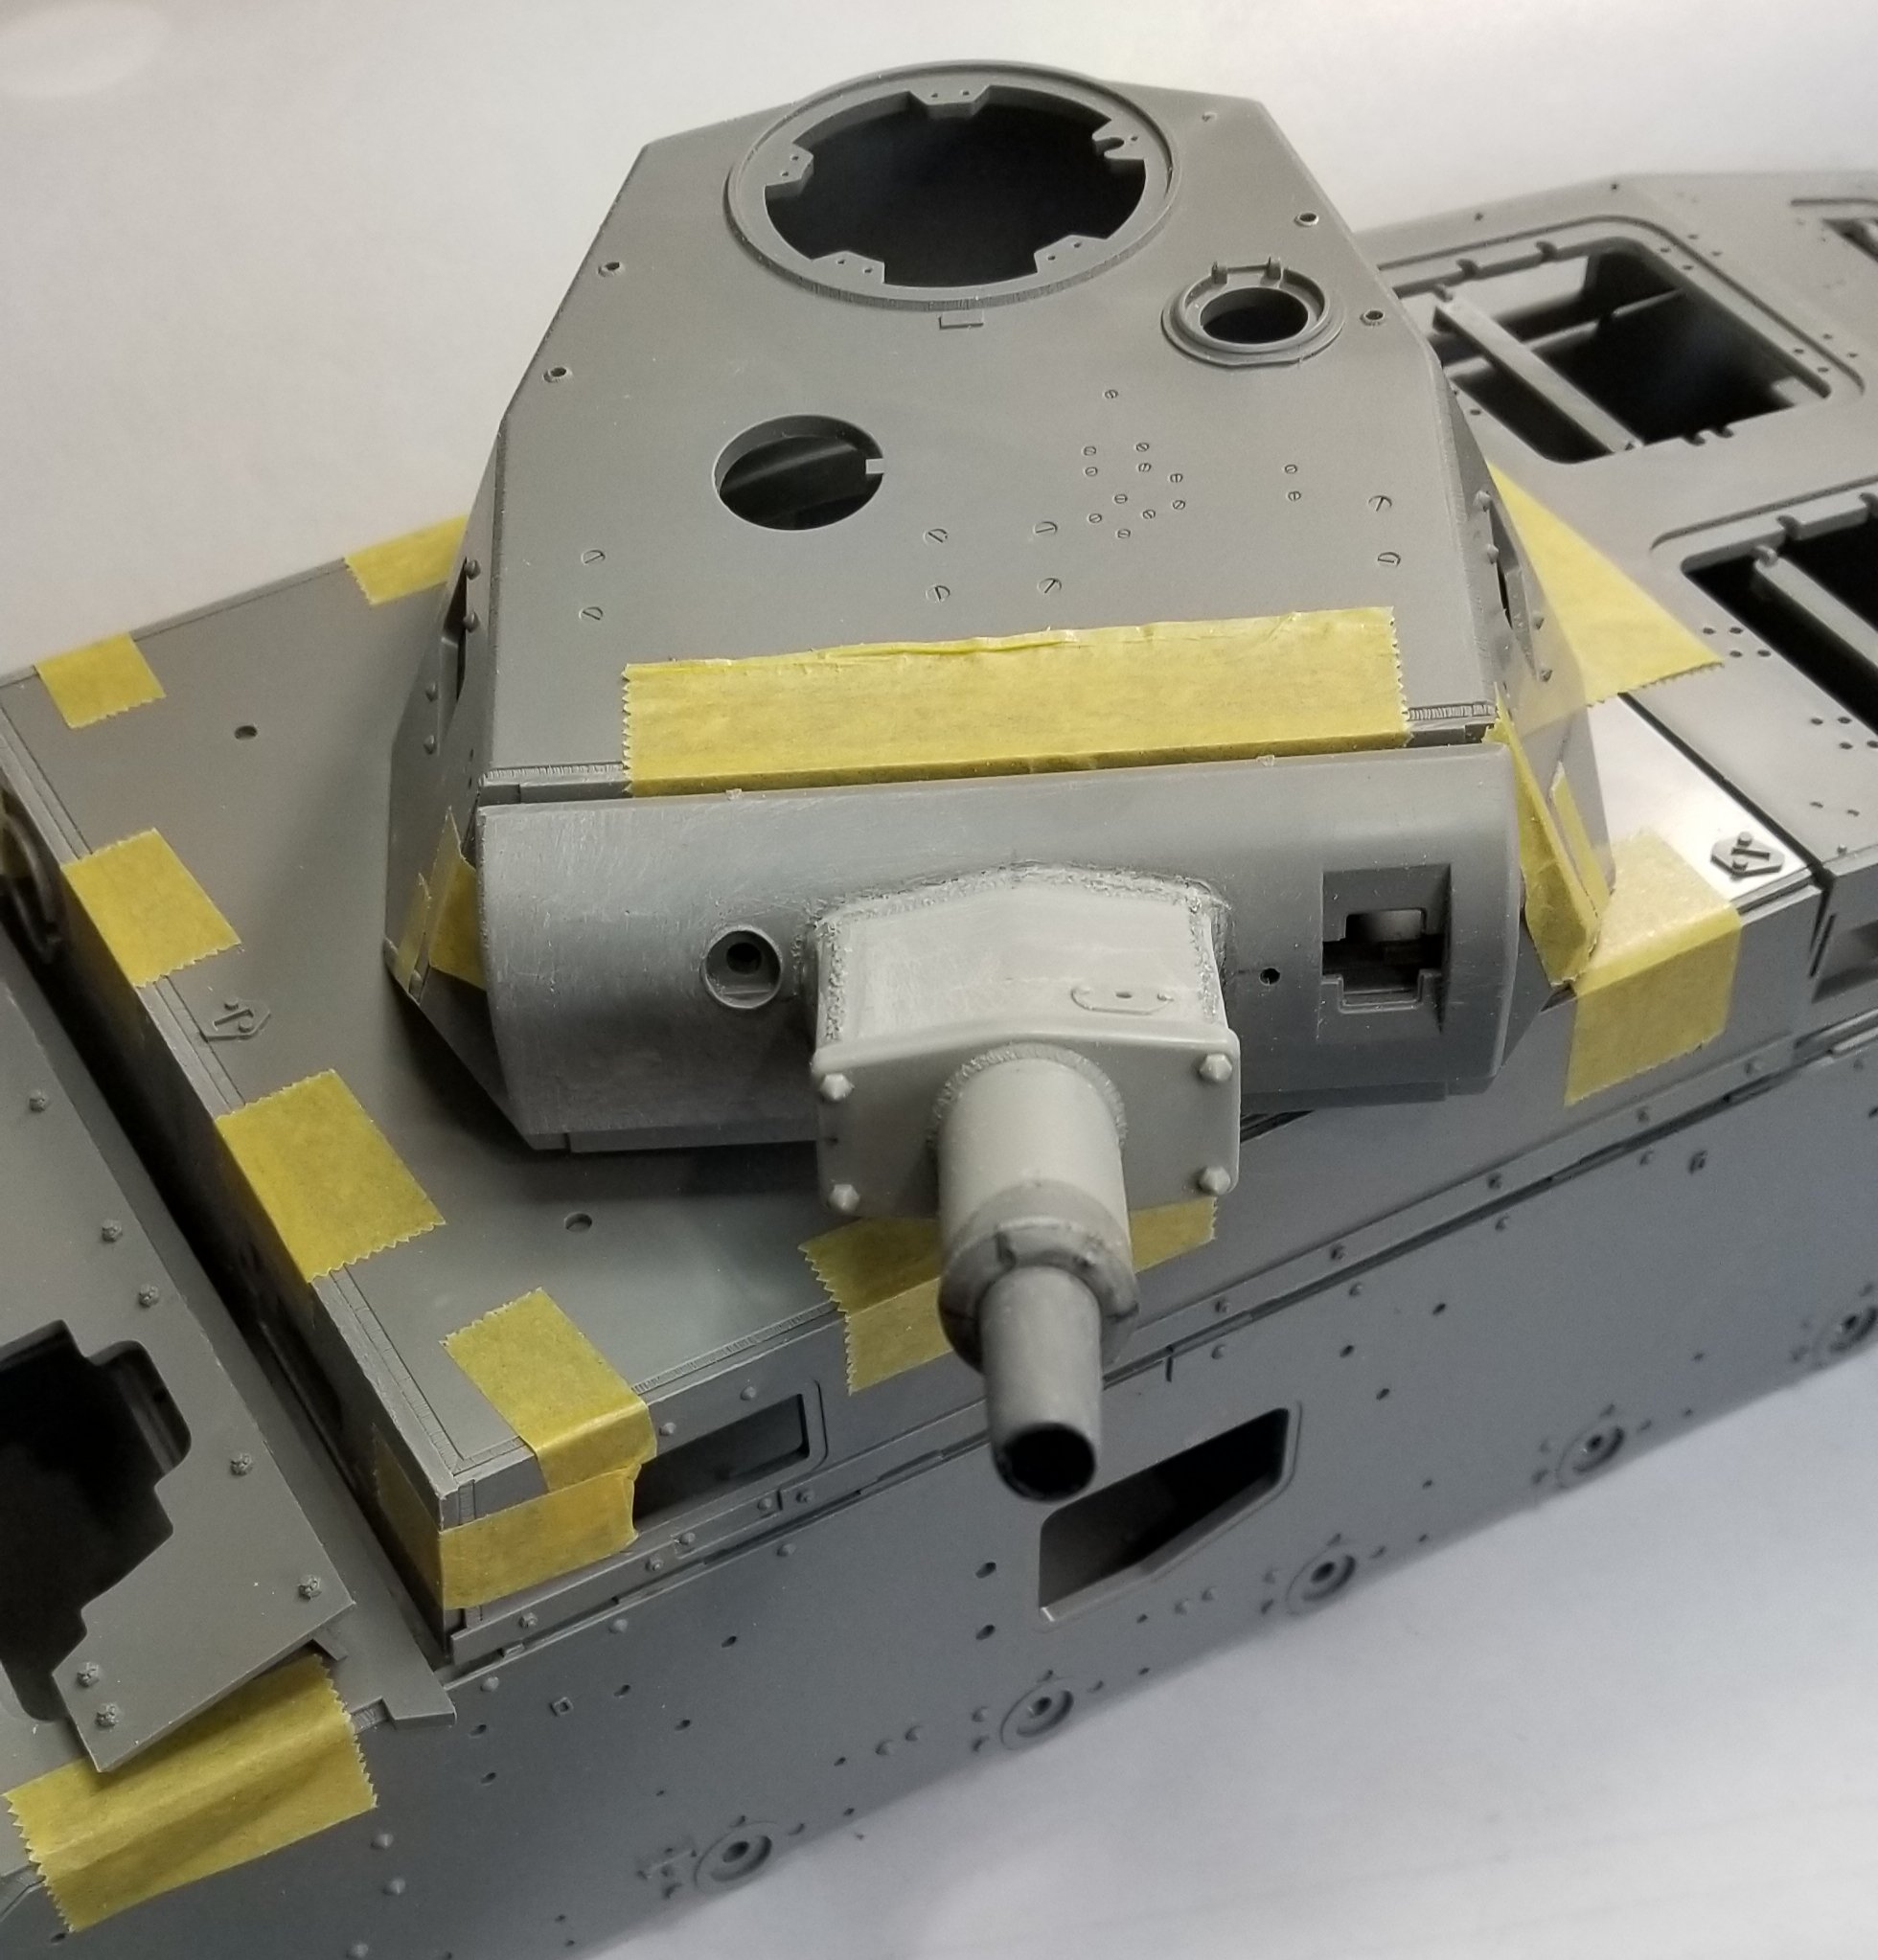
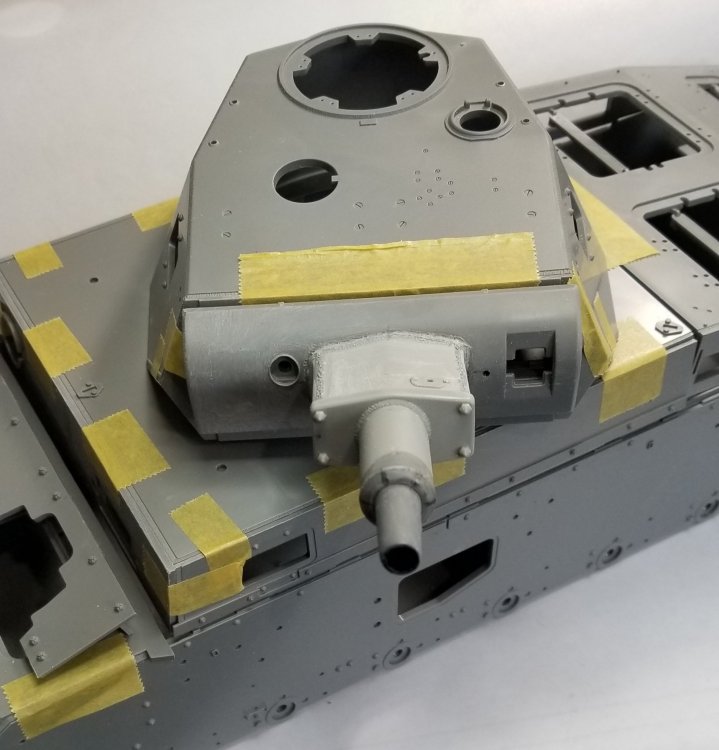
My panzer Iii's book says that they used up the remaining hulls from J, L and M's. So I based mine on a L. Here's some pics. This view shows the mantlet and gun how it looks on the tank. This is another view of the same thing. This view shows the gun in its most elevated position. This view shows the gun in its lowest position. This view shows the modifications I made to the mantlet on the left side. I filled in the square hole that was there, because it wasn't there on the Ausf N. Ron G

-
Hey Rog From what I understand the Ausf N was made on J, L and M chassis. Ron G
-
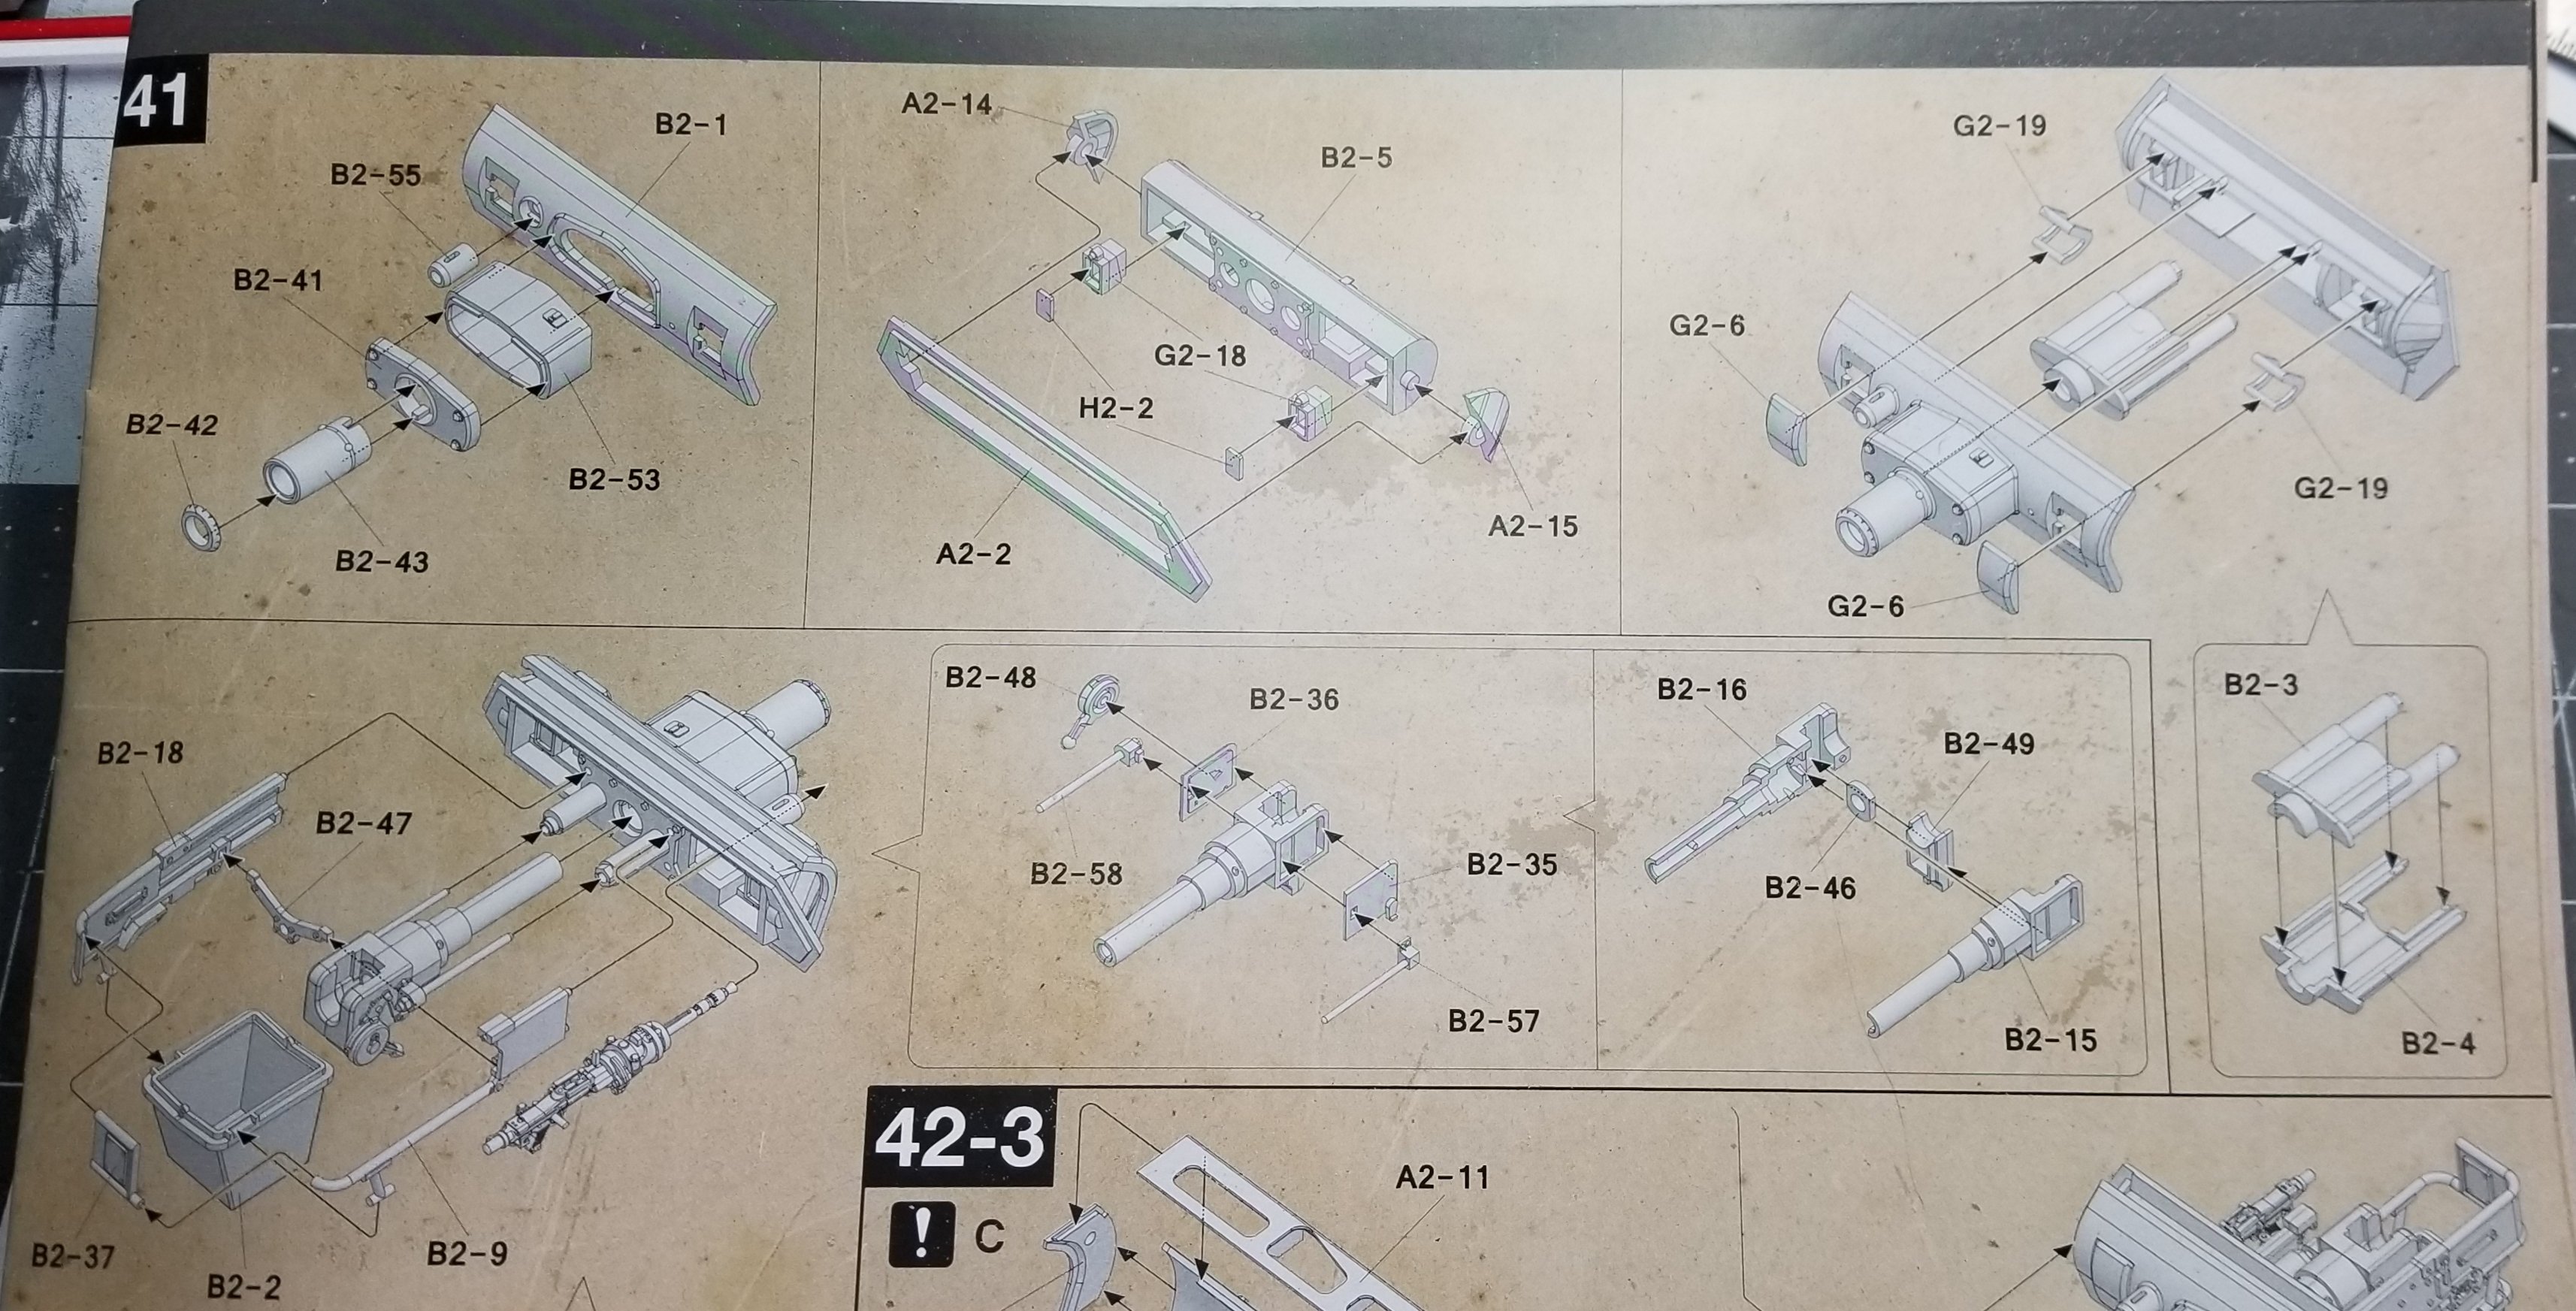
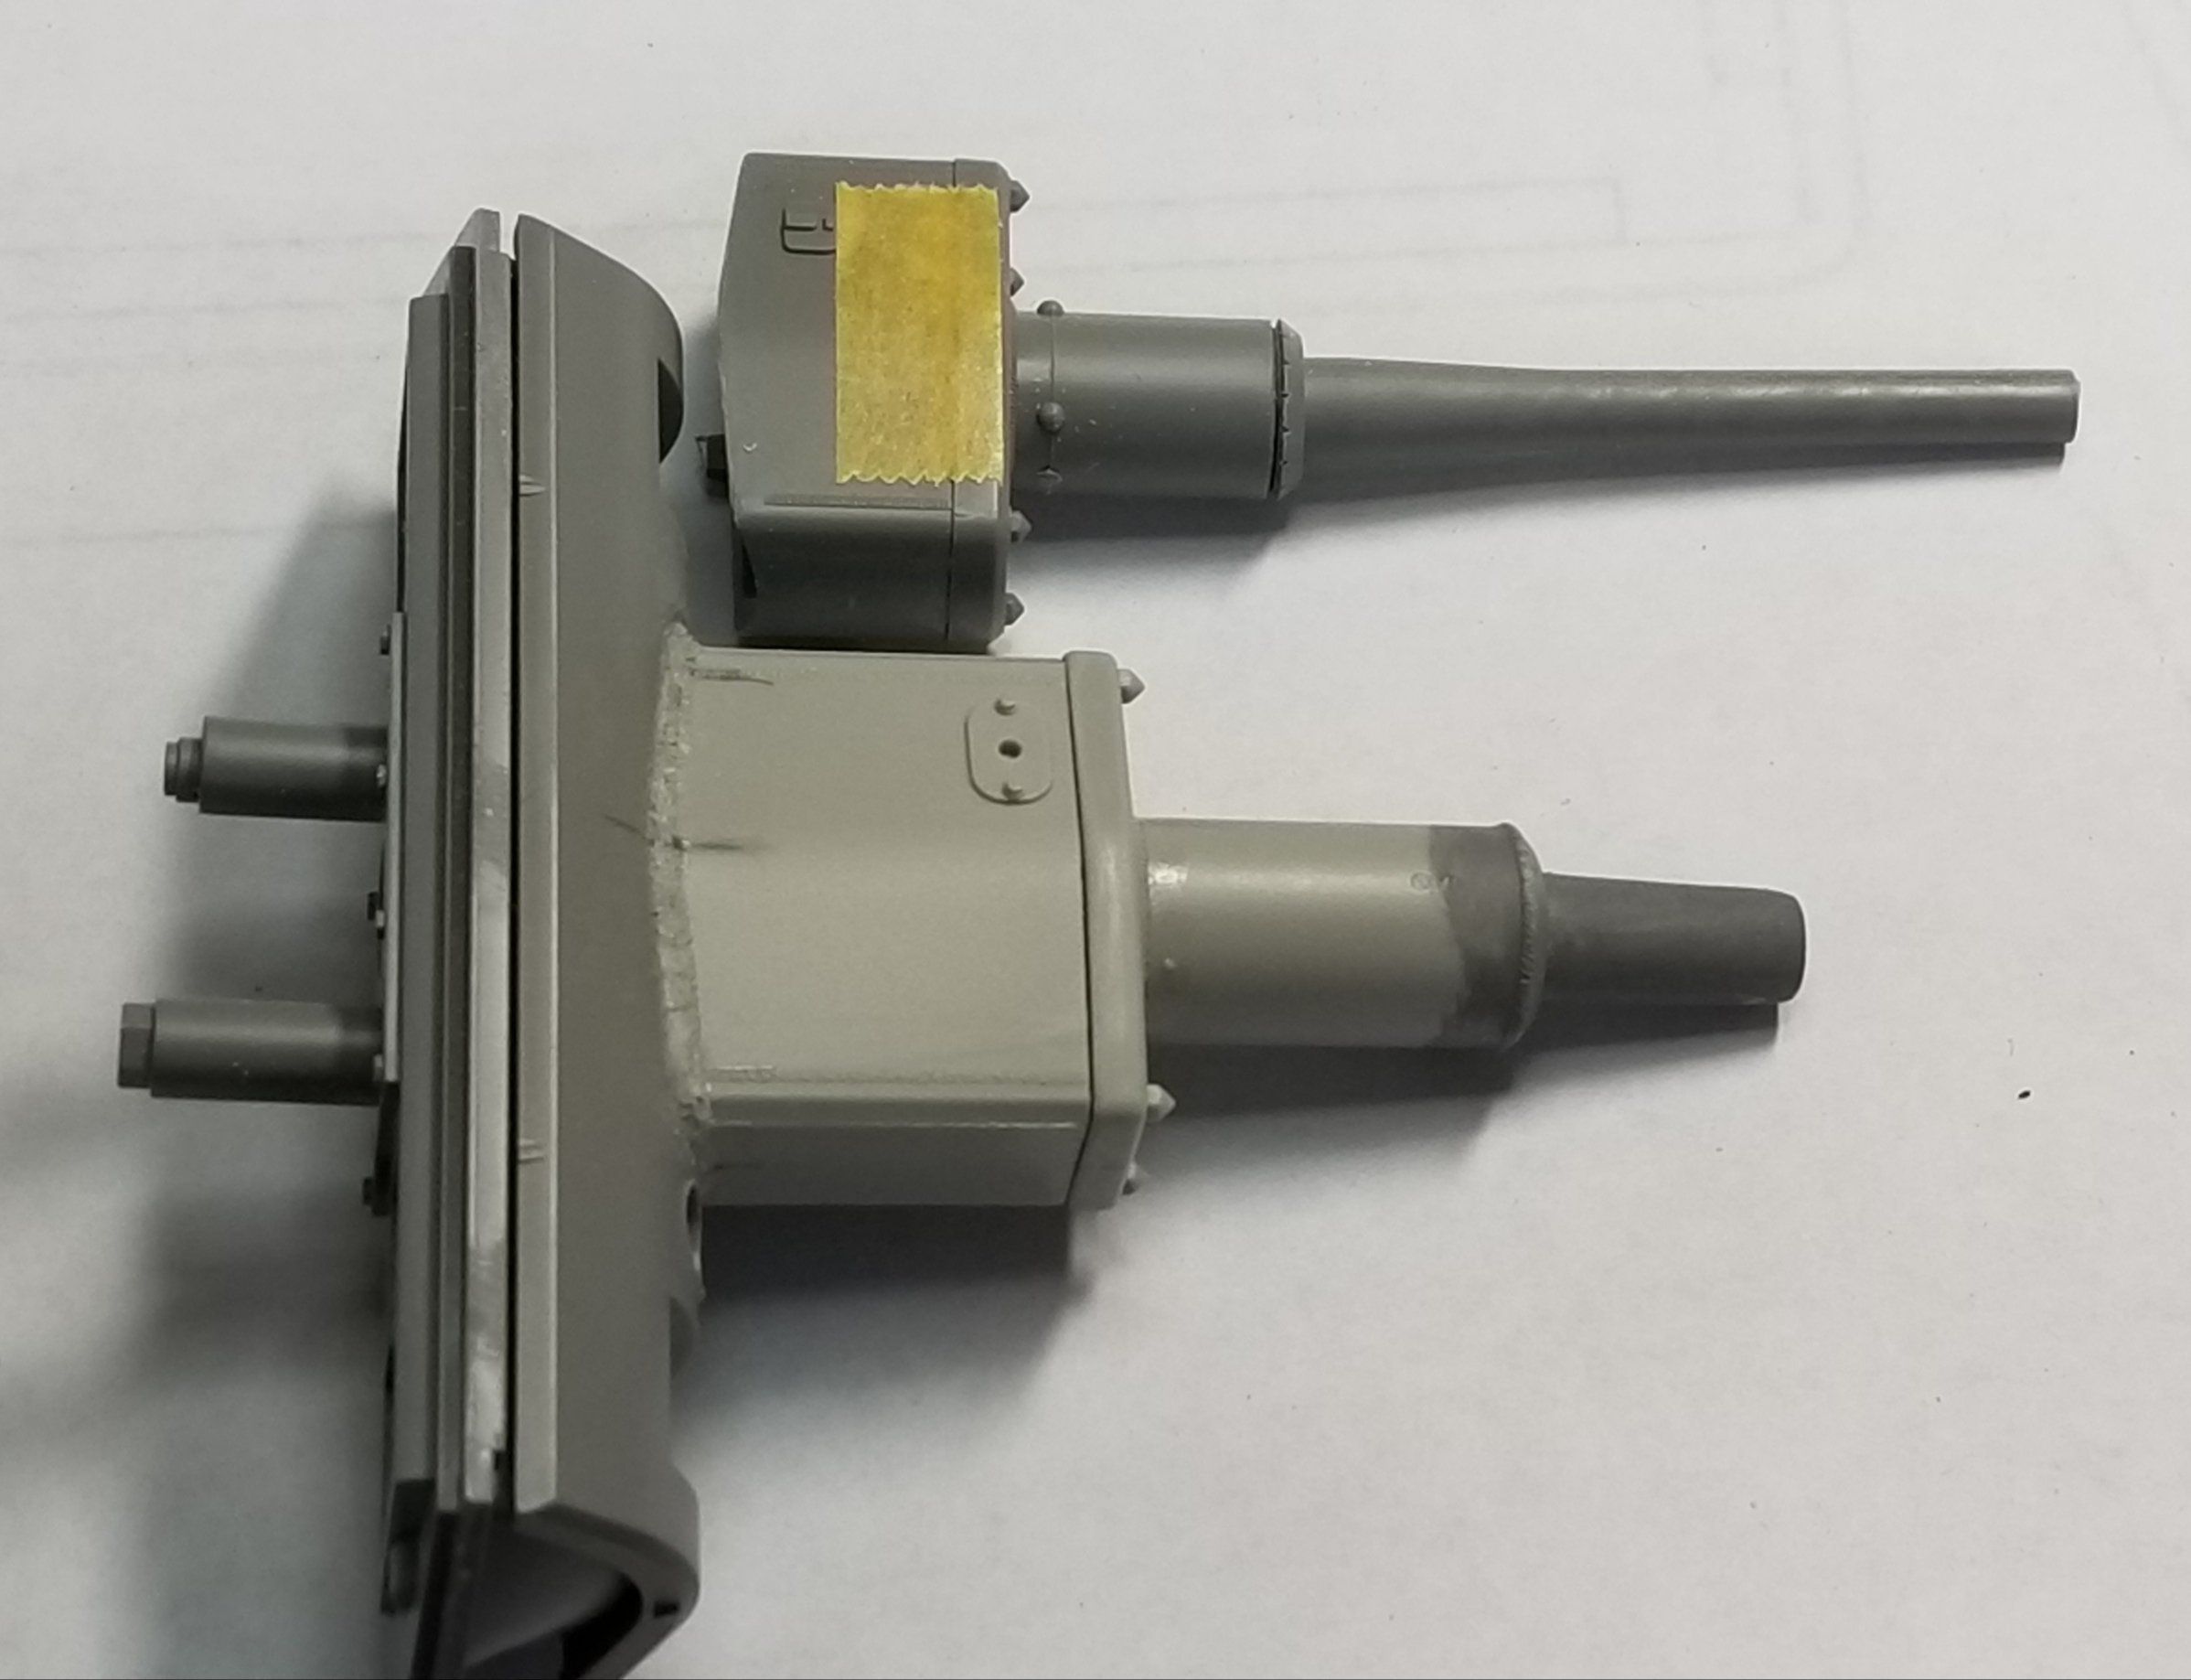
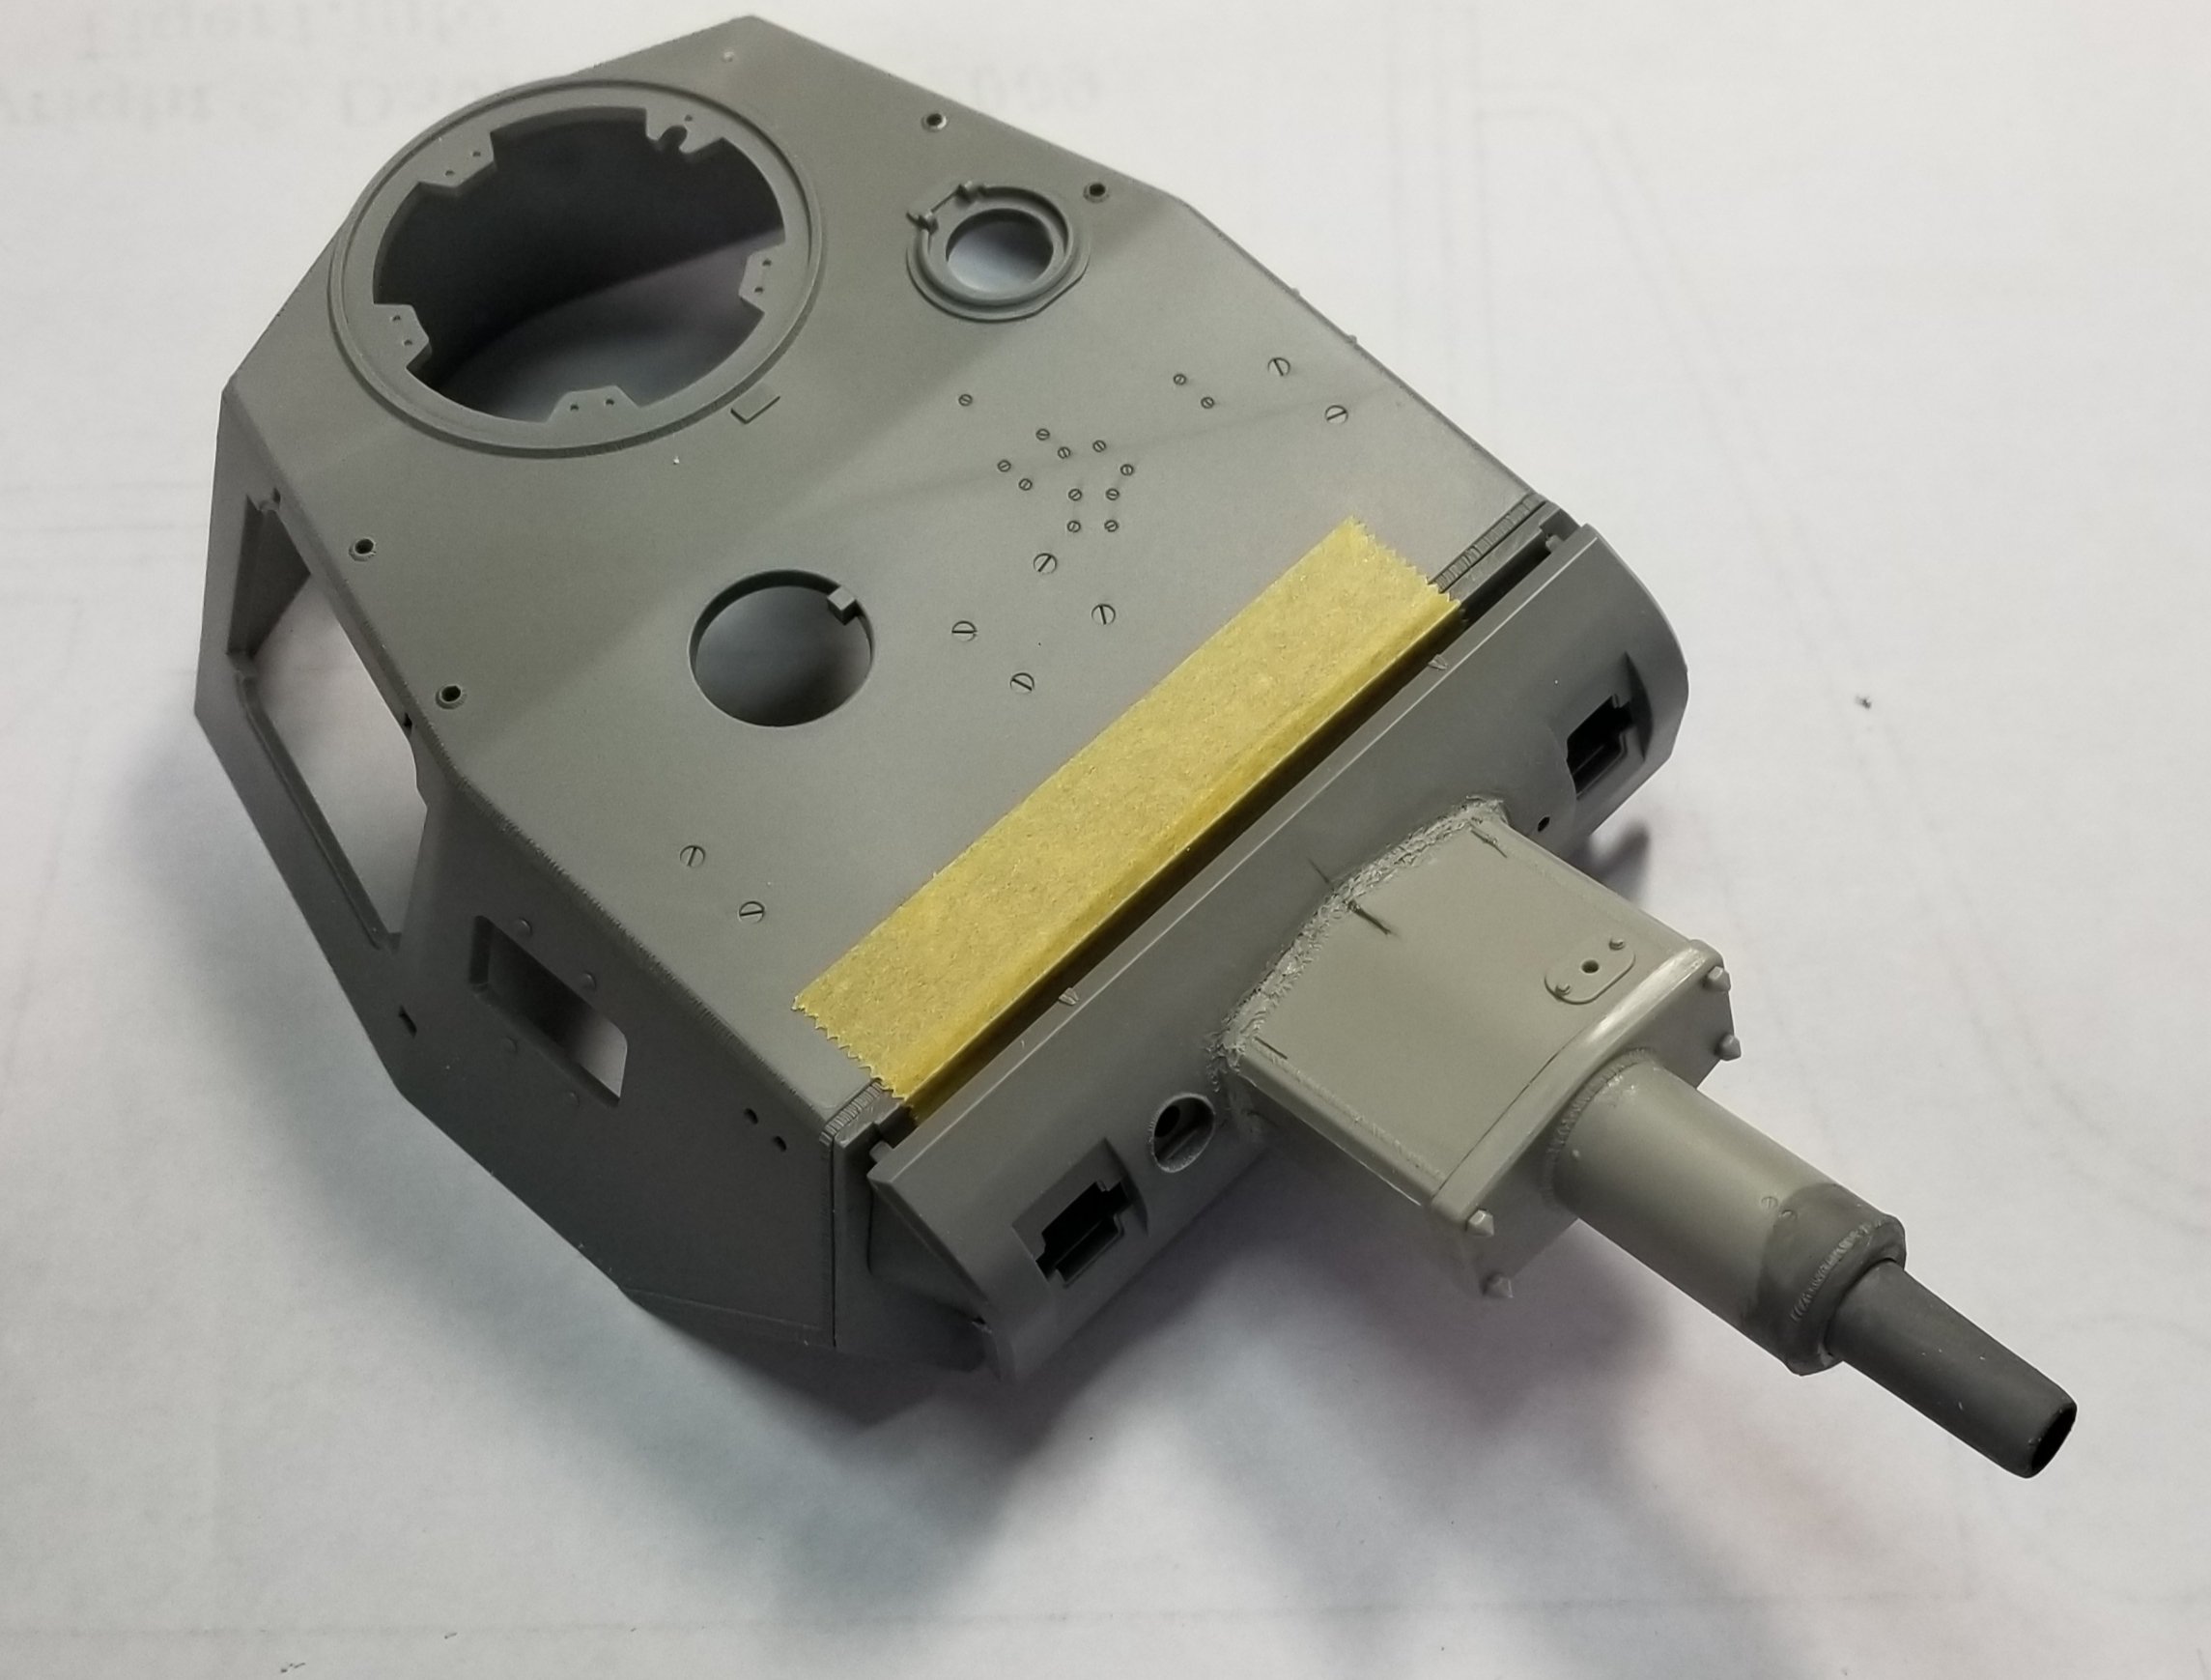
Ok here's the pictures I promised. I took the mantlet peices from my panzer iv and cut them up for the panzer iii. I took the plastic barrel from the panzer iv and modified it into the barrel for the panzer iii ausf N's 7.5cm kwk 37 L/24 barrel. This is a view of the Panzer iii's kit instructions showing the mantlet and barrel assembly. This view shows the kits mantlet with the parts form the panzer iv that I kit bashed into a 7.5cm kwk 37 L/24. This is a more top down view of the gun. This view shows the panzer iii's kit barrel assembly on top compared to the modified one I made. I think I got the rectangular part that the barrel fits into to long, not sure have to do some more investigation on it. This view shows the modified mantlet and gun on the turret. So what do you think. Does it look ok? Ron G