Landlubber Mike
-
Posts
1,277 -
Joined
-
Last visited
Content Type
Profiles
Forums
Events
Gallery
Everything posted by Landlubber Mike
-
1/18 Supermarine S6B - S1595
Landlubber Mike replied to airscale's topic in LSM 1/35 and Larger Work In Progress
Wow this is absolutely incredible, not sure how I've missed this log. Thanks for posting all the pictures of your detail work! Can I ask - when you put the foil down, do you glue it and then hammer, smooth, cut, etc. the foil to shape? And what kind of glue do you use so that you can still get the foil to lie flat when you hammer it. I've always wondered how that was done. Thanks in advance and again, amazing work! Thanks for sharing. -
Revell Destroyer Escort rehab finished
Landlubber Mike replied to JohnB's topic in Non LSM Ready for Inspection.
Nice job! With all the dust in the first pictures, you probably could have turned it into a submerged wreck! -
Looking good Ernie, I'm enjoying following along.
-
Ben, I think this is absolutely fantastic! Really nice job, and I think you didn't quite use enough aftermarket 😇 I have the 1/700 Fujimi and Pontos kits. Doing a little research on the Fujimi kit, it seems that there were multiple configurations of guns used over the years. There seem to be some discrepancies for sure out there. Can I ask how long it took you to build this?
-
Great start Peter. What a pain about the mold release agent. So far in the few number of kits I've built, I haven't run into that problem. Hope to IPA solves it. Going to be an epic build when you work your magic on it! Good luck with the snow. We were supposed to get 5+ inches down here, but we got like less than 1/4" that melted instantly.
-
Sikorsky JRS-1 with AM (Eduard) 1/72
Landlubber Mike replied to Landlubber Mike's topic in The Great Twins Broup Bluild
Thanks Rob! Not that I've built a lot of kits or anything, but I'm not a big fan of trying to fit fuselage halves over multiple interior parts. I guess I've learned enough on prior builds to recognize that I had to go slowly and in stages. There's really no interlocking parts here for the interior (minus the wheel wells which are actually quite helpful to get the floor board in), you just have to keep test fitting. Two of the biggest fit problems coming up are the canopy, which is too low and needs to be built up to sit higher, and the panel that closes up the rear top space on the fuselage, where the kit part is too big. Apparently there are fit issues with the wings and tail as well. Will have to see how the CMK parts work with it. -
Sikorsky JRS-1 with AM (Eduard) 1/72
Landlubber Mike replied to Landlubber Mike's topic in The Great Twins Broup Bluild
Thanks Martin! It's really not too bad given the scale. The PE parts for this kit are fairly big in size, at least compared to the 1/700 scale ship kit PE that I'm used to working with. -
AEG G.IV - Creature of the Night - WNW 1/32
Landlubber Mike replied to DocRob's topic in The Great Twins Broup Bluild
Rob that came out fantastic! Really great job! -
Sikorsky JRS-1 with AM (Eduard) 1/72
Landlubber Mike replied to Landlubber Mike's topic in The Great Twins Broup Bluild
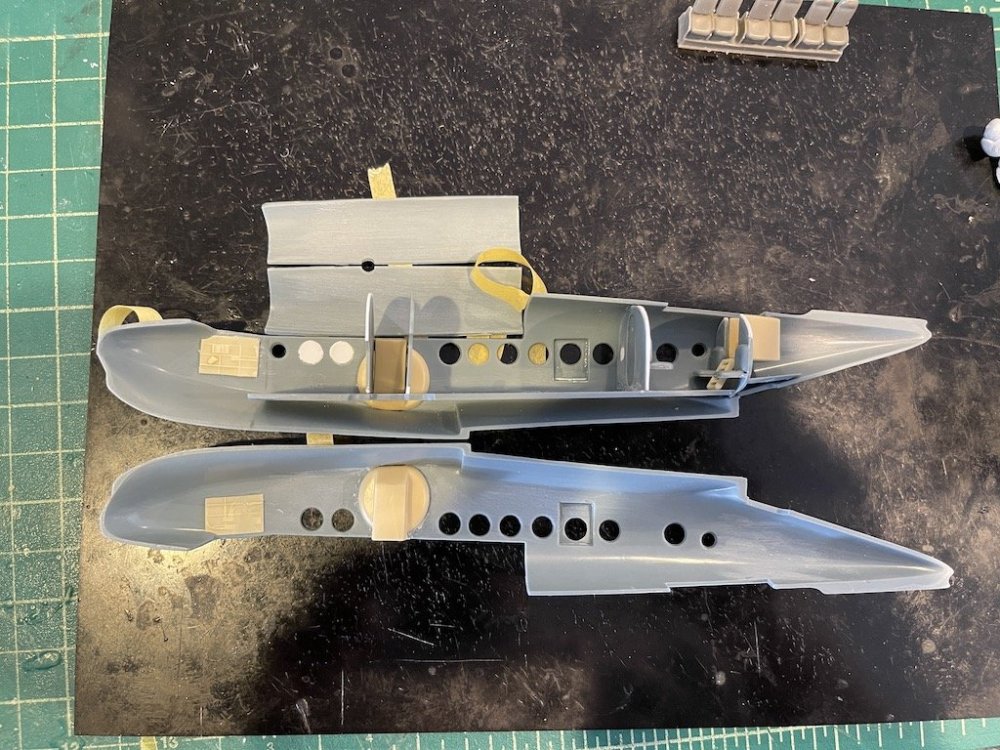
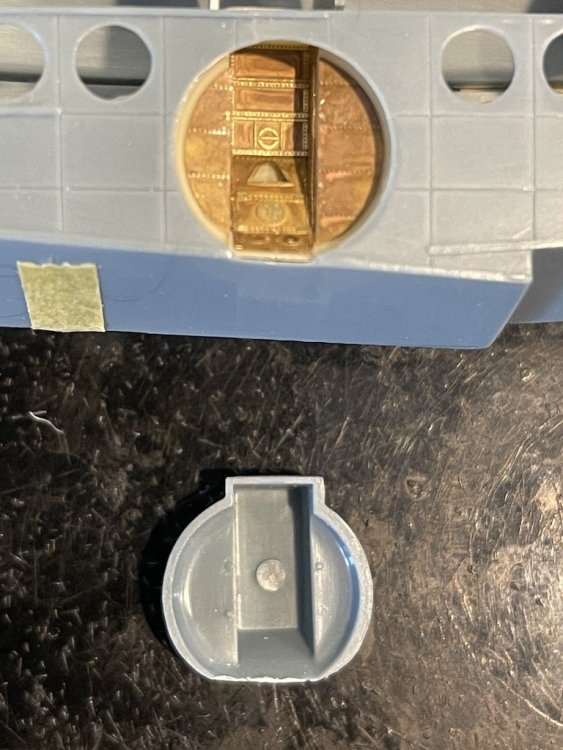
This week I've been able to put in a lot of work on the JRS-1. Though, from the pictures it probably doesn't look like it! You can probably slap this kit together fairly quickly, but there are a lot of fit and other issues that I'm spending the time addressing along the way. The external Eduard photo etch has some nice details, including the main wheel well. You can see the kit part instead gives you a present of a hard to access ejection pin. I ended up using the CMK part instead of the kit part because it had a clean bottom edge and seemed to fit better. The CMK part gives you a little more detail than the kit part, but you have to remove it to add the Eduard photo etch: The kit has five bulkheads, and each of them is a bit too small. I spent a lot of time adding material so that the fuselage halves and the front half top parts can sit properly supported on the bulkheads. Might be overkill, but better than chancing a cave-in of the fuselage during my clumsy handling: Here is where things stand now - I've inserted the rear four bulkheads and floors into the starboard fuselage half, and the interior is ready to prime and paint. Since I had to test fit the bulkheads and cockpit dozens of times, I taped the parts in this way so that I could quickly test fit and make adjustments. I'm using a mixture of the CMK and kit parts. The CMK parts certainly have more detail, but one of the rear bulkheads was warped and one of the sliding fuselage doors had the window drilled off center. The kit doors were a little too thick I thought, so I thinned them down. Looks like all the pre-work helped, as the fuselage closes up fairly nicely: Thanks for looking in!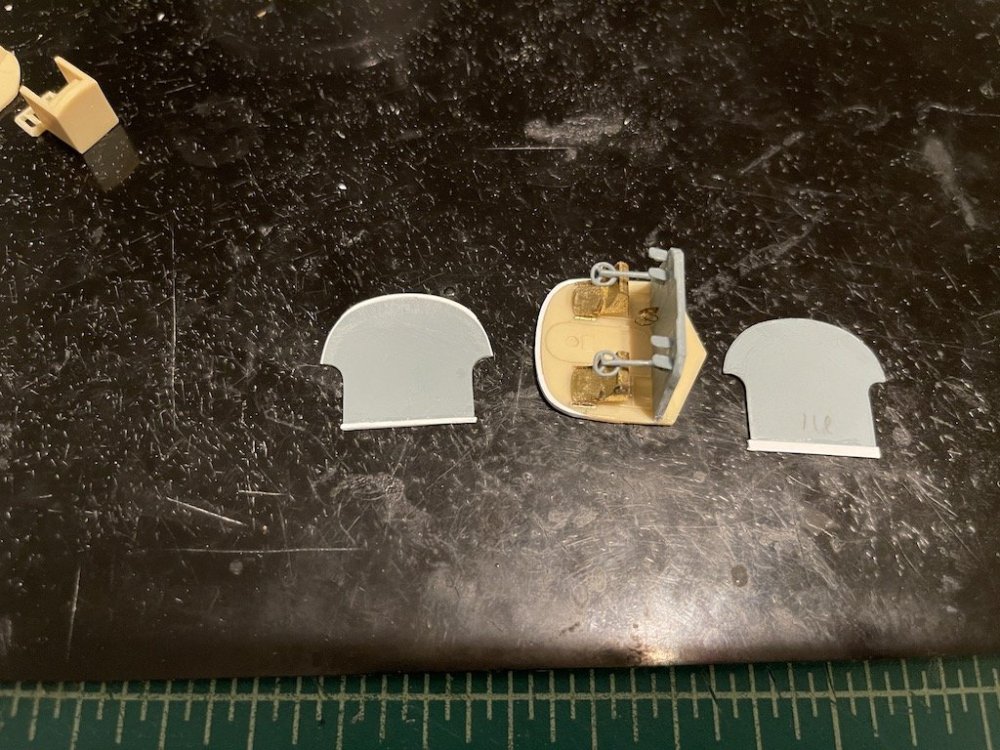

-
AEG G.IV - Creature of the Night - WNW 1/32
Landlubber Mike replied to DocRob's topic in The Great Twins Broup Bluild
Looks great Rob. I'm going to have to try that salt technique. -
MiniArt P-47D Thunderbolt: COMPLETED 2/13/24
Landlubber Mike replied to Peterpools's topic in LSM 1/48 Work in Progress
Wow, beautiful build Peter, and fast too! Really nice job! -
Sikorsky JRS-1 with AM (Eduard) 1/72
Landlubber Mike replied to Landlubber Mike's topic in The Great Twins Broup Bluild
Thanks Peter! I'm trying to get moving on this one so I can actually make the deadline. Spring is a crazy busy time with the kid sports and other activities. And I have to mow the lawn 😫 -
Sikorsky JRS-1 with AM (Eduard) 1/72
Landlubber Mike replied to Landlubber Mike's topic in The Great Twins Broup Bluild
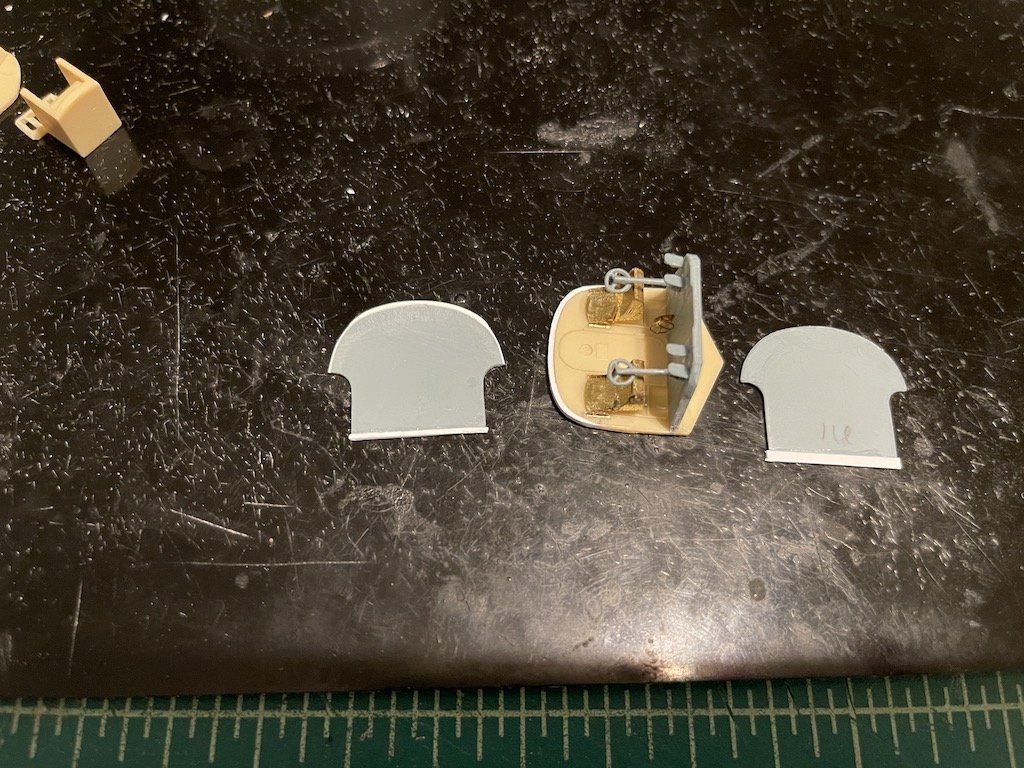
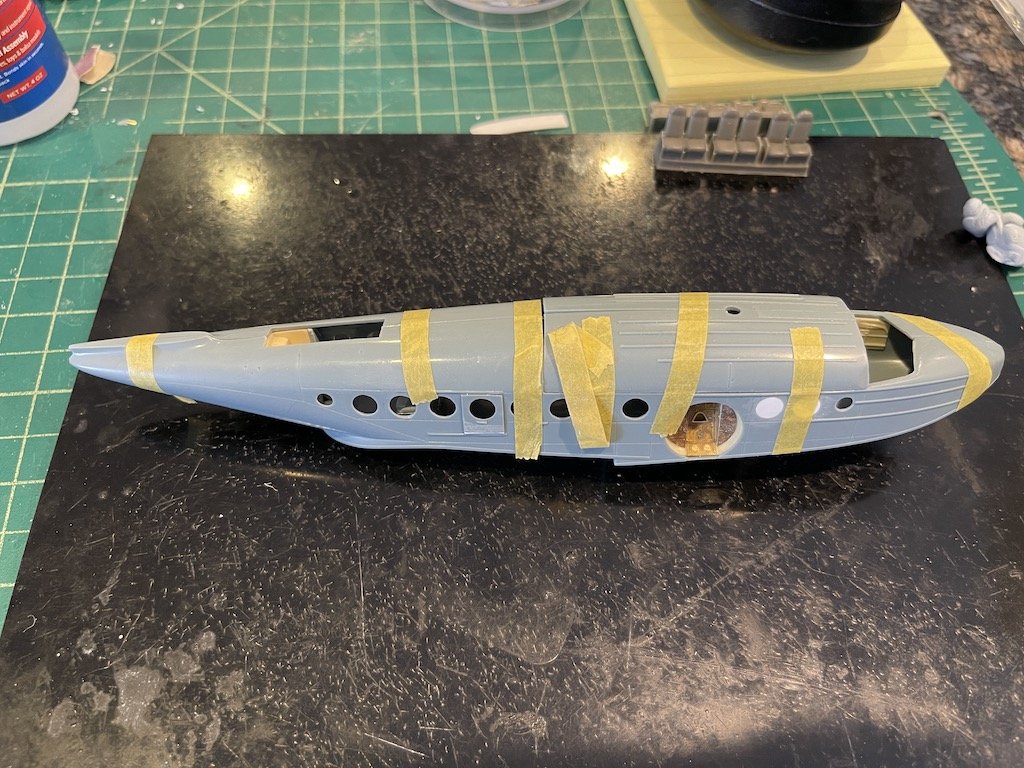
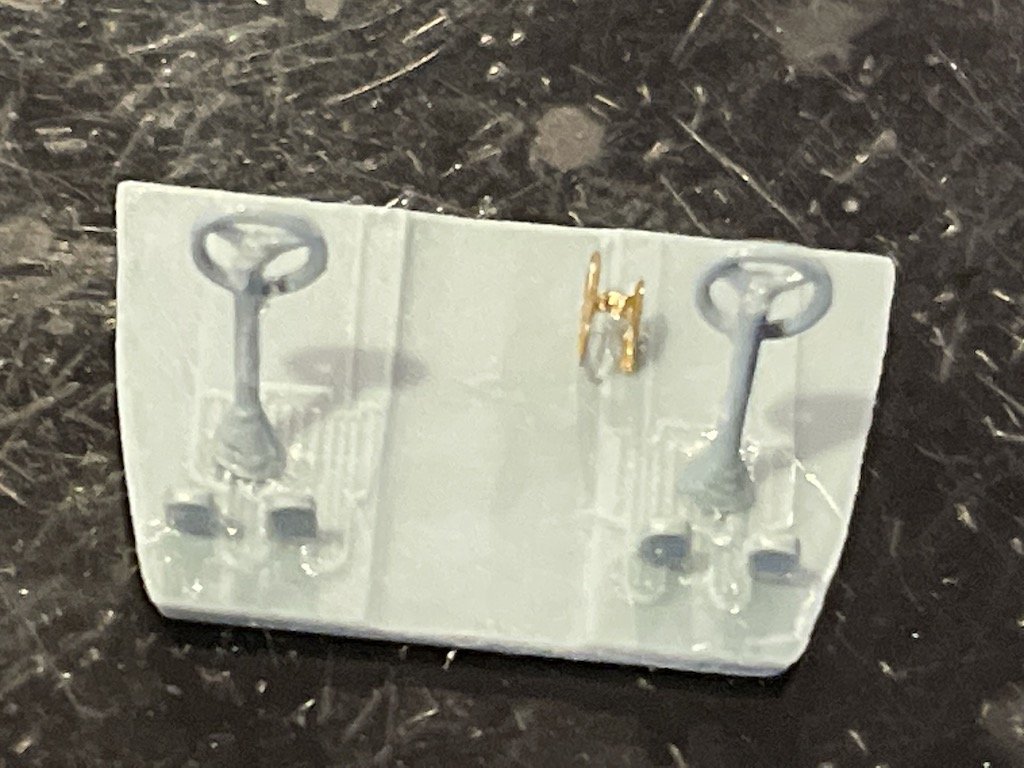
Made some progress on the JRS-1 over the last couple of days. First, put together the floor board for the cockpit. Not too much there, and probably won't able to see any of it given the scale and the size of the canopy windows: Next, had to do a little surgery to the starboard side fuselage half to change the windows line-up: (1) fill the two forward-most large windows, (2) add a new small window just in front of the two large windows that were filled, and (3) open up a new large window in the panel between the two rear-most large windows. Sounds fairly simple, but was a couple of hours of work. Opening the windows, particularly the rear large window, was a little nerve-wracking. The rear-most window really had to be placed perfectly or it would stick out like a sore thumb if it interrupted the flow of the windows. I started with a 1mm drill, and slowly opened up the windows in 0.5mm increments, checking the measurements in between each drilling to make sure I wasn't drifting. I was pretty happy with how things turned out in the end. If you are building this kit, the small windows are slightly larger than 3.5mm, and the large hole slightly larger than 5.5mm. The kit porthole windows are pushed into the openings from the interior, where the window has a slight chamfer (one side of the windows is larger, the other slightly smaller, to ensure a tight fit). Filling the two holes at the front wasn't too bad. I really like the Dspiae circle cutter. It's a perfect tool to cut plastic filler circles for cases like this. Much easier than trying to fill the holes with putty. The time consuming part was sanding the circles flush with the fuselage, as on the outside, there is some fine detail you don't want to accidentally remove. Thanks for looking in!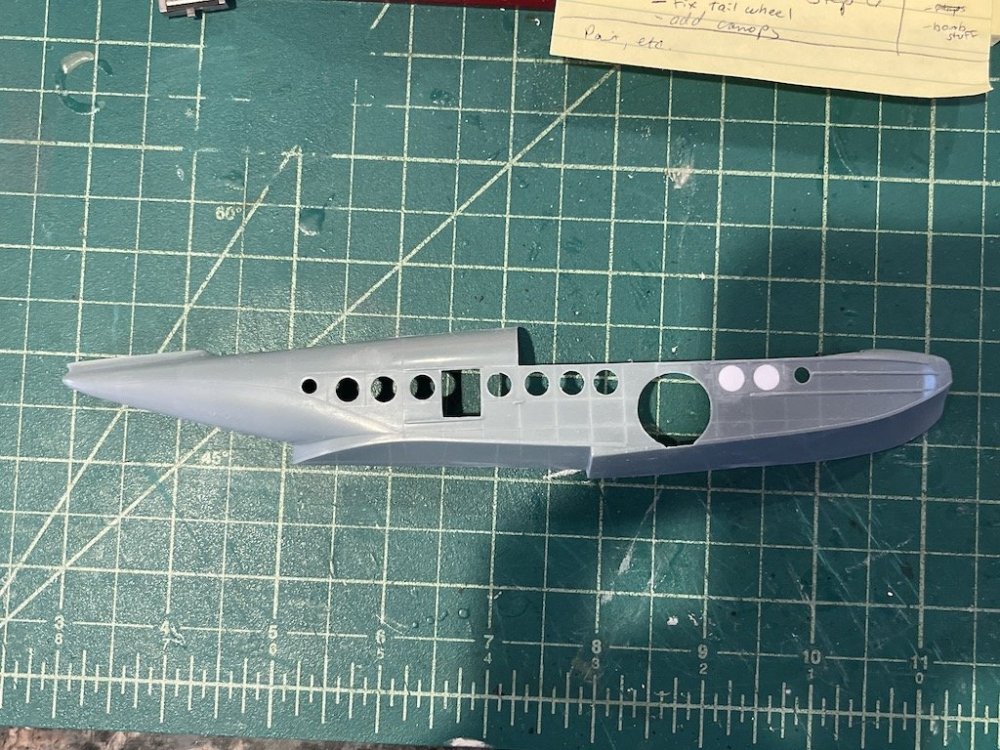

-
Some really nice details in there Ernie. Great job!
-
Cool choice Peter! Looking forward to seeing this come alive!
-
Revell Razor Crest - Finished
Landlubber Mike replied to denders's topic in The Great Twins Broup Bluild
This is going to be awesome, looking forward to watching you put this together. I've been sorely tempted to add this kit to the stash, but I don't want to open up the door to a new genre of models. -
AEG G.IV - Creature of the Night - WNW 1/32
Landlubber Mike replied to DocRob's topic in The Great Twins Broup Bluild
Rob, I think those will provide a really nice touch. They look similar to the former Moskit exhausts which I've been picking up where I can for some of the kits in the stash. -
MiniArt P-47D Thunderbolt: COMPLETED 2/13/24
Landlubber Mike replied to Peterpools's topic in LSM 1/48 Work in Progress
Looks great to me Peter, really nice job! Checkerboard came out great. -
AEG G.IV - Creature of the Night - WNW 1/32
Landlubber Mike replied to DocRob's topic in The Great Twins Broup Bluild
Hey Rob, what do you think of the Rexx exhausts? I've wondered about adding their exhausts to some of the kits I own. -
Looking really great Martin! Those engines are fantastic!
-
AEG G.IV - Creature of the Night - WNW 1/32
Landlubber Mike replied to DocRob's topic in The Great Twins Broup Bluild
Oh yes! I'm in for this one! -
Thanks neighbor! Hope you are well!
-
Cool project Chris - love all the AM you have for it! Looking forward to watching it come along!
-
Looks awesome - those belts are incredible, wow!
-
Sikorsky JRS-1 with AM (Eduard) 1/72
Landlubber Mike replied to Landlubber Mike's topic in The Great Twins Broup Bluild
Thanks Jeff. Only problem is I will have to spend $20 on masking materials with all the colors!