CANicoll
-
Posts
1,928 -
Joined
-
Last visited
Content Type
Profiles
Forums
Events
Gallery
Everything posted by CANicoll
-
Looking good John!
-
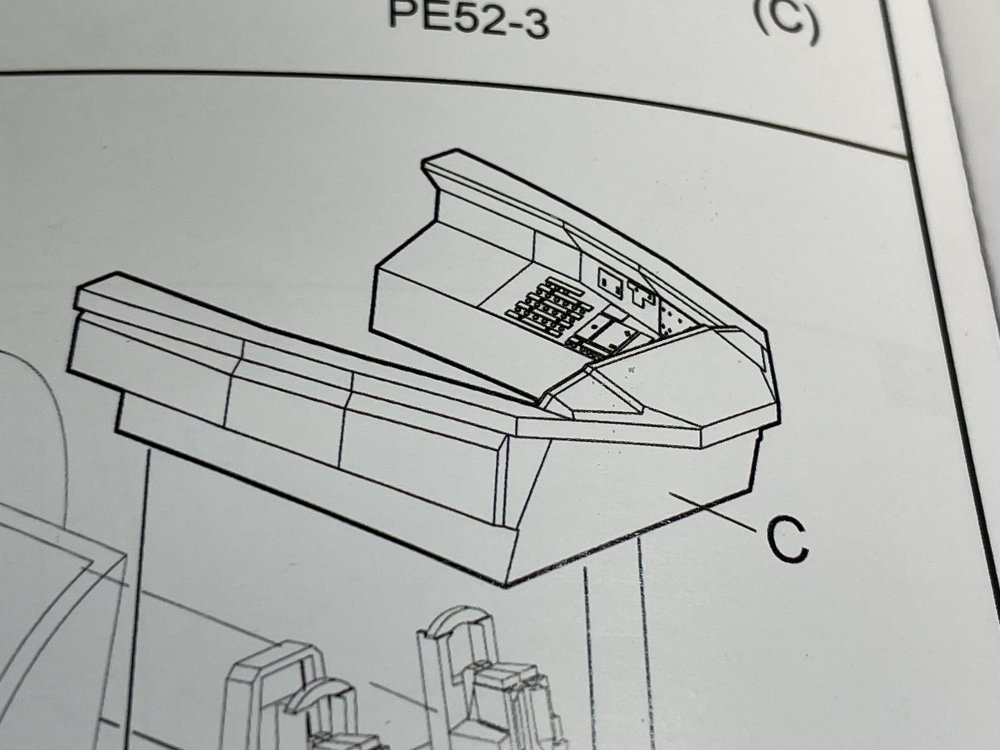
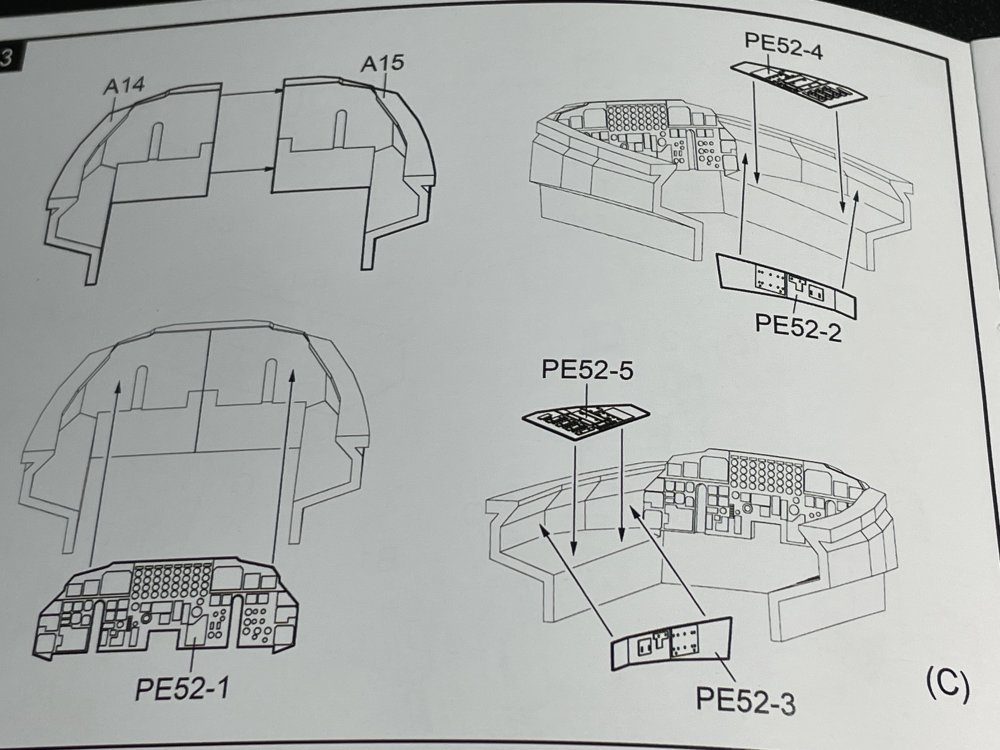
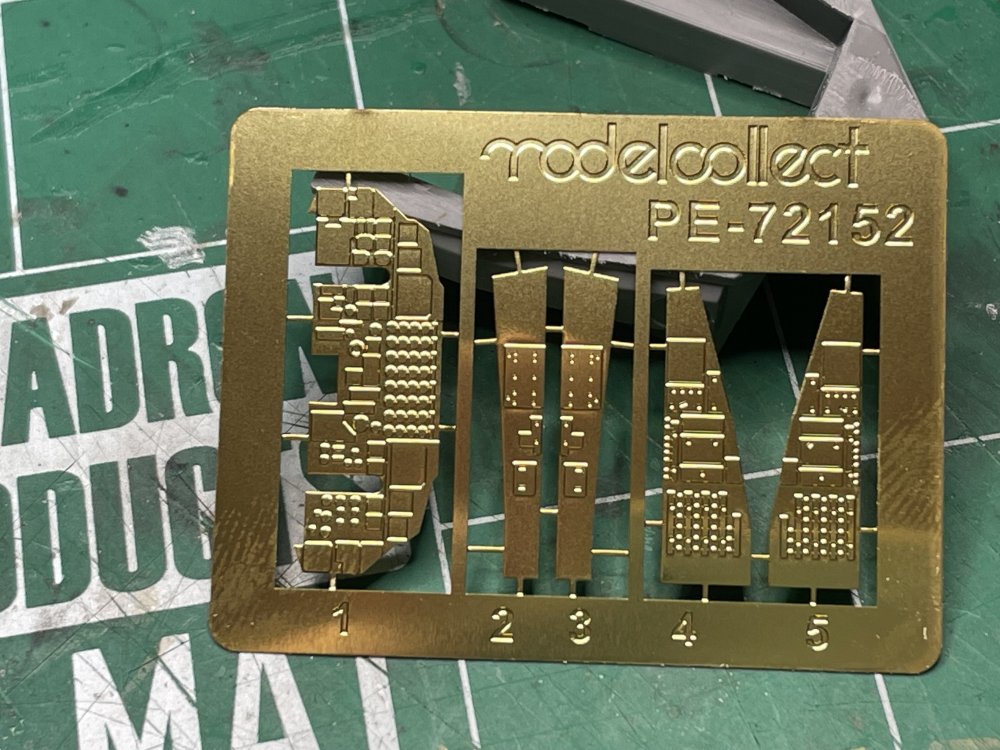
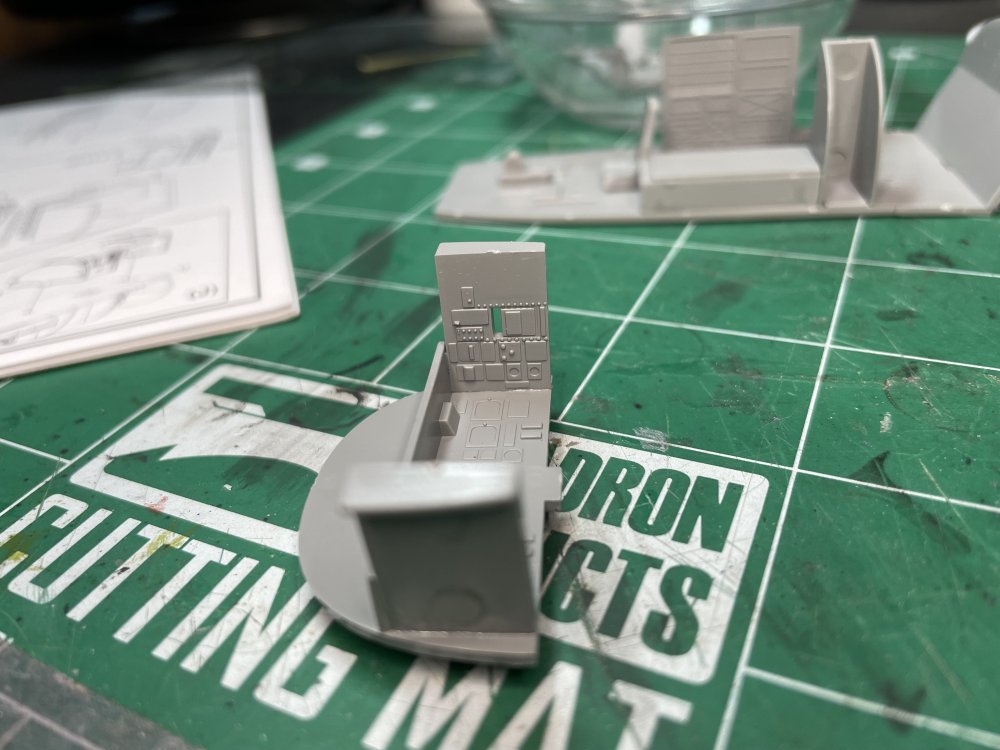
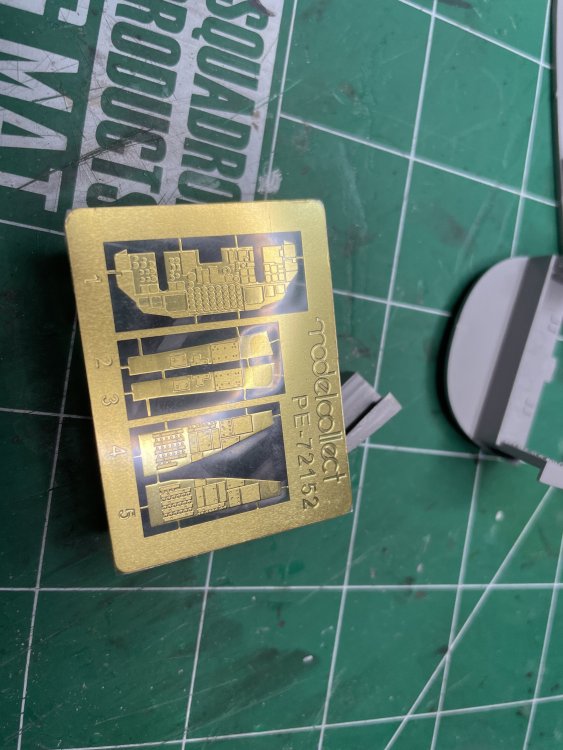
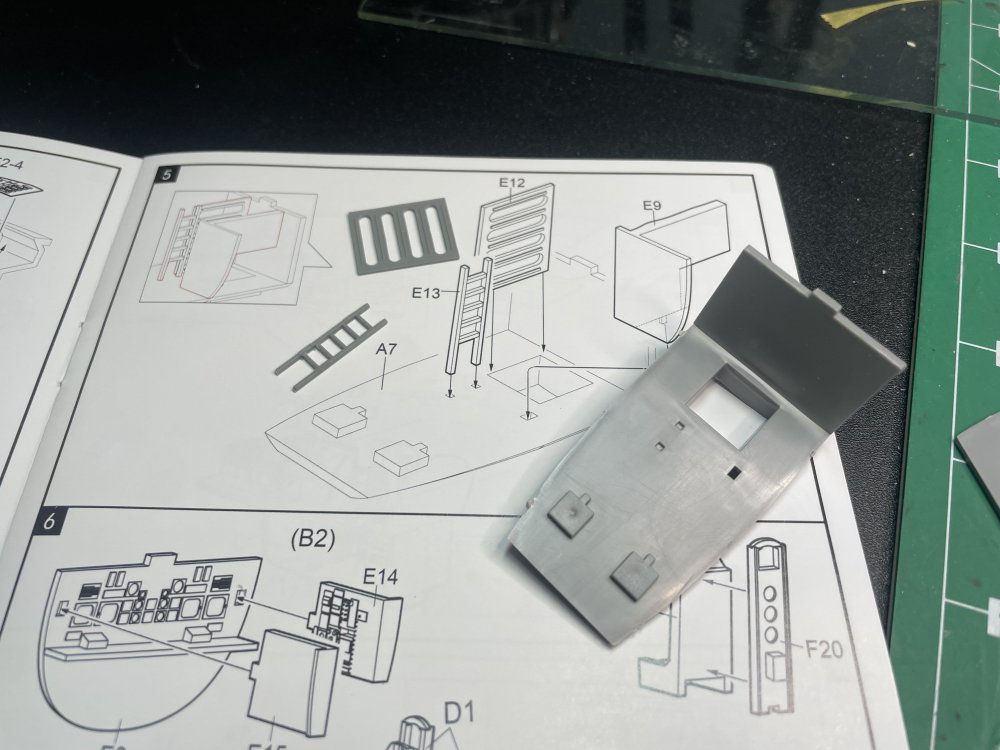
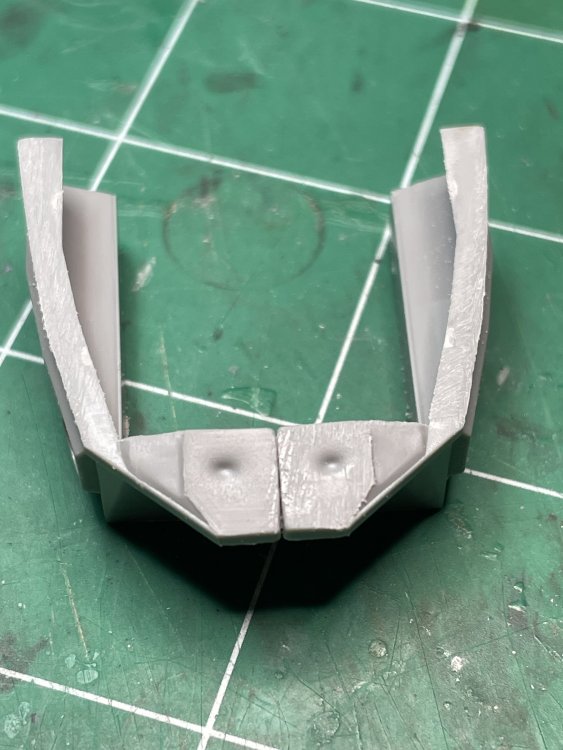
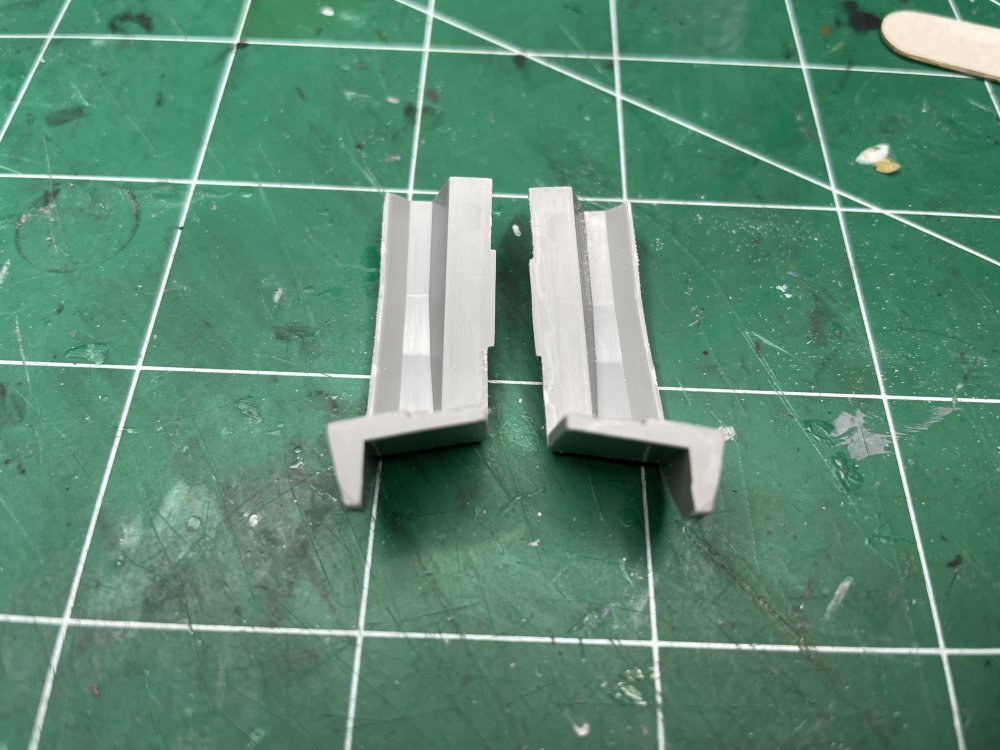
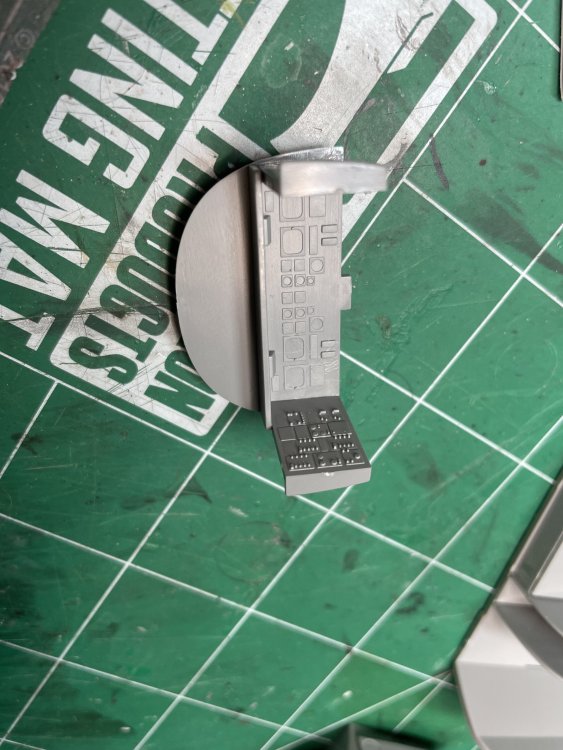
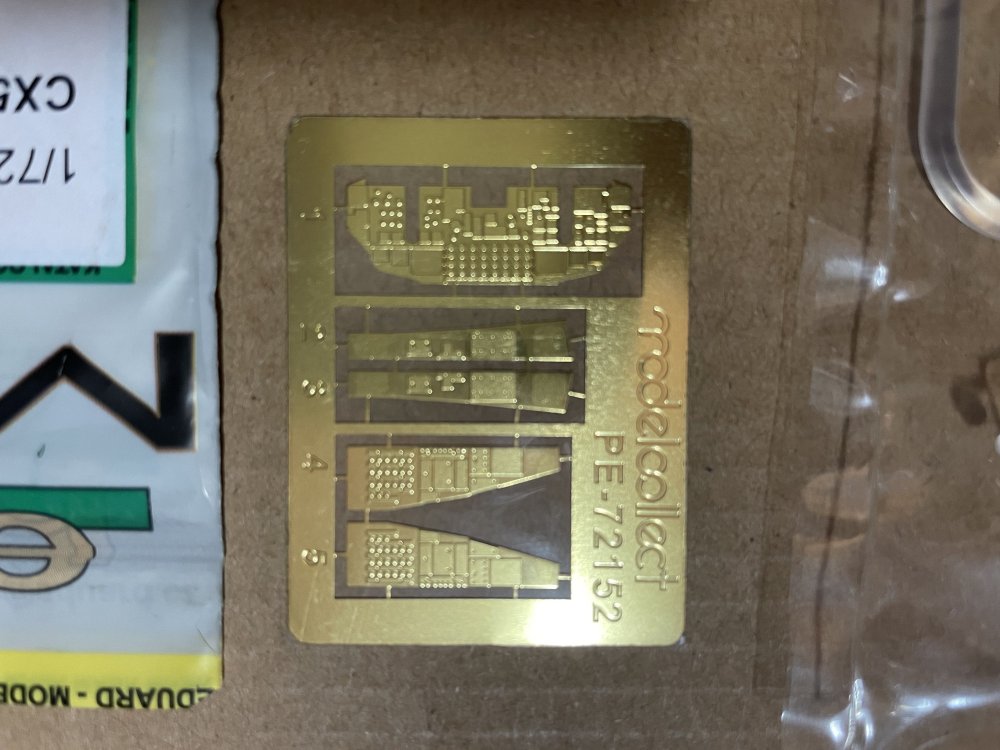
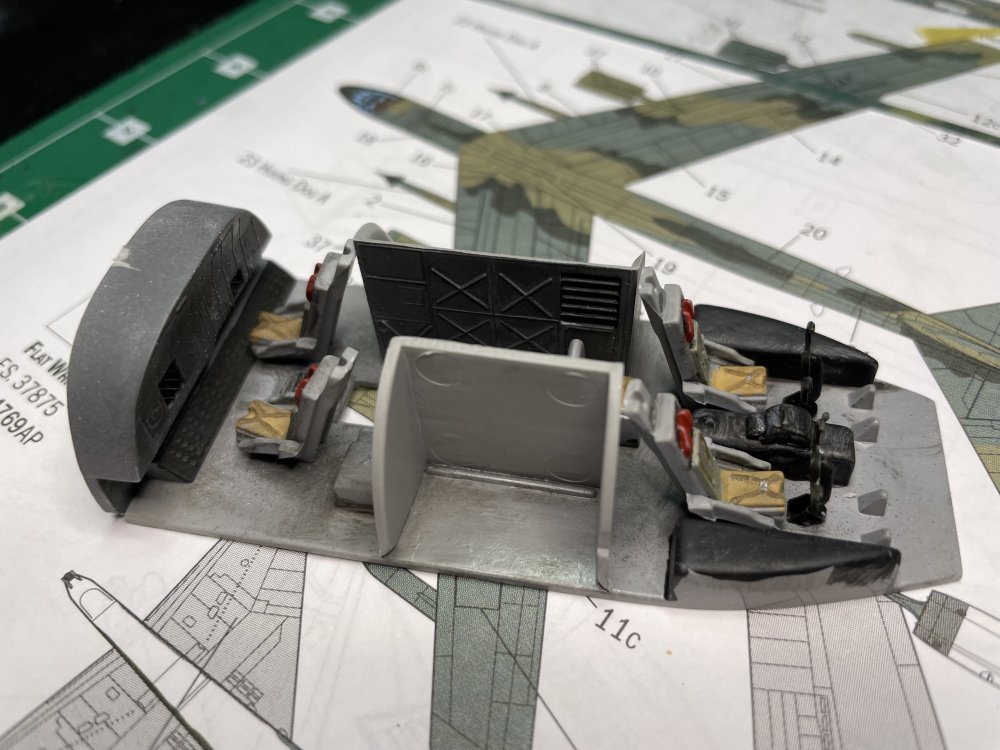
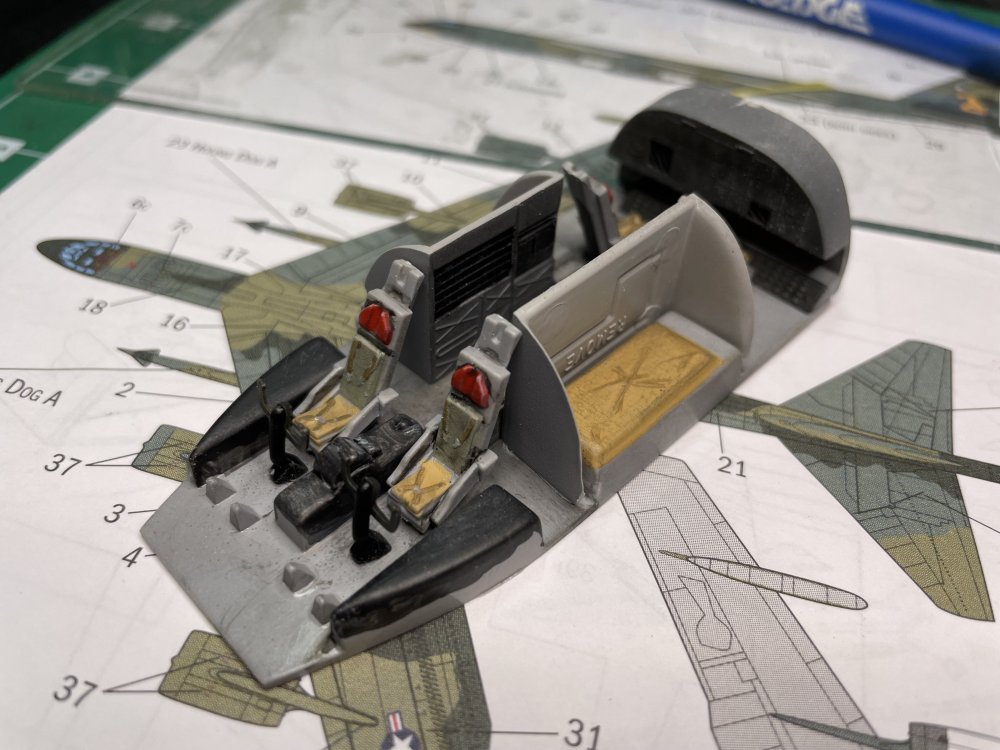
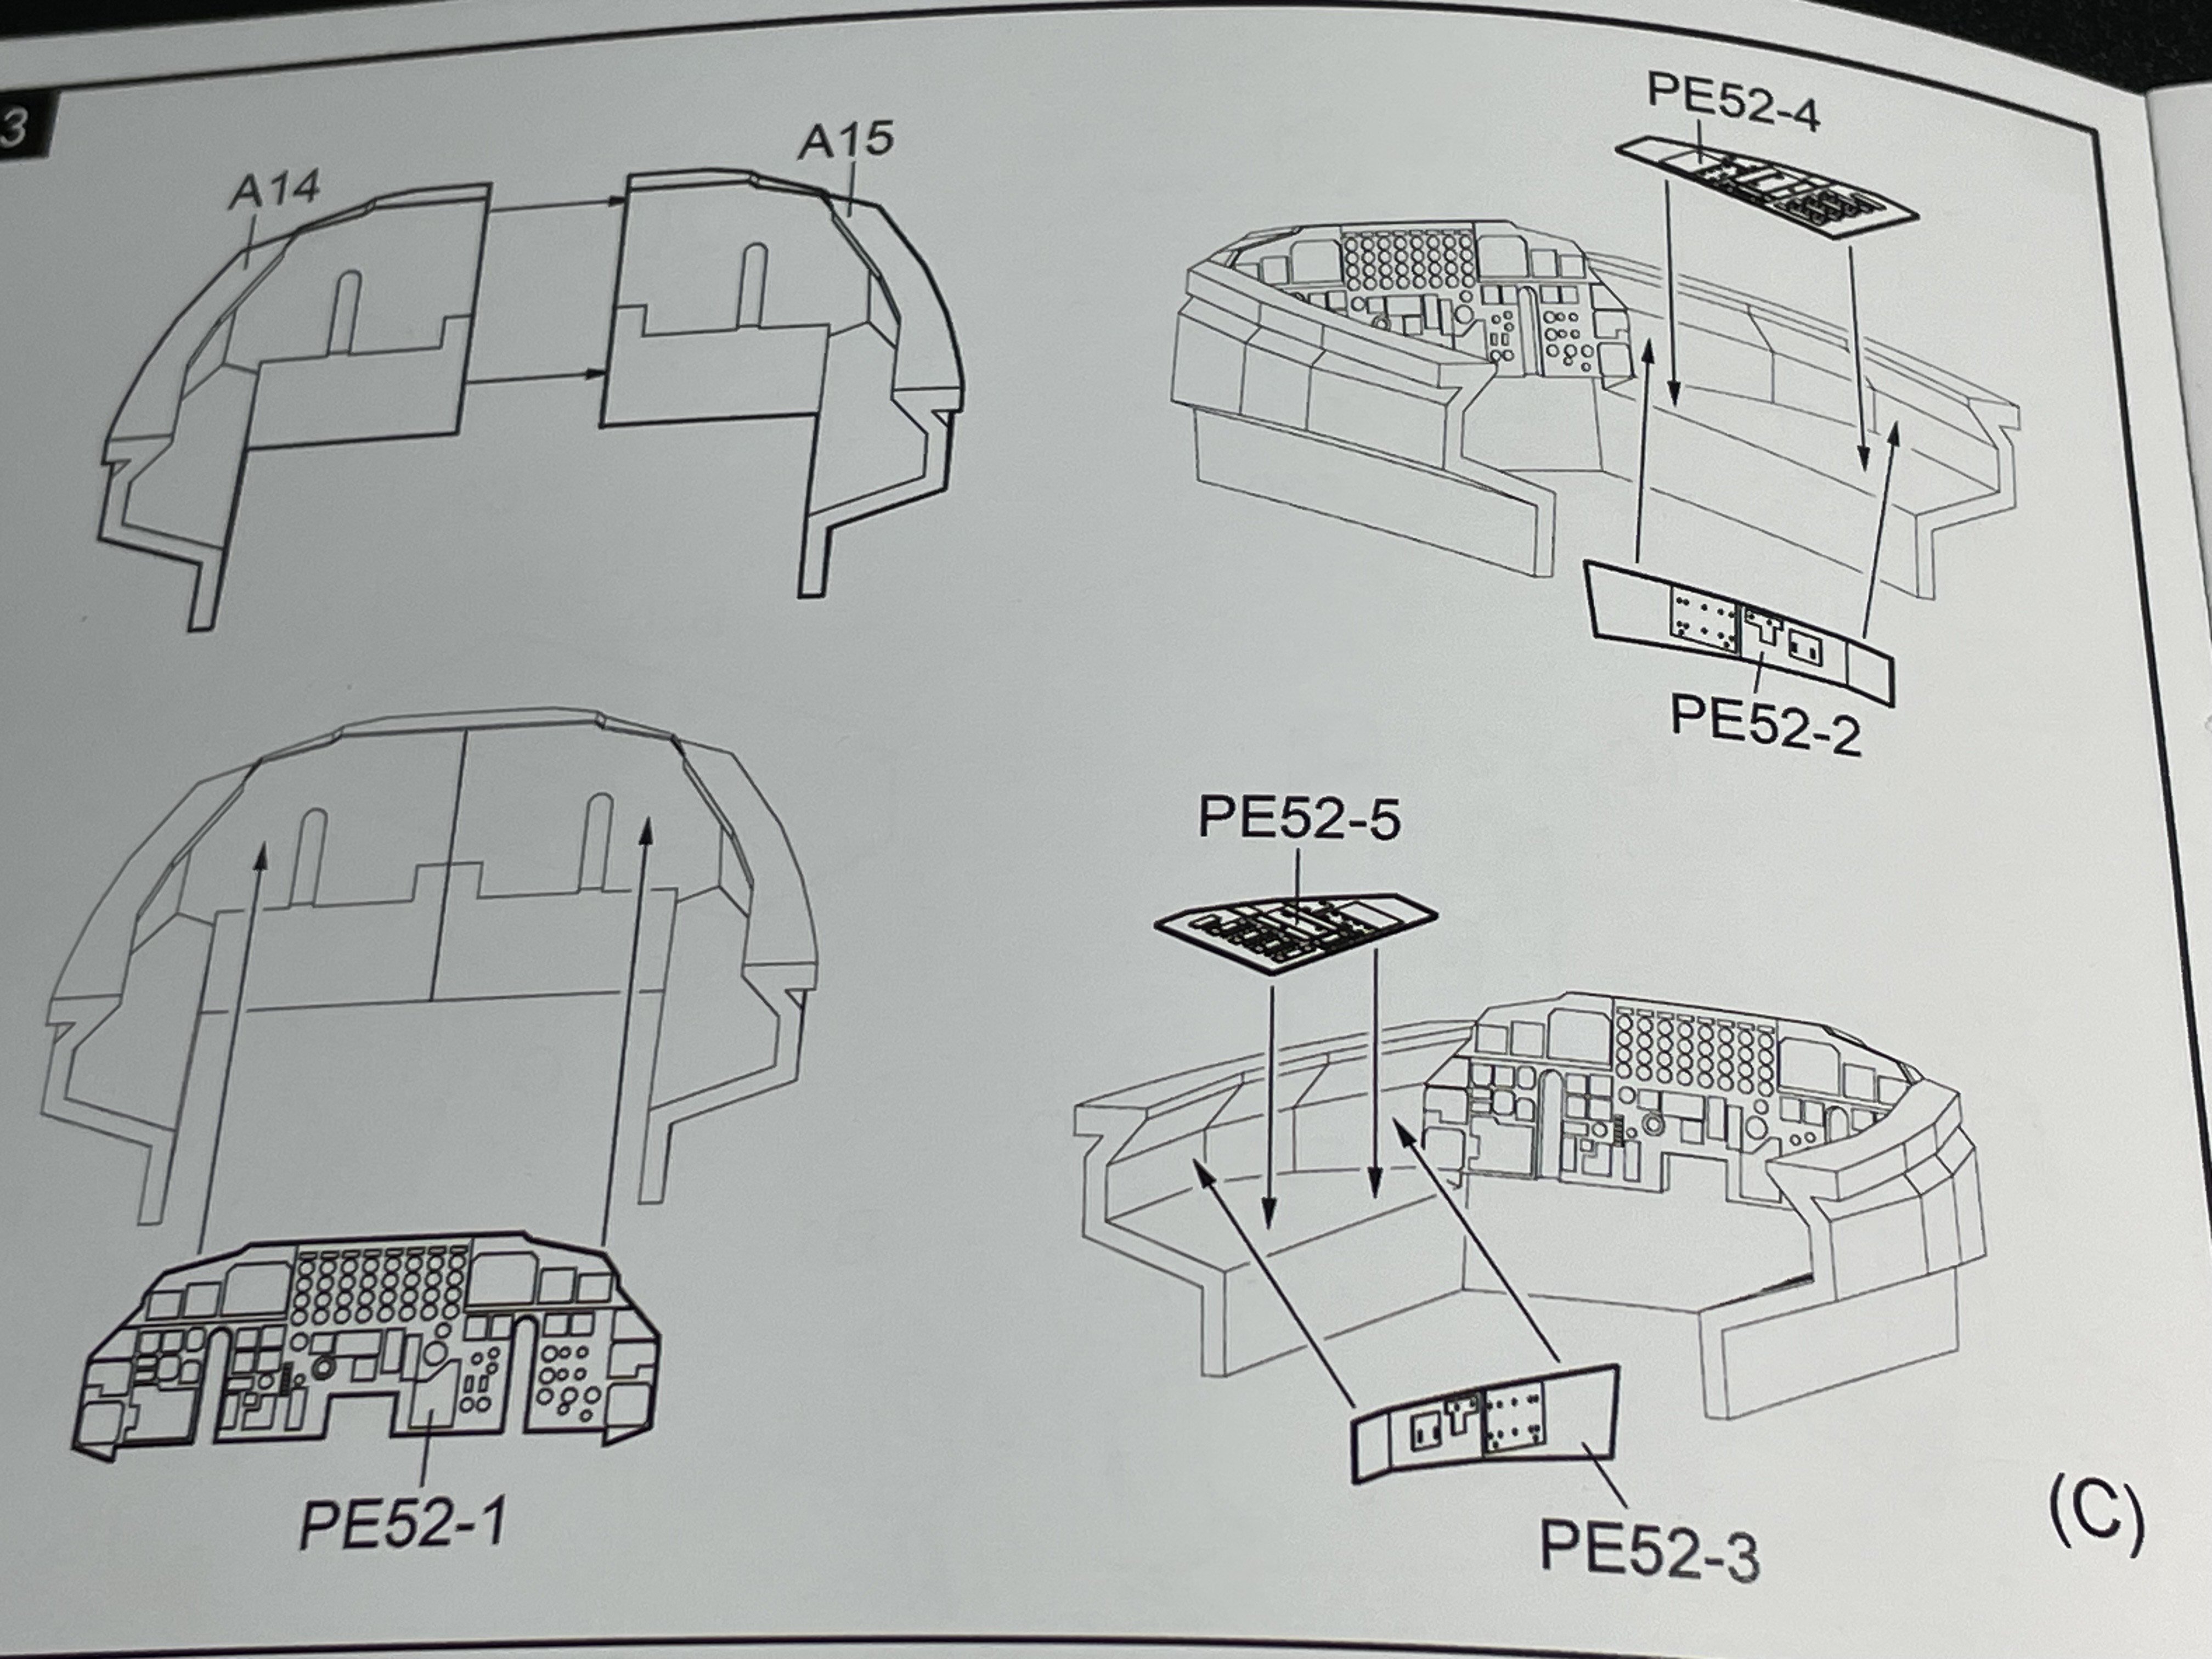
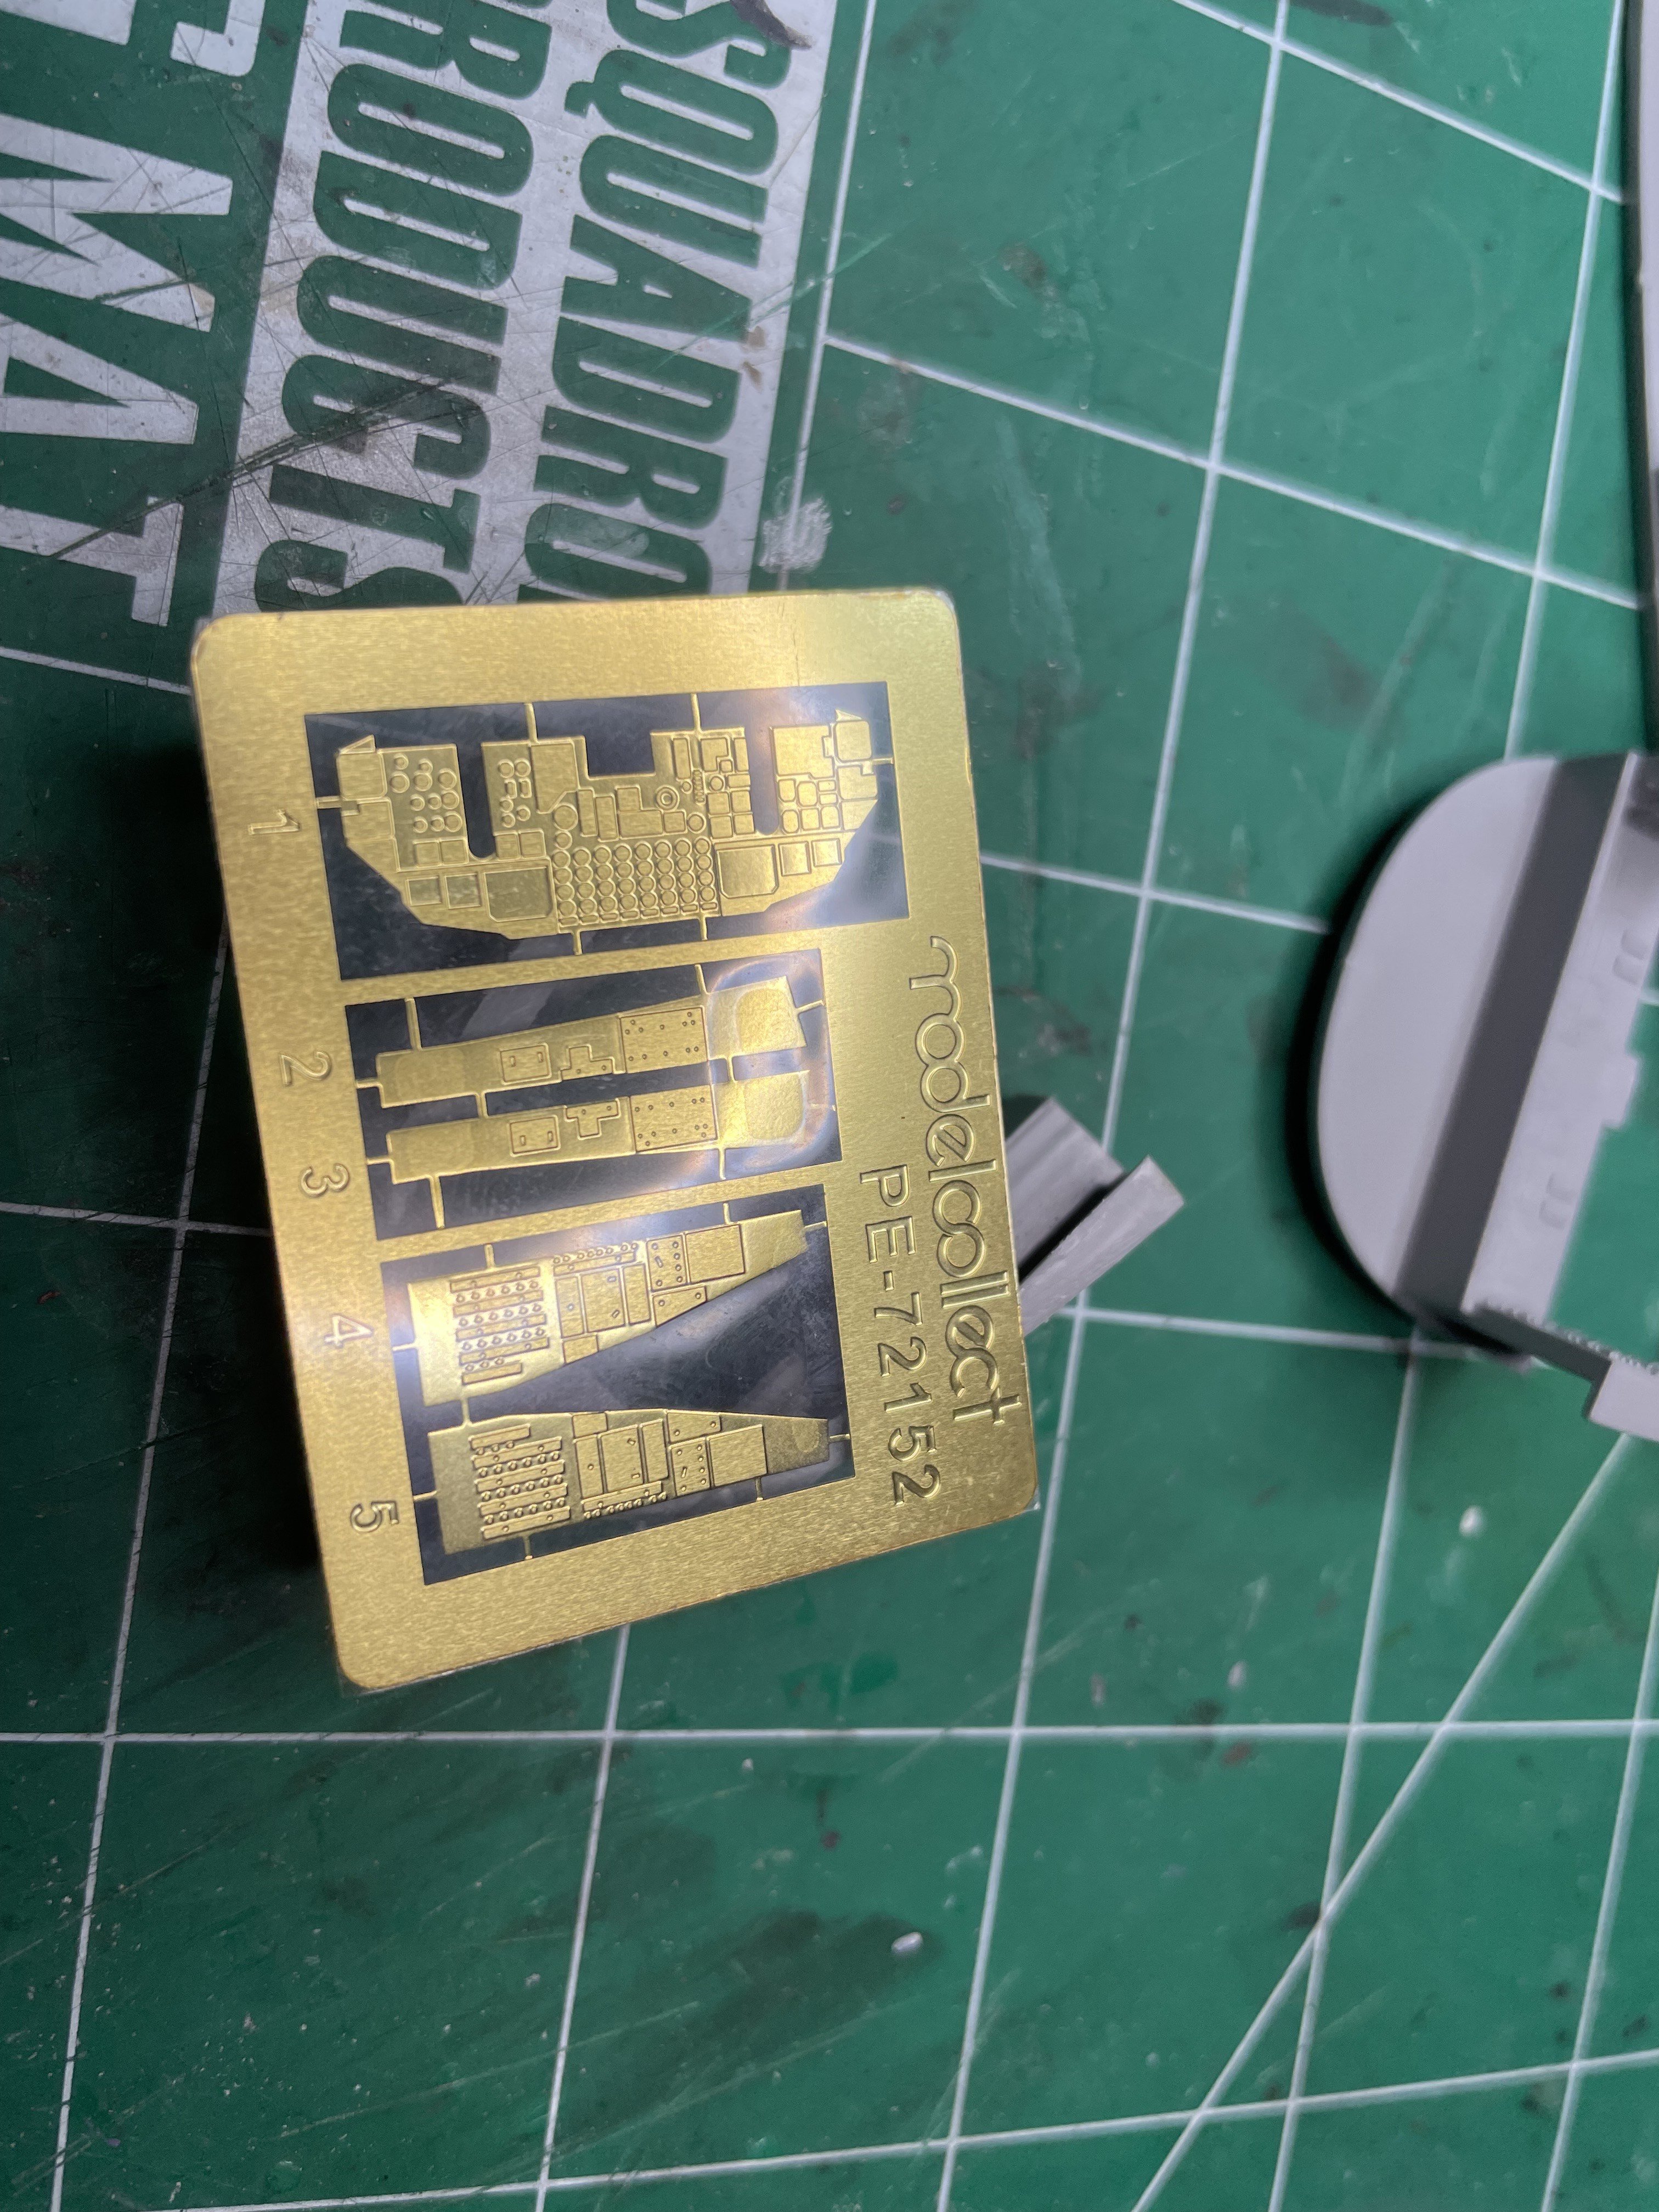
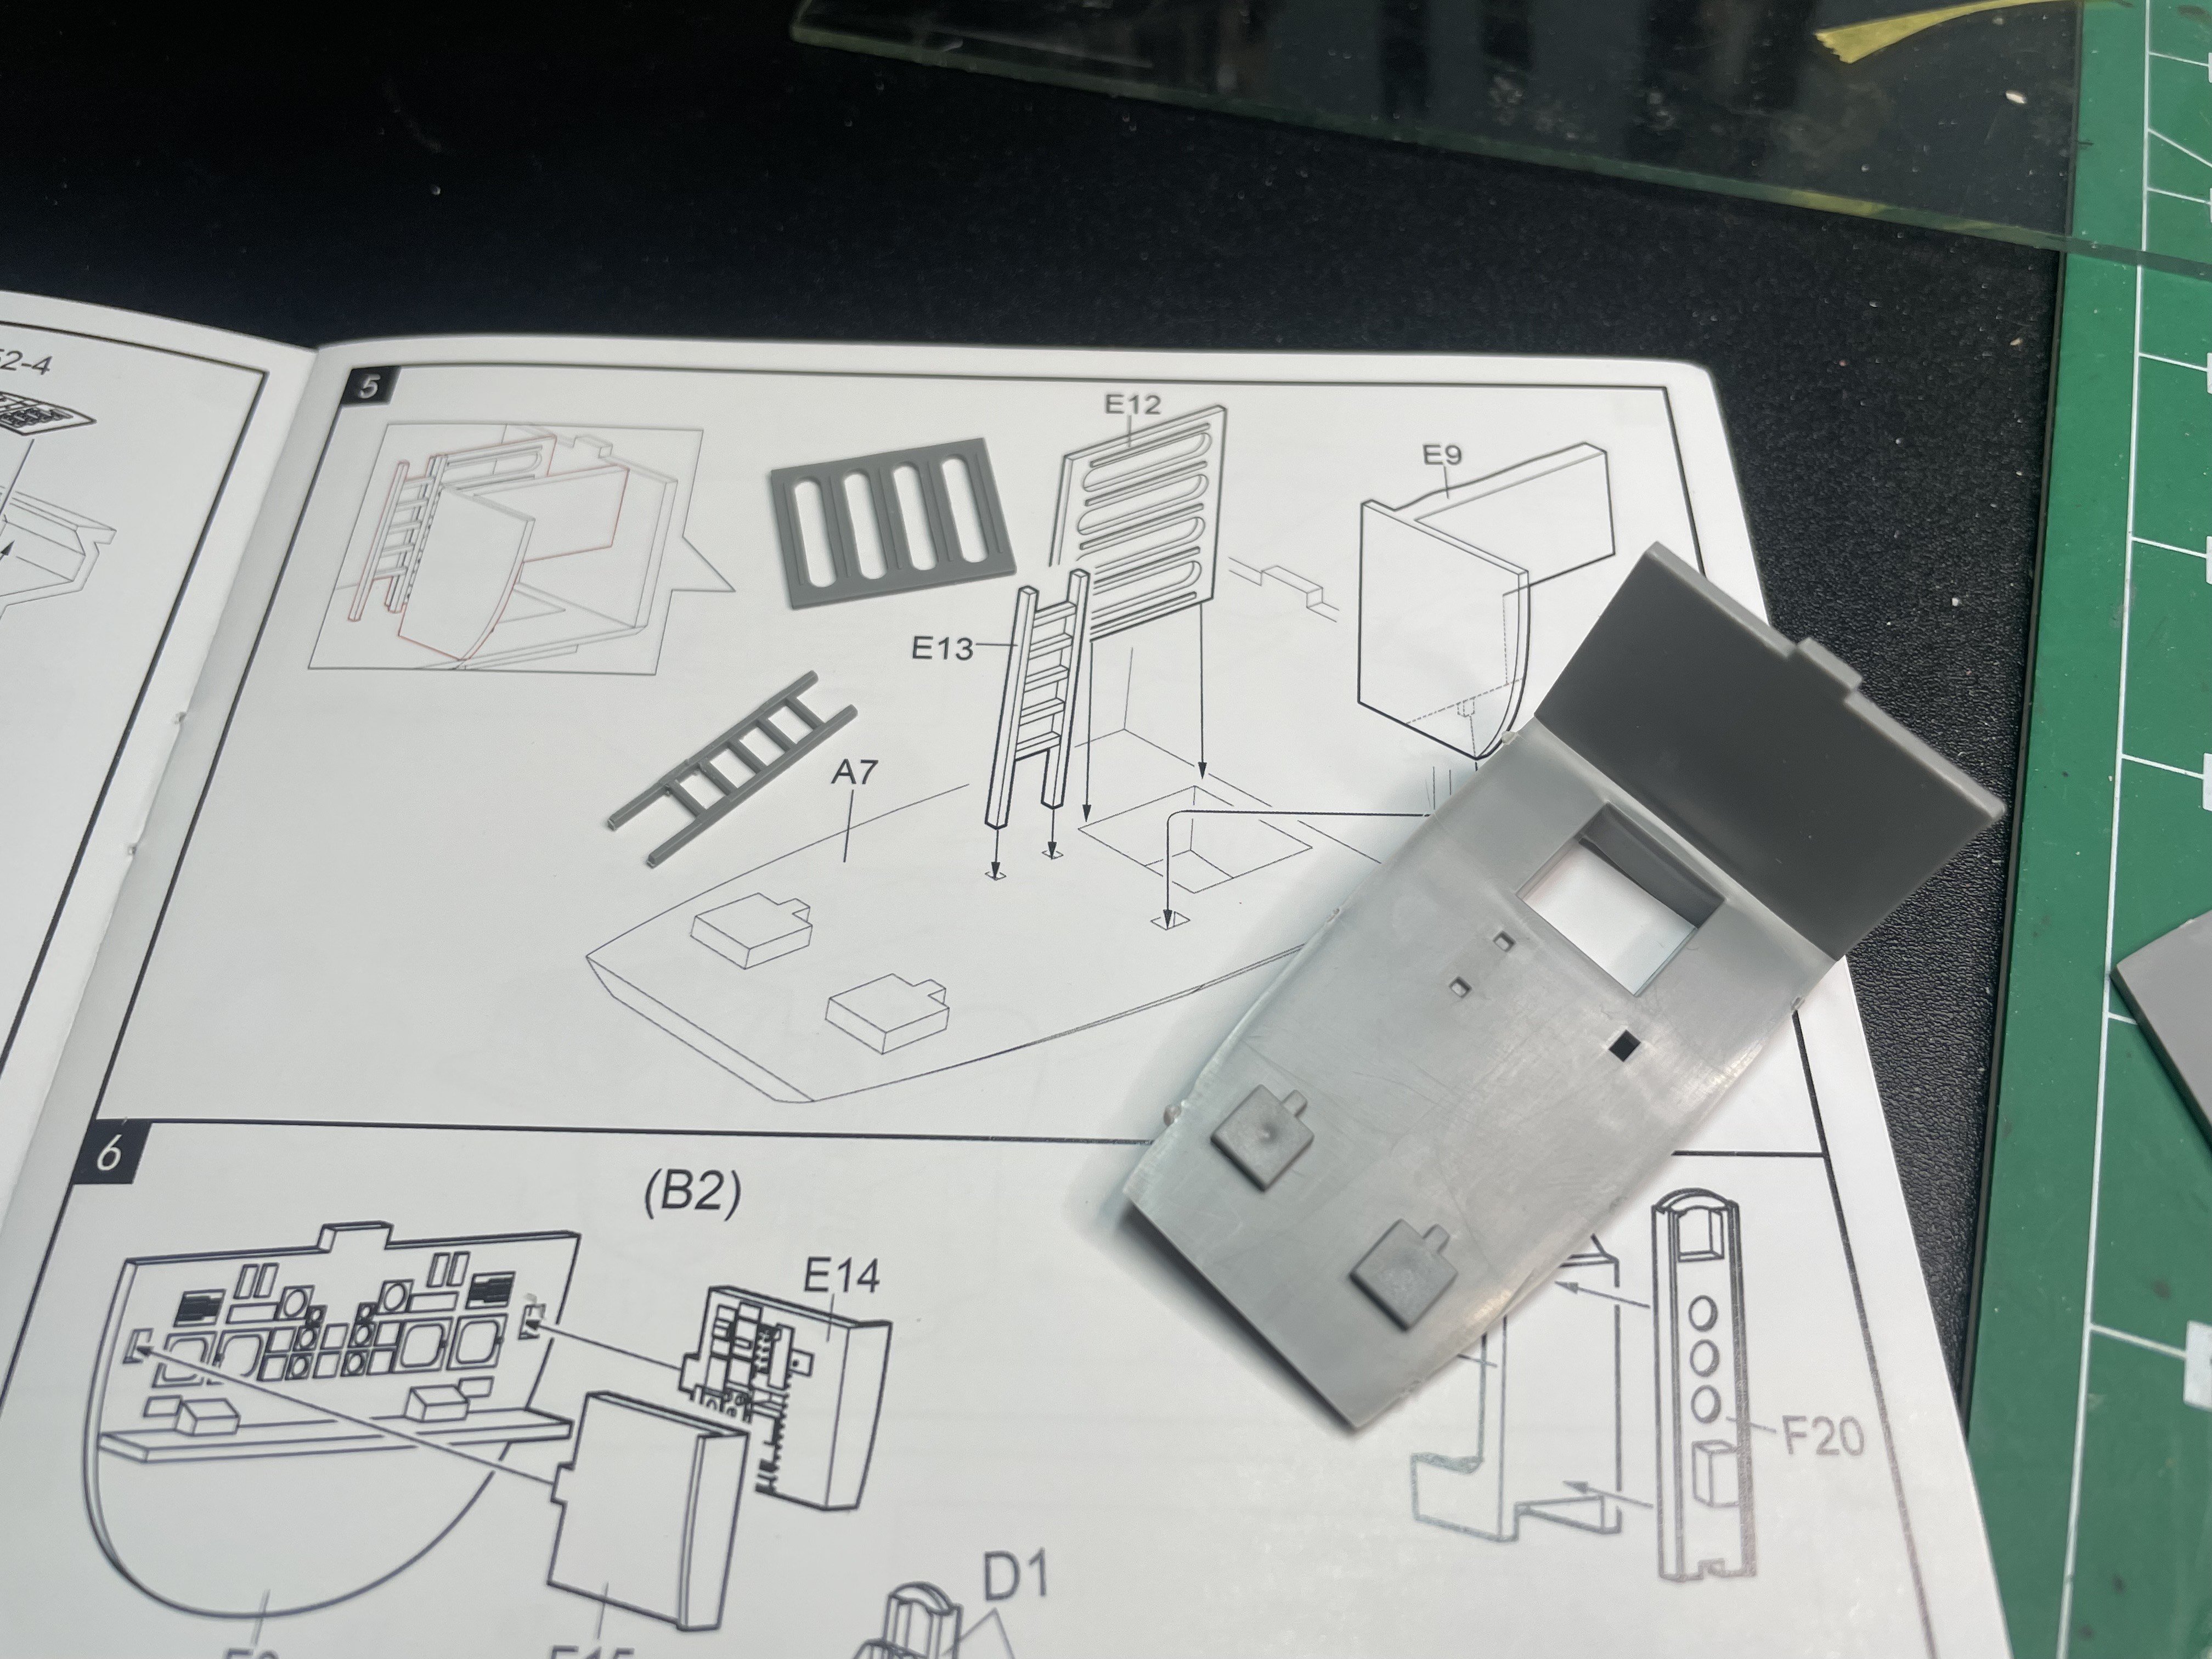
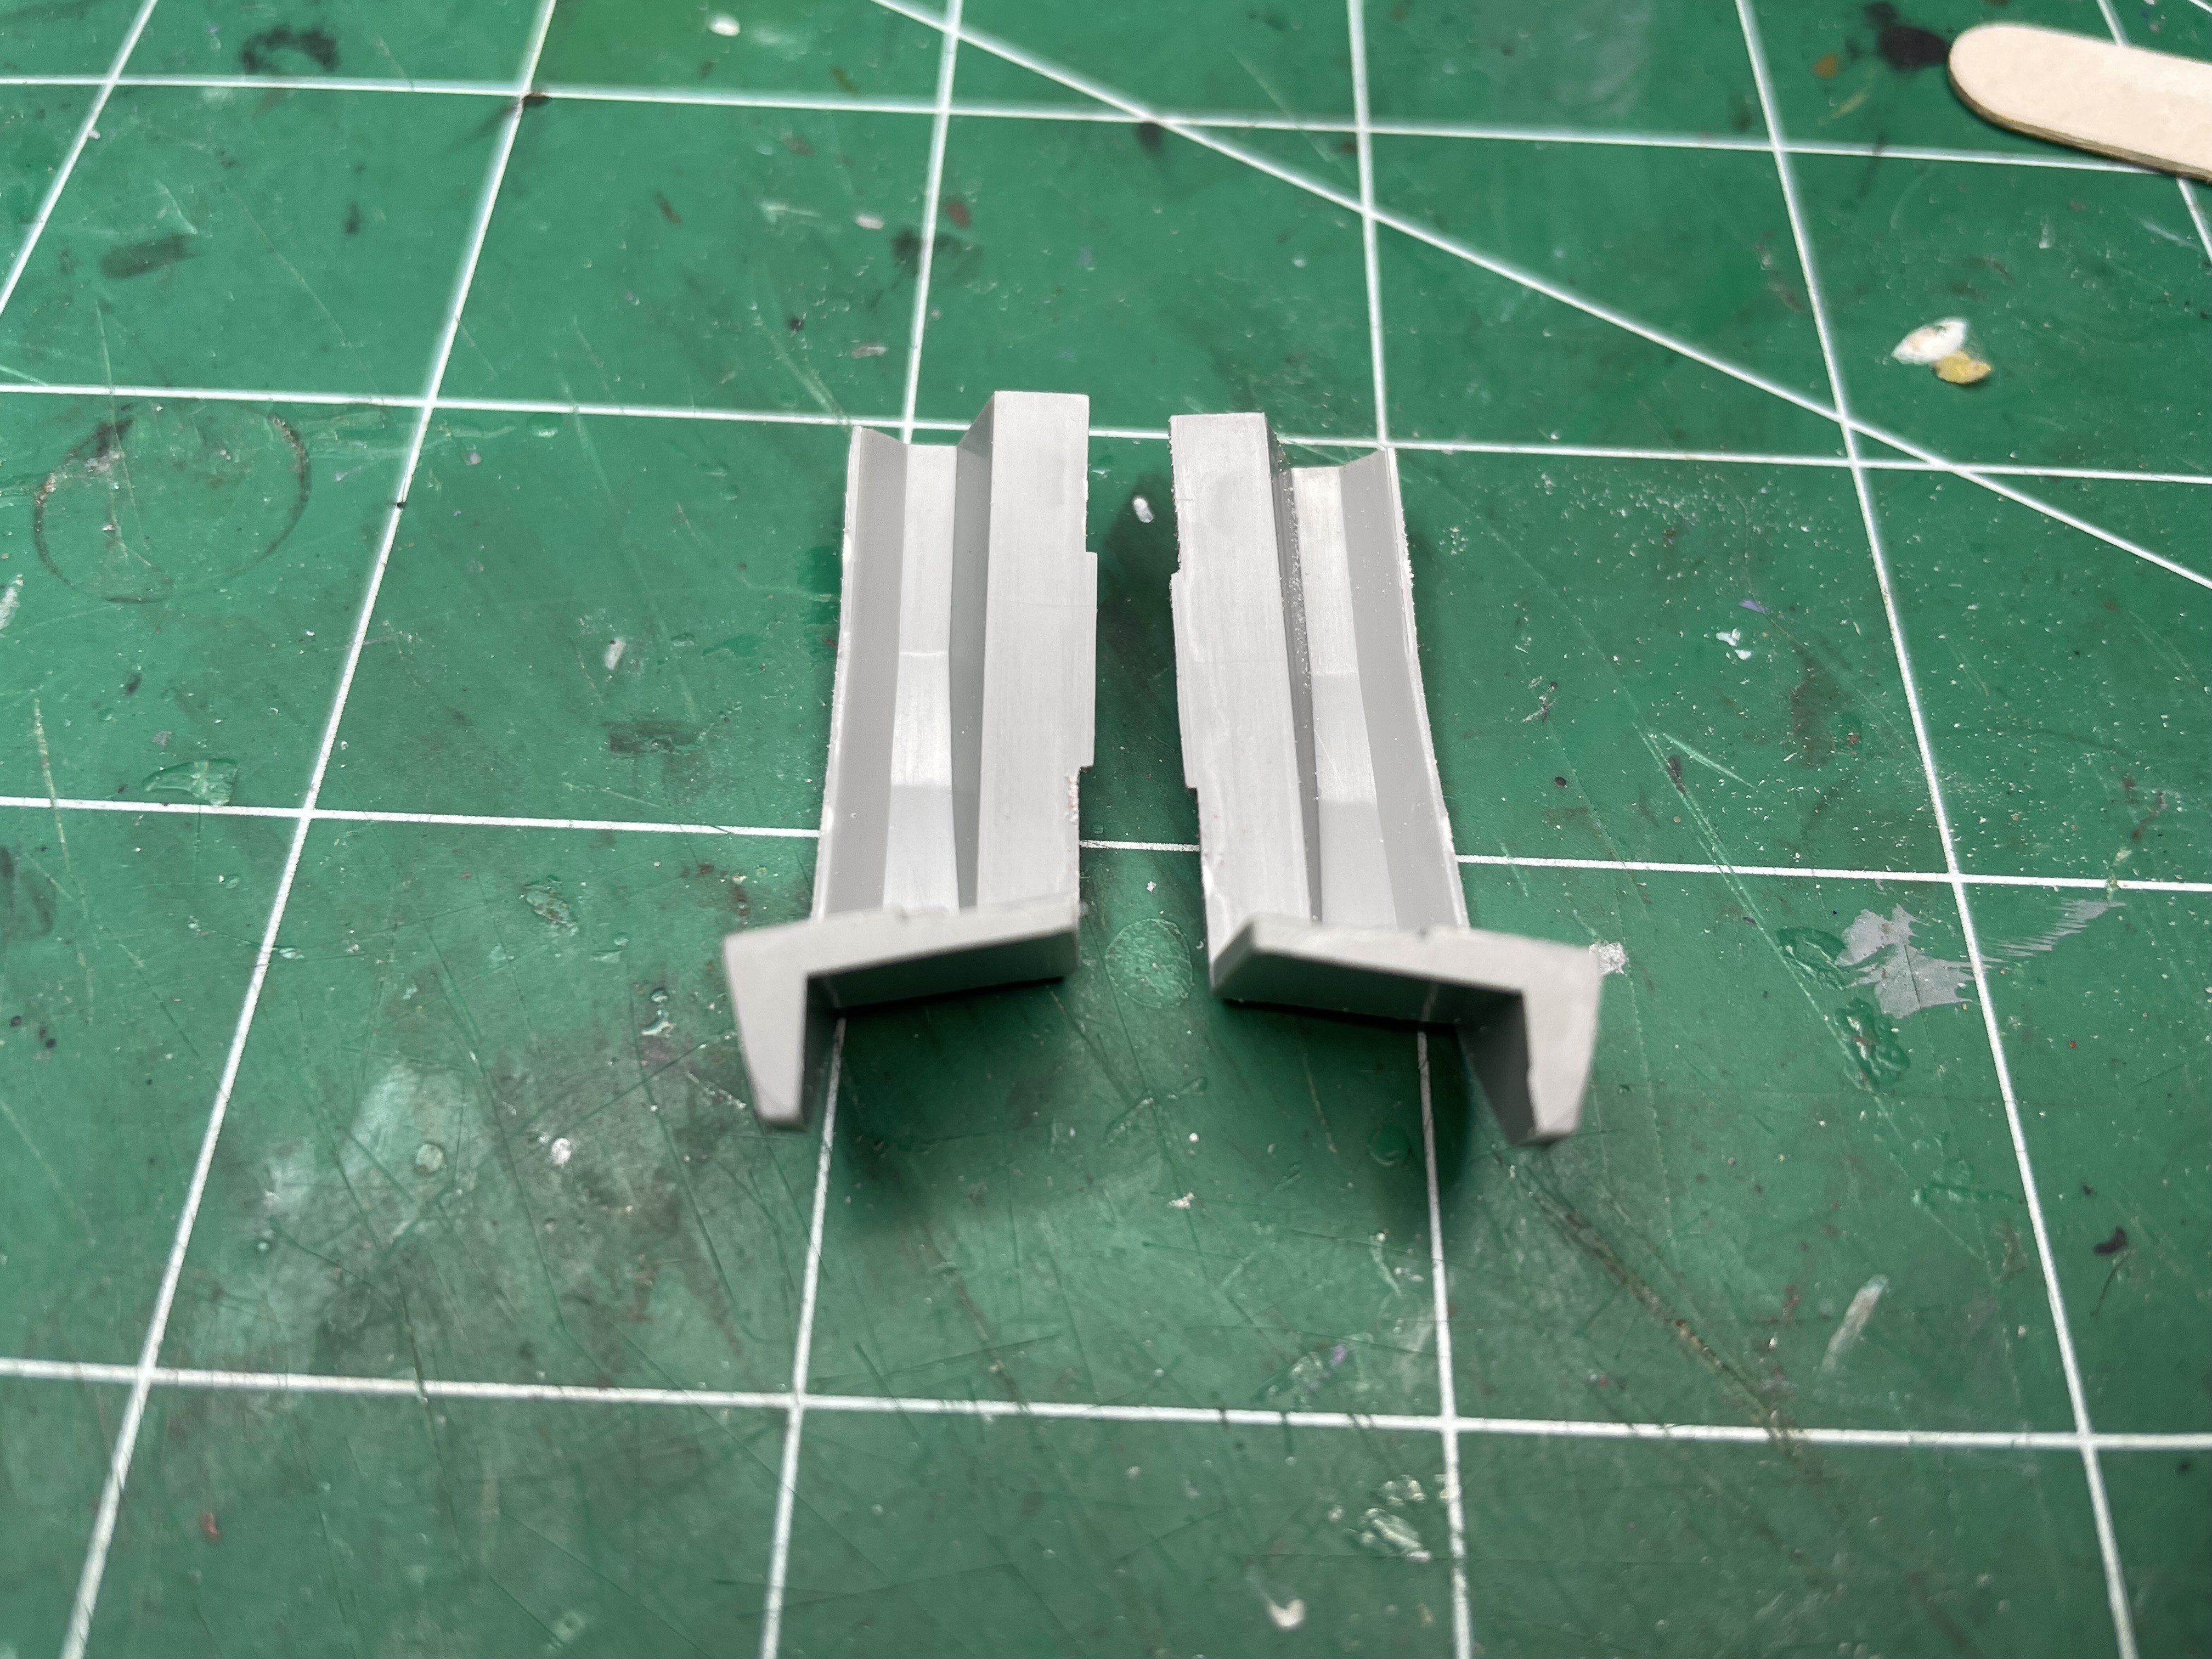
Making progress and showing some of the peculiarities of this kit: Many parts have no locating pins. Such as the cockpit instrument panel tub: The instruction sheet shows this as 1 piece. Took me a long time to realize this is actually two pieces. Very cool that there are PE instrument panels. Not cool that there are no decals to go over the panels. Going to paint the tub gray, then the PE panels Black and see what I can do from there. The PE fret has plastic over both sides. Interesting. Good detail but wish I had decals to go over them. Some really nice detail on the cockpit walls for the various stations. I probably should have painted these before assembling. Hmmm Location information from the instruction sheet means dry fitting is mandatory There is some minor flash to address and I've already figured out there is a fit problem with this next step. The floor is too long to fit the next step. More on that later.
-
Hi Mike! This one is going to a friend. He has maybe 200 diecast planes in his house. No B-52's however. He's already cleared out a space to hang this from the ceiling. I'm keeping in mind where to hang the monofilament line. At least this kit has a full bomb bay of bombs to show off.
-
You mean these ones? Even how grainy enlarging the picture is, I think Carl is right. Hmmm....
-
Don't tell me that Carl!!!
-
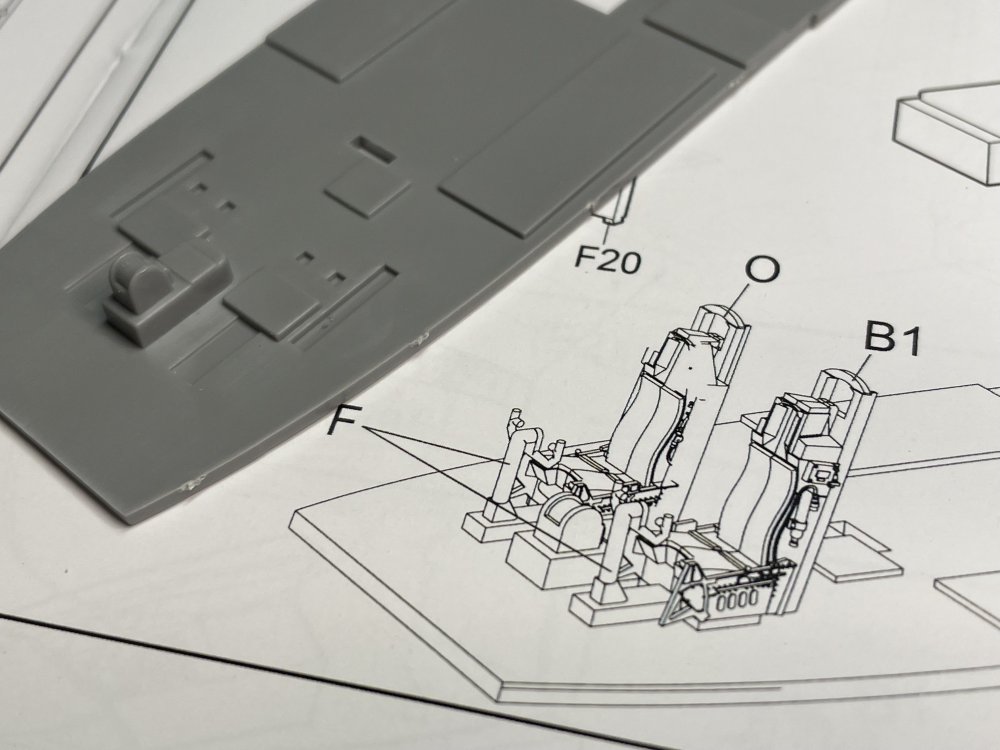
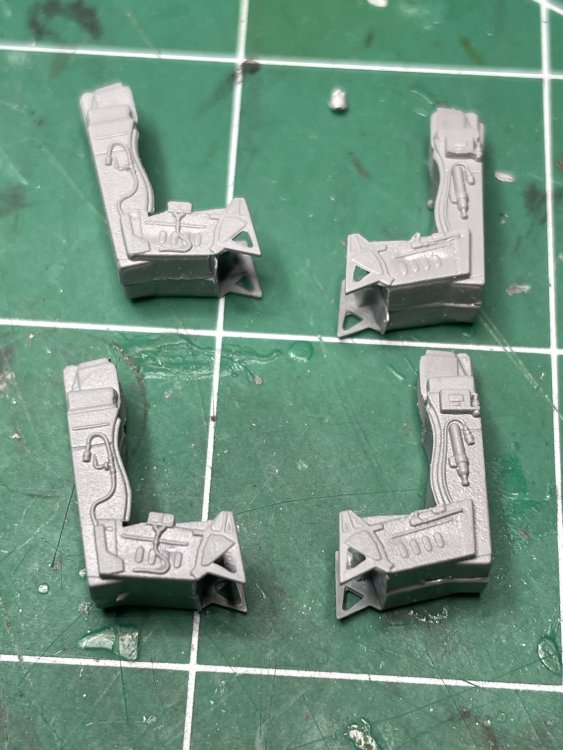
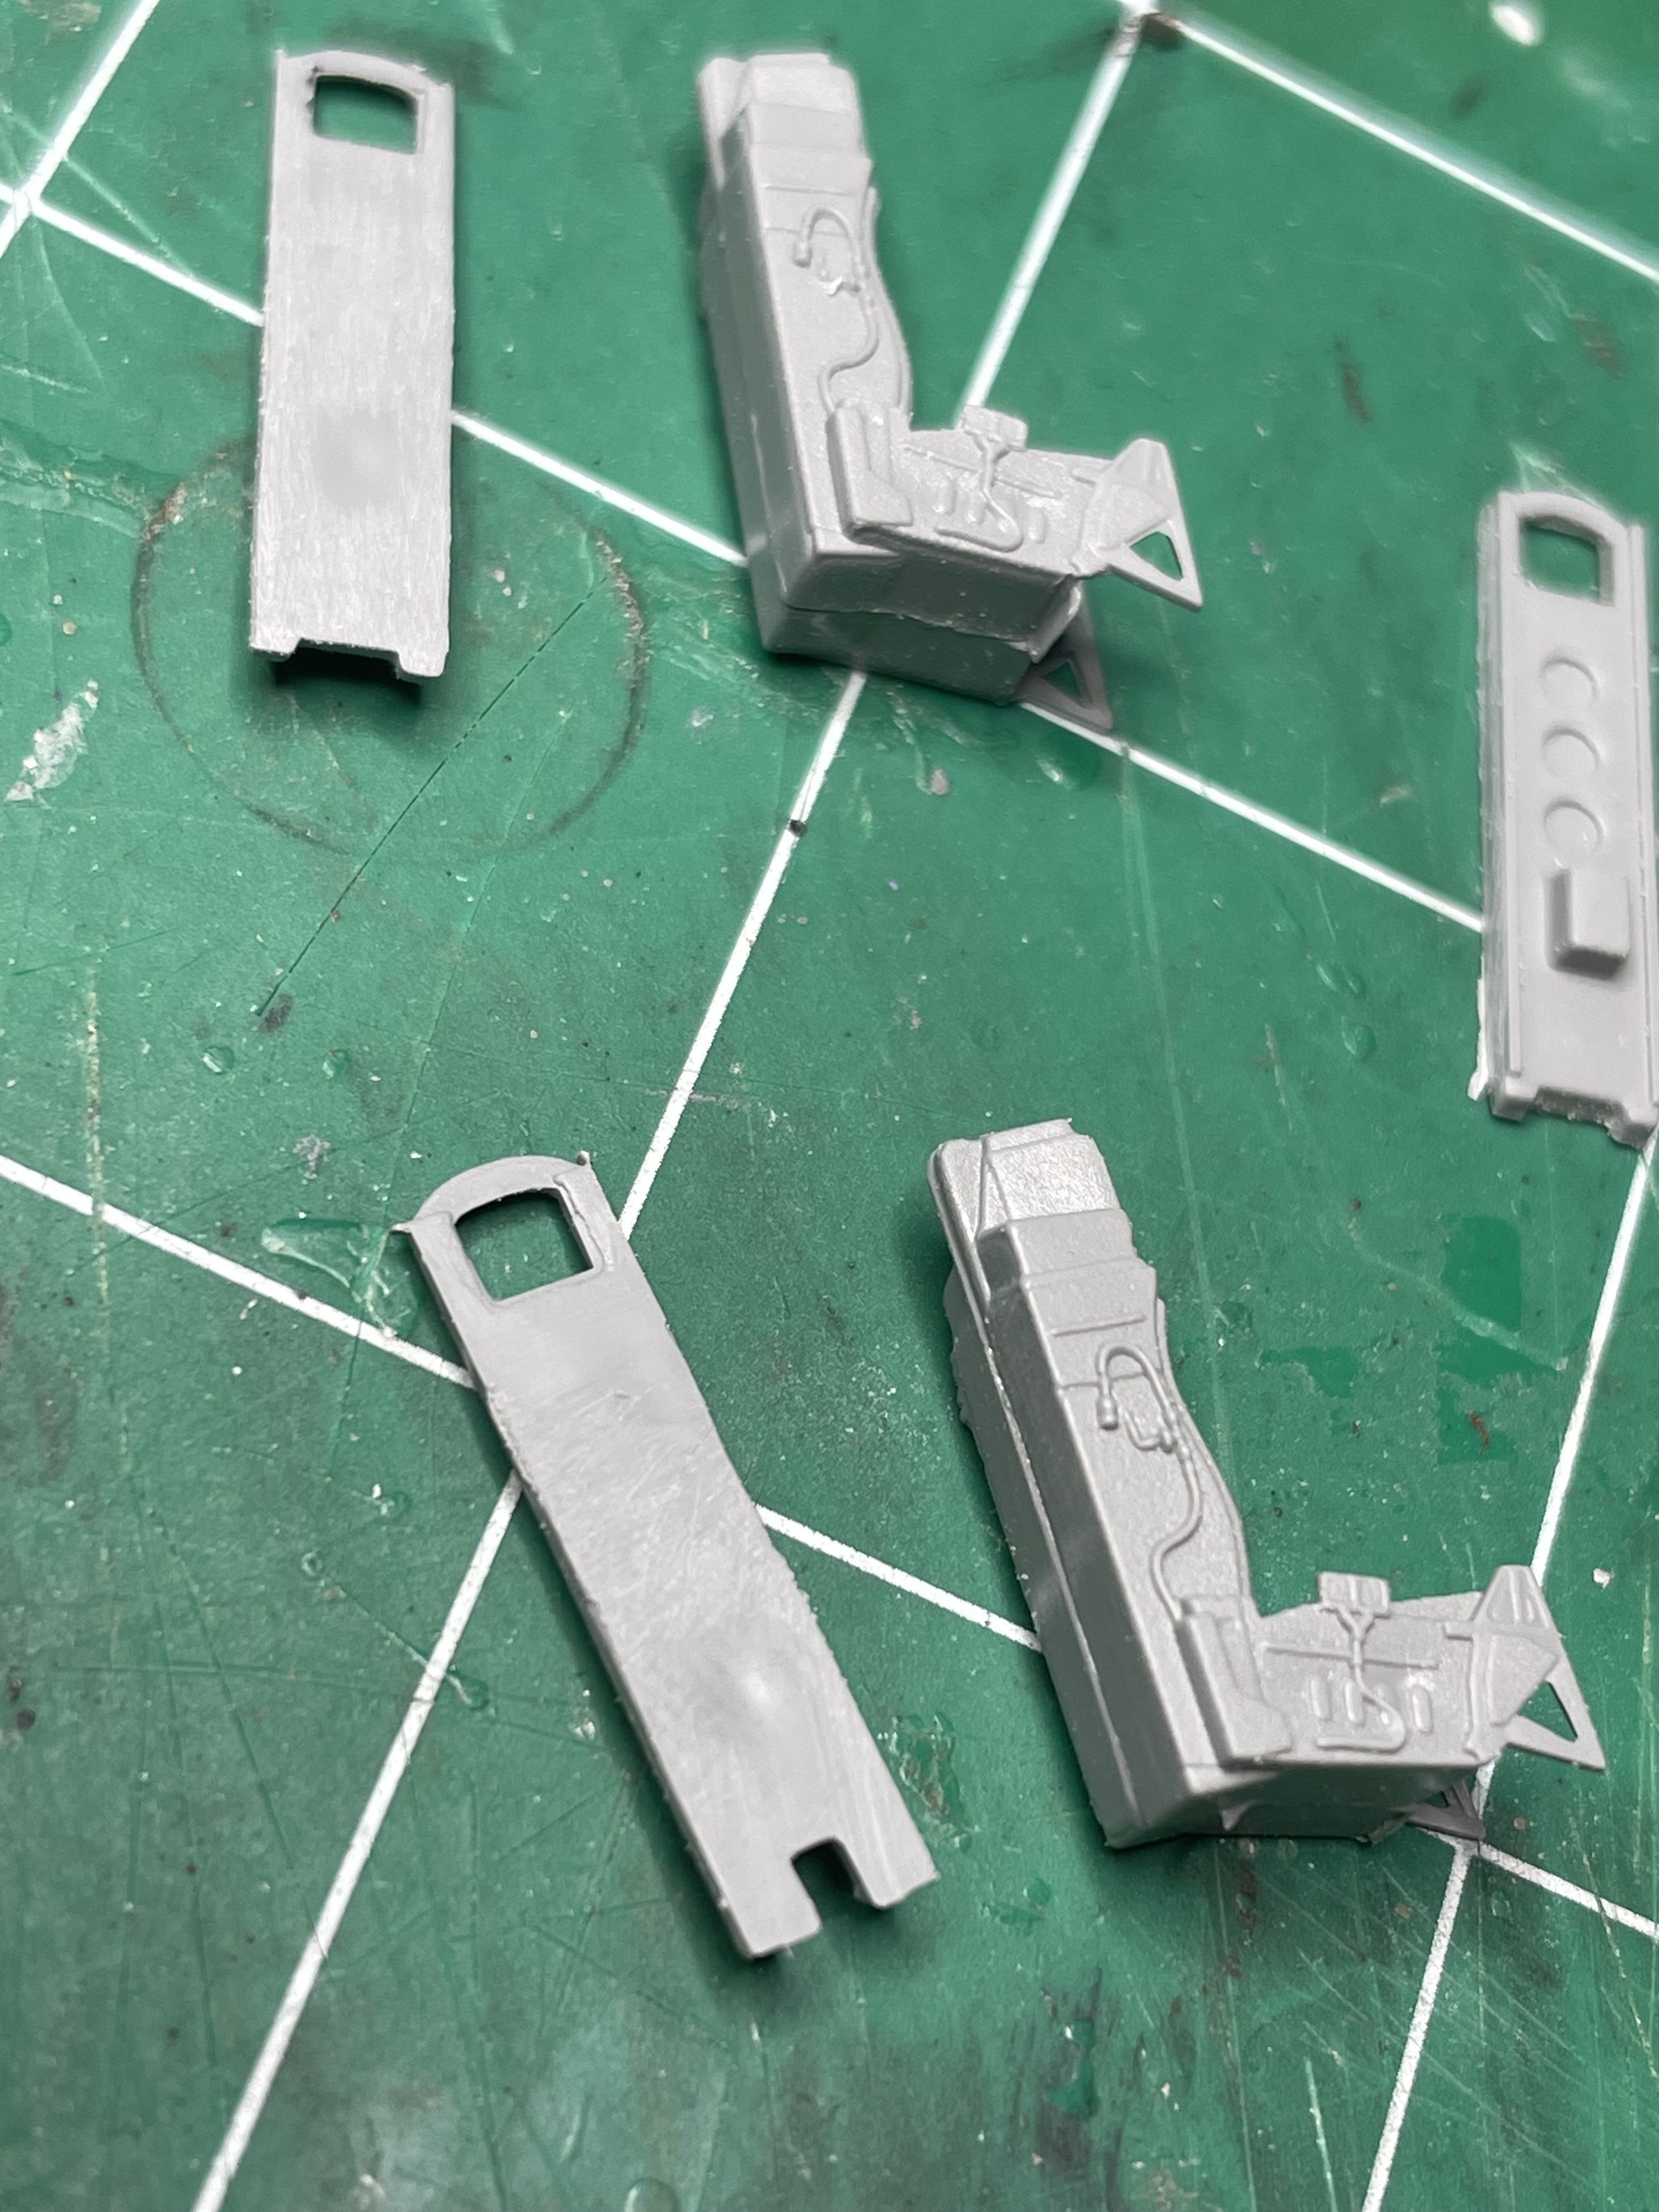
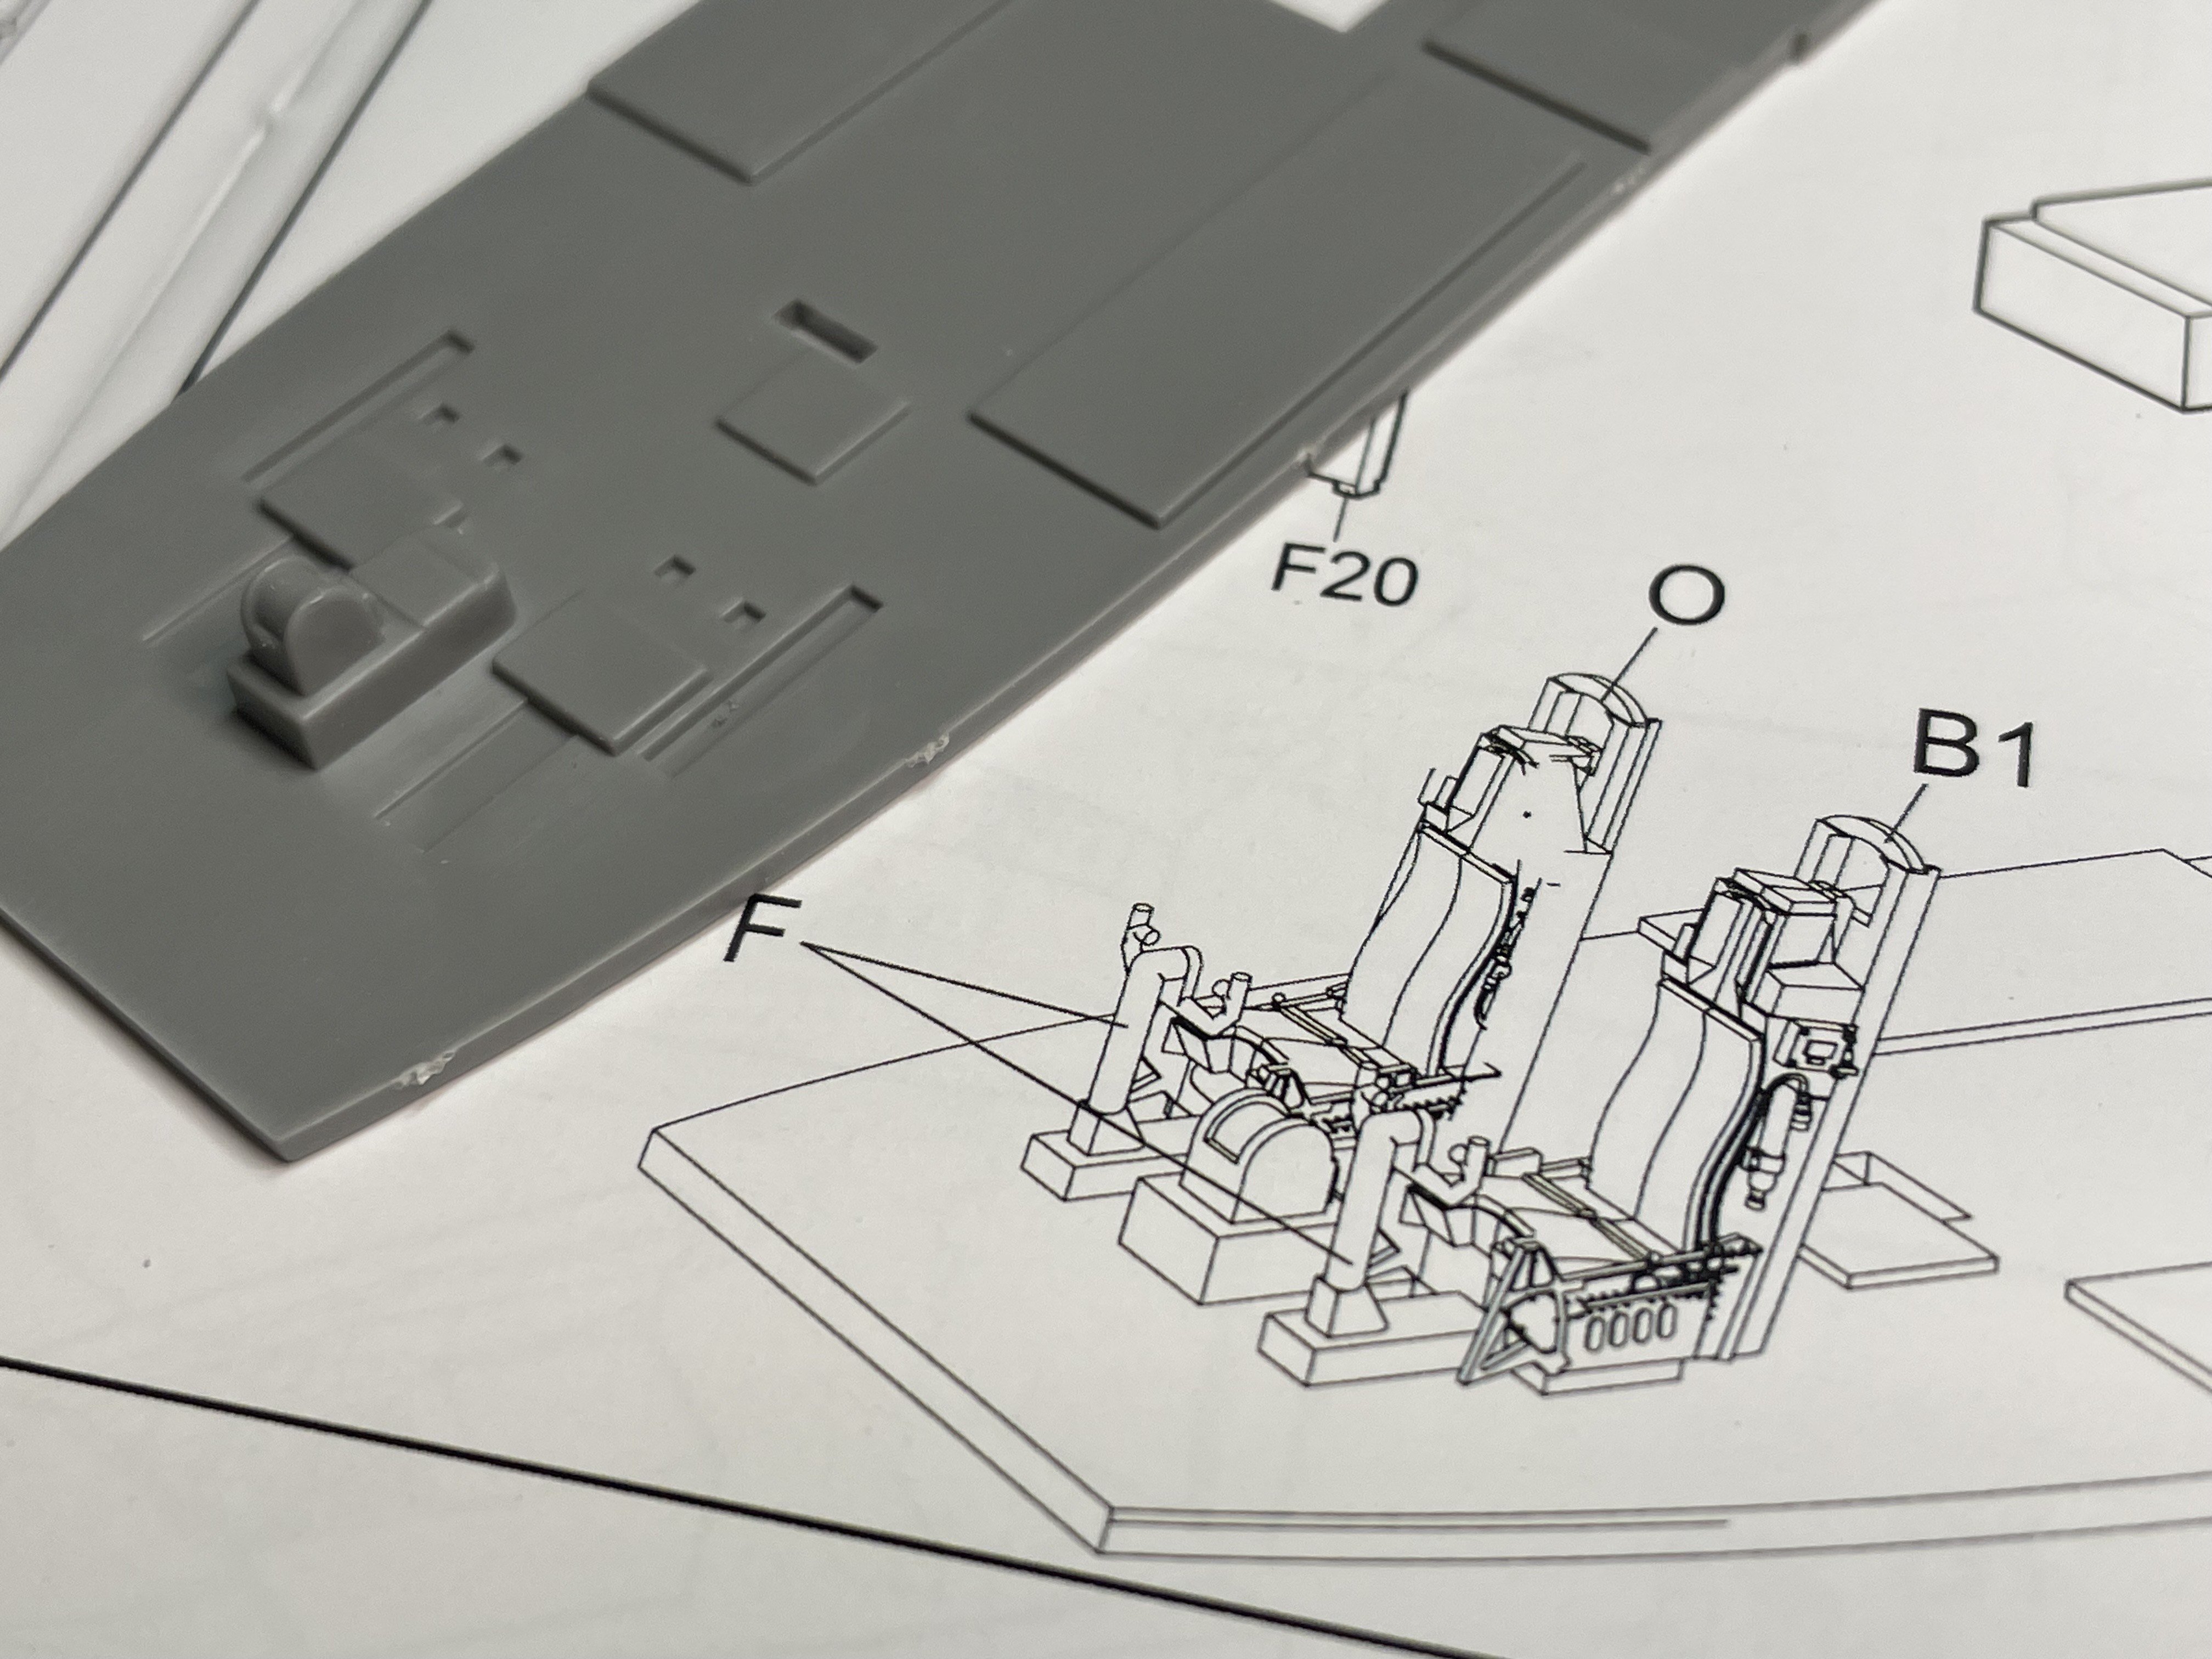
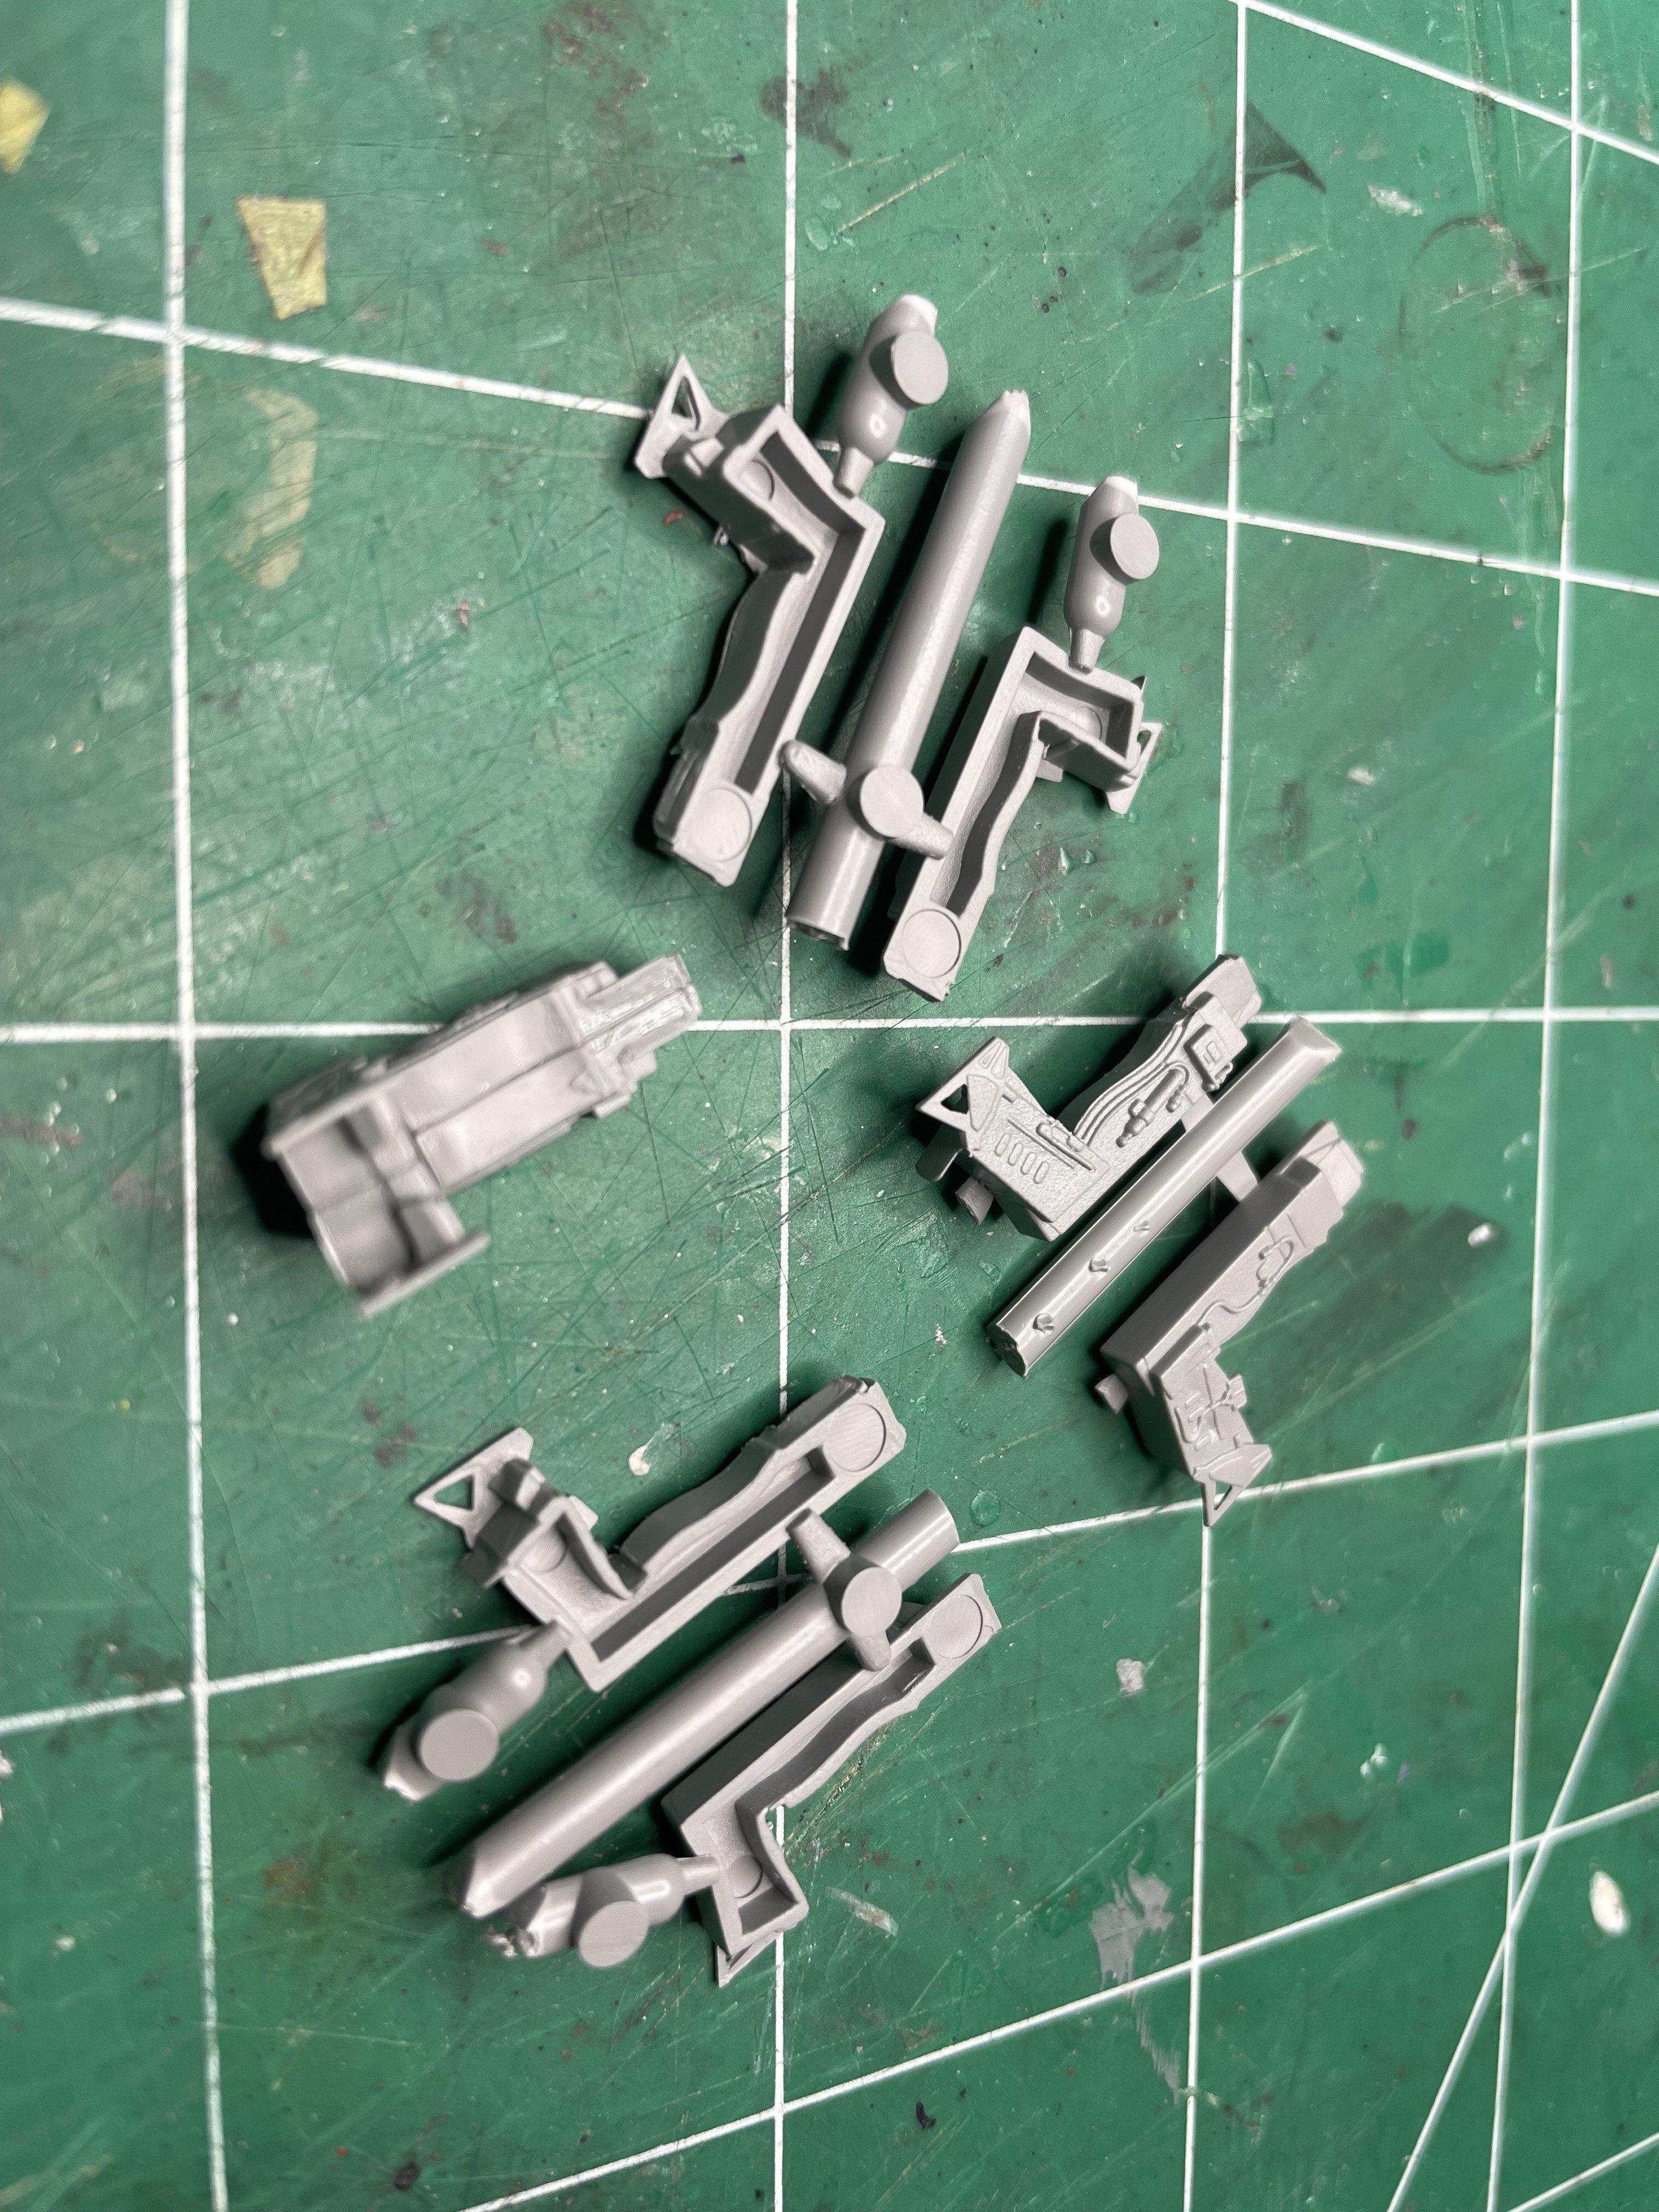
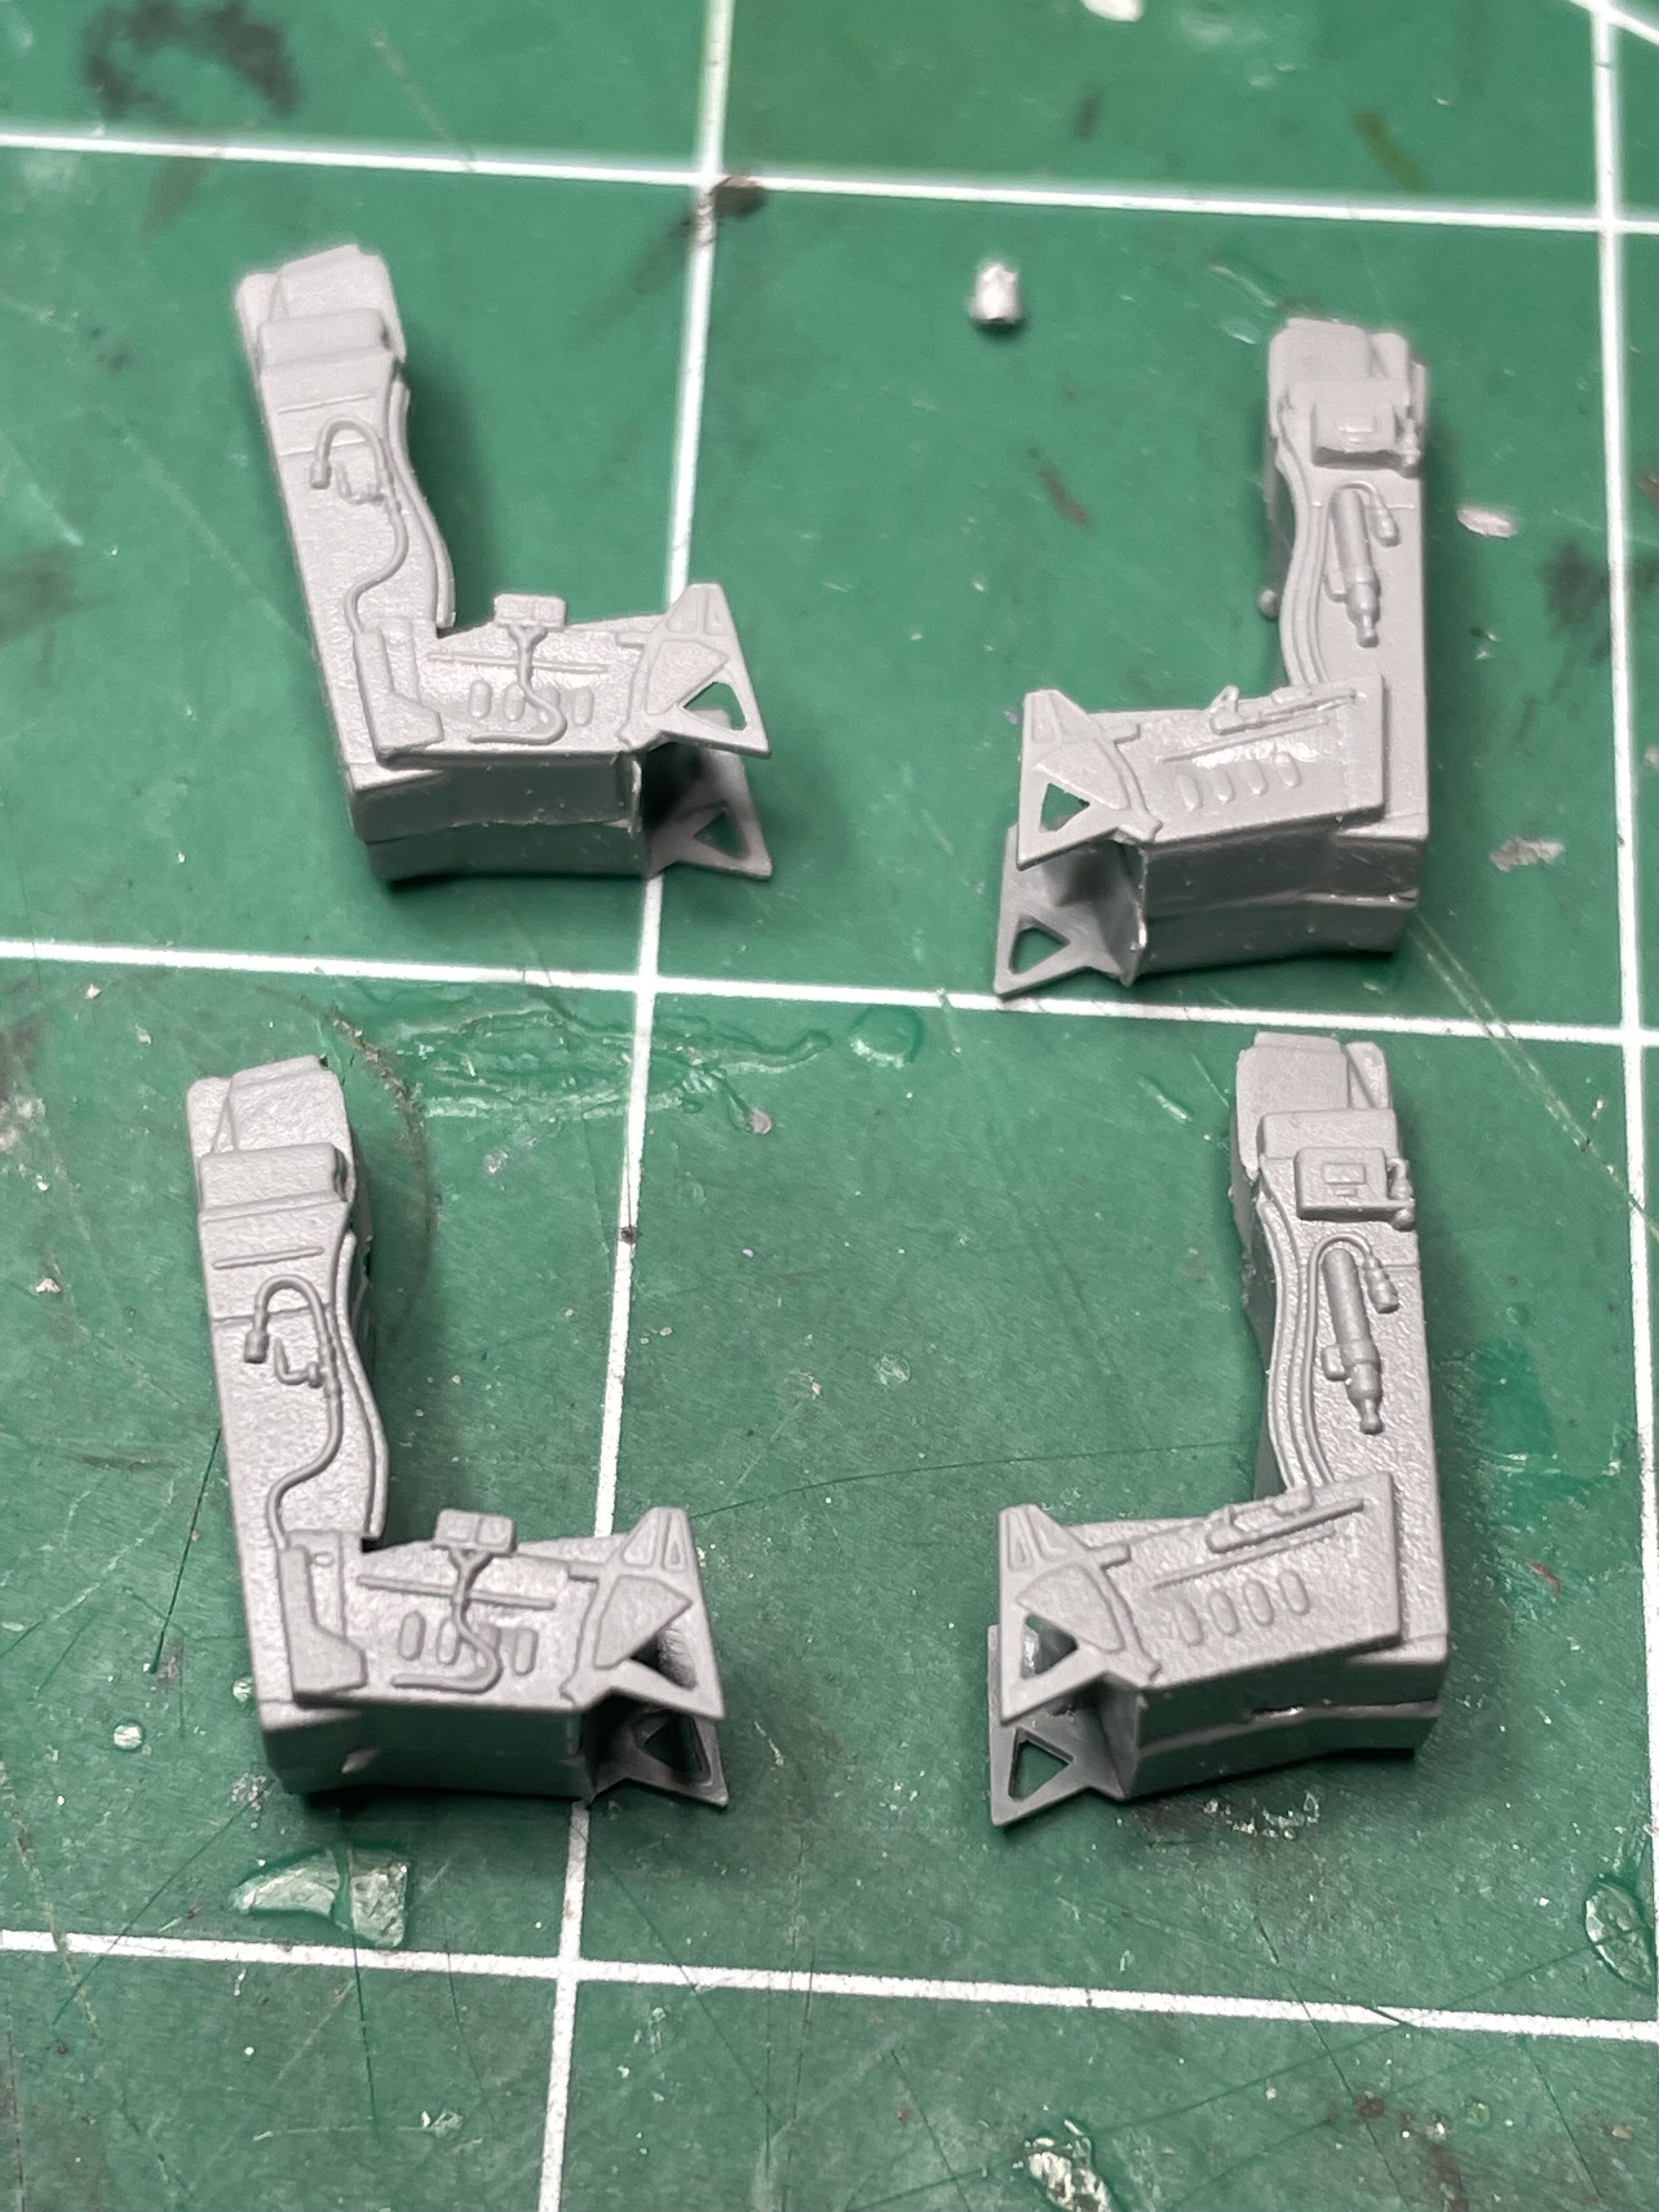
This kit is interesting. After assembling the 54 pieces to create the 27 bombs, started working on the cockpit. The seat detail is impressive, for 1/72 scale. But literally none of this will be visible once the plane is assembled. I guess that is the case with all of the bombers. More on that later. Put the seats together, and there are no placement pins on the seats. Just have to eyeball it. Again, the sprue attachment points are on the join surfaces. The instructions give you an IDEA of where things go, but not much in the way of actual placement detail. Four square divots are for the seat frame to fit into - not that the instructions show that to you. But the detail on the side of the seats is pretty impressive, I think. I'll detail this as much as I can, just because... Now I need to find some reference photos!! Honestly, I did try and find 1/72 resin or 3D printed seats and bombs. Couldn't find any.

-
Oh. I didn't think about that. 😢
-
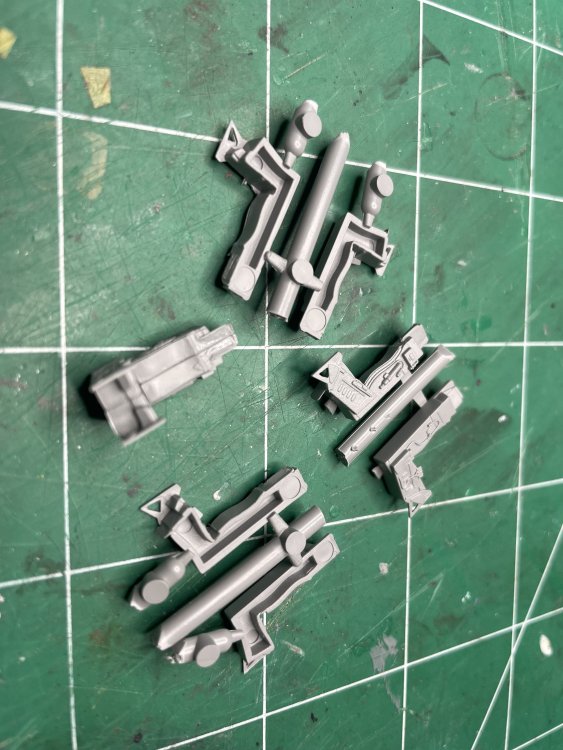
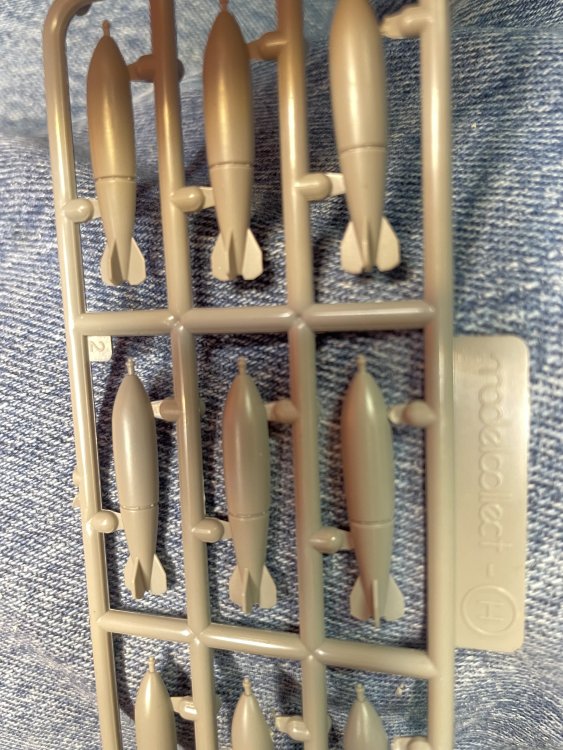
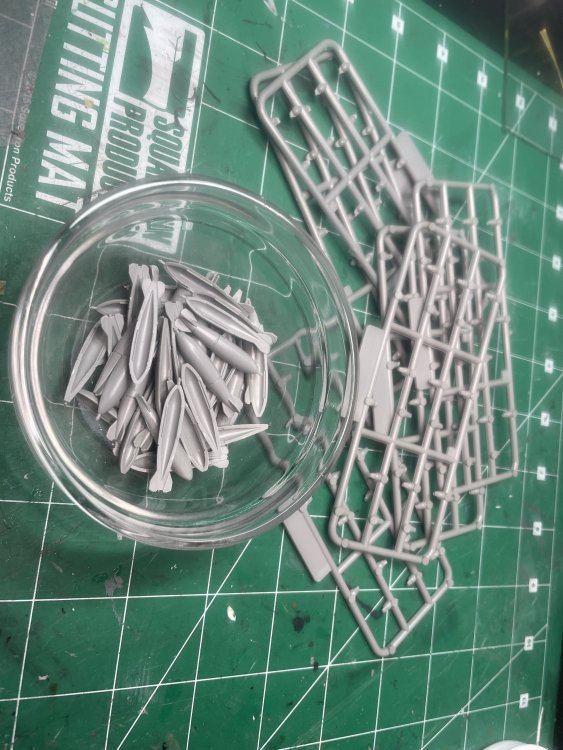
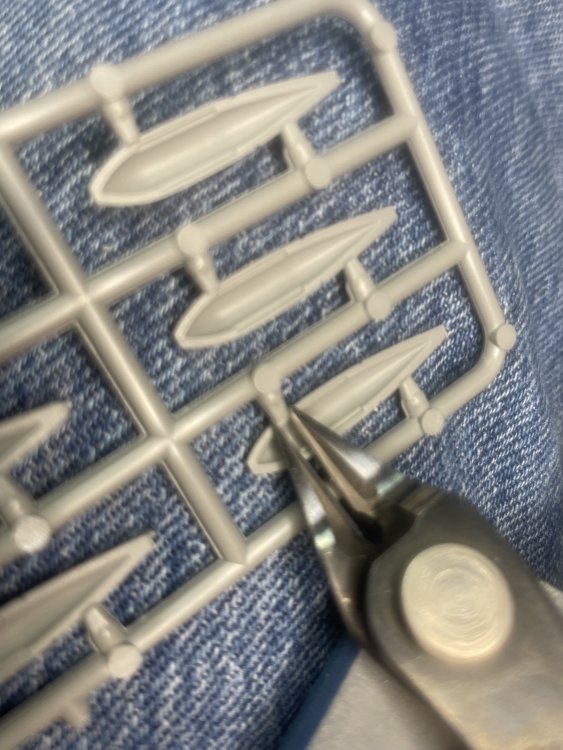
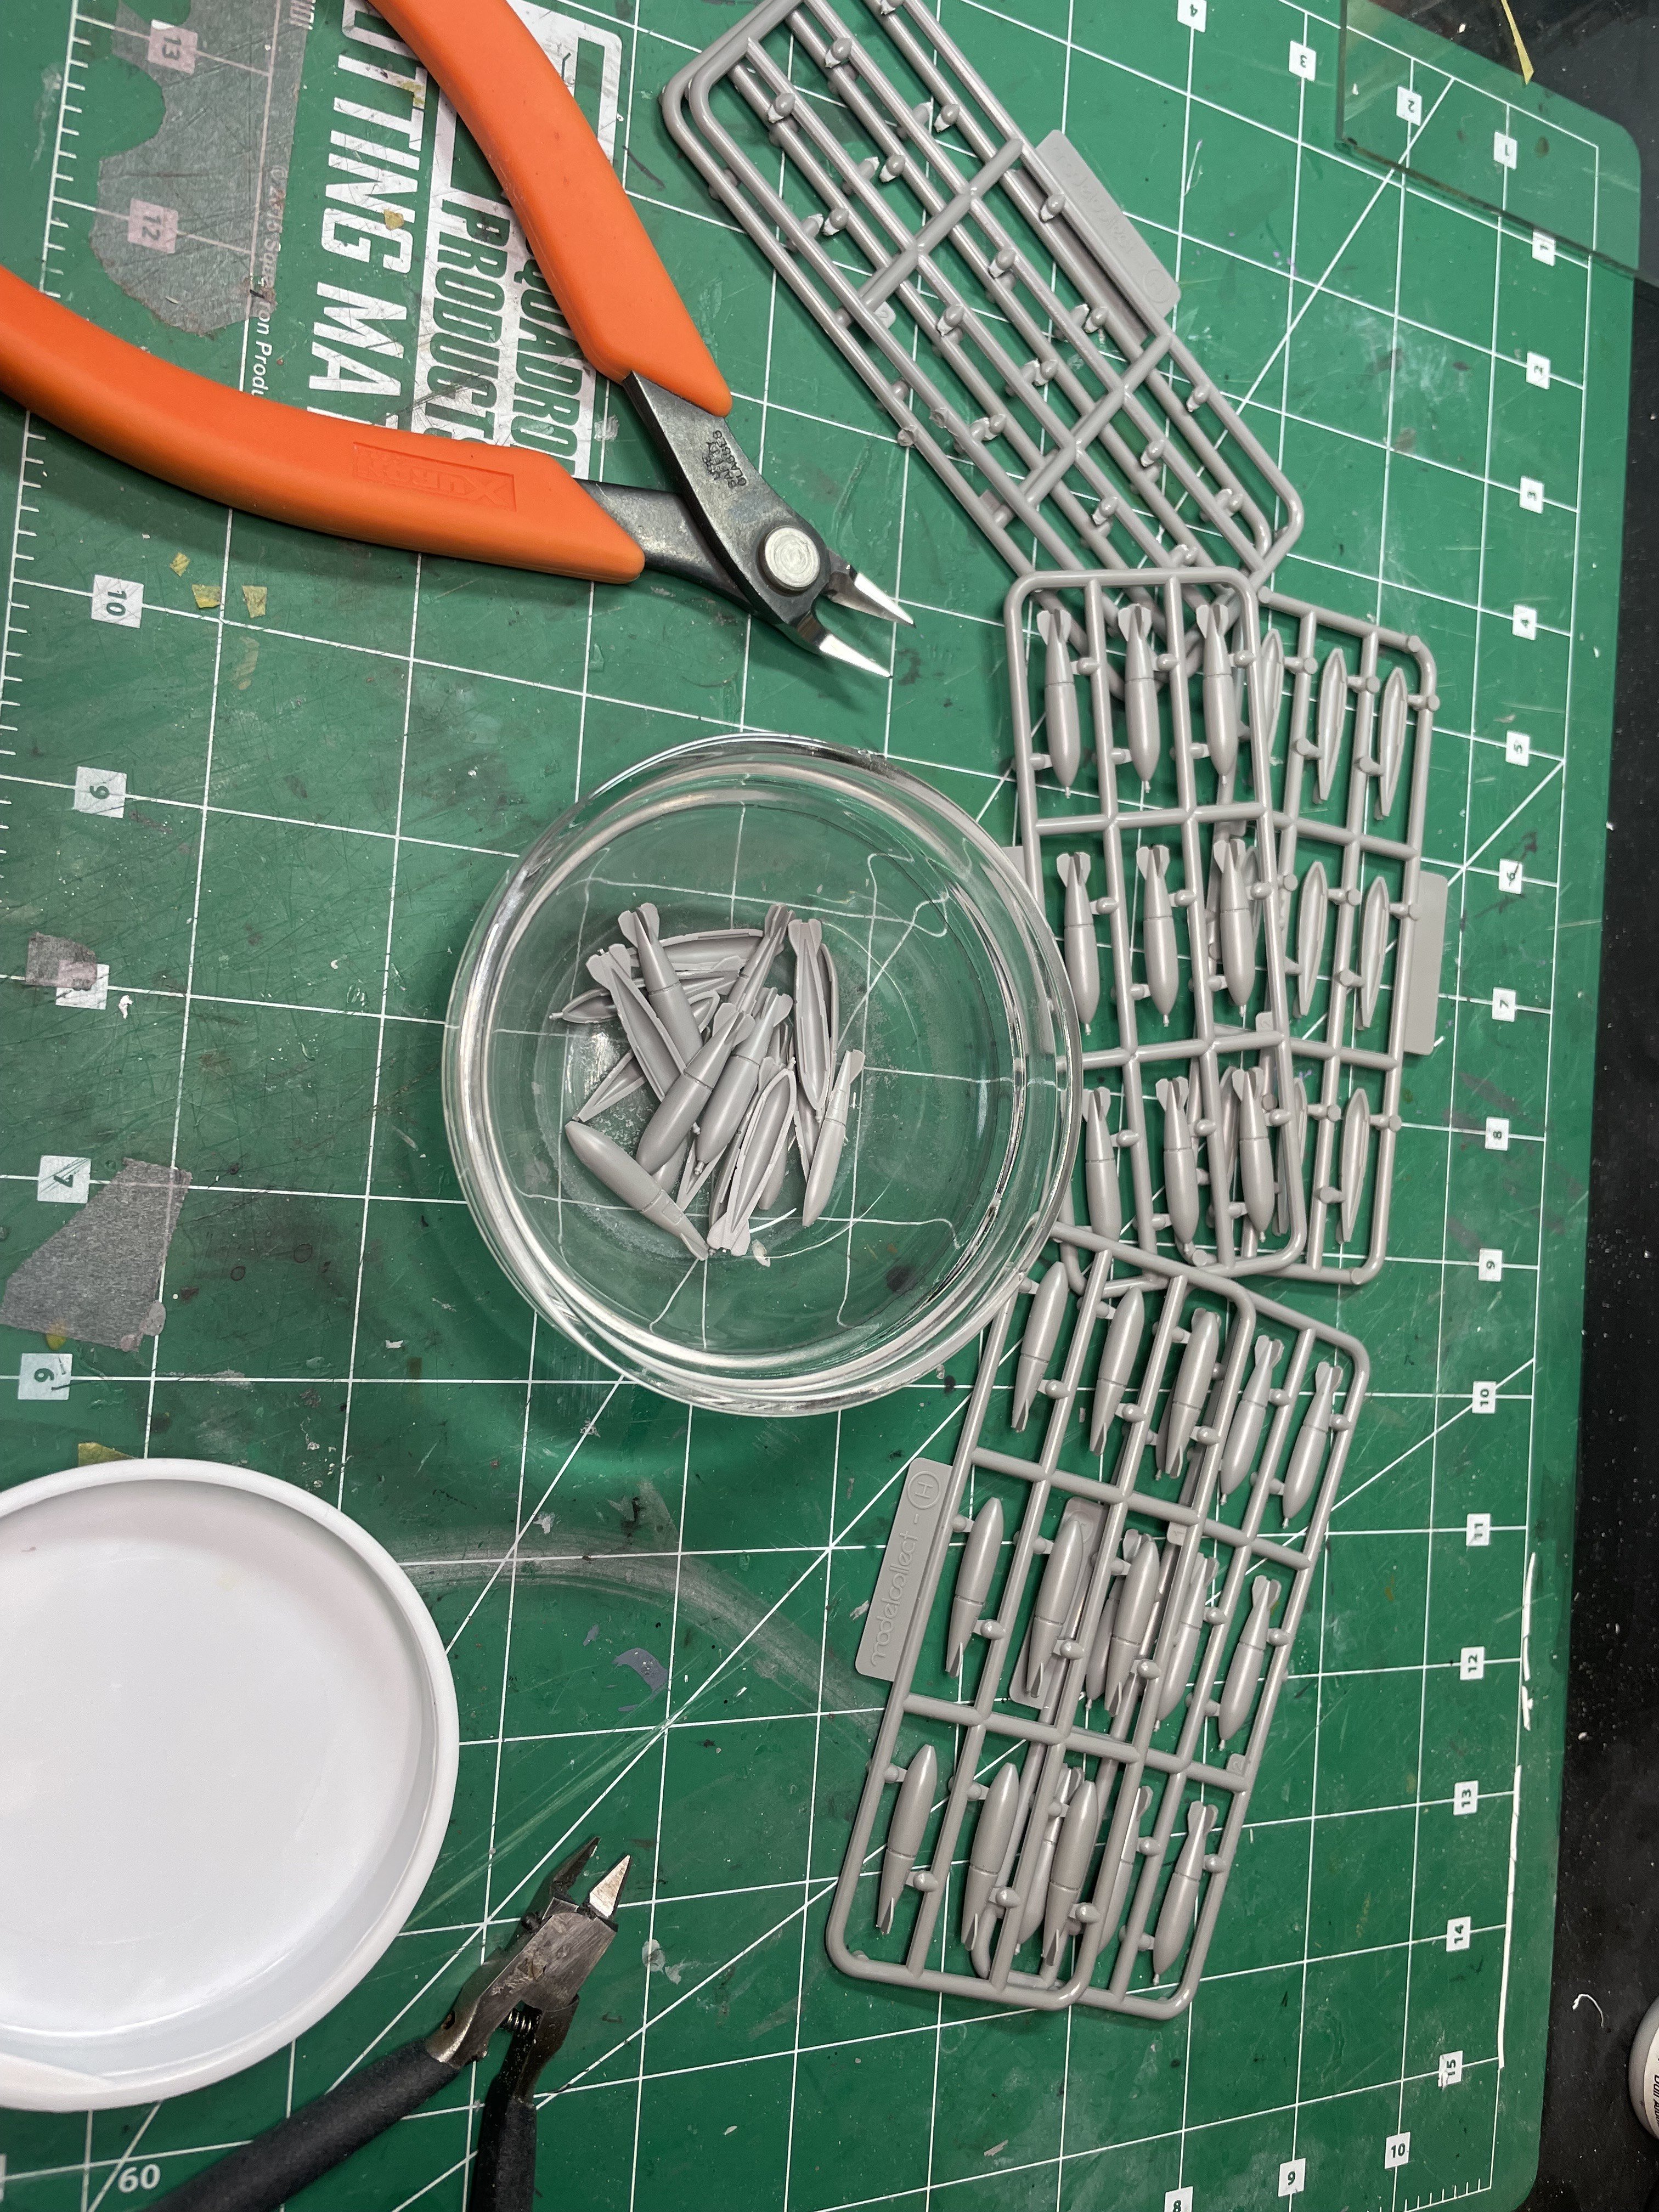
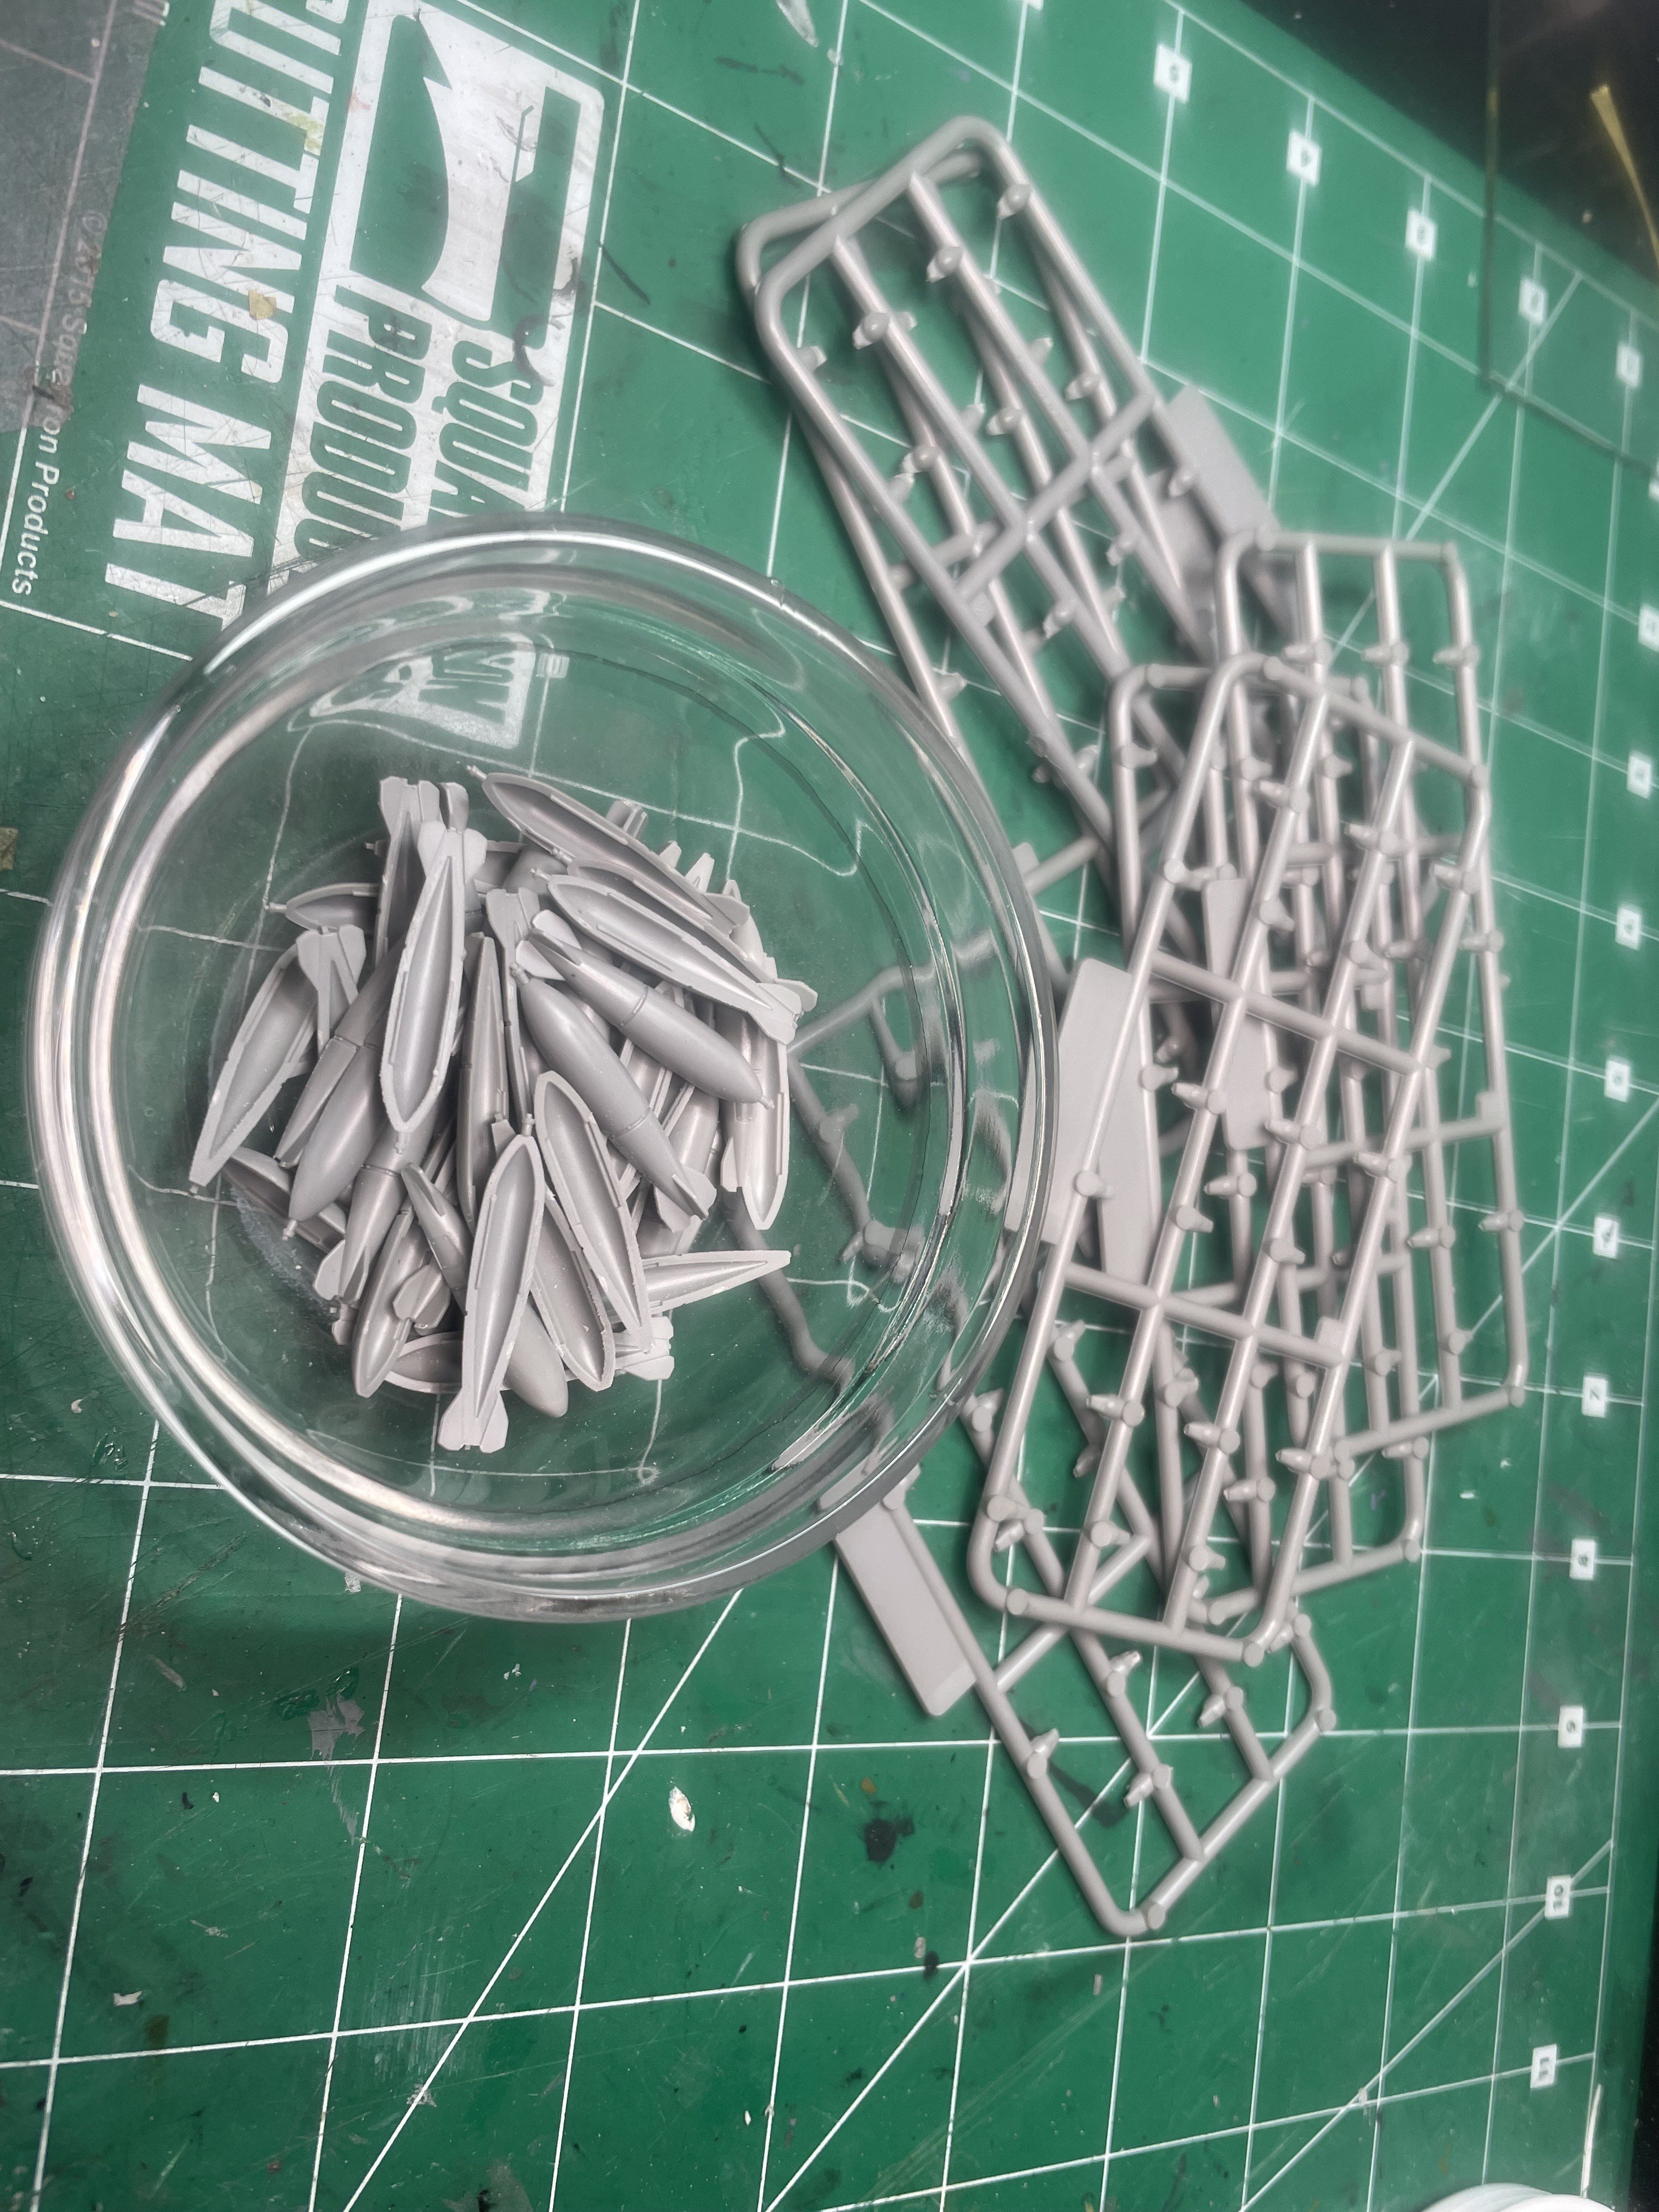
Made progress last night on the bombs. 54 pieces but the nice thing is the seam is on the horizontal so when the bombs are loaded, they won't be seen. Smart! What is interesting is how the sprue gates attach to each piece. It is off-set and on the join. Once I figured out how to cut the piece loose, clean up became much easier and faster. Sorry for the out of focus picture. The trick is to cut basically at a shallow angle from the join-side of the part. It comes away cleanly with minimal clean up needed. Helpful when you have 54 pieces to do! And done! Now to put them together

-
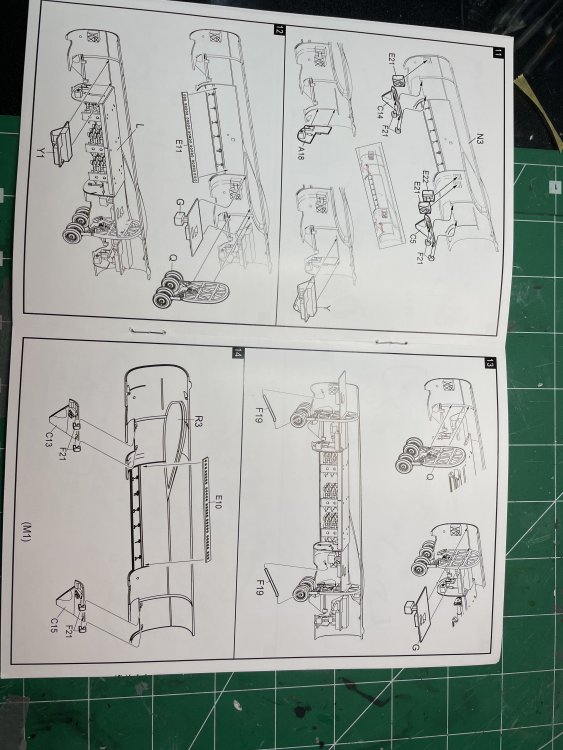
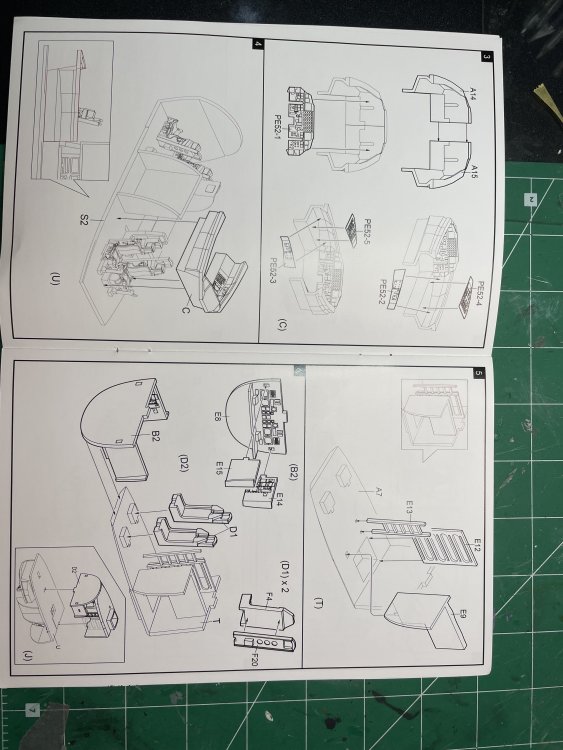
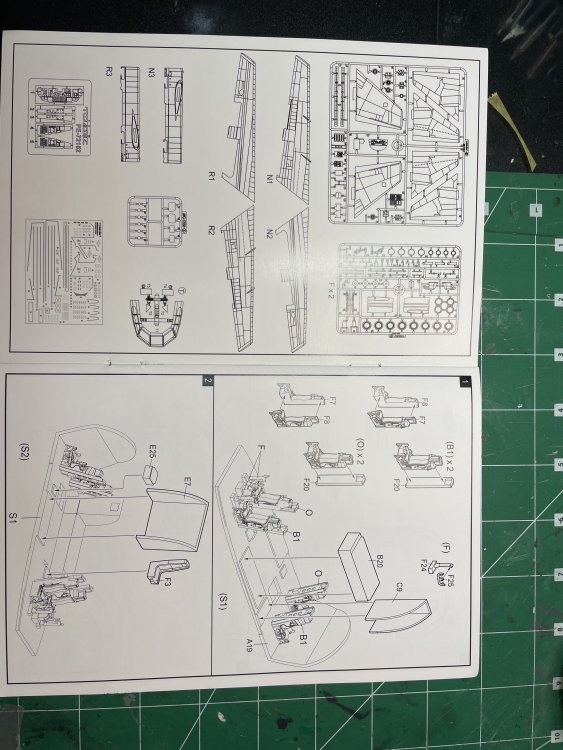
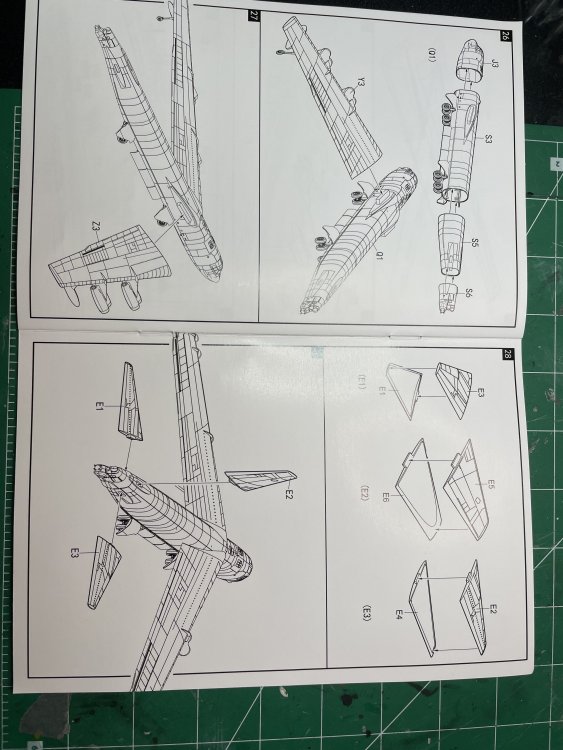
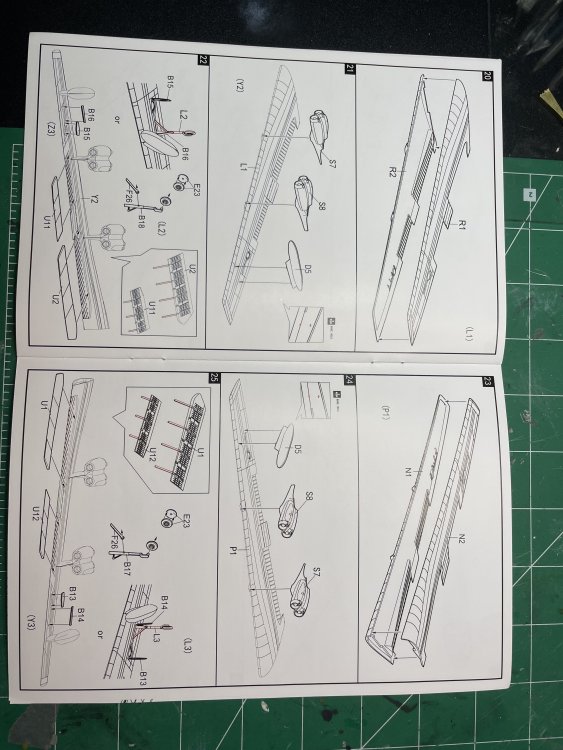
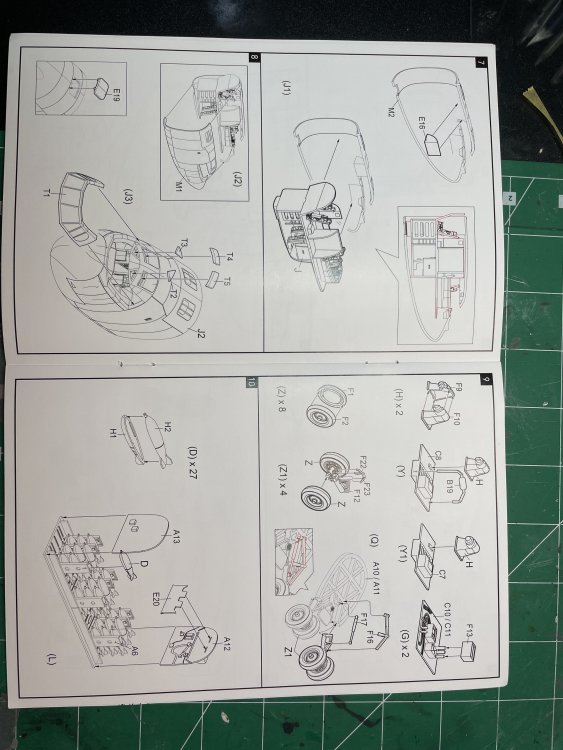
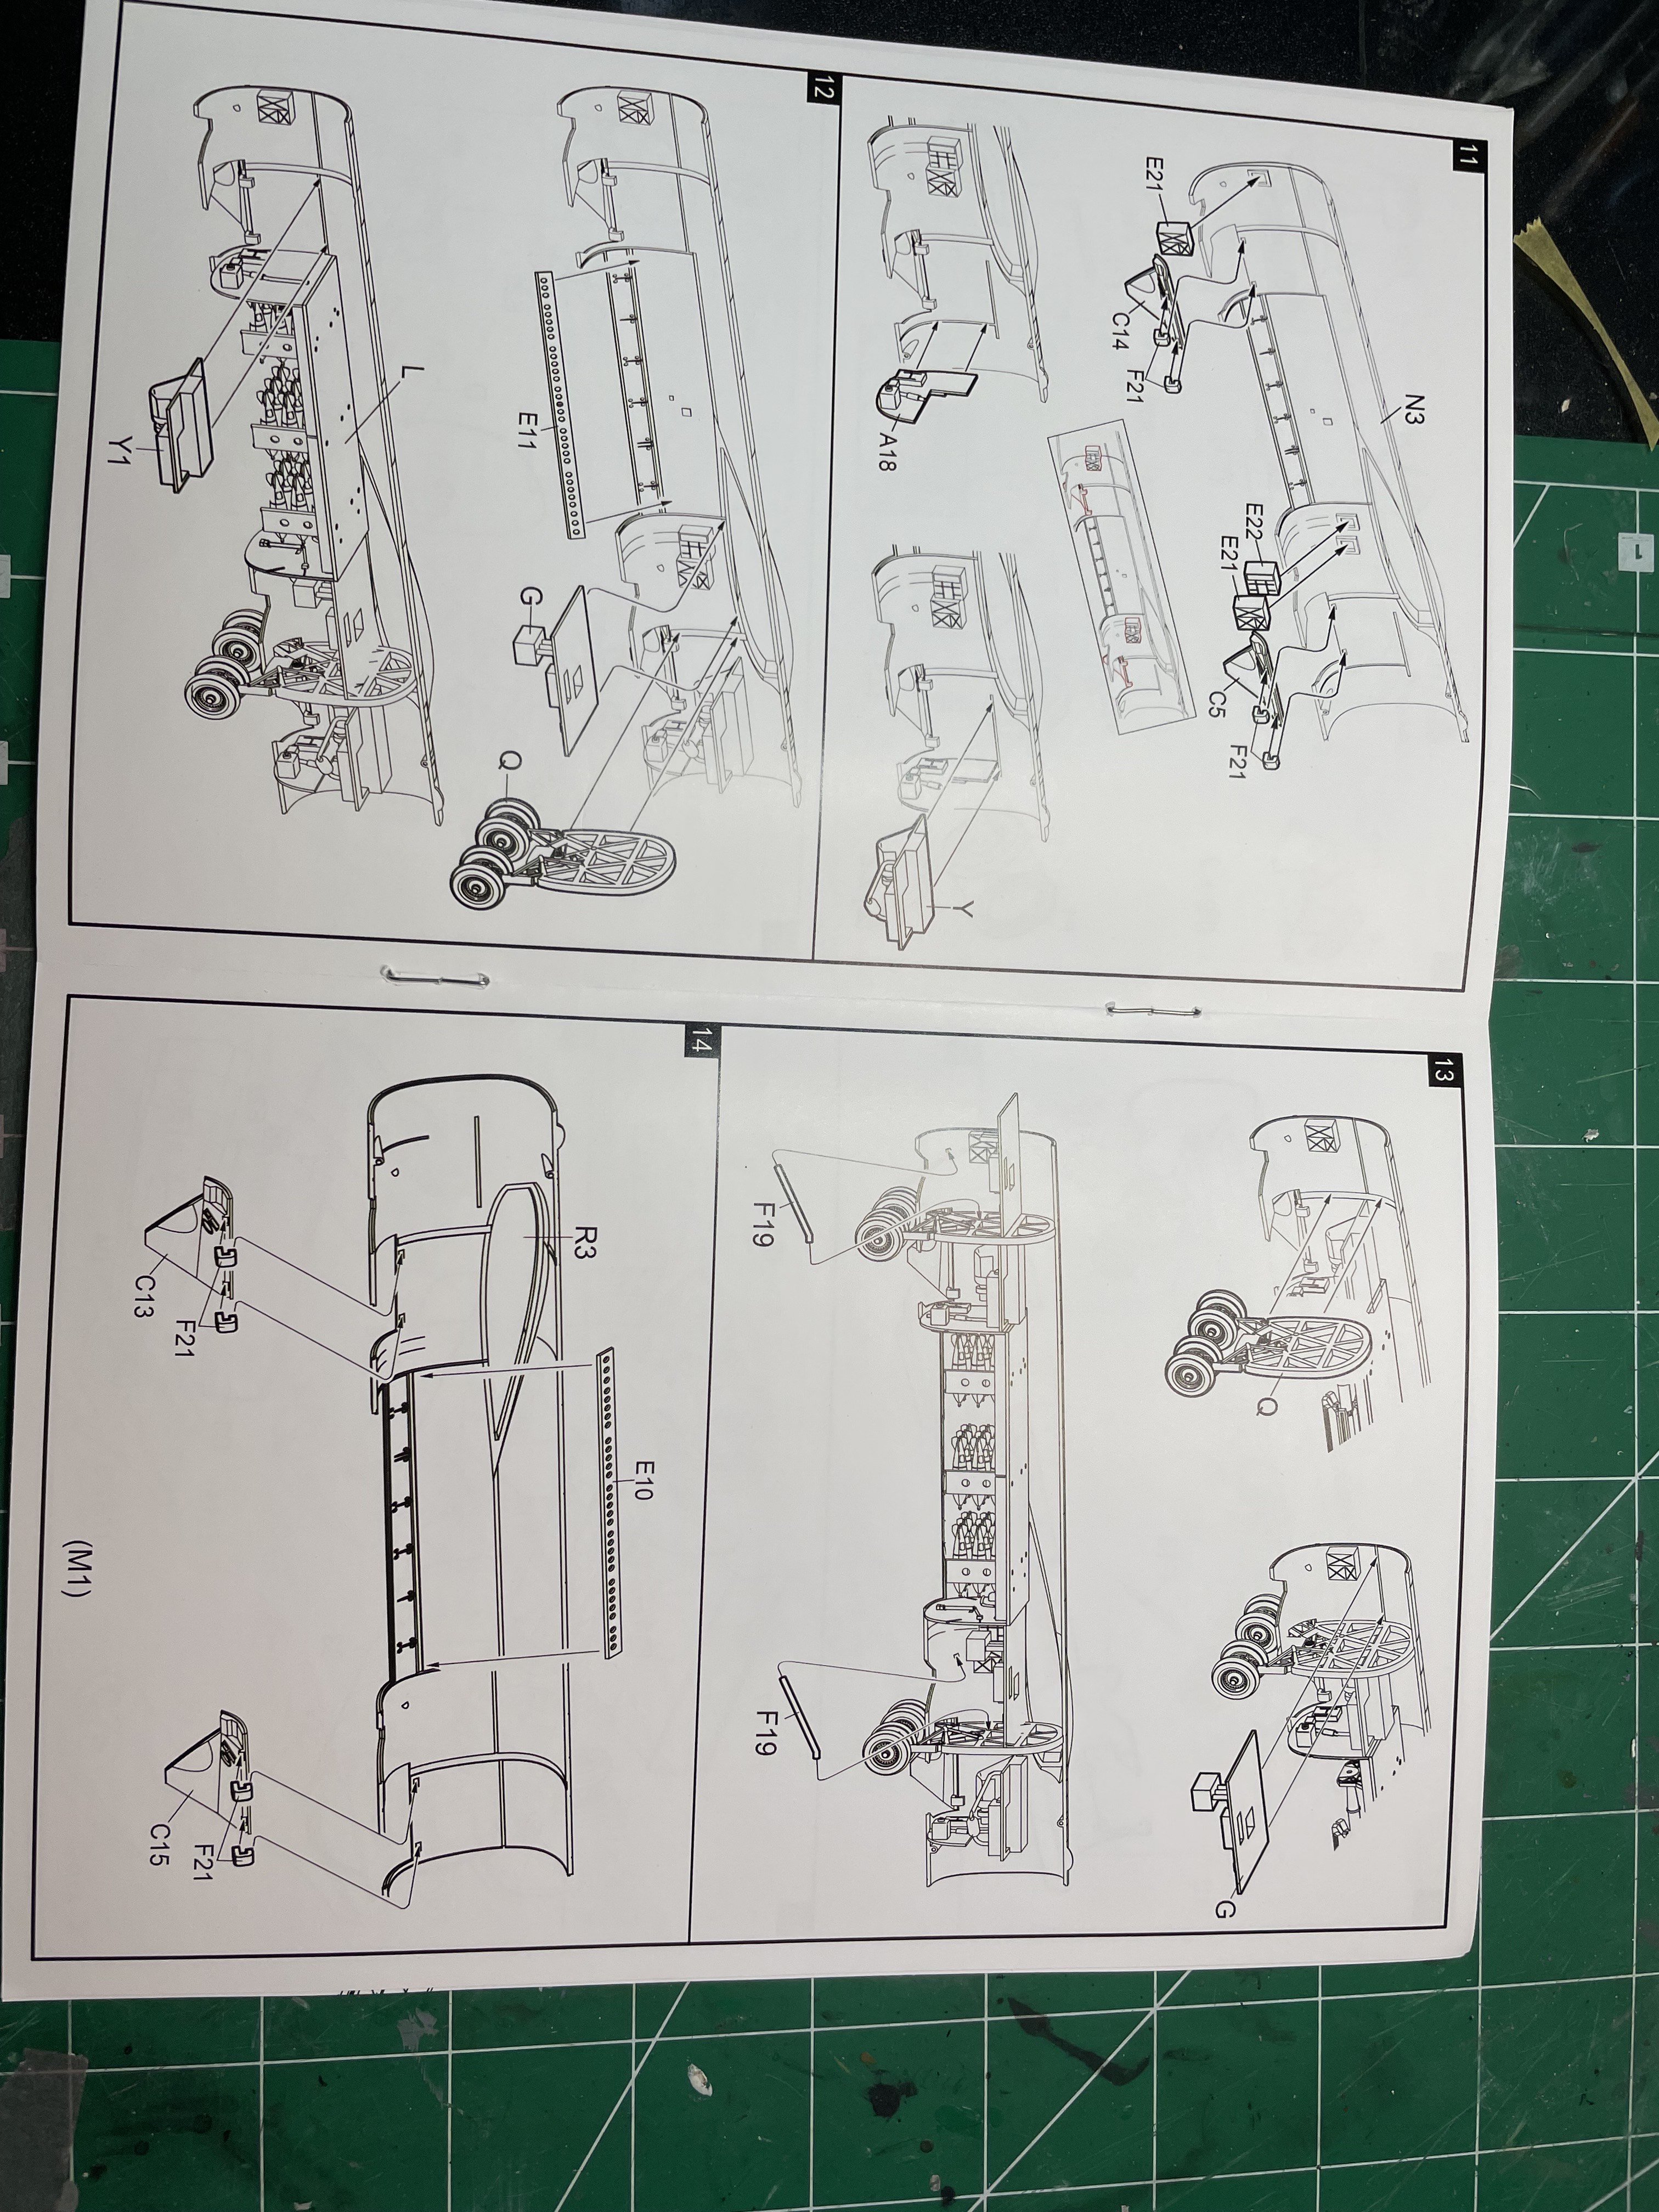
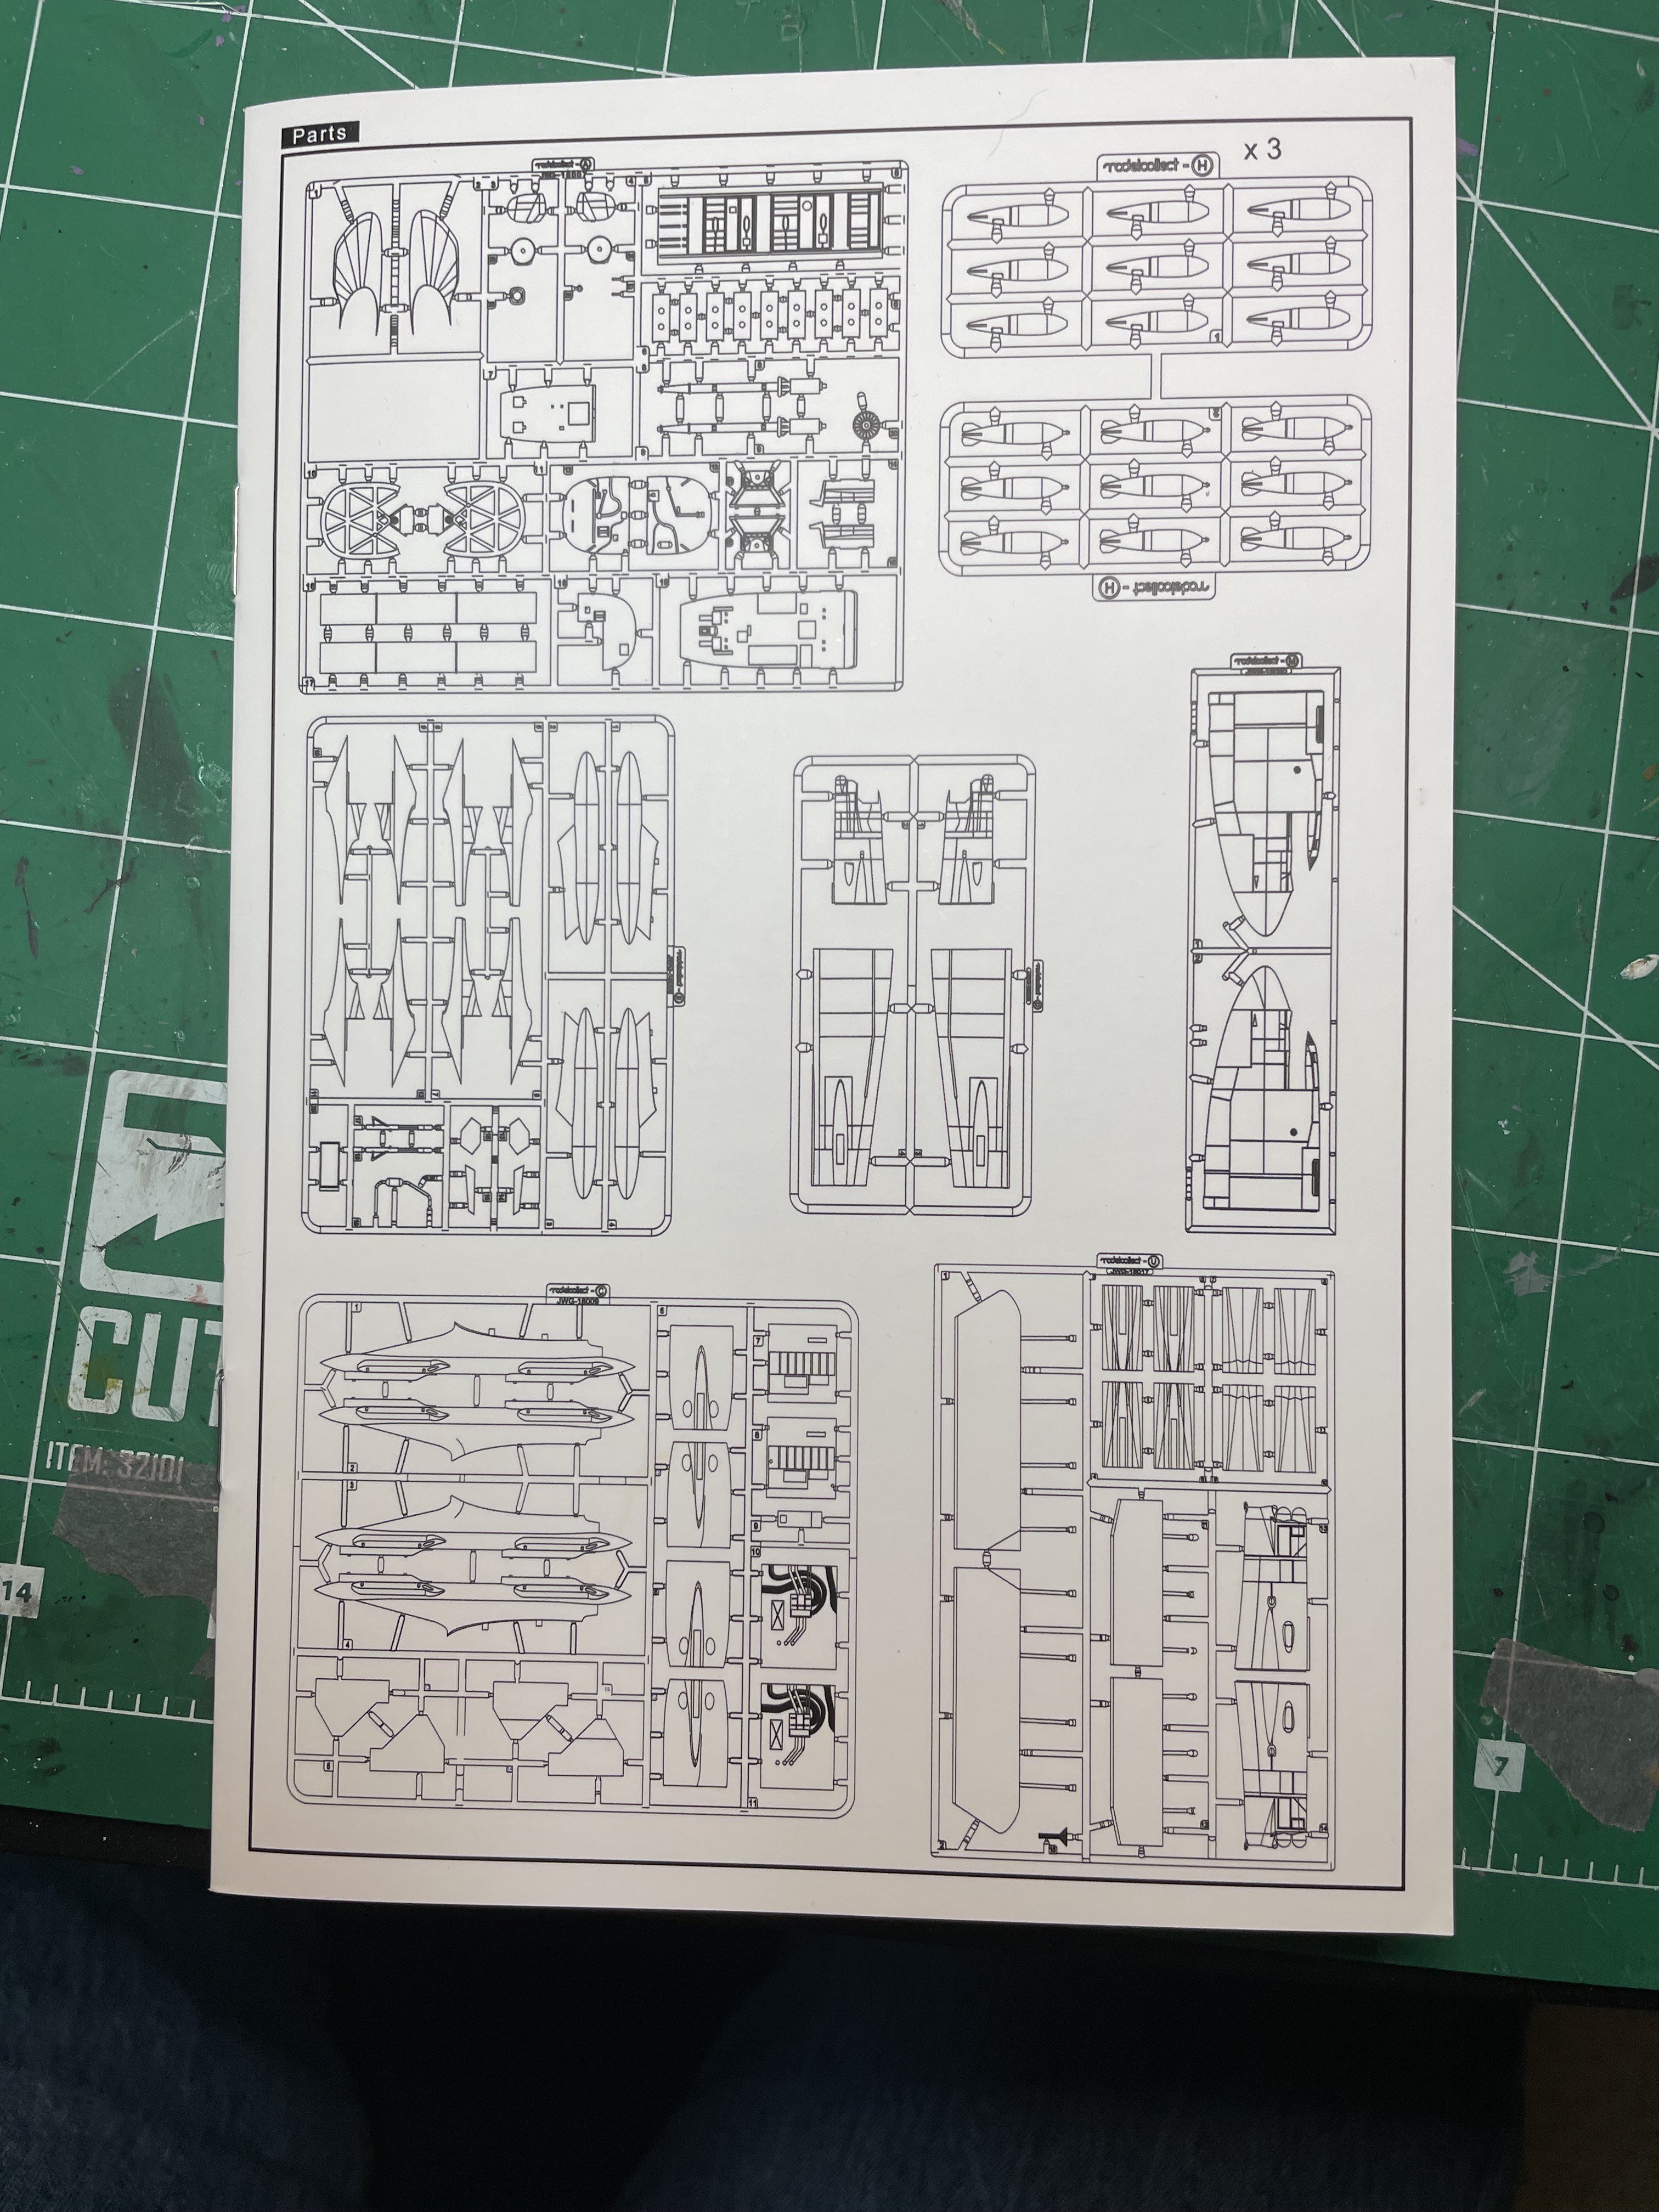
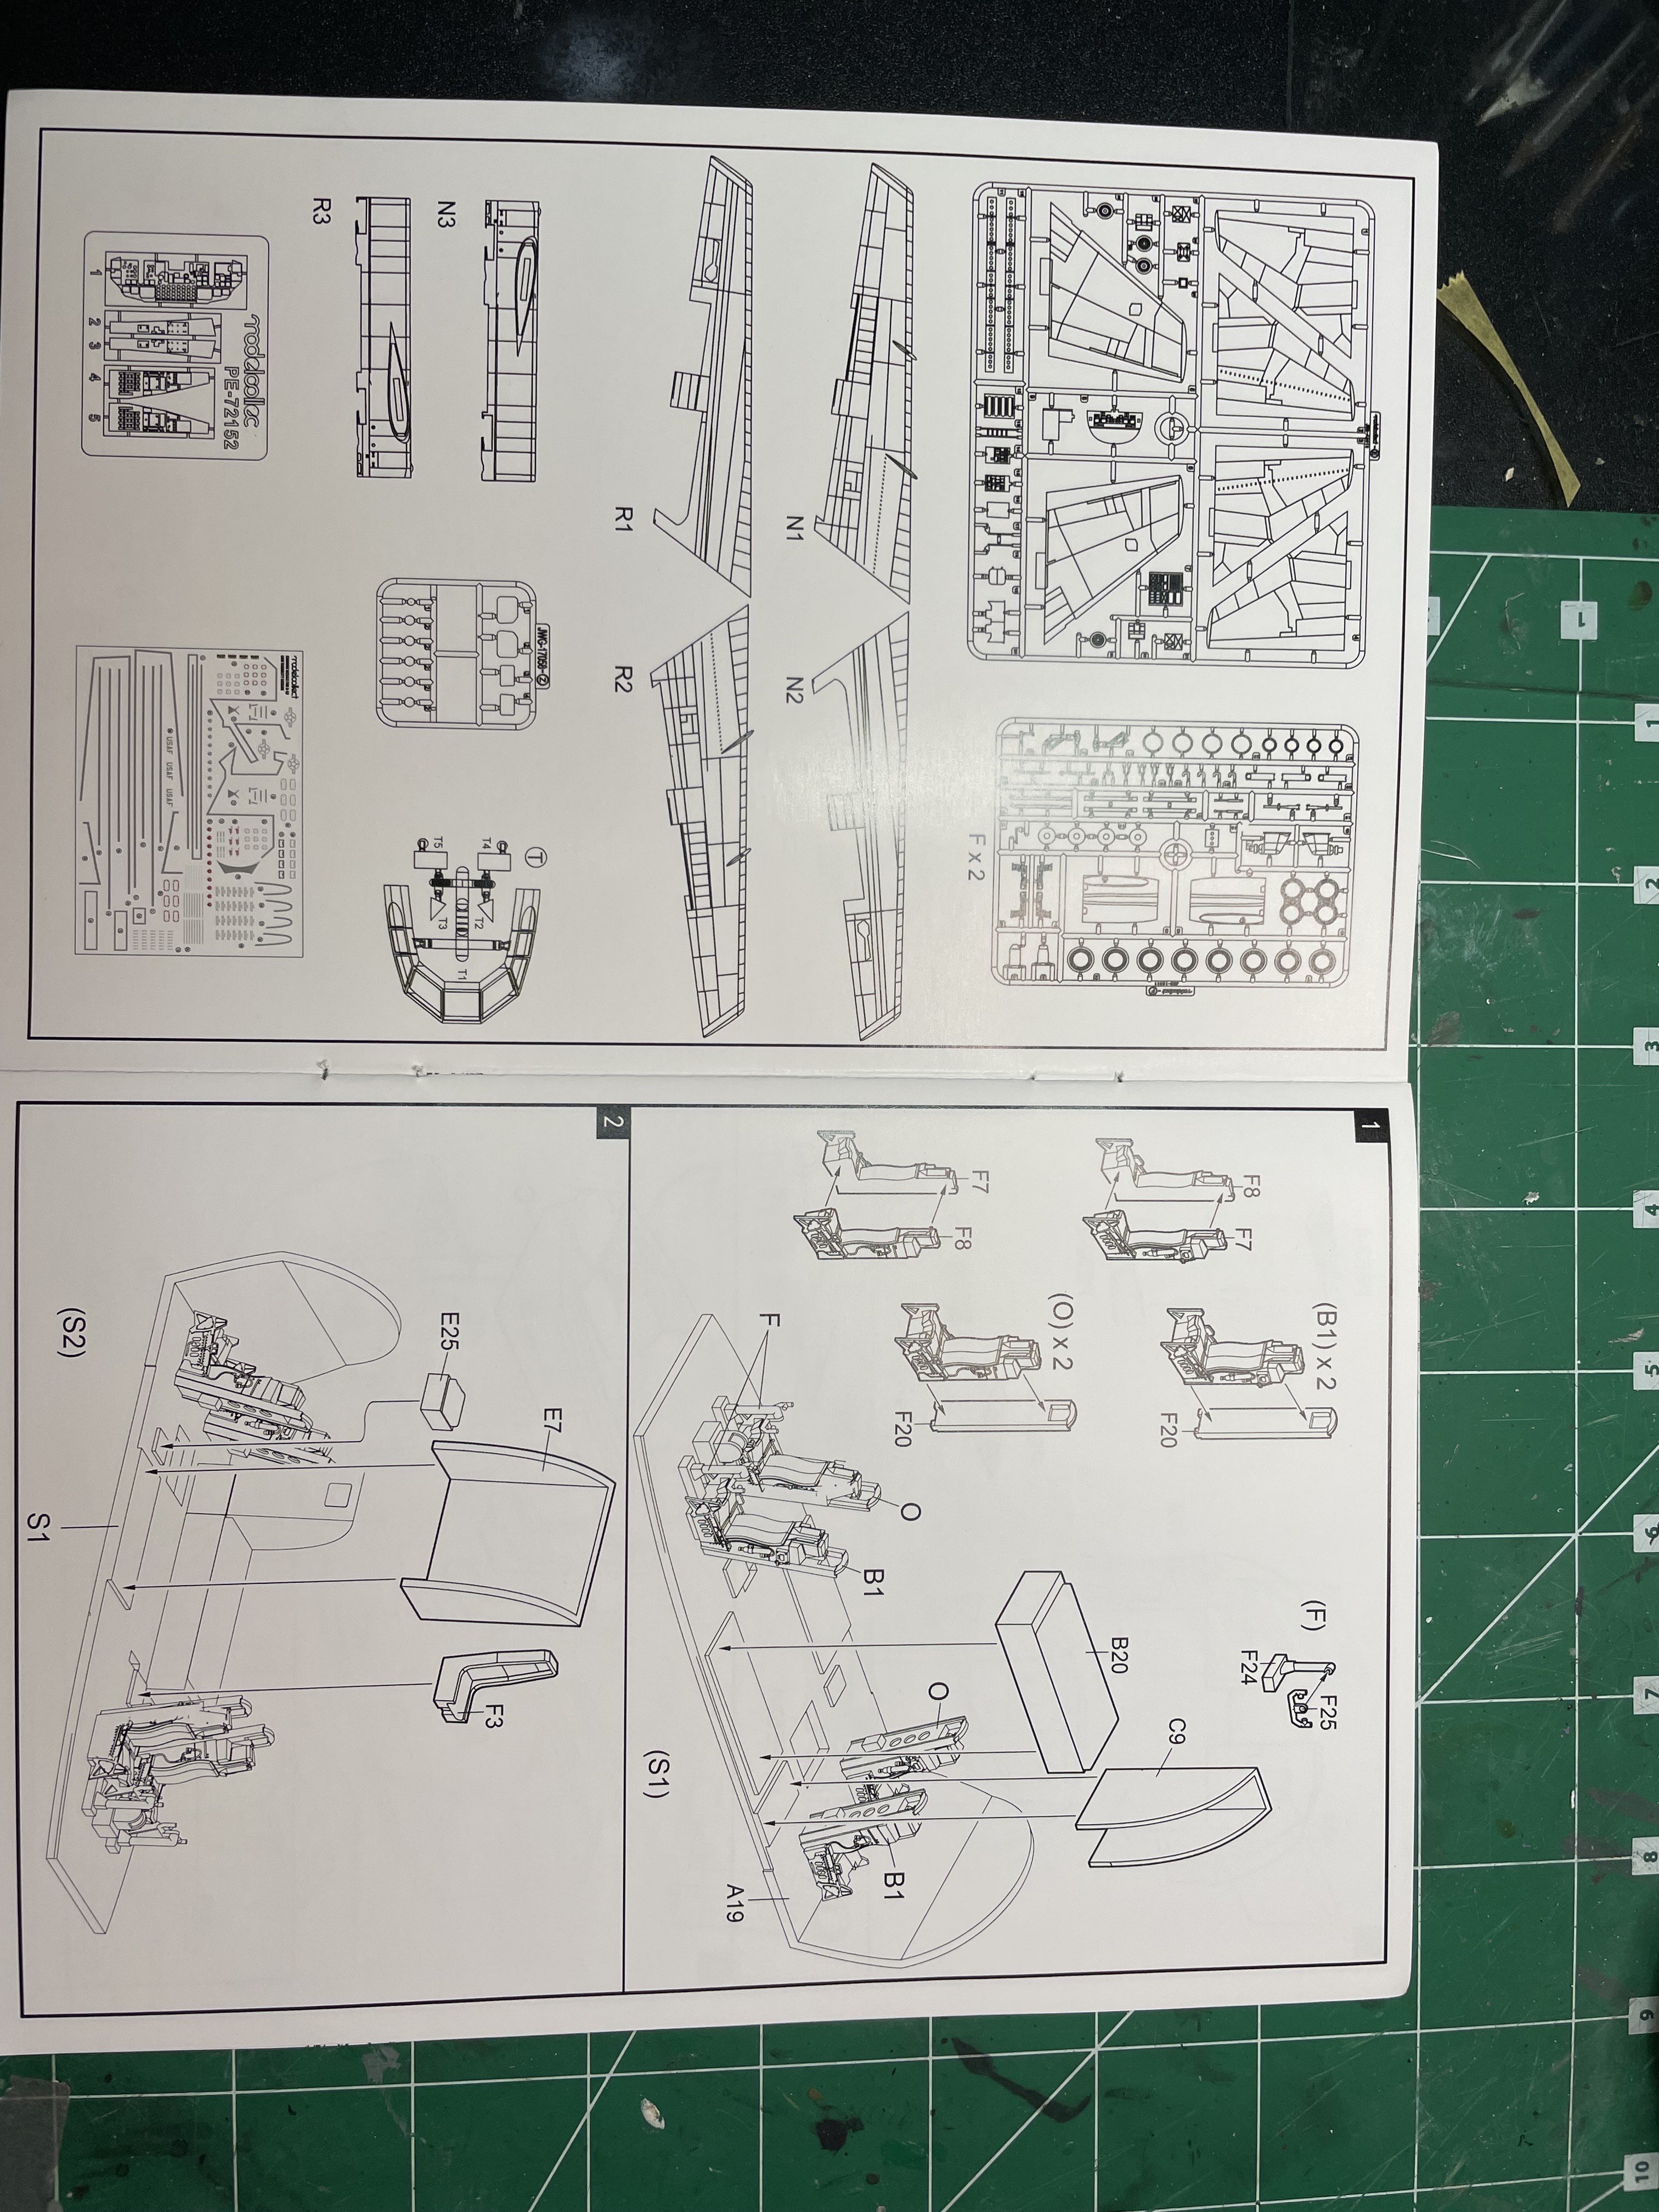
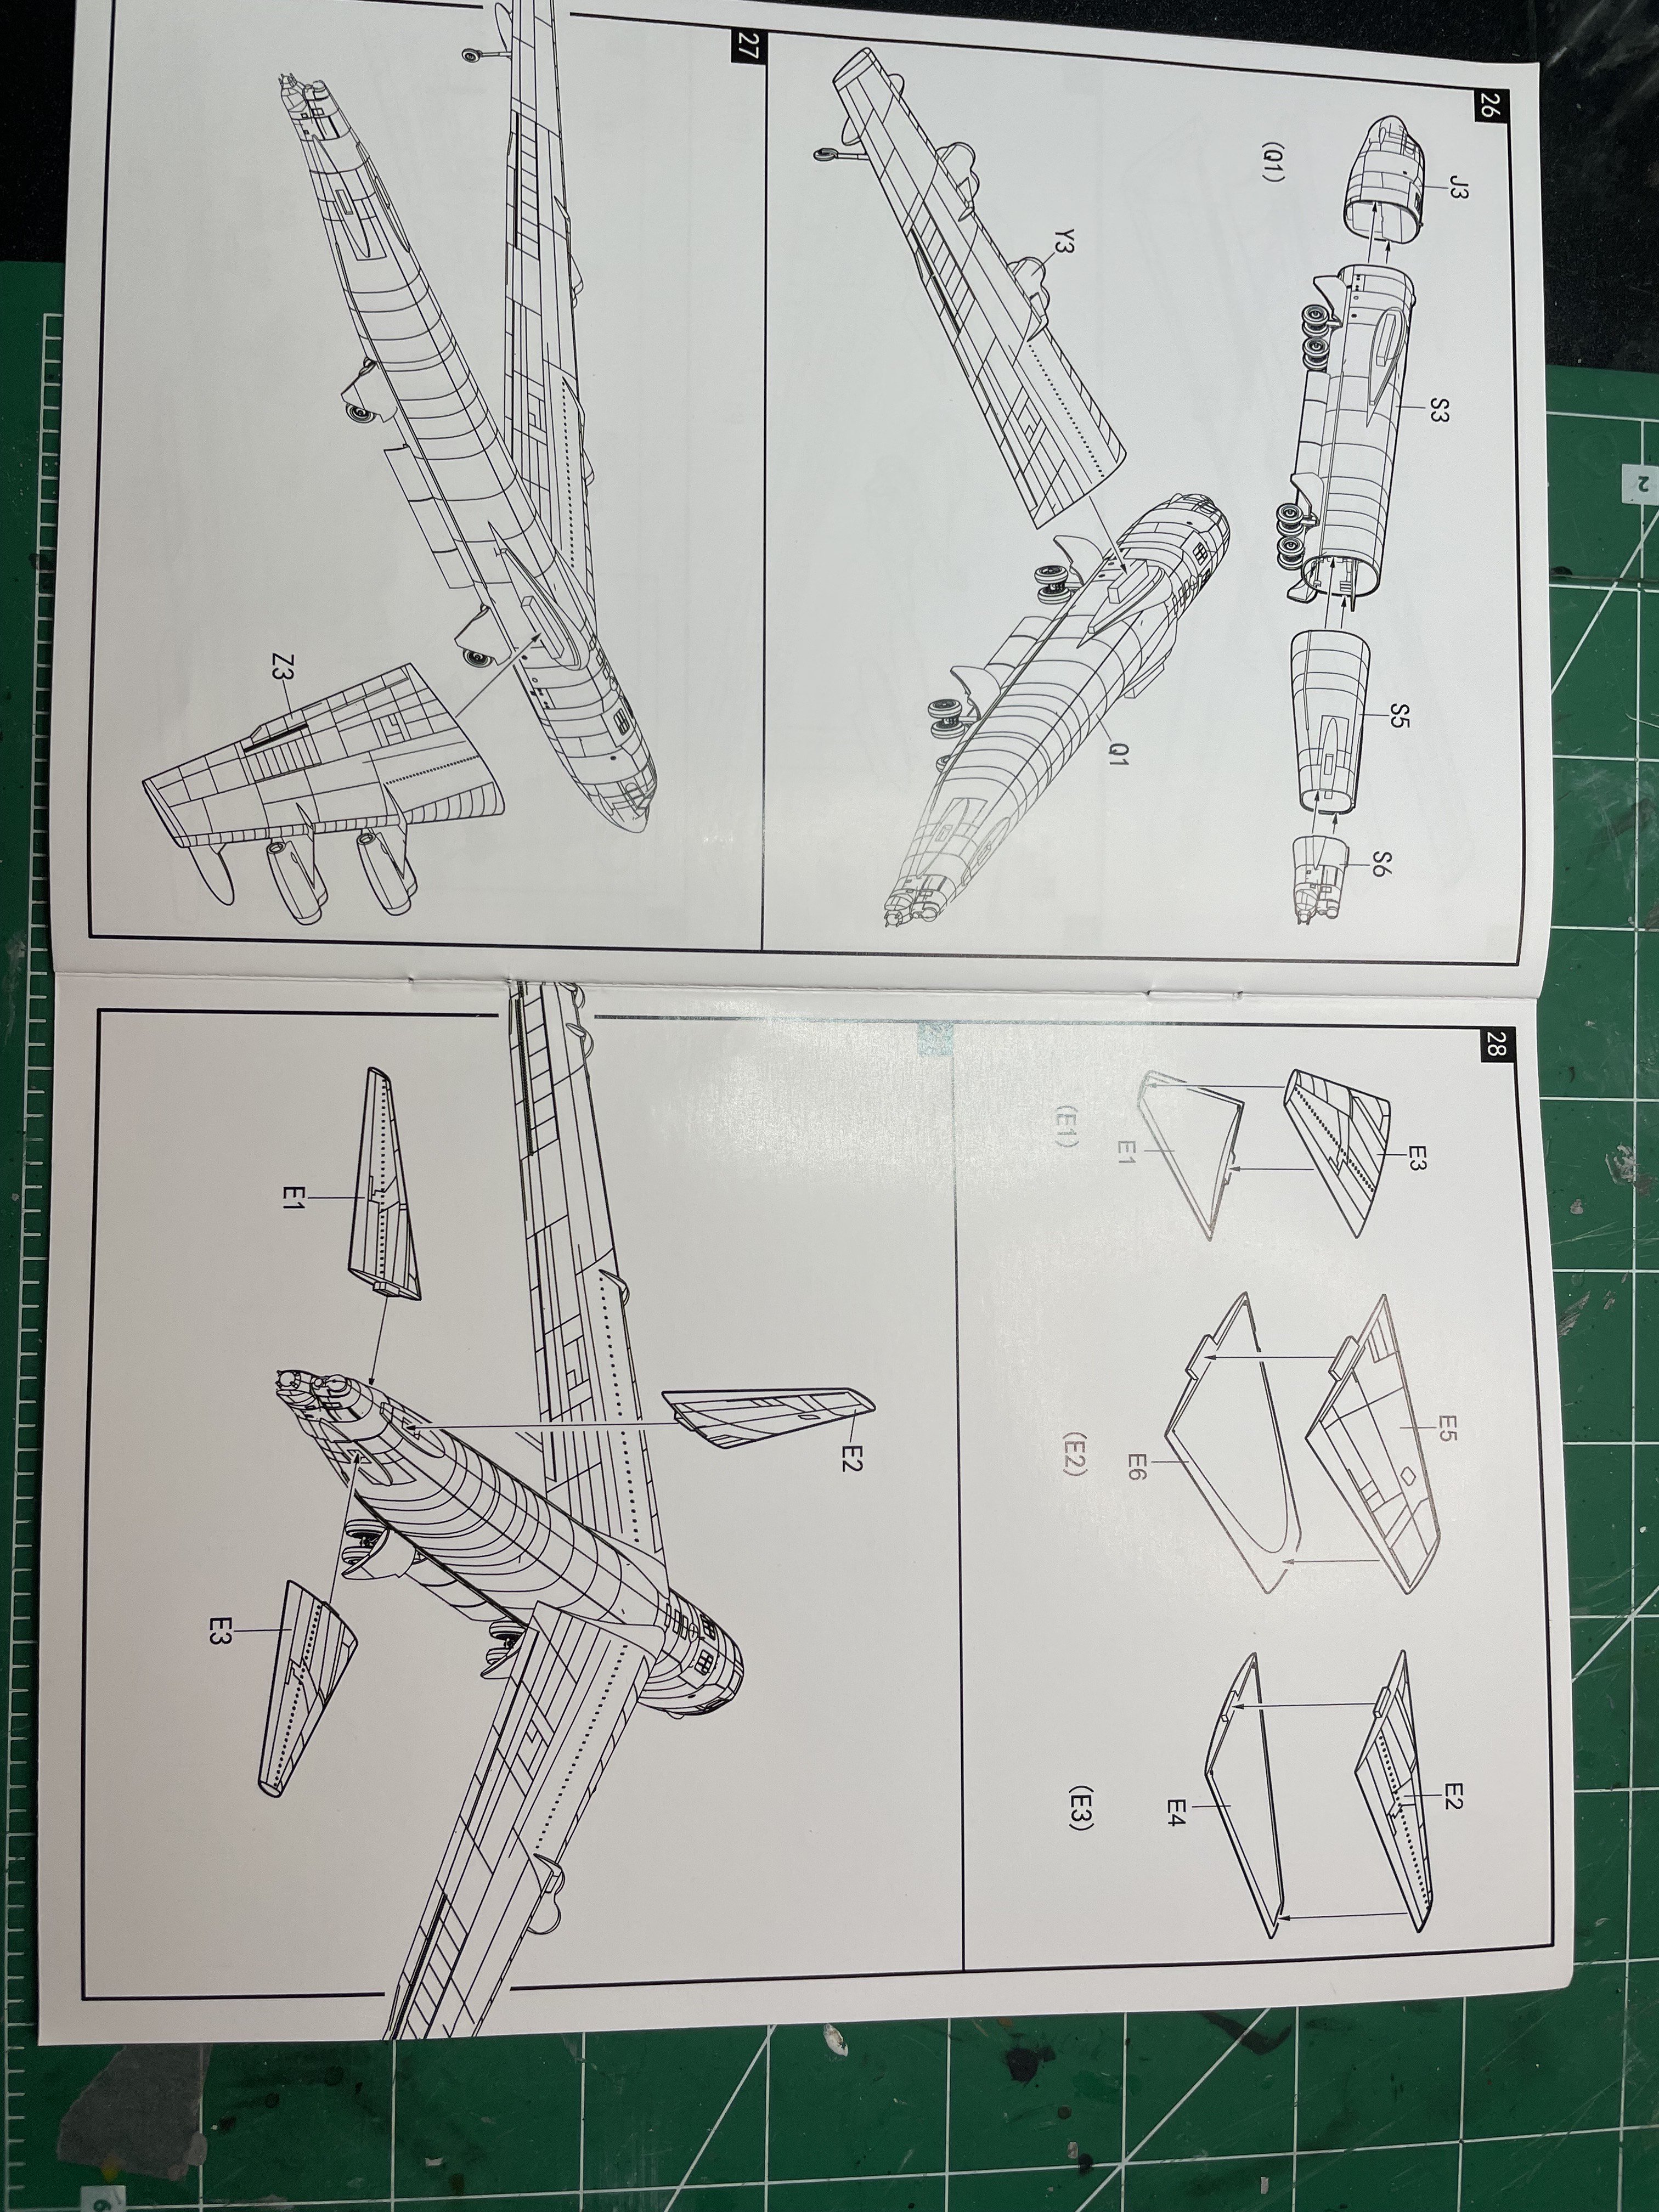
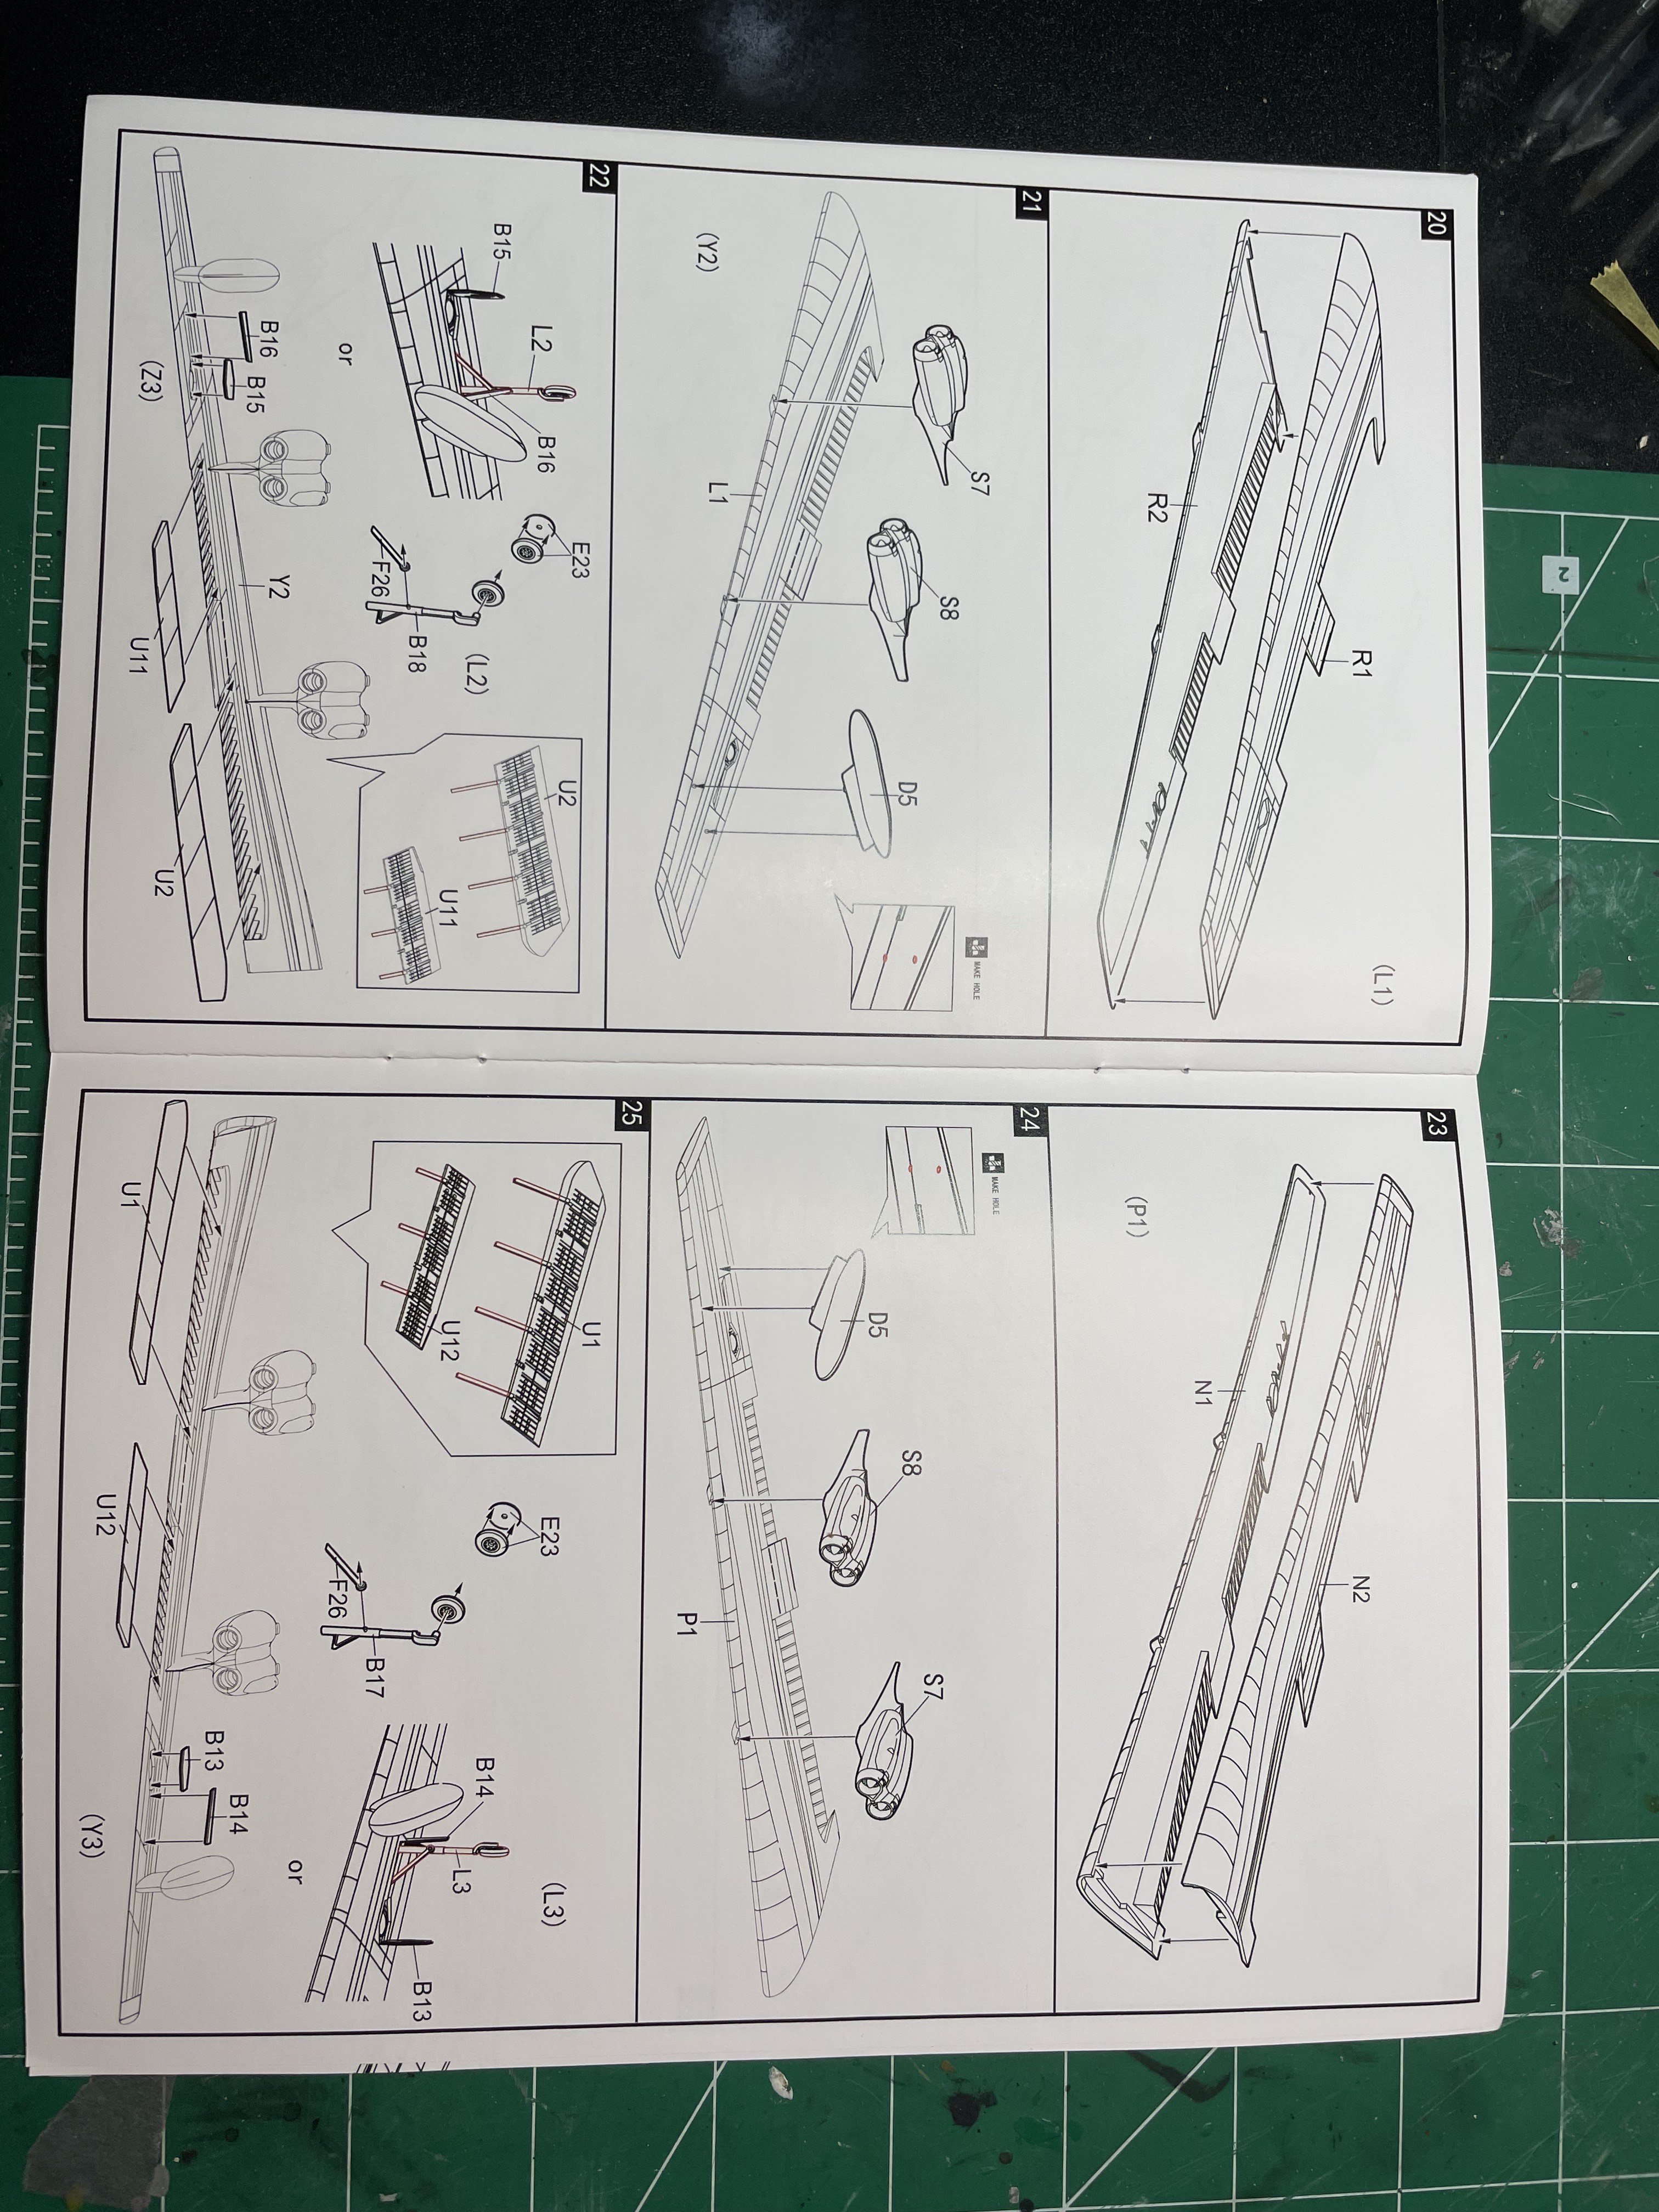
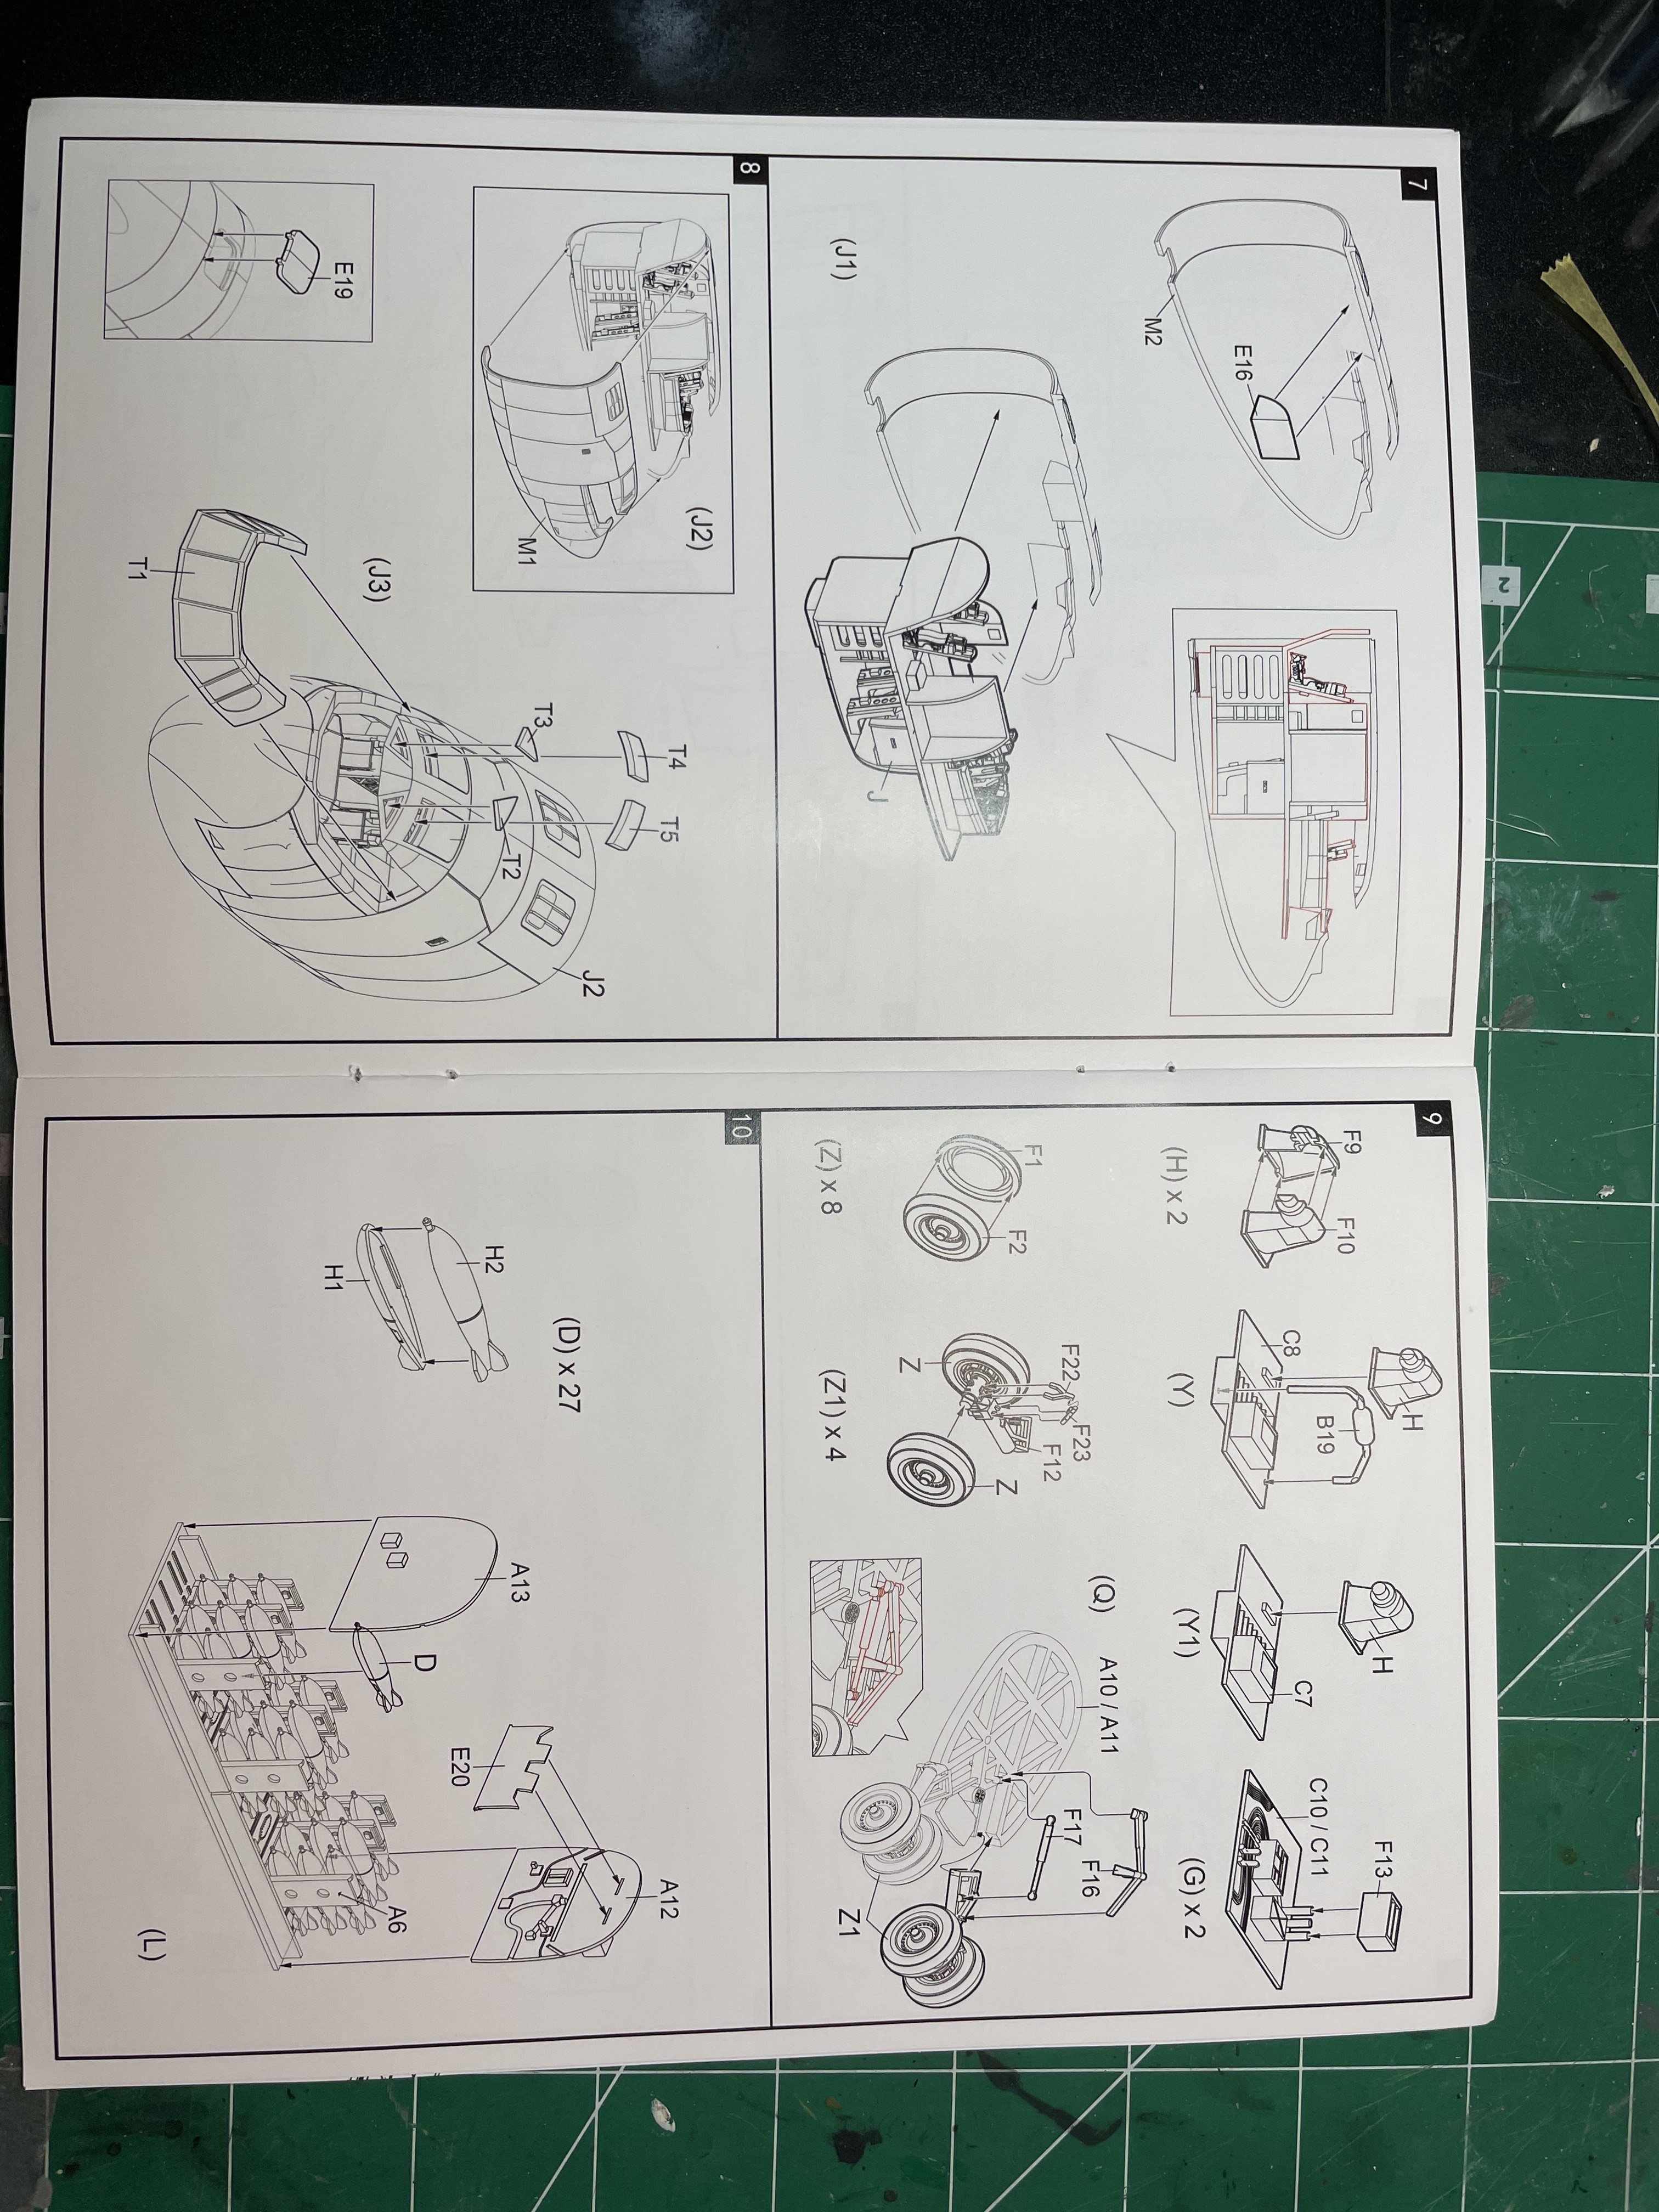
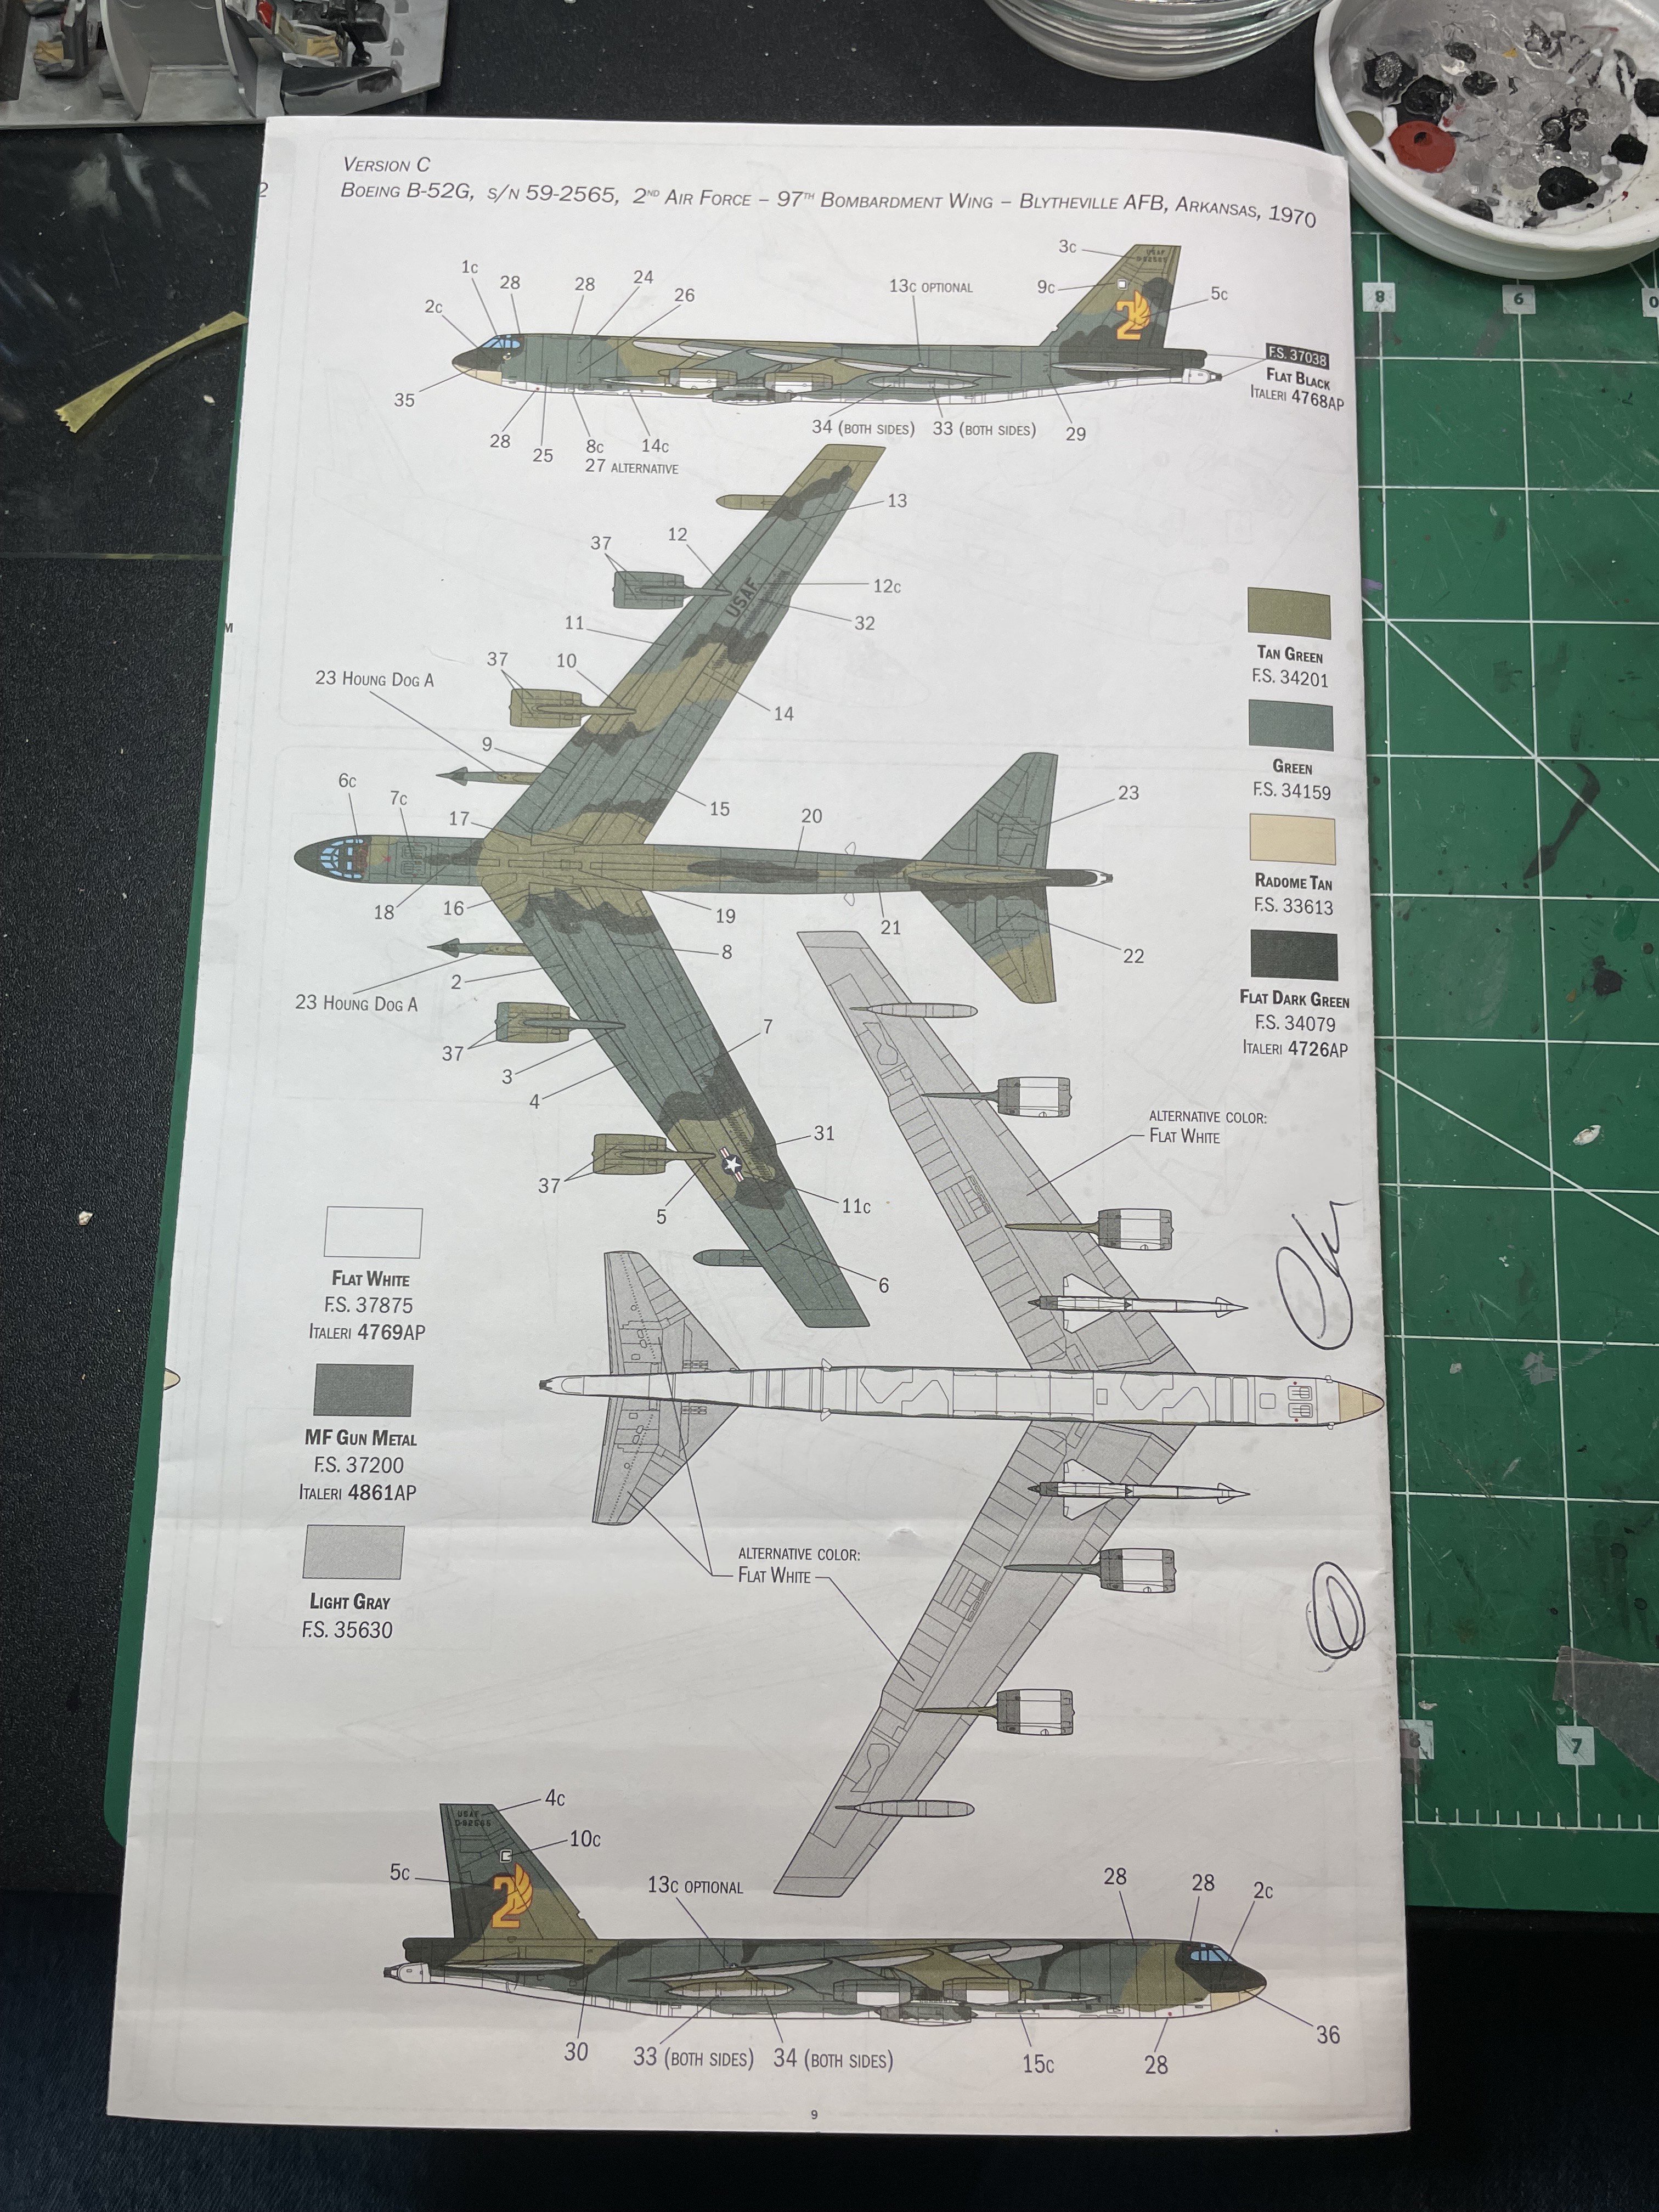
More from the kit. The instruction booklet is small (measuring a little over 5x8 inches) so the diagrams are, as well. Here are some sample pages. I have them all if anyone wants to see them.

.thumb.jpeg.0073729febb77b7e8dc123aeac829108.jpeg)
.thumb.jpeg.f197ab44f2aa8e02e218353ef4951bd9.jpeg)
-
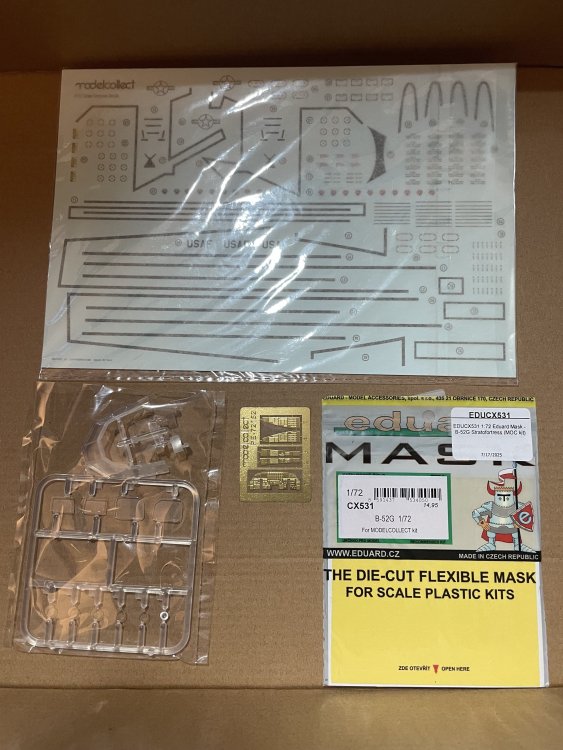
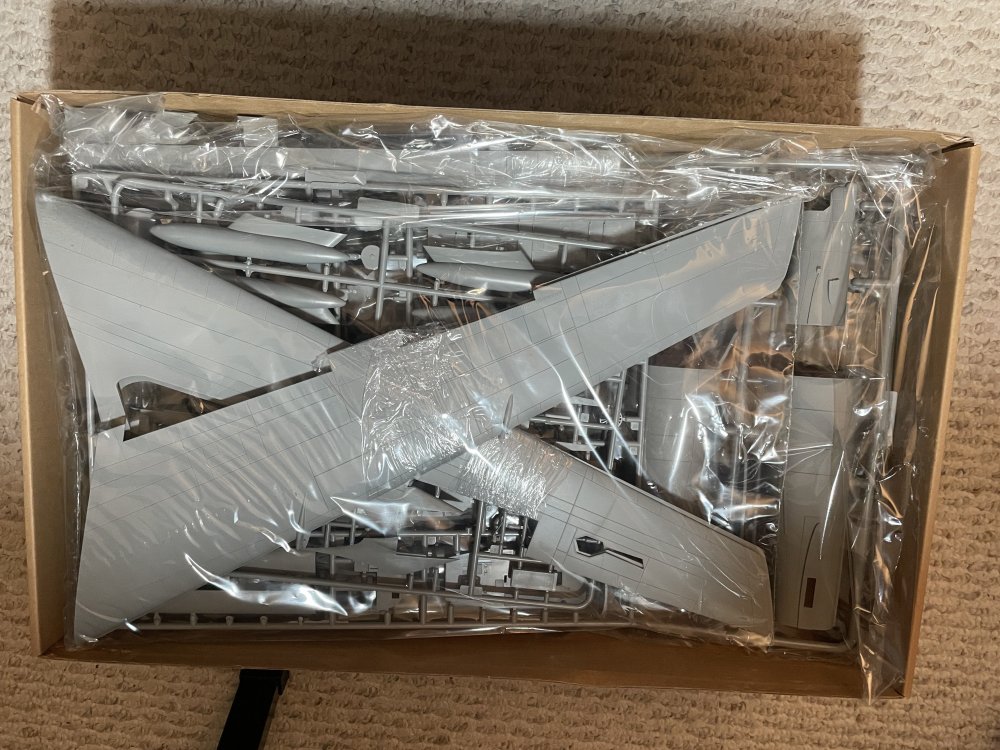
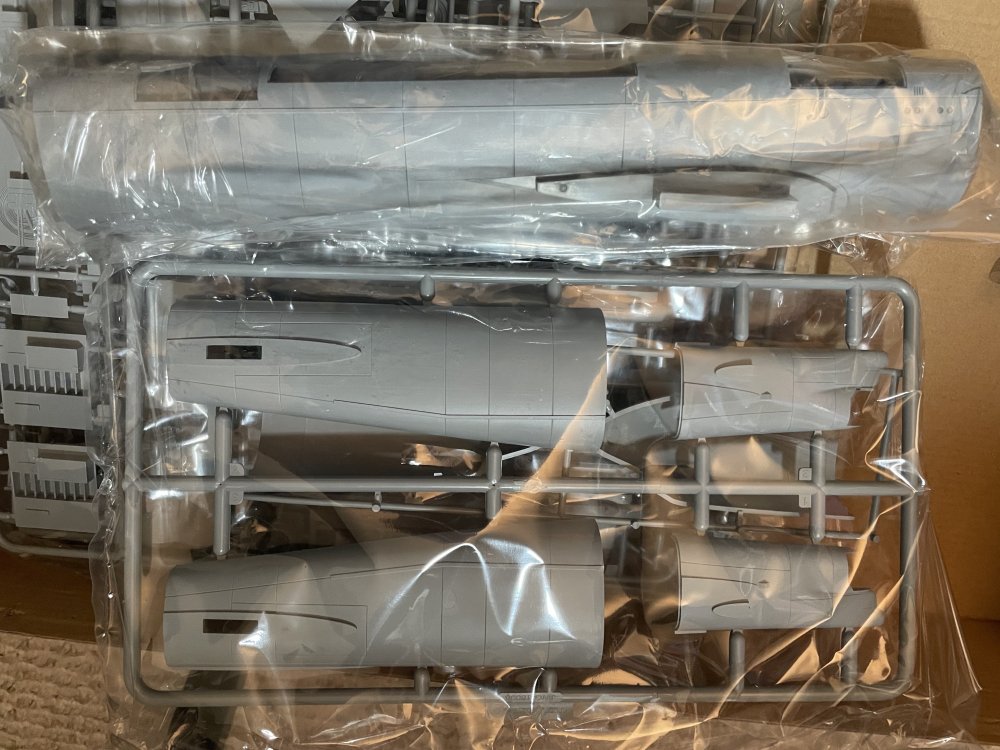
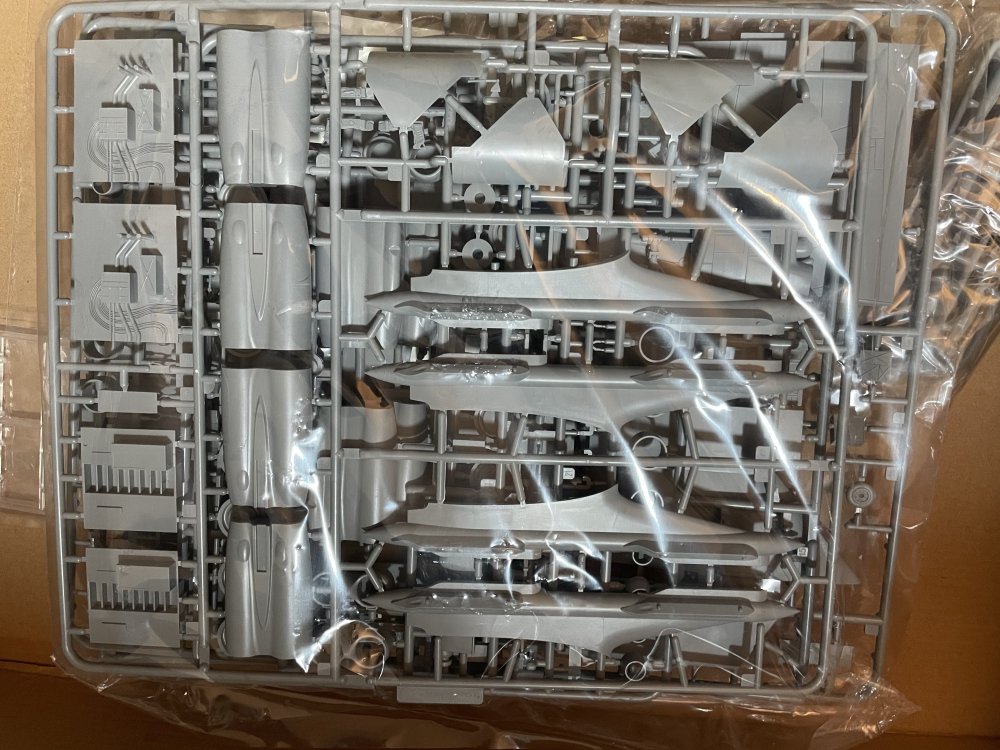
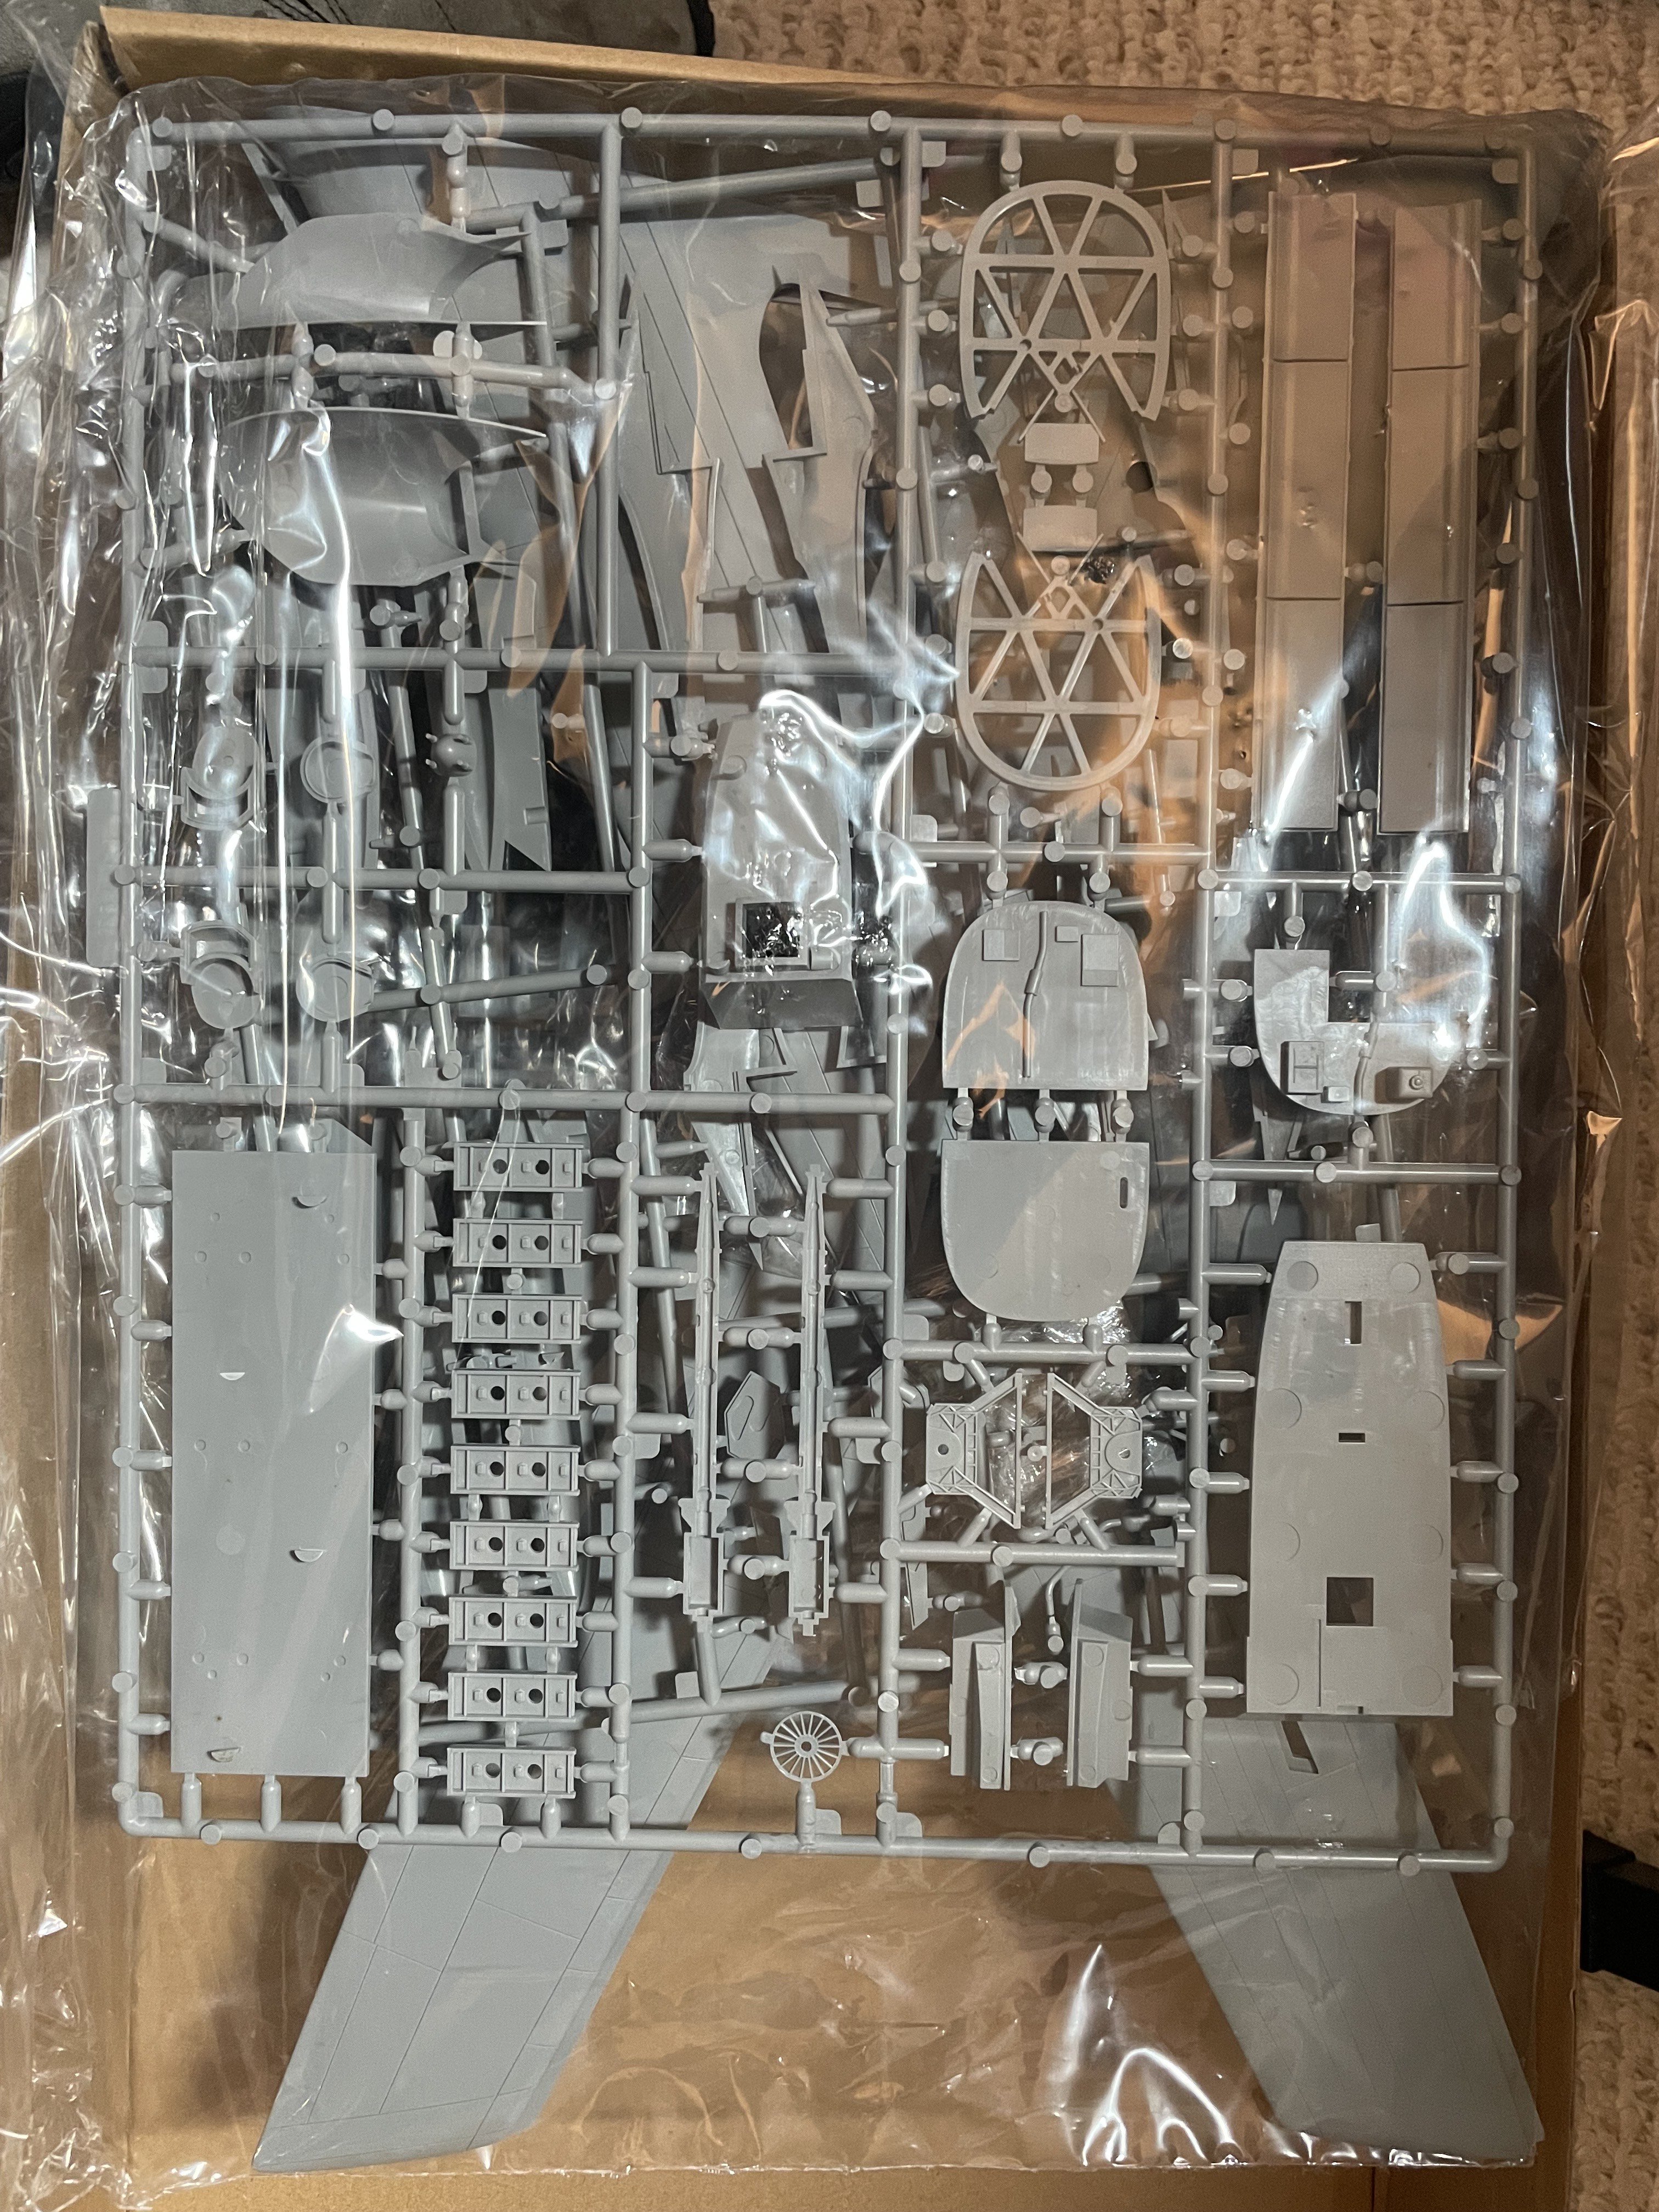
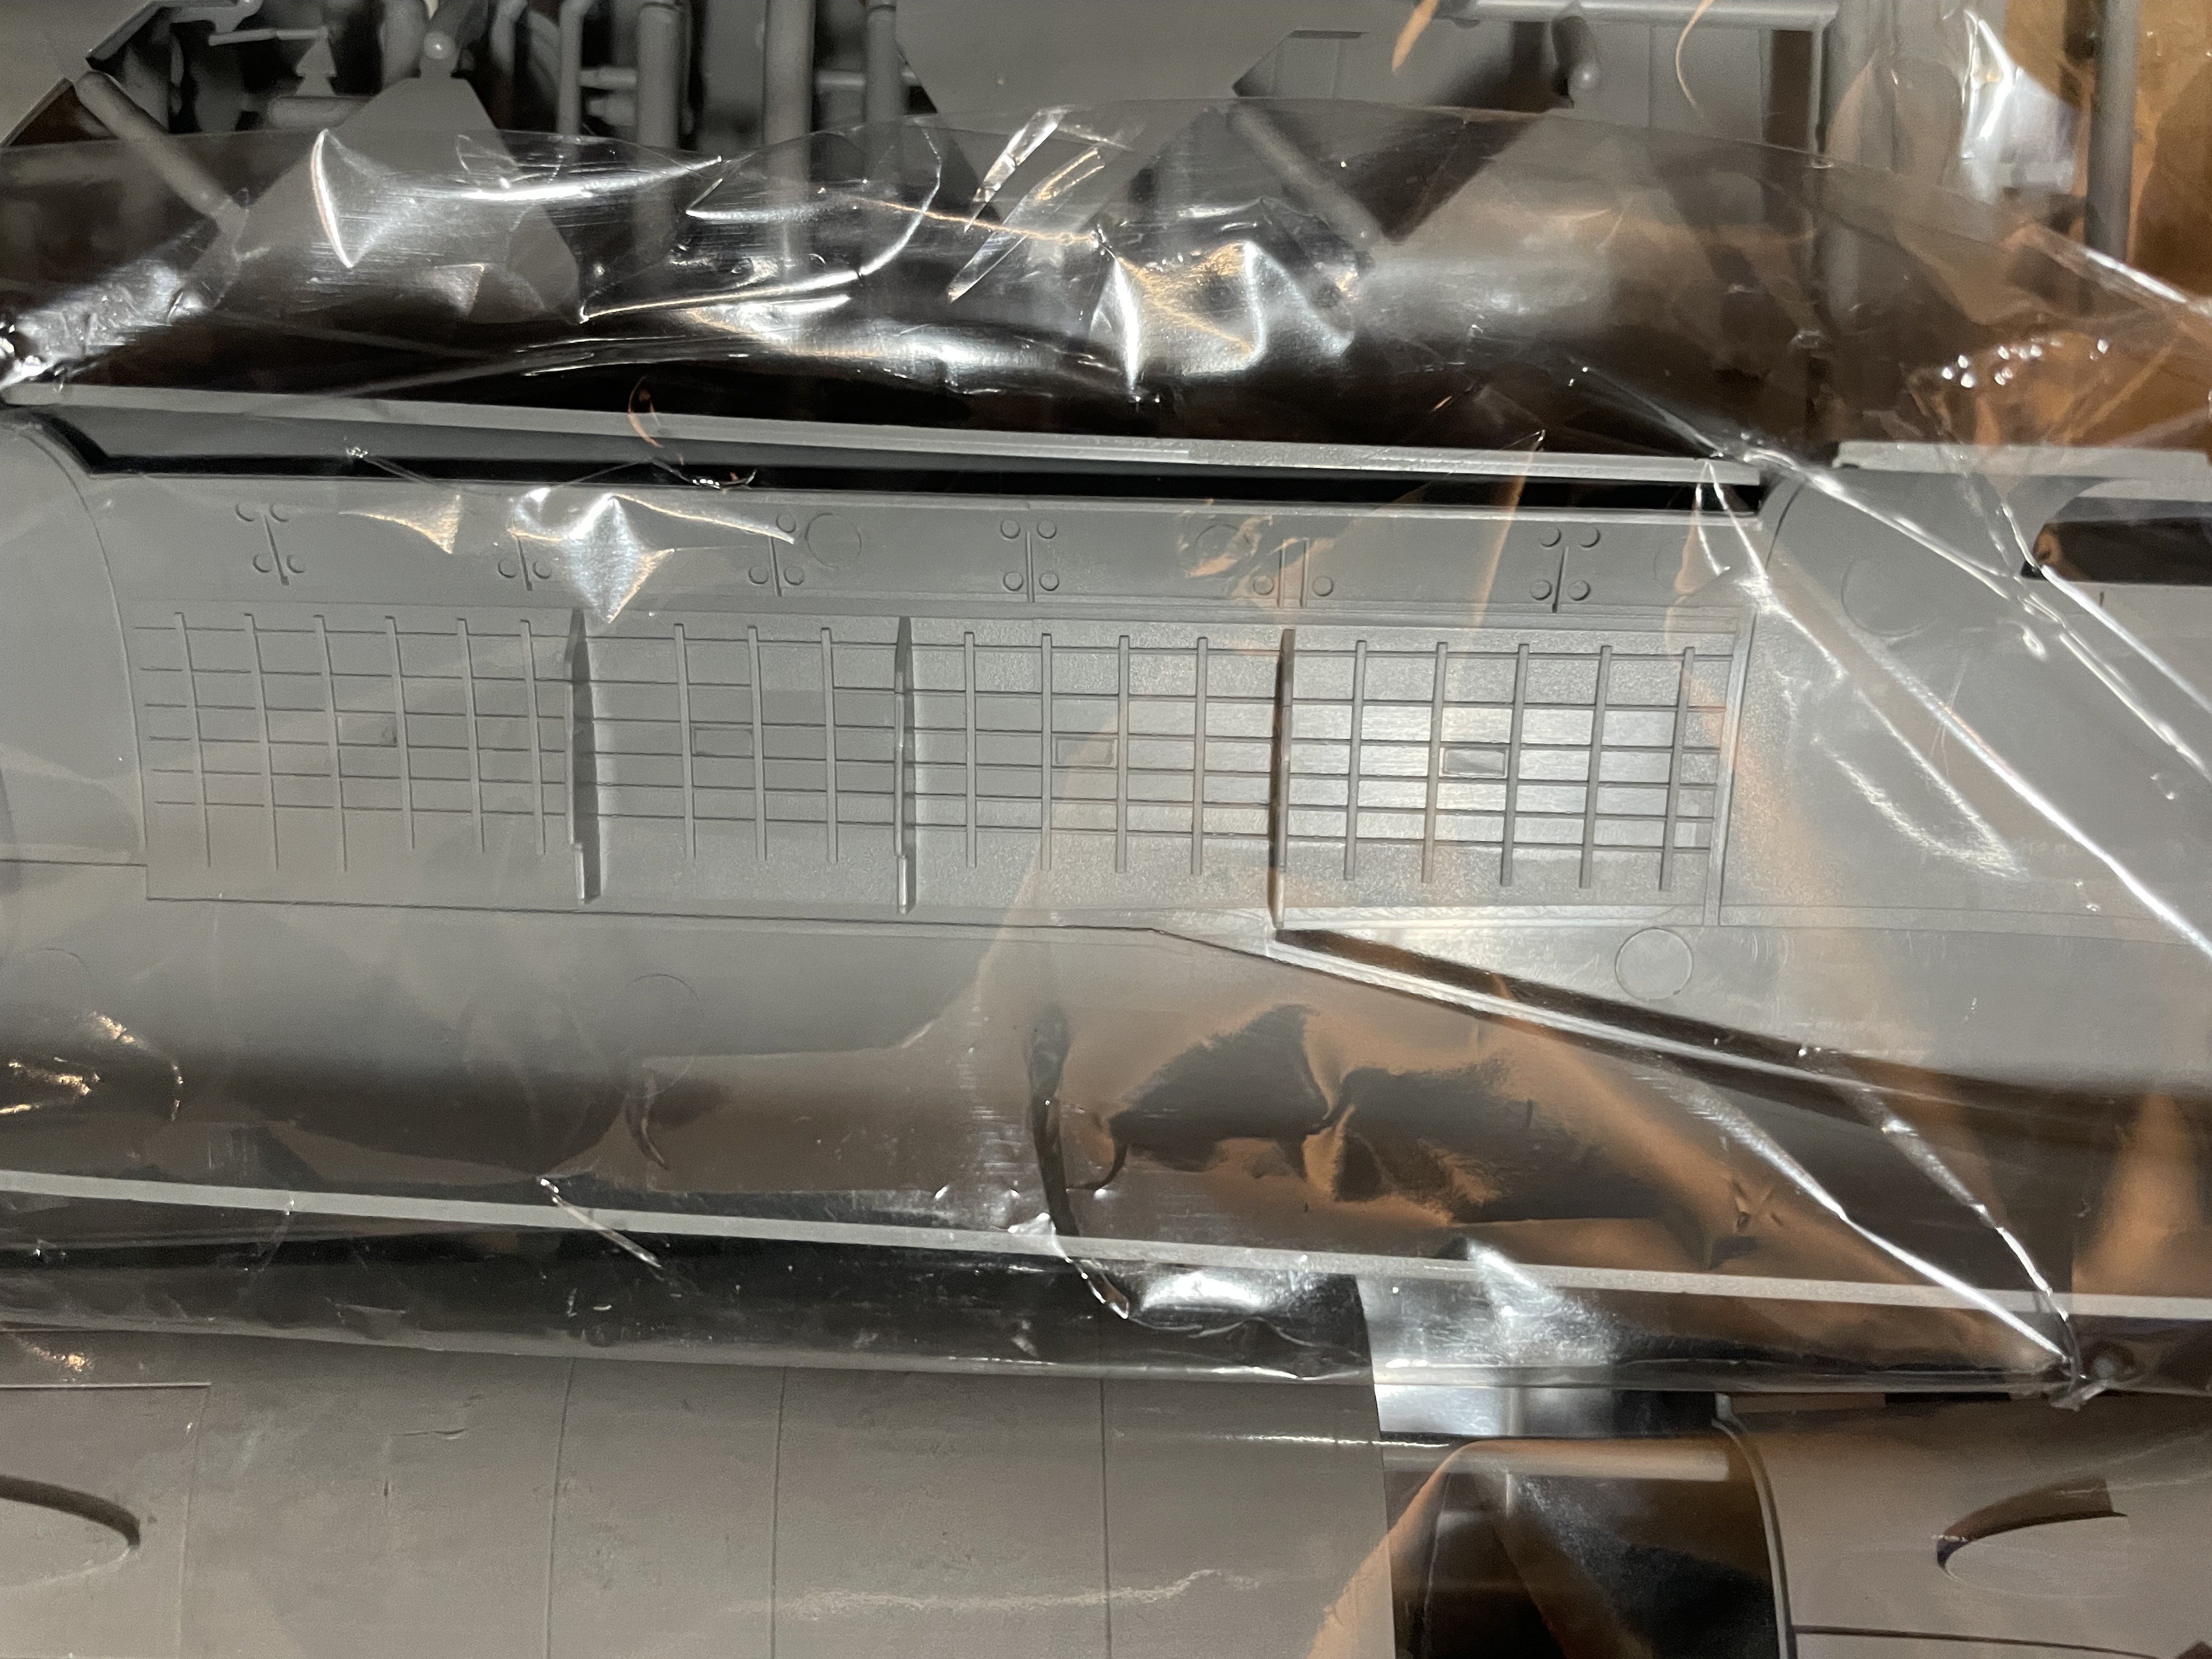
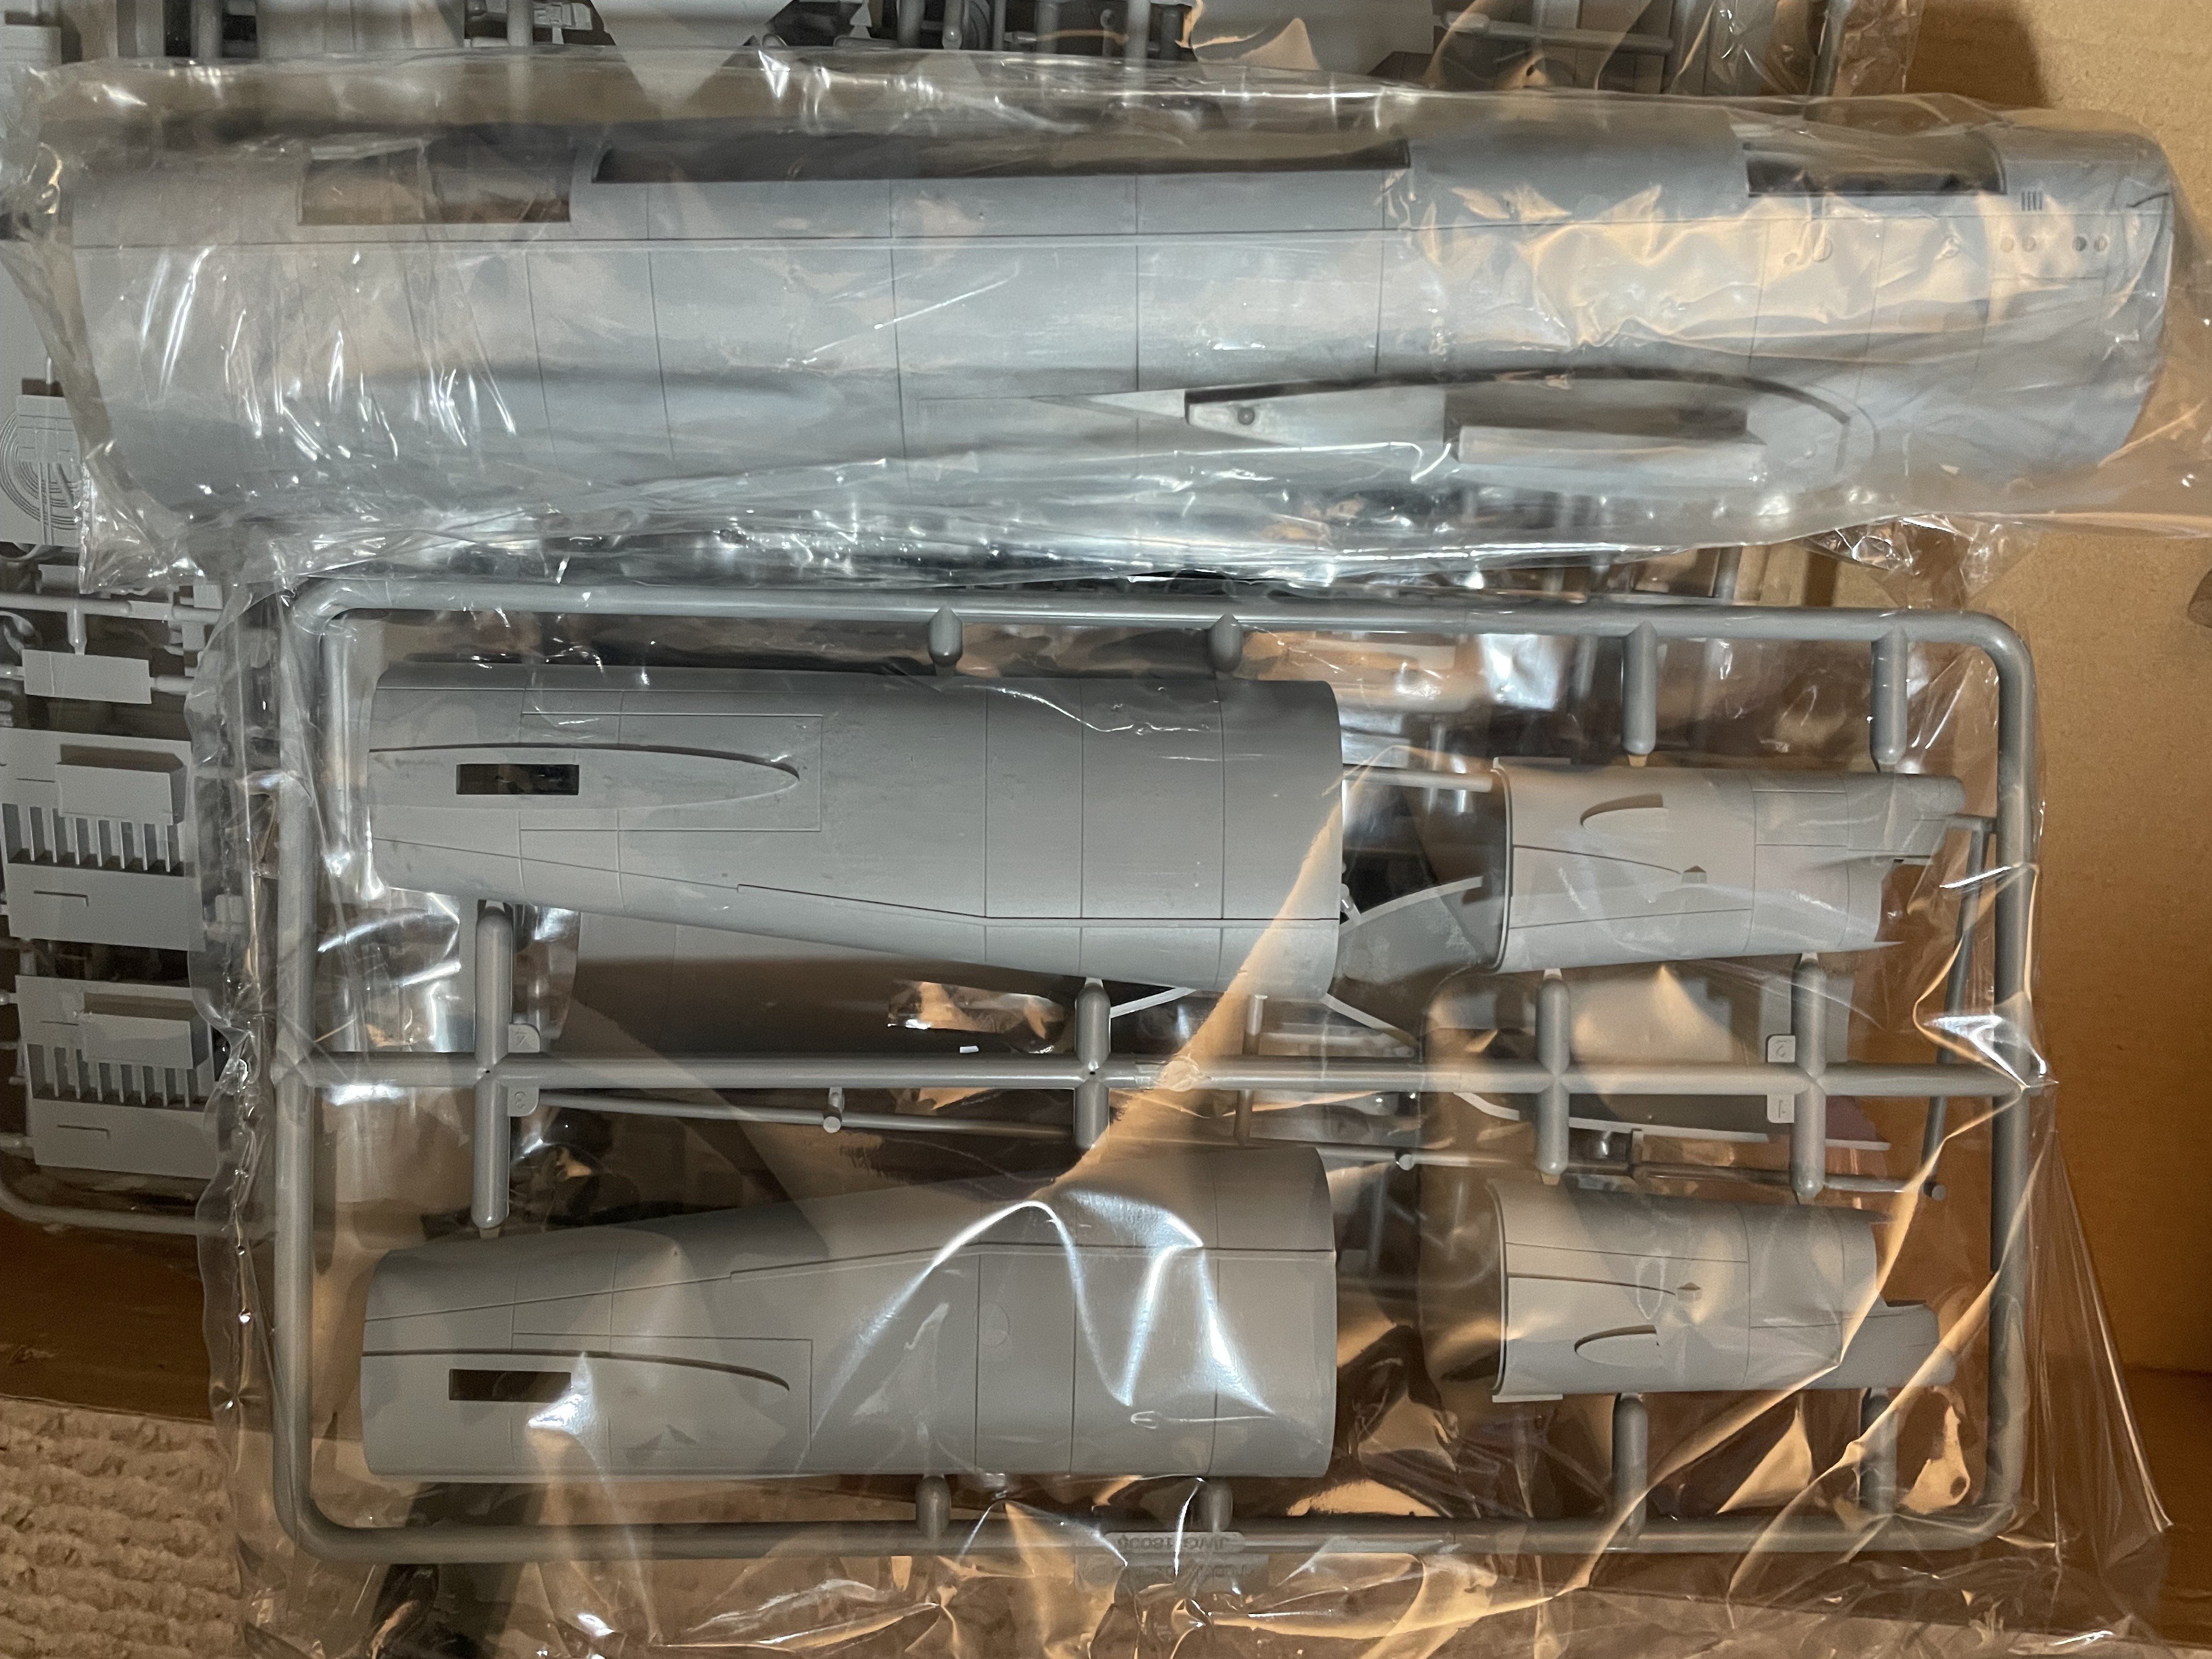
Having given up on the Italeri kit, am moving over try out the MC kit. For one thing, the MC kit has a full bomb bay, with bombs, but NOT the ones depicted on the box art. Go figure... Also has PE panels for the cockpit, which really makes no sense as there is no way to see that level of detail, through the small windshield and windows of the cockpit. Also a pretty full interior - again, which will not be seen. At least the bomb bay detail is pretty good. Not sure why they bothered with the PE for the cockpit and sidepanels: LOTS of styrene: The fuselage pieces but not the nose: The fuselage is in four pieces; here is the center section with the bomb bay. The instruction sheet is disappointing. Will post pictures of that tomorrow, For a box of this size, the instruction booklet is very small, with no paint callouts for anything. Which also means the decal placement will require some work (and a huge magnifying glass). Will most likely simply enlarge them and hope the detail is there. Started on the bombs. Separated and cleaned up all 54 pieces. There is a slight trick to separating them cleanly from the sprues. More on that to come!


-
Thanks Rob! I'm looking forward to getting started with the ModelCollect kit soon.
-
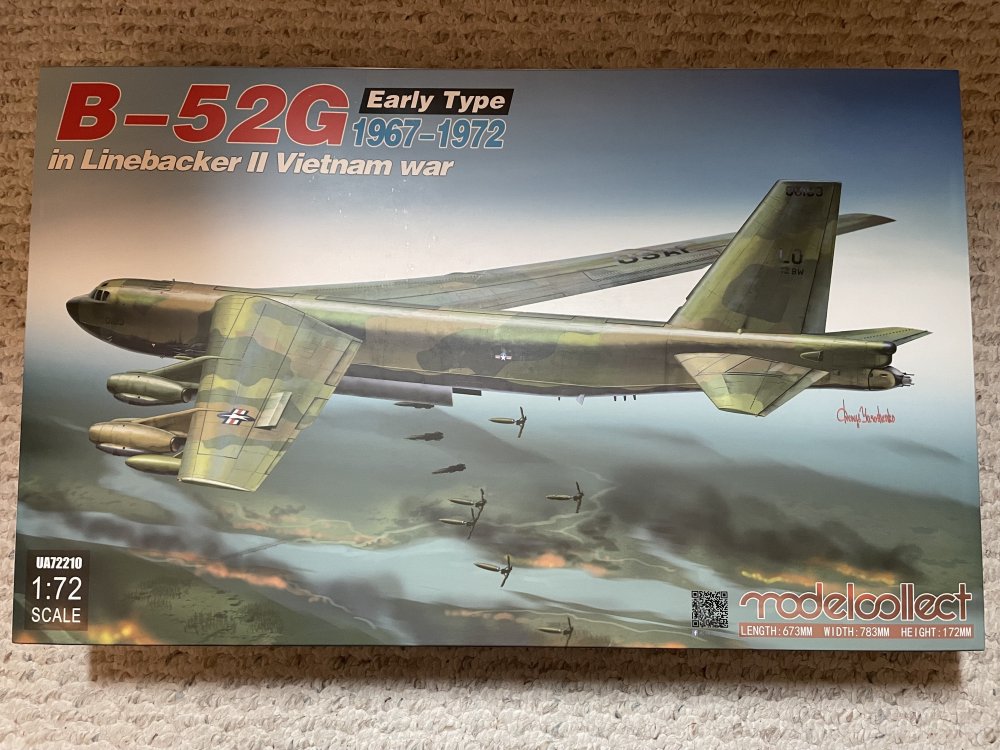
I'm putting this away. Probably permanently. The fit of the major parts is just not good enough for me to build this for a friend. The engine cowling parts would require so much putty and scribing to get them looking decent, coupled with NO bomb load or detail in the bomb bay and I've decided to call it a day on this one. I've been working on it, putting it aside, coming back to it, putting it aside. Finally decided it is time to move on. Good news! The Modelcollect B-52G Early Type from Linebacker II came today. Full bomb bay (be careful what you ask for: 27 bombs!!!) and I MAY, just for the sake of it, add the Hound Dog missiles. Send good vibes. This looks like a much better kit, with most of the interior detail going to covered up. but still should be a cool build. Did I mention 27 bombs? No paint call-outs whatsoever so will be relying on the Italieri instructions for that. Stay tuned!
-
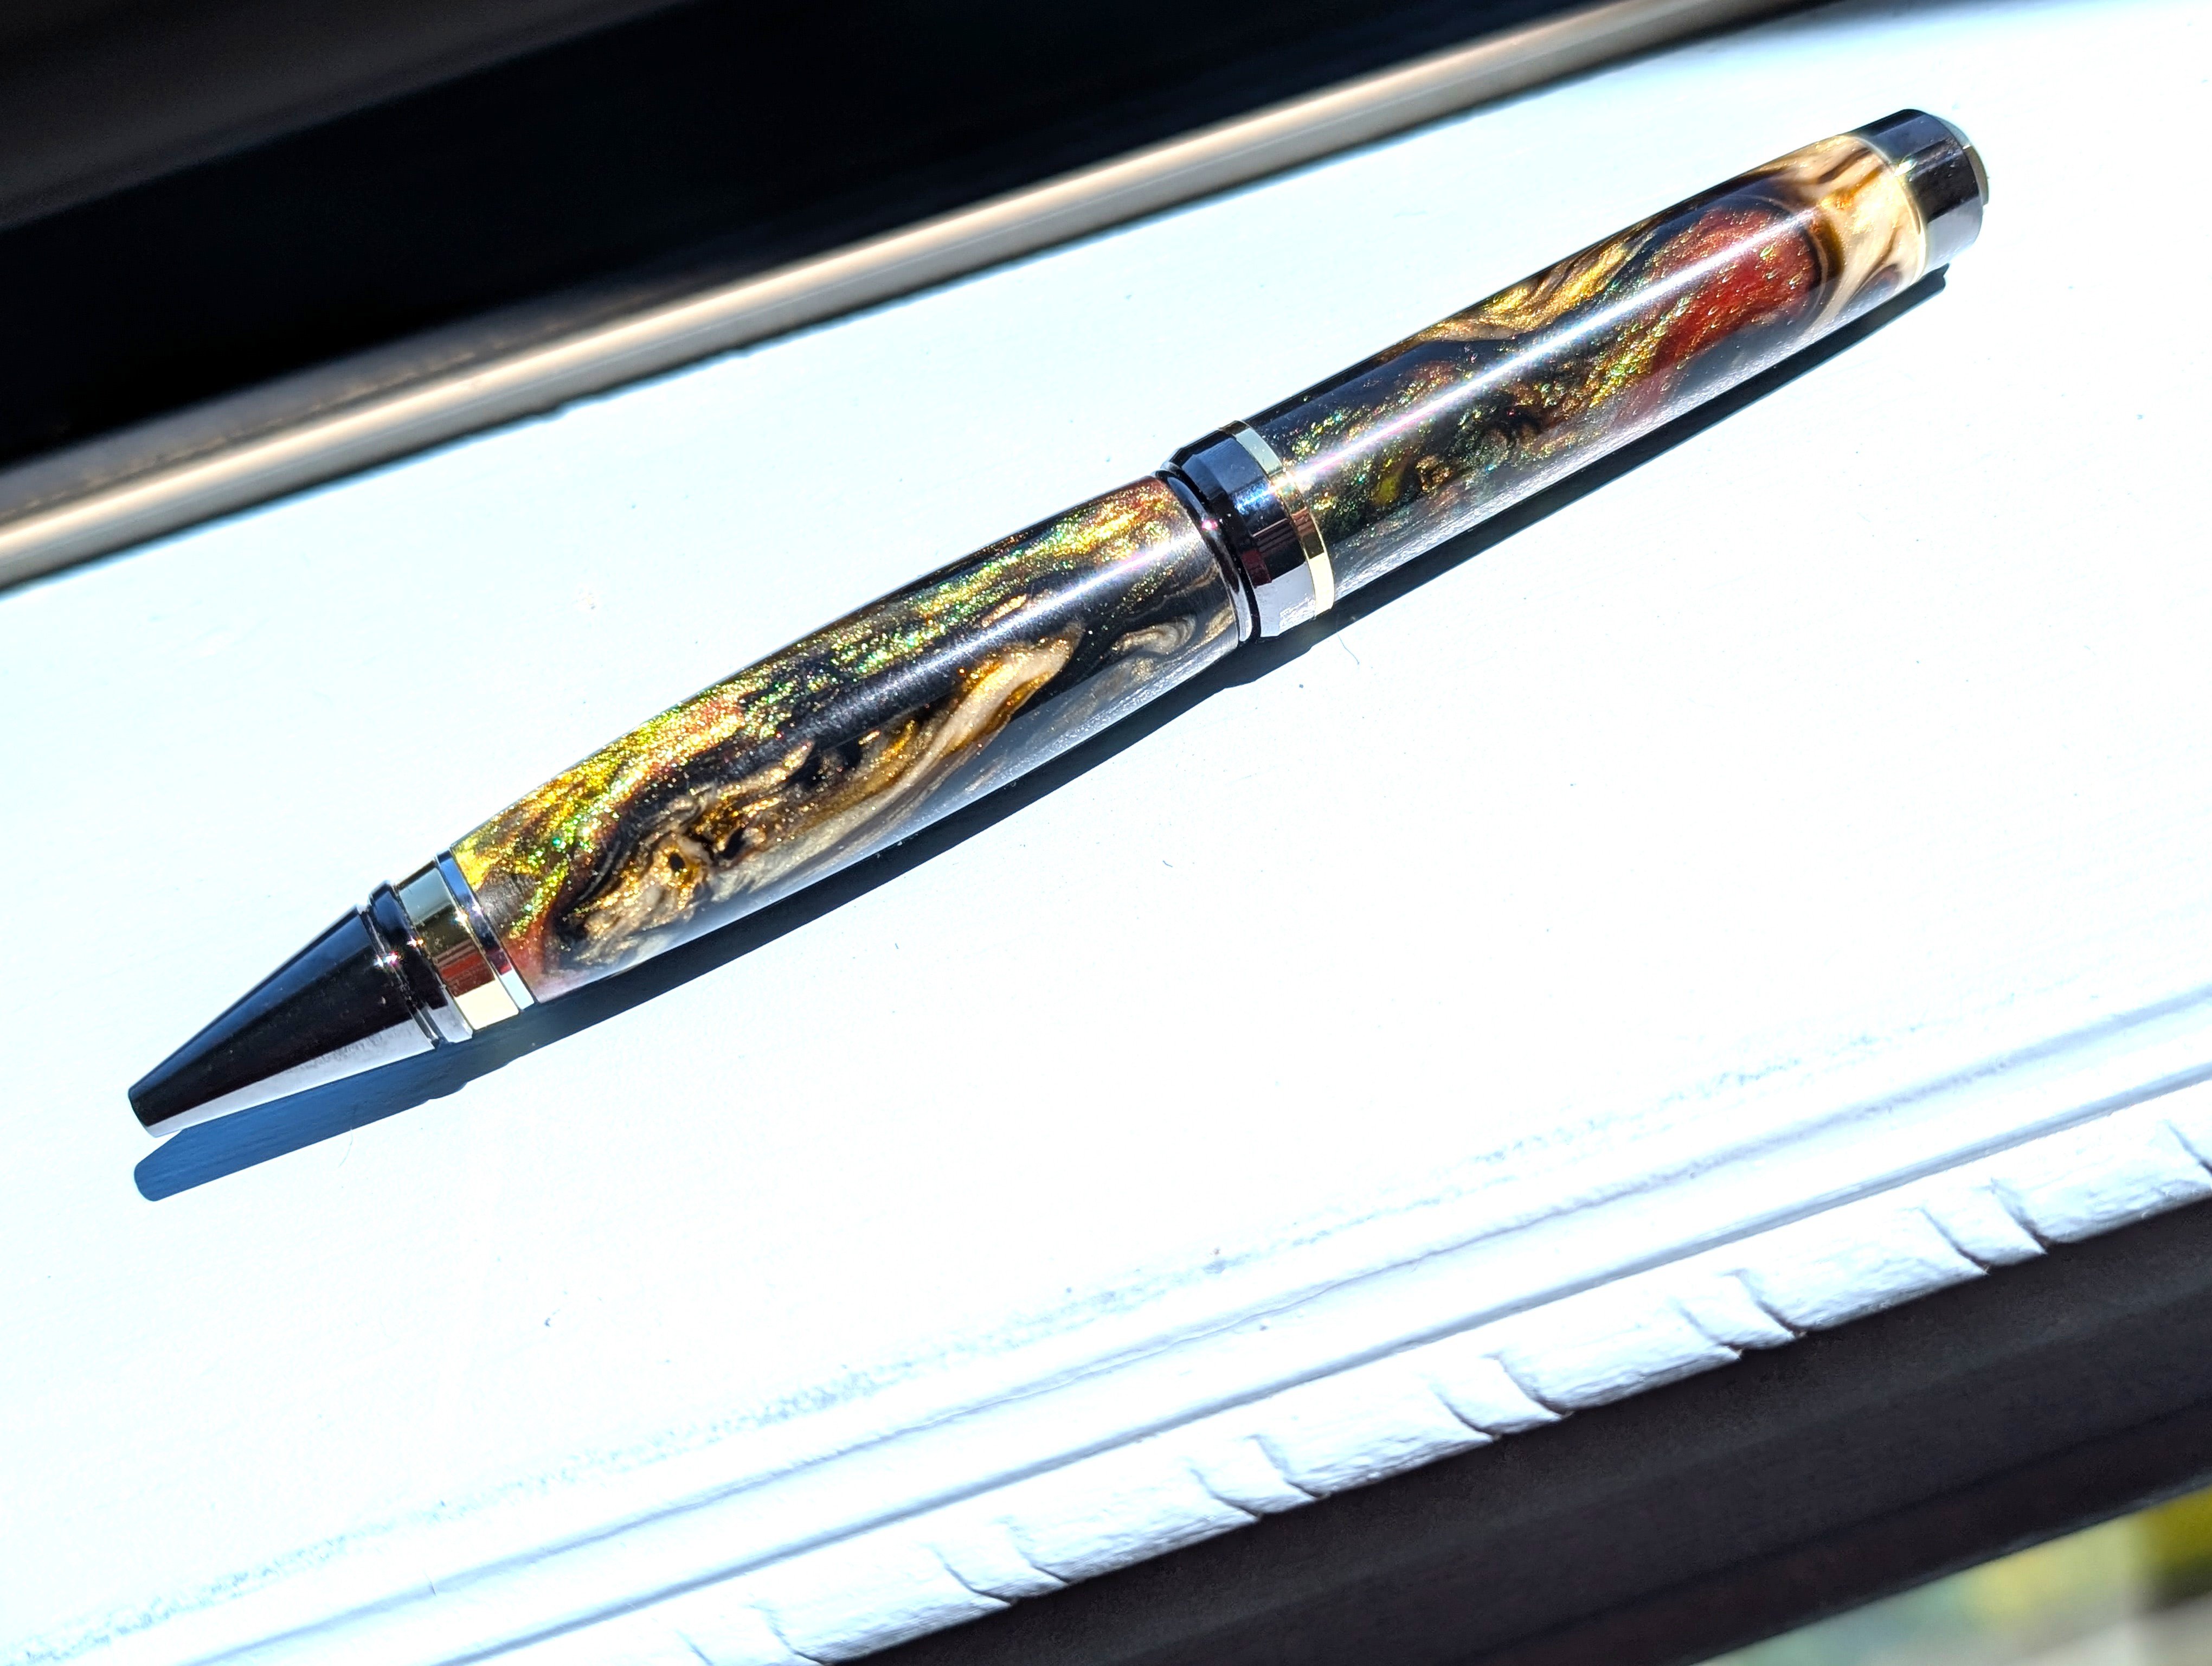
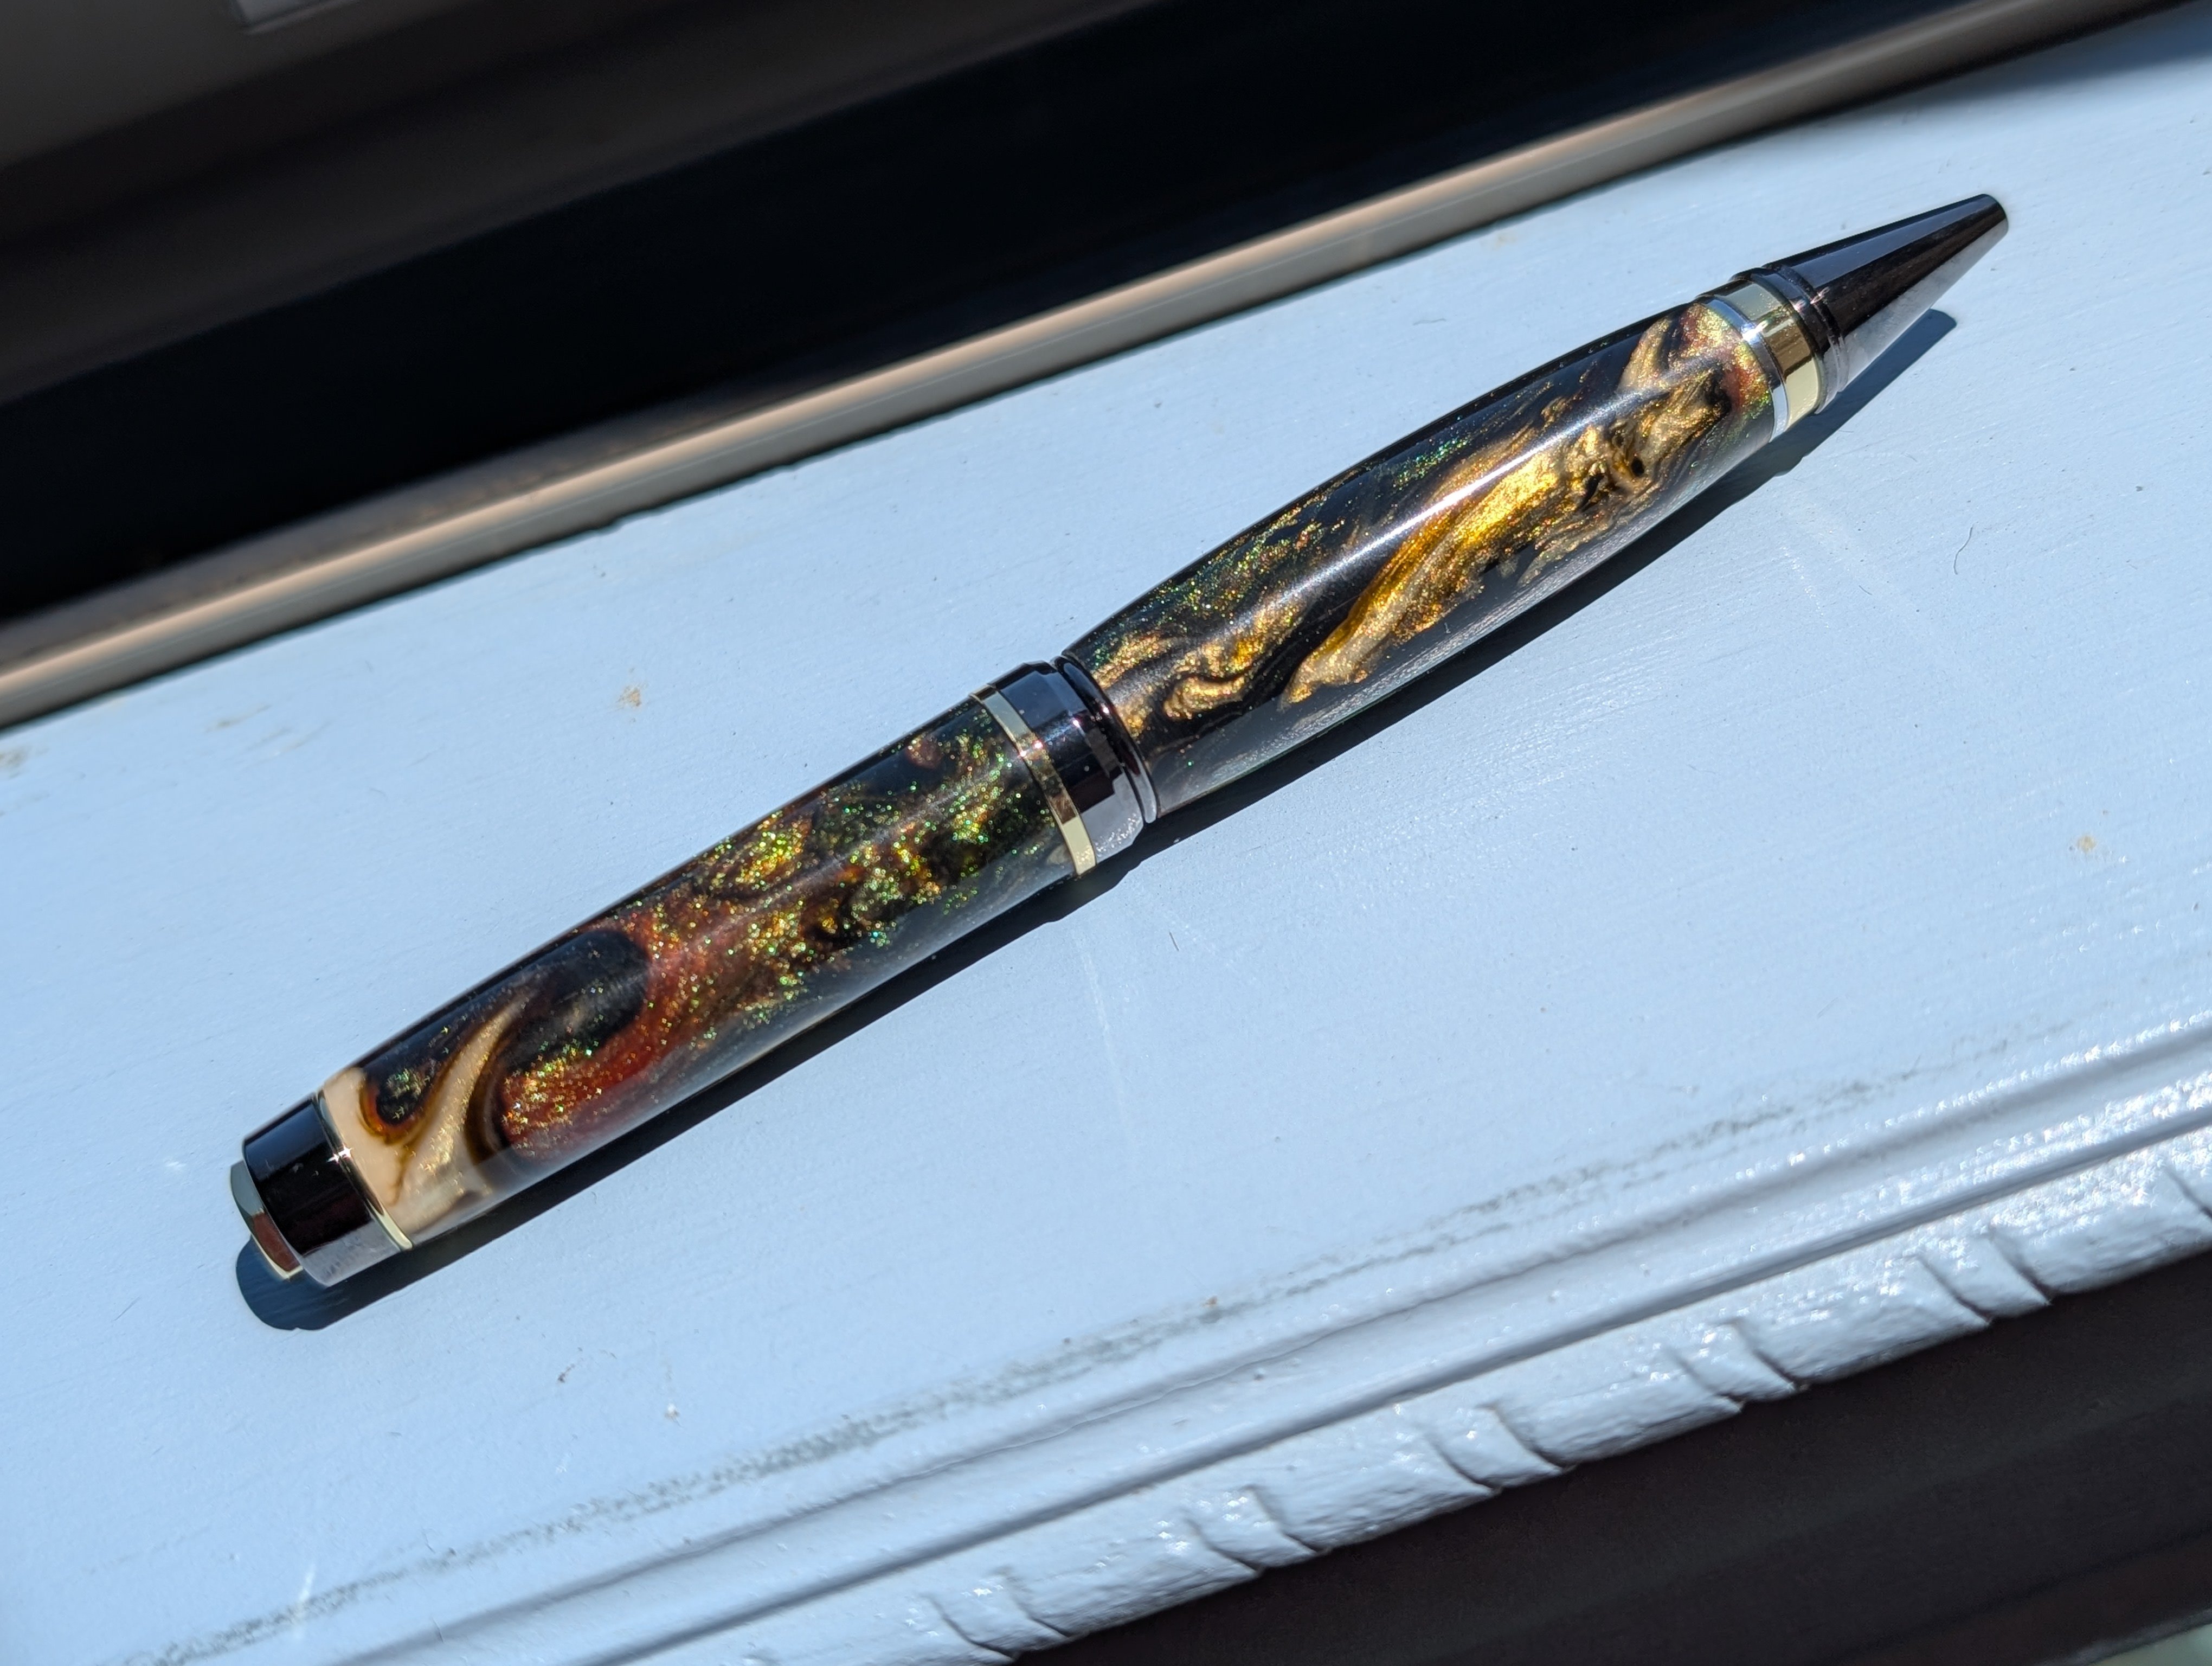
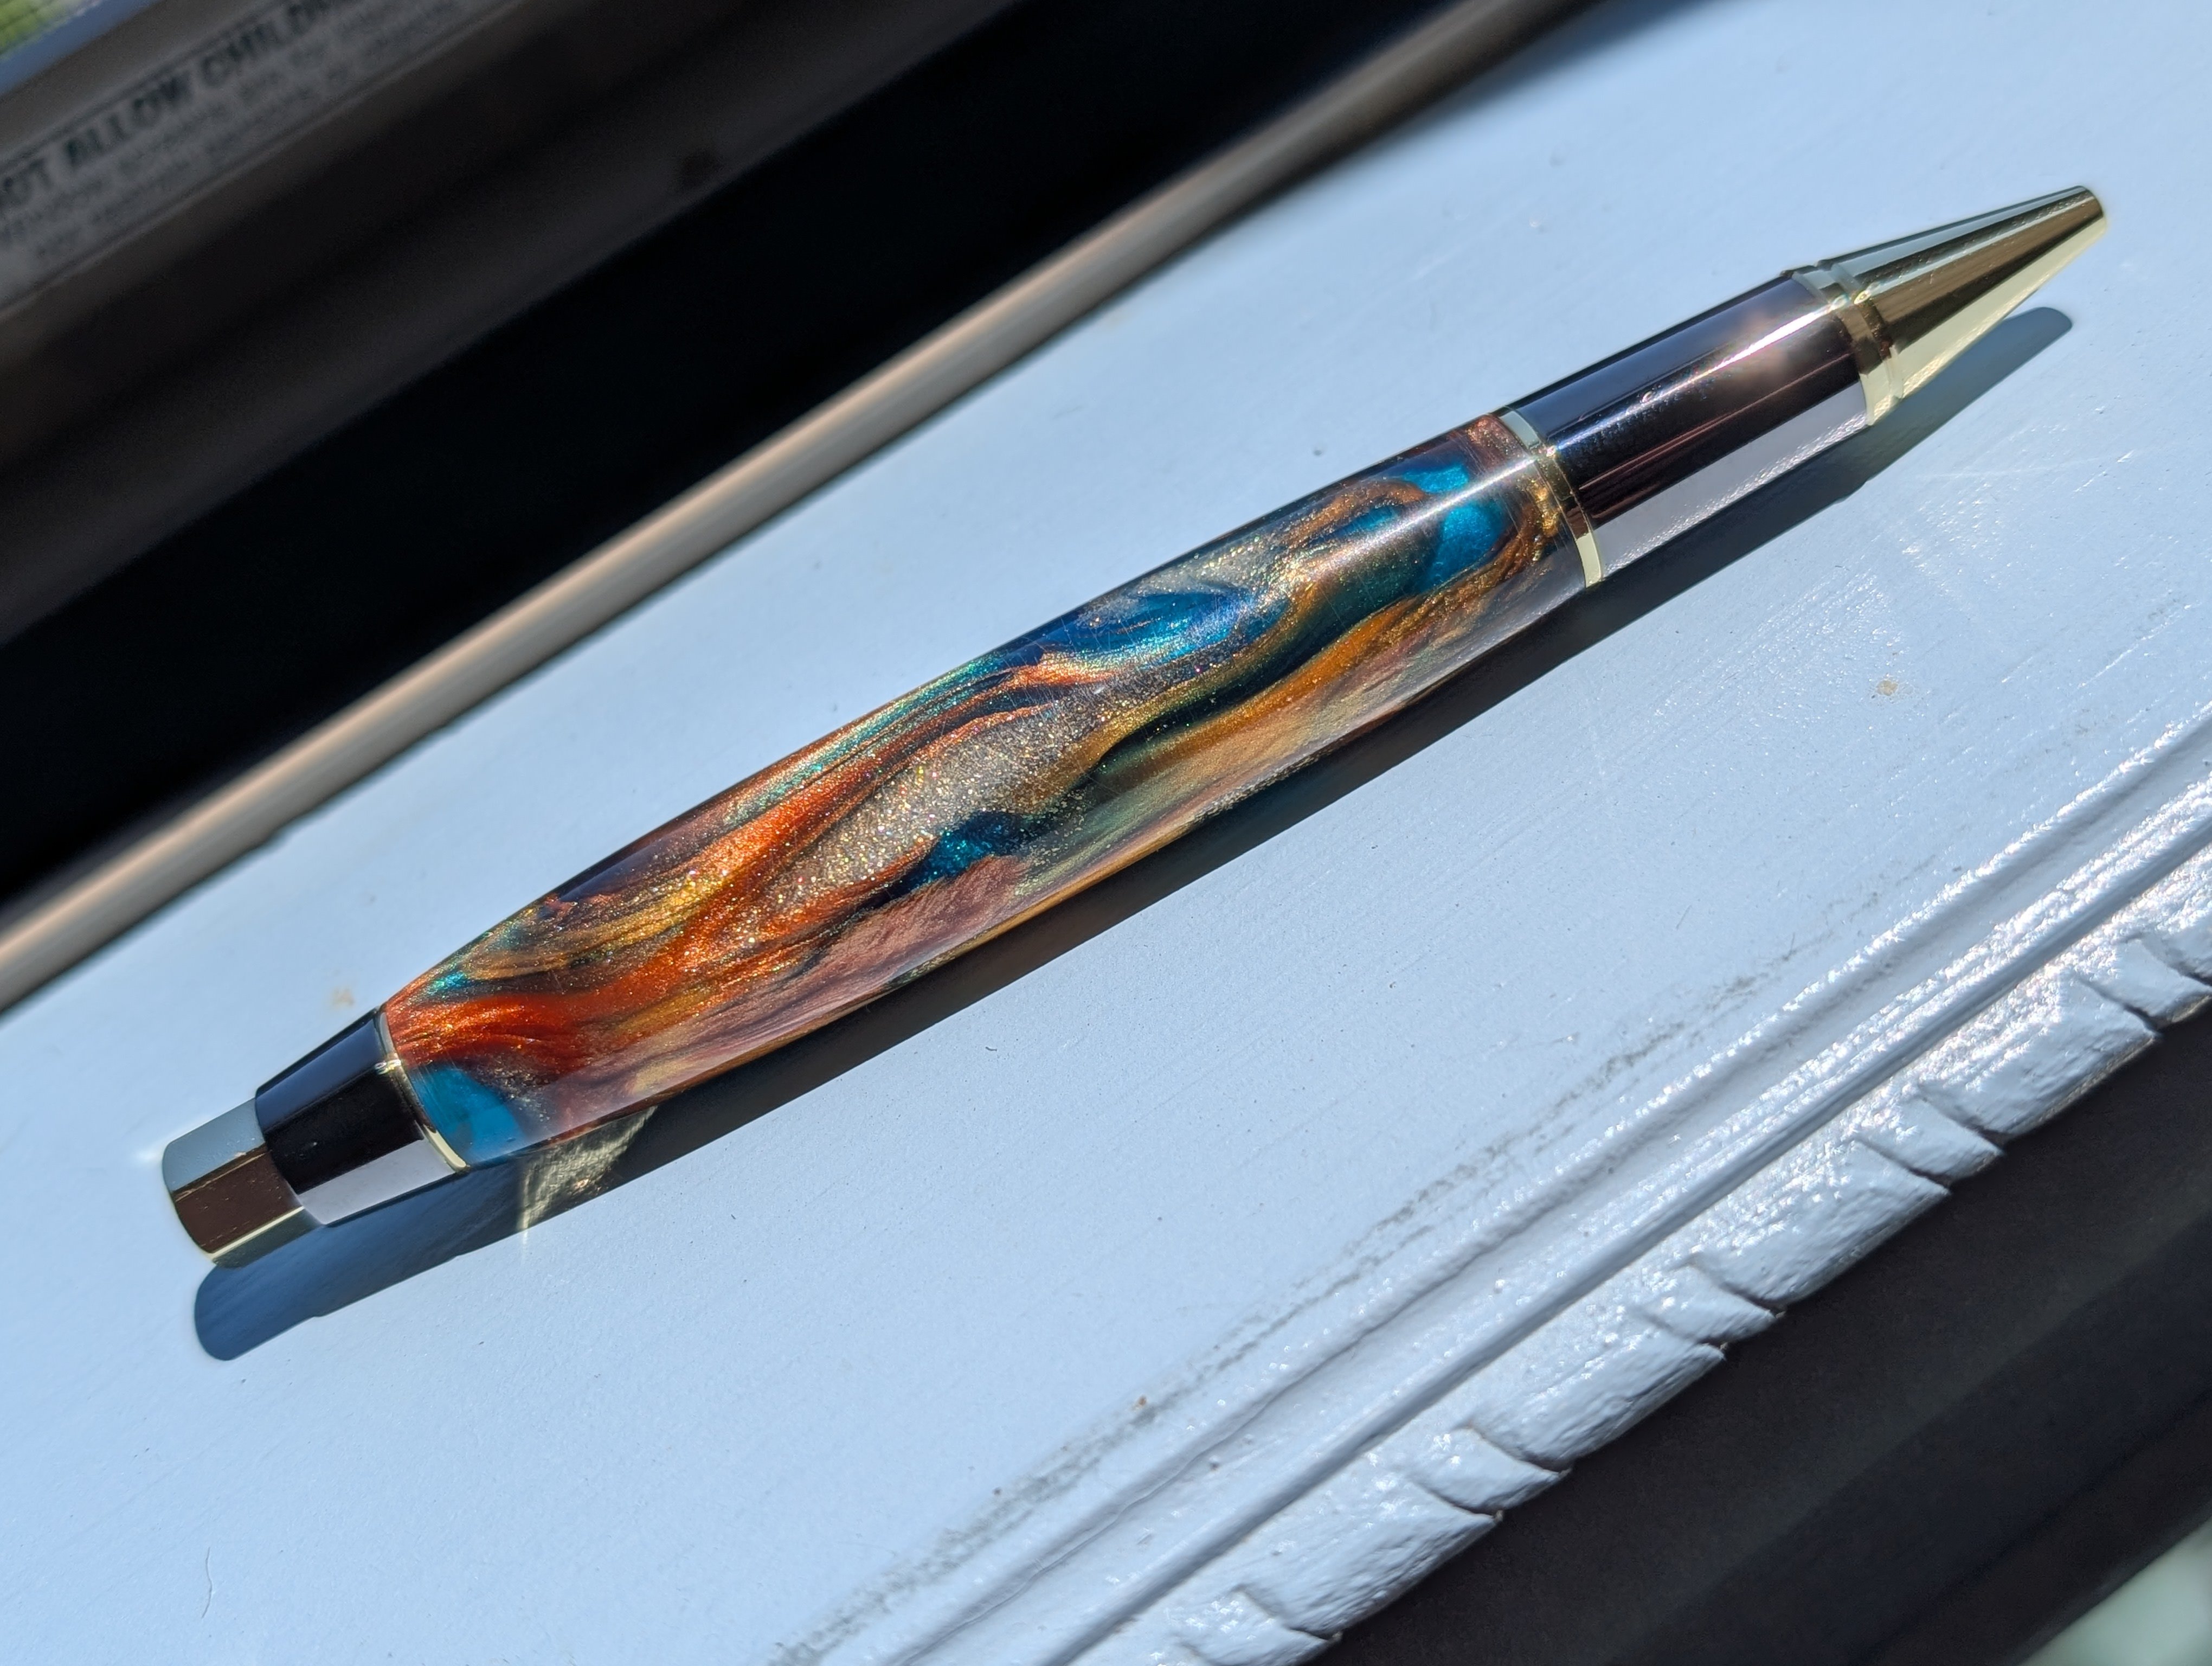
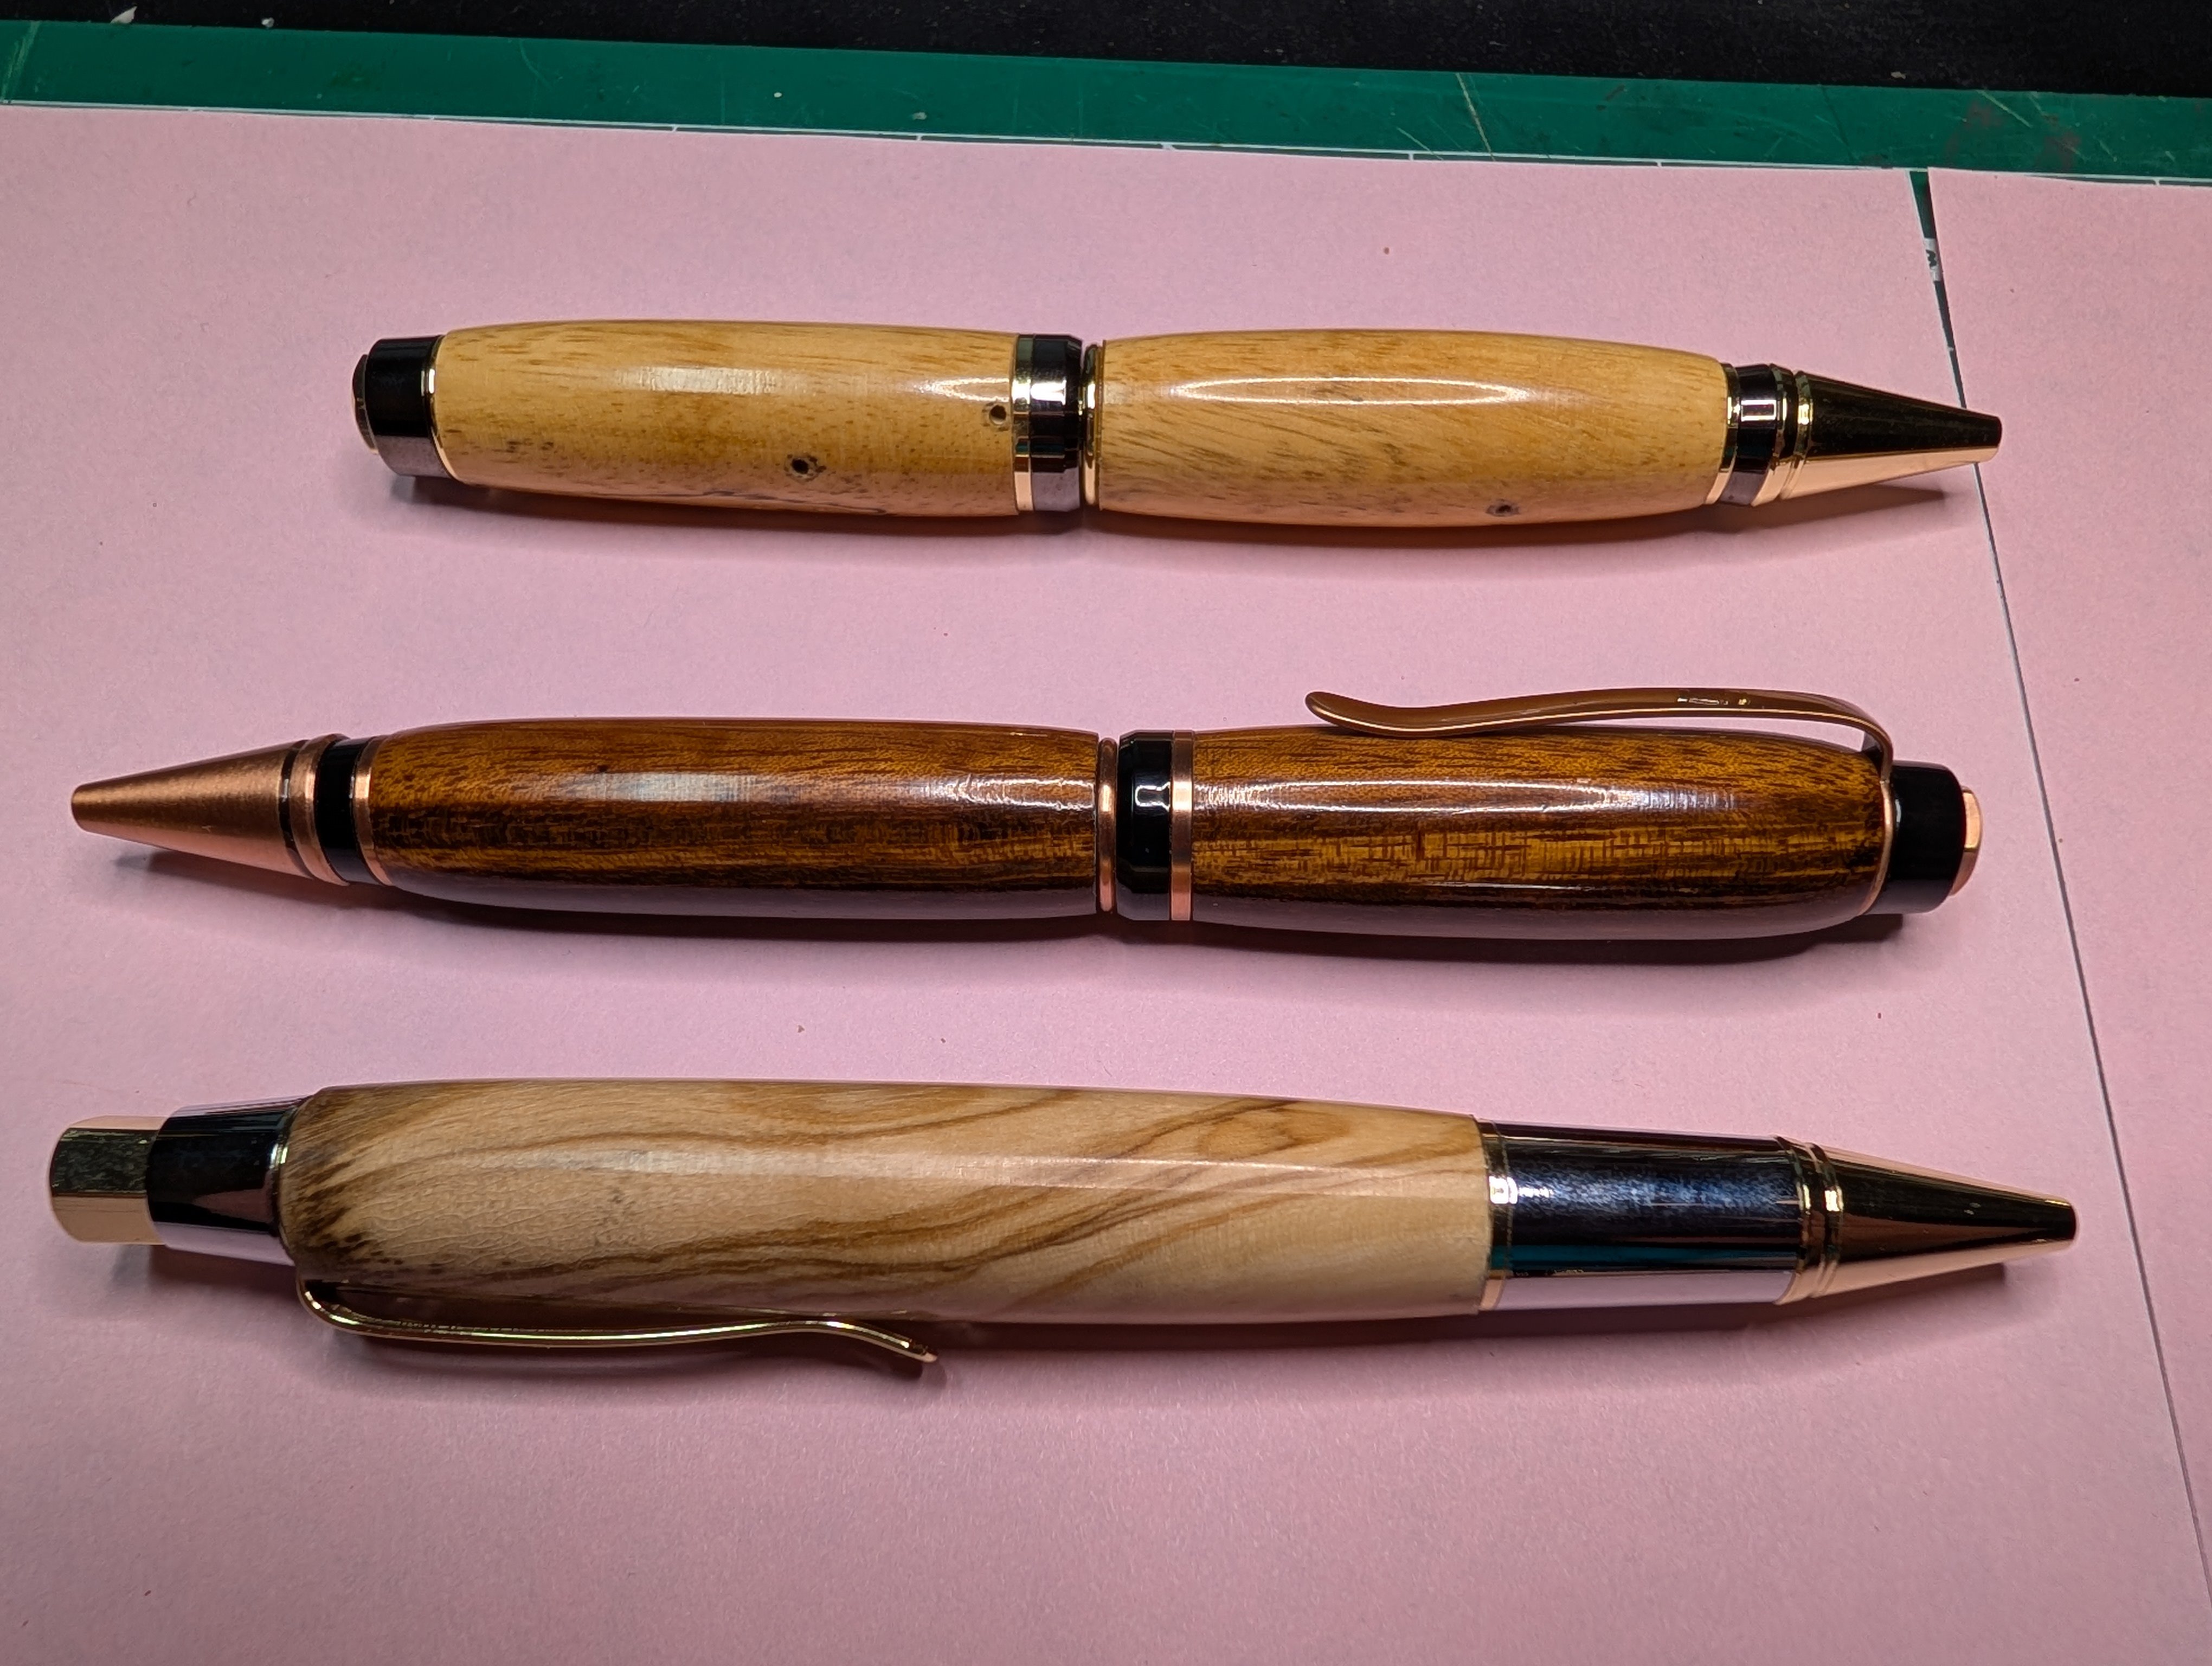
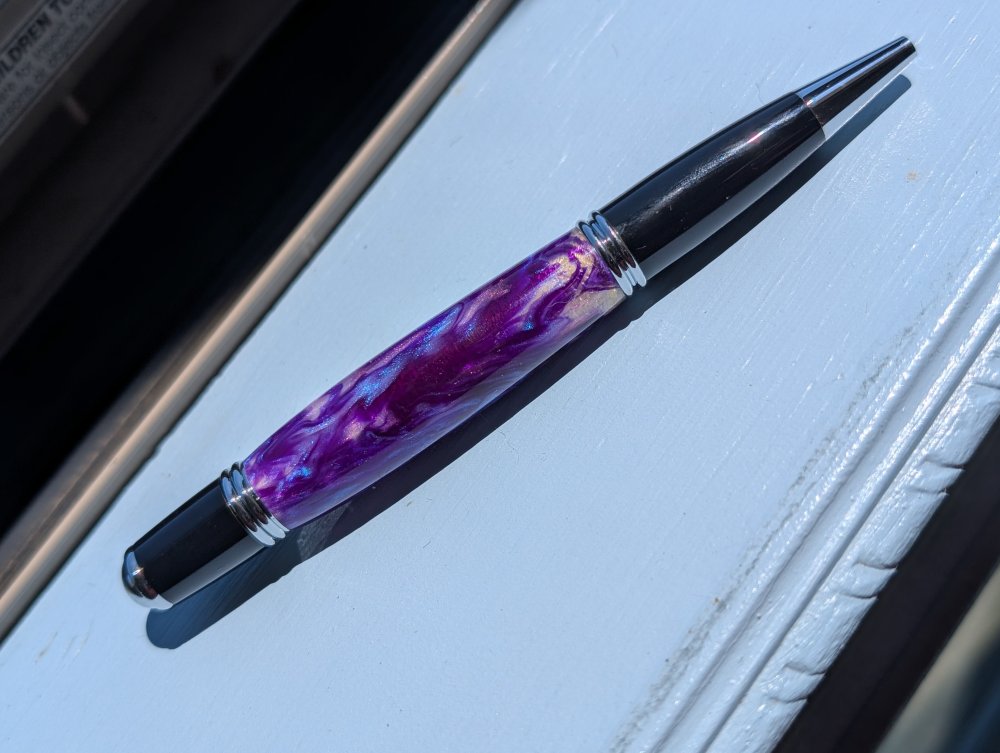
Hi Kevin, sorry for the late response. These are all resin. The guy who pours the resin blanks gets the colors to mix a certain way and the result is amazing. Those ones are from a blank he calls Painted Desert and are on his website. He's frequently out of stock, but if you like something, he will pour some for you. It is an art to get them to swirl and not really mix. It is also really hard to visualize what the turned blank looks like from the pictures on his website. I met him at a pen show nearby and took a chance turning some blanks. With a sharp gouge, they turn very smoothly and finish quickly.
-
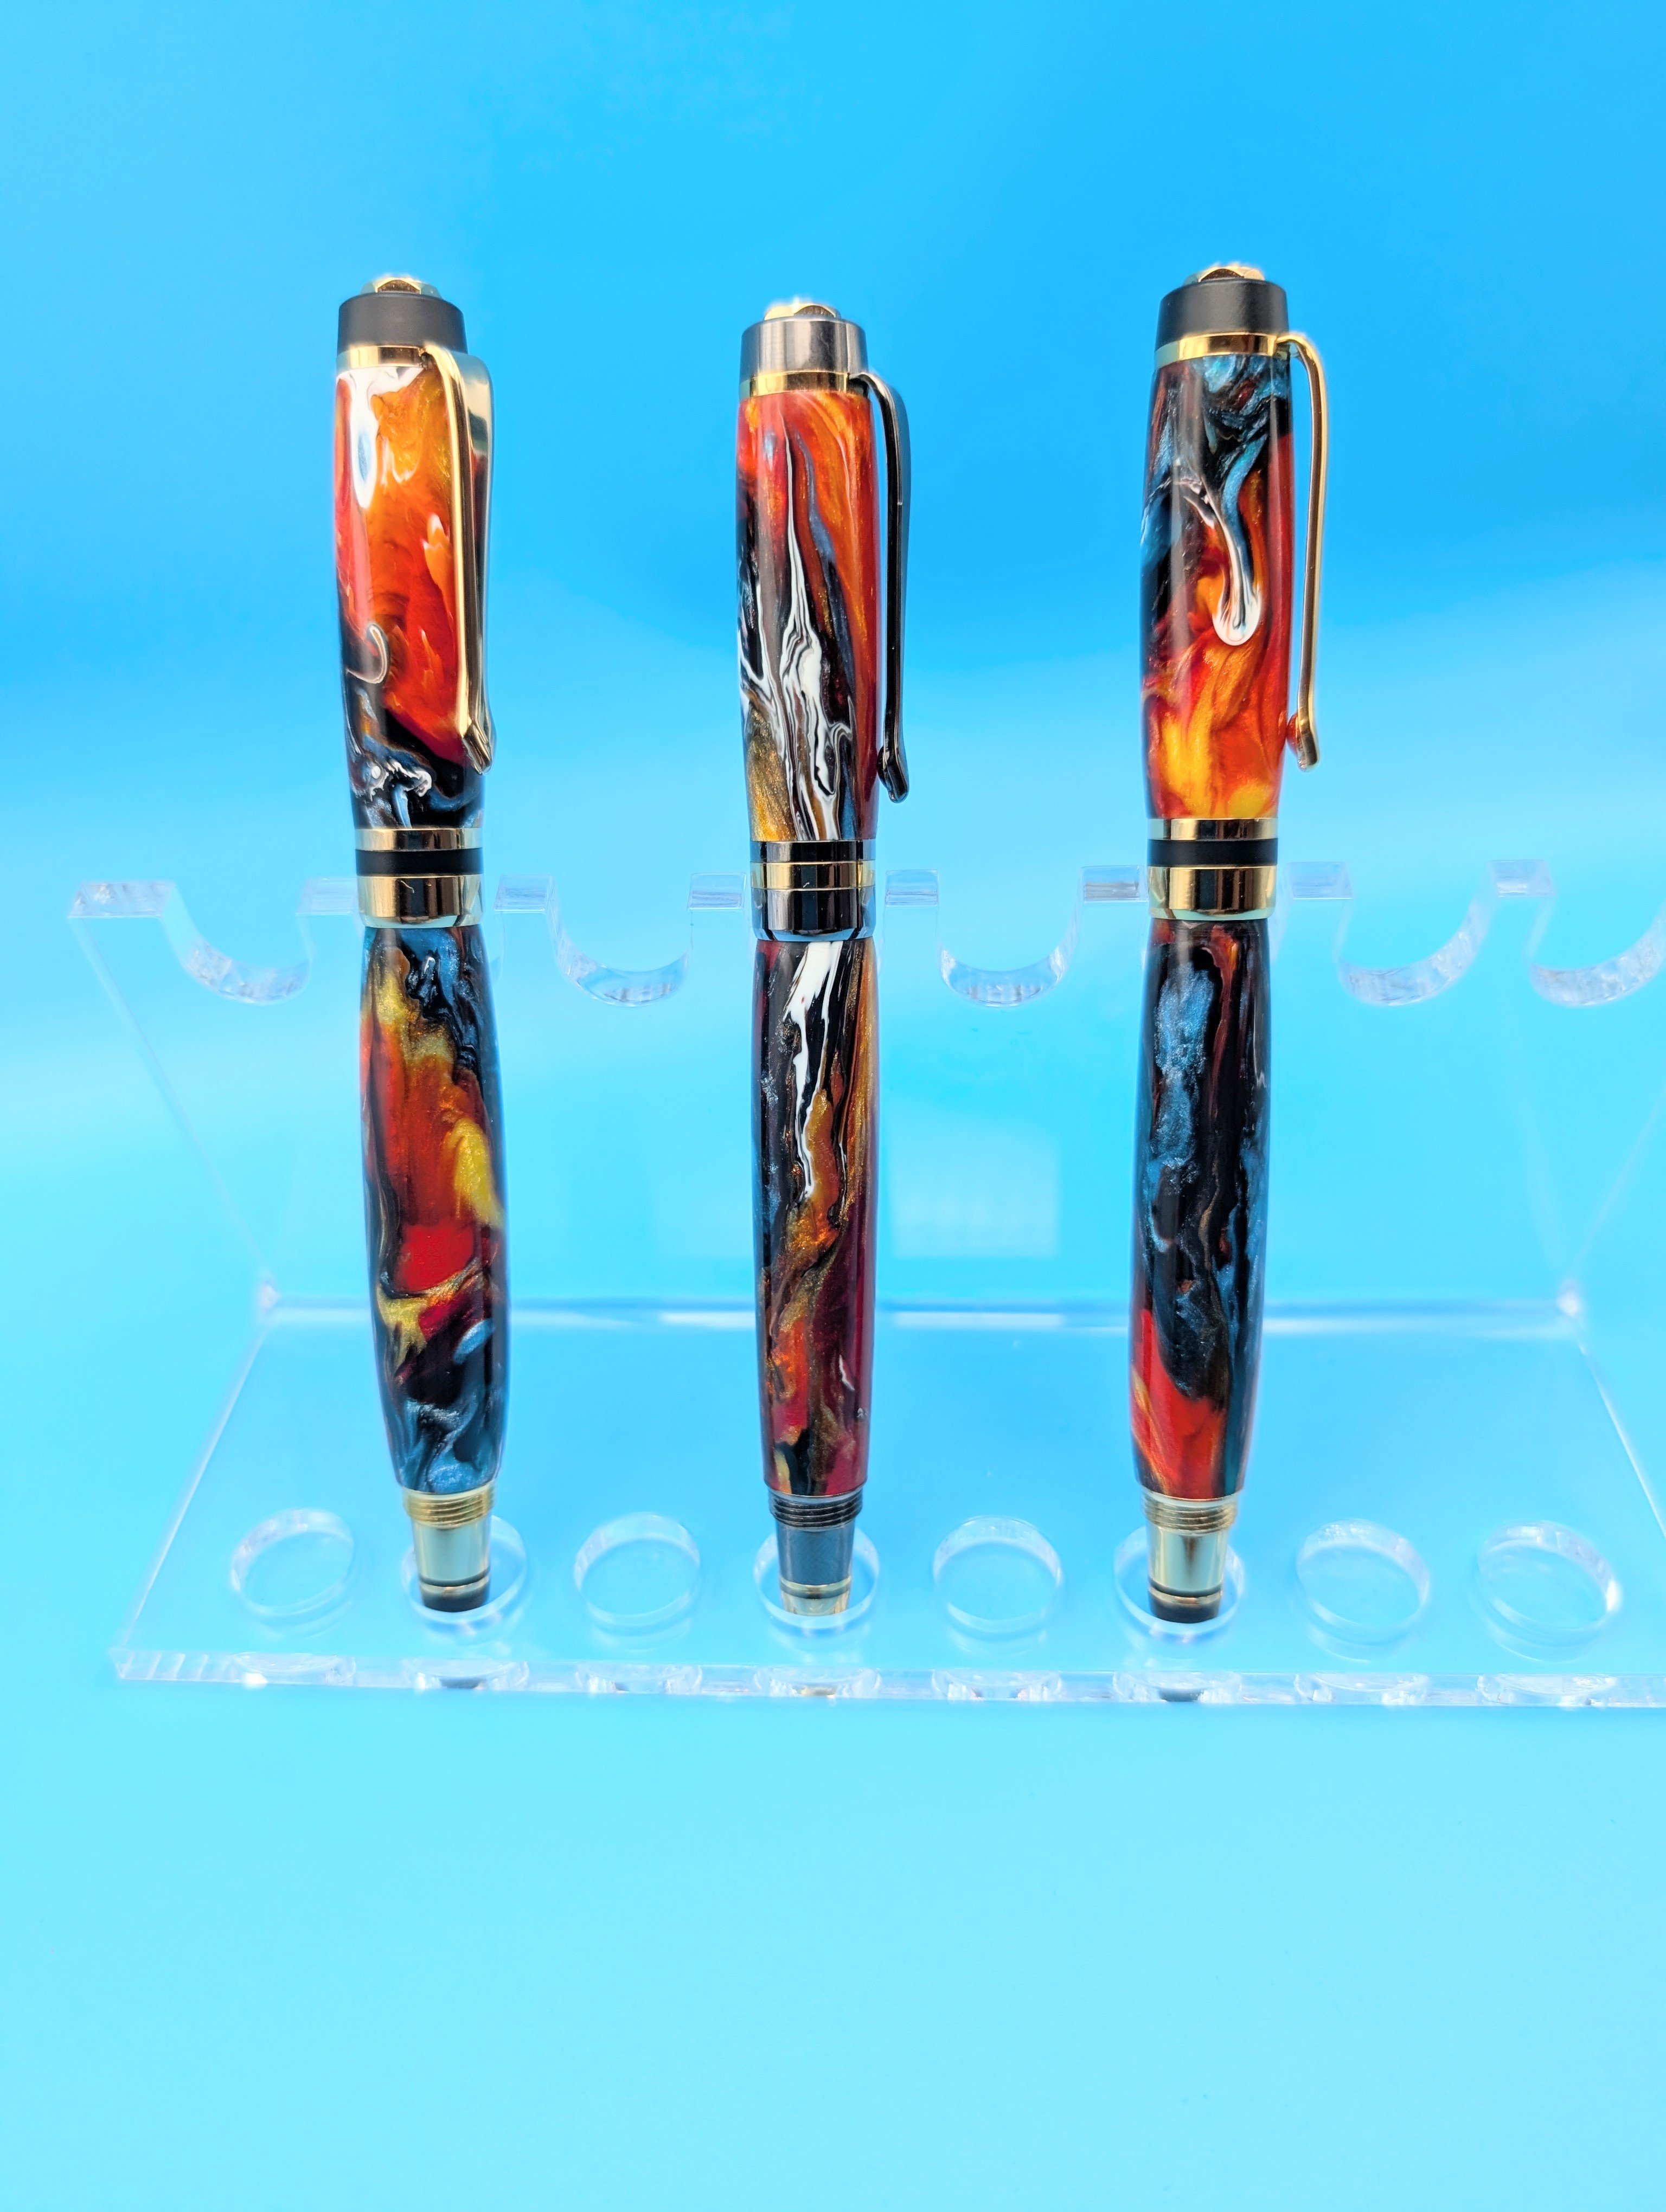
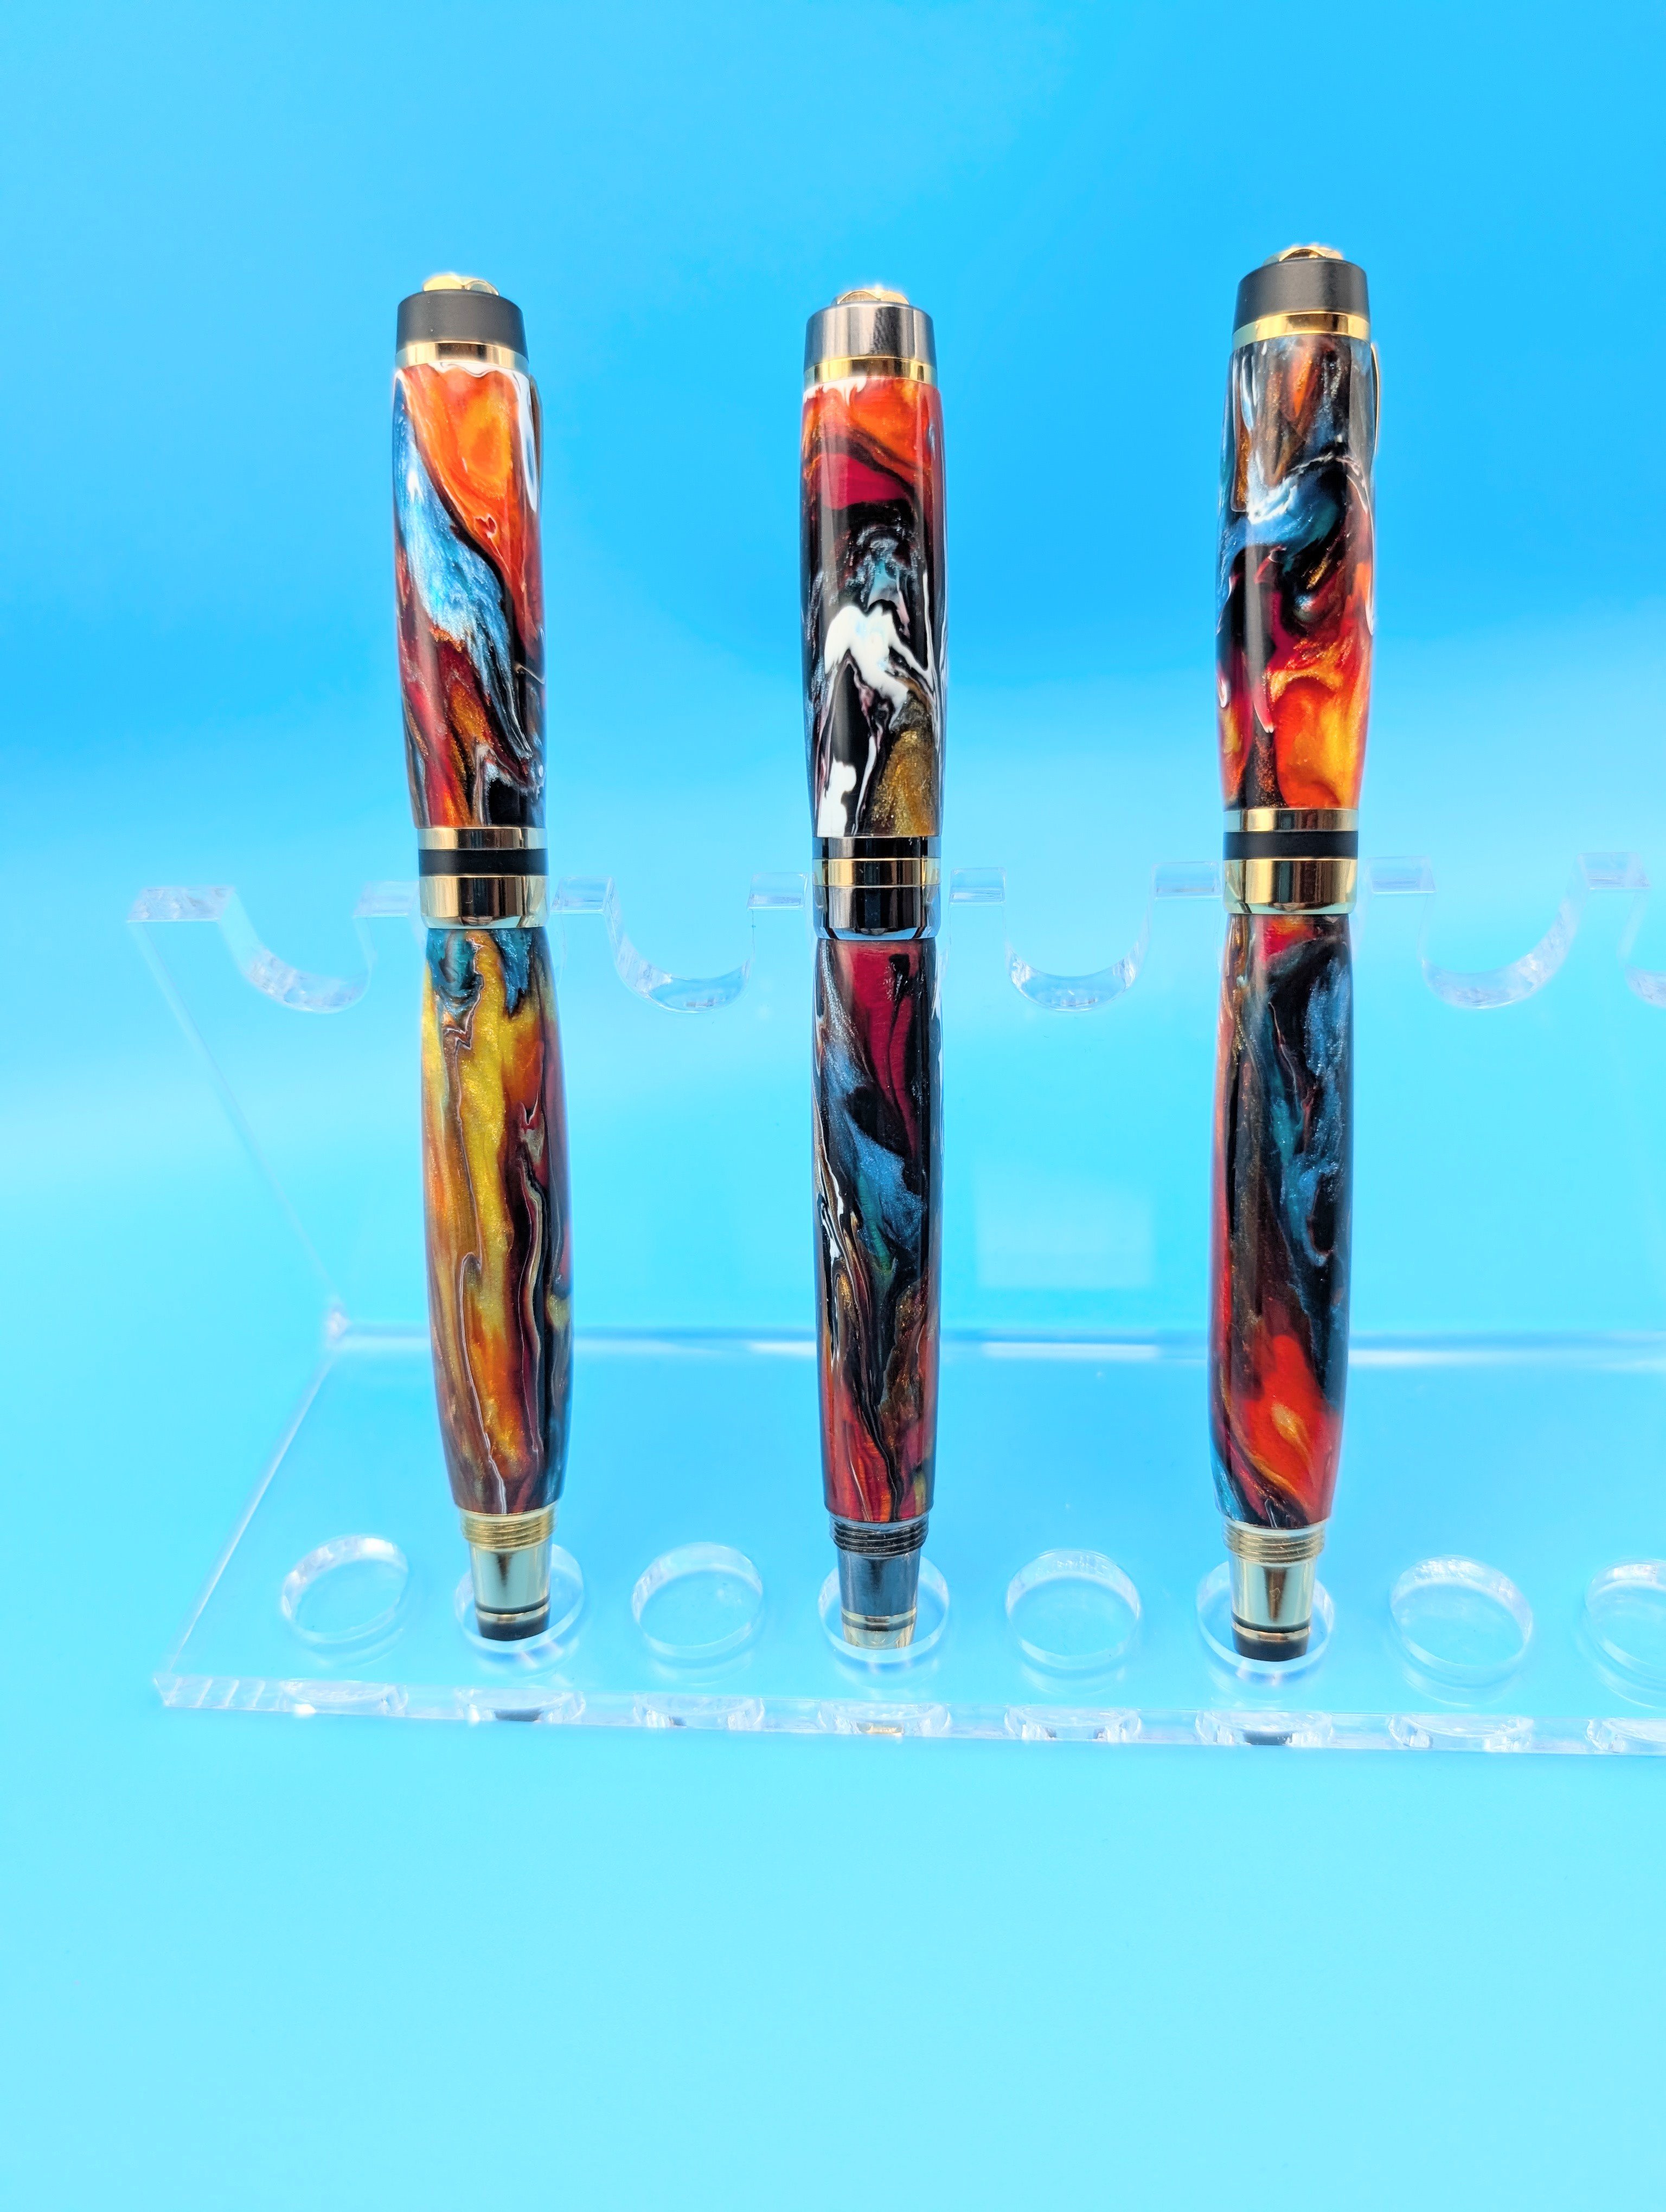
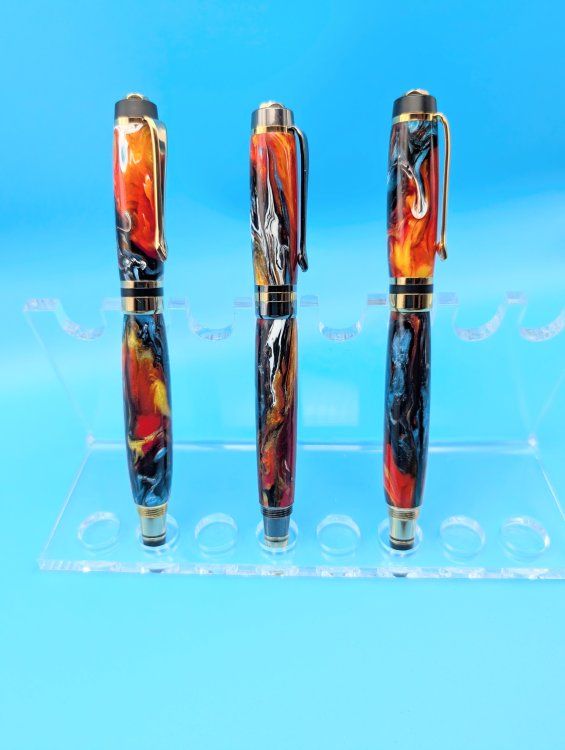
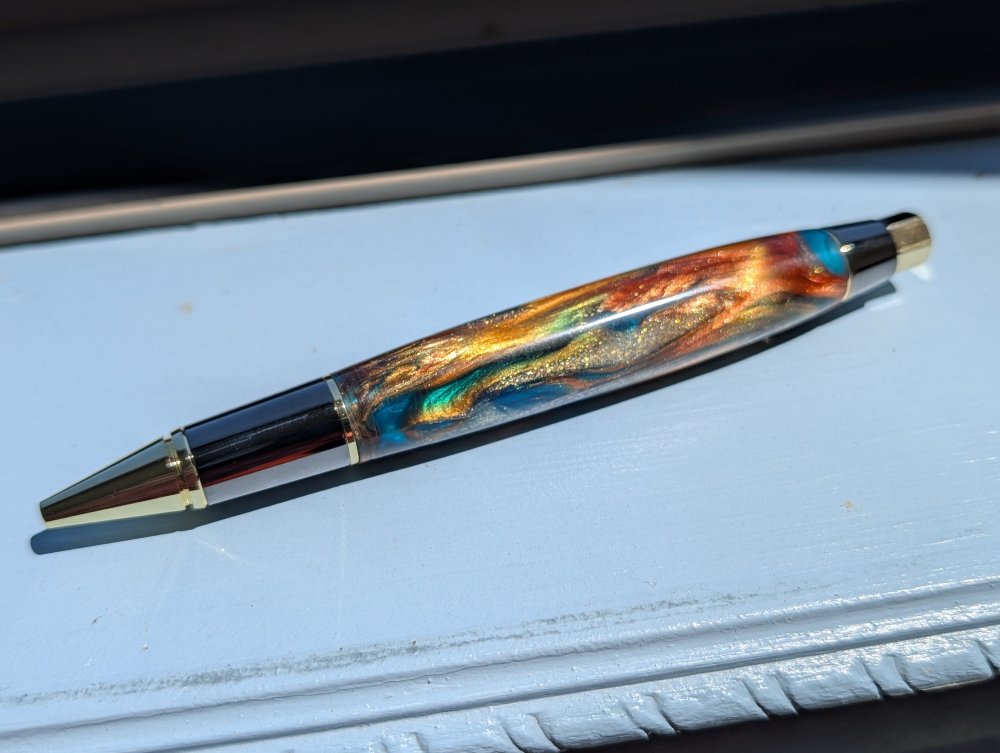
One of the things that has kept me away from the bench has been the woodshop. There is a crafts fair this weekend I have been gearing up for. Here are some of what I'm selling. Wood and custom acrylic ballpoints, as well as Rollerball and Fountain pens. These are from custom acrylic blanks made for me off of a NASA photo of a sunspot. I love the colors! They easily convert from Rollerball to Fountain pens. Two views of the same three pens.

.thumb.jpg.820ef8140a6f9e998f80a776340a8ffc.jpg)

-
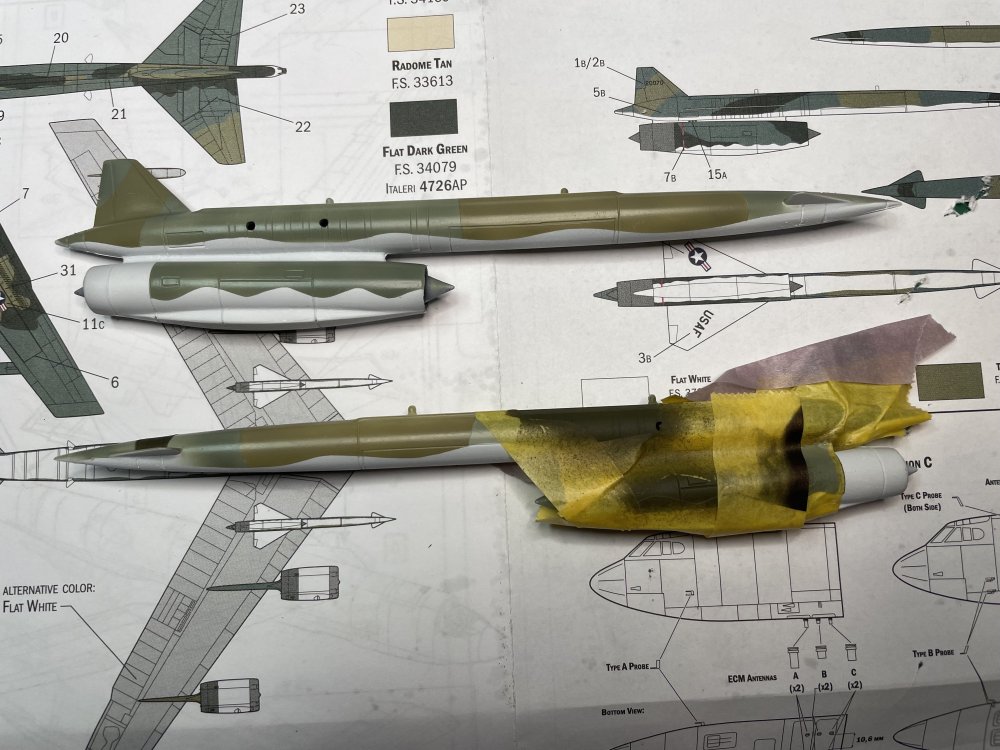
Howdy!! The AK color I used is the AK11346 Forest Green from their AFVI series, the Radome Tan is from their Air series and in all candor, I didn't even realize I was buying those and not Real Colors, when I ordered from SB. They both say they are 3rd Gen. But I used their thinner, not MLT. The result was excellent - flat, sturdy. Just the spraying sounded like an angry cat spitting. I'll try using the MLT shortly - thanks for the suggestion! The kit is going together not fantastically. The halves for the hound dog missiles did not line up very well. I'm thinking that enormous fuselage will have the same issue so I am planning on going not quite inch-by-inch with the Tamiya Extra Thin, but probably pretty close. The dry fitting of the wings shows similar alignment problems. When I get to them in earnest, I'll post pictures. Thanks for the reminder. With my plan to mount this on a poster and frame, the focus is really topside (but I do want the bottom side to look as good as I can get it).
-
I have the exact same problem with the IXC UBoat standing on end in my closet. I'd love to build it, but then where to put it?? On top of my display case, I guess??
-
I did build a Tamiya 335 and it was the usual Tamiya kit: goes together well. This a surprisingly large aircraft. There is one at Udvar Hazy and you can actually walk underneath it without ducking (not that I'm all that tall, but still!)....
-
Seems like a fair price and I agree with you about supporting the "local" LHS! Let me know when you are headed that way again and I'll see if I can meet you at one of the shops.
-
Thanks Mike! It is the largest plane I have attempted to build. I have no idea how I am going to paint this thing actually.... How are things in your part of NOVA?
-
Dave, I've been to that shop but years ago. It is a great find, but you really do need to spend a fair amount of time looking around. I don't know if they are better organized now, but when they first opened there were kits EVERYWHERE! Very cool tho... Glad to see they are still around. How much was the kit?
-
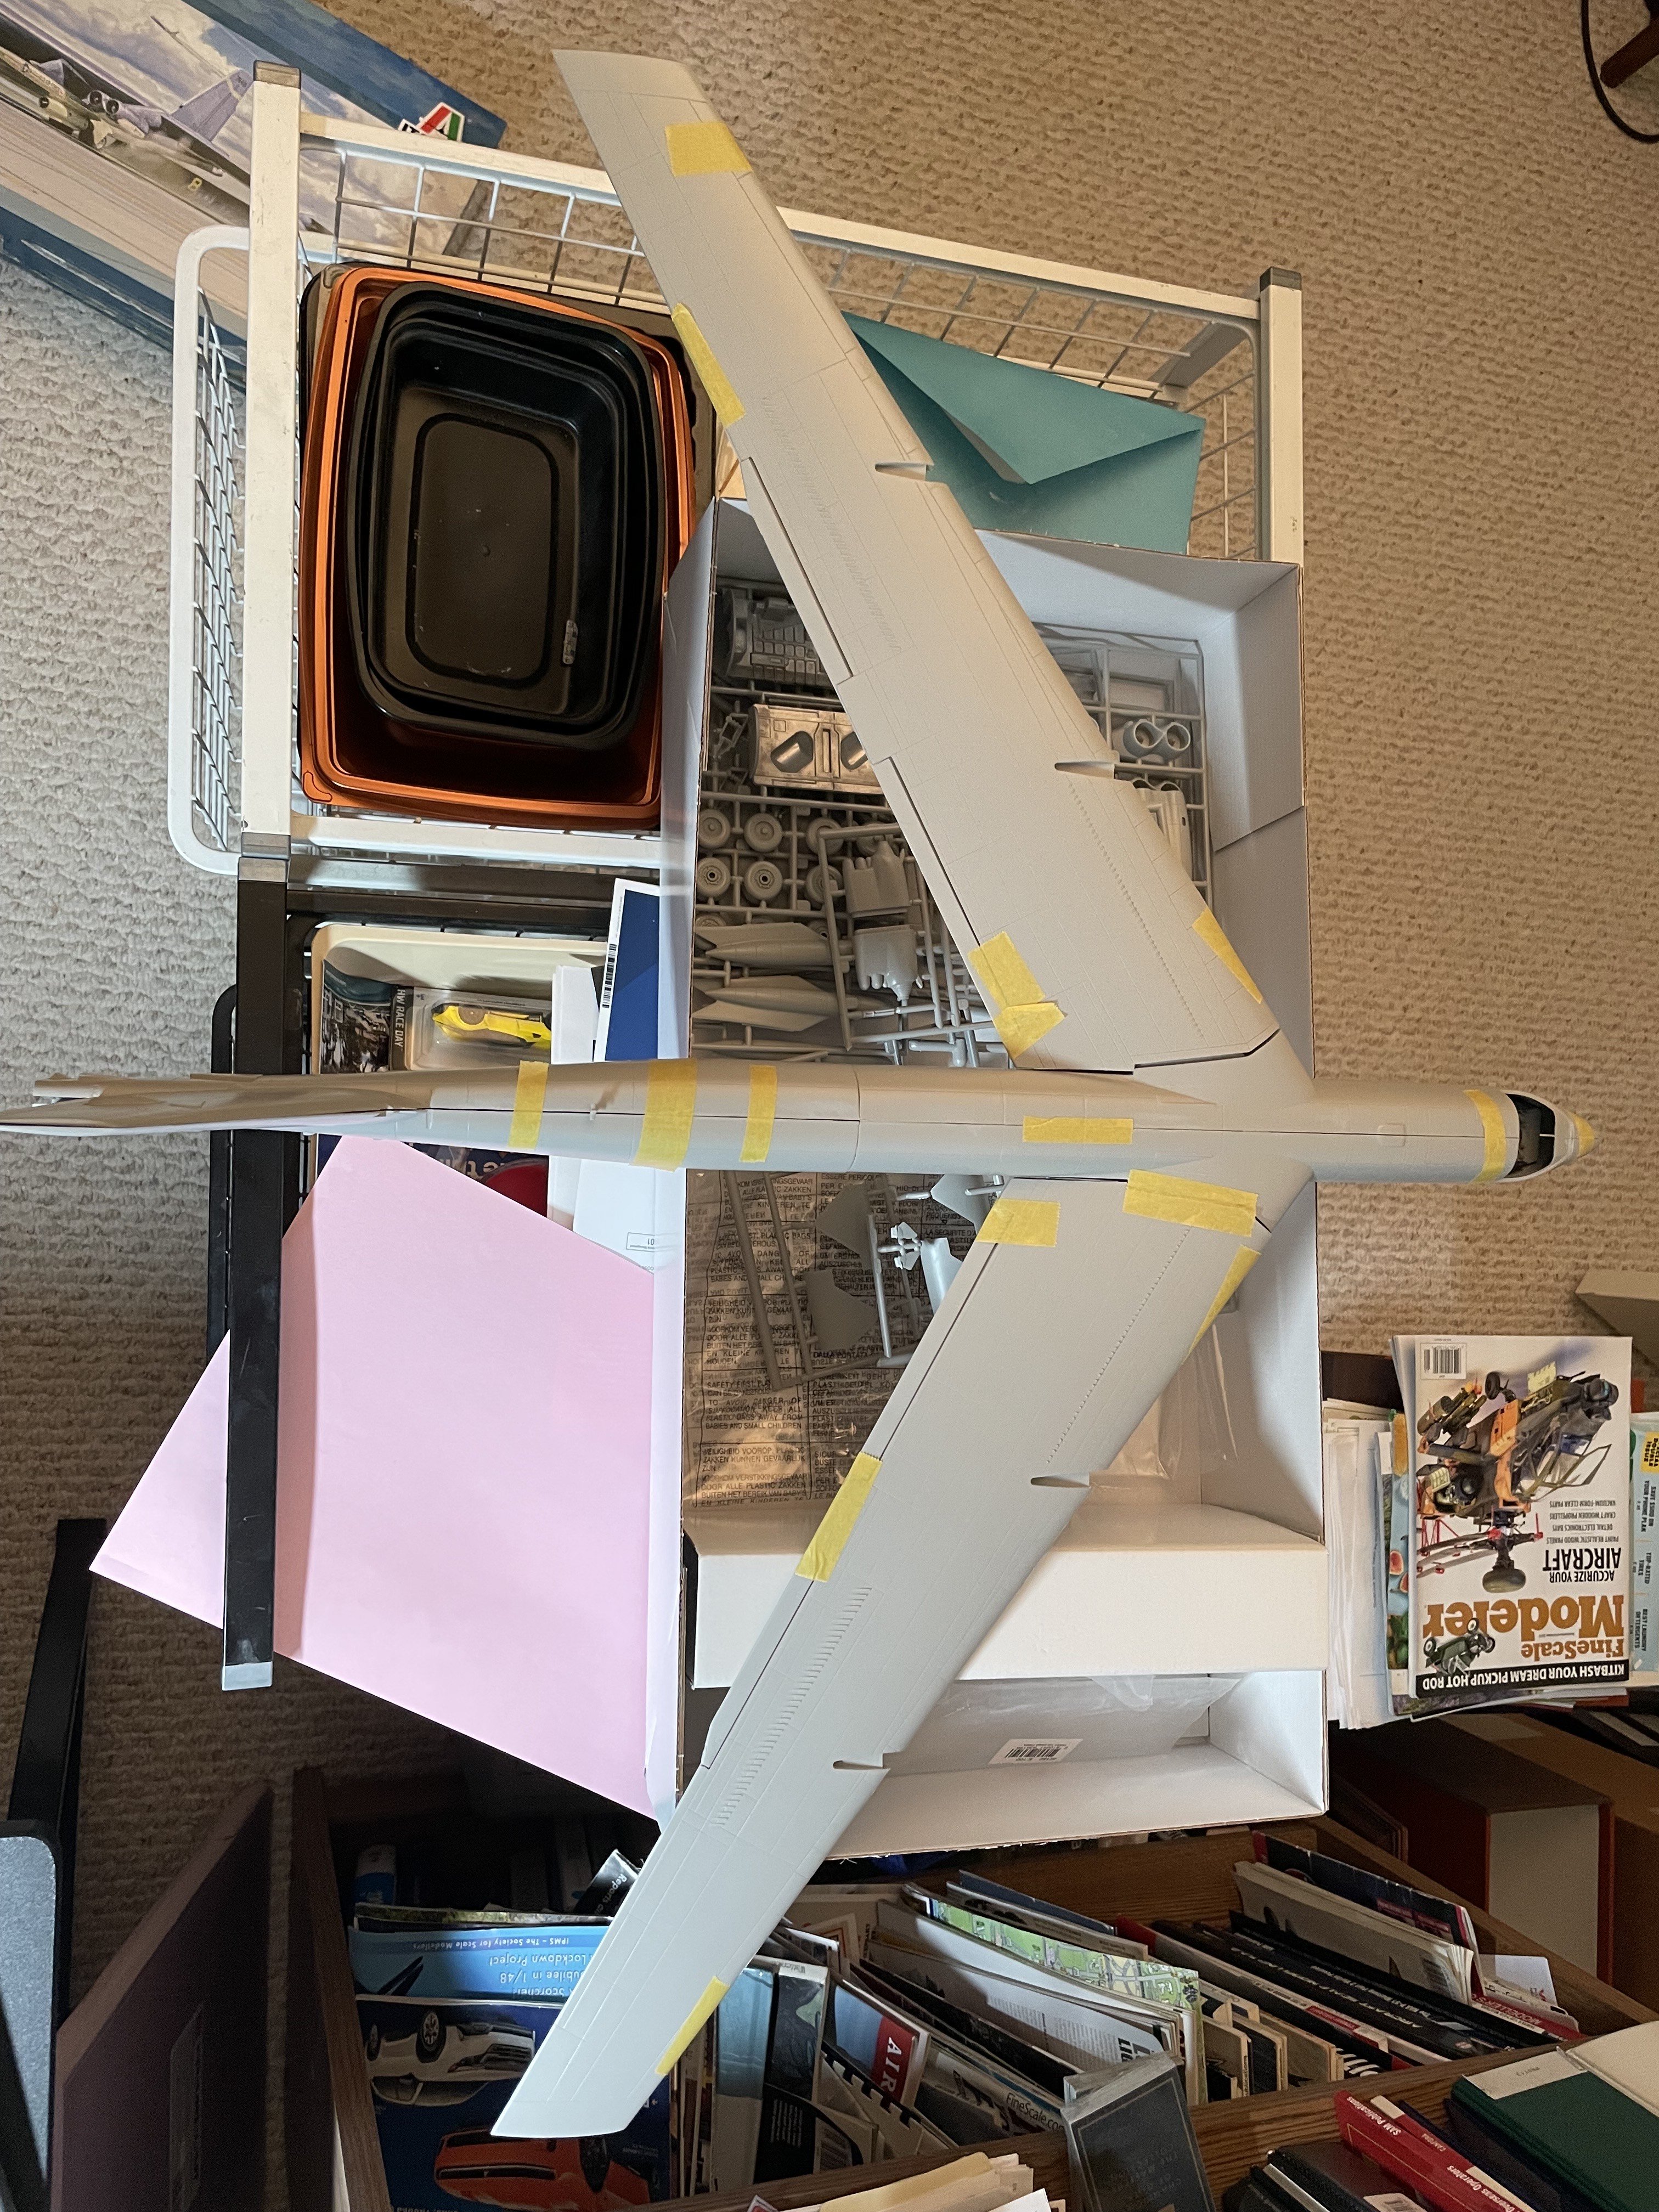
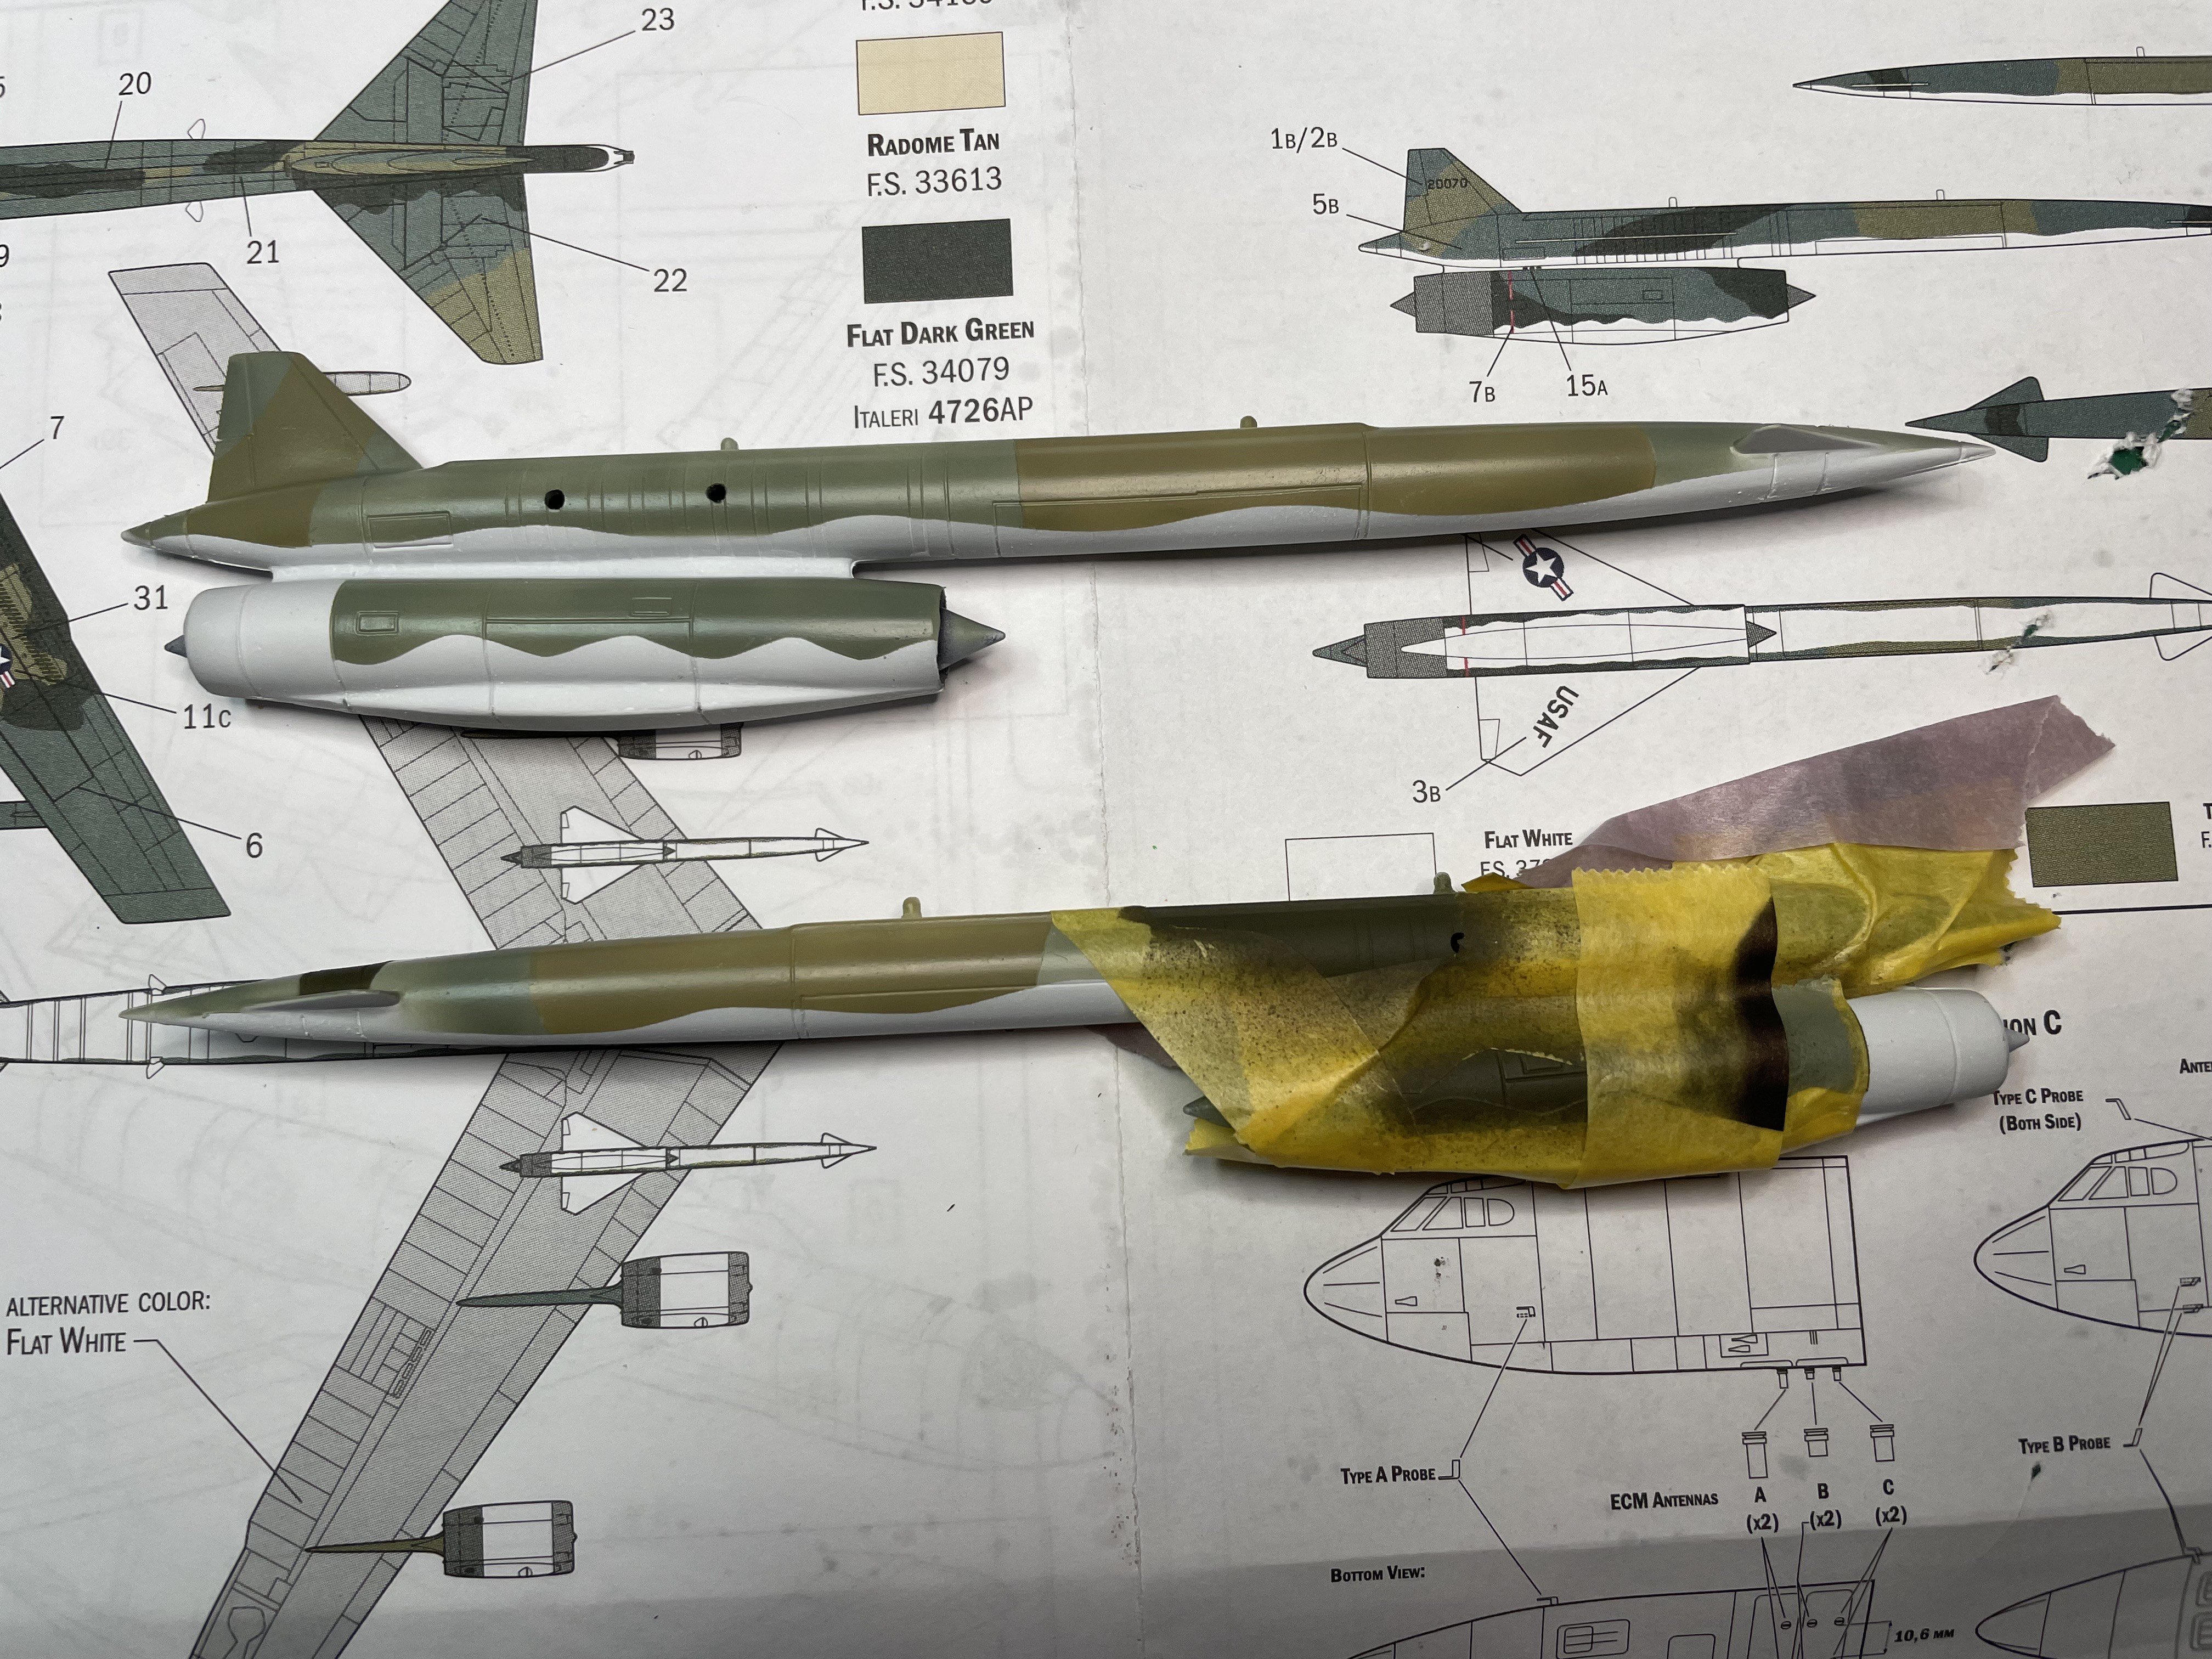
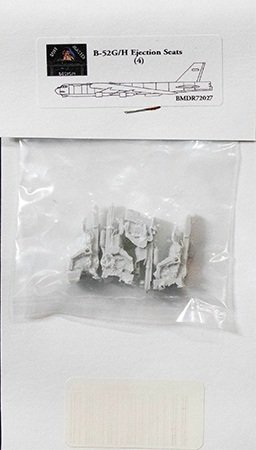
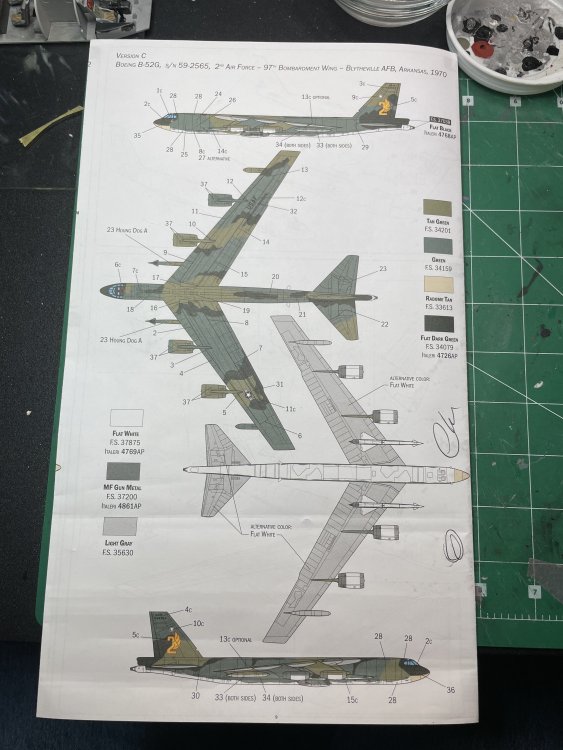
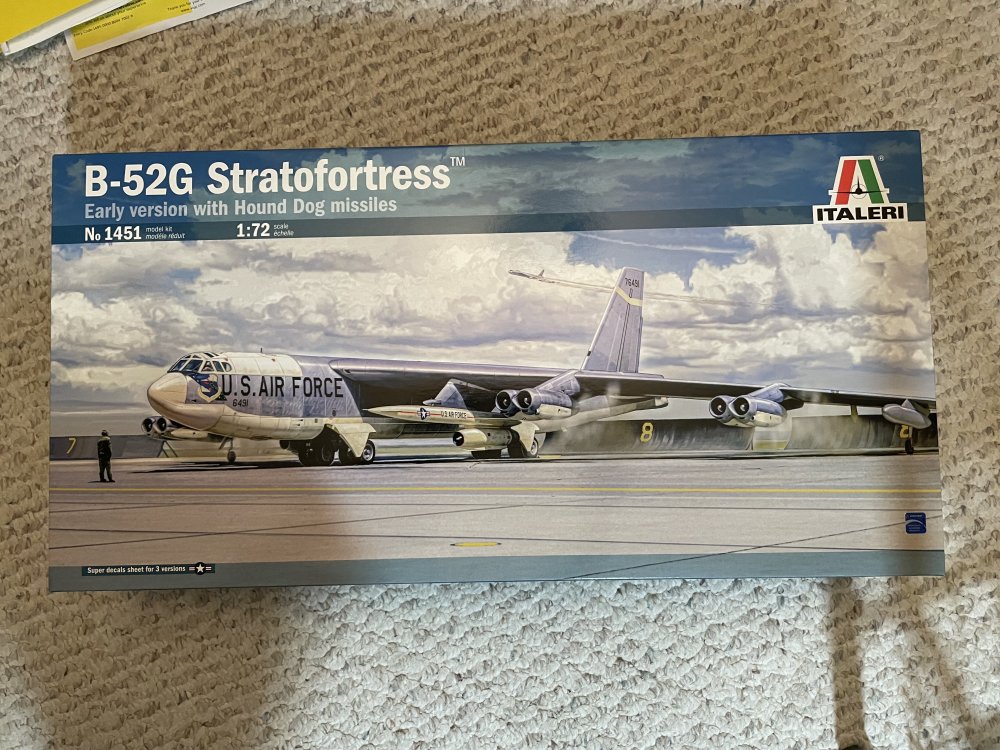
Hi all! I'm kinda back. Too much having gone on and going on to get into, so let's jump into this build. A friend has a huge collection of mostly diecast planes but does not have a B-52. We are trading this build for a nice Burbon (of which I have so little knowledge to be useless on the subject). But my friend has over 500 bottles and knows his stuff. Sorry to be so absent - I'm sure I've missed a lot of what you all have going on. Have missed you all! Here is the kit, however I will be doing one out of Barksdale AFB in SEA camo: I debated on the Italeri or the Modelcollect but my friend bought the Italeri kit so here we go. This thing is MASSIVE.. OMG. There is literally NO detail in the bomb bays, and the early G's did not have wing pylons for bombs. Just the nuclear Hound Dog missiles which were never used in Vietnam. But my friend wants the missiles, so... The build will be showing 'in-flight' and I'm thinking of printing off an aerial shot of a Vietnam bomb run and having this 'fly' over the picture, attached to a picture/display frame. More on this later... Kinda disappointed in the cockpit, but it is 1/72 so it is not as bad as it could be. However, it turns out I used the wrong IP. There were 2: One flat panel intended for use with the IP decal, and a panel with the raised gauges, switches, displays, etc. Yeah, I used that one for the decal with tons of setting solution. However, in this scale, through the cockpit windows, will anything be seen?? Isn't that nice! They had a bed in the cockpit... Since my friend wanted the missiles, here they are, getting their camo. I'm primarily using MRP paints but could not get the Flat Dark Green in MRP so thought I would try the AK Interactive paints. I can't decide if that is a mistake or not. I failed to ready any reviews before I bought a couple of bottles of the Dark Green (did I mention this is a huge plane??). Lots of reports of sputtering even with thinning, that the paint doesn't thin well with their own thinner, and various concoctions of other thinners, retarders and what-have-you. I bit the bullet, thinned it about 50% with the AK thinner and stirred the heck out of it. Still seemed to separate in the cup. Weird. However, the Dark Green, despite sputtering a lot while spraying, seems to have sprayed pretty smoothly. Anyone have thoughts about the AK paints? More to come!

-
Thank you! I do sell them, mostly locally and we have a crafts fair coming up that I'm trying to stock up for. Prices range from $95 to $30 for some of the Slimline pens. I can send you more pics if interested and let me know what catches your eye. I have about 30 pens at the moment. Thanks for asking!
-
Sorry folks. Been far too absent and have missed you all. Lots going on, as usual. Elderly mom is declining and trying to put guardrails up to keep her from getting taken advantage of/making bad decisions that would impact her quality of life/etc. is taking a disproportionate amount of time. Its hard when you know she needs help, but legally it is very difficult to show cause to take over responsibilities. On the flip side, have been doing more on the pen making, as it is a nice distraction that only takes a couple of hours to accomplish. Here is some of my recent work, using custom acrylic blanks I picked up at the recent DC Pen show. I knew nothing about this entire world (mostly about fountain pens). Also looks like I am going to pick up a commission build of a 1/72 B-52 so will make that a build thread. Take care, all! Chris


-
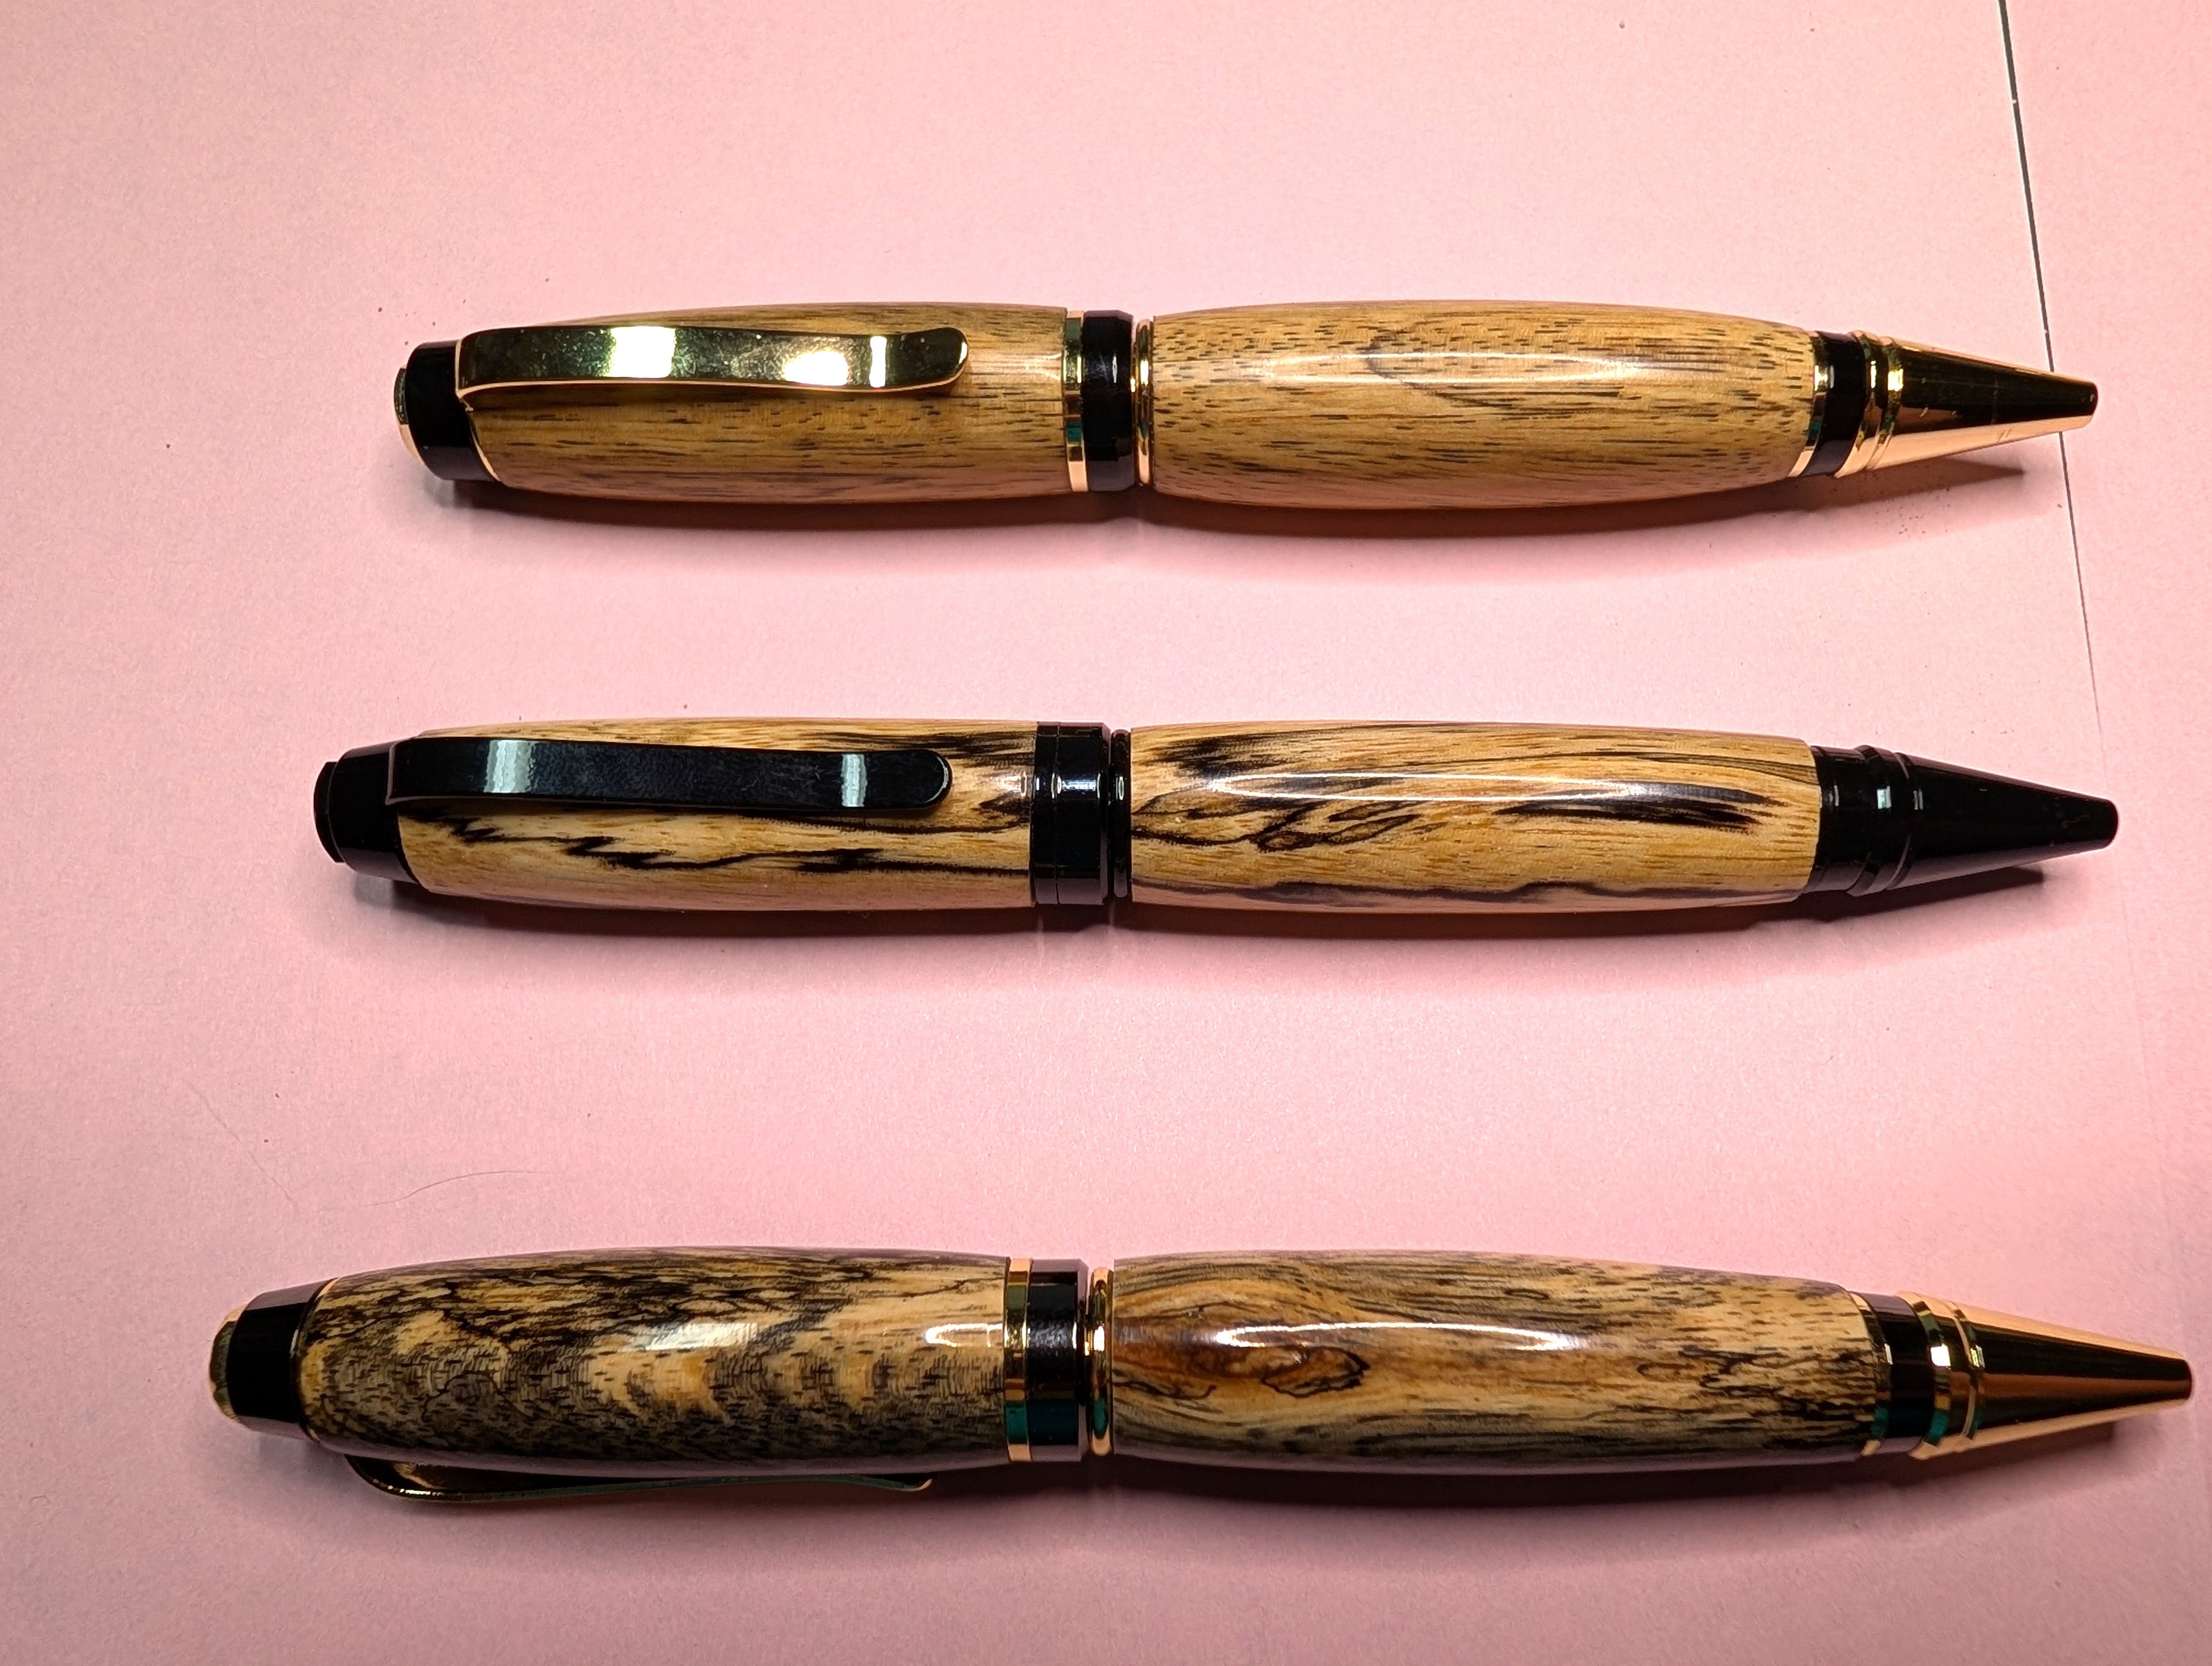
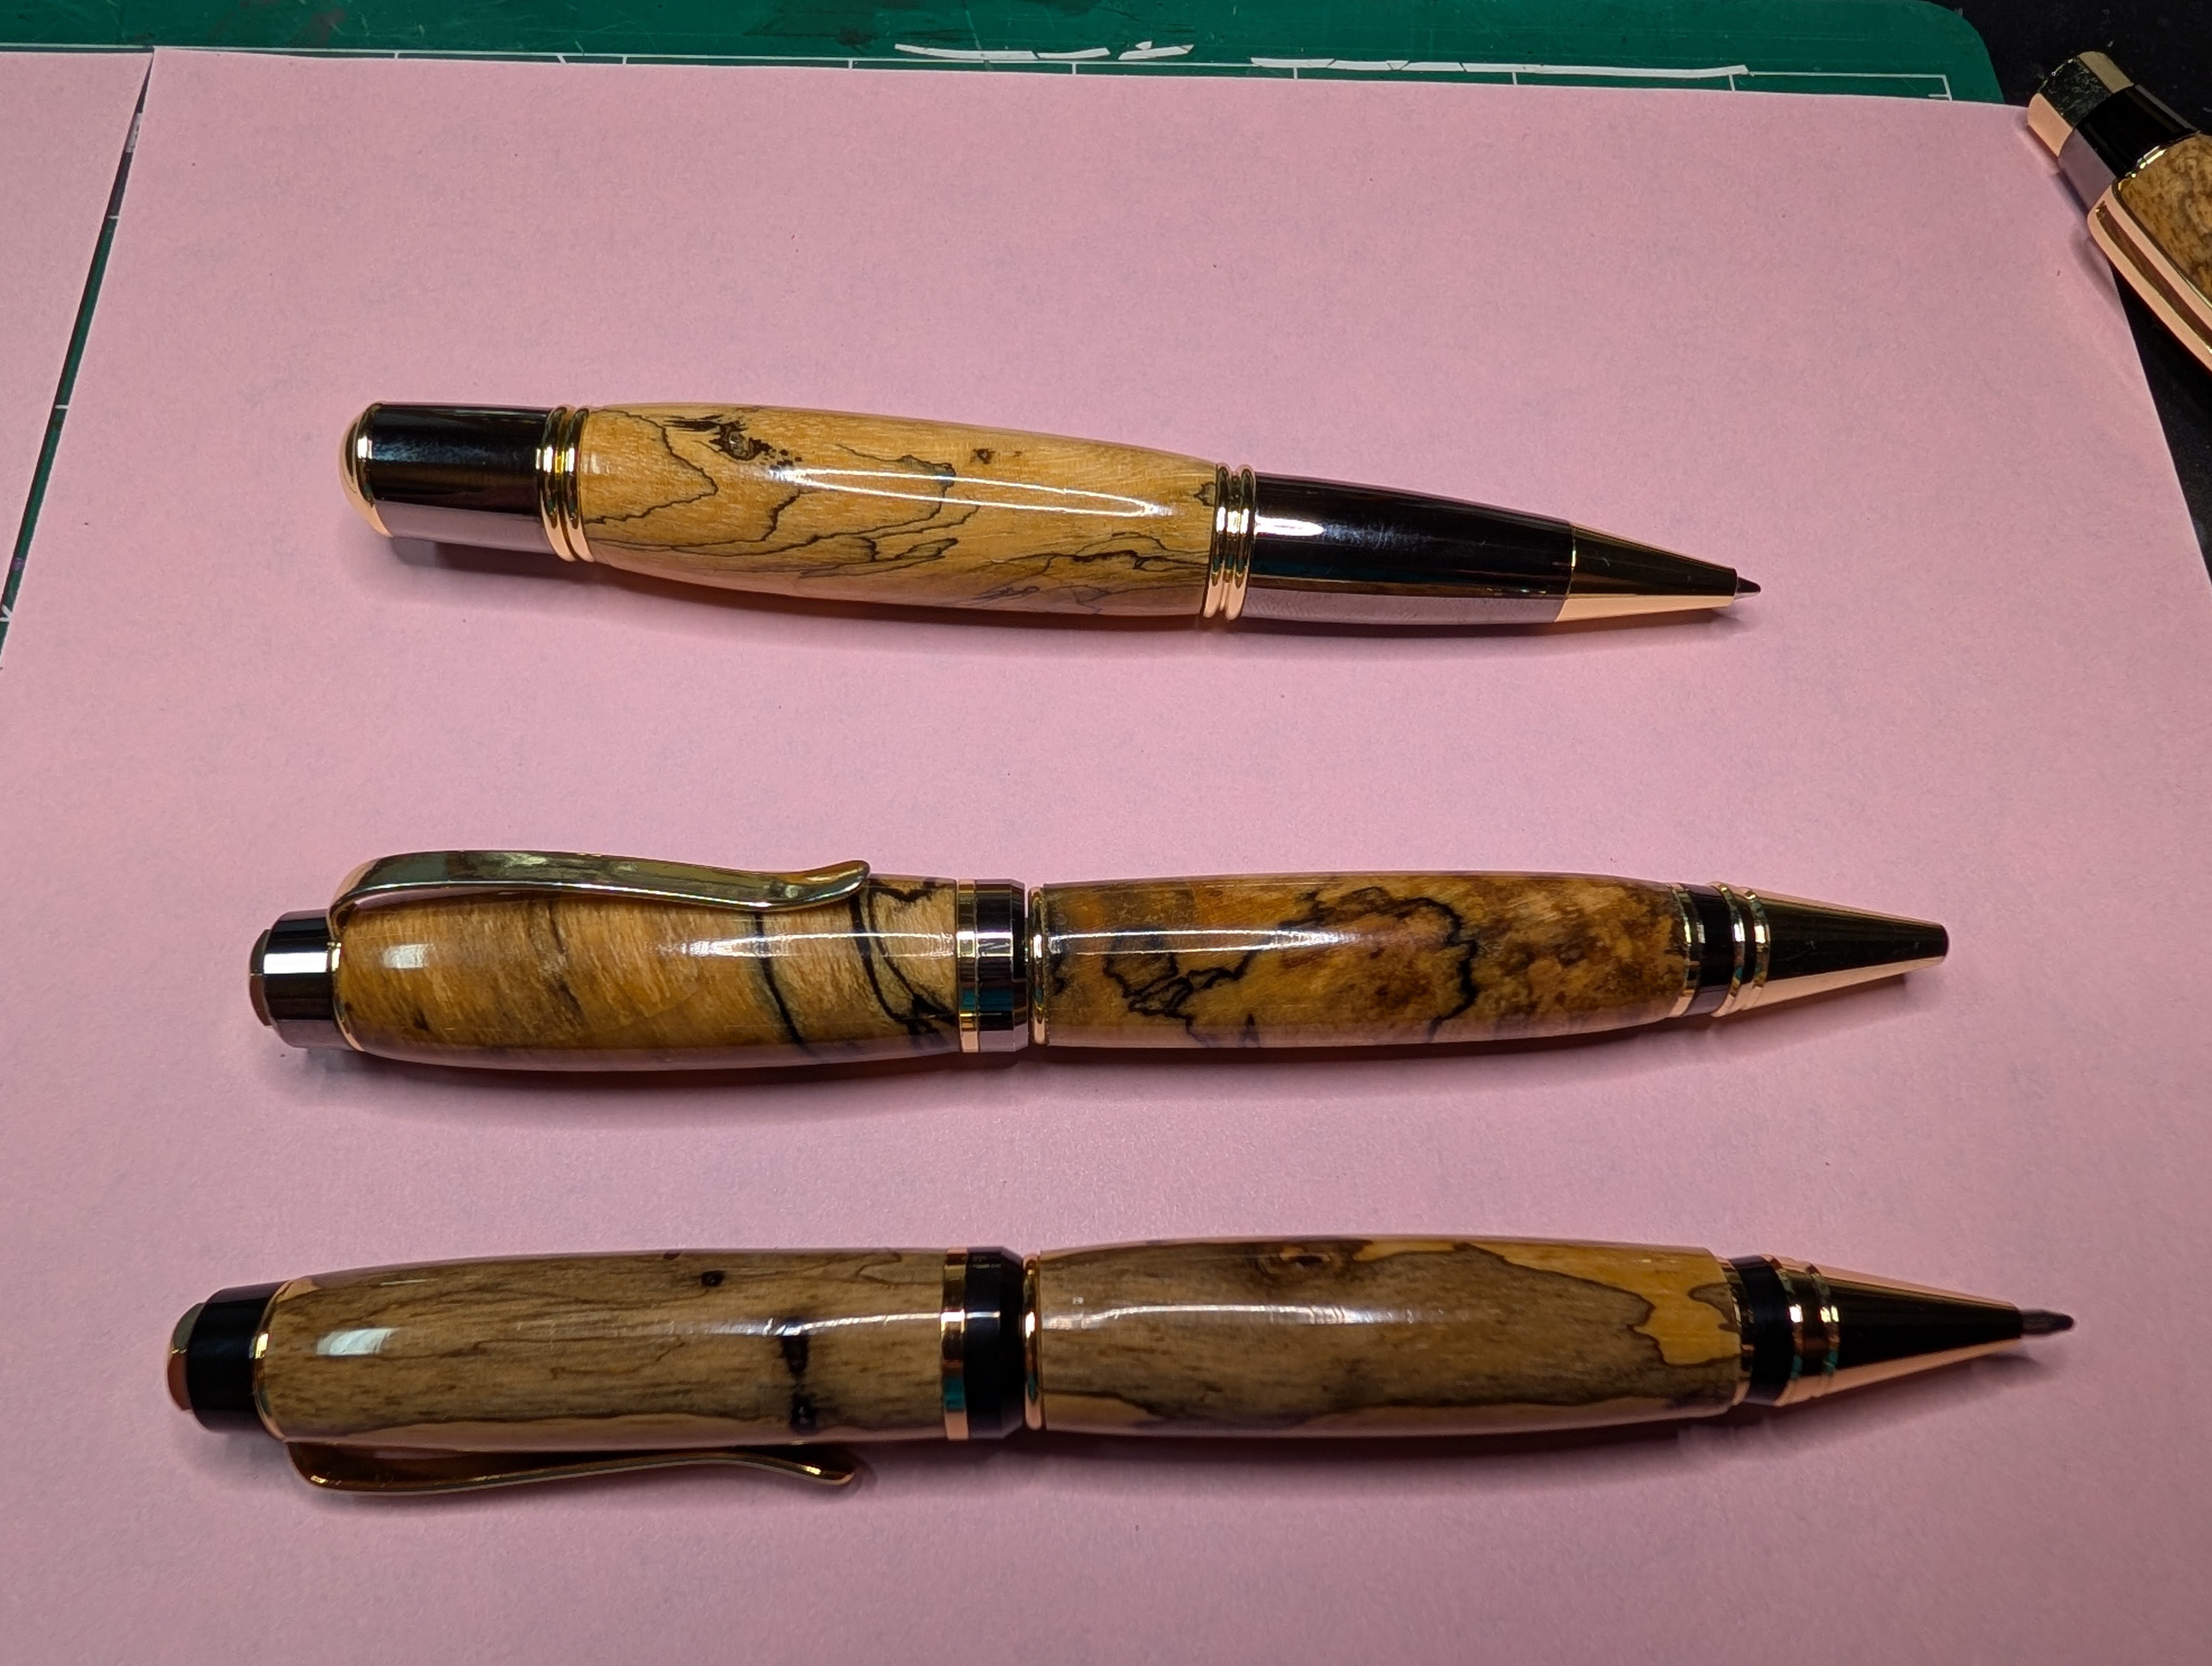
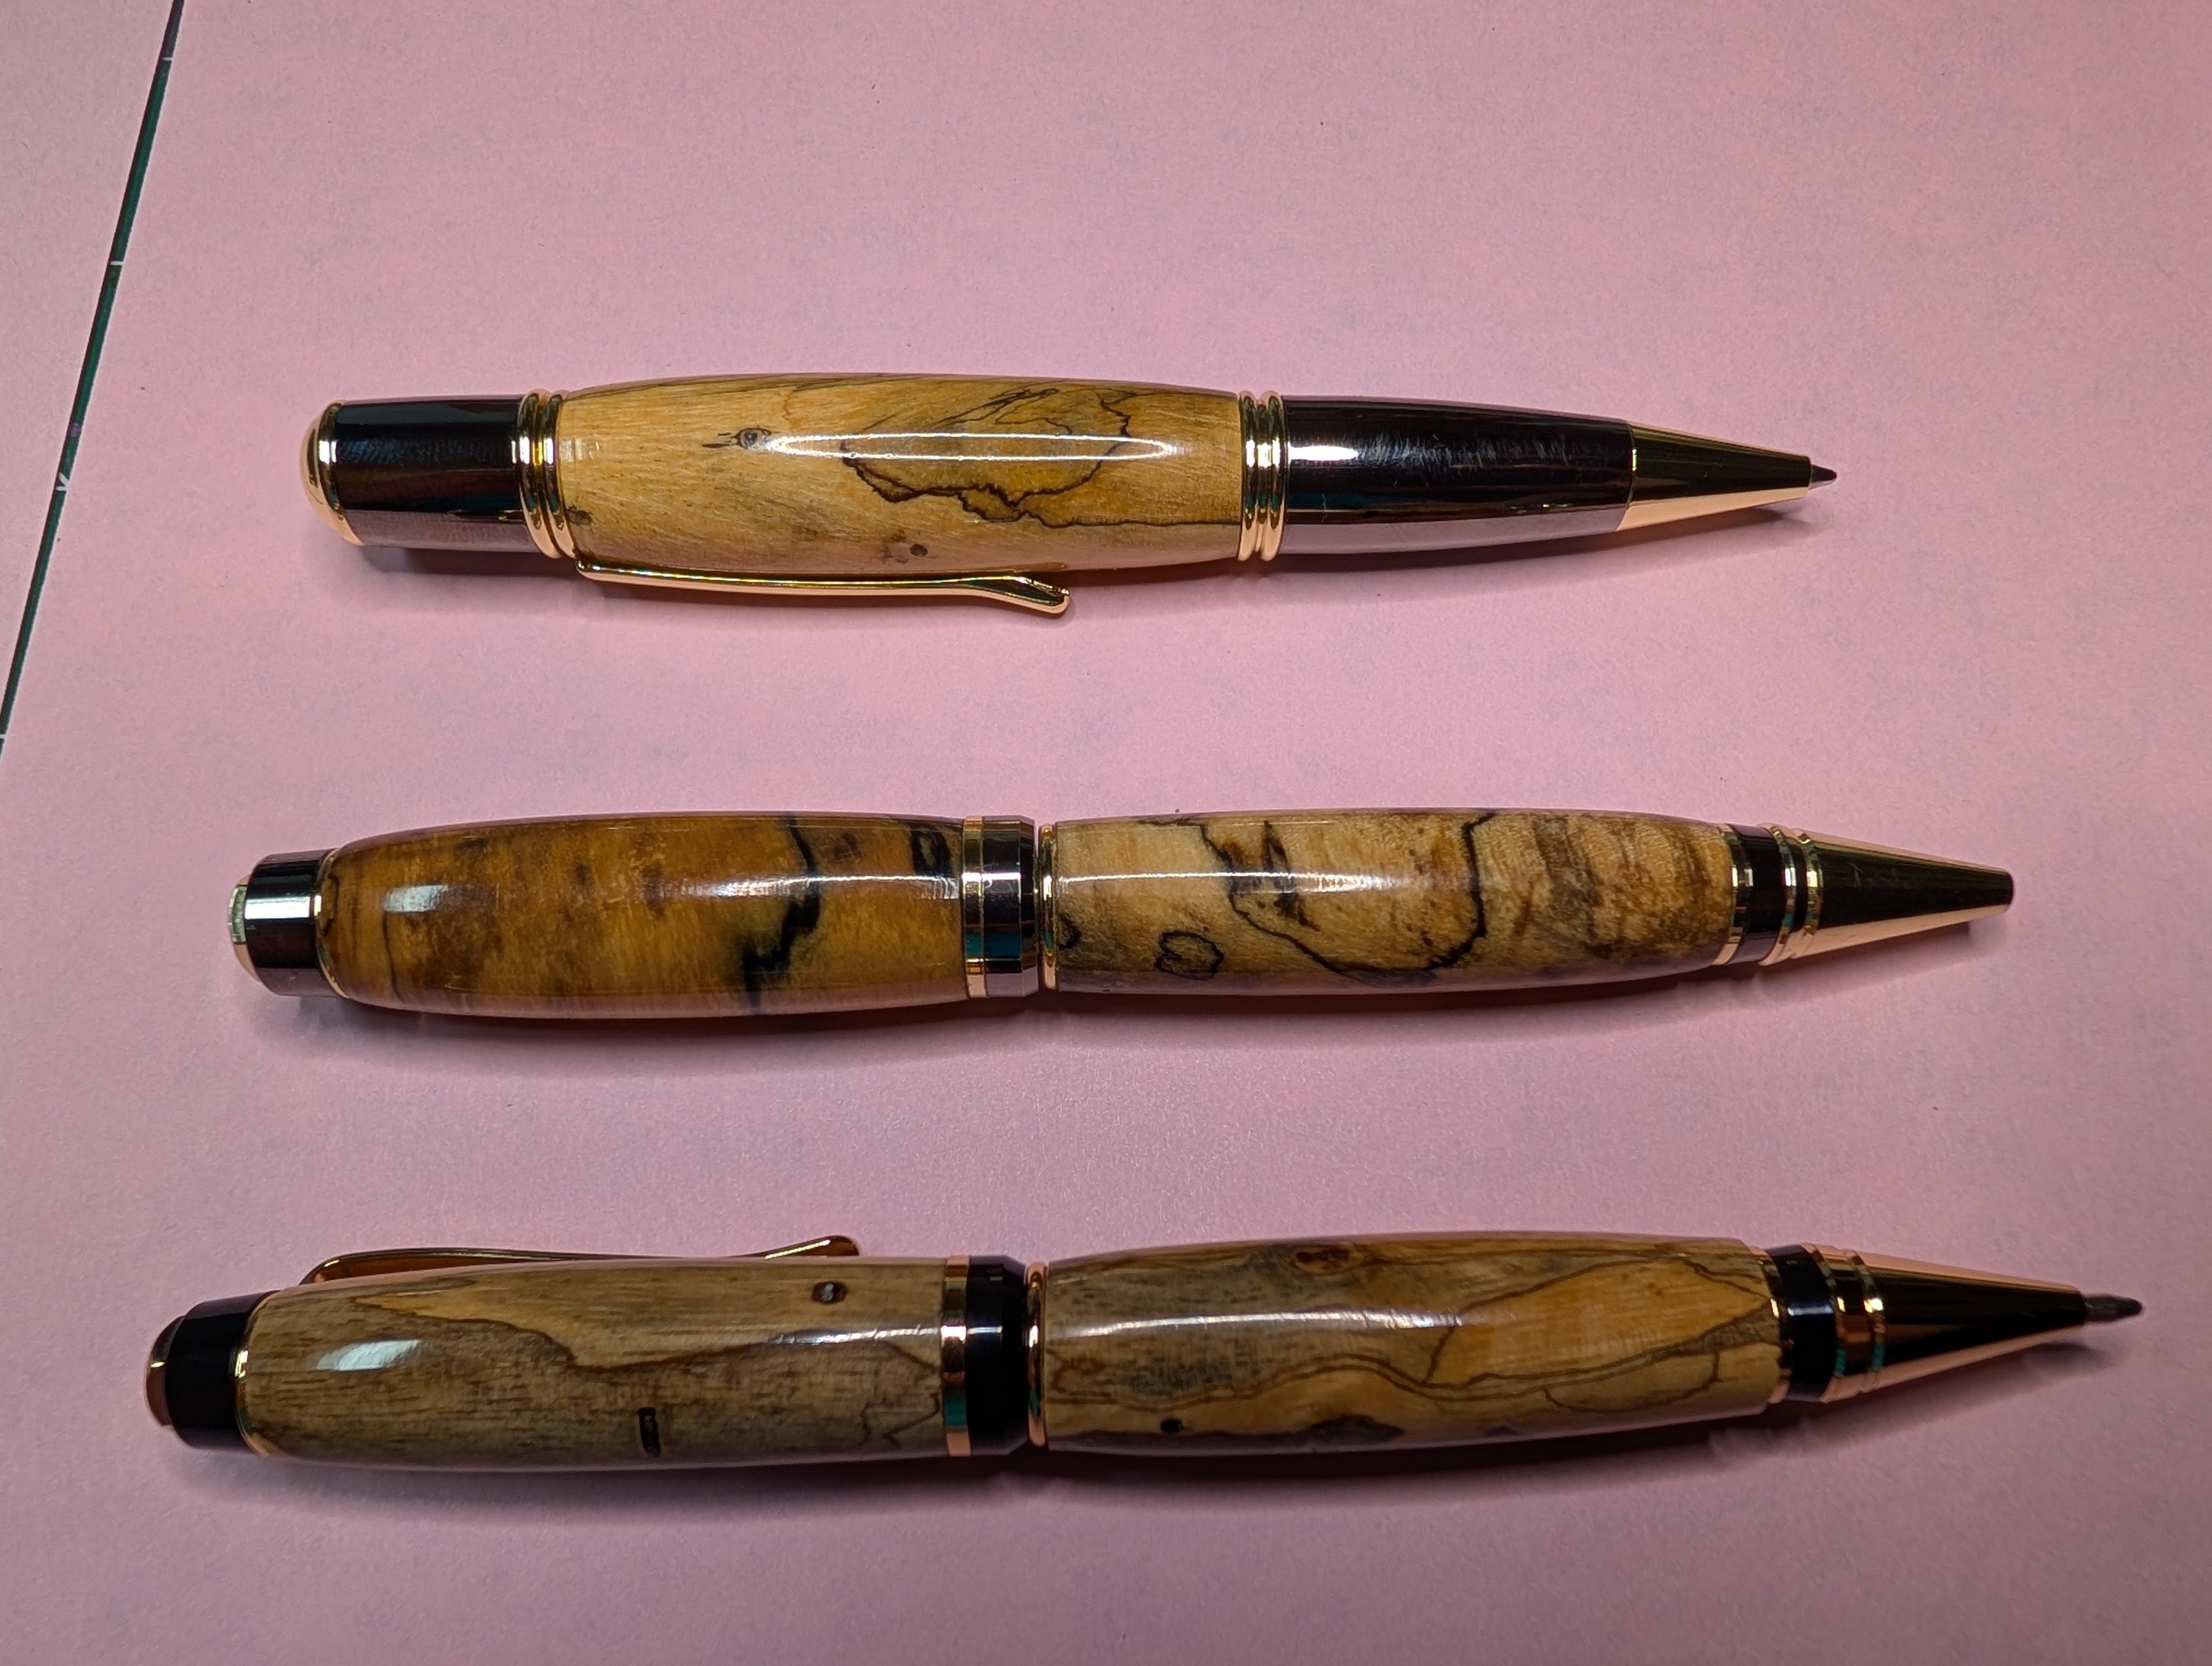
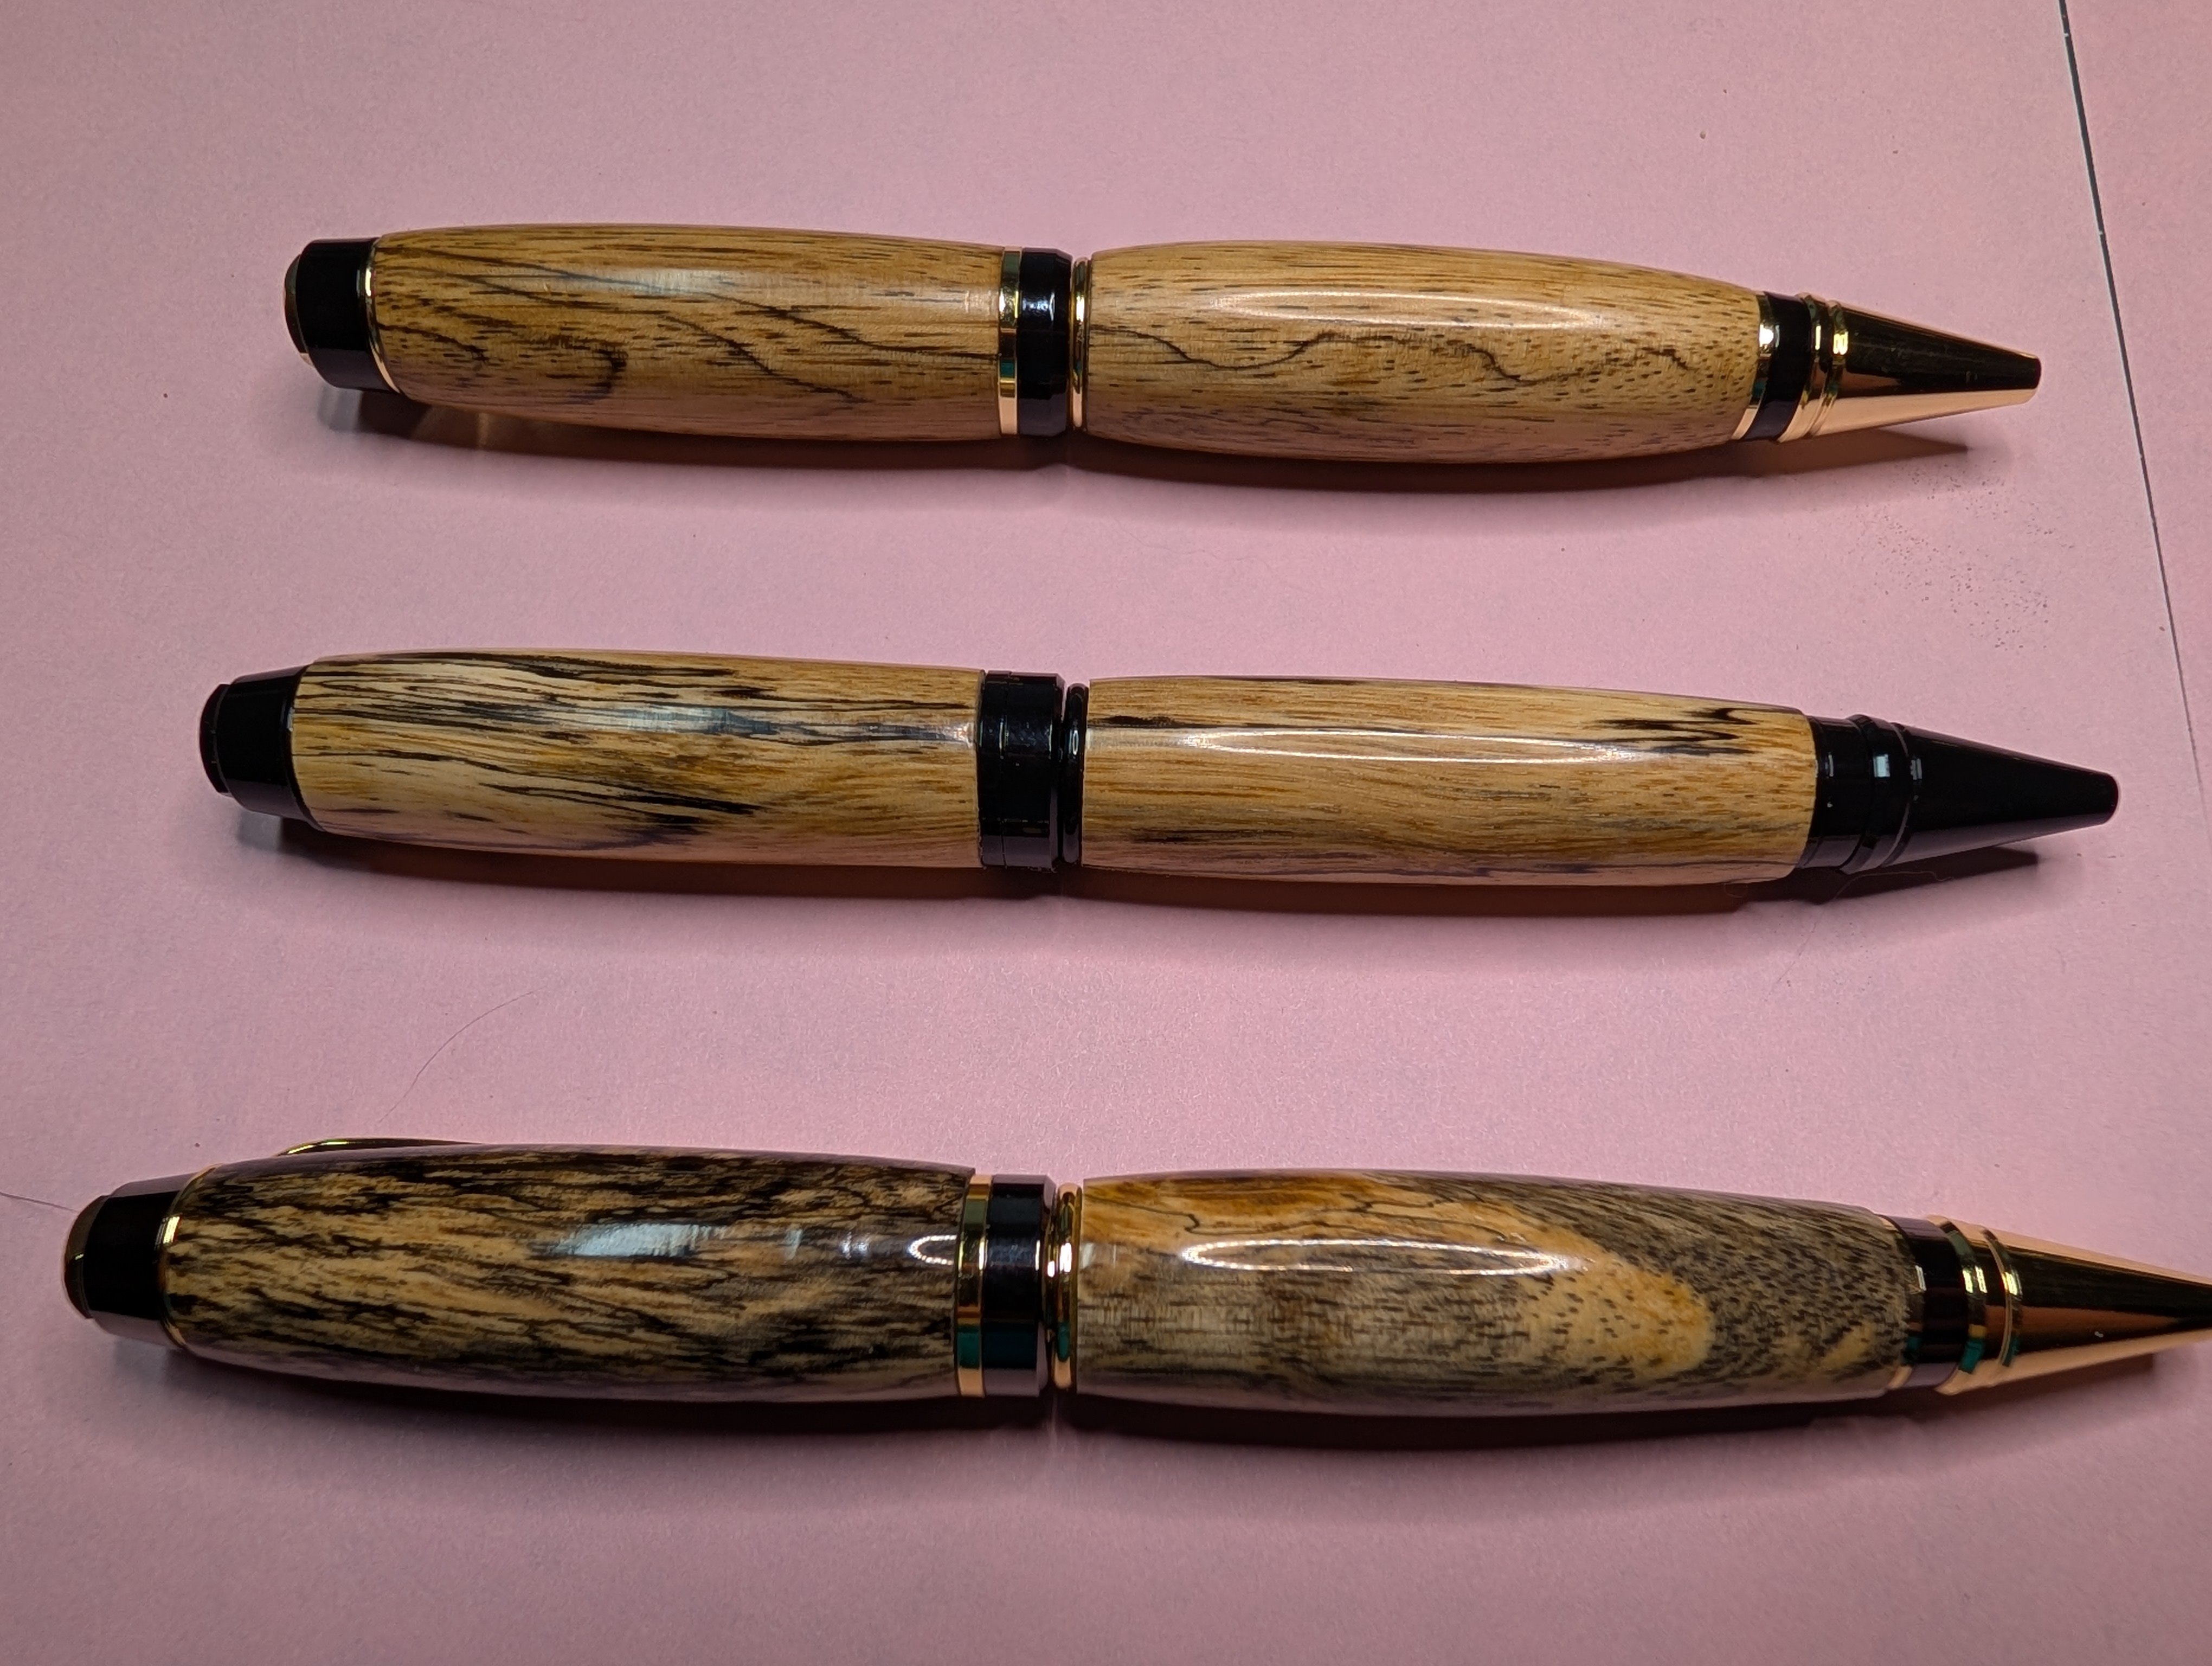
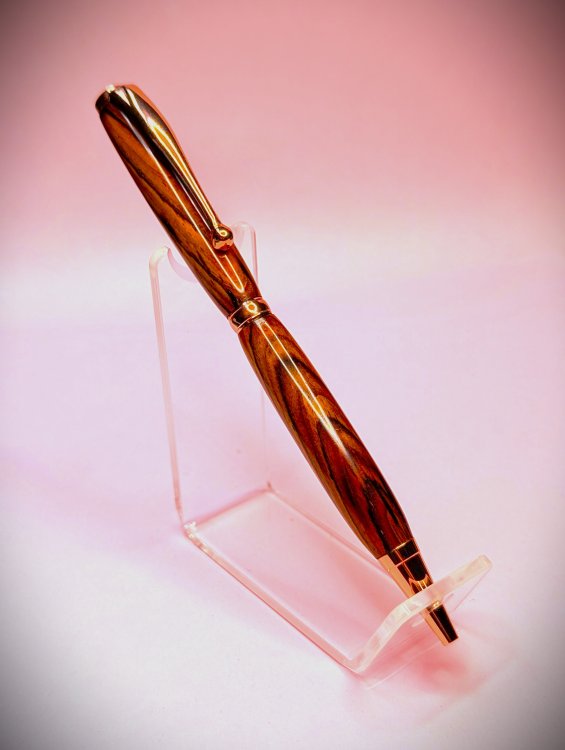
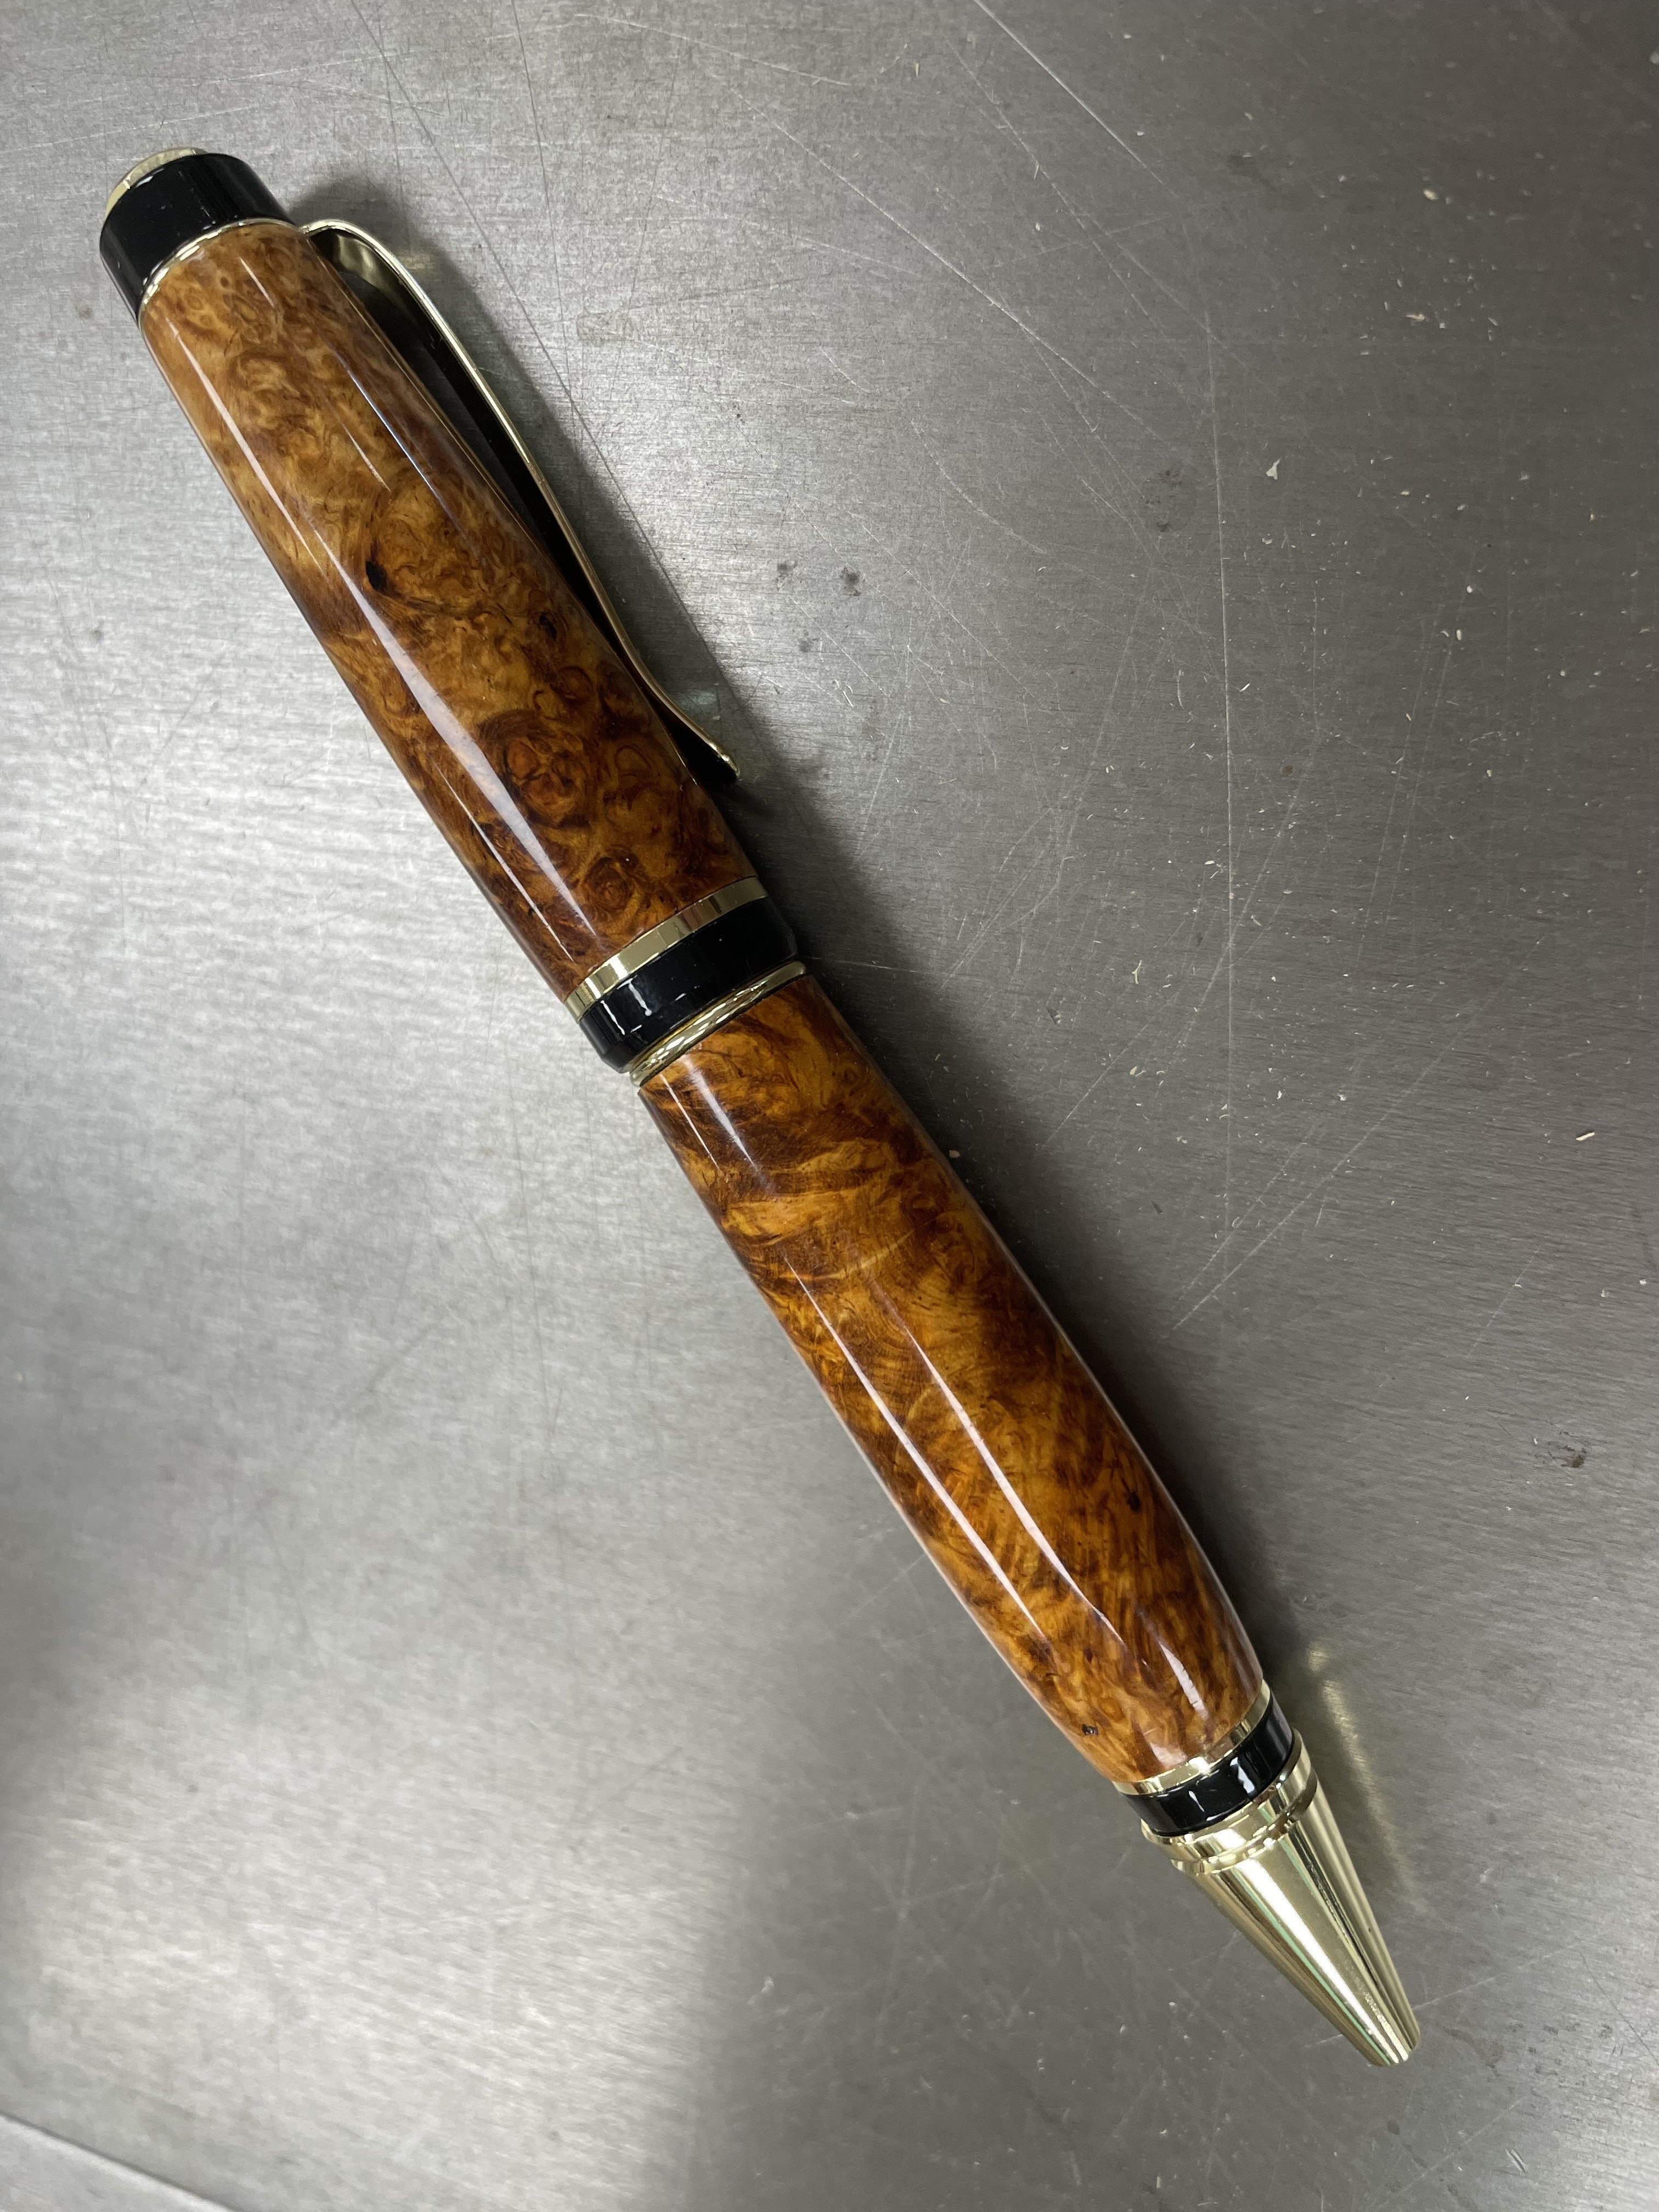
Thanks for the comments and the sharing. We really do have a nice community here. I'm looking forward to getting back to the bench, but not quite ready to do that yet. Kinda fun making the pens as I can finish one in a few hours, so the gratification is a lot faster! Here are some of my current pens. Mostly spalted woods, some Ambrosa Maple, Olive Wood and Cocobolo. The finish is CA, wet sanded. It is nearly indestructible! I carry one of the pens pictured below in my back pocket and have for a couple of years (it's the 8th pen pictured below).


-
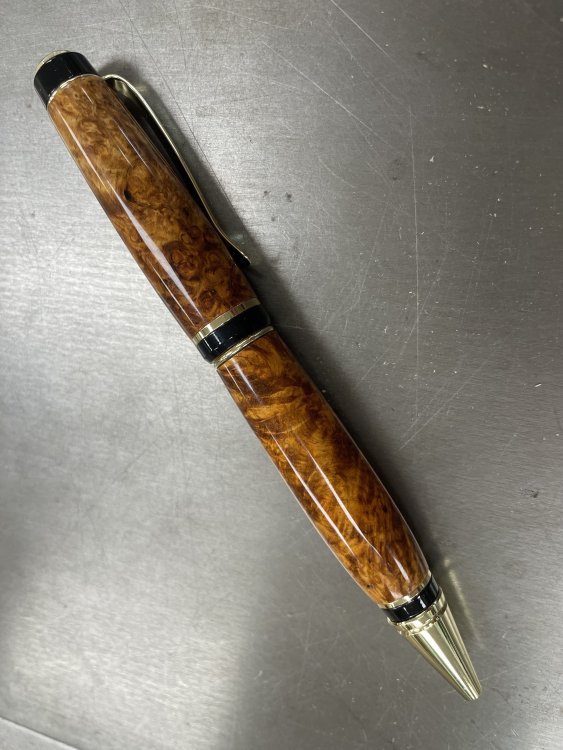
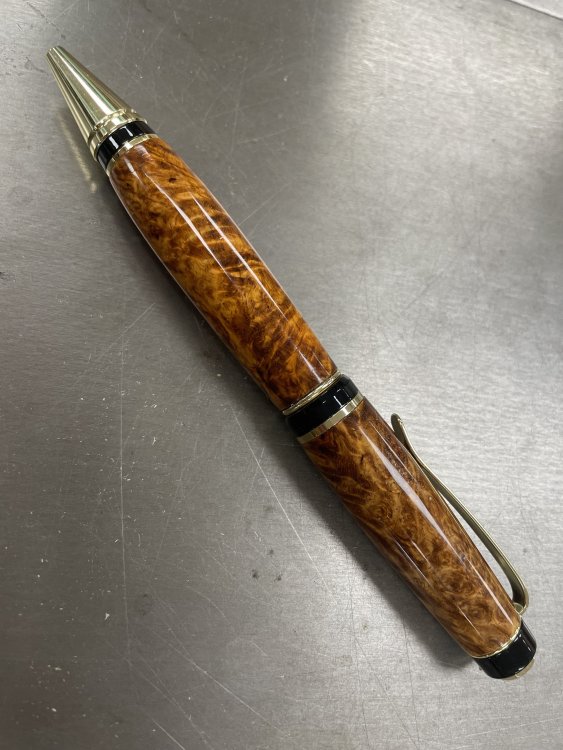
Mike and Mark, thank you for your support! It means a lot. Mike, I do have some nice wood blanks - I really like spalted and stabilized blanks - and have one pen I'm having to work on the finish - it's getting there. I've never turned acrylic but the guy who taught me only turns acrylic. I'll get some pictures to post for you. Cheers, gents!


.jpeg.702853c65669c23dc72fa5fc3d2deeb9.jpeg)
.jpeg.3aa5e59368436b7cb703b3c3139cfa19.jpeg)


.jpg.42f4874a4366ea04d7e30724dbc7aa03.jpg)