CANicoll
-
Posts
1,928 -
Joined
-
Last visited
Content Type
Profiles
Forums
Events
Gallery
Everything posted by CANicoll
-
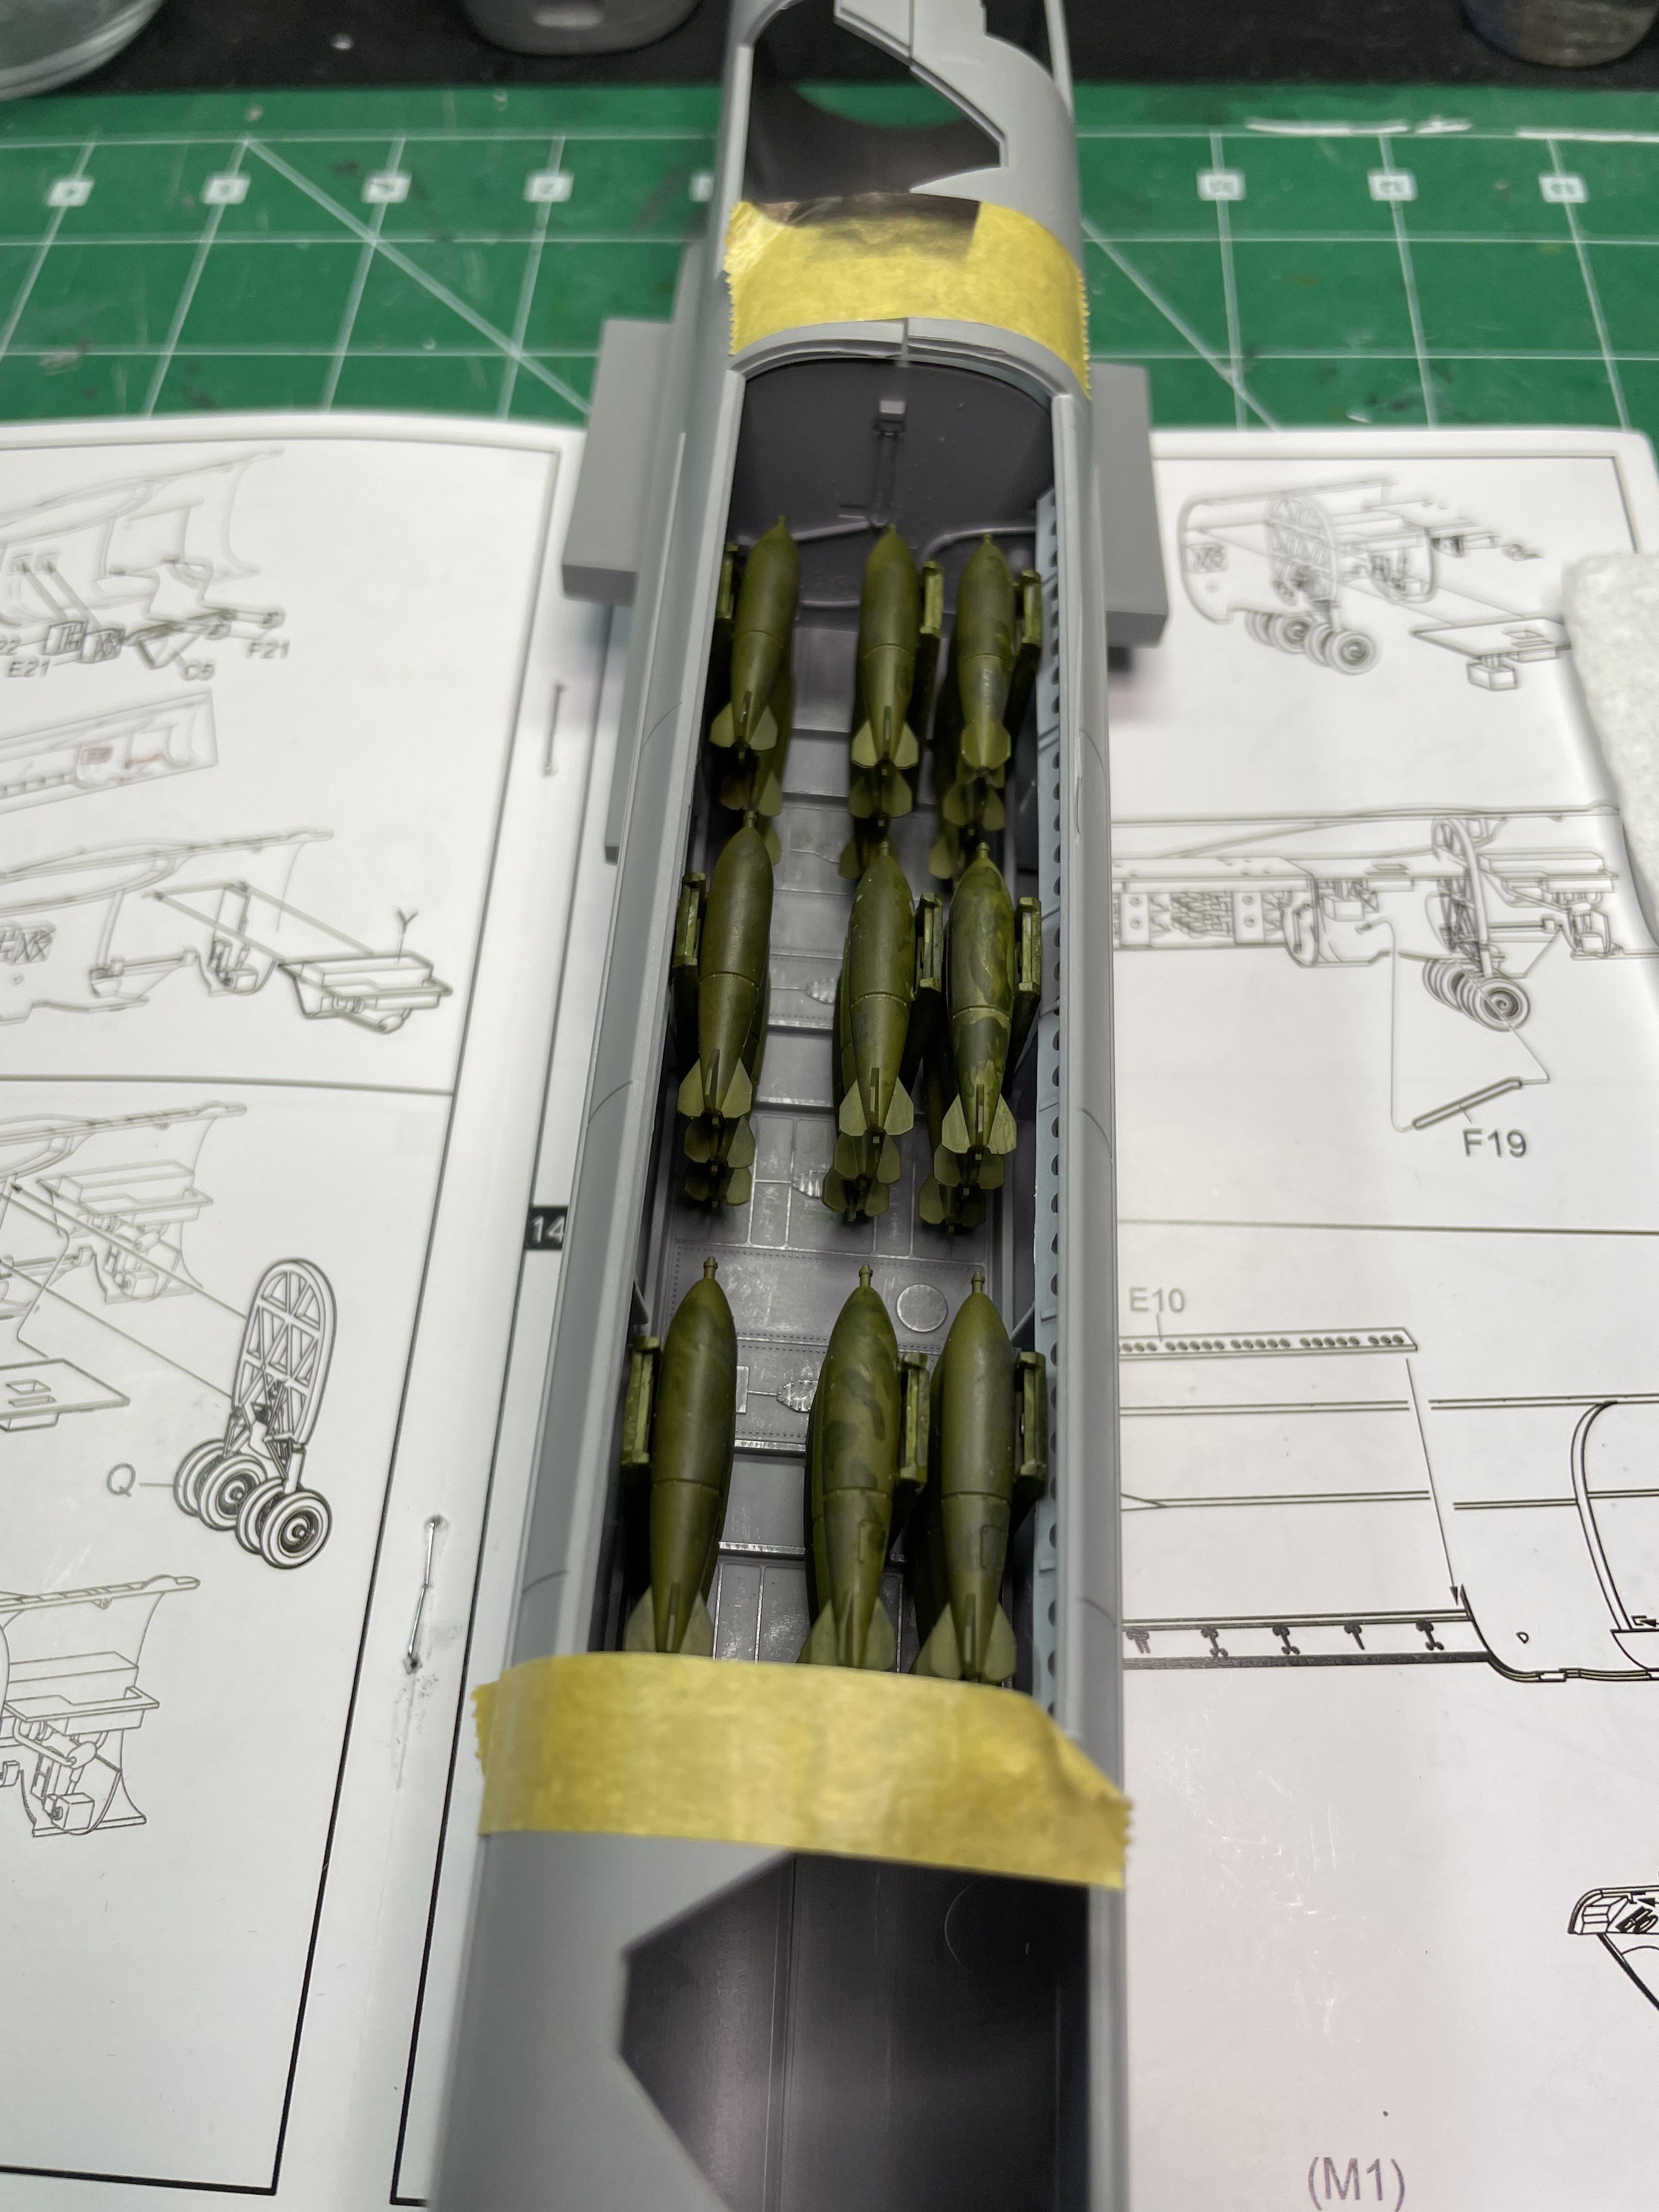
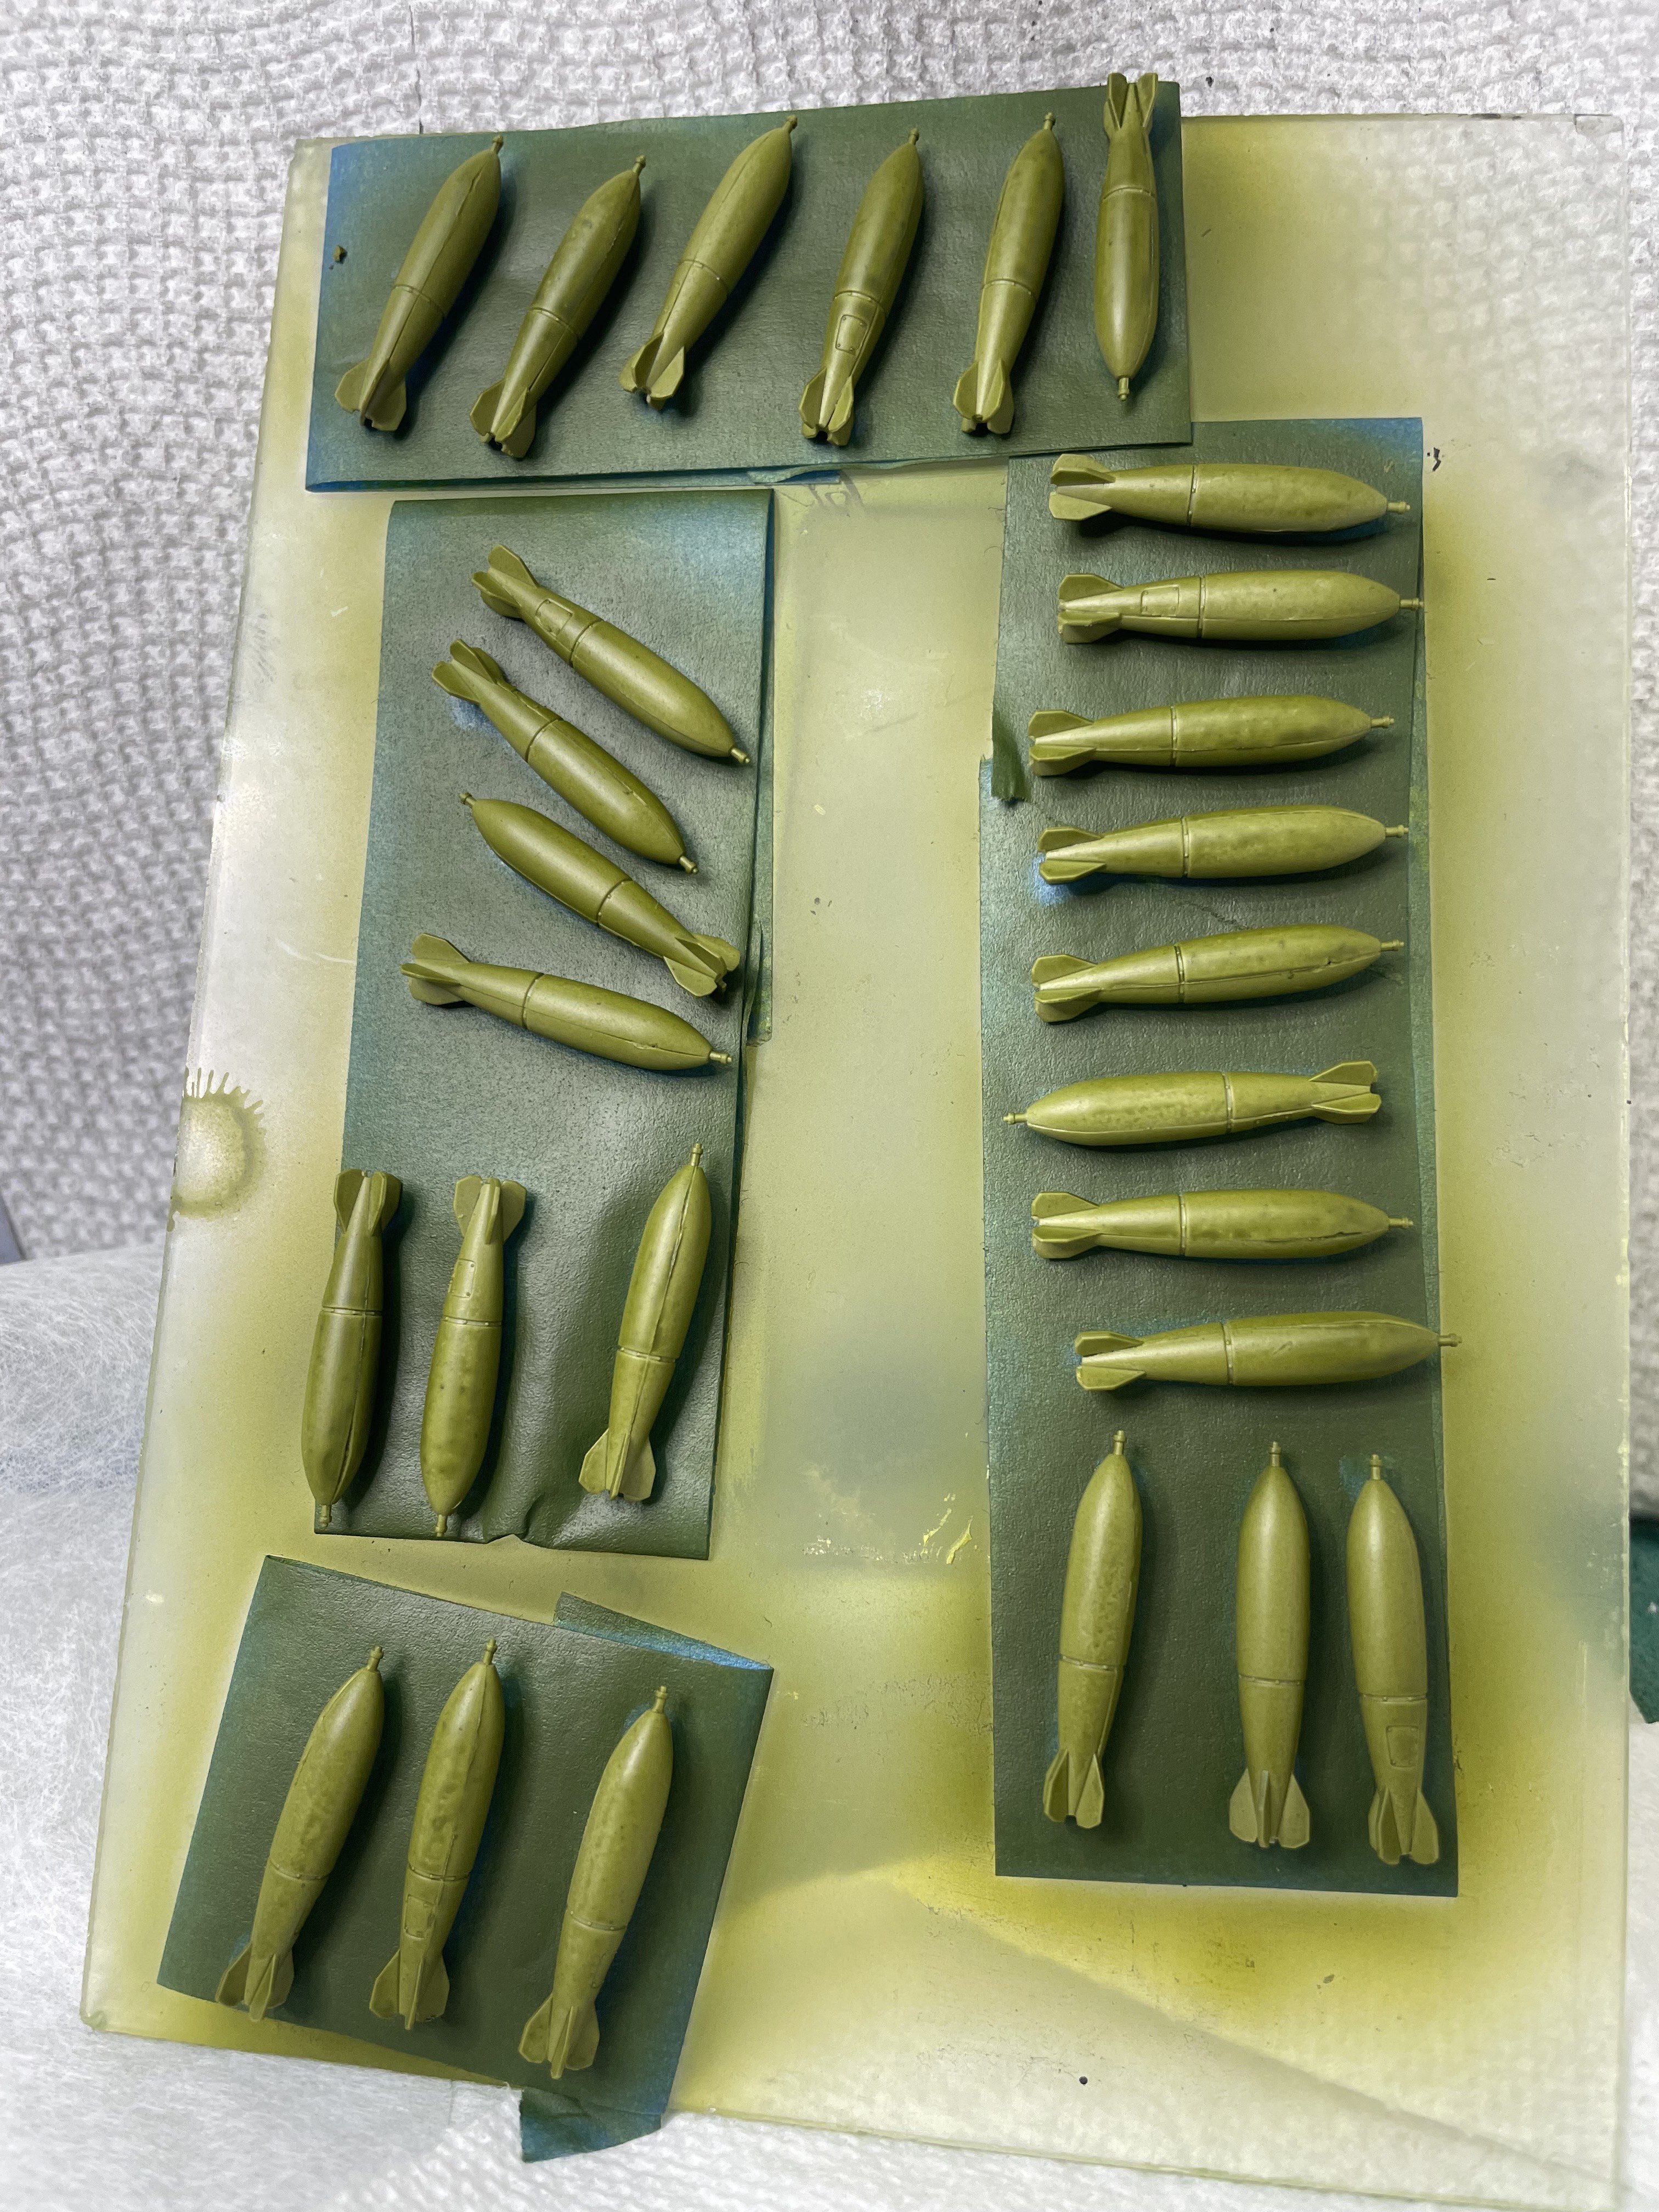
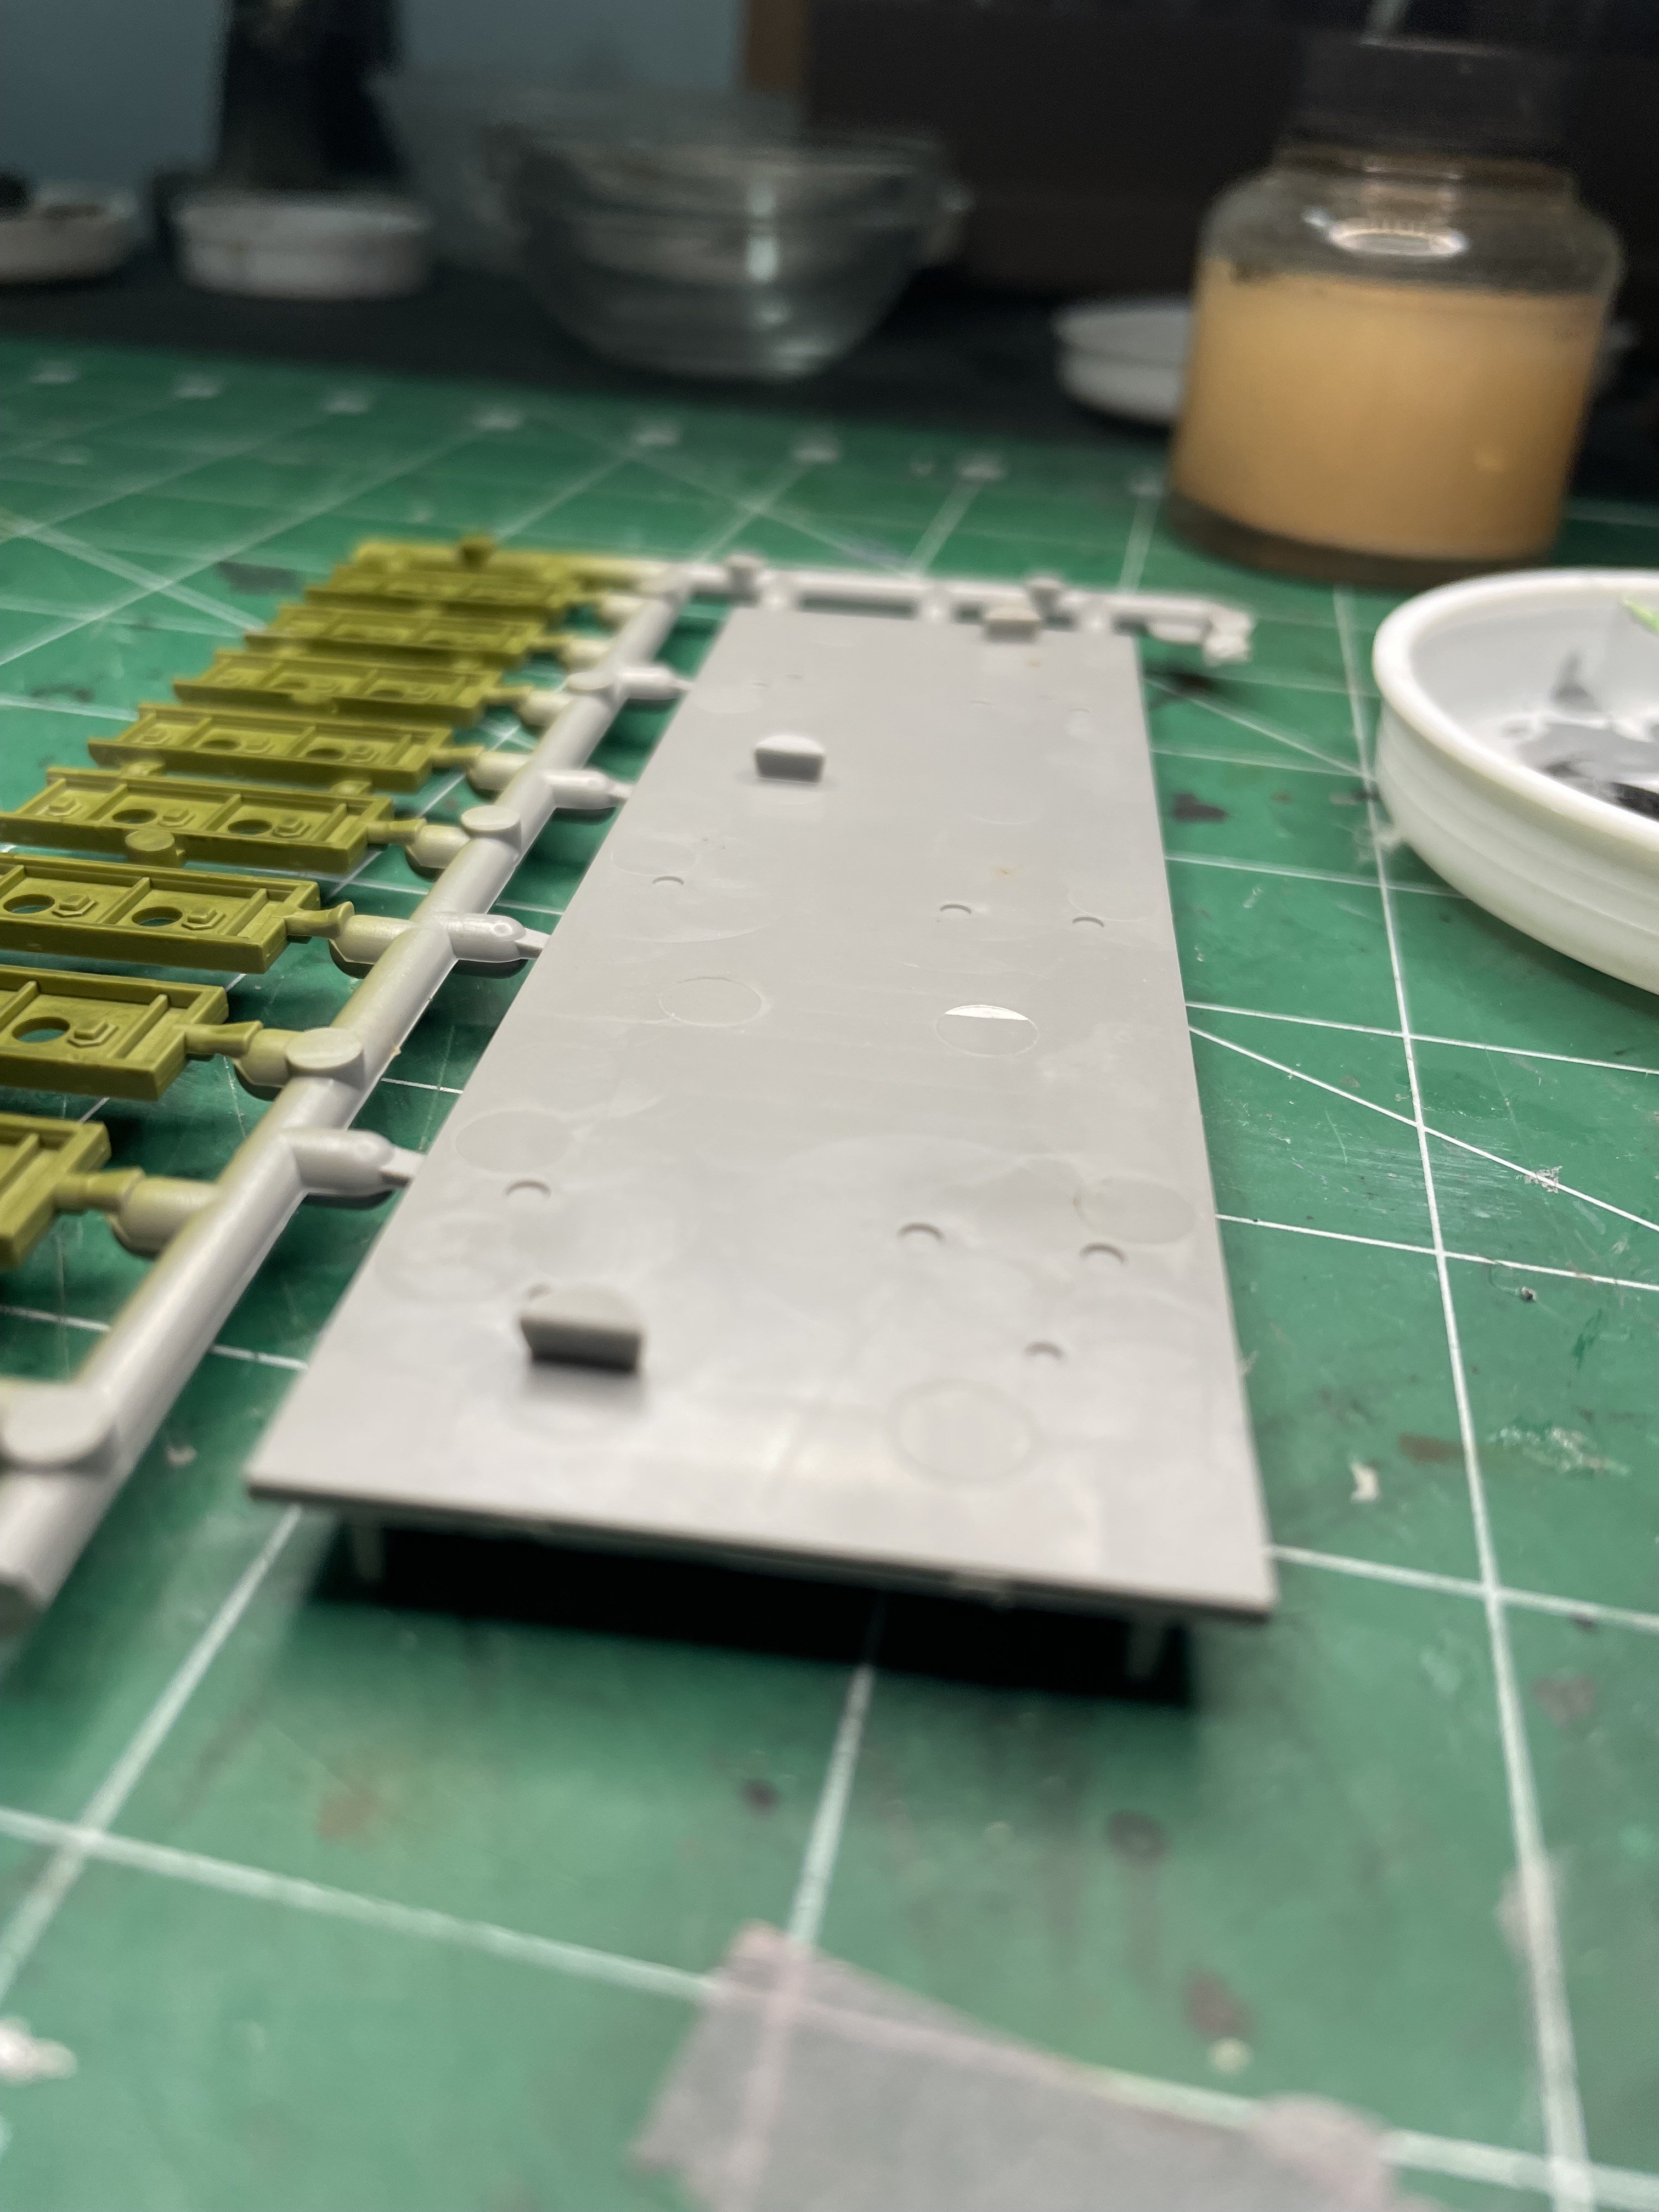
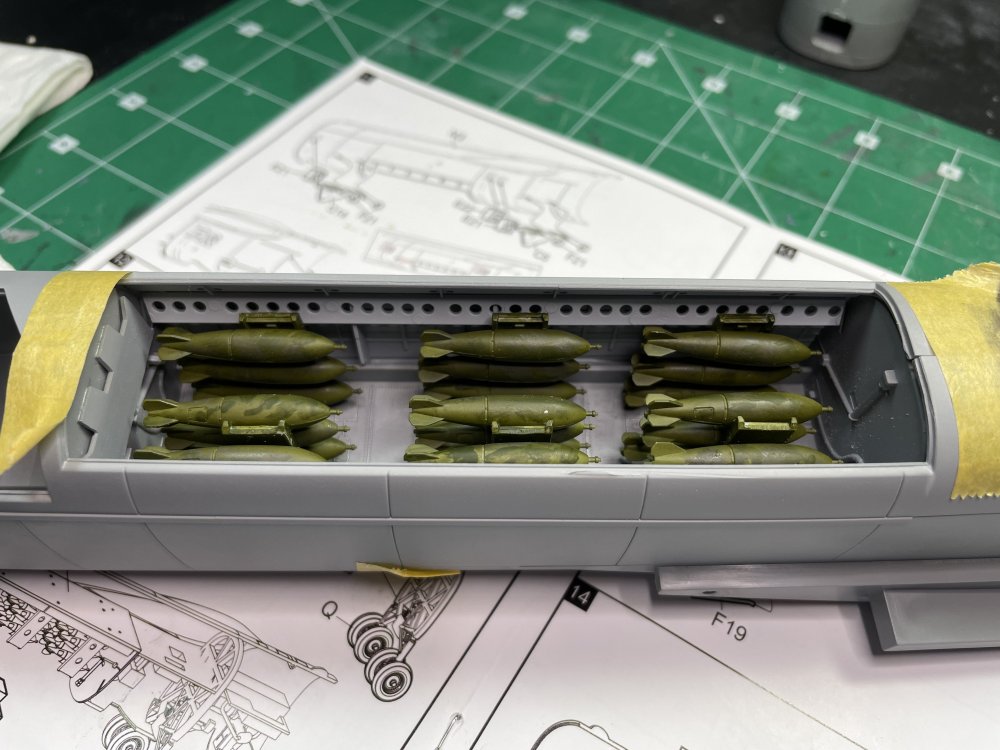
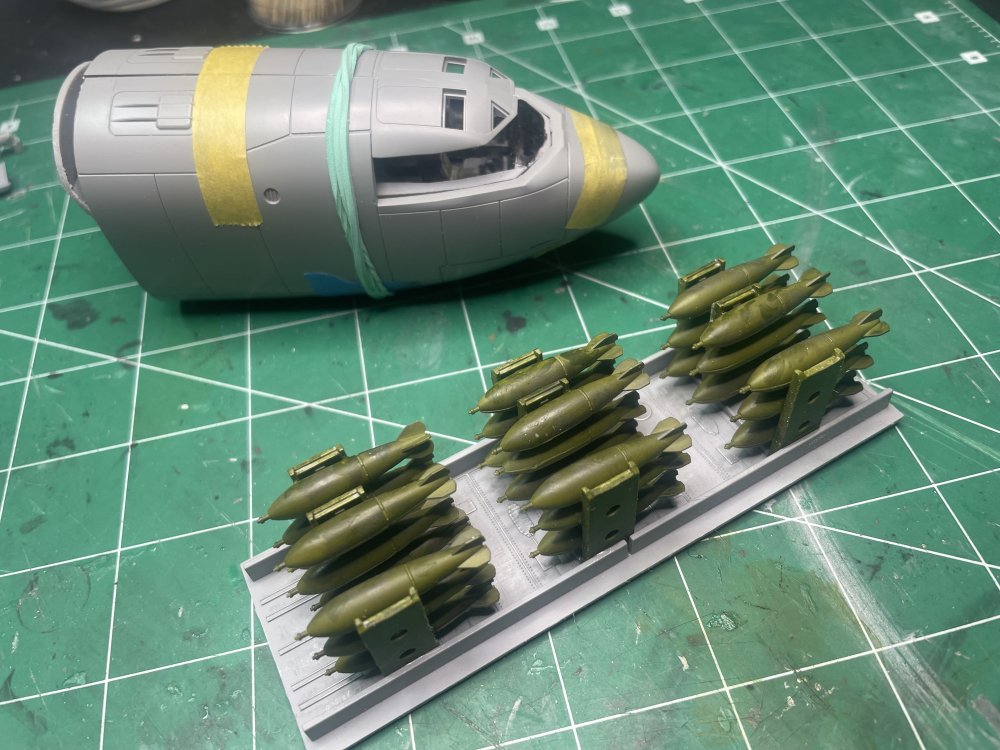
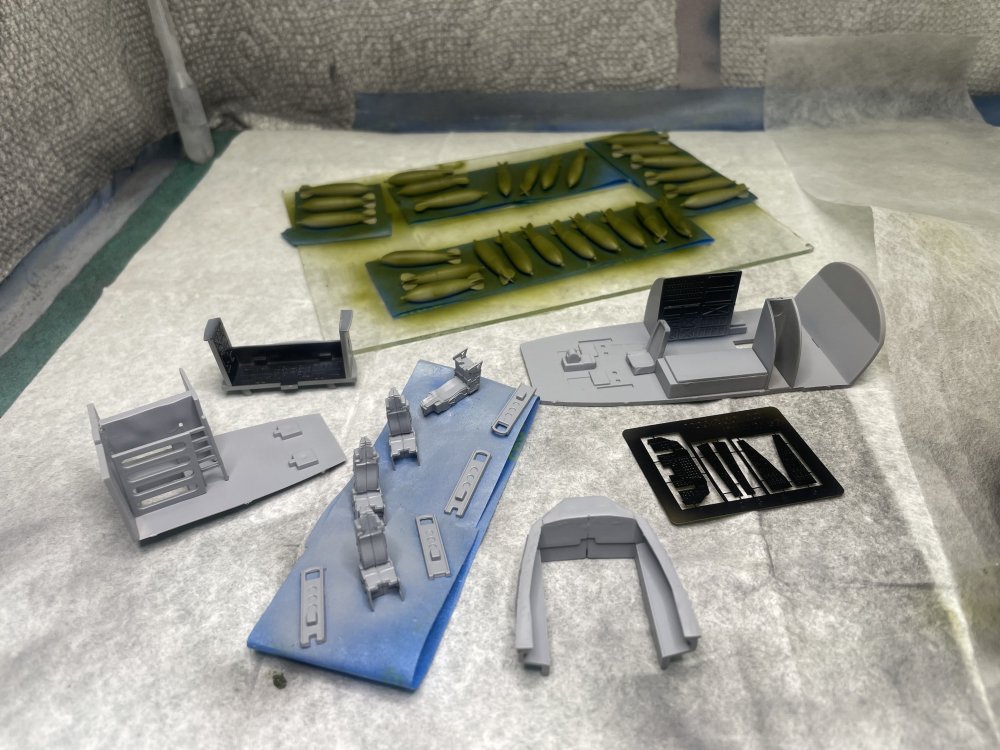
Had a bit of a break for the Thanksgiving holiday but slowly making progress. Having a lot of trouble with my Vallejo paints clogging up the nozzles on both my Grex and my Iwata. Maybe the paint is old?? I'm thinning about 50/50 and have even started using a few drops of retarder. I don't get very far before the airbrush starts spitting and then forget getting any paint out of it. I pulled both nozzles and soaked them in lacquer thinner. Used a small brush and got gunk out of both. What I didn't try but will next is spraying MRP acrylic lacquer and see what that does. But I only have Vallejo primers... Anyway I keep running into annoying fit issues, this time in the bomb bay. There are two pieces that extend the length of the bay, but both pieces are a few mm too long and interfere with where the bomb bay bulkheads fit into the grooves in the fuselage halves: It is an incredibly easy fix - simply snip off a bit on the ends, but reminds me of the Special Hobby P-39 fit issues. Should not happen. Anyway, here is the bomb bay dry fitted. I have some touch-up to do on some of the bombs. Ham-fisted the painting... Got the engine cowlings together and they take a bit of filler. But I think that is coming along pretty well. The left side shows the pre-sanding filler, the right side post sanding.


-

HK 1/32 B-25J Strafer next
CANicoll replied to JohnB's topic in LSM 1/35 and Larger Work In Progress
Nice work, John! Love the cockpit - and your seat pads. Well done! -
Did anyone join Project Halifax?
-
It is challenging, but not so bad so I hope I'm not over doing the complaints. The Kitty Hawk P-39 had me ripping out the entire nose armament after it was built as there was no way to close up the fuselage with it in there. And literally NONE of the wing panels would fit, closed. So that is my baseline comparison. I think better instructions would help with the cockpit alignment and that might reduce some of that sanding I had to do. But it is not shake and bake so maybe that is a good thing? Have to do research and use the brain? Thanks, Rob. Yeah, the fit issues are something, but the lack of detailed instructions is too. I guess MC went back to the old days where they basically point to where something should be attached and leave it up to you to figure it out. I'll know how bad things are when I get back to the nose section and see how the seams are from last night's session. And then the center fuselage section which is very long itself. I may go through have a bottle of Tamiya Thin just on that...
-
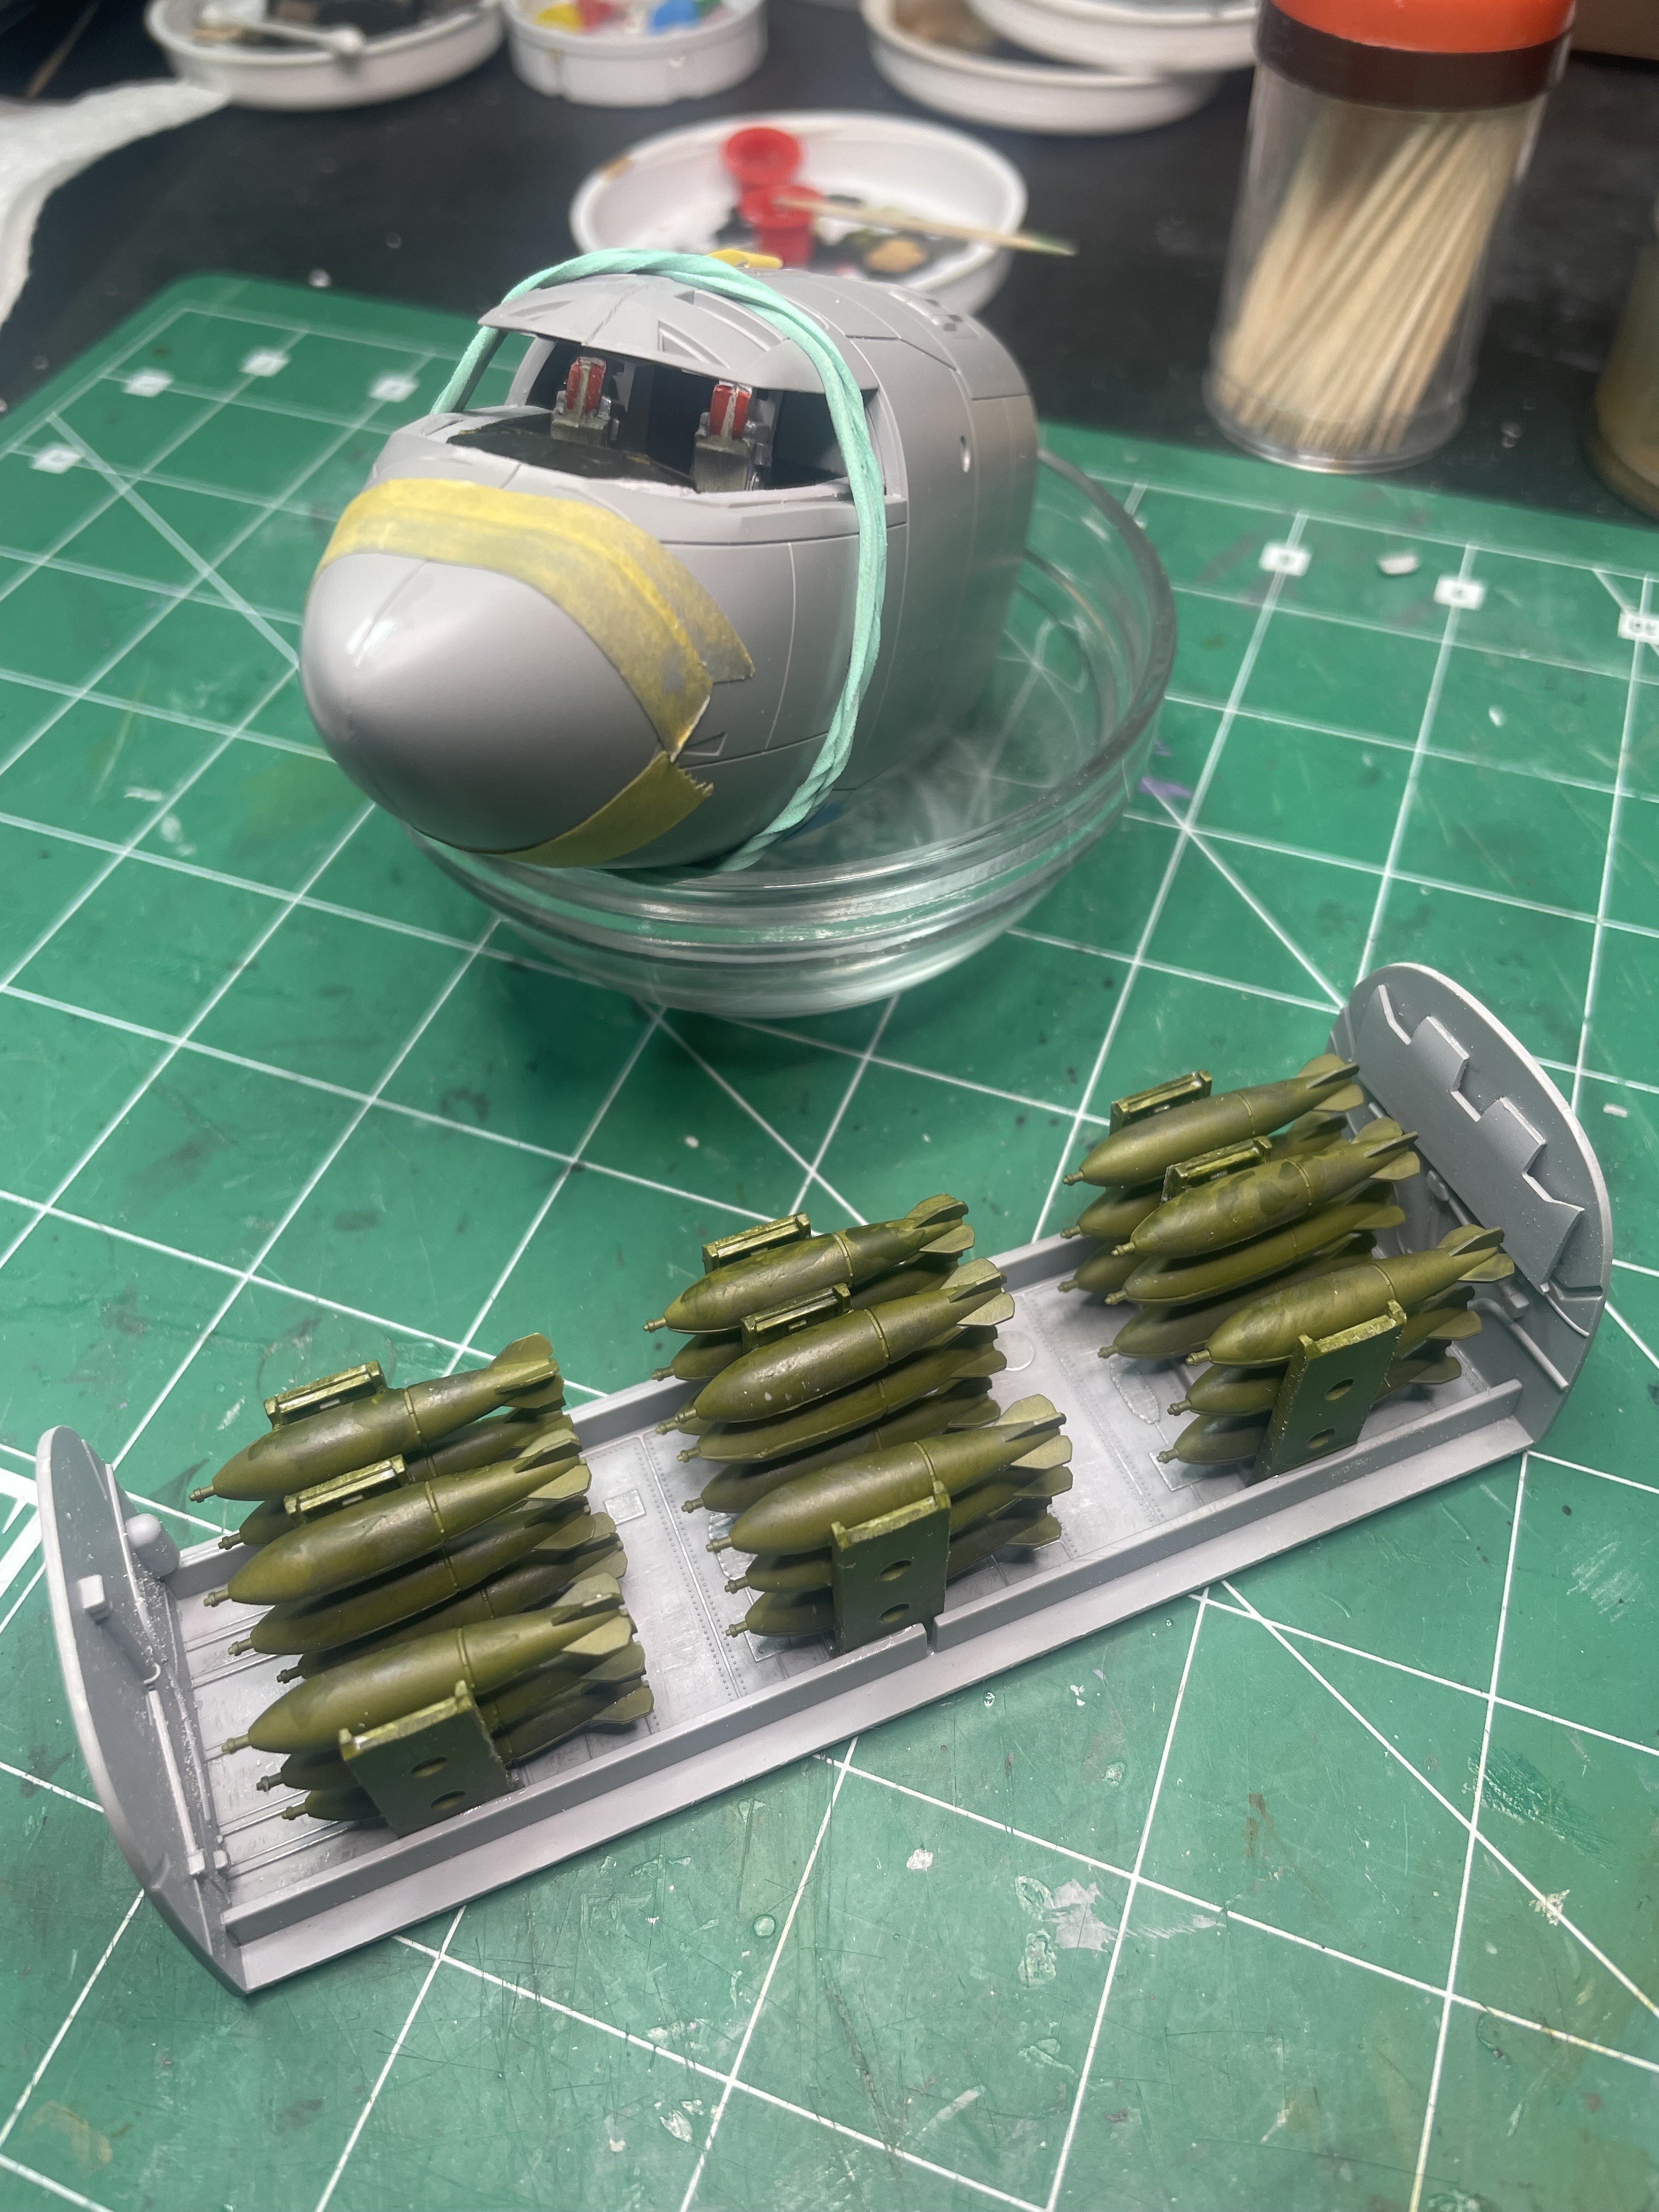
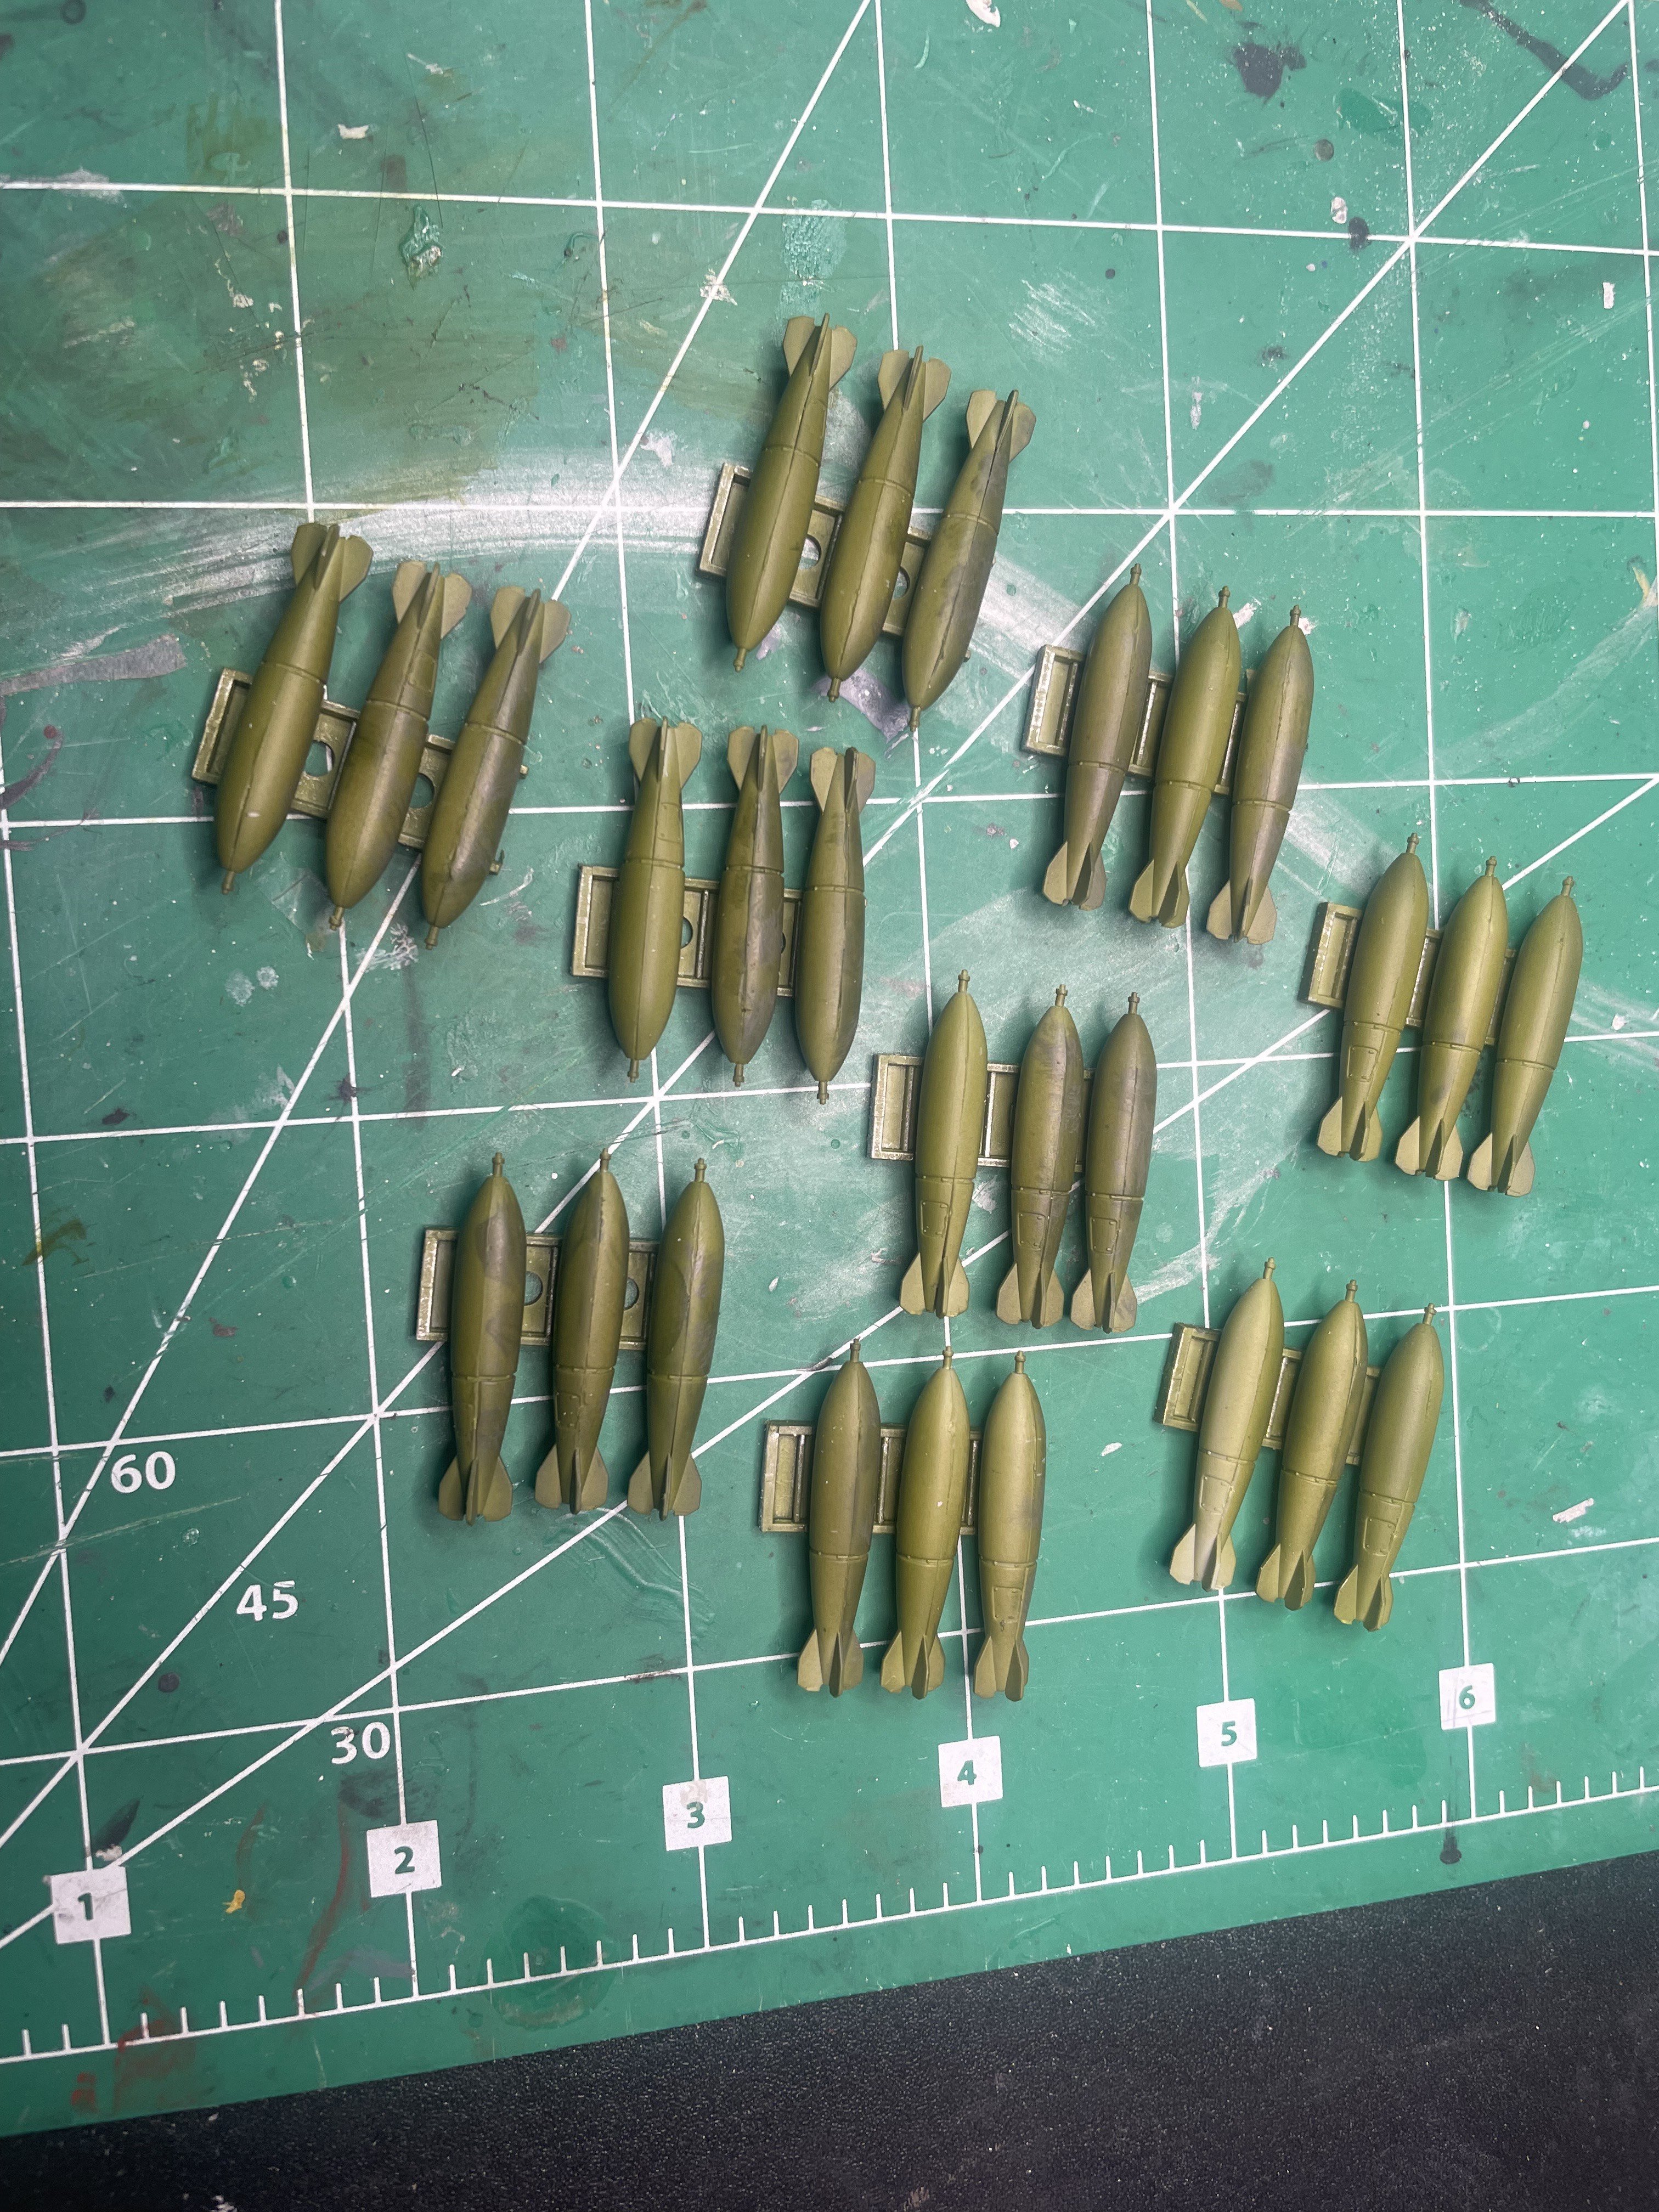
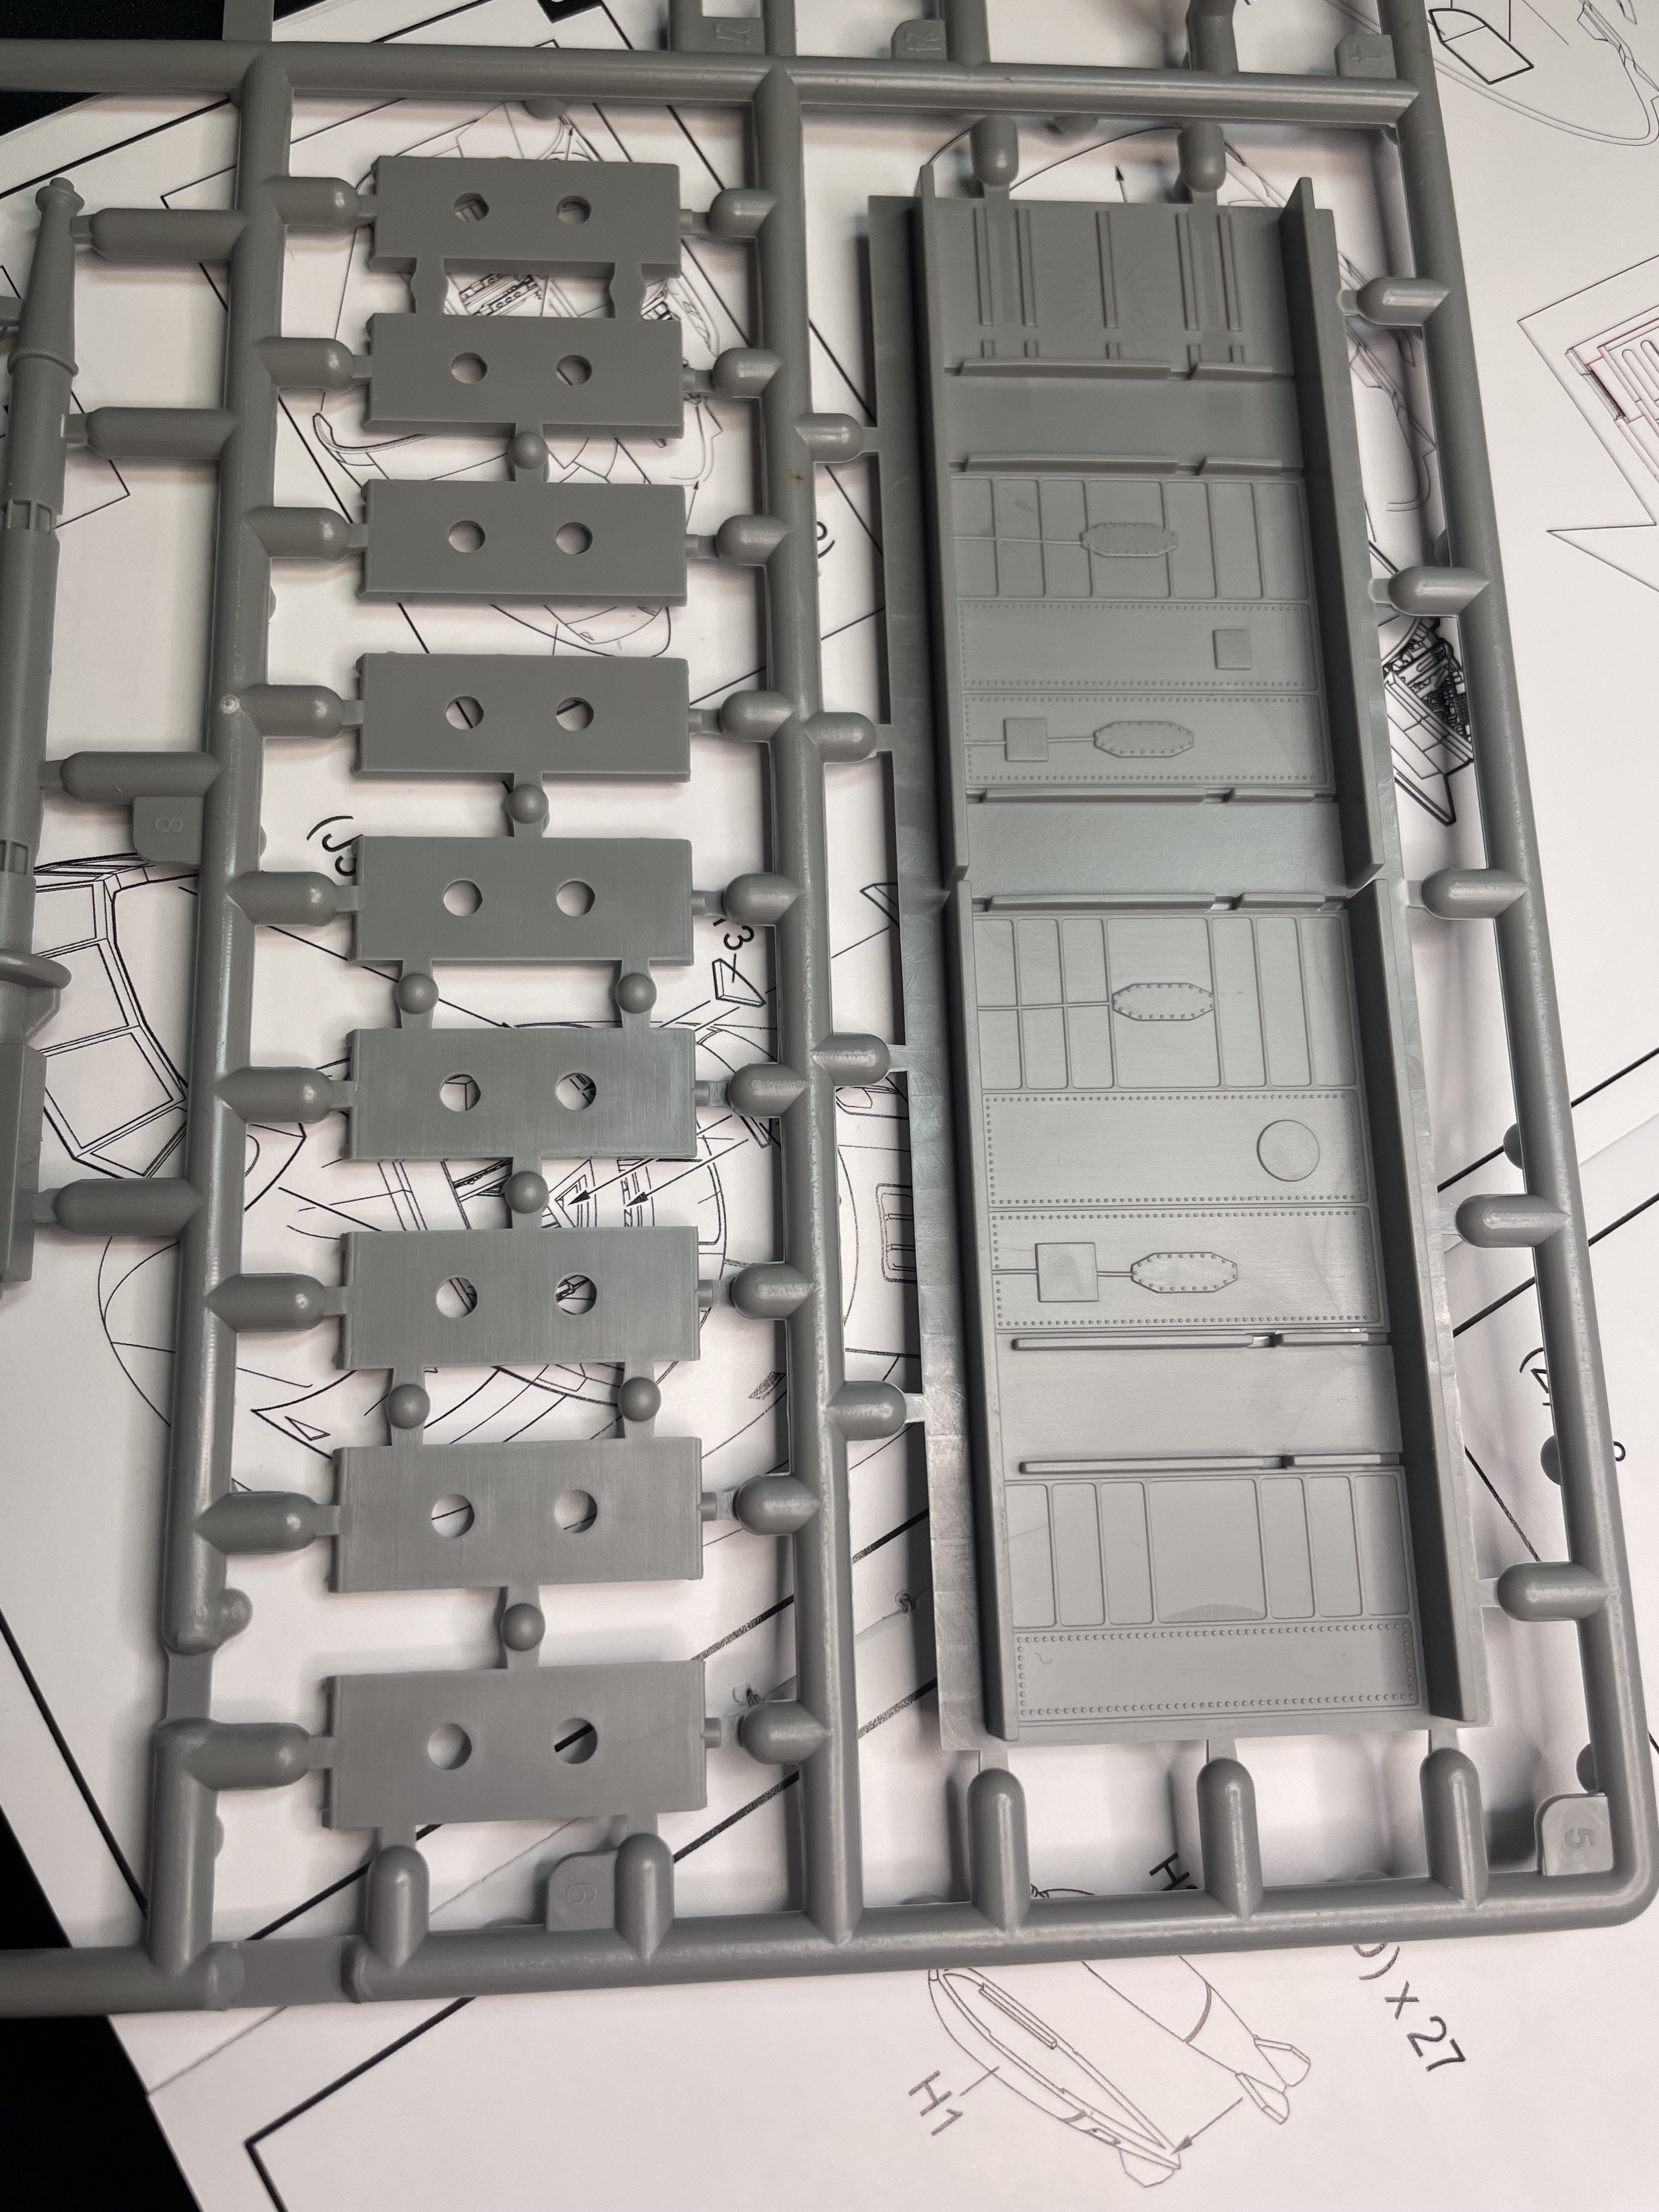
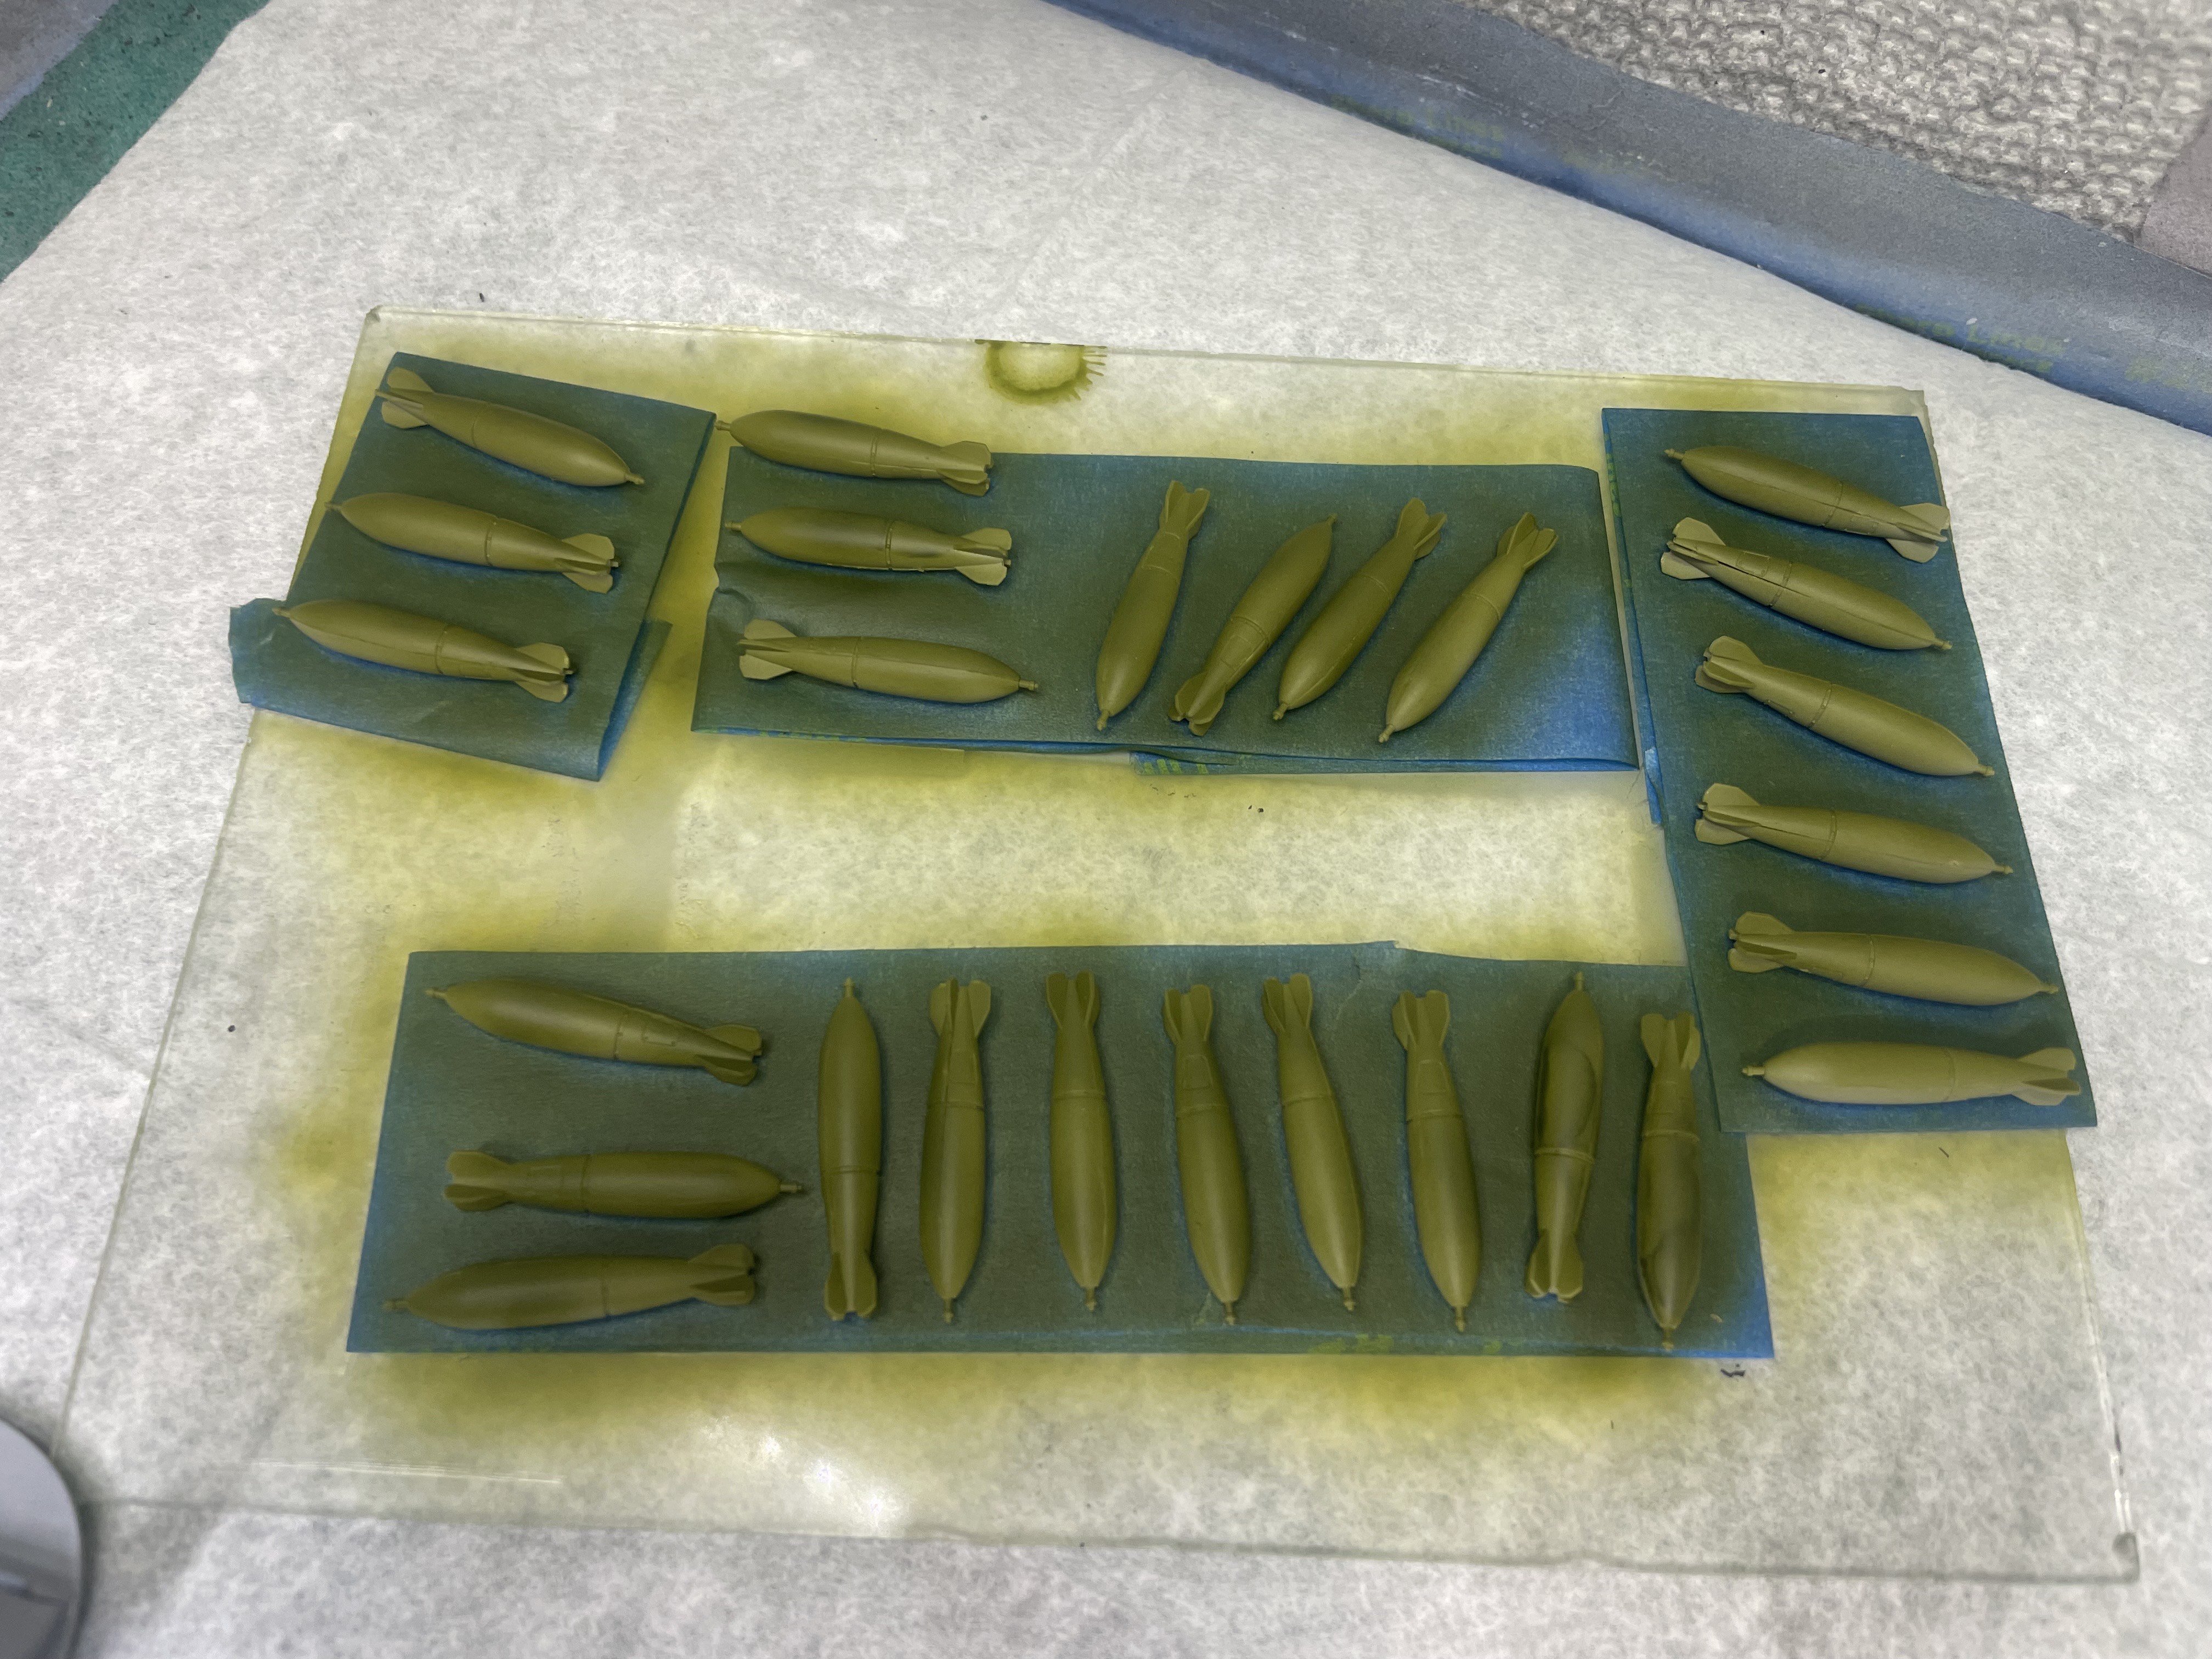
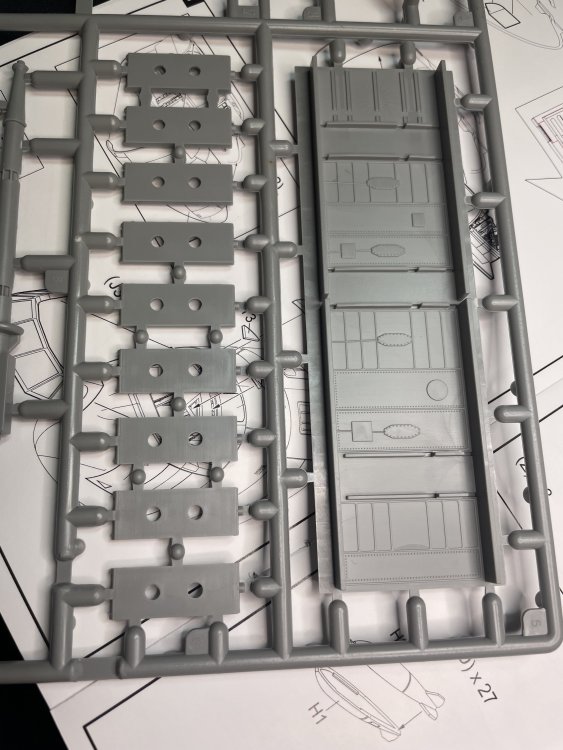
I'm still a bit unsure about not displaying the landing gear, but for now, made progress on the bomb bay. Why the Italeri shows nothing here is beyond me, but at least this kit has the complete bomb set up. Again, not the same bombs shown on the box. First step was to get the bombs onto the racks. Easy, right? There is nothing to show where the bombs should be attached to the racks. And the bombs themselves rest against the side rails - there is not even a pad for them to be attached to the rail. I kind of guessed where the bombs would be relative to the rack. I used medium CA and hope none of these come loose because if they do, OMG what a PITA that will be to reattach! Here are the racks installed in the tray. There was nothing in the instructions to remind you that three of the racks need the bombs to be pointed in the other direction. (the row at the side of the rack towards the bottom of the picture). and with the bulkheads attached. This assembly fits perfectly into the main fuselage. However, the curve of the fuselage means that next to nothing other than the bombs will be seen. Hence, and you can't see it, but the light weathering I did in the bomb bay is moot. Here is the nose part showing just how much can be seen through the front windscreen - just wait till I add the clear parts!! I did, subsequently, glue these halves together. Major seam work ahead but I did get the parts to mostly align...


-
What is on your bench right now ? Share a picture :)
CANicoll replied to Martinnfb's topic in Modelling Discussion
Stay away from those 16 oz curls.... -
The build reviews online say basically the same thing. However, this is worse than I expected. Not as bad as Kitty Hawk's P-39 bad, however. The lack of locating pins along that very long fuselage is problematic.
-
GWH Hawk 81-A 2 Flying Tigers
CANicoll replied to denders's topic in LSM 1/35 and Larger Work In Progress
Dave, Can't wait to watch this build! This is one aircraft I have not built many of. I have a personalized signed bio of Tex Hill on my shelf. I'd have to build his aircraft, number 48! Chris -
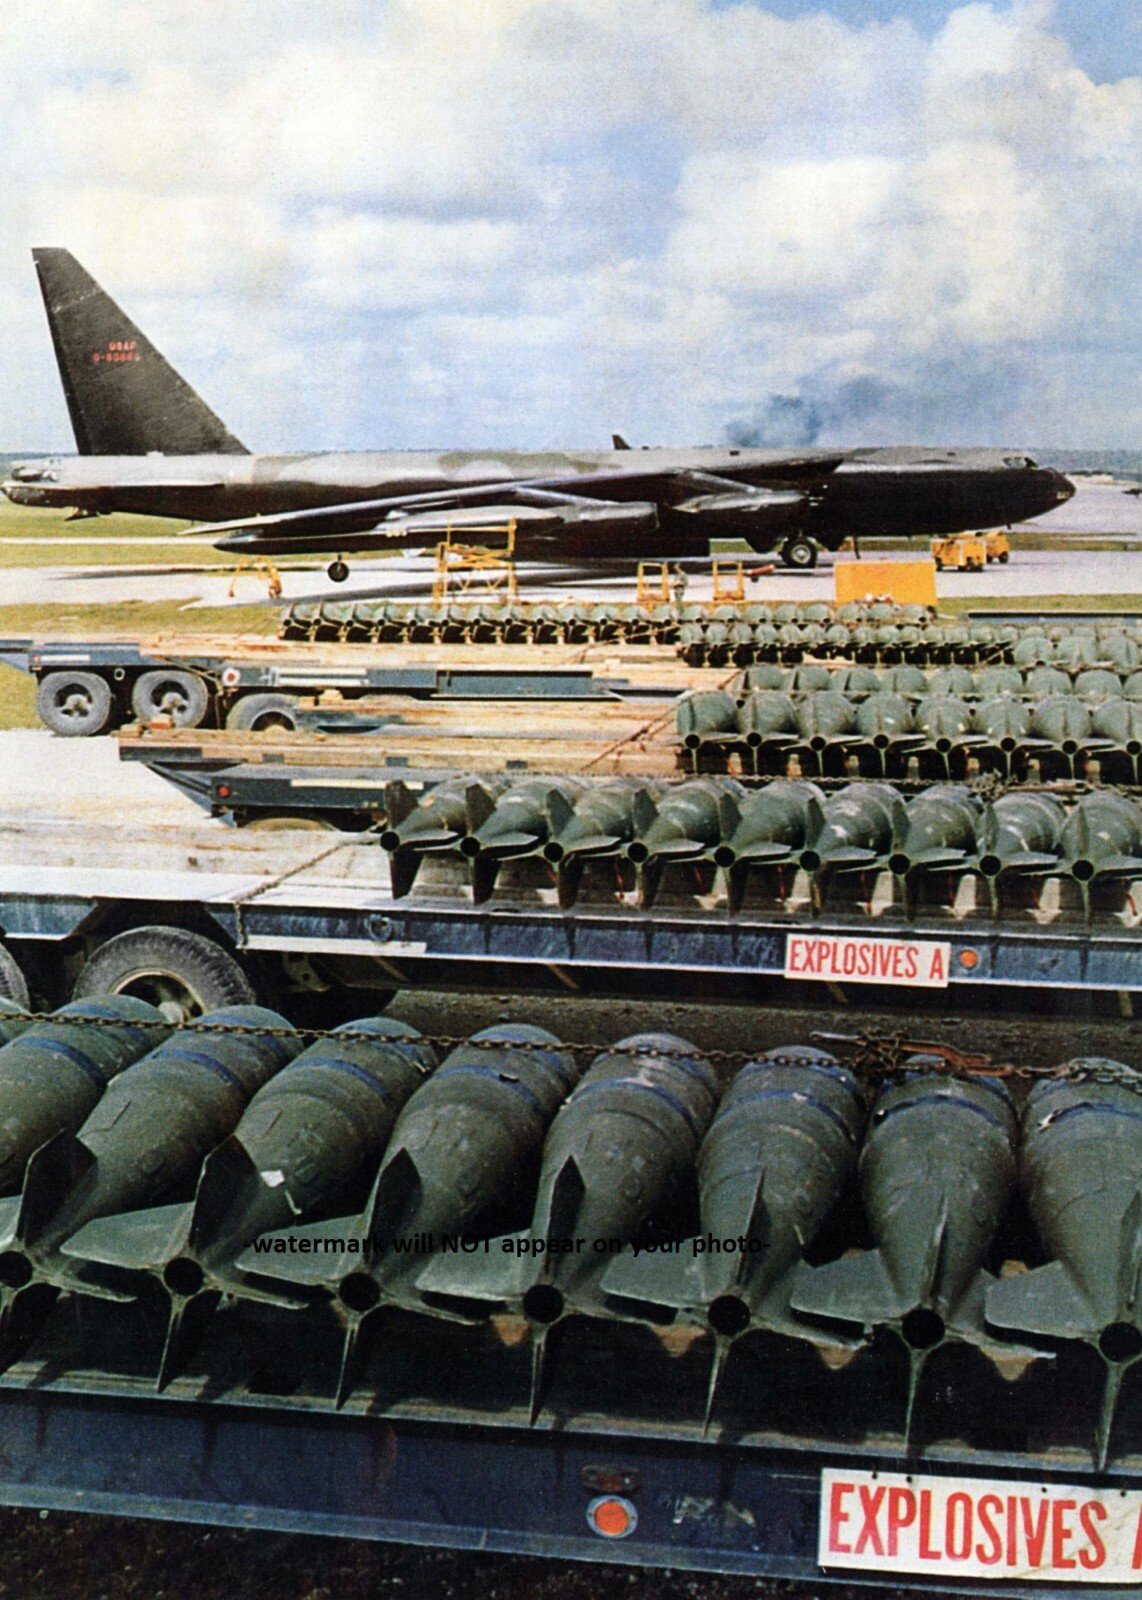
Unless someone wants it, the Italieri B-52G is likely to join this list... I also have some older built models I think I need to part with. Just one of those things.
-
Nice work, Dave! Fun to 'binge follow' the build and see your progress all at once. Great job on fixing the issues, looks terrific.
-
Did a quick test-fit and am very happy to say that the fit of the landing gear doors is very good. Tight even. That being said I can see the potential for two issues: 1. For the entire center fuselage section there are only two locating pins, both on the same end (just top and bottom). Alignment will need to be done very carefully. 2. The join of the nose section to the center section may show a pretty significant fuselage line, but a larger issue may be that the two cylindrical pieces may be of different sizes. I think the nose section is smaller than the fuselage section. Will cross that bridge when I get there. But being able to close up the wheel wells is really good news as the plane will be hung from the ceiling with the bomb bay doors open.


-
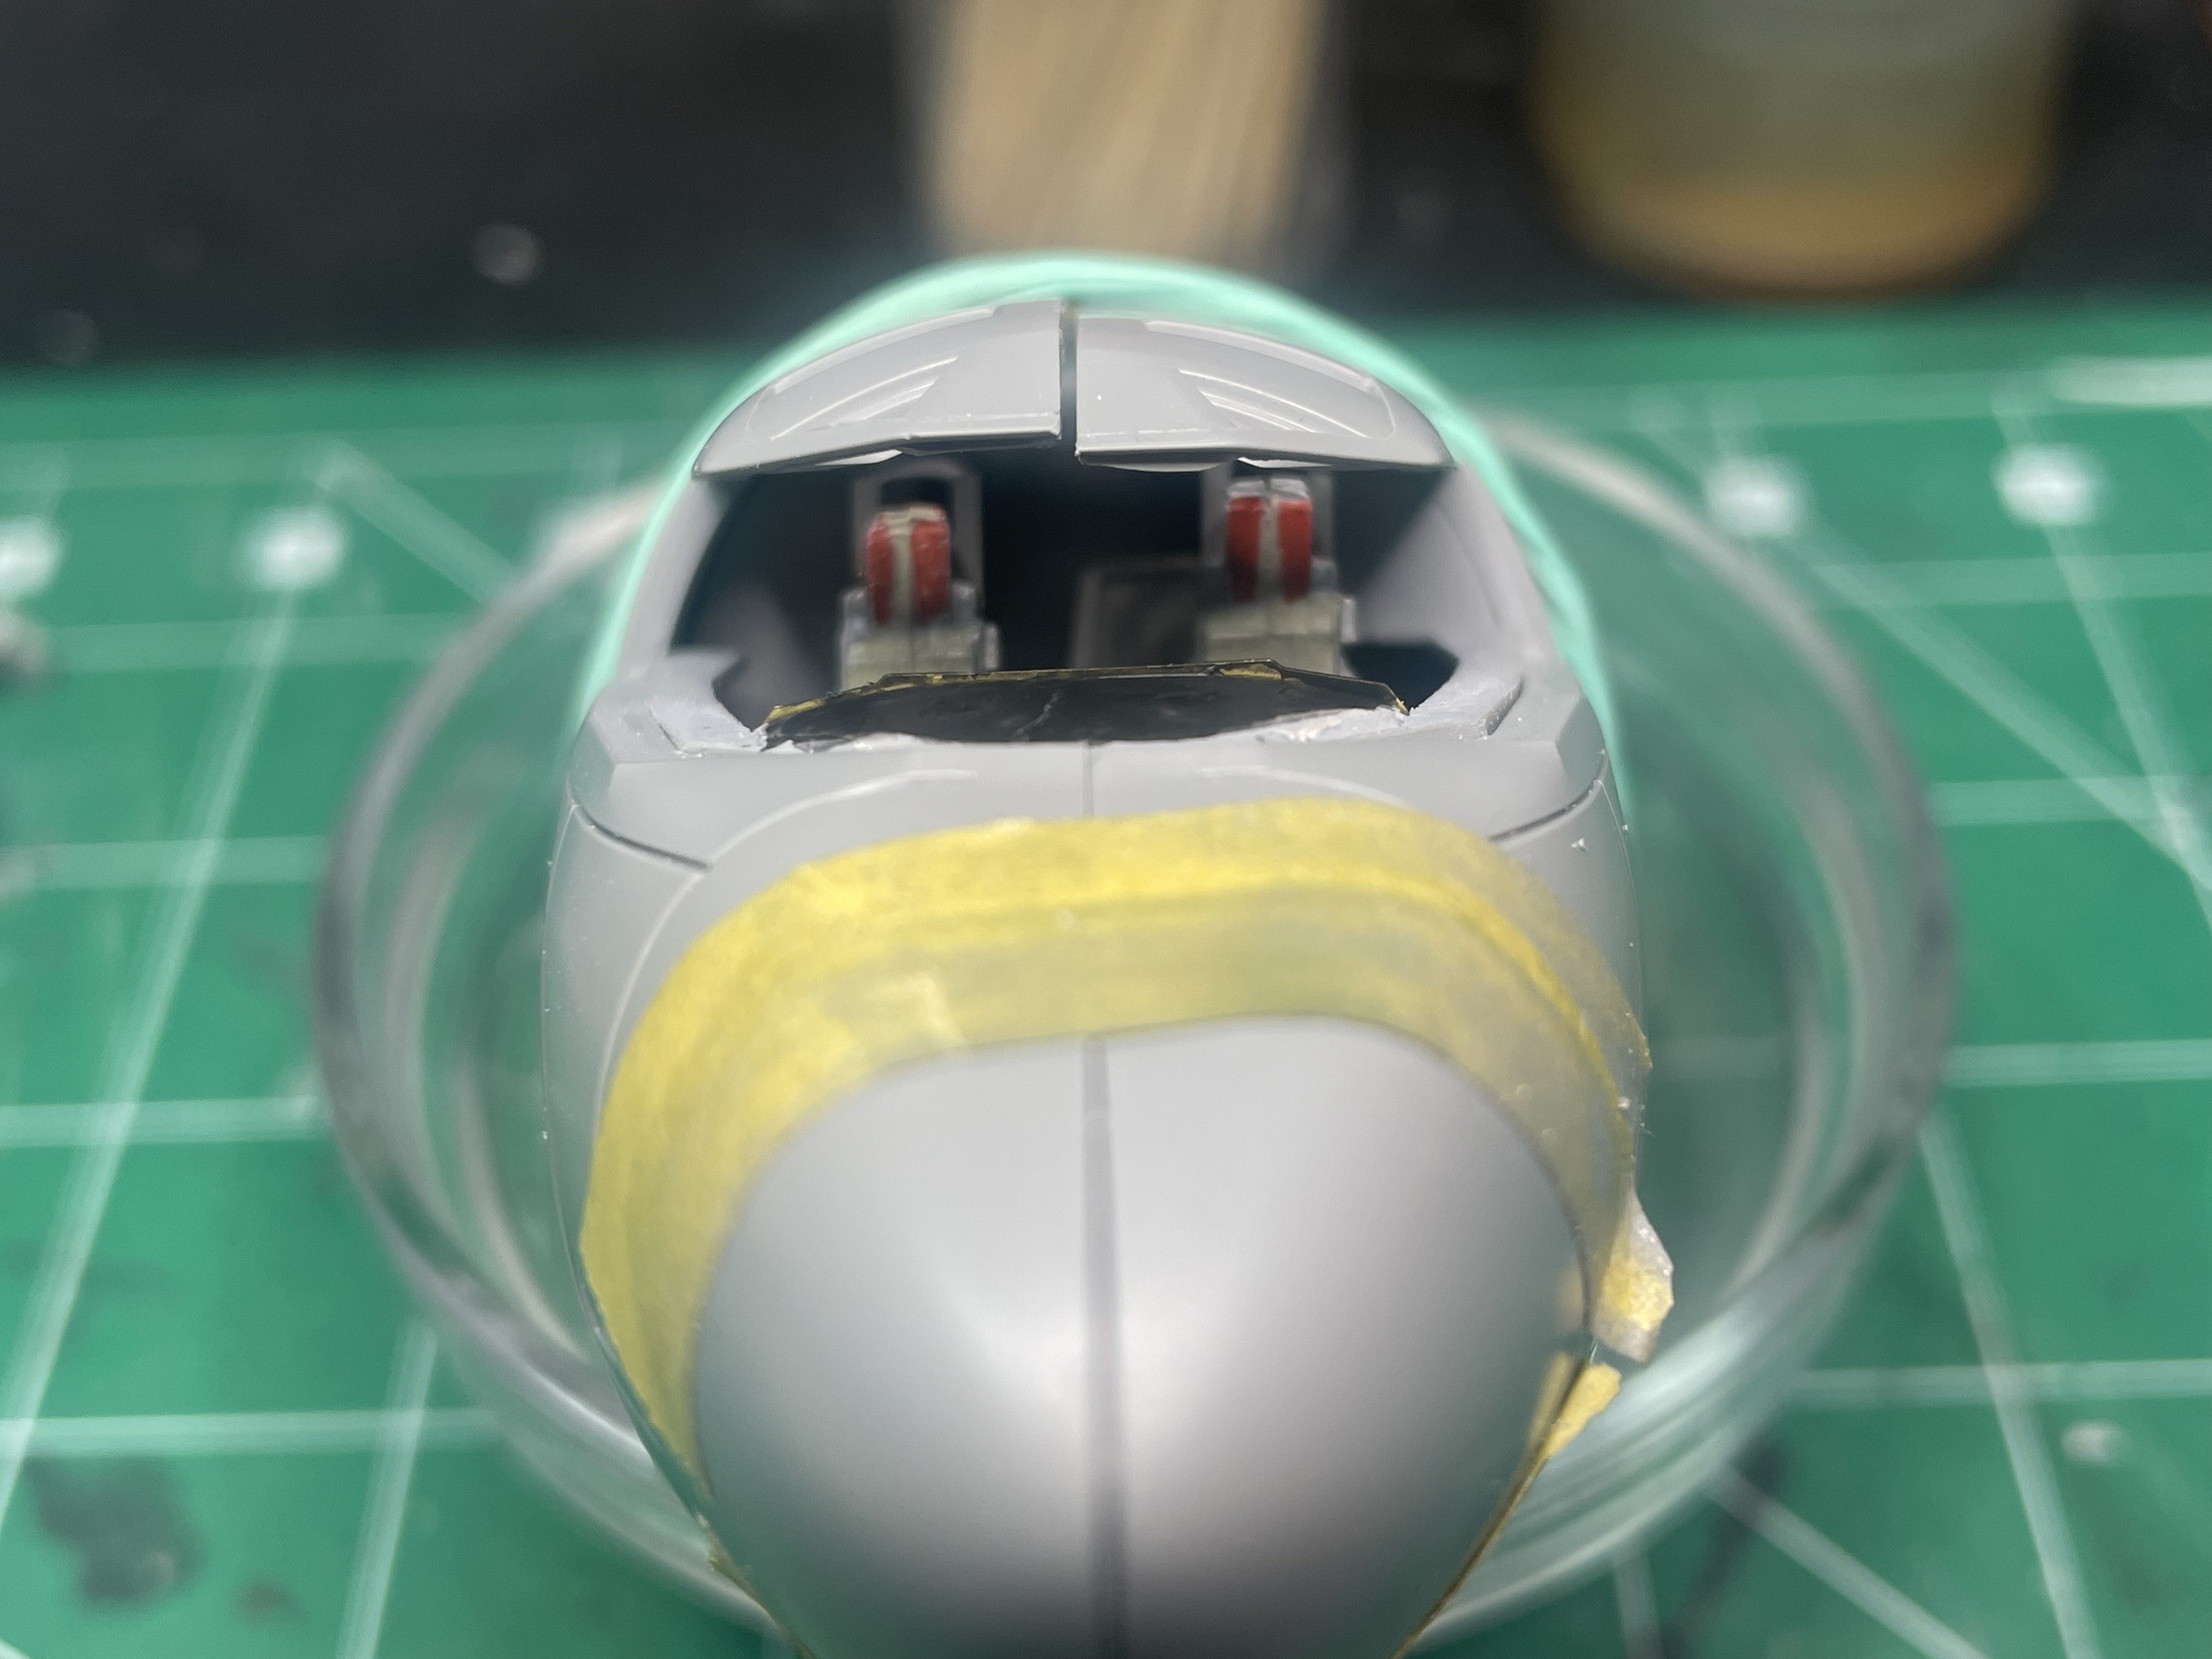
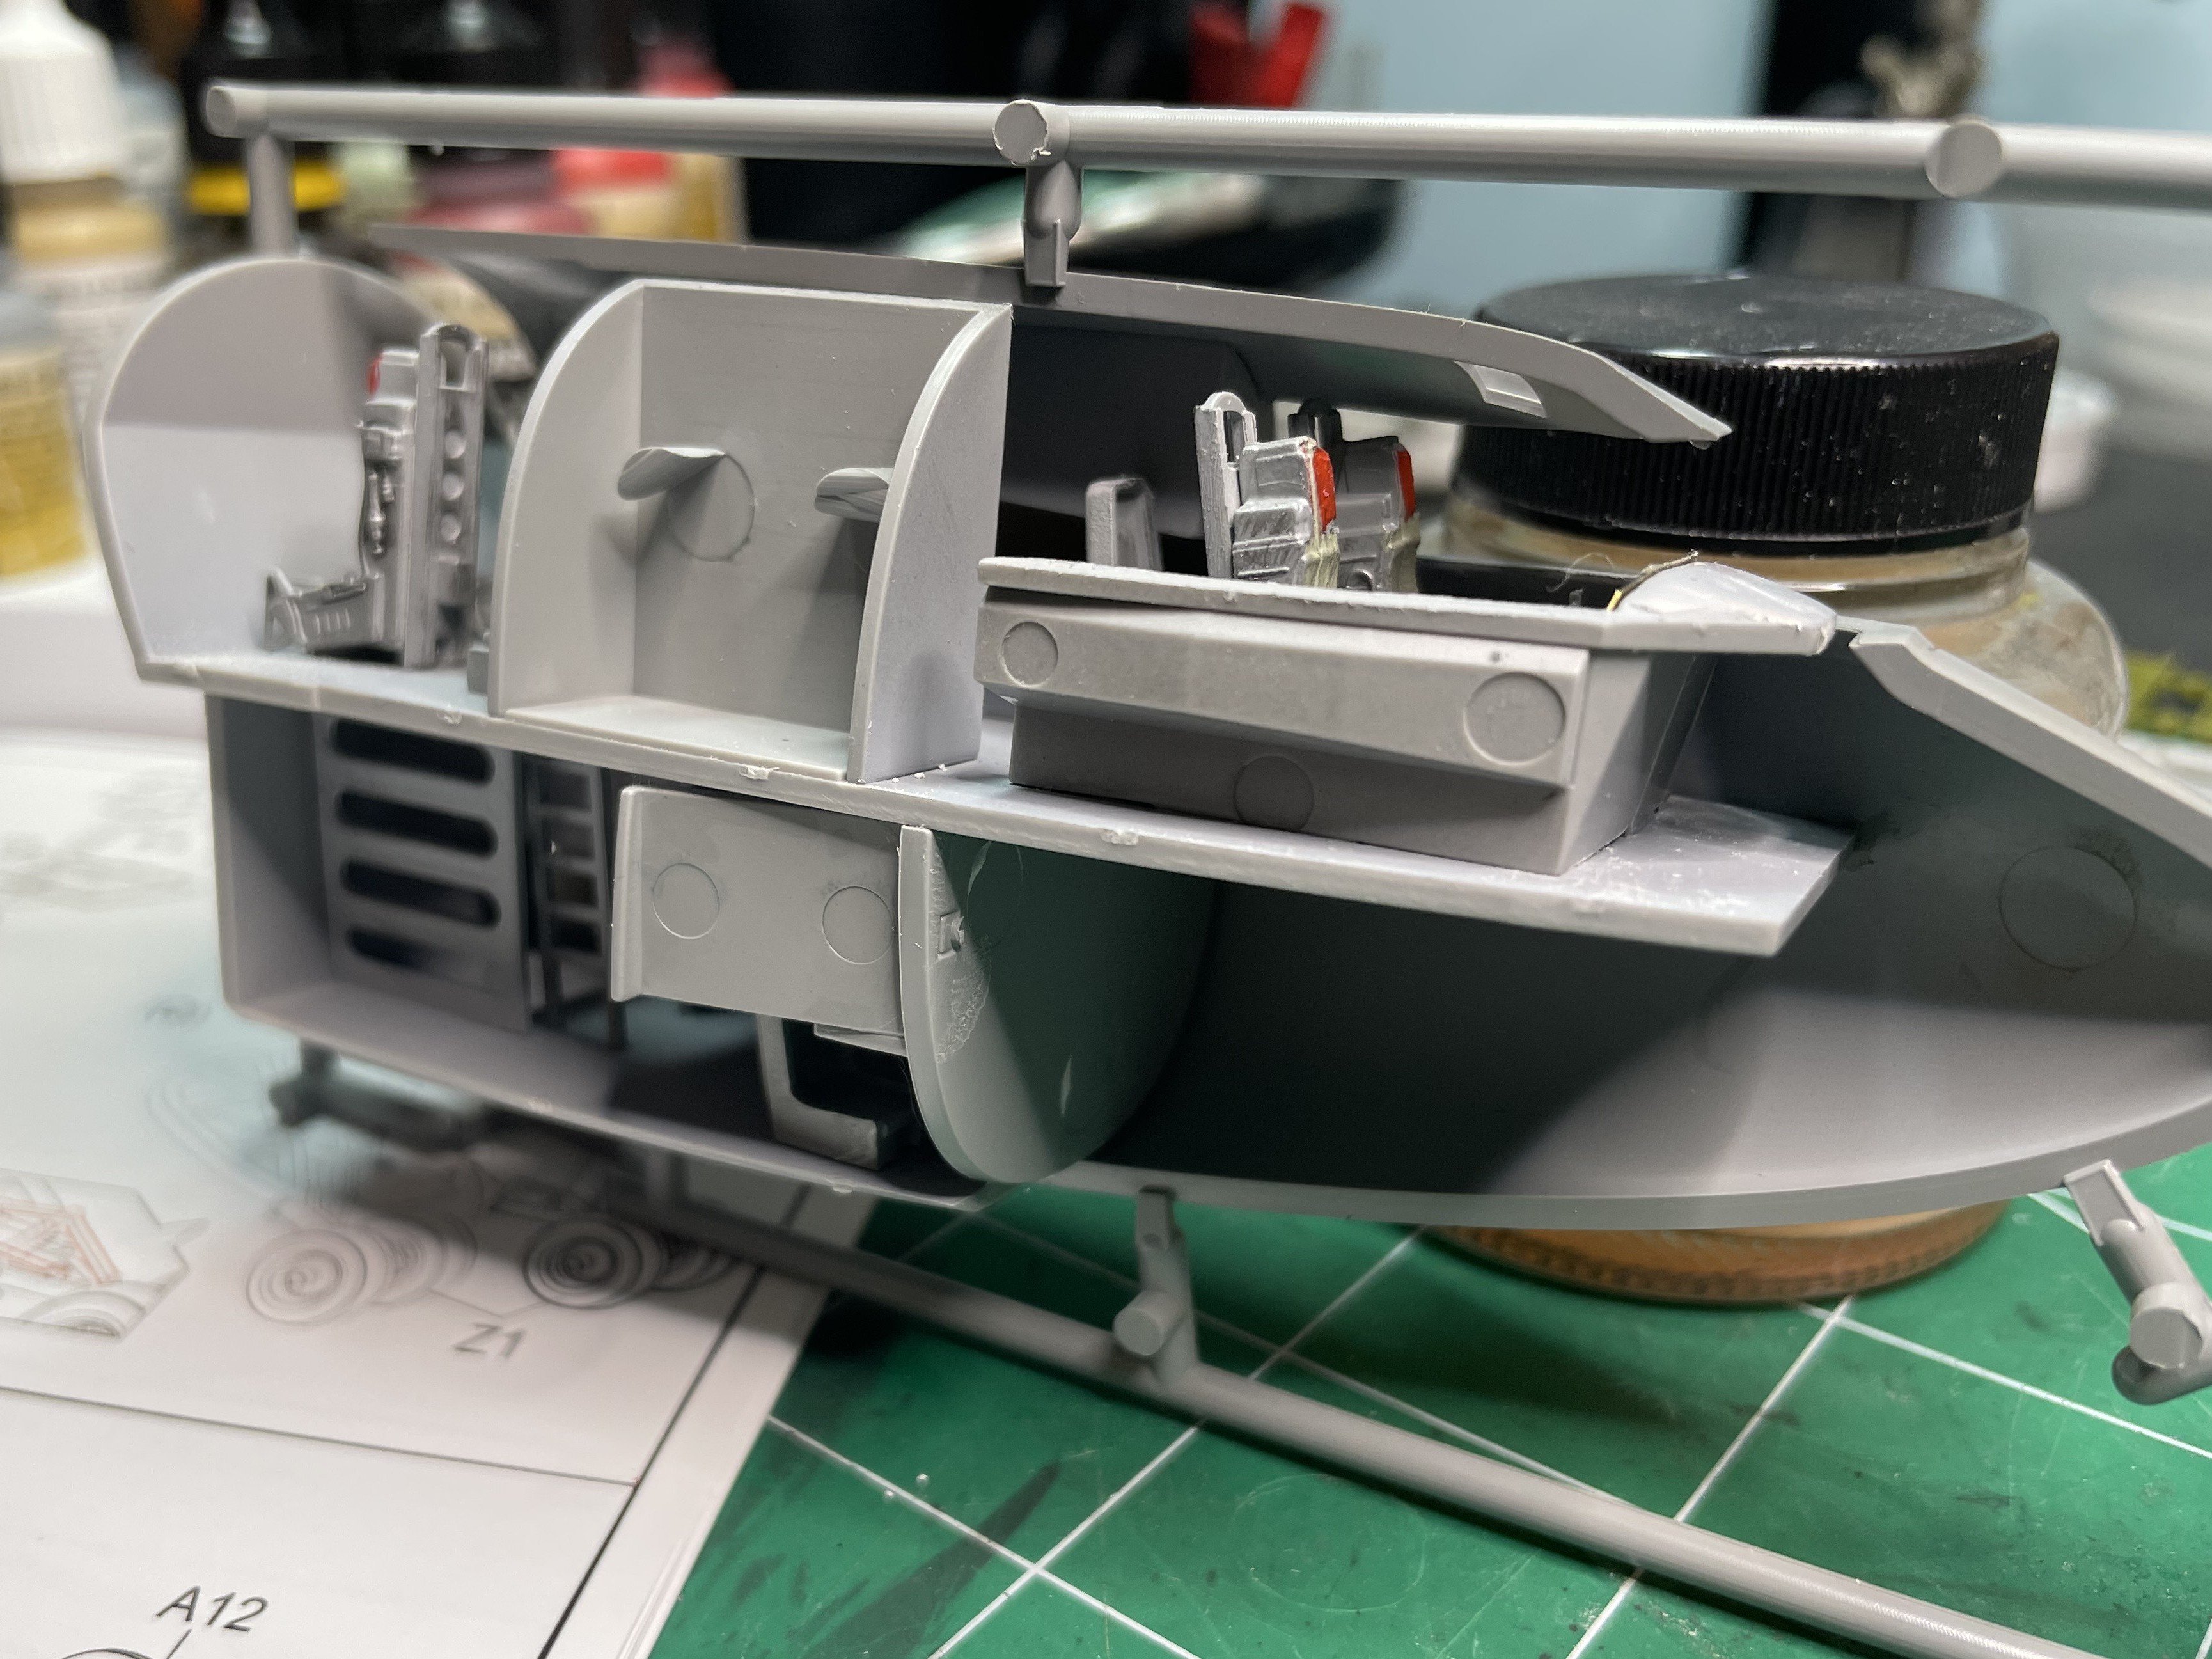
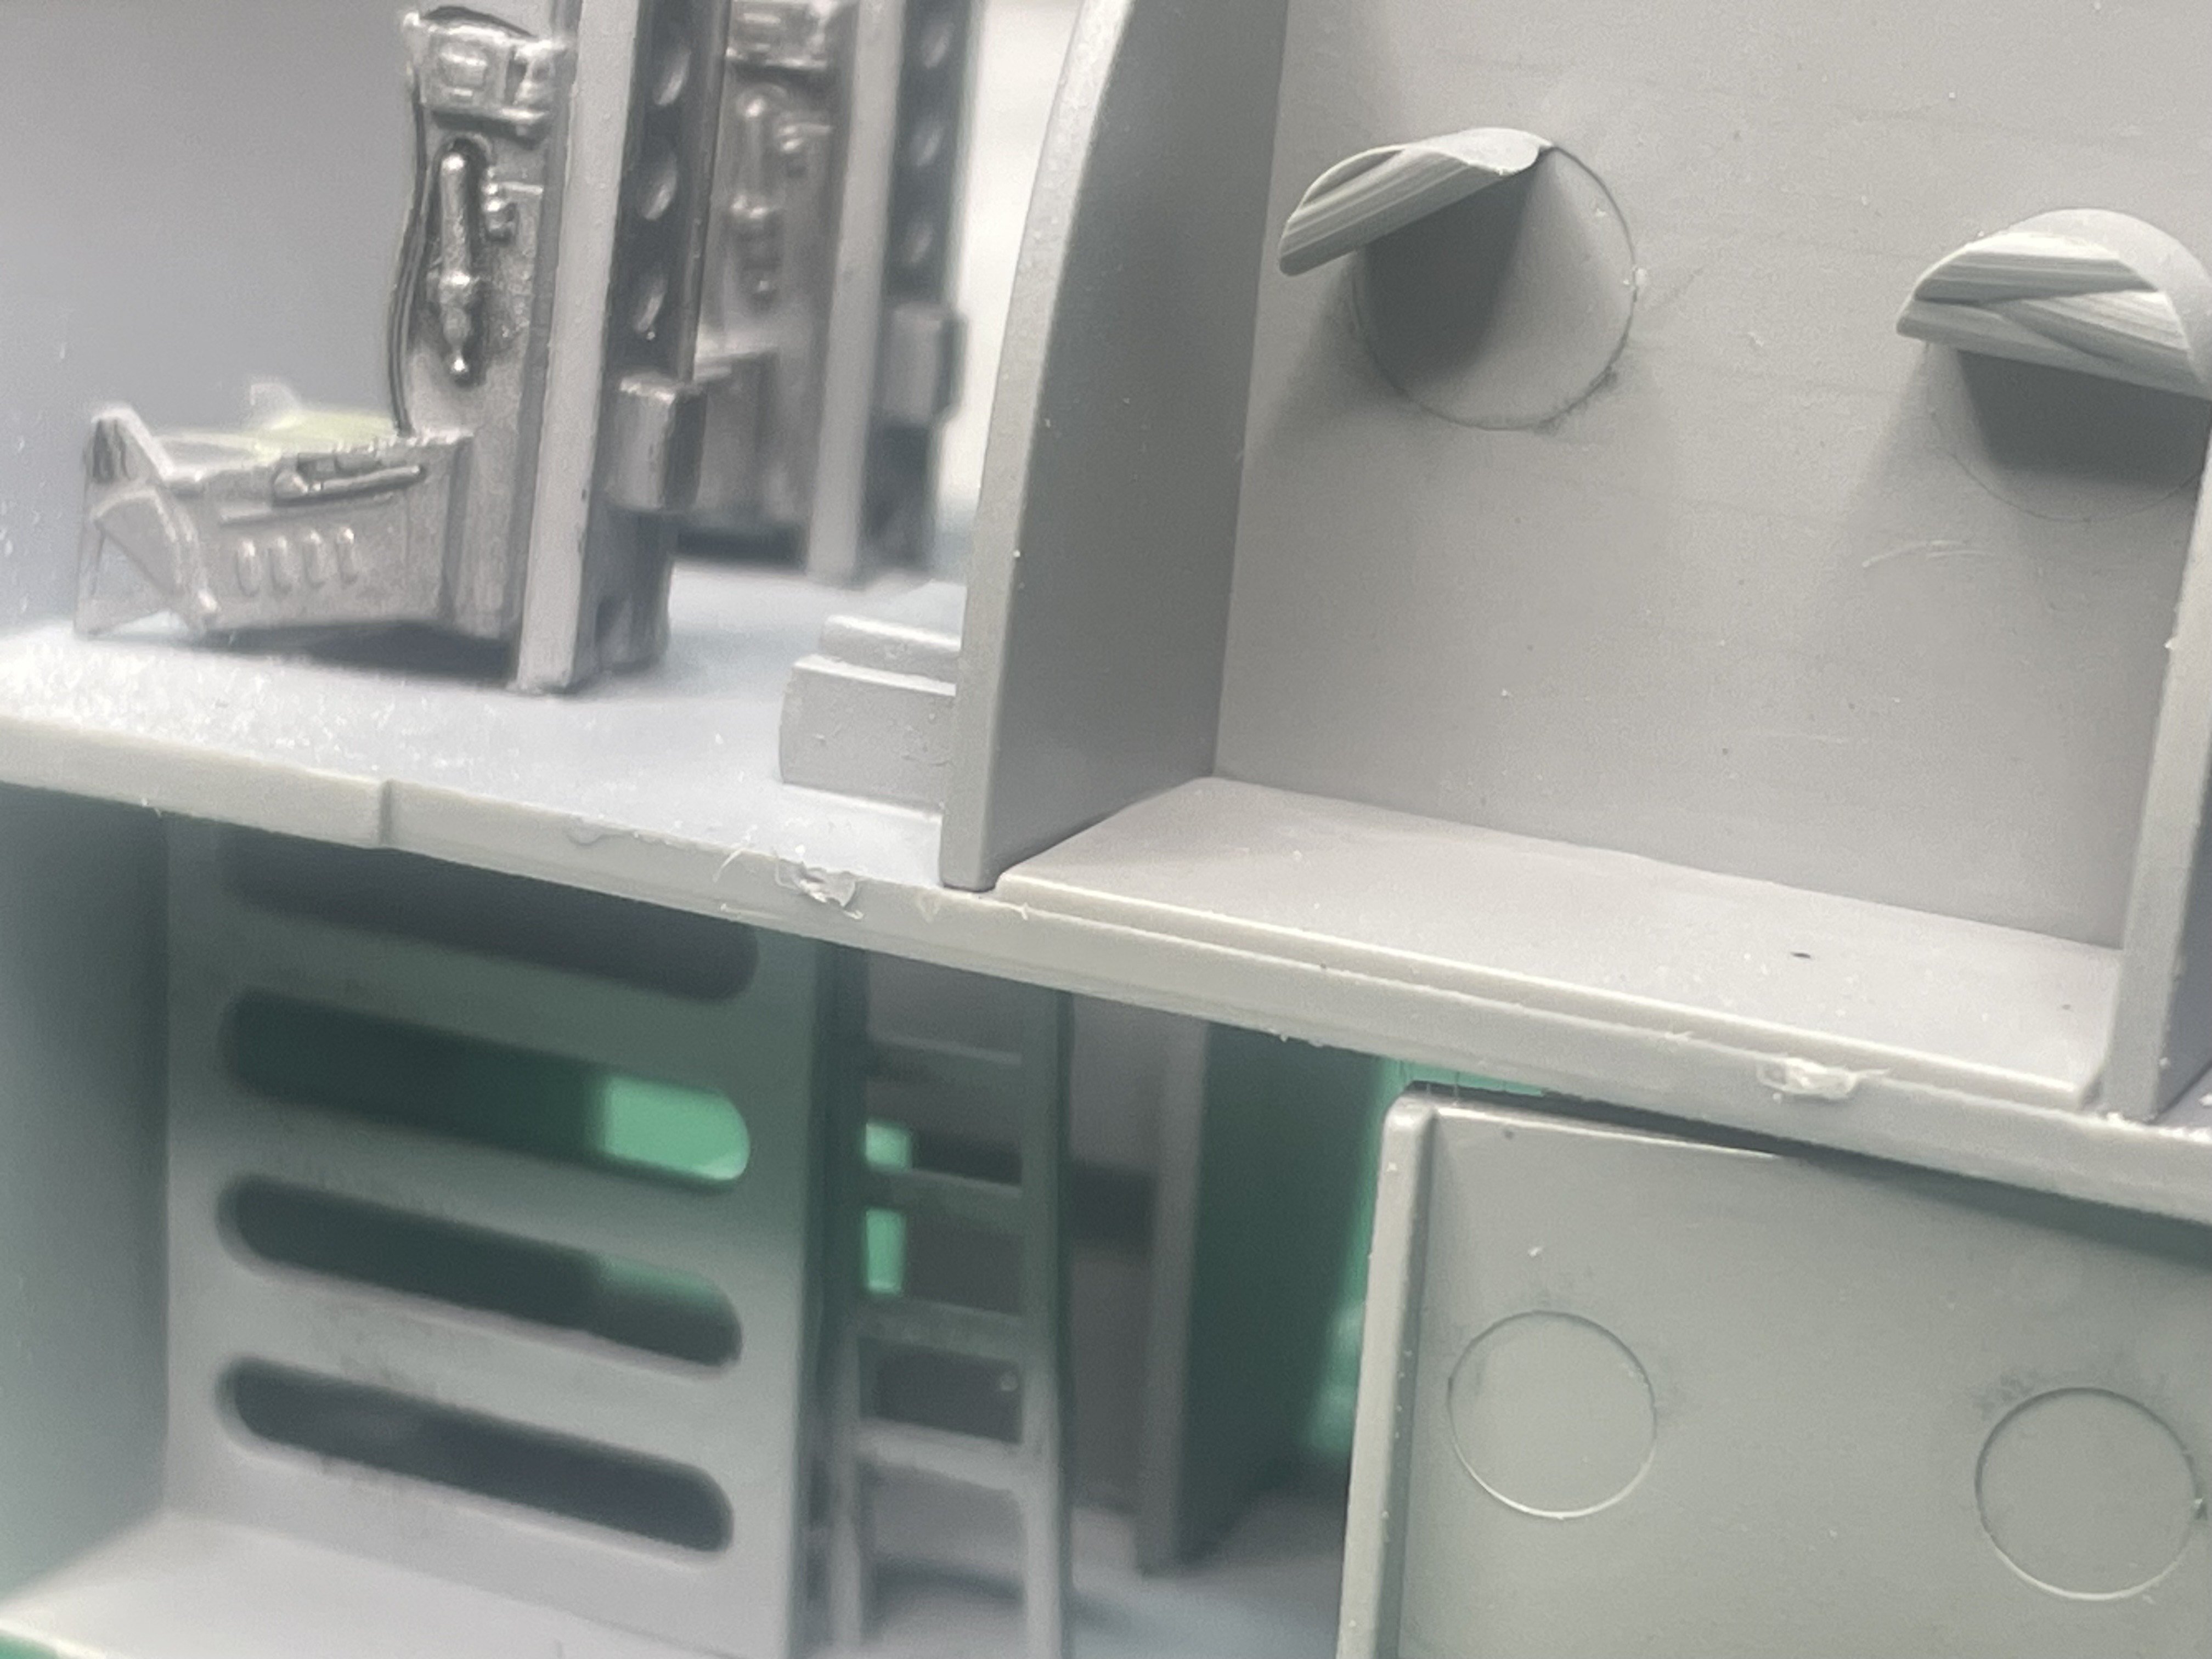
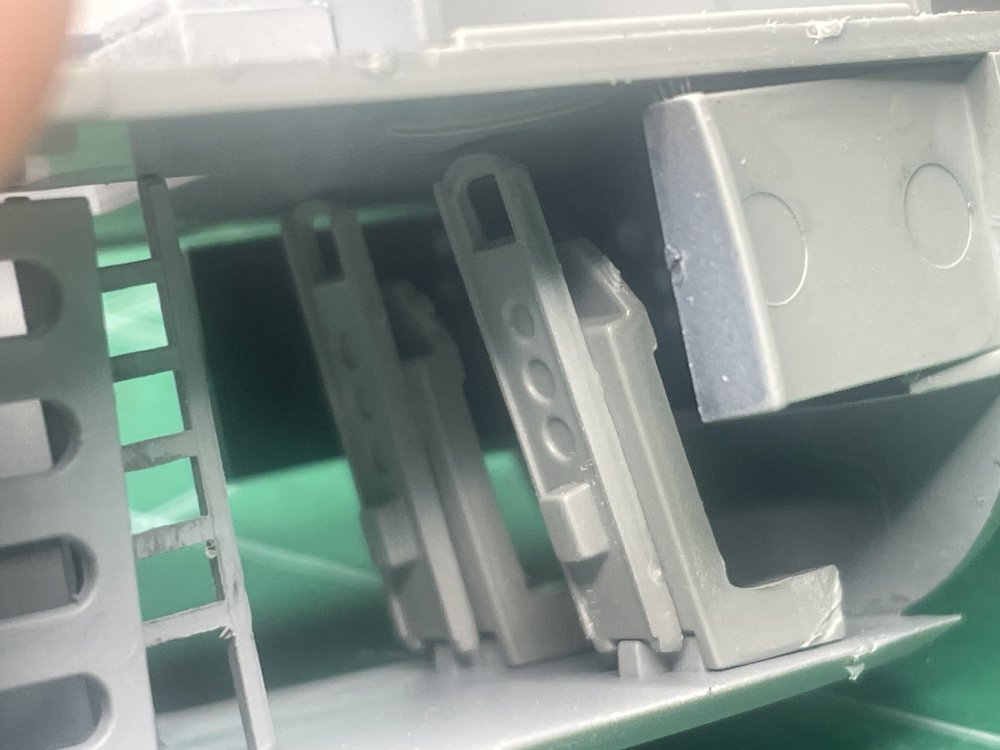
The assembly continues, with some major fit issues. I'm sure some of the issues I created, and some by the lack of clear assembly instructions. So double whammy. This is how the cockpit is supposed to fit into the nose of the fuselage. There is ONE locator pin in the nose, which if you are going to have ONE, that is place you want it. I used the IP tub to determine where the cockpit should be located. Pushing the tub forward split the nose pieces. Uh oh... This gives you an idea of the challenge ahead... Here is where I created part of the problem not pushing the floor up onto the bulkhead, but doing so created other fit problems... The other area to determine the proper fit is the entry door: After clipping off the corners of the cockpit floor, here are the areas I had to sand down to get a decent fit. Same on both sides After some judicious sanding, and lots of test fitting, am able to close up the fuselage without a whole lot of pressure. Making progress, but this is not a shake and bake kit by any means. It is not horribly fitting as I think a lot of these fit problems could be fixed with better instructions. Just a shame nearly ALL of this can't be seen once the fuselage halves are closed up. Working on the bomb bay in parallel but also realized that I'm not sure how well the landing gear doors fit into their openings. Stay tuned!


-
Mark, What is that and where did you get it? Looks like something I need!
-
You need that up there!!
- 2,036 replies
-
- 1
-

-
- car related stuff
- anything about cars
- (and 6 more)
-
Thanks Martin, It is sooo smooth and, well, grown up. Pretty comfy...
- 2,036 replies
-
- 2
-

-
- car related stuff
- anything about cars
- (and 6 more)
-
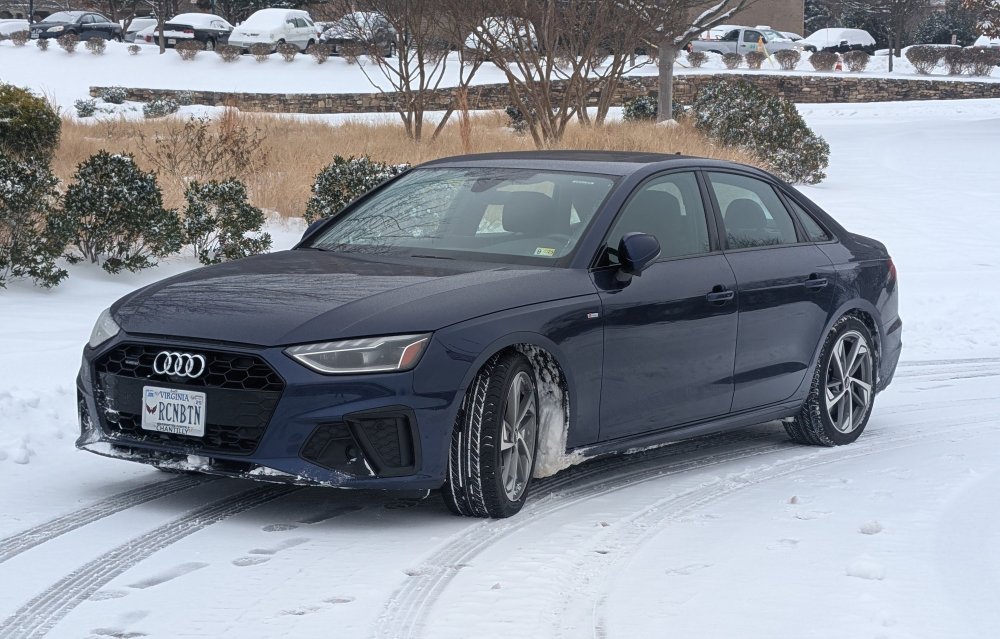
Got tired of shifting (kinda) but mostly just the boy-racer thing with the WRX so traded it in. Got this 2021 A4 with only 24k miles on it. $10k + the WRX. Here's the thing, it is nearly half a second quicker 0-60 and has about the same top-end as the Subie. SOO much more comfortable and has all the modern car features (Apple Carplay and Android Auto) including excellent lane control and adaptive cruise control. On the highway and even around town I get in the mid-30s MPG. It is what Audi call a Mild Hybrid Electric Vehicle with a 12V electric system to assist the engine at starting, low speeds and cruising. From last winter...
- 2,036 replies
-
- 3
-
-
- car related stuff
- anything about cars
- (and 6 more)
-
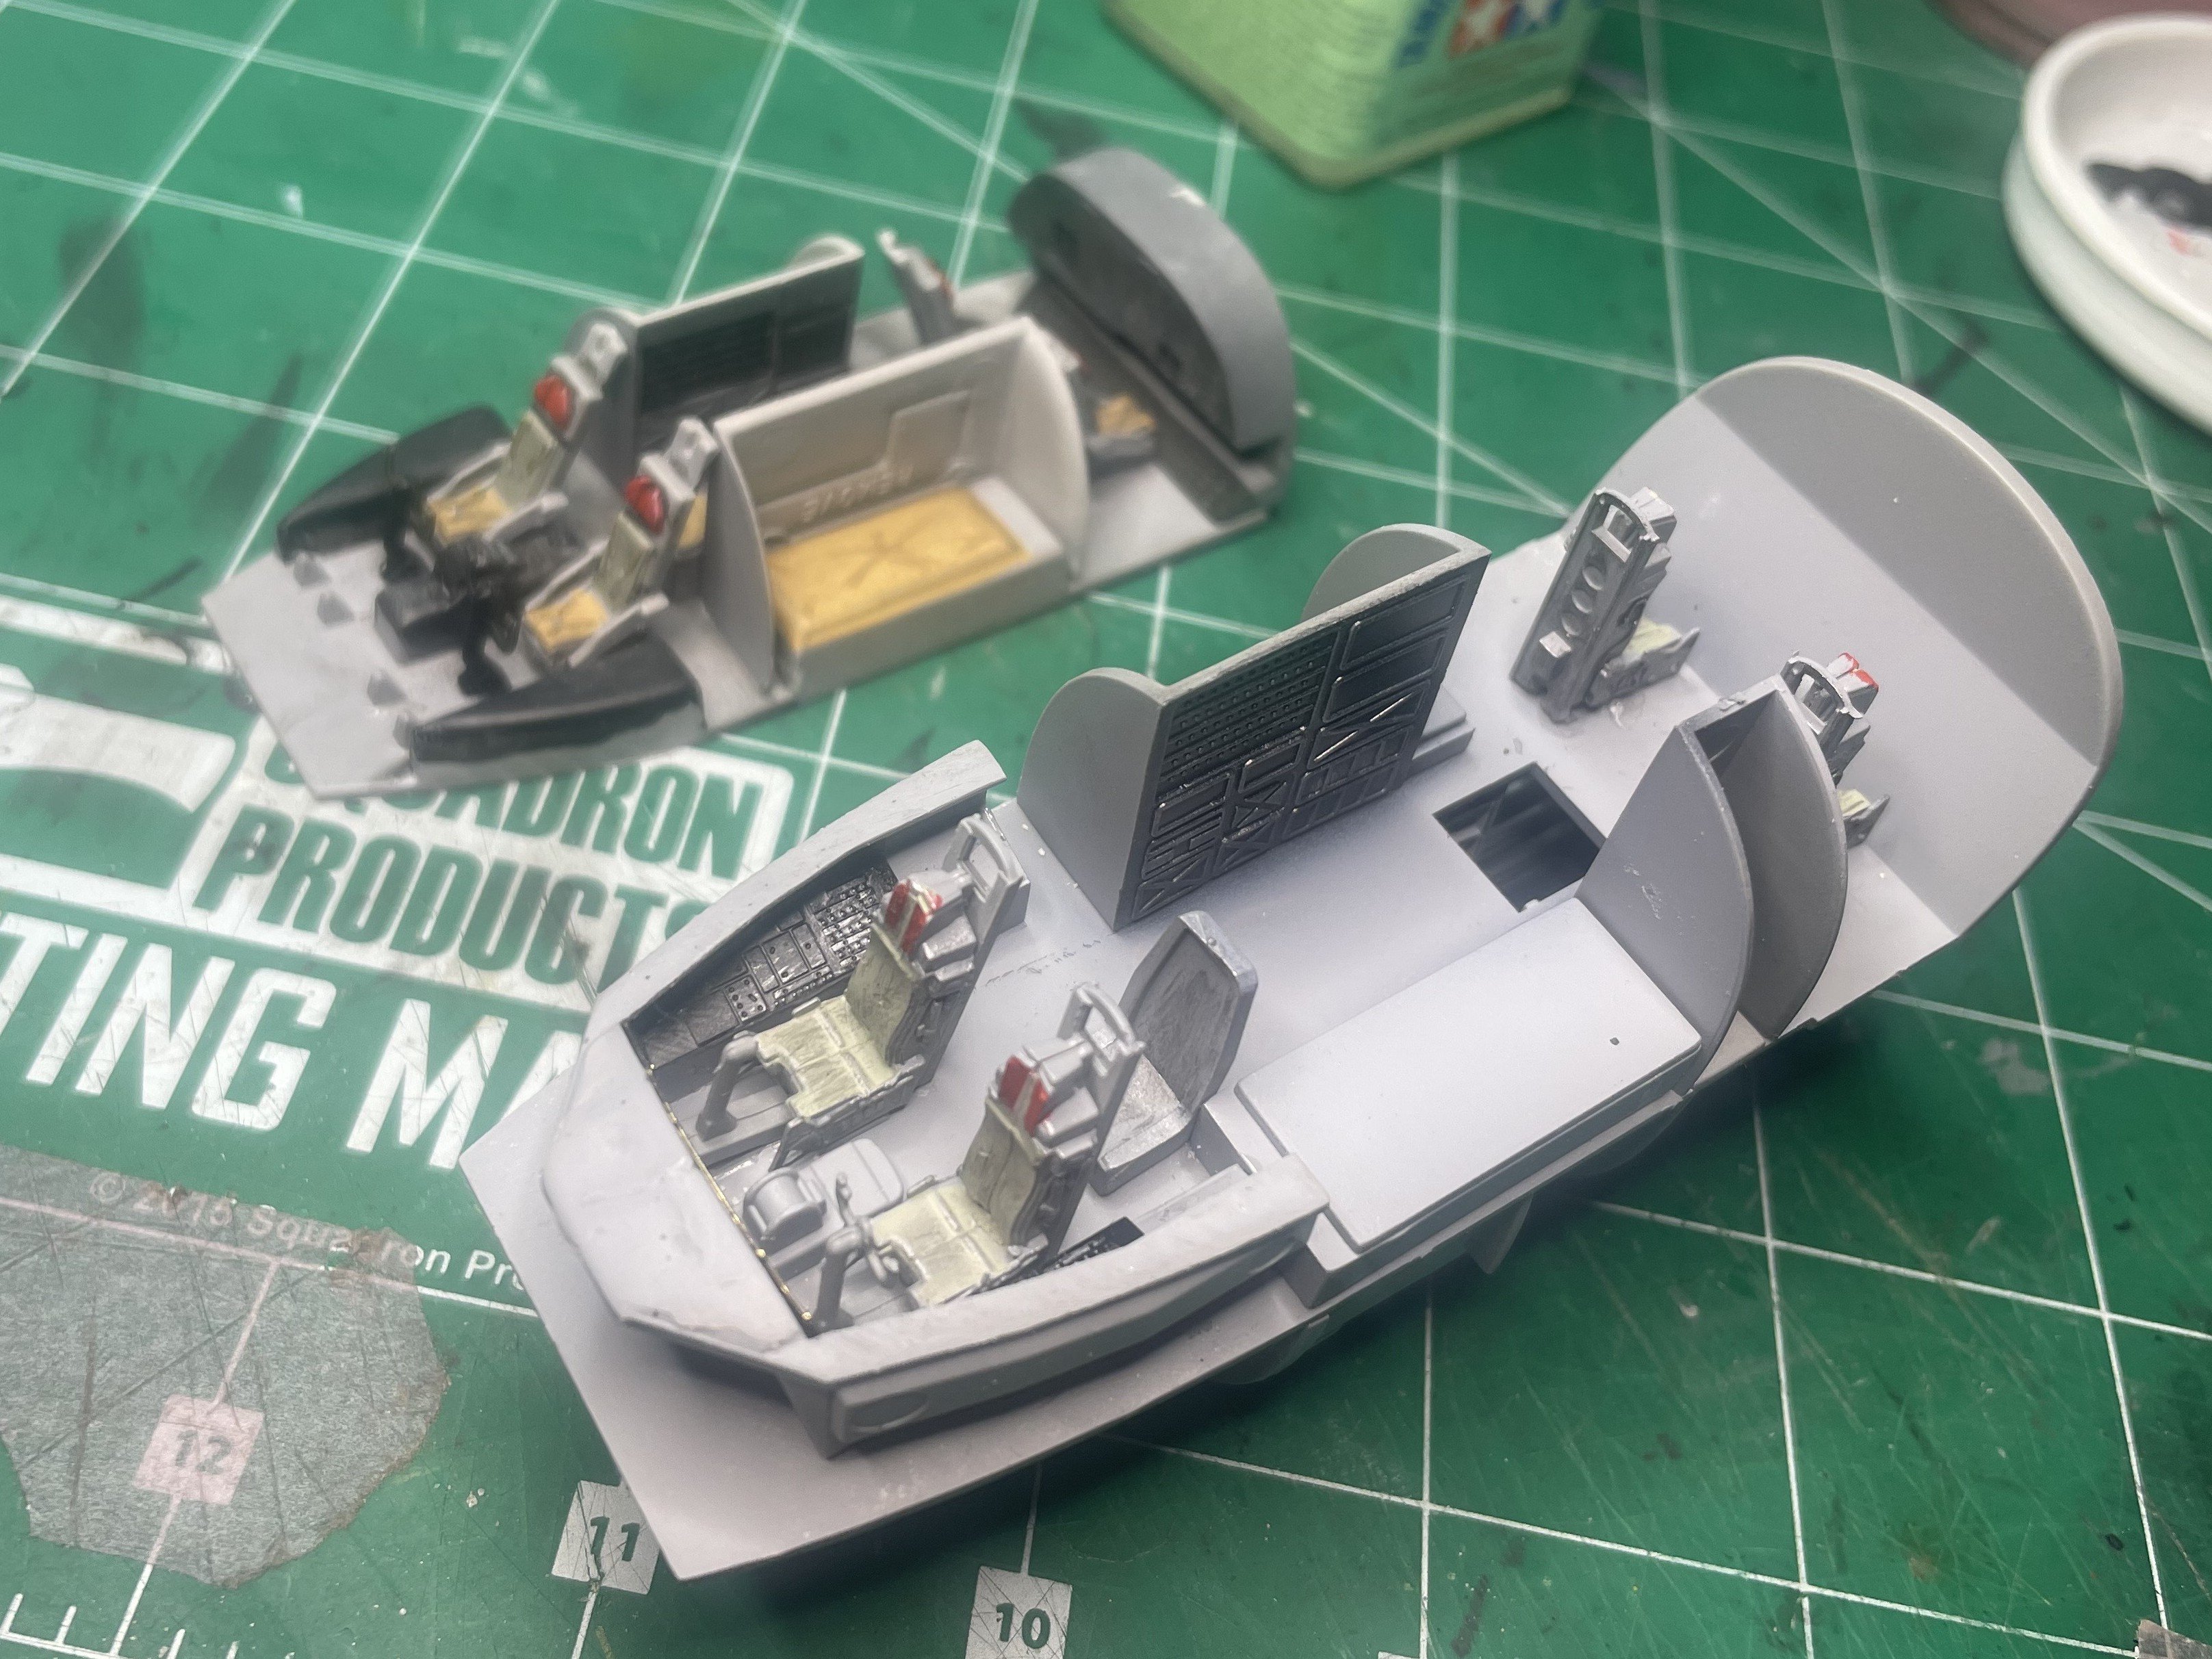
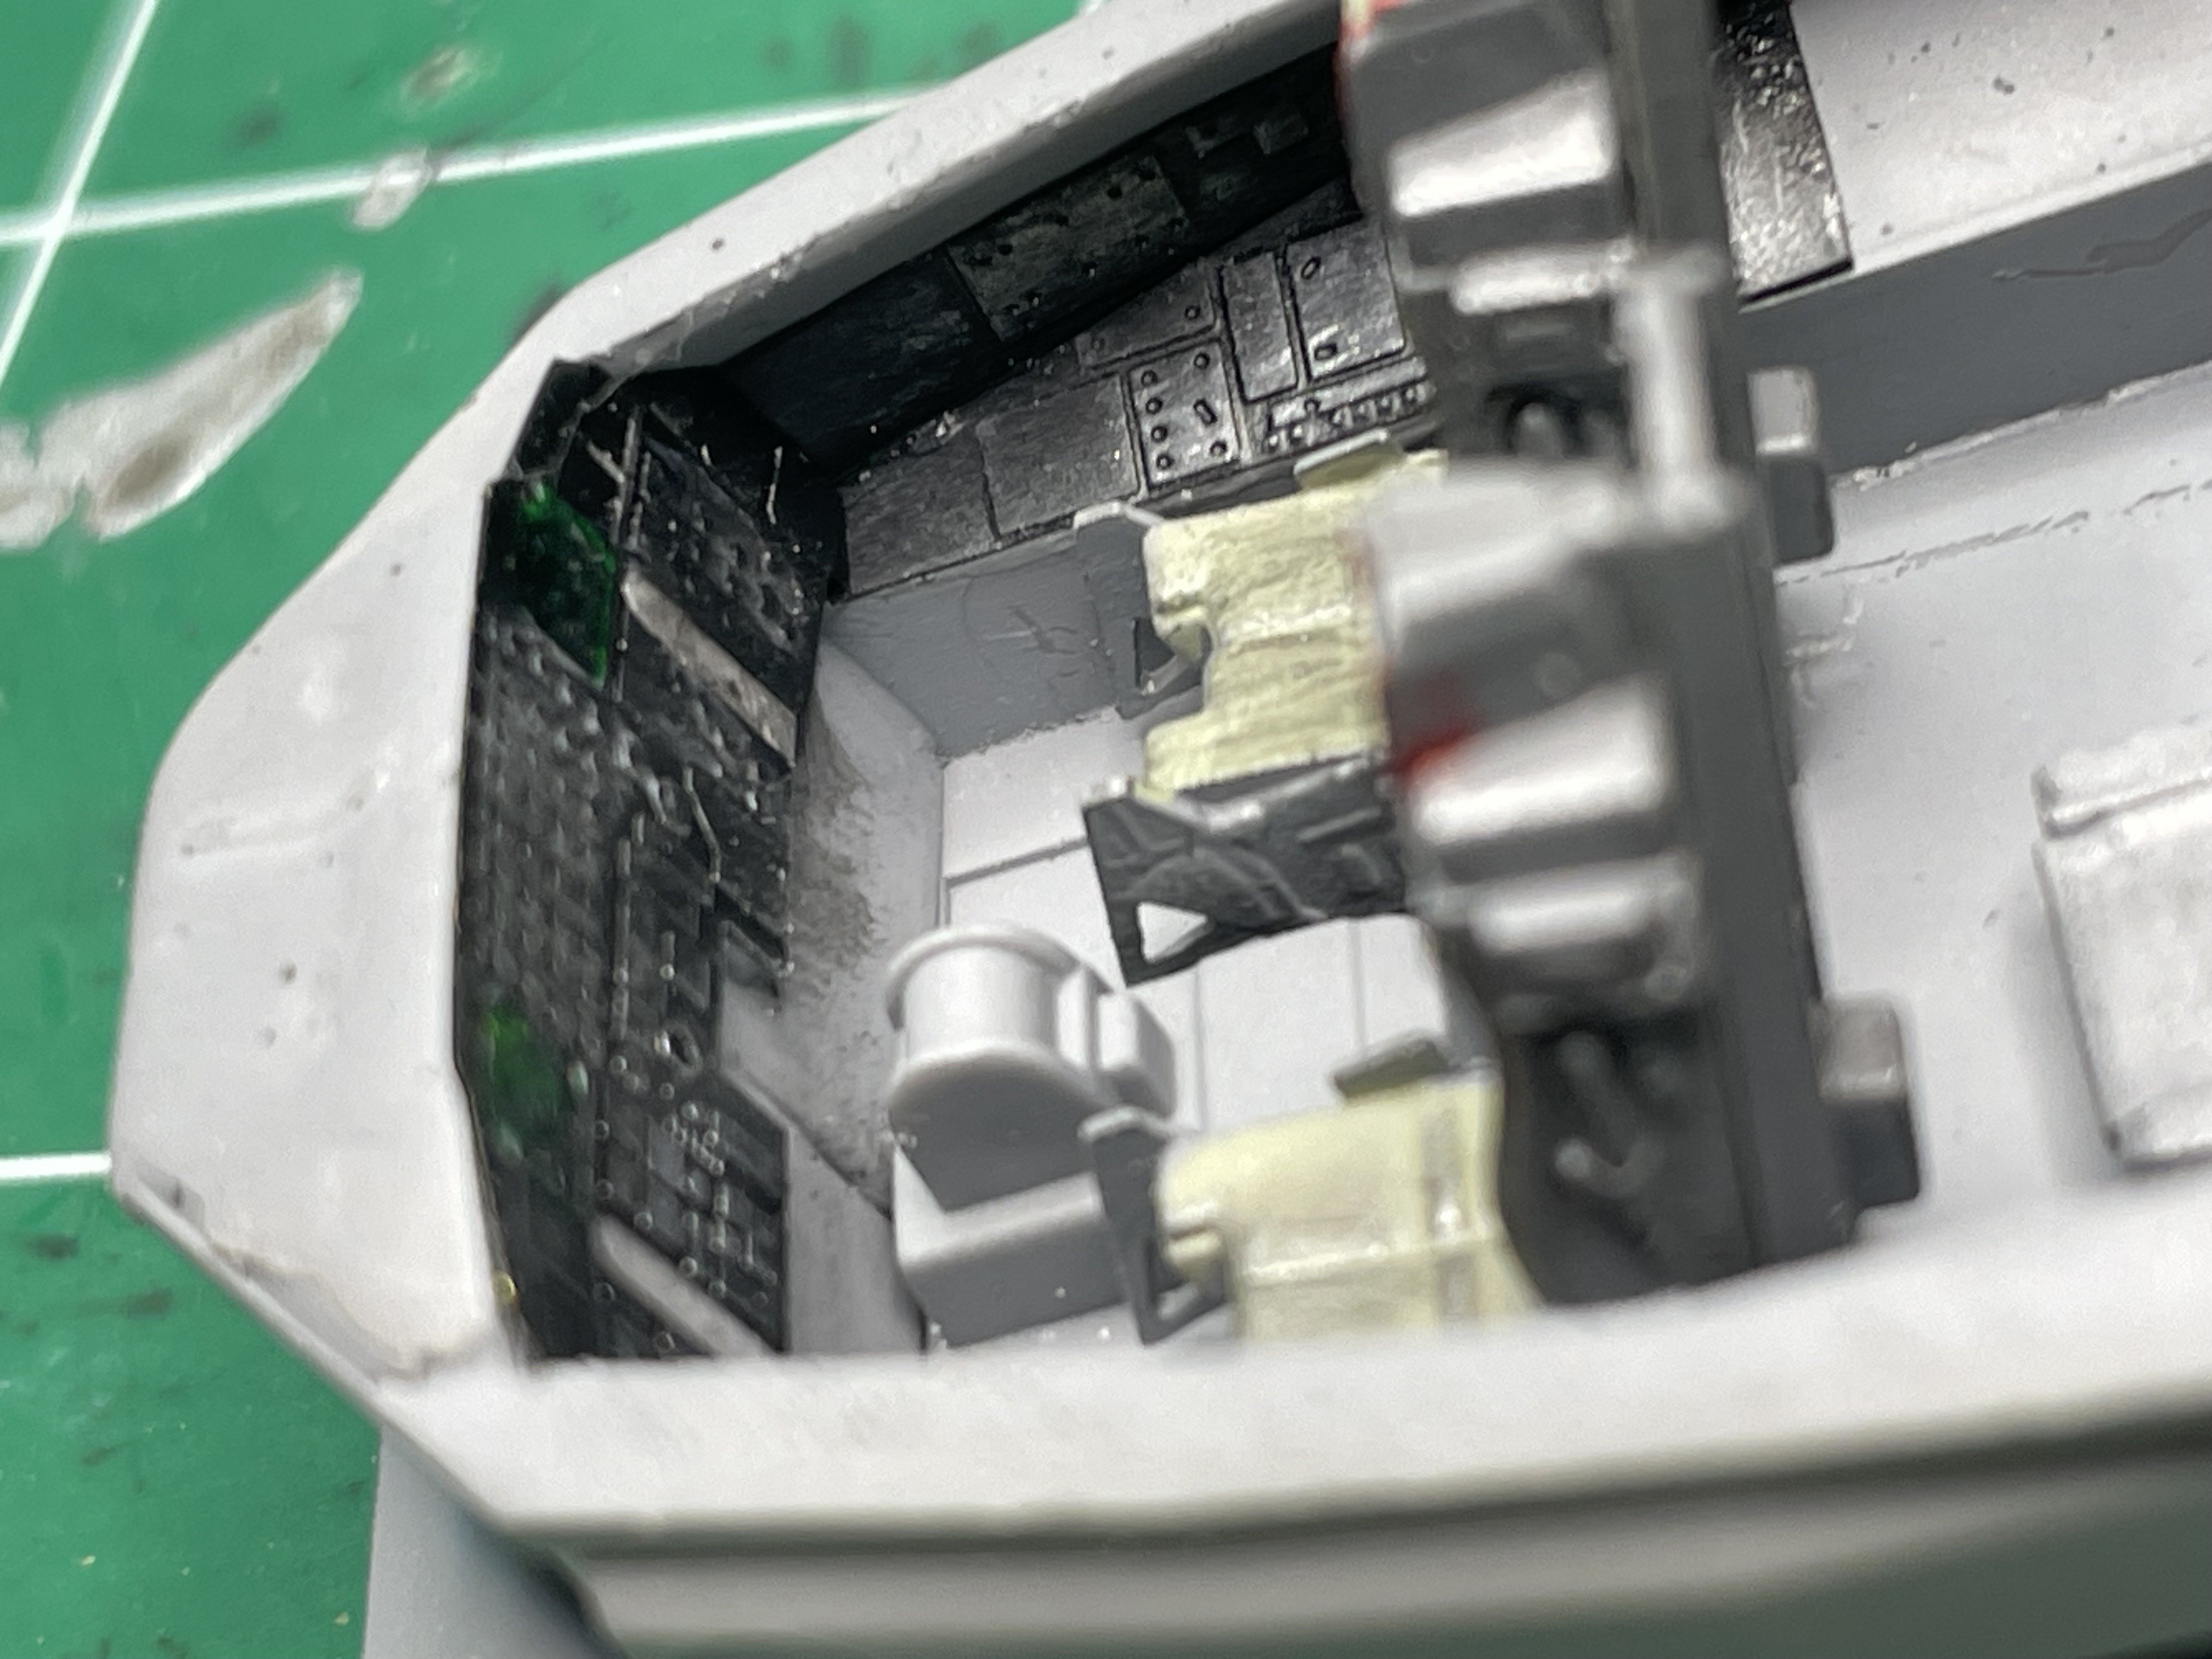
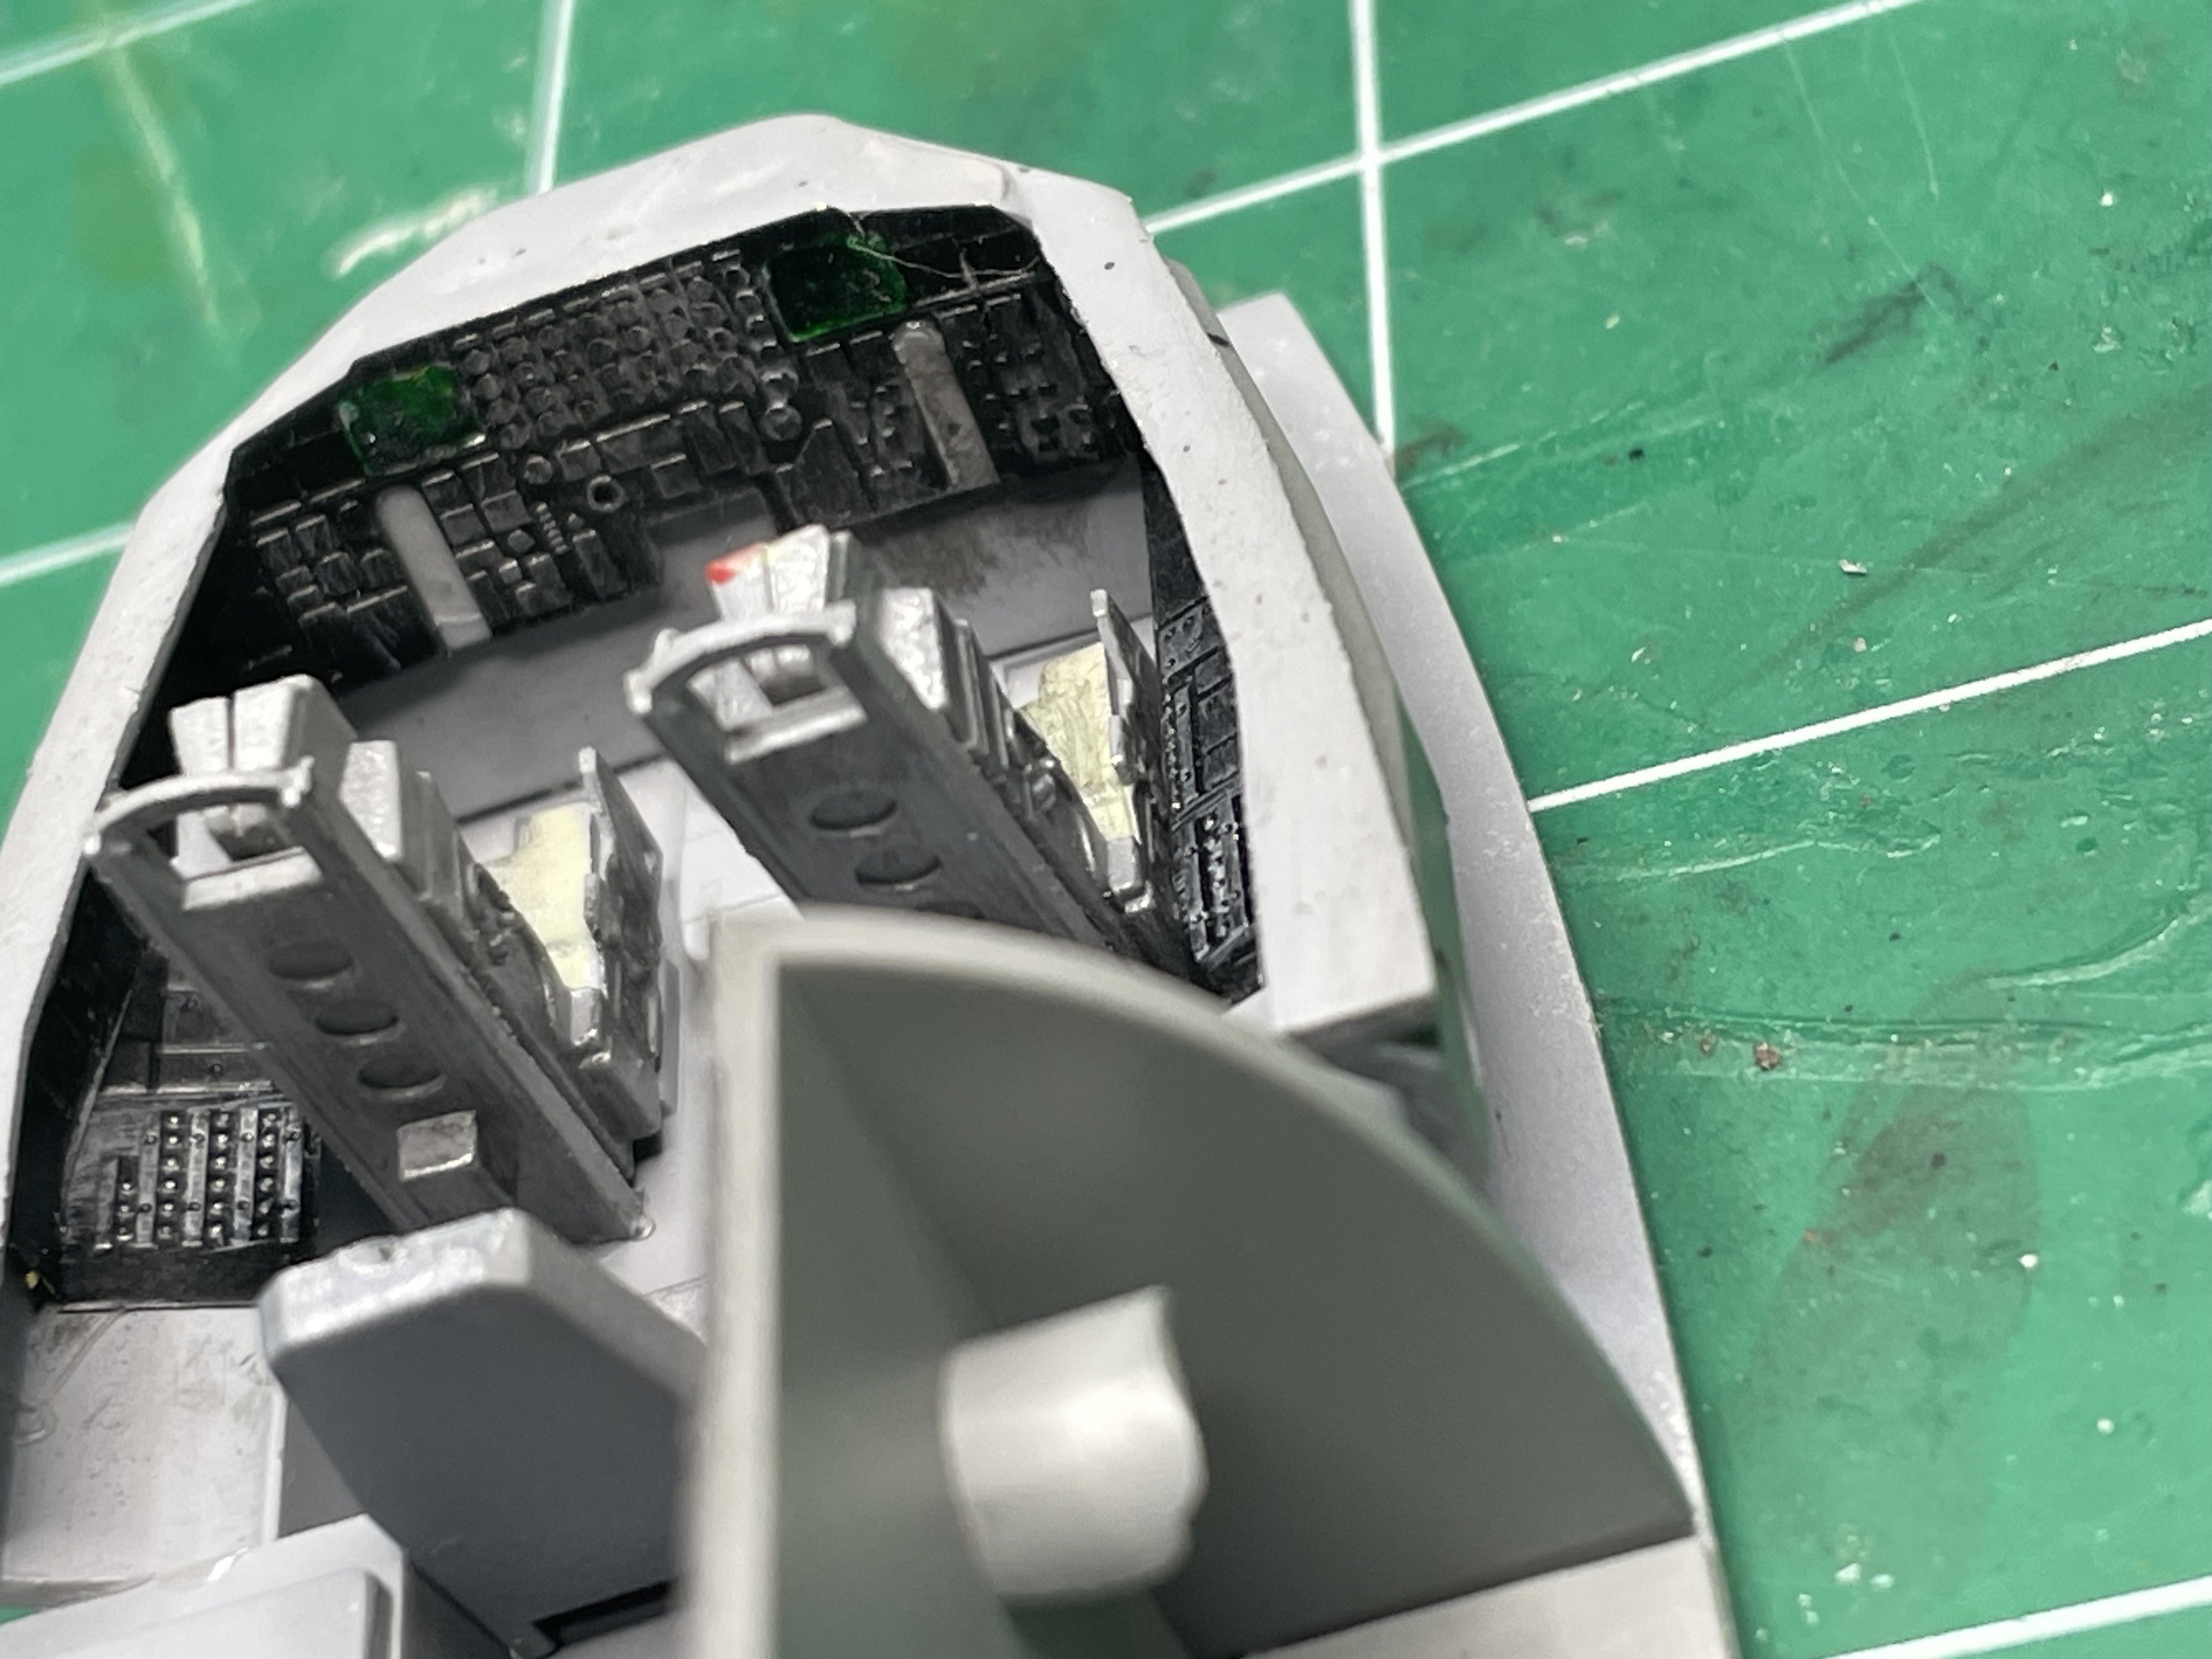
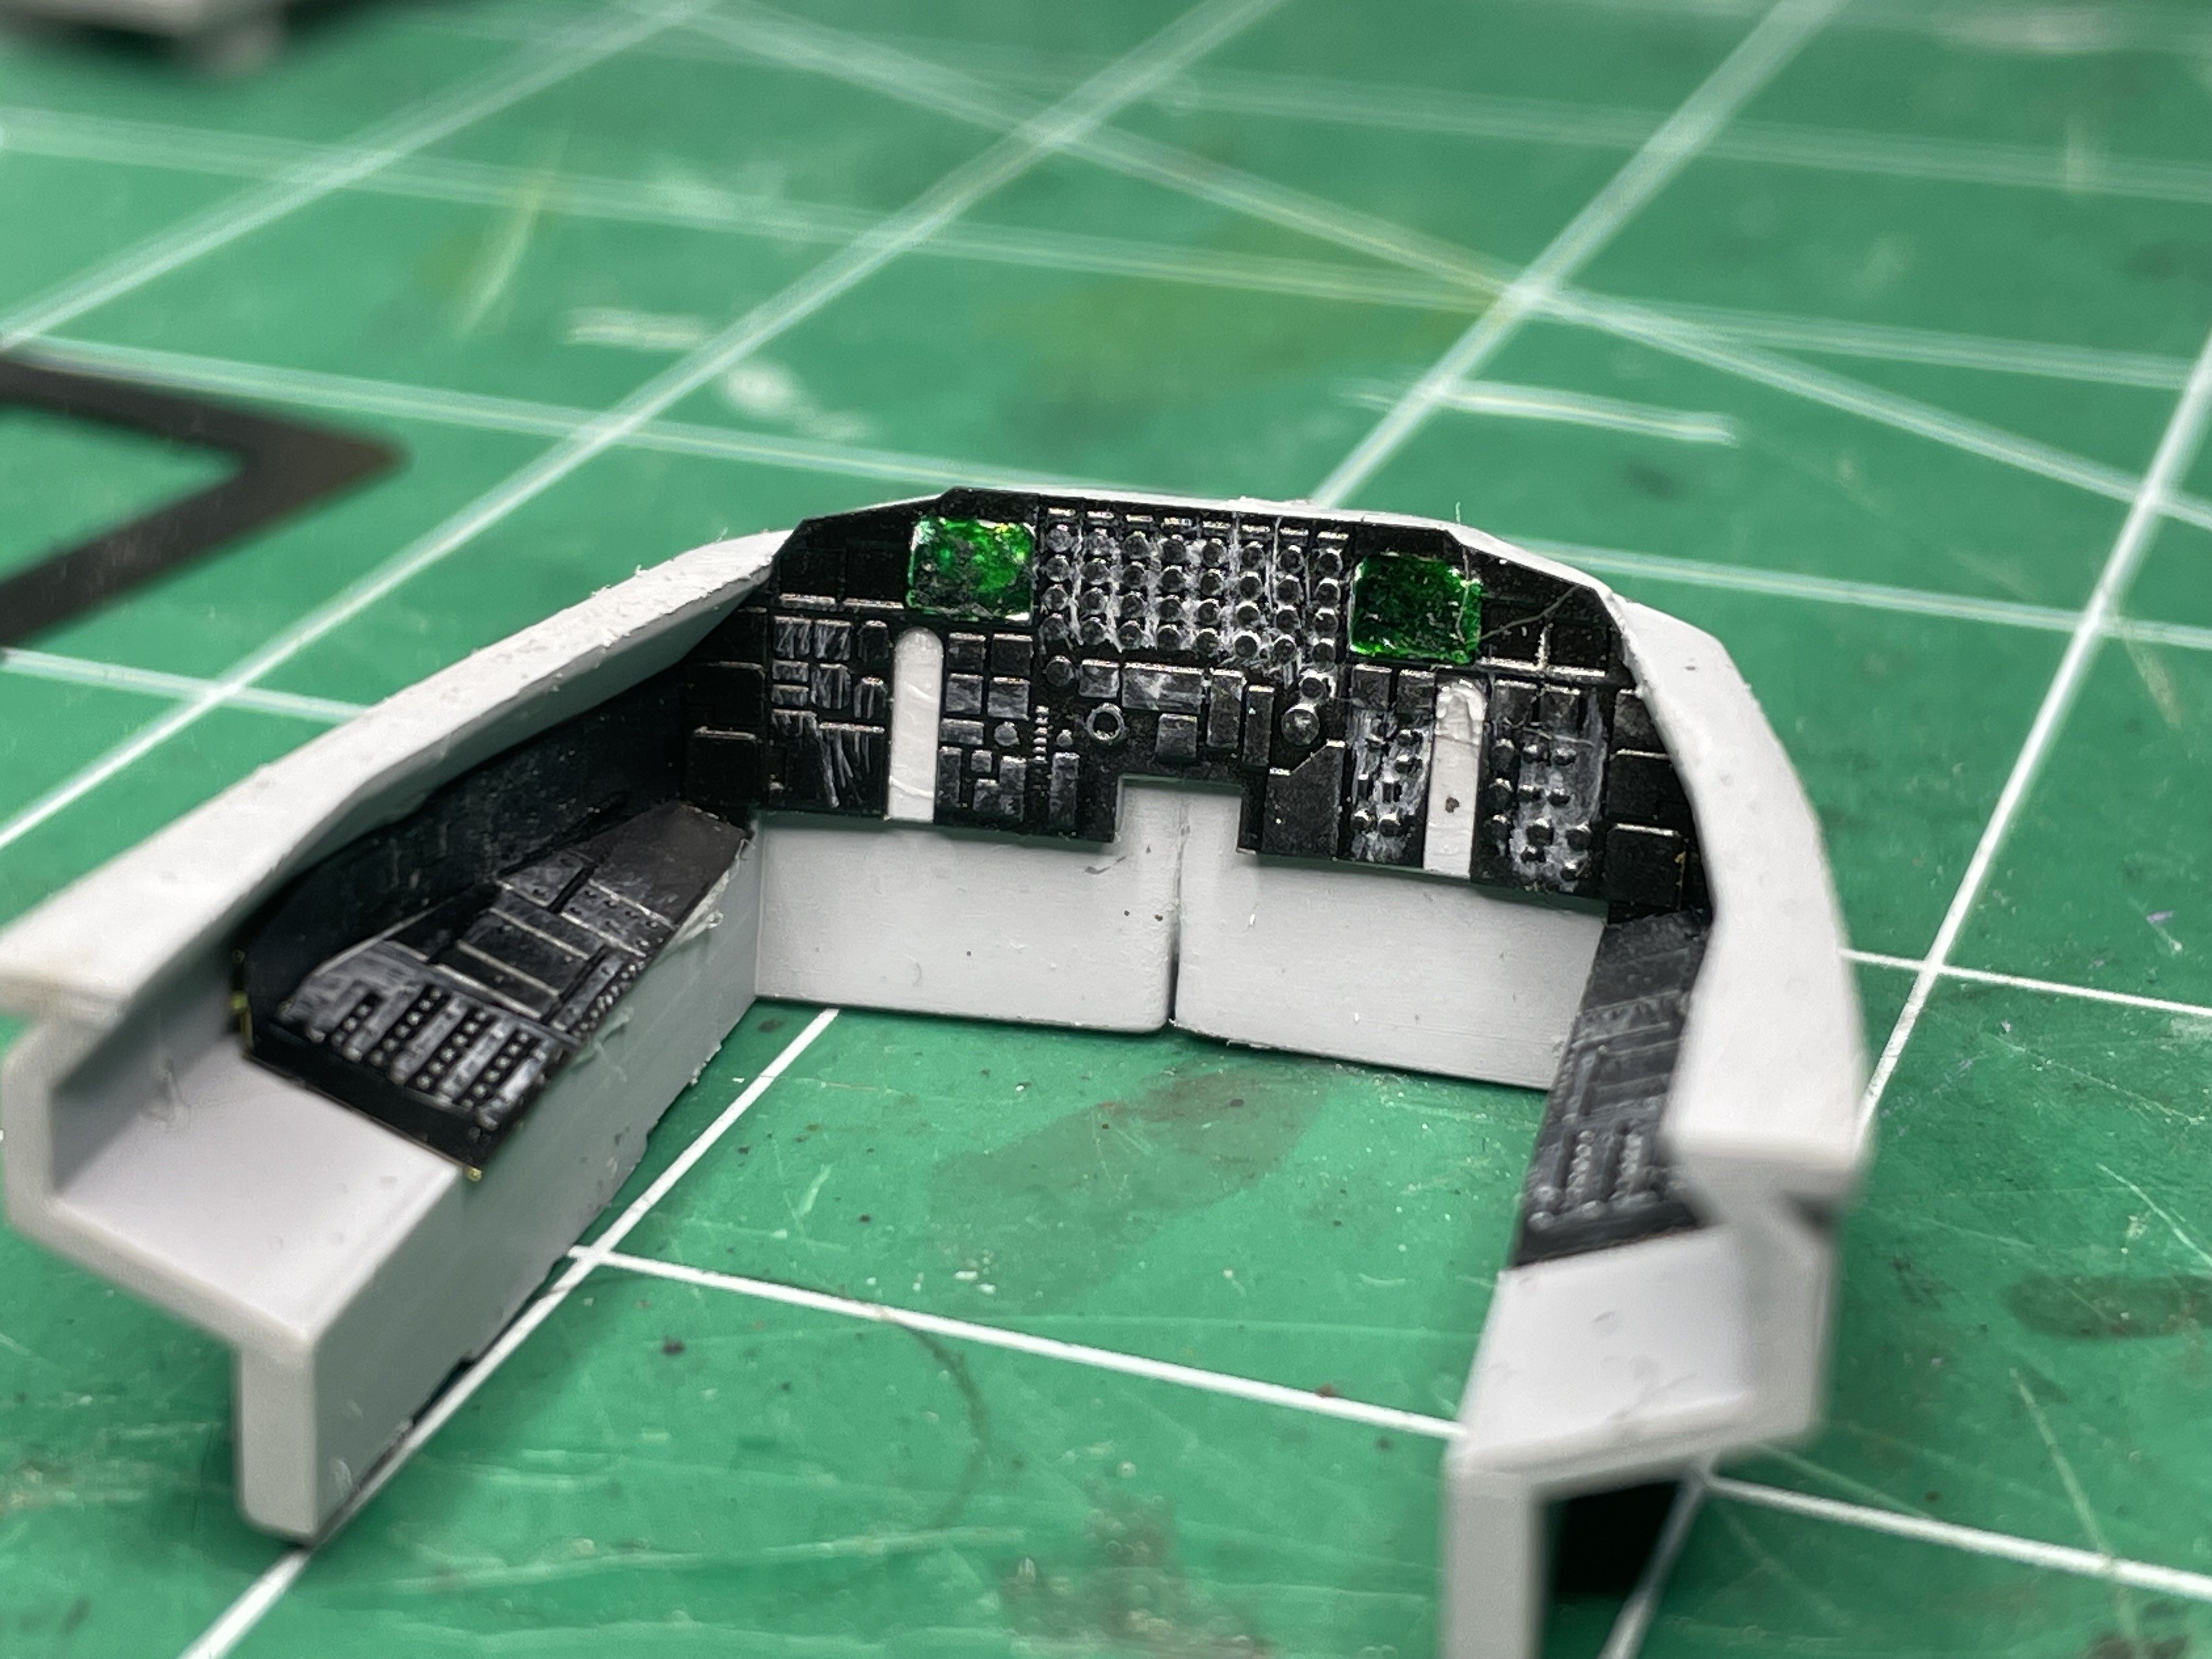
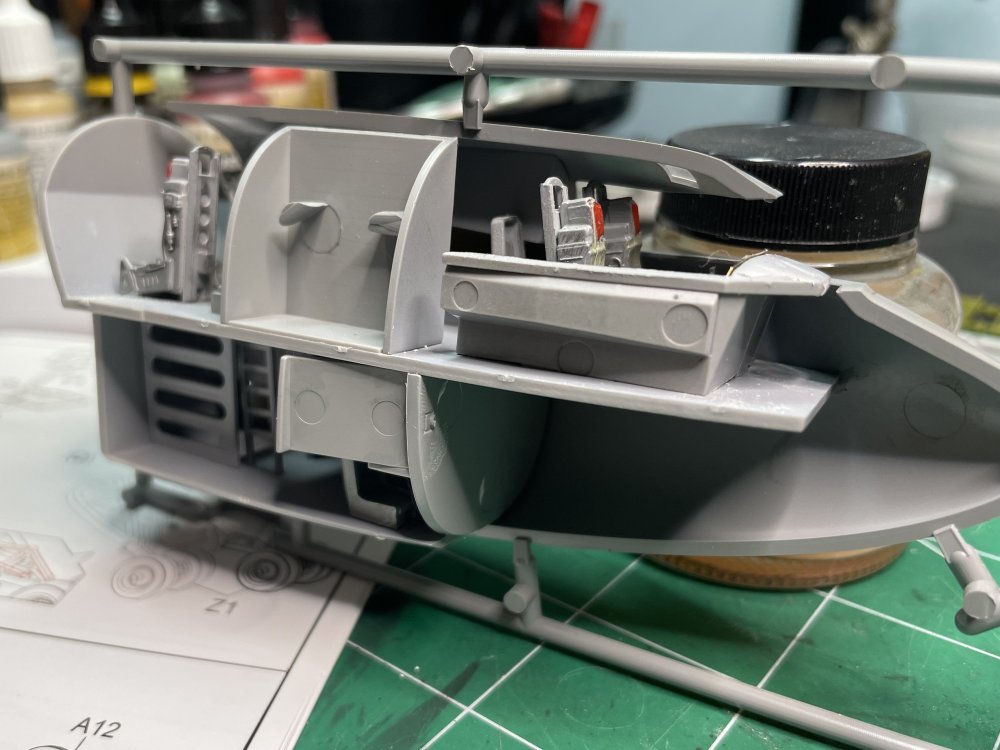
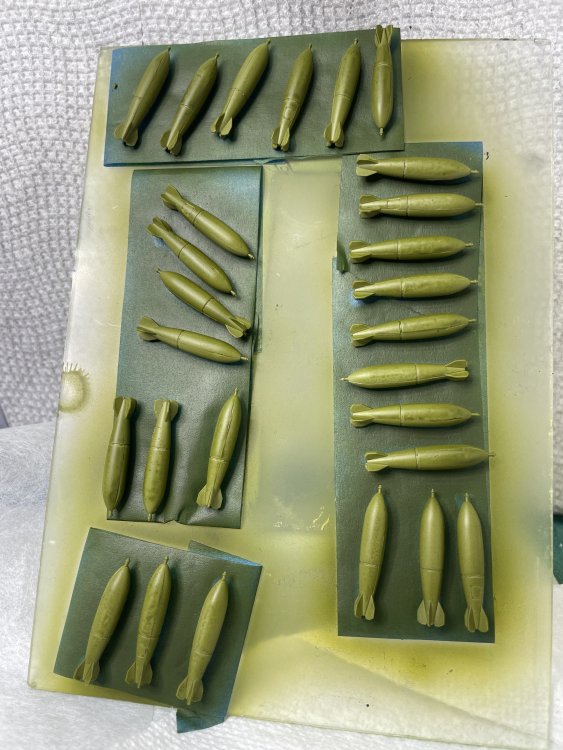
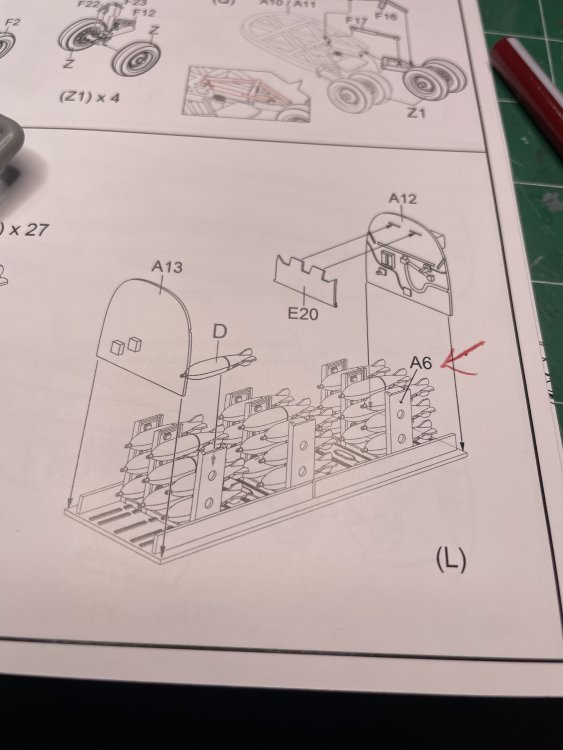
Pulled together the cockpit and again, the fit is interesting. Not a lot of locating help. But seems to be working out. Cleaned up some of the detail in the cockpit. The cockpit tub looks pretty good and the tub concept fits much better than the Italeri cockpit, which has more detail at the rear of the cockpit. These are supposedly the same size. Also the Italeri kit does not show the second level of the cockpit at all. NONE of that detail will be seen, but cool to know it is there! These guys didn't' have a lot of headroom! I'd have spent more time on this but... Some of the pour gates are really big, but all are on back surfaces (so far anyway). I did finally find some pictures of this area. Would have been cool to detail. Working on the bomb bay we again get to strange misses on the part of the instructions: it doesn't show the assembly of the bomb racks! Part A6 is shown completed, but nowhere in the instructions is how to put it together. It will not be hard to figure out, however. Base coat is completed on the bombs. Will do a top coat of darker green, then some color bands. The plane will be suspended from the ceiling so will be paying some special attention here That's it for now! Thanks for hanging in with me. Keeps me motivated to keep working on this beast.


-
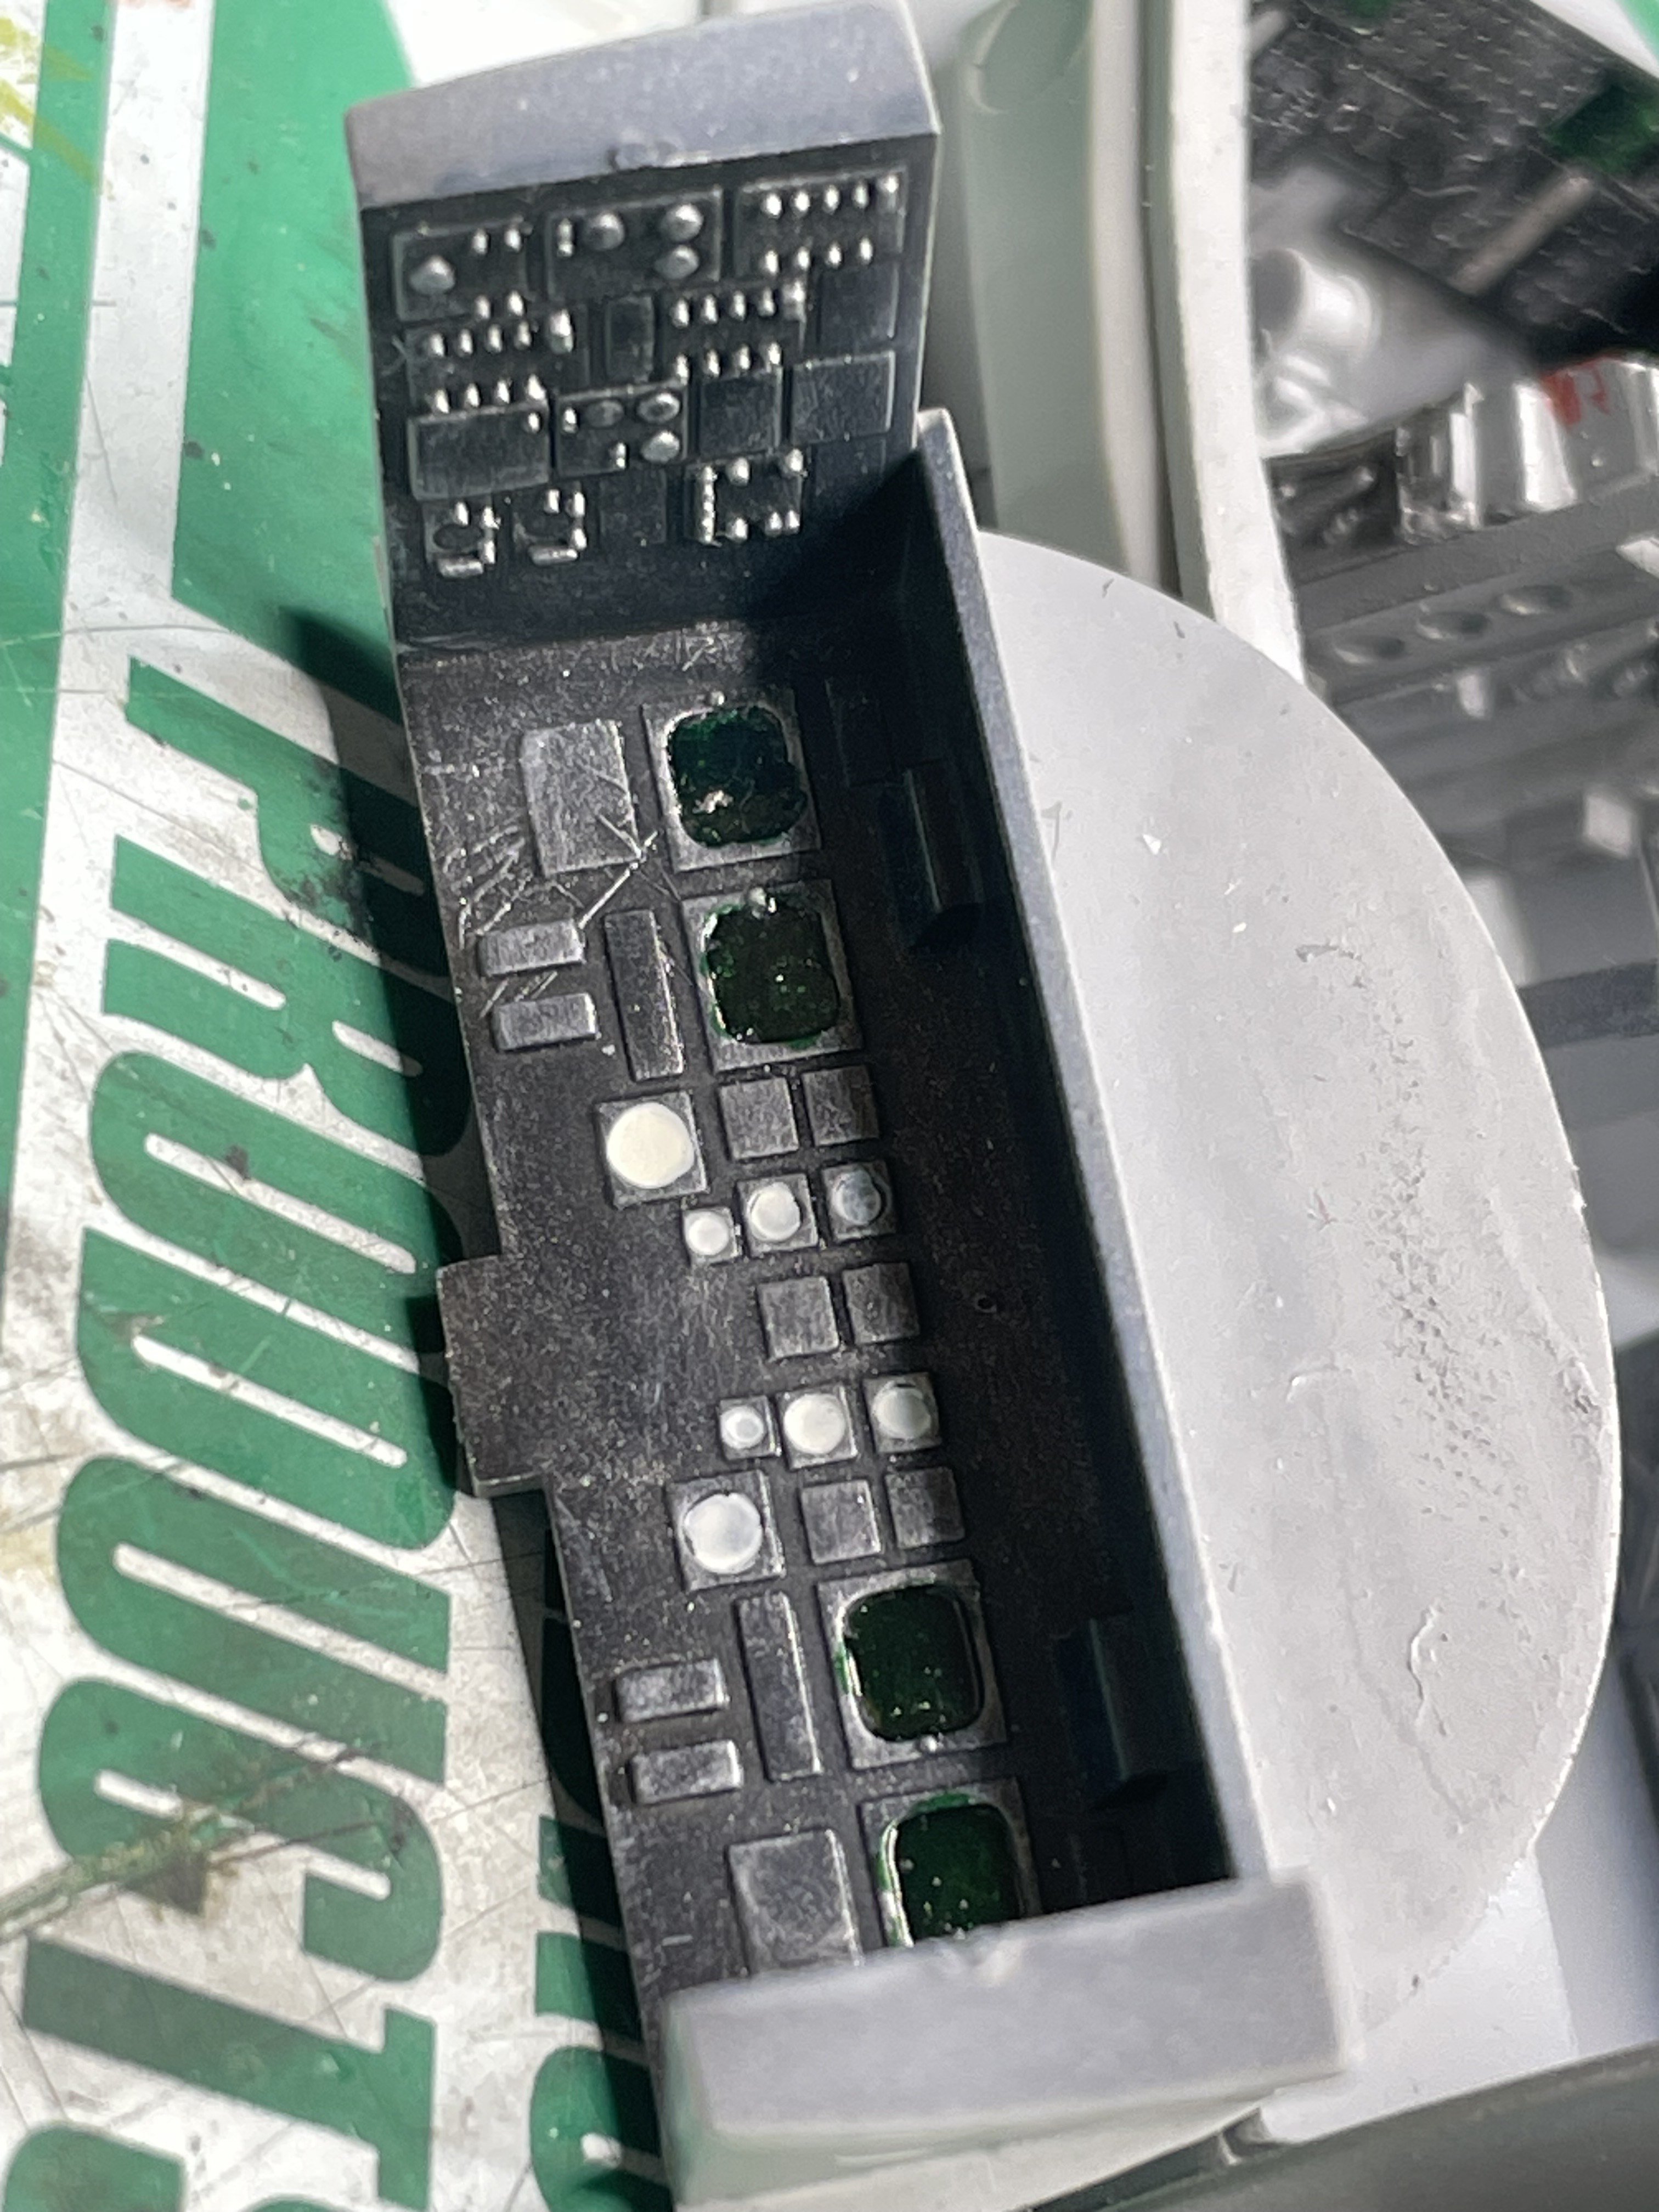
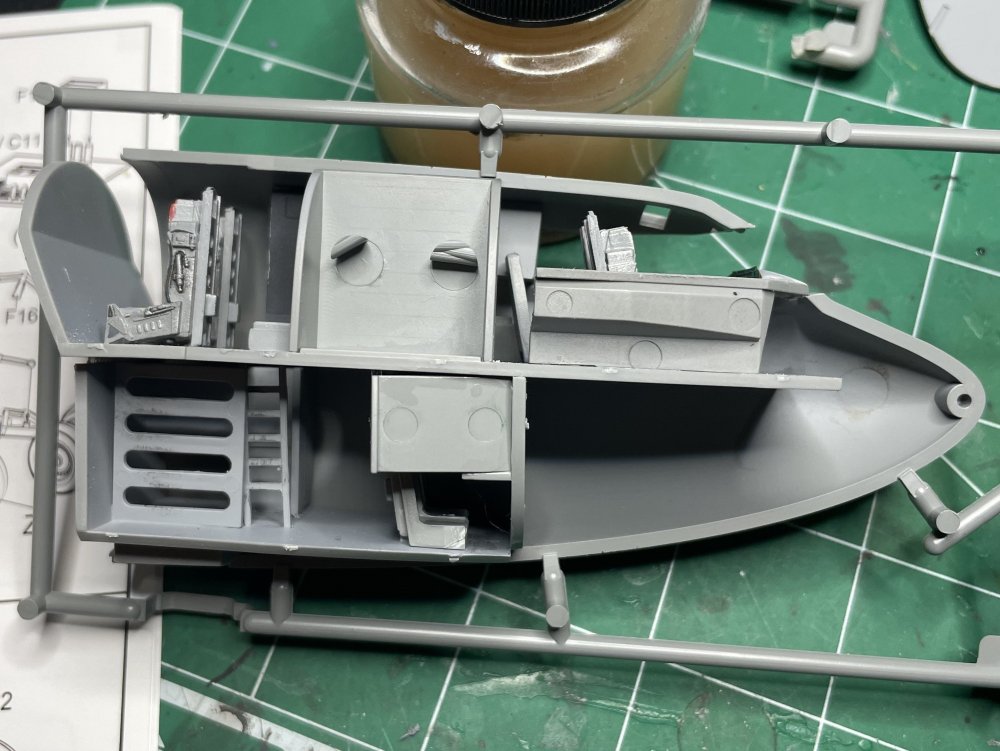
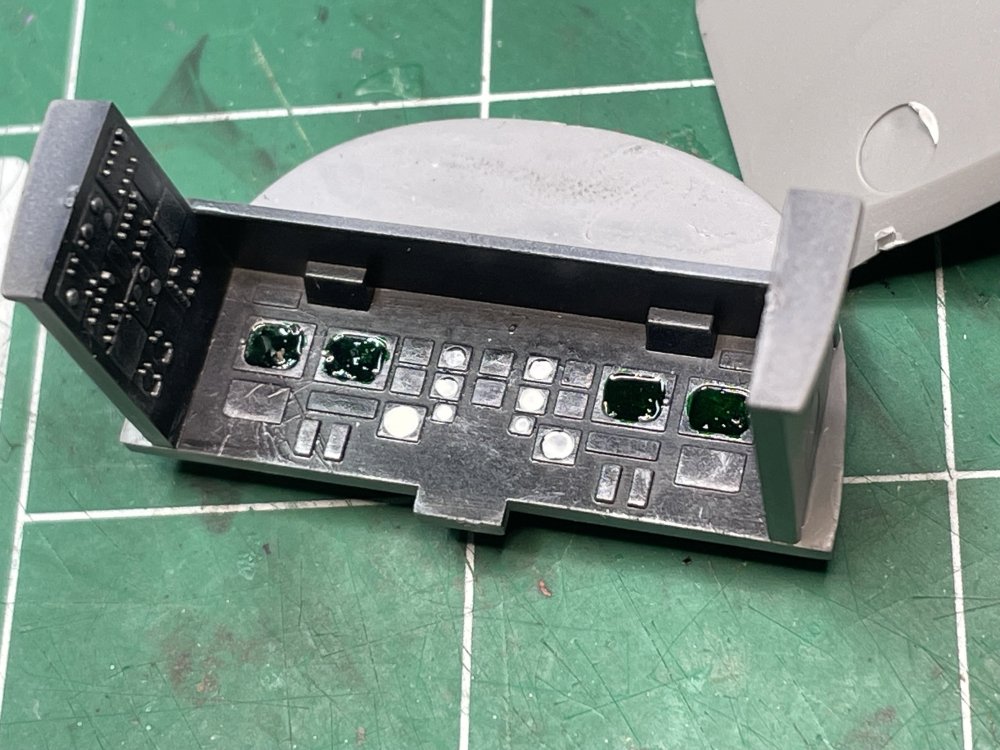
Quick update. Painted and did some dry brushing and some detail painting of the PE panels. It is not accurate, but this will not be seen anyway. Hate doing it this way...There is a lot of detail there, but more could easily have been added with some decals.

-
I'm diligent about cleaning my Iwata, but apparently much less so on my Grex. Ugh...
-
Amazing, isn't it? With all of the solvents and cleaners, sometimes you still have to use a brush or toothpick to scrape out the mess.
-
This is soo embarrassing. My usually trusty GREX Tritium airbrush was barely putting any paint out. Spitting and sputtering. I ran cleaner through it, lacquer thinner, etc. That seemed to work so started back painting and back to the spitting and sputtering. Even back flushing didn't do much. I thought there must be a clog. Little did I know... Took the needle out and saw that it was kind of gunky. Then took the nozzle protector off and realized I would have to take the nozzle off - something I have done thousands of times with my HP-CS. However, I had never taken the tool out of the GREX case to take off the nozzle. I figured back washing and using lacquer thinner probably took care of the mess in the nozzle. Not so much. This is what I cleaned out behind the nozzle. That is a standard toothpick which I used to help dig out the mess. How it the world so much paint built-up behind the nozzle is beyond me. Clearly I was not cleaning very well at all. Ugh. I figured I'd share to remind especially the Grex users that the nozzle needs to be removed periodically to facilitate proper cleaning.

-
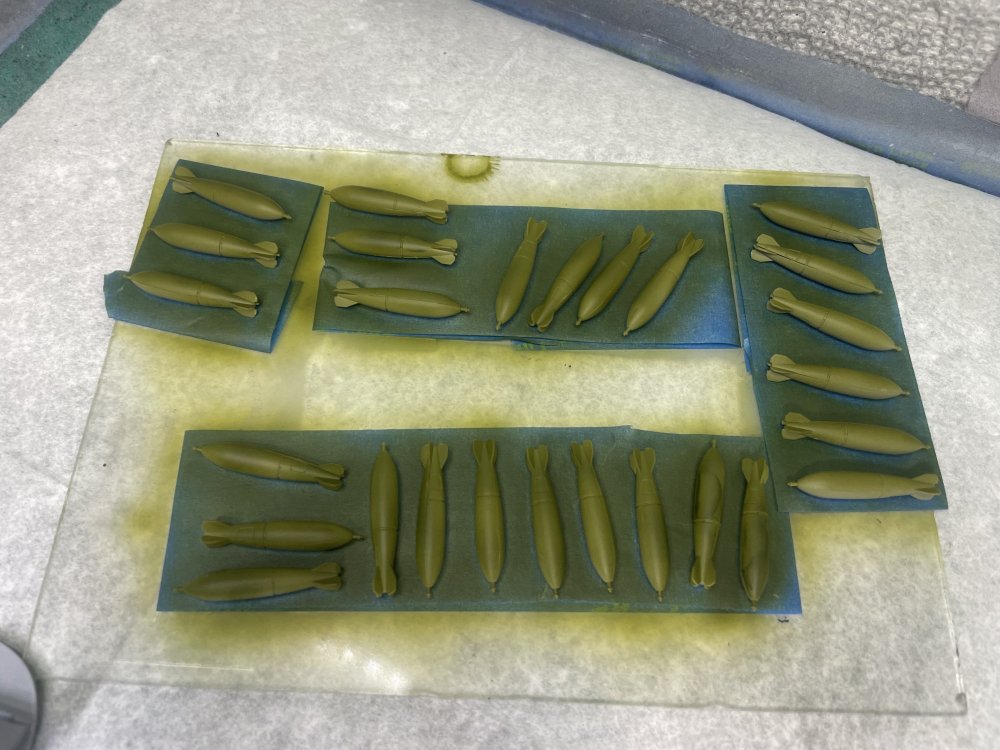
Made a LITTLE progress mostly because I ran into major airbrush issues (please see my message "Well, THIS is embarrassing"). Have most of the two-tier cockpit (I didn't know the cockpit was two levels! The Italeri kit doesn't show this level of detail) in Light Gray and the Instrument racks and PE instrument panels in black. All the black areas and the seats have a gloss coat getting ready for washes and detail painting. The bombs have an initial coat of Green but not full coverage yet. Here is my motivation for the bombs. They are greener than I thought they would be. Notice how high up the side of the fuselage the black comes on the plane: And my first coat of green. Had airbrush issues so this was the best I could lay down. The issue is fixed now, so hope to make more progress tomorrow. Will be layering a few colors.

-
What is on your bench right now ? Share a picture :)
CANicoll replied to Martinnfb's topic in Modelling Discussion
Super job!! Not an easy kit and the finishes are amazing. I cheated and did mine in SEA camo... -
What is on your bench right now ? Share a picture :)
CANicoll replied to Martinnfb's topic in Modelling Discussion
Rob, AWESOME build! I've missed a lot, but glad I found this beauty. Love it! -
Tamiya 1/32 F4U1-D completed
CANicoll replied to JohnB's topic in LSM 1/32 and Larger Aircraft Ready for Inspection
Beautiful work, John!!