CANicoll
-
Posts
1,928 -
Joined
-
Last visited
Content Type
Profiles
Forums
Events
Gallery
Everything posted by CANicoll
-
Hi folks, I feel like it's been forever since I've posted so wanted to check-in and say hi and that I have not forgotten you. I have so many things I could build I'm still choosing something. I have diverted some time back to making a few pens, which is a quick-hit to completion - like 3 hours quick hit! I had picked up some really nice-looking blanks. Will post some pictures when I get a few more done. Health update - actually, not bad. Had a few kidney stones but been down that road before. One quick (four hour) trip to the hospital for one of them and Morphine is a wonderful invention. Passed no problem. Otherwise, still (mostly) vertical! Cleaned out some people from my life who have not been as invested in our relationship/friendships as I have been. Freeing up that mental space has been a really good feeling. Helps that I found a new friend who continues that brings life and sunshine into mine. She actually will ping me to say "Are you busy? I don't feel like cooking tonight. Want to go grab a bite somewhere?". It's nice. Taking care of my mother is a different matter. Took her to dinner for Mother's Day (of course!). During dinner she was talking about how her father was so good raising all of the (seven) kids by himself. Ummm.. Yes, her mother left when they were young, but her father remarried shortly thereafter. Even growing up I met her stepmother several times. She had forgotten about her stepmother. This is the most glaring of her memory issues and indicative of her continued decline. She's 89 and in otherwise very good health, but I'm having to spend more time taking care of her affairs. It is VERY hard to set up the guardrails for an elderly parent. I at least am able to ensure her bank and investment accounts can't be emptied without me knowing she's trying to move some money. If she has to go full memory care, that will drain her accounts very quickly... Fortunately, she moved to an assisted living facility 10 min away from me, so I know someone is there 24/7 if something happens. So that is my update; Sorry to not be as active as usual, but I'll get a build started sometime soon and will try and be more diligent about at least seeing what great work you all are doing.
-
I was just going to post a similar update! Good to see you check in. Even if you can't build at the moment, would be good to hear from you on the various builds going on...
-

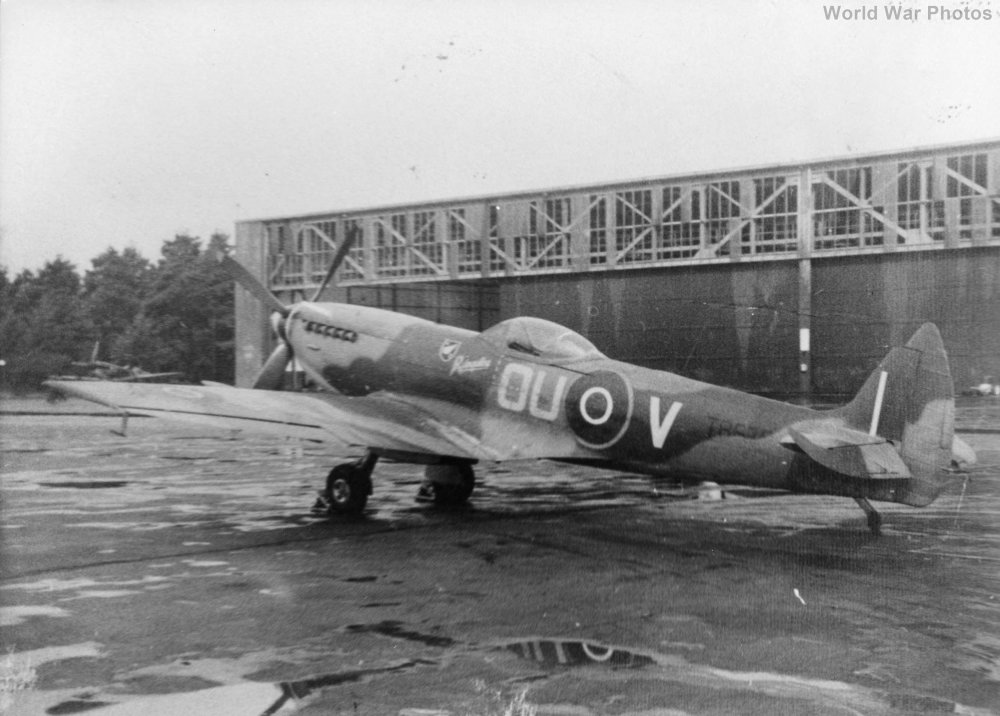
Eduard Spitfire Mk. XVI Bubbletop 1/48
CANicoll replied to CANicoll's topic in LSM 1/48 Work in Progress
I forgot to post the RFI thread which is here. Now I just have to figure out the next build... -
Cobra Coupe - Le Mans - Model Factory Hiro 1/12
CANicoll replied to DocRob's topic in LSM 1/35 and Larger Work In Progress
Rob, Sorry, been off for a bit but catching up quickly. LOVELY!! The culmination of your efforts are striking. You've often referenced where you know things are off a bit, but what I see is a fantastic build that could easily be mistaken for a photo of the actual car. I see wear marks that would appear on the actual car but that body work you did is amazing. I'm not as worried about the gaps - the car looks right. I remain in awe at your skills. -
Eduard Spitfire Mk. XVI Bubbletop 1/48, RFI!
CANicoll replied to CANicoll's topic in LSM 1/48 Aircraft Ready for Inspection
Gentlemen, thank you so much! Nice to finally finish something in a decent amount of time. I really do appreciate your comments, all along the build, too! -
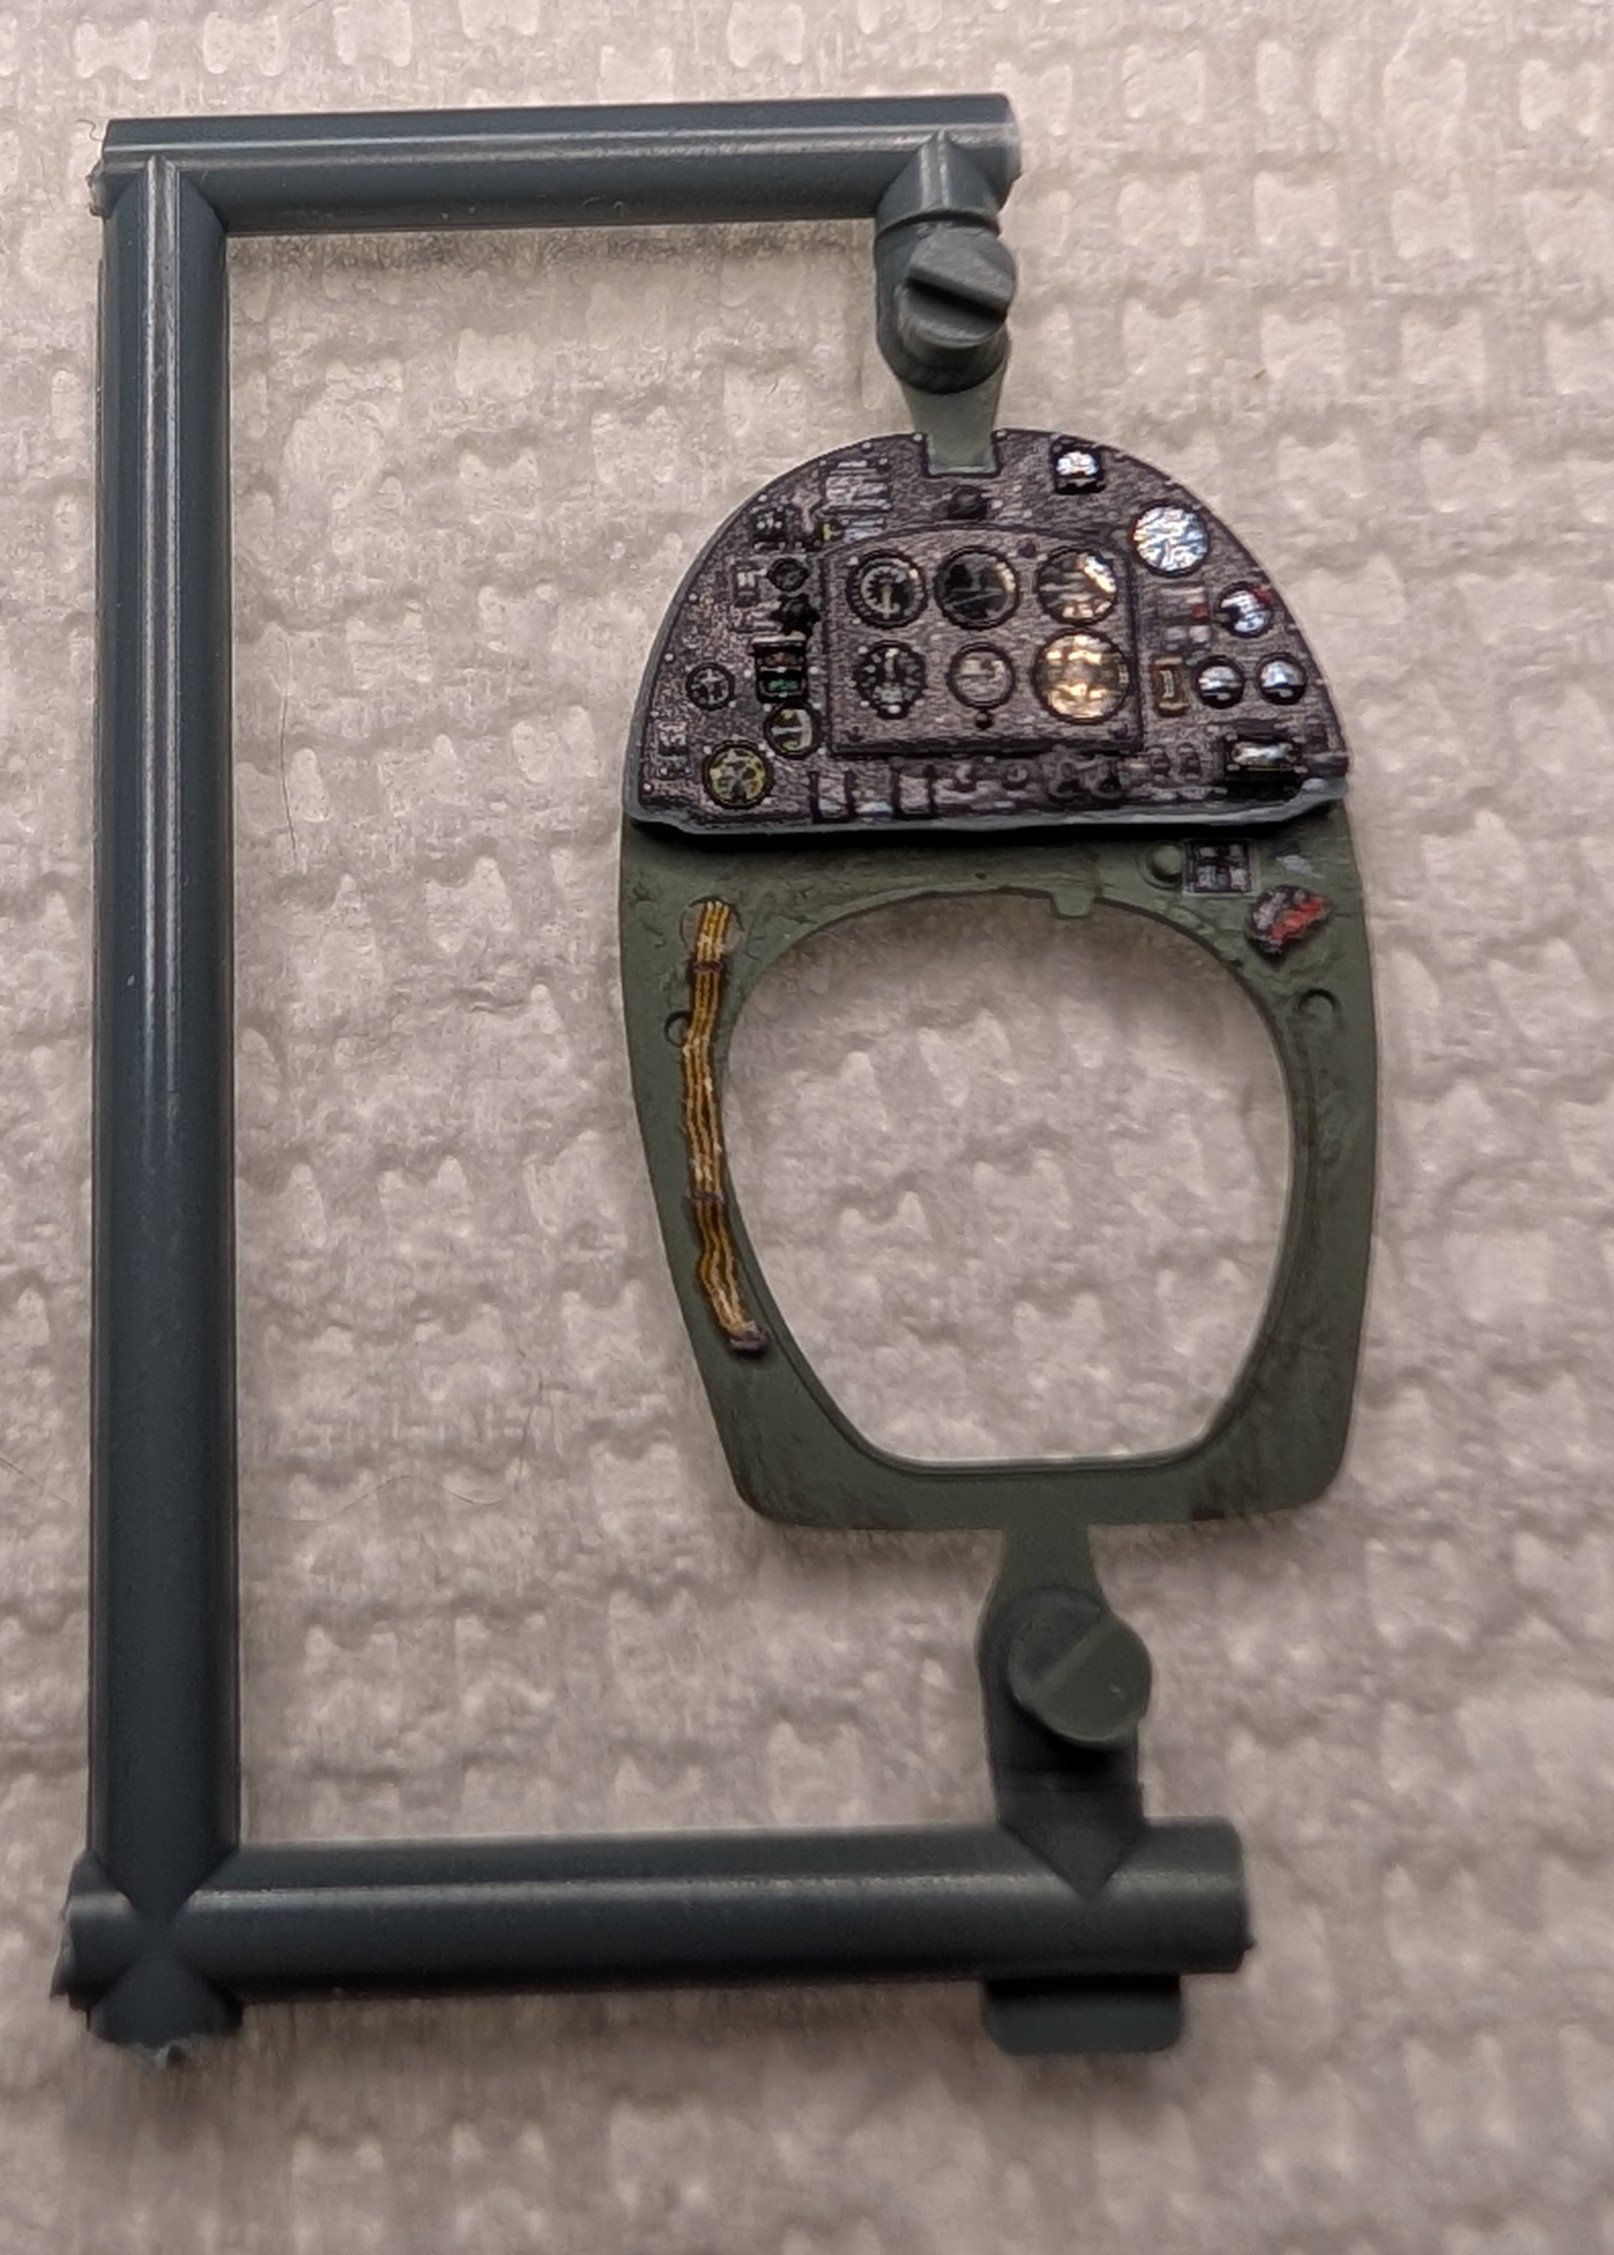
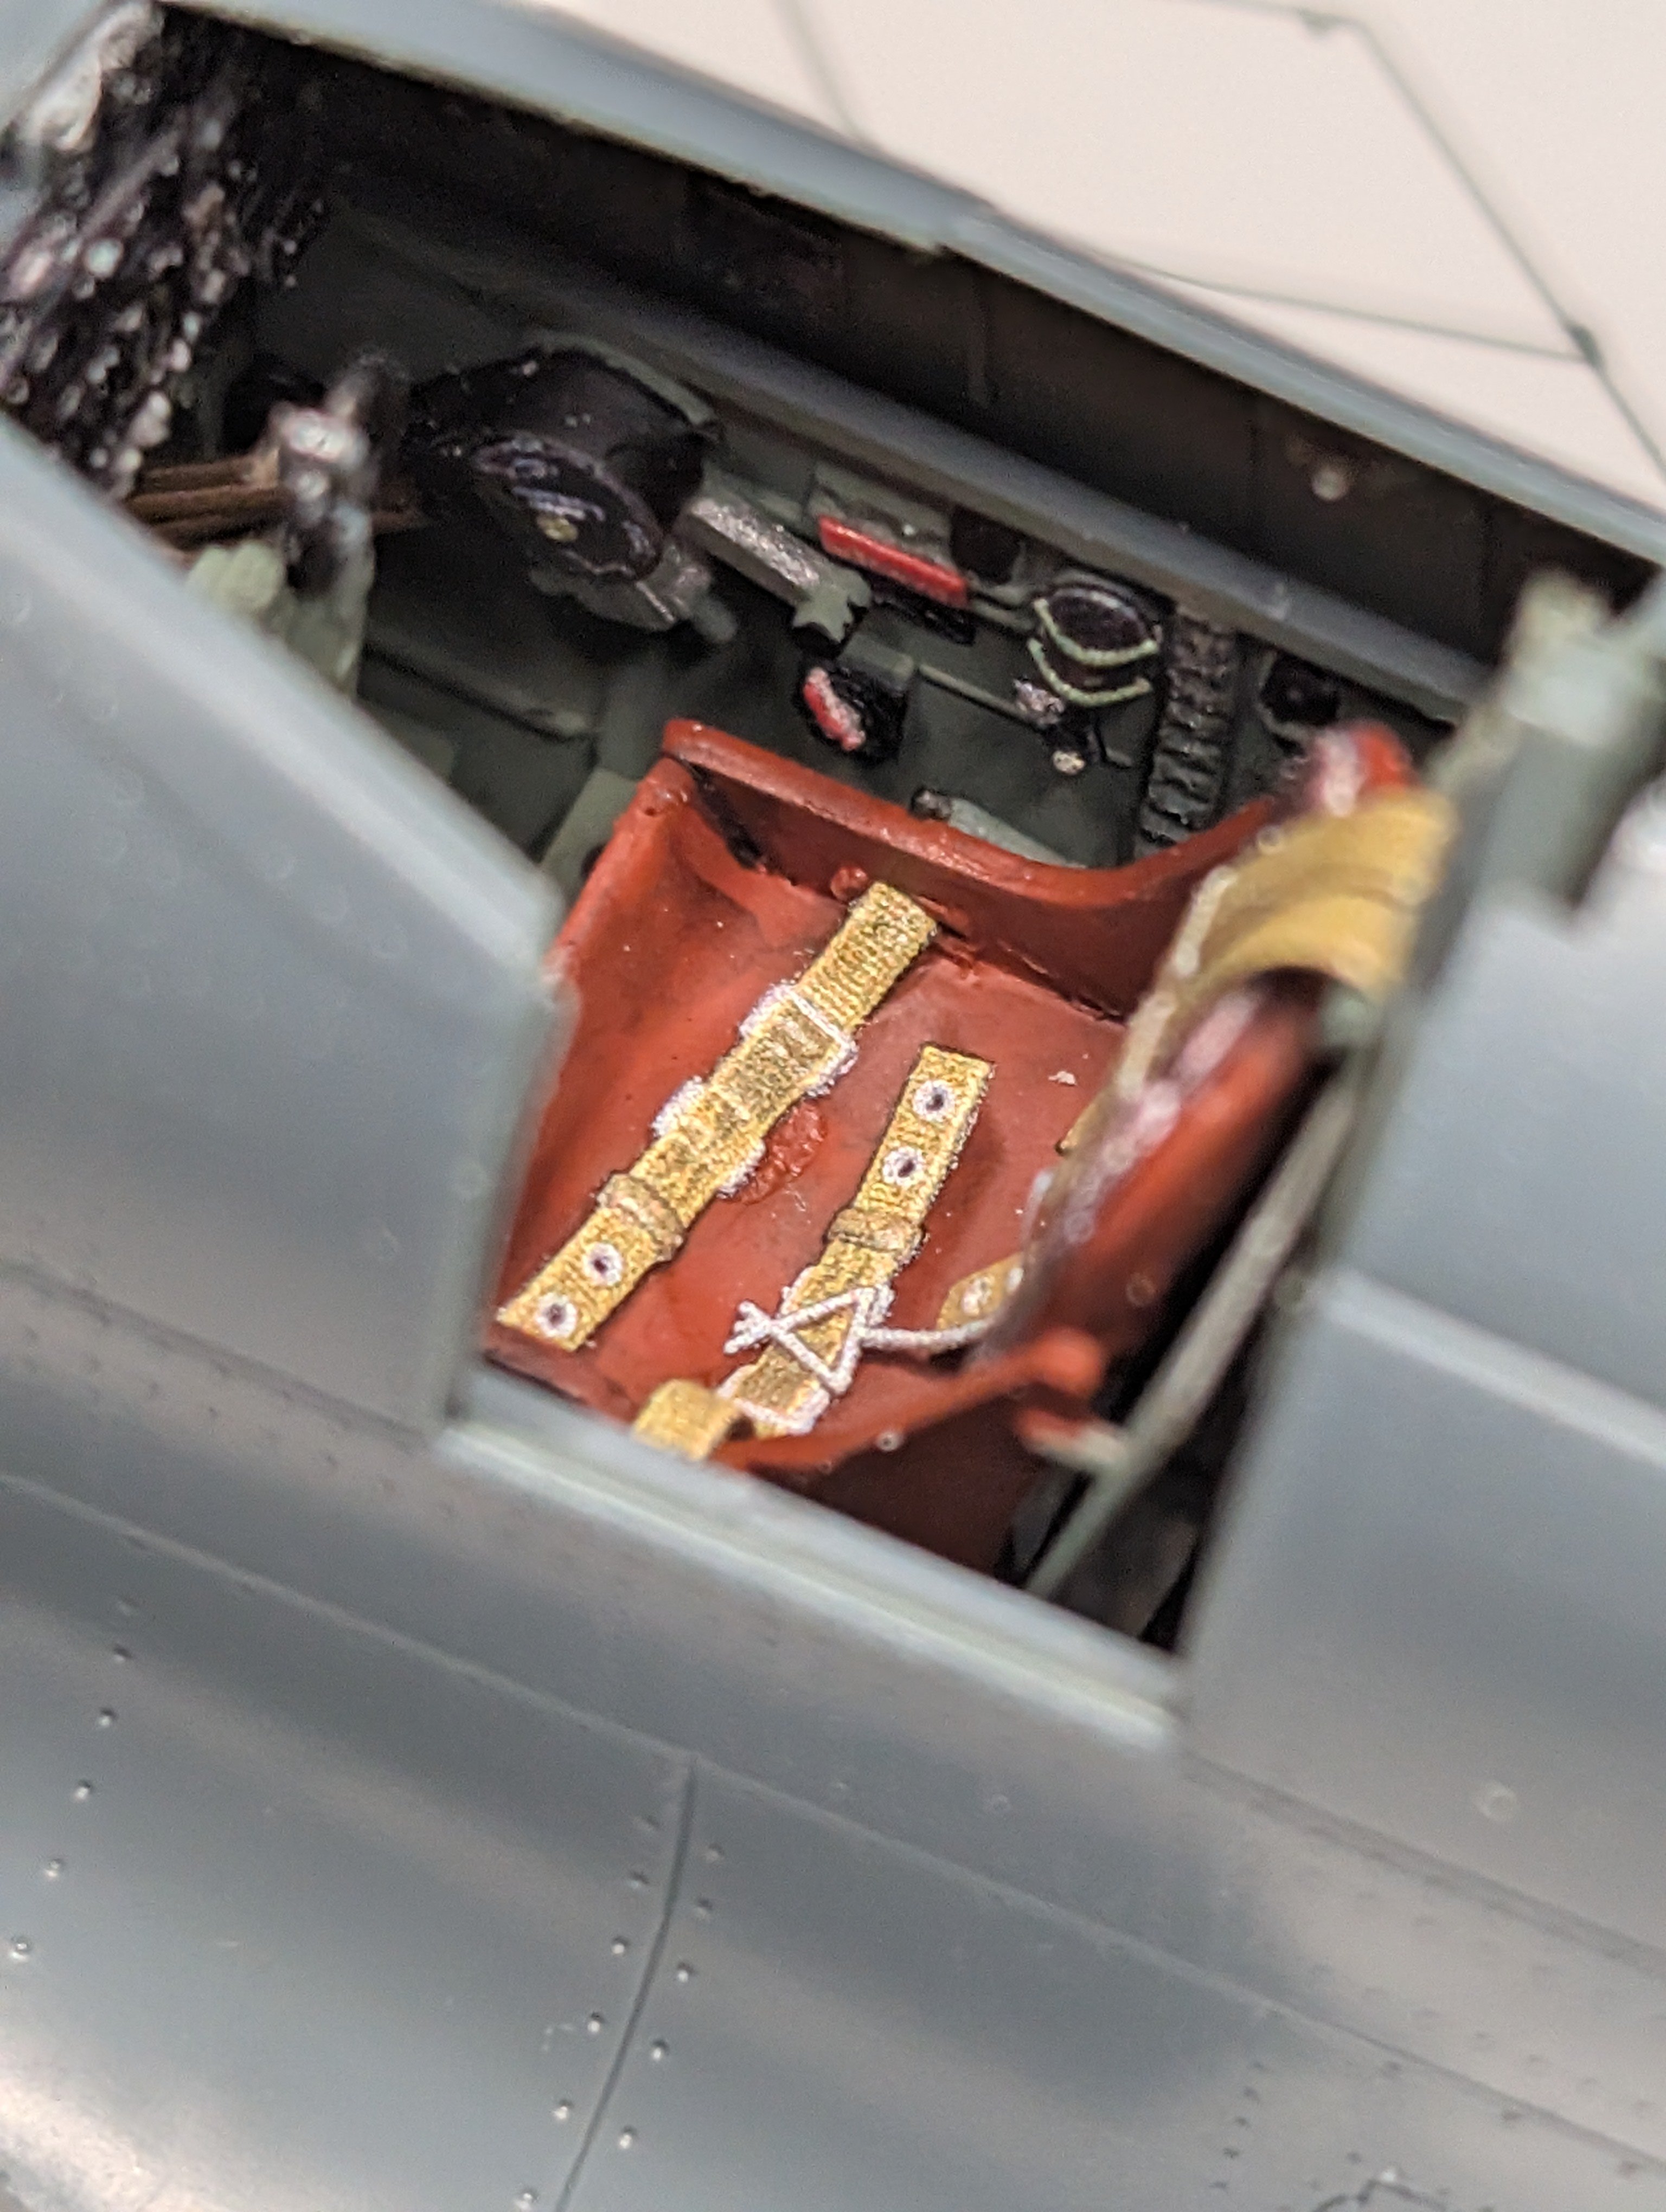
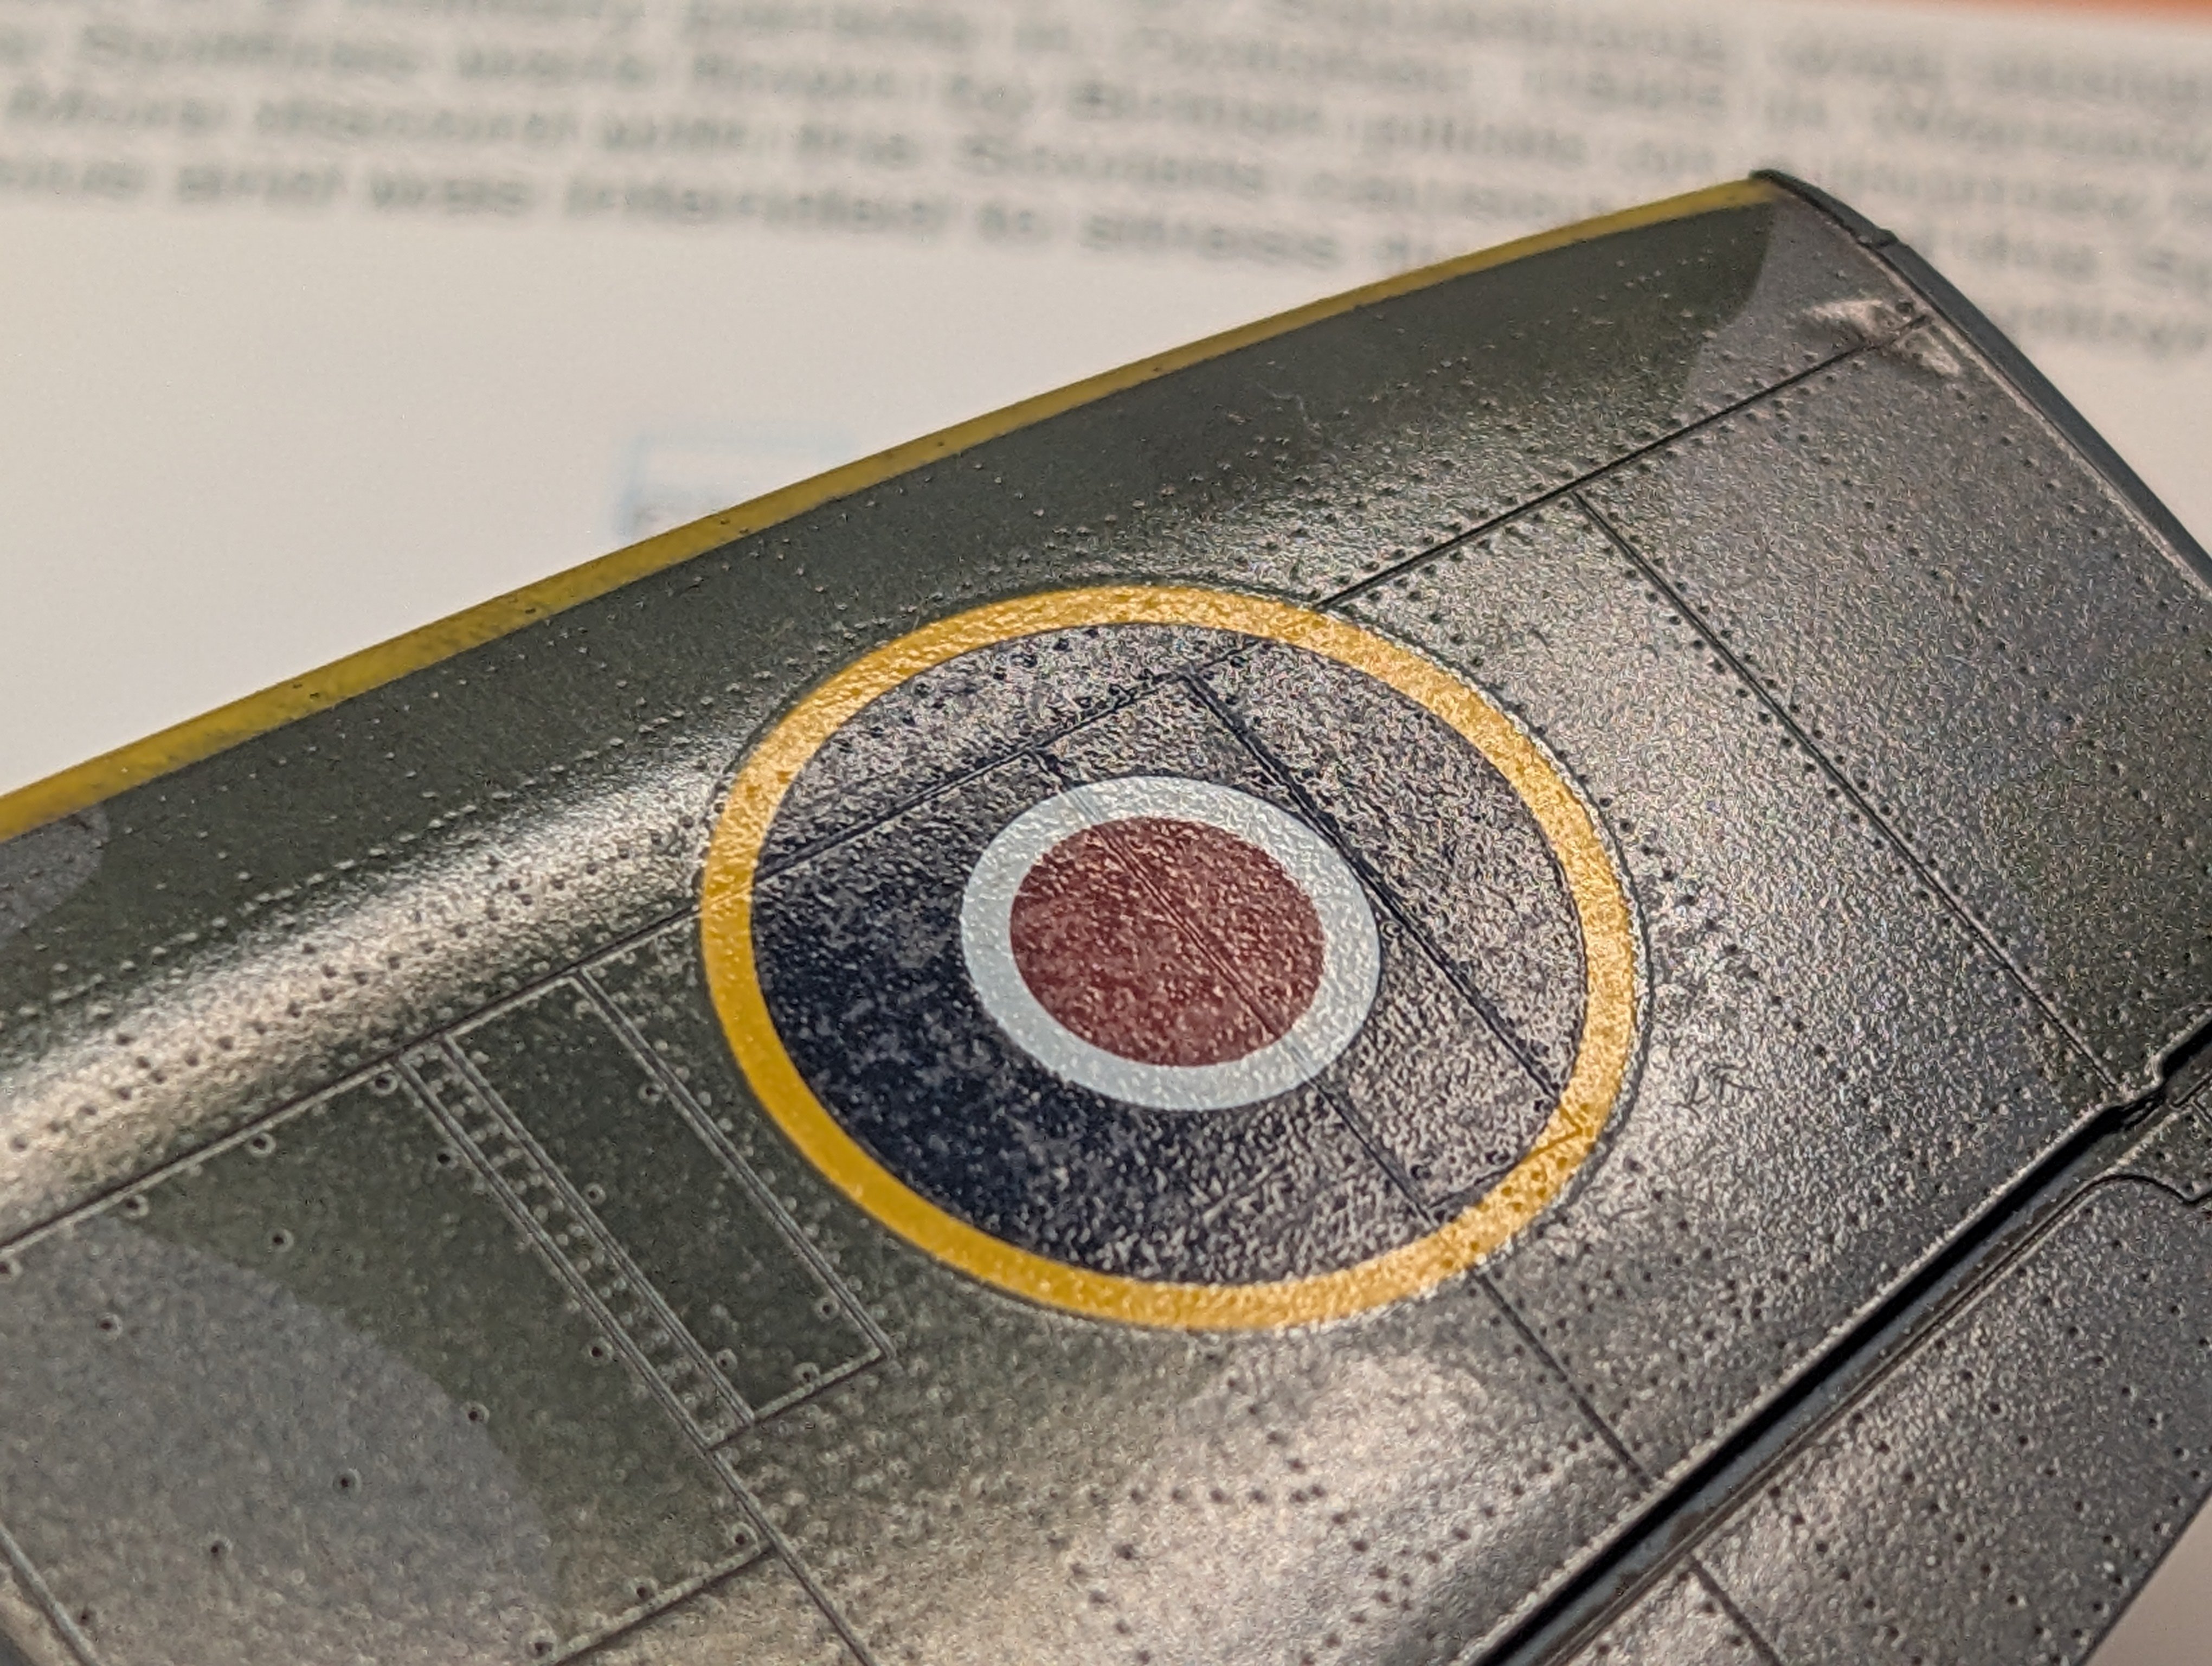
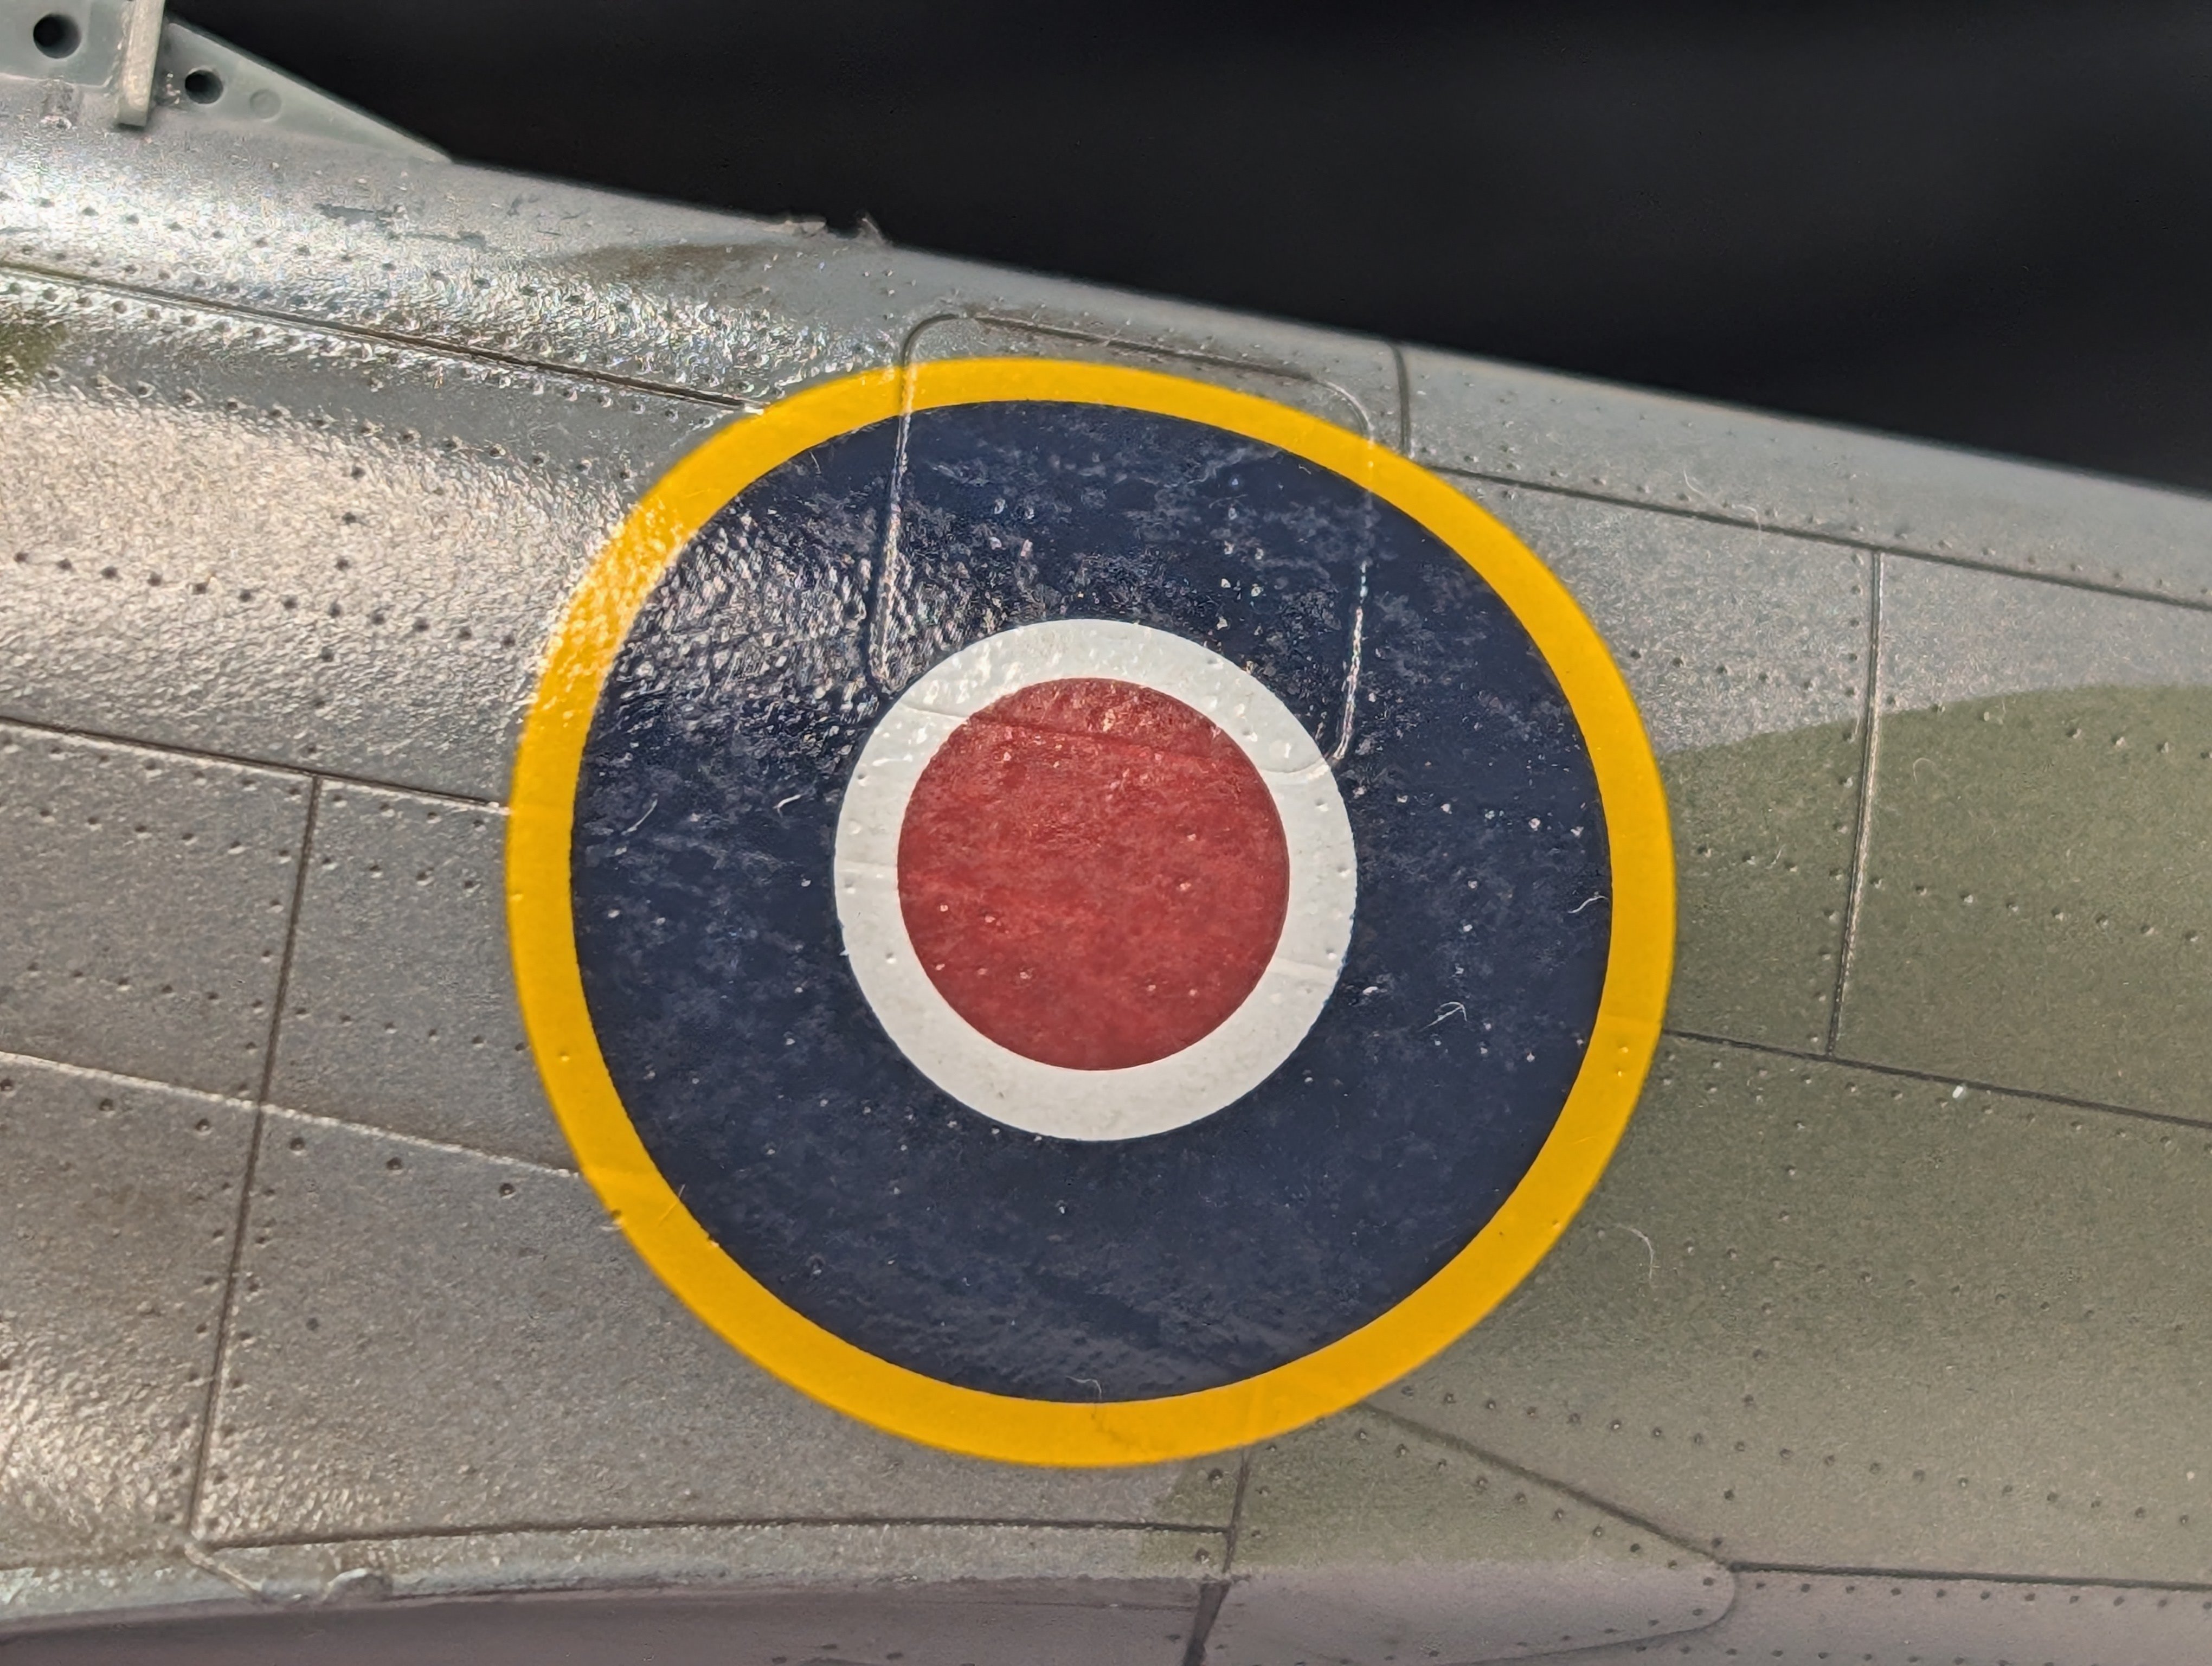
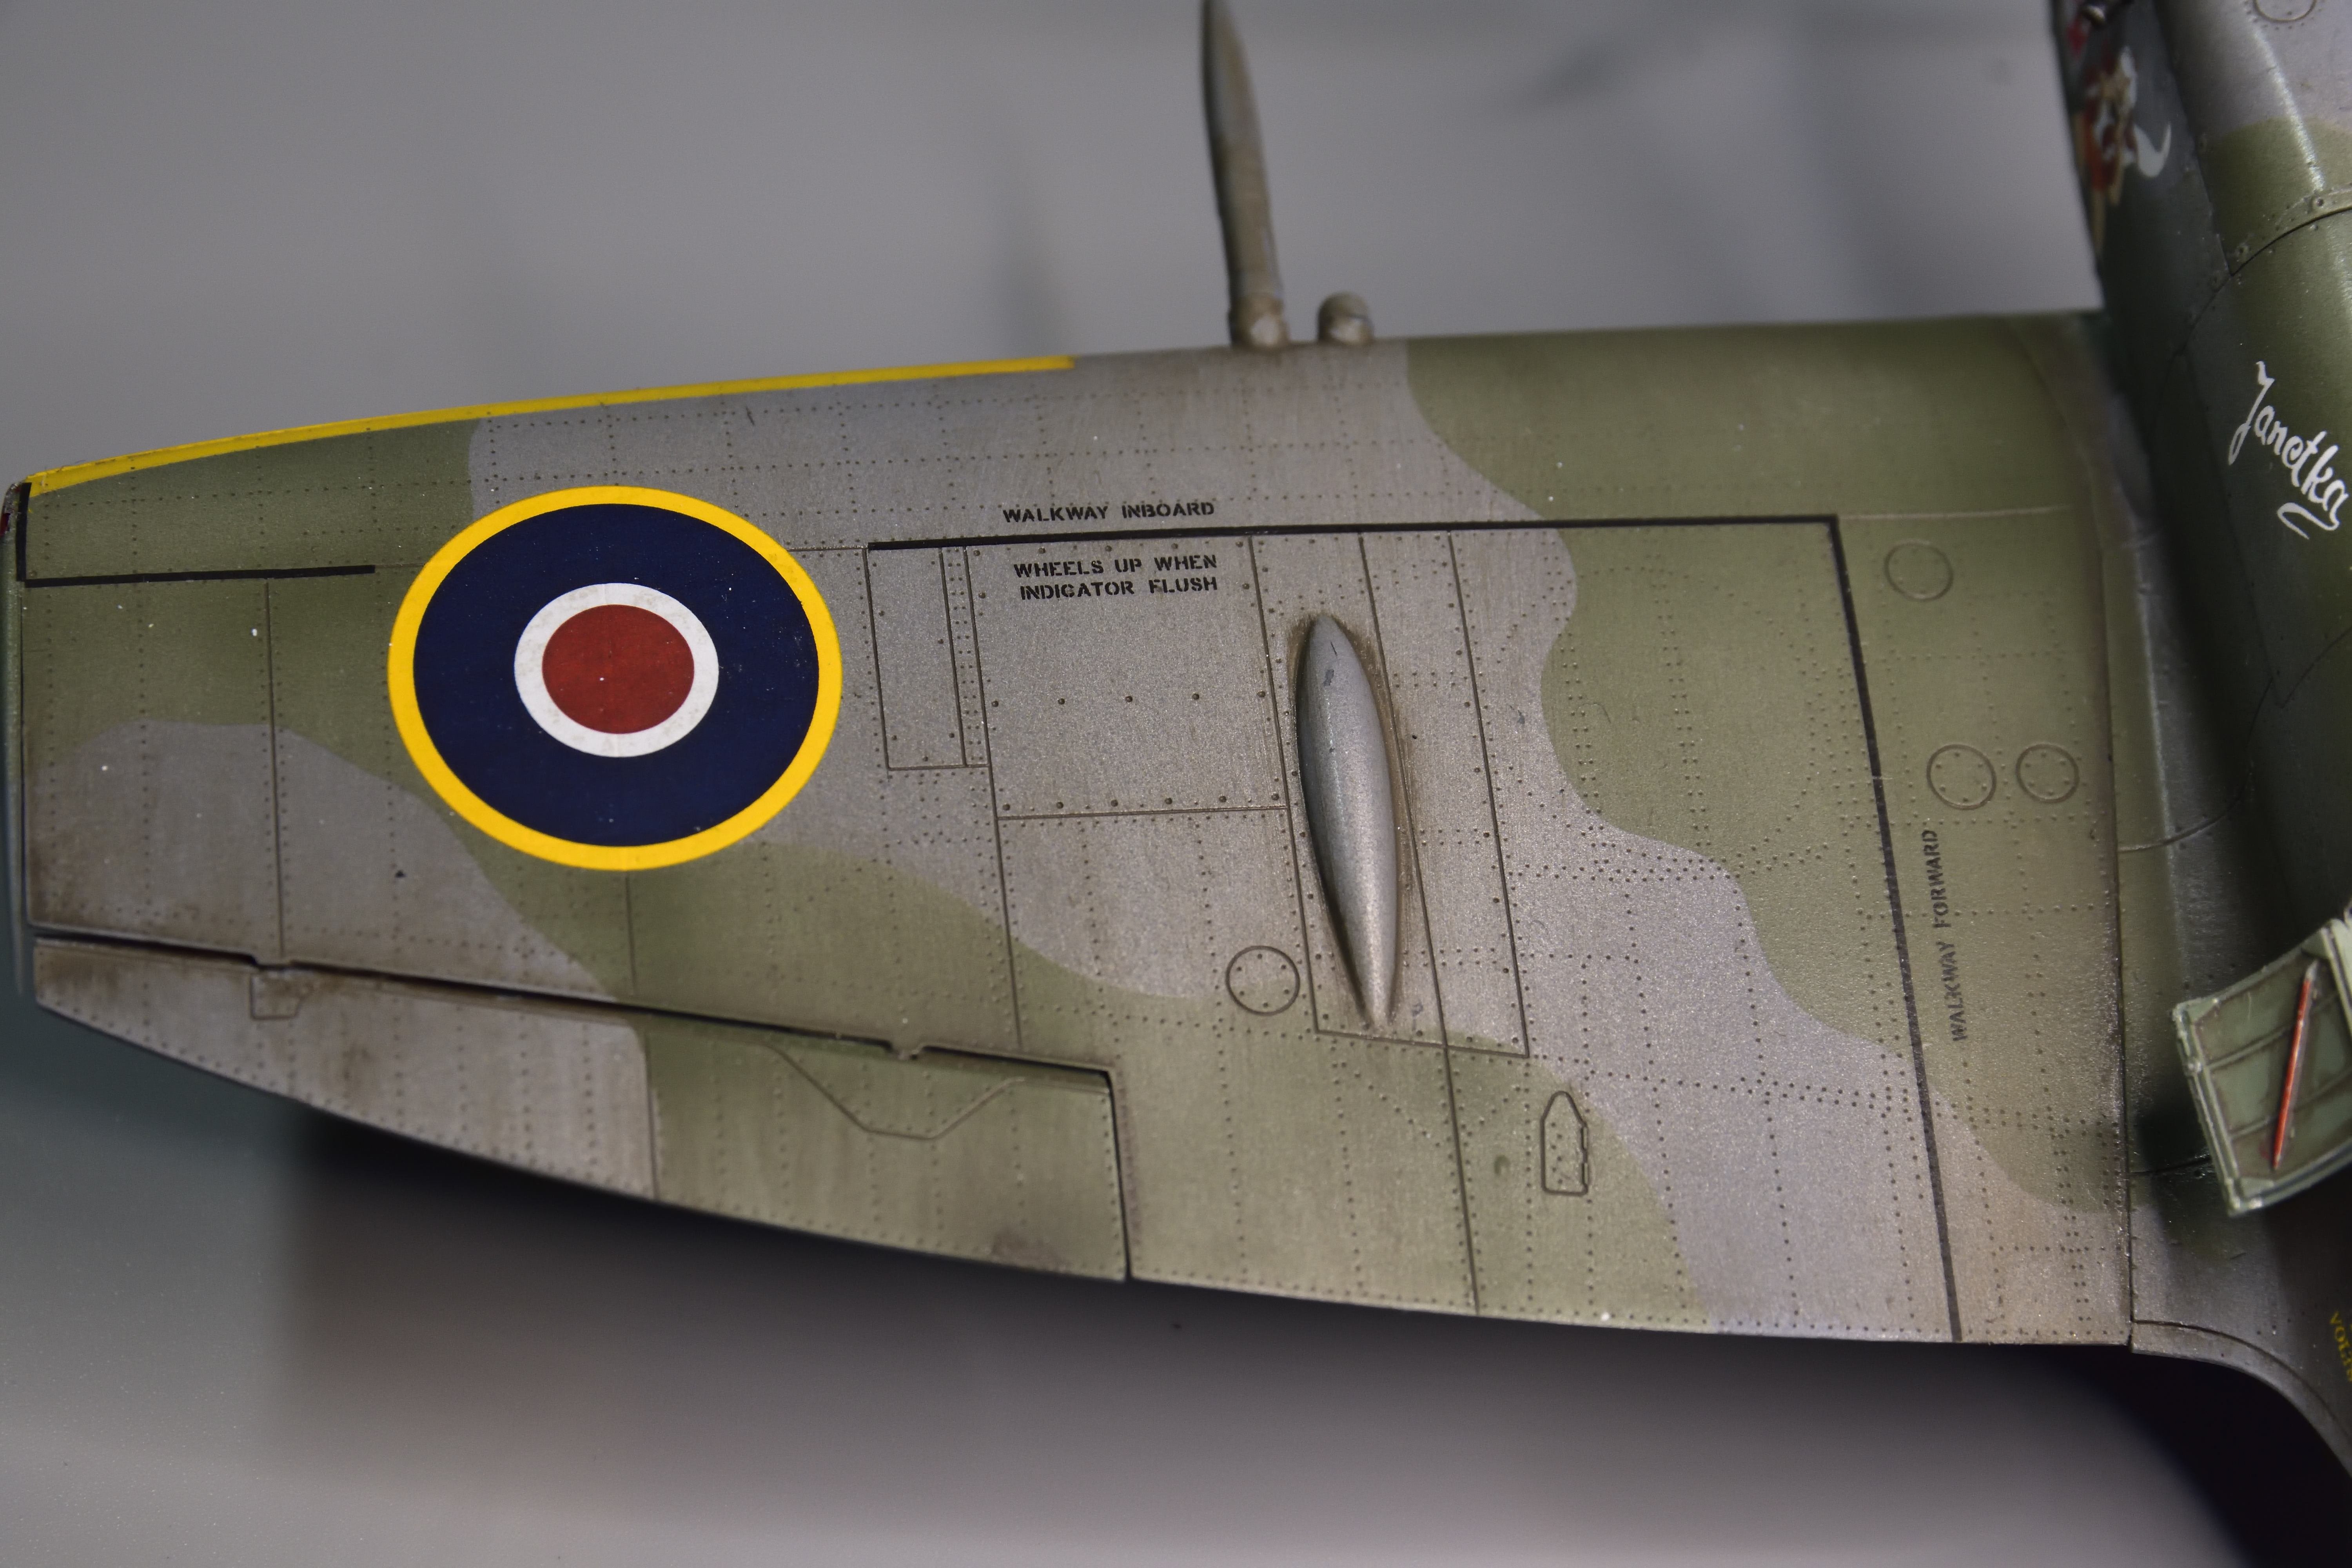
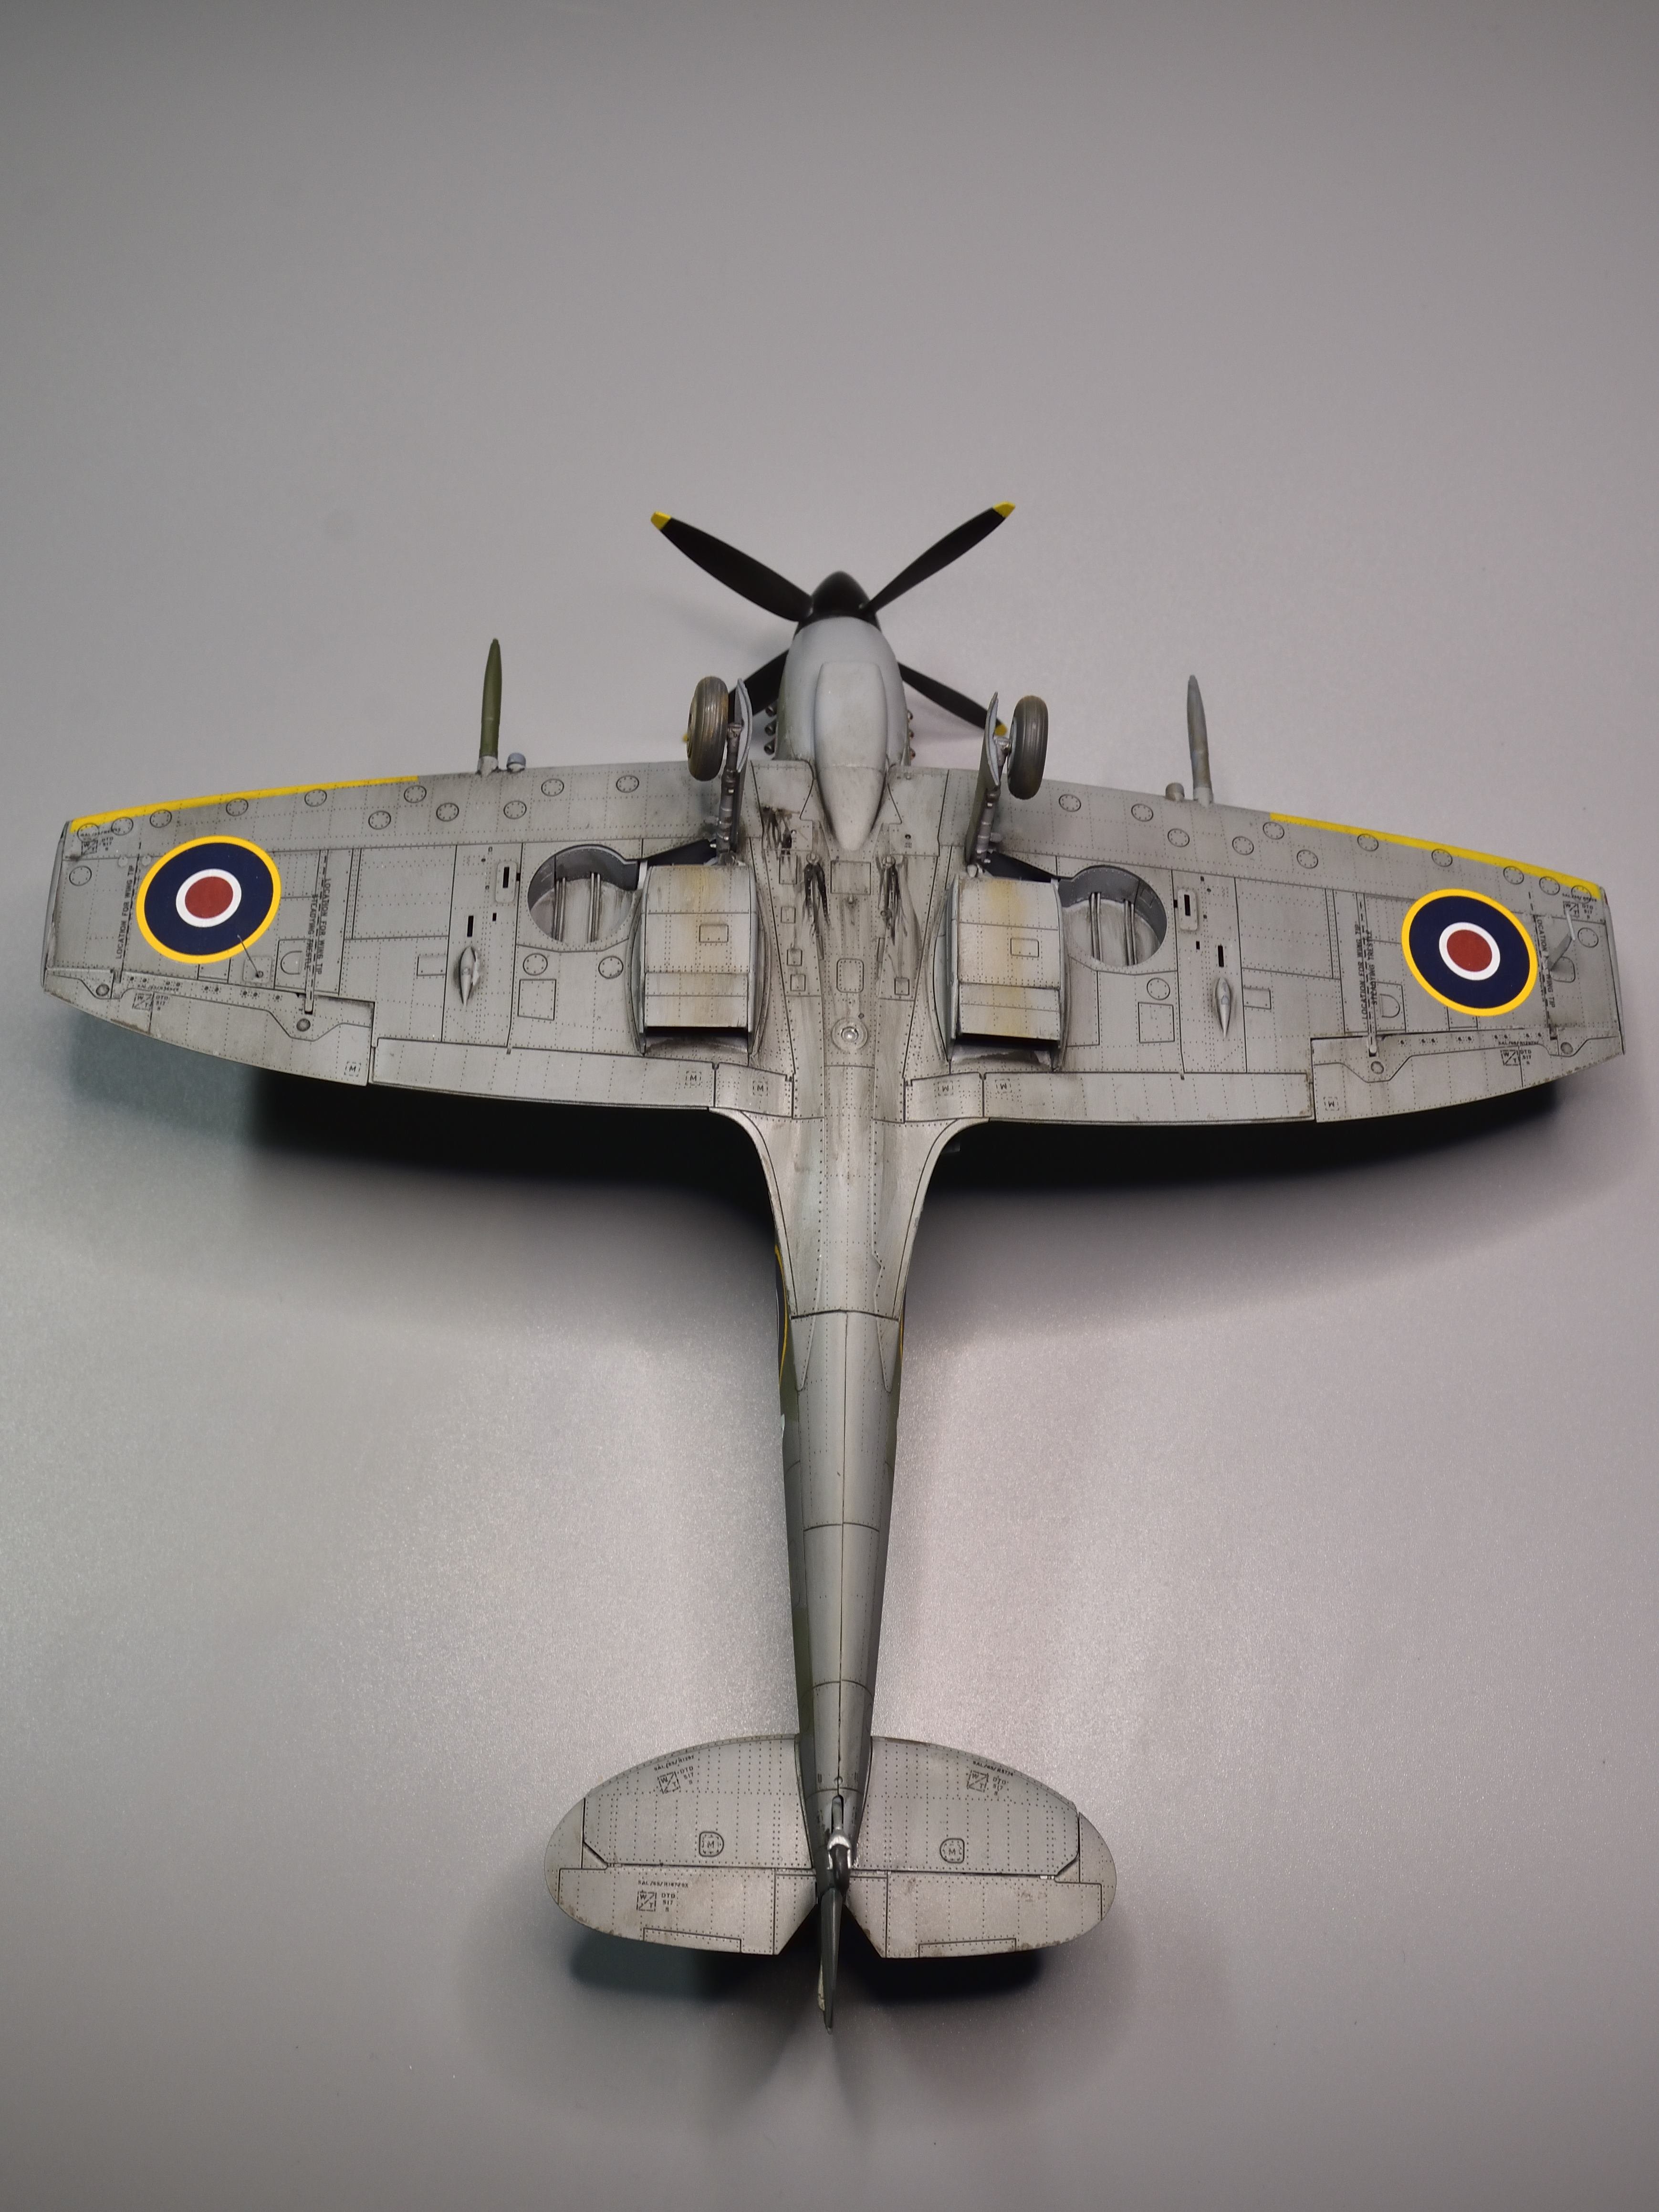
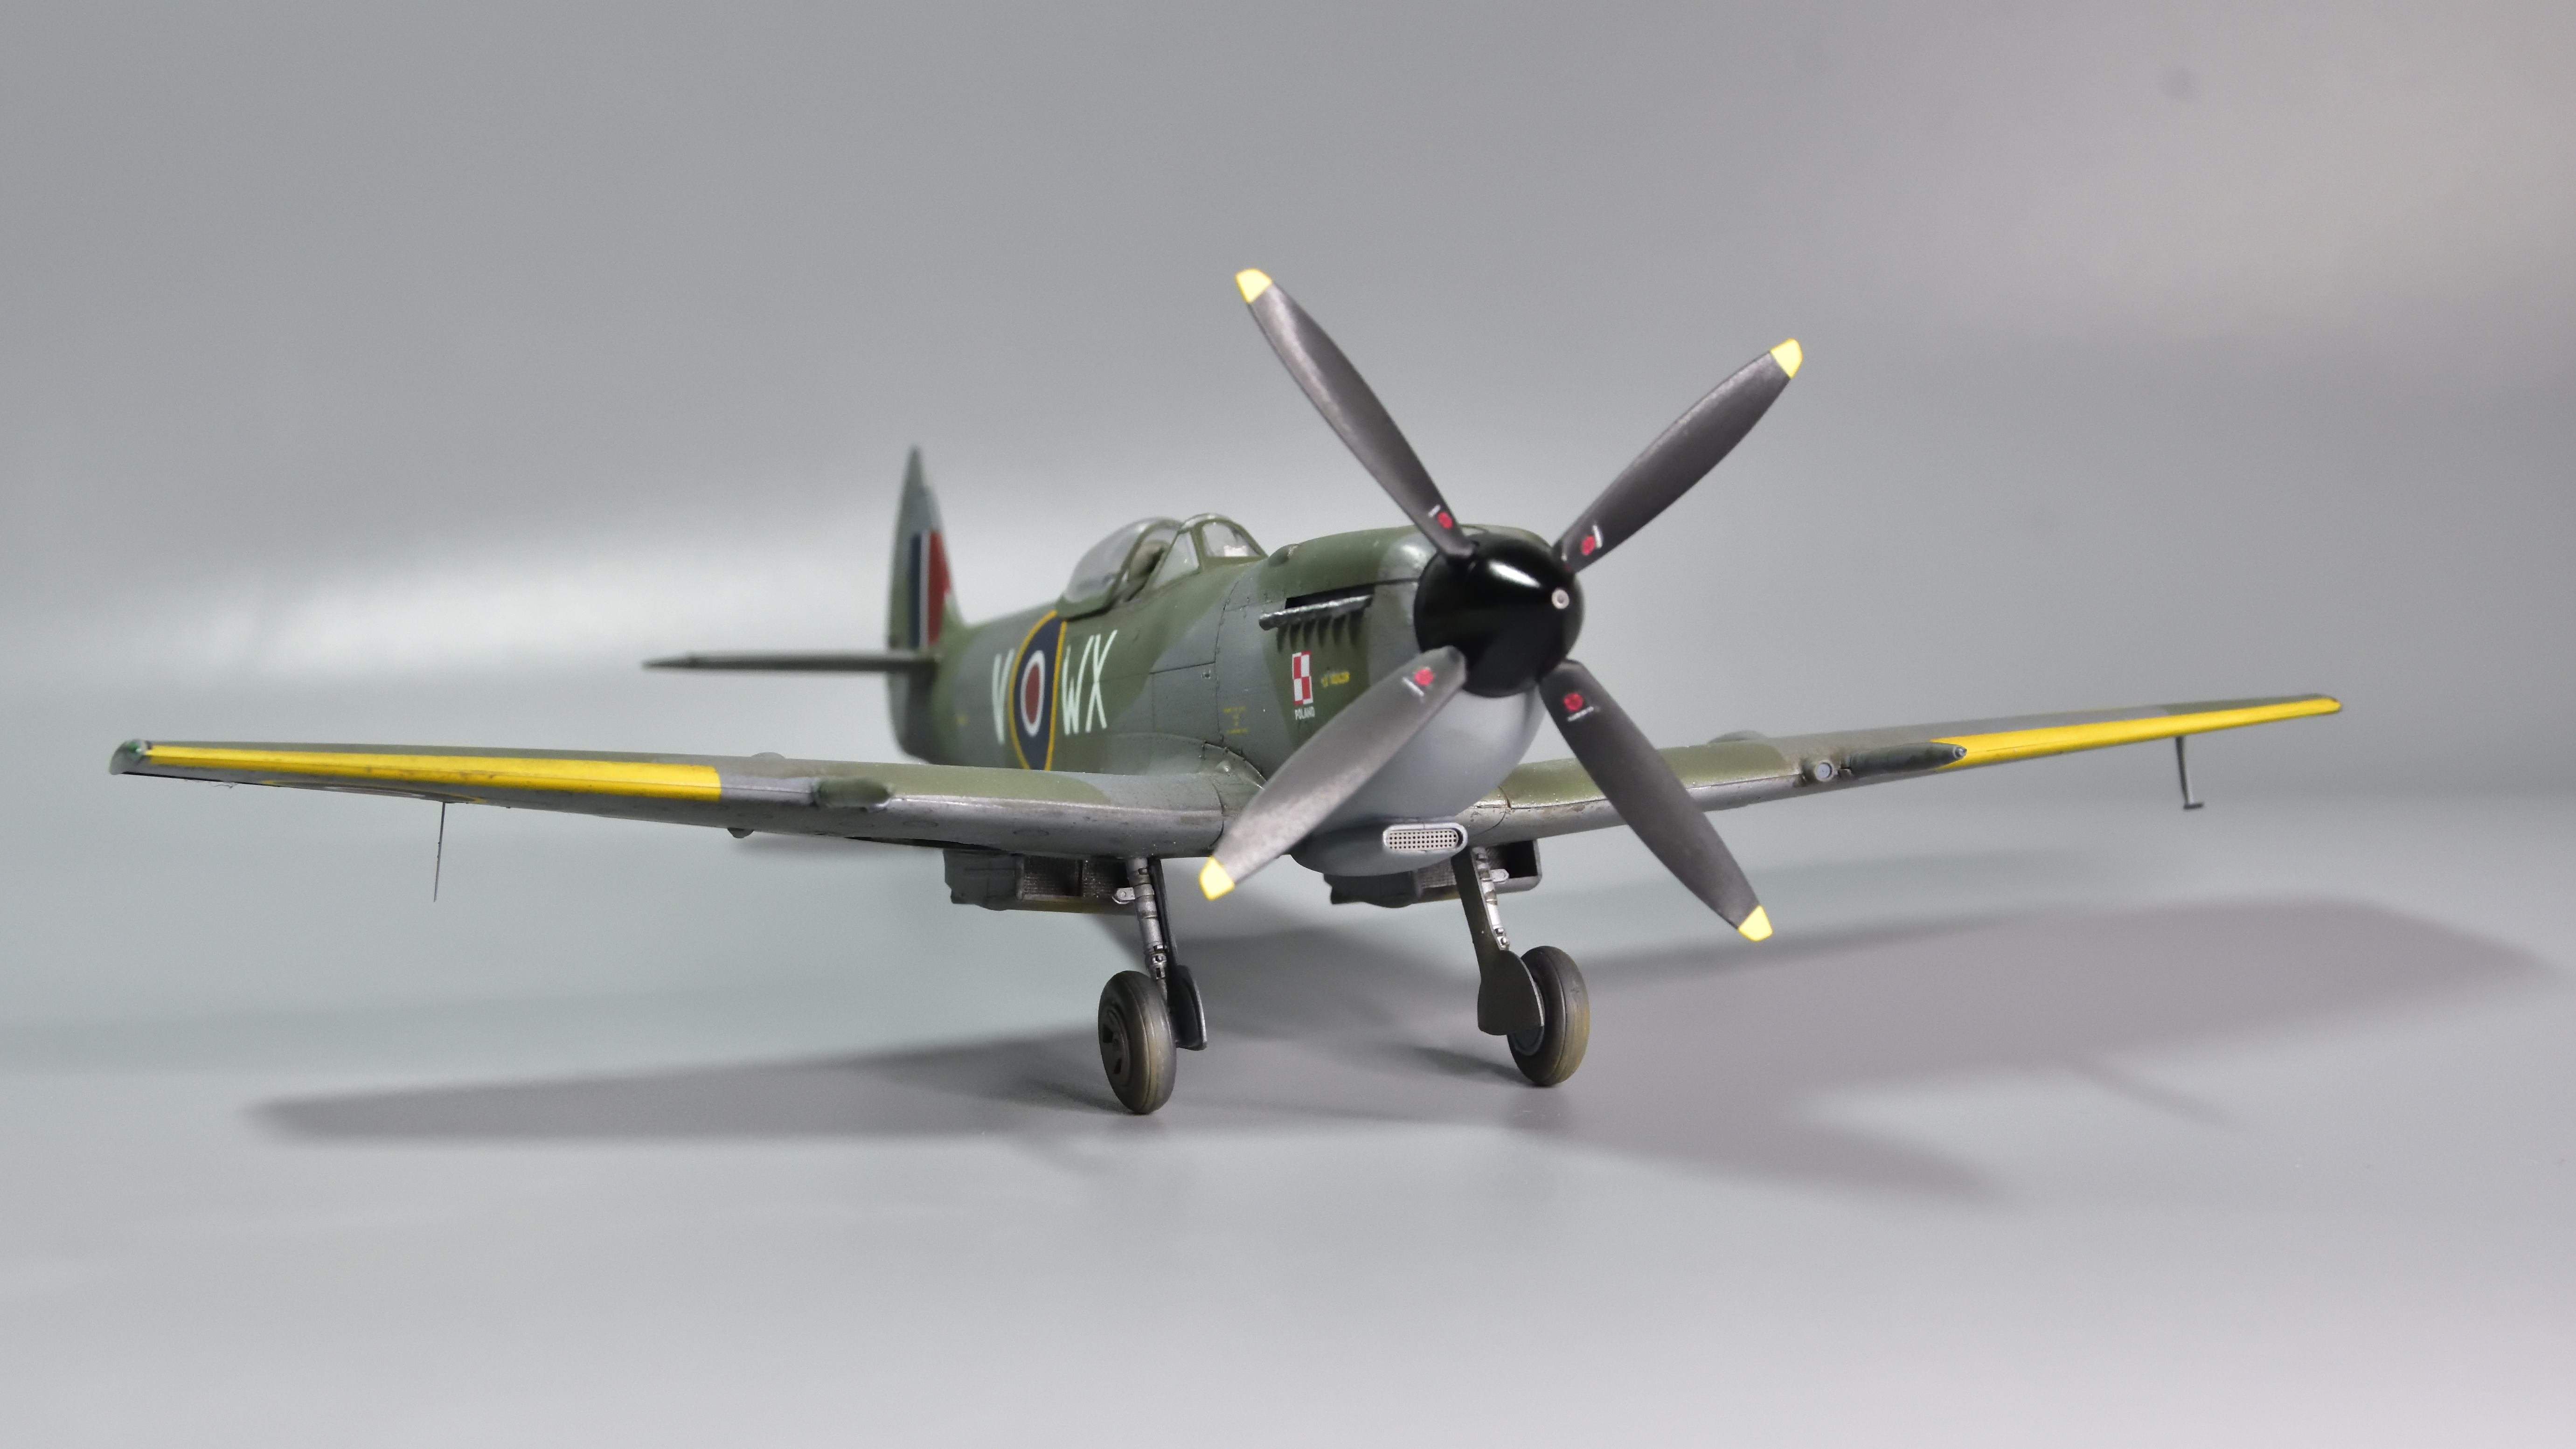
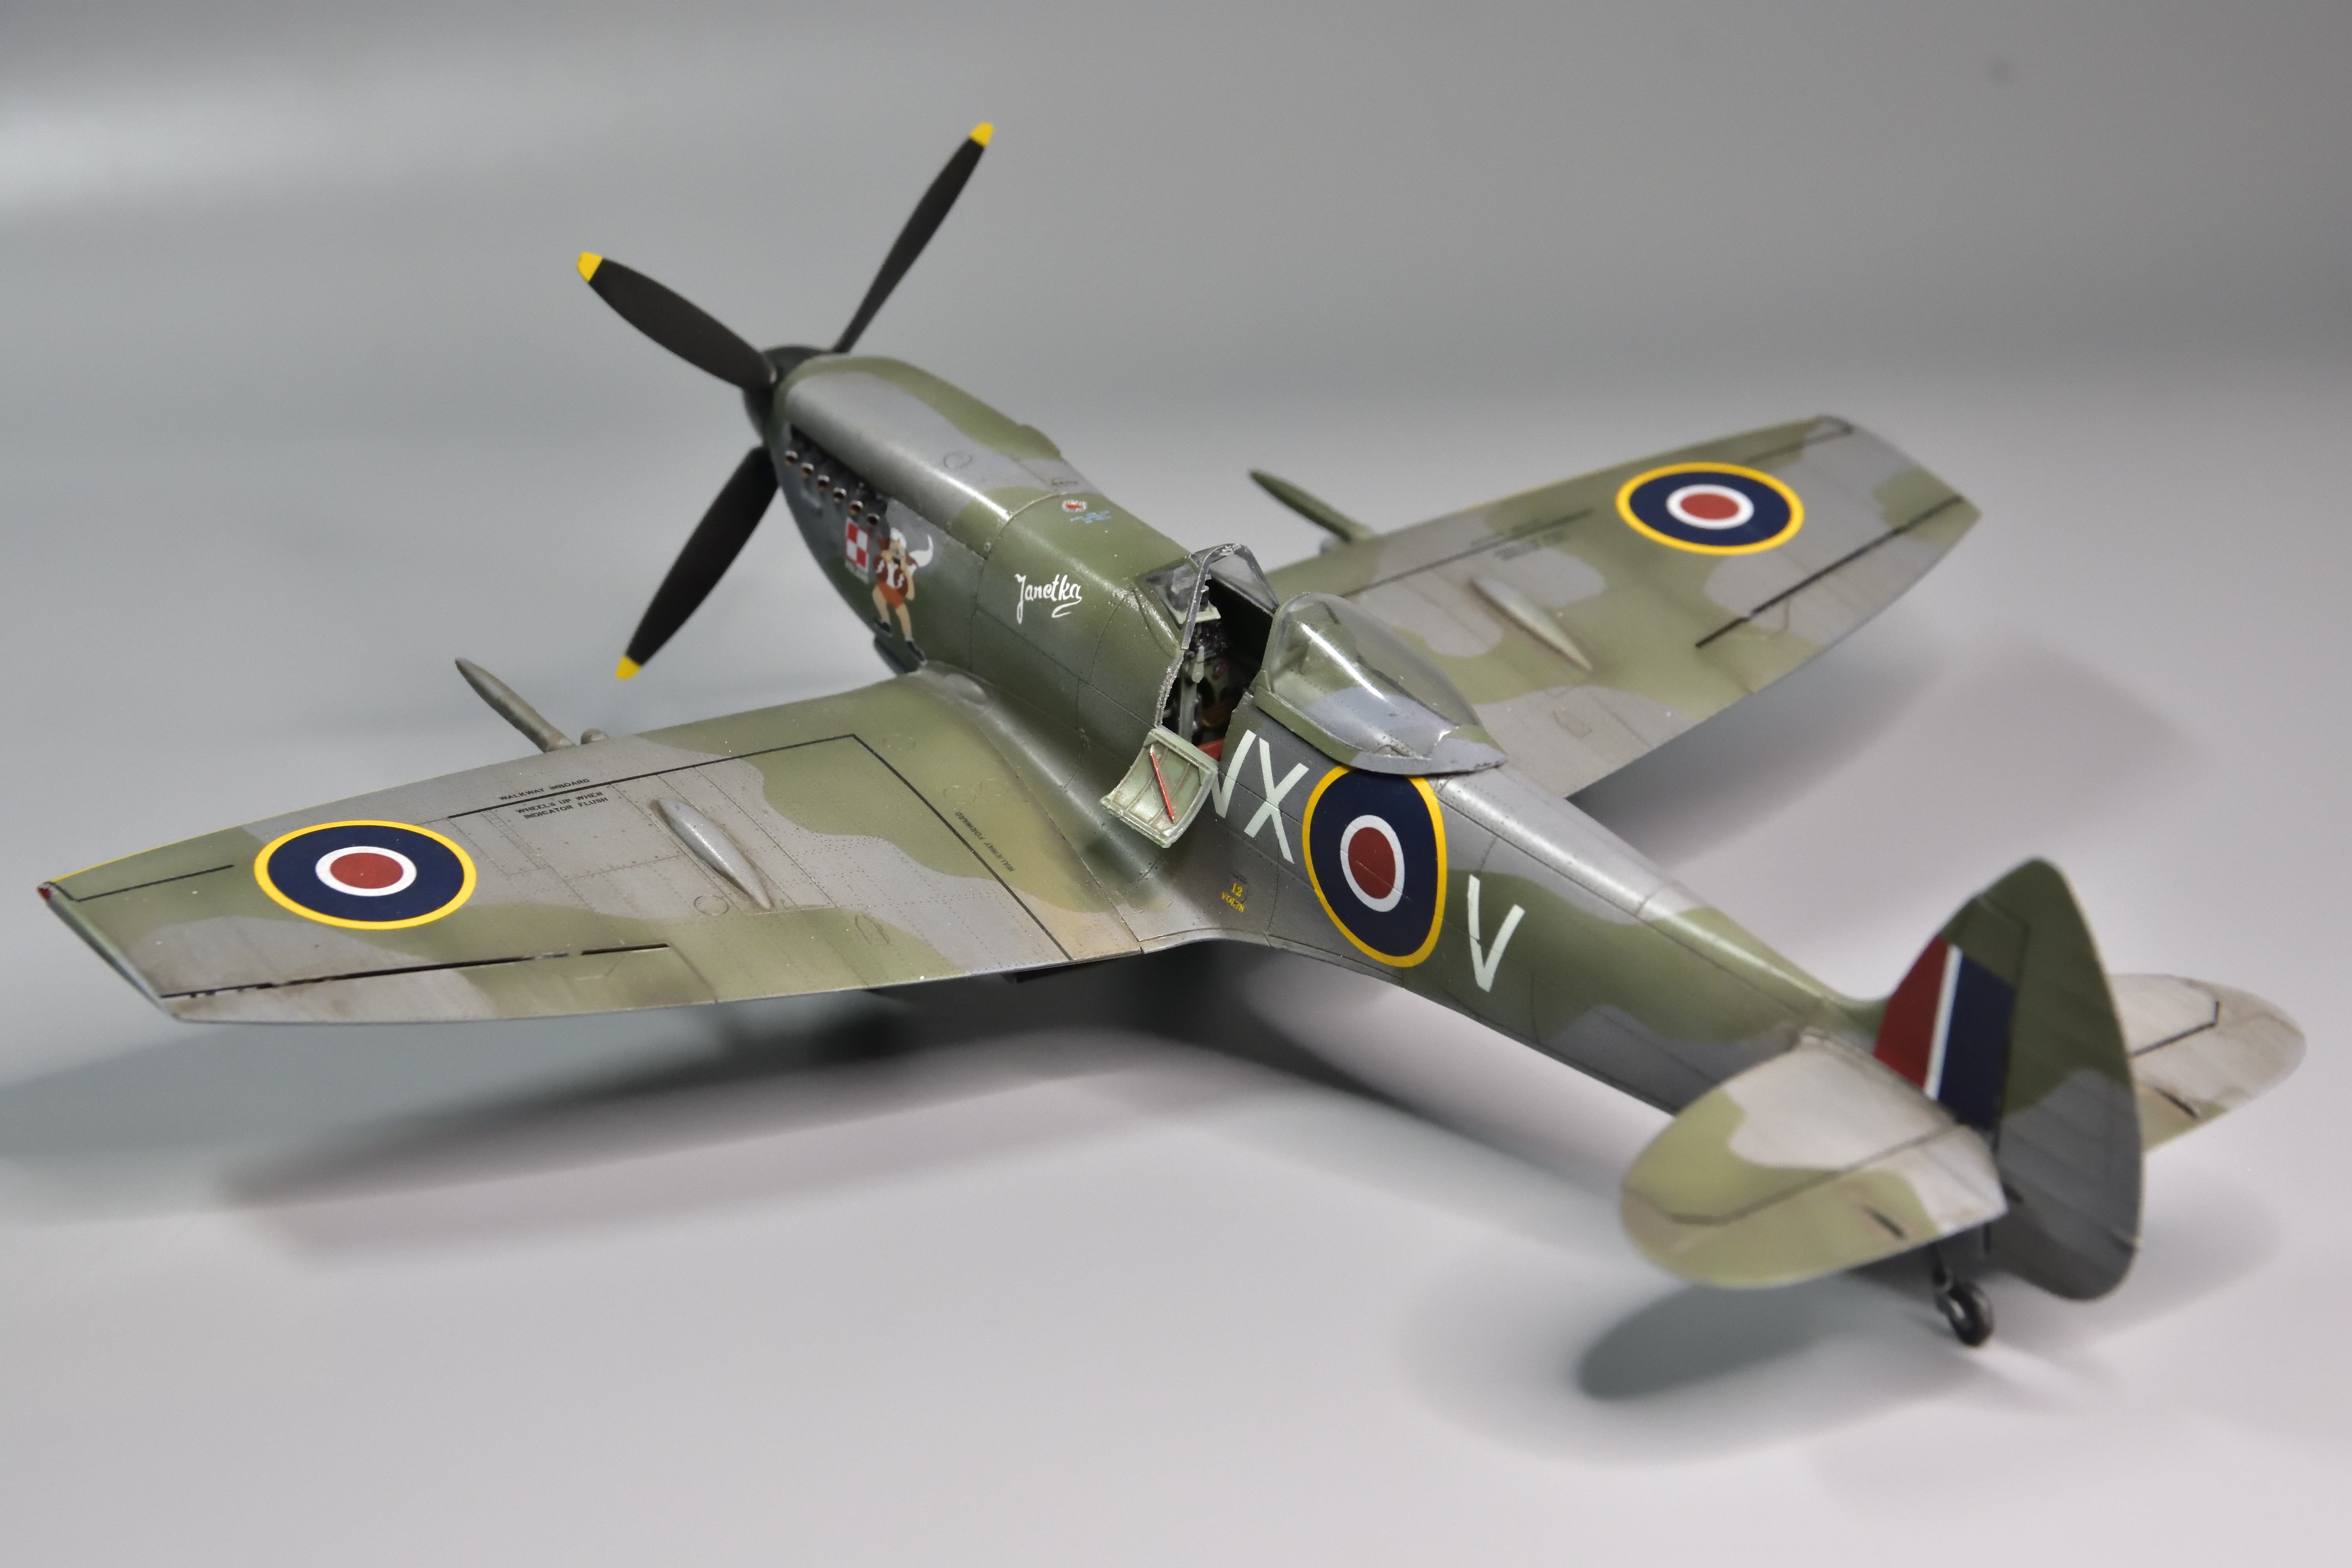
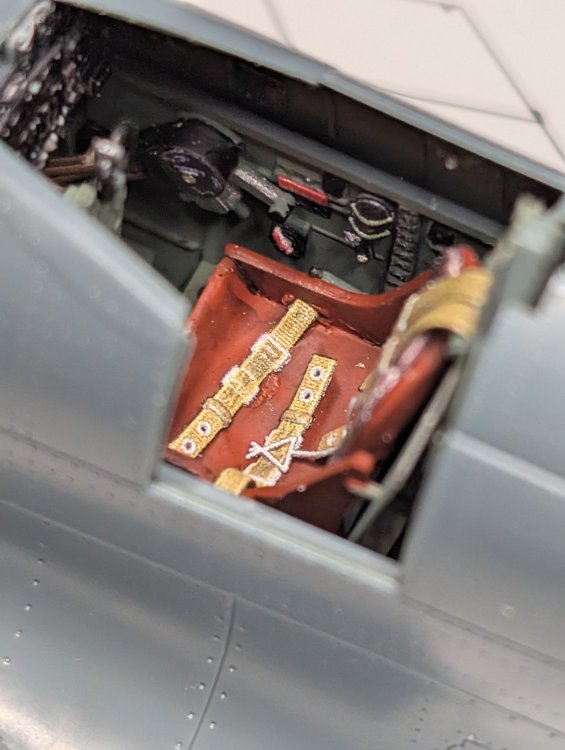
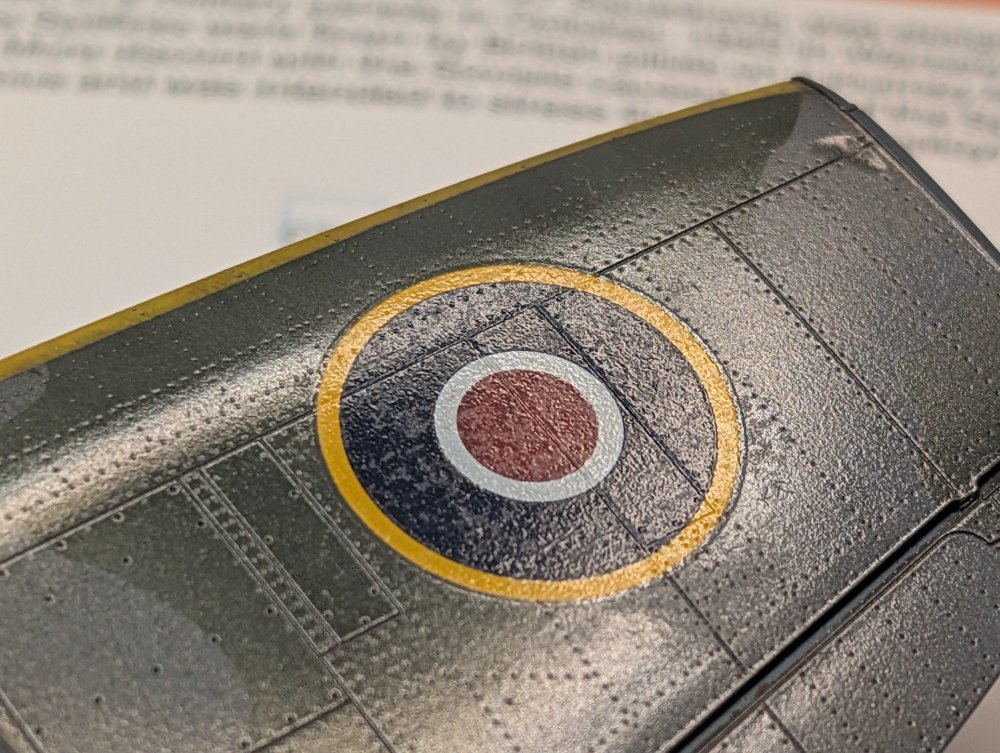
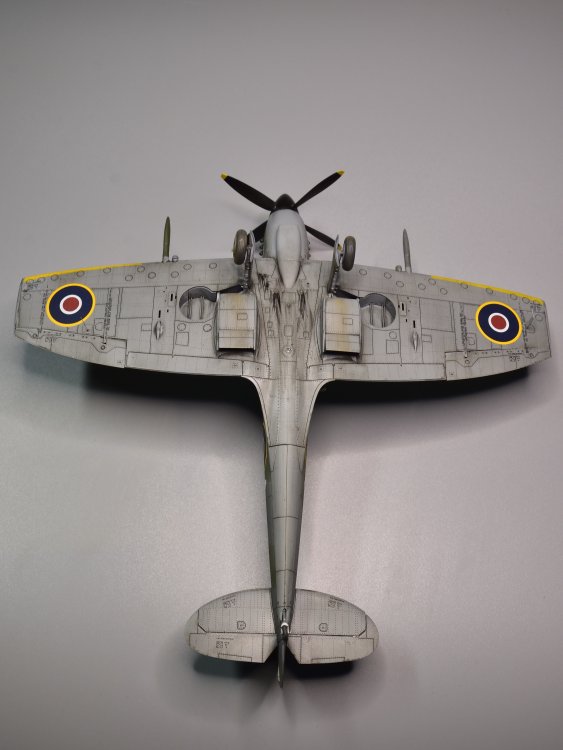
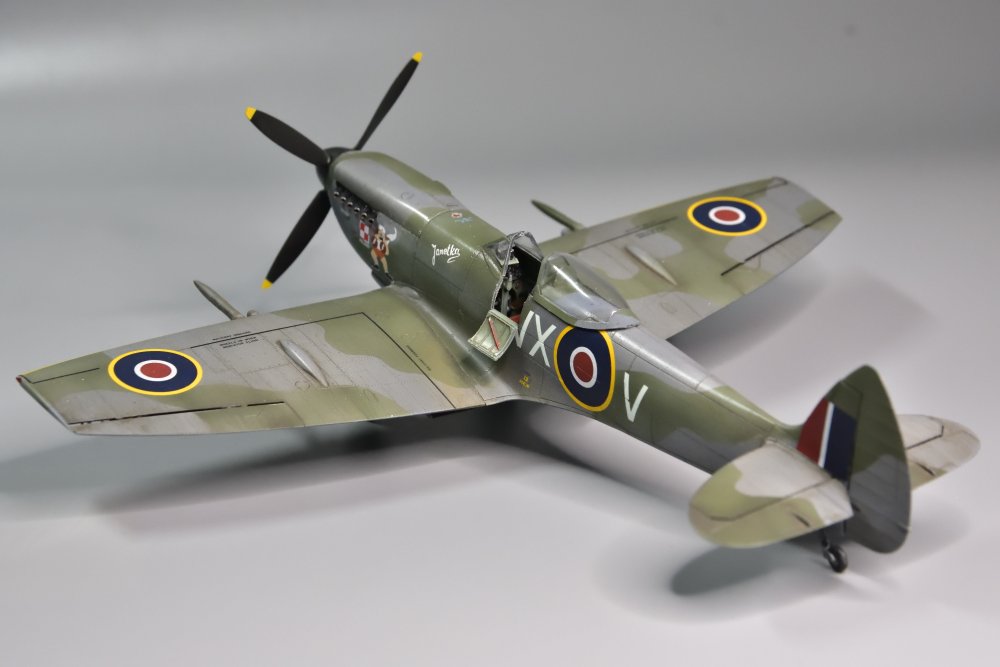
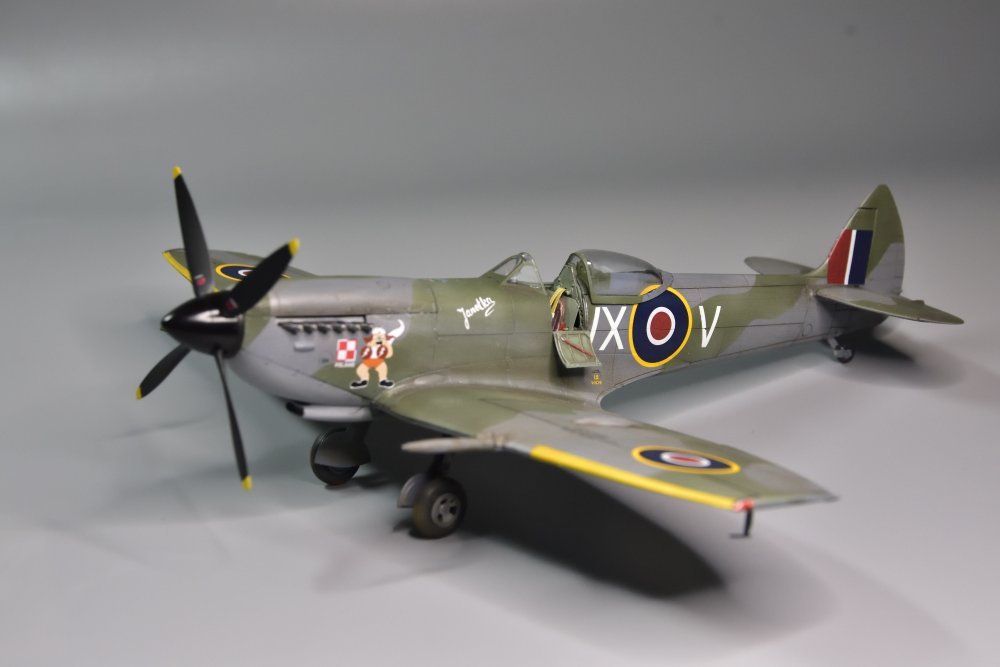
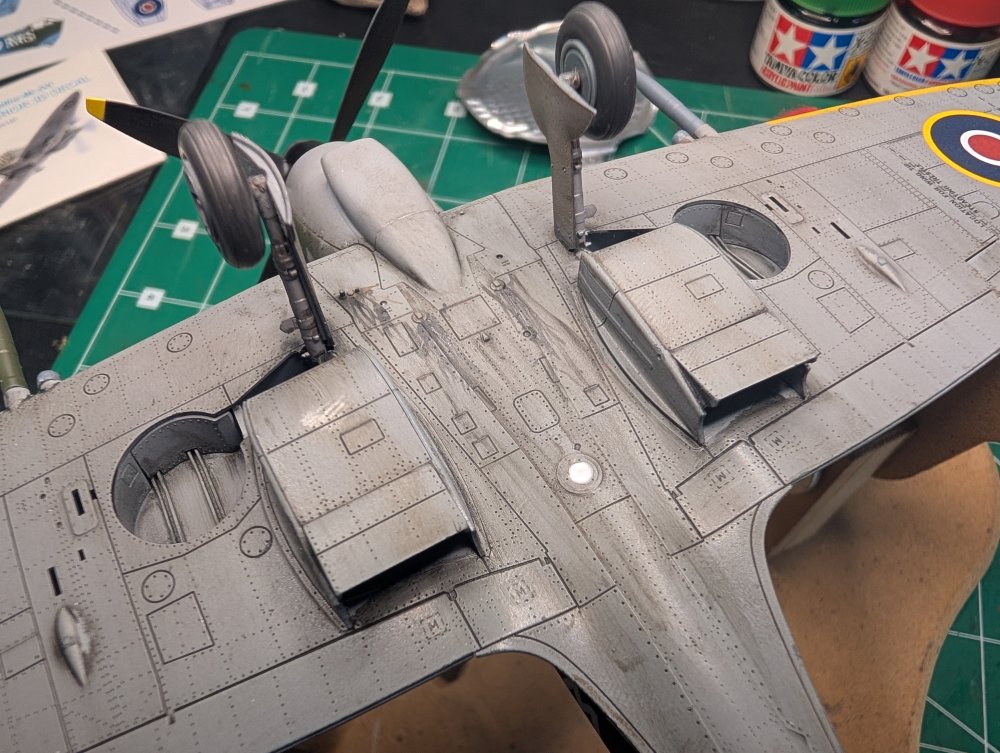
Amazingly, I'm done after only three months. Actually, I SHOULD have been done a month ago, but the last four weeks have been busy. But here she goes. The build thread is here. Such a nice build, the surface detail is terrific. The Quinta cockpit set really added to the pit, since this is the ProfiPACK used some of the PE that comes in the kit. All of the 'issues' were self-inflicted either by not paying attention to the instructions (umm.. WHICH wheels and tyres go where??? and should have used the fishtail exhausts but was too late on that to use the correct parts) or forgetting where I was coming back to the bench. The Lifelike Decals worked very well, as did the Eduard decals. The Masks were not properly sized to the aircraft, but a little extra tape worked wonders. A few of the build detail shots to start off. The decals really did snuggle down nicely into the find recessed detail of the Eduard plastic.


-
Cobra Coupe - Le Mans - Model Factory Hiro 1/12
CANicoll replied to DocRob's topic in LSM 1/35 and Larger Work In Progress
That gasket around the windshield looks amazing, nice work!! All of those clear bits have really come together beautifully, Rob. -
Eduard Spitfire Mk. XVI Bubbletop 1/48
CANicoll replied to CANicoll's topic in LSM 1/48 Work in Progress
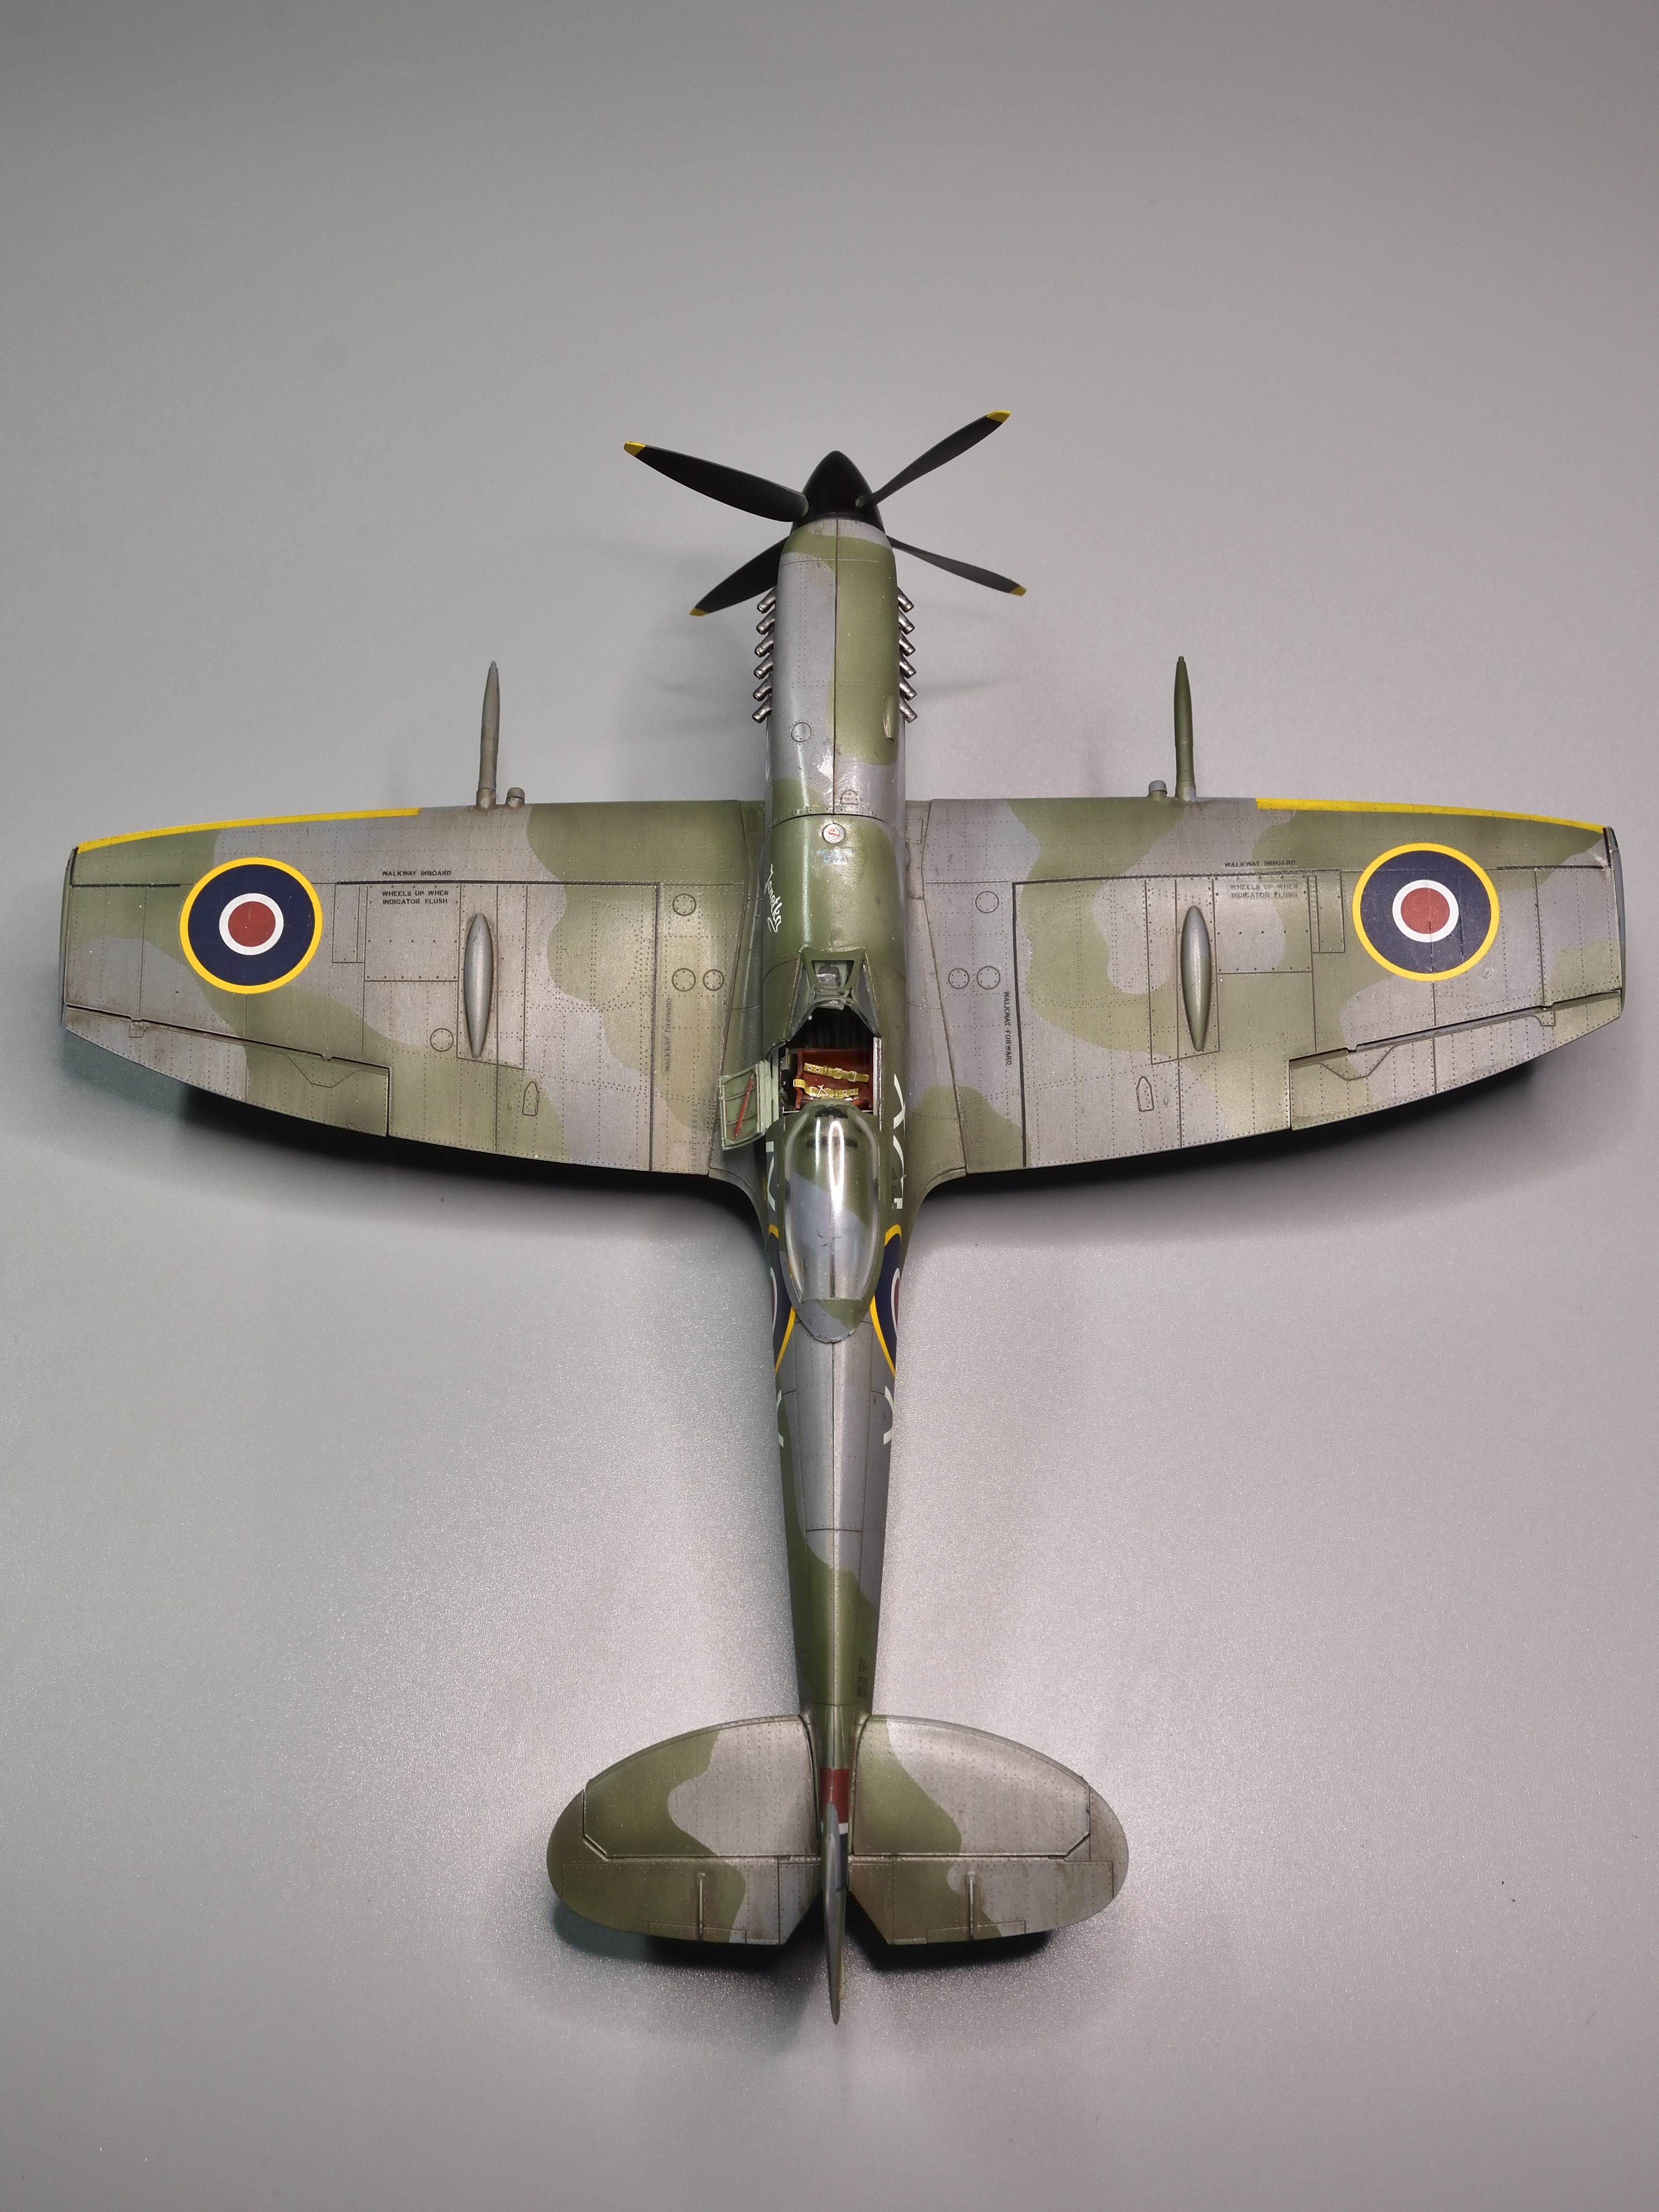
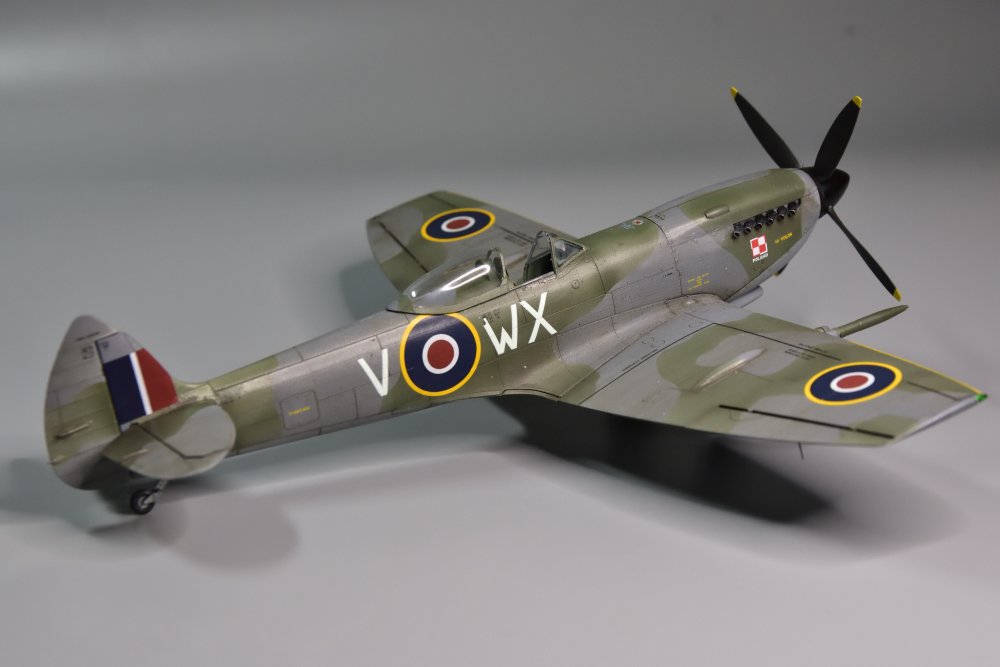
Rob, Thanks and good point. I didn't think about the retouching. The period photographs of the Mk XVI that I have seen do not have an antenna on the spine of the aircraft. I'm seeing that my wing leading edge work needs some attention! -
Beautiful detail! That took a lot of work and references. Amazing - looks so real.
-
American Beauty Part II B-17G
CANicoll replied to Rod Bettencourt's topic in LSM 1/48 Aircraft Ready for Inspection
Rod, Beautiful job on a huge build. The NMF is terrific, well done! Nice work on the interior and the details (like the pin-up poster!) and the wheel chocks. Beautifully done through and through. -
Eduard Spitfire Mk. XVI Bubbletop 1/48
CANicoll replied to CANicoll's topic in LSM 1/48 Work in Progress
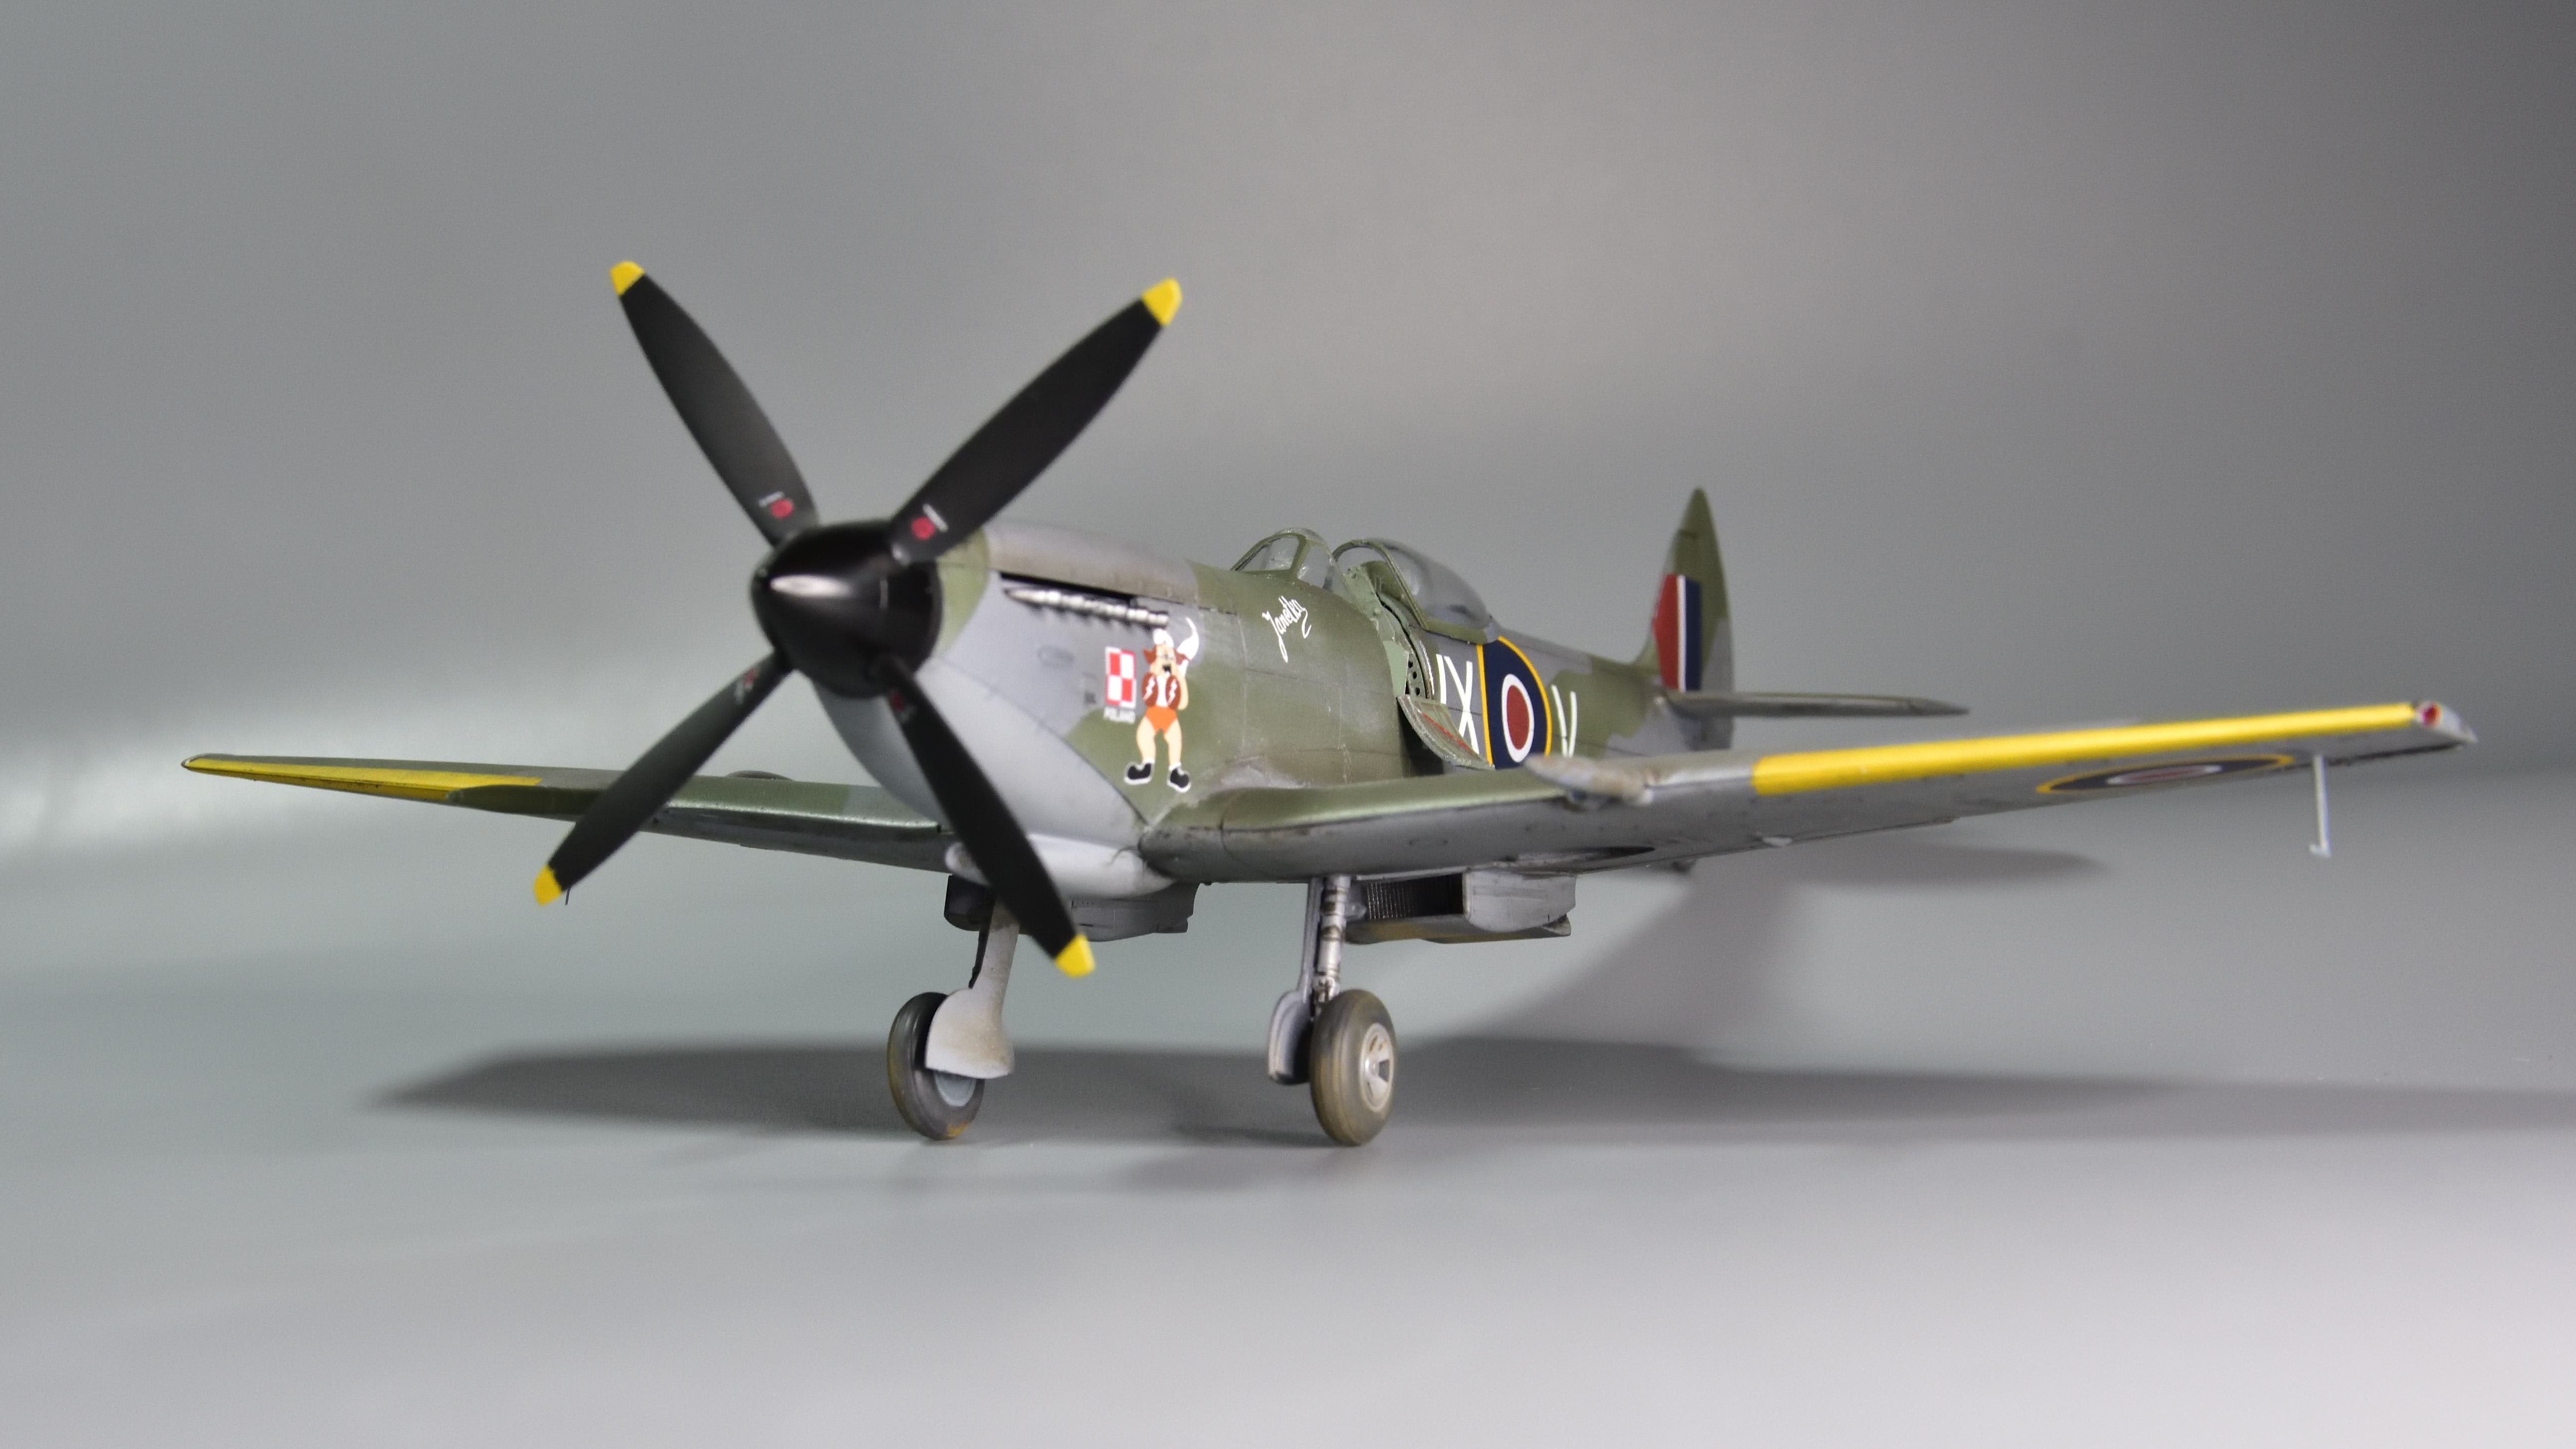
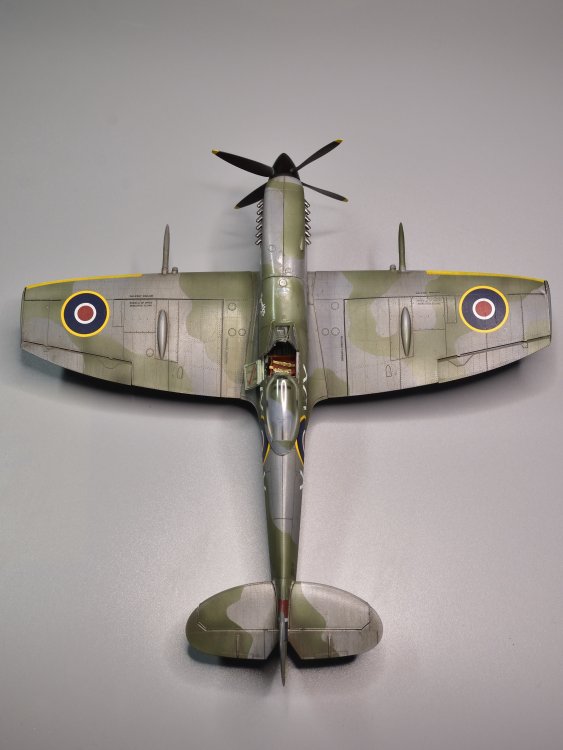
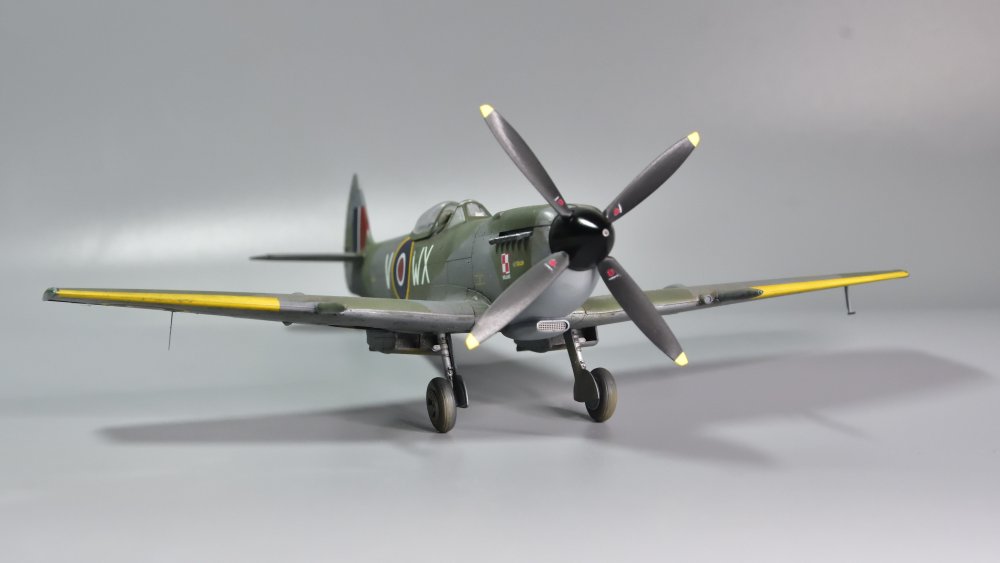
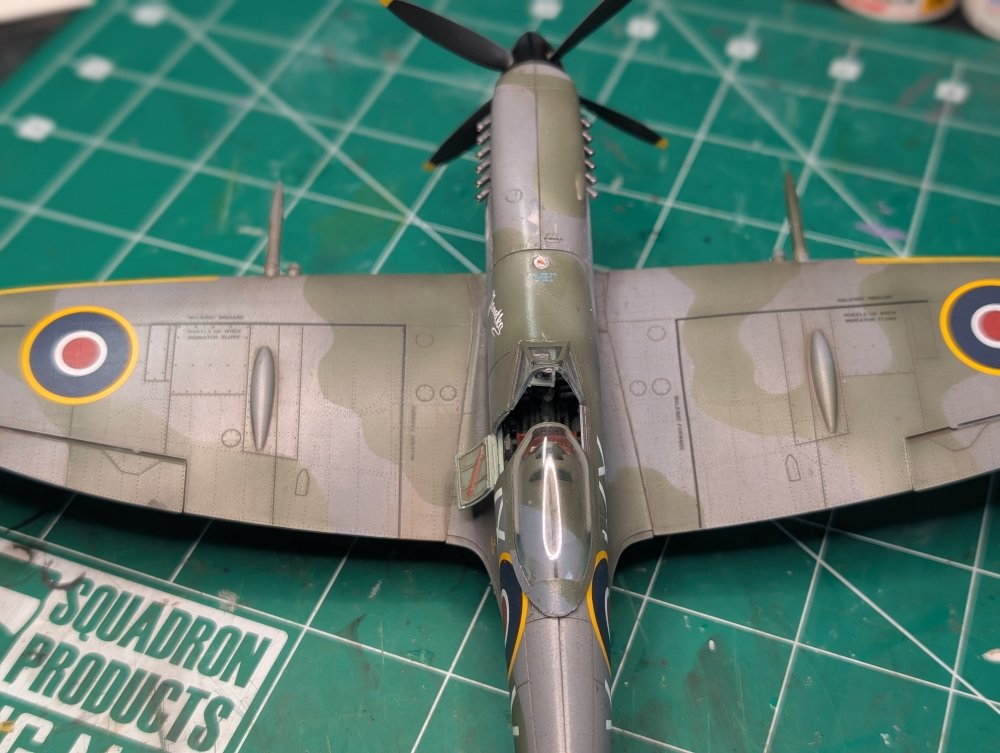
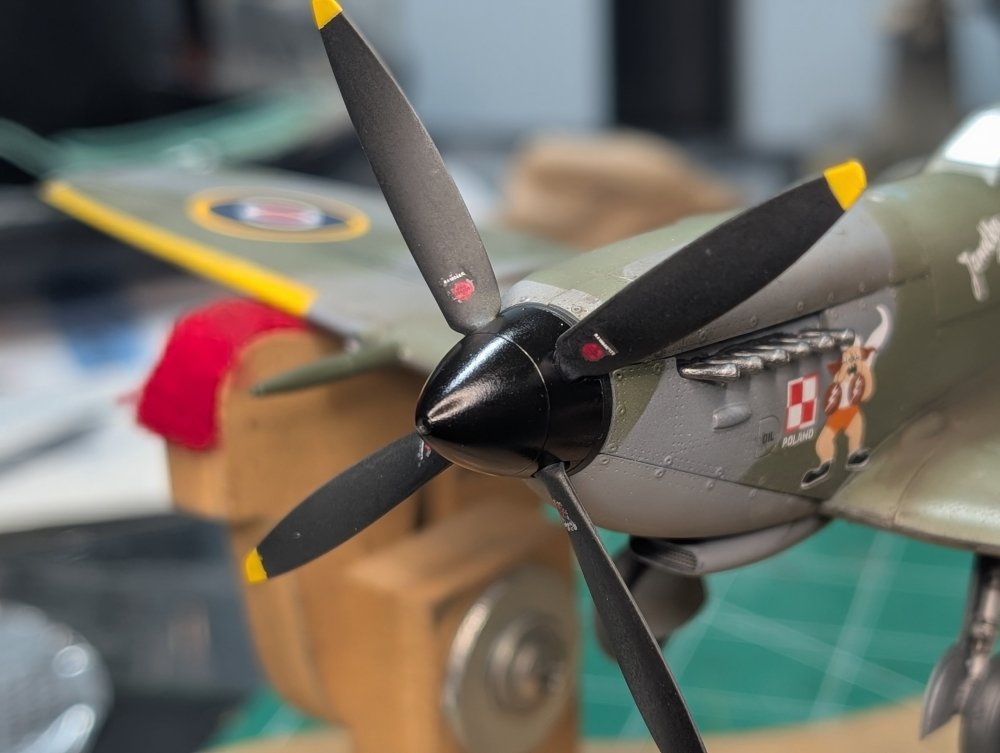
Finishing up but still have some details to add like the underwing antenna and probes, as well as the radio antenna which is presenting me with an conundrum: some pictures seem to show no antenna on the top of the fuselage. I THINK I see a very thin wire on top of the fuselage above the V here. Thoughts please! Also noticing really no exhaust staining The clear lens didn't fit the opening very well so am using some canopy glue which eventually will dry clear and will need multiple applications to flatten out. Attached the cannons and the prop. Now its looking like a Mk XVI Spitfire! Applied a bit of light gray chalk to hint at exhaust staining and some brown chalk on the wheels for the dirty airfields.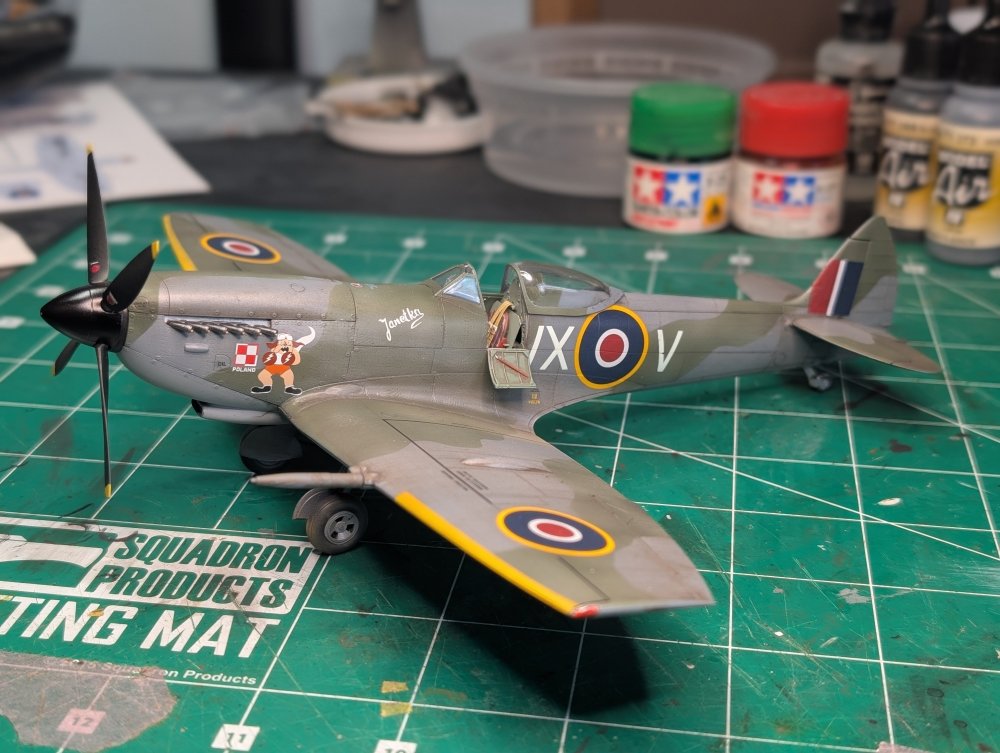
-
Cobra Coupe - Le Mans - Model Factory Hiro 1/12
CANicoll replied to DocRob's topic in LSM 1/35 and Larger Work In Progress
Awesome Rob!! Looks just like glass. -
Eduard Spitfire Mk. XVI Bubbletop 1/48
CANicoll replied to CANicoll's topic in LSM 1/48 Work in Progress
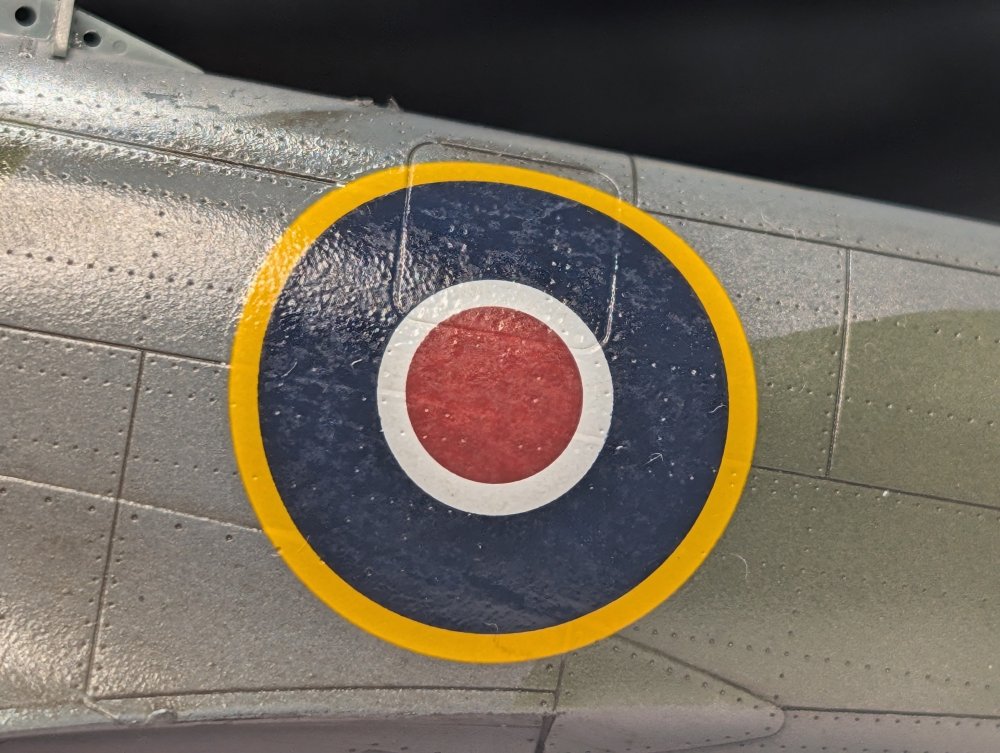
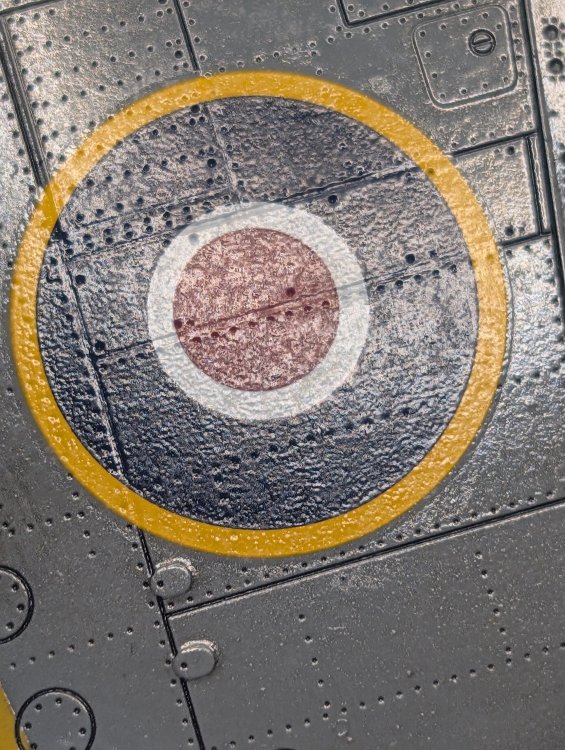
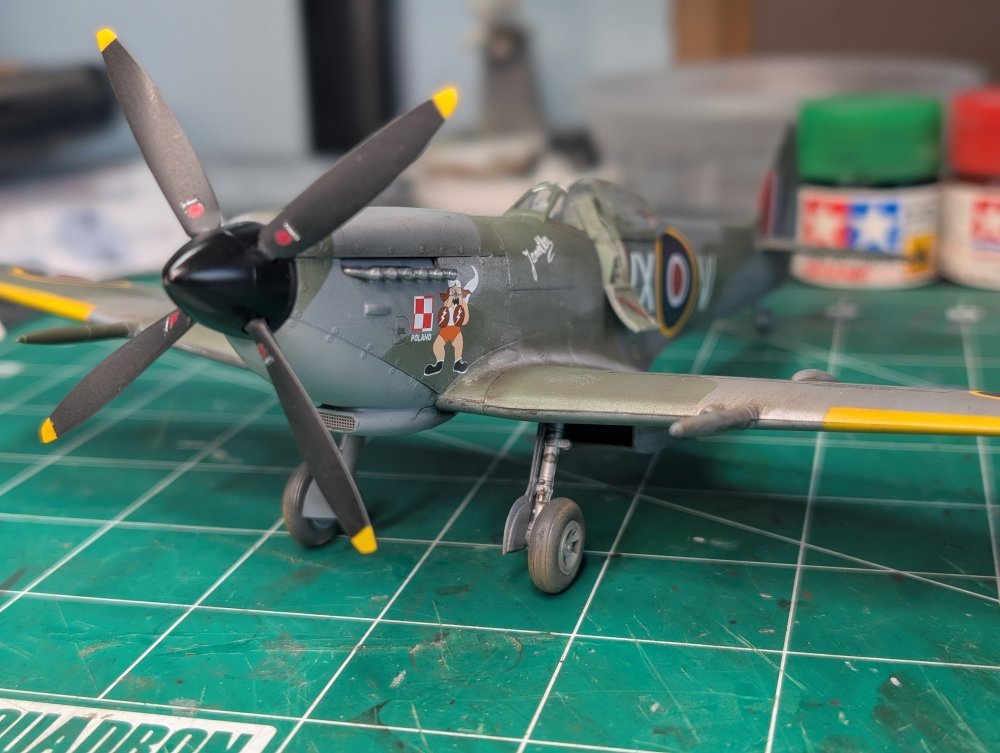
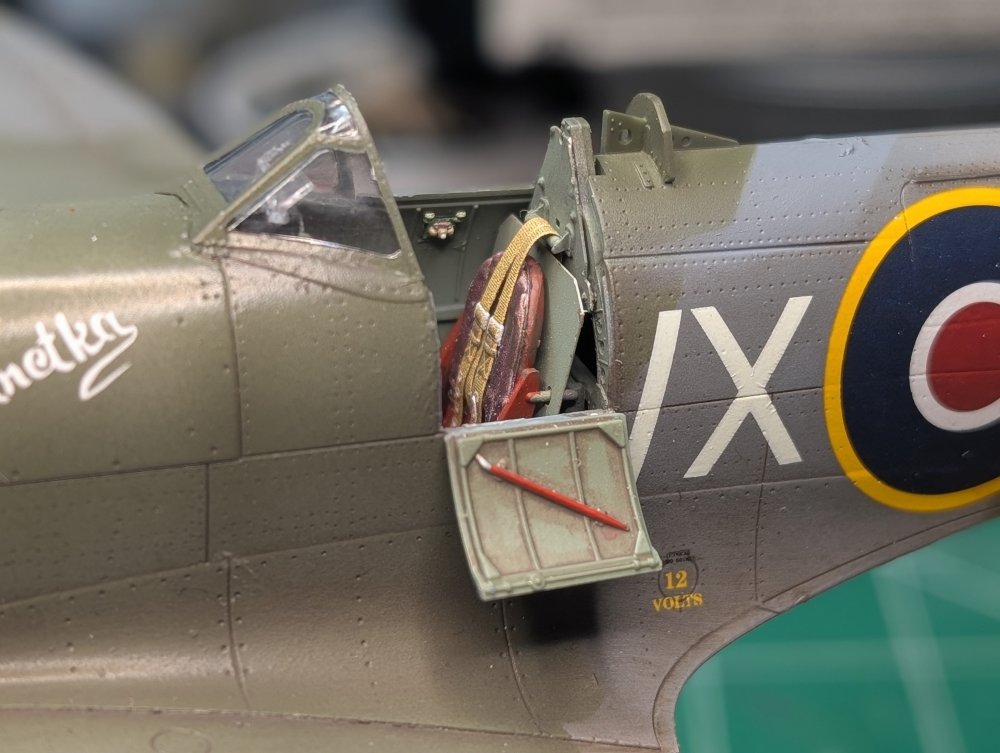
Minor update as I approach the finish line here. Still have to do weathering for the exhausts and touch-up from attaching the door (could have used a PE hinge there!) which needs some clean up. Got the petrol filler cap in place. Photos show a red center, which I'm taking as getting worn, as well as some stains. Finally did attach the engine cover and exhausts along with the prop. Getting there, finally!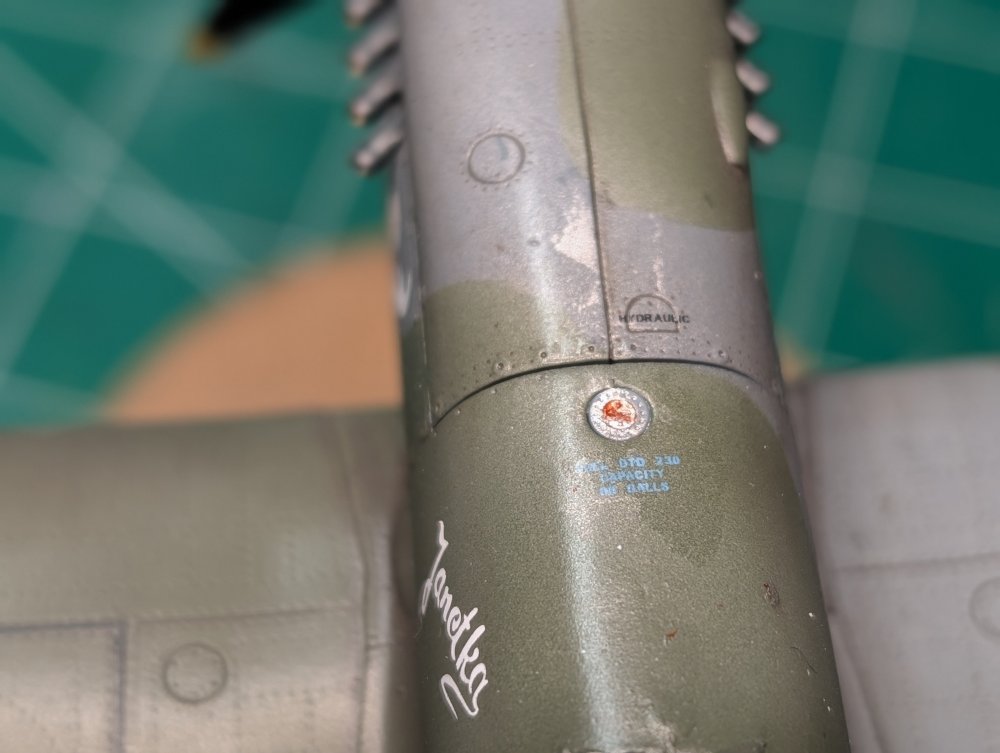
-
Cobra Coupe - Le Mans - Model Factory Hiro 1/12
CANicoll replied to DocRob's topic in LSM 1/35 and Larger Work In Progress
Nice fit and with incredible detail. Whew! -
Cobra Coupe - Le Mans - Model Factory Hiro 1/12
CANicoll replied to DocRob's topic in LSM 1/35 and Larger Work In Progress
Hmmm. Sorry to hear you consider this a failed build, Rob. I certainly understand your frustration with getting things to fit (or not fit as the case may be) and the bonnet is the latest example of bits to disappoint you. For static display buttoned up, all of the frustrations are not apparent, at least from what I can see. She's a real beauty and the detail inside and out is amazing. The engine bay is too good not to be seen and appreciated. Sorry it is turning out this way, but what a beautiful effort and workmanship you showed. -
I forgot you did that to the SH P-39's. Beautiful fix, John. Wow!
-
John, What tail is that? did you graft a resin tail on the P-400? Nice recovery!
-
Oh, right, sorry, Gary. Yeah, it was HOT!!! That's right - Ernie missed Pima, but Tim was there among others. I remember us sitting in the restaurant waiting for the bus to take us back. While they were cleaning around us! That was a B-17 pilot from WWII we talked to. Fascinating guy. I still have his book. Good happy days, for sure!
-
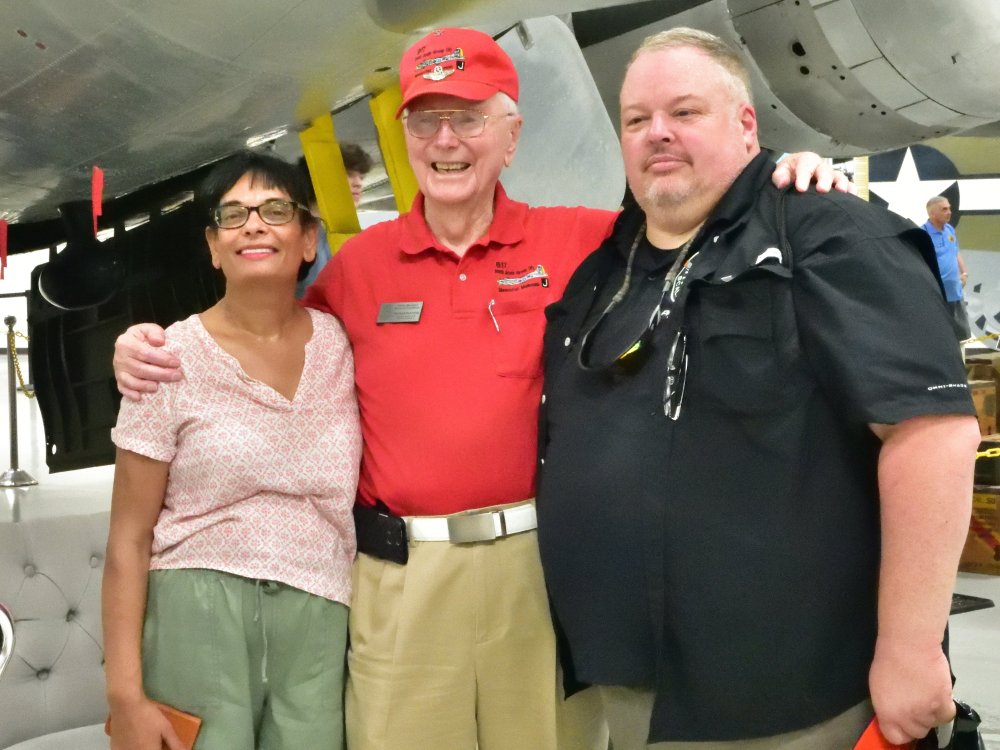
And we hid under the wing from the hot sun! Great seeing you there and at Telford. I was looking for those pictures of you and found this of you and Ernie:
-
Phoenix was an amazing trip to meet you all. I missed that dinner and the group pic but the trip to Pima (sadly, without Harv) was memorable. That was quite a Nationals! This hobby puts together some incredible people.
-
Dragon Bf110E - Wolfgang Falck - Finished
CANicoll replied to denders's topic in LSM 1/35 and Larger Work In Progress
Dave, Looks awesome! Pity that German cockpits were so tight hiding all of that terrific details you put in there. Good thing you have pictures! -
Ernie, Will be good to have you back. Missed you too!
-
Cobra Coupe - Le Mans - Model Factory Hiro 1/12
CANicoll replied to DocRob's topic in LSM 1/35 and Larger Work In Progress
Rob, Still, amazing work. I see the bit of damage that you'll touch up, but overall this looks terrific. I didn't realize the headers were white. I did remember how tight the engine compartment was with the 427 shoe-horned in where a small-block had originally been fitted. -
Eduard Spitfire Mk. XVI Bubbletop 1/48
CANicoll replied to CANicoll's topic in LSM 1/48 Work in Progress
Rob and John - that is what I SHOULD have done! Actually, if I had just bothered to clear coat the props after the decals it would not have been an issue, but no biggie. Rob thanks for your comment! -
Eduard Spitfire Mk. XVI Bubbletop 1/48
CANicoll replied to CANicoll's topic in LSM 1/48 Work in Progress
Yep, I think in the early war they were Sky or some other color. But the pictures I have found of the XVI seem to show white lettering. Not that it matters now. The lettering is under two clear coats. Something I should have looked more closely into, but I was relying on the decal manufacturer. Not always the best source.