JeroenPeters
-
Posts
4,867 -
Joined
-
Last visited
Content Type
Profiles
Forums
Events
Gallery
Everything posted by JeroenPeters
-
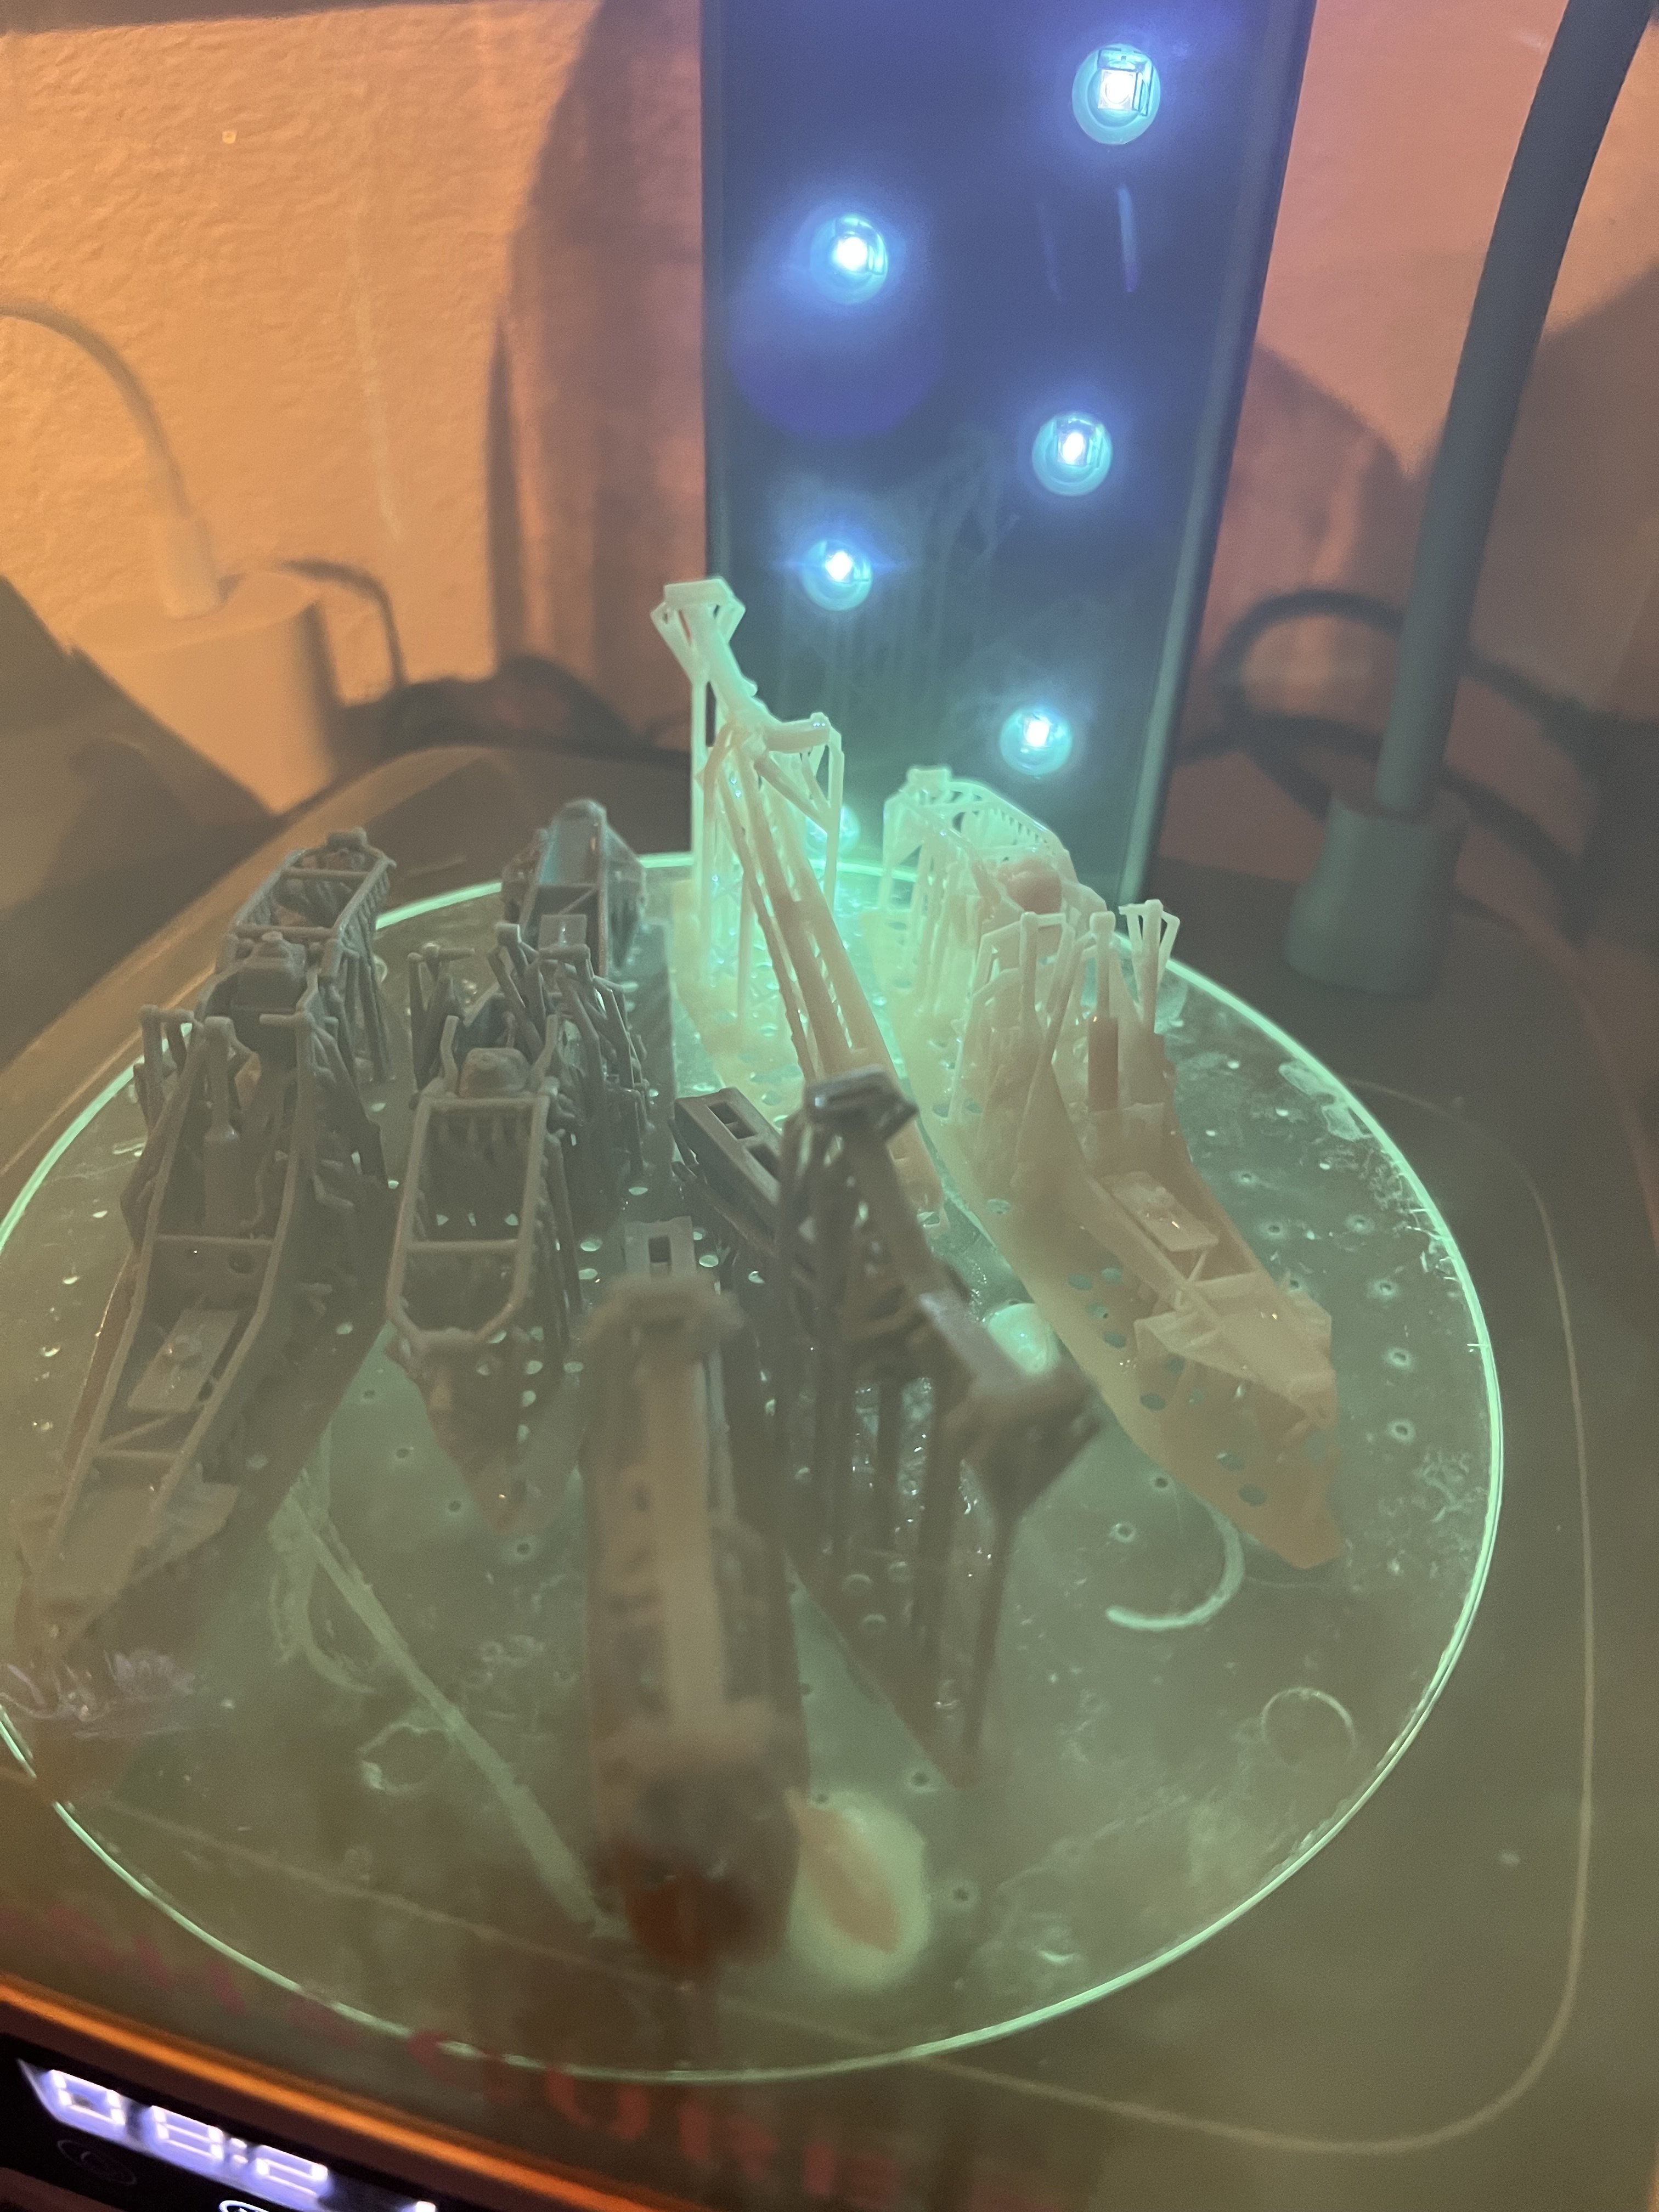
 First print with medium thick supports. Safe but i prefer thinner supports
-
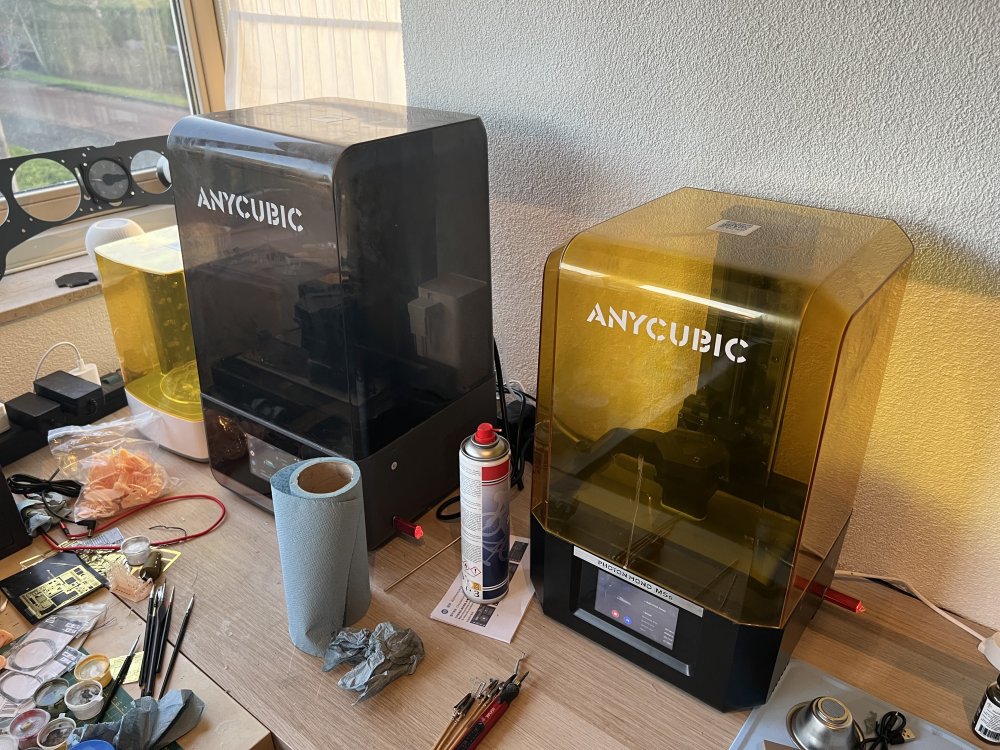
Here we go. Fired up all printers today with mixed results. Managed to pull off 3 complete sets. Might do some new prints with thinner supports.

-
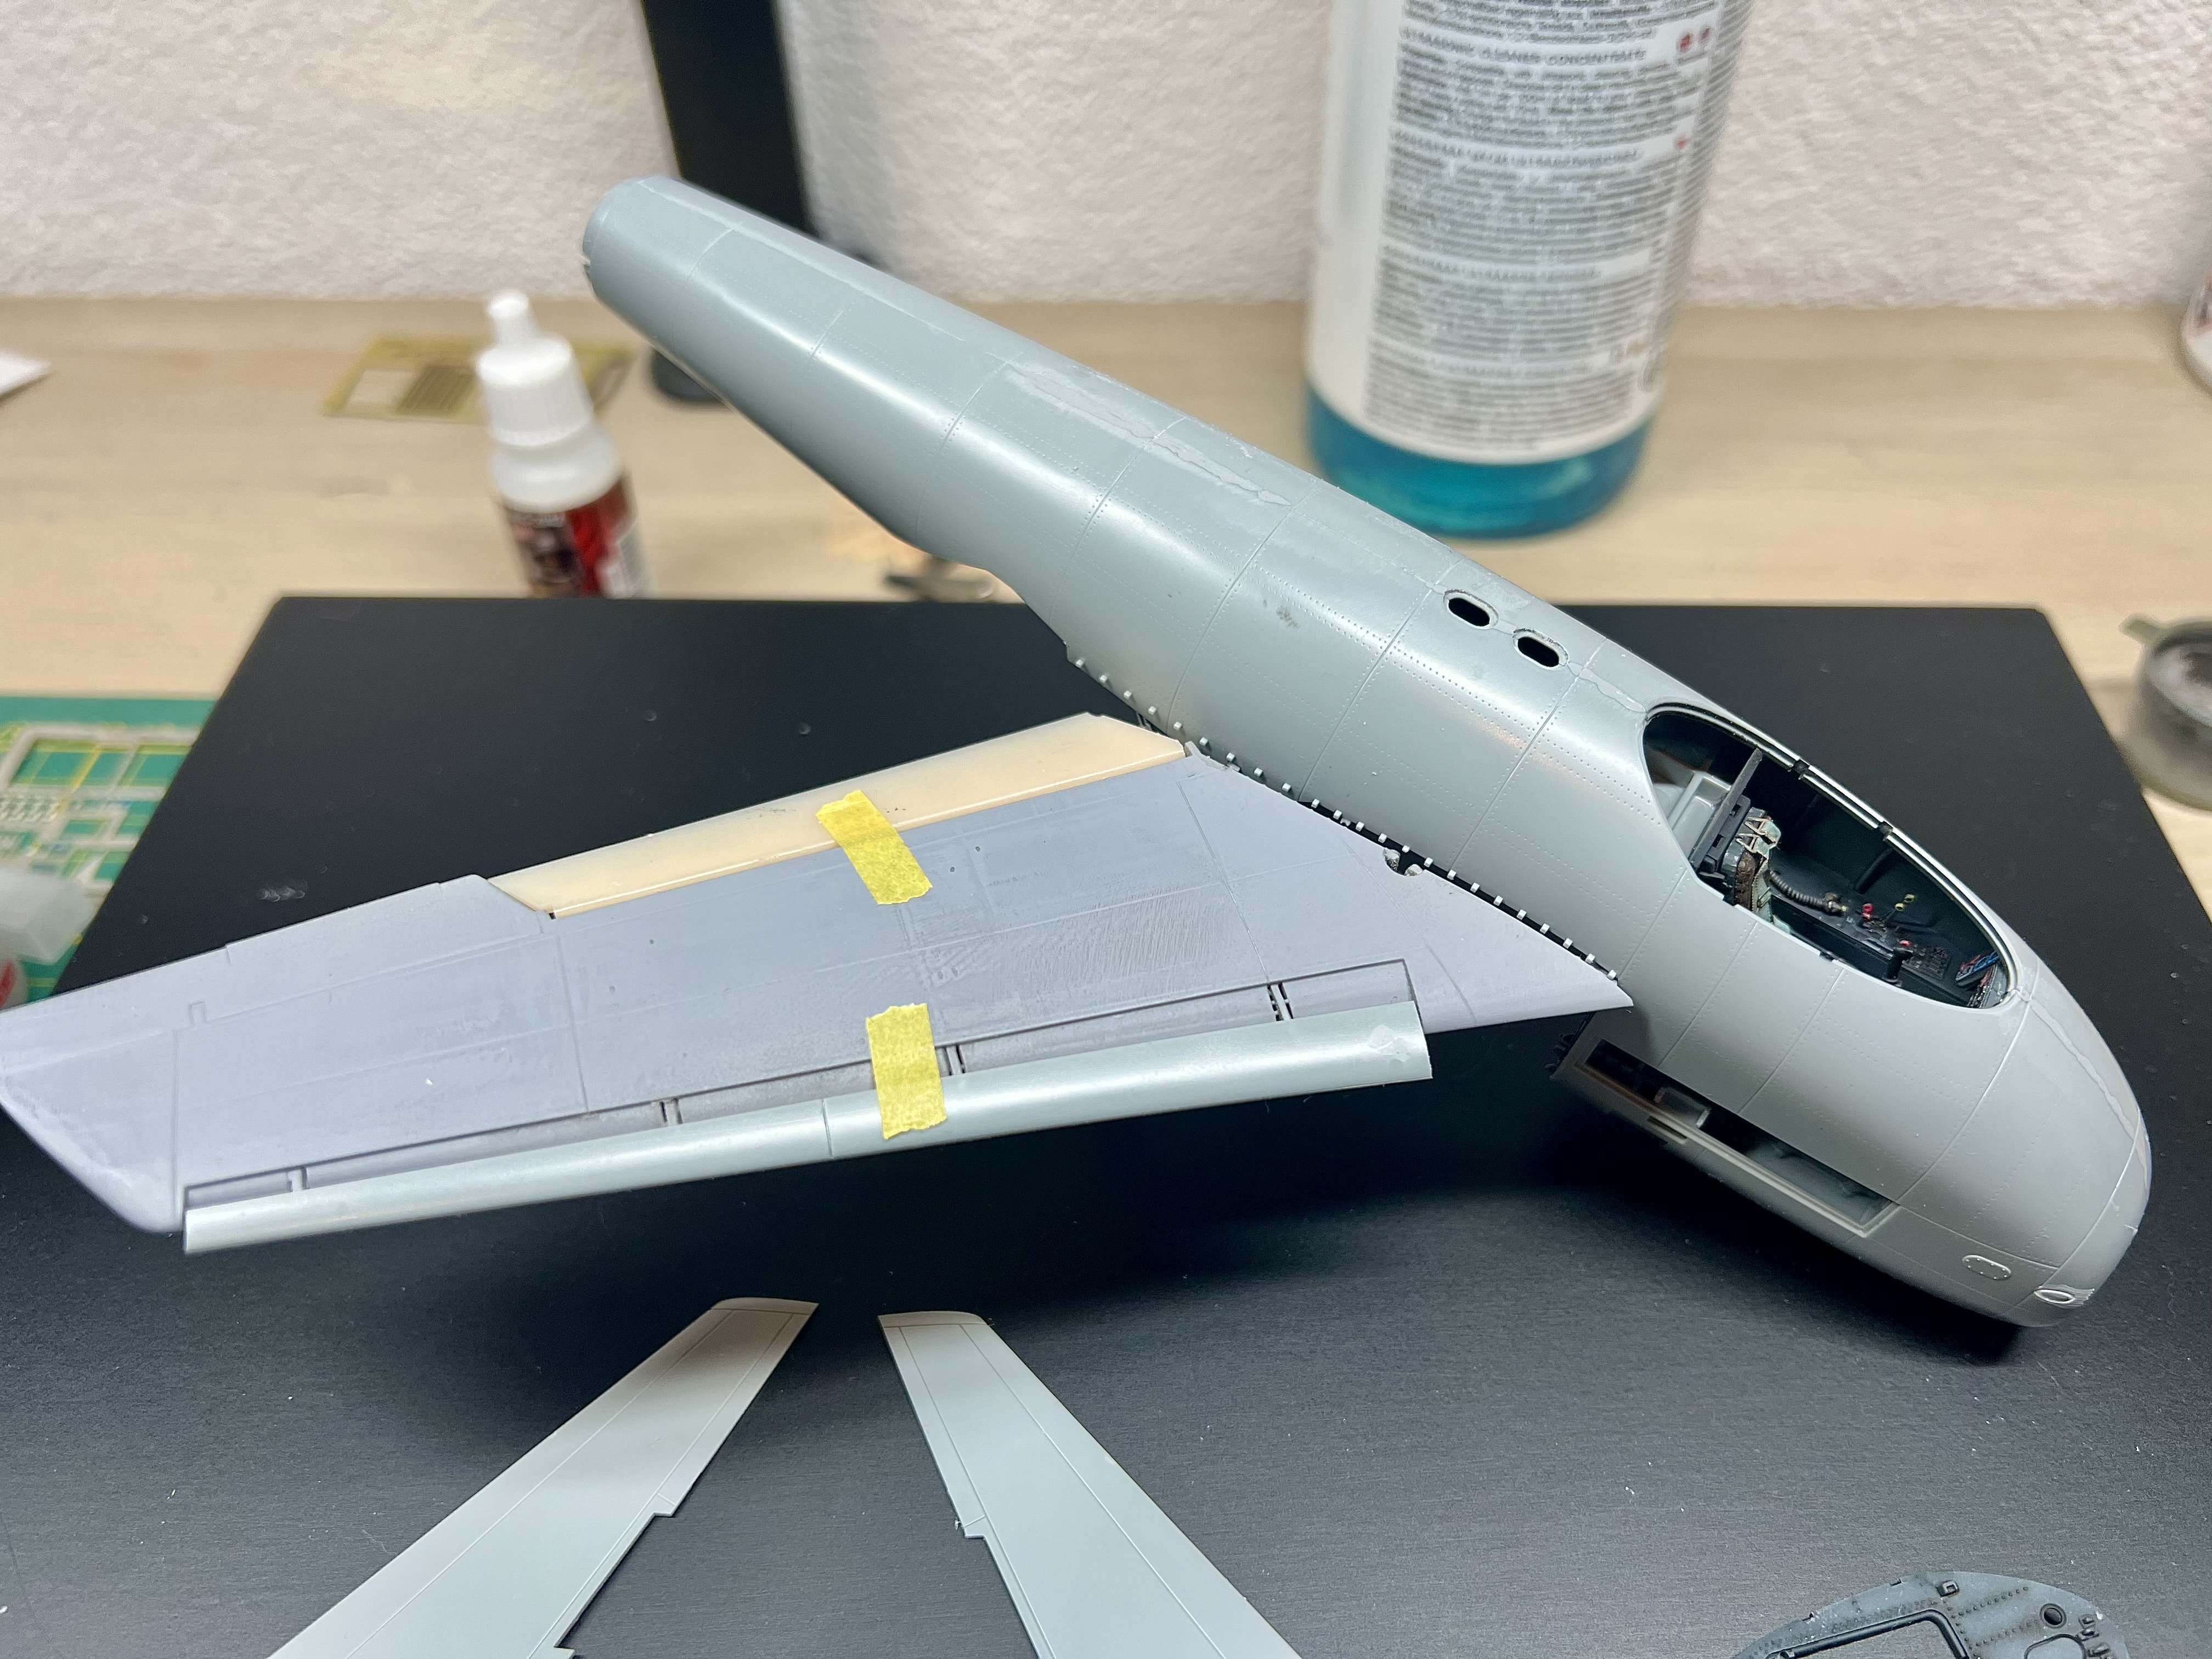
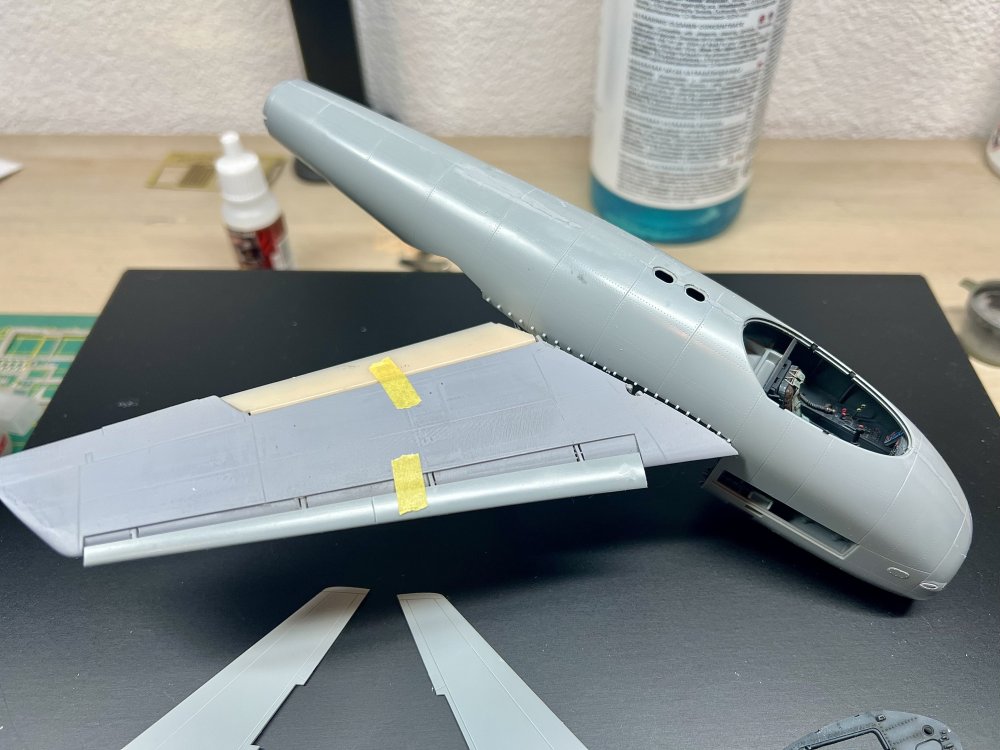
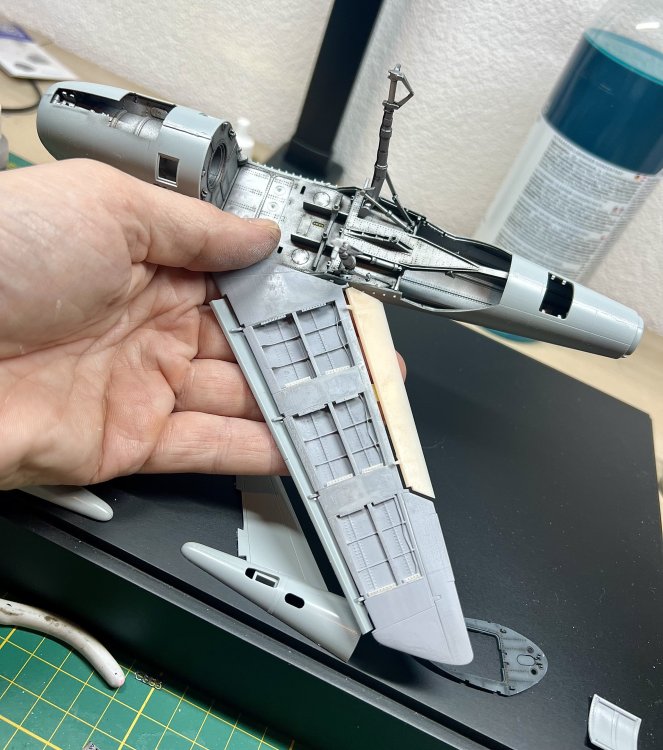
Test fitted the wings. Perfect fit. Added the fastener strips to the inside of the underwing panel openings. This build is going pretty fast due to great fit and engineering.
-
Well. Here goes nothing!

-
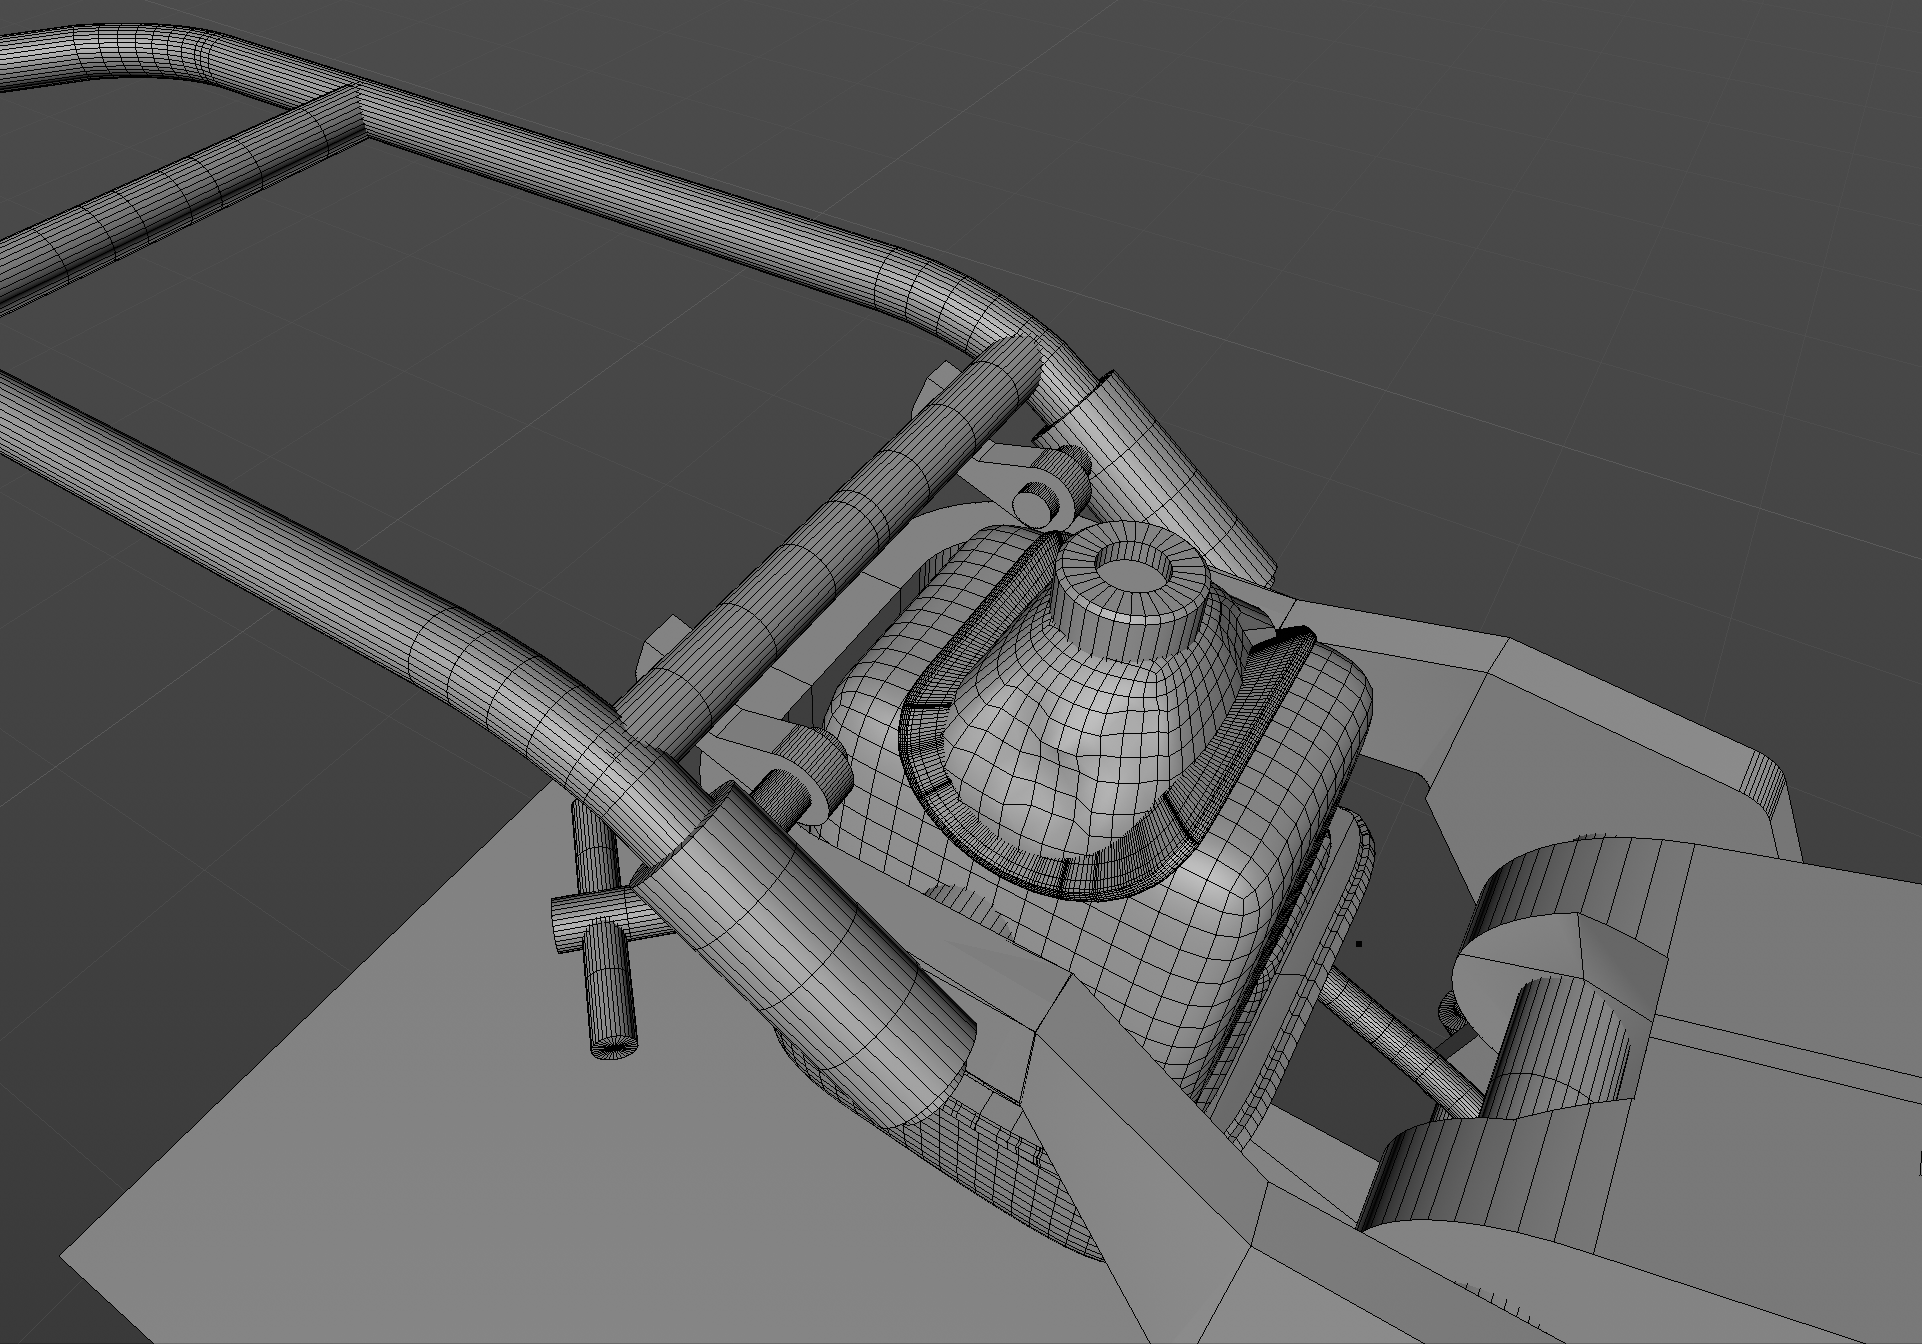
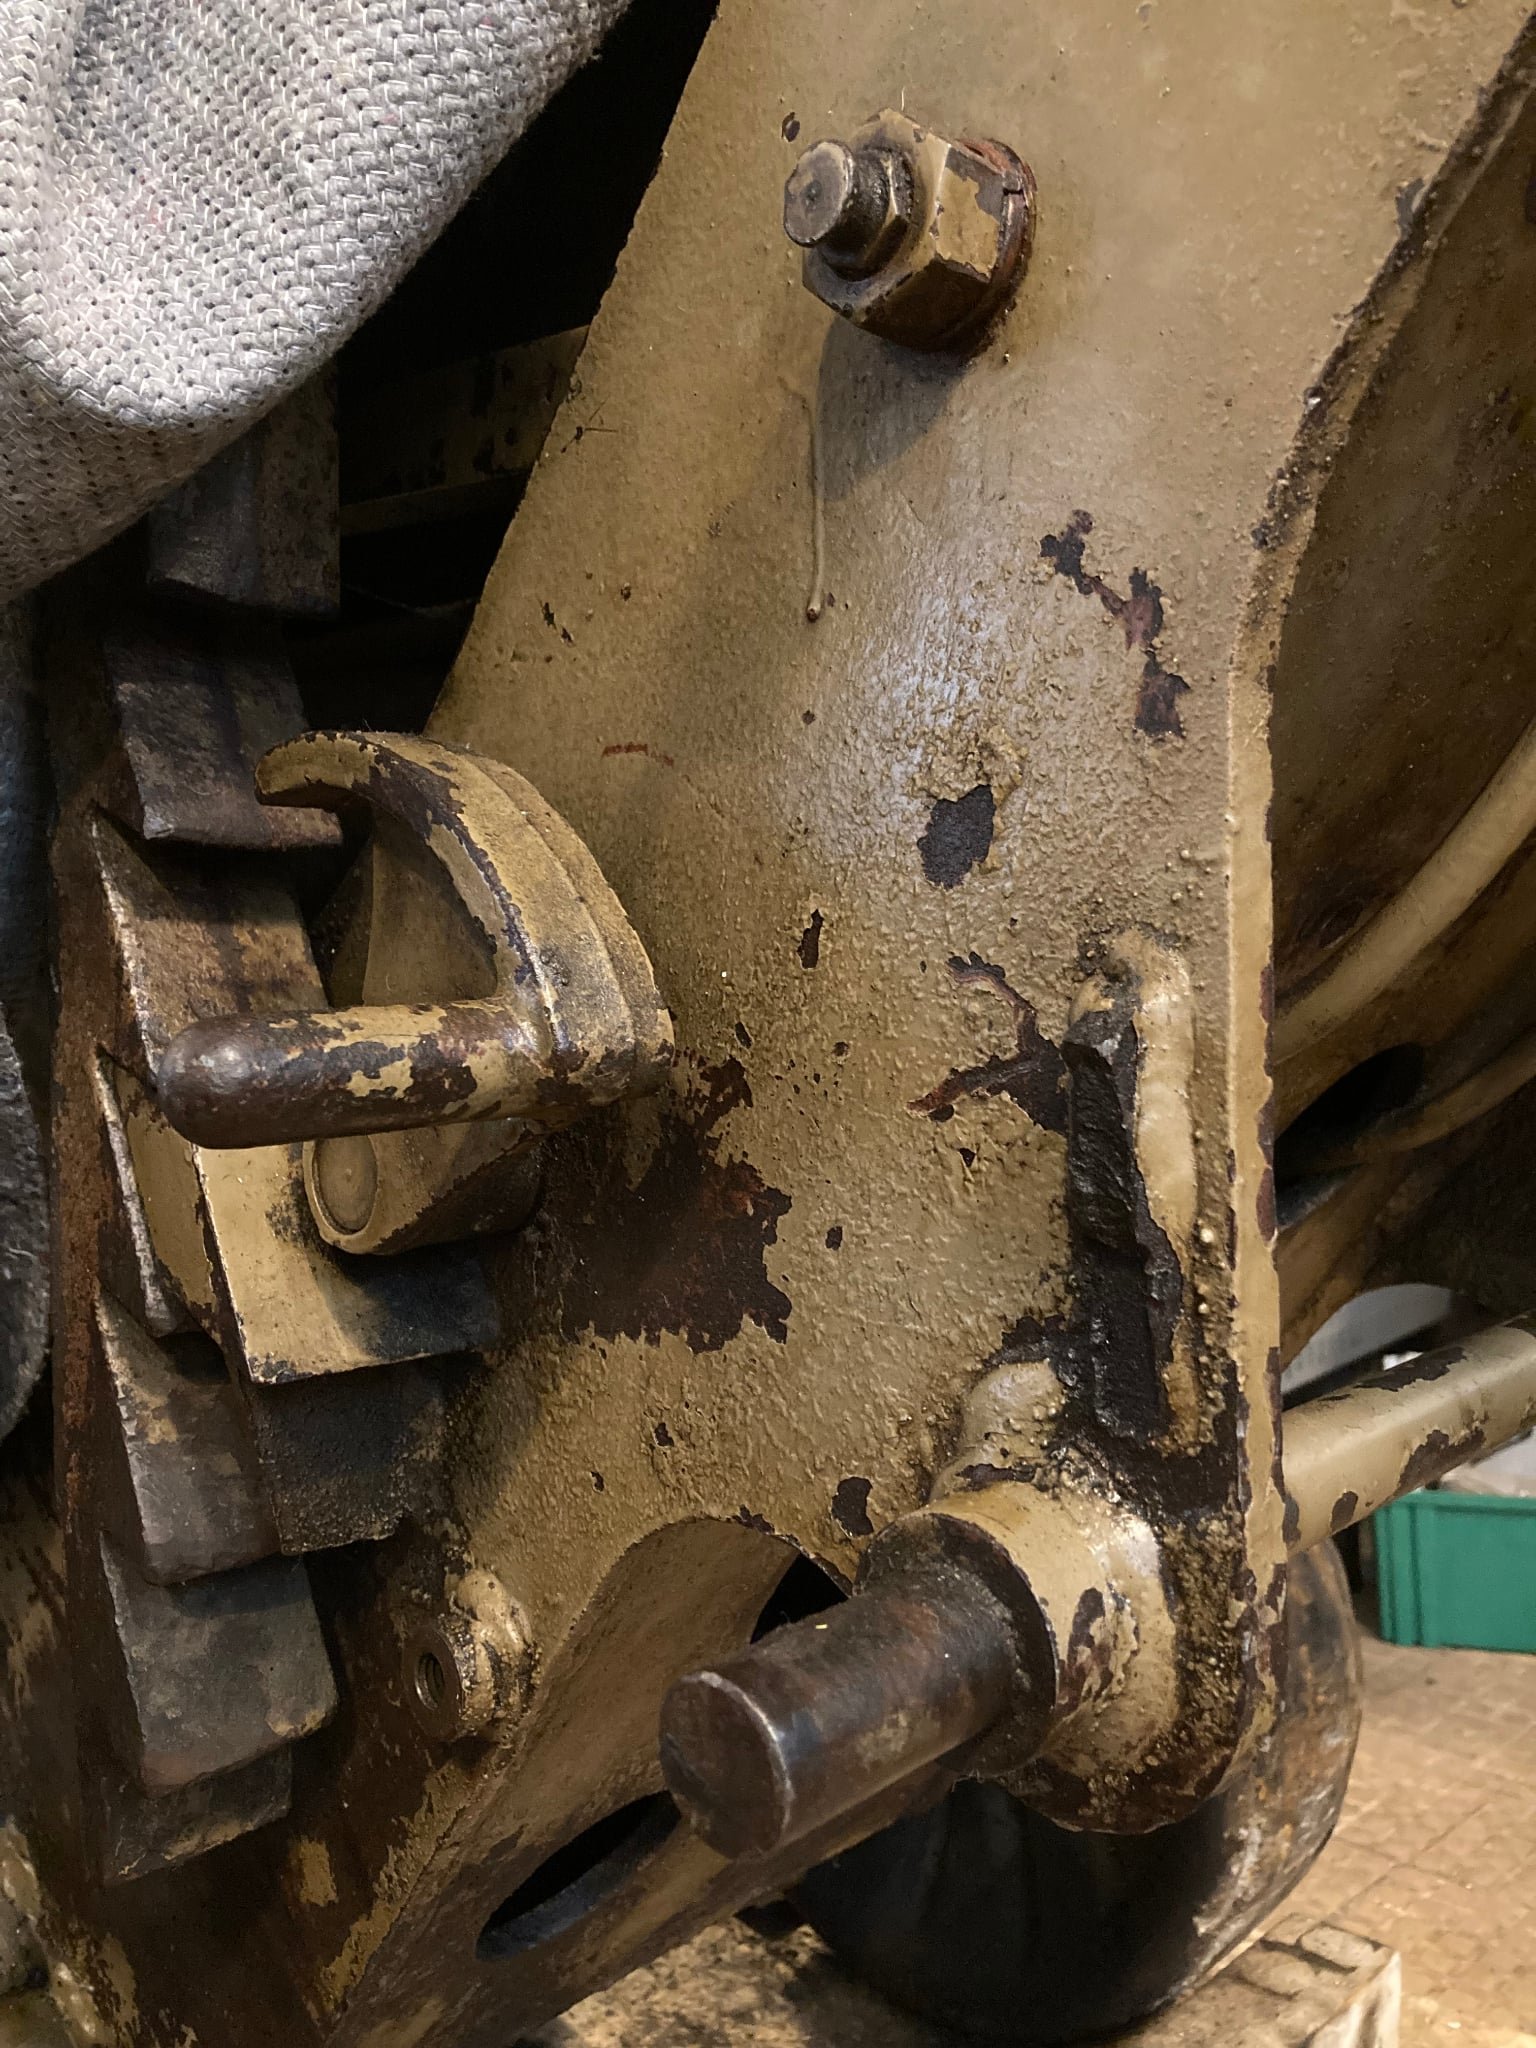
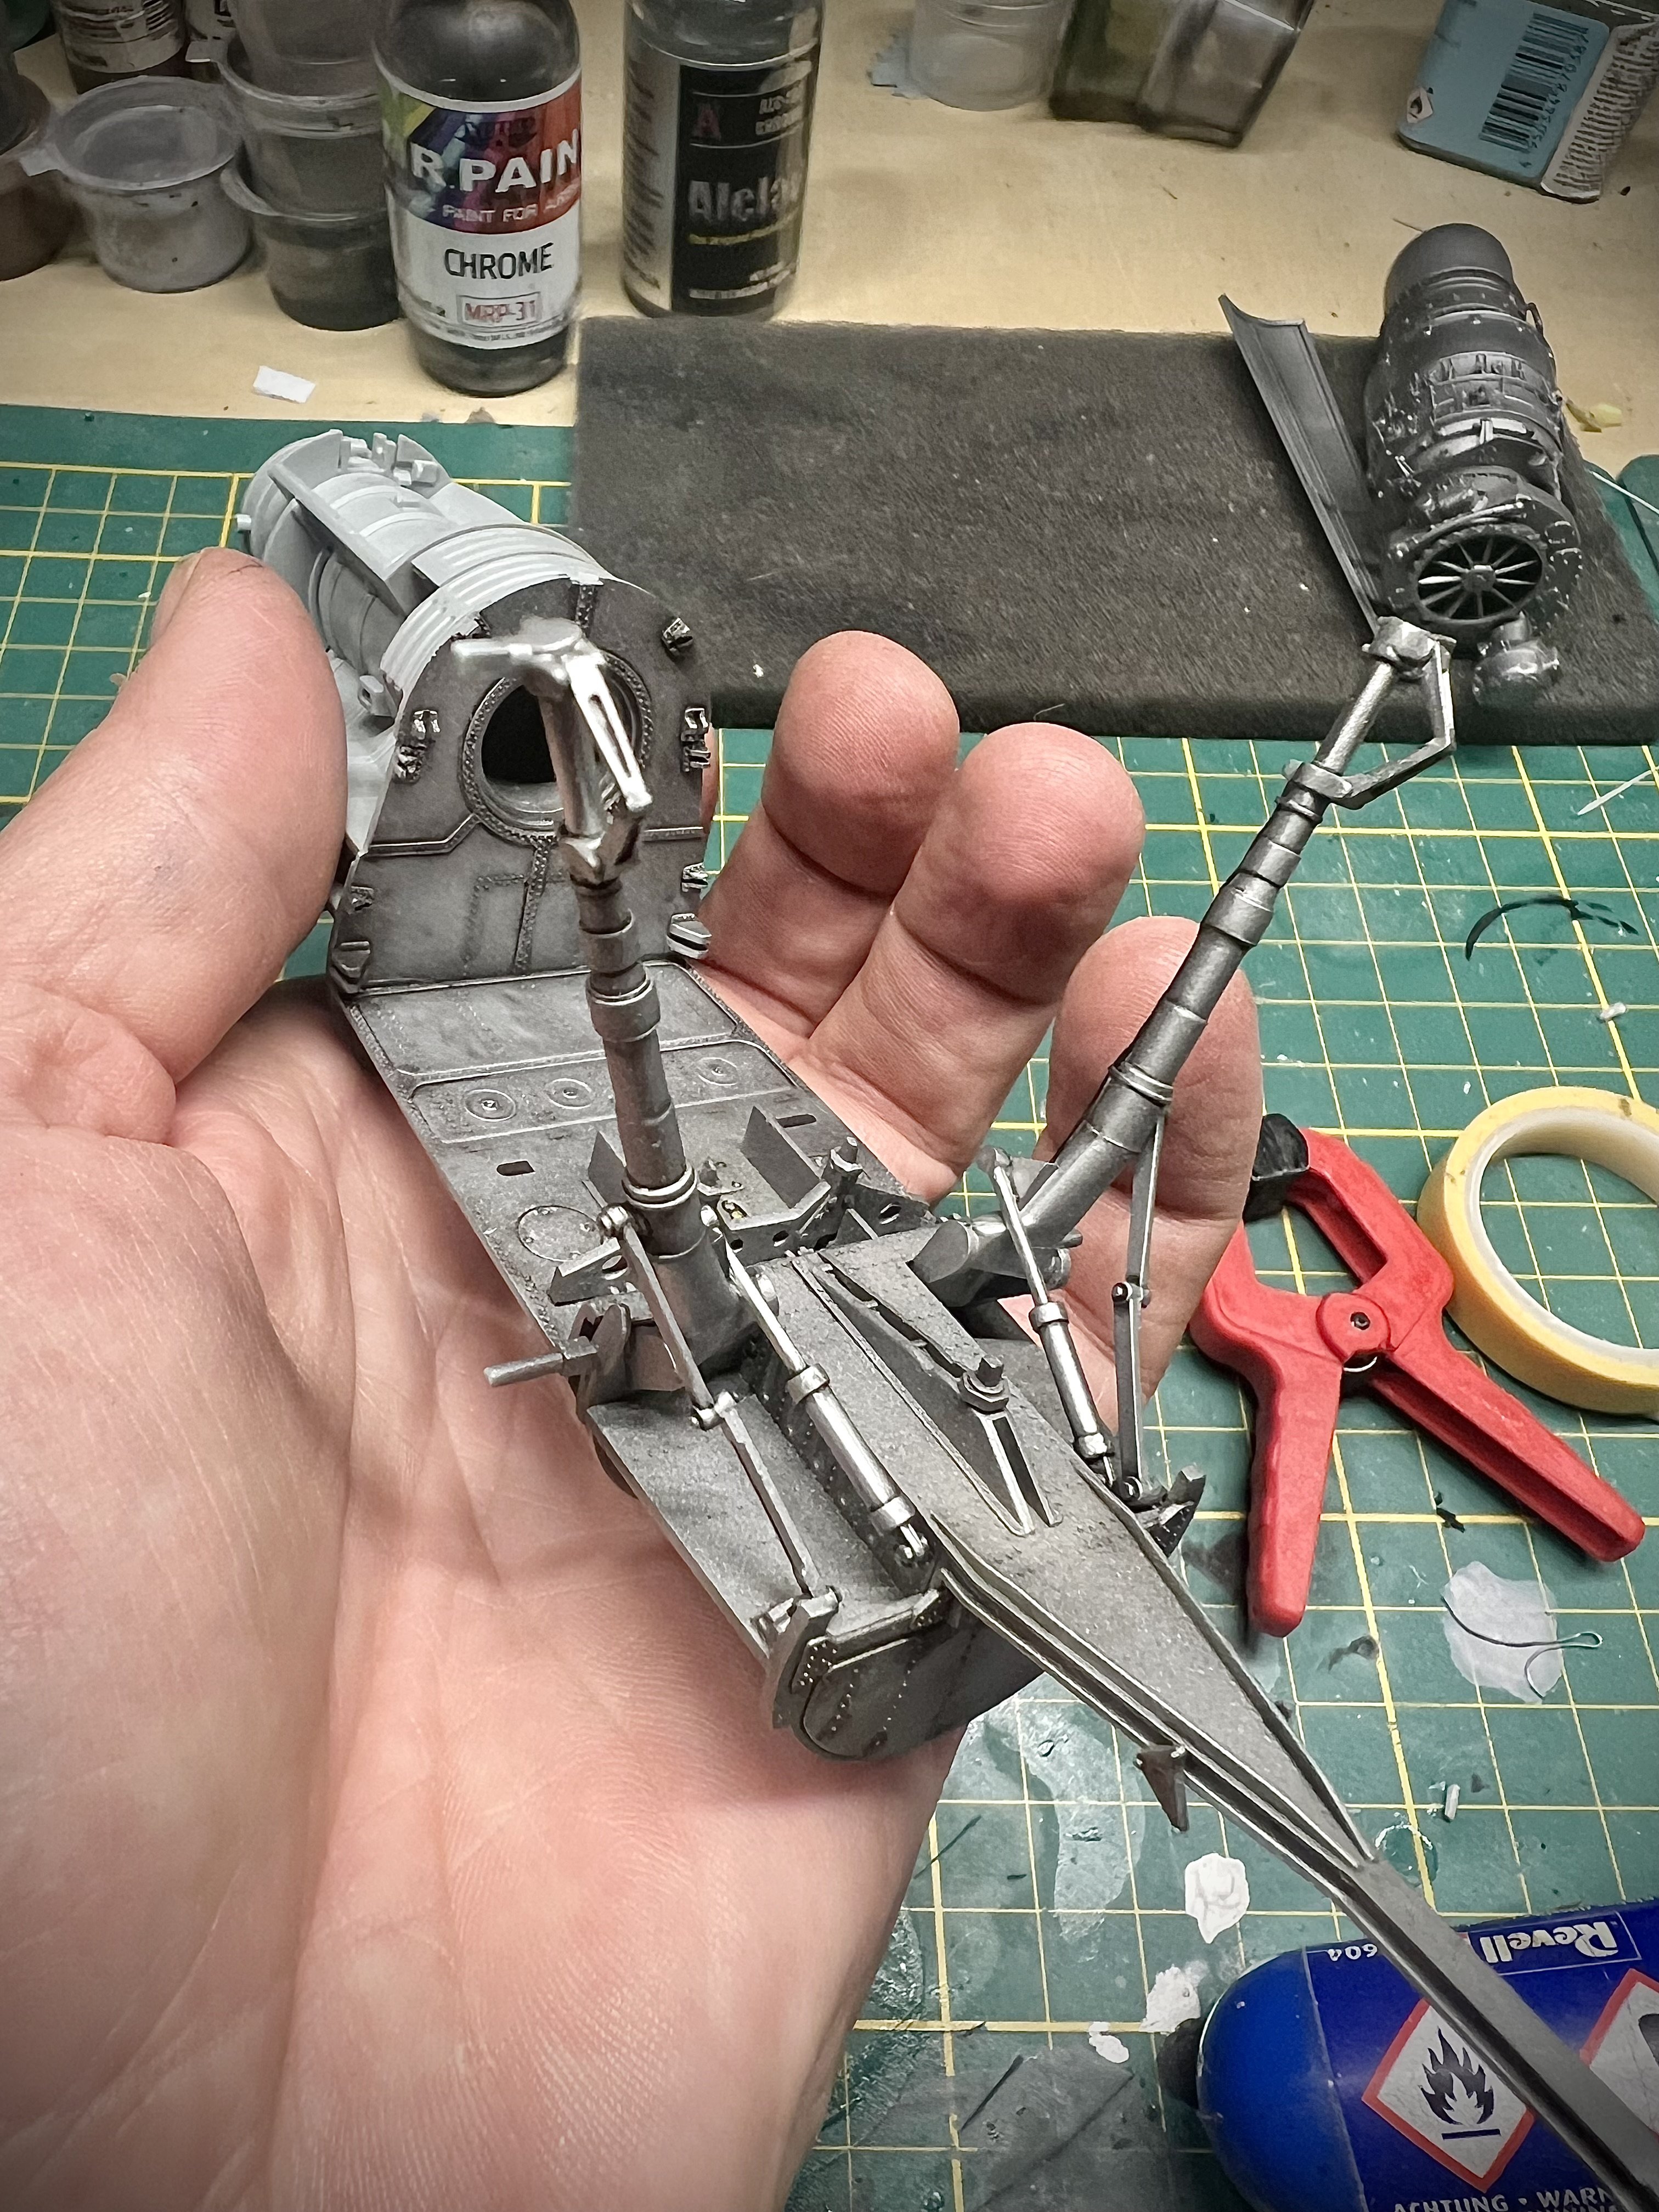
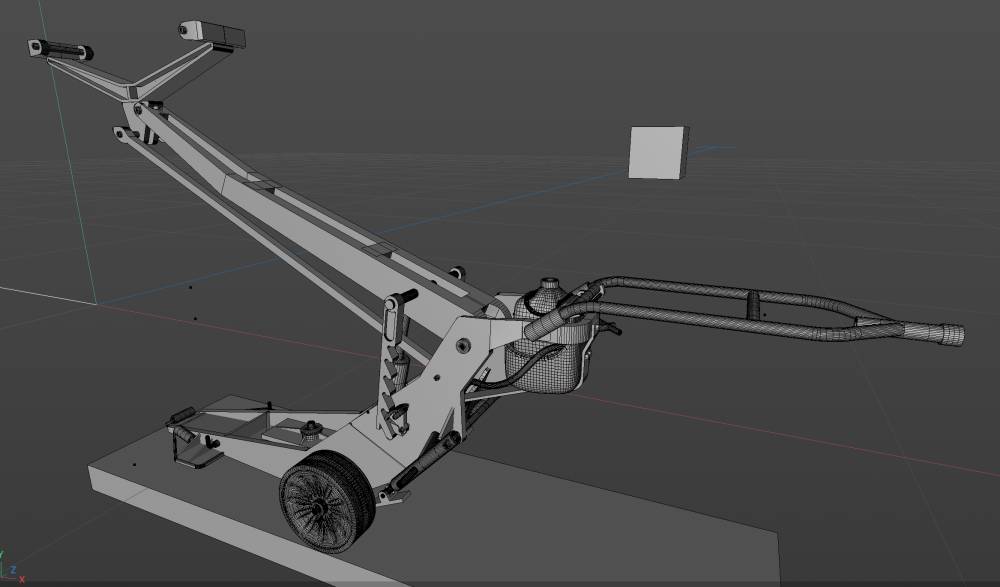
Doing numerous changes based on the photo's and measurements I received from Arsenal45. One detail is the double lock that secures the handlebar. Will look the whole thing over a few more times, but then it should be OK-ish enough.


-
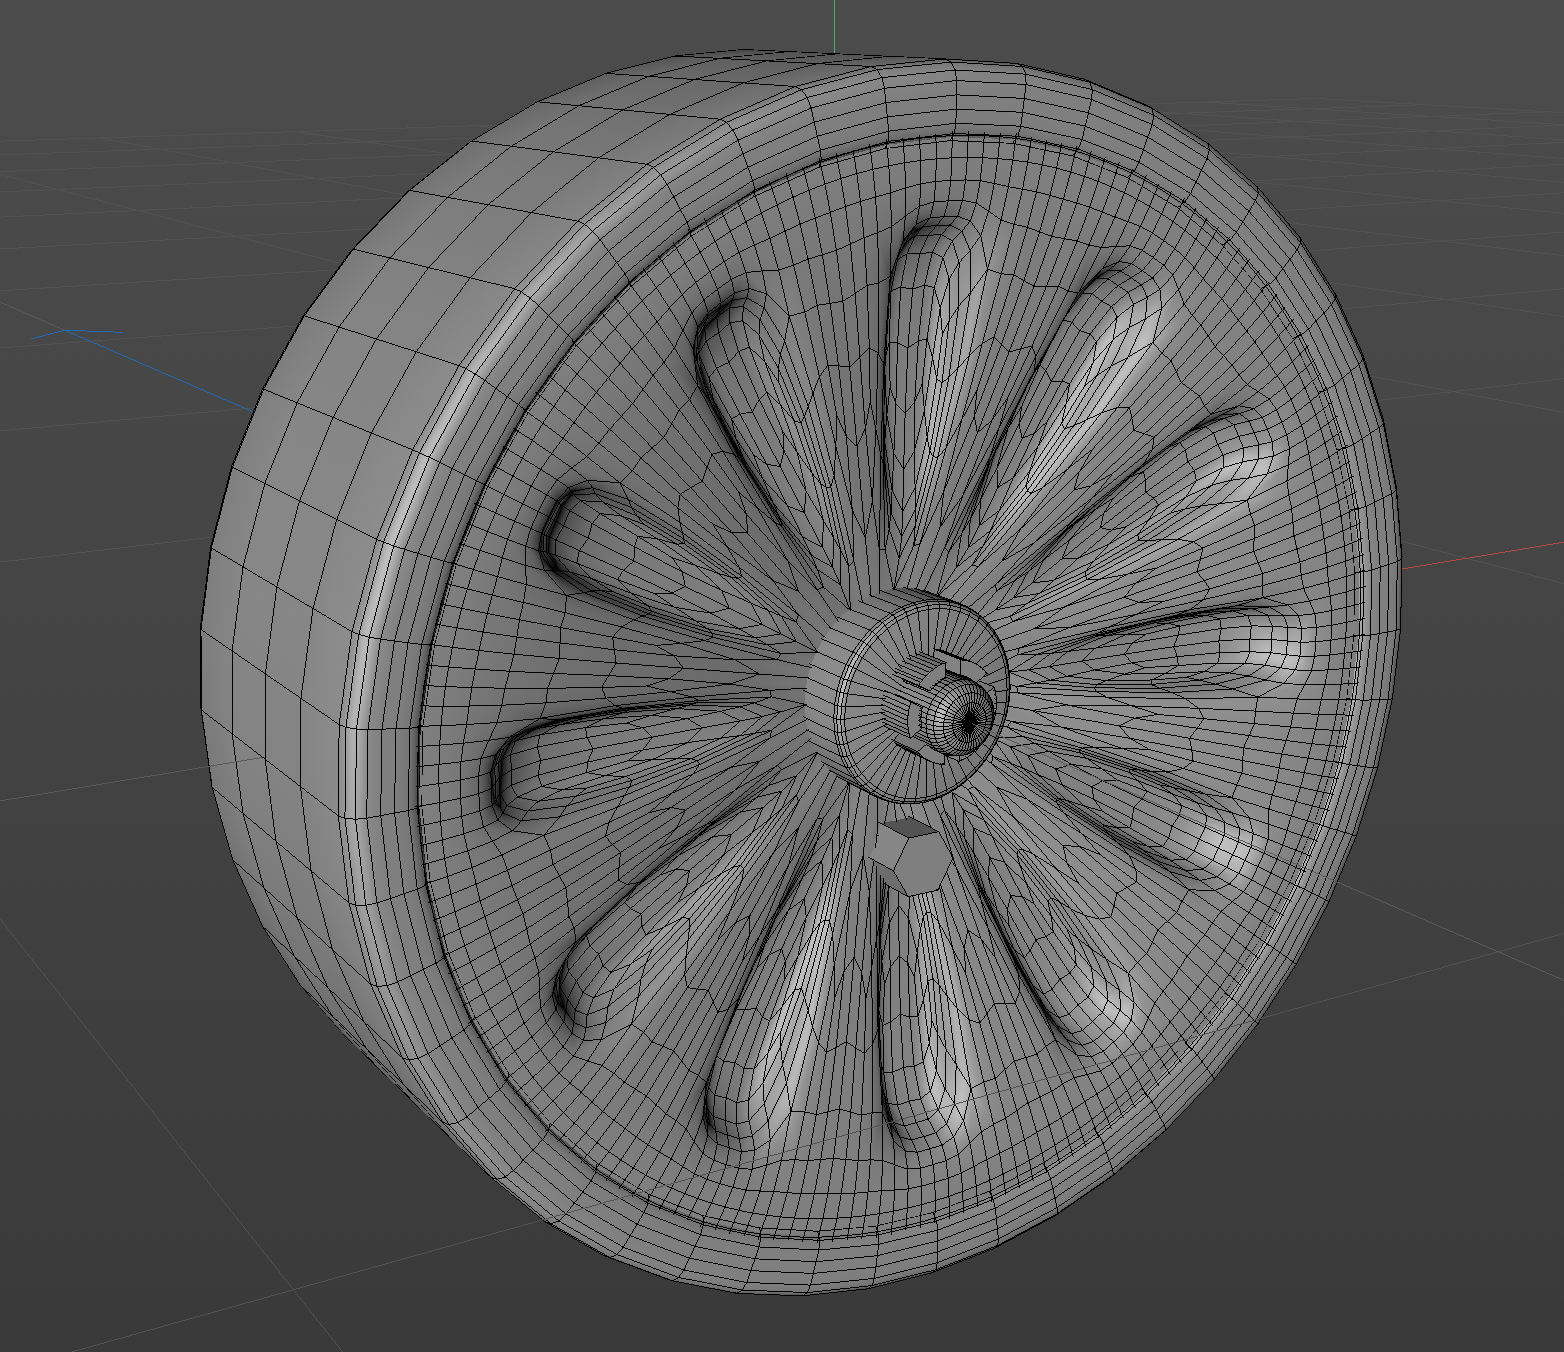
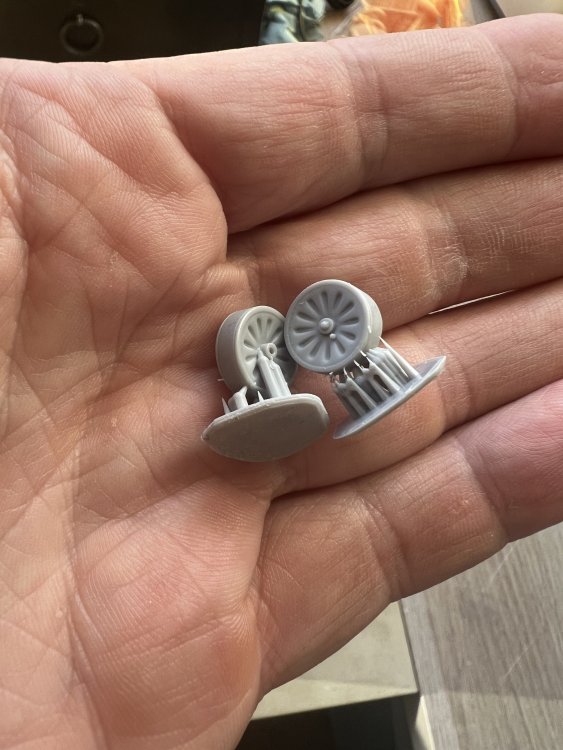
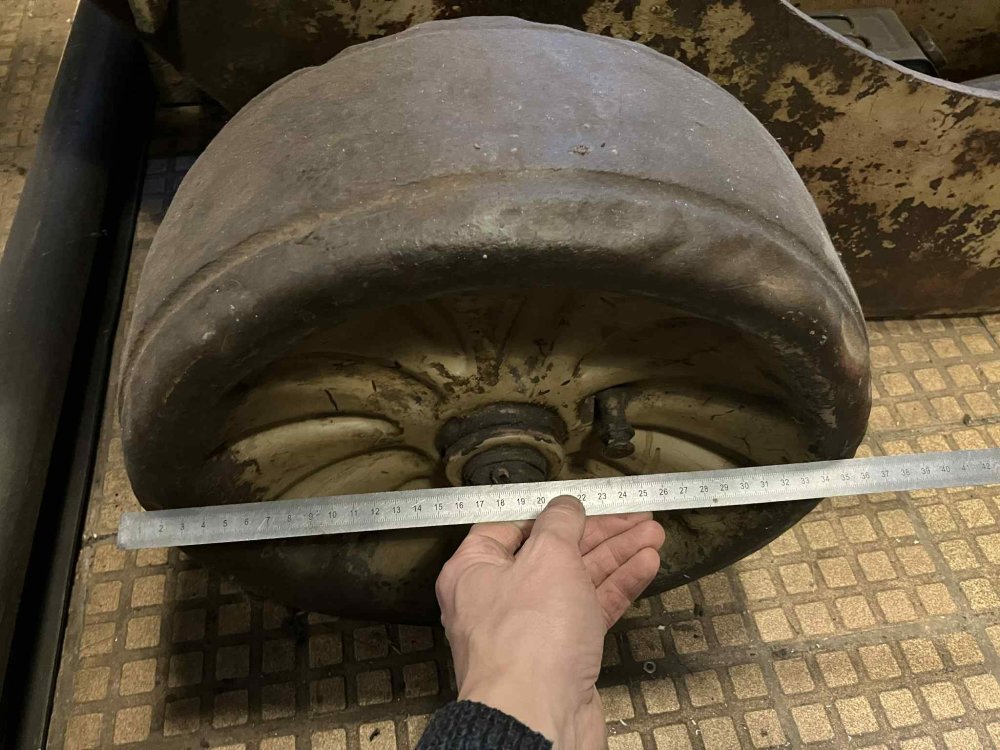
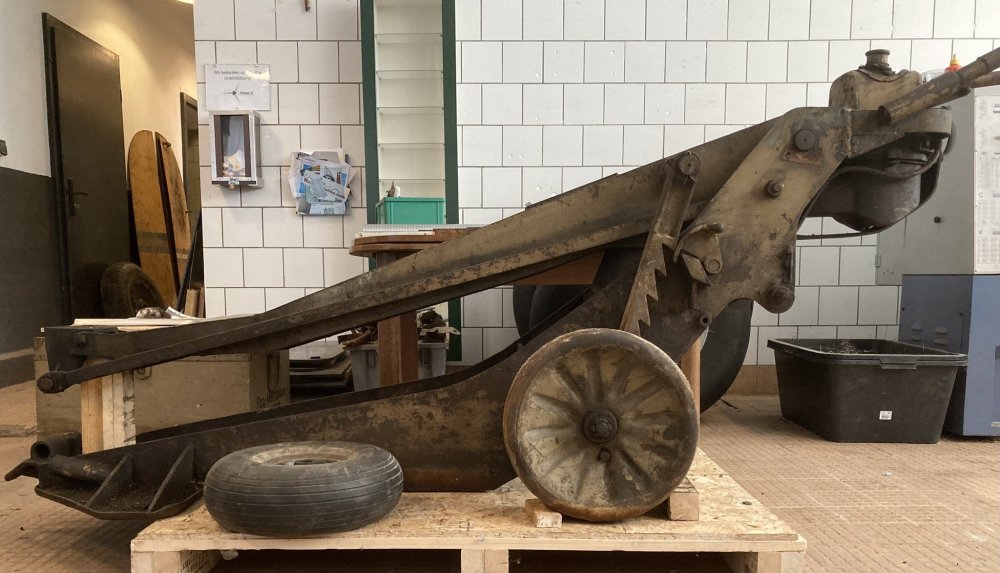
Just received a whole set of photographs and measurements from Arsenal-45. Amazing stuff. Where is was first short on reference, I now have it in abundance! Here's a newer pic of my wheel (37cm in diameter) and a new reference photo.
-
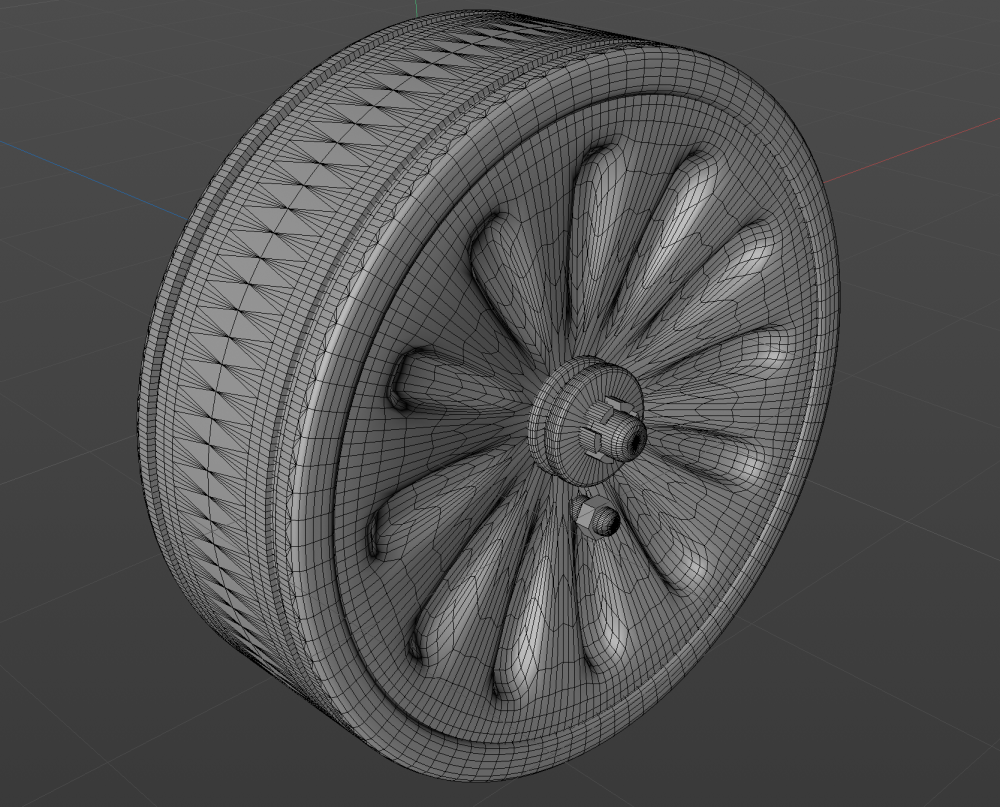
Posting stuff online can be very rewarding. Yesterday someone on Facebook shared photo's of his own Herkules II. He actually owns one in his collection and shared several photo's. Needless to say this results in a list of necessary changes I'll need to make. First: the wheels. My 3D skills are not good enough to replicate the wheels 100%, but I can make them way more accurate than my first try.

-
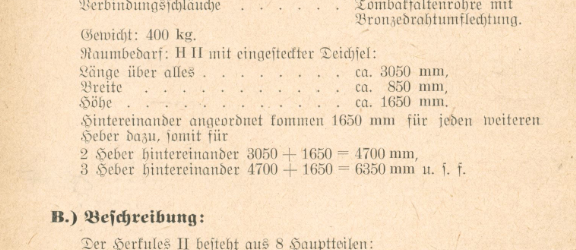
Great stuff. Read through the manual and found the dimensions. Length and width were almost spot on!
-
Ready for the first print. movie2.mp4
-
This actually is a pretty easy kit to build. Quite enjoyable after a few Special Hobby projects…

-
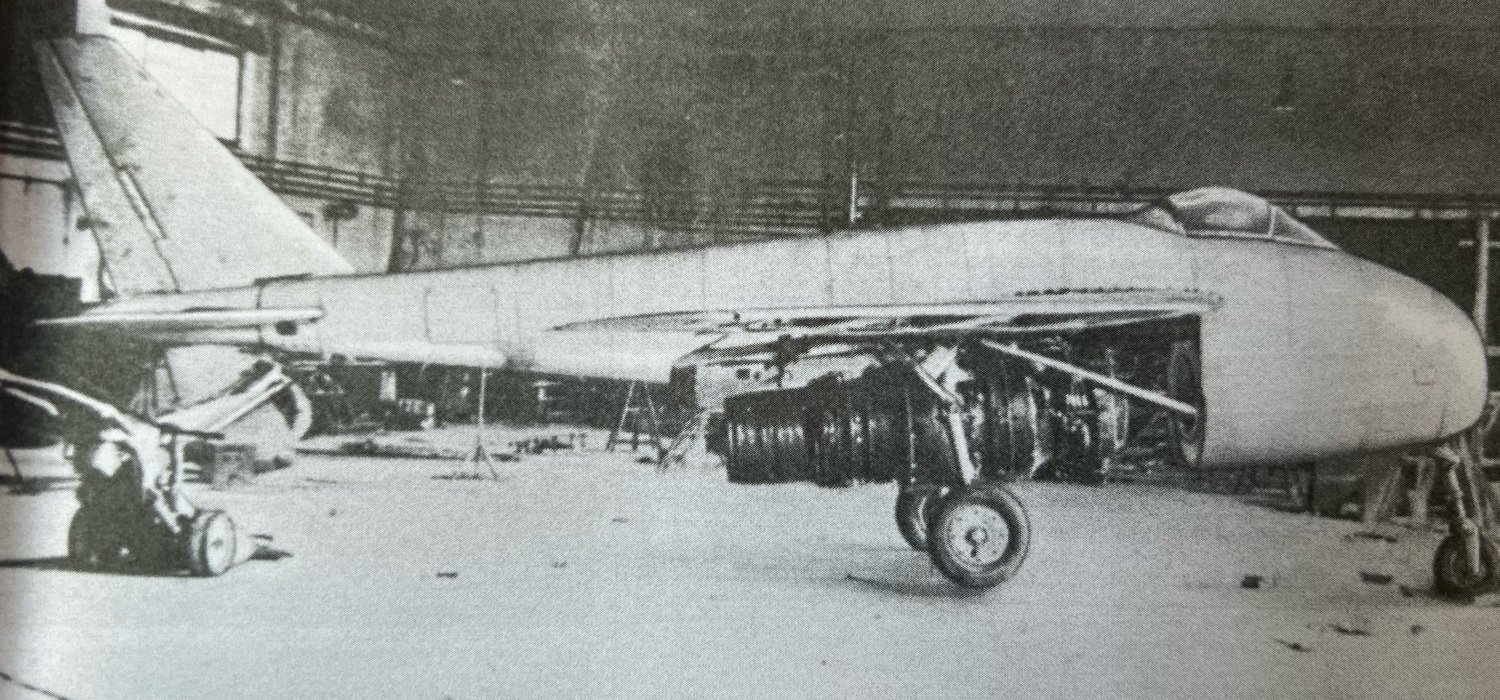
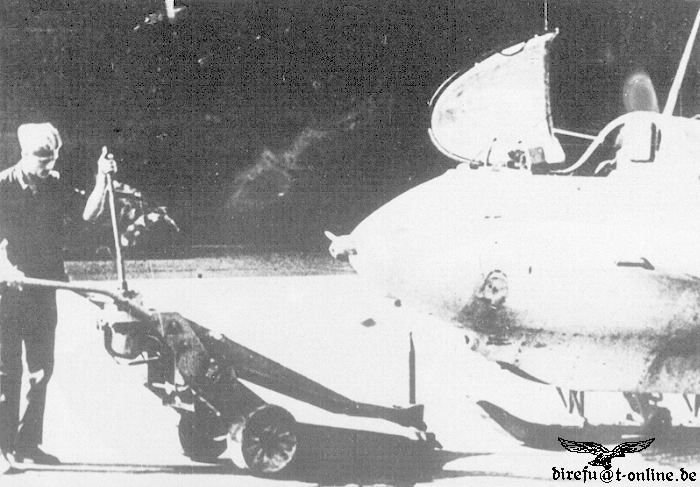
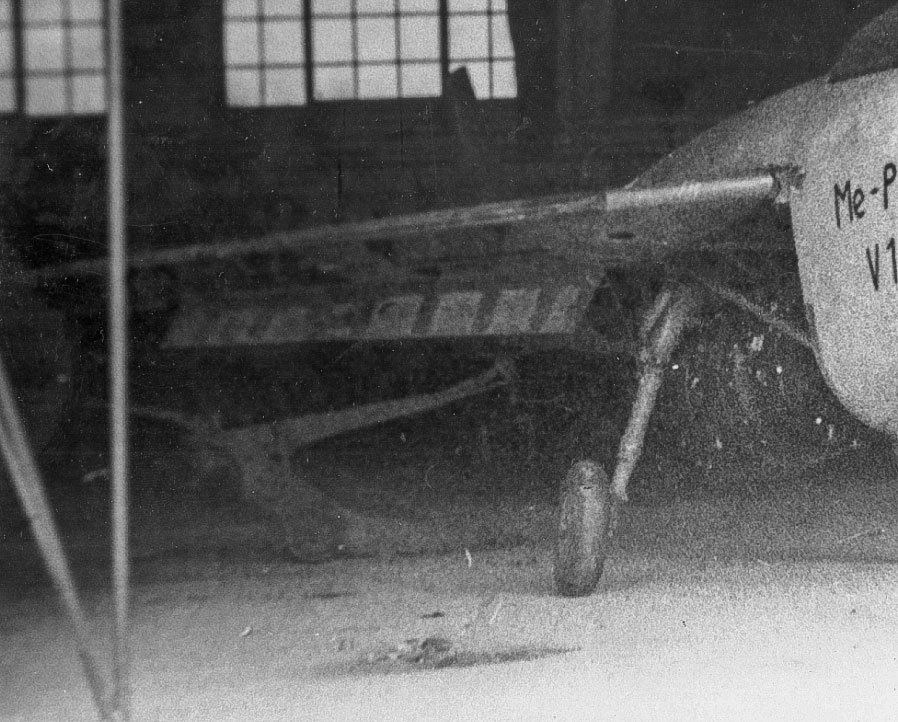
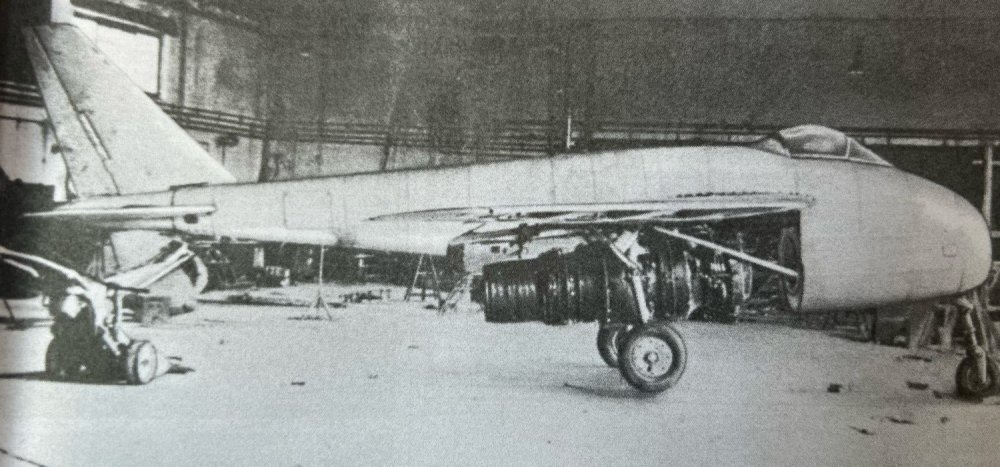
That's the Herkules II done. I put the P.1101 on its feet as a dry fit to measure the height of the tail. About 6cm is what the Herkules should reach. As far as size of the Herkules I can only go by this photo. A Luftwaffe ground crew standing beside it and the nose of a Me163. Alsmost ready for a first 3D print.


-
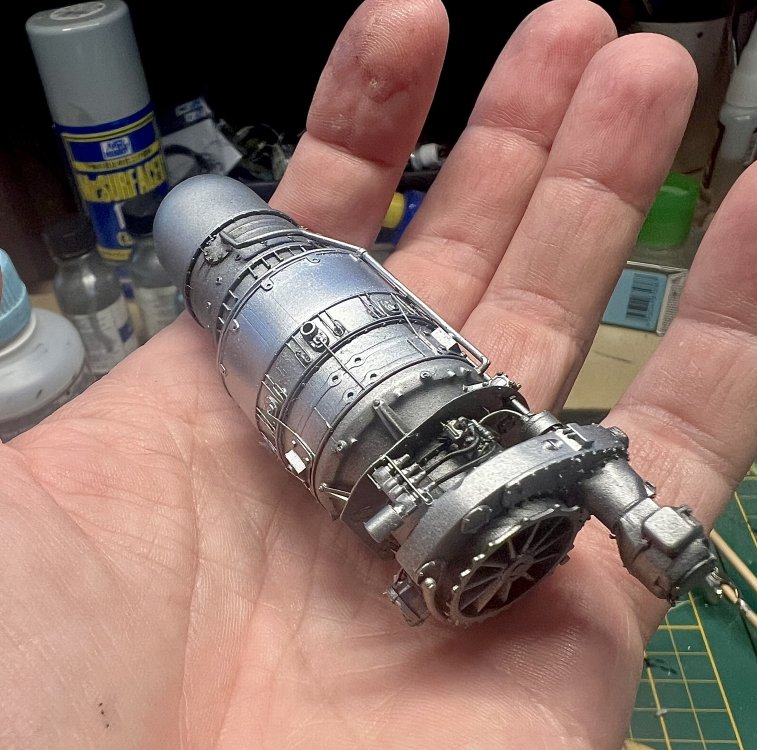
First alclad on the interior and engine

-
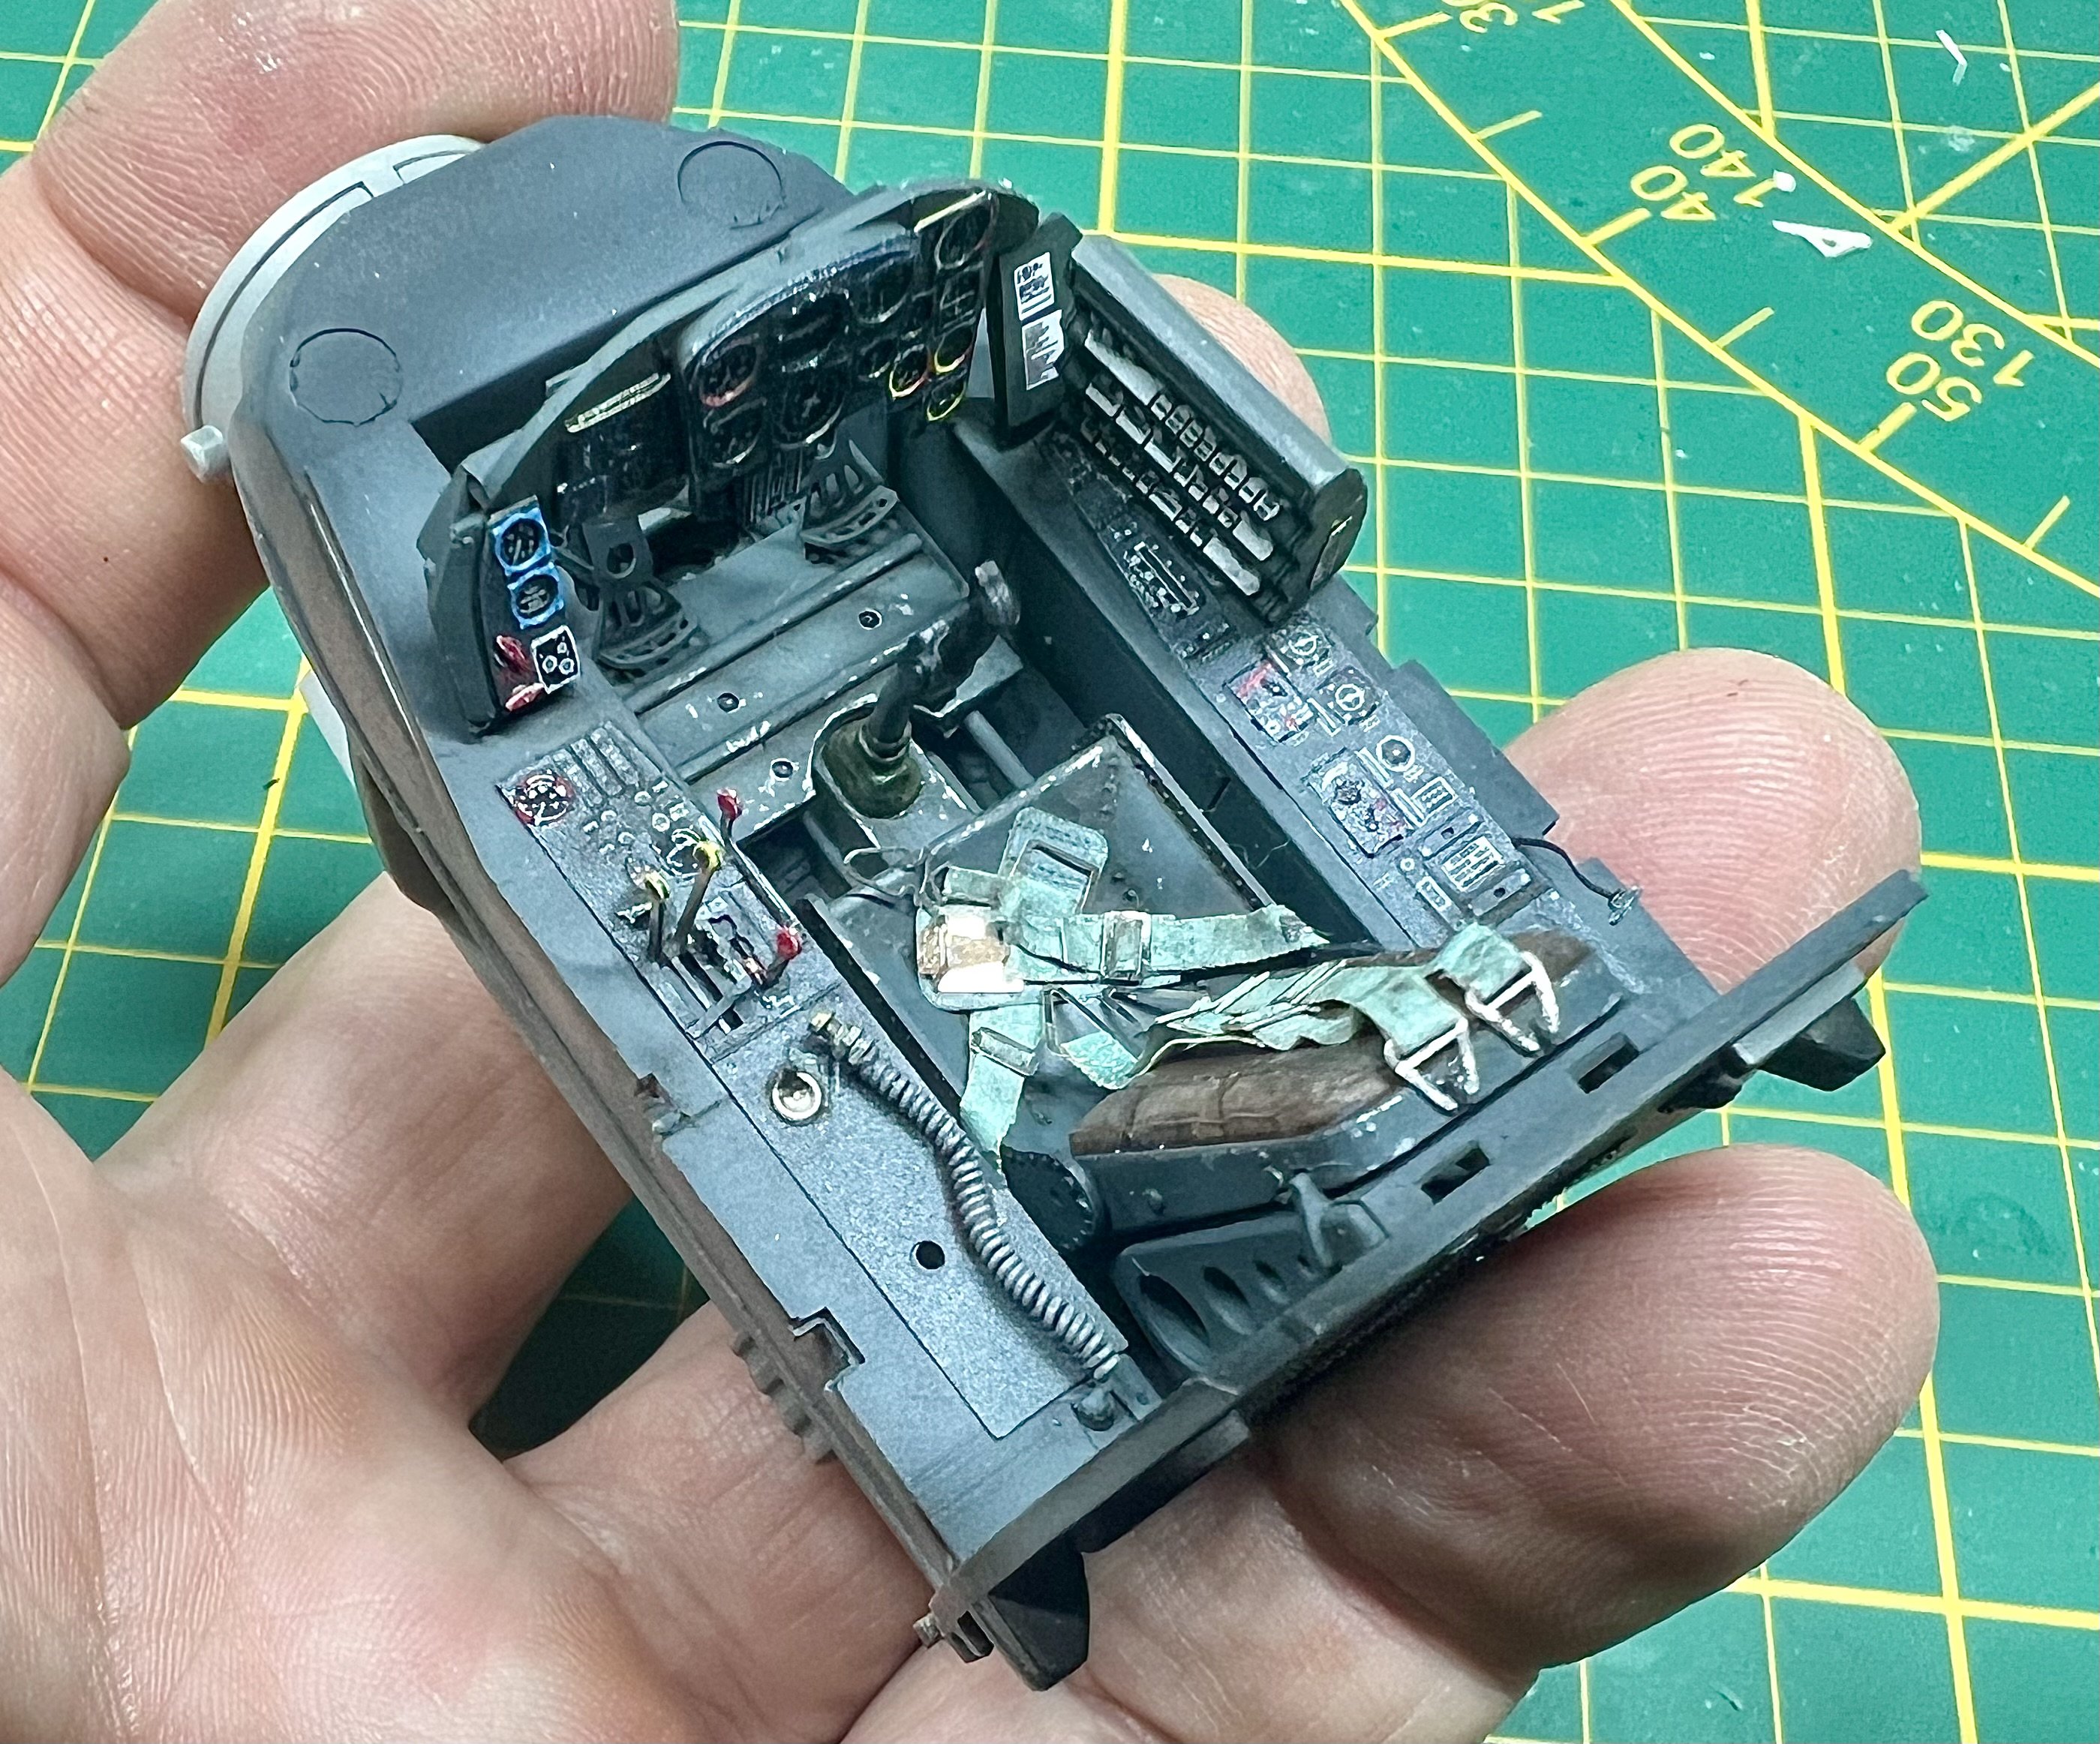
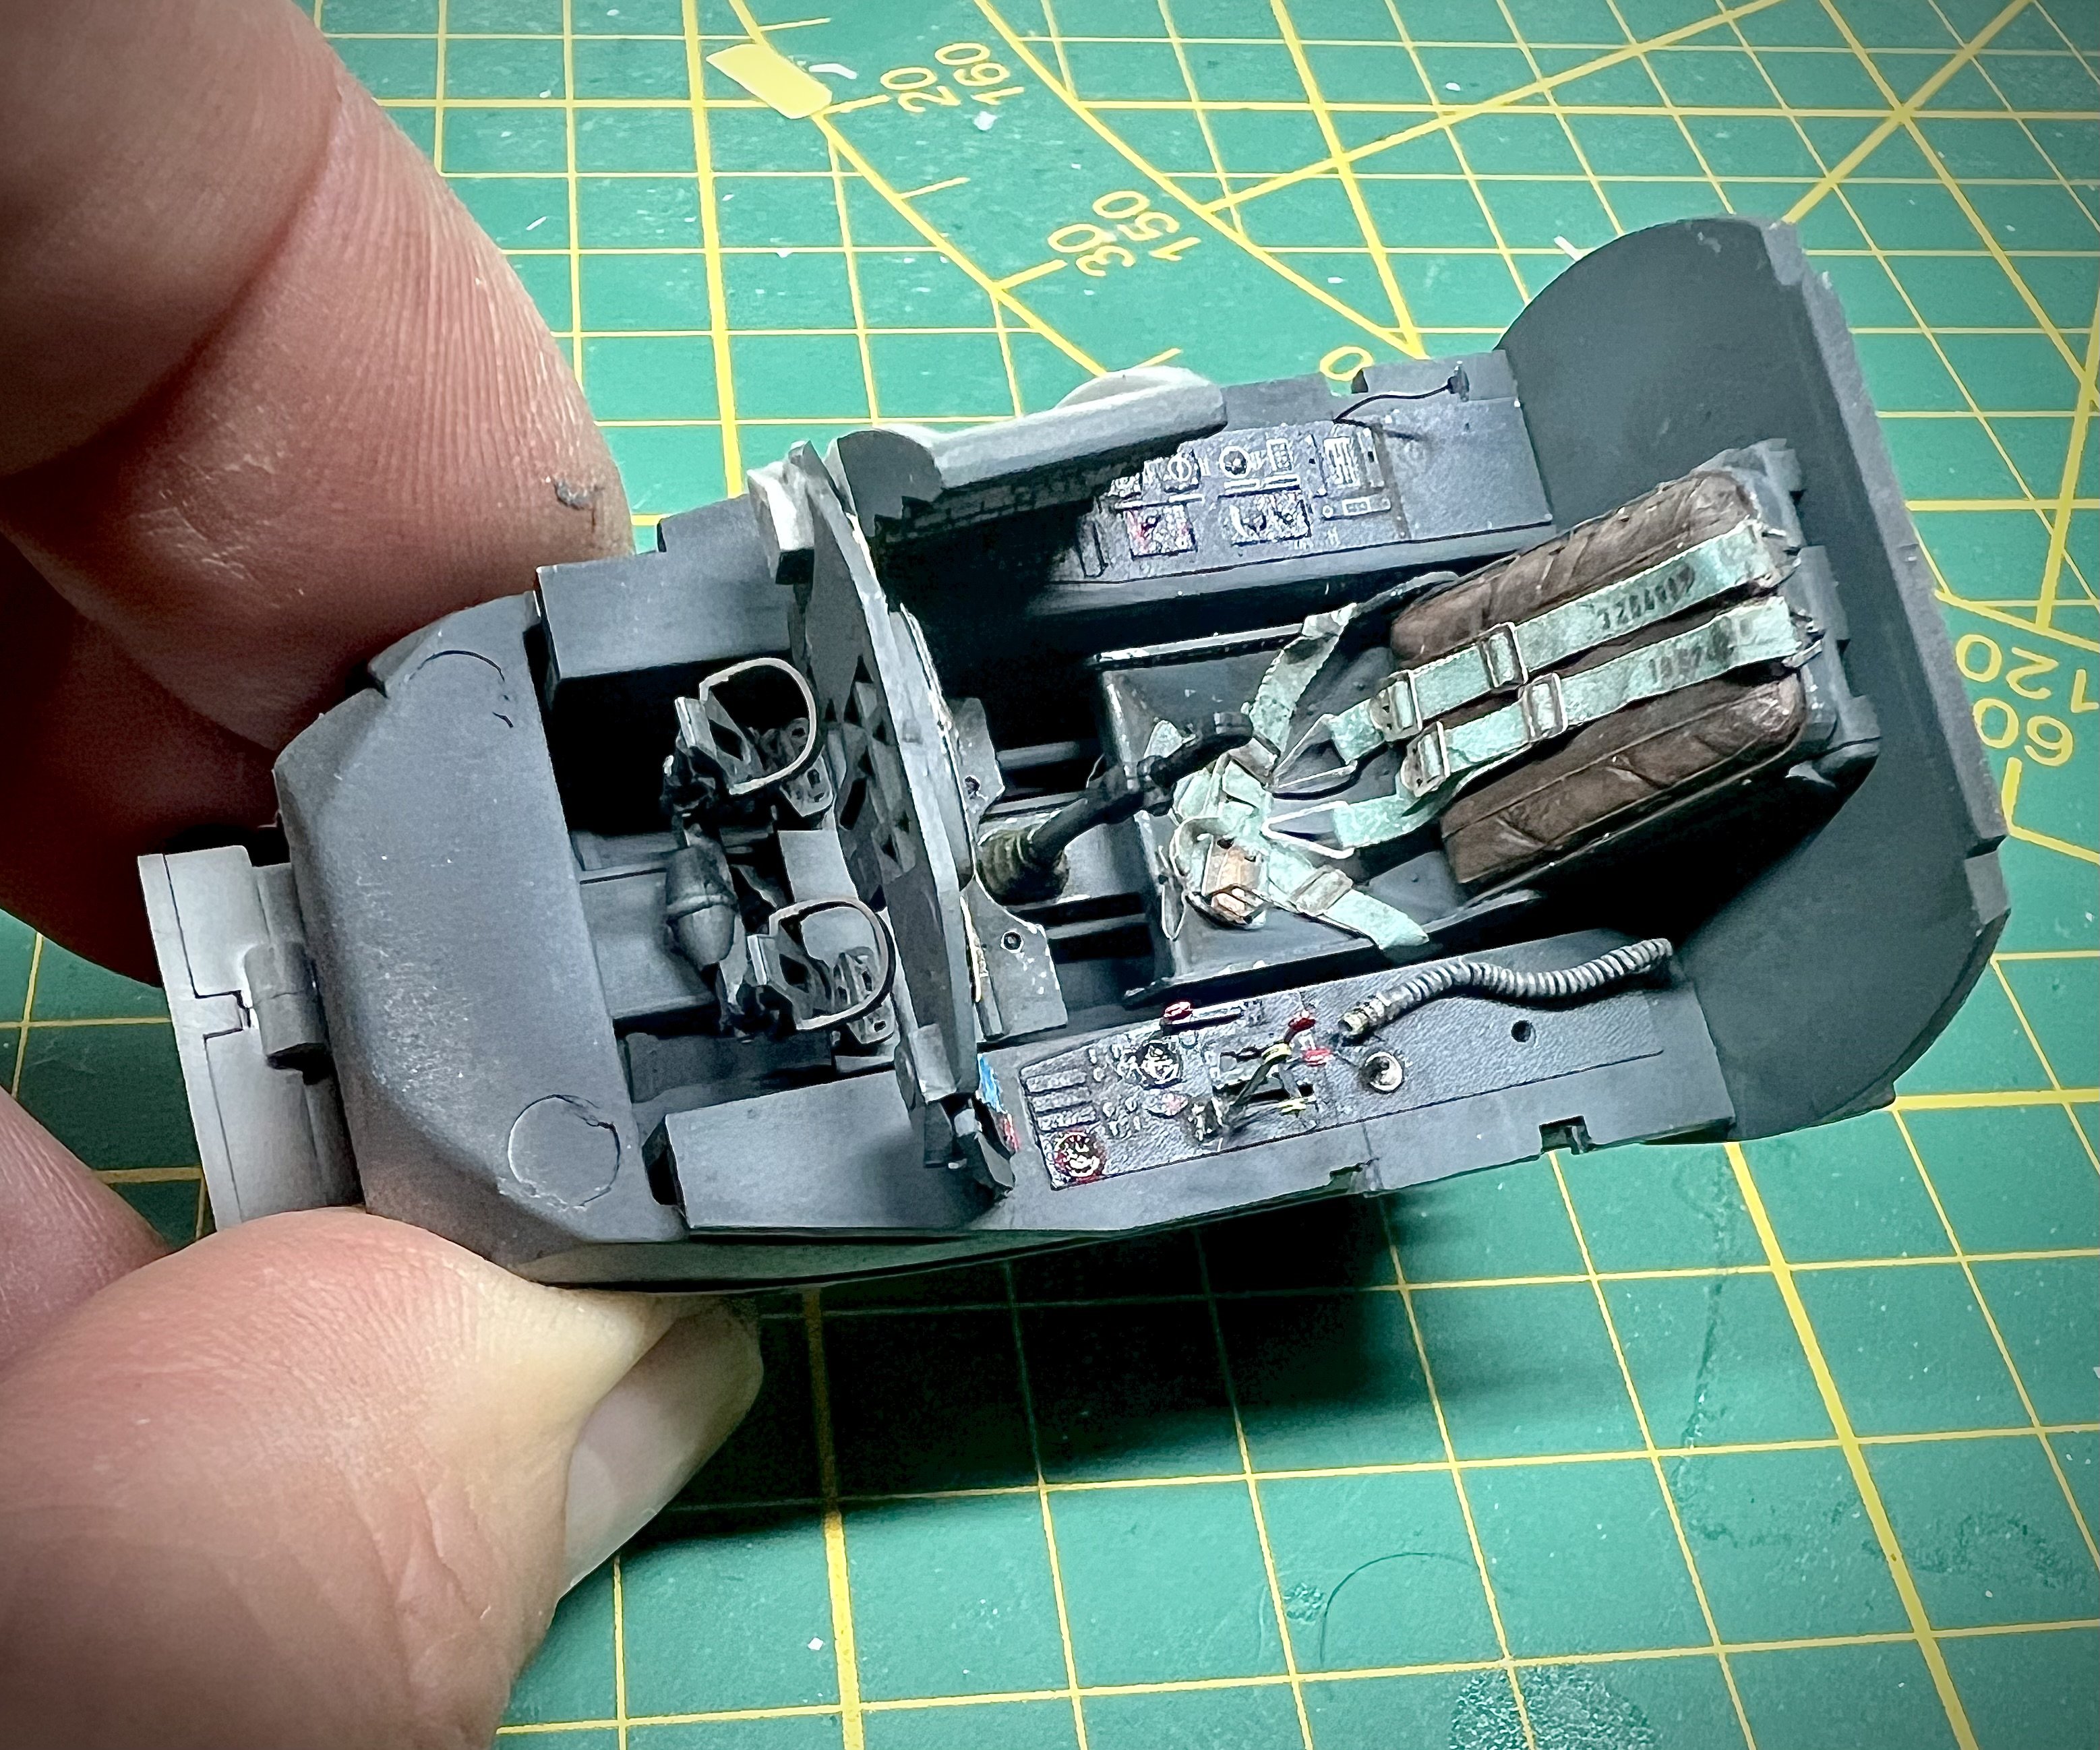
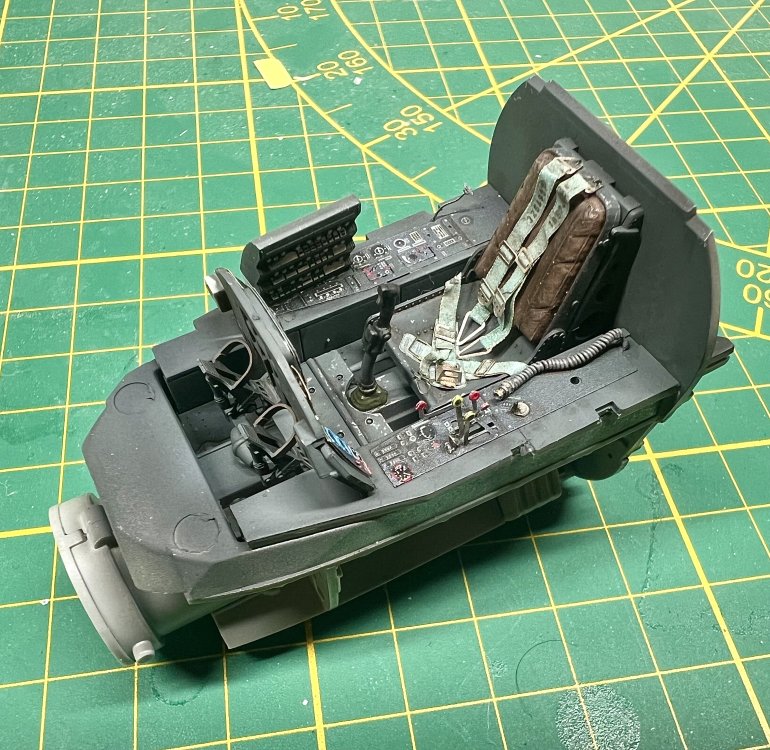
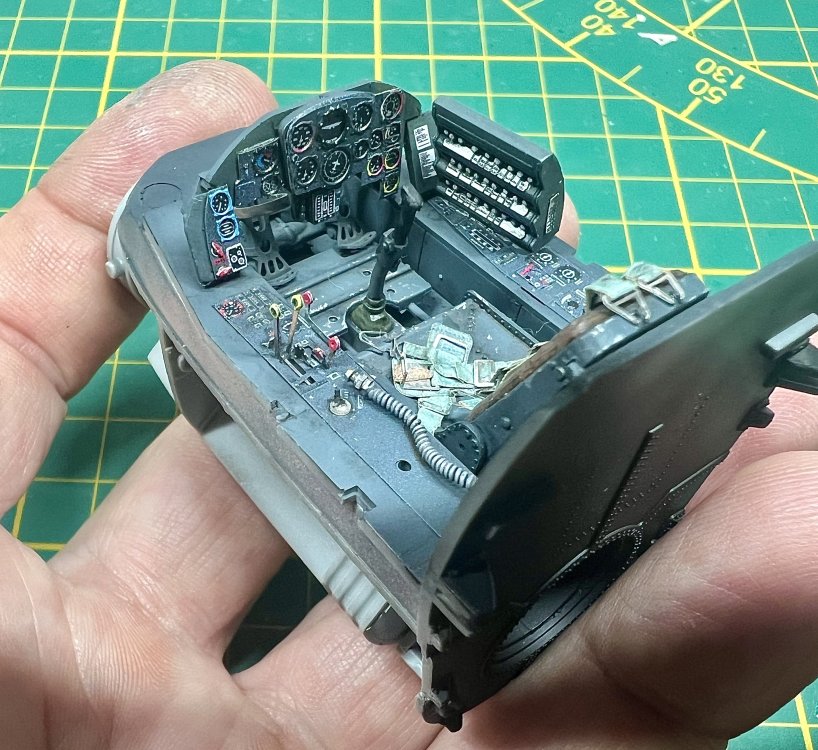
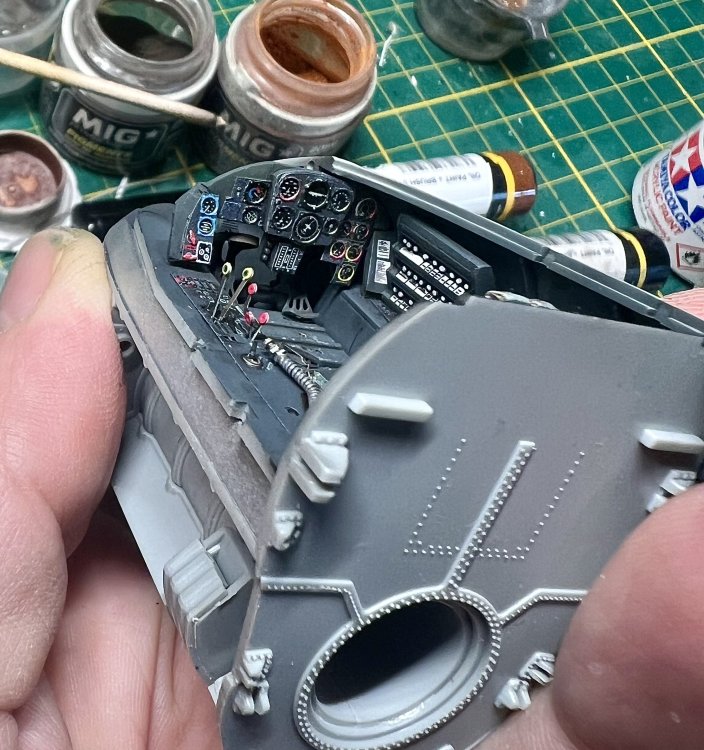
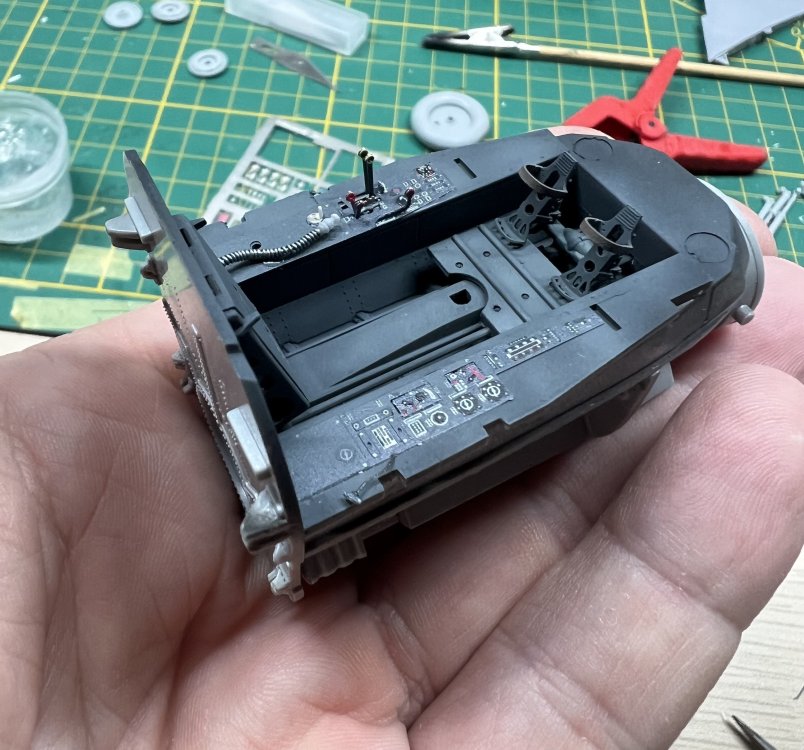
Here are some shots of the finished pit.


-
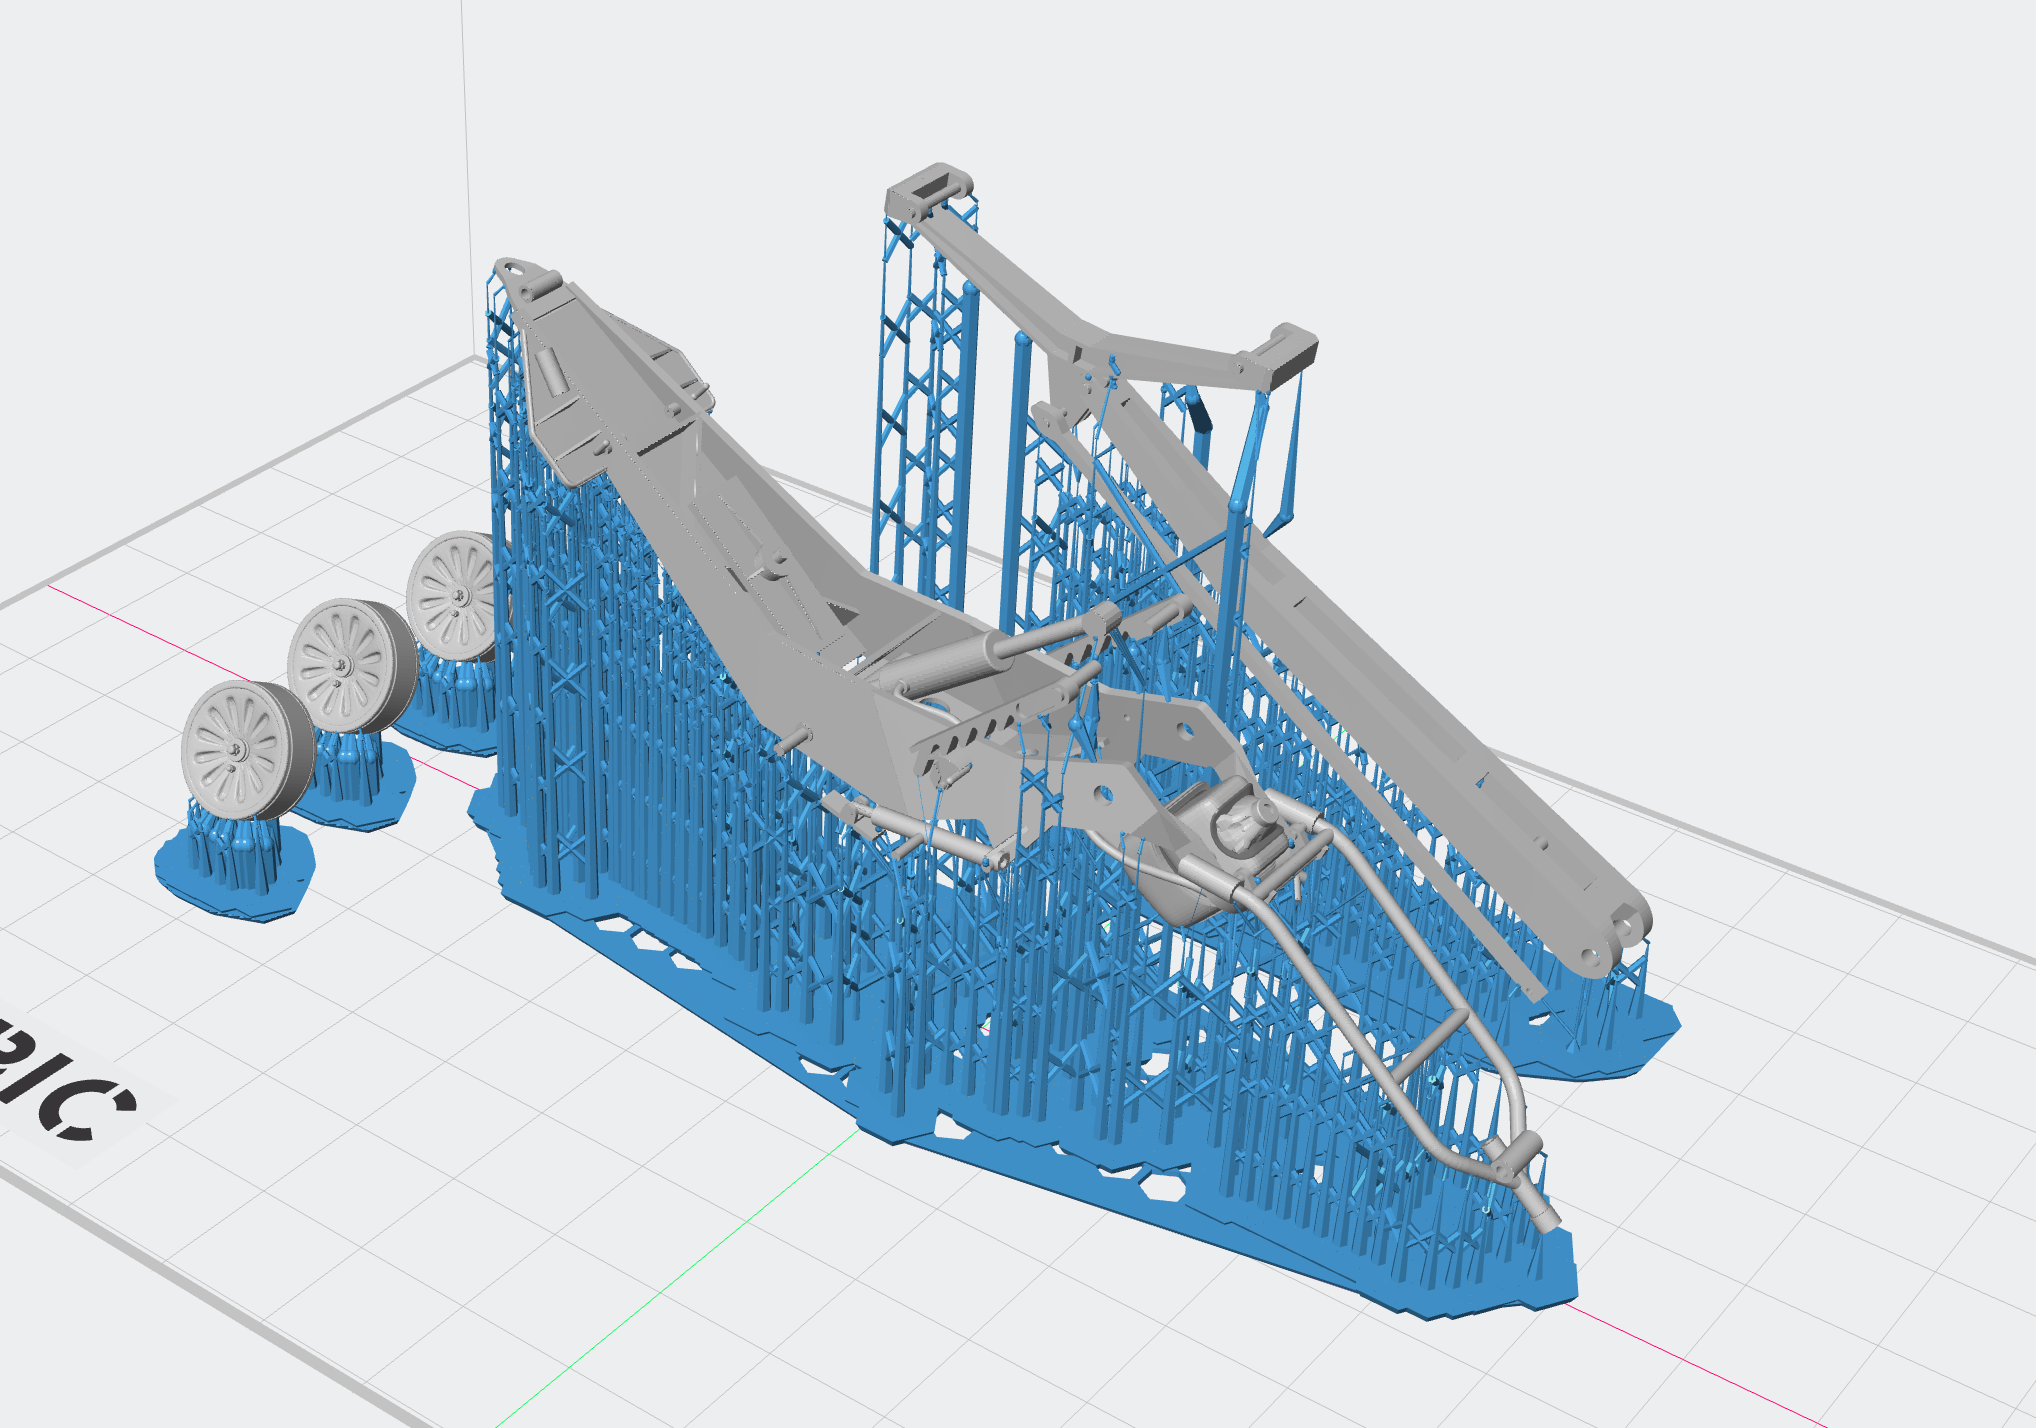
Almost ready for the details and thinking about how to divide the parts for optimal 3D printing.

-
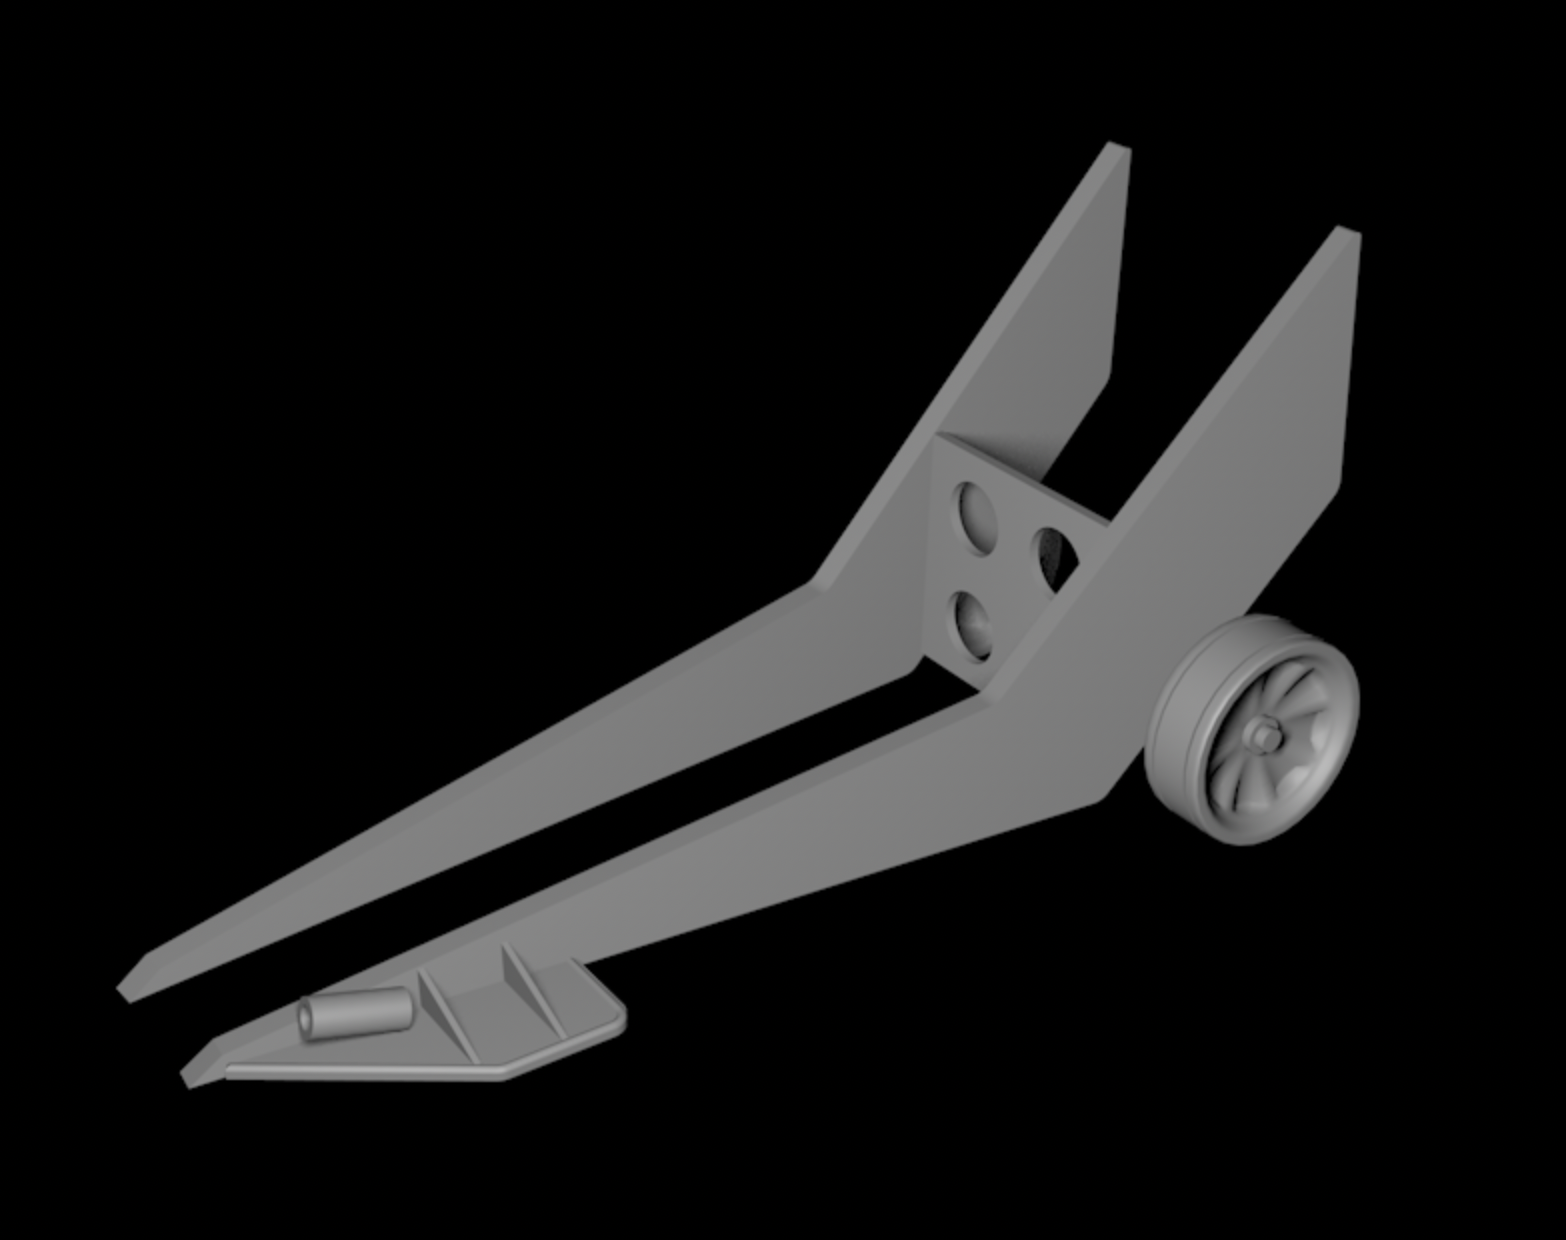
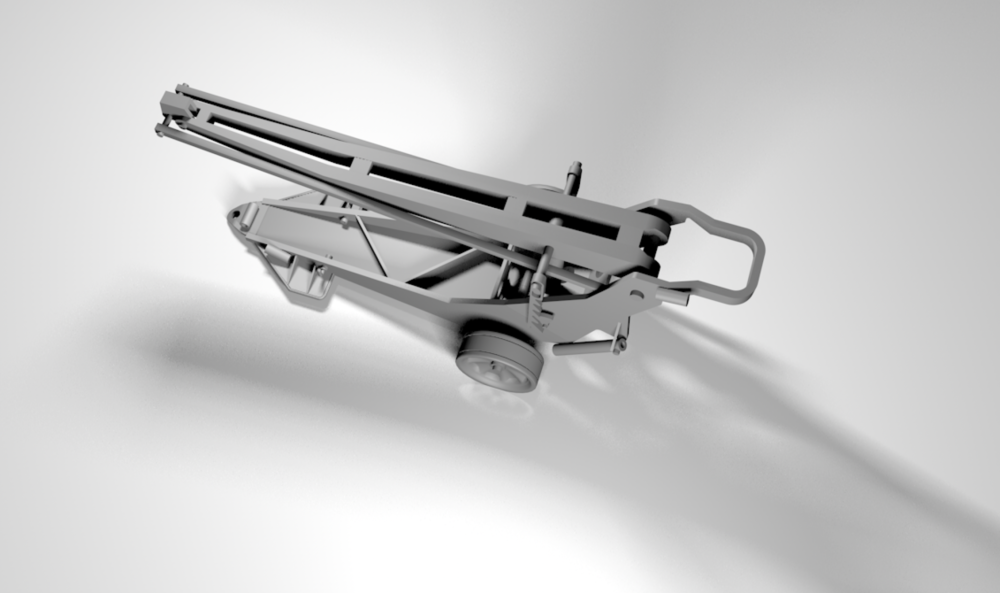
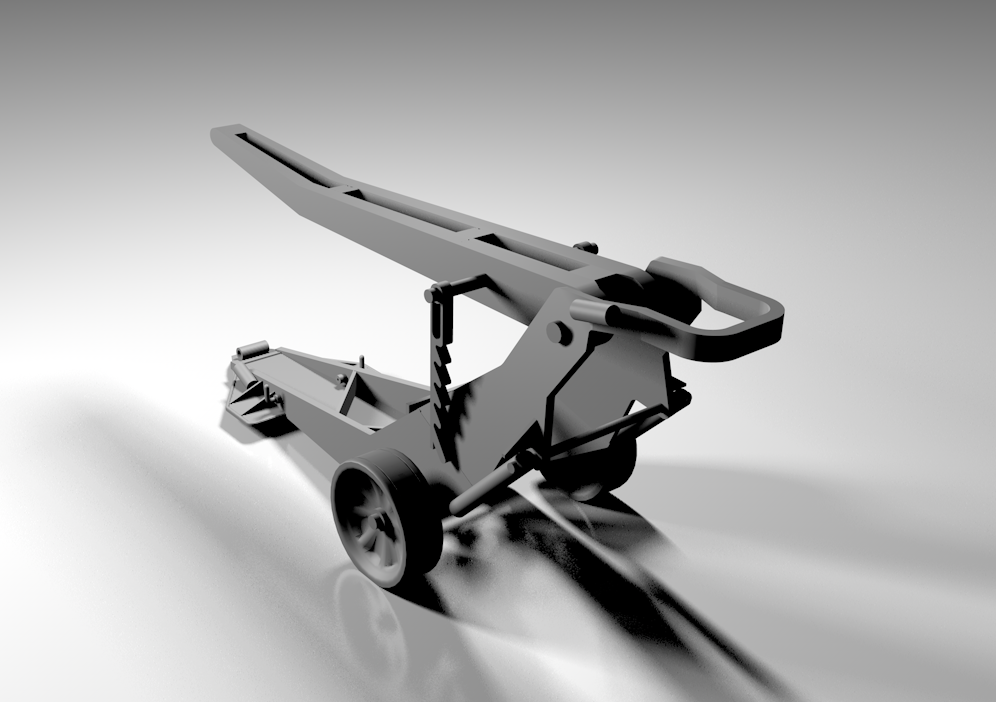
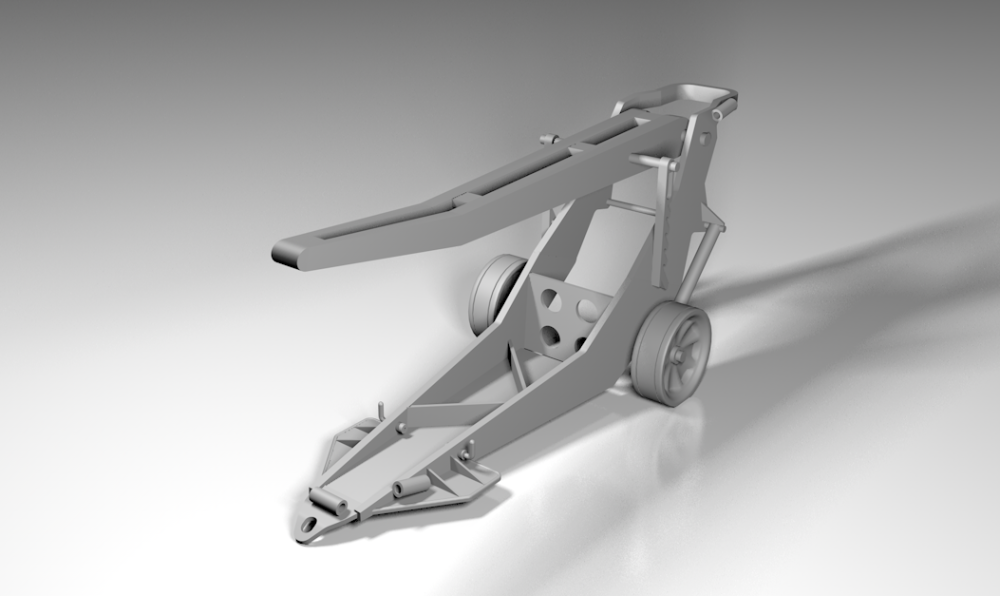
Drew the cradle, but left out the 'hammock', since I'll make that from masking tape. Only need to measure the exact height of the tail, in order to determine the height of the arm.
-
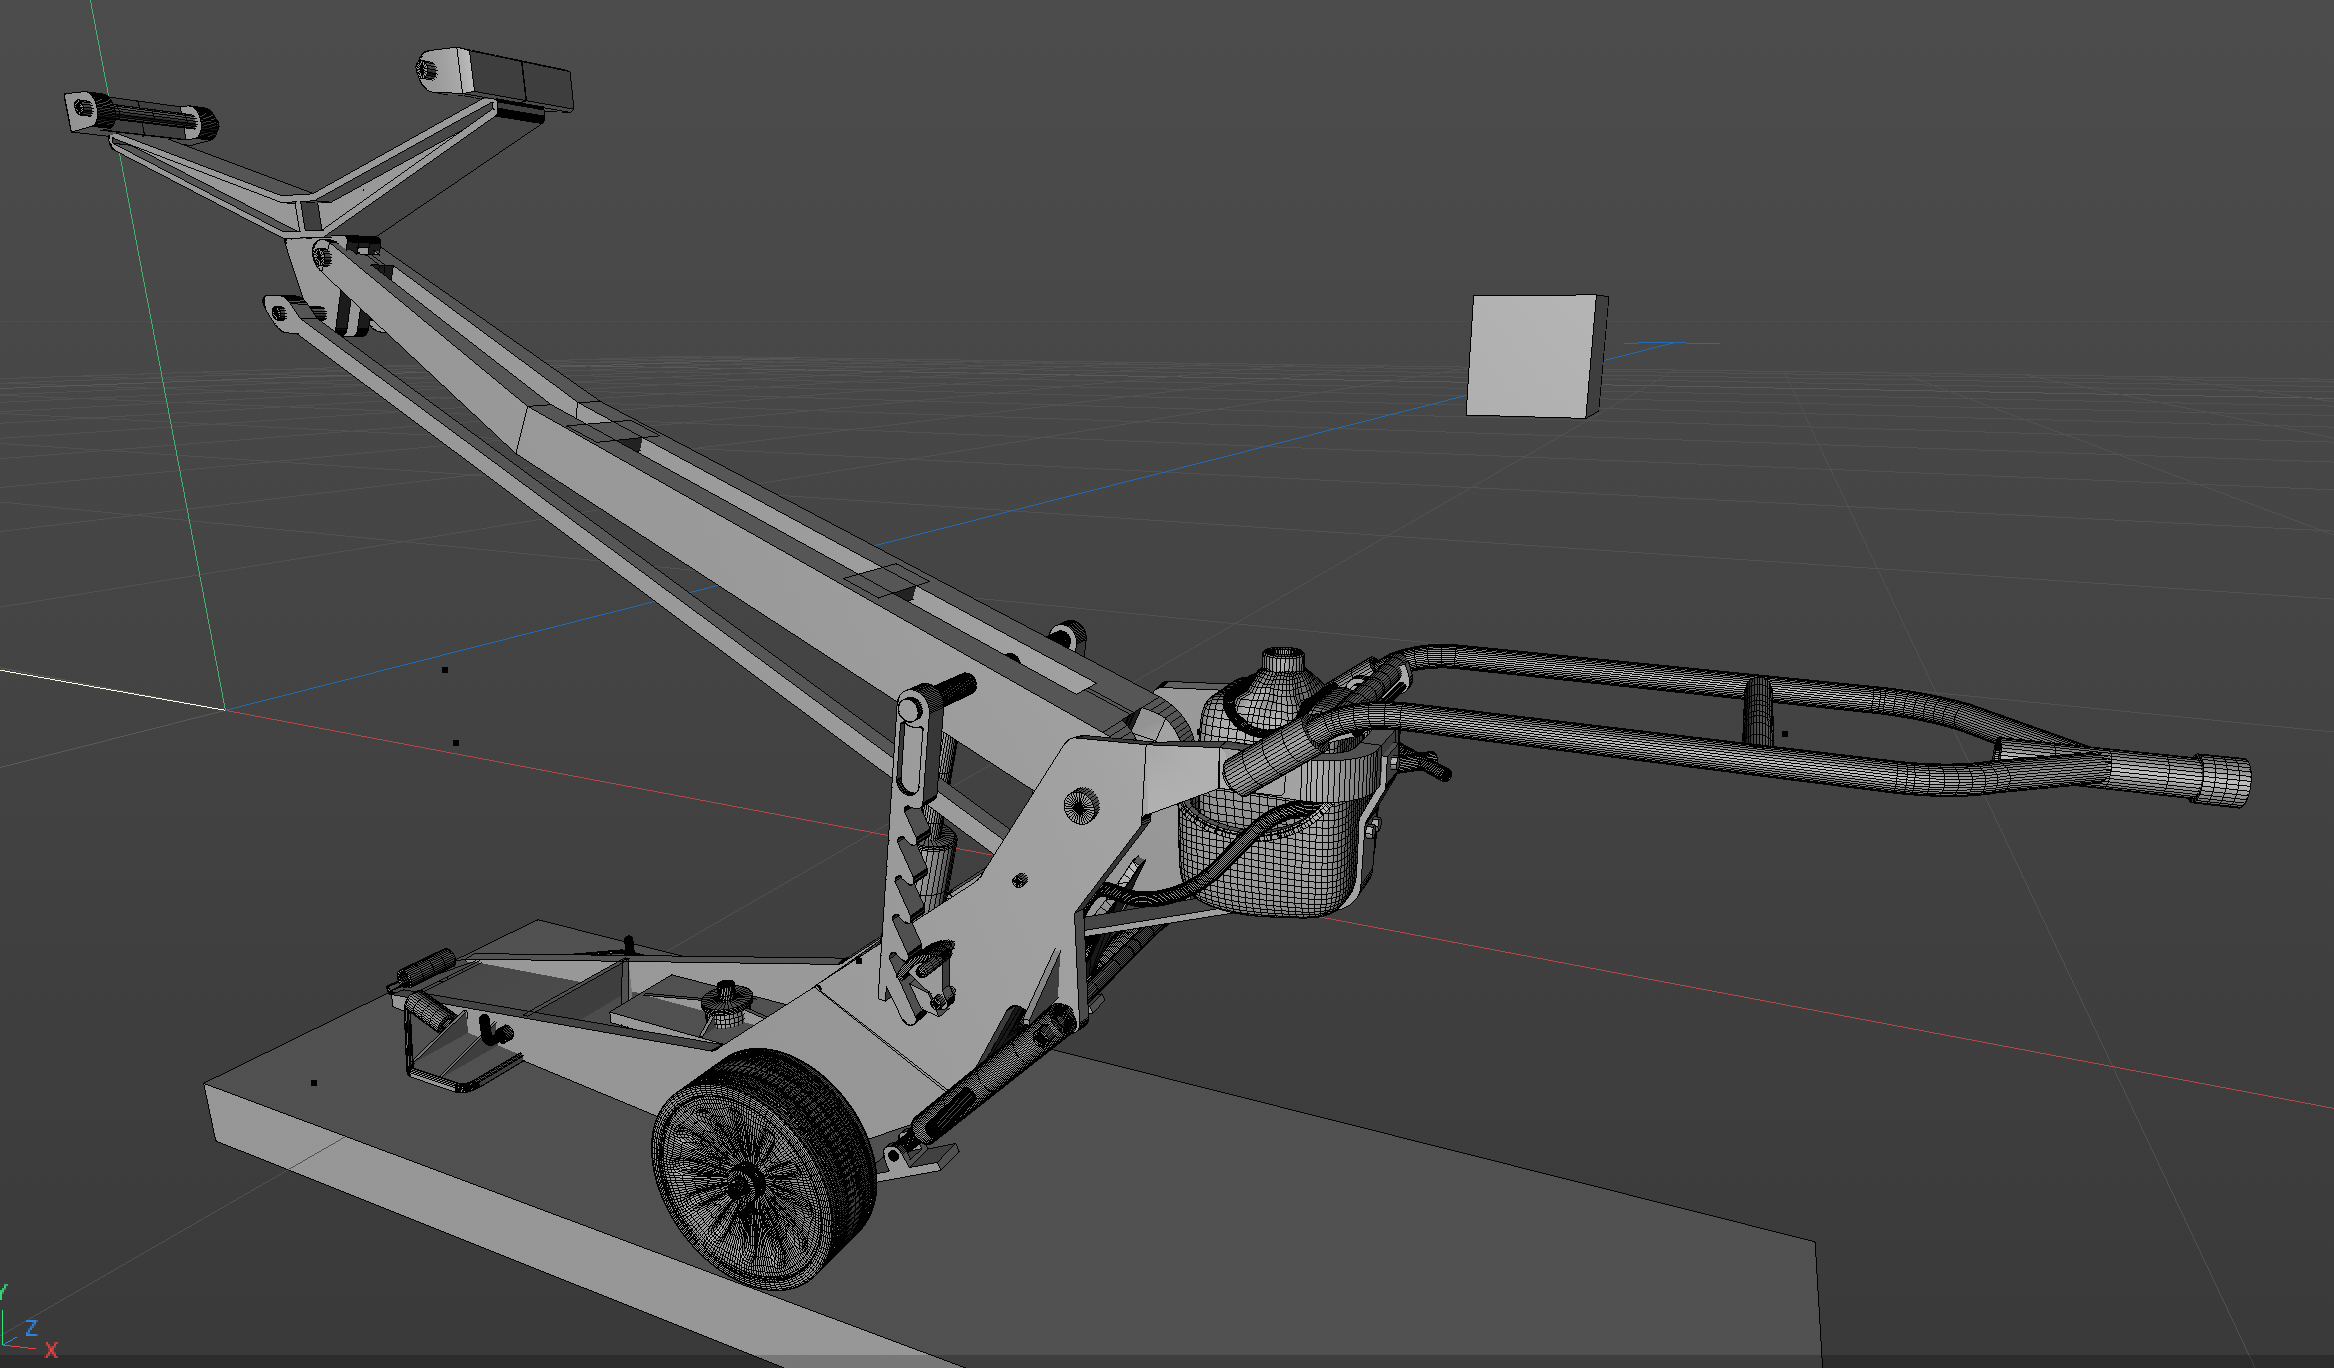
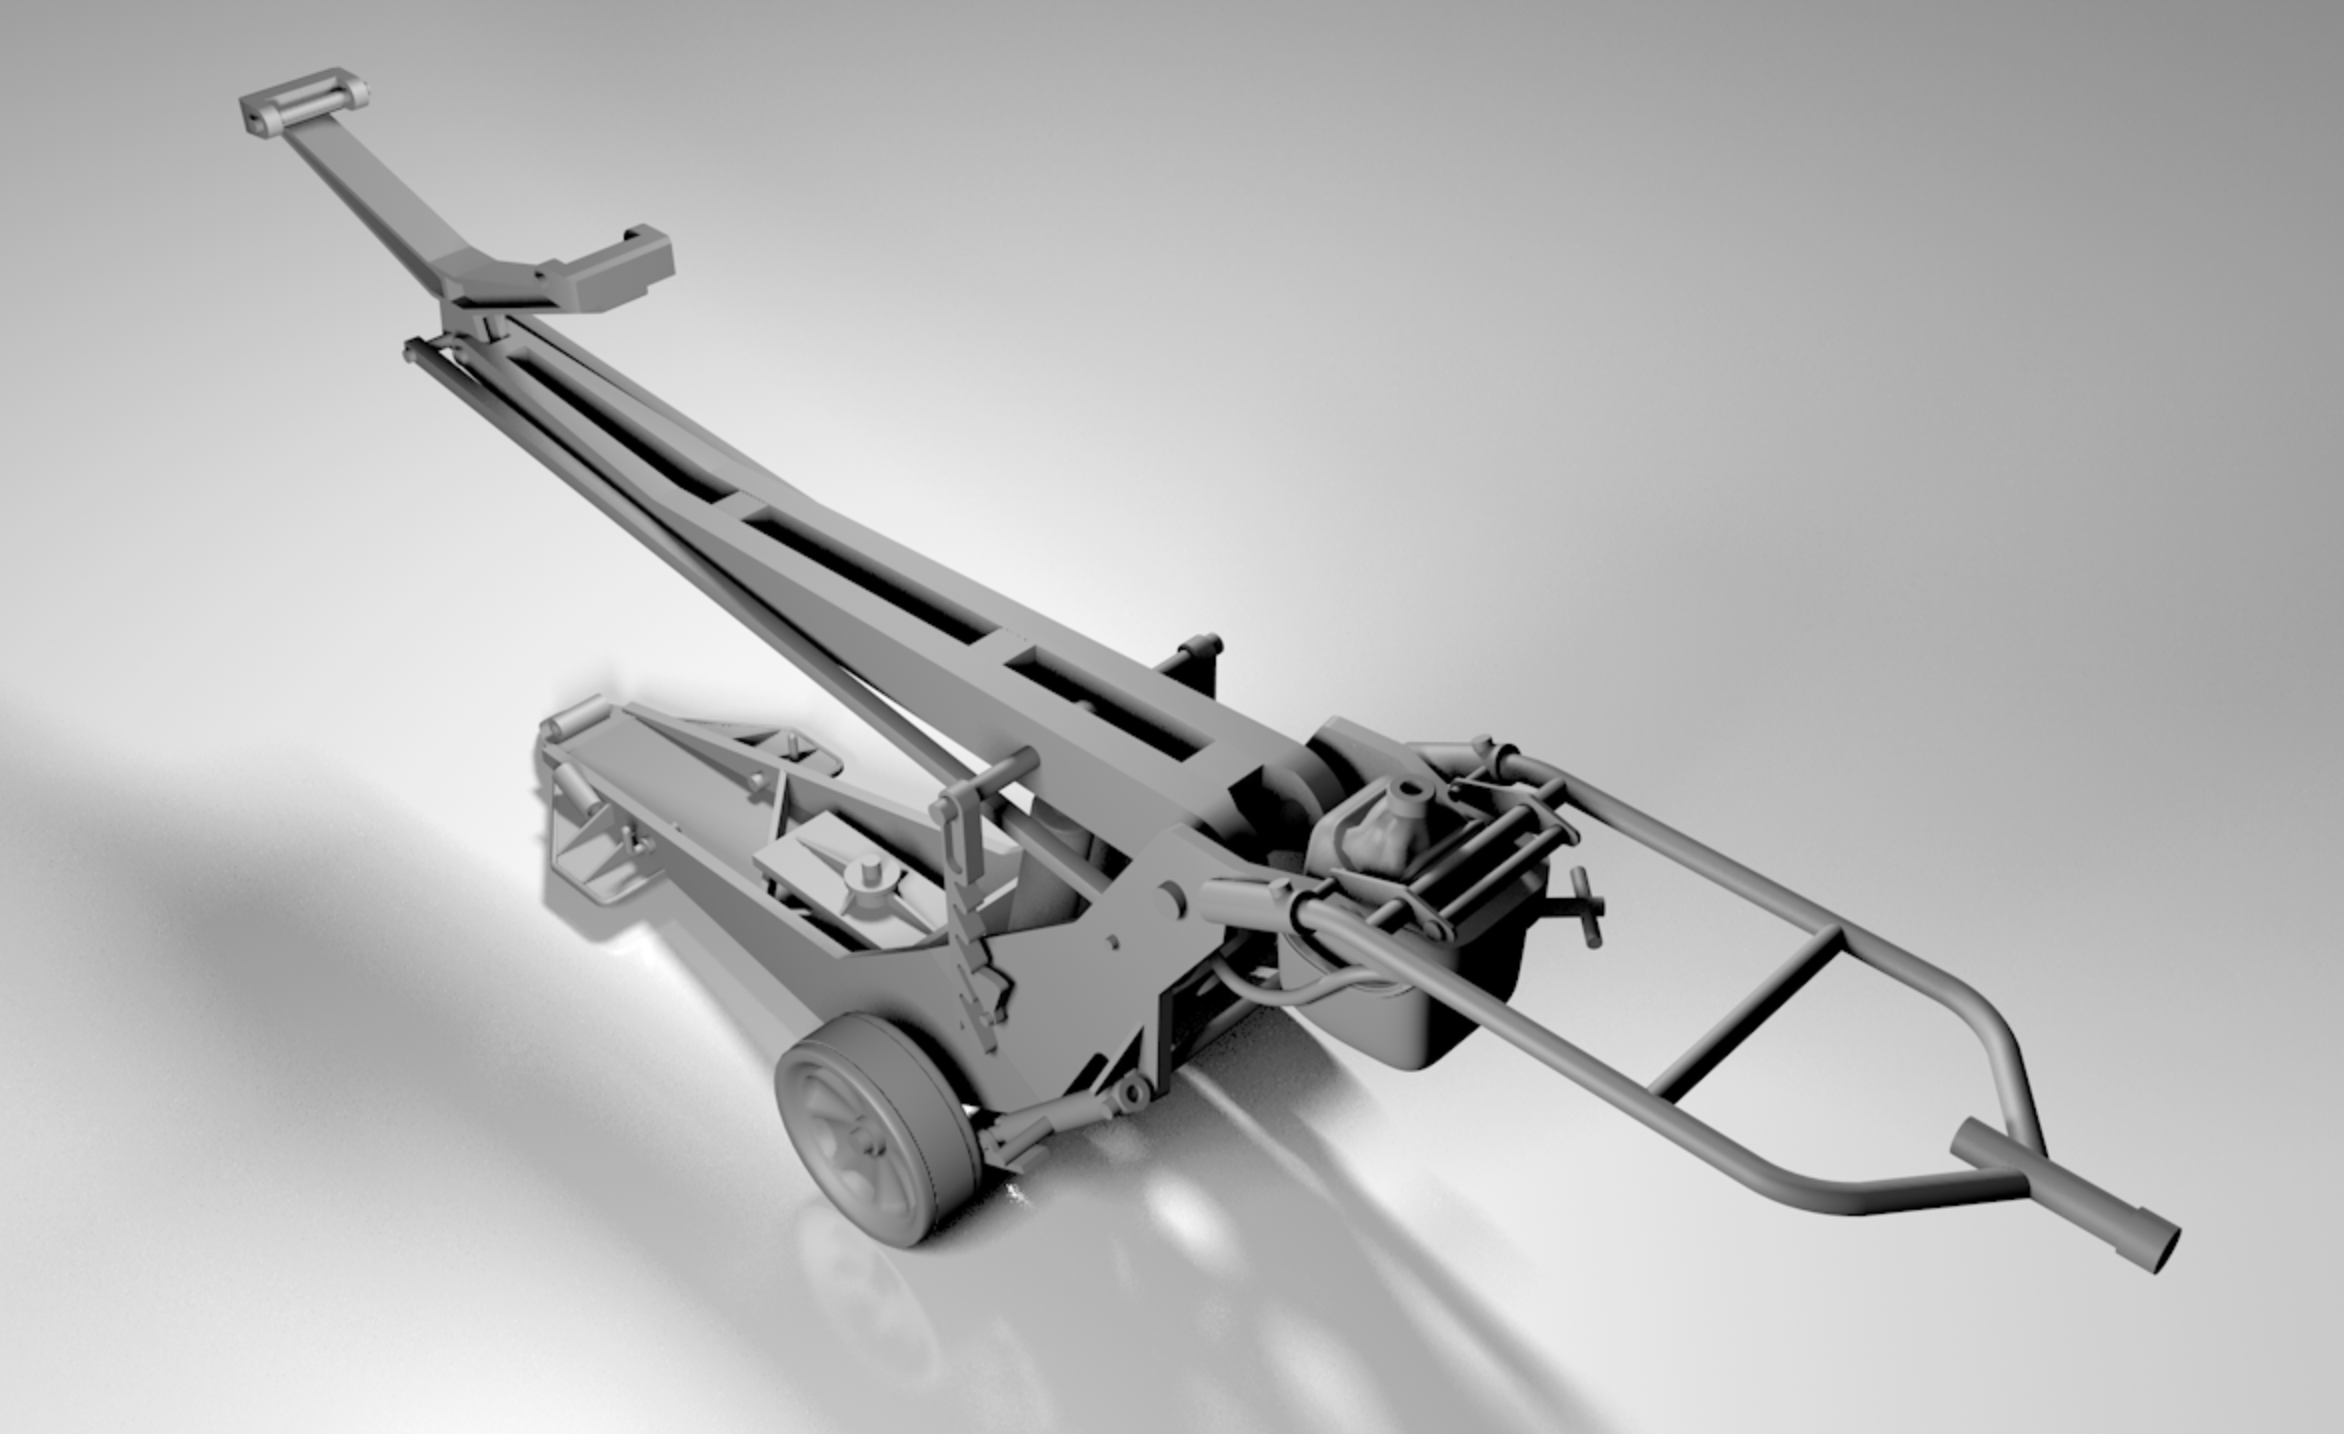
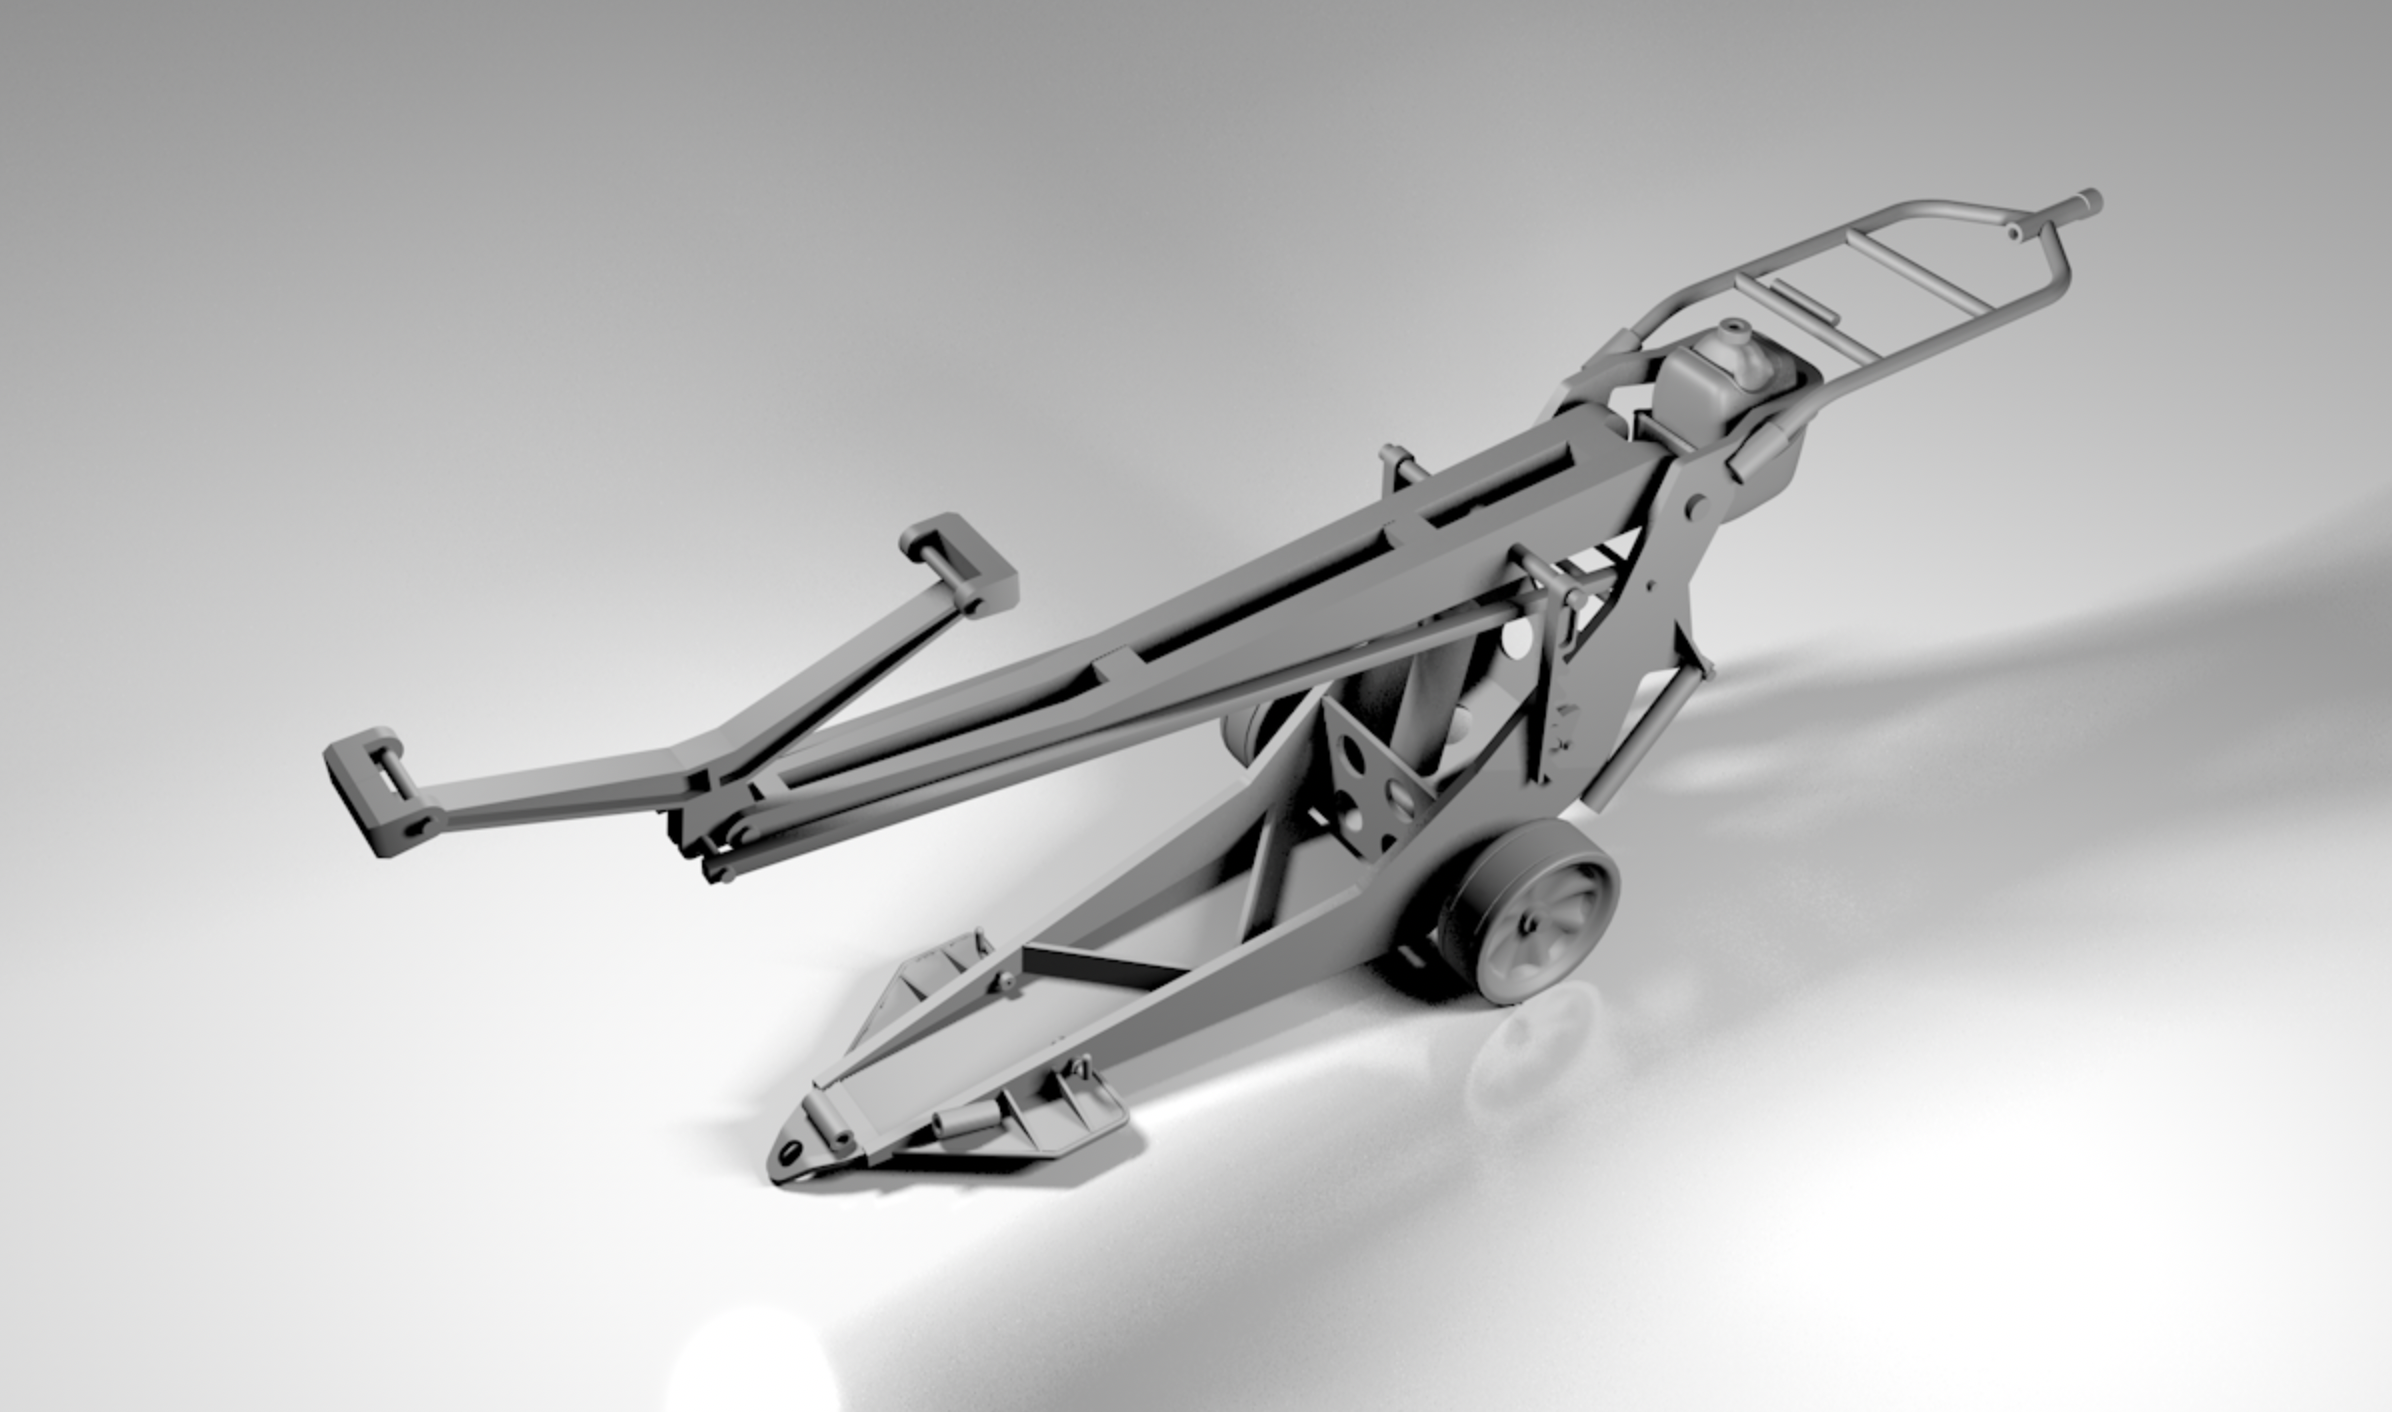
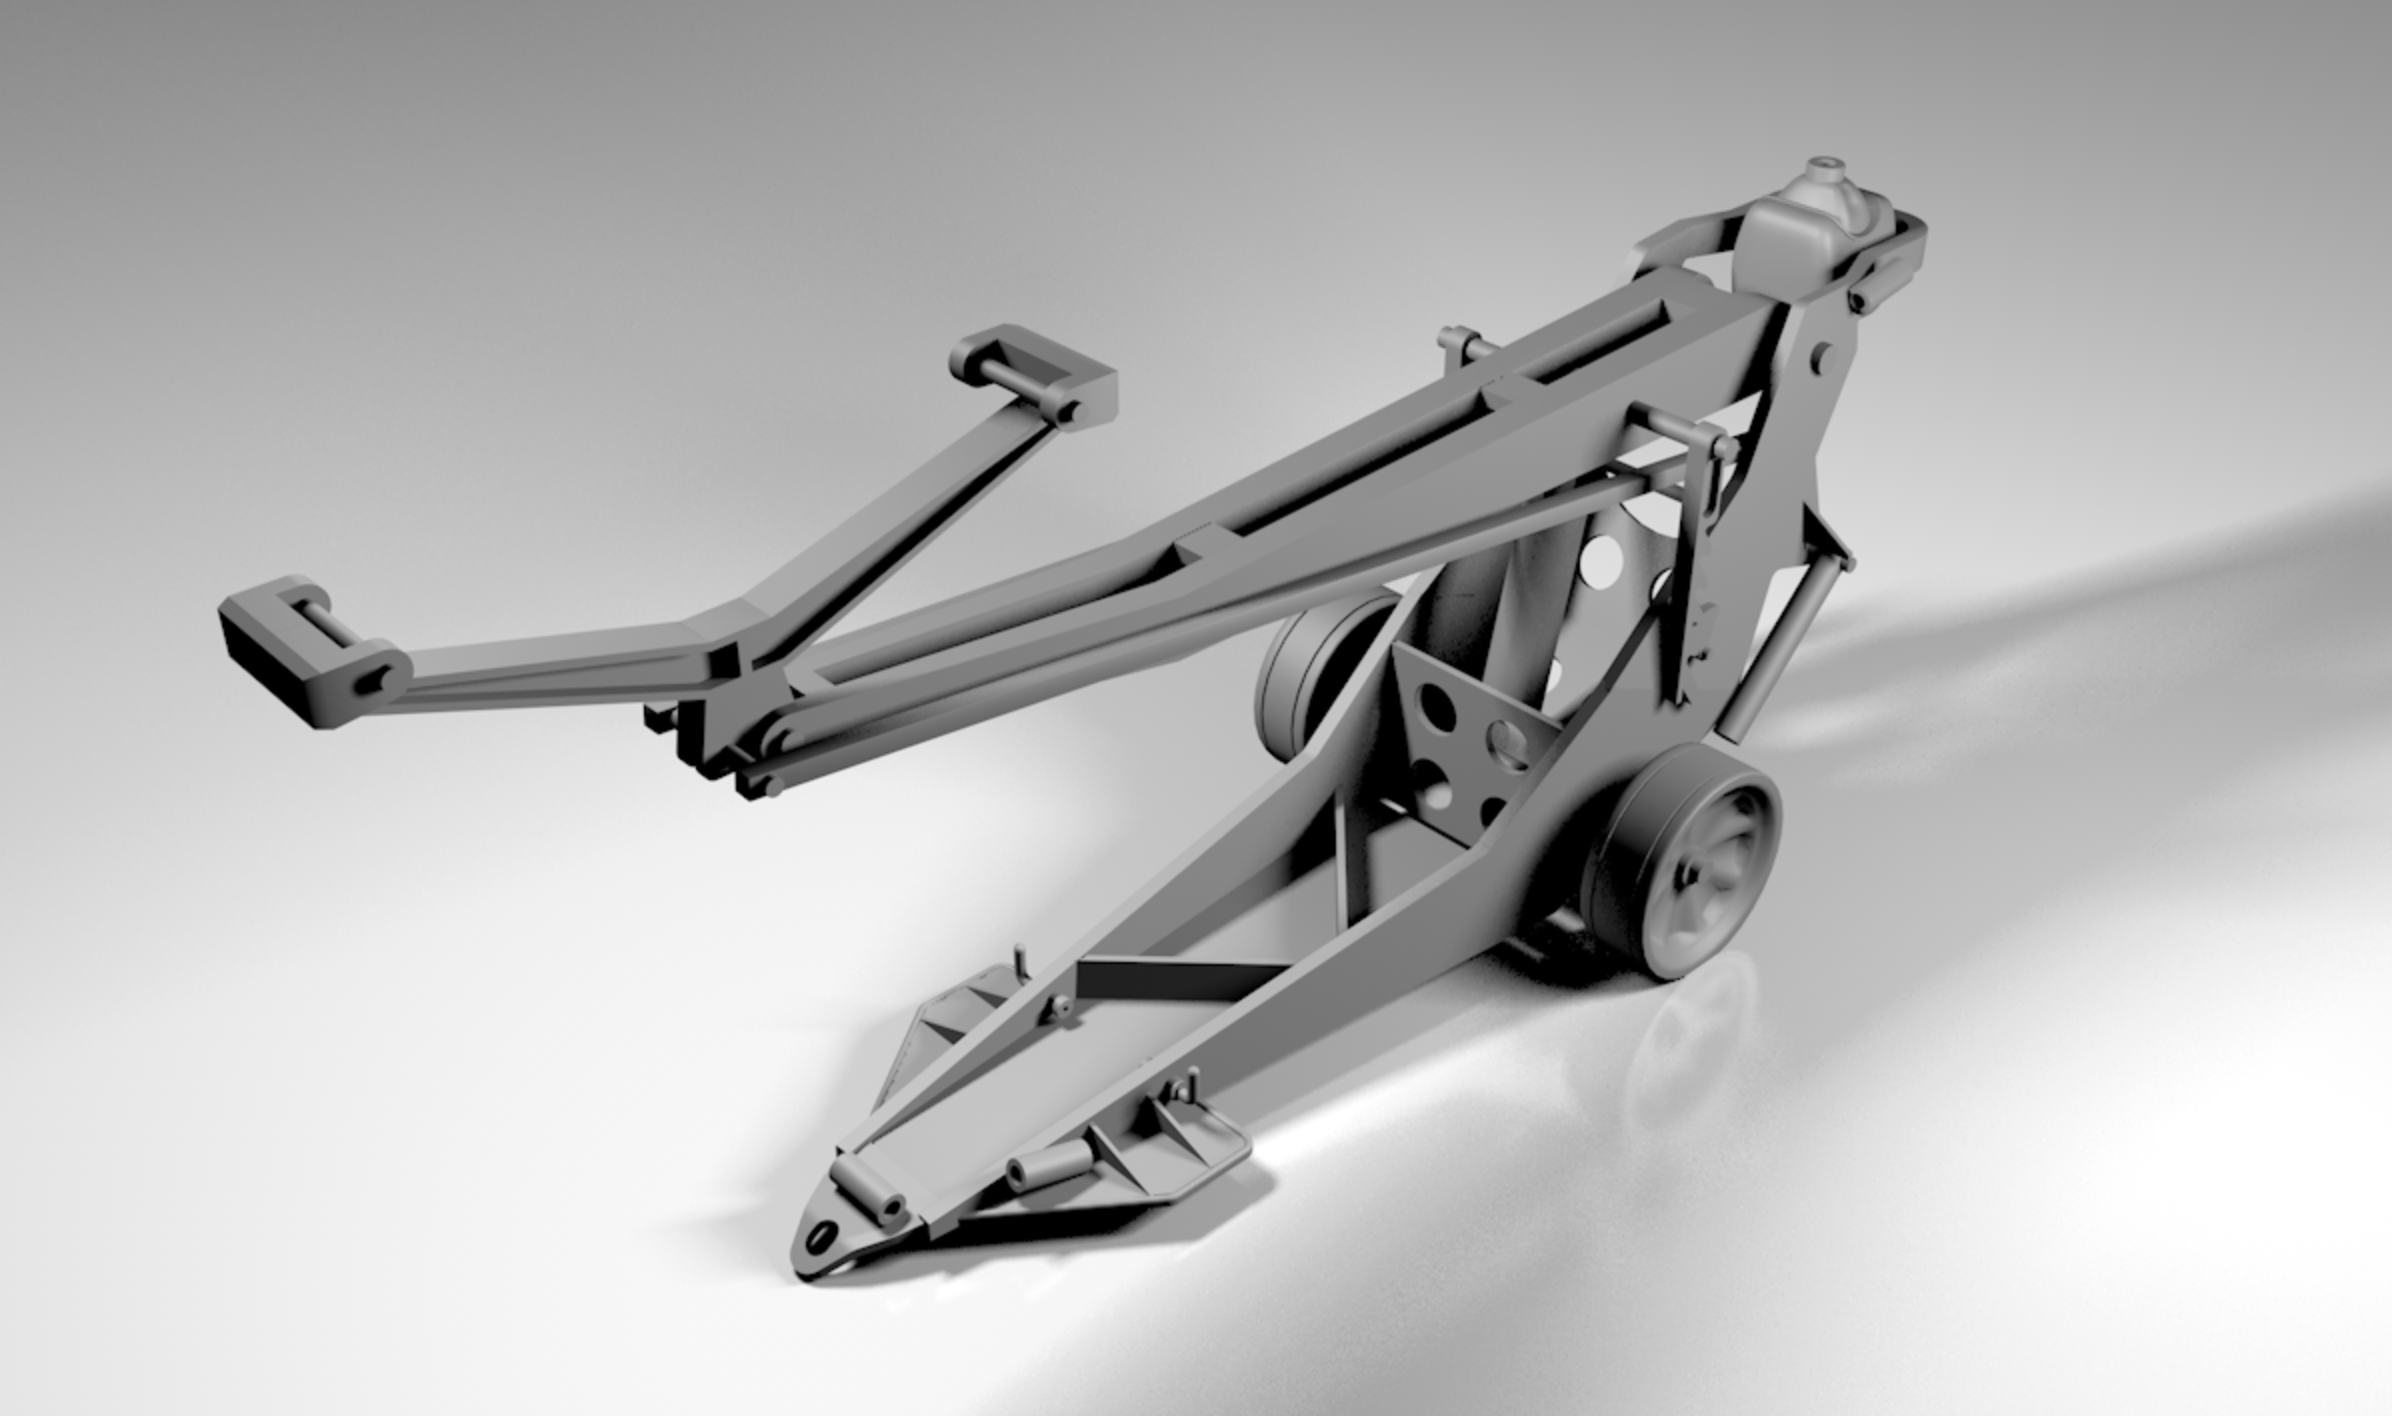
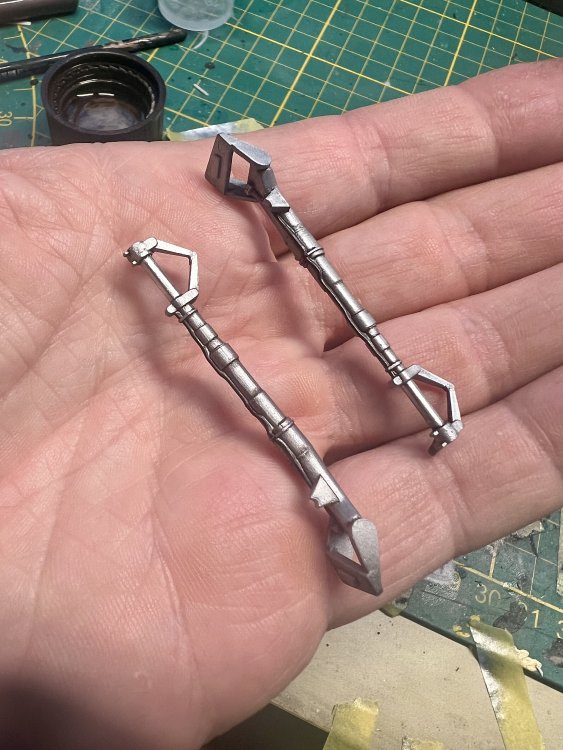
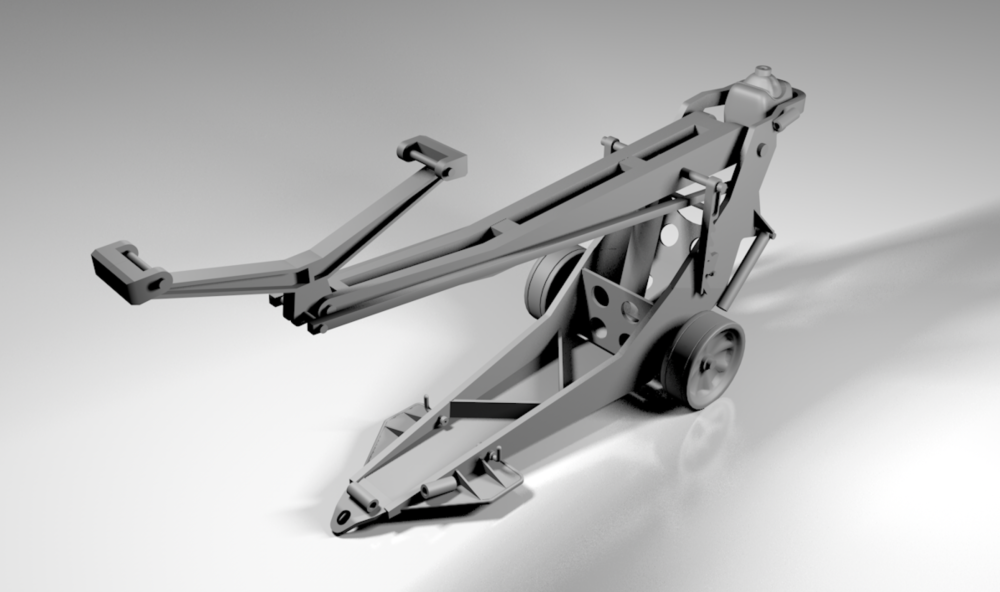
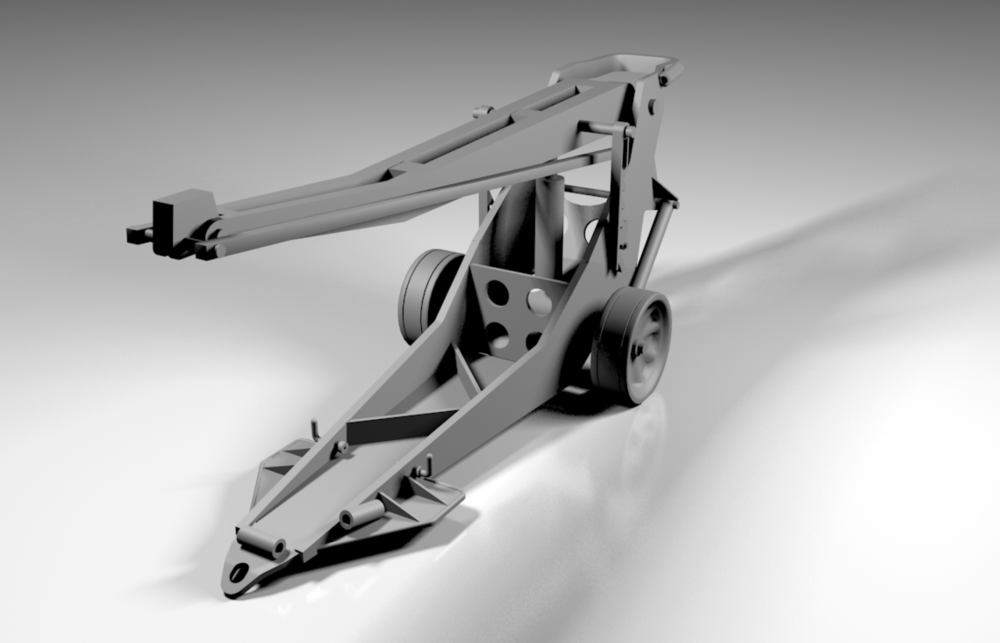
Most of the basic shapes are there and seem to check out. The hollow tubes on the base-plate and the side of the handle are to stick a long carrying bar in. This way the jack could be transported by either two men side by side, or one pulling and one pushing.
-
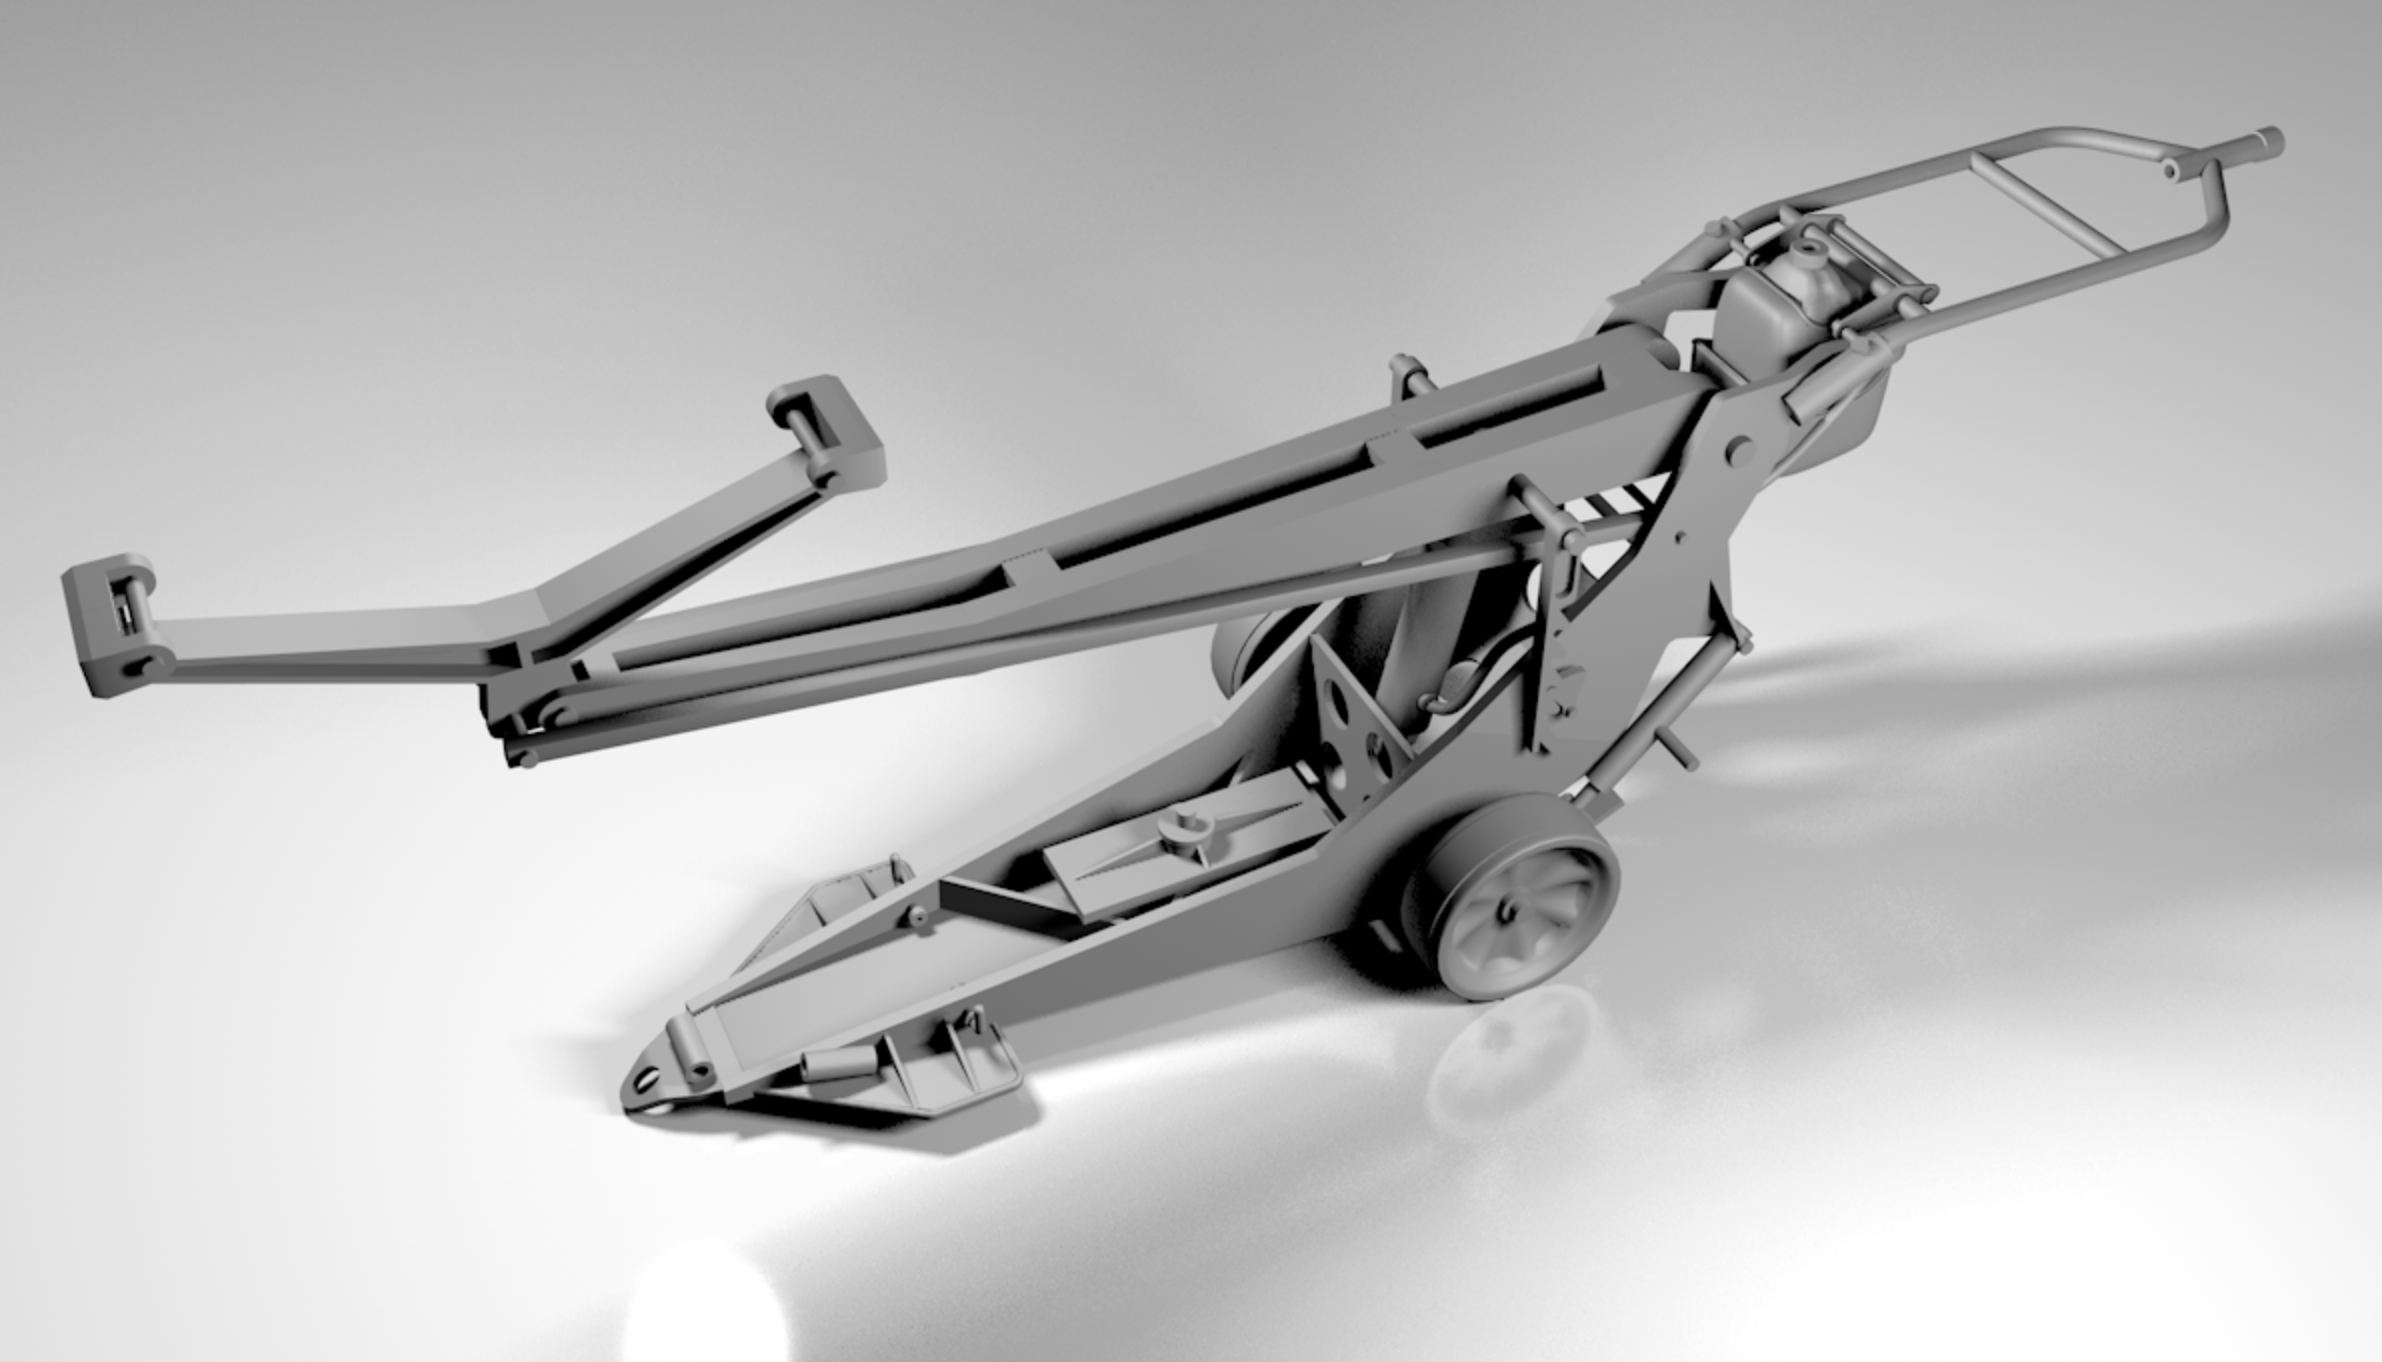
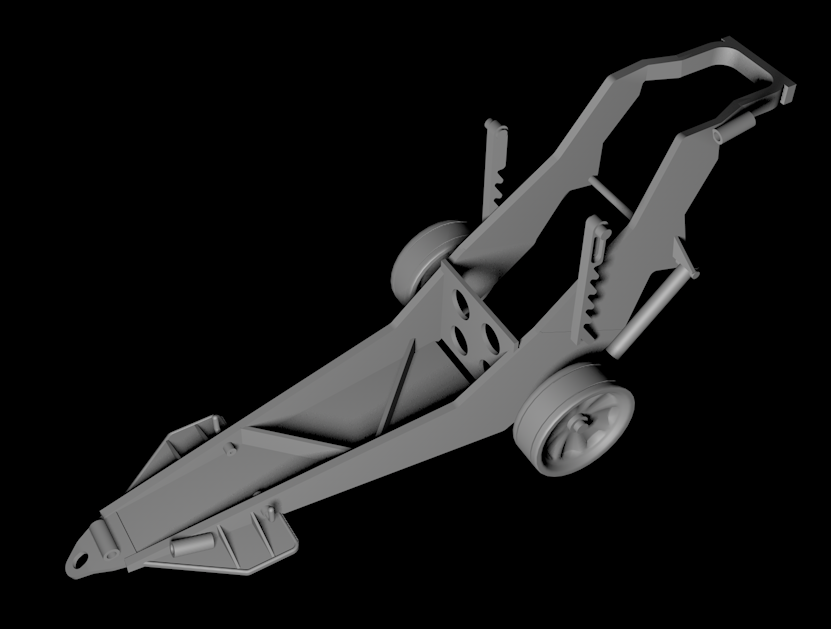
Starting to look like something now. While drawing I try to think about how I'll 3D print this in the best possible way. If you study the photo's, you see that the Herkules at Oberammergau did not have the vertical pin, as was used to handle the Me163, but rather the 'hammock', if that makes sense to support the tail. That's the reason it was placed sideways to the P.1101.

-
It's really difficult estimating measurements and shapes from the few pics I have as reference, but things are slowly starting to make sense....
-
More work on the pit. All the Eduard bits i could use from the me262 set are in. So are the HGW seatbelts. Always a treat. And the Artscale seat.

-
Small steps..
-
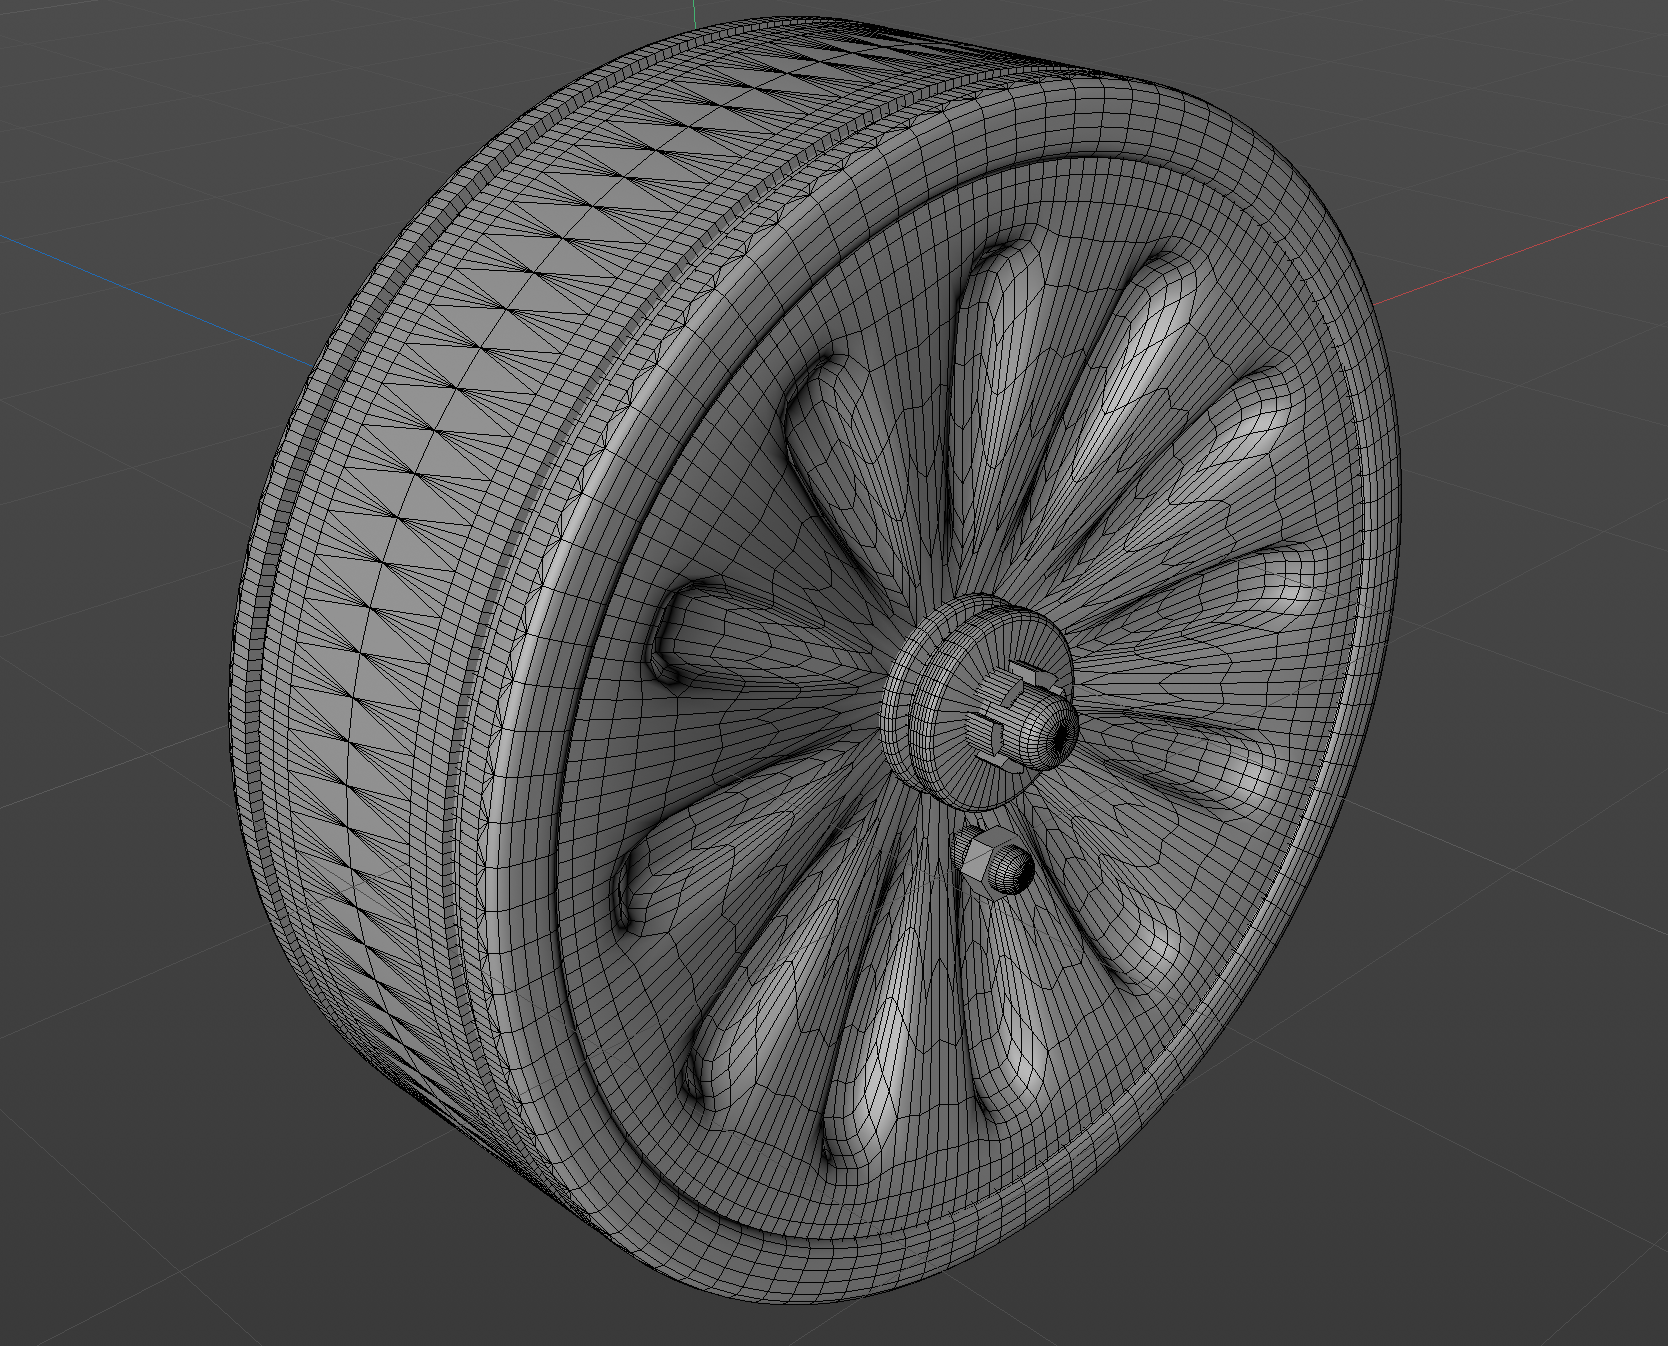
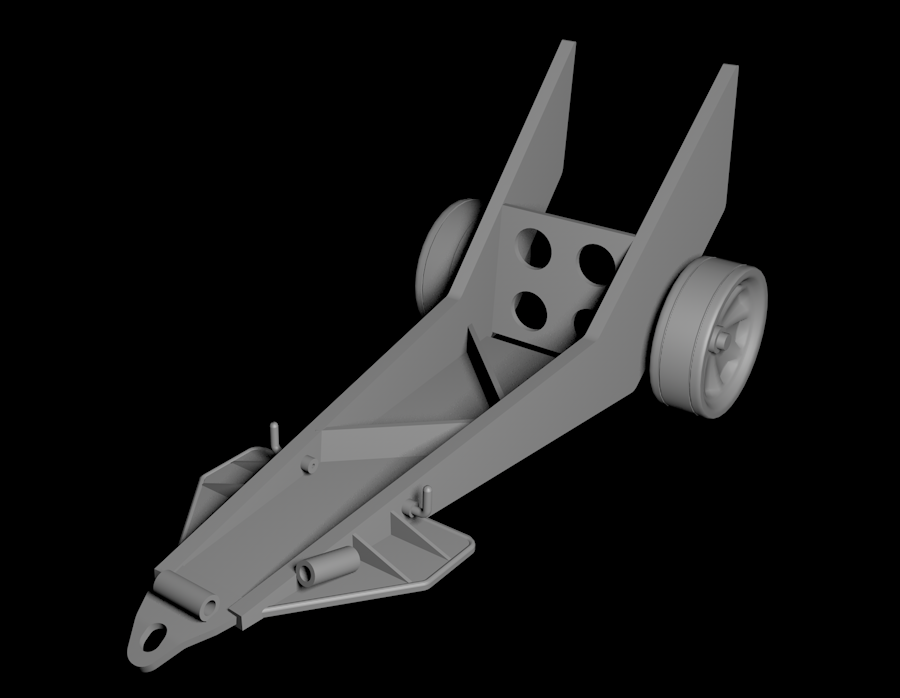
First steps in drawing the Herkules II lift. I have bought the Luftwaffe manual, which describes the workings of the Herkules I, II and III. The wheels on the one found underneath the P.1101 at Oberammergau are steel, instead of the rubber tire ones in the manual. I did my best to guess the shape of the steel wheels from the few photos there are and I'm trying to use new 3D techniques as I go along. The manual (L.Dv 526) is in the German Bundesarchiv, but is not digitally available. This manual was bought from Luftfahrt Archives Hafner for 29 euro's (for those wondering).

-
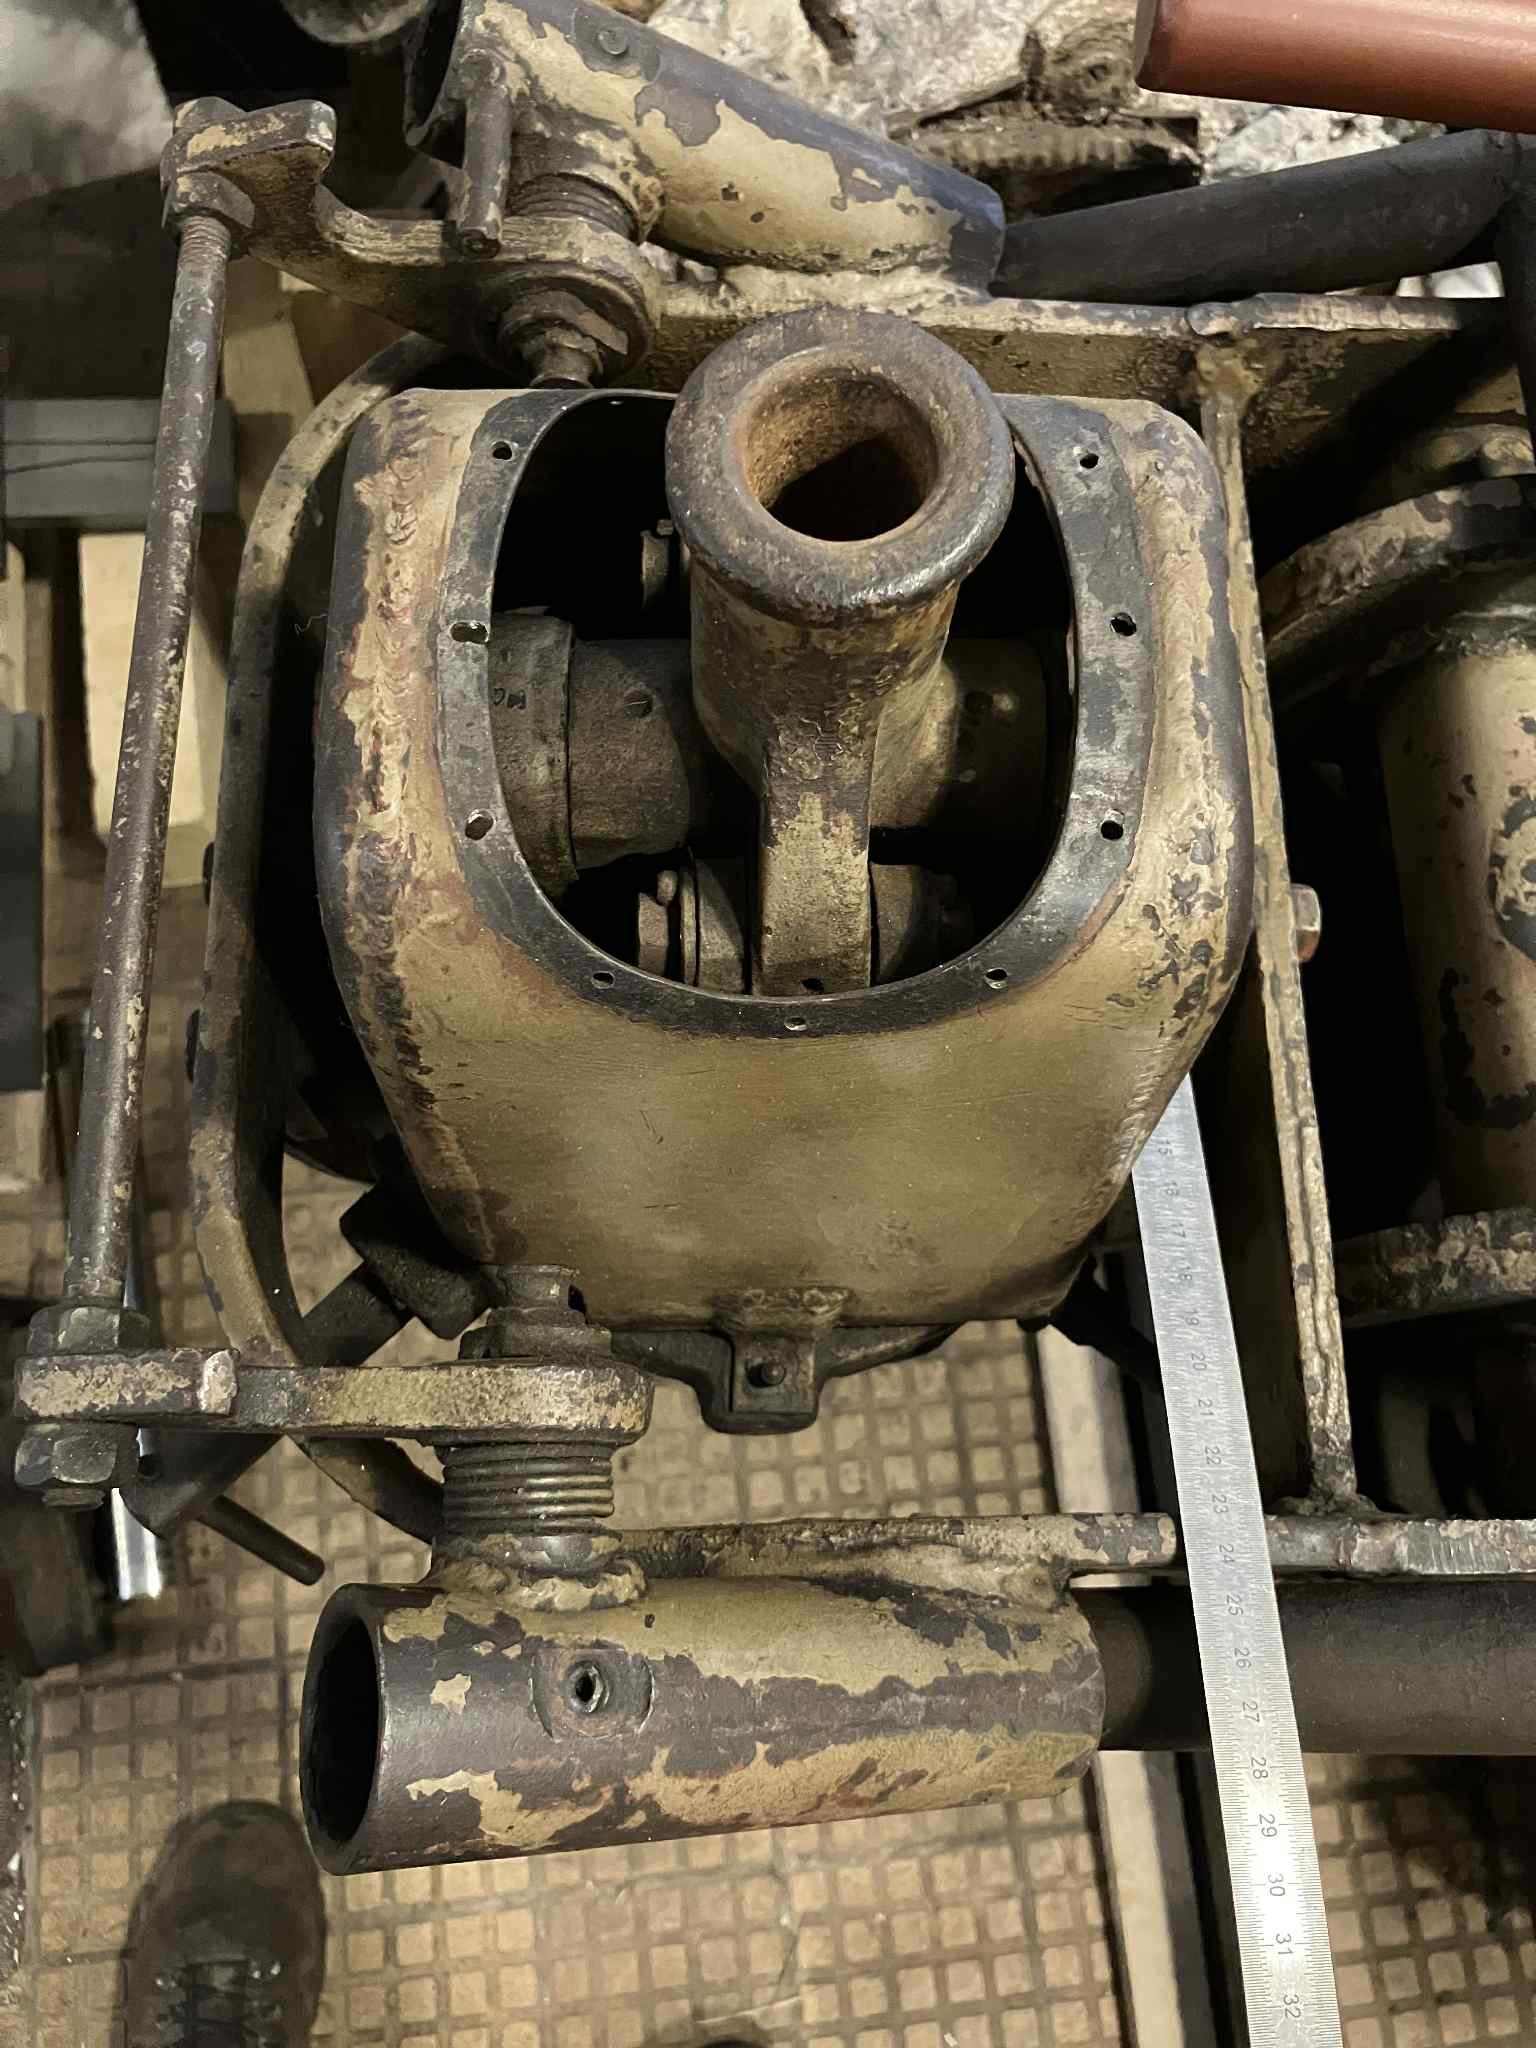
Now for the bomb loader that was holding up the tail at the time the US Army found it. It was actually a 1939 Hercules II model. Not much can be found on this loader. U-models made a 1/35 resin kit once, before it went belly up. There was someone on Artstation (whom I messaged) who did a 3d model on this loader, so let's see. Today I bought the Luftwaffe manual on this loader with the intention to 3d draw it myself.


-
I saw it too. I remember contacting them about over a year ago asking whether they were interested in buying the 3D models of the engine to produce their own update set. But they were not. Glad they at least liked the finished product! And it's not that I wanted to make money of this. The engine itself was drawn by someone from the Westland Whirlwind Fighter Project and he would have been compensated. Ah well.
-
Decided to add the oxygen hose again. Made it from thin lead wire and an Anyz coupling. Having a kot of fun adding all the Eduard PE from the Me262 set.


-
I stand corrected. The tires correctly state 740mm which corresponds to an outer diameter of 74cm. Converted to 32nd scale that translates to 23,13mm. I measured about 23mm. I also sanded and polished the wheels a bit, so that checks out The story that this mockup used Bf109K wheels is therefor not correct. Maybe the wheel hubs, but not the tires.