JeroenPeters
-
Posts
4,867 -
Joined
-
Last visited
Content Type
Profiles
Forums
Events
Gallery
Everything posted by JeroenPeters
-
Both kits are great. The reason I prefer the HKM one, is that there is AFTER MARKET for it! Eduard, Profi Modeller, HGW etc... For the ZM kit there isn't that much, since we all think it doesn't need anything, but ofcourse it does.
-

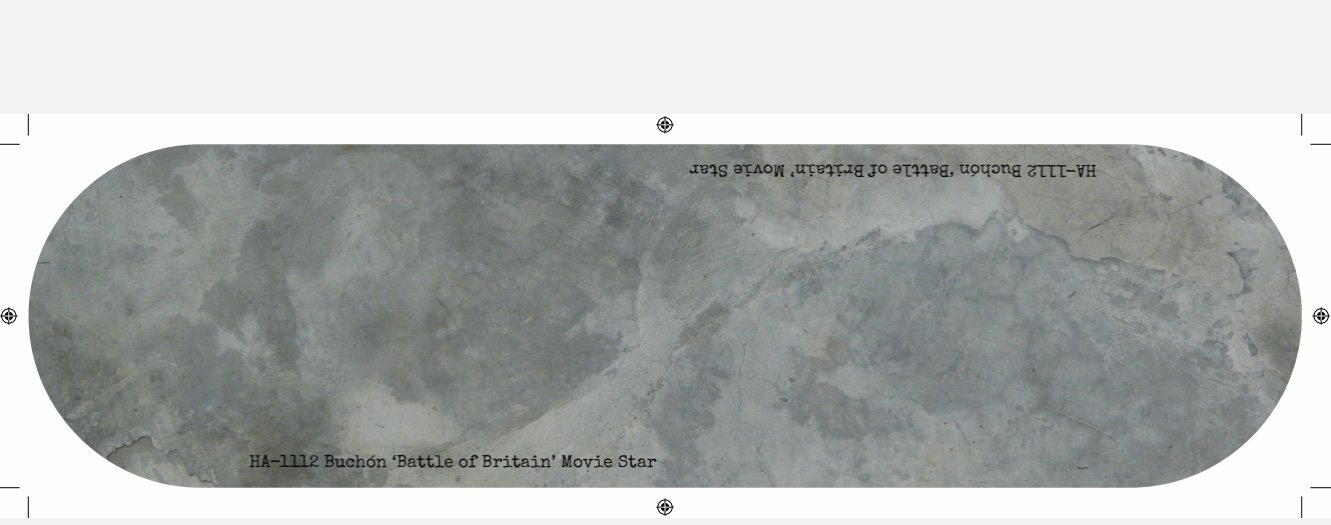
1/32 Connie Edwards Ha-1112 Buchon
JeroenPeters replied to JeroenPeters's topic in LSM 1/35 and Larger Work In Progress
The base will get a concrete floor texture: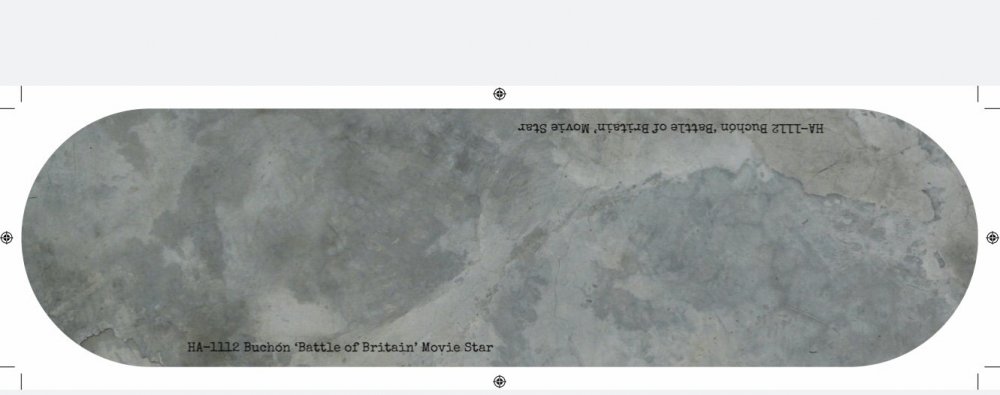
-
1/32 Connie Edwards Ha-1112 Buchon
JeroenPeters replied to JeroenPeters's topic in LSM 1/35 and Larger Work In Progress
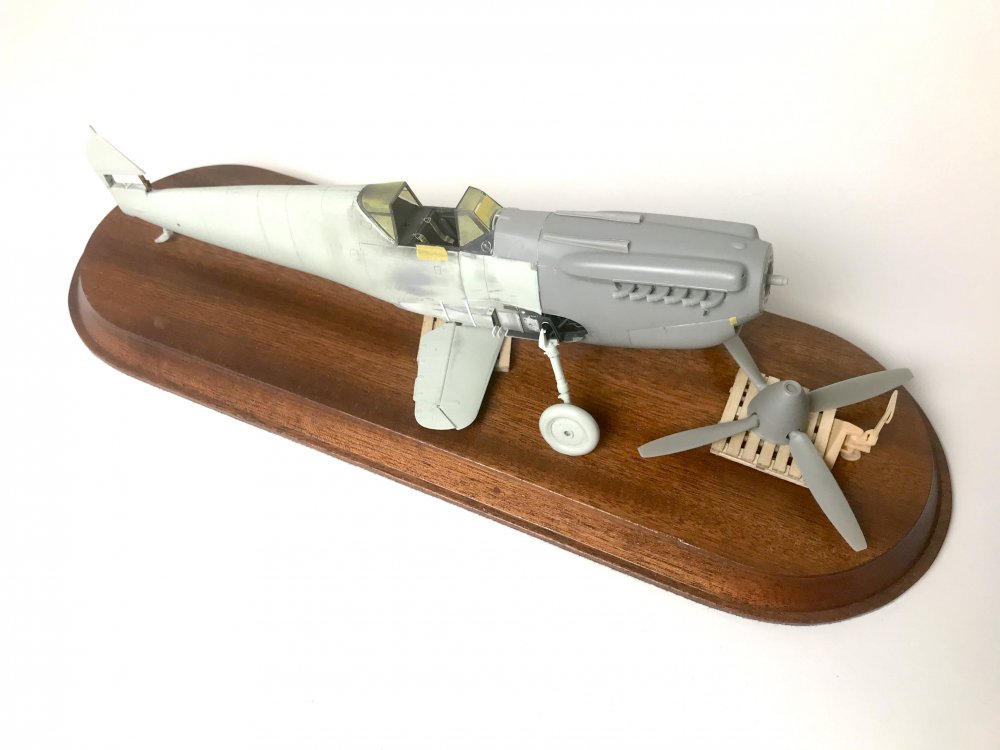
Rlm65 is on.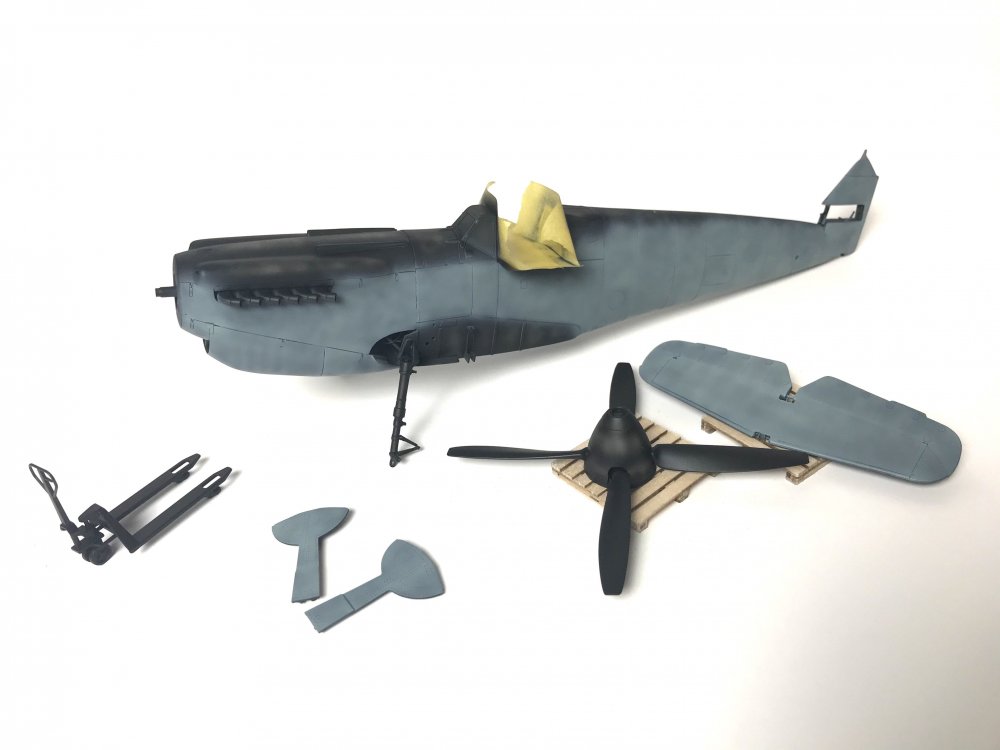
-
Fokker D.VIIF, Wilhelm Hippert, 'Mimmi'
JeroenPeters replied to JayDee's topic in LSM 1/35 and Larger Work In Progress
Lovely crisp work! And what a cool scheme. I agree: one of the best wnw kits... -
1/32 Connie Edwards Ha-1112 Buchon
JeroenPeters replied to JeroenPeters's topic in LSM 1/35 and Larger Work In Progress
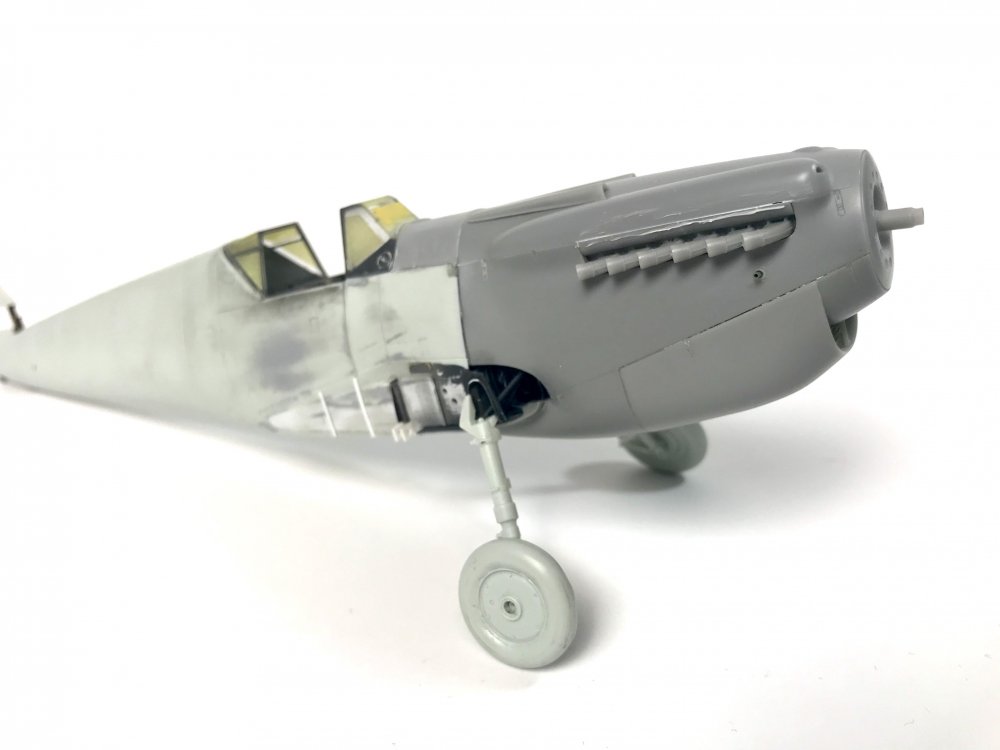
Base coat on. Mr Surfacer 1500.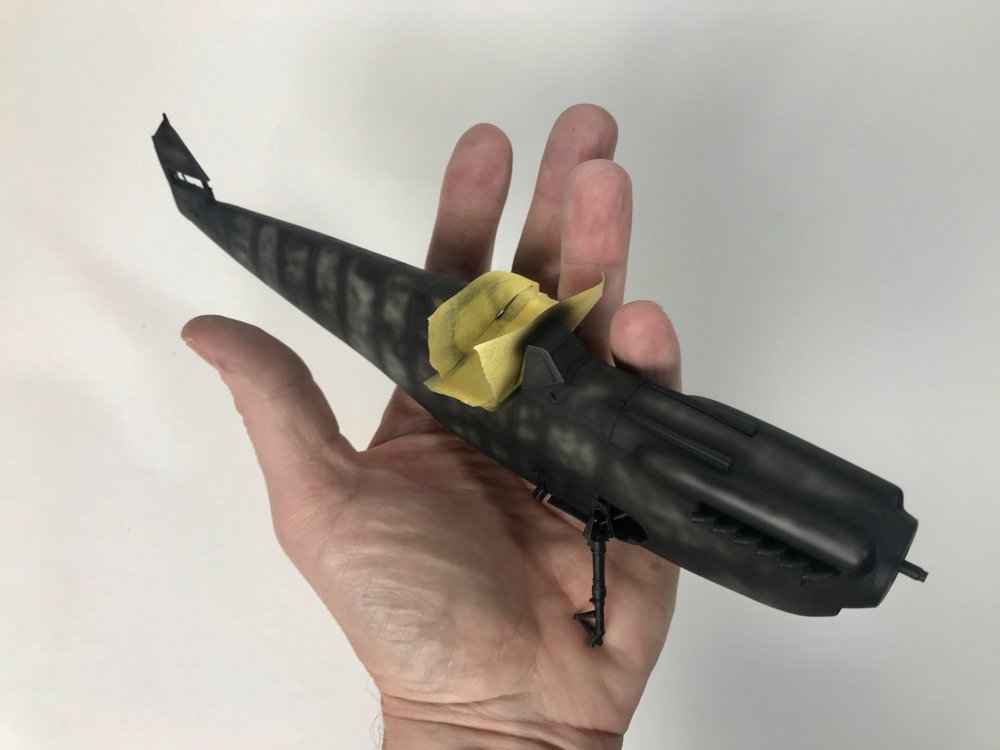

-
1/32 Connie Edwards Ha-1112 Buchon
JeroenPeters replied to JeroenPeters's topic in LSM 1/35 and Larger Work In Progress

-
1/32 Connie Edwards Ha-1112 Buchon
JeroenPeters replied to JeroenPeters's topic in LSM 1/35 and Larger Work In Progress
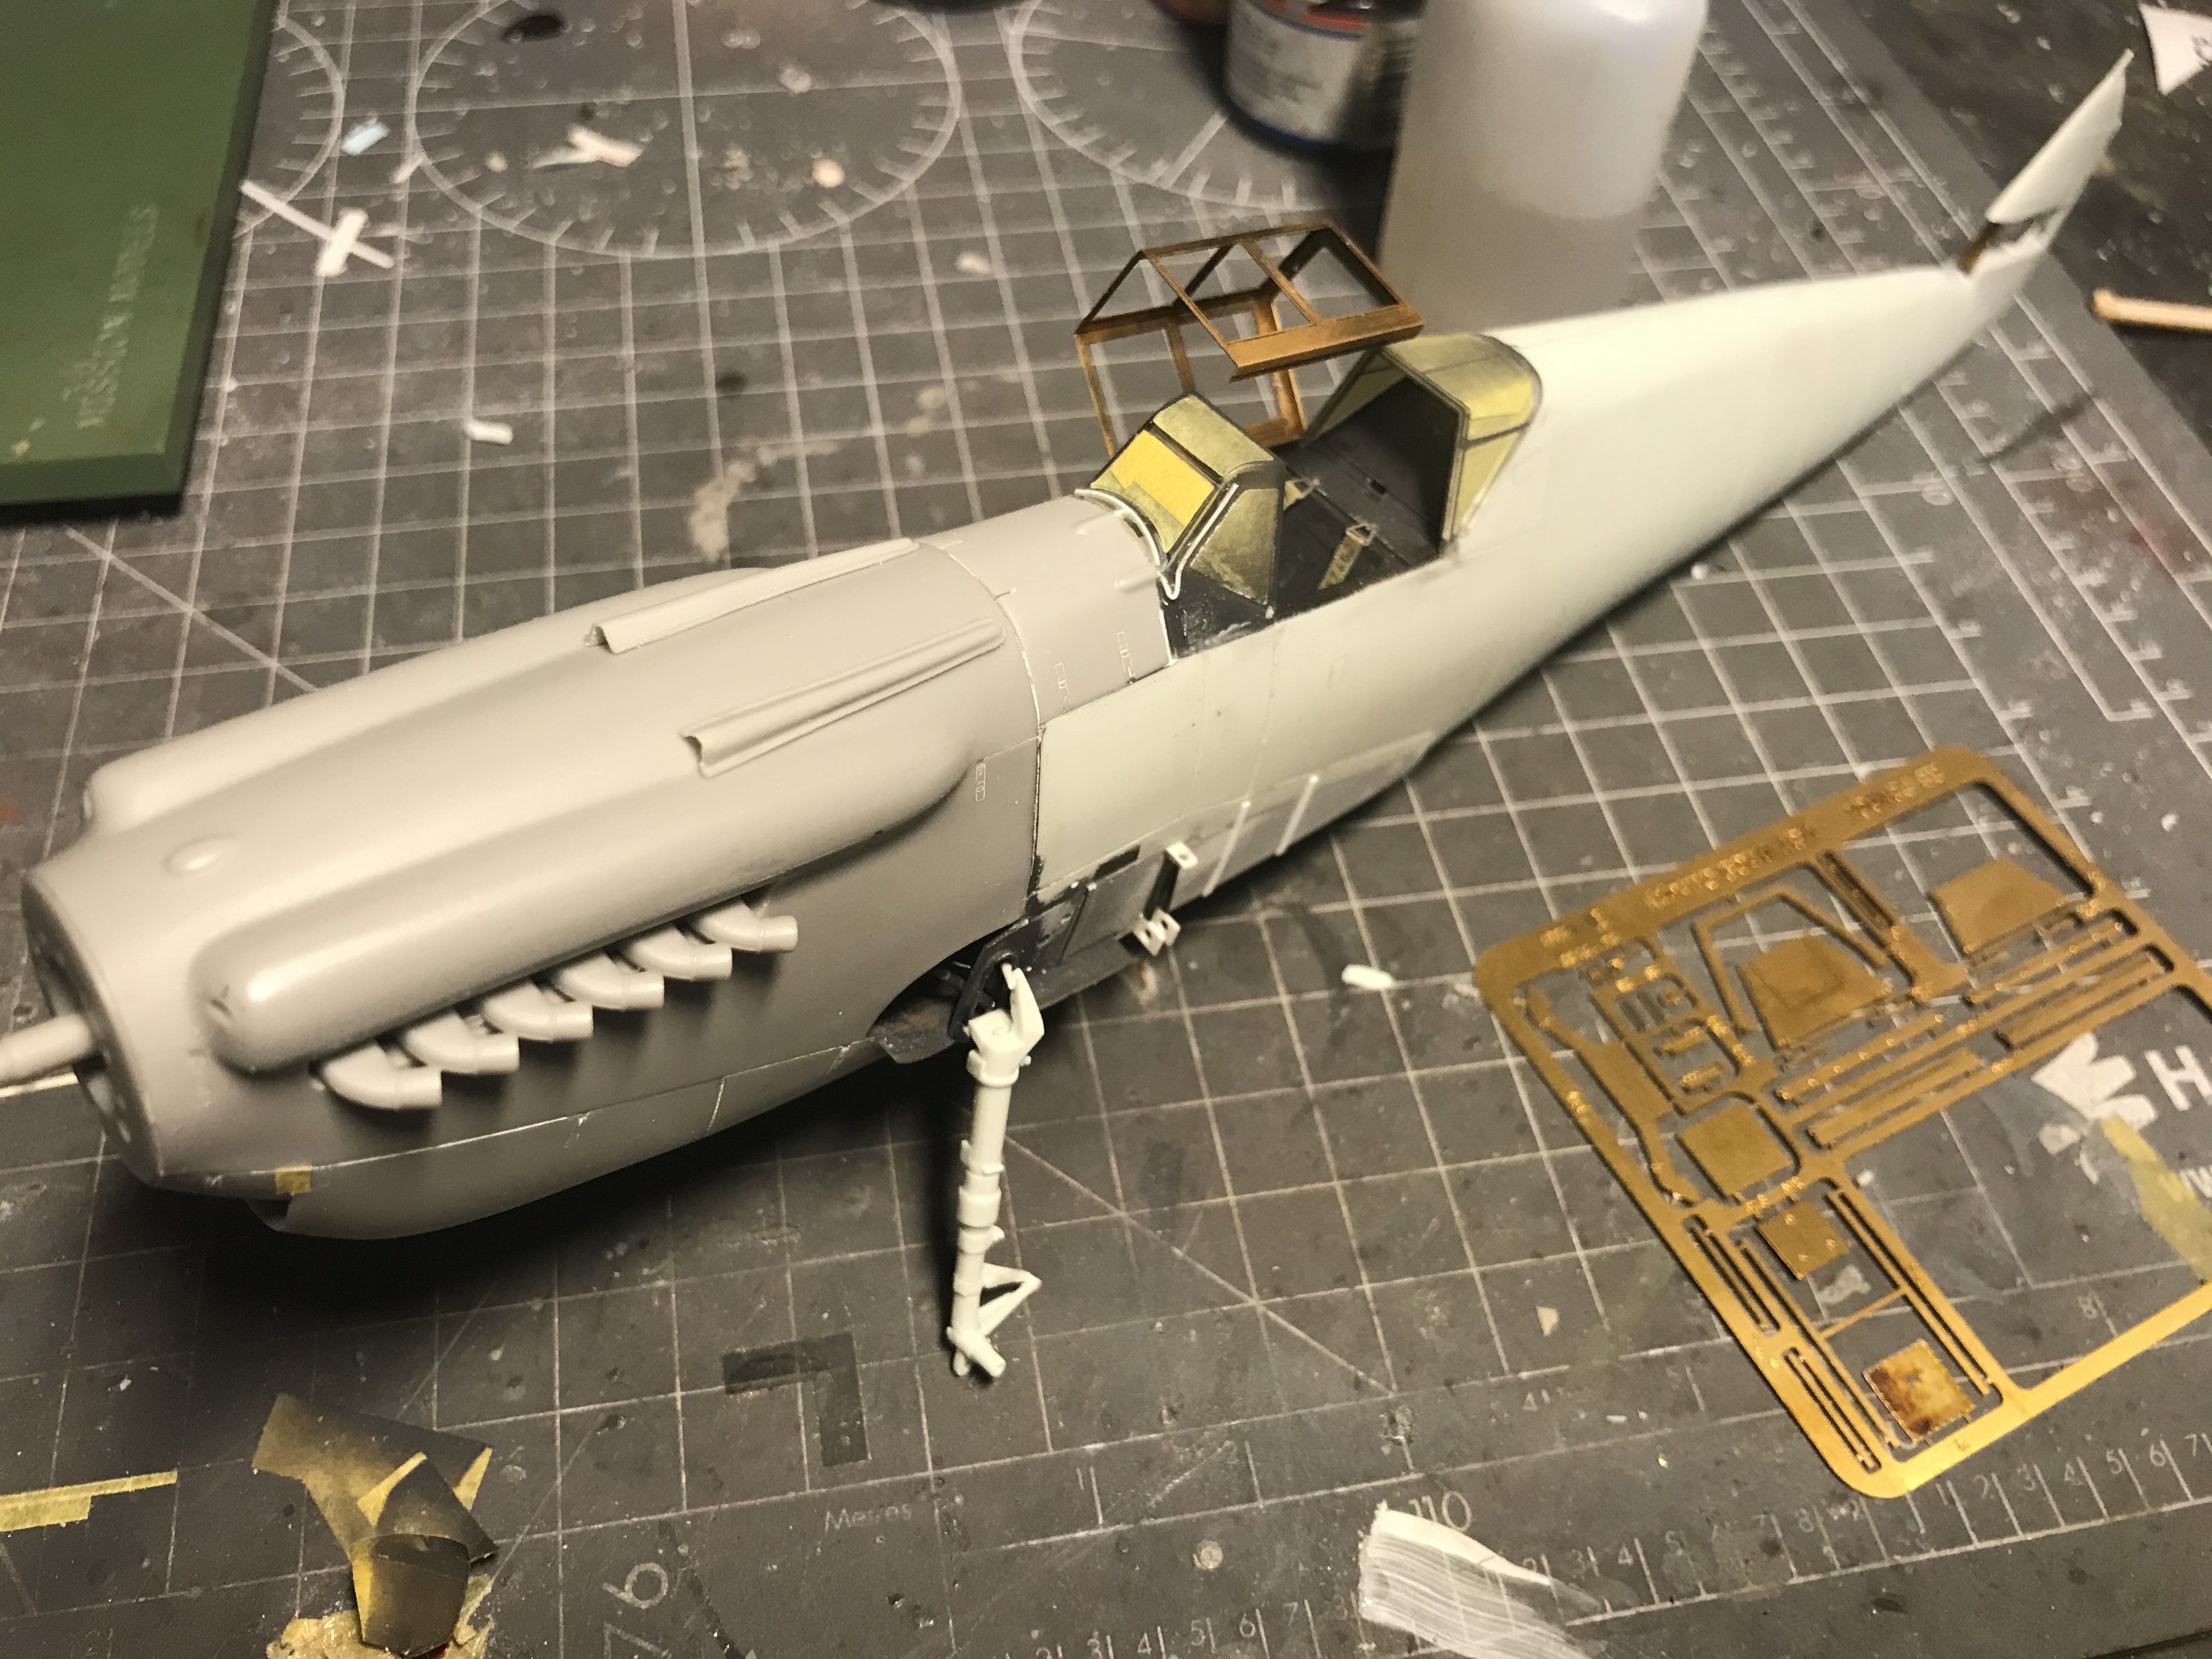
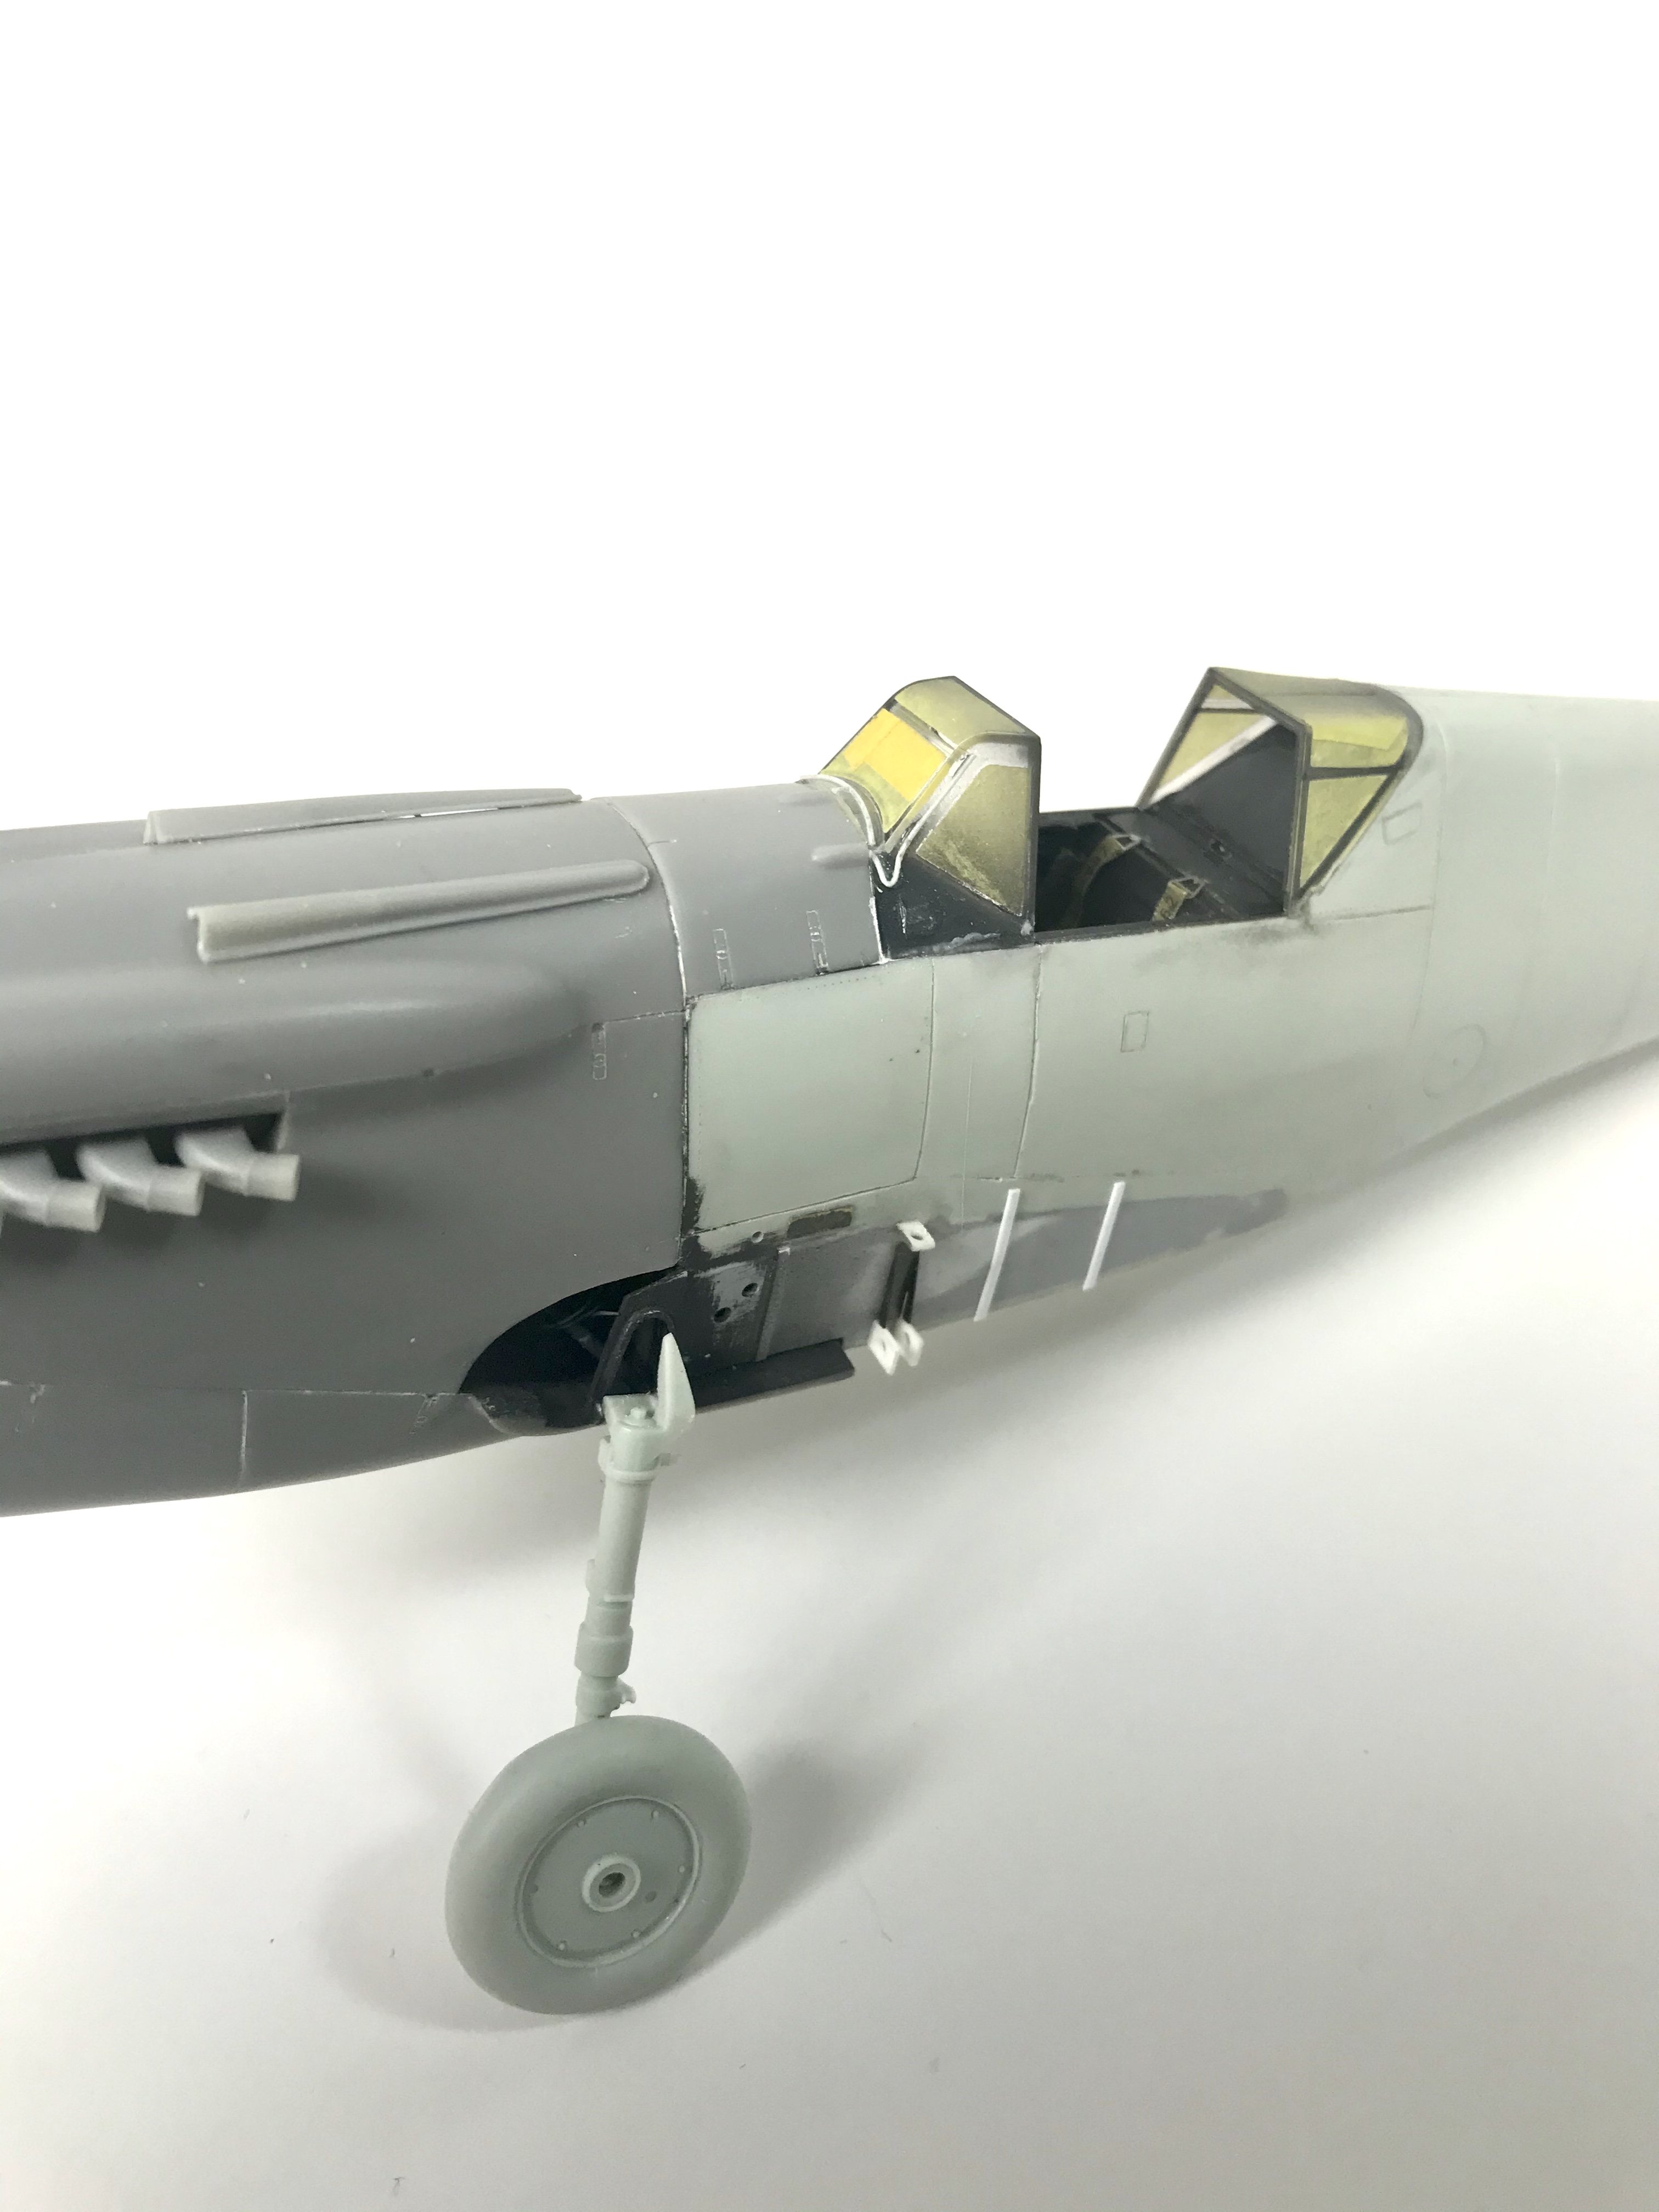
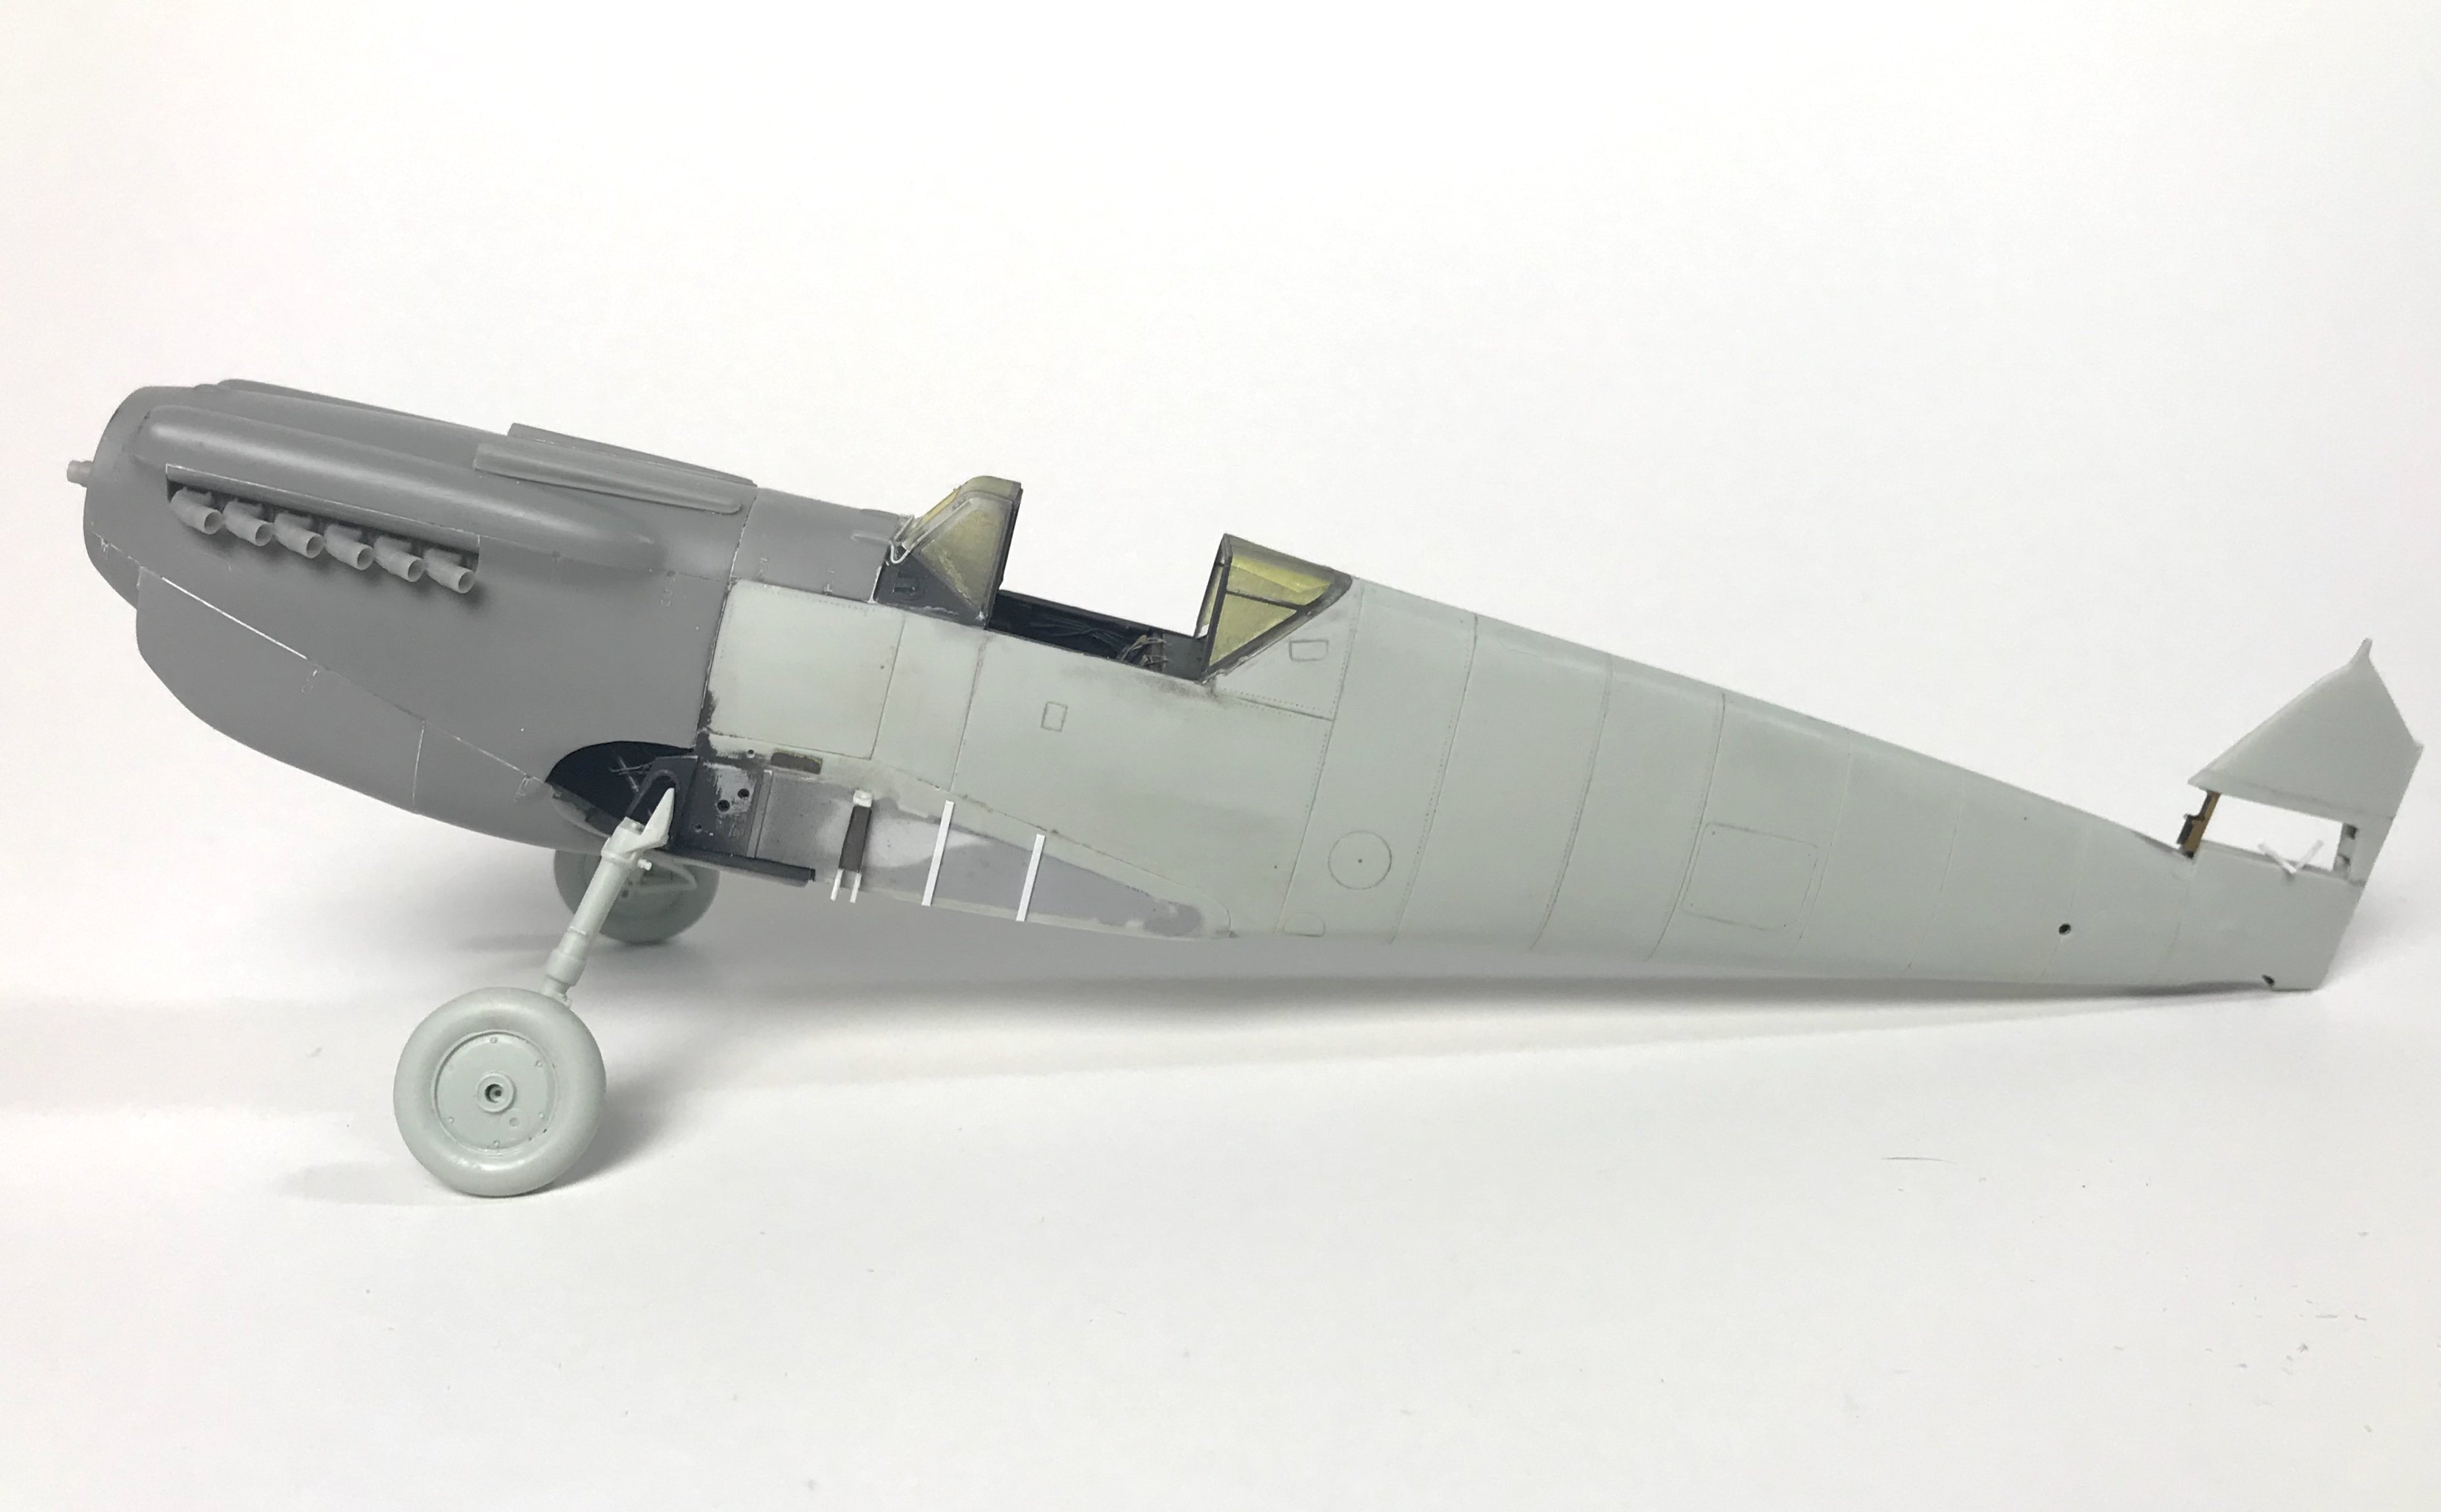
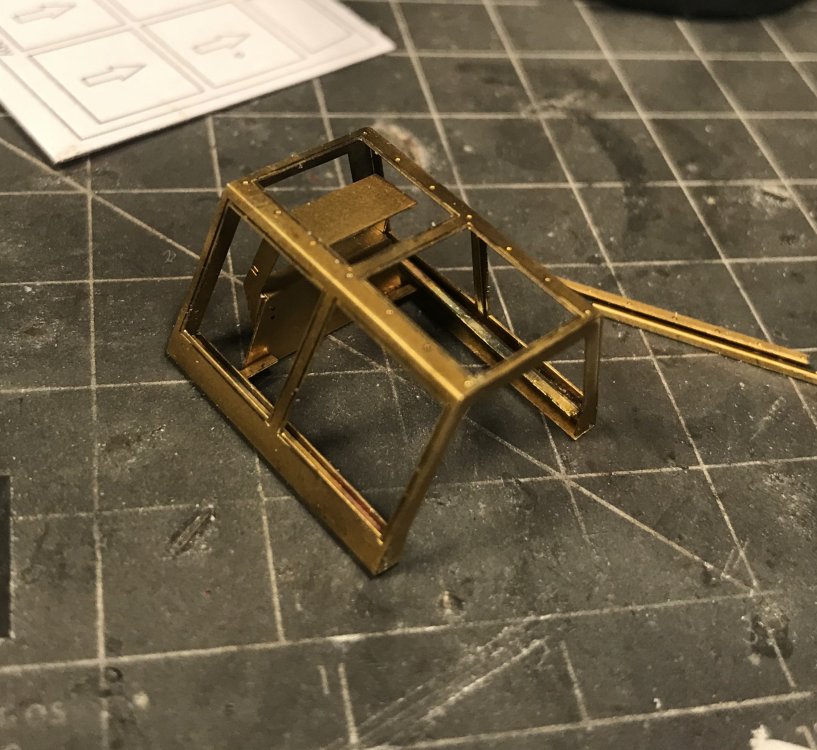
More work on the canopy. Glass fitting next.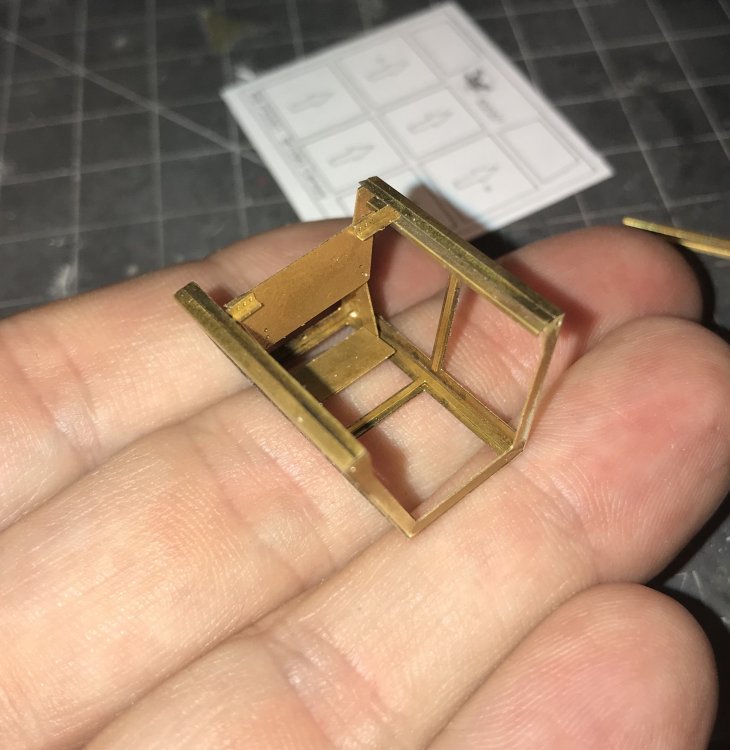

-
Not me this year...
-
1/32 Connie Edwards Ha-1112 Buchon
JeroenPeters replied to JeroenPeters's topic in LSM 1/35 and Larger Work In Progress
Drew up the masks. Mal Mayfield of Miracle Masks is cutting them....
-
1/32 Connie Edwards Ha-1112 Buchon
JeroenPeters replied to JeroenPeters's topic in LSM 1/35 and Larger Work In Progress
No. Im using Zap glue and Future for the parts that carry no weight. -
1/32 Connie Edwards Ha-1112 Buchon
JeroenPeters replied to JeroenPeters's topic in LSM 1/35 and Larger Work In Progress
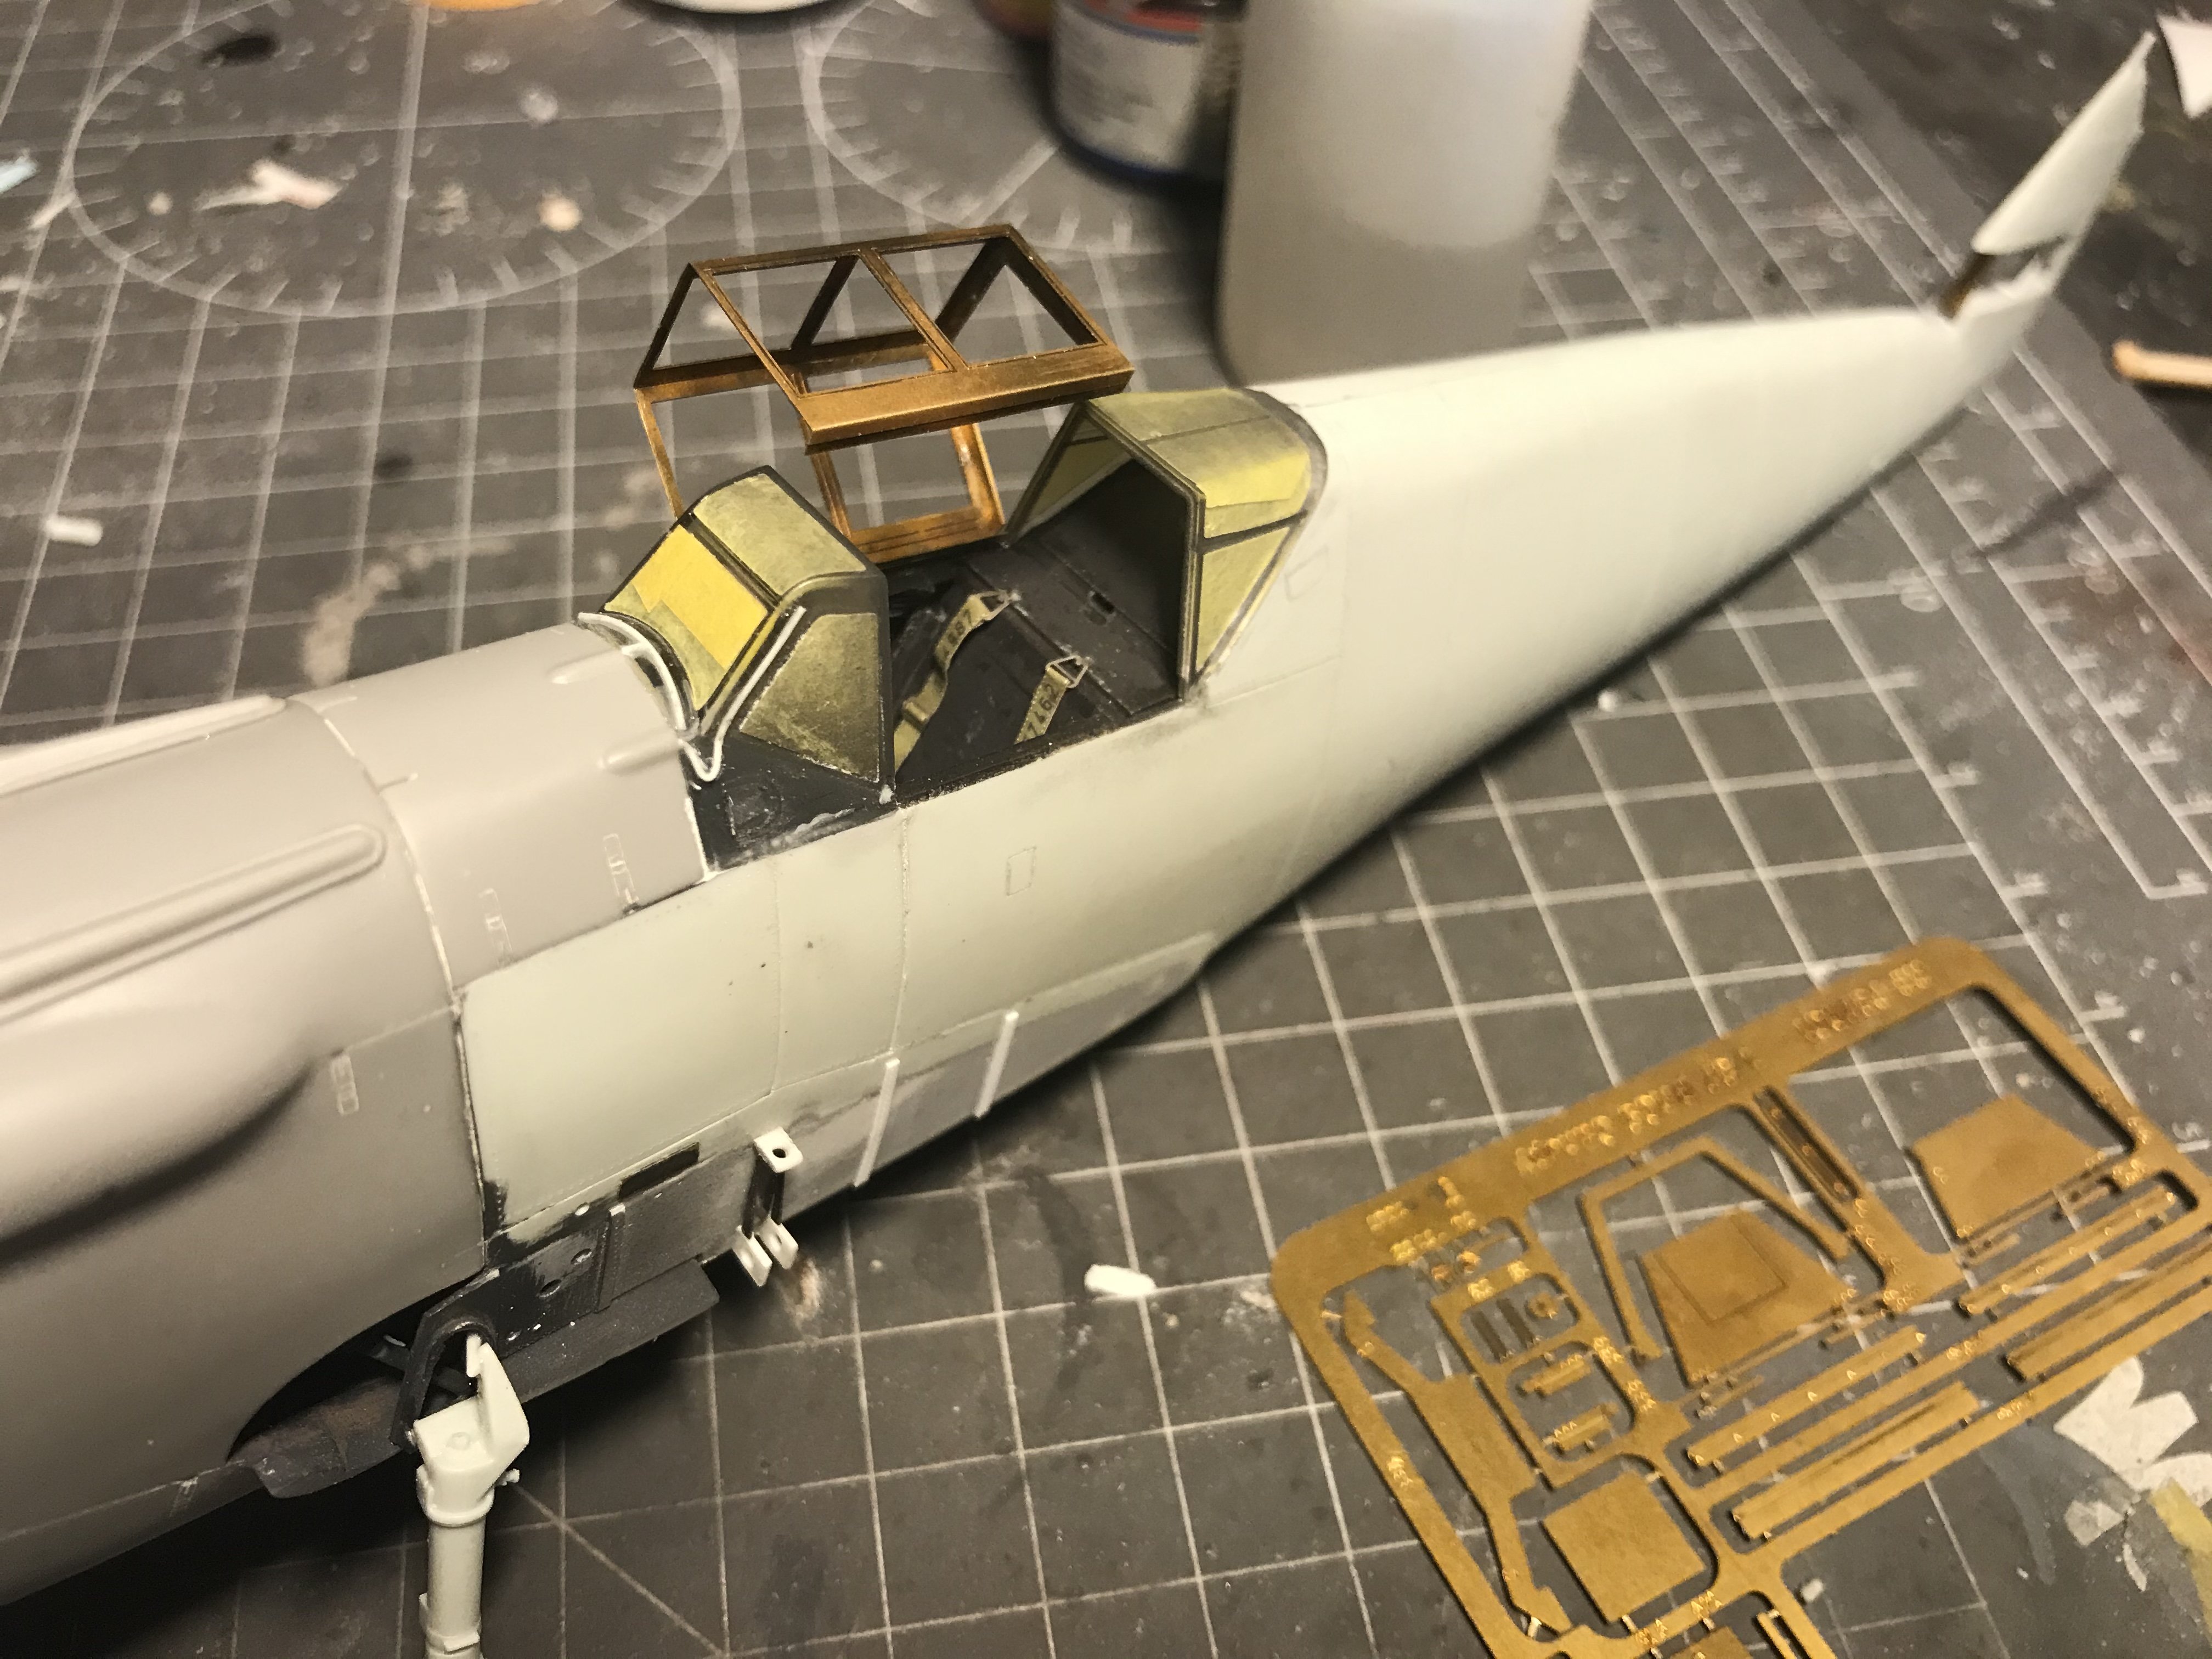
Small work on the canopy. 6 parts on now...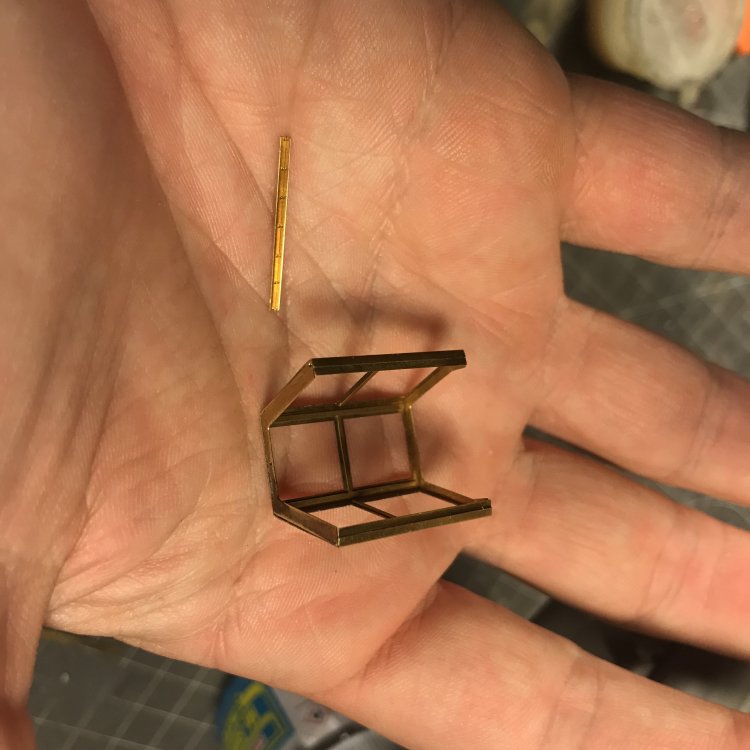
-
1/32 Connie Edwards Ha-1112 Buchon
JeroenPeters replied to JeroenPeters's topic in LSM 1/35 and Larger Work In Progress
Thnx guys! working in the Radu Brinzan canopy. Lovely stuff. Hope i can do it justice.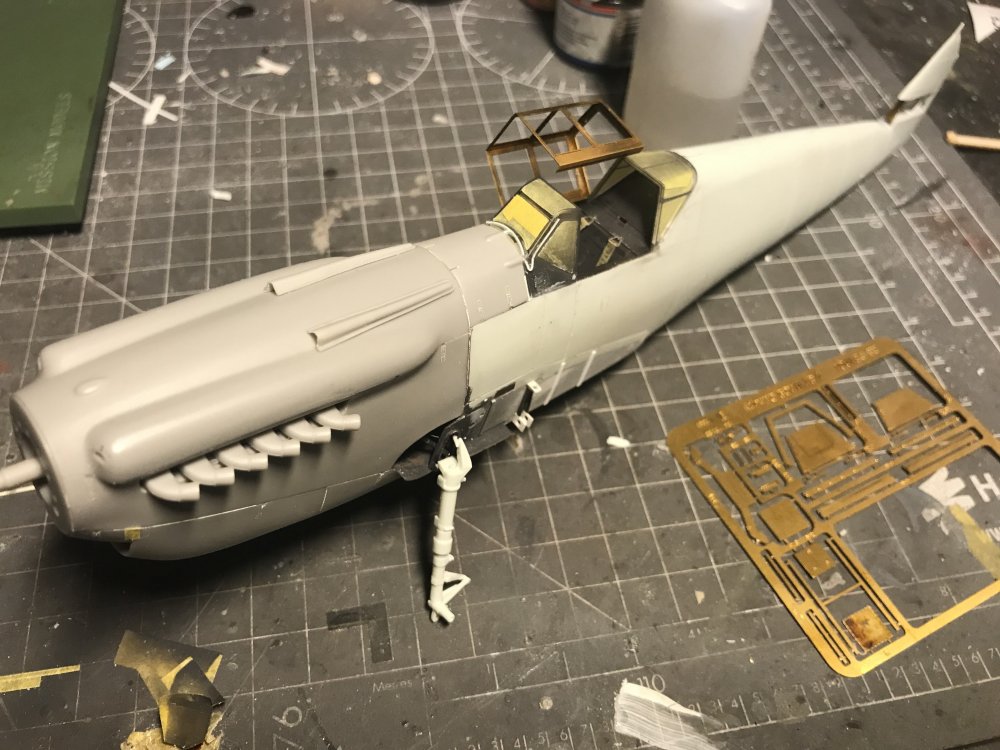

-
1/32 Connie Edwards Ha-1112 Buchon
JeroenPeters replied to JeroenPeters's topic in LSM 1/35 and Larger Work In Progress
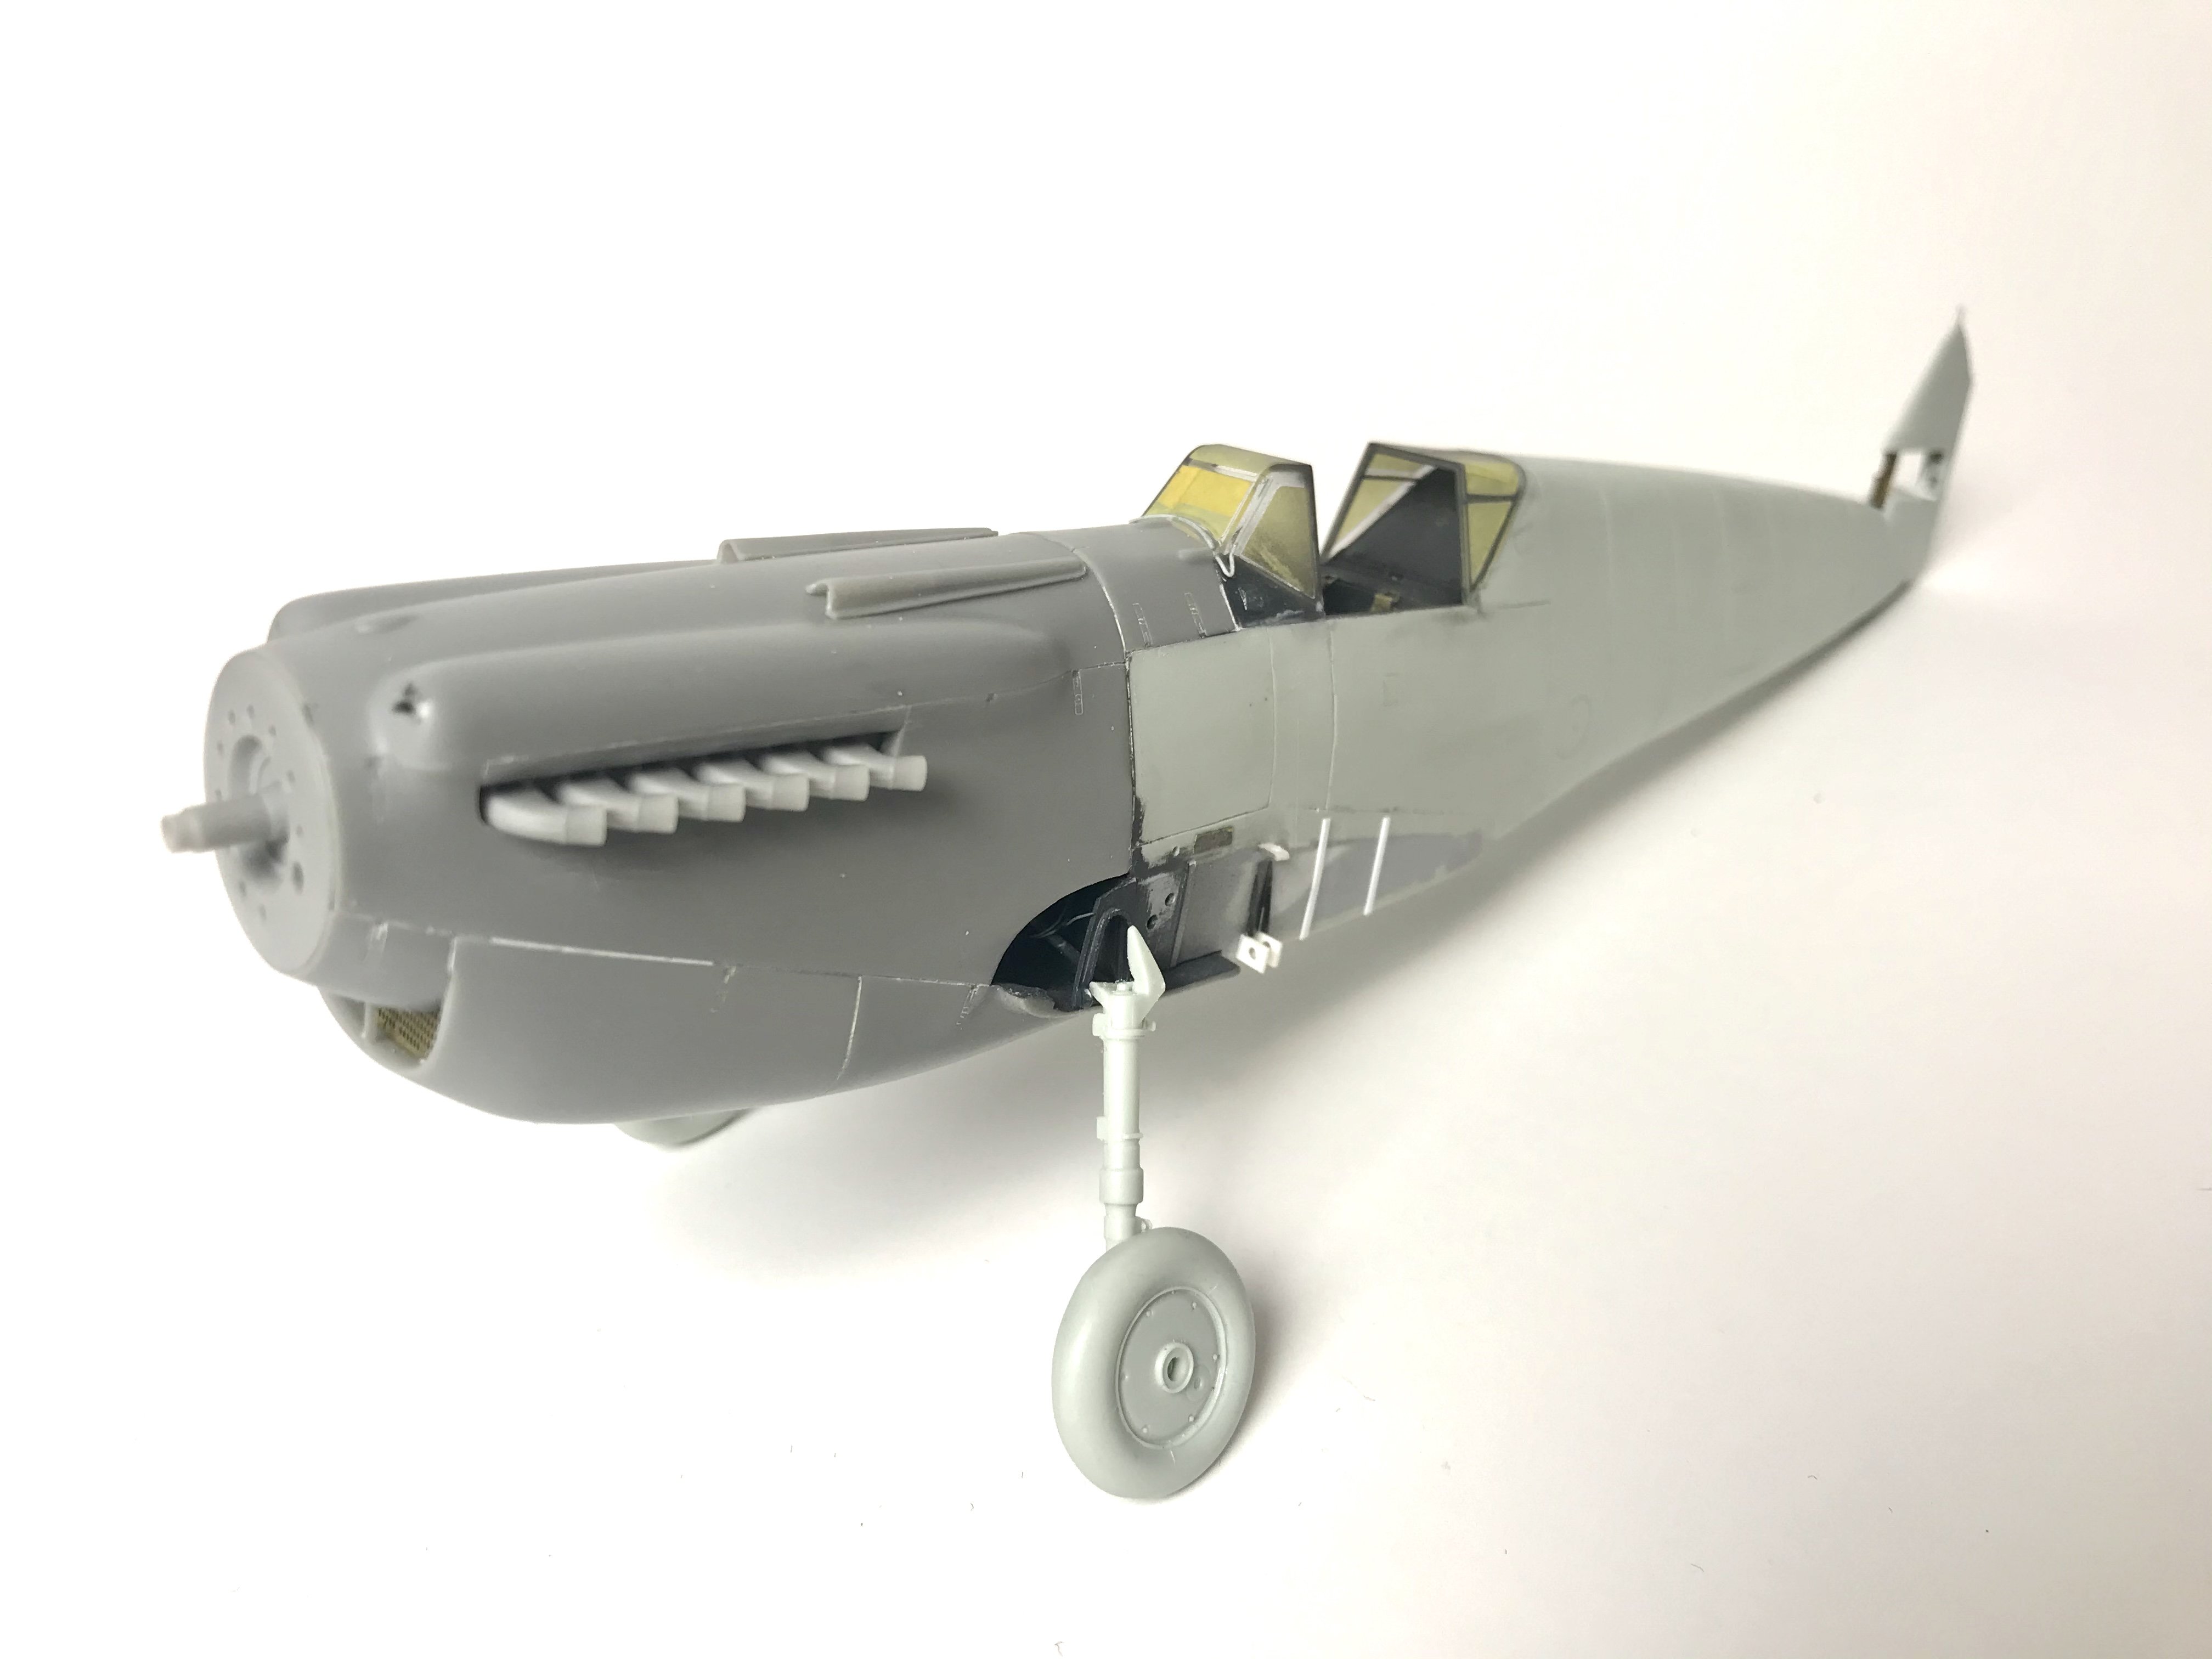
On her legs!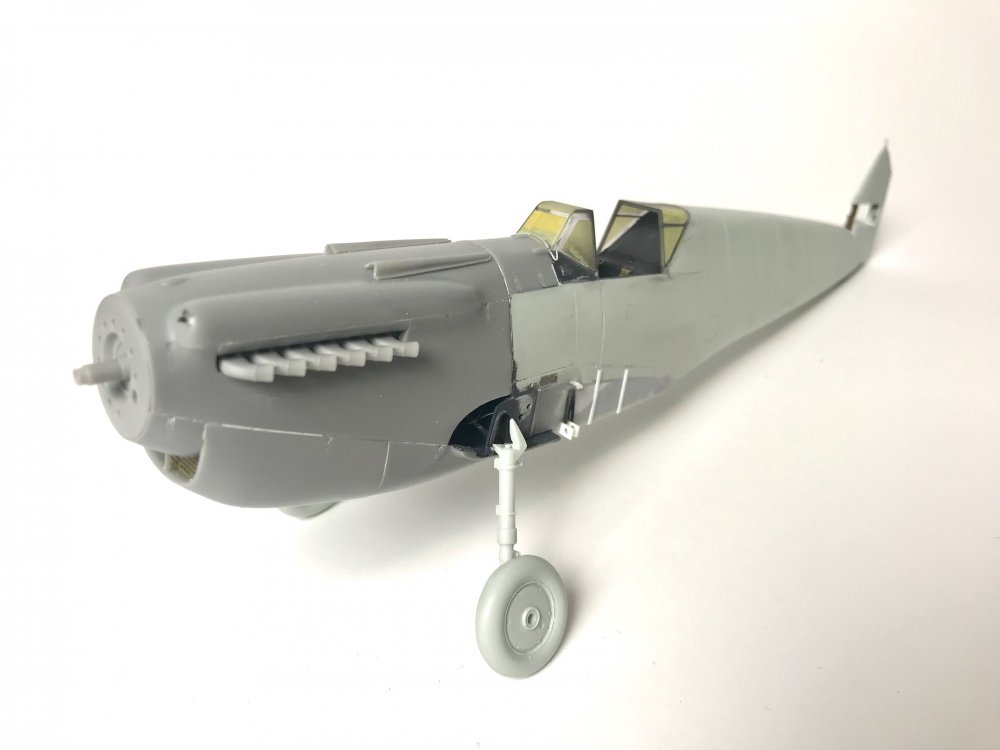


-
Aviatik 'Berg' D.1
JeroenPeters replied to sandbagger's topic in LSM 1/35 and Larger Work In Progress
Lovely. Looks like a sweet kit. -
1/18 P51C Mustang "Lopes Hope 3rd"
JeroenPeters replied to airscale's topic in LSM 1/35 and Larger Work In Progress
my lord.... respect! -
Fock Achgelis Fa330
JeroenPeters replied to rkranias's topic in LSM 1/35 and Larger Work In Progress
loving this!!- 34 replies
-
- 5
-

-
- u-boat scout
- gyro glider
- (and 2 more)
-
1/32 Connie Edwards Ha-1112 Buchon
JeroenPeters replied to JeroenPeters's topic in LSM 1/35 and Larger Work In Progress
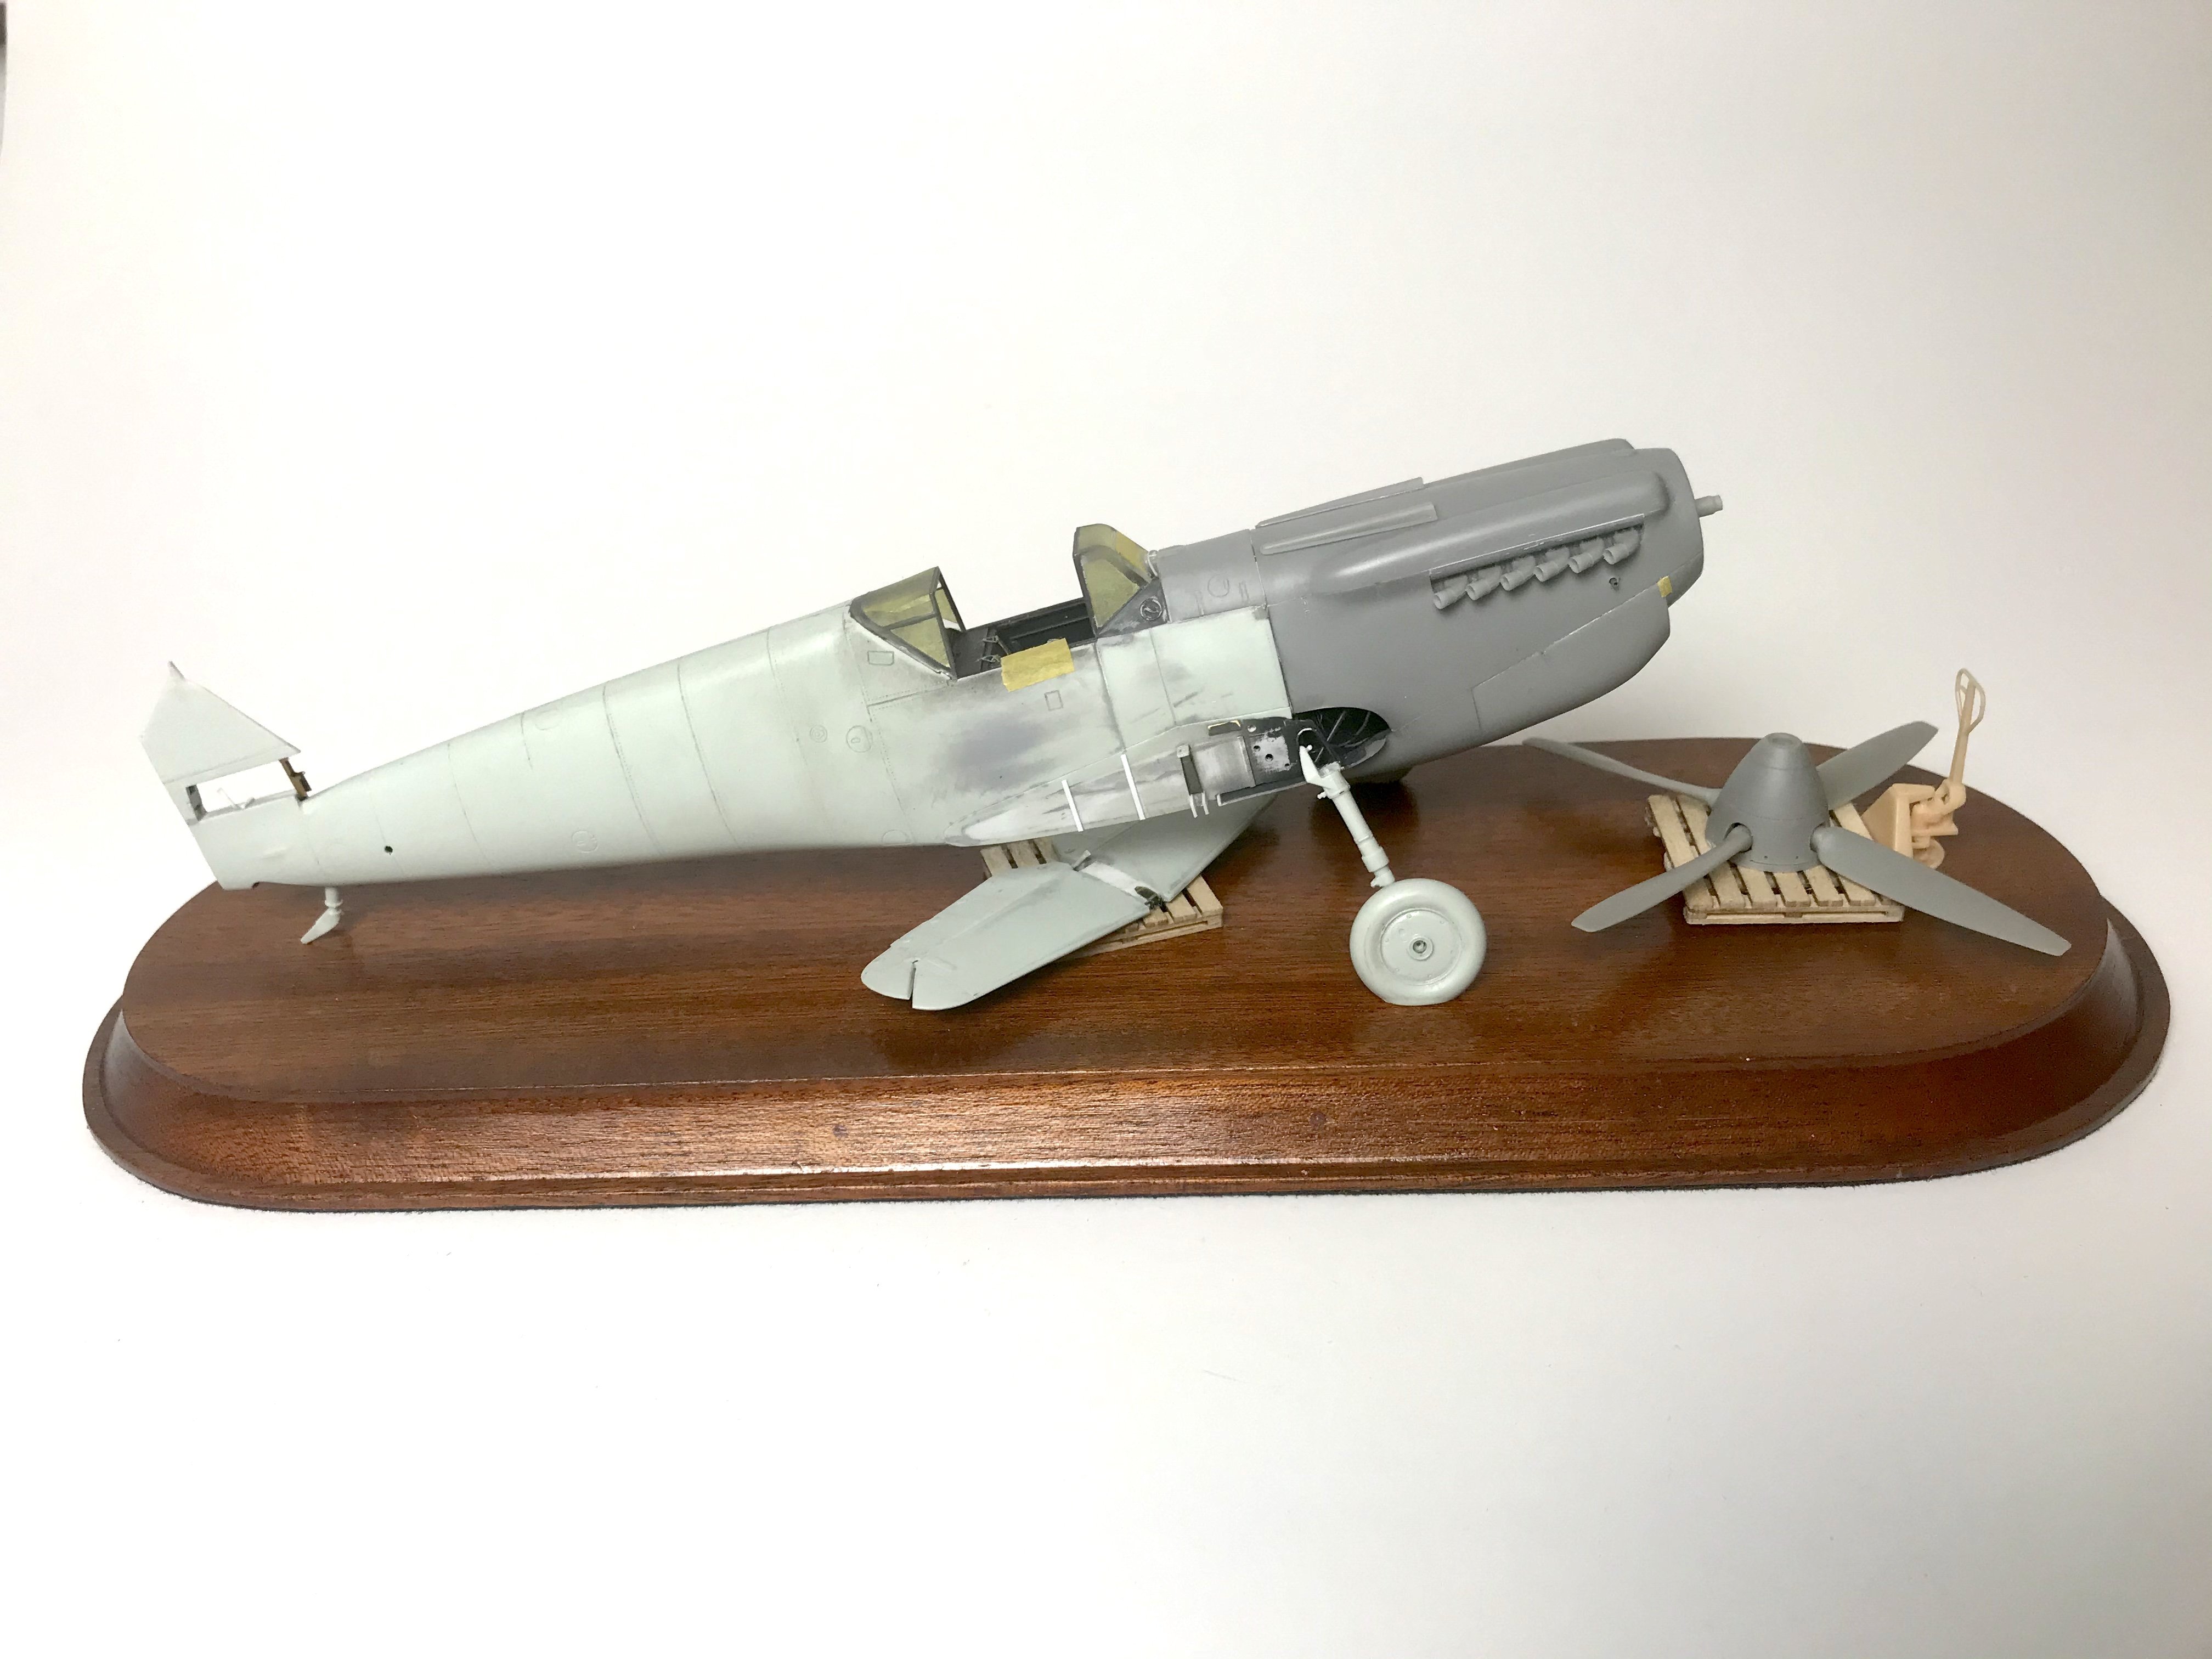
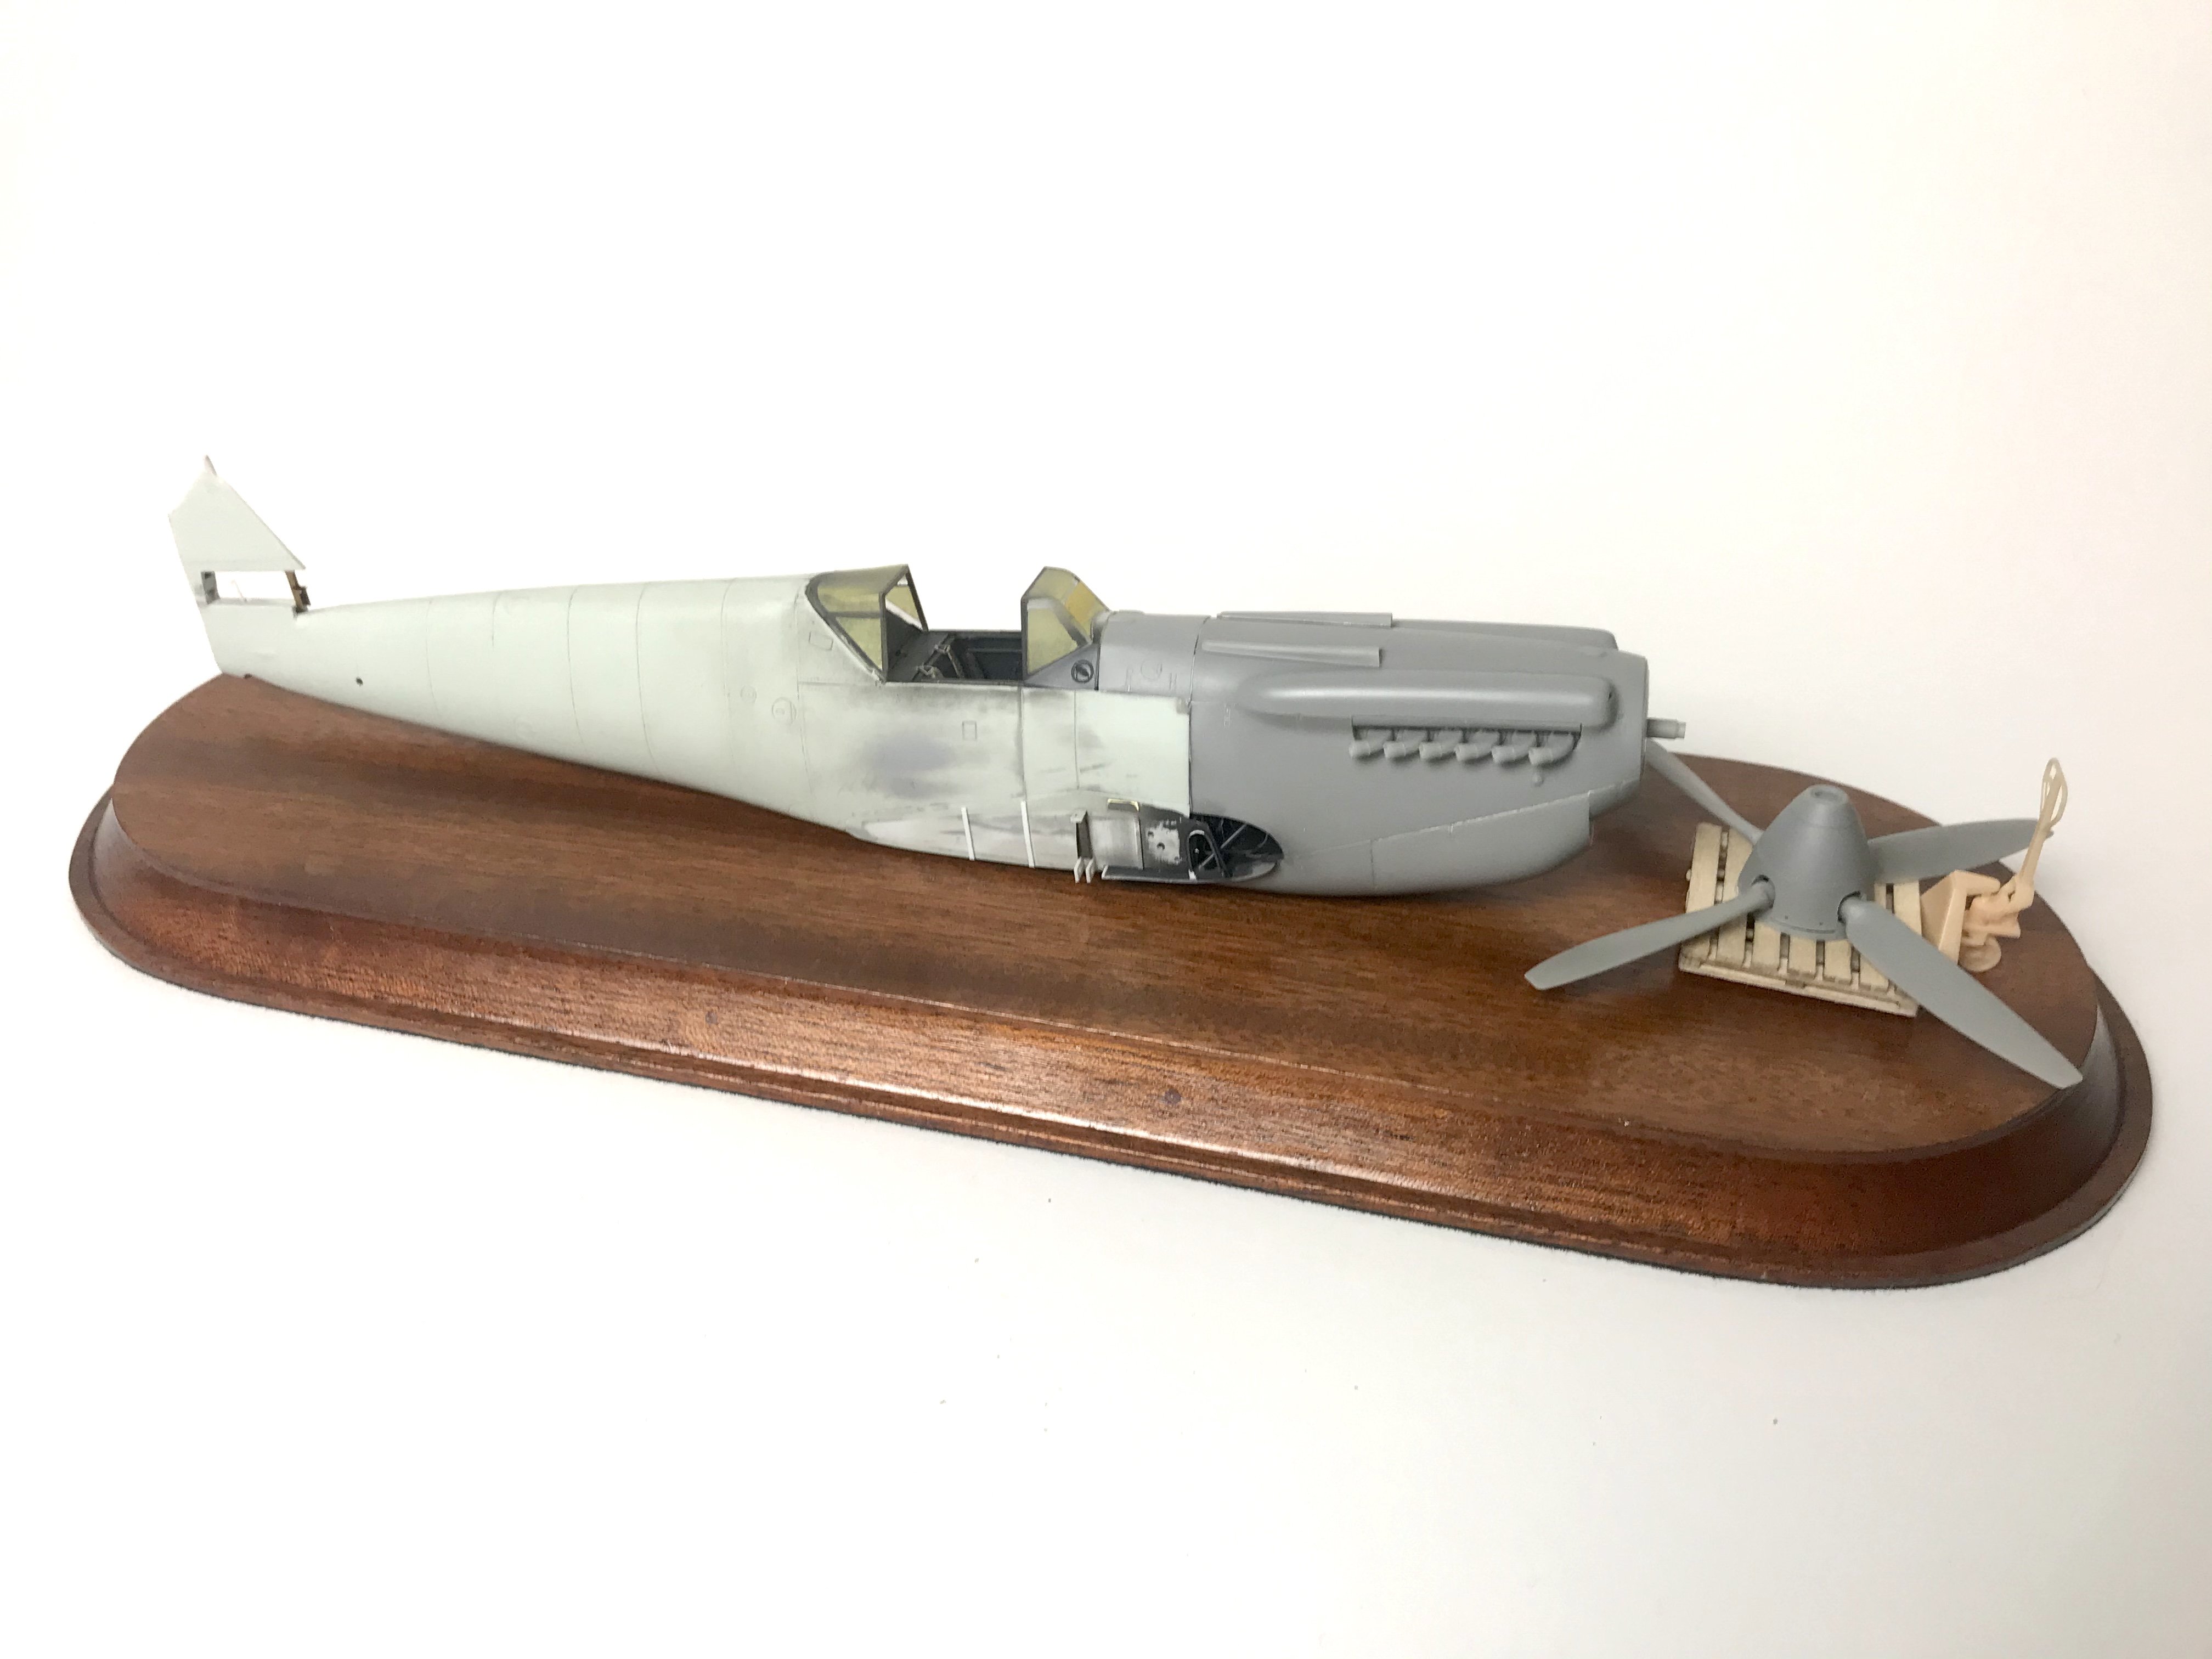
Small progress. Found a wooden base at the SMC show today.

-
1/32 Connie Edwards Ha-1112 Buchon
JeroenPeters replied to JeroenPeters's topic in LSM 1/35 and Larger Work In Progress
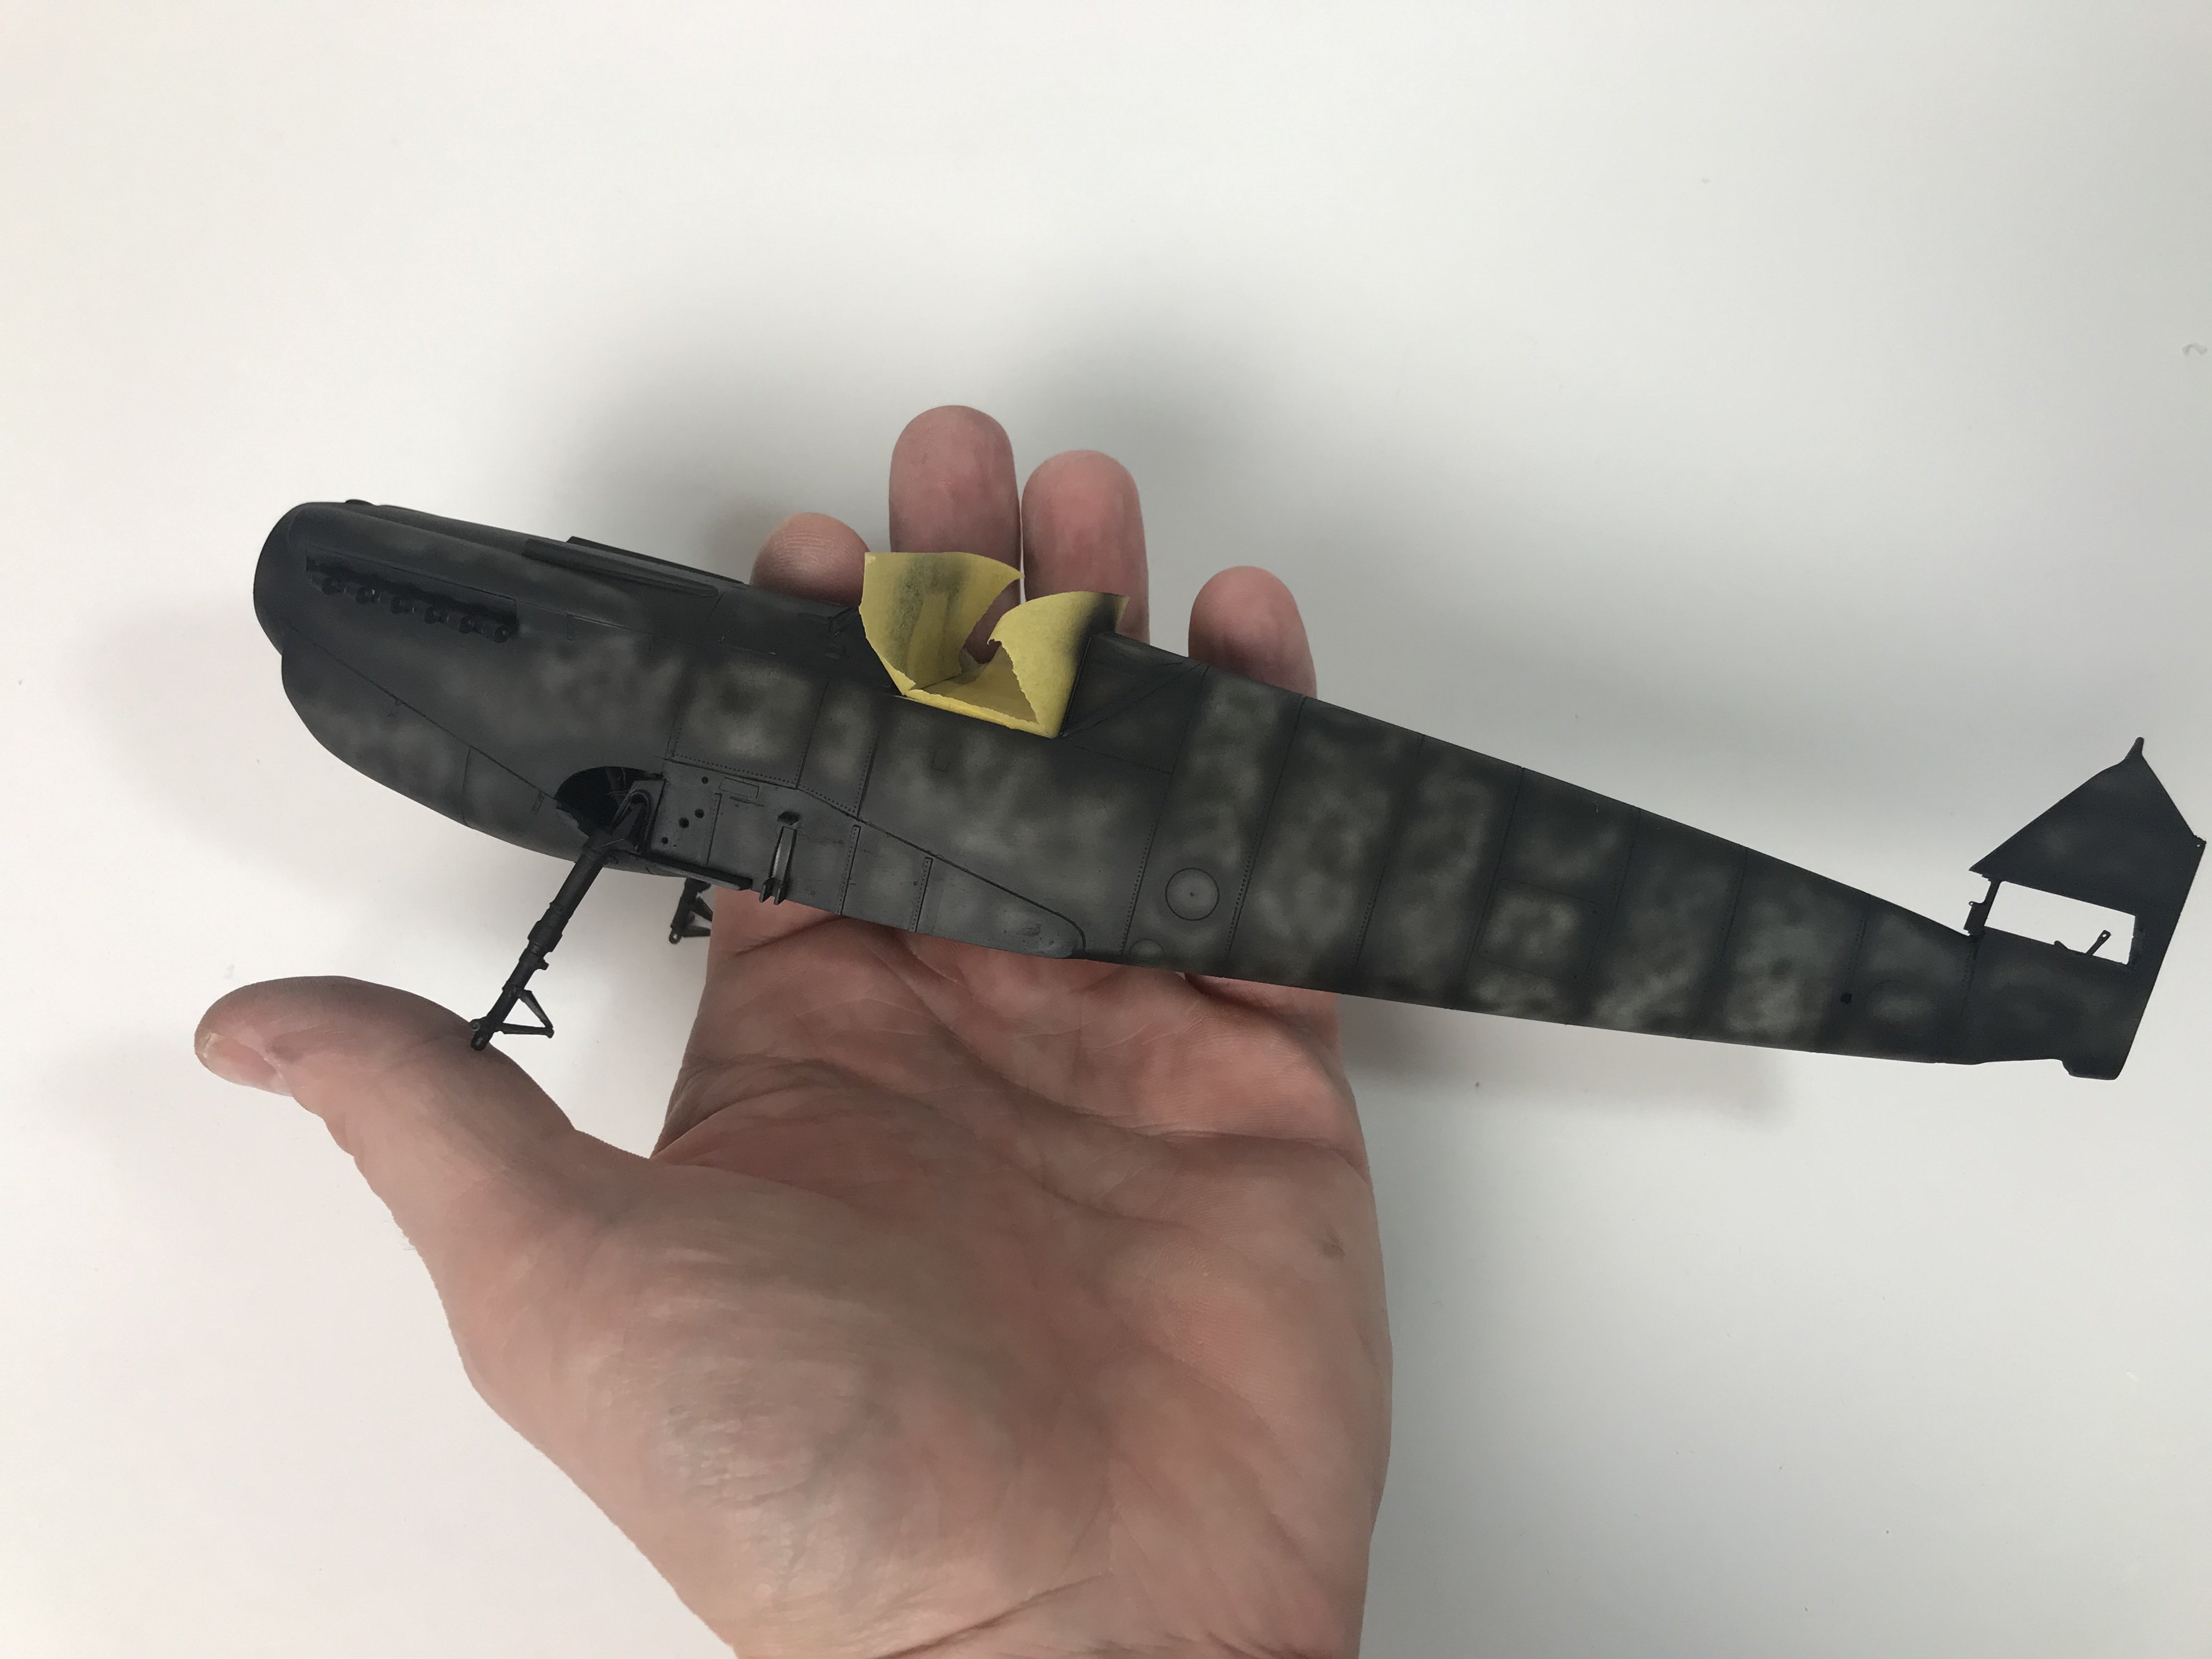
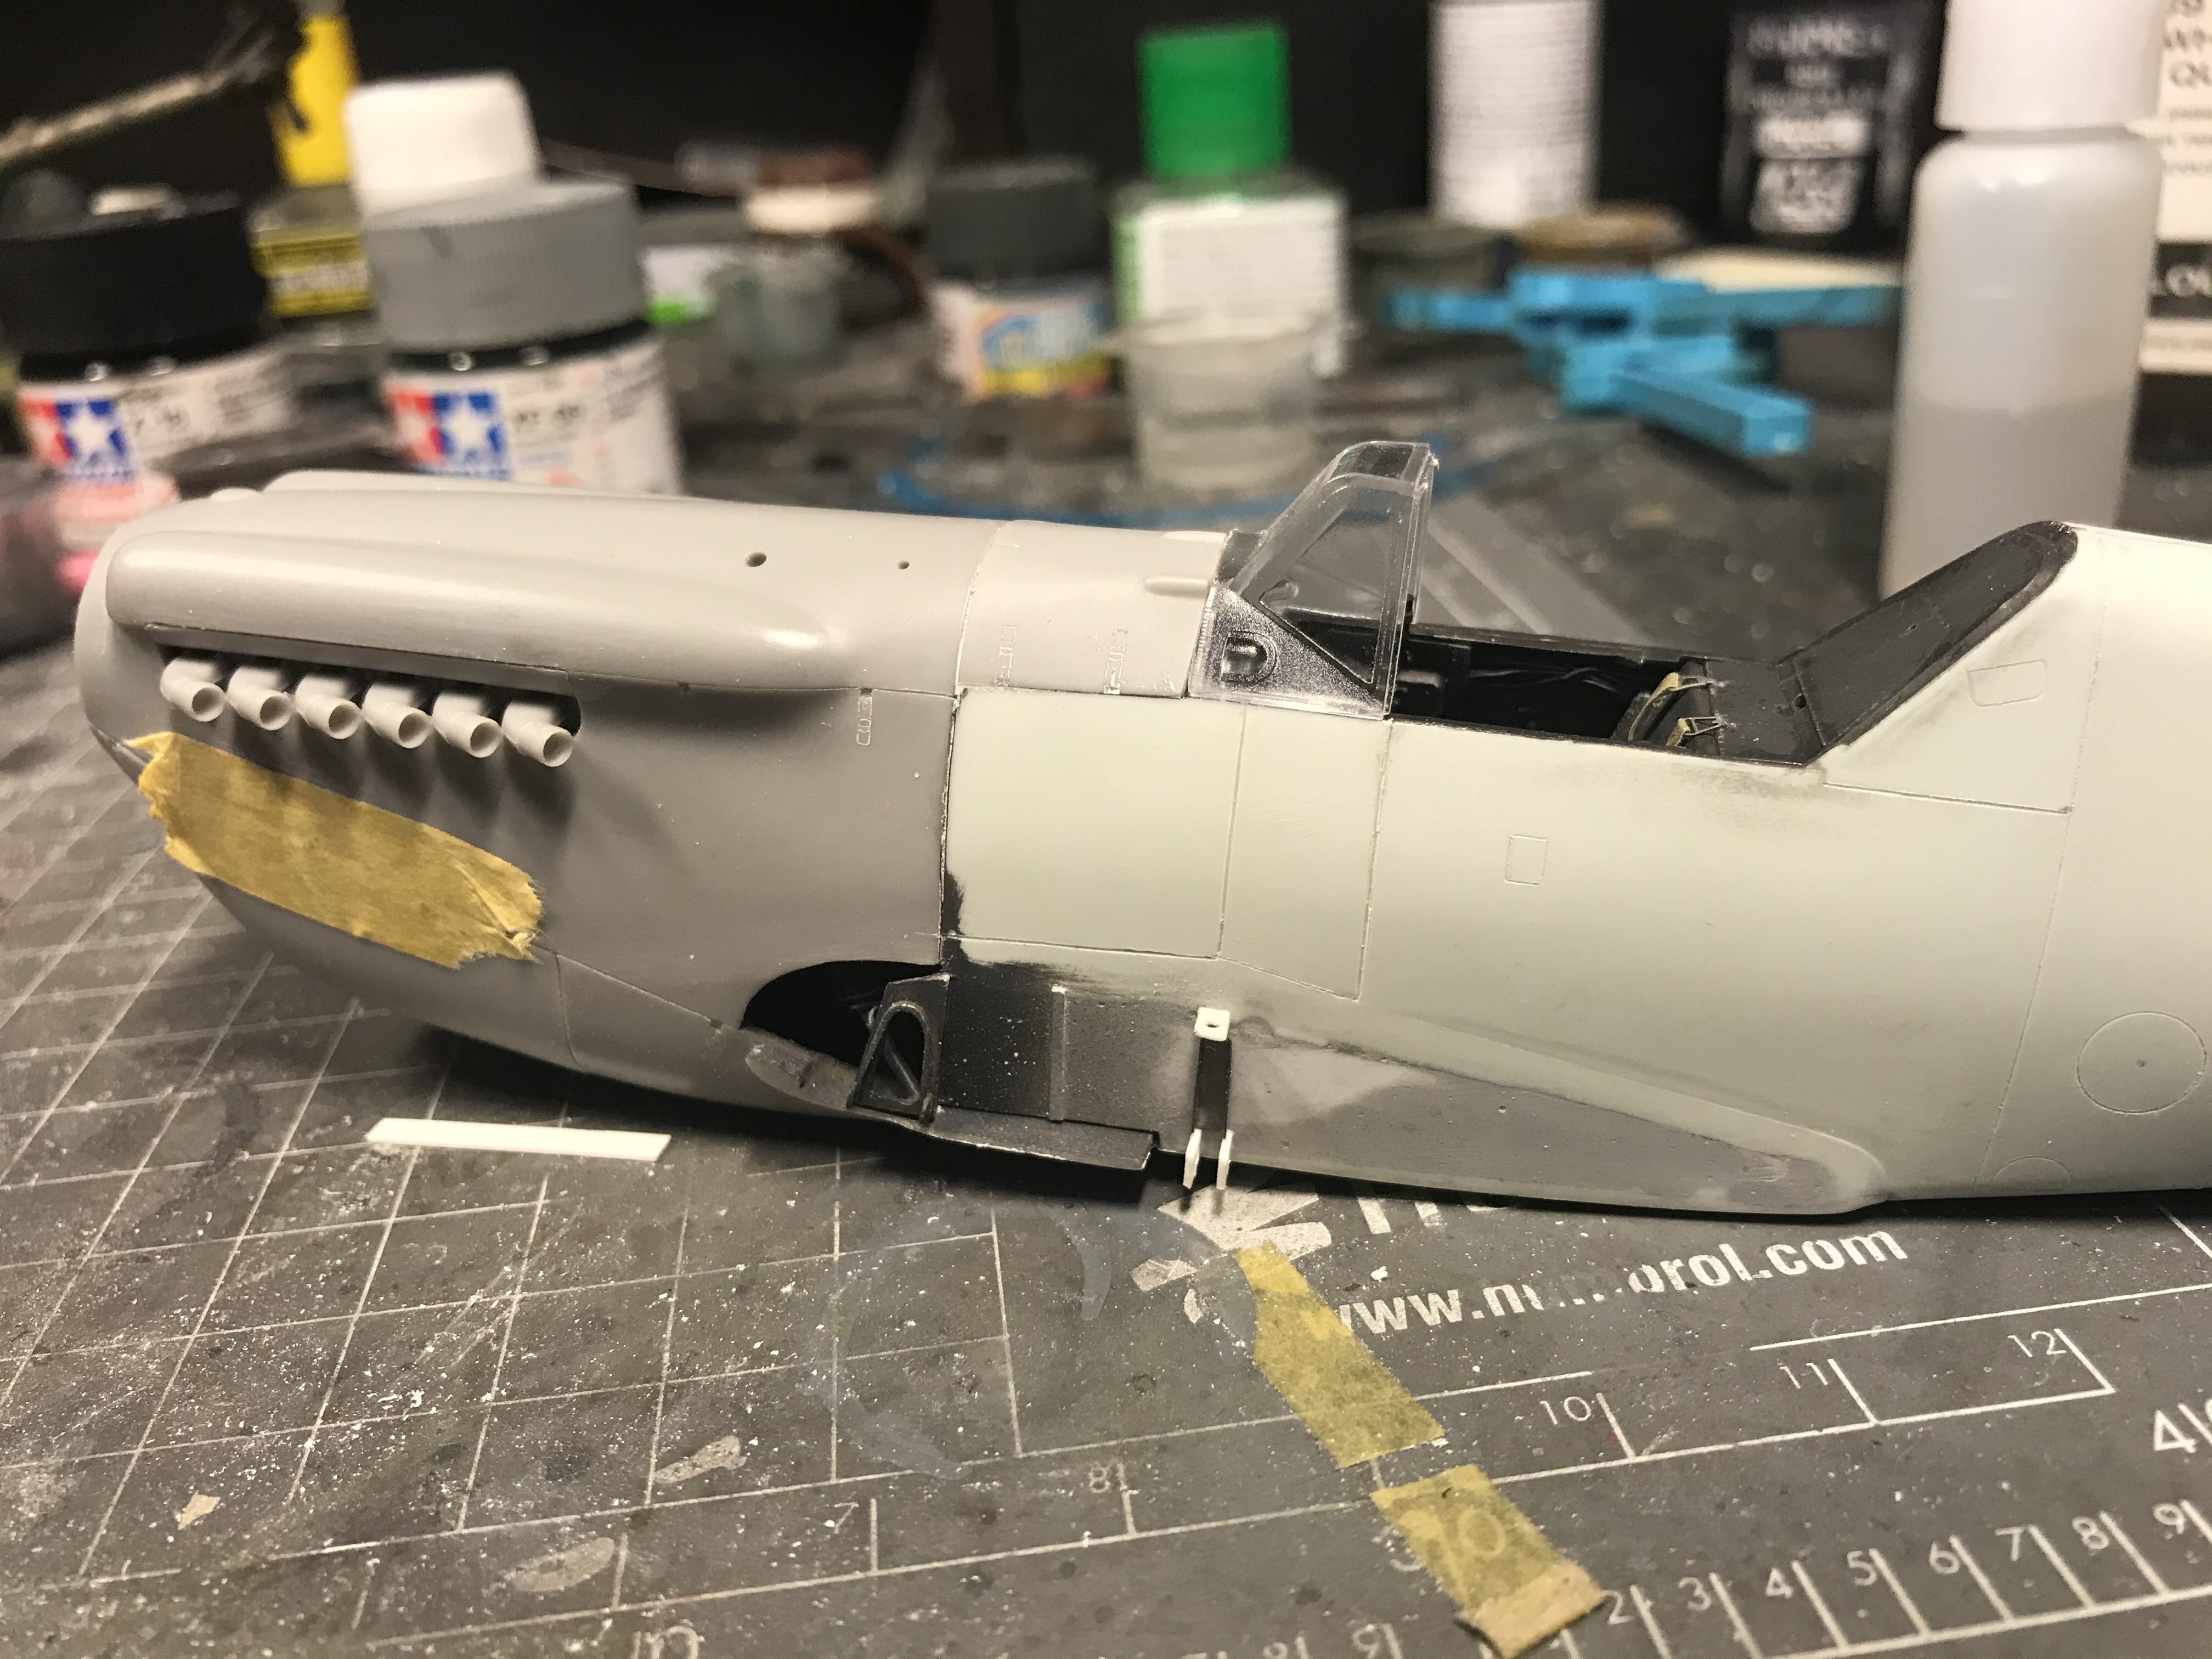
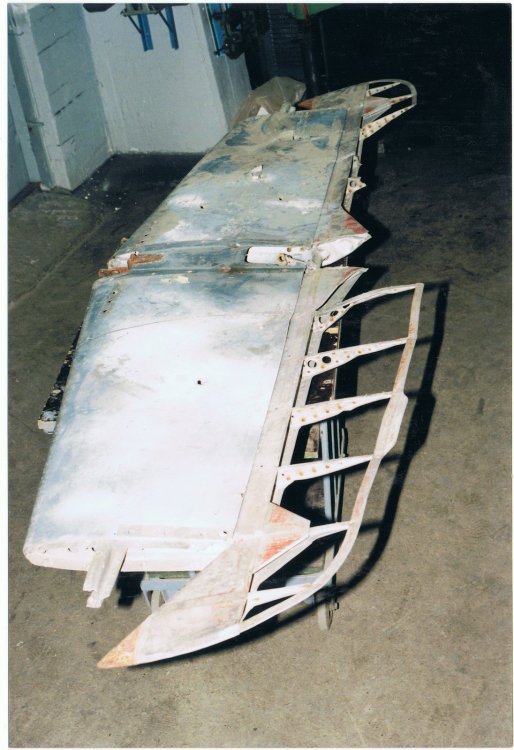
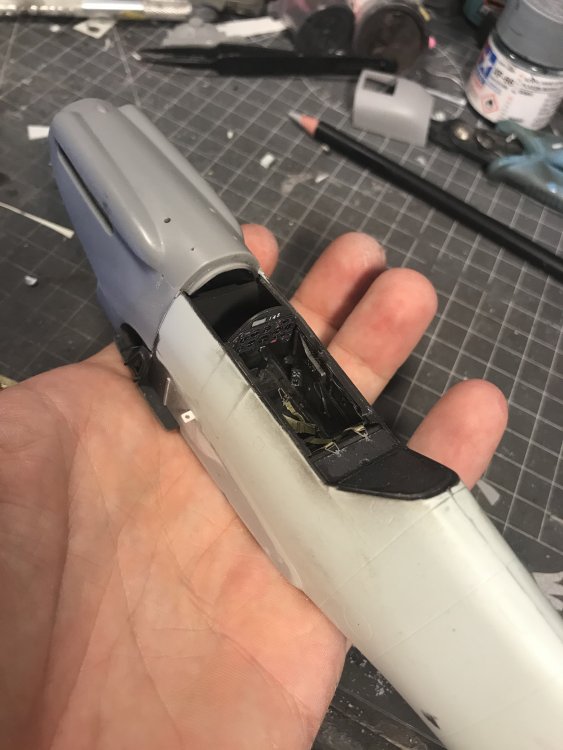
More done on the wingroots. And surgery on the tail. A lot needed to be removed and scratched.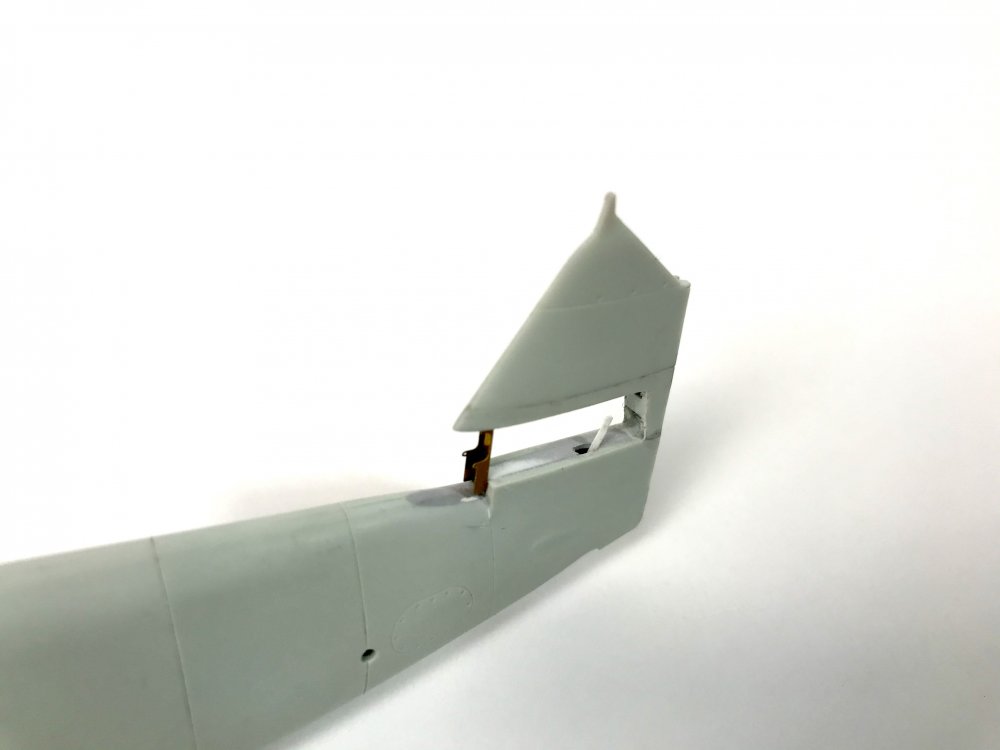


-
1/32 Connie Edwards Ha-1112 Buchon
JeroenPeters replied to JeroenPeters's topic in LSM 1/35 and Larger Work In Progress
Dry fitting the chin and building more wingroot detail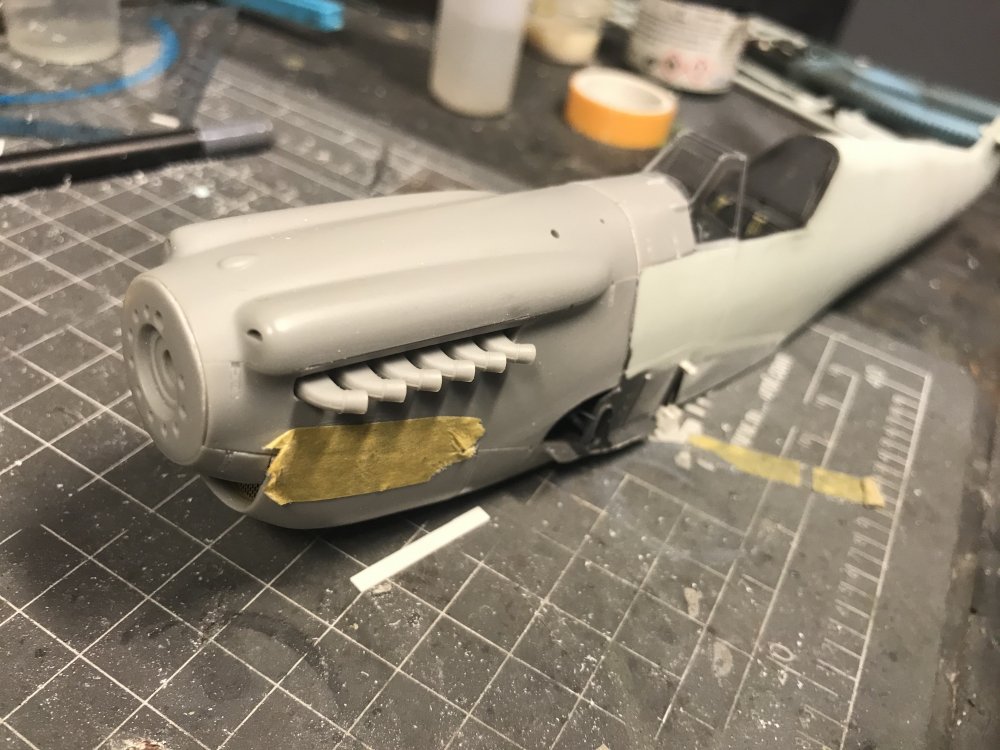

- 121 replies
-
- 11
-
-
1/32 Connie Edwards Ha-1112 Buchon
JeroenPeters replied to JeroenPeters's topic in LSM 1/35 and Larger Work In Progress
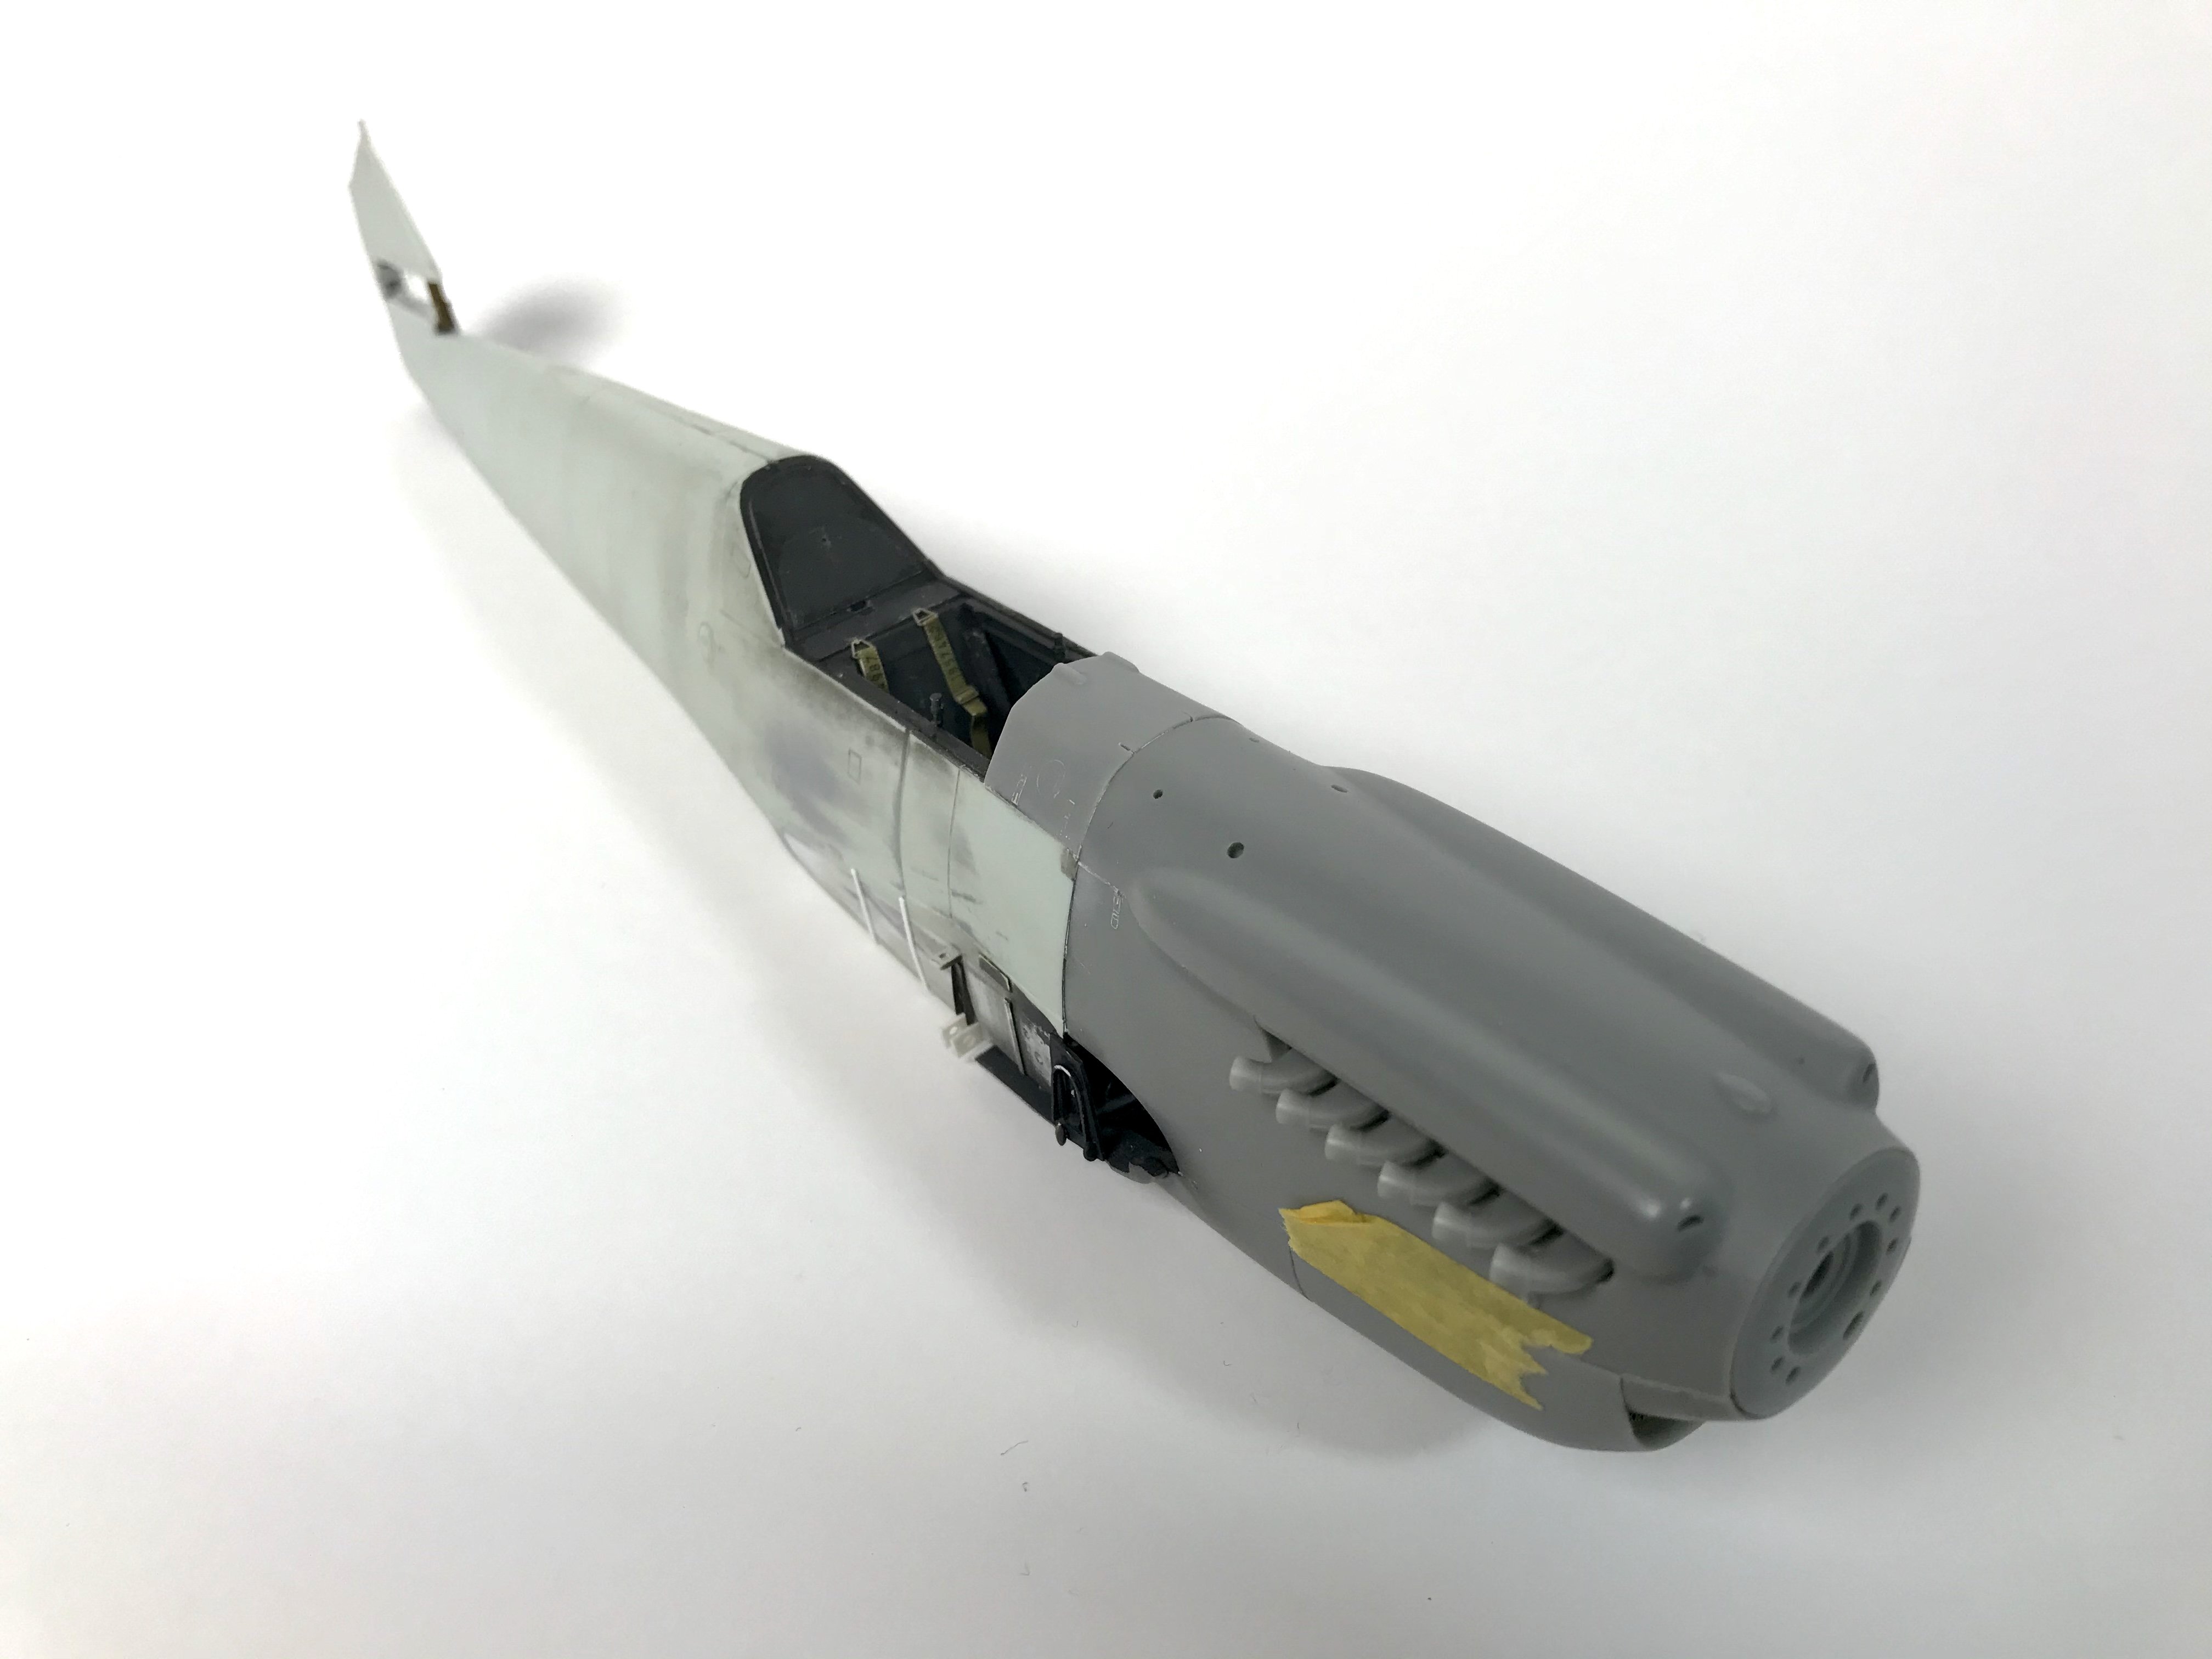
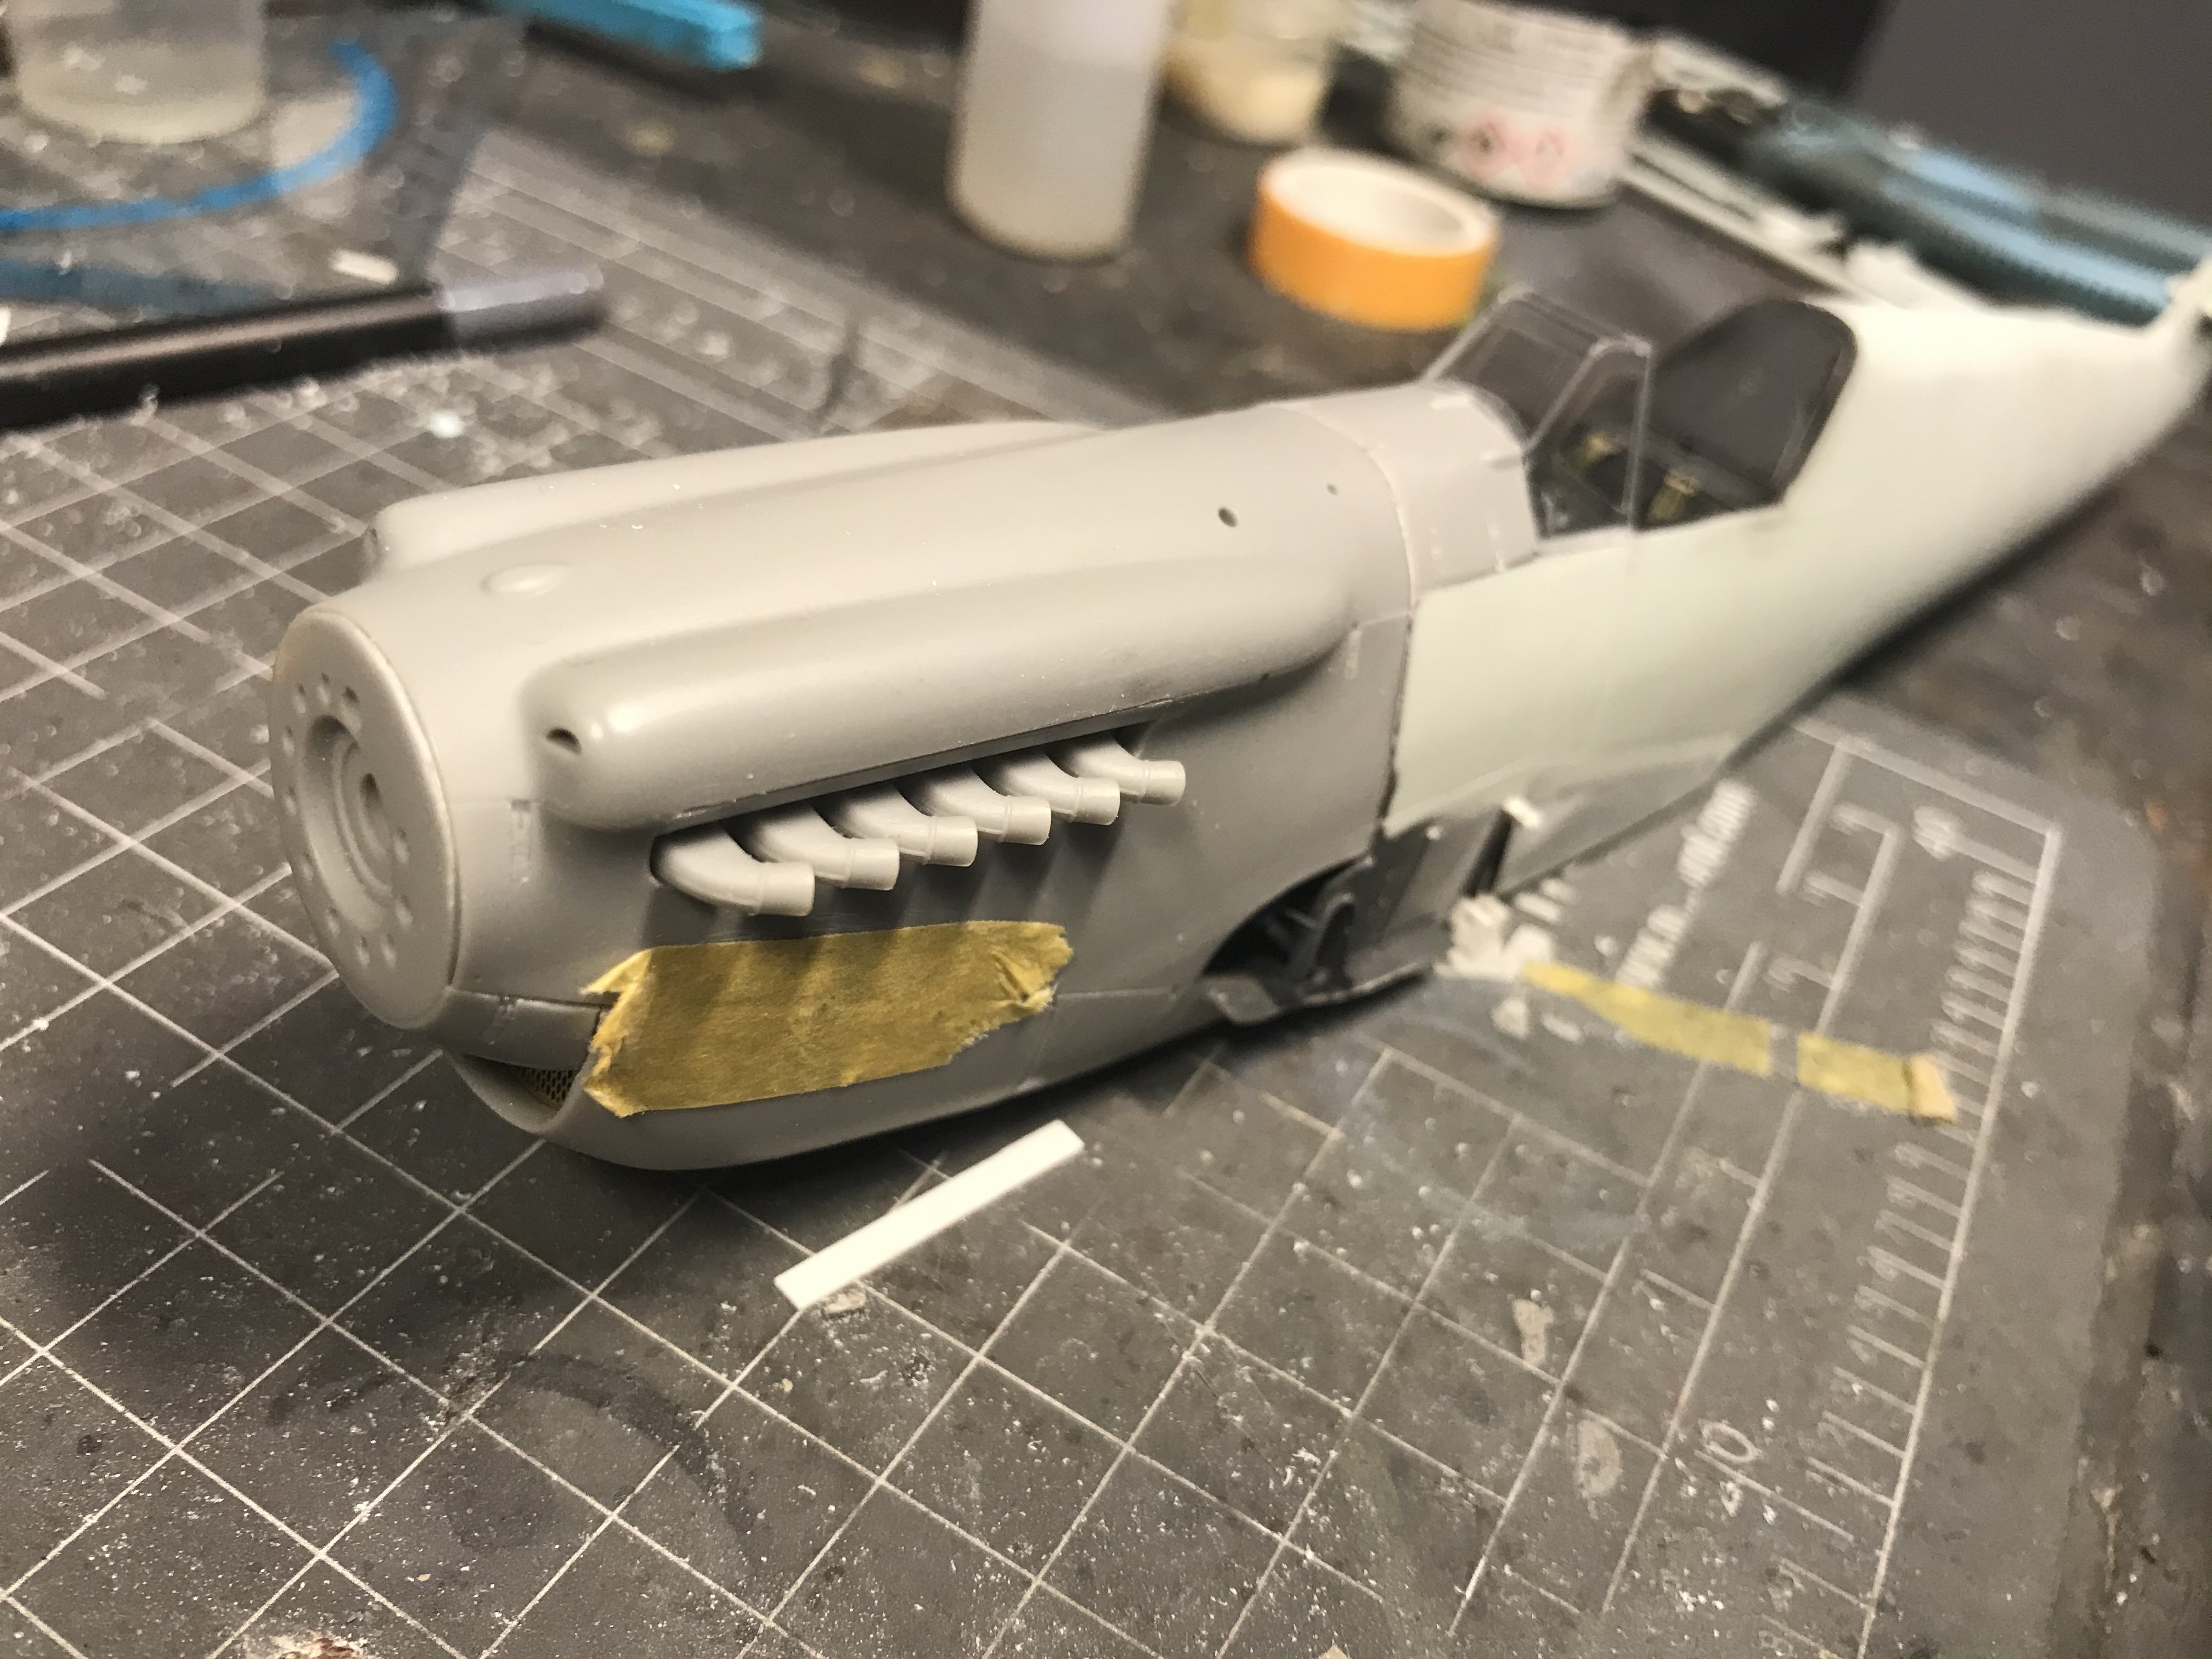
Nose is on!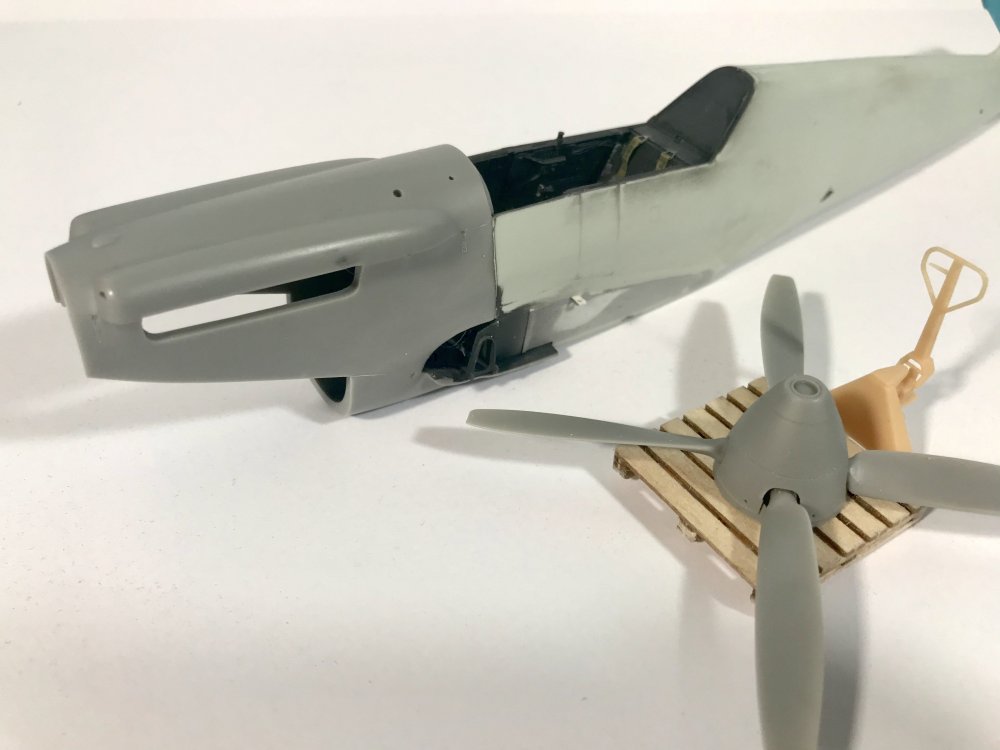
-
Great work!!!
-
1/32 Connie Edwards Ha-1112 Buchon
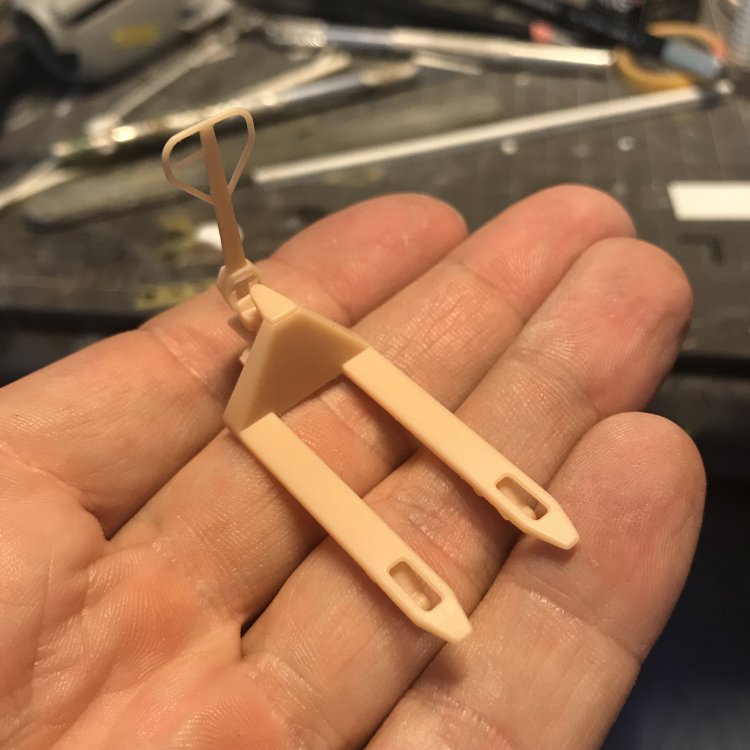
JeroenPeters replied to JeroenPeters's topic in LSM 1/35 and Larger Work In Progress
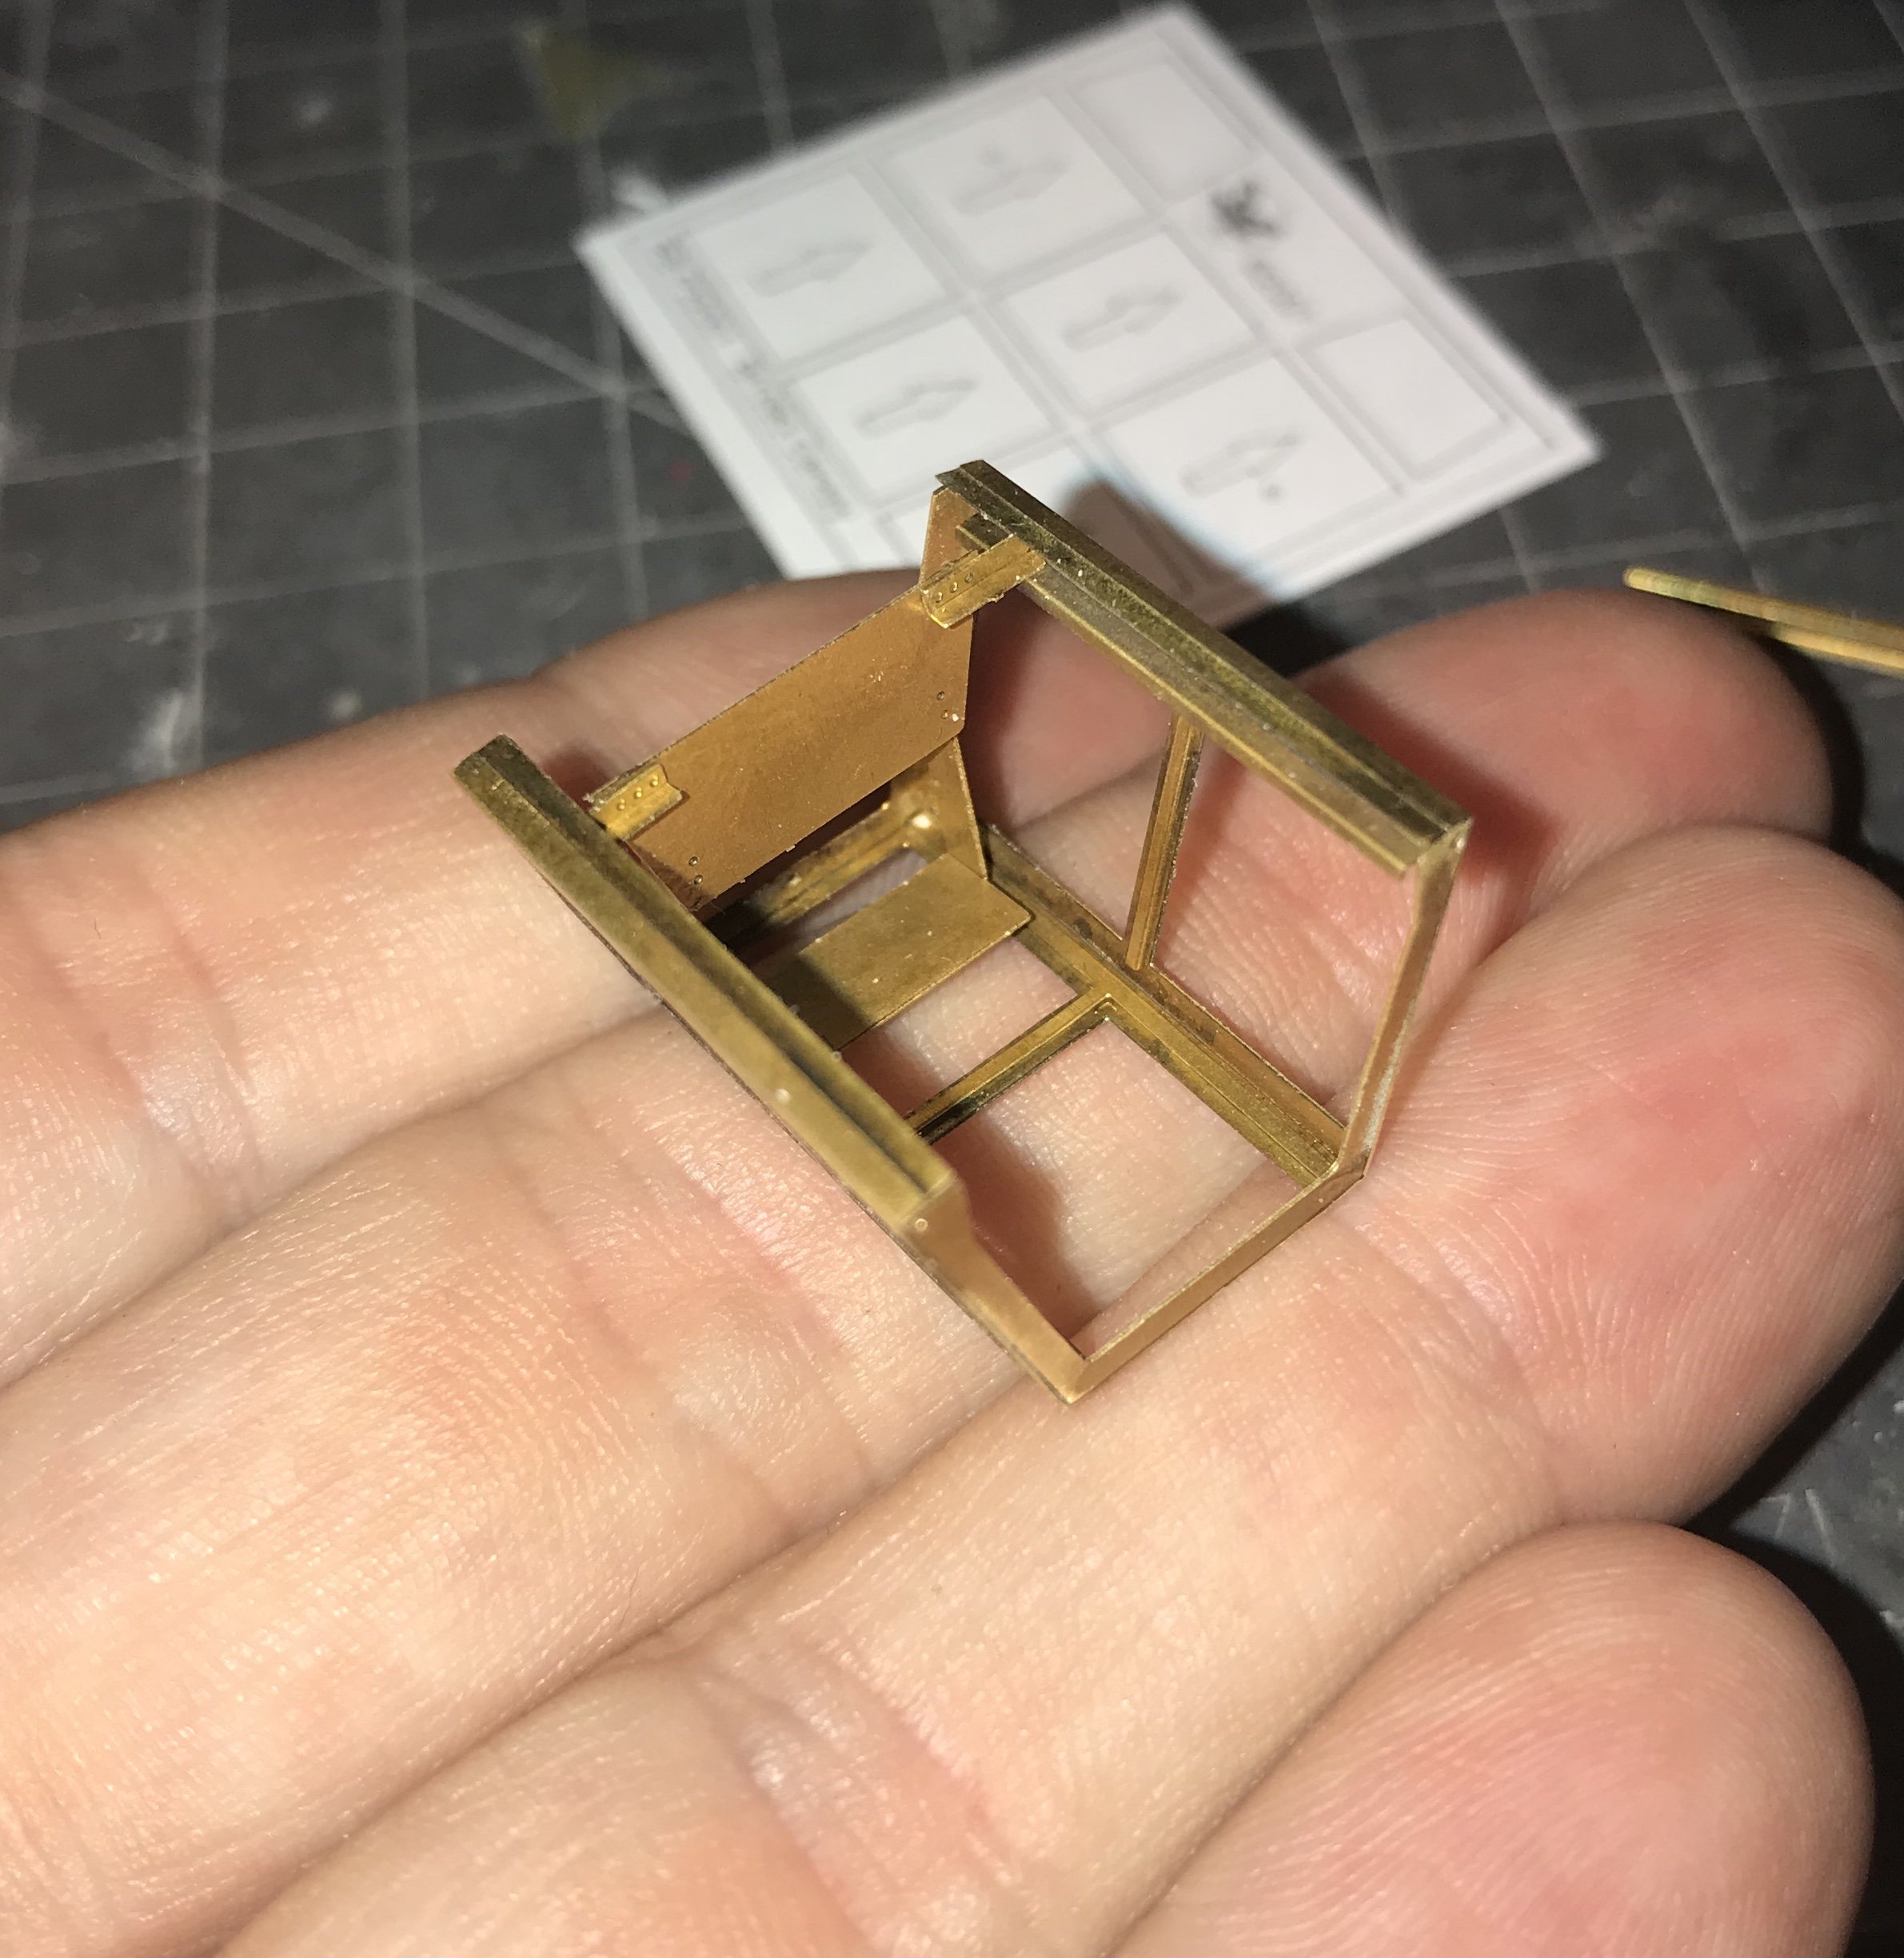
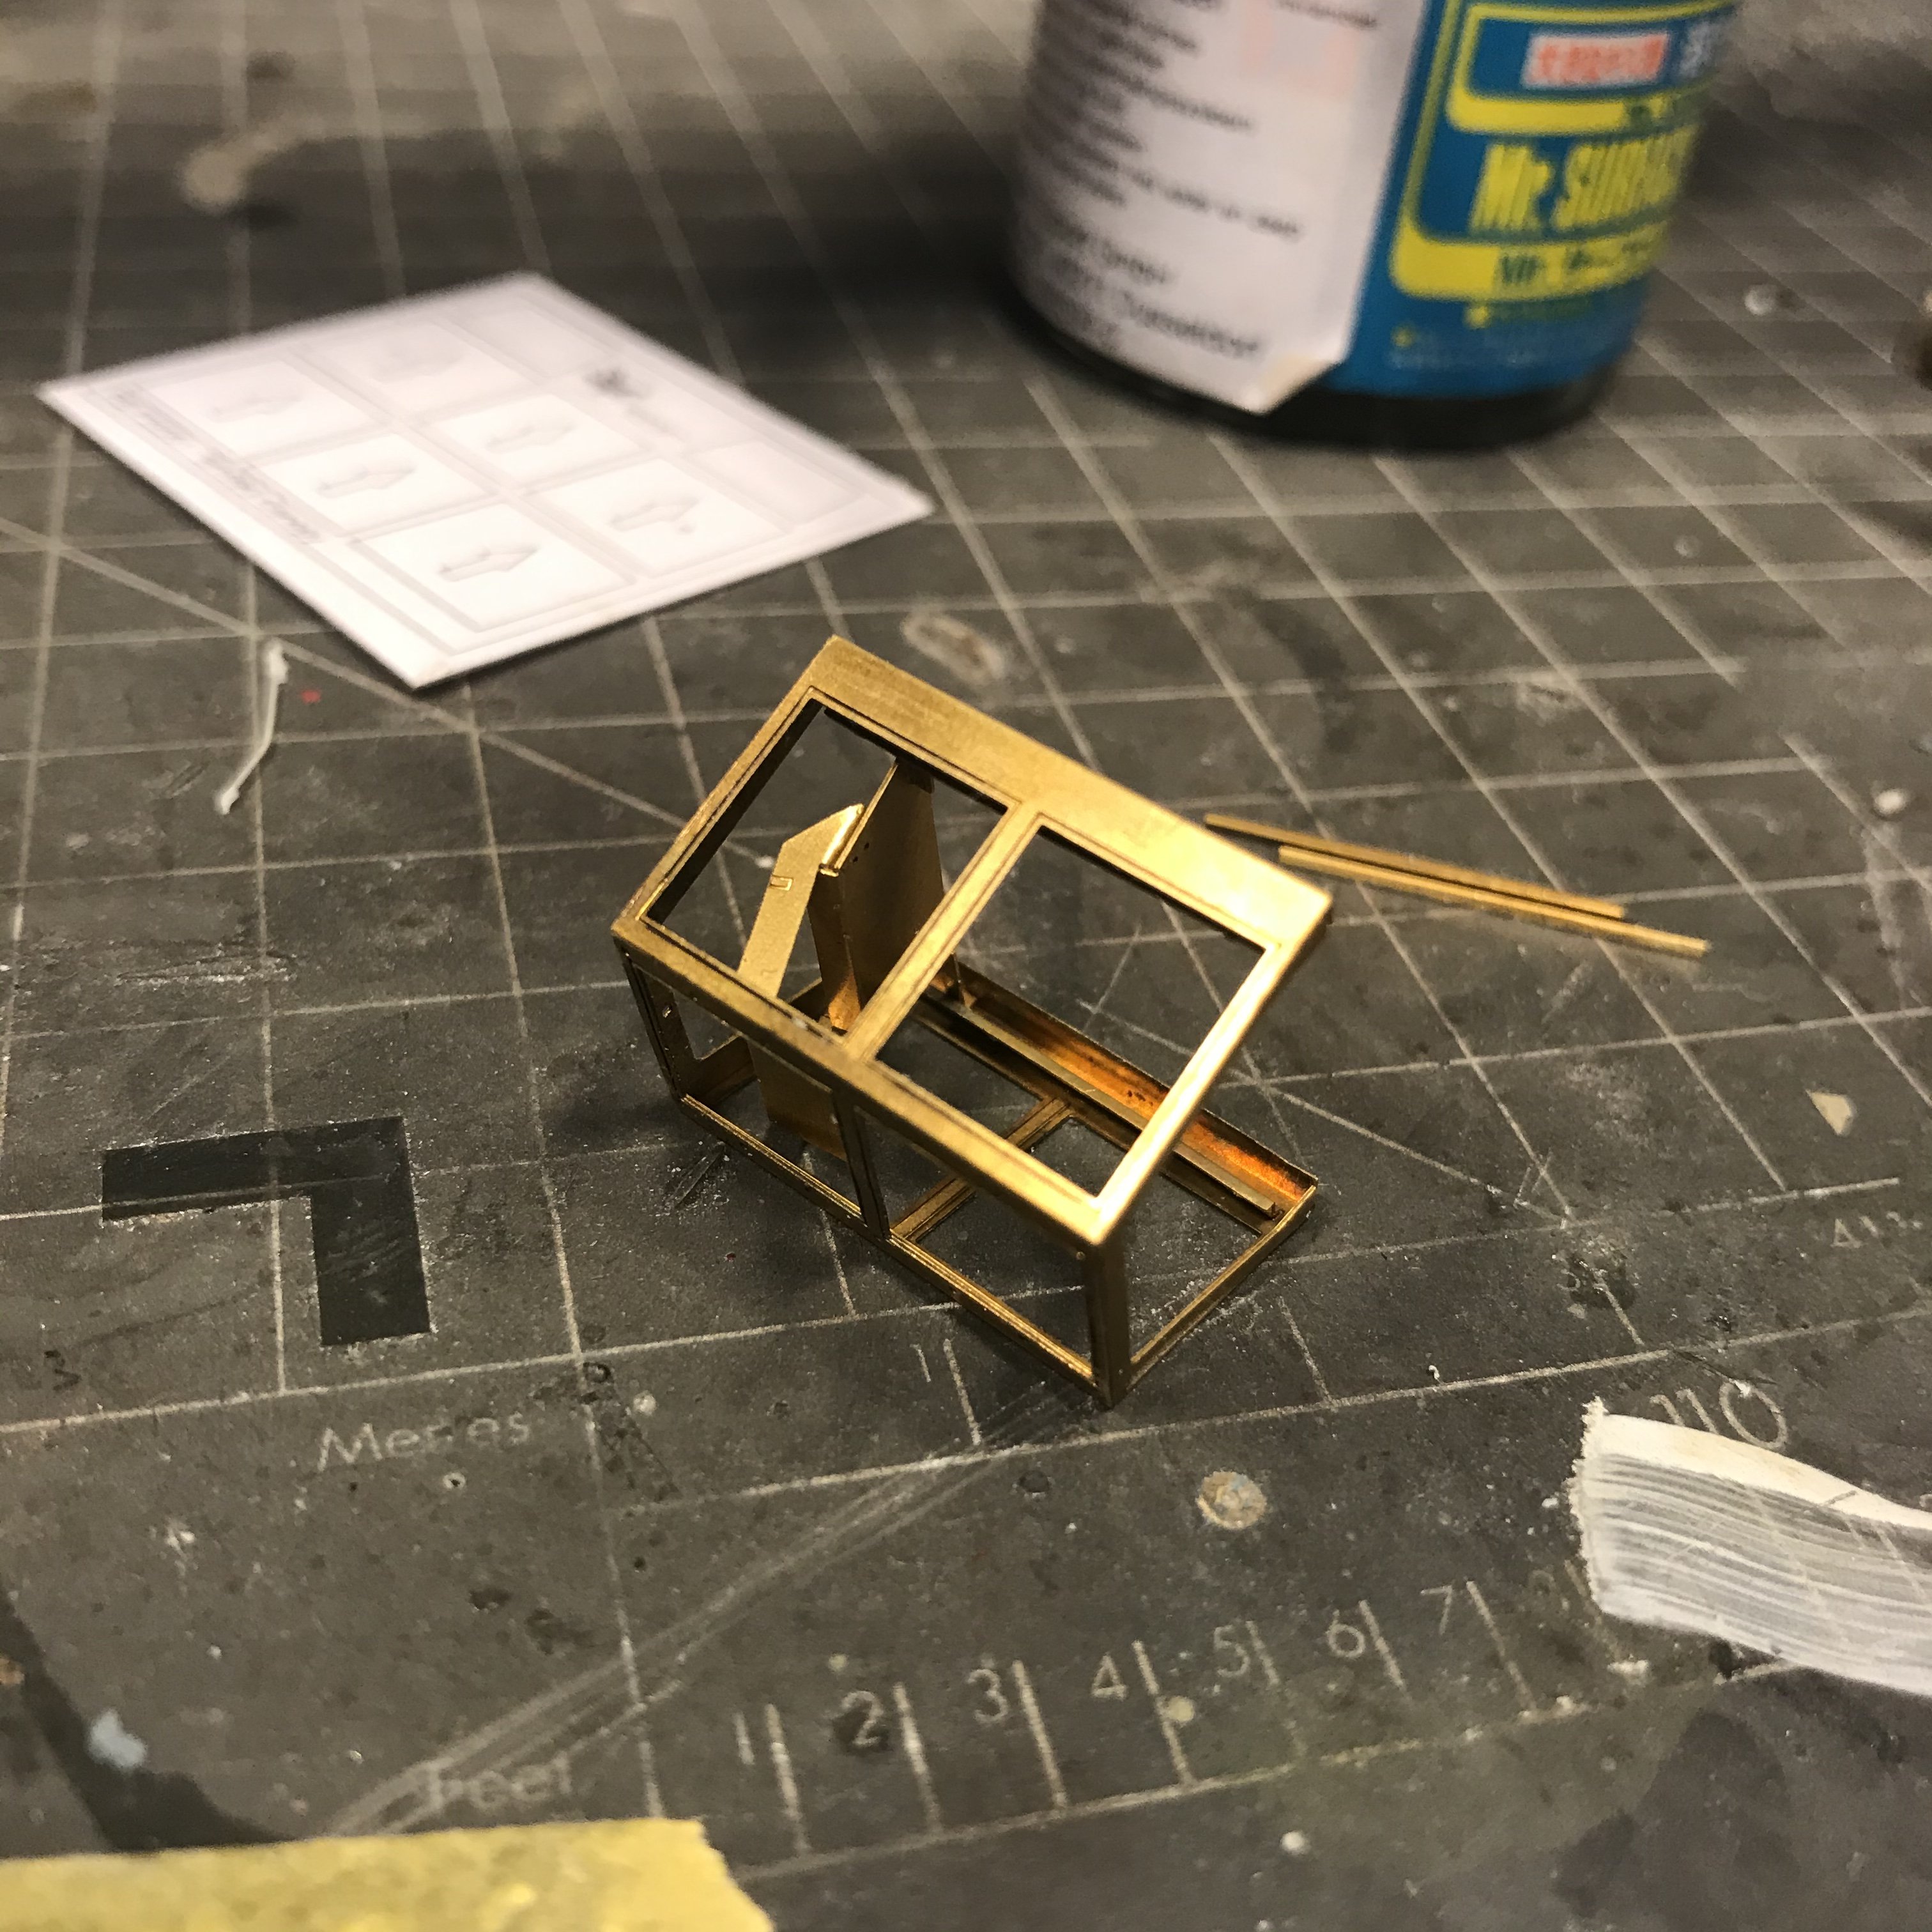
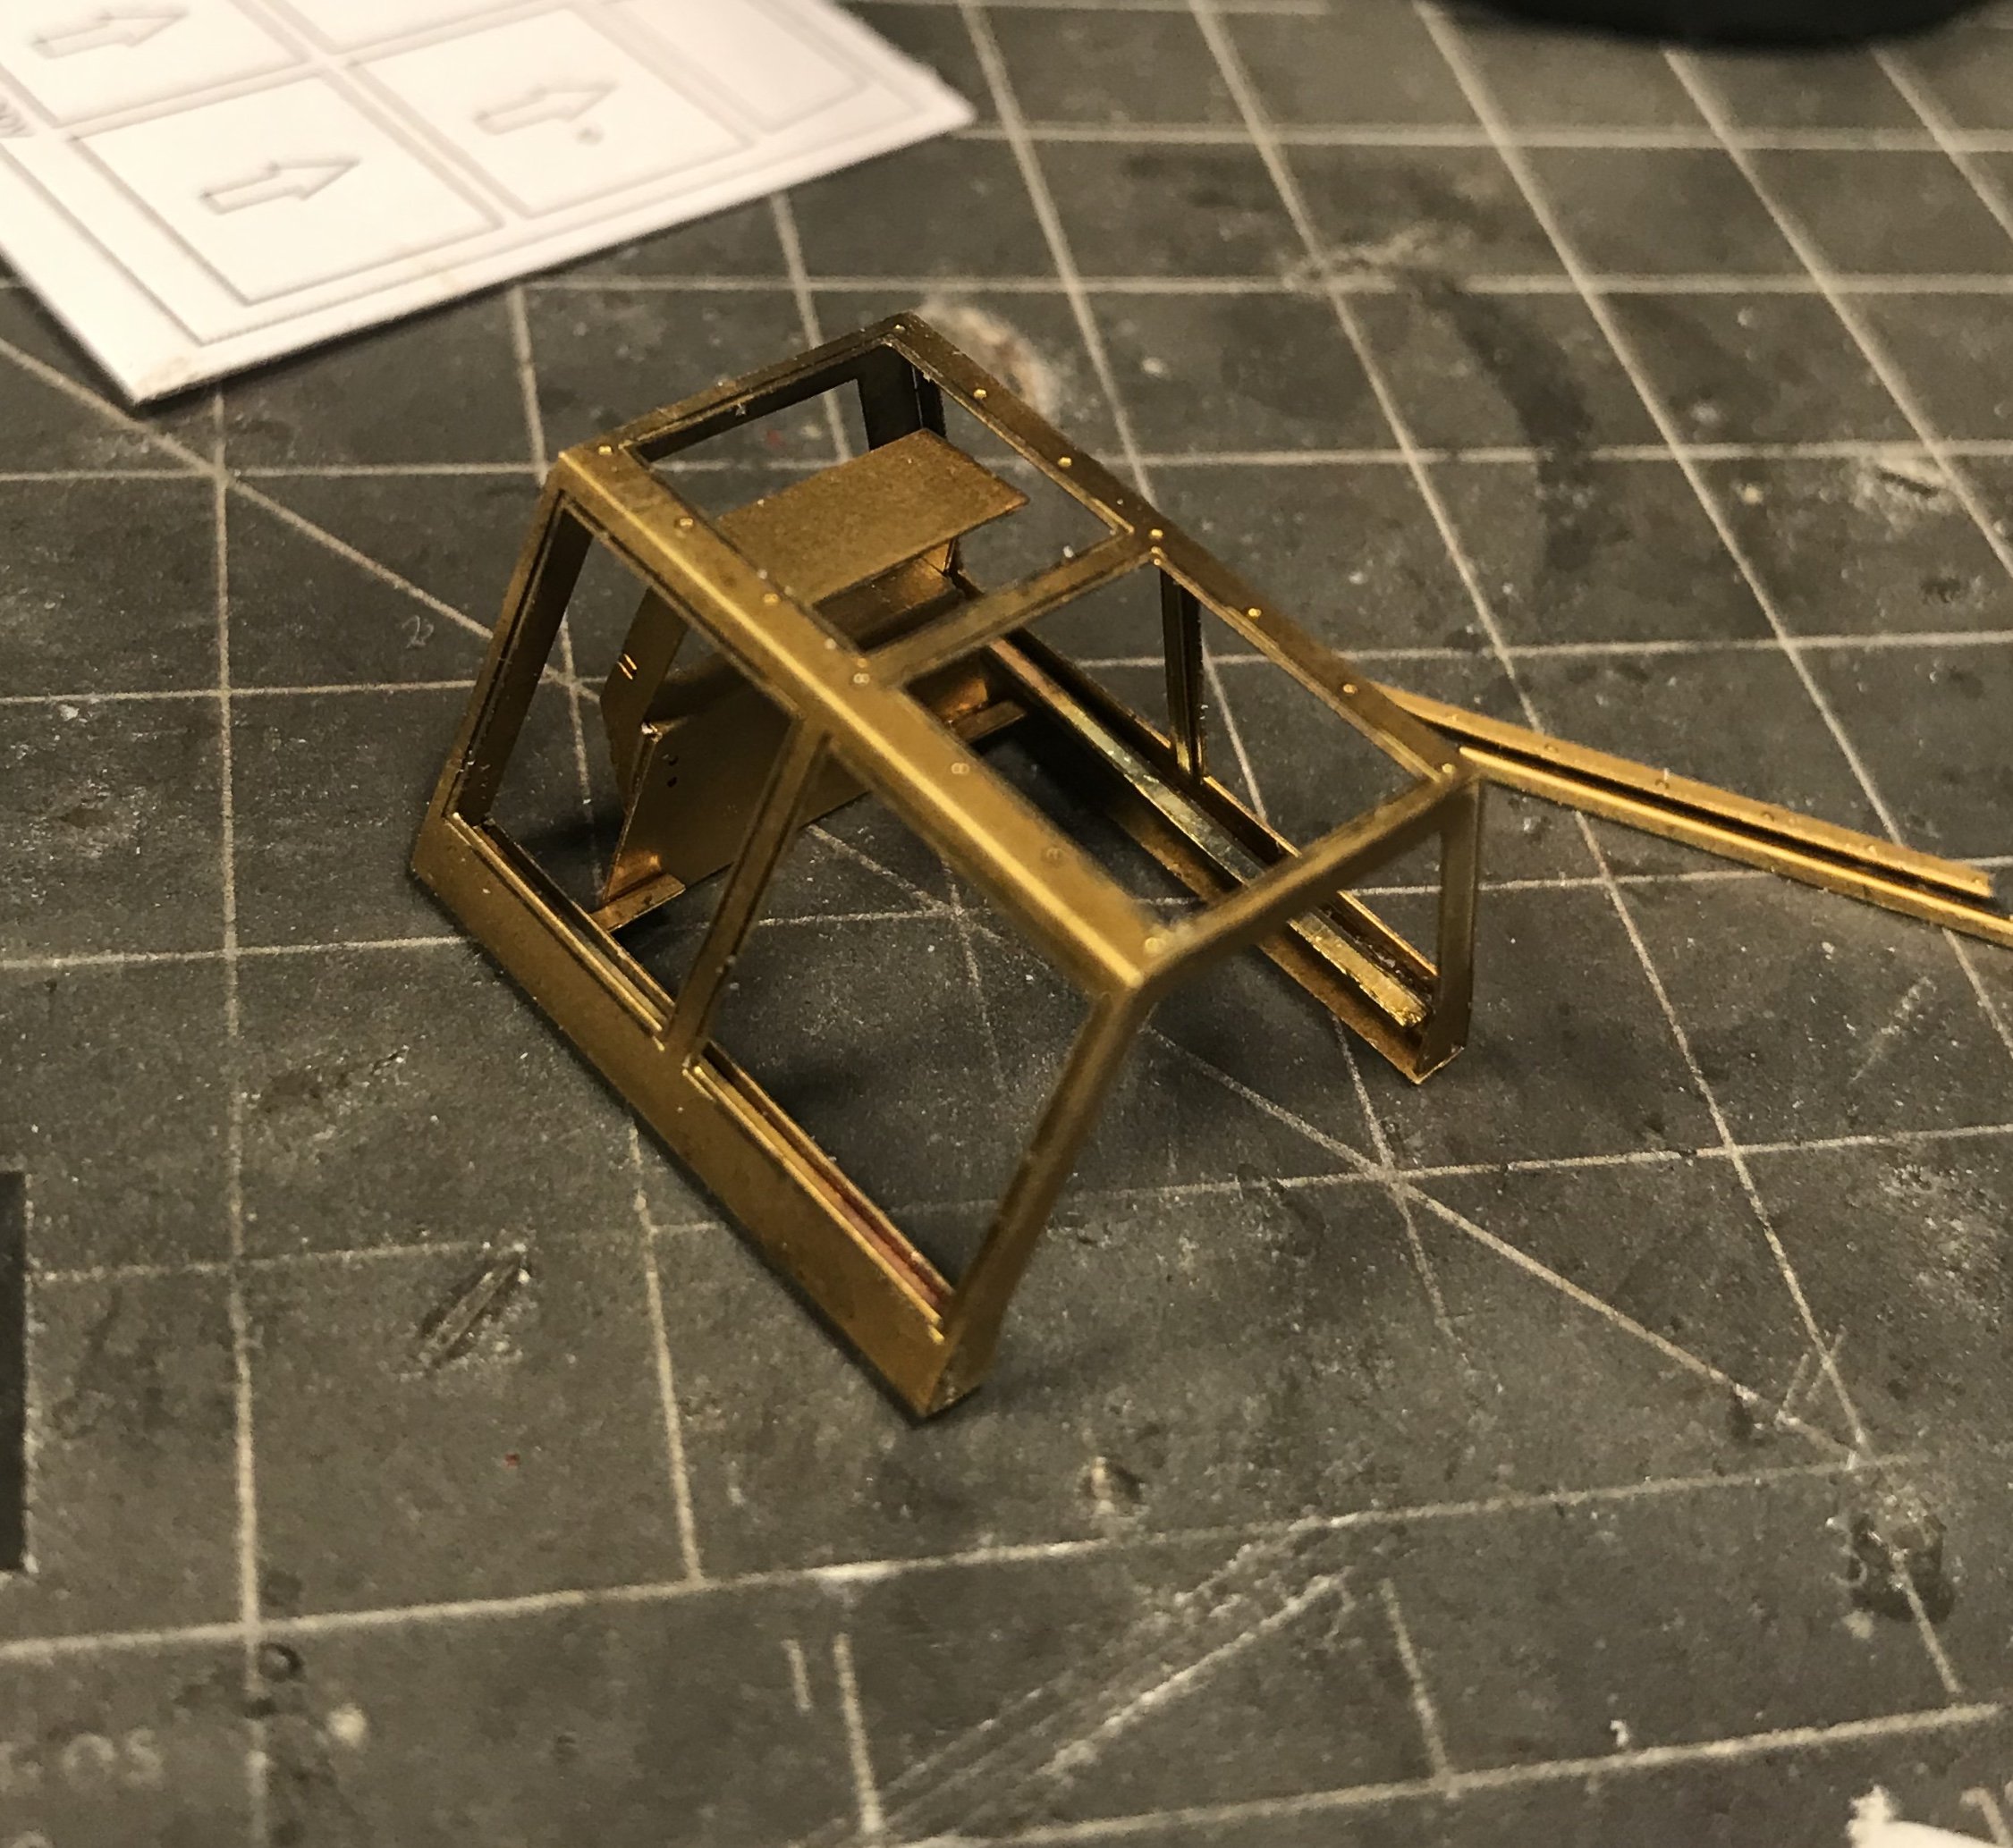
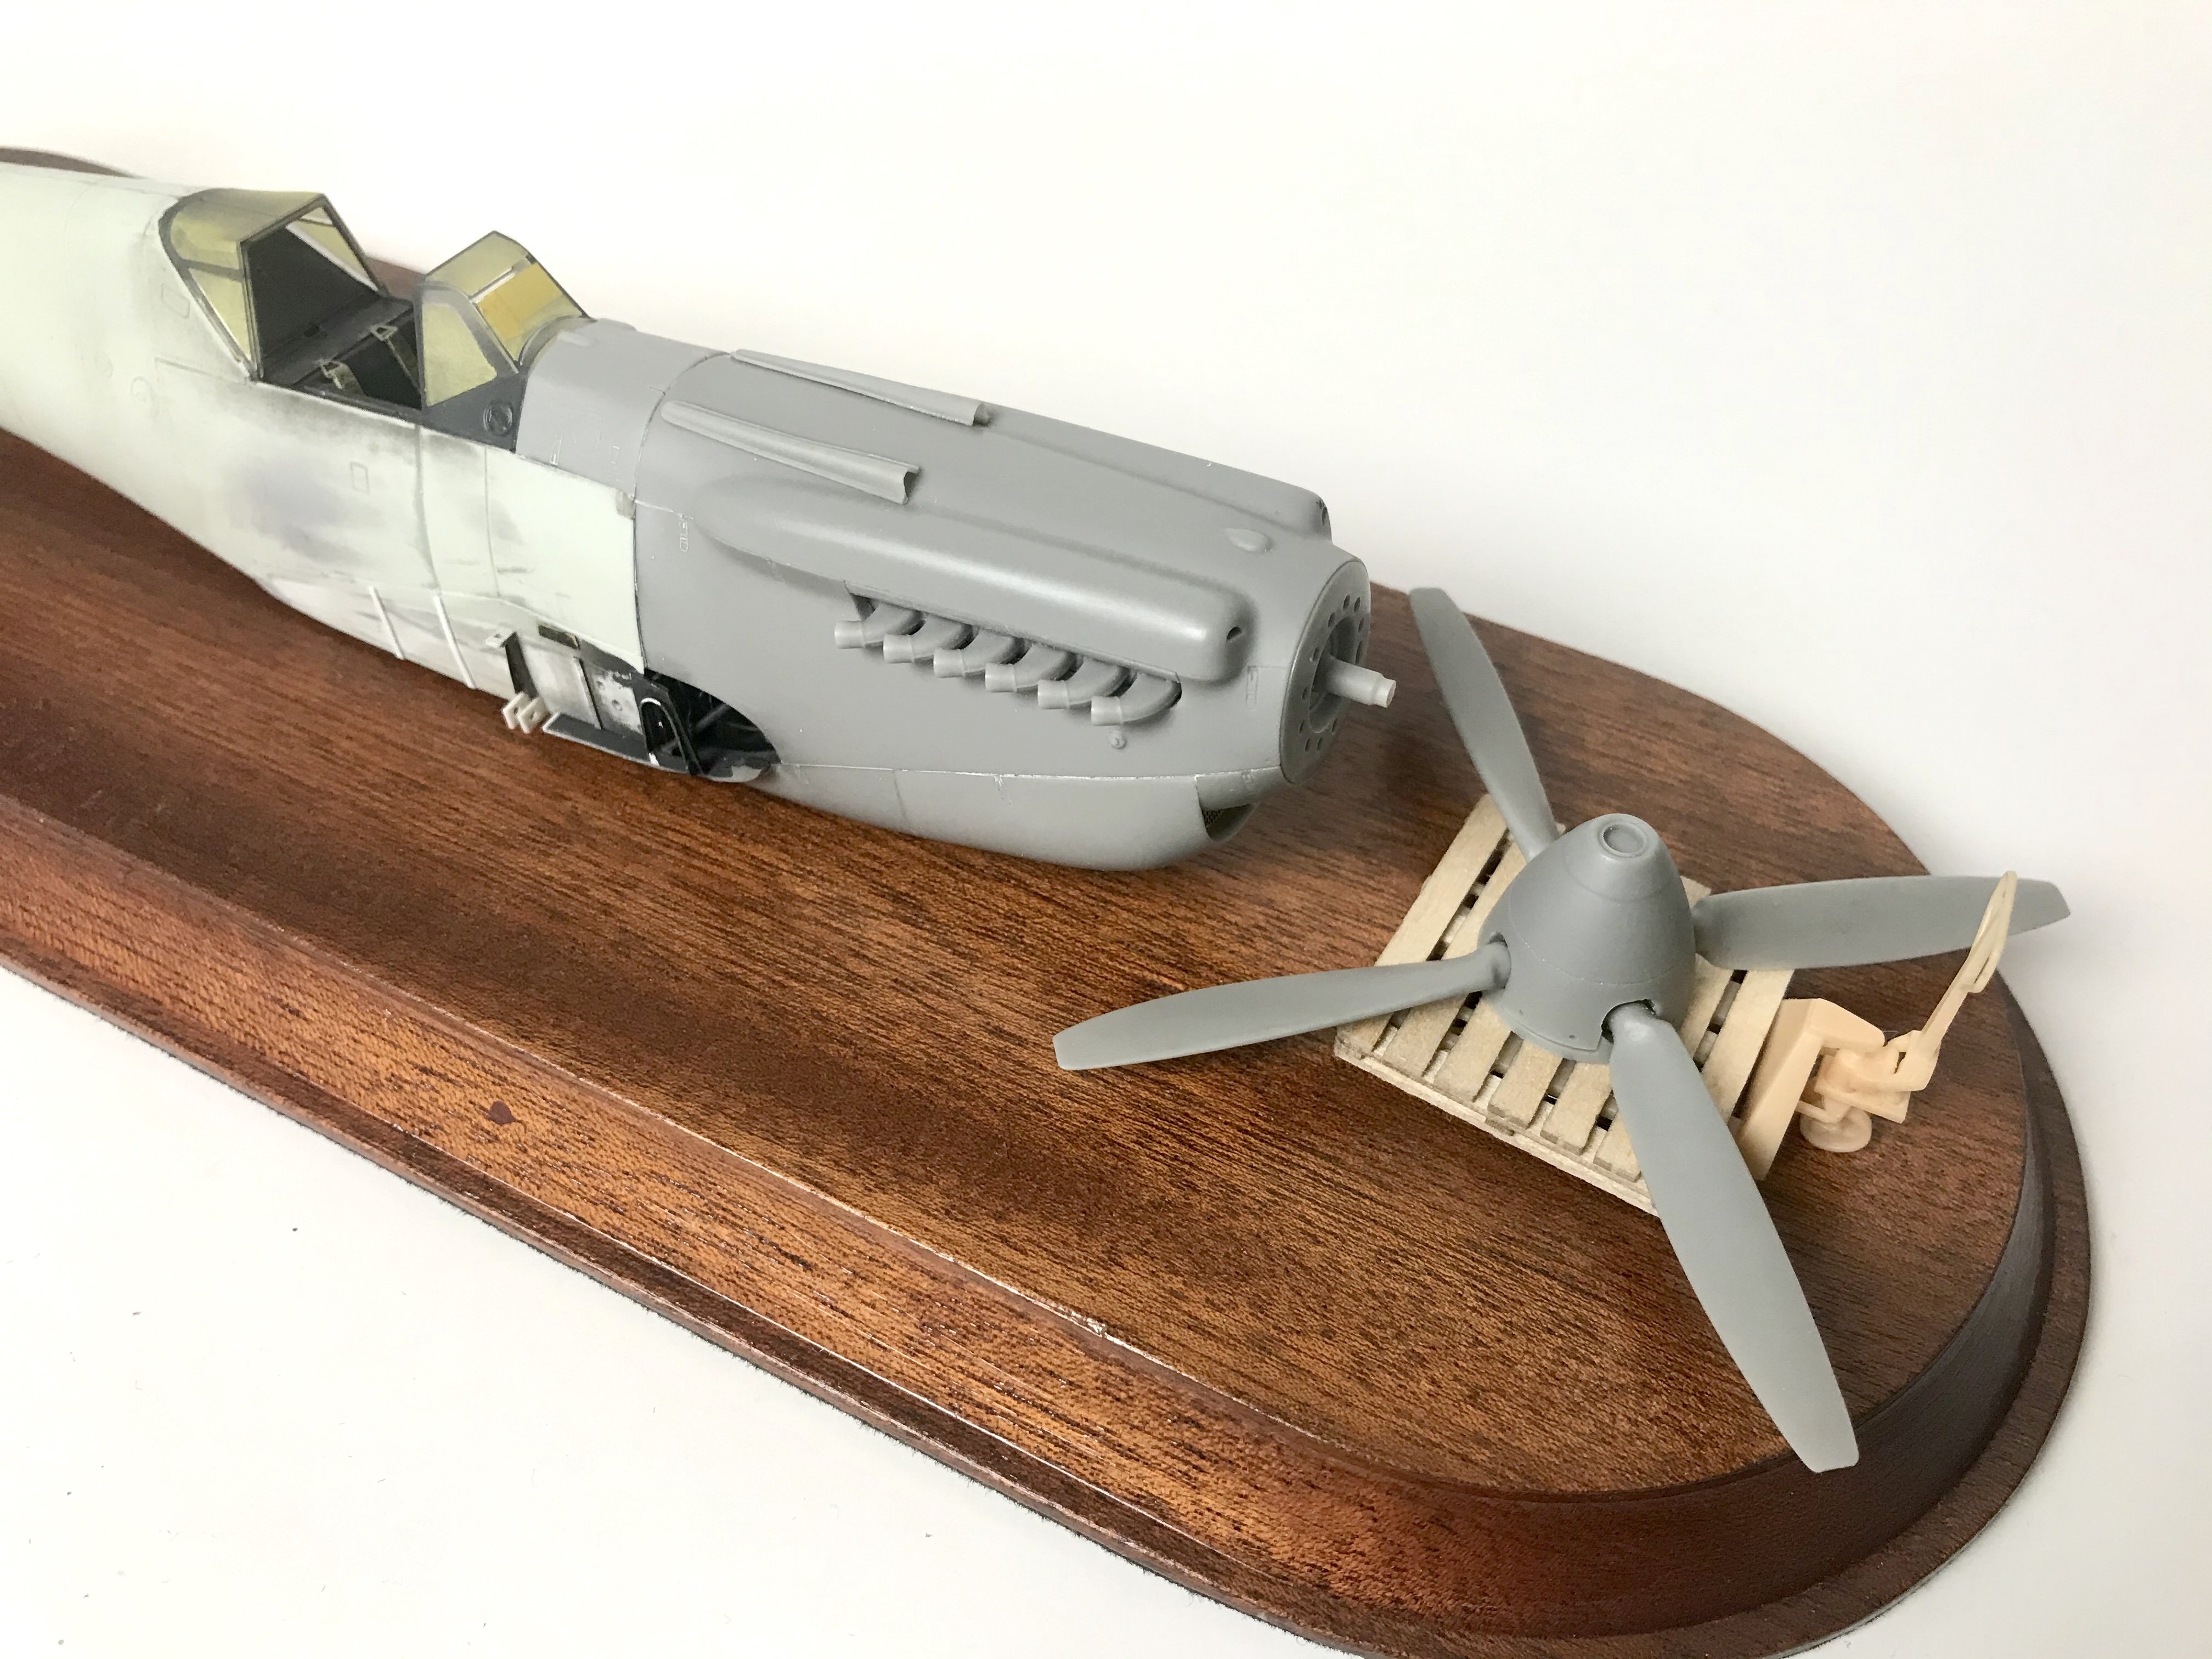
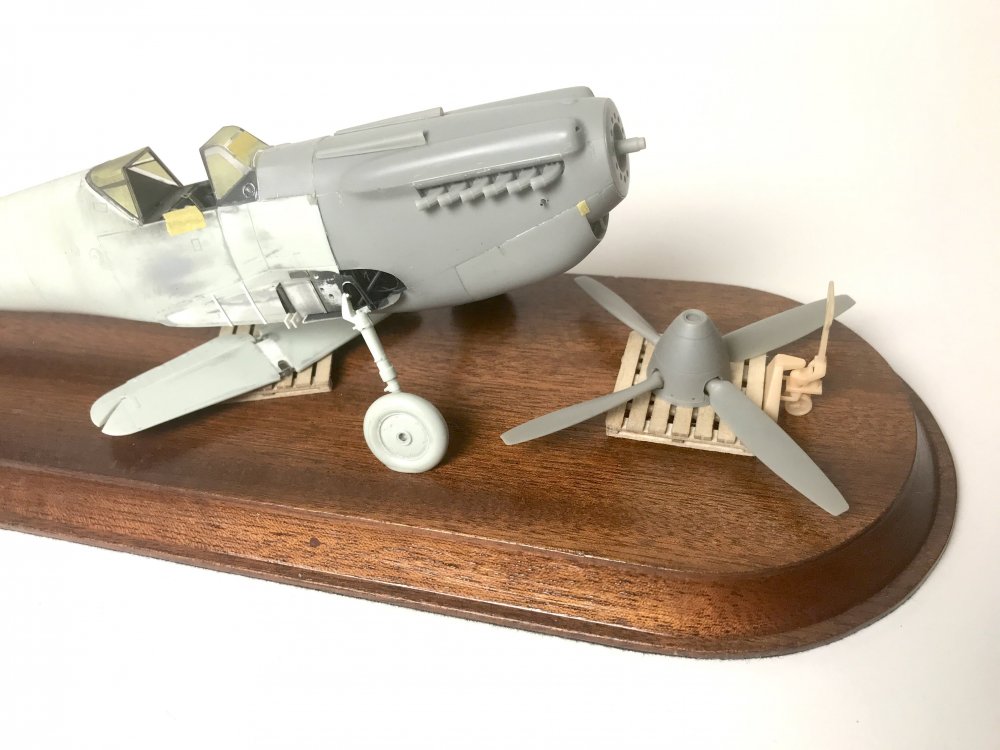
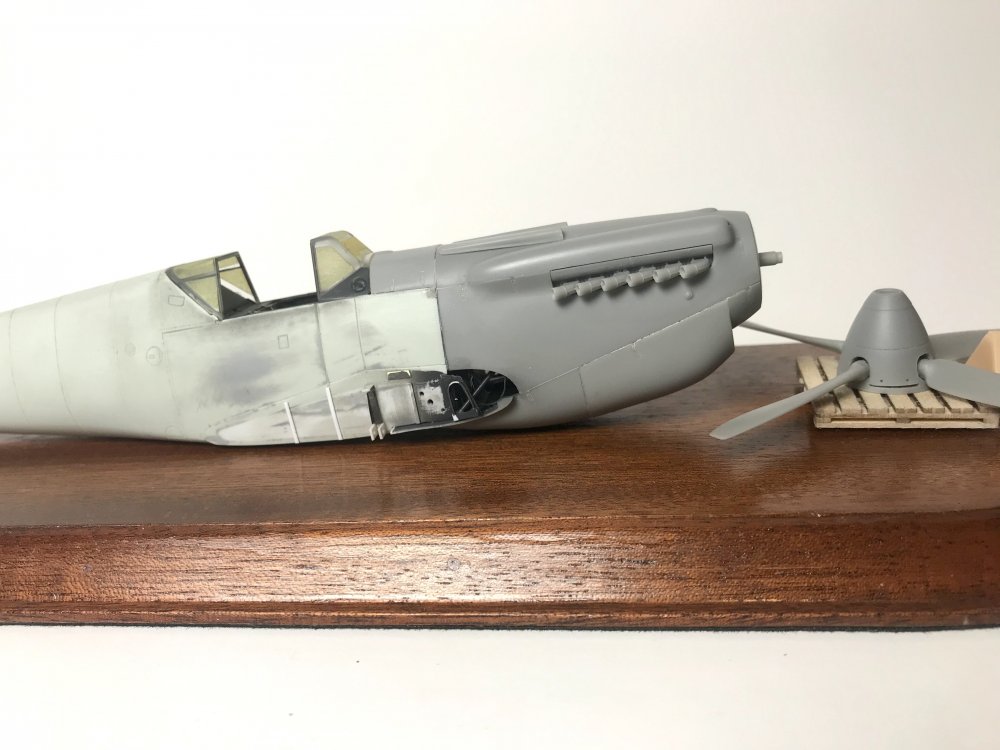
Forklift done. I’ll add the props to the spinner. I think.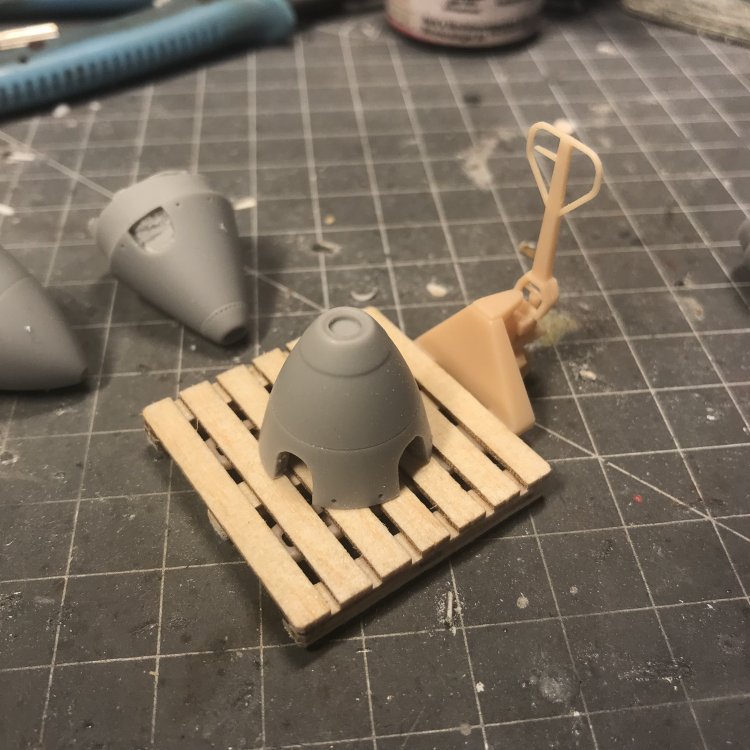
-
1/32 Connie Edwards Ha-1112 Buchon
JeroenPeters replied to JeroenPeters's topic in LSM 1/35 and Larger Work In Progress
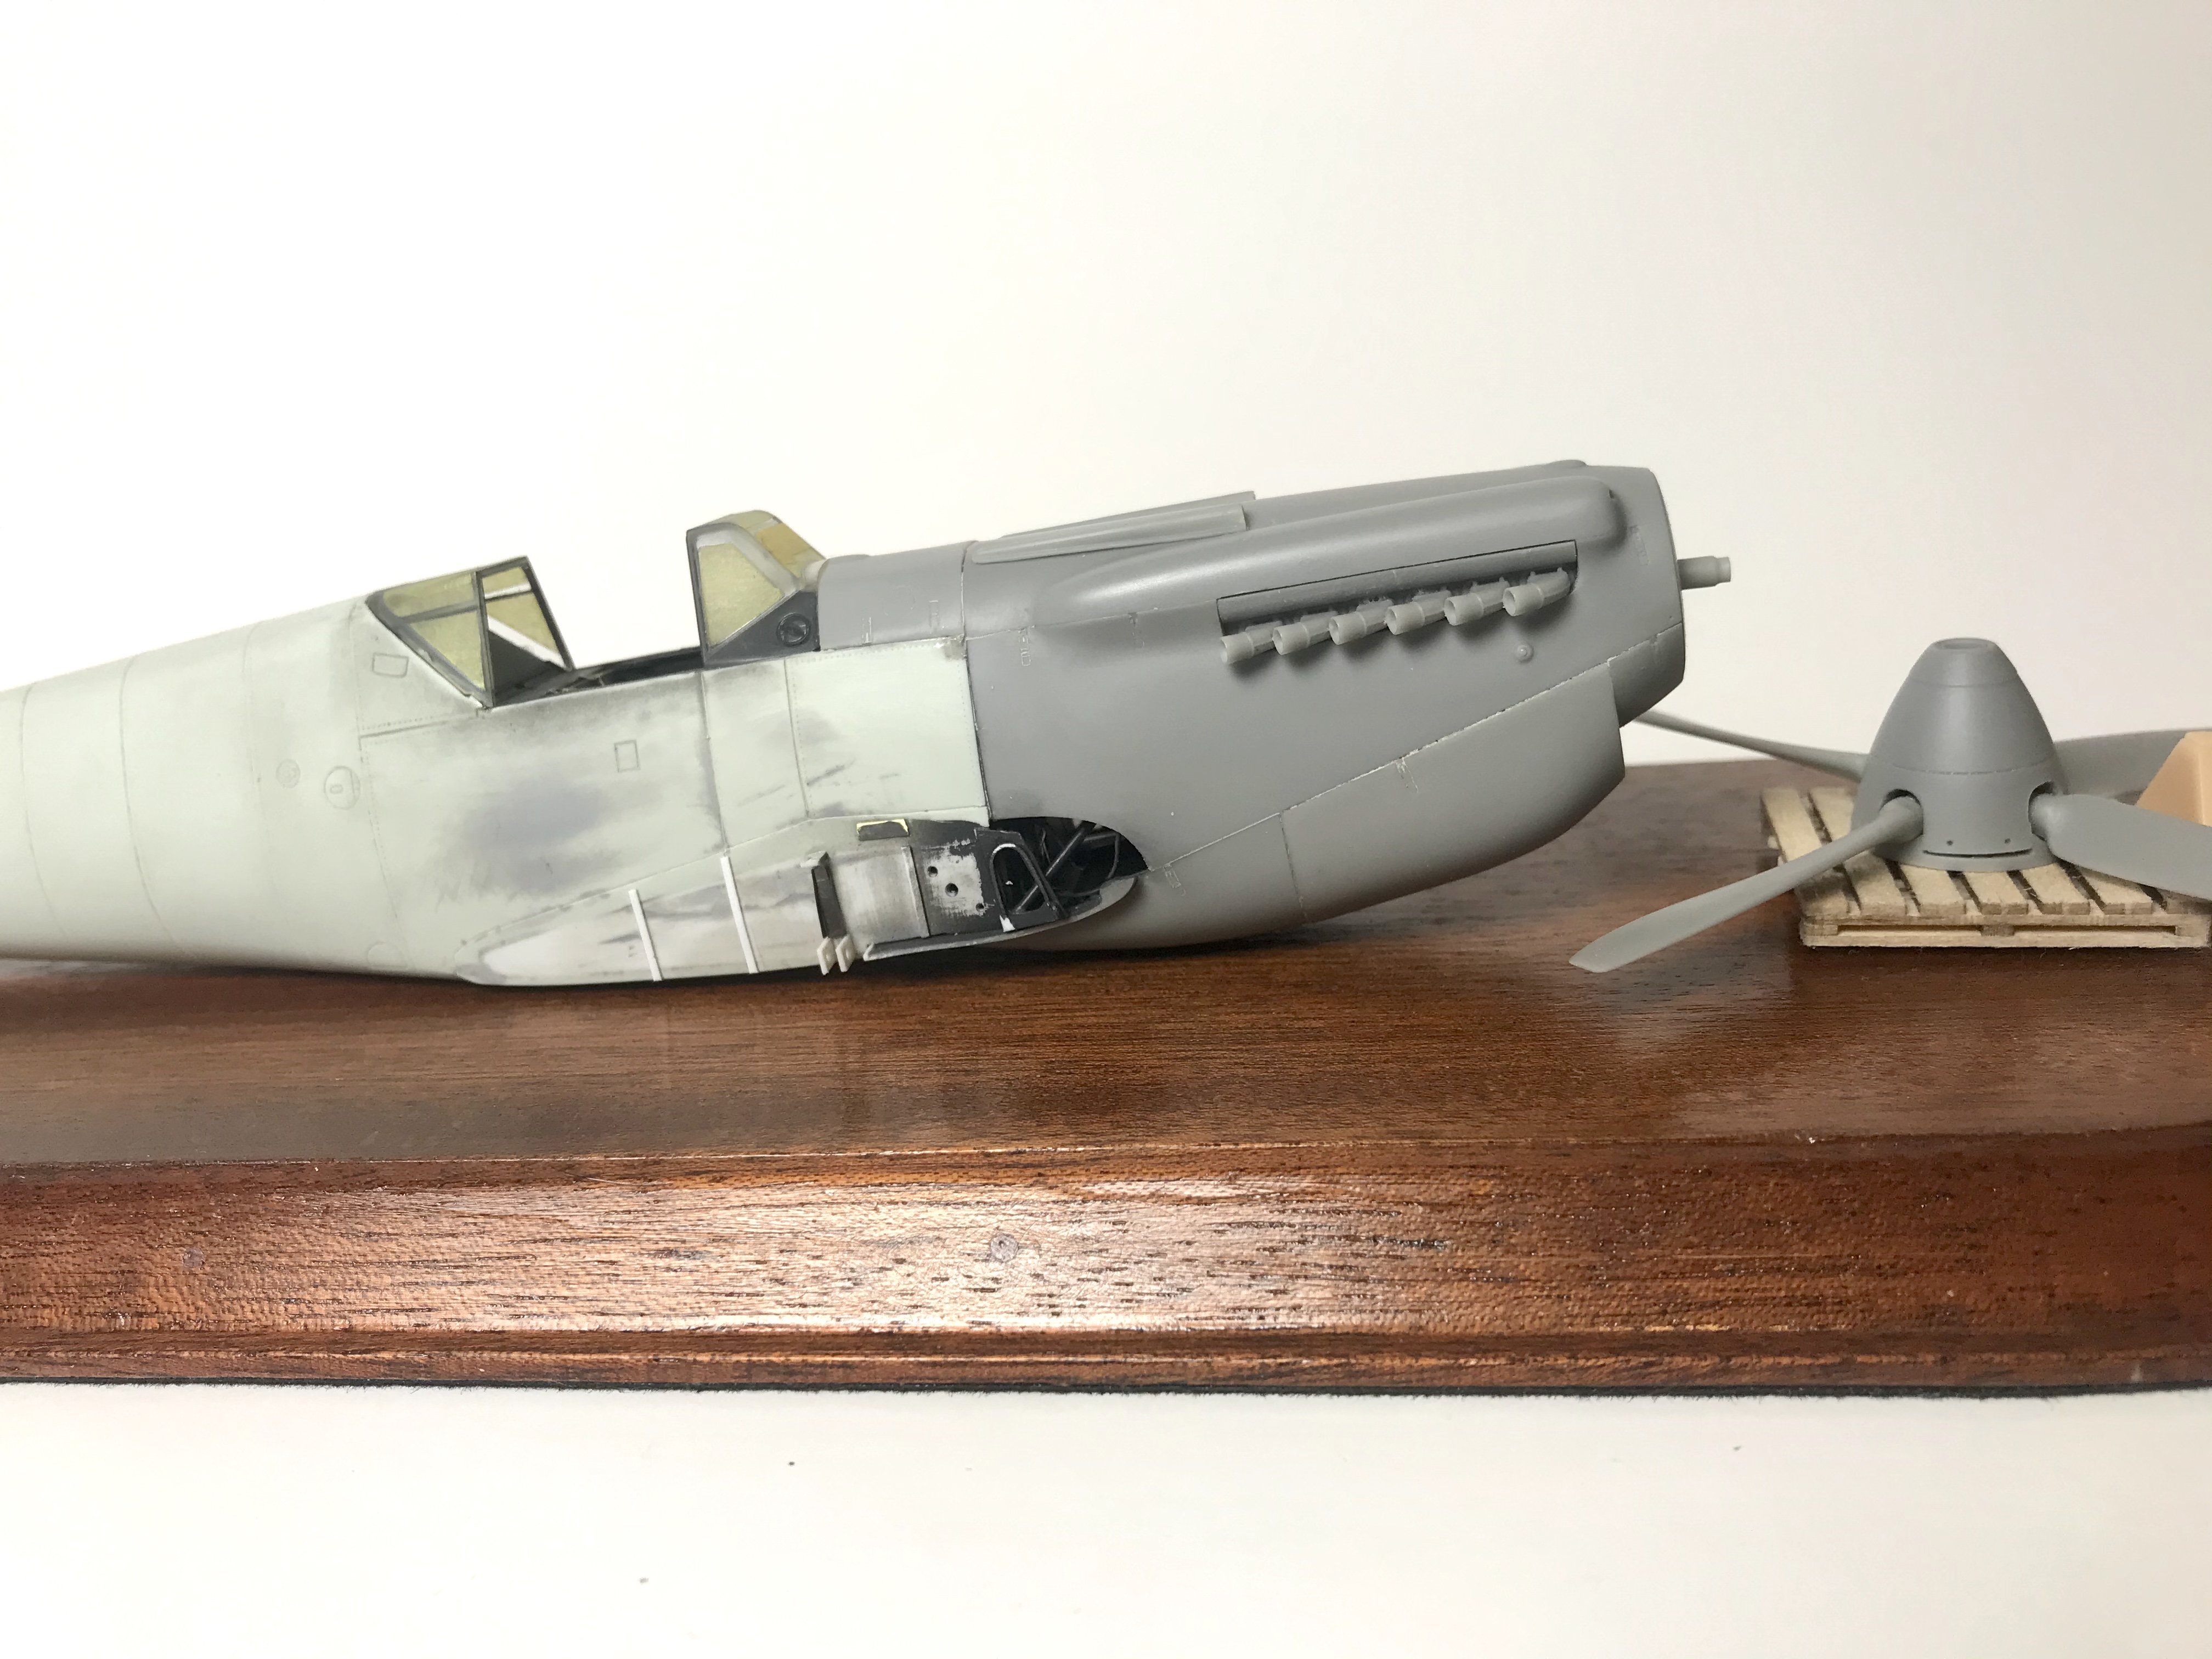
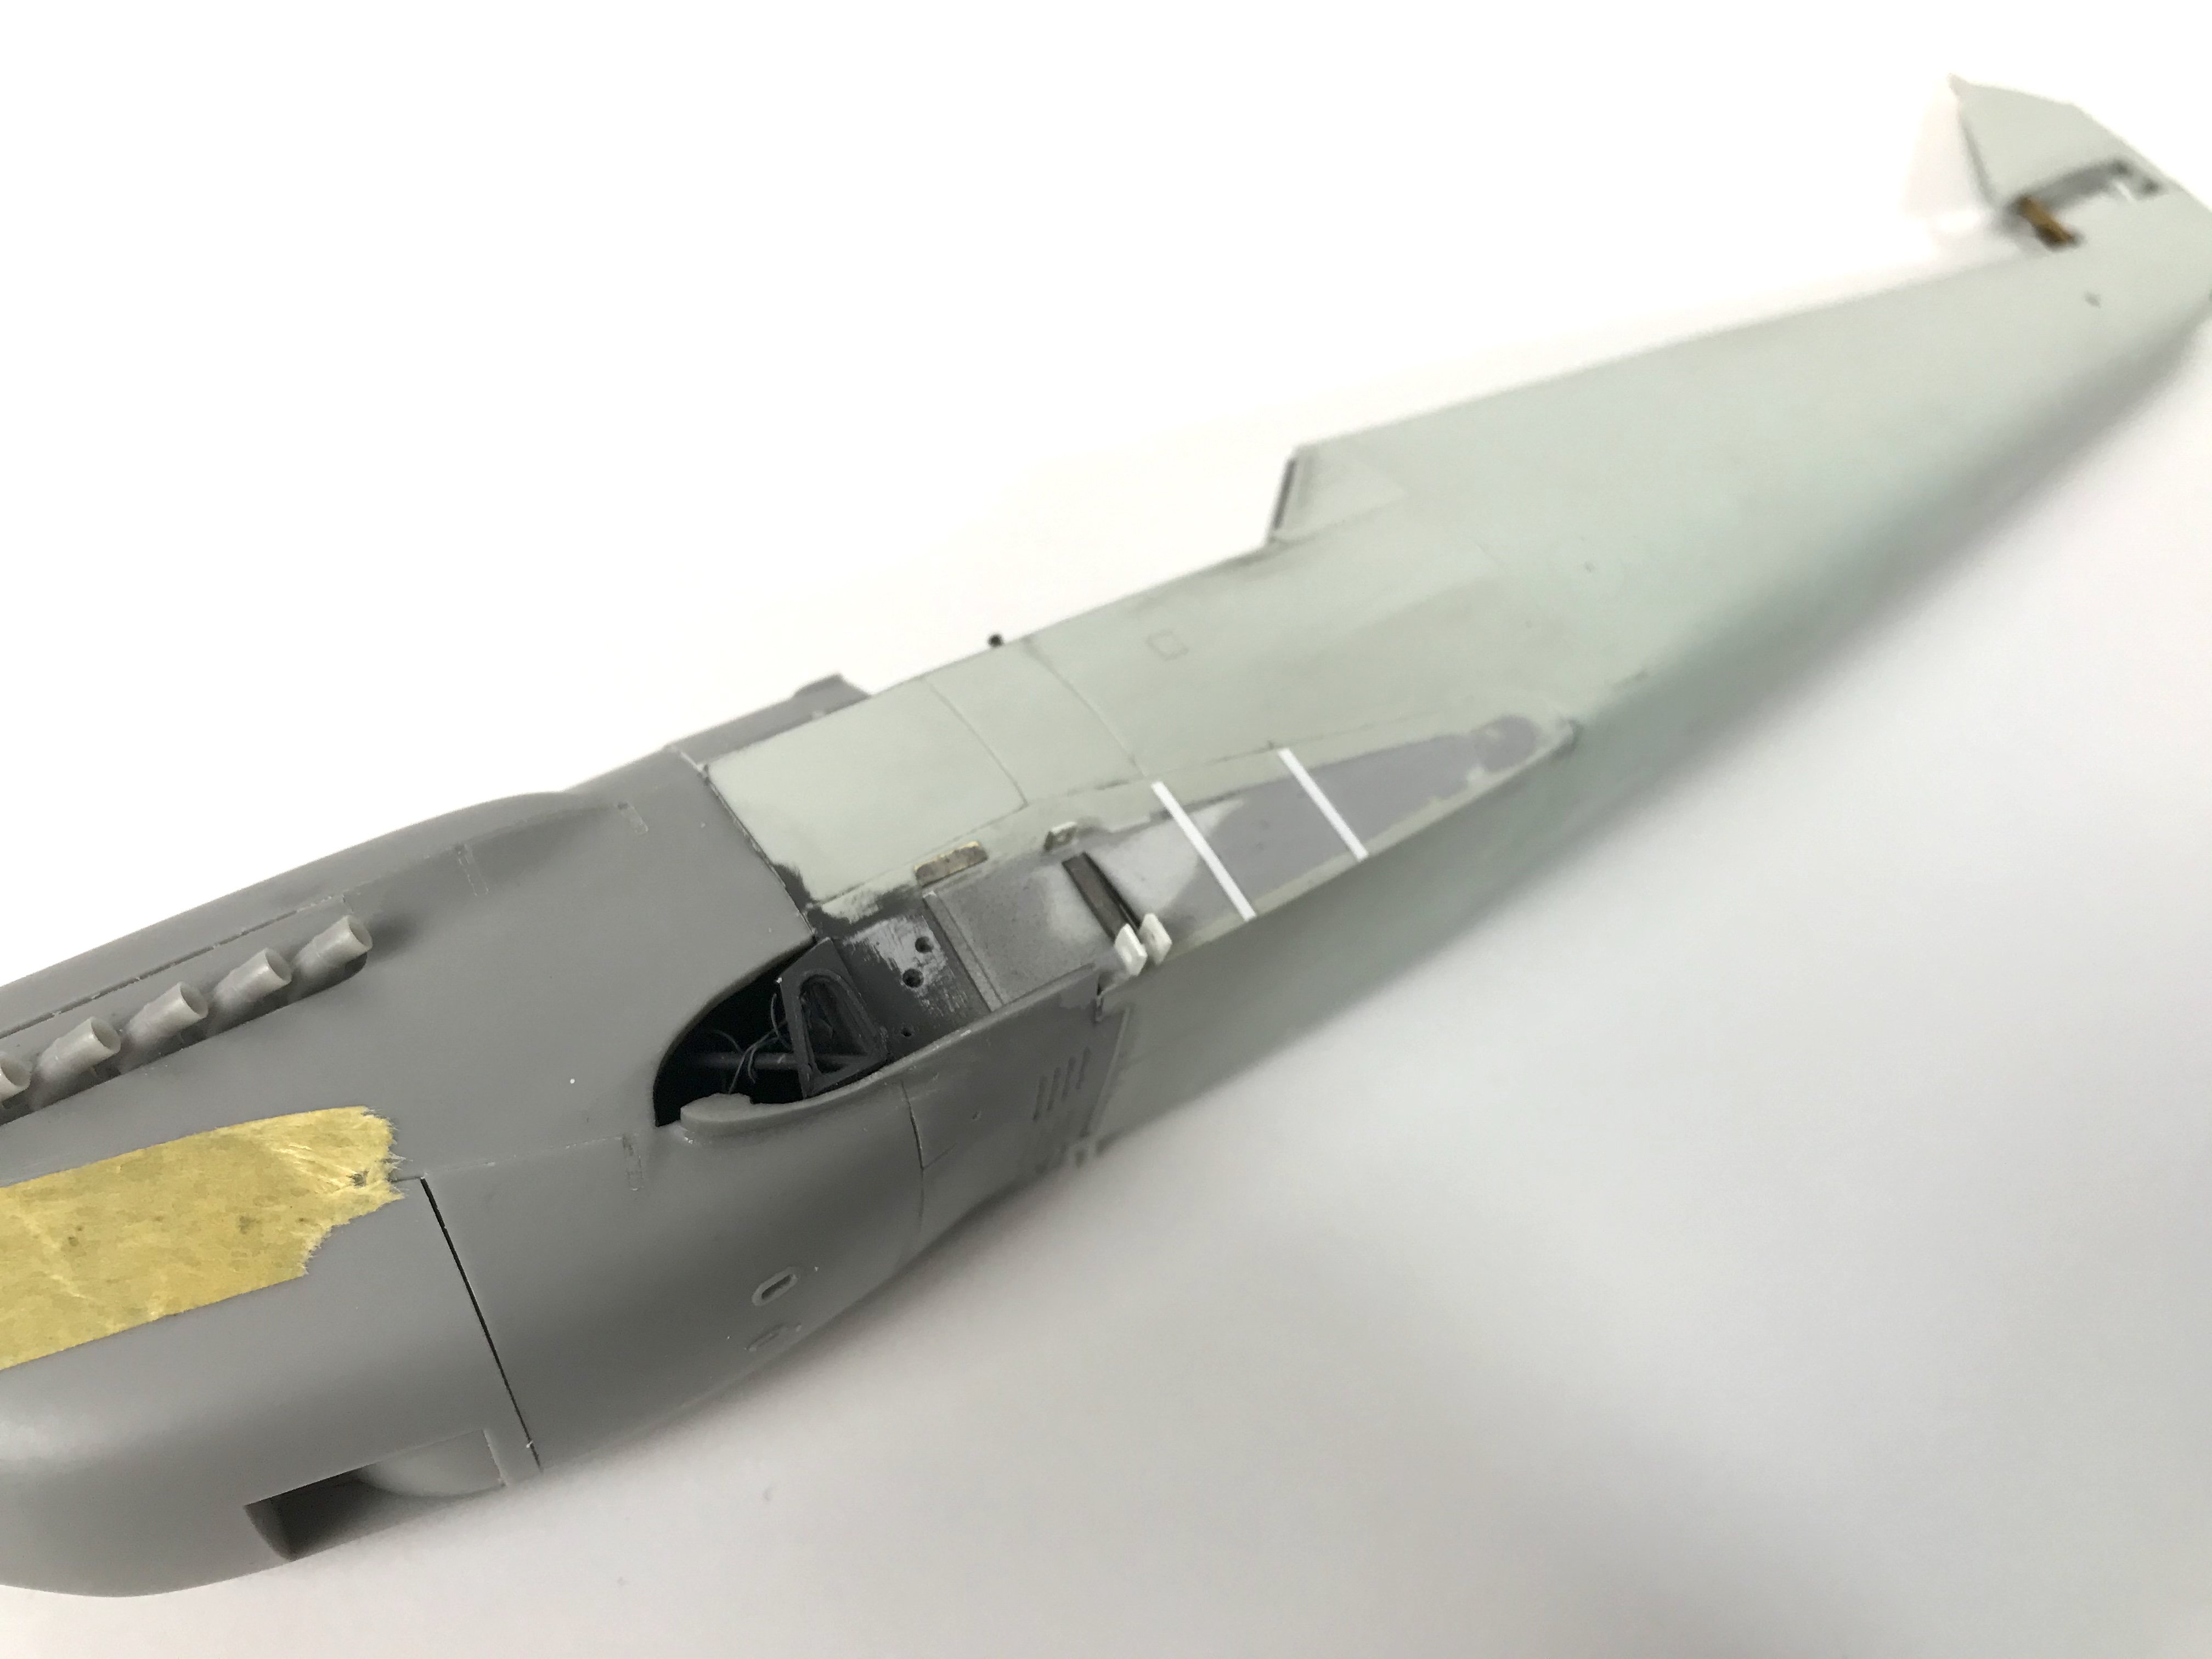
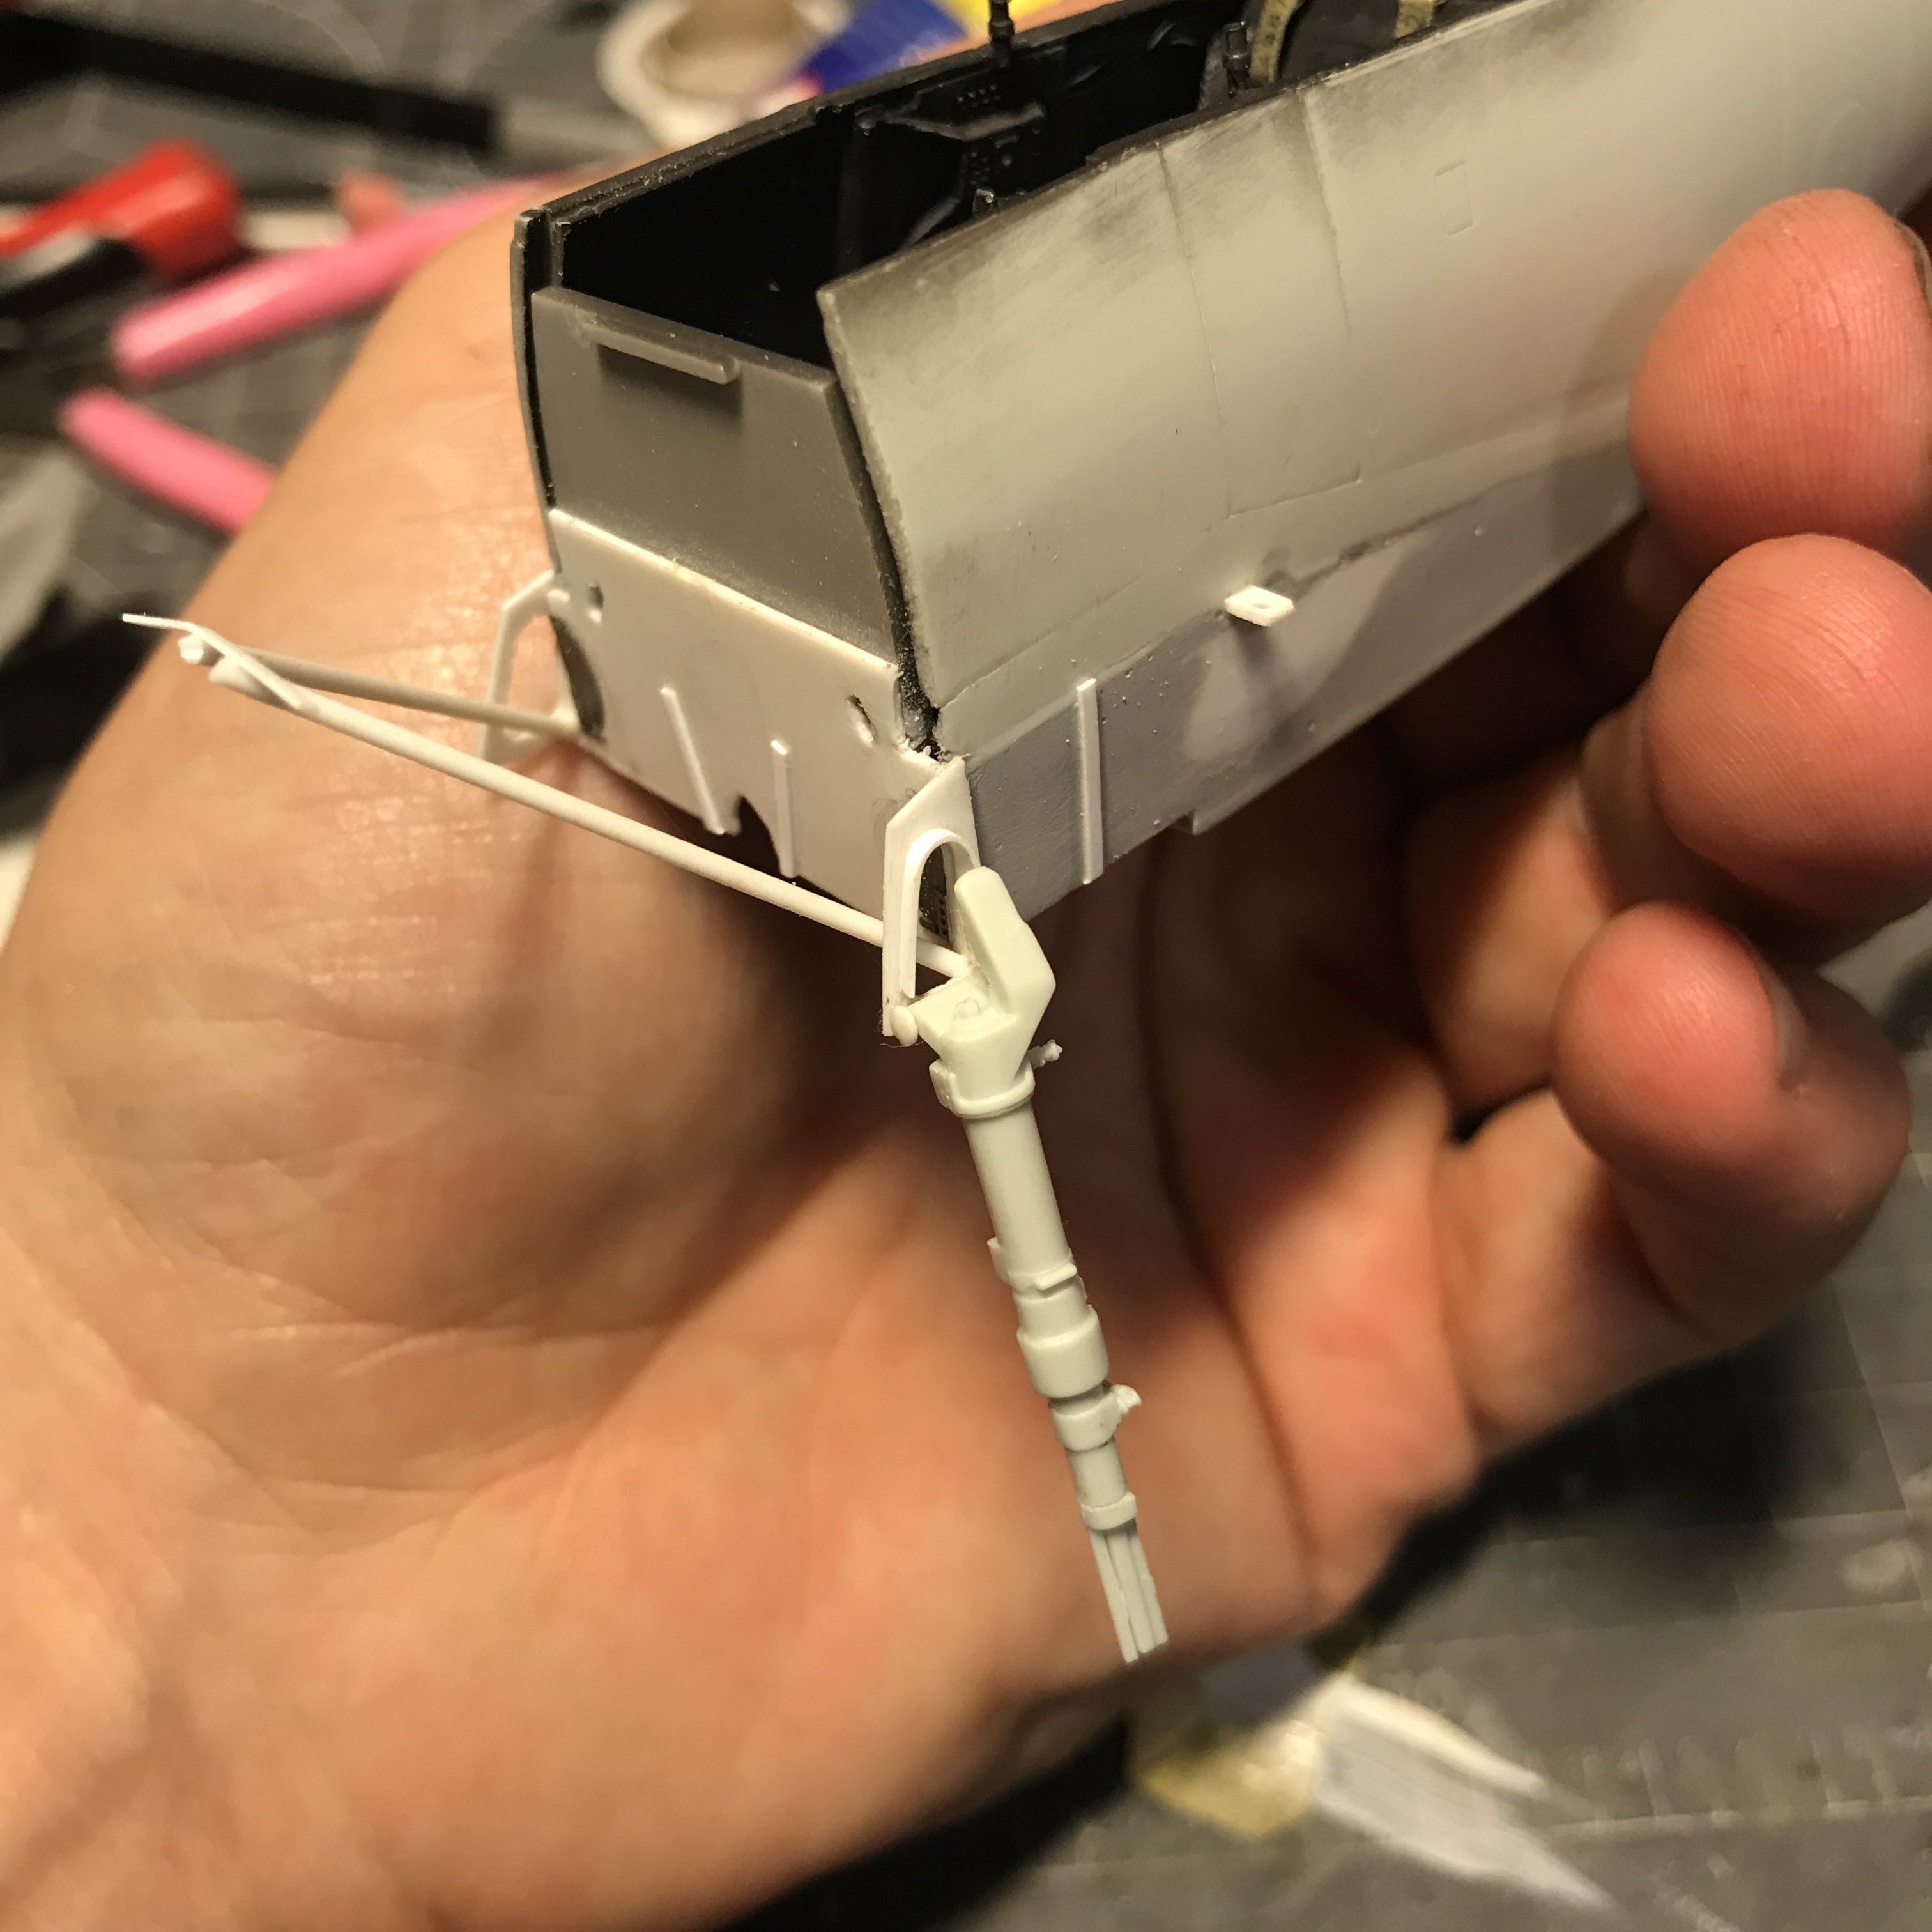
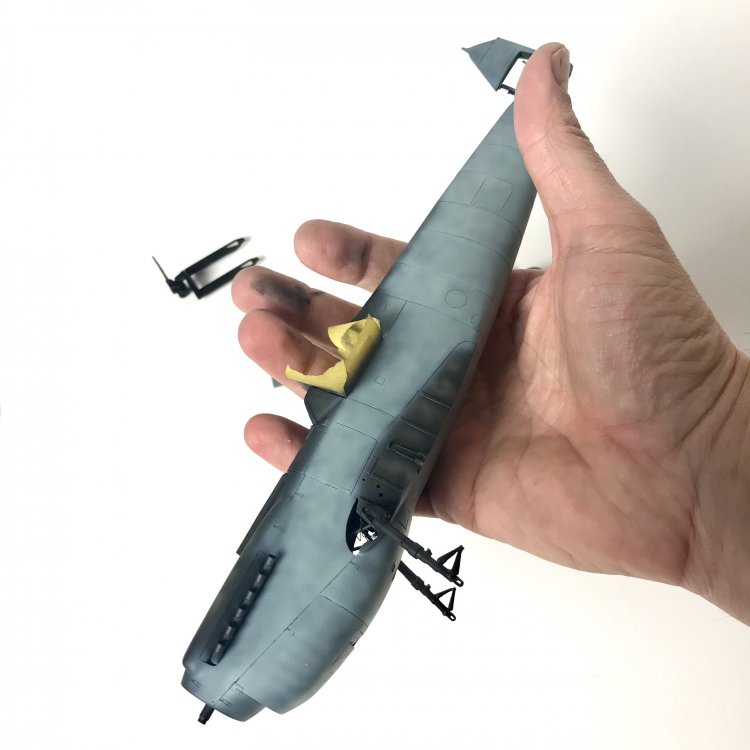
Slowly building up the gear hinges and detail.
-
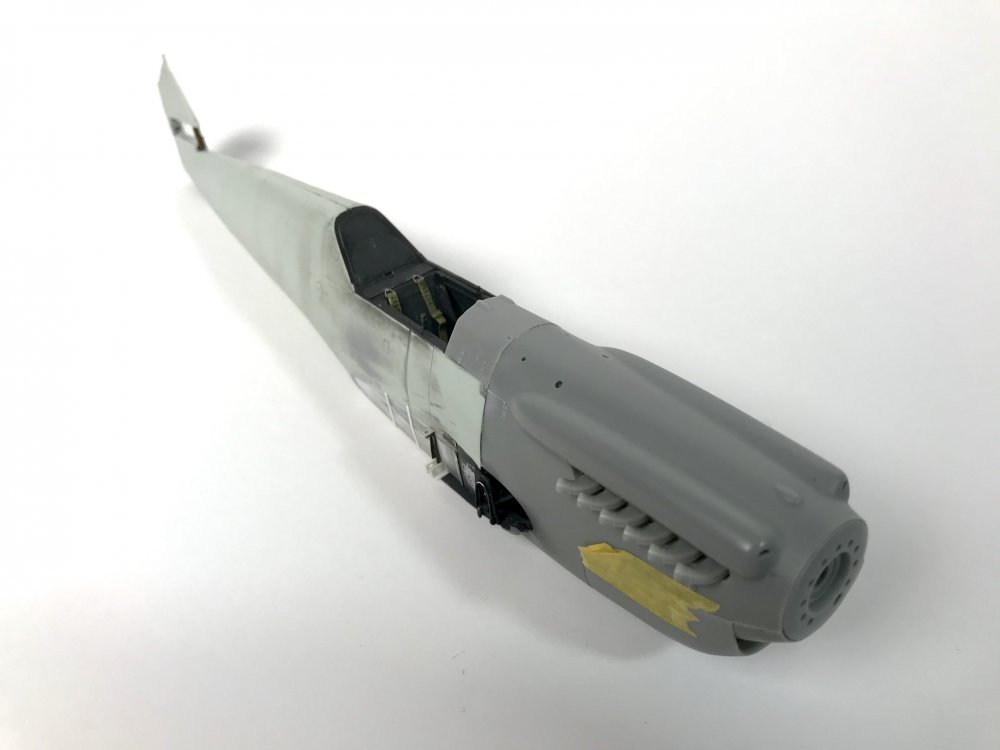
1/32 Connie Edwards Ha-1112 Buchon
JeroenPeters replied to JeroenPeters's topic in LSM 1/35 and Larger Work In Progress
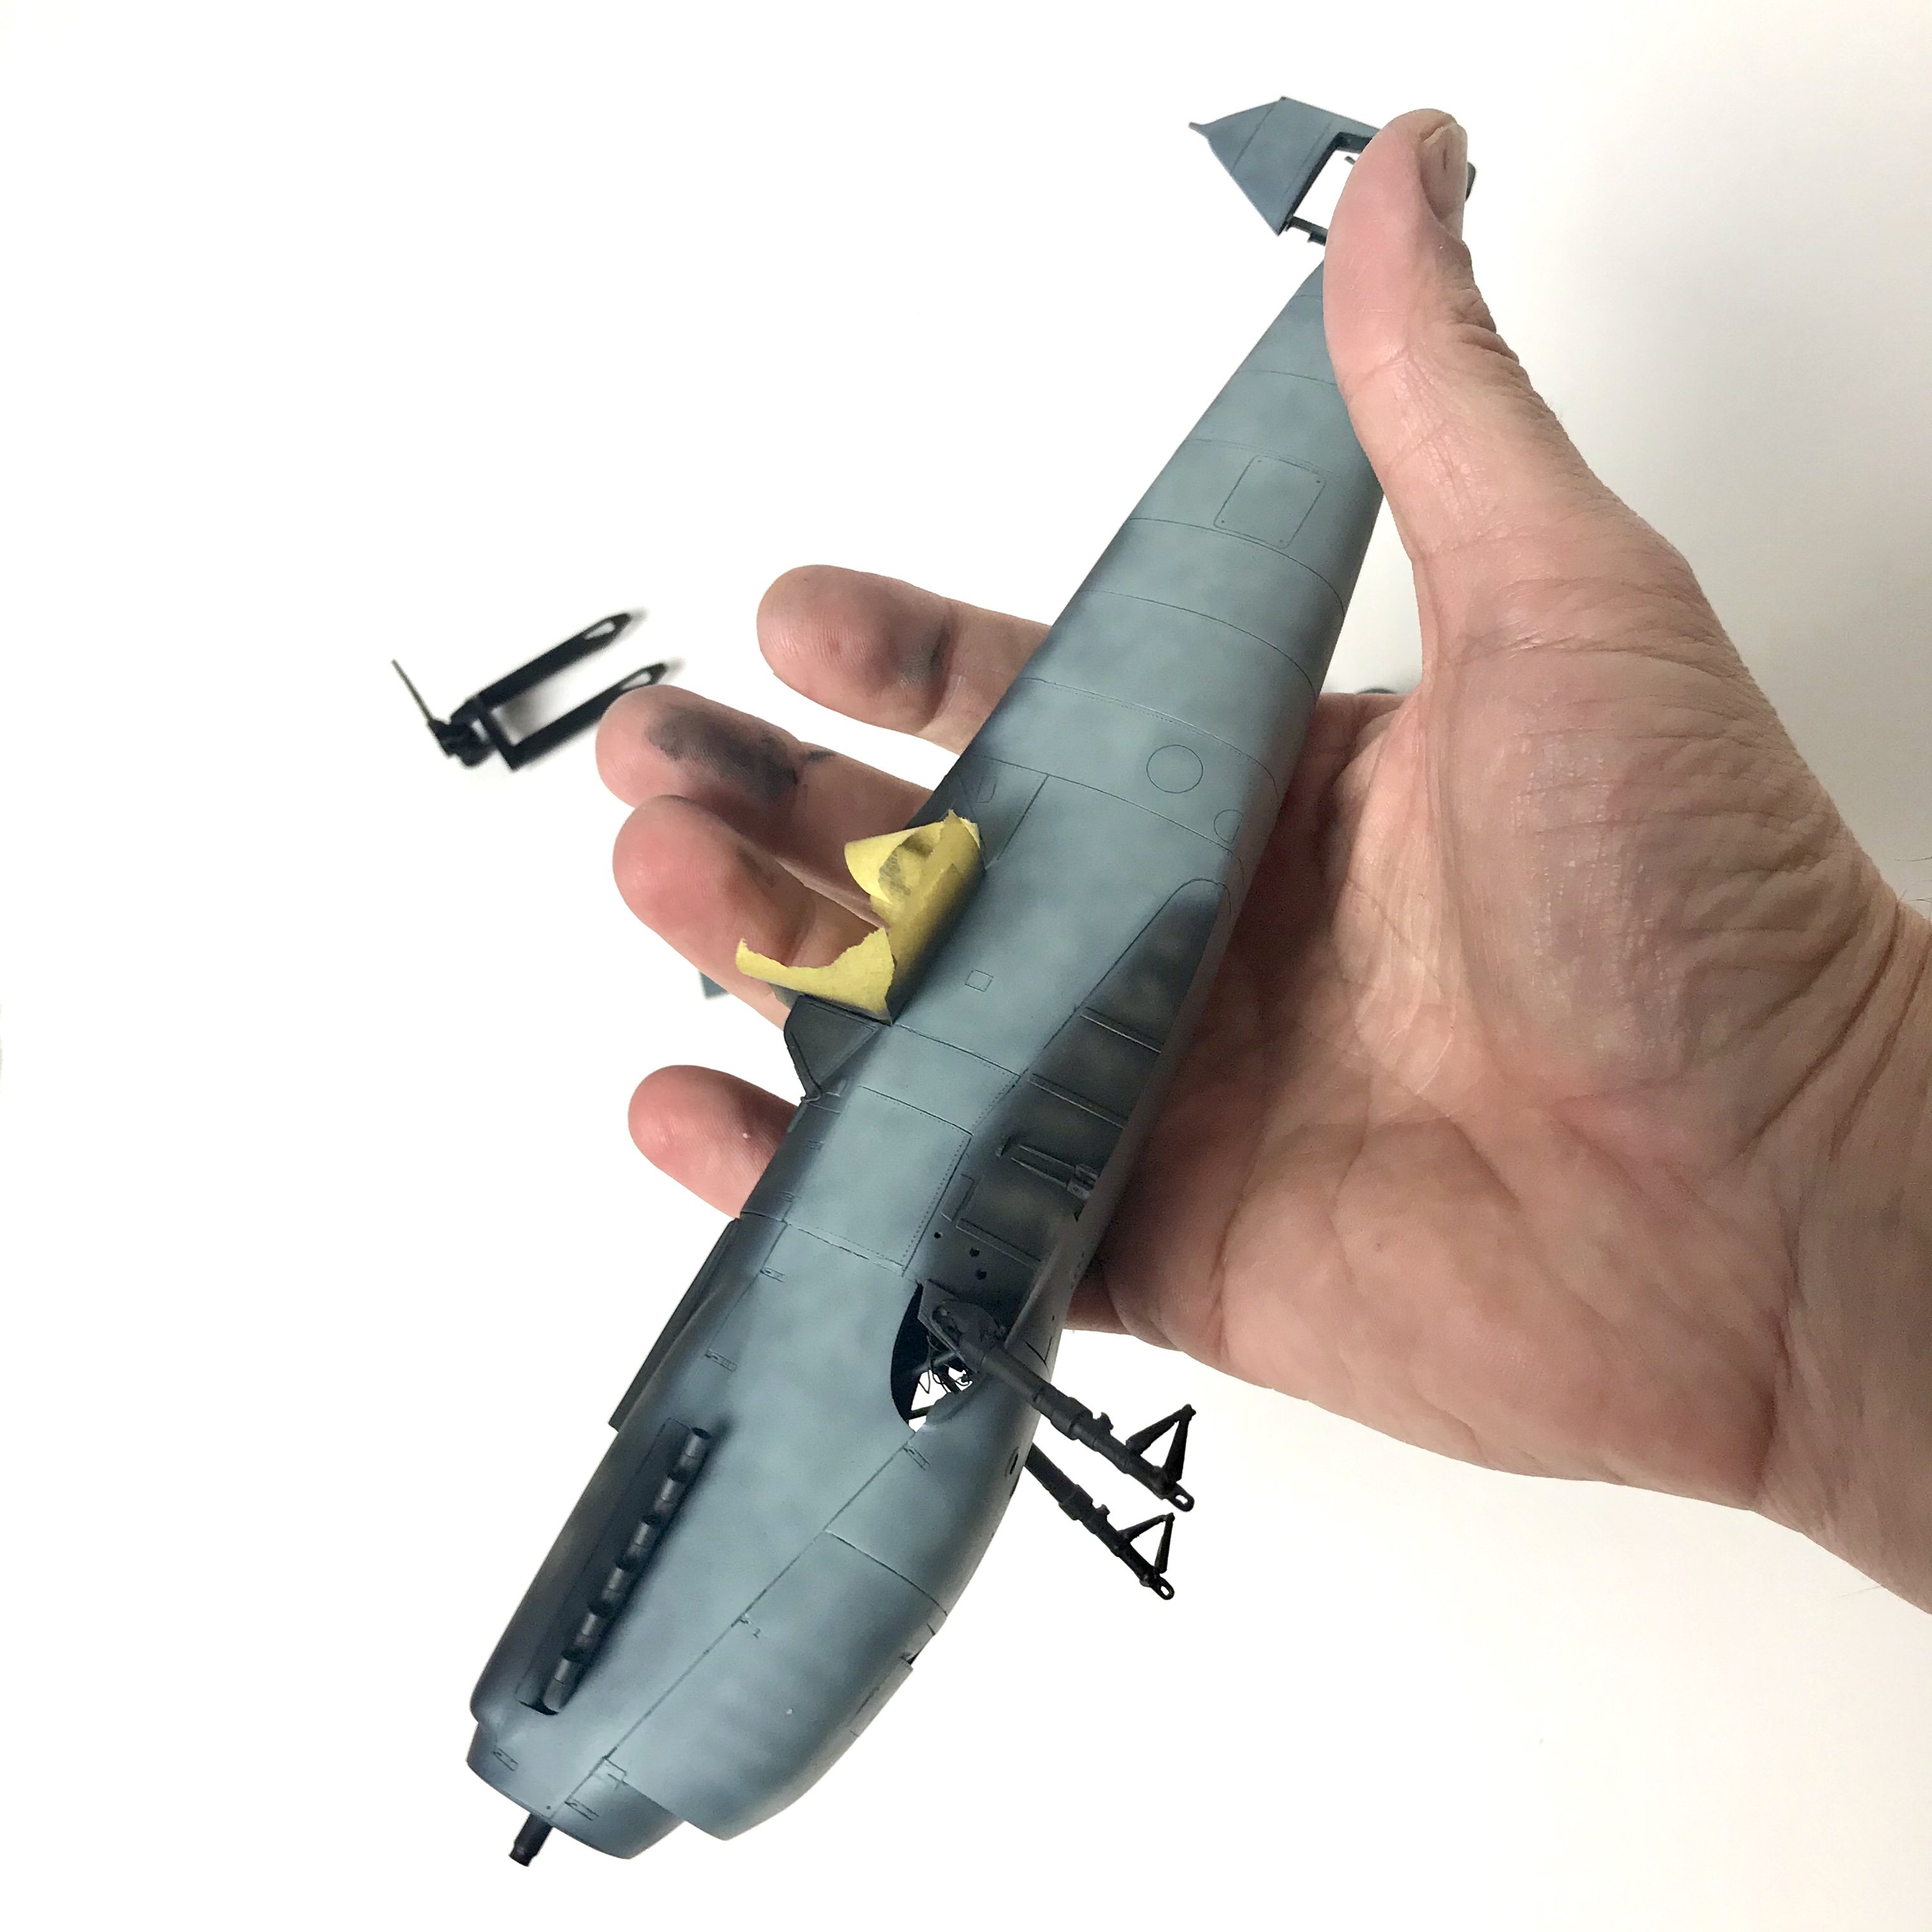
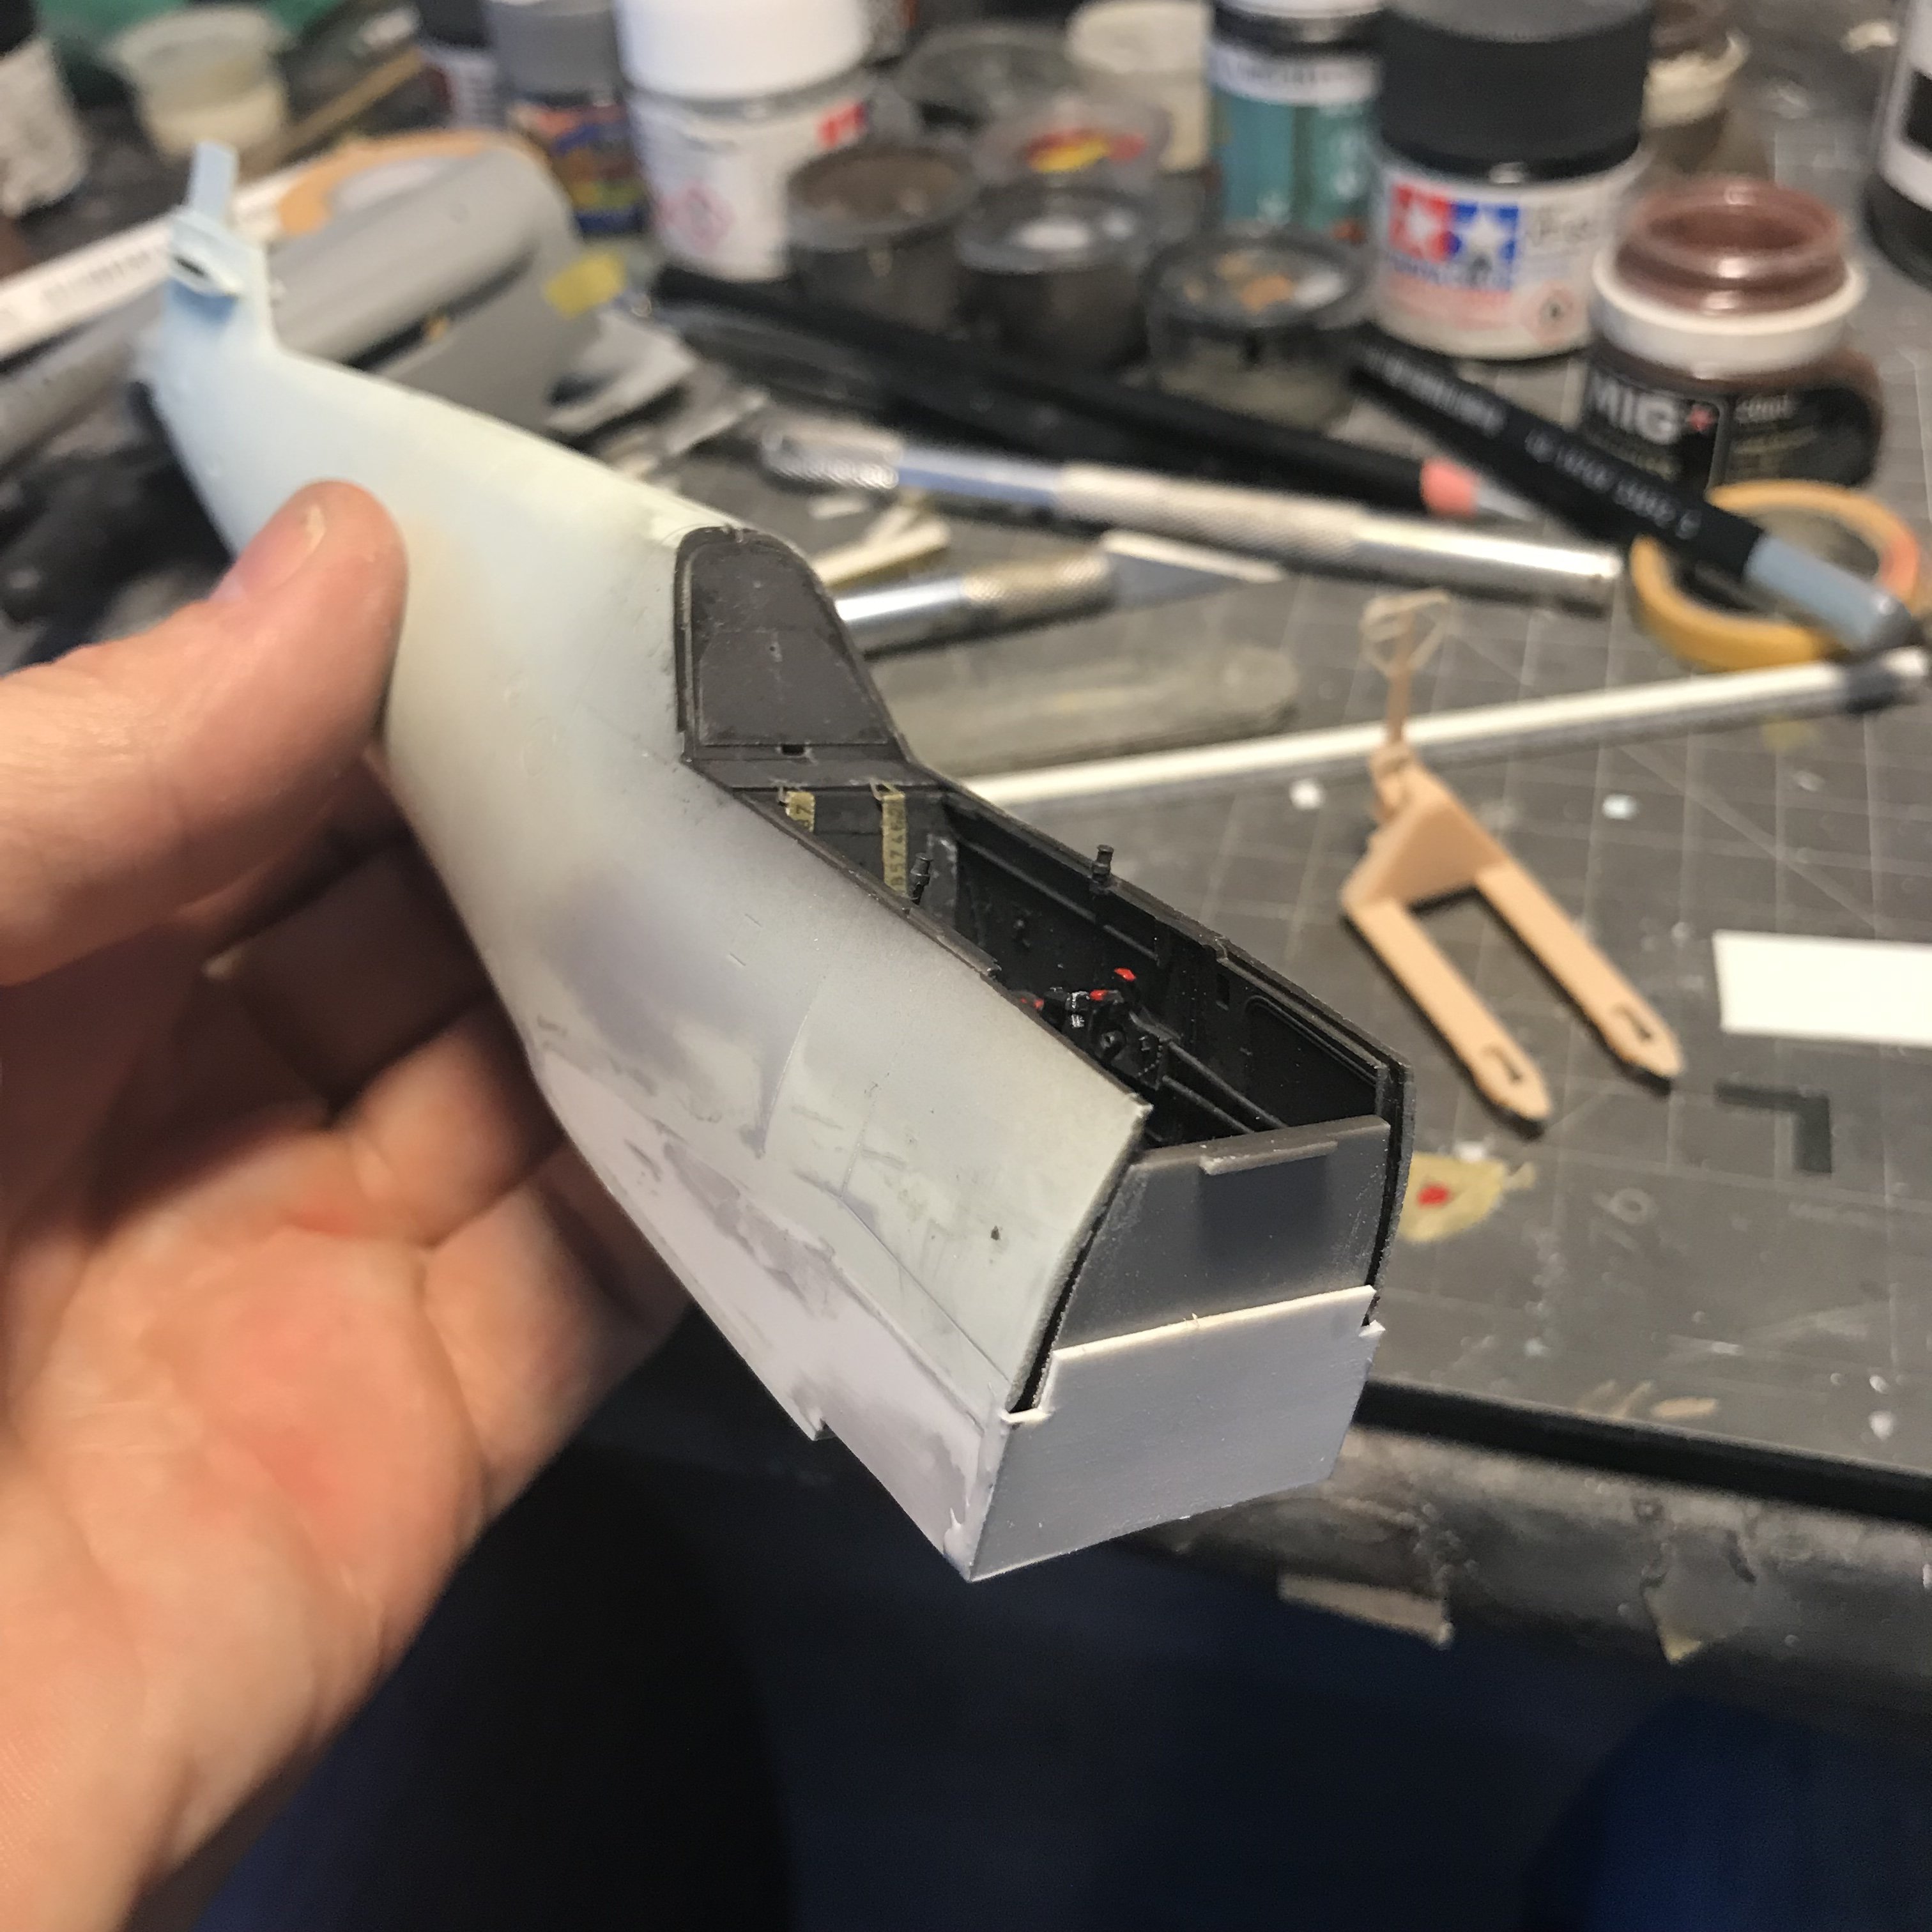
Hi guys, closing the fuse and building up the interior detail that is not present. Like the front of the firewall. Next up is adding the detail and figuring out the gear hinges. Also put together the forklift.
-
1/32 Connie Edwards Ha-1112 Buchon
JeroenPeters replied to JeroenPeters's topic in LSM 1/35 and Larger Work In Progress
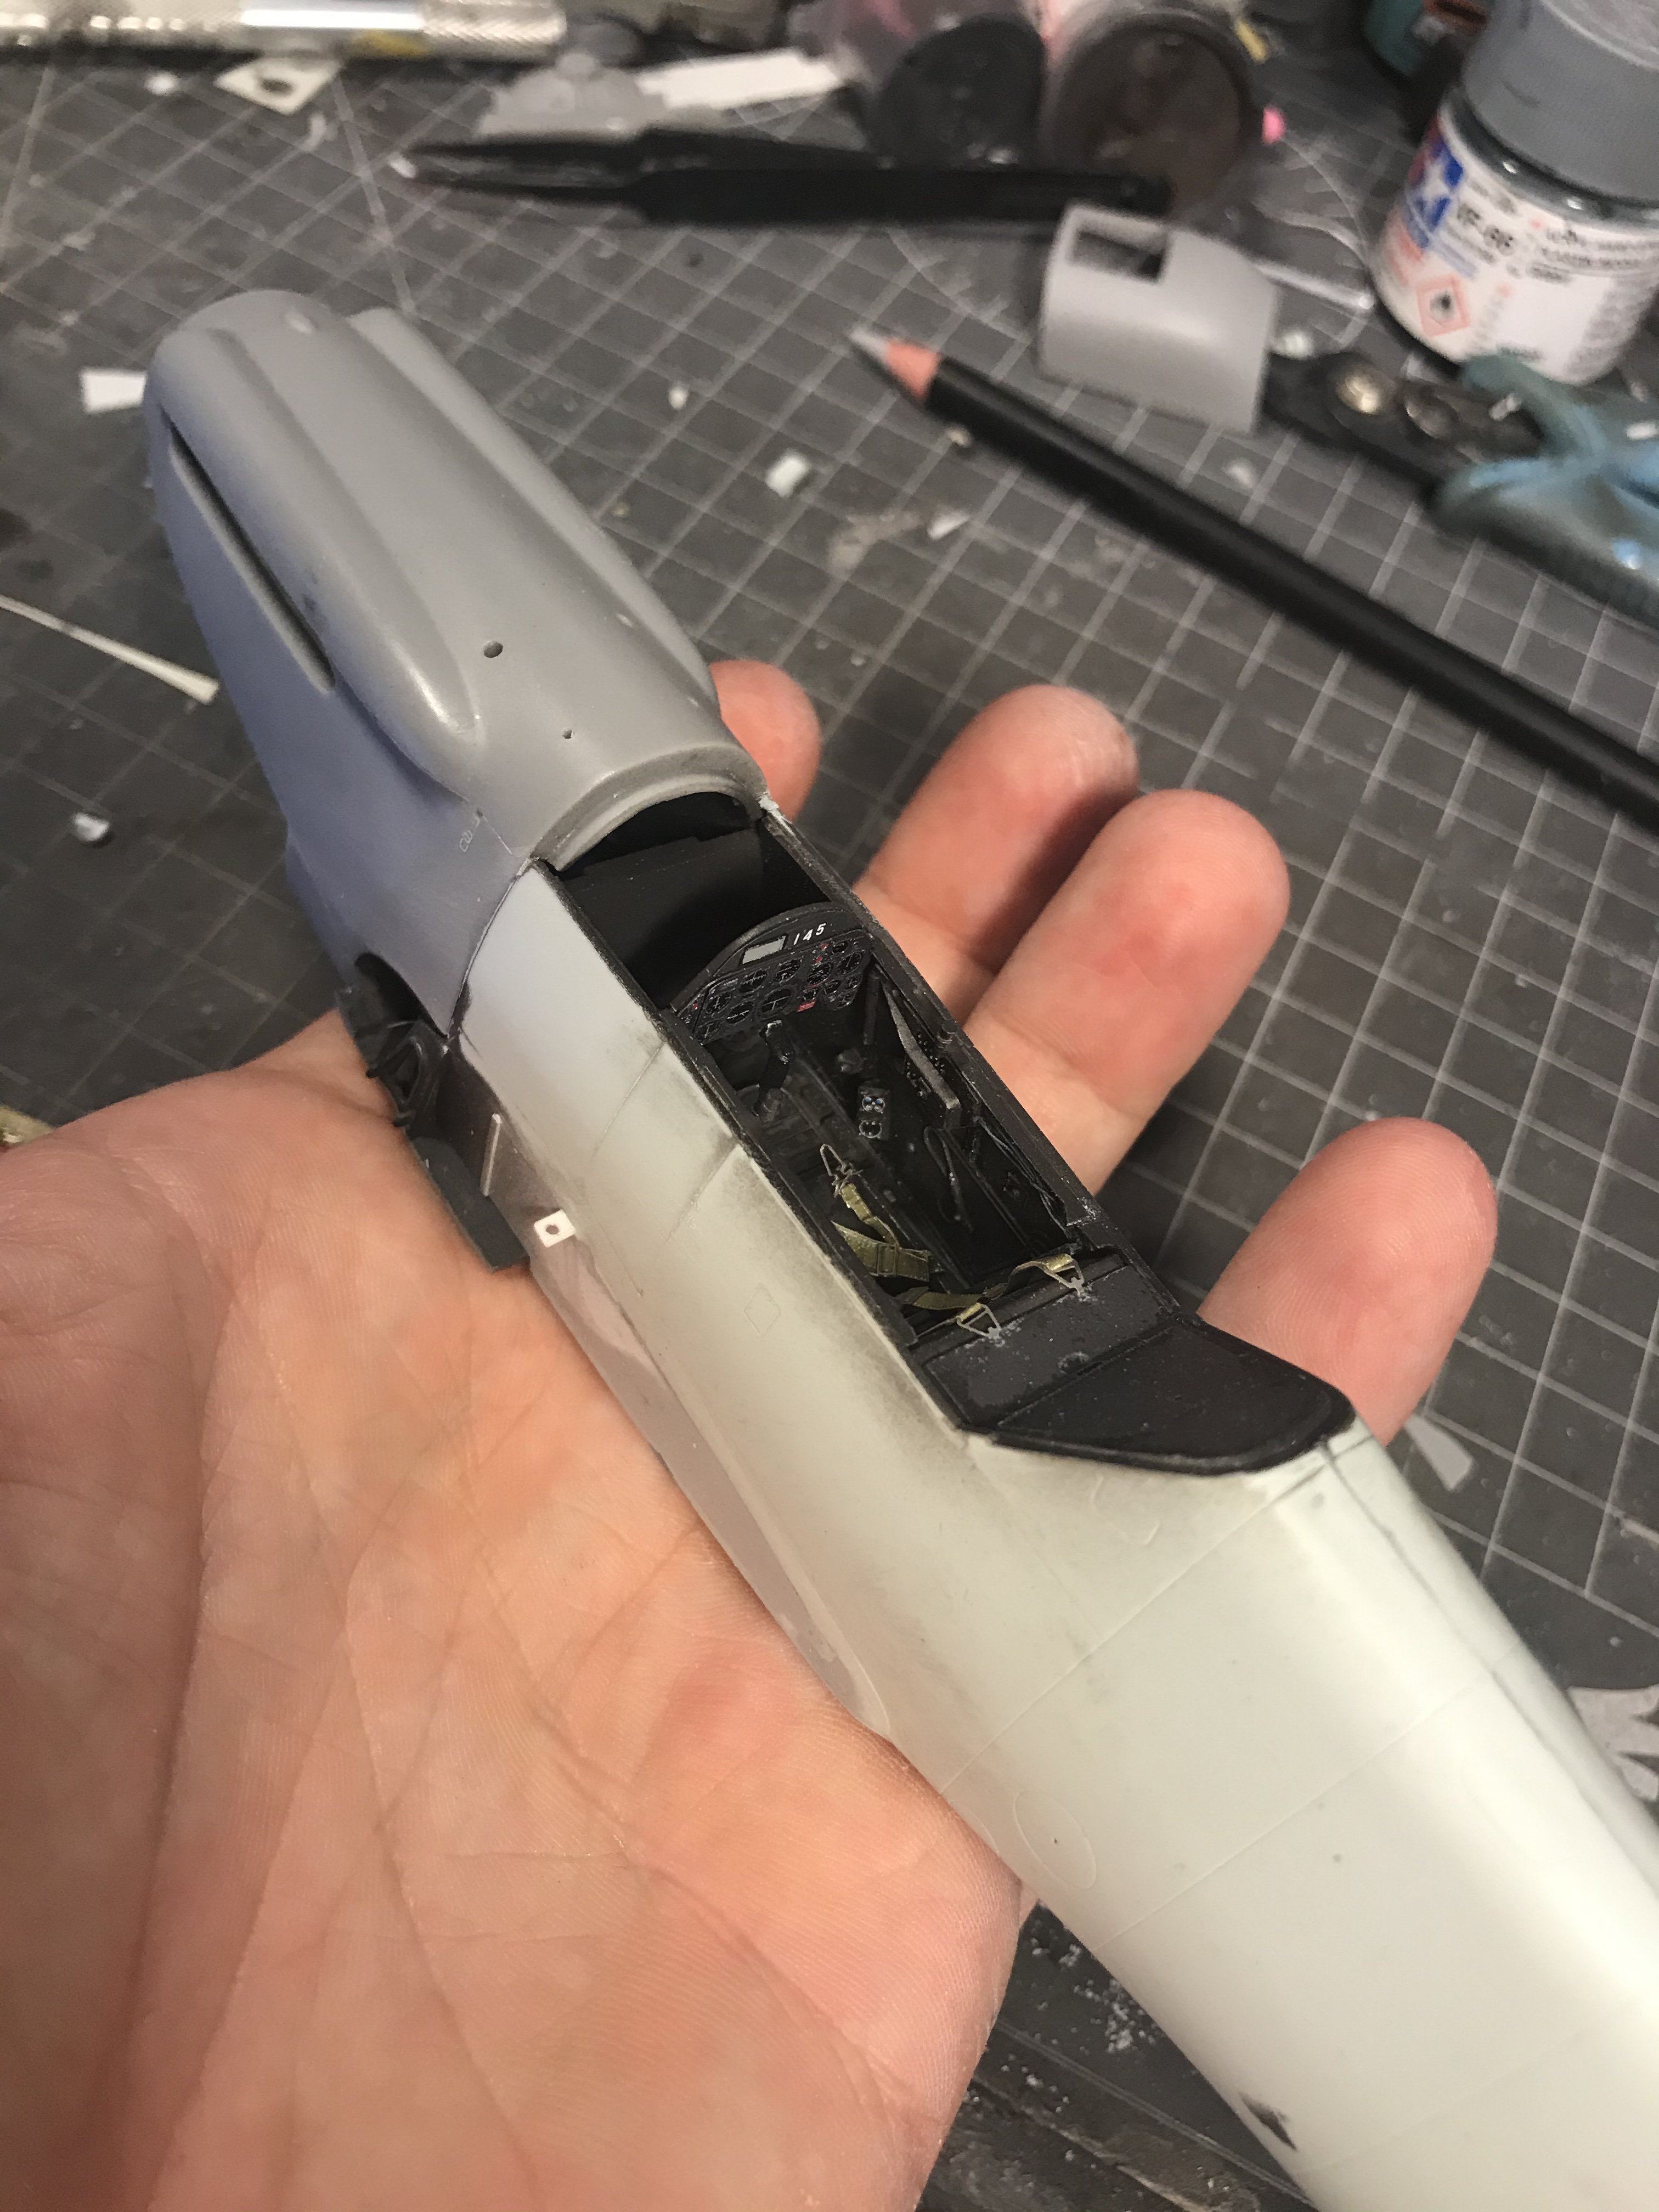
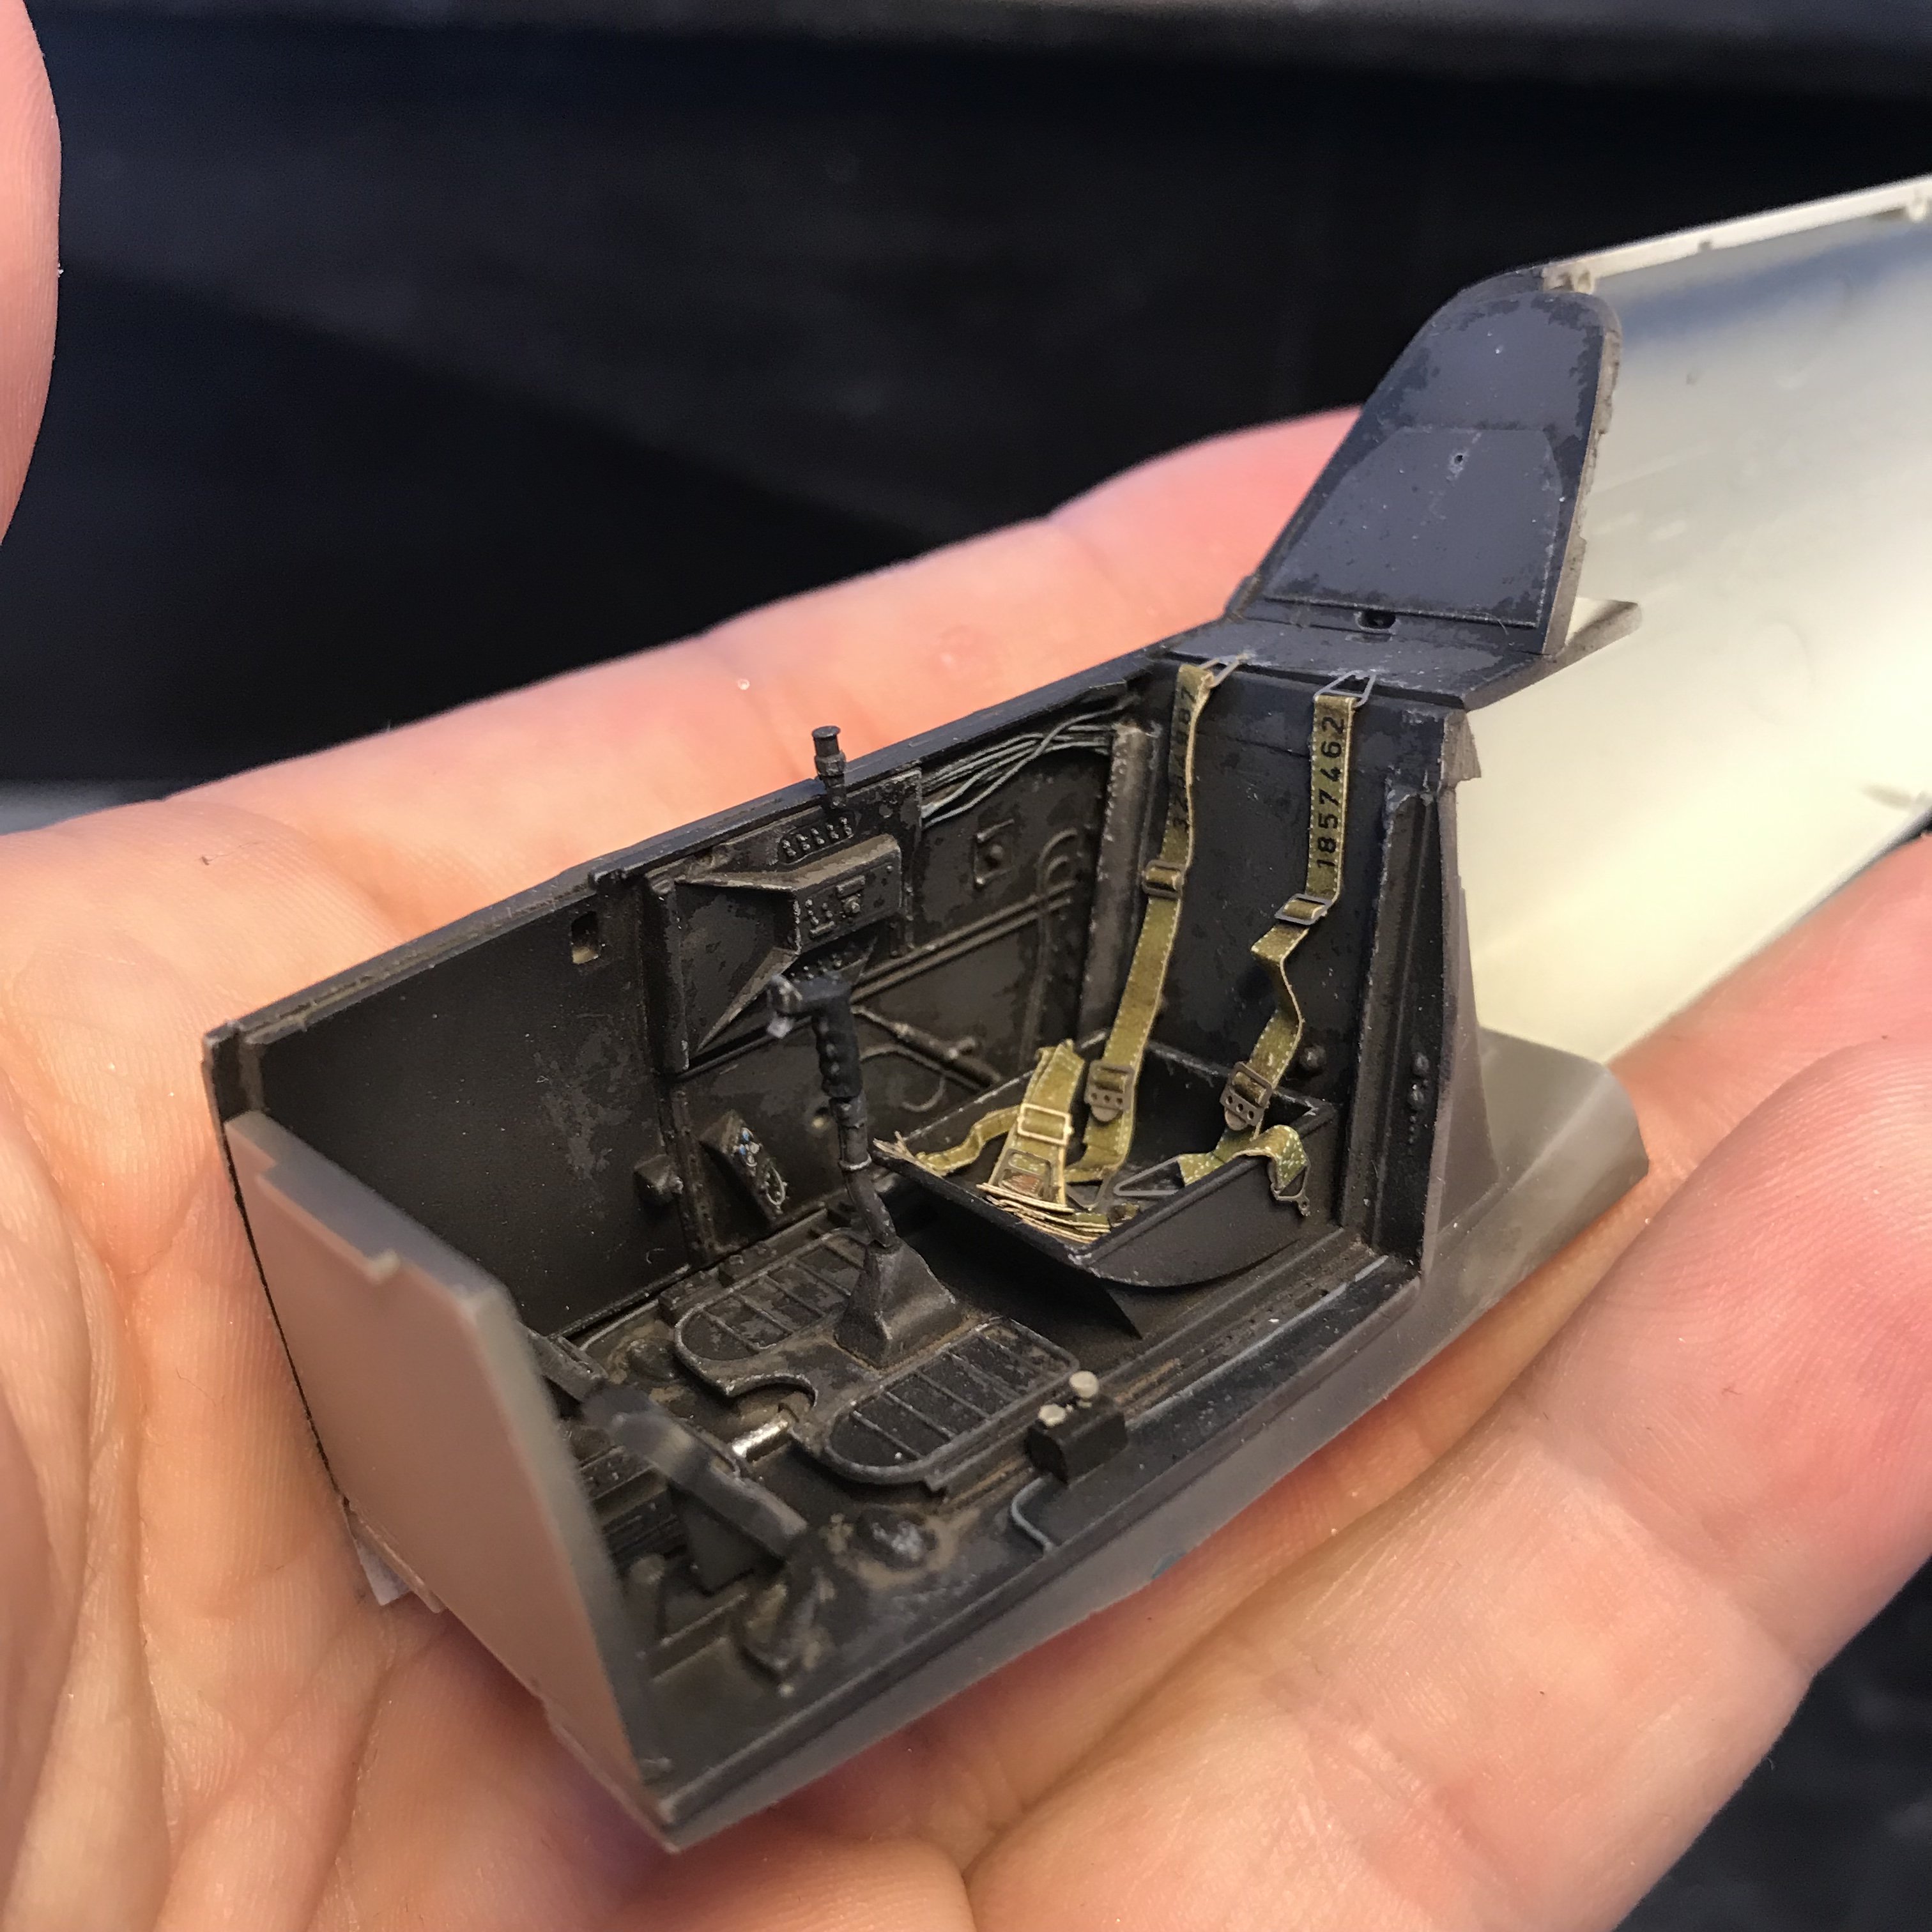
Seatbelts done.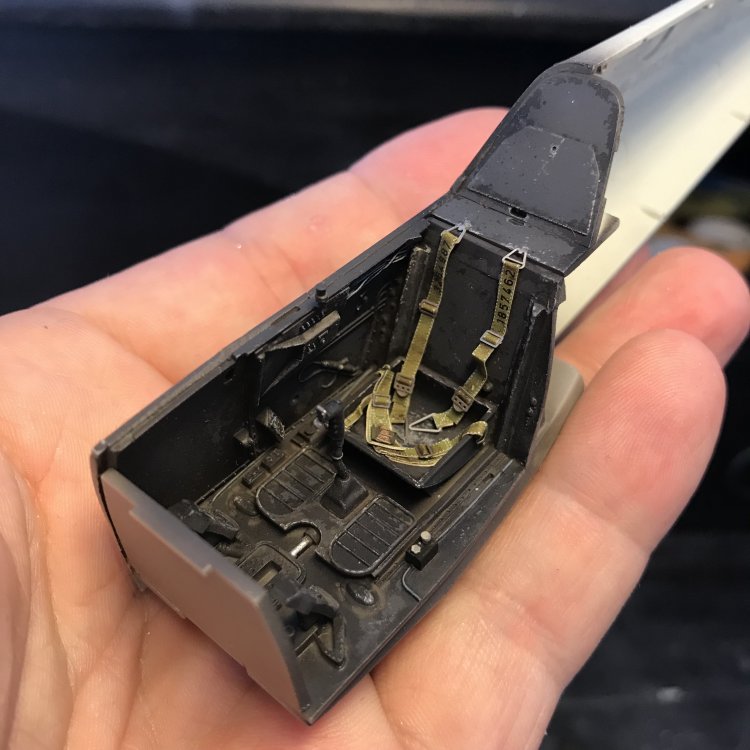

- 121 replies
-
- 10
-