JeroenPeters
-
Posts
4,867 -
Joined
-
Last visited
Content Type
Profiles
Forums
Events
Gallery
Everything posted by JeroenPeters
-

Takom 1/35 V2 Rocket
JeroenPeters replied to JeroenPeters's topic in LSM 1/35 and Larger Work In Progress
More...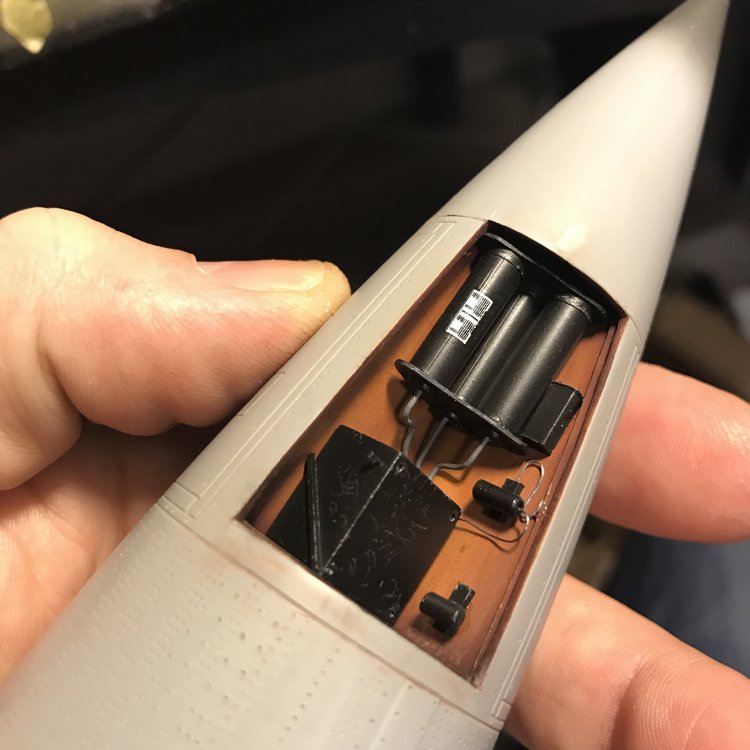
-
hk models Lancaster B Mk.I, R5868, PO-S (S-Sugar)
JeroenPeters replied to JayDee's topic in LSM 1/35 and Larger Work In Progress
Really nice... -
Takom 1/35 V2 Rocket
JeroenPeters replied to JeroenPeters's topic in LSM 1/35 and Larger Work In Progress
One step further. More wiring to add.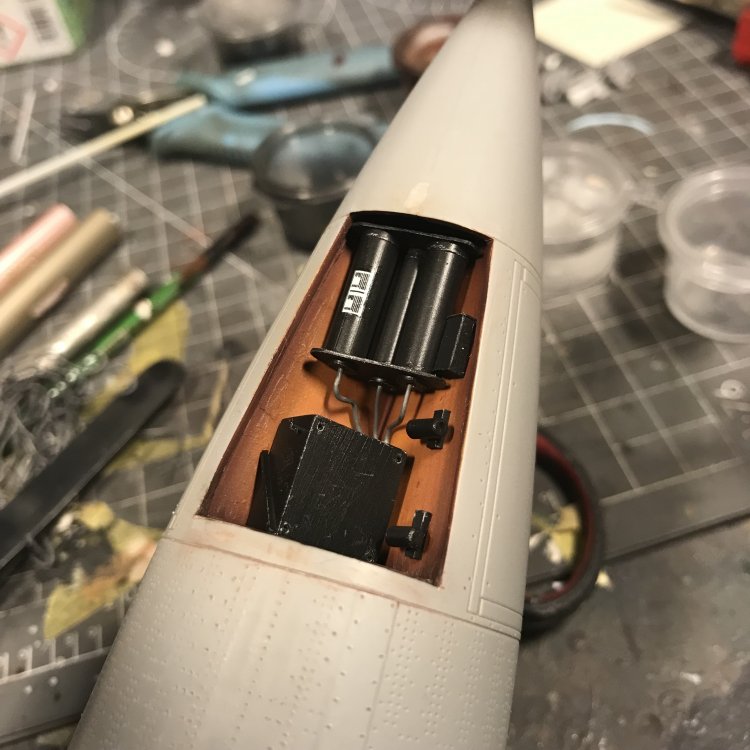
-
Takom 1/35 V2 Rocket
JeroenPeters replied to JeroenPeters's topic in LSM 1/35 and Larger Work In Progress
Cant wait to add some wiring...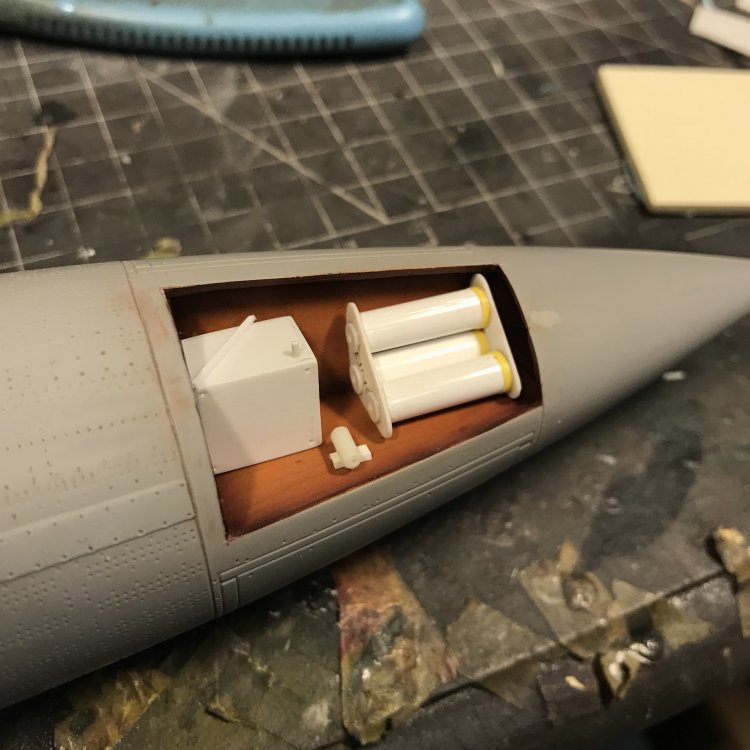
-
Cool little big kit!!
-
Takom 1/35 V2 Rocket
JeroenPeters replied to JeroenPeters's topic in LSM 1/35 and Larger Work In Progress
Here you go: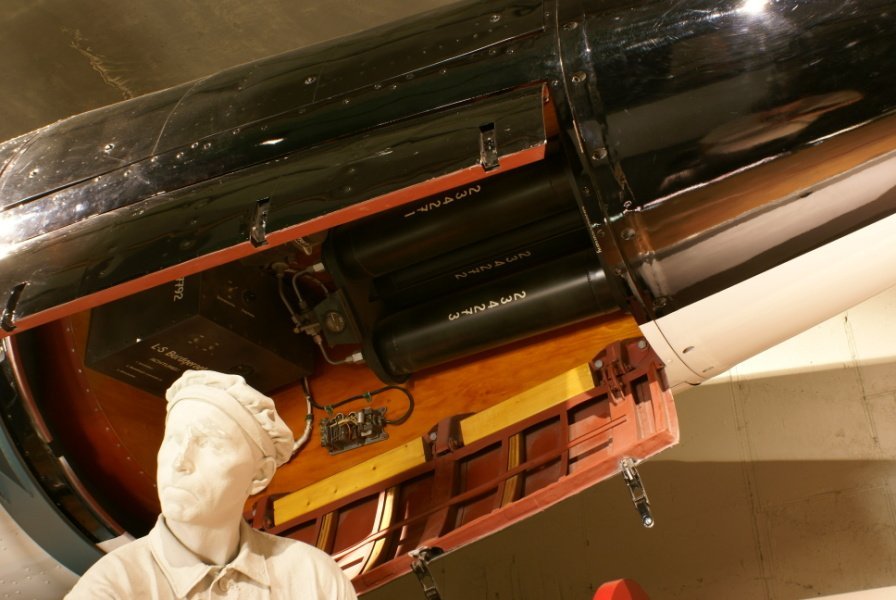
-
Takom 1/35 V2 Rocket
JeroenPeters replied to JeroenPeters's topic in LSM 1/35 and Larger Work In Progress
Yes there was. Check the reference photo’s a few posts back. These things were quickly built with light and easy to obtain materials. -
Takom 1/35 V2 Rocket
JeroenPeters replied to JeroenPeters's topic in LSM 1/35 and Larger Work In Progress
Sprayed the inside of the compartment light wood. Now adding wood grain decals.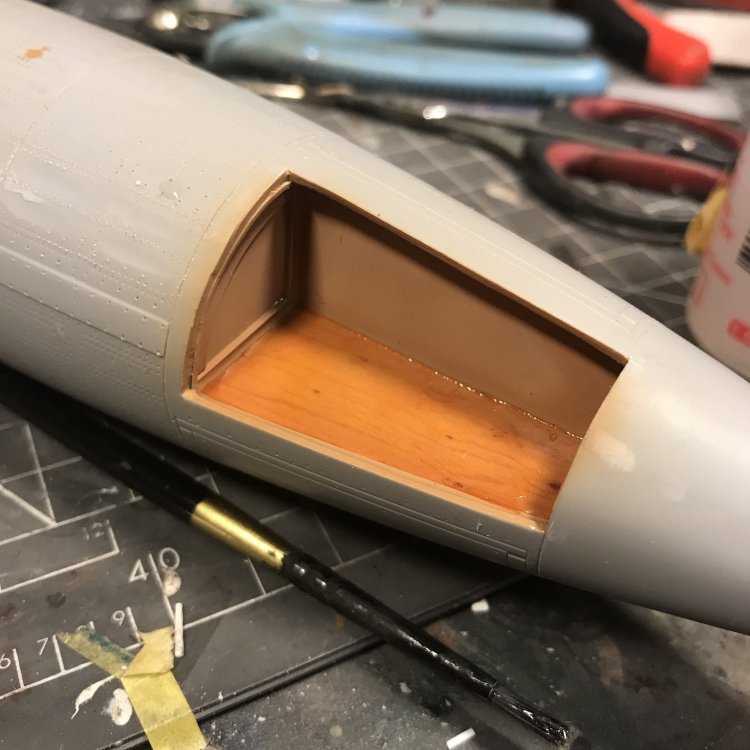
-
Nice!! Looks like quality stuff. You going on a bend?
-
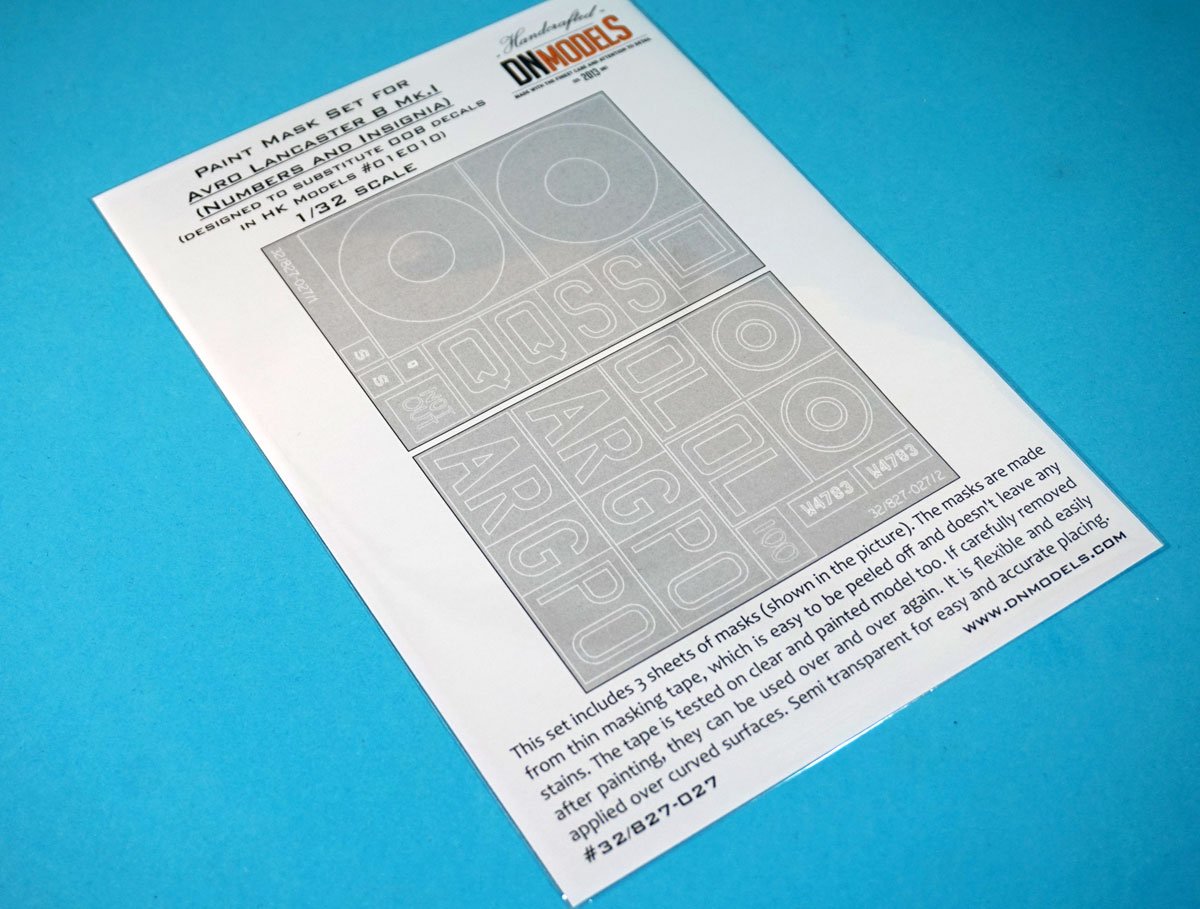
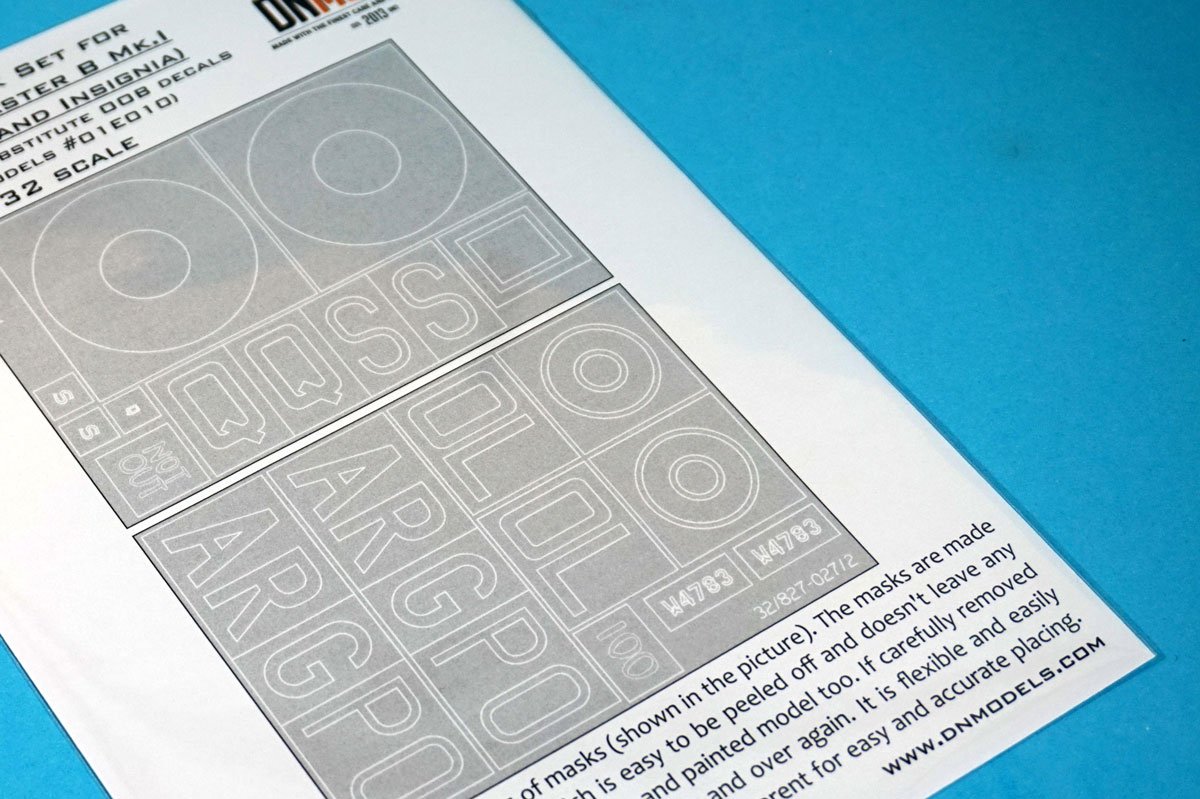
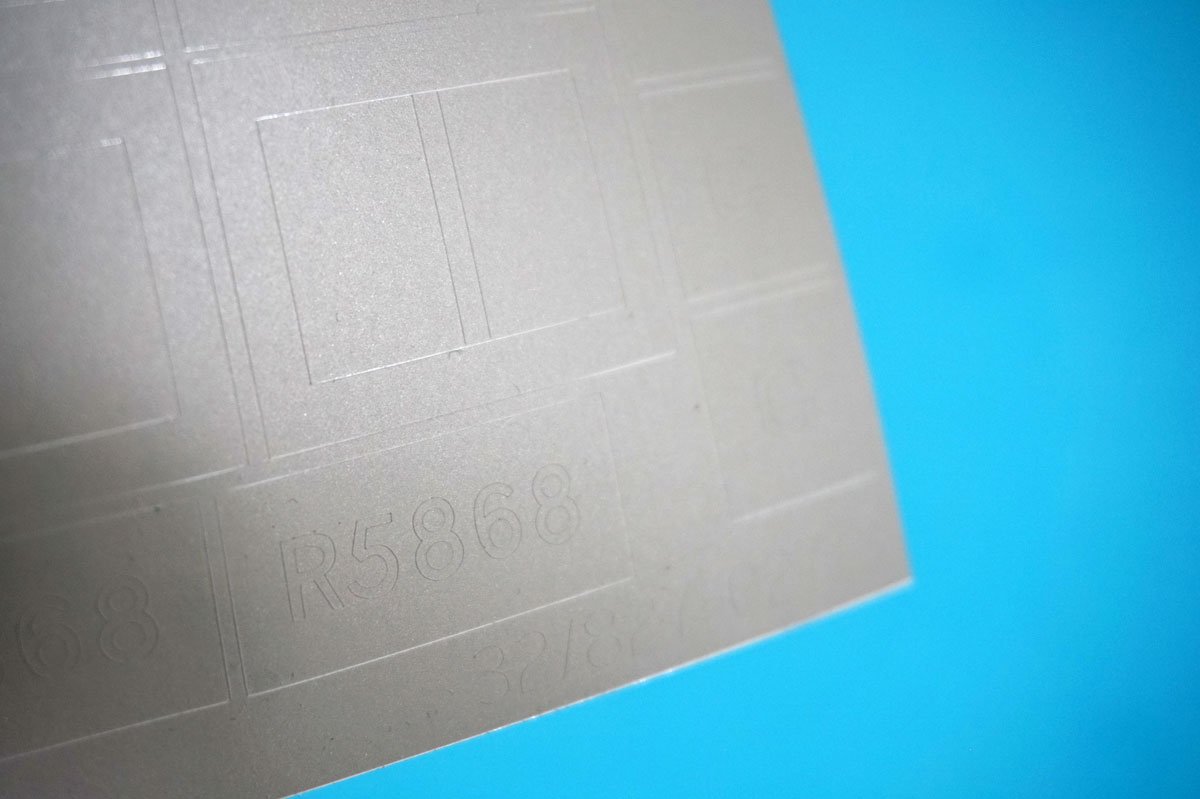
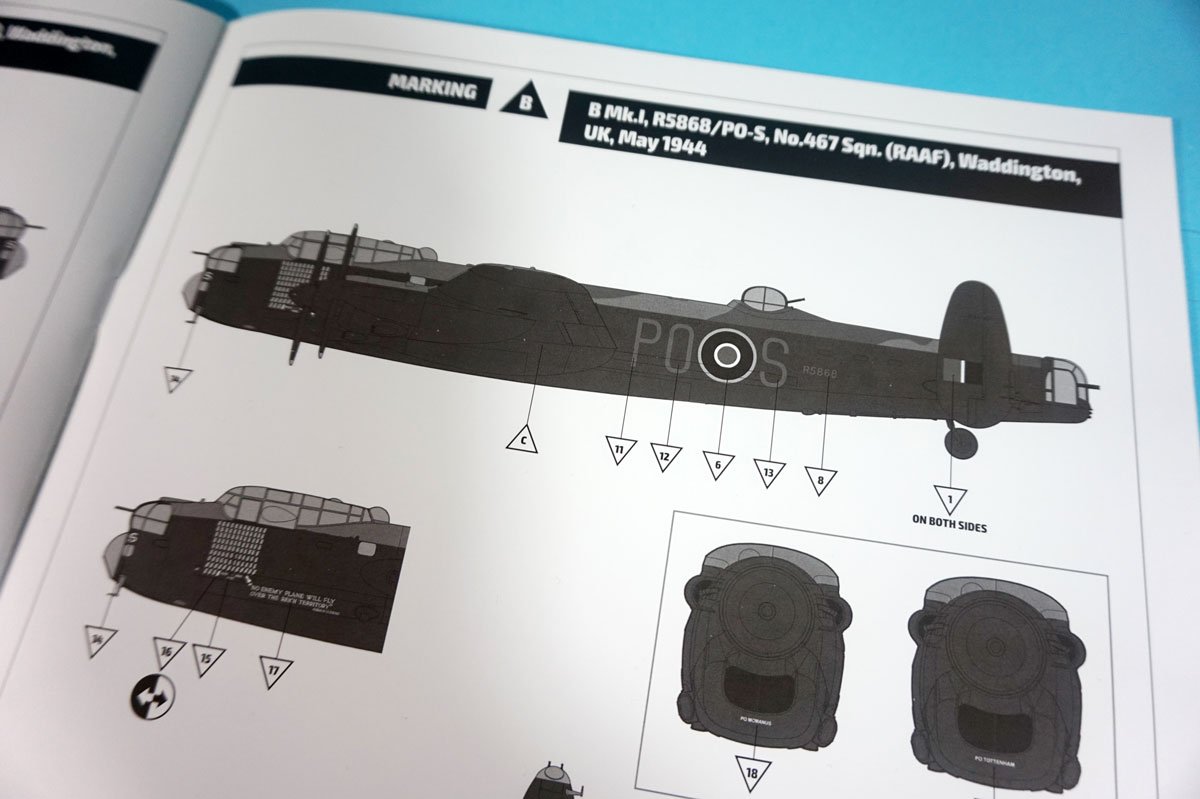
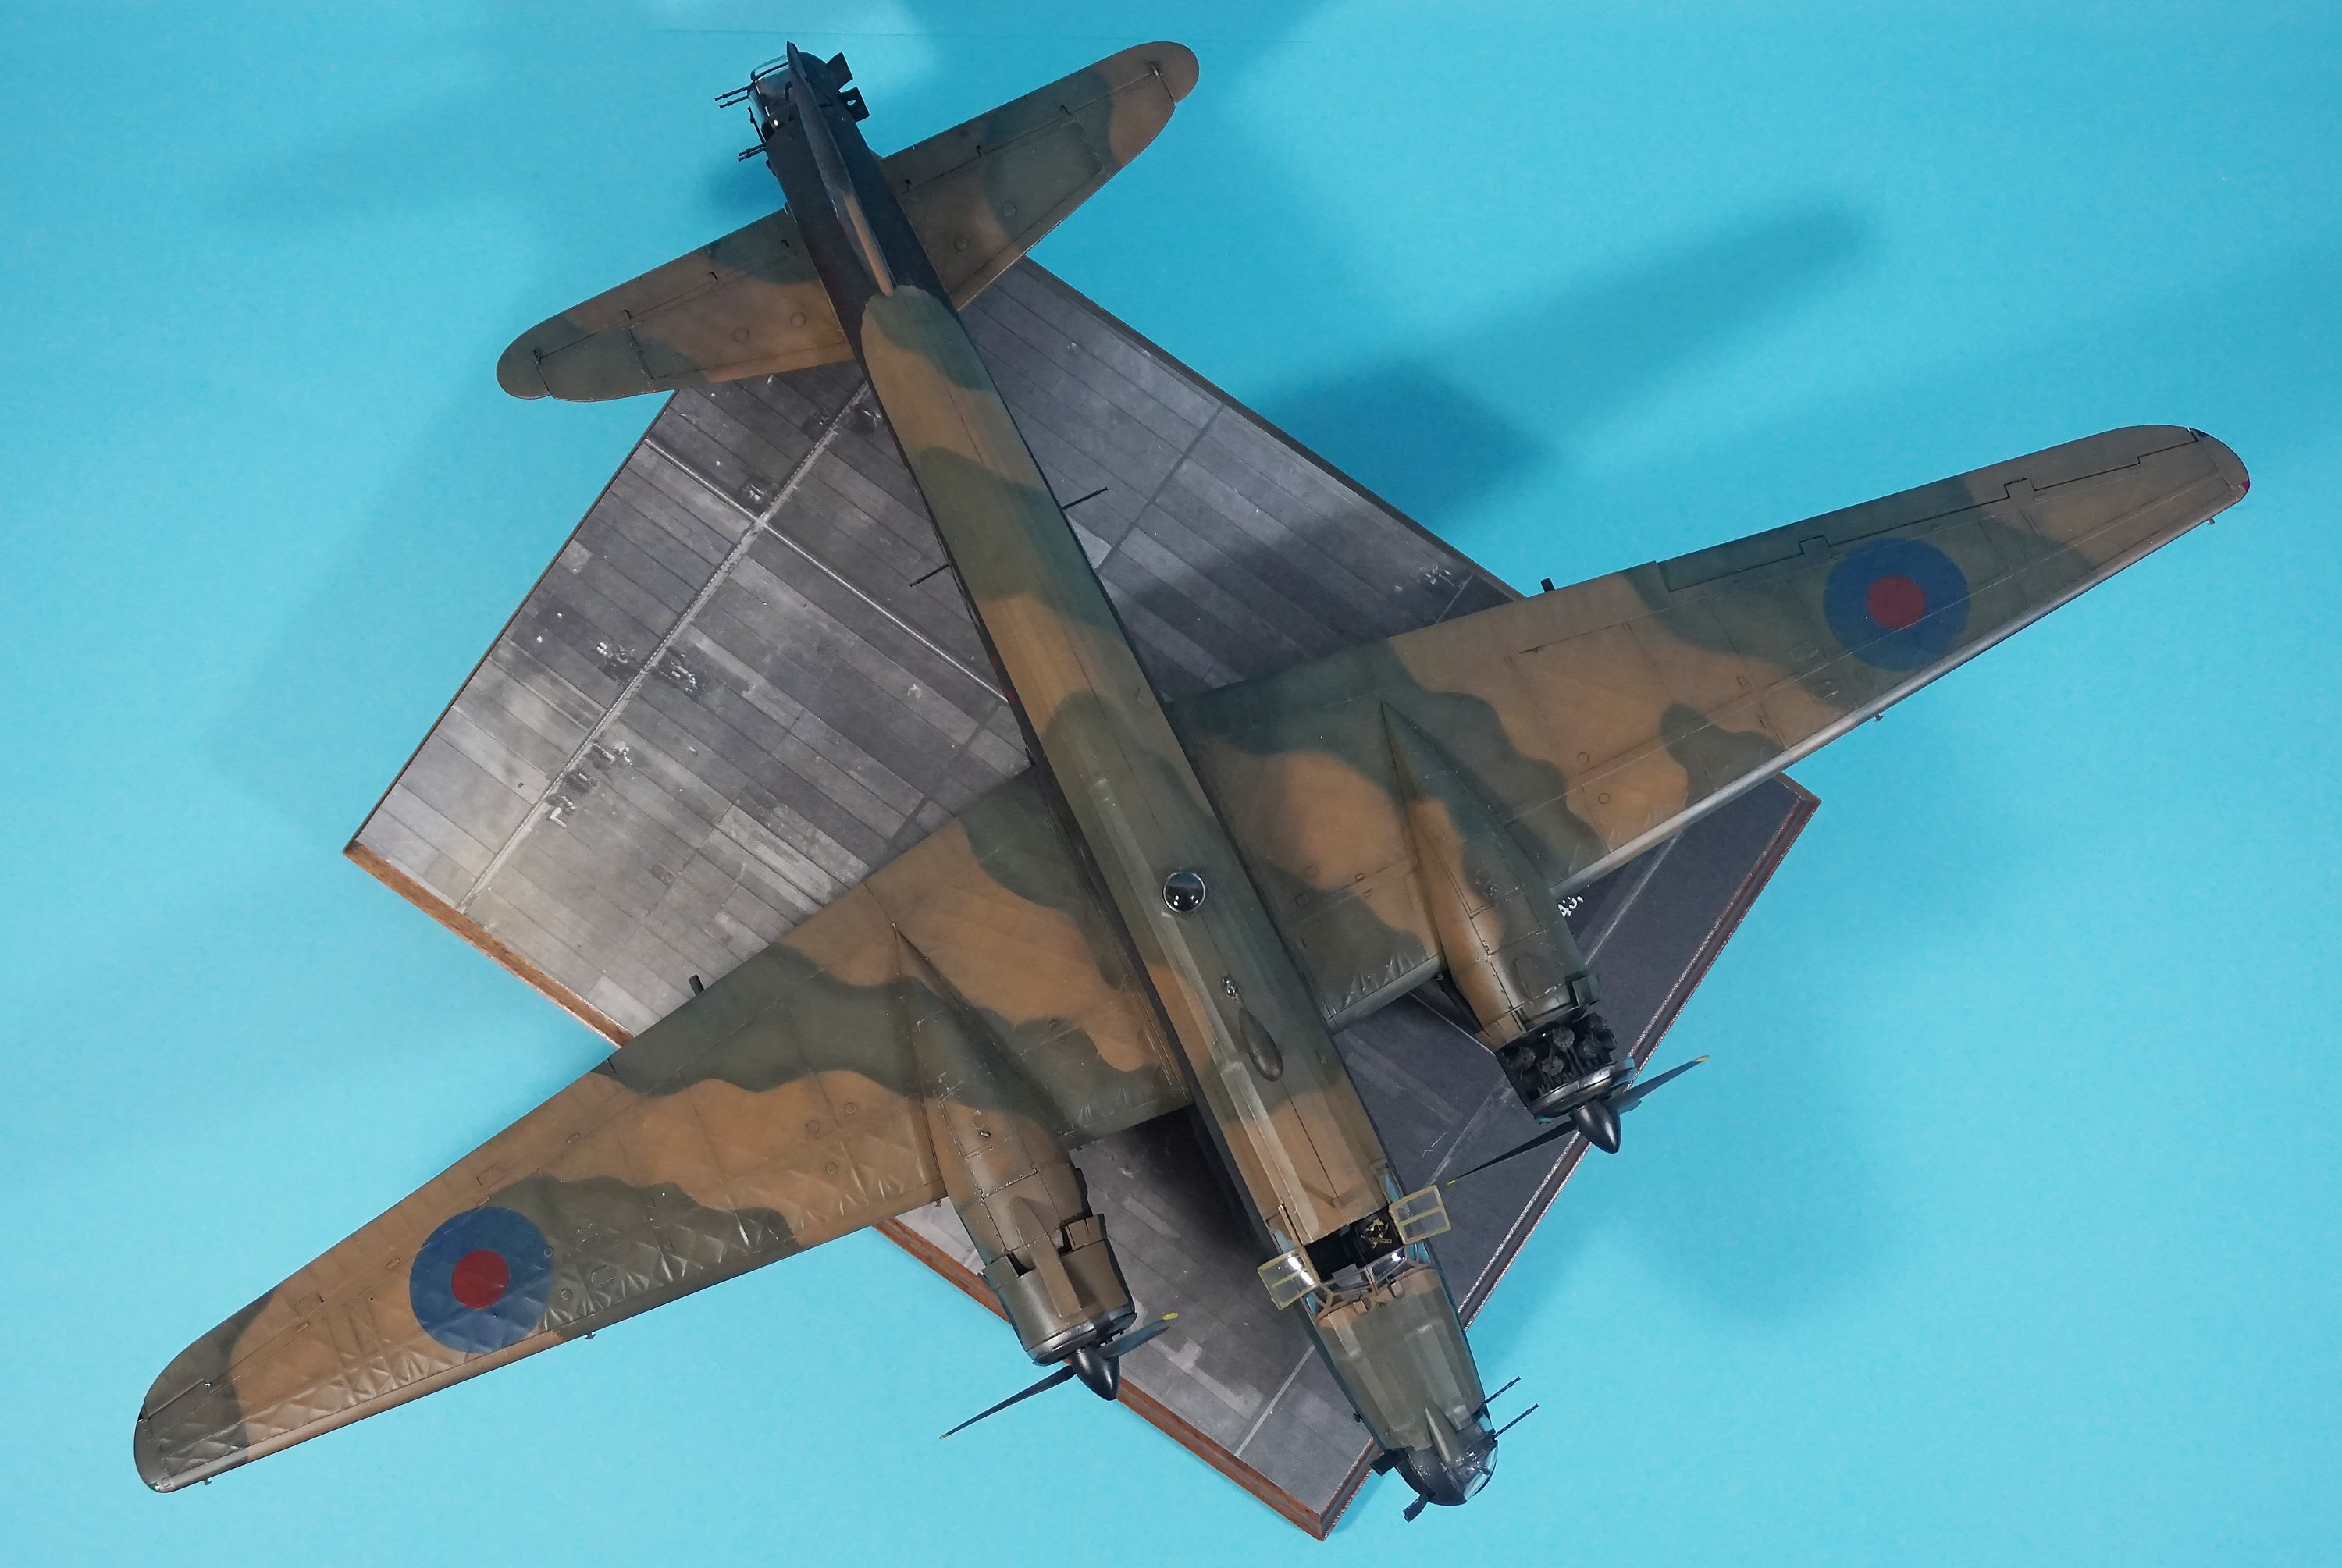
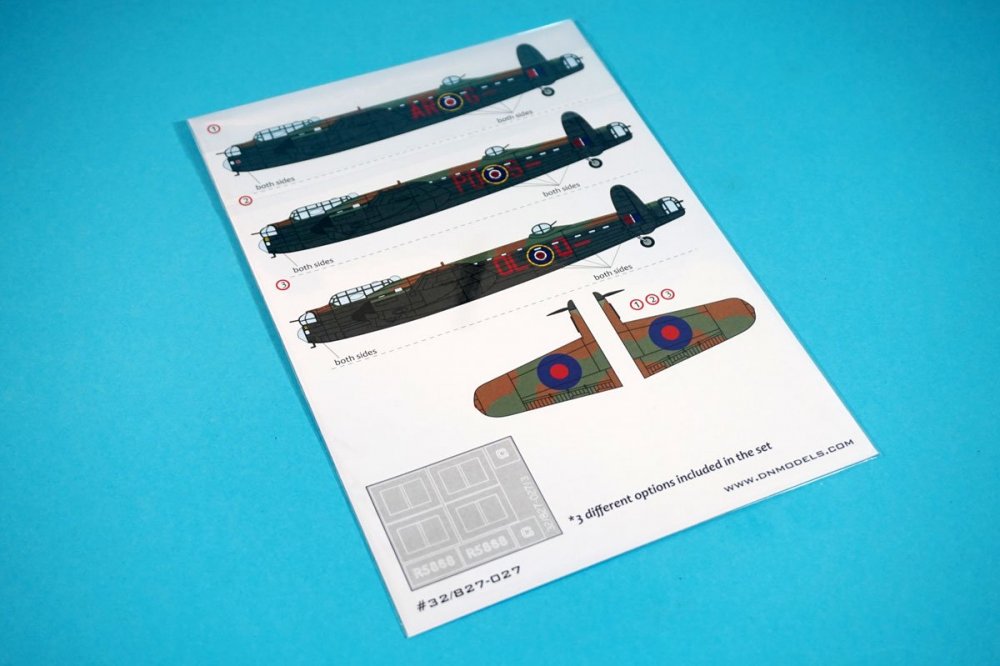
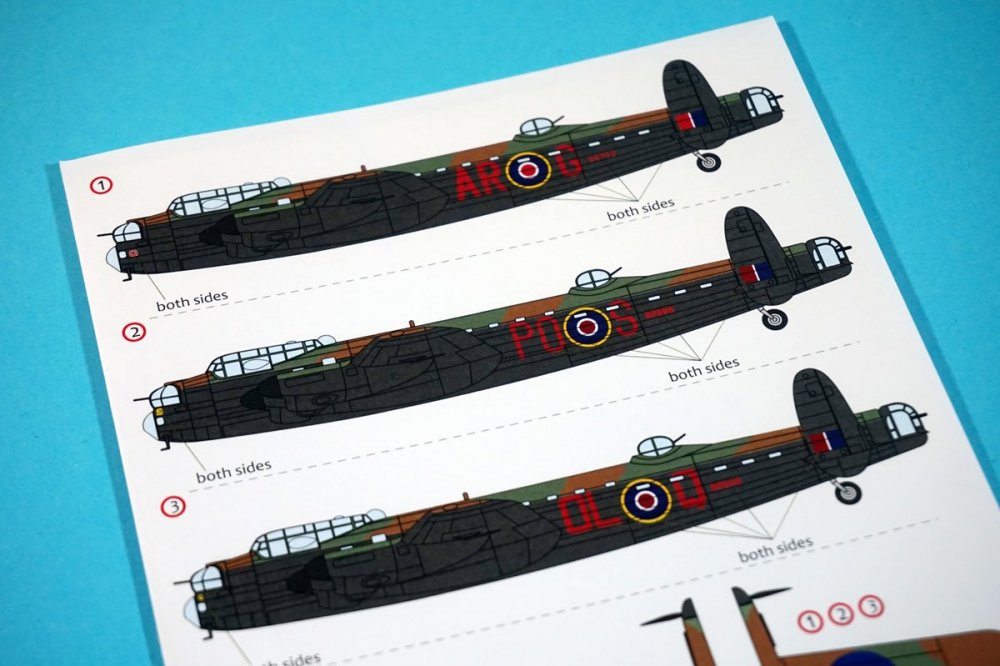
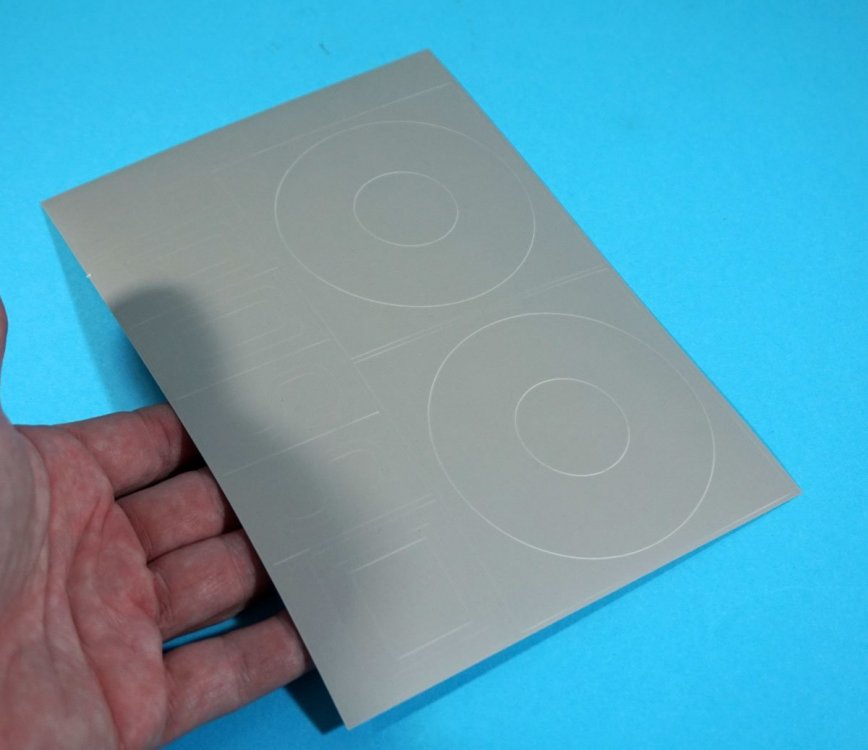
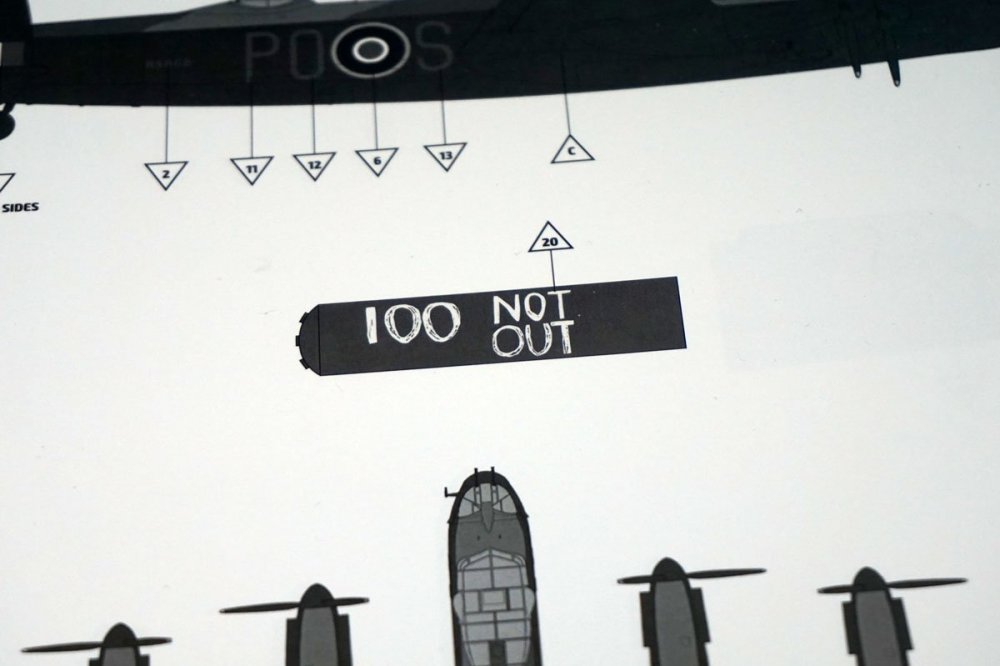
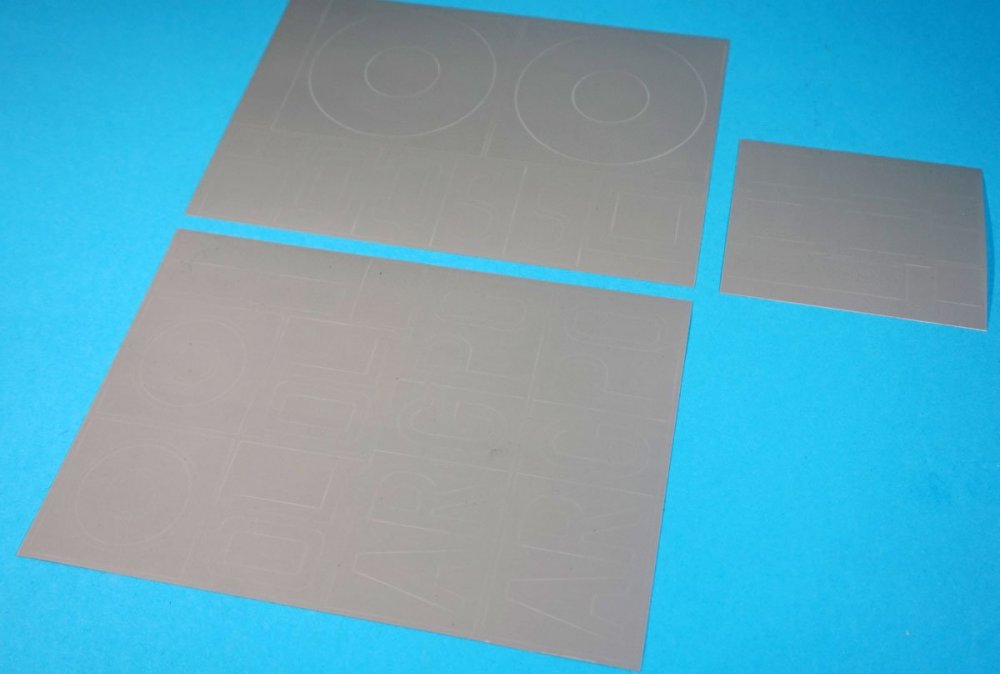
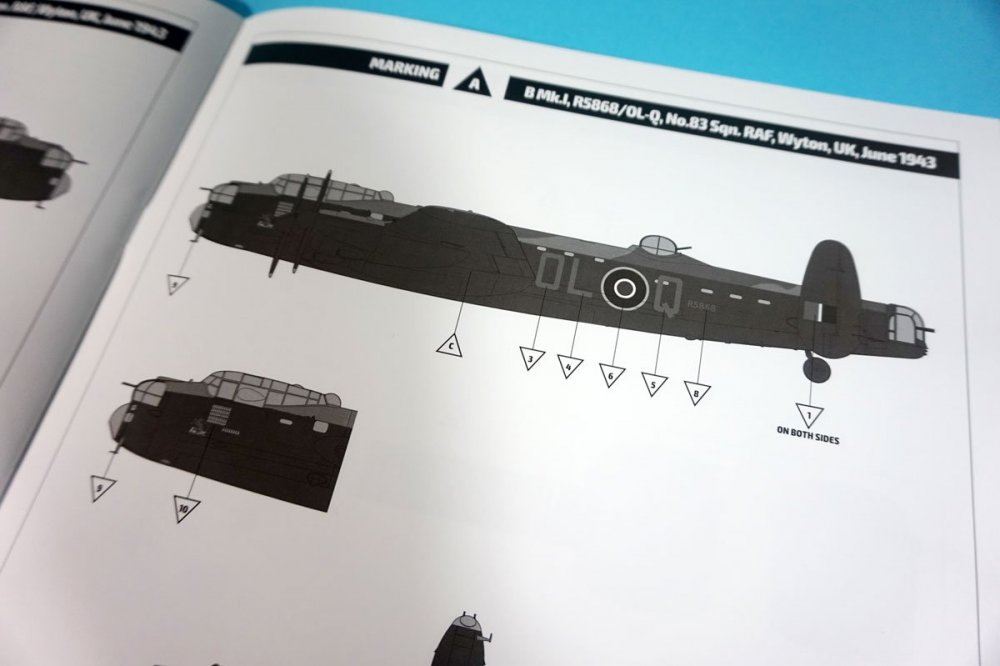
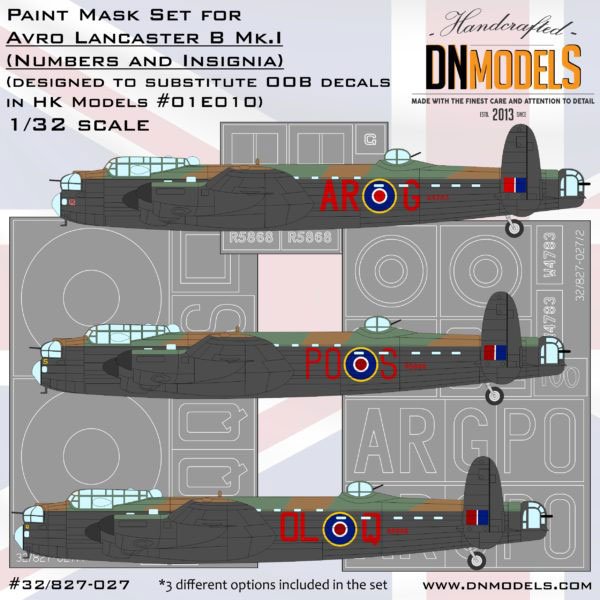
1/32 Paint Mask Set for Avro Lancaster B Mk.I (Numbers and Insignia) DN Models Catalogue #32/827-027 Available from DN Modelsfor $21,99 Introduction Today we take a look at a ‘complete’ mask set for the HK Models Lancaster, which ofcourse will also be applicable for the future Wingnut Wings Lancaster. The brand behind this mask set is new to me, but as the logo states has been around since 2013. Founder and owner Mitko Nikitov sent us these masks after we came into contact through his HK Models Lancaster review. His website shows an extensive range of mask sets for all scales. We being Large Scale Modeller ofcourse only look at the 1/32 and 1/35 sets, which include masks for the B-24, Do-335, Me-262B, A-4 Skyhawk, Starfighter, etc… The branding, look and feel and product looks very professional. Therefor we’d like to welcome Mitko with his DN Models product range to Large Scale Modeller! The set When comparing the quality of this product to other suppliers of masks sets, I’m tempted to look at Montex or Maketar, because the same kind of material is used. There are people that prefer the Kabuki paper (like is almost always used by Eduard and is also offered by Masketar) and there are people that prefer this rubbery, plastic adhesive like we have here. To me it definitely depends on the type of curved surface we’re working with. Plastic tends to have a sharper edge but is more difficult to work with on rounded and strongly curved areas. In this case, the case of the Lancaster, I would definitely prefer this material over Kabuki. The complete set: When people ask me whether I have started my Lancaster build I answer with a strong ‘No’. The reason is that I think using decals for the roundels on a kit this size is a no go. No matter how good you are in getting rid of silvering with setting solution, you will always see a decal was used. Besides: on roundels this big I love to play with contrast and shade insides the large red and blue areas. Fading, chipping… all things that are near impossible with decals. Here's my recent finished Wellington (48th scale) on which I used only masks. The roundels bland in with the model and are sprayed very thinly. Alongside this full mask set for the numbers and insignia DN Models has released a canopy mask set for the Lancaster, which we will look at in a separate review. This is a first for them in this scale and we’ve seen them do the same for the B-24 kit. The mask set includes three sheets with all insignia and numbers to build any of the three options included in the HK Models kit: AR-G B.MkI, W4783, No.460 Squadron, RAAF, Binbrook, United Kingdom, May 1944 The ‘G’ for George is a WW2 survivor with 90 operational flights and can be seen today at the Australian War Memorial in the Anzac Hall. What I like is that the serial number W4783 in reality shows small interuptions in the letter W and numbers 4 and 8. This is because masks were used in reality as well. These small interuptions are also present in the paint mask. PO-S B Mk.I, R5868, No.467 Squadron, RAAF, Waddington, United Kingdom, May 1944 ‘S’ for Sugar. When looking at reference photo’s of this aircraft (I’m talking about photo’s of the RAF Museum in Hendon) you’ll things like a large ‘S’ above the flash on the tail. This ‘S’ does not show up in earlier wartime photographs. Make sure you use wartime photographs of this plane and be sure to pick a certain time period, since this plane was altered in many areas. Think of needle props vs. paddle props for instance. The Cookie bomb carried by PO-S features hand written text: 100 NOT OUT. Even this artwork is included in the mask set. This hand chalked marking was done to indicate the 100thmission of this plane. OL-Q B Mk.I, R5868, No. 83 Squadron. RAF, Wyton, United Kingdom, June 1943 ‘Q’ for Queen. You might notice the same serial number on this plane. This is because this plane started out as OL-Q where it flew with the RAF, and was transferred in September 1943 to the Australian RAAF and received codes PO-S. This set does not replace all the decals provided with the HK Models kit. Only the larger ones’ you really want to spray. The mission nose art of PO-S, ground crew instructions, etc.. are not included. The large square you’ll find on one of the sheets is not mentioned in the instructions. This is ofcourse the marking for the life raft on the top side of the right wing. Verdict This set is (in my eyes) a must have for anyone building a large scale Lancaster. It’s complete, easy to use (easier than Kabuki in my honest opinion. Especially in this large size), and it’s well produced. No small corner inaccuracies that can cause masks to tear were spotted. Mitko was quite critical on the absence of colours in the HK Models kit instructions. We can say that he makes up for this in his own way by adding colour in his own instruction sheet. Well done Mitko! The only thing that I would have maybe added is an instruction on how to use these kind of masks. Many modelers lack experience in this craft. Make sure you use a marker to draw a large X over the roundels. This makes it easier to reposition the removed sections. And use masking tape to holy the letters, roundels and numerals in place while transferring them to your model. When in doubt: ask a fellow modeler on the forum! Highly recommended. Our sincere thanks to DN Modelsproviding this mask set for review. Jeroen Peters


-
The Force is strong with this one...
JeroenPeters replied to Bill_S's topic in LSM 1/35 and Larger Work In Progress
Niiiiice!!! -
Takom 1/35 V2 Rocket
JeroenPeters replied to JeroenPeters's topic in LSM 1/35 and Larger Work In Progress
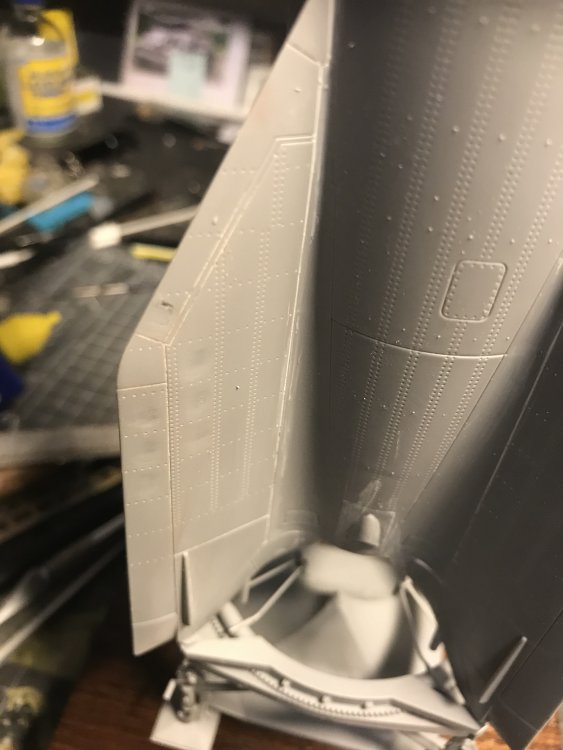
Hi Iain, I use a dremel with a sanding boll for the first rough work. Then I use a round scalpel to smoothen the dent out and then I smooth it further with really fine wet sanding paper. Takes a lot of time and patience. More to do. -
Takom 1/35 V2 Rocket
JeroenPeters replied to JeroenPeters's topic in LSM 1/35 and Larger Work In Progress
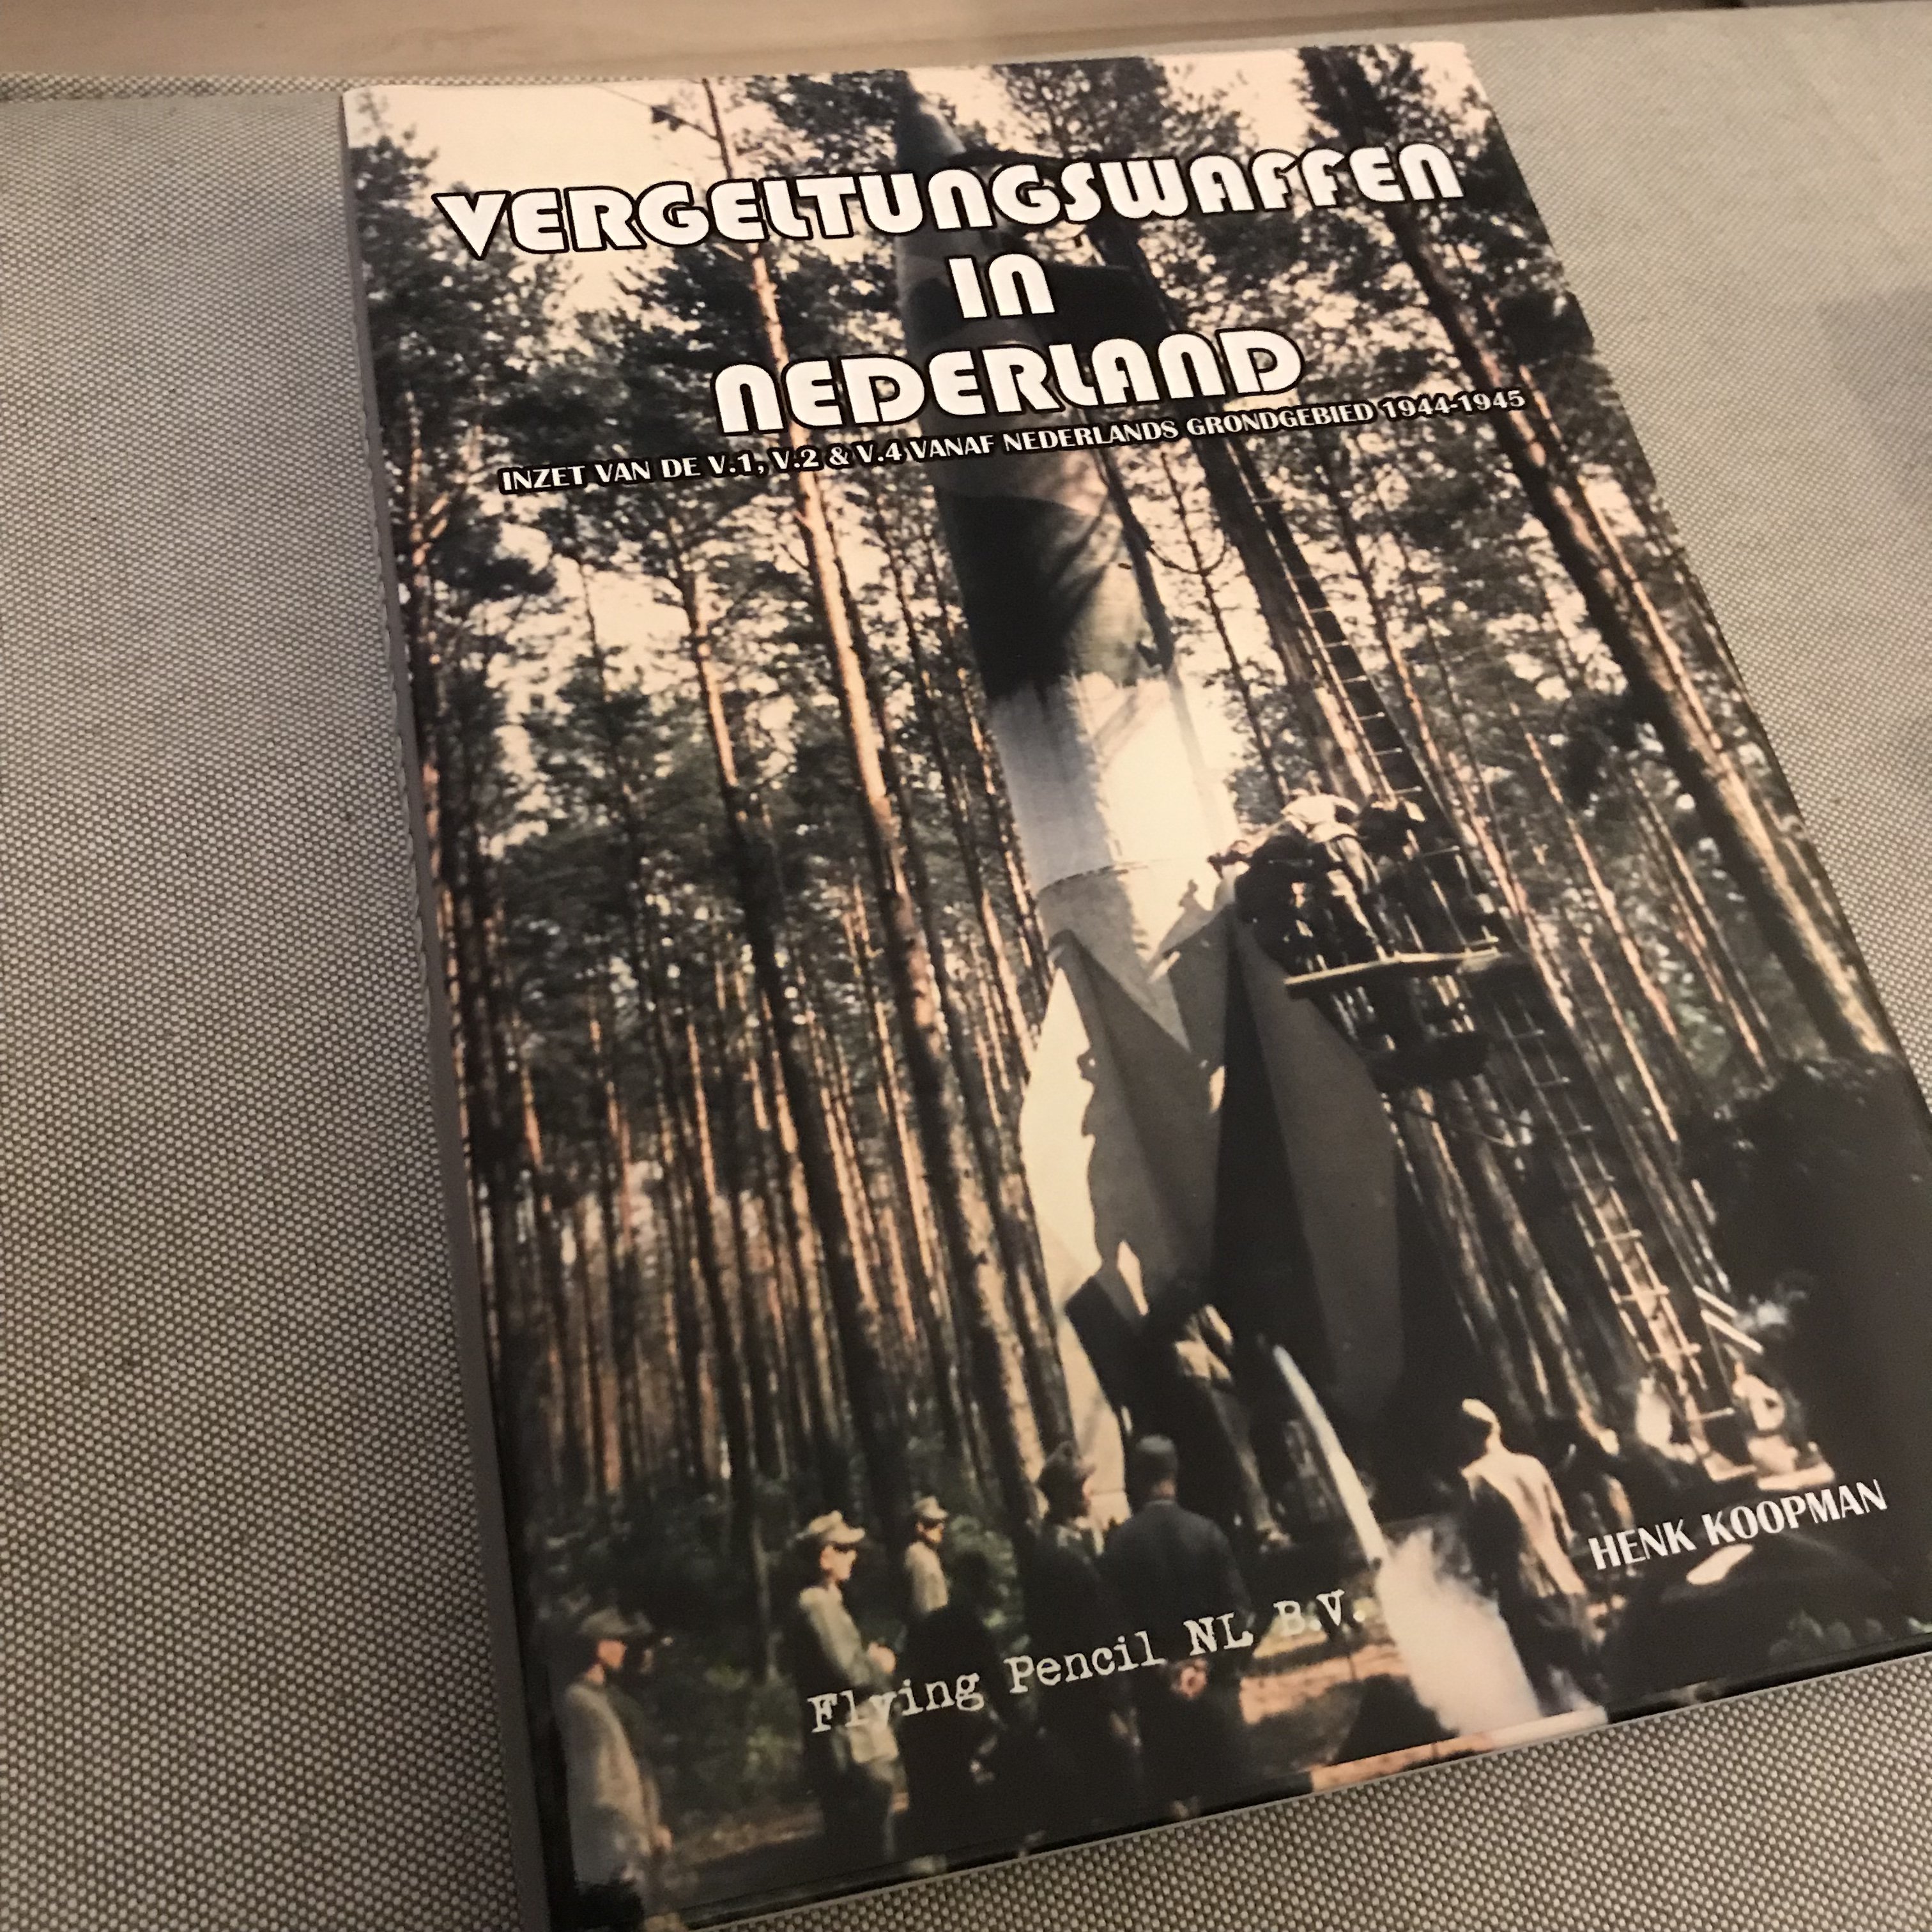
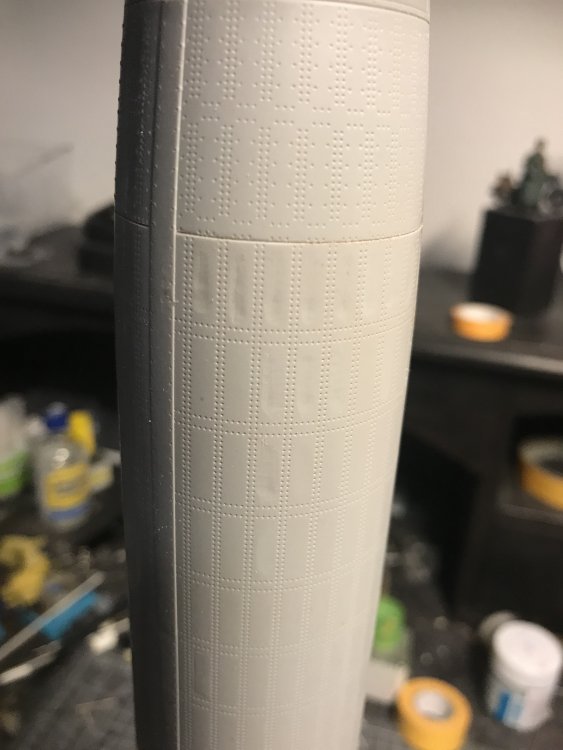
Thnx guys, bought a book today on V weapons in the Netherlands. The pic on the cover shows another clear example of oil canning on a V2. Pretty dramatic.
-
Takom 1/35 V2 Rocket
JeroenPeters replied to JeroenPeters's topic in LSM 1/35 and Larger Work In Progress
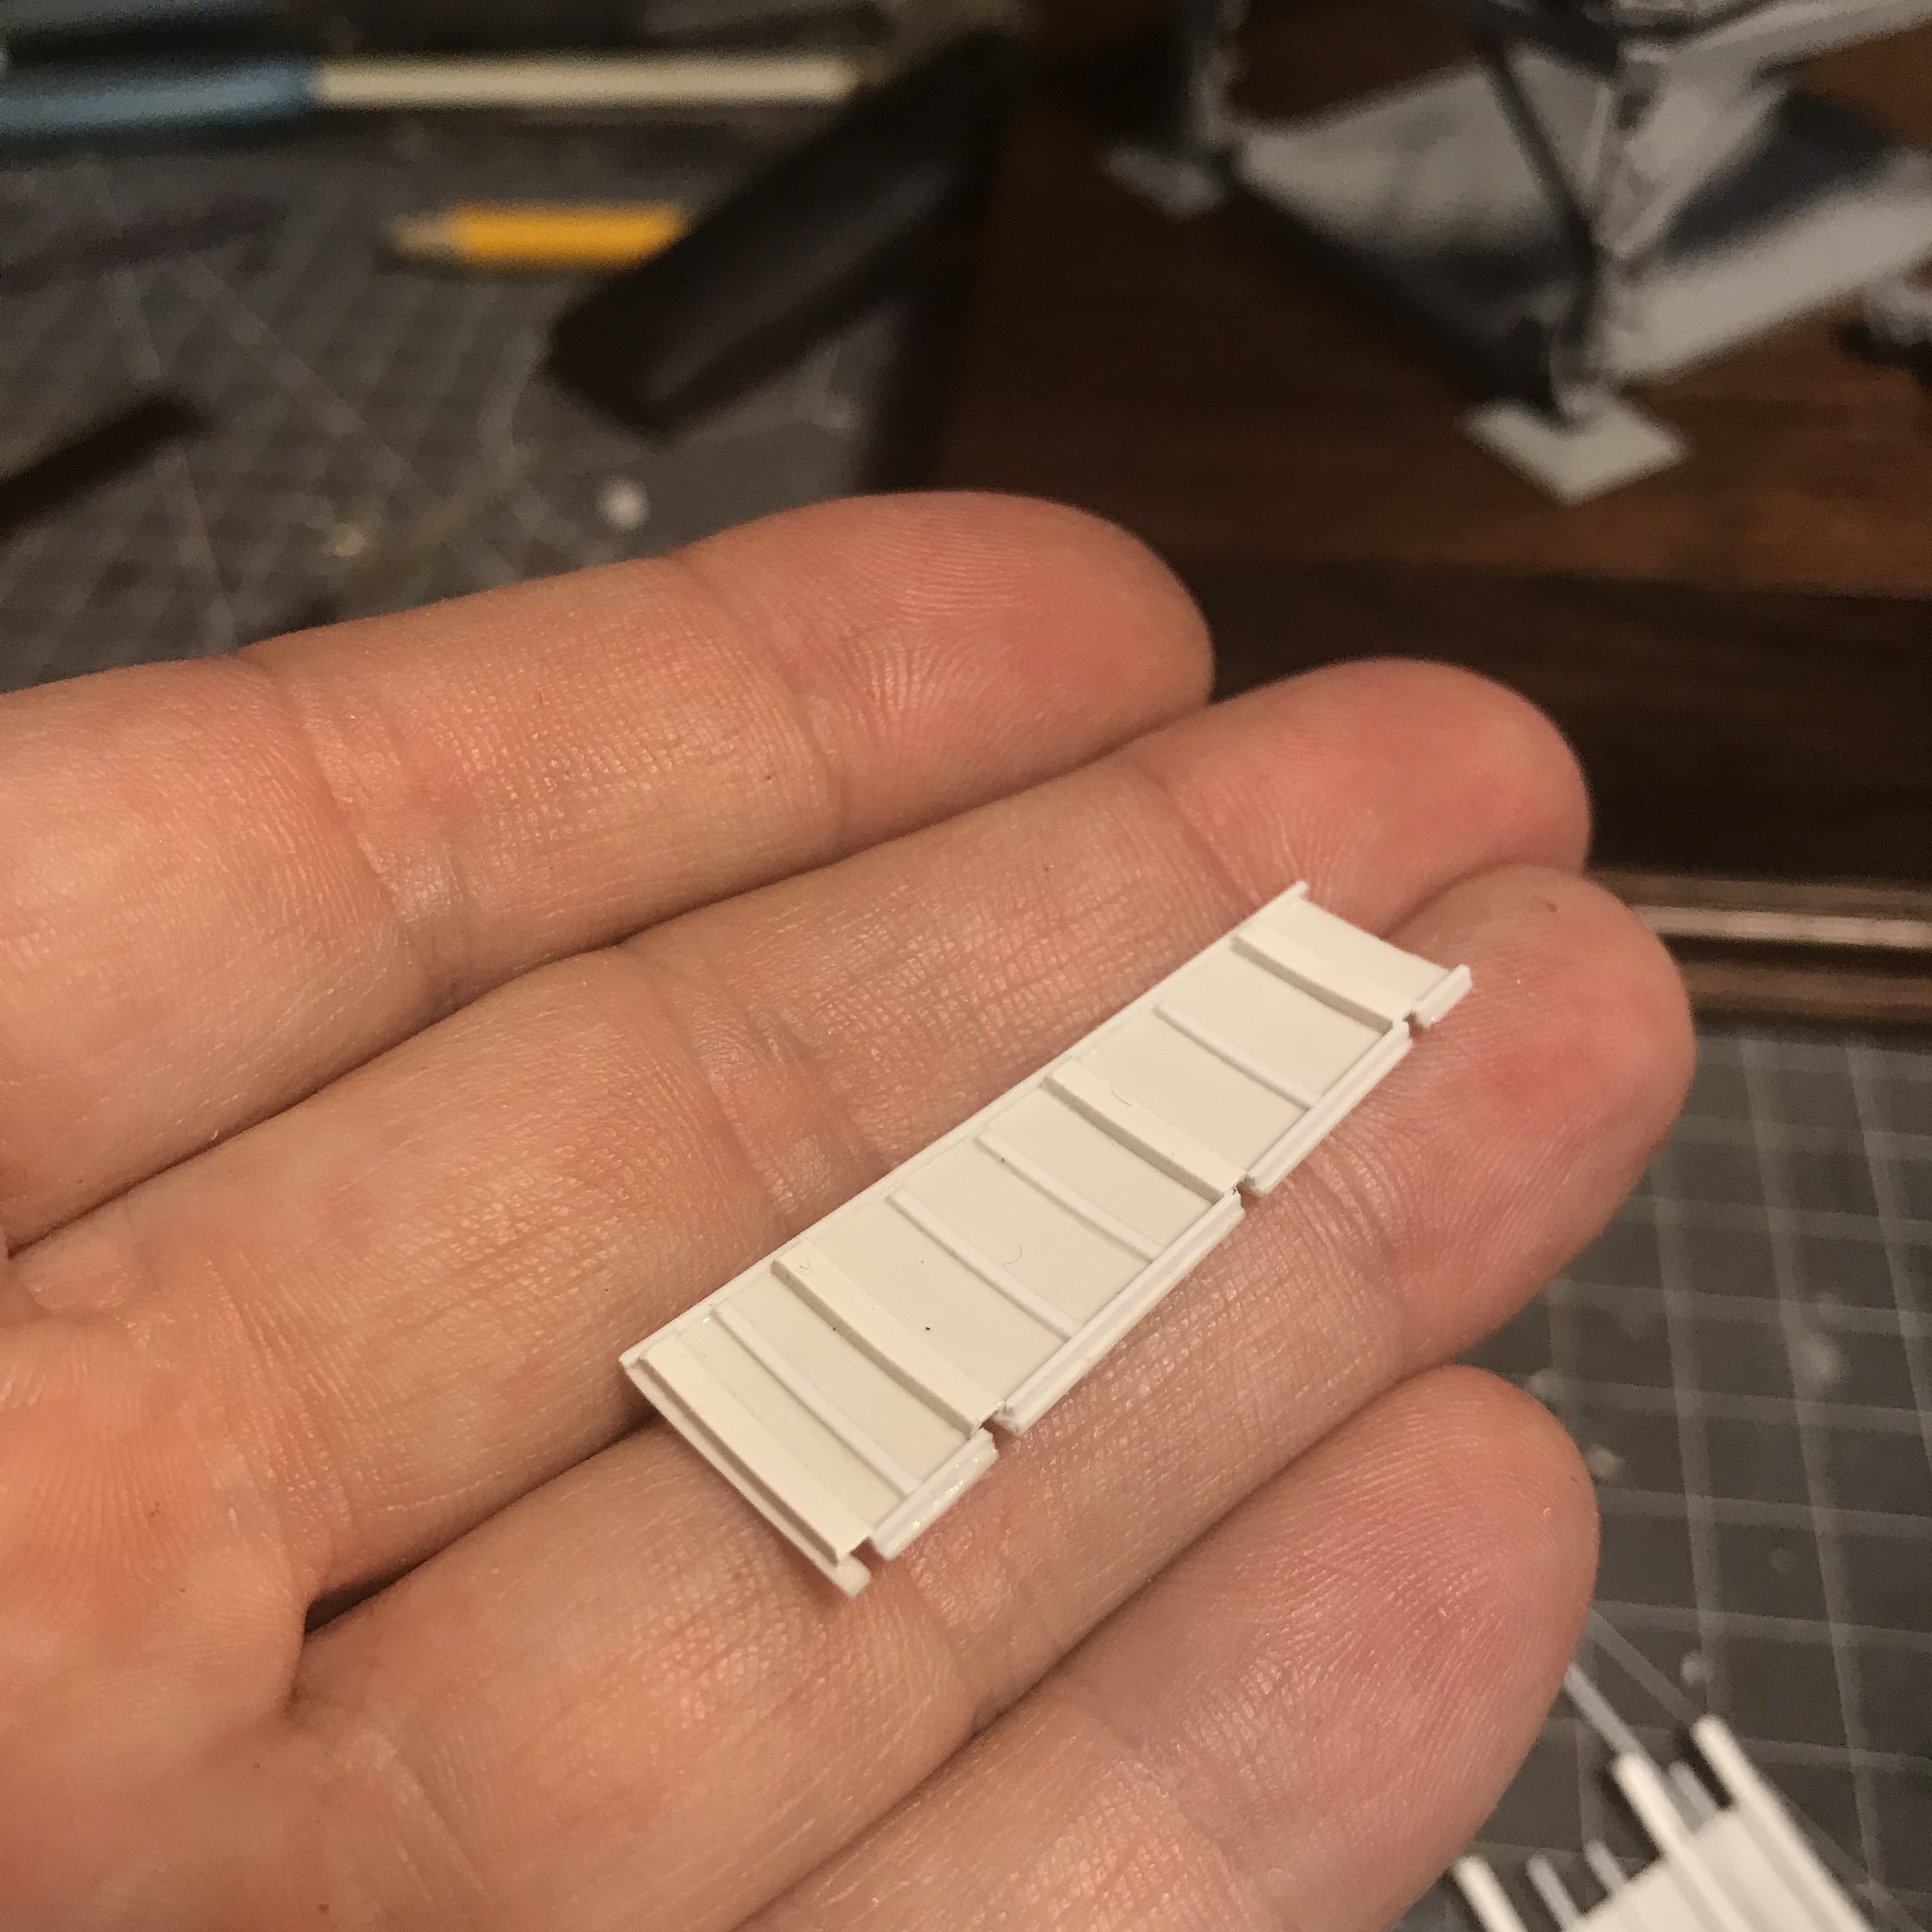
More work done. Doors are almost finished. Started work on the Funkgerät.

-
Takom 1/35 V2 Rocket
JeroenPeters replied to JeroenPeters's topic in LSM 1/35 and Larger Work In Progress
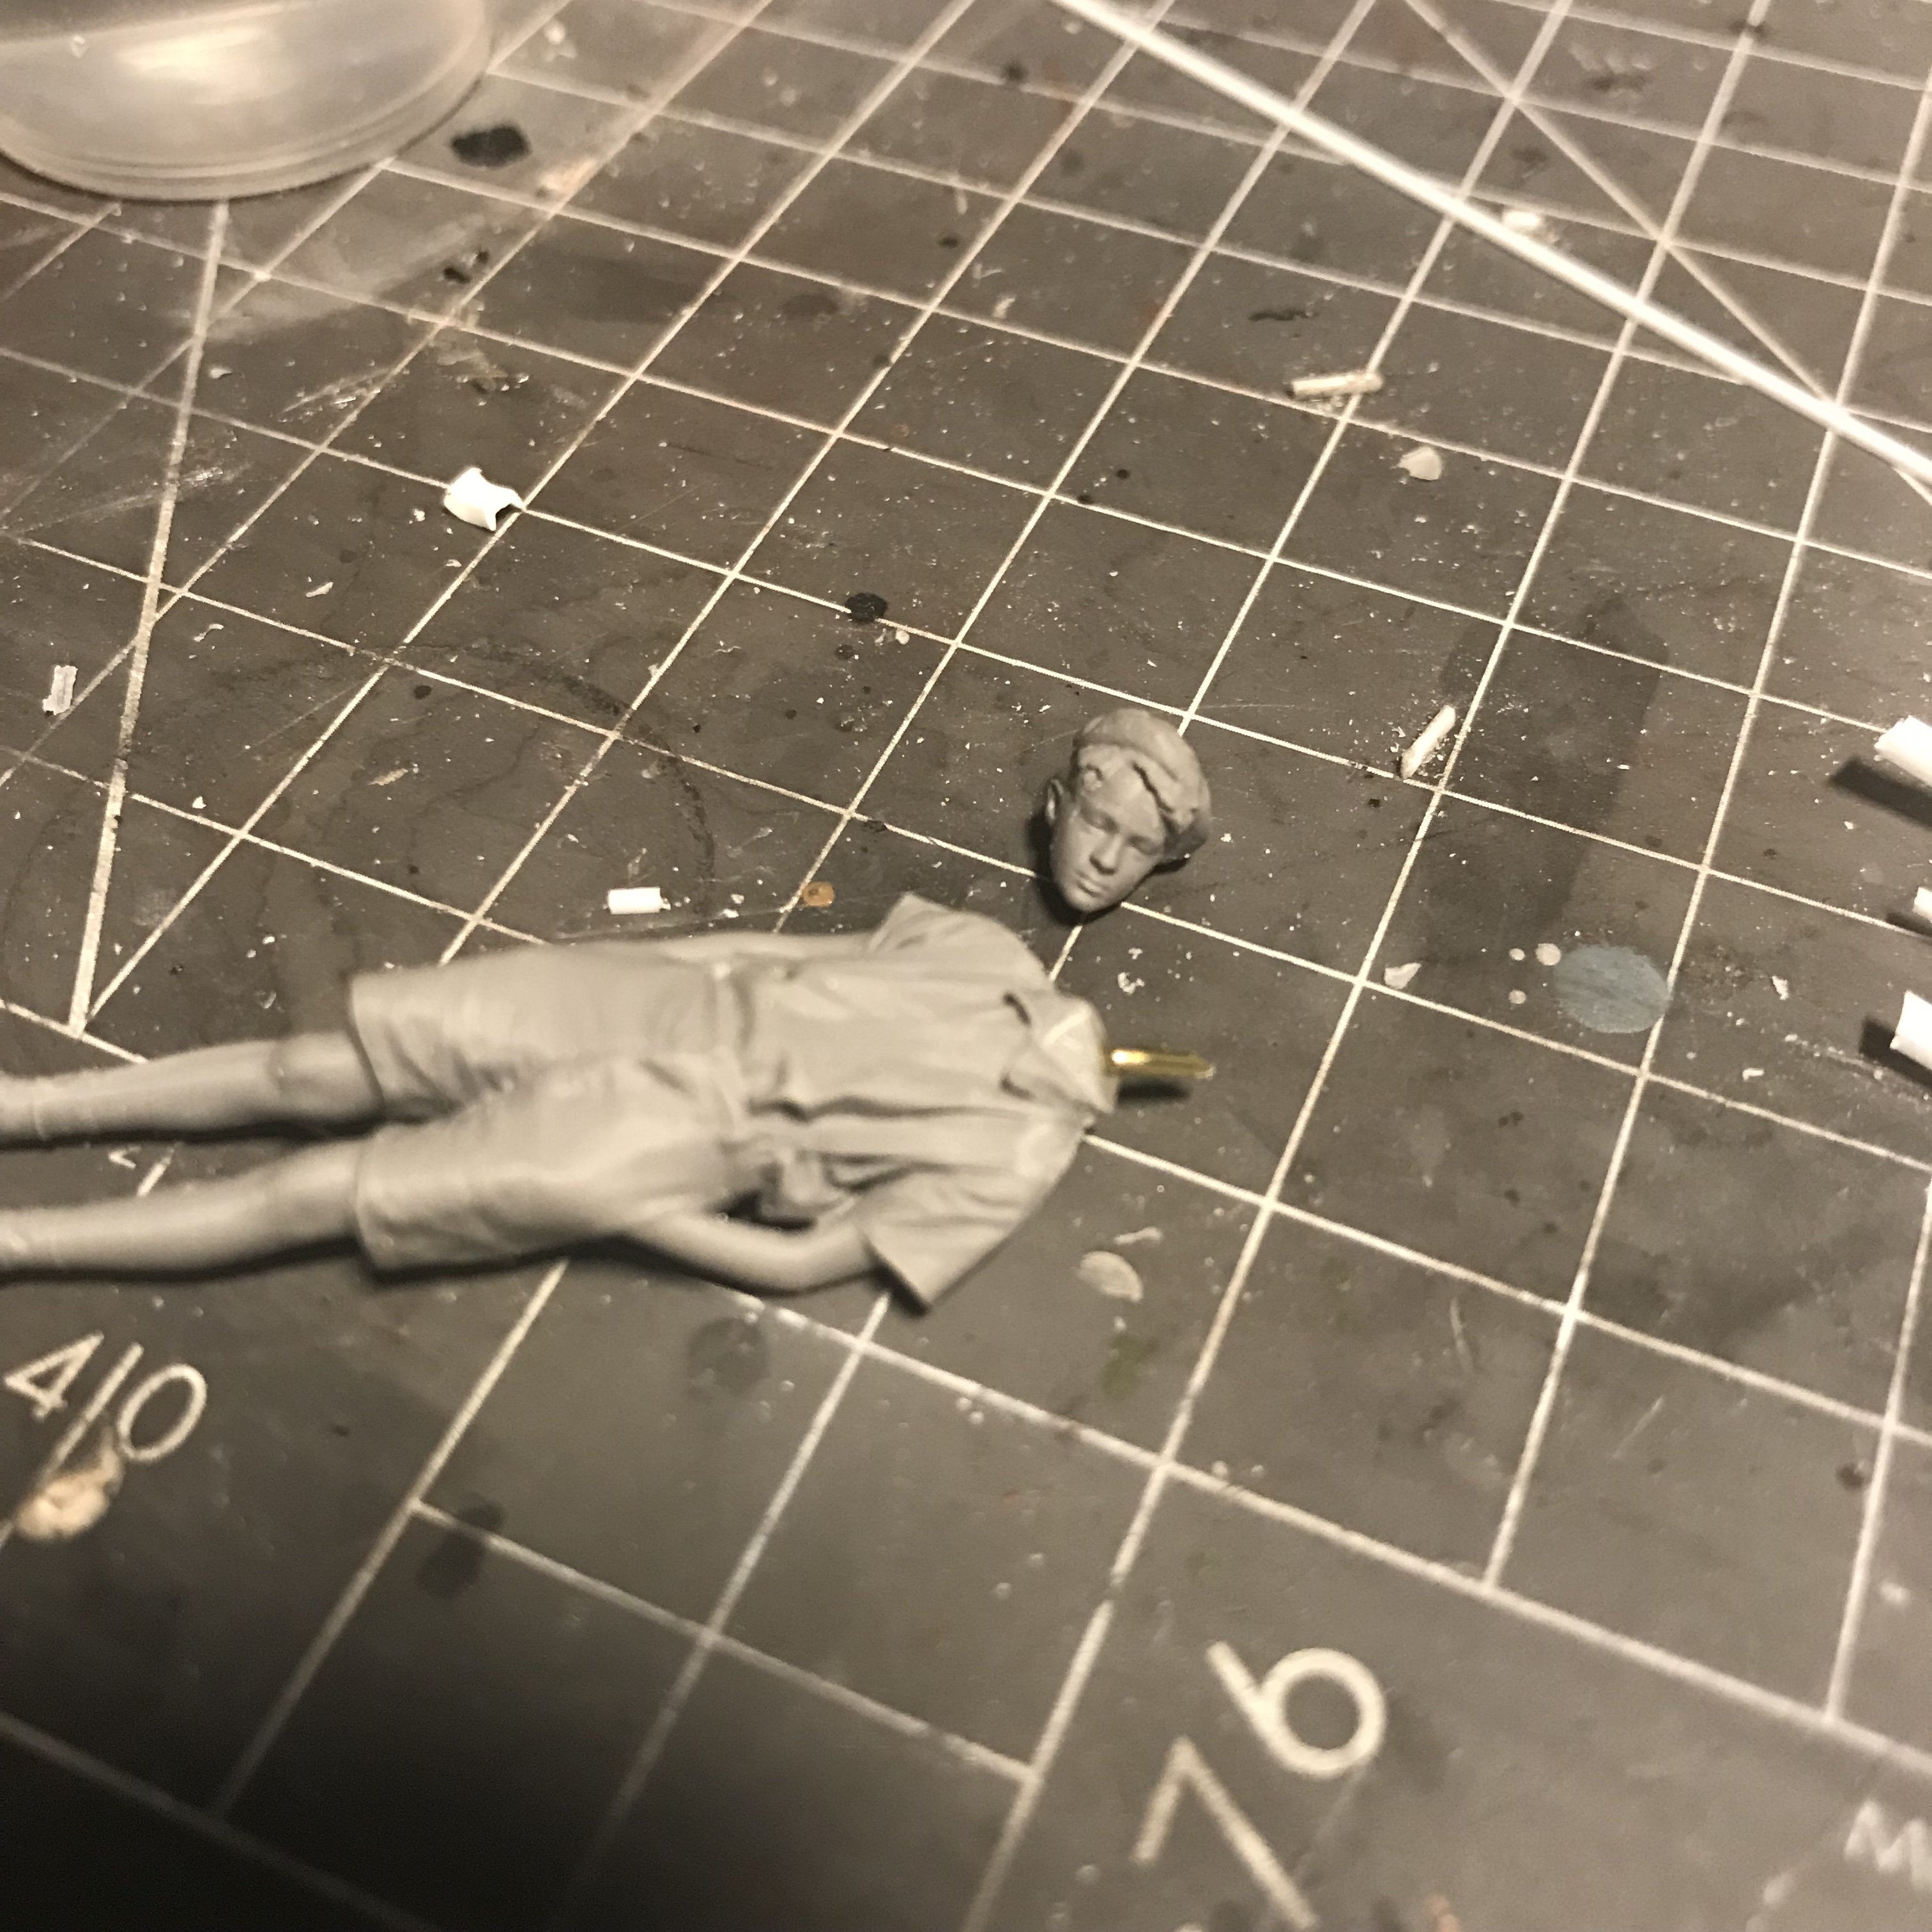
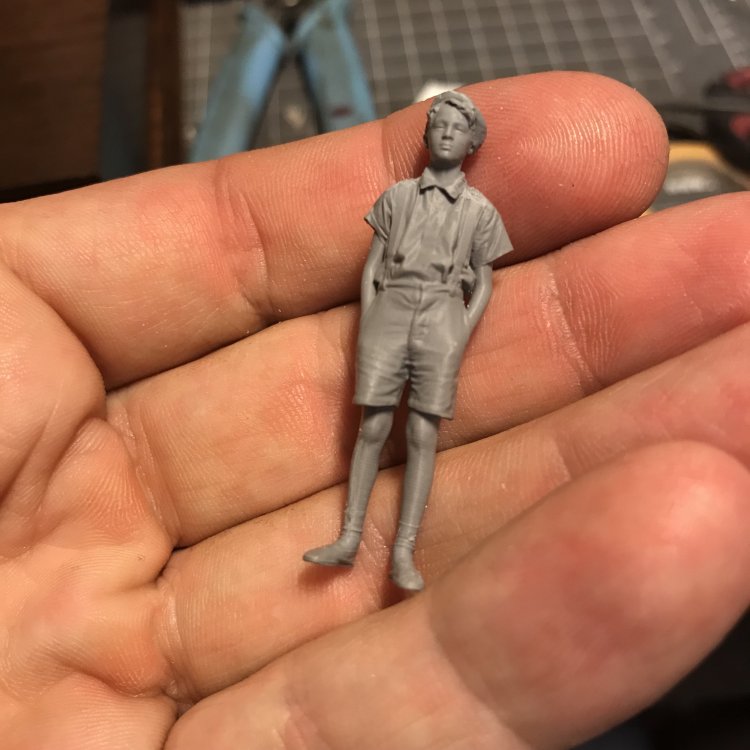
Removed the head again and sculpted a neck from wire and light curing putty. Great stuff.

-
Loving this!
-
I love it!!! Beautiful. And nice safe with the decal too!
-
Takom 1/35 V2 Rocket
JeroenPeters replied to JeroenPeters's topic in LSM 1/35 and Larger Work In Progress
Thnx! But the hardest part of the surgery needs to be completed yet. Re-sculpt the neck! -
Takom 1/35 V2 Rocket
JeroenPeters replied to JeroenPeters's topic in LSM 1/35 and Larger Work In Progress
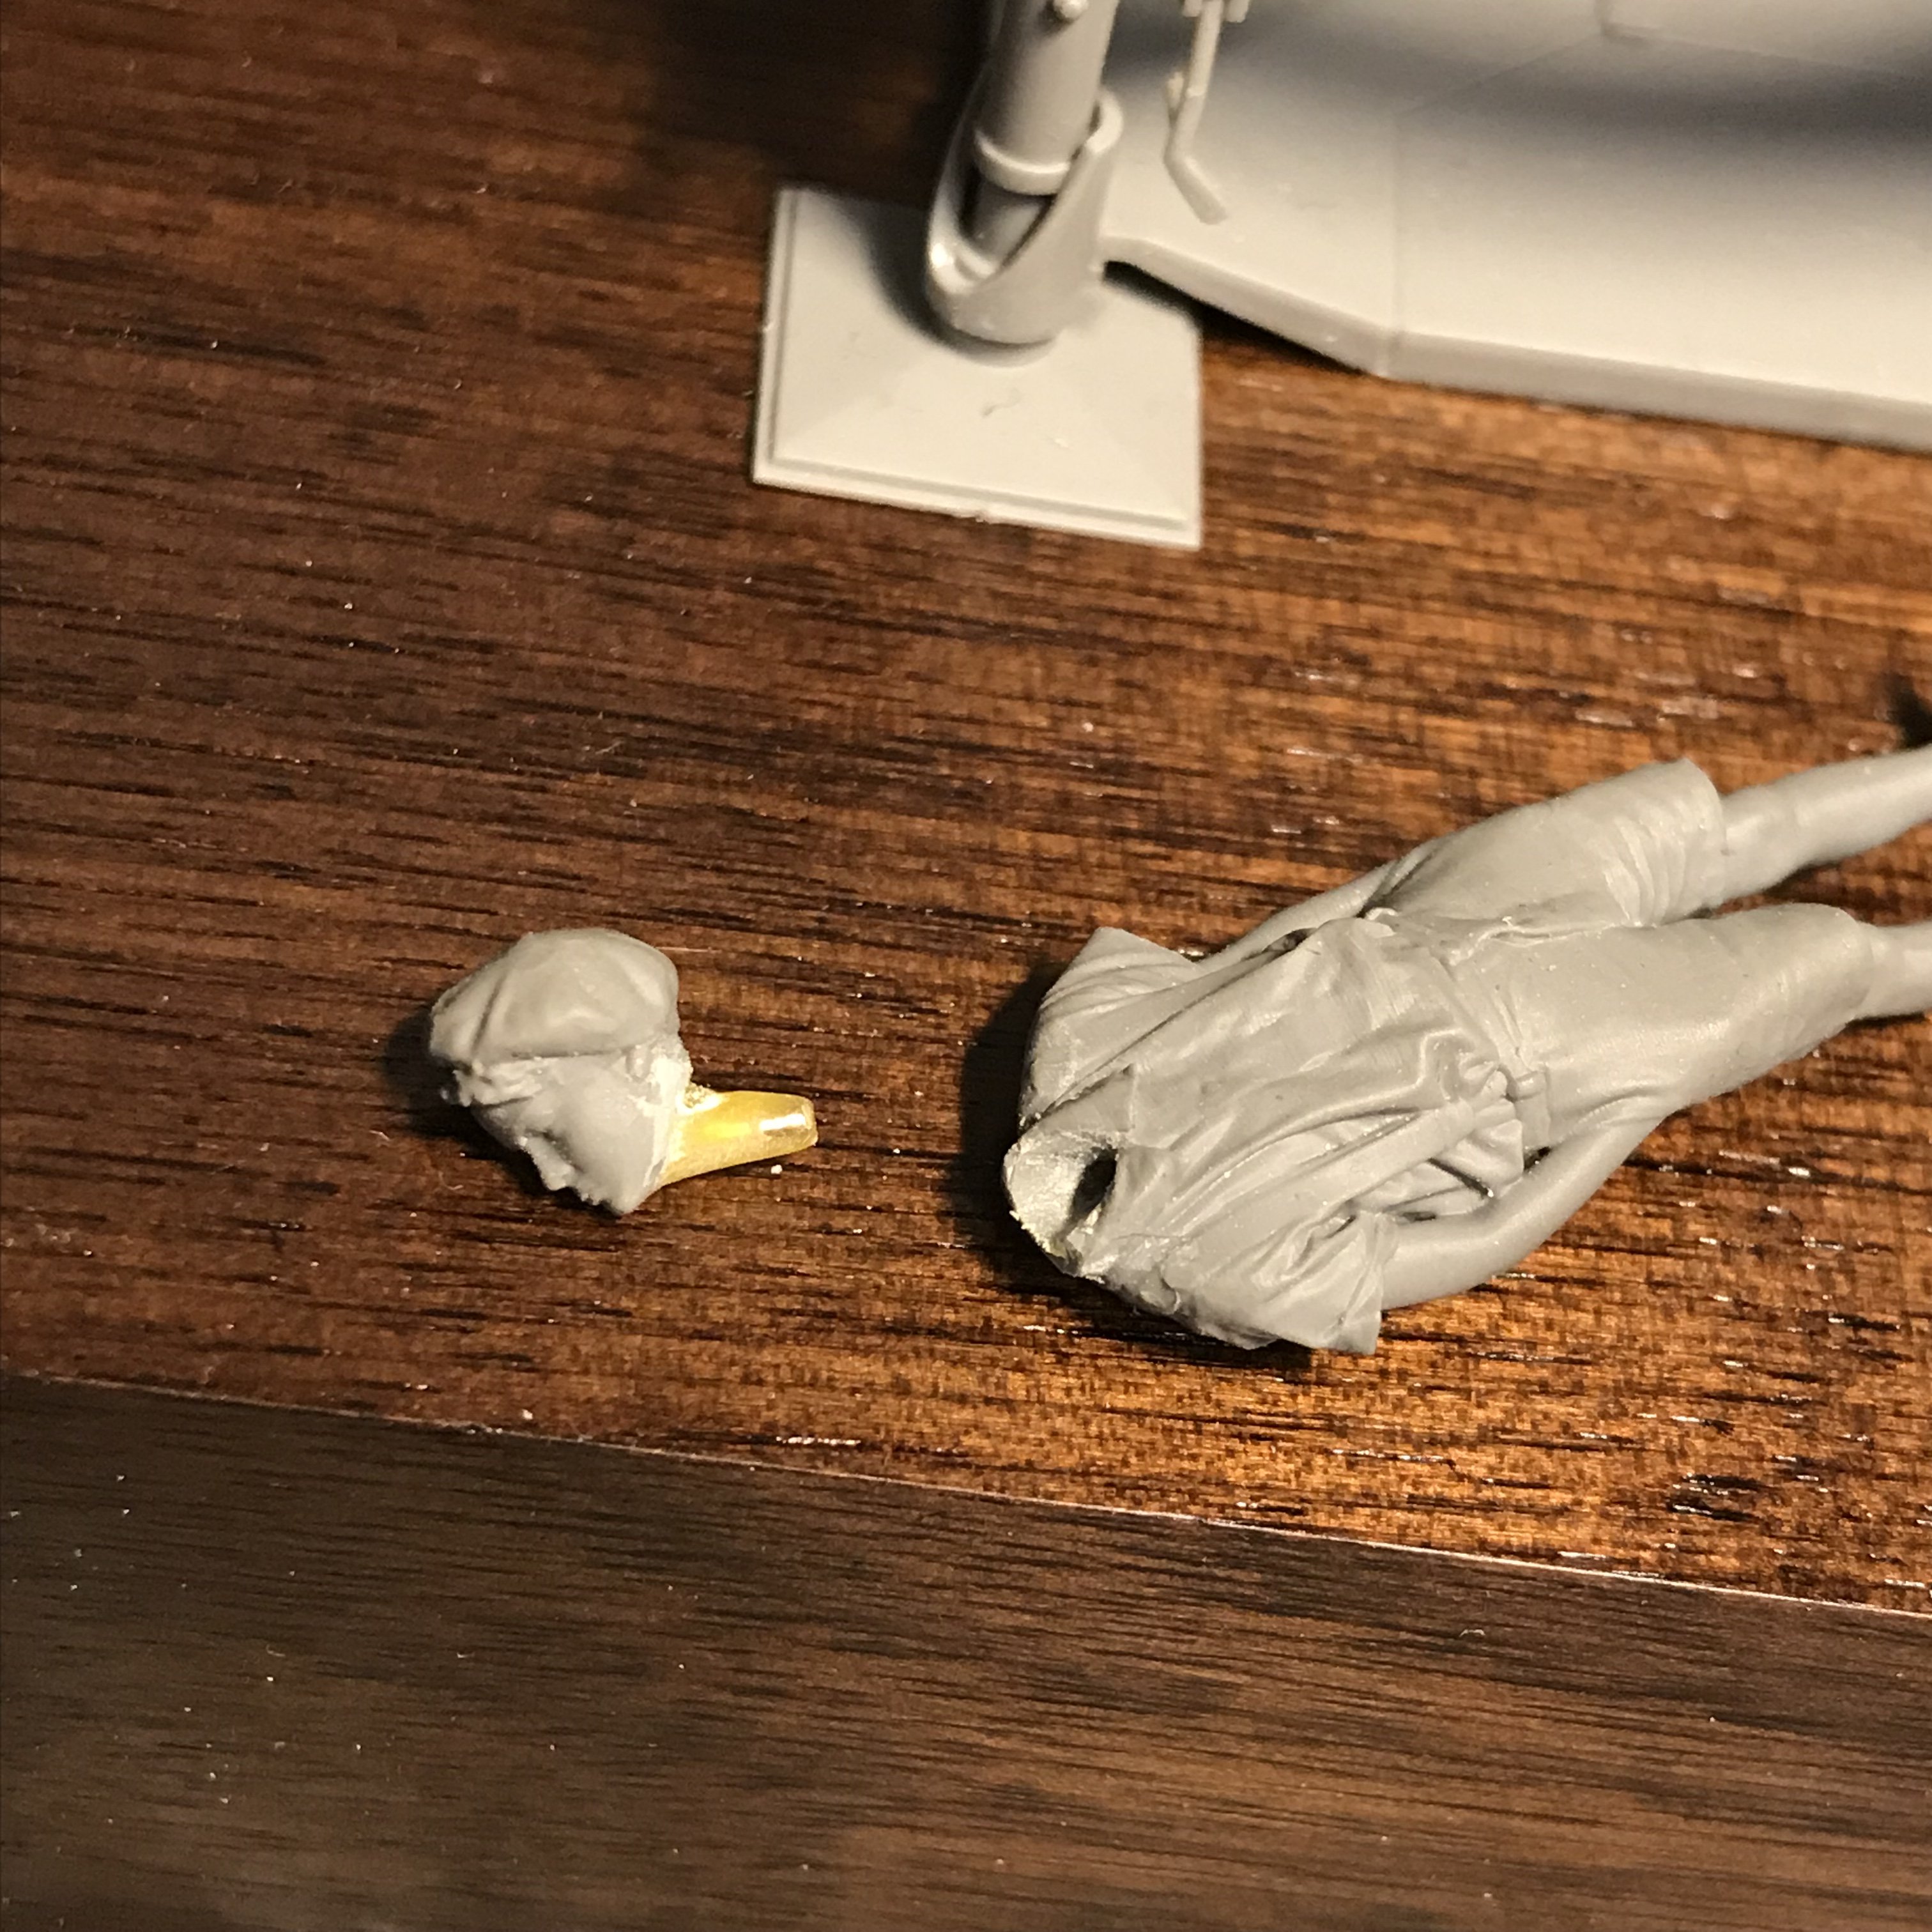
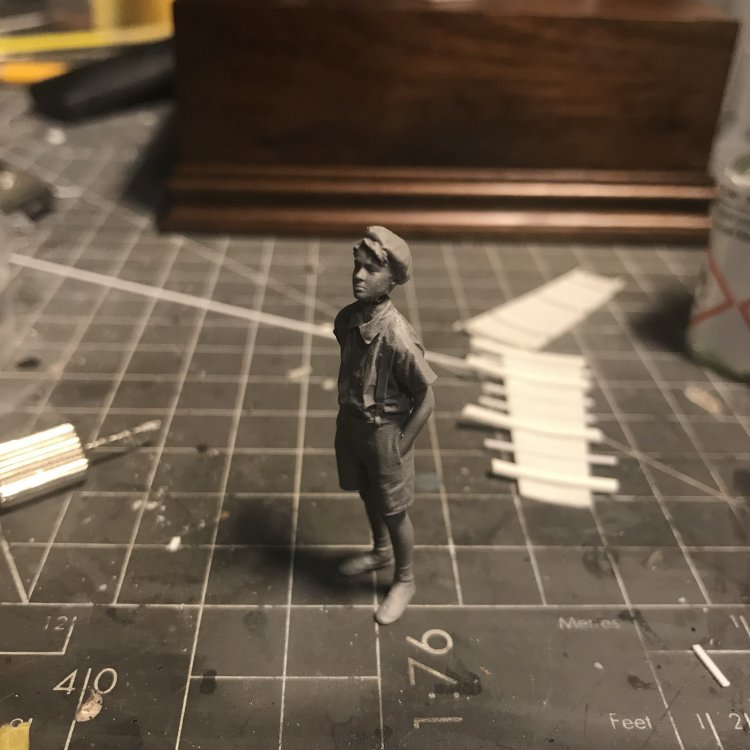
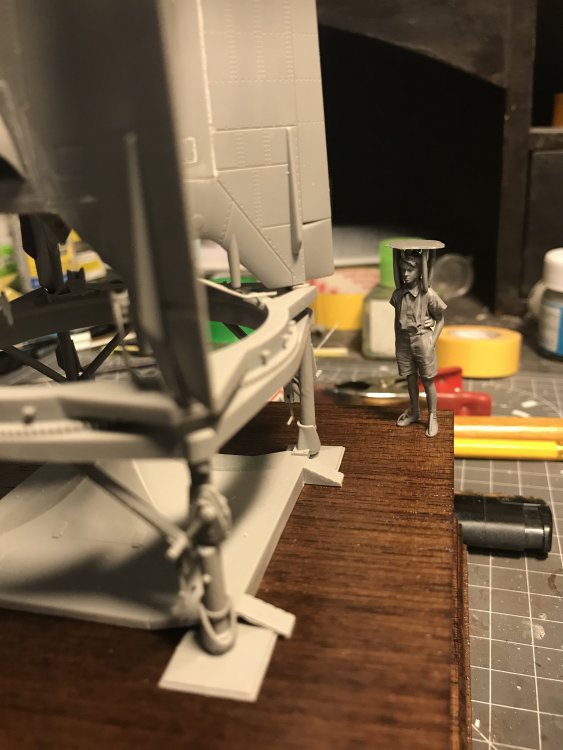
I wasnt happy with the boy looking straight forward. He needs to look up at the rocket. So i chopped off his head, cleaned up the jawline. Drilled holes, inserted rod. Now to remodel the flesh. also almost finished one door. Only needs clasps and hinges and rivets.

-
Takom 1/35 V2 Rocket
JeroenPeters replied to JeroenPeters's topic in LSM 1/35 and Larger Work In Progress
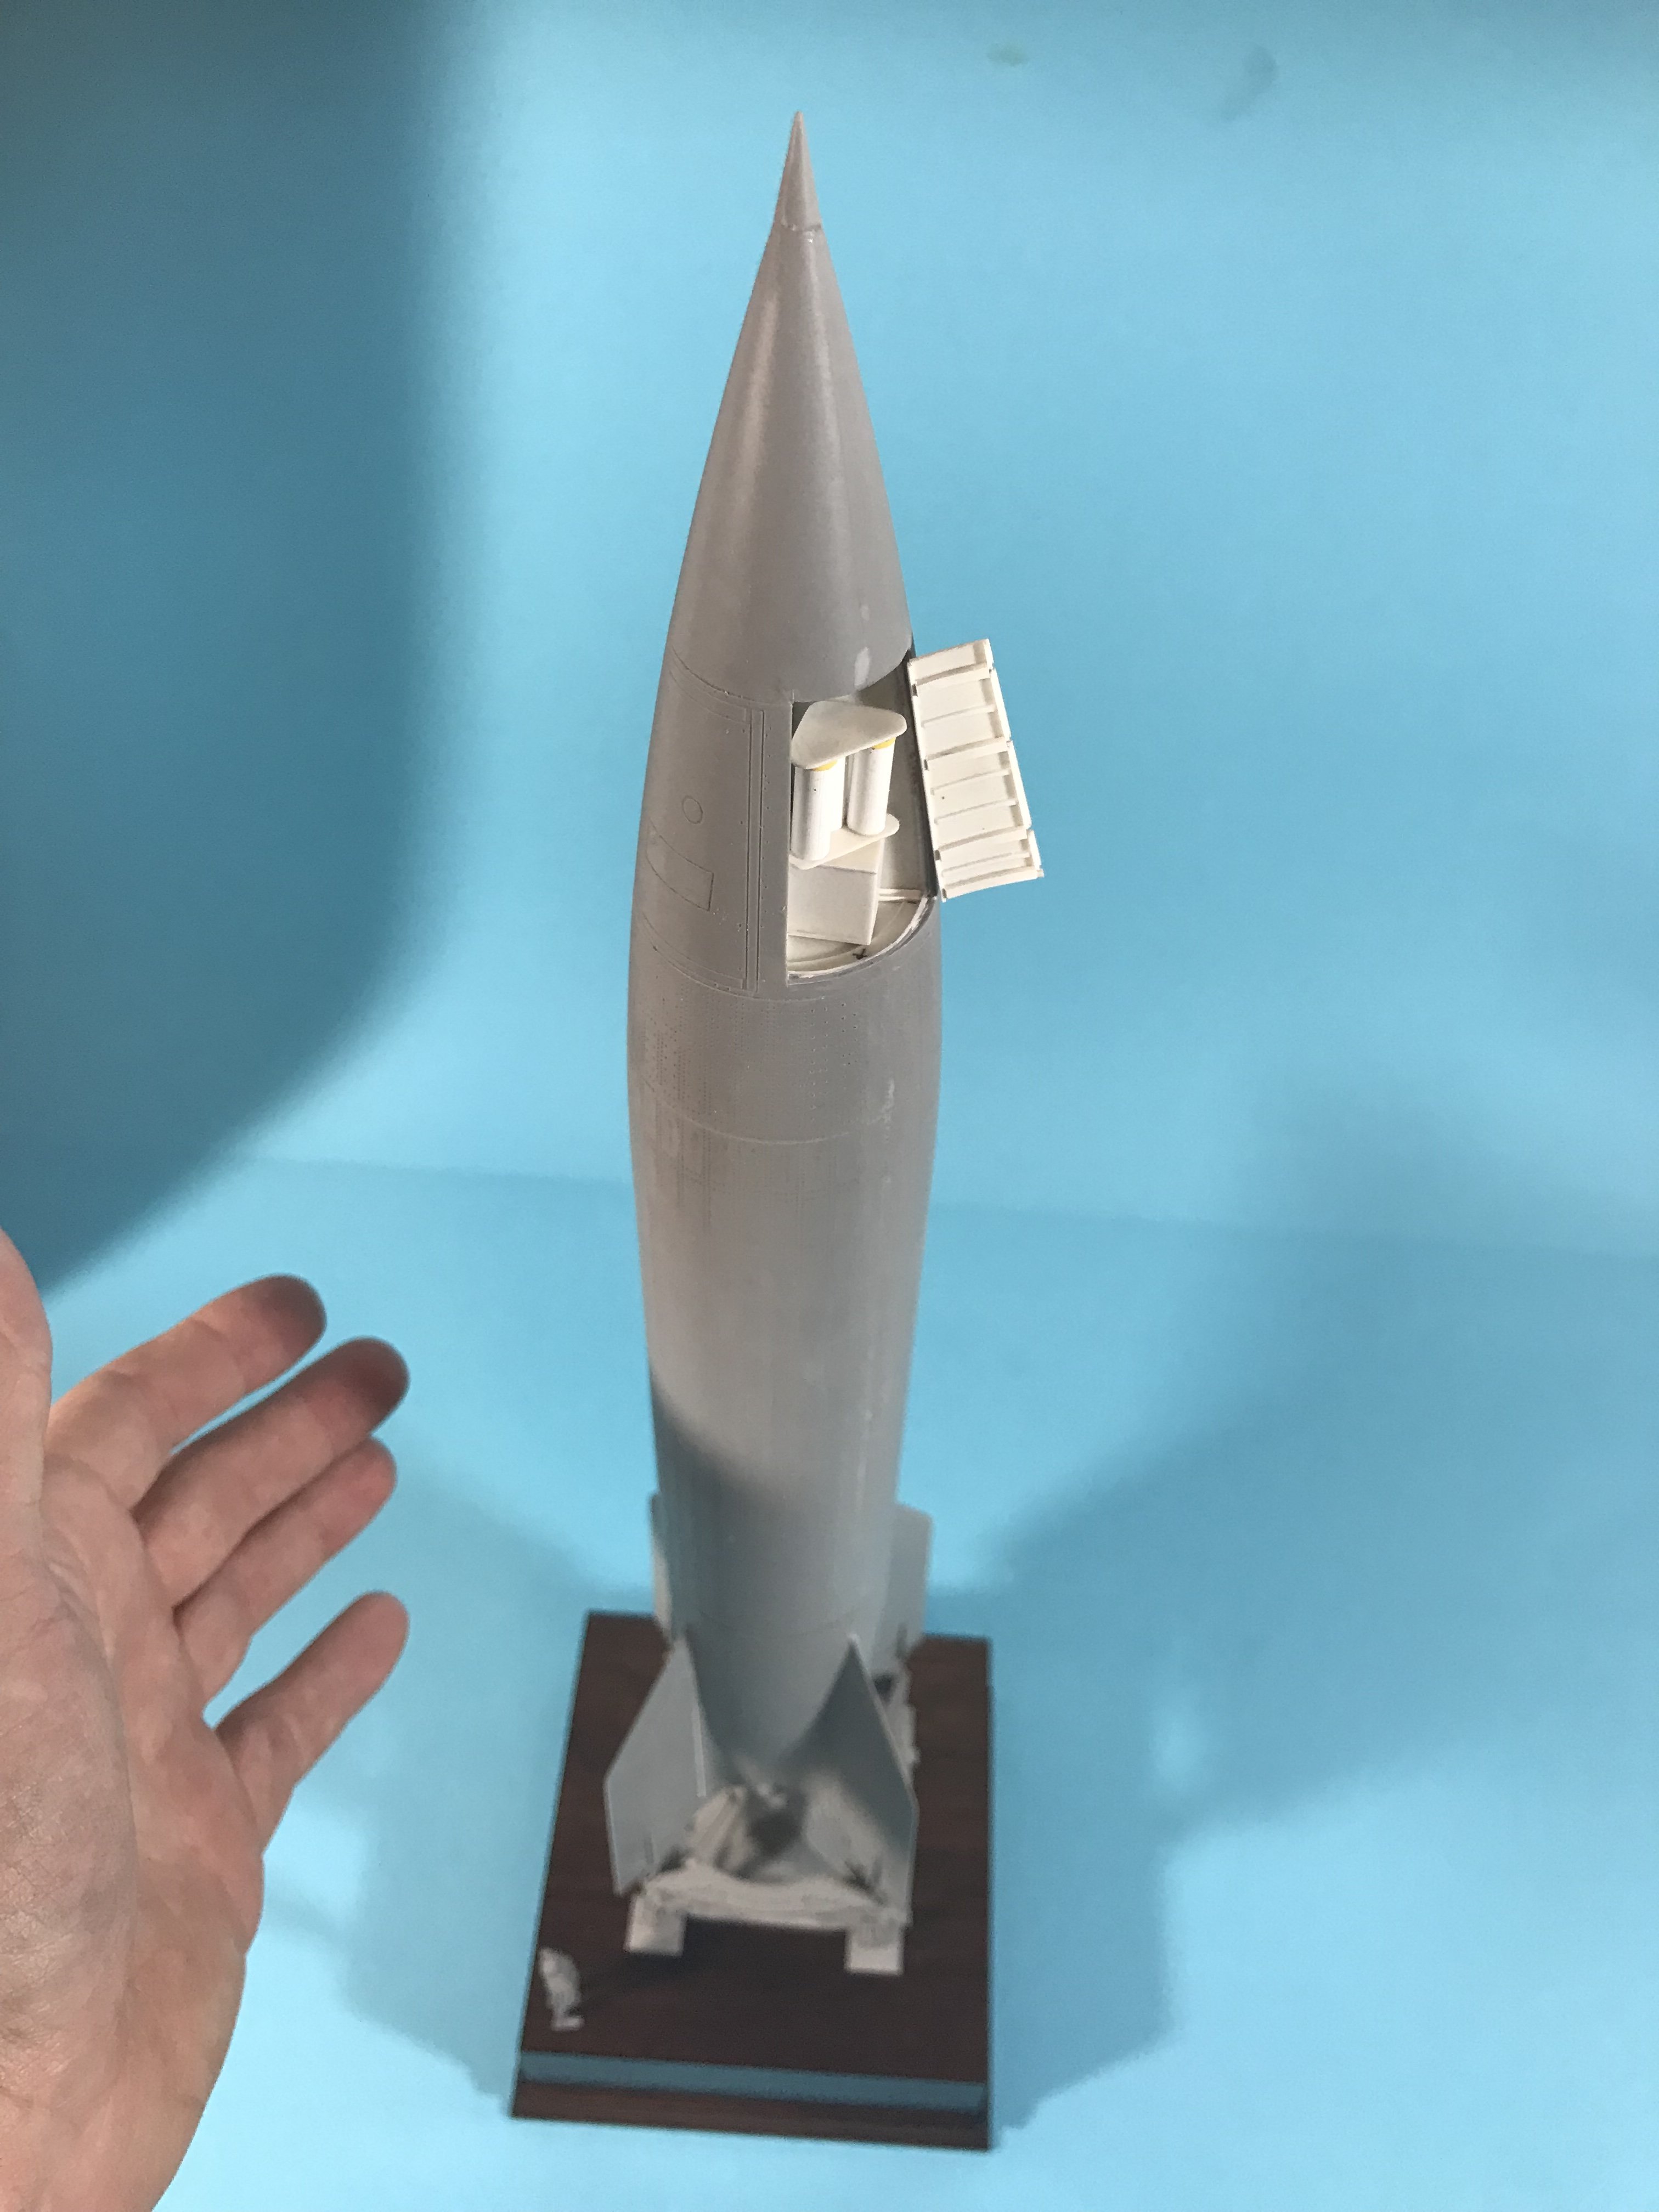
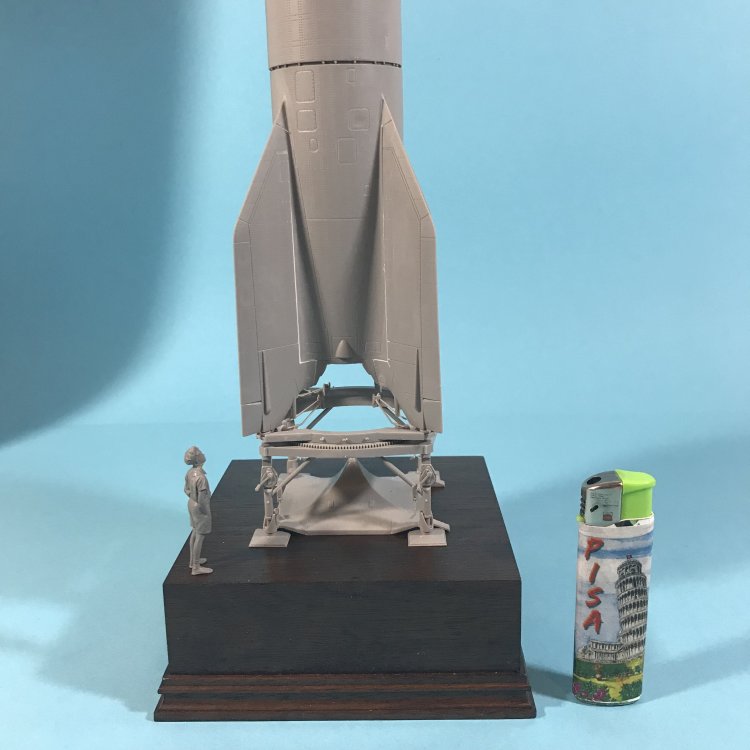
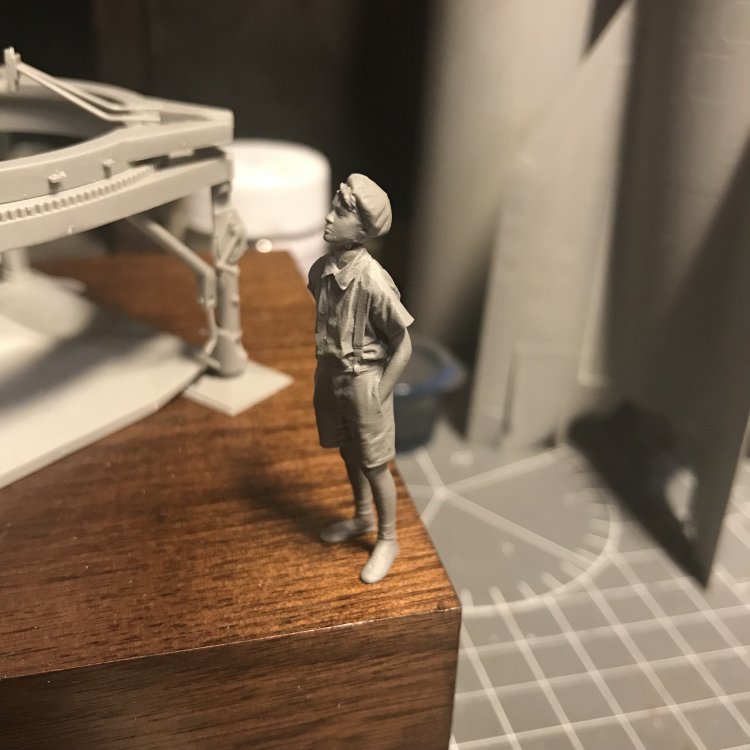
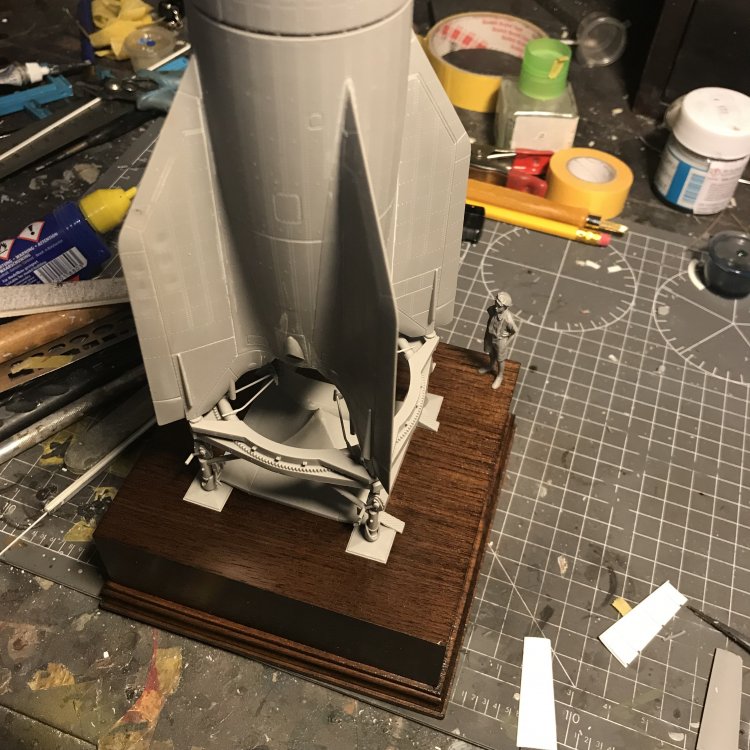
Bought a Reedoak boy figure today to stand at the base of the v2 to demonstrate the size. beautiful stuff. Also bought a wooden square base.

-
Nice! This is exactly why LSM was started years ago!
-
Takom 1/35 V2 Rocket
JeroenPeters replied to JeroenPeters's topic in LSM 1/35 and Larger Work In Progress
Scratching the doors. Really happy with the great reference pics i have.
- 143 replies
-
- 10
-

-
Takom 1/35 V2 Rocket
JeroenPeters replied to JeroenPeters's topic in LSM 1/35 and Larger Work In Progress
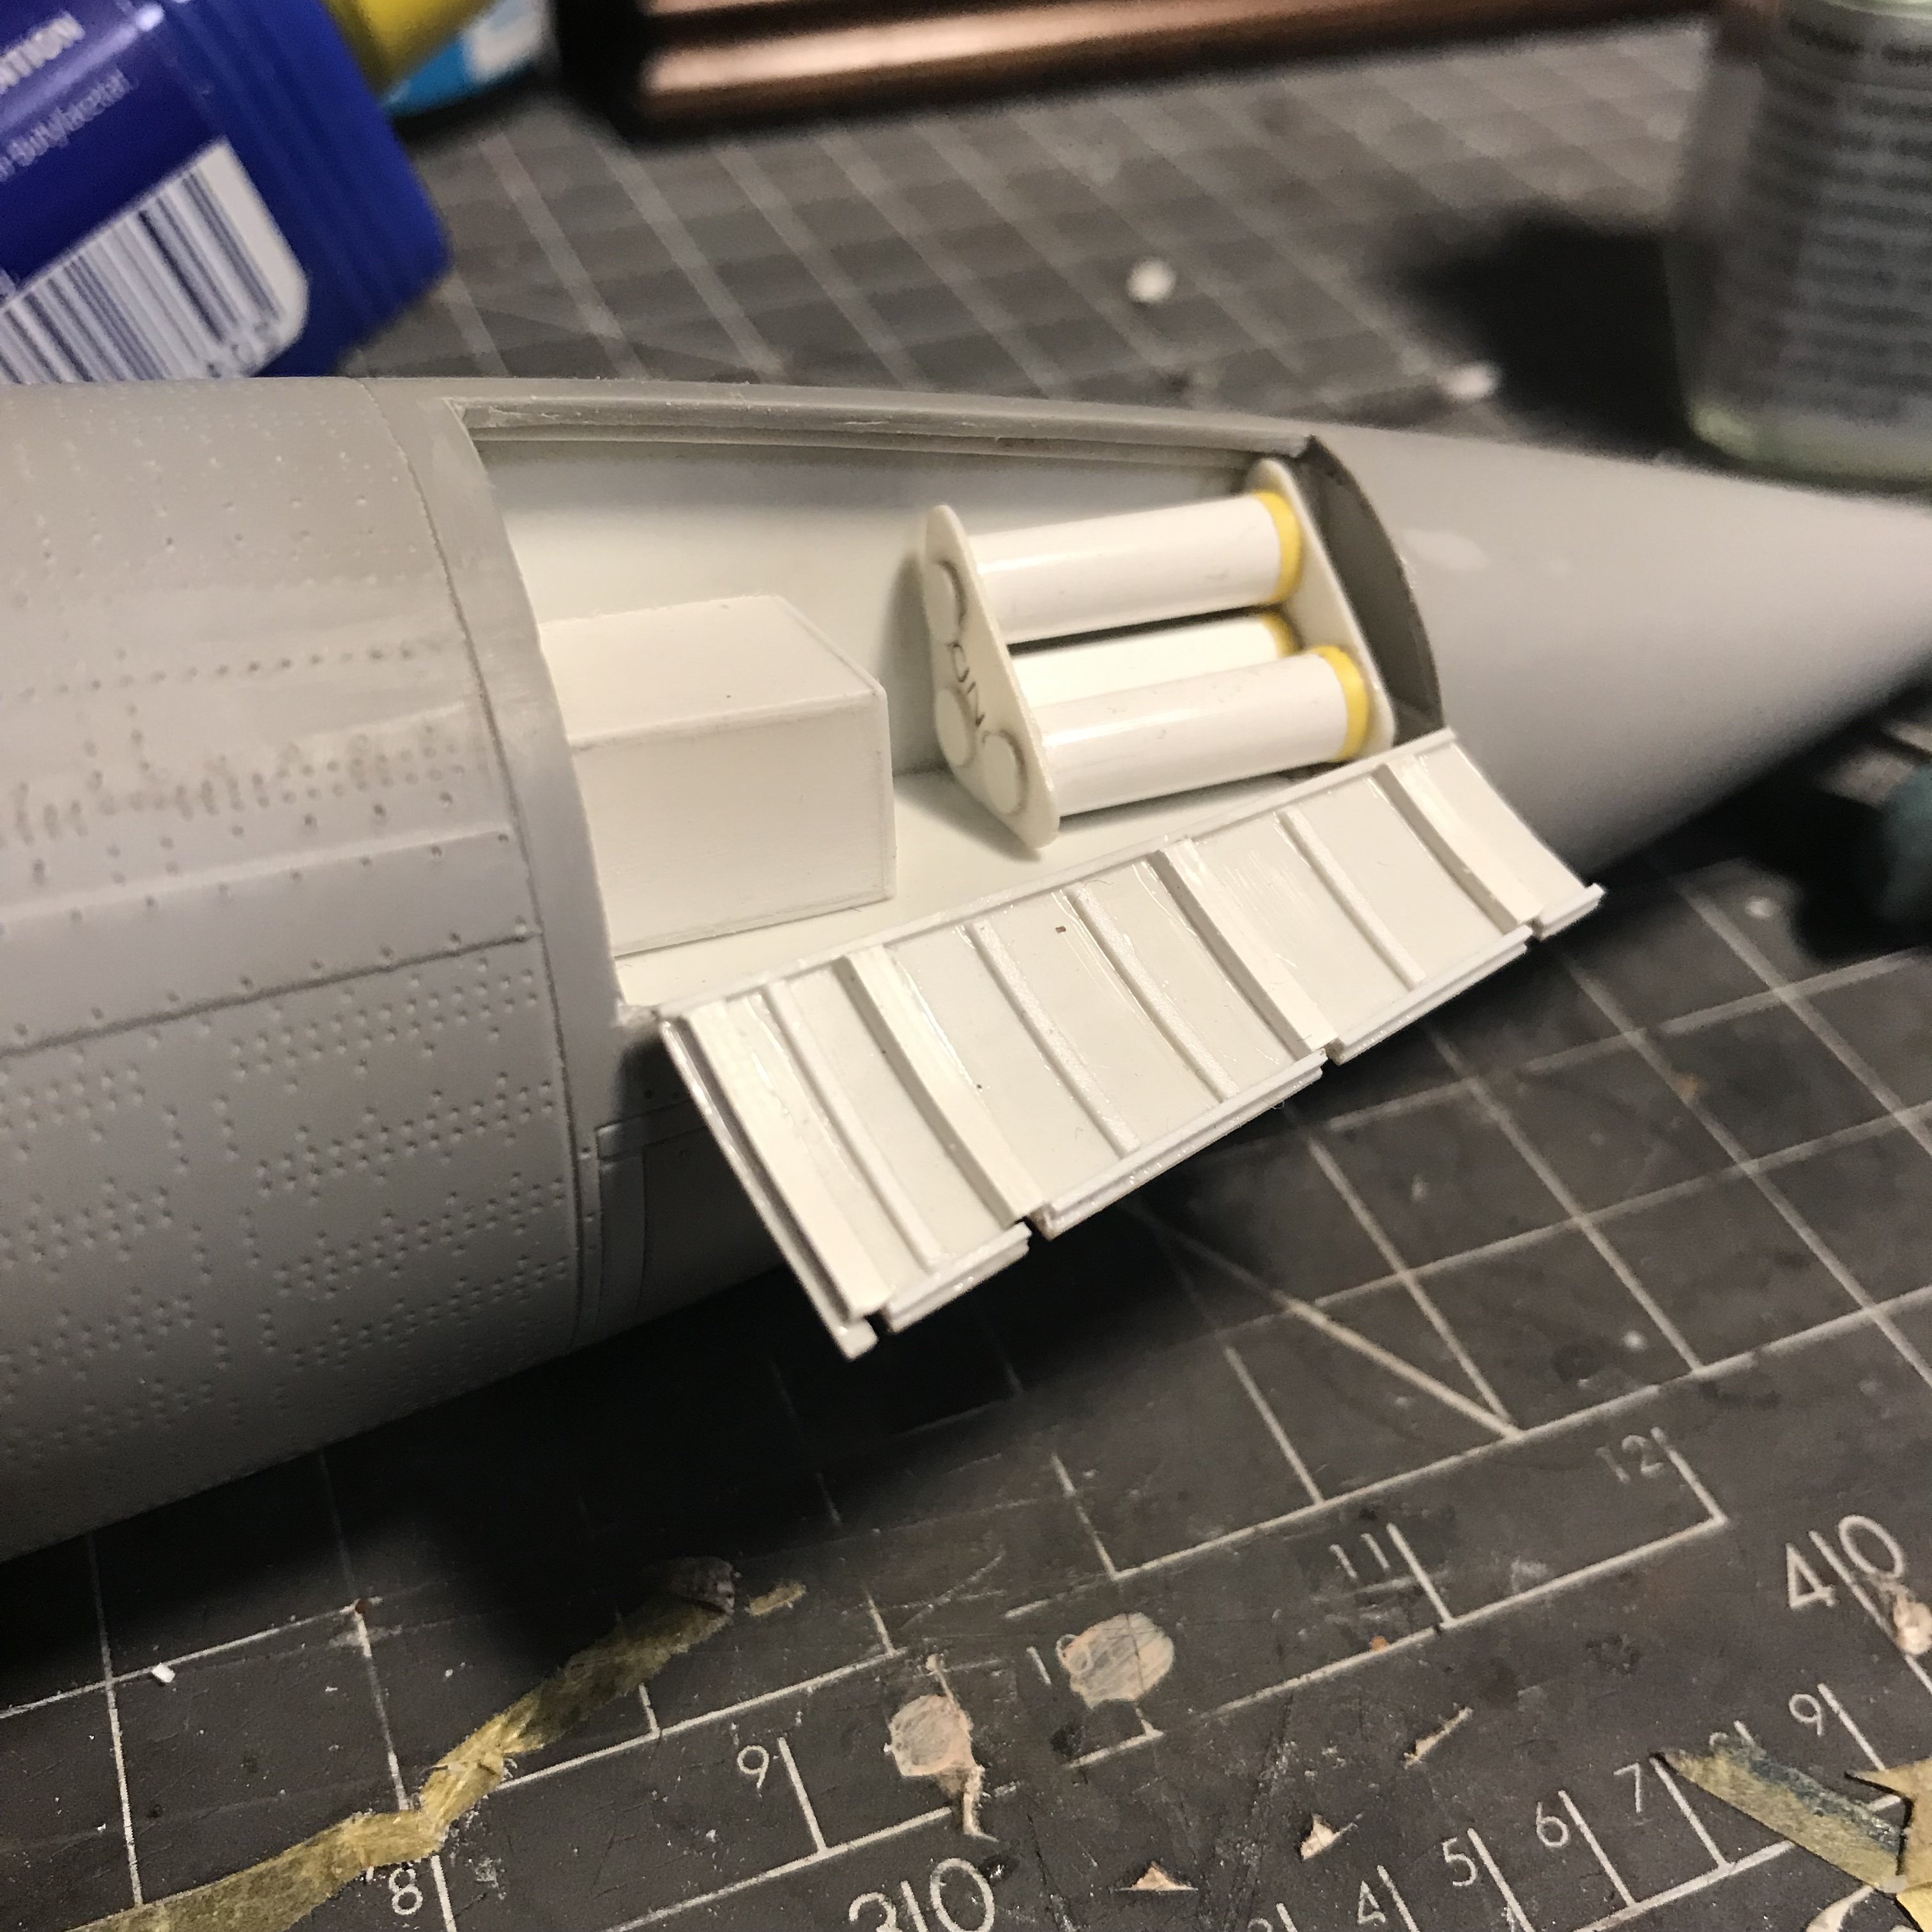
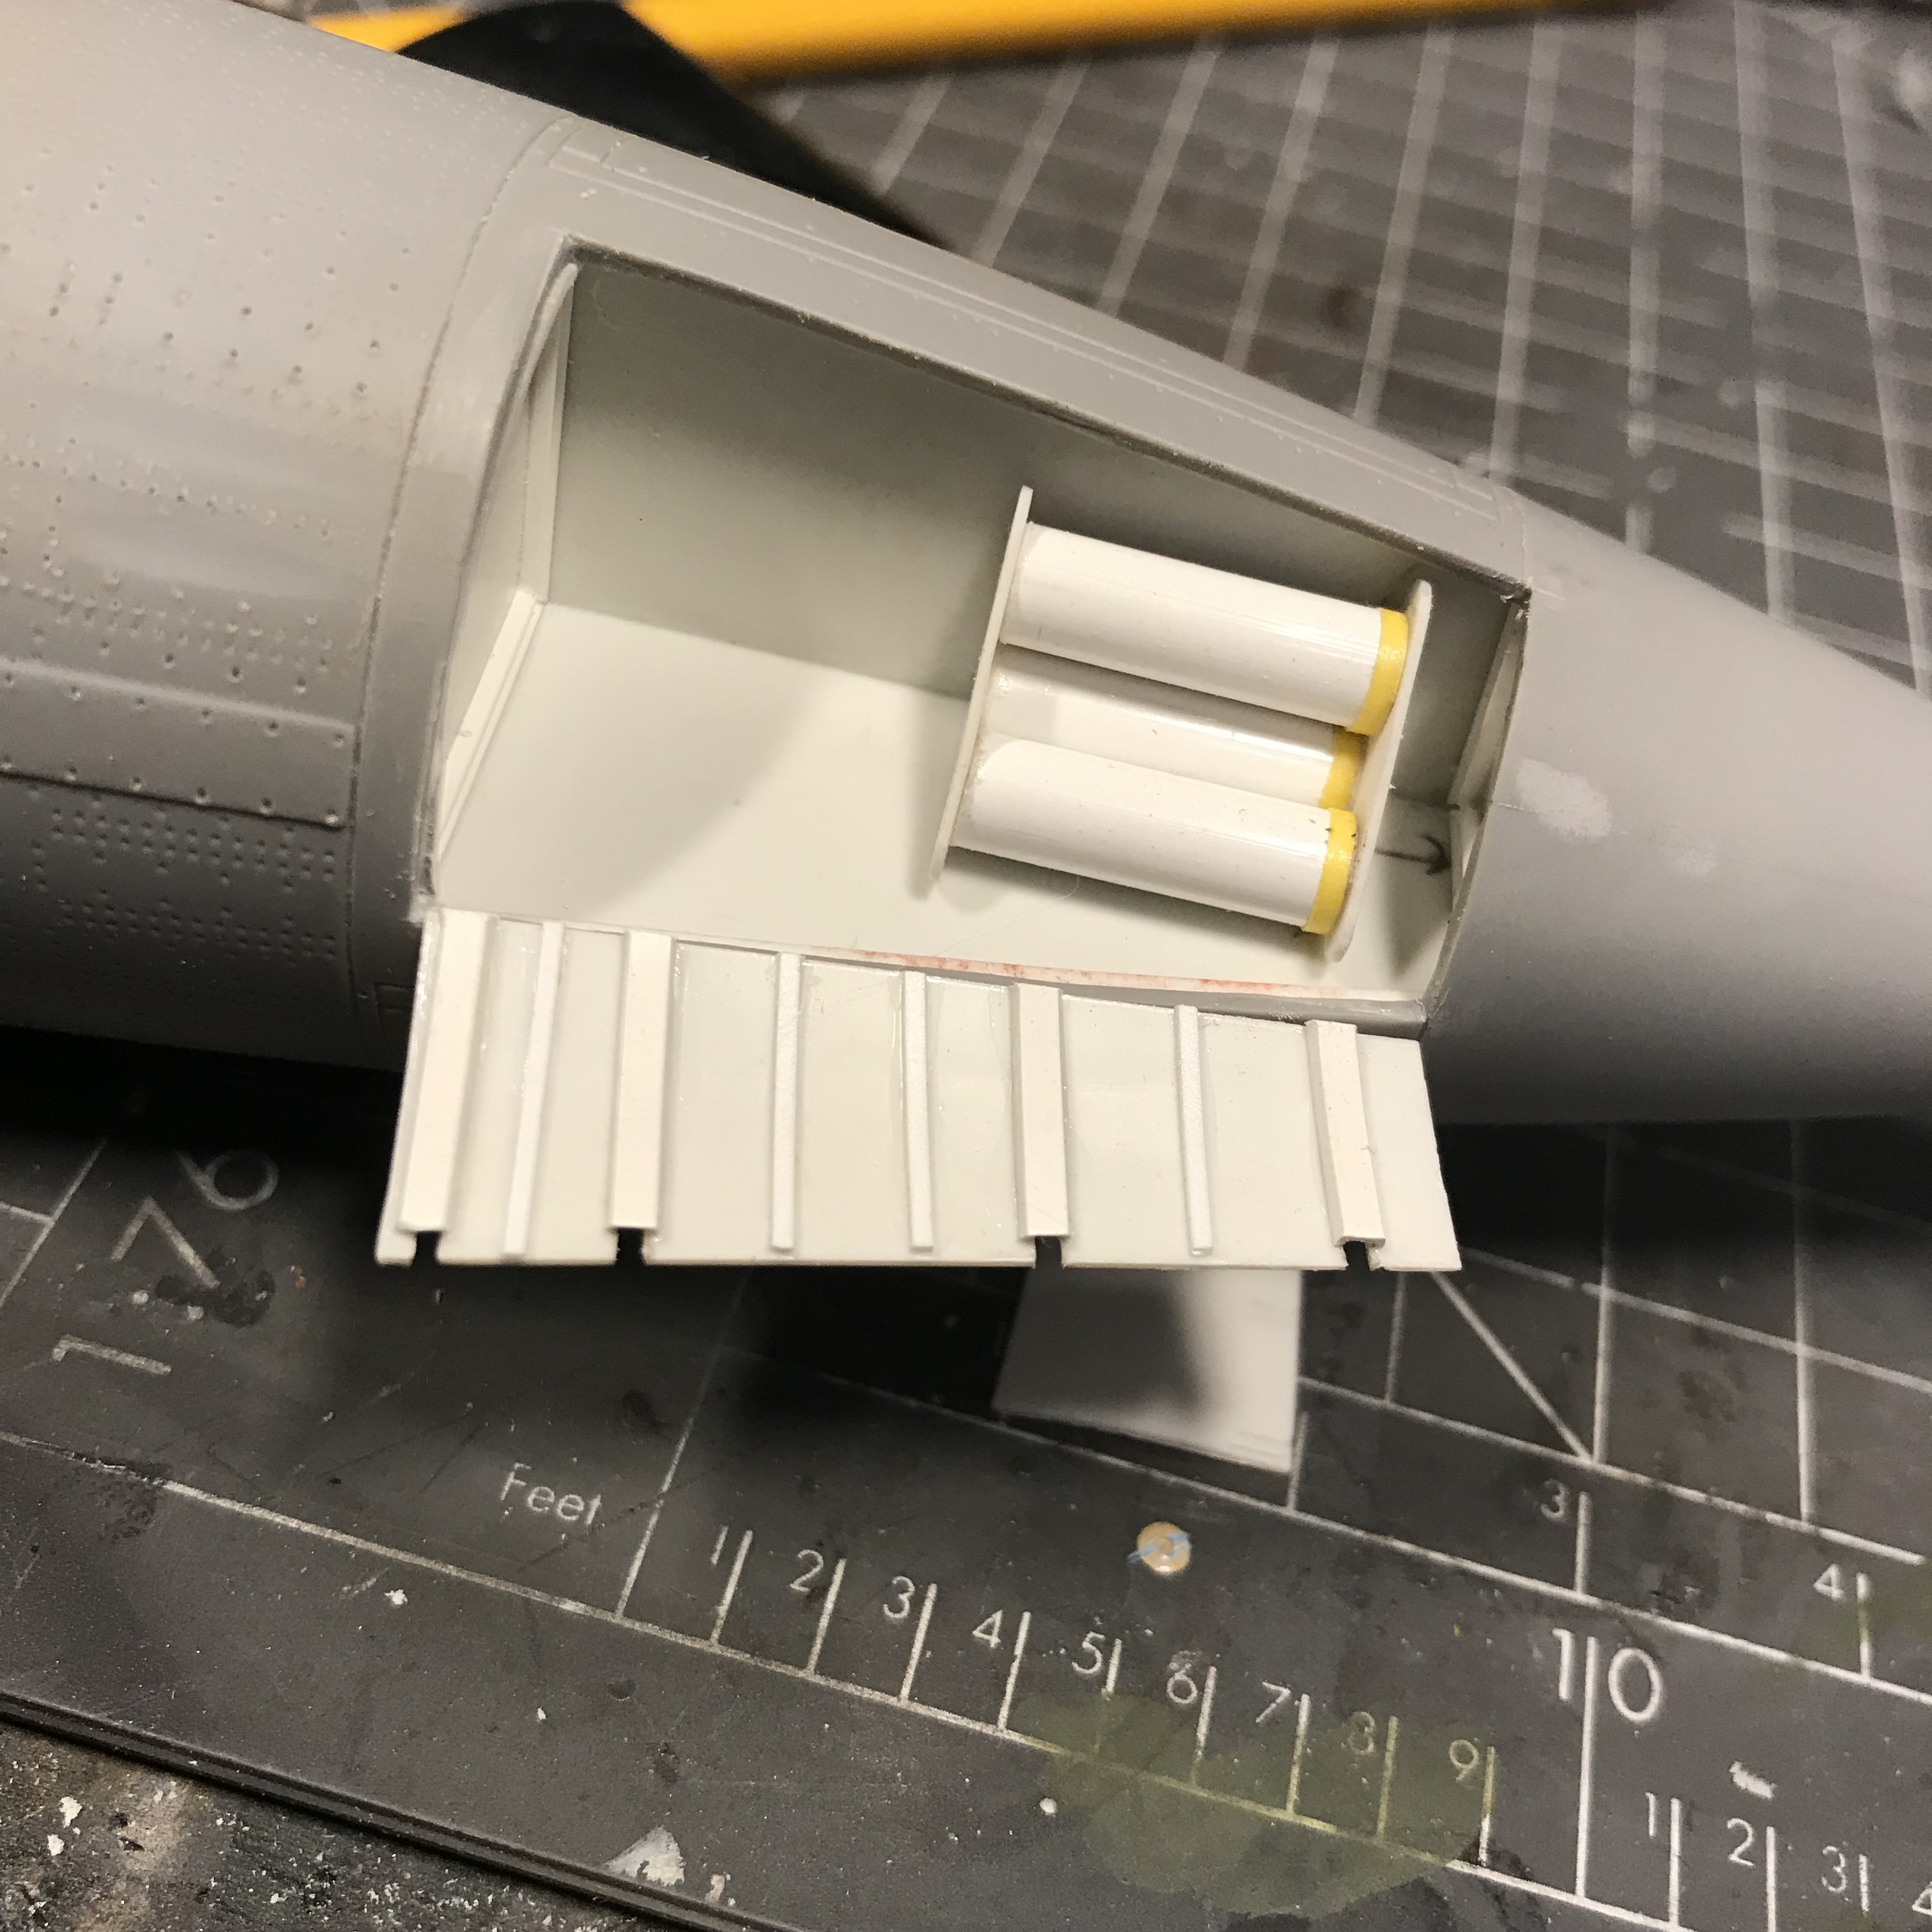
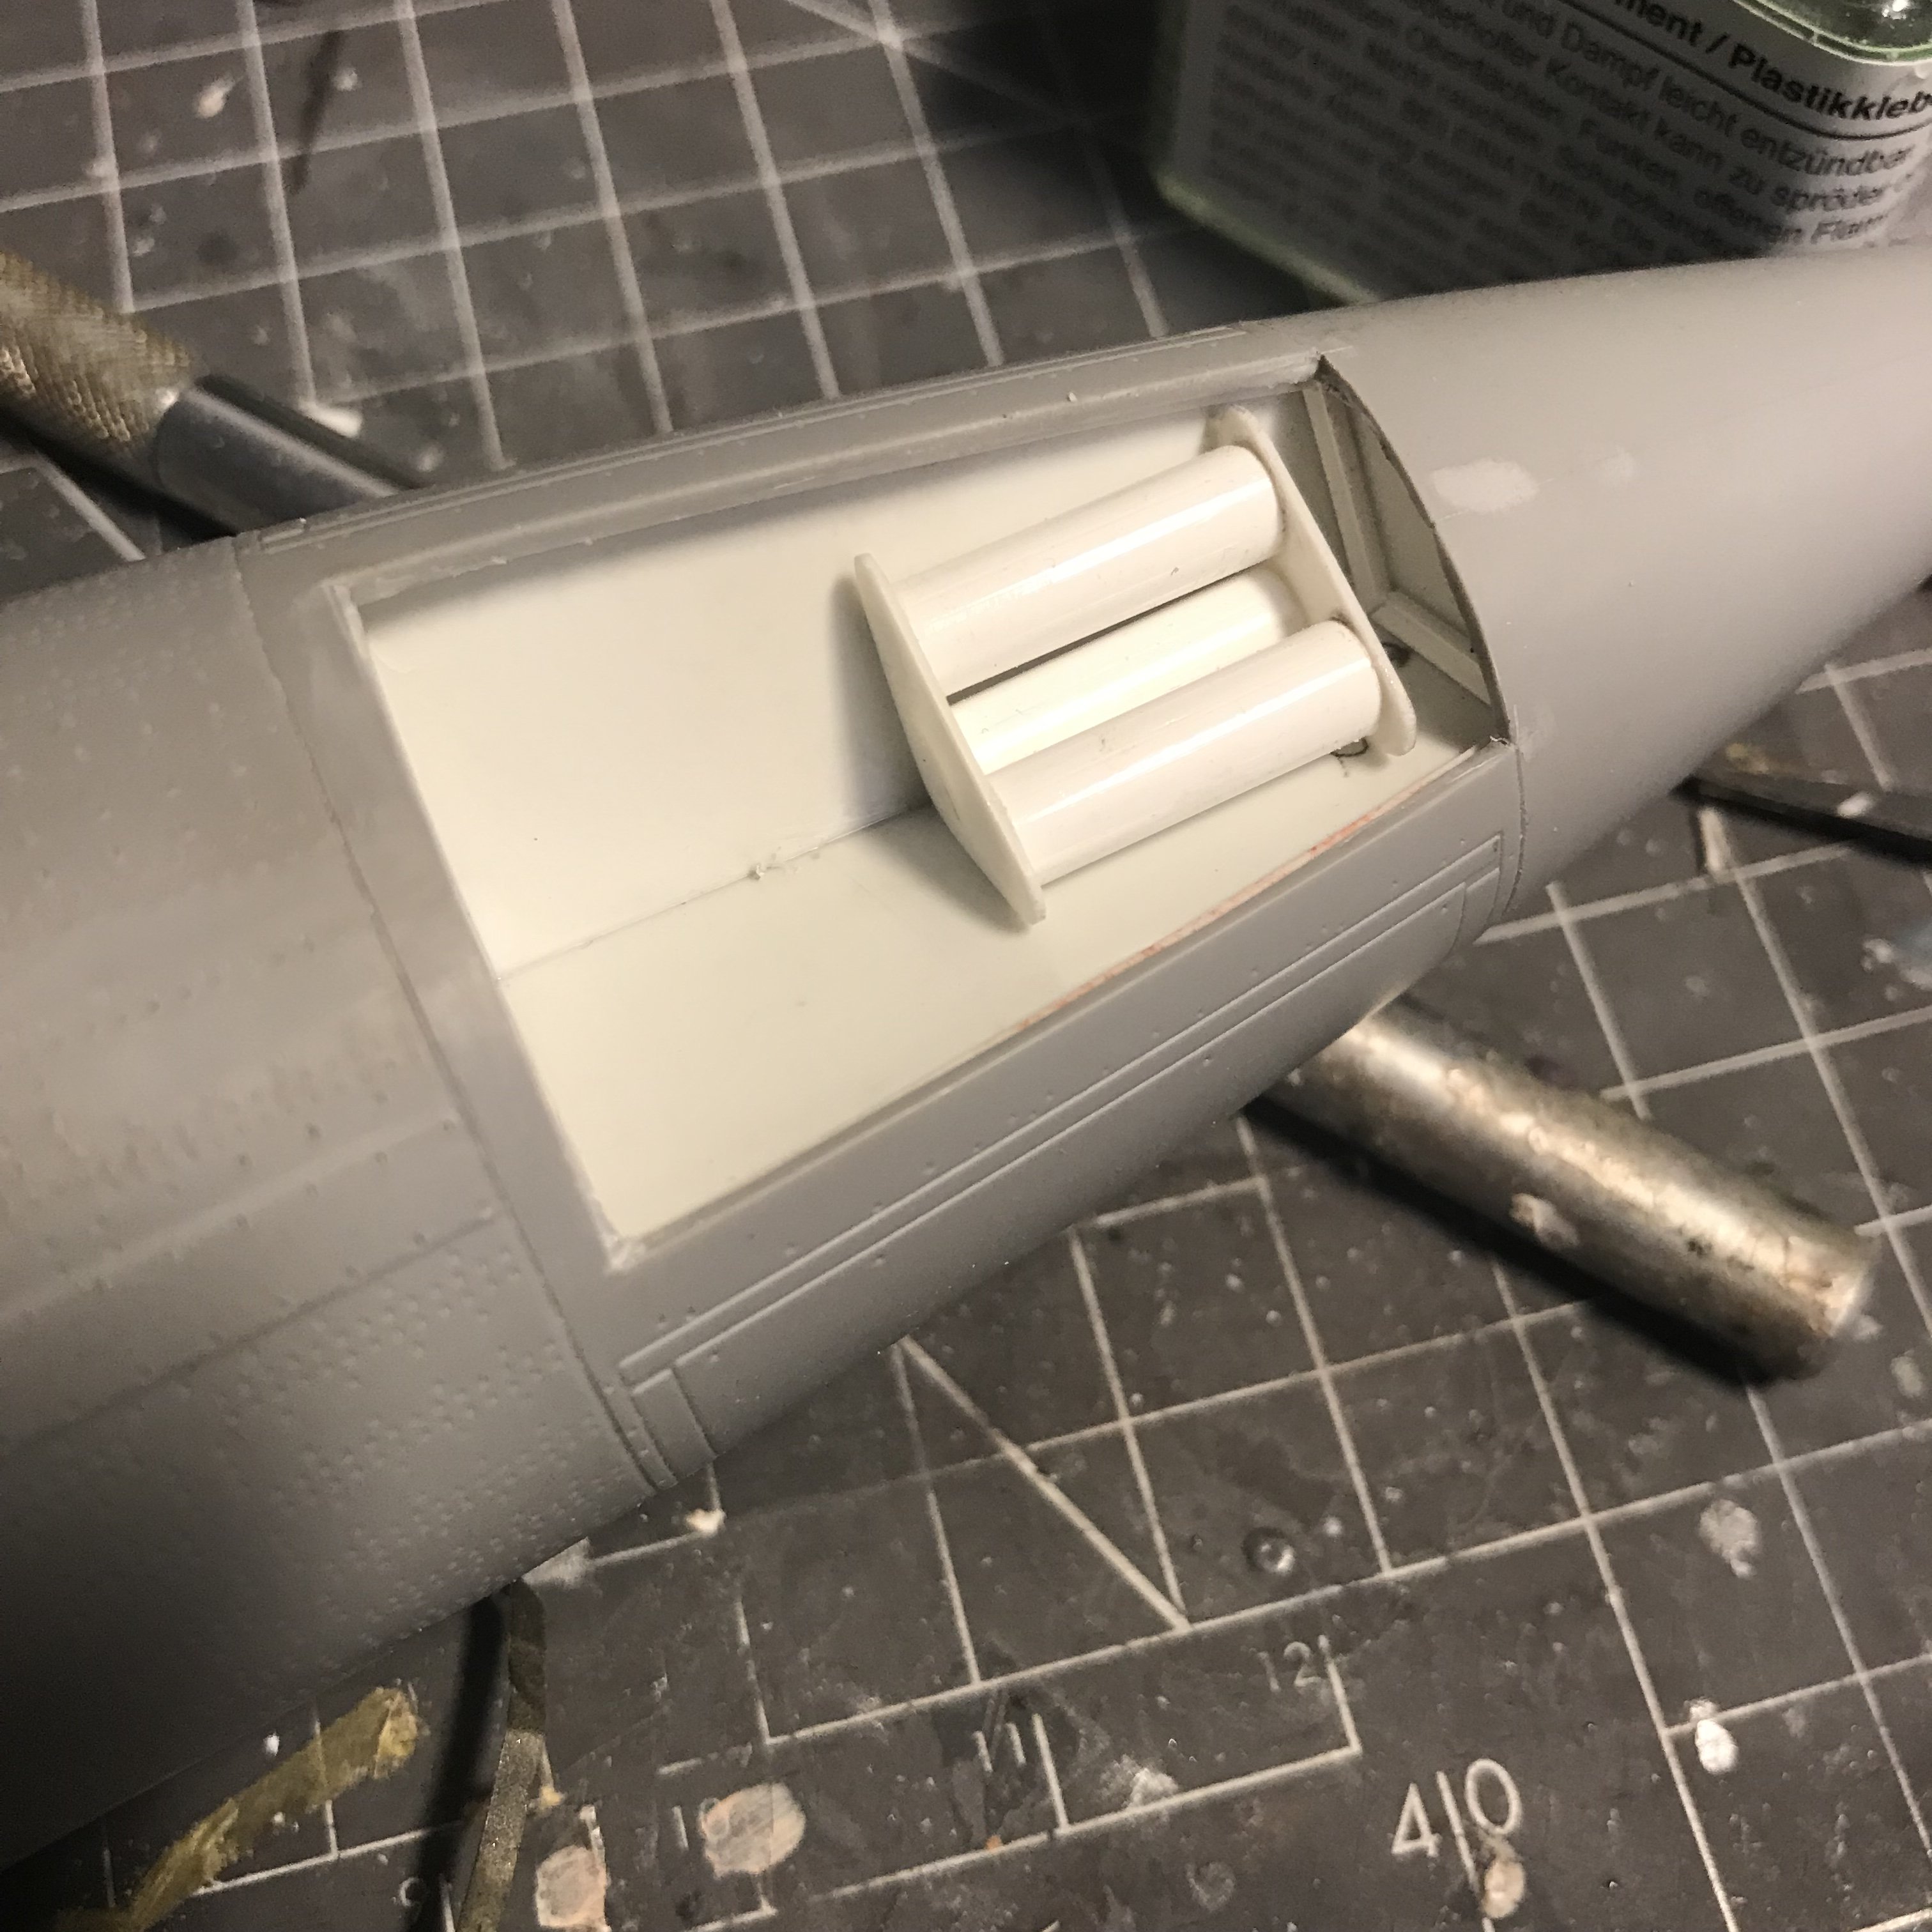
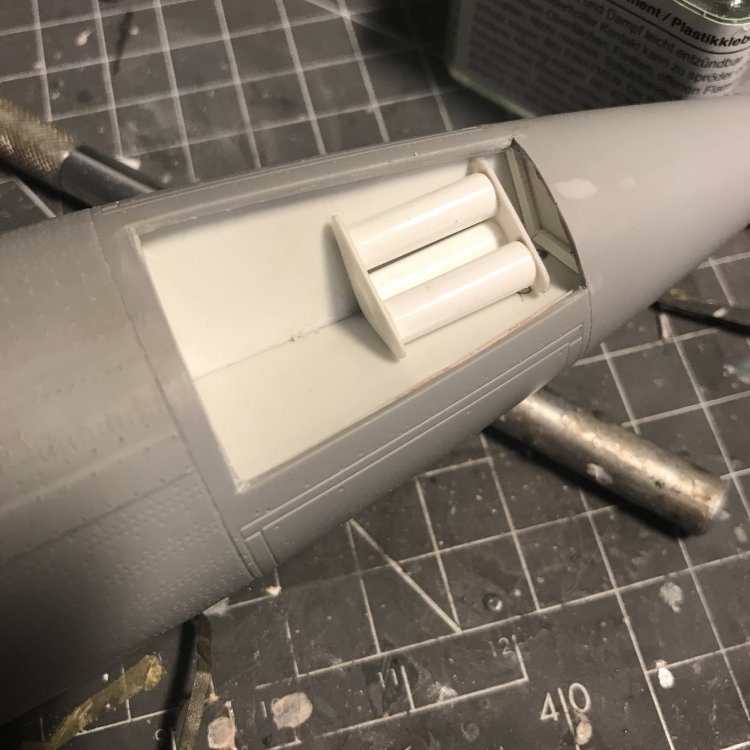
Started work on the nitrogen tanks: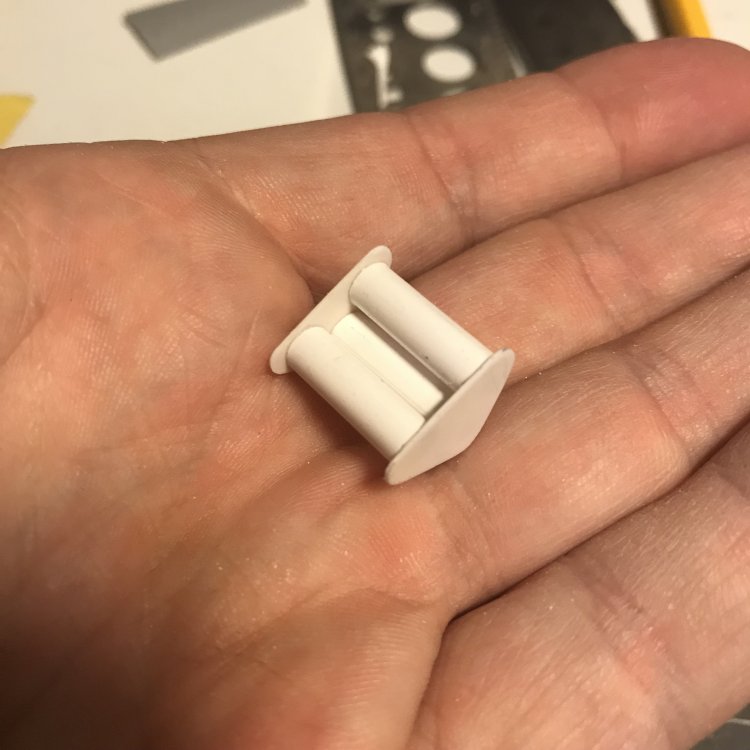
-
RR Spey powered RAF Phantom conversion
JeroenPeters replied to Wingco57's topic in LSM 1/35 and Larger Work In Progress
Coolest Pahntom in my book! Go for it!- 414 replies
-
- 2
-
-
- conversion
- phantom
- (and 1 more)
-
Takom 1/35 V2 Rocket
JeroenPeters replied to JeroenPeters's topic in LSM 1/35 and Larger Work In Progress
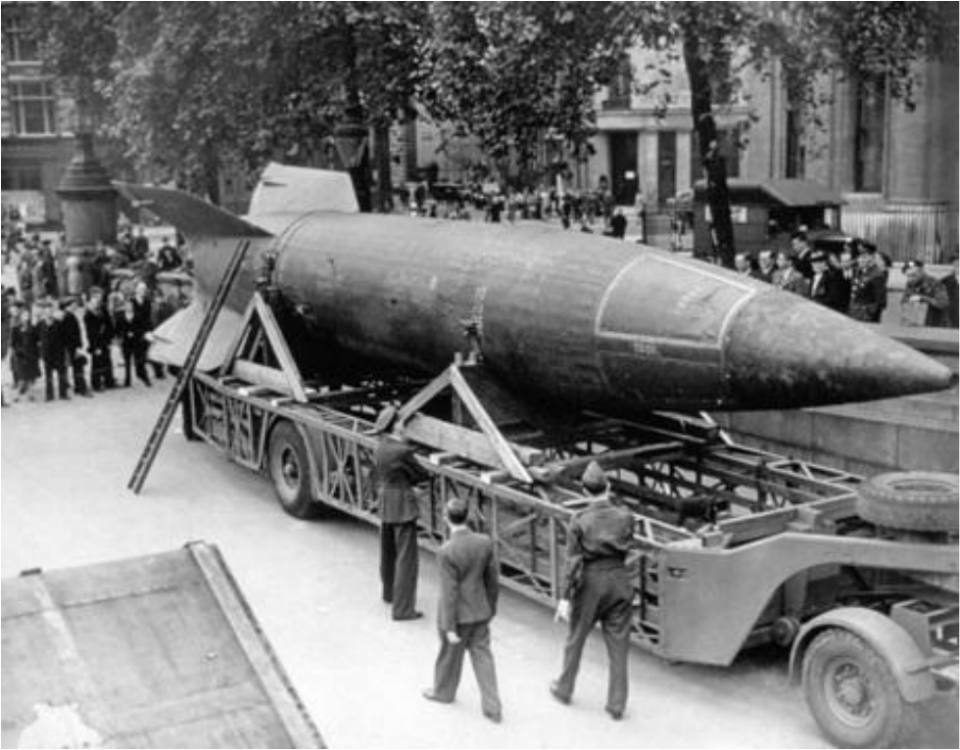
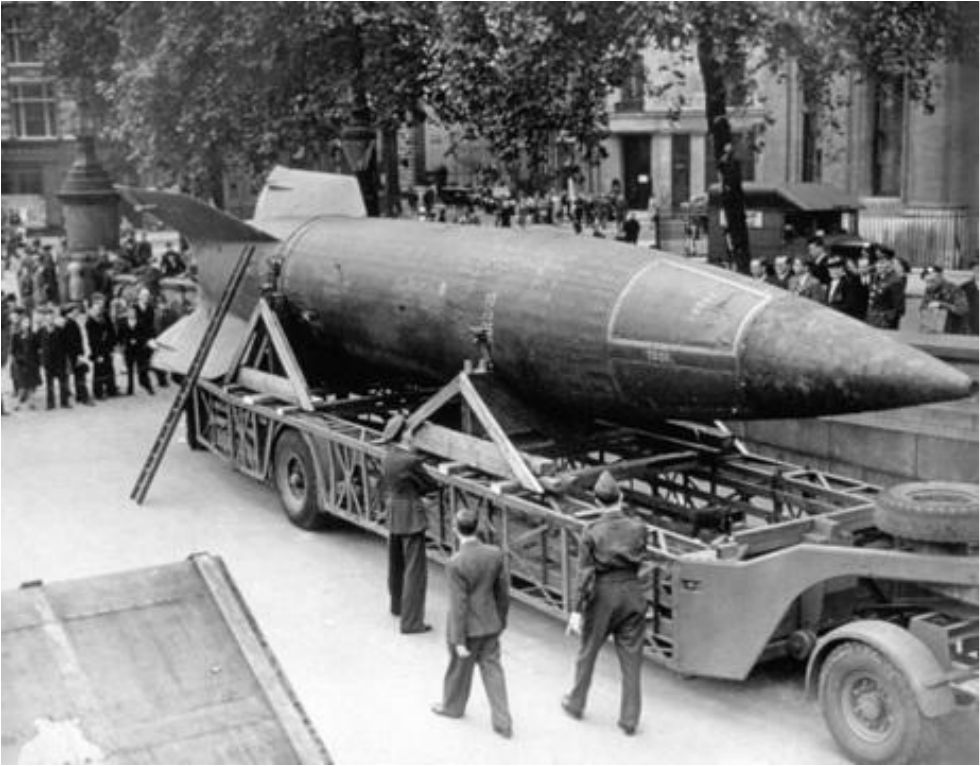
This is the one displayed at Trafalgar Square. But you also see it on a lot of operational pics. A very distorted overall skin.