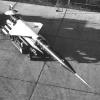
Dennis.E Posted December 31, 2015 Posted December 31, 2015 I brought this from another modeler back in October if memory serves me correctly. It's kinda quirky, kinda different and emerges timidly from the Special Hobby stable... more in the days and weeks to come guys.... As soon as the workshop Manager comes back from her holiday we'll be away... I want to have a go at the color scheme on the left - it's a striking looking scheme and I think one, that with a bit of the old weathering in the right places will come up great! I plan on starting Sunday, after cleaning up the decorations from Christmas tomorrow... I'm sorry these images are'nt as clear as I would like...I hope to improve as we progress.Surface detail is very nice on some parts...not so on others. Still, you accept that with a Special Hobby kit so I'll refrain from moaning and give these parts a bath... 2
Wingco57 Posted December 31, 2015 Posted December 31, 2015 Good choice Dennis, you don't see much of these built. cees
Administrators JeroenPeters Posted December 31, 2015 Administrators Posted December 31, 2015 Ooooh!! Nice one! Very quirky indeed.
Dennis.E Posted January 1, 2016 Author Posted January 1, 2016 Thanks guys! - As soon as I get started I'll get some images up...I am still learning the genteel art of using photobucket, and writing this forum. Dennis
Dennis.E Posted January 1, 2016 Author Posted January 1, 2016 Actually guys...can I ask for help?? How do I write my next forum thread?? Do I just use the 'edit' function,do I use the 'start a new topic' or is it another gateway?? Cheers Dennis
Wingco57 Posted January 1, 2016 Posted January 1, 2016 hi Dennis, for a new forum thread/topic just use the button in the top right hand corner. Happy 2016 Cheers Cees
Dennis.E Posted January 1, 2016 Author Posted January 1, 2016 ..That's the 'reply to this topic' button Cees??
Artful69 Posted January 2, 2016 Posted January 2, 2016 Actually guys...can I ask for help?? How do I write my next forum thread?? Do I just use the 'edit' function,do I use the 'start a new topic' or is it another gateway?? Cheers Dennis hi Dennis, for a new forum thread/topic just use the button in the top right hand corner. Happy 2016 Cheers Cees Hi Dennis ... Happy New Year! ... Apologies in advance for the 'detailed' reply - but you seemed a little confused by Cee's reply so I thought to explain further ... We are currently on a 'thread' (this topic - entitled "And now for something a little different") ... * If you are talking about an entirely new 'thread' or topic, you actually have to get out of this one before you can start another one ... You can't start one from here. To do this ... I find it easier to go back to the main page and start from there, as at least you can follow the various sections and subsections down the page until you get to the precise section that you want to post the topic to. To do all of this ... * Scroll back up to the top of this page. When you get there look at the top right hand corner. You should see the LSM logo ... under that will be the toolbar with your site 'handle' (name) and avatar etc ... directly under that will be the following: Large Scale Modeller > LSM Modelling > LSM Aircraft Work In Progress * Click your mouse cursor on the "Large Scale Modeller" button to get you home ... then find your subsection (relating to the topic you want to create) Example: Let's say you want ask a question relating to referencing (personal knowledge, books, webpages etc) on this particular aircraft ... Firstly, you can post the question here, in this thread ... But just in case people take ages to see it and reply - or to reach a wider audience ... you can post a new topic: "Question relating to XYZ". Looking down the list from the home page ... "Modelling Discussion" seems to be the best fit - It's going to grab the widest audience and the topic is in line with ... well, modelling! * Click on "Modelling Discussion" ... You will then see the button in the top left corner of the subtopic/section that Cee's is referring to ... and away you go! NOW ... If you're talking about an addition to this topic ... like an update? ... just do it via the bottom of the page in the "Reply to this topic" window. Oh ... a helpful tip also when posting (looking over your original post, as I have) ... in order to avoid the pictures breaking up your narrative as they have in your original post - type something relating to a following picture ... when finished hit "enter/return" (depending on your keyboard) about 3 or 4 times. click your cursor on the line (one you've just created) that's giving you a single line space after the snippet you've just written ... then post your pic! ... then, give yourself another line space before your next pic or narrative (by hitting "enter/return" 3 or 4 times originally, you should be able to do this) ... obviously you need to 'create' more lines if you have several pictures. If you wanted to edit the Original post here to "pretty" it up a little ... you can do that by scrolling down to the bottom of that particular post ... there should be 3 green buttons there and one of them will be labeled "edit". Click that and the screen will give you a window with your original text posted as if you were going to post it for the first time ... click your cursor on the various places where you want to do do your editing as you go ... at the end of that process click the "Save Changes" button directly under that window ... Hopefully that covers everything? Rog
Spitfire Posted January 4, 2016 Posted January 4, 2016 Nice to see one of those being built, I enjoyed building mine and it turned out well but it's not in the same class as the Bloch that they released. Cheers Dennis
Dennis.E Posted January 6, 2016 Author Posted January 6, 2016 Hi All, Over the past few days I have had a chance to make some headway on the MS.406...there have been/are some issues, but that is just something you have to live with with Special Hobby kits. Anyway, I started on the cockpit; the trim wheel doesn't fit when installing the seat, and most of the numbering on the instruction sheet is all wrong. You have to work it out for yourself, pretty much. Still, that's not the end of the world, as this kit doesn't have a large volume of pieces. The photo etch is lovely, and easy to work with...it's just SMALL!!! I simply couldn't install the tiny switches as they really were just too small for my mark 9 eyeballs... The gun sight is scratch built per instructional requirement, and I have installed the exhausts in place, where they fit like a glove. The main wings also fit together very well. There does appear to be a slight gap when I test fit the main wings to the fuselage...we'll see how that pans out when the time comes... I've now finished the cockpit cage, and found it slightly warped...never mind, we'll see how it goes into the fuselage.Right now...I'm happy! 1
Administrators JeroenPeters Posted January 6, 2016 Administrators Posted January 6, 2016 thats pretty cool! You might want to add some Klear or Micro to the instrument facings. Really makes them stand out.
Dennis.E Posted January 6, 2016 Author Posted January 6, 2016 ...Would something like a varnish have the same effect Jeroen? I don't have any of the other products you mention and getting to a hobby store for me is like a trek up the north face of Everest!
Dennis.E Posted January 6, 2016 Author Posted January 6, 2016 ...mating the cockpit cage within the fuselage half was trouble free...in fact I have have had more trouble with more main stream manufacturers! There was a slight gap between the rear decking and the cockpit cage - nothing to write home about though. Just how the other fuselage half will fit remains to be seen...we'll find out tomorrow. One issue I have noted is a discrepancy at the front of the fuselage halves from the cockpit to the front of the air frame. I am not quite sure exactly what the problem is, but the result of this issue is that upon trying to close the fuselage halves one half wants to ride up over the other creating quite a 'lip'. I noticed this when I test fitted the parts at the beginning, and another modeler has noted it in his review of this kit - unfortunately for him too late, resulting in copious amounts of filling and sanding. 1
tomv1987 Posted January 18, 2016 Posted January 18, 2016 Coming along nicely Dennis! Nice looking cockpit! Tom
Wingco57 Posted January 18, 2016 Posted January 18, 2016 Very nice progress, Regarding glazing for instrument faces I use ordinary sellotape over the instruments. When the layer is put over that the instruments really shine like real glass. Cees 1
Members Mikester Posted January 24, 2016 Members Posted January 24, 2016 Very nice, the Special Hobby kits can be a little work to get together but they do a lot of interesting subjects.
Dennis.E Posted January 24, 2016 Author Posted January 24, 2016 Thanks Gentlemen! I had never thought of using sellotape for instrument faces! I have been working away on a 32 scale Gr.1 and my 35 scale Super Cobra over this weekend, however I will be getting back to the MS406 shortly...photos to come. 1

Recommended Posts
Create an account or sign in to comment
You need to be a member in order to leave a comment
Create an account
Sign up for a new account in our community. It's easy!
Register a new accountSign in
Already have an account? Sign in here.
Sign In Now