
Kaireckstadt
-
Posts
1,705 -
Joined
-
Last visited
Content Type
Profiles
Forums
Events
Gallery
Everything posted by Kaireckstadt
-

Zoukei-Mura P51D Mustang SWS No 4.
Kaireckstadt replied to Bomber_County's topic in LSM 1/35 and Larger Work In Progress
That‘s a good idea, Peter! This is an awesome model with beautiful details (although lots of them will be hidden when the build is finished).I have also one in my stash and I will closely follow your posts when you start it. For my build I also have a beautiful how-to-book by Daniel Zamarbide. It will look nice next to my HK Lancaster... Please start as soon as possible... -
Israeli Mirage III C with Atar9C
Kaireckstadt replied to Kaireckstadt's topic in LSM 1/35 and Larger Work In Progress
Your tipp also sounds very good Rob! Which steel pigments do you use for the treatment of the light gray? Also thanks for the Info with Scale75 metallic paints. In which cases do you use them? -
Israeli Mirage III C with Atar9C
Kaireckstadt replied to Kaireckstadt's topic in LSM 1/35 and Larger Work In Progress
Thanks for the tip, Gaz! With what kind of clear coat would you tone them down? -
Great looking A-20 with an interesting well weathered camo scheme and a really eyecatching nose-art. Since we also saw a 48 scale Lancaster here it’s ok from my point of view to show the A-20 here. Also a big model in 48 scale close to a small fighter in 32nd scale...
-
Israeli Mirage III C with Atar9C
Kaireckstadt replied to Kaireckstadt's topic in LSM 1/35 and Larger Work In Progress
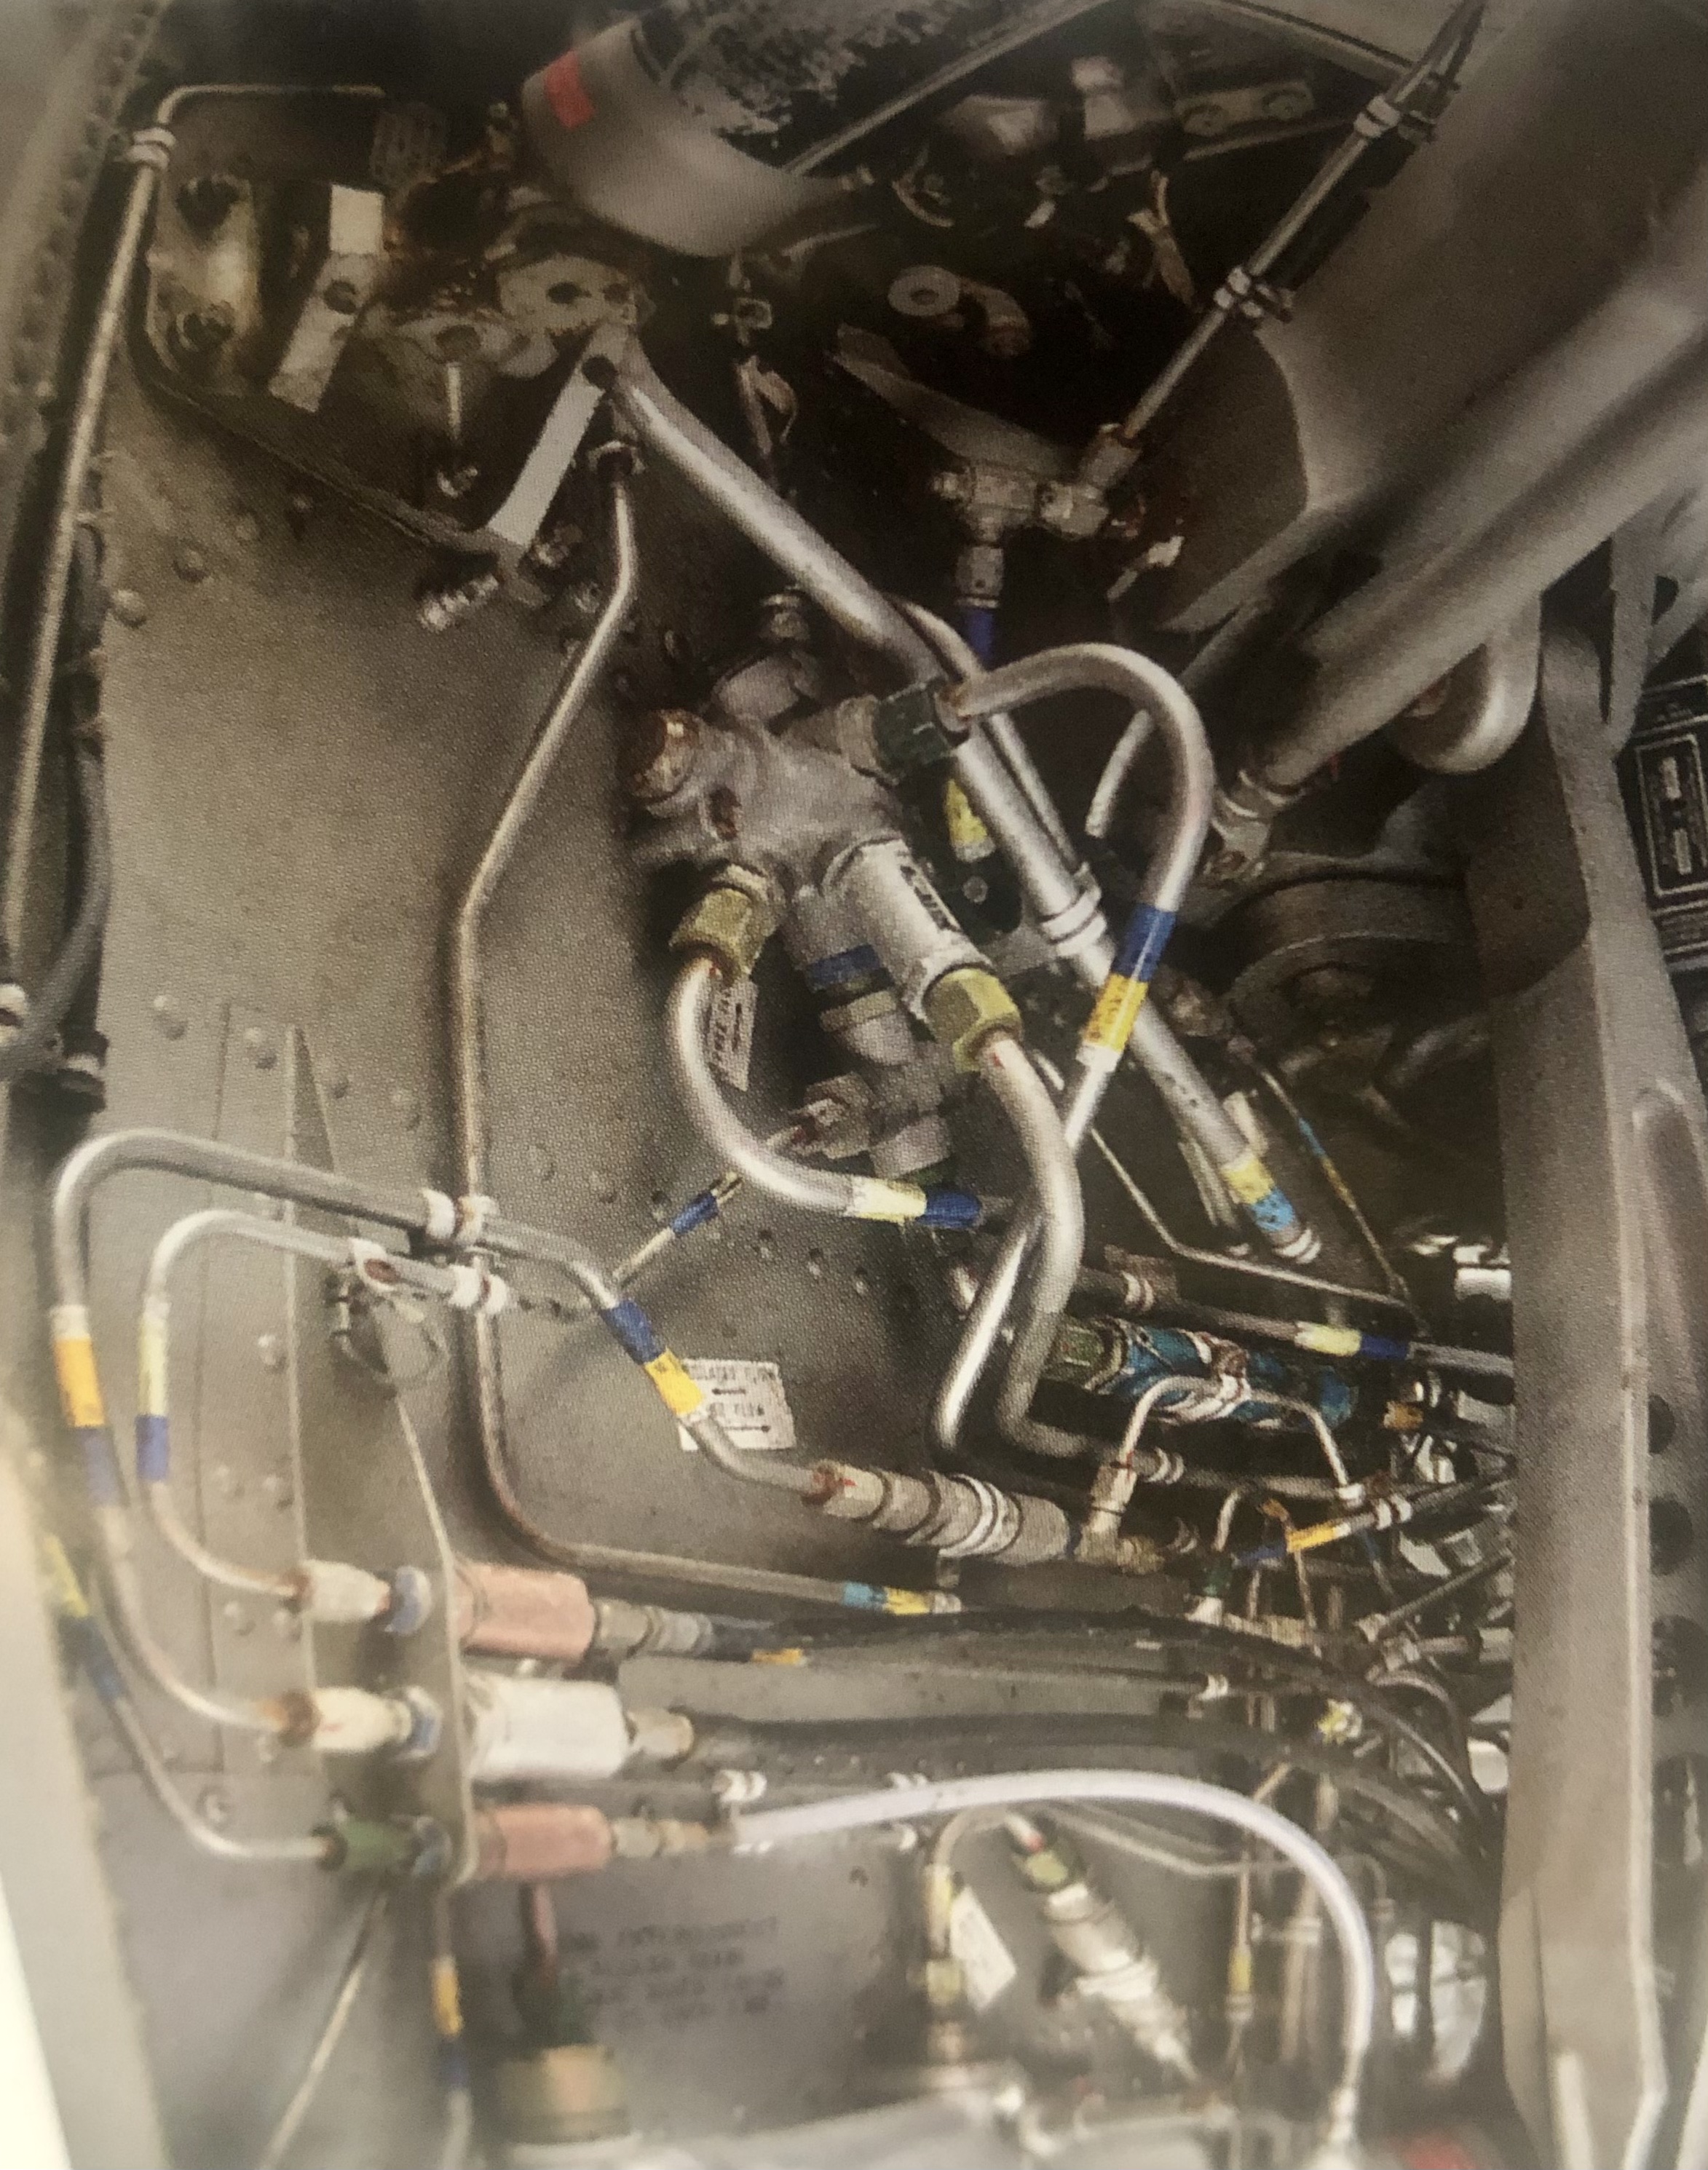
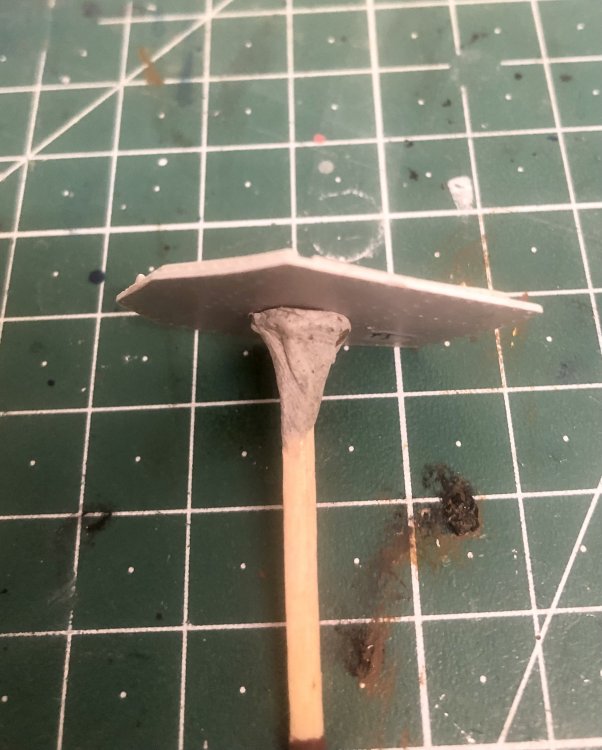
Thanks for your feedback Gaz! I have the 1 and 2 mm Molotows which I mainly use for oleos of undercarriage legs. Good idea from your side. I have tried them also for the pipes but to my personal gusto it’s too bright. The original pipes in the plane are made of steel and are exposed to the elements and tear and wear. Therefore they appear to have a more matte appearance. See example in the attached foto.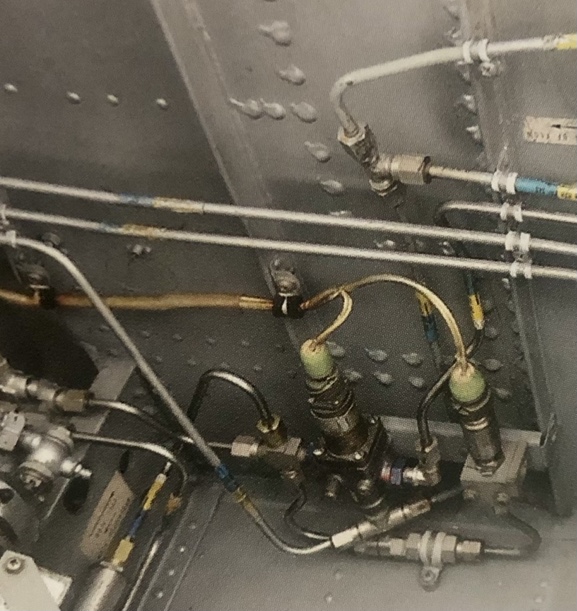
-
Israeli Mirage III C with Atar9C
Kaireckstadt replied to Kaireckstadt's topic in LSM 1/35 and Larger Work In Progress
Thank you Peter! Much appreciated! When will we see new pictures of your Mustang build? Did you have the time to proceed? -
Looking really awesome so far. Beautiful detail! I always have to remember that it’s 72nd scale! Not easy to handle if you have small brass-parts! So definitely pre-planning is necessary like you do! Looking forward to seeing your progress!
-
Israeli Mirage III C with Atar9C
Kaireckstadt replied to Kaireckstadt's topic in LSM 1/35 and Larger Work In Progress
Thanks Harv! Would have been surprised if it was the other way round... We will see which other surprises the kit offers... -
Israeli Mirage III C with Atar9C
Kaireckstadt replied to Kaireckstadt's topic in LSM 1/35 and Larger Work In Progress
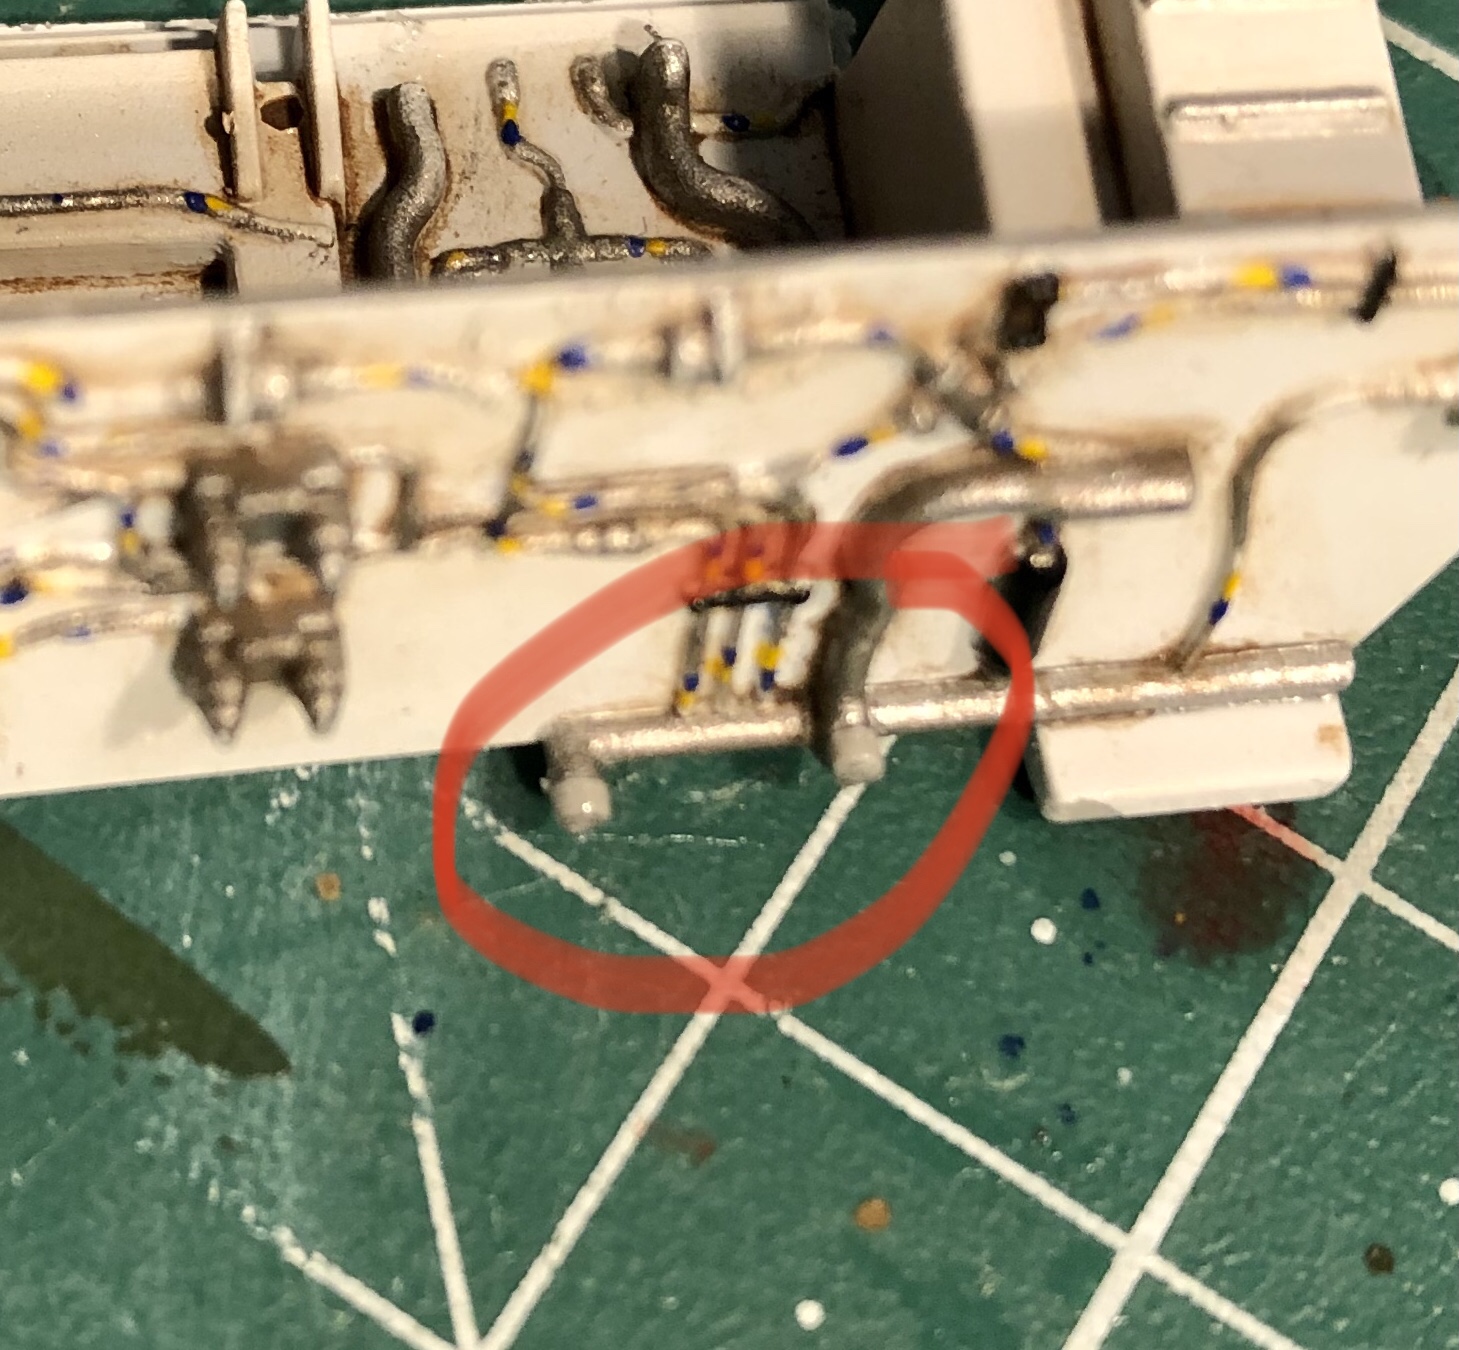
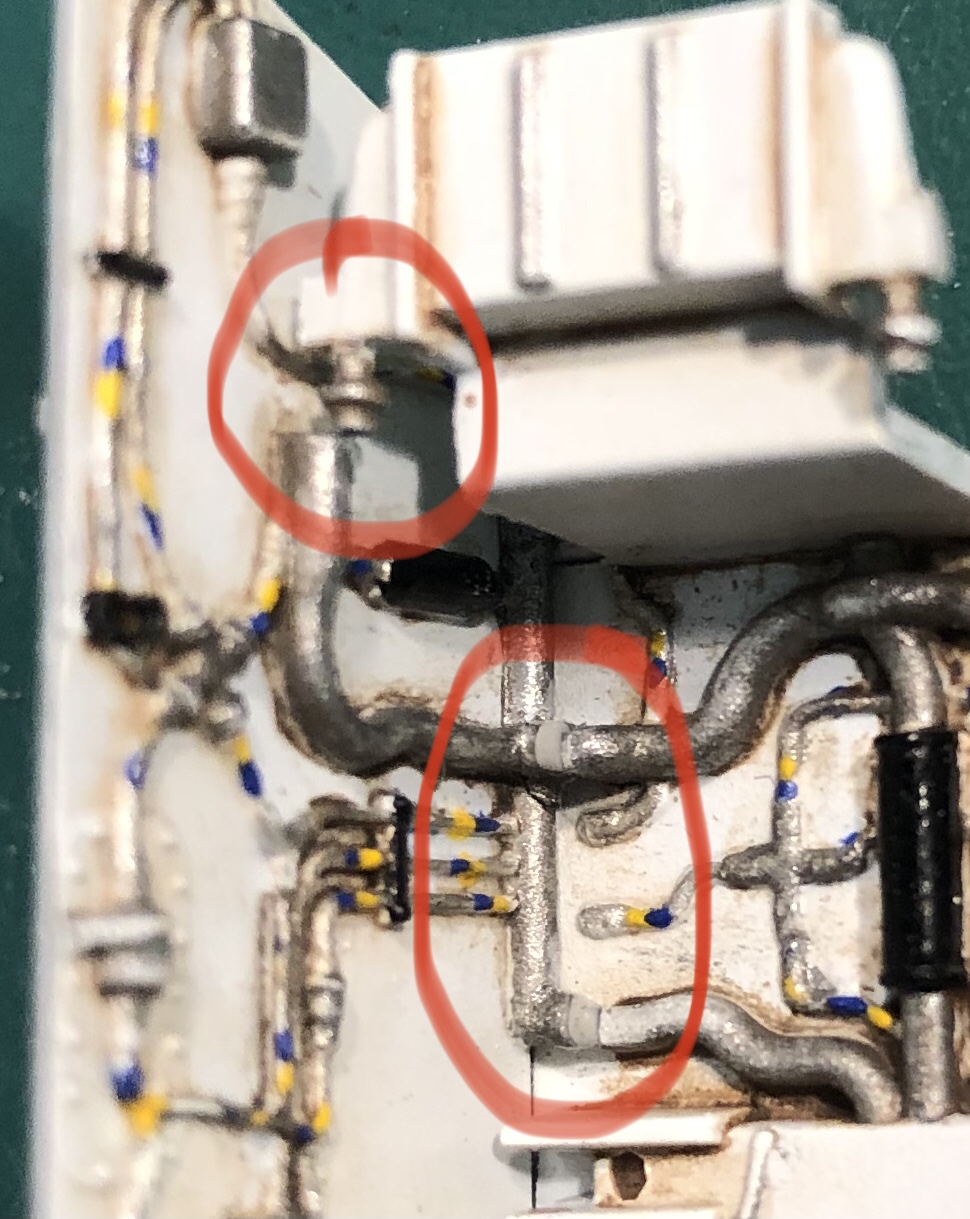
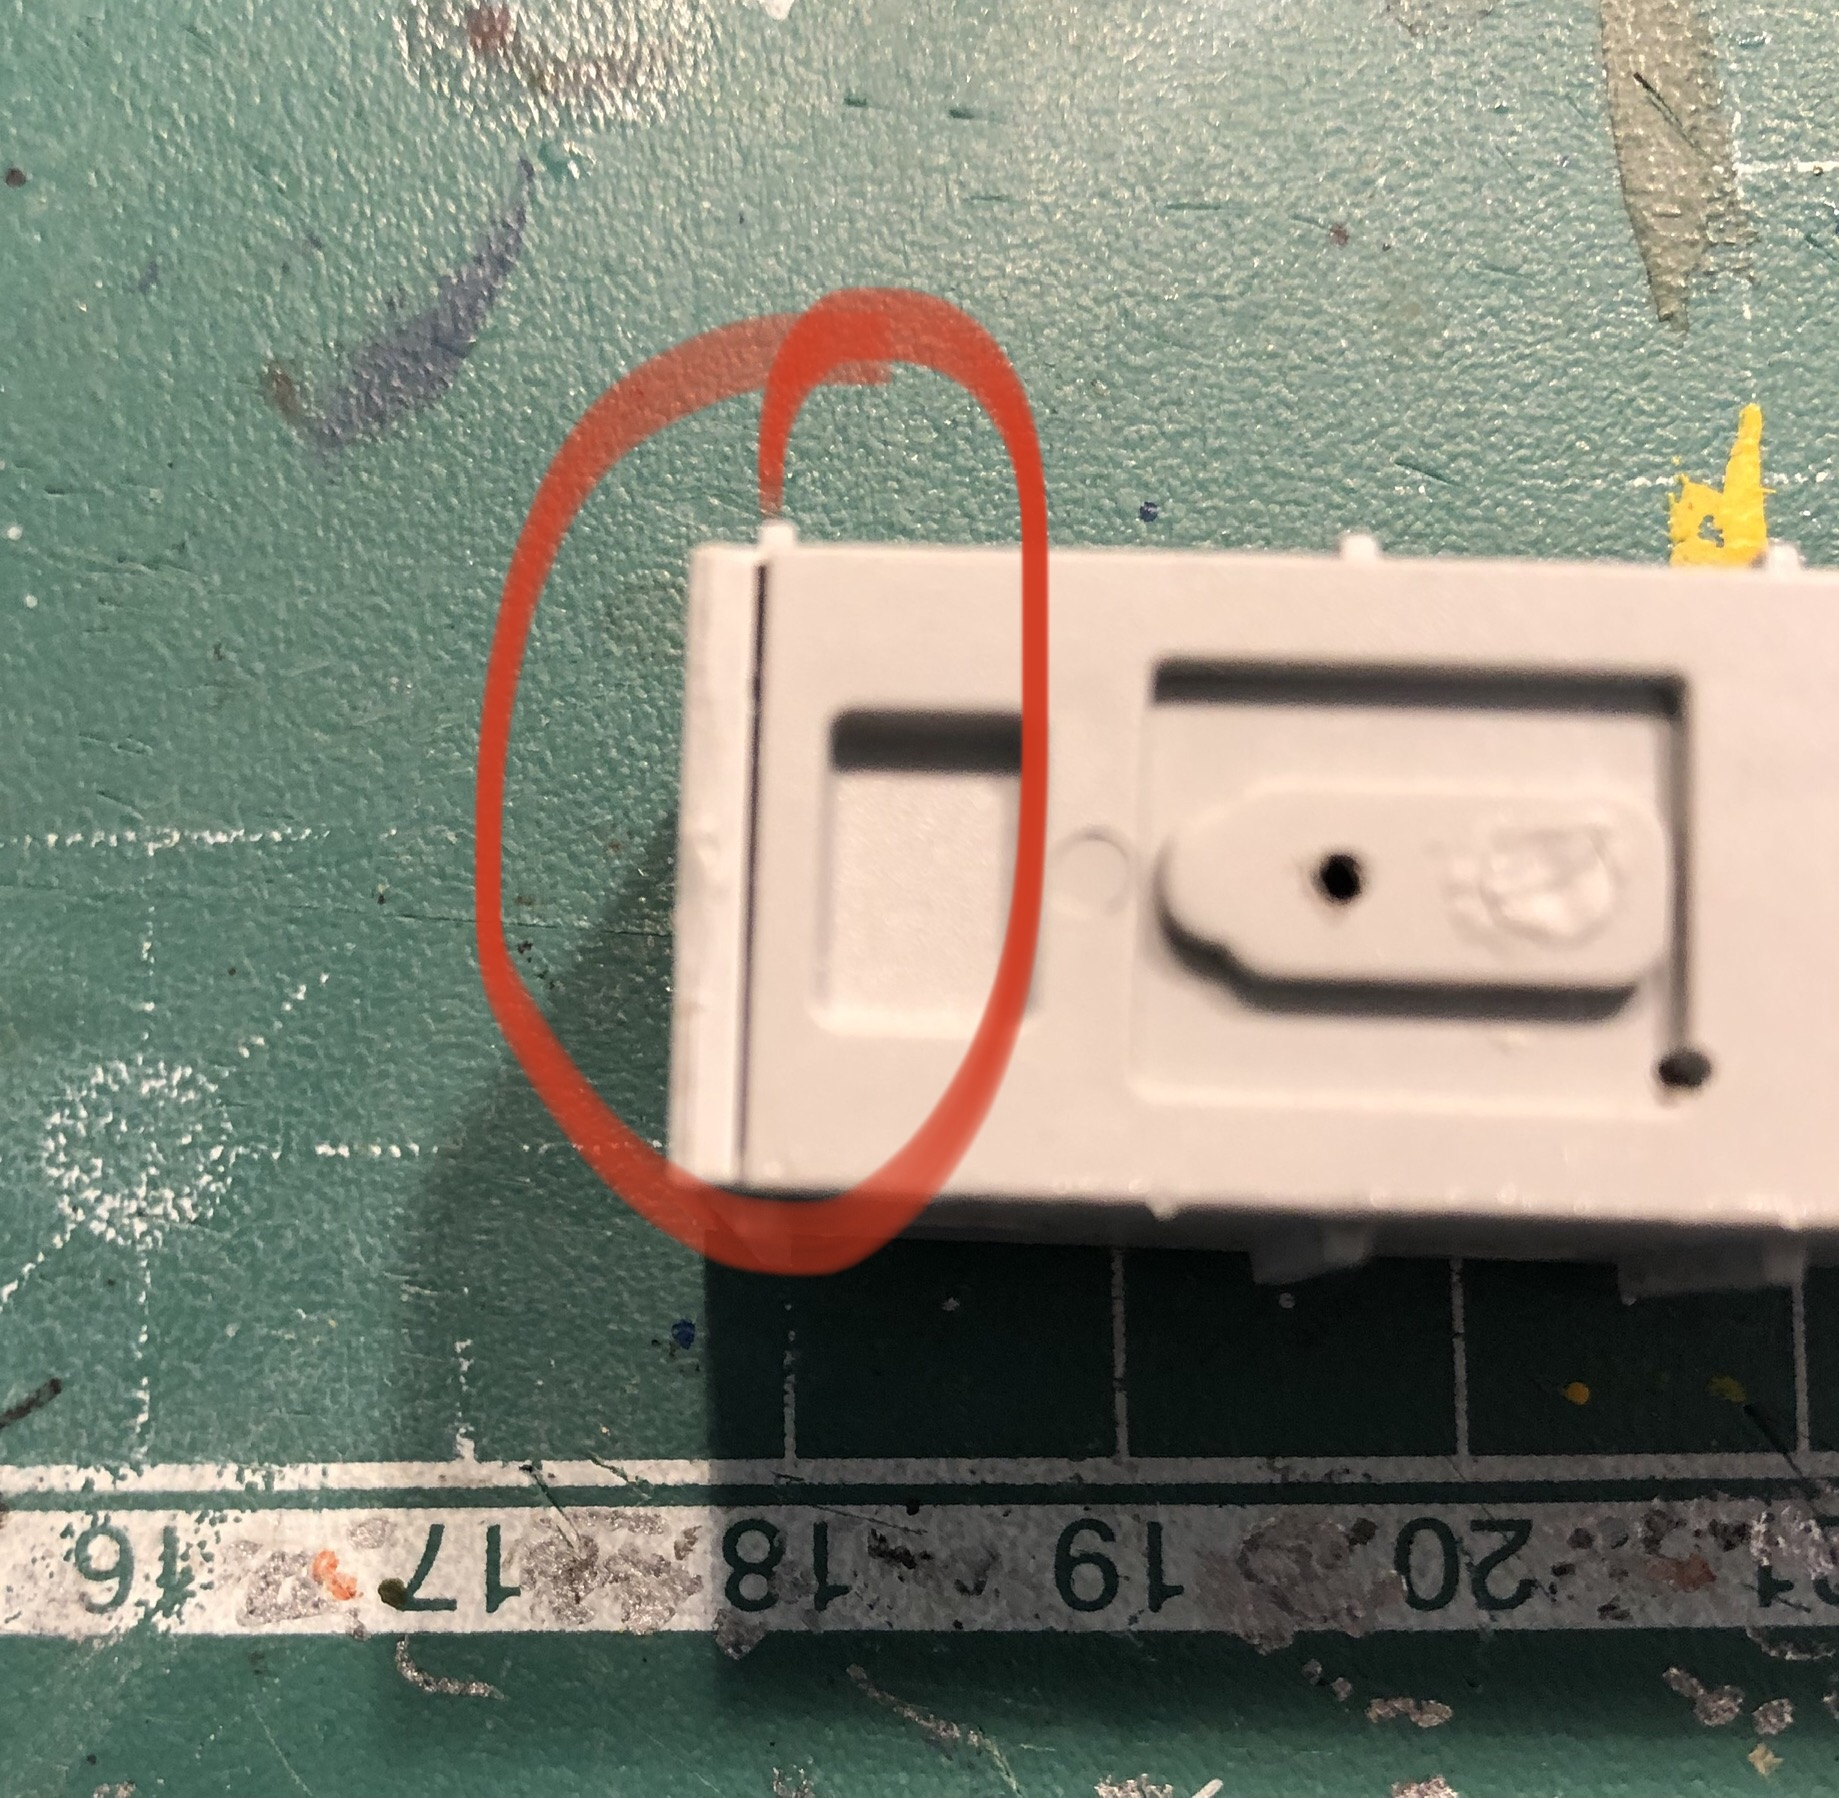
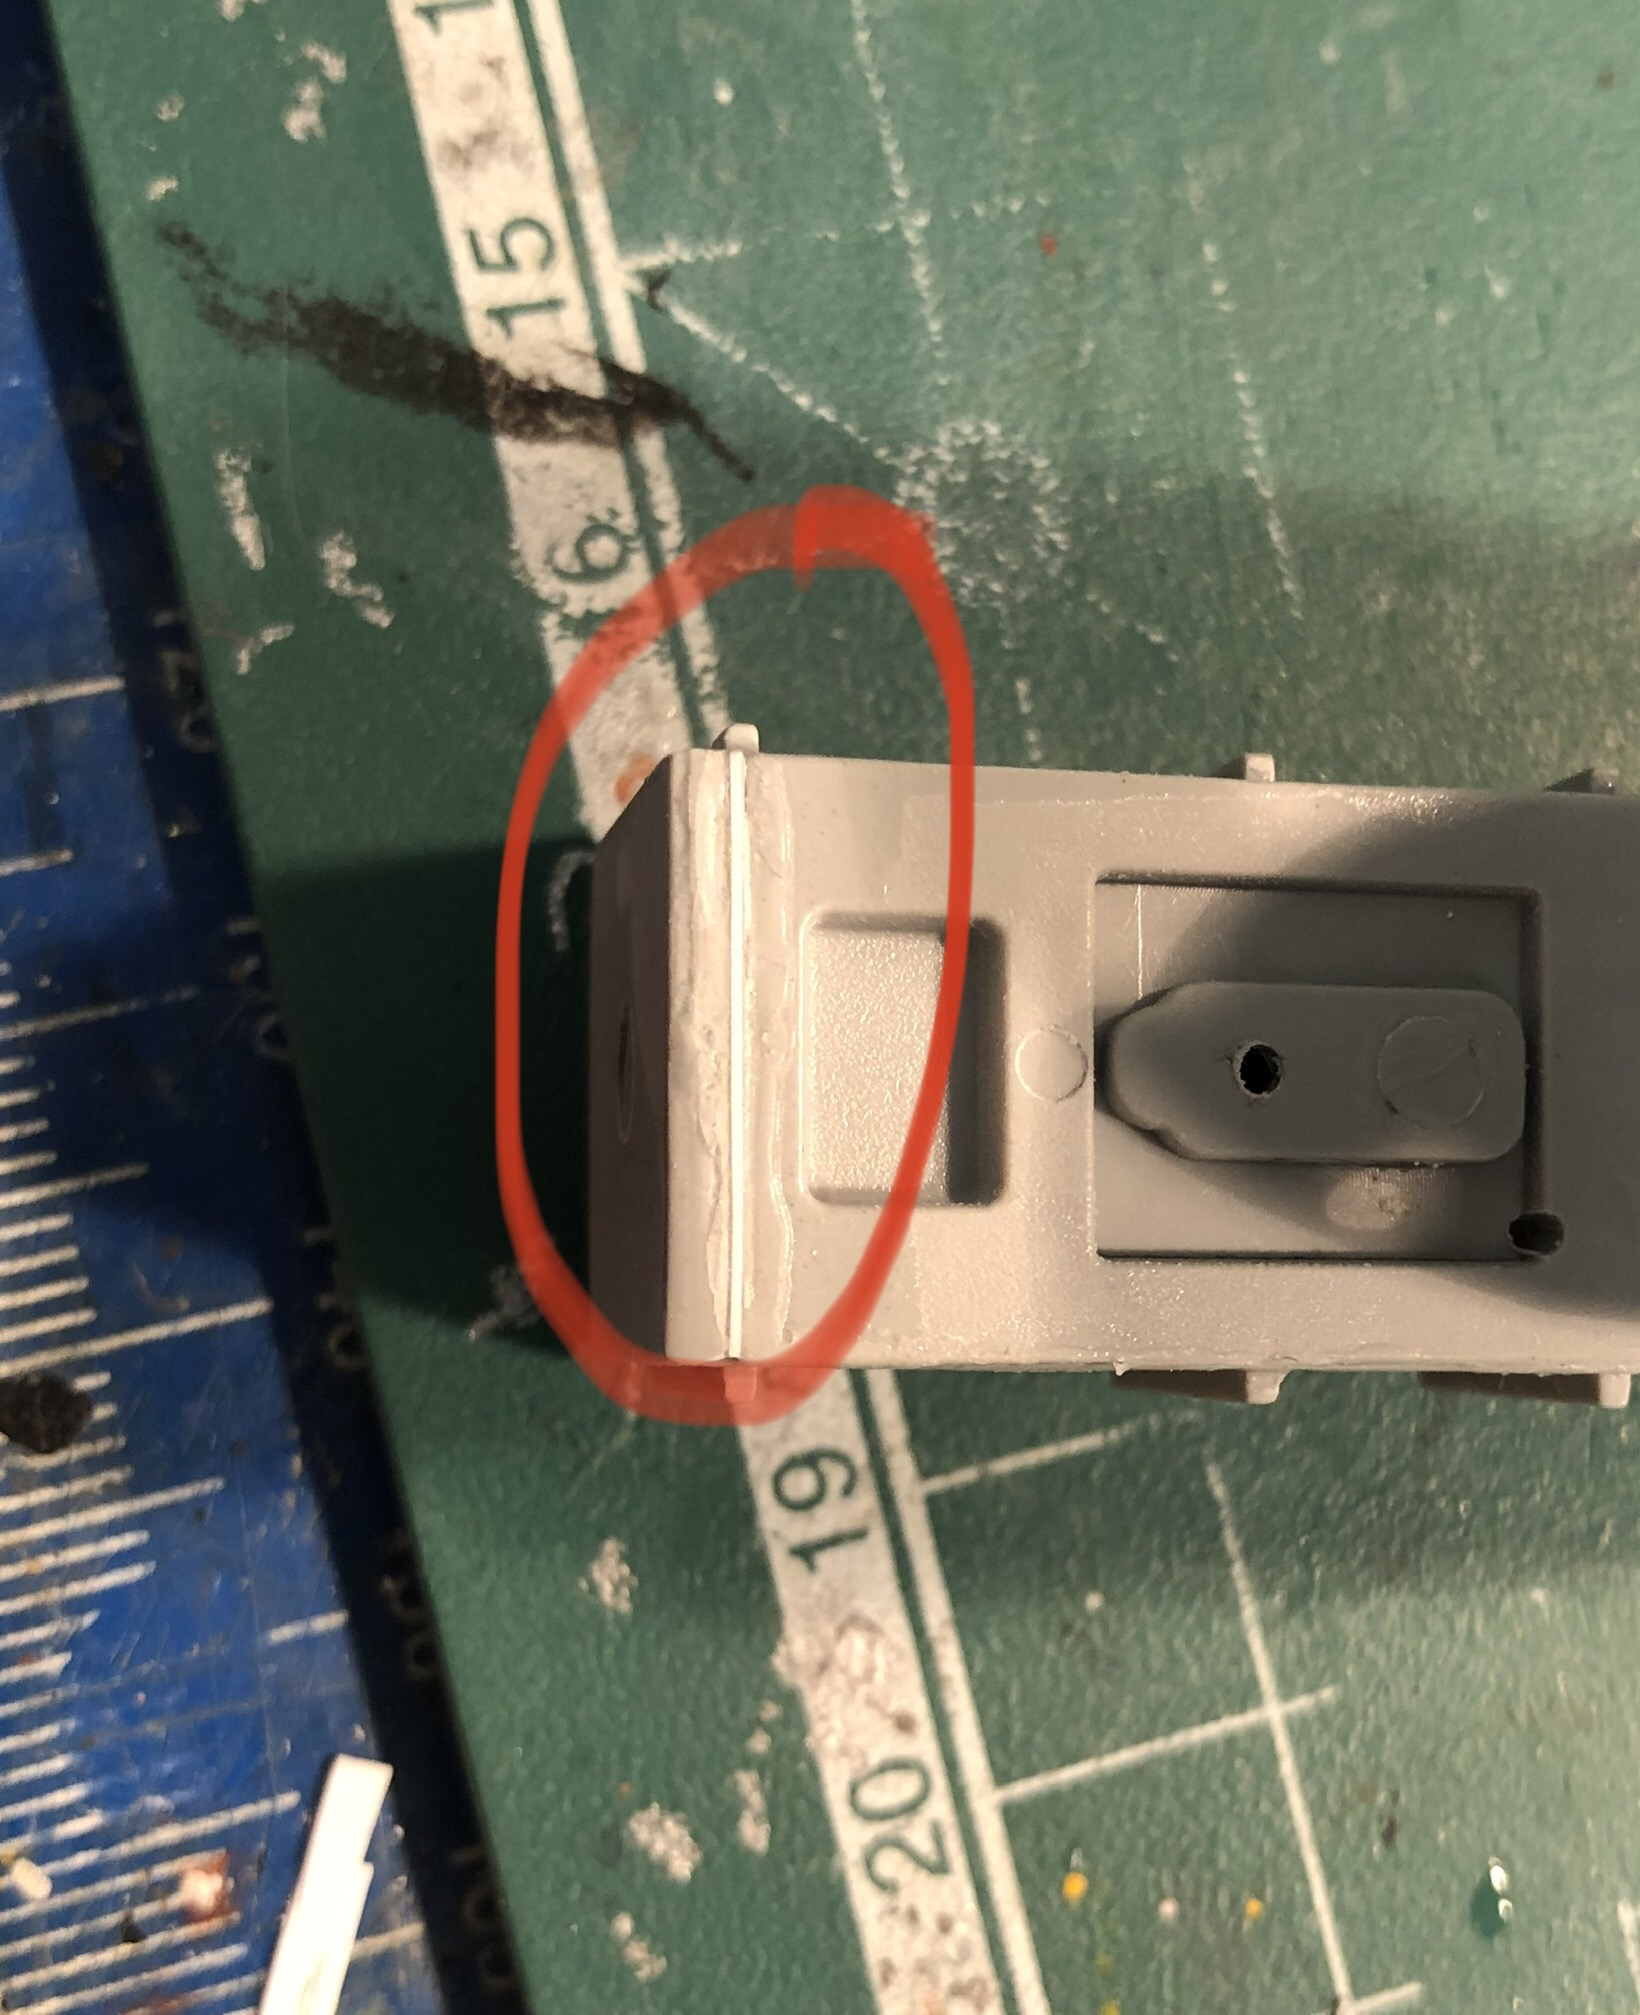
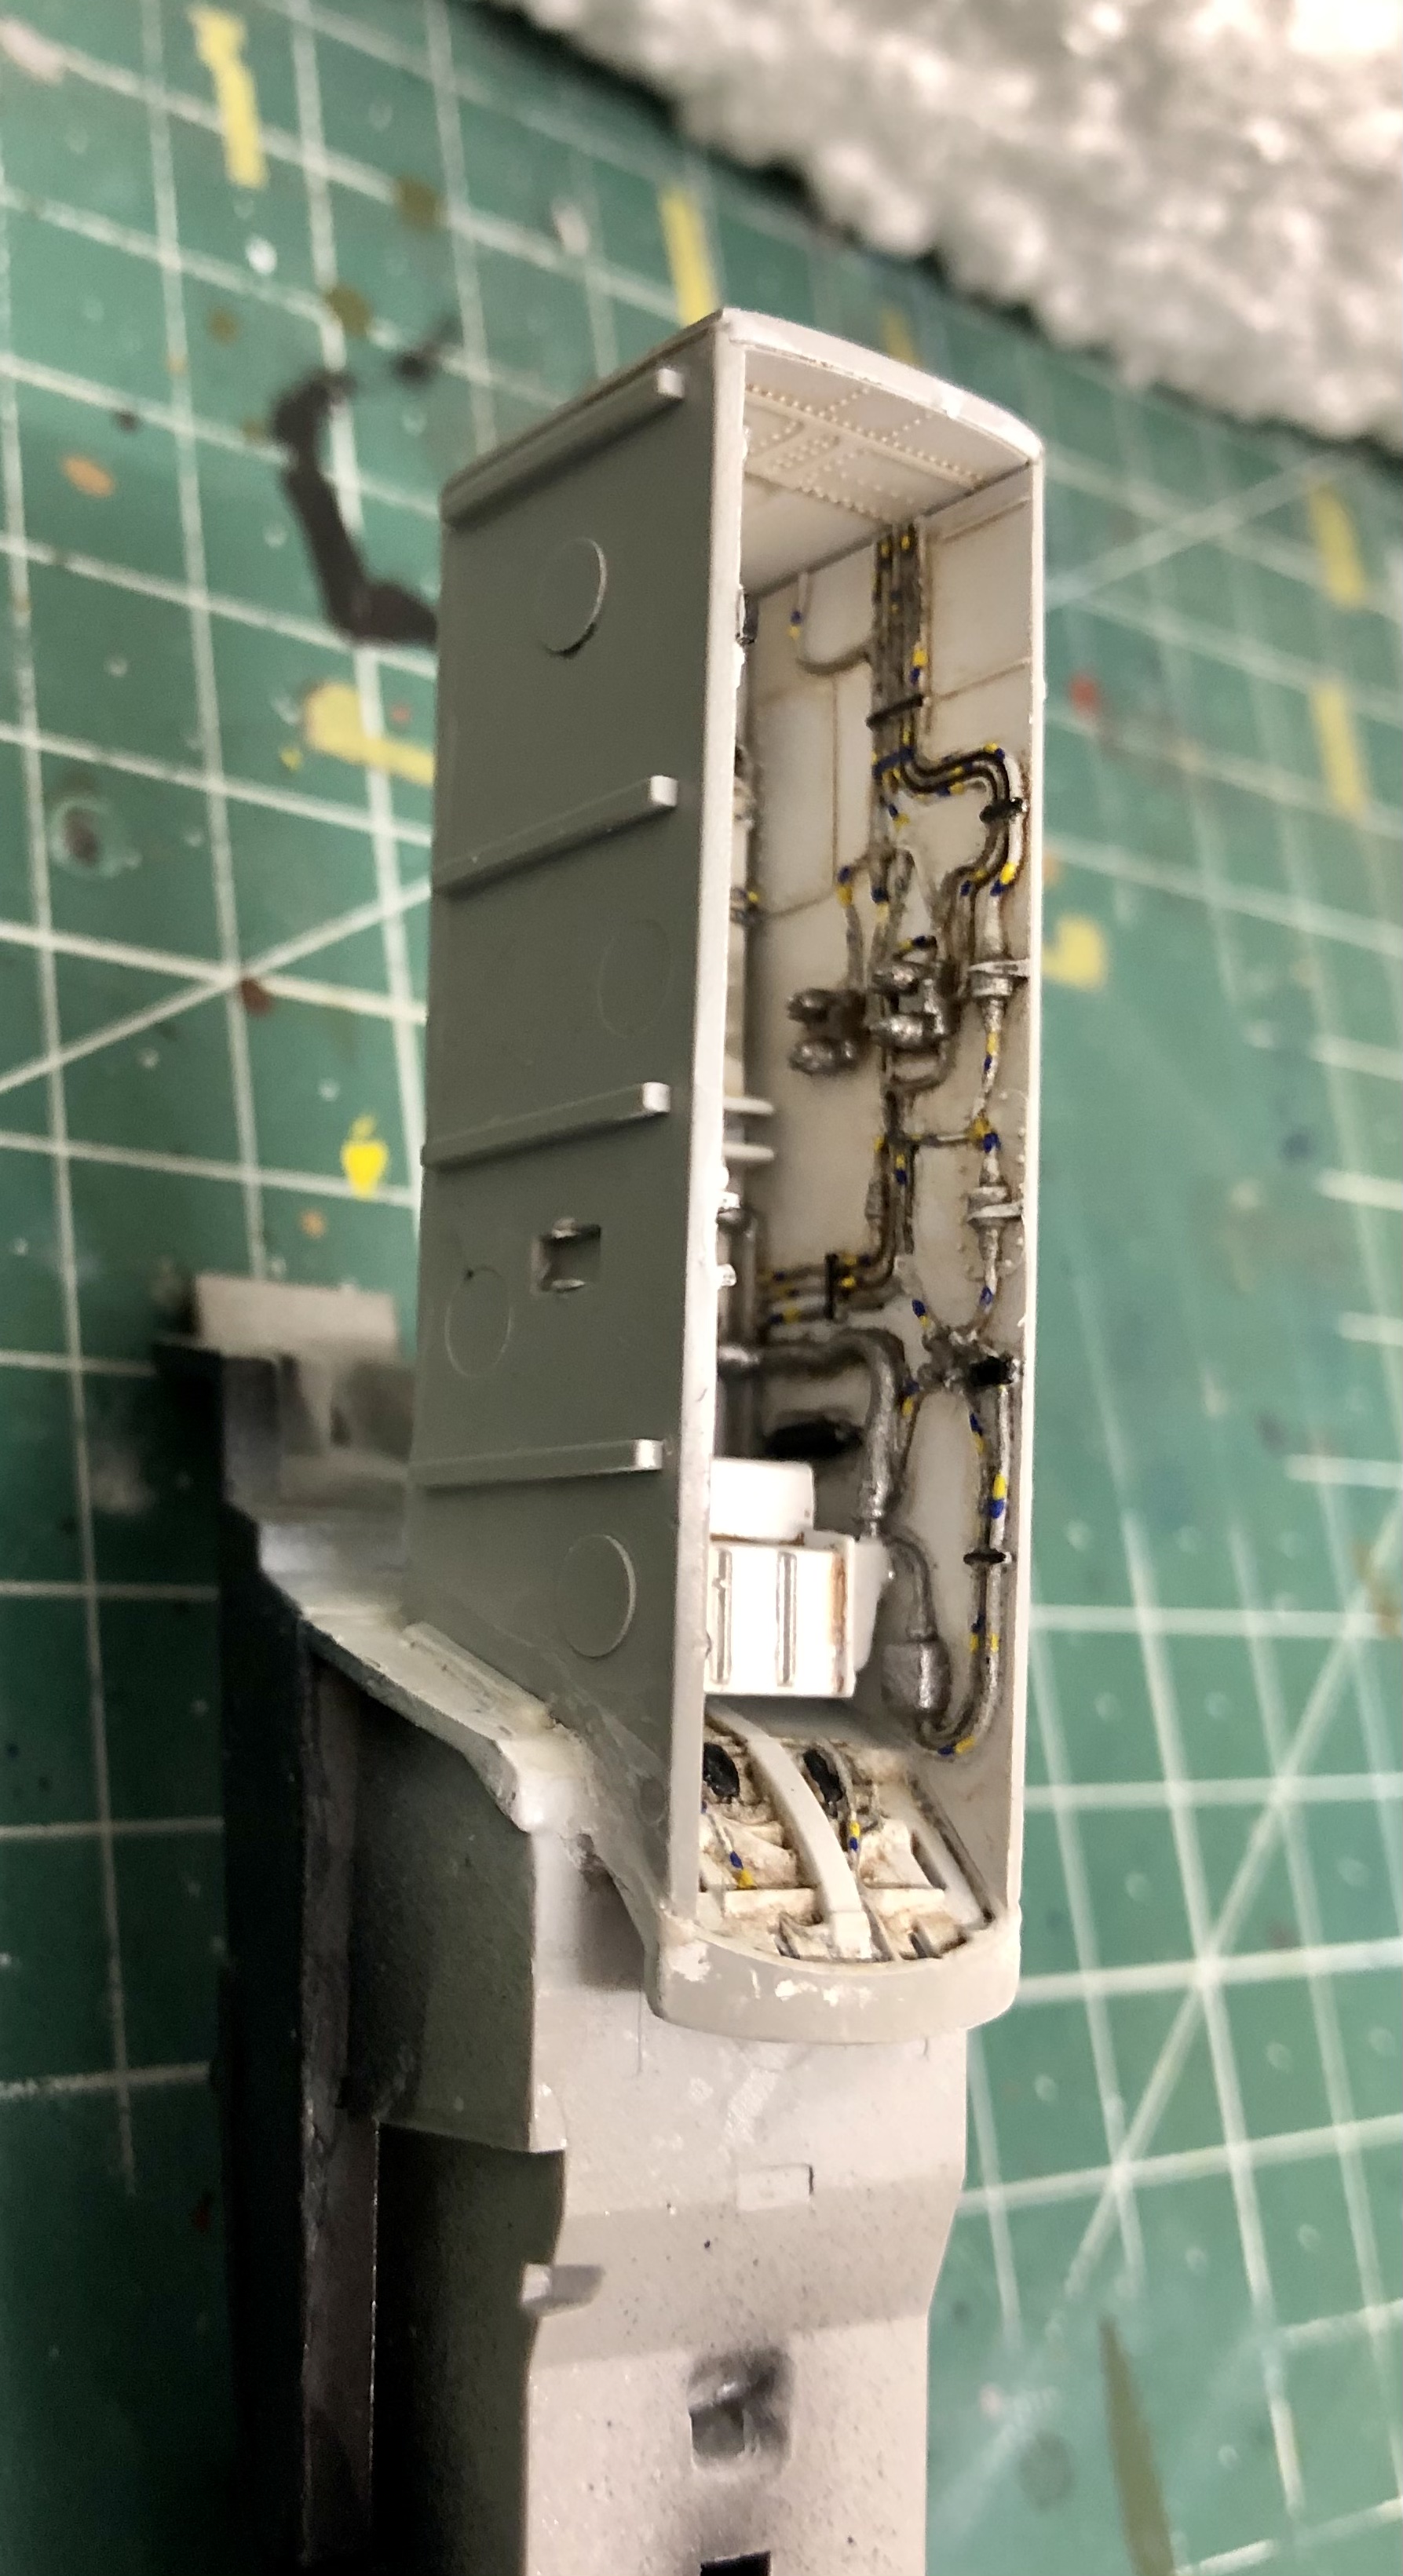
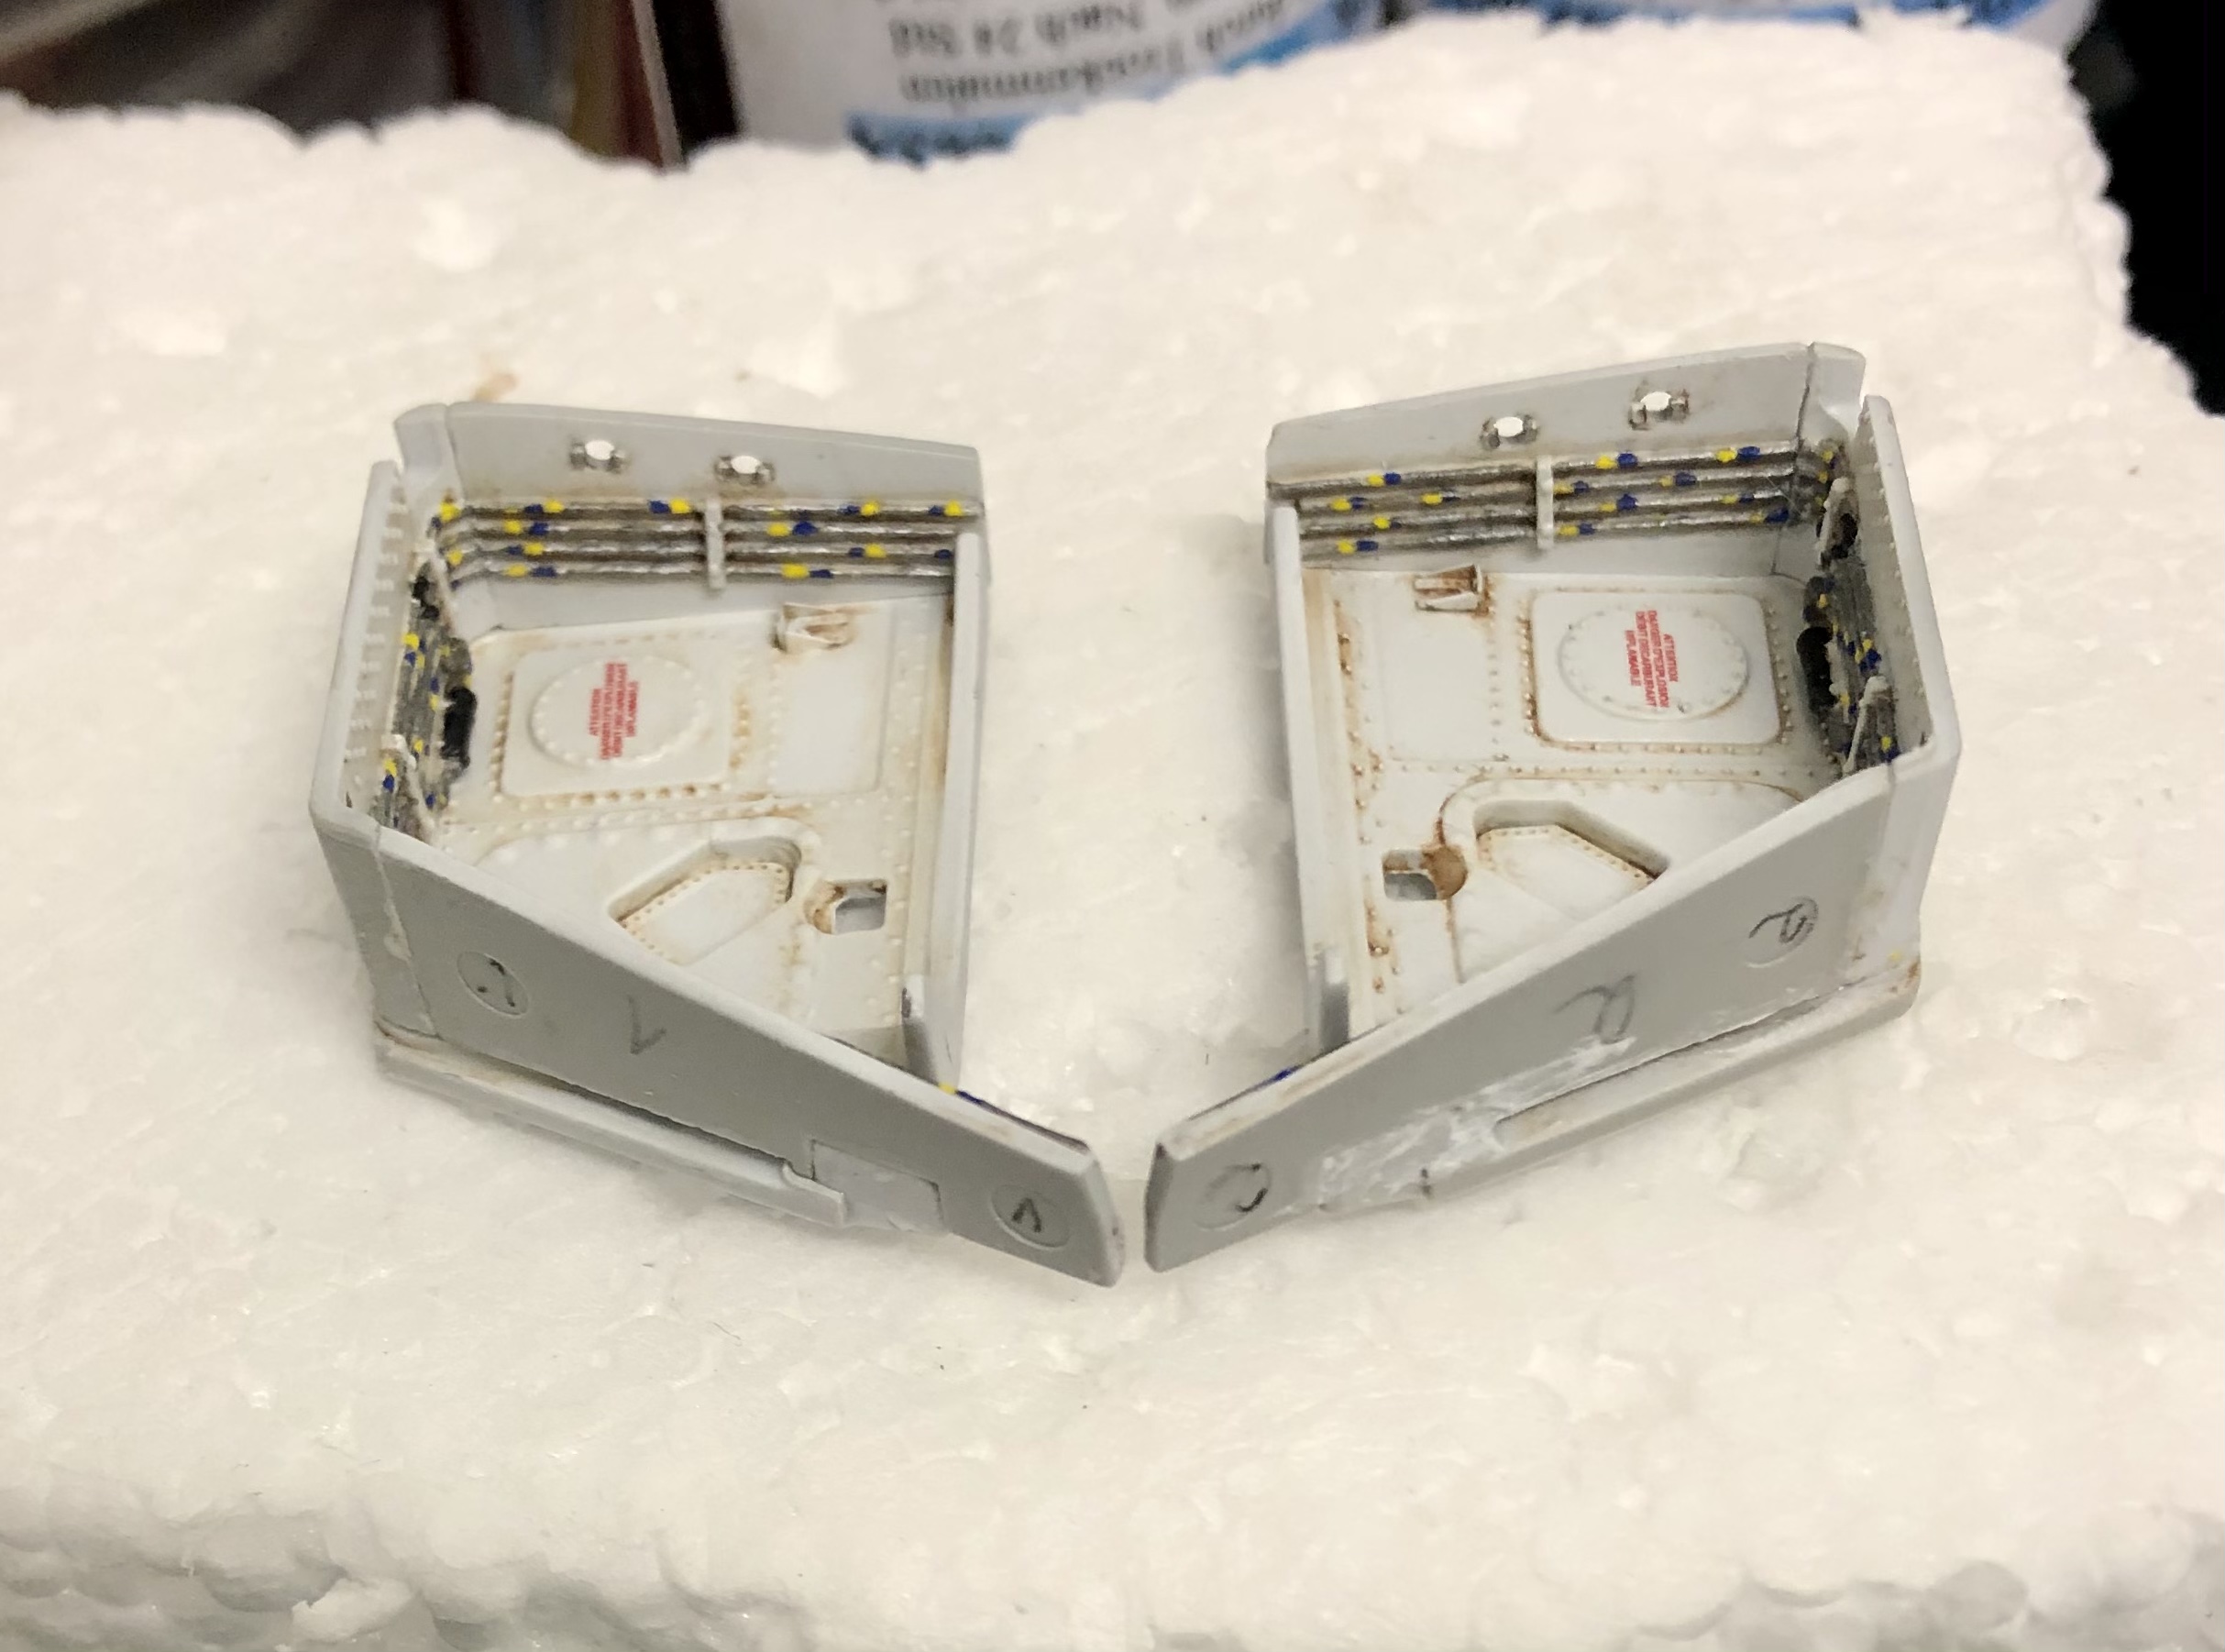
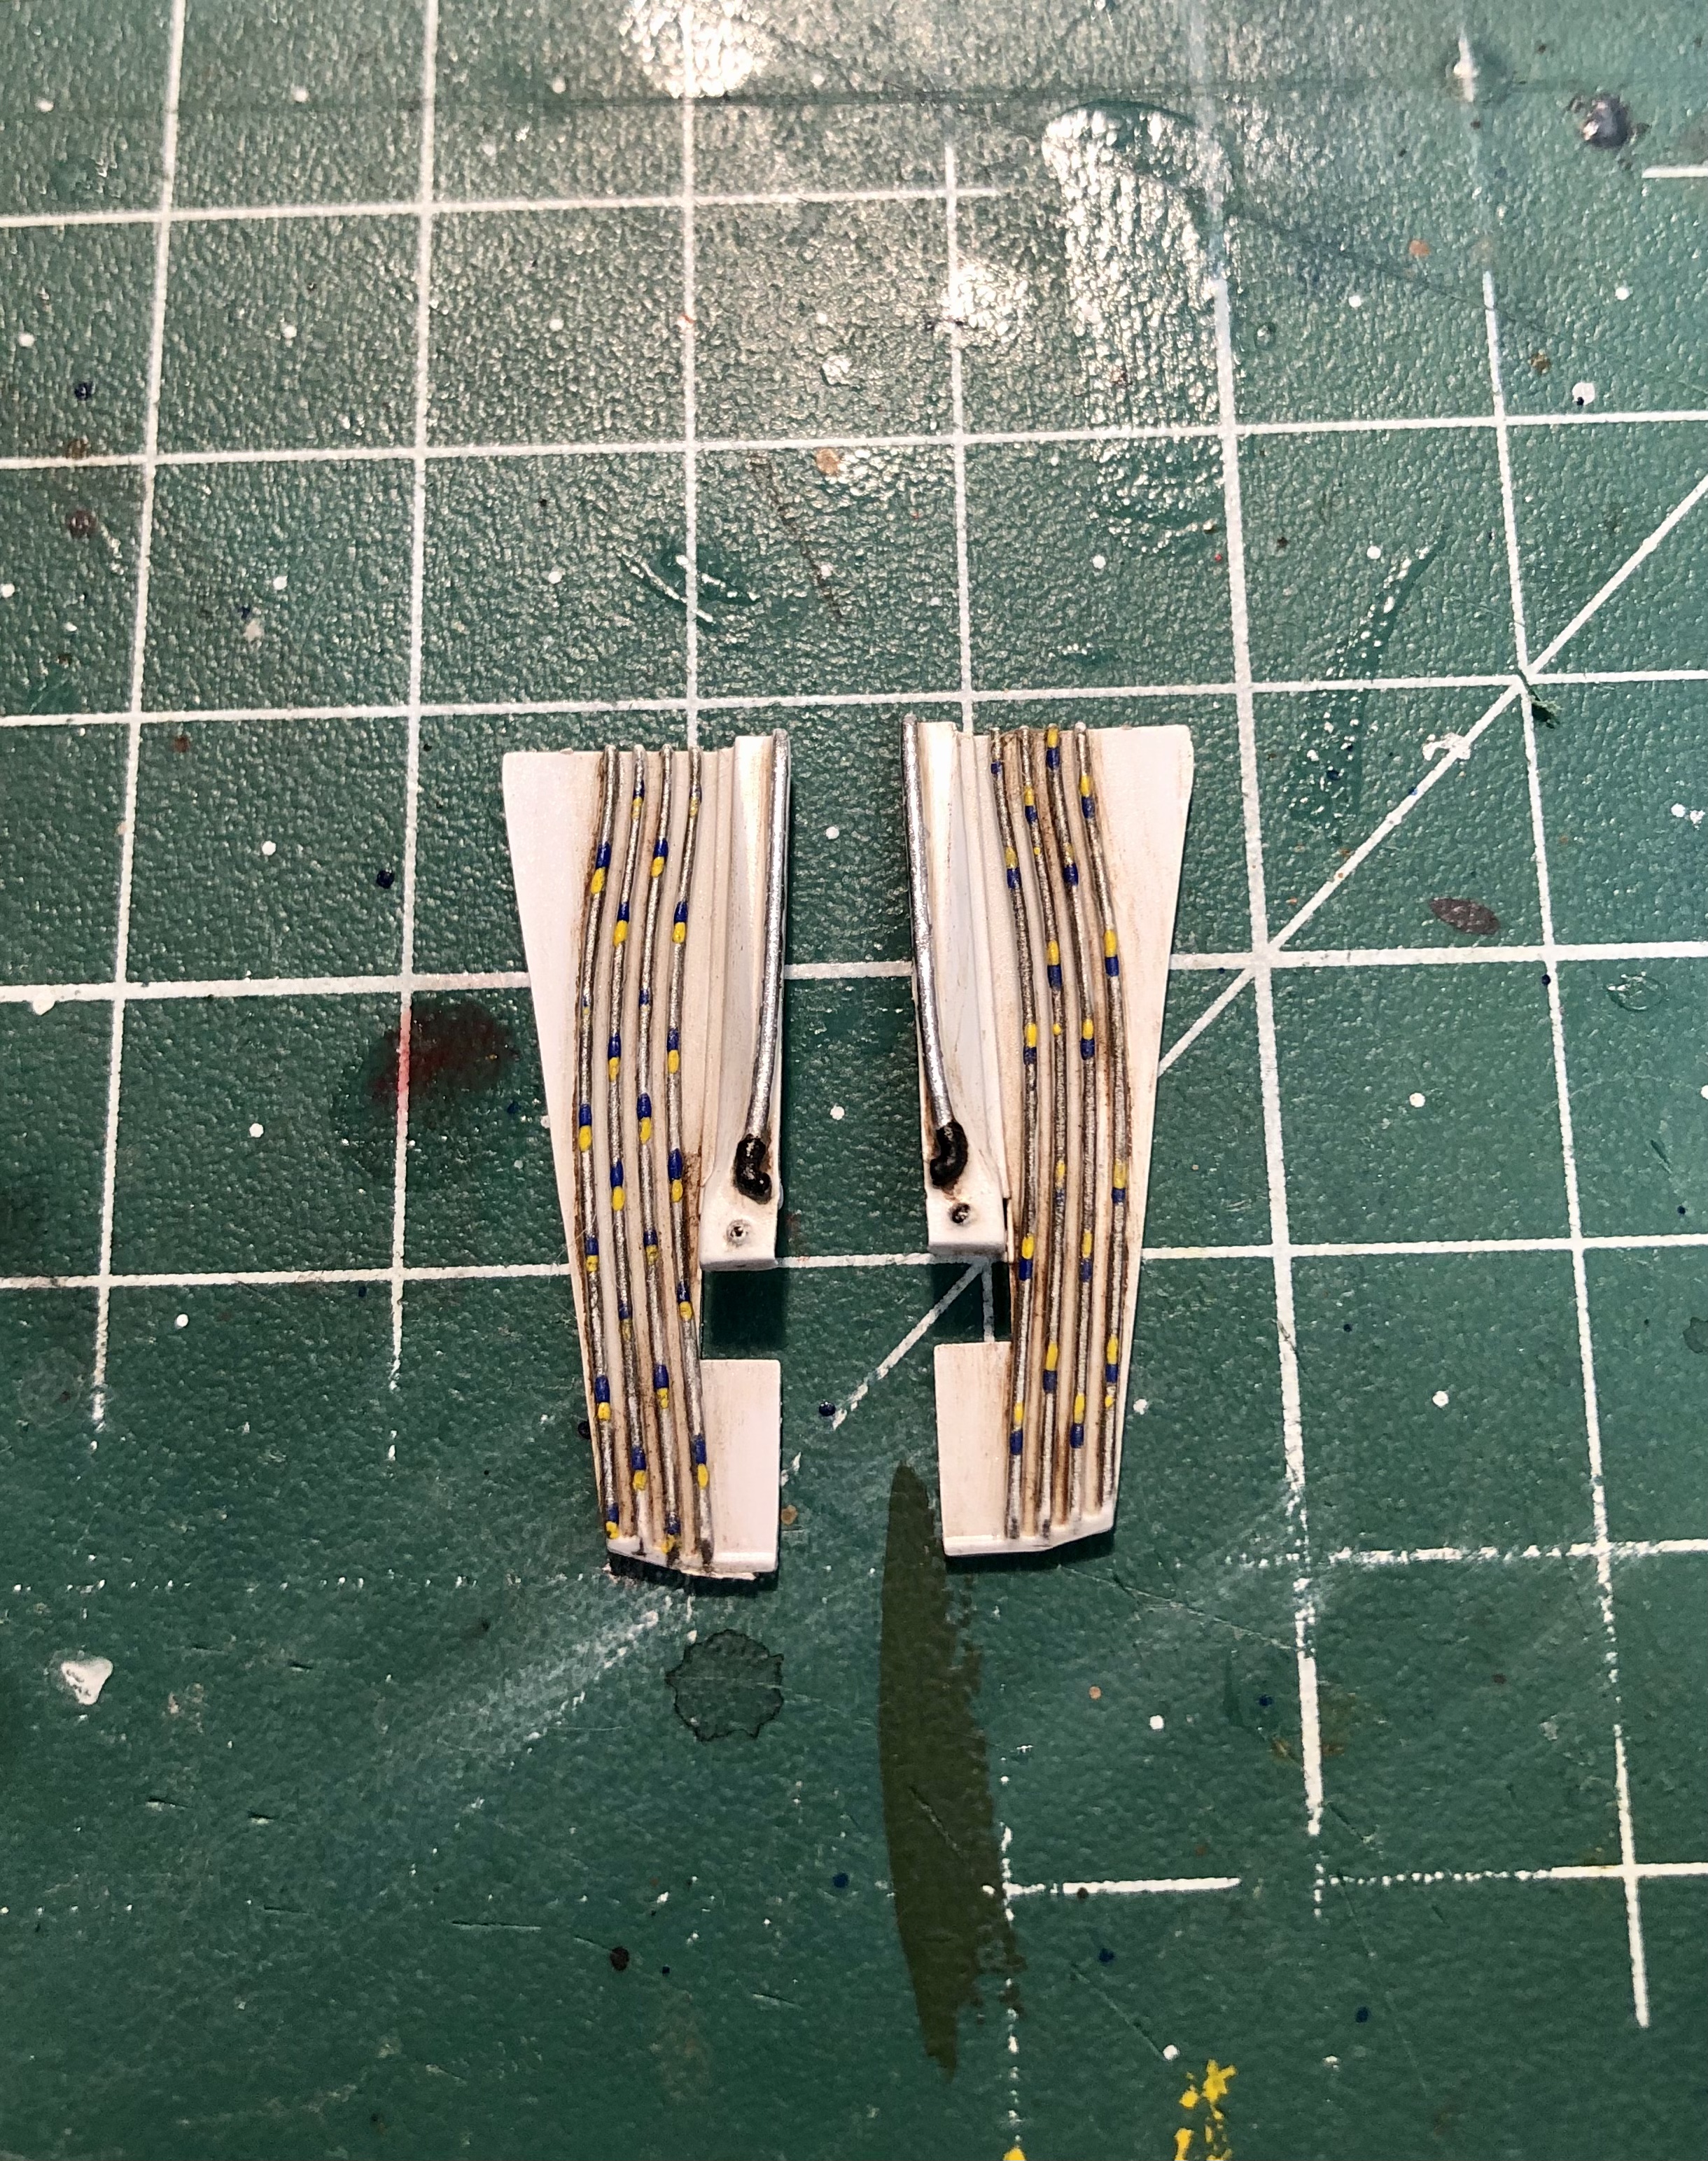
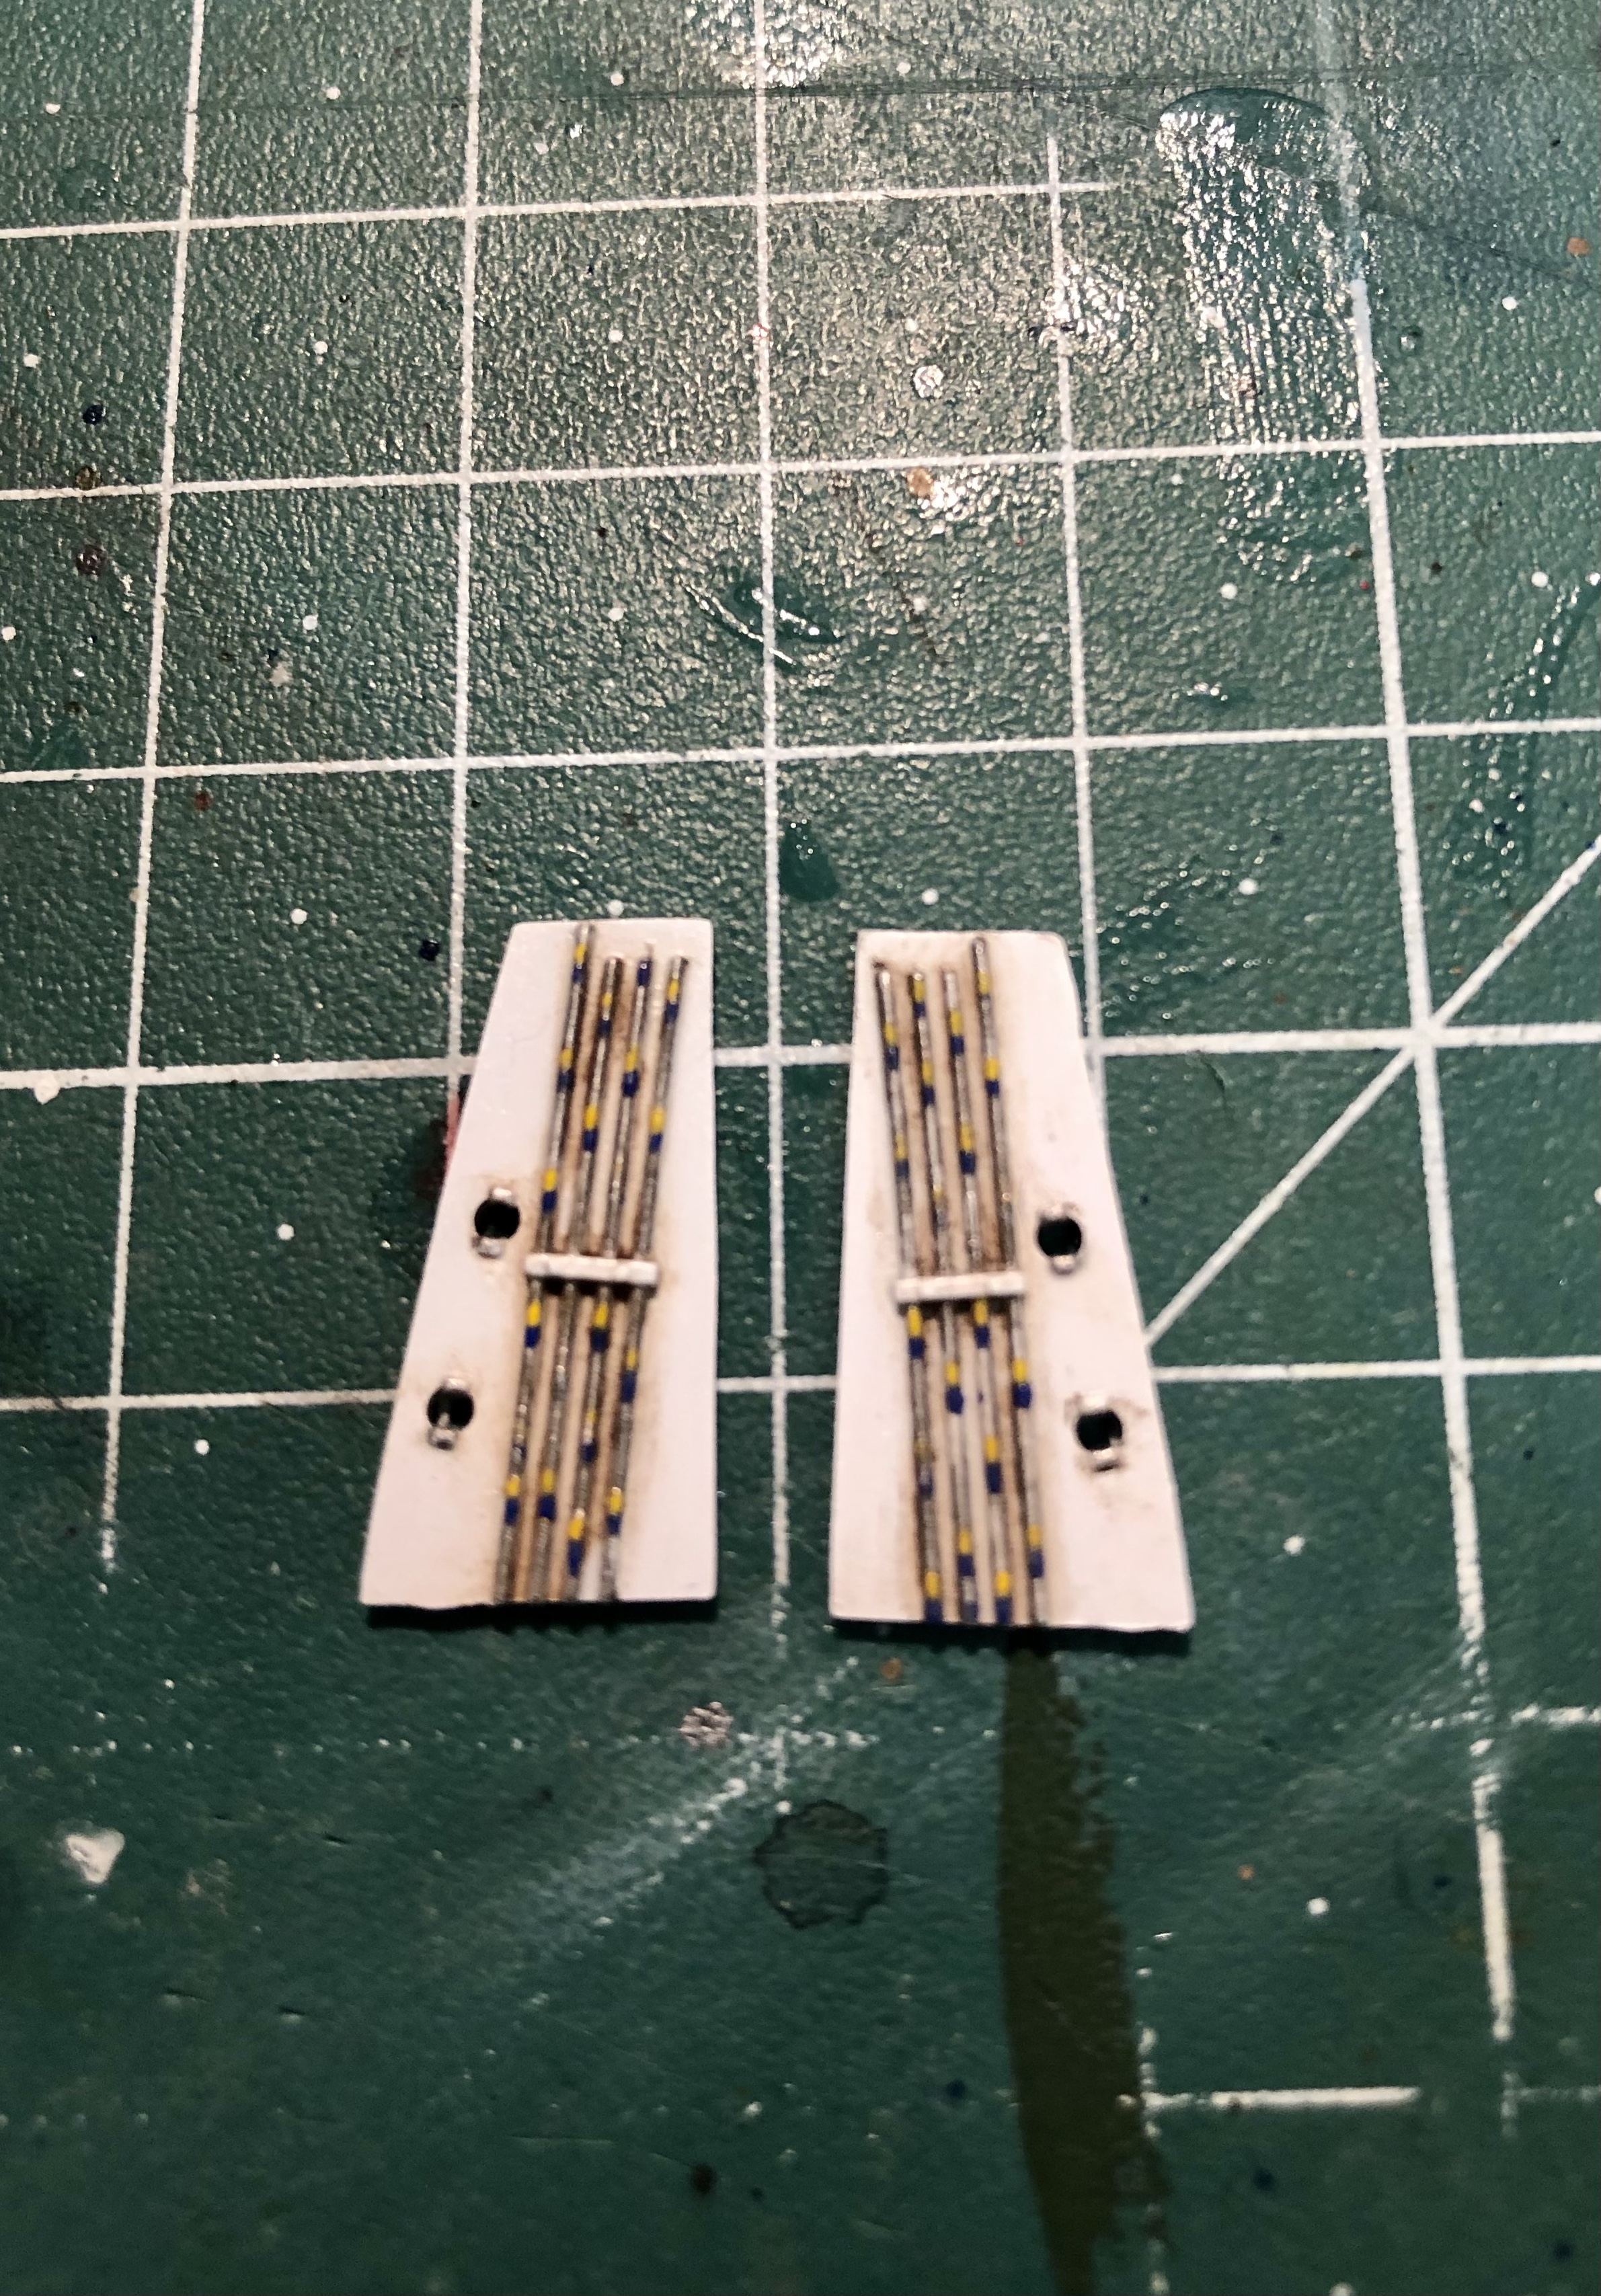
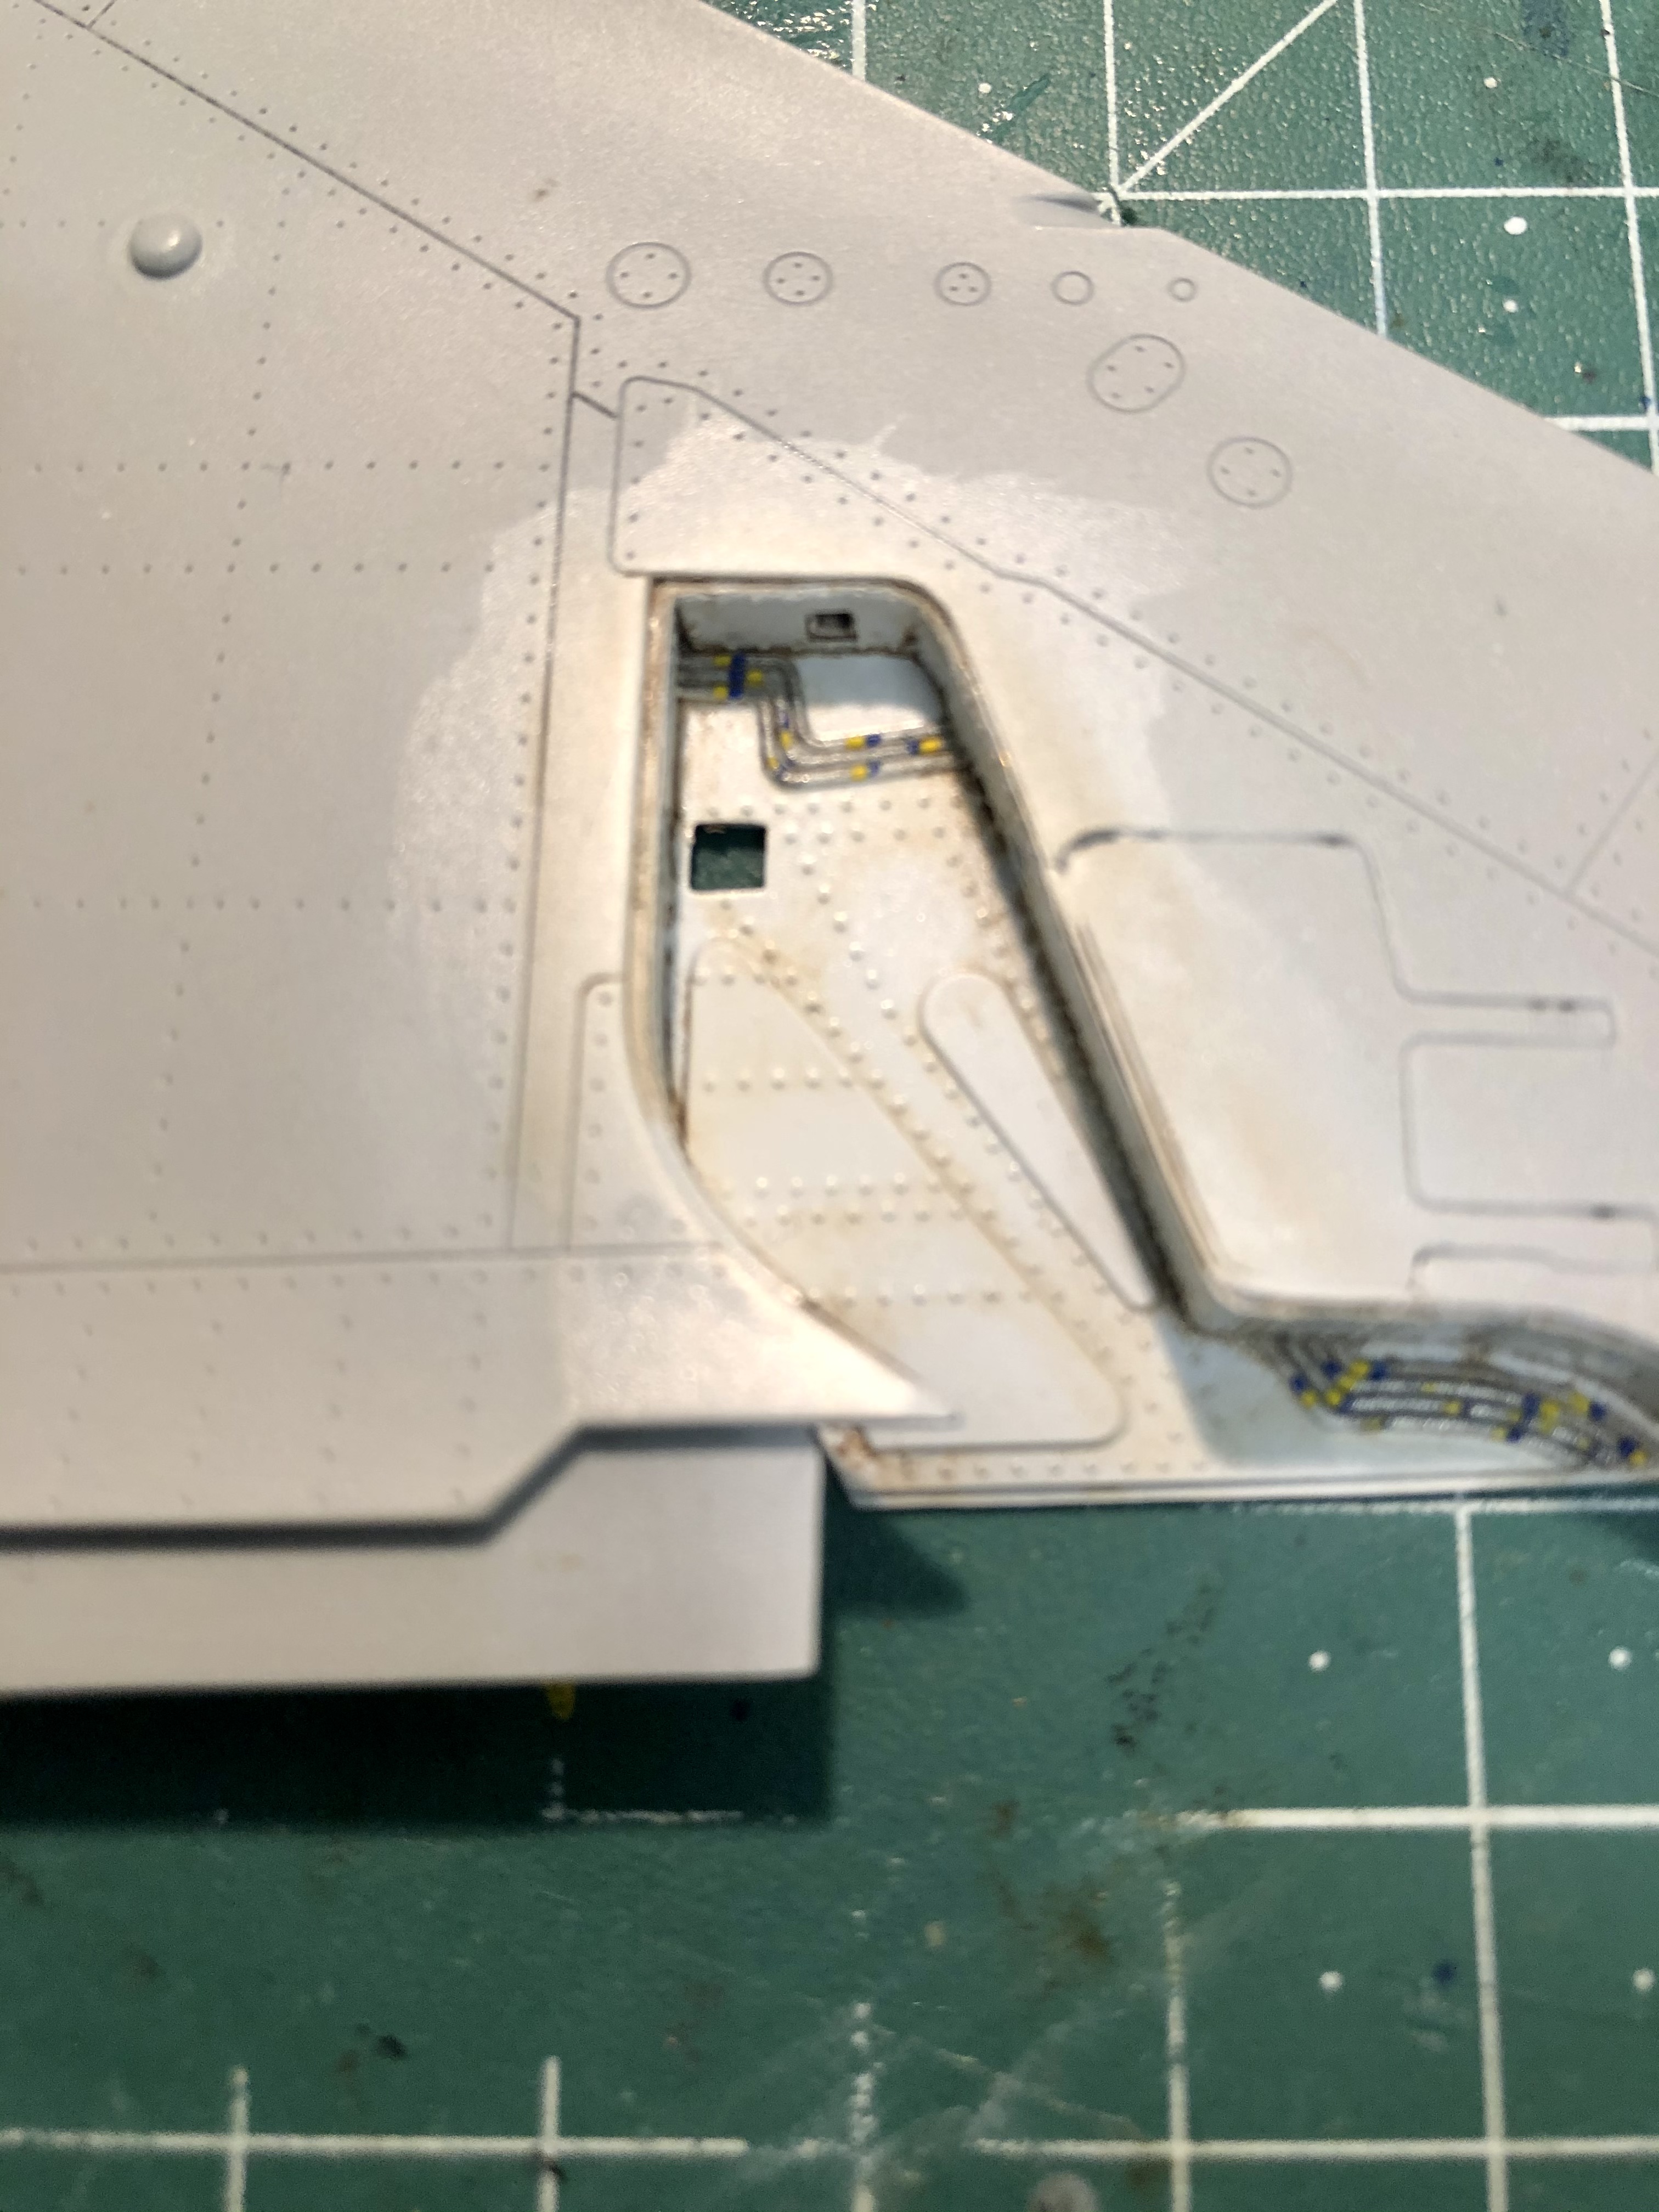
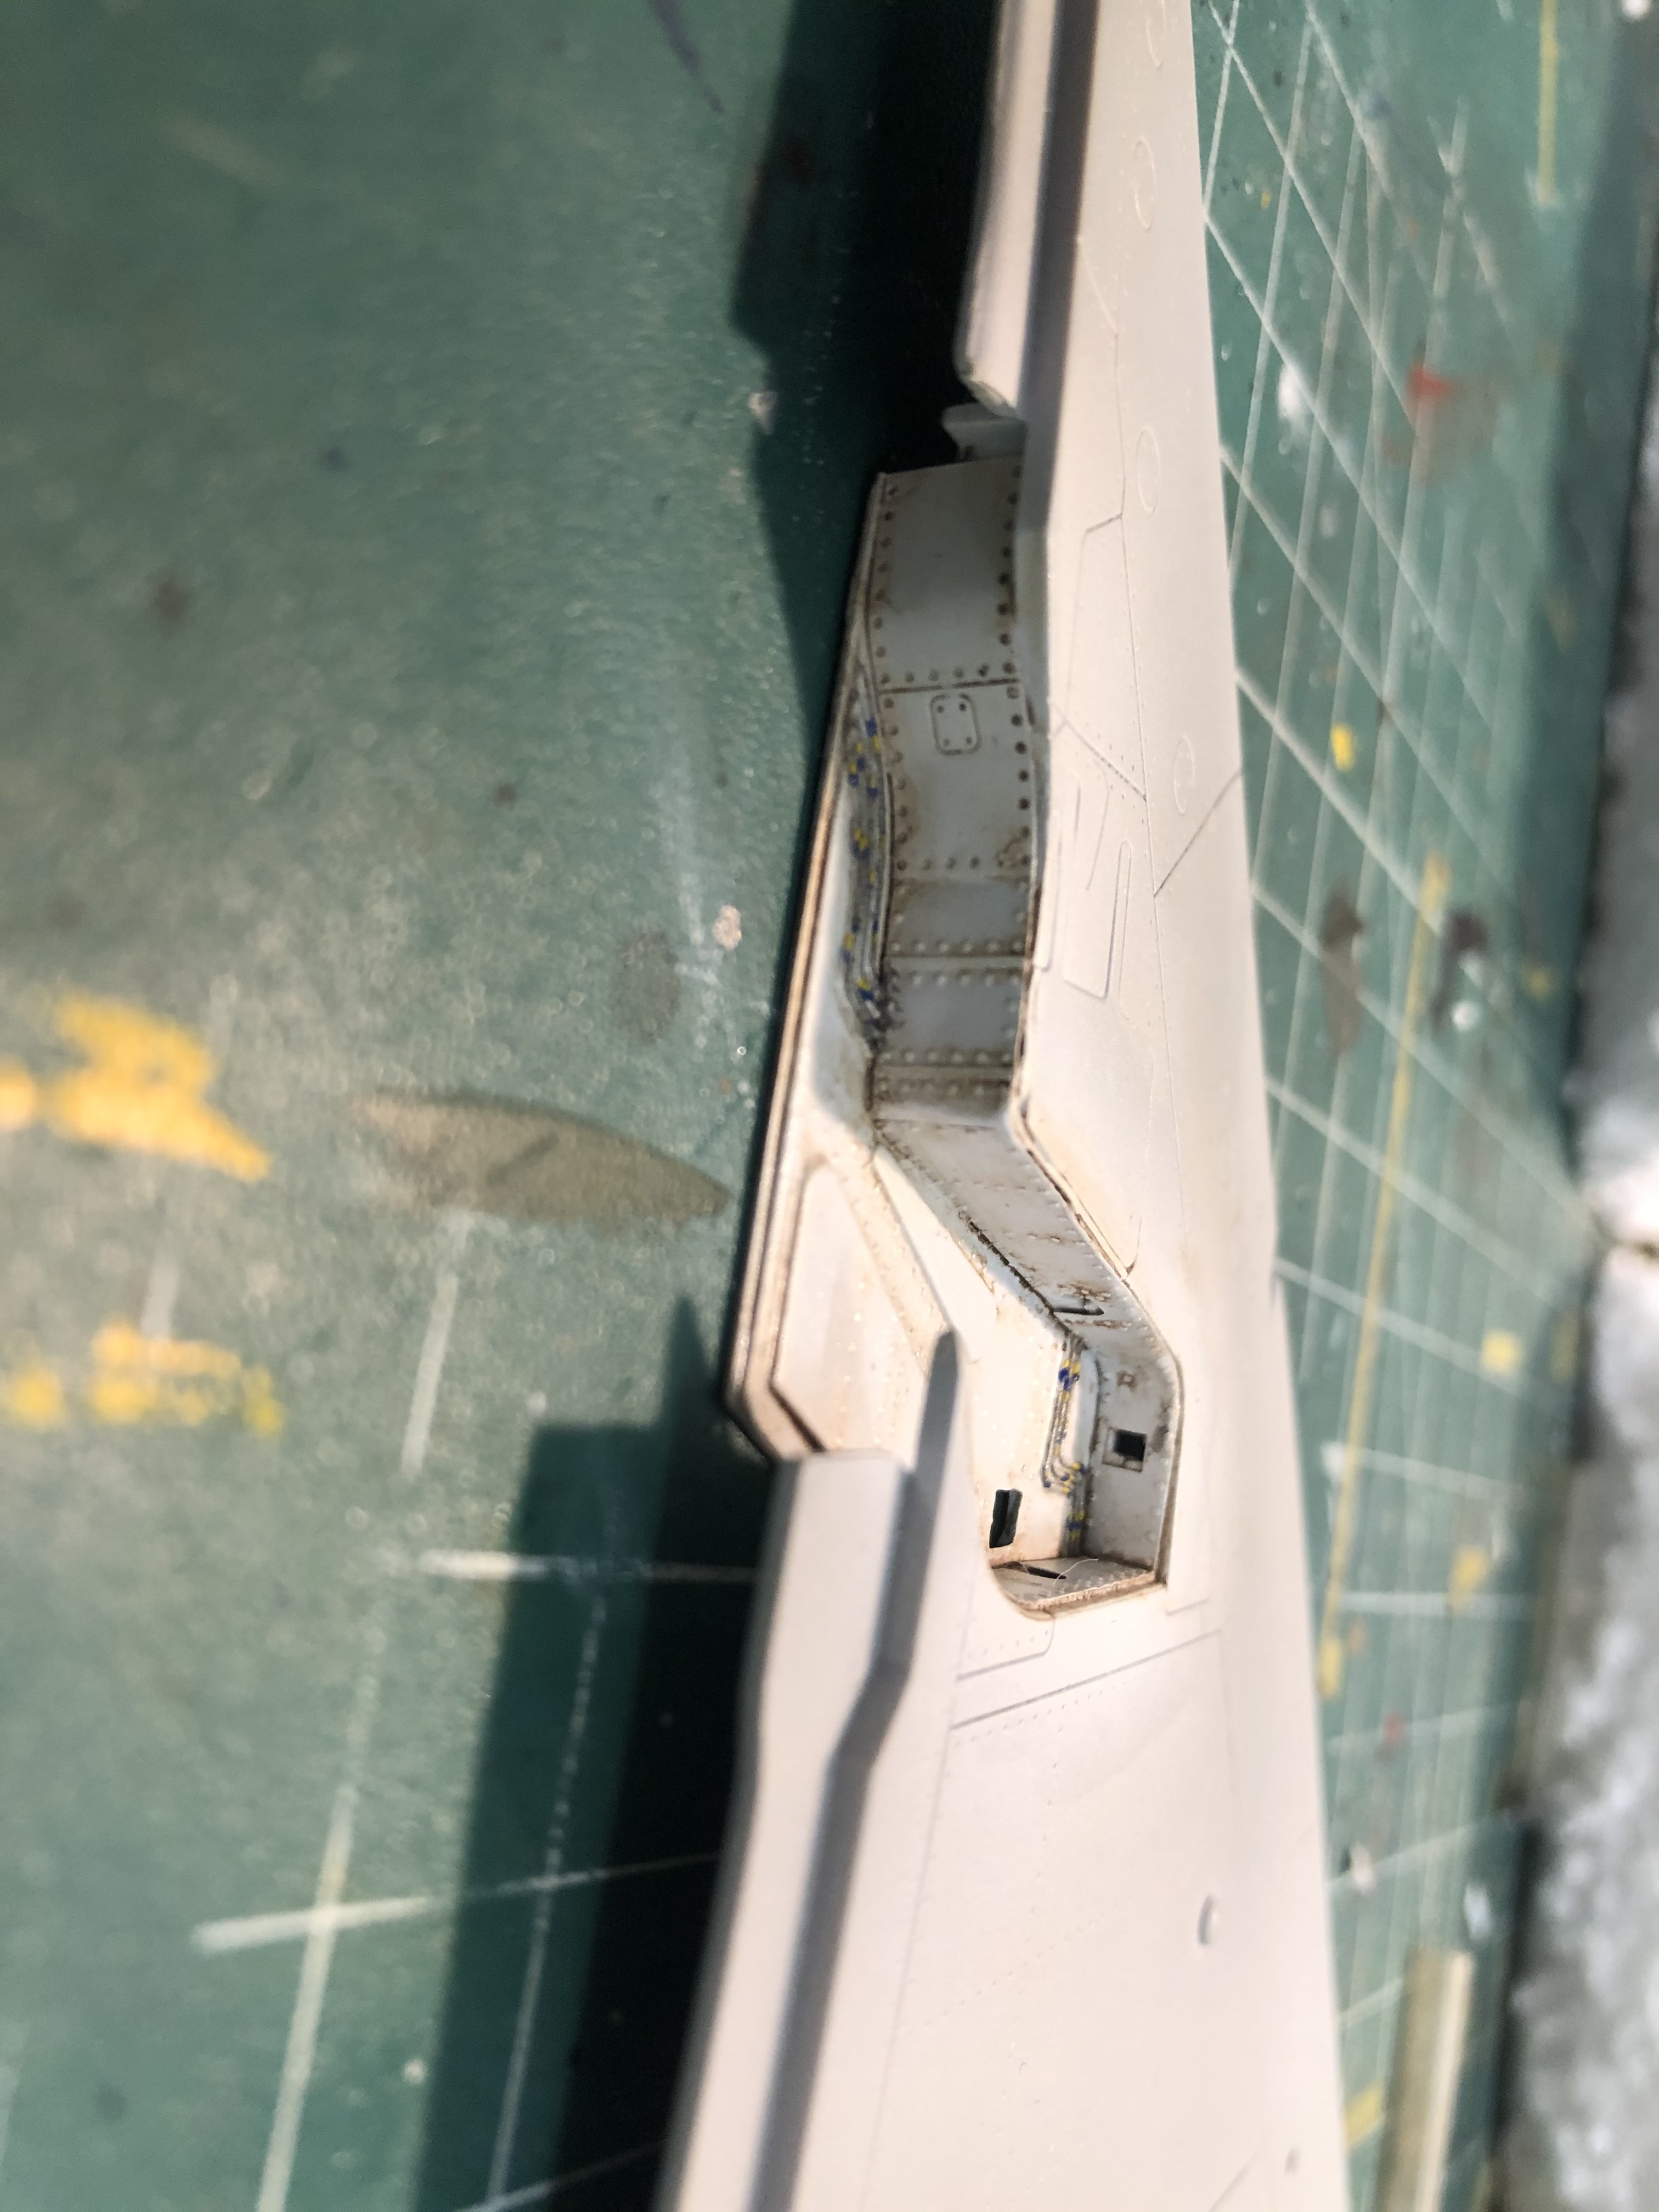
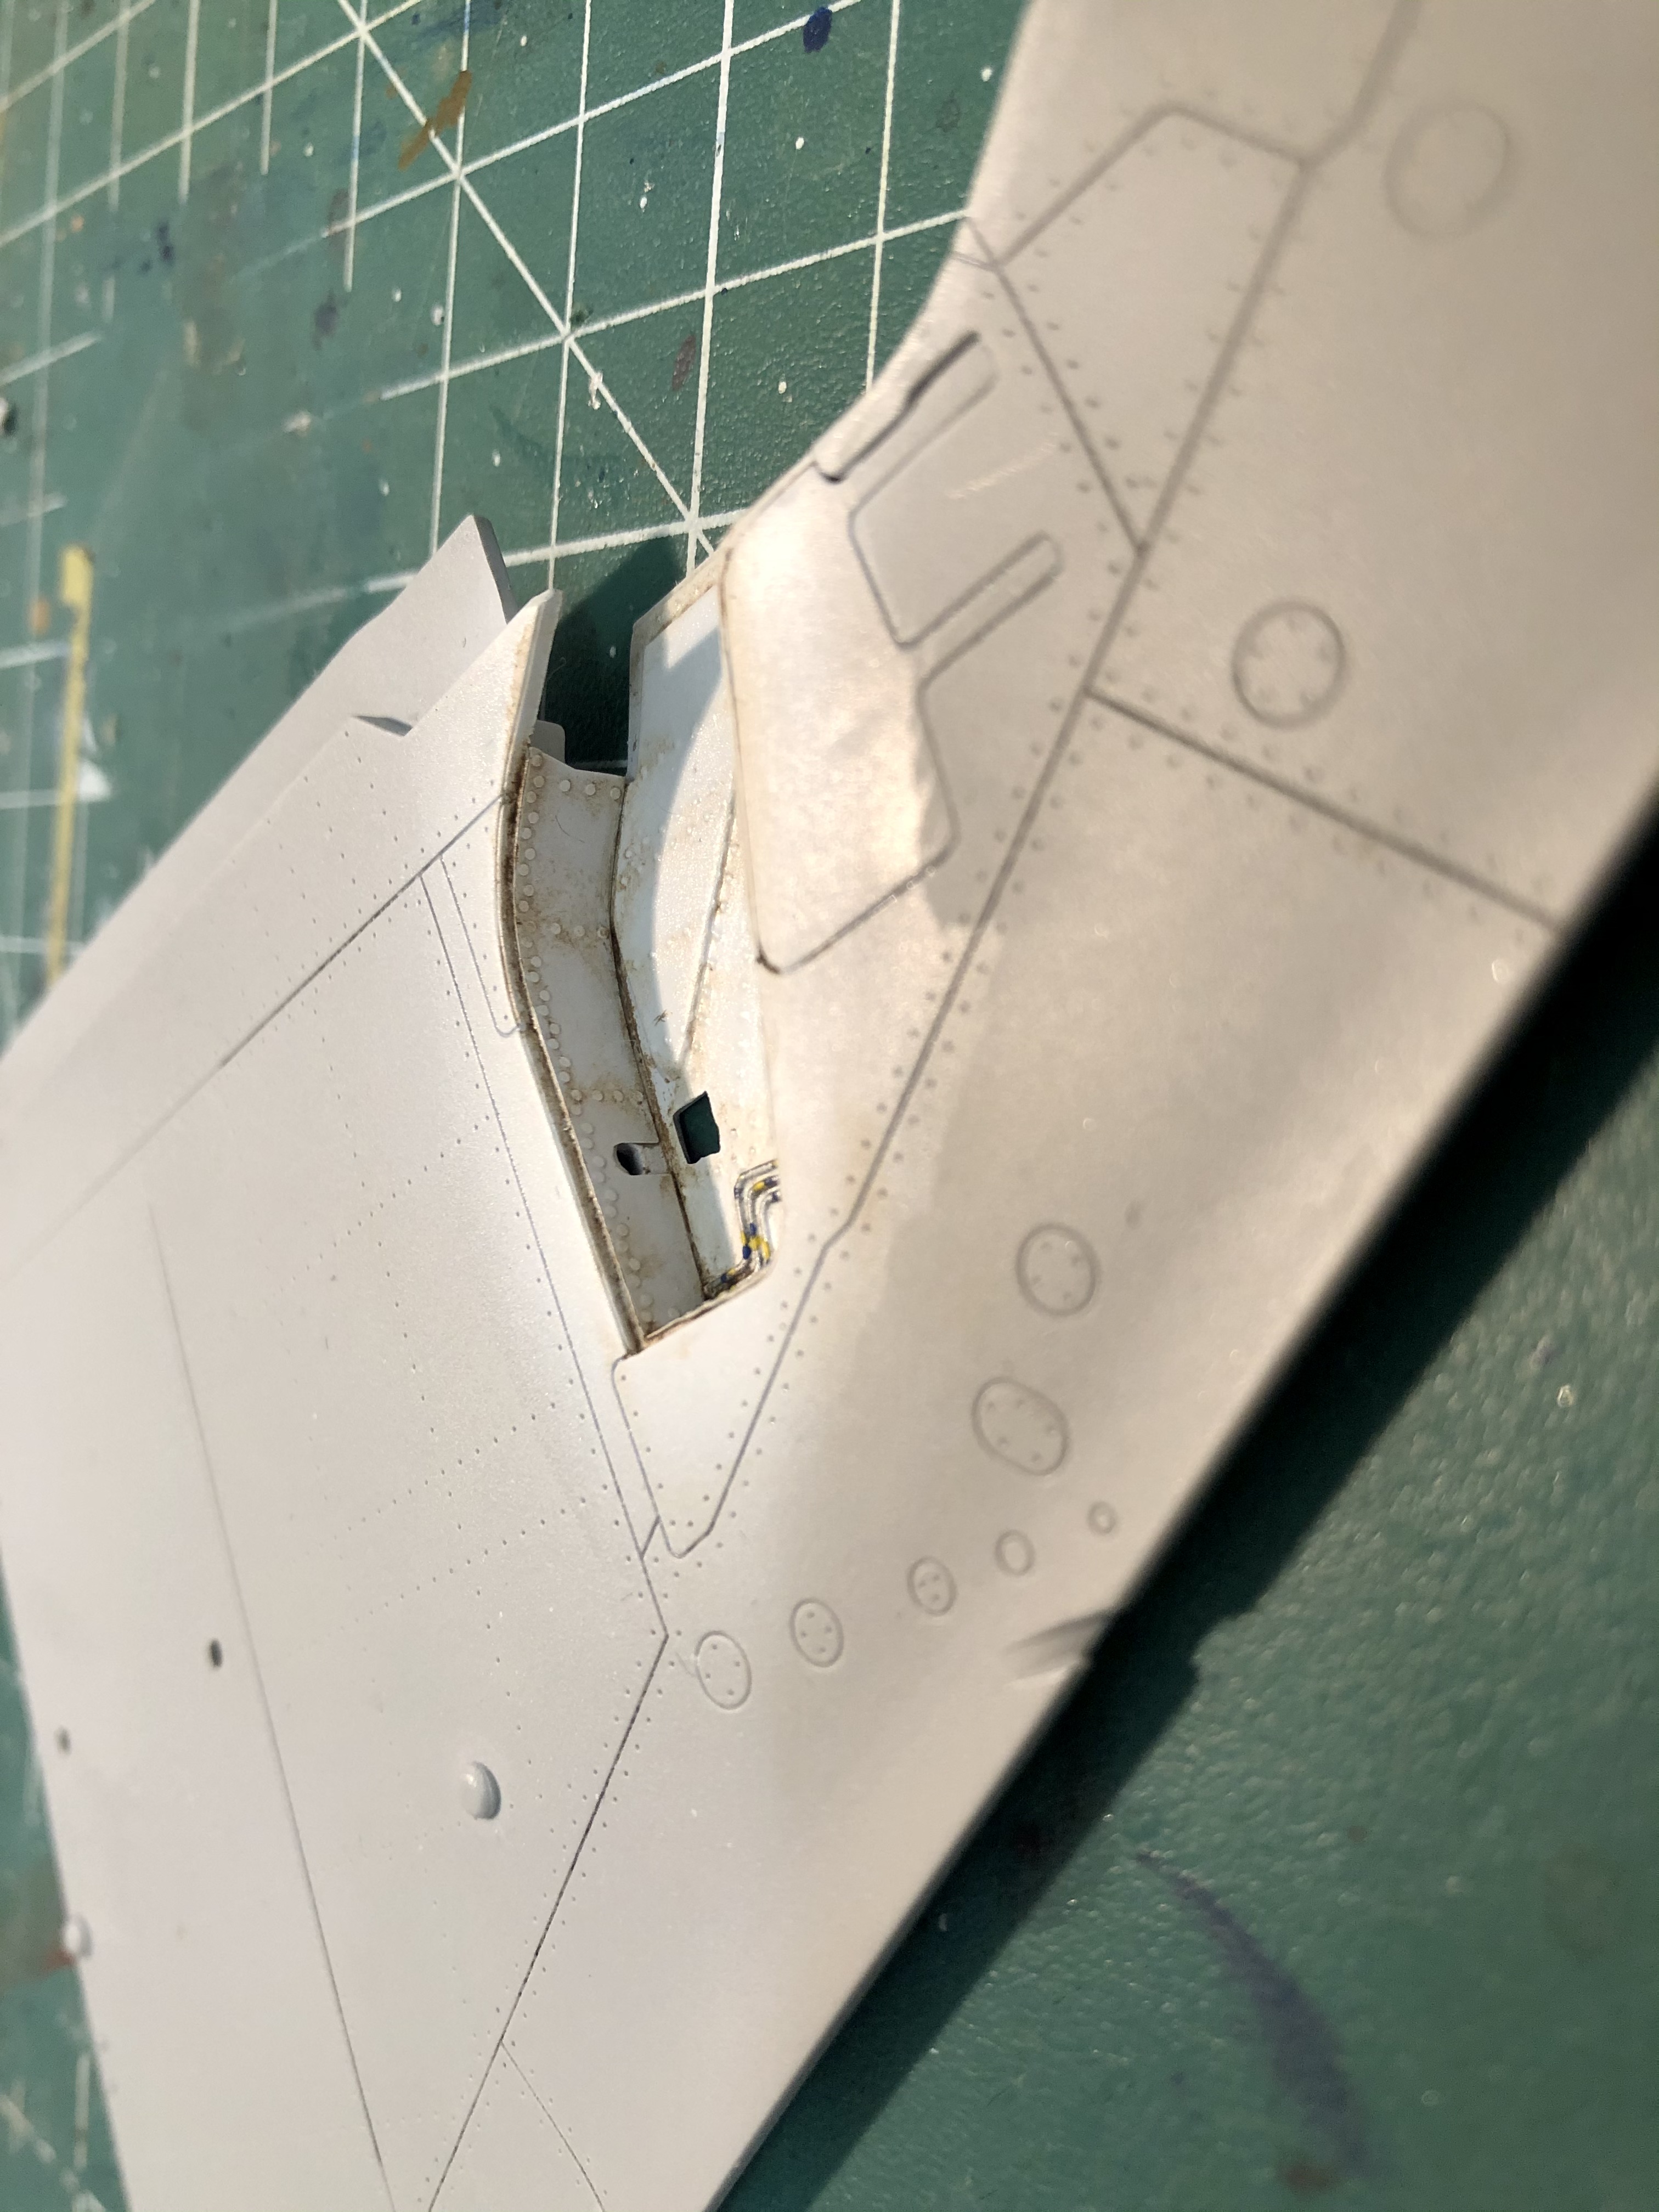
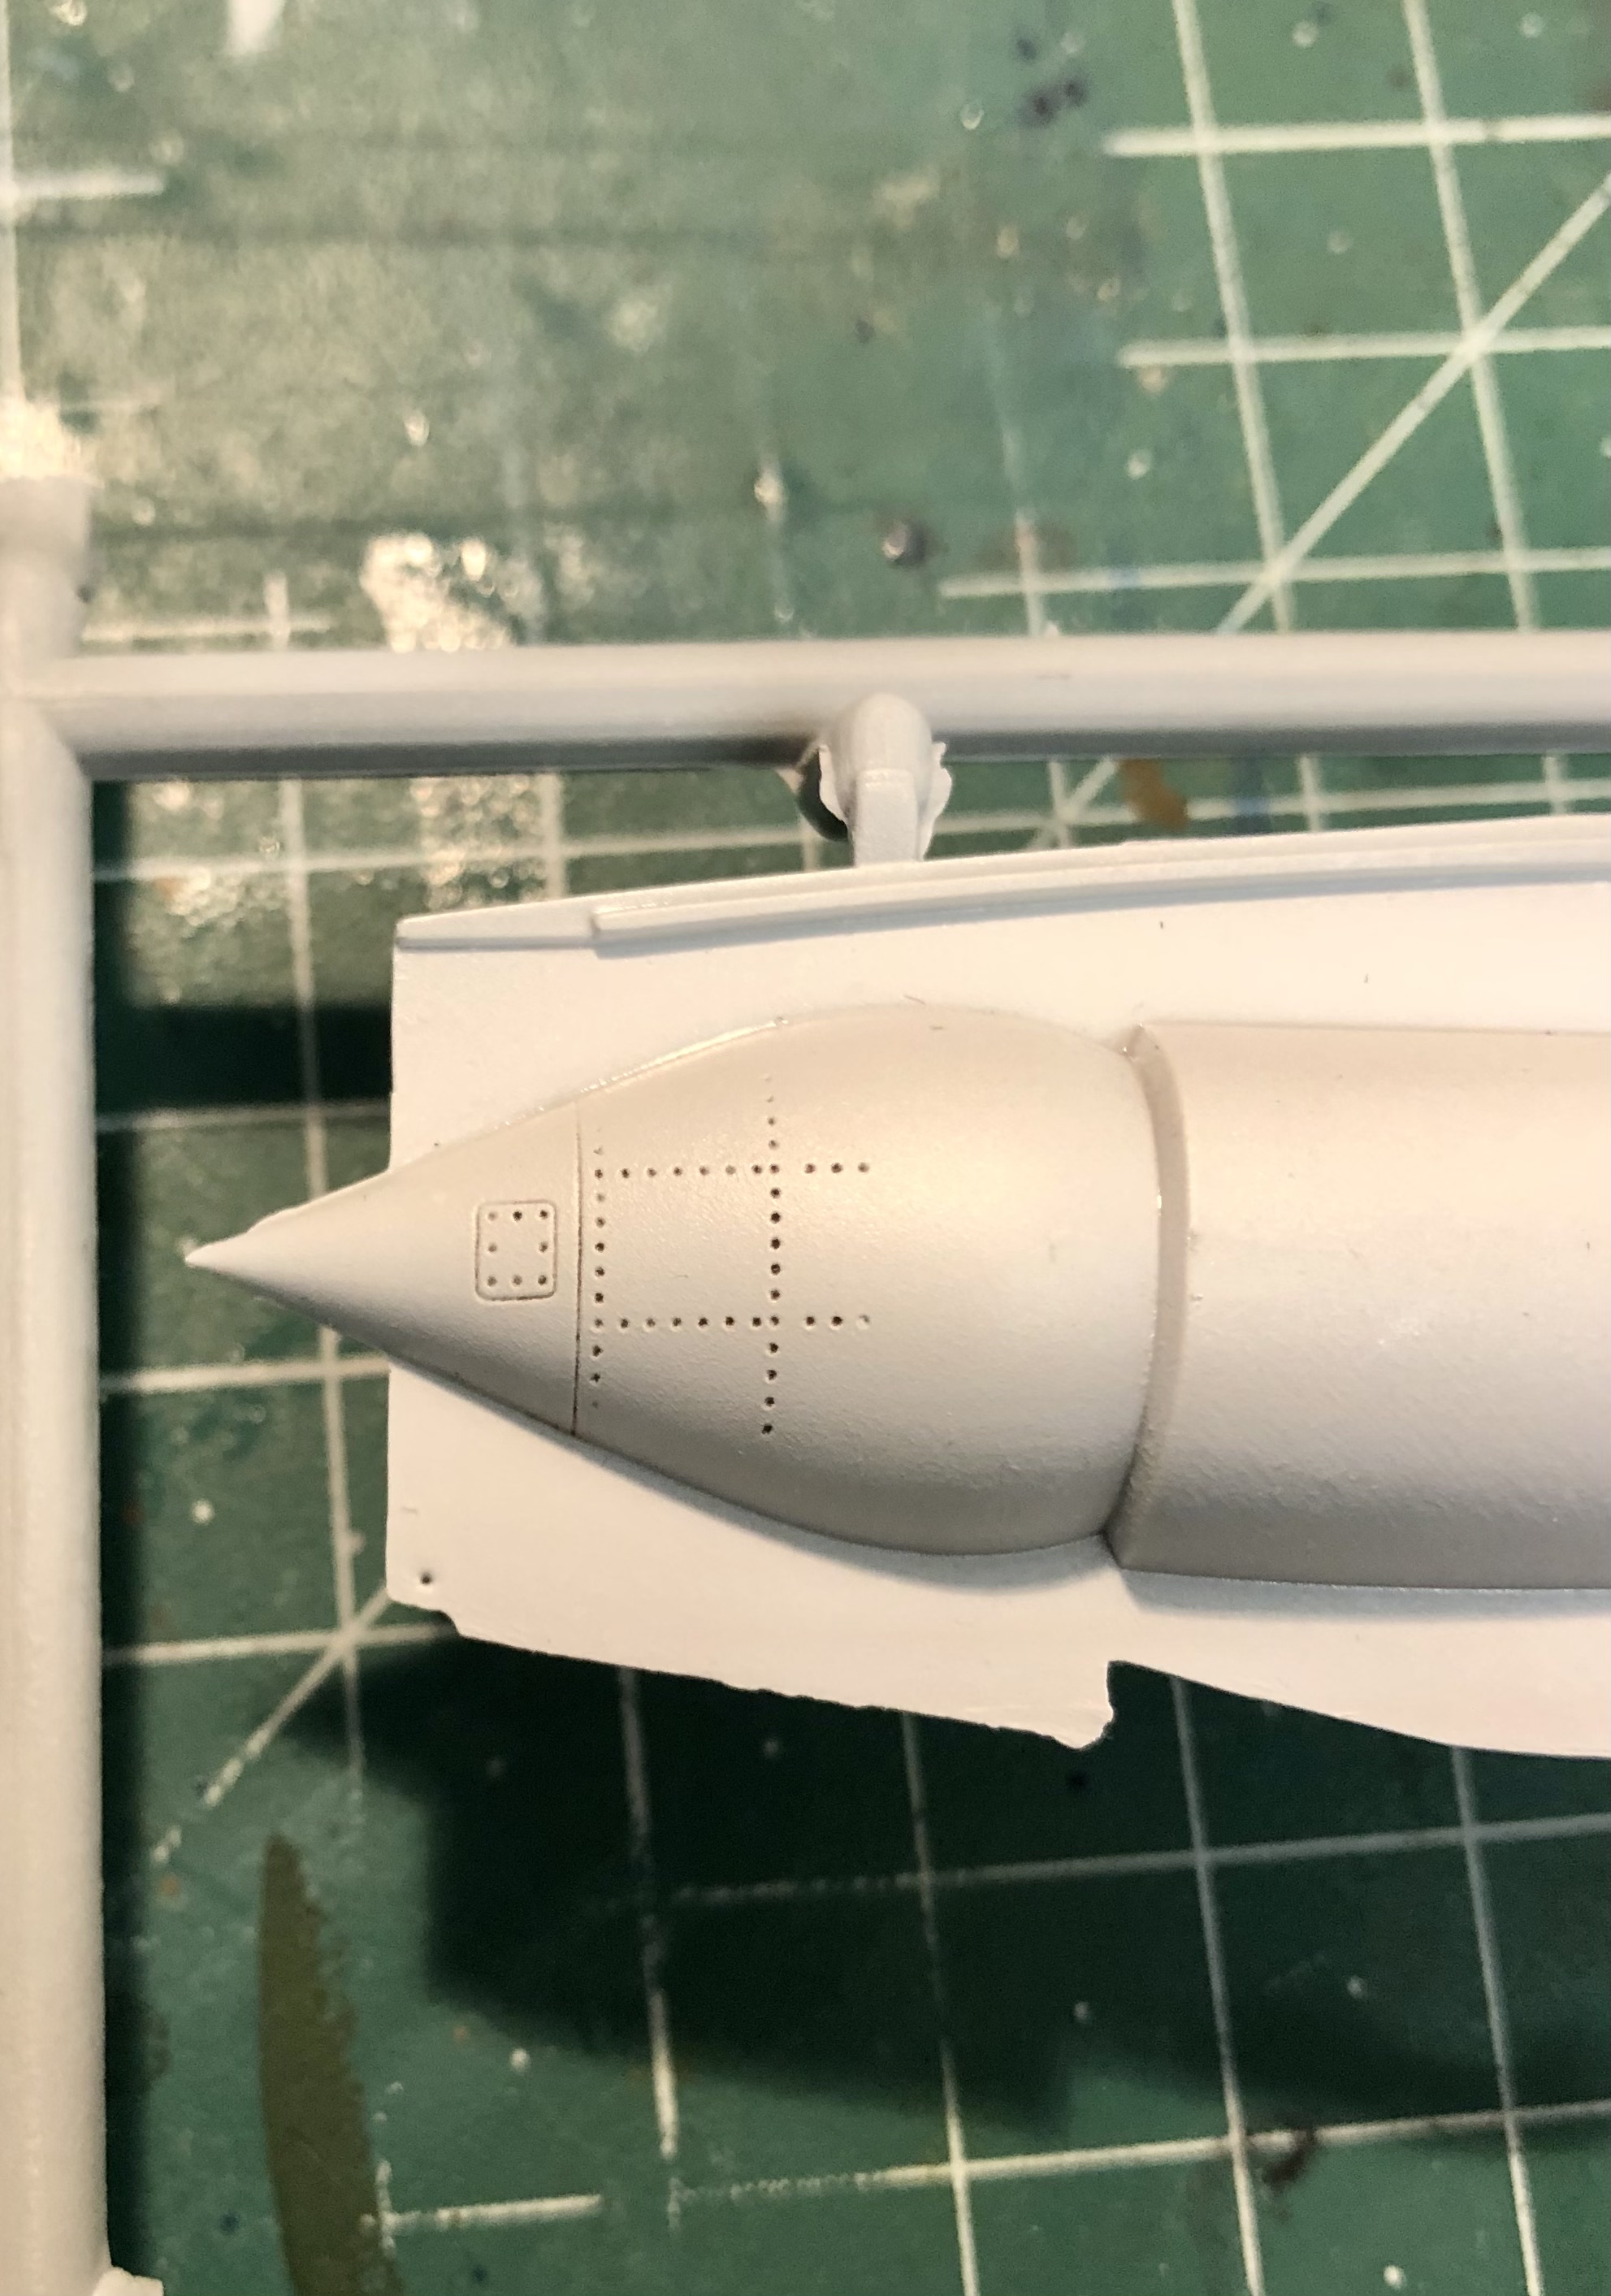
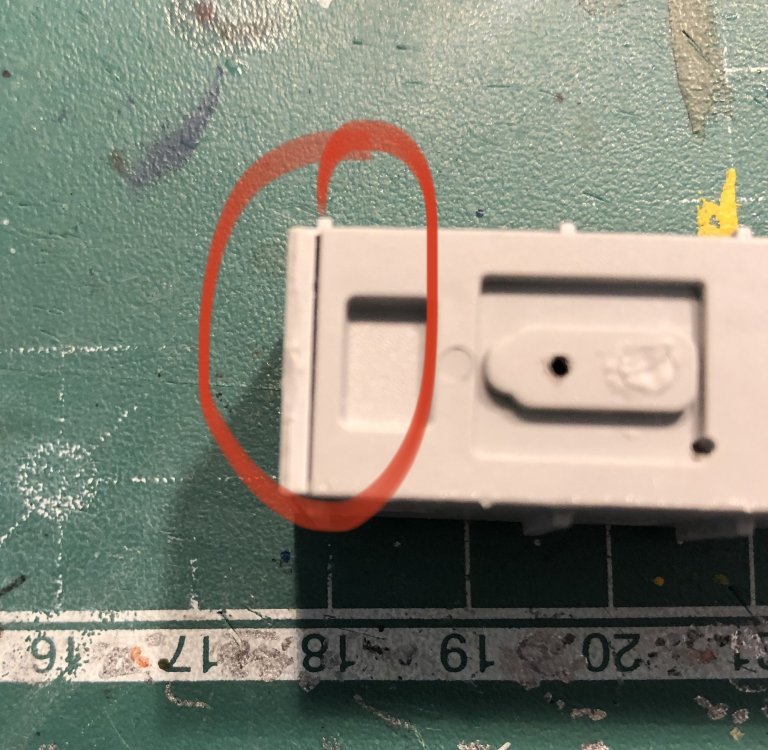
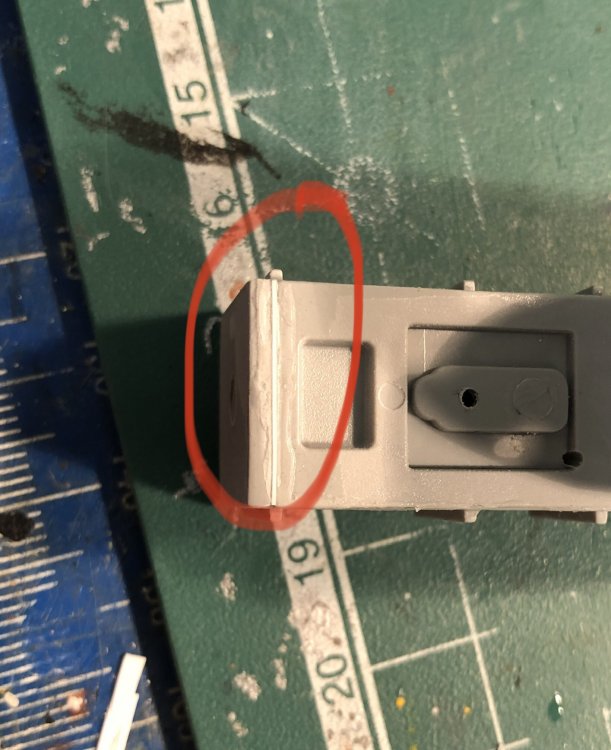
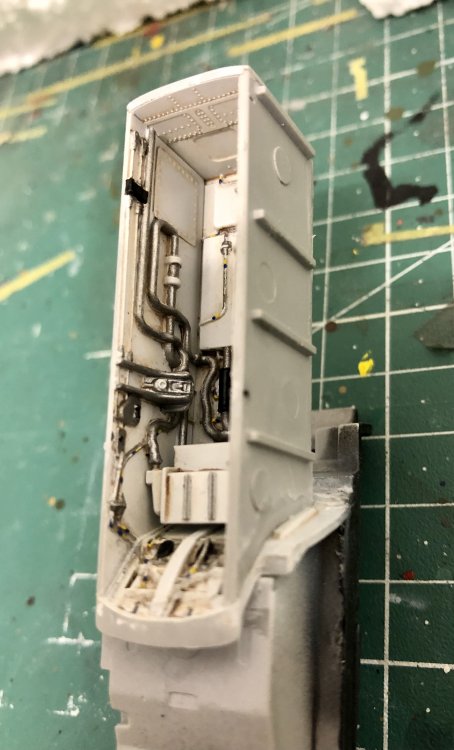
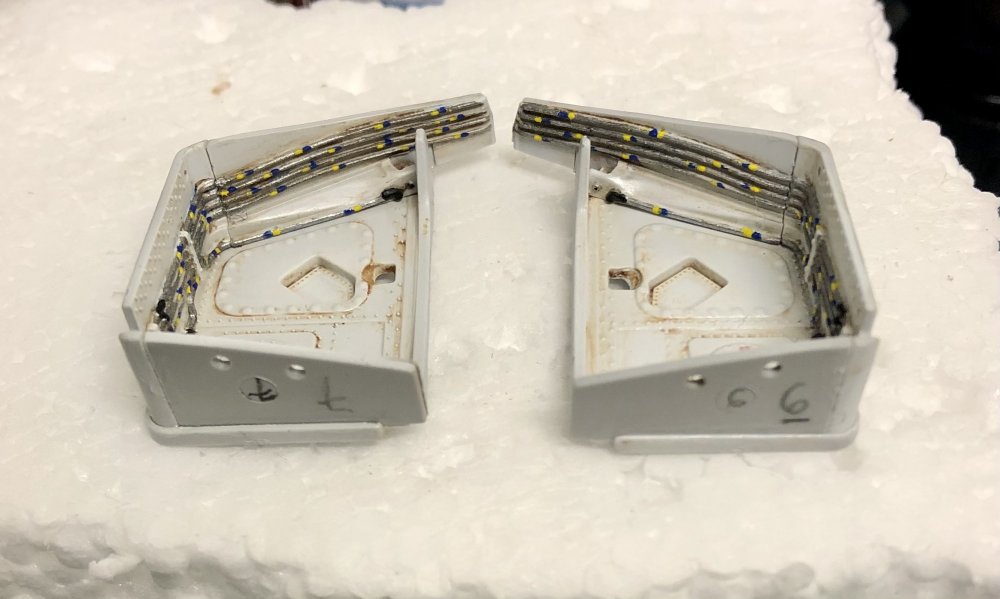
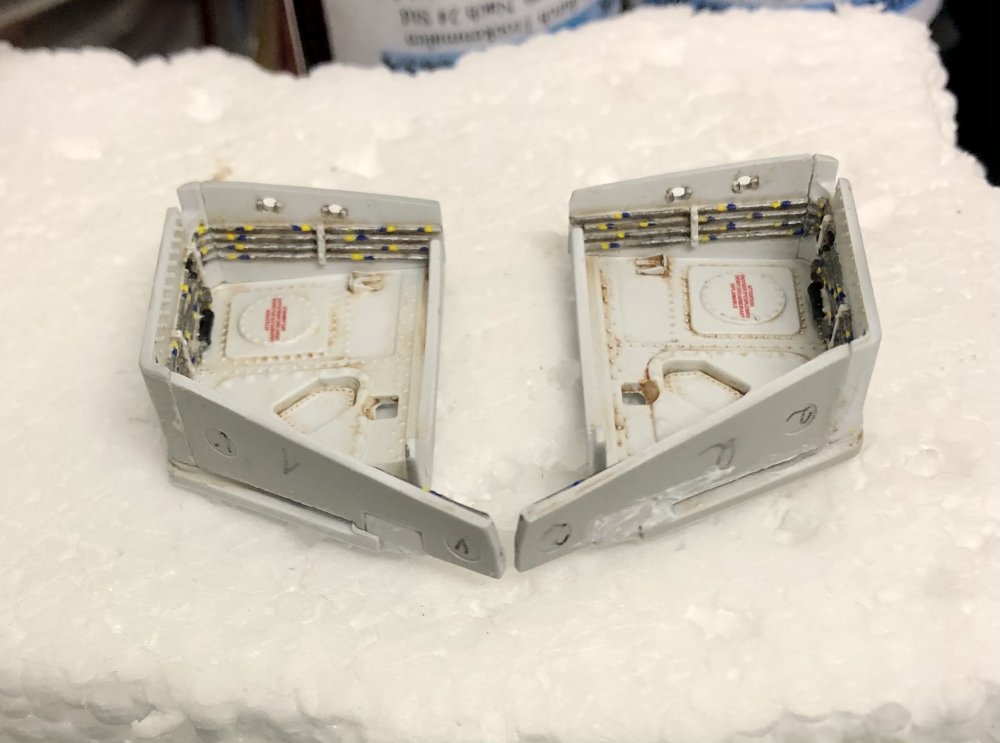
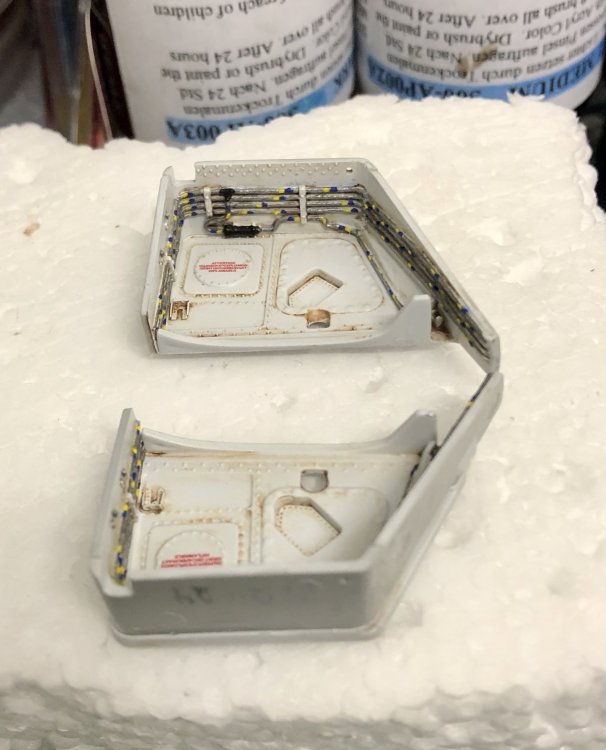
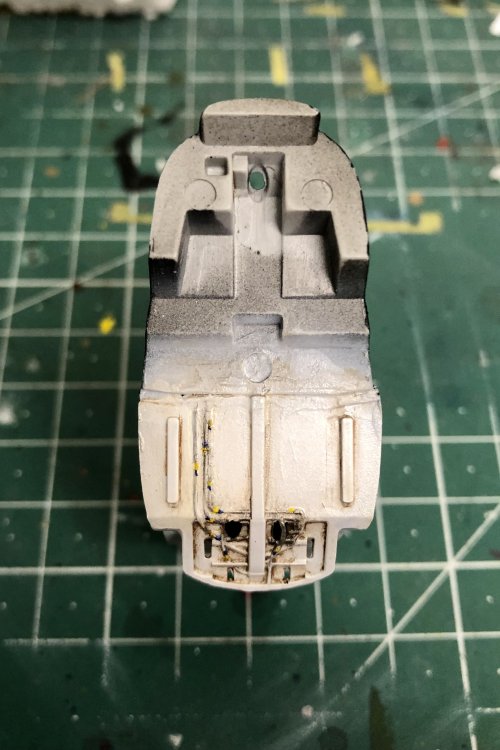
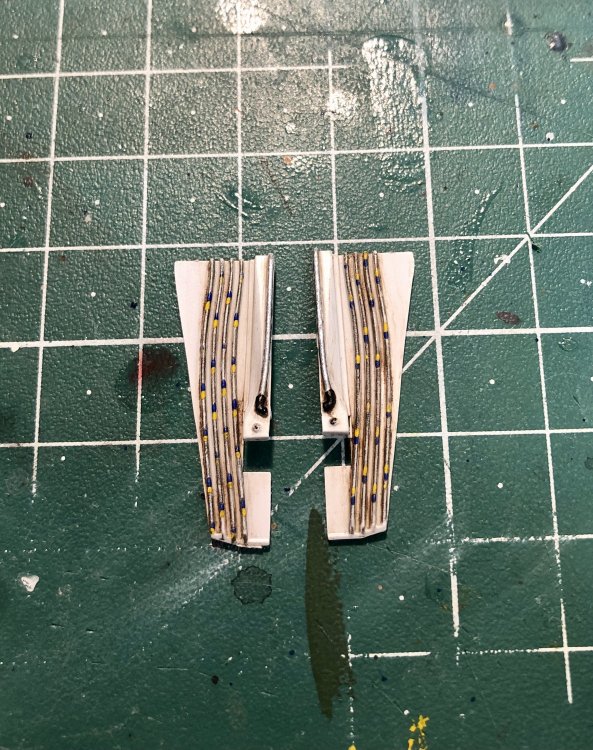
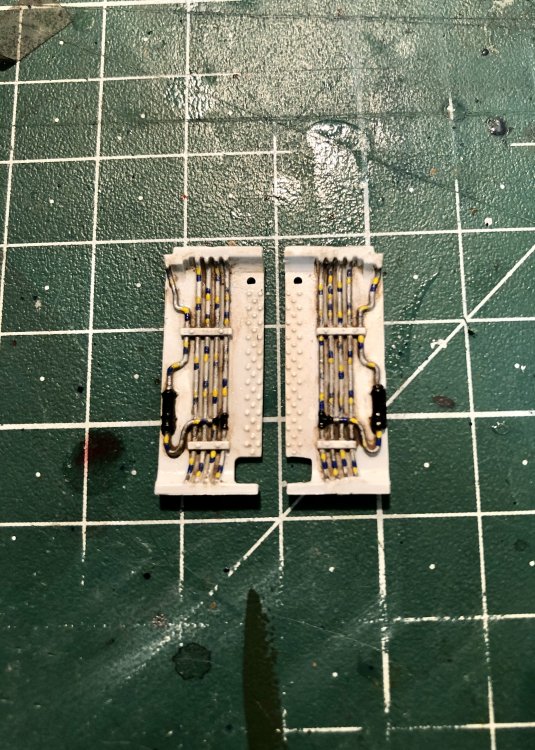
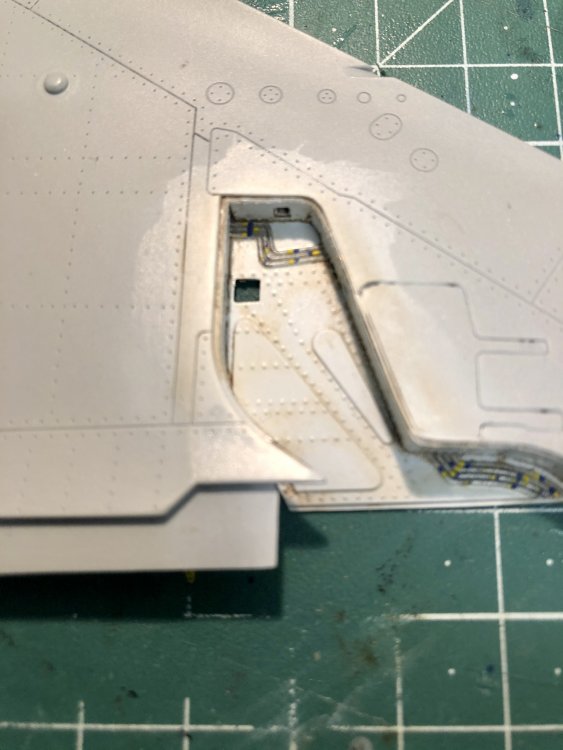
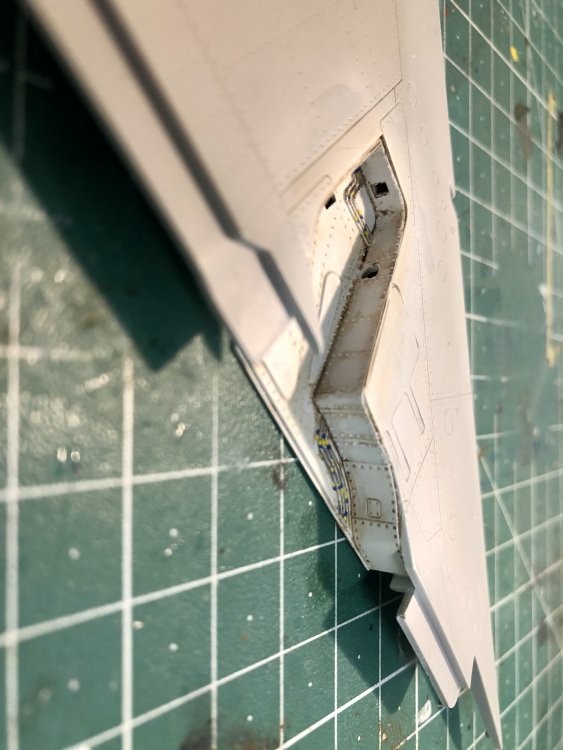
Assembled the wheel wells yesterday. And typical Italeri: Some fit-problems with the front bay. Some pipes were appr. 1 mm too short and the fit of the upper pipes had to be improved. Also the backplate didn’t fit well. Had to add sheet to close the gap. The assembly of the main gear wells went straightforward until I noticed that I had made a mistake when painting the blue-yellow markings on the single parts: I didn’t take into account that all markings on one pipe needed the same sequence of colors. The result was that I had pipes which had markings with both sequences blue-yellow and yellow-blue. So I had to redo a lot of markings on the pipes. I love painting these markings now! The fit of the wells to the fuselage-parts is really good. No extra work expected here. Next thing will be the assembly of these parts to the fuselage and the preparation of the jet-engine. What is the most important thing when you build an Italeri-kit? Test-fitting, test-fitting and once again test-fitting...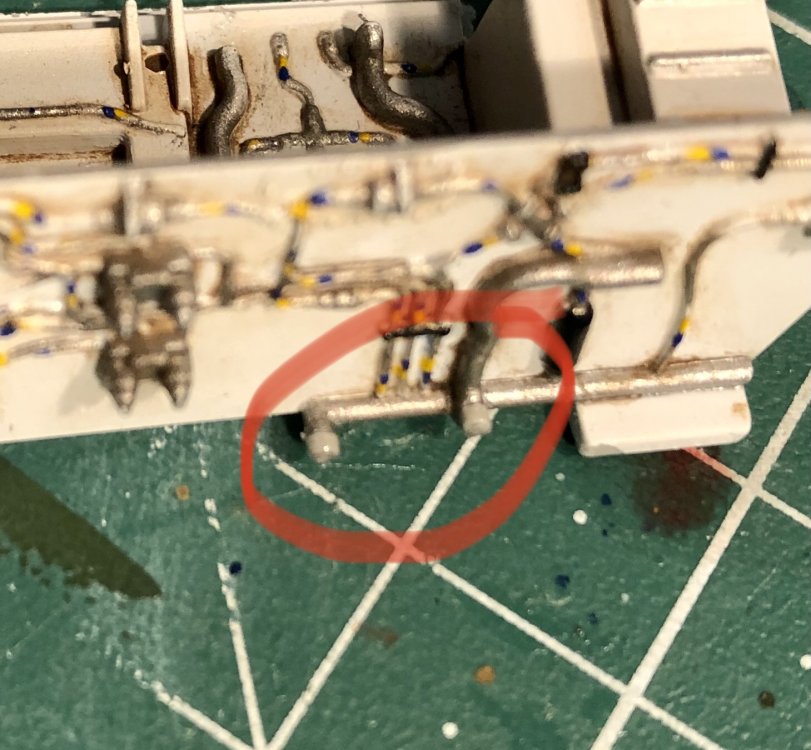


-
Israeli Mirage III C with Atar9C
Kaireckstadt replied to Kaireckstadt's topic in LSM 1/35 and Larger Work In Progress
The Australian Mirage III O were build in License. You can find more information here: https://en.m.wikipedia.org/wiki/Dassault_Mirage_III I haven’t build one in 1/32, but these guys did: http://www.arcair.com/Gal6/5801-5900/gal5888-MirageIII-Platt/00.shtm http://www.arcair.com/Gal12/11701-11800/gal11794-Mirage-Param/00.shtm Hope this helps a little. Cheers Kai -
Great build so far! The camo looks spot-on! Beautiful!
-
Great work with stunning results! Looks absolutely awesome!
-
Israeli Mirage III C with Atar9C
Kaireckstadt replied to Kaireckstadt's topic in LSM 1/35 and Larger Work In Progress
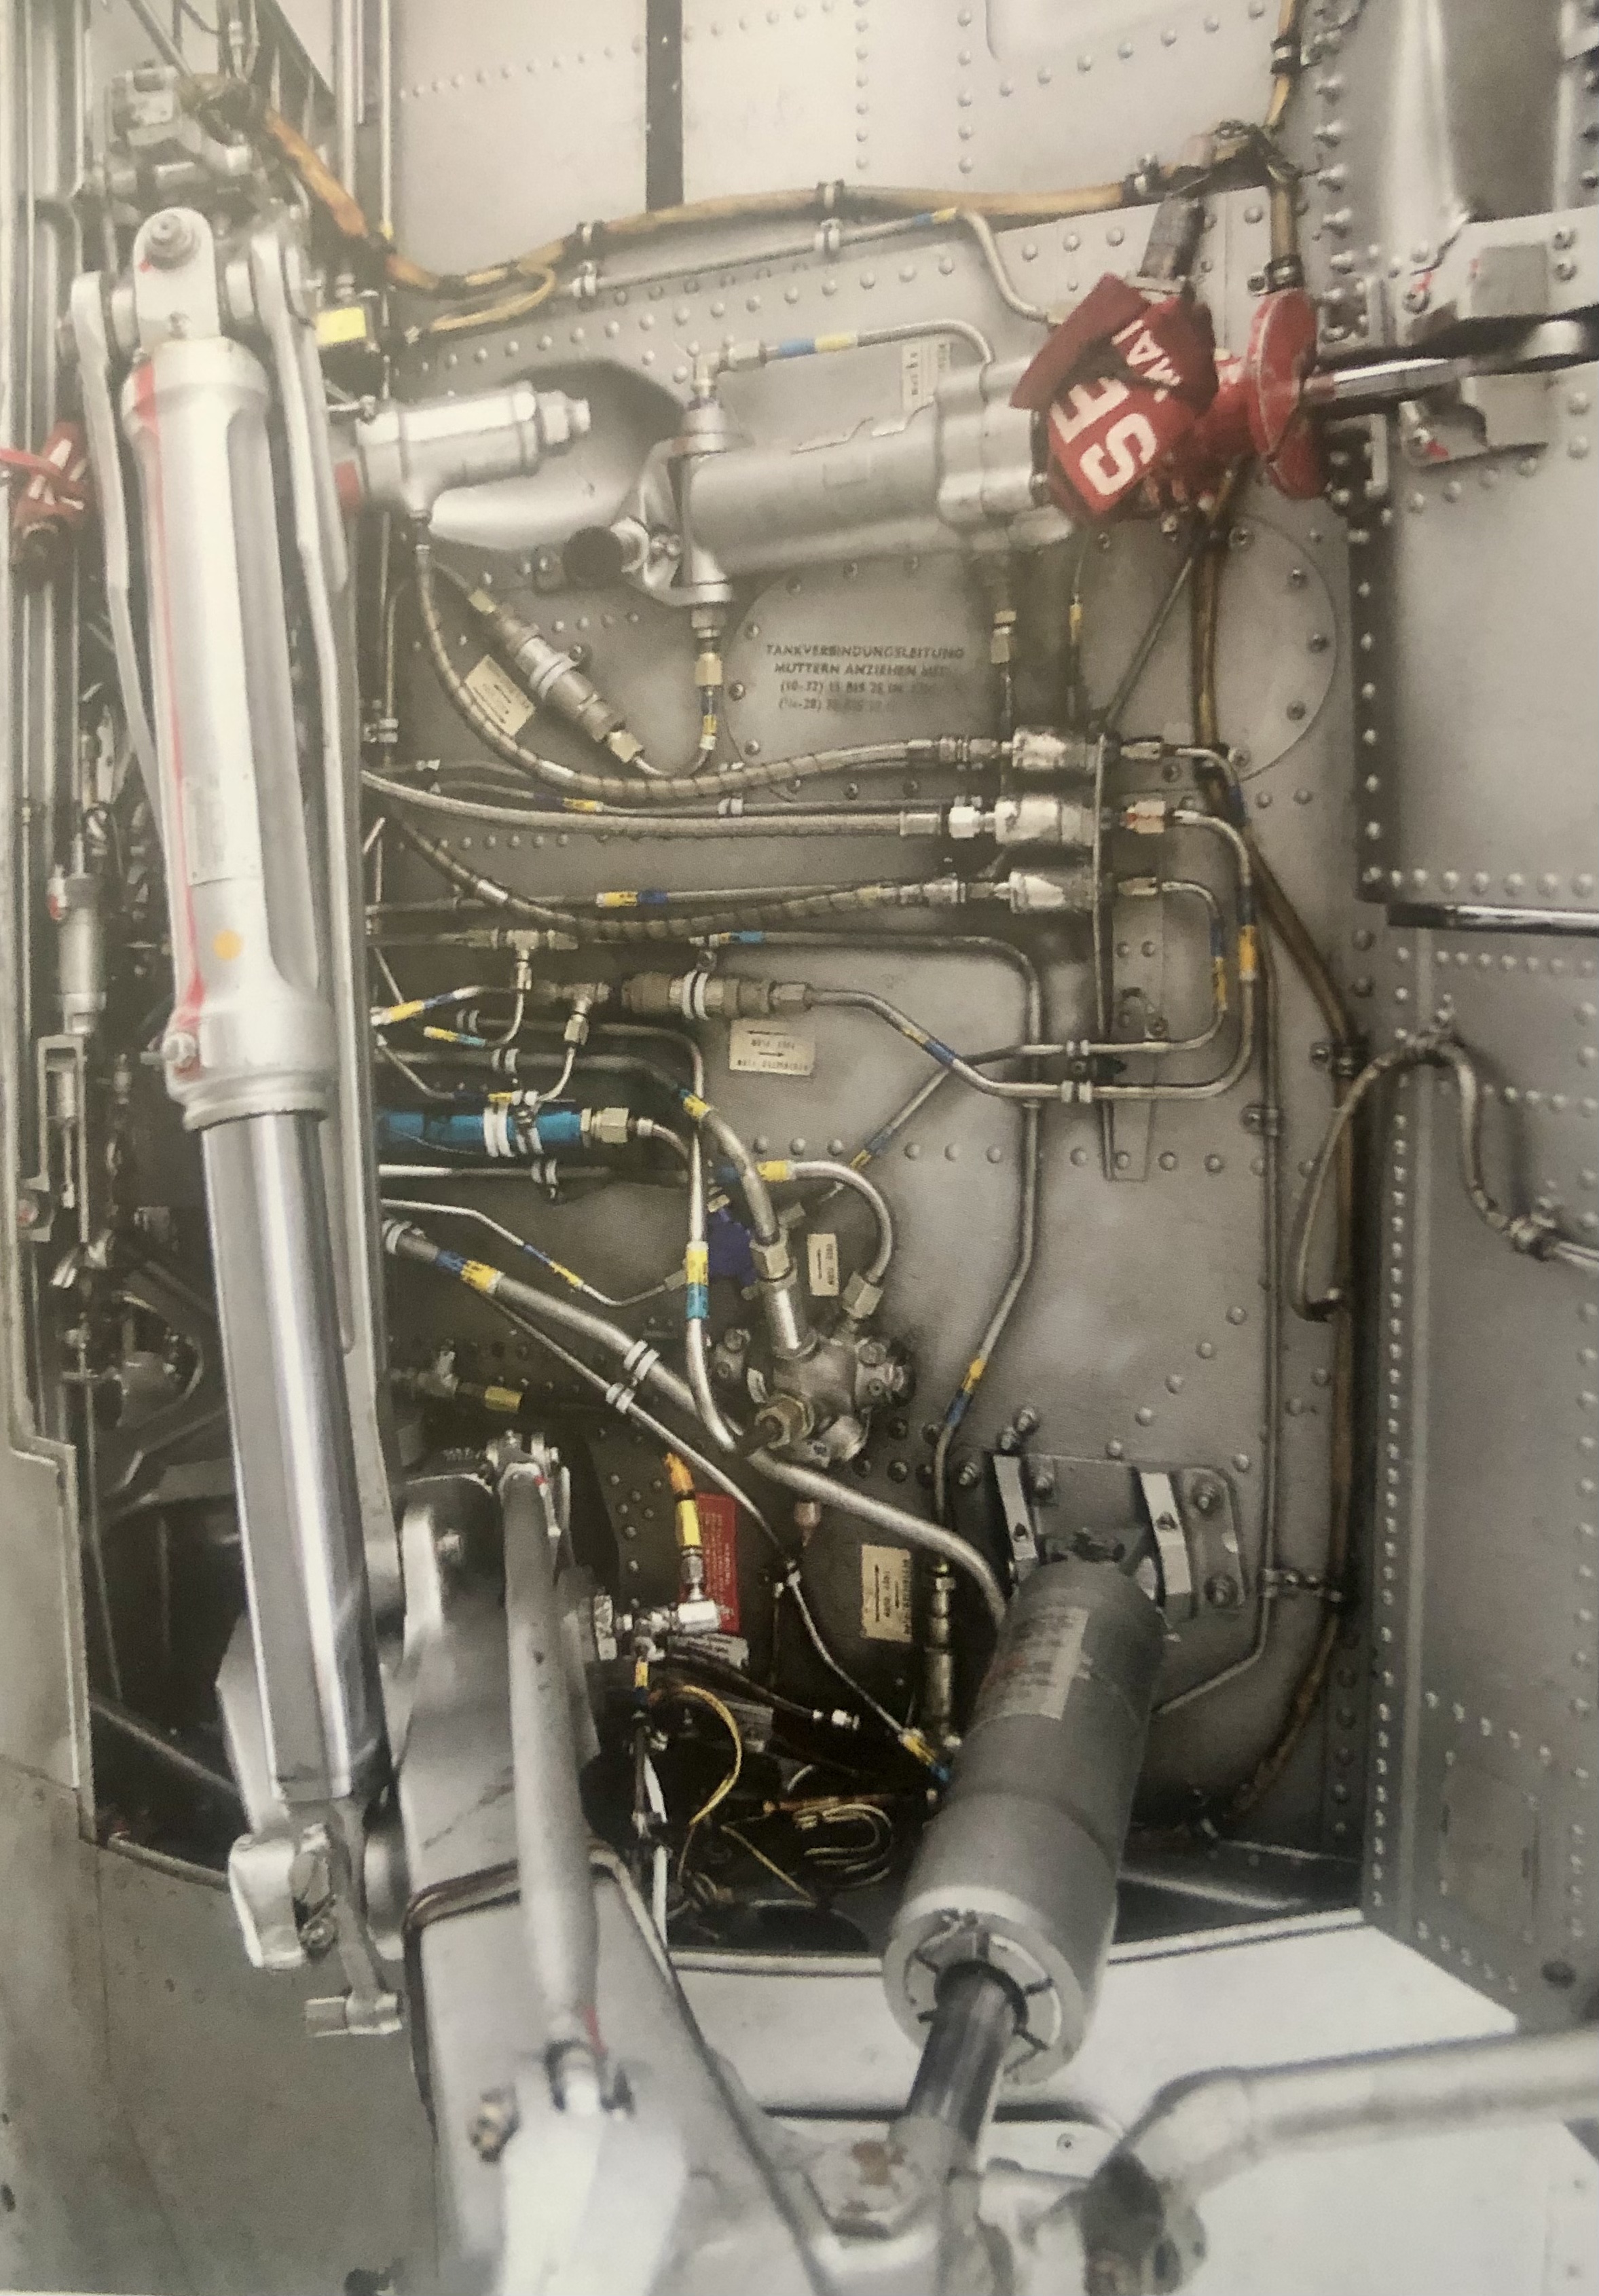
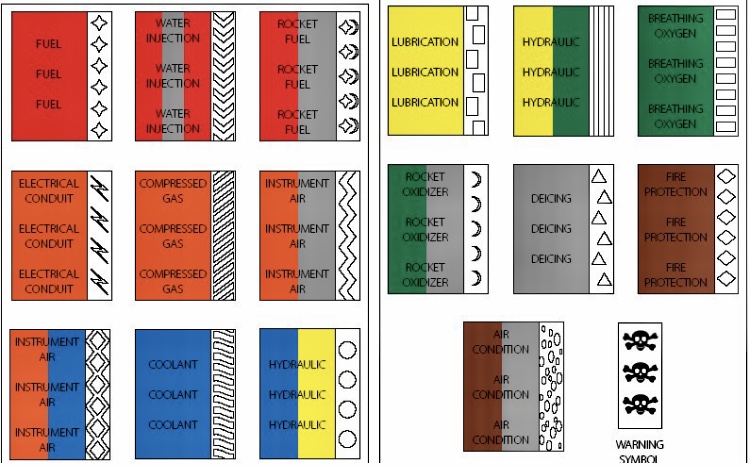
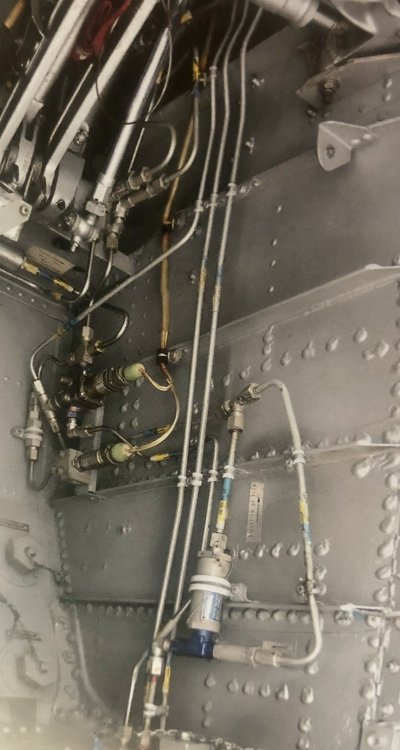
Sorry Hubert, I didn’t want to initiate a web-training here. Only thought it would be of interest to the modelers here because it may be a detail to add to the pipes. To your question: The flow-direction is from yellow to blue. See attached picture. And finally for all who are interested the markings for other fluids in the aircraft. With this I close the web-training, Hubert. Back to modeling now!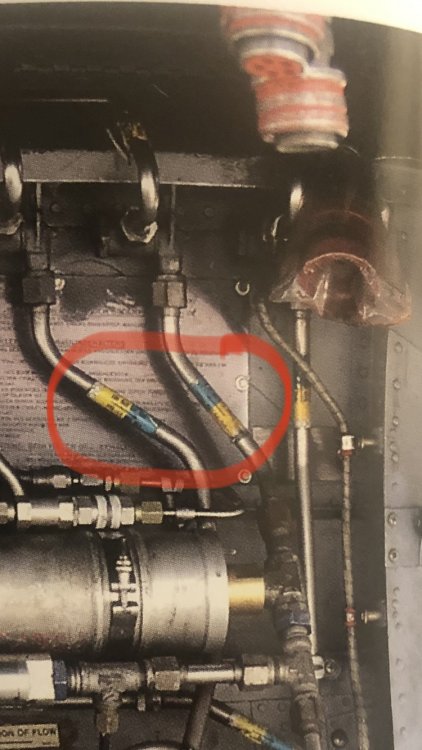
-
Israeli Mirage III C with Atar9C
Kaireckstadt replied to Kaireckstadt's topic in LSM 1/35 and Larger Work In Progress
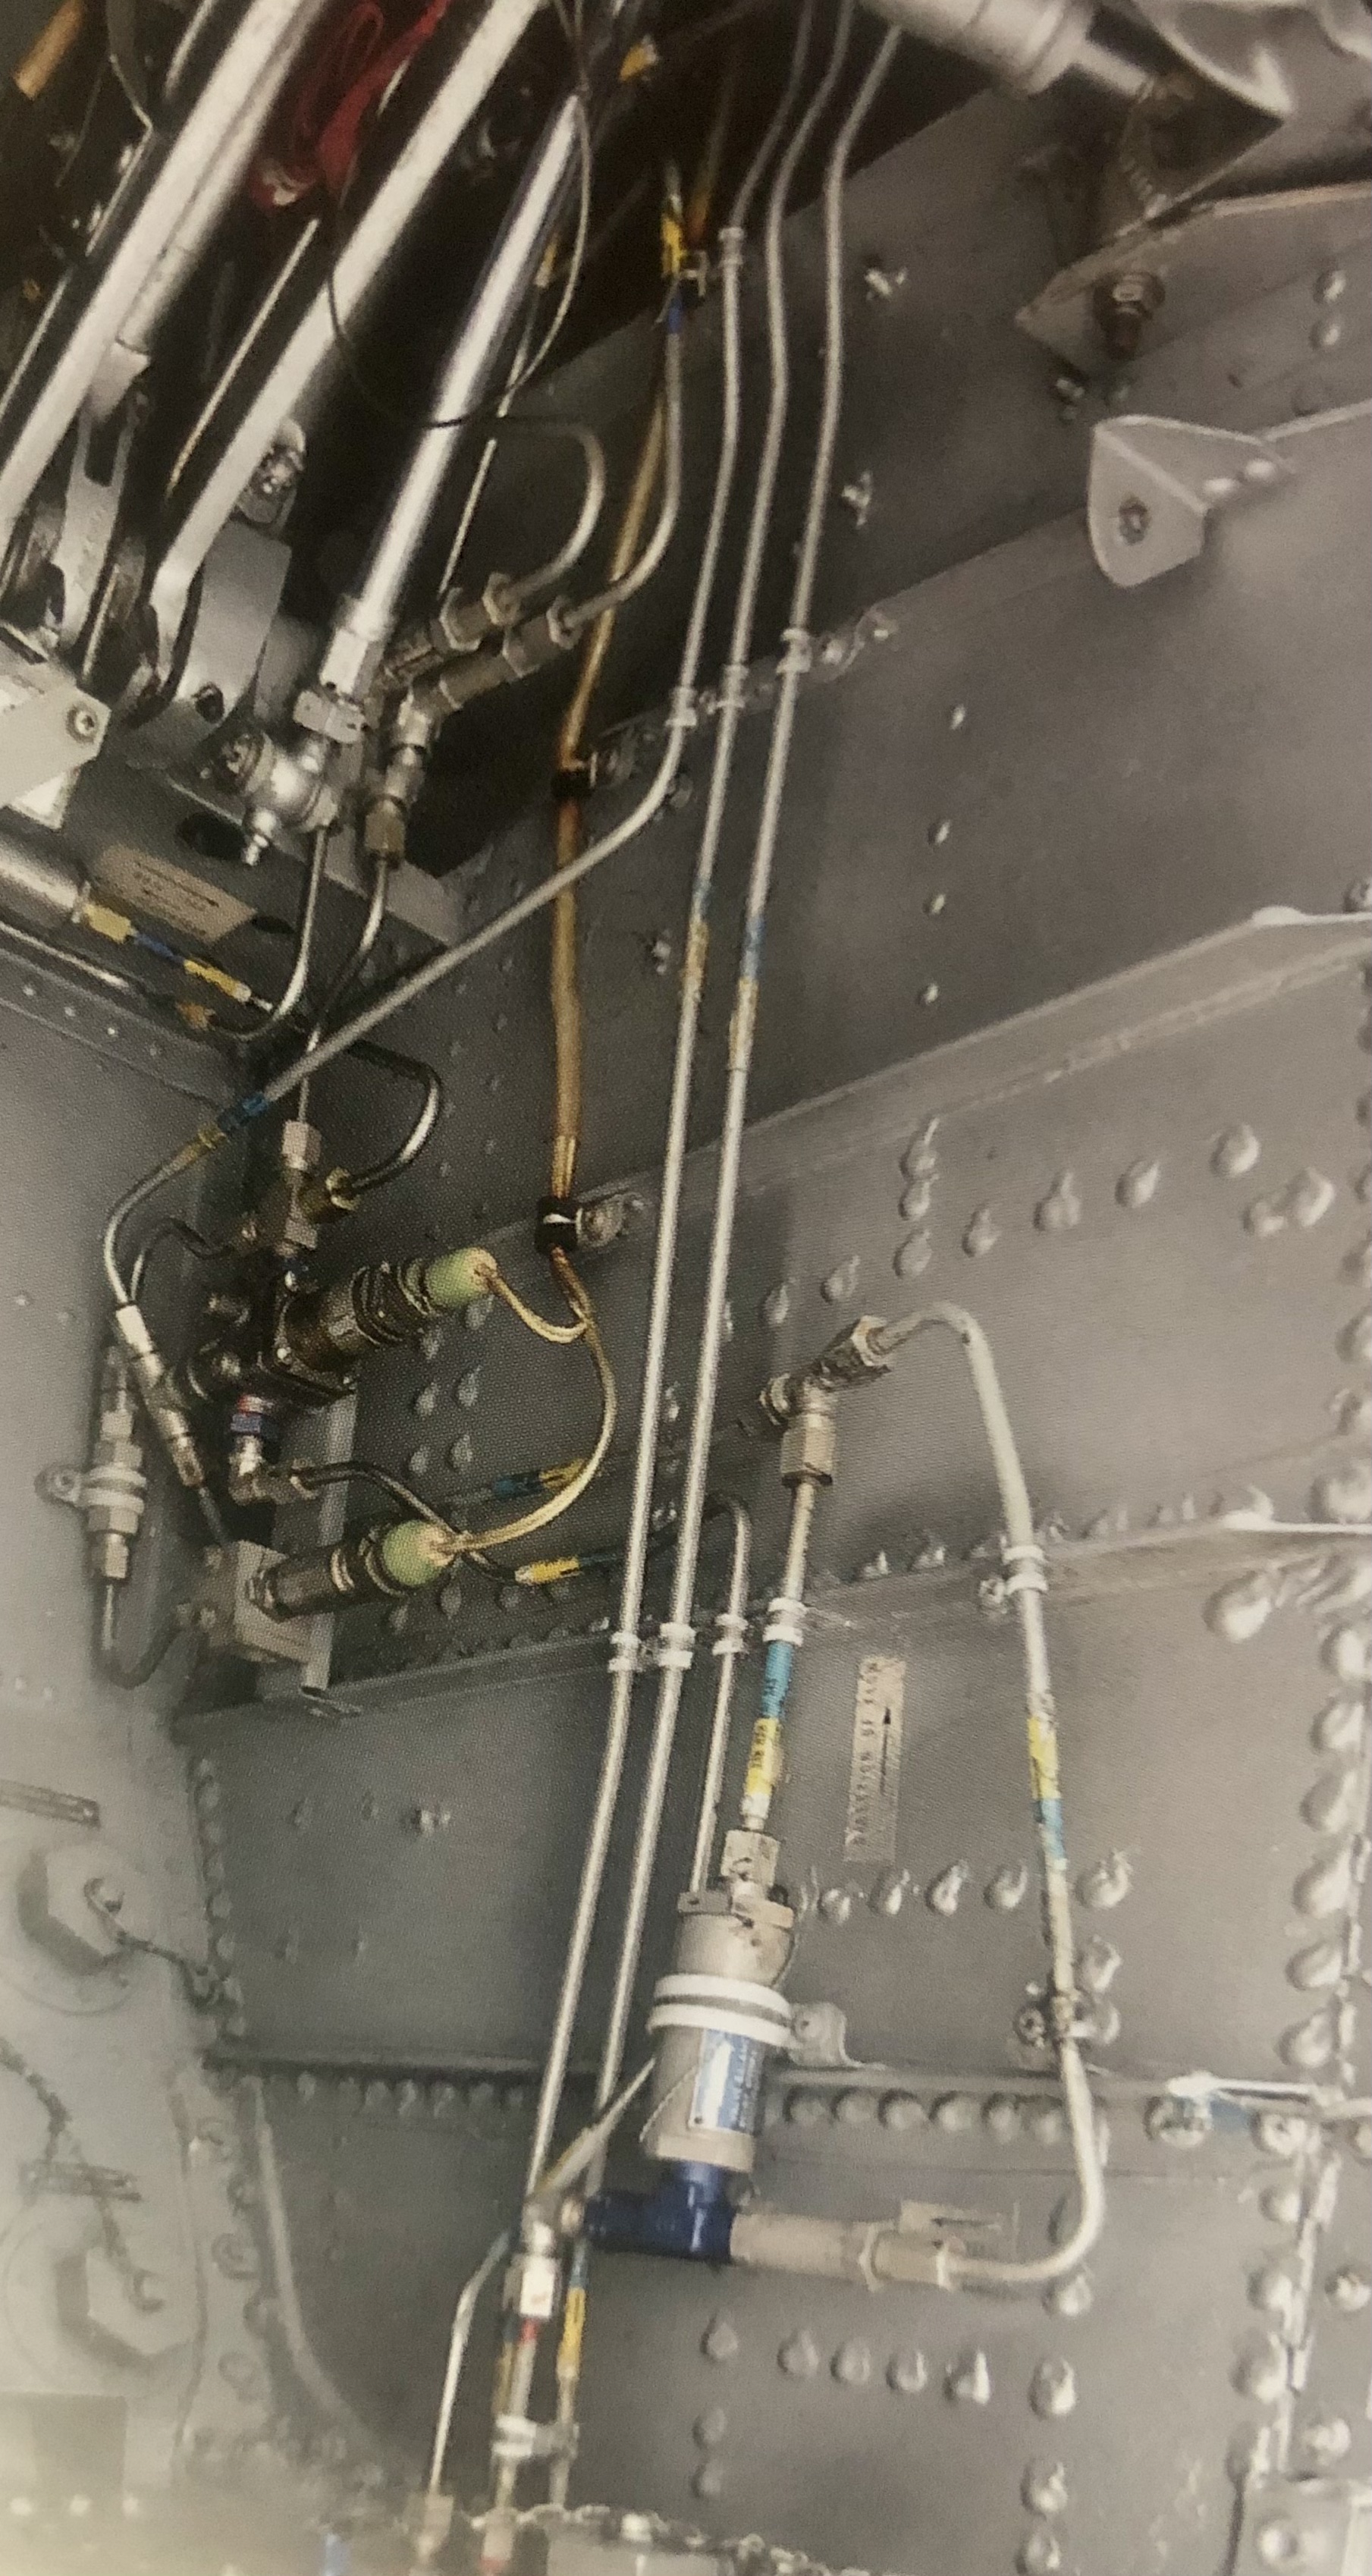
I just found some beautiful pictures showing the blue-yellow markings on the hydraulic pipes. And there are lots to be seen! These are the wheel wells of a F-104G. But the markings are the same on most military aircraft due to cross-servicing capability, meaning a British mechanic should also be able to turn around a German Tornado visiting their Squadron.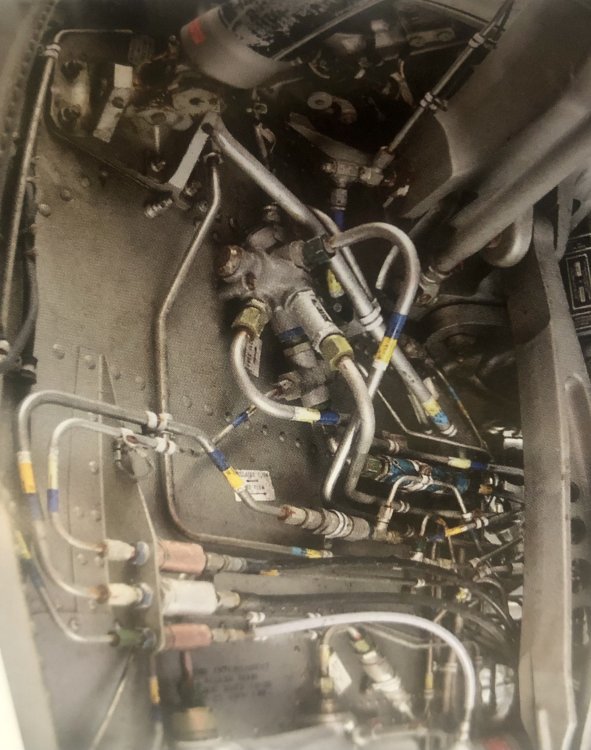

-
Israeli Mirage III C with Atar9C
Kaireckstadt replied to Kaireckstadt's topic in LSM 1/35 and Larger Work In Progress
Thanks Rob! Also thanks for the tip! That’s a good idea I will try! I already learned a lot in this forum! BTW: We always buy cotton-swabs with paper-sticks to protect the environ- ment... -
PCM Focke Wulf FW 190 A-1/A-2/A-3
Kaireckstadt replied to GazzaS's topic in LSM 1/35 and Larger Work In Progress
Very nice looking Albatross! The rigging is the point why I didn’t build any WWI planes so far. And it‘s not that easy as your example shows! Thanks for all the informations ! -
Israeli Mirage III C with Atar9C
Kaireckstadt replied to Kaireckstadt's topic in LSM 1/35 and Larger Work In Progress
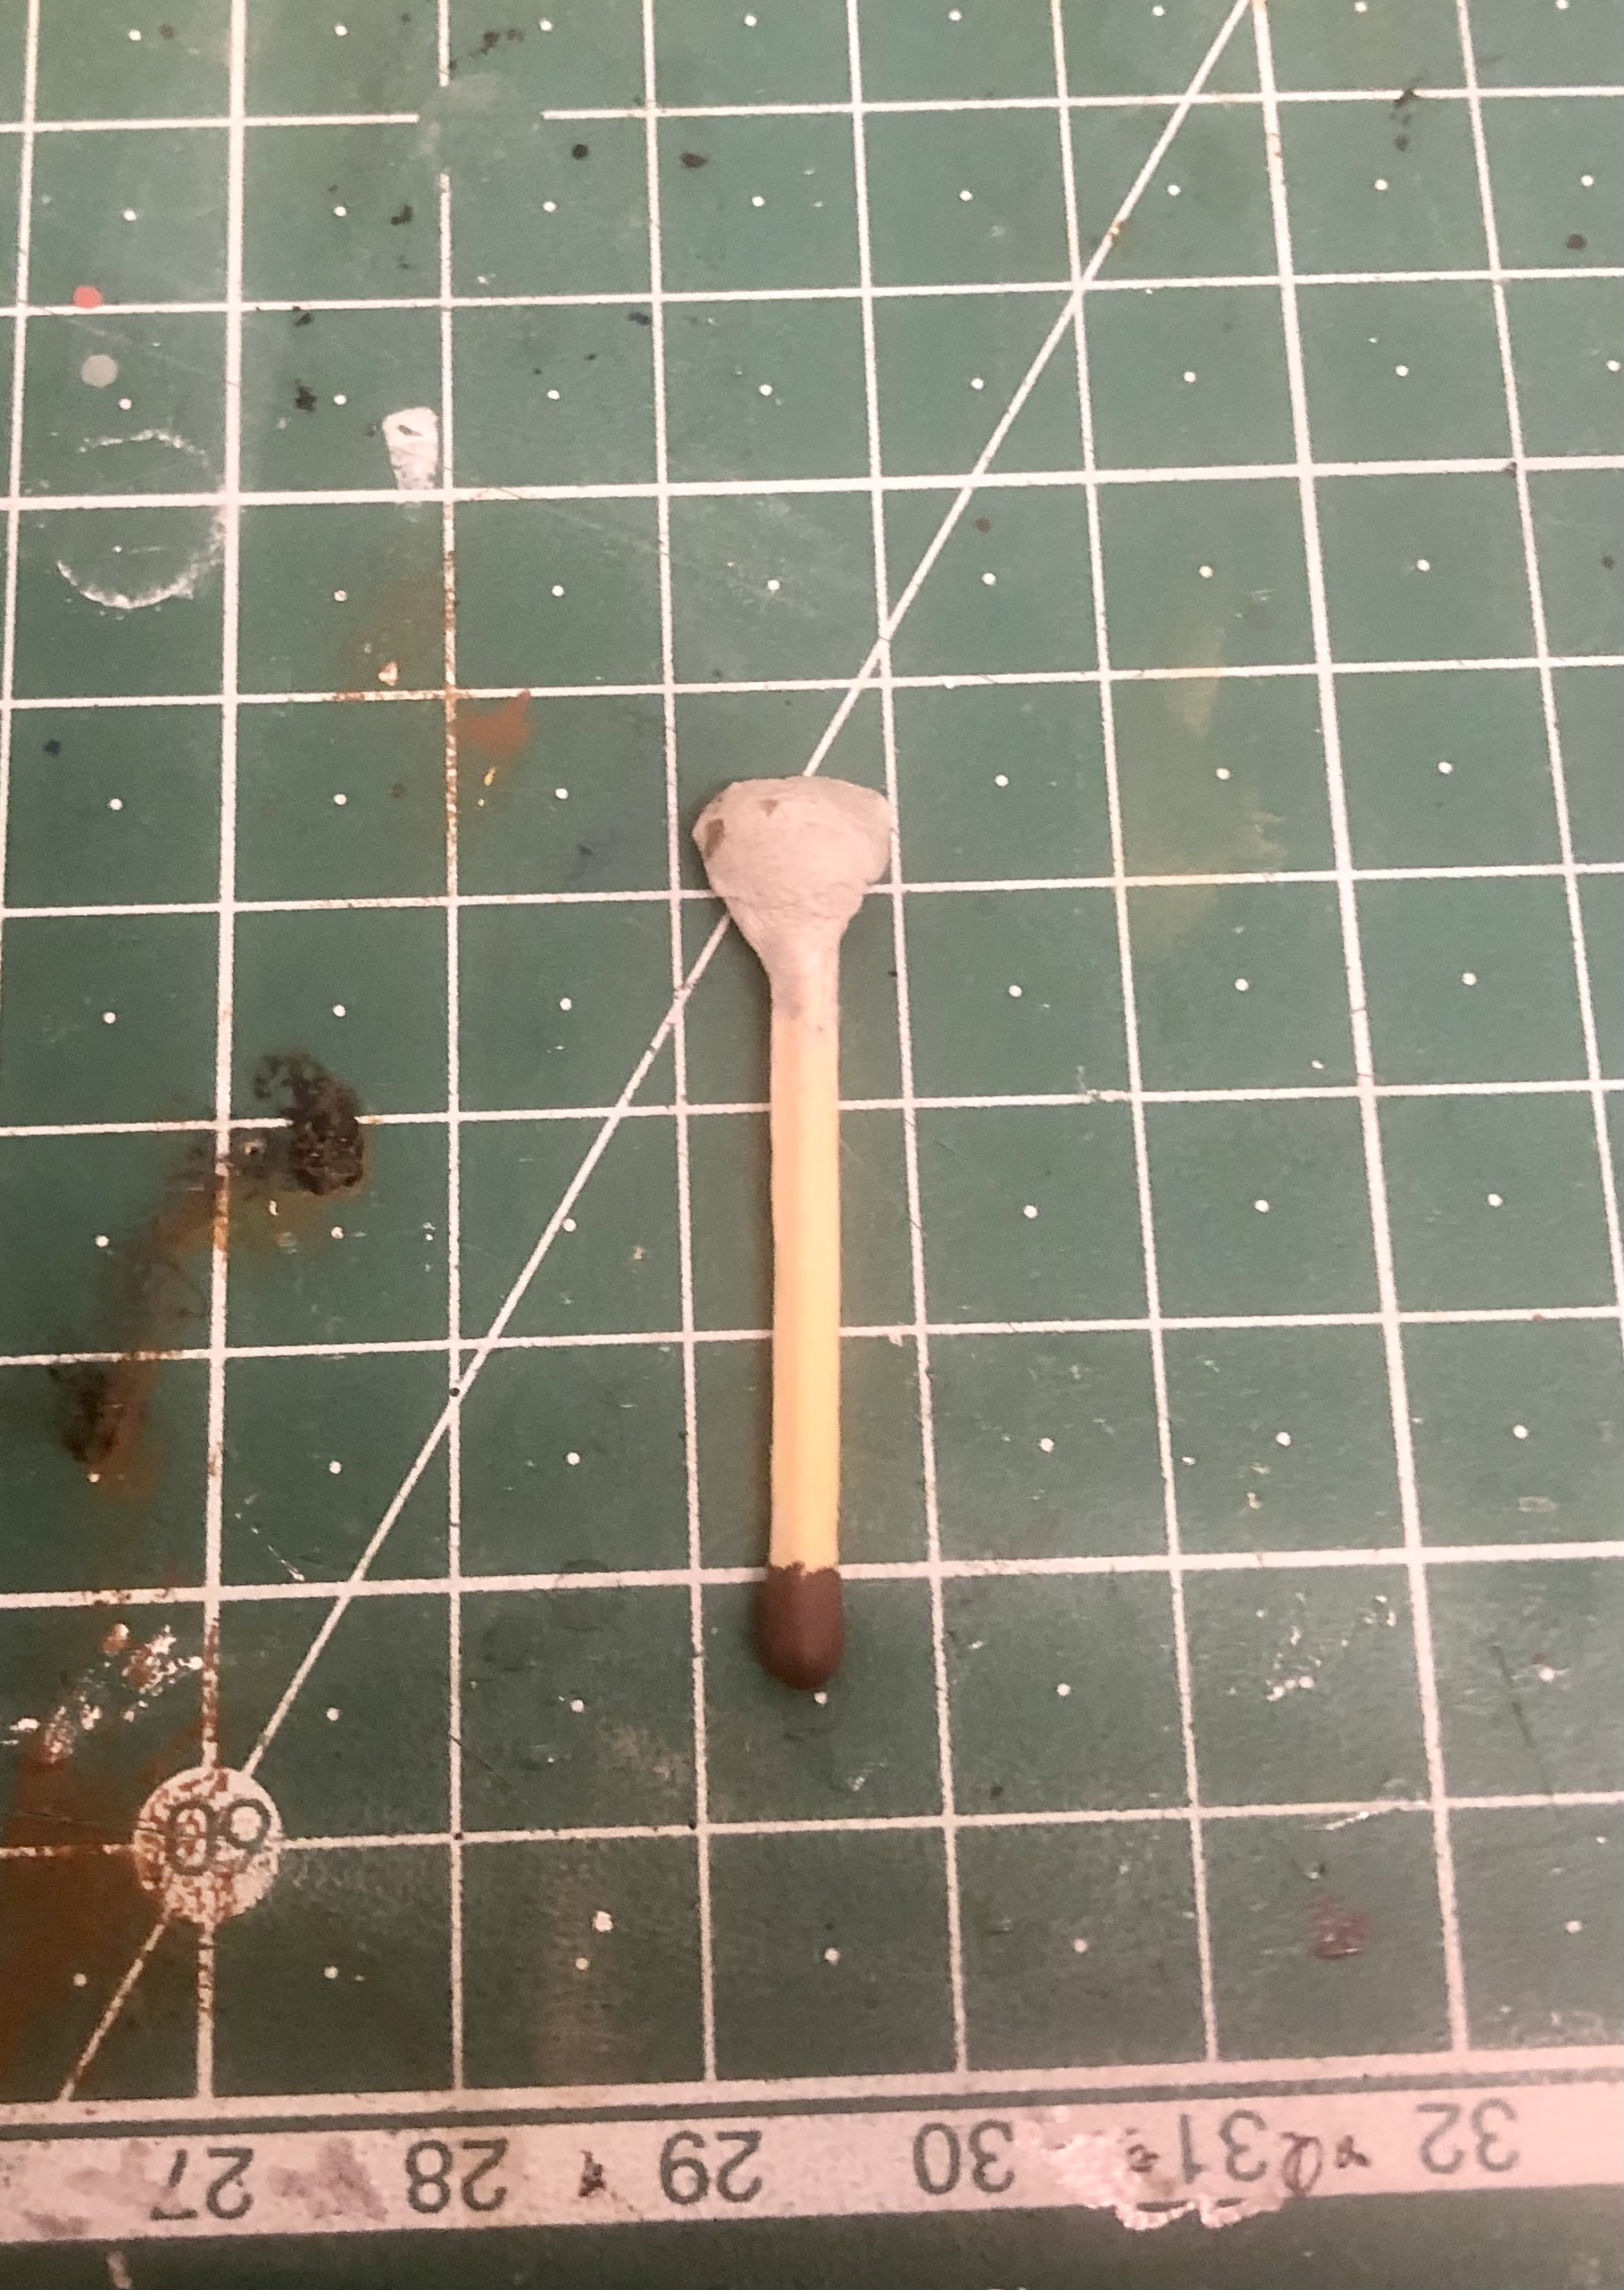
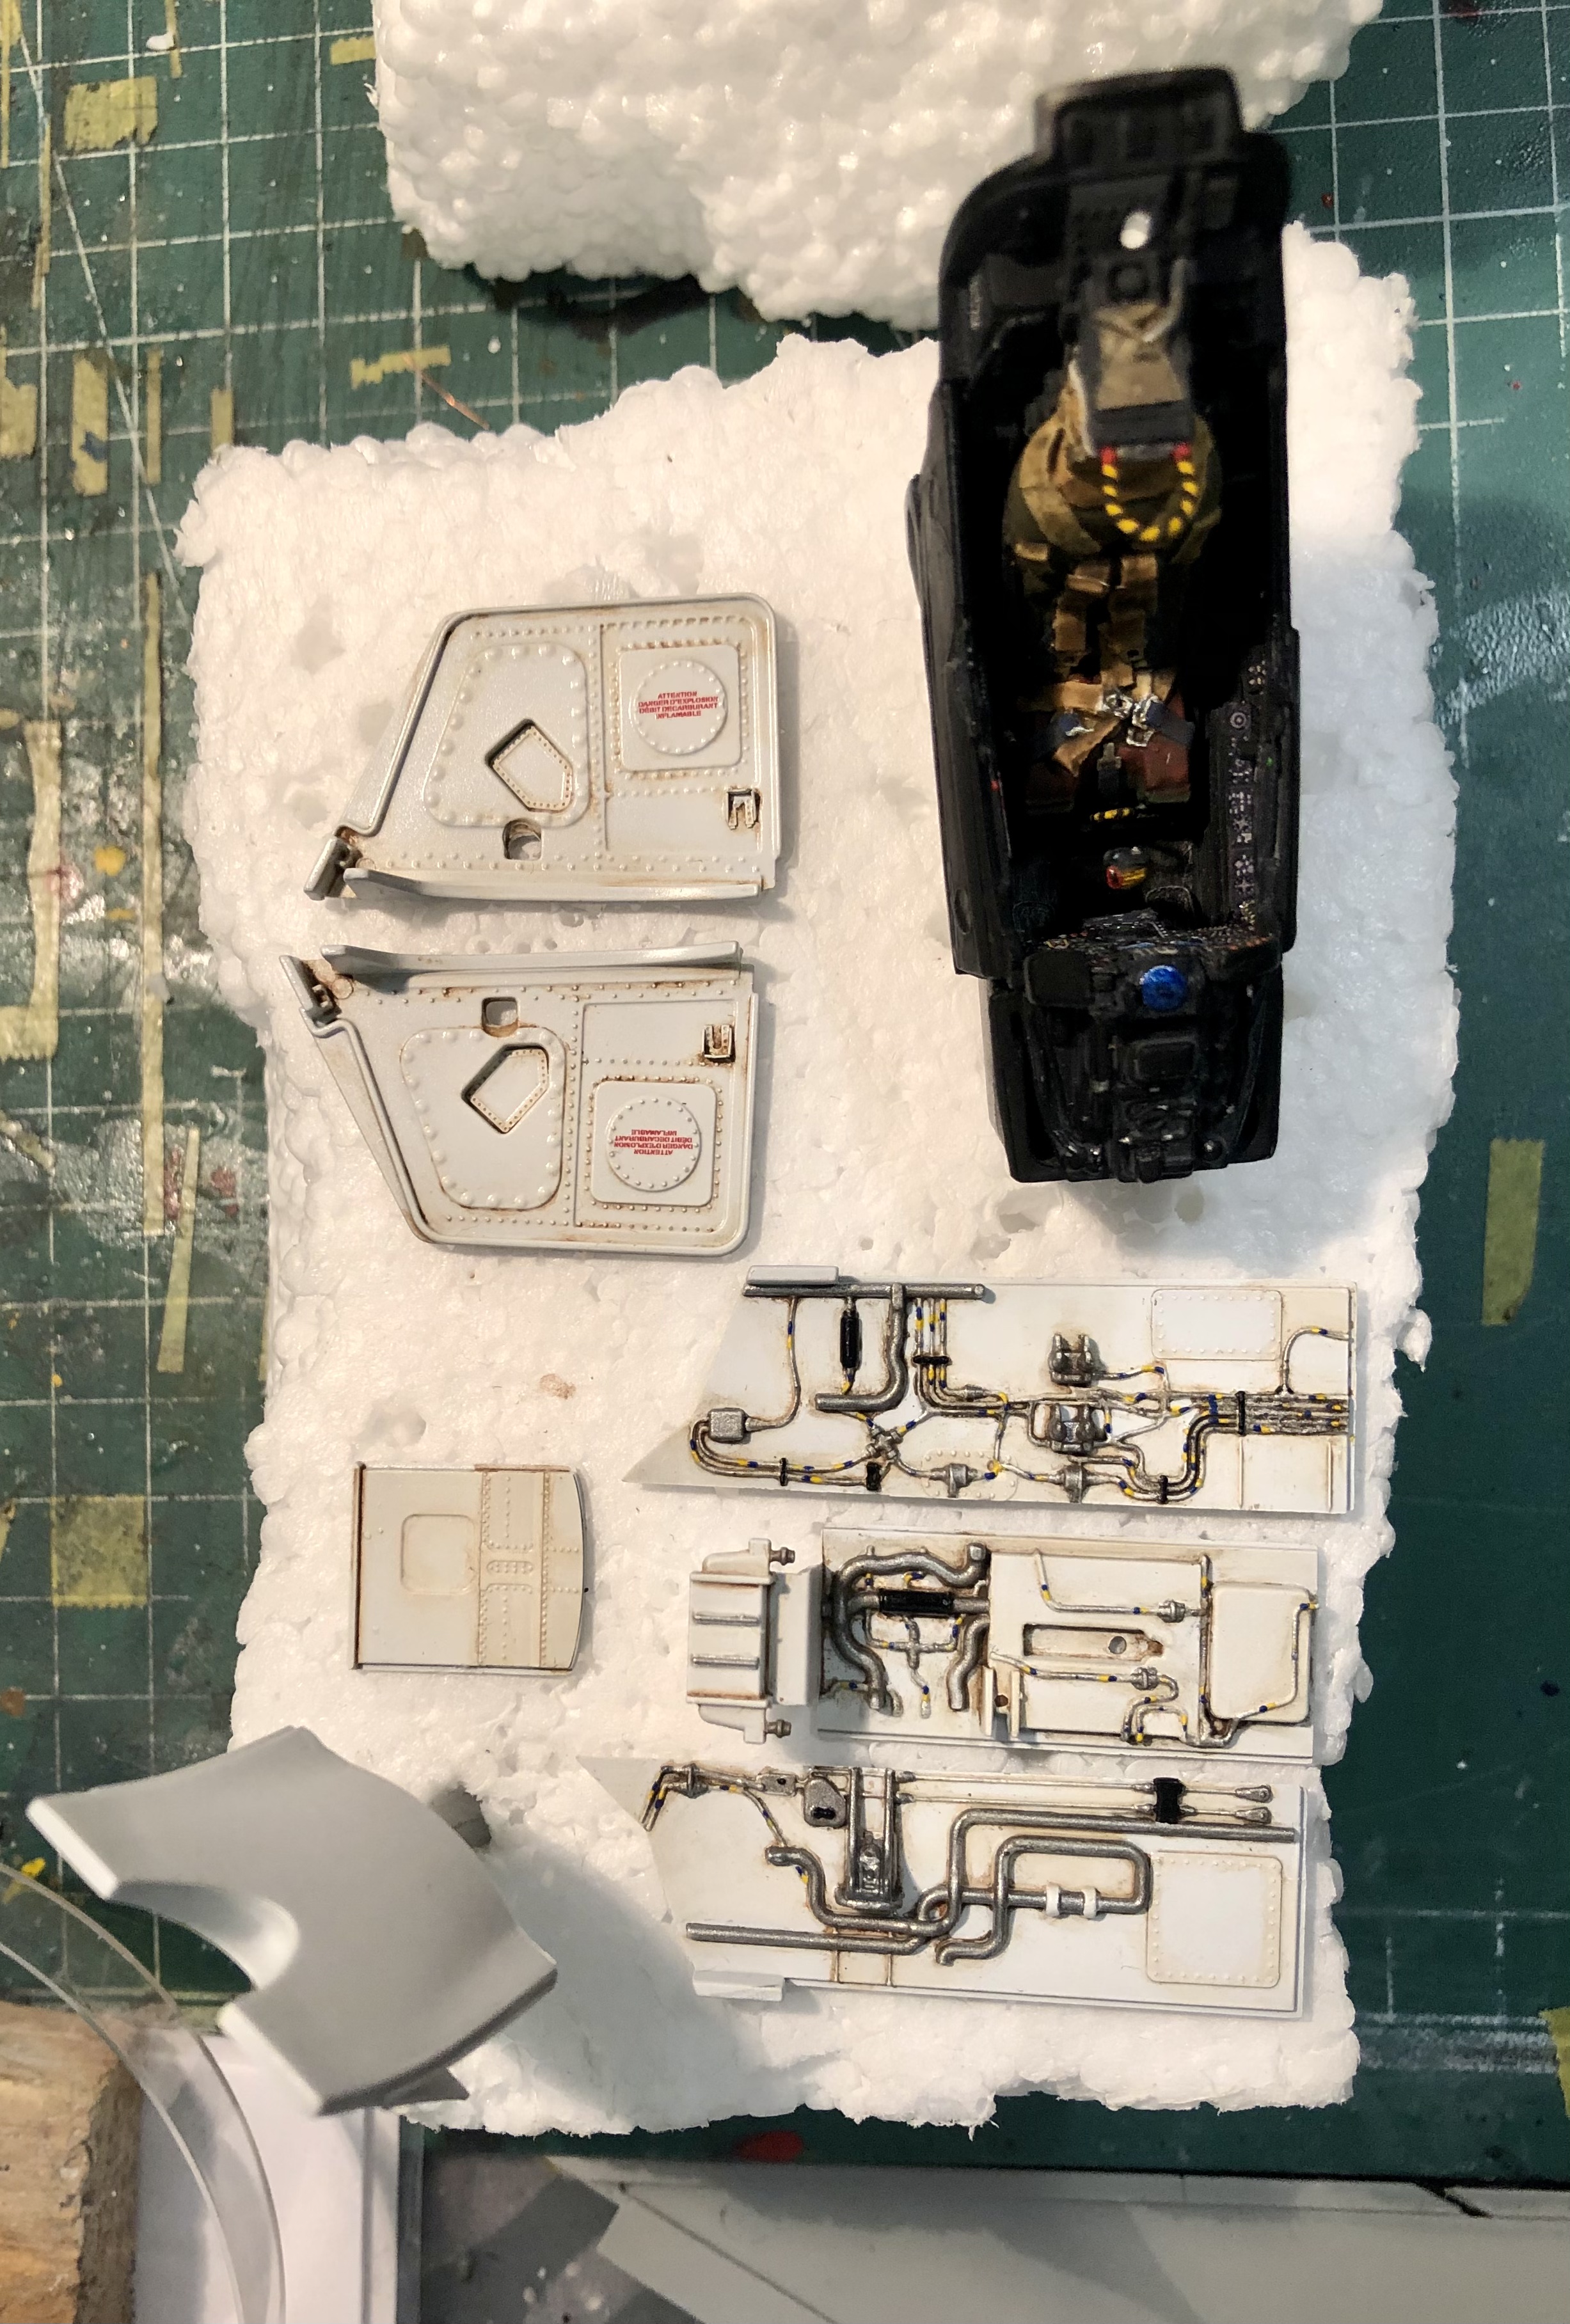
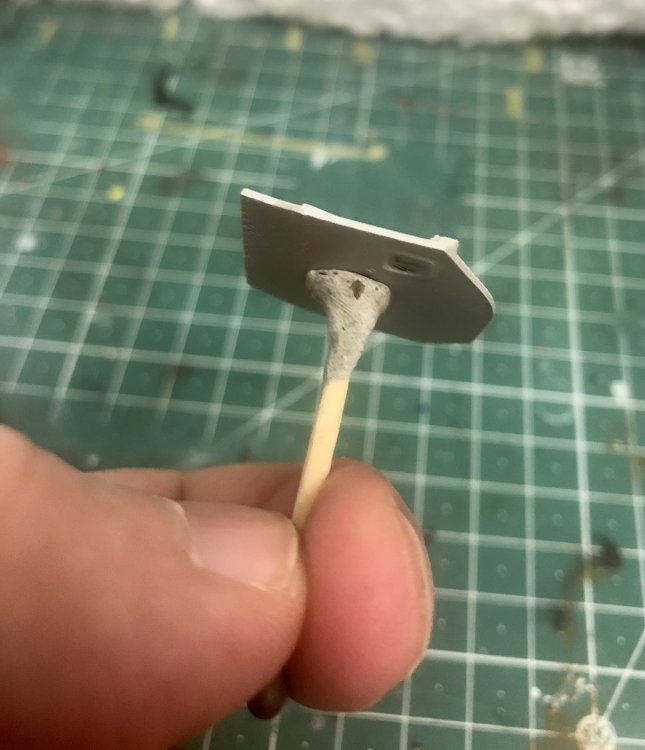
Thank you Gaz! This is how I use the styrofoam: I take a match, put some blue tech or similar on it and onto this the part. I can hold the part for painting at the match and when finished stick it into the styrofoam for drying. Easy method and solves some painting topics.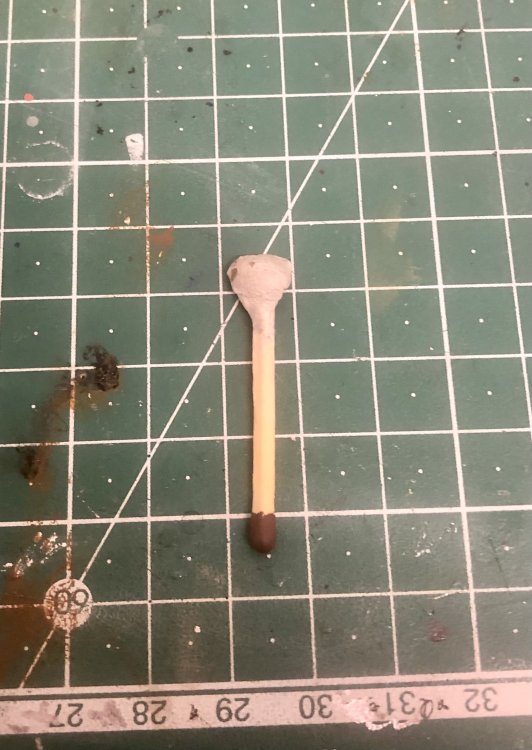
-
PCM Focke Wulf FW 190 A-1/A-2/A-3
Kaireckstadt replied to GazzaS's topic in LSM 1/35 and Larger Work In Progress
This is an interesting subject Gaz. And the camo seems to be a real challenge! Will follow that for sure! How is the quality of the Roden kit? -
Israeli Mirage III C with Atar9C
Kaireckstadt replied to Kaireckstadt's topic in LSM 1/35 and Larger Work In Progress
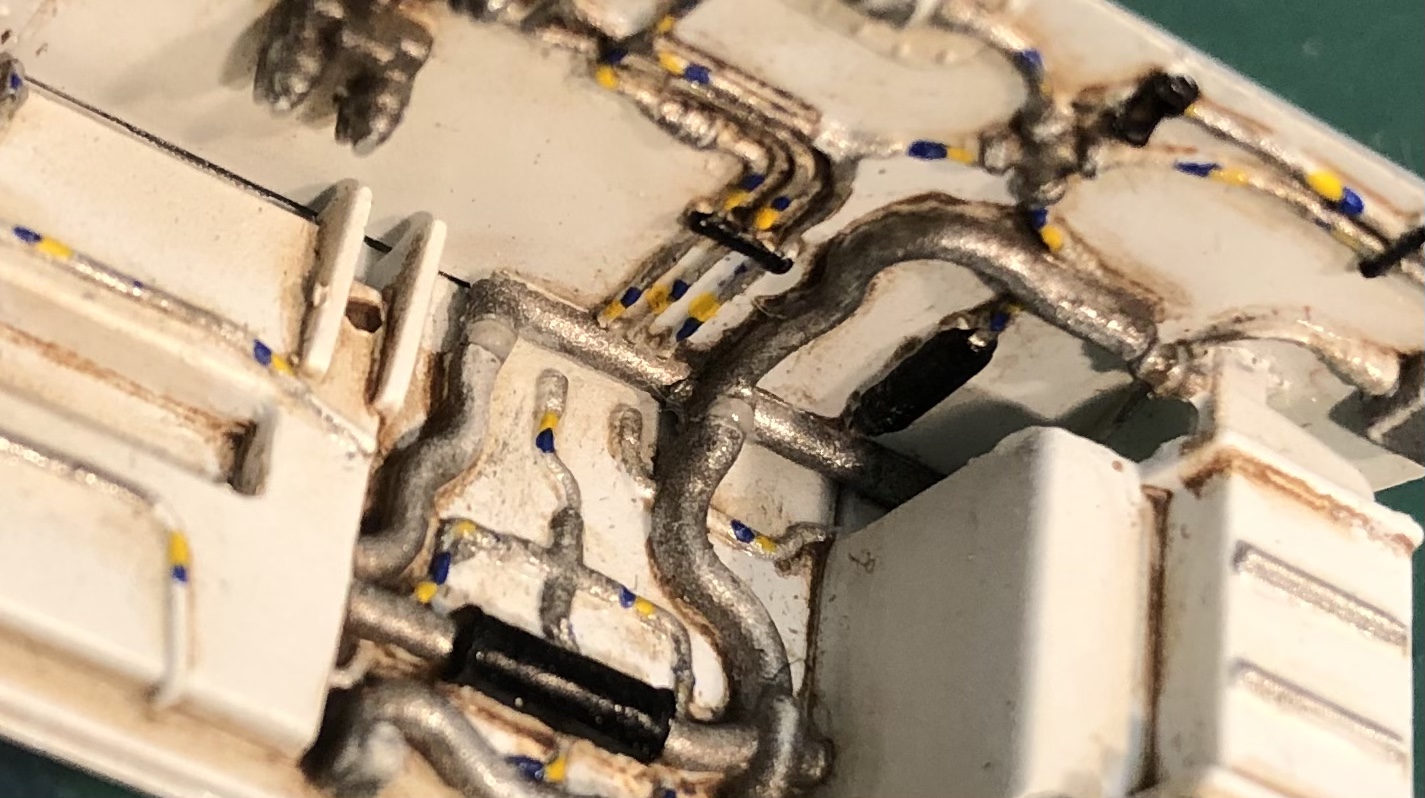
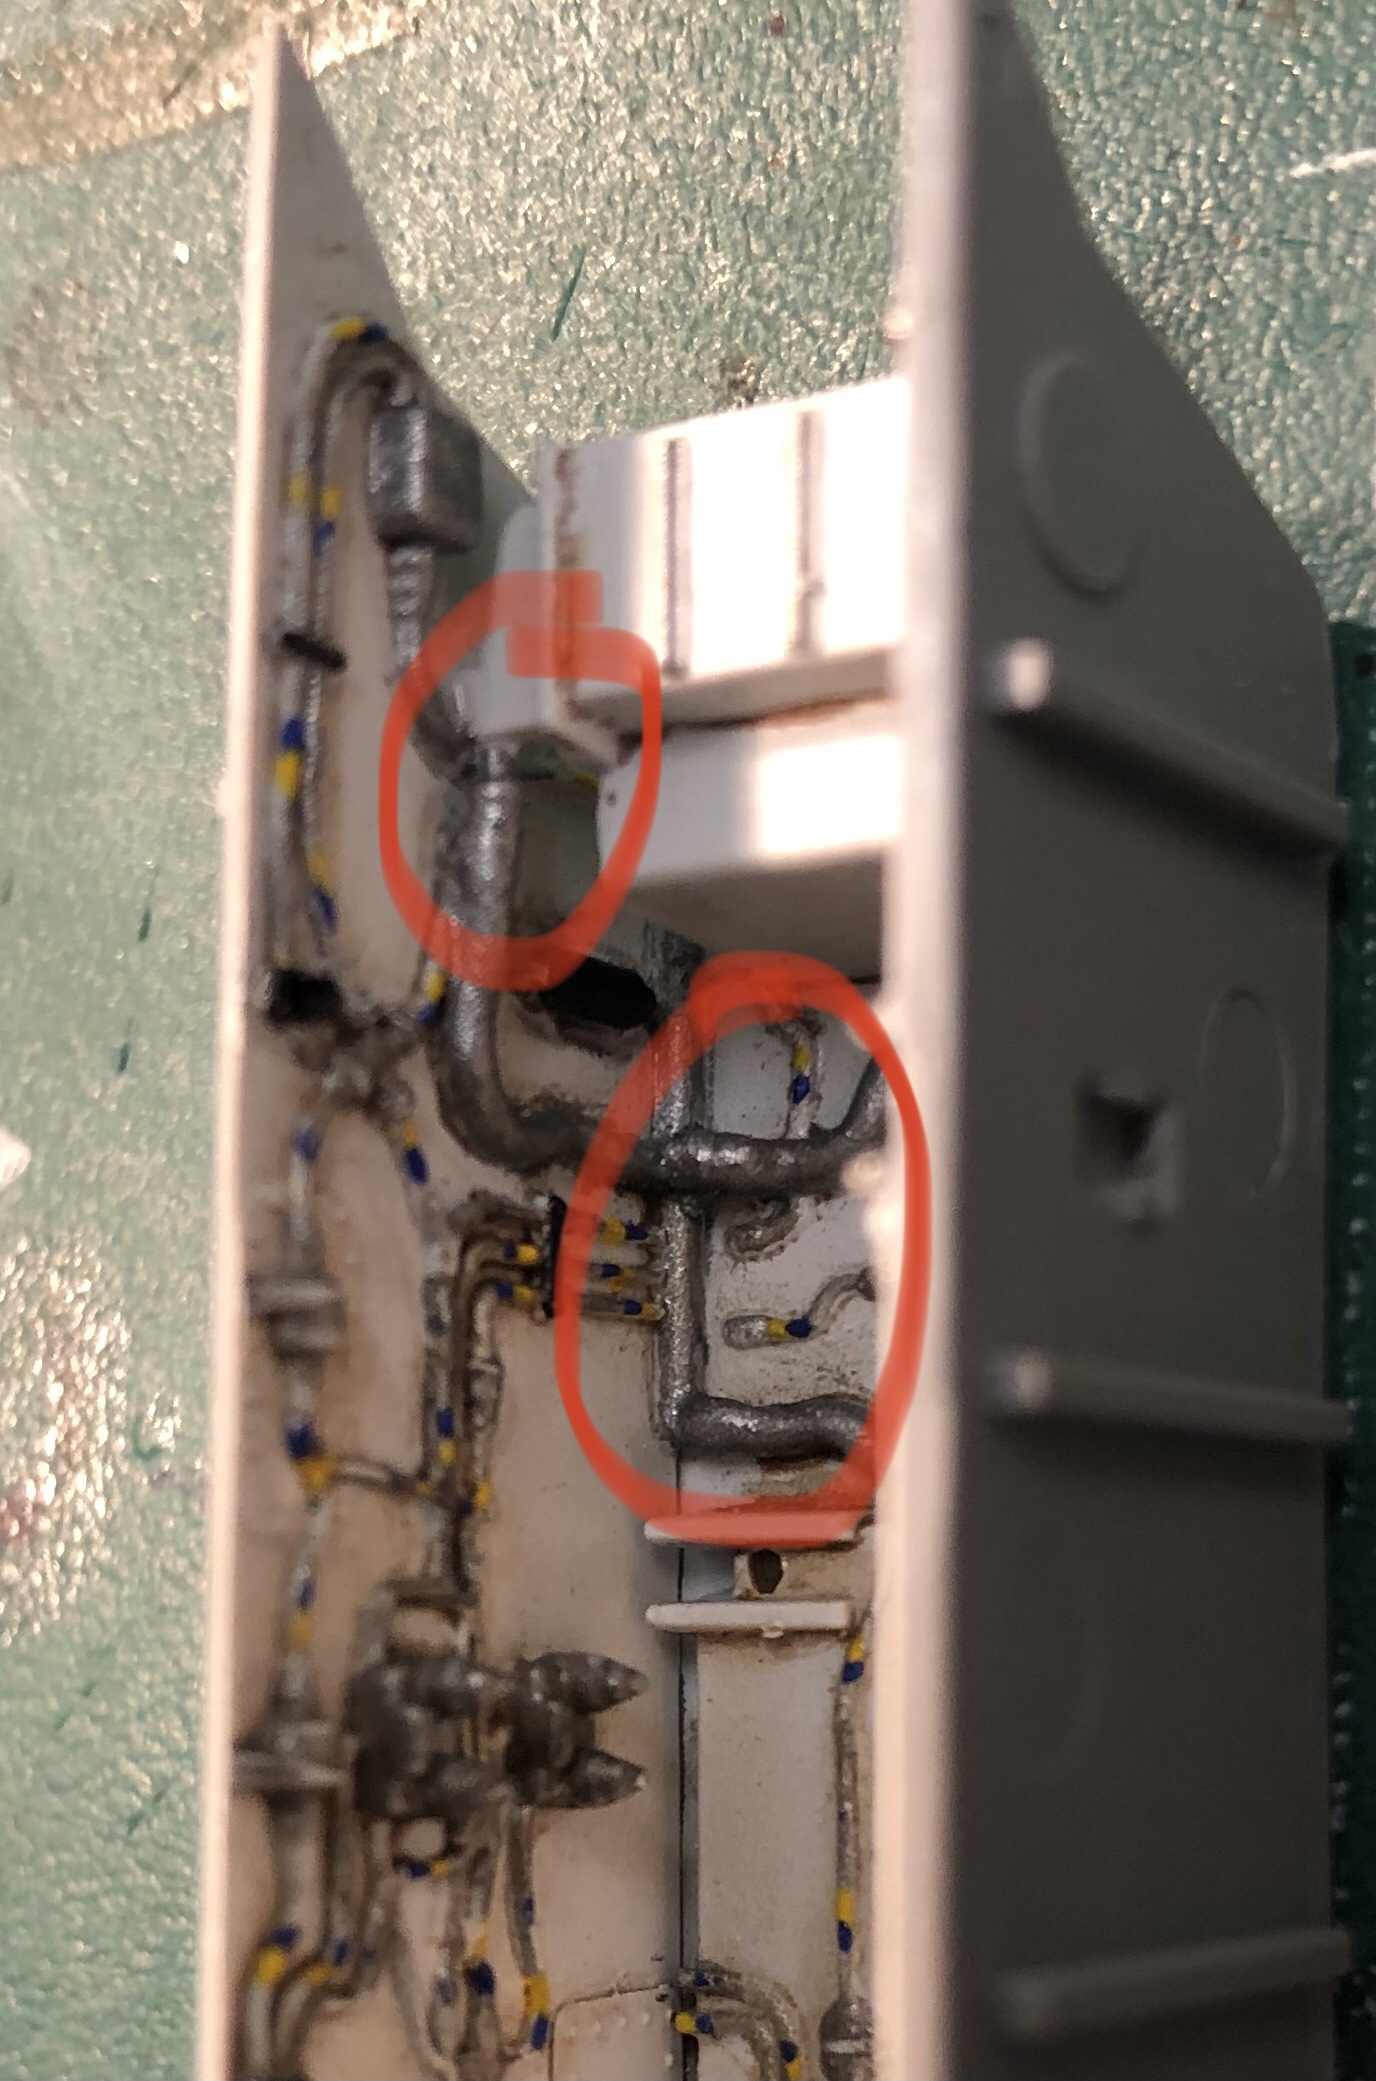
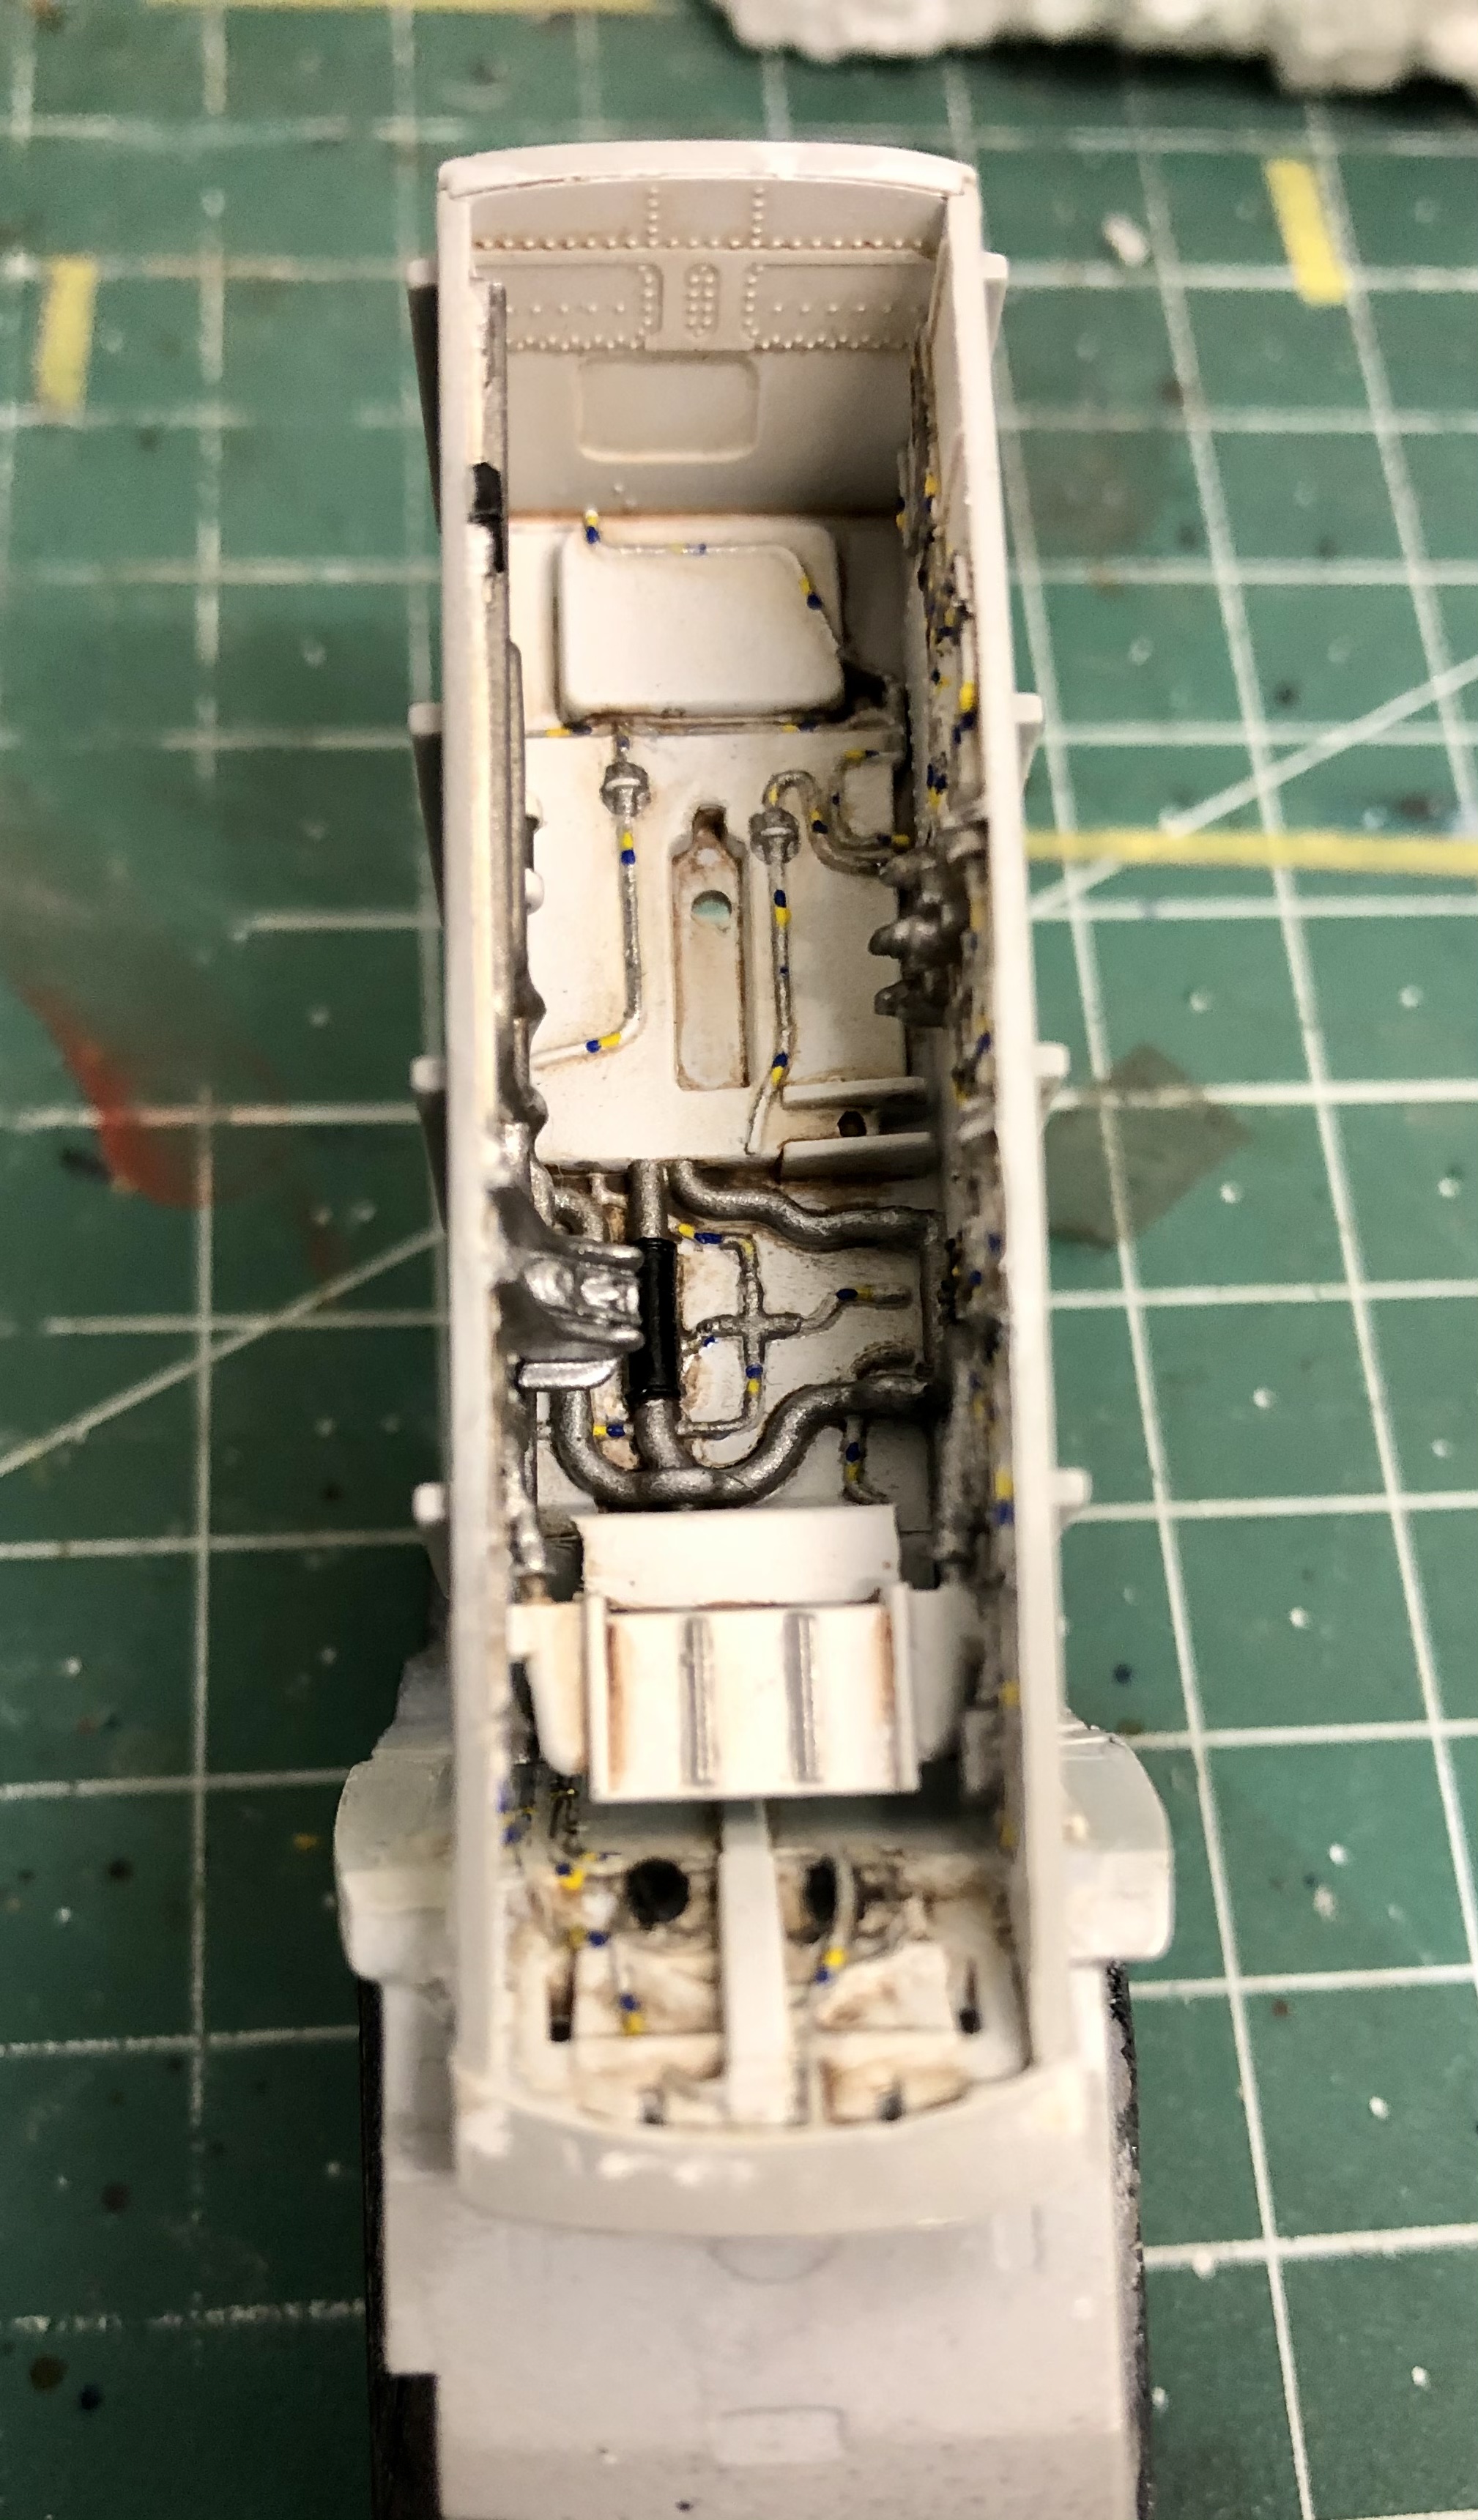
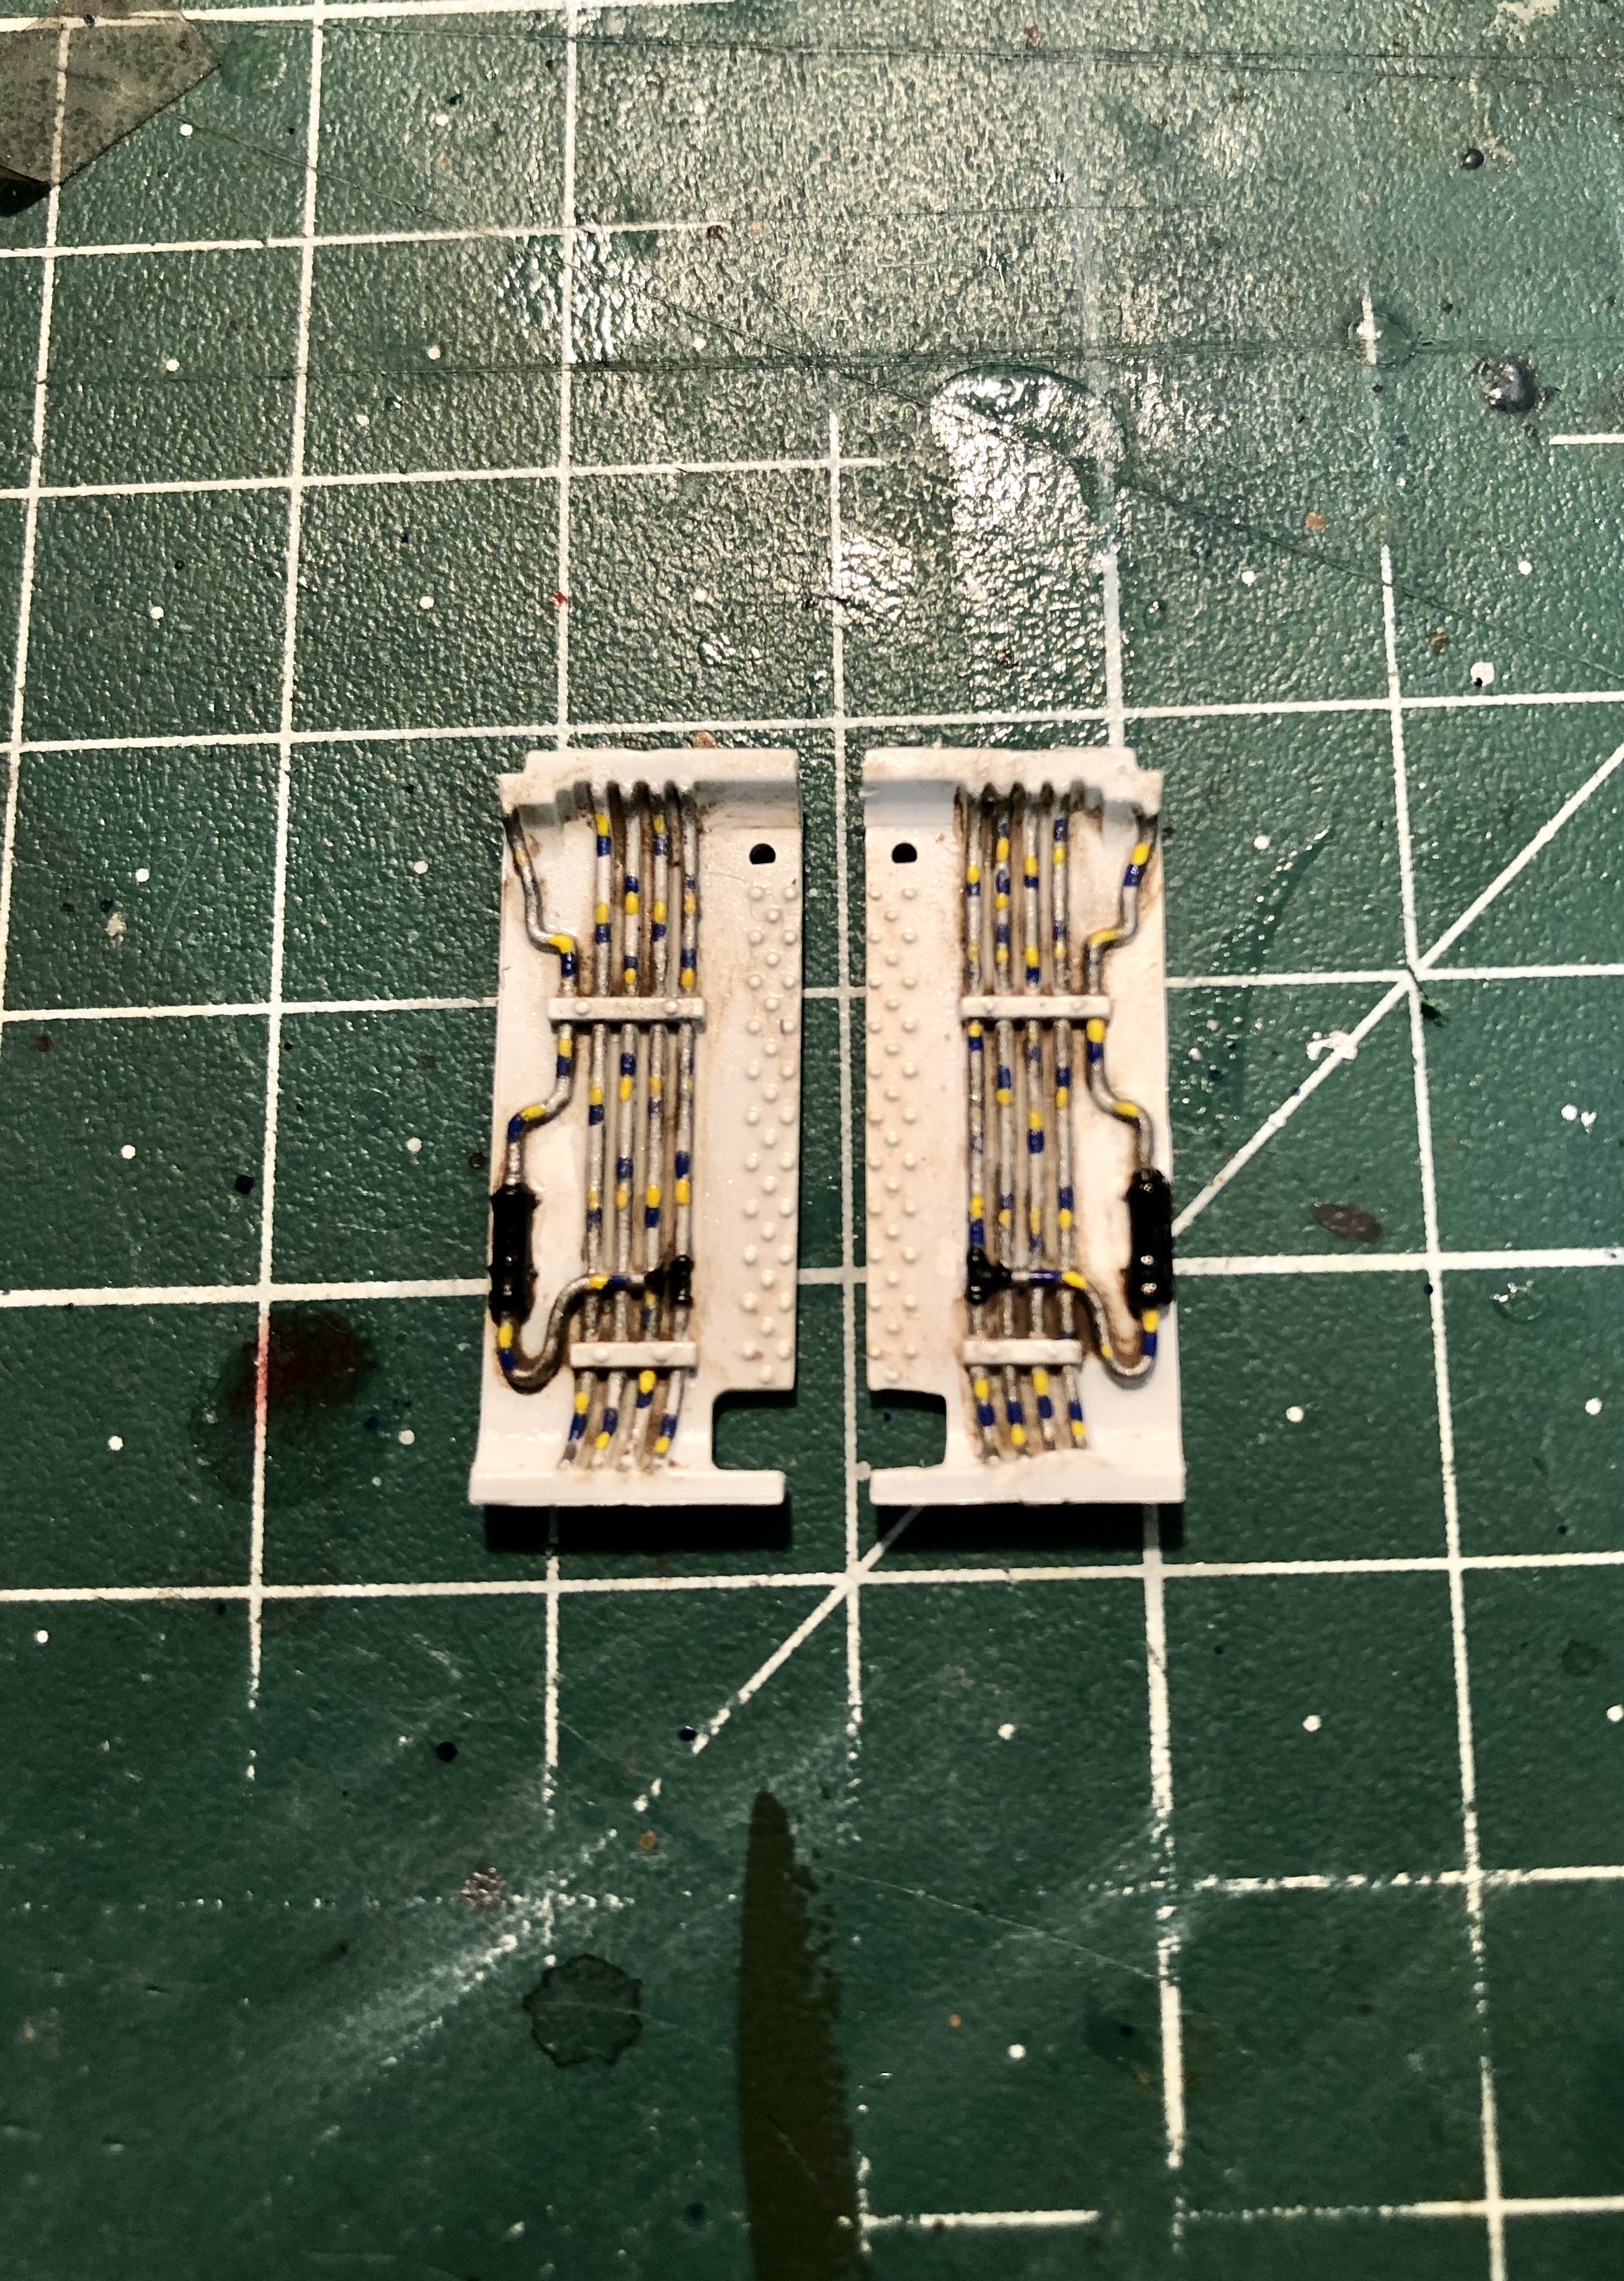
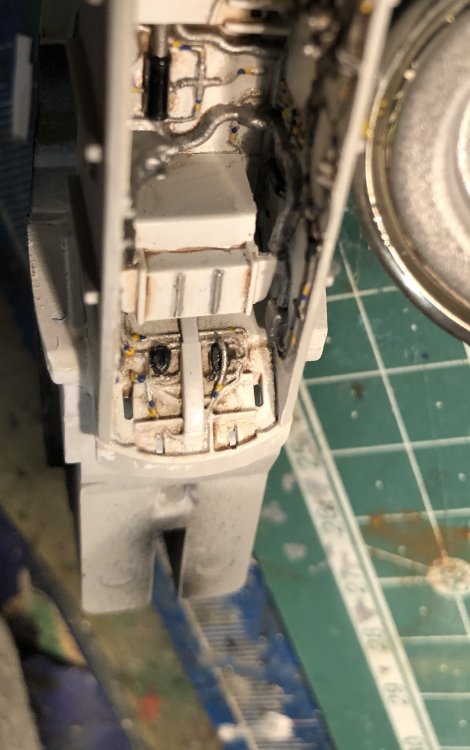
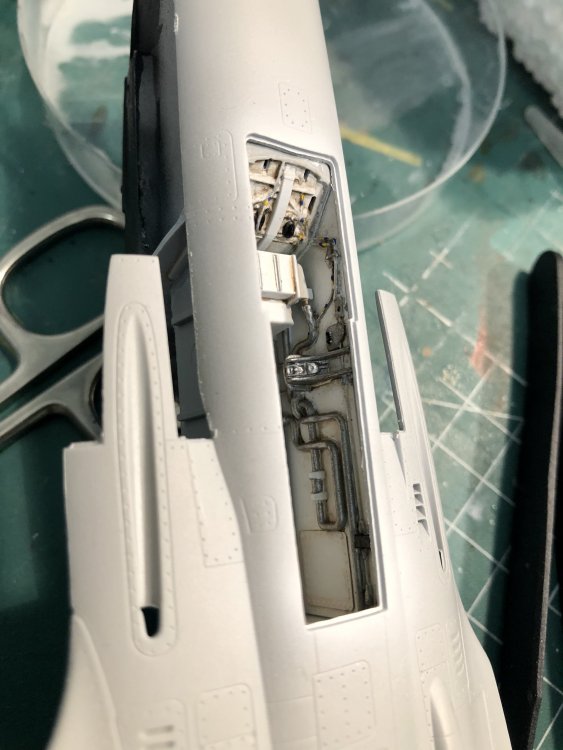
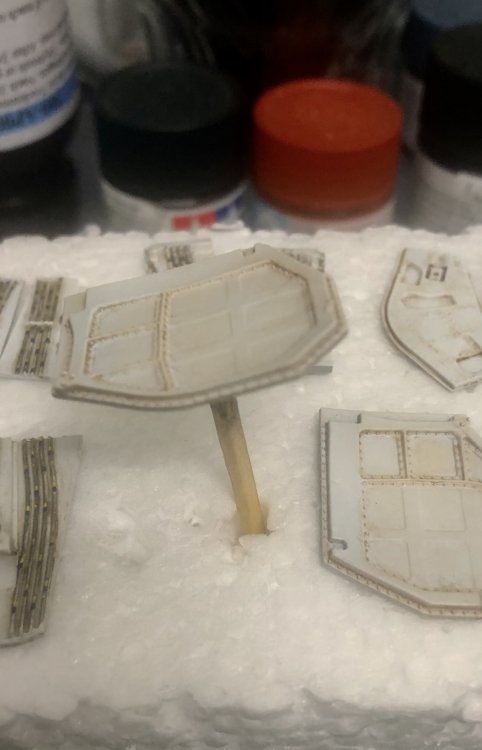
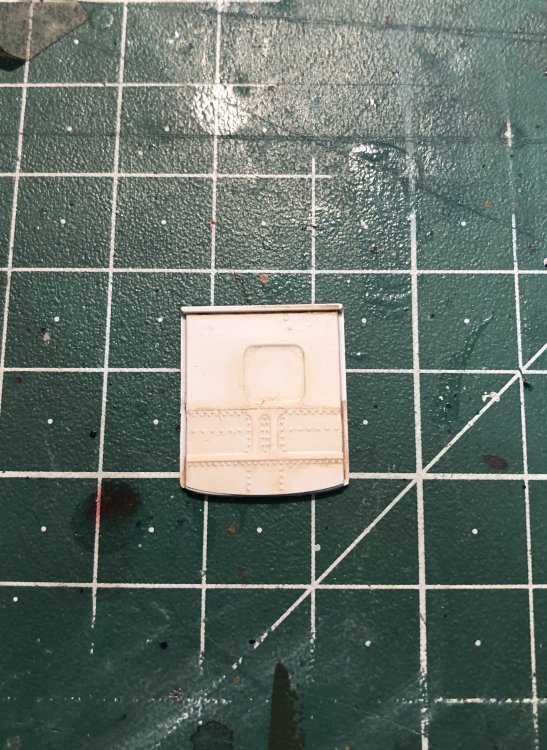
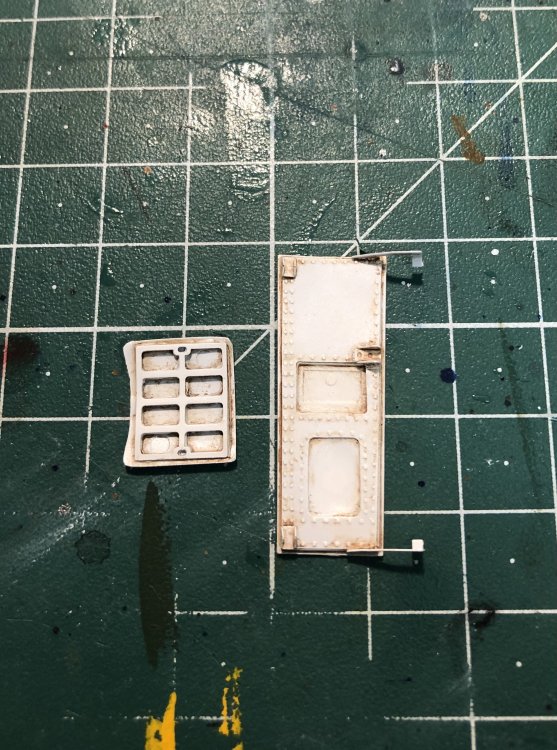
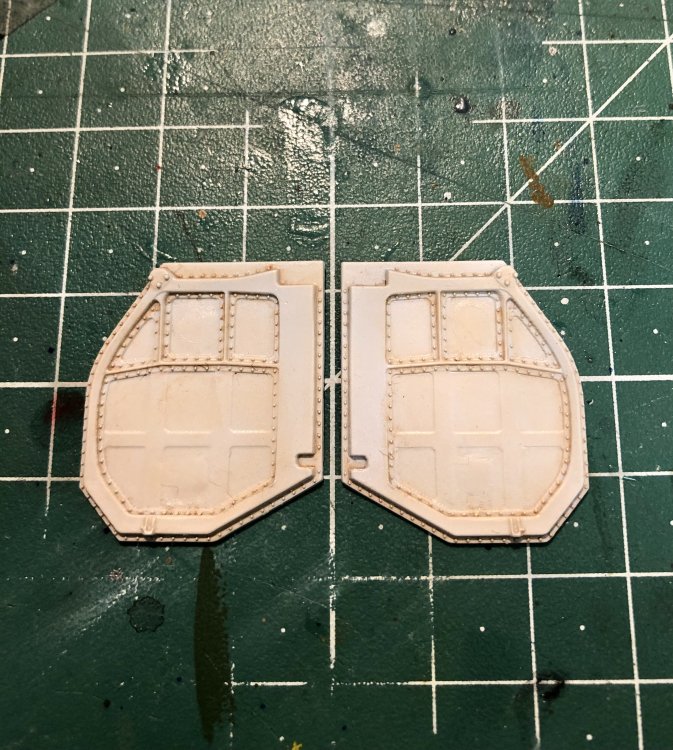
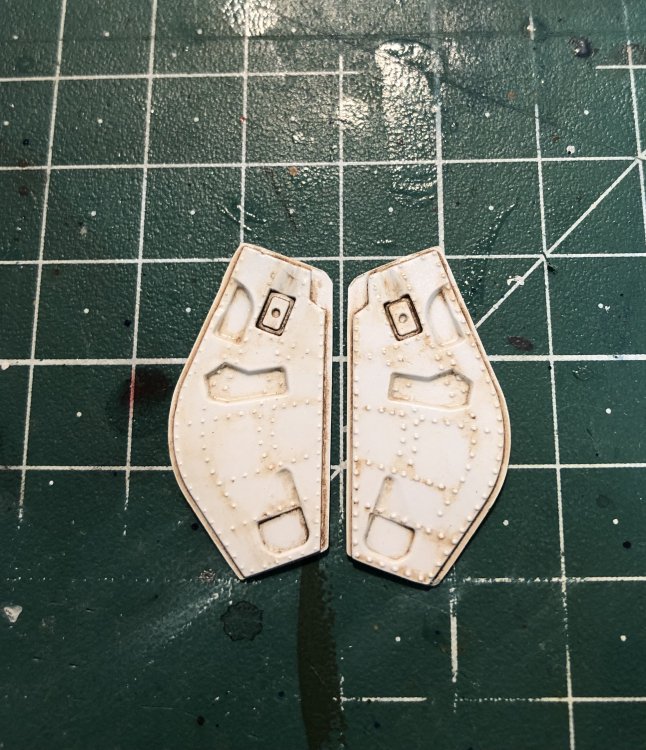
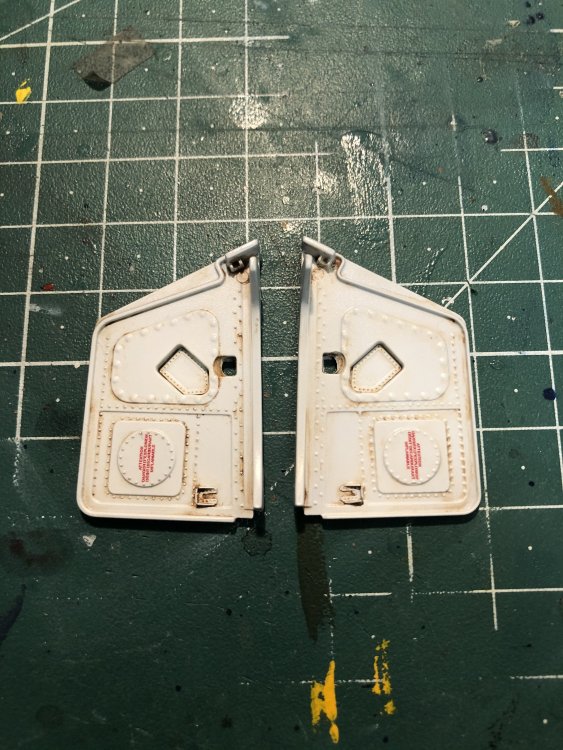
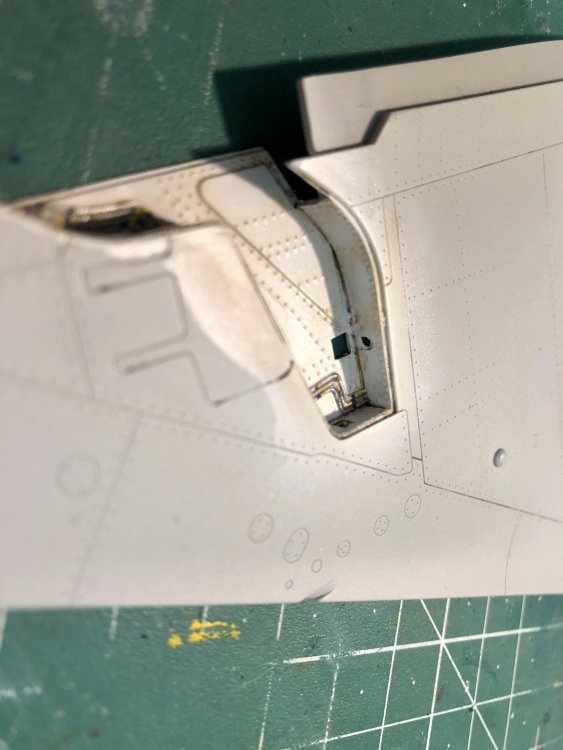
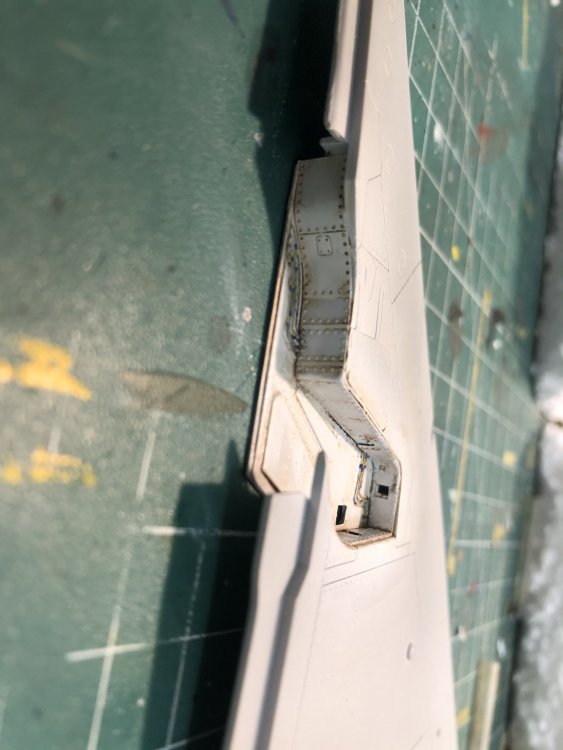
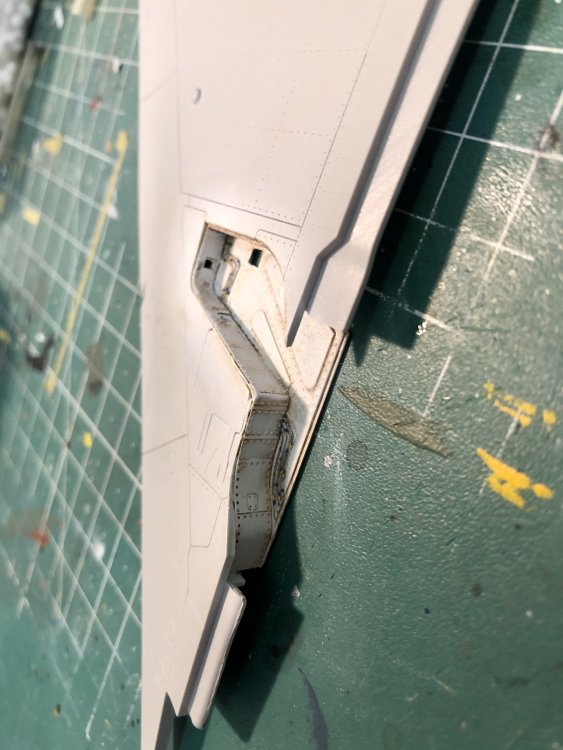
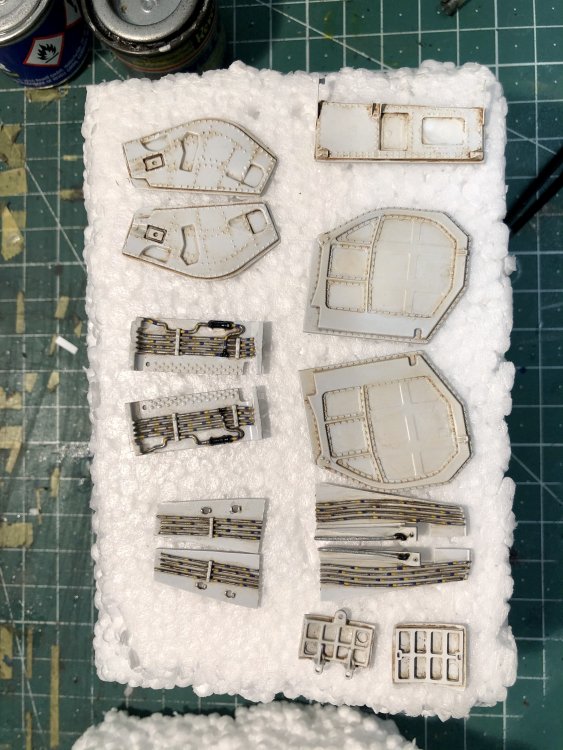
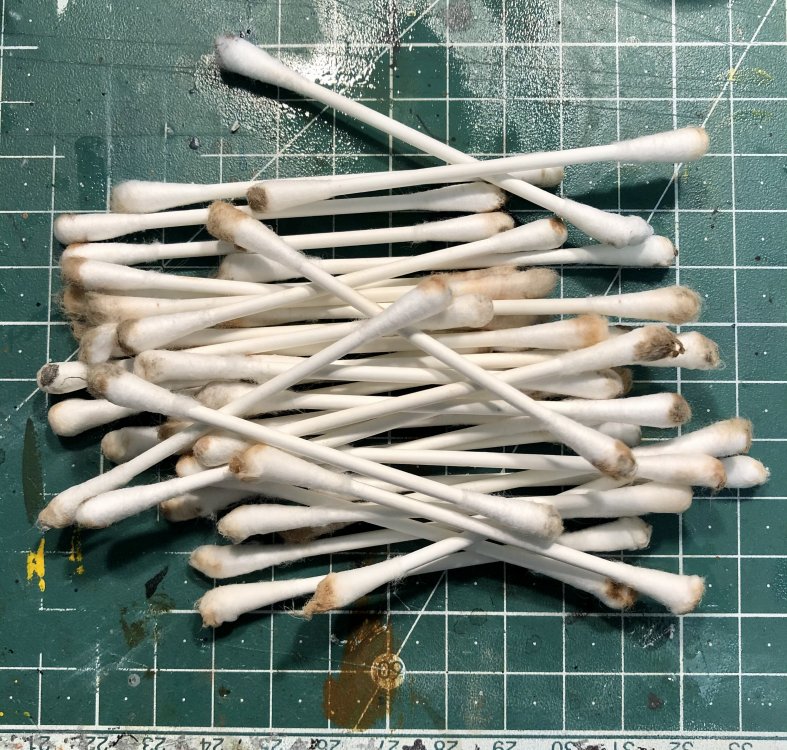
Weathered all the wheel-well parts yesterday. Weathering was done with oil colors, since they offer a vide variety of tones. Needed half a package of cotton-swabs... Taking into account the white base color and the surrounding in Israel I choose not to use a too dark color because black causes too much contrast and doesn’t look realistic. Now I can start the assembly of some of the components and give it a flat varnish and some oil-stains.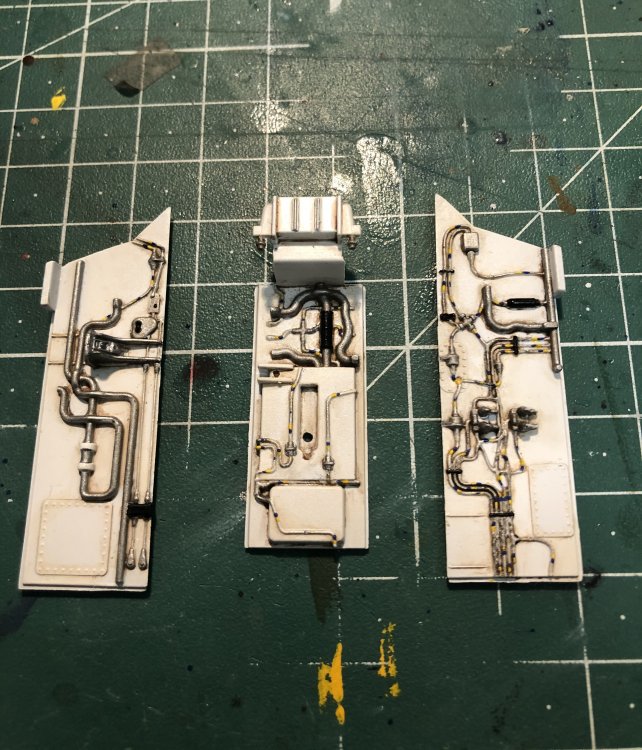


-
PCM Focke Wulf FW 190 A-1/A-2/A-3
Kaireckstadt replied to GazzaS's topic in LSM 1/35 and Larger Work In Progress
Looks perfect with the final flat varnish! Great idea solving the problem with the canopy! This is a real beauty and it was a joy following your build. I learned new techniques and many things about the 190. What will be the next bird on your bench? -
After all the work you invested the Würger is finished! And from my point of view it fully pays off. This is a stunning build with an awesome result Gaz! Camo and weathering are spot-on! Looks like the real thing! The subject you chose is a very special one since it has 3 (!) upper surface colors. Have never seen that before on a 190! Keep em coming!
-
And when you cover all Panzer Putty with superglue (and accelerator)?
-
You got the wintercamo spot-on, Gaz! The basic camouflage is shining through irregularly and even in some places completely to be seen. In my eyes it’s really stunning up to now. Is the Panzer Putty on the model really a mess? I think it’s hardly to be seen when all the wheels and the track are assembled. And when you cover it with dirt nothing will be seen of it anymore. But that’s only my opinion.
-
That’s not an easy job you have to do but taking into account the skills you have you will easily manage. I wouldn’t have expected anything else from you than facing the challenge. Looking forward to seeing the progress!
-
This is absolutely awesome work Rob! If I didn’t read that you still have to finish the paintjob I thought it would be ready now. Would also be a nice look when finished. There is no original to compare to... I‘m sure you will also manage the last step! Can’t wait to see the result!
- 100 replies
-
- 7
-

-

-
- hasegawa
- ammoknight
- (and 1 more)