DocRob
-
Posts
7,122 -
Joined
-
Last visited
Content Type
Profiles
Forums
Events
Gallery
Everything posted by DocRob
-
Very nice and fast build, Carl, makes me almost want to start mine . Cheers Rob
-
Te engine looks very nice. These 3D printed ones are really hard to paint, you mastered that beautifully. Cheers Rob
-

Duchess of Kingston - Beauty of the Seas - Wooden Sailing Ship 1/64
DocRob replied to DocRob's topic in Non LSM 'WIP
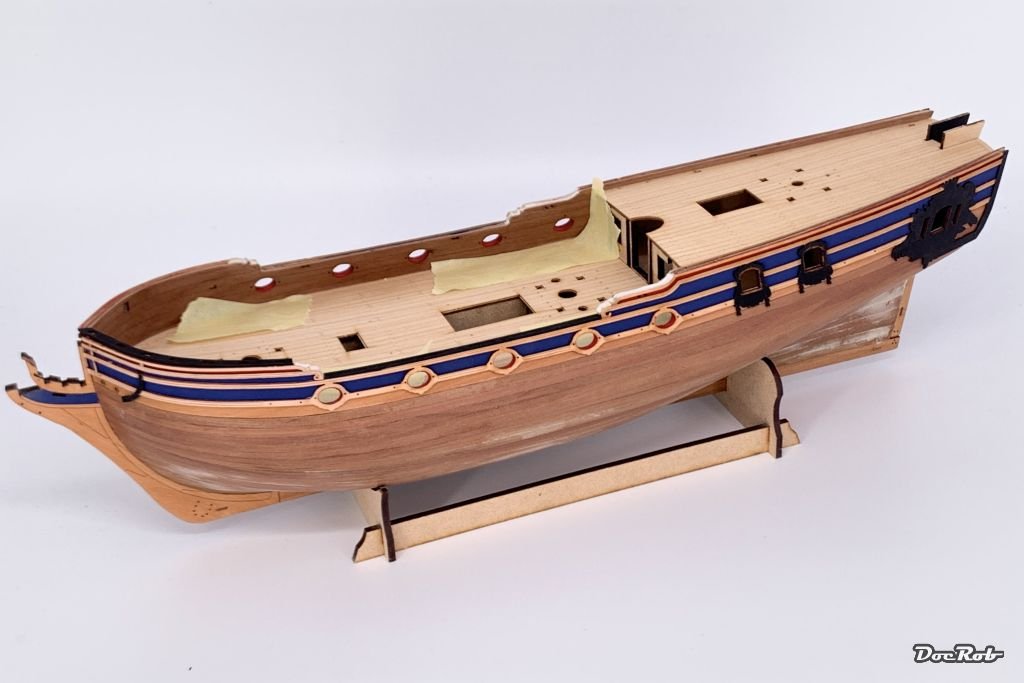
Some more color onto the hull. After marking the waterline, I masked off the whole ship, to avoid overspray and primed with light gray Mr. Surfacer 1200. Then I sprayed on some coats of Tamiya XF-flat white and carefully removed the masking, as I prefer to do so, when the color hasn't completely dried. The same procedure was used for the rudder and the opulent PE sheets, which will later be masked and painted red occasionally and more so in gold color. Cheers Rob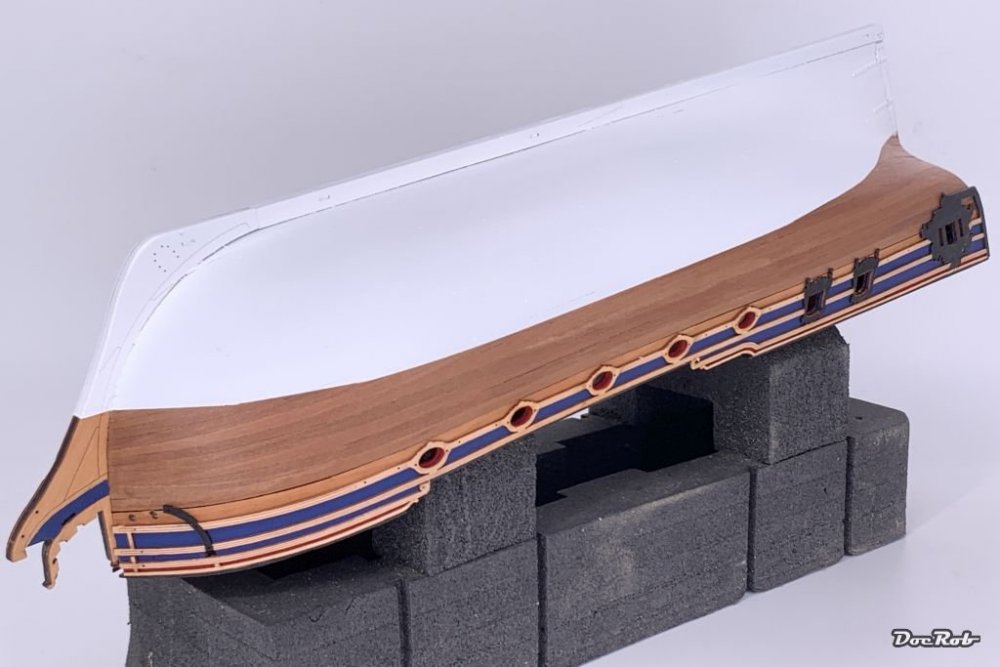
-
Duchess of Kingston - Beauty of the Seas - Wooden Sailing Ship 1/64
DocRob replied to DocRob's topic in Non LSM 'WIP
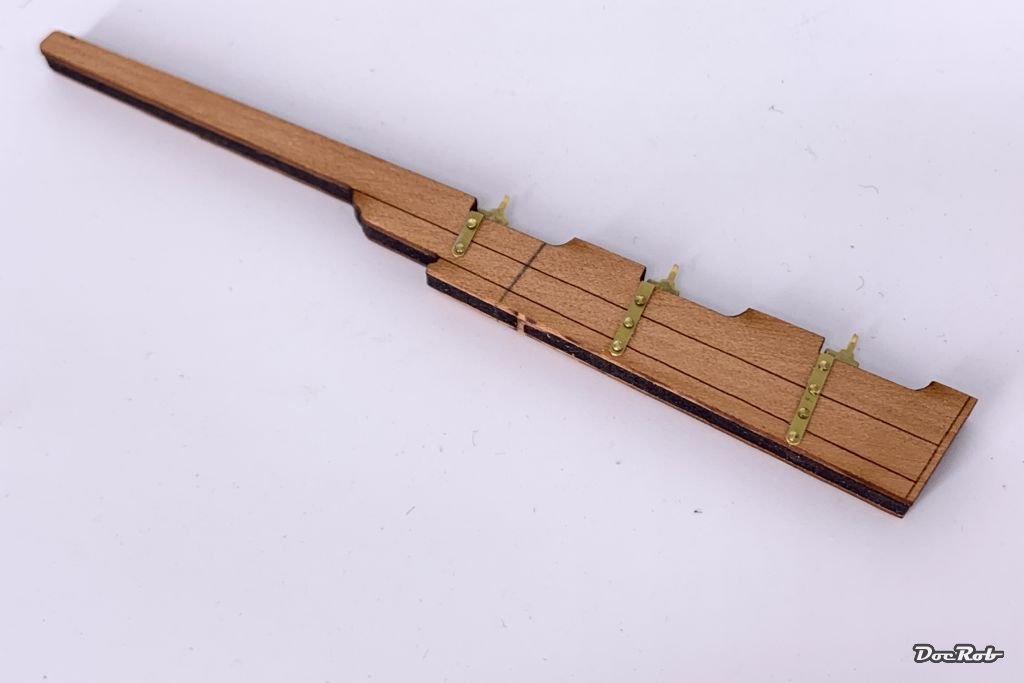
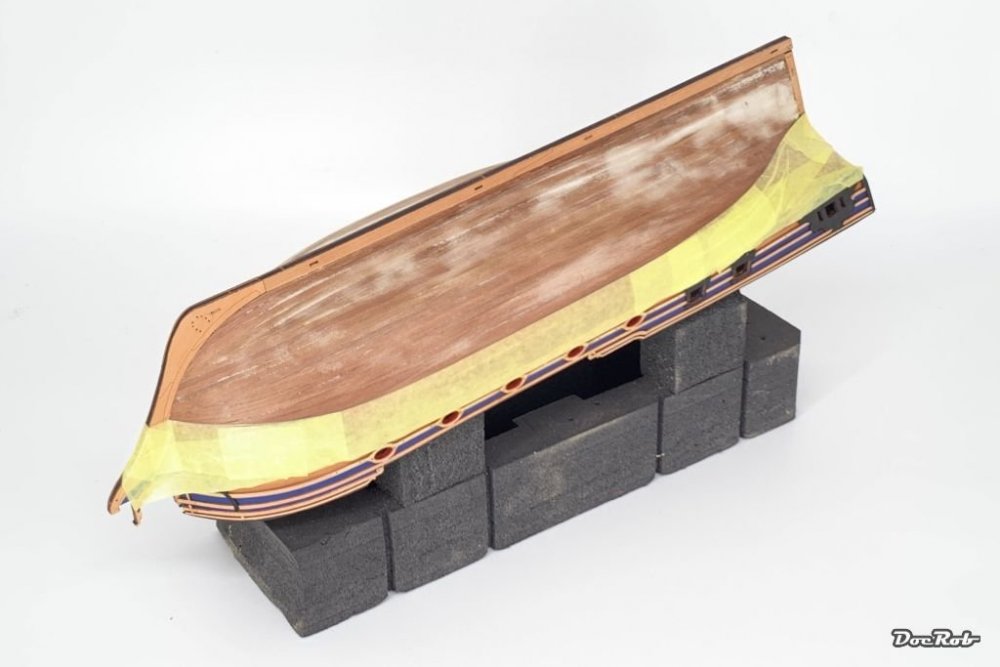
Slight change of plans, following the manual, next would have been adding two black wales on each side to the hull. I pre-bended these, but as I saw, how close they were to the waterline, I decided to first paint the underwater area of the hull in matte white, after priming. I again marked the waterline with a pencil and used Kabuki tape for demarcation. As the rudder has an underwater area, painted white , as the hull, I prepared the rudder with PE fittings, which were pinned to fit with tiny brass nails. The fit again was exceptional with the pre drilled holes to the etched fittings. You can see the pencil marked waterline on the side. Cheers Rob
-
Phew, this kit seems to be a lot of extra work, I admire your patience. This along with the Hustler are fantastic (in the words sense) airframes, which inspired my thoughts in their time, design wise and technically. Please keep on fighting the plastic, for a great result Bill. Cheers Rob
-
Very nice sharp edged camo Phil, not easy to achieve with that masking putty. When I use it, it always flows over time and ruins the hard edges. I use it only on flat objects anymore and try to keep it cold. Cheers Rob
-
Duchess of Kingston - Beauty of the Seas - Wooden Sailing Ship 1/64
DocRob replied to DocRob's topic in Non LSM 'WIP
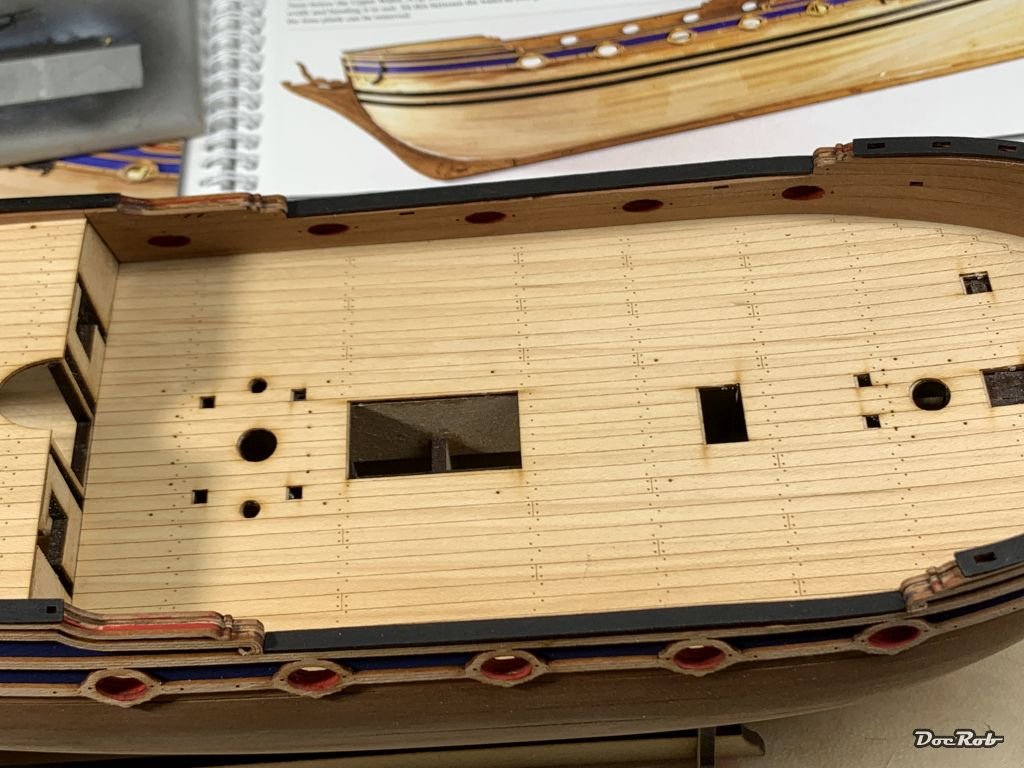
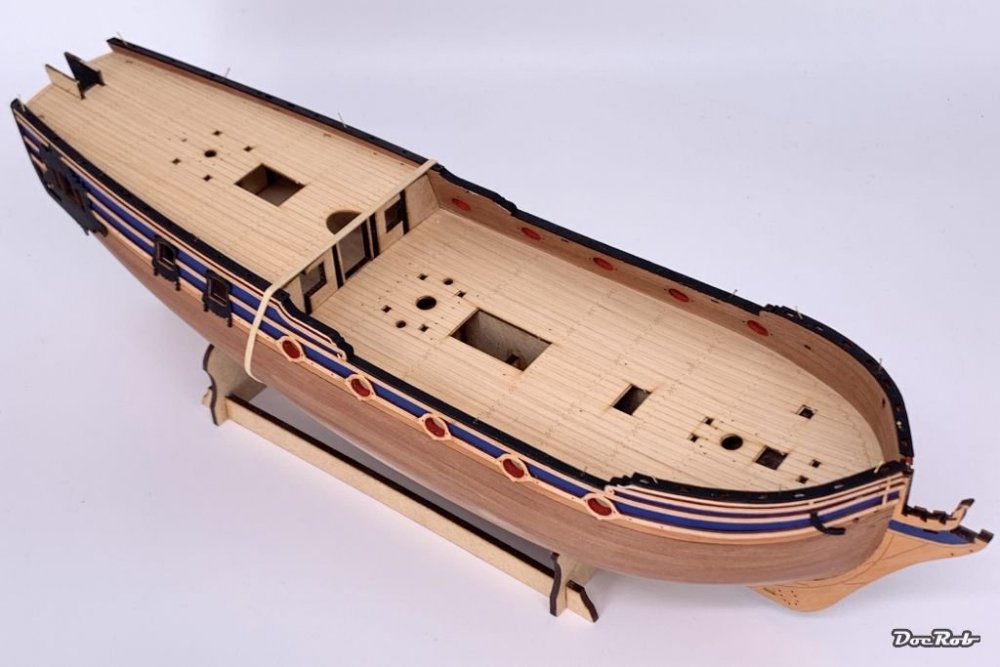
In the first pic, I filled and sanded the four areas between the next to add bulwarks. Here the bulwarks are on and the filled areas painted correspondingly in matte black. To apply a bit of pressure onto the parts for a thorough bond, the sharp eyed between you will spot some tiny nails which were angled thrust into the underlaying wood through pre drilled holes in the gunwales. Cheers Rob
-
Duchess of Kingston - Beauty of the Seas - Wooden Sailing Ship 1/64
DocRob replied to DocRob's topic in Non LSM 'WIP
Thank you Mike, for this build, I do not considered staining, because I read the Biography of the Duchess of Kingston, where some mentioning about her Yacht were made. This ship was an opulent yacht, to party on and I think, solid bright colors do that appearance justice. I want to use the same blue color for the hull, as is used for the background of the stern decorations and the figurehead, not possible with staining. I really like the translucent look of stains on wood, it make the wood look rich, obviously different from opaque colors and I may try this on other builds, possibly in larger scales. Besides lots of preparations, I assembled the decorative fairings on the hull. A picture of these will follow. I primed the resin parts for figurehead and stern decoration, the latter has been bent slightly, to follow the stern contour with hot air. I then sprayed some Tamiya flat blue as a base for the gold painting. Speaking of gold, I test sprayed Vallejo rich gold from the Liquid Gold range and it works. It thins with Alcohol. When brush painting this color, it looks first a little stained, but then turns to reflective gold, without showing any grain. The effect is smiliar to the Molotow chrome markers Next on the to do list is adding the black painted gunwales, which are only test fitted on the pic, to determine, where I have to use some wood filler on the curved parts, which will be painted black after sanding the filler smooth. Cheers Rob

-
I like the camo a lot, how did you do it? Were you using masks or is it hand painted? Cheers Rob
-
Very nice build and presentation. I really like the very matte paintjob with just a bit of weathering, which contrasts nicely to the reflective transparent parts. Pity that the interior is relatively hidden. Cheers Rob
- 9 replies
-
- 1
-

-
- hobby boss
- b-24d
- (and 1 more)
-
Wow Carl, the Cobra is coming together fast and very nice. The detail on the Minigun was a bit on the weak side, so your tweak enrichens the appearance. It's always good to have a kit with a flat bottom to sit on, I can tell you while working on a wooden ship with delicate underwater shape . Cheers Rob
-
What is on your bench right now ? Share a picture :)
DocRob replied to Martinnfb's topic in Modelling Discussion
Whoa Martin, that's some piece. He appears to be a bit dark, but that's maybe the soul showing through. Cheers Rob -
What is on your bench right now ? Share a picture :)
DocRob replied to Martinnfb's topic in Modelling Discussion
She came out great, Carl, nice paintjob, very natural colors, is this 1/1 scale? Cheers Rob -
WNW Fokker D.VllF Ukrainian Galician Army 1919
DocRob replied to Clunkmeister's topic in Everything Ukraine Group Build
Hi Mike, if I may answer. The Aviatic decal sets for dedicated planes like the Fokker D.VII are only cookie printed, you have to cut every decal to fit. Cheers Rob -
WNW Fokker D.VllF Ukrainian Galician Army 1919
DocRob replied to Clunkmeister's topic in Everything Ukraine Group Build
Now we are talking, great choice Ernie, I love the late Fokkers but like you haven't build a D.VII yet. With the colorful scheme she will be a supportive beauty. I plastered some planes with Aviattic decals and they are the best decals, I ever worked with. No troubles except excessive pre-cutting. Cheers Rob -
1:32nd scale Fokker D.VI
DocRob replied to sandbagger's topic in LSM 1/35 and Larger Work In Progress
Your Fokker is looking absolutely perfect with your trademark appearance. What I mean, it's easily recognizable, that you laid your talented fingers onto this build. That raises my appetite for another Fokker D.VIII, this time a yellow diamond clad maritime bird. Cheers Rob -
Some very nice extra work, which paid really off. Cheers Rob
-
Scalemates 106310-24-instructions.pdf (scalemates.com)
-
Cheetah C conversion
DocRob replied to Mirage's topic in LSM 1/32 and Larger Aircraft Ready for Inspection
Very nice and unusual plane, well rendered. By the way, welcome to LSM. Cheers Rob -
Nice save Martin, the closed canopy will look good and doesn't disturb the sleek shape. I had a very similar prob with an Eduard boxing of a Su-27 UB. The supplied canopy had a crack and I ordered a vac replacement which was scratched. I got a second intact vac canopy and as we are speaking about, I think the box contained an Ukrainian decal option. Cheers Rob
-
Nice build and also nicely photographed with the background. Cheers Rob
-
Duchess of Kingston - Beauty of the Seas - Wooden Sailing Ship 1/64
DocRob replied to DocRob's topic in Non LSM 'WIP
Decorations are on, at least preliminary. I attached them, using tiny nails into the pre drilled holes to align in different locations. Fit is perfect in all directions, except one cut at the bow, but that's by design. I'm not sure, if I use PVA or CA for the decorations, as it's easy to soil the painted parts. I think, I will glue, while pinned, using only the distance, the nail provides for putting the glue on. This way, I have a minimized risk of smears. I will work from the stern forward to the bow poco a poco. I love the way, Chris designed the decorations layer wise, as there will be PE-window frames and PE decorations added onto the wooden parts. I searched the whole box for some clear acetate for the windows and found none. Not sure, if I will make them myself or leave them out. Cheers Rob

-
Duchess of Kingston - Beauty of the Seas - Wooden Sailing Ship 1/64
DocRob replied to DocRob's topic in Non LSM 'WIP
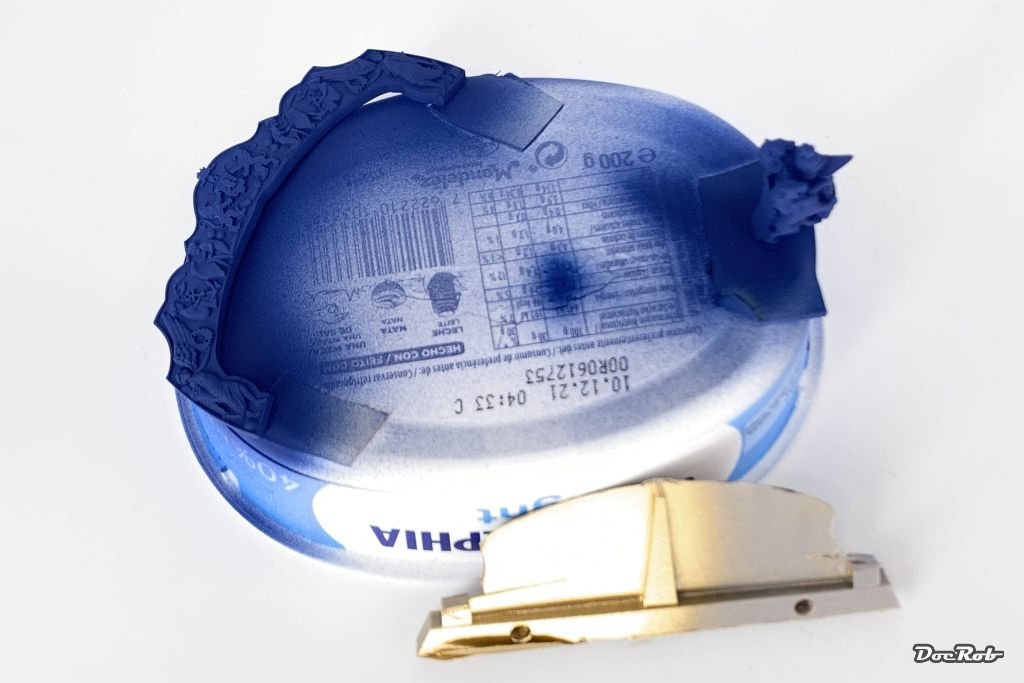
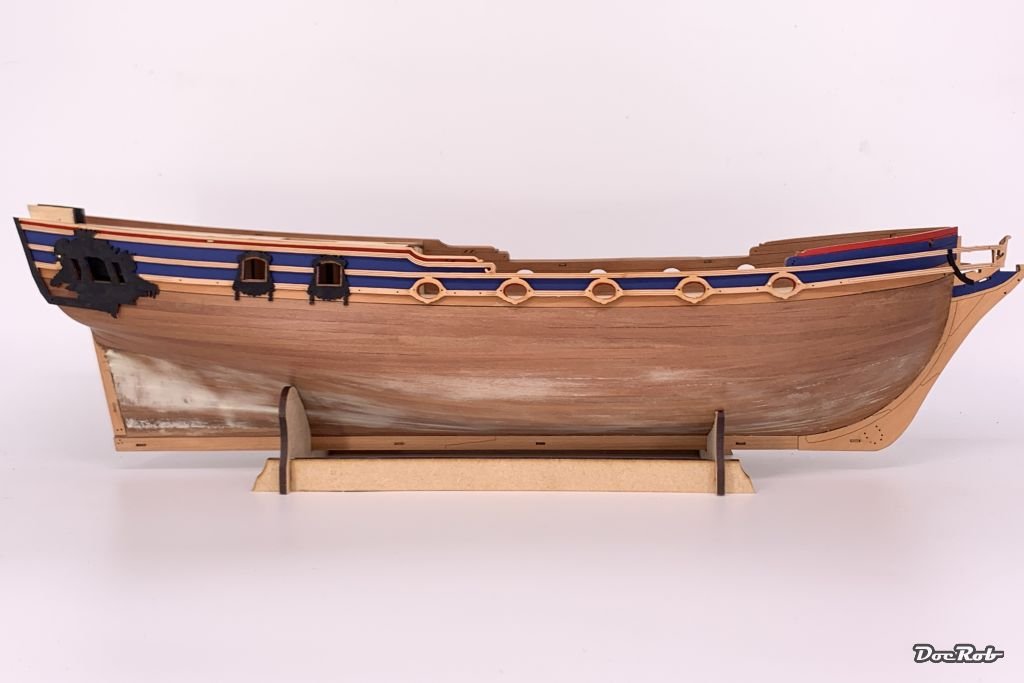
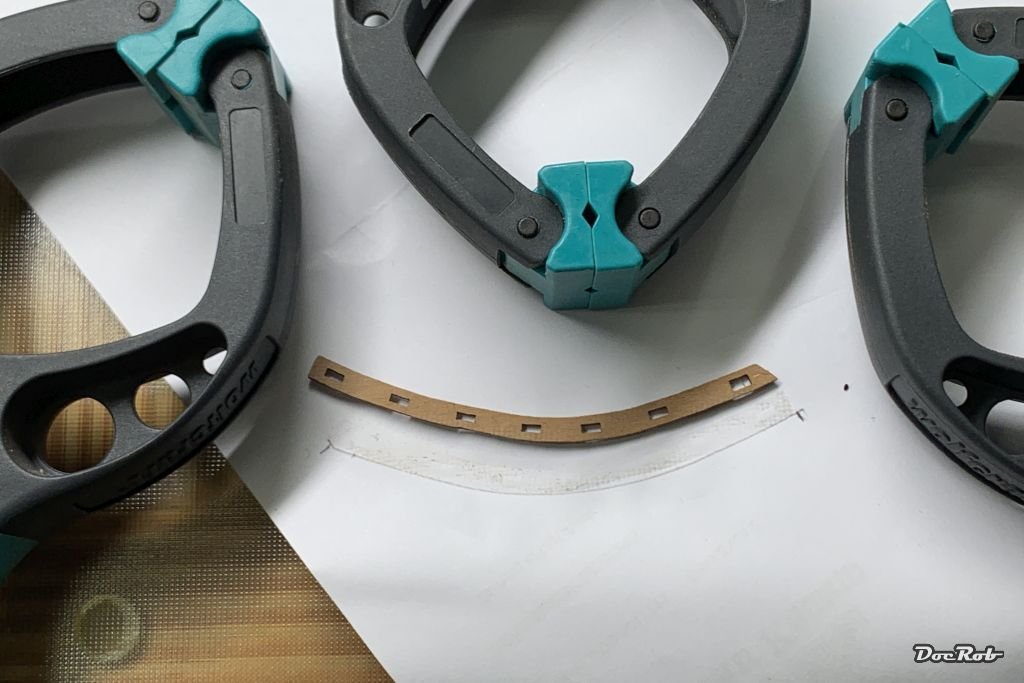
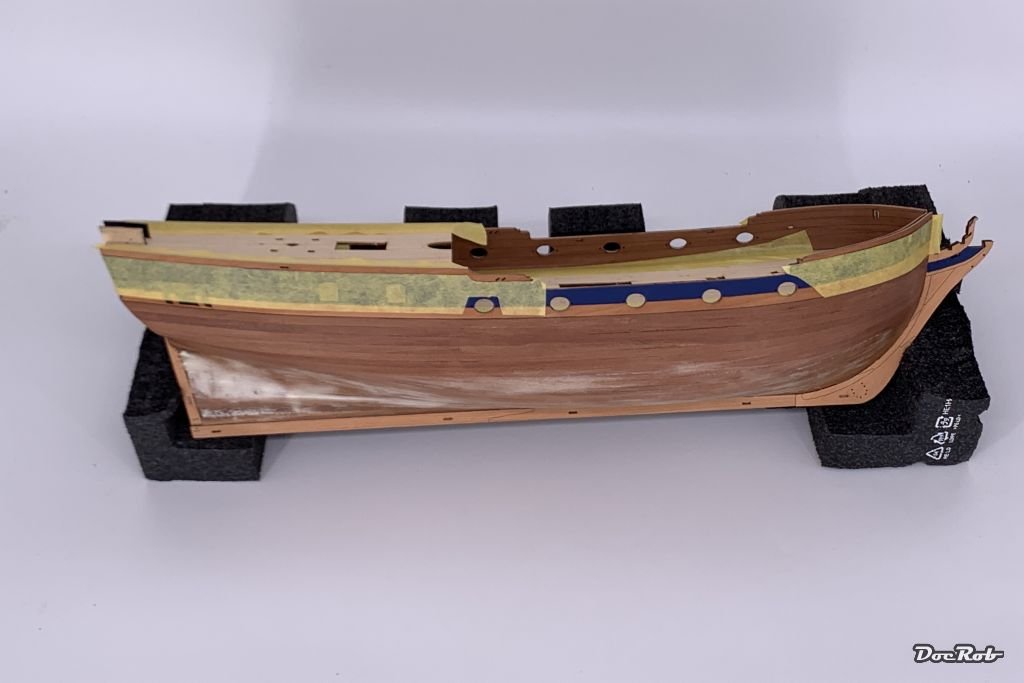
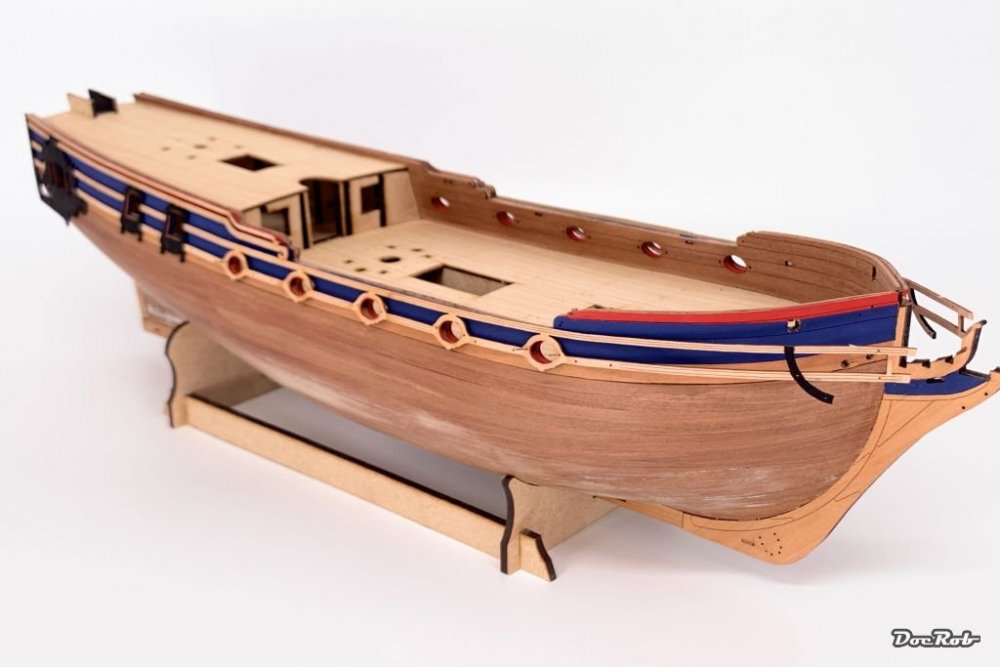
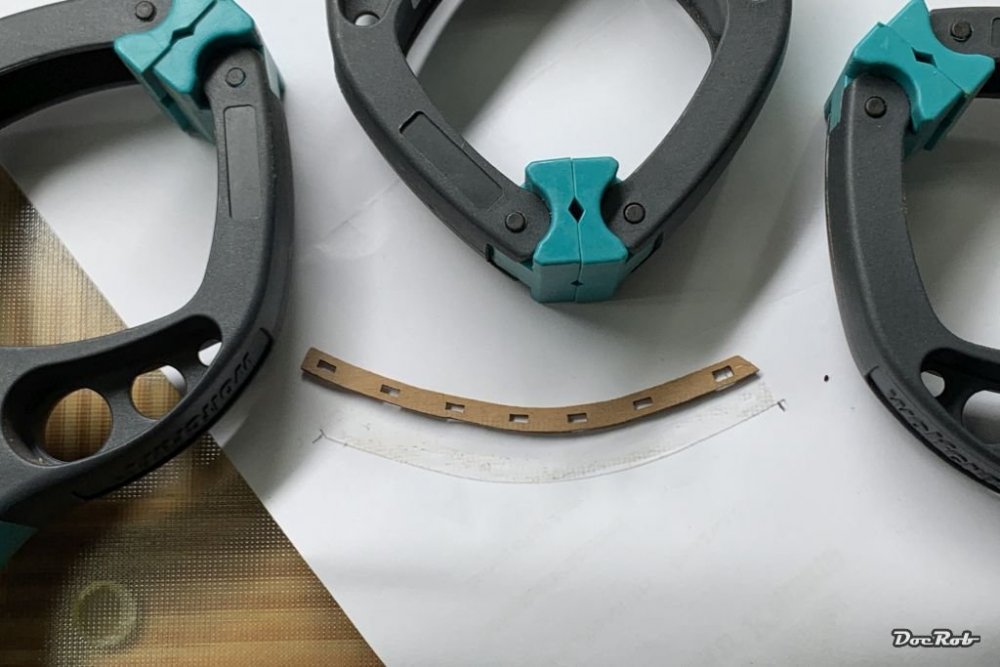
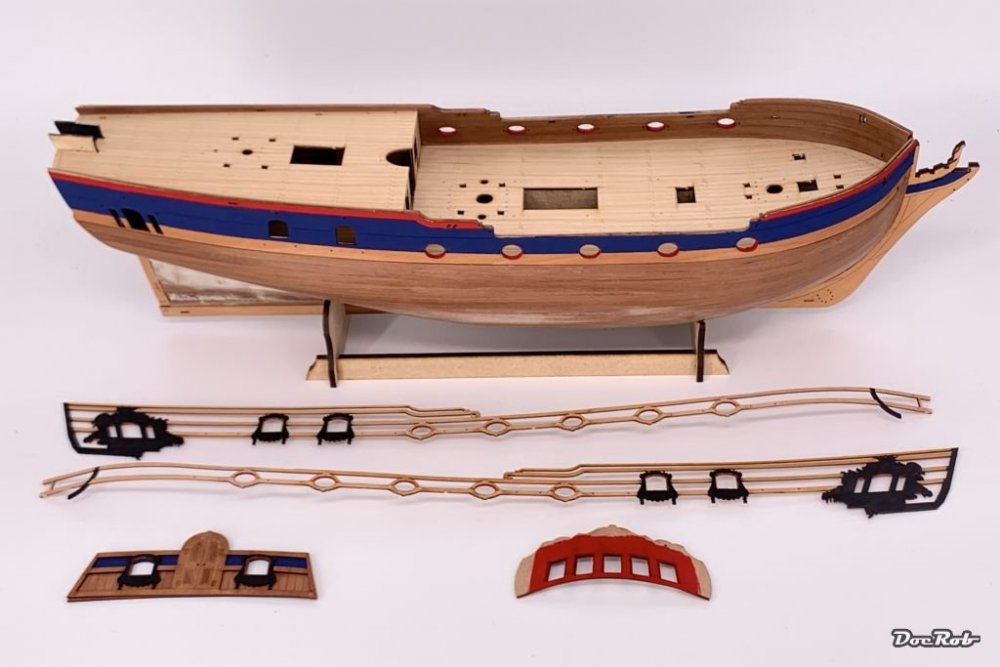
Like every build, there are some mishaps taking place. When I narrowed the cabin front on the disc sander, I managed to break the decorations part. Luckily I found all the pieces and was able to glue them together on a glass plate, phew. While test fitting, I found out, that the gunwales for the starboard side doesn't fit with my bulwark, the radius was too tight. I turned the DoK upside down and marked the correct contour with a pencil on a sheet of paper. After soaking the gunwale part, I clamped it down, the shape forced to fit the paper and let it dry overnight. Now it fits perfectly. At last, something, I'm used to, masking. I masked off the areas on top, which will be painted bright red. An old foam insert from a laptop packet, was cut to fit, as a soft cradle for the painting jobs. That's where I am now, the rims are painted red as well as the stern and I painted the inside of the gun ports red, which was quite nerve tangling. I used a cotton swab soaked with Tamiya XF flat red color to do this. In the next step, I will add the rail patterns to the hull, where I brush painted the window framing with Tamiya XF flat black and the gun ports in red color. Cheers Rob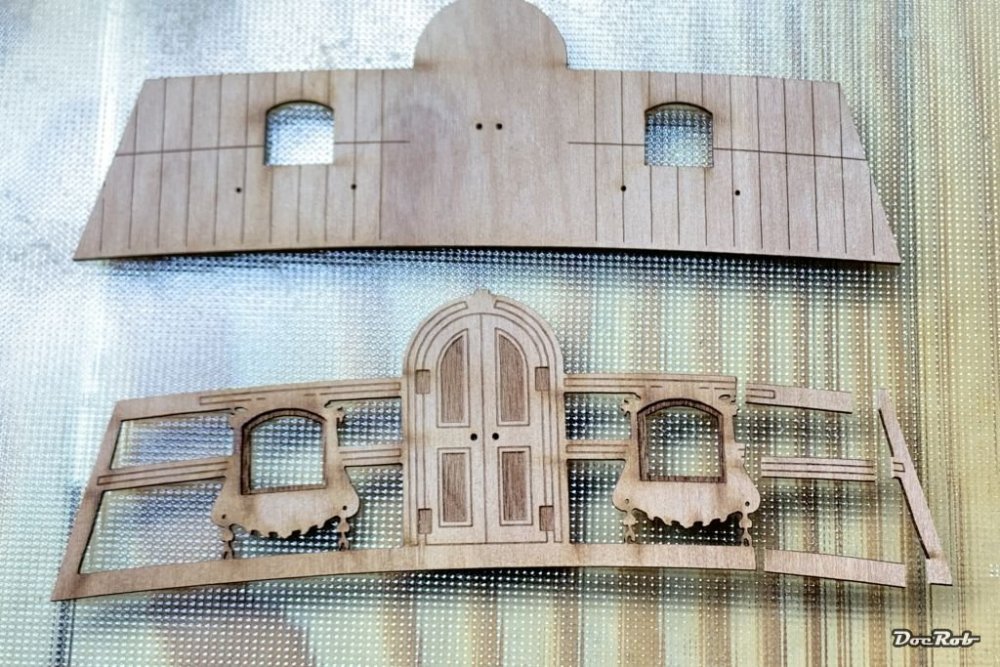

-
Duchess of Kingston - Beauty of the Seas - Wooden Sailing Ship 1/64
DocRob replied to DocRob's topic in Non LSM 'WIP
Ha ha, the maritime terminology is a language in it's own. I read Hornblower and others, when I was young, so I'm a bit accustomed to the slang. To tell progress differently would not be very helpful with descriptions like 'the thing, made from wood, which is protruding from the upper front of the fuselage, which carries the ships breaking system' , so cathead is a bit shorter. As English is not my mother tongue, it also helps me using the manual for vocabulary Cheers Rob -
Duchess of Kingston - Beauty of the Seas - Wooden Sailing Ship 1/64
DocRob replied to DocRob's topic in Non LSM 'WIP
Thanks a lot, she starts to look like a yacht for a Duchess. Cheers Rob