DocRob
-
Posts
7,122 -
Joined
-
Last visited
Content Type
Profiles
Forums
Events
Gallery
Everything posted by DocRob
-
Start to look Cobra, Carl. Nine Cent are a true bargain for better balance , thanks for that tip. Are you sure, the extra armor is not to protect the pilot a bit better? Cheers Rob
-

Tamiya 1/12 Ferrari 312T
DocRob replied to Peterpools's topic in LSM 1/35 and Larger Work In Progress
Great work on the body parts Peter. I do like your iterative thinking process, about what to show of the model. I like to do it the same way, having a relatively fixed plan of a build, including needed techniques, skills and building steps and reevaluate, when questions arise. I believe, that this is a good way to prevent epic fails. With your Ferrari, I have no doubts the outcome will be terrific. Cheers Rob -
Duchess of Kingston - Beauty of the Seas - Wooden Sailing Ship 1/64
DocRob replied to DocRob's topic in Non LSM 'WIP
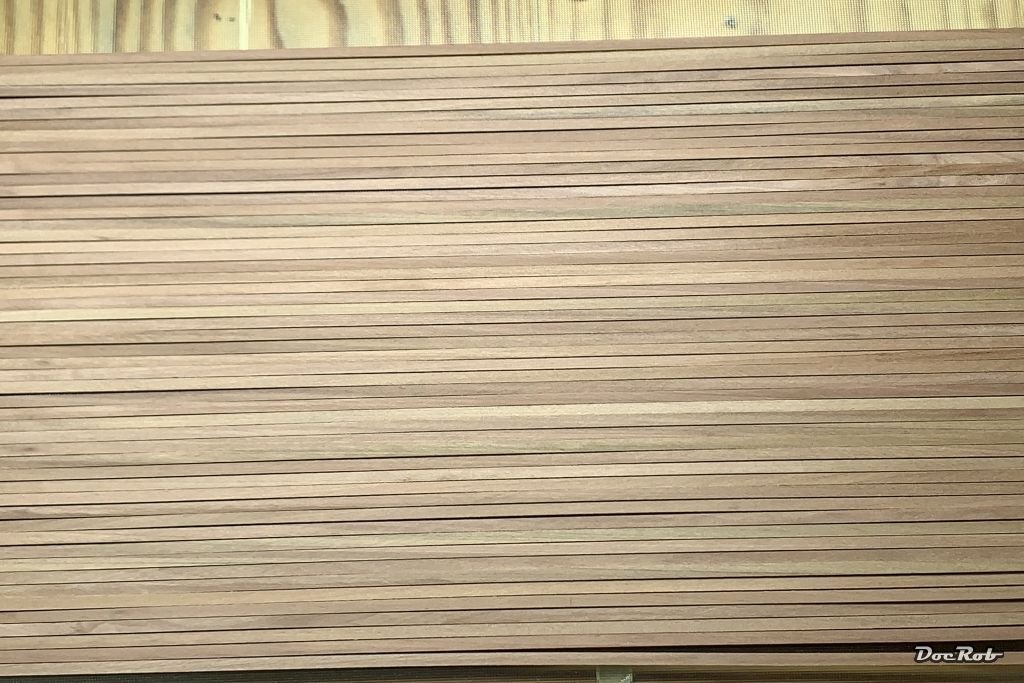
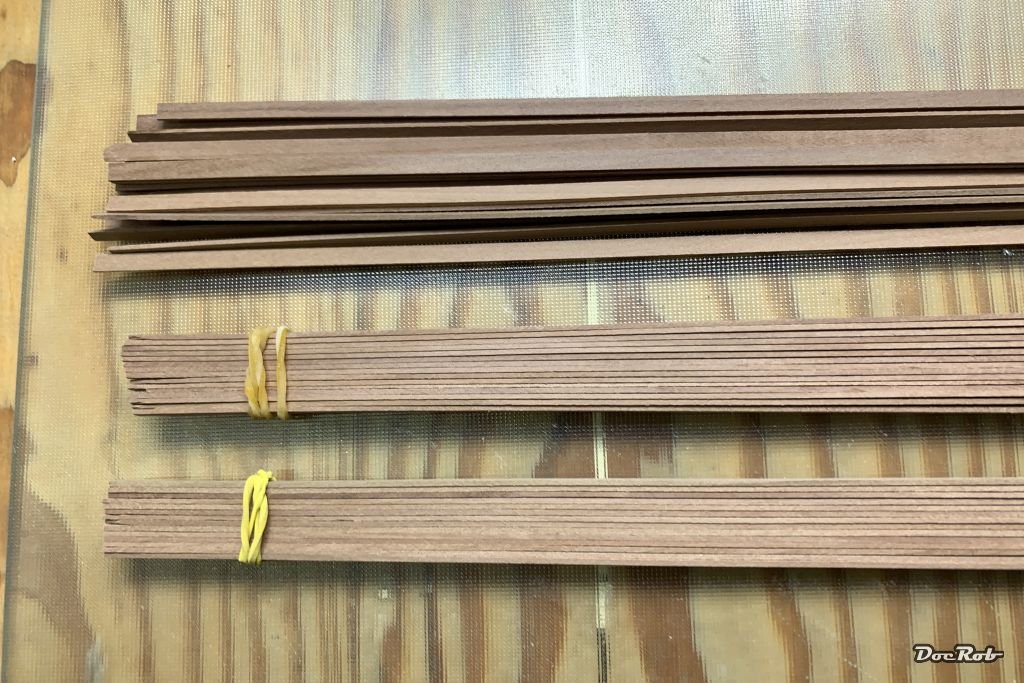
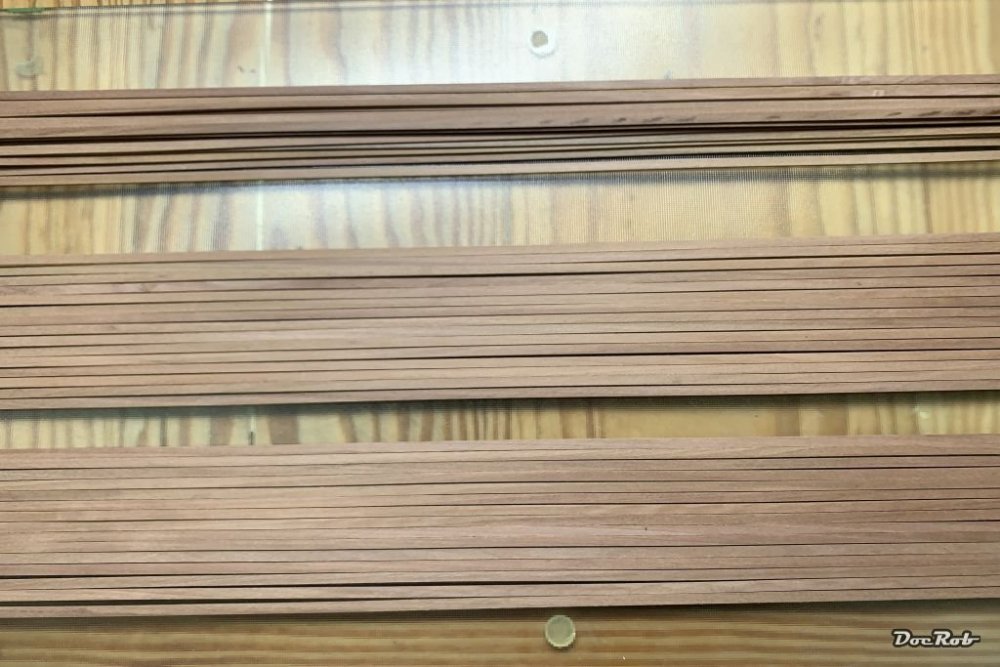
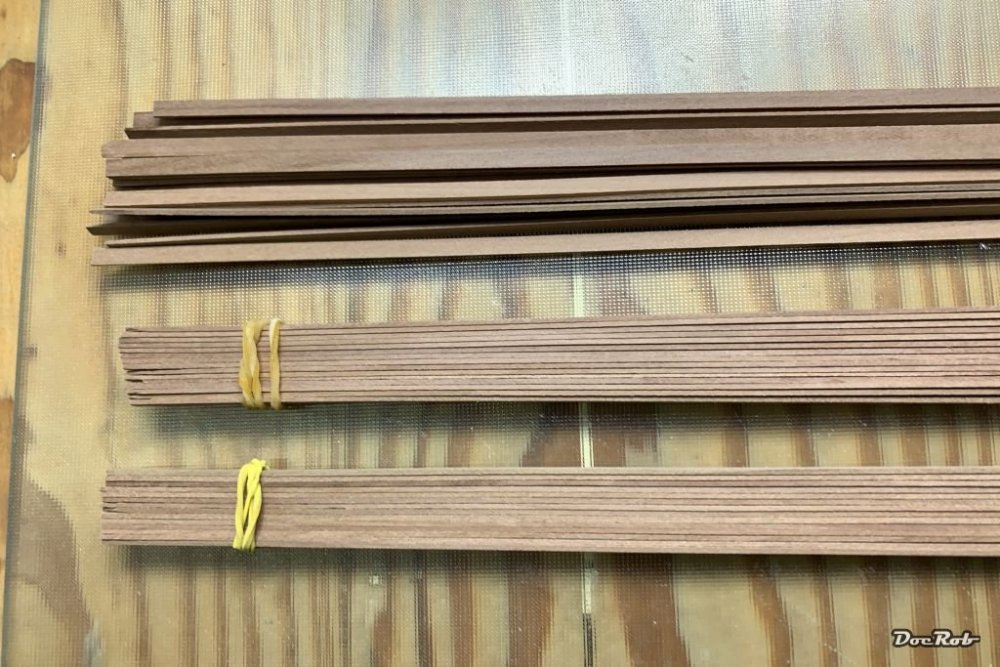
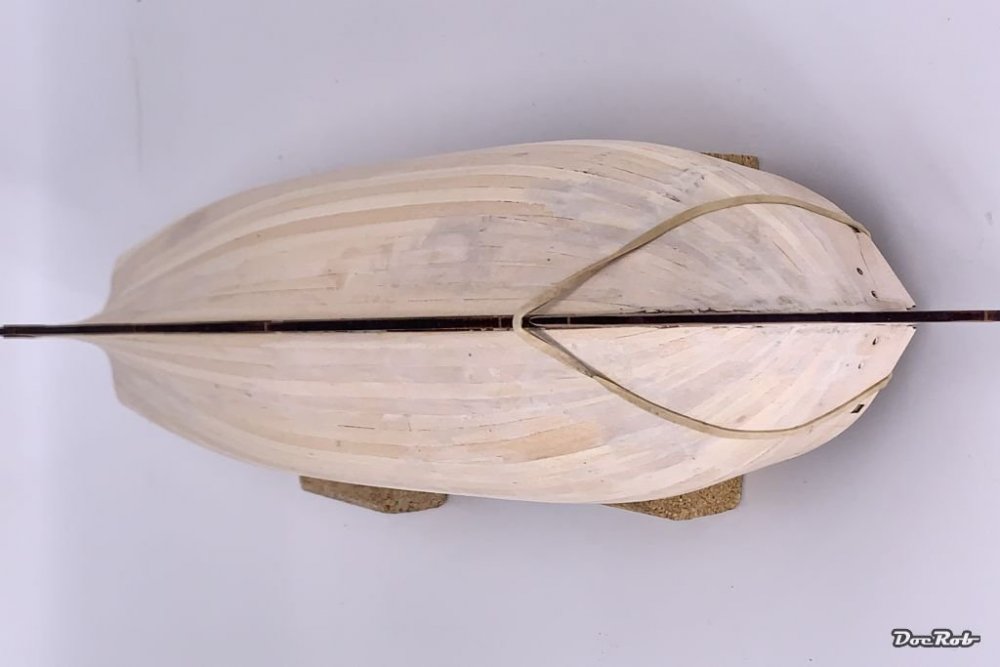
Preparations, preparations. To achieve the best possible second planking, I spread the pearwood planks out and sorted them for color matches. I selected two sets of 15 planks in similar shades for each side. This will be more than enough for the planks for the visible area above the waterline. I also reviewed the planks, to see, which is the better side, because some have marks from planing. The sets of 15 where then bundeled orientated with rubber bands. I'm not sure for which purpose I marked the run of the spars with a flexible strip and a pencil, but better now than too late. In the last days, I also added the keel and bow fairings, to tuck the second planking under. Cheers Rob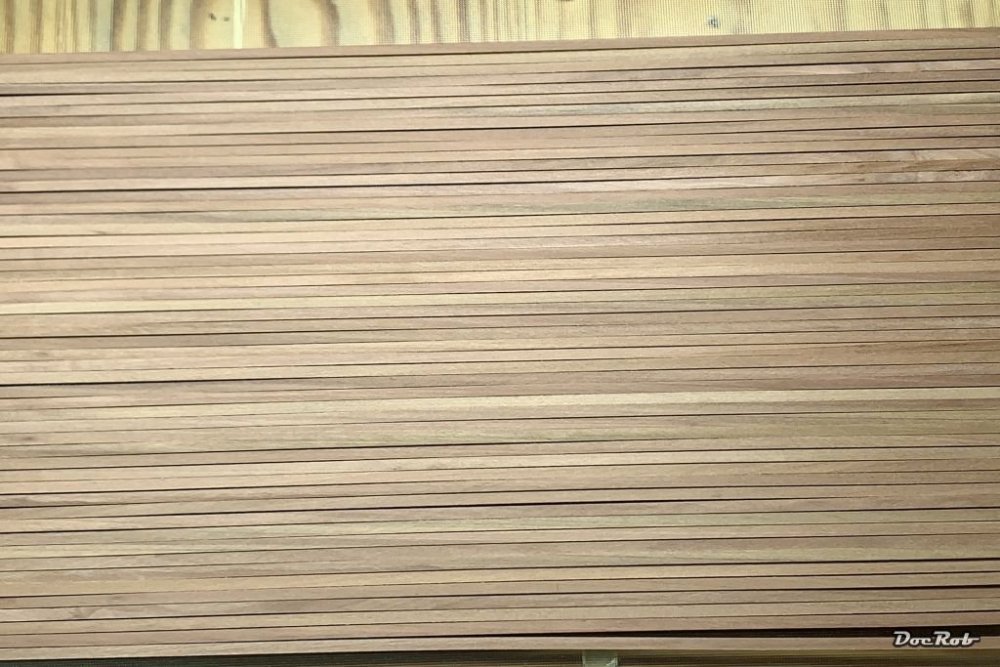


-
Looks like a nice straightforward build Carl. The cockpit is looking great. Cheers Rob
-
Duchess of Kingston - Beauty of the Seas - Wooden Sailing Ship 1/64
DocRob replied to DocRob's topic in Non LSM 'WIP
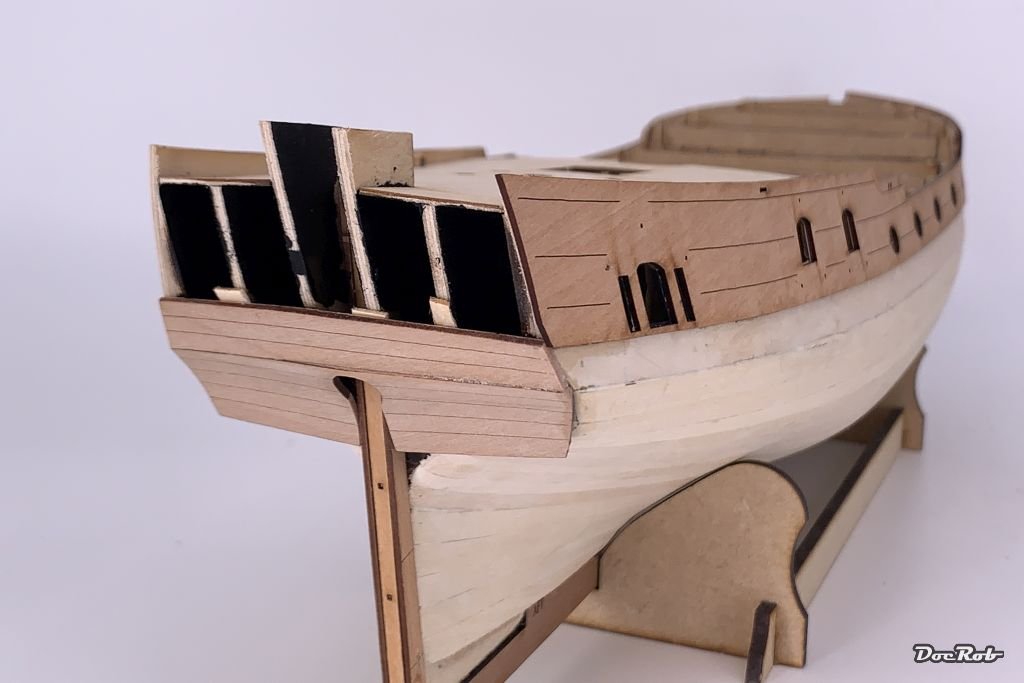
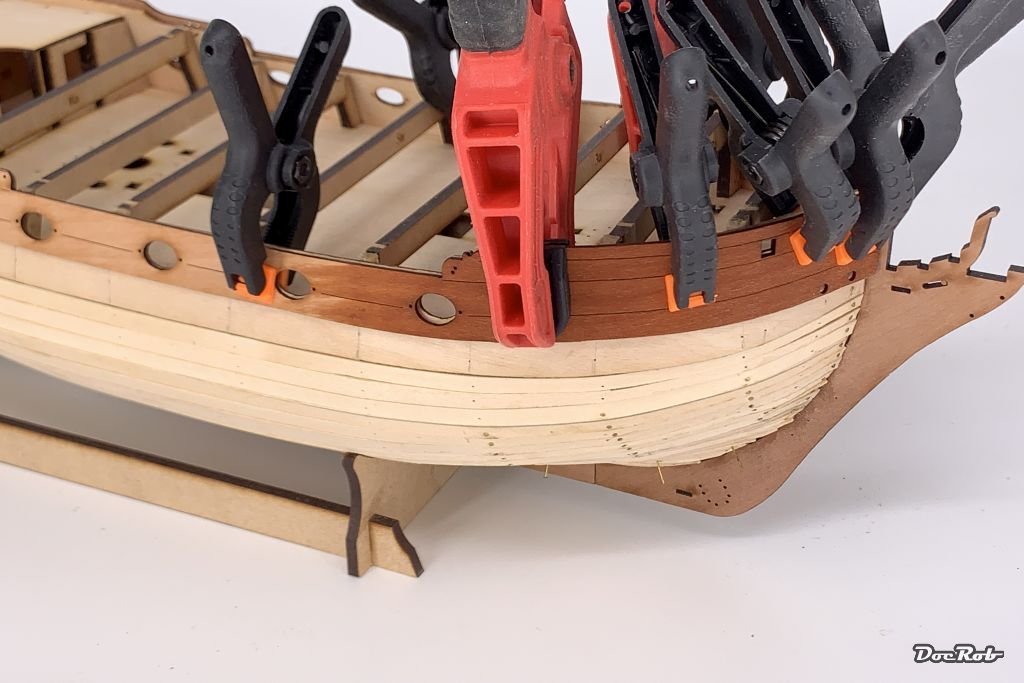
Thank you Gaz, while the second side of the pre fabricated planks are clamped, rubber banded nailed, ..., I can show the nice result of the first side. The pearwood looks great to my eye. It was not so easy to get the long part aligned and I could barely see anything because of the amount of clamps used. It skipped my ever suspicious eye, that in the bow area, the planks are a bit high, about 2mm too much. I saw this after the glue cured and decided to do it the same way on the other side, which make it necessary to correct six holes in the hull. In the middle of the night, it struck me, that now it's maybe the best time to paint some black behind the stern and side windows, without the risk to ruin decorative elements later. I took out some Tamiya XF-black and painted the area and cleaned the brush with some Tamiya solvent. I tell this, because at that moment I realized somethin great about wooden ship modelling. Most of the building stages do not require chemicals with strong and unhealthy odor, great. Of course there is dust and vapors from varnish, but not the ever present Tamiya Extra Thin, permanent painting, cleaning, airbrushing, it's a difference. Cheers Rob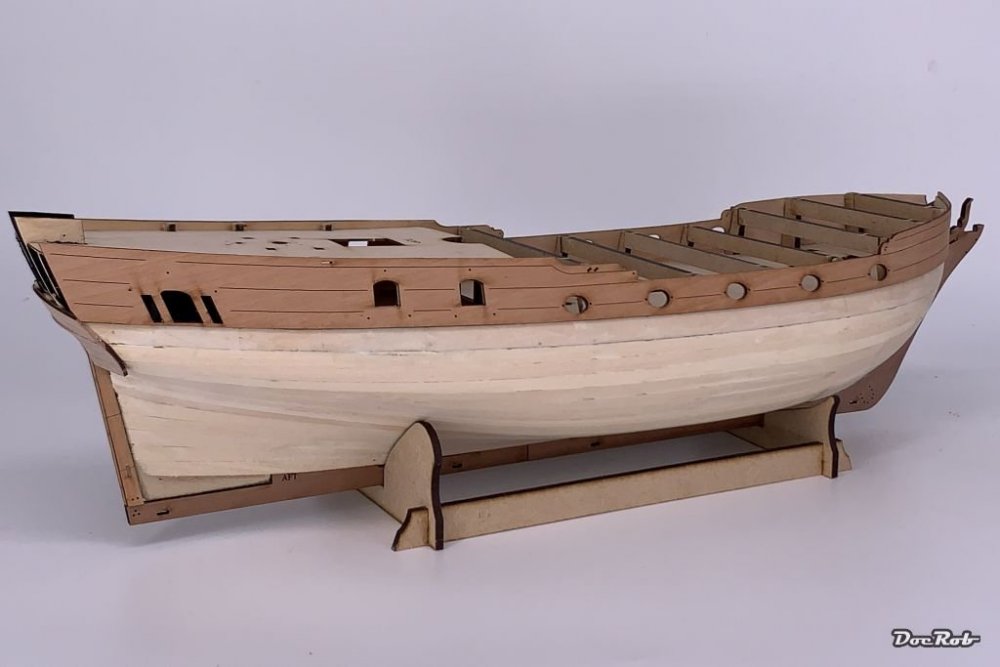
-
Nice start Carl, good to see you working on the Cobra. Having the Special Hobby derivate of the early model in stash, I will follow closely. Cheers Rob
-
Duchess of Kingston - Beauty of the Seas - Wooden Sailing Ship 1/64
DocRob replied to DocRob's topic in Non LSM 'WIP
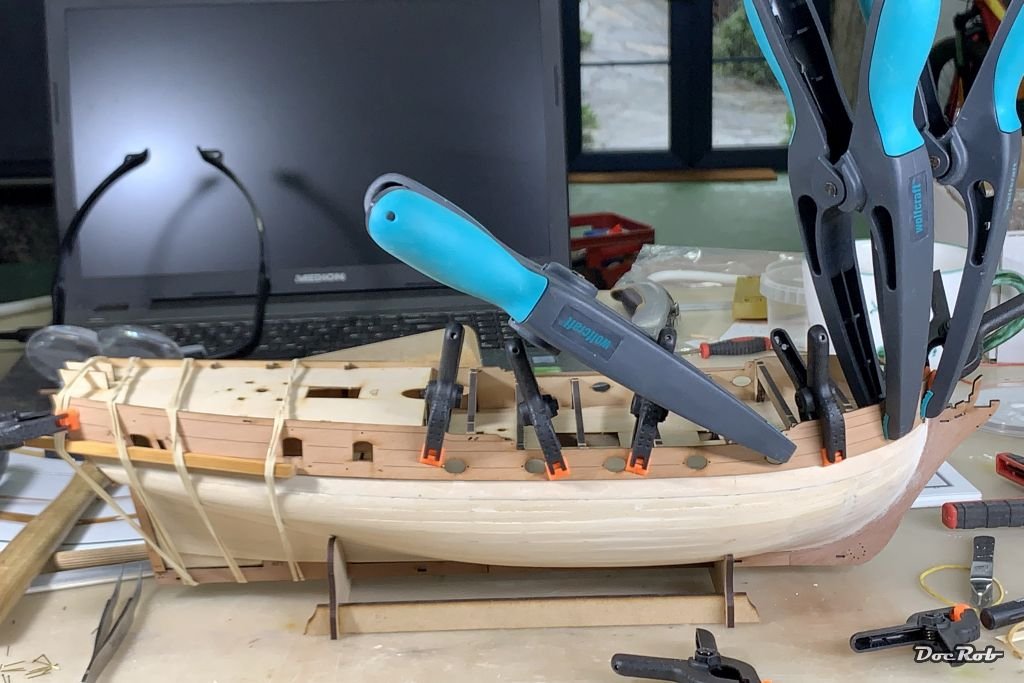
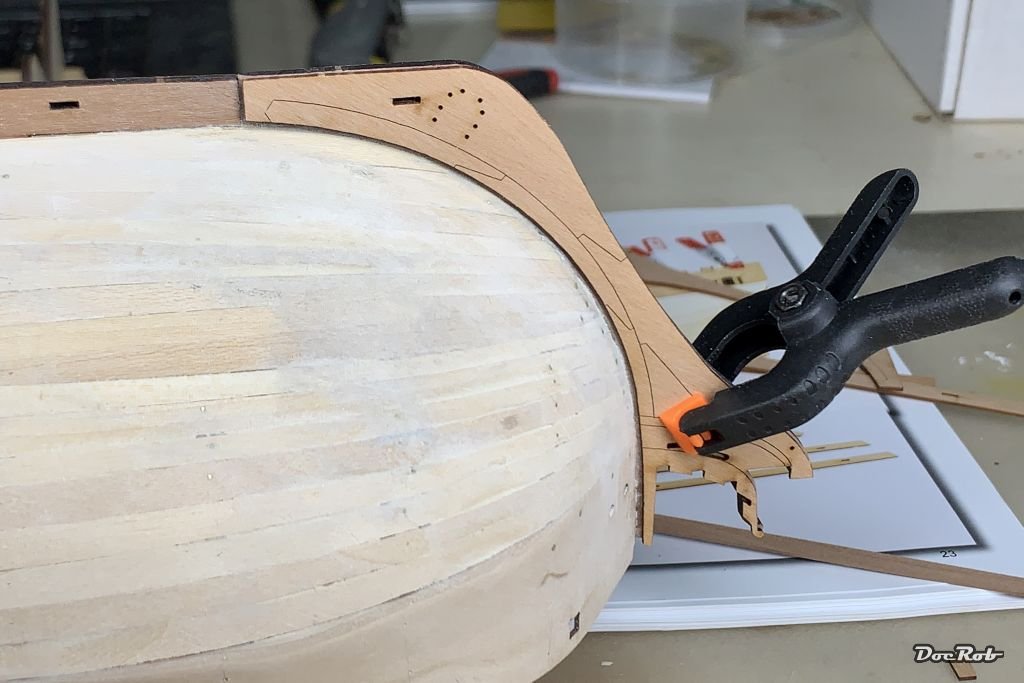
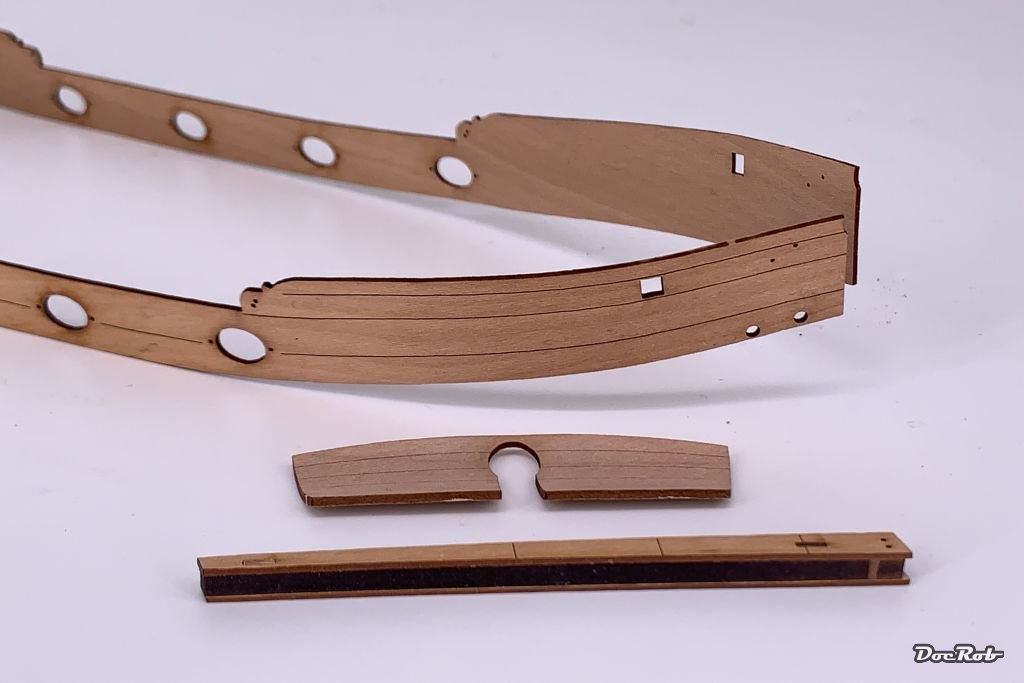
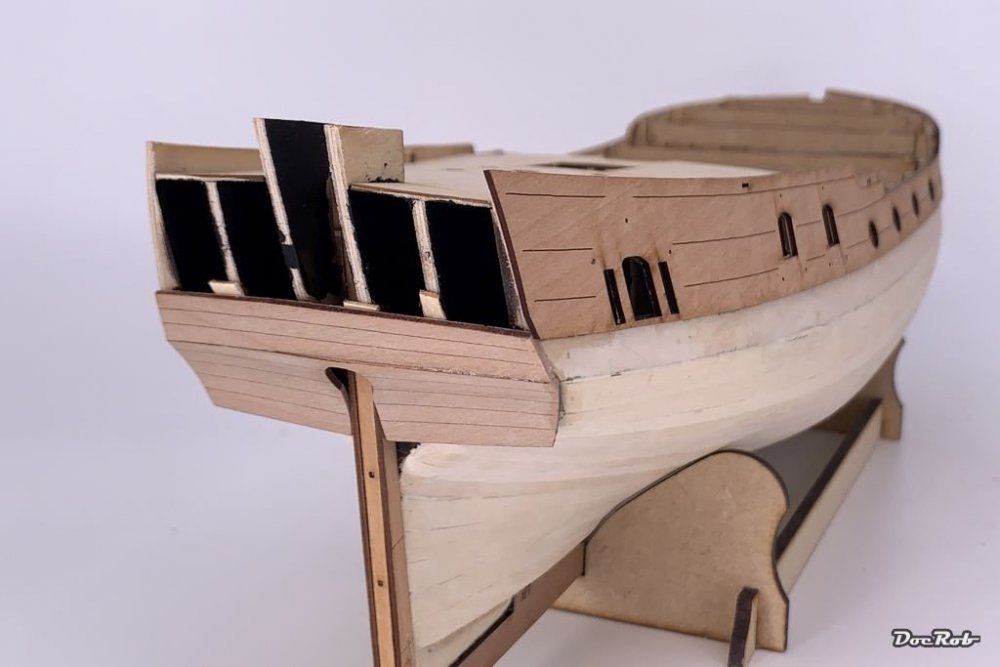
This is really step by step work, as it's always curing time, drying time, ...-time. We have storm and rain in the moment and I hoped to advance a bit farther, but no, poco a poco . The actual building steps are important for second planking and complicated, so a bit patience is necessary. I glued on the stern fairings and applied the stern fascia loosely to get an impression, if everything is right. Looks good to me and the stern fairing will be sanded to fit after planking. The planks above the deck line are prefabricated and have engravings to resemble planks. The wooden parts were soaked in the bow area and clamped to the bulwark for drying preformed some days before. I glued the planks onto the bulwark using an assortment of clamps and rubber bands. Alignment was relatively easy, because bulwark and prefab planks have corresponding holes, where I inserted nails for alignment, clever engineering again. Fit was very good, but it was not easy to press on the planks onto the entire surface equally. I absolutely love that the gunports are pre-cut through the bulwark, the inner and the outer planking. To drill these out and get them sanded square and perfectly aligned on my Kutter model was a task, which lead to a benching of the vessel. Cheers Rob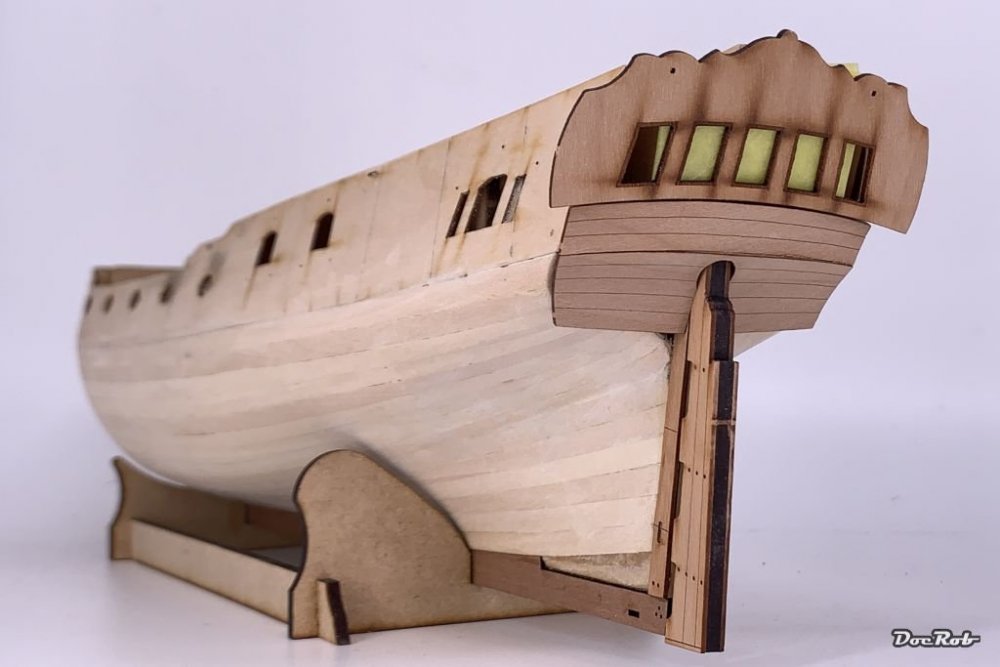

-
Duchess of Kingston - Beauty of the Seas - Wooden Sailing Ship 1/64
DocRob replied to DocRob's topic in Non LSM 'WIP
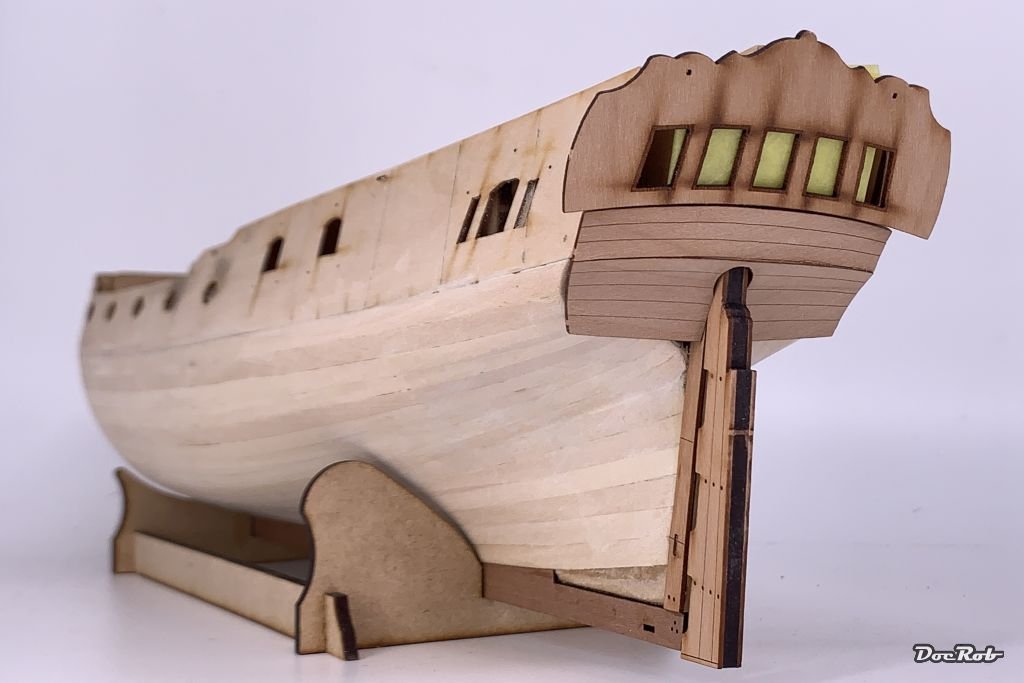
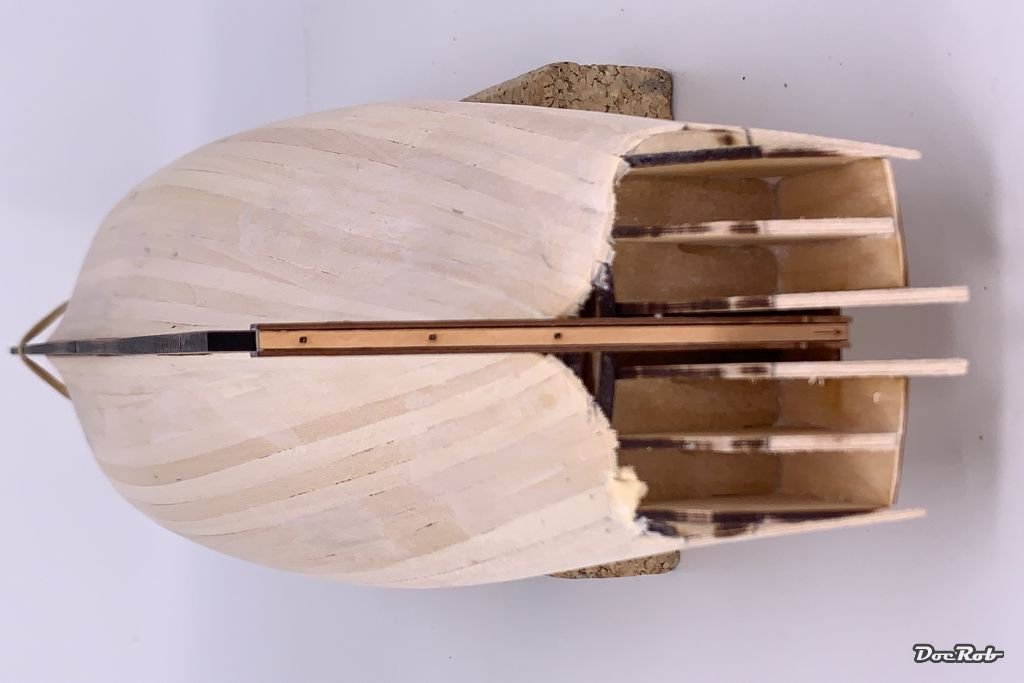
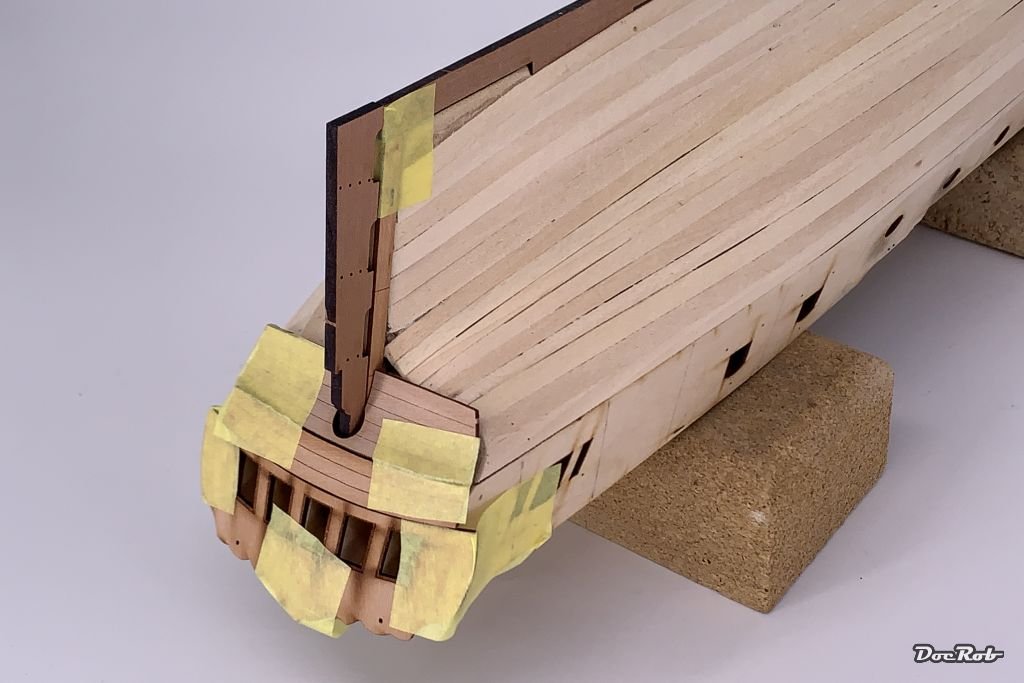
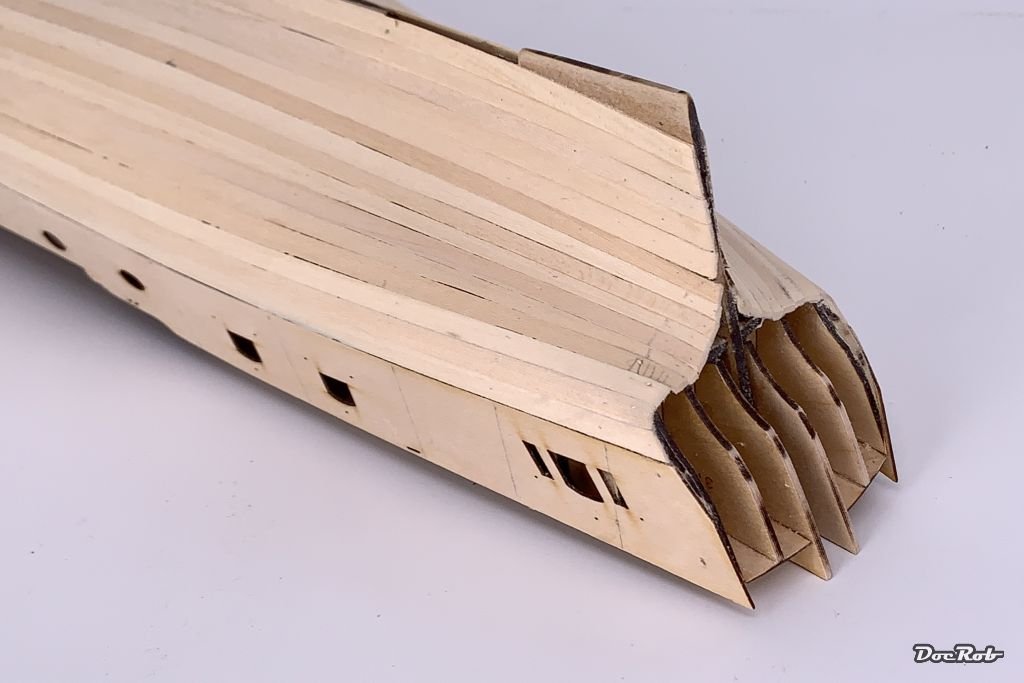
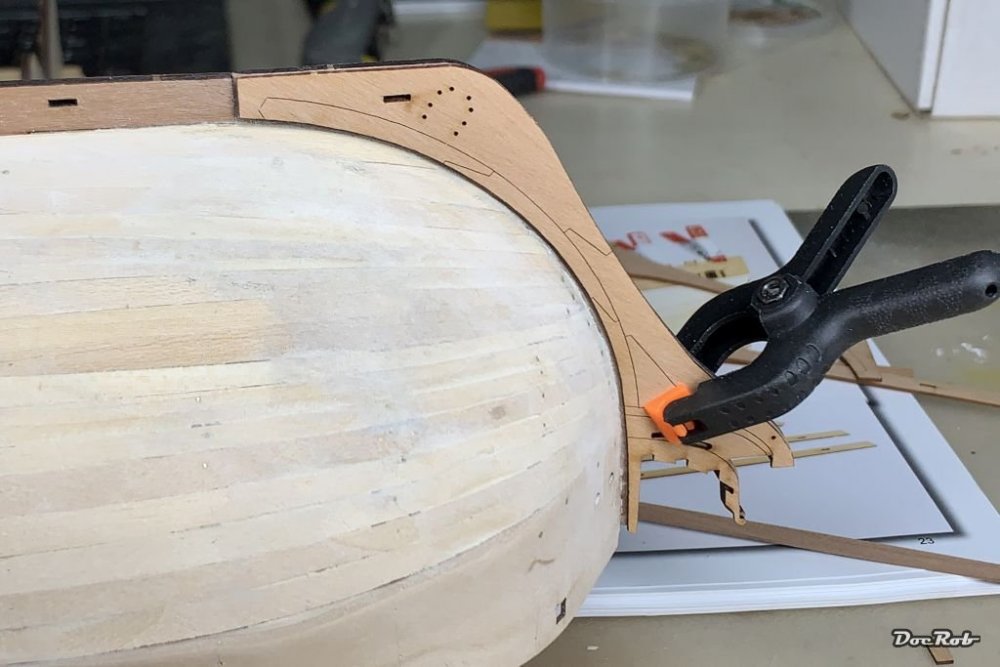
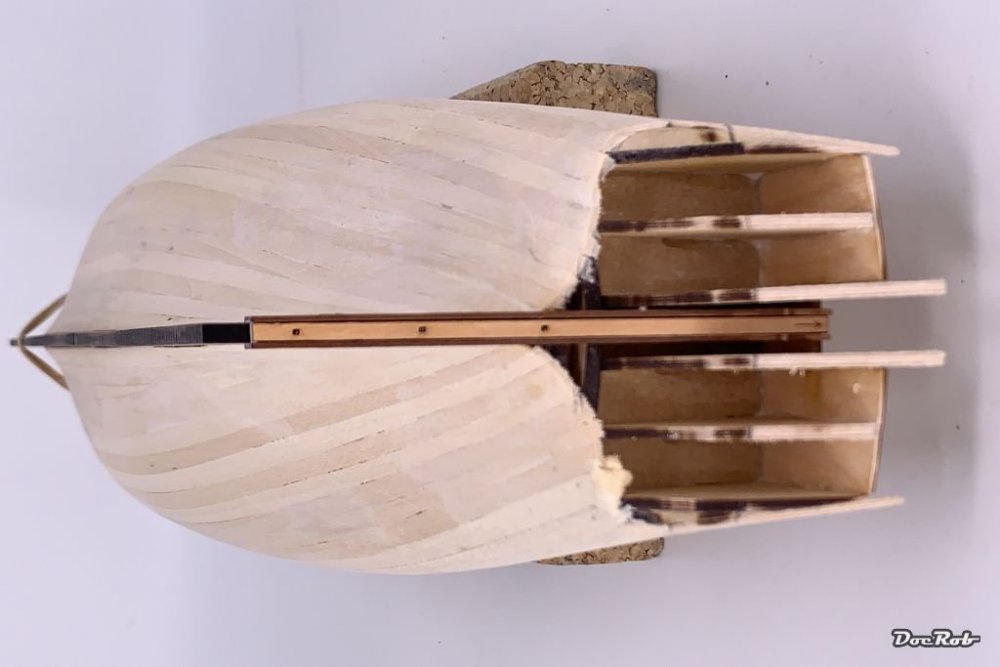
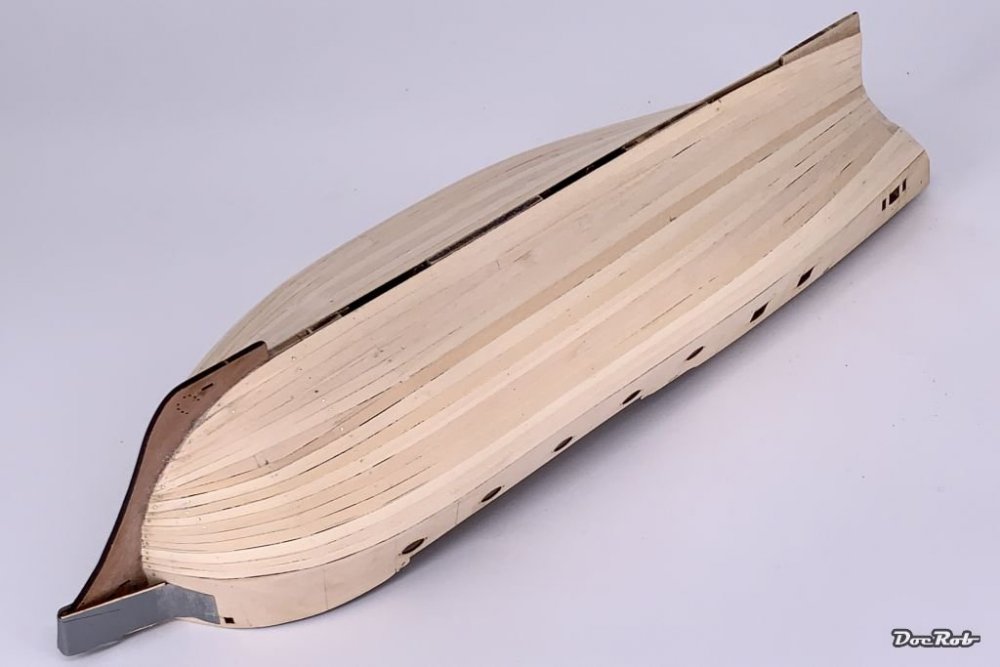
Progress is slow in the moment, as I try to eliminate all hindering elements for second planking. This is a time consuming process with a lot of test fitting and anticipation. The most difficult part to foresee is the stern area with it's multi dimensional shape. The manual states, that the stern end of the planks should tuck under the stern fairing. In order to do this, I found it necessary to add some supports, to achieve the geometry needed. For measurement, I built together the rudder and taped it in place. I found out, that I had to open the slot for the rudder on the fairing a bit more. While using the glue's drying time to prepare the decorative keel fairings, I clamped them onto the keel in their final position and found the gap between first planking and keel fairing too narrow in places to tuck under a plank. I sanded the hull to conform, like on the picture, the gap is now evenly wide enough to accept second planking. Cheers Rob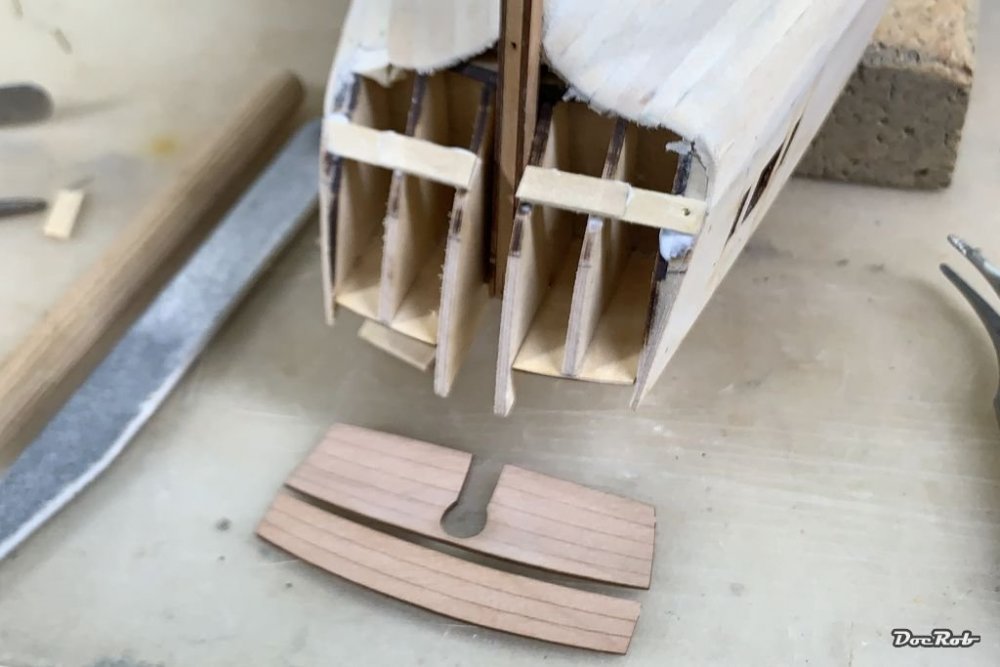
-
Duchess of Kingston - Beauty of the Seas - Wooden Sailing Ship 1/64
DocRob replied to DocRob's topic in Non LSM 'WIP
Muchas gracias Gaz, fingers crossed. The second planking has some new difficulties to master. Below the water line my hull will be painted white, no copper with DoK. Cheers Rob -
Duchess of Kingston - Beauty of the Seas - Wooden Sailing Ship 1/64
DocRob replied to DocRob's topic in Non LSM 'WIP
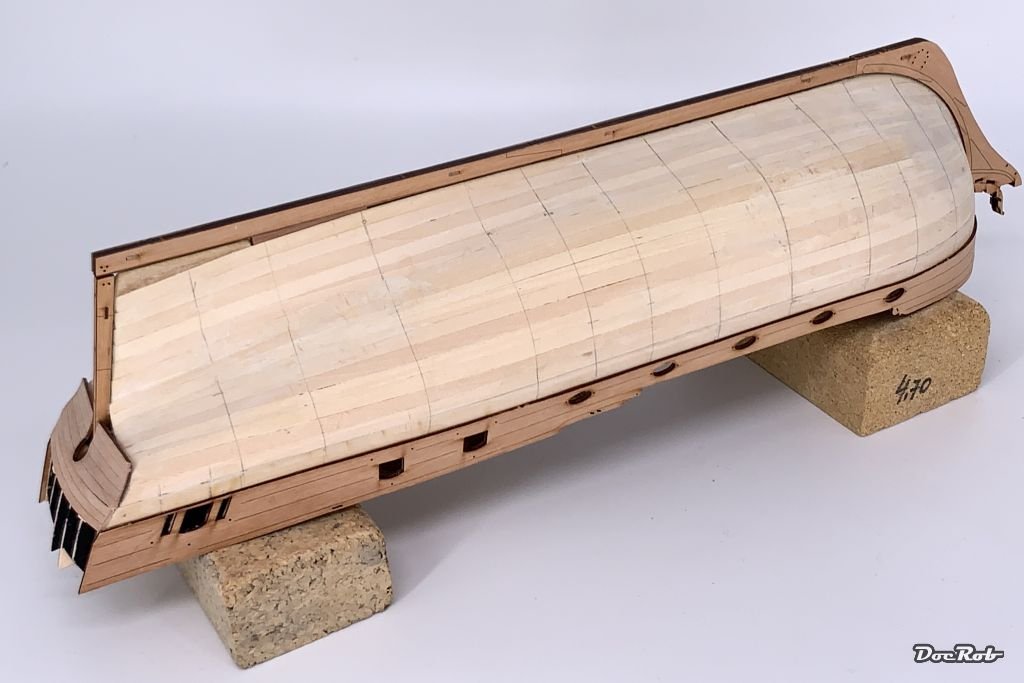
Not only are the filler blocks a good foundation, to apply the planks on, but by preparing them, you easier spot, where a spar might be a bit out of shape to accept the planks, specially in the delicate bow area. On my DoK build, I haven't realized, that the third spar isn't perfect, and I didn't spot it with controlling the shape with a test plank. Cheers Rob -
Duchess of Kingston - Beauty of the Seas - Wooden Sailing Ship 1/64
DocRob replied to DocRob's topic in Non LSM 'WIP
It's very good news to see you back at the Speedy Ernie. The name of the vessel should anticipate the building speed . Planking is a laborious task, but it has to be done and there is always room to improve it seems. I ended up with a smooth hull and cannot spot irregularities shape ways, so far so good, but it will not be good enough for second planking. With my experiences from first planking, I will incorporate some changings and new techniques for the second planking. I will taper the bow ends to measure, to have a symmetrical planking. I plan to bend the planks dampened where necessary, putting them onto a flat surface with two clamps in the desired bow shape. Lastly I will bevel more thoroughly. My planking is made from pear wood and I will select matching color planks for the part from the deck line down to the waterline, which will be visible later. The deck looks fine to me and I will use it as it is. In another build log, somebody sanded the deck carefully with 320 grit, to get rid of the burn marks and reported to have not removed any of the engravings. I'm pondering about participating in the Ukraine group build the whole time, but in the moment I don't have the space and capacity to start something parallel. I started with DoK only a few days before the world got out of hand. Let's see, if I'm in it will be ICM's Gladiator. Sphinx is always on my mind as a future project, but fishing vessels too. In my case it would be the Amati Fifie, which is designed by Chris, I think. I like the scale and for a change, I would make it look weathered and used. Seeing forward to you continuing the sleek Speedy Chees Rob -
Duchess of Kingston - Beauty of the Seas - Wooden Sailing Ship 1/64
DocRob replied to DocRob's topic in Non LSM 'WIP
Thanks Peter, I stay with the simplified scale version for now . When I look out of my window at the rough Atlantic ocean, spotting a very rare sail, I couldn't help but to think about green faces. I try to use the best part of the mostly ugly waves (at least on my my island) and surf. You don't get seasick on a surfboard . Cheers Rob -
Very nice rendition of this interesting tank. I really liked the kit, which was, if I remember it right, my first back in the hobby. I tried so many things on it, but left the kit in Berlin when I left the city. Maybe I will build another one one day. Cheers Rob
-
Thanks for taking us around Carl. Looks like a great show and family event. Cheers Rob
-
Duchess of Kingston - Beauty of the Seas - Wooden Sailing Ship 1/64
DocRob replied to DocRob's topic in Non LSM 'WIP
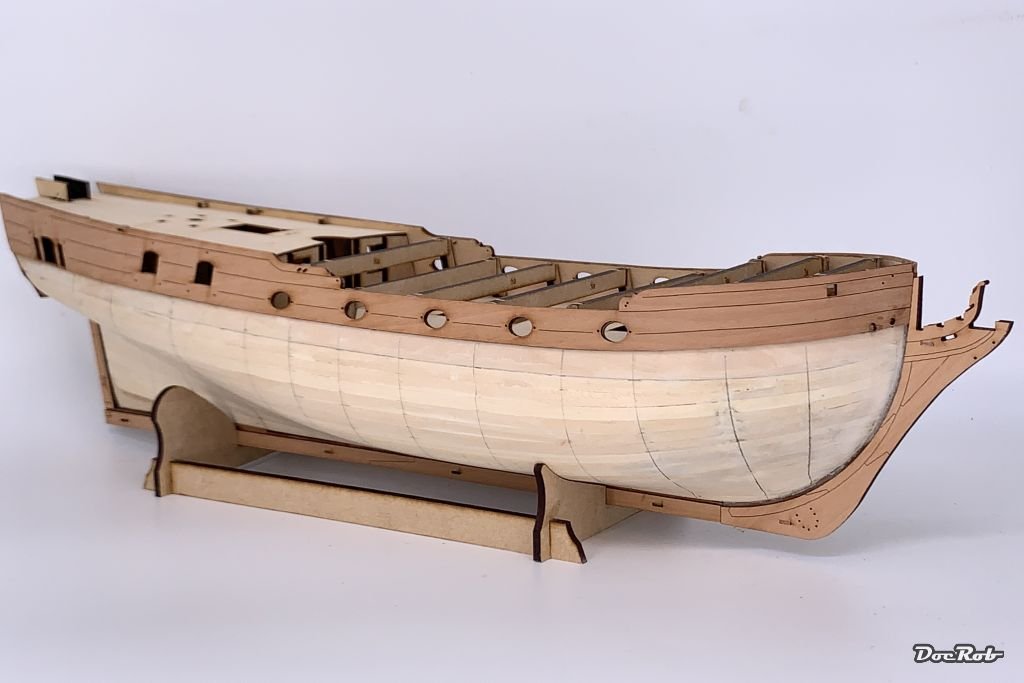
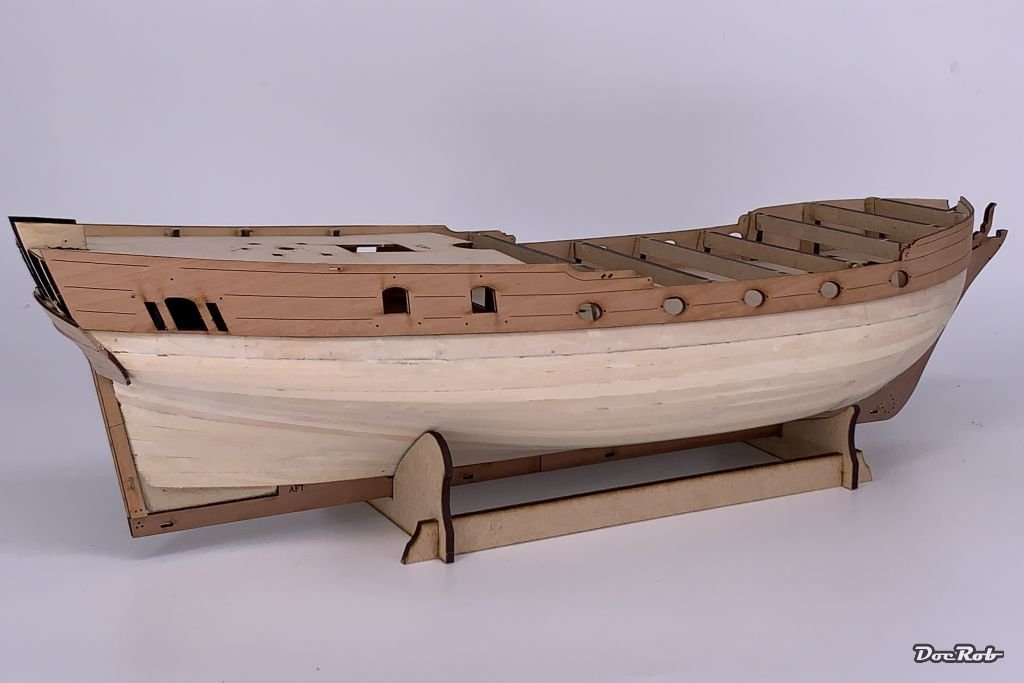
After filling the hull with acrylic wood filler, it was again time for a thorough sanding but now I call the first planking done. It came out smoother than I feared after the first sanding job and the amounts of applicated filler were tiny. After this dusty affair was achieved, I cleaned the hull and glued in the keel and the sternpost. What's next, you couldn't have guessed, second planking hooray. Cheers Rob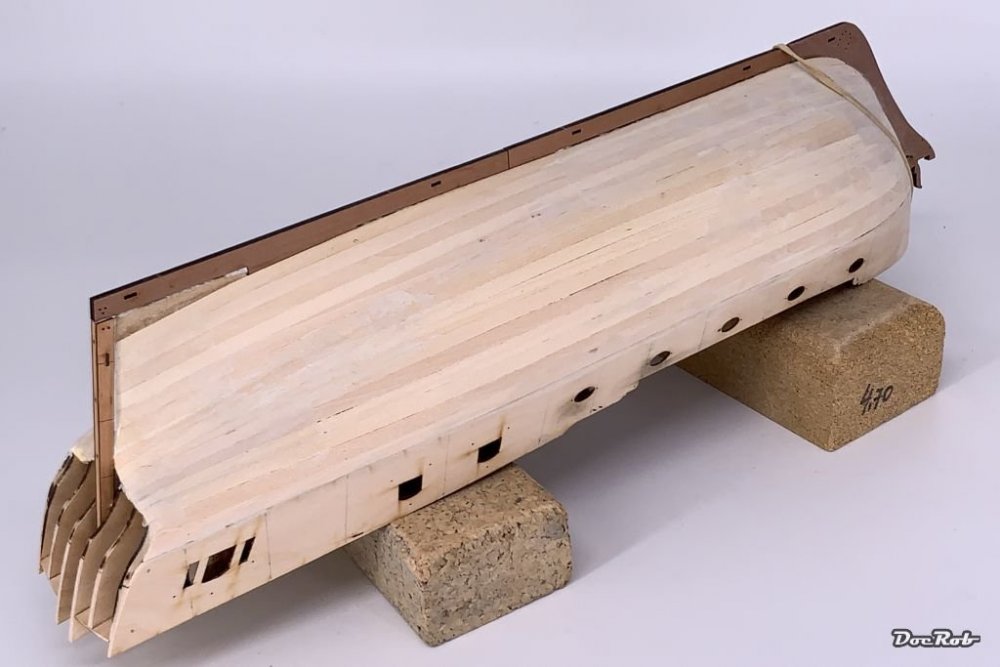

-
Duchess of Kingston - Beauty of the Seas - Wooden Sailing Ship 1/64
DocRob replied to DocRob's topic in Non LSM 'WIP
Indeed Gaz and there is even more to consider, like how do I apply the second planking around the stern, how do I close the small triangulas openings under the stern fairings with second planking . I didn't get that message, was there something funny in my faulty English ? Cheers Rob -
Dragon Panther A with Zimmerit
DocRob replied to GazzaS's topic in LSM 1/35 and Larger Work In Progress
I like your base very much, the proportions are densed in a very appealing way, exactly the right size for the project. I wouldn't have used black for base, but don't like the silver either. I would sand the sides more smooth and would use a brown tone, which contrasts well to the sand color of the Panther and surface, but not too dark, to distract from the scene . Cheers Rob -
Duchess of Kingston - Beauty of the Seas - Wooden Sailing Ship 1/64
DocRob replied to DocRob's topic in Non LSM 'WIP
After a long sanding session, where I thinned the stern considerably to accept the sternpost and the rest of the hull now ready to receive some filler, I turned my attention to an area, which I dread a little. The stern is very complex, many parts meet with a delicate geometry there and I will prepare myself with a little test fitting. I figured, If I put the stern fairings (the planked looking stern parts) flat onto the remaining spars of the fuselage, there is not enough room to accept the rudder. I have to cheat the geometry a bit here. It was also important to find the right position for the stern fascia (the part with the windows), as it's not overly clear shown in the instructions, where a pic from the inside would have helped. All in all, I took my time breeding for more than two hours about the area and hope I have a cunning plan now. Cheers Rob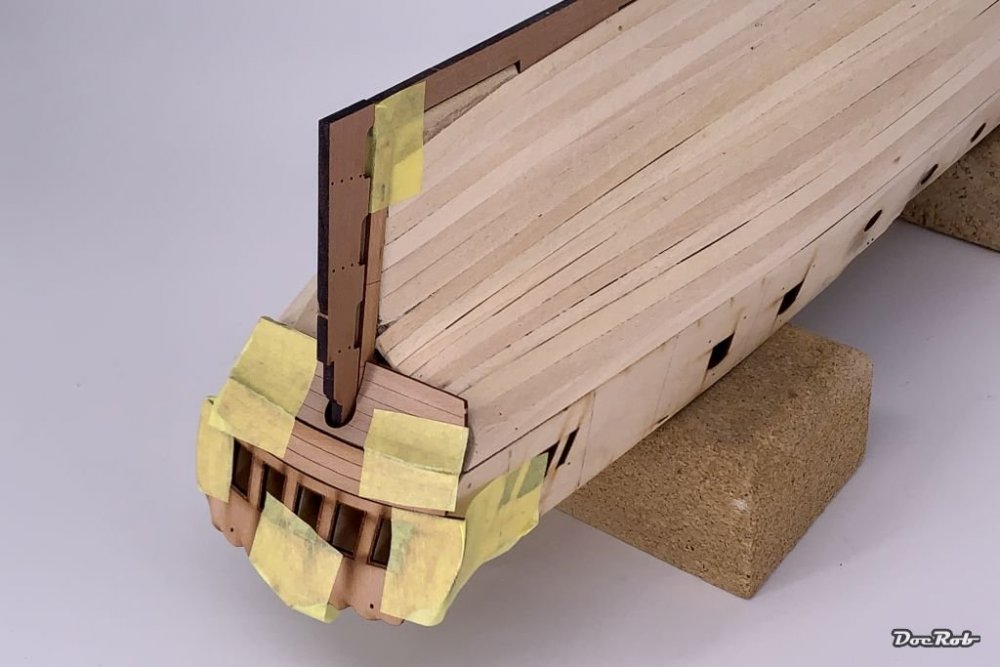
-
Duchess of Kingston - Beauty of the Seas - Wooden Sailing Ship 1/64
DocRob replied to DocRob's topic in Non LSM 'WIP
Thank you Phil, but my planking skills need to be honed for second planking, which can't be hidden. Actually, I'm not working on the DoK for too many hours daily, to be concentrated. There is a lot of drying time involved, be it glue or soaked wood, which have to dry preformed. On the other hand, the build is more relaxing than a plastic kit until now, I even curse less . Cheers Rob -
Duchess of Kingston - Beauty of the Seas - Wooden Sailing Ship 1/64
DocRob replied to DocRob's topic in Non LSM 'WIP
Pity, interesting project though. I know about the lack of documentation from old builds. I switched to digital photography very late, as I didn't liked the results of the early cameras. I loved my Contax with Zeiss lenses, using slide film, often black and white and enjoyed the quality of the pics after having to wait for them. After converting to digital photography, I always felt, the quality of my pics declined a lot. Anyway, I got some hundred important slides digitized, but modelling was not on my priority list by this time. Cheers Rob -
Duchess of Kingston - Beauty of the Seas - Wooden Sailing Ship 1/64
DocRob replied to DocRob's topic in Non LSM 'WIP
Thanks Gaz, I'd really like to see some pics of your SMS Seydlitz. I like these older battle ships with casemates. Which scale is it 1/200 or 1/150? Cheers Rob -
Duchess of Kingston - Beauty of the Seas - Wooden Sailing Ship 1/64
DocRob replied to DocRob's topic in Non LSM 'WIP
Thank you Peter, building a wooden ship is quite different from plastic kits. Basically all is made from flat material and the result is 3D. You are also closer to the original thing, using some techniques and materials, like the real thing (In a simplified form with DoK). Cheers Rob -
Tamiya 1/12 Ferrari 312T
DocRob replied to Peterpools's topic in LSM 1/35 and Larger Work In Progress
Great start Peter, I absolutely love the F1 cars of that era. Basically strong engines and some fat wheels, not the high tech stuff of recent years. It was about drivers then and now it's about building this Italian icon, which has the same fascination as a kit, like the original, given the time it was produced. I will follow your path soon building either the Porsche 935 or the Brabham BT44. Do I like Martinis, you bet Cheers Rob -
Duchess of Kingston - Beauty of the Seas - Wooden Sailing Ship 1/64
DocRob replied to DocRob's topic in Non LSM 'WIP
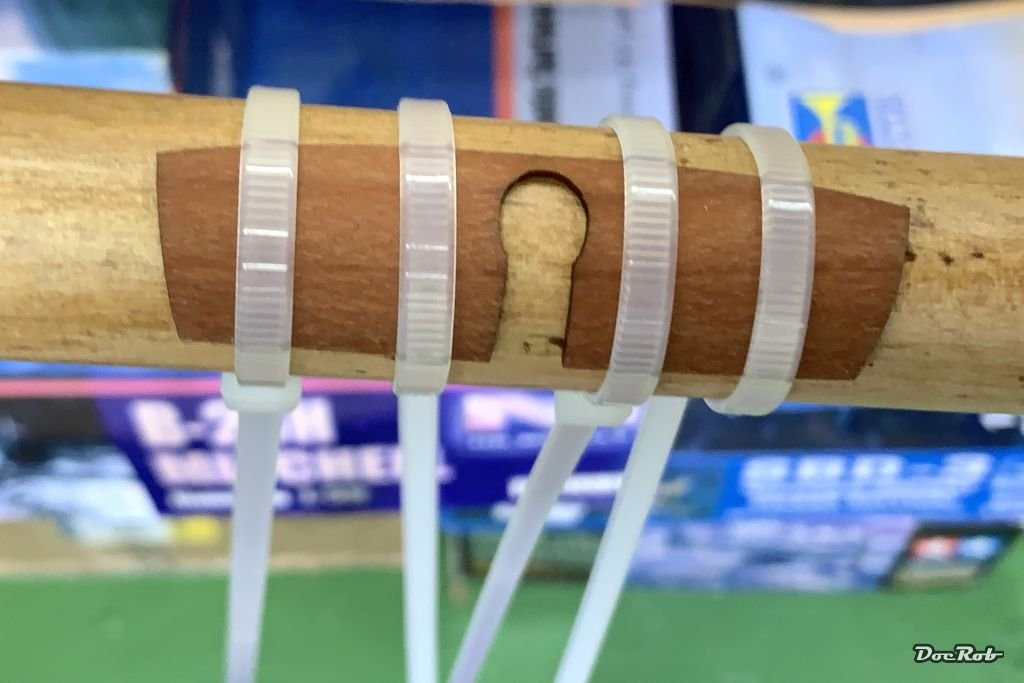
Yesterday, I used the curing time of the PVA to prepare some parts for the following steps. This included preforming some parts like the stern blending and the outer bulwarks. These parts were soaked in warm water for a while and in case of the stern blending wrapped around a round wooden shaft with zip ties (a tip from another build log) and left to dry over night. The outer planking of the bulwarks was clamped to the hull after soaking and left to dry overnight as well. The result was looking like this and the method had worked successfully. The pic shows also the sternpost, which will be added with the keel and later accepts the rudder. Finally I started trimming the stern area planking with my Dspiae nipper and a fine Tamiya saw. I tried to follow the line of the sternpost with the saw, to have a square and symmetrical shape. This is only the first step of closing in with the stern blending. The firs sanding session is over and the hull looks way better. There will be less filler needed, than first thought. Like the stern area, I'm far from finished with sanding, but the planking starts to look smooth. Cheers Rob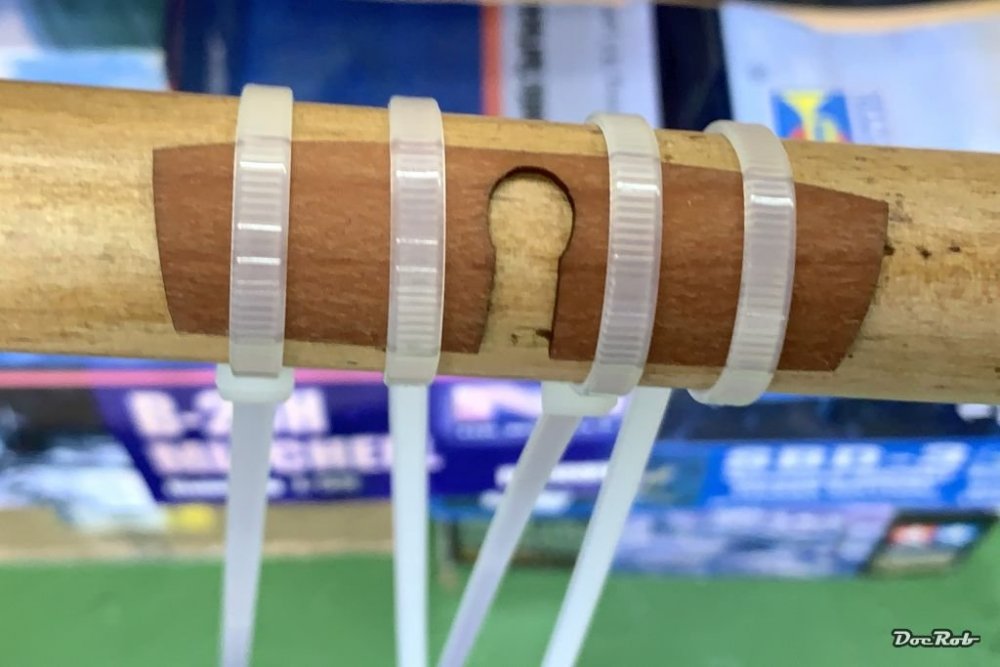


-
Duchess of Kingston - Beauty of the Seas - Wooden Sailing Ship 1/64
DocRob replied to DocRob's topic in Non LSM 'WIP
Thank you Gaz, I had the same sensation and another benefit of finalizing the first planking is, I can use the stand now . Cheers Rob