DocRob
-
Posts
7,122 -
Joined
-
Last visited
Content Type
Profiles
Forums
Events
Gallery
Everything posted by DocRob
-

Duchess of Kingston - Beauty of the Seas - Wooden Sailing Ship 1/64
DocRob replied to DocRob's topic in Non LSM 'WIP
Thanks Mike, I have only a large Festool orbital sander, but will add a smaller accumulator driven sander to my tools shortly. For now it's manual sanding, which has the advantage of better control and les vibrations. In some areas, my disc sander could be used for getting roughly to the finalshape. Cheers Rob -
Dragon Panther A with Zimmerit
DocRob replied to GazzaS's topic in LSM 1/35 and Larger Work In Progress
Wow, impressive Gaz, I like your mud application and weathering, which blends perfectly. I always thought about mud in a layering way, with dry, partly dry and sticky wet parts. I also like the spots you applied the mud, as sometimes you see models, where mud was applied in places, very hard to soil with it. Yours look spot on. The Tannenbaum, well it looks not exactly like a Christmas tree, but could resemble a small larch. With the light passing through in the firs pis, it appears to be very natural. Cheers Rob -
Duchess of Kingston - Beauty of the Seas - Wooden Sailing Ship 1/64
DocRob replied to DocRob's topic in Non LSM 'WIP
My comfort zone with wooden ship models is very narrow, as I lack the experiences necessary. This is only my fourth wooden ship, with two, a trawler and a racing boat built in my twens and the one before Dok is a Kutter, with the first planking finished. As much as I like the USS Constitution as an icon of an ending era of wind powered Man O' War's, I would never consider building one in wood (I built a plastic one as a teenager). There are different reasons, first I like larger scales for detailing and realistic outfitting and rigging of wooden models. The 1/64 scale of the DoK was the biggest obstacle for me, while deciding about buying the kit. Only the obvious quality of the kit made me change my mind. The second important aspect in choosing a wooden kit is the lack of too much redundancy. I can not bring myself into rigging a myriad of cannons or get the gun ports aligned properly. You see, the USS Constitution is far off my list, with maybe Vanguard's HMS Sphinx as a follow up project, which is the absolute border in connection to the above mentioned points. What I surveyed so far is, the kit should build up from quality materials, cheap wood and crudely prepared parts are a nightmare. A good documentation along drawings are also very important. Personal preferences, as the scale in your case are also important, there are differently complex models available and the price range is also important. Only to be of little help, I recommend our resourceful partner forum 'Model Ship World'. I only attempted one search and found that: USS Constitution Best historical wooden kit available? - Wood ship model kits - Model Ship World™ Cheers Rob -
Duchess of Kingston - Beauty of the Seas - Wooden Sailing Ship 1/64
DocRob replied to DocRob's topic in Non LSM 'WIP
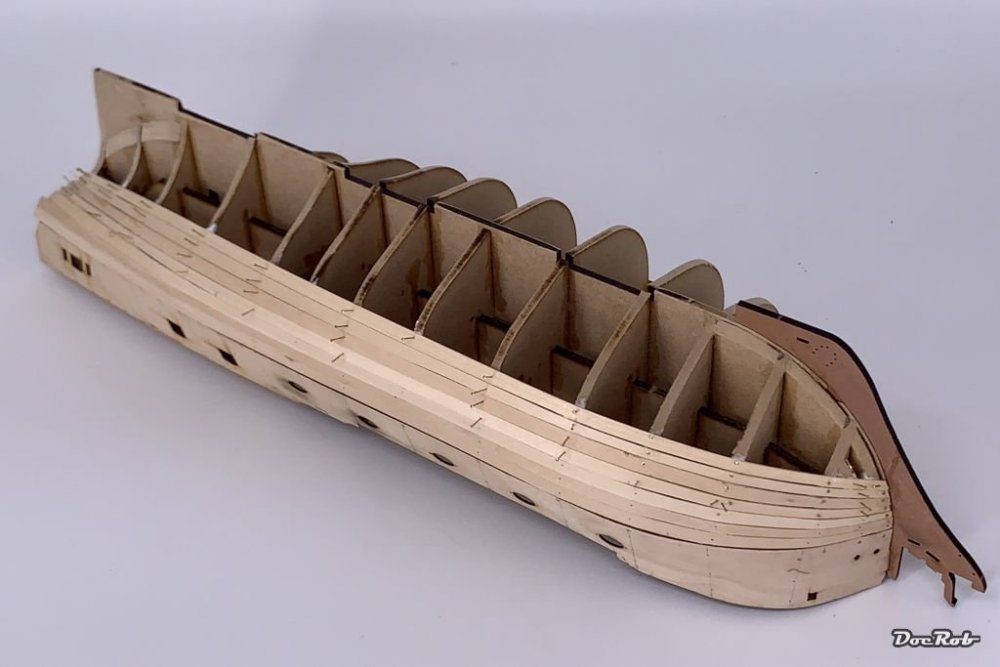
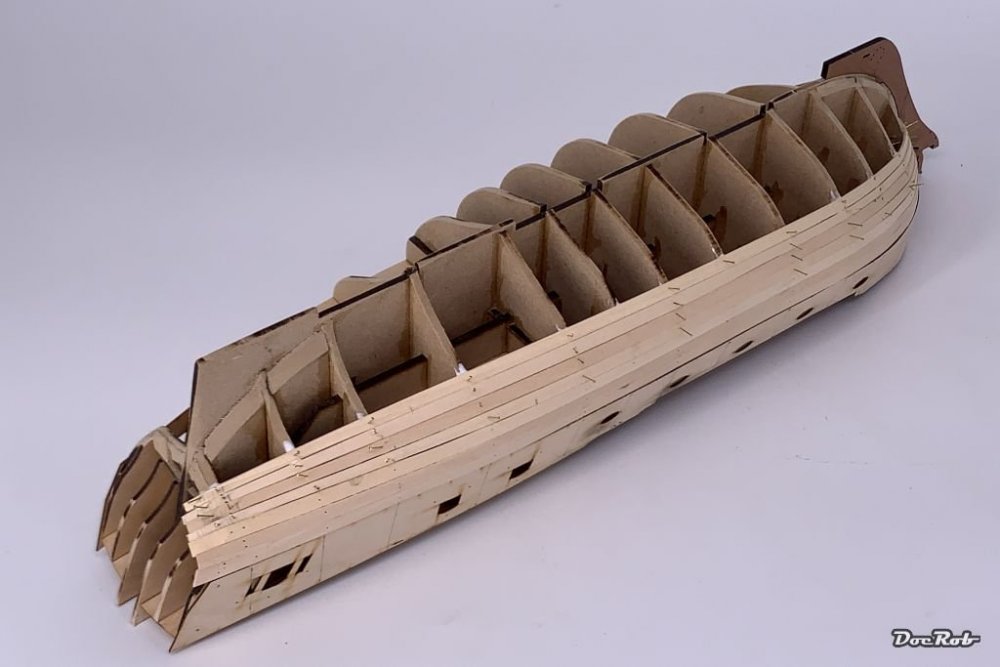
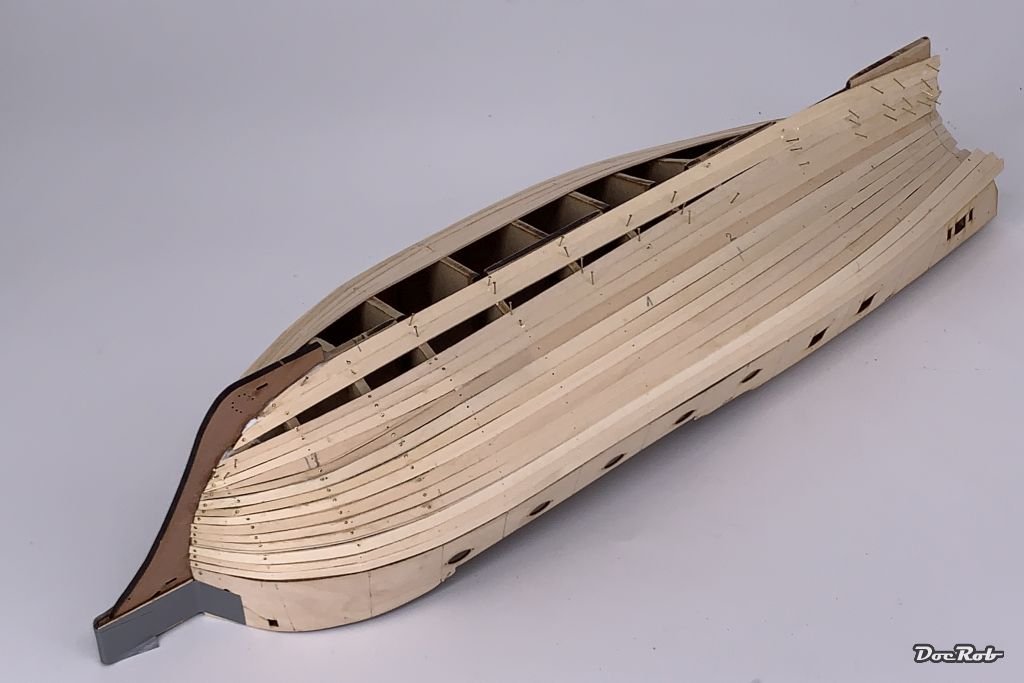
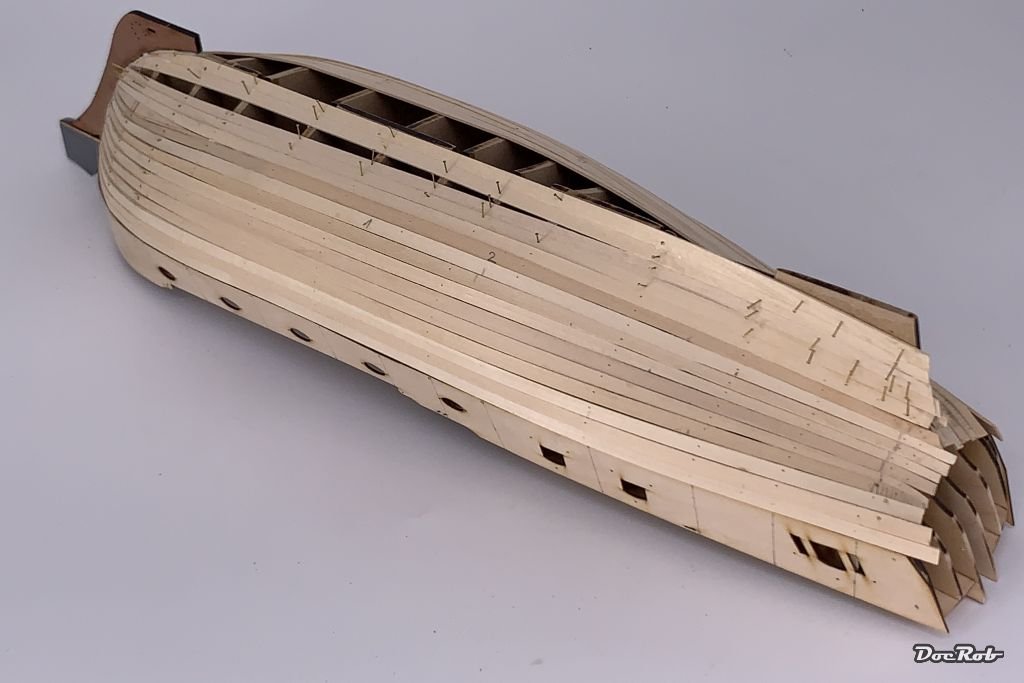
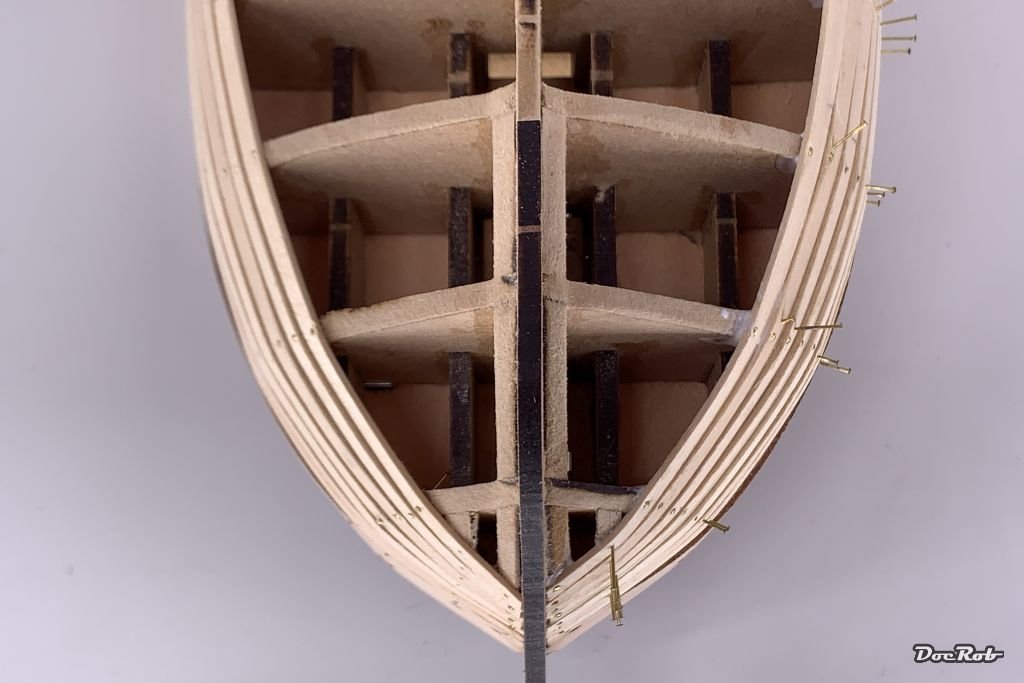
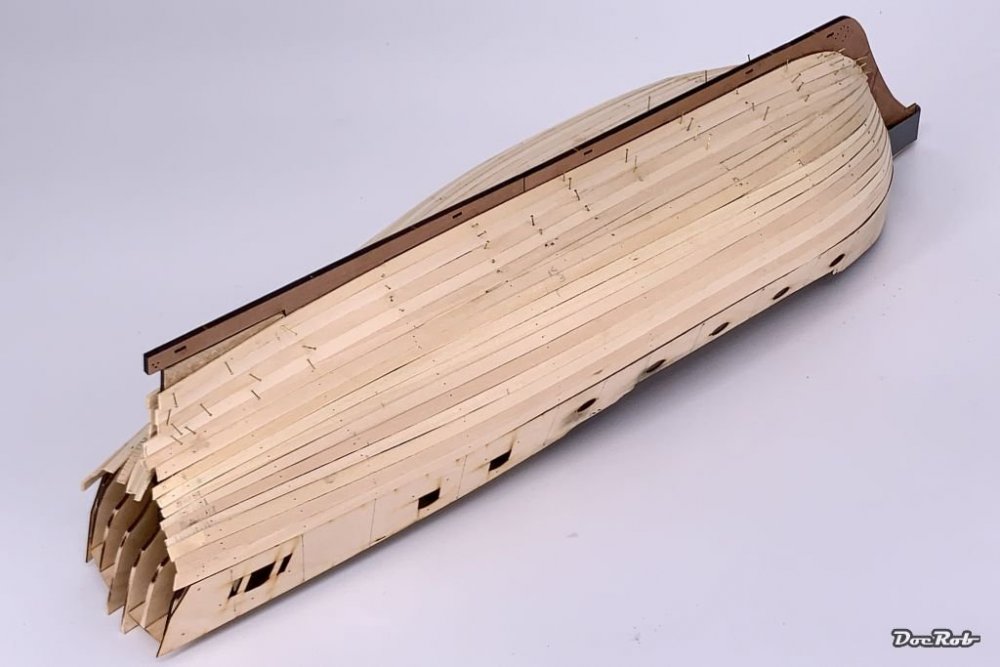
One milestone done, with finishing the first planking. Planking all the way down from the deck line to the keel, I stopped some planks from the keel and applied the keel plank as straight as possible to the keel position. In the firs pic you can see, that I used some plank pieces as spacer, to get as close to only inserting one last plank, to close the hull entirely. After inserting some very fine strips of plank residue, to fill the last remaining gaps, I prepared the keel planks to accept the keel, which is only loosely assembled on the following pics. After an overnight curing period, next up will be sanding the hull smooth and add some filler where needed, along with trimming the planks in the stern area. In case you wonder about the strange looking gray tape on the bowsprit, this is only to protect the part during the planking phase. Cheers Rob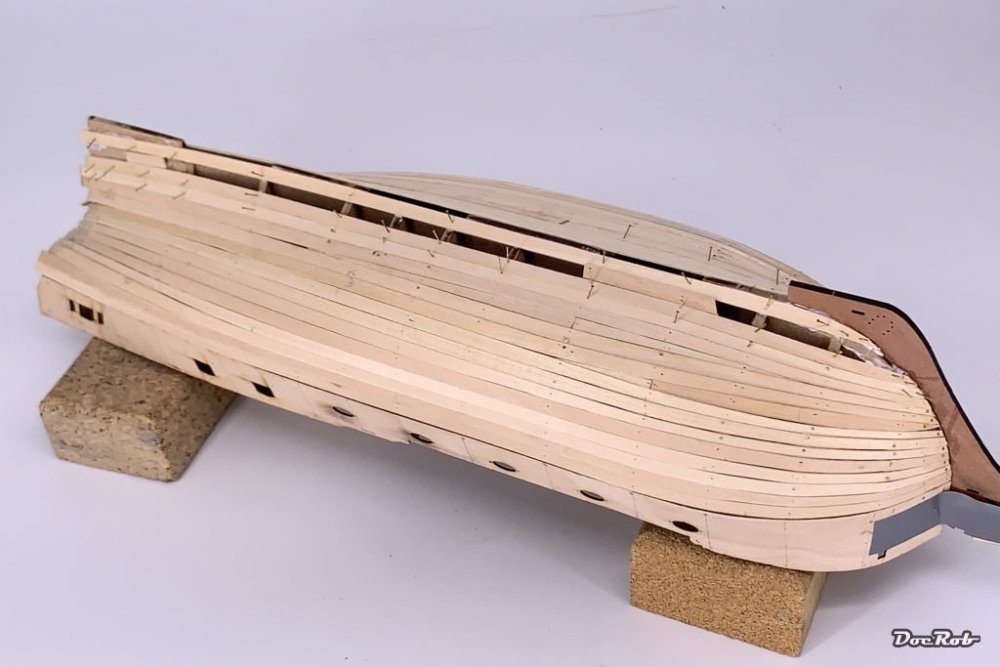

-
What is on your bench right now ? Share a picture :)
DocRob replied to Martinnfb's topic in Modelling Discussion
Your Kingfisher looks extremely good, love the painting and weathering. I wanted this kit so often, but failed to grab one, but one day... I have only these little fellas in my stash, which are a part of Eduards recent USS Arizona boxing in 1/350. 3D printing is clearly the new wow. If they turn out a tenth as good as yours, I will be satisfied . Cheers Rob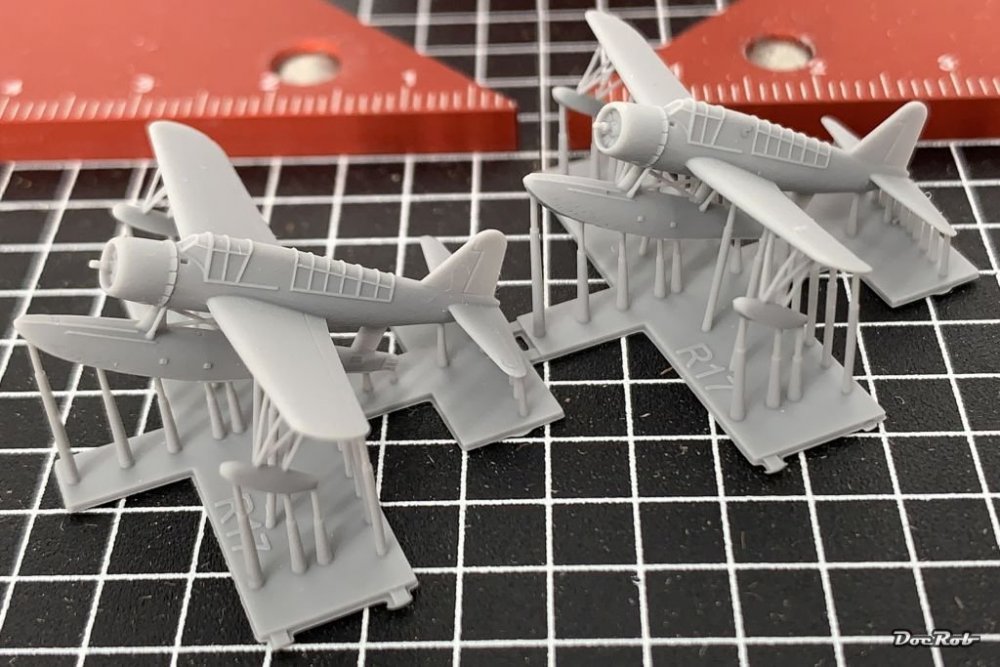
-
Amazing detail with these printed parts. Your great painting reveals the quality of those parts. This pit is truly a kit in the kit and let me think again about getting the nose section without the redundant accessories . Cheers Rob
-
Duchess of Kingston - Beauty of the Seas - Wooden Sailing Ship 1/64
DocRob replied to DocRob's topic in Non LSM 'WIP
Almost there with the first planking, at least on one side. For the last rows, I inserted some stealers to adapt to the geometry. With only some planks to apply, I prepared the plank nearest to the keel, as I want that to be a full plank. I then added a second one upwards and have to close the remaining opening with tailored pieces of plank. It somehow looks a bit crude under my inquisitional lighting, but is smoother to the real eye, luckily, but I have to do a lot better with second planking. Cheers Rob

-
Duchess of Kingston - Beauty of the Seas - Wooden Sailing Ship 1/64
DocRob replied to DocRob's topic in Non LSM 'WIP
I hear you about the distractions, quite a few tempting projects. I will not start to count down mine, because I will abandon the DoK build only by studying the list . I keep it poco a poco, step by step, like the Spanish here say. I still work on the first planking, but I can see the end now. Some pics will follow later. Cheers Rob -
Duchess of Kingston - Beauty of the Seas - Wooden Sailing Ship 1/64
DocRob replied to DocRob's topic in Non LSM 'WIP
Indeed Peter, it's like a guide book to me with the right chapter always opening at the right time. There is so much to learn about wooden ship modeling and it's best to learn from the aces. Cheers Rob -
Nice little Albie Gaz, but c'mon, no rigging . I can only bow my head to modelers, who are able to rig their 72 scale planes. I only built the Fokker D.VIII from Arma hobby in this scale and there are only a few rigging lines with this. Your Albatros looks great though and you have to look twice to realize the scale. Cheers Rob
-
Duchess of Kingston - Beauty of the Seas - Wooden Sailing Ship 1/64
DocRob replied to DocRob's topic in Non LSM 'WIP
I feel with you Tim, having lots of different hobbies is a prob for me too. In the moment I feel perfectly comfortable with building the DoK, which is so positively different from plastic modelling. I will stay with polystyrene for sure, but I always loved working with different materials, be it wood or metal and a wooden ship to me is something special. Not utterly sorry about stirring up your emotions, about building a wooden ship . Do yourself a favor and get a good kit, which helps immensely and start a WIP, if only to receive as many golden tips, as I got here . Cheers Rob -
Duchess of Kingston - Beauty of the Seas - Wooden Sailing Ship 1/64
DocRob replied to DocRob's topic in Non LSM 'WIP
You are absolutely right Mike, painting the lower hull makes the task much easier. The upper planks are relatively easy to lay down and the pear wood seems to be a fine and forgiving material. This will be assisted by having a fully sanded and filled hull as a base and not only spars to apply the planks on. Somewhere I have seen somebody using plastic headed thumbtacks for second planking, using the pin to push the plank up and the head to get a good bond on the first planking. I will try to lay the planks nicely in the underwater area too, as to learn something for future projects. I could not force myself into thinking about partial cut planks now, it feels somehow, that fitting the pars of the plank smoothly would not be too easy, but you seem to have mastered that perfectly. I beveled some planks,, but only one sided this time. For the second planking, I'd like to bevel both sides of the plank to achieve an even smoother result. Some hours ago, I claimed, I will use inserts (stealers) only if it couldn't be prevented. With my good side of the hull, I experimented with a two part filler made from scrap plank and I think at least in this area it makes life much easier for the following planks to lay. The inserts are only pinned now as is the last plank, which was soaked in water and now needs to dry. On the bad side, I pinned the next two planks, which were also soaked in warm water for an hour. I think I will add an insert here too. Cheers Rob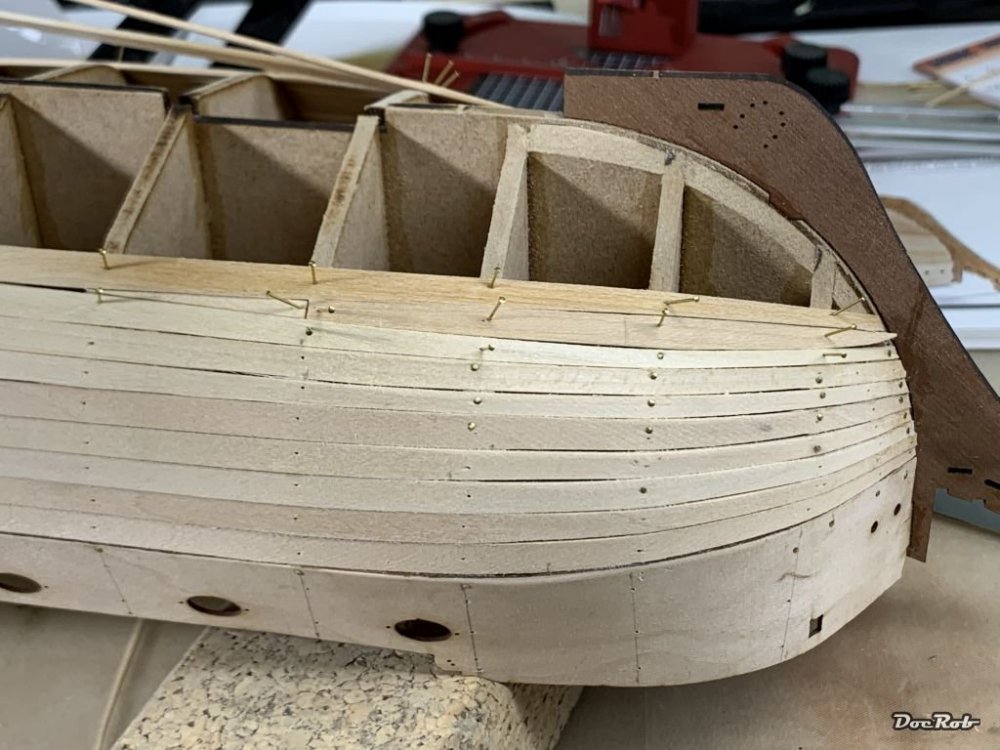

-
Duchess of Kingston - Beauty of the Seas - Wooden Sailing Ship 1/64
DocRob replied to DocRob's topic in Non LSM 'WIP
Peter, I can't express, how grateful I am for the help and knowledge shared by Mike. I learn a lot with every post and I couldn't have hoped for more support. Cheers Rob -
Duchess of Kingston - Beauty of the Seas - Wooden Sailing Ship 1/64
DocRob replied to DocRob's topic in Non LSM 'WIP
I might try that hairdryer method with the more warped planks, which are now to prepare. 'Unfortunately' the planks are completely perfect with Chris kits, no bends no nothing to take advantage off . As impressive, as I find your planking on the shown hulls, this is not for me, as I fight the material enough the conventional way. But it's good to see, how it could be done. I like to be prepared in case of... In my case, the first planking will be only the invisible base layer and I plan to paint the hull under the waterline with white color. I will pre select the second planks for consistent color and texture, using the not so perfect ones under water. Cheers Rob -
Duchess of Kingston - Beauty of the Seas - Wooden Sailing Ship 1/64
DocRob replied to DocRob's topic in Non LSM 'WIP
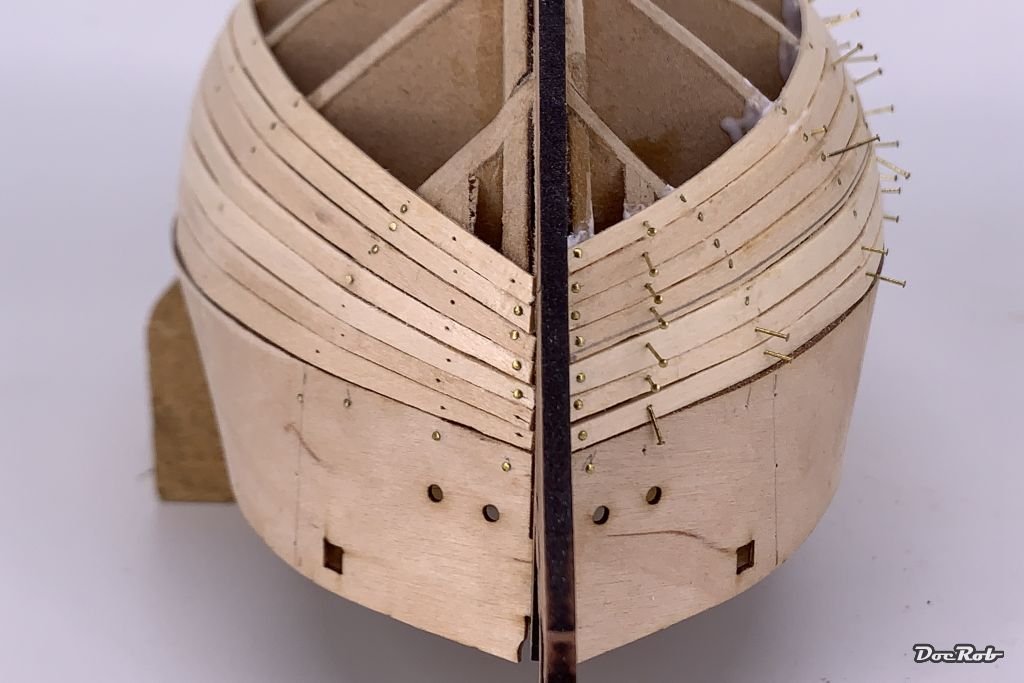
I can't thank you enough for your extremely valuable input into this build. It's more than I ever hoped for, while starting this WIP. It's a new experience, like guided modelling . The best about it, the solutions you present are exactly in the timeframe, when I build the section, perfect for me. I also cannot understand, how people can get a decent job out of single planking. There are so many things to do at the same time. I try to use the first planking as a training for the second decorative planking. When I look for the differences between the better side of planking on my DoK, one obvious difference is the width of the planking in the bow area. All the planks are narrowed by cutting off a wedge of material from between the third and fourth spar forward. The good side is a bit more regular in width, a thing, I will keep in mind for second planking. For a better understanding of the geometry of the hull, I measured the distance from the keel to deck level on each spar with a piece of thread. The results show, that for an evenly planking, I need to narrow the planks on the bow to half their full width and approximately to two thirds in the stern area. With planking further down to the keel, I found the geometry from the V-shaped bow to the barrel shaped midship harder to maintain and therefore soaked the prepared planks in hot water and pin them on for drying, before I glue them to the spars.. The hull of your Rennomee seems to be nearly watertight planked, very beautiful work you made there. I try to get away with as few stealers and filling planks as possible for this build, lets see, how this works out. Cheers Rob -
Sorry Gaz, I put it the wrong way, I meant the indentions and irregulations in the plastic, not your nice woodpainting. Cheers Rob
-
Hopefully the decals are still usable on your Ferrari Peter. I see, that there are substitutes available from Tabu, just in case of. My Brabham kit is the 2021 reissue with Cartograph decals, luckily, PE-parts and aluminum cylinder funnels. Tamiya announced to re-release their Renault RE-20 this year and I'm not sure, if I will buy one. I'm not a big friend of those turbo charged monsters of the time. Tiny engines, blown up by turbo power infinitely. I have not the biggest knowledge about the Ferrari, but I think the spoiler, rims and nose wings should be polished aluminum instead of chrome as provided in the kit. Cheers Rob
-
I pull out my popcorn Peter, when you start with the Ferrari. One of my next builds will be Tamiya's 1/12 Brabham BT44B, so I'm naturally interested how these big kits go together. Good look with the renovation work, it can be a pain, but this will be forgotten in a while, when you enjoy your 'new' home. Cheers Rob
-
I don't know about the shapes Gaz, looks Albatros to me. What I do like, is the slightly visible wooden structure of the fuselage. Have you done this or is this the kit plastic? Cheers Rob
-
Duchess of Kingston - Beauty of the Seas - Wooden Sailing Ship 1/64
DocRob replied to DocRob's topic in Non LSM 'WIP
Thanks Mike, I will plank from the bulwark down, but the last plank on the keel will be installed before, I finish planking down. You are absolutely right, the keel plank should be as easy to apply as possible, given all the geometrical issues in this area. I have to admit, that I fear second planking a bit, as I find it not easy, to get the planks aligned well. Most build logs of DoK mention problems in the stern area, but my problem zone is between the second and fourth spar on the bow side. I can't bend the planks enough, to get them glued perfectly to the spars. There's some torsion there and I have to address this for the second planking. The bow side has a perfect klinker planking, like a Viking boat should have, not good. The planking on the lright side was done today and was worse than the left side, although I tried to improve different things. I can definitely see, why filler blocks are not the worst to have, as it is very difficult to pin the planks to align onto the narrow spars. I may use the dampen - preform - dry - method you mentioned for second planking. The seven planks on the left side took less space on the bow, than their right counterparts. No problem while first planking, but I have to measure more exact for second planking. The often dreaded stern area was easier with a bit of beveling and will be smooth after sanding. Cheers Rob


-
Duchess of Kingston - Beauty of the Seas - Wooden Sailing Ship 1/64
DocRob replied to DocRob's topic in Non LSM 'WIP
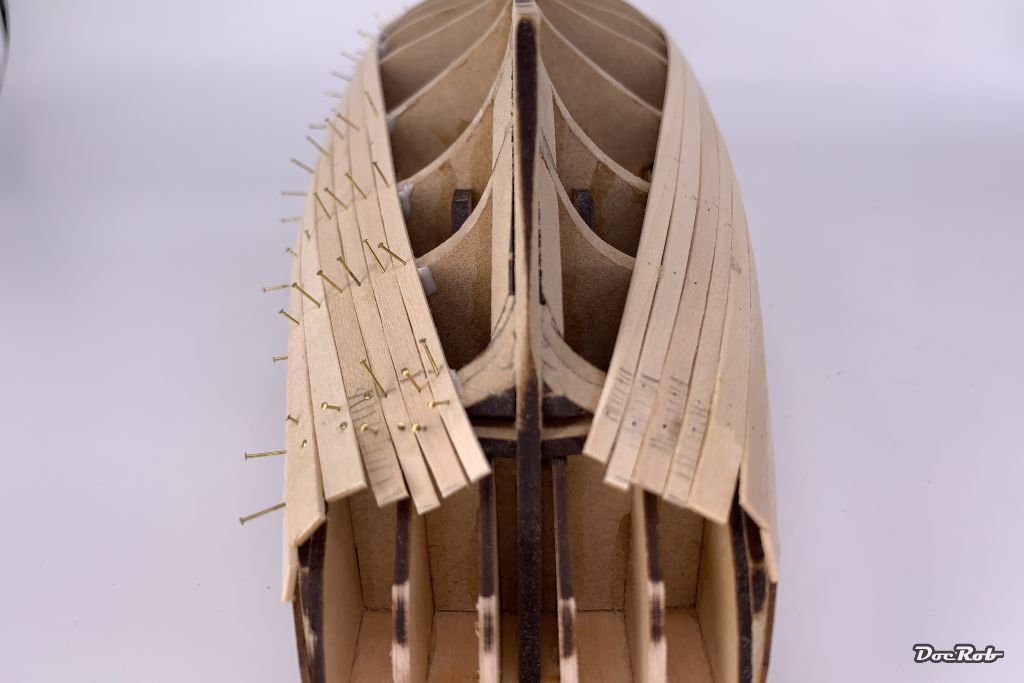
I seem only to be able to add three planks per session. I made the first three on the other side and will continue in the afternoon. It's a time consuming affair and test of patience. On the pic, I loosely attached some plank remains on the fattest part of the hull, only to check, where I land with a full plank in this area (of course, bended to shape). Seeing the result, I will continue full planking down to the keel, with tapering and beveling the planks near the bow and stern area. Some builders do it this way, others applied a neutral plank somewhere in the middle and fitted in the rest of the planks. Previewing the layout, I chose not to go this route. I will try to achieve a relatively homogenous planking with filler planks only if absolutely needed, because i think the planking layout looks more even and nicer than. This is especially important for the second planking and is done on the first for training. Cheers Rob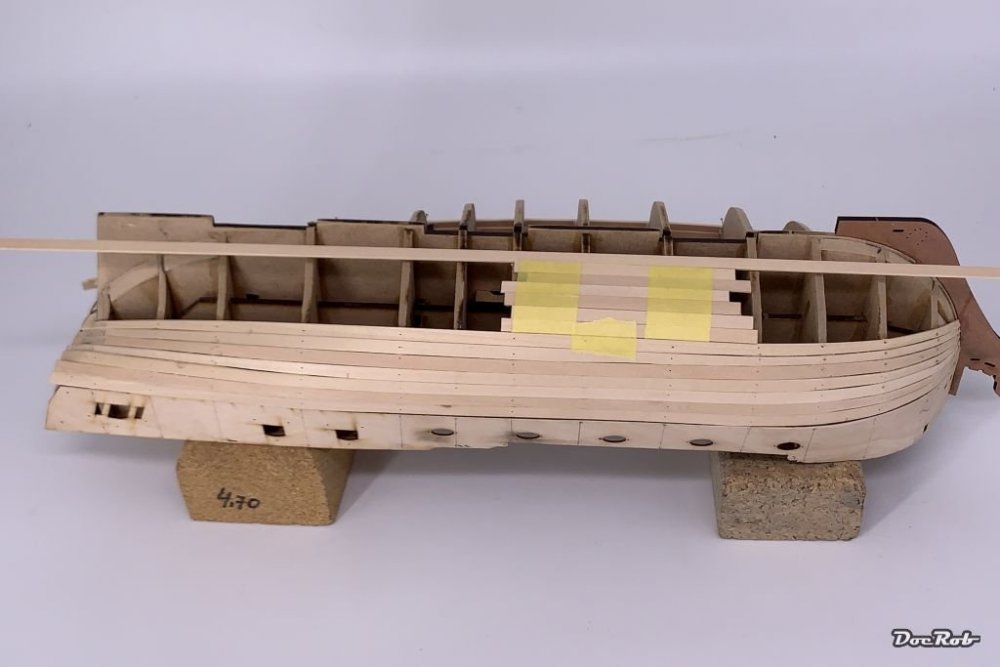
-
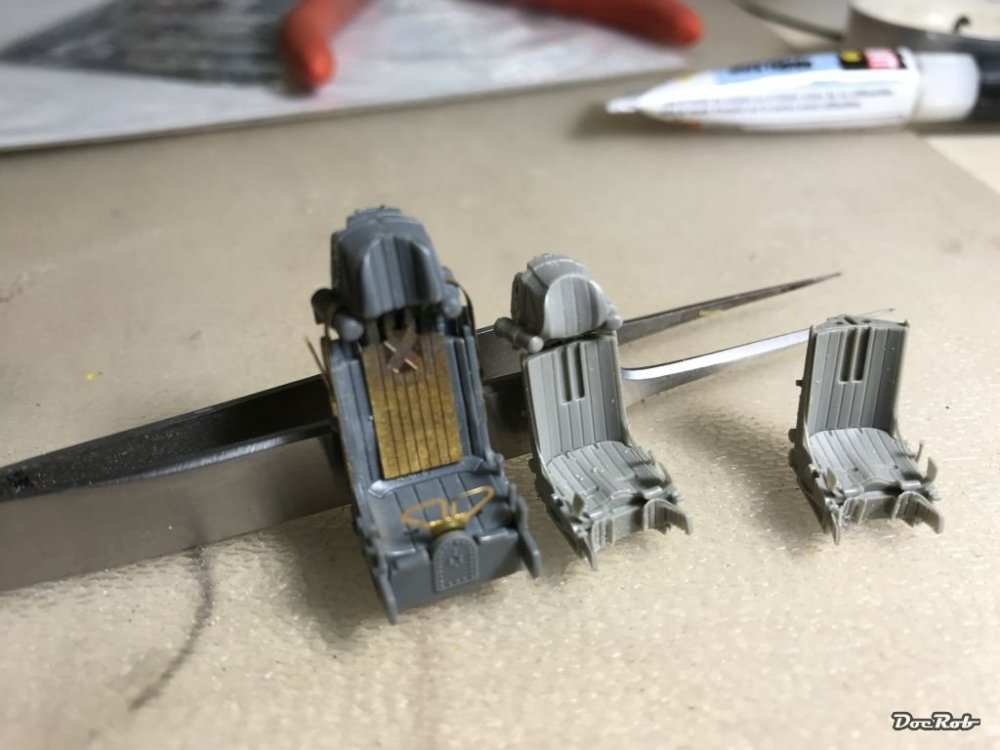
This was the seat comparison, I made at the time. Left: AMK Mig-31 kit, Right: Eduard Brassin from SU-27-UB - both 48 scale This was my solution, Aires bang seats with pilots, as it also solved the prob of the seat belts. You sometimes have to wonder about the tolerances in measurement in 48 scale. Cheers Rob

-
Duchess of Kingston - Beauty of the Seas - Wooden Sailing Ship 1/64
DocRob replied to DocRob's topic in Non LSM 'WIP
Until there is a fleet, I will rest in peace, I guess . Cheers Rob -
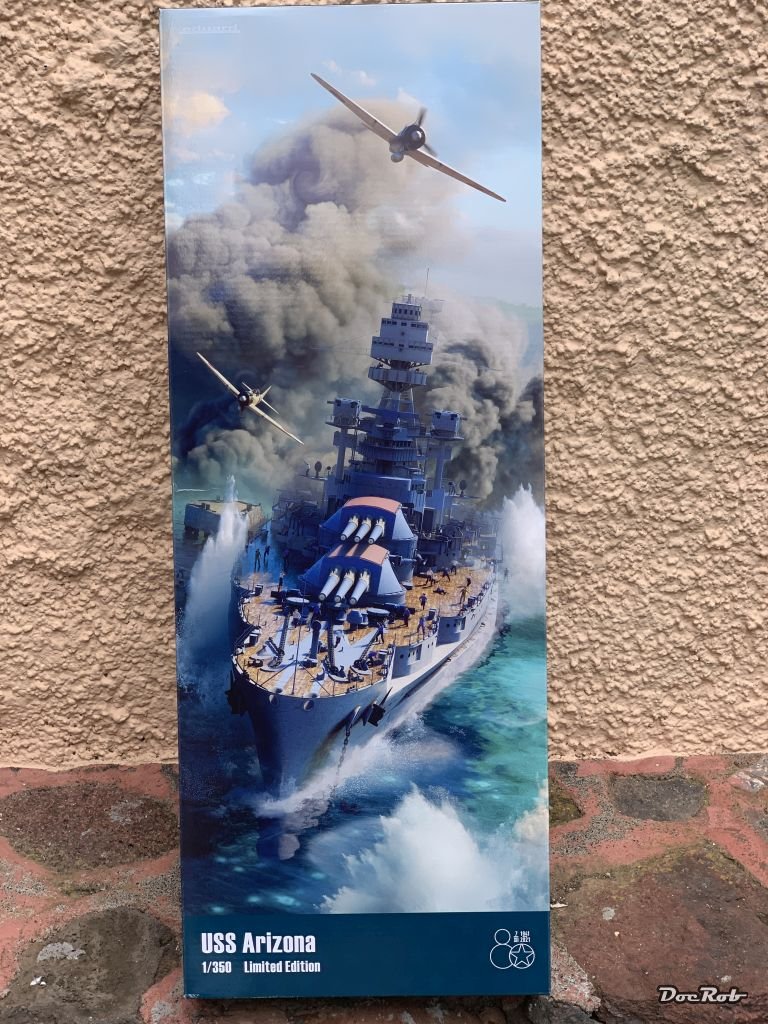
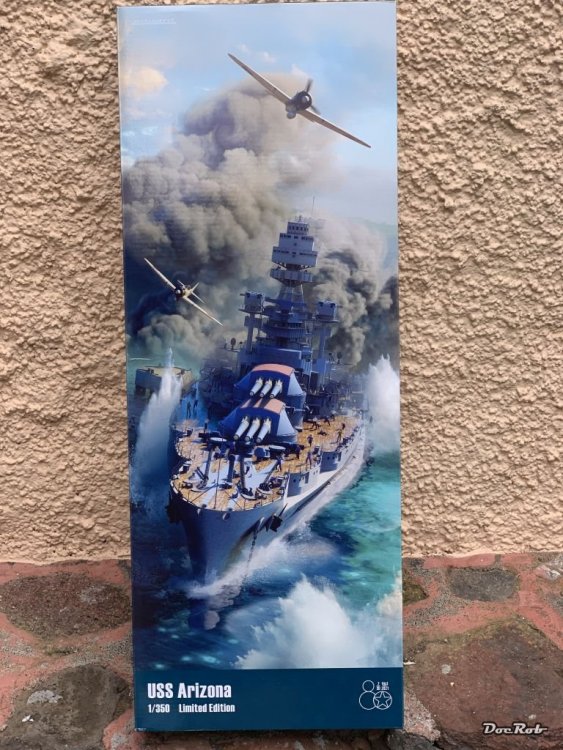
Today arrived the new Eduard limited edition of the USS Arizona in 1/350. The plastic is from Hobby Boss and consists from astonishingly few parts. The reception of the original kit was mixed, but Eduard being Eduard and the edition being limited, addressed most of the shortcomings. There are five sheets of PE, 3D-printed parts, even two very finely printed KIngfishers and Master metal barrels. I ordered a wooden deck from Australia, because I couldn't find one in Europe. Next will be a test of patience and figure painting skills, with this figure from the Spanish company Rage, were I couldn't resist. Two figures from Bodi were also in the package, a German driver for my RSO and the absolutely weird looking British Husar, who will accompany my LRDG Jeep along some more British desert figures. Cheers Rob

-
Duchess of Kingston - Beauty of the Seas - Wooden Sailing Ship 1/64
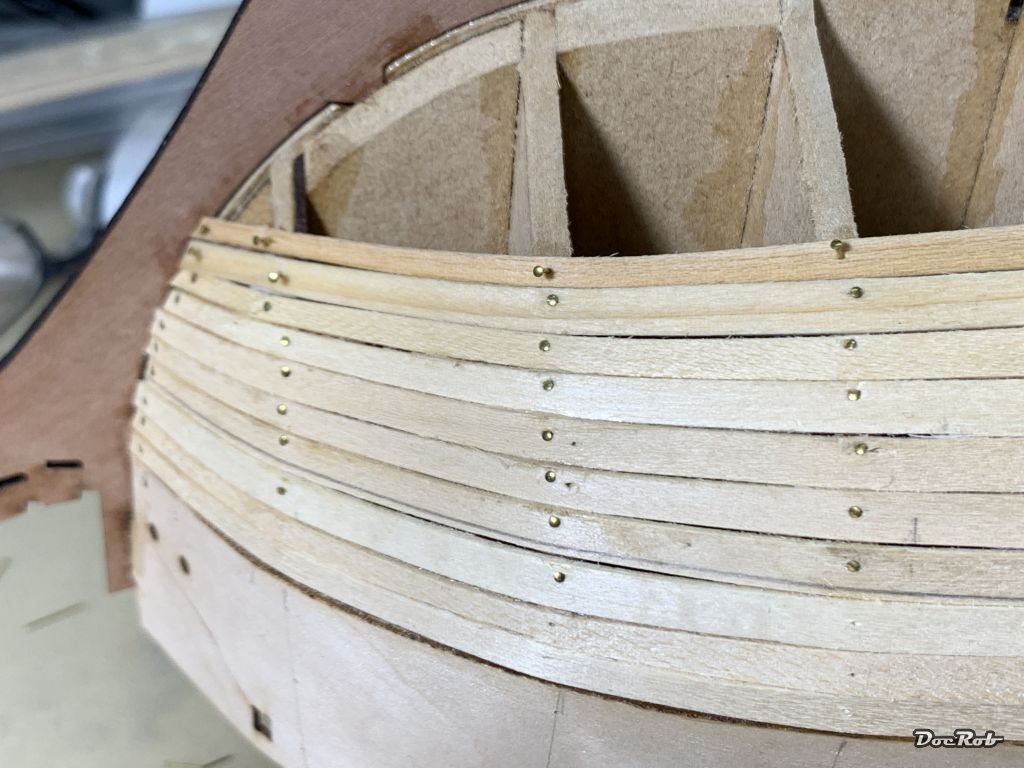
DocRob replied to DocRob's topic in Non LSM 'WIP
Thank you Mike and in addition, if it gets messy with CA, it's much harder than the limewood and therefore difficult to sand. ...meanwhile, I planked down seven planks and thought this might be a good time to start the other side next. Each plank takes up to half an hour, with marking, tapering the bow, holding on for marking taper sections on the stern, tapering, beveling in case of tight radii and finally cut to length, but not before using my bending pliers to give some flex to the stern end of the plank, to bend it according to the desired shape. Than, gluing and pinning with the nails, followed by some glue brushed on from the inside as reinforcement. I try to practice the smooth laying down of the planks, which will help me with the second planking, which will be visible, at least above the waterline. For the second planking there are no nails or other helpers, so it better be good. Cheers Rob