DocRob
-
Posts
7,132 -
Joined
-
Last visited
Content Type
Profiles
Forums
Events
Gallery
Everything posted by DocRob
-
I don´t want to tempt you Carl, but there is a clear psycho frame for the Unicorn out there and a dedicated multi colored LED set from Kosmos. Mine is red and I stay wit hit for my first Gundam build. PG Unicorn Clear Psycho Frame | Transparent Replacement Kit 1/60 – Takara Model Studio Cheers Rob
-
 thank you FA, there are two types of foil included in the kit, self adhesive aluminum foil and self adhesive embossed aluminum foil, along a sheet with the paper templates to cut them. The fittings you mention are beautiful, but also cause for some headaches. Many need to be drilled with a 0,8 mm bit, being only of slightly larger diameter than 1 mm. Sometimes, they are not that well cast and it is hard to find the exact middle point for drilling. The other problem is the manual, which often does not show, where the wire or tube leads to and there are lots of connections. Cheers Rob
 -
Nice Carl, mine is still with the customs Carl. Is it the red light set or with RGB color change for a clear psycho frame?. In any case, the name plate says, your unicorn has a thermonuclear power plant, so you never need batteries for your LED´s . Cheers Rob
-
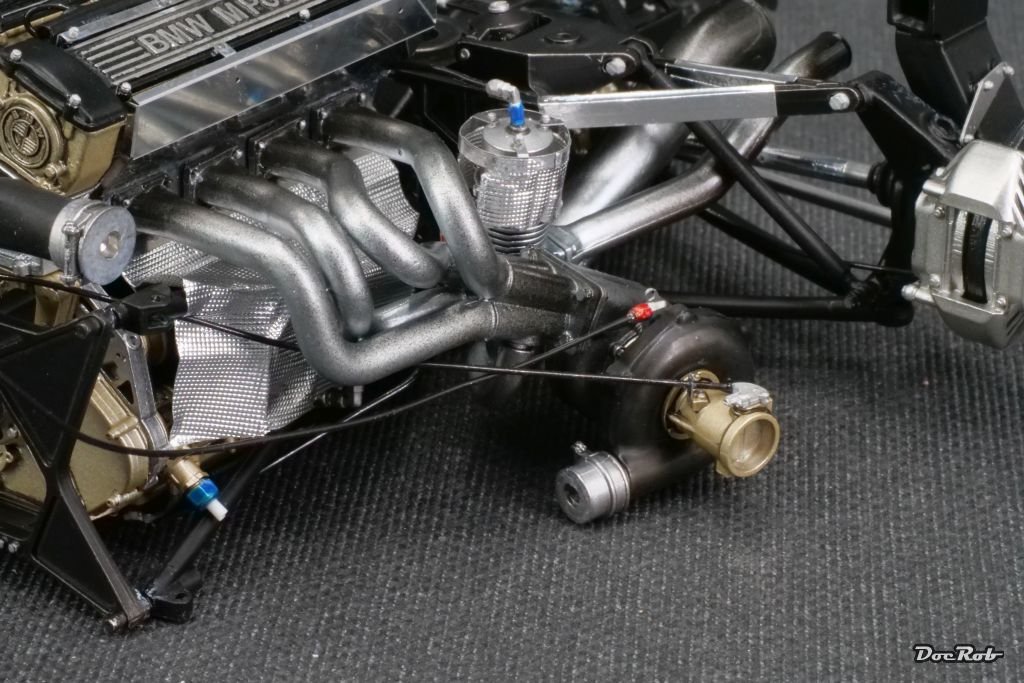
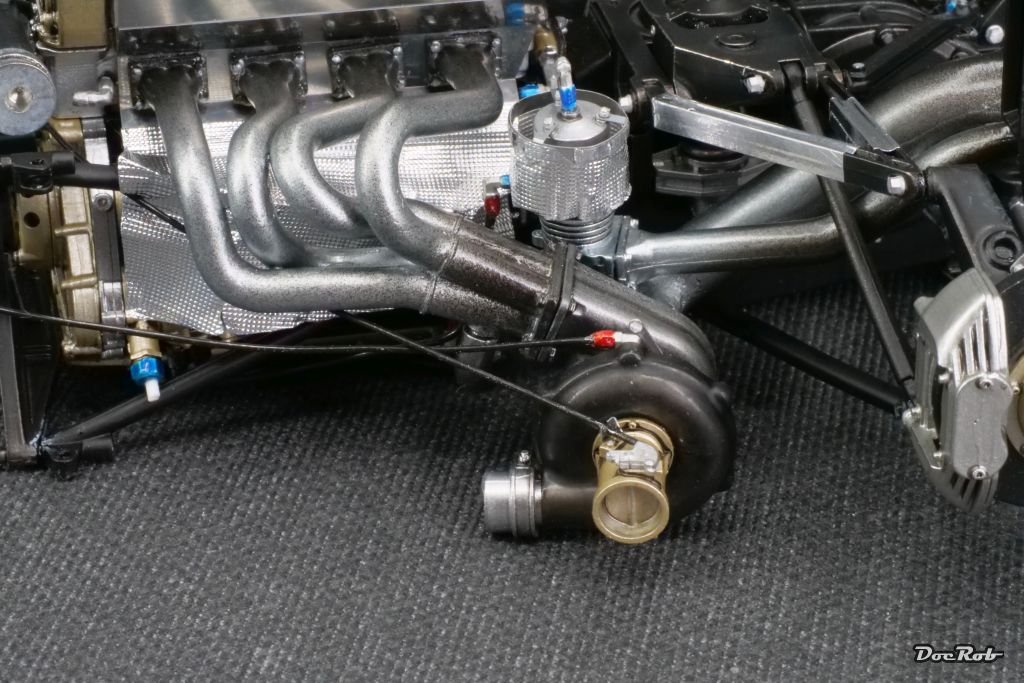
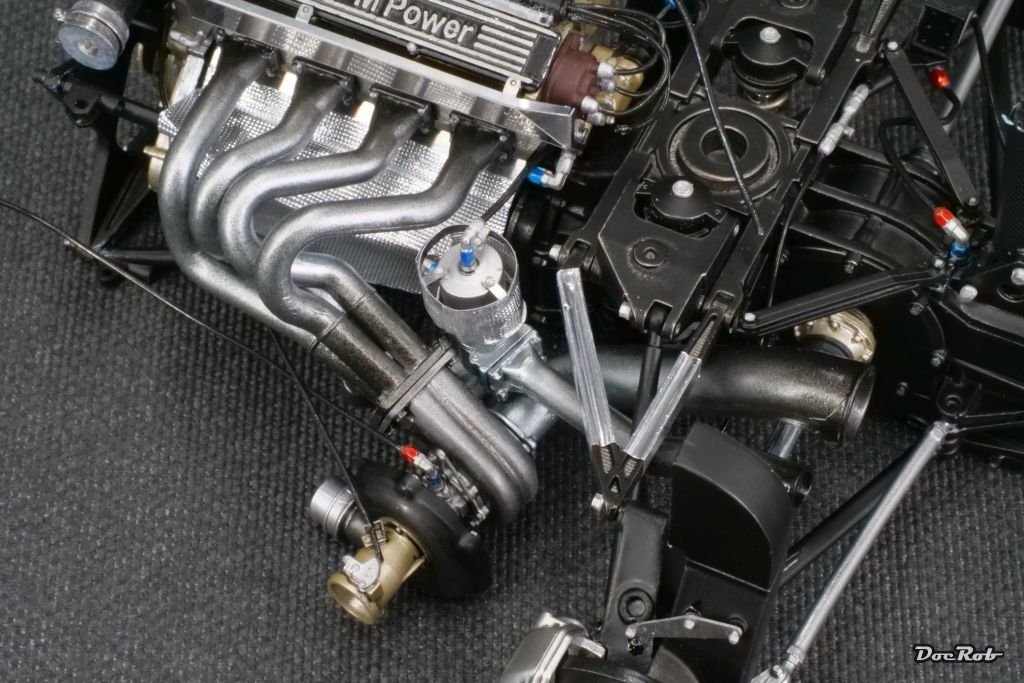
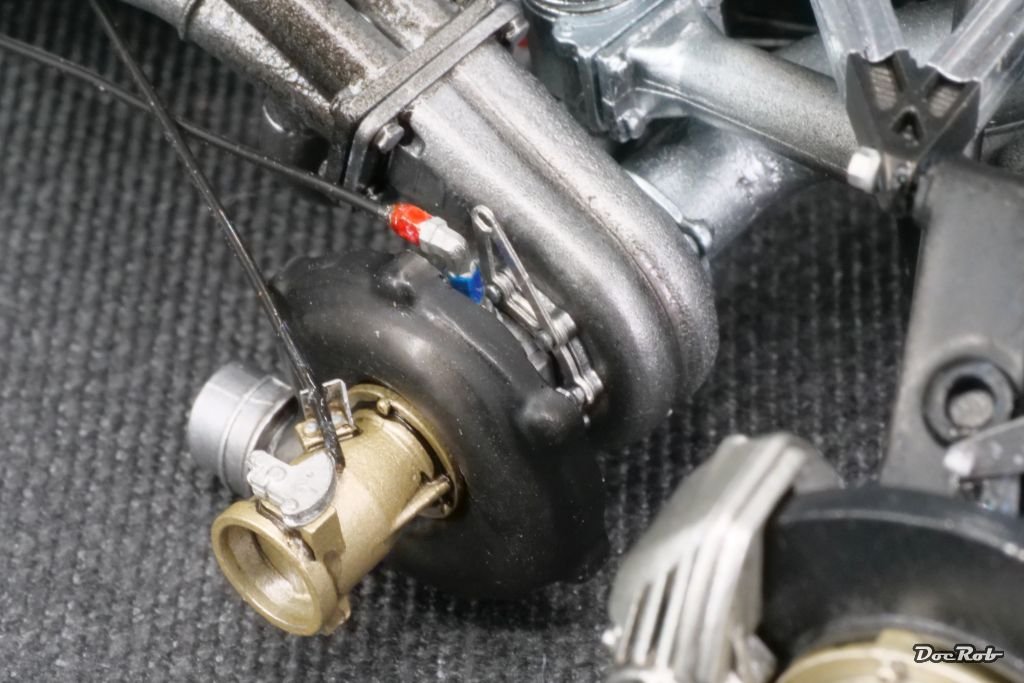
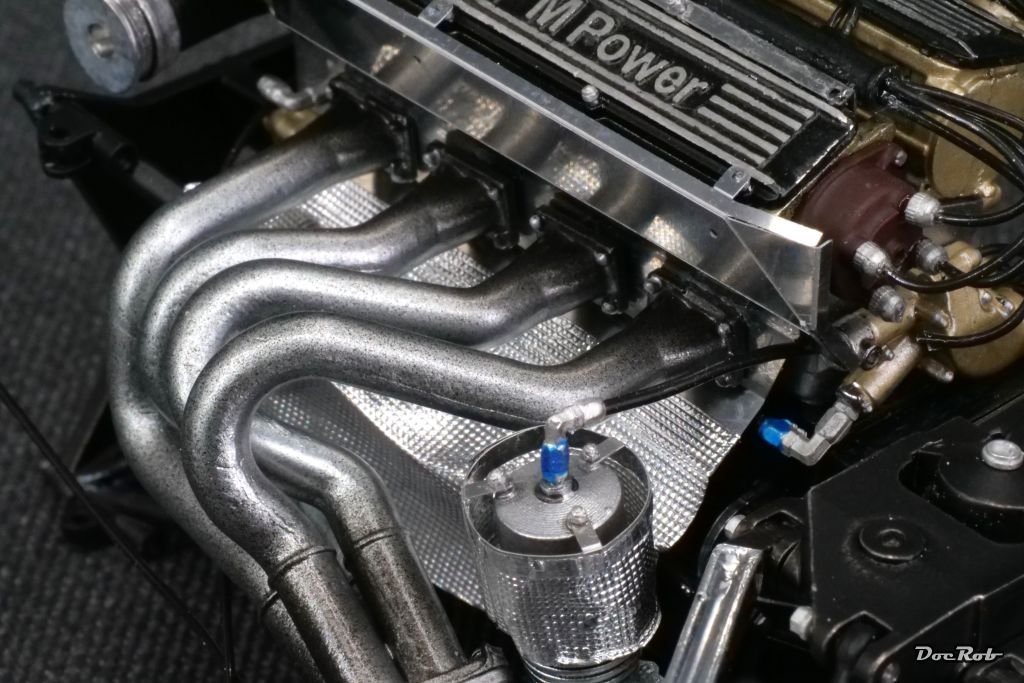
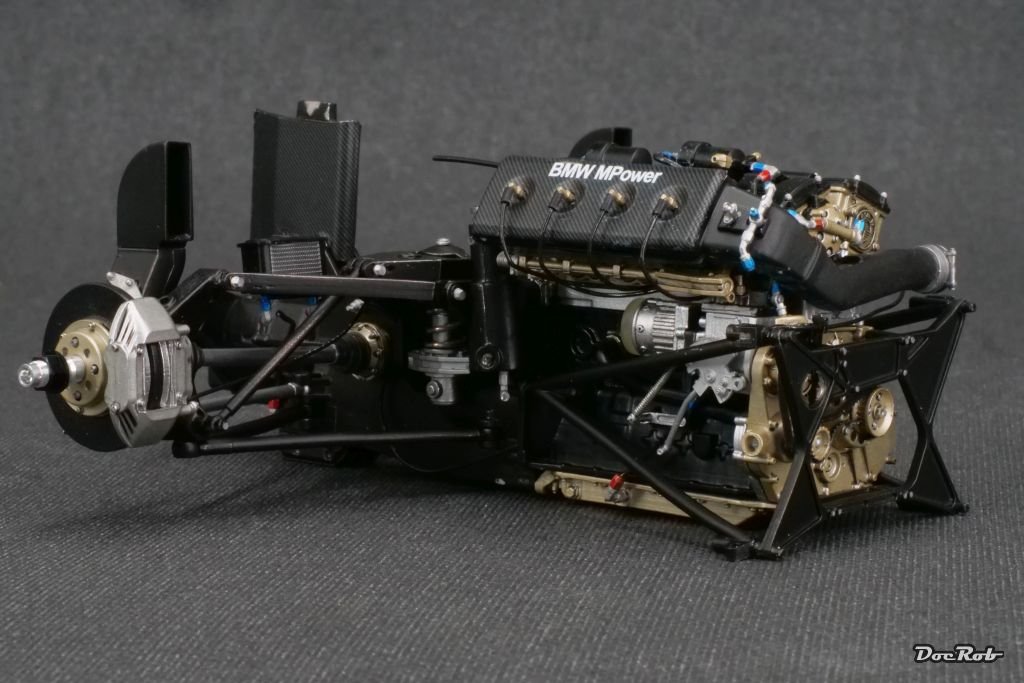
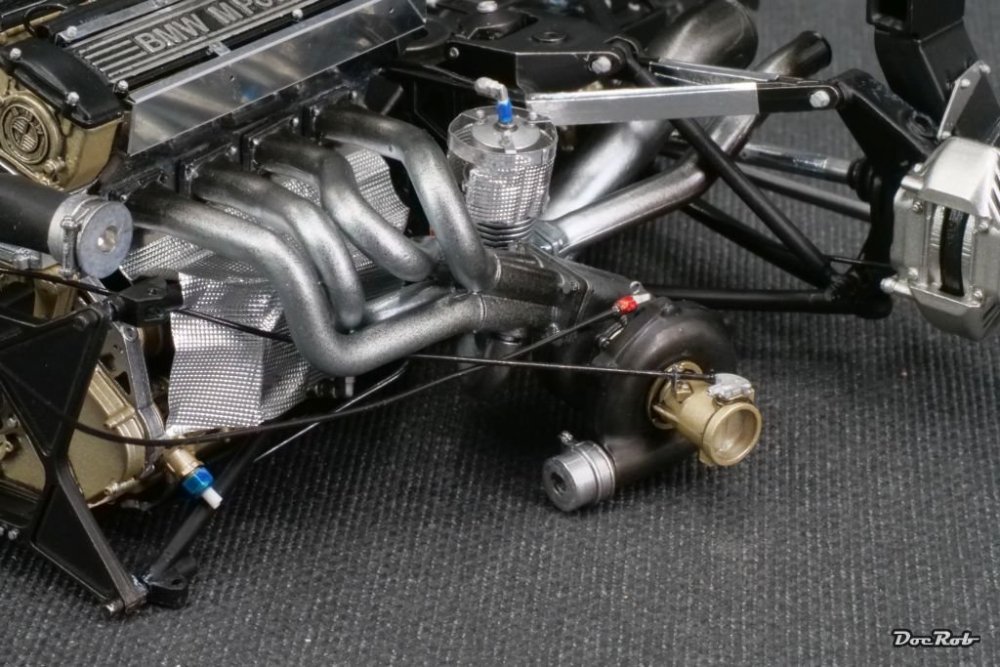
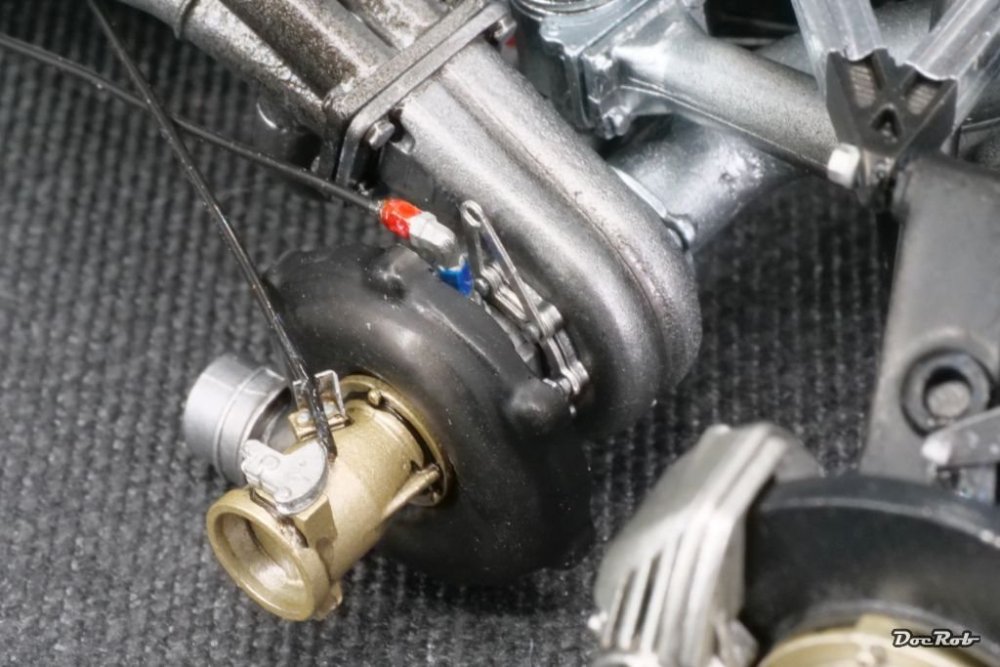
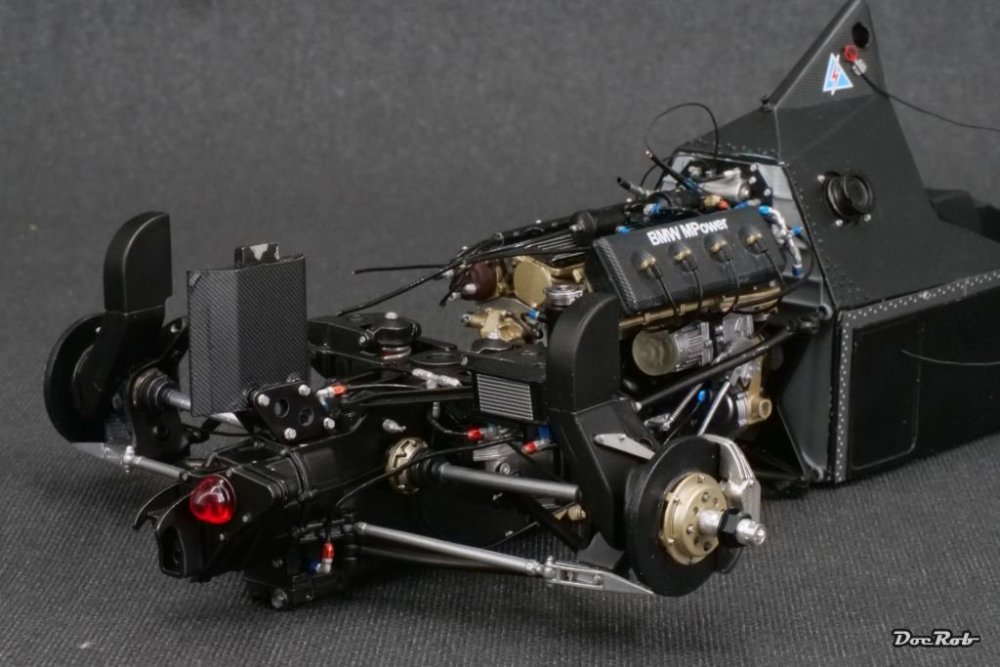
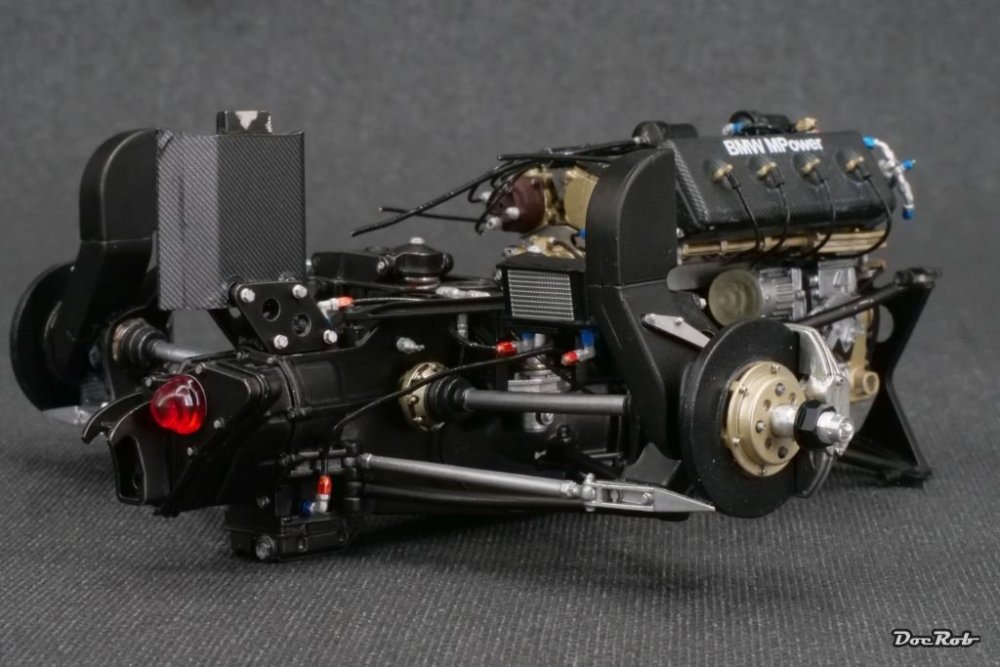
Phew, the real powerhouse of the BT52b took some effort to get right. I can only estimate, how hot the turbo gets when run to full power with all the heat shielding. I should have aluminum wrapped all hoses and tubes, but installation was difficult enough, so I omitted it. The exhaust manifolds, turbo parts and exhausts were painted with AK Extreme Metal stainless steel and accentuated with black smoke of the same brand and finally touched up with Alclad jet exhaust for a reddish brown shine like on my reference pics. The black cover of the turbo is a clear vac part, which I painted translucent black. On the original it is made from carbon fiber, but I was too lazy to decal it, as it will be hidden very deep into the car. I had difficulties to get good color reads off the pictures from the original engine. The embossed aluminum foil needs to be cut and glued to the PE parts. It needs a bit of fine tuning, but it was not easy to get the foiled parts in place. Specially on the tiny cylindrical pot on top it was tedious, with the microscopic three rivets to be placed there. Cheers Rob


-
A bad weather spell helps a lot, but I generally like to get into something like a meditative groove when modelling. I don´t build for the display shelf, but for the building experience itself. Prep work with MFH kits is time consuming and the painting stage dictates it´s timing due to curing times, but with the assembly phases, I can determine my building speed myself. I usually work myself through one or more often two pages of the manual as one step. At the beginning of a build, I try to determine, which steps will be the hardest for me to achieve and try to get them out of the way first. With the Brabham, it was the carbon fiber decaling, which proved easier than thought. Cheers Rob
-
Thank you Gus, Therese is described as the biggest storm and rainfront since 2013. Not the strongest fortunately, but it passes for over a week, but I hope from Monday on, it will be better. There are strong winds and downpours of 100 l in one hour and in between sunny stretches, weird. It´s about time for some calm and sunny weather, as winter was cold, ugly and long this year. I start getting fat, sitting inside building models, when there are no reparations to do outside. No sports, no swimming since over a week . Cheers Rob
-
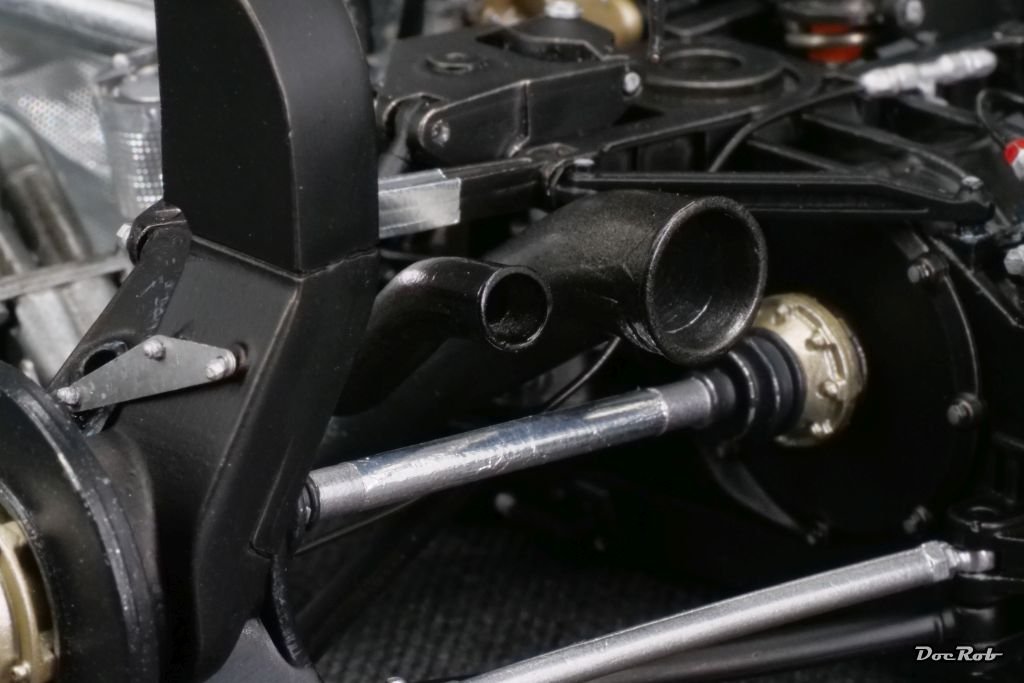
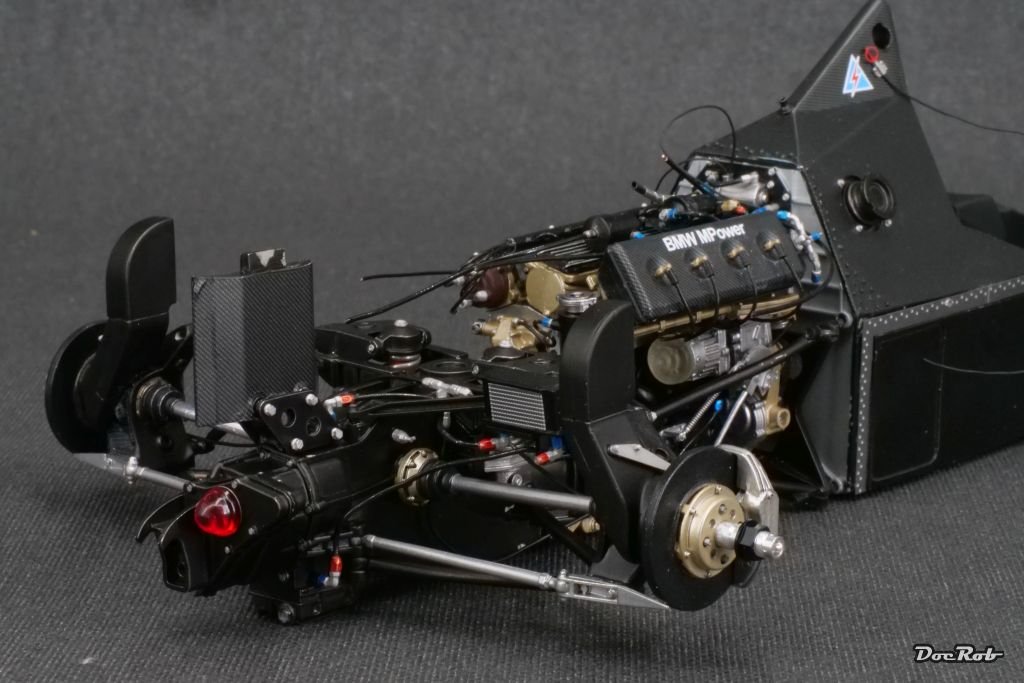
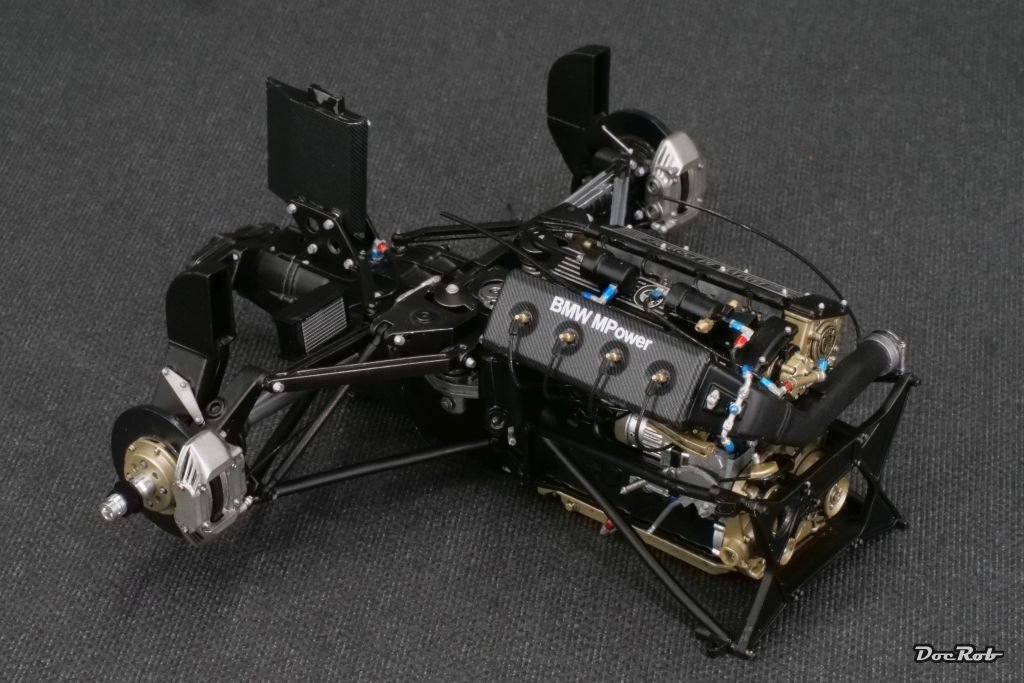
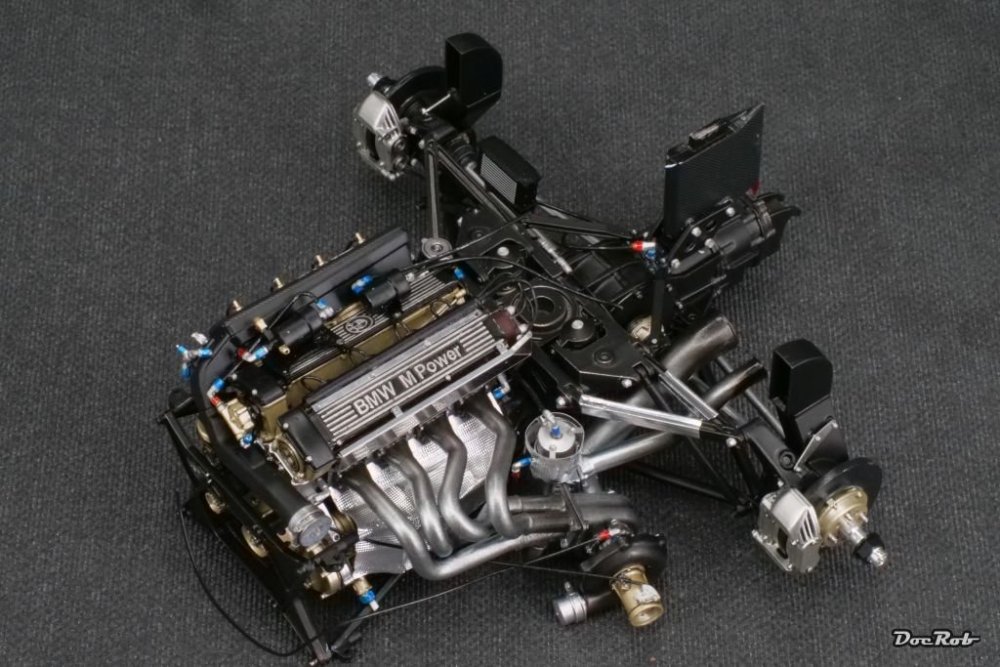
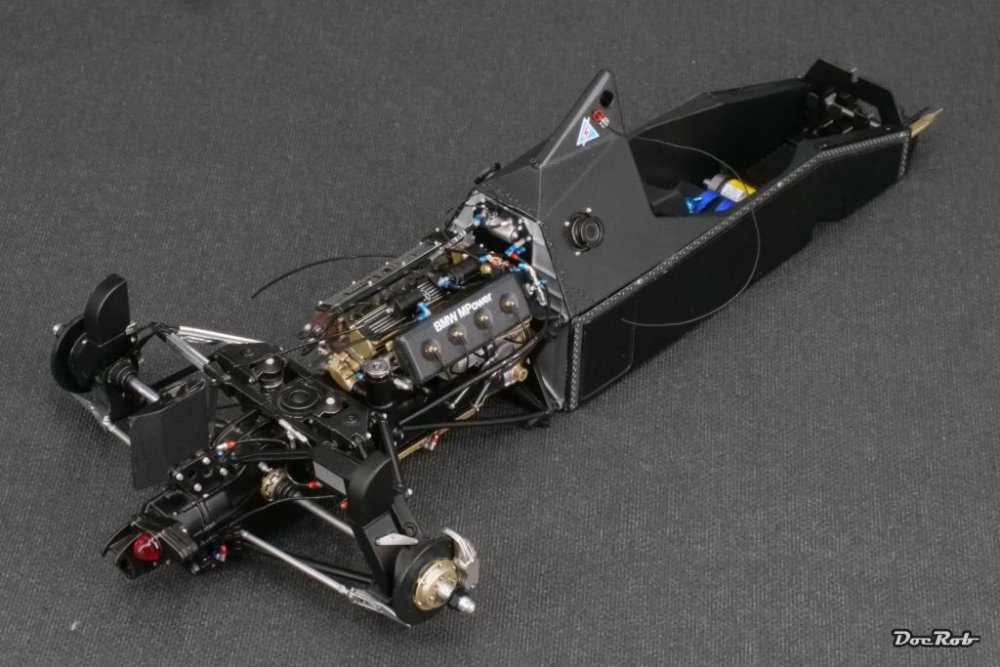
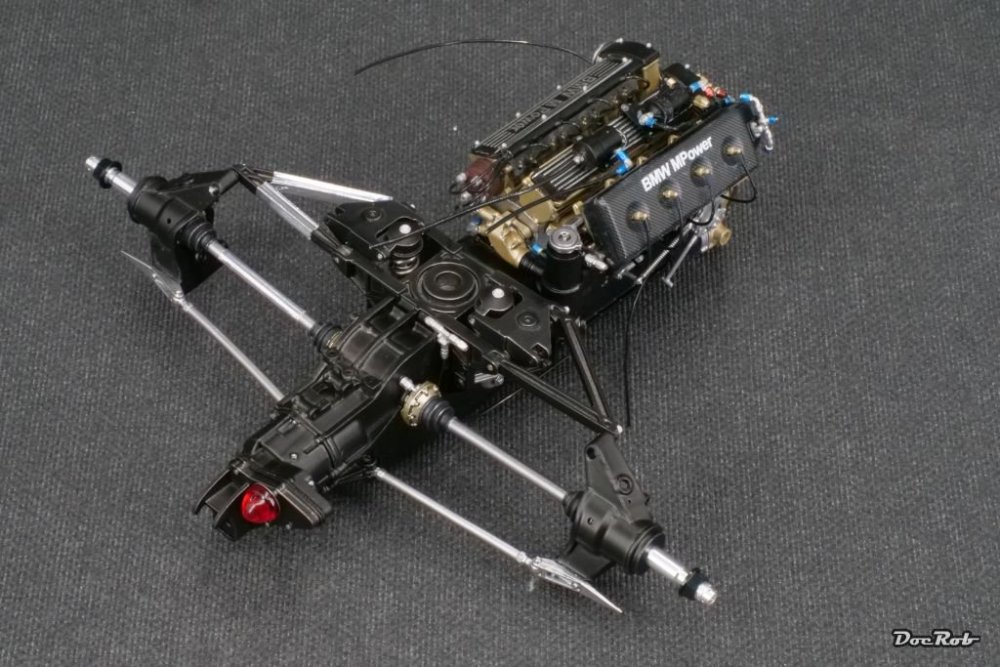
I got some more steps completed. I finished the brakes and suspension, added a radiator, the tailwing post and some engine framing, along wiring and tubing. If you ever build this kit, be aware, that the nickel silver wires are pushed deep enough into the holes and don´t end flush, because a peg from part M74 and M75 in a later step will be fitted into the hole. I´ve overseen it and had to do some surgery. Finally the gearbox was glued and screwed to the engine block and now the rear section lacks only the turbo, the exhausts, some electronics and lastly the huge coolers. A spell of really ugly weather with storm and flooding rain acts as a building booster, always hoping, nothing flies away or goes submarine. Some mock up pictures with the monocoque loosely added: Cheers Rob


-
Hasegawa P-40M 1/32 scale
DocRob replied to Glijn Van Driessche's topic in LSM 1/32 and Larger Aircraft Ready for Inspection
Your patience paid off, the P-40 looks fantastic. Weathering is spot on and I really like, what you have done with the white surfaces, which can look boring, when non treated. Cheers Rob -
No need for depression Pw, you would be amazed what you can do with that kind of kit. It needs some adapting and it is a challenge, but other than many near unbuildable kits, MFH kits are rarely frustrating. They turn out the best in the builder, due to motivation and satisfaction. Cheers Rob
-
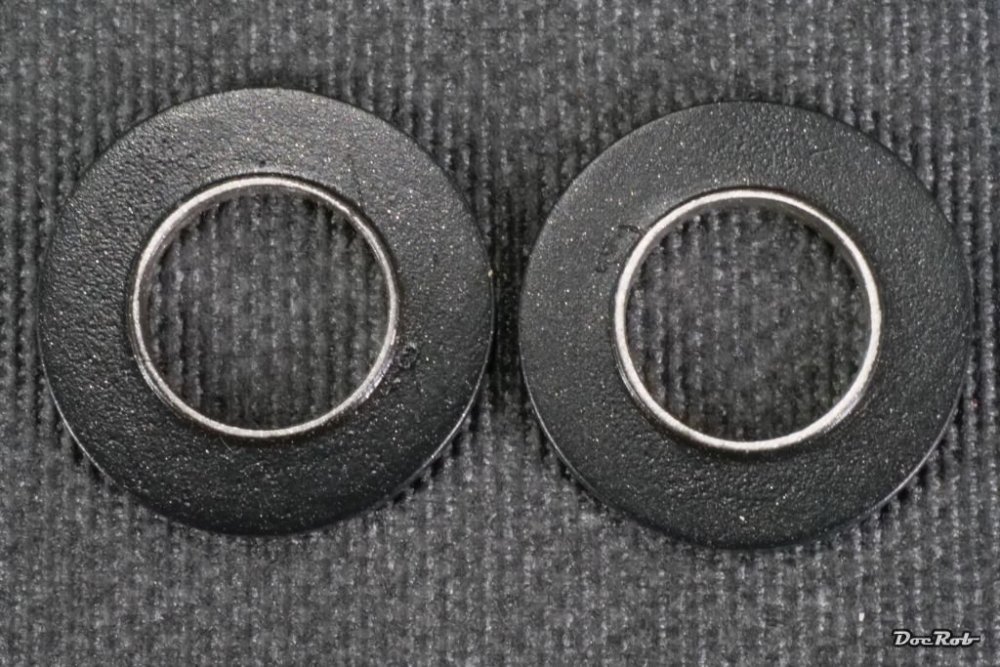
Can´t tell for sure, which type of brake discs were used, the race, I plan to build the BT52b for. They were using carbon disc brakes for testing, maybe for races as well and I was eager to test the carbon paint. Both types of brake discs are included in the kit. Cheers Rob
-
It is Tamiya LP-5 semi gloss black thinned with about 50% of leveling thinner. Cheers Rob
-
I guess they will, I´m wondering, why Bandai didn´t include the set with their absolute prime squirrel. It´s not a lot you get for the asked 200 bucks. Five LED´s and a bit of electronic, deeply unsquirreling. Cheers Rob
-
From what I´ve seen, the Kosmos sets are not only cheaper, they are also better than the Bandai sets. Cheers Rob
-
Jeannin Stahltaube (Steel Dove)
DocRob replied to sandbagger's topic in WNW and WW1 Ready for Inspection'
A fantastic rendition of that fragile plane. Thanks again Mike for sharing your PDF logs. I will load it down and use it, when I build mine. Cheers Rob -
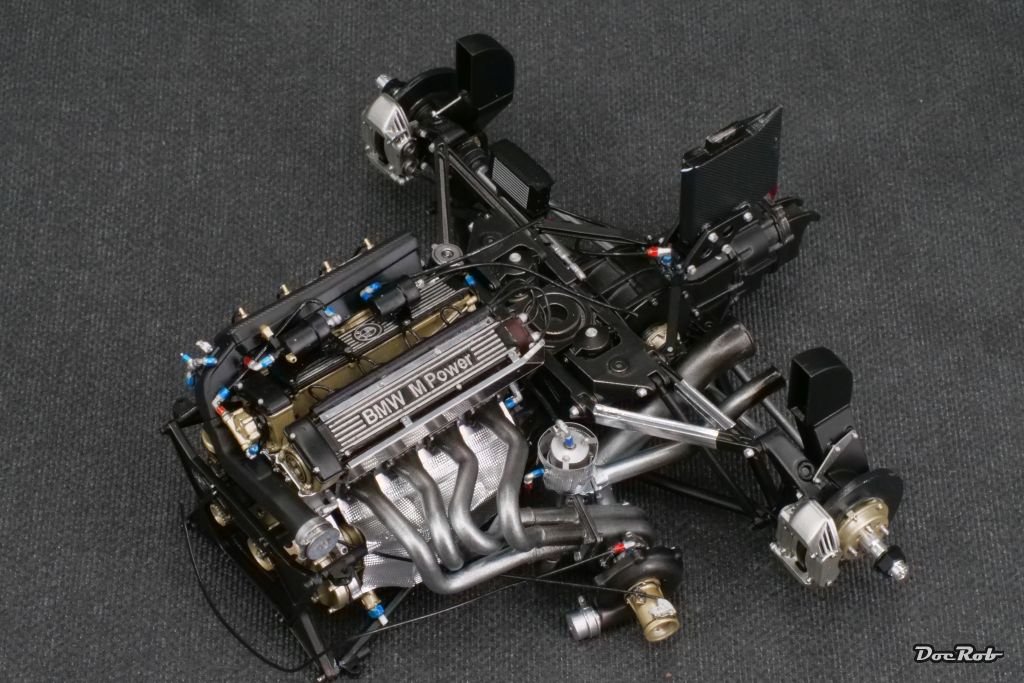
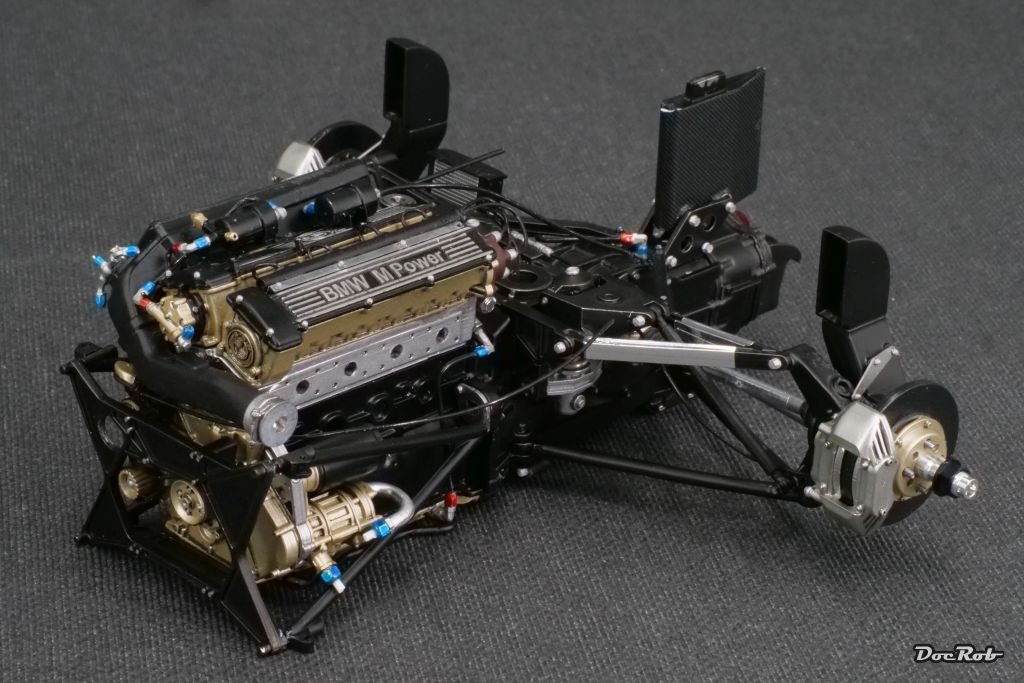
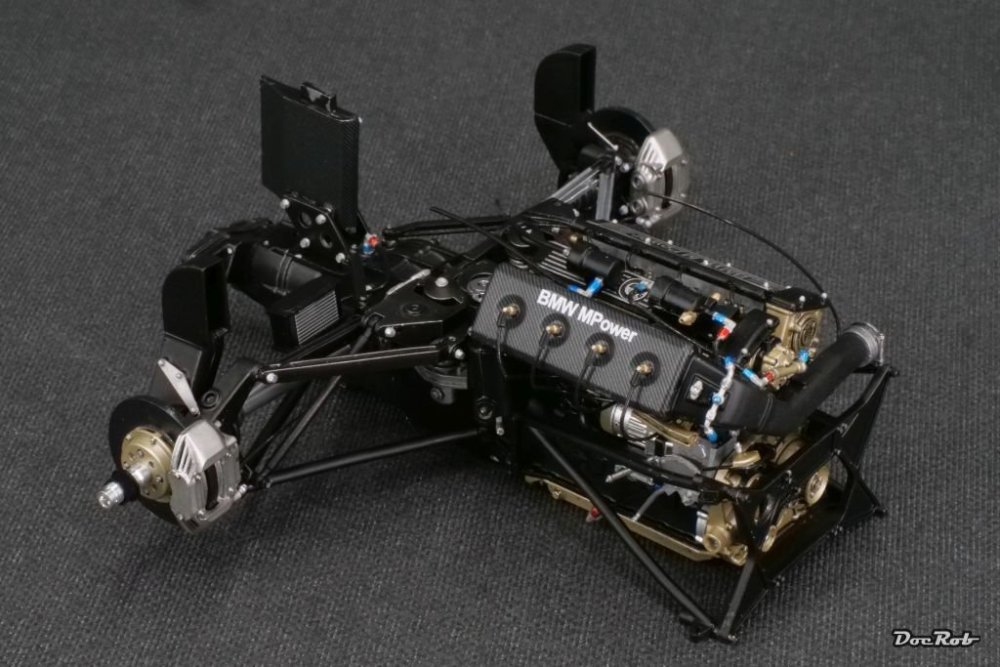
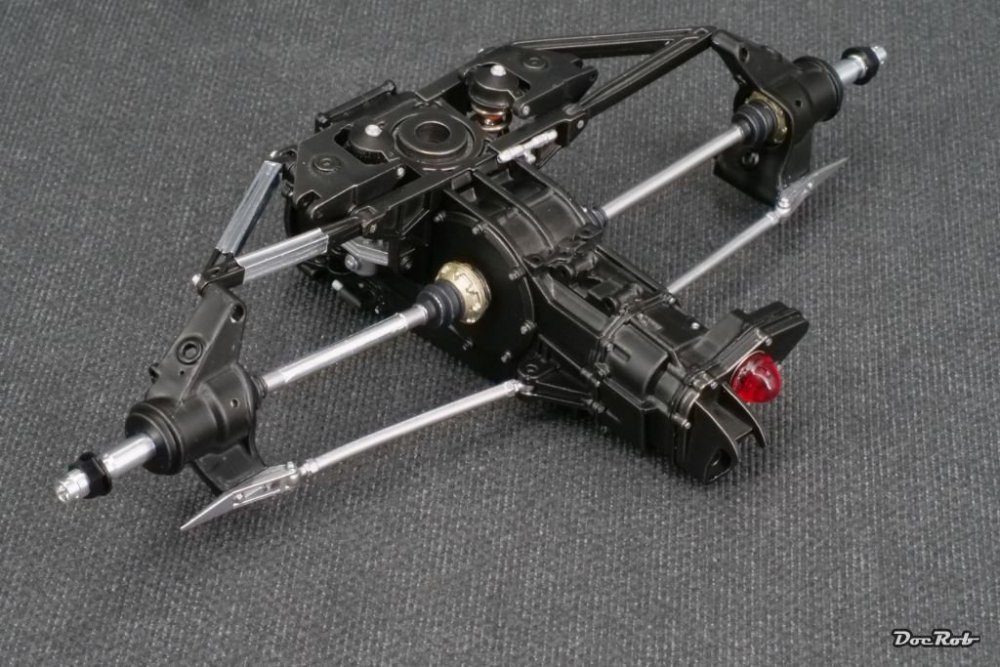
Again it is cash in time, my favorite part of MFH builds, when all the necessary parts for a section are prepared, drilled and painted and ready to assemble. The gearbox received lots of the suspension parts, absolutely trouble free and relatively sturdy and good to handle. The aluminum foil on the suspension arms and axle on one side is provided with the kit as self adhesive foil. Here you can also see, how I work with semi transparent black color over metal or silver priming, to let the parts look more interesting and scale wise more correct than deep black, which to the eye nearly never exists. A mock up shot with the engine: For the first time, I used Zero Paints carbon ceramic grey paint for the brake discs and I really like the effect: Cheers Rob
-
That´s what I call a MONSTER SQURREL Carl, I just got infested by you and got a perfect grade Unicorn. I haven´t showed it, because I´m still waiting for the Kosmos LED set.
-
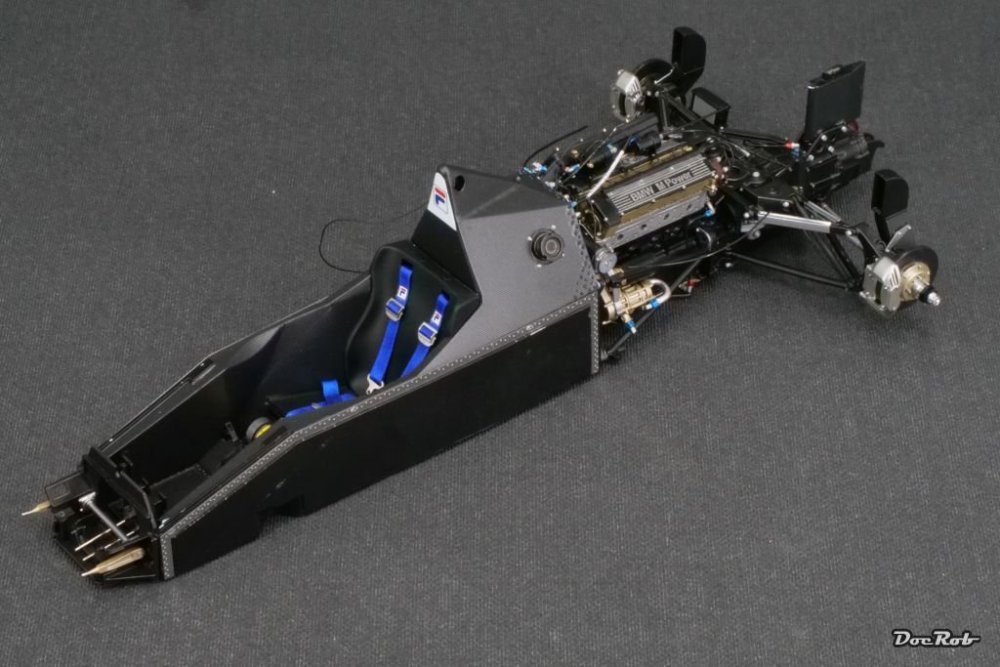
De nada Nick, there are no length measurements given, but a photo of the real car shows where the buckles belong and where the fasteners are. With the MFH method to glue the seat belt parts together with double sided adhesive tape, you can adjust until the last moment. Getting the belts through the top seat belt fasteners (the white metal parts) is a bit tricky, as you have to fiddle them through the holes in the seat first and then through the top fasteners. Good tweezers are helpful here. The four lower belts are glued to the underside of the rubber seat pan, using the supplied double sided adhesive tape. You can estimate the length, when you think about fastening them around a not too heavy driver. Cheers Rob
-
Thank you Nick, I used just a tiny bit of CA glue. If you don´t feel comfortable with CA on rubber you can always use double sided adhesive tape, which works perfect as well. Where the seat belts attach to the rubber, it´s always double sided adhesive tape, to fix them in place. Cheers Rob
-
Land Rover Defender 110
DocRob replied to BlrwestSiR's topic in LSM 1/35 and Larger Work In Progress
You ran into a lot of trouble with that conversion, Carl. Your solution seems to work, albeit the wider fenders of the conversion kit look a bit too small to accept the huge wheels, when they are in their uppermost position. Cheers Rob- 18 replies
-
- 3
-

-

-
- c1 models
- land rover
- (and 1 more)
-
TAKON Chieftain MK11 , Last Hurrah at BATUS 1993
DocRob replied to PanzerWomble's topic in LSM Armour Finished Work
It´s easier to sign up for that Martin, you not only get around the fine, but you also don´t need to wash the car afterwards and also no tank running over your bonnet, when you stuck into the mud. Cheers Rob -
TAKON Chieftain MK11 , Last Hurrah at BATUS 1993
DocRob replied to PanzerWomble's topic in LSM Armour Finished Work
Nice little dio PW and it is good to see a more unusual tank kitted. Cheers Rob -
Again dirty and weathered to your usual high standards FA. You found a home in both worlds now, the clean and polished as well with your car build. Cheers Rob
-
Land Rover Defender 110
DocRob replied to BlrwestSiR's topic in LSM 1/35 and Larger Work In Progress
Nice surgery and kit bashing, Carl. Cheers Rob- 18 replies
-
- 2
-
-
-
- c1 models
- land rover
- (and 1 more)
-
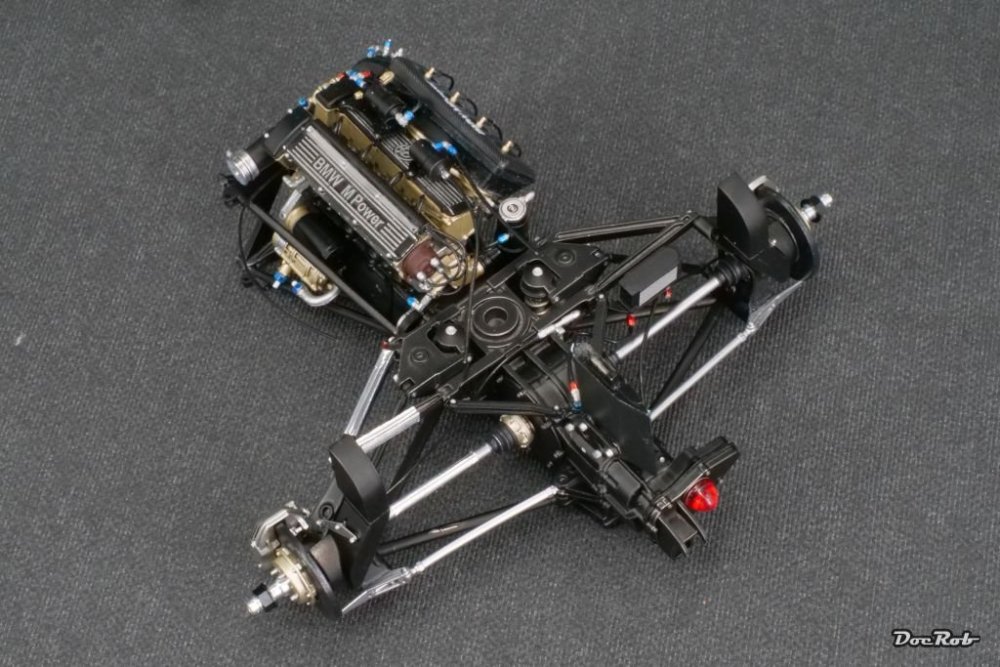
Only to show, why it takes some time for the next bigger update. These are the parts for the gearbox and rear suspension cleaned up, drilled (the most time consuming part) and ready for primer and paint. Cheers Rob

-
Very nice and vivid, FA. I love the contrast between body and blue interior, a beauty for the display shelf. Cheers Rob