DocRob
-
Posts
7,015 -
Joined
-
Last visited
Content Type
Profiles
Forums
Events
Gallery
Everything posted by DocRob
-

The Legend - Lotus 72D - Tamiya 1/12
DocRob replied to DocRob's topic in LSM 1/35 and Larger Work In Progress
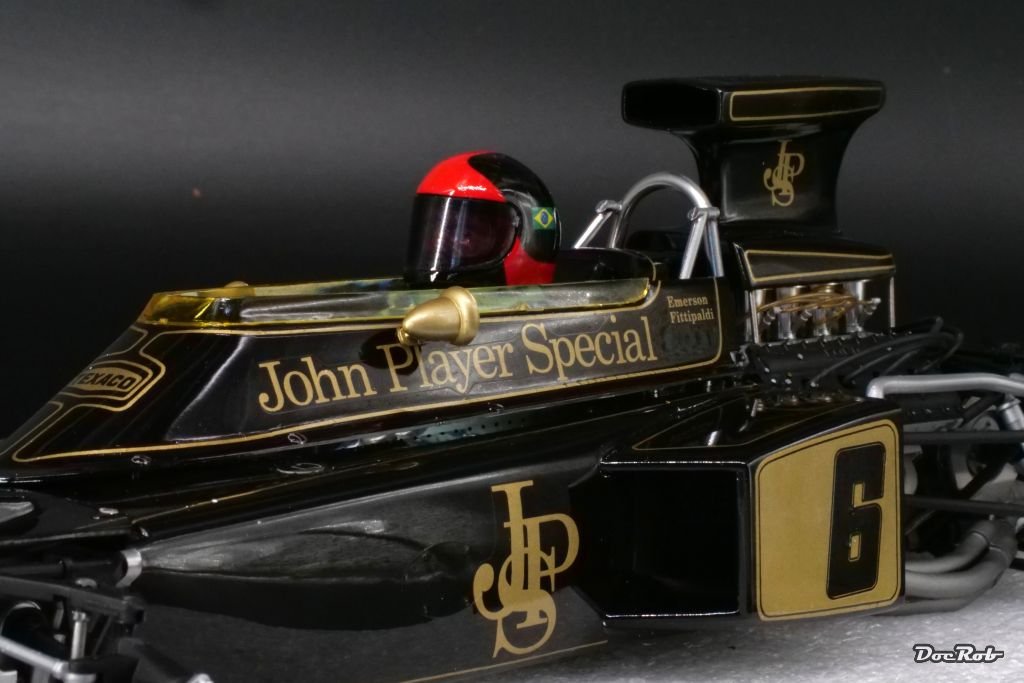
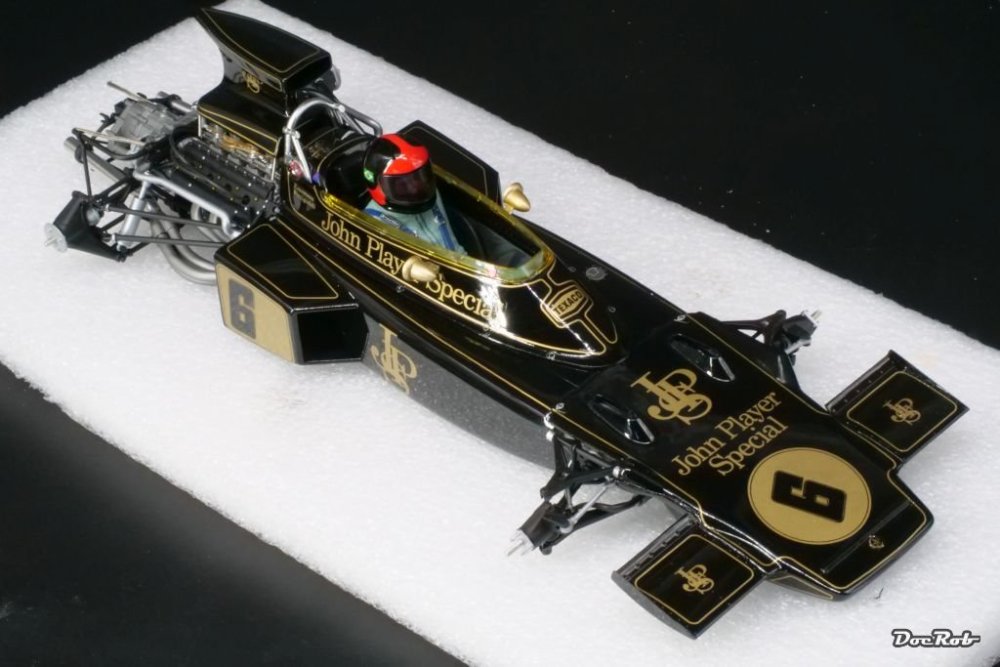
Some vanity shots, before disaster struck. I finished the cockpit with the driver, the instrument panel with added wiring and the steering wheel. Would I have known, how prominent the clumsy hands of the driver figure where, I may have given a first shot of sculpting a try. I added the rear wing without difficulties and installed some braided lines instead of Tamiya vinyl tubes. Therefore, I pinned all the fittings with 0,5 mm brass rod. Cheers Rob


-
The Legend - Lotus 72D - Tamiya 1/12
DocRob replied to DocRob's topic in LSM 1/35 and Larger Work In Progress
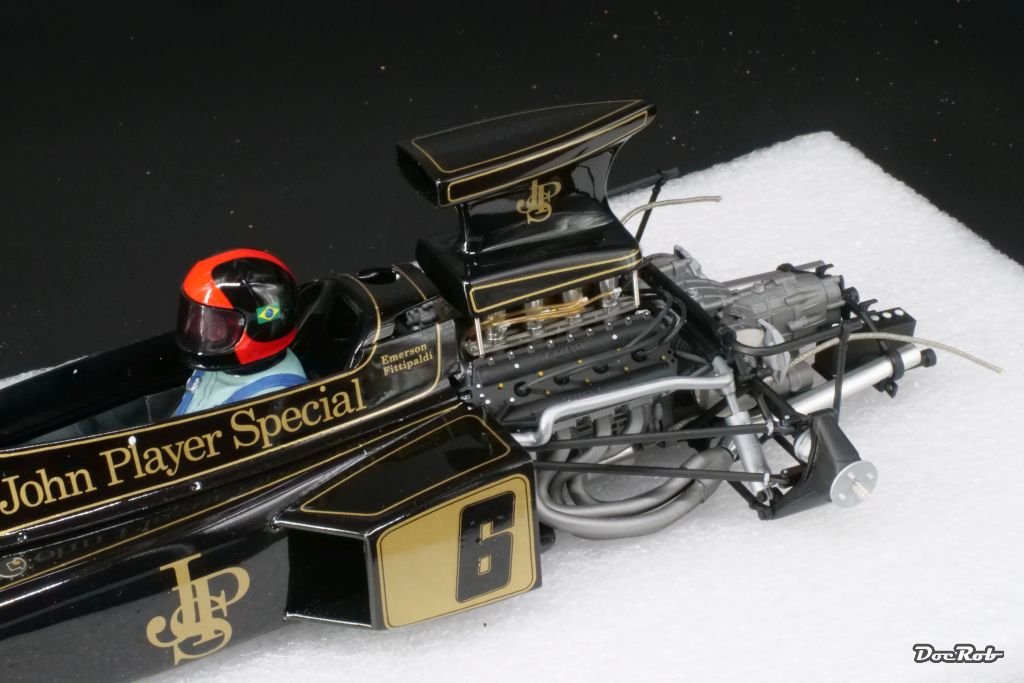
The air intake is hold in place with four coil springs and will add only to the risk, when crashing frontal onto something. These cars were really dangerous to drive it seems. Cheers Rob -
Kotare Bf 109K-4 with AIMS decals
DocRob replied to denders's topic in LSM 1/35 and Larger Work In Progress
Your cockpit looks fantastic. Are you sure, the seat pan was made of wood? I´m no 109 expert, but would think aluminum. Cheers Rob -
The Legend - Lotus 72D - Tamiya 1/12
DocRob replied to DocRob's topic in LSM 1/35 and Larger Work In Progress
after a lot of detailwork, I can see the finish line slowly. I added many fittings to the engine, added the rollbar, tank filler and other bits and pieces. I installed the roll bar, which hasn´t even the height of the drivers helmet, so far for security. The cockpit fairing was finished, with PE-fasteners, rear view mirrors and the yellow tinted clear part. The rear wing is prepared, but needs some curing time before mounting. Cheers Rob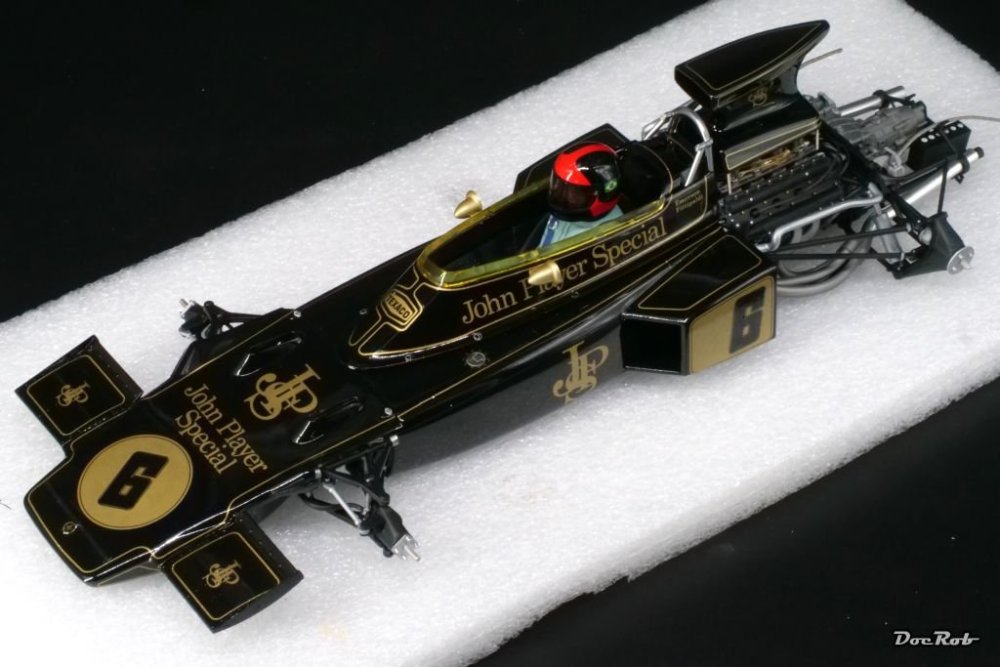

-
The Legend - Lotus 72D - Tamiya 1/12
DocRob replied to DocRob's topic in LSM 1/35 and Larger Work In Progress
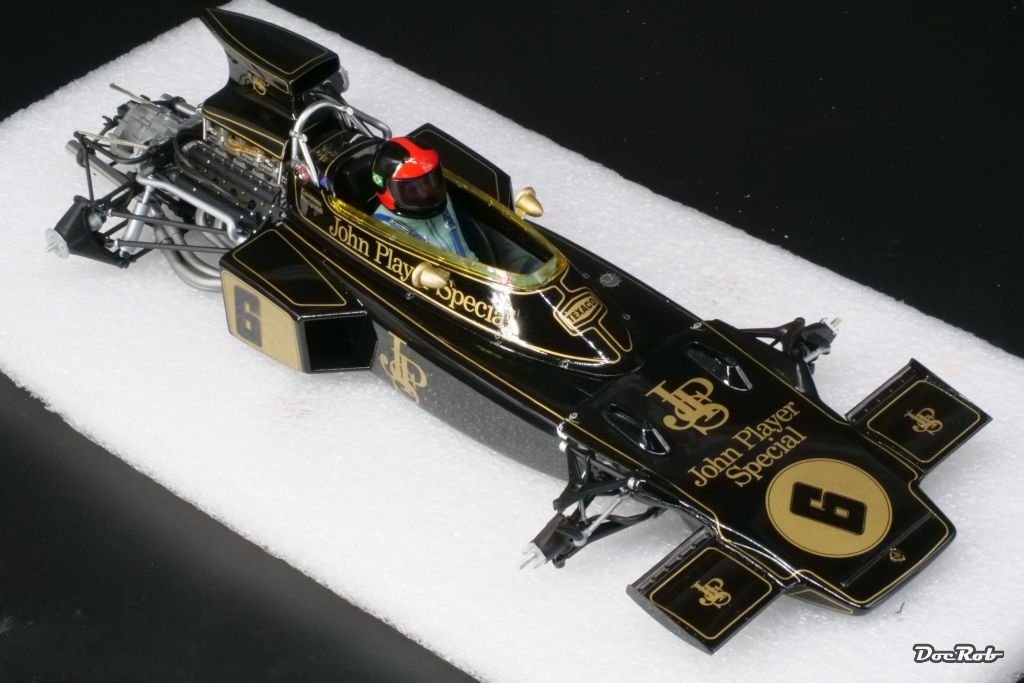
Finally, I married the engine to the gearbox and then to the body. Sounds easy, but isn´t. There are so many fragile parts intersecting, that you have to work out a good sequence. To make the rear suspension workable, it needs a higher skilled builder than me. I early skipped the idea of function and glued everything in place, specially after some of the snap fit connectors broke (old brittle plastic?). I added some braided lines from Top Studio instead of using the thick rubber hoses, Tamiya provides. I also added coil springs as air intake fasteners, which I found in the spare box. Please don´t mind the dust and fingerprints, these are work in progress shots. Cheers Rob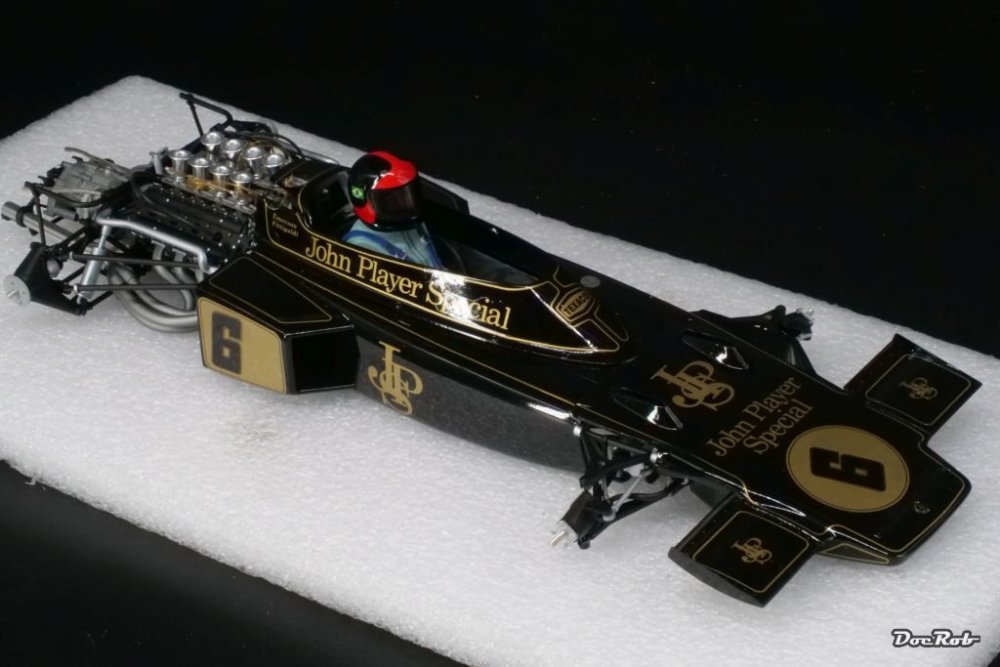

-
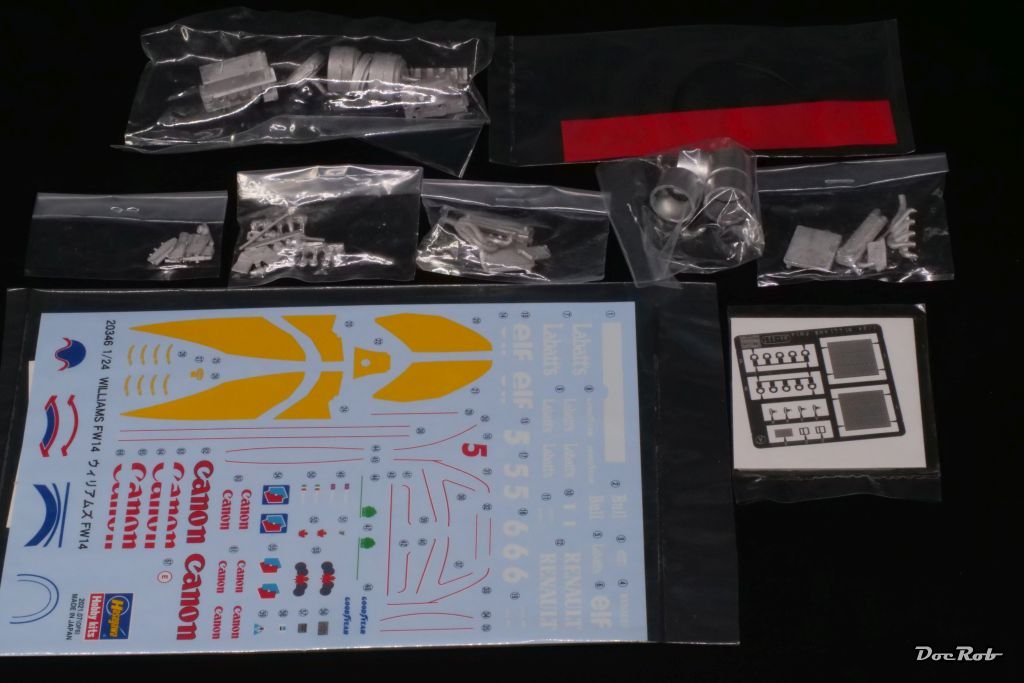
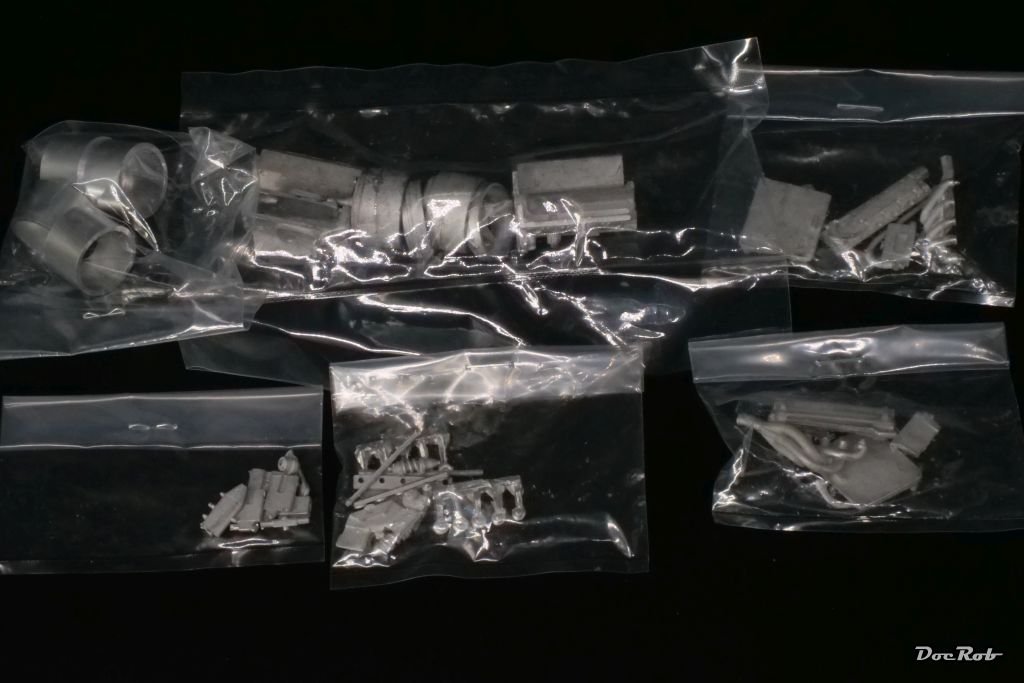
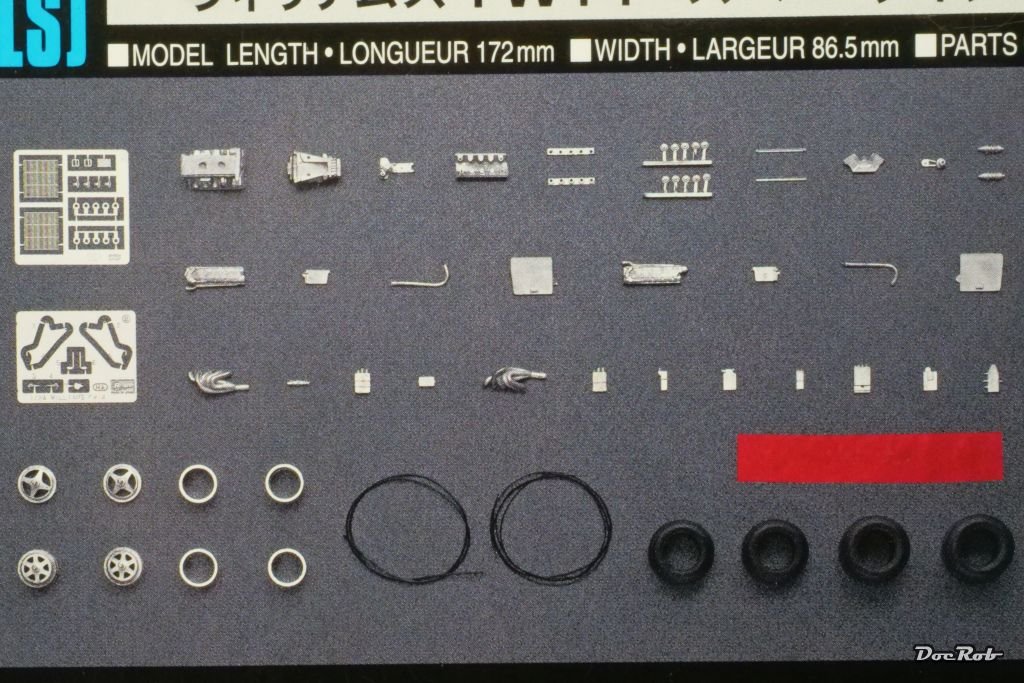
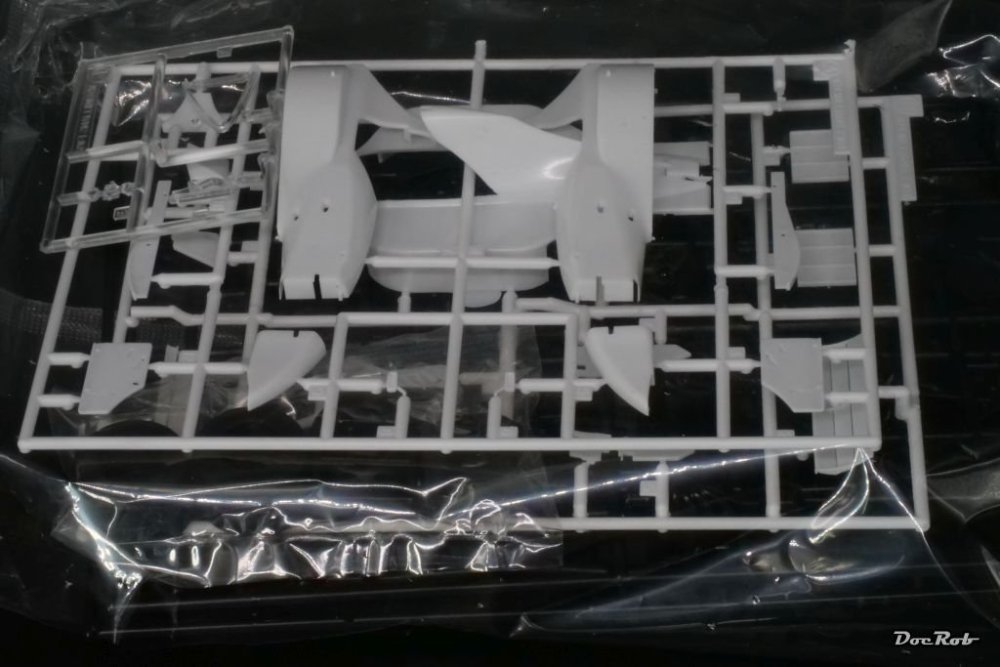
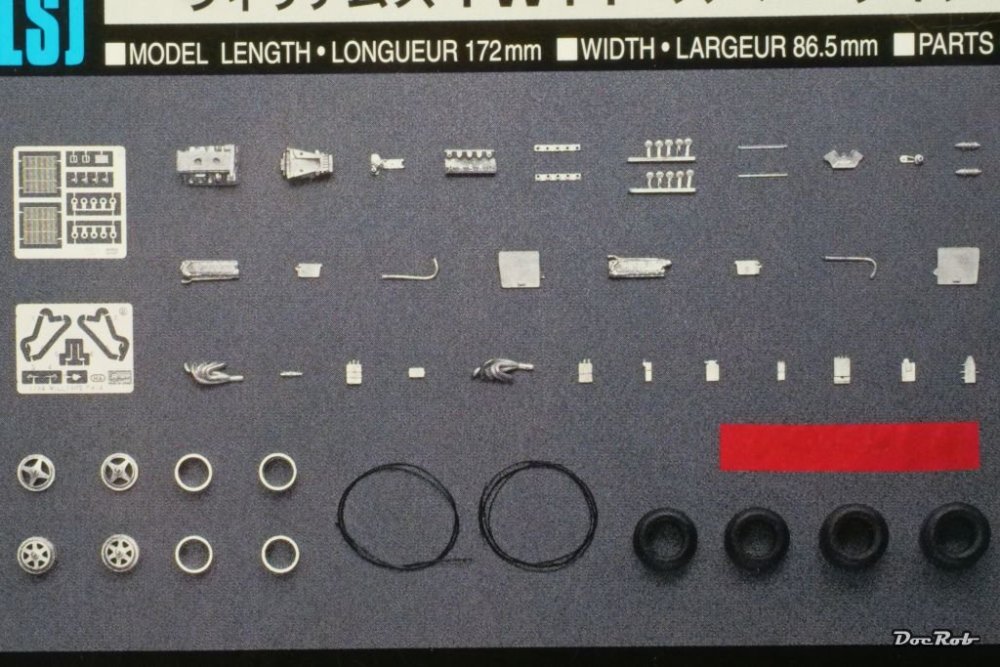
Here you are. The kit is 1/24 unfortunately, I prefer 1/20 and naturally 1/12 for these delicate racers. There is not that much AM out there for this kit, so no carbon fiber this time, but I sourced some Camel branding decals, which are not included in the kit. The metal detail kits are expensive in Europe, but I bought mine from Plaza Japan for a good price. Black and white sprues, no chrome luckily Extras and decals. The decals include also the Goodyear branding and seat belt logos A closer look onto the metal parts. A pic from the multi material content, taken from the box. Cheers Rob


-
The Legend - Lotus 72D - Tamiya 1/12
DocRob replied to DocRob's topic in LSM 1/35 and Larger Work In Progress
Thank you Kirk, the hole is already closed and I will post some pictures of further progress soon. Cheers Rob -
The Legend - Lotus 72D - Tamiya 1/12
DocRob replied to DocRob's topic in LSM 1/35 and Larger Work In Progress
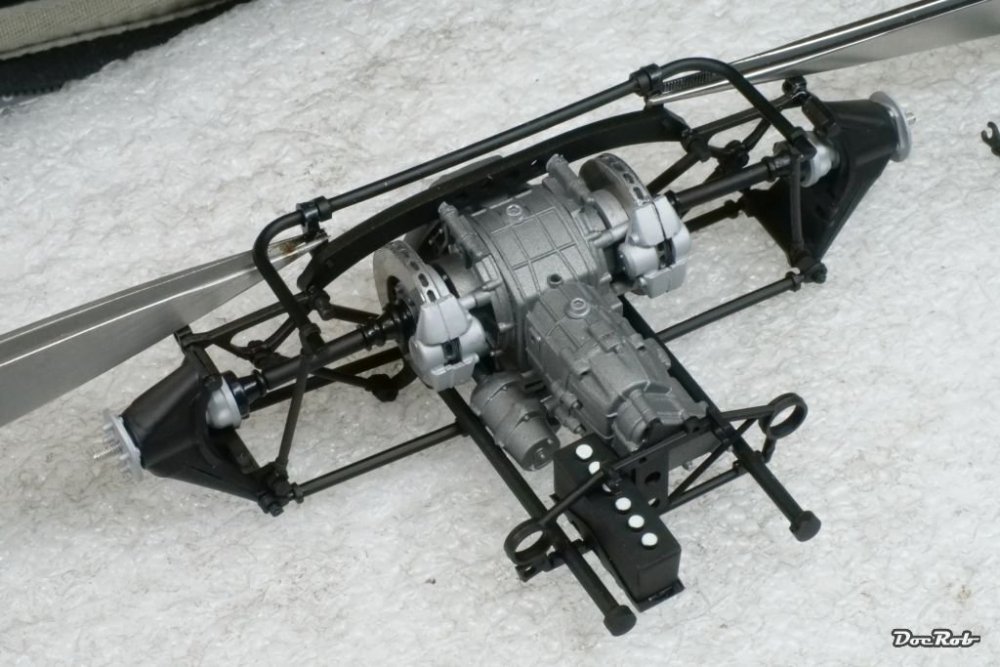
During the Christmas days, I prepared the parts for the rear suspension and framework. The moulds are really old and there was a lot of clean up to do. Everything was painted according to the manual with Tamiya LP colors and then assembled. This, like the front suspension assembly was a daring task and some supposed snap fit parts broke during the process. Now, everything is fixed, but not working anymore. To be honest, the working suspension is a unnecessary gimmick and I have no idea, how you should assemble it to a working state. Finally, I glued the exhausts and some tubing to the engine and let everything dry over night. Cheers Rob
-
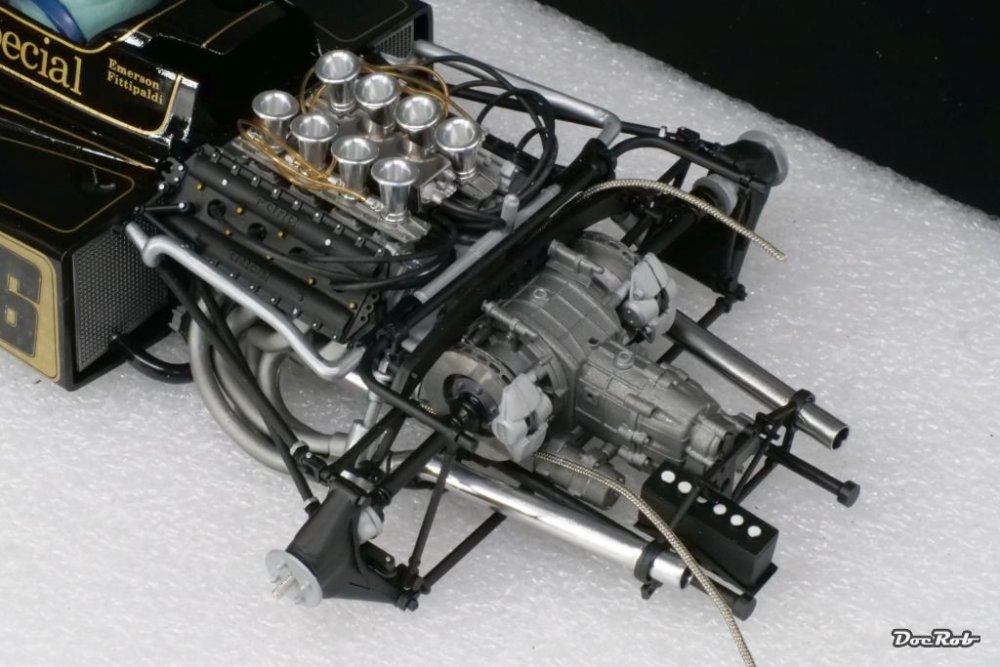
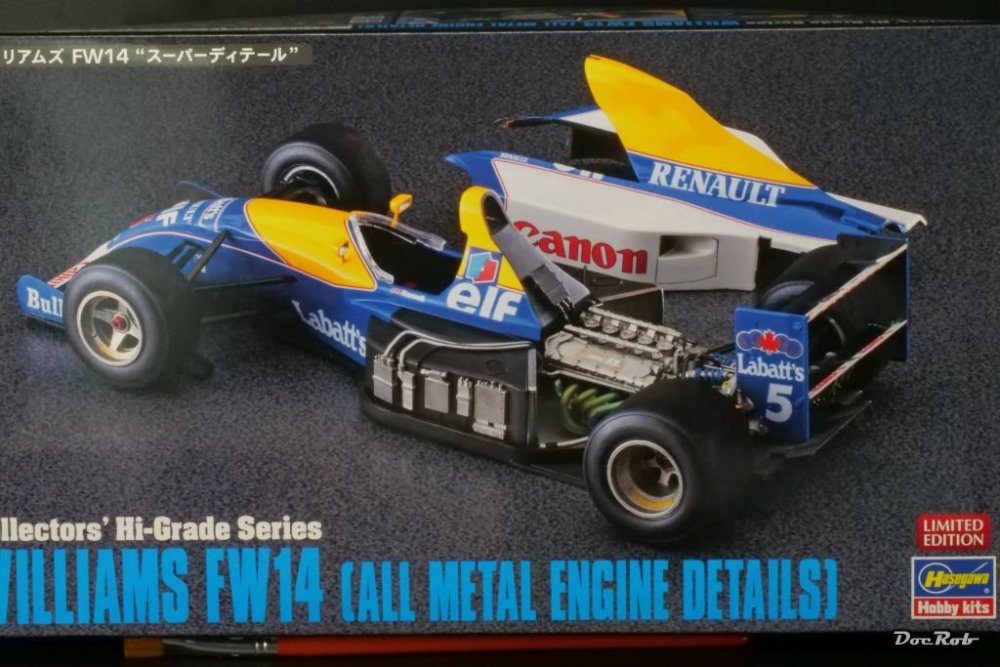
Got this little beauty along with some tools from Japan. It´s the "all metal" version of the Williams FW14 from Hasegawa in 1/24. All metal means, that the engine, exhausts, rims and other accesories are made from cast metal, the outer rims are turned aluminum and there is some PE included and some material for fabric seat belts. Cheers Rob

-
So sad to hear it, Hubert. Strength and all the best to you and your family. I hope you did make it in time. Rob
-
I wish you and your family strength, Hubert. My thoughts are with you. Cheers Rob
-
Kotare Bf 109K-4 with AIMS decals
DocRob replied to denders's topic in LSM 1/35 and Larger Work In Progress
The HGW belts are easiest assembled with the PE-buckles still on the fret. It´s easier to fiddle the paper parts through then. Cheers Rob -
The Legend - Lotus 72D - Tamiya 1/12
DocRob replied to DocRob's topic in LSM 1/35 and Larger Work In Progress
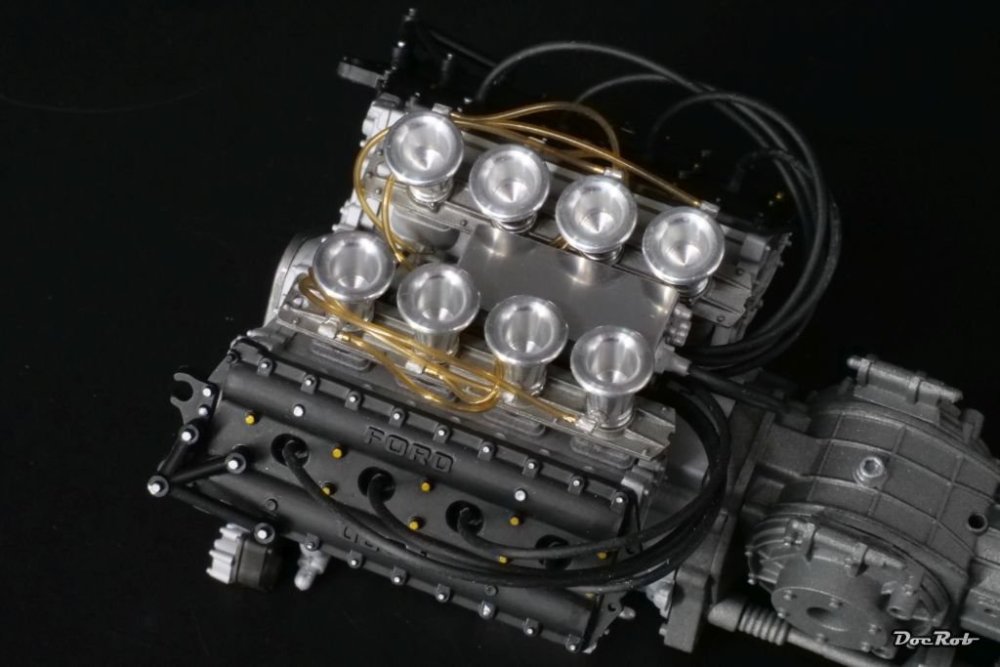
Thank you Martin, no turbo chargers on work here, just pure 450 air breathing horses. The turbo era came later in F1. I have a MFH kit of the most powerful F1 car ever, the Brabham BT52. It had only four cylinders and 1,5 liter displacement, but could generate up to 1400 horses in qualifying setup. Not easy to ride, as you can imagine with the enormous turbo boost hitting, when revving up. But this was later in the 80´s, when the turbo boom was rolling. Cheers Rob -
The Legend - Lotus 72D - Tamiya 1/12
DocRob replied to DocRob's topic in LSM 1/35 and Larger Work In Progress
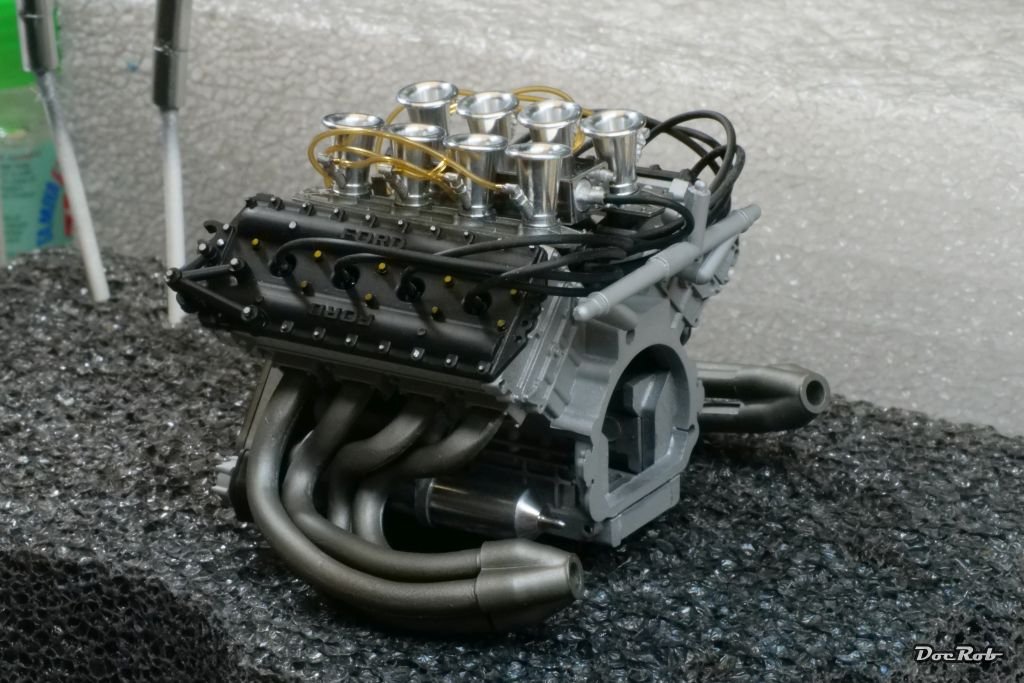
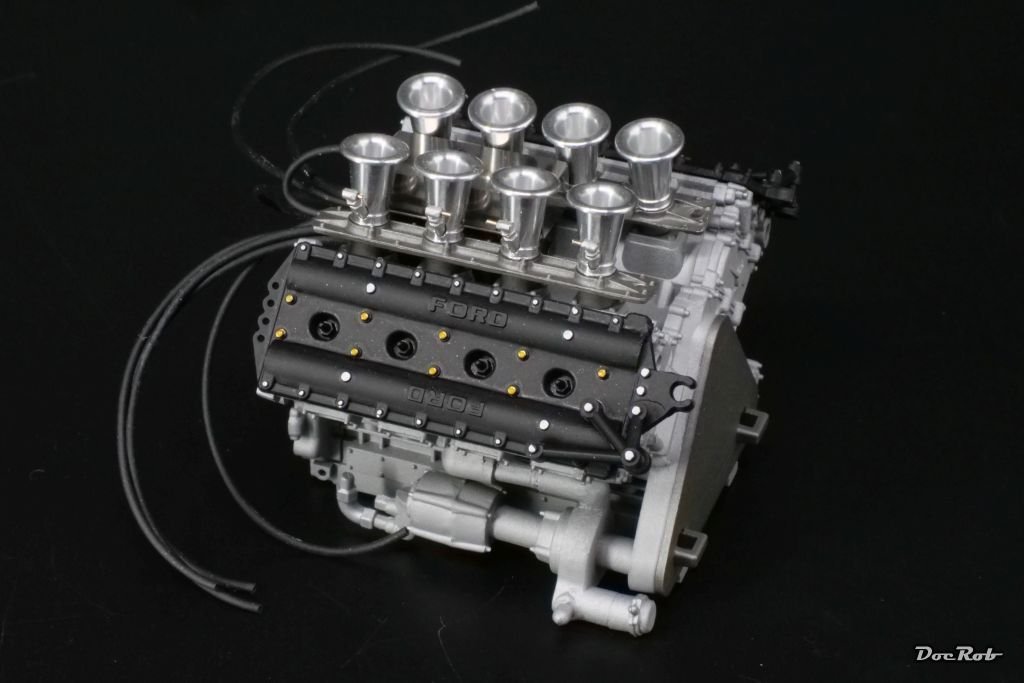
Today, I finished the engine and connected all the tubing. The yellow clear fuel lines were part of the MFH set, the black ignition cables were from the spare box, because the Tamiya supplied ones looked way too thick and out of scale. The MFH set fits the Tamiya plastic without the need for tweaking, great. Cheers Rob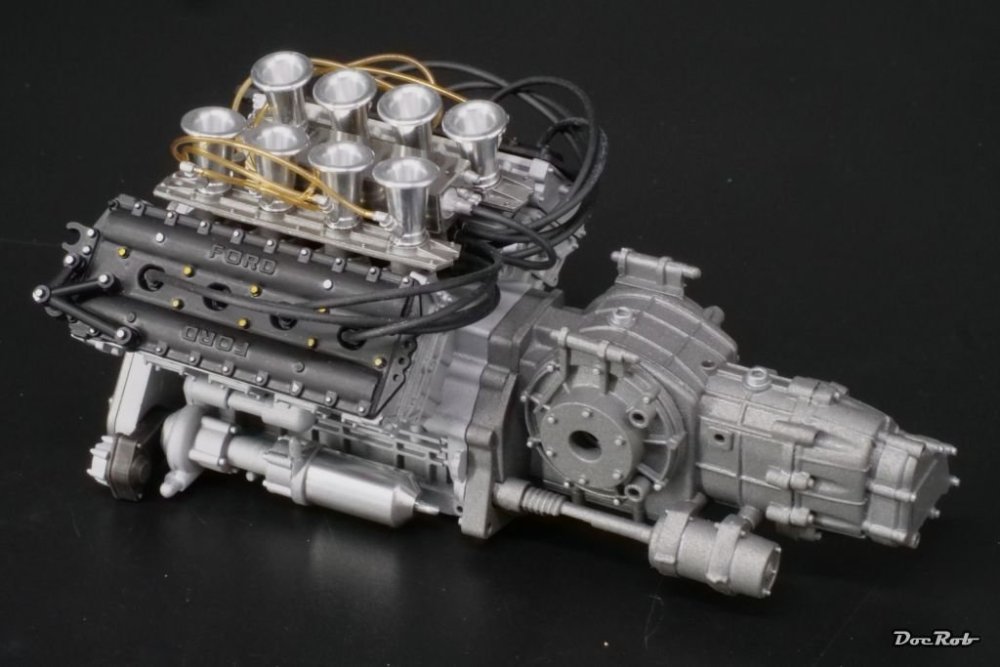
- 89 replies
-
- 10
-

-
The Legend - Lotus 72D - Tamiya 1/12
DocRob replied to DocRob's topic in LSM 1/35 and Larger Work In Progress
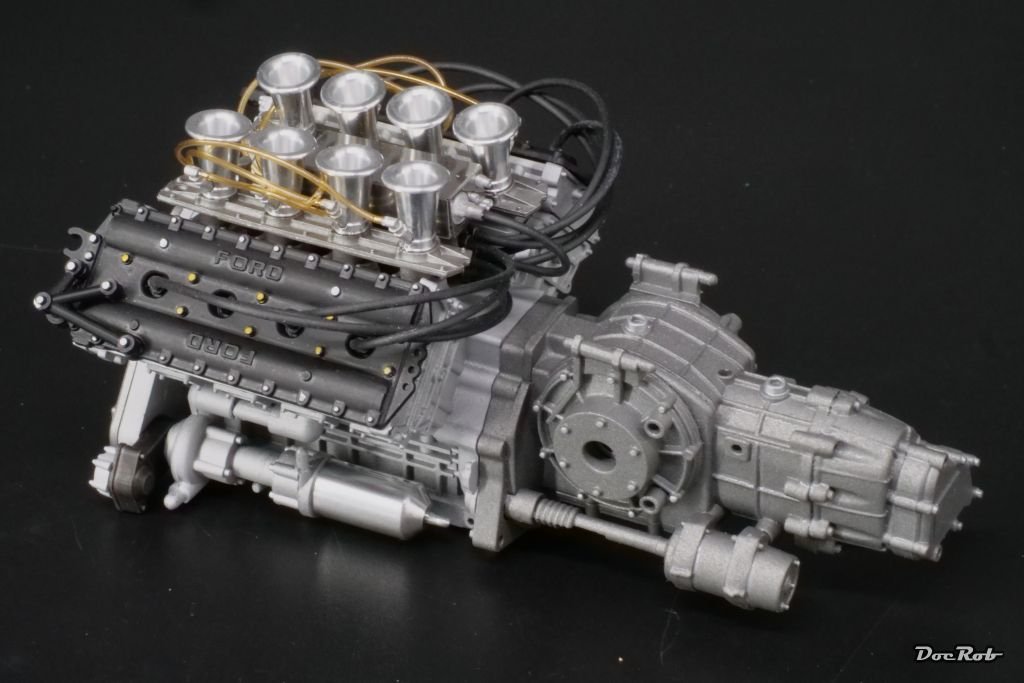
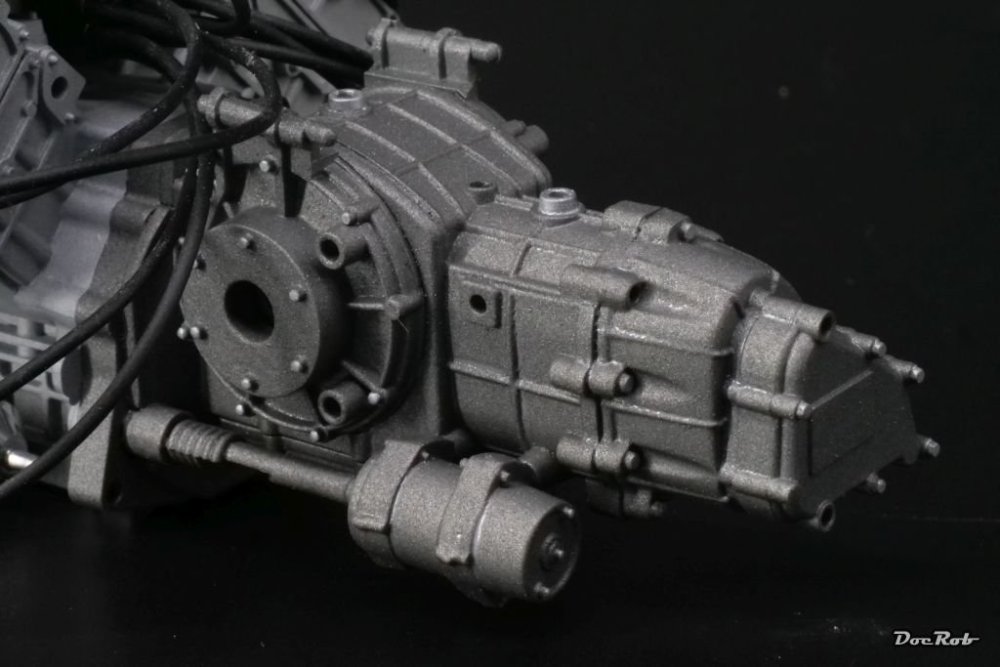
Thanks Kevin, I used the texturized color only for the gearbox, for the engine housing, I found it too coarse. Cheers Rob -
The Legend - Lotus 72D - Tamiya 1/12
DocRob replied to DocRob's topic in LSM 1/35 and Larger Work In Progress
Thank you Carl, it´s sad to hear, there is no way to get Zero paints to Canada. I really like the texturized paint. Sprayed with a 0,4 mm nozzle and a bit higher air pressure, it gives a convincing finish, at least for 1/12 parts. I didn´t use it for my 1/20 builds lately, it would have looked out of scale. Cheers Rob -
The Legend - Lotus 72D - Tamiya 1/12
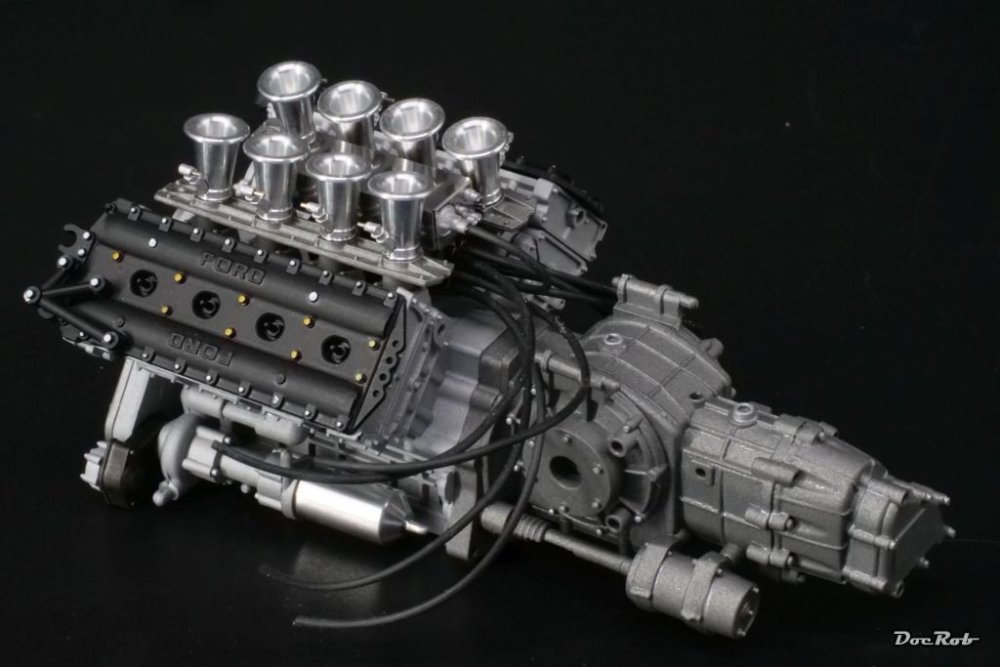
DocRob replied to DocRob's topic in LSM 1/35 and Larger Work In Progress
Engine and gearbox are halfway done. I used the MFH air funnel and distributor set, which is a big advantage against the kit plastic parts, specially the aluminum funnels. I also used black tubing from the spare box, the Tamiya material is too thick. I now own a silver pencil, but pictures show, that the Ford branding wasn´t silver with the 72d. All paints are from the Tamiya LP range and the screwheads were picked out with markers. The gearbox was painted with Zero Paints texturized color for Hewland gearboxes. Cheers Rob
-
I can´t get any rattle cans to my island since years and paint only in jars, smaller than 30ml. There is only one Spanish mainland vendor, who smuggles stuff to my place, somehow. Therefore, I switched to Mr. Surfacer jars in different grades and colors and have to say, besides a little more clean up work with the AB, there are only benefits, better control, thinable to my liking with leveling thinner, less environmental pollution, ... Cheers Rob
-
Your paintjob and weathering is perfectly blended, love it. Cheers Rob
-
What is on your bench right now ? Share a picture :)
DocRob replied to Martinnfb's topic in Modelling Discussion
The path to high shine car finishes, poco a poco, step by step, like they say, where I live . At least you couldn´t let go off the drybrushing . I like it FA, the interior looks great and the added details let it look busy. Cheers Rob -
The Legend - Lotus 72D - Tamiya 1/12
DocRob replied to DocRob's topic in LSM 1/35 and Larger Work In Progress
I started to prepare the engine and transmission for painting. Assembly is straight forward, albeit there´s a lot of clean up necessary. The exhausts are always a bit complicated to assemble, therefore, I decided to finish this task before painting. I glued the exhaust pipes with a tiny bit of glue into the silver four in one piece and then fiddled the other ends of the pipes into their holes in the engine block, before the glue cured. Fixed wit a strip of adhesive tape, I added more glue to the four in one piece and let dry. Cheers Rob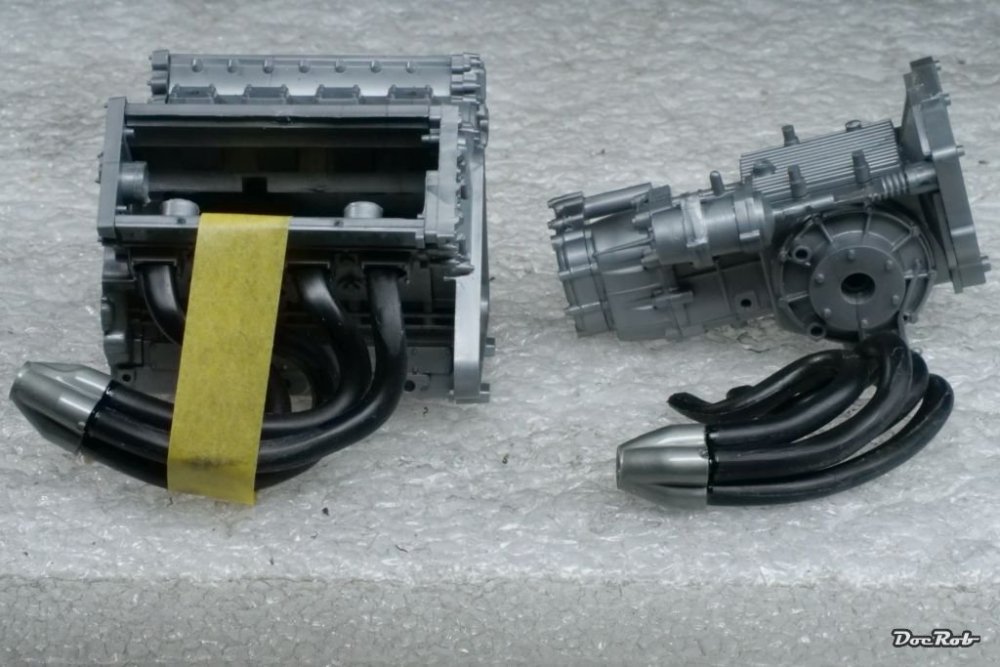
-
What is on your bench right now ? Share a picture :)
DocRob replied to Martinnfb's topic in Modelling Discussion
Nice progress, Gus. These ZM F4´s are pure pleasure builds. Like you mentioned, the engineering is fantastic, as is the fit and detail. If there weren´t the stencils, I would build another. Cheers Rob -
The Legend - Lotus 72D - Tamiya 1/12
DocRob replied to DocRob's topic in LSM 1/35 and Larger Work In Progress
Thanks FA, it also shows how small these cars actually are. Lots of technic build tightly around the driver. Cheers Rob -
The Legend - Lotus 72D - Tamiya 1/12
DocRob replied to DocRob's topic in LSM 1/35 and Larger Work In Progress
The nose section got finished. The assembly was fiddly, but in the end, I got it together. For a bit more rigidity, I glued all the parts in place, so I have no working suspension (I doubt, that this would be possible without modification) and no steering function. I added some braided lines, for which I drilled out the plastic fittings with a 0,5mm drill bit and inserted a tiny brass rod, to accept the braided hose. Mr. Fittipaldi will receive his arms later, when the upper cowling will be finally placed, along with the steering wheel. ...and the best, the front body fits over everything, without problems, it´s Tamiya, even, if it´s 50years old. Cheers Rob


-
The Legend - Lotus 72D - Tamiya 1/12
DocRob replied to DocRob's topic in LSM 1/35 and Larger Work In Progress
Thank you Carl, it´s not easy to get into some kind of building flow with all the ongoing issues. About the brakes, you could have guessed, there are very prominent venting domes on the nose part of the car, where the brake disks are hidden under. My last build, the Brabham BT45 had also inboard brakes, but only for the rear. Cheers Rob