

lawman56
-
Posts
283 -
Joined
-
Last visited
Content Type
Profiles
Forums
Events
Gallery
Everything posted by lawman56
-
Wingnut Wings Salmson 2-A2 "USAS"
lawman56 replied to Dave J's topic in LSM 1/32 and Larger Aircraft Ready for Inspection
Beautiful aircraft! -
I just found this thread, but would absolutely LOVE to see WWII Russian aircraft produced by a Russian manufacturer! I feel the Russian, Italian and French, (yes, the French made some good aircraft, just not enough of them), are not represented enough. I, for one, would be excited to build some!
-
Don't forget the infamous "they". "I was up at Battalion and they said....."
-
Ah yes, the good old days! Lol!
-
My only complaint about Humbrol has more to do with my environment. My garage/work bench is currently unfinished, so in the summer I end up with a bunch of dried up tins. I may just start buying empty paint jars and start storing them in that to alleviate the dried sludge I invariably find when I need it most.
-
Thanks Stikpusher Unless it's in the motor pool for an IG inspection, it will always be dirty!
-
I've just about finished with the hull. I've made a base, and made the Priest dirty. Now to shoot it all with dullcoat, quit popping the lanyard pull off the howitzer, and mount it. Then blend in more mud. Here's the little bastage that keeps popping off! At some point, I will be creating a wooden handle for the lanyard, and placing it in the hand of a gunner. Until then, I just want it to stop annoying me. Is that too much to ask??? Thanks for looking!
-
Happy Birthday!
-
The only thing I could tell you, Matt, is after all these years of using pin vices for model railroading, is get a good set of handles, buy tons of the tiny bits, (ie: #80), apply little to no pressure and constantly back the bit out to clear the kerf from the hole. I learned that after drilling 16 #80 holes per passenger car on a 20 car New York Century 20th Century Limited consist!
-
WNW Alb D.V 4578~17 Jasta B / E. Boehme
lawman56 replied to BoMonroe's topic in LSM 1/35 and Larger Work In Progress
Thanks Bo. I really need to practice that technique. One of the things holding me up is spending too much time trying to perfect the prop. Thankfully, WNW provides all the models, so I have extras to practice on! -
WNW Alb D.V 4578~17 Jasta B / E. Boehme
lawman56 replied to BoMonroe's topic in LSM 1/35 and Larger Work In Progress
In lieu of going over and spending the next 24 hours drooling over your Alby builds, I'll just ask here. Did you paint your kit prop, or is that one of the wooden aftermarket ones? The wood grain is fantastic! -
Great work! He sure does know how to make murky water.
-
I'm becoming that!
-
I'm finally starting to realize how those who have been modelling continuously for years, end up with a stash they'll never finish! So many great kits and no time to build them all!
-
WW Fokker E.III (Late)
lawman56 replied to Dances With Wolves's topic in WNW and WW1 Ready for Inspection'
You mean to tell me Eindecker isn't German for "Teddy Bear"? -
Thanks Matt, Ironic that you would be my first answer, considering I was reading through your blog when the thought hit me. I've been thinking it would be good to try for some minor surface blemishes, etc...never thought of using the thicker stuff as a form of stippling. Even thought the 500 might work to create linen texture for WWI aircraft or WWII rudders, flaps, etc... I'll have to try it out.
-
Hi all, I've noticed quite a wide range of types and manufacturers on here when it comes to paint. I've never had any luck with acrylics, so unless I'm creating a wash, I stay away from them. I love Humbrol, but hate the little tins. They dry up much too fast. I'm quite pleased with Model Master, and am disappointed at the discontinuation of Floquil. I'm a firm believer in using what you're comfortable with, but have noticed quite a few folks on here using Mr. Surfacer. What, exactly, is it? I know it's a primer, but is it a self leveling primer good for use with all paints? Does it come in various thicknesses? I'm thinking, (within the next year), of trying my hand at some limited run kits, and from what I've read, they may have minor seam/fit issues at times. That's usually where I see Mr. Surfacer mentioned. I know that some paints and chemicals aren't available in every country, but I live in the US, so I don't think it would be an issue. Any pointers or info would be greatly appreciated.
-
I've managed to accomplish a little more on the Priest. Not much, but at this point, it's pretty much do a little, let it dry, do a little more, etc... Main gun and tow cable mounted. All my trinkets and baubles attached, minus one or two. Mud. Tanks like mud and mud likes tanks. It's the circle of life. More evidence of the above mentioned circle. This guy is officially known as "Gun Dude #1". Only 5-6 more to go! Still working on the base and weathering. Mud is just the beginning! Mwahaha! Enjoy, and thanks for looking!
-
Just as a side note, myself, as I'm sure some others, use model building as a form of therapy for PTSD. I am a combat veteran and have found it much easier to face certain issues through this medium. A good friend found that coping with his "survivor guilt" was easier once I helped him build a diorama honoring the action that won him a Silver Star. So ethics and opinions aside, I tend to view it as a form of 3D art. Bringing a photo to life, if you will.
-
Thanks for the info, that's my take on it as well, it seemed that the tape would serve as a sort of "flag", if you will. No tape, guns not ready. Tape, guns ready. Although not the actual intention, my experience in the Army has shown that there are many uses for one thing. I'm planning a diorama in the future that involves ammo being loaded into the wing bays, and thought it might be intersting to show one set of gun ports taped over, ("ready"), and the others untaped as the ammo is reloaded.
-
So, if I read this right, the primary purpose was to prevent freezing, which makes sense. All the other stuff was secondary, or incidental. So when would the tape have been applied? I've just recently started to look at the "bigger picture" so to speak, of how and when certain servicing was done to aircraft. Let's take my favorite P-51B for example, after returning from a mission, were the guns removed from the wing and cleaned immediately? Were they left in the wings at all times, unless they needed to be replaced for service? Would the ground crew placed the tape immediately on the ports, or after the aircraft the aircraft was fueled? Etc.... I know different teams did different things, such as fuel handlers, armorers, etc... If my aircraft was being re-armed, would the tape be present? If it was sitting on the apron, awaiting the next mission, would it be taped? I'm asking all these obscure questions so once I get ready to build a diorama, I can be more accurate in the depiction.
-
Market Research - your top 'wanted' kits in 1/32 & larger please!
lawman56 replied to richdlc's topic in General Discussion
I'd love to see some more options from other WWII participants, such as Italian and Russian. Some Macchis and Yaks, for example. -
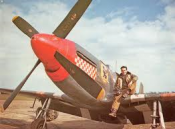
Here's a question that's been nagging at me for a few days. Hopefully someone knows the answer. In many of the WWII era photos, especially of British fighters, (but some American ones as well, as my avatar shows), I've noticed tape covering the gun ports. My assumption is that it basically cuts down on drag as air flows through the open wing ports. Here's what I've been curious about. When was it applied? Let's say our brave flier has returned from a mission where he has used his guns. Of course the tape has been blasted to bits, but when was it re-applied? I know at some point the guns would have been cleaned and serviced, but was the tape re-applied then, or after they were re-armed? Personally, it would seem they would be taped over after being re-armed and just prior to a mission. Sort of as a "flag" to let others know at a glance that the aircraft was "hot". But it also could have been right after they were cleaned, to prevent foriegn matter from entering the barrel. Any thoughts on this?
-
Thanks for all the kind words! I enjoy the diorama process, but as I stated in my post under "General Discussion", it's burnt me out a little. I've been doing it for so long, that it's hard for me to realize that it's ok to build the HK B-17 without a 4ft x 4ft simulated apron and an army of figures maintaining it! I don't build much on commission anymore. Too many demands that take the fun out of it. Plus, it's hard to explain why a diorama of a "toy" would cost so much. The Sheridan was a great example of that. The kit is passable, but aftermarket is a must have, otherwise it's wrong. The tracks are inexcusable, and at the time, only Fruil made AM tracks for the Sheridan. Now add the little stuff, like MREs, ammo cans, decals, paint and don't forget time and skill. Fyi-this Cassino diorama took almost 200 hours to build, and I didn't start until I had everything I'd need. Nor did I count the time it took to plan. Figure if I only charged $2 per hour, that's still over $400 in labor alone. Since it was for a friend, and would be on display in a Regimental history room, I only charged them $200.
-
I think for me the issue has more to do with subject matter. With ground vehicles, you can do or add almost anything and the vehicle still maintains it's integrity. Aircraft, however, are different. Shy of paint, there's not much you can do structurally, otherwise it won't fly. I've been building armor for a while now, and I think the M7 finally pushed me over. In an effort to "build it better than my last one", (as most of us do, I suppose), I got too wrapped up in what could be done, versus what will be done. A sort sensory overload, if you will. This is one of the reasons I was slowly switching to aircraft. Which is actually making me slow down and become a little more simplistic in my approach. Compared to my other dioramas, my Tamiya Spitfire made me realize that I can relax my diorama details somewhat. Aircraft, by nature, are in flat surroundings, so a little groundwork and some weeds, and Ta-Da! instant airfield! Much more relaxing. My next completed aircraft will be my WNW Albatross Dv, and then on to the HK B-17! I think Matt, (Doogs), was on to something when he mentioned in a previous remark that "there's real value in tackling subjects you know jack all about". I'm pleased to see I'm not the only looney in the bunch, though!