JohnB
-
Posts
7,220 -
Joined
-
Last visited
Content Type
Profiles
Forums
Events
Gallery
Everything posted by JohnB
-
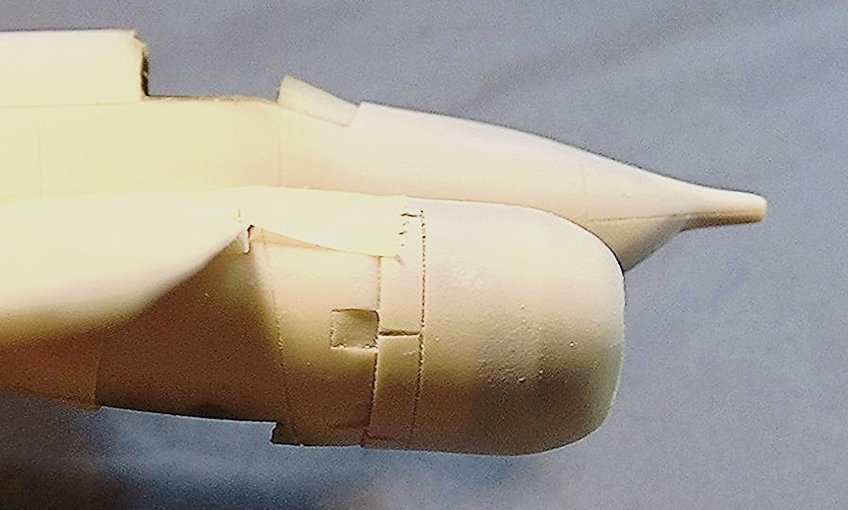
Hubert had the right answer. I removed the molded on attachment areas and CA'd the wings on at what looked "right". Now to putty in the cracks and smooth everything out.


-
I can use that one remaining locating "post" to swivel and adjust the angle.
-
Hubert After your post I decided to see about adjusting the wing/fuselage attachment areas. It appears that just might do the trick. I attached the nacelles to the wings after carefully aligning them to the wing to try to get the right angle. Now I'll dry fit the wing to fuselage areas and CA them in what looks like the right angle. Takes 3 hands!!! I'll post some pics if it looks like it does the job. Lots of trial and error. John
-
You might be right Hubert. Fixing that would really be difficult. At any rate, I'm putting it on the SOD.
-
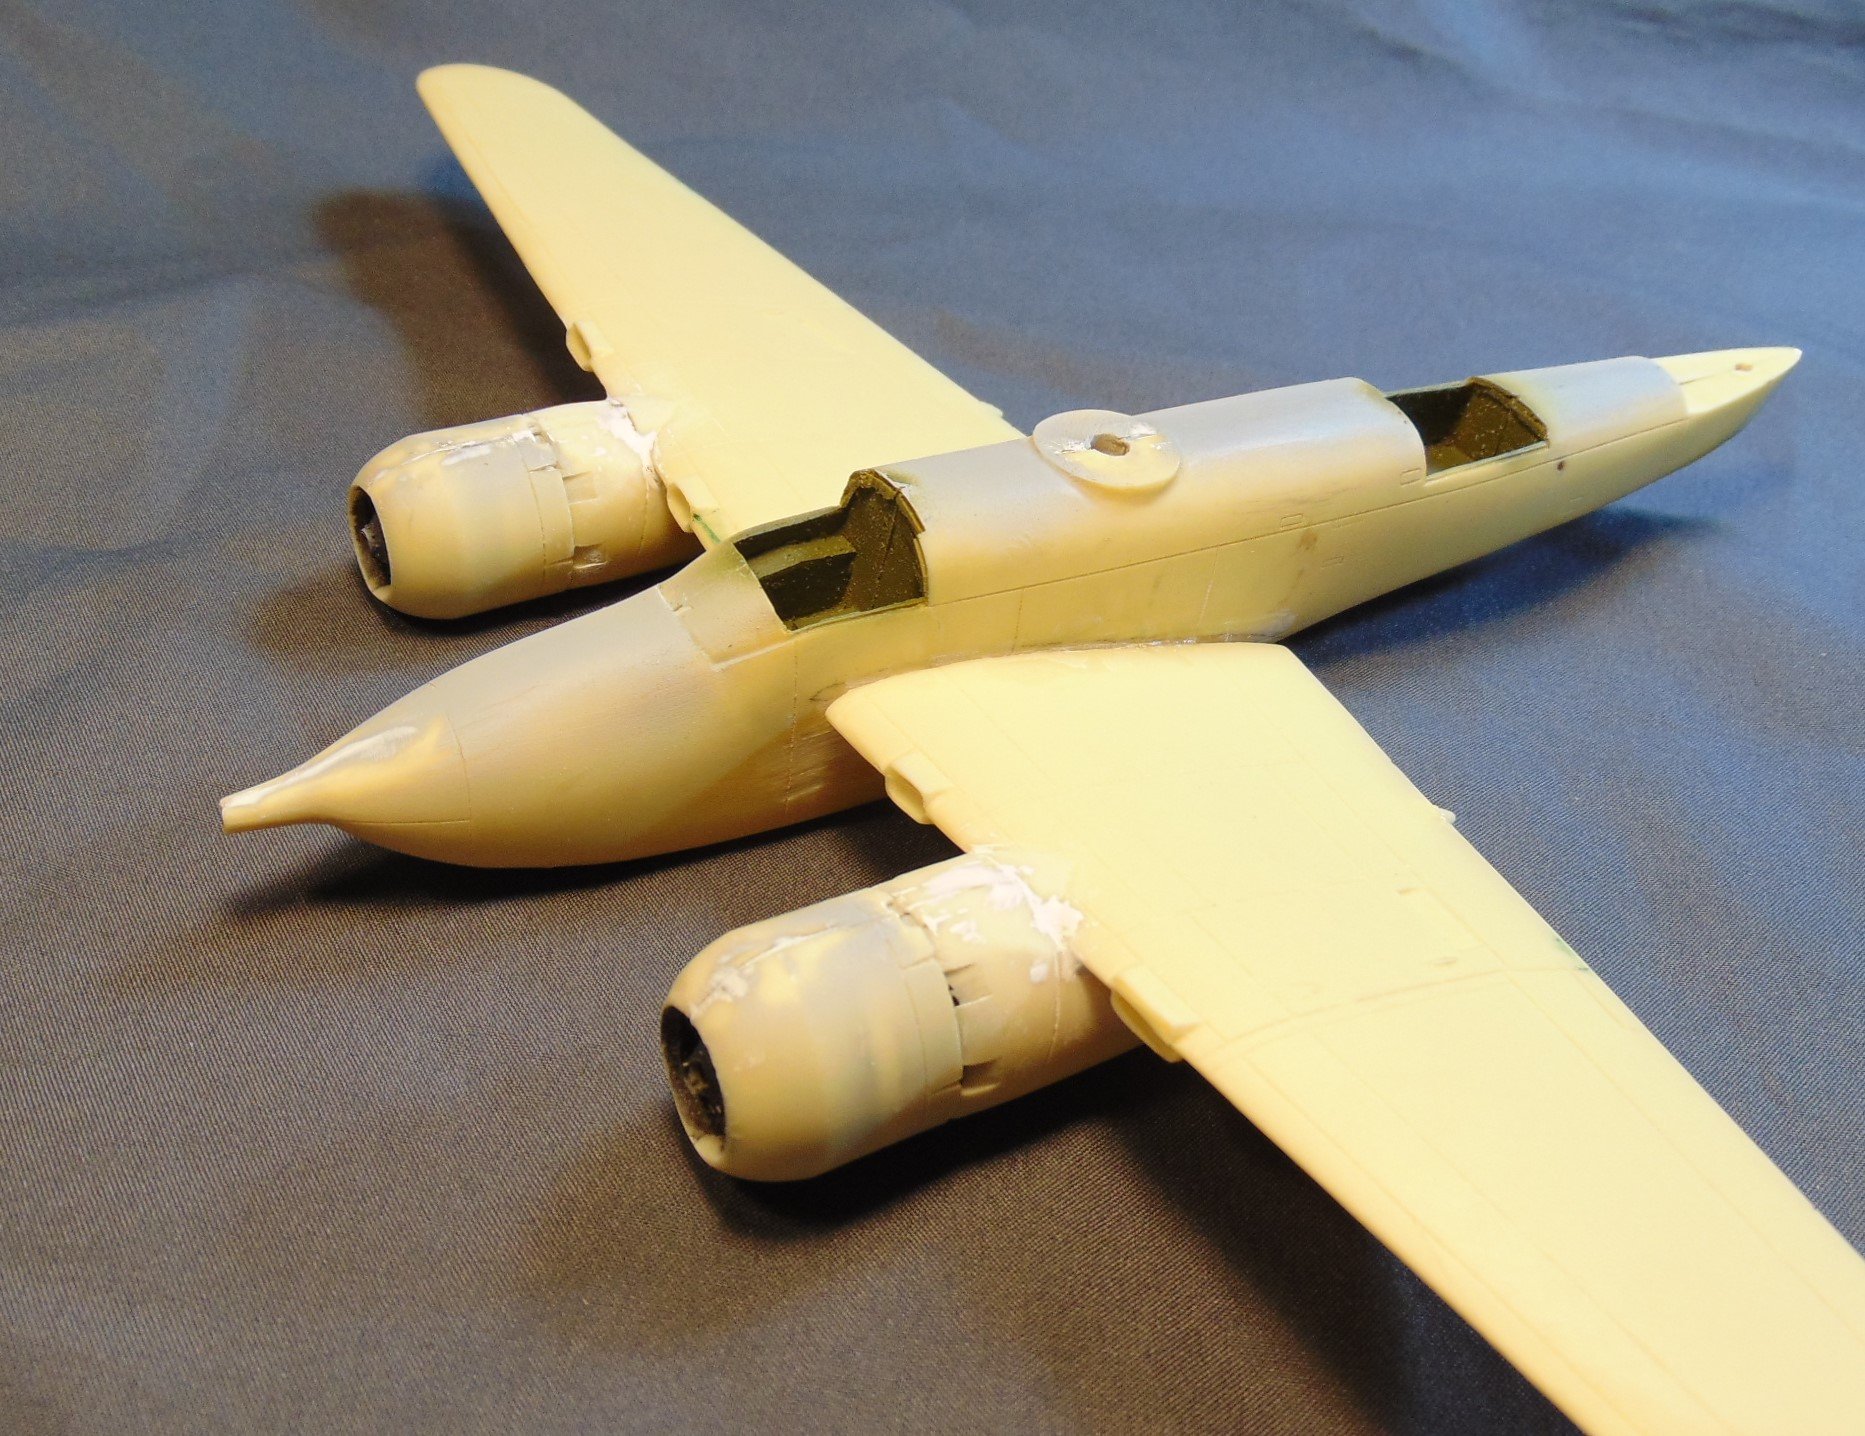
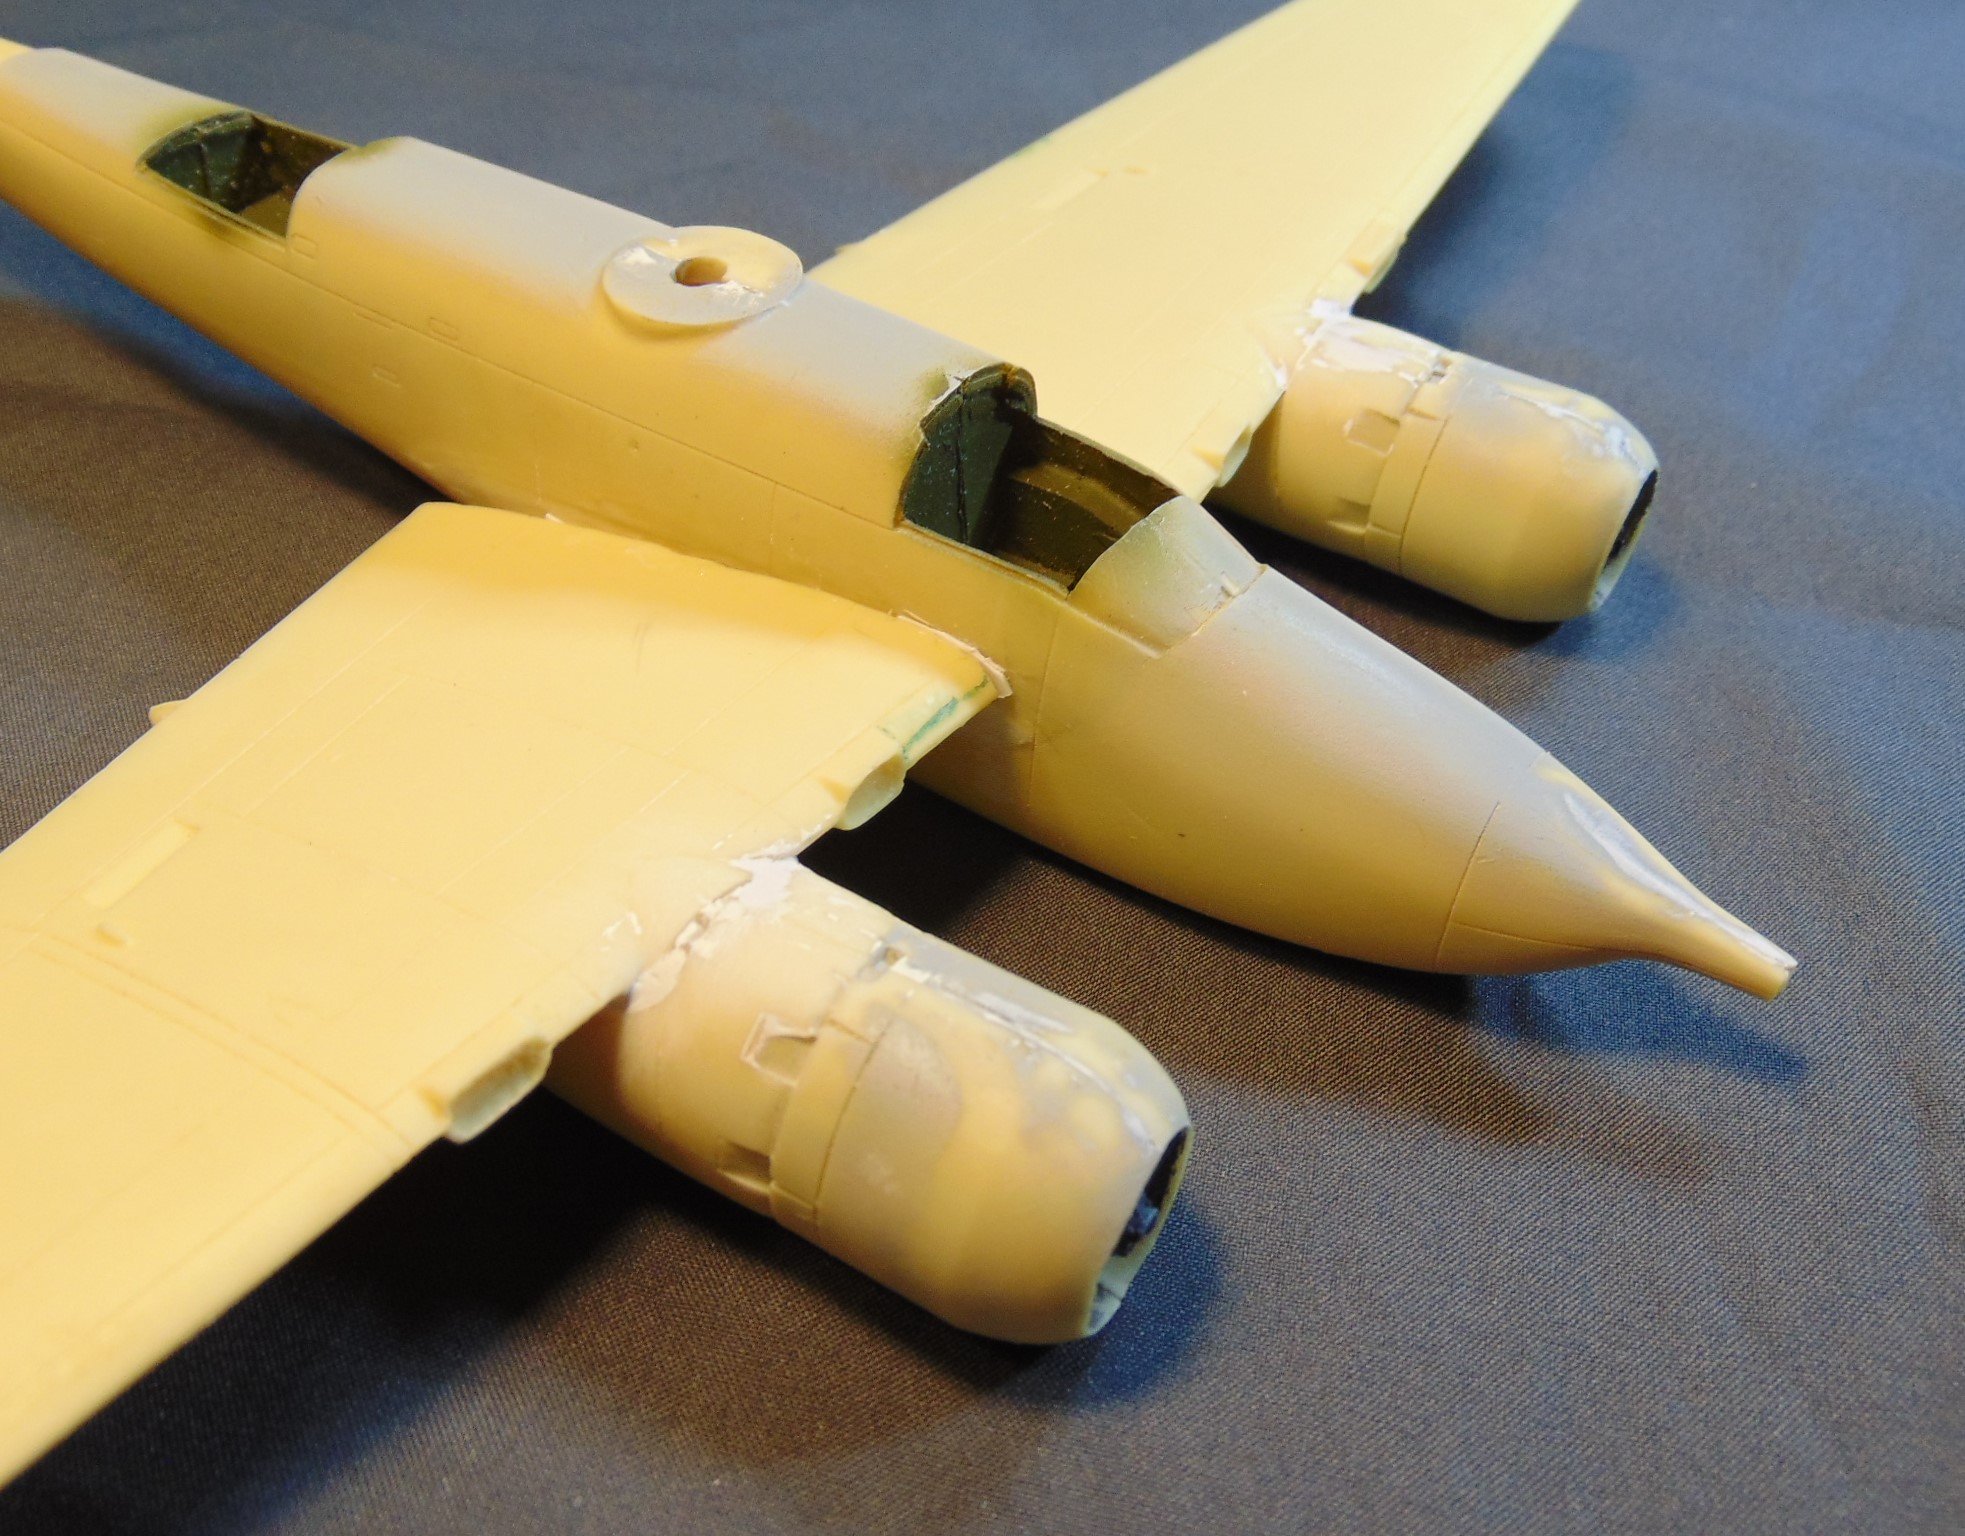
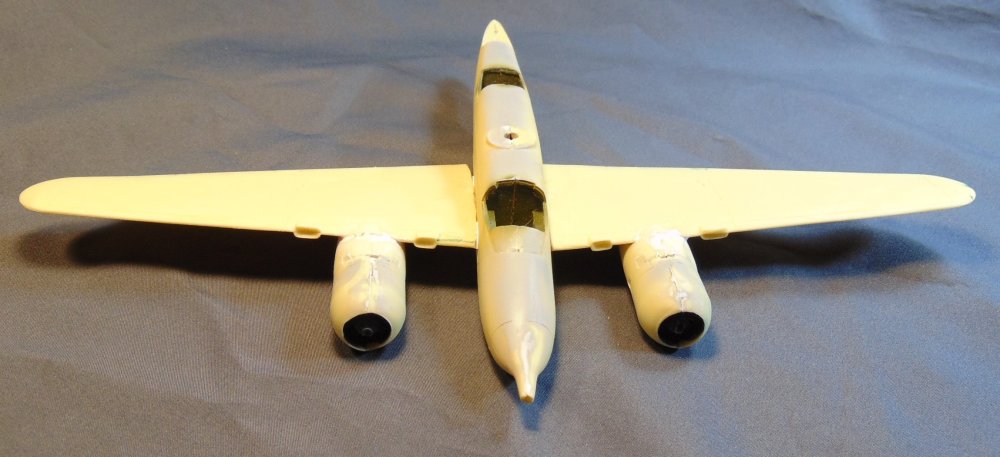
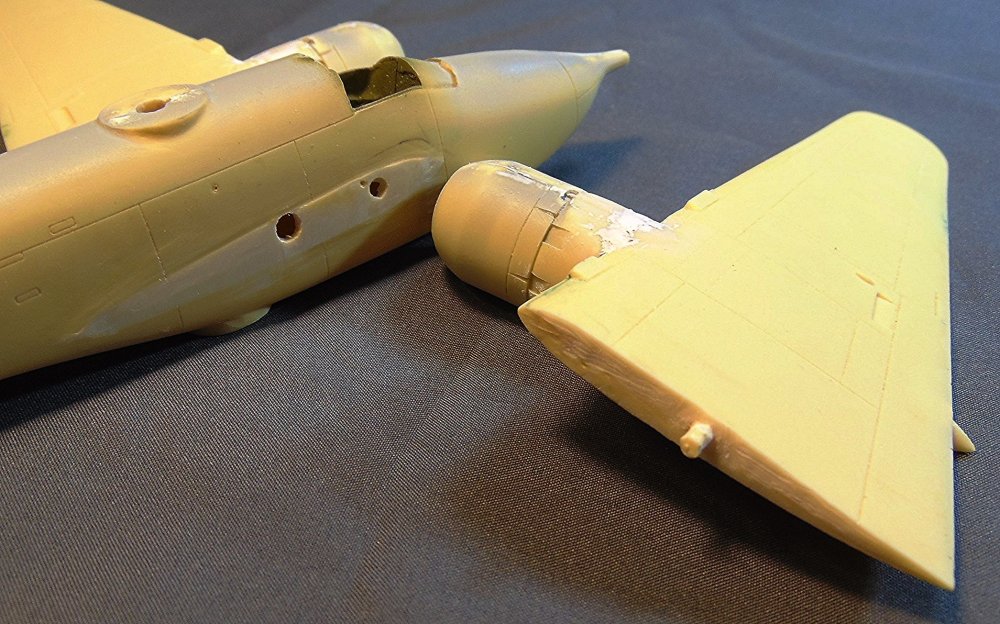
I hate to do it but this one is going on the SOD. No matter how many approaches I tried to properly align the nacelle's on the wings I just wasn't able to come up with a workable "fix". Not worth the aggravation unfortunately. No wonder I've never seen one of these built. 🫤
-
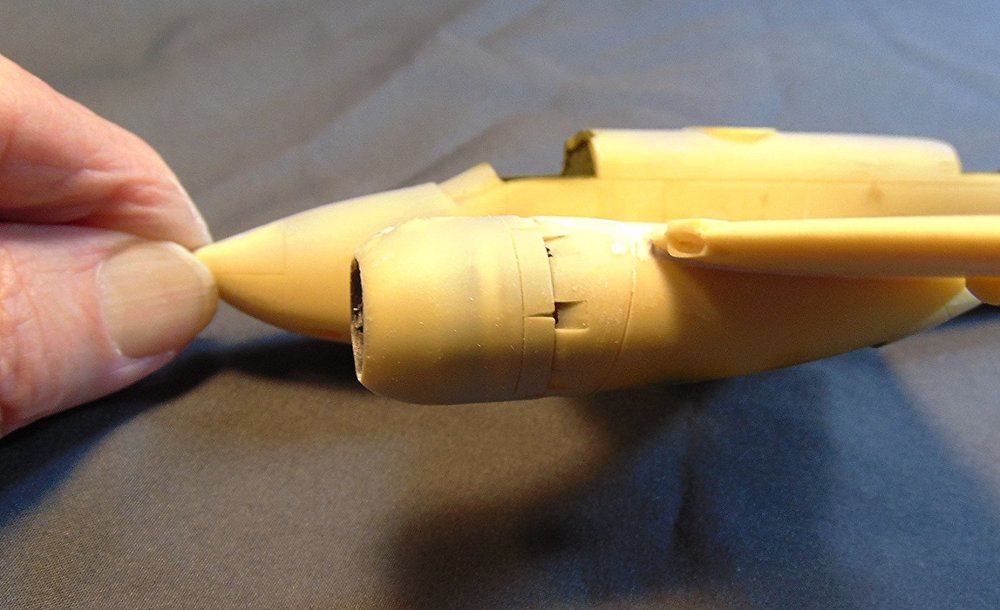
I have attached the wings and did some test fitting of the wing/cowling attachment and it looks like there's a big problem. When the nacelles are snugged up to the underside of the wings the front ends, instead of being parallel with the fuselage , they have a distinct downward angle on both sides. Doesn't look like a easy fix. 🙄
-
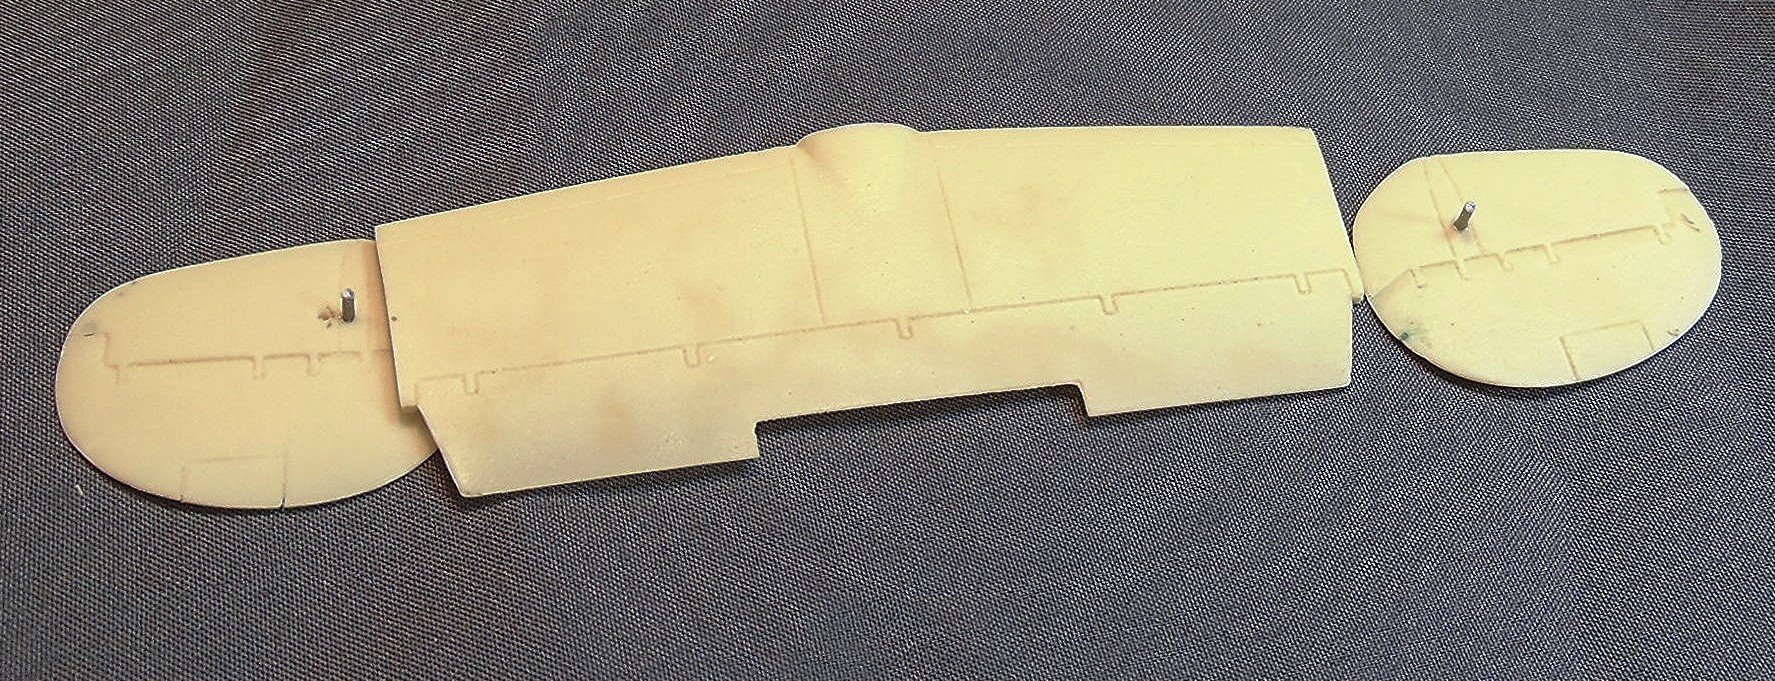
For the tail assembly I drilled out some small locating holes in the horizontal stabilizer and the two vertical pieces. Then I installed a couple of lengths of round plastic strip to get a little better strength when I super glue the assembly together.

-
It's not even close to the nice details we get with some of the other short run resin kits but the dimensions seem to be correct which goes a long way in making it worth the extra effort to build. I'm not sure yet as to how well everything will fit but I'll have the answer to that soon. I just wish they'd give us injection molded clear parts instead of vac formed parts. I built their XB-51 and it built up okay with few headaches. More later.
-
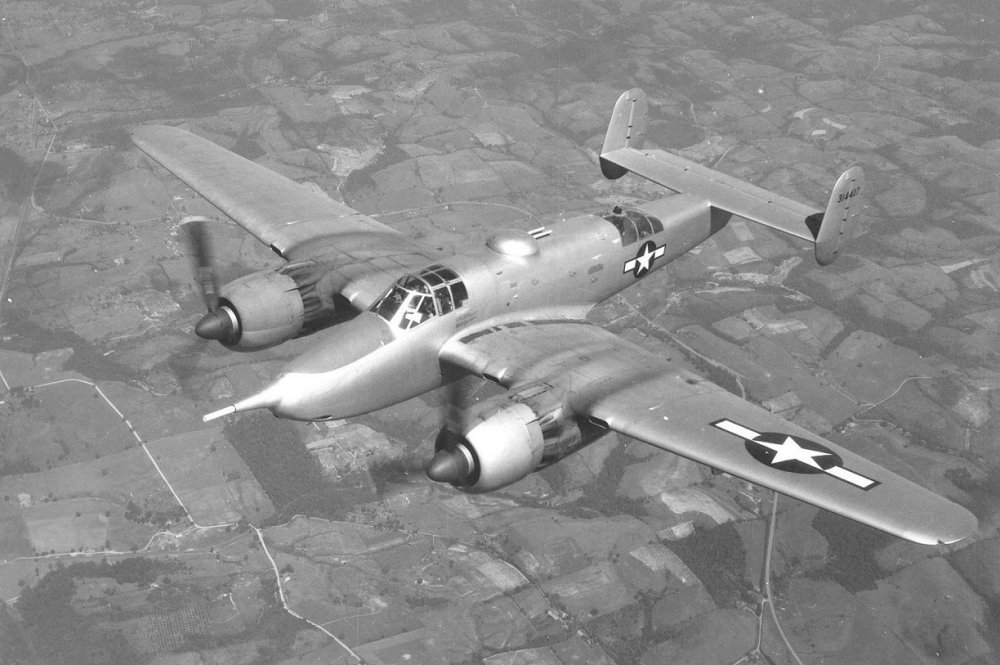
I started work on this kit a while back but decided to put it aside for "later". I guess now is later. 🙂 The big reason I set it aside was I didn't want to deal with those vac formed clear parts. I pulled it off the shelf yesterday and decided to go on and try to get the clear parts trimmed down enough to give a reasonable fit. Not something I enjoy doing but I went ahead and bit the bullet. I think I have them trimmed enough now for a fairly decent fit but we will see. I like the looks of the "Grizzly" and hope to be able to finish it this time around. Too bad the air force didn't give Beechcraft the go ahead to build a bunch of them.
-

Frankenstein P-40 done
JohnB replied to JohnB's topic in LSM 1/32 and Larger Aircraft Ready for Inspection
Agreed Chris. I guess I got lucky! LOL -
Frankenstein P-40 done
JohnB replied to JohnB's topic in LSM 1/32 and Larger Aircraft Ready for Inspection
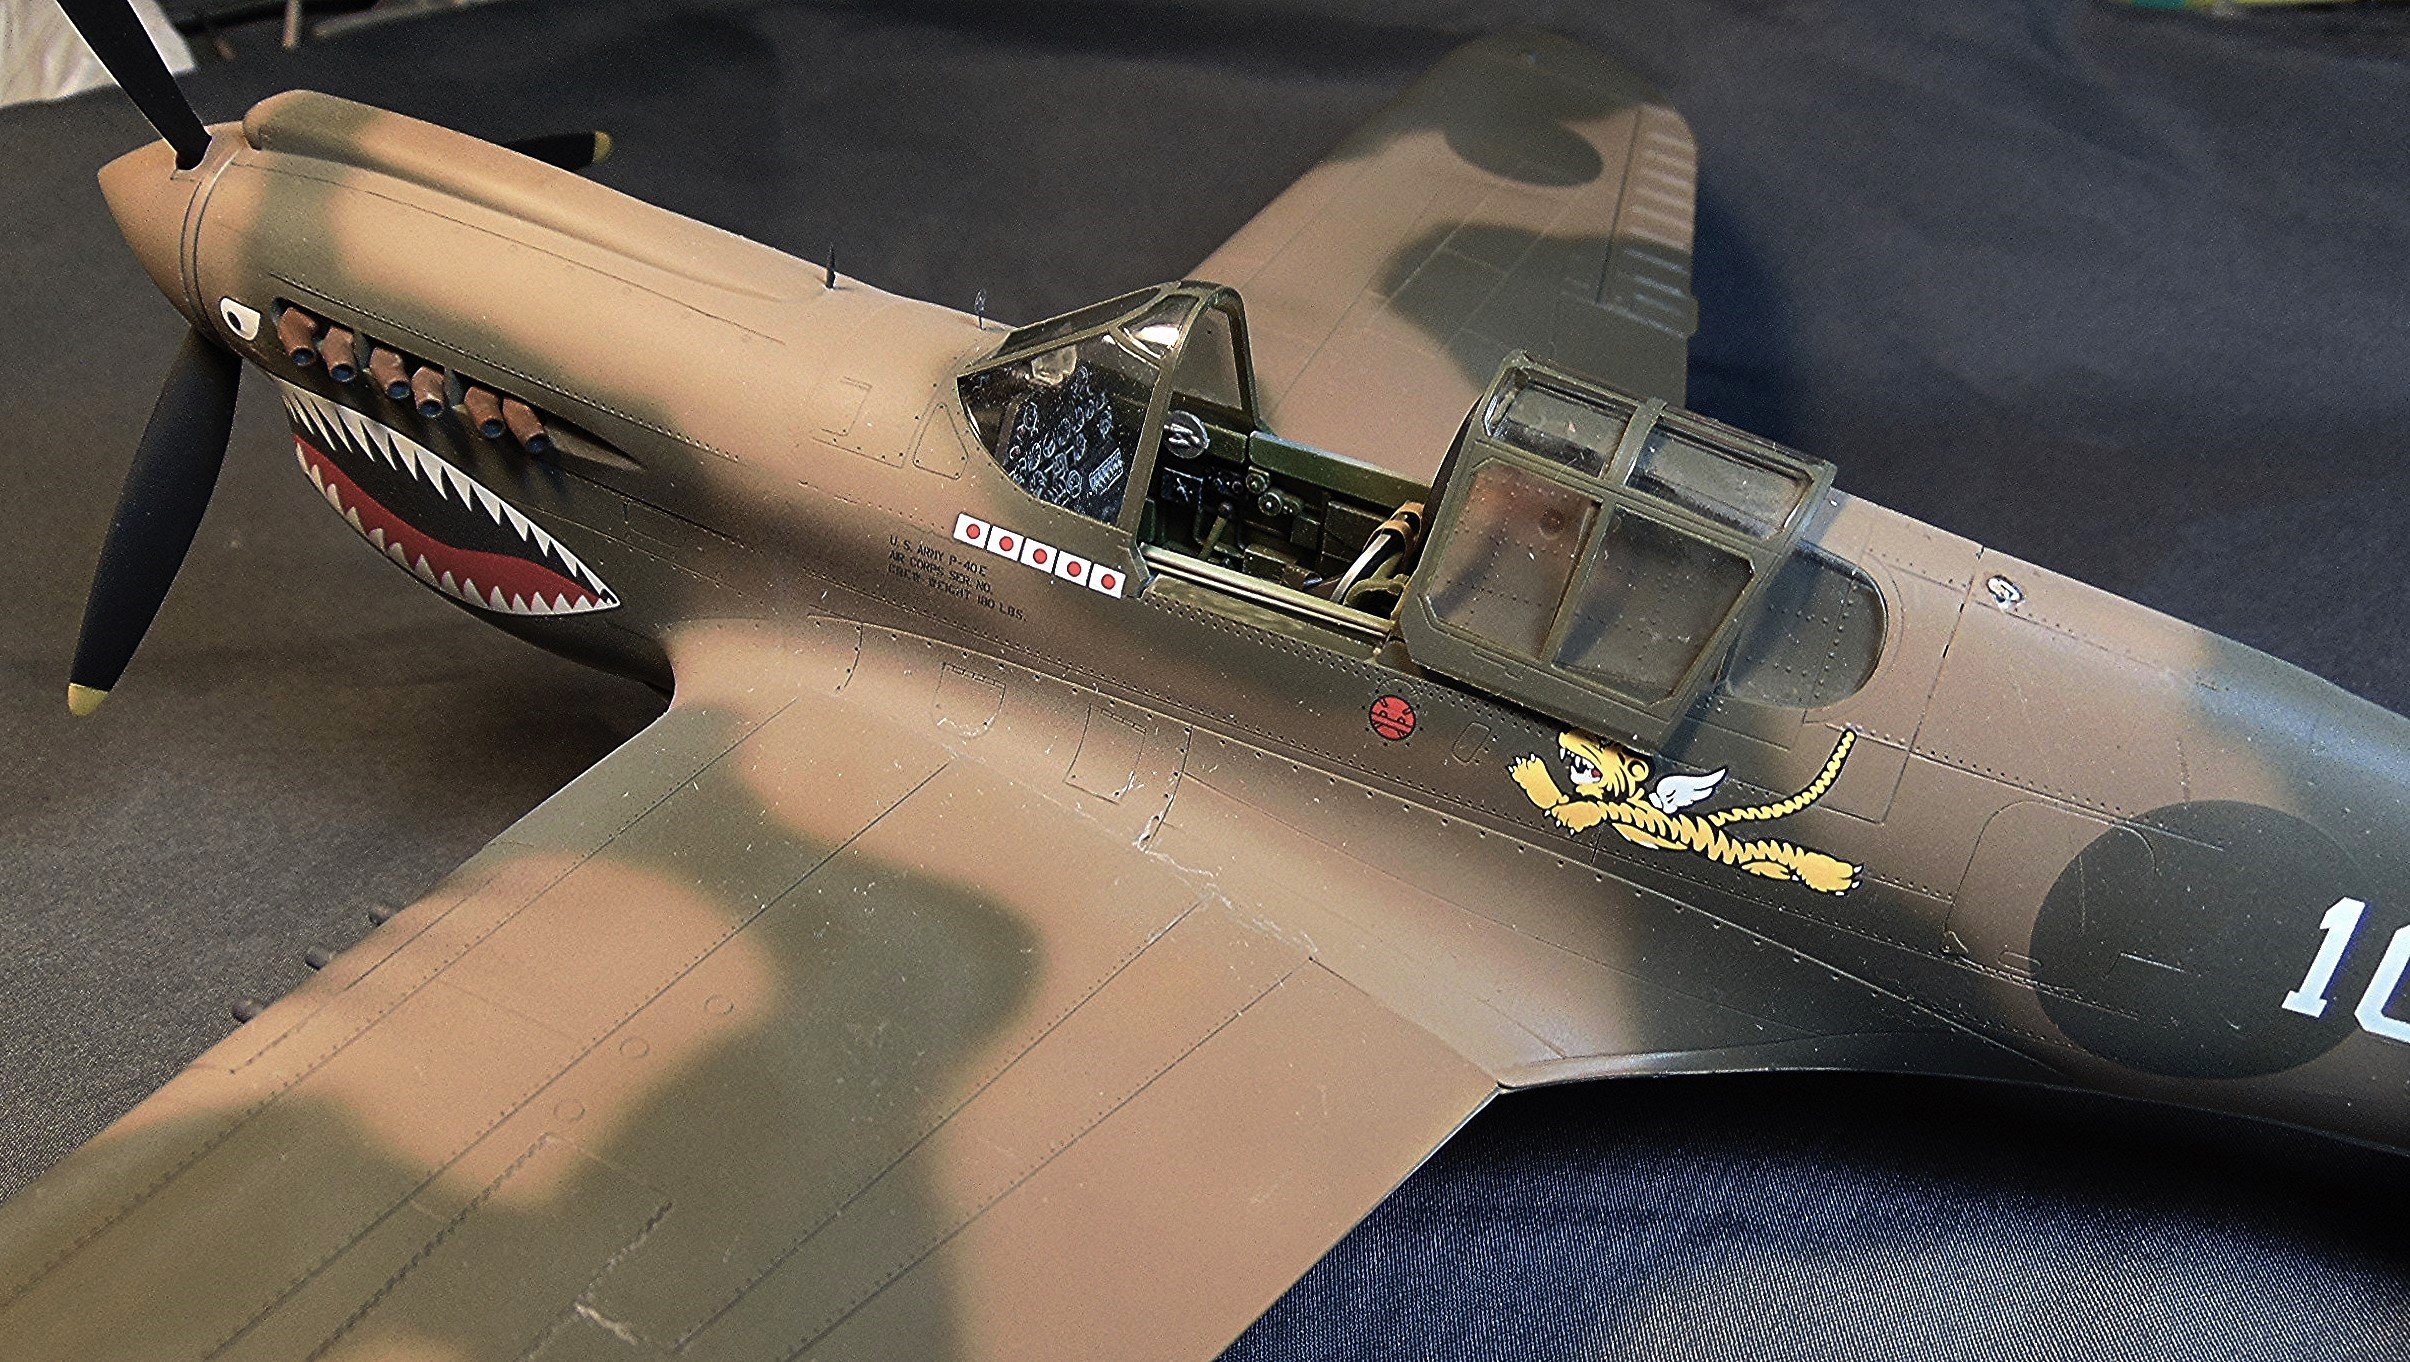
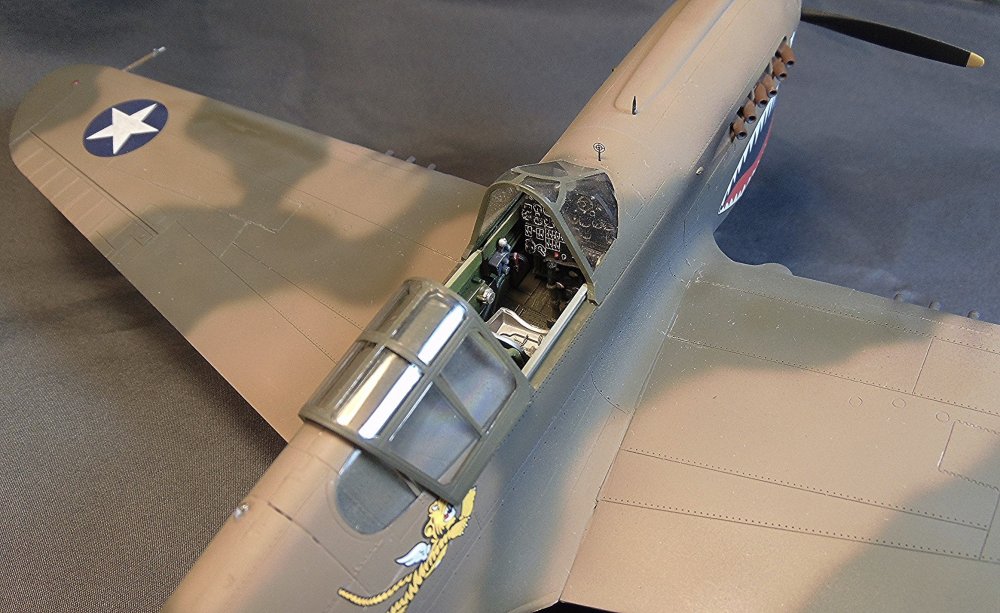
Thanks Chris. I'm pleased that you like how it turned out. That IP is a decal from the kit. I was a little surprised it came out as well as it did. 🙂 -
Frankenstein P-40 done
JohnB replied to JohnB's topic in LSM 1/32 and Larger Aircraft Ready for Inspection
Thanks Scott!!! I appreciate the nice comment. 🙂 Thank you Martin. 🙂 -
Frankenstein P-40 done
JohnB replied to JohnB's topic in LSM 1/32 and Larger Aircraft Ready for Inspection
I'm glad you like it Kevin, thanks. -
Frankenstein P-40 done
JohnB replied to JohnB's topic in LSM 1/32 and Larger Aircraft Ready for Inspection
Thank you Dennis. It was a fun "spare parts" challenge and I'm pleased with the results. 🙂 -
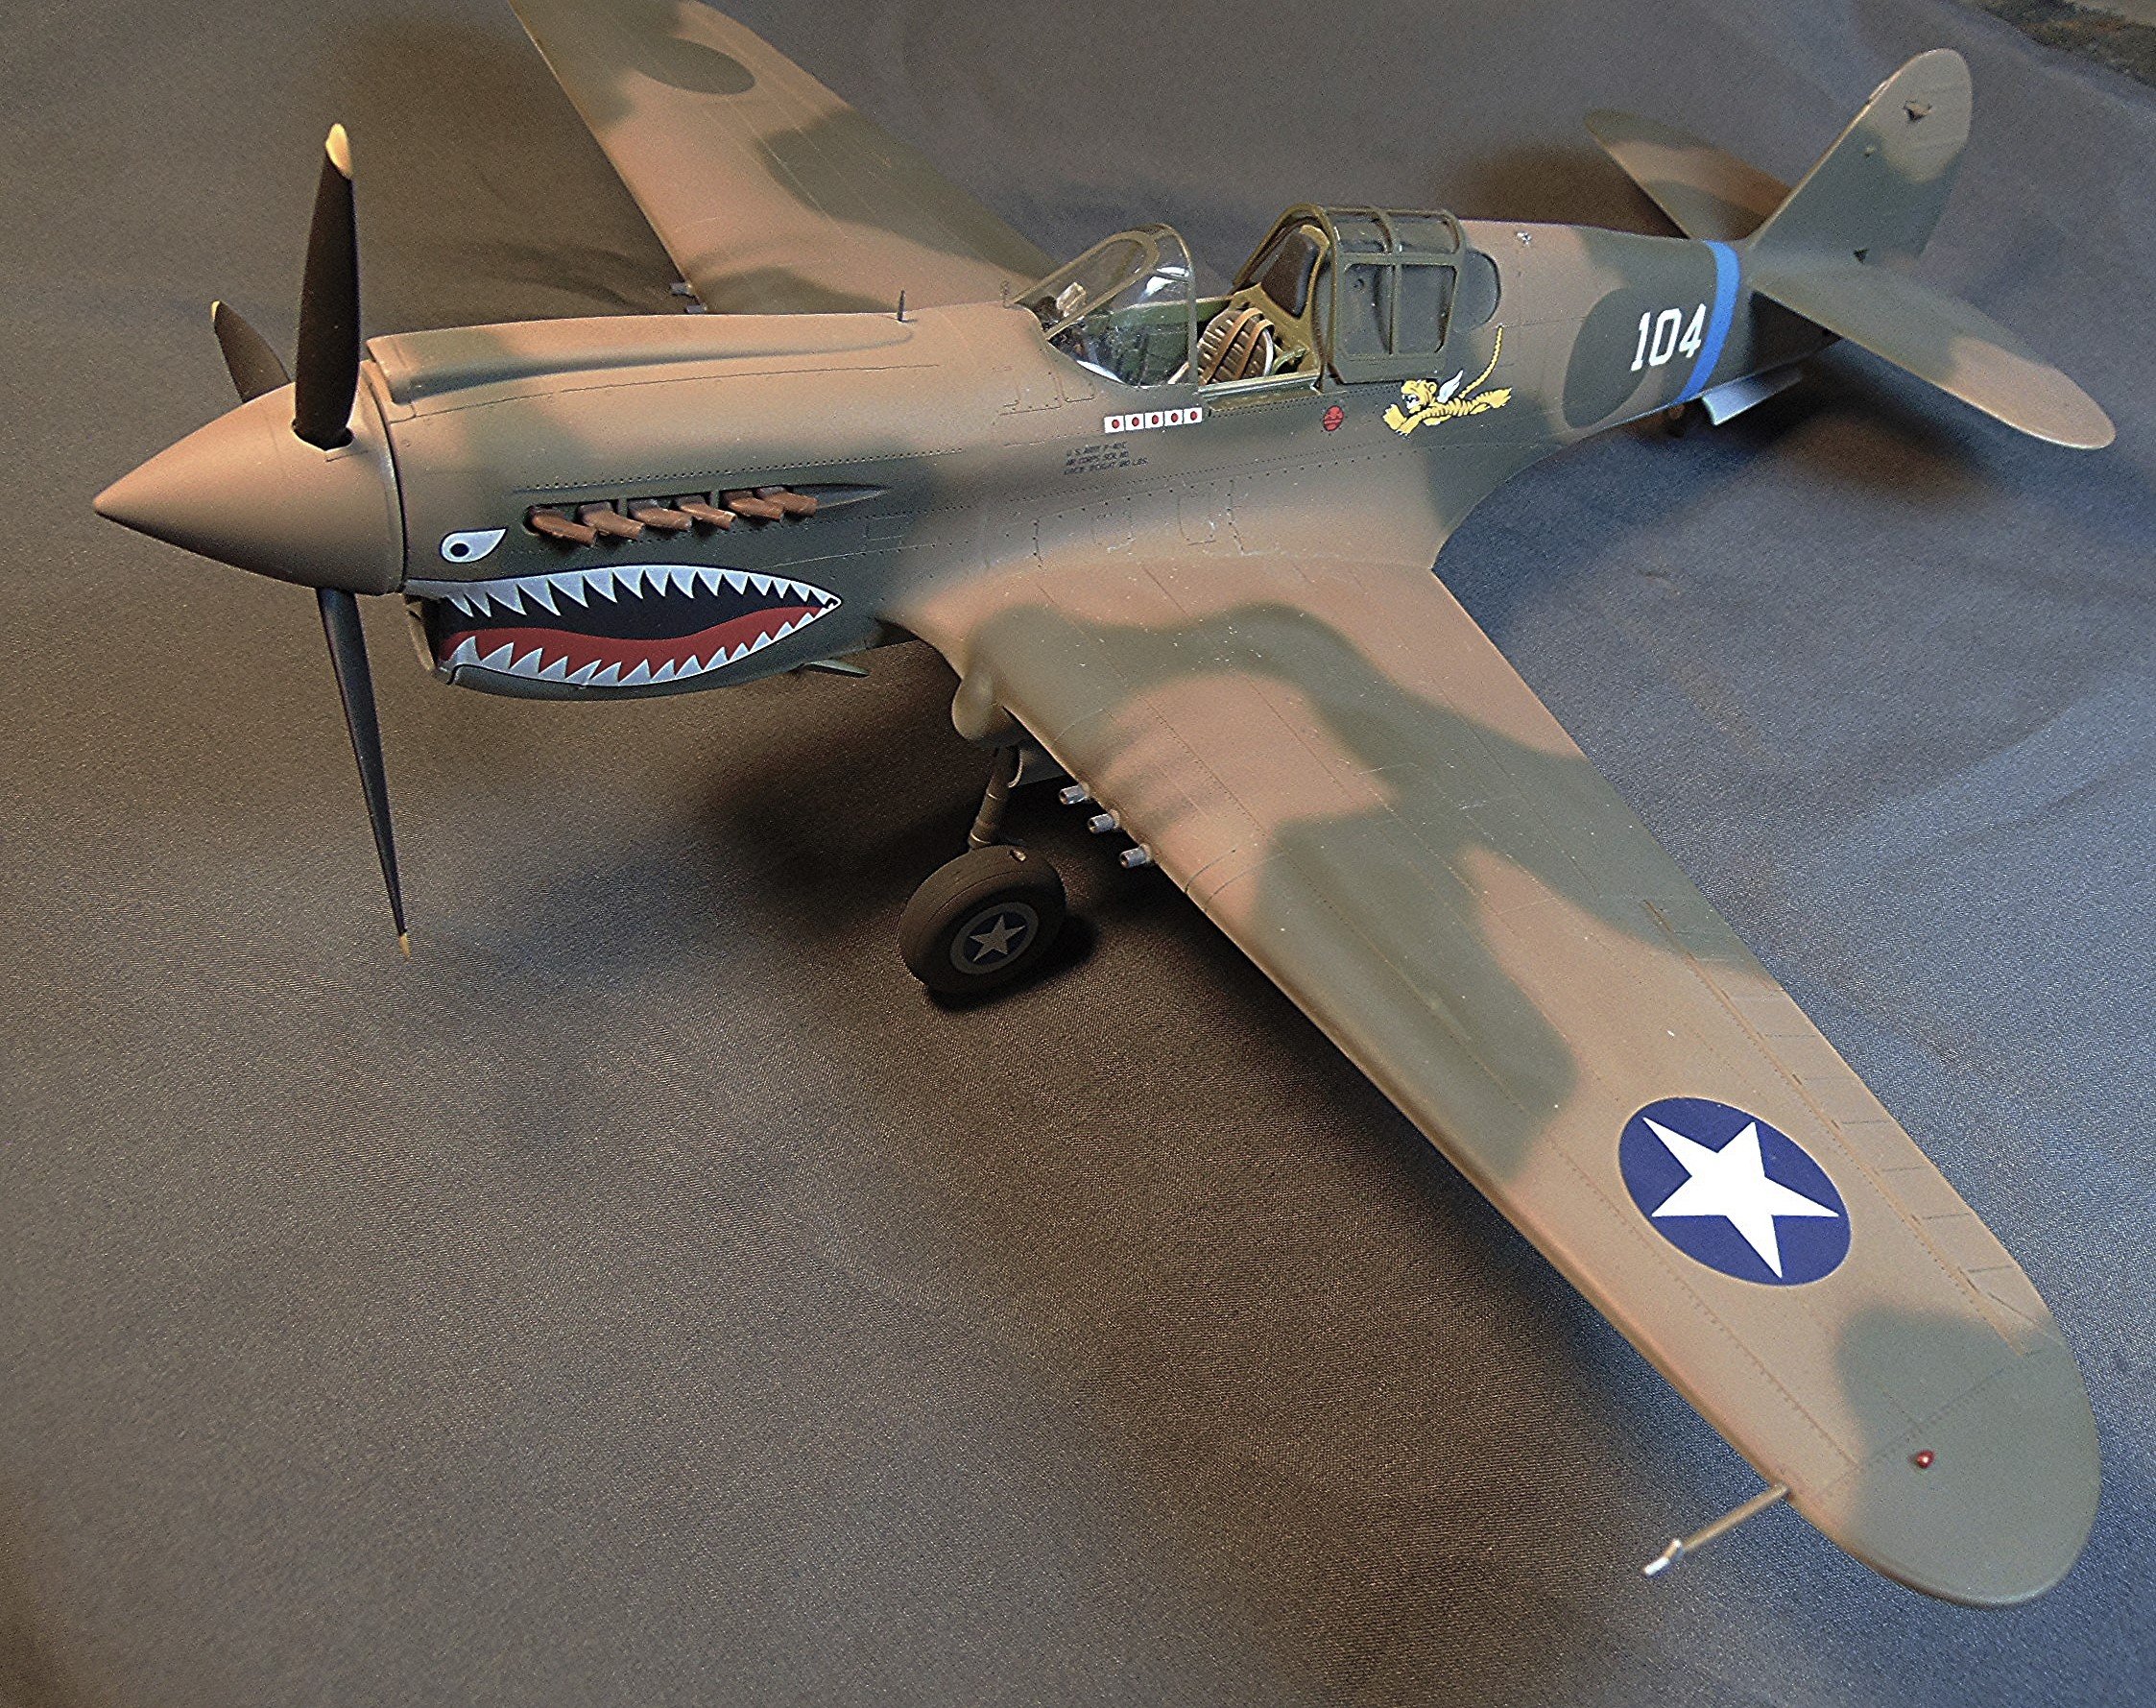
Finished and RFI. https://forum.largescalemodeller.com/topic/20465-frankenstein-p-40-done/
-
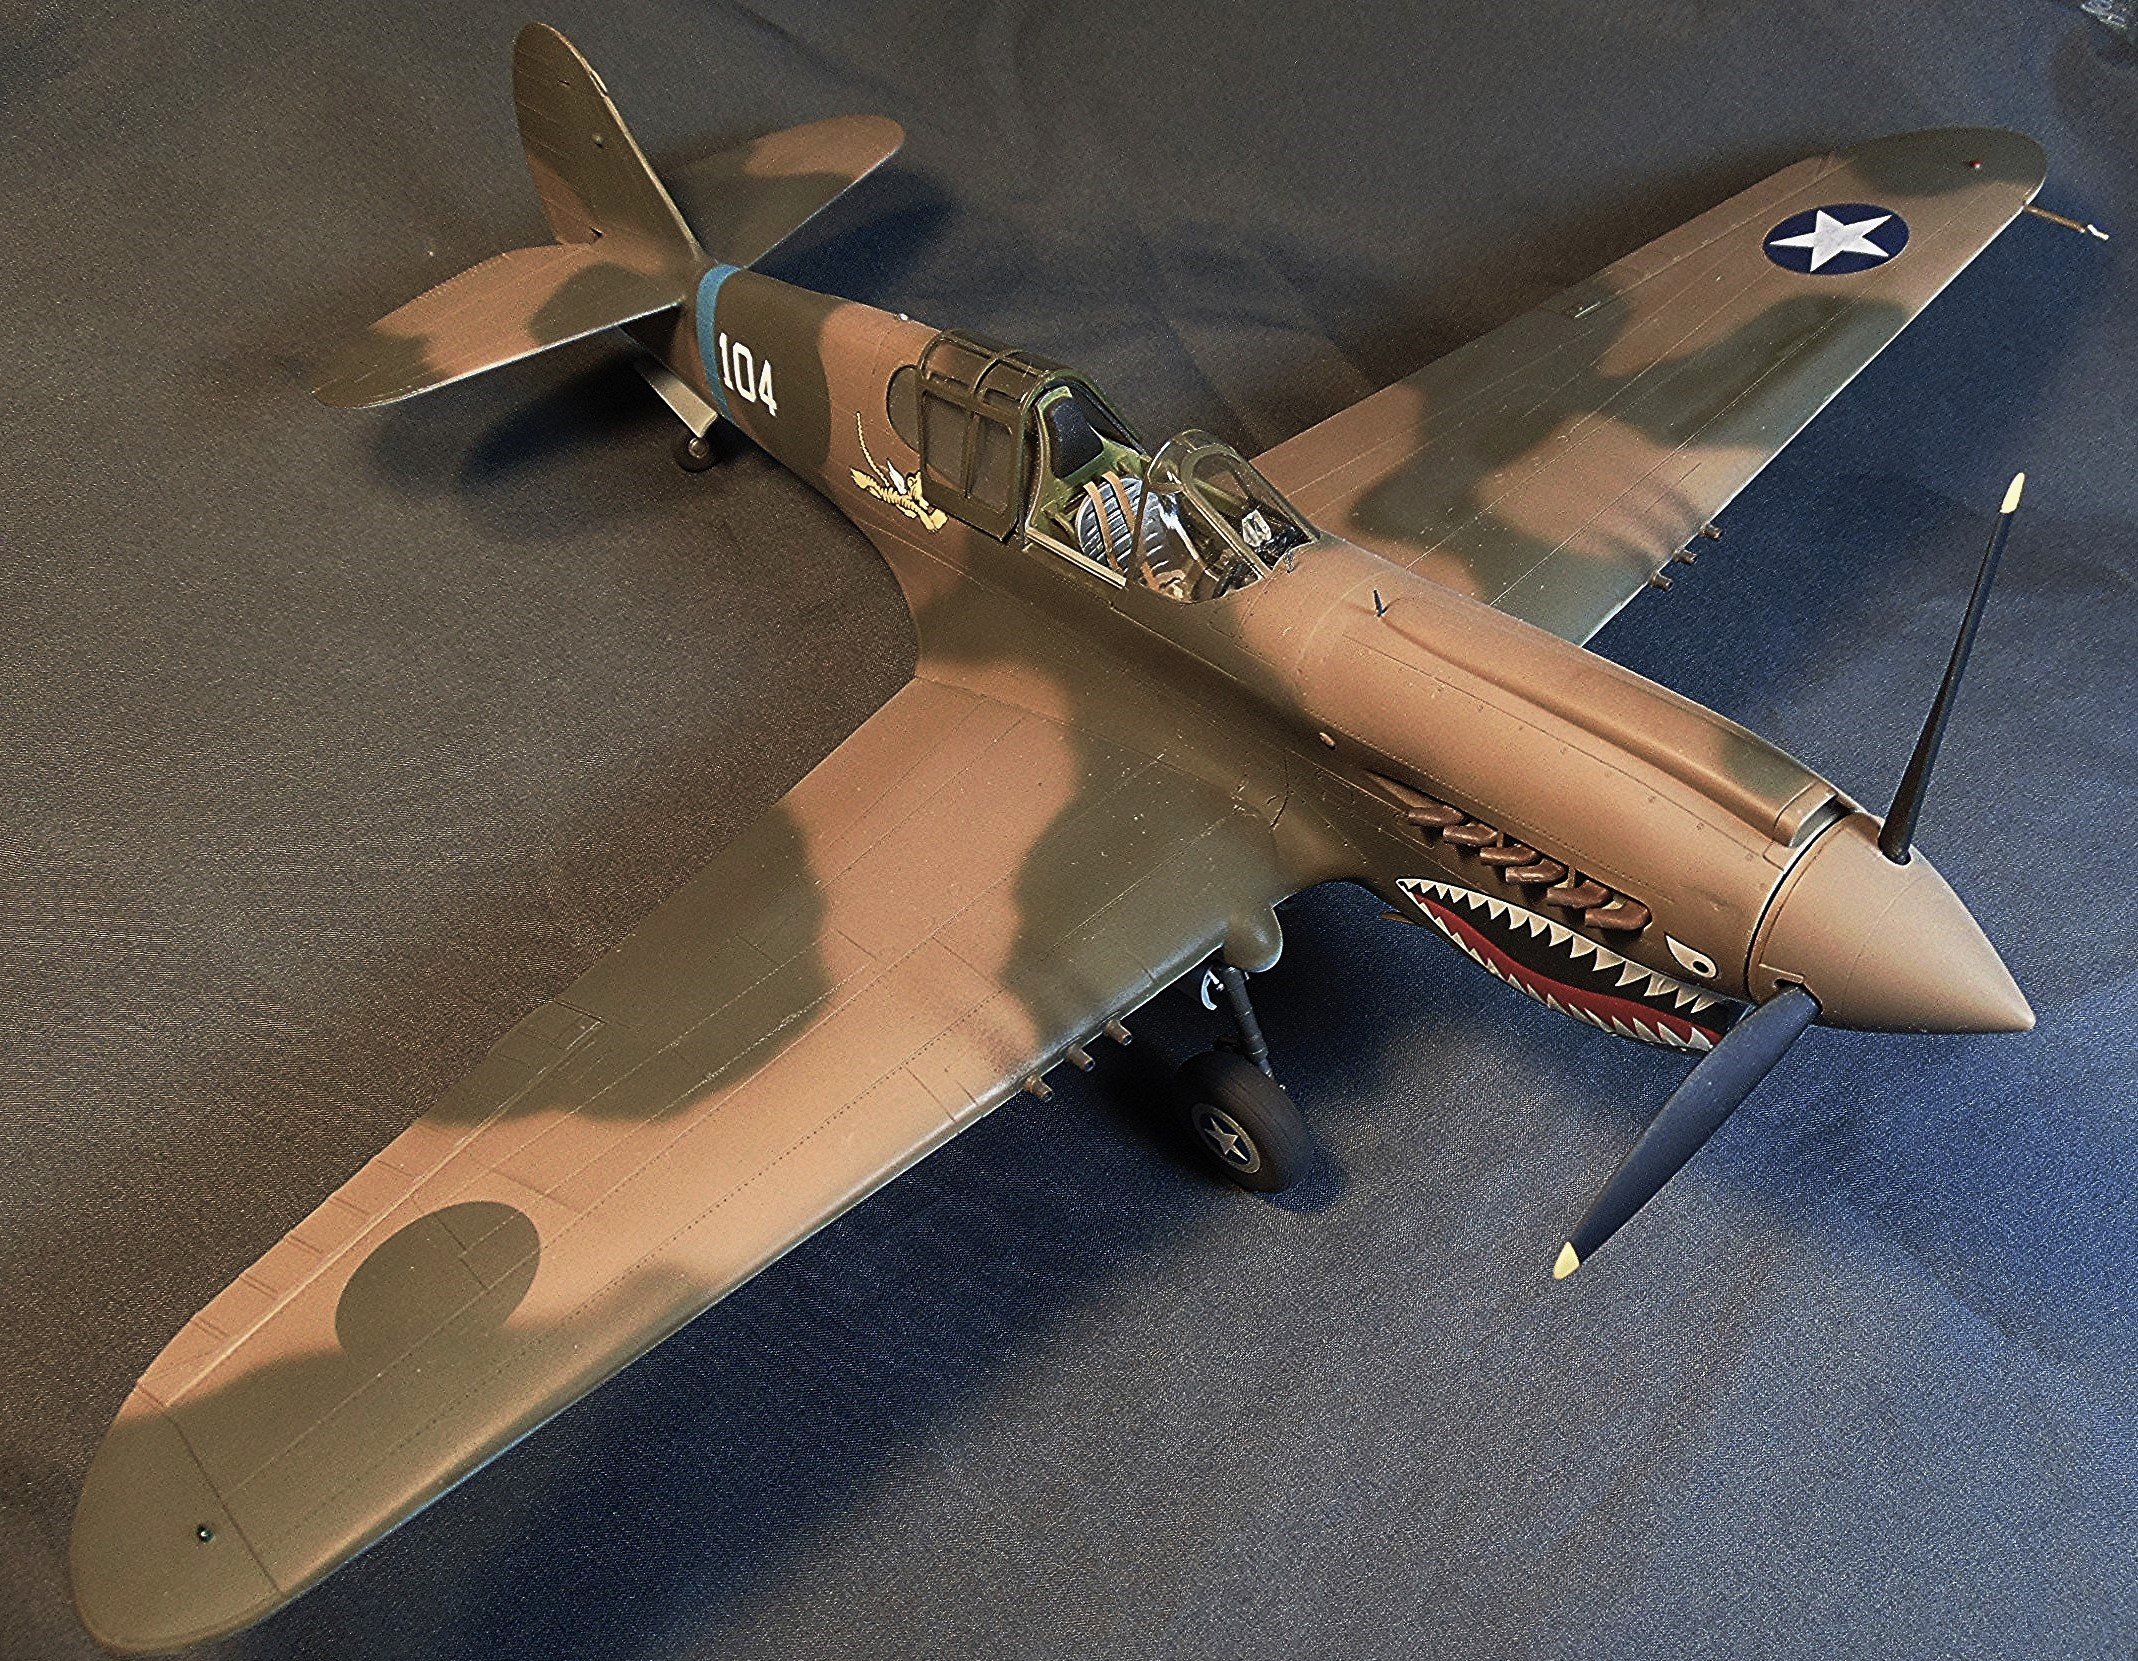
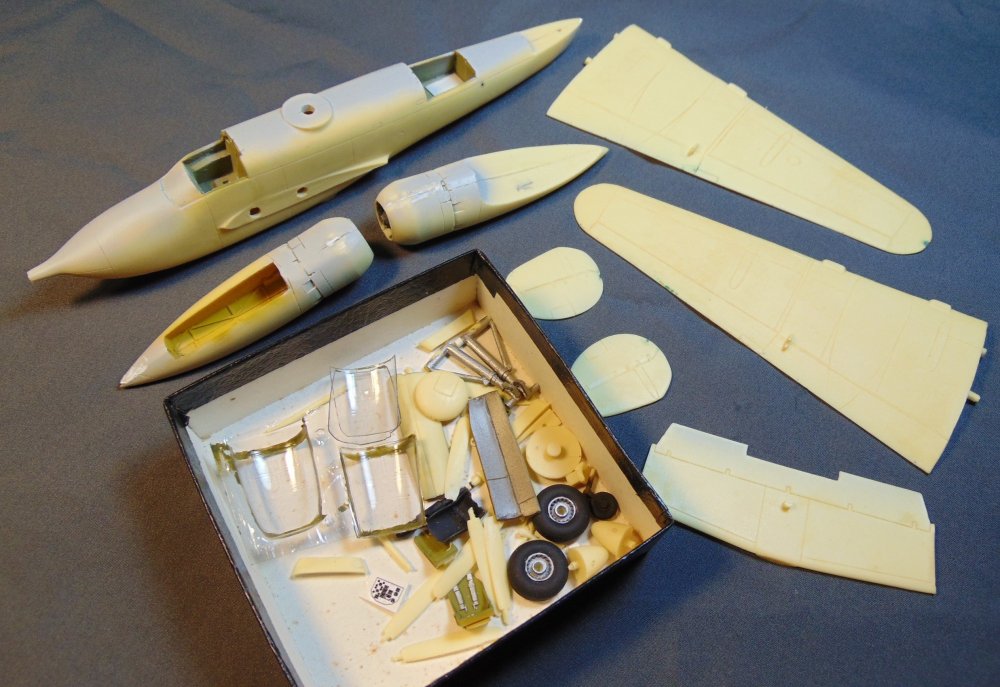
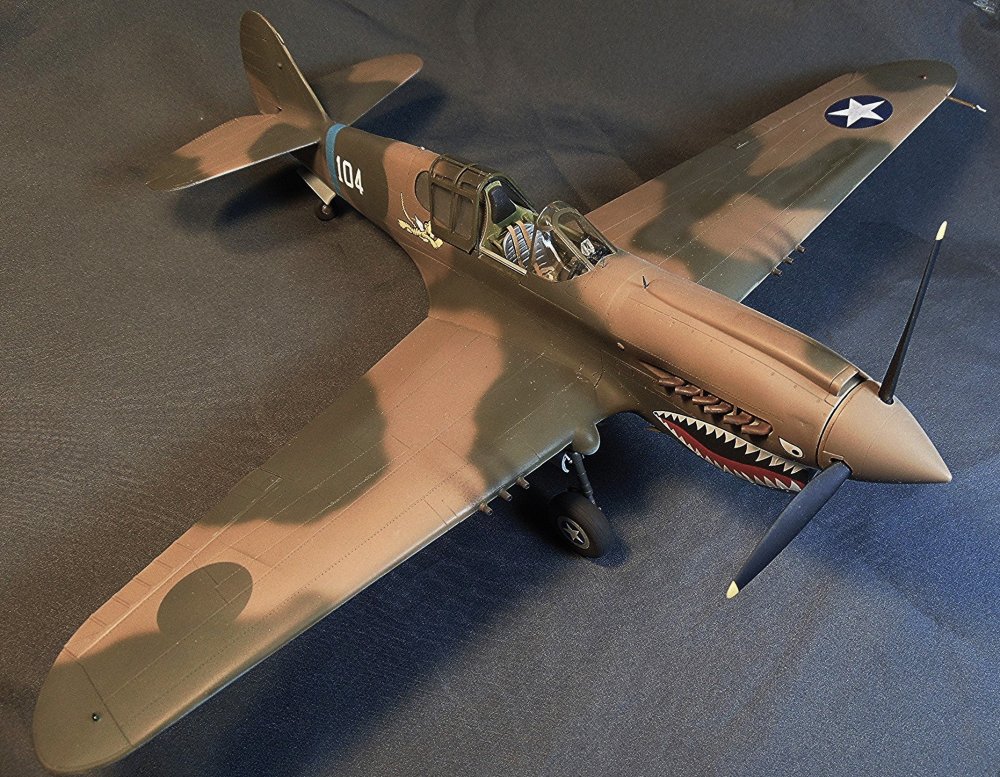
When I decided to start this build I wasn't sure I had all the needed pieces. I'm pleased I was able to complete it although I had to scratch a right LG/wing knuckle cover. I think it turned out well considering what I had to work with. No after market except for the PE gun sight on the cowling so I guess it's a OOB build. LOL Painted with Xtracolor and Floquil. Decals are from the kit. I hope y'all like it! 🙂


-
I didn't intend for it to be in the GB. I don't think CBI qualifies for that. Needs to be changed.
-
LOL Kevin. That ought to be a really nice one with the shark mouth. 🙂
-
Thanks Dennis. I'm a bit surprised it came together as well as it did. I intend to finish it today. 🙂
-
Thanks Carl. When I started this I didn't know for sure I had all the needed parts. Except for that LG/wing piece everything was there surprisingly. 🙂
-
Me too Kevin. I added the "eyes" and the rest of the teeth decals so now it's time for some clear flat over spray. As usual I'll use Alclad clear flat. I hope to be finished or close to it tomorrow some time.
-
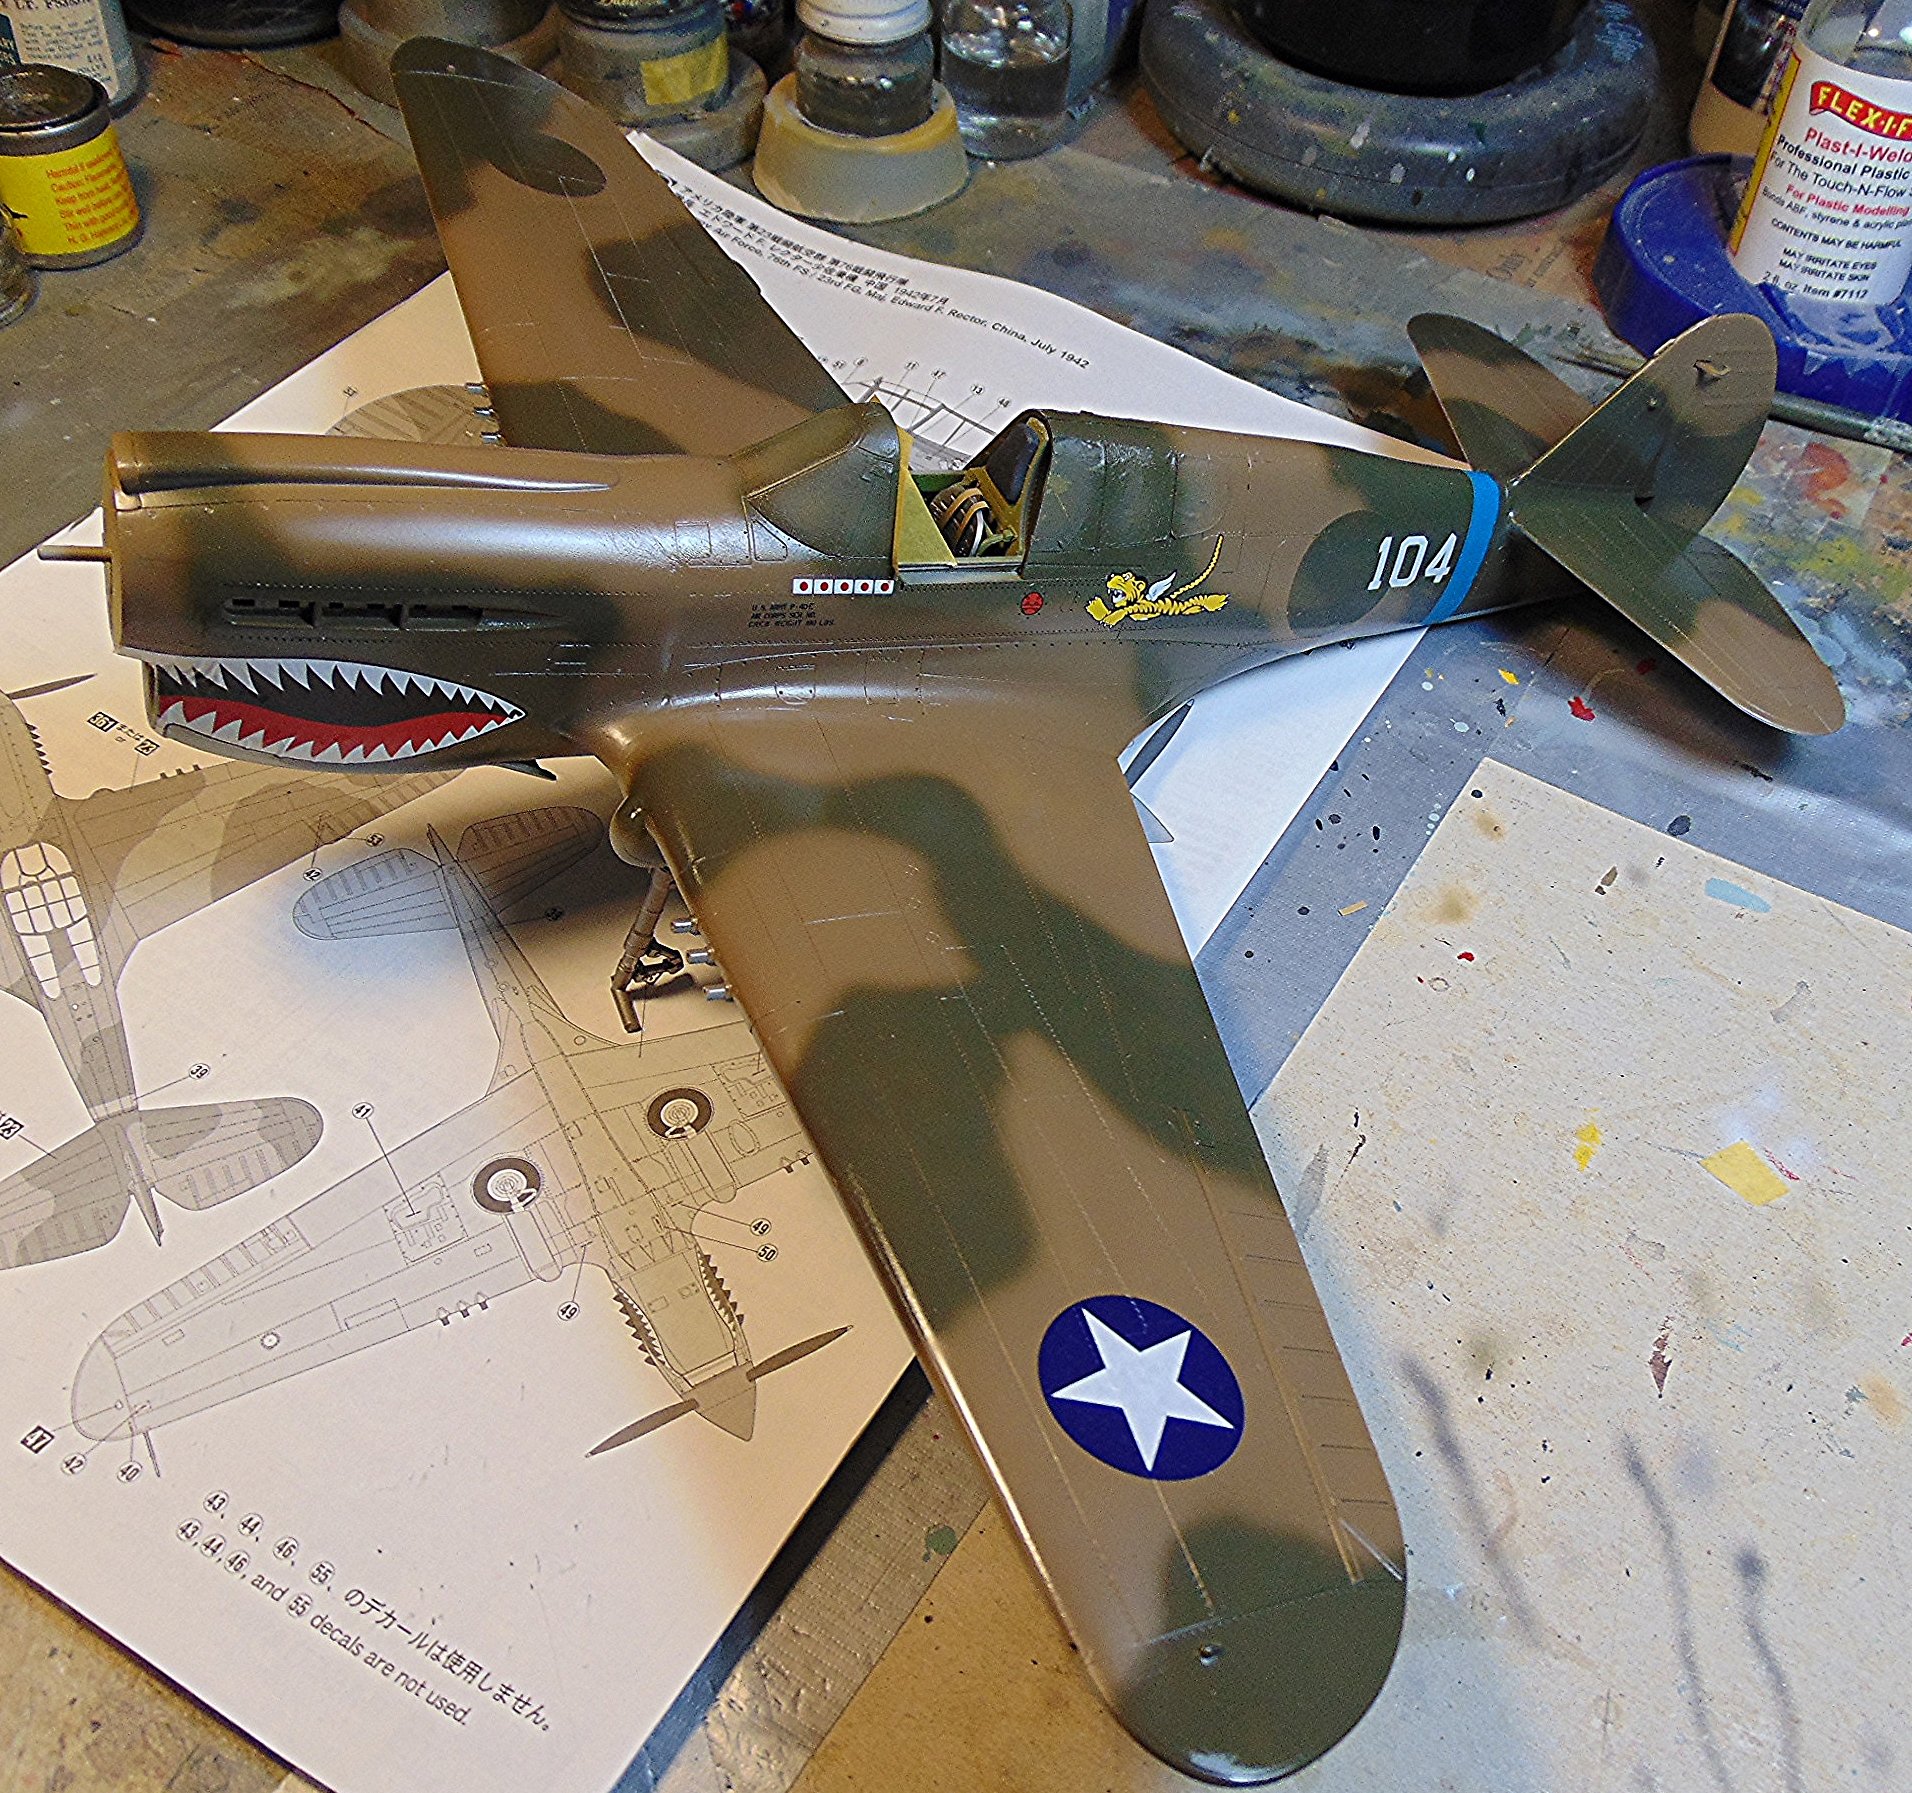
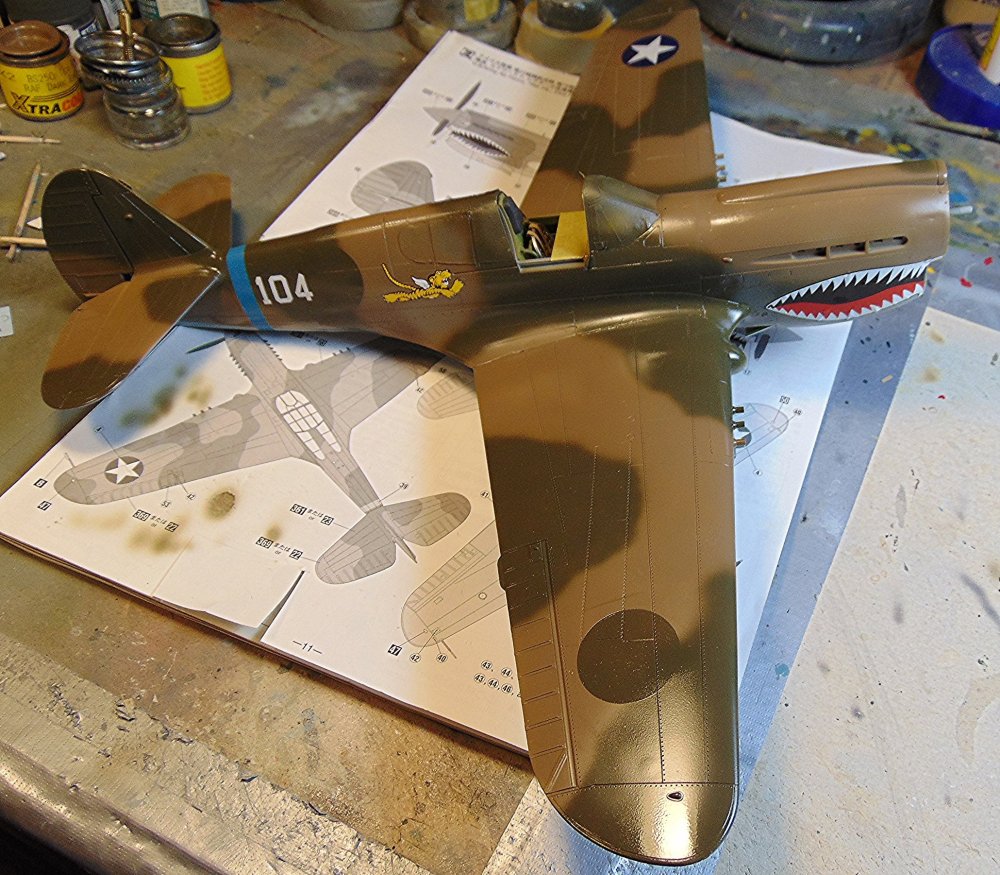
The painting, with Xtracolor, is done so now it's time for some decals. Then it'll be over sprayed with clear flat and some exhaust stains, etc.

-
Yes indeed Martin. I see the wheel covers had stars. They aren't included on the decal sheet so I'll have to look through my decal stash to see if I can come up with some. 🙂
-
Thank you Peter. Neither had I but decided to give it a try since it looked like I had enough parts to do it. 🙂
-
I'm glad you have decided to resume posting, etc. I hope all goes well. 🙂