GazzaS
-
Posts
6,396 -
Joined
-
Last visited
Content Type
Profiles
Forums
Events
Gallery
Everything posted by GazzaS
-

RFI 1/48 Jagdpantherette diorama , Belgium Sept '44 Completed
GazzaS replied to PanzerWomble's topic in Non LSM 'WIP
Very nice, Guy! When does the swearing begin? -
I ended up using the re-usable 1 Man Army Masks, which cover even the stencils. Really, Peter... a great way to go. I only had to redo one of them cuz I was way off center.
-
I'd offer you your G10 back if I hadn't already bough a bunch of AM for it.
-
The underwing decals were the only ones I used from the kit excluding interior decals. But yeah... all of that carrier film... no thanks.
-
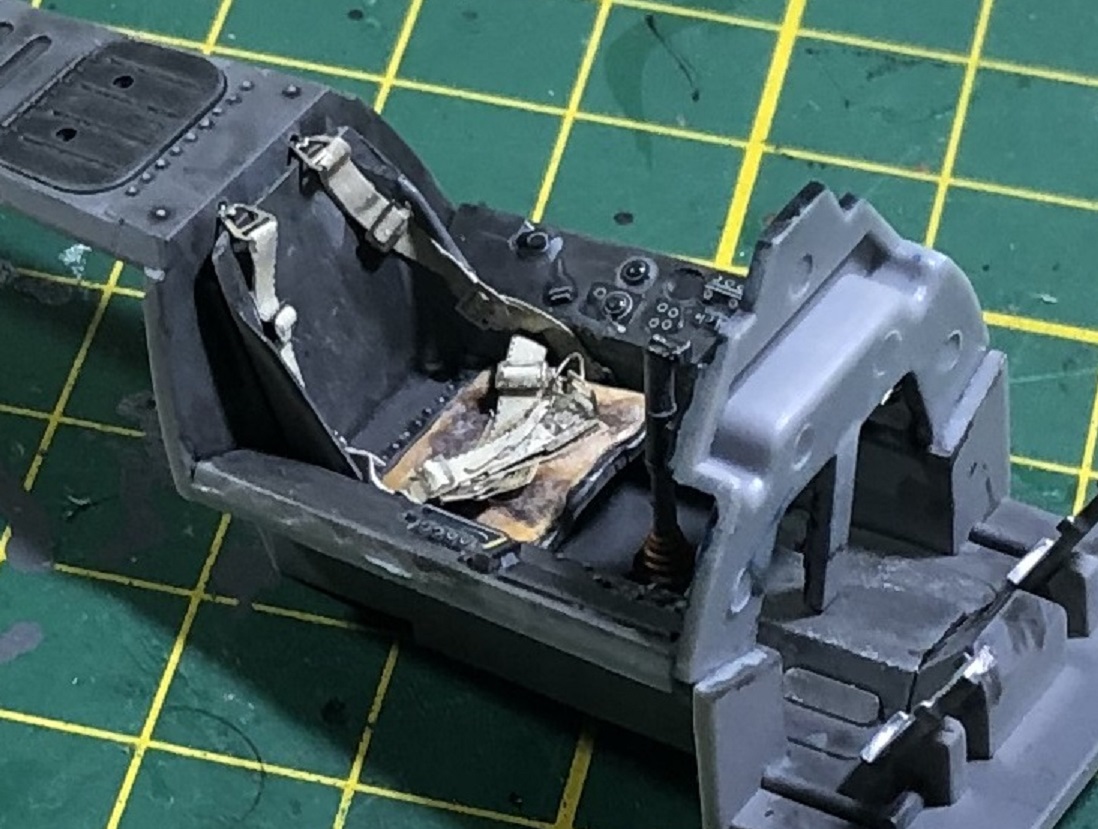
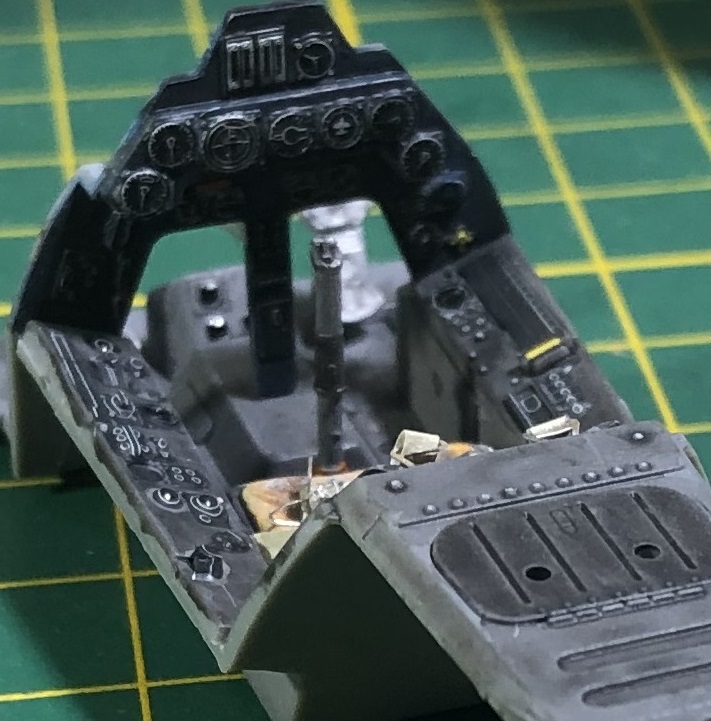
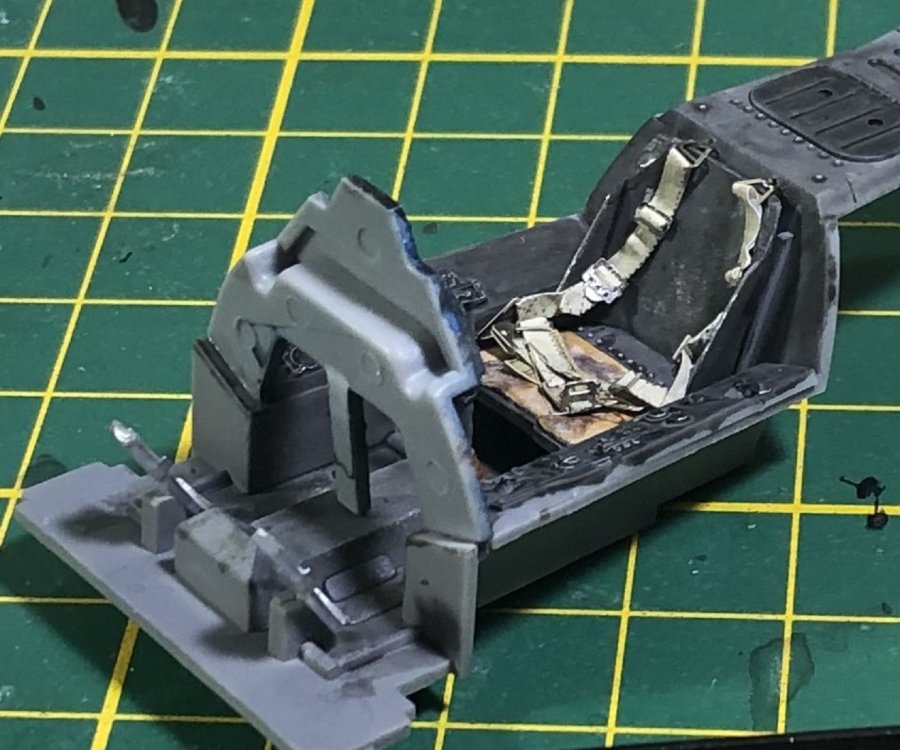
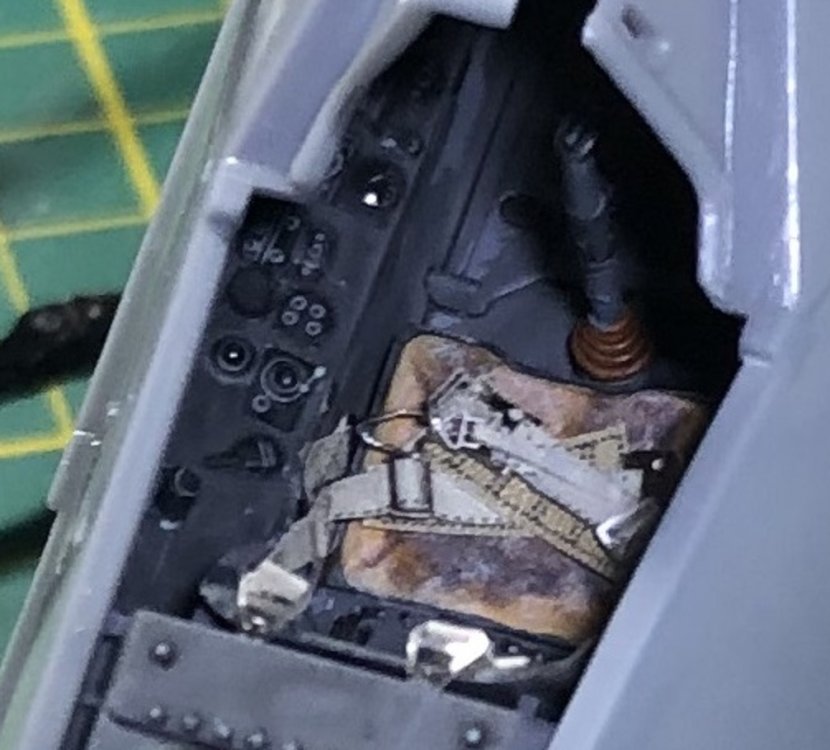
Back again. Yesterday the HGW belts got here. And thank goodness you get two sets. Because I totally ruined one with clumsiness and bullheadedness. And since I had today off... scheduled, not a sickee... I knew I would get them done. They took me all morning. You can see in the last picture that 65% of the detail disappeared when I closed up the fuselage. Ciao babies!

-
Revell 1/32 Hurricane llb. Finishing touches.
GazzaS replied to Clunkmeister's topic in LSM 1/35 and Larger Work In Progress
As the white band was prescribed after a certain date, it would have to be applied over the existing paint... I imagine. -
Hurricane Mk.l style straight leg tailwheel.
GazzaS replied to Clunkmeister's topic in General Discussion
Toe jam always goes over well at the IPMS hobby shows and conventions. Always in plentiful supply along with BO and mullets. -
Quite an improvement, John! Glad we are one more step away from the SOD.
-
Is it getting too easy? I wouldn't say that. it's great to have choice. And it's great to have good kits instead of kits you have to wrestle into submission. It's good that your only choices aren't those three standard bearers of mediocrity: Revell, Italeri, and Airfix, like when I was a kid. I started modelling when I was 12, but didn't get my first Tamiya kit until I was 18 I can live with bad, but fixable fit. What I can't condone is a shape that is obviously wrong and would require re-sculpting beyond the limits of the plastic. Shake and bake is great... Really, who wants to sand and scribe? Masochists? It's good to see companies making less-modelled subjects.
-
LSM Modelling News 2023 merged Fran and Artful69’s threads
GazzaS replied to Fran's topic in Modelling Discussion
Thank you for the post and link, Rob. Here is a scheme I could dig, CDL is one thing I've wanted to do, but not so easy to do if you are doing active aircraft in the service of Kaiser Wilhelm.
-
Italeri 1/35 Elco 80' Torpedo Boat PT-596
GazzaS replied to Bomber_County's topic in Let’s Get Wet Group Build.
haha... have you ever seen the USN sailor's manual? My uncle was in the USN, and it's quite a thick book. The knot section was huge. -
LSM Modelling News 2023 merged Fran and Artful69’s threads
GazzaS replied to Fran's topic in Modelling Discussion
I have done the large decal thing with wnw... I dunno... feels a bit uncreative to me. Like imagine buying one of those Perfect Props where all you have to do is attach it to the model. -
Very nice!
-
Italeri 1/35 Elco 80' Torpedo Boat PT-596
GazzaS replied to Bomber_County's topic in Let’s Get Wet Group Build.
At that big scale, I think the rope looks good. Nice work! -
LSM Modelling News 2023 merged Fran and Artful69’s threads
GazzaS replied to Fran's topic in Modelling Discussion
Both so tempting. Love that you can see how the Austrians fixed the Alby's diving problem by moving the spar. And the Wurger... Do I need another one? Austrian Albatros schemes are pretty boring... I know there is the Bromkowski one.... but every man and his dog will be doing it. Of course... if you wanna prove me wrong, would love to see some inspiring pics. And the A4... you know I never do the in-box scheme... -
Peter, Very nice paintwork.
-
Why enamels? They will be a headache to weather if you plan on using oils. Most people are using lacquers or acrylics and weathering over them with oils or enamels.
-
If you want to soften demarcation, you can lightly spray the area with a little self-levelling thinner or apply a filter.
-
Caudron C.561 French Racing Plane - Resin - 1/48 - S.B.S.
GazzaS replied to DocRob's topic in LSM 1/48 Work in Progress
Very interesting project, Rob! I definitely like the shape of the bird... but the forward view??? I love the photo etch press! Wish we had more for those ambiguous shapes. -
You really need to use paper and worms. This will give you a more realistic finish with no 1/1 scale overspray. Even for 'late war'.
-
I've looked at those. But being sworn to secrecy I can say no more.
-
Yes... the Taurus set. *sniff*
- 329 replies
-
- 3
-

-

-
- uss arizona
- eduard
- (and 1 more)
-
Another one not to share with the wife!