CrankyCrafstman
-
Posts
1,350 -
Joined
-
Last visited
Content Type
Profiles
Forums
Events
Gallery
Everything posted by CrankyCrafstman
-
 Hey Phil Looking good. Thats minuscule, compared to what I'm working on...lol Ron G
 -
Thanks guys
-
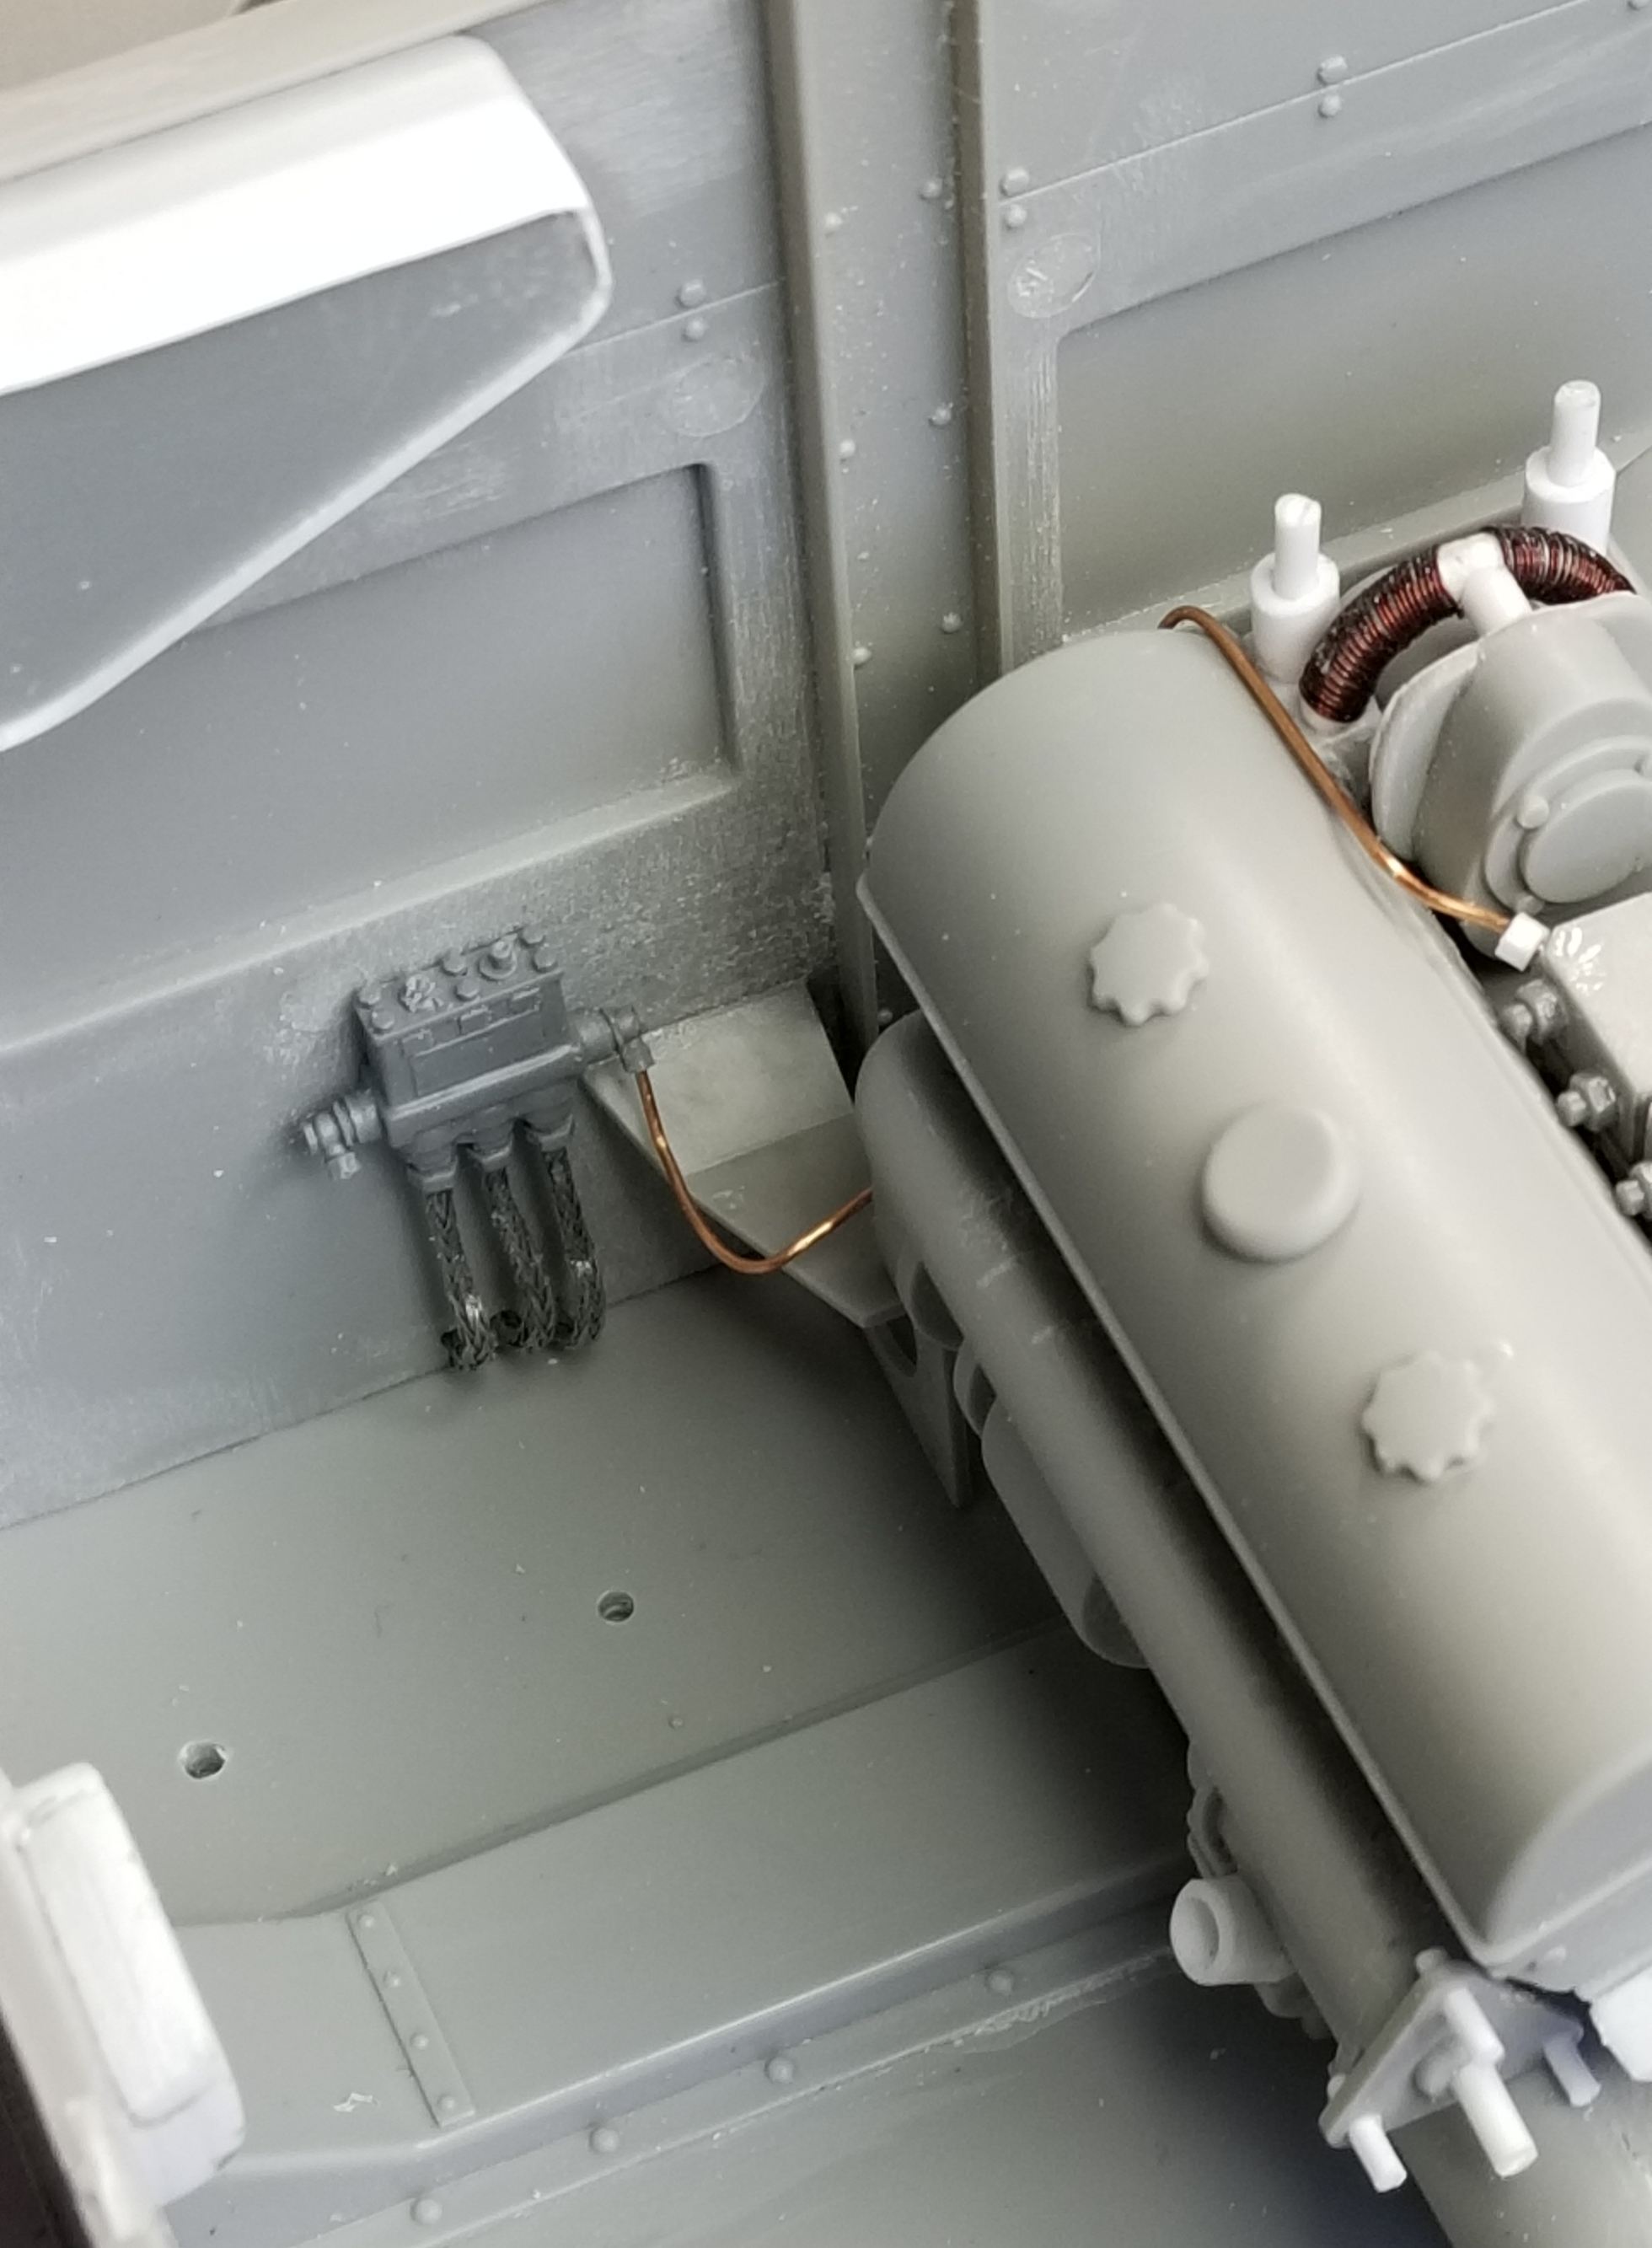
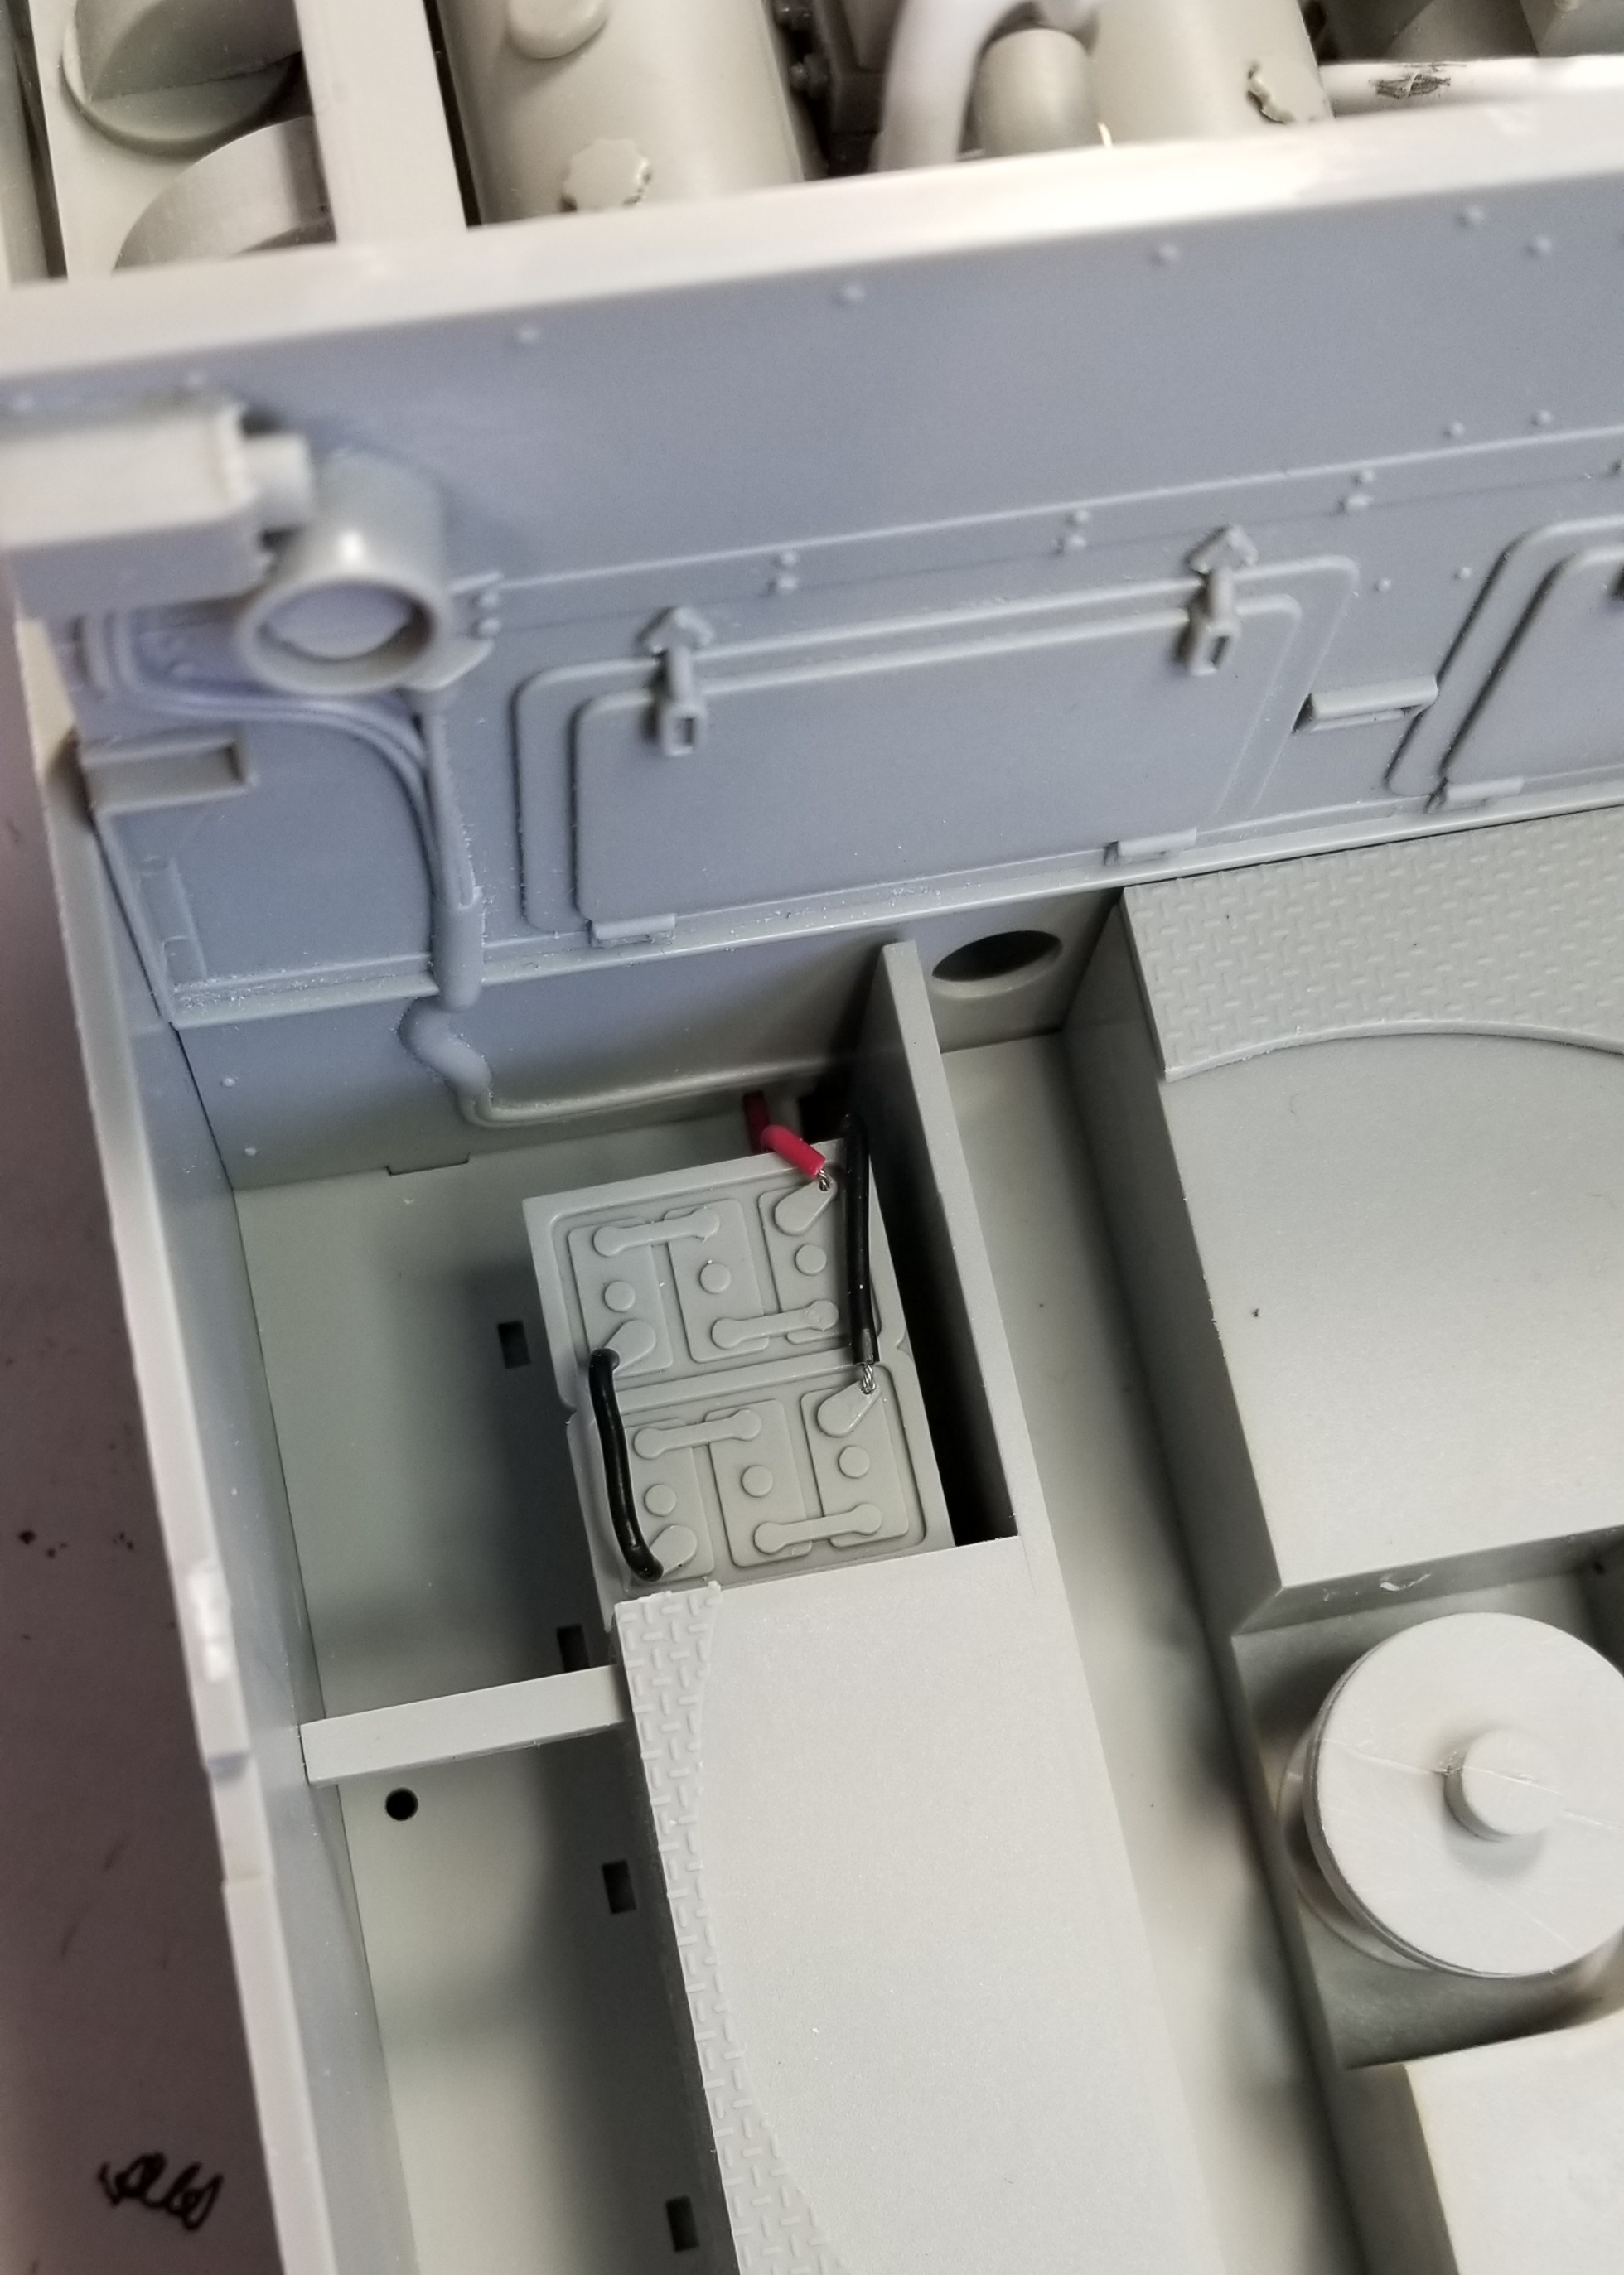
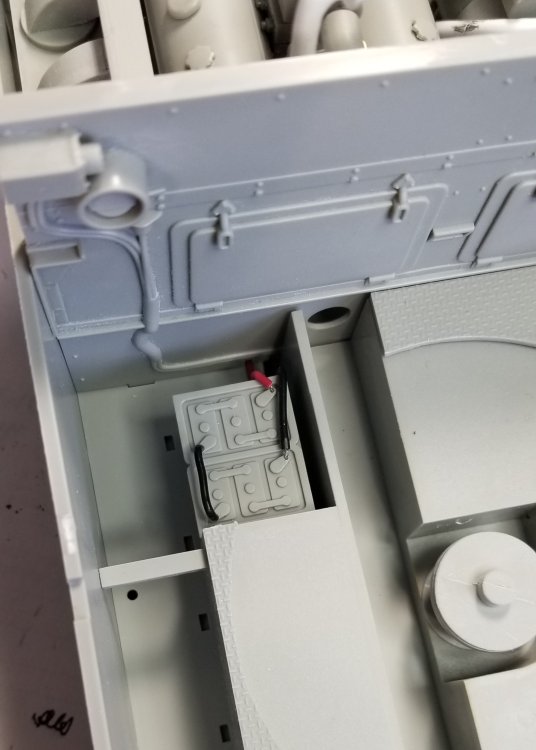
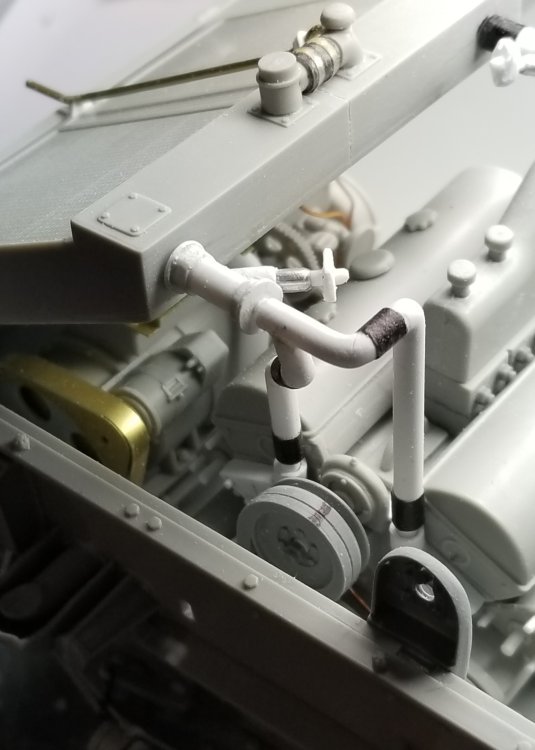
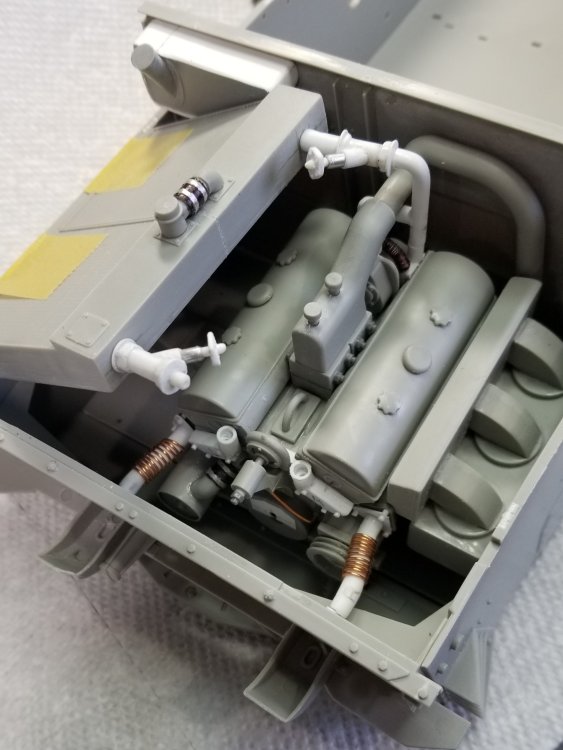
Hey all I have done a little more to the engine and the auxiliary power unit. I added the fuel shutoff valve (from AFV Modeller) and 3 fuel lines from the fuel tanks. I also added fuel lines from the valve to the engine and power unit. These may not be 100% accurate, but they work I think. This view shows the fuel shutoff valve and fuel line to the engine carburetors. This view shows the valve and the fuel line to the power units carburetor. Plan view showing all the plumbing, exhaust pipes and fuel lines. This view shows everything together with the radiator. This view shows the battery cables I added to the battery. Well that's it for now be back with more soon. Ron G

-
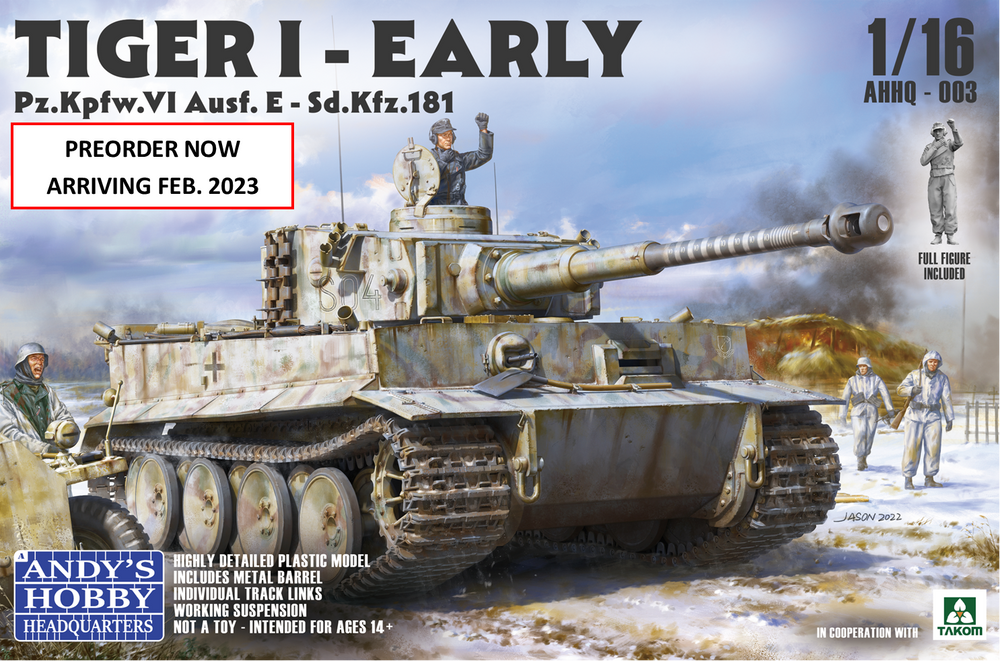
Hey all Not really an update, but this is probably going to be my next build. I placed my pre order at Andy's hobby for this kit. 1/16 scale Tiger 1 - early. Pre order price is $149.00 + shipping. Just watched a YouTube video from Andy's on this kit it looks real nice! Full working tracks & hatches, no interior except for the gun breach. I'll post pictures when it gets here. Supposed to ship around February 2023. Ron G
-
Looking good Phil
-
Trumpeter P-47D Razorback
CrankyCrafstman replied to crazypoet's topic in LSM 1/35 and Larger Work In Progress
I'll be following this one I did this one a few years back, had a heck of a time with the cowl clearing the rocker covers, had to do some grinding to get it to fit, but it looked good when done. Ron G -
Thanks guys
-
Thanks Harv It took me several trys to get this right. It's made up of 5 peices glued together with CA glue. Then glued to the modified frame and painted. Ron G
-
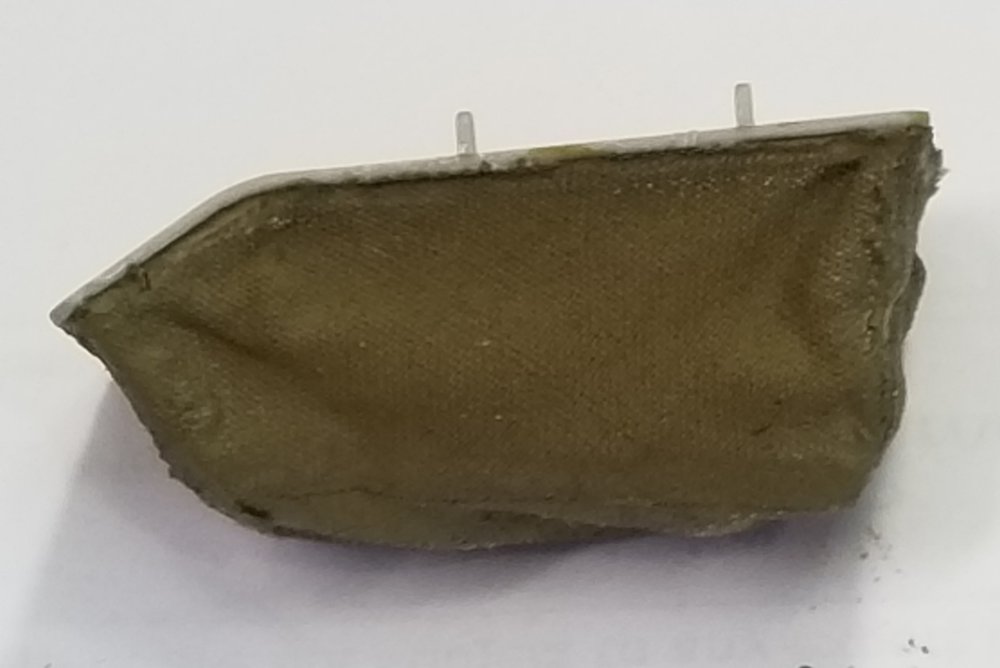
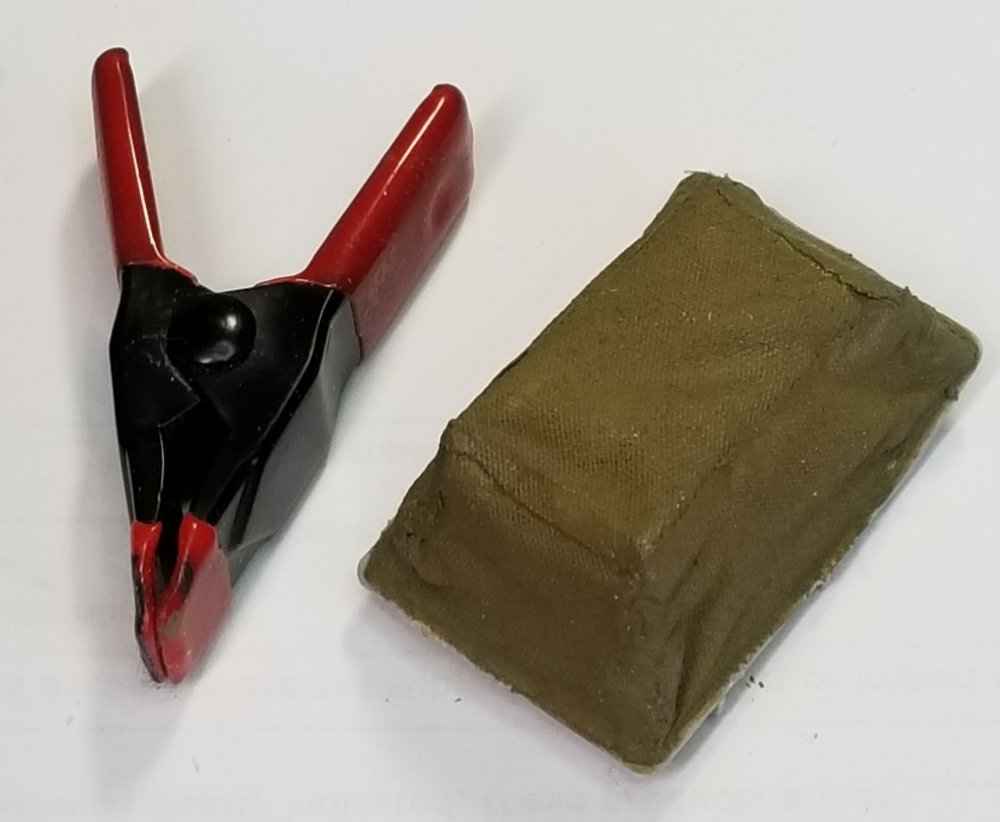
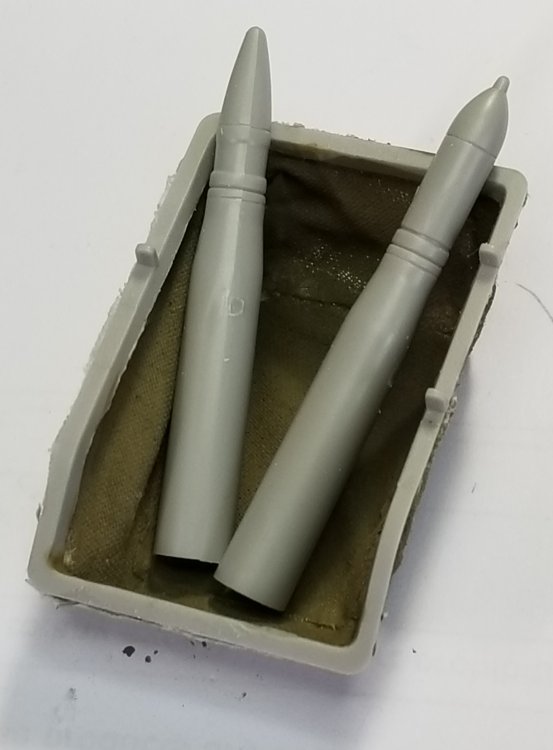
Hey all Very small update, but very tricky to do. I cut the spent shell basket/bag form the the frame that attaches it to the gun frame. I then made, from an old cotton bed sheet, a new basket/bag to represent the canvas one that the crappy kit one is supposed to be made of, but looks like crap and very unrealistic. This view shows the bag attached to the kit frame that I modified. I painted it with Tamiya khaki. Side view of the bag, front to the right and rear to the left. This view shows the bottom of the bag. The clamp is for scale. This view shows some of the rounds from the kit. This will get more done to it, some shading, weathering and such. Well that's it for now be back soon. Ron G


- 41 replies
-
- 11
-

-

-
Thanks guys
-
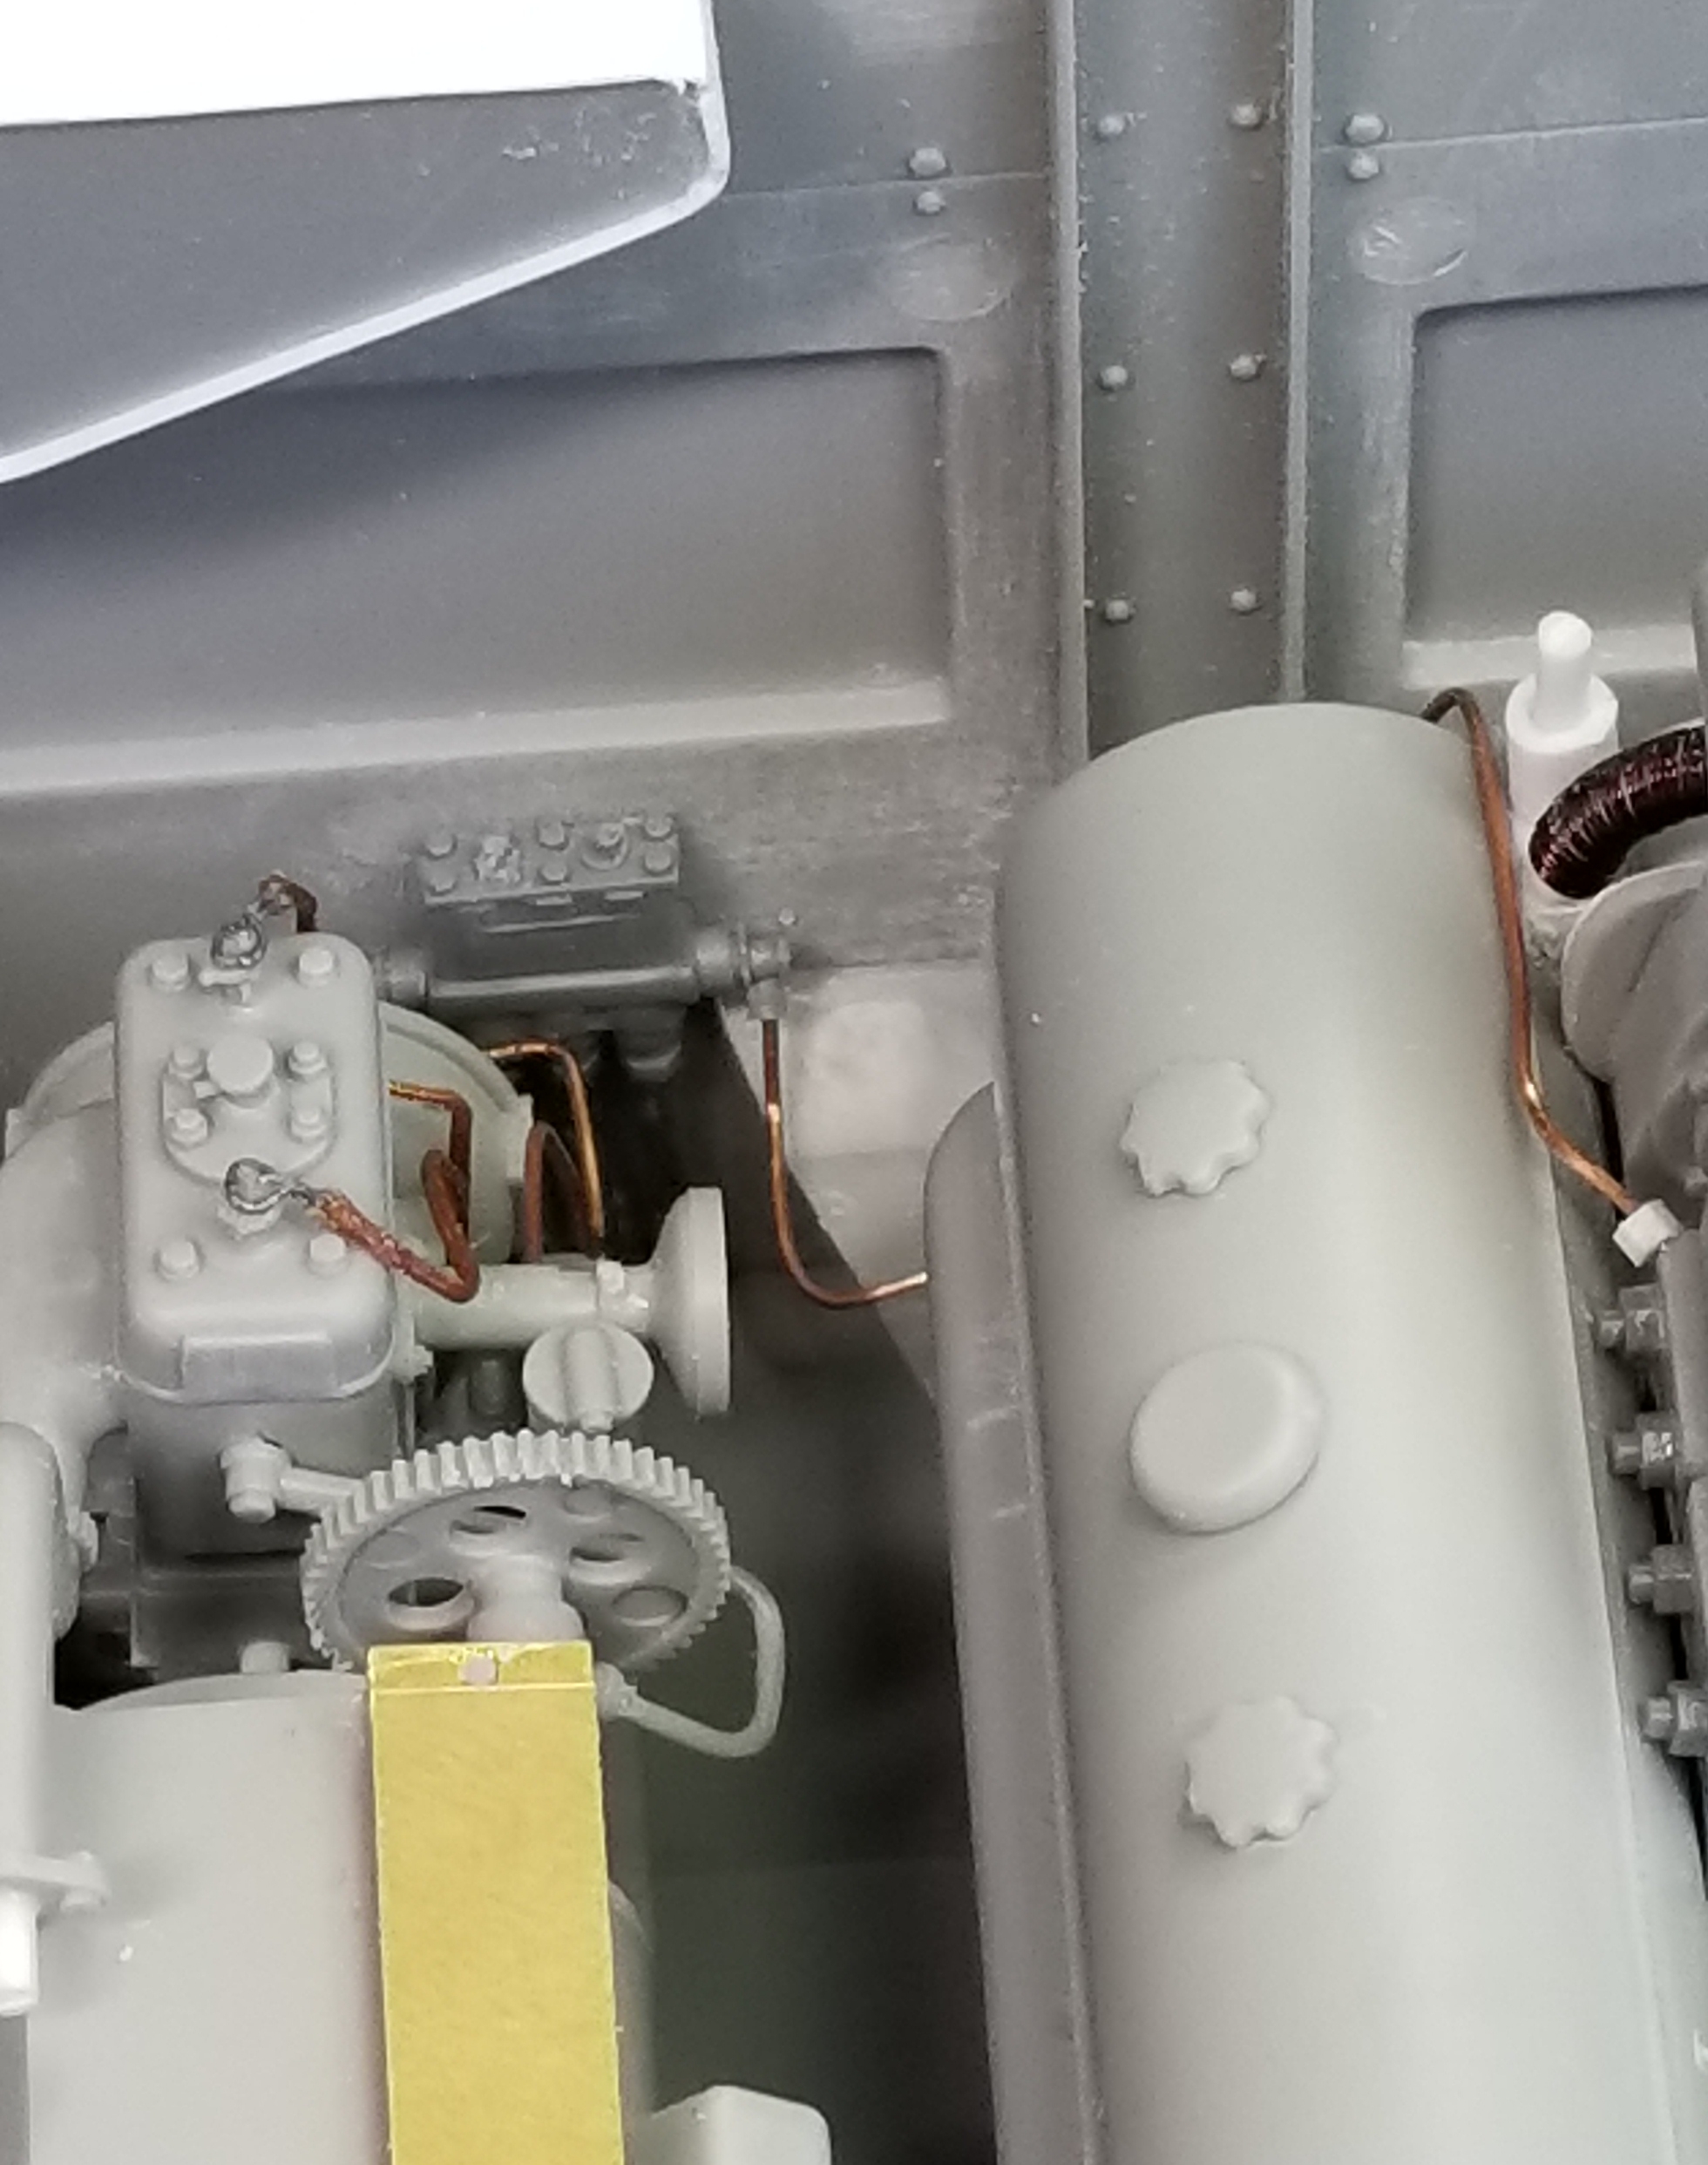
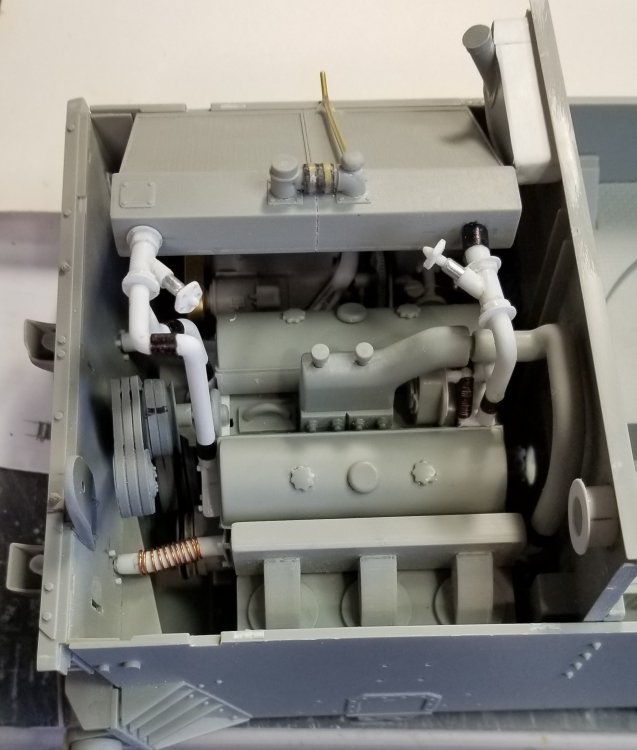
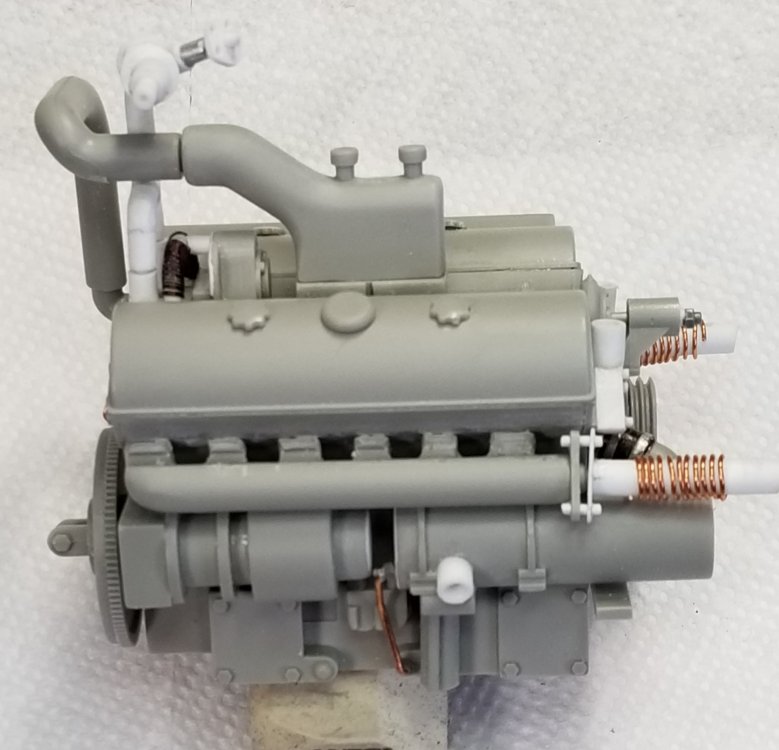
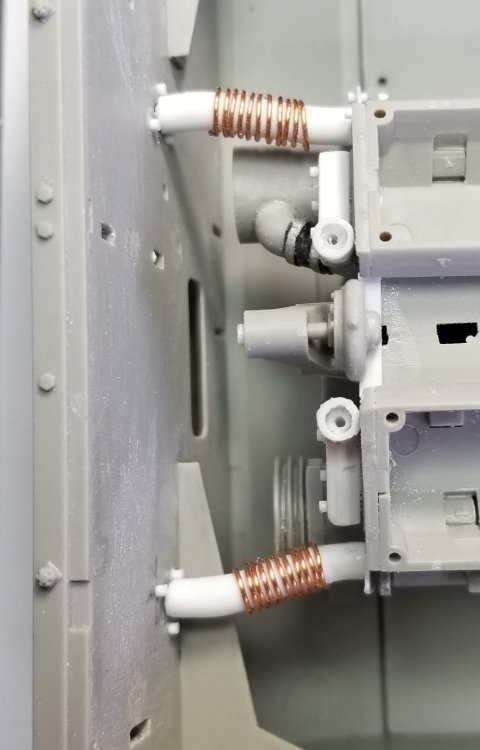
Hey all Did a little more work on the engine and coolant plumbing. I put the auxiliary power generator together. I added spark plug wires to the two spark plugs on the small motor. And made a exhaust pipe extension from the kit exhaust pipe on the small motor to the rear wall. This view shows the spark plug wires I added, they are the copper colored ones. These are braided wires from Anzy. another view showing the plug wires. The roundish object on the right is where the fan belts attach to the rear panel. This view shows the lower radiator hose. It's the white pipe that bends down, it's barely visible. This view shows the rest of the lower radiator hose, this attaches to the pipe I added to the oil cooler. That's it for now be back with more soon. Ron G


-
Hasegawa F-104 G/S next
CrankyCrafstman replied to JohnB's topic in LSM 1/35 and Larger Work In Progress
Hey John And you were going to put this on the shelf of doom. Ron G -
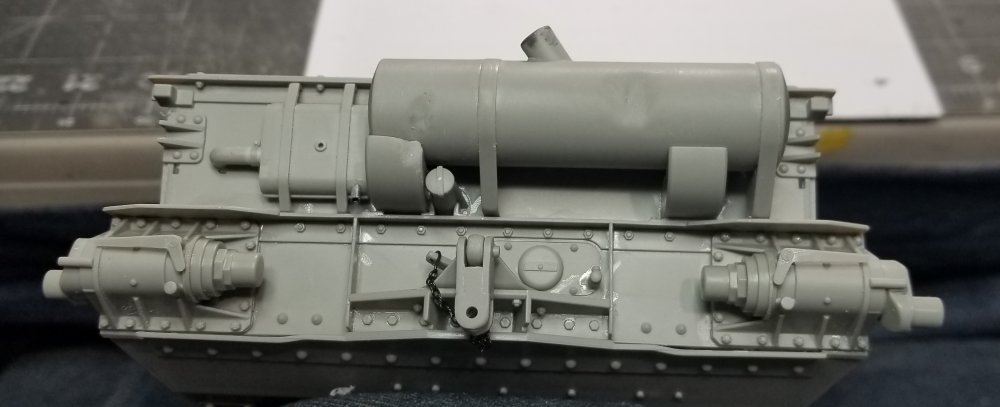
Hey all Very small update, couldn't get much done today, my eyes were acting up. I did some work on the rear panel. The exhaust is only on for the picture. I dented it up bit, it will look better once it's rusted up. I added a small chain to the towing pin. I added the rear idler mounts, I made these movable so I can adjust the tracks. I wish my eyes weren't bothering me, then maybe I could get more done. Ron G

-
You bet Harv.
-
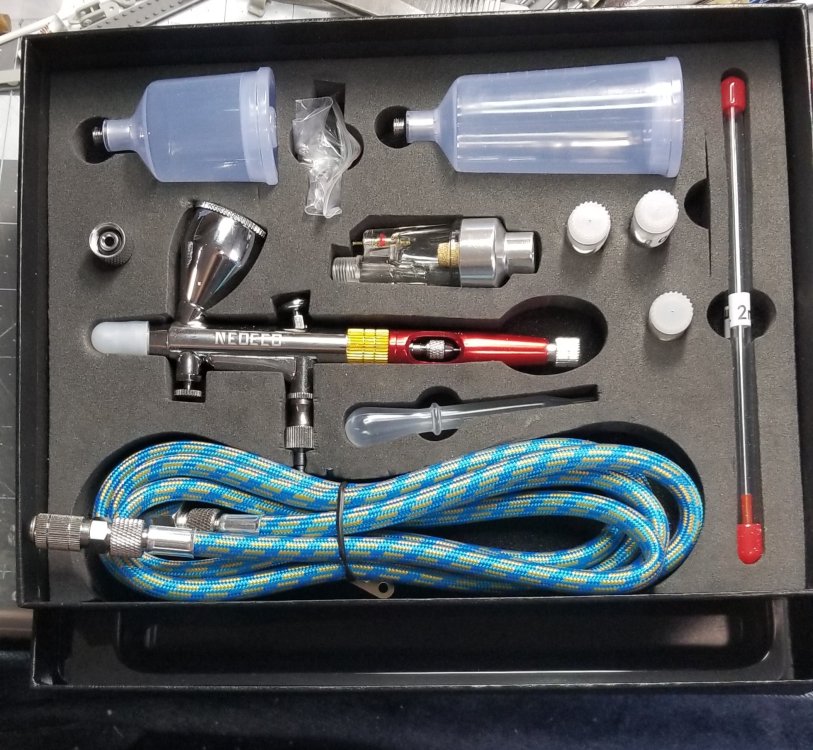
Hey all New toy showed up from Amazon. It's an air brush from a company called Nedeco, it is Chinese made, but it is pretty good for the price. $38.95 including shipping from Amazon! I saw this on YouTube previewed by Barbatosa rex, I think thats right. He has quite a few YouTube videos about spray painting with air brushes. He rated it very highly, did a demo on it with all three needles 0.2mm, 0.3mm & 0.5mm all included. It comes with a quick disconnect, different nozzle guard, moisture trap, 6' hose, eye dropper, 9cc cup with lid (the chrome one) 20cc cup & a 40cc cup, all for under 40 bucks! As soon as I try it out I'll let you all know if it is as good as I hope. One thing, the 0.2mm needle was bent like a fishing hook, but I think I got it straightened out. Ron G
-
Thanks Peter
-
Thanks Harv That's a great idea. I made mine out of tamiya tape colored with a black sharpie and the clamps are small 1/32" .0312" tape painted with silver sharpie. Ron G .
-
Hey Carl My the force be with you, mighty padawon. Ron G
-
Thanks Harv This kit is very challenging in as I need to skip around the build sequence in order to make sure all of the scratch building I'm doing fits. I had to modify the plumbing for the radiator hoses in order to get them to fit under the upper deck. Right now I'm in the process of finishing all of the plumbing to the radiators. This all has to fit around the auxiliary power generator that sits next to the engine. As soon as I'm done with that I will hopefully be ready for some paint. It would have been a lot easier if Trumpeter supplied all this in the first place...lol. they do have it in there king tiger and jagtiger kits. Ron G
-
Thanks guys
-
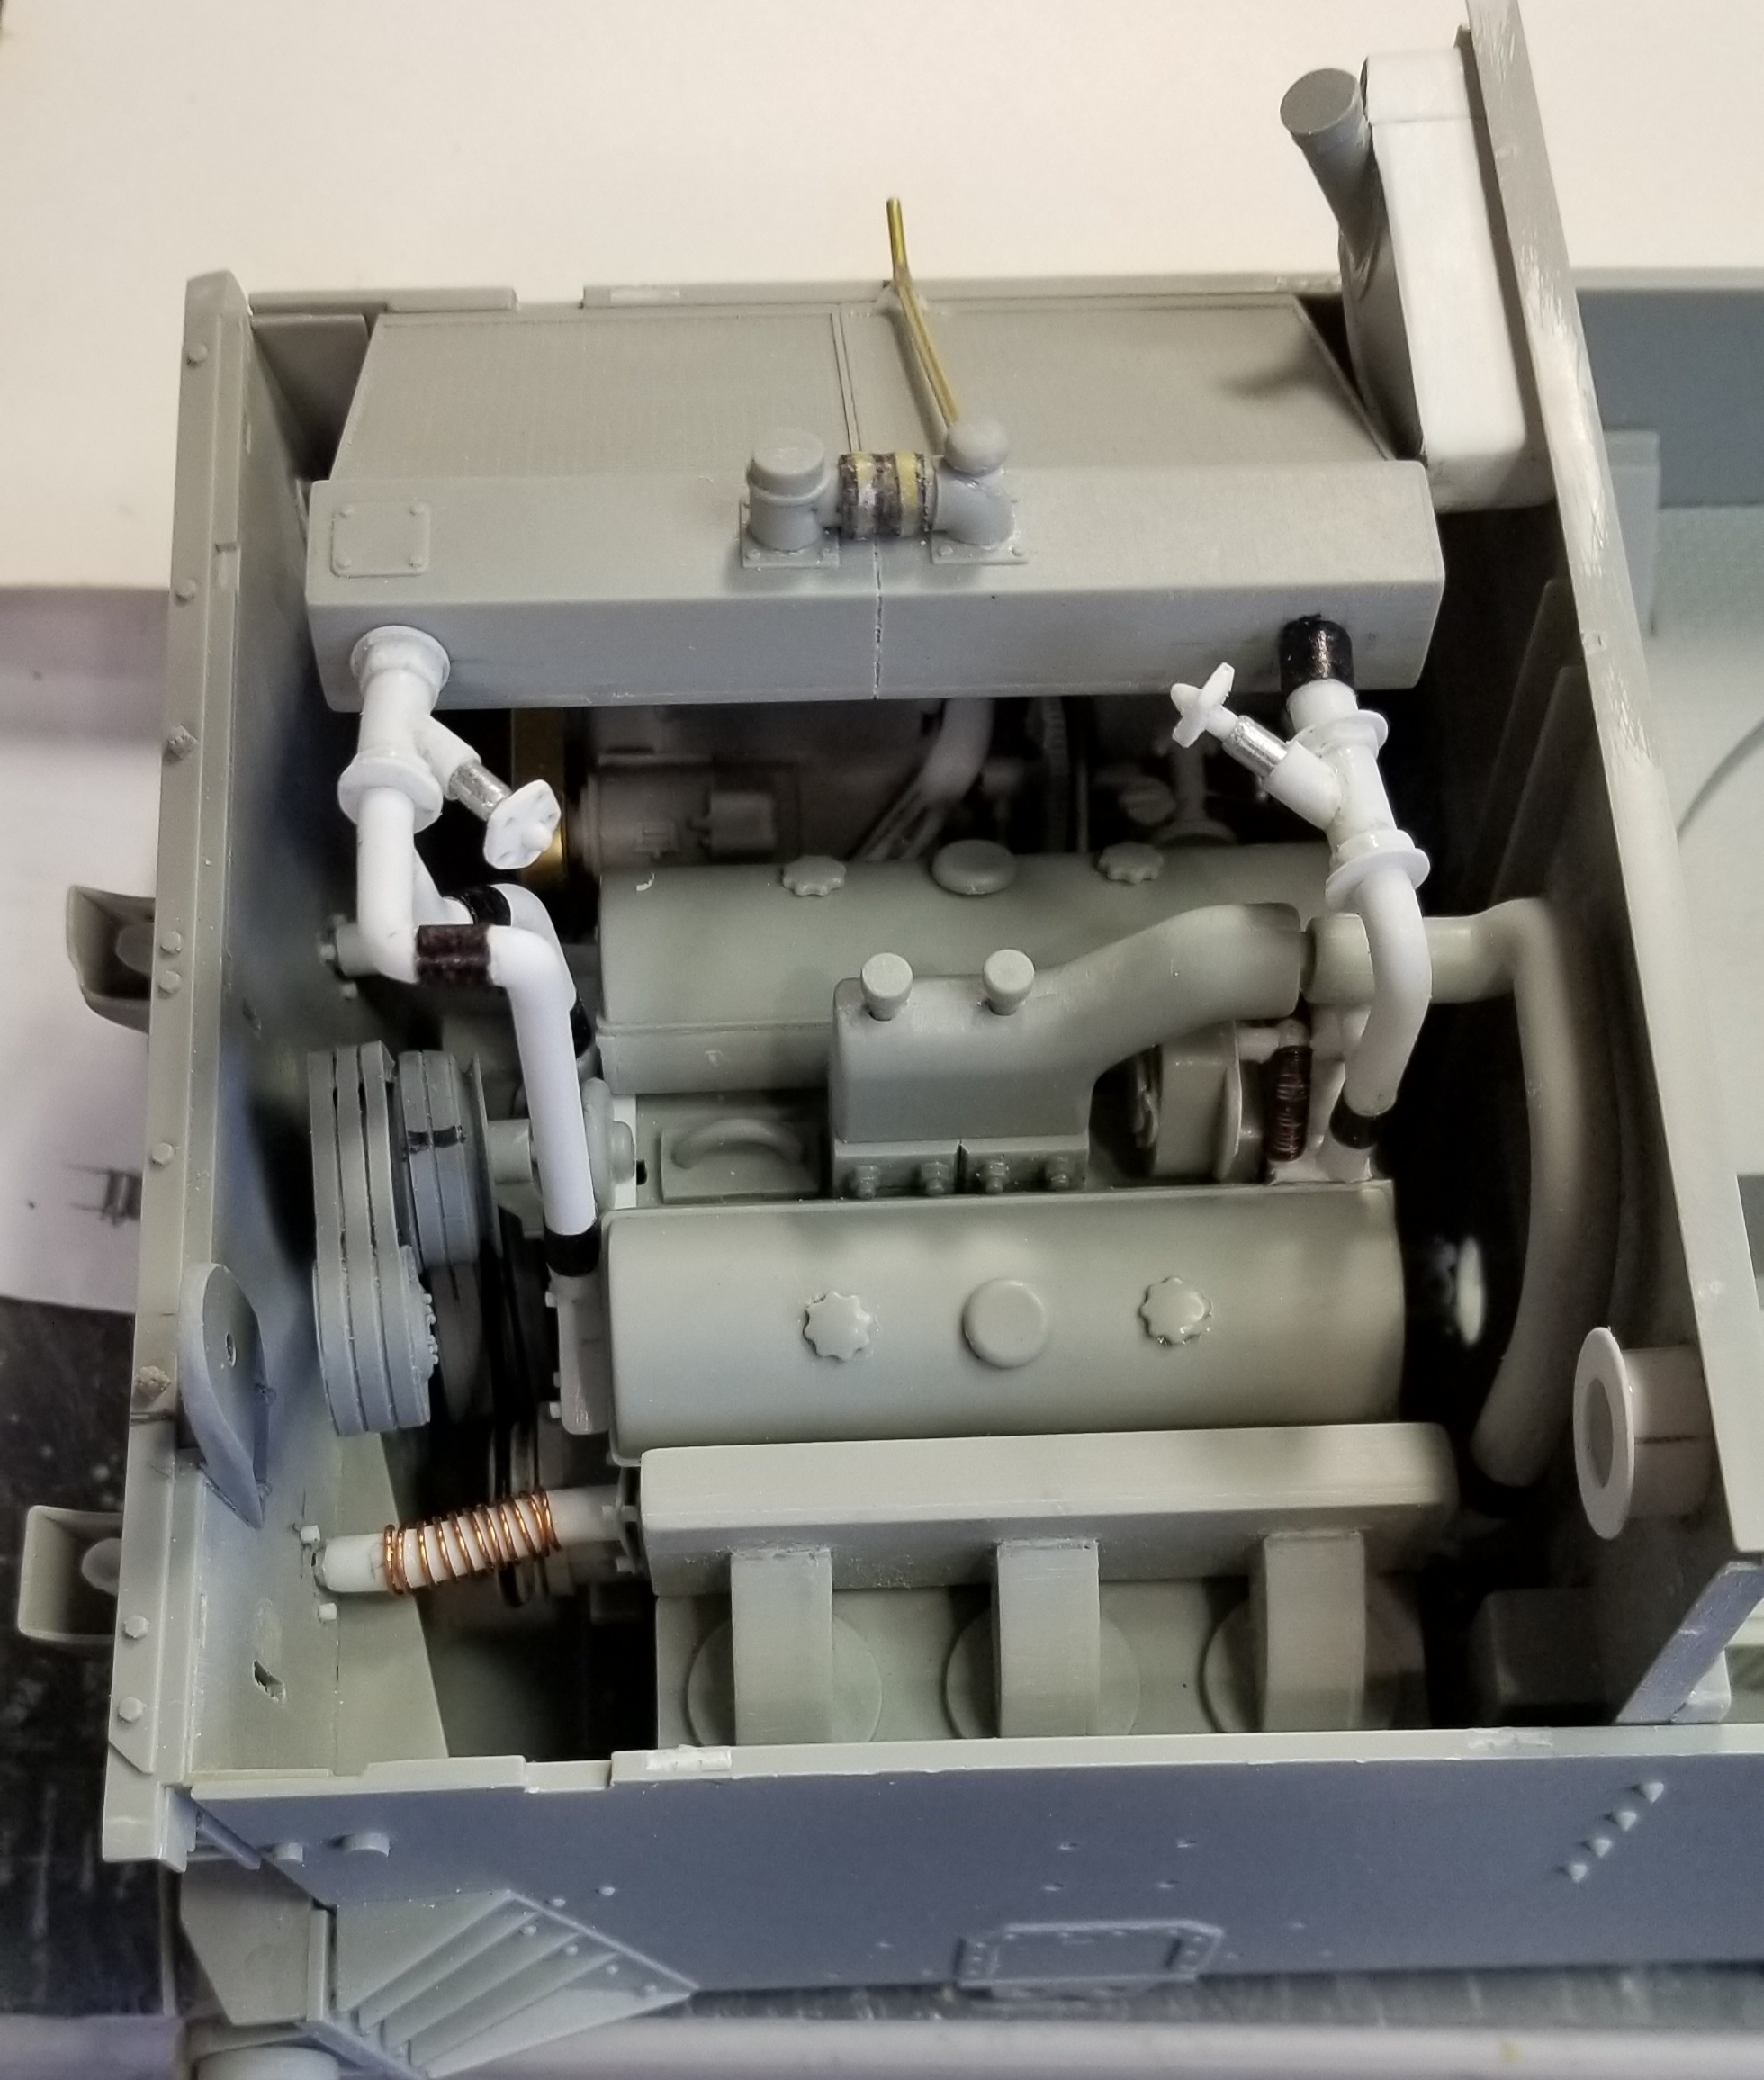
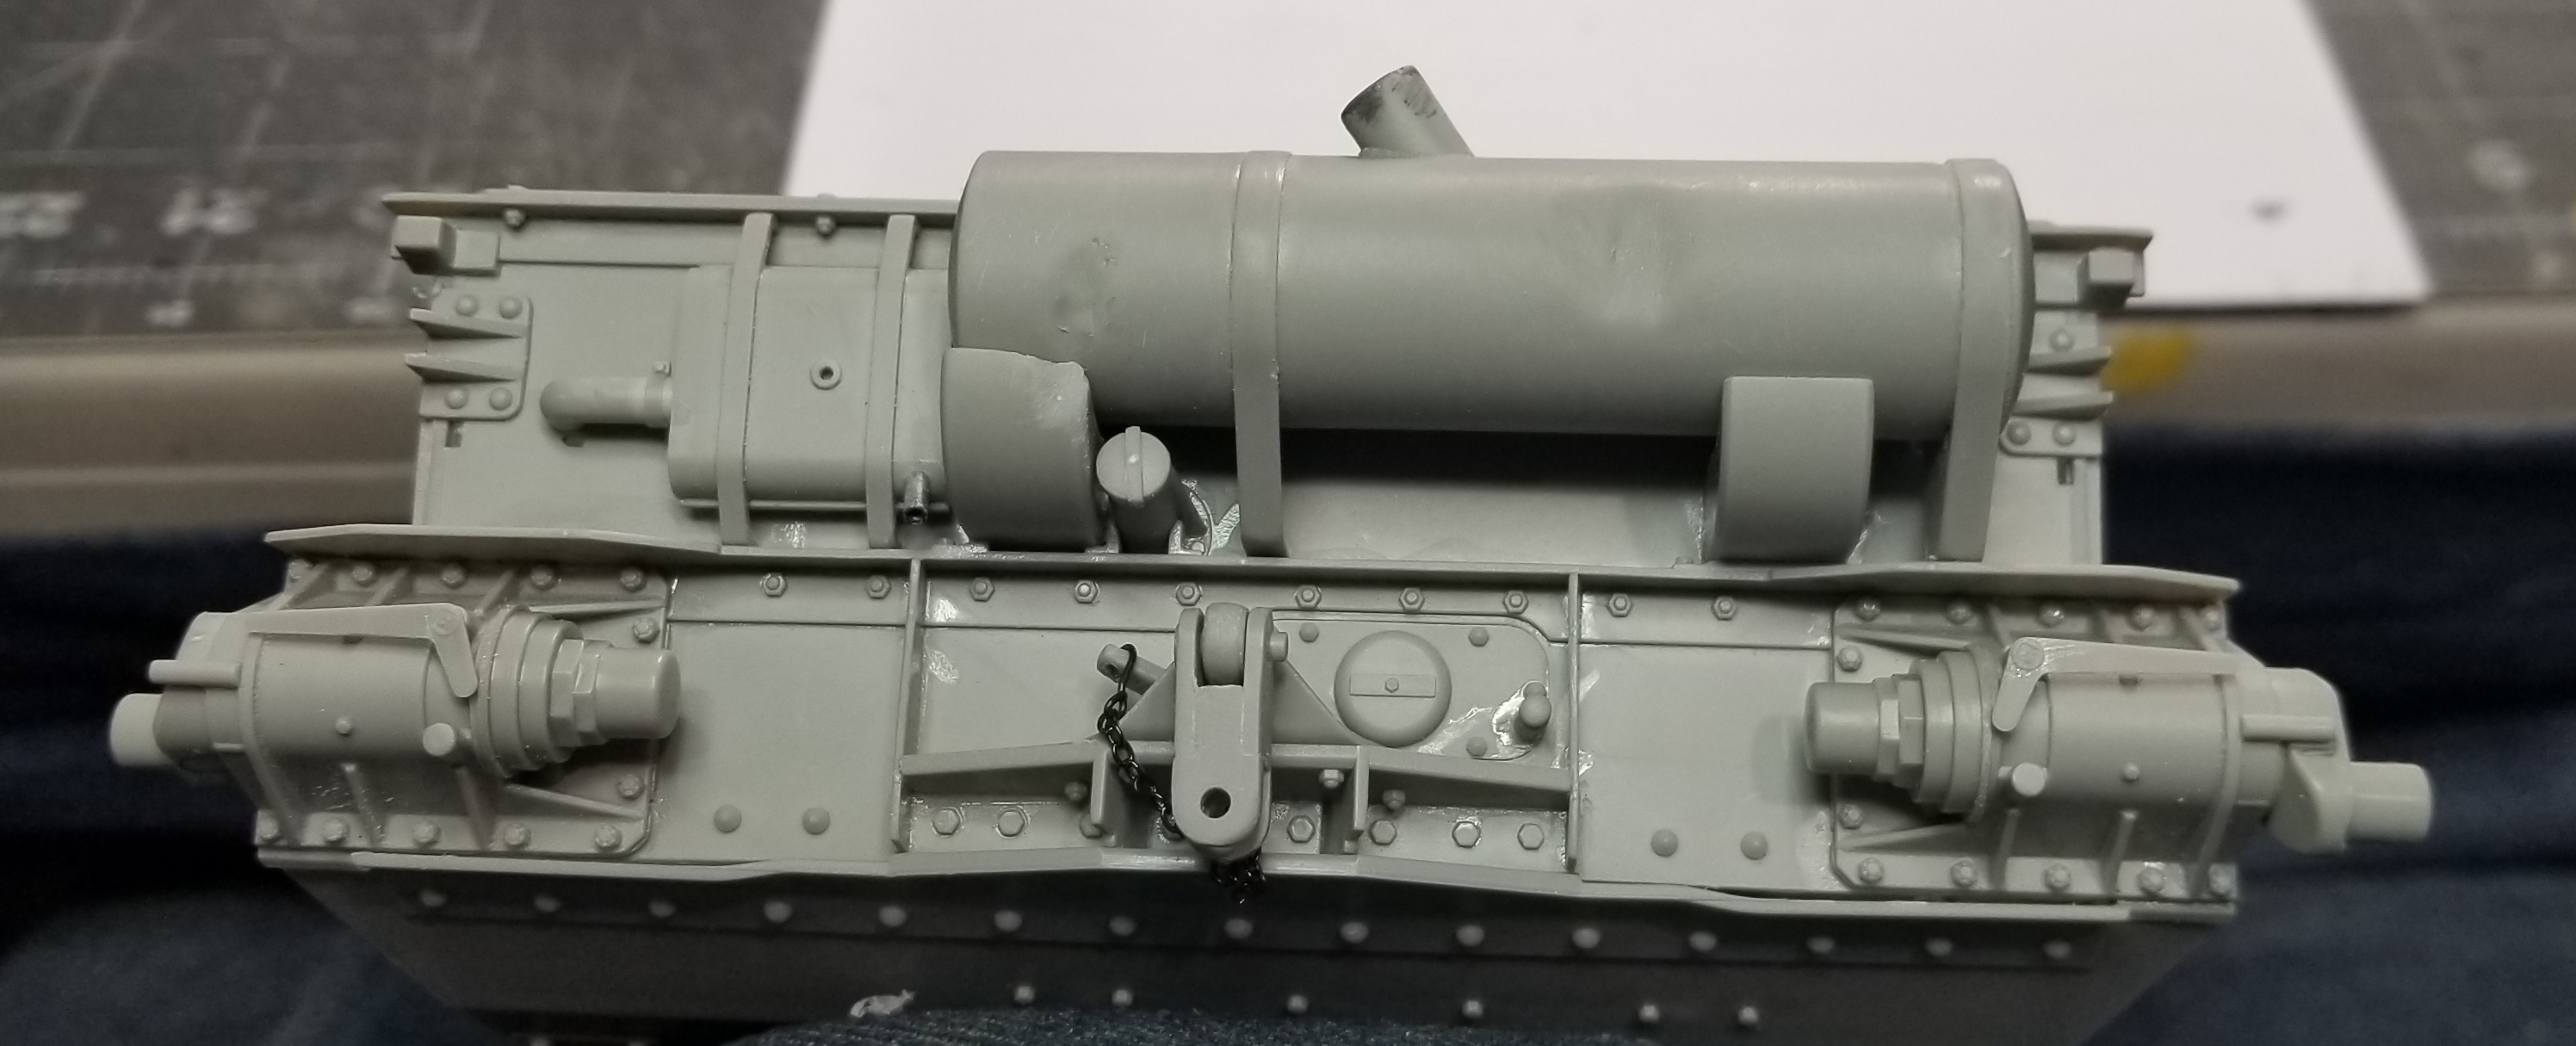
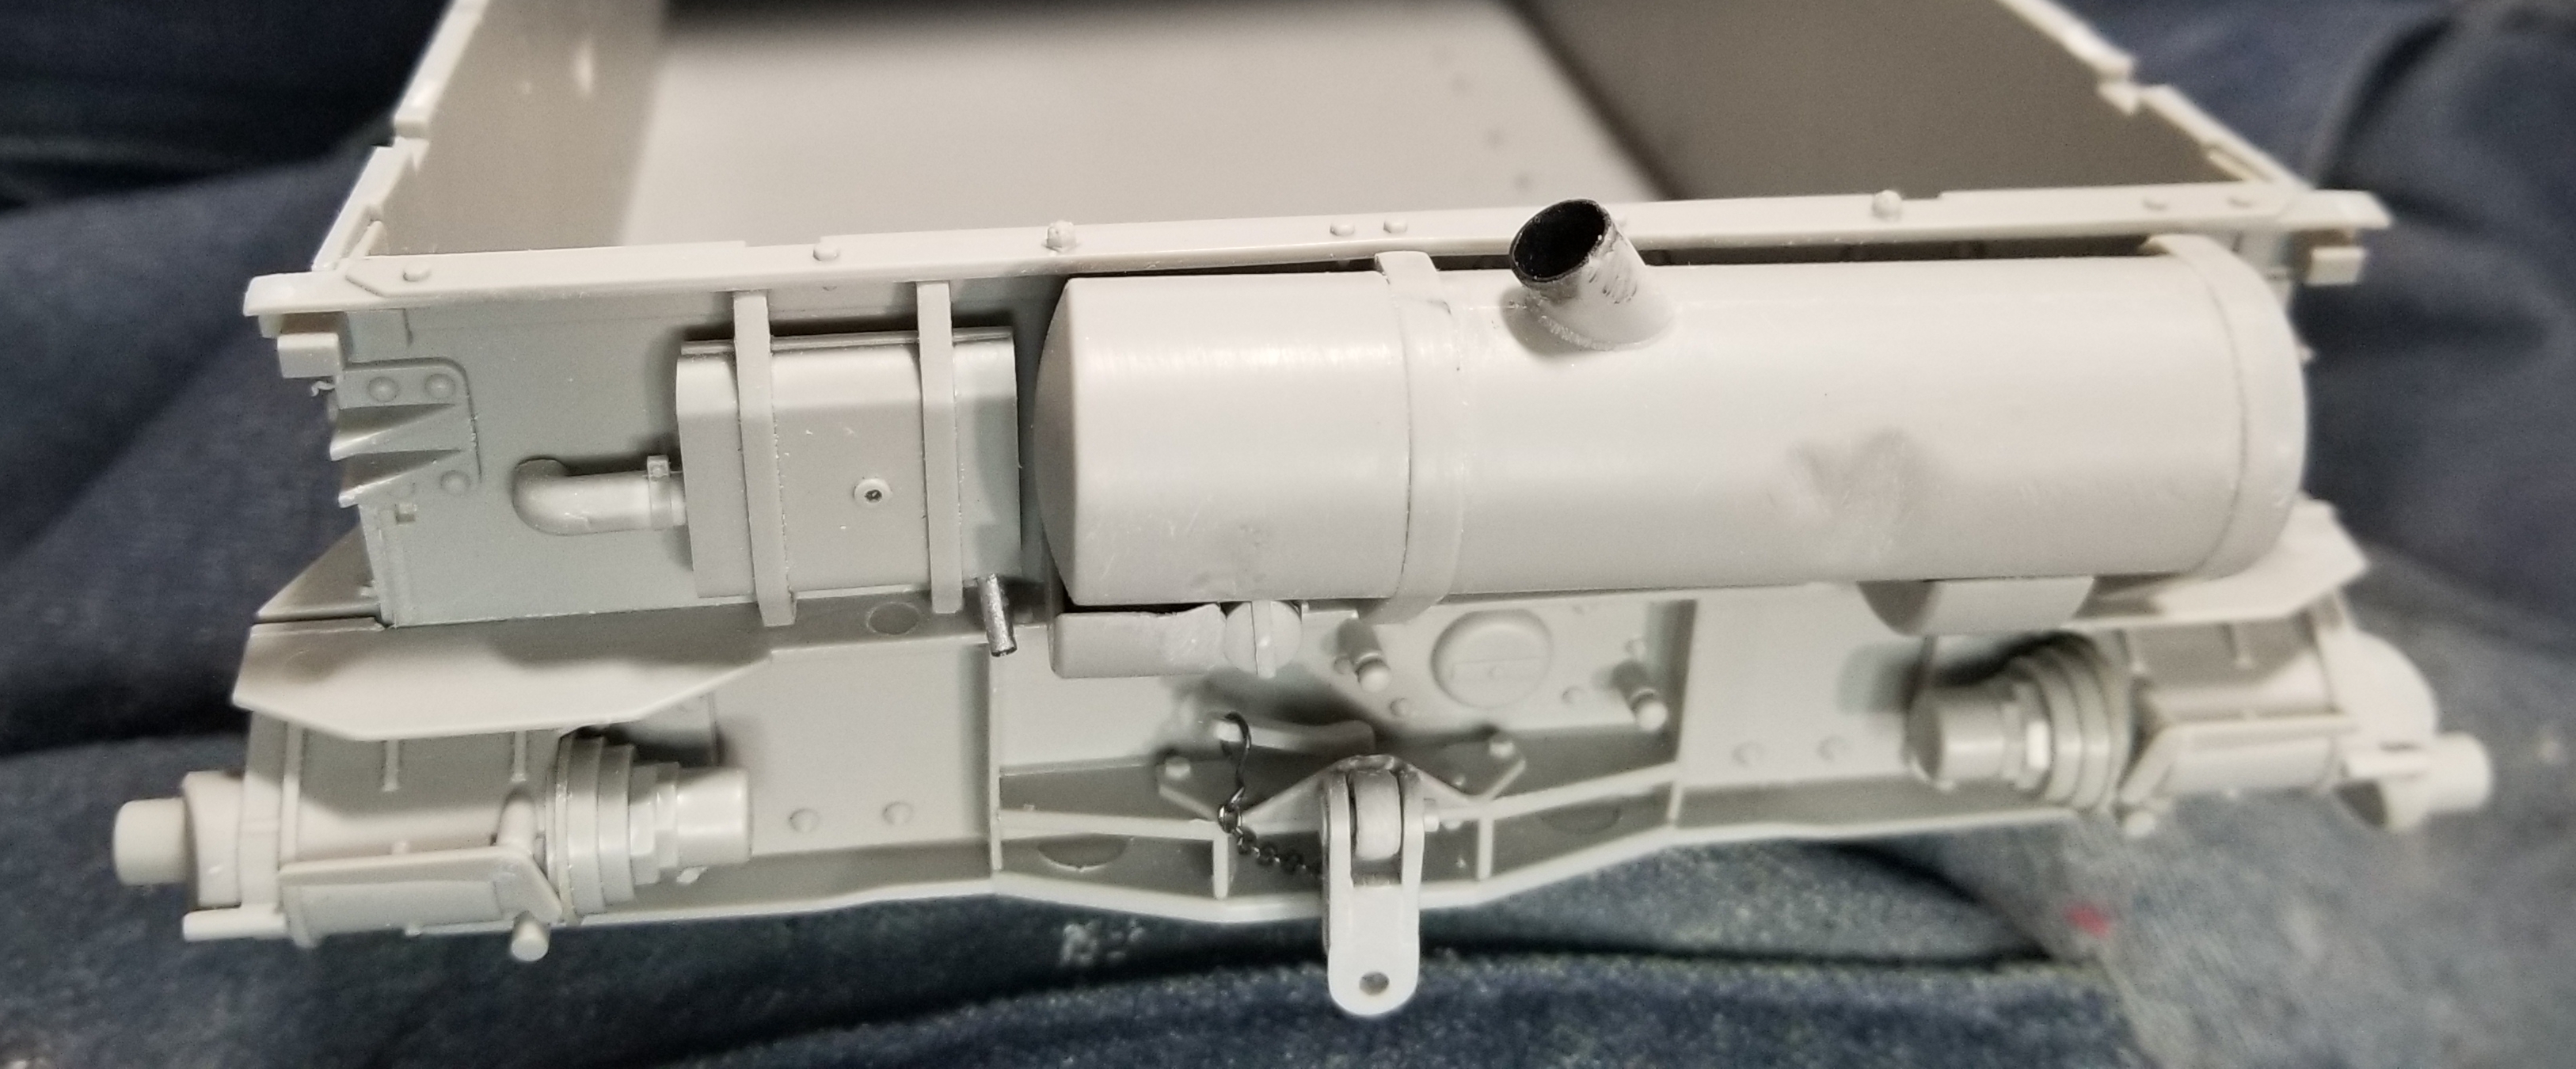
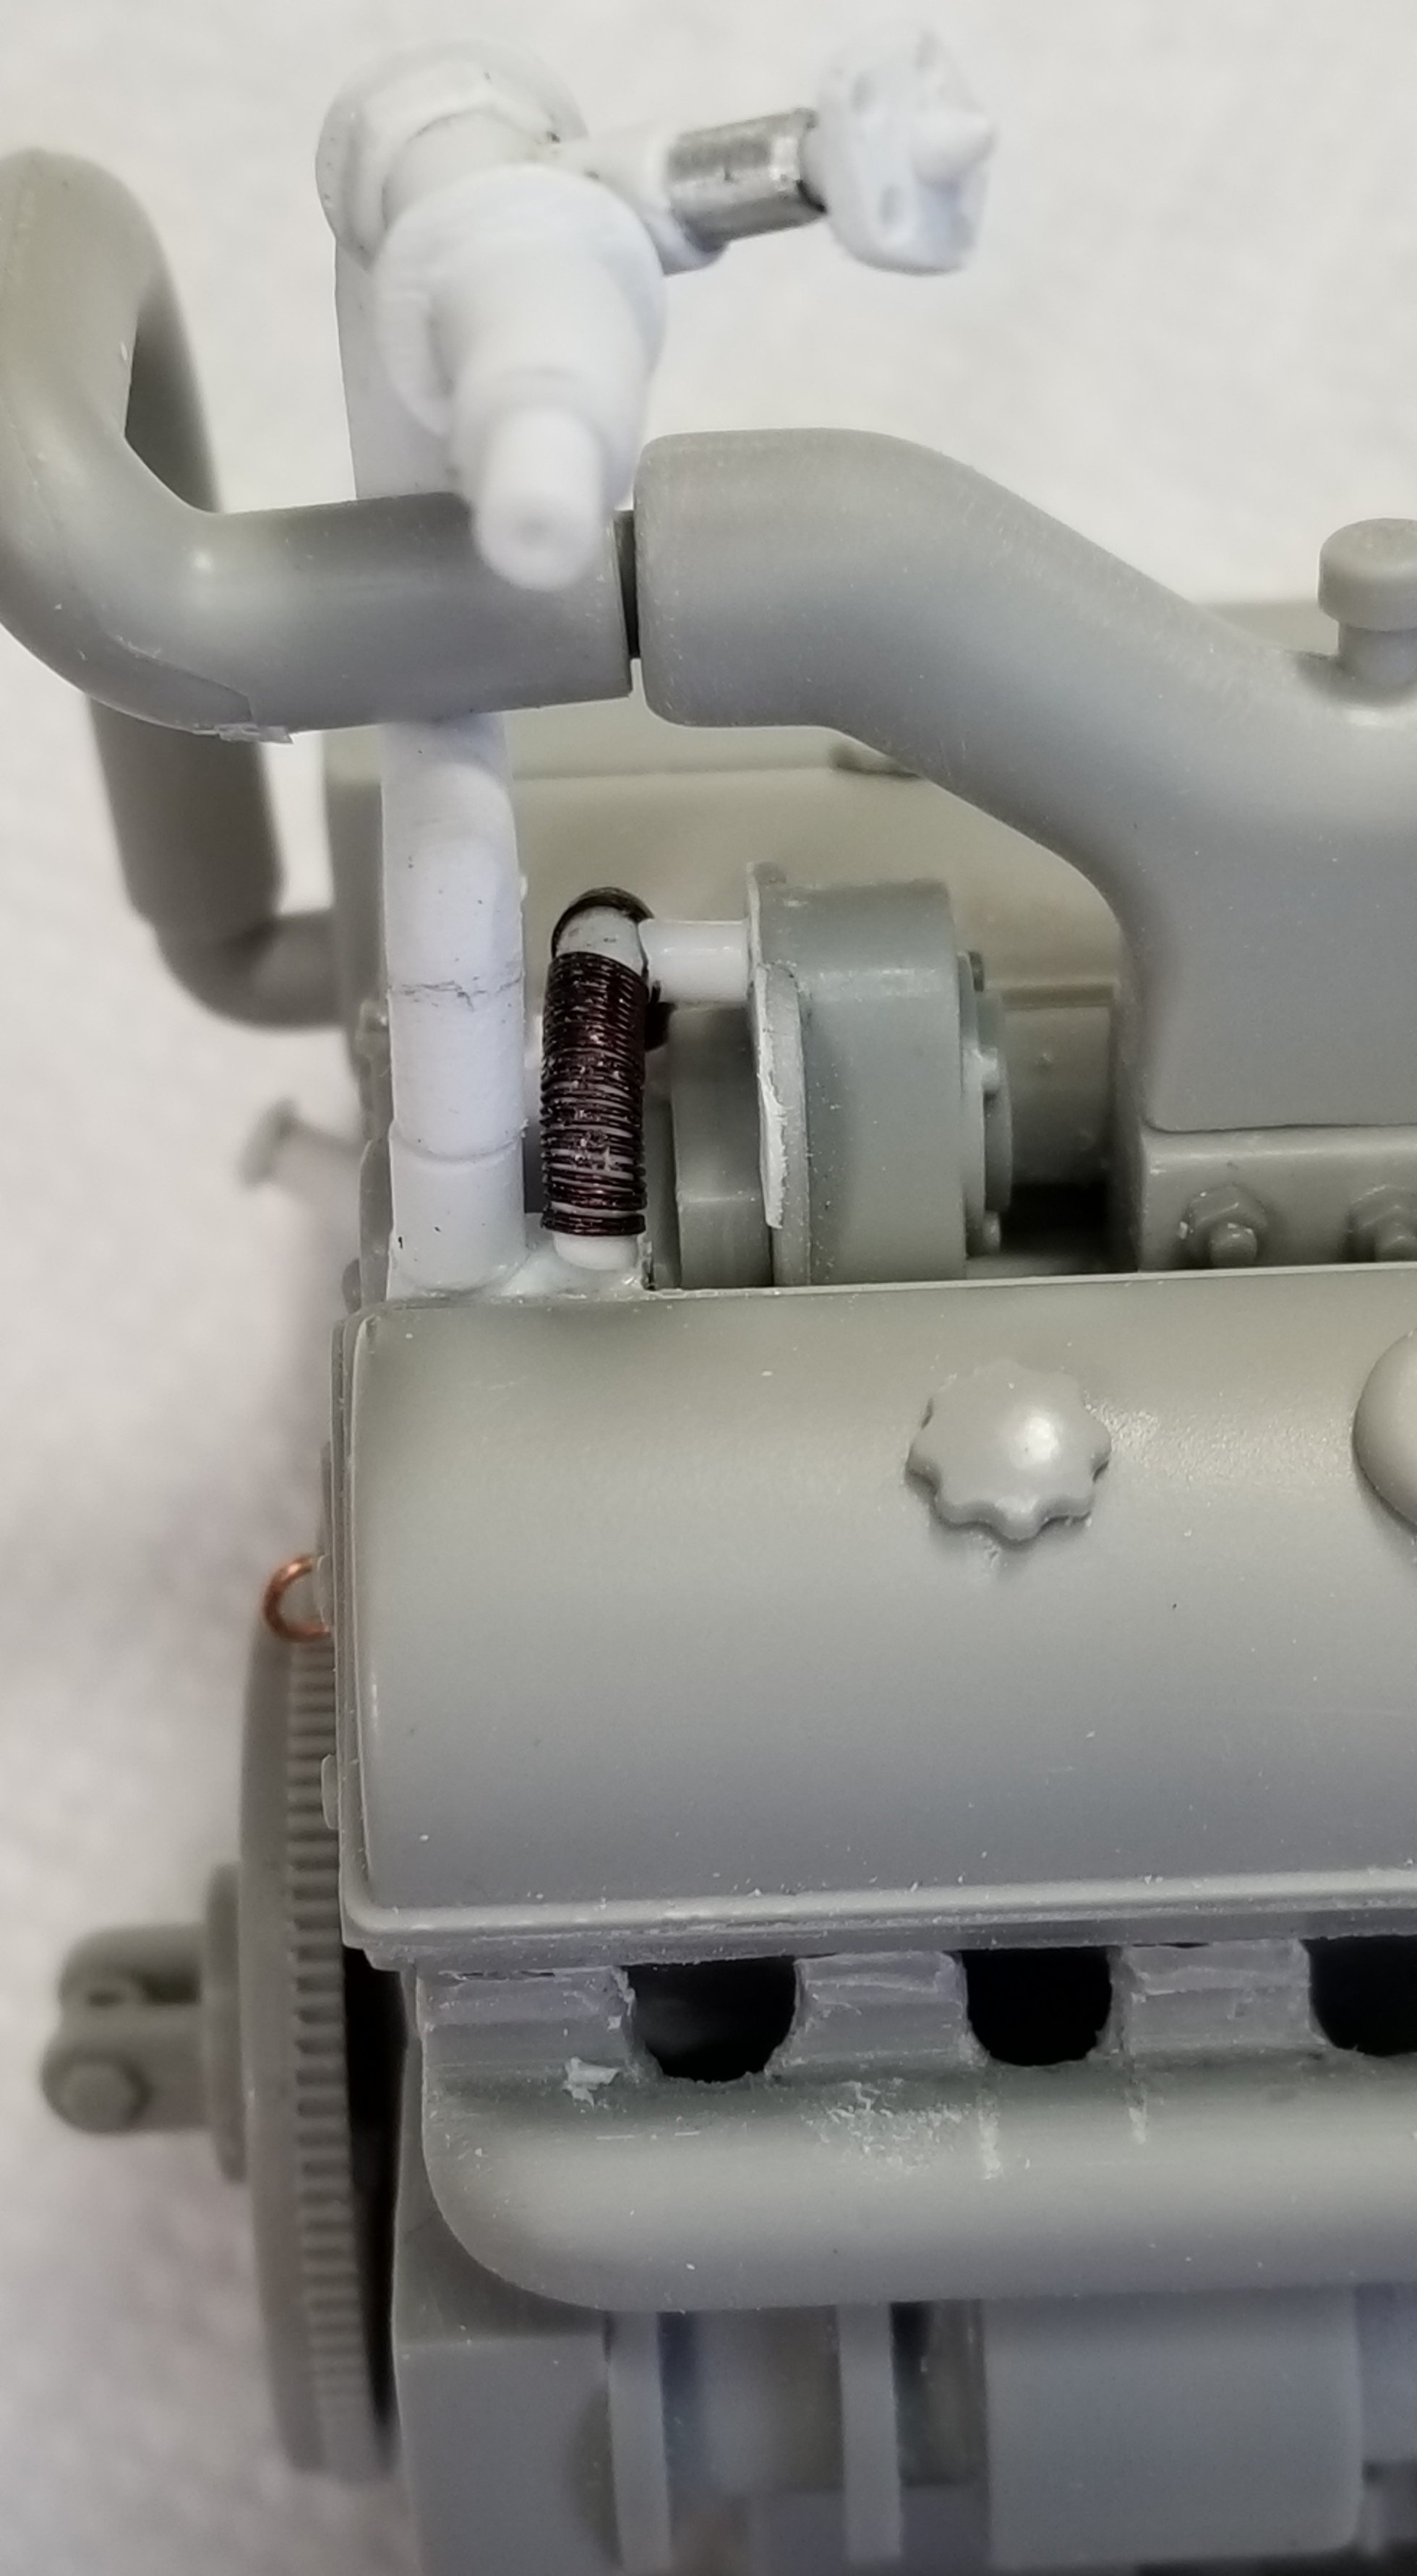
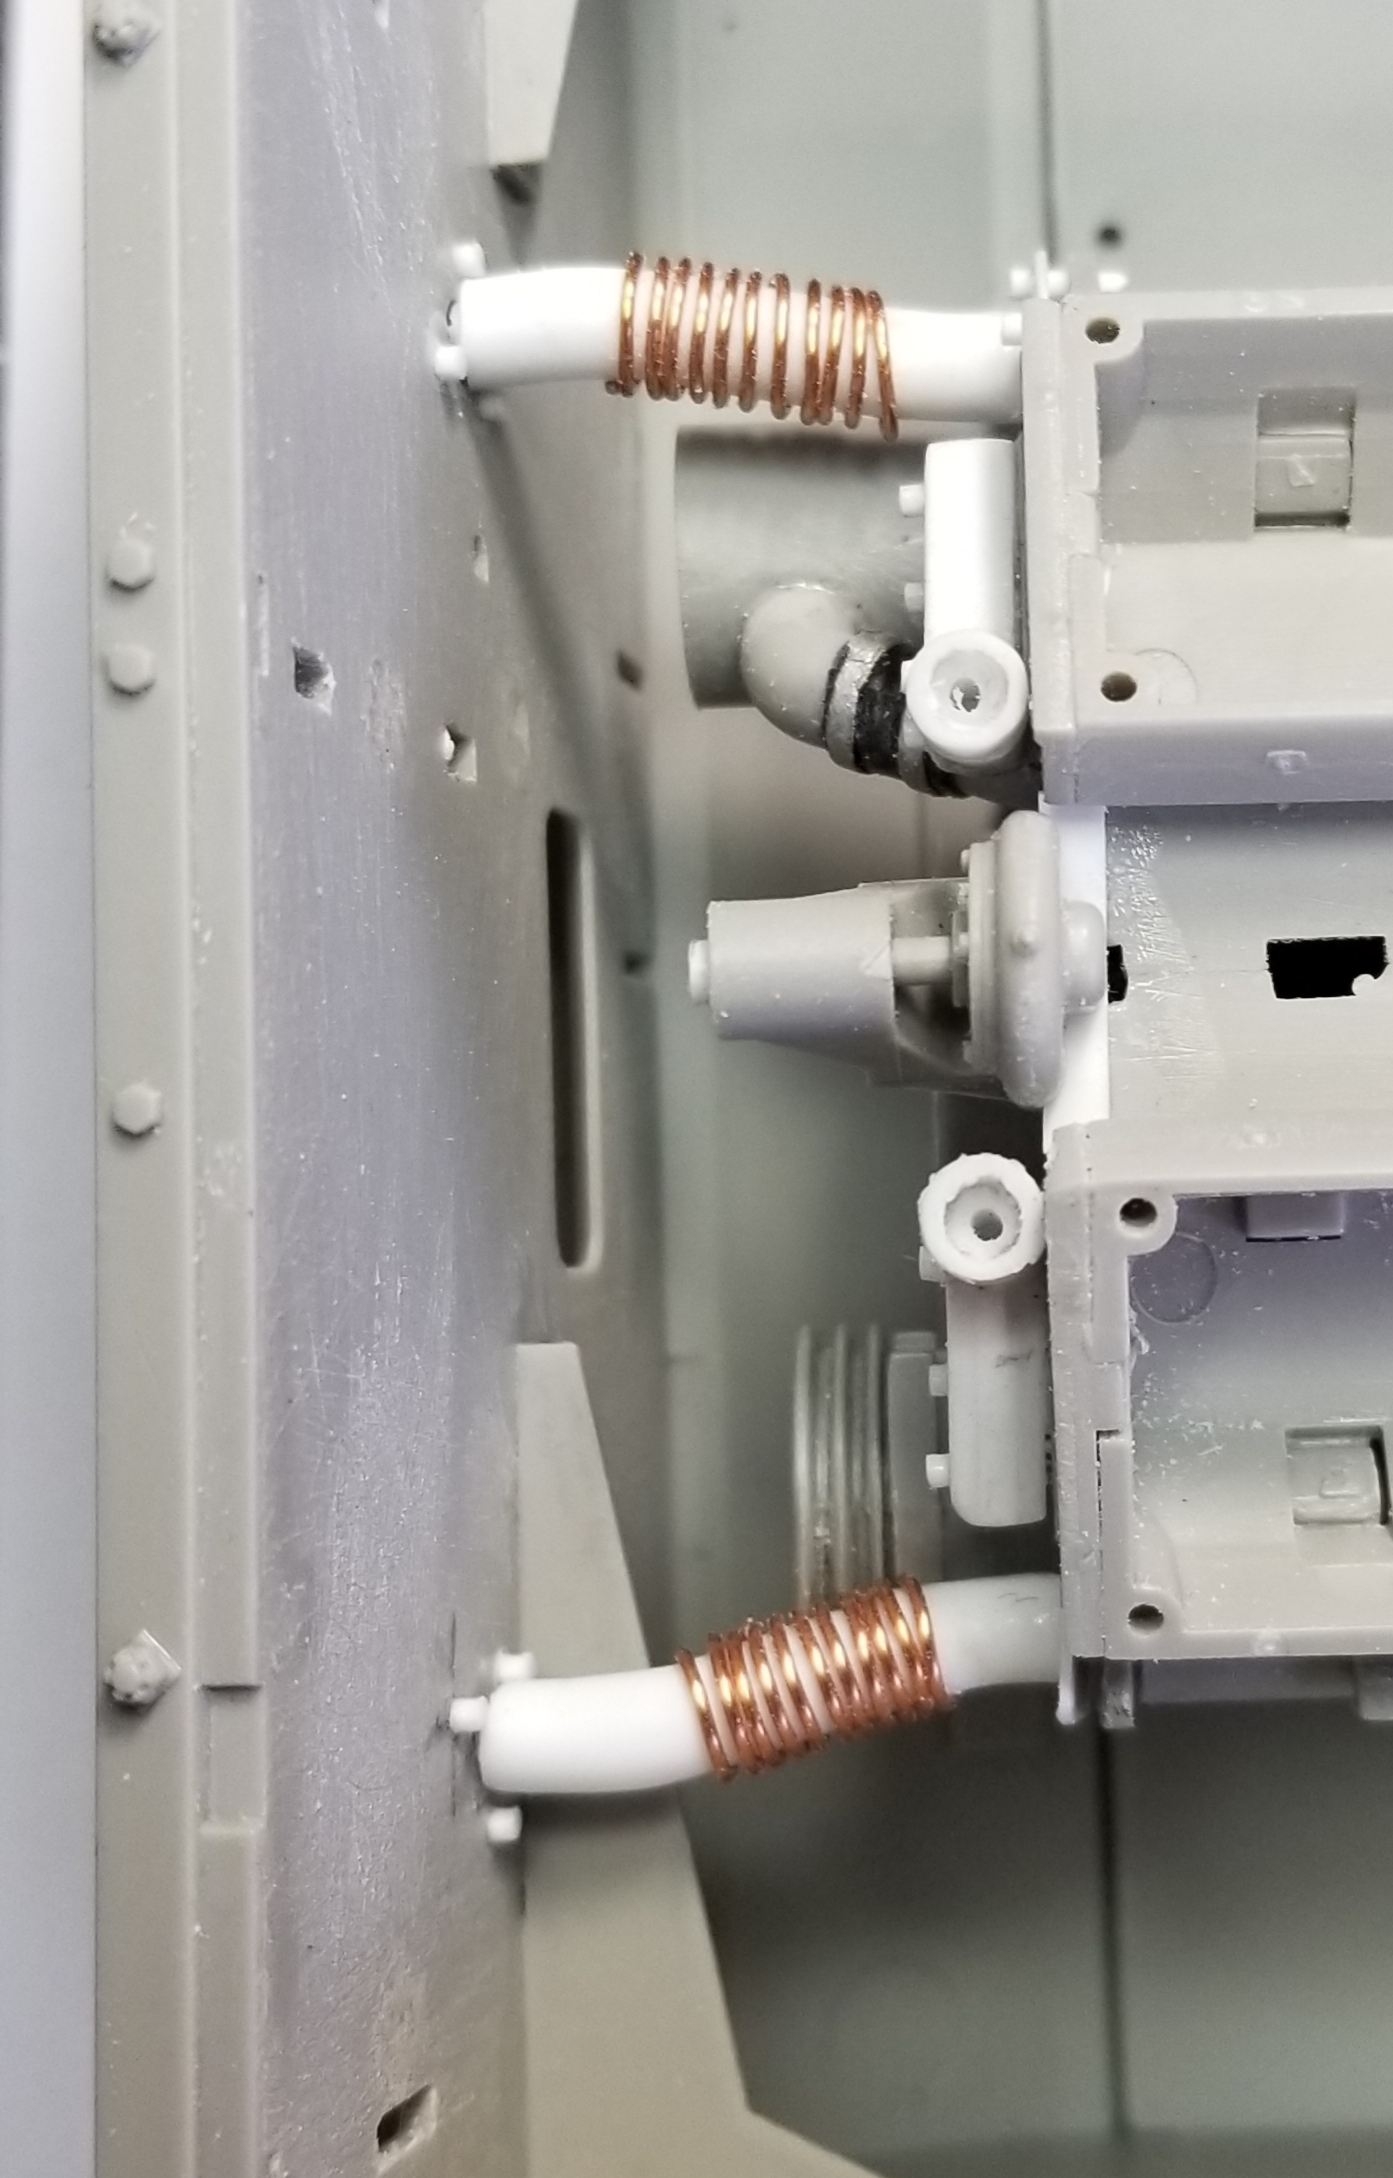
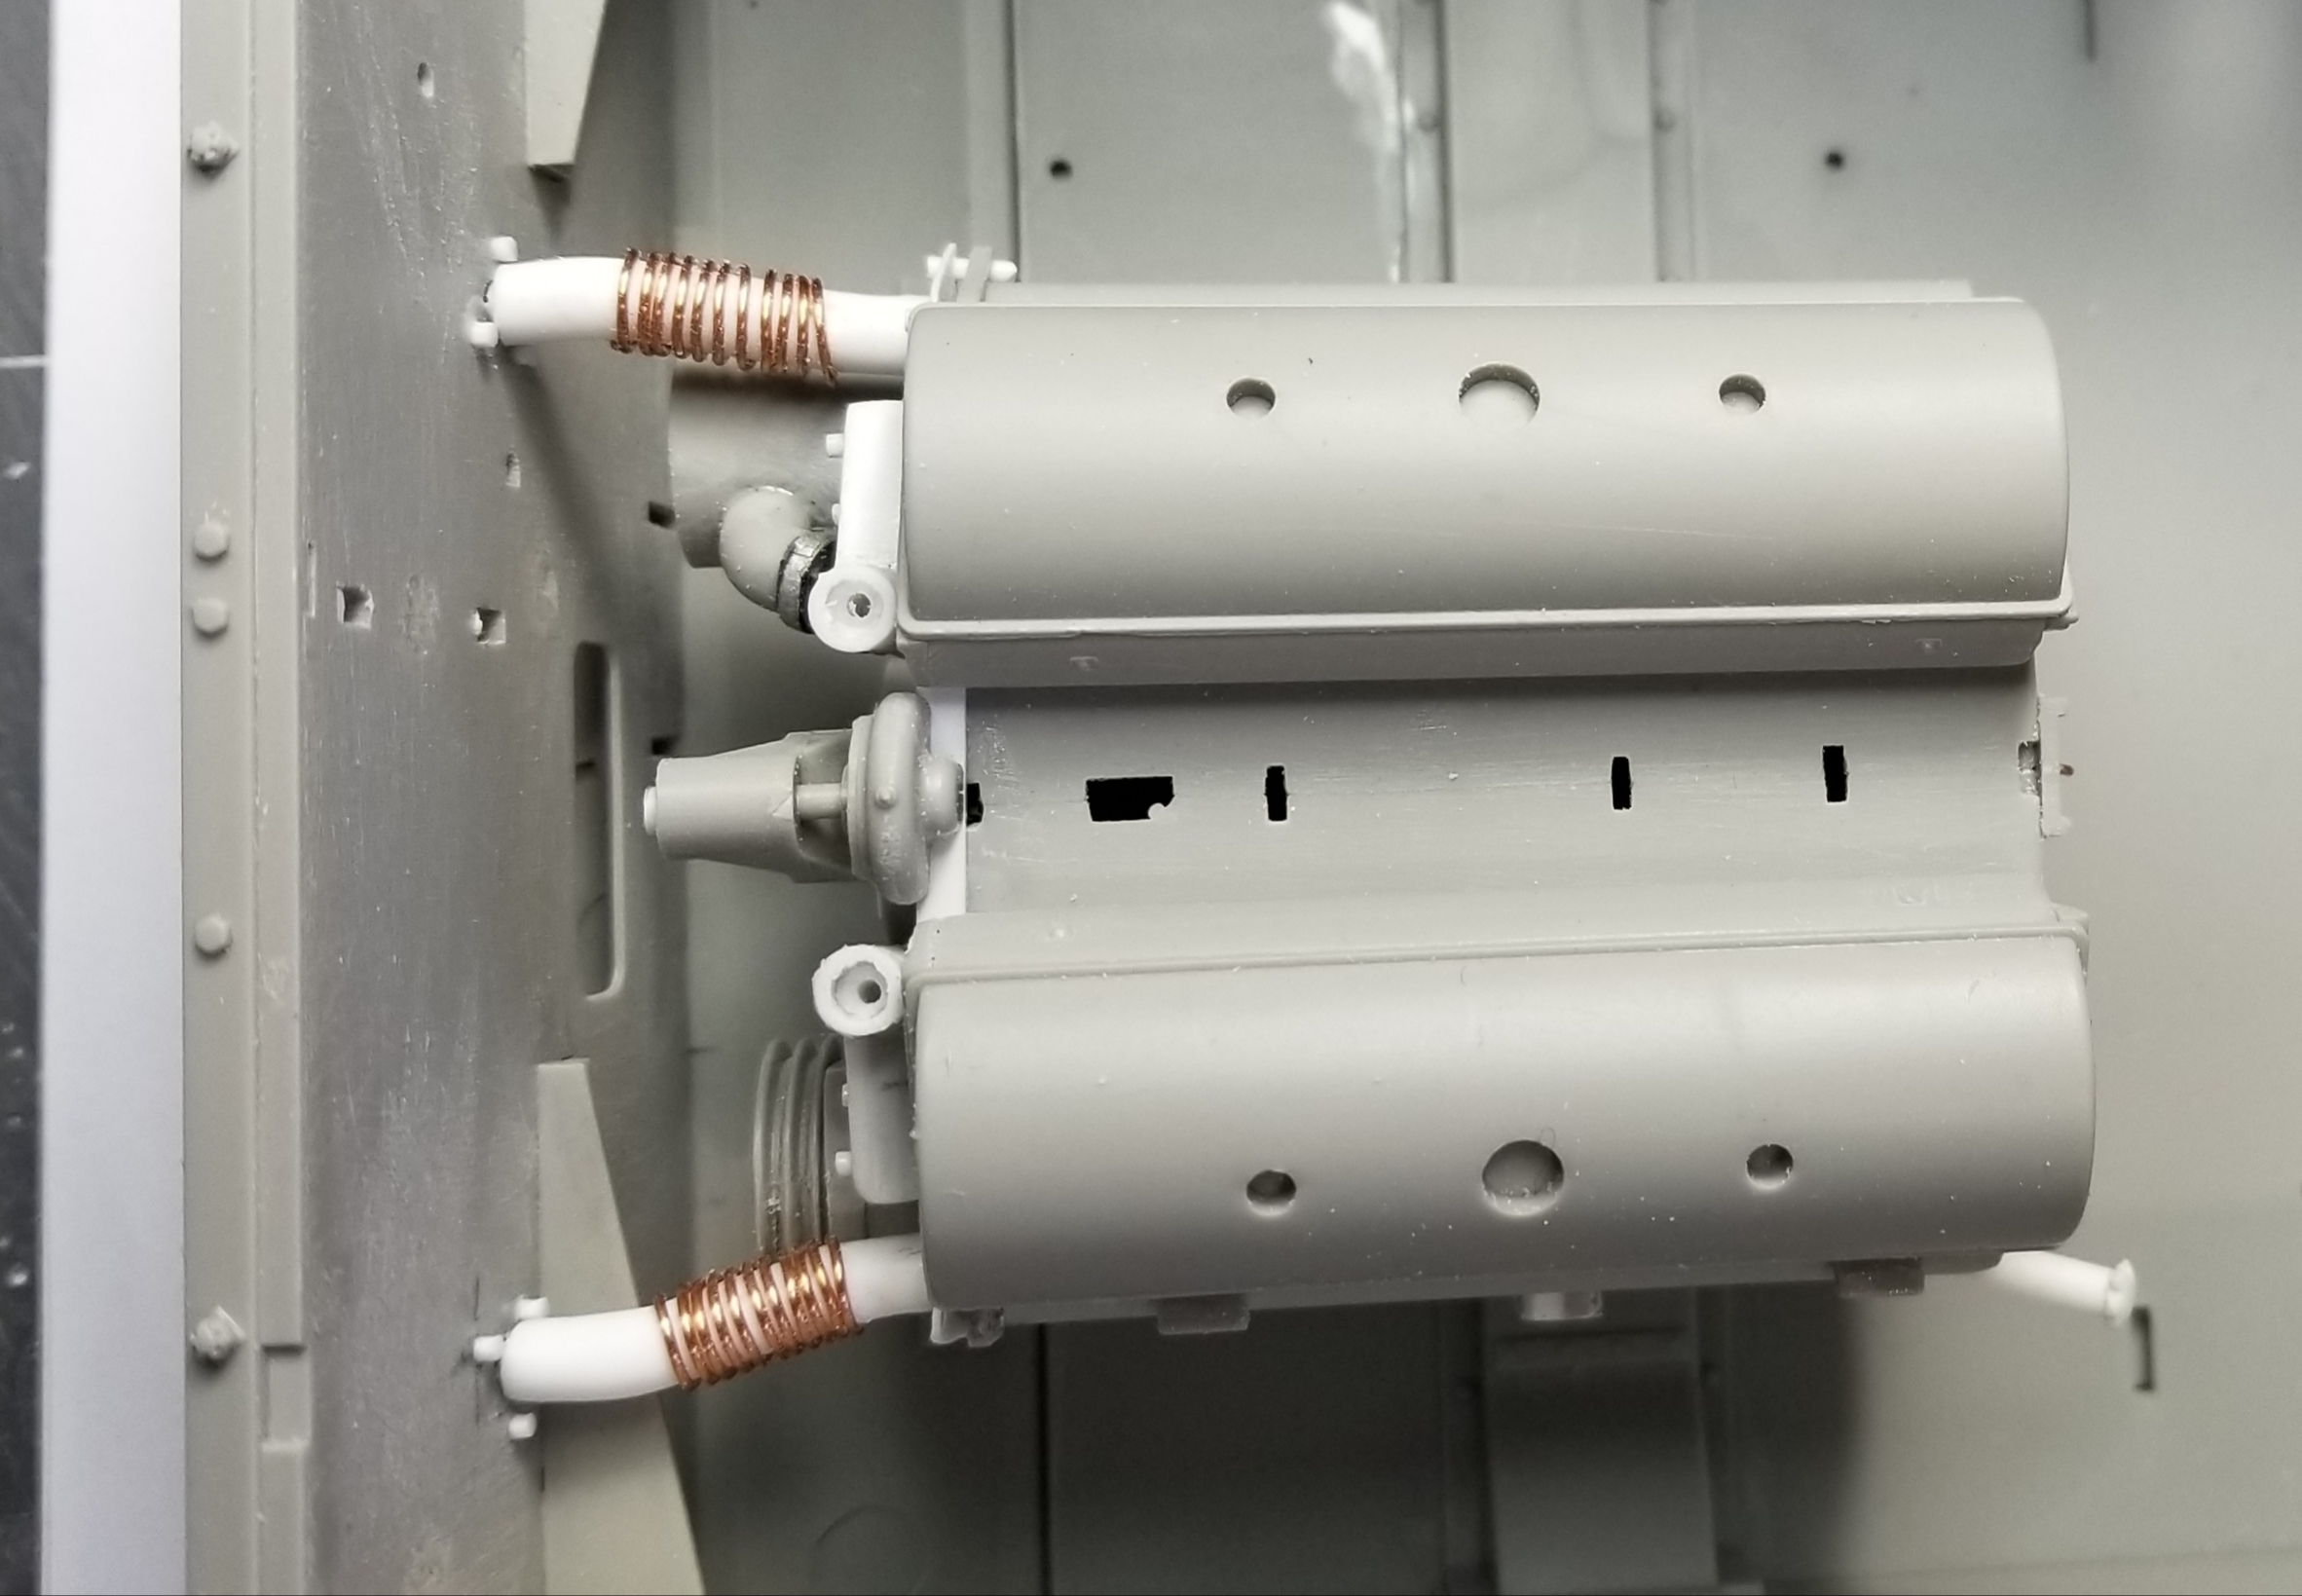
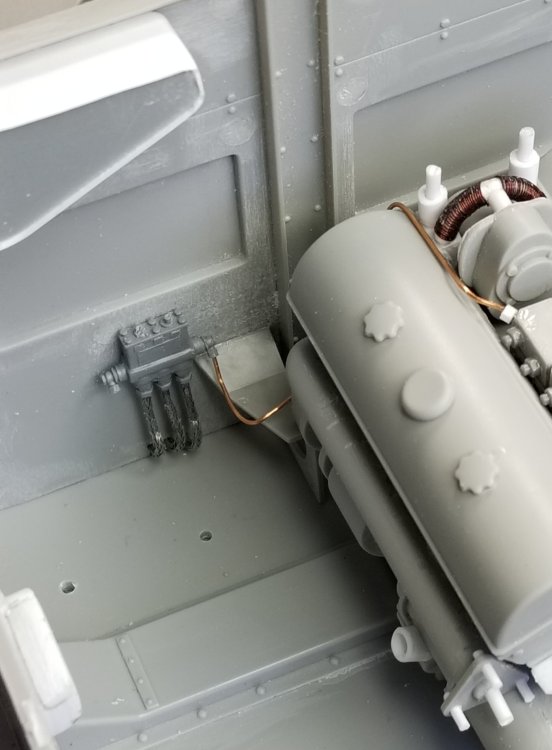
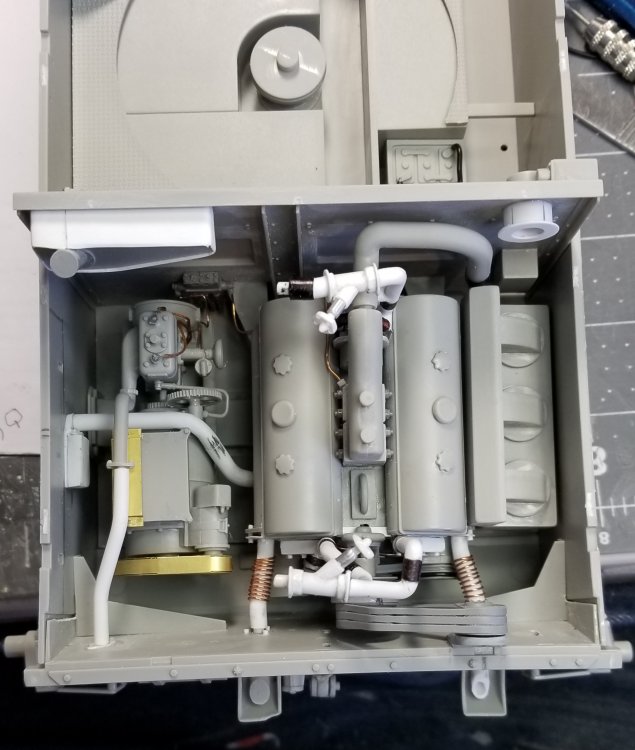
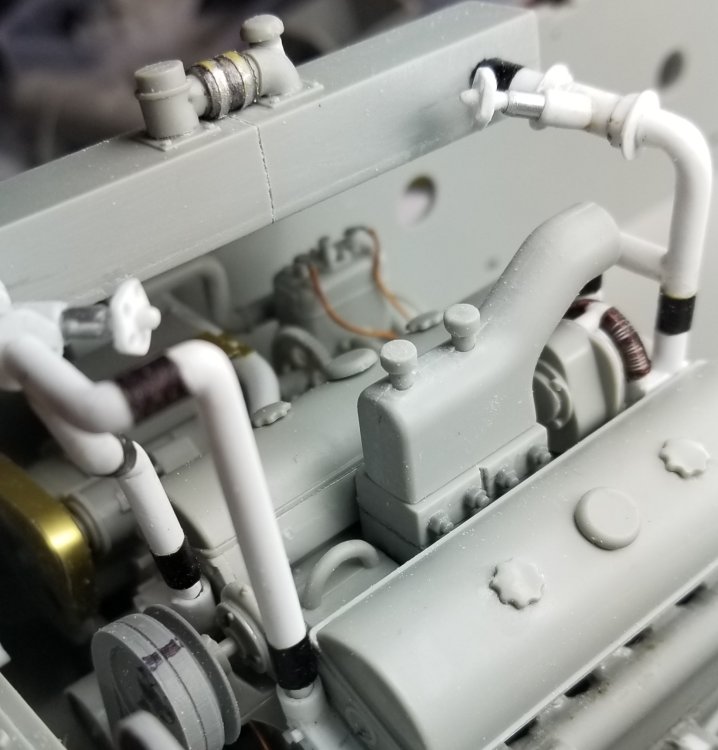
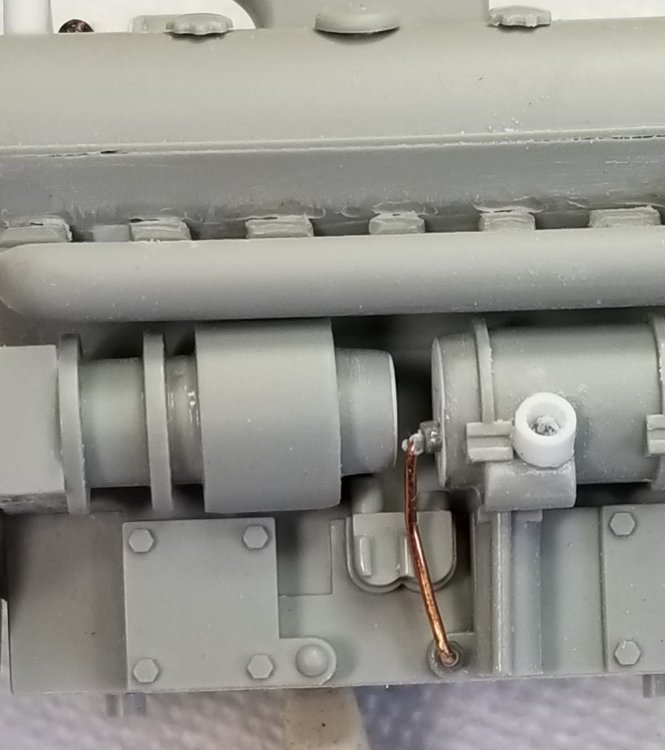
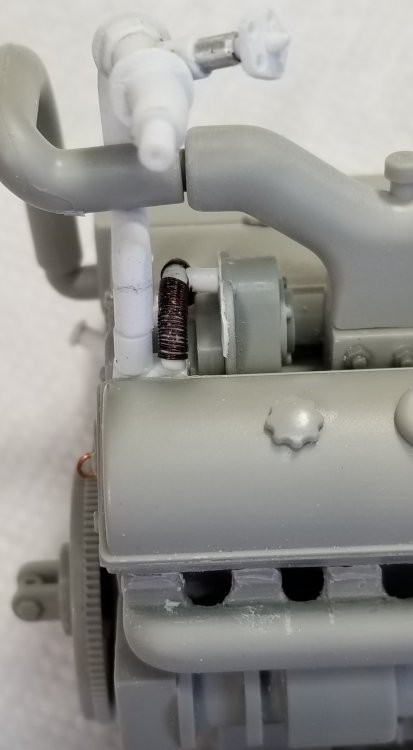
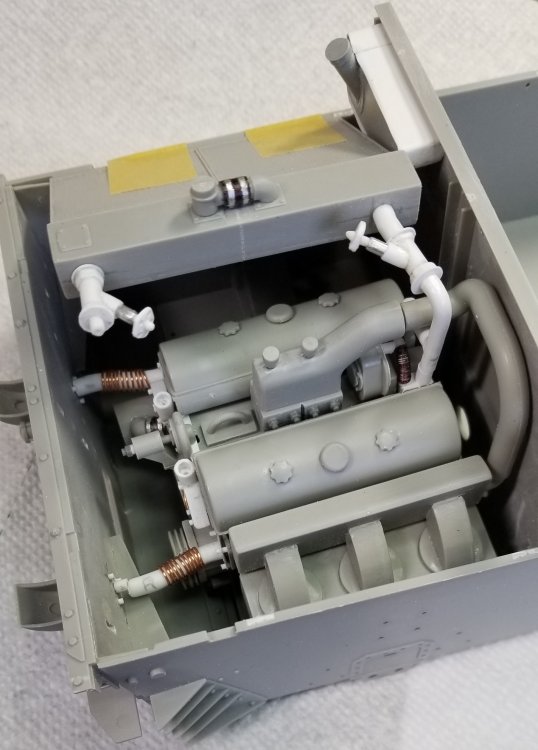
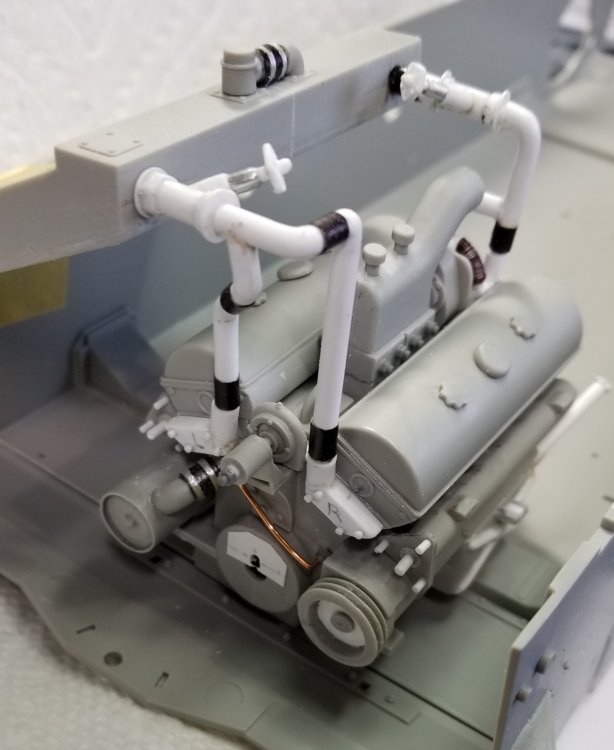
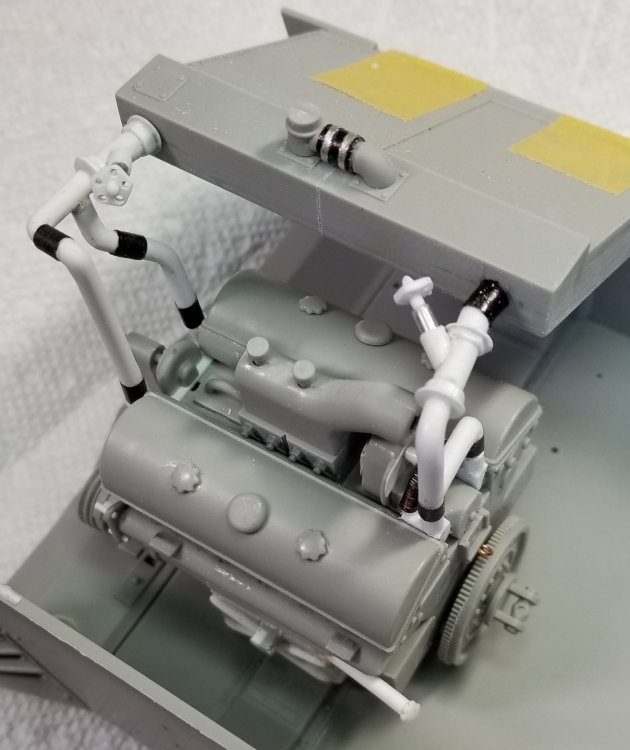
Did some more work on the engine and radiator hoses. So here are some pictures for you to look at. This view shows the two solex carburetors and the intake inlet on top of them. I added the nuts on the carbs, 4 on each side. This view shows the exhaust manifold that I modified to look more realistic. Below it on the left is the inertia starter. To the right of this is the oil cooler, this is connected to the radiator cooling system. This view shows the rear radiator plumbing to the left, it's the white pipe work. To the right you can see the exhaust pipes that go from the exhaust manifolds to the rear panel. Closer view of the radiator plumbing and the white pipe with the dark brown wire rapped around it is the ignition leads from the magneto (the grey part that it is attached to) these feed the spark plugs that are incorporated into the heads under a cover. Another view showing the rear radiator plumbing. This view shows the radiators, the engine with the exhaust pipes and the radiator plumbing. Another view of the same thing from a different angle. This view shows the rear plumbing and valve and the front valve. Same thing from a different angle. This view shows the front and rear plumbing and valves. The black areas are the rubber tubes that connect the pipes together. These will eventually have silver clamps. Same thing from a different angle. Well that's it for now be back with more updates soon. Please comment and let me know what you think. Ron G


-
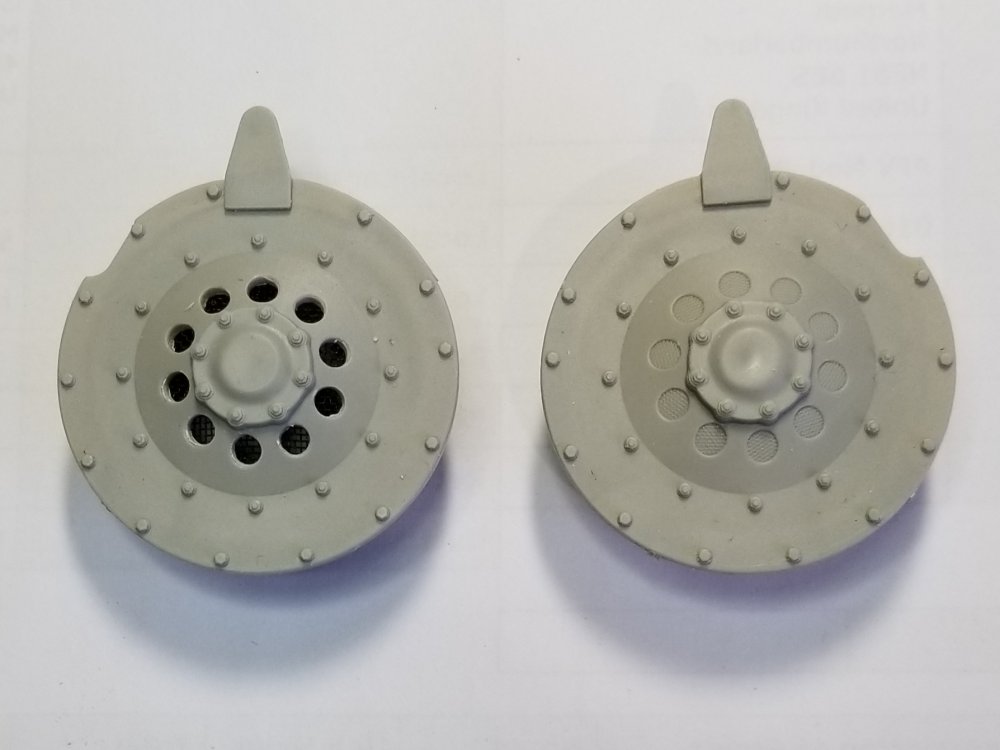
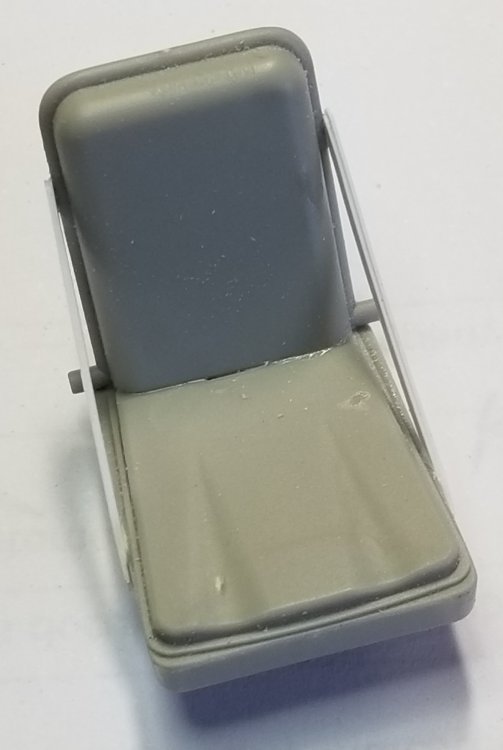
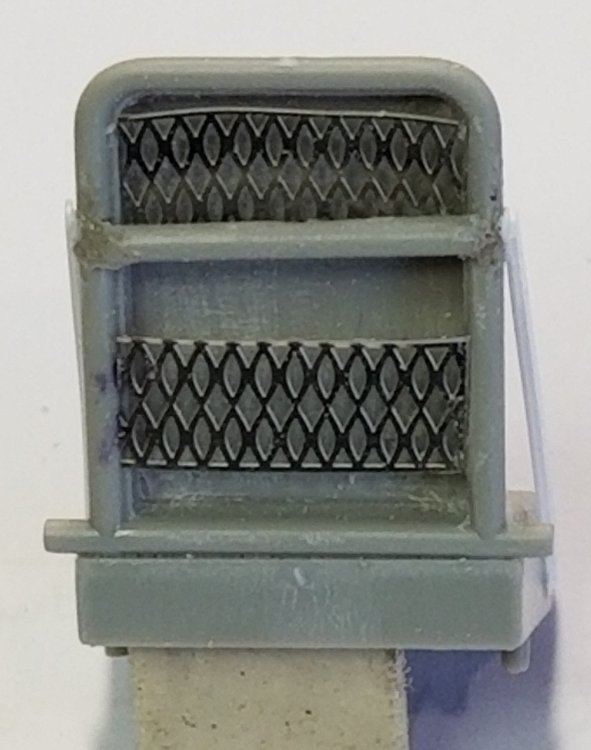
Hey all More work done on the engine and some other parts. I forgot to take pictures of the engine stuff, I'll post some tomorrow. This view shows the rear cover of the transmission housing. I drilled out the holes and added some screen to make it look more like the real thing. This view shows one of the steering brake housings. I drilled out the holes in these and added some screen to make them look more real. This view shows the steering housing on the right, the way it looks from the kit. The one on the left is the one I drilled out. This view shows the drivers seat that I added the two support straps on the sides. This is the rear of the seat that I added the seat springs to. This seat isn't as accurate as the one from AFV Modeller, but, I do want to do some scratch building on this kit...lol. I'll be back tomorrow with more pictures. Ron G


-
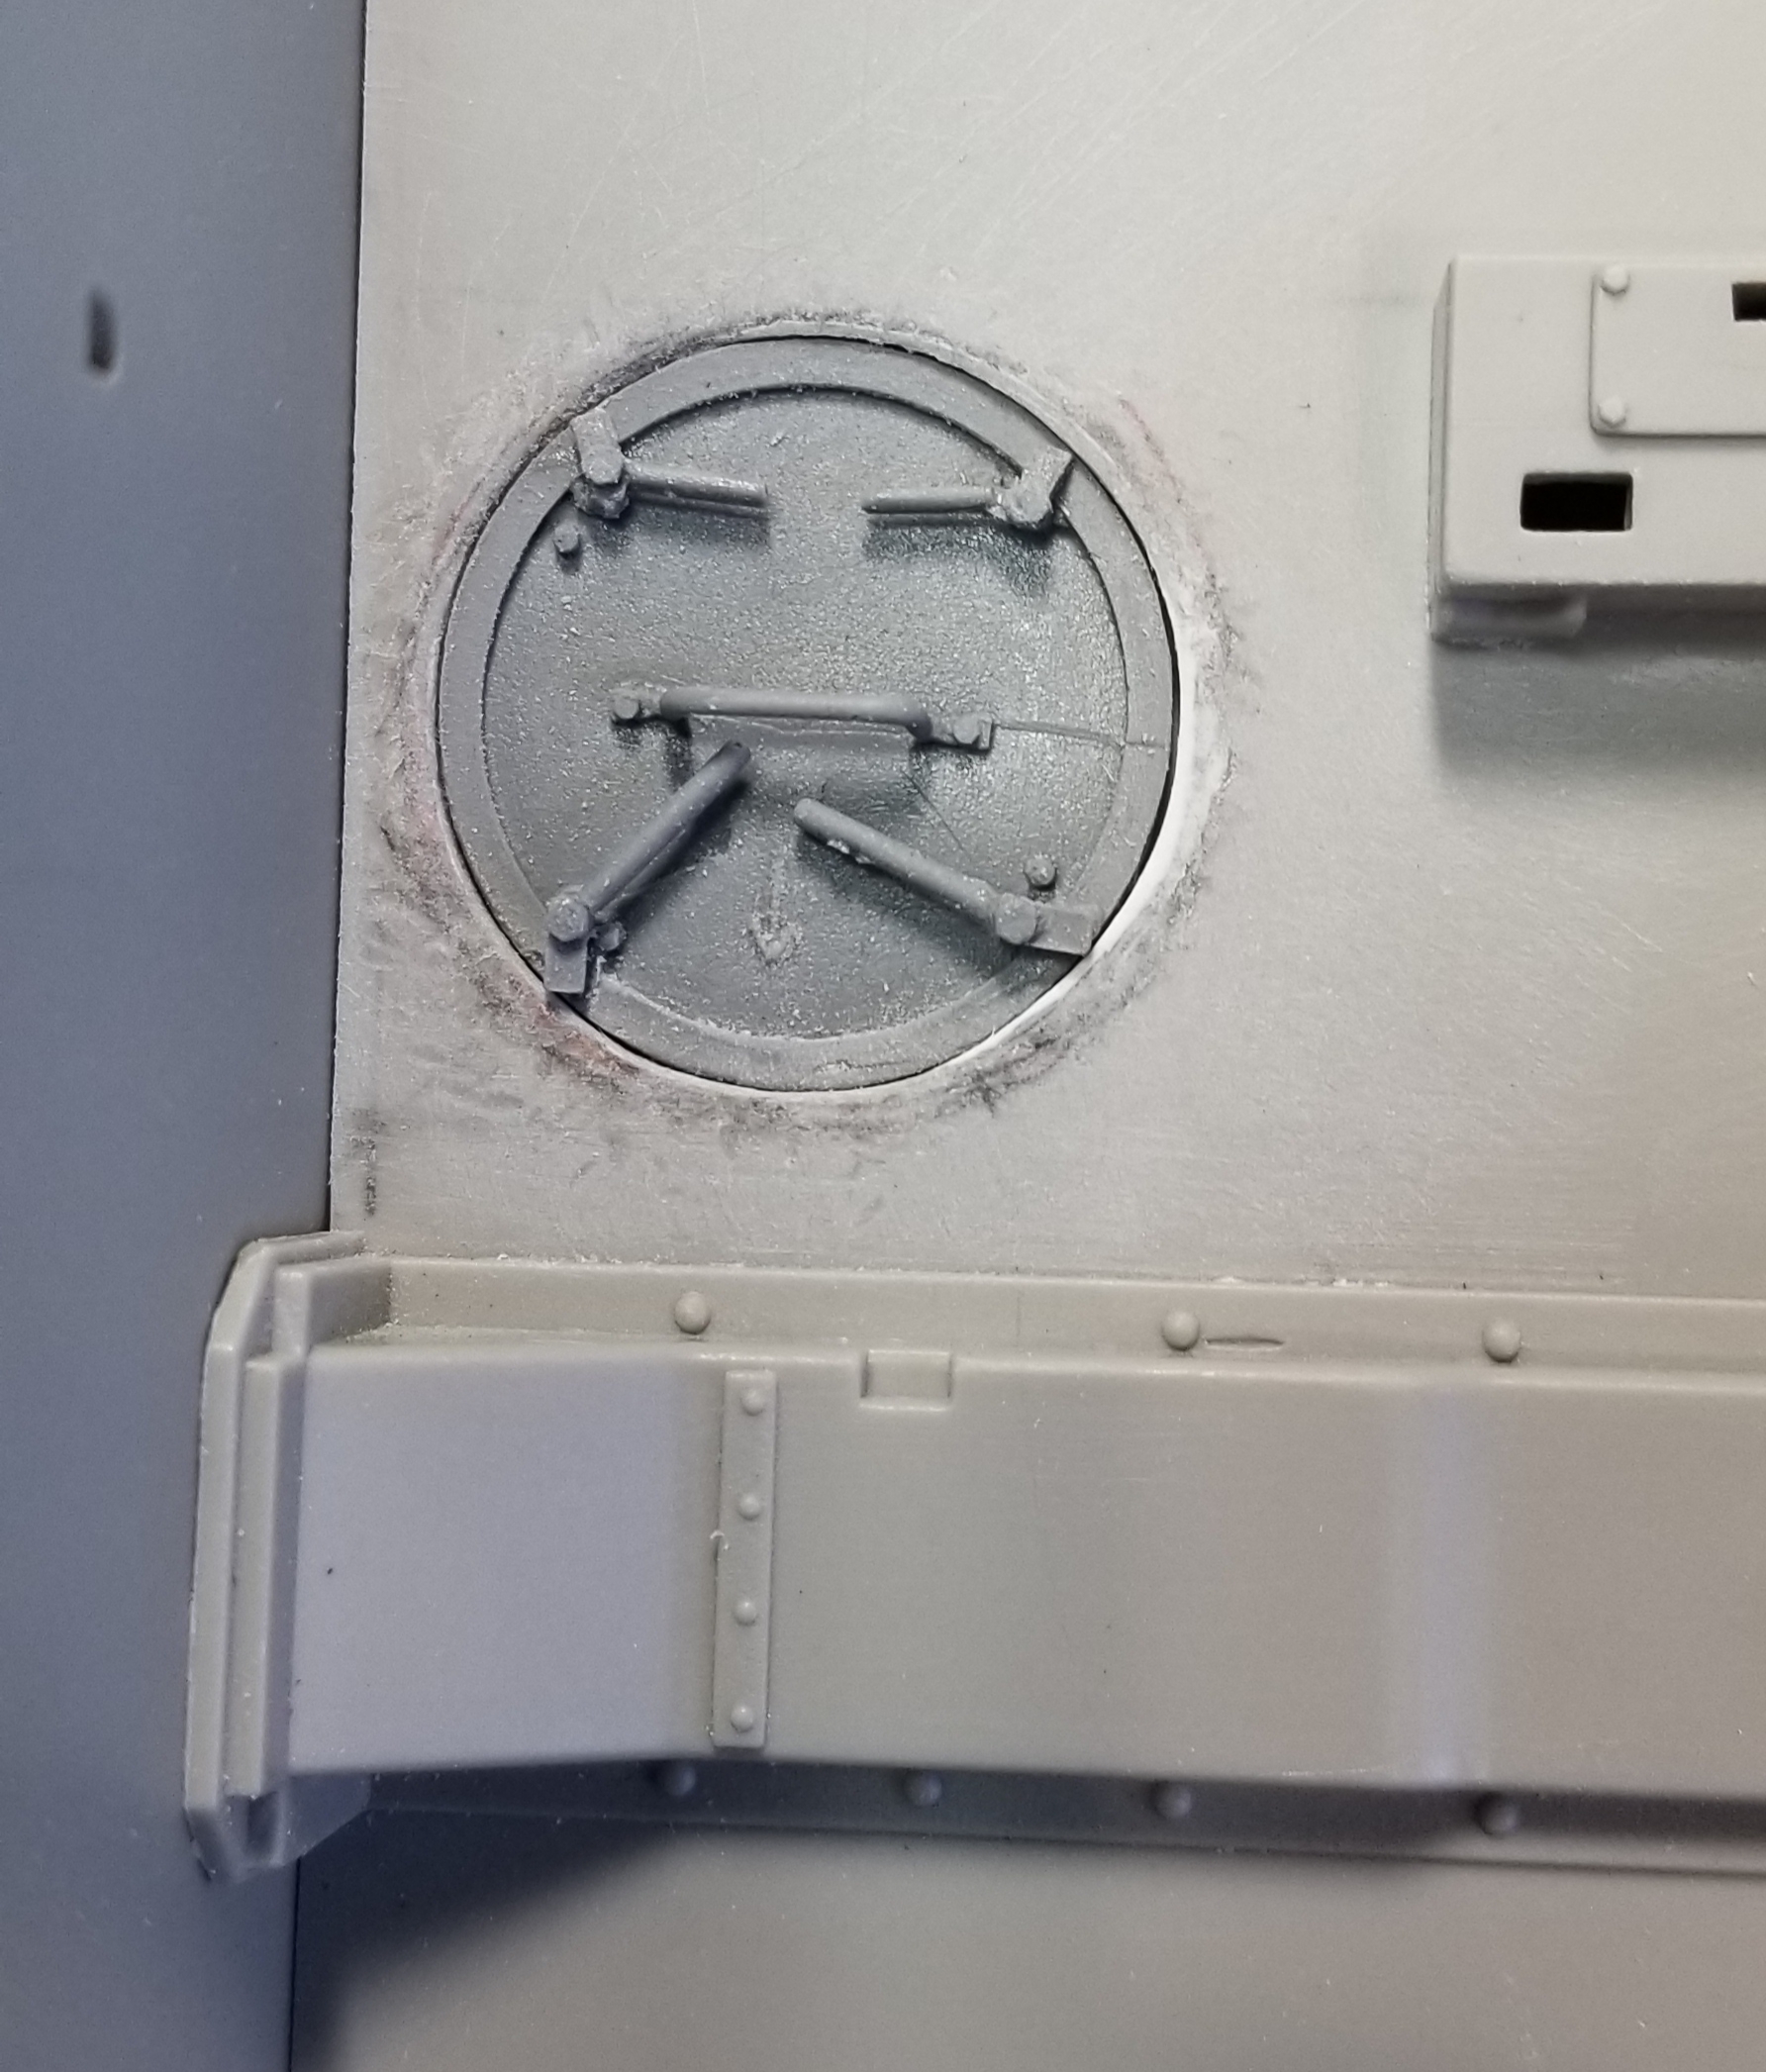
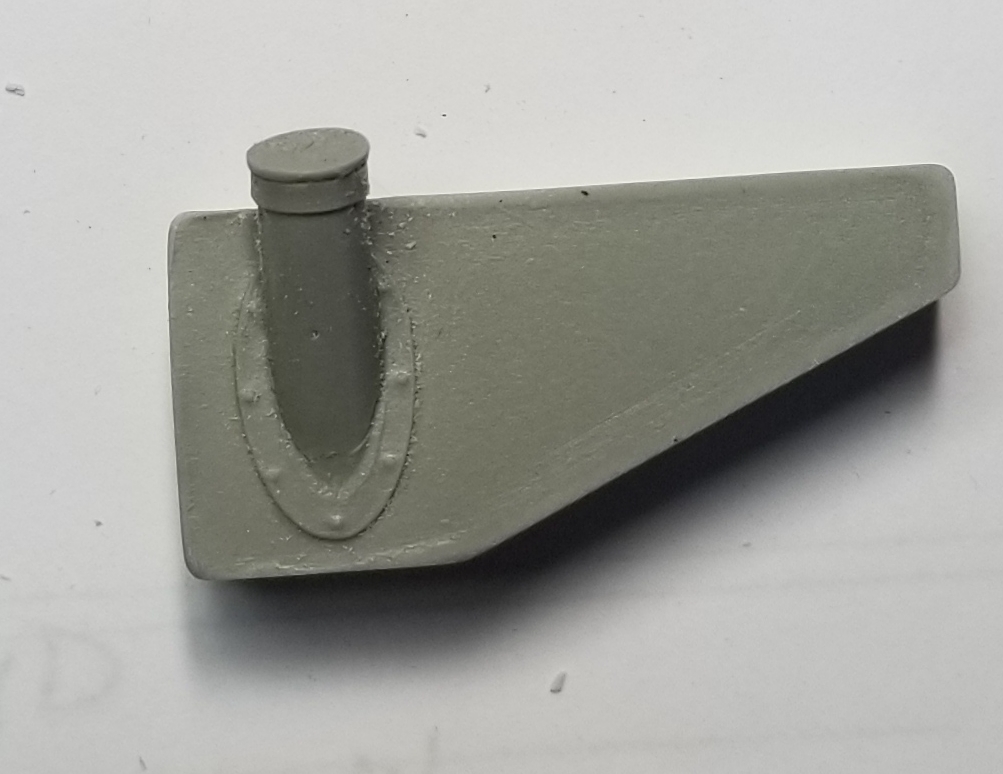
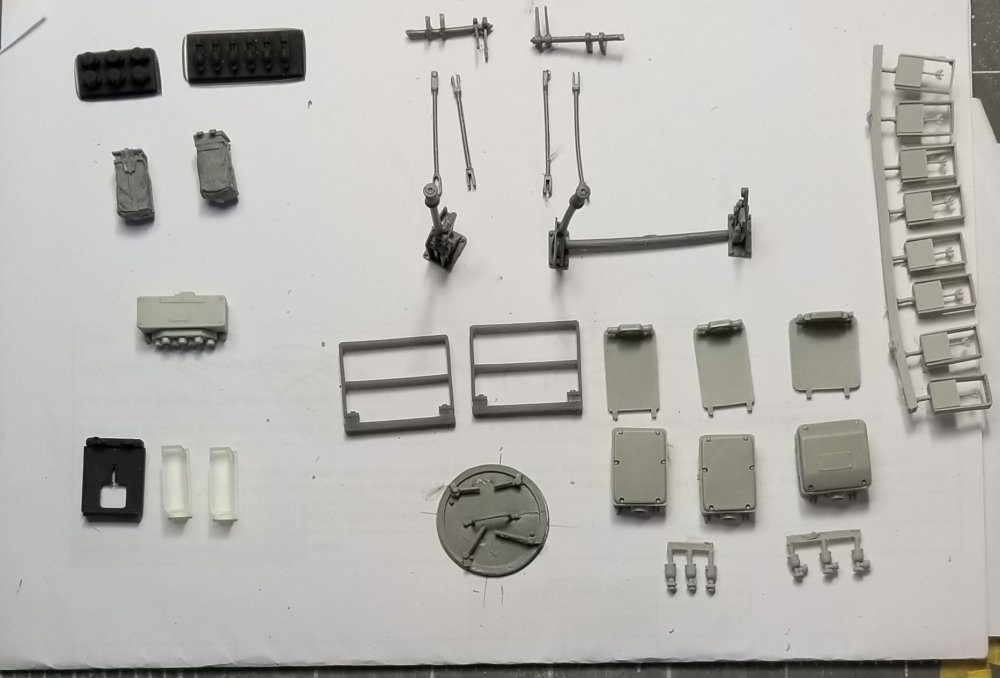
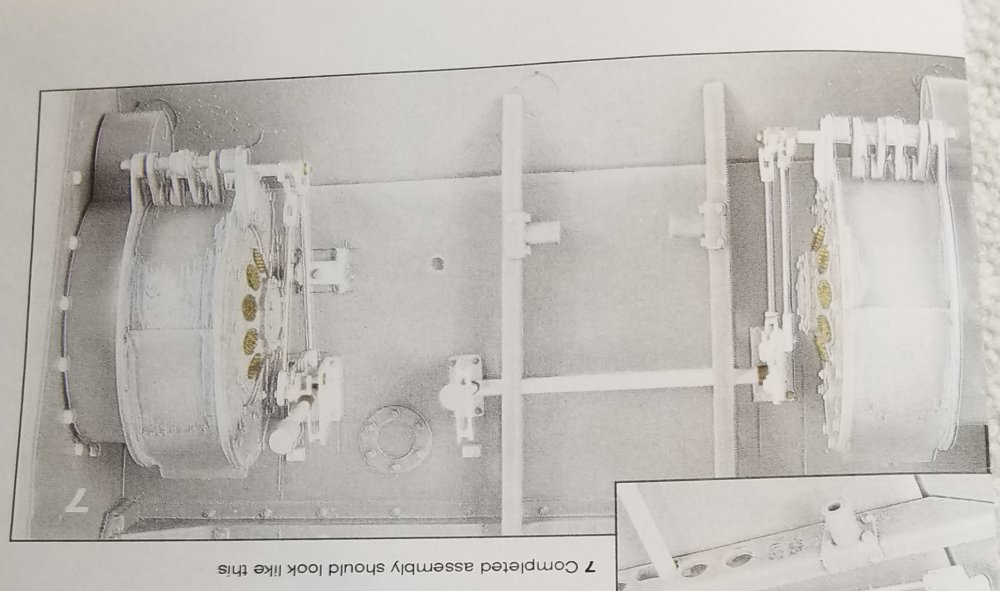
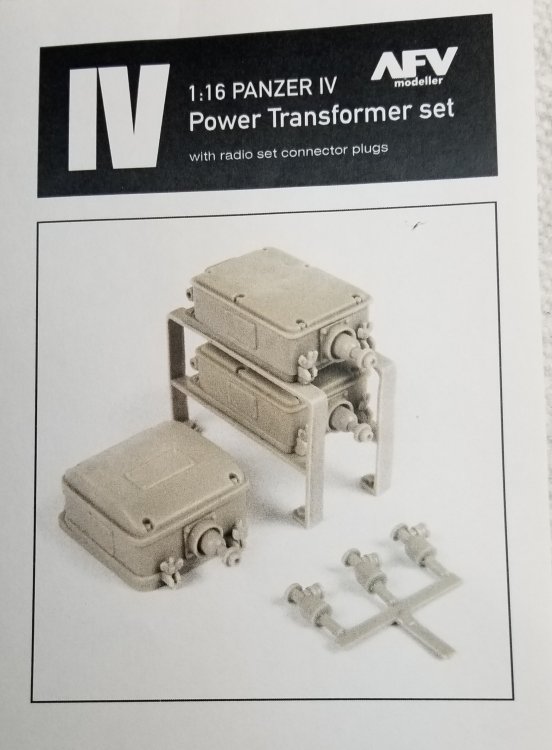
Hey all Some more work done on the engine. Also, some more stuff from AFV Modeller came today (shhuuu! don't tell the wife, I like my genitals right were they came from the factory...lol)So here are some pictures for you to look at. This view shows the exhaust pipes I made from evergreen plastic tube. Another thing that Trumpeter forgot to put in this kit. Another view showing the exhaust pipes, also the nuts I added around the area where they go through the rear wall. This view shows the hole I cut out of the floor and the escape hatch from AFV. These are the parts that came from AFV. Starting in the upper left are some interior light fixtures and switch terminal boxes, then moving right are the control levers and linkages for the front steering brakes, back to the left are ammo pouches closed (there are 32 of these) below them is the z-18 box, and below that is the spare vison blocks with mounting bracket for the drivers area. To the right is the escape hatch, the rest is the power transformer for the radios. The 8 grey brackets on the right I'm not sure what they are for. This view shows the fuel tank for the auxiliary engine. This picture shows how the steering mechanism goes together. This picture shows how the transformer goes together. That's it for now be back with more soon. Ron G


-
Thanks guys
-
Thanks Irish The belts are 3D printed and are from AFV Modeller, made by David Parker. I only made the one that goes from the crank pulley to the alternator pulley. Ron G