CrankyCrafstman
-
Posts
1,350 -
Joined
-
Last visited
Content Type
Profiles
Forums
Events
Gallery
Everything posted by CrankyCrafstman
-
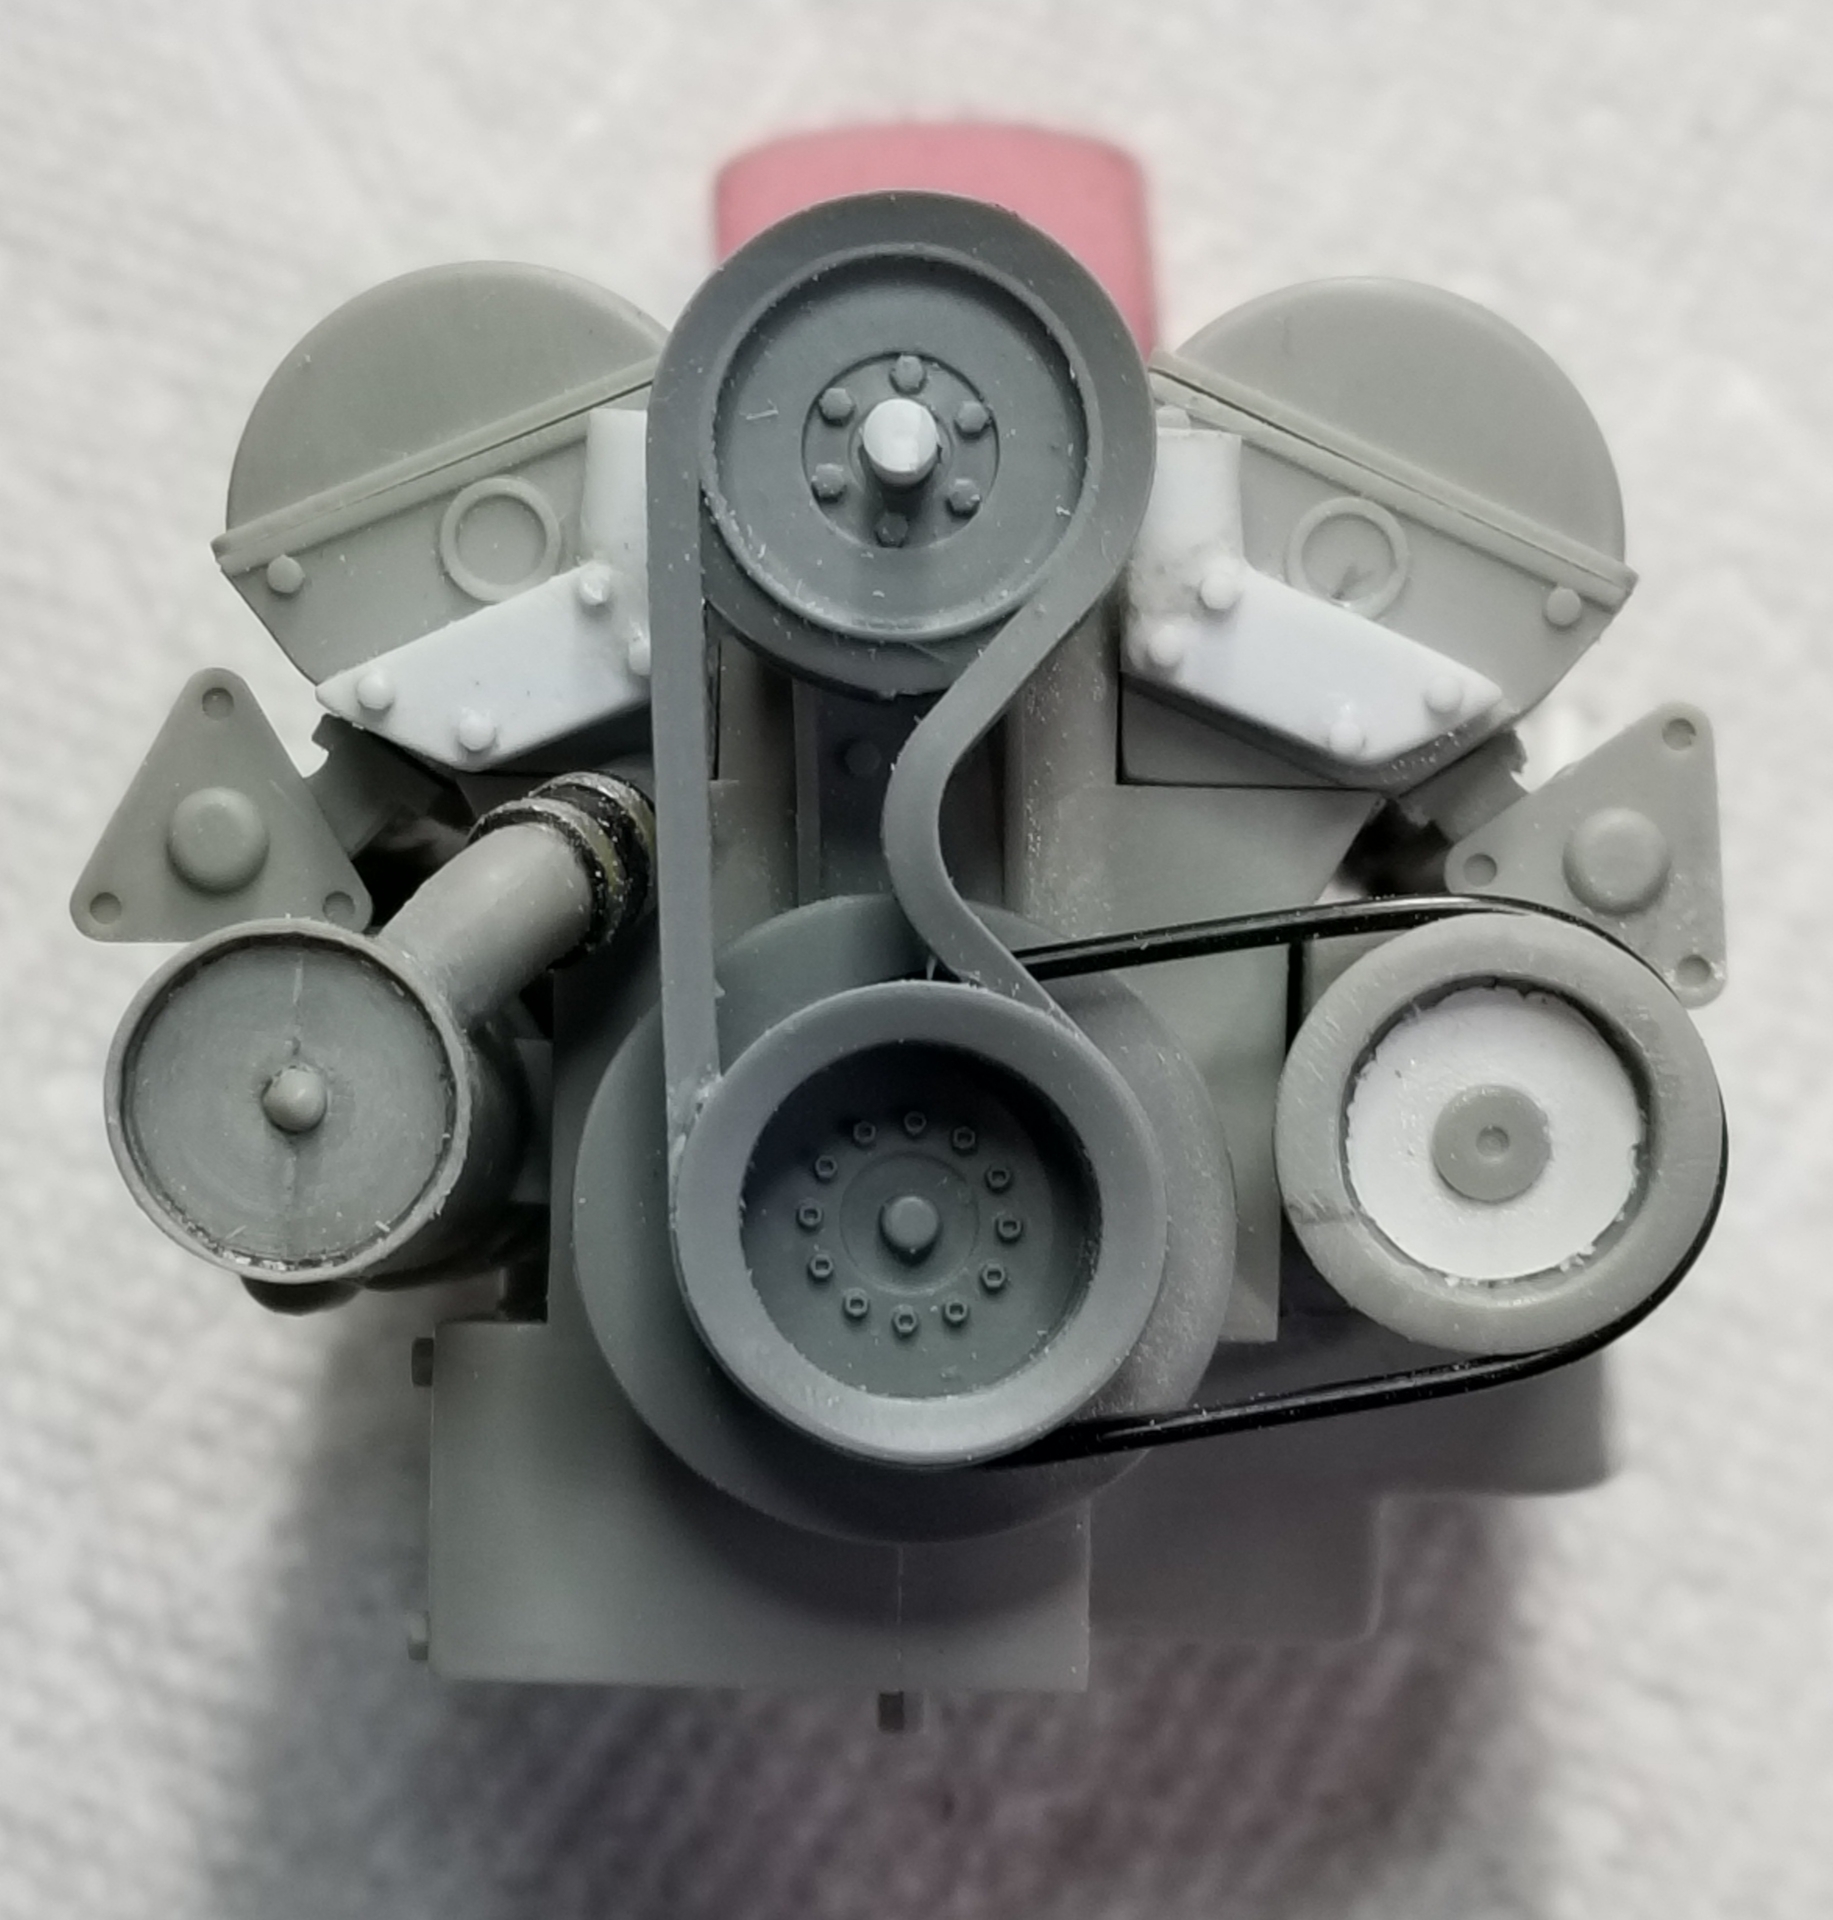
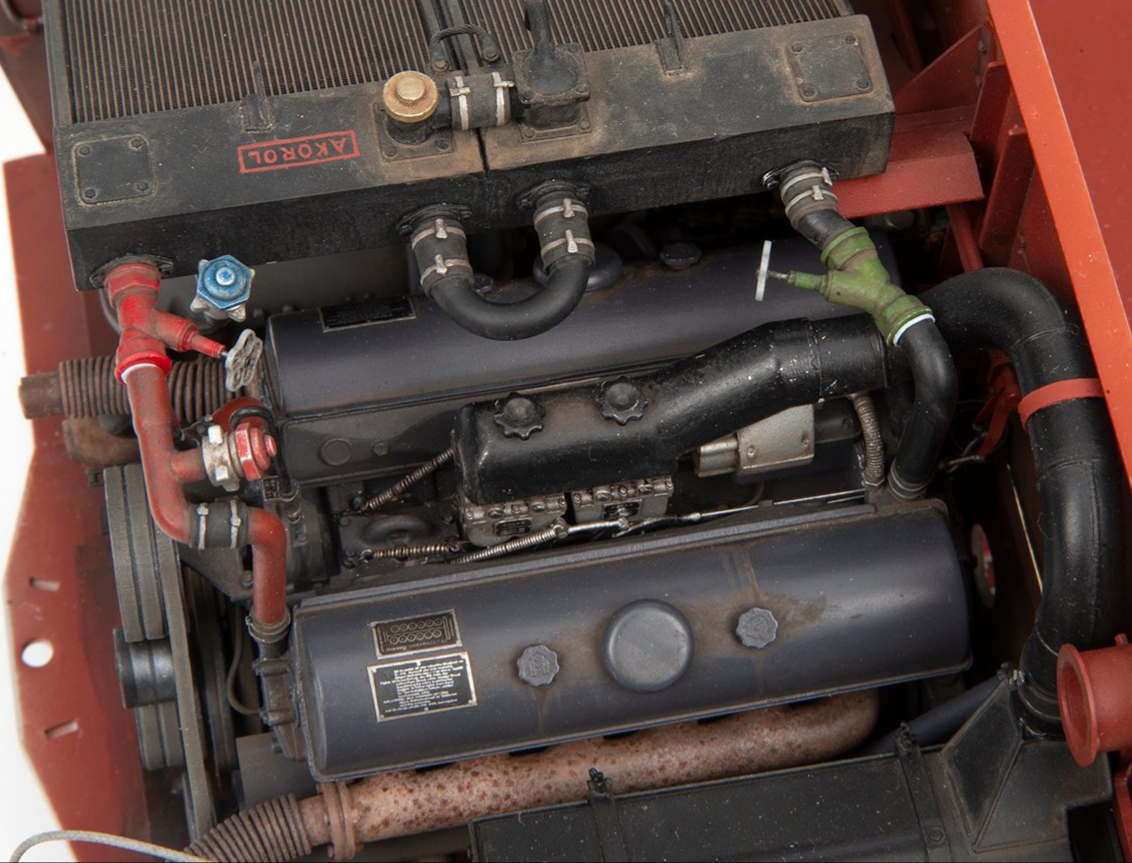
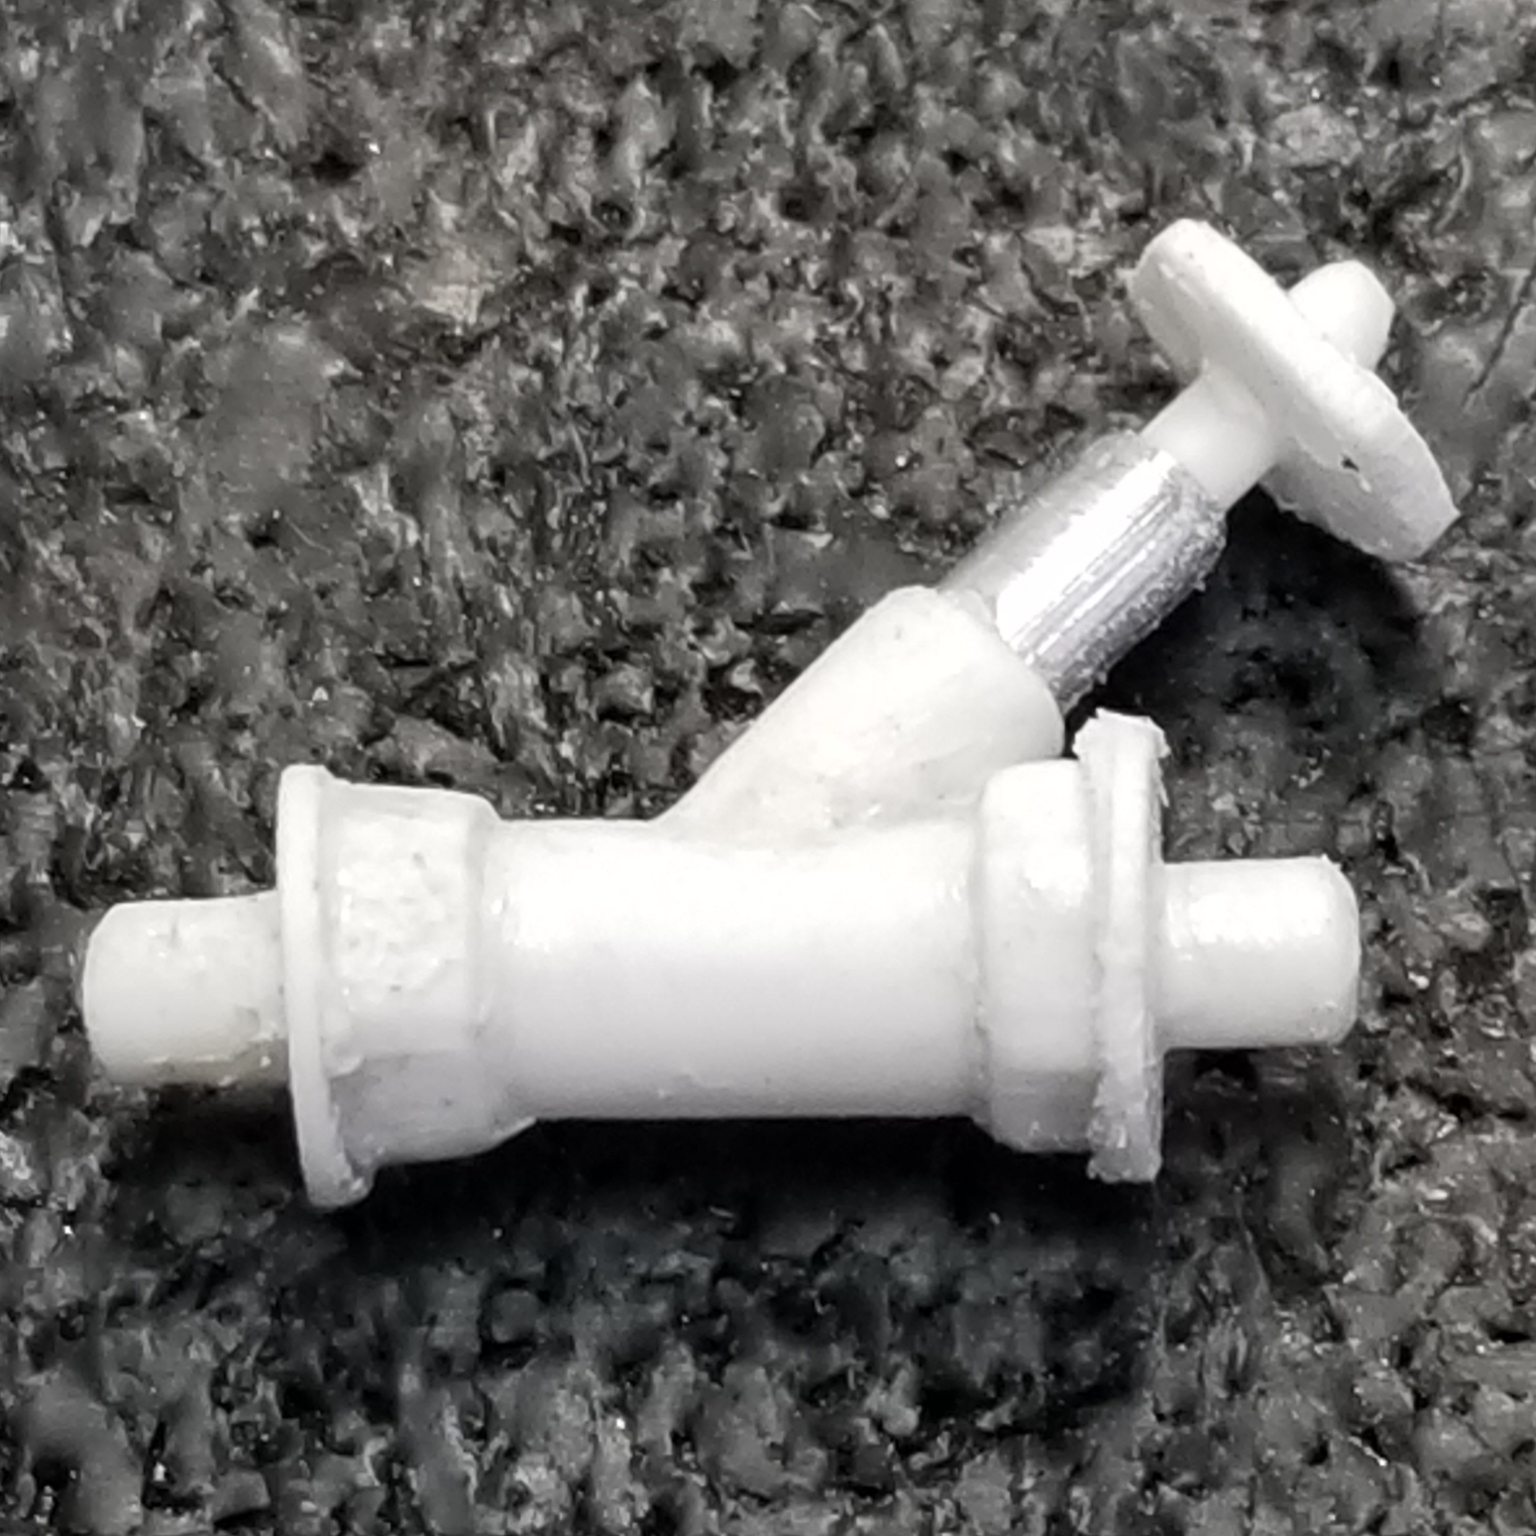
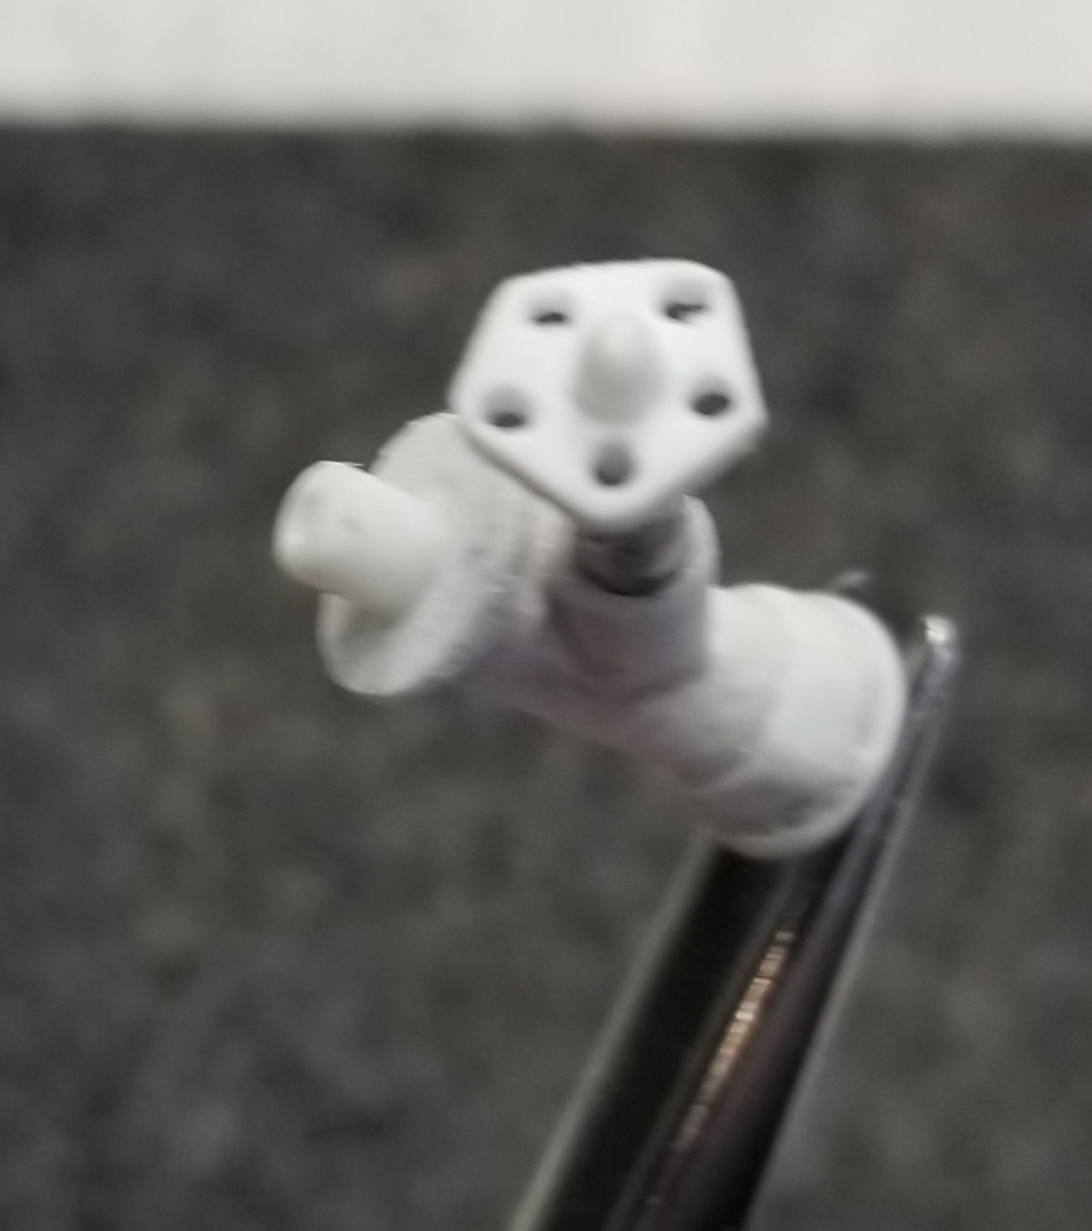
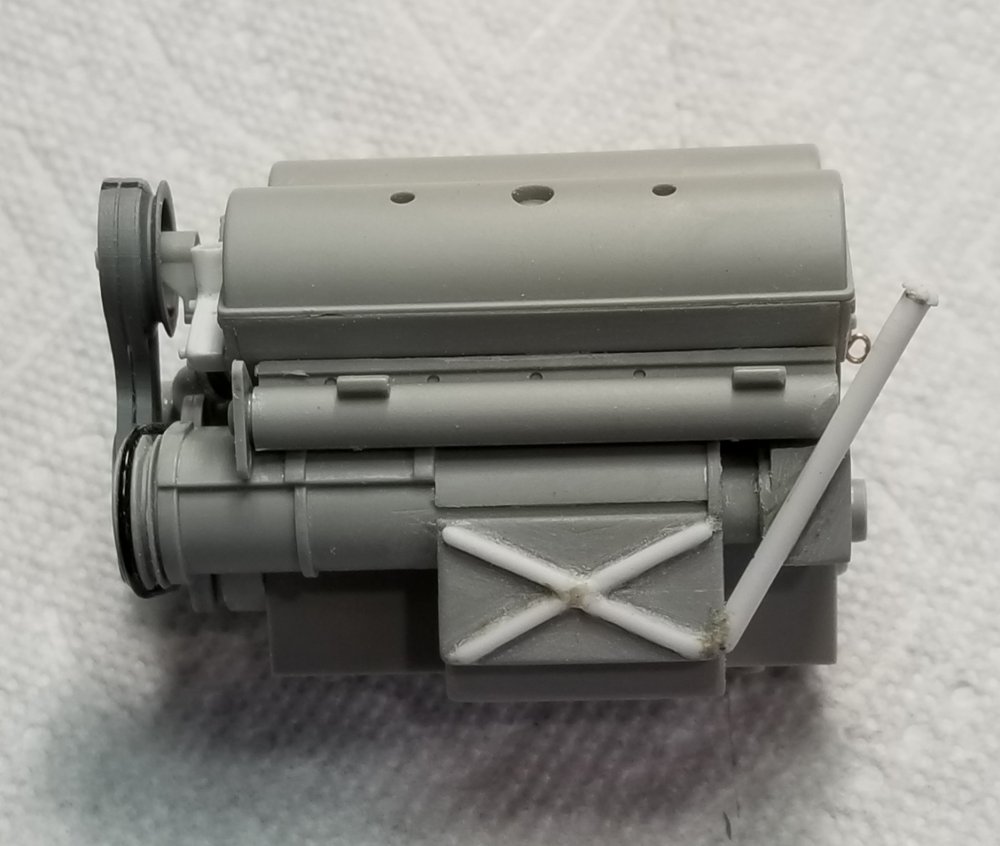
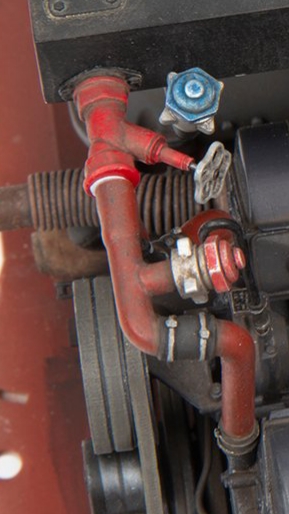
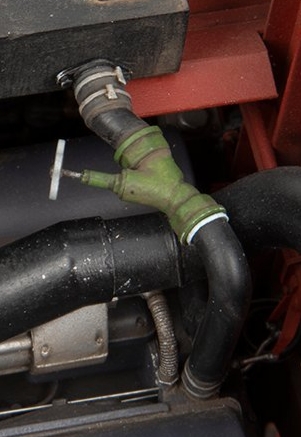
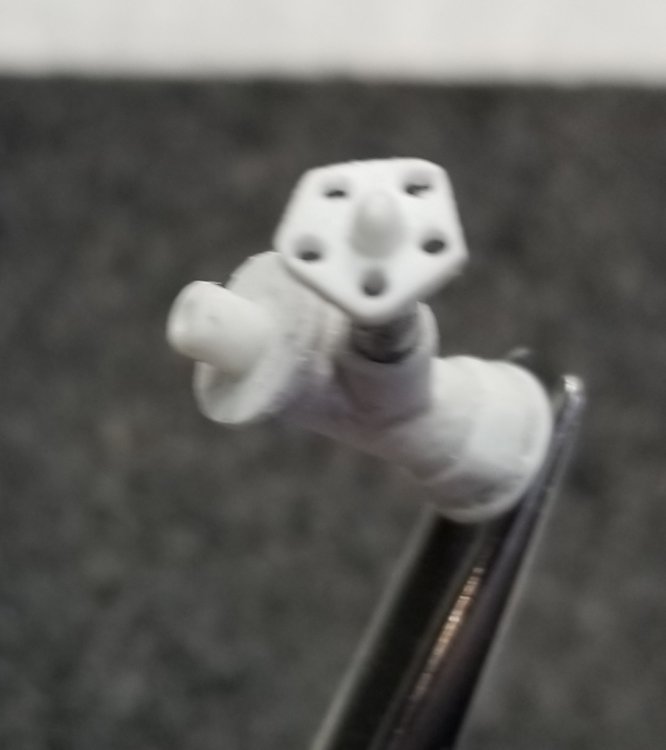
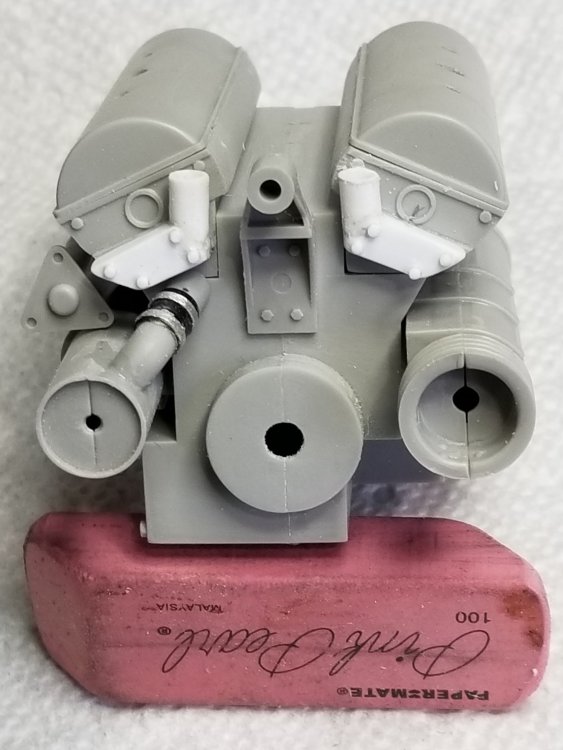
 Some more done on the engine. I started to fit the AFV fan belt system to the kit engine. This was designed to fit there resin engine kit. I had to modify this to work with the kit engine. The round part on the left is part of the cooling system. The round part on the right has a pulley on it, I think it's the generator, but I'm not sure. I added a fan belt to it made out of a piece of small rubber tube. This view shows how I added the fan belts to the front of the engine. This view shows the modifications I made to the engine oil tank. This is modelled wrong from Trumpeter, so I reworked it to look more like the real thing. The white parts are what I added. The next 3 pictures are of David Parkers build up of this kit. All the plumbing you see was completely scratch built, as Trumpeter neglected to give us any.which is to bad because it is very visible through the open engine hatch. This view shows both the front (red) and the rear (green) radiator hose valves. I'm going to try and replicate this up to a point. This view shows the front plumbing. This view shows the rear plumbing. This view shows my crude attempt at replicating David's work. Close, but no cookie...lol Another view of the valve. And another view of the valve. I still need to make the ones for the rear. This is very time consuming and tedious work, especially with my eyes not being that good. Oh well, that's it for know I'll be back with more updates soon. Ron G


-
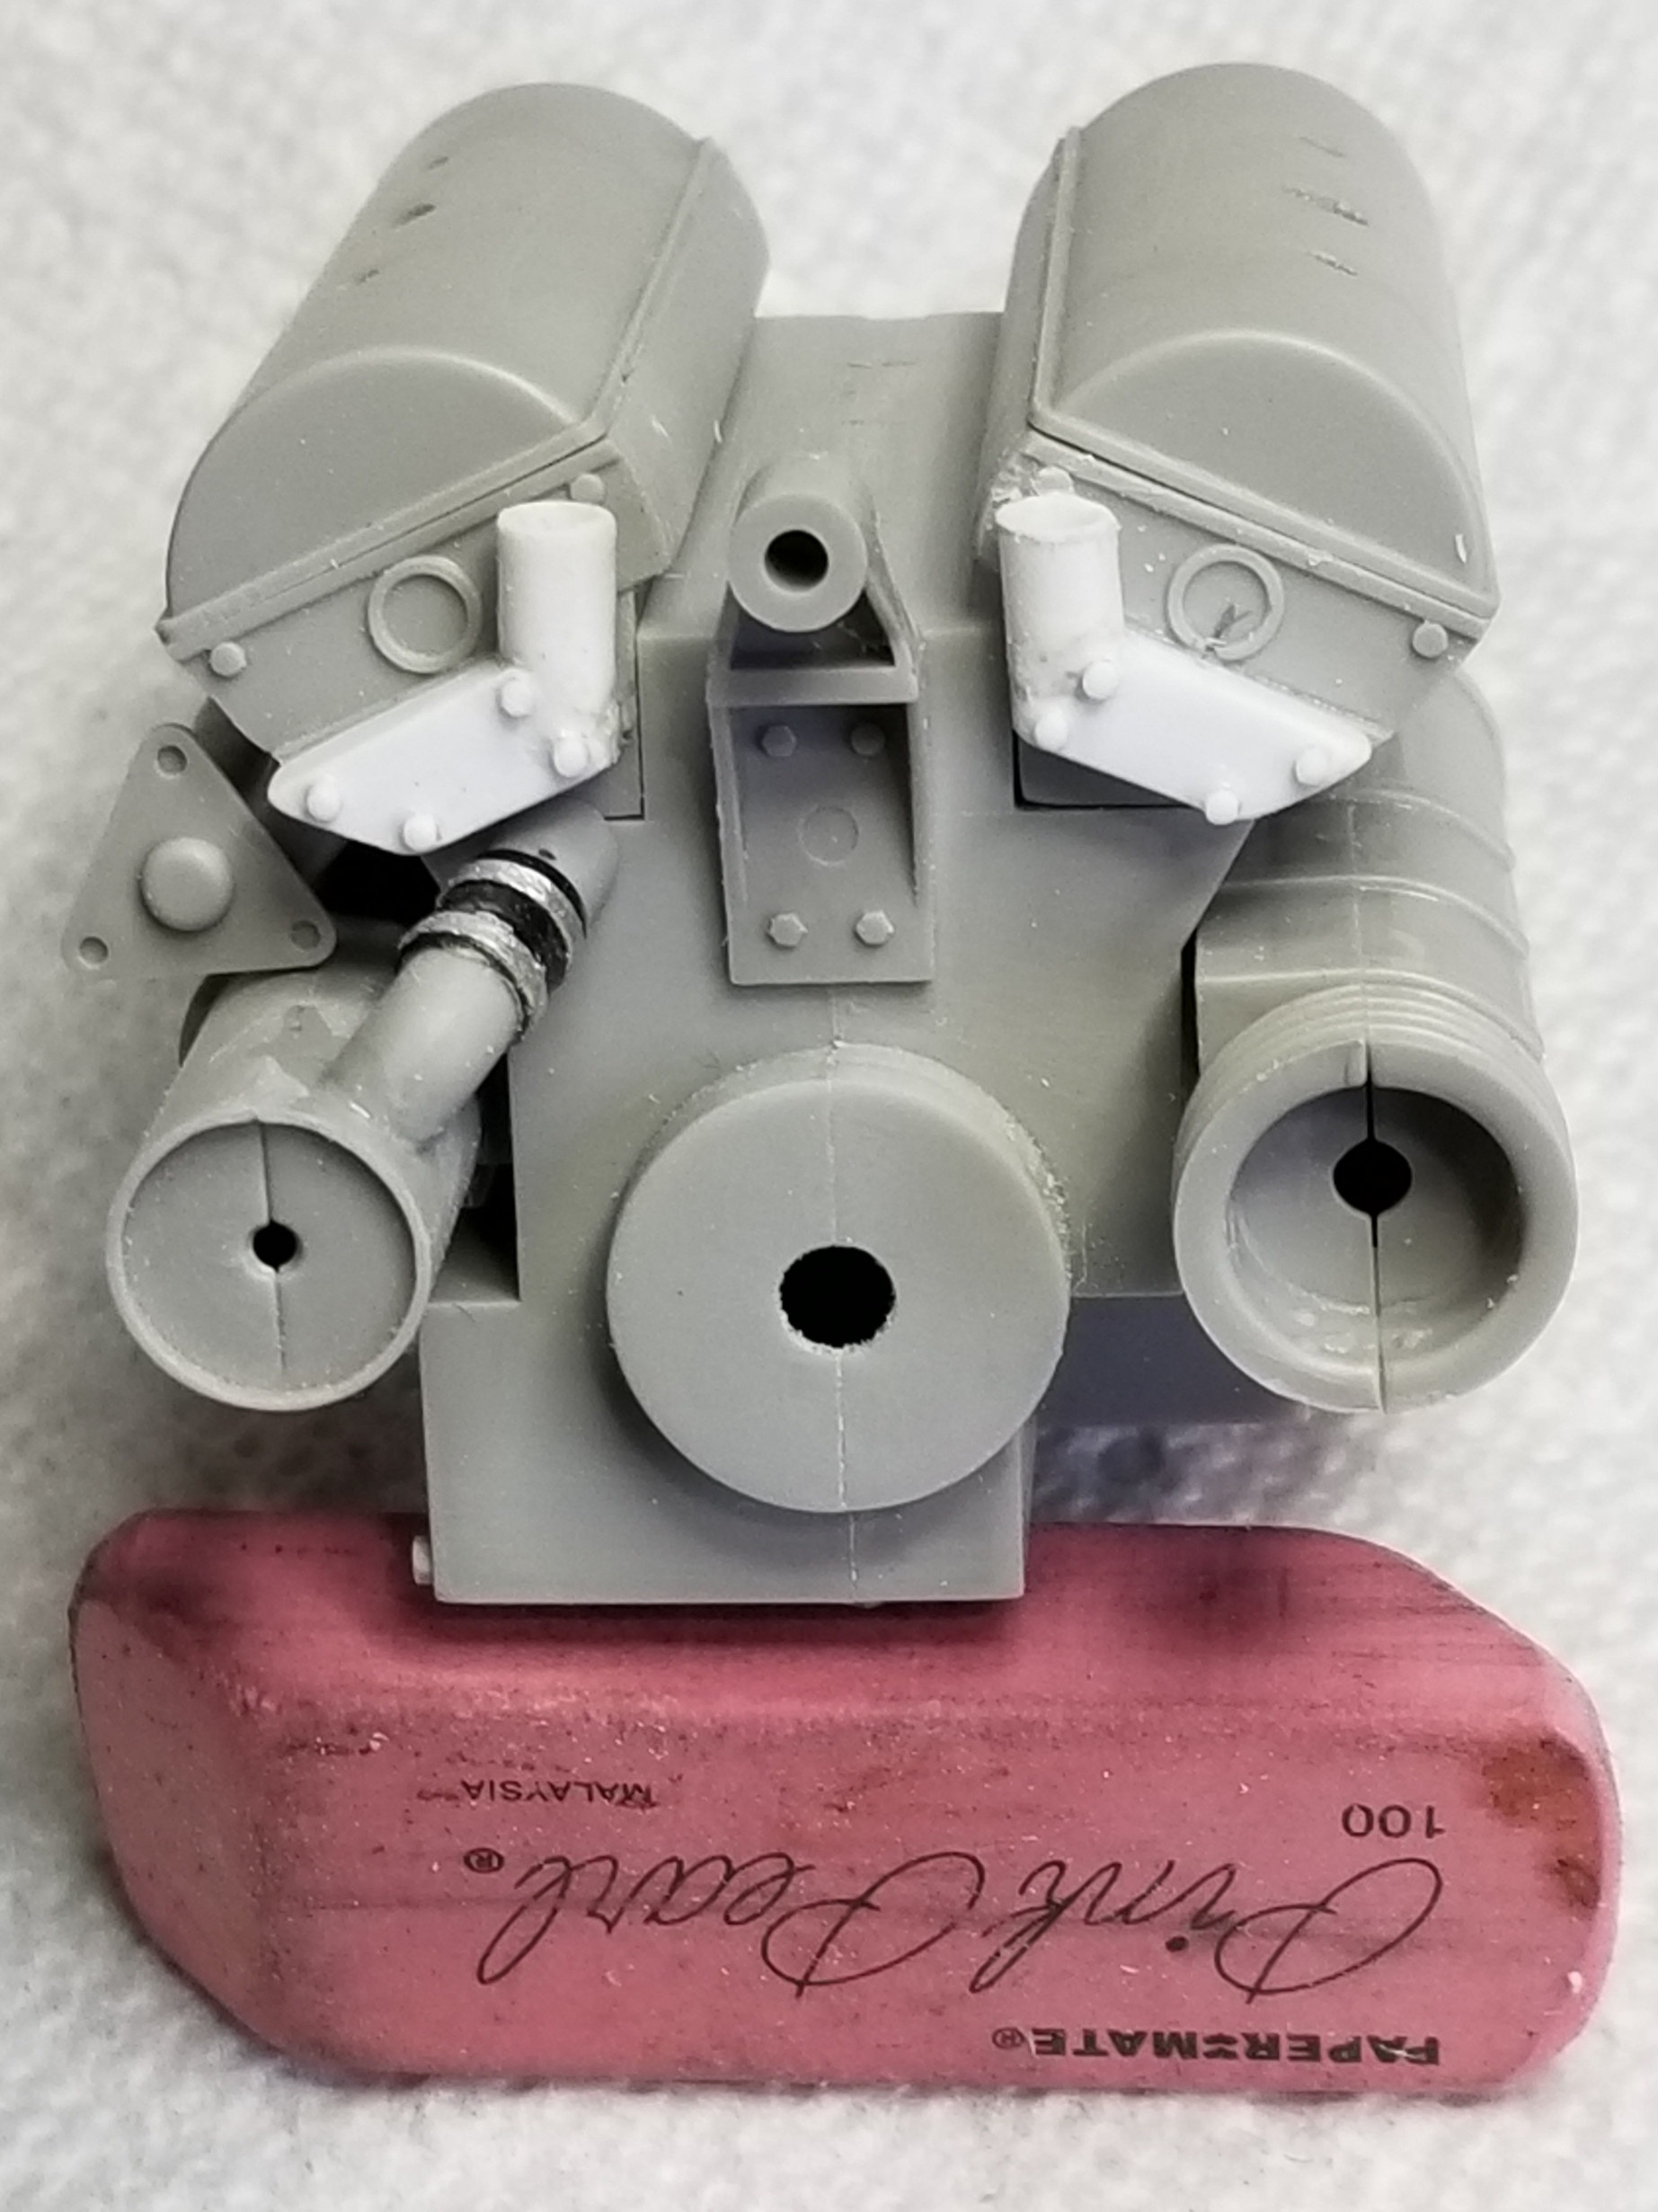
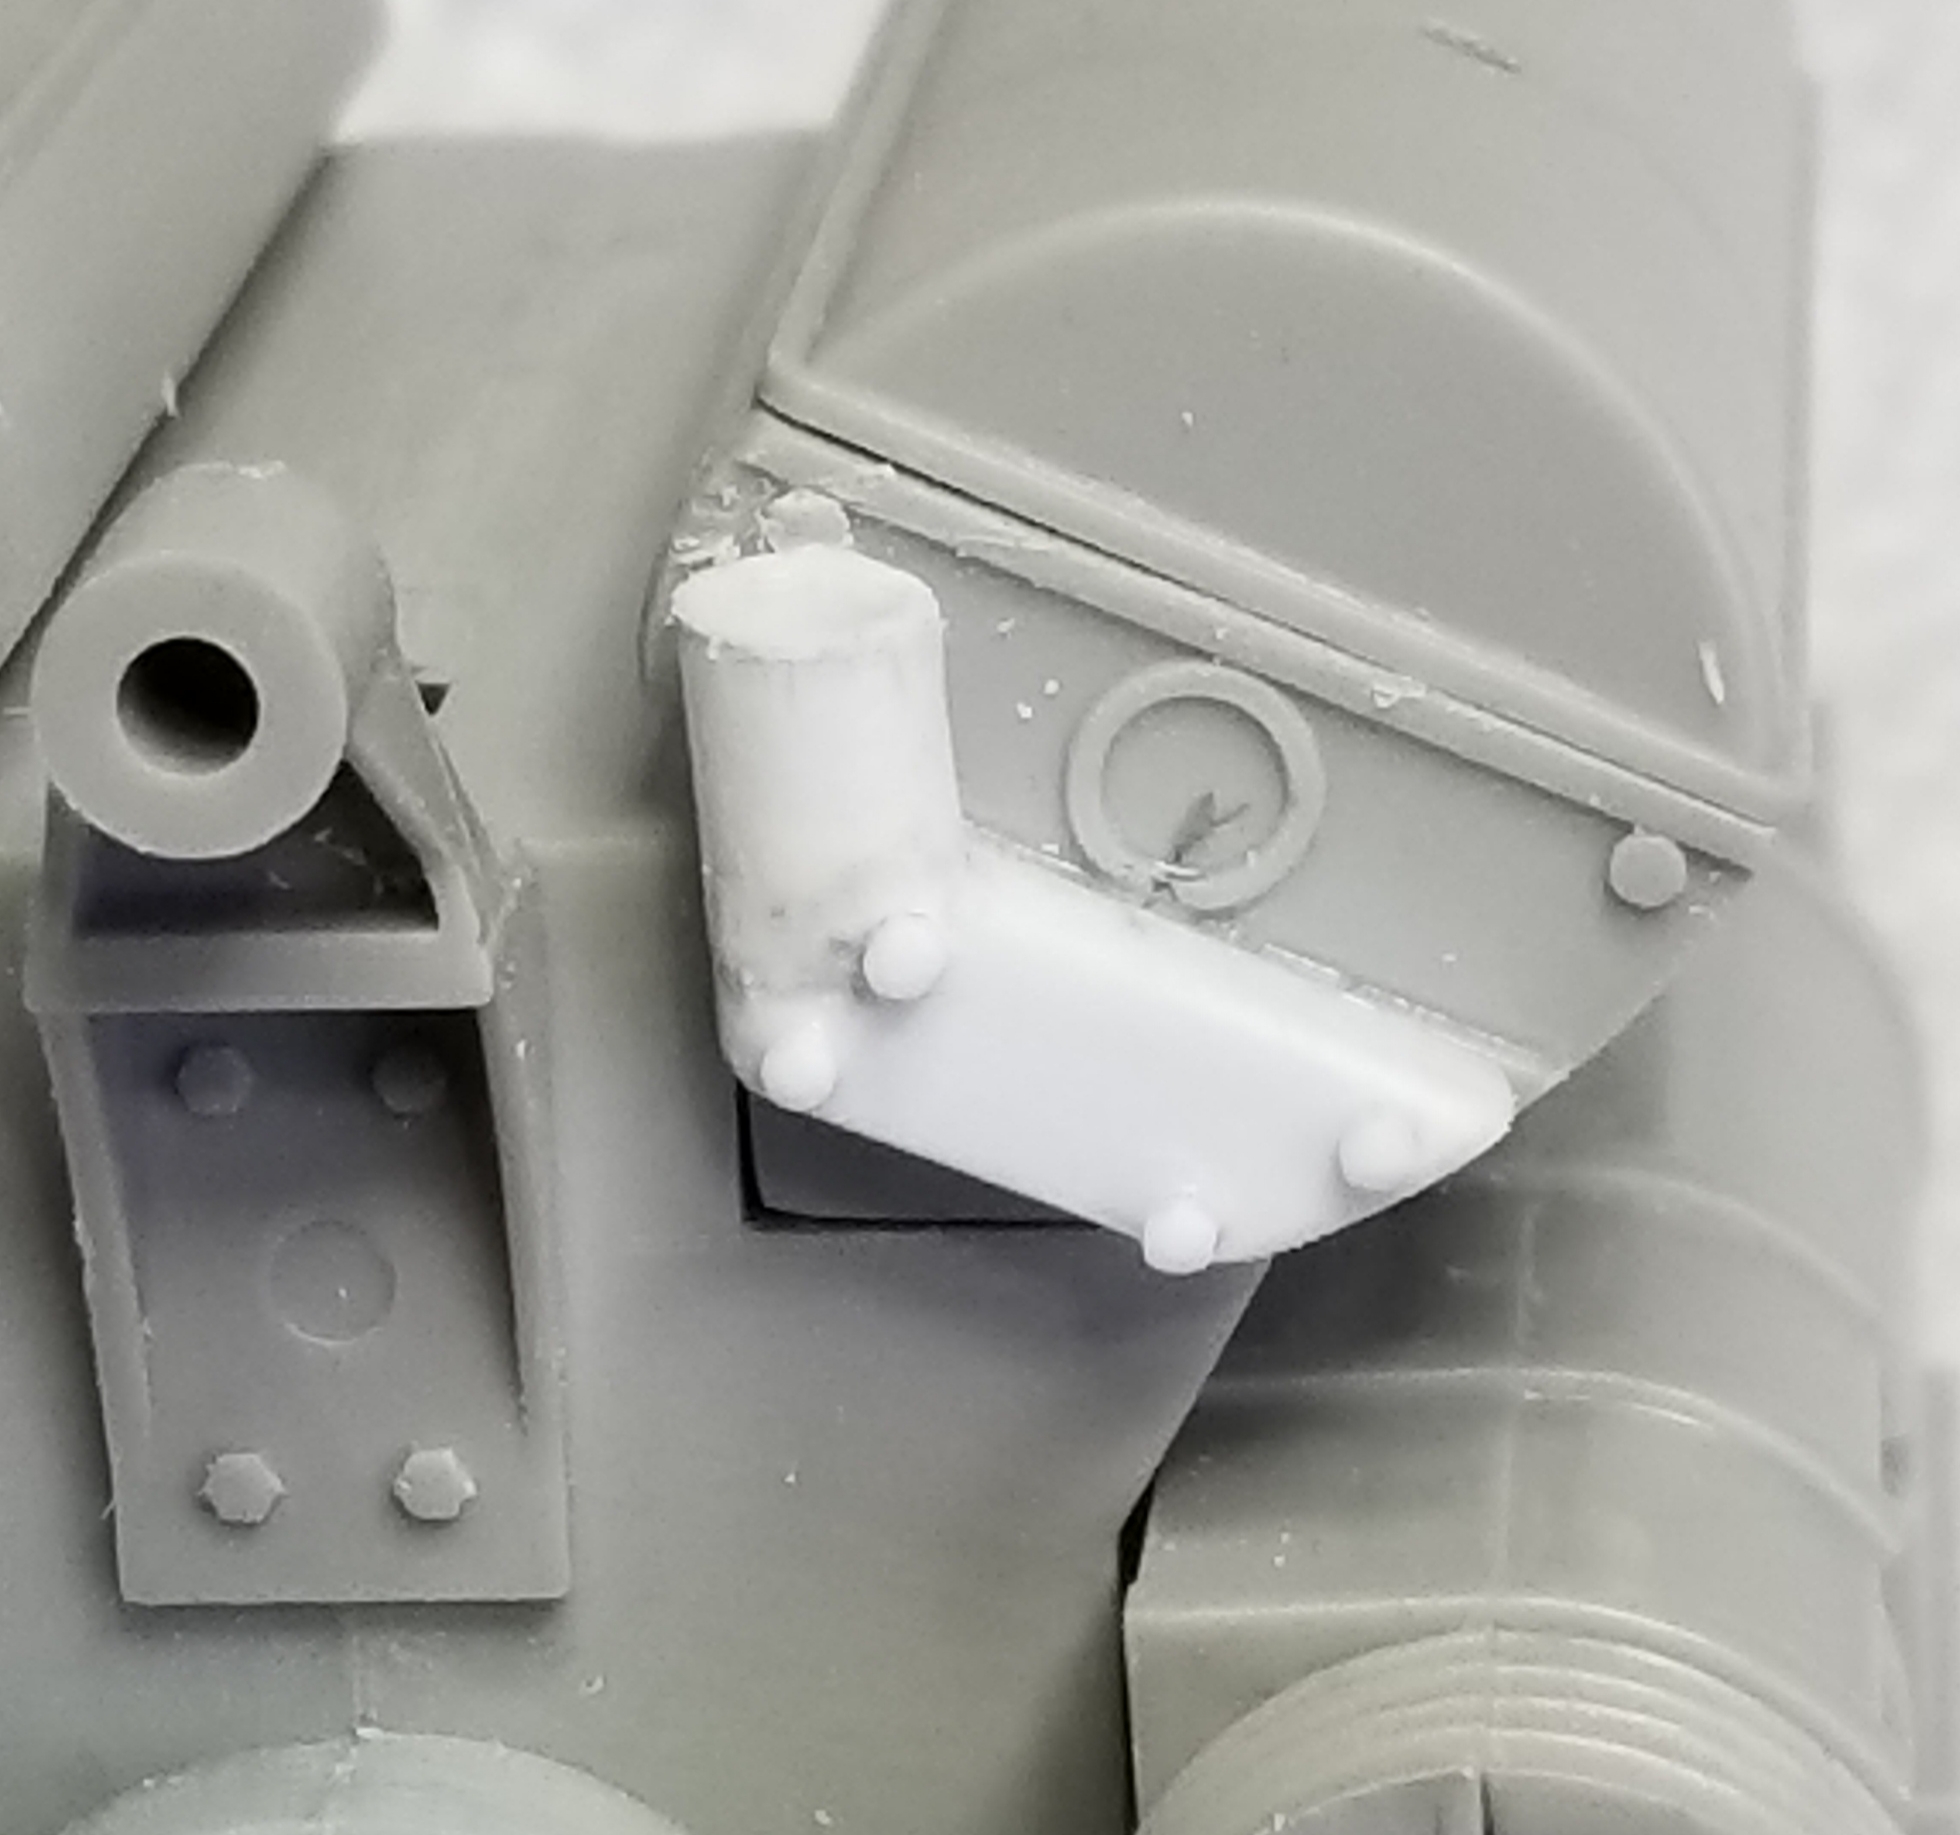
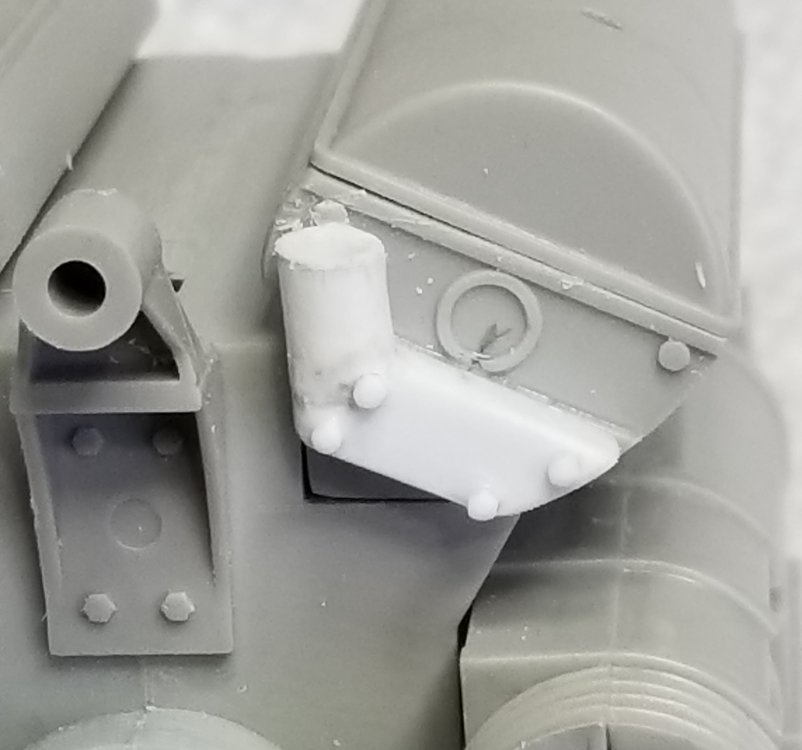
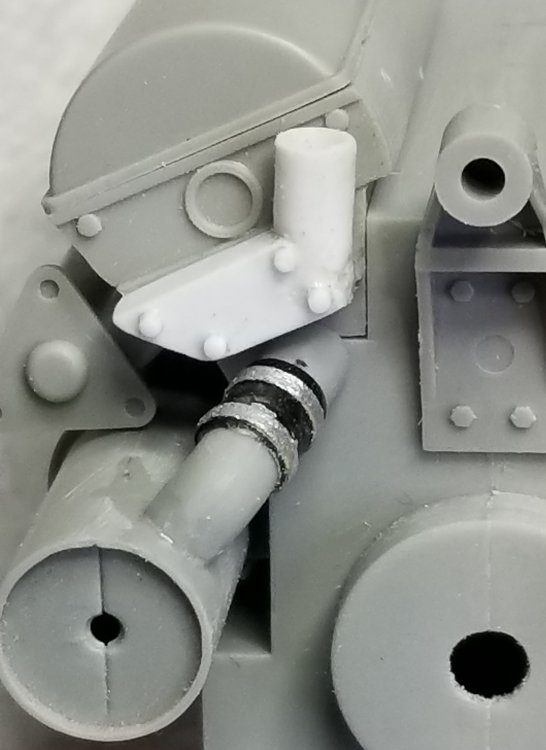
Hey all Just a small update. I started on the kits engine, I didn't get the one from AFV Modeller because it costs $96.50 and I've already spent over $150.00 there , so I'm going to add my own scratch building to this. If you have ever seen David Parkers build of this kit on Facebook, it's absolutely fantastic. I think it took him over 7 years to finish this kit, at least I think he finished it, I wouldn't know I don't do social media. That's a long time on one kit. This view shows the front of the engine. (actually the front faces to the rear of the tank on the Panzer IV). The white parts are the water intake manifolds. Trumpeter forgot to add any water hoses, plumbing or anything but the basic engine to this kit. This view shows the right side of the engine and the right water intake manifold. I made this from Evergreen plastic stock and some Plastsruct 0.04" hexagon rods to make the bolts. This view shows the left side water intake manifold. I added some tape to the small hose to make a rubber hose connection. Well that's all for know I'll be back with more soon Ron G
-
Hey Bomber I had a devil of a time doing this in 1/16 scale, I wouldn't even want to think about doing it in 1/35 scale . Ron G
-
Yeah, there small pieces of brass rod, I will trim them to size at final installation. Ron G
-
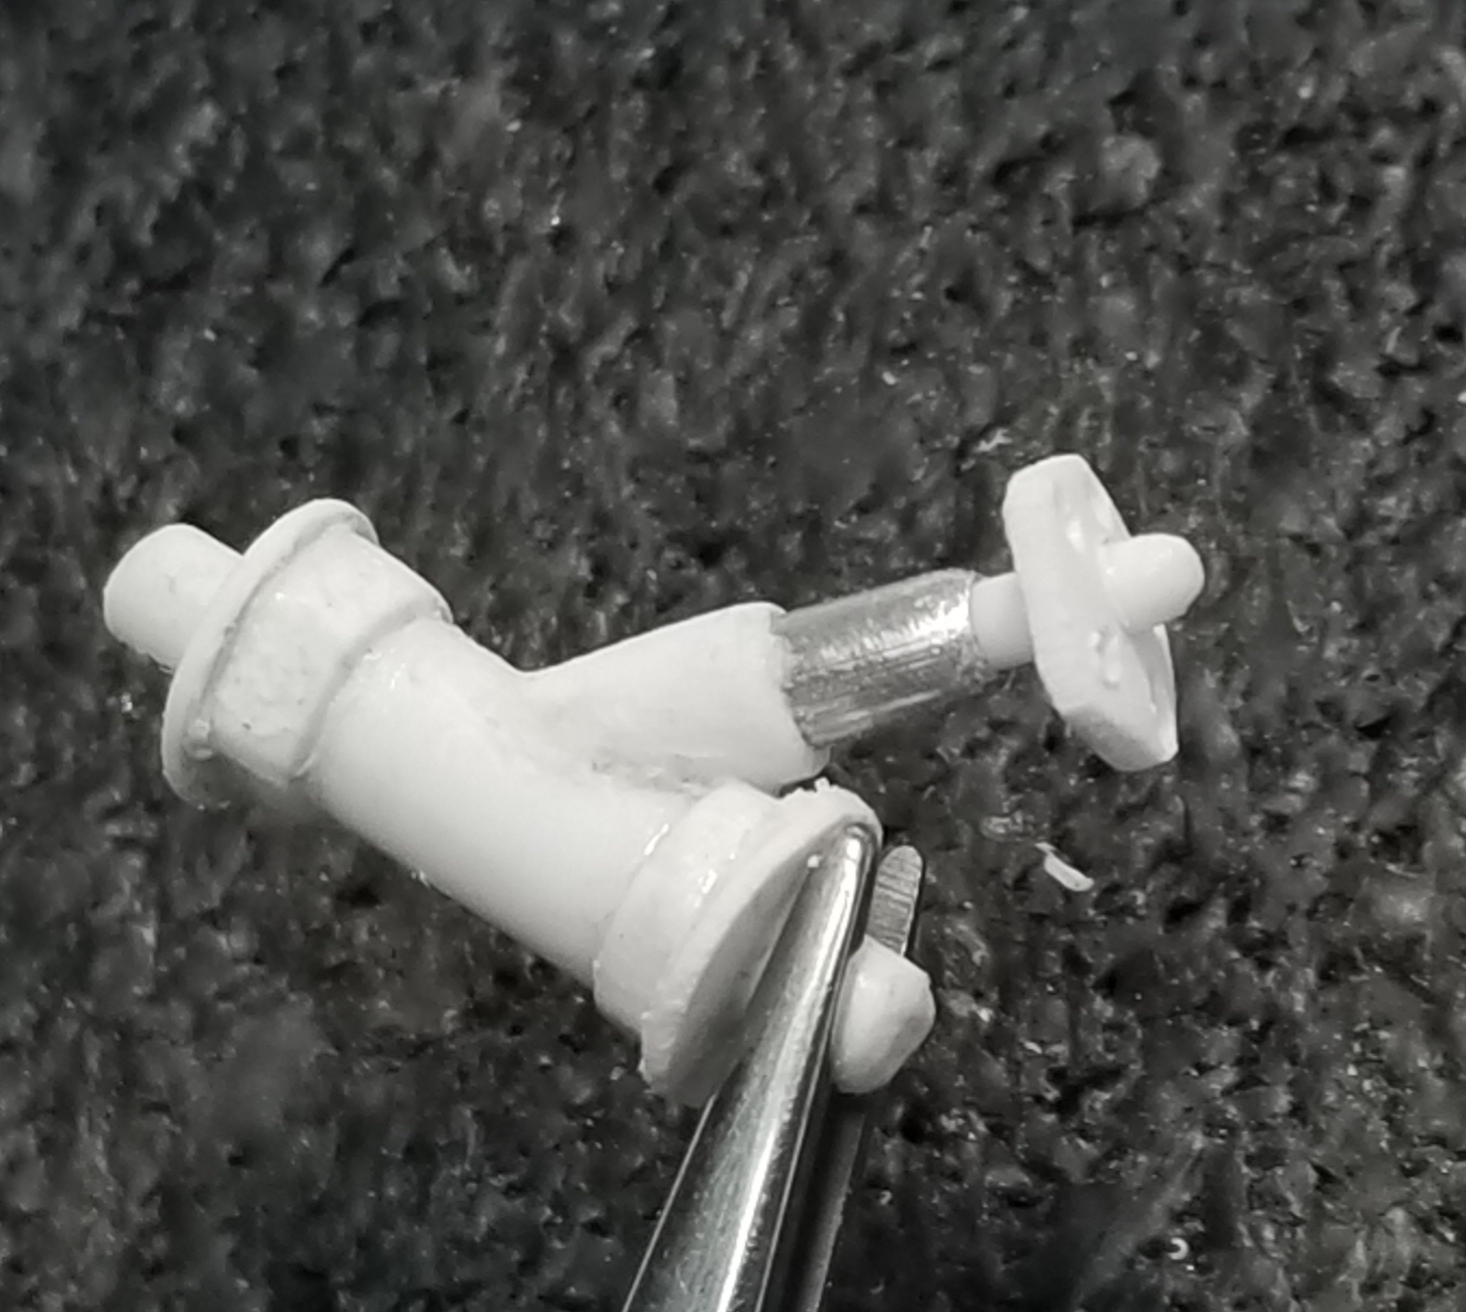
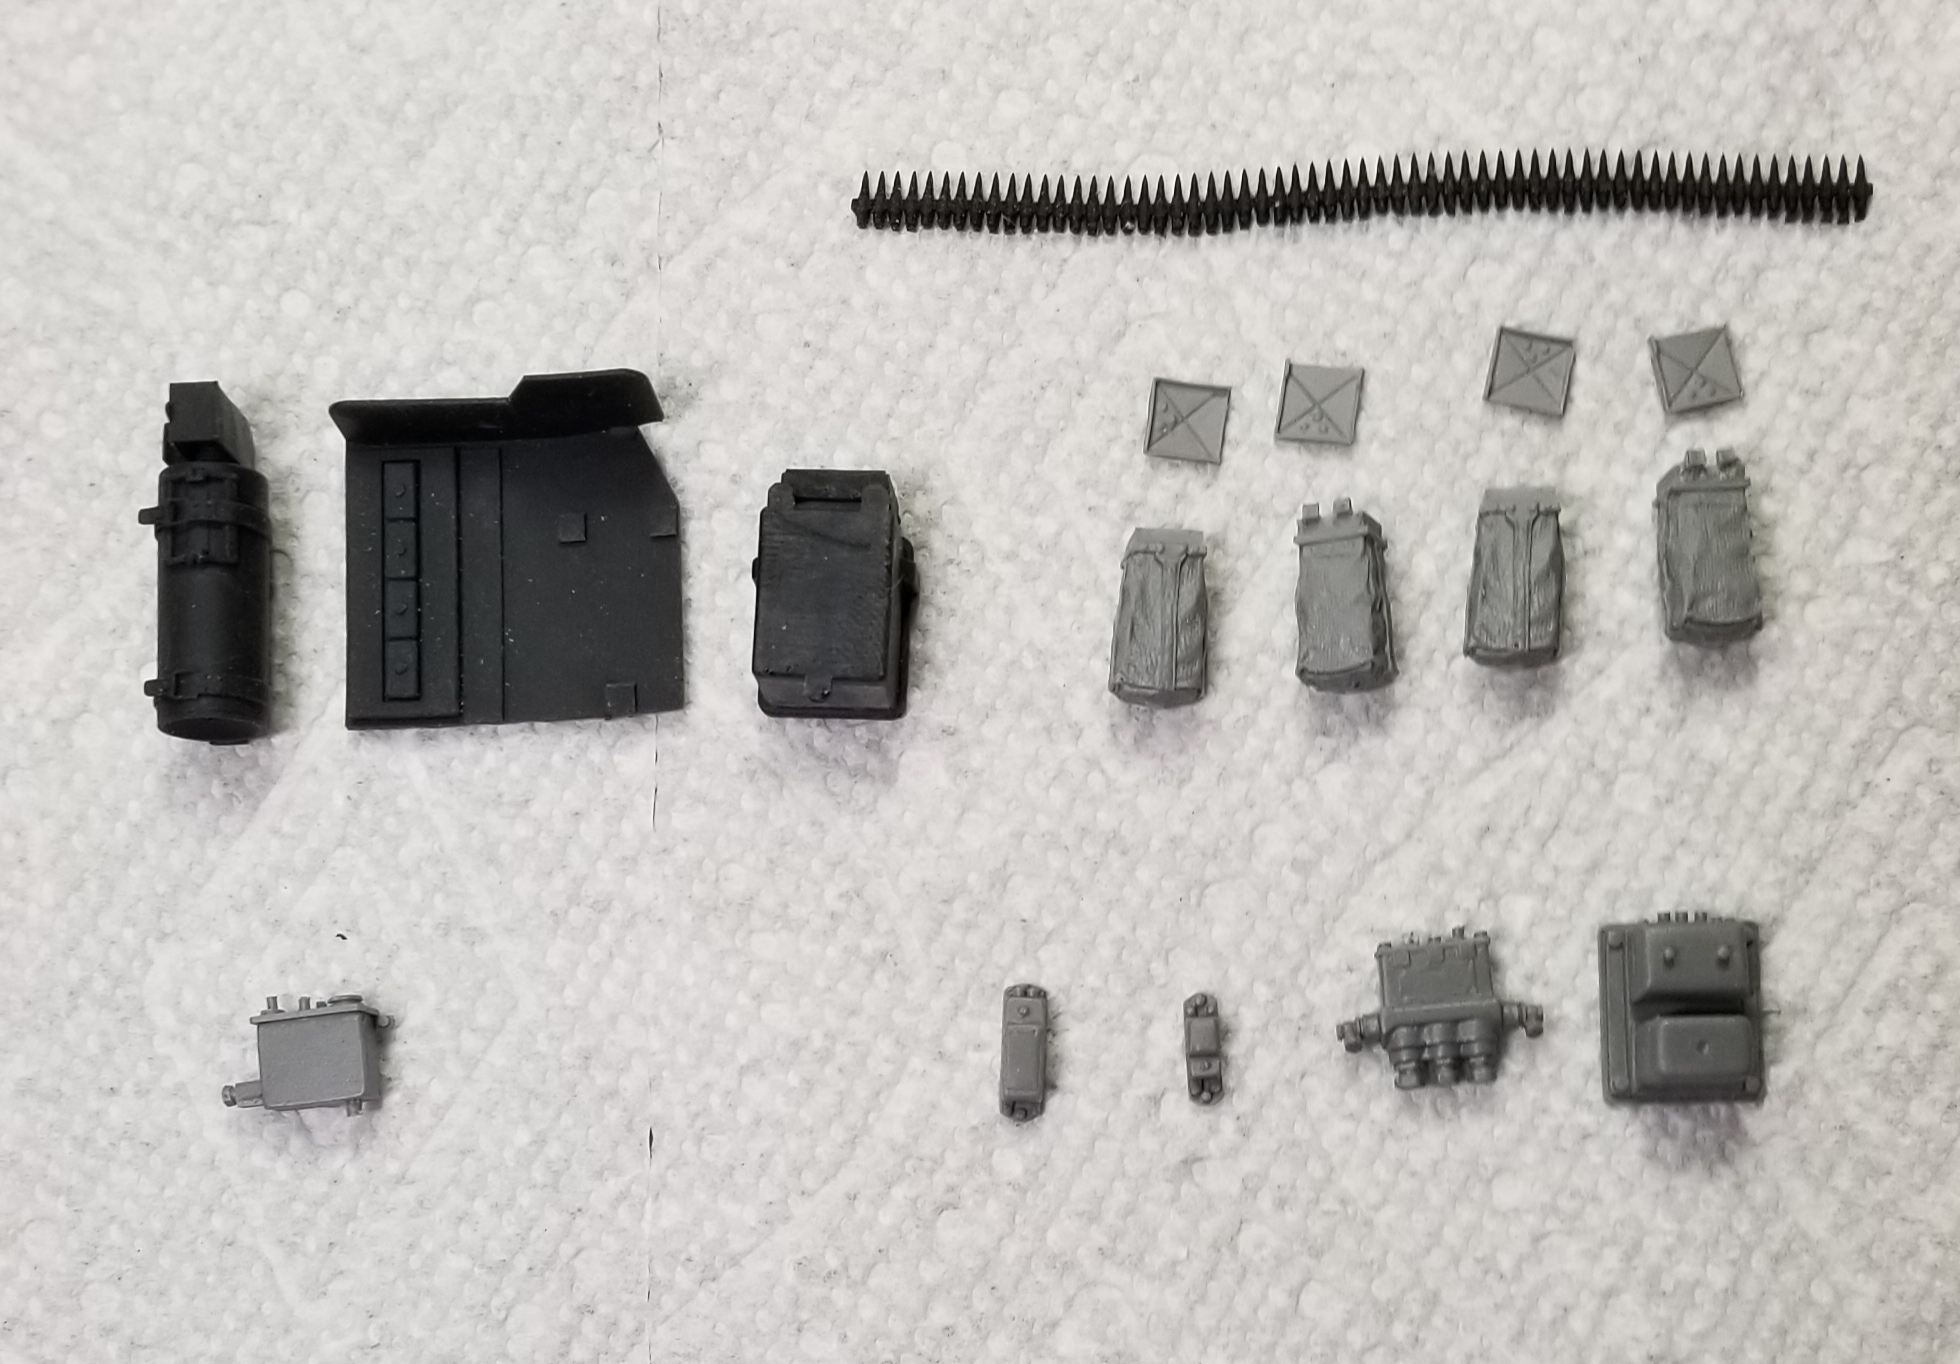
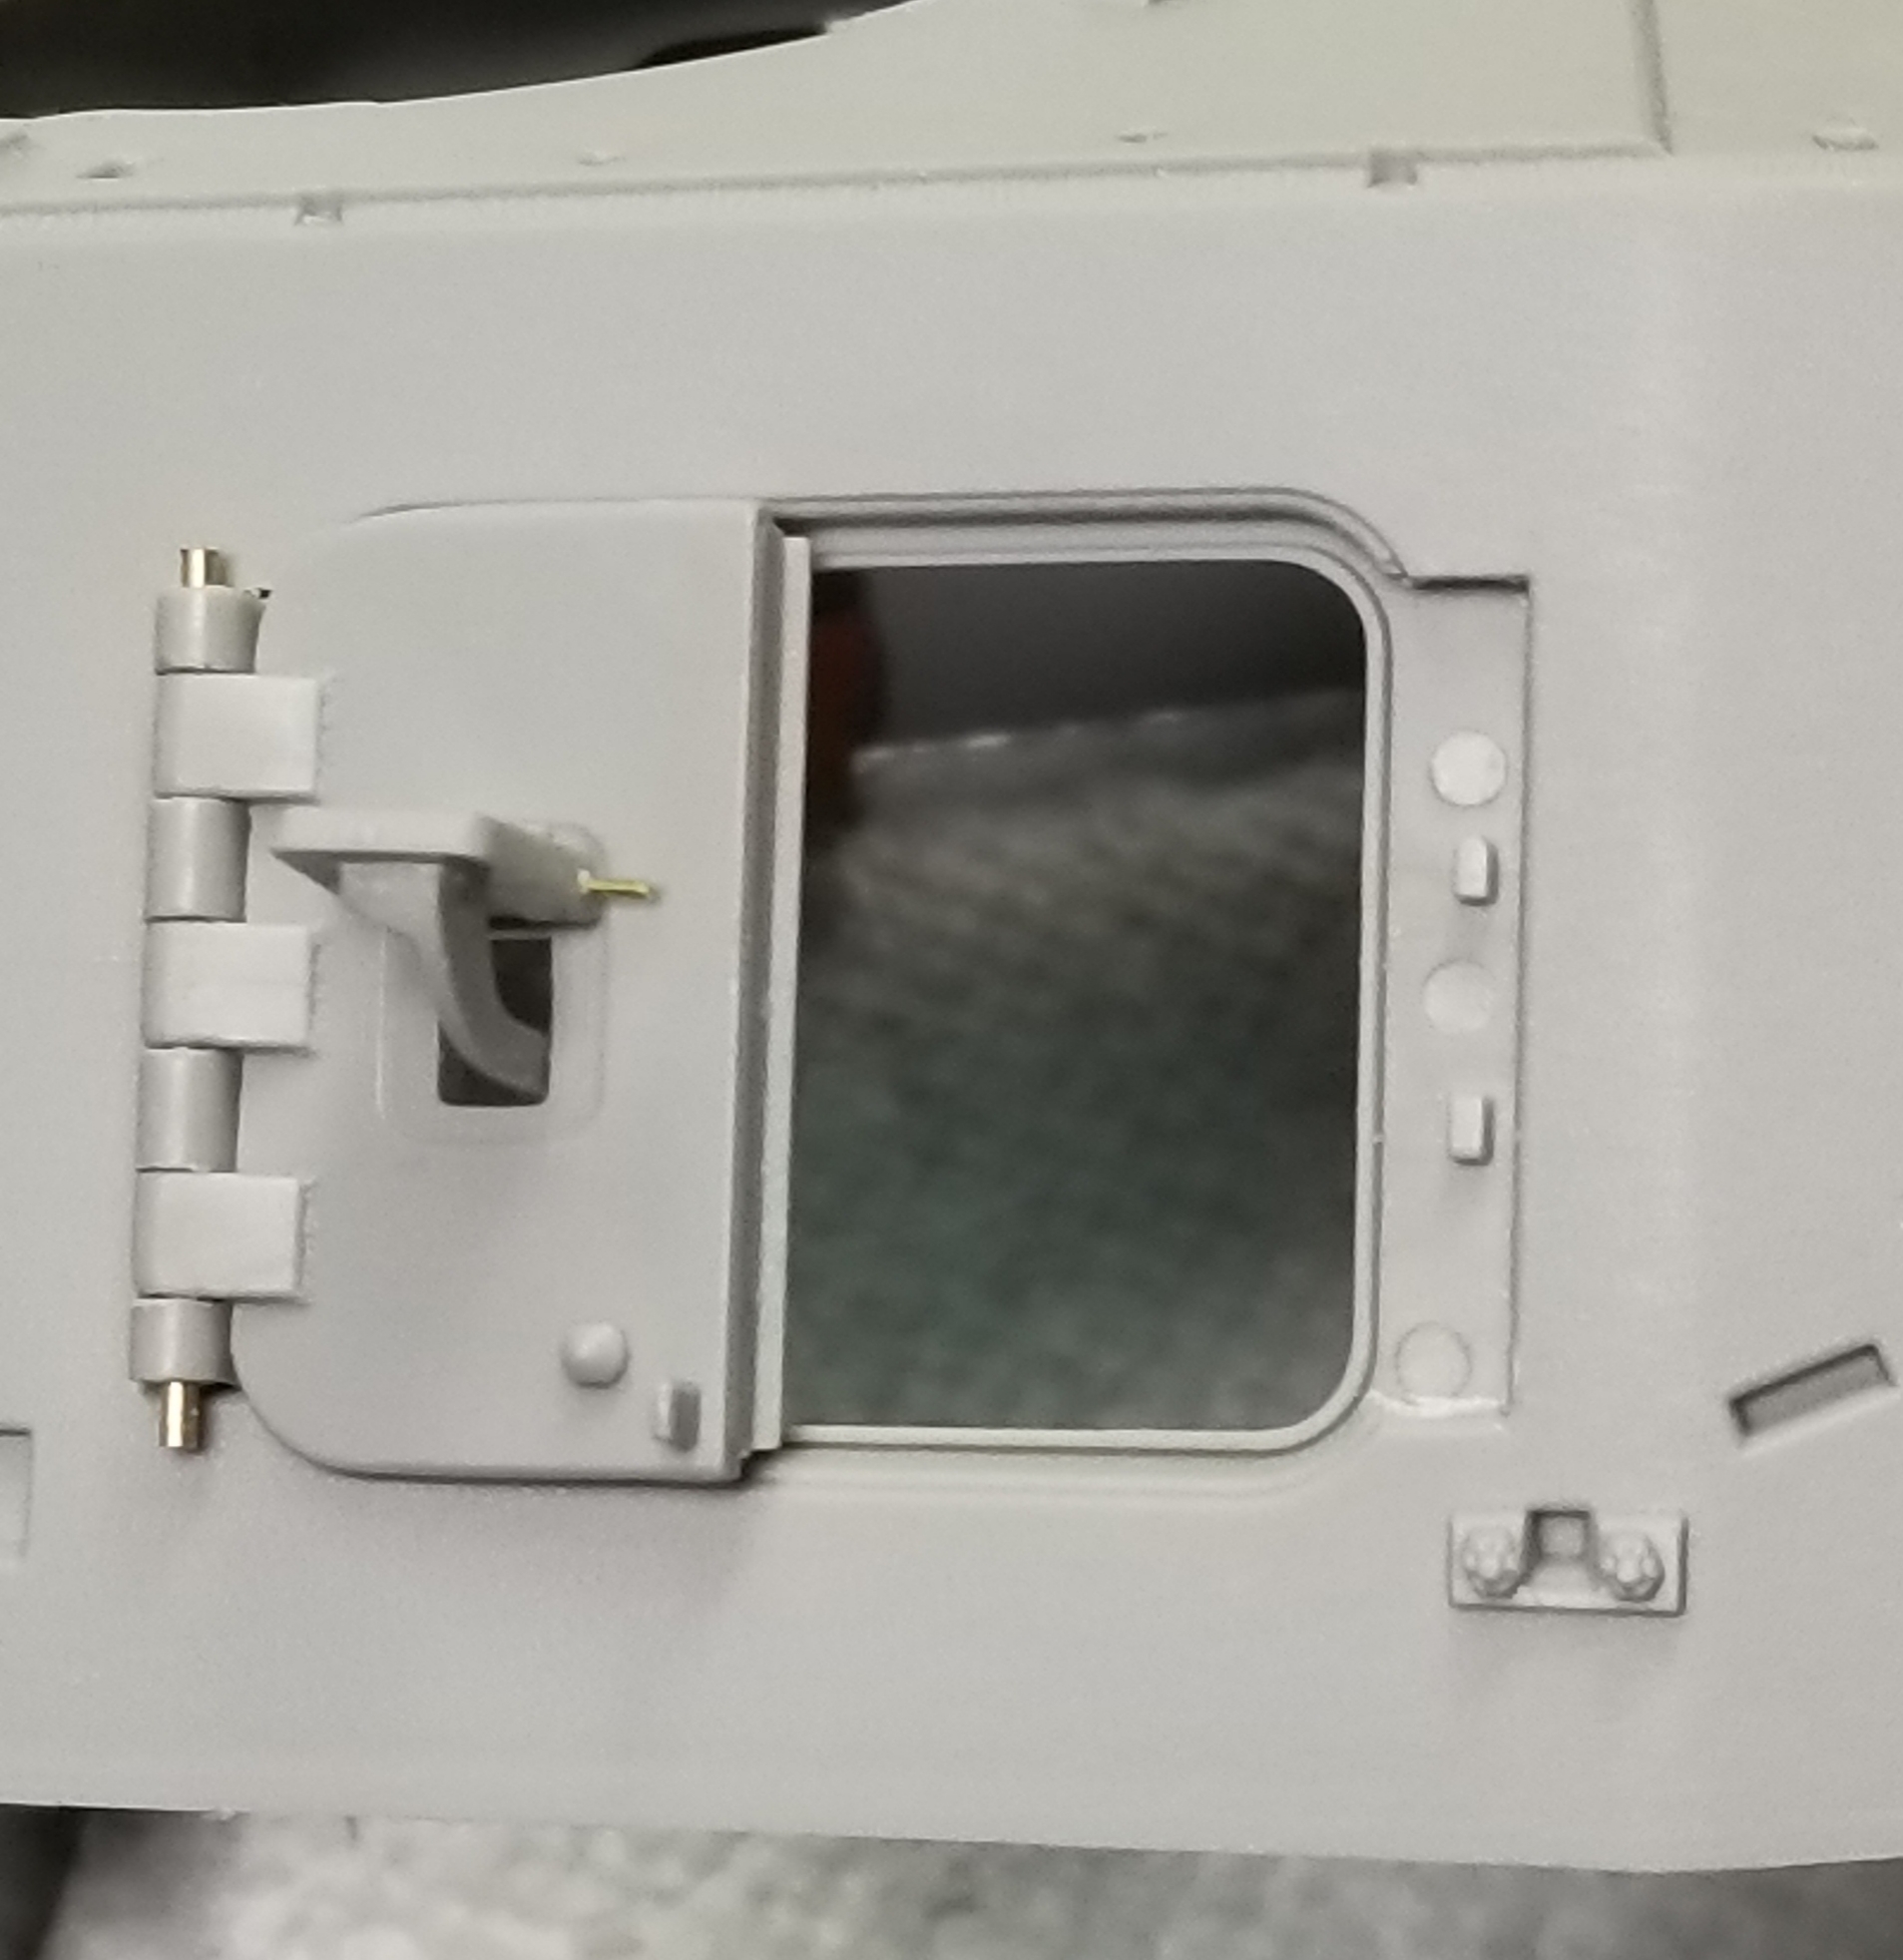
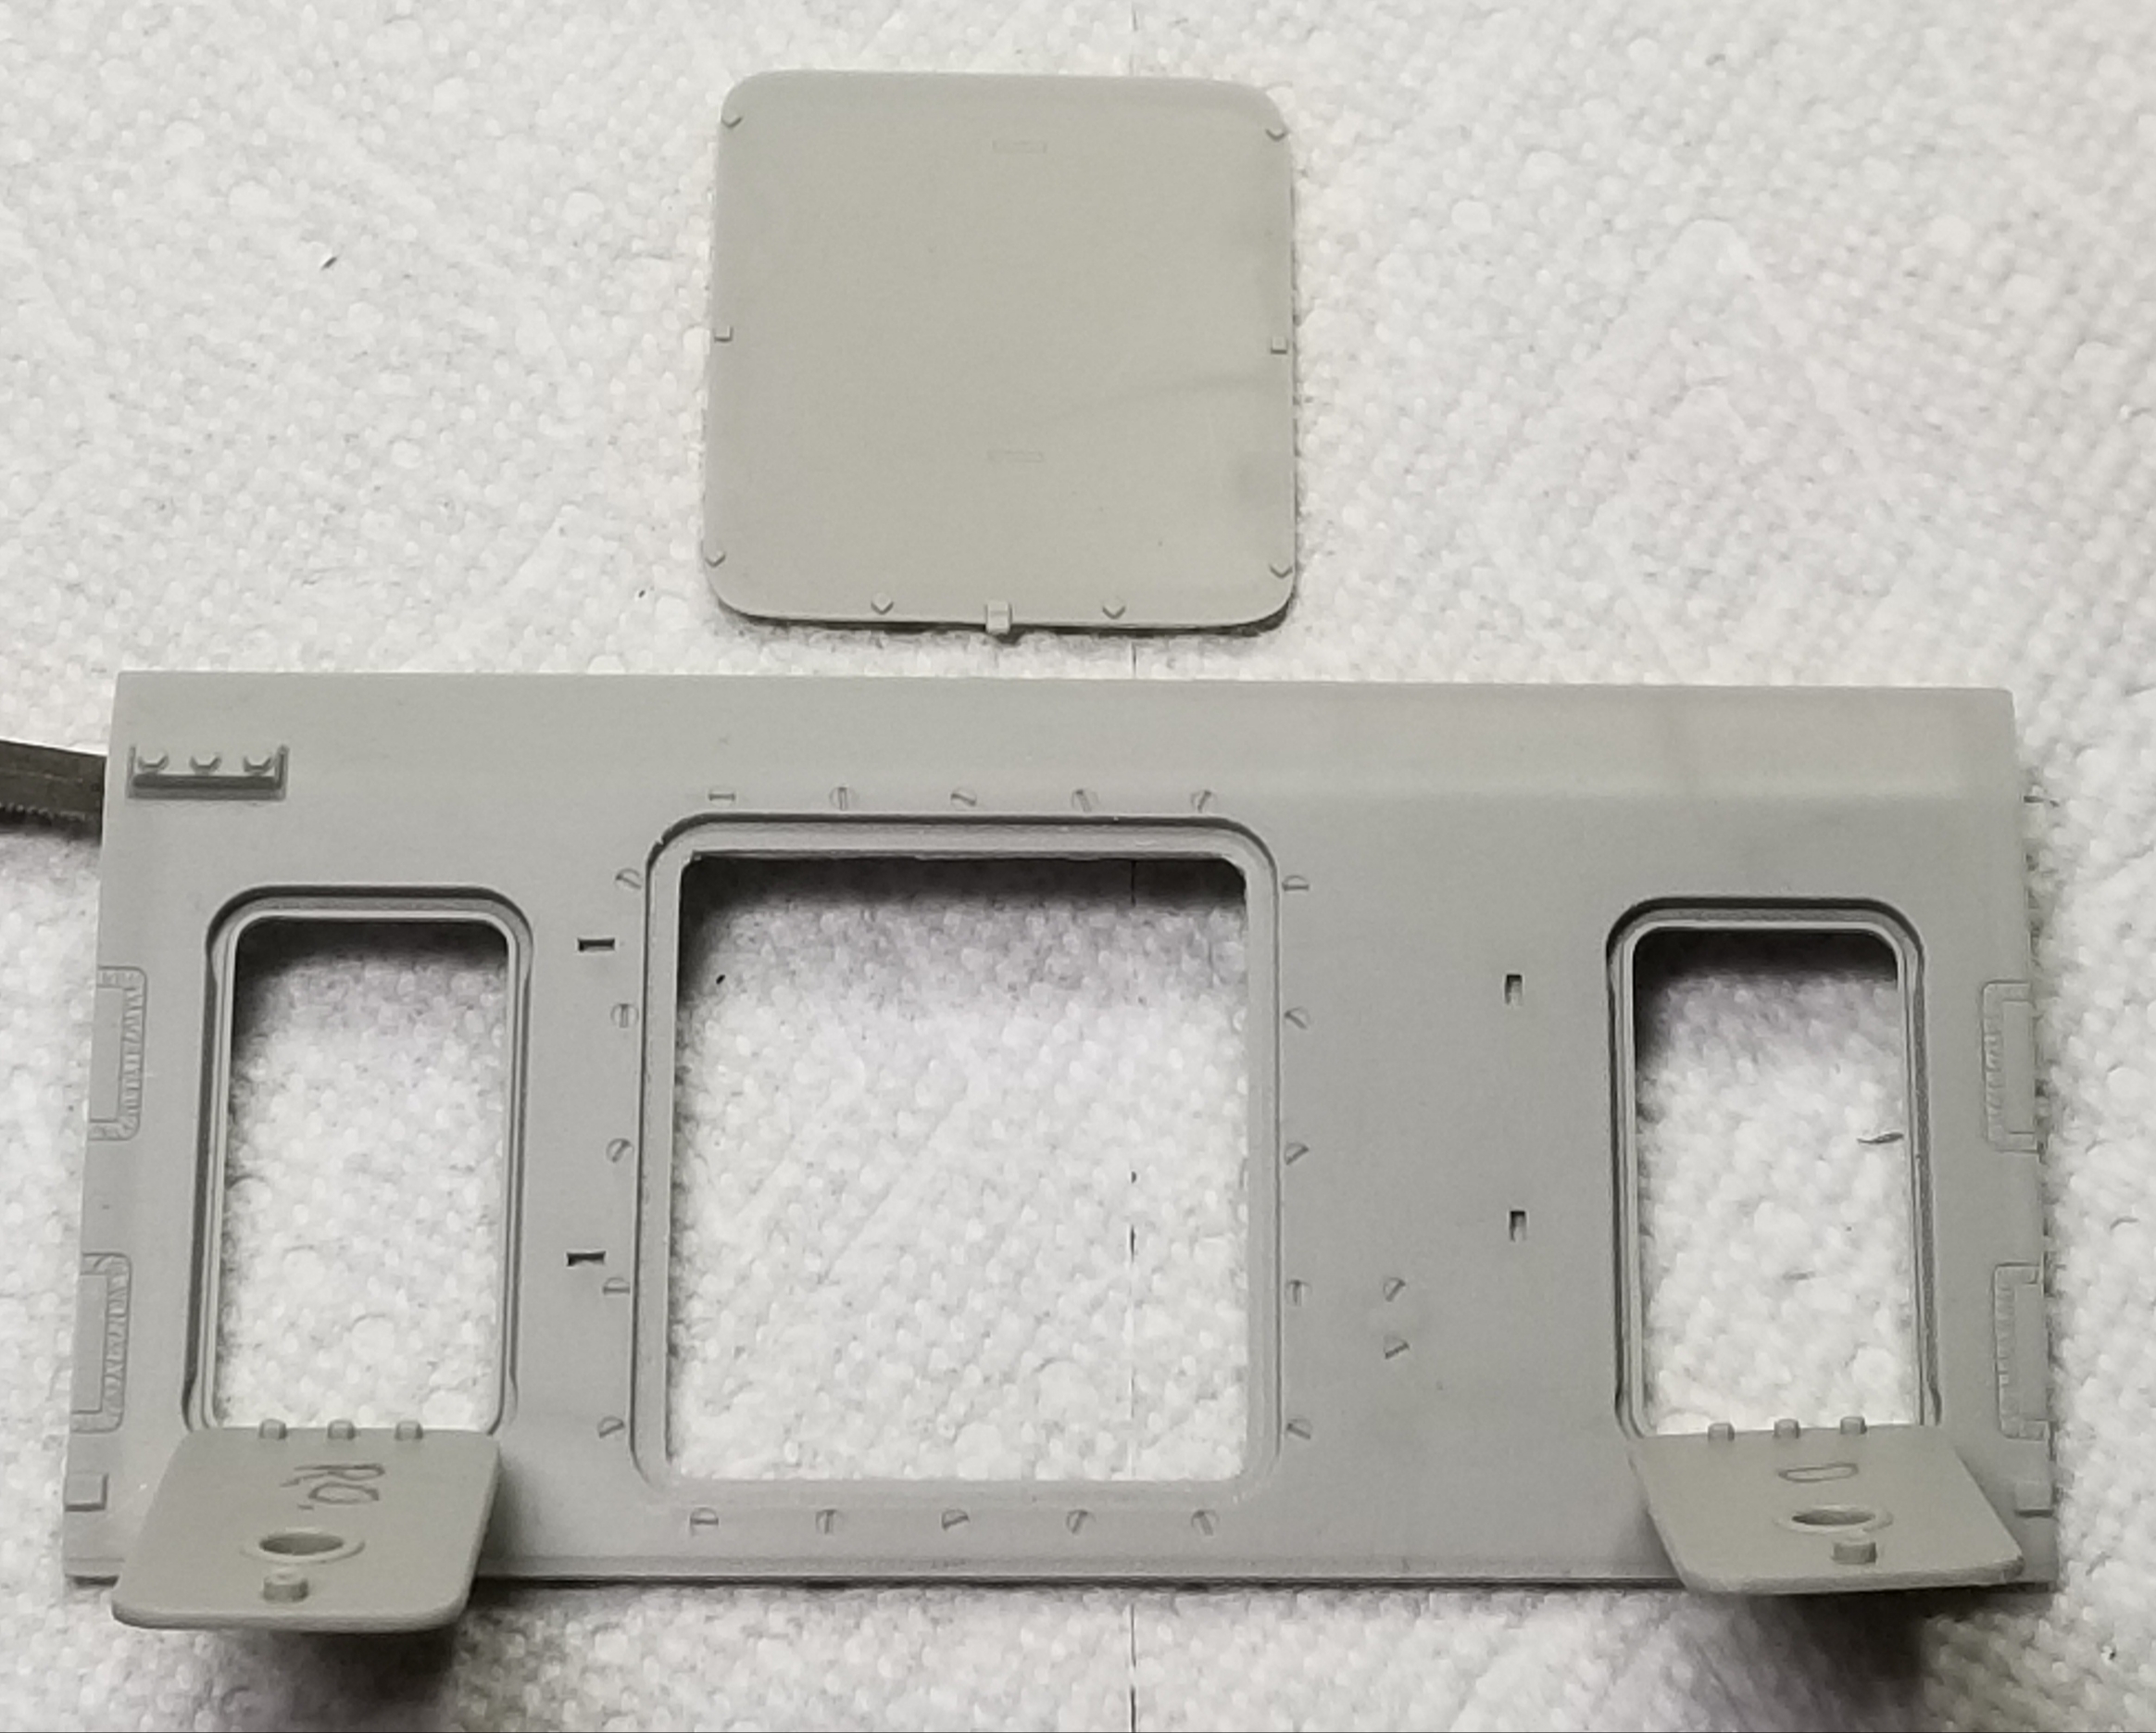
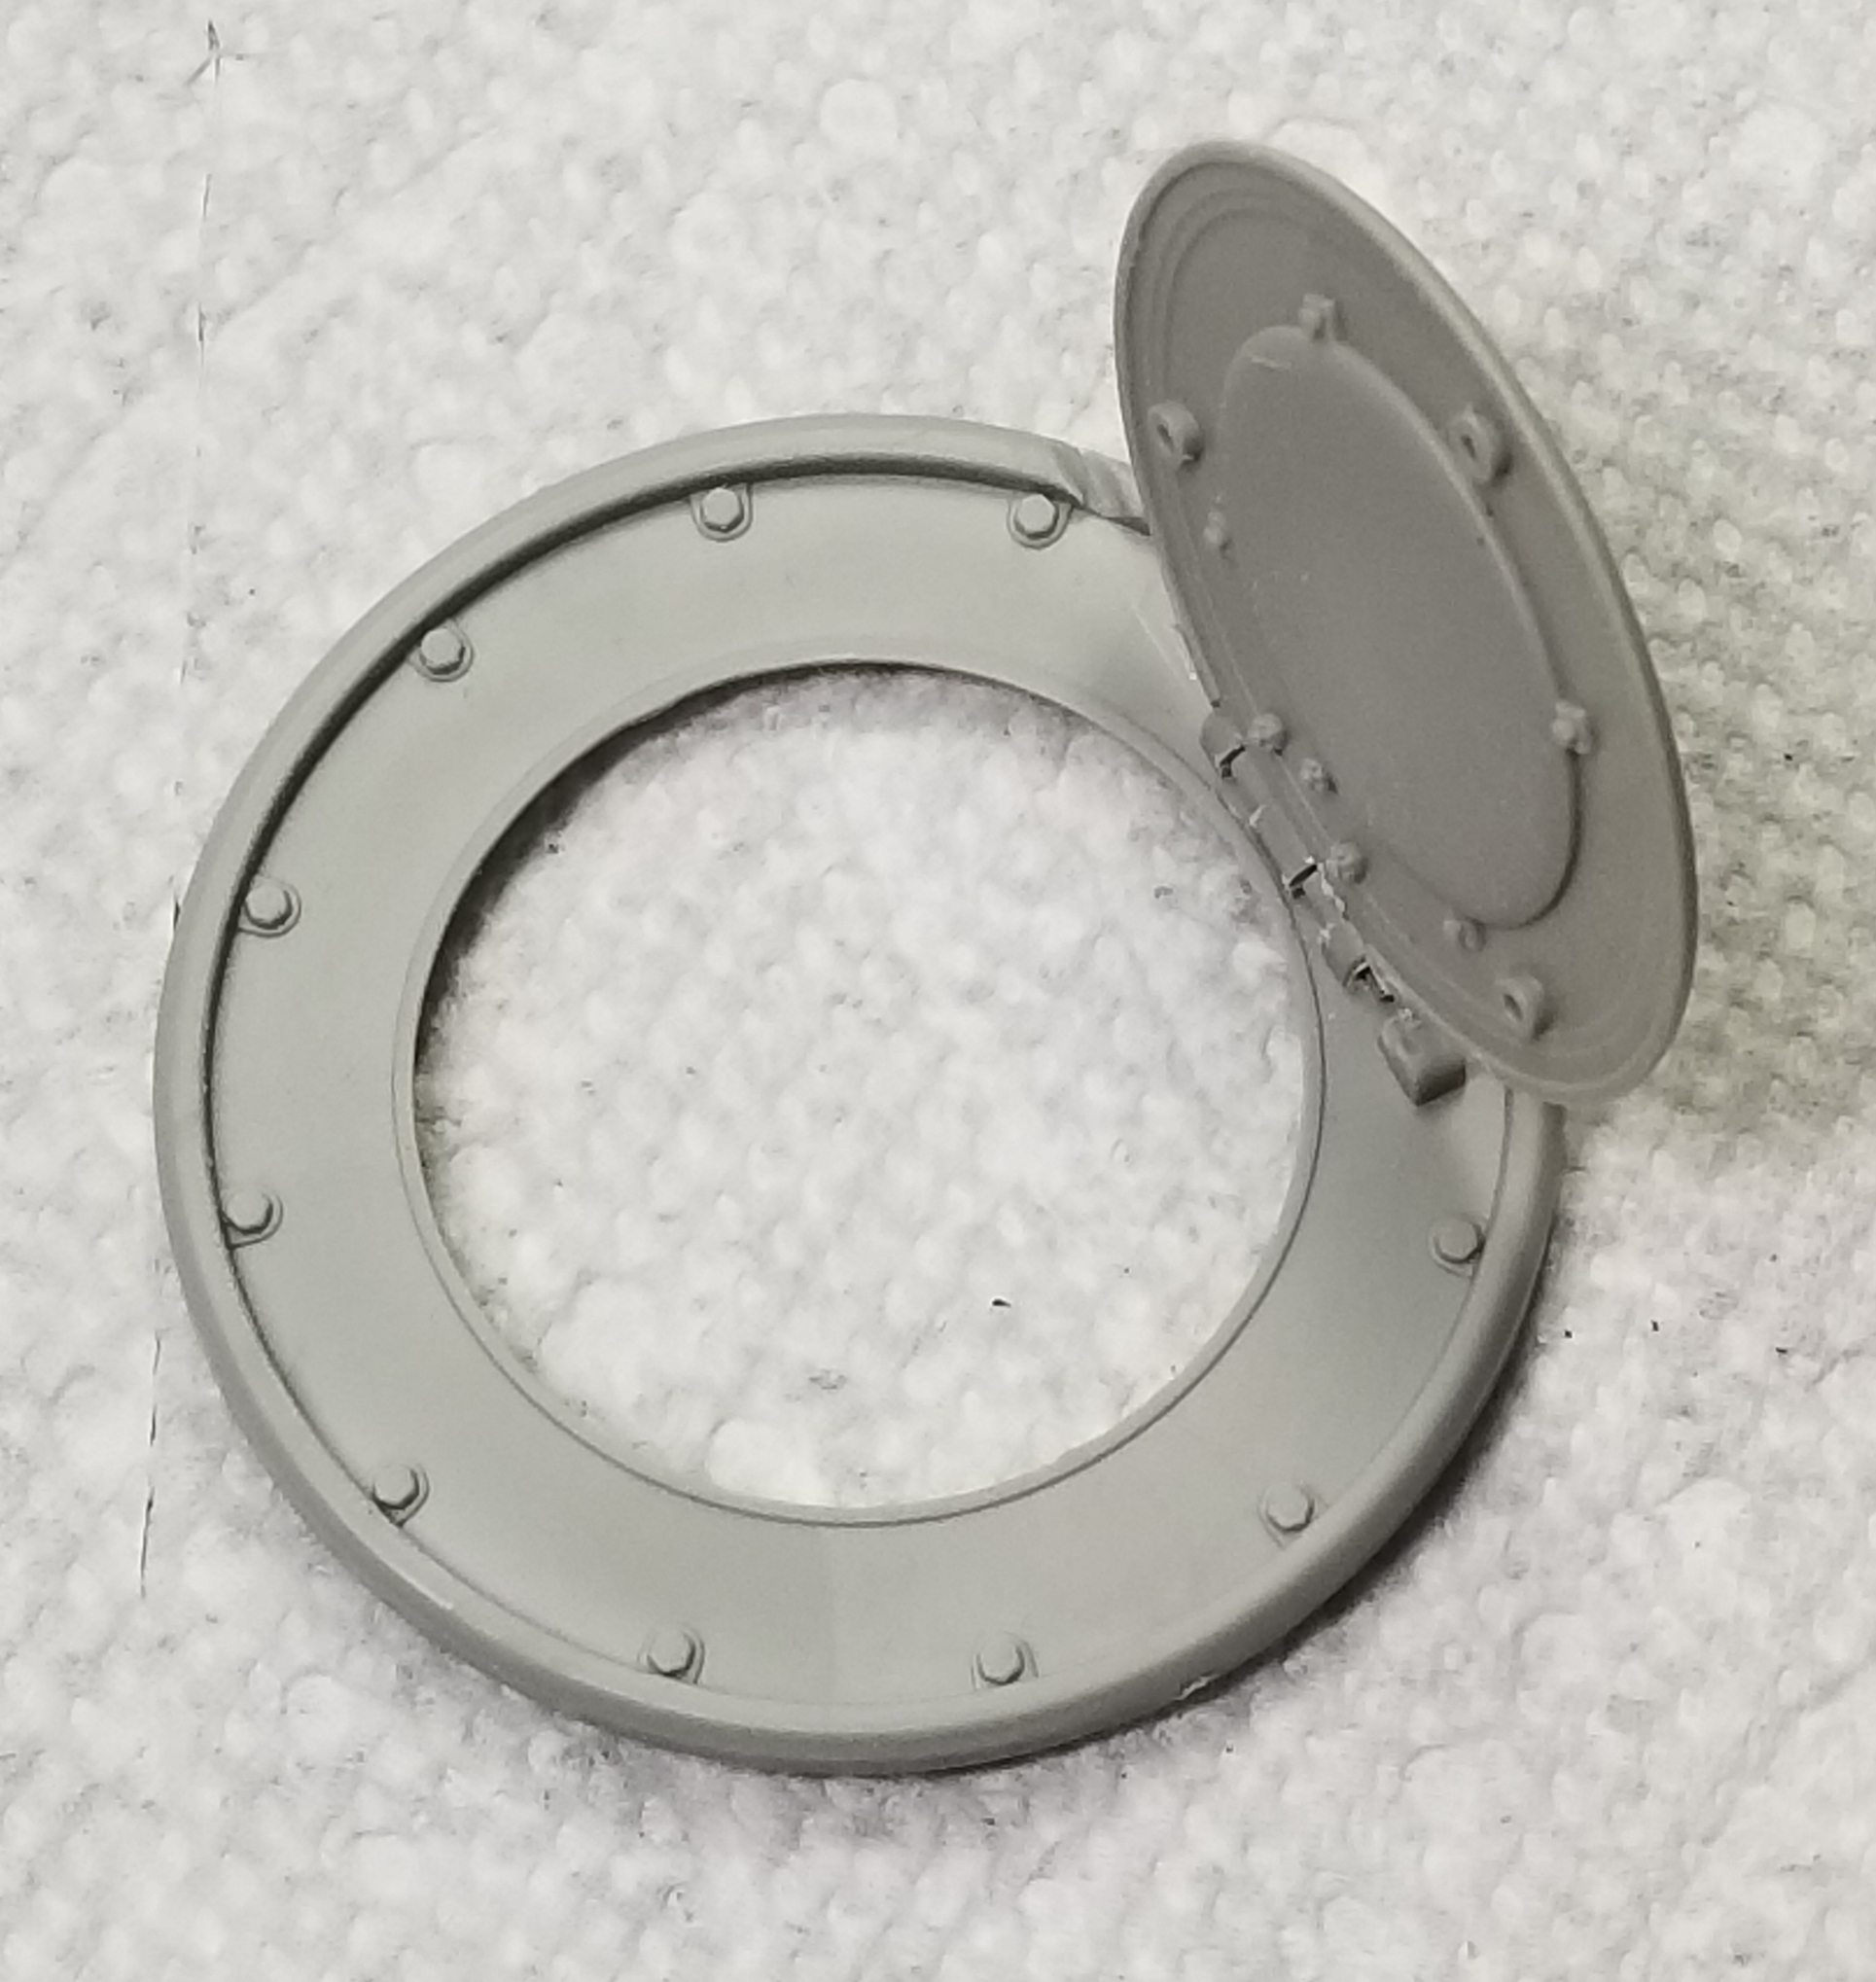
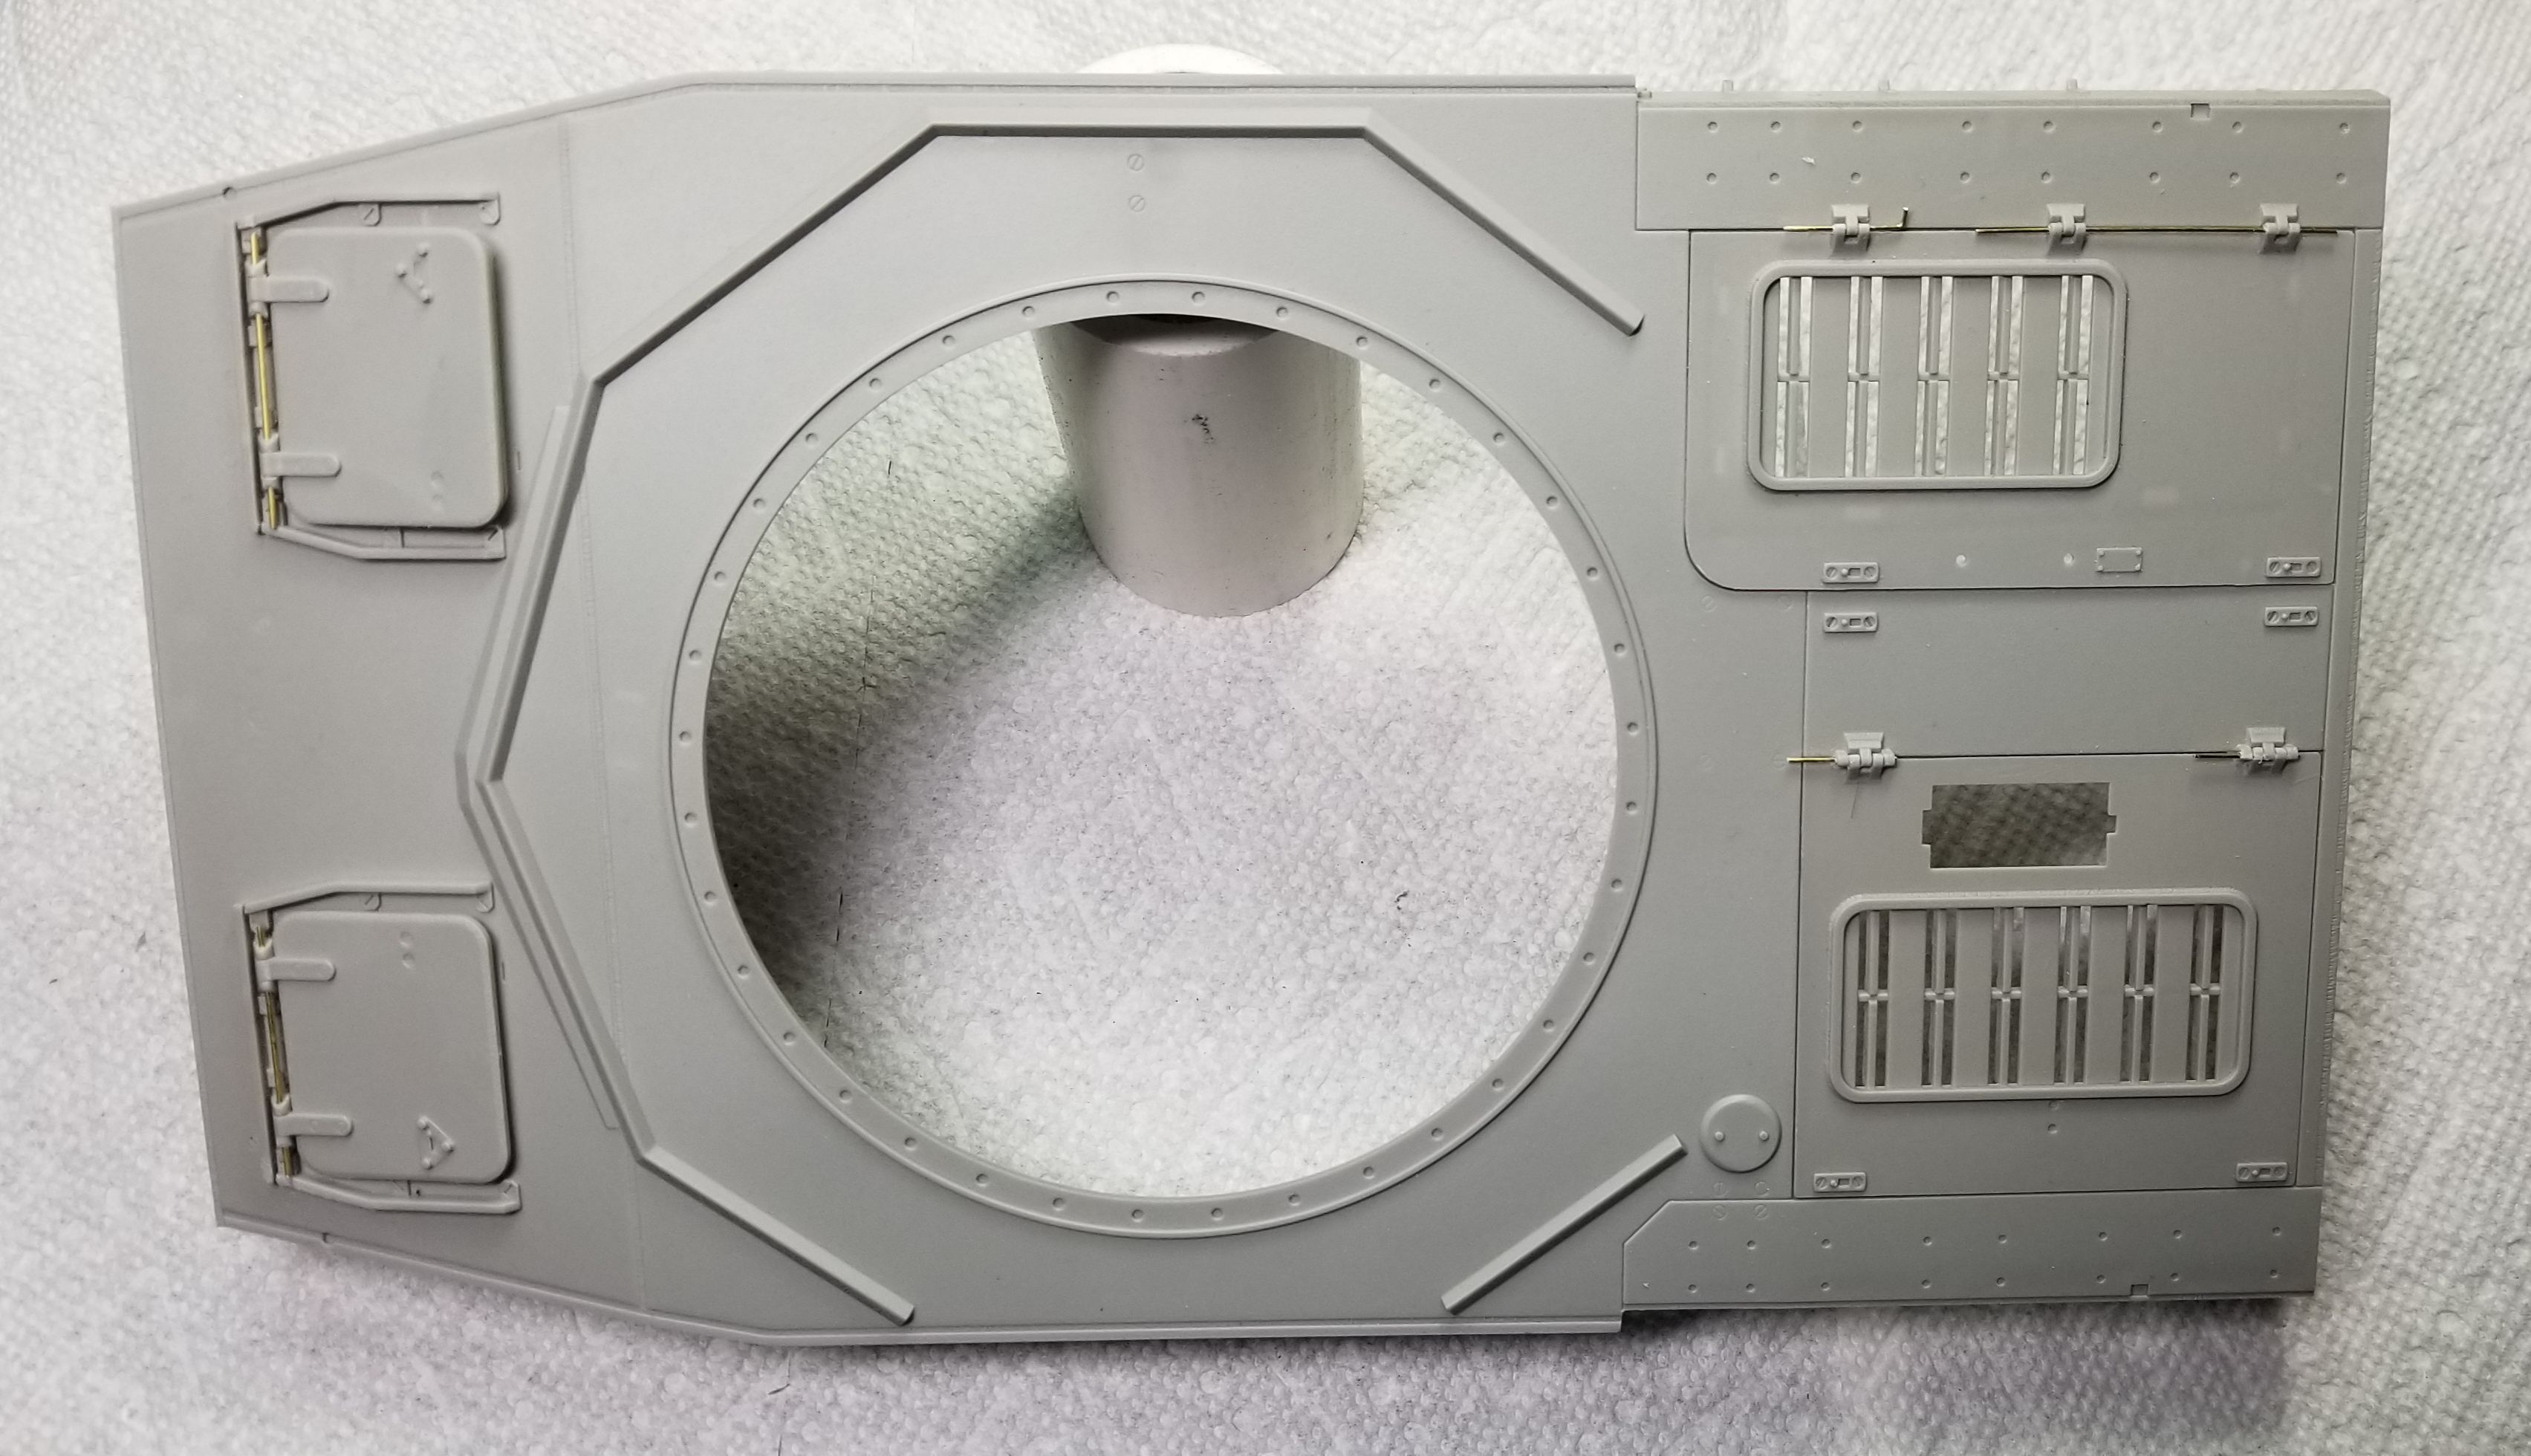
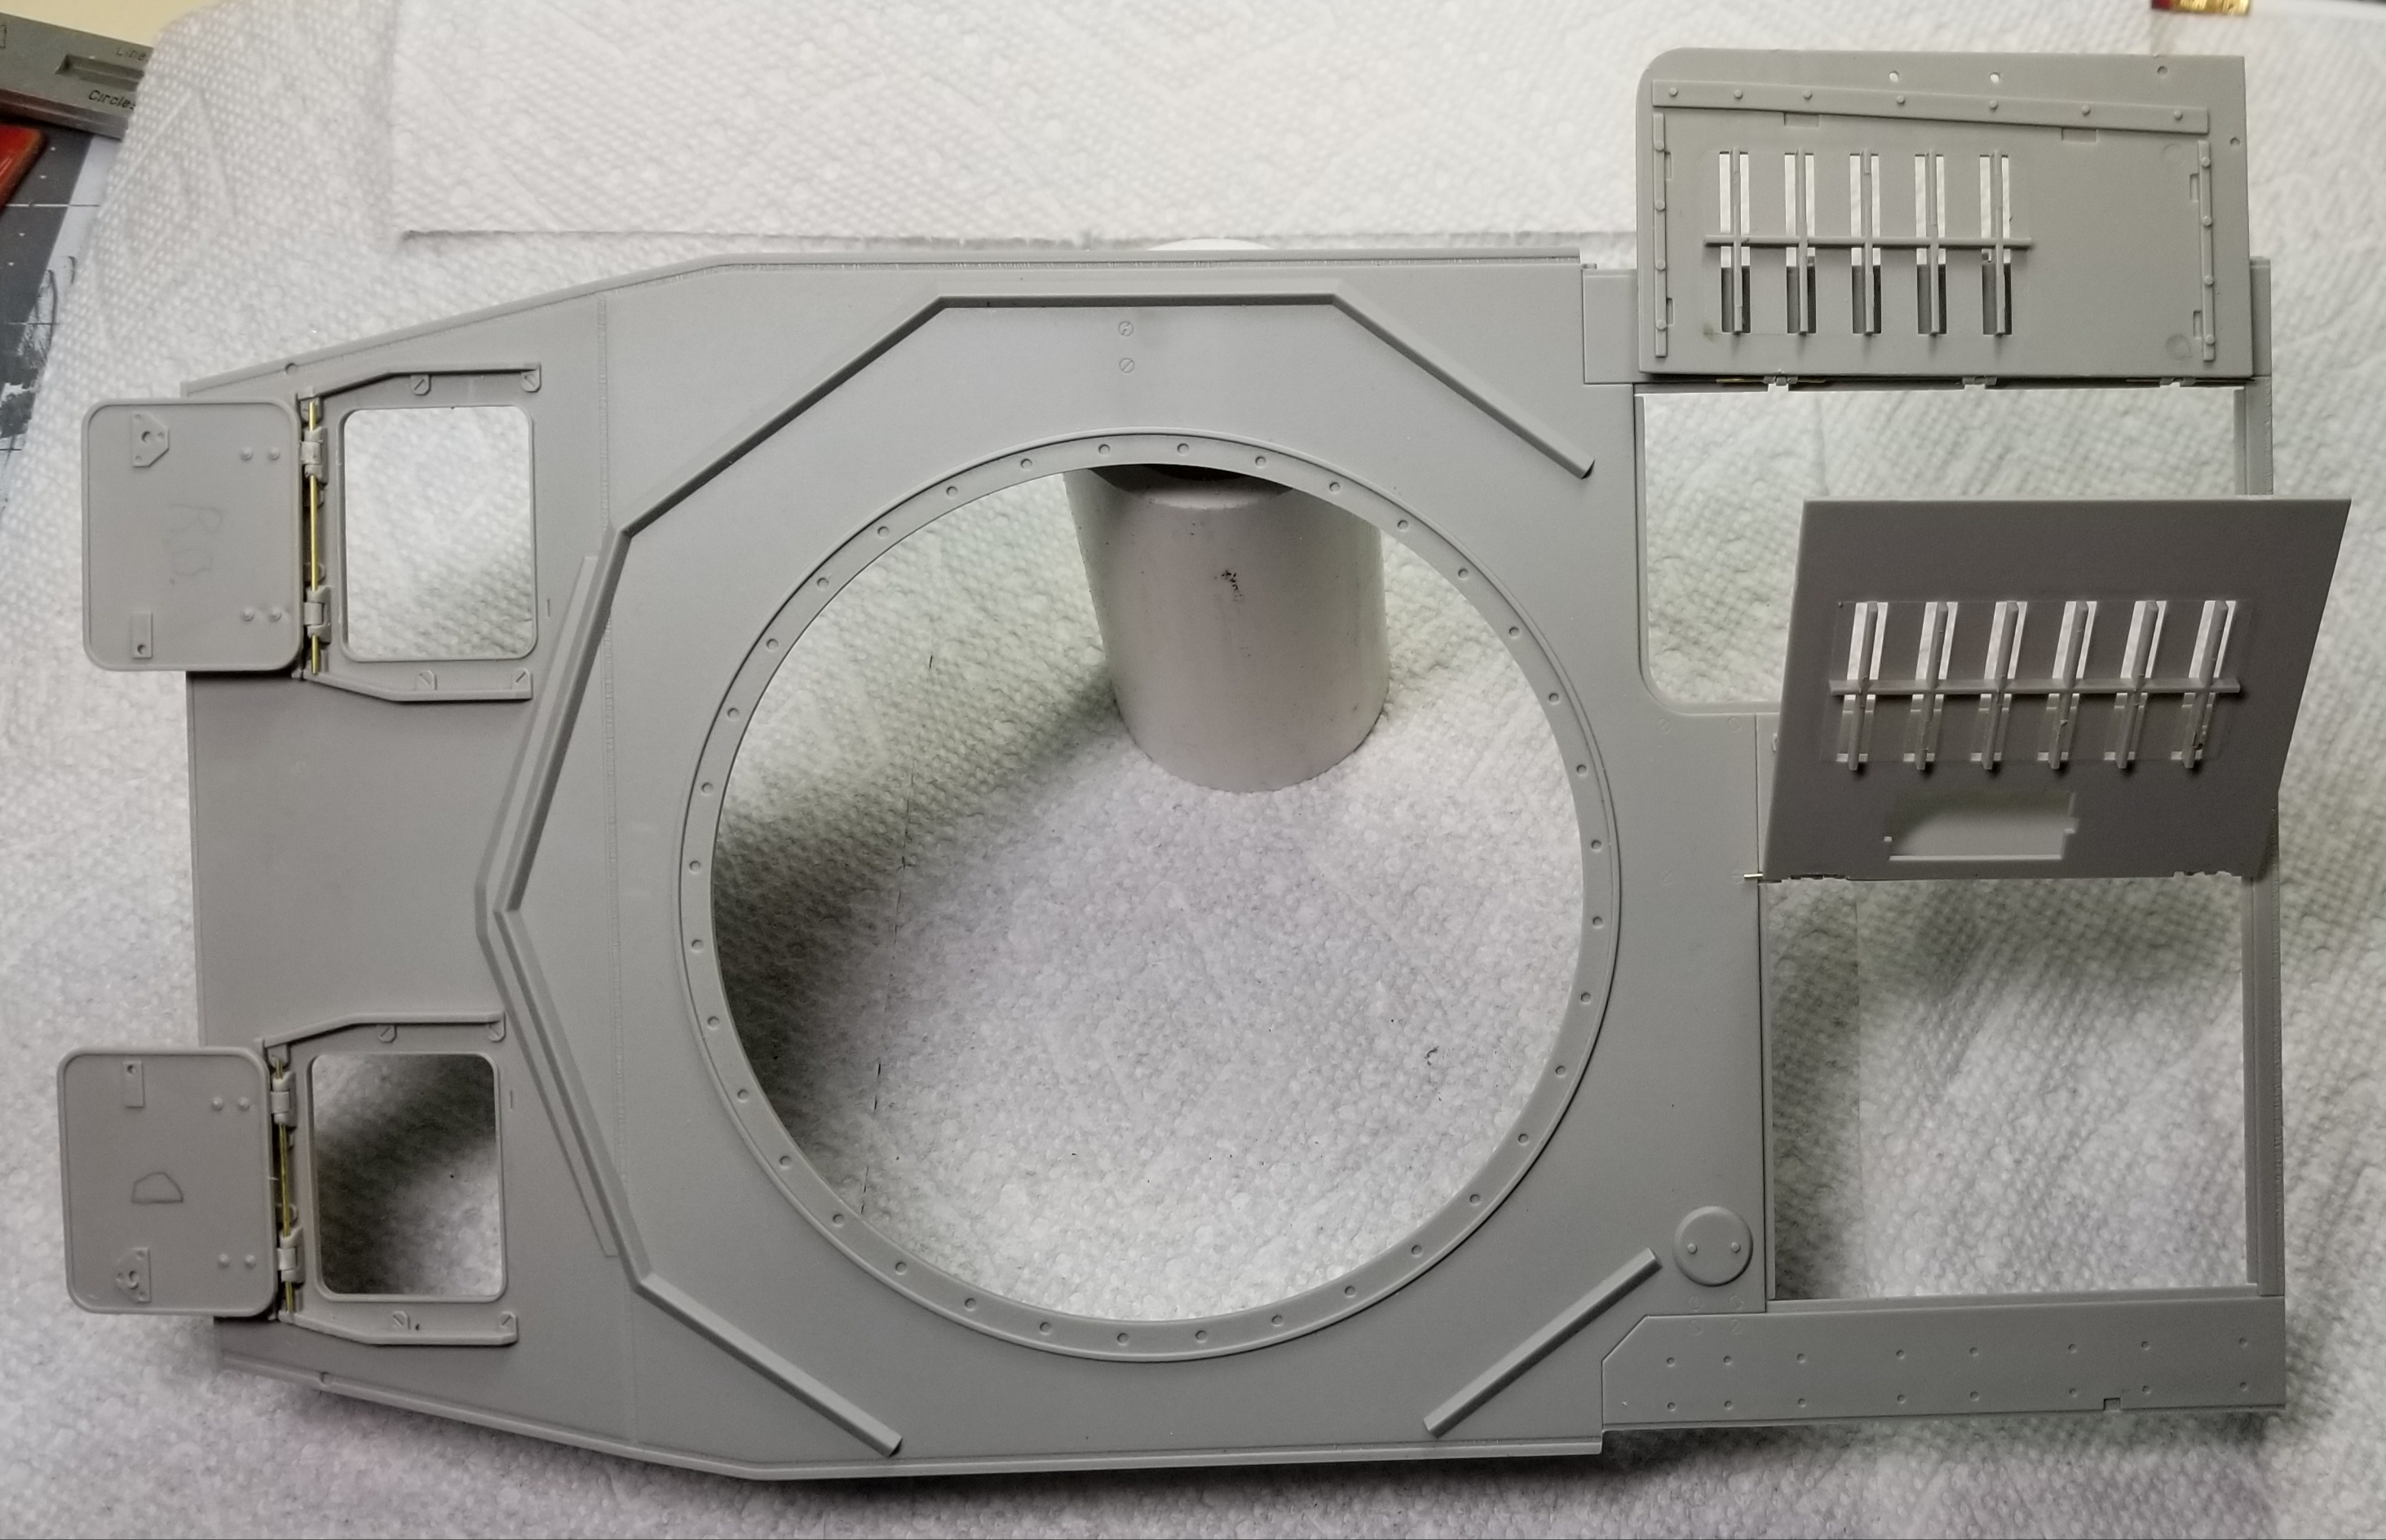
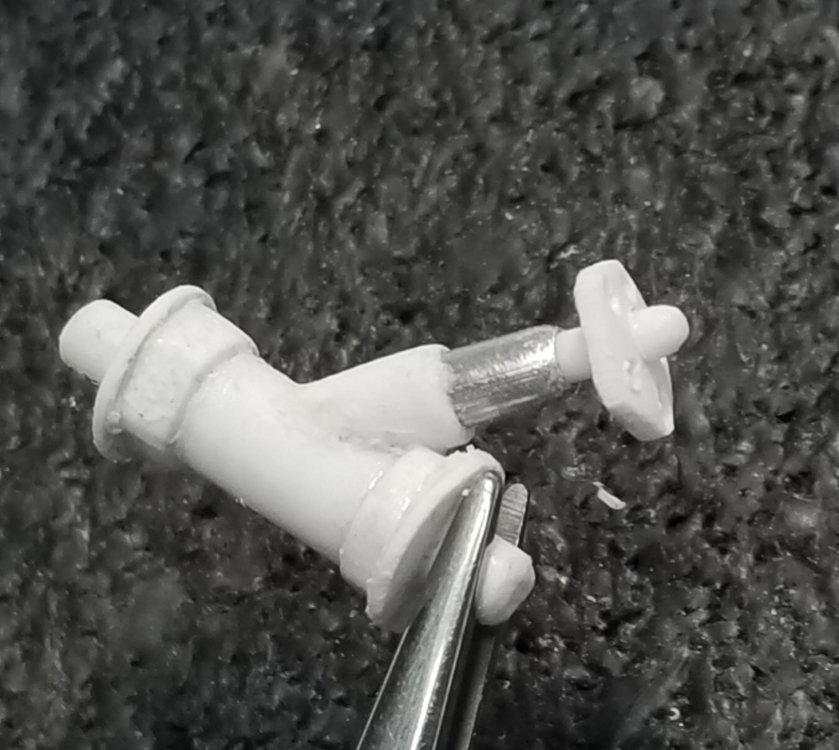
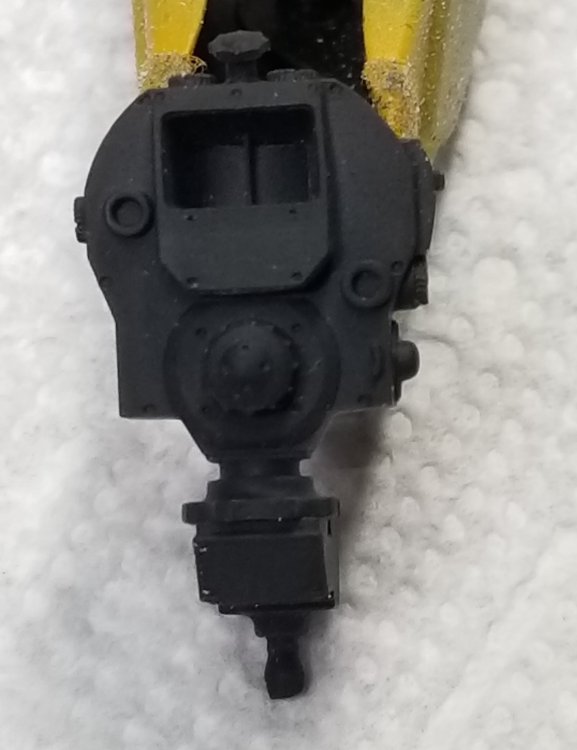
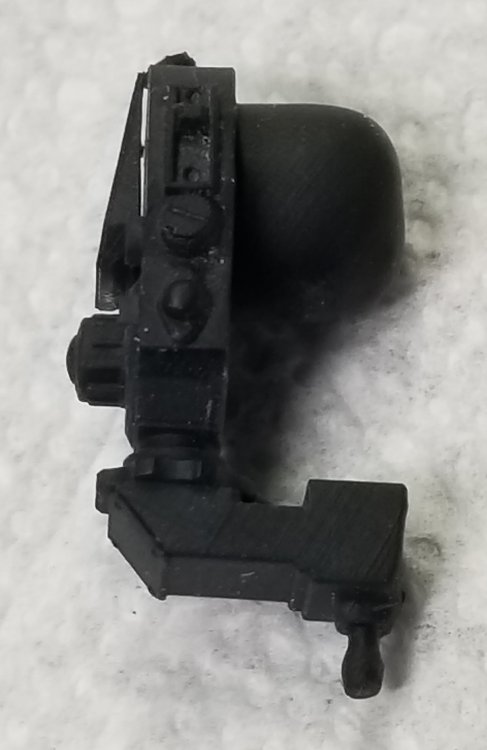
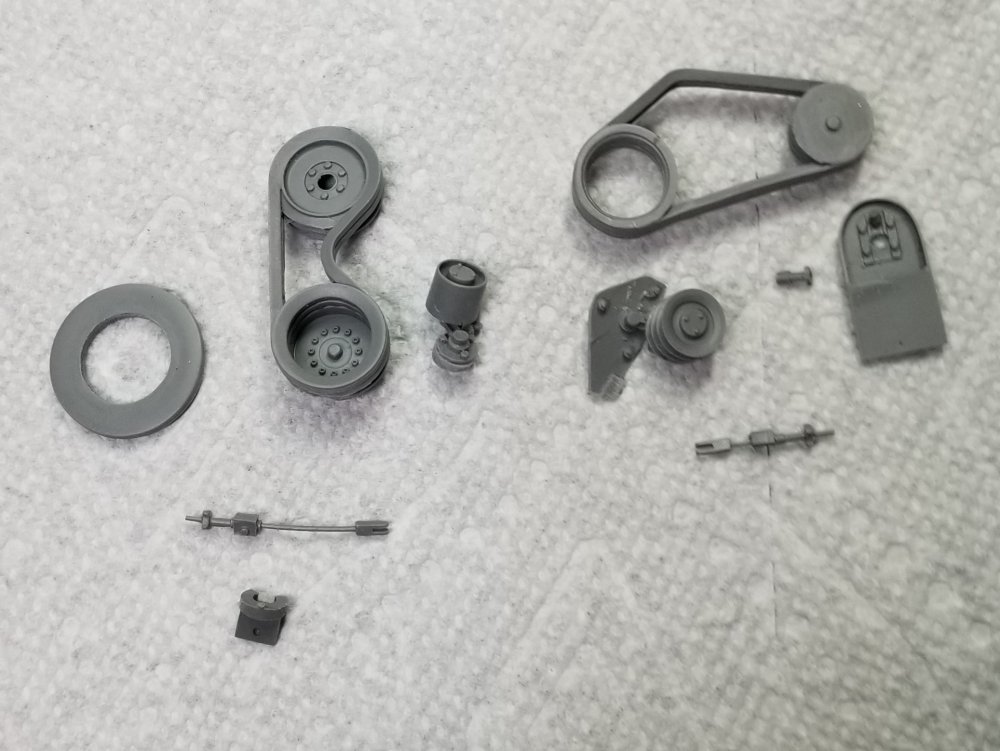
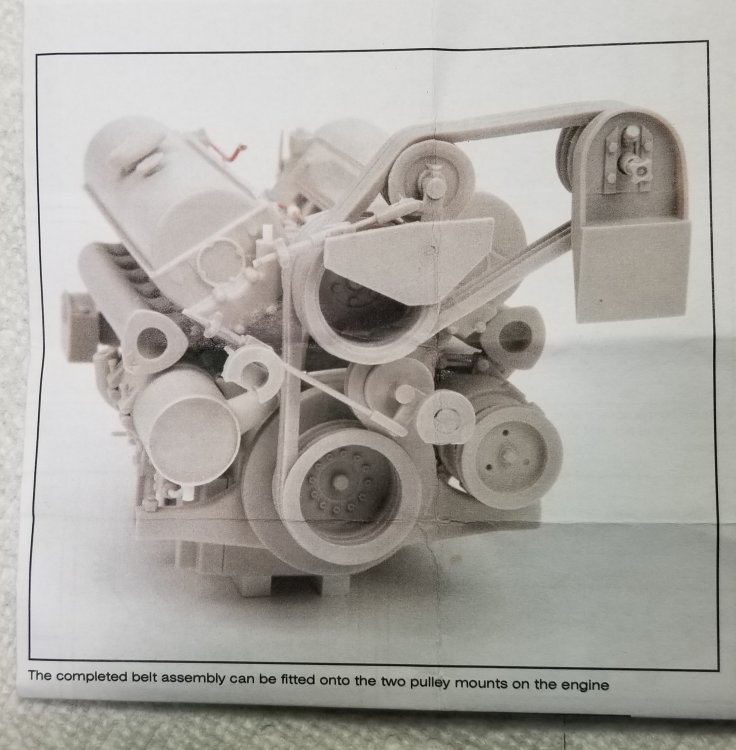
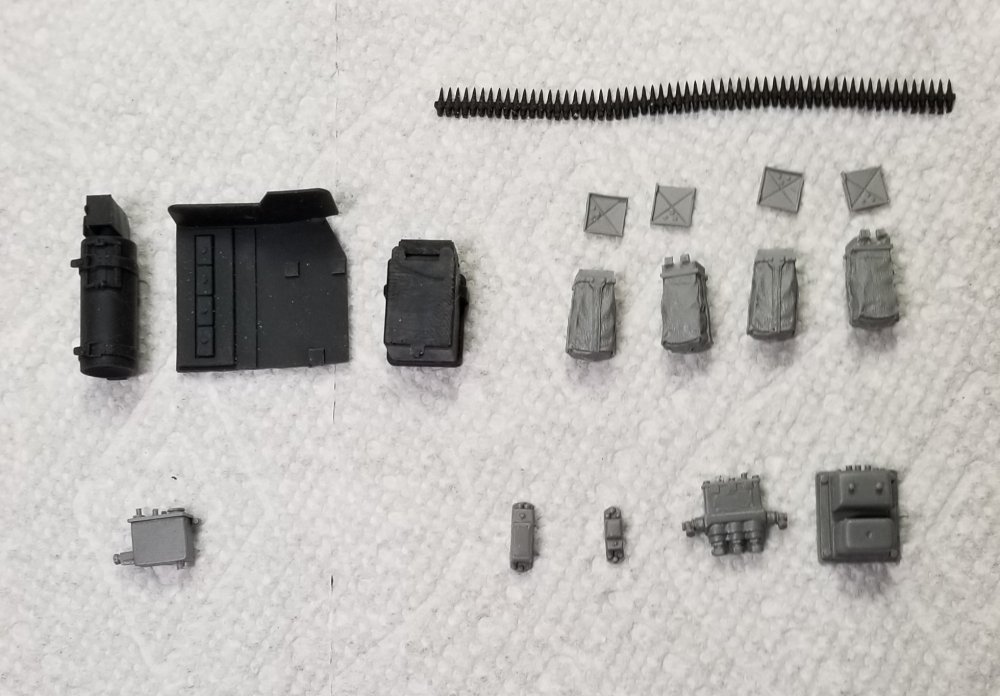
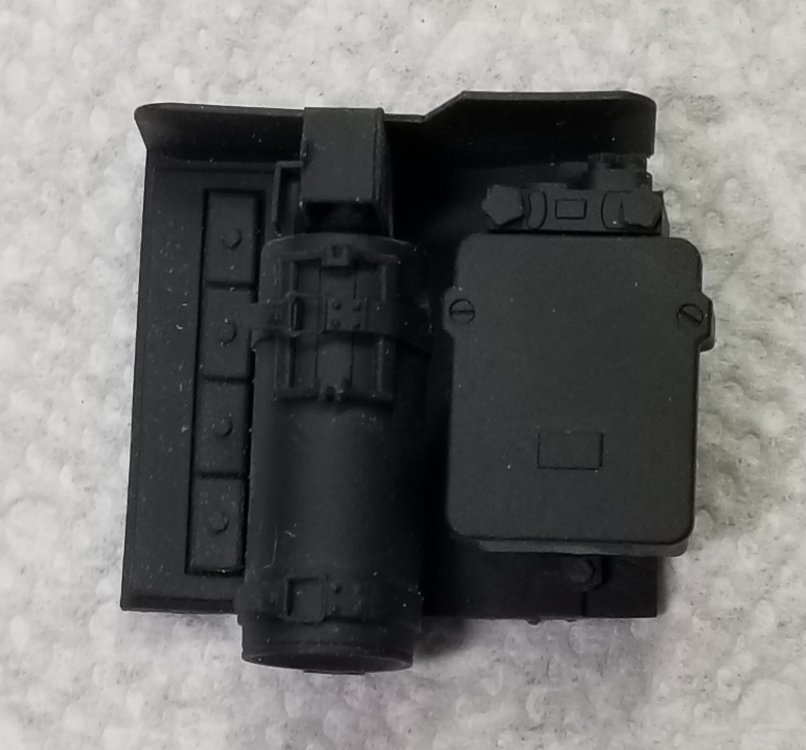
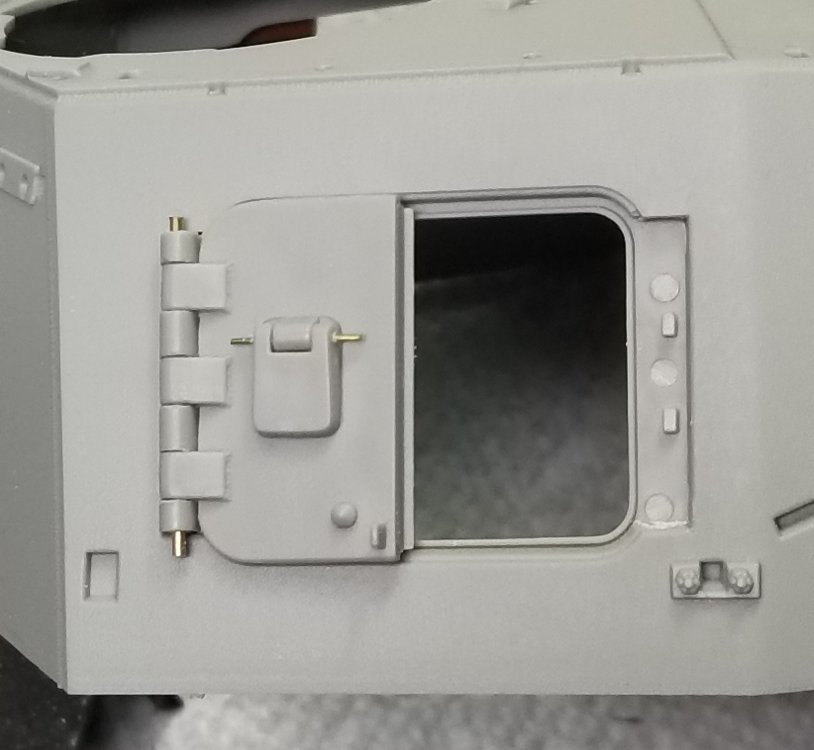
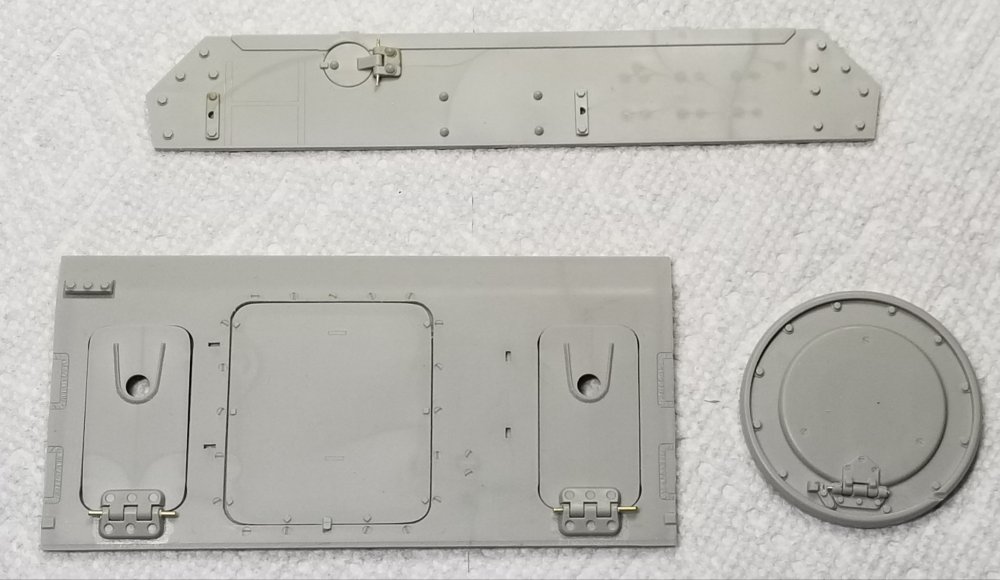
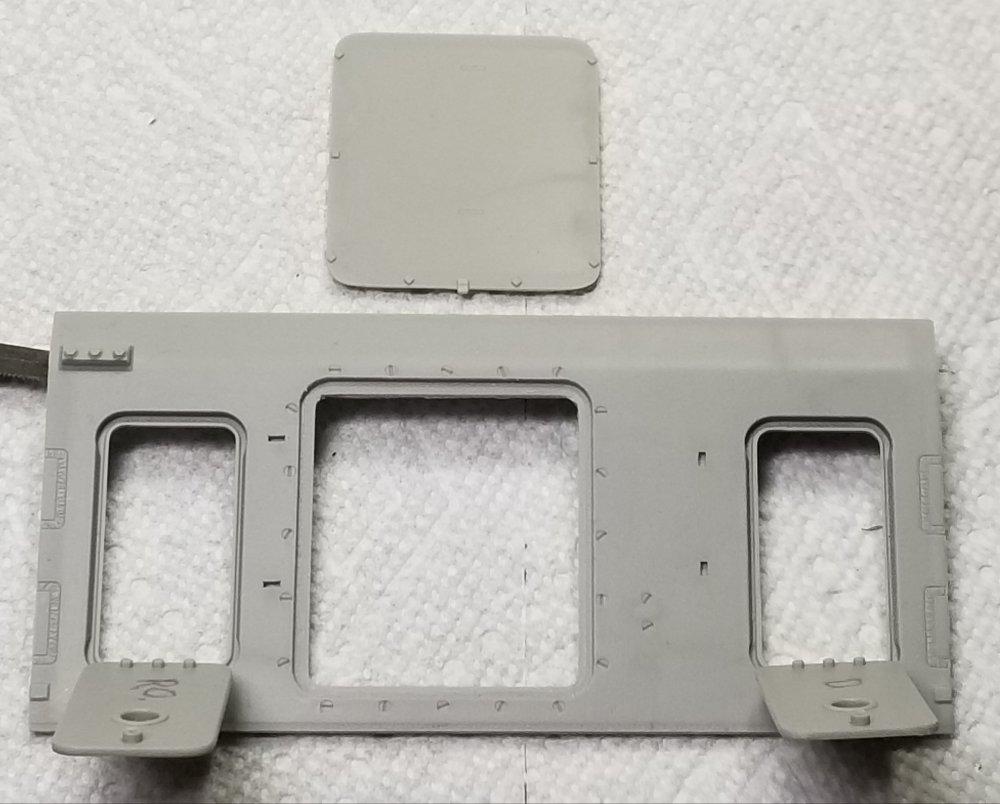
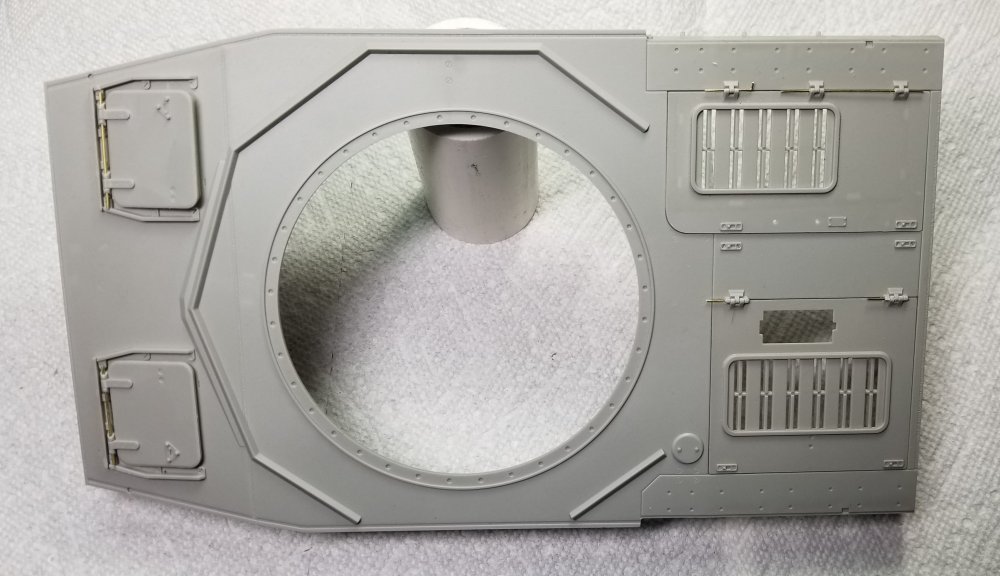
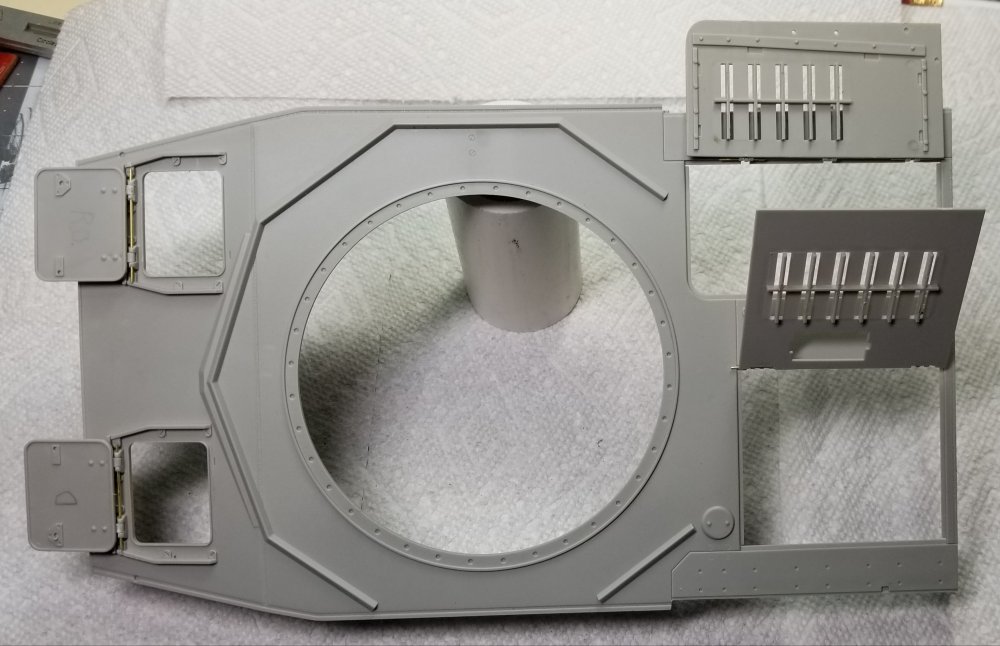
Hey all I actually started on this on Friday the 28th. I started out drilling out all, and I mean all the hinge pivots. I bought some extra long 0.5mm, 0.6mm, 1.0mm and 1.2mm drill bits off of Amazon. There from China, but they are pretty decent. The 0.5 are 80mm long and are VERY flexible. As of today (my 72 birthday)🎃 I have most of the hinges done, all but the turret hatch hinges. So here are some pictures for you to perose. This is the gyro compass from AFV Modeller it's made up of 3 parts, plus a decal. Another view of the compass. This is the fan belt system from AFV Modeller. It is more accurate then the kit, which is missing alot. This is a picture of how the fan belt system is supposed to look, from AFV Modeller. This is some more 3D printed parts from AFV Modeller. The black parts are a bracket, fire extinguisher and transformer box for the compass. The grey parts on the bottom are electrical boxs and valves for the engine compartment. The parts on top are machine gun ammo belt and 4 gerttz sacks for holding ammo for the machine guns. This view shows how the 3 peices go together. This sits on the wall to the left of the driver. View showing one of the turret hatch doors for the loader in the closed position. This view shows the hatch in the open position. I'm not sure what this small hatch is but made so it will open. This view shows the rear upper back panel, the front upper hull plate with hatches and the cupola hatch. This view shows the hatches over the steering brakes in the open position. I'm thinking about making the center hatch removable. I know there are several spare track links mounted on this, but they are held on with track pins, which are removable. I think I can hide some small Tamiya magnets under the hull plate to hold the hatch in the closed position. This shows the lid cover over the starter port, I made this operable. This view shows the cupola hatch in the open position. This view shows the upper hull and the engine hatches and the driver and radio operators hatches. This view shows all the hatches in the open position. Well that's it for know I'll be back with more soon. Ron G


-
HELP!!!! Problem with decal.
CrankyCrafstman replied to CrankyCrafstman's topic in Modelling Discussion
Hey Bomber They do have some crosses, numbers some swastikas. But no emblems. There from DN, I think that's right, but there $46.00 bucks. I'm thinking that I'm going to be hand painting them on. I can make my own masks for the crosses and numbers from the decals, I hope. Ron G -
HELP!!!! Problem with decal.
CrankyCrafstman replied to CrankyCrafstman's topic in Modelling Discussion
Thanks Paul -
HELP!!!! Problem with decal.
CrankyCrafstman replied to CrankyCrafstman's topic in Modelling Discussion
Yeah Paul, my toughts exactly. Martin How much and where do you get it? Ron G -
HELP!!!! Problem with decal.
CrankyCrafstman replied to CrankyCrafstman's topic in Modelling Discussion
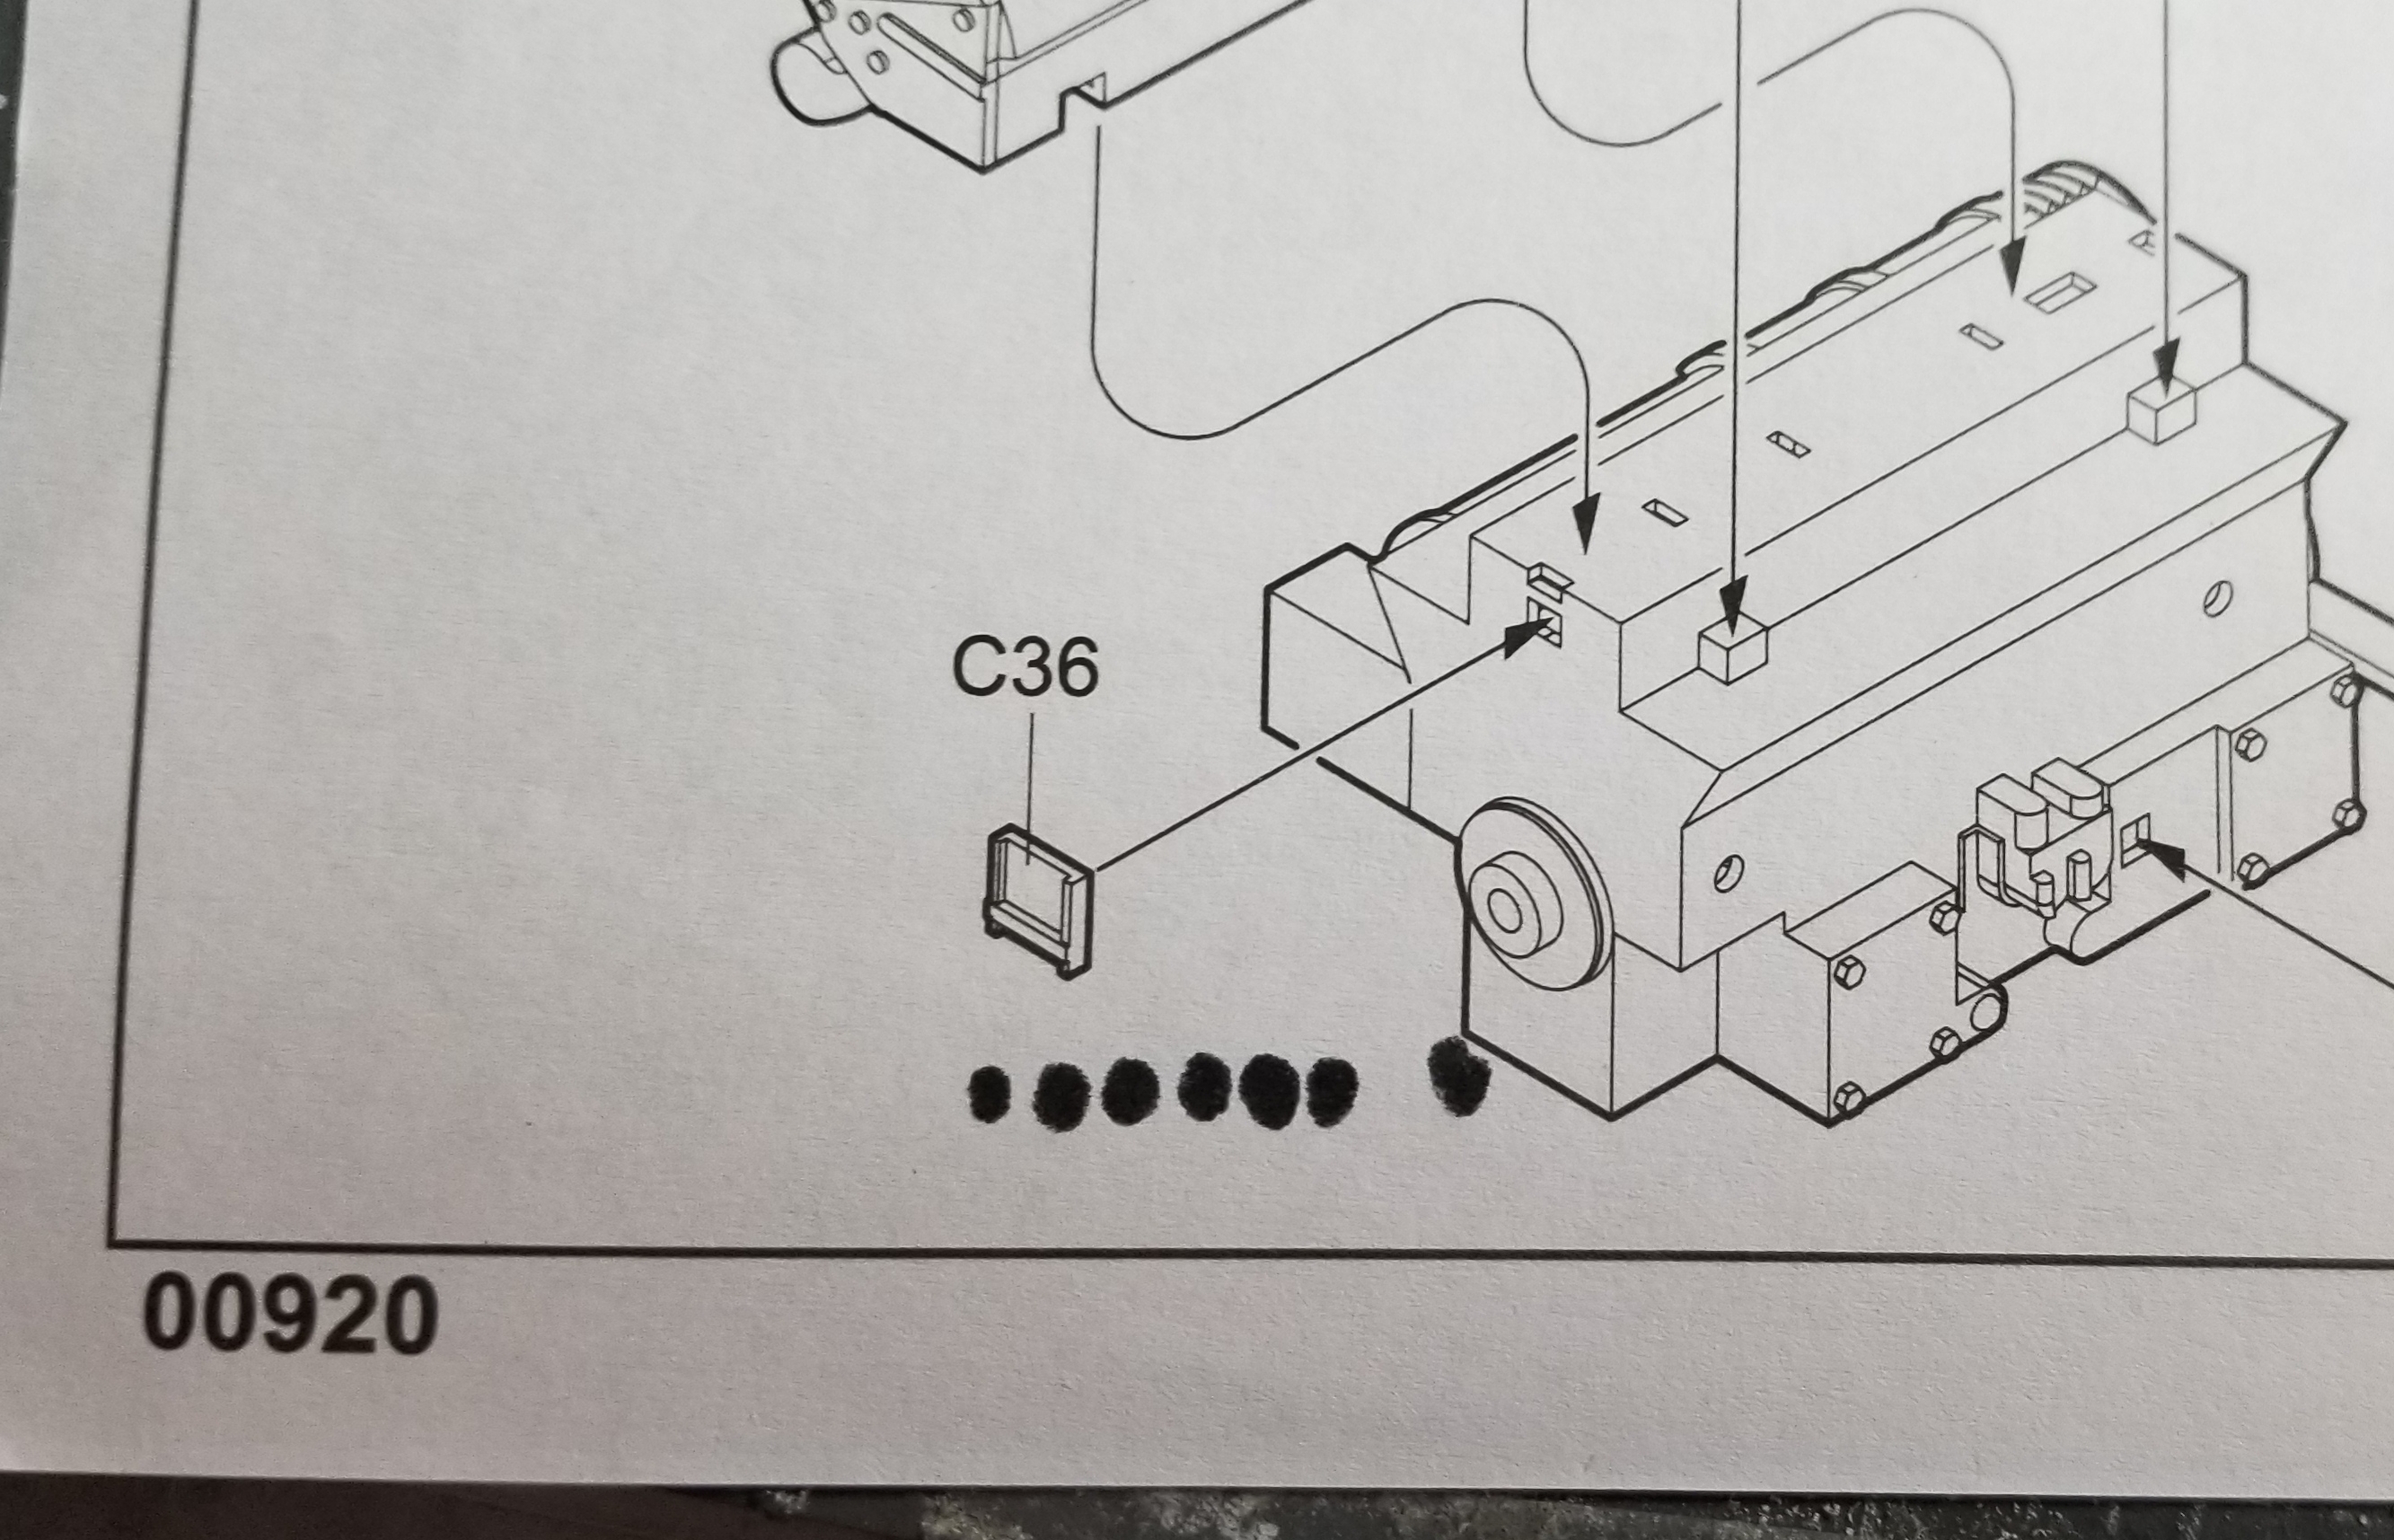
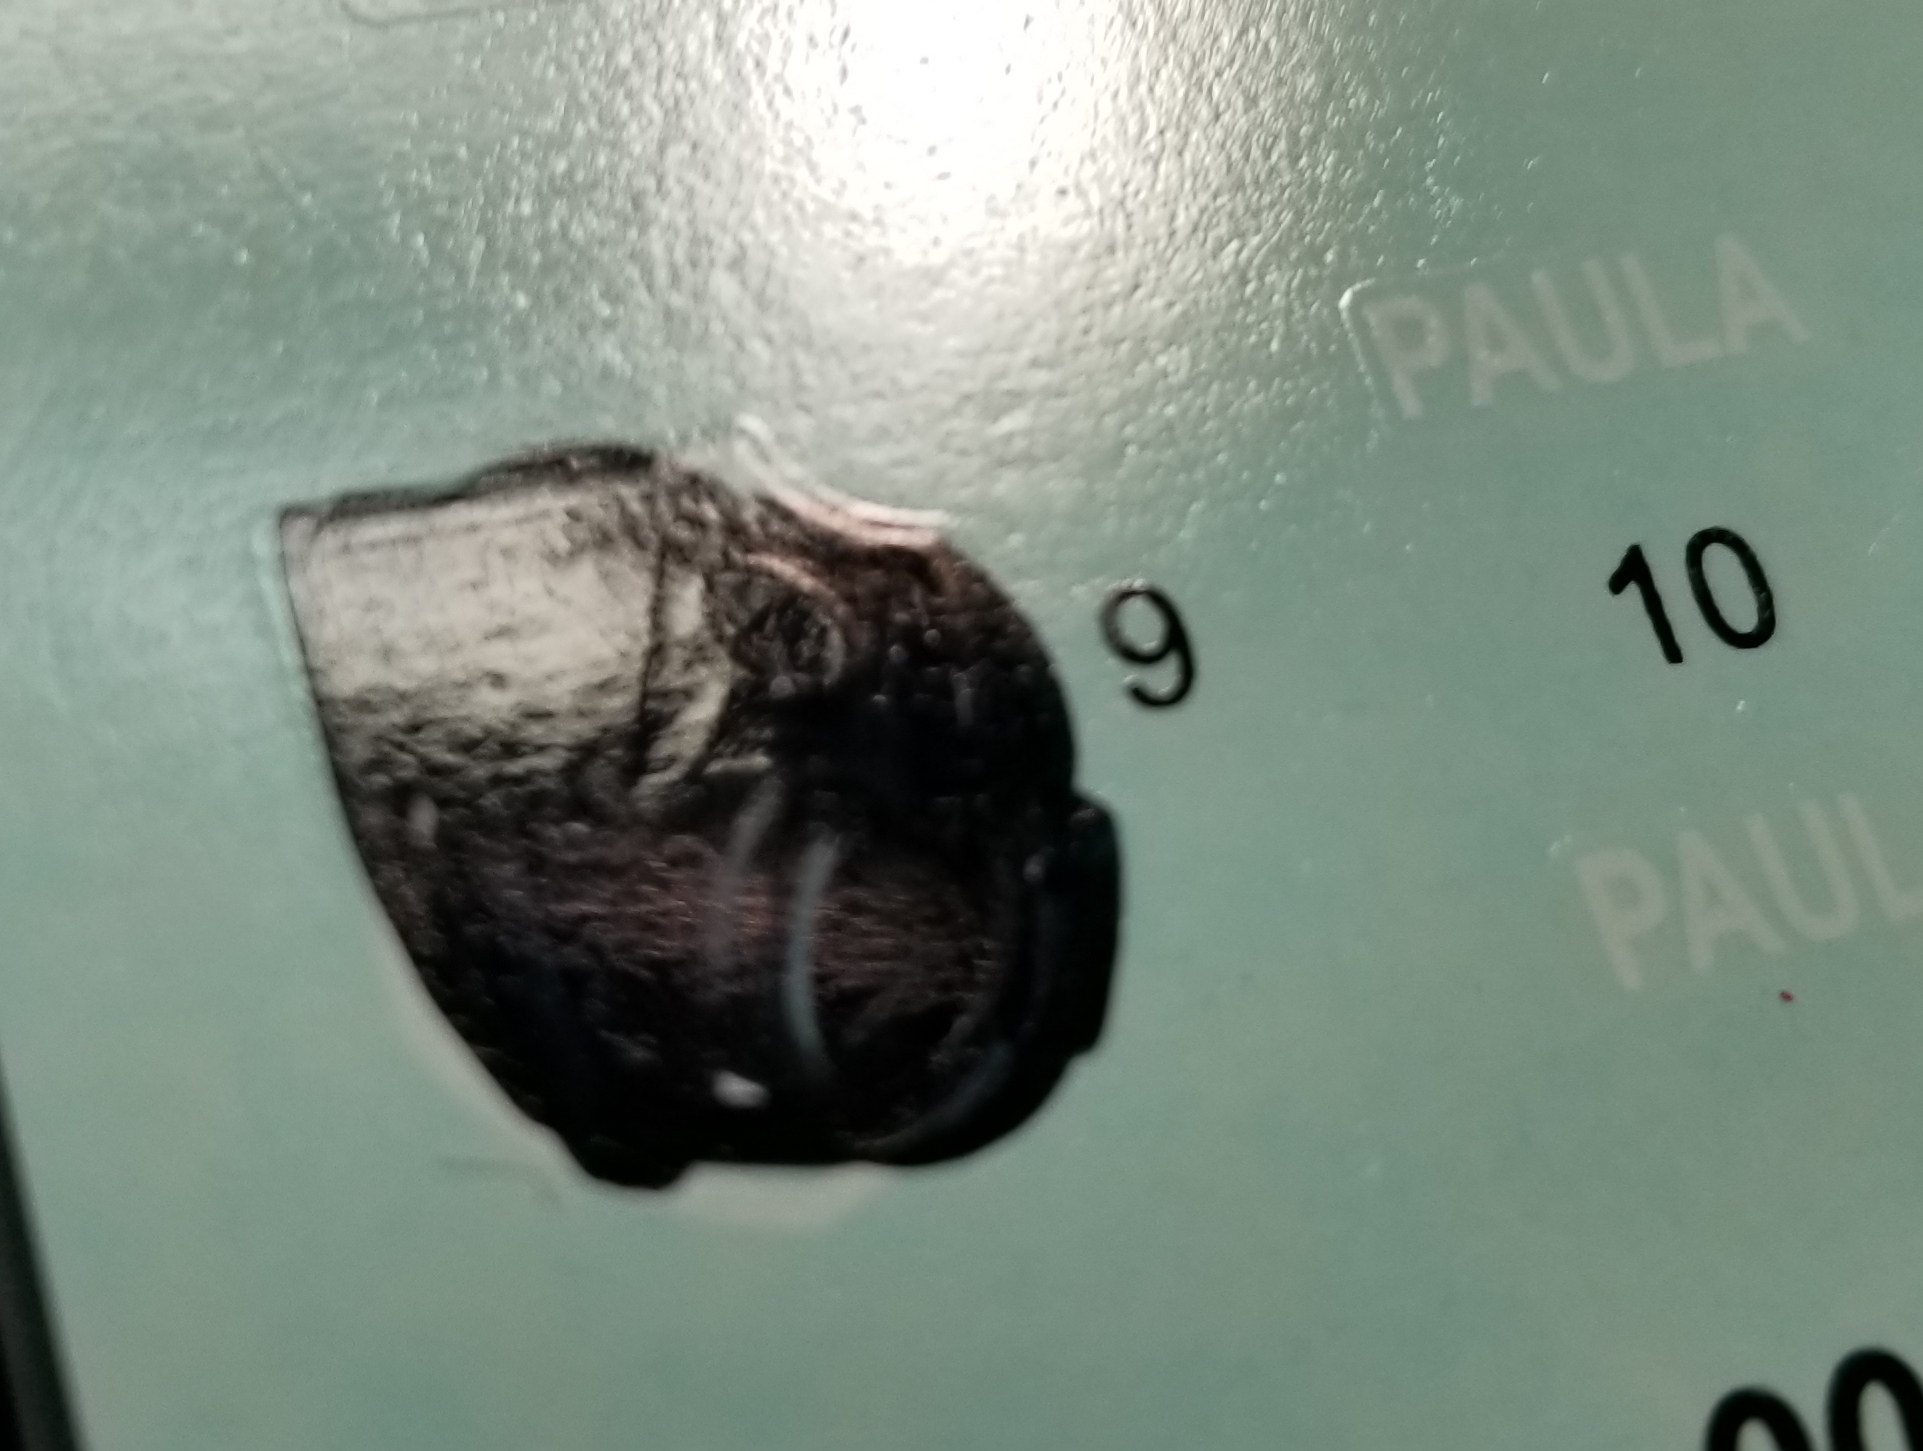
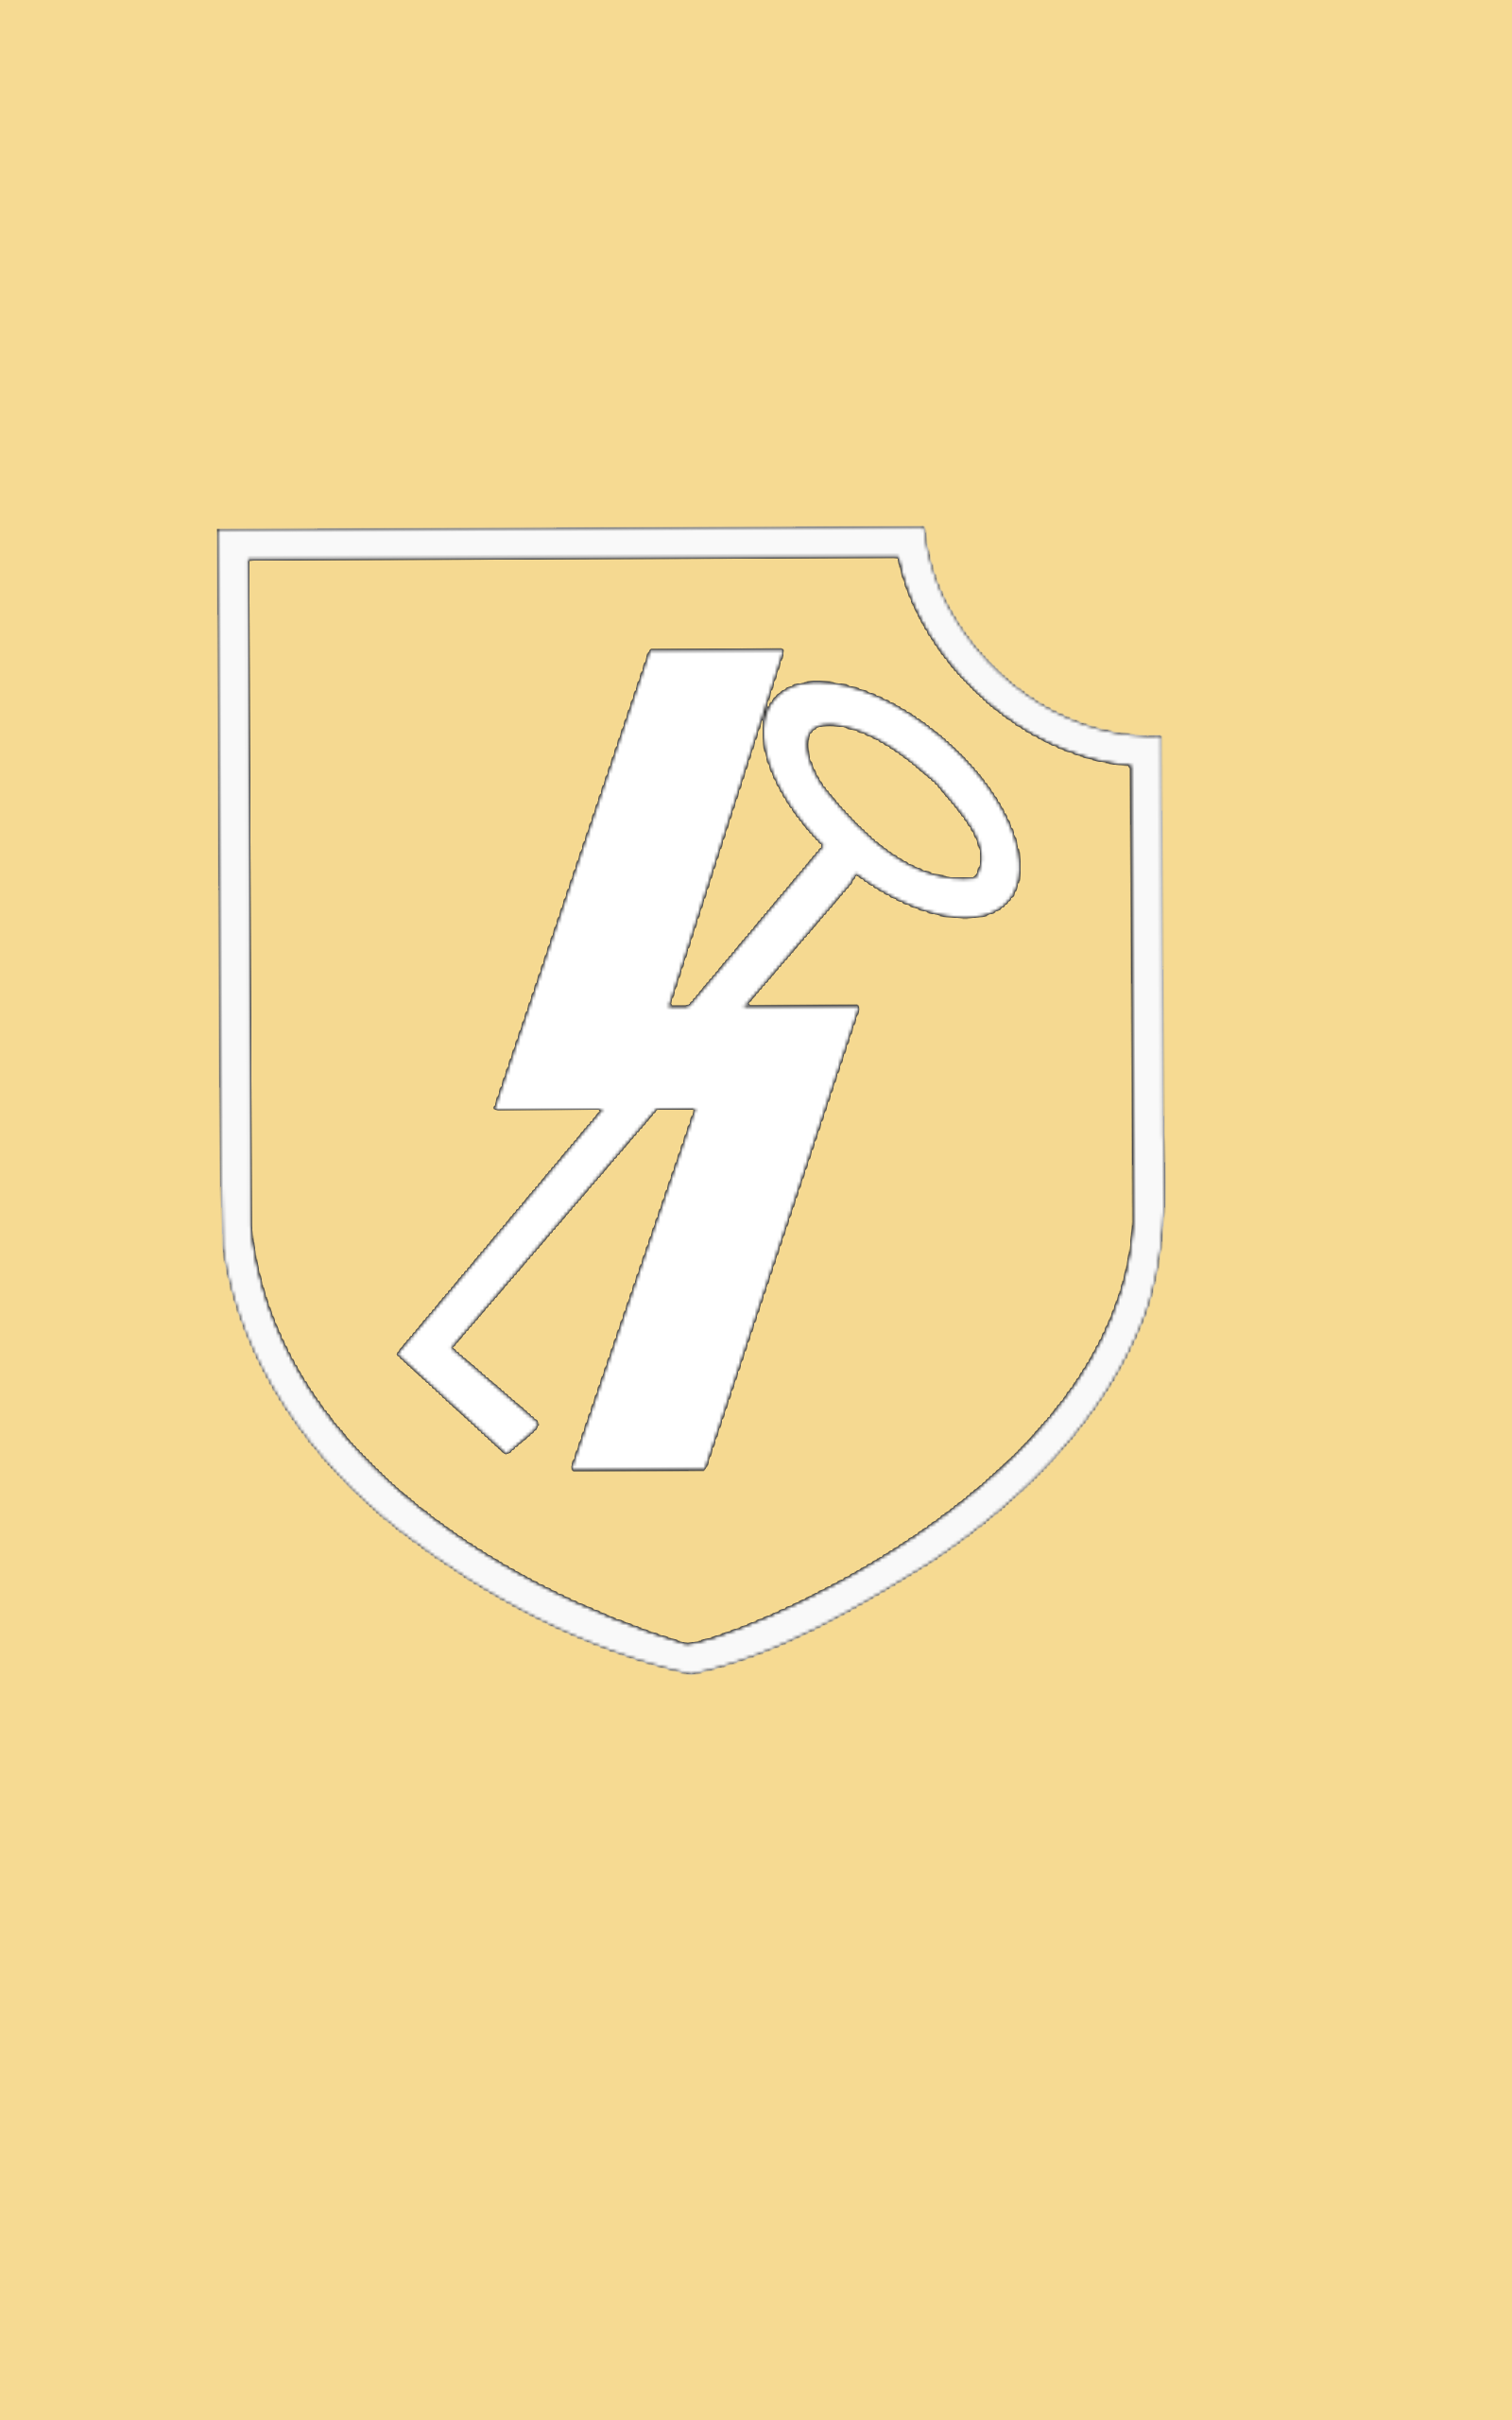
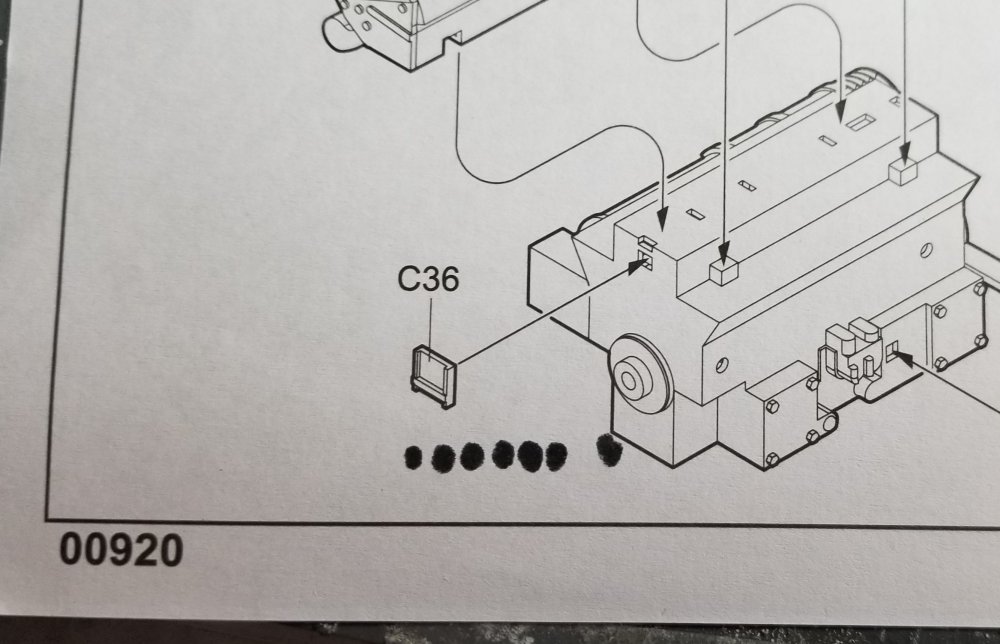
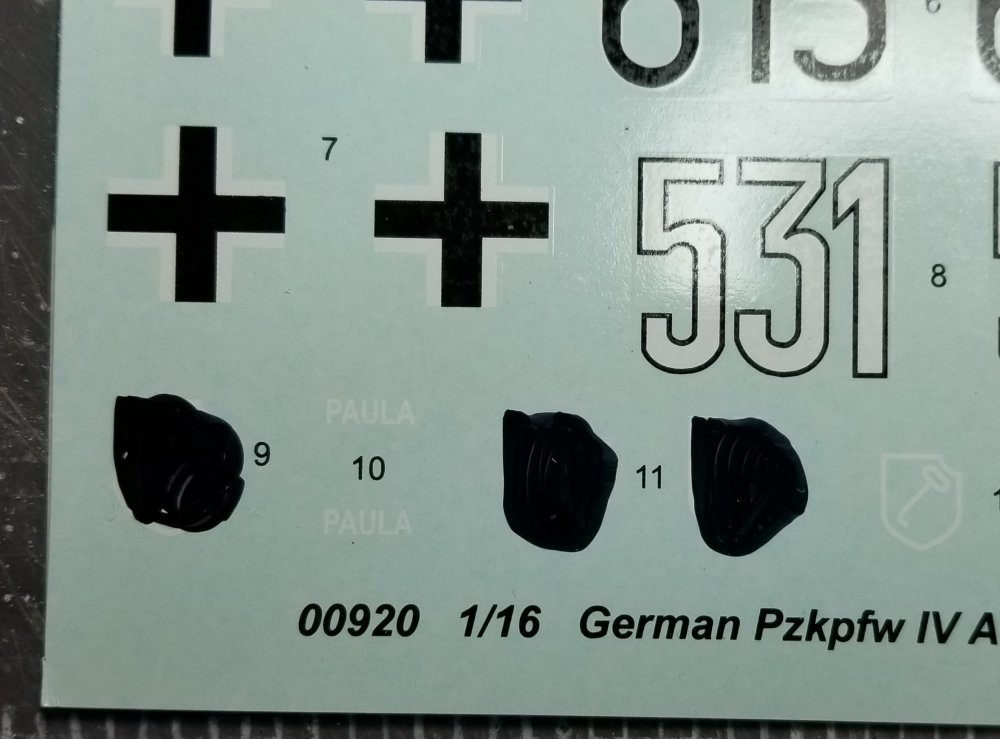
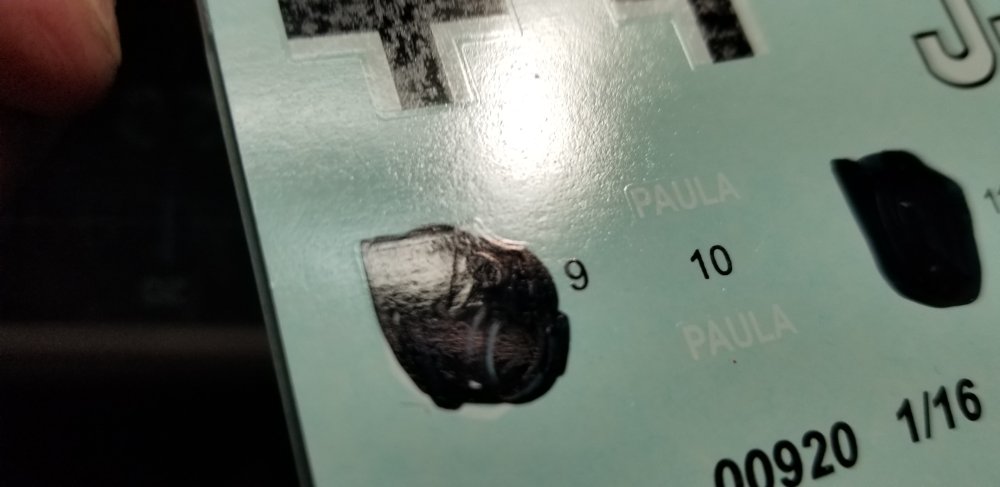
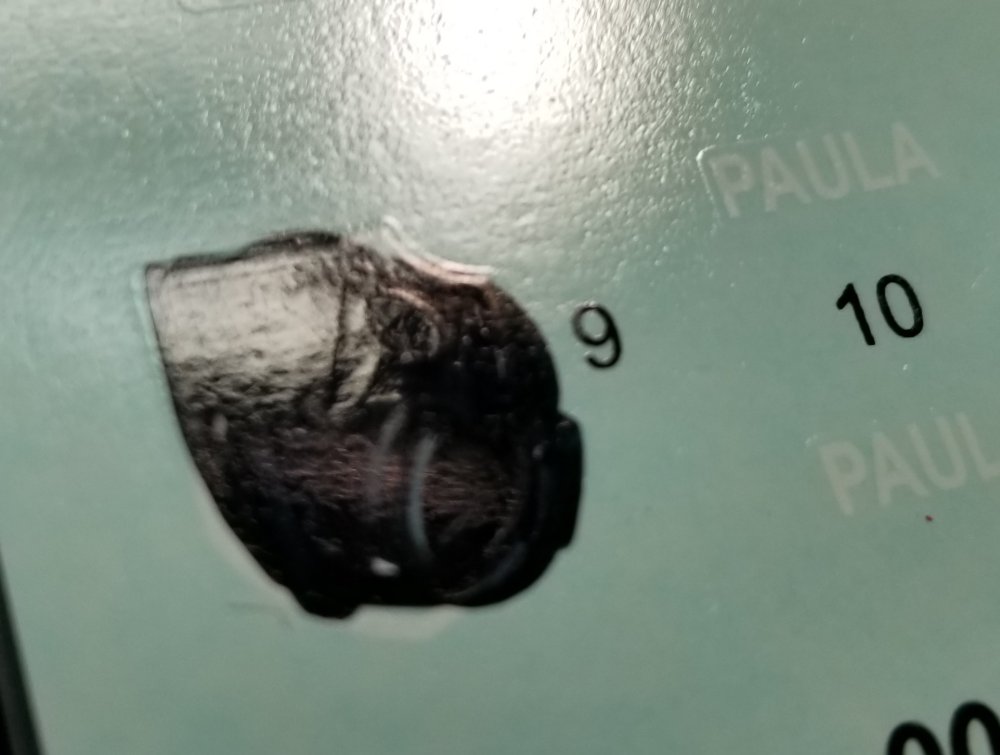
Hey Paul Here are some photo's. As you can see they even blanked out the markings on the instruction manual. View of the other side of the instructions. view of the decals that are blacked out. The number 9 is the one I need. Closer view of number 9. See photo below. This is what I need. It's the unit emblem for Panzer-regiment 12 SS, for 5 or 6 Kompanie. I think they did it because it's an SS symbol. I started on the kit, marked out the escape hatch to cut out, drilled out the hinges for the engine deck, they didn't turn out the way I hoped, need to fix. So that's it for now I'll post some pictures tomorrow. Bye for now. Ron G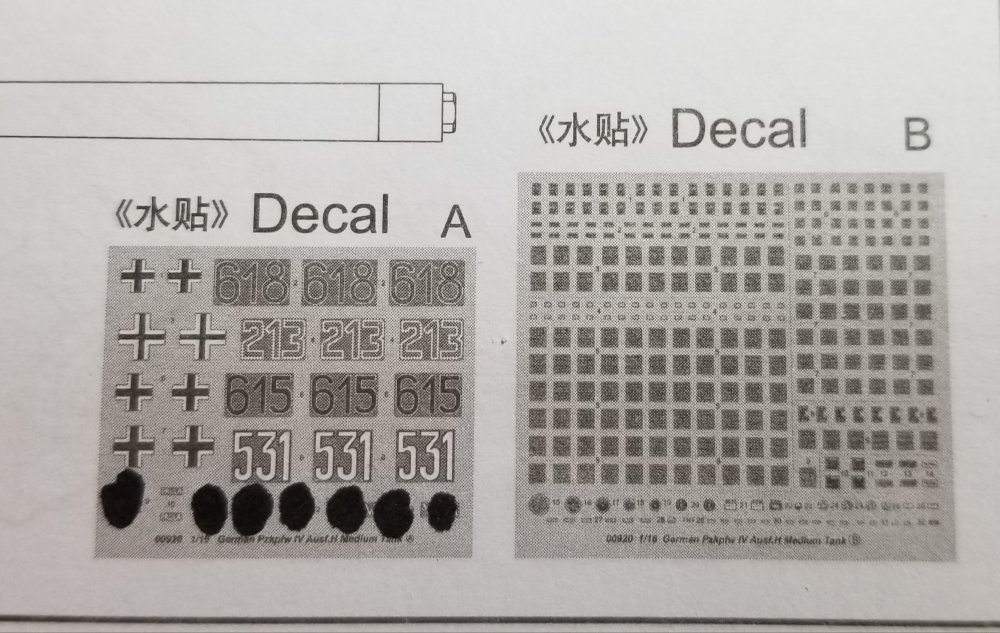

-
HELP!!!! Problem with decal.
CrankyCrafstman replied to CrankyCrafstman's topic in Modelling Discussion
Hey Paul I'll post some pictures of them tomorrow. Ron G -
HELP!!!! Problem with decal.
CrankyCrafstman replied to CrankyCrafstman's topic in Modelling Discussion
Actually it's on the just the unit emblems. I tought that some where swastikas my bad. Martin you can't tell what version panzer those were. I guess I wasn't very clear on what I was looking for. I'm trying to find tanks from the SS Panzer-regiment 12, 5 or 6 Kompanie at Normandy fighting near Caen, France around mid June 1944. Ron G -
Hey all As you may or may not know I'm building a 1/16 scale Panzer IV Ausf H from Trumpeter. I purchased the kit off of Ebay from a place in Germany. It seems that they opened the kit and took a black sharpie to some of the decals, the swastikas and some unit emblems. My question is can this be removed without destroying the decals? And if so how. I'm trying to do the tank in an early 1944 Normandy 3 color paint scheme with zimmerit on the hull and turret shurzen. This is proving to be quite difficult as I can't find any pictures that show them with the zimmerit on both sets of shurzen. You find them with the turret and the turret shurzen done with zimmerit and not on the hull shurzen, can't seem to find both. Ok rant over. Any help would be greatly appreciated. Thanks Ron G
-
Hey all The tank showed up today! Woo hoo! I have the Atak zimmerit, all the paint, I think, some extra parts from AFV Modeller. My modeling area needs a complete overhaul, theres so much stuff cramed in there I can't move. So my son and I are going to redue it all. I got some risers for my tables, they sit around 35"-36" high and these will raise them to 42" so I don't have to bend over so much. When I get everything back together I will be doing a in box, very HUGE box, look around showing the Atak zimmerit and extra parts from AFV Modeller. So see you all in a few days. Ron G
-
Jees Phil! That thing is really small, I don't envy you doing the tracks. You do know they (Das Werk) make this in 1/16 scale. The tracks would be easier...lol. its looking real good. Cant wait to see it painted. Ron G
-
WW2 German armor colors ???
CrankyCrafstman replied to CrankyCrafstman's topic in Research Discussion
Thanks Nick I'll check it out. Ron G -
WW2 German armor colors ???
CrankyCrafstman replied to CrankyCrafstman's topic in Research Discussion
I don't do facebook, or any social media. Ron G -
WW2 German armor colors ???
CrankyCrafstman replied to CrankyCrafstman's topic in Research Discussion
Thanks Carl -
WW2 German armor colors ???
CrankyCrafstman replied to CrankyCrafstman's topic in Research Discussion
Yeah bomber, I got that, I'm looking for more info, on colors, pictures, books anything that will help. RFM has good instructions, but they don't cover everything. Thanks for your input. Ron G -
Hey all I know, I know this is a tough subject. I'm looking for some help from the knowledgeable ones on this forum. As you know, or not I'm going to be building a 1/16 scale Trumpeter Panzer IV Ausf. H with zimmerit. I have some questions that I need help with. I've tried the internet, but alas, no luck. Trumpeter doesn't give you any color information on the interior of the tank. Ist question When did they change from the welded tubular idler wheel to the cast one? They give you both in the kit but don't give you a time line on when they switched. 2nd question What color was the floor in the front of the tank under the driver & radio operator? I've seen bluish grey, red oxide primer and white (Elfenbein-ivory) I'm leaning towards red oxide primer. 3rd question From what I understand Germany during WW2 didn't have alot of brass for shells, so they used parkerized steel for shells. My question is why does EVERYONE paint there shells brass? Shouldn't they be a steelish grey with a slight greenish tint to represent parkerized steel? 4th question What color was the Maybach HL 120 TRM engine? I can't find any definitive answers for this. I think it should be a greenish black for the block, possibly oxidized aluminum for the cylinder heads, black for the valve covers. Not sure what color the box with three pipes, on the right side of the engine should be. Most paint it red oxide primer. 5th question What colors are the generator and motor on the left side of the engine under the radiators? I have more questions but I'll hold them for later. Thanks in advance. Ron G
-
Most of the ones you see on Amazon or the net are enamel based paint, or they are ink based. I use the enamel based ones to mark my mechanic tools, black metric red SAE, etc. Ron G
-
My airfix 1/24 hellcat
CrankyCrafstman replied to Irishman1's topic in LSM 1/35 and Larger Work In Progress
Hey Irish That cat is looking real good, the pipes that you have to glue together and fill before painting are the intake pipes. Ron G -
Sorry, I don't do social media. Ron G
-
Hey all Ok, after doing some research I discovered that Panzer IV's during 1944 through early 1945 had zimmerit!!! So I just ordered some from Atak (in poland I think) hopefully it will get here around the same time as the tank. I got the full set, including the shurzen pieces. I think this build is really going to task my skills, I'm definitely going to be asking a lot of questions from you guys. First question is "what color was the floor in the main driver/radio oper. area" I've come across red oxide primer, RAL 7009 grey-green, etc.? Anybody have any idea what color? Ok I'll go back to watching out for those pesky squirrels. lol Ron G
-
F4U-1A Corsair Tamiya 1/32
CrankyCrafstman replied to DocRob's topic in LSM 1/35 and Larger Work In Progress
OK I'm hooked in for the whole build. Ron G 🎃 -
Thanks Martin, the eyes are still acting up but other then that everything is good Ron G