CrankyCrafstman
-
Posts
1,358 -
Joined
-
Last visited
Content Type
Profiles
Forums
Events
Gallery
Everything posted by CrankyCrafstman
-
 I'll have to try that trick, I'll let you know how it works out. Ron G
 -
A moment of silence for those we lost this day on 9/11. Least we forget. Ron G
-
Fly on the wall....?
CrankyCrafstman replied to Sir Desmond Glazebrook's topic in General Discussion
On a rock by the burnig bush when God gave the 10 commandments to Moses. -
Tamiya 1/32 Mosquito, A good 1/32 F4 Phantom, want to do Robin Olds Scat from Nam.
-
My gift today for THE MACHINE!!!
CrankyCrafstman replied to Sir Desmond Glazebrook's topic in General Discussion
Hey Dale Ten years from now he's going to be kicking out some cracker builds. Ron G -
Time for another CORSAIR! LOL
CrankyCrafstman replied to JohnB's topic in LSM 1/35 and Larger Work In Progress
QUIET!! Shhuuu! Don't let John know that there are other model kits out there, that way there will be more for us...lol Ron G -
Could you use this to replicate round knobs on cockpit levers? It sounds like it might work. Can you paint it after it has set-up? Ron G
-
How to fix the Airfix 1/24 Mossie landing gear
CrankyCrafstman replied to CrankyCrafstman's topic in Modelling Discussion
I think I understand what you are getting at, and I can fix that as I haven't gotten that far yet. What about the rest of the undercarriage is there anything else that needs to be fixed? I plan on making a diorama of this Mossie with a AEC 2500 gal 6x6 Matador tanker refueling it just before it goes on a mission. I have to scratch build the Matador because nobody makes a kit of one. I found a company in England that makes alot of different British 1/24 scale trucks. They have a 4x4 Matador MAT truck that I can get the cab from and a 6x6 Militant gun tractor that has the correct chassis and wheels and tires but thay are expensive 250£ each. I'm going to try and work out a deal to see if I can get the cab from one and the chassis from the other. We'll see I'm waiting to hear from him. If not there's a company that makes a 1/24 Bedford O tanker that I could use. Ron G -
How to fix the Airfix 1/24 Mossie landing gear
CrankyCrafstman replied to CrankyCrafstman's topic in Modelling Discussion
Hey Anthony This is the wrong post to answer in you should go to the other one thats the right one. To late already have the legs built up, would be very difficult to fix them know. Are you saying Airfix molded the legs to long, or they have them mounted to the nacelles to low? Ron G -
1/32 Trumpeter F6F-5 Hellcat
CrankyCrafstman replied to Ryan's topic in LSM 1/35 and Larger Work In Progress
Great! Glad you got it figured out. Ron G -
1/32 Trumpeter F6F-5 Hellcat
CrankyCrafstman replied to Ryan's topic in LSM 1/35 and Larger Work In Progress
Looking good Ryan. Did you check to see if you can get a different fuselage from Trumpeter? My F6F-3 isn't warped like that. It's fine except for the improper shape of the rear fuselage that everyone complains about. Ron G -
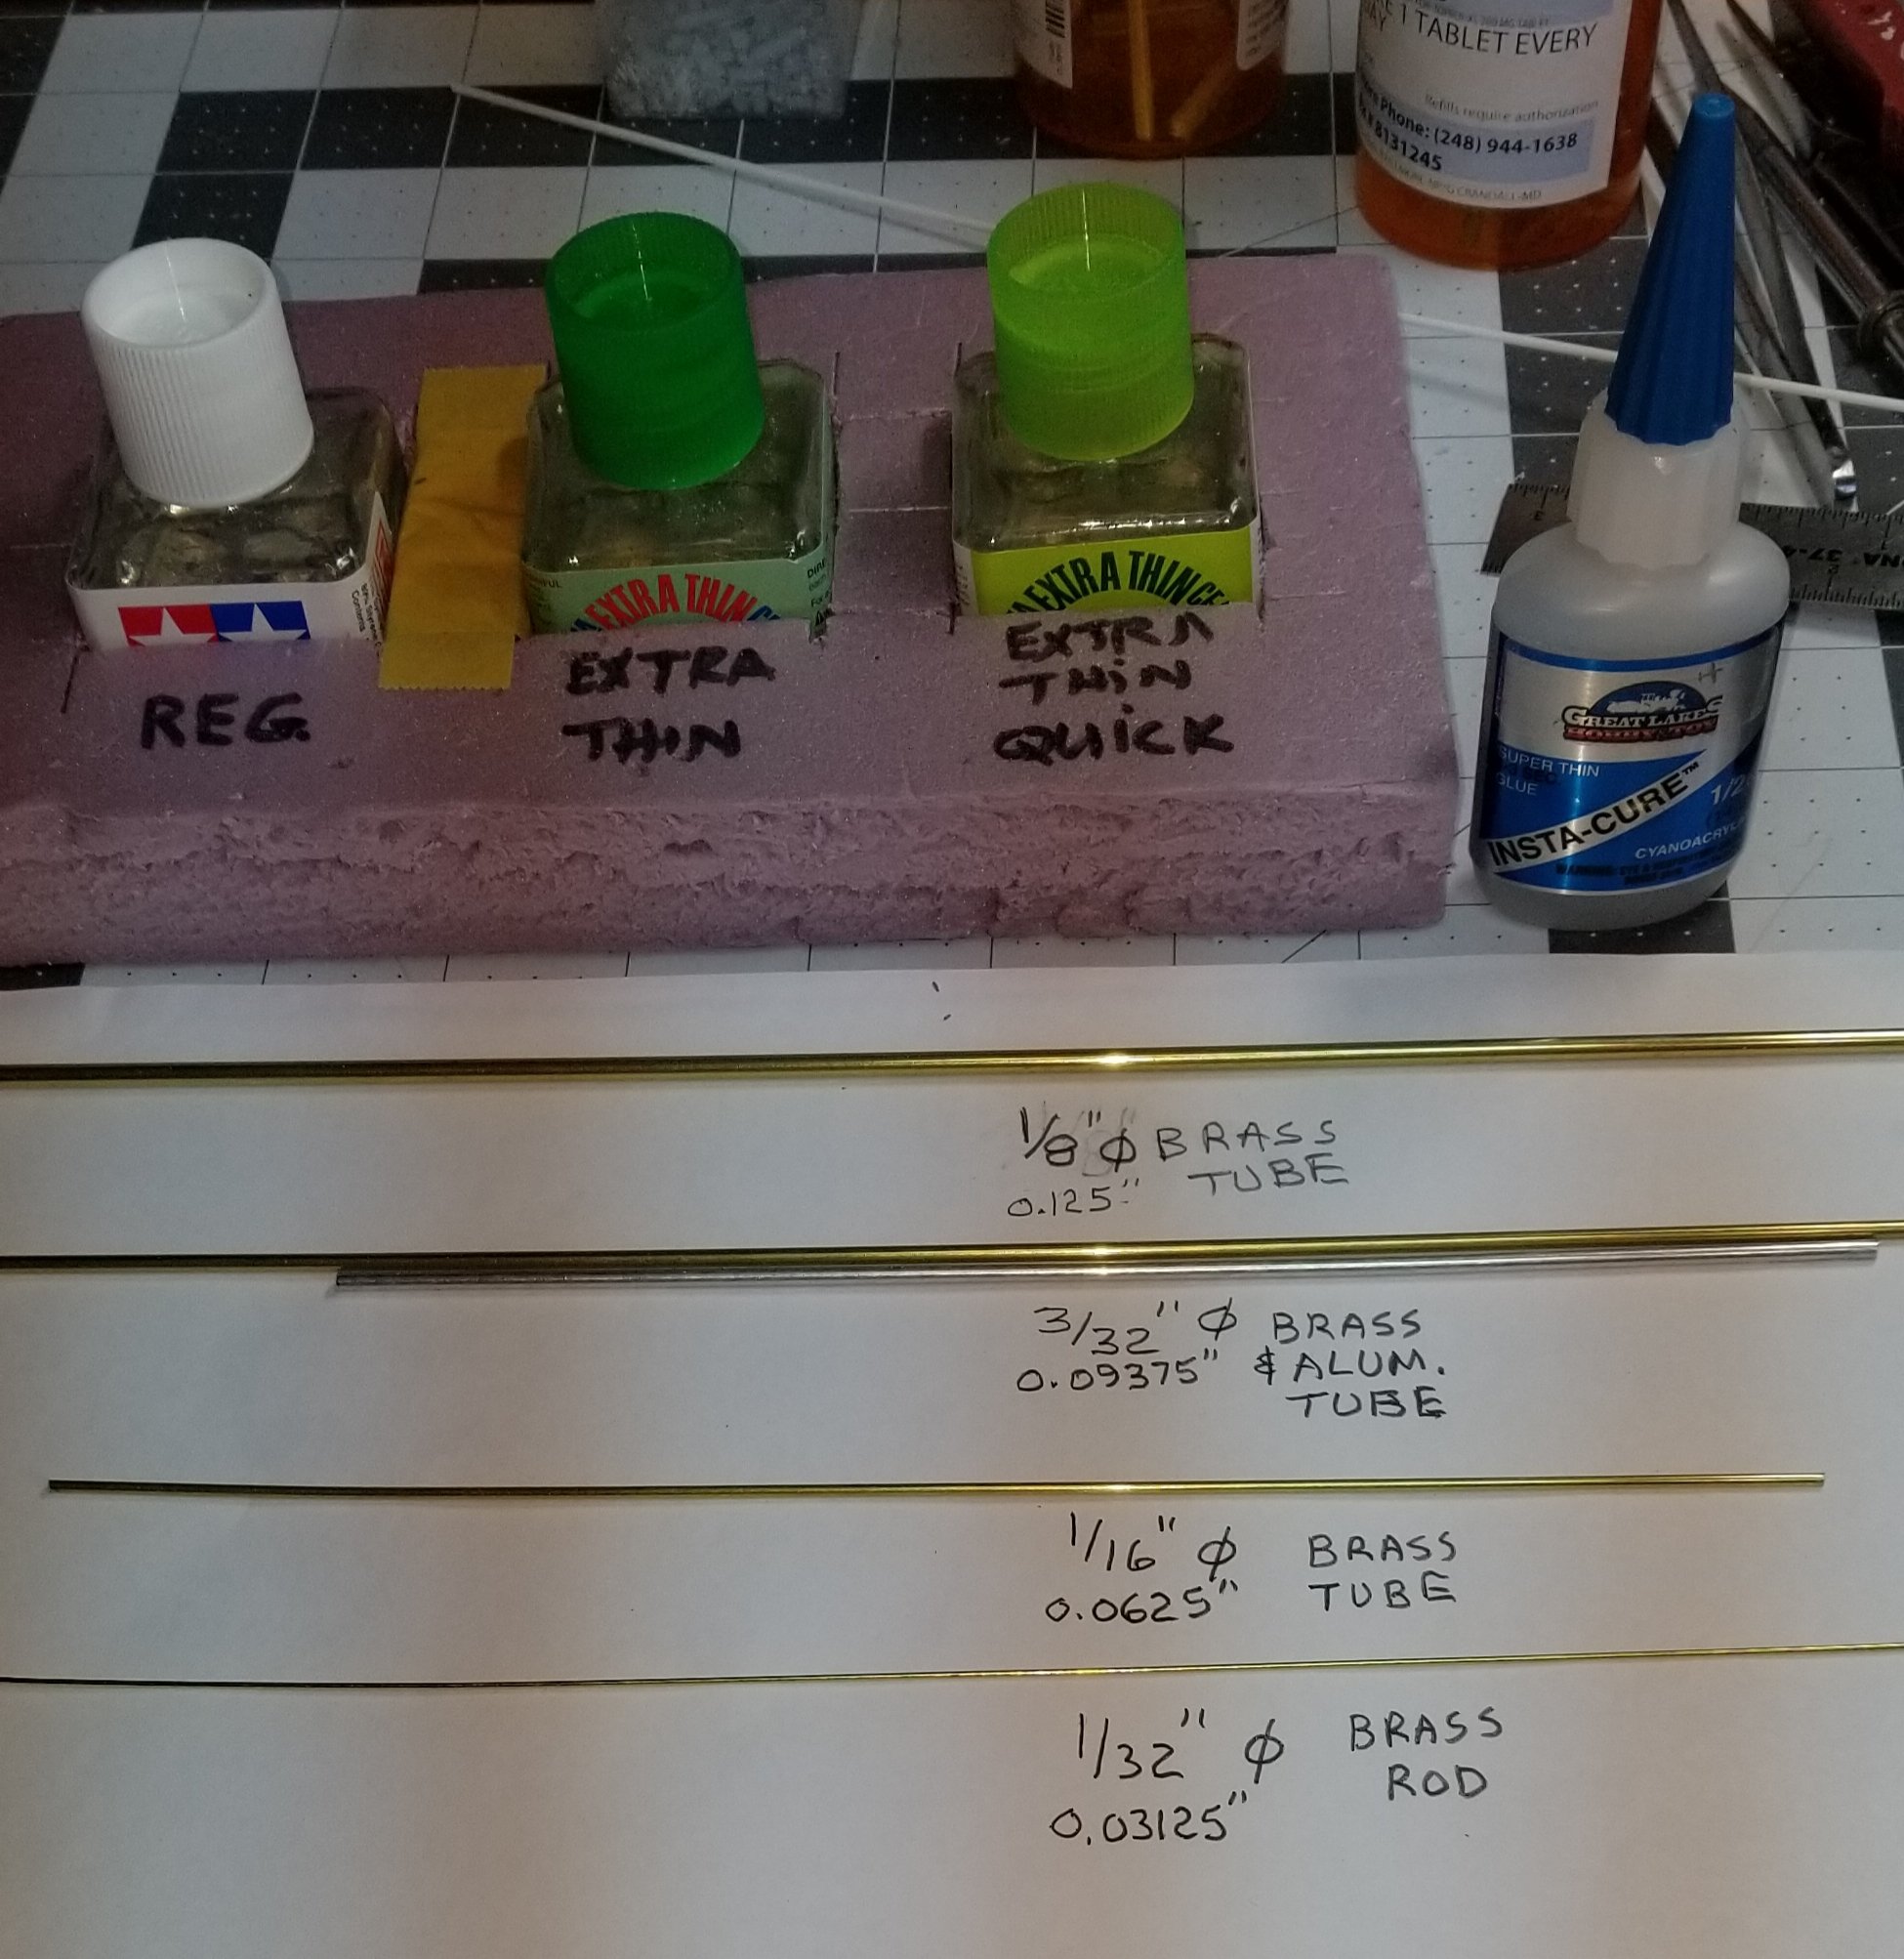
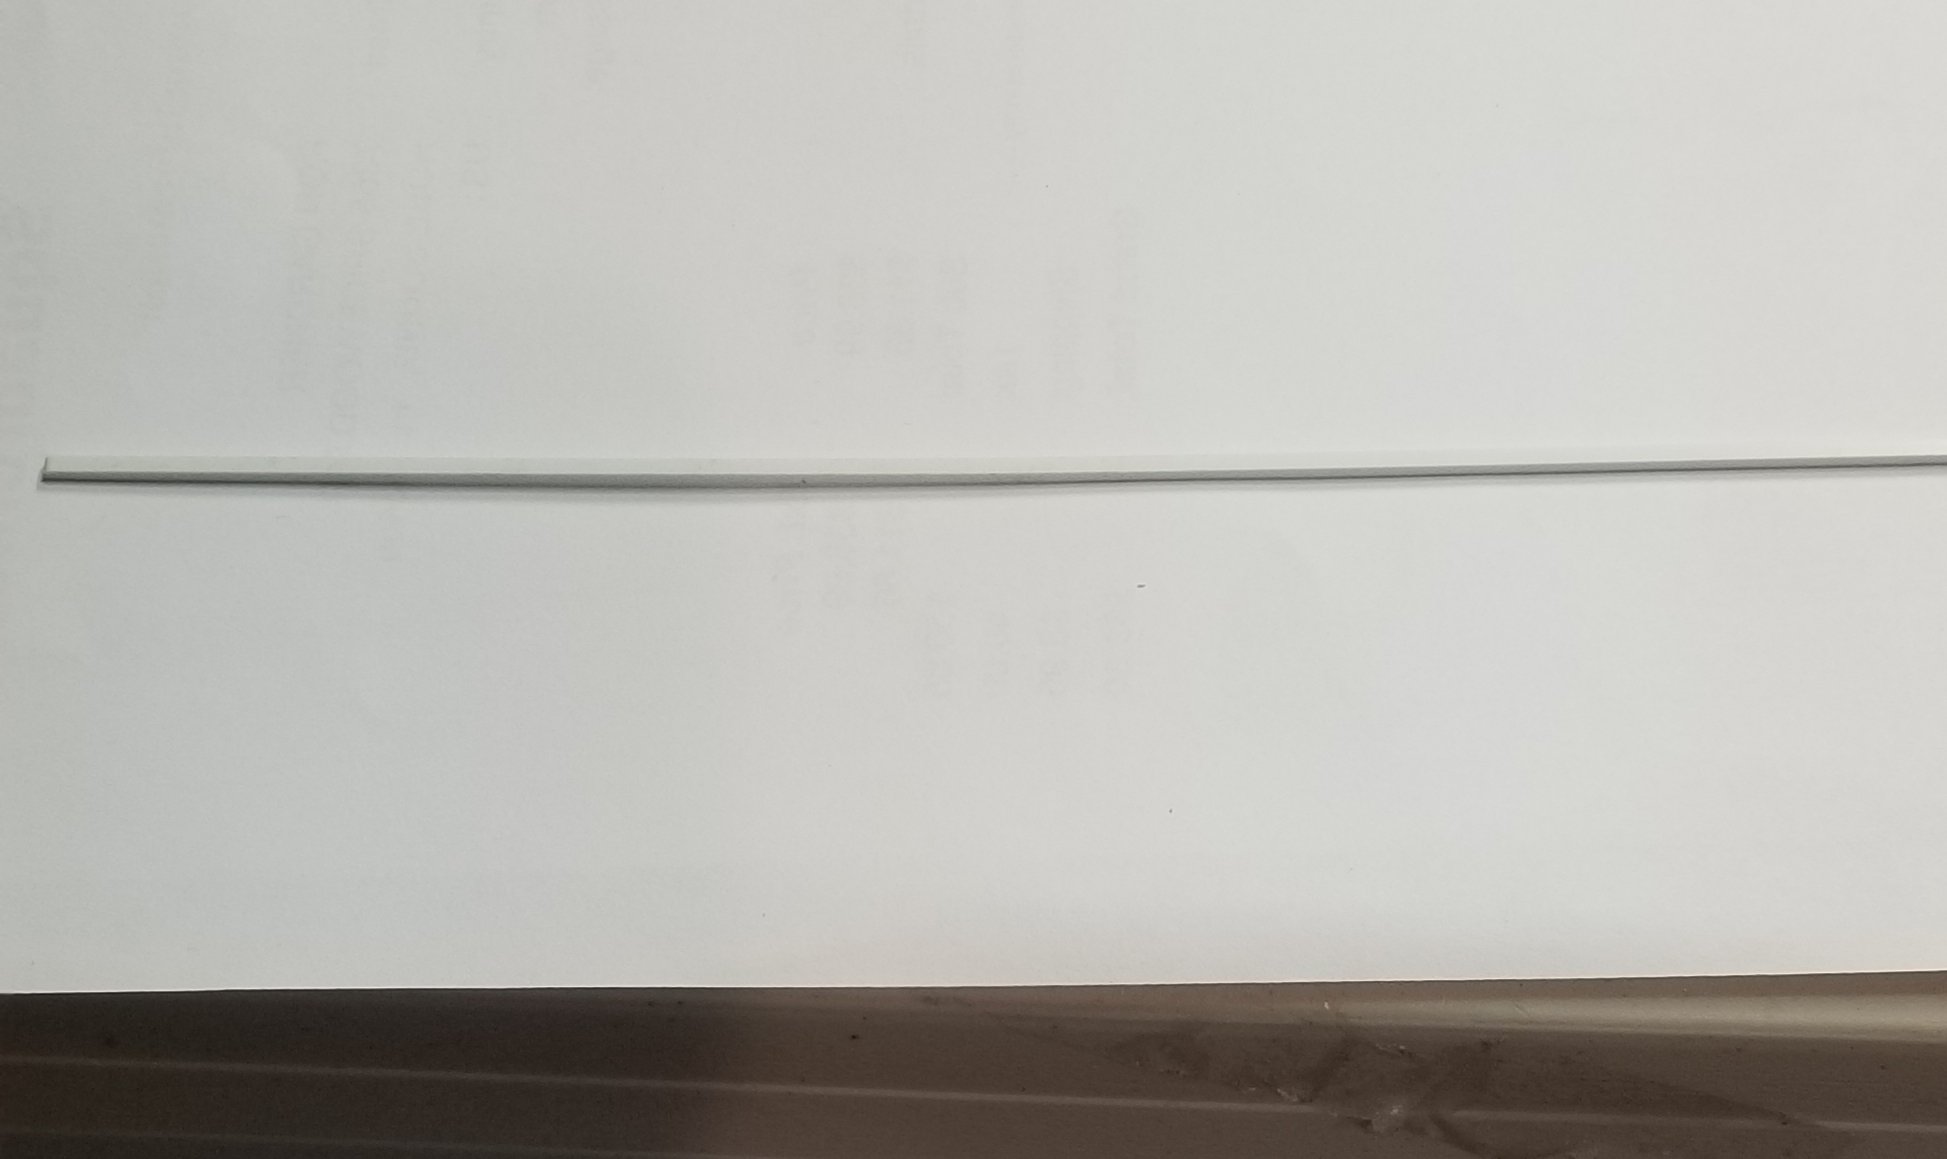
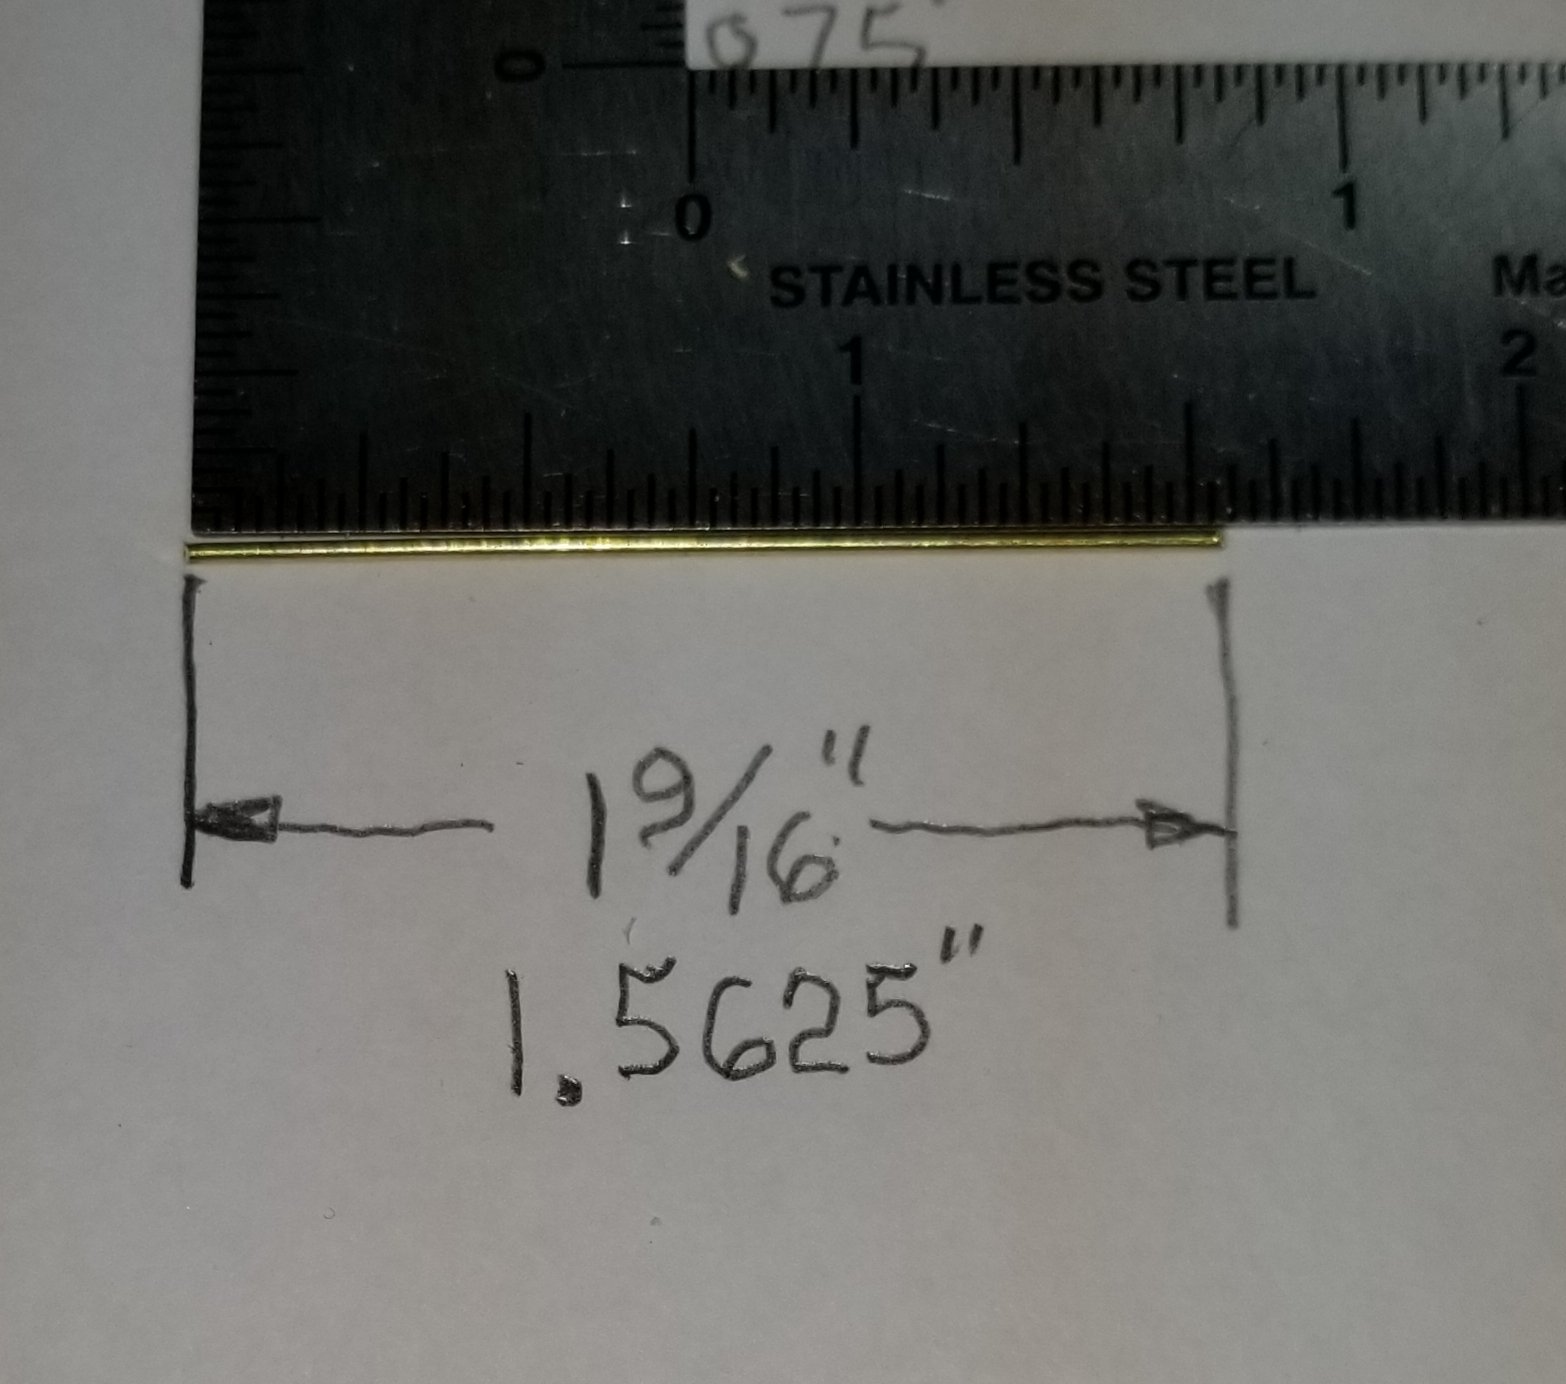
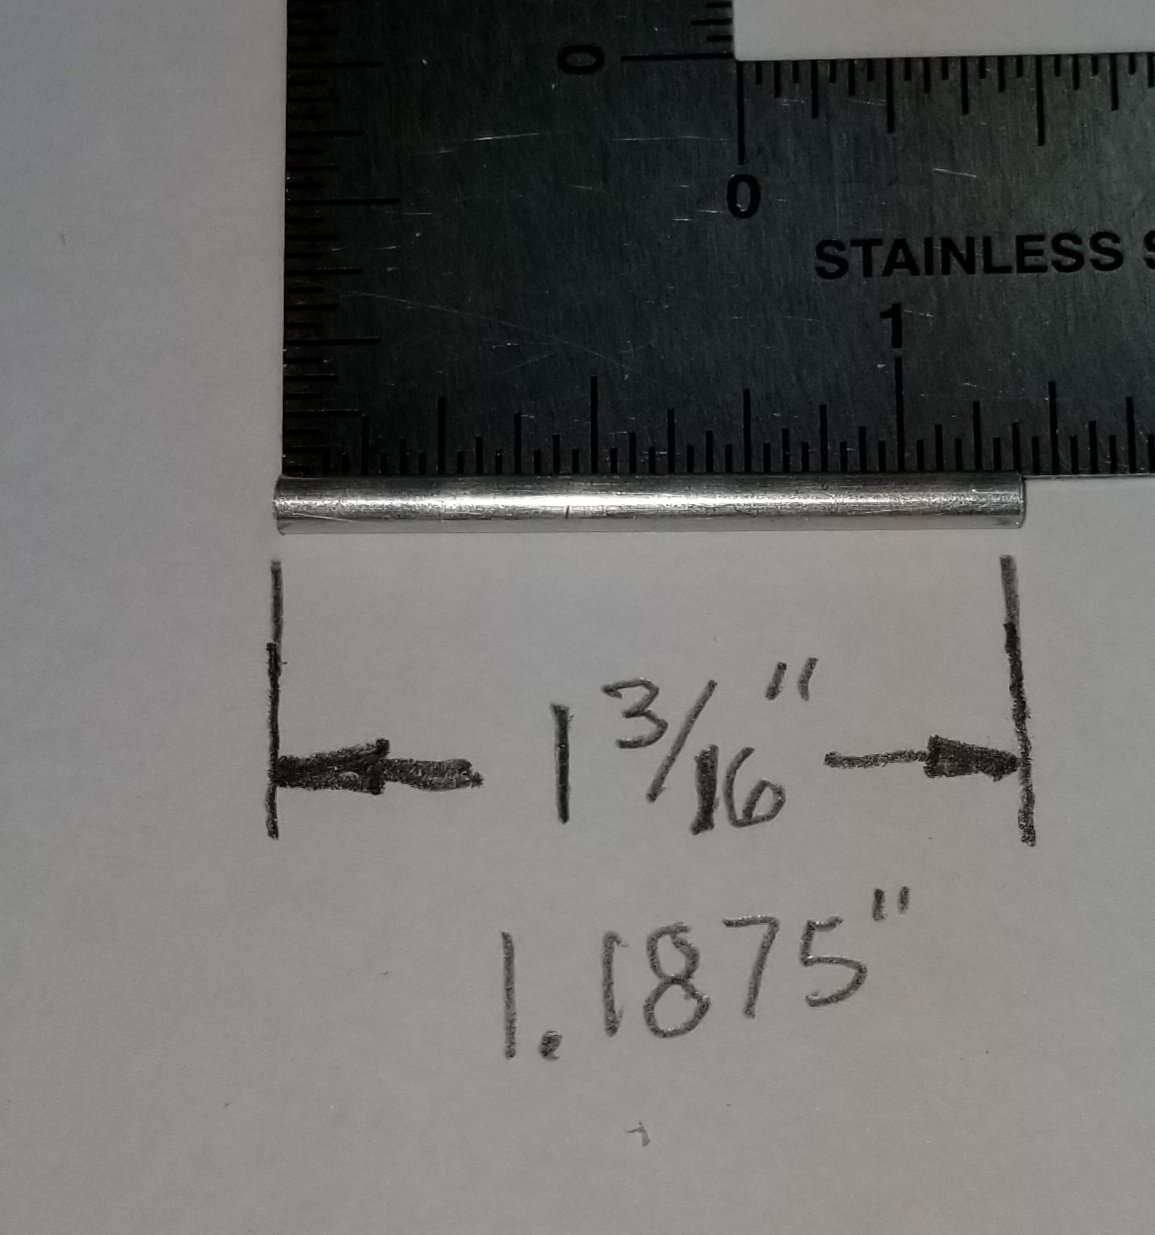
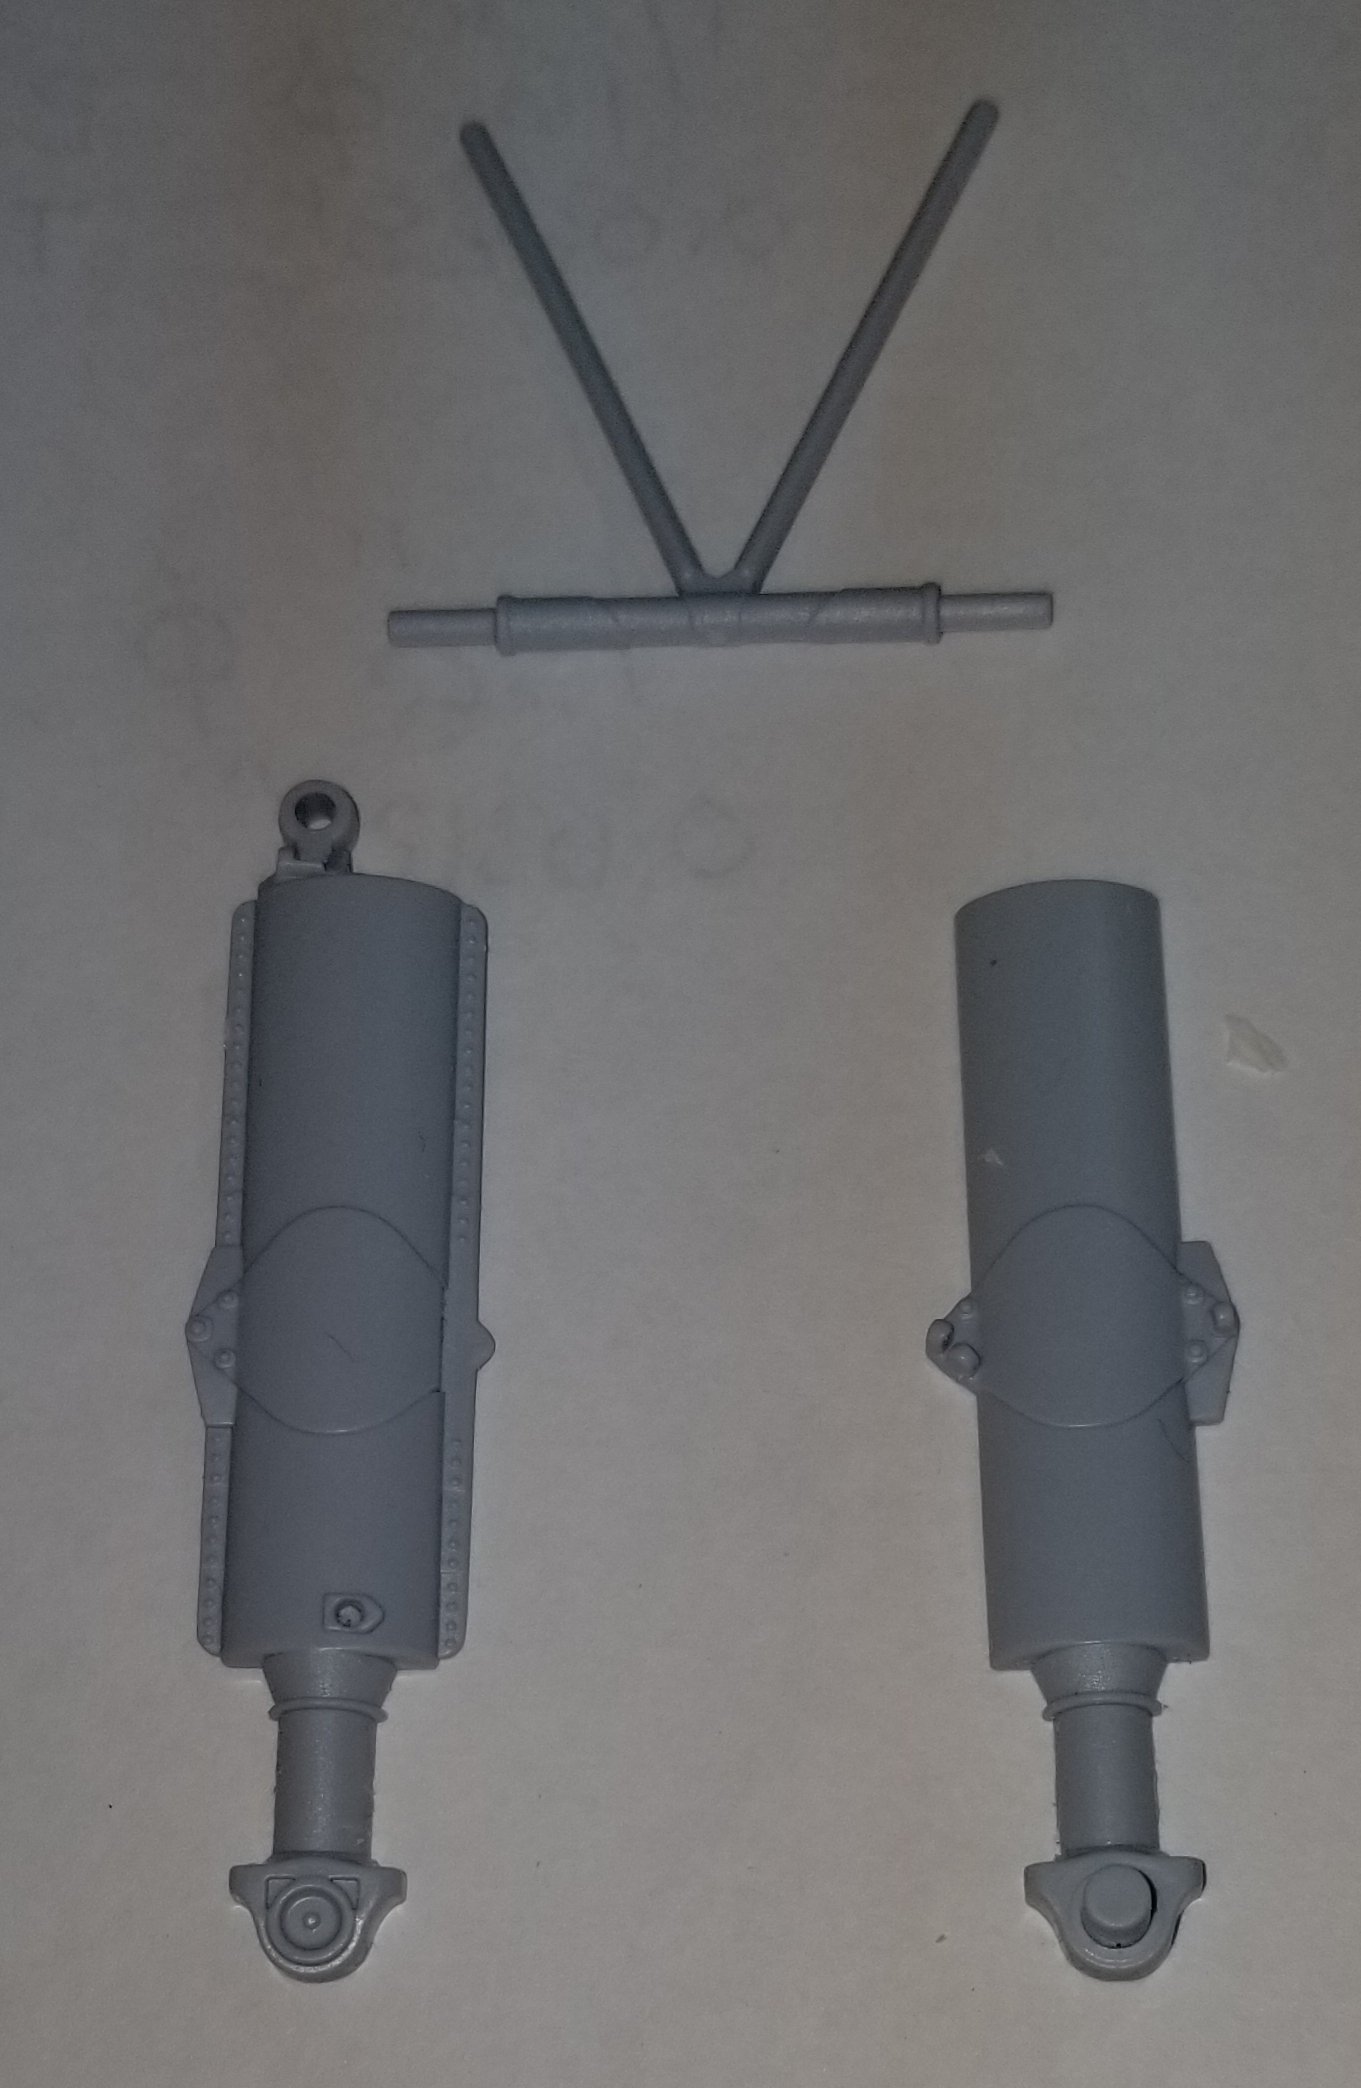
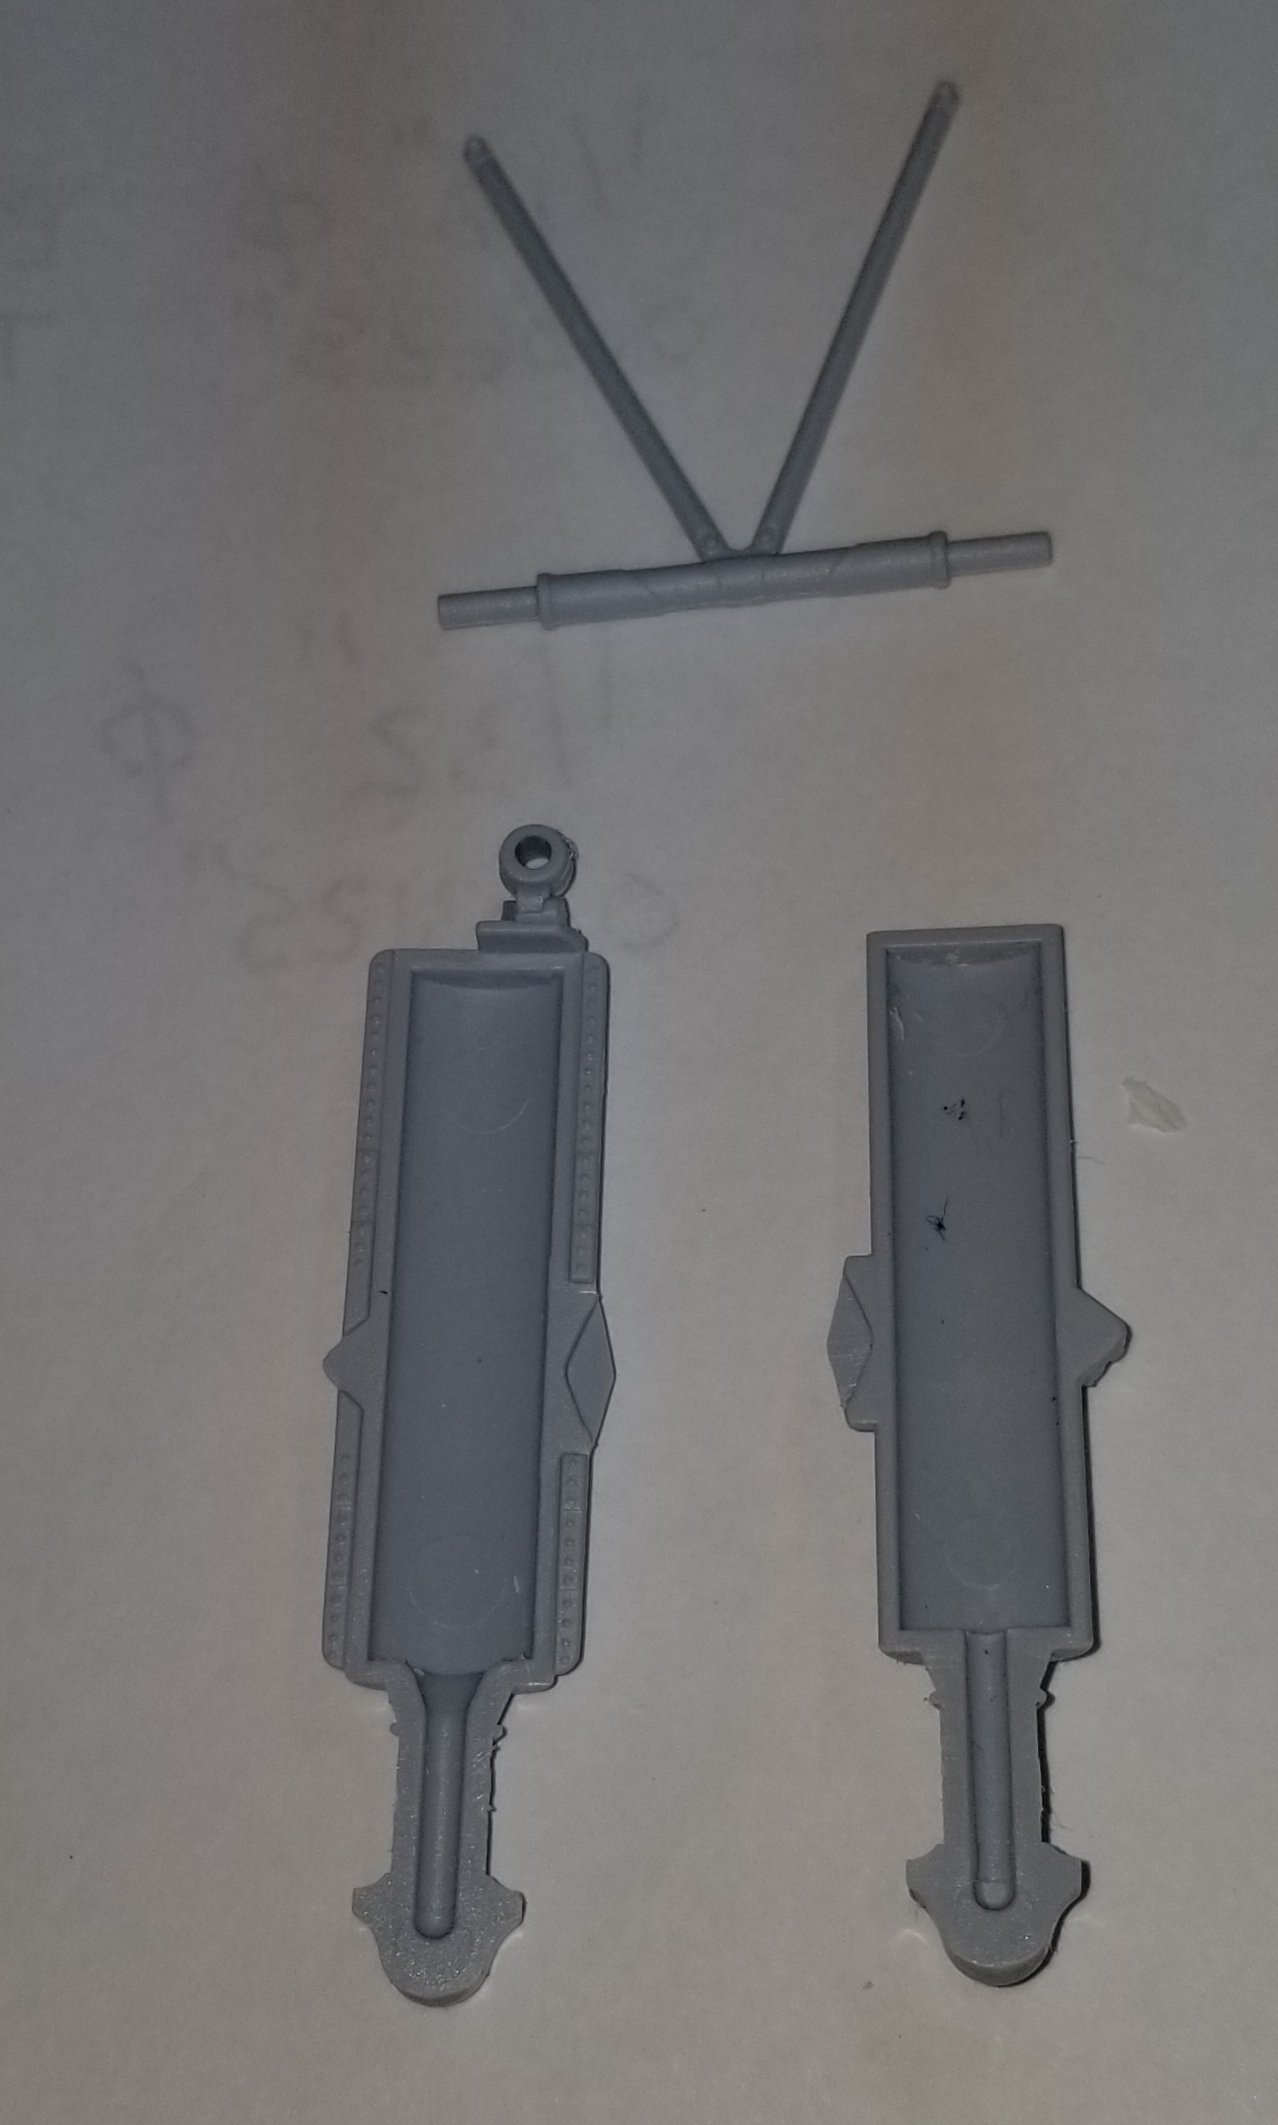
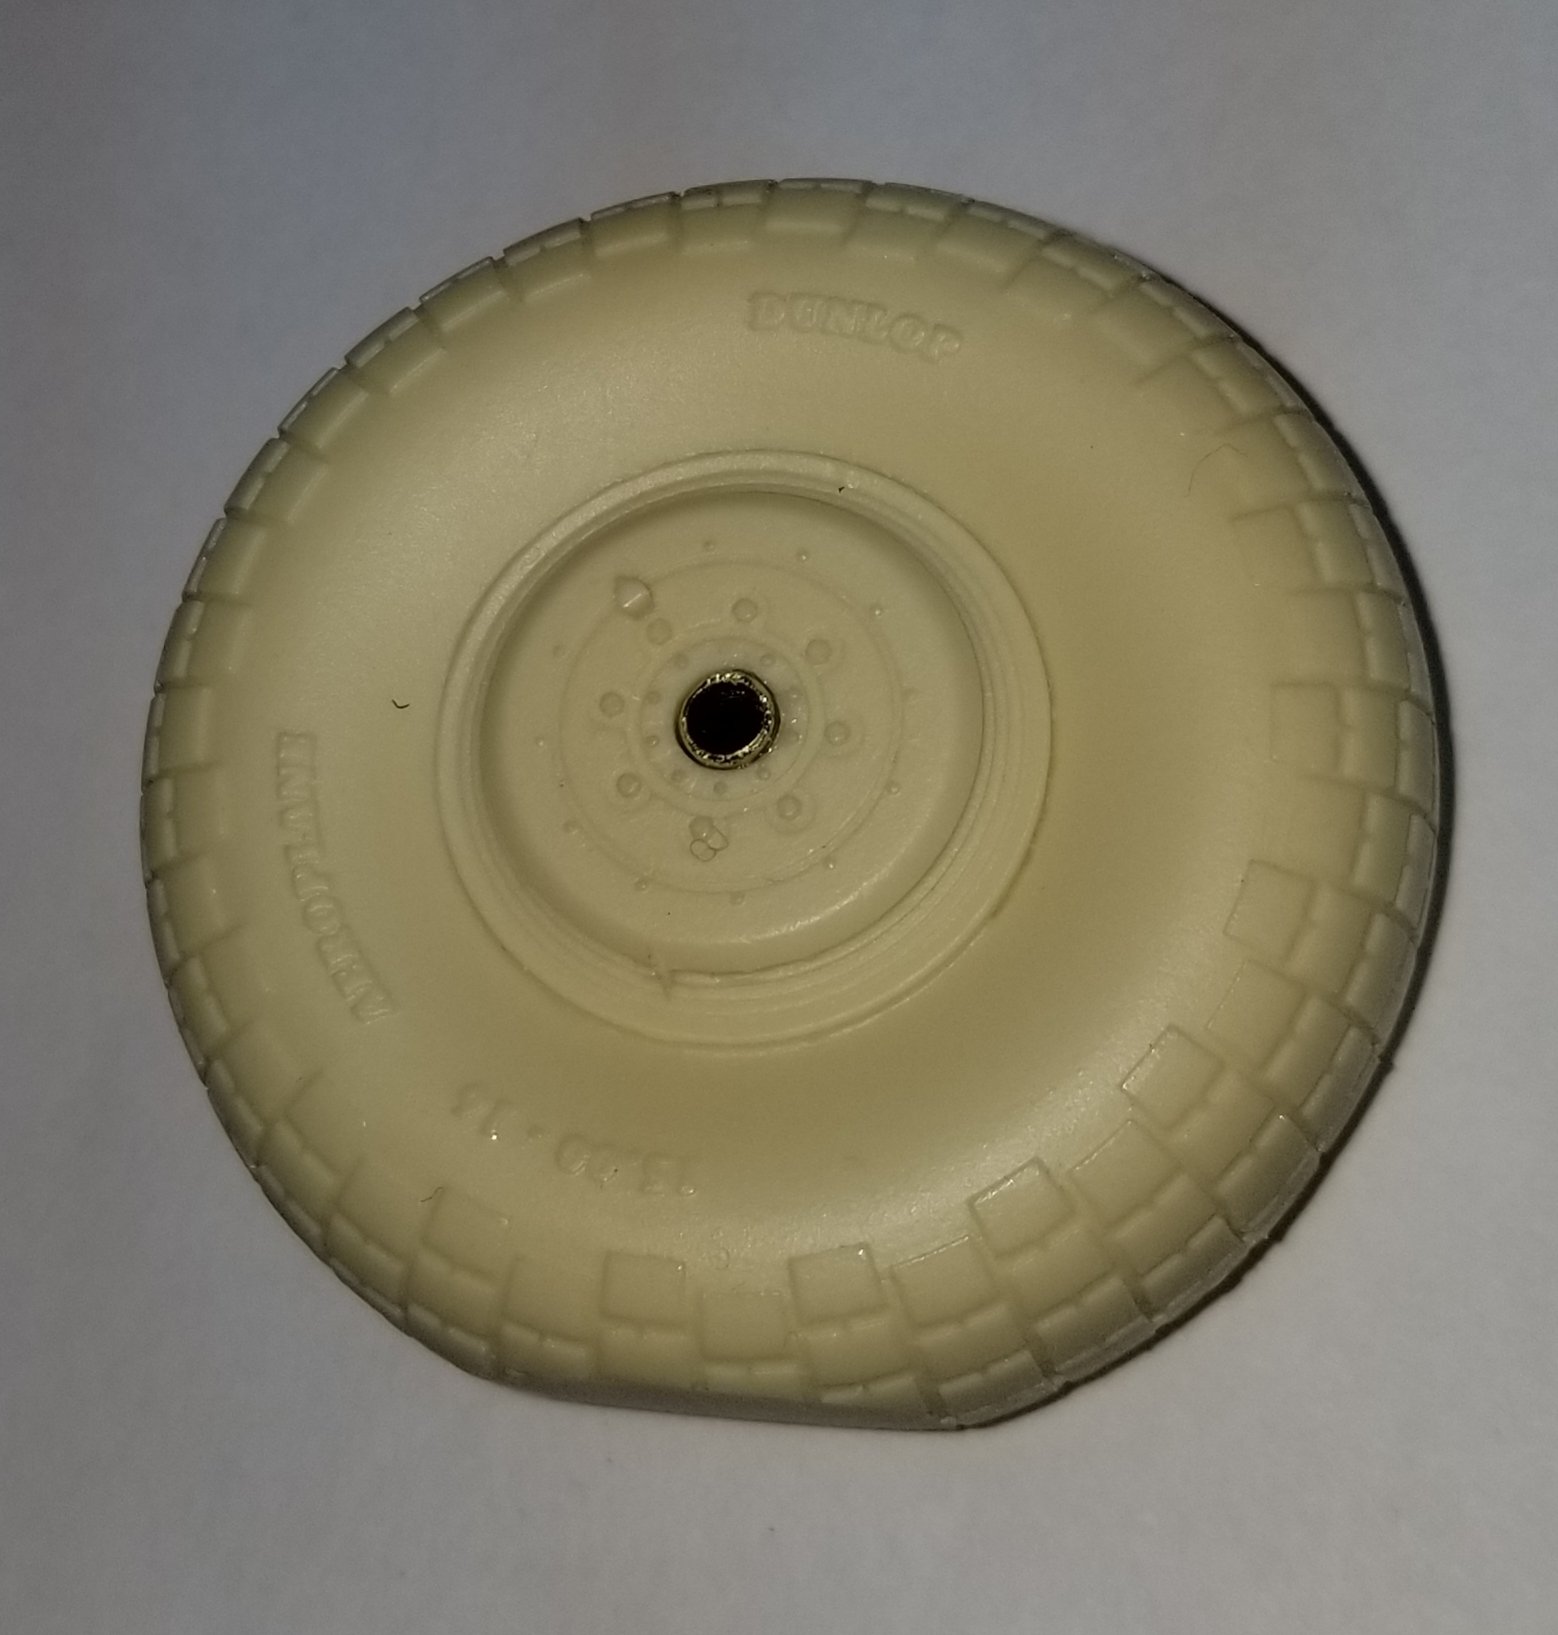
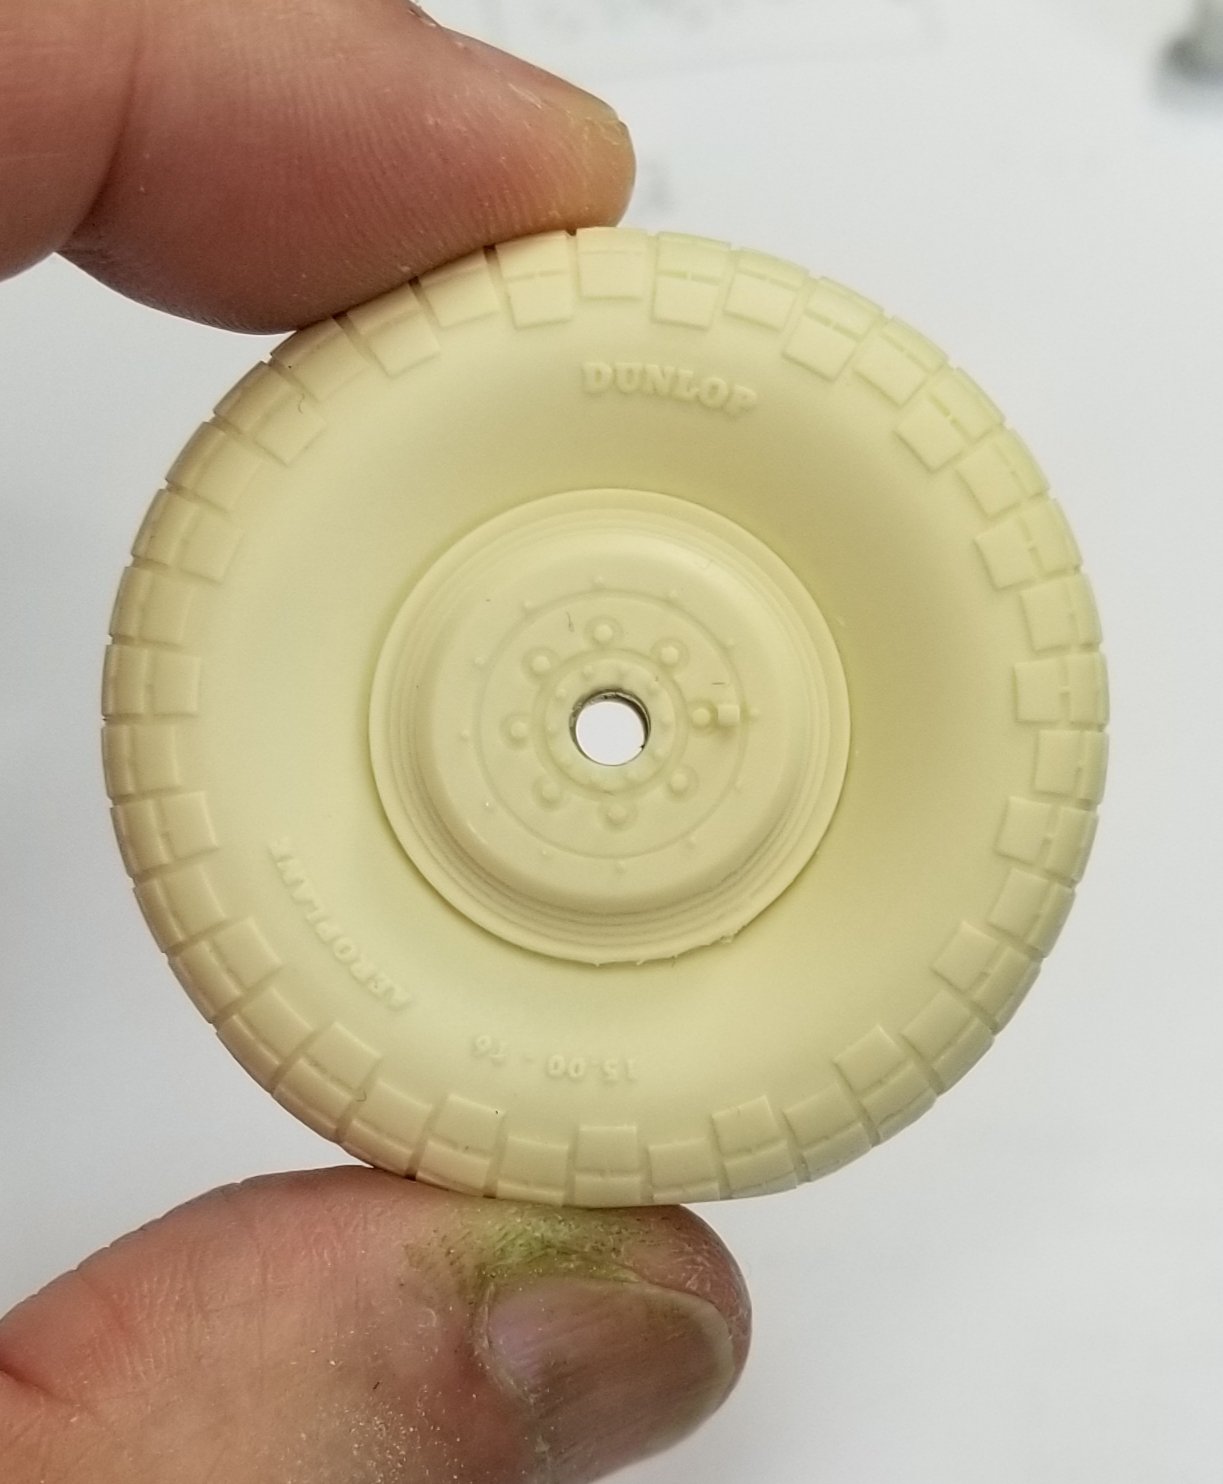
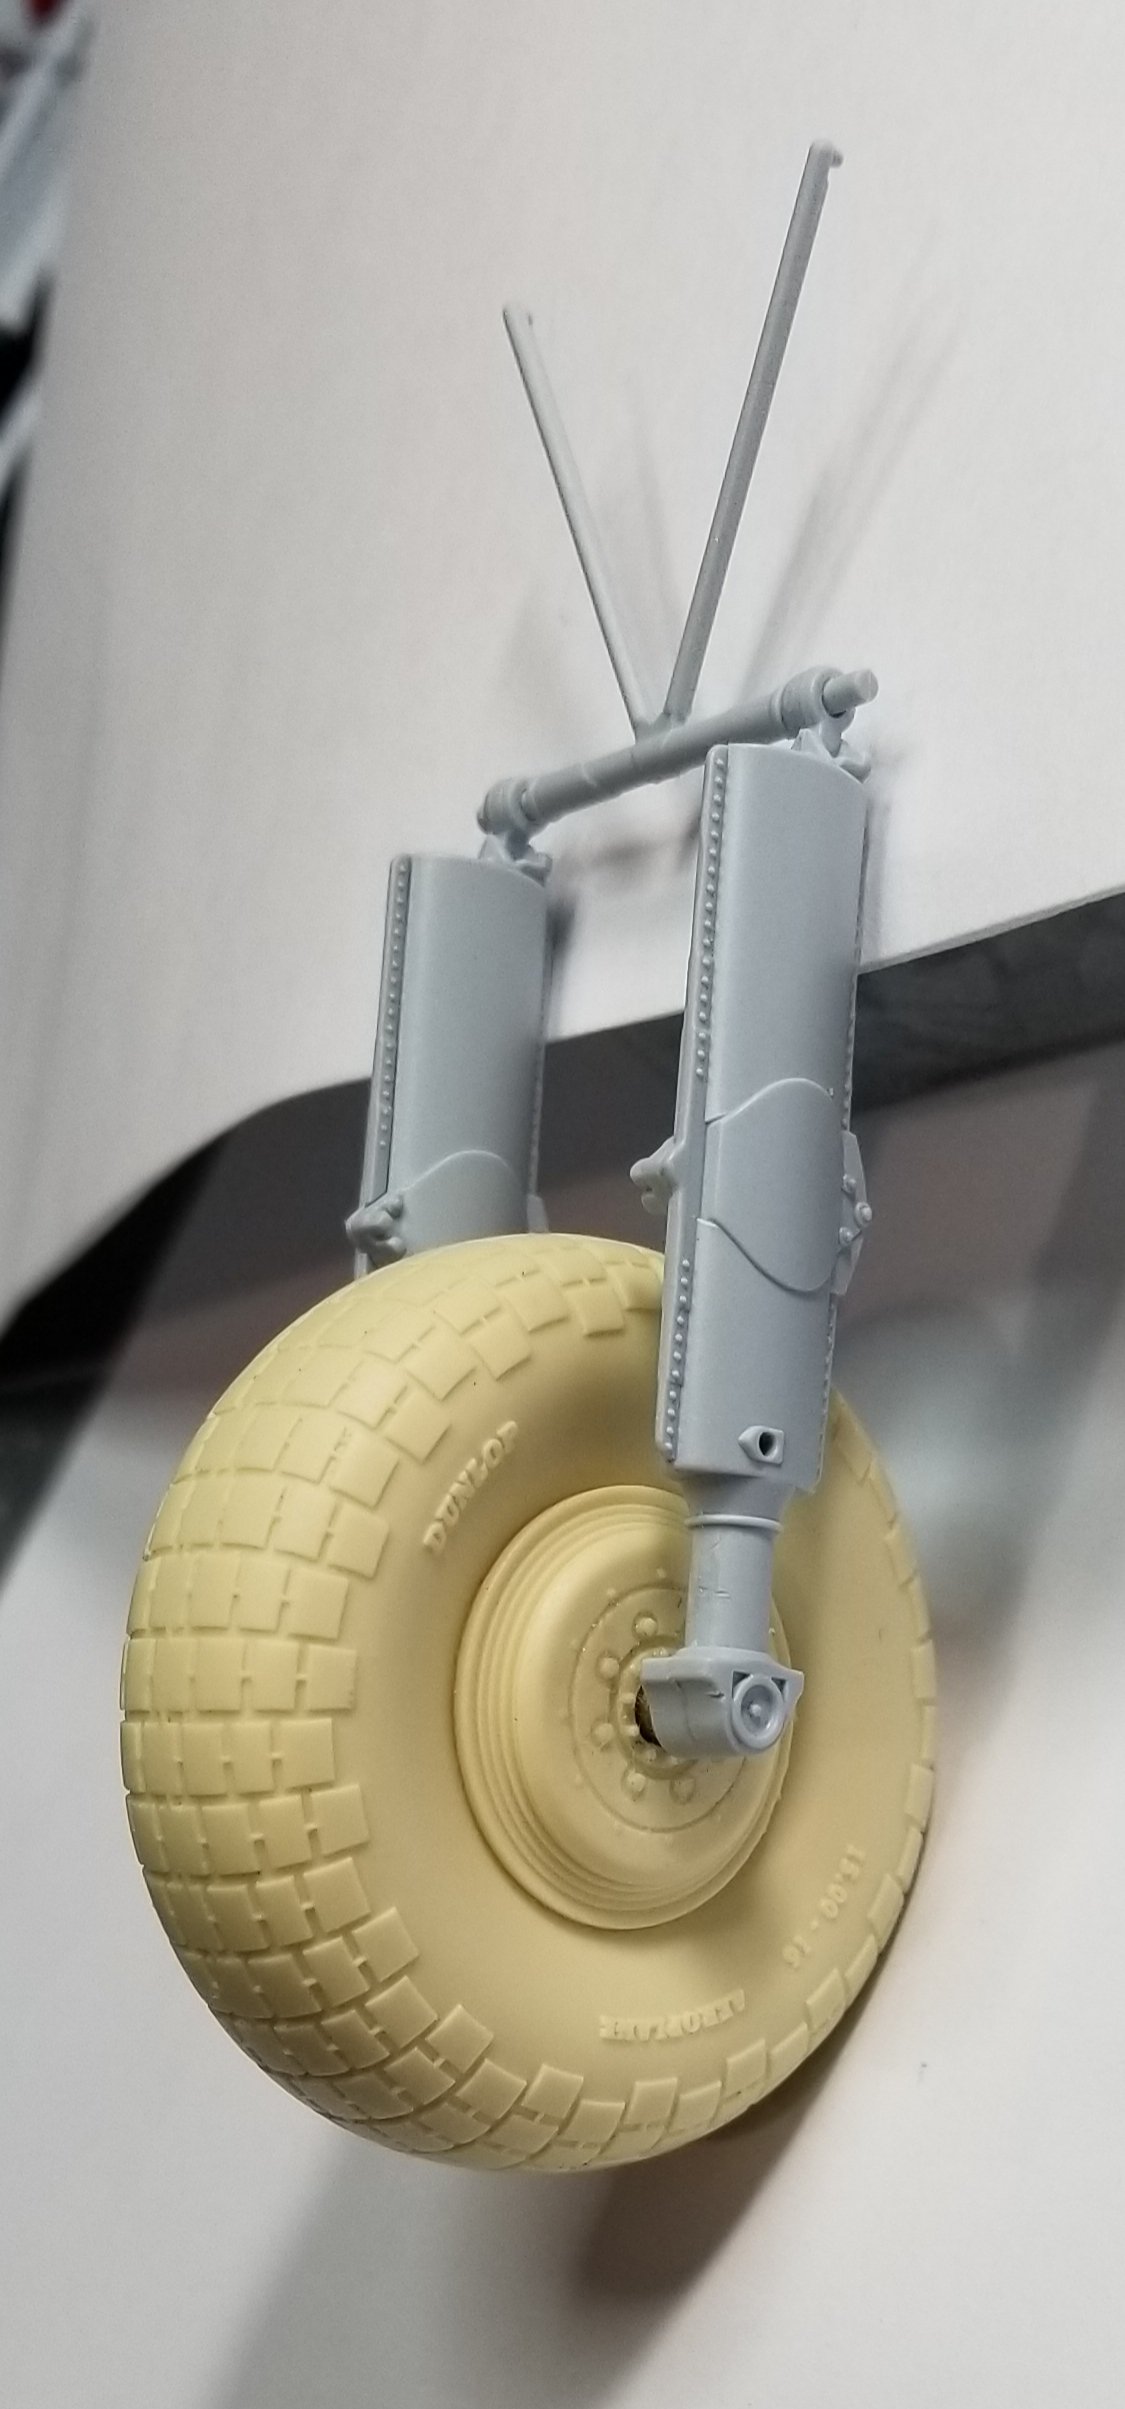
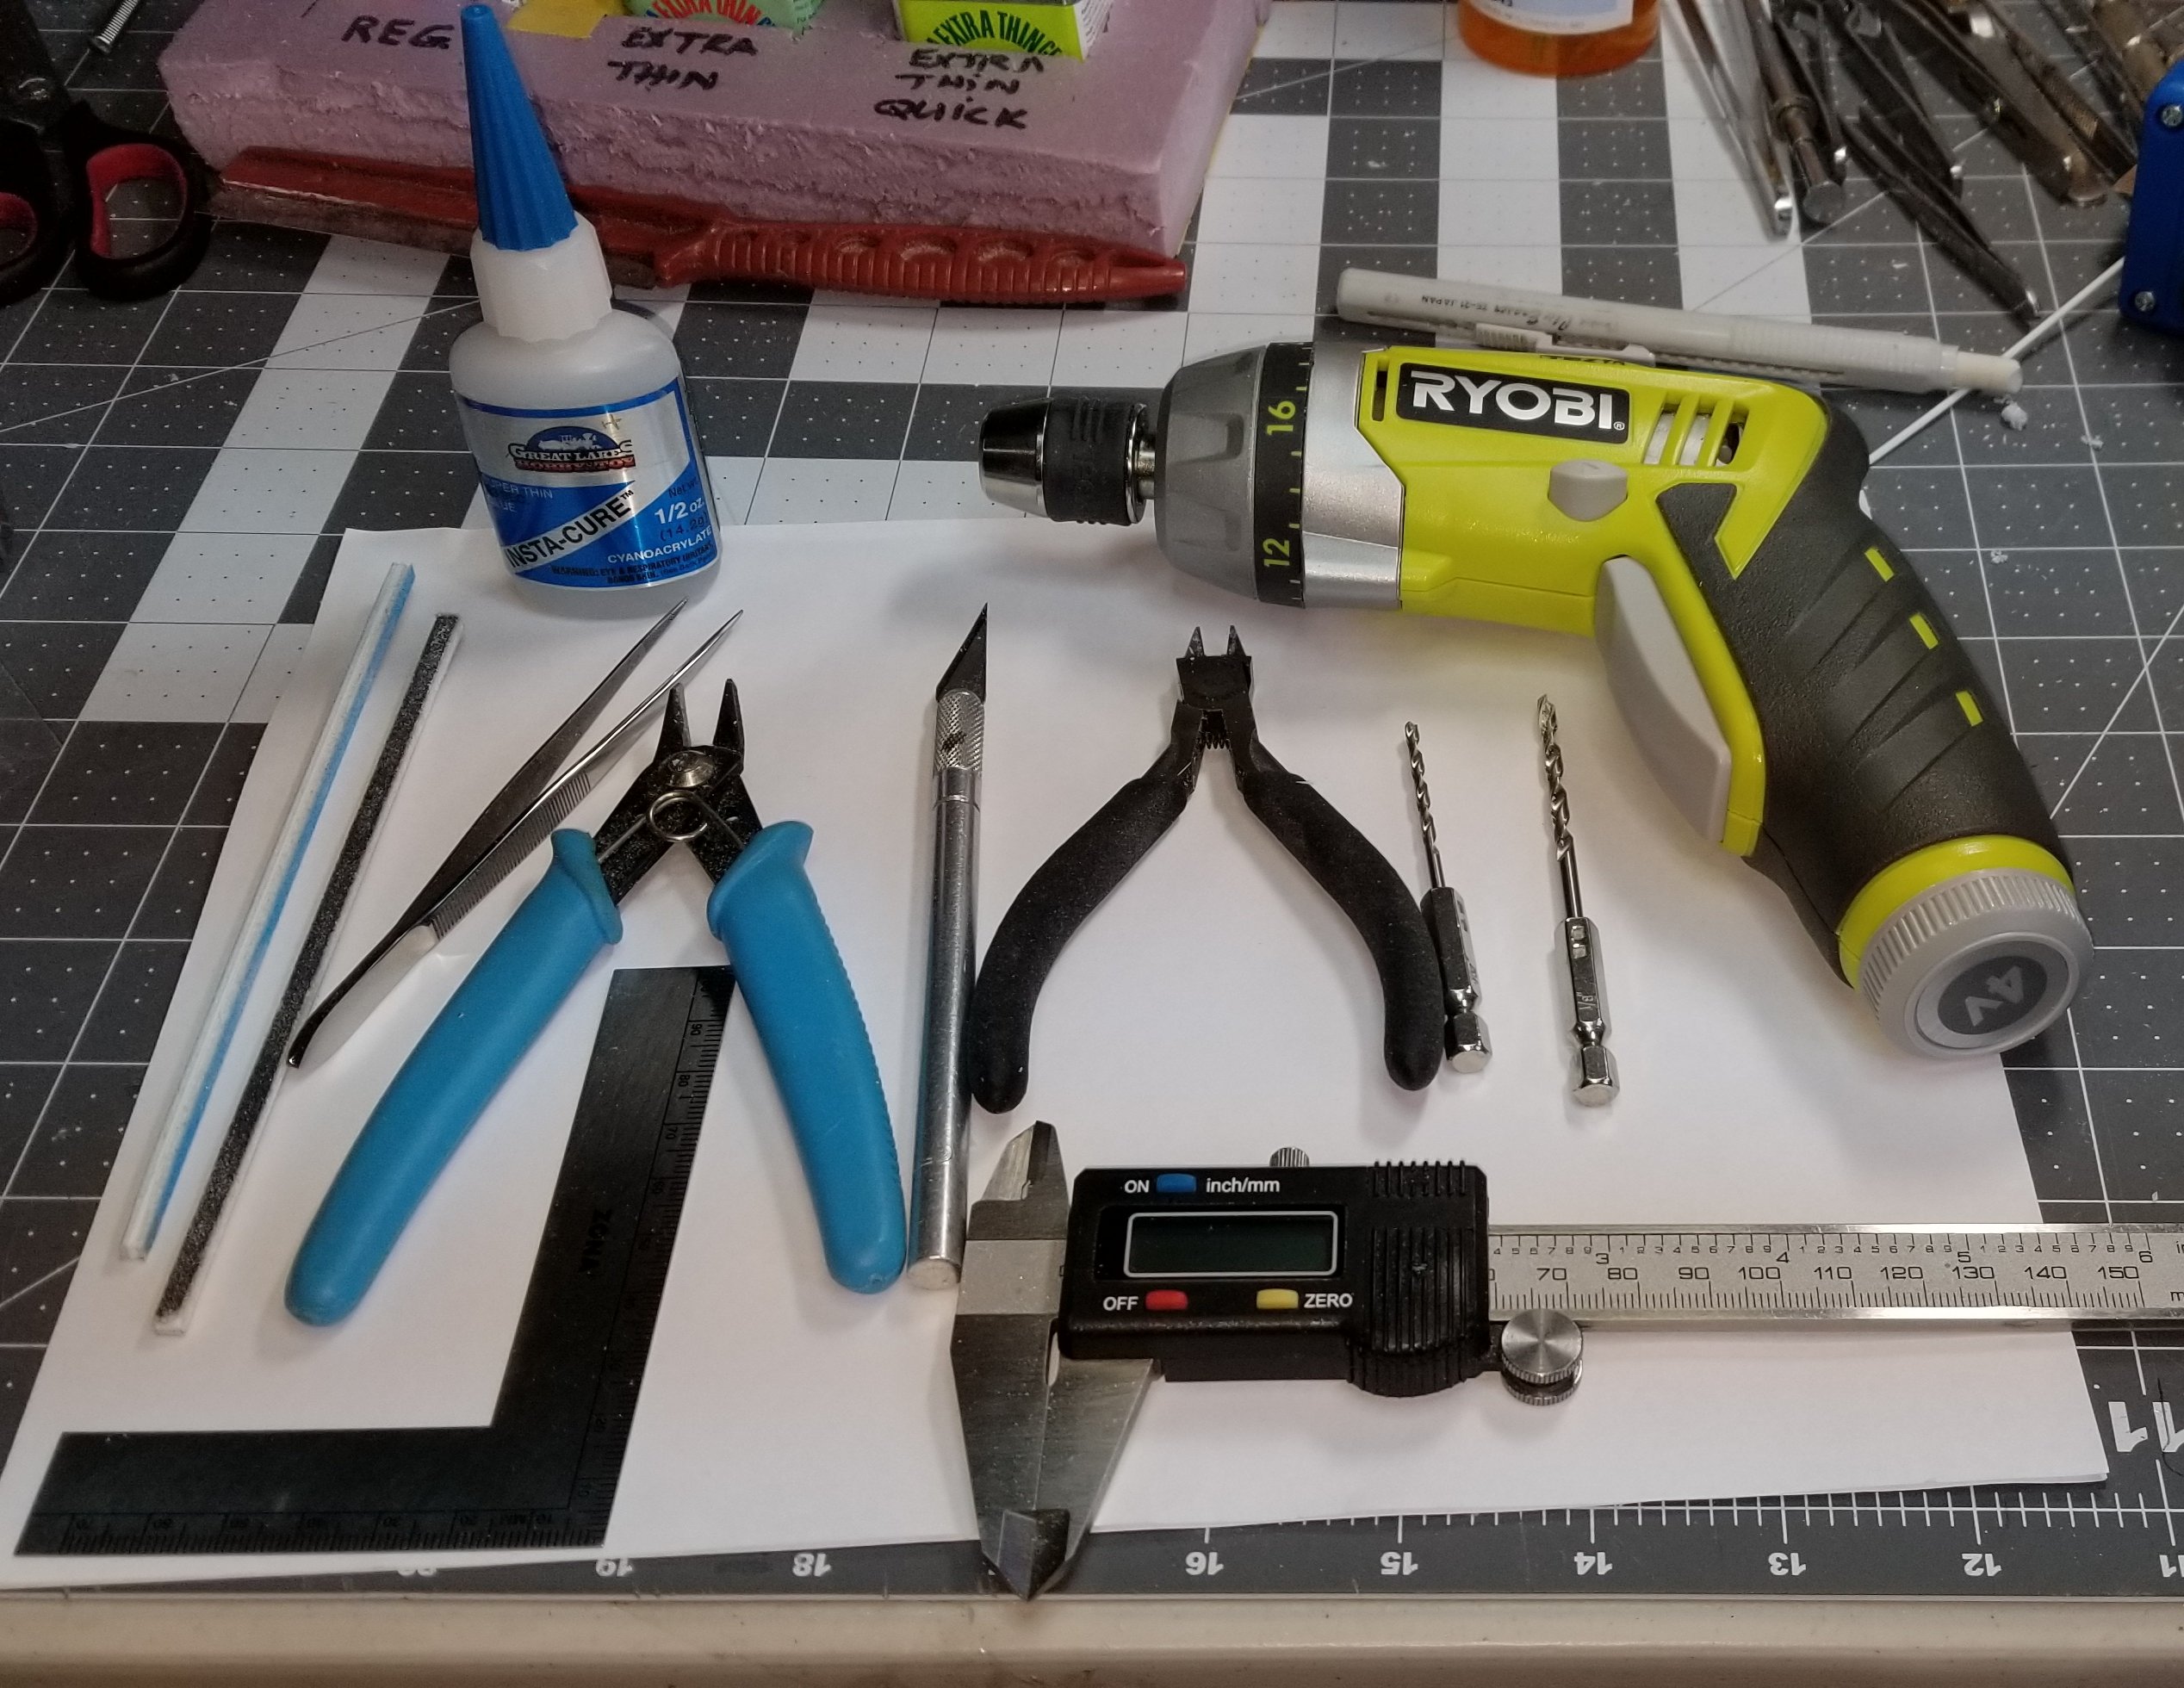
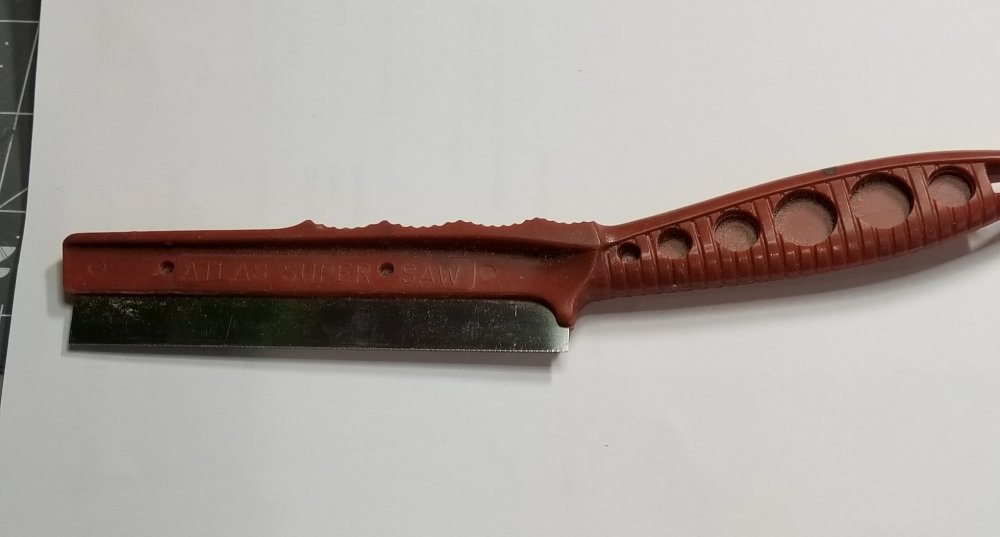
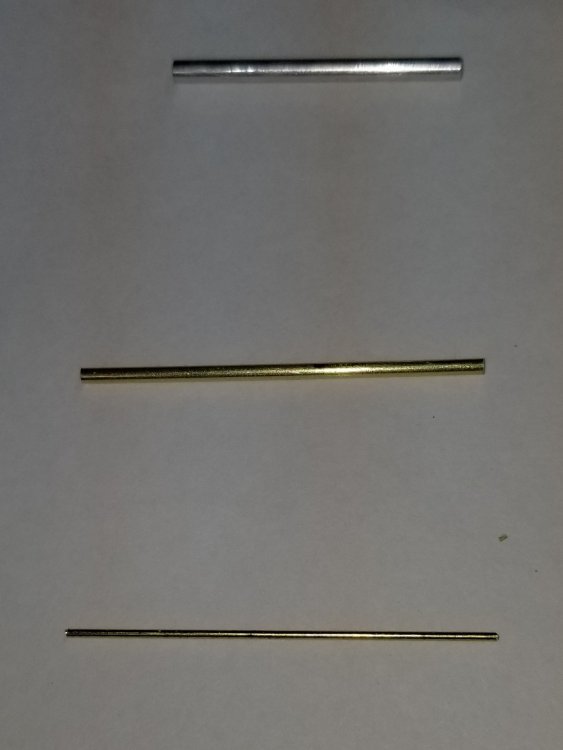
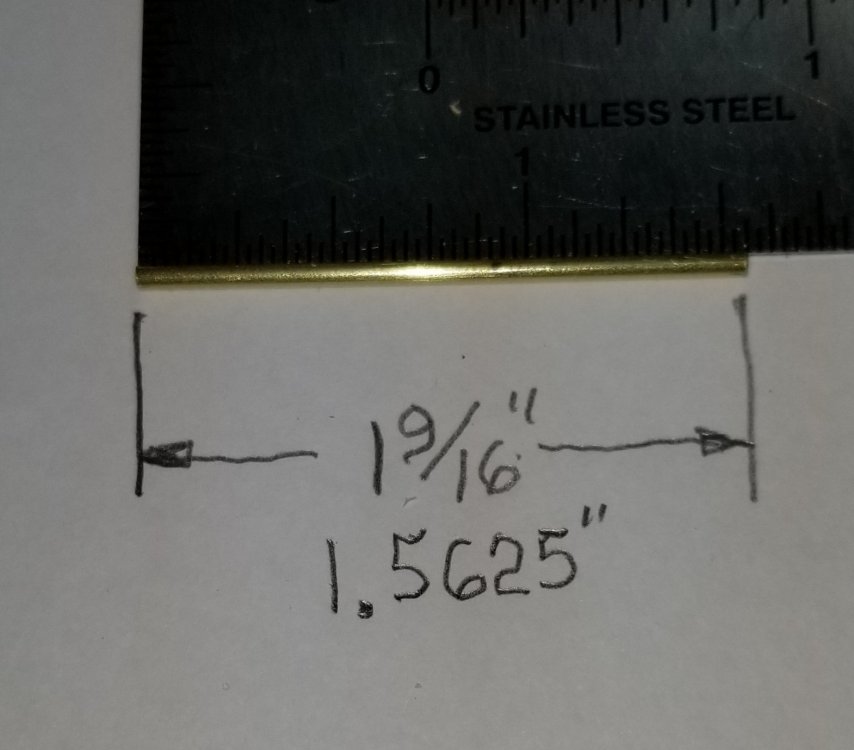
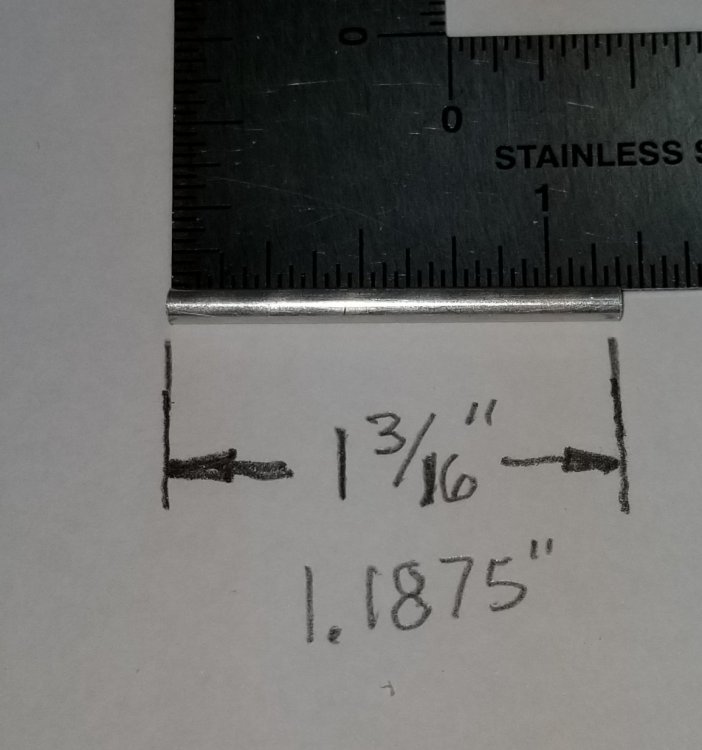
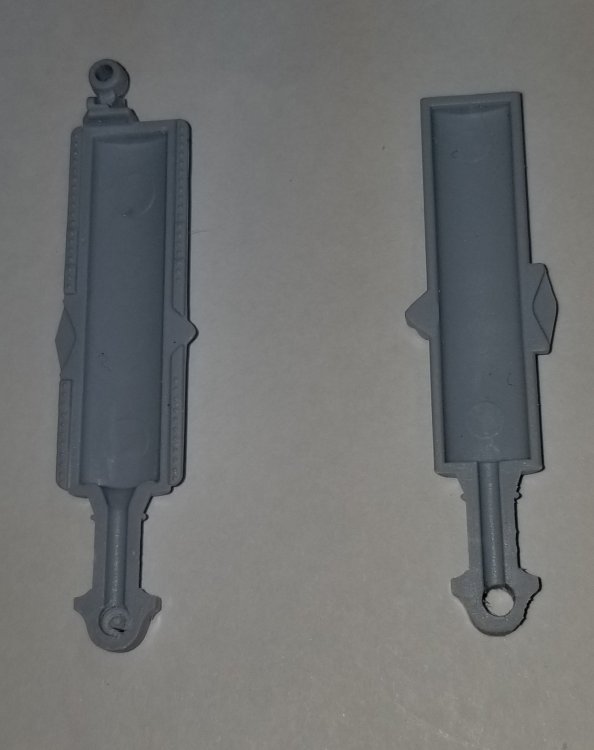
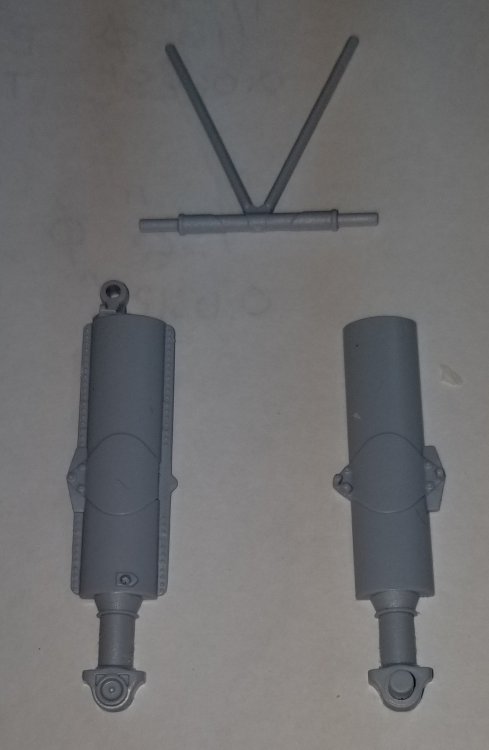
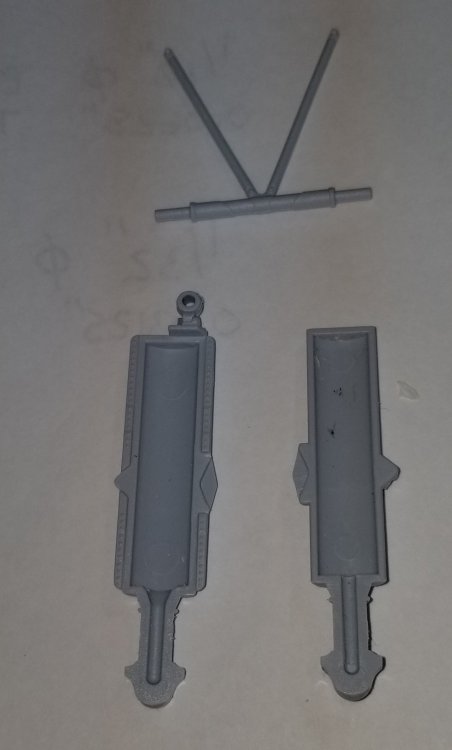
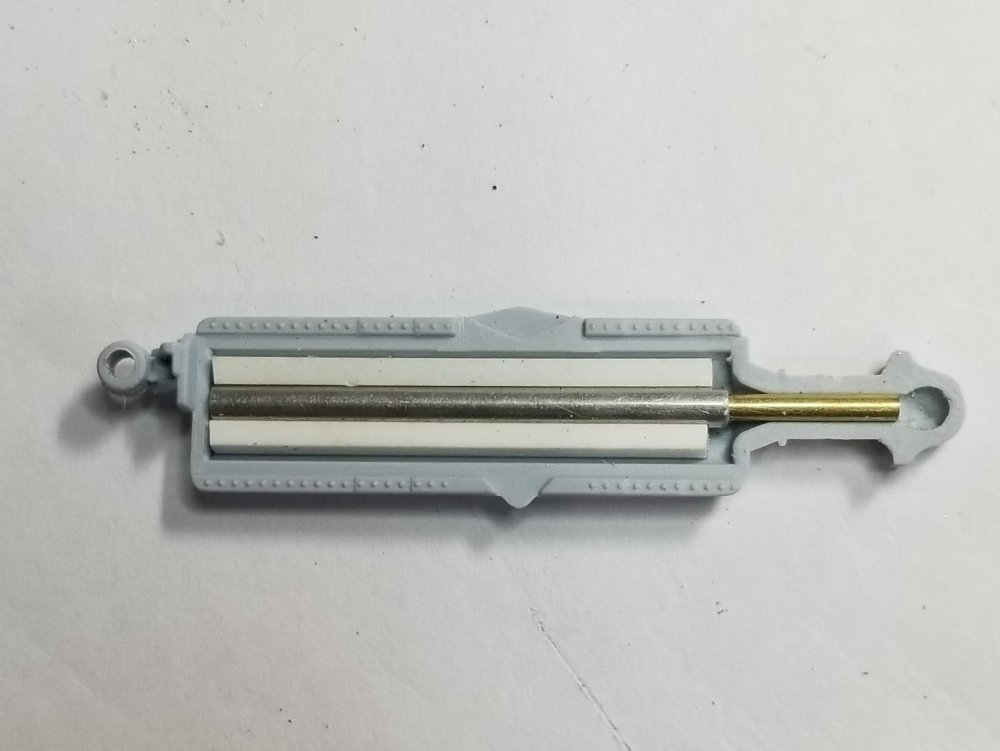
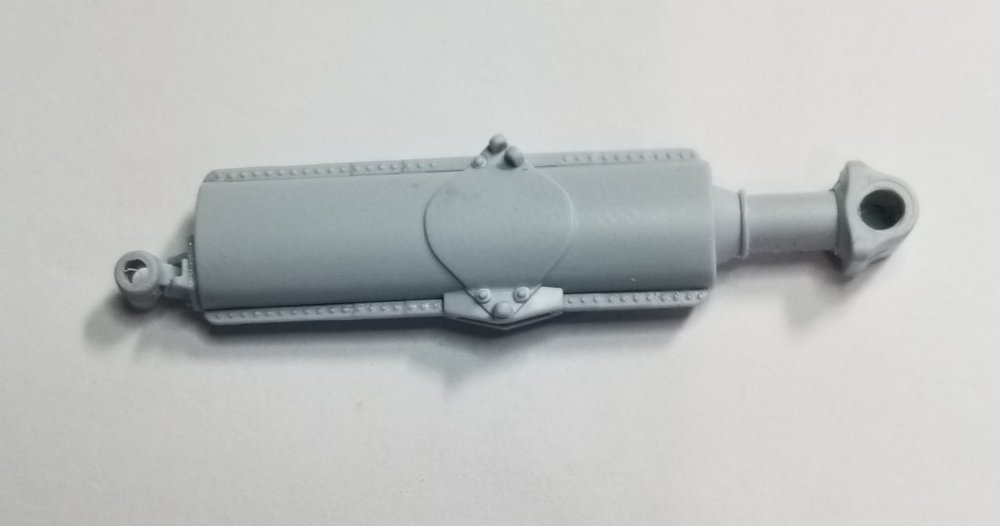
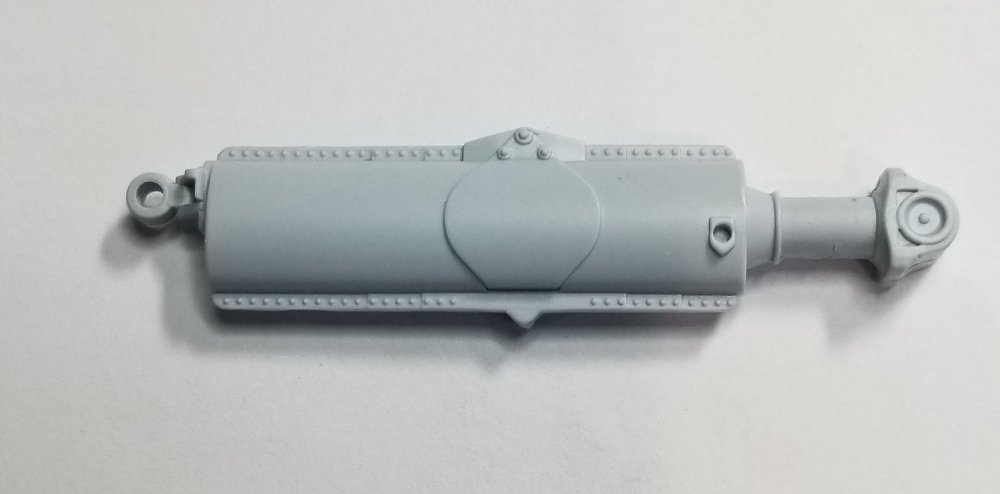
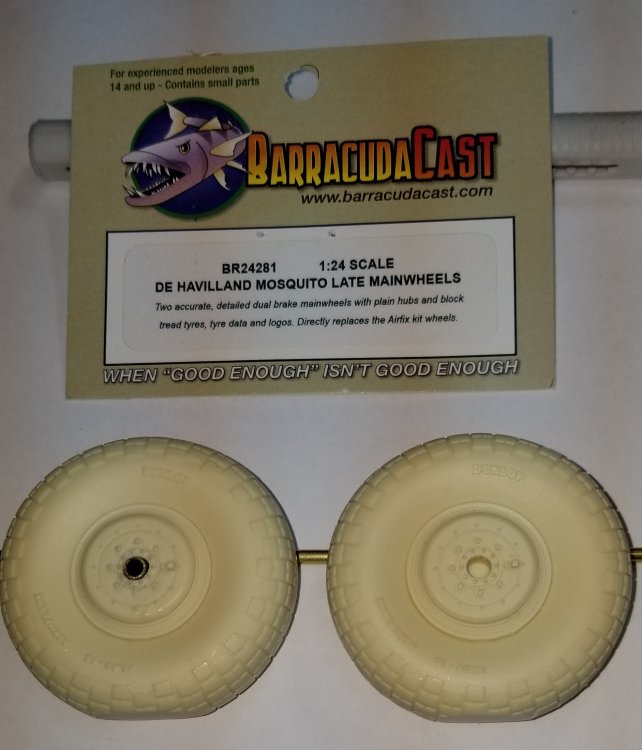
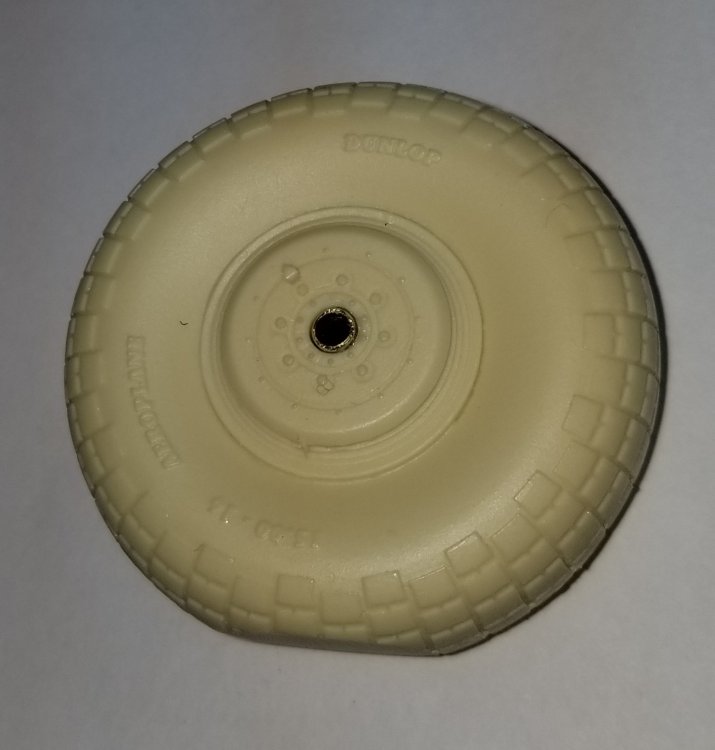
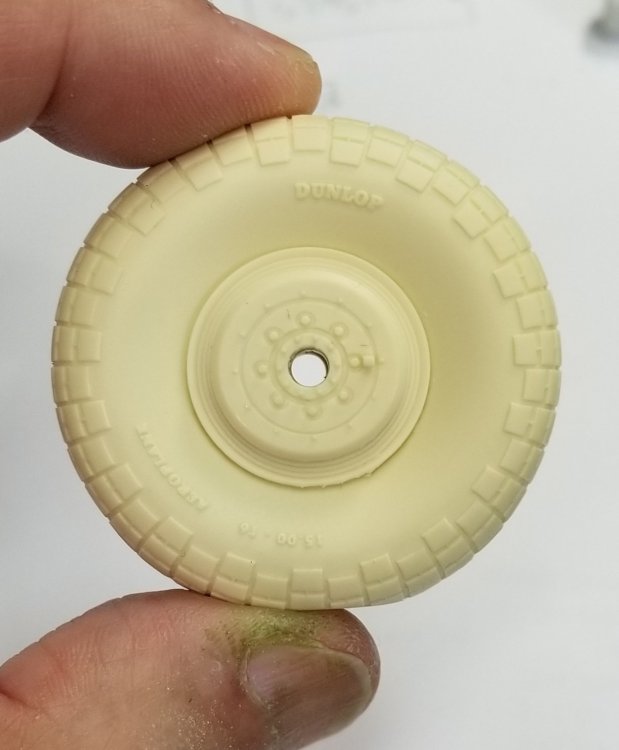
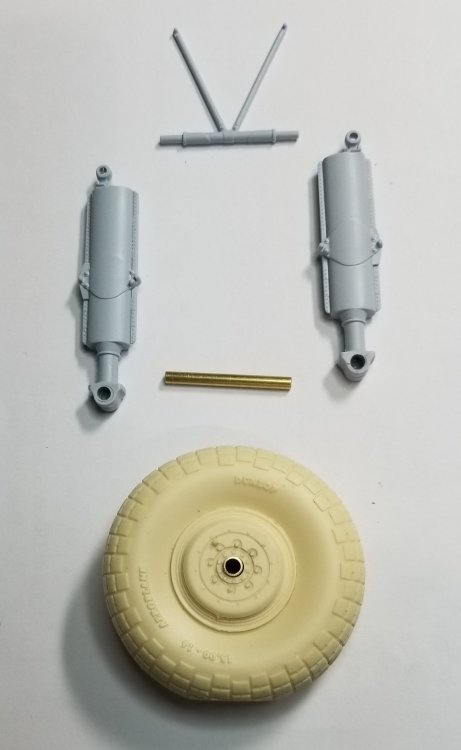
Hey all I was getting a little burned out on the Hellcat, so thought I would work on something else for awhile. I've had this kicking around in my head since I picked up the Airfix 1/24 Mosquito kit. It's been bouncing around in there with my one brain cell, or so I've been told...lol. We all know that these big 1/24th kits need metal (make that brass) landing gear to support there weight. Well since nobody makes brass ones what do you do, you say? Well I think I can fix this problem with some creative scratch building. First] Here are the tools I used, mostly. Just your basic stuff. Secind] Here are the materials I used. Tamiya glues, regular, extra thin and extra thin quick set some super glue. 1/8" dia. Brass tubing, 3/32" dia. Brass tubing, 1/16" dia. Brass tubing and some 1/32" dia. Brass rod, akso some 1/16" x 1/16" square plastic rod. Lets start: Step 1 First you need to cut (4) pieces of 3/32" (0.09375") dia. brass tubing 1 9/16" (1.5625") long. Next you need to cut (4) pieces of 1/32" (0.03125") dia. brass tubing 1 9/16" (1.5625") long. Then you need to put the 1/32" dia. Rod into the 3/32" dia. Tubing ~ use super glue. Next you need to cut (4) pieces of 3/32" dia. brass tubing 1 3/16" (1.1875") long. I used aluminum tubing because i didn't have enough brass tubing to go around. Insert the previous two pieces you already assembled into the 3/32" tube you just cut onto one end (see pictures)These go together to make an assembly. You need to make four of these assemblies, one for each leg. Step 2 You need to remove parts 18H, 21H and 10H from both of the "H" sprues. Next you need to cut off the small stub axle from 21H so you can drill a hole for a new brass tube axle. You need to drill it with a 3/32" drill. Drill through, be careful to stay centered. Next (this is critical) you need to drill into part 18H in the area where the axle will go, caution only go in about 1/32", just enough for the axle to sit in. When you glue 18H and 21H together this will make sure they stay lined up together. (See pictures)As you can see you go through 21H on the right and just barley into 18H on the left. Heres what they look like before you modify them. step 3 Now you should have four inner and four outer legs drilled out and ready to go. Next take a piece of the 1/16" x 1/16" square plastic and cut (8) pieces 1 1/8" k1.125") long. Now comes some assembly. Take 18H and add one of the brass tube assemblies you made previously and align with the depression in 18H and add (2) of the 1/16" square plastic pieces on either side of the tube assembly (these are to kept everything lined up) and glue in place, I used extra thin and super glue. (See pictures)It should look like this when assembled correctly. Then you need to add 21H to 18H and glue together. You need to make (4) of these assemblies. (See pictures)They should look like this when done. At this point I deviated from the kit. I used BarracudaCast 1/24 resin wheels/tires. I highly recommend these they are superb castings and put the kit parts to shame. I drilled out the resin wheels with a 1/8" drill makeing sure i was centered and straight. You can do this to the kit parts, you just need to drill out the four wheel parts 40H and 41H with the 1 1/8" drill. Step 4 Now you need to cut a piece of 3/32" (0.09375 dia. Brass tubing 15/16" (0.09375") long for the axle that will go between the two legs. You need to cut two of these. Next you need to take part 10H and add it to one of the legs per the kit instructions. Next add the axle you just cut into the leg, then add the wheel/tire then add the other leg. Once your satisfied that everything fits correctly you can go back and super glue it together, just don't glue the wheel/tire yet, do that when you are done and ready to set it on its wheels. This way you can line up the flats on the tires with the ground. You can hold it together with tape until then. Thats pretty much it. Make another assembly from the peices you already cut and you have two reinforced under carriage legs. Pretty simple actually I think most competent modelers should be able to accomplish this. If your not that good try it anyway just be very careful and take your time and follow what I said and you can be proud of accomplishing something that will improve your modeling skills. I cant get rid of this picture so ignore it. Once this is glued together it will be very solid. Now I have to look at fixing the rest of the landing gear to see if theres a way to stiffen them up. Ron G


-
Hey all I was getting a little burned out on the Hellcat, so thought I would work on something else for awhile. I've had this kicking around in my head sunce I picked up the Airfix 1/24 Mosquito kit. It's been bouncing around in there with my one brain cell, or so I've been told...lol. We all know that these big 1/24th kits need metal (make that brass) landing gear to support there weight. Well since nobody makes brass ones what do you do you say? Well I think I can fix this problem with some creative scratch building. First] Here are the tools I used, mostly.


-
Happy B day
-
1/32 Trumpeter F6F-5 Hellcat
CrankyCrafstman replied to Ryan's topic in LSM 1/35 and Larger Work In Progress
Check with Stevens International and see if you can get a new fuslage. Ron G -
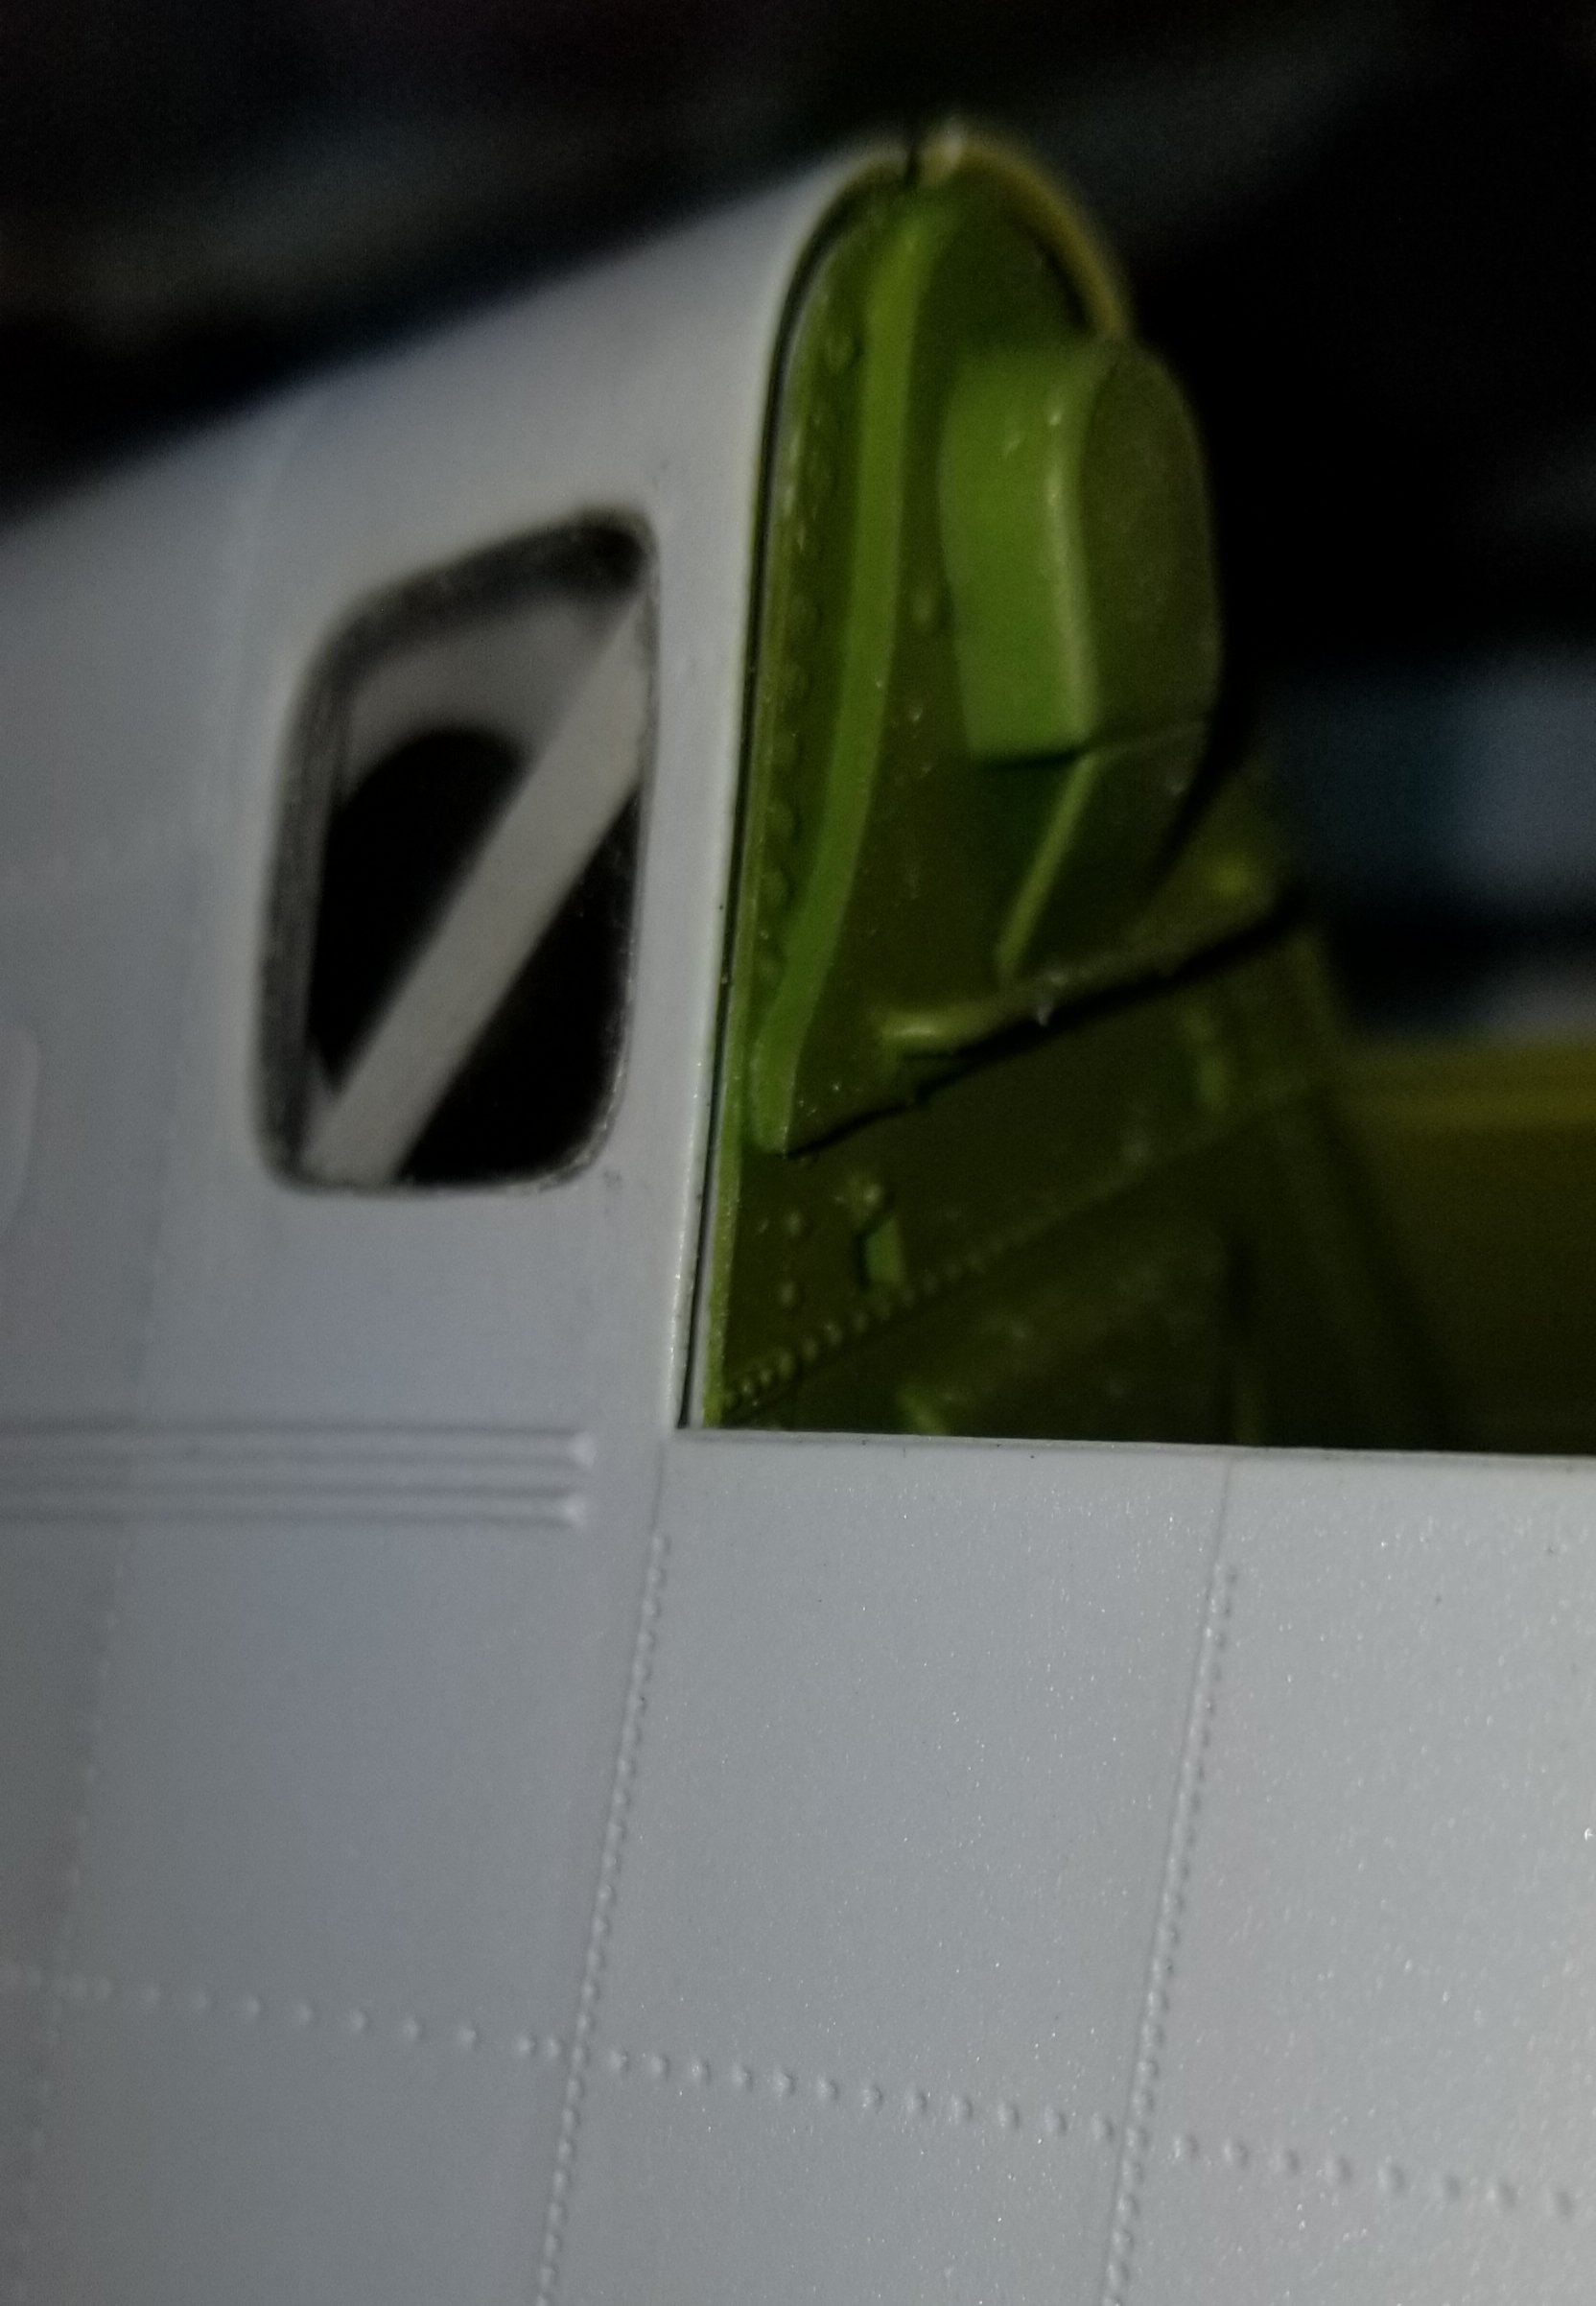
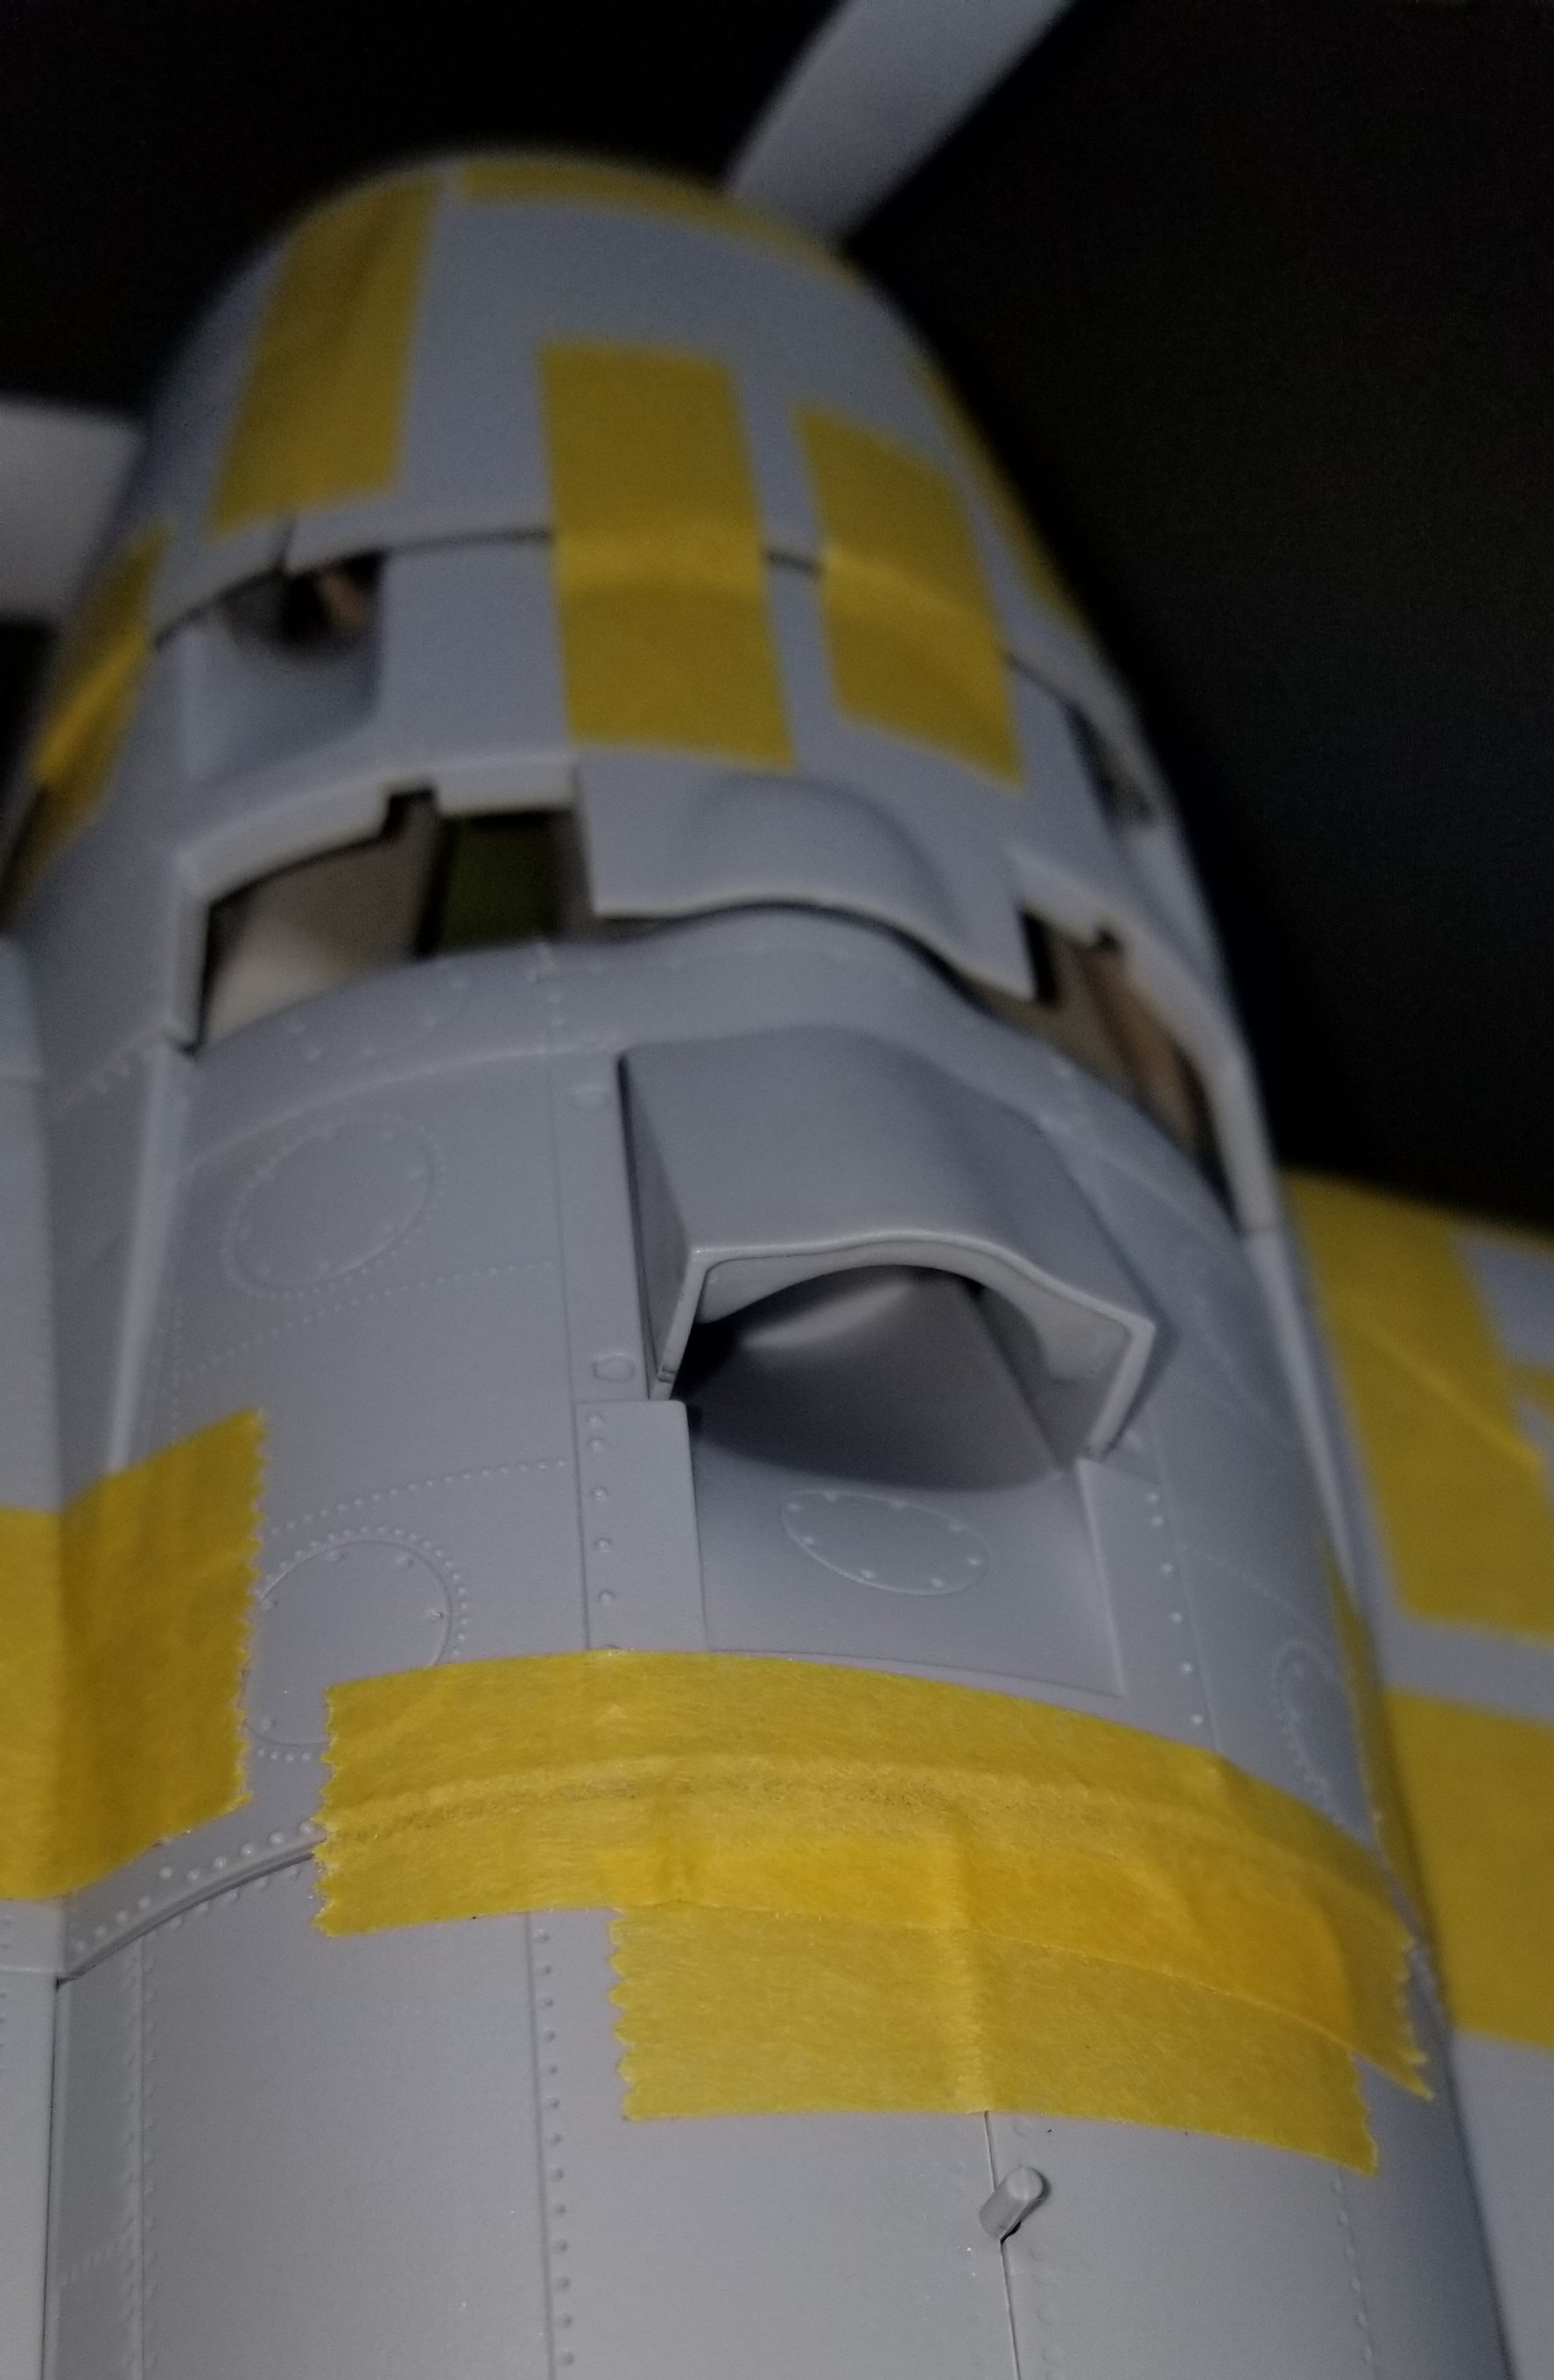
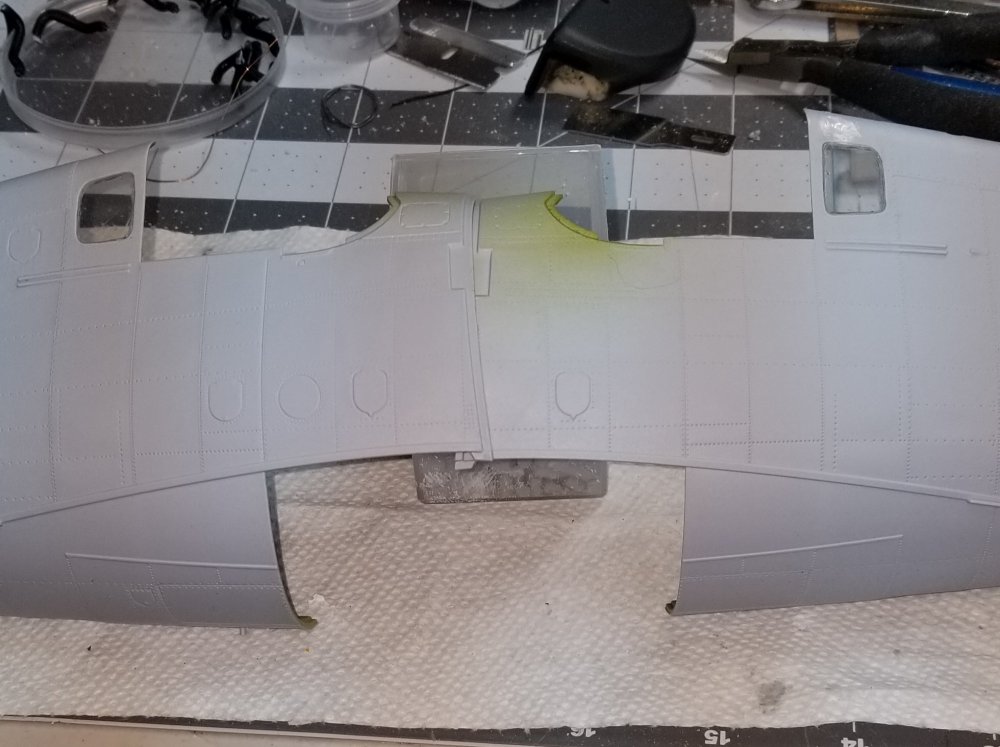
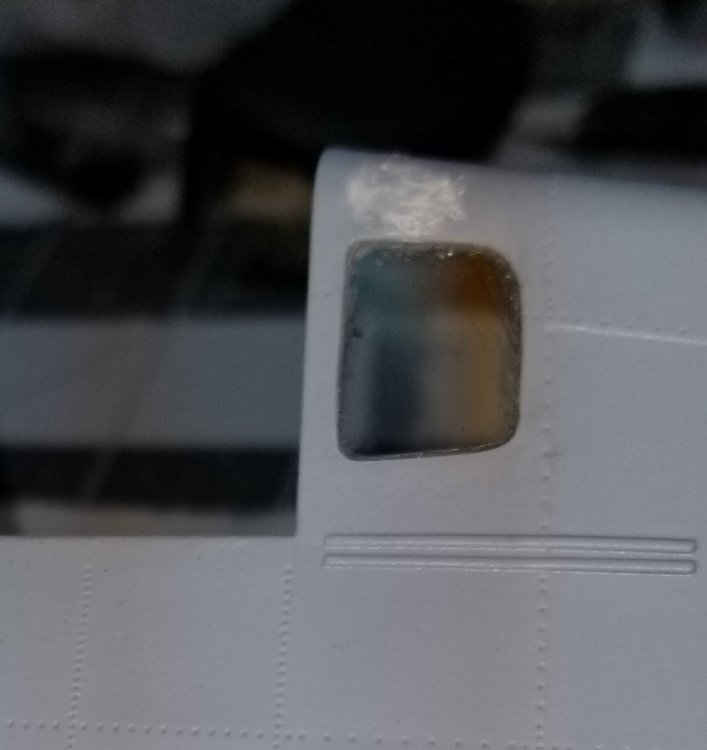
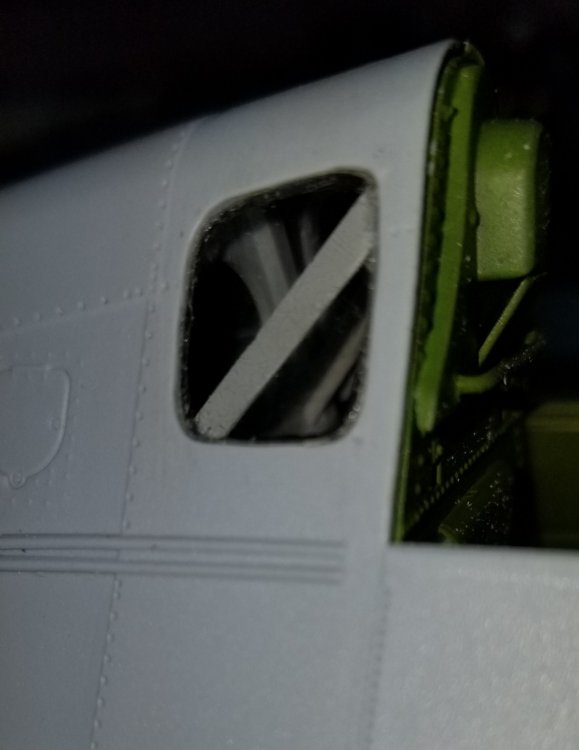
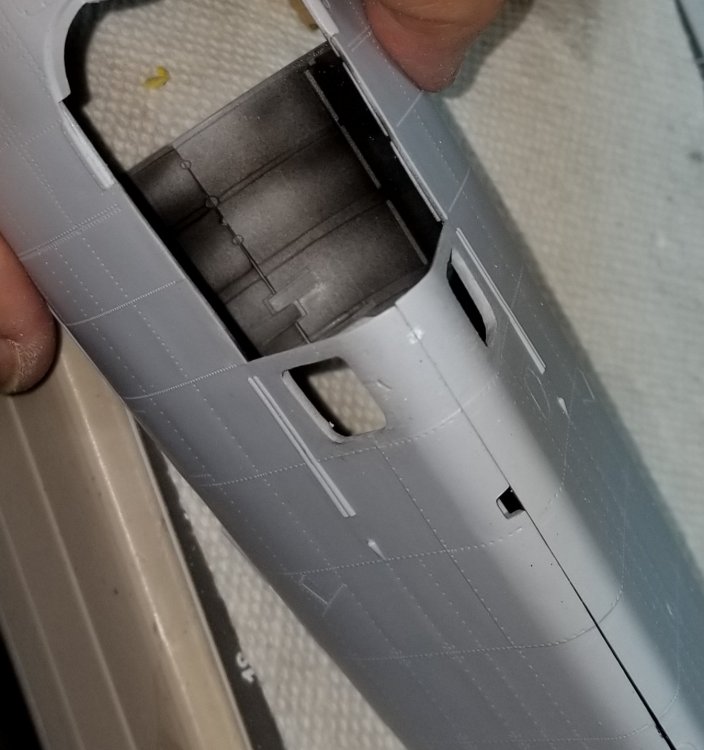
Ok the windows are in. I need to wait for the glue to dry, then its clean up time. Took a ding out of the fuselage so a little putty to fix. Need to add some pipe work to these area. Vent tubes for the water injection tank system. They will be visible thru the windows on both sides, also from the lower hatch. Thats it for now. Ron G


-
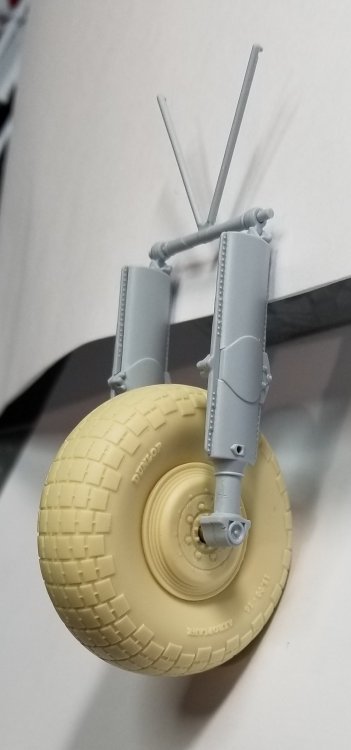
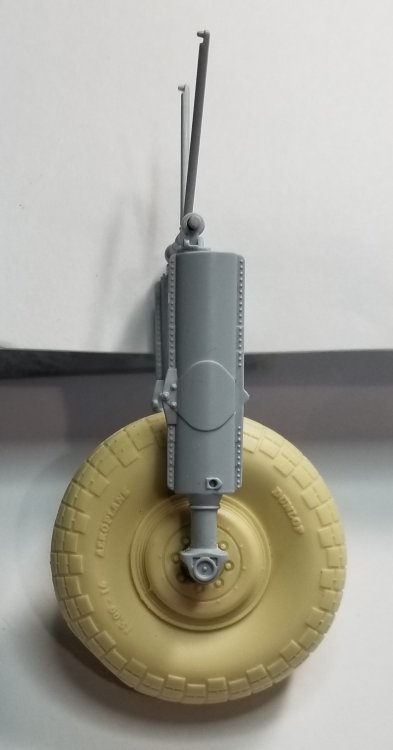
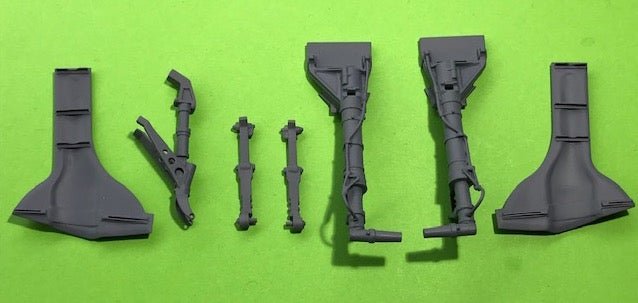
Will be adding these from Alistair at Aerocraft. These are going to be made out of brass, there shown primed. these will be cast in grey resin. Not sure which ones I'll be using, probably will get all three. Ron G


-
New stuff for the 1/24 Airfix F6F-5 Hellcat
CrankyCrafstman replied to CrankyCrafstman's topic in Modelling Discussion
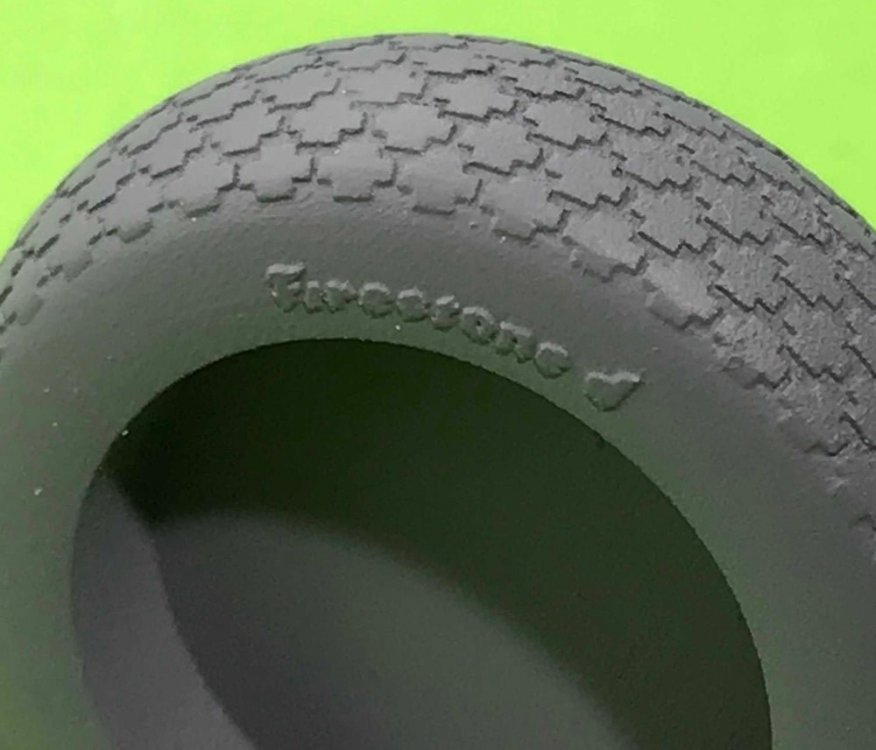
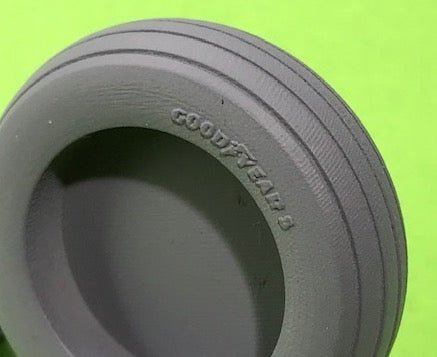
Hey all Just got this from Alistair at Aerocraft. They look really superb. Landing gear and three different types of tires. https://aerocraftmodels.bigcartel.com/product/airfix-hellcat-brass-undercarriage-and-wheel-doors https://aerocraftmodels.bigcartel.com/product/airfix-hellcat-tyres-cross-hatch-type https://aerocraftmodels.bigcartel.com/product/airfix-hellcat-tyres-straight-running-tread https://aerocraftmodels.bigcartel.com/product/airfix-hellcat-tyres-cruciform-block-pattern Ron G


-
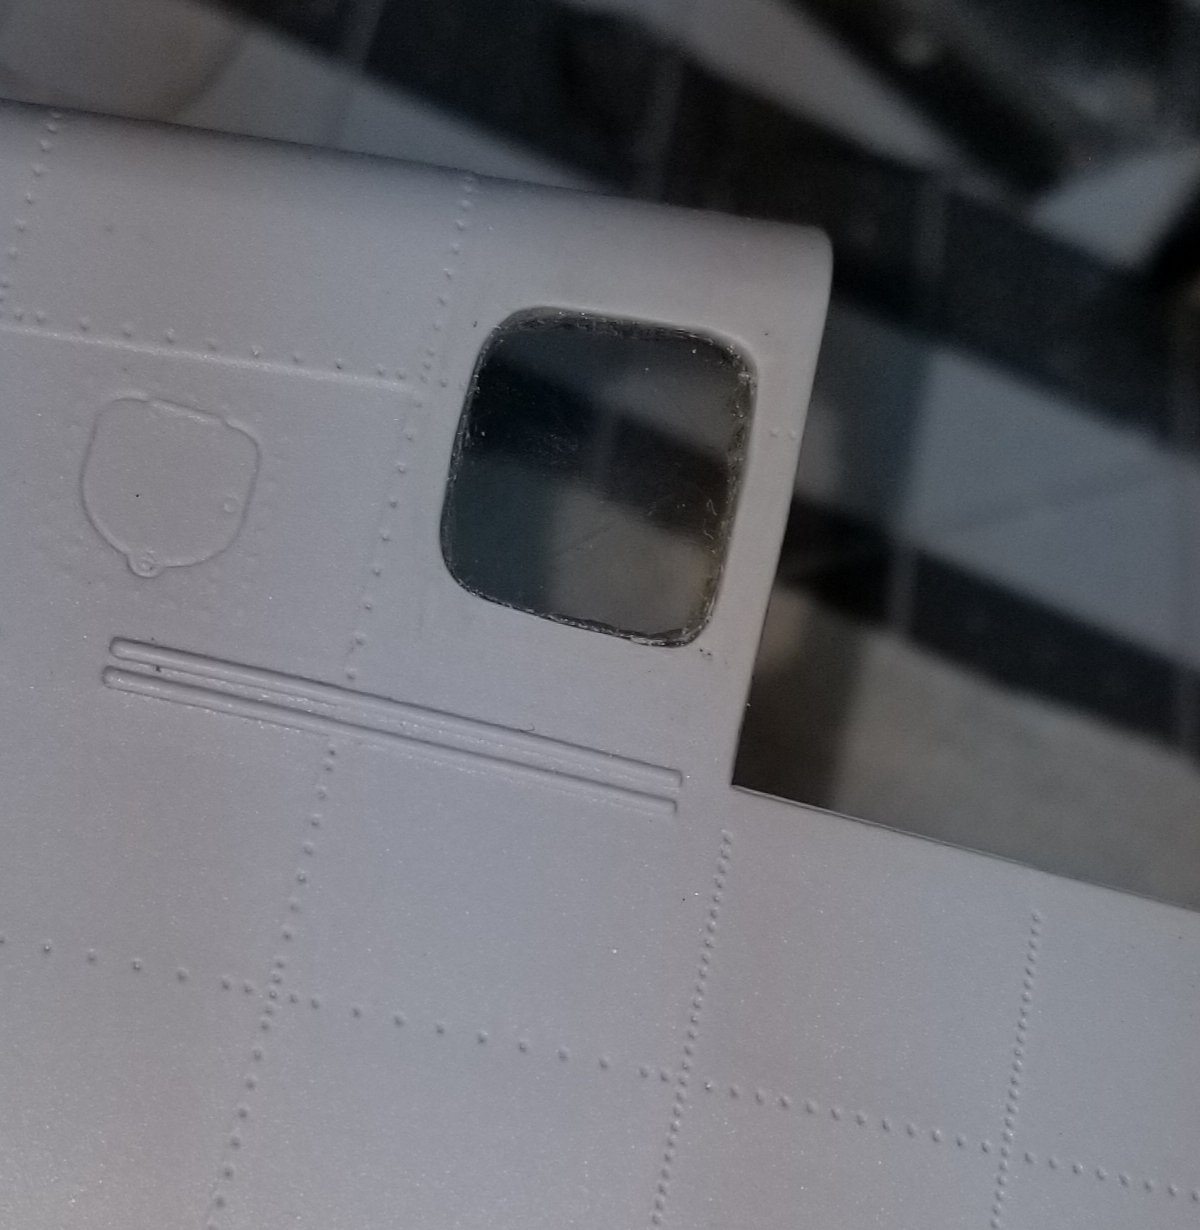
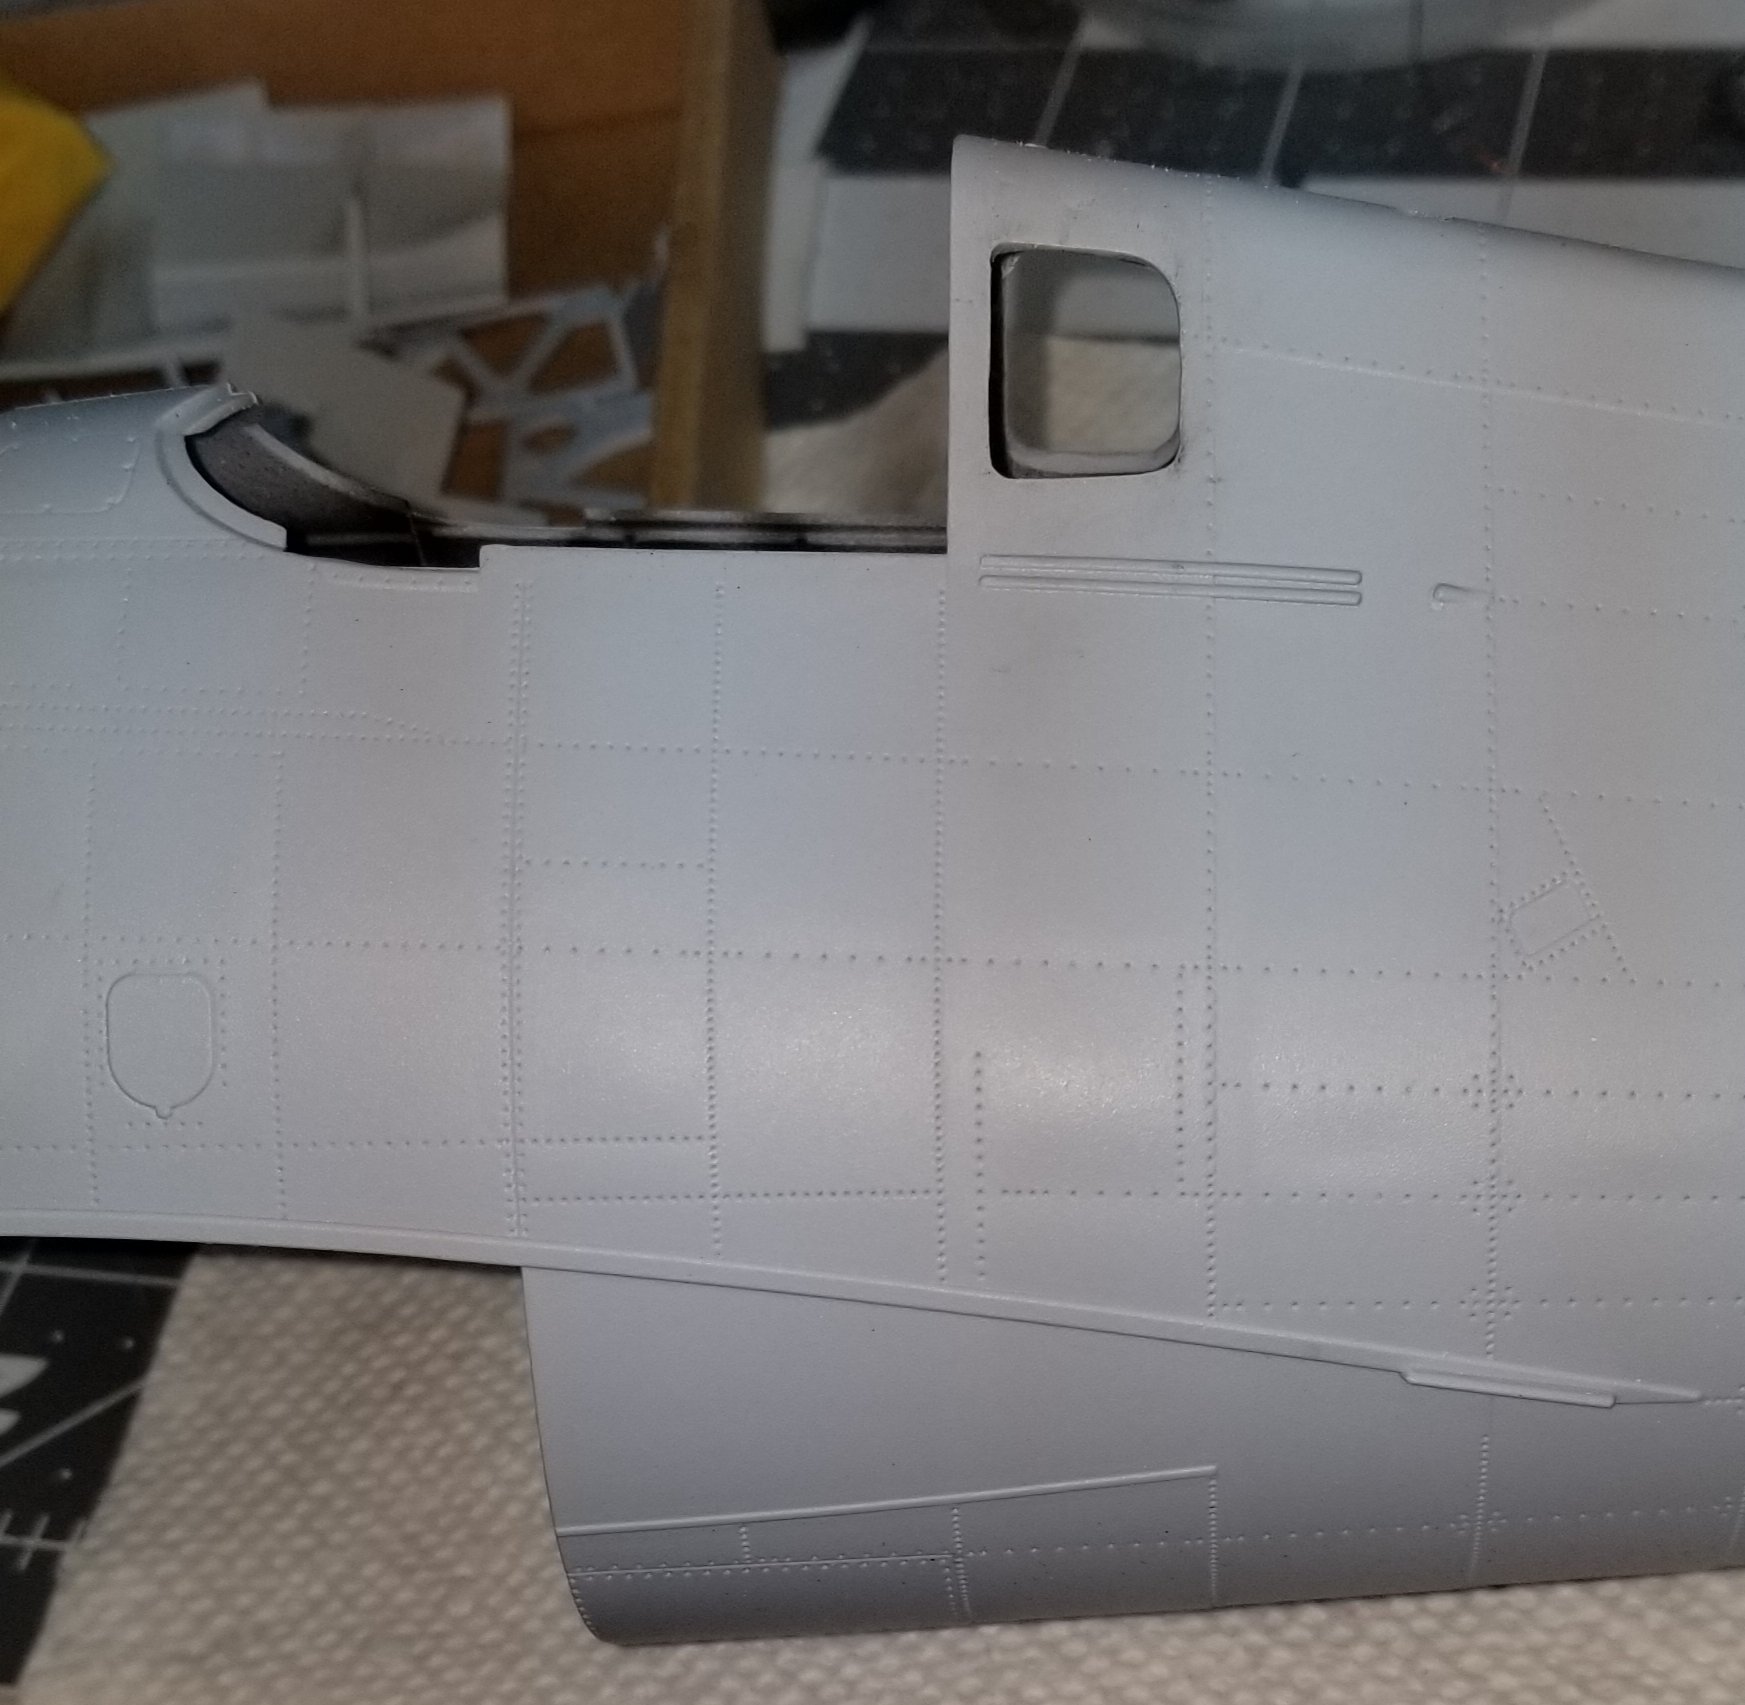
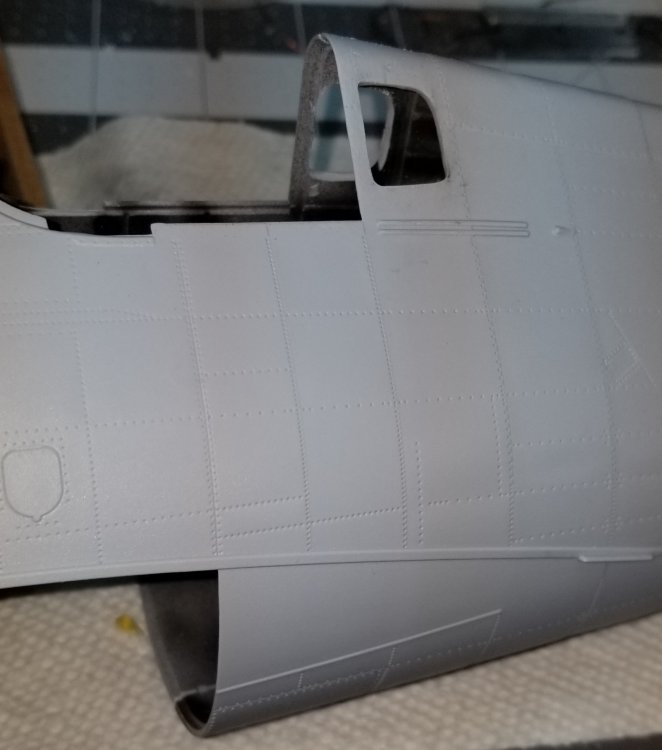
Hey all Ok, well there's no turning back now. I've cut out the rear windows behind the pilots head. Now I need to get some clear plastic card, probably around 0.04" thick to make the windows glass. It took me about four to five minutes starring at it before I could get up the gumption to start cutting. I think they came out nice. Here's some pics.

-
Trumpeter P-47D Razorback
CrankyCrafstman replied to crazypoet's topic in LSM 1/35 and Larger Work In Progress
Hey crazypoet Check out my build of this kit as a 325 fighter group "Checkertail" I went for BigStud. Still have to finish it need to add the checkertail decals to the tail. I used HGW seatbelts, Eduard interior kit and Zots decals. Ron G -
Hey all just found these on Ebay. They look better then the kit parts. We'll see when they get here from the Ukraine. Since I now have two kits I ordered two sets. They run about $25.00 US dollars including shipping. As soon as they get here I will post some pictures. Ron G

-
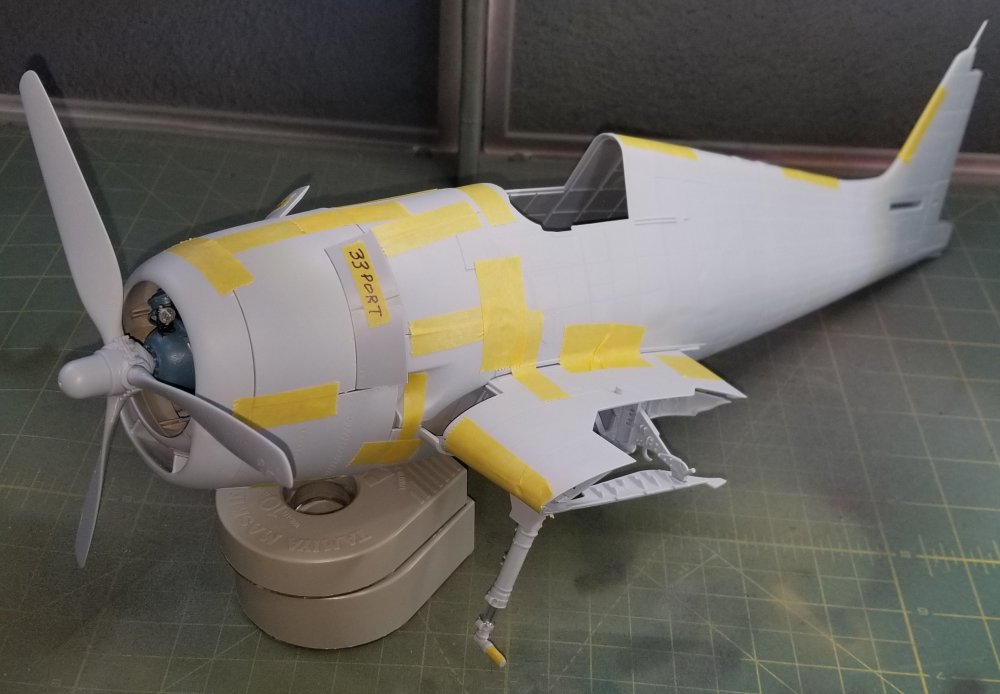
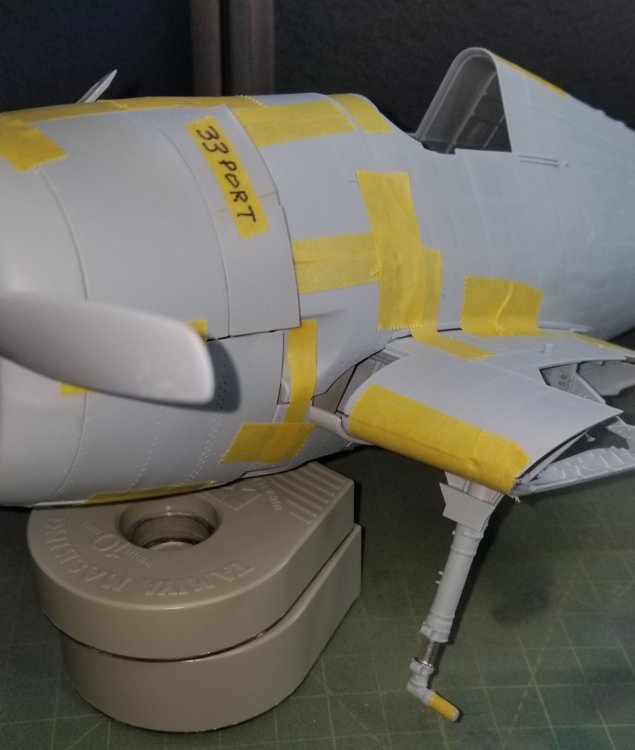
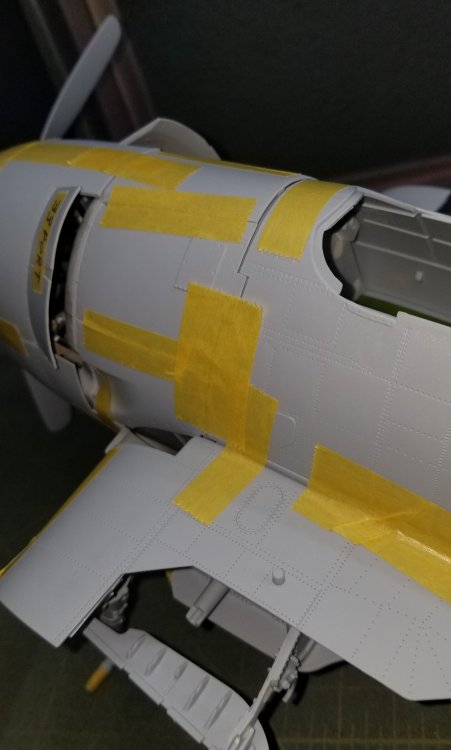
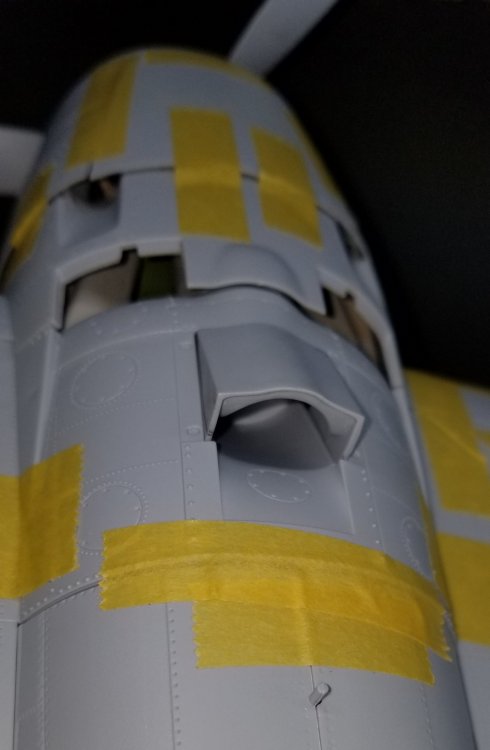
Just some pictures to show how good the fit is on all the cowl panels and wing to fuselage. It does fit together really nice, and will be much better once finally glued in place. I found these on Ebay. They look really good and are better then the kit parts. We will see when they get here from the Ukraine.


-
Trumpeter P-47D Razorback
CrankyCrafstman replied to crazypoet's topic in LSM 1/35 and Larger Work In Progress
Be aware. There are two different types of rocker covers for the engine, one works the other one doesn't, by this I mean once assembled it doesn't fit inside of the cowl. I had to grind the heck out of mine to get the engine to fit, and it still doesn't fit well. I don't rember which one is correct one to use have to dig through my photos and notes to find out. Ron G -
Just watched "Strategic Air Command" so I'm ready. are you going to do a B-47 to go with it Ron G
-
GUY ON A BUFFALO - I will be out for a while.
CrankyCrafstman replied to Martinnfb's topic in General Discussion
Hey Martin Good luck and have fun, but when you get off of the Buffalo don't step in the Buffalo chips... I said chips not %*#^... lol Ron G