BlrwestSiR
-
Posts
9,218 -
Joined
-
Last visited
Content Type
Profiles
Forums
Events
Gallery
Everything posted by BlrwestSiR
-

Land Rover Defender 110
BlrwestSiR replied to BlrwestSiR's topic in LSM 1/35 and Larger Work In Progress
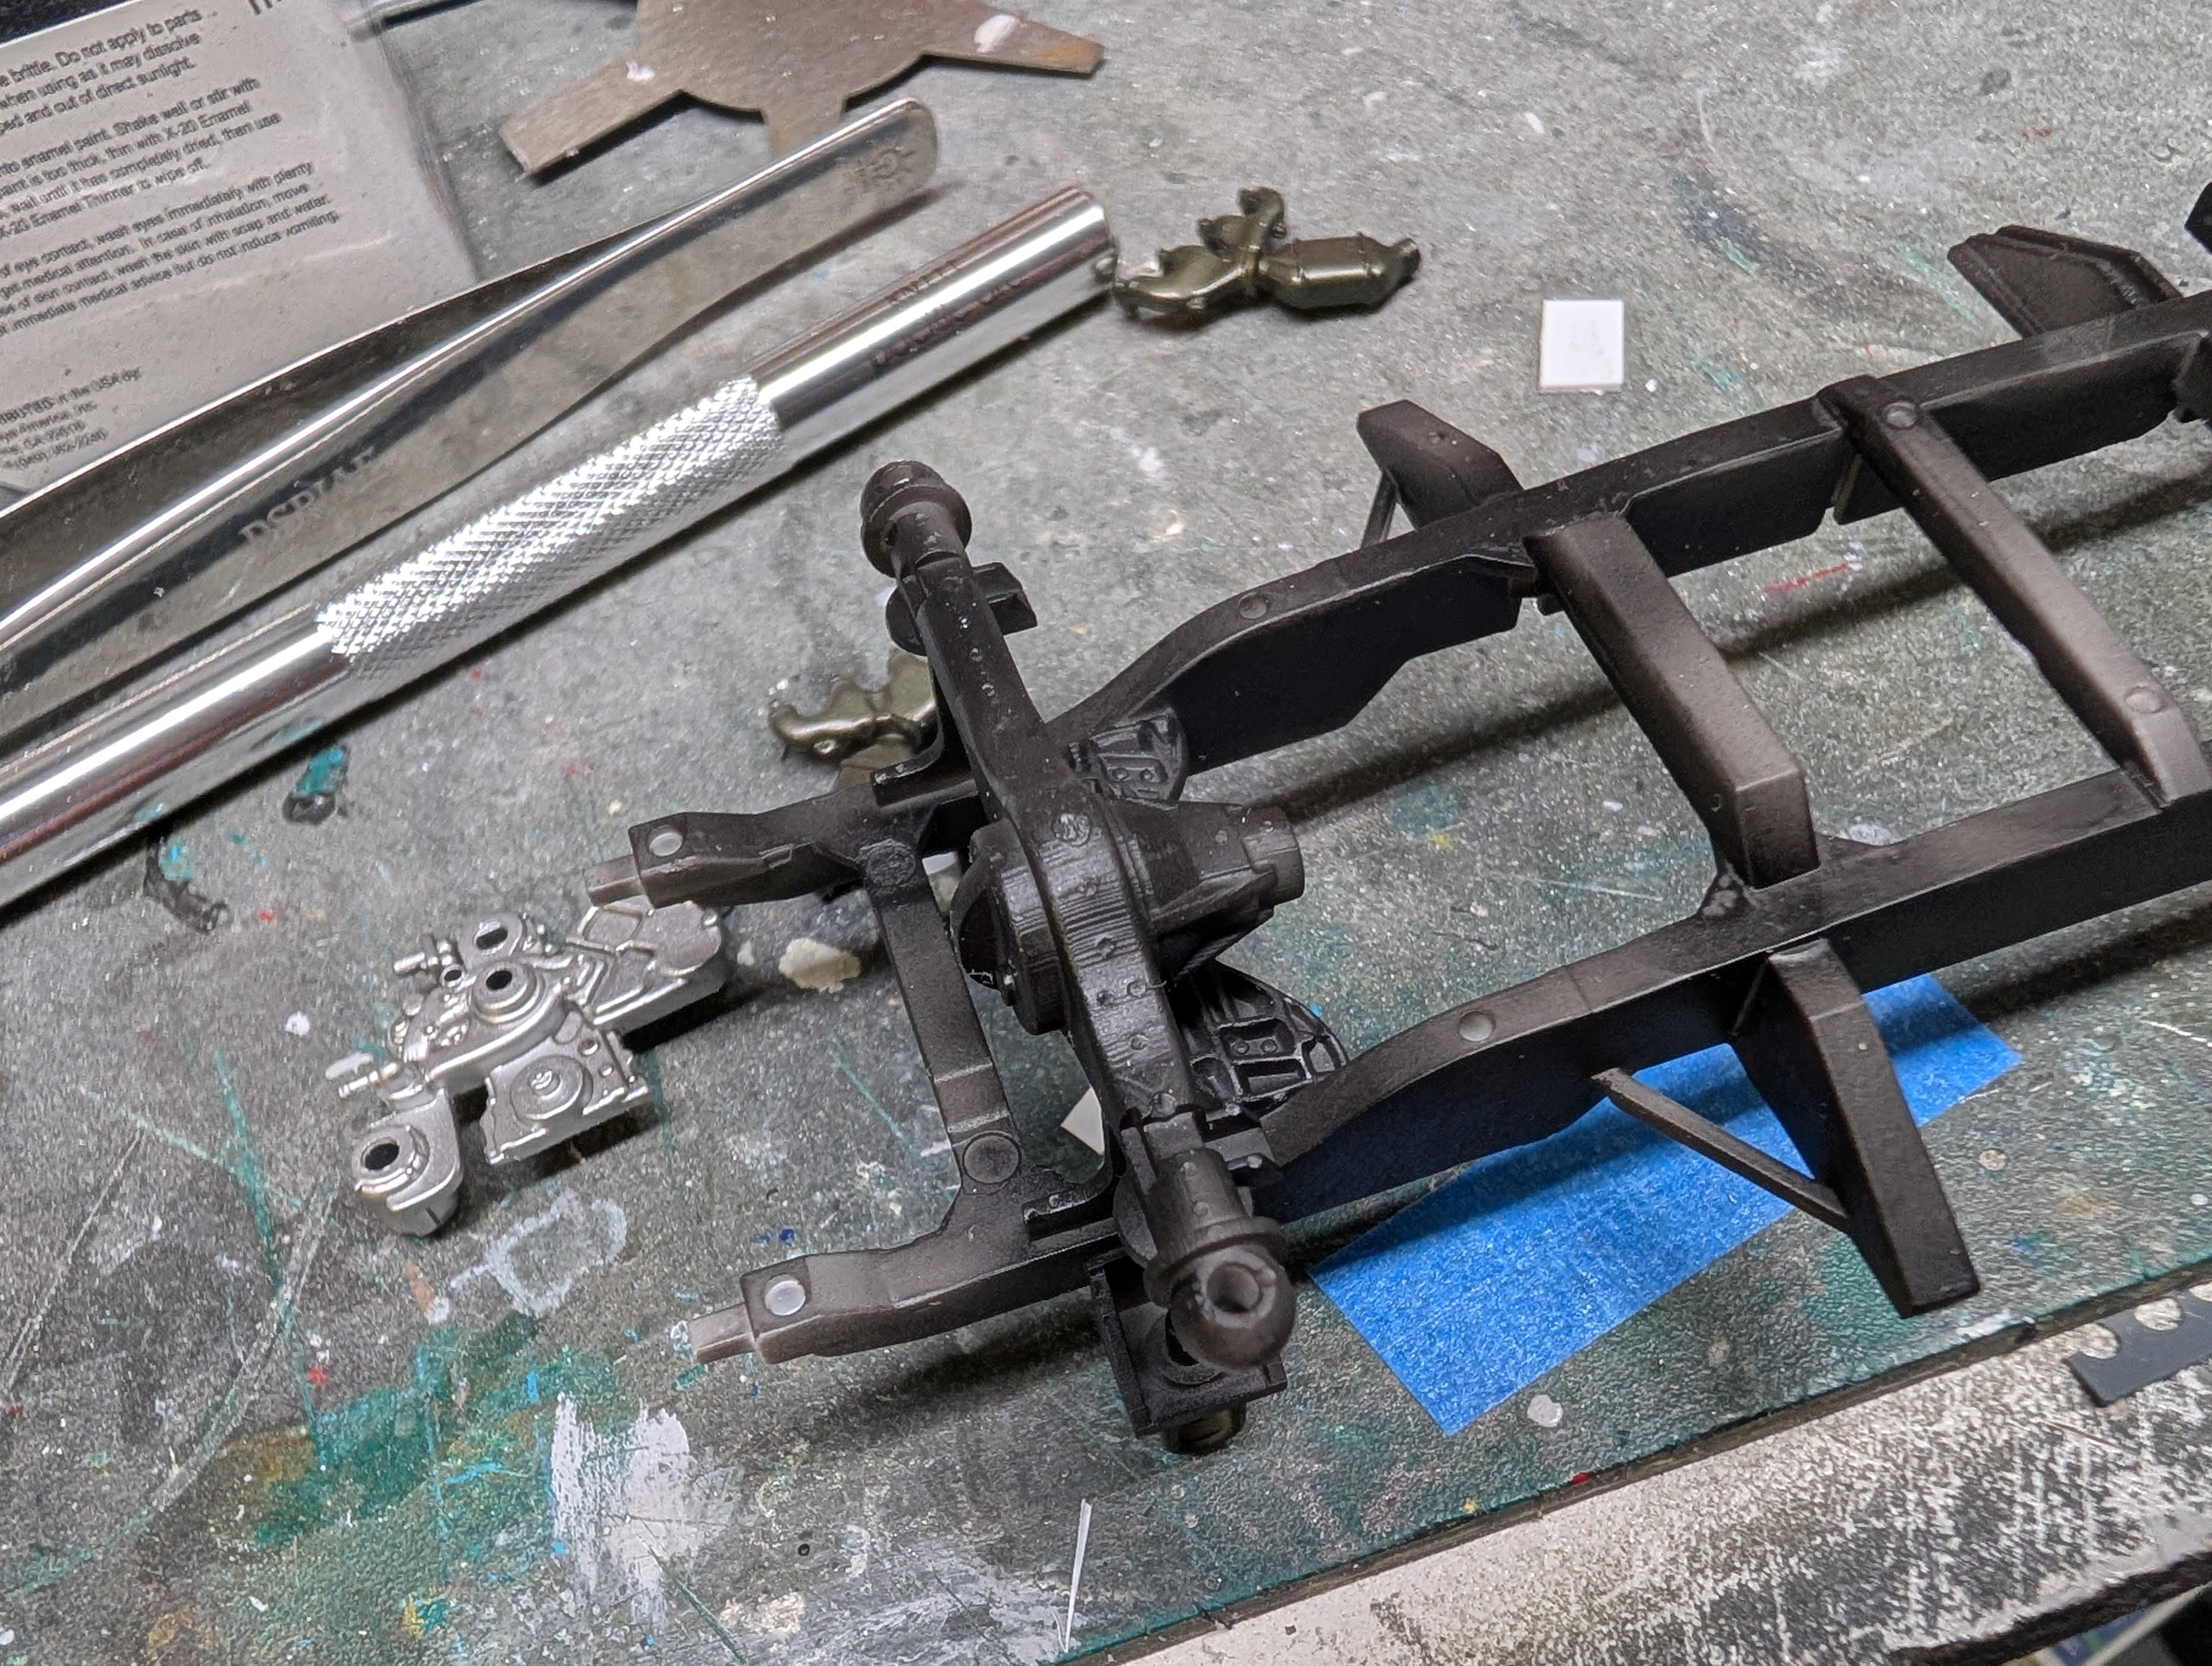
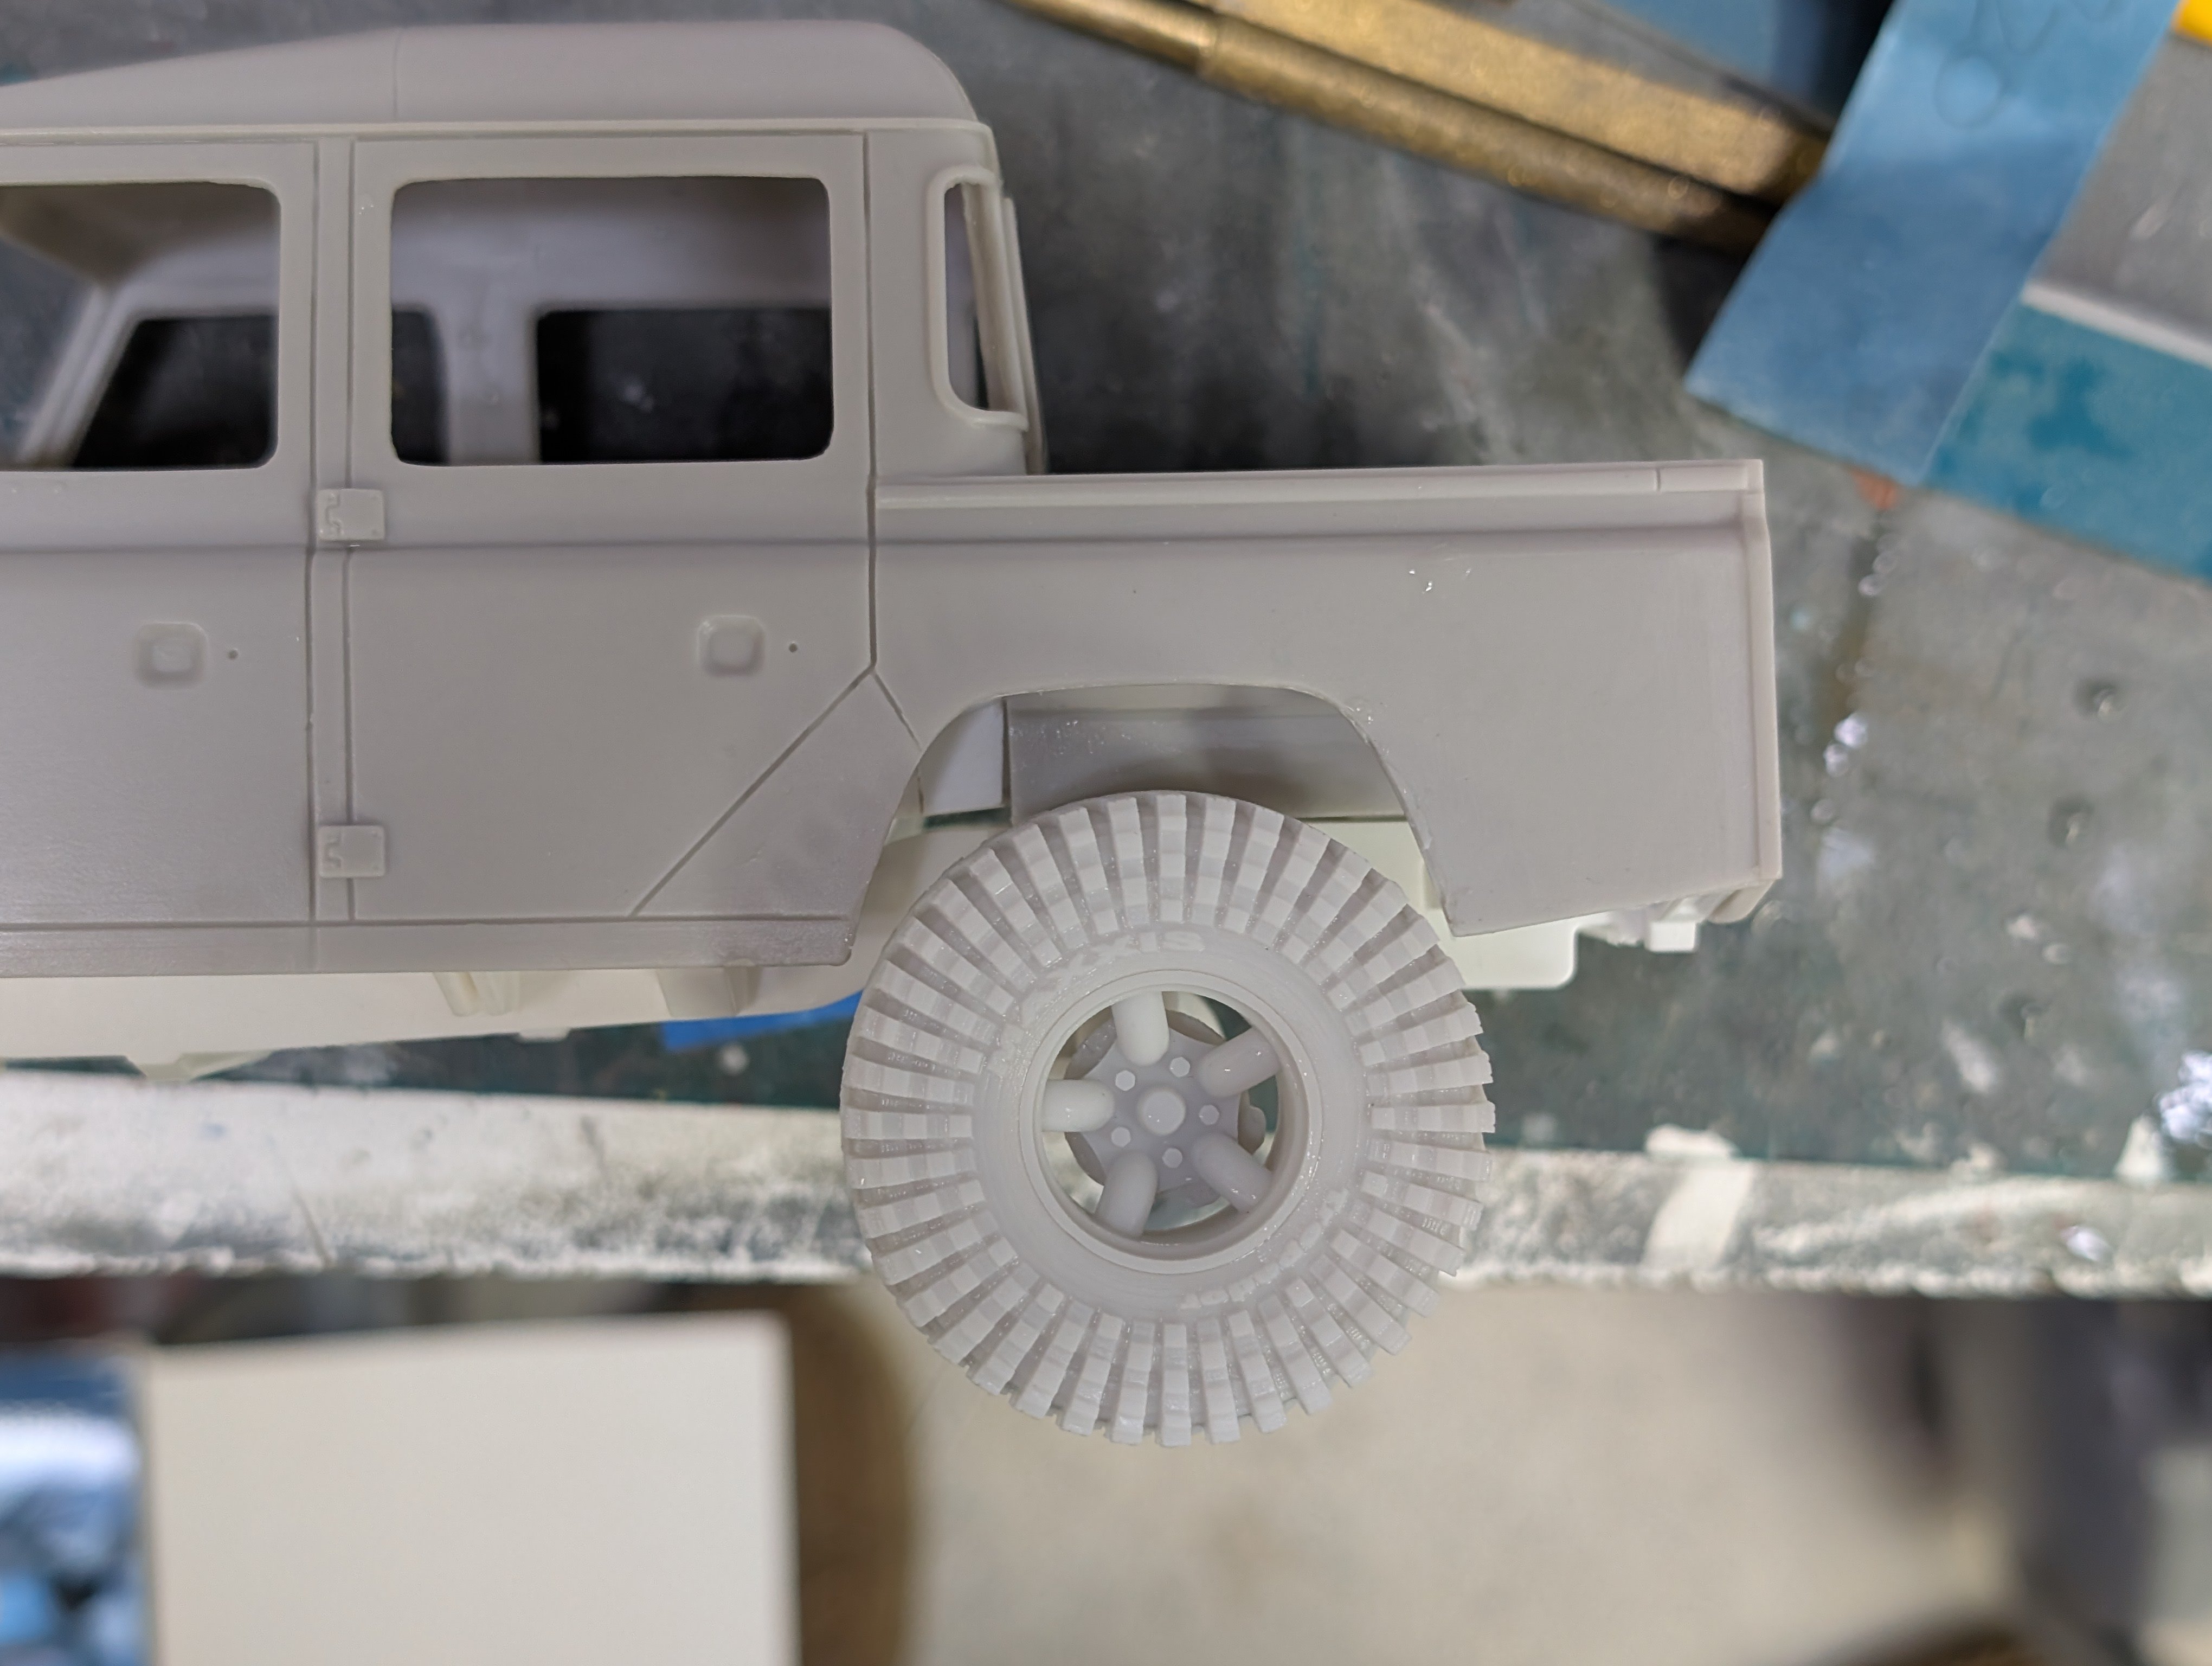
The new fender wells are done. No more gaps. Of course, the rears needed a bit done there too but it's a bit easier at least. I also finally put some paint on parts. The primer showed off some more cleanup work to be done on the axles. I also painted the engine and transmission.


- 18 replies
-
- 3
-

-
- c1 models
- land rover
- (and 1 more)
-
1/24 Airfix Bf-109K (conversion)
BlrwestSiR replied to Martinnfb's topic in LSM 1/35 and Larger Work In Progress
Nice! -
A nice collection of very lovely kits there Dennis. And a fantastic gift from your daughter too. Carl
-
The gearbox looks great Rob. What brand do you use for the transparent black? I was actually looking at that colour made by Gaianotes (they call it Clear Black) and was trying to figure out how to use it. They do a white as well. Carl
-
Bandai not including the LED set has been the biggest complaint about the kit.
-
They're a lot brighter and seem to run longer too. I'm hoping they make one for the RX-93 as the Bandai set at $200 for 5 LEDs seem a bit much.
-
I'm waiting on a Kosmos LED set for mine as well! The Bandai one was just too silly in price.
-
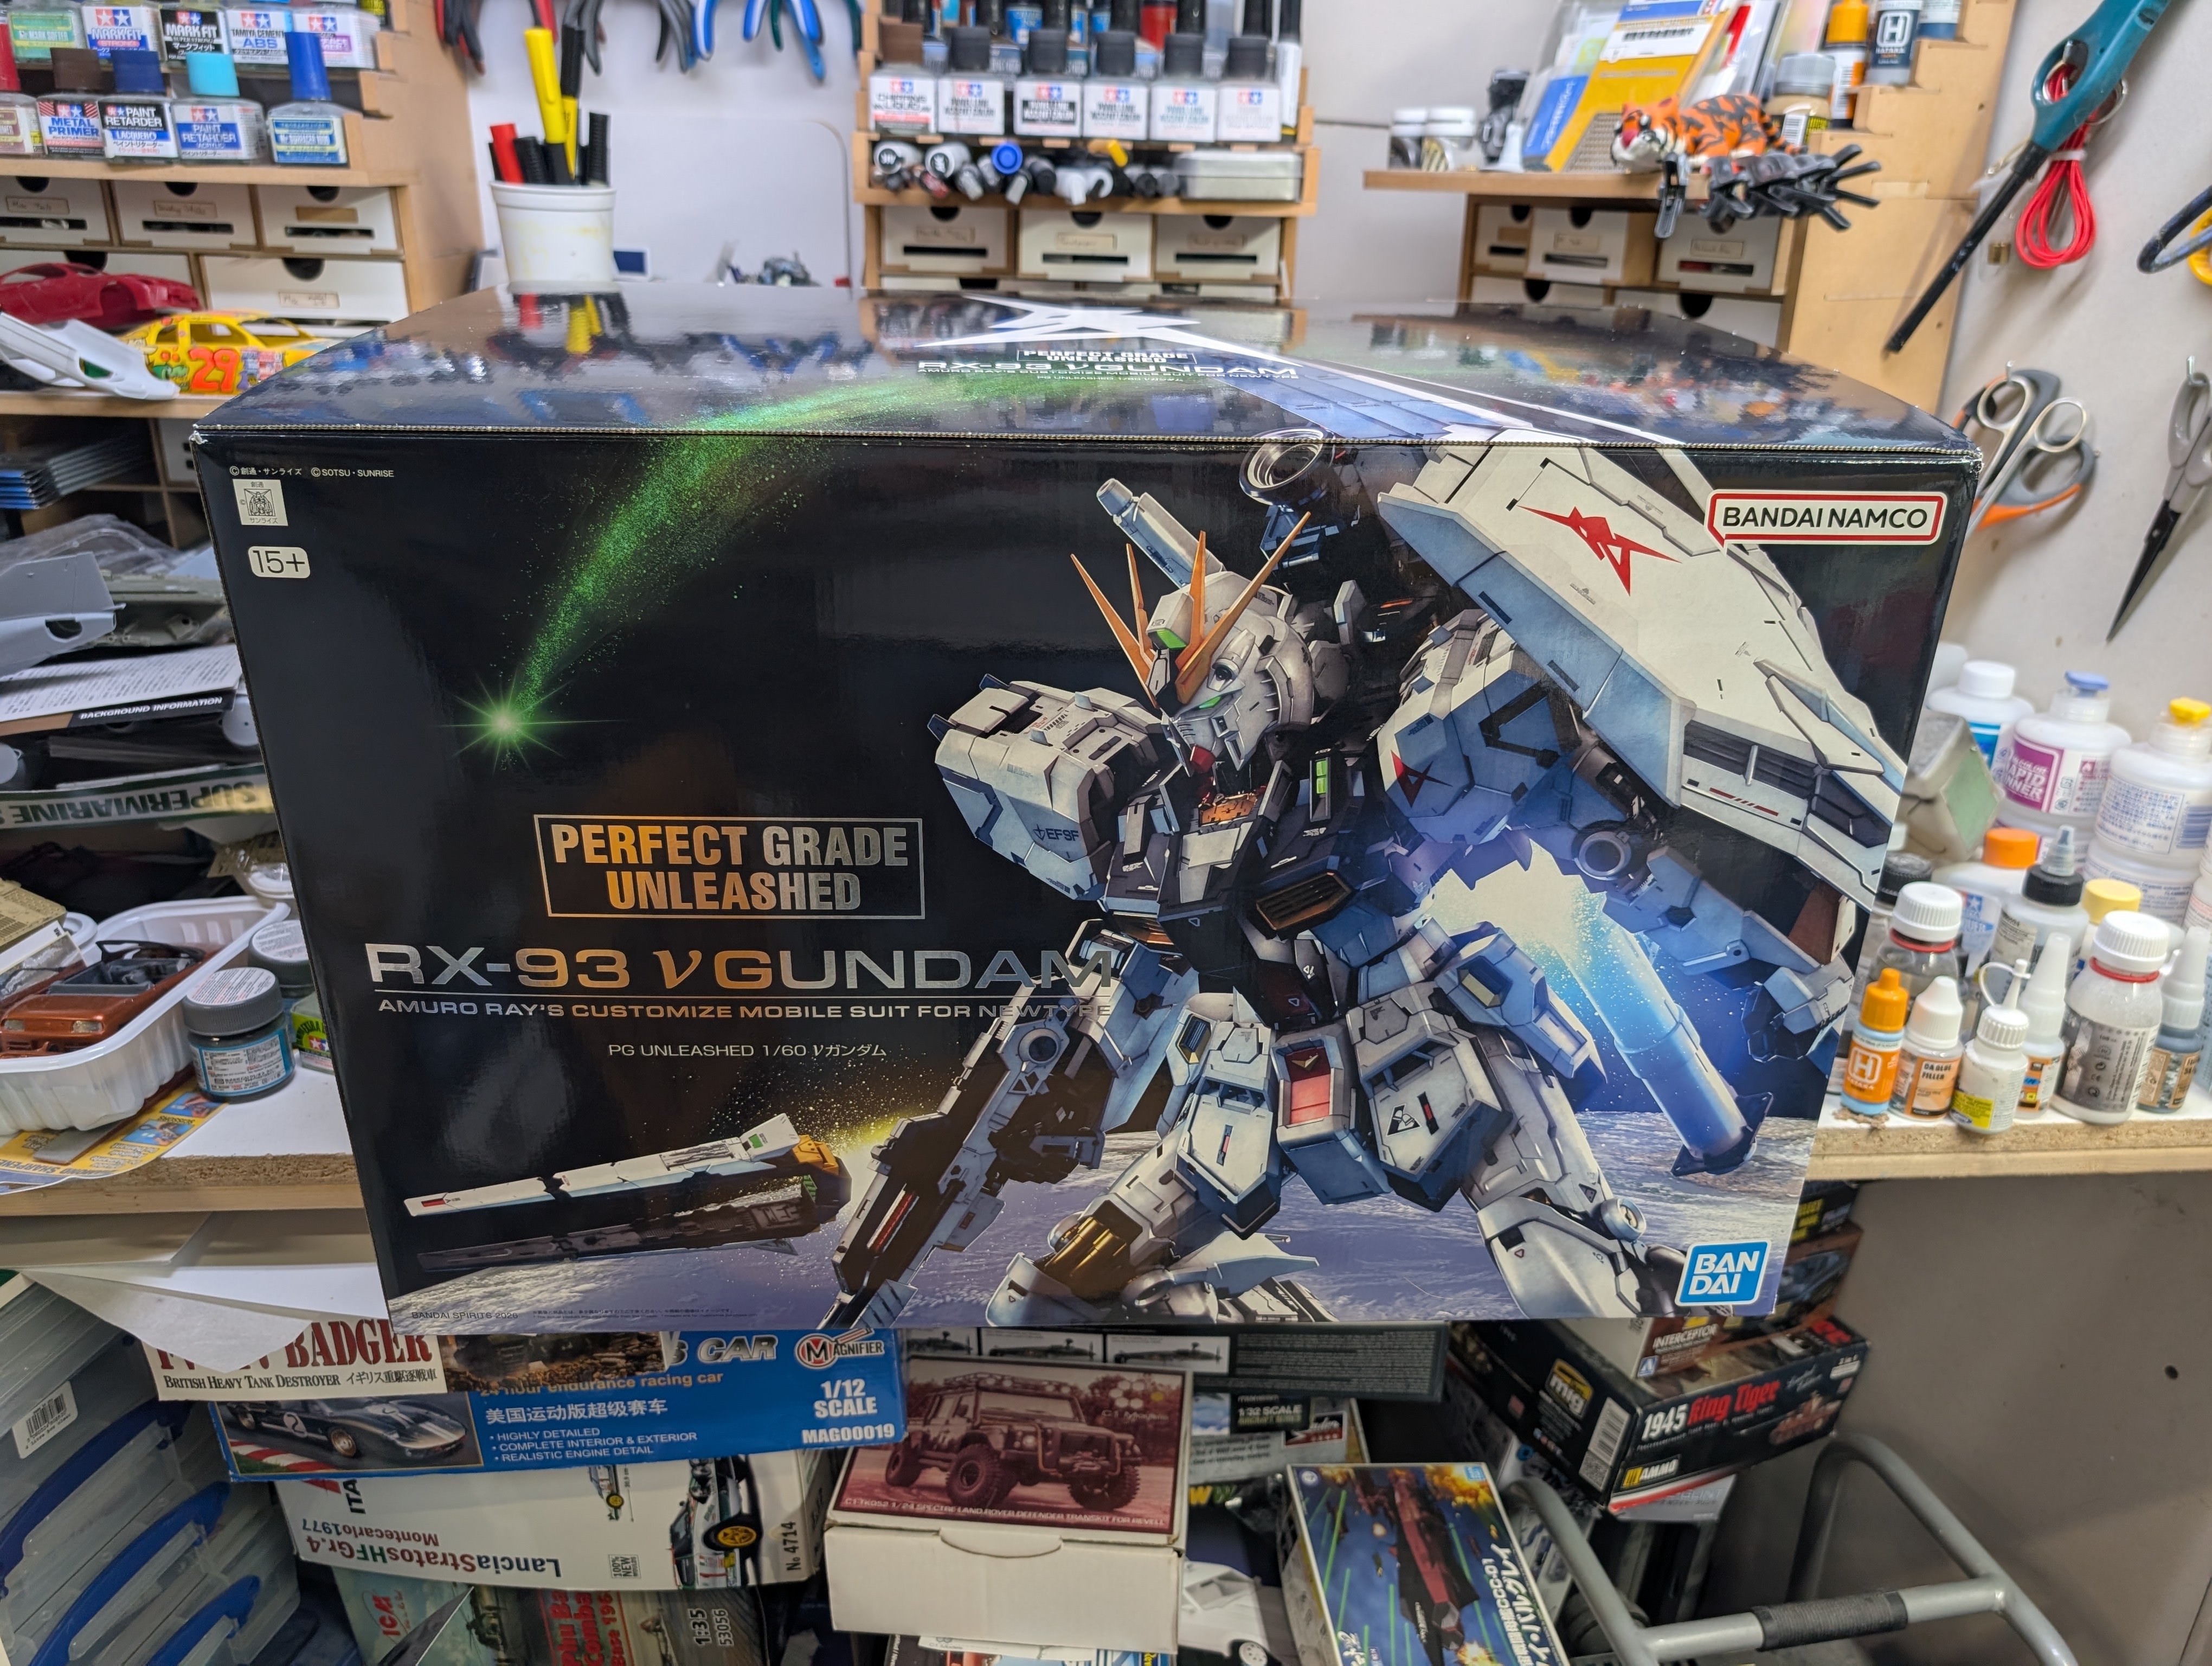
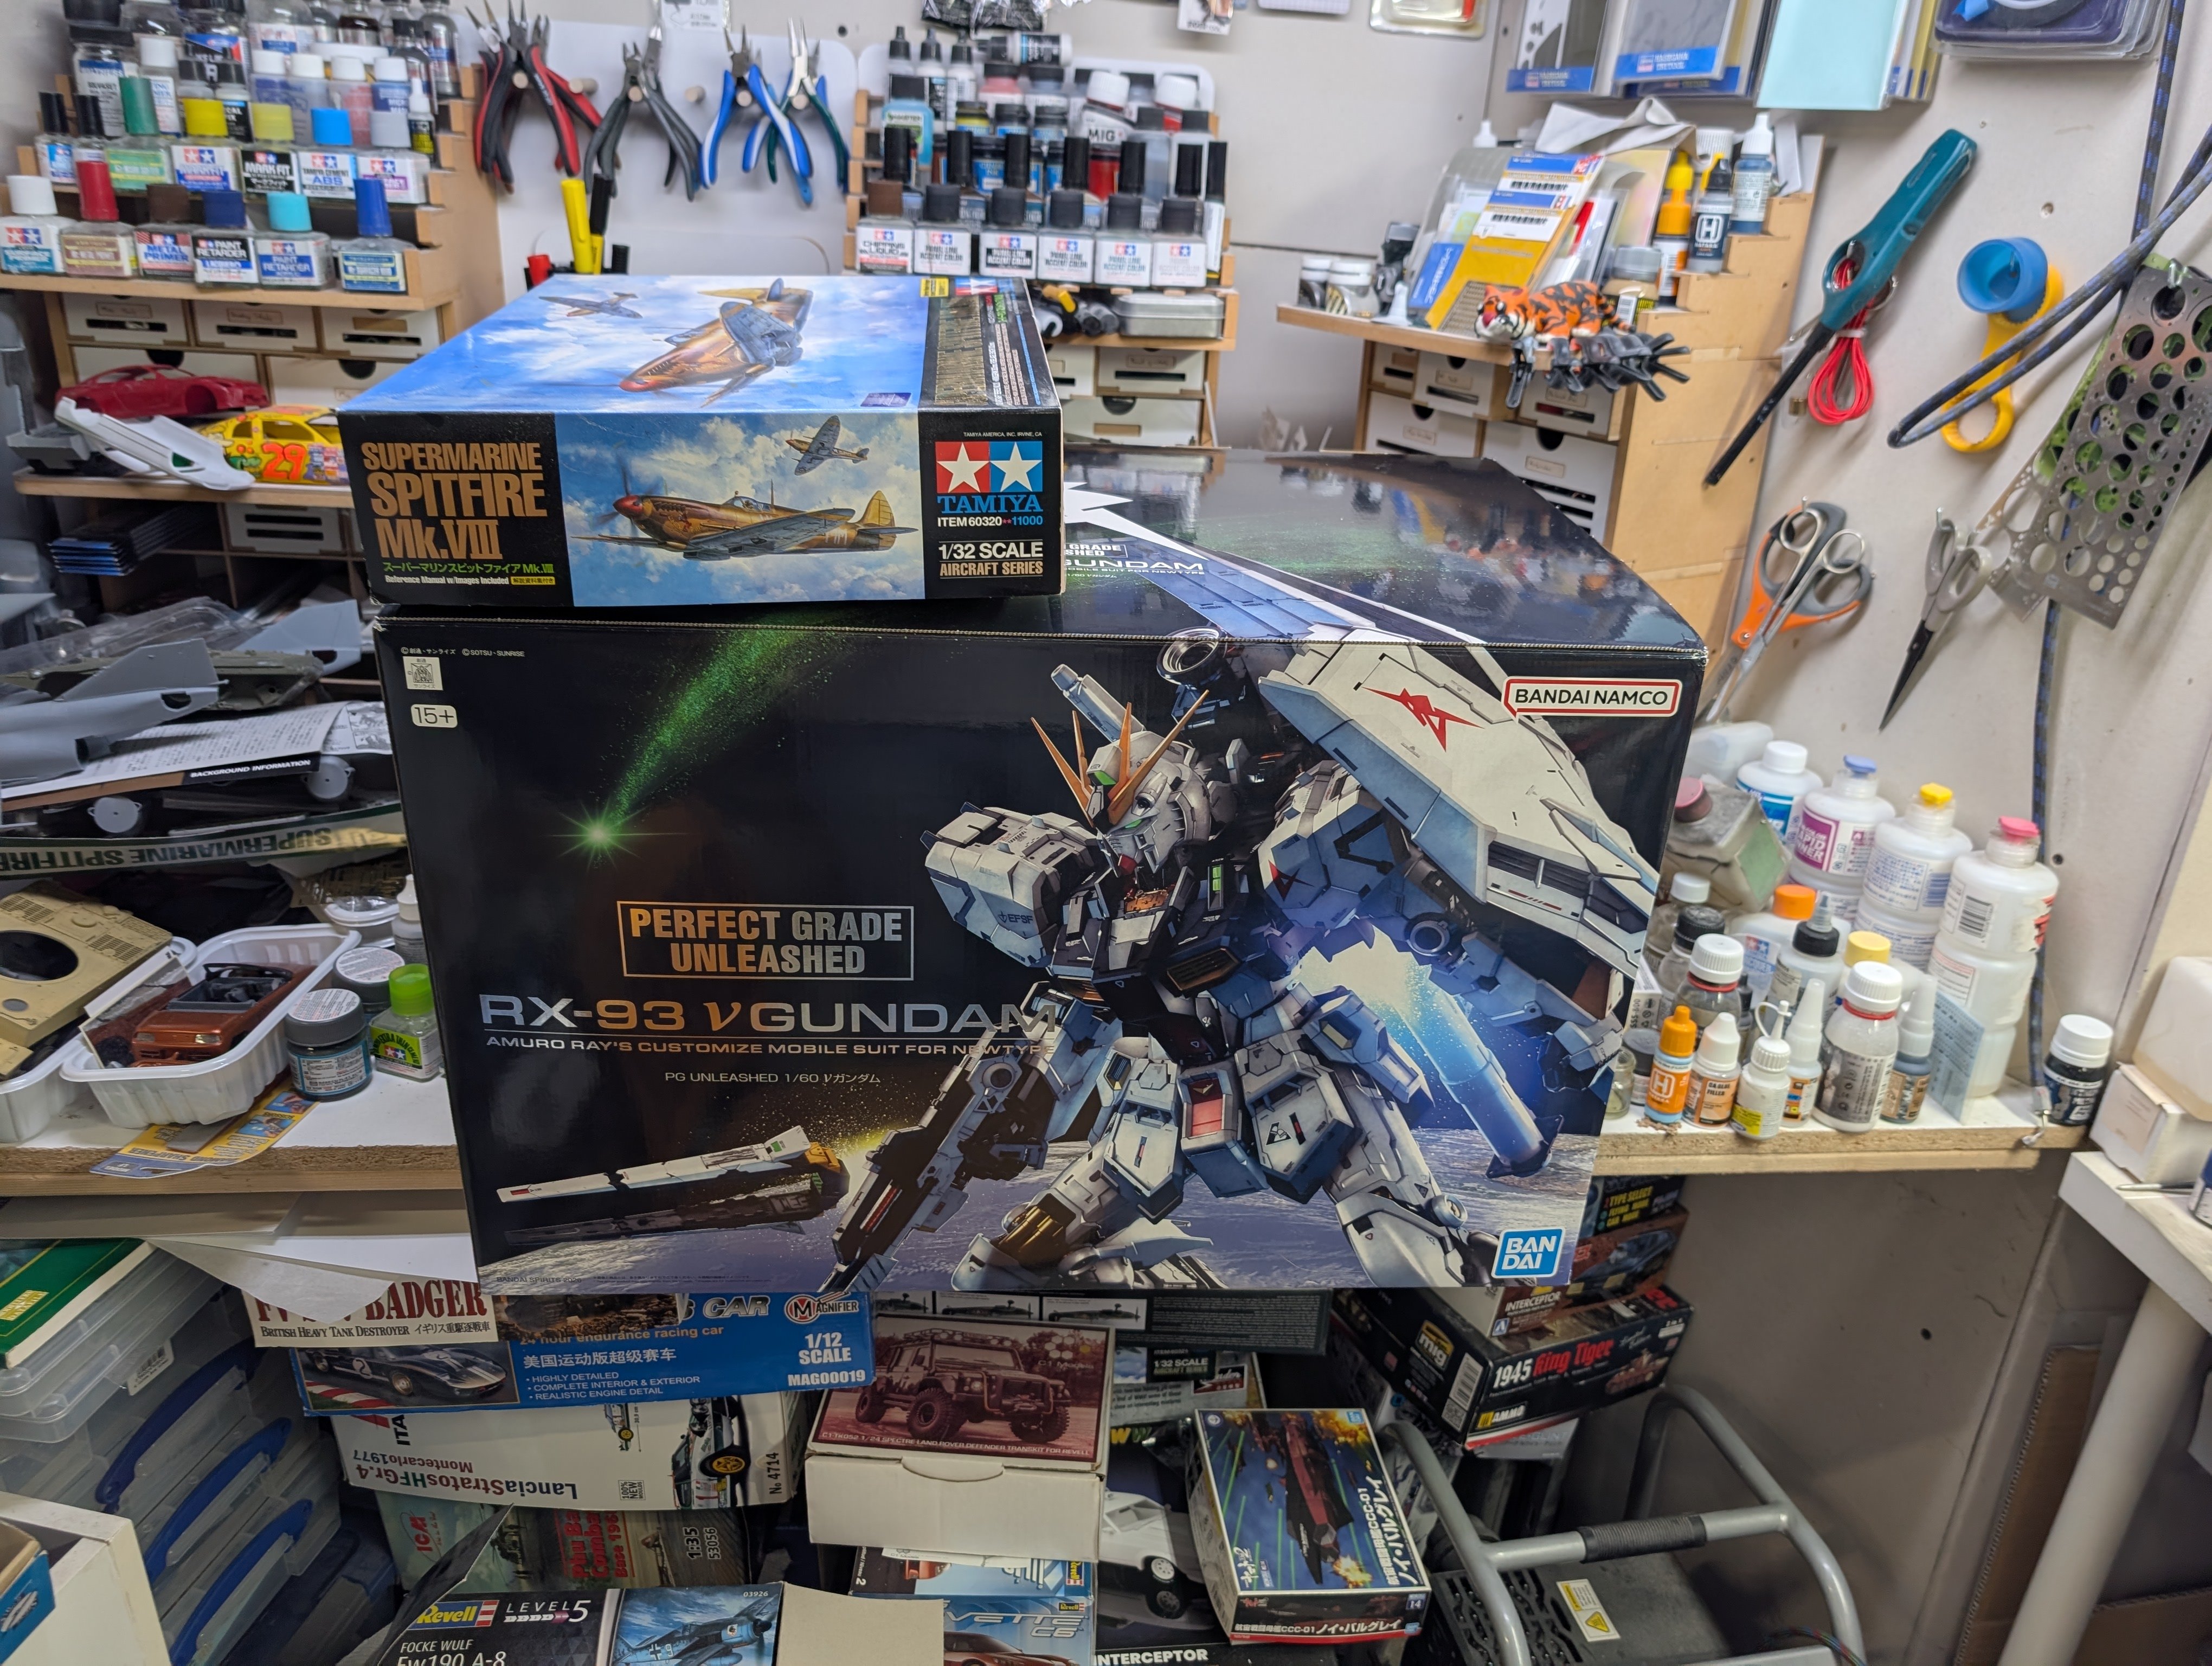
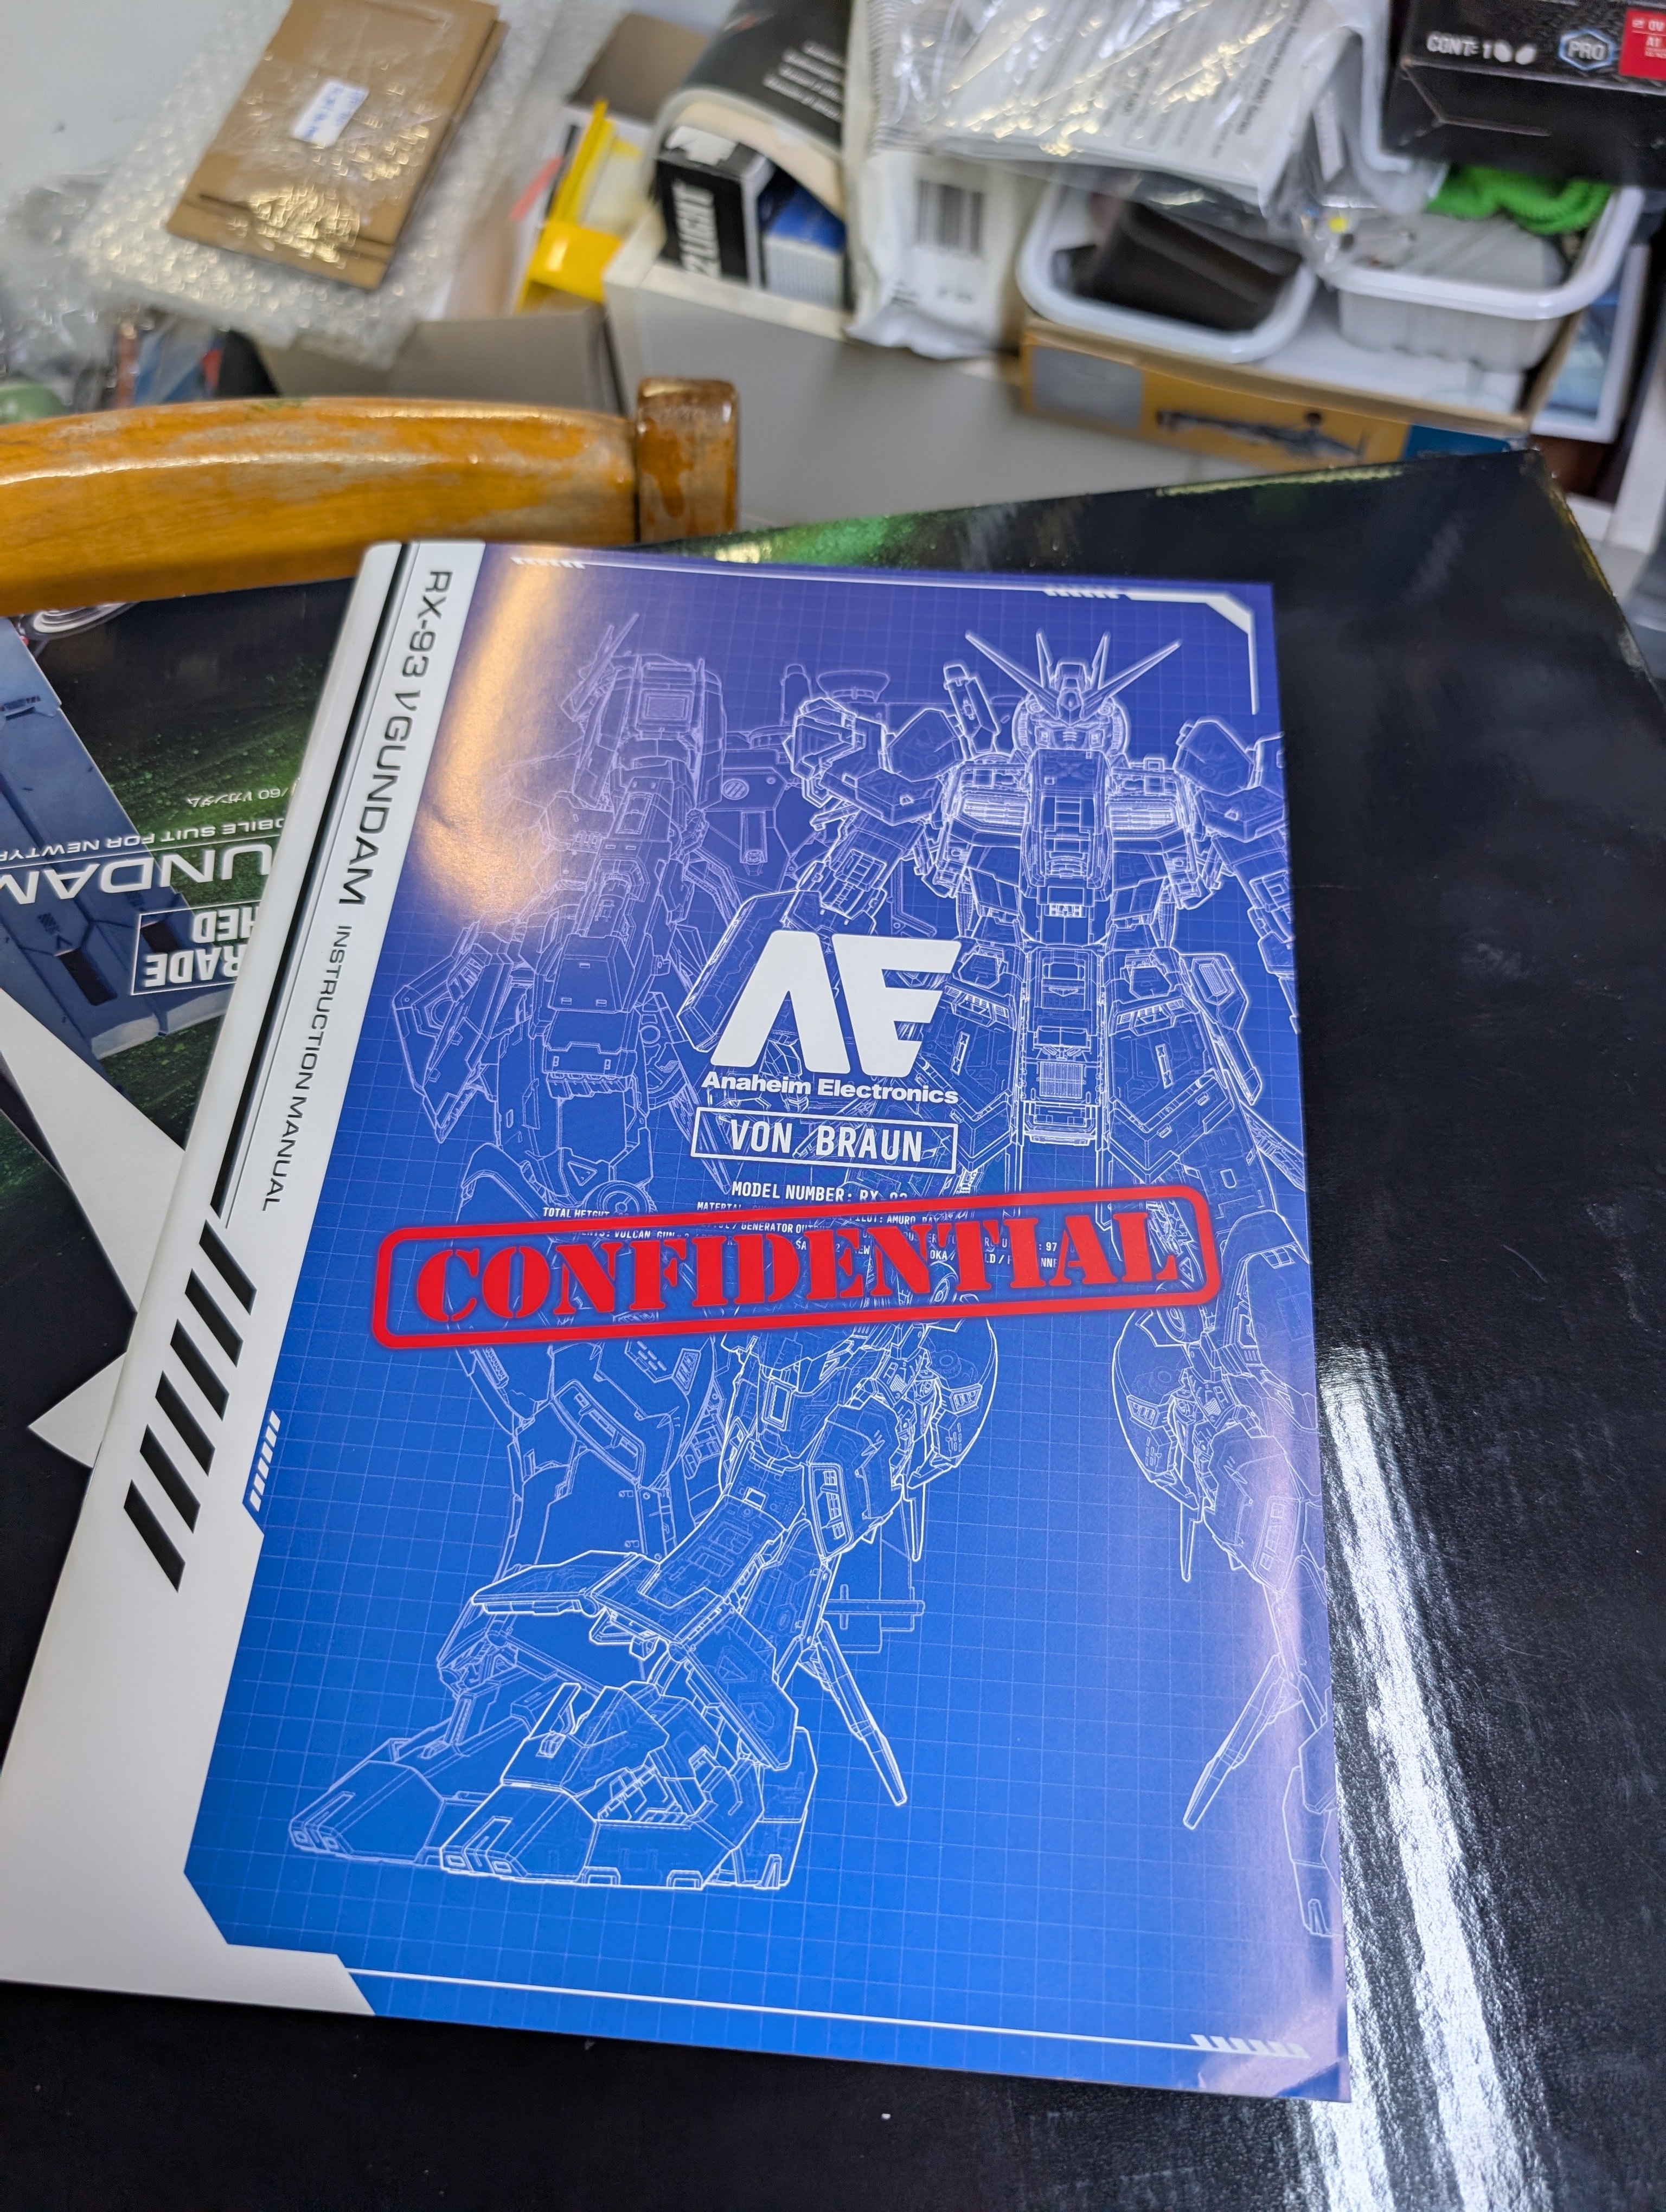
Not just something shiny. Not just a squirrel. A very, shiny squirrel. Actually a cherry, very big, shiny squirrel!!! 😆 For size comparison, here's a Tamiya Spitfire box on top. The instructions are...111 pages. I think this may take a bit of time to build.


-
1/24 Airfix Bf-109K (conversion)
BlrwestSiR replied to Martinnfb's topic in LSM 1/35 and Larger Work In Progress
It's coming along nicely there. Annoying about the belts being too wide for the buckles. Such an odd error to make. -
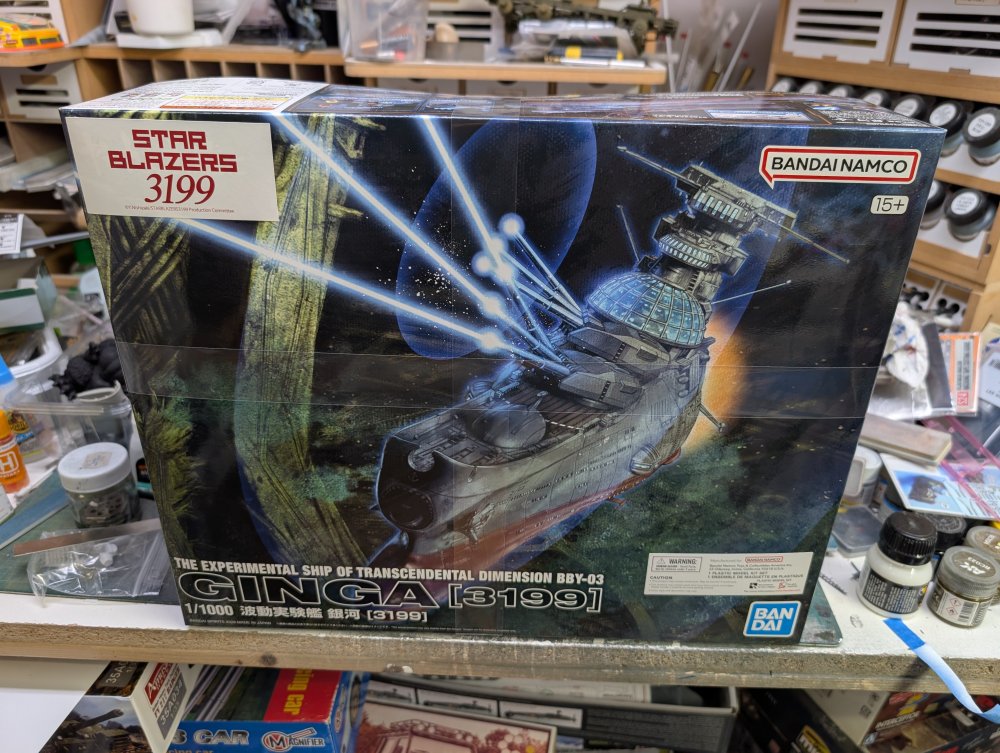
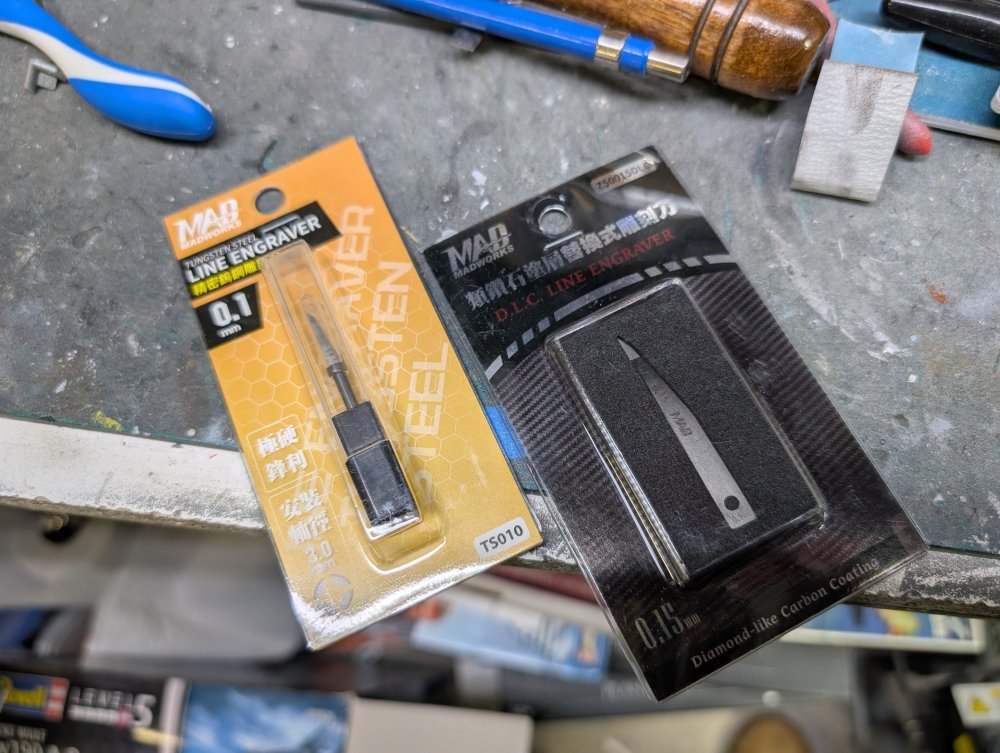
I saw some scribers made by Madworks from Taiwan being used and wanted to give them a try. I found a shop that had the size I was looking for in stock so I ordered them. Then I noticed they had the Bandai 1/1000 Ginga in stock and for a great price too so that got added to the cart. I placed my order Sunday night and they delivered it yesterday at 10 PM. Which cost me $3. Carl
-
Land Rover Defender 110
BlrwestSiR replied to BlrwestSiR's topic in LSM 1/35 and Larger Work In Progress
Thanks Rob! It's definitely not been as straightforward as I thought it would be. The biggest annoyance is the lack of instructions.- 18 replies
-
- 3
-
-
- c1 models
- land rover
- (and 1 more)
-
Land Rover Defender 110
BlrwestSiR replied to BlrwestSiR's topic in LSM 1/35 and Larger Work In Progress
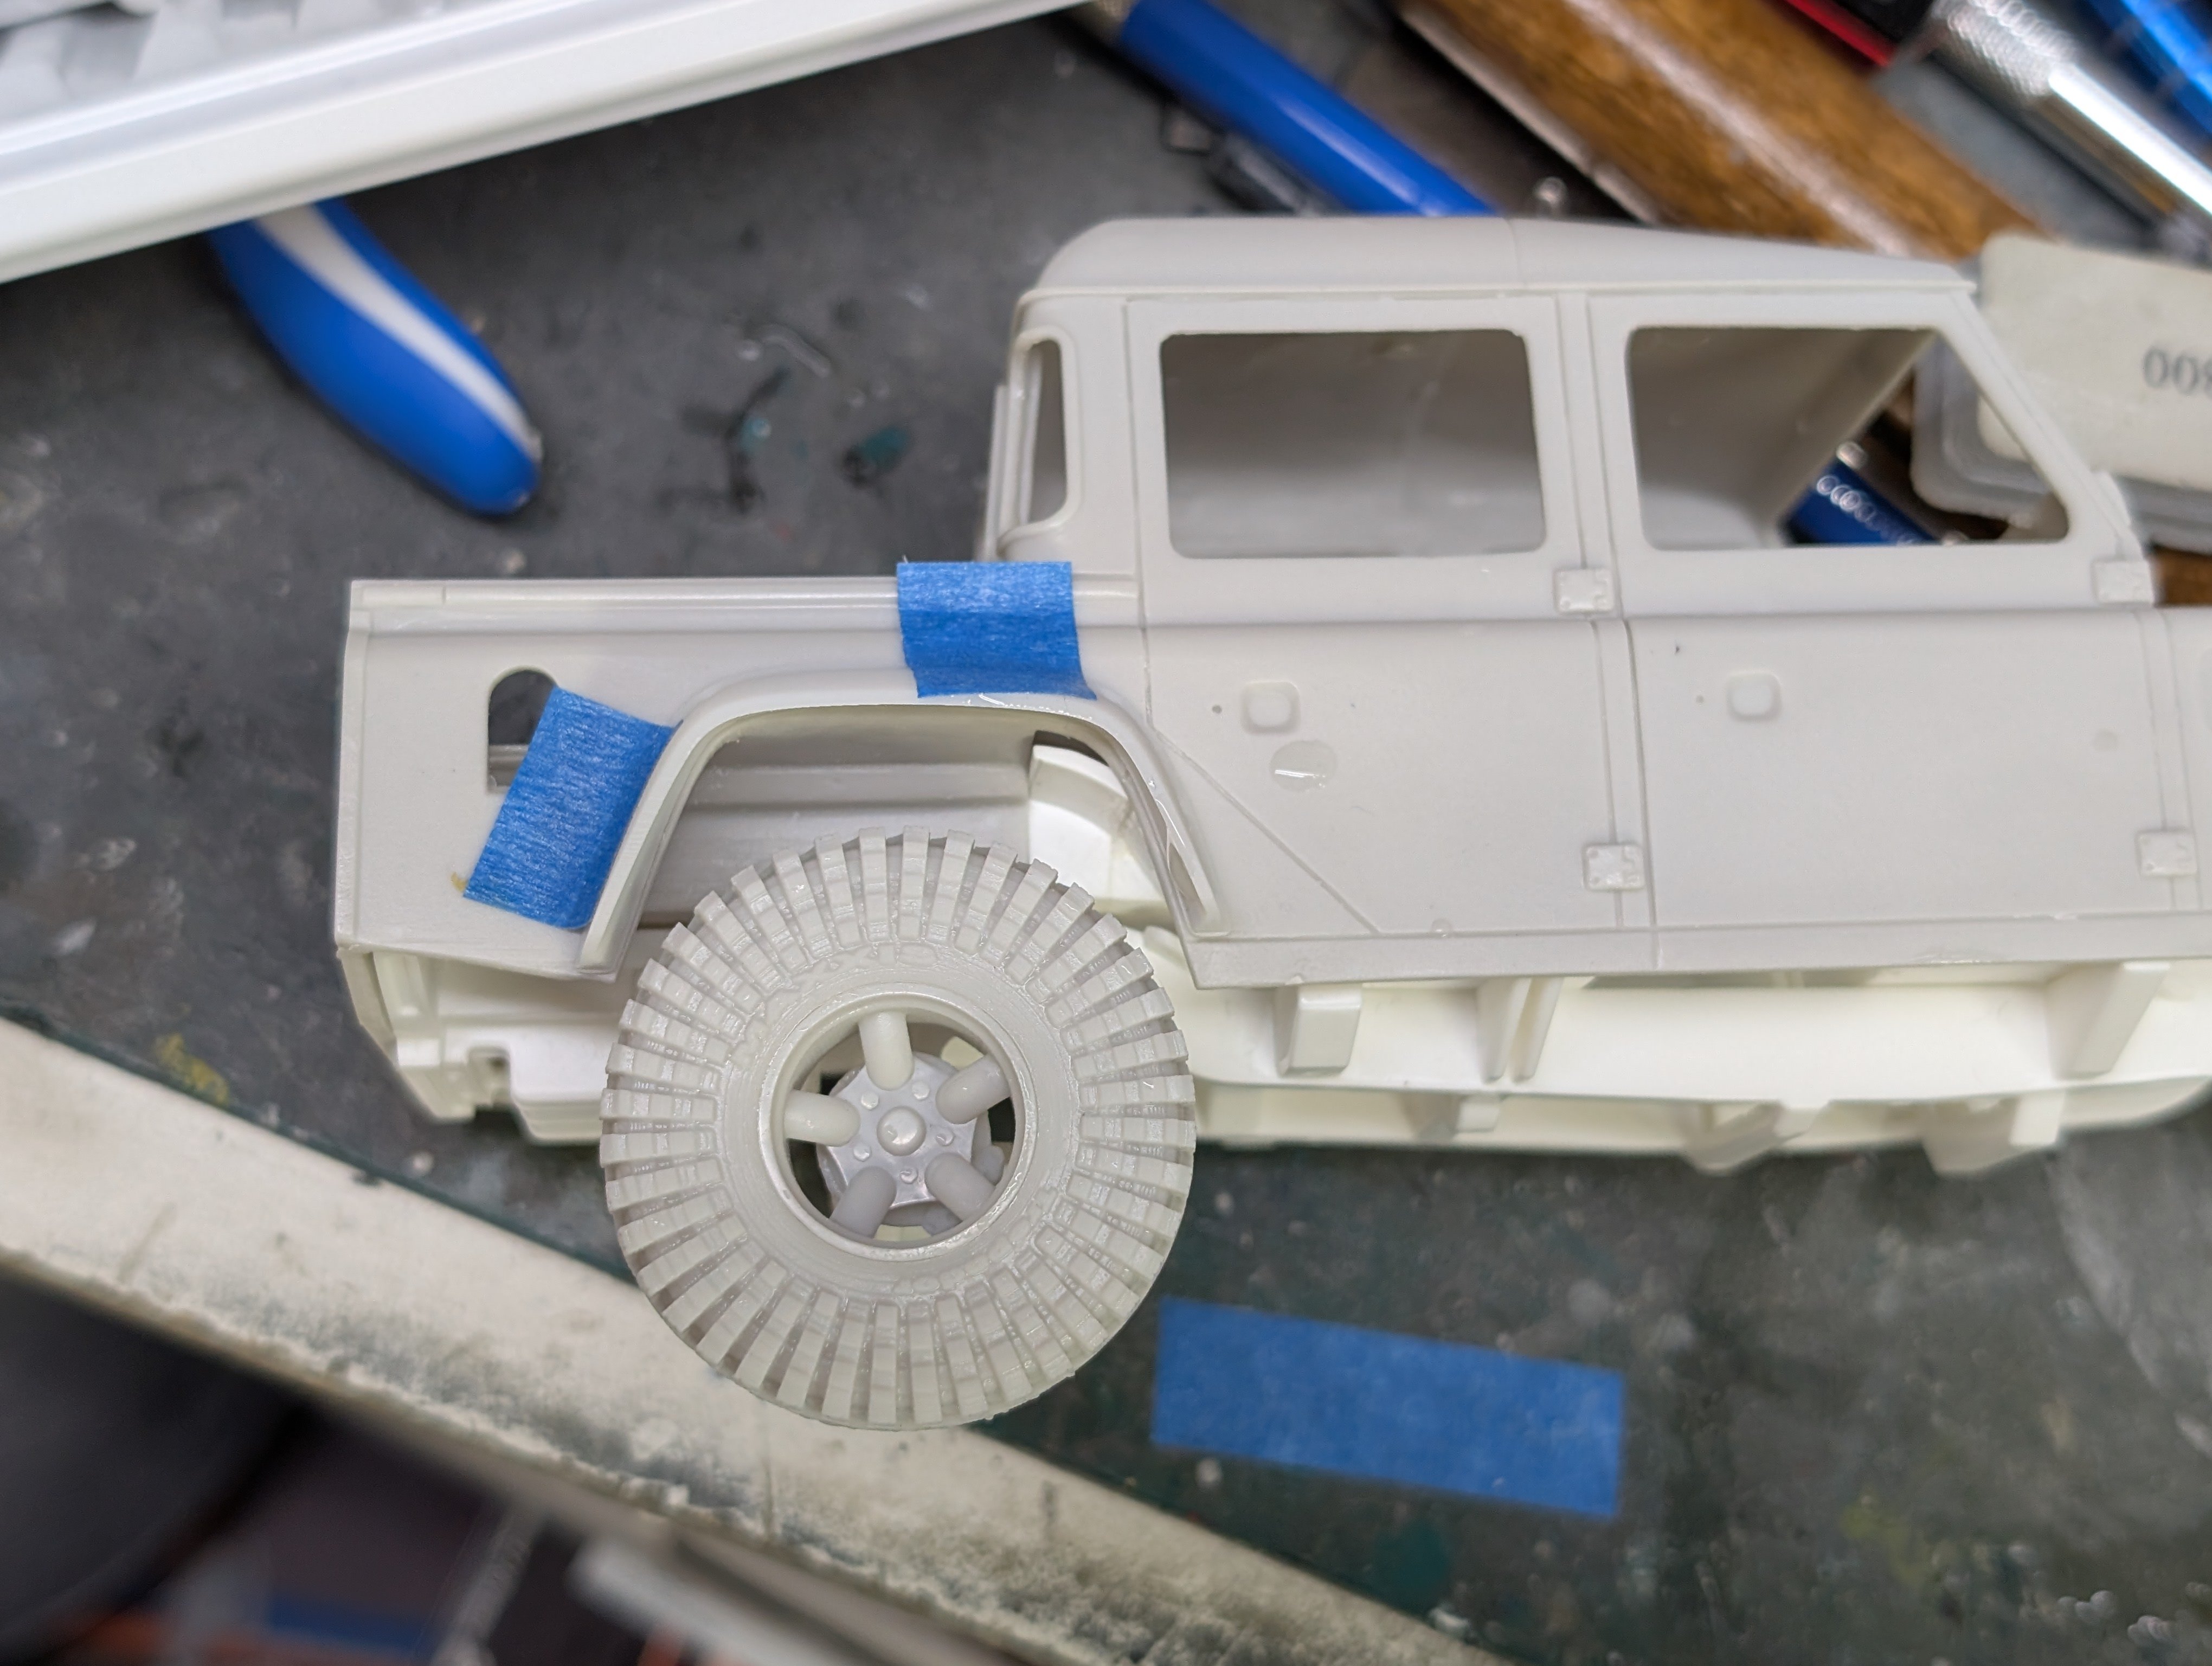
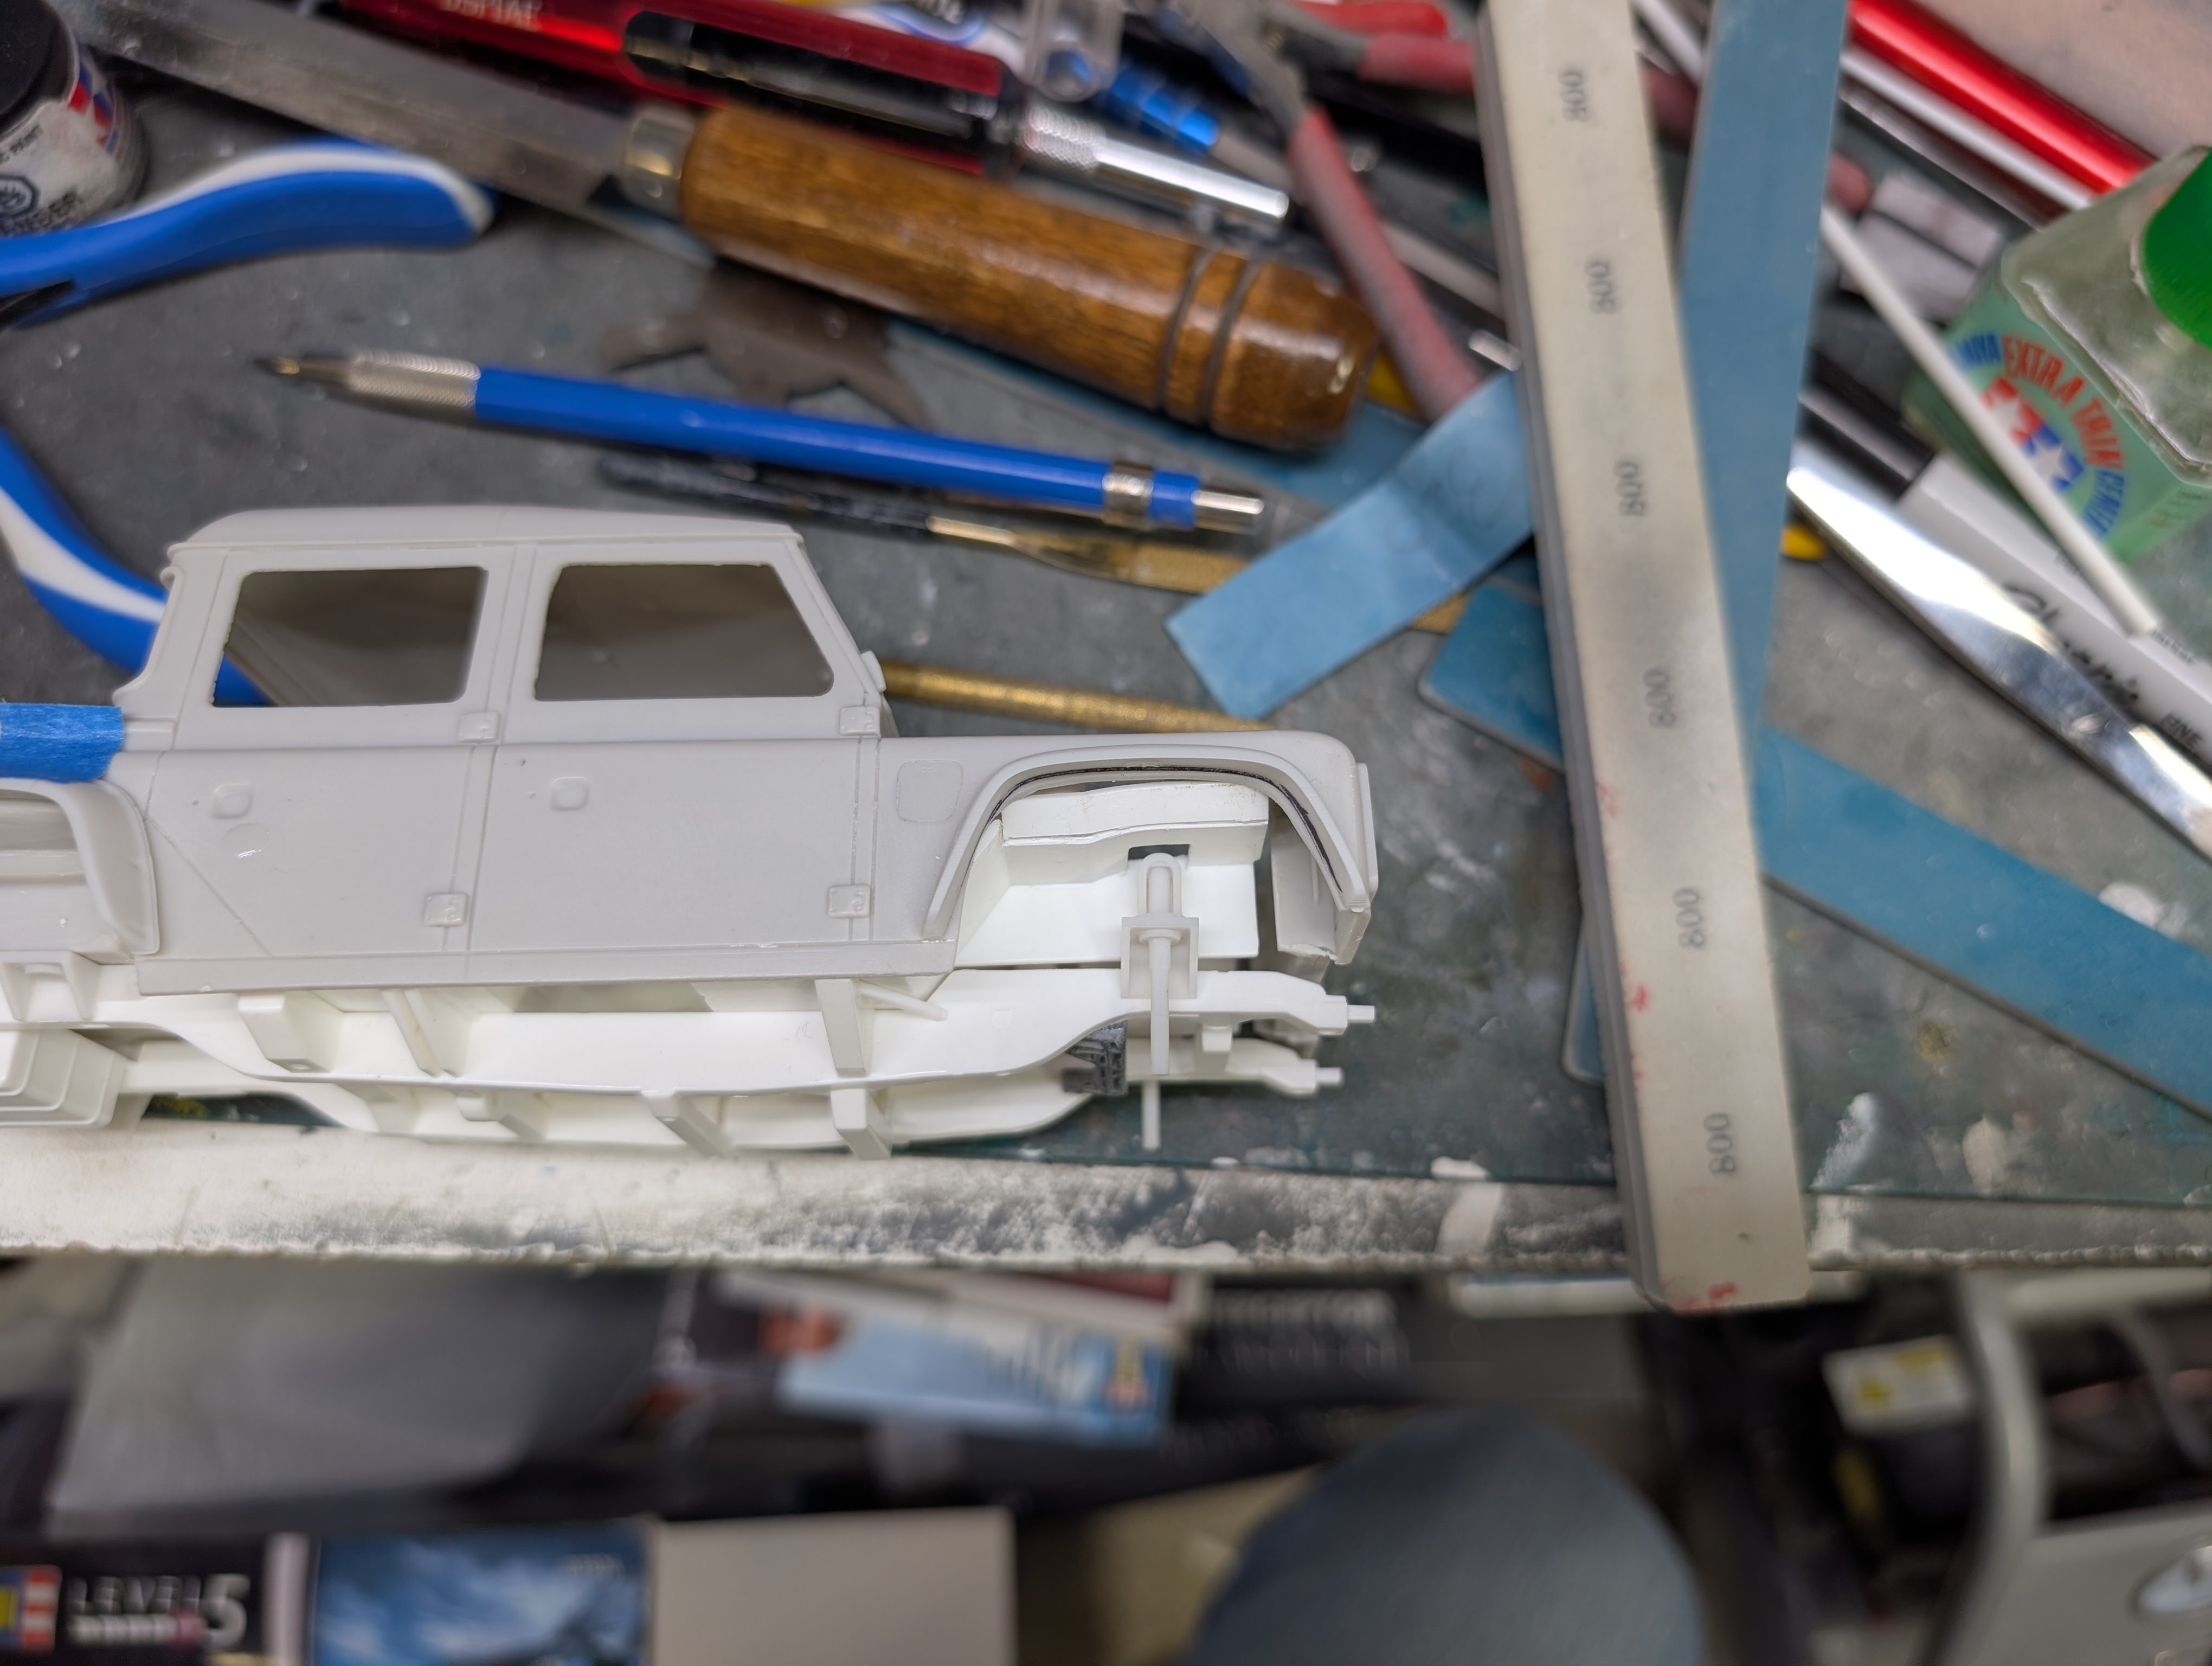
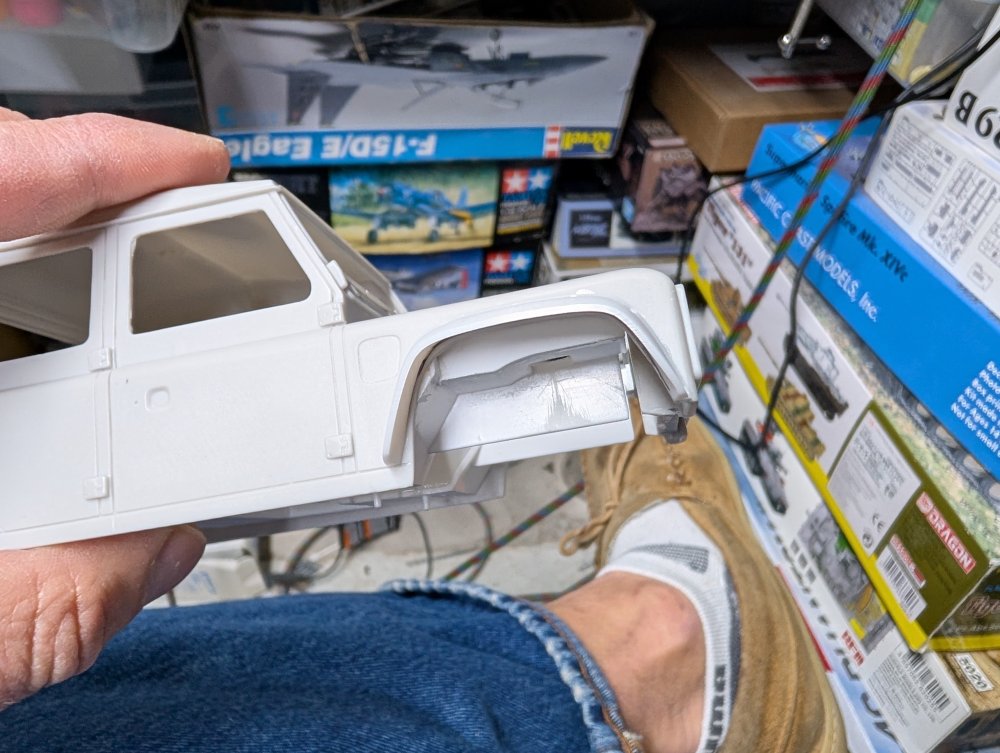
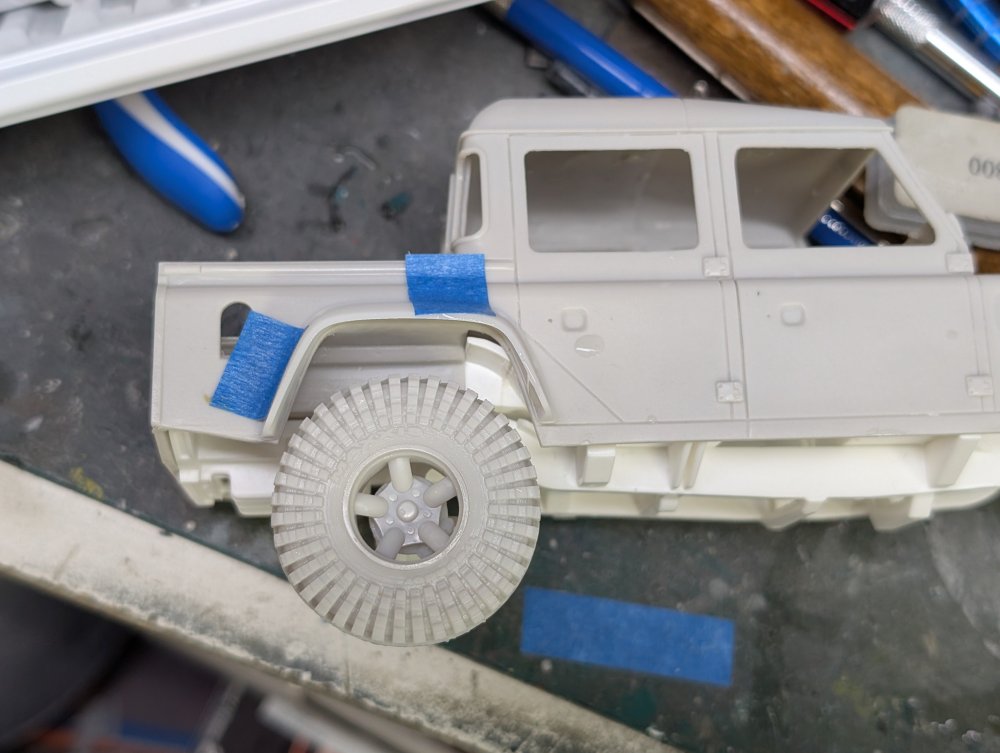
Using a rotary tool and grinding bit, I carefully cut back the fender. I left a bit of a lip but it's a huge improvement. I then marked the rear fender and repeated the process. Mocked up with the tire in place. The inner fender will need a small tweaks to it. Compared to the other side which has yet to be modified.


- 18 replies
-
- 5
-
-
- c1 models
- land rover
- (and 1 more)
-
That's a lovely looking Mossie. Nice work on the guns and cannon. Carl
-
Land Rover Defender 110
BlrwestSiR replied to BlrwestSiR's topic in LSM 1/35 and Larger Work In Progress
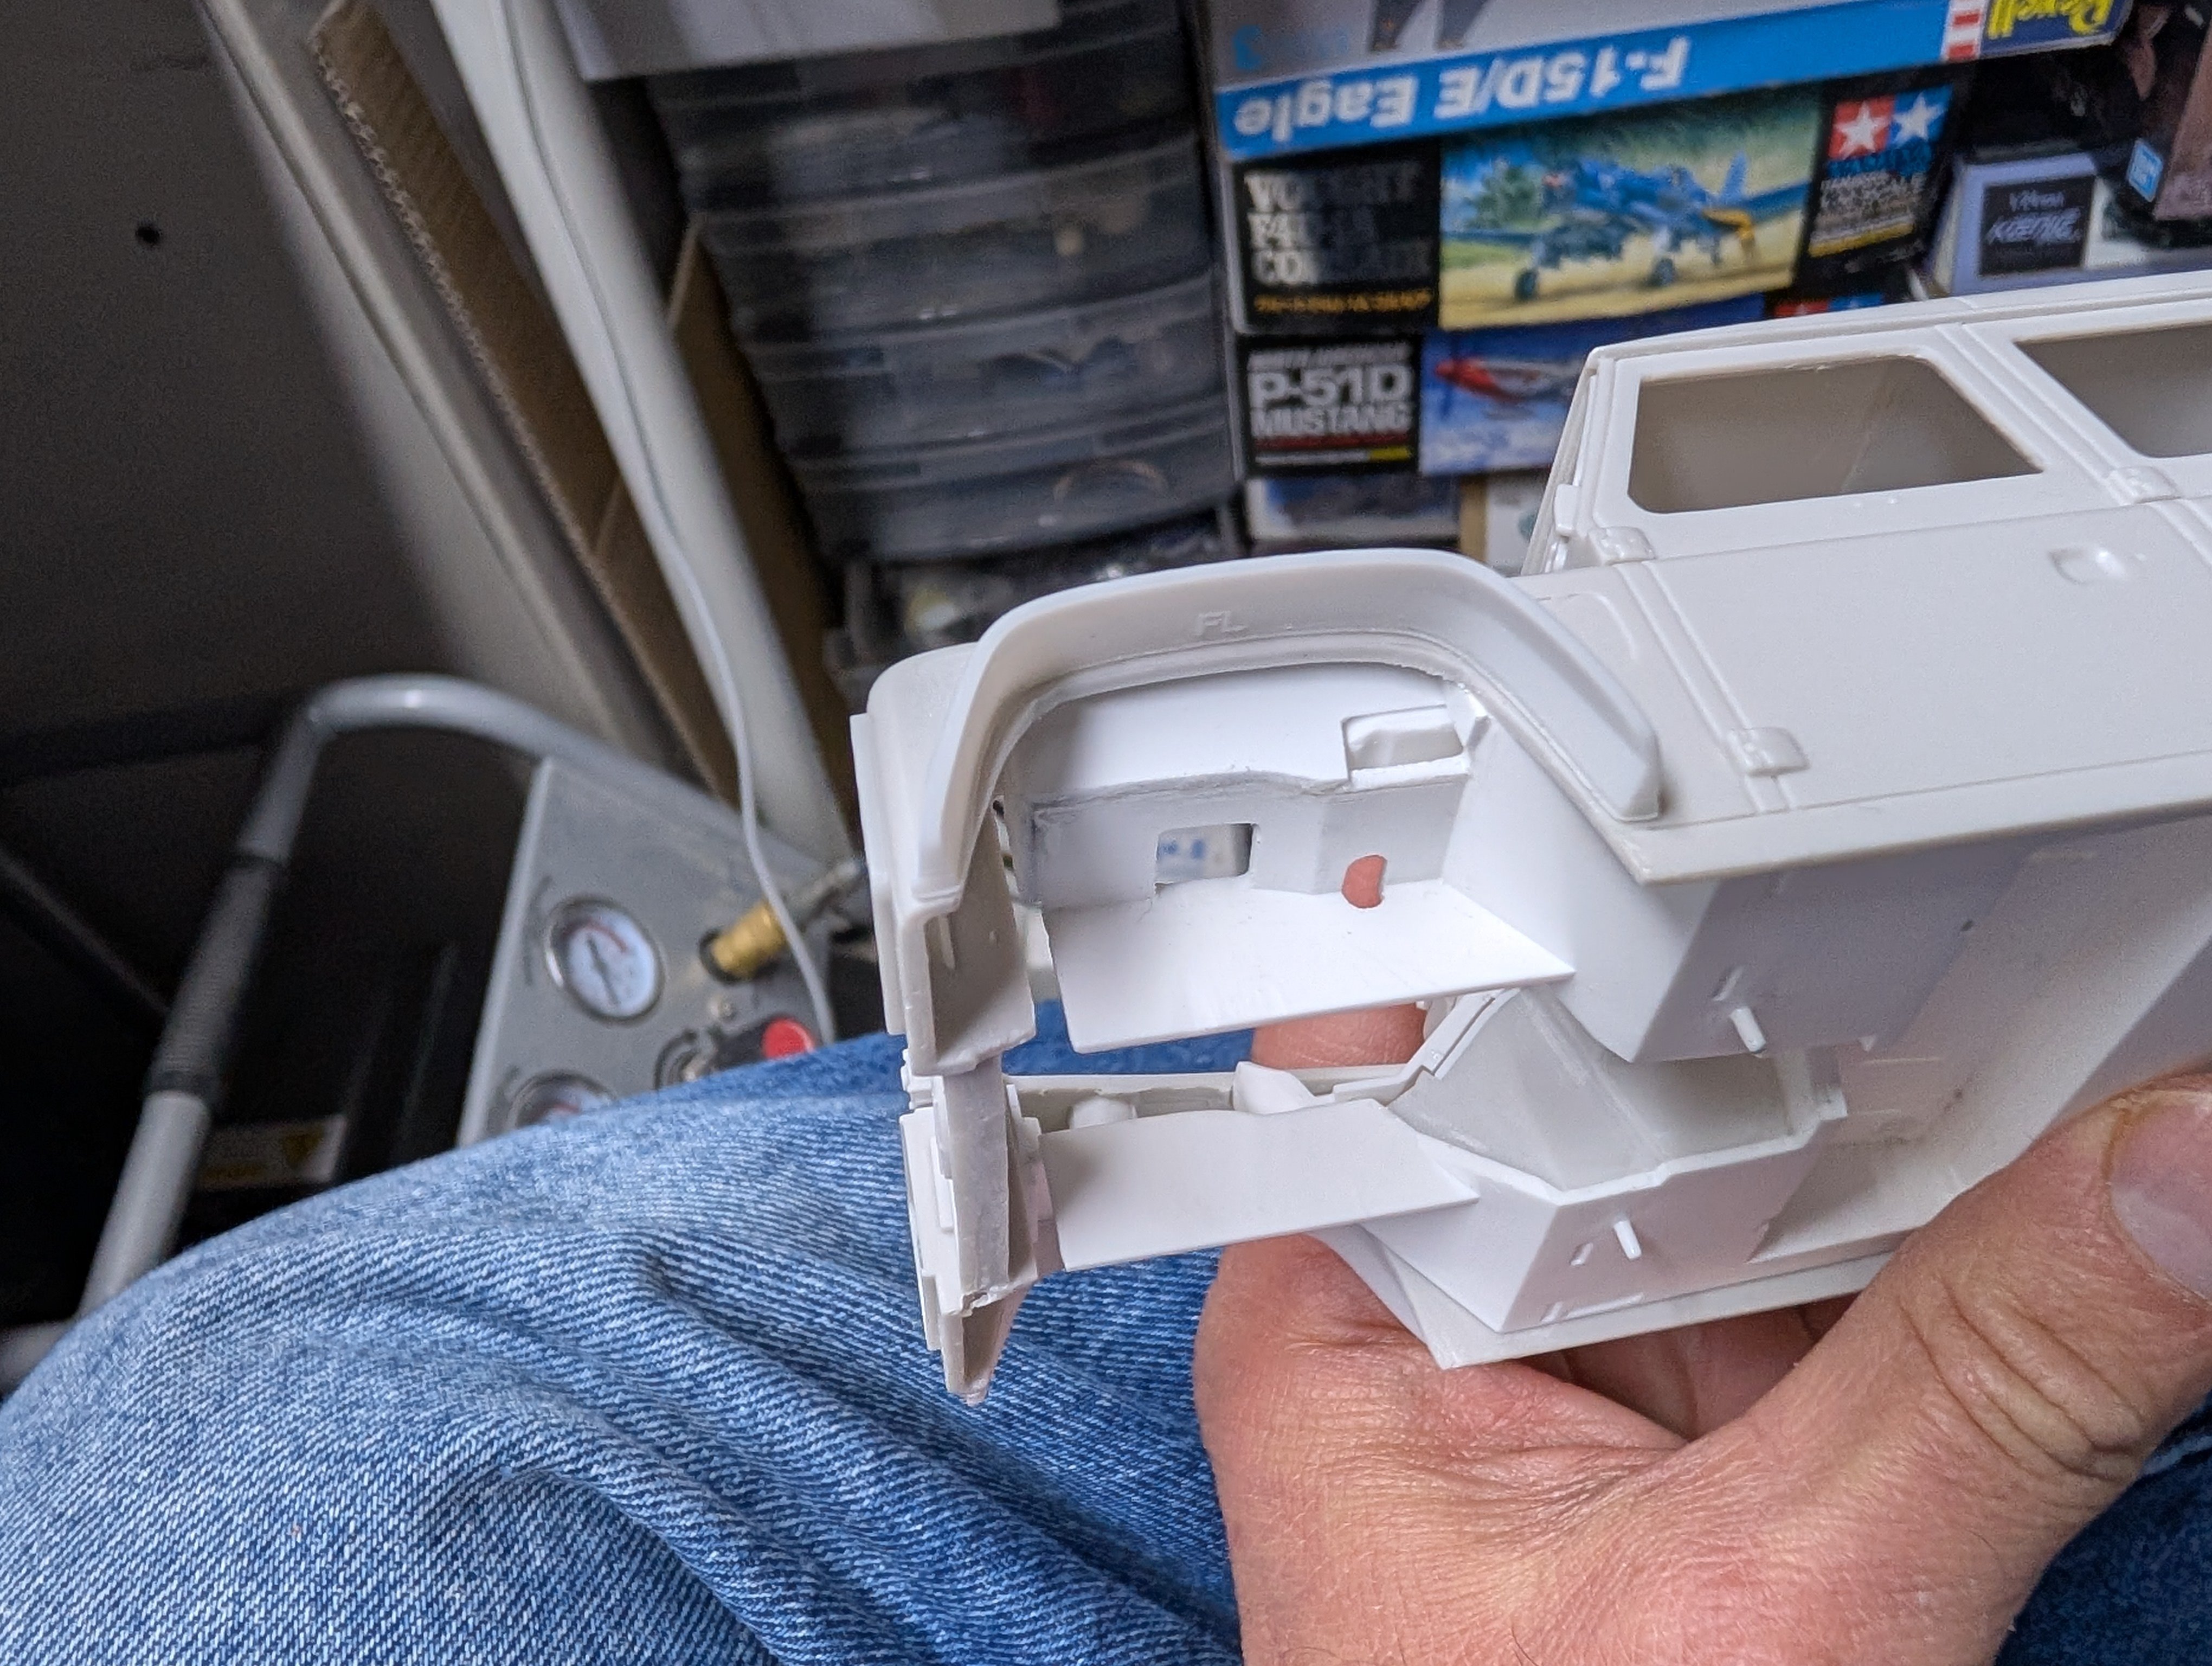
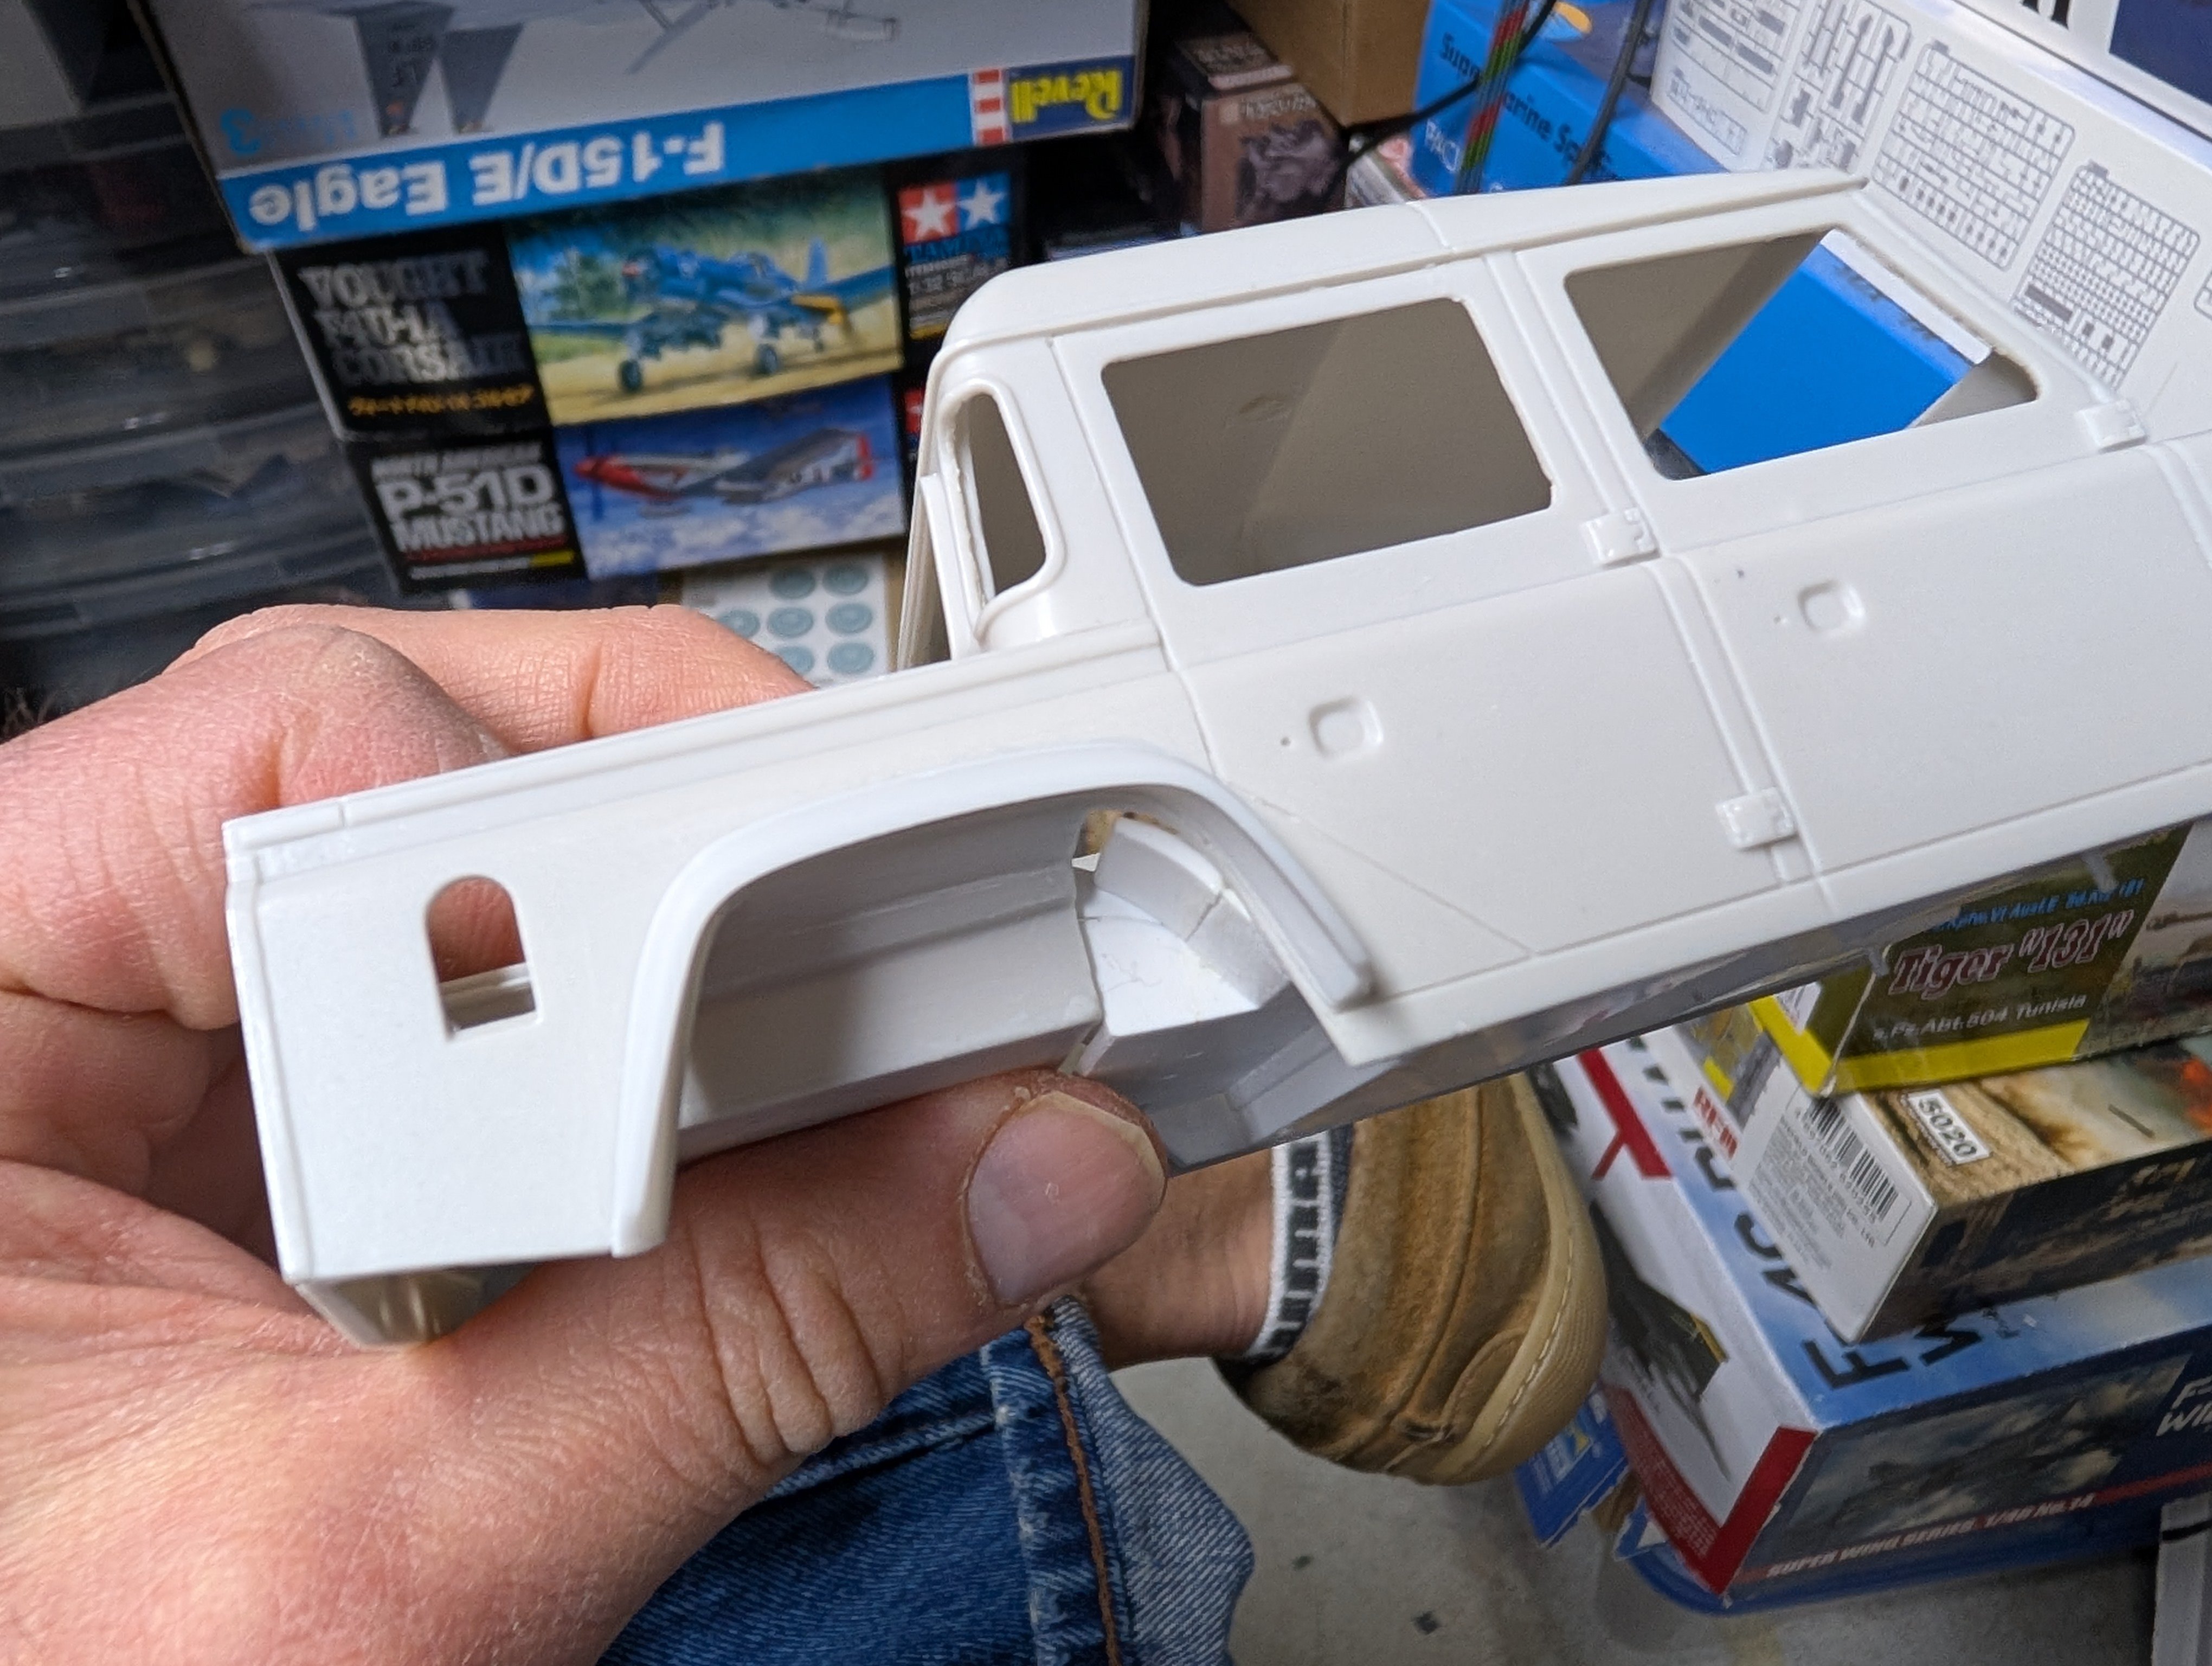
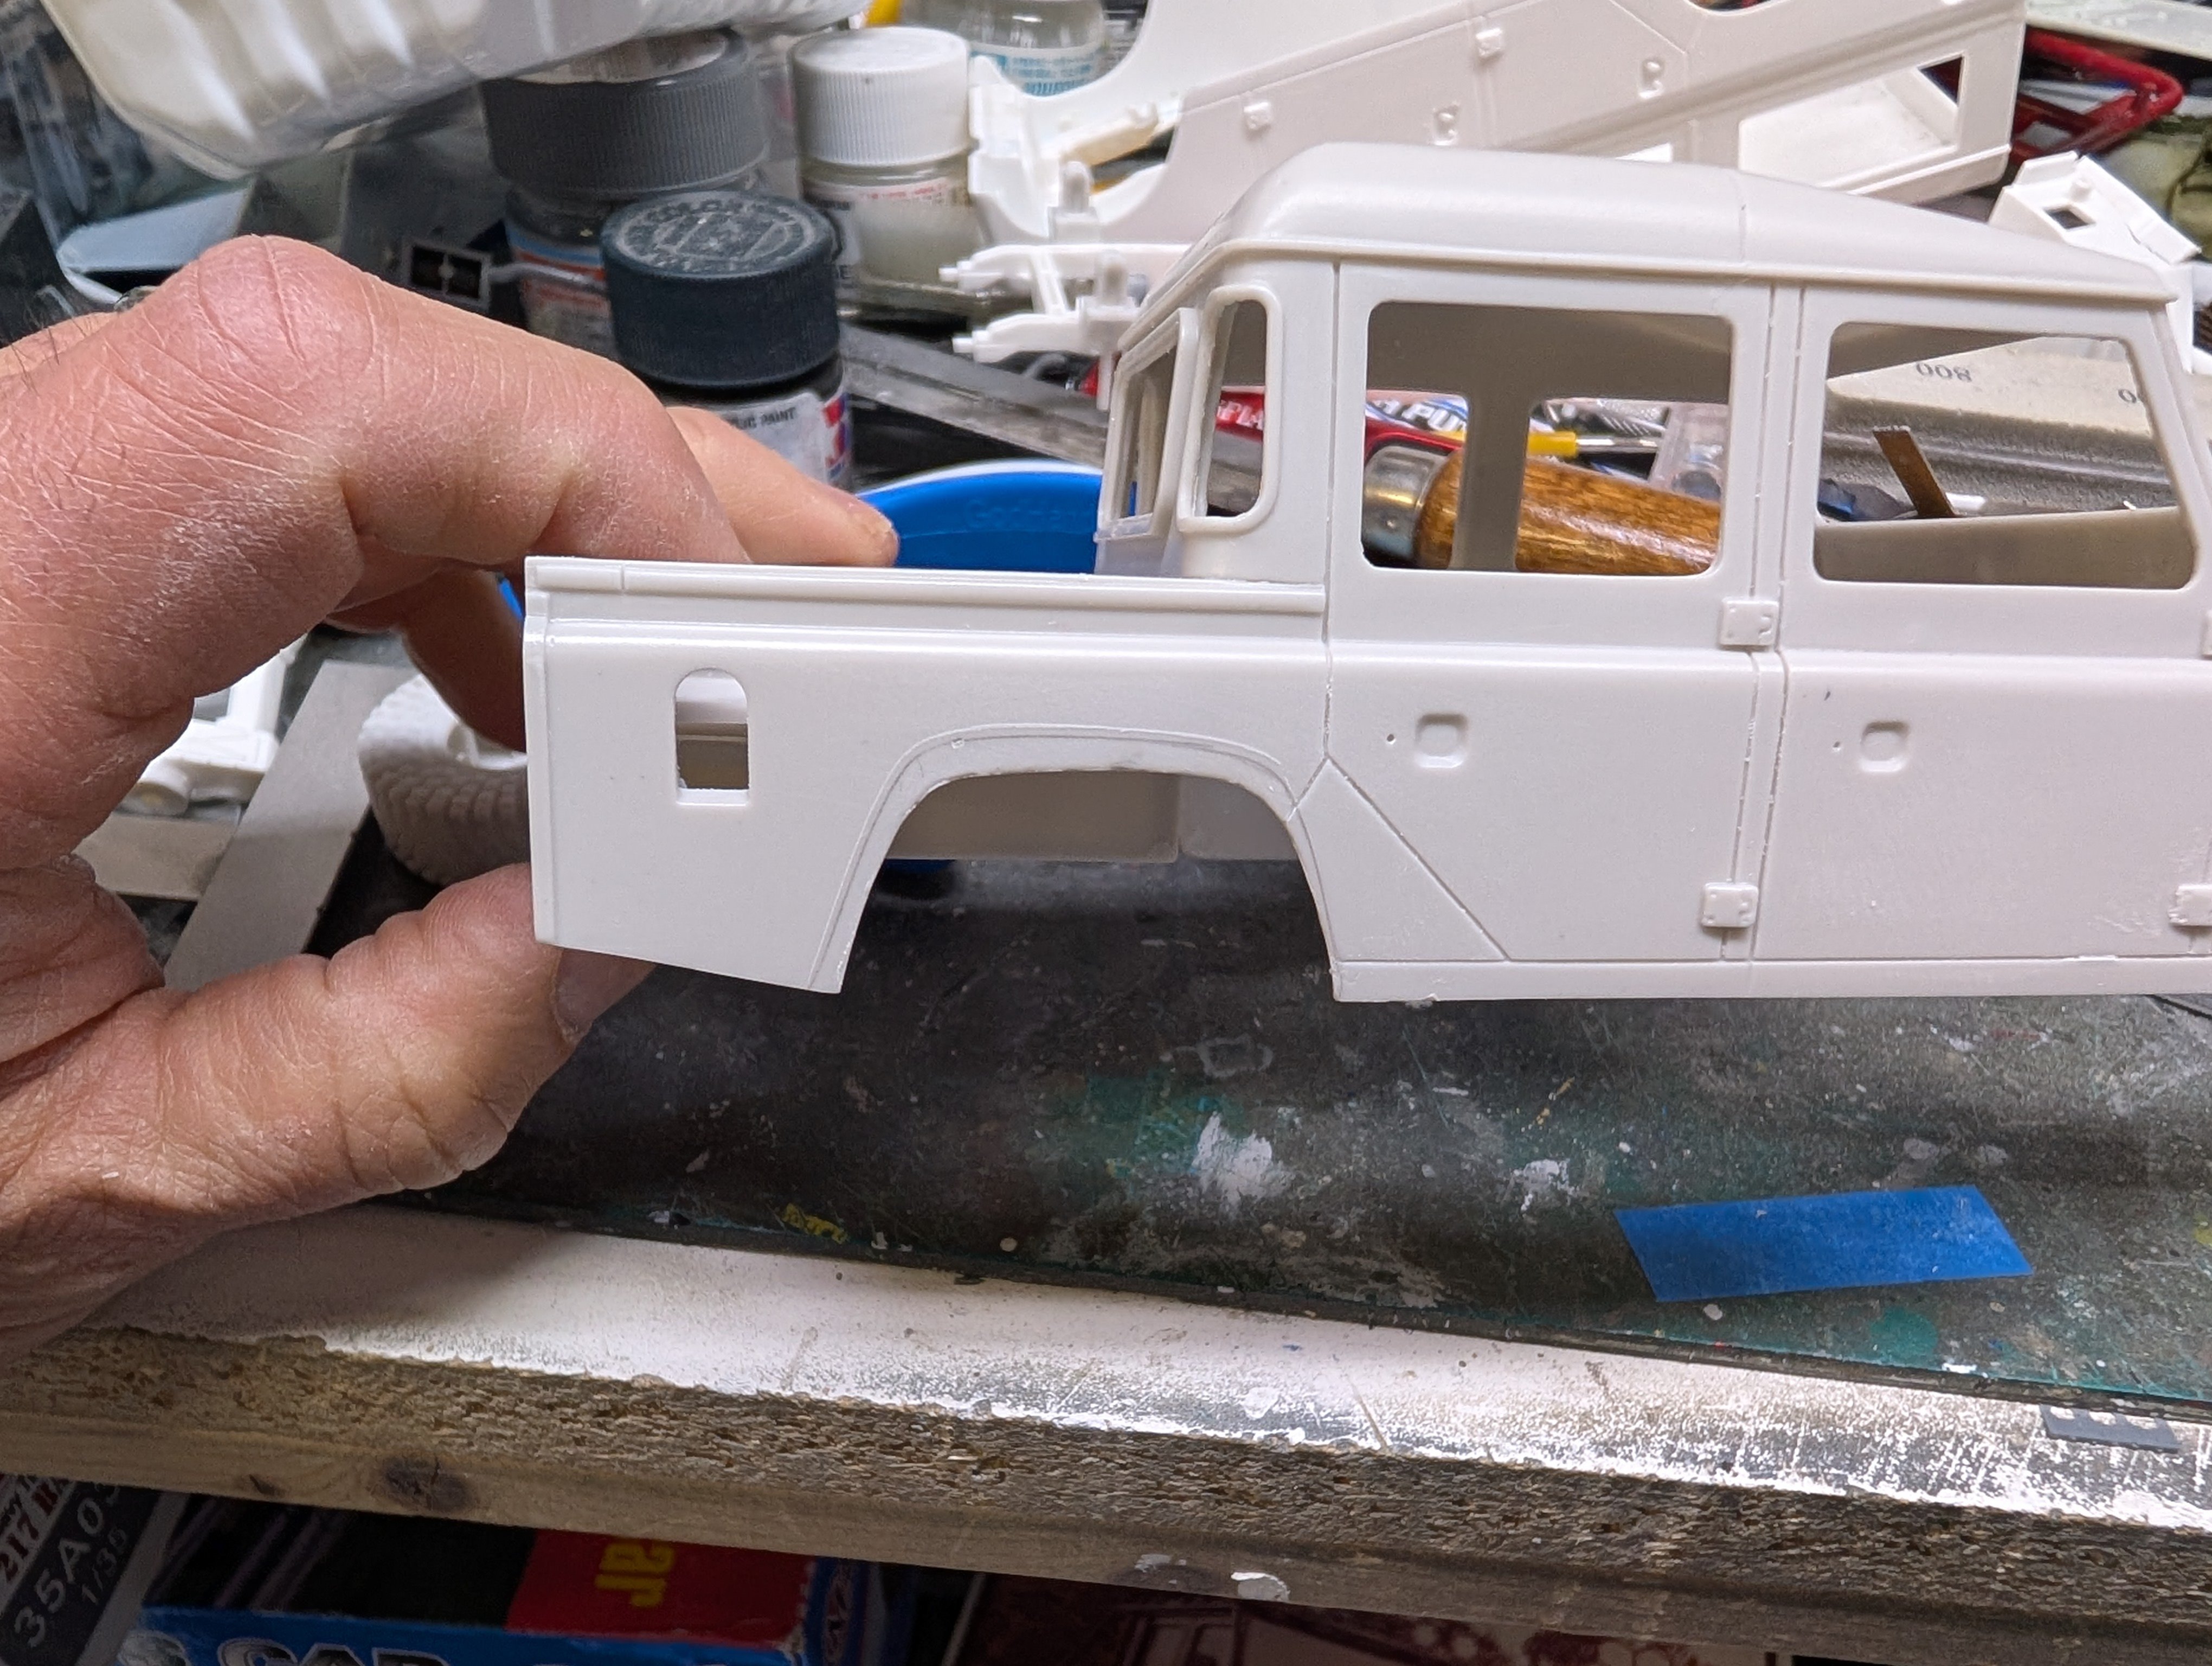
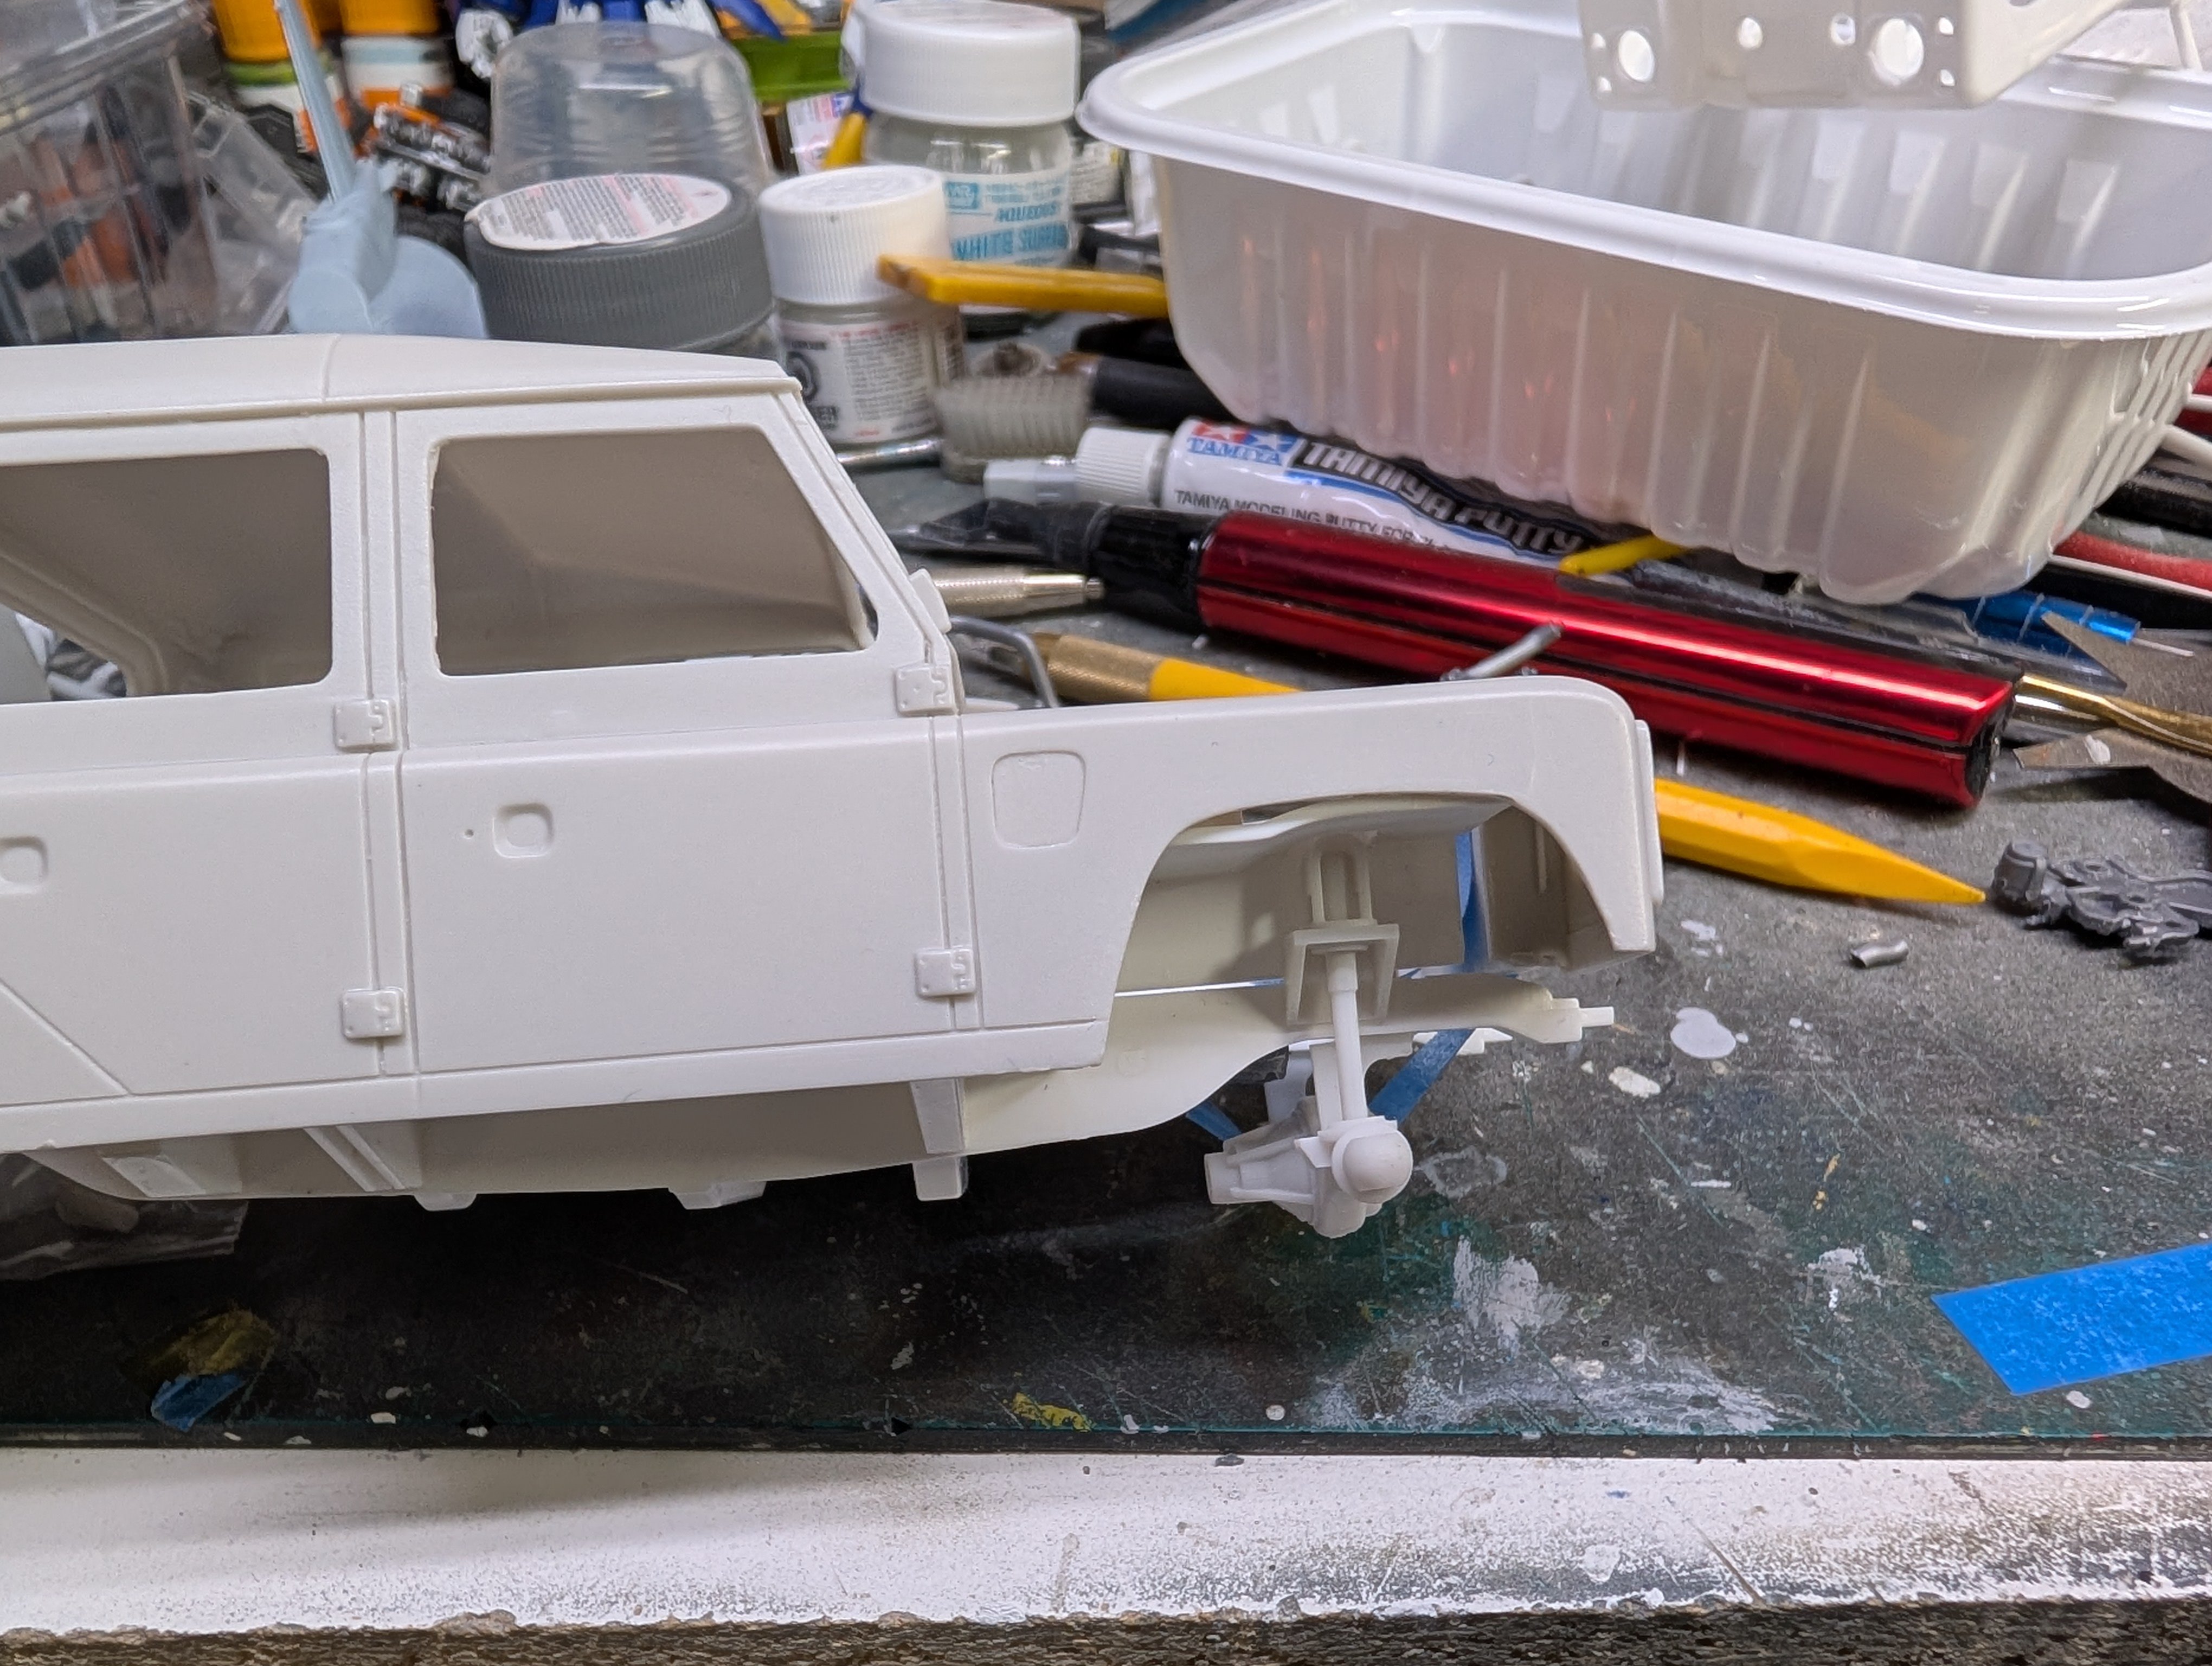
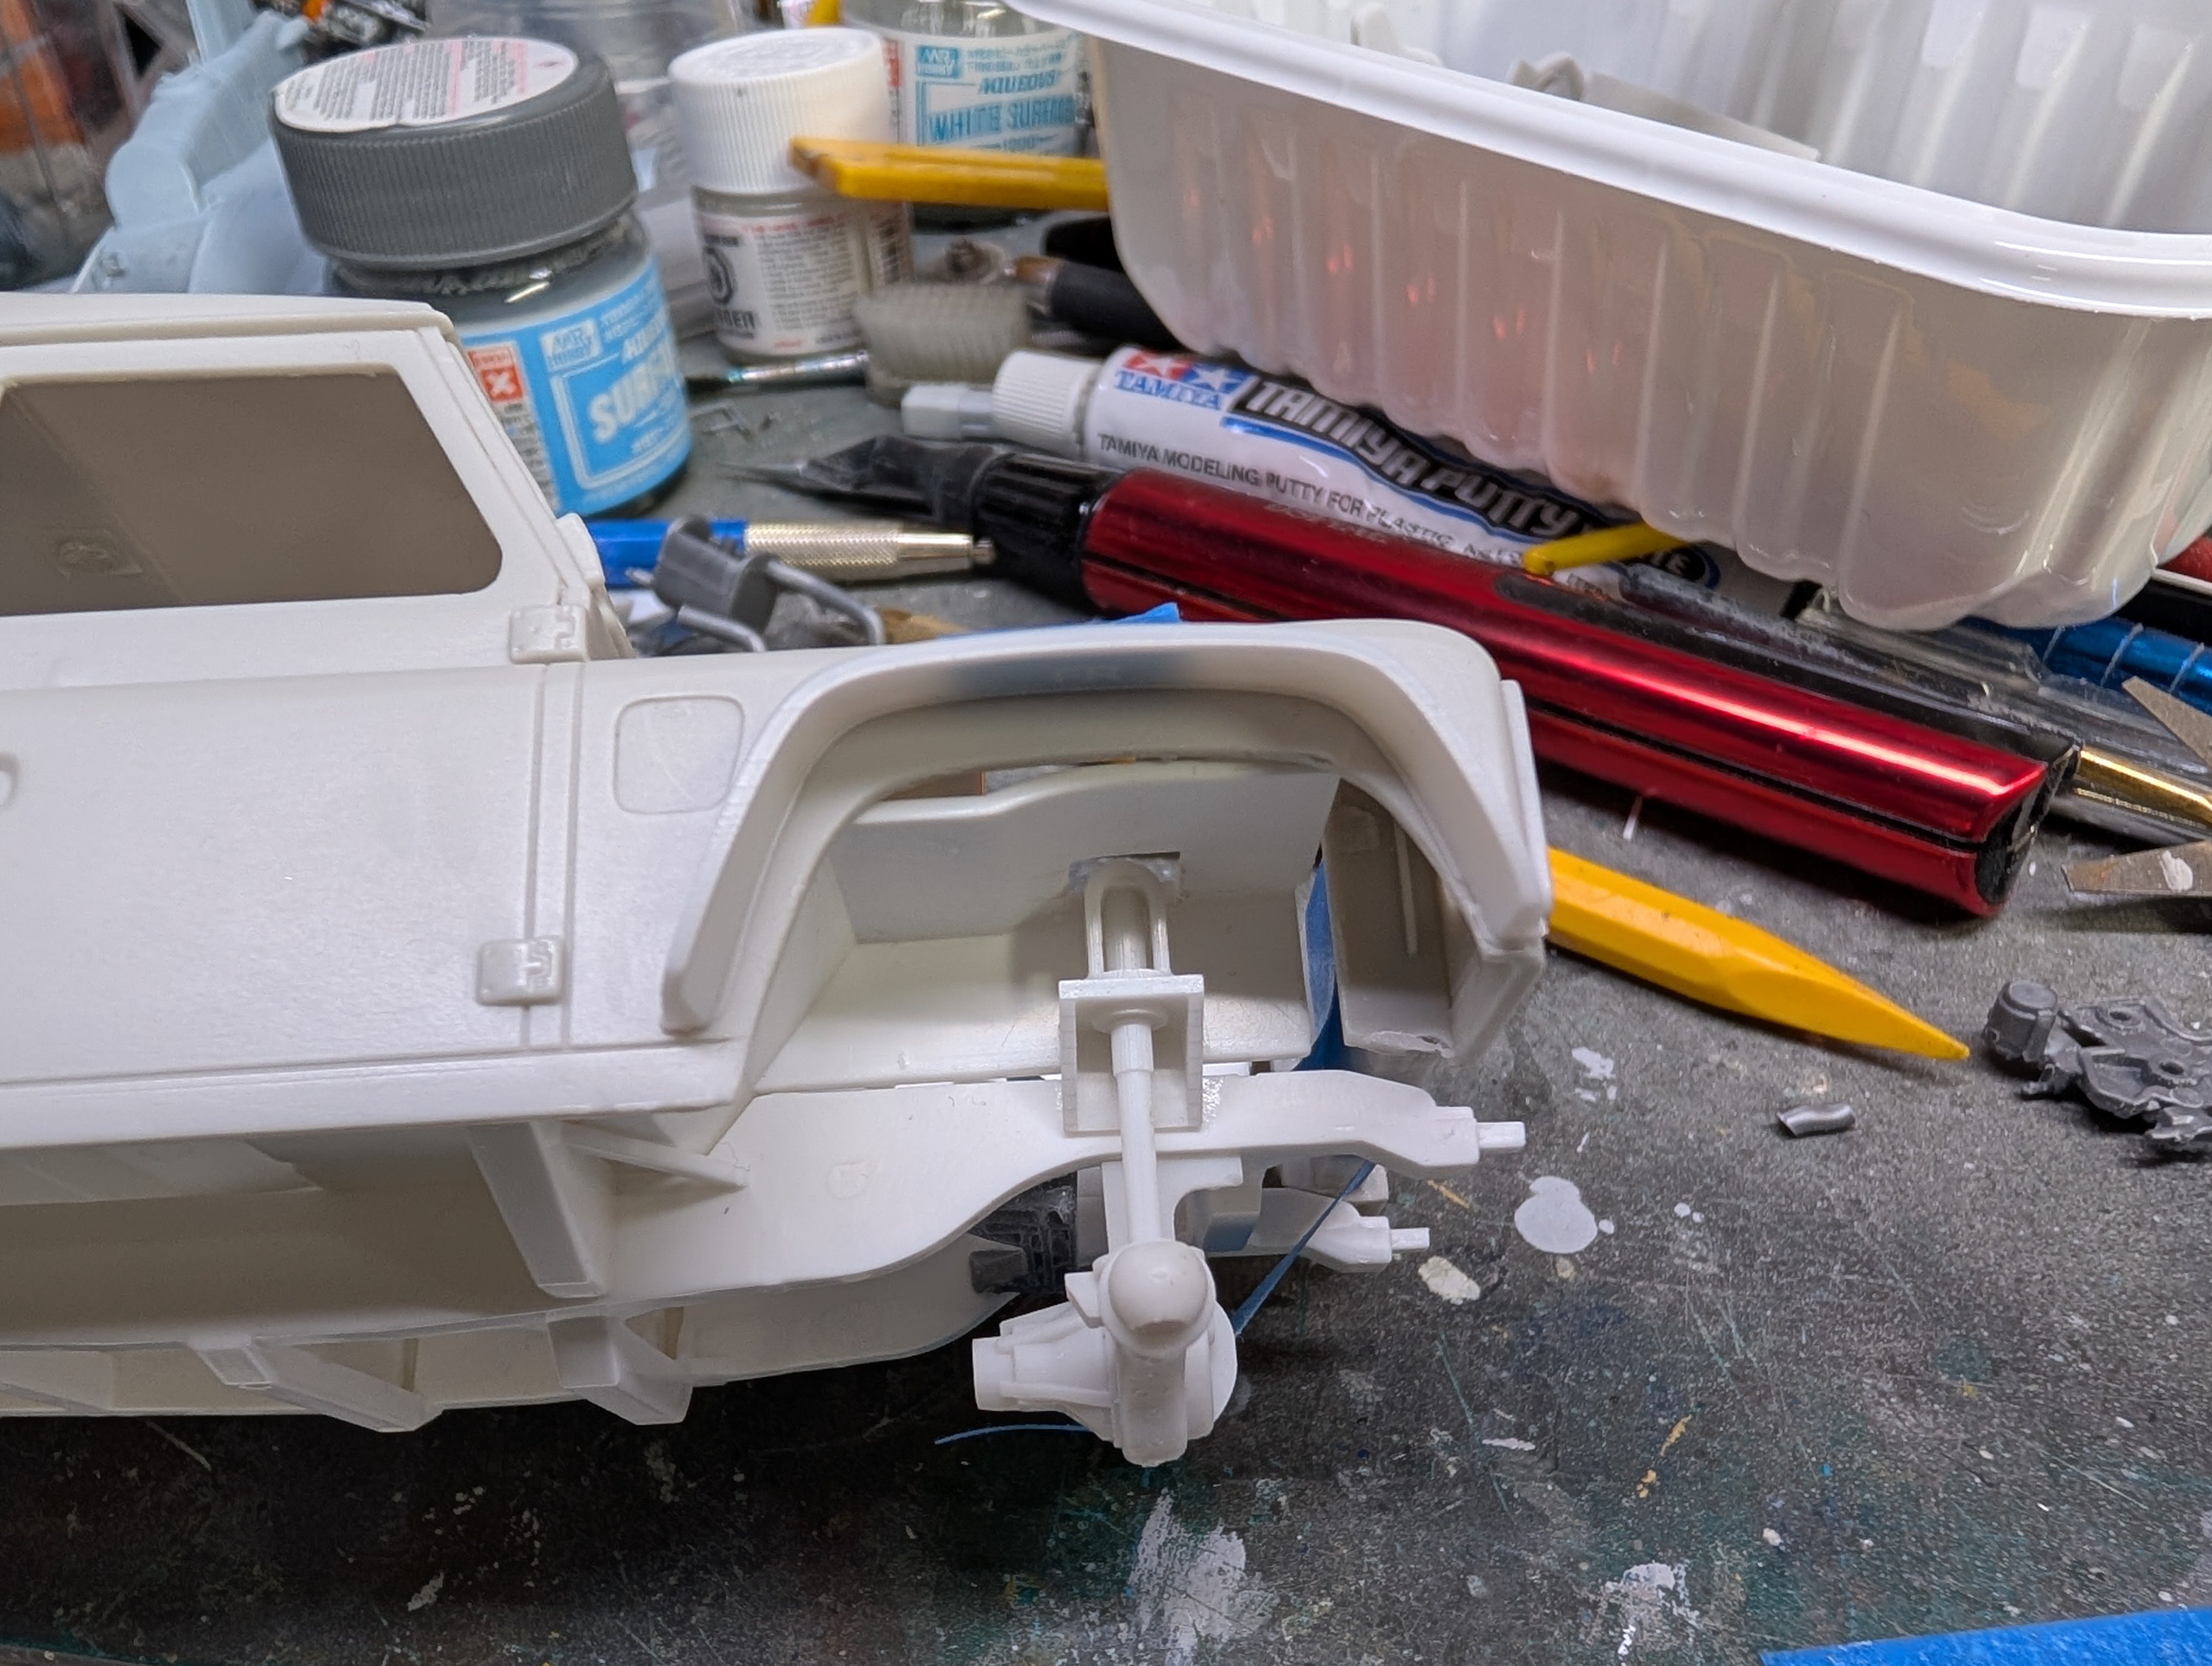
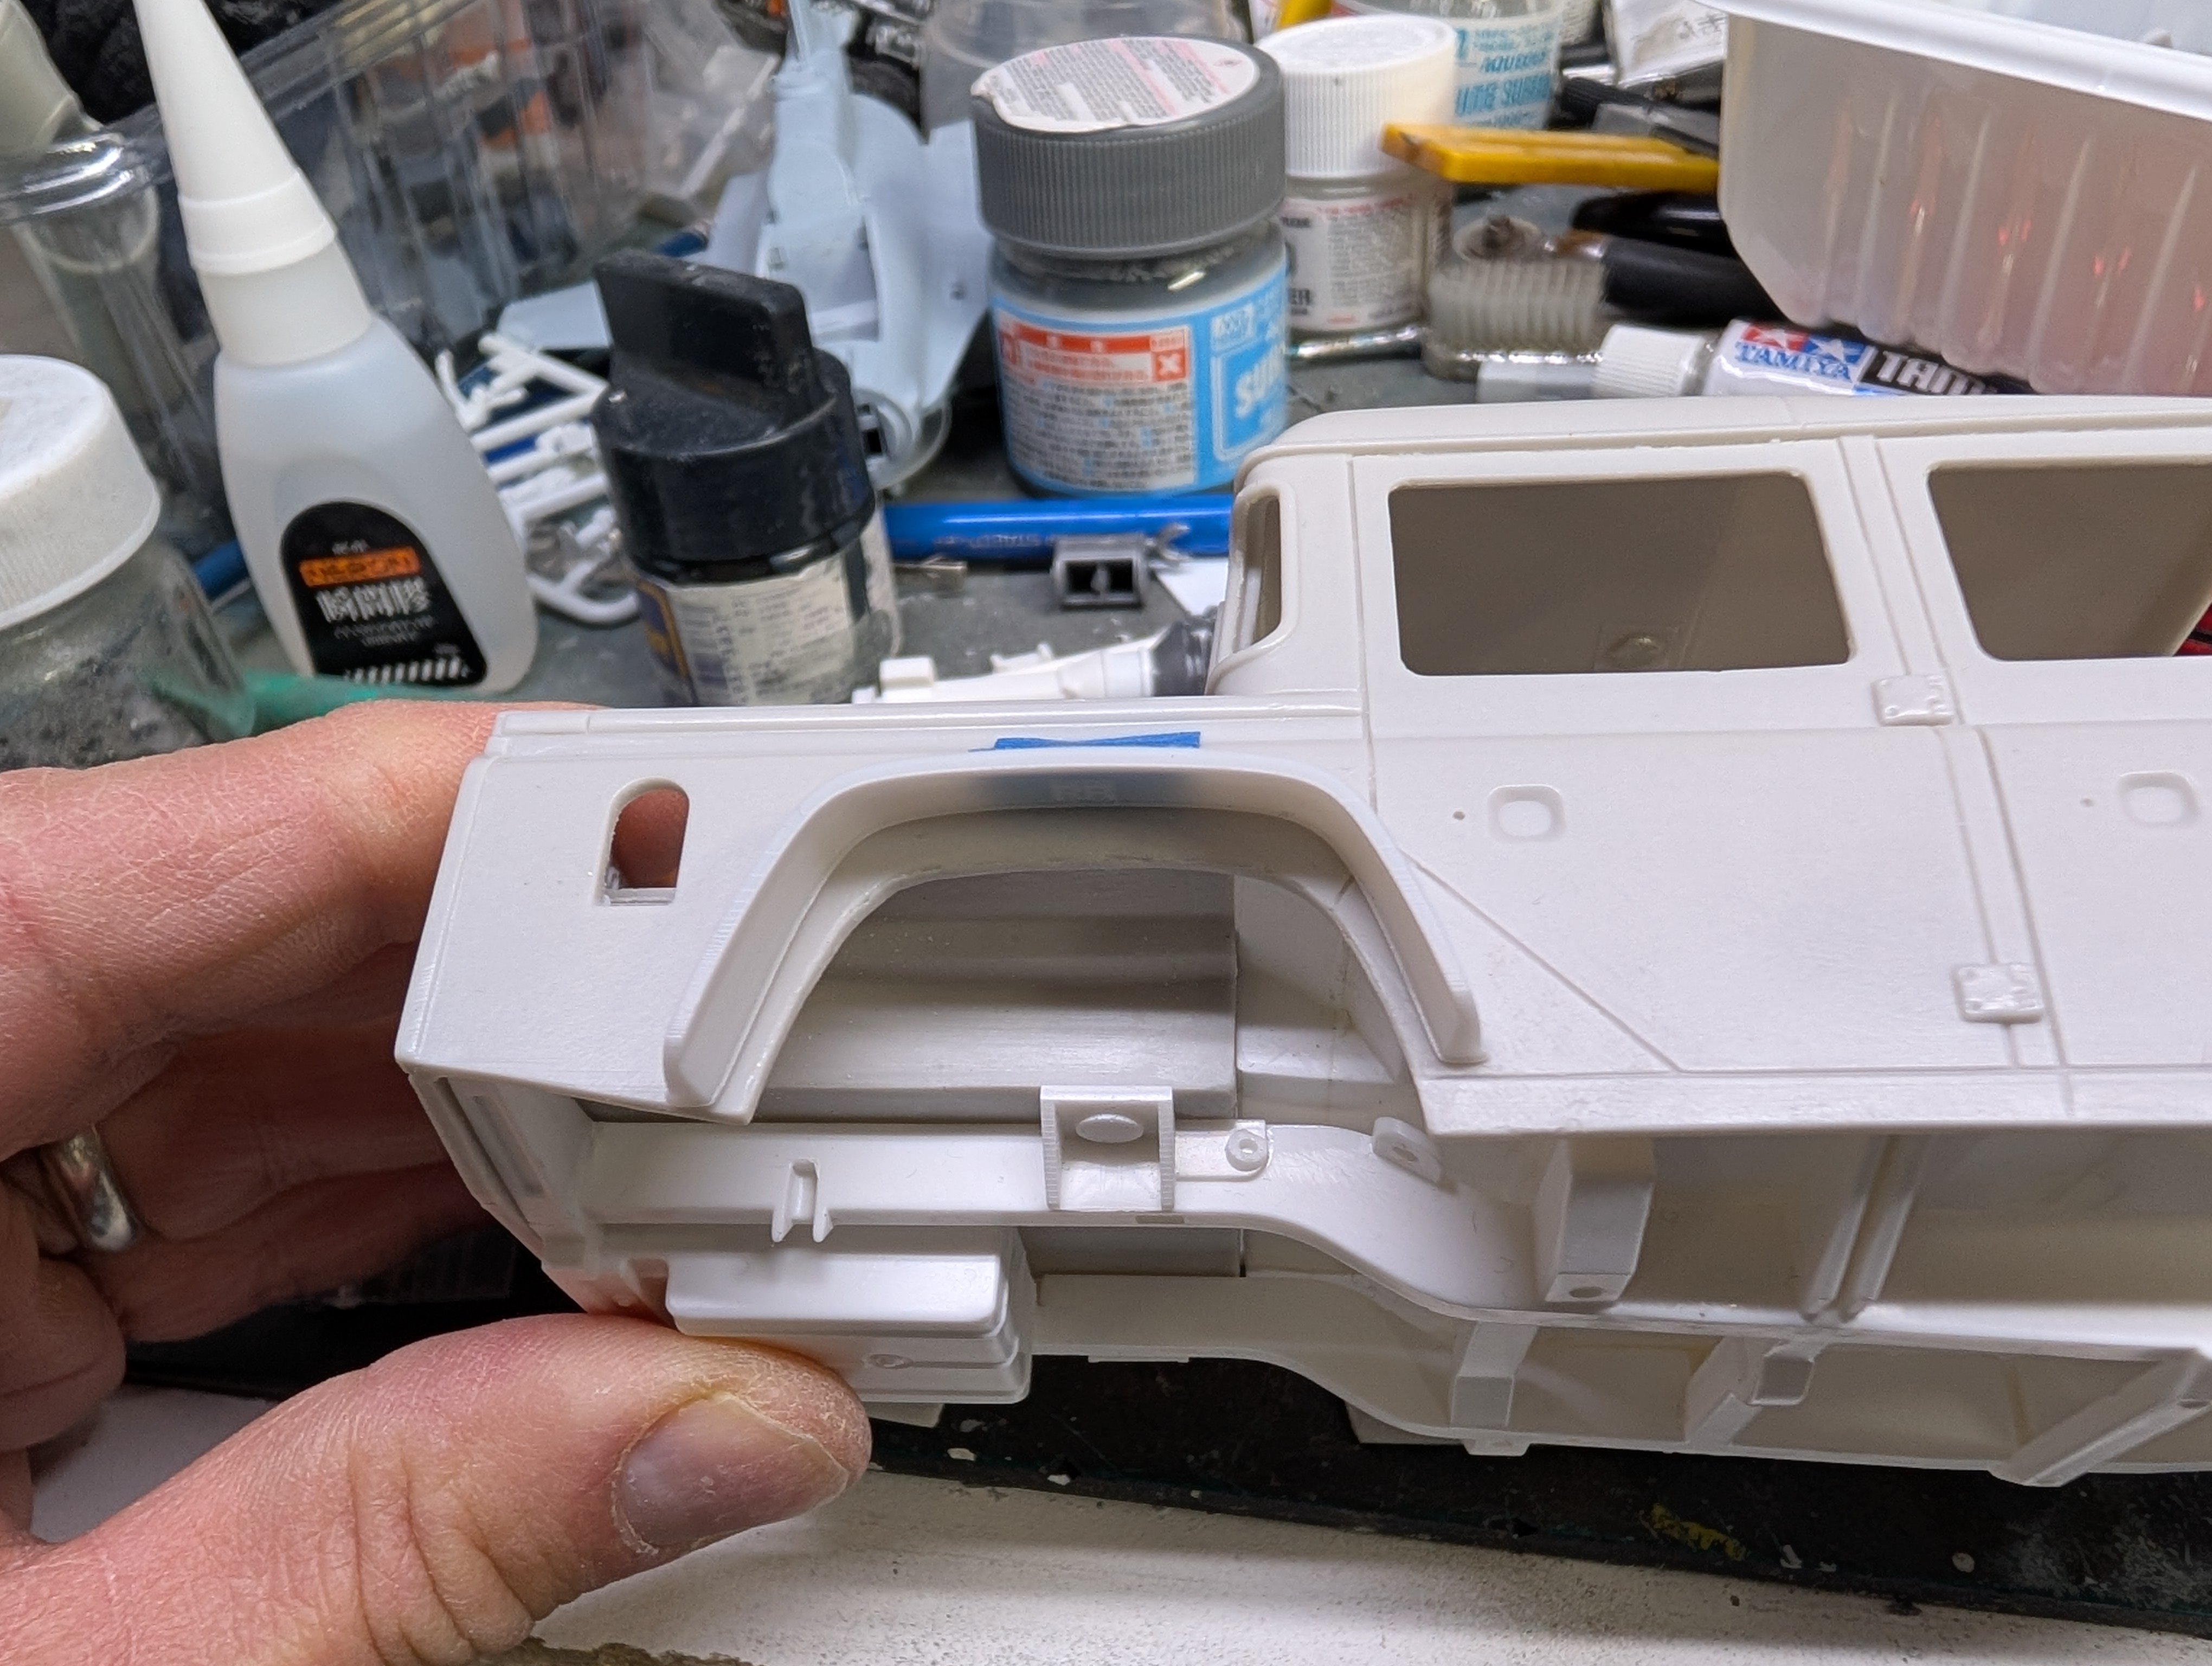
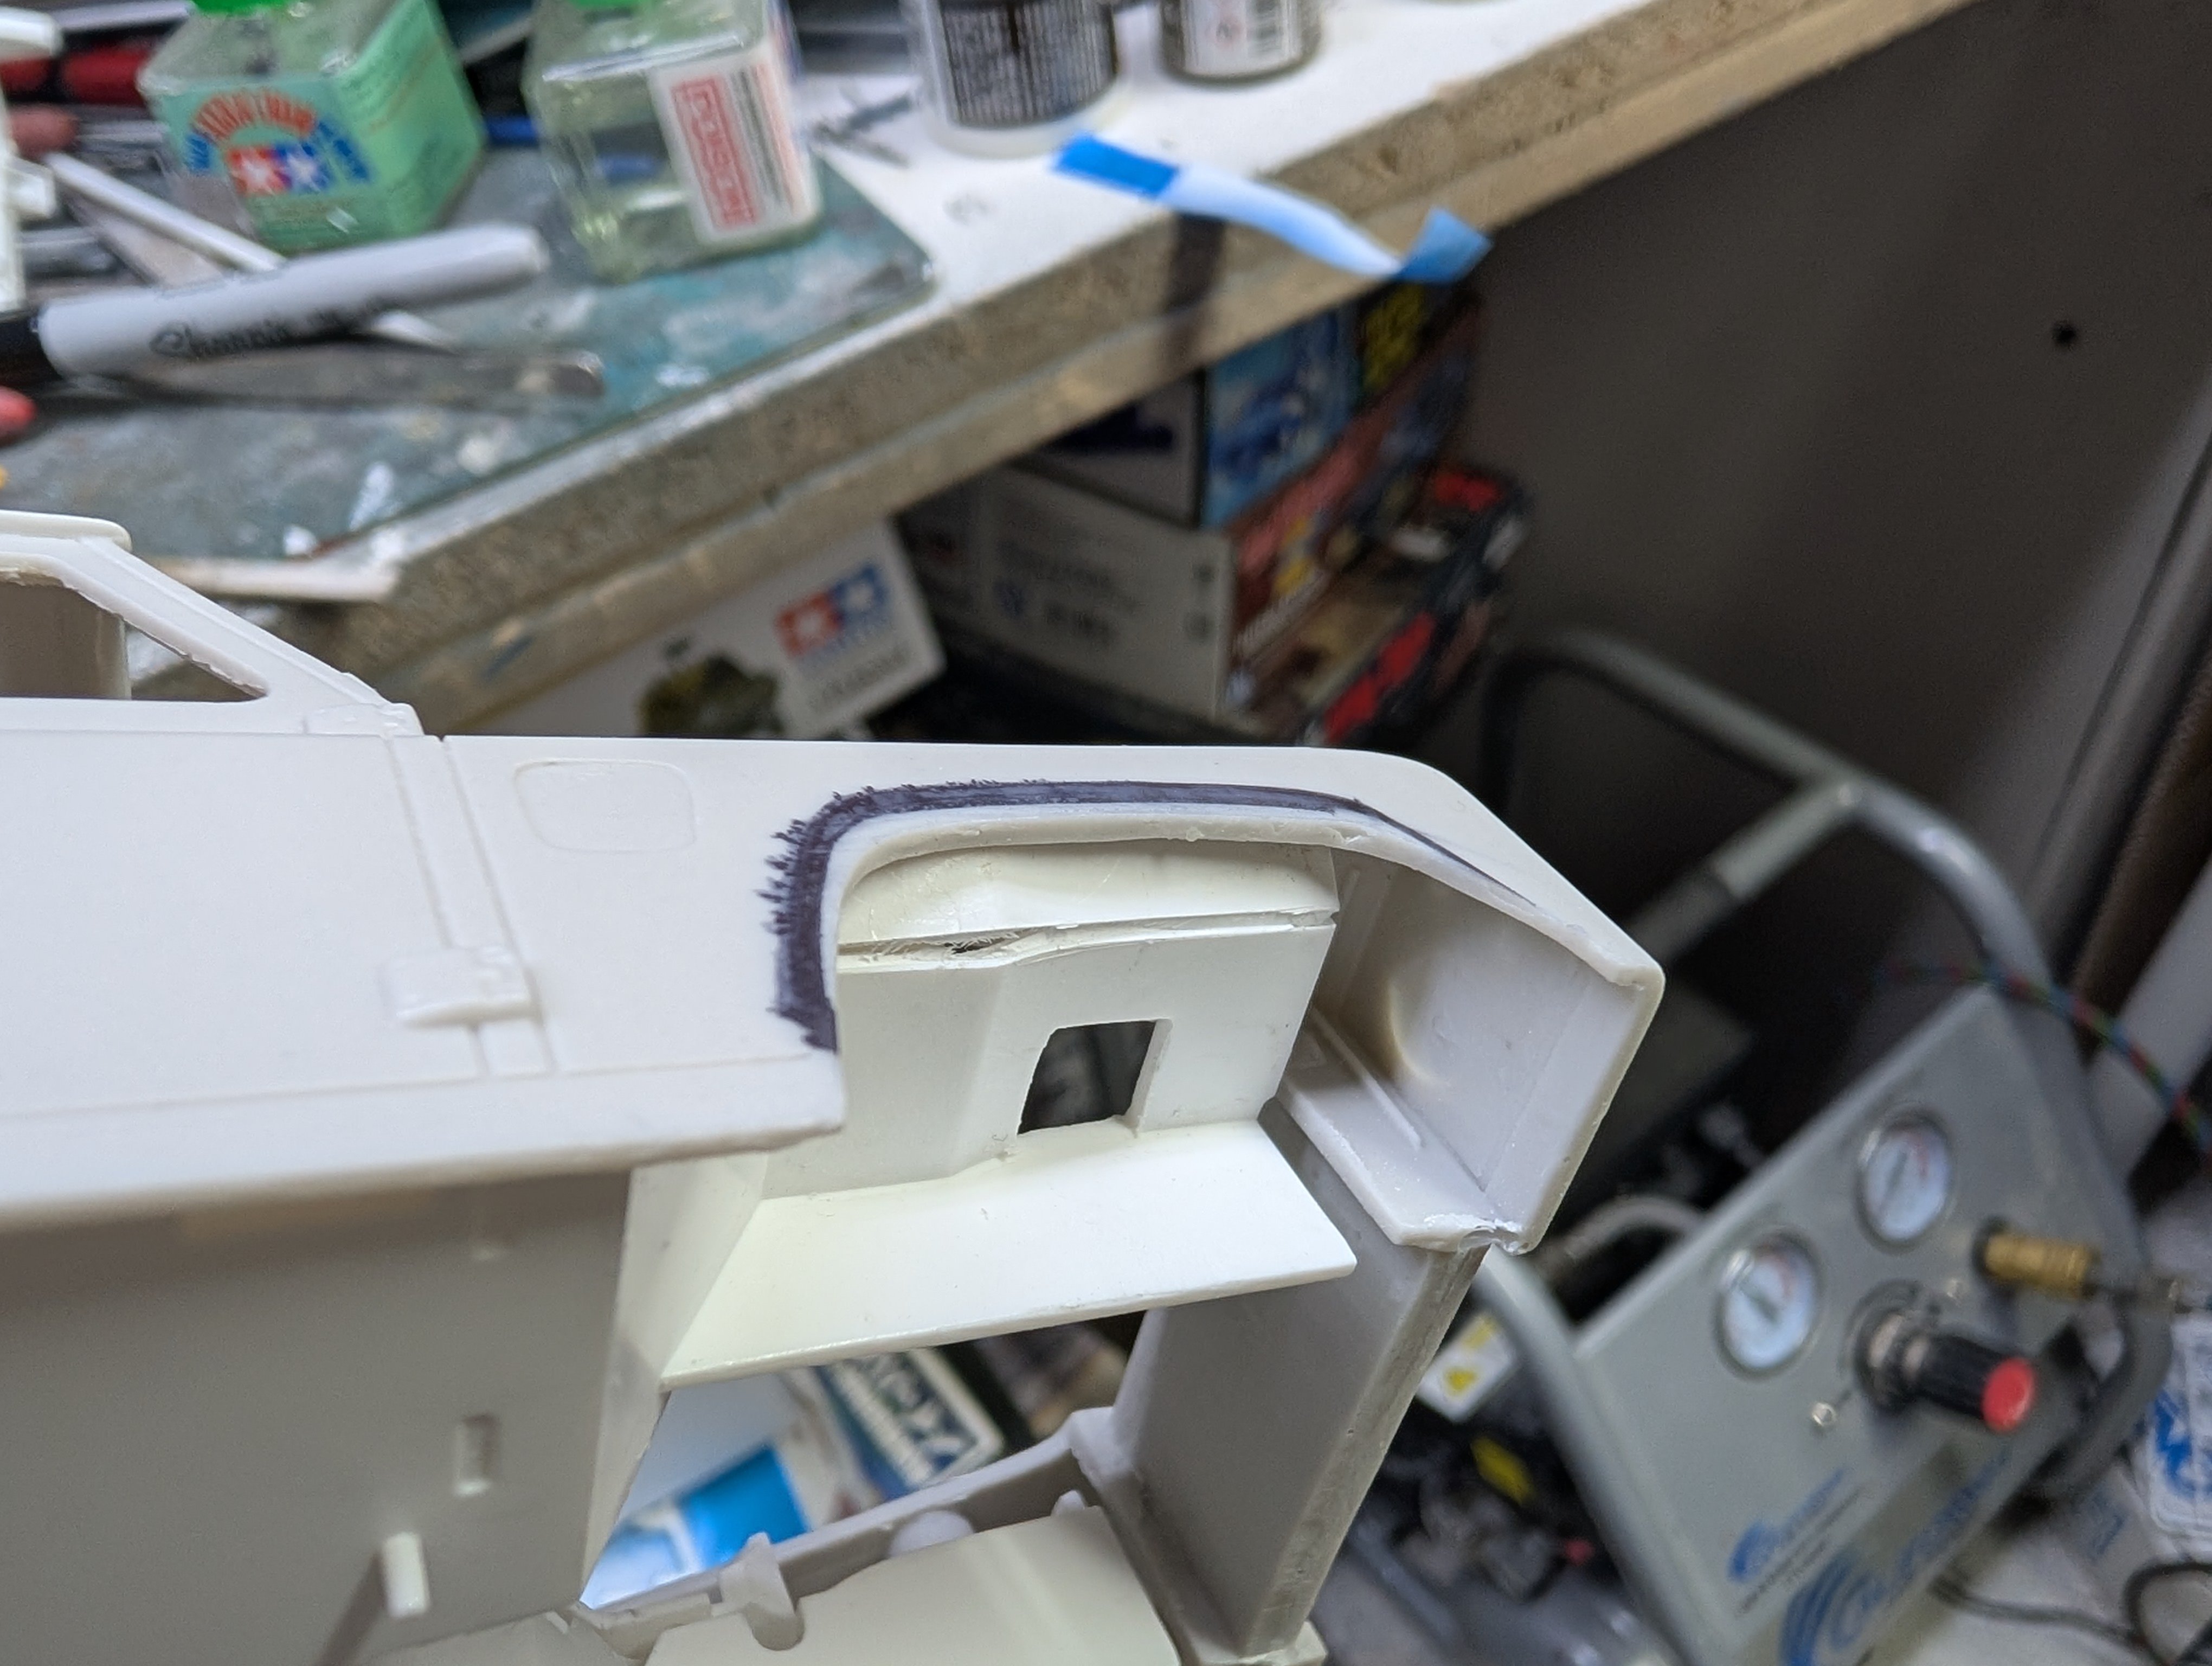
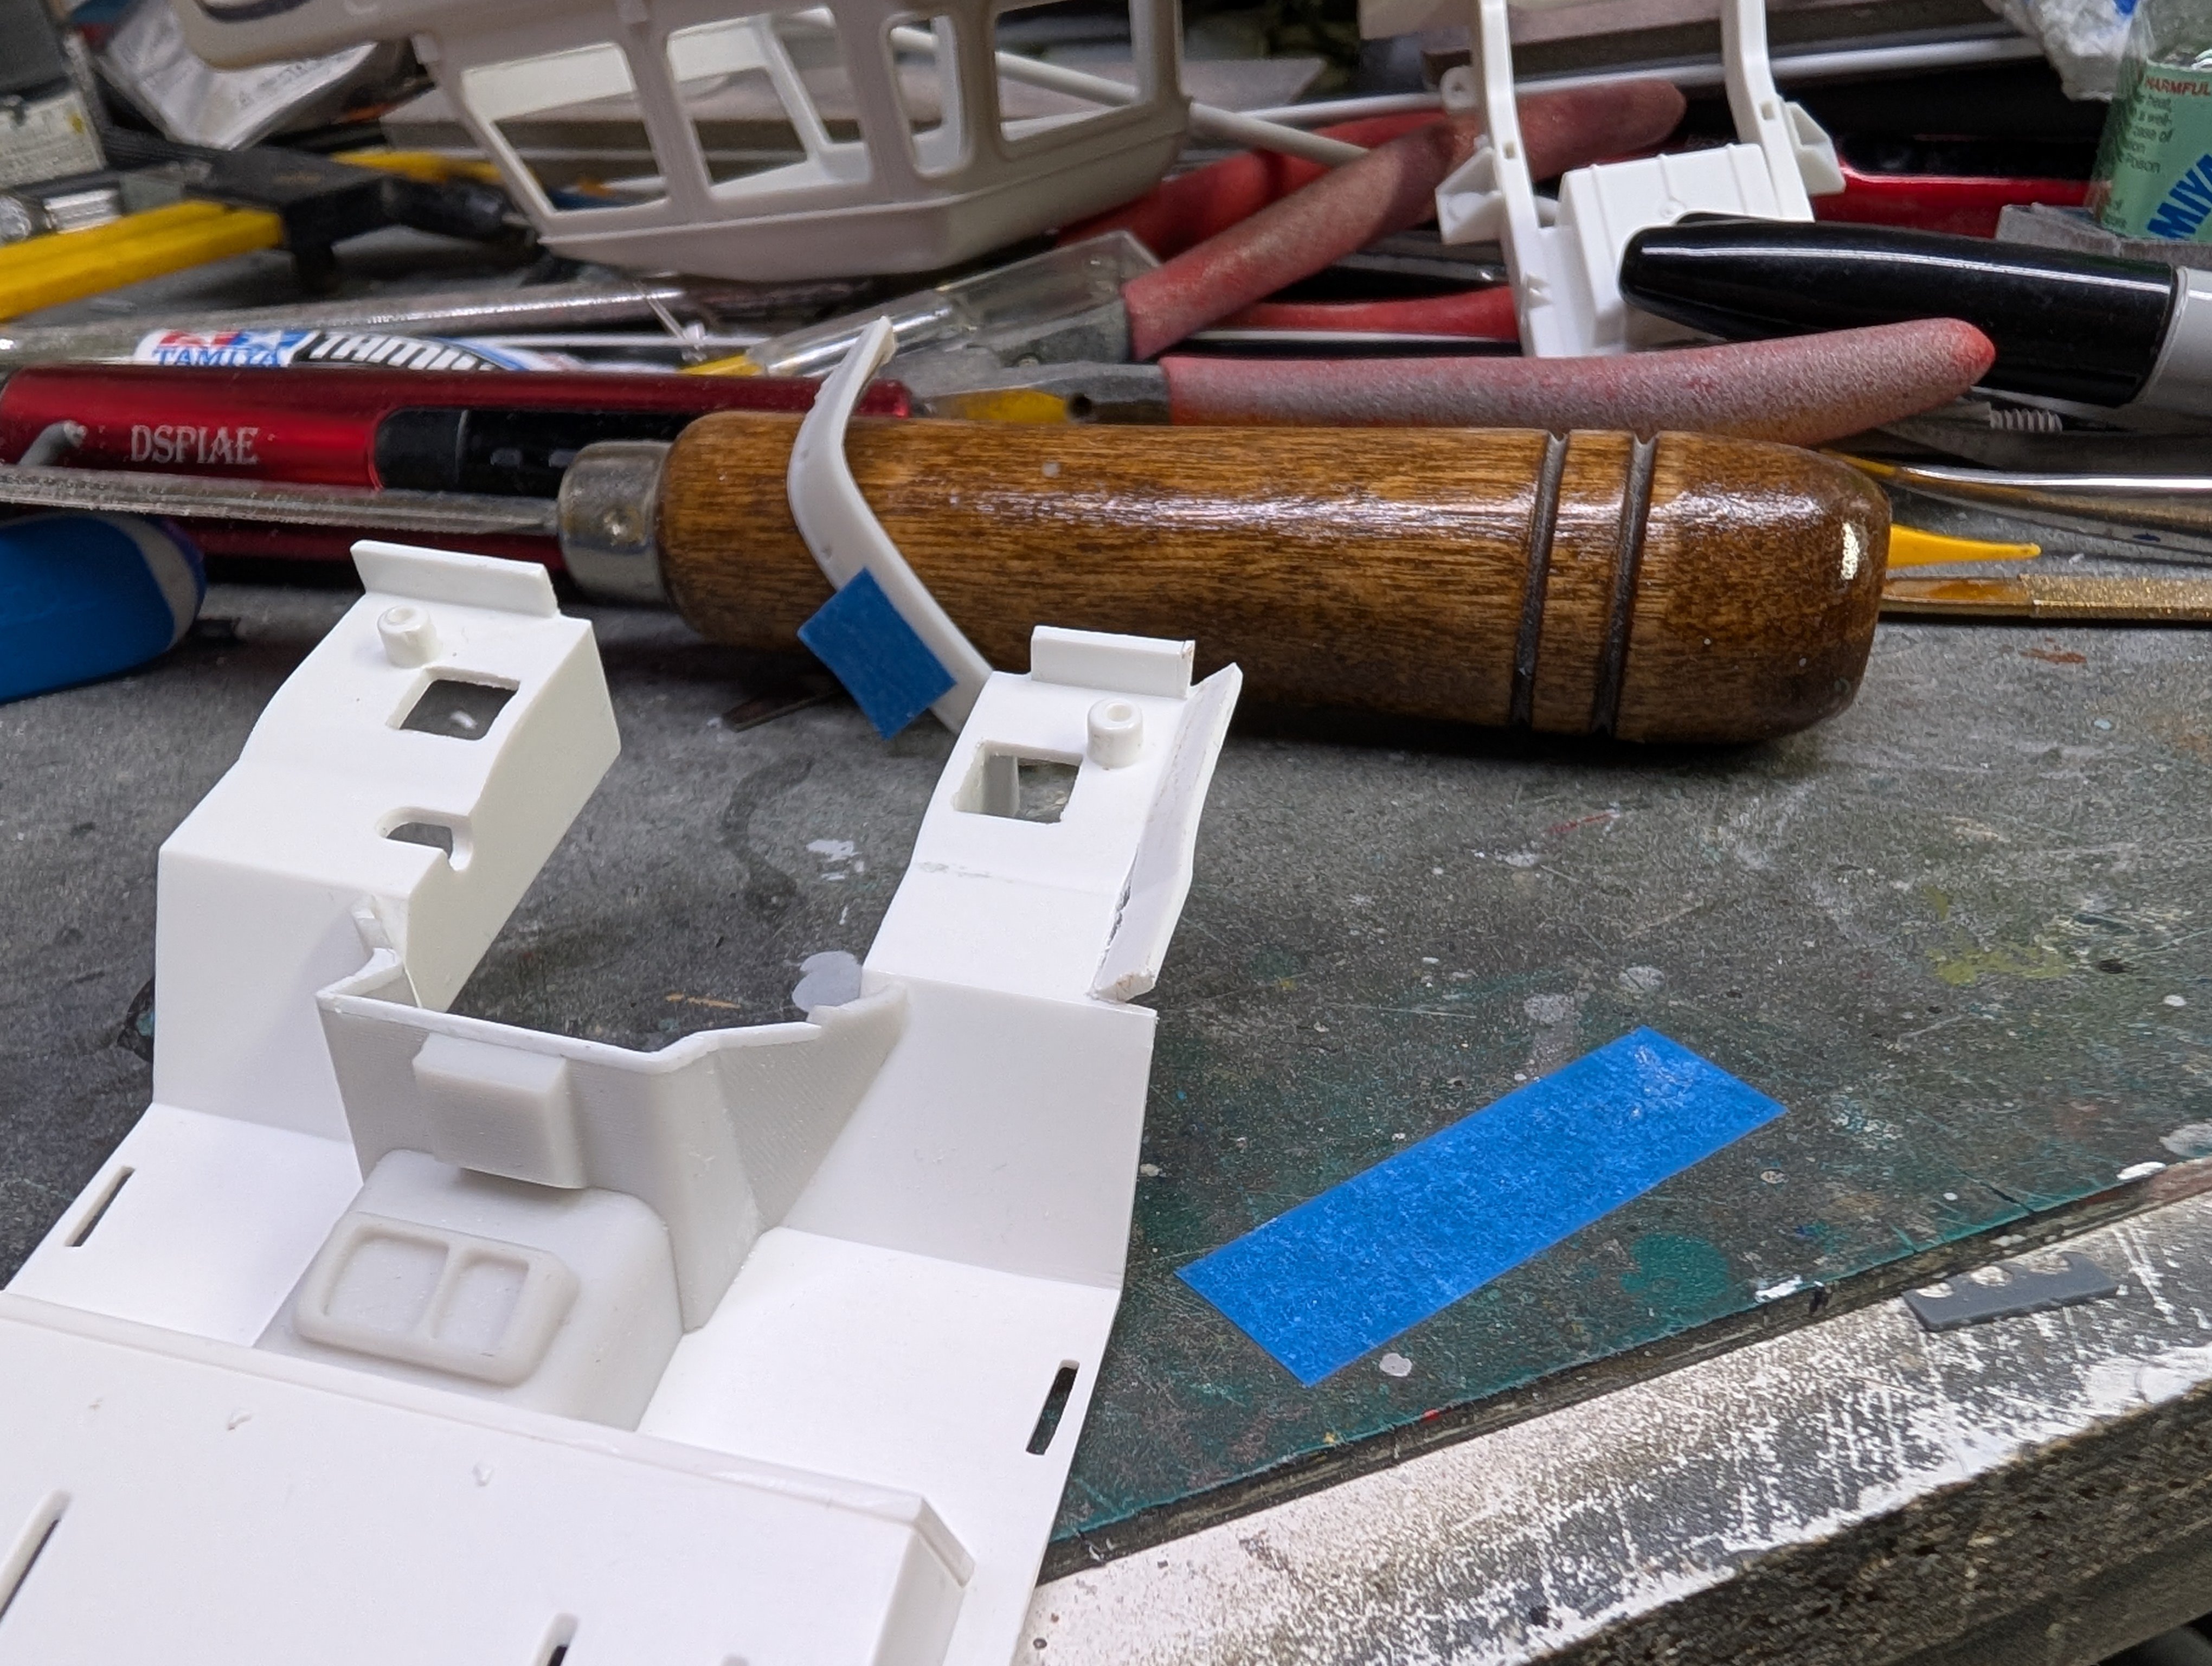
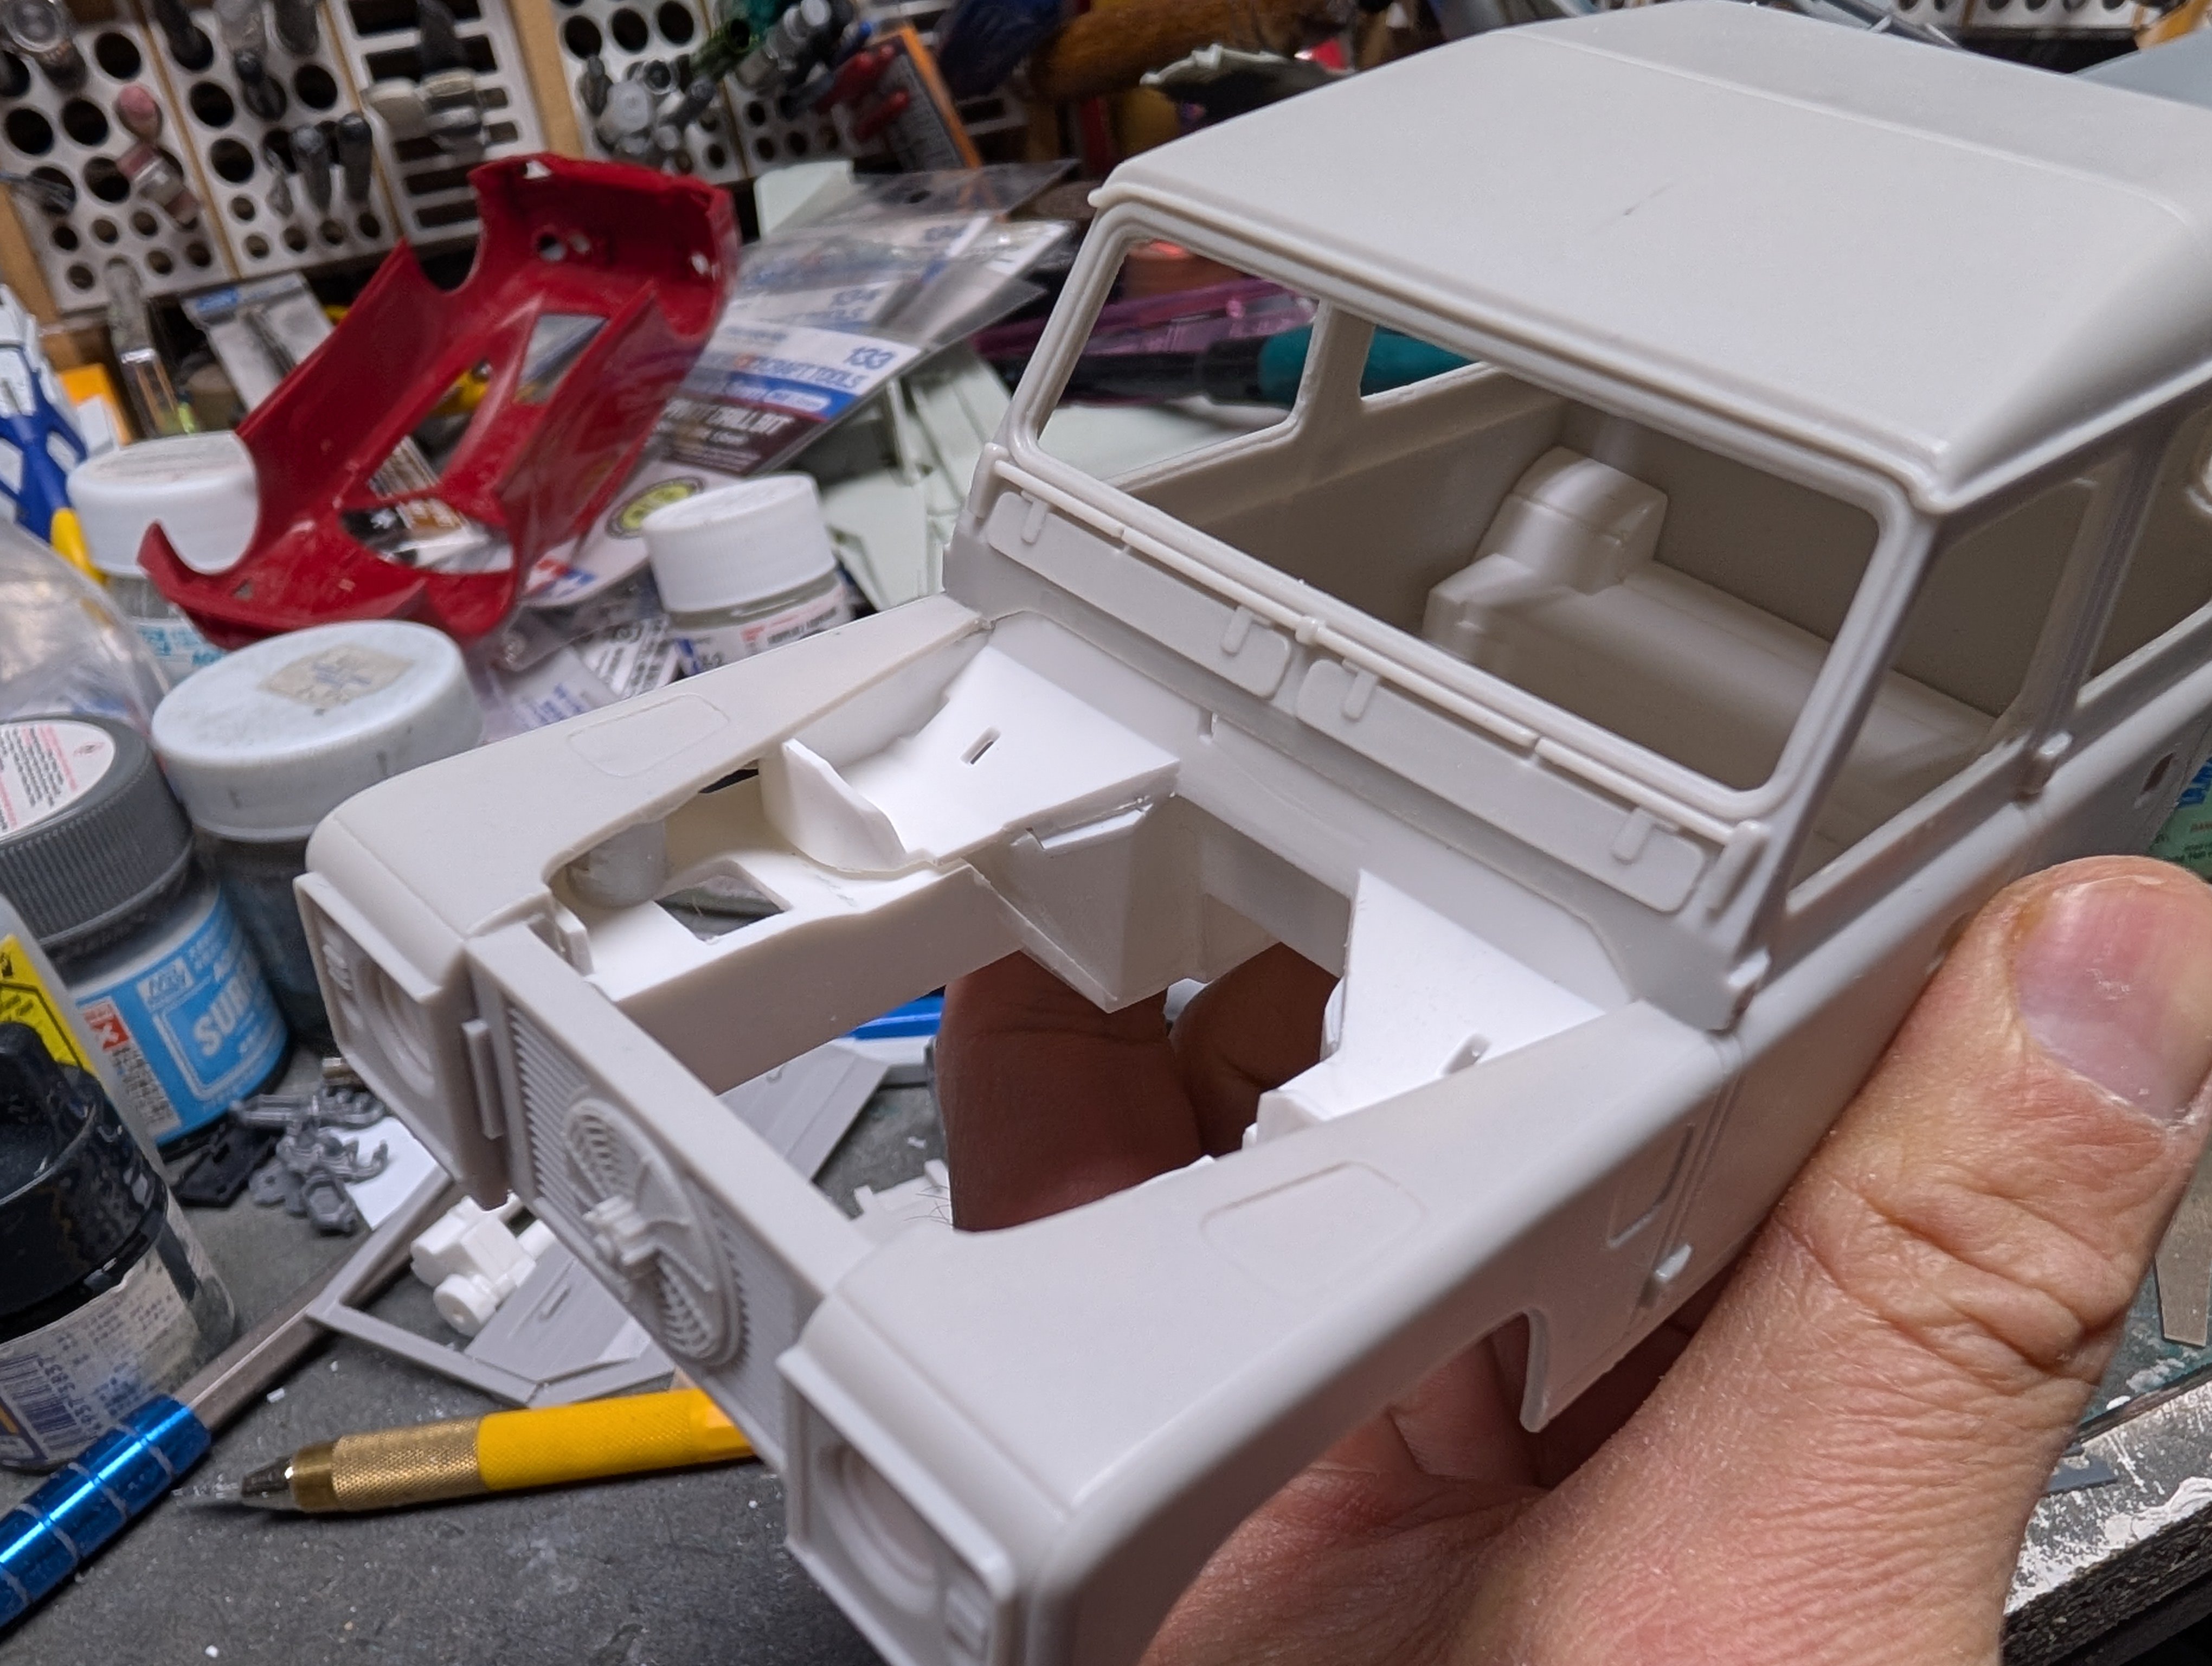
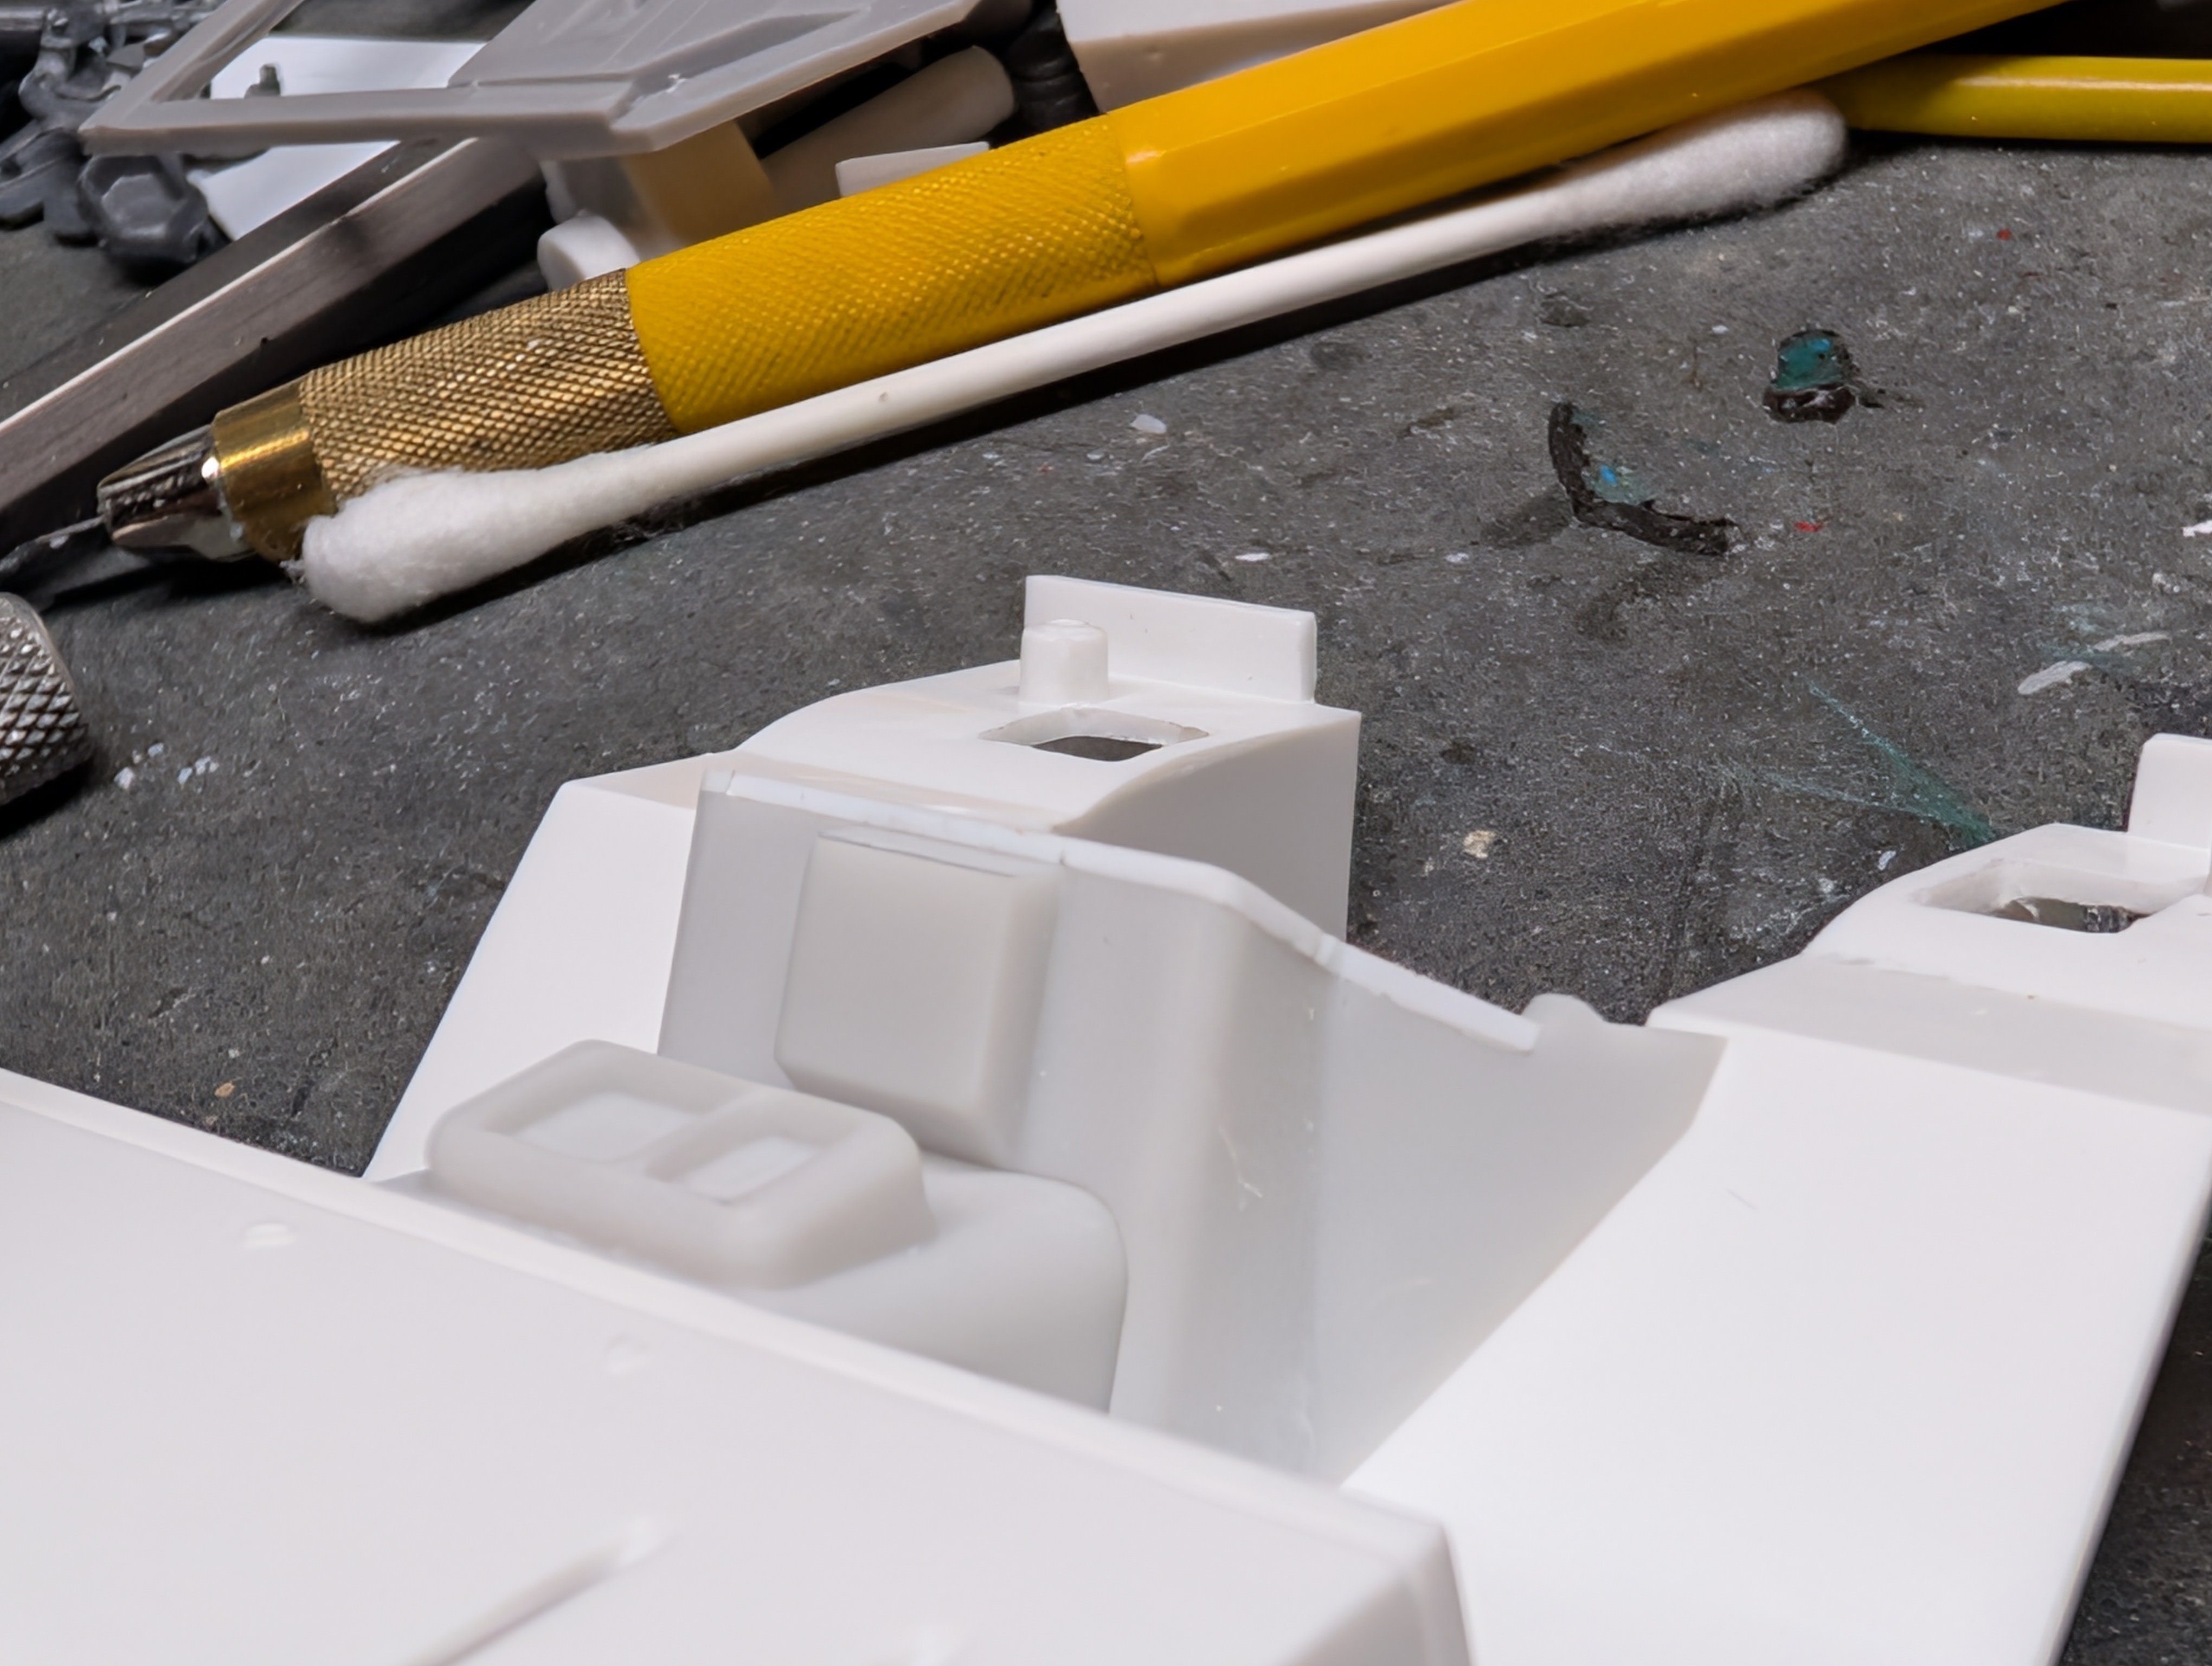
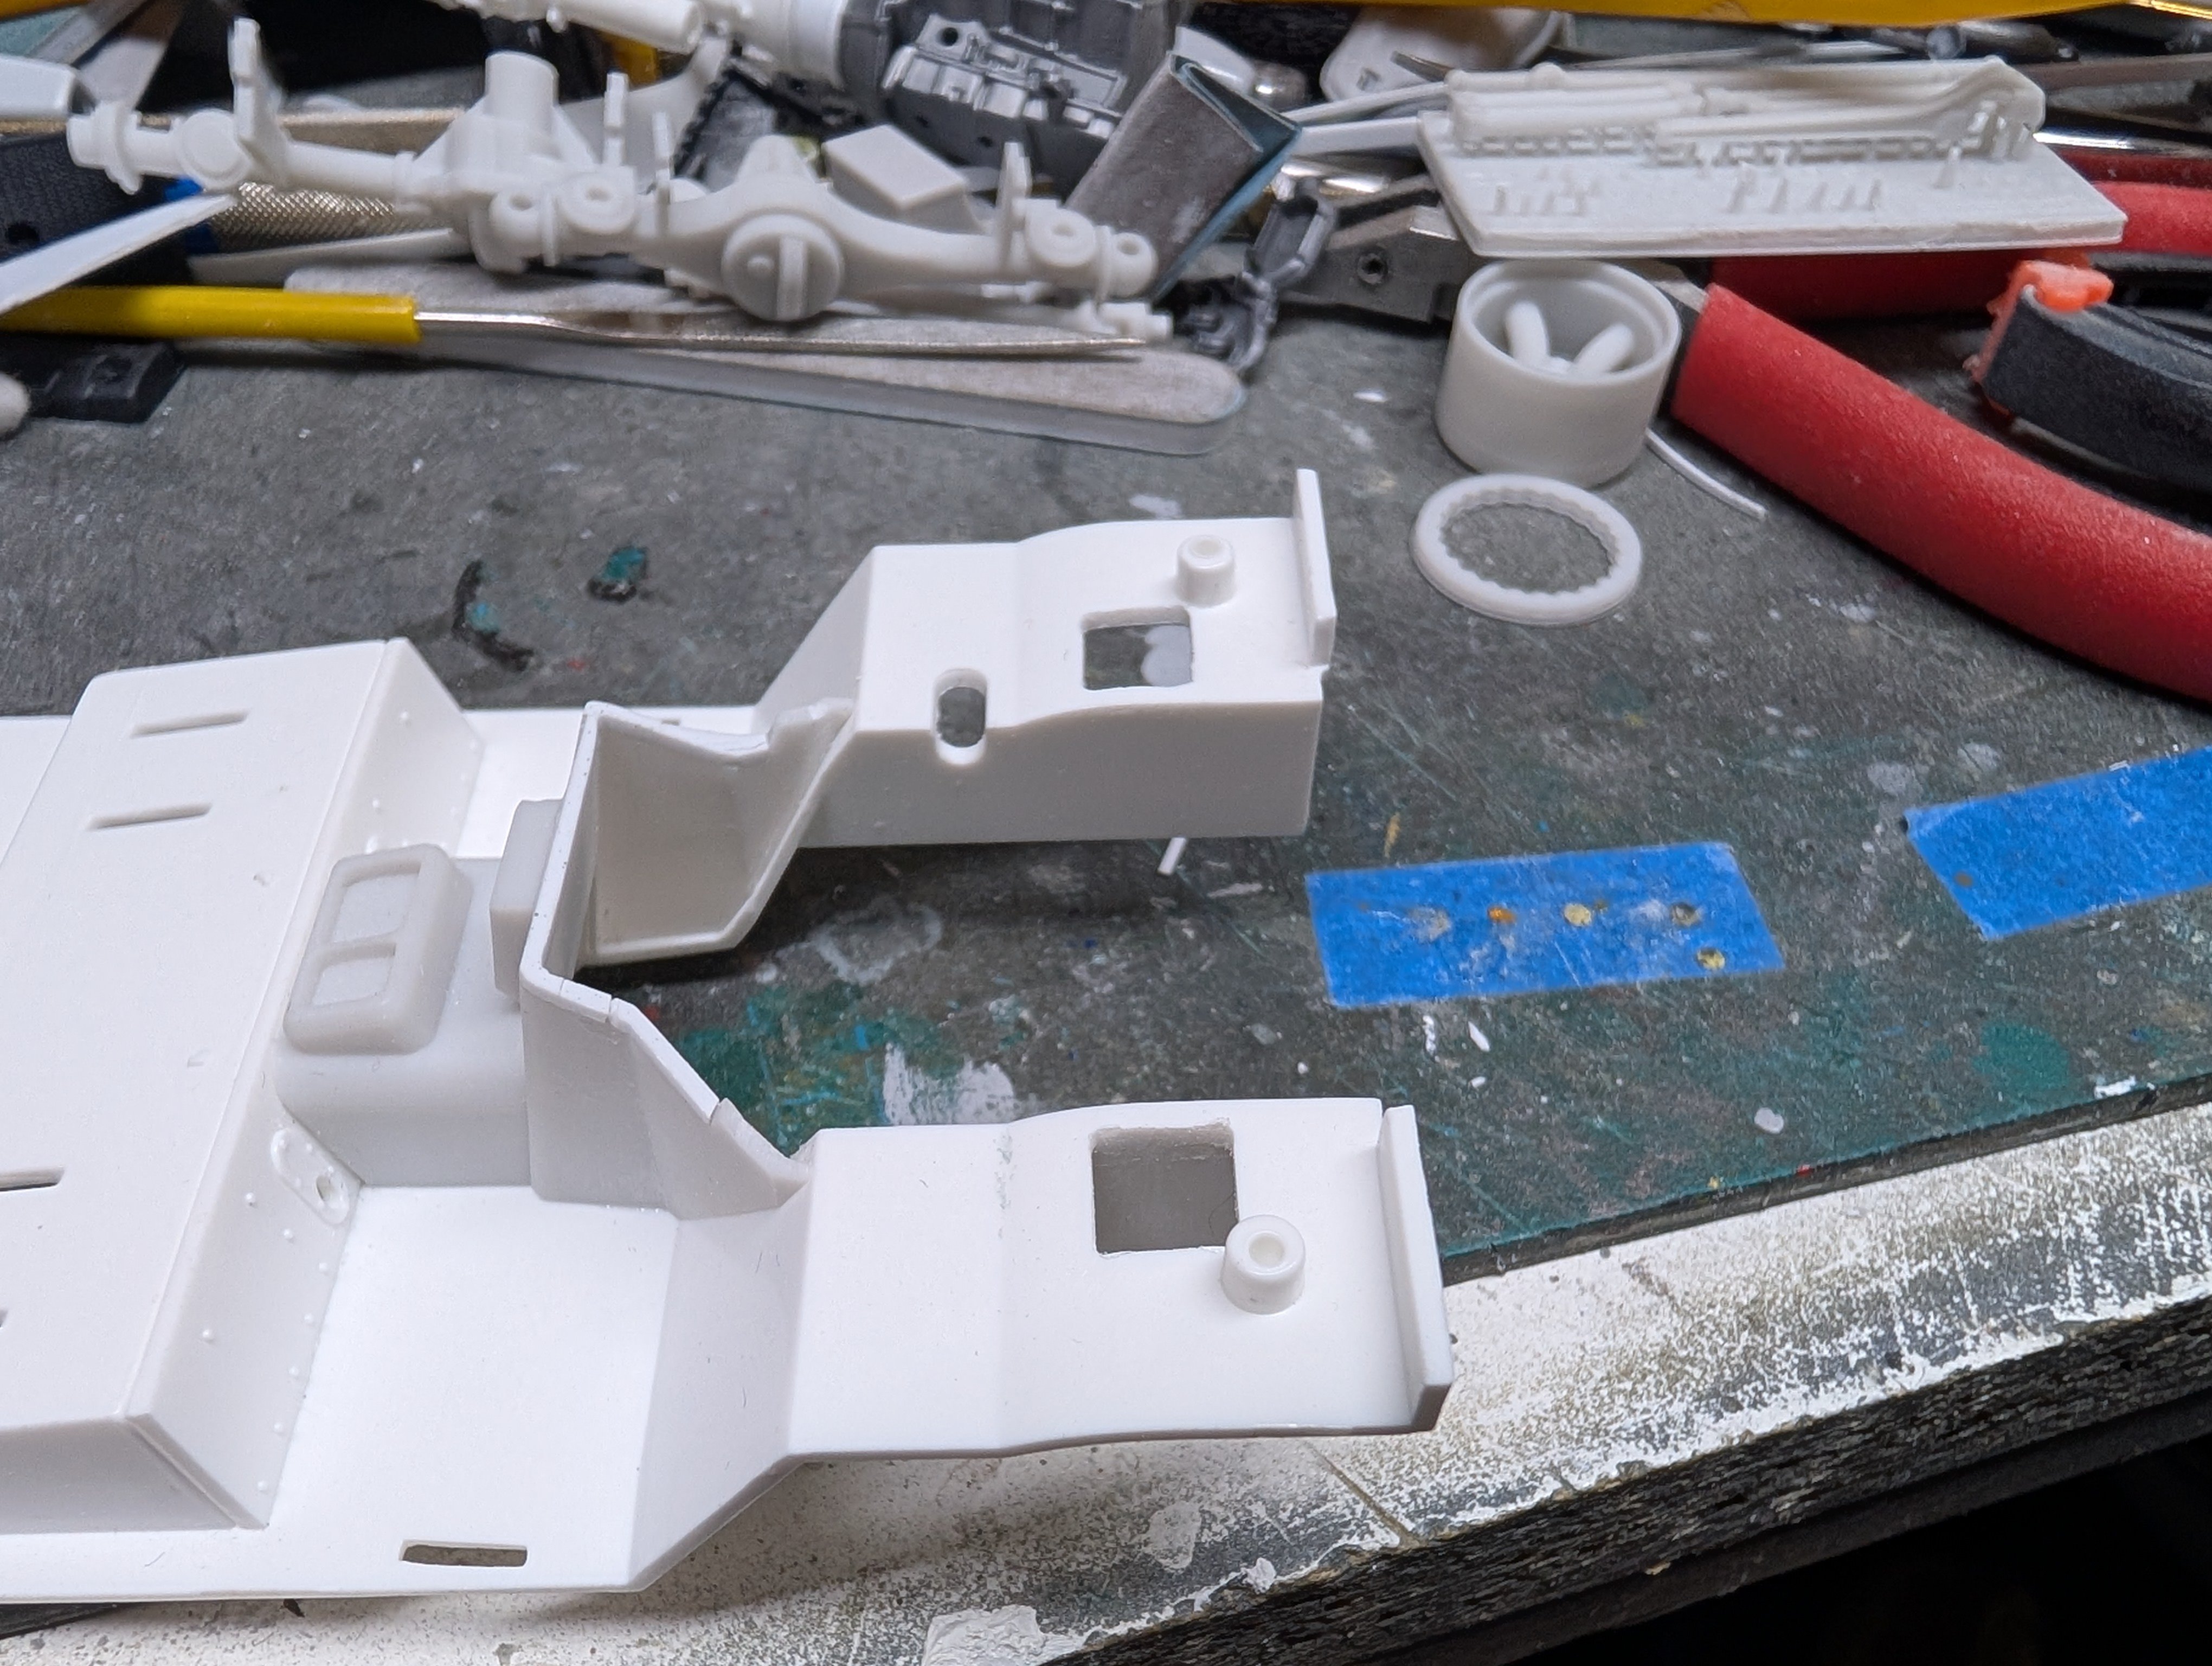
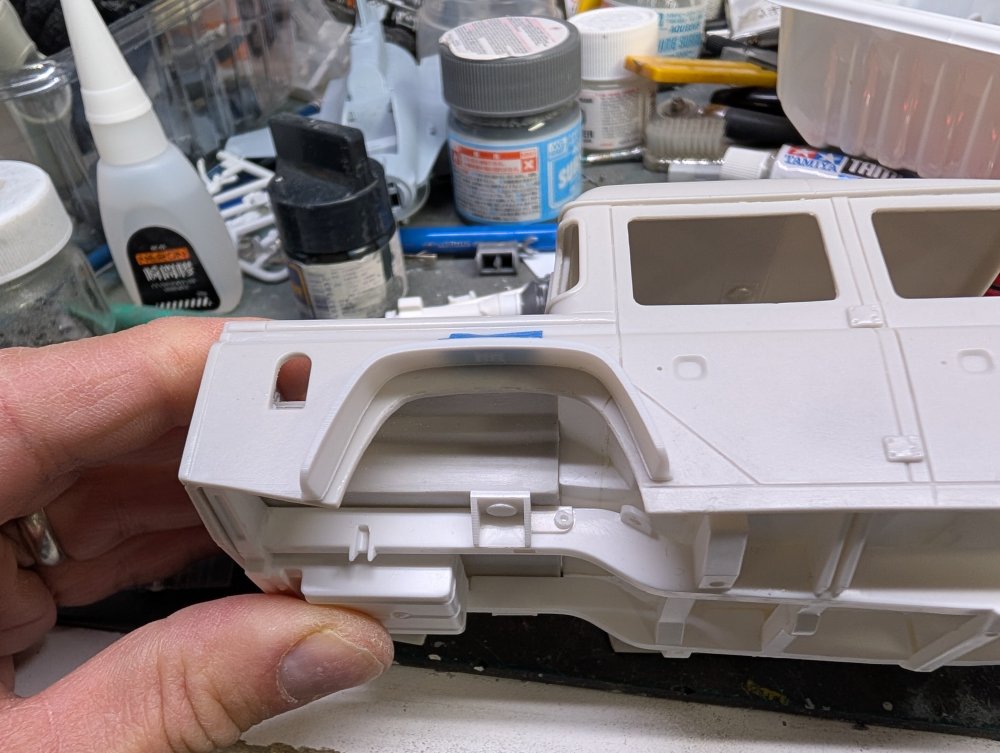
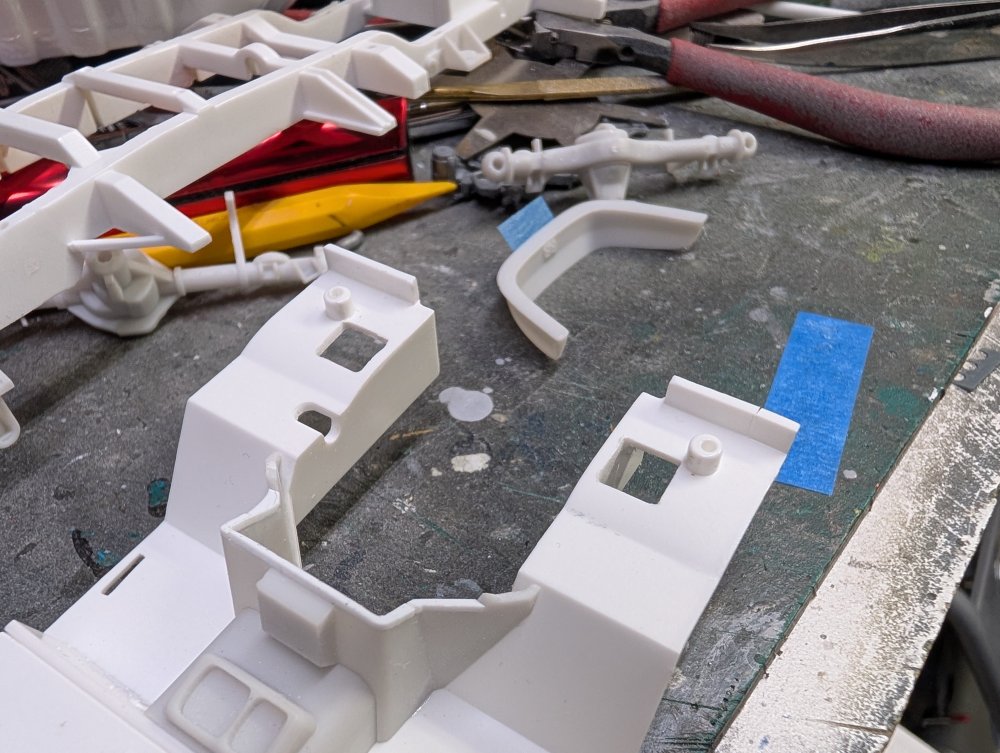
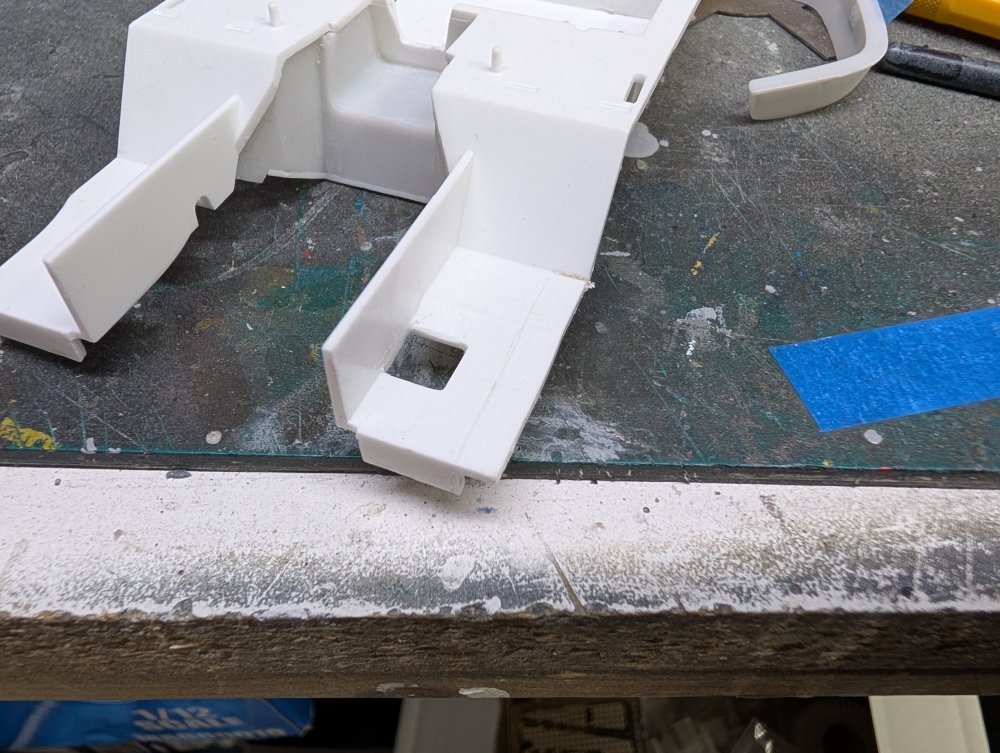
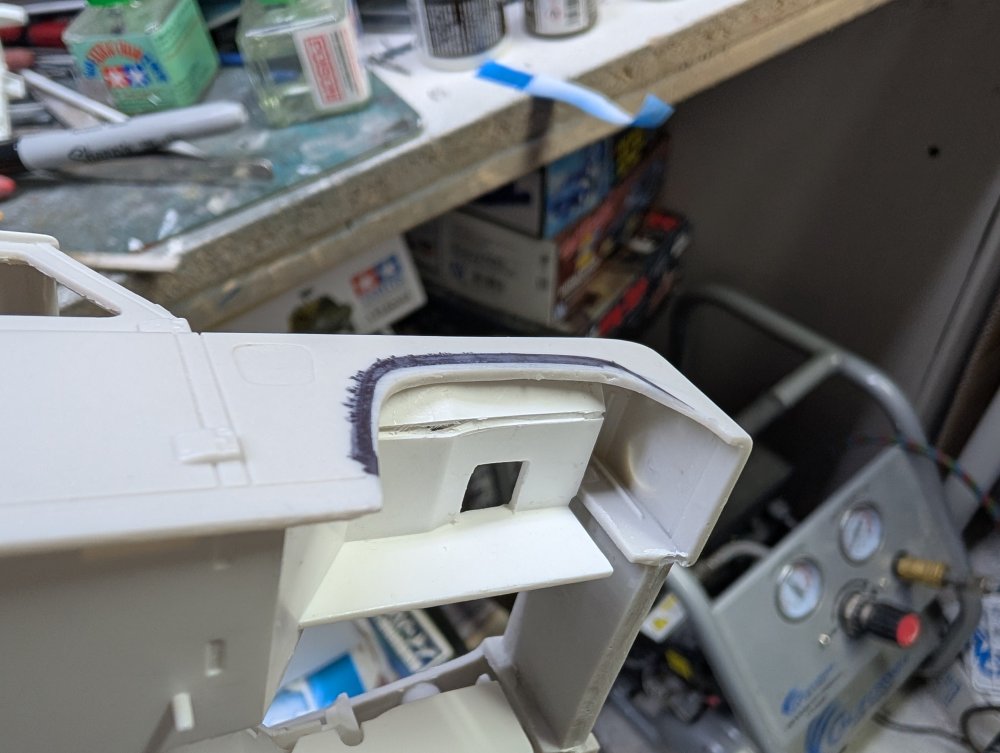
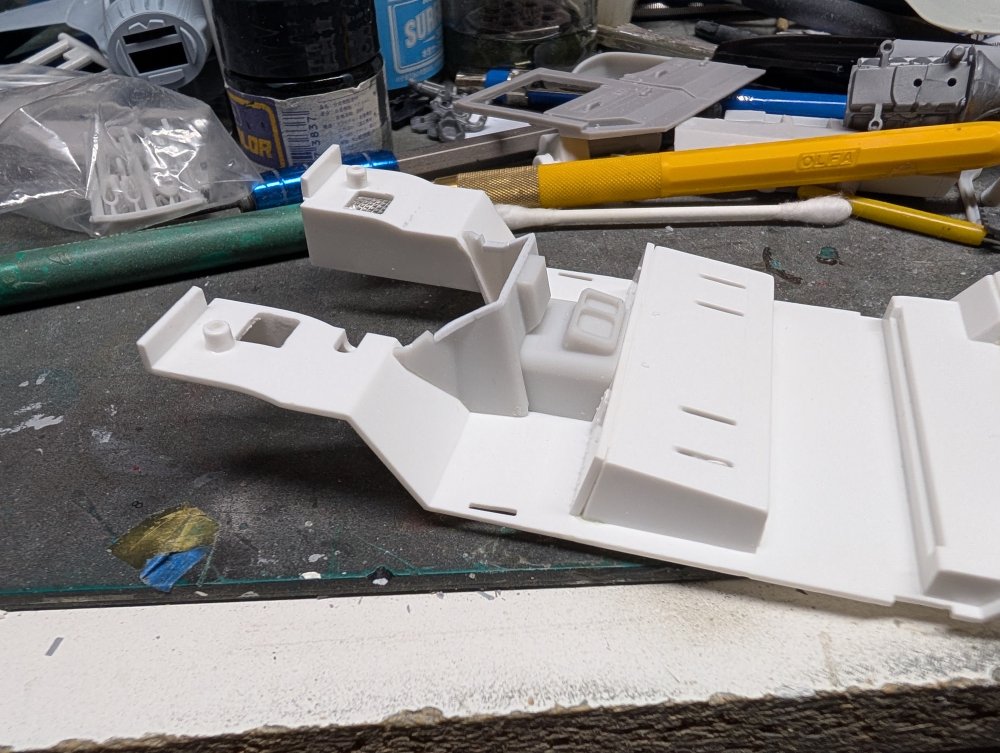
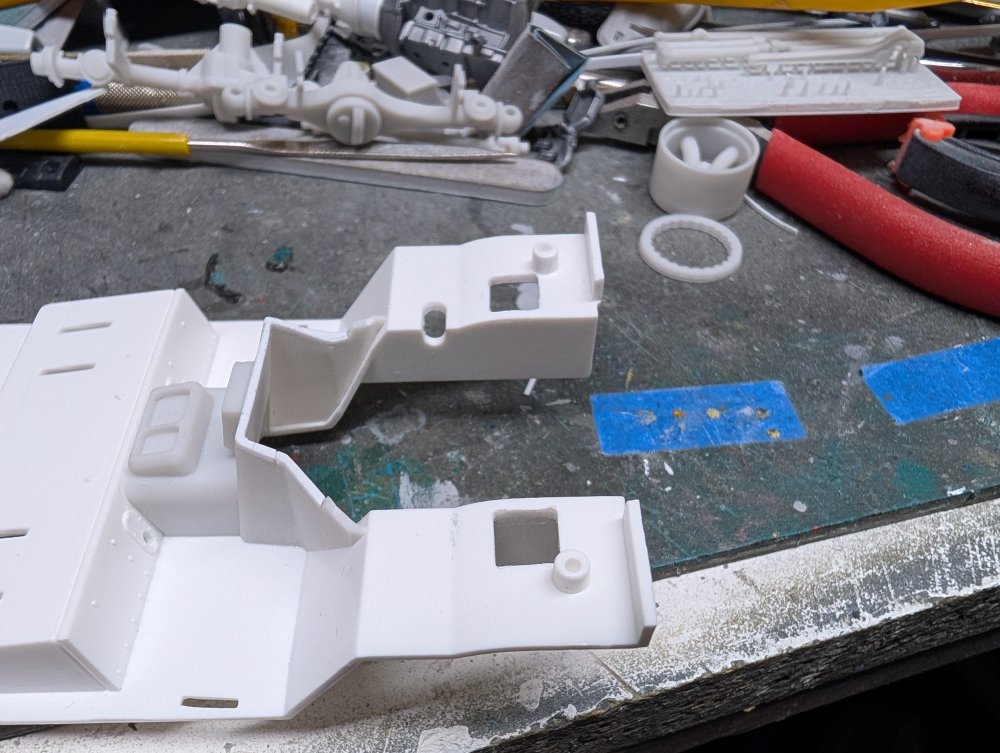
Thanks to everyone checking in on this. It's makes the problem solving more satisfying. Speaking of which, a new one has popped up. It seems that C1 Models uses the same body shell for a standard style 110 pickup as well as the custom Bowler one as seen in Spectre. You just add the Bowler specific bits- fender flares, roll bar, bumpers, suspension, and so on. Except they don't tell you what mods are needed on their body. With the chassis and floor pan fitted to the body shell, the front fender liners are lower than the standard 110 fender openings. It looked odd to me and I figured that the fender flares would cover this up. Except they don't. In fact, they require that the fender openings be increased in size. The same goes for the rear. Even worse, it looks like the if you don't do this, the rear tires may not fit. What would be the easy solution of just cutting away the front inner fenders, and increasing the wheel openings won't work. The floor pan is mounted to the body by the inner fenders. Here's the mounting pegs on the upper side of the floor pan. After some thought, I decided to narrow the inner fenders and started by notching the front and back. I then scored the inner fender in a straight line on the underside. This was then bent upwards. It looks like this should work. I'll have to fill in the cut on the bottom. The black on the body is roughly how much I'll need to cut away. The added bonus of doing it this way is I won't have a gap around the inside of the inner fender. The rear won't be as complicated as the pickup bed is there.


- 18 replies
-
- 3
-
-
- c1 models
- land rover
- (and 1 more)
-
Land Rover Defender 110
BlrwestSiR replied to BlrwestSiR's topic in LSM 1/35 and Larger Work In Progress
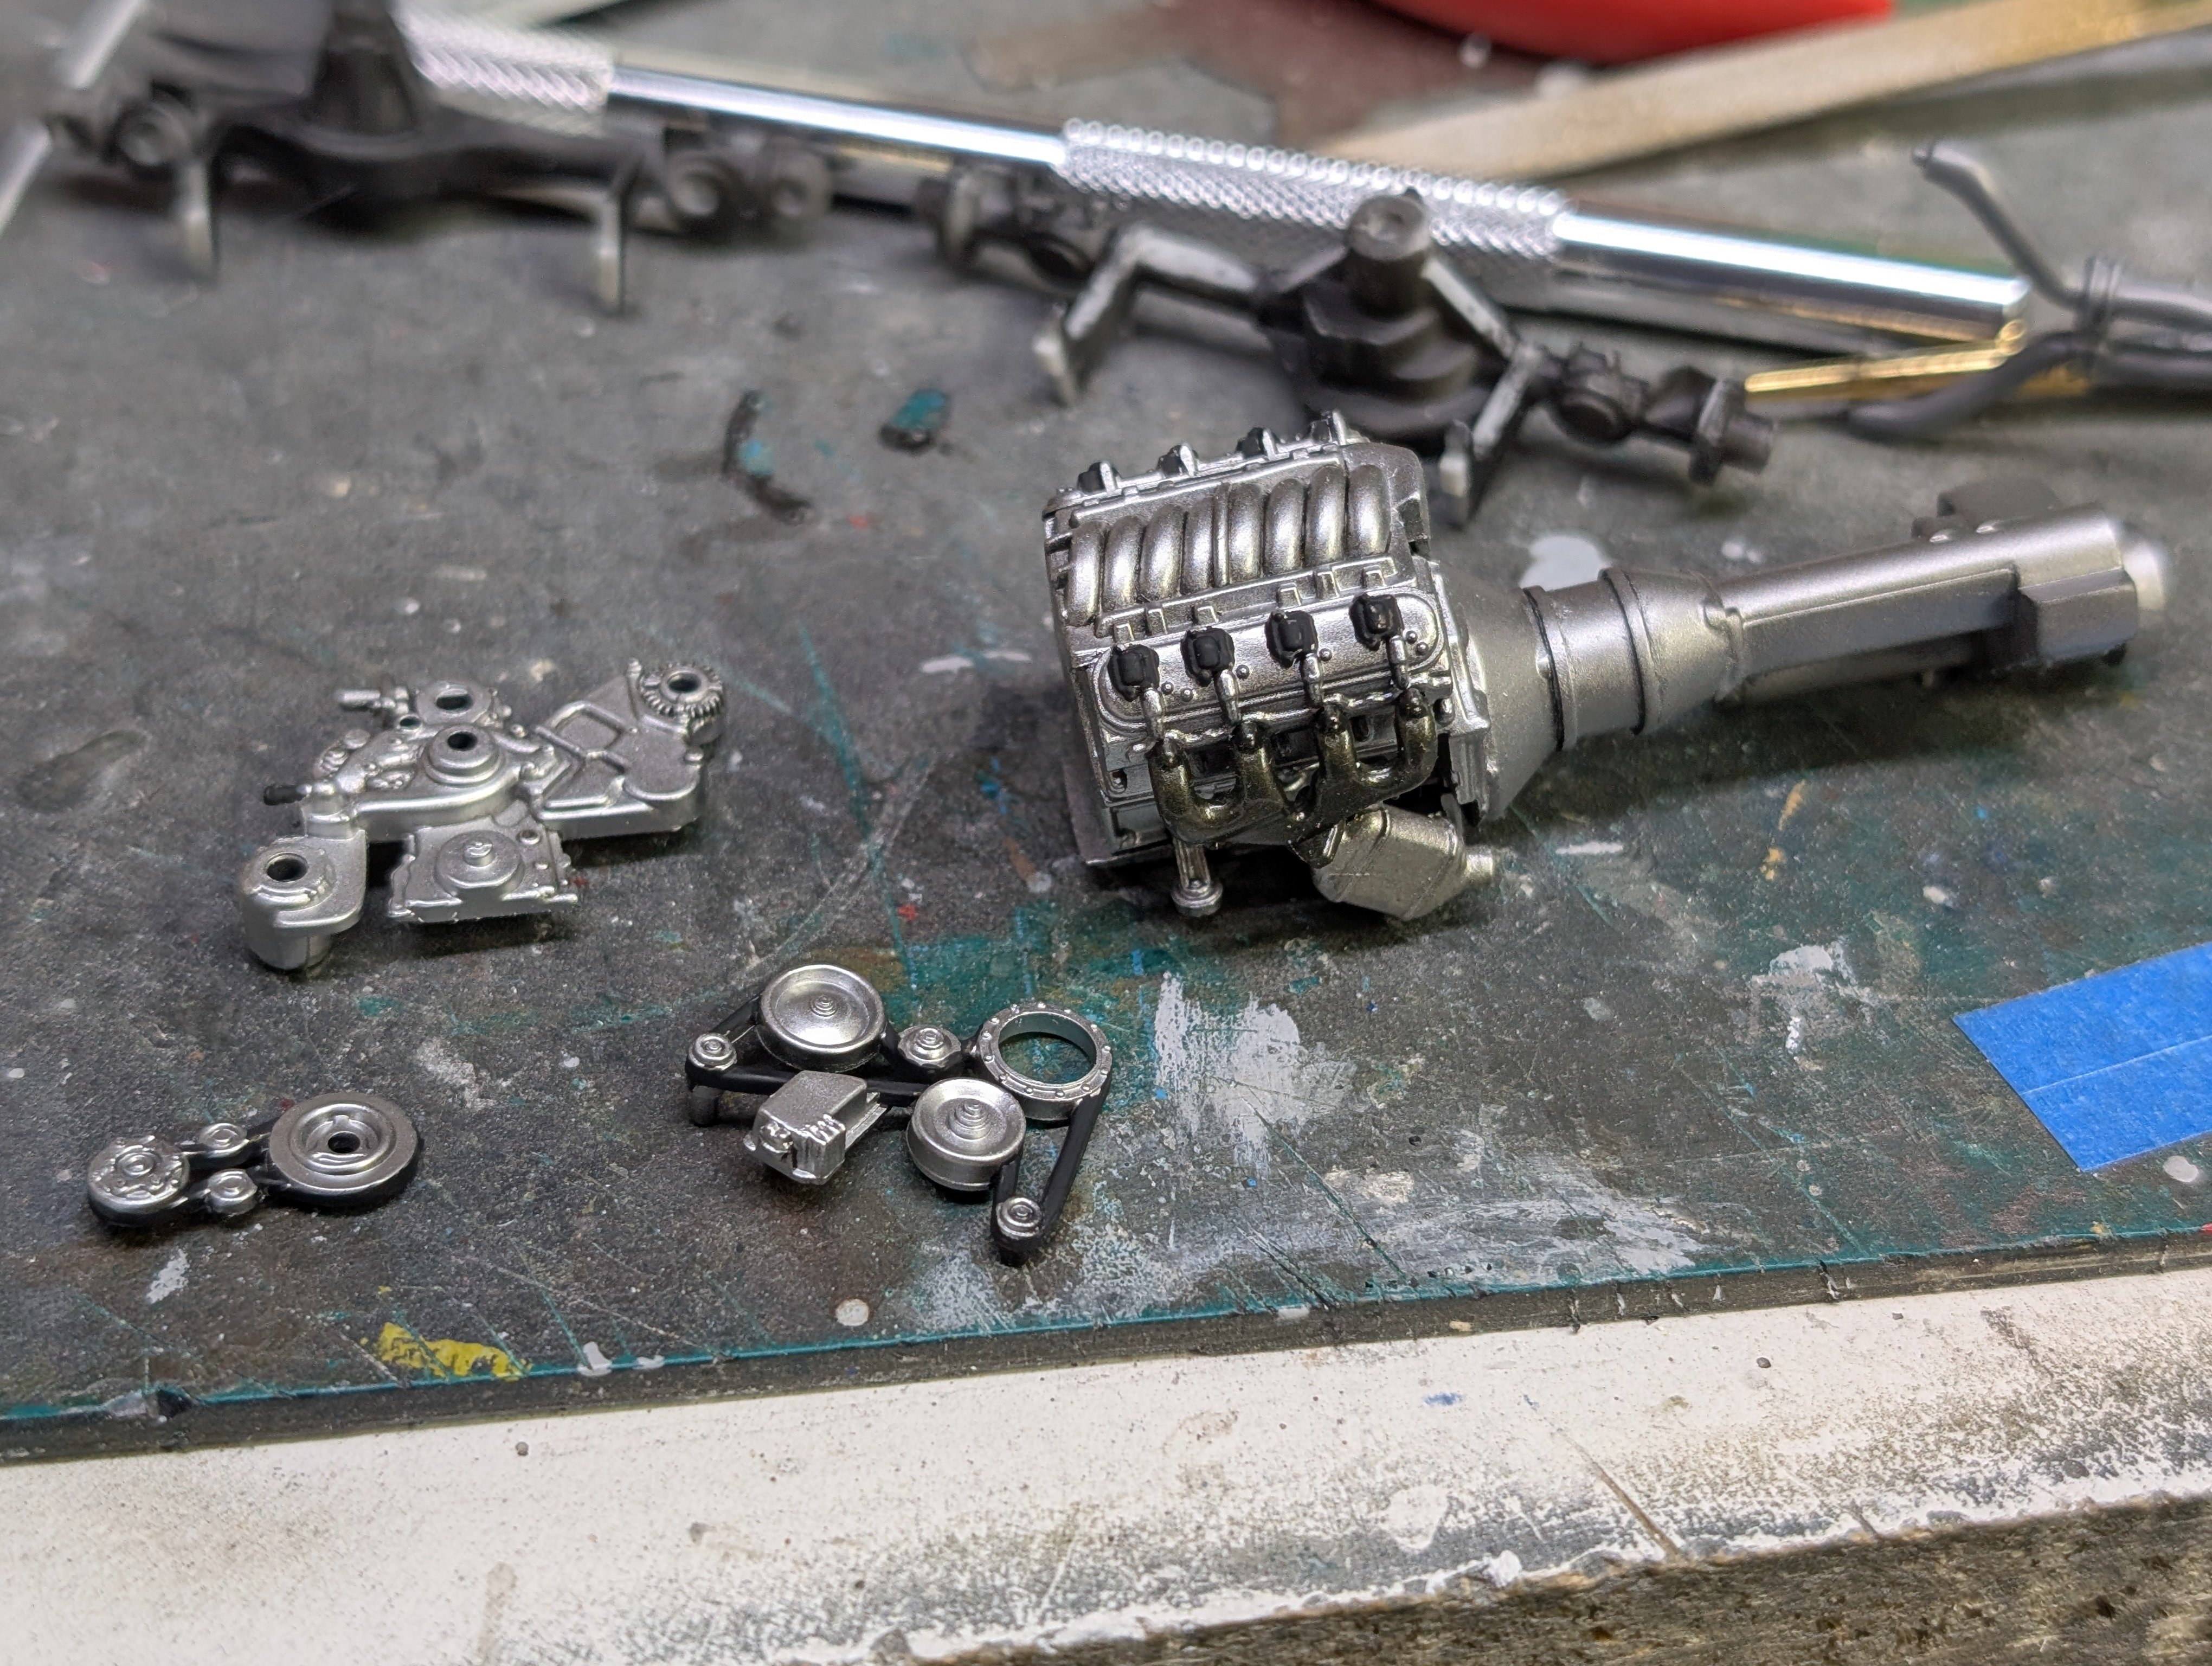
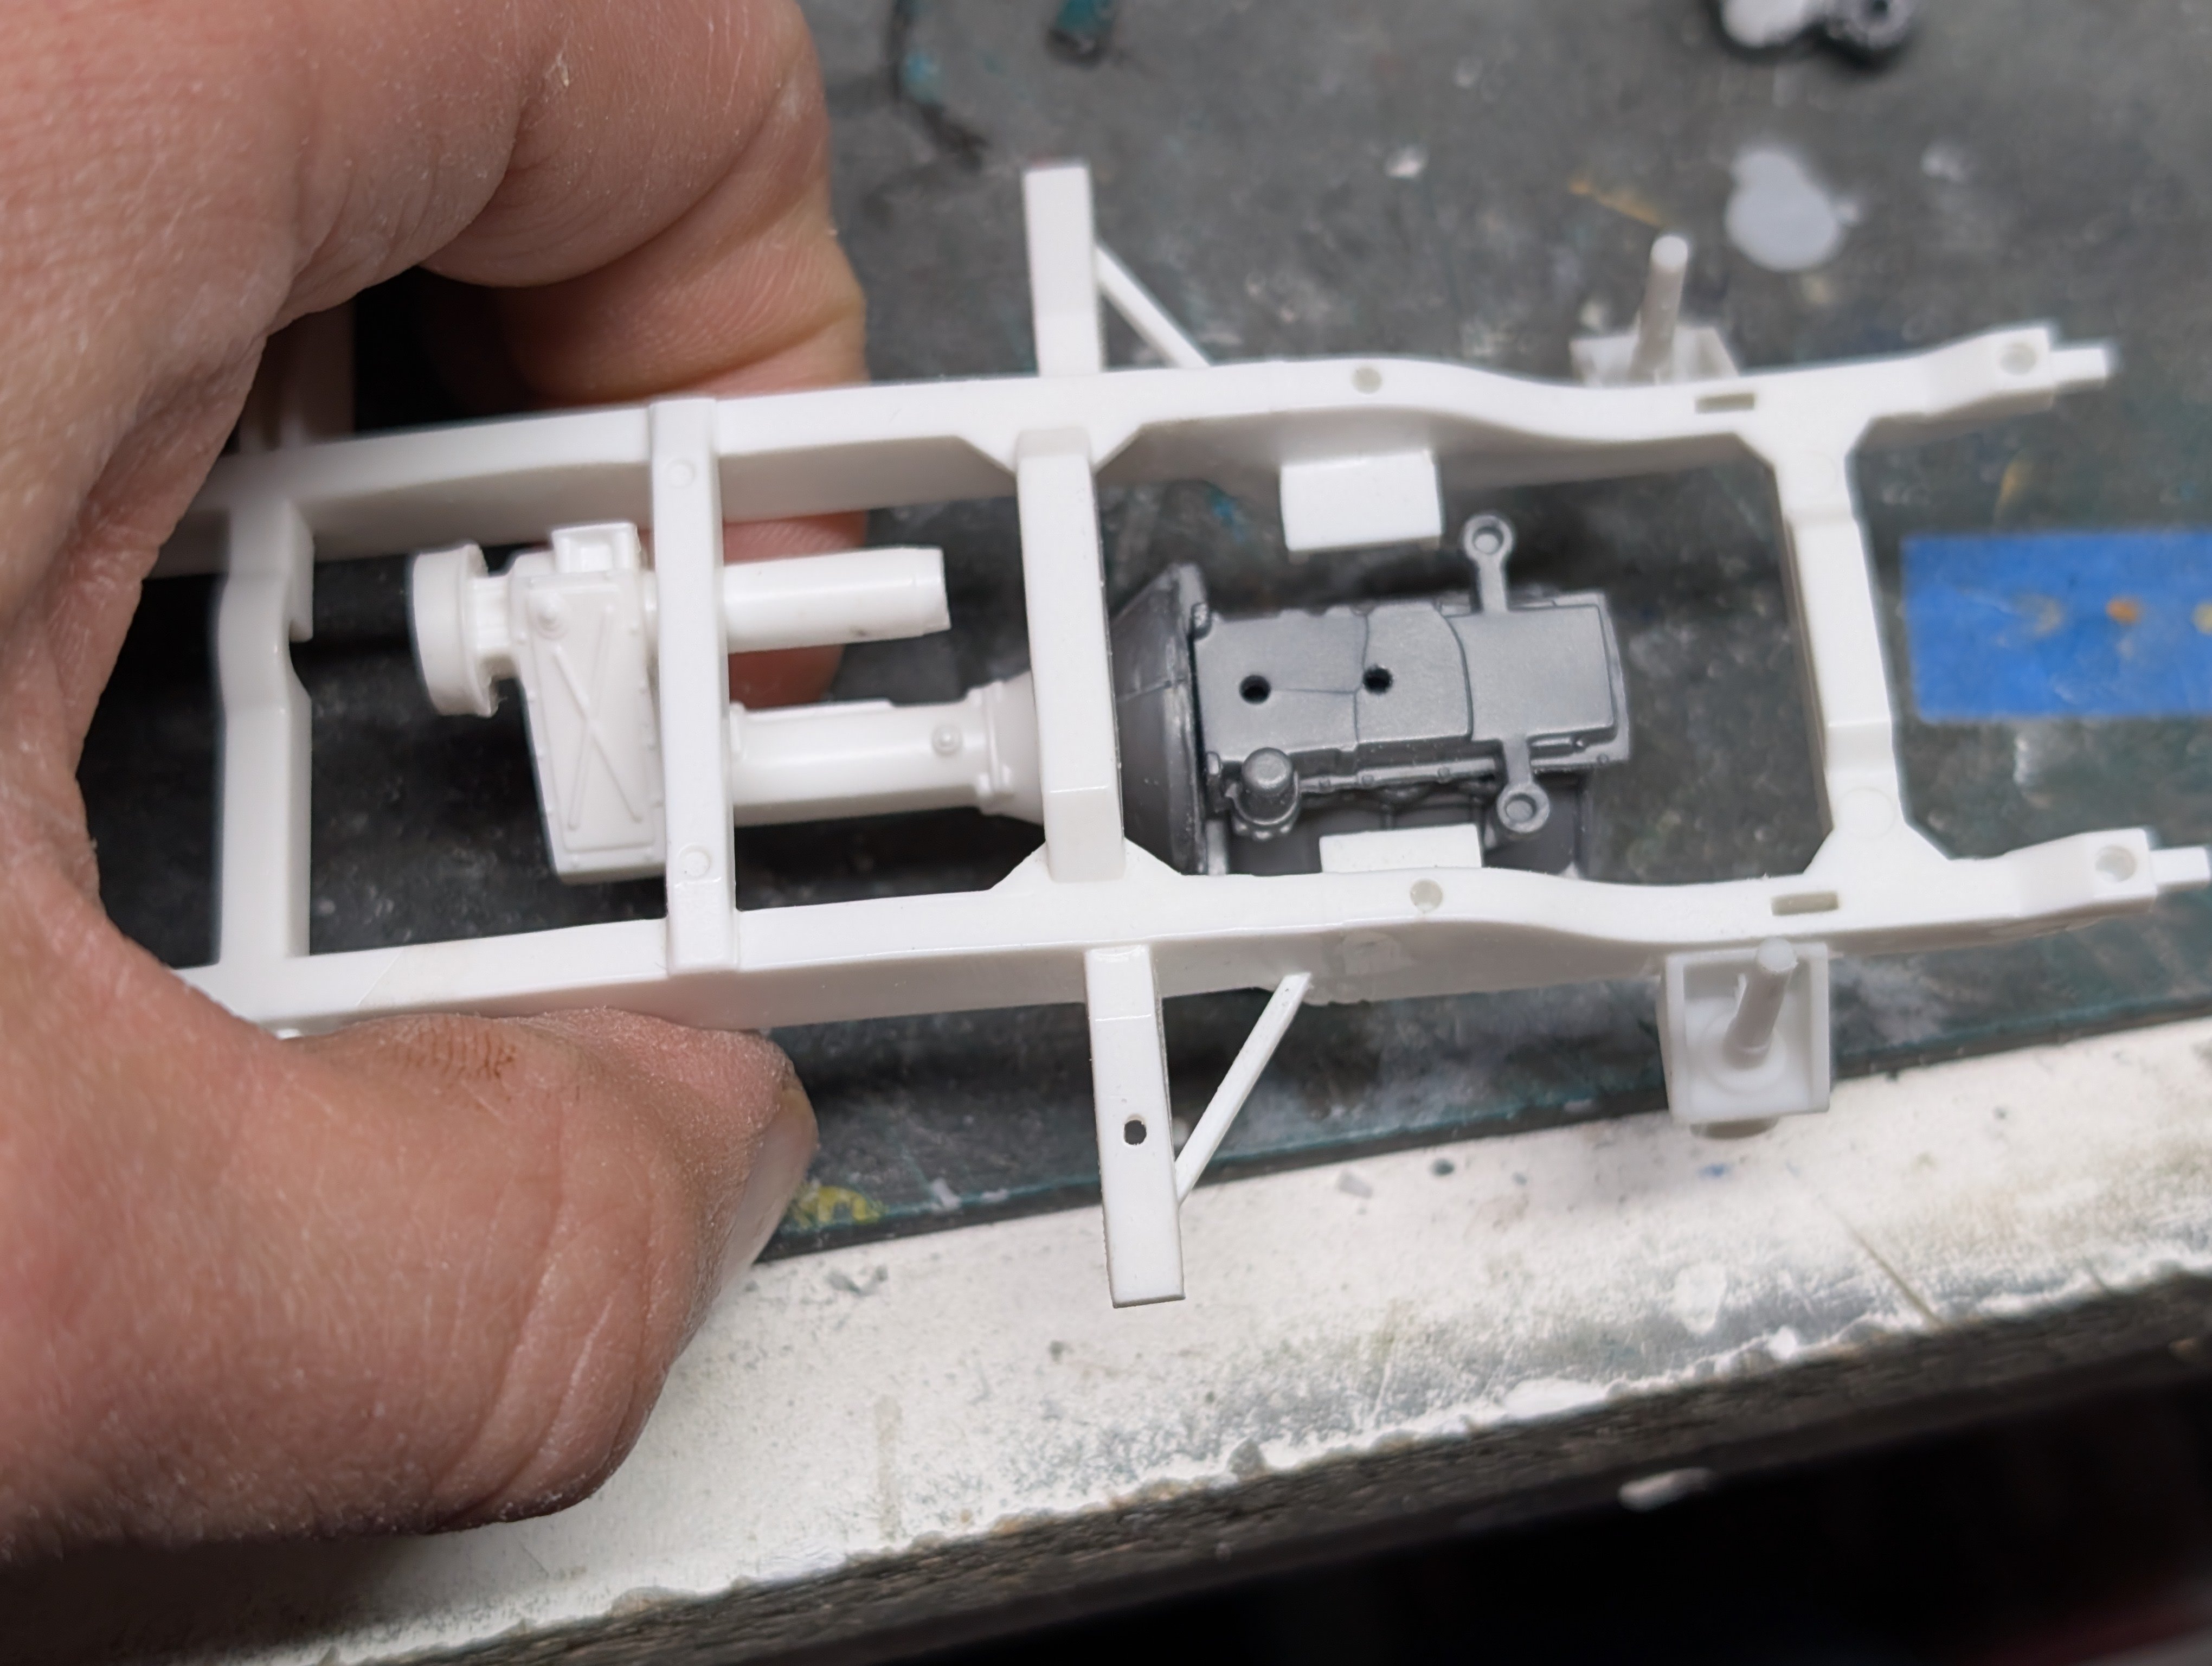
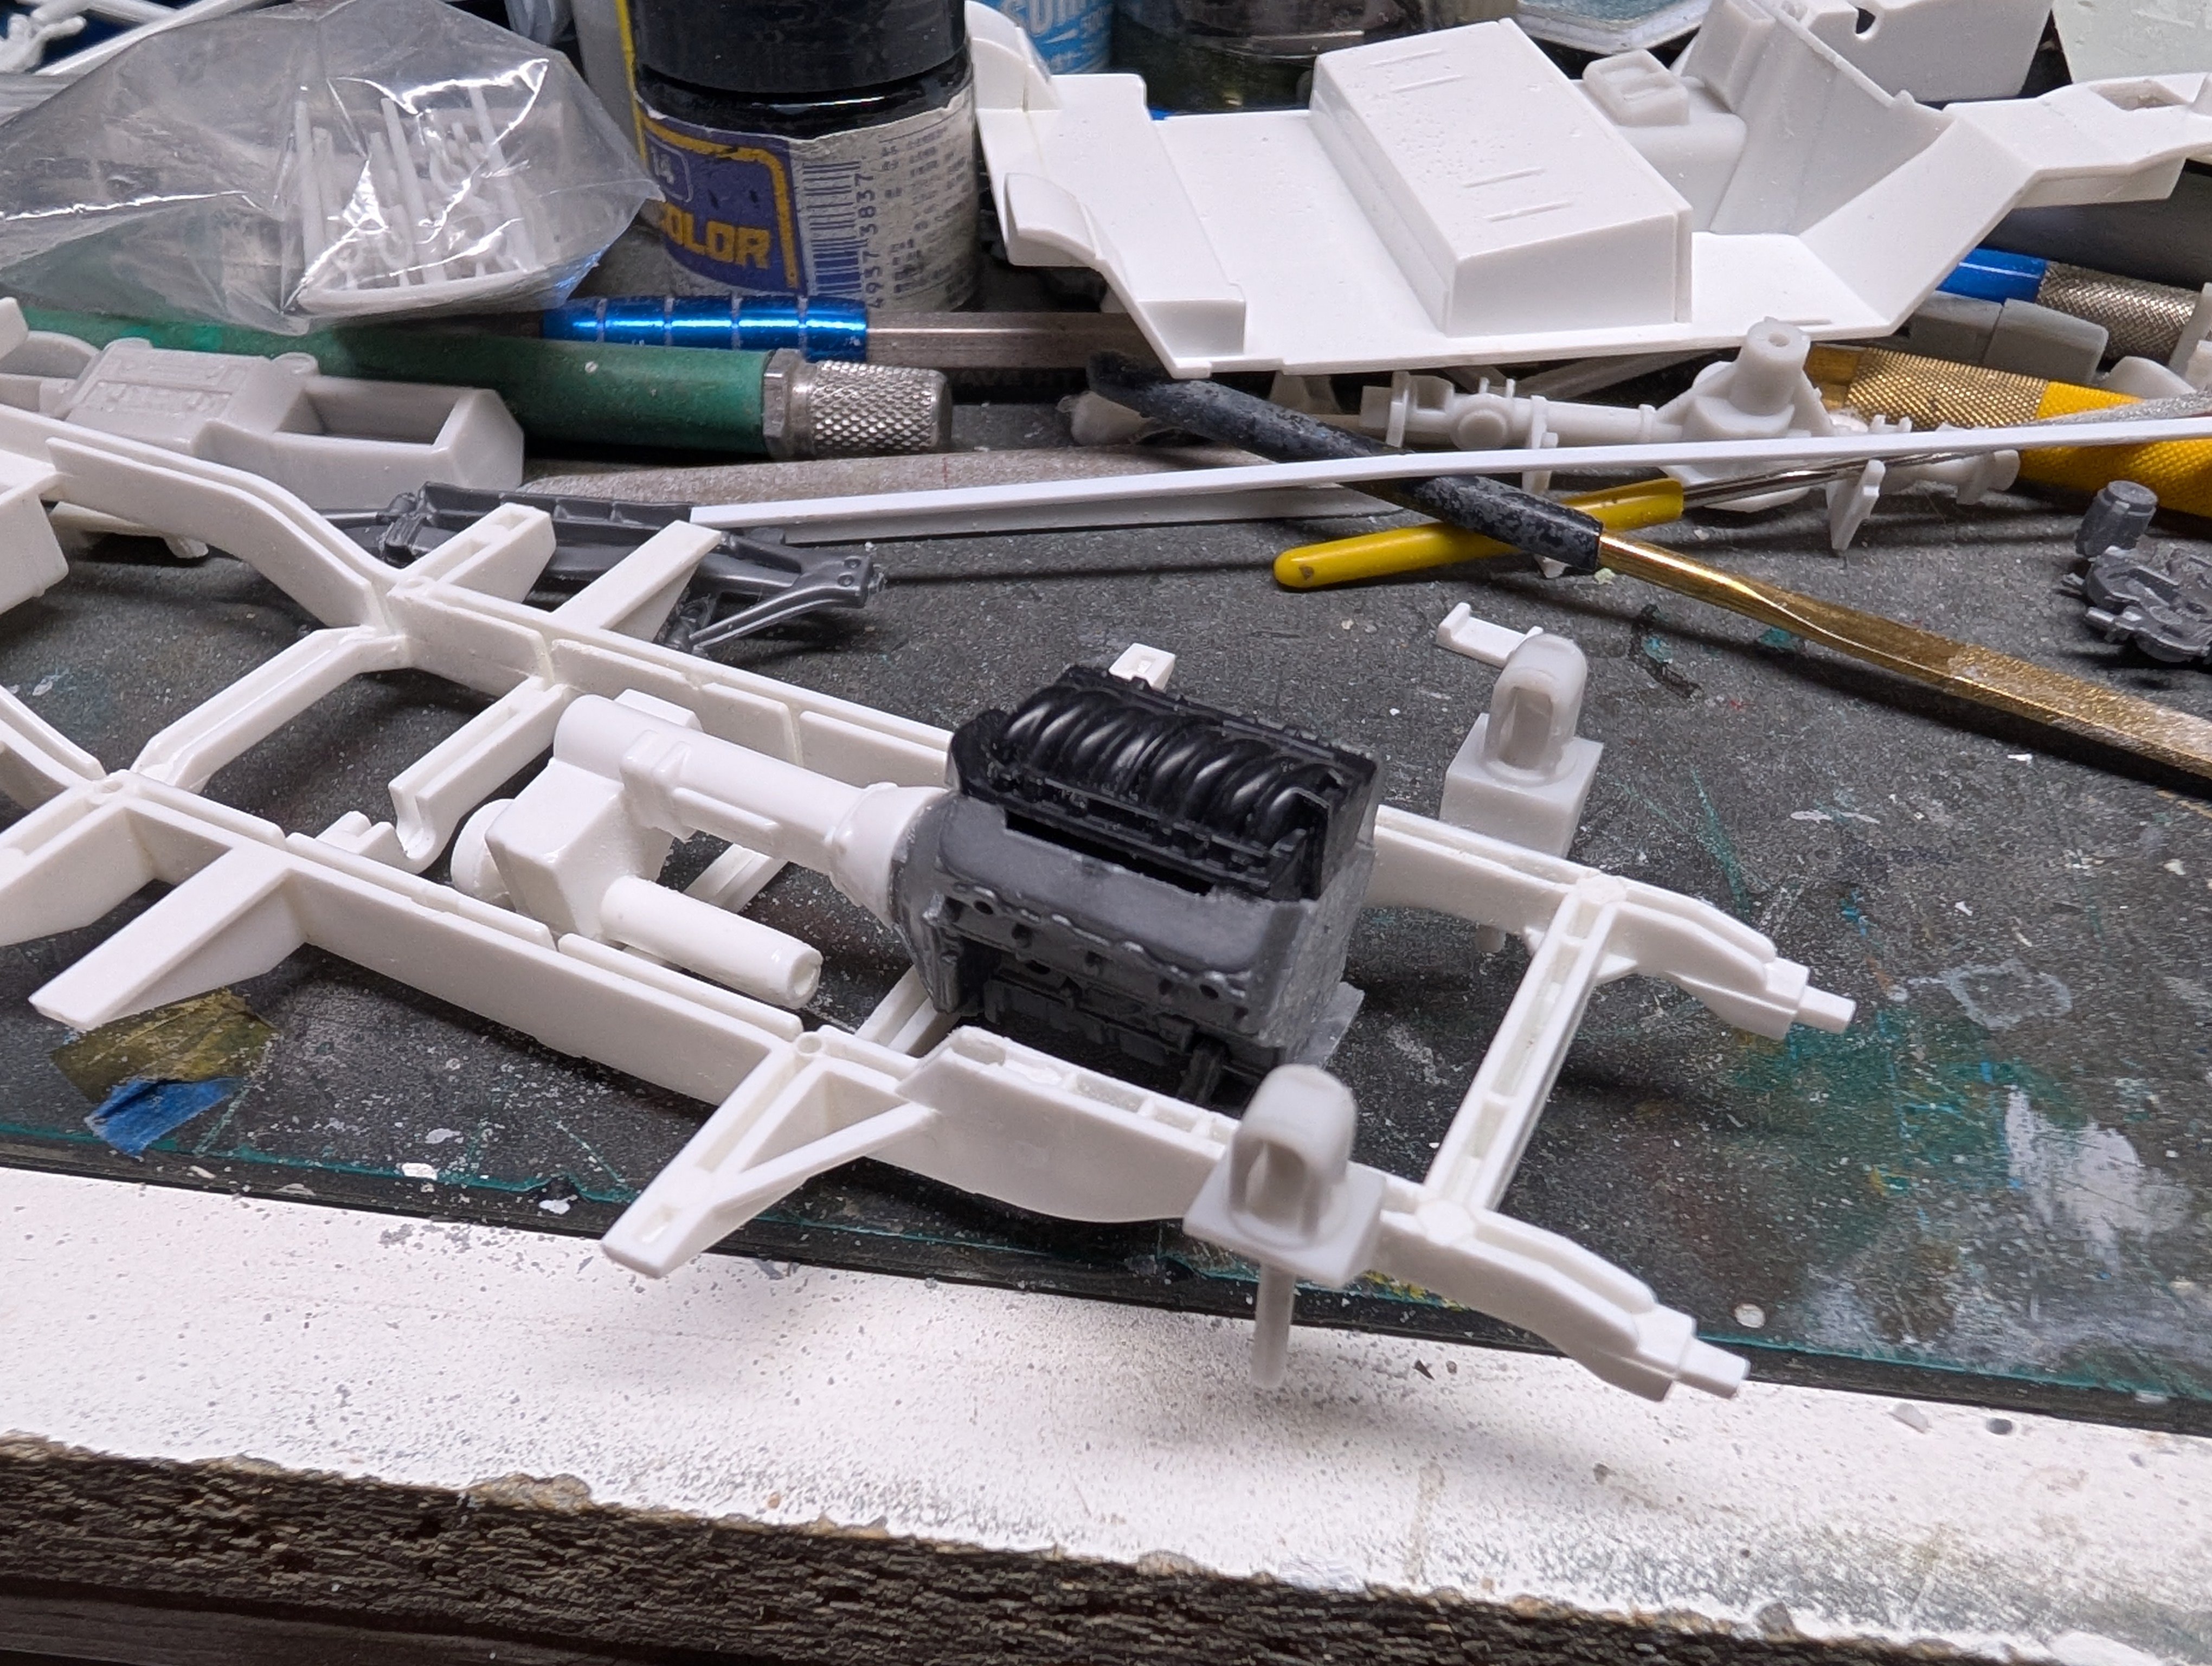
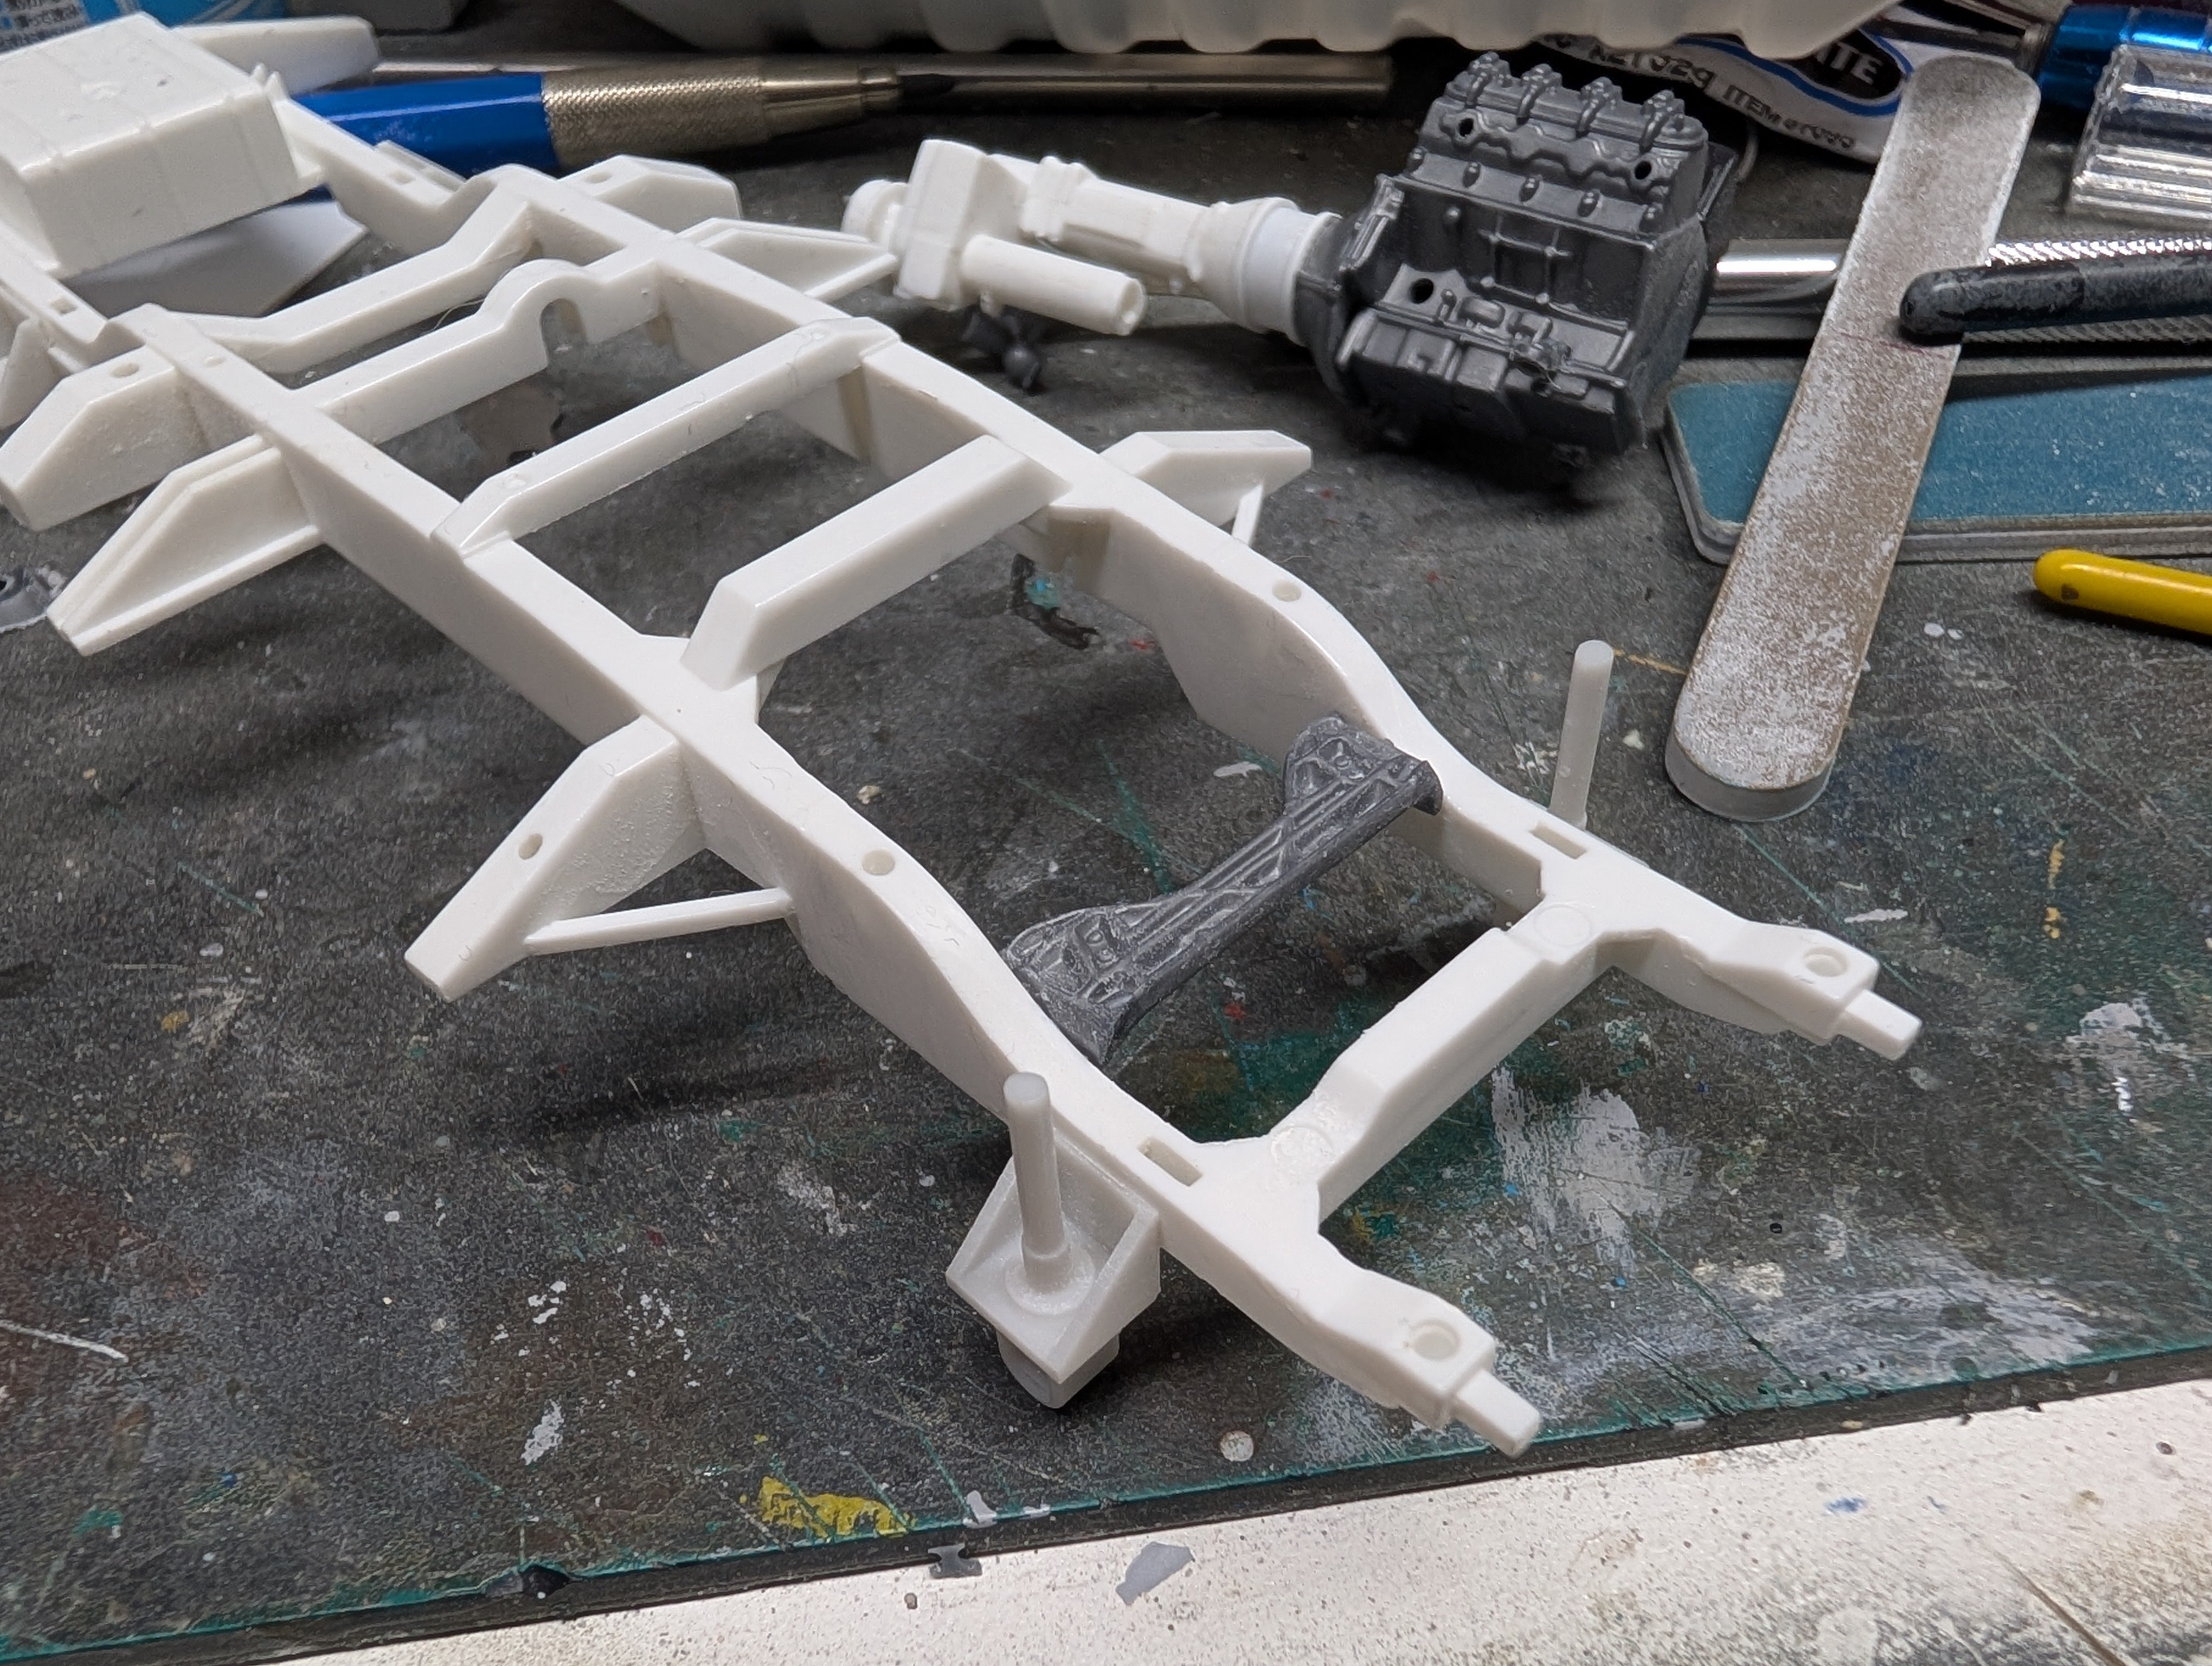
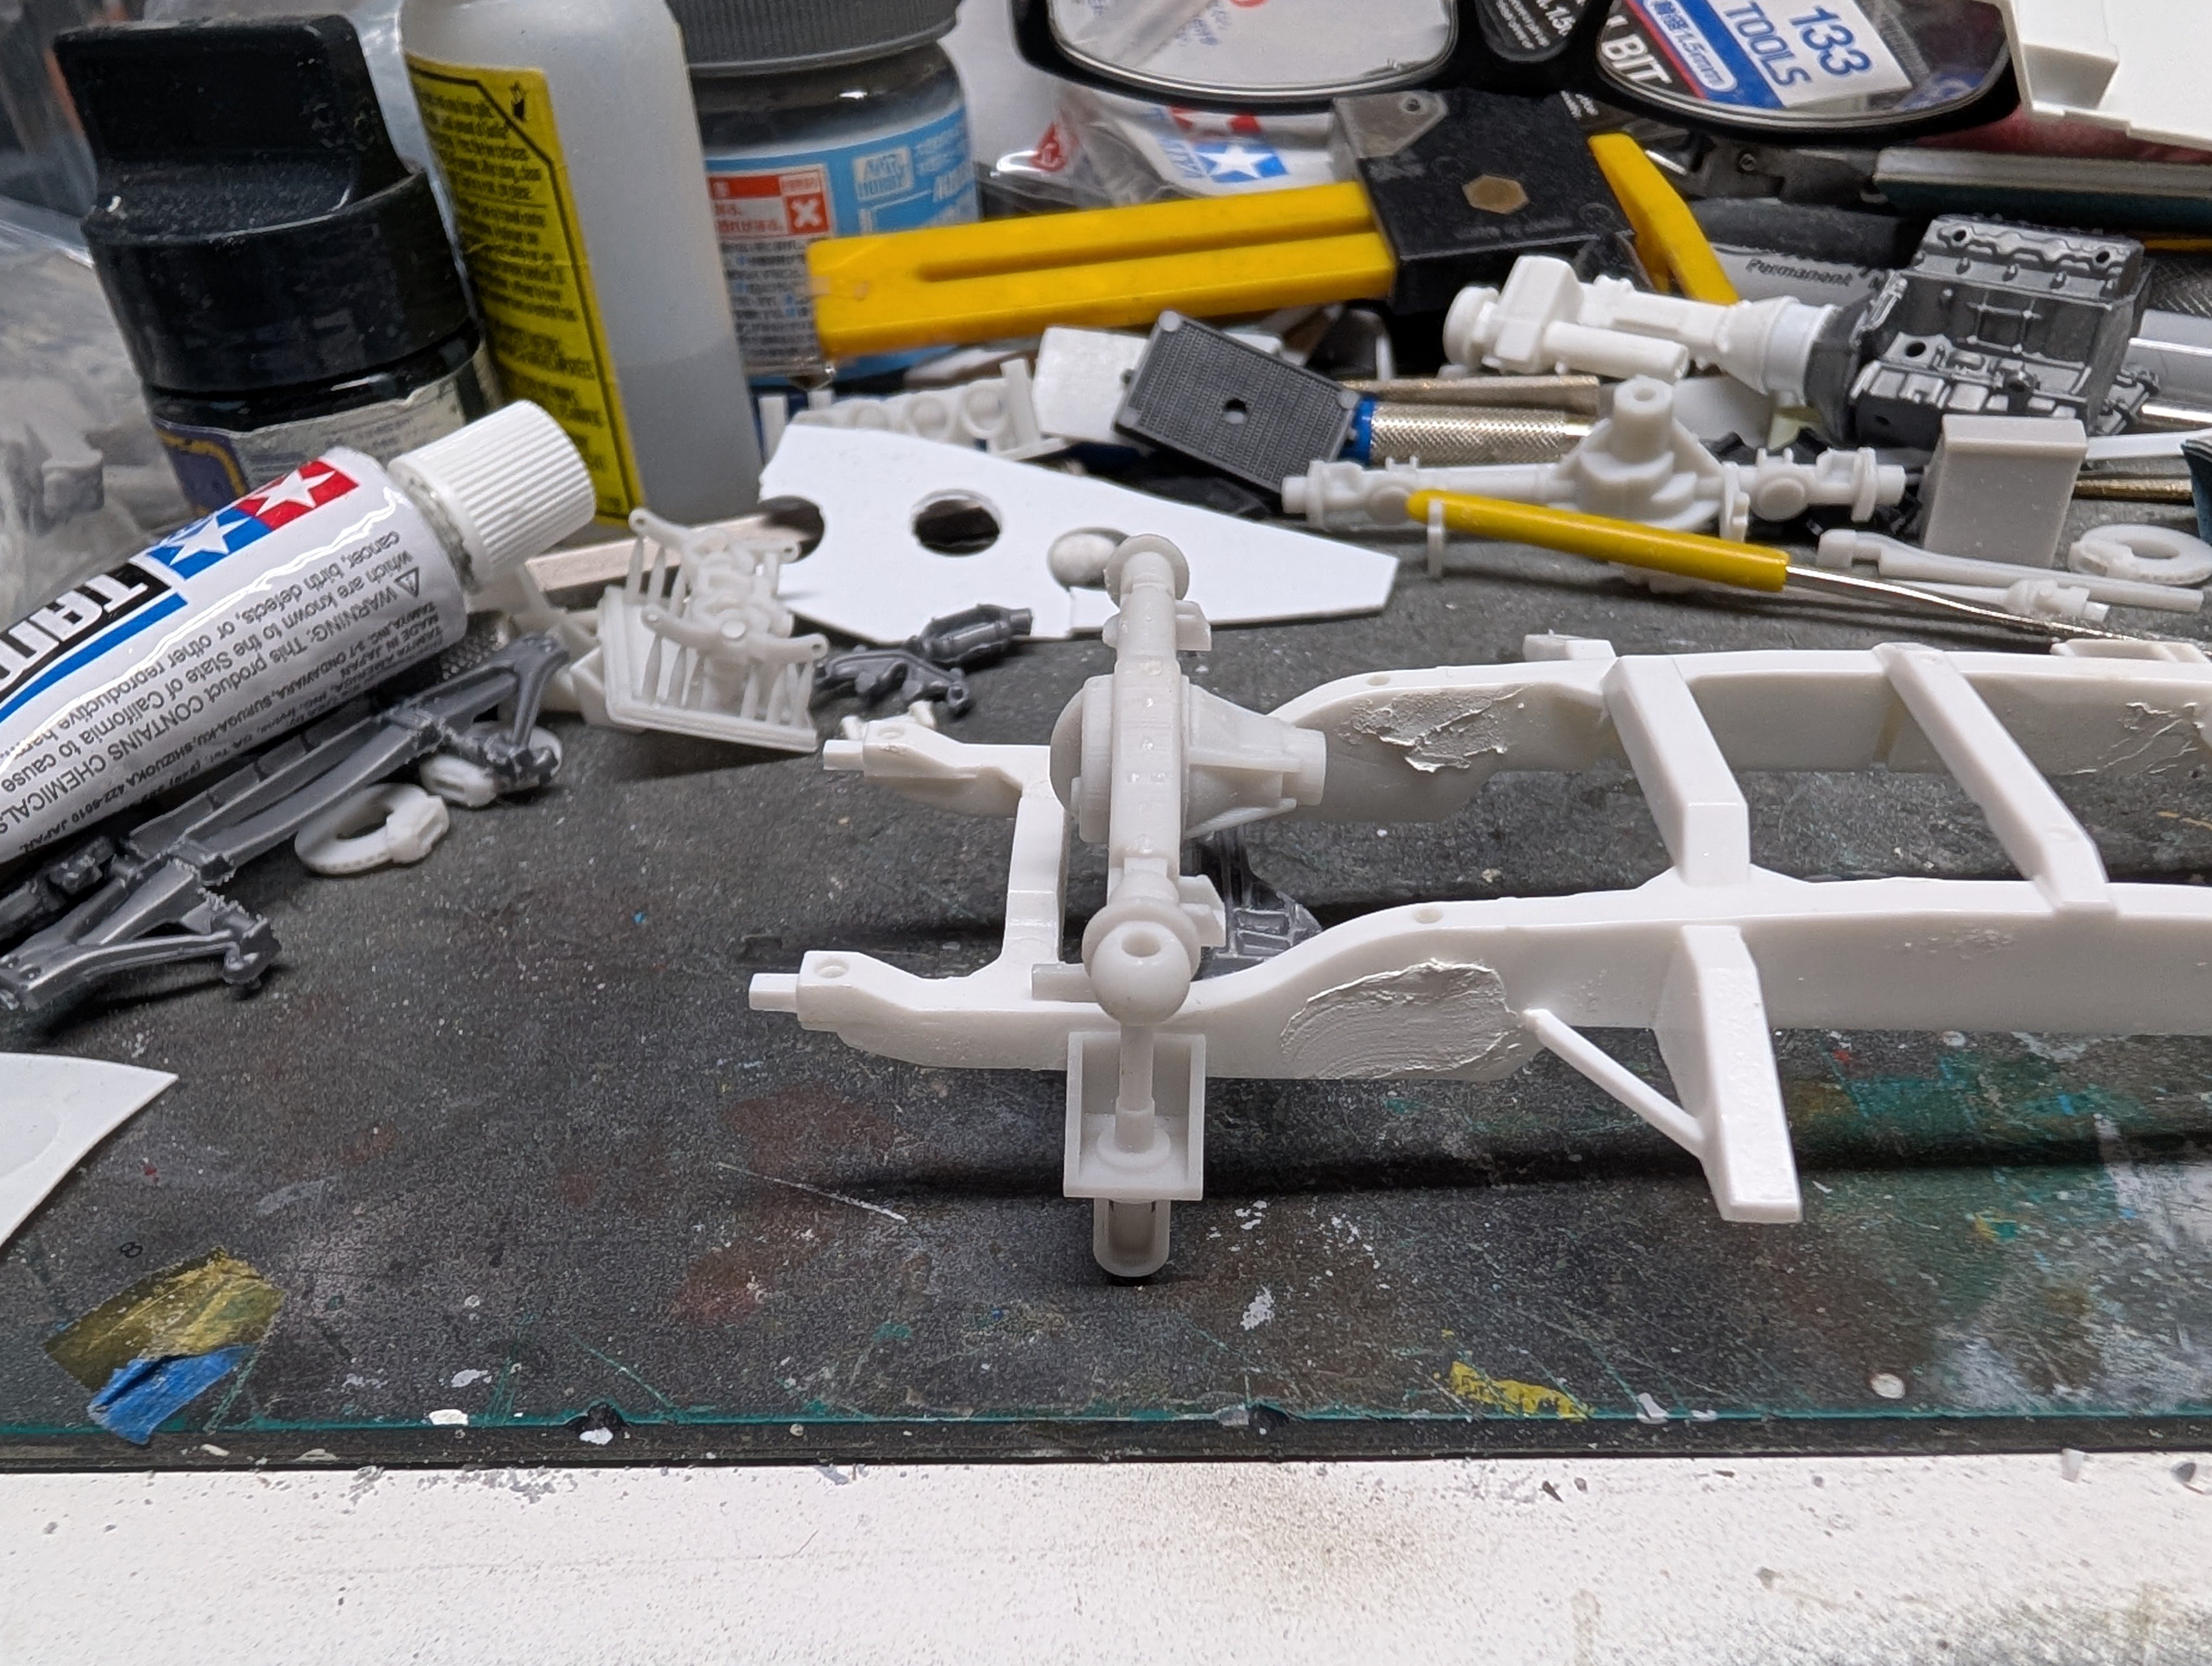
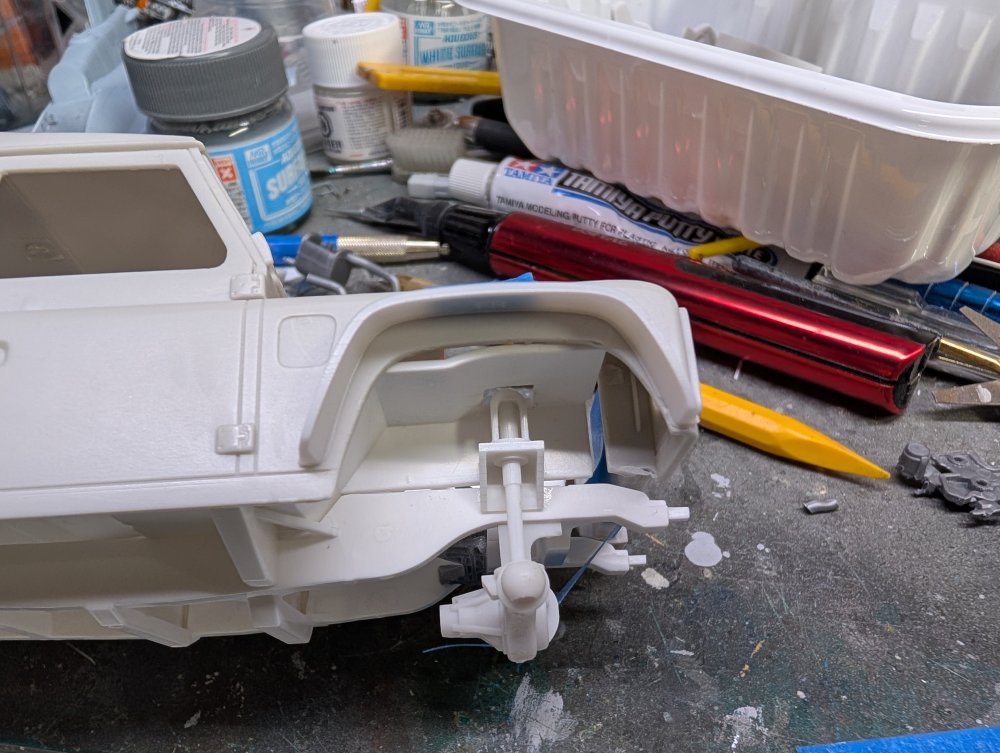
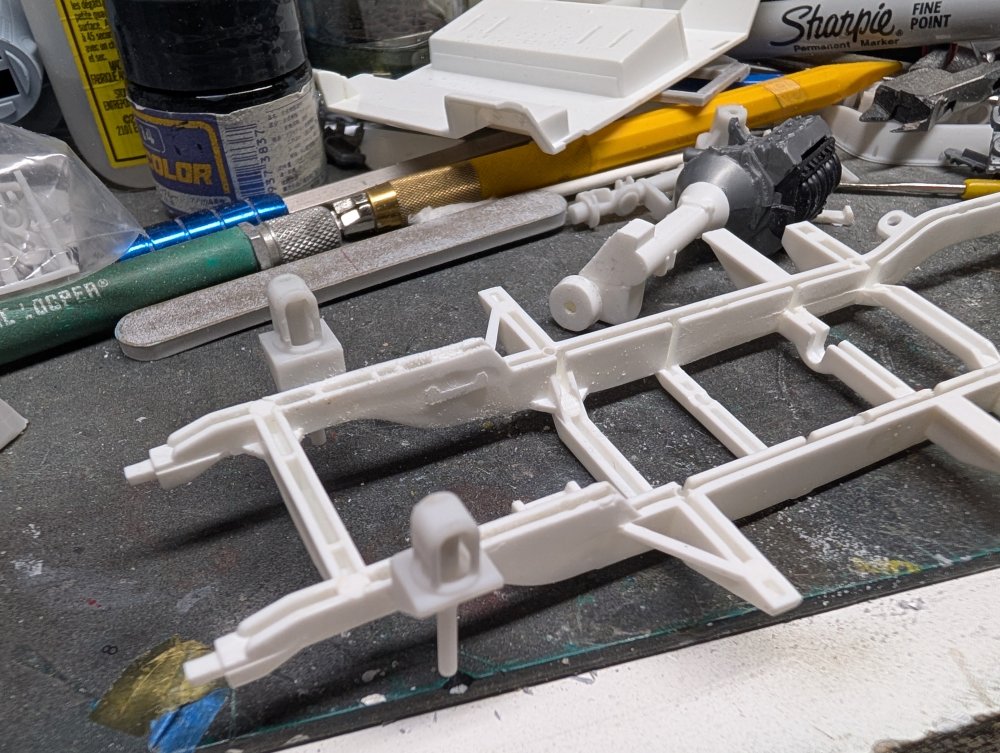
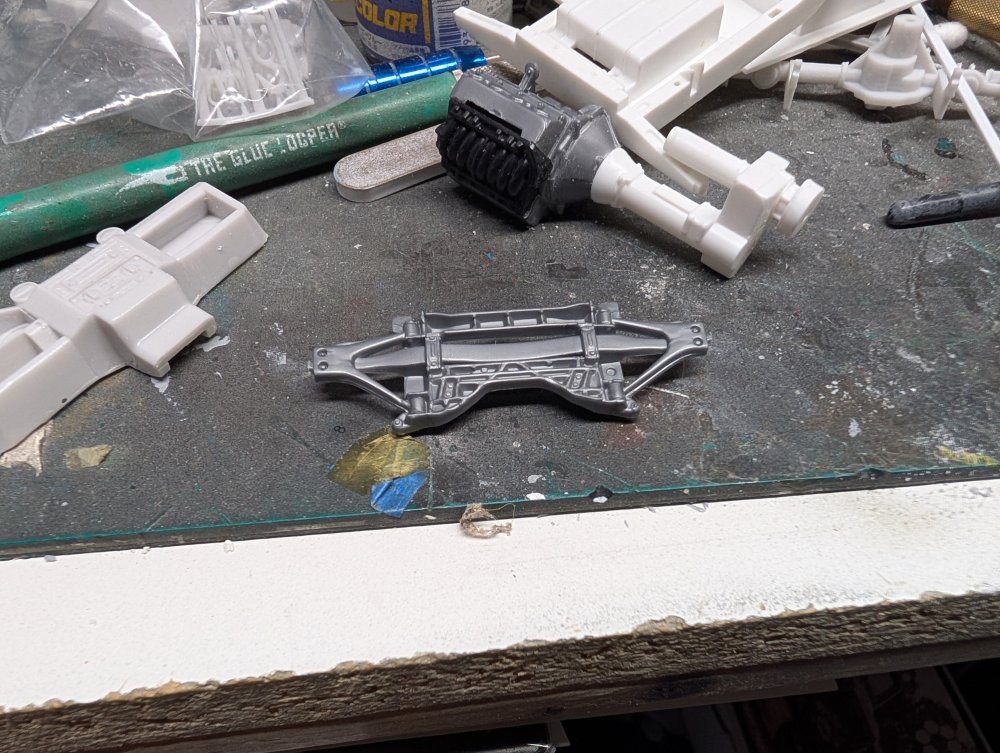
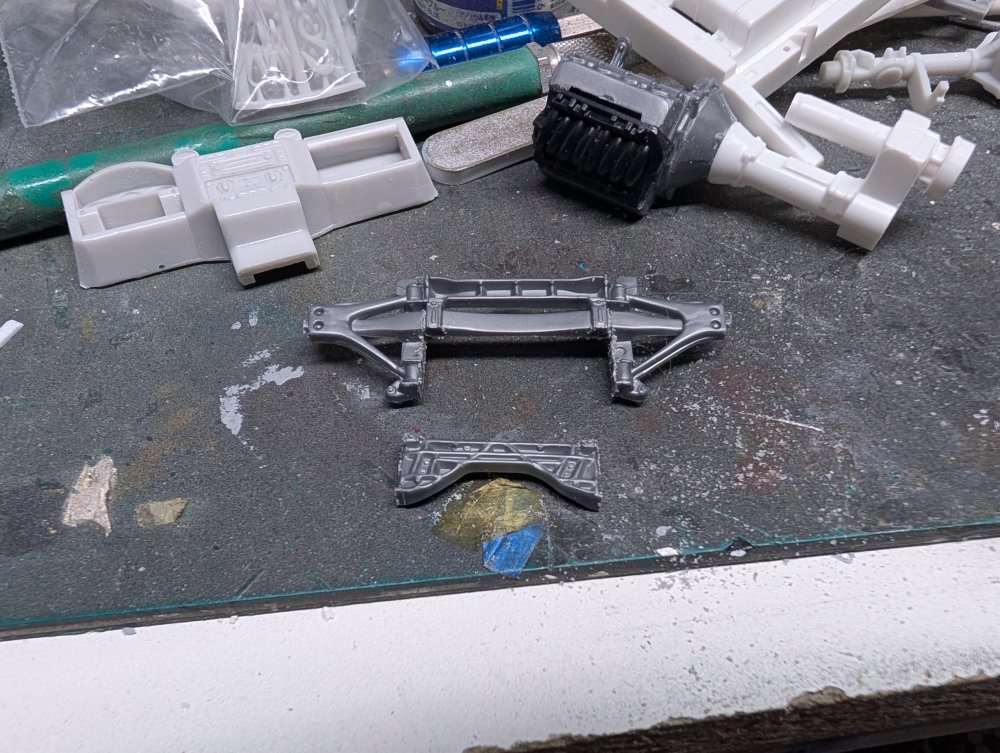
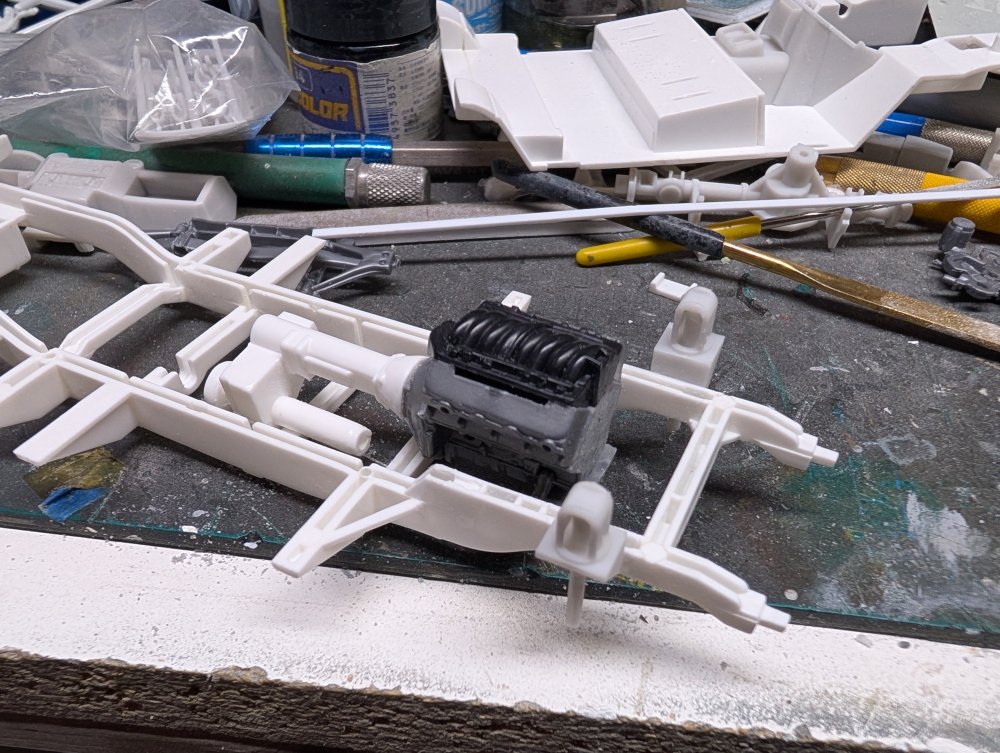
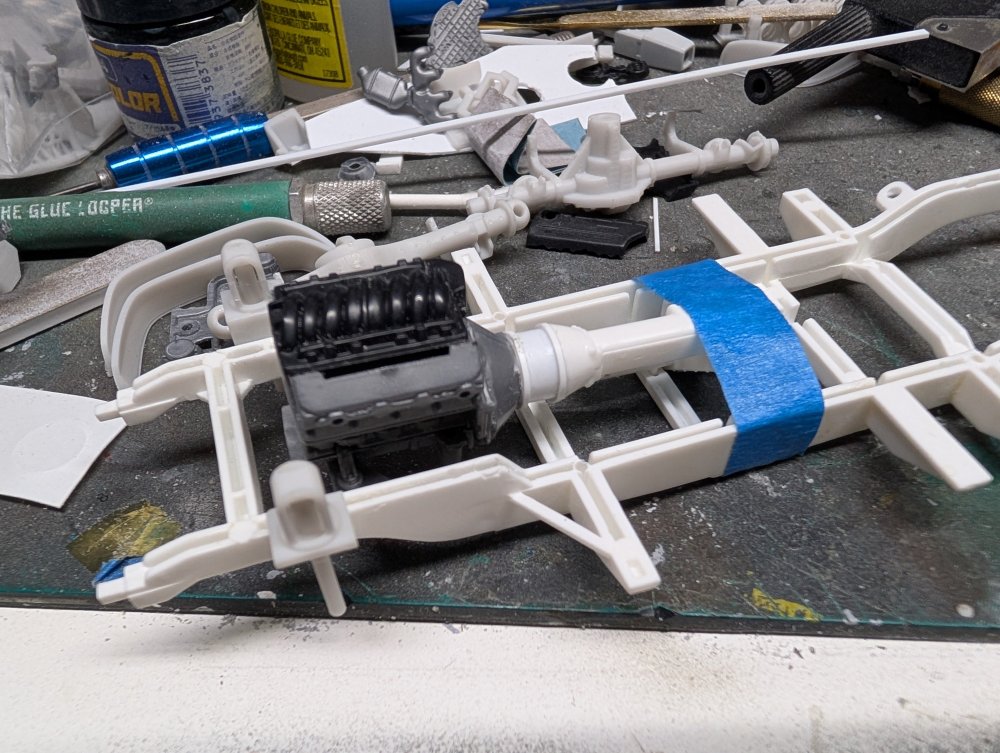
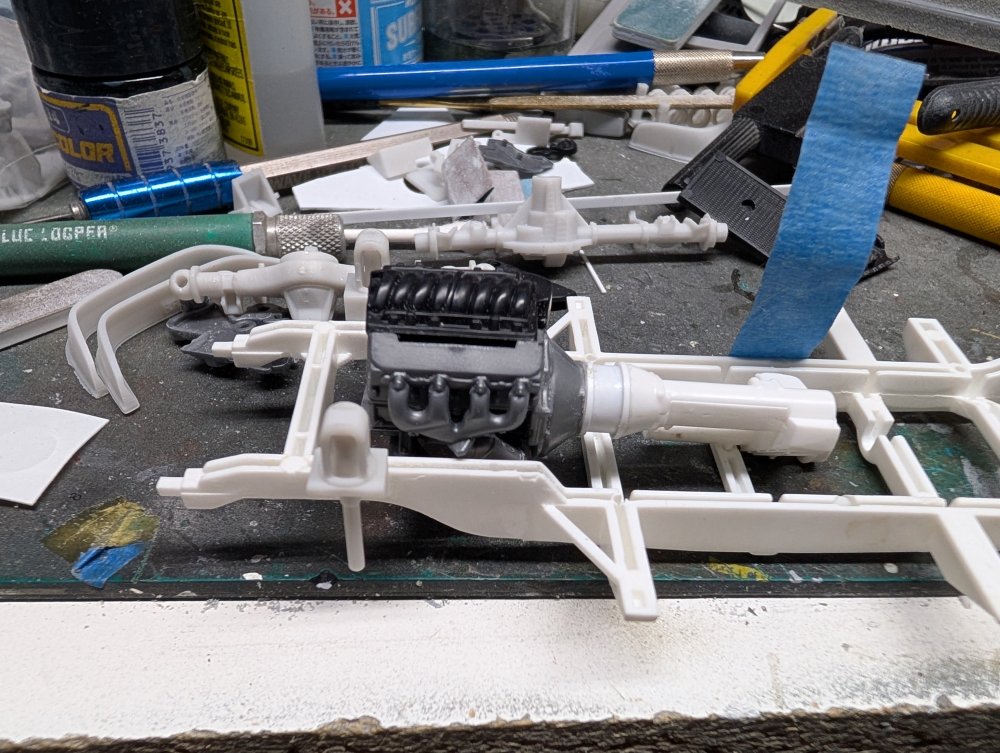
Engine time. I assembled the engine block and heads from the donor LS V8 engine. I also cut the transmission housing shorter and grafted on the Land Rover transmission/transfer case. My initial test fit showed that the stock engine mounts would need to be moved/replaced. First step was cutting the existing mounts off the chassis. At this point I decided to replace them as they were not the right shape for a good fit. I decided to use the front subframe from the Corvette kit. I then cut the engine mount crossmember free. Turned out this was pretty much the same width as the Land Rover chassis rails. The crossmember glued in place. Test fitting the body with the engine now in place showed that the engine was too far back and didn't have enough clearance around the firewall. I extended the transmission housing a bit and moved the crossmember forward a bit as well. Now the valve covers will clear the firewall.


- 18 replies
-
- 6
-
-
- c1 models
- land rover
- (and 1 more)
-
Land Rover Defender 110
BlrwestSiR replied to BlrwestSiR's topic in LSM 1/35 and Larger Work In Progress
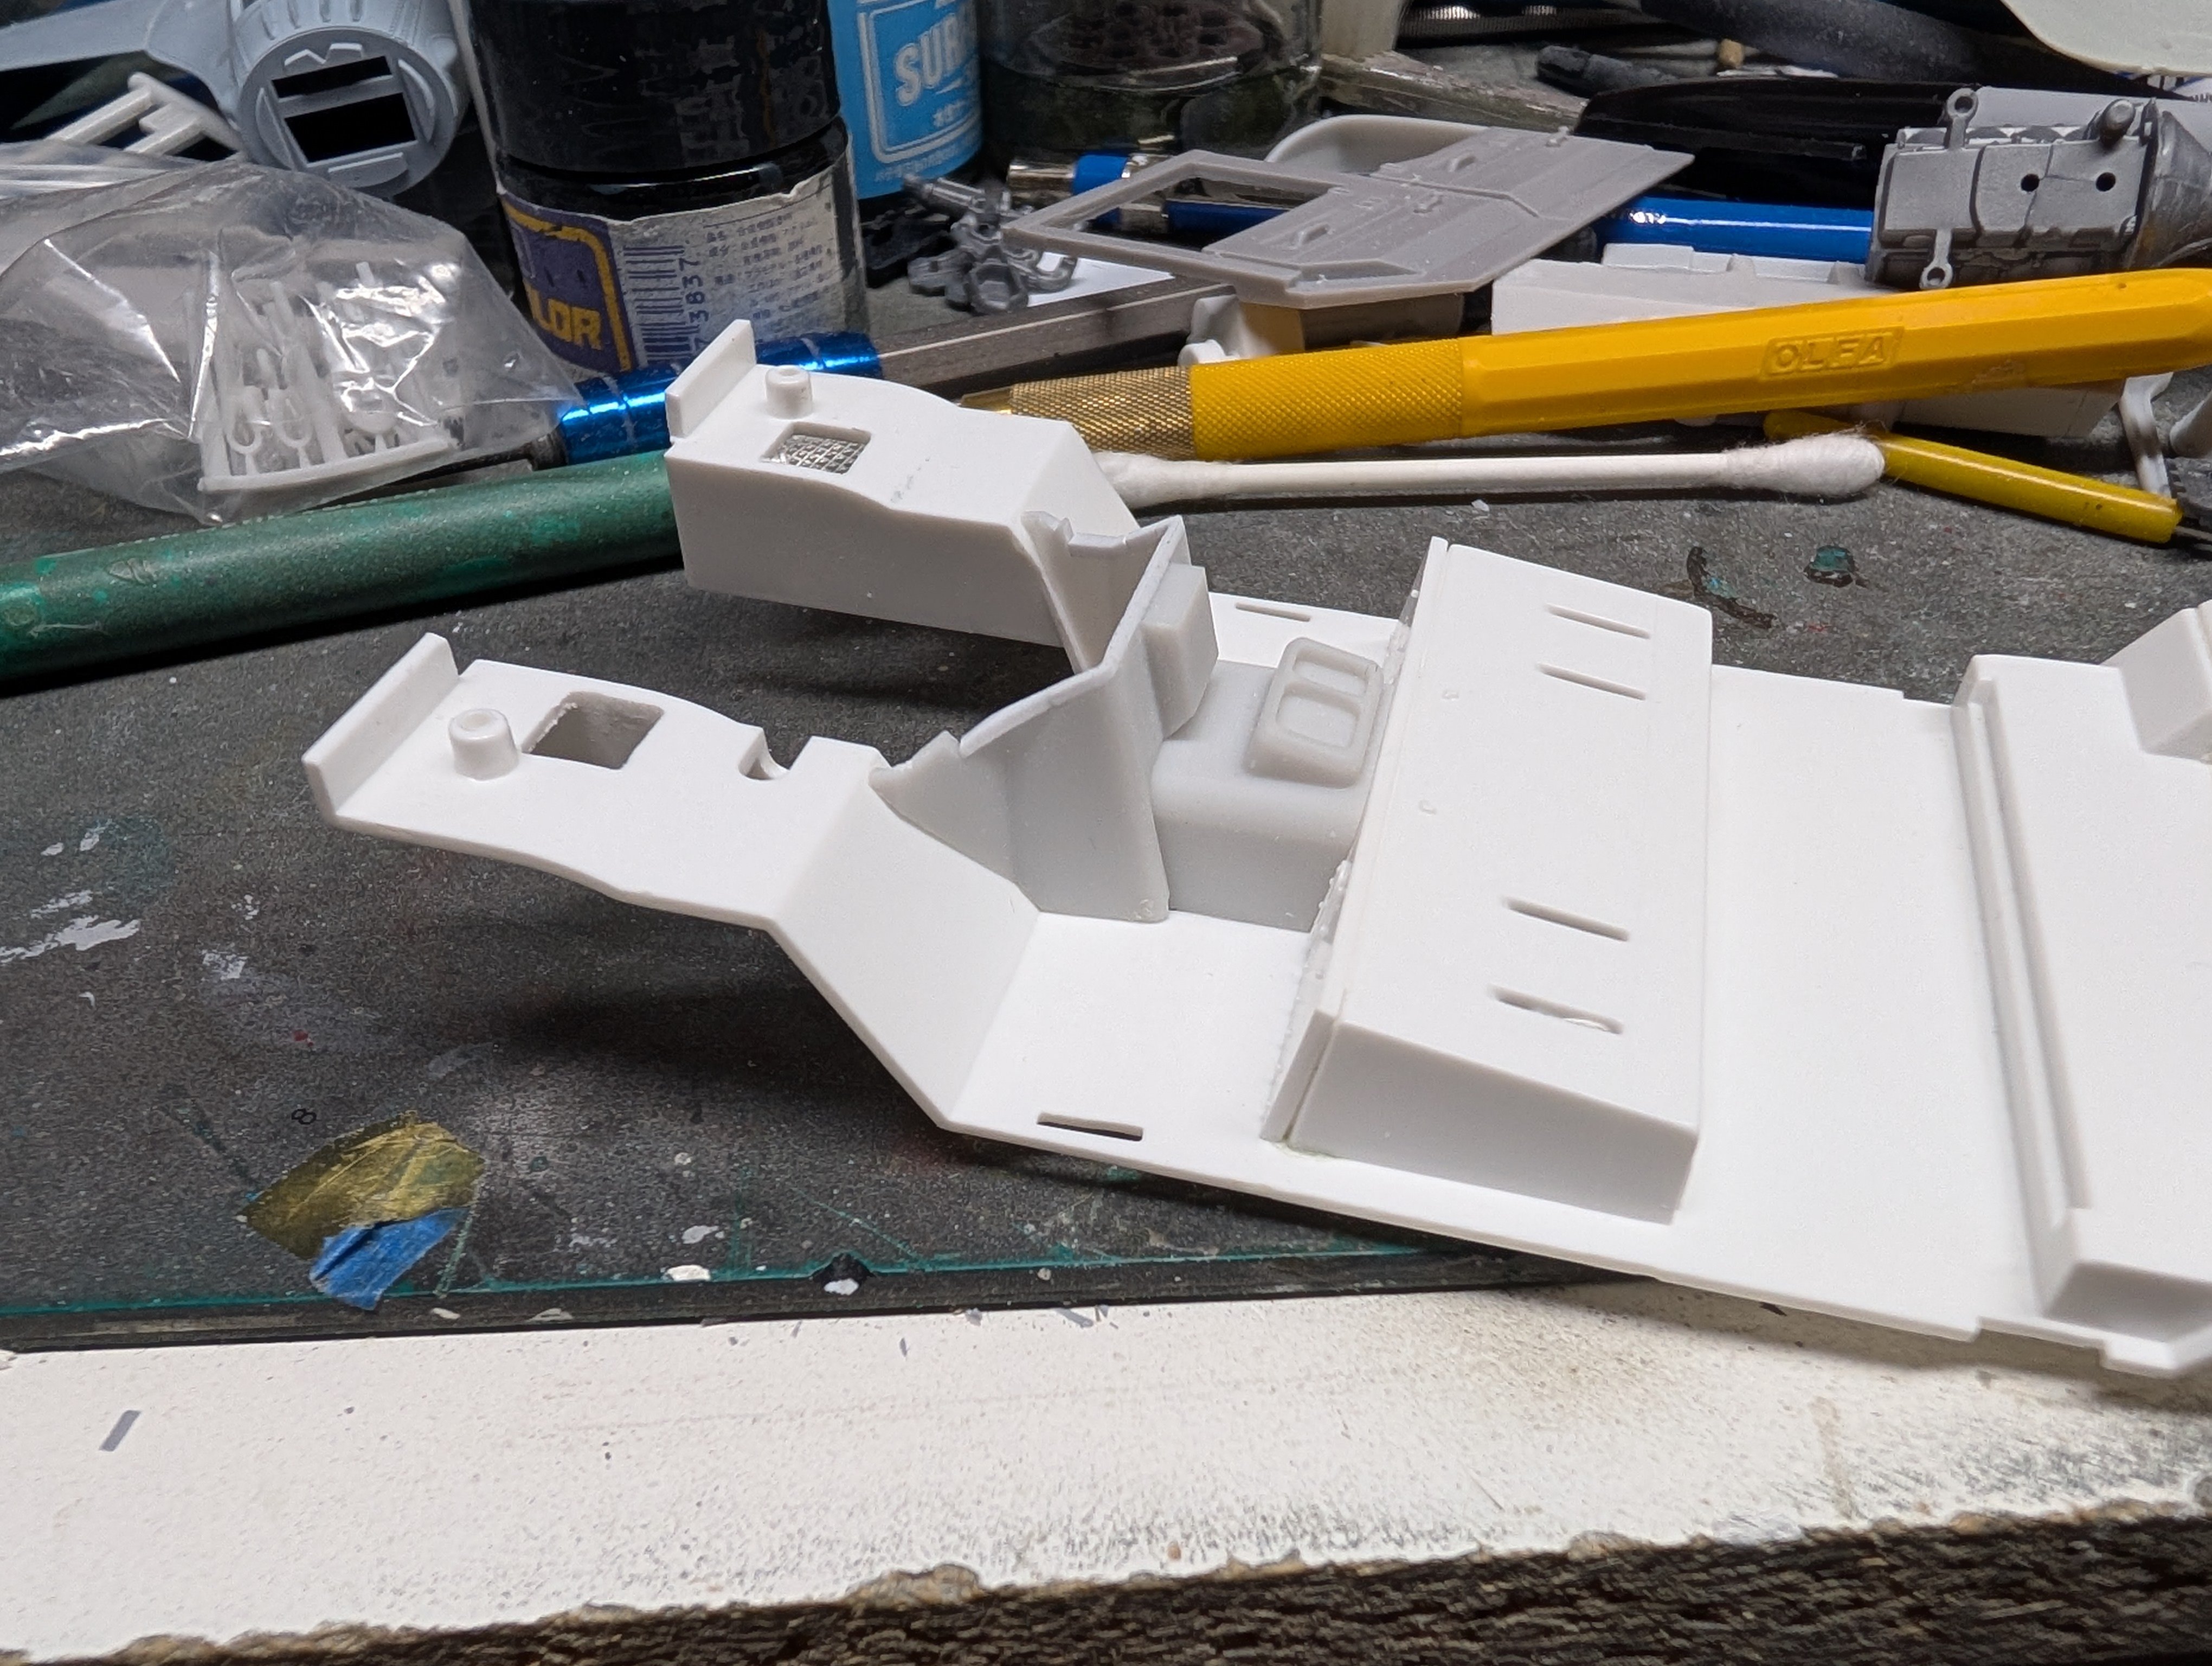
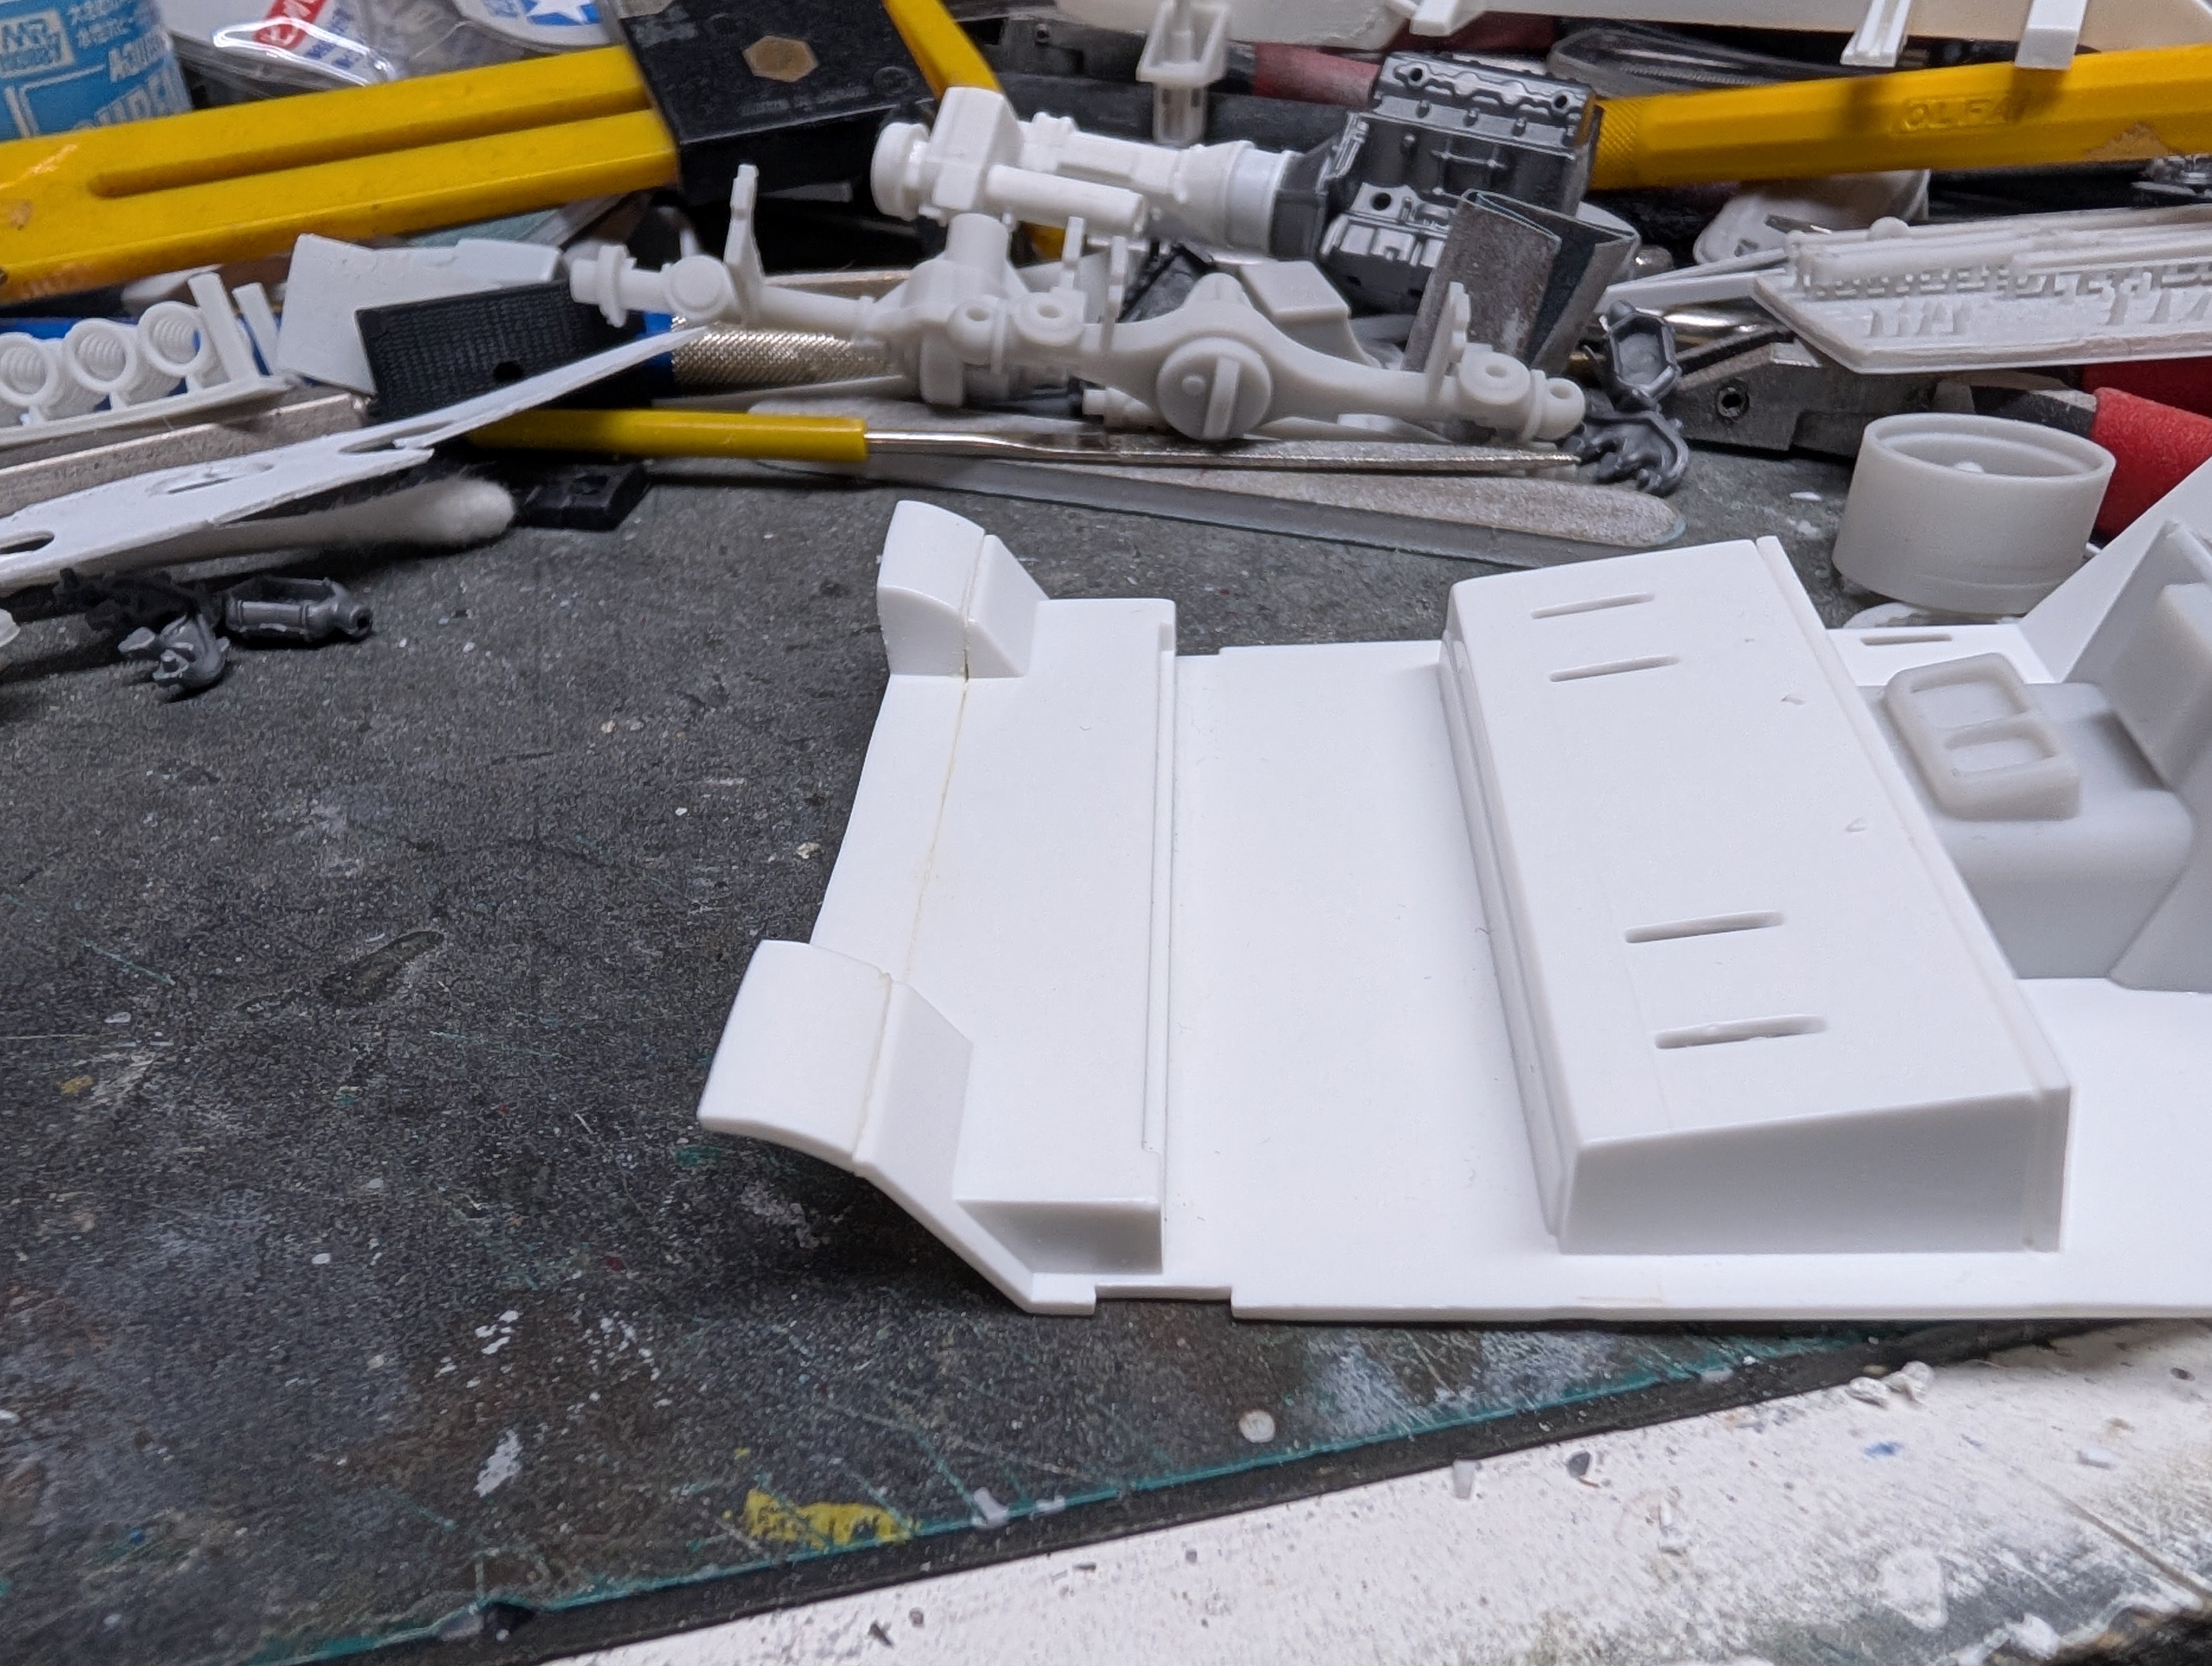
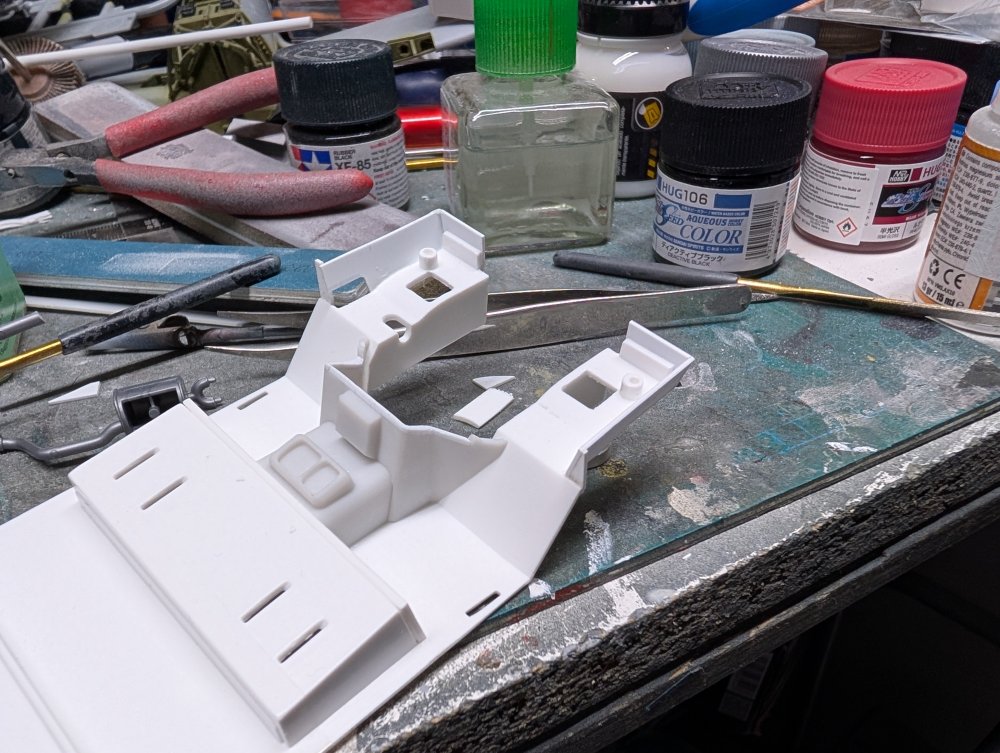
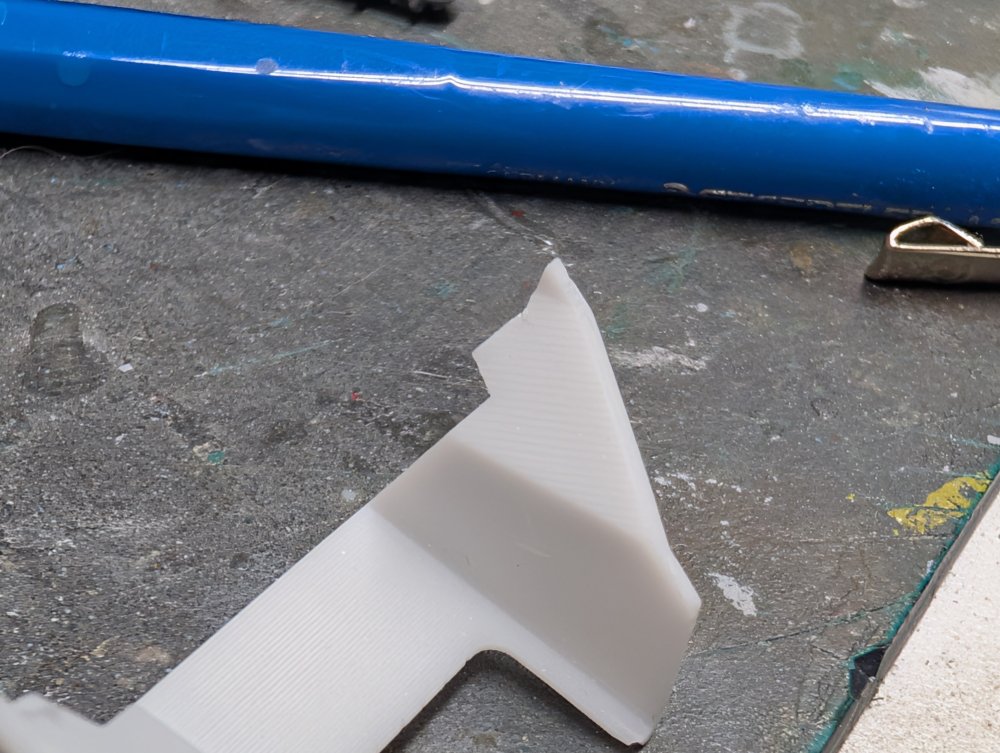
Sorry for the lack of updates. Our cat was reenacting The Exorcist and so we were a bit busy that he didn't end up in a Pet Semetery situation. Back to the Land Rover, I fitted the replacement transmission tunnel. This needed a fair bit of test fitting. It was mostly small tweaks to the edges to get a cleaner fit. When I test fit the floor assembly to the body, I noted a gap between the console and the inner cowl. I used strip styrene on the console to help fill the gap in.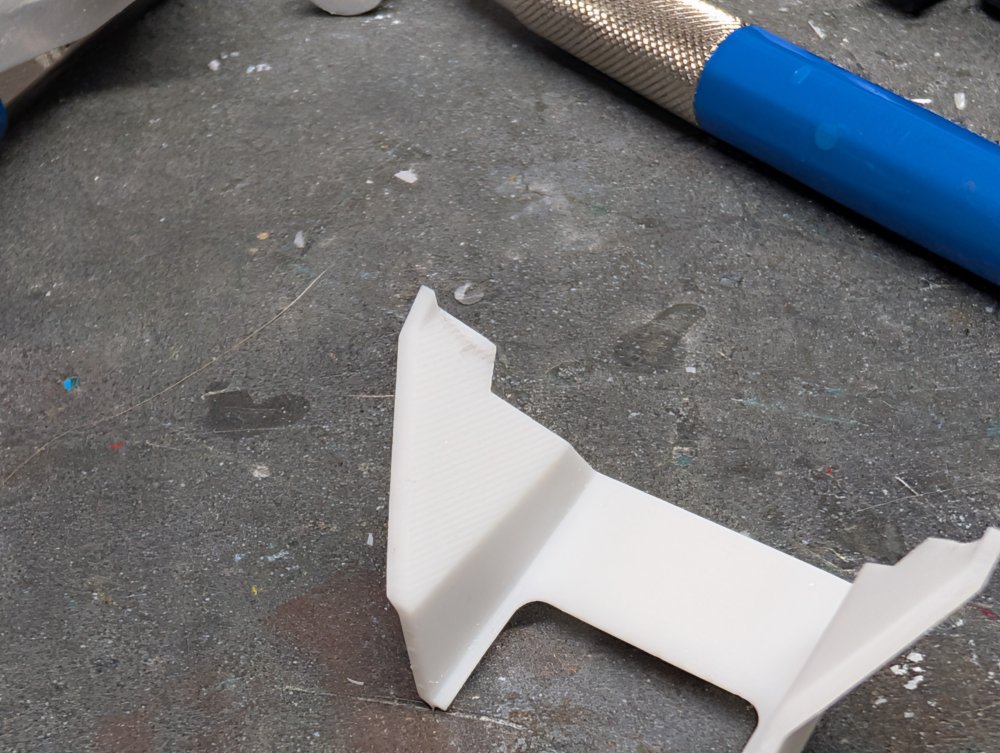


- 18 replies
-
- 1
-
-
- c1 models
- land rover
- (and 1 more)
-
Kotare Bf 109K-4 with AIMS decals -- Finished
BlrwestSiR replied to denders's topic in LSM 1/35 and Larger Work In Progress
Nicely built 109 there Dave. Carl -
Your work is on another level to what I'm doing. So a little progress on your build is the equivalent of me finishing a model. Great work by the way.
-
What is on your bench right now ? Share a picture :)
BlrwestSiR replied to Martinnfb's topic in Modelling Discussion
That's my motto! -
Land Rover Defender 110
BlrwestSiR replied to BlrwestSiR's topic in LSM 1/35 and Larger Work In Progress
Thanks Rob, I think you're right about how many car builds there are being a record. As for the lights, I have to agree with you. They do look a bit out of place even if they're better. At least they're separate parts so I can leave them off.- 18 replies
-
- 3
-
-
- c1 models
- land rover
- (and 1 more)
-
What is on your bench right now ? Share a picture :)
BlrwestSiR replied to Martinnfb's topic in Modelling Discussion
Actually that's the one kit I'm working on. What's hiding is a pair of 1/32 FW 190s. -
Land Rover Defender 110
BlrwestSiR replied to BlrwestSiR's topic in LSM 1/35 and Larger Work In Progress
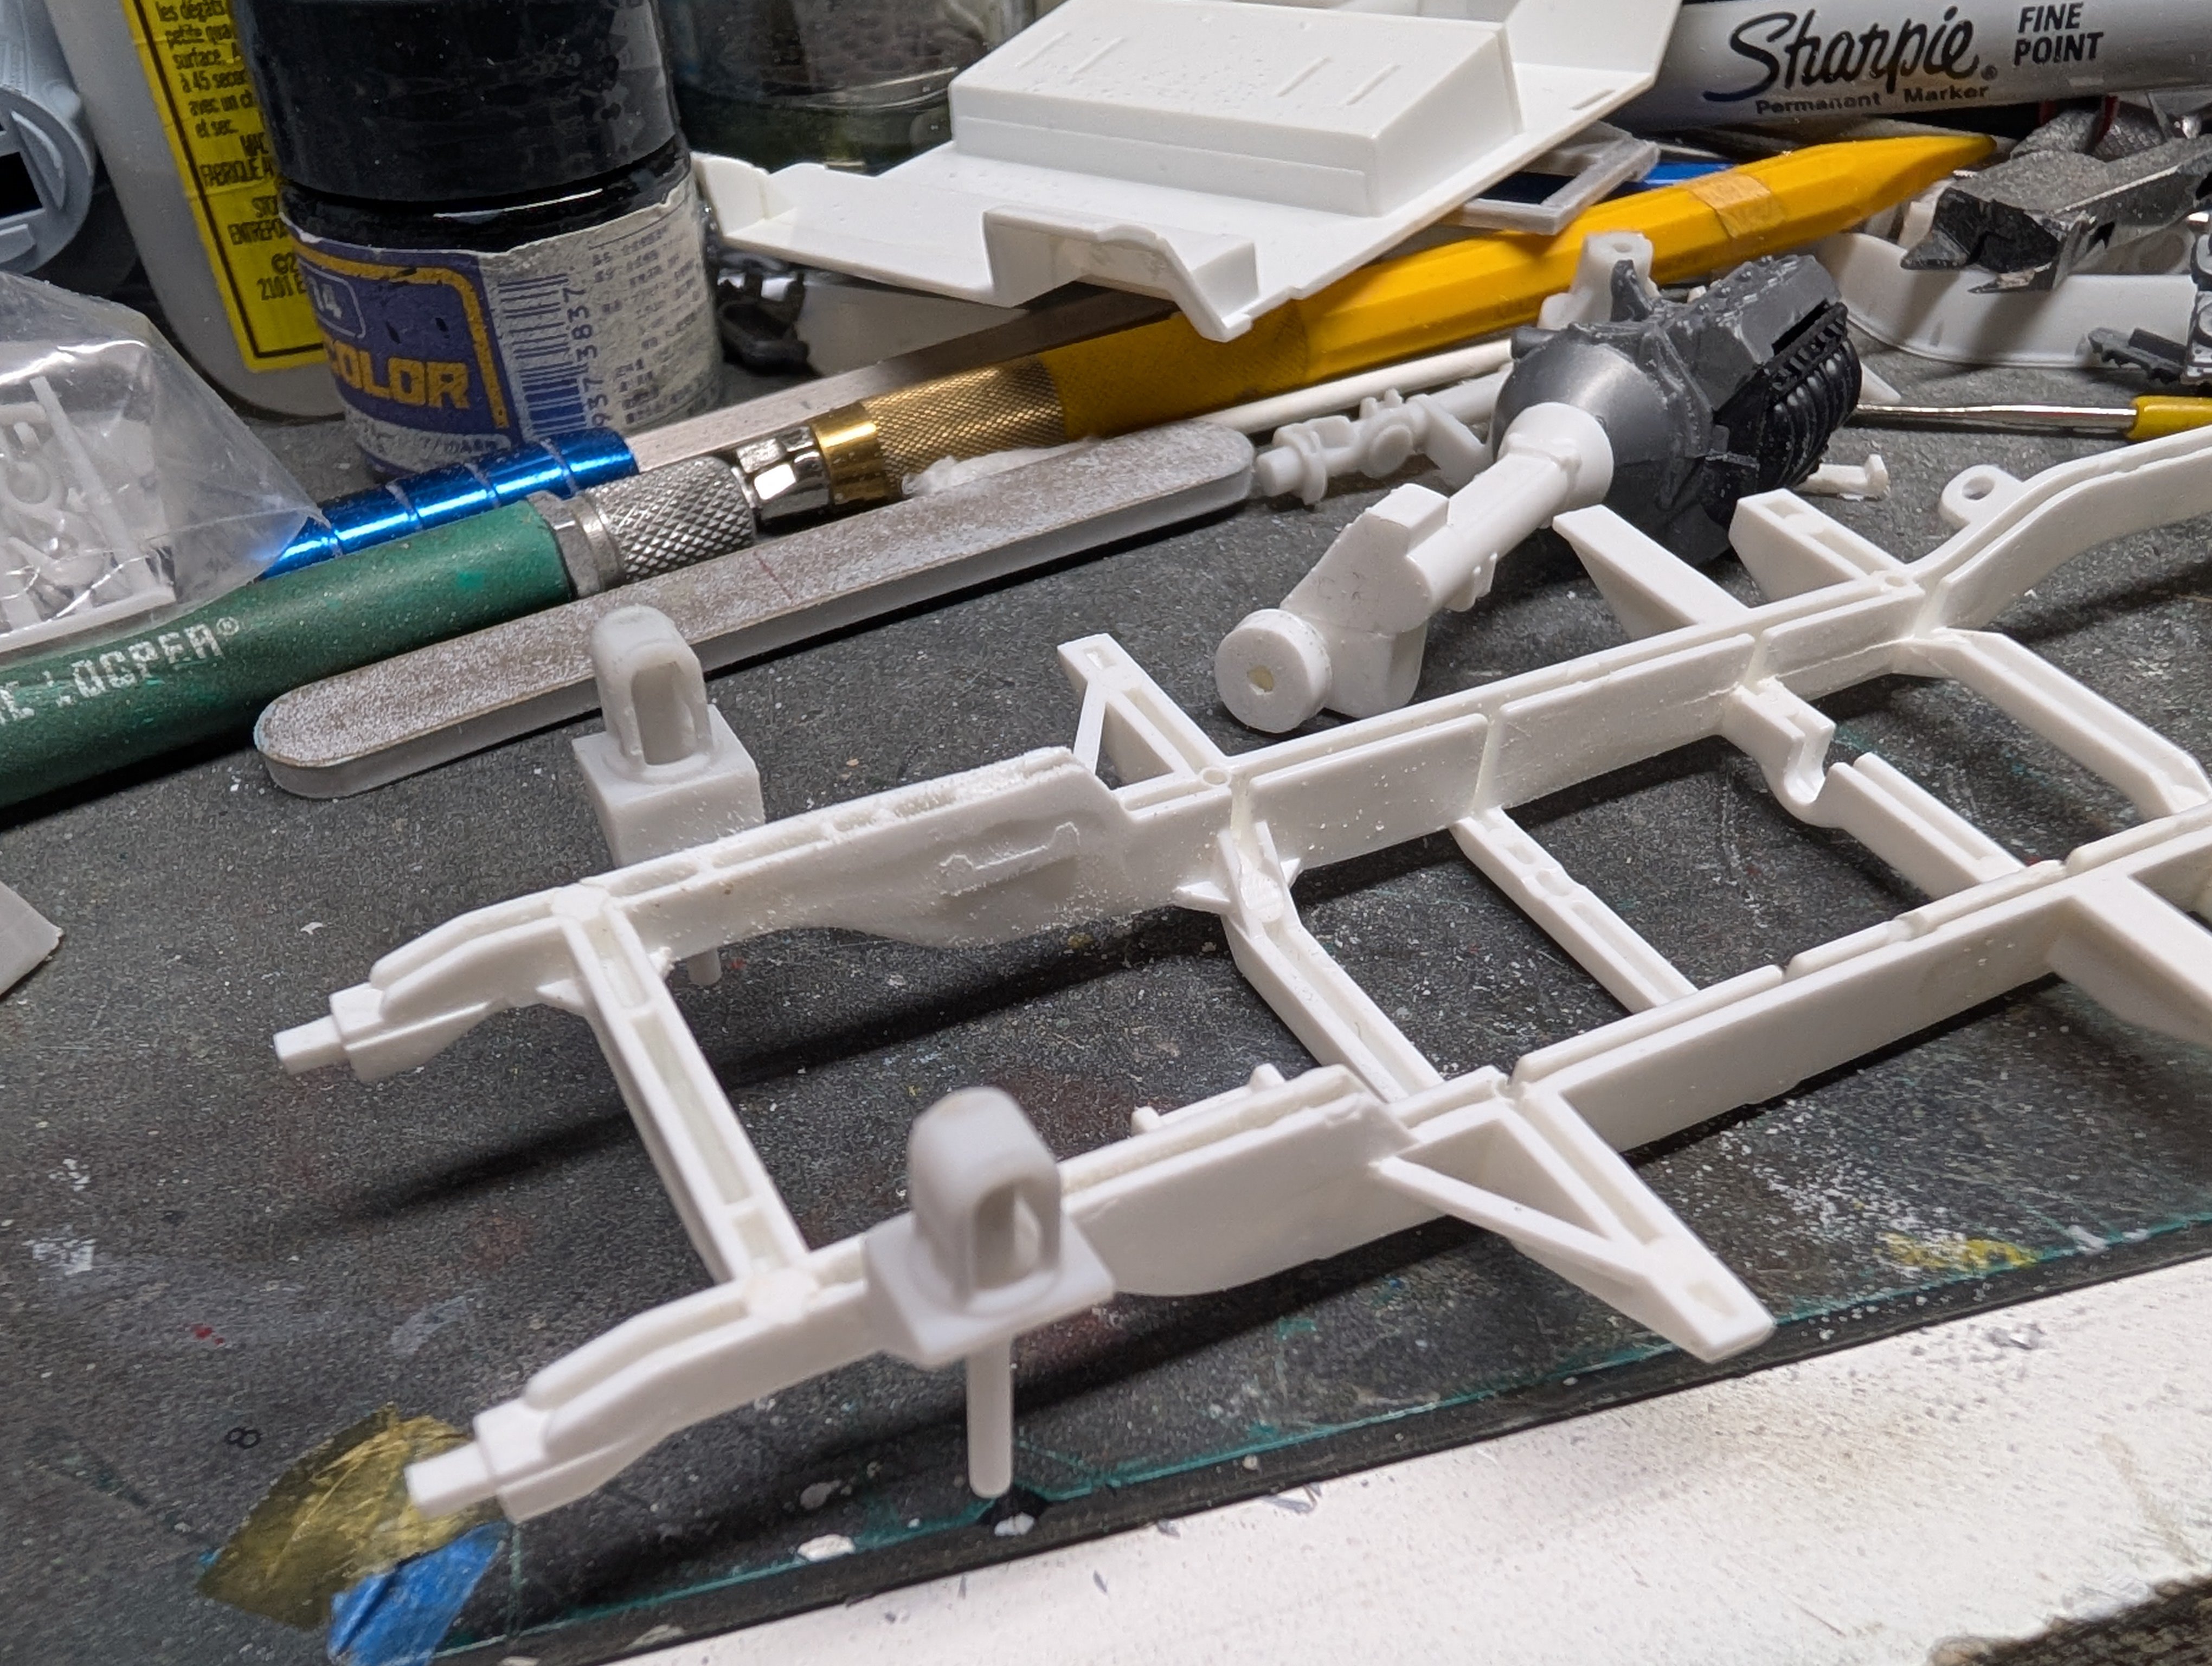
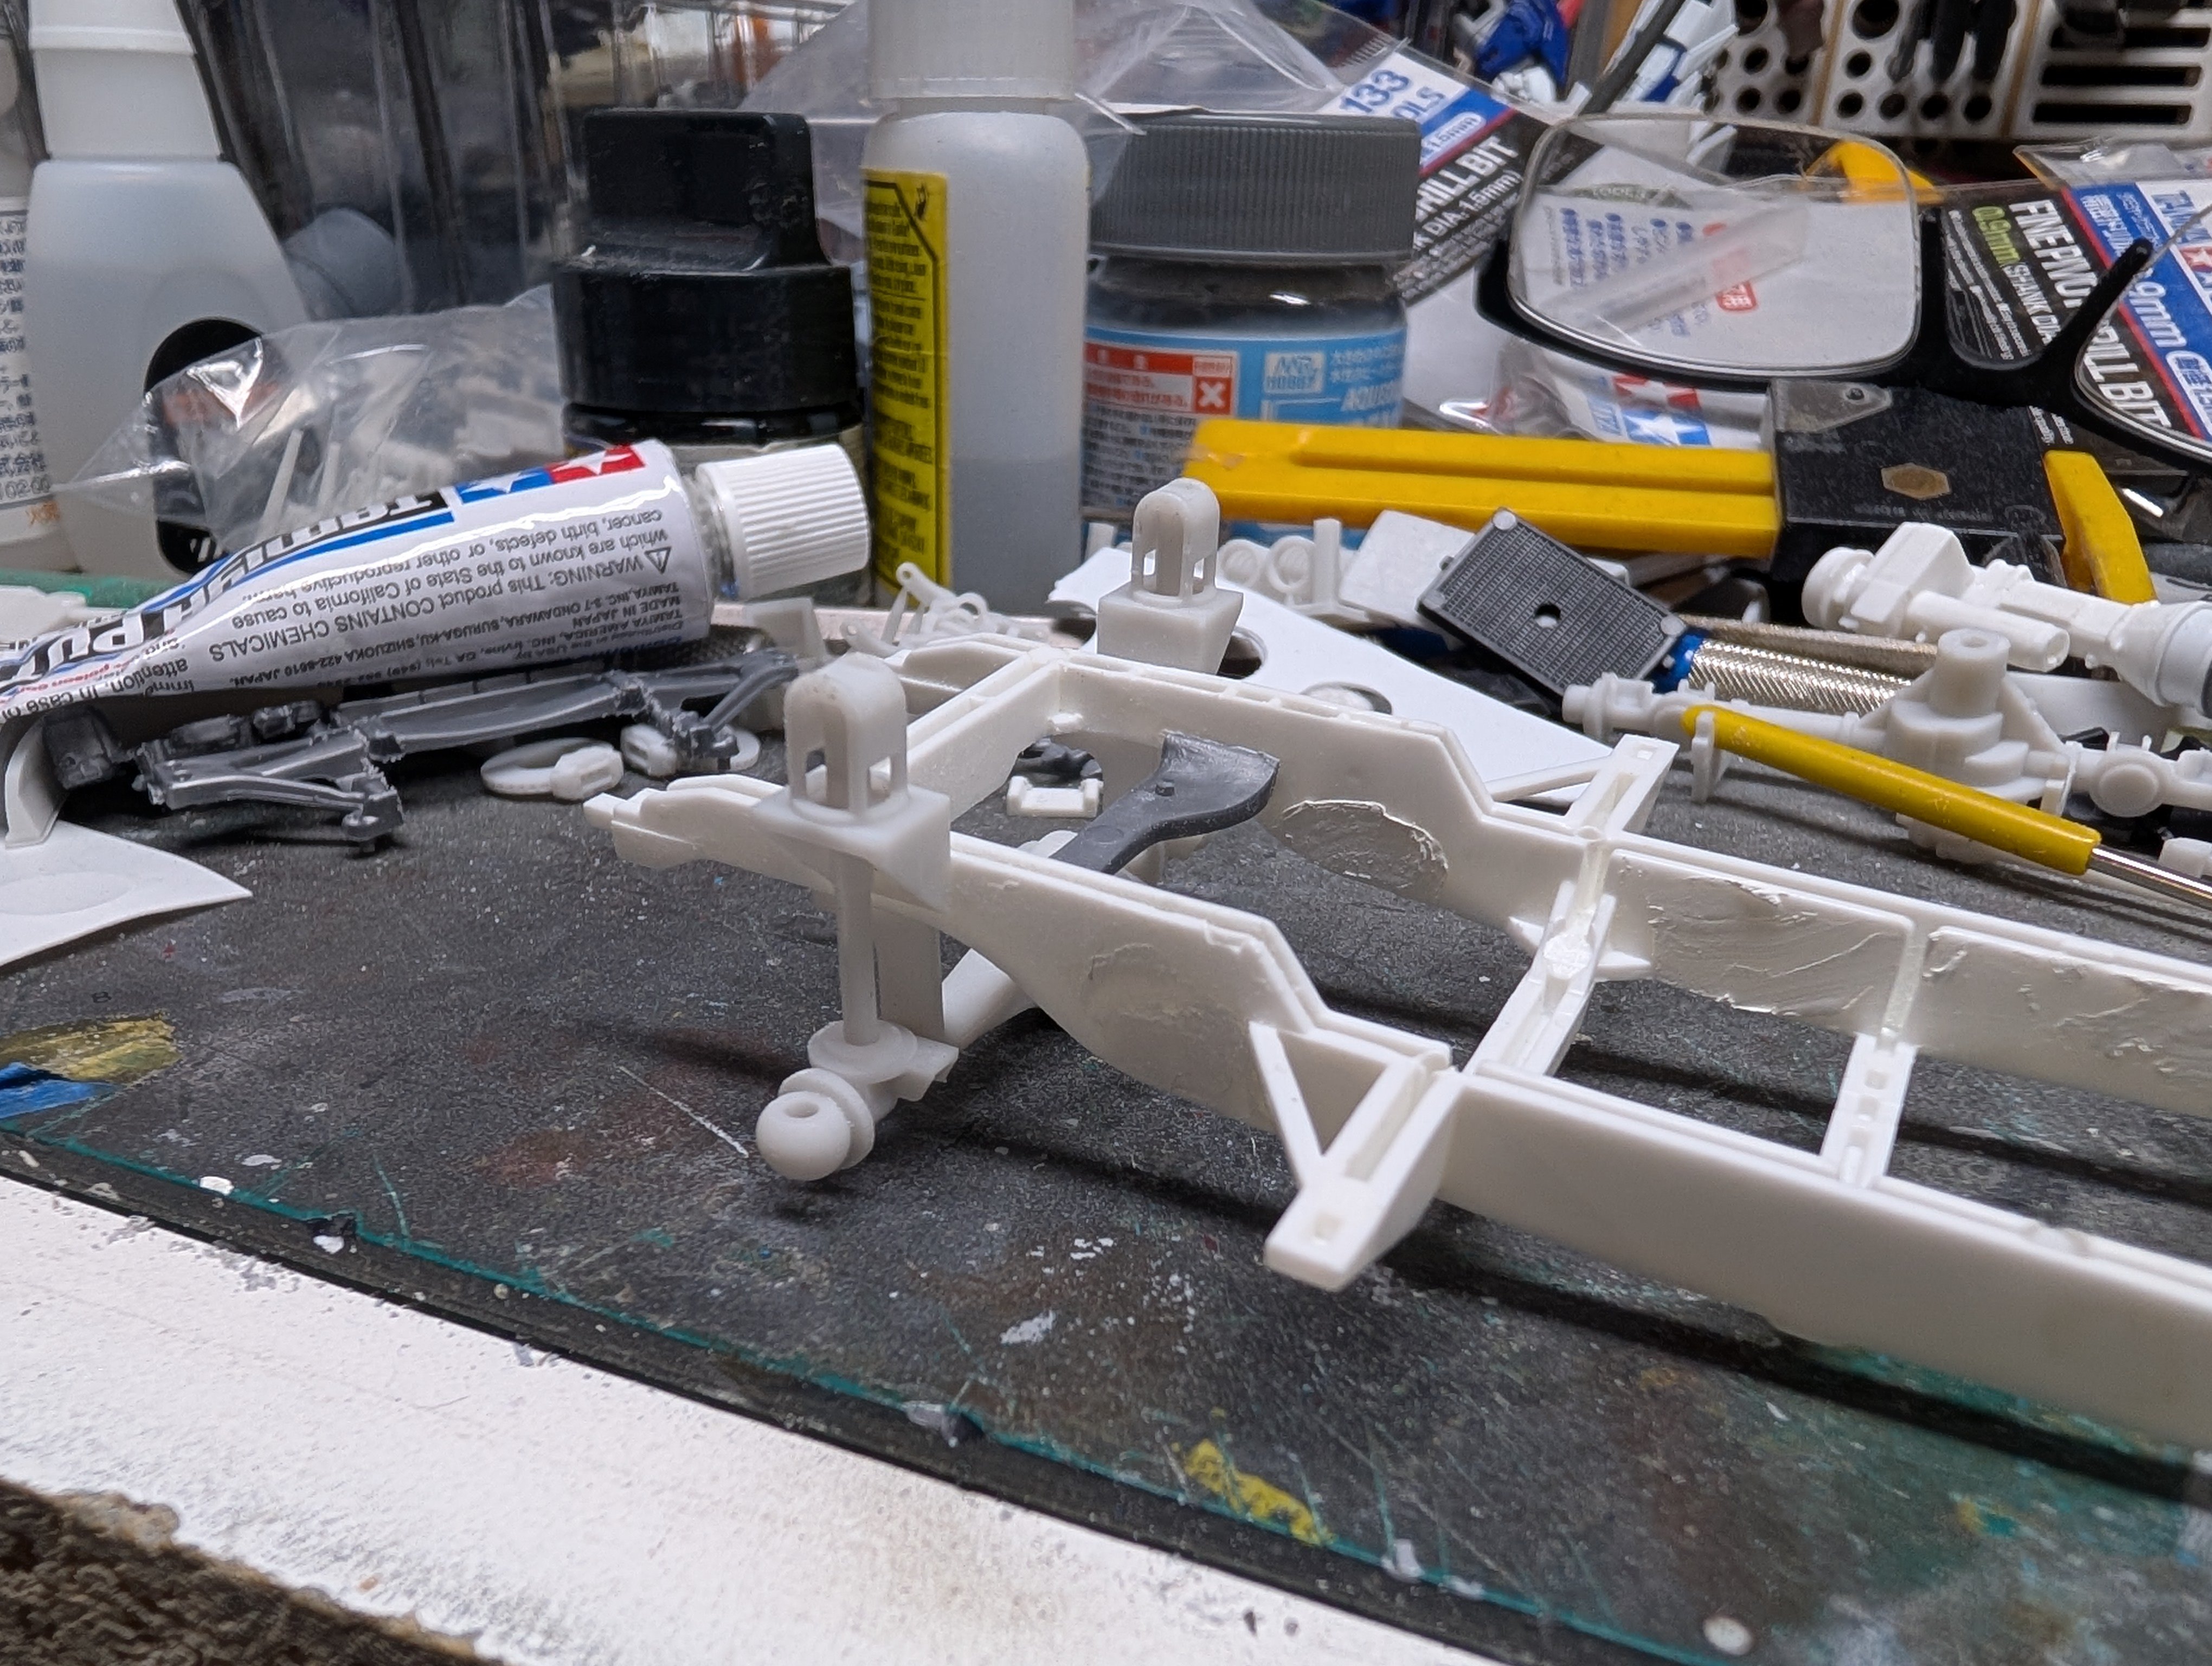
The biggest challenge with this kit is the lack of instructions. They include some for the assembly of the external roll cage and there's a short video on their website that shows how the suspension goes together. So there's no real information on what to cut/modify on the kit parts. There's also no engine included. On the actual vehicle, a Chevy LS V8 was swapped in place of the stock inline -6. One can either use the kit engine or source a V8 from somewhere else. I ended up buying a Revell 2005 Corvette to act as an engine donor. The first step is to cut down the floorplan to make it fit the pickup body style. I cut it way too short the first time so you can see where I glued it back together and tried again. Next, the central transmission tunnel is cut away between the front seats. Unfortunately I don't have a pic of this. Lastly, to fit the front shock towers, a couple openings need to be cut into the front fender linings. But before that, the shock towers need to be mounted to the frame. Fit the front axle to the frame but don't glue it in place. Then fit the shock towers the frame using the axle as a location guide. With the shock towers in place one can figure out where to cut the openings in the fender linings


- 18 replies
-
- 8
-
-
- c1 models
- land rover
- (and 1 more)
-
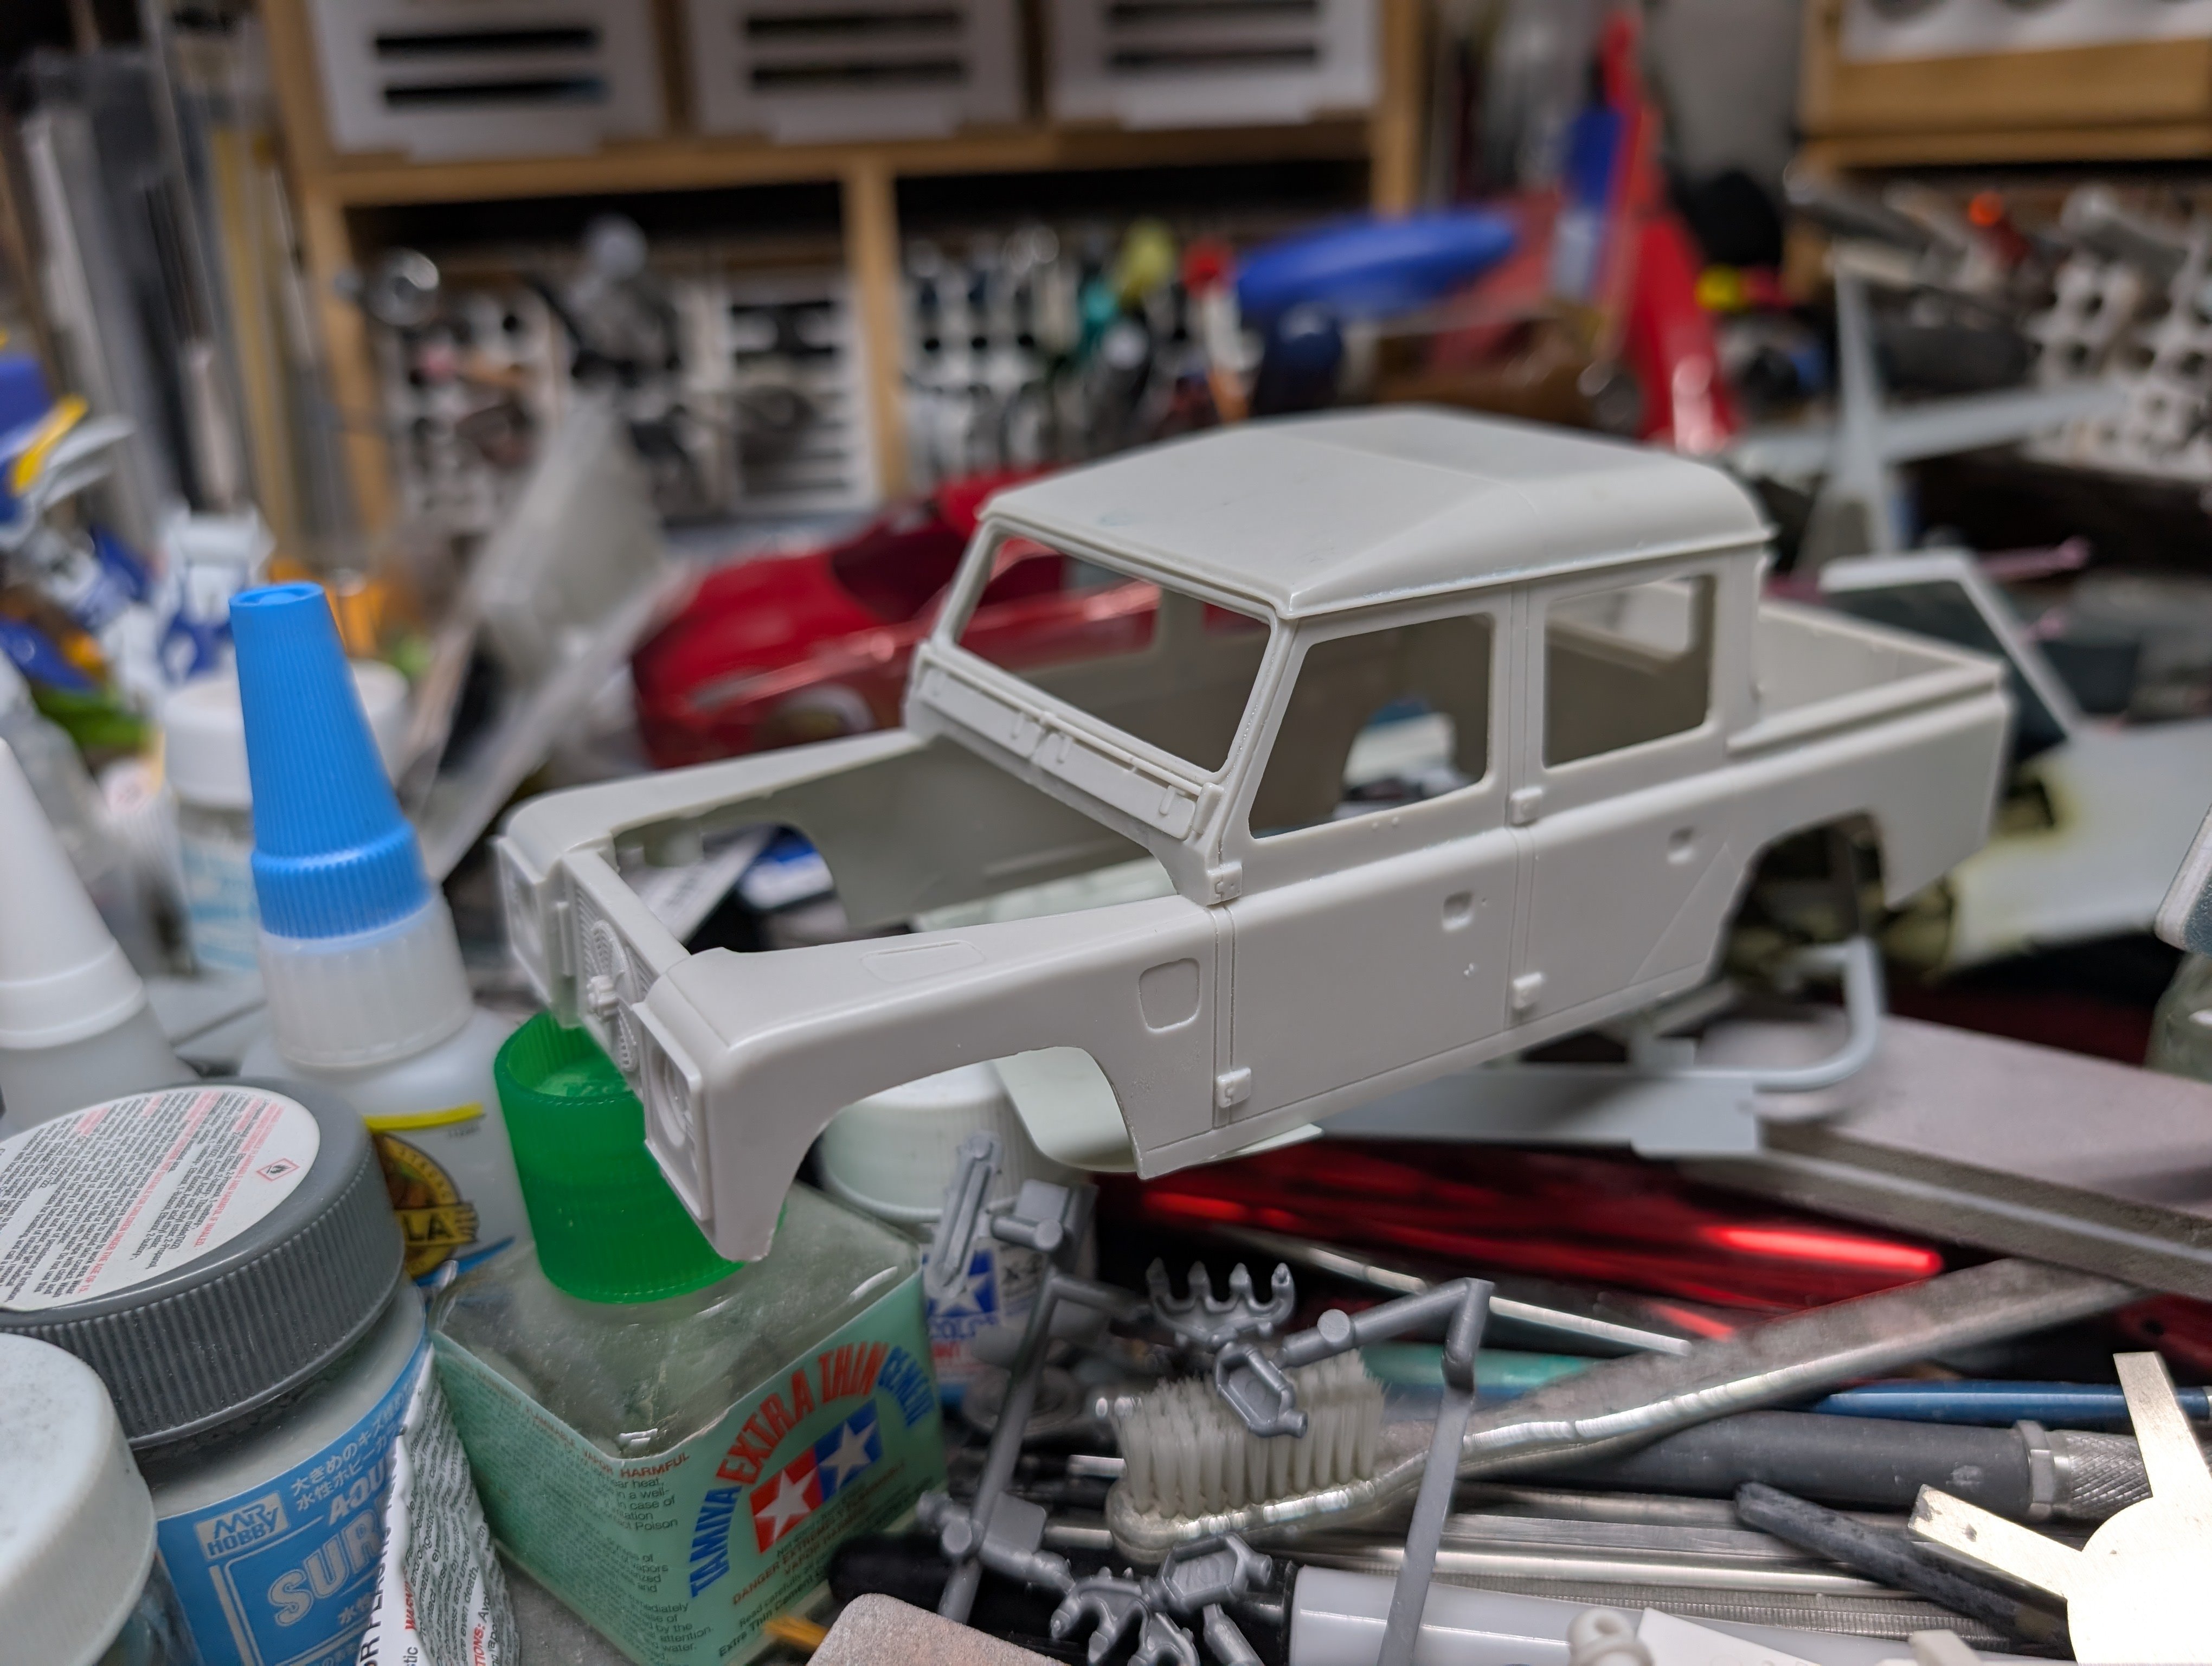
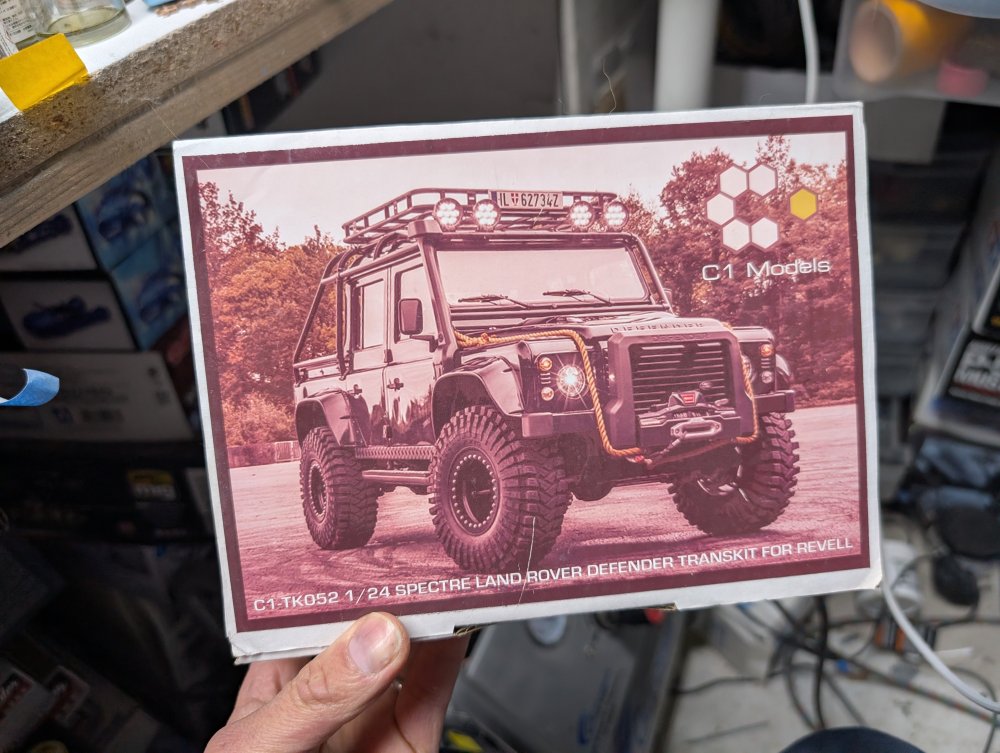
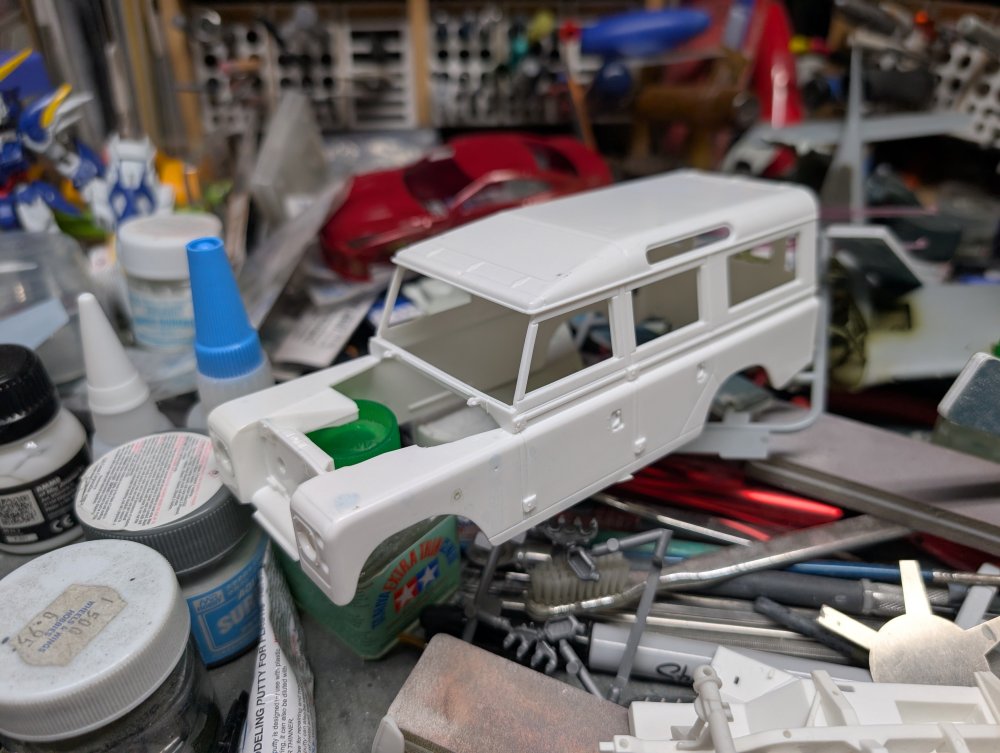
A couple years ago I came across a conversion kit made by C1 Models for the Revell Land Rover Series III kit. It allowed one to make a later updated version of the Defender as seen in the James Bond film Spectre. Here's a comparison of the stock kit body with the one in the conversion kit. The Series III body The Defender body. The fender flares, roll bars and bash bar are all separate add-ons, much like they would on the real thing.

- 18 replies
-
- 5
-
-
- c1 models
- land rover
- (and 1 more)
-
What is on your bench right now ? Share a picture :)
BlrwestSiR replied to Martinnfb's topic in Modelling Discussion
I thought it was. Then I couldn't find my tweezers. -
What is on your bench right now ? Share a picture :)
BlrwestSiR replied to Martinnfb's topic in Modelling Discussion
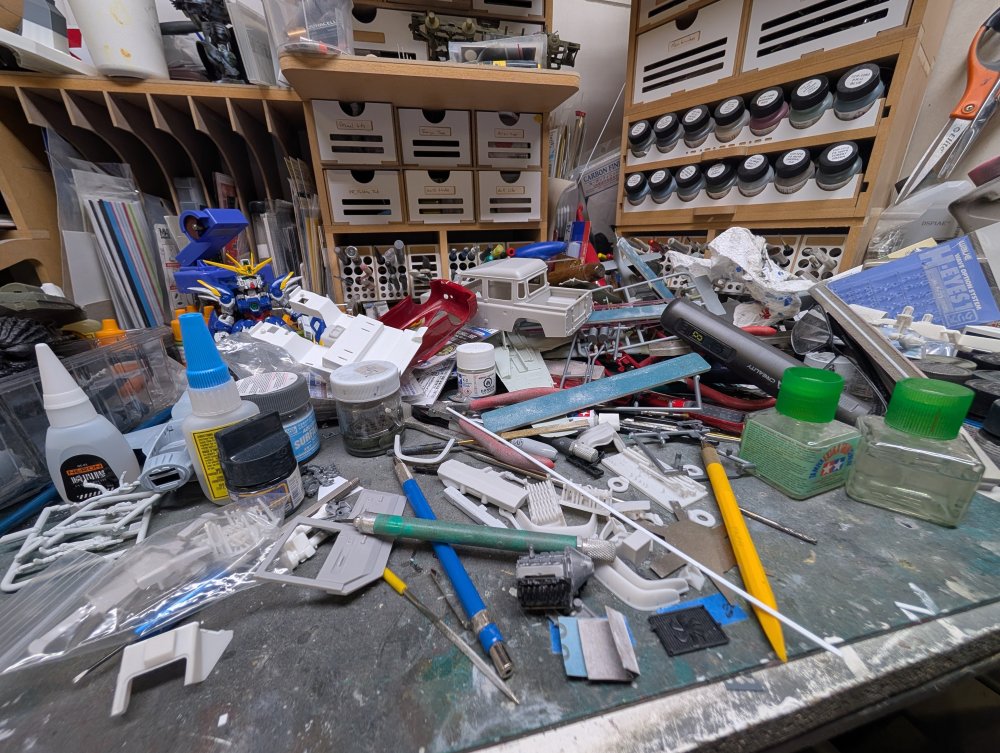
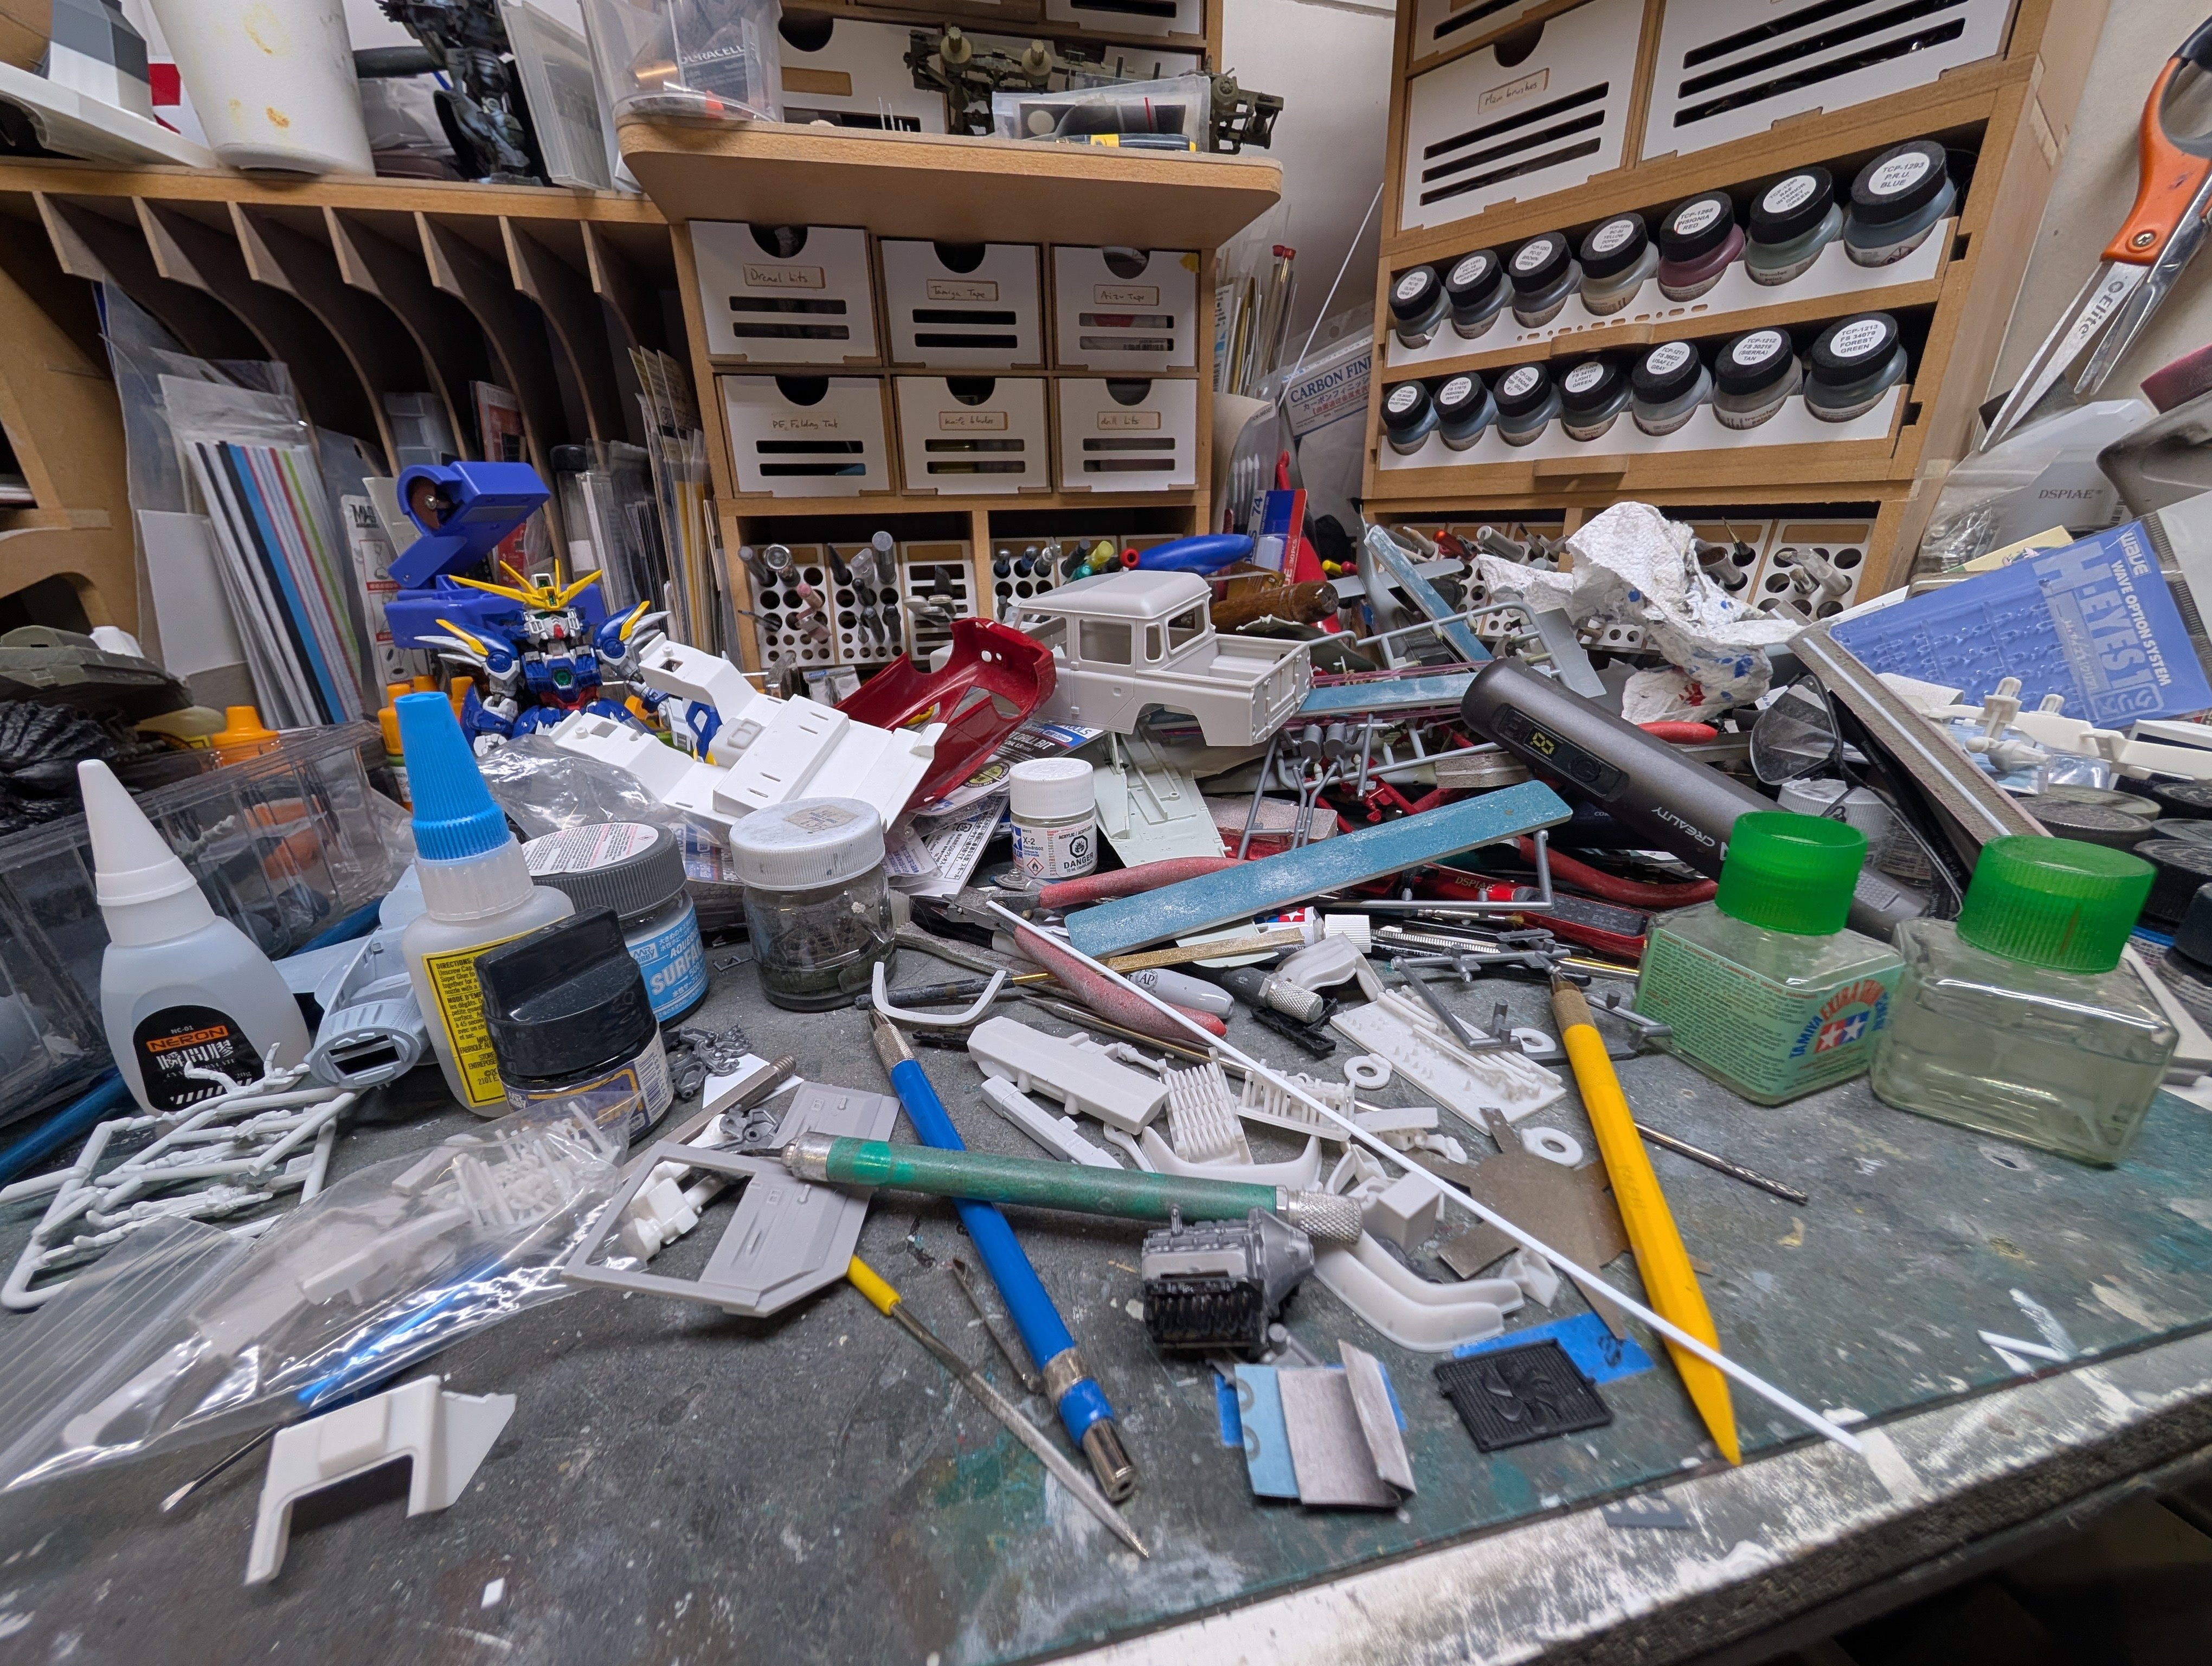
Working at my bench, I needed my tweezers to hold a part in place while I glued it on. Except I couldn't find them which I found odd until I looked at the state of my bench. I think I've reached the point where a cleanup/re-organization may be in order. Carl