Landlubber Mike
-
Posts
1,277 -
Joined
-
Last visited
Content Type
Profiles
Forums
Events
Gallery
Everything posted by Landlubber Mike
-
Totally agree Hubert. I give SH a hard time, but a lot of their kits are repops of older kits so it's really not on them. I have their Siebel Si 204D kit, and am curious as to how the fuselage fits given that I think the kit is original to SH, and not a repop. SH also releases subjects that are rarely seen, so I'm very thankful for that as I tend to go for less modeled, quirky subjects.
-
Wow Peter, that seat is insanely good! Like PW, I assumed when I saw it you were building in 1/32. Also love the color scheme you picked - will be a nice and colorful bird. Looking forward to following along! Hopefully Special Hobby didn't leave you with their special fit issues At least with the two kits I built, they had such nice details that I wondered why they couldn't make the fuselage halves fit better.
-
G-BKF Armoured Recovery now on the sod
Landlubber Mike replied to mark31's topic in The Sandbox Group Build.
Sorry about the bad print Mark - but I love the subject! Really cool! -
Always in for your builds PW!
-
Martin, you read my mind - when I posted the picture, I thought to myself, man, that would be a cool diorama to model. If I didn't have all the AM I had for this kit, I'd probably go that way. I might, however, buy a second kit just to do this diorama (I think I have the German cargo truck in the stash). The nice thing about the Hs 129 is that it's a pretty small plane (I'm guessing it's pretty close in size to a F4F Wildcat), so adding a truck to the diorama won't make for too big of a base. Thanks also for sending that link to the other build - pretty cool! Maybe I can finish two in the next six months. This kit is actually pretty straightforward without many parts.
-
Thanks for sharing that info Rob - you've got it down pat!
-
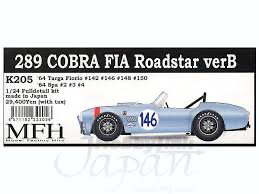
Looking great Rob. I love the seats with the leather! I have a few car kits in the stash, but wanted to either learn how to paint leather textures better, or find the actual thing thin enough for scale. From your pictures, seems like the MFH stuff is worth me looking at. I will blame you, however, for inspiring me to pick up a 1/24 MFH Cobra kit. Saw one listed on eBay last week and got it for a really good price. 🤫
-
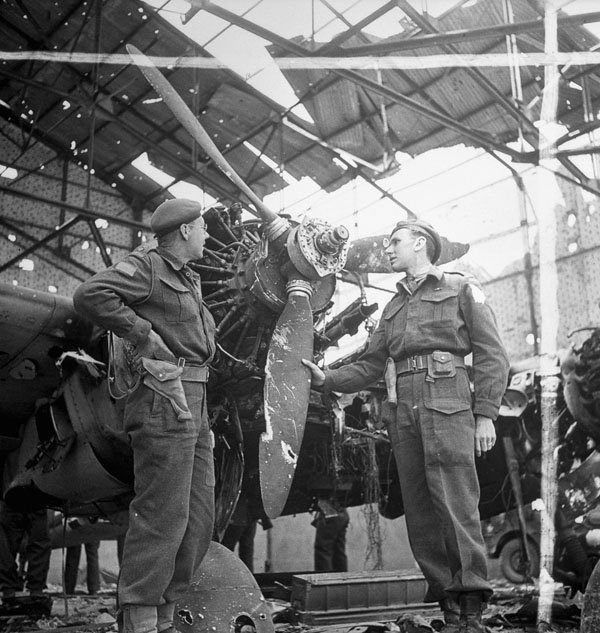
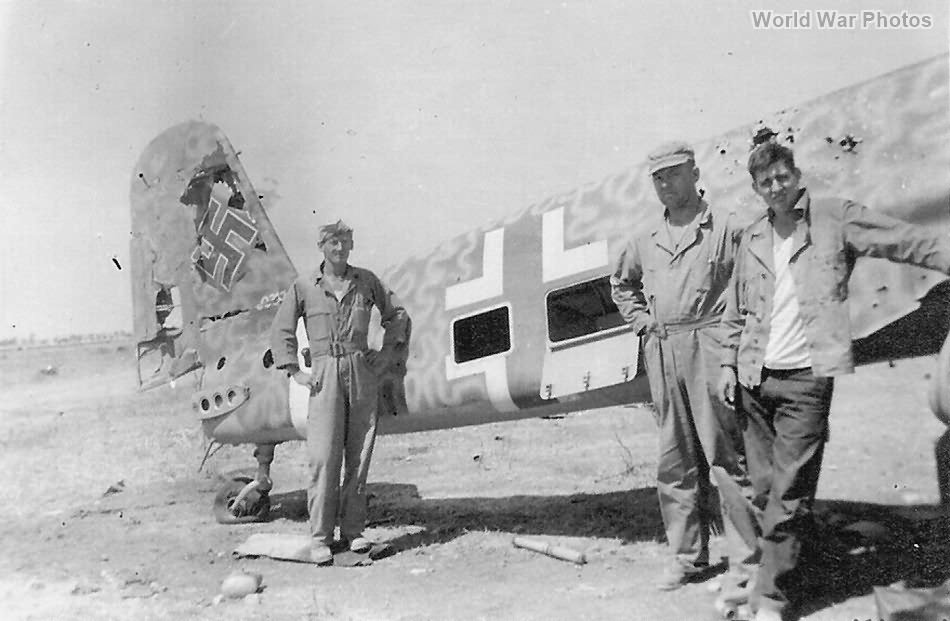
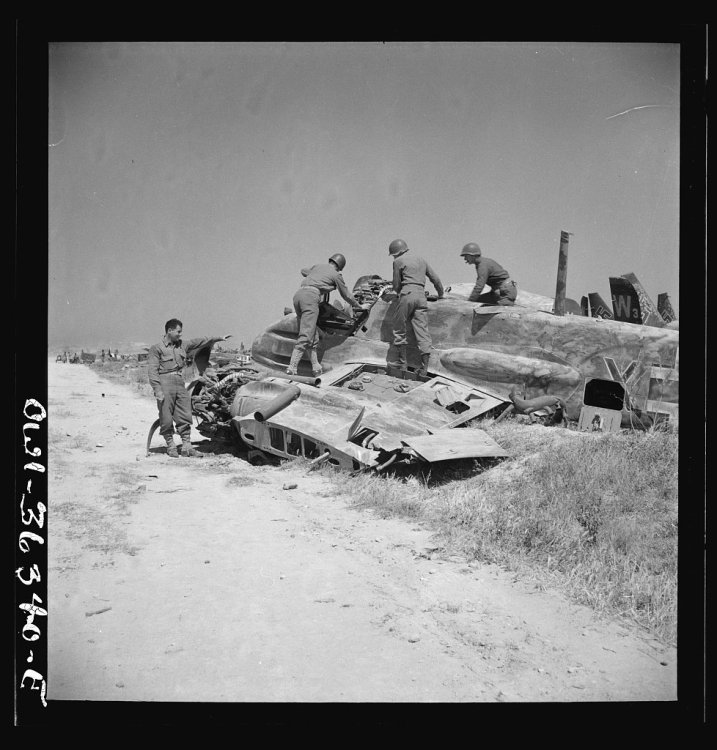
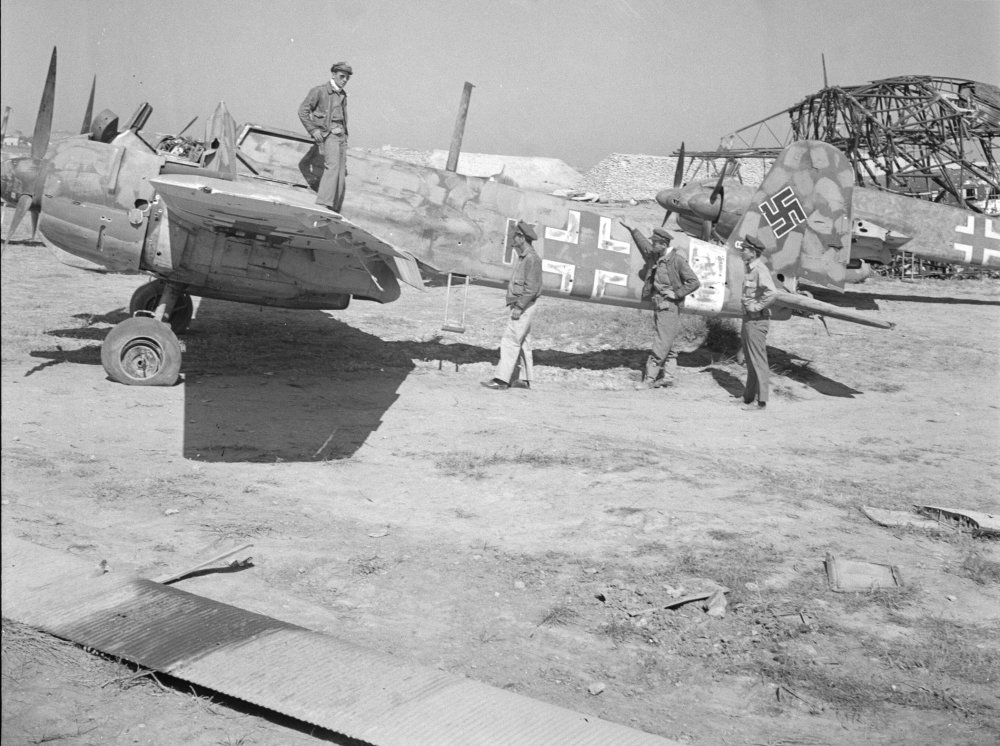
Some other cool pictures I found of the Hs 129 in the desert:


-
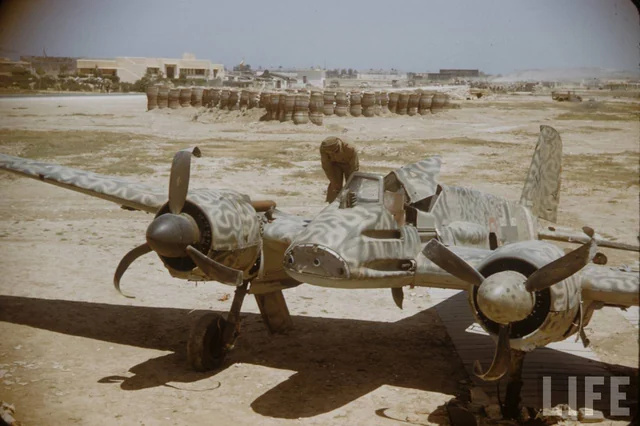
This is a colorized picture I found of the one with the very fine squiggles - cool scheme for sure, but probably too hard to paint for me so thankfully I prefer the other one: I came close to buying the Eastern Front as I saw that offering first and liked the winter camo. I've got a couple of Hasegawa 1/72 kits (Ju 88A-4 and He111 A-6) that at least one of which I was hoping to do winter camo on, so when I found this Hs129 desert boxing, I was happy for something a little different. I'm surprised this boxing is sold out already? I did see on Scalemates that MN Hobby seems to have done a recent repop of both the desert and Eastern Front kits.
-
Hey Chris - I saw the subject a while back offered by ZM. Then I happened to randomly come across the AM for this kit on eBay I think, went to Scalemates, and realized Hobby 2000 did the repop. I tend to see what AM is out there on Scalemates before picking up a kit - as I usually buy kits off eBay or the FB auction sites if only I can get a good deal. On the dromedary, I was looking up where Shchigry in the Soviet Union is for your BF 109 - not sure there are any camels there? Just make sure if you get a two hump Bactrian Camel 🐫 that your plane was in Mongolia, as those were found there compared to the single hump camel in Africa and the Middle East. 🐪 Yeah I know Mark. Though, this one seems easier than the second subject in the box which has a million squiggles all over. Hopefully the one I’ve chosen isn’t as bad. I have a 0.19mm airbrush so will just have to practice.
-
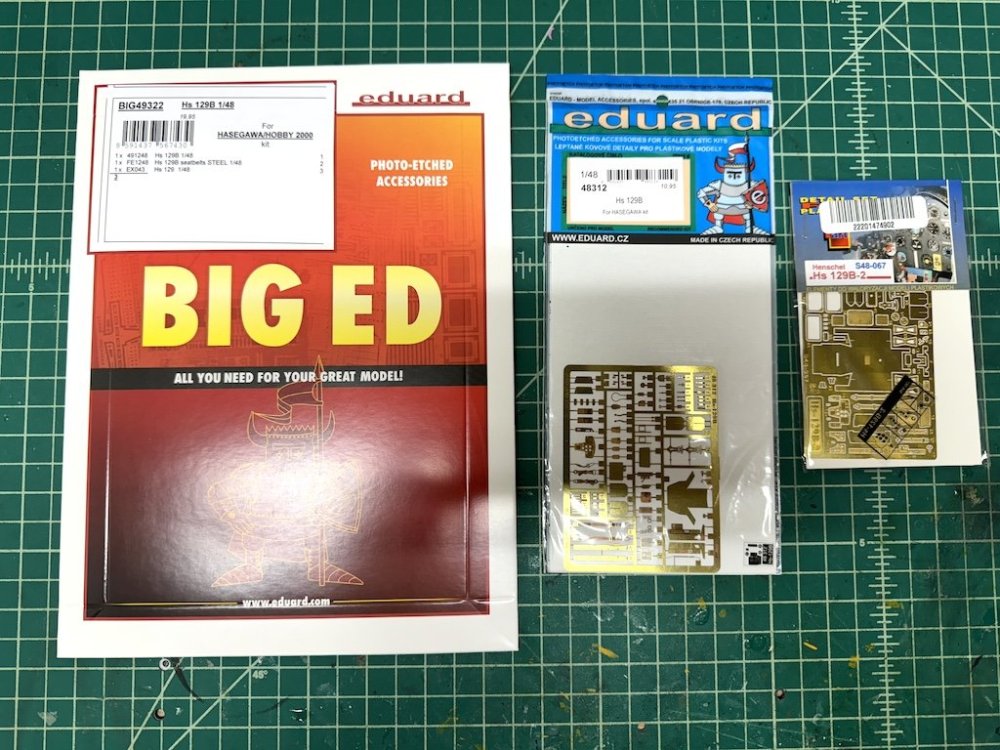
Hi Peter, I think most of the stuff is plug and play. I probably won't use much of the PE sets given that I have the various CMK and Quickboost resin sets. But yeah, while my parts are soaking tonight, I will probably mark up the instruction manual to indicate where I should be looking to the AM.
-
Oh boy Martin, I wish you didn't send that to me lol
-
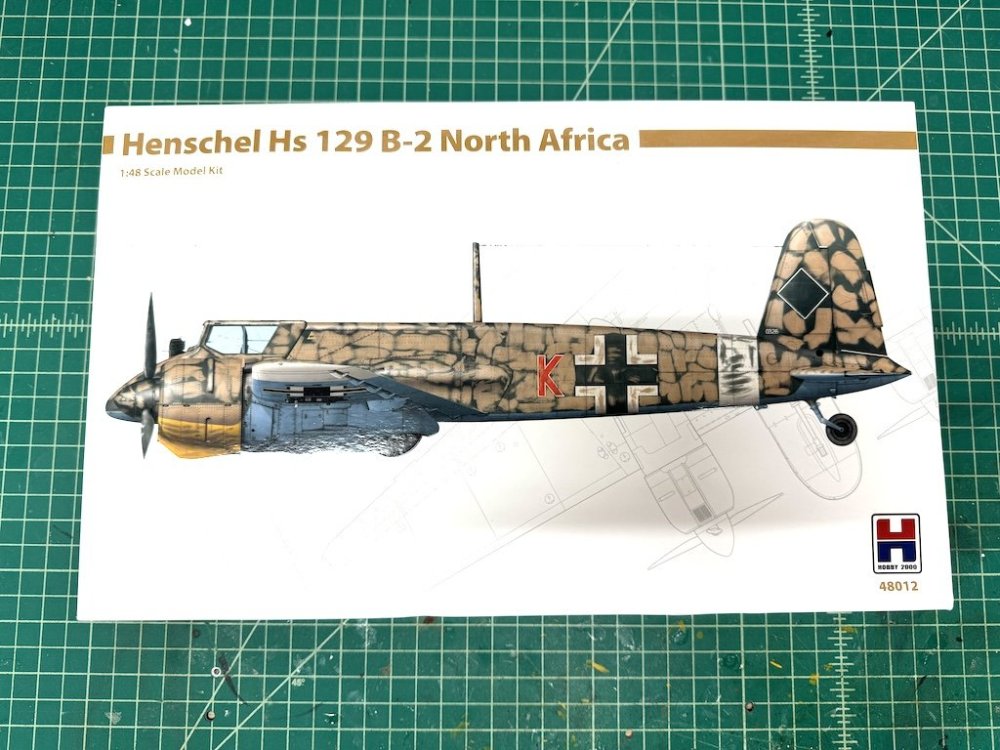
Thanks Martin! Really appreciate it! PW - I had been thinking about doing the Zoukei-Mura version, but at 1/32, it's a bit large I think. I happened to come across an auction for a ton of the 1/48 aftermarket sets for the Hasegawa kit for a steal, and then realized that Hobby 2000 recently released this rebox (they also did a rebox for Eastern Front planes). I've always liked the looks of this plane, which reminds me of the A-10 Warthog.
-
Thanks Martin, should be fun. Does anyone know how this was painted? I'm assuming it was originally a dark gray/green plane that was quickly brushed over with tan? I was originally going to paint it tan and then try to hand paint the dark original colors peeking through, but now I might actually paint it in the dark gray/green scheme and then try to airbrush over in tan. I saw someone do a winter camo scheme that way, where they first painted the dark original colors, then painted the white wash over the top.
-
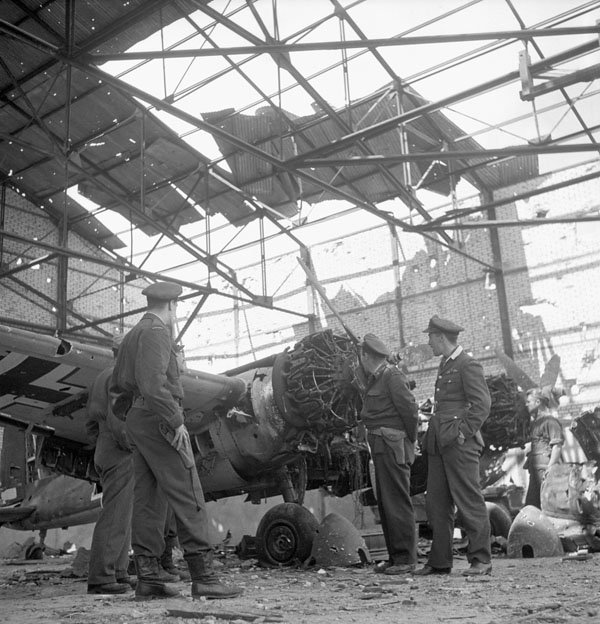
When I was researching this a few weeks ago when the GB topic was being considered, I think I found a picture of the particular plane I will be modeling: The caption for the photo I believe said something to the effect of US soldiers inspecting a captured Hs 129 in Tunisia in May 1943.
-
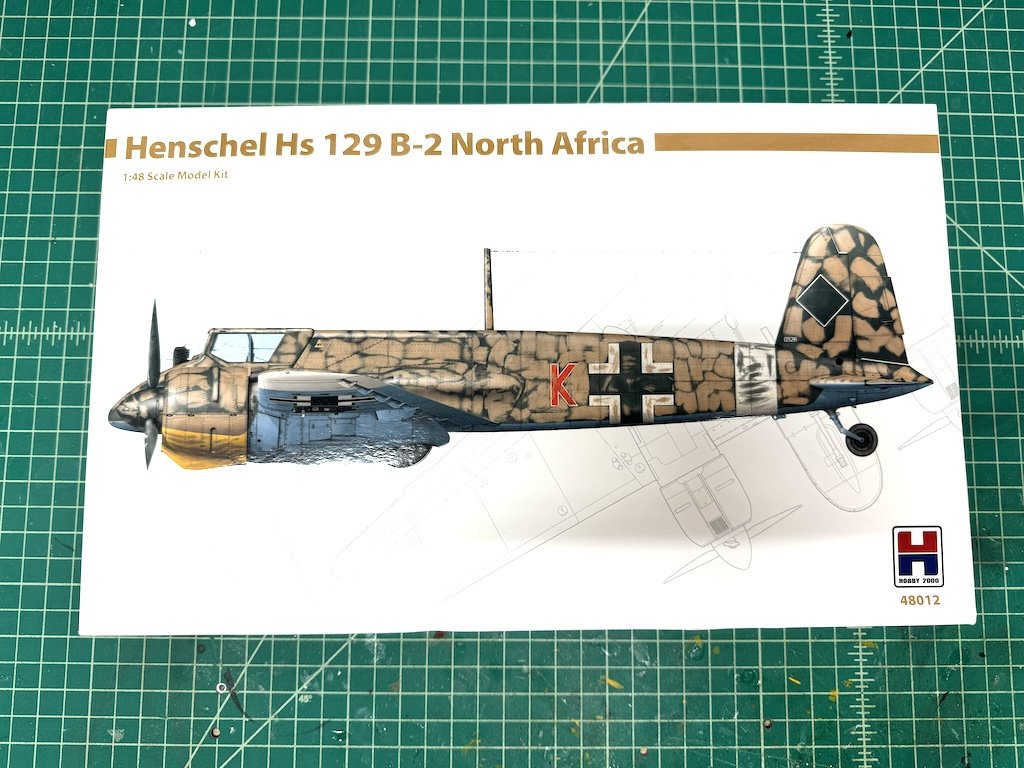
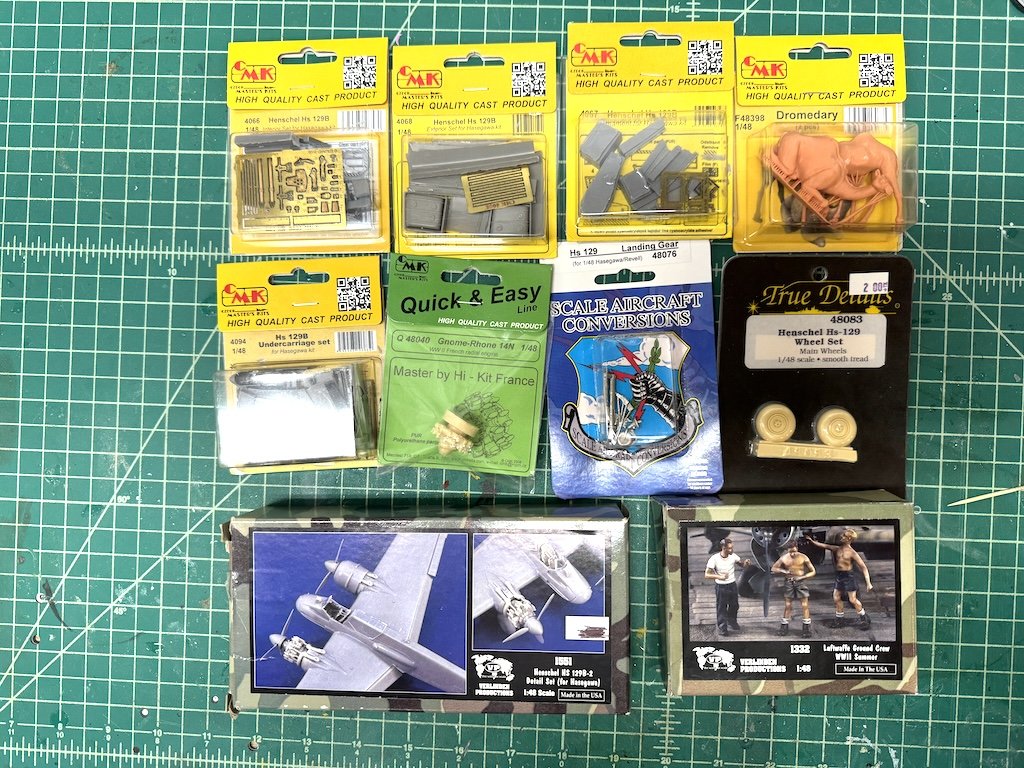
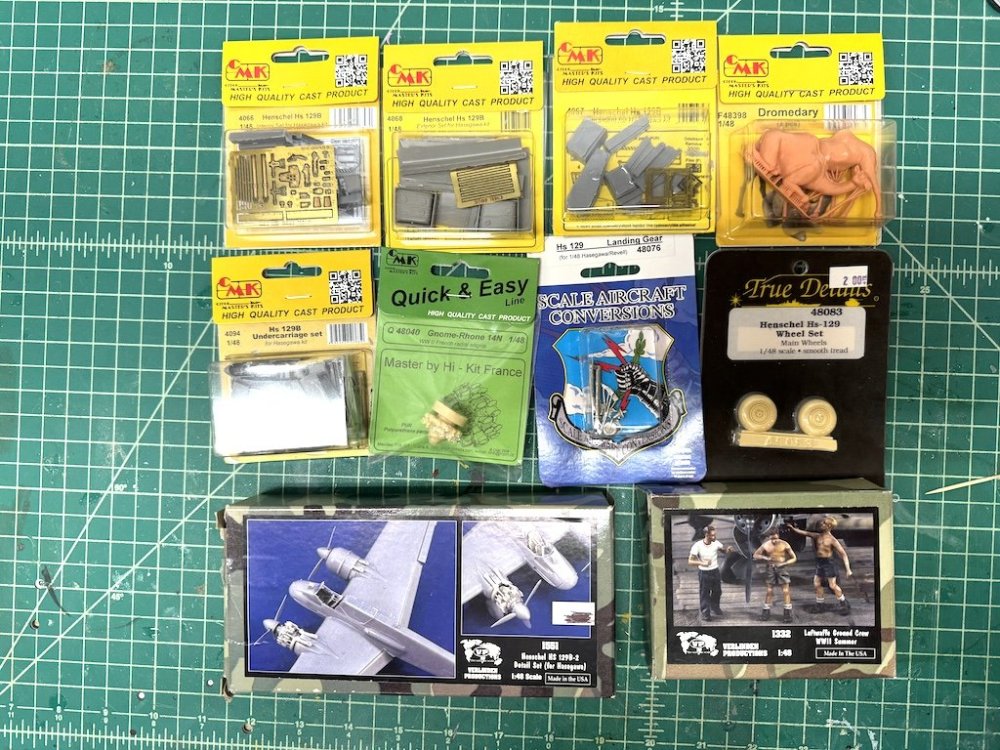
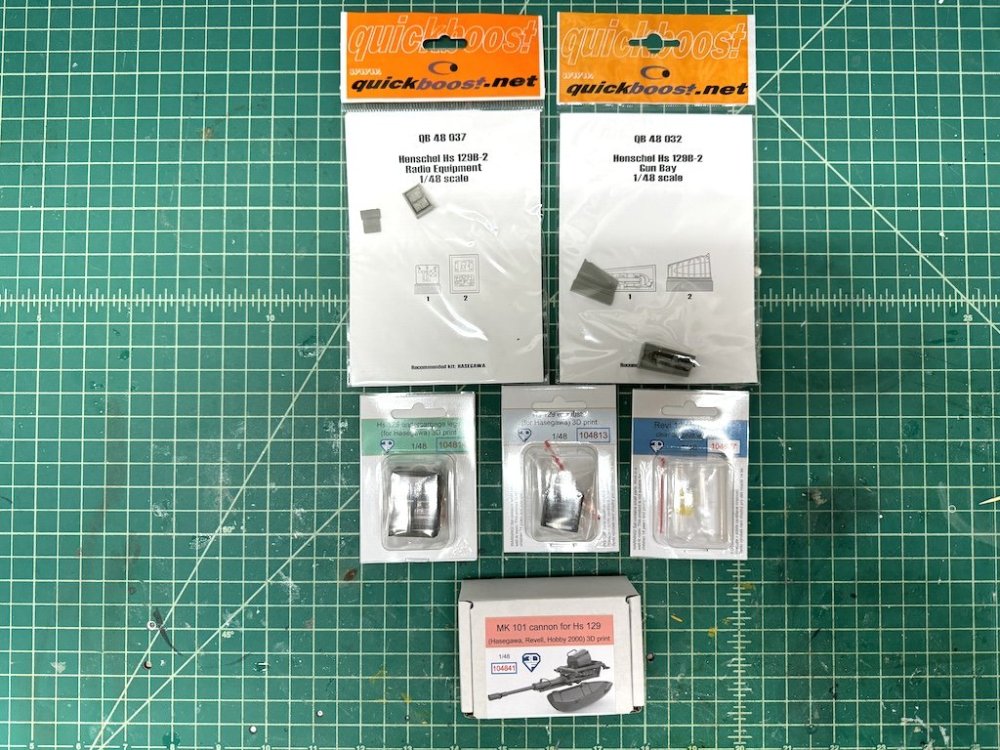
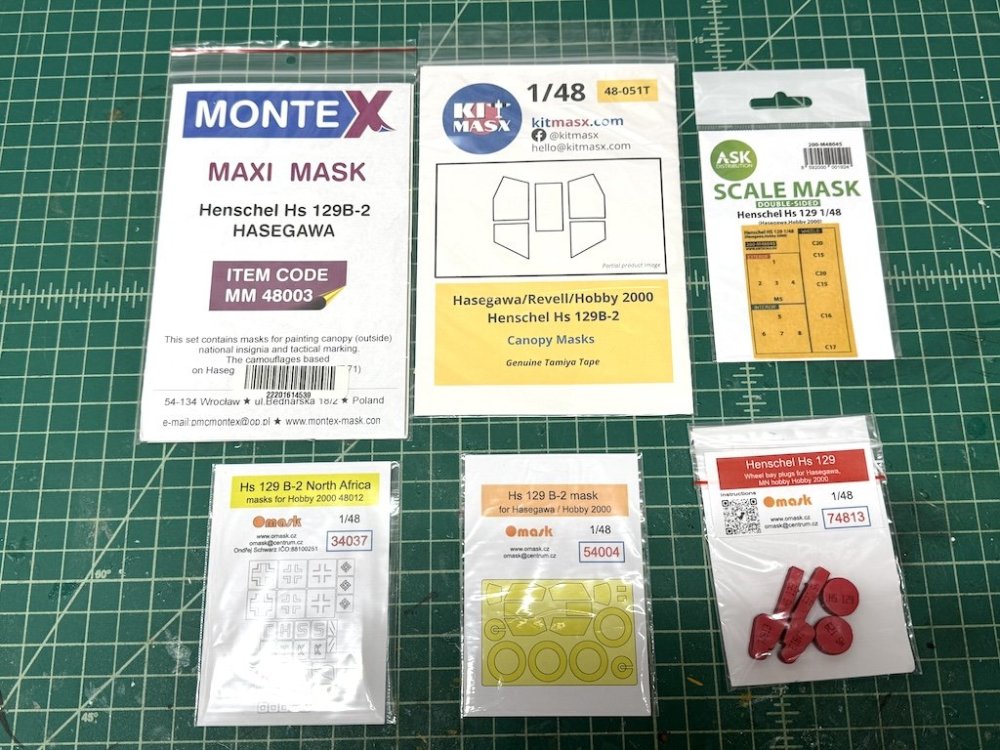
Excited for this sandbox GB! I'll be building (and hopefully finishing) the Hobby 2000 Hs 129B-2. I've got probably every piece of aftermarket for this kit so I'm planning on showing this bird fully opened up. I hadn't heard of Omask before, but when researching, I found they offered a lot of great AM for this kit, including a 3D printed Mk 101 cannon (which I couldn't find elsewhere in this scale) and stencil masks for the two color schemes offered in the kit. I'm planning on building the one on the cover: Below from OMask - Mk 101 cannons, Revi gunsight, exhausts, and undercarriage legs: Like @HubertB, I also managed to find some scale camels to add to the diorama. Should be a fun ride!
-
Awesome! I'm in for this one Peter!
-
Intermediate Twin GB beauty pageant Winner !!!
Landlubber Mike replied to Martinnfb's topic in The Great Twins Broup Bluild
Congrats! Well deserved! -
Very cool choice Hubert! Love your scratch parts, this is going to be a stunner for sure.
-
Fantastic choice Chris! That camo scheme is really sharp looking! Looking forward to following along!
-
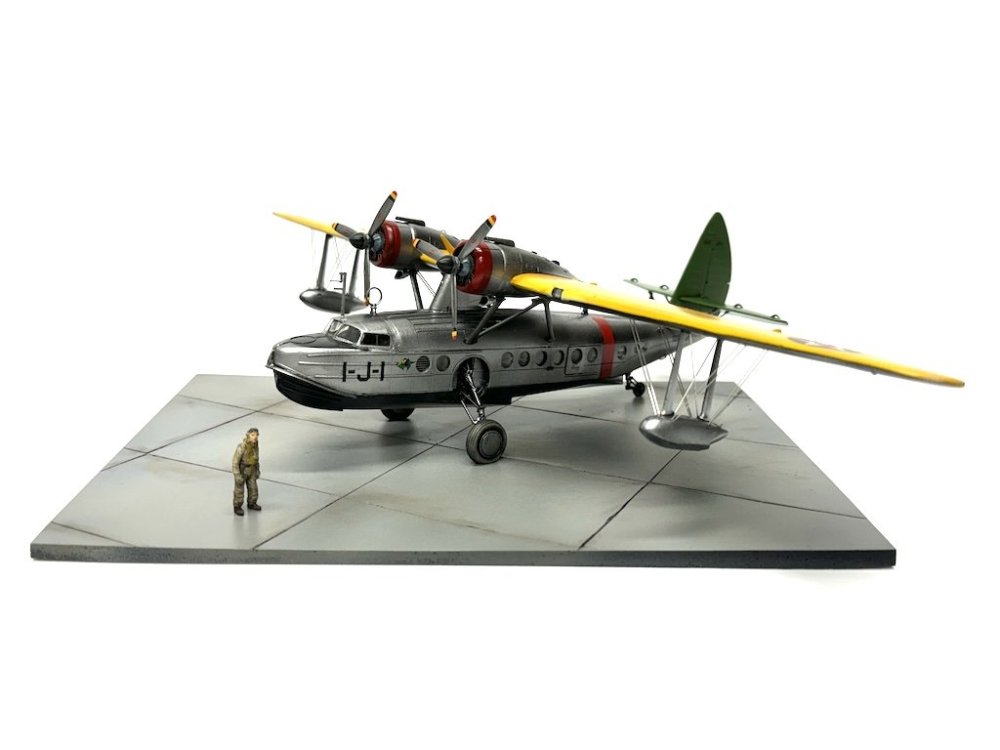
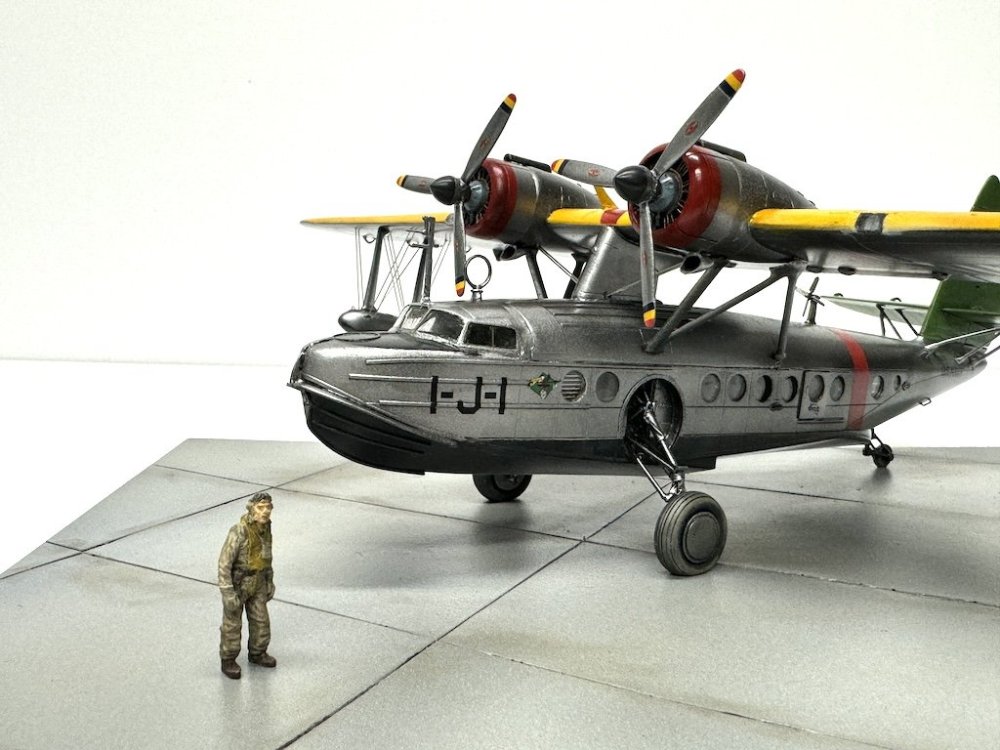
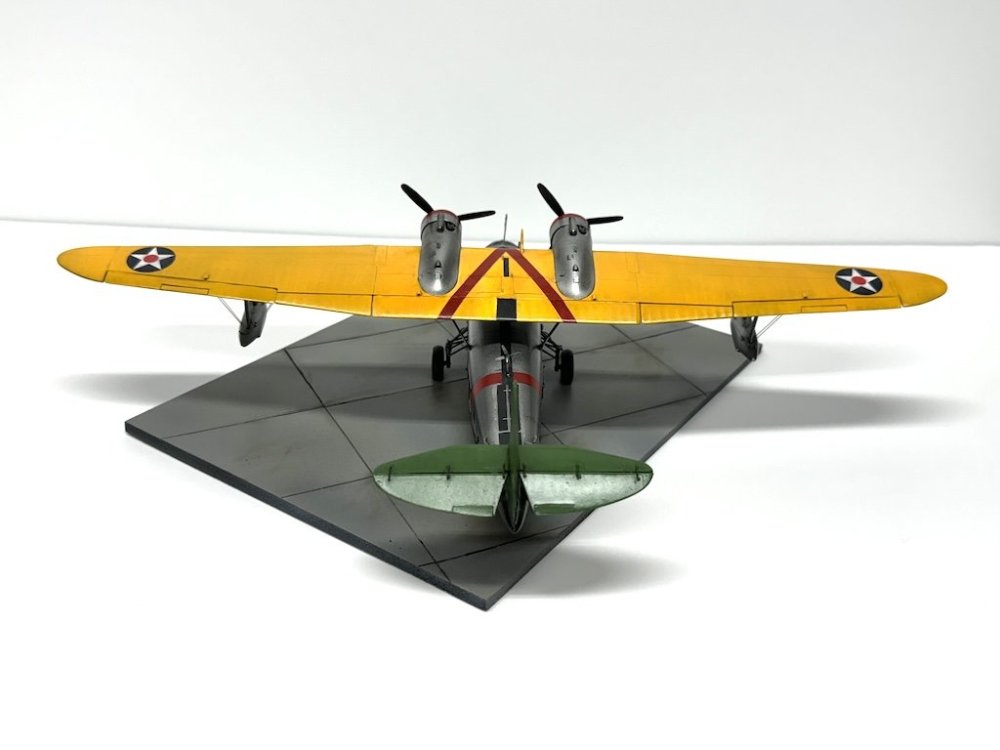
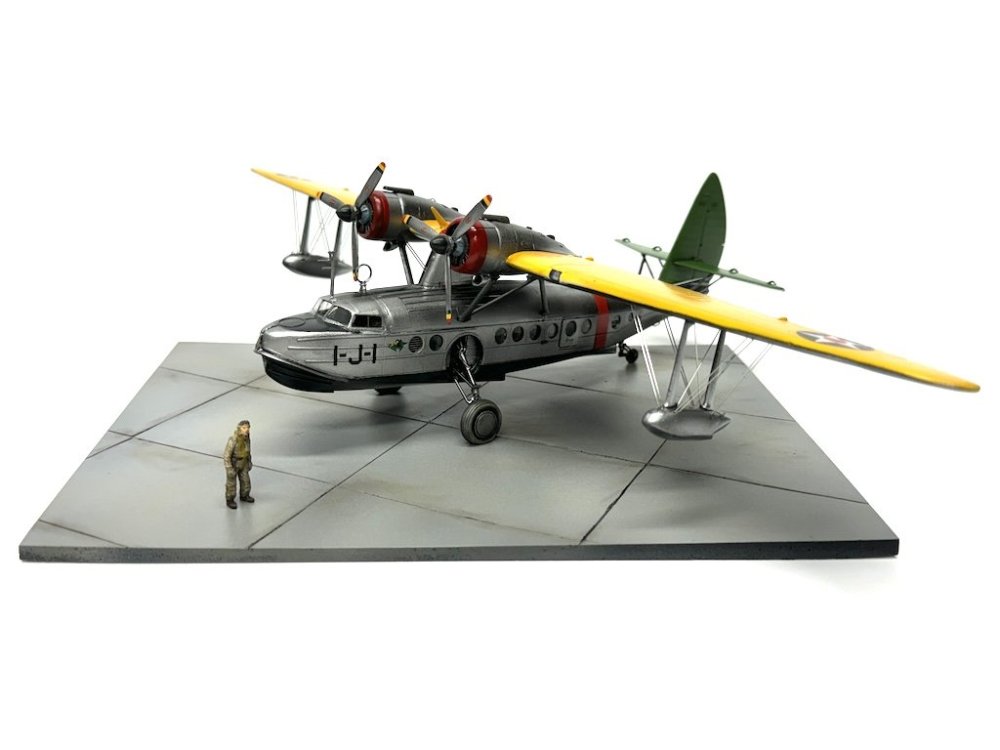
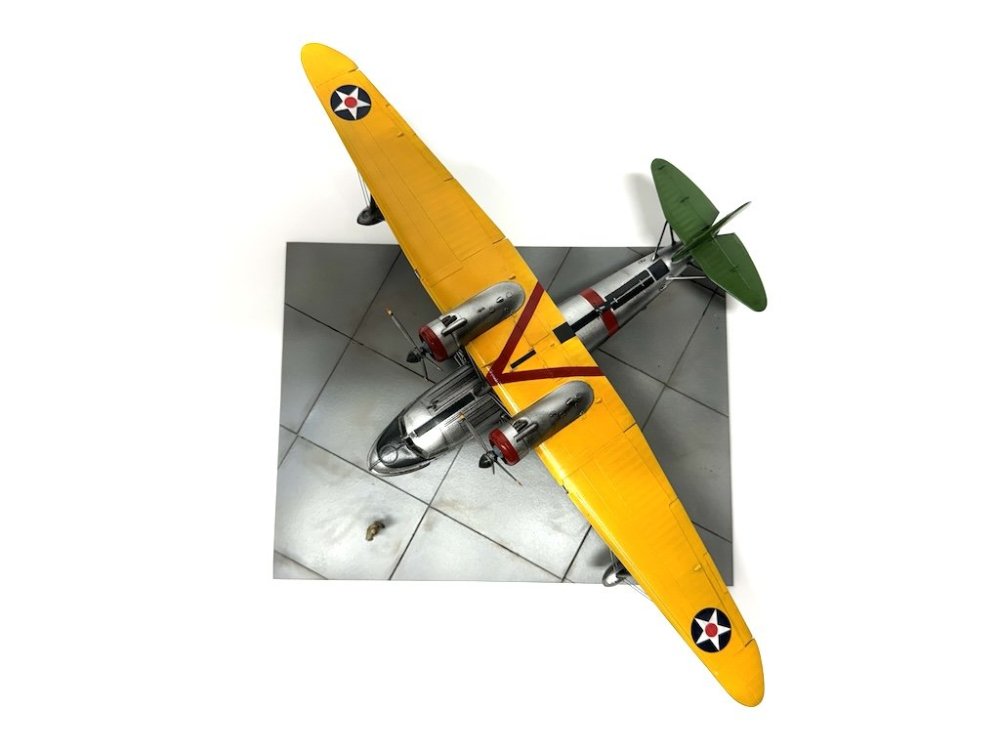
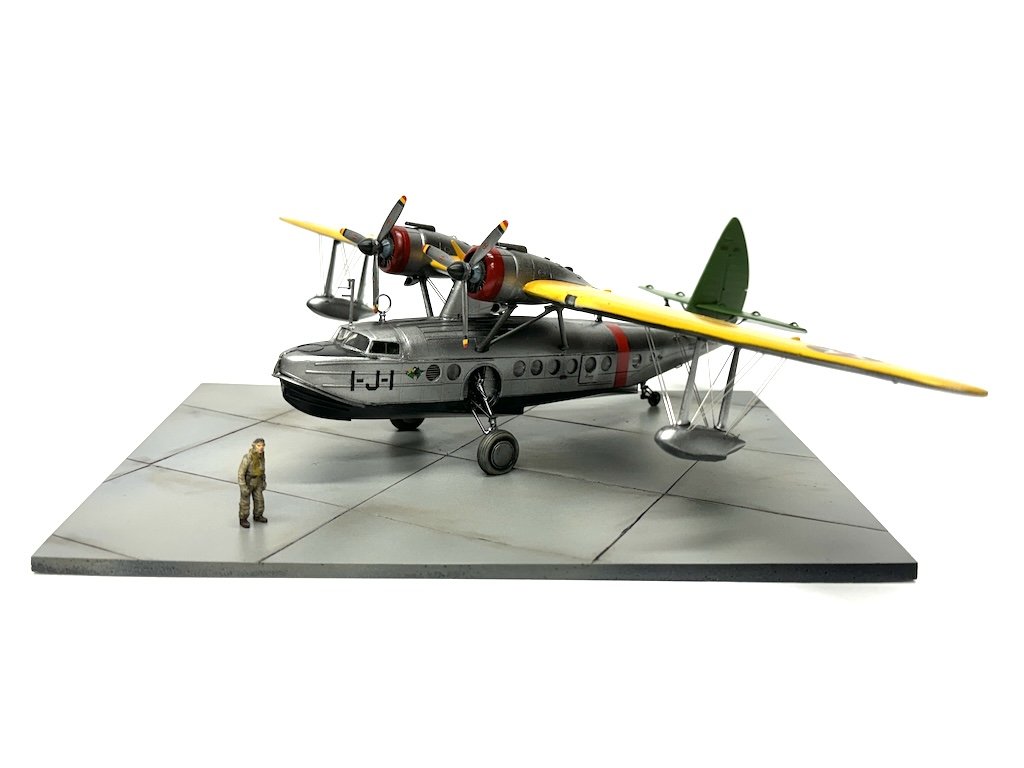
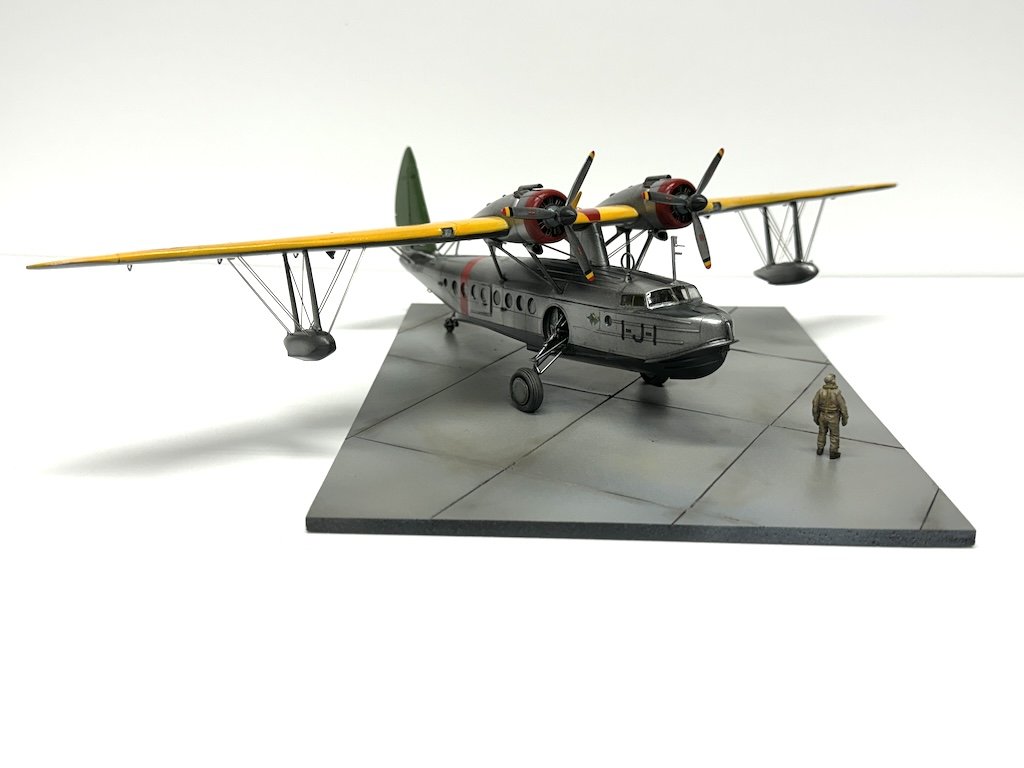
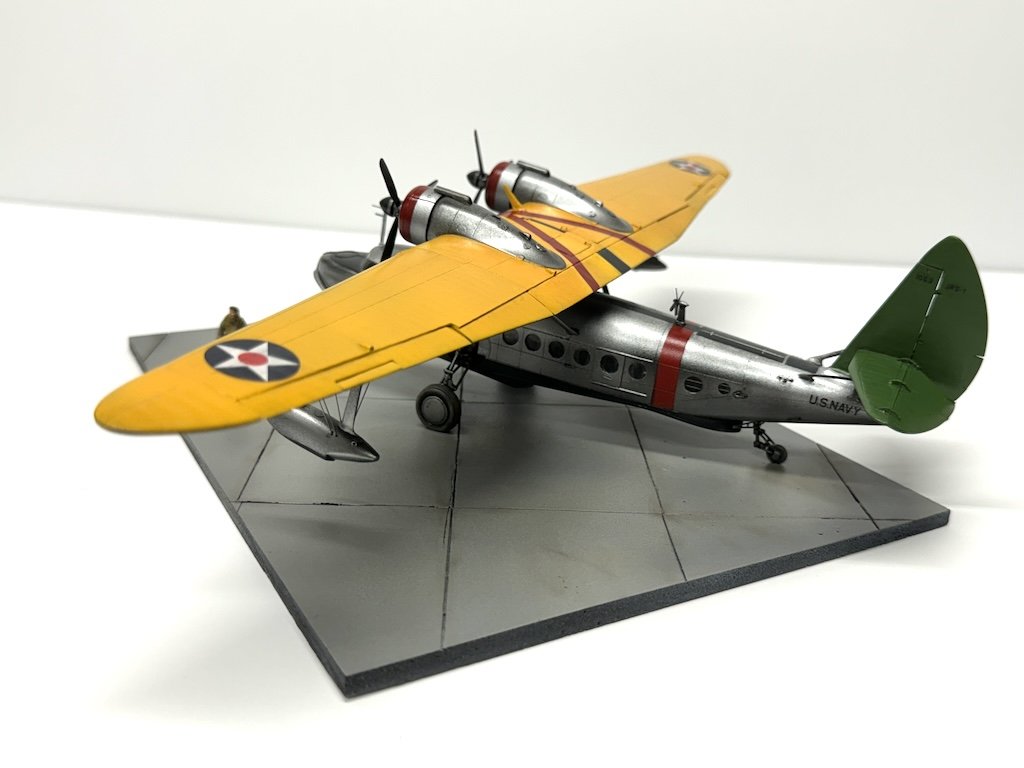
Sikorsky JRS-1 with AM (Eduard) 1/72
Landlubber Mike replied to Landlubber Mike's topic in The Great Twins Broup Bluild
Thanks guys! Now to start early on the next GB -
Sweet subjects Peter! Looking forward to them!
-
Sikorsky JRS-1 1/72 - Bu. No. 1063
Landlubber Mike replied to Landlubber Mike's topic in The Great Twins Broup Bluild
Thanks Peter! Really appreciate all your encouragement and support on the build. Also, thanks for recommending this kit over some of the others I was considering. It certainly ended up pushing me but I learned quite a bit along the way! The mask removal was a big relief. With the windows being in relief, tweezers and toothpicks didn't work. I then tried using a sharp scalpel blade to get the mask started, and then finished pulling them off with tweezers. I don't know how people build those big liners with rows of windows! -
Sikorsky JRS-1 1/72 - Bu. No. 1063
Landlubber Mike replied to Landlubber Mike's topic in The Great Twins Broup Bluild
Thanks guys! Really appreciate it! Rob - tough kit, but I found the subject really interesting and beautiful. Would love to see you work your magic on one of these! Chris, I ended up using cut down steel pins for the rigging. I had bought these insect pins of all things for my 1/700 ship builds (for things like masts and flag poles), which come in different thicknesses and I believe are stainless steel. They don’t bend which makes them great for the diameters I needed compared to brass wire. I had pre-drilled the holes before assembling and painting, so it was just a matter of figuring out what length to cut them to (which was a bit of a pain). Thankfully it worked out because I had never done this type of rigging before and took a chance. Well, after getting three hours of sleep I was up and halfway out the door for one of my daughter’s softball tournaments. Just found out it was cancelled due to the fields being unplayable with the rain yesterday. Guess the modeling gods had my back again so off to bed I go. 😴 Looking forward to the next GB! -
Build log here in case anyone is interested: