
Fran
-
Posts
2,286 -
Joined
-
Last visited
Content Type
Profiles
Forums
Events
Gallery
Everything posted by Fran
-
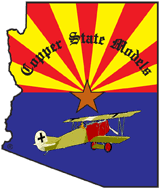
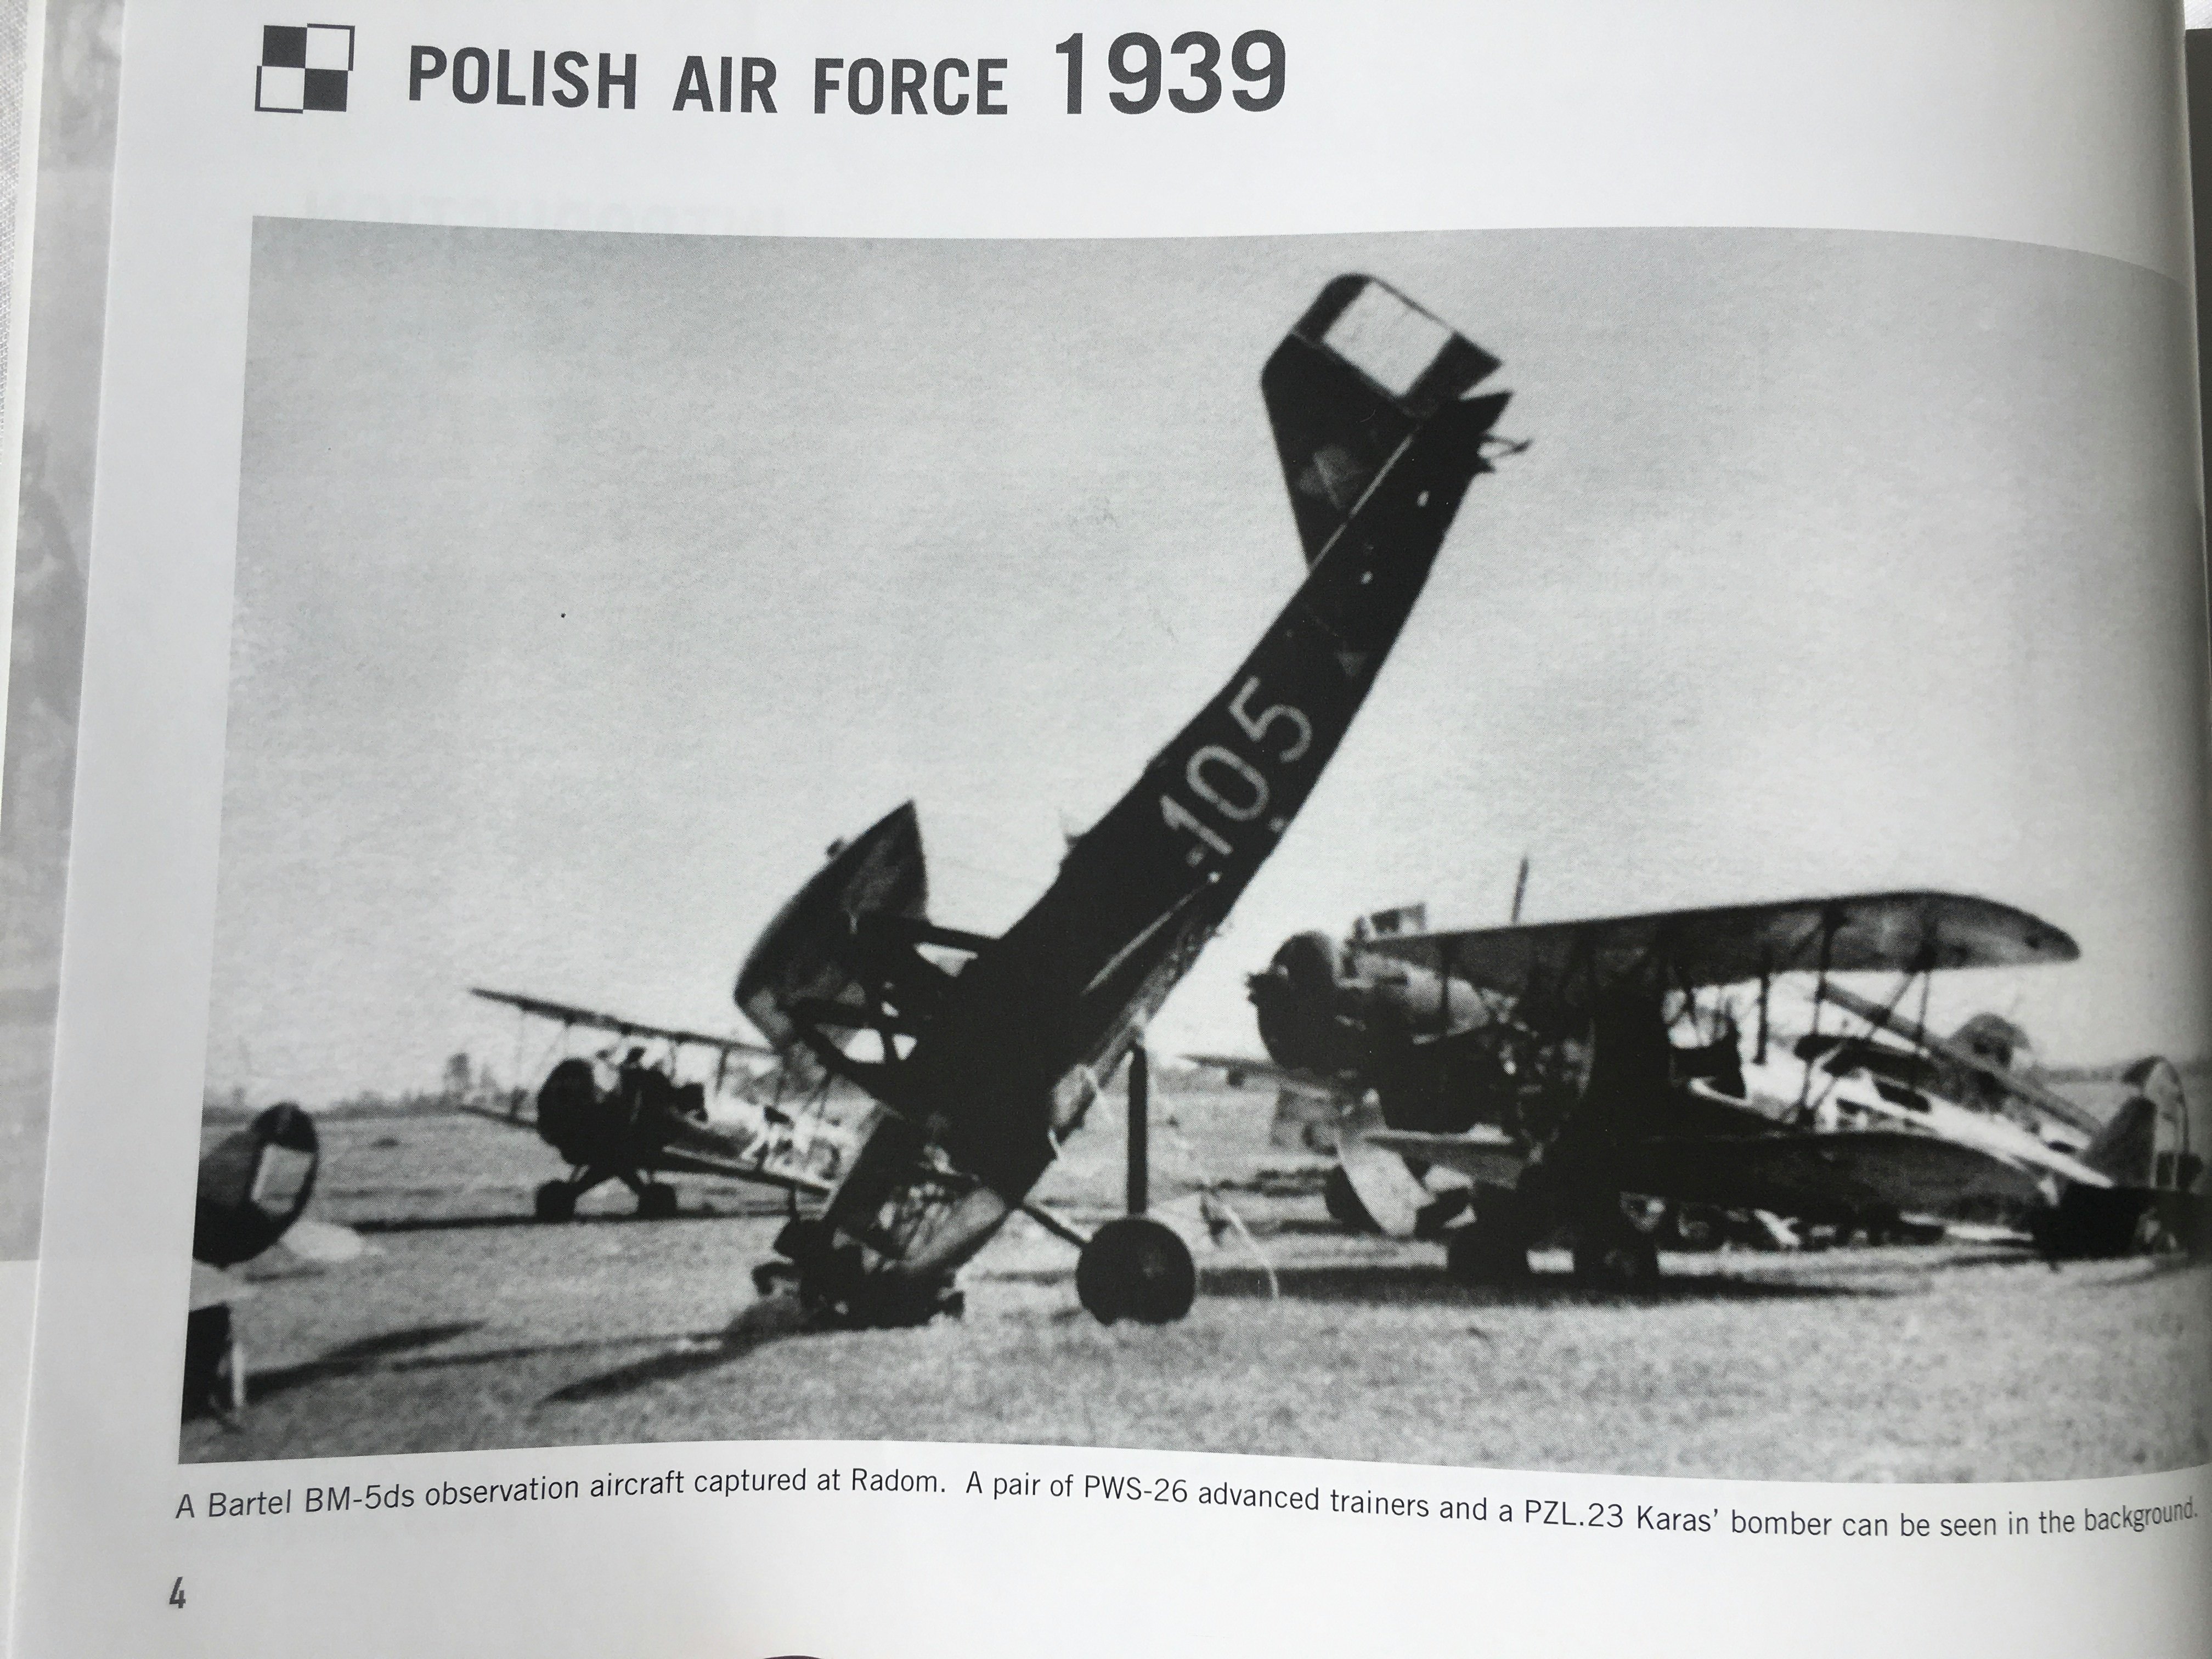
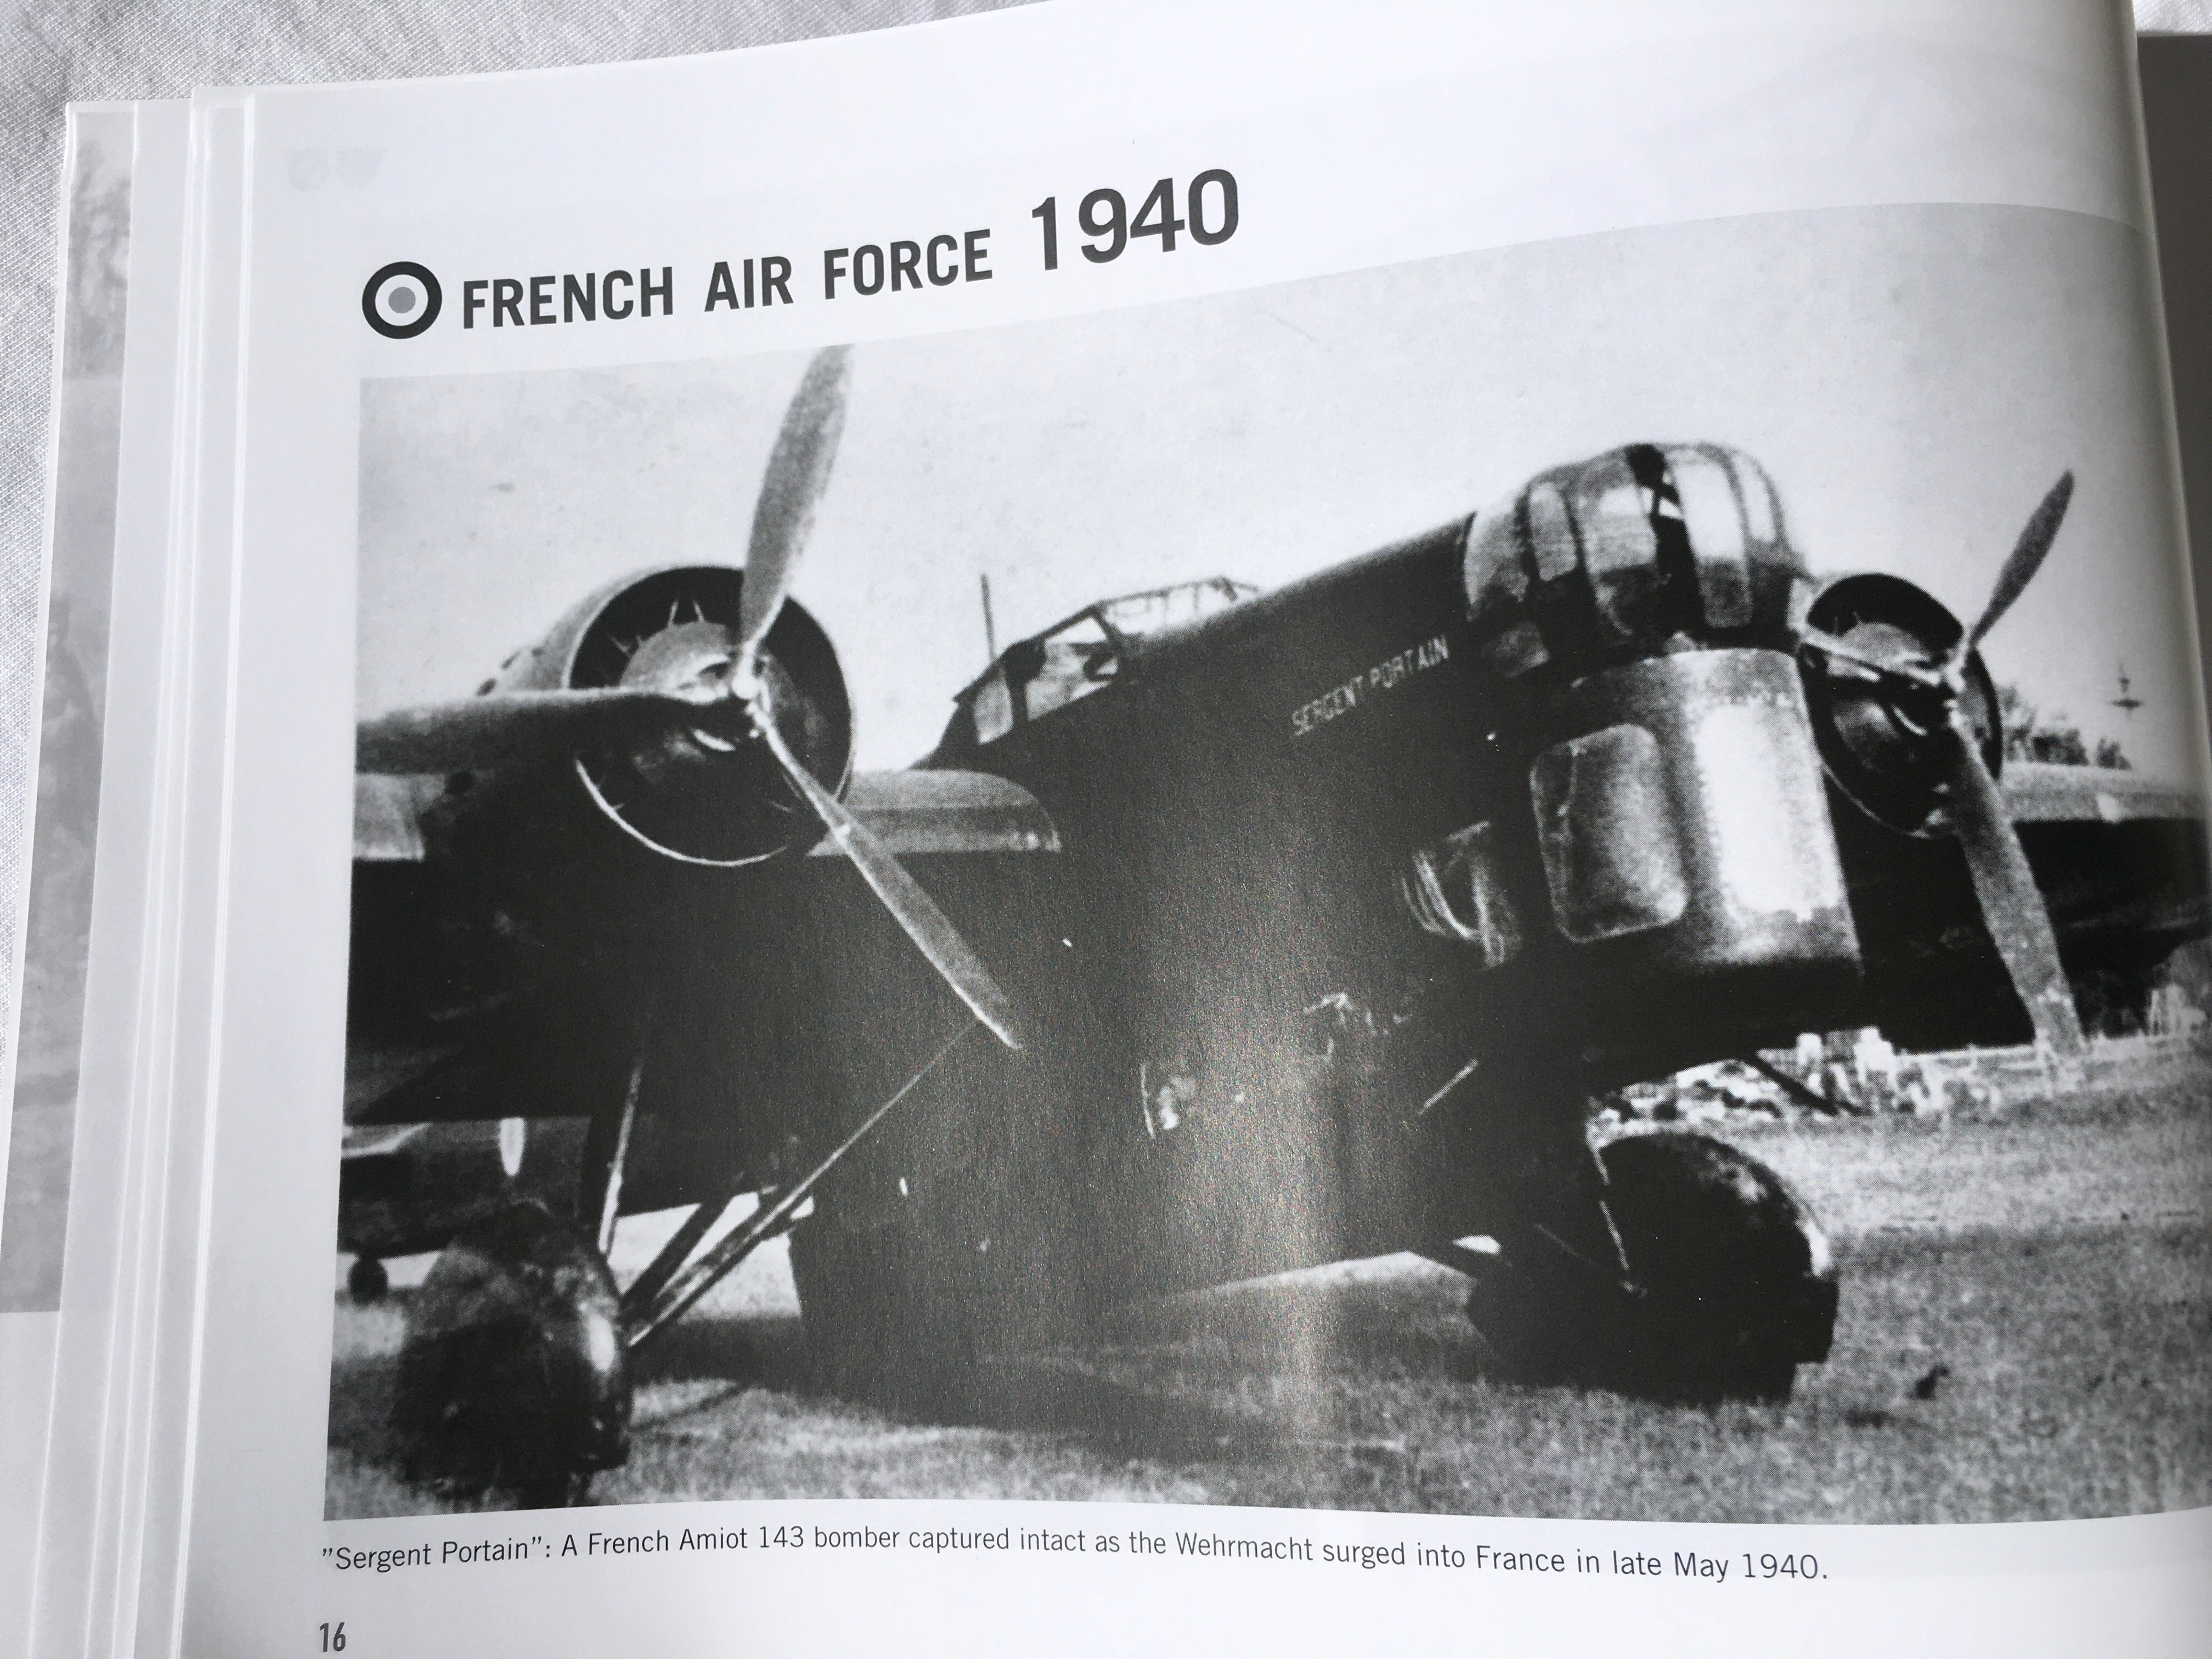
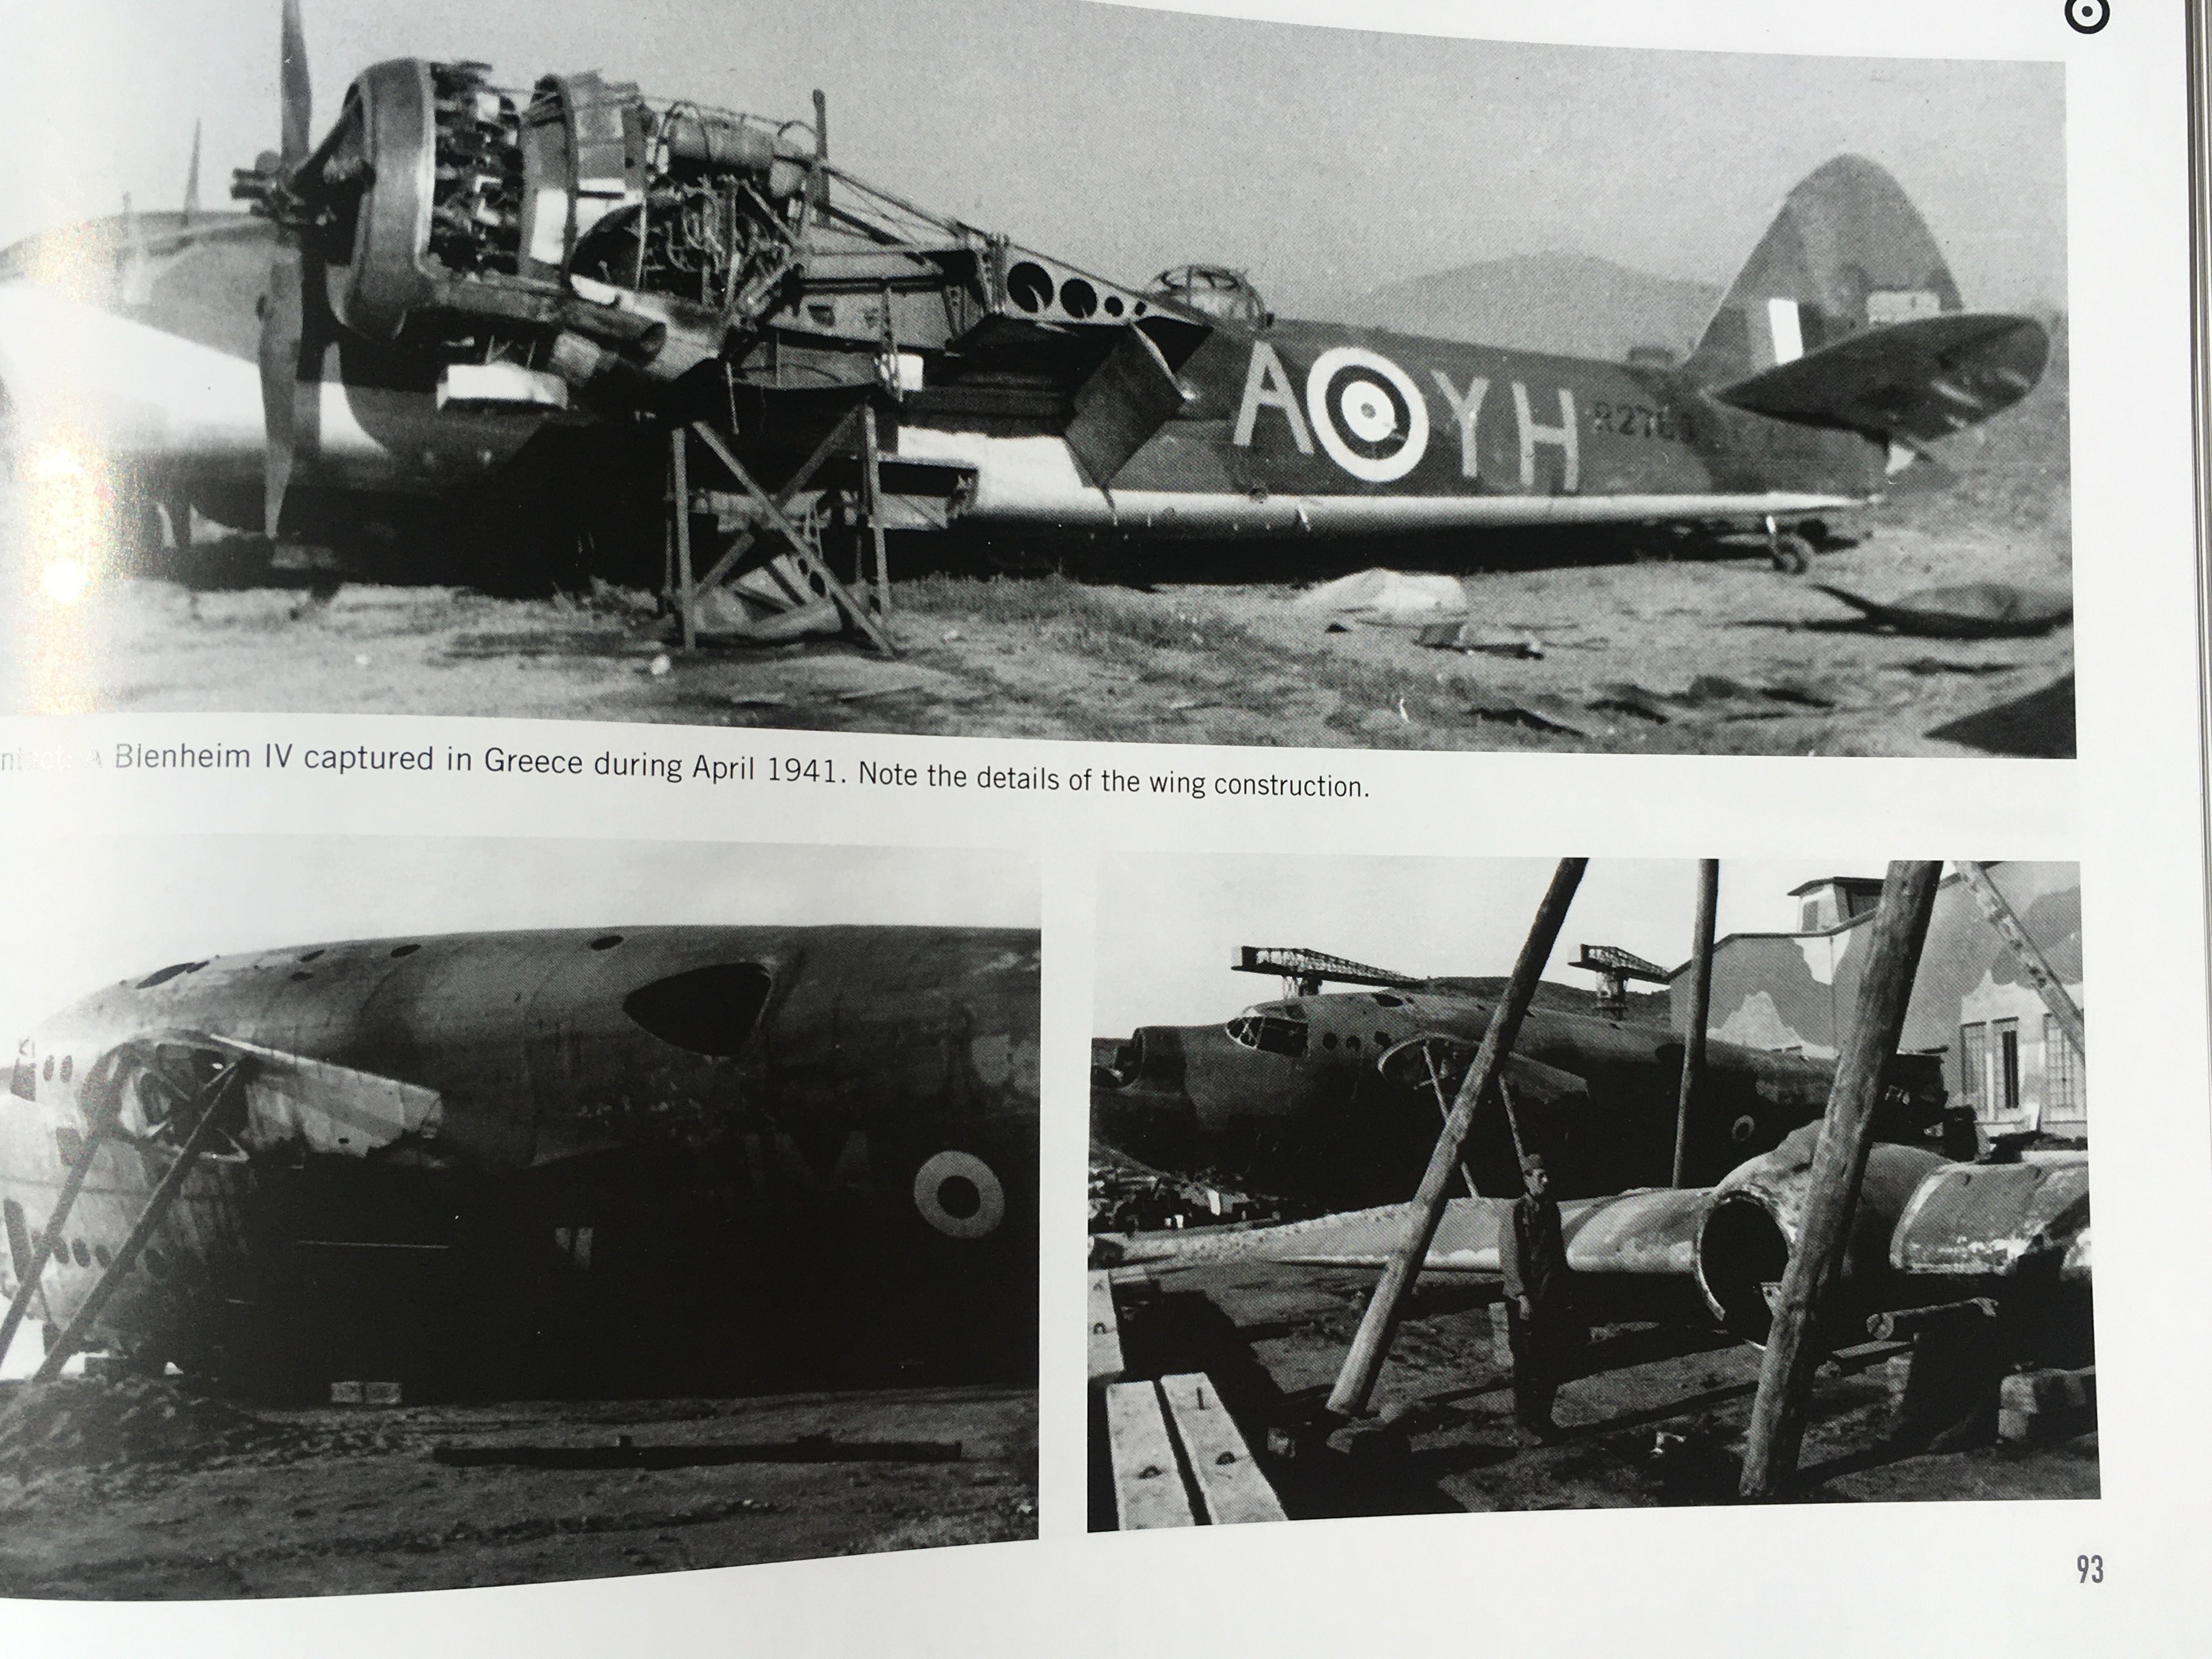
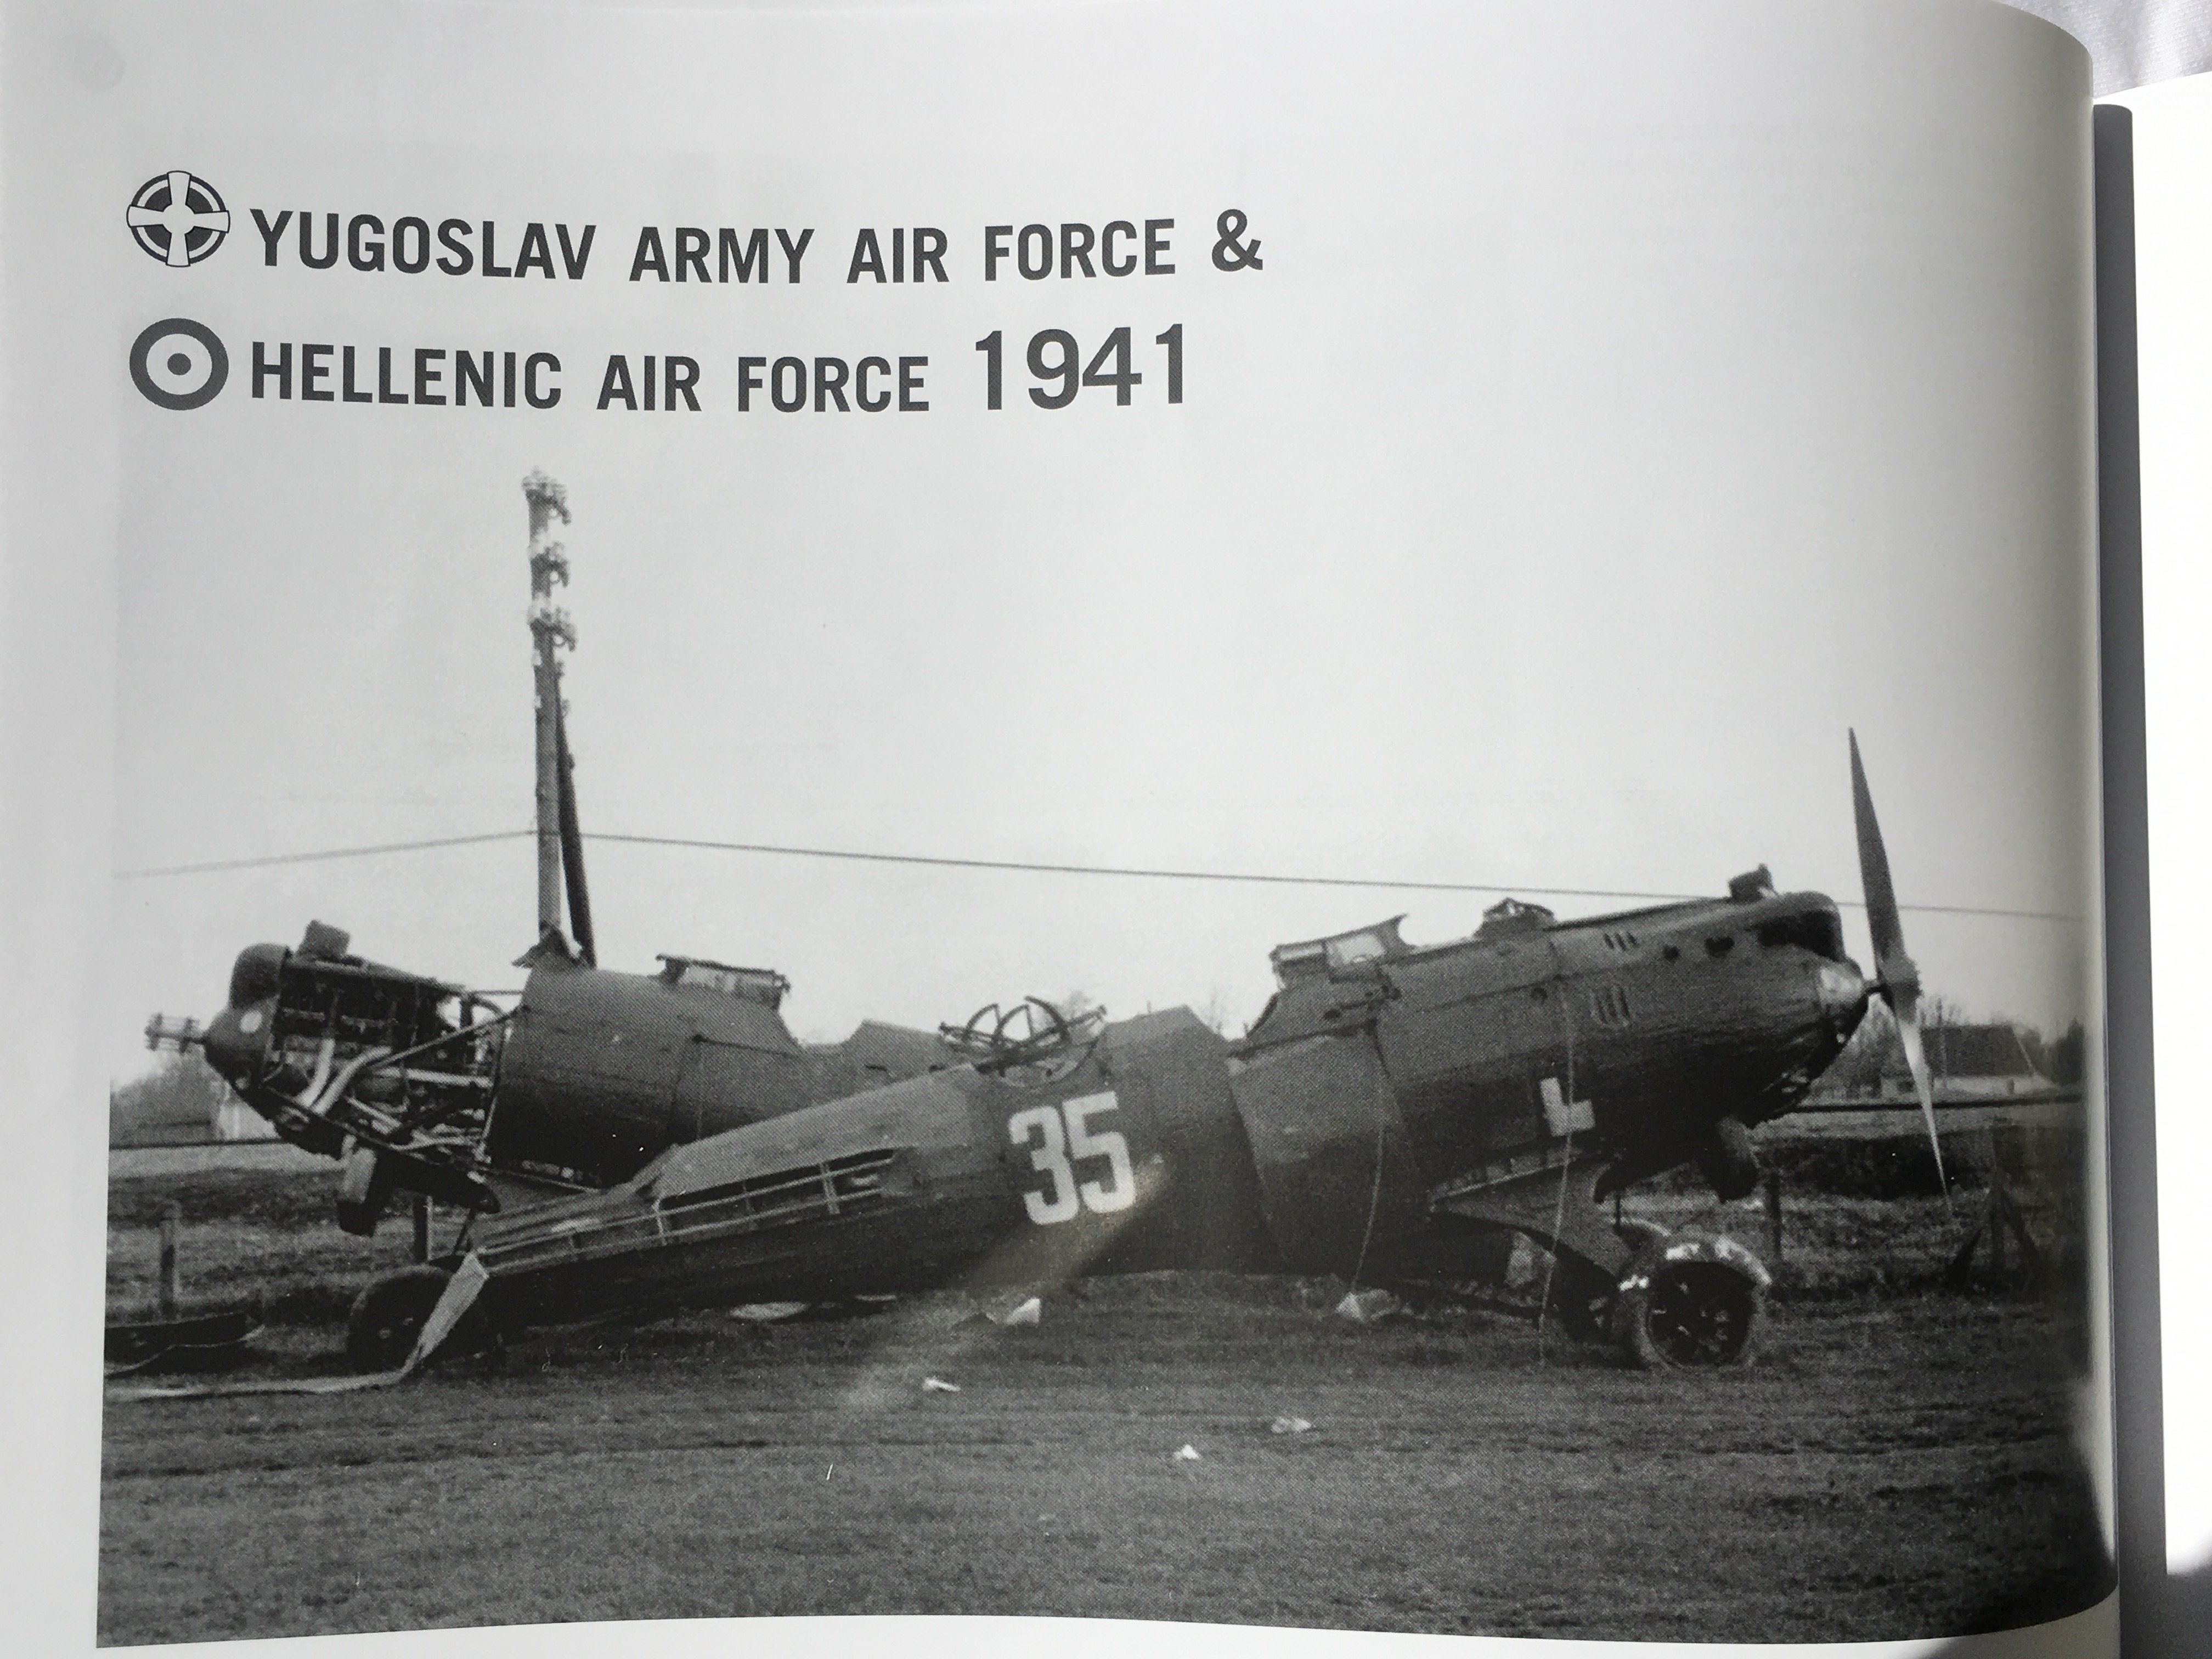
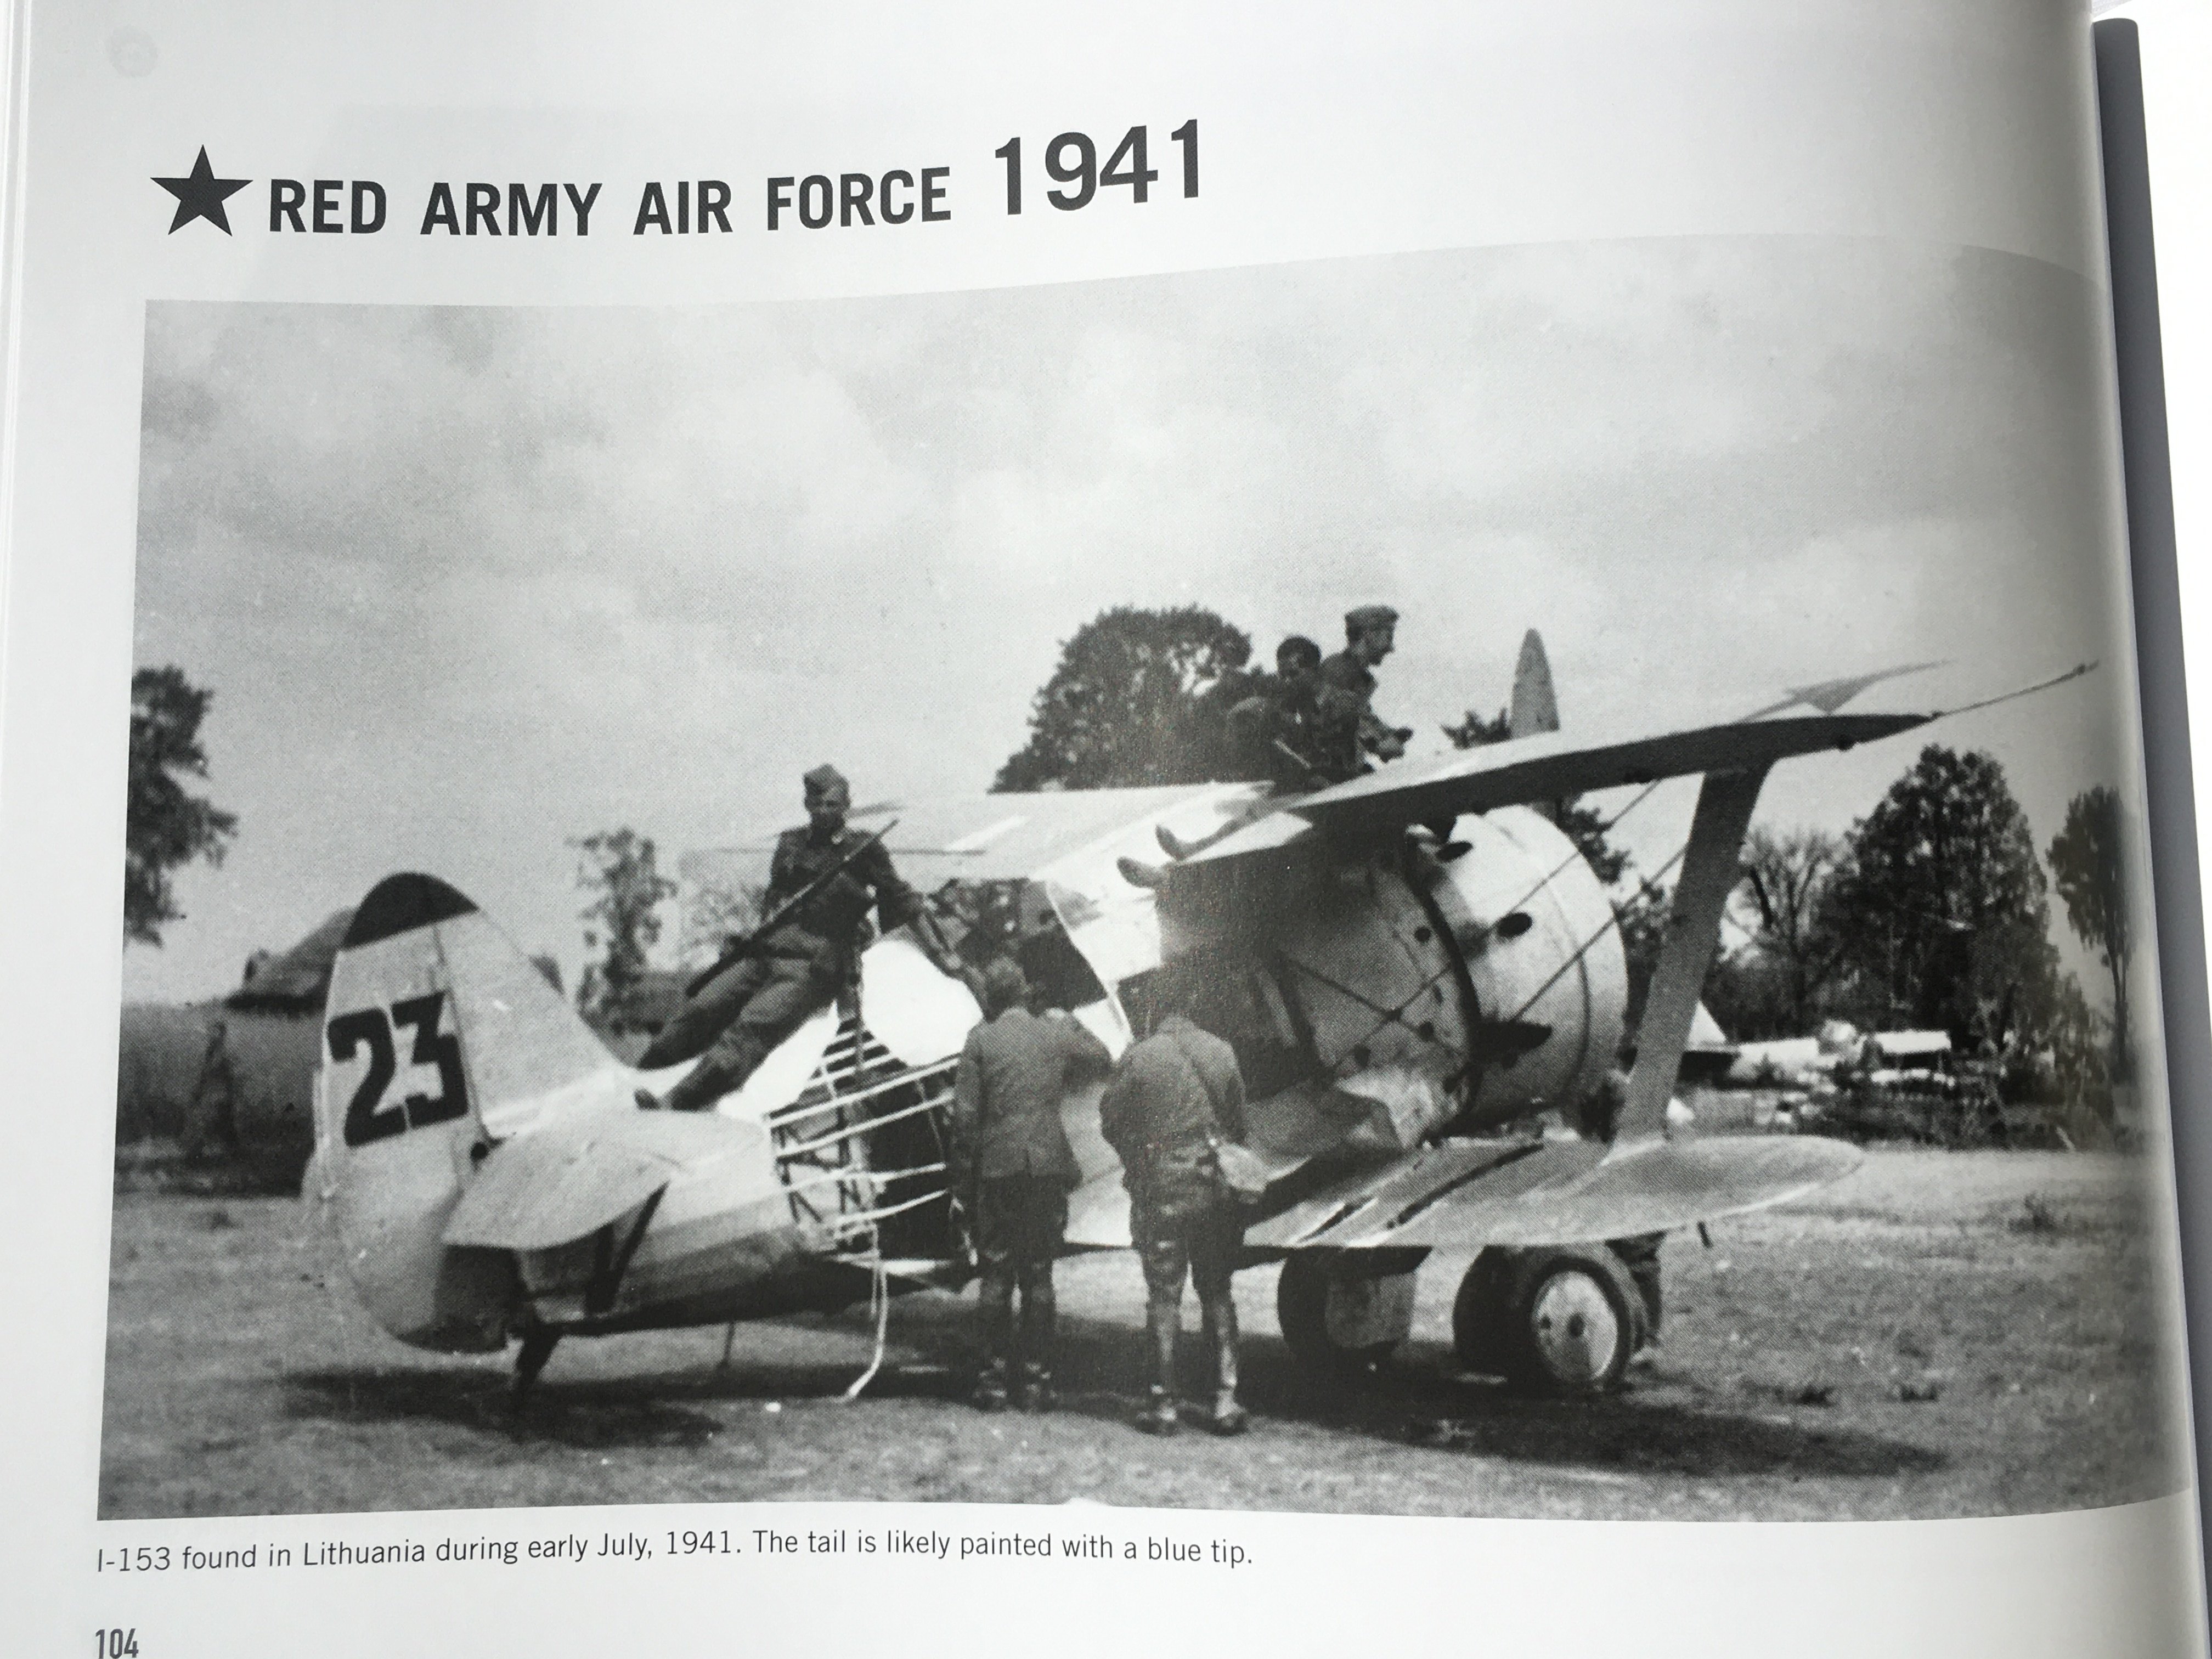
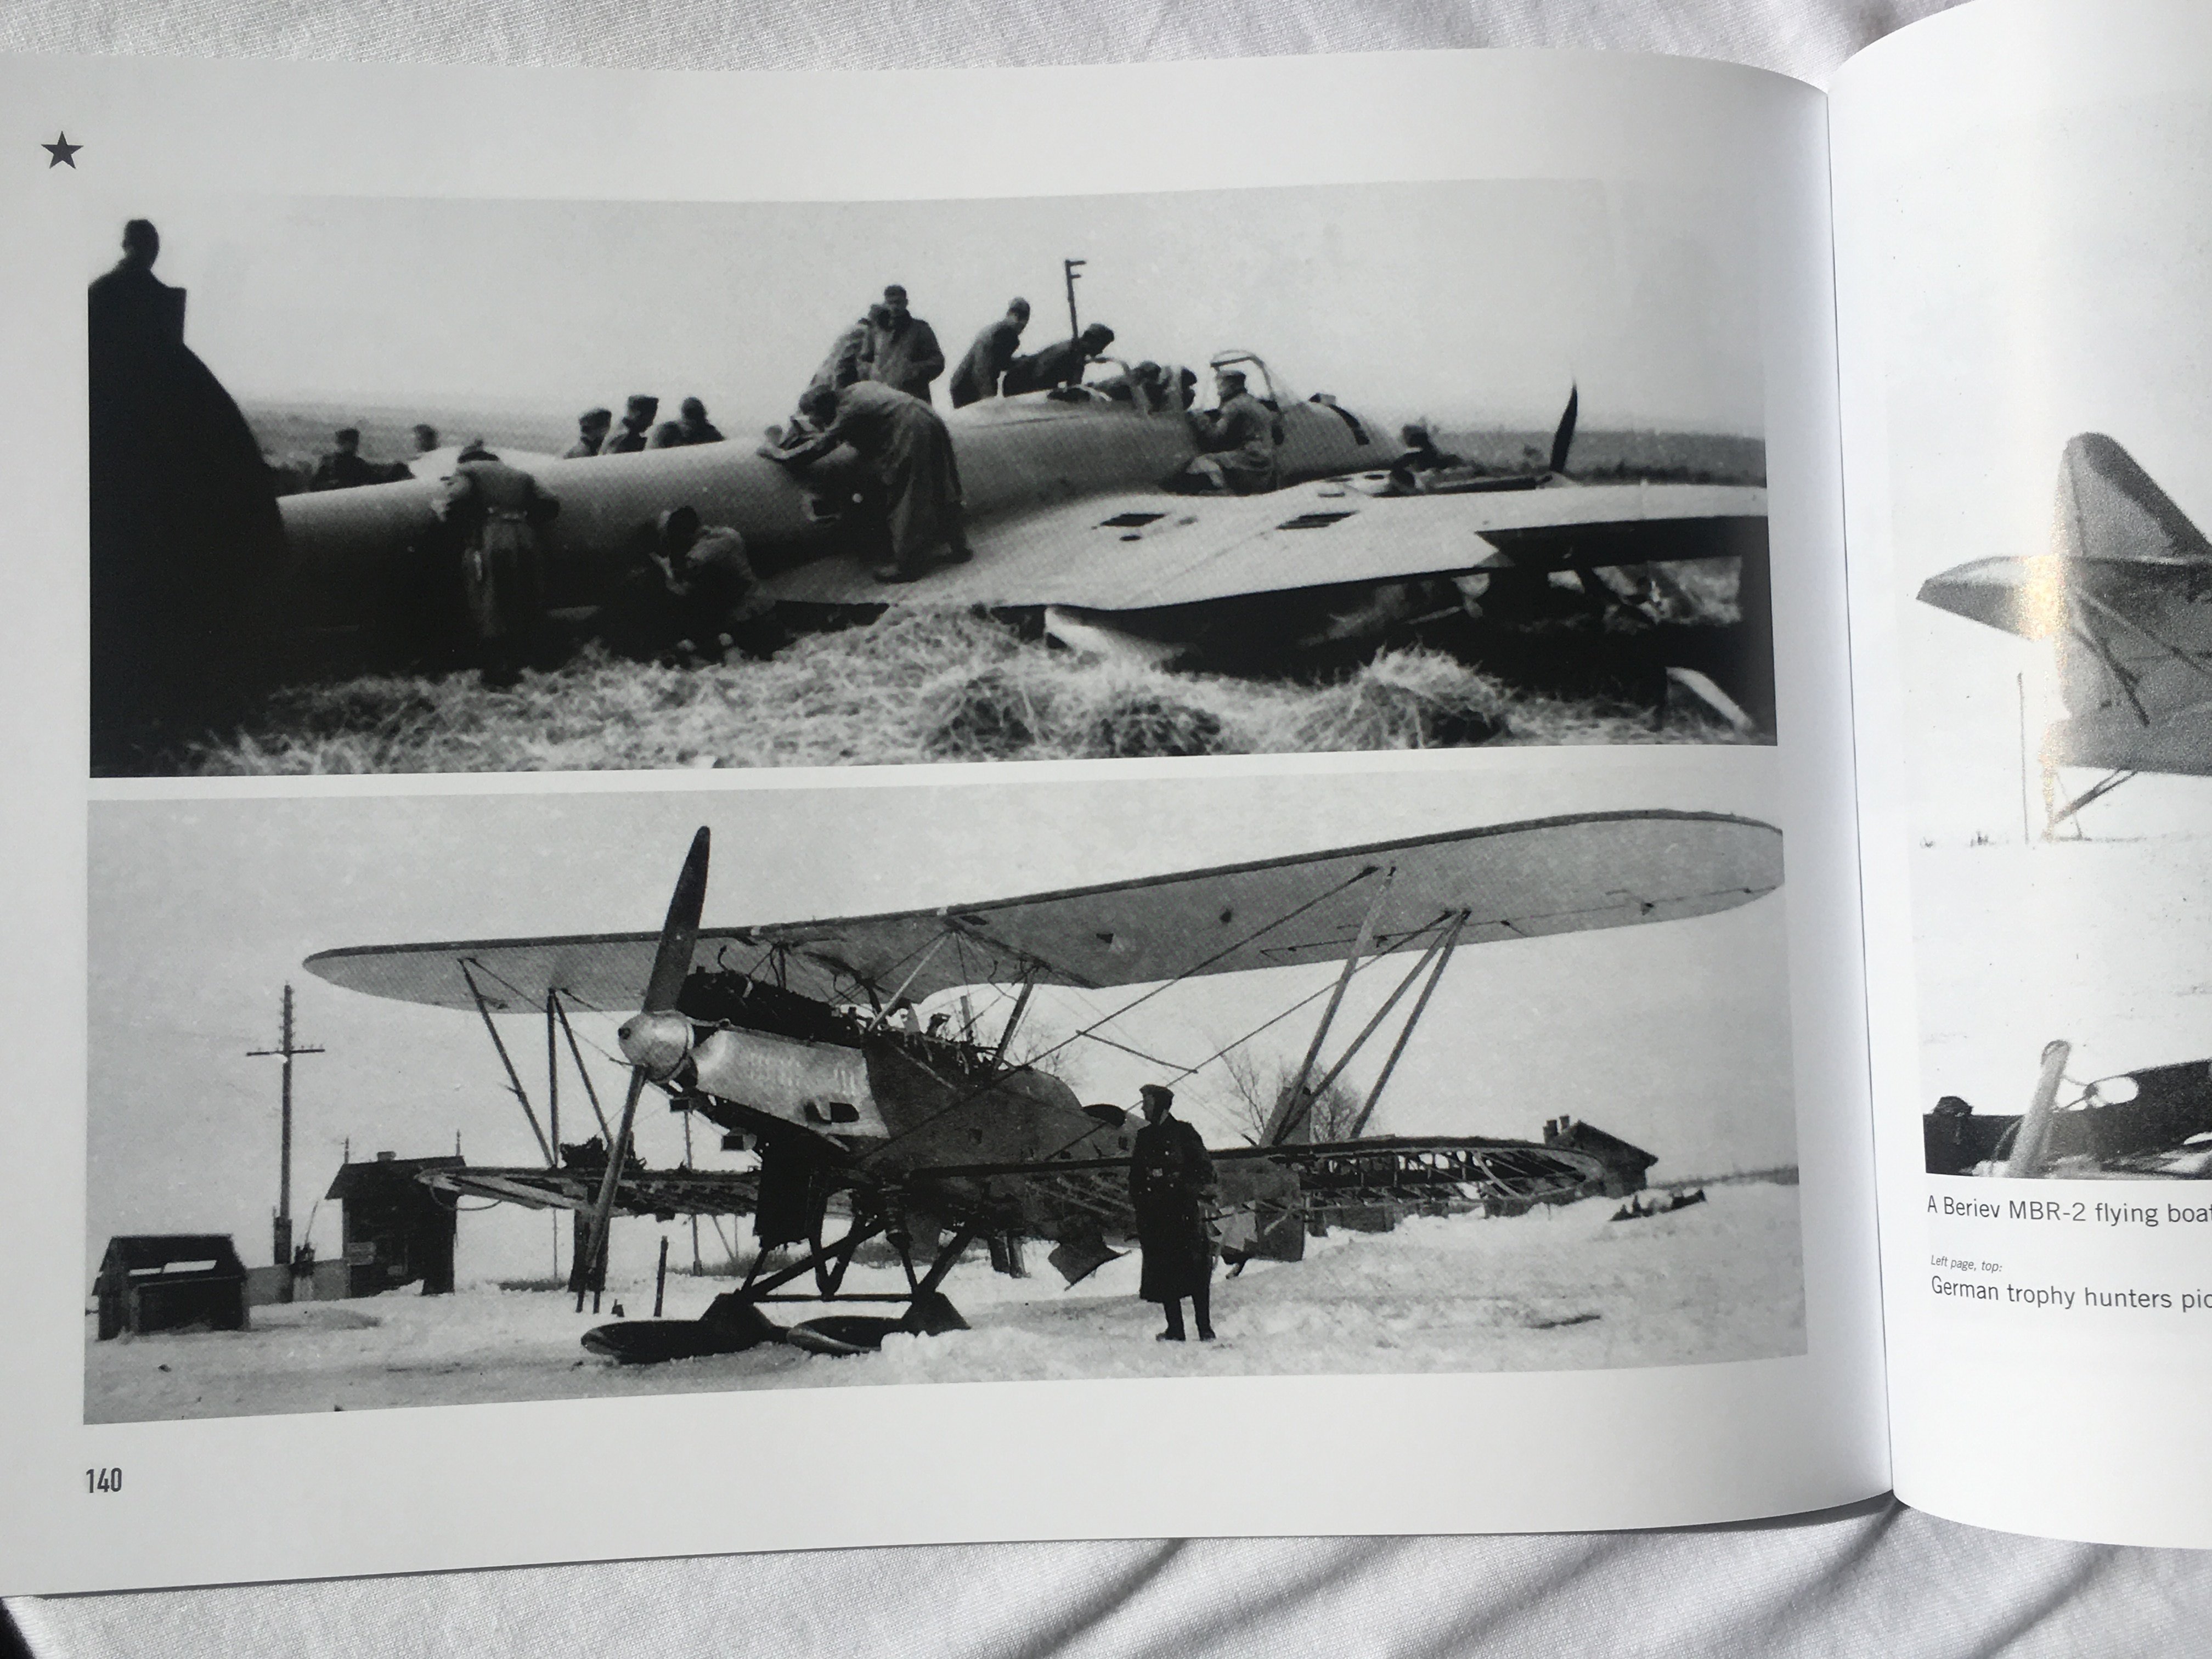
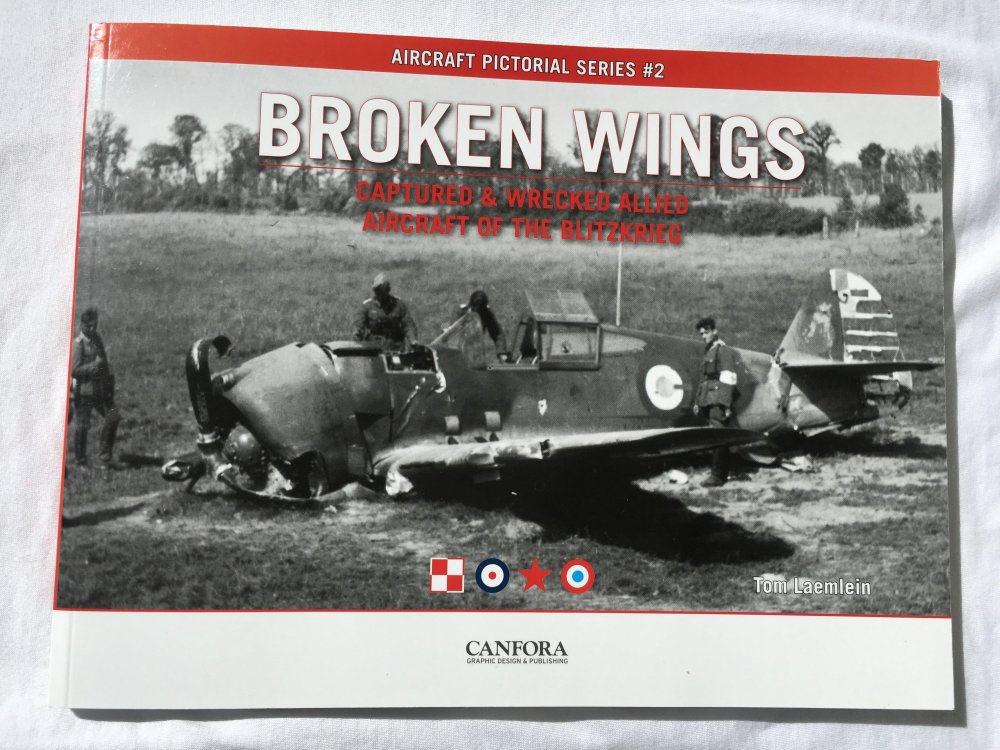
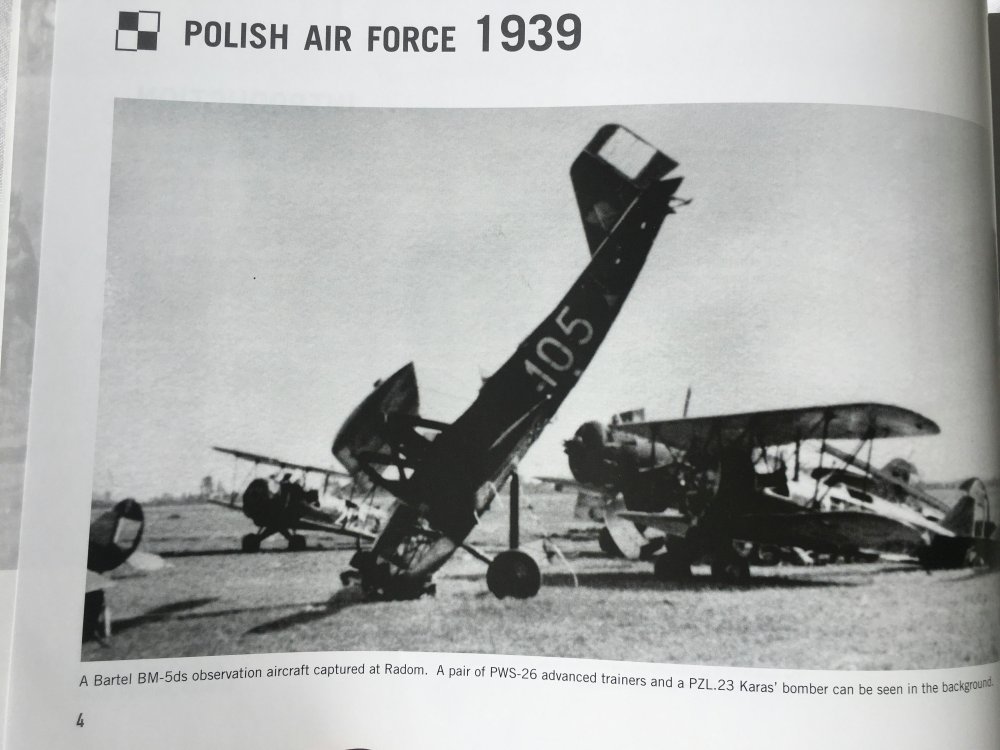
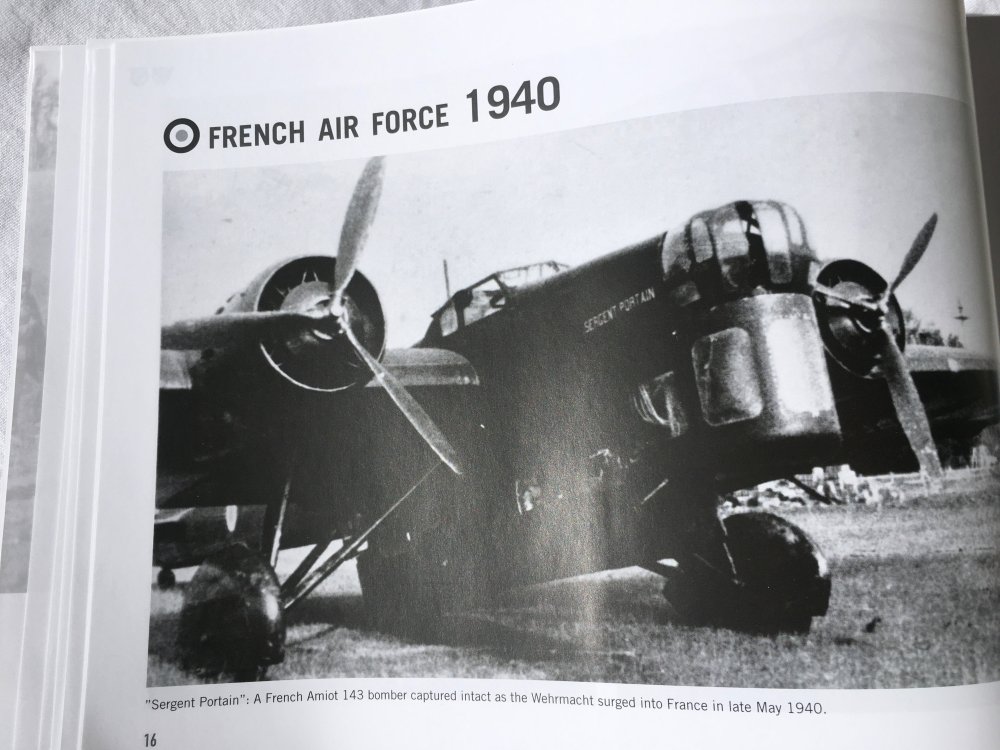
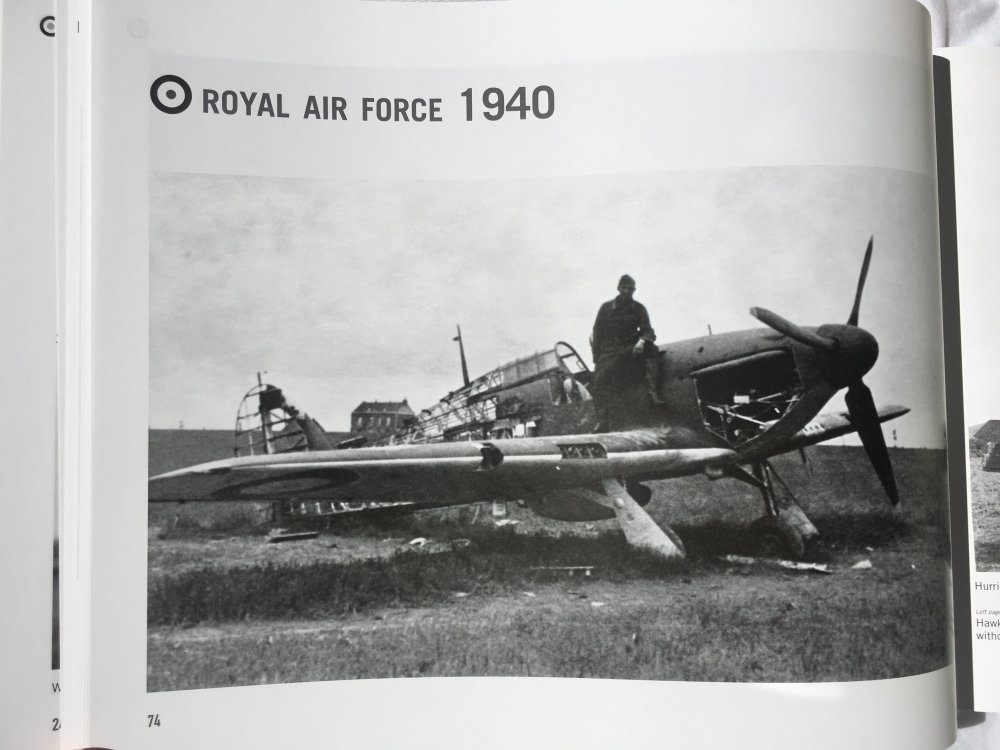
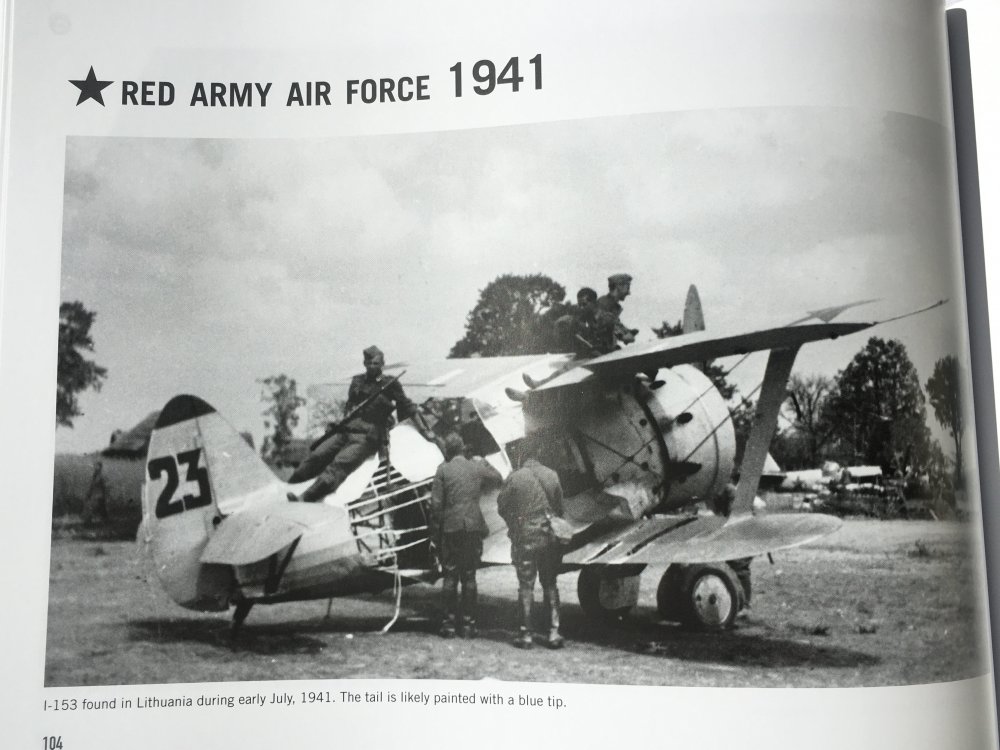
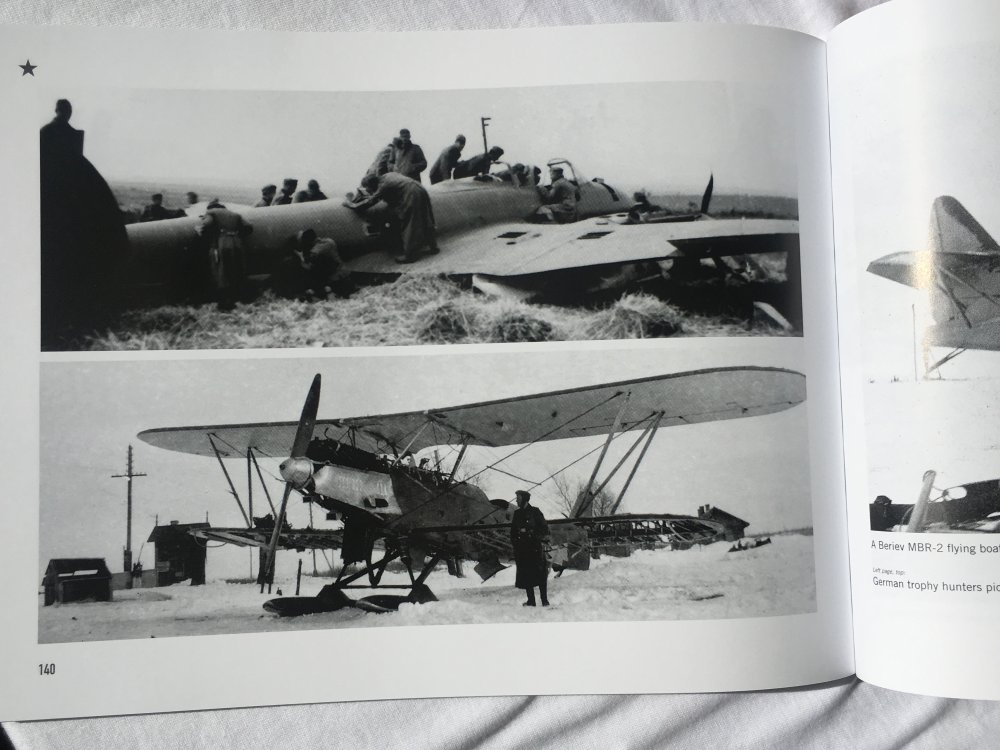
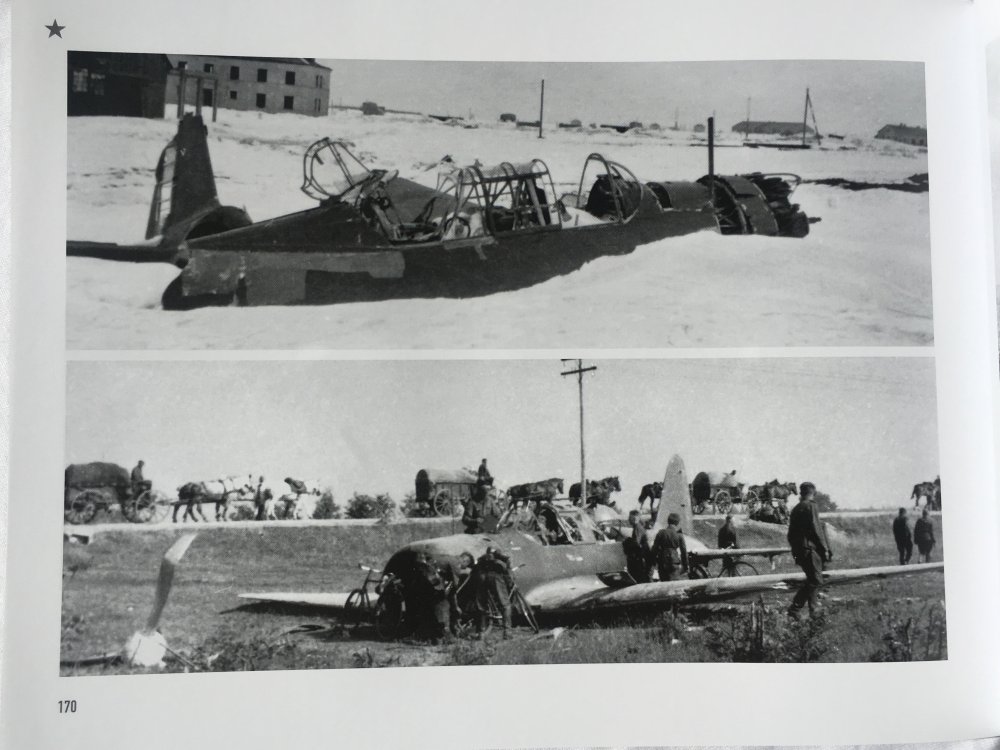
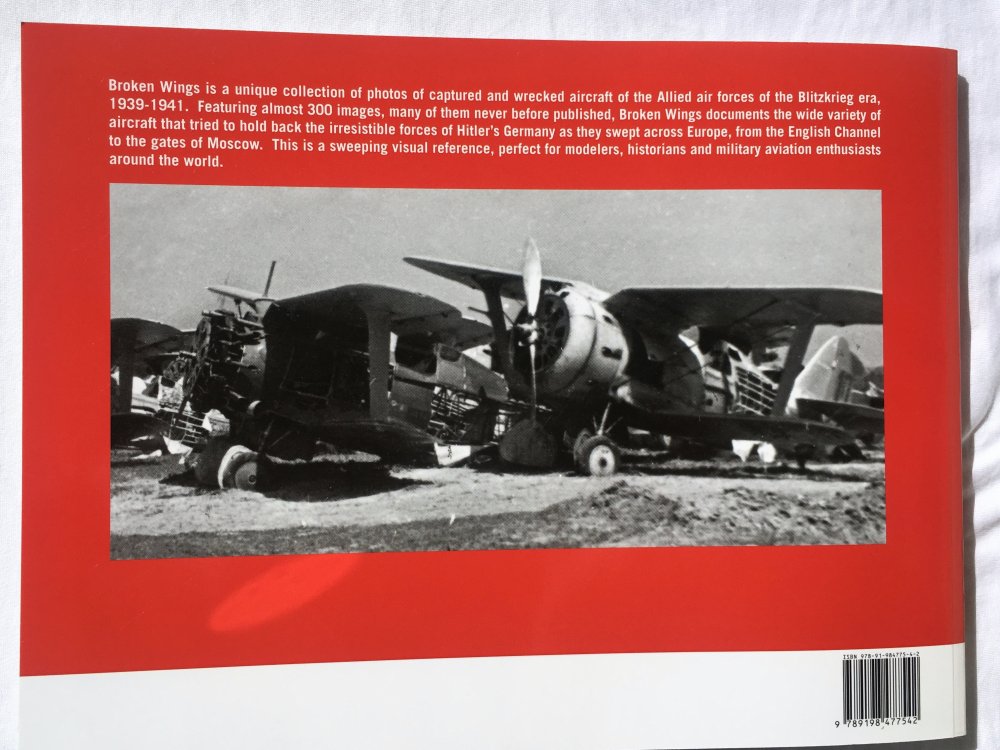
Broken Wings Captured & Wrecked Allied Aircraft of the Blizkrieg. Aircraft Pictorial series, #2 Publisher: Canfora Graphic Design & Publishing Price: 29€ (EU price) At LSM we had the pleasure to read, view and review several past titles from Canfora Publishing, like the Wingspan Vol. I, Vol.II, Rare Wheels, T-60 and others. And also the first books of this series also passed in LSM. Check here. Today we have in hands a new title in this series: Broken Wings, also written by Tom Leamlein. This book have some unpublished pictures from author private collection and all are from Allied aircraft in a specific era: Blitzkrieg. As the first book of this serie, the idea is to compile the best pictures of fallen aircraft. Like others books from Canfora as Wingspan, this one is produced in soft-cover landscape format with 176 glossy pages. The quality paper is a reference in Canfora books, that helps a lot in the printing stage of thousands of black and pictures that have more than 70 years. I have been a modeler for 30 years now, and some of these pictures (several ones) are totally new to me and as my acknowledge, is the first time that most as published. So, these pictures were taken by German troops in the early stages of WWII. As the first serie book, this volume is also a truly and fantastic inspiration to all modellers, that will give to us some very new and good ideas for aircraft dioramas. All the pictures are in black and white and in the cover, a Curtiss Hawk H-75A3, flown by S/lt Rey of GC 1/5, shot down on May 18, 1940 (French Air Force). This volume its about several nations aircrafts, like France, U.K., Soviet, Poland, The Netherlands, Belgium, ex-Yugoslavia after crash landing or soil destruction. The book is divided and organized by nation, with the insignia on the top right of the page, starting with Polish Air Force and ending ex-USSR Air Force. So some of the aircraft are less know from the general modeler like the Amiot 143, Zmaj Faziz FN or the Kharkiv KhAI-5. So several types from those air forces are covered. Conclusion Is the book a good value for the modeler? Yes as it give the modelers, besides inspiration for new projects, very good and useful pictorial information of the airplanes in large and good resolution pictures. For me, it as work as an inspirational as I just have more future project in my head... thanks Canfora! Thanks to Toni and Canfora Publishing for the review sample. Fran


-
Great review!! Thanks
-

Ho229 at the Udvar-Hazy Center
Fran replied to JeroenPeters's topic in LSM 1/35 and Larger Work In Progress
Looking very good my friend!!! -
1/32 PZL P.11c supposedly coming in 2020 from IBG Models
Fran replied to [CAT]CplSlade's topic in General Discussion
Can`t wait to get my hands in one!! -
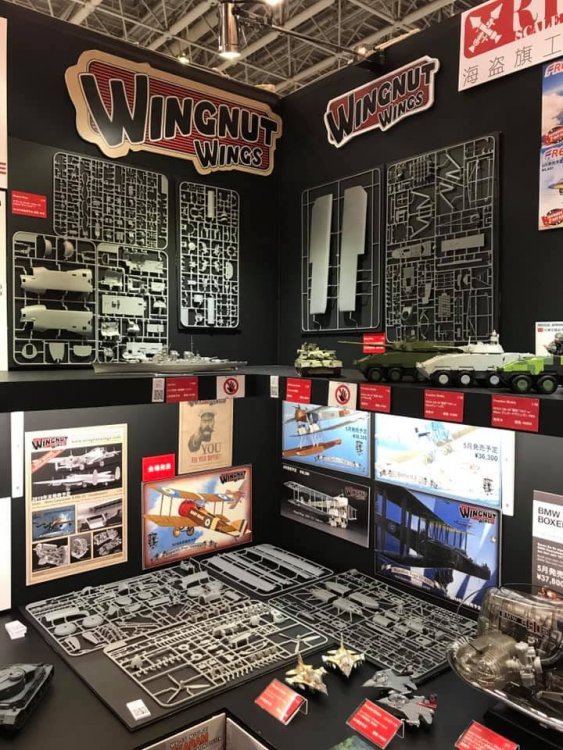
Some WnW news from Shizouka!! Here’s some intel directly from Beaver stand!! The 0/400 box art and a new Pup coming!! A Sopwith Pup "Gnome"!
-
Hobby Boss B-24 Liberator
Fran replied to RAF Liberators's topic in LSM 1/32 and Larger Aircraft Ready for Inspection
Great work!! It´s the first HB B-24 that I see and it looks fantastic!! -
Great pics guys!! quite inspirational ones!!! Thanks!
-
takom Takom 1/35 Bergepanzer Ausf.D Umbau Seibert 1945
Fran replied to JeroenPeters's topic in Armour/AFV Reviews
Love it mate! -
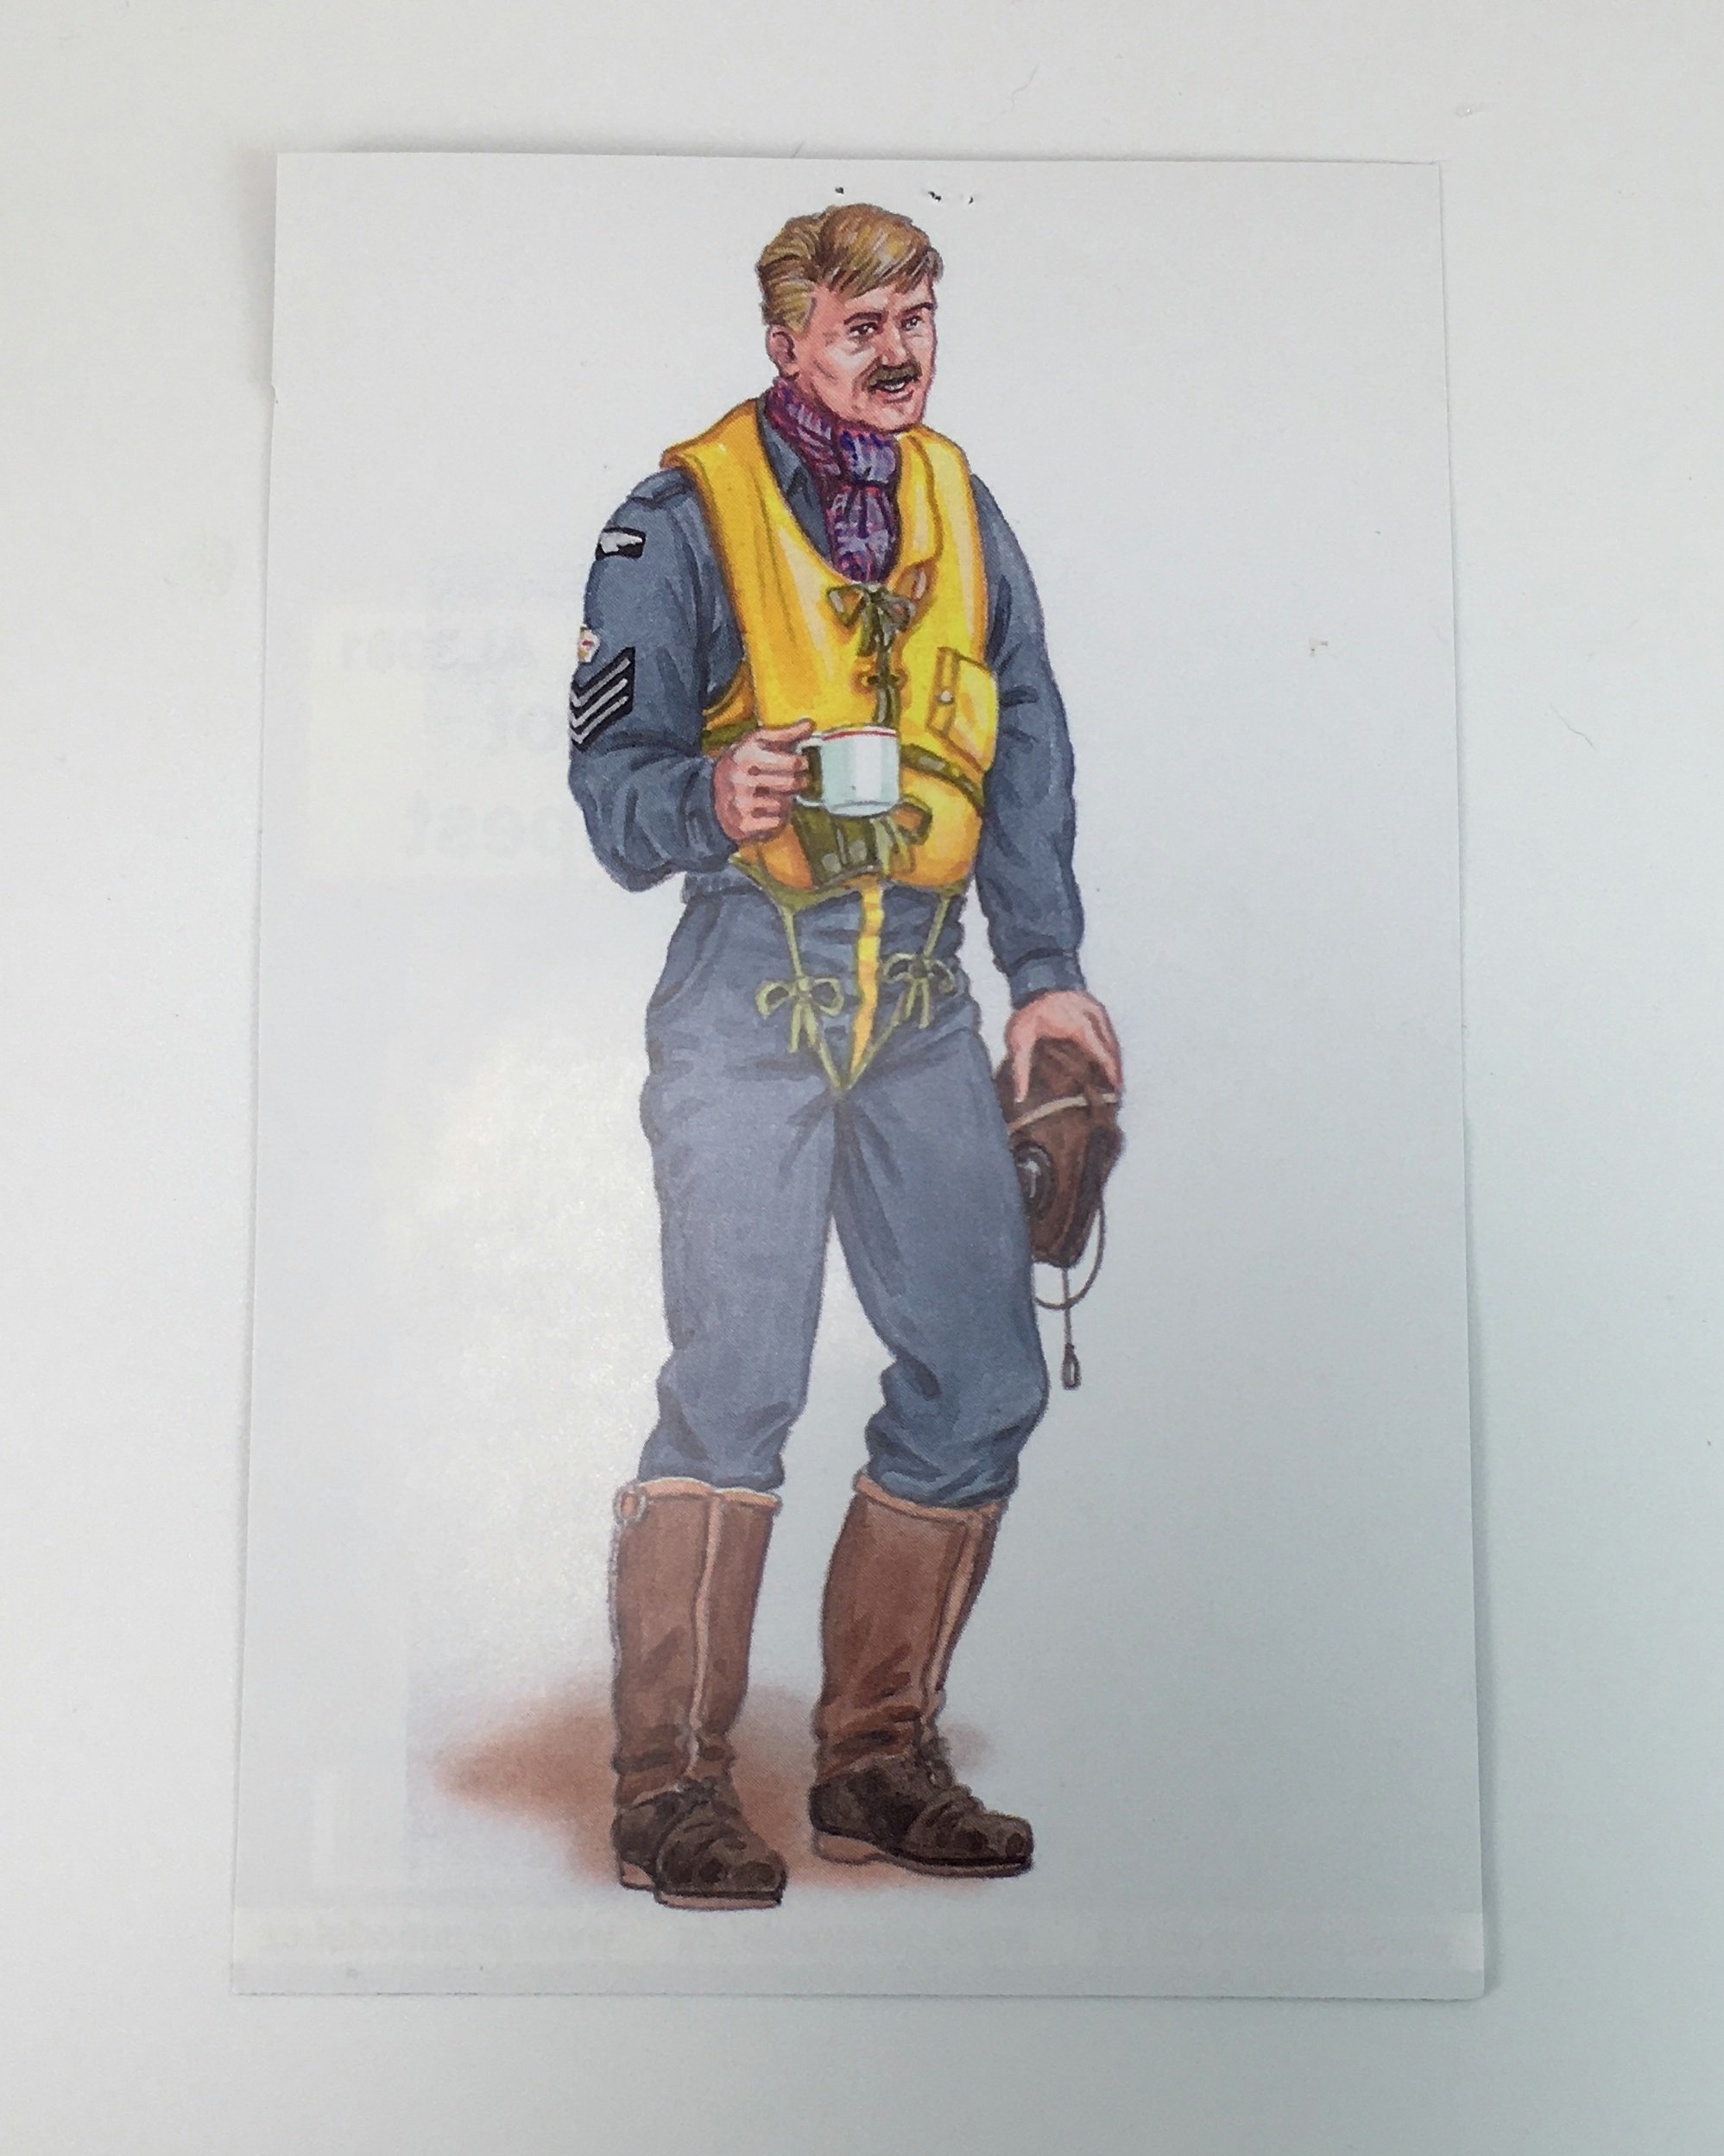
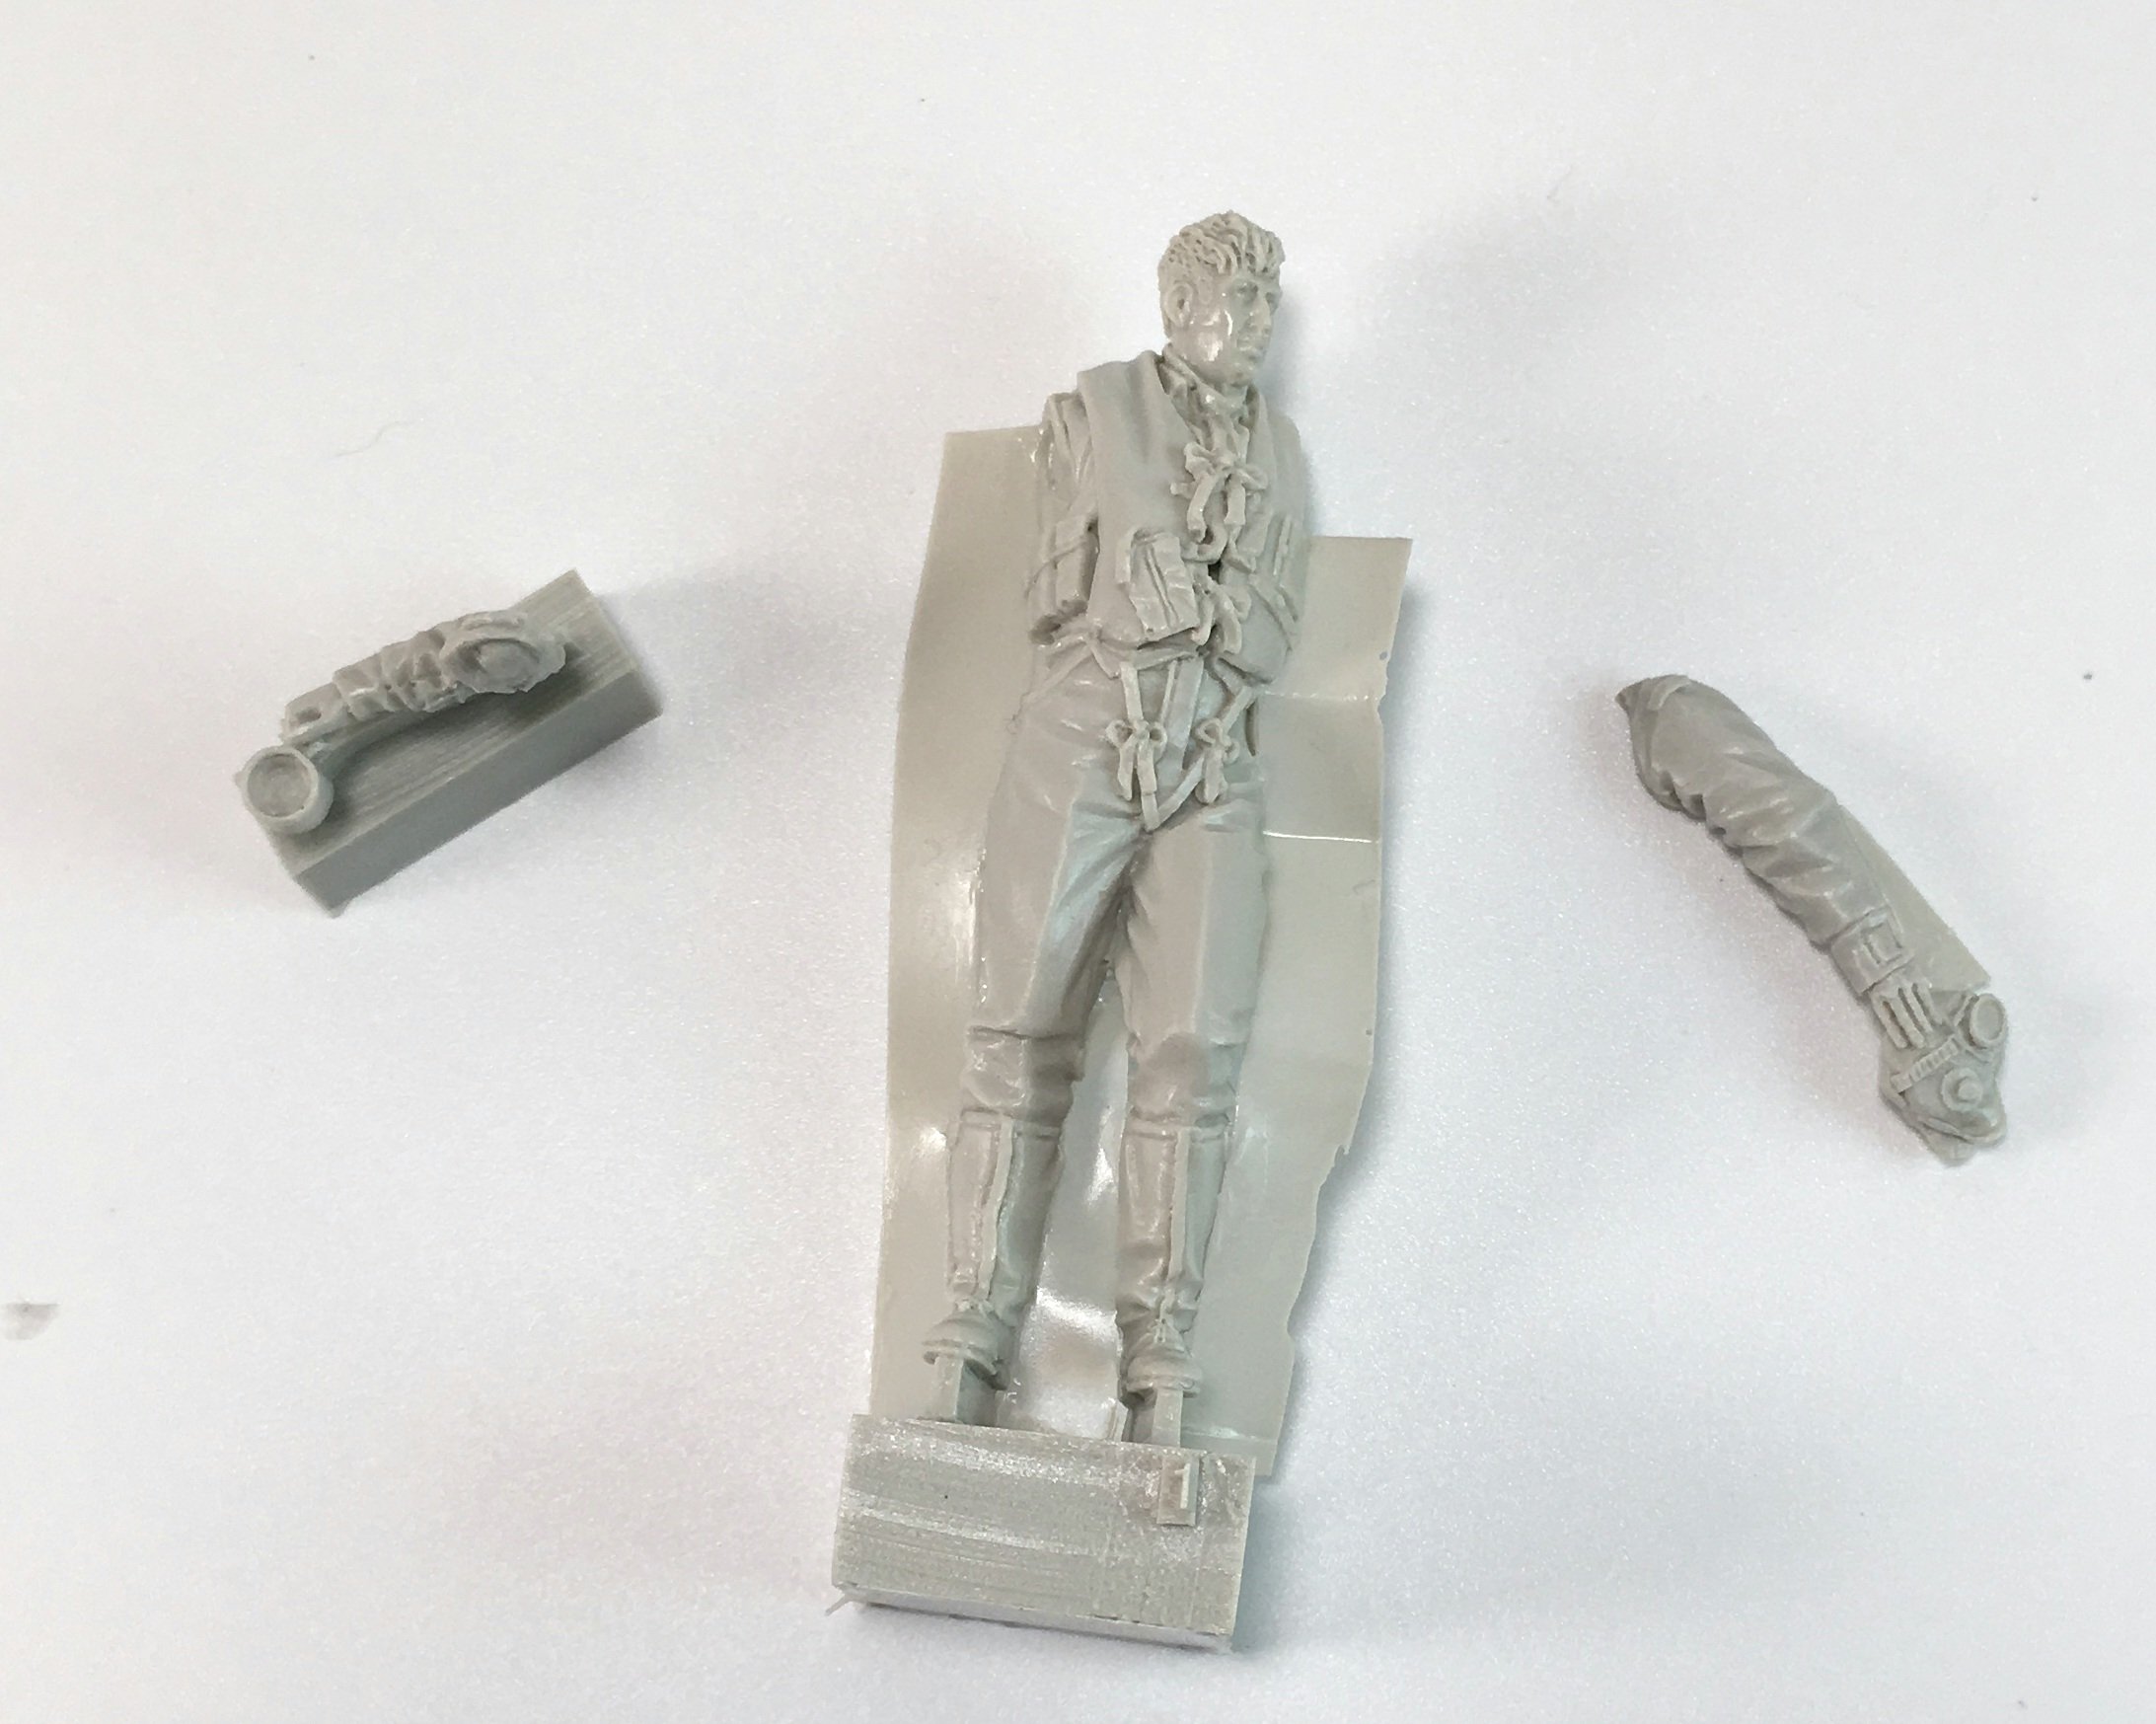
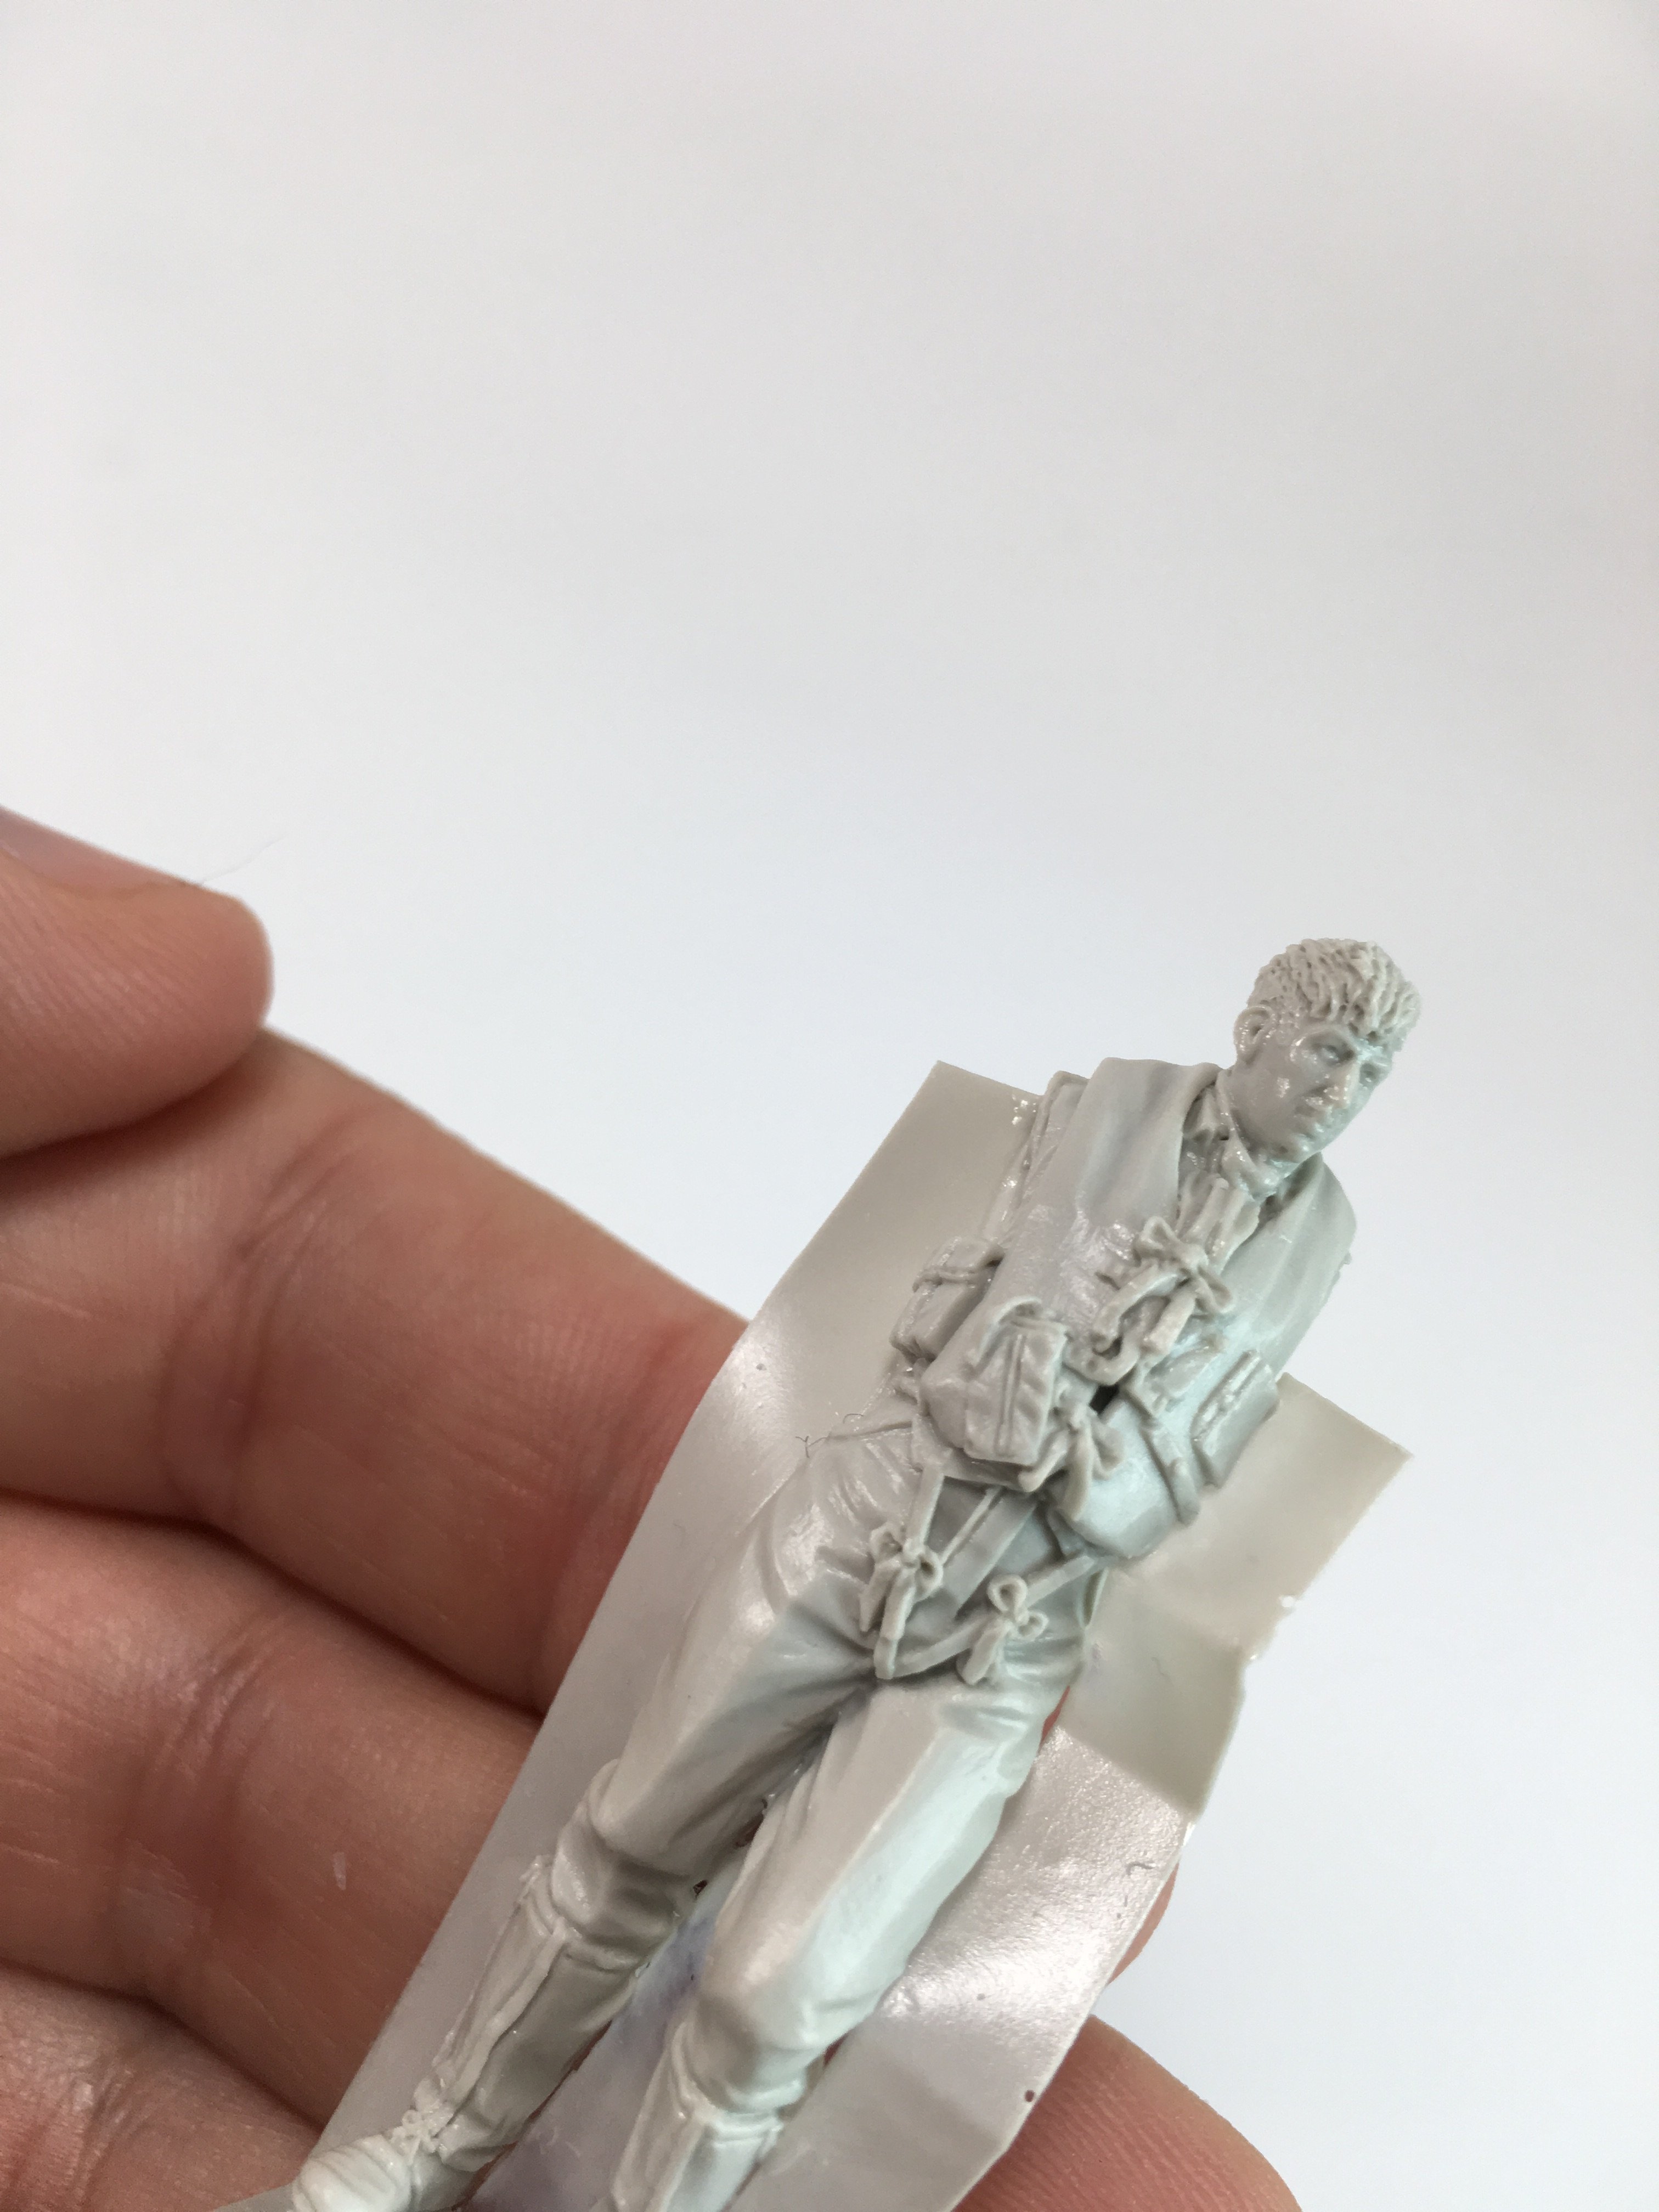
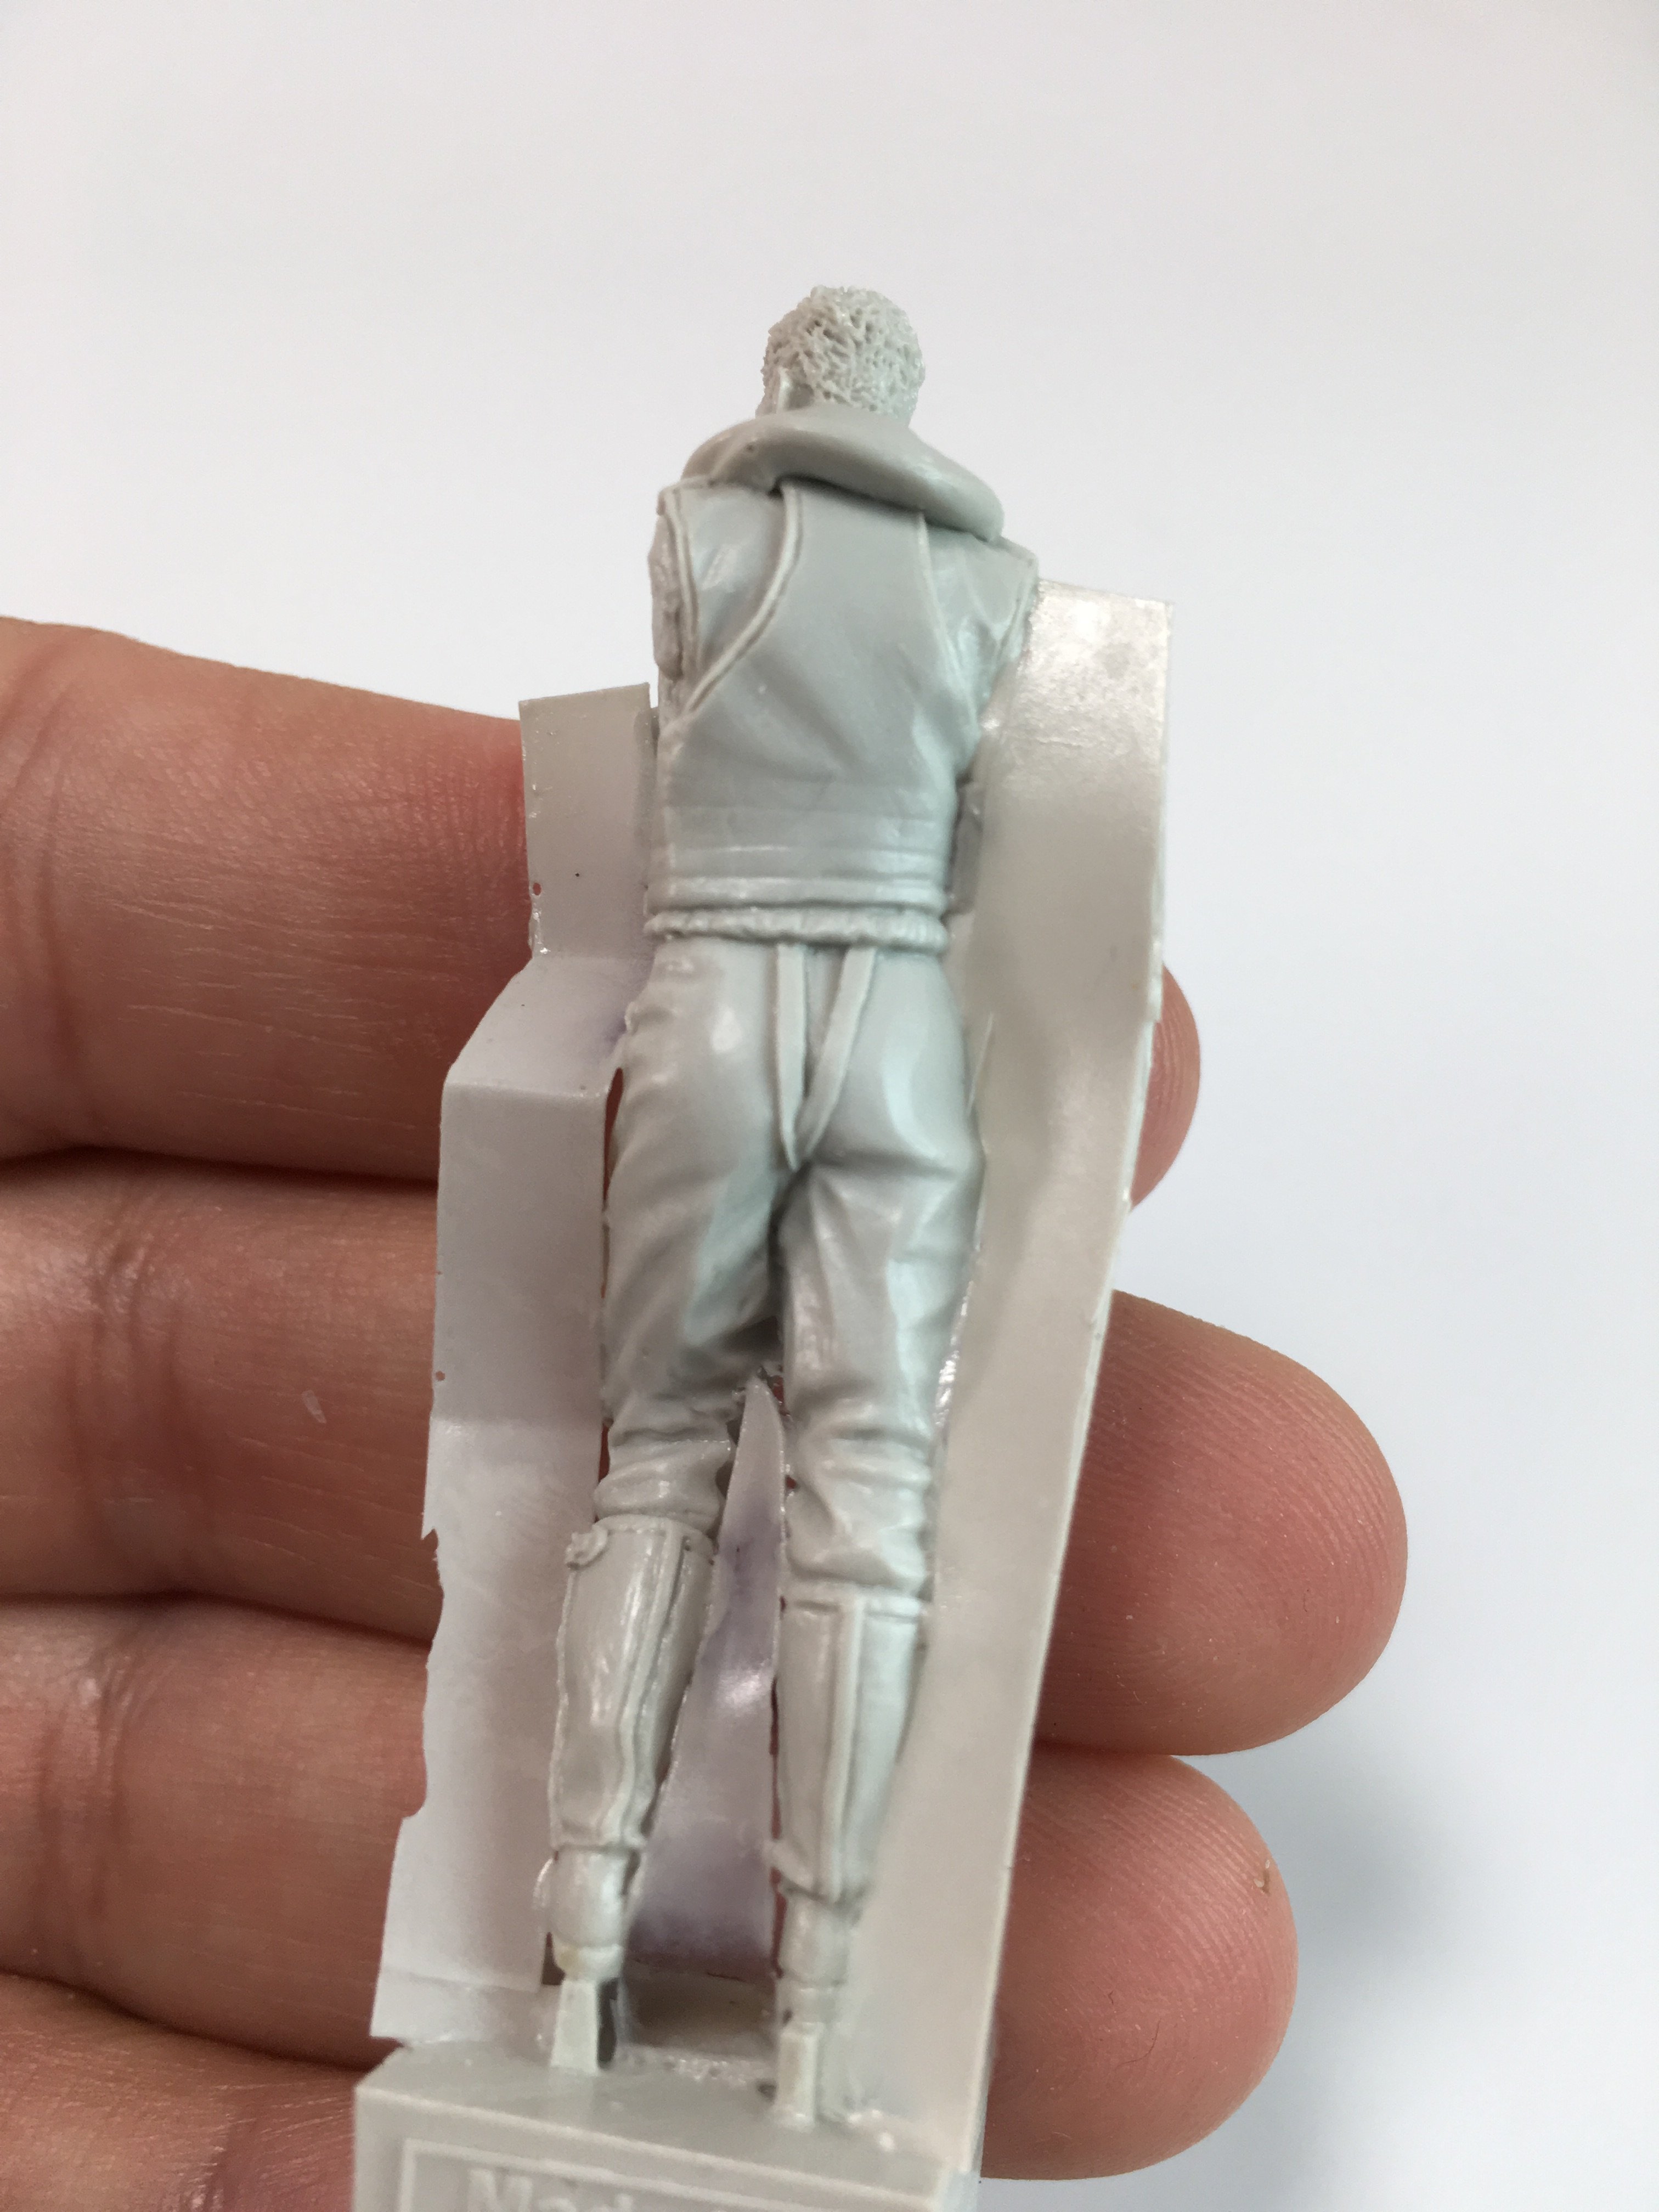
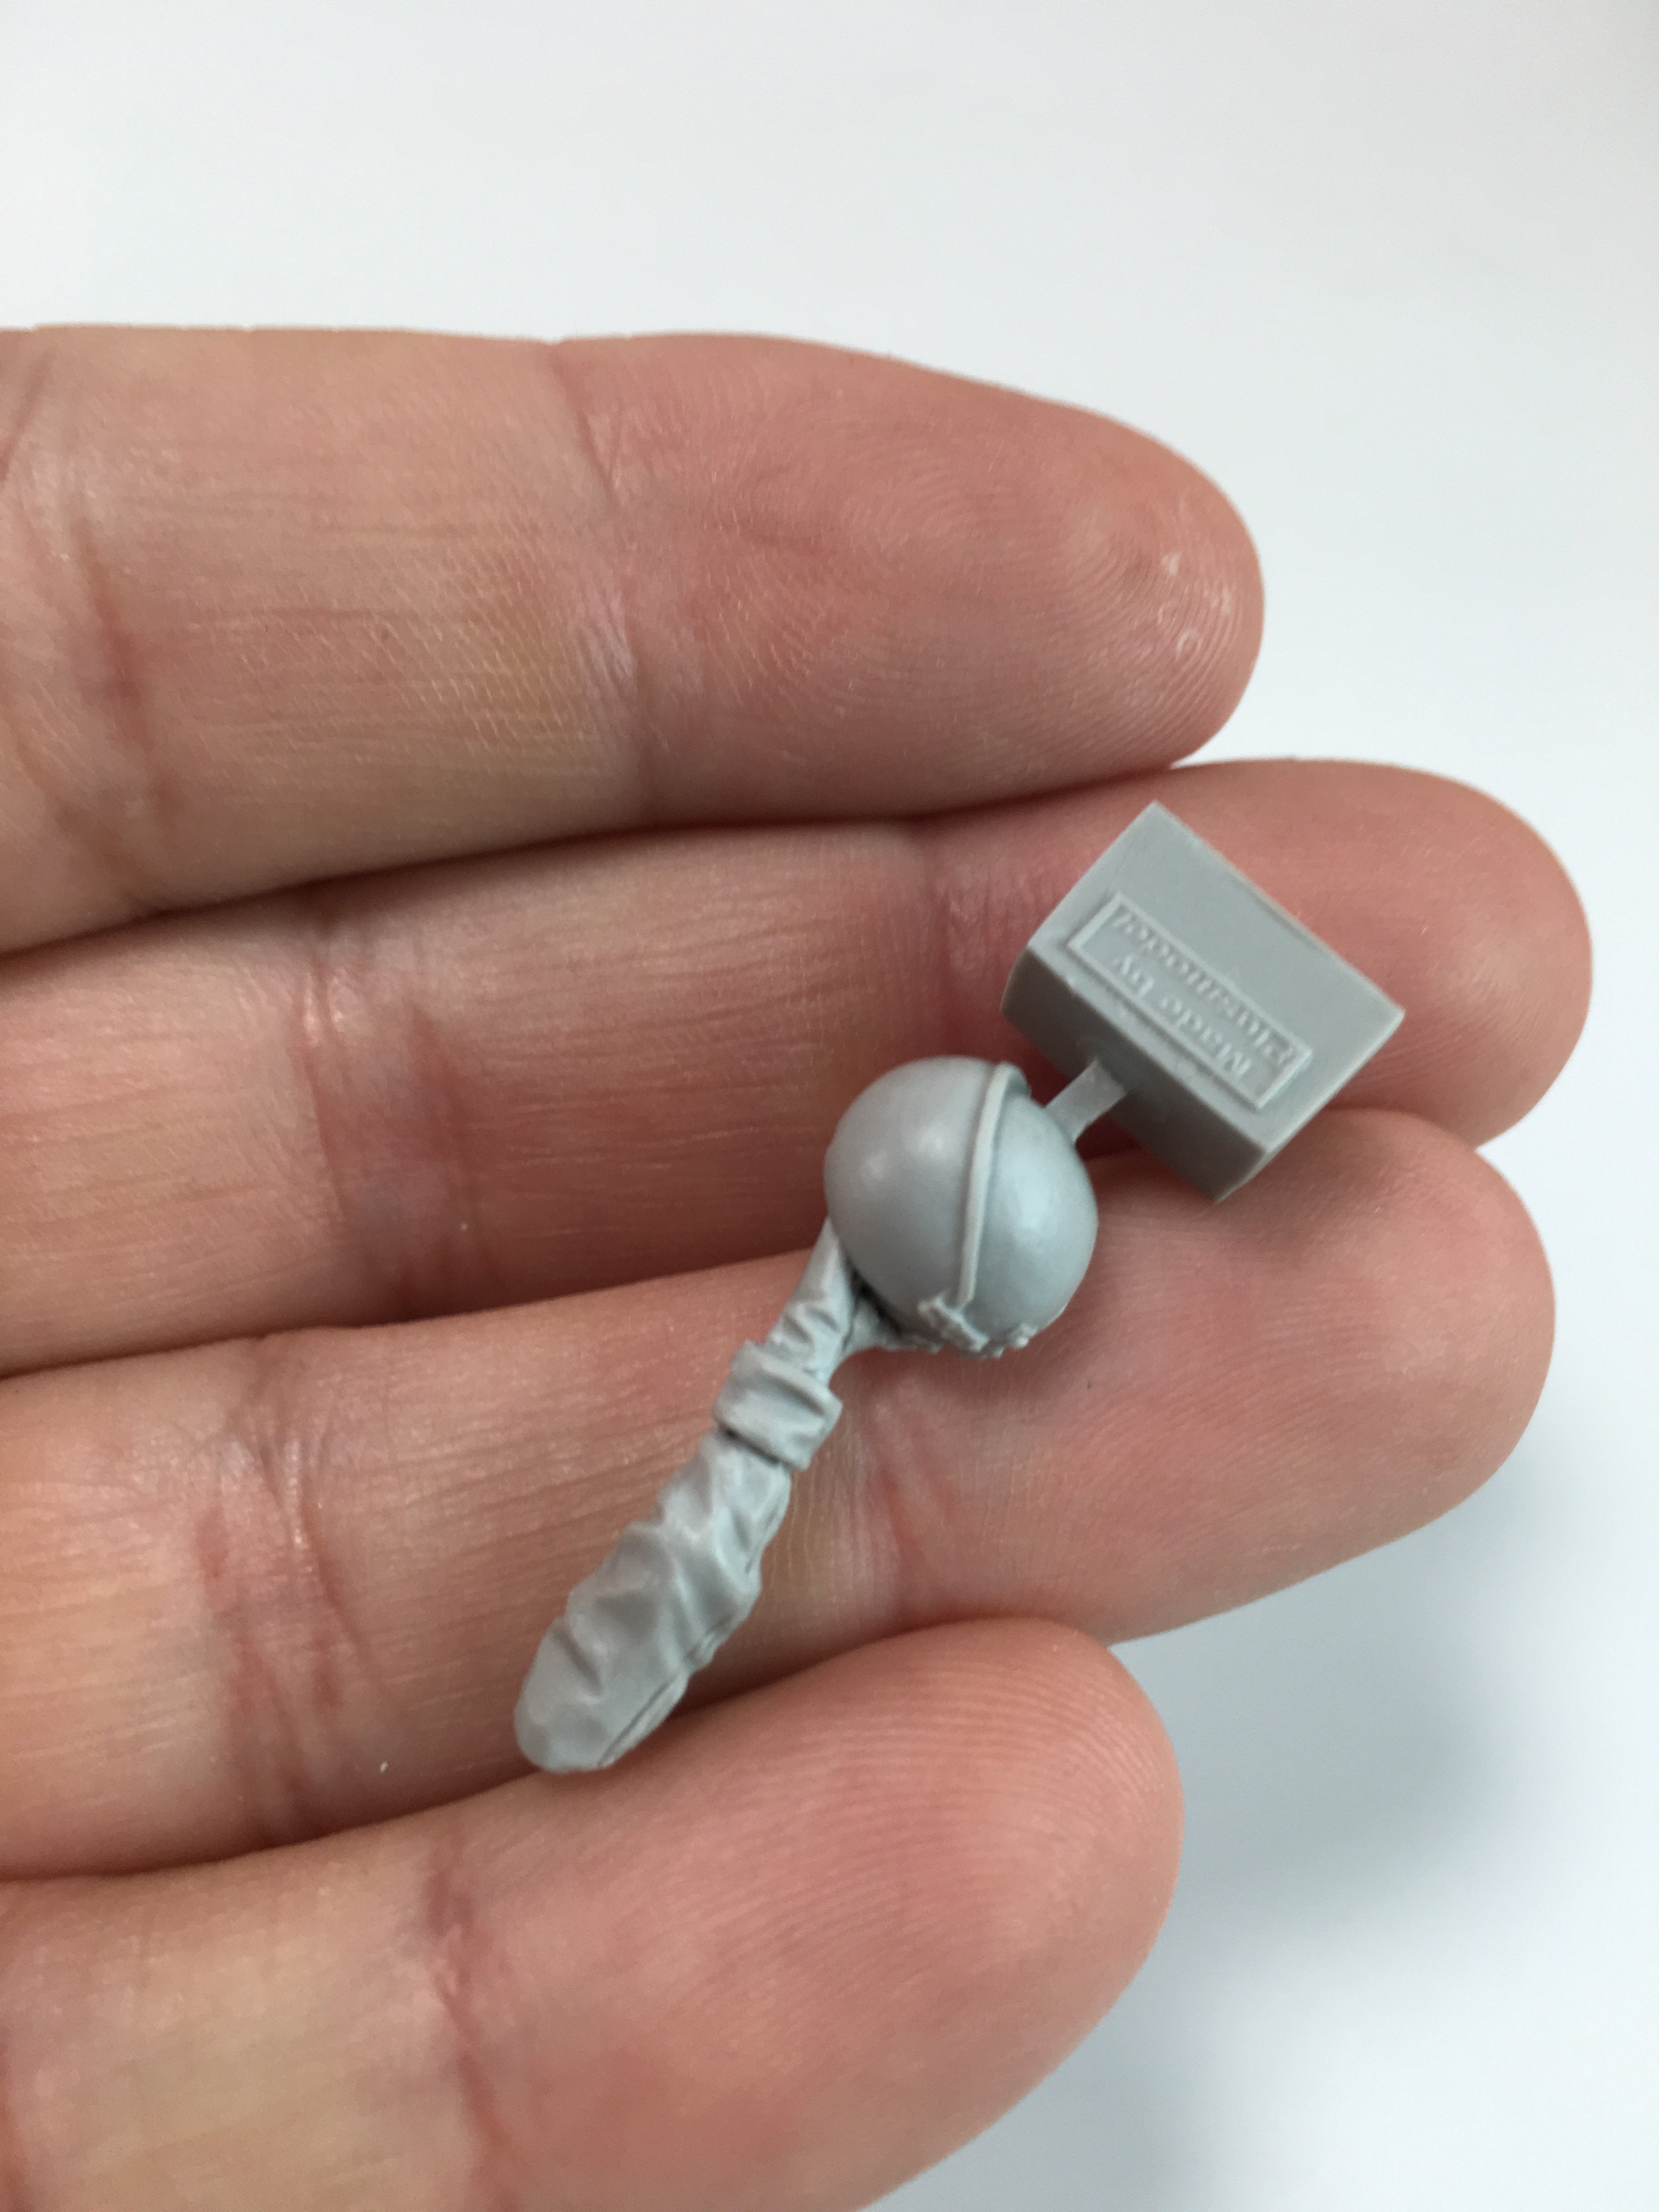
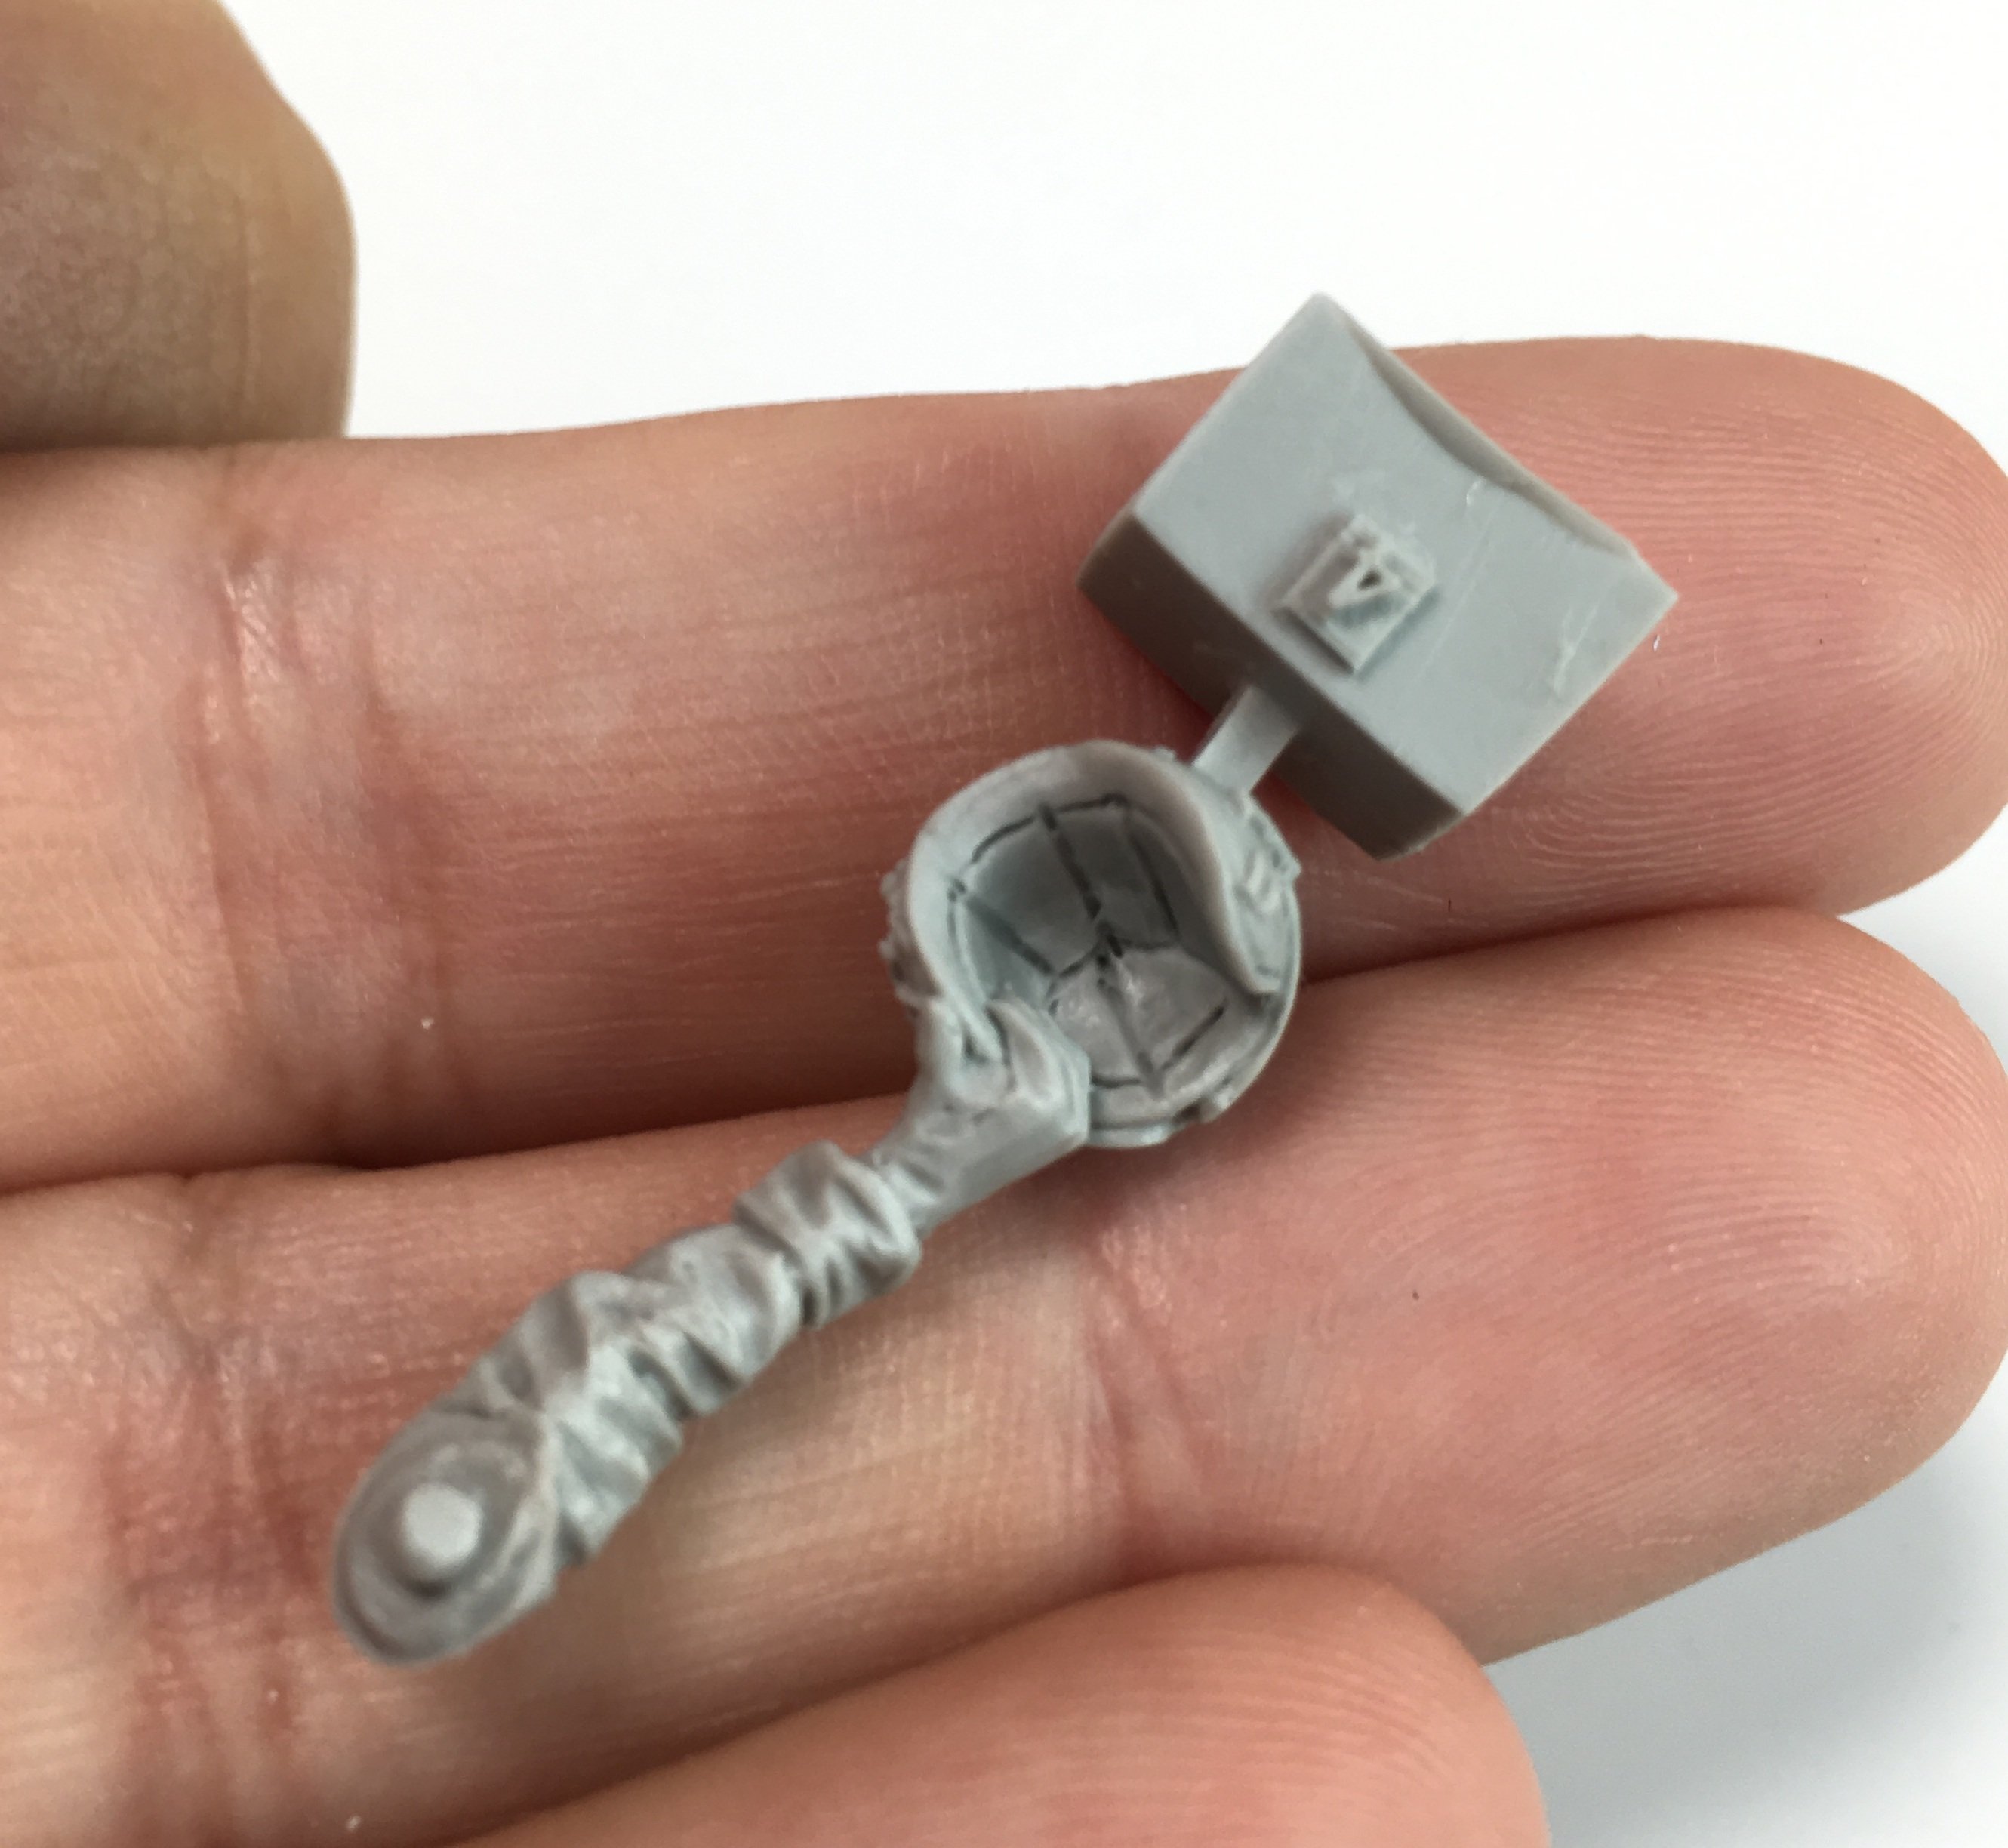
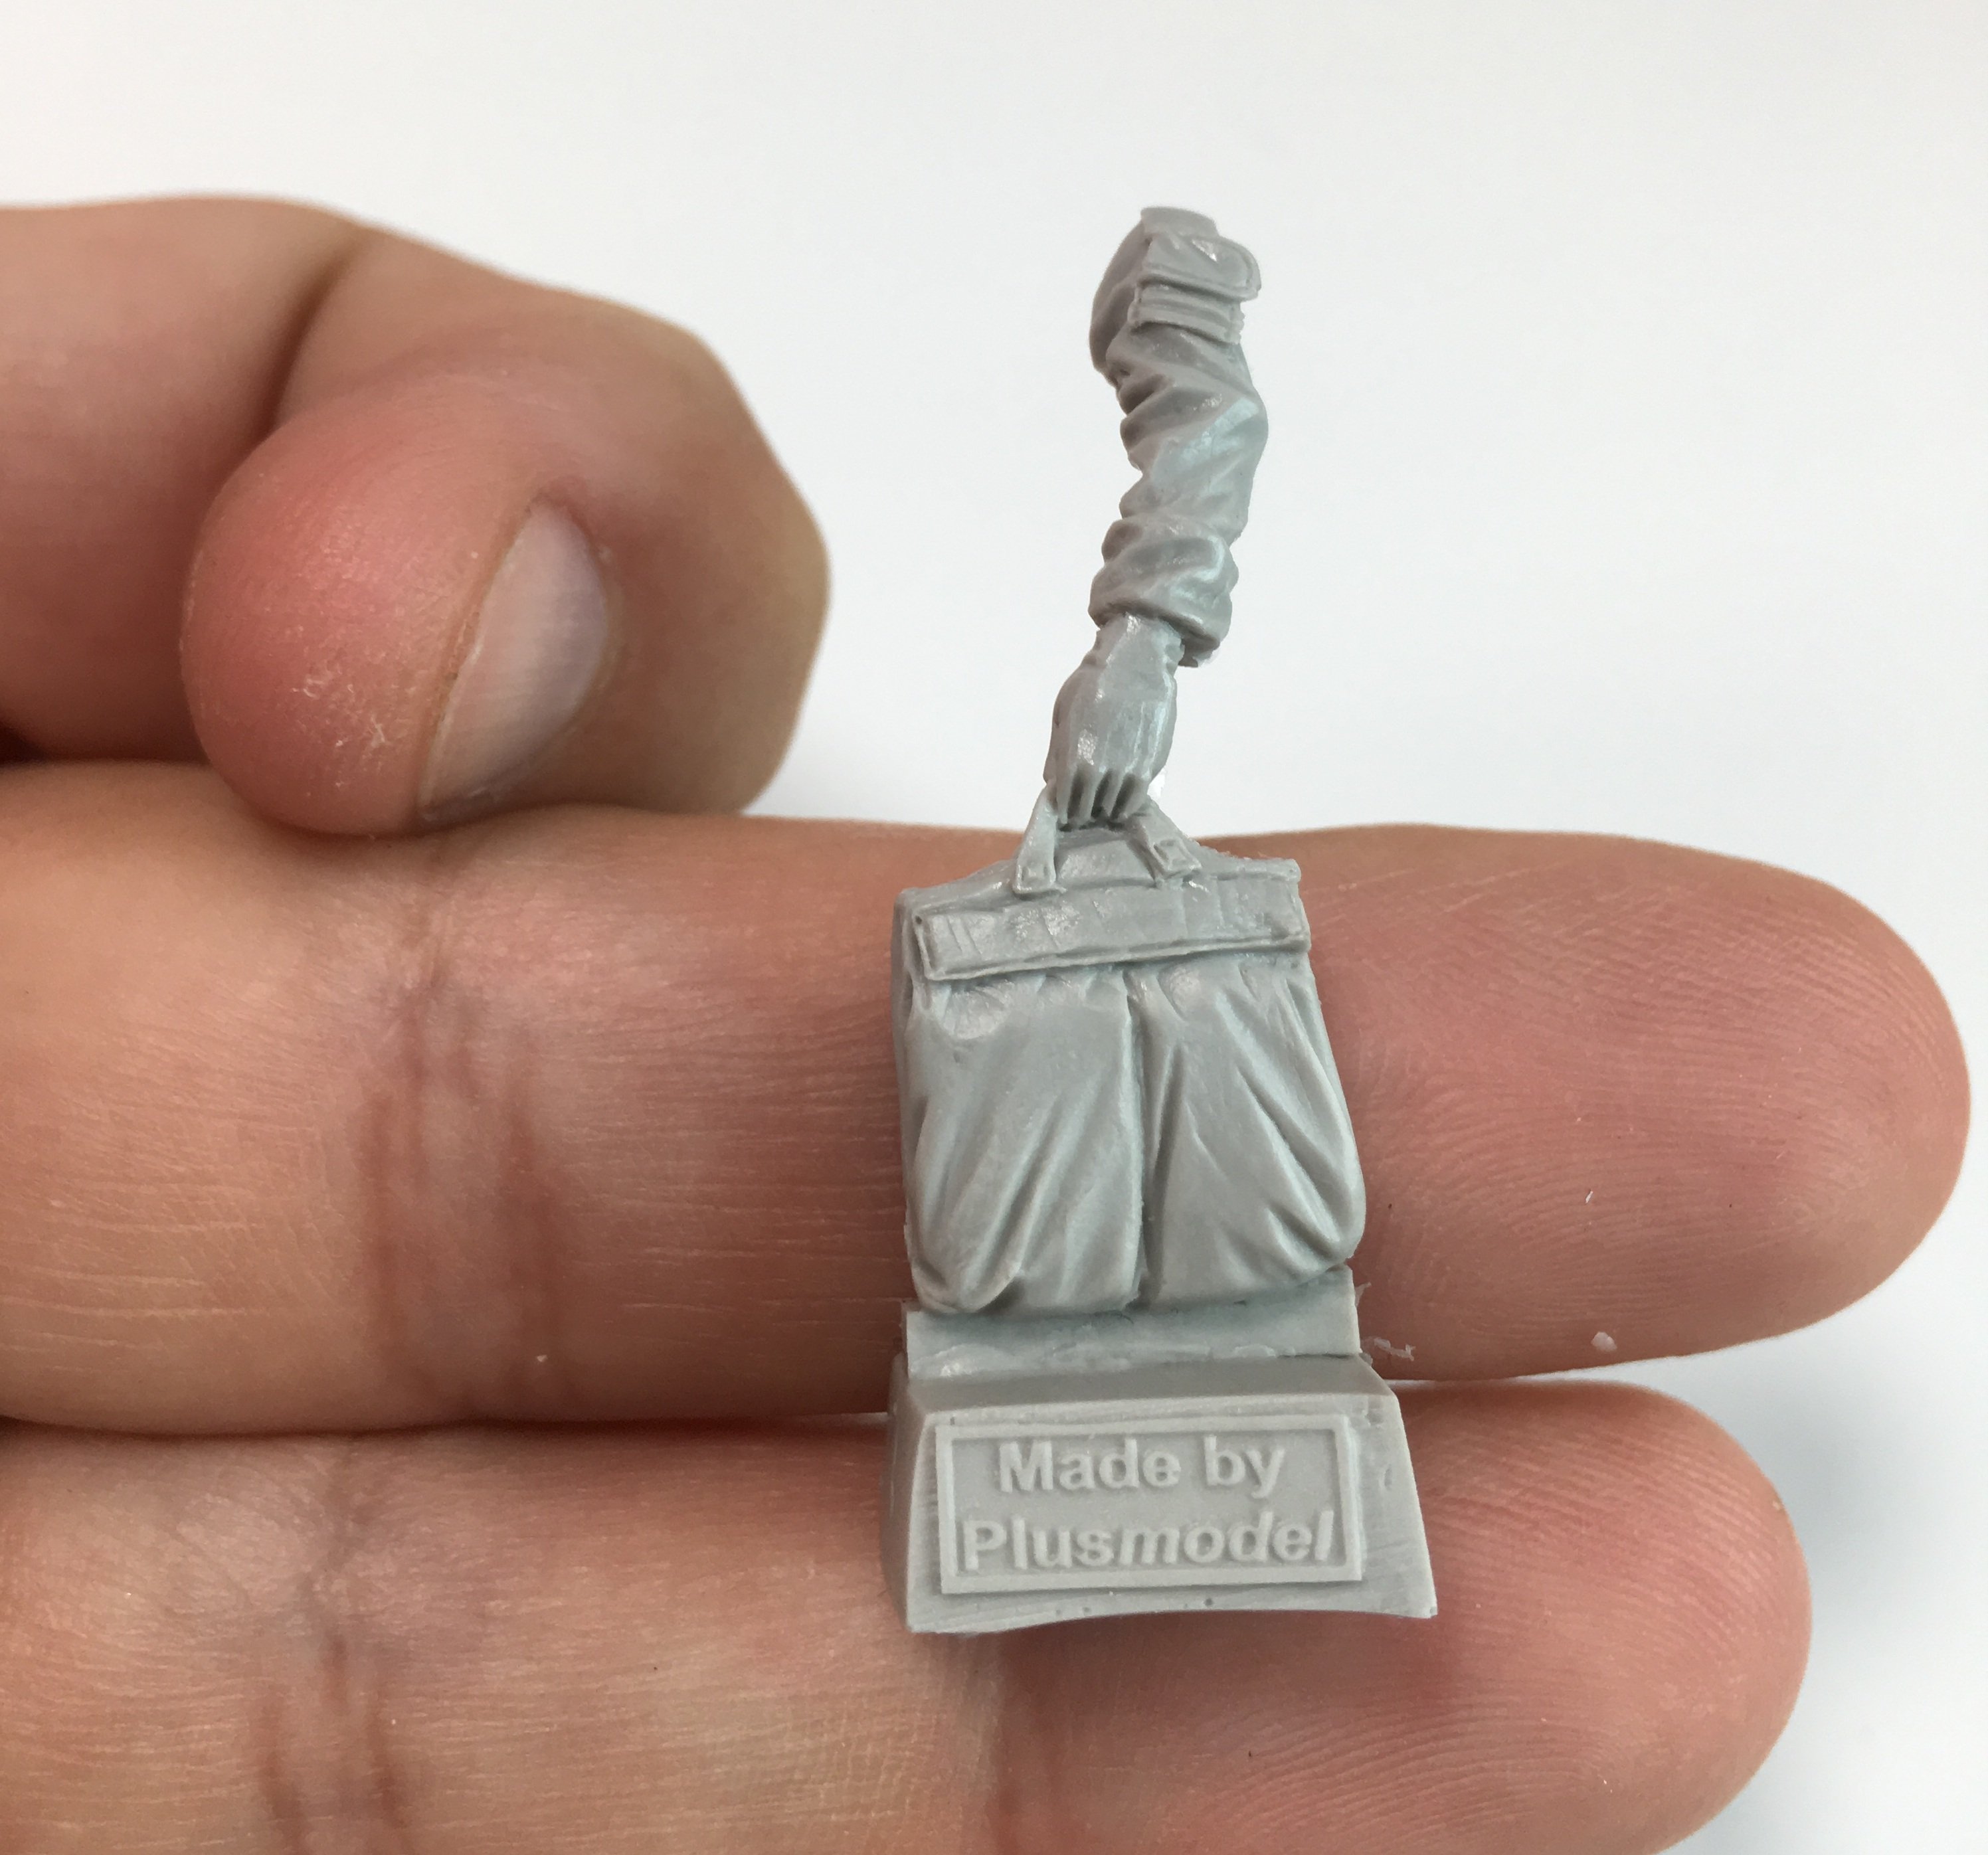
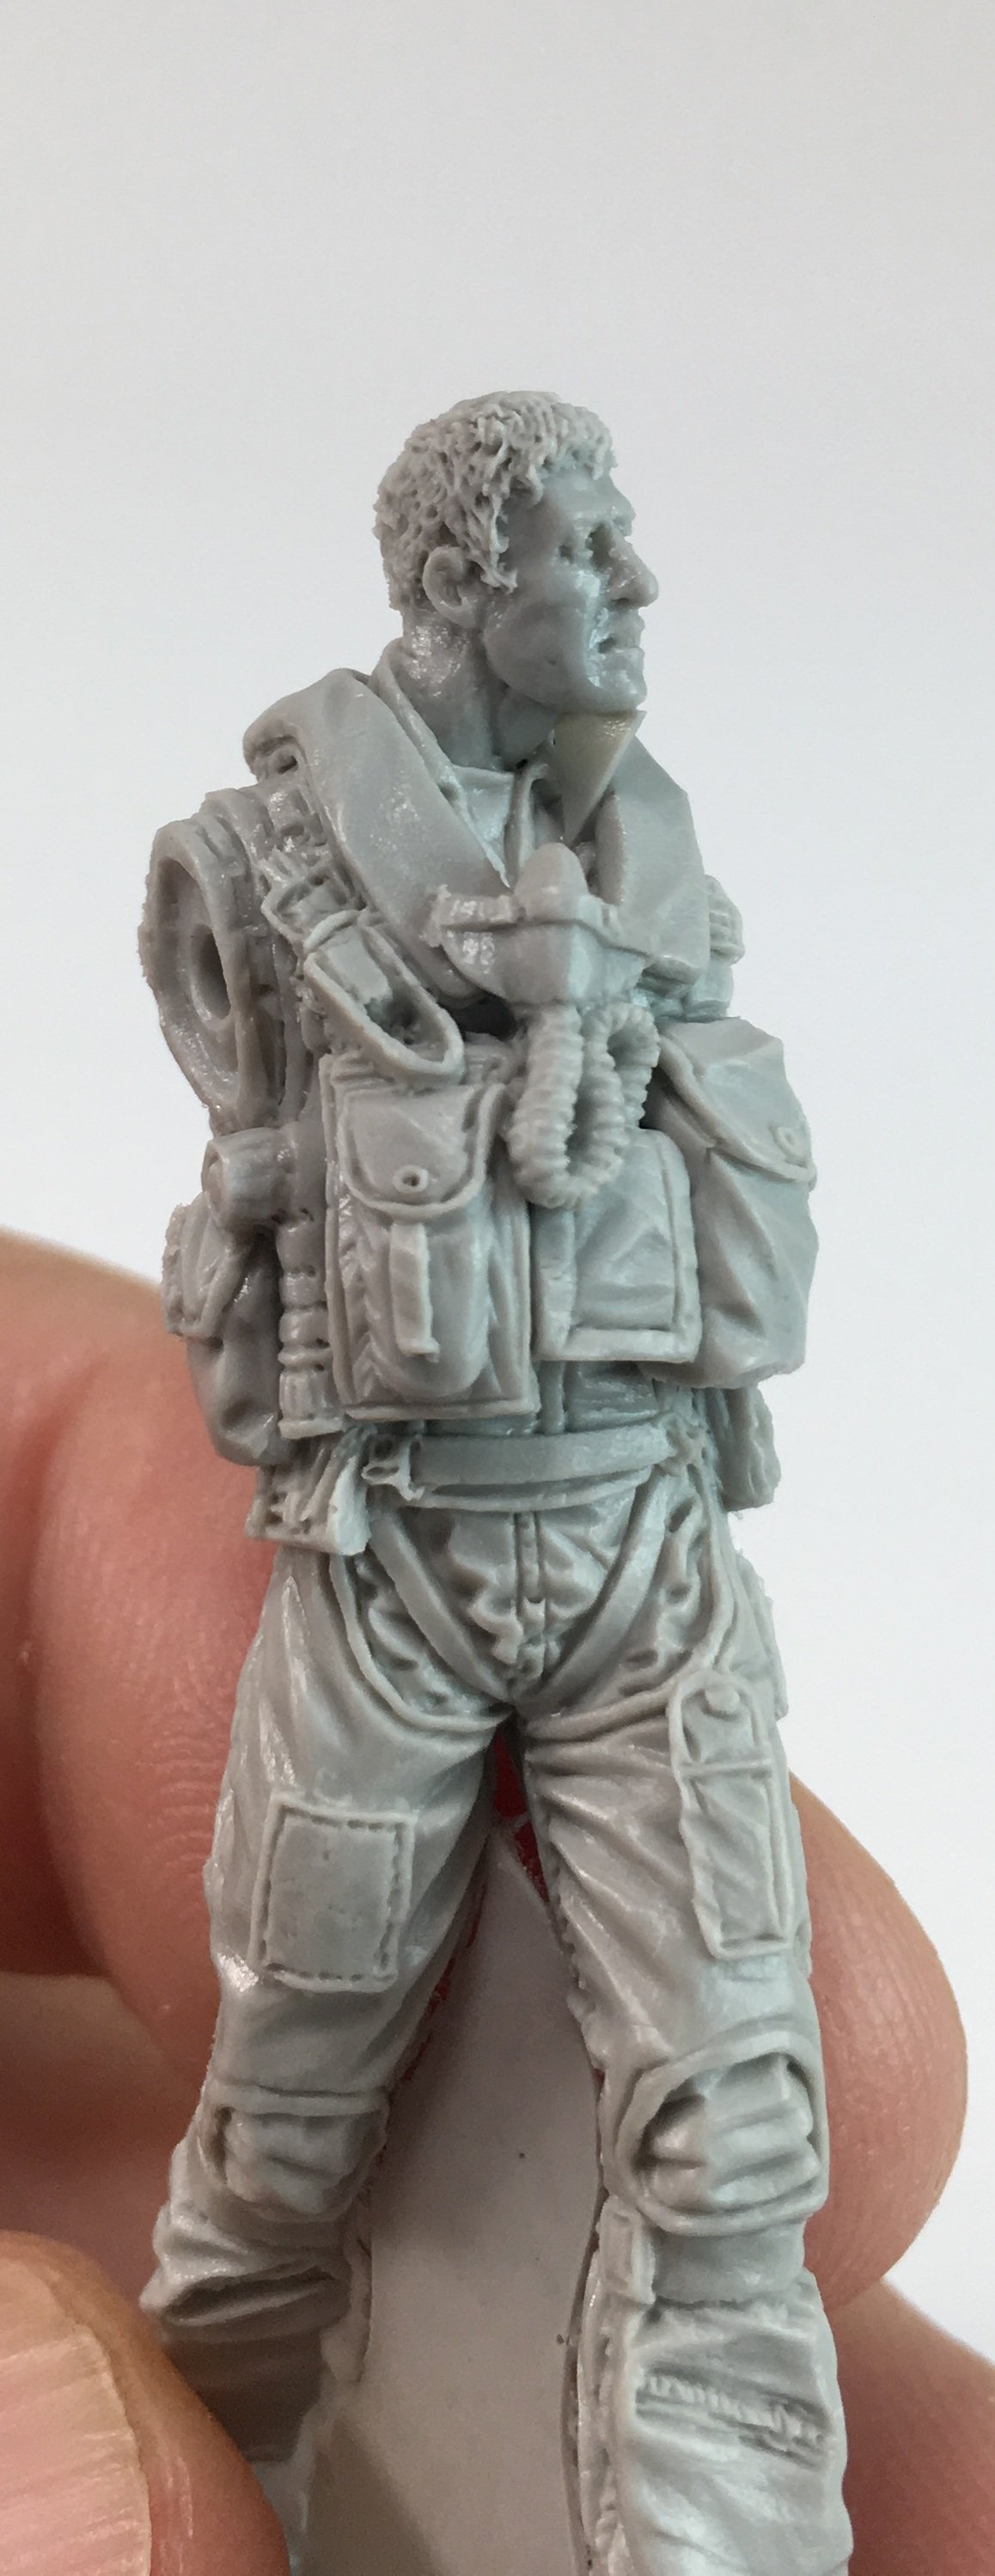
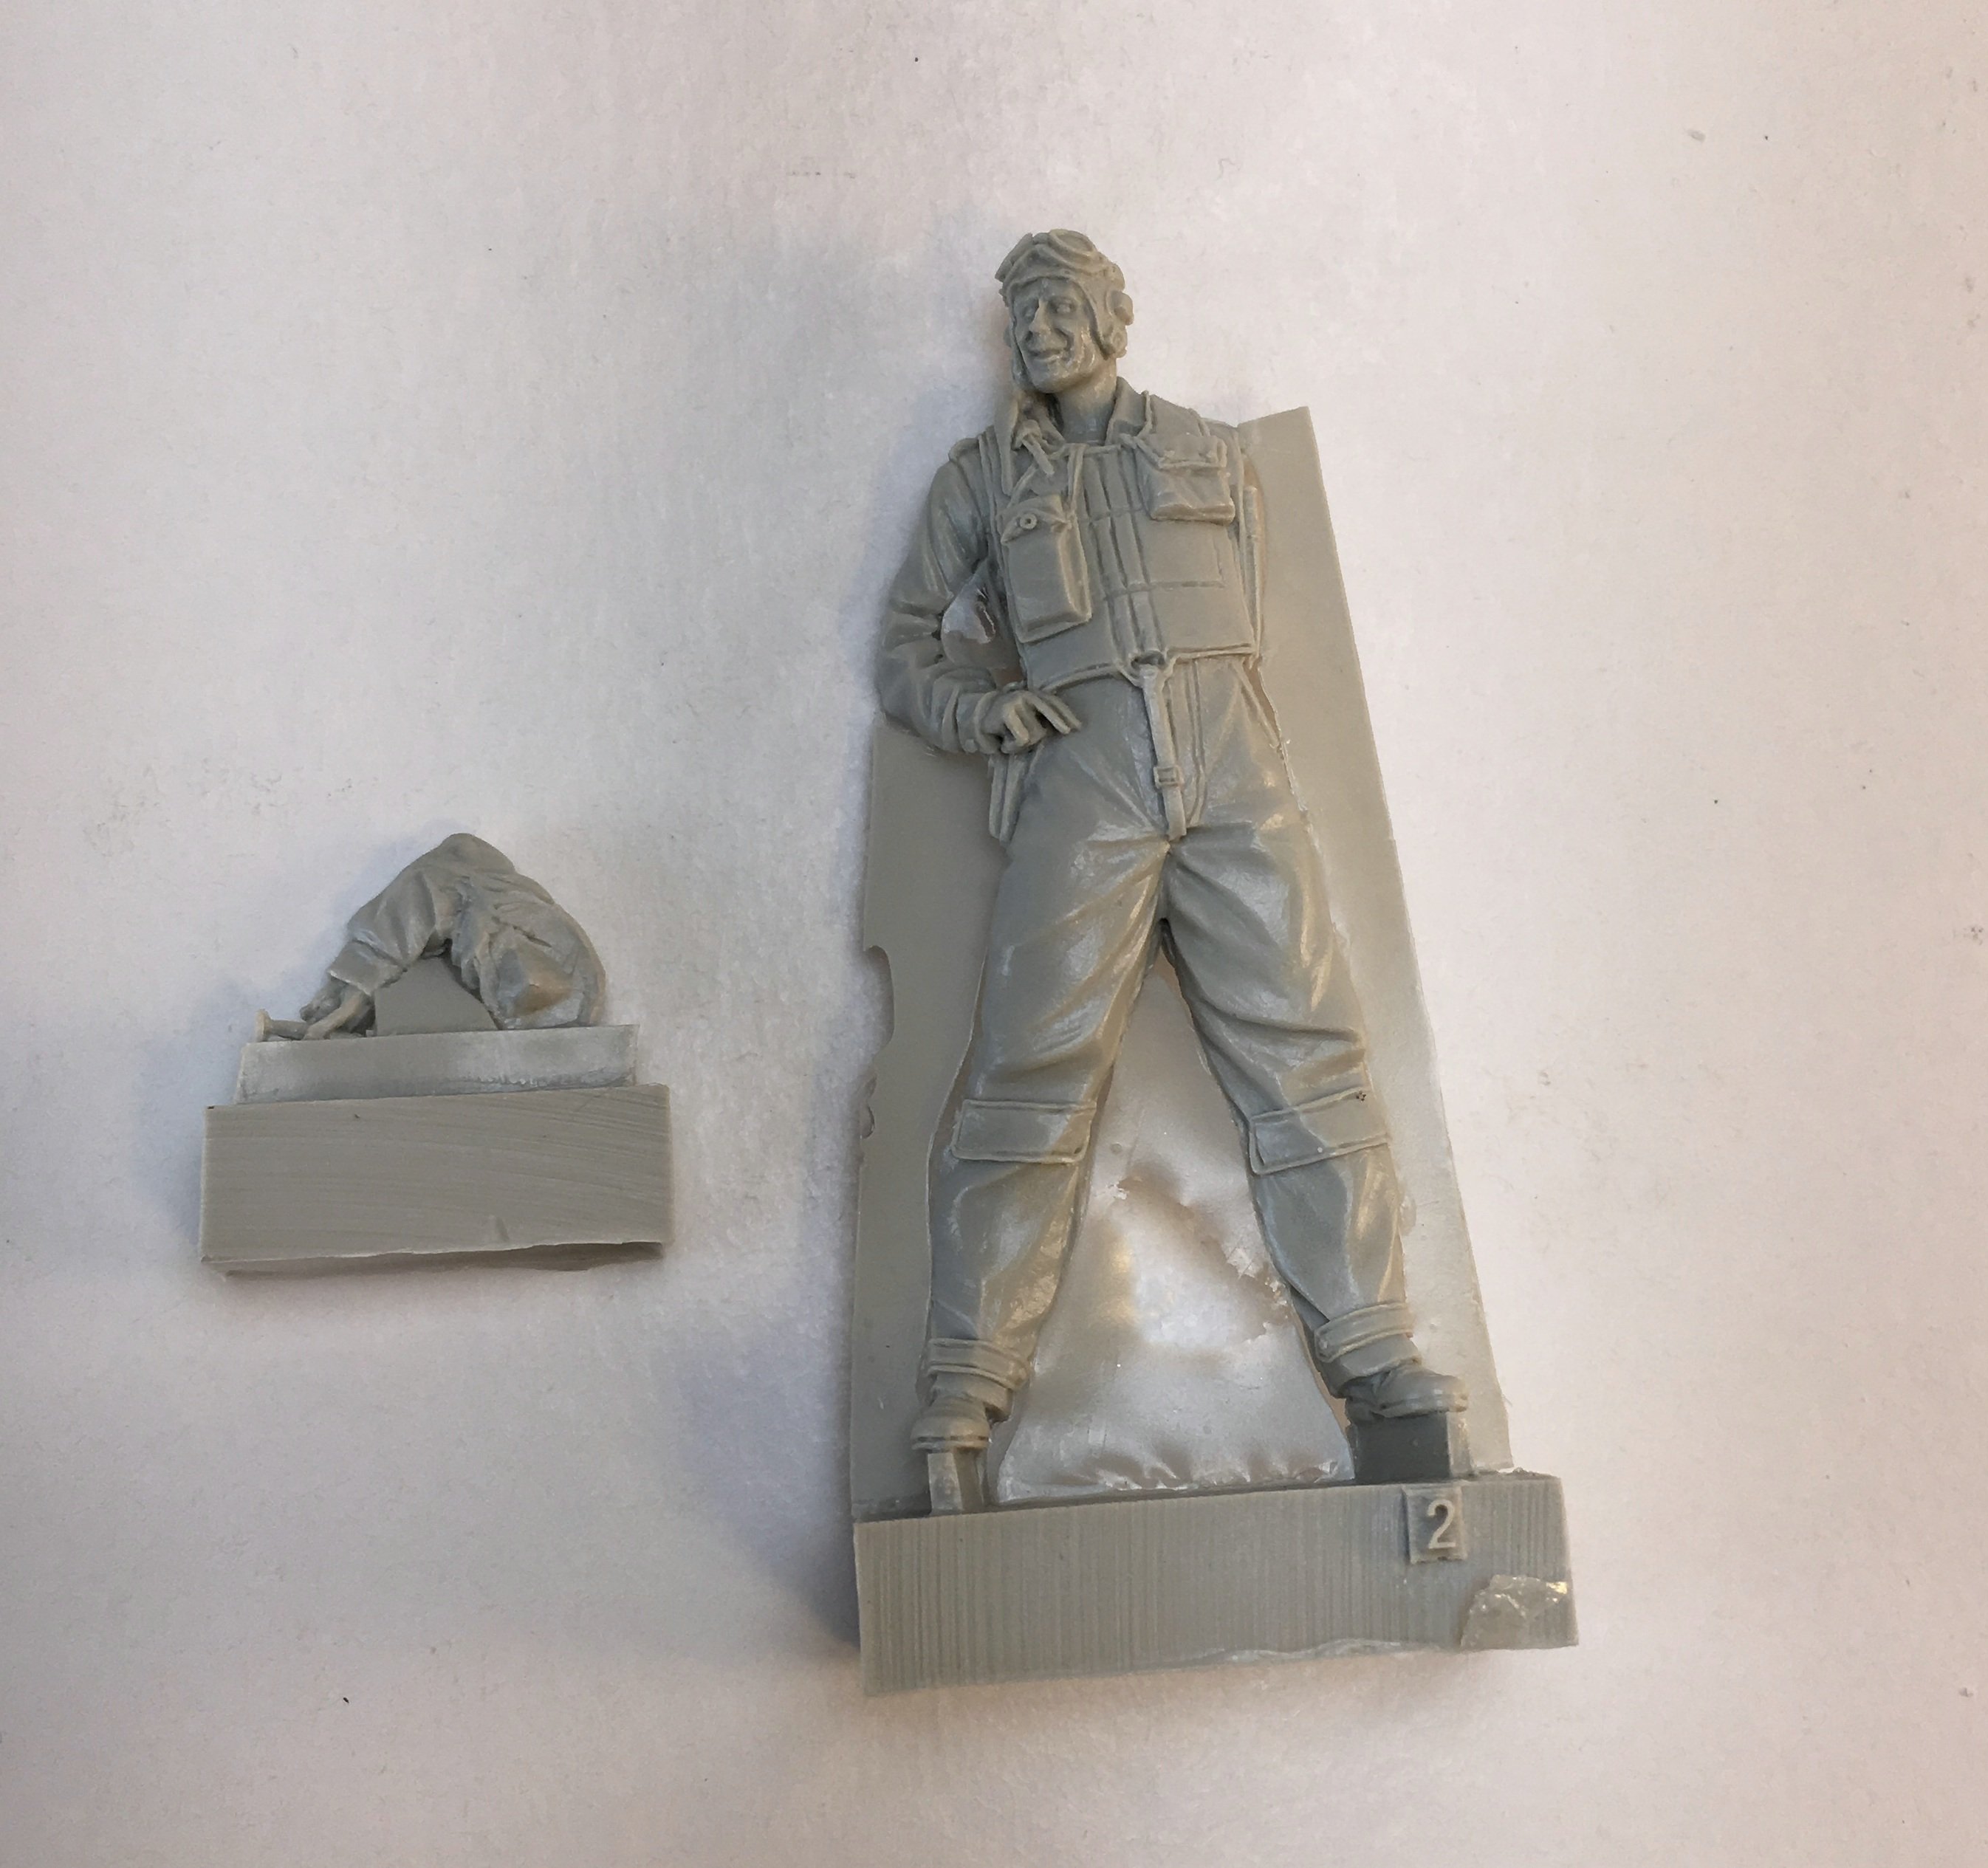
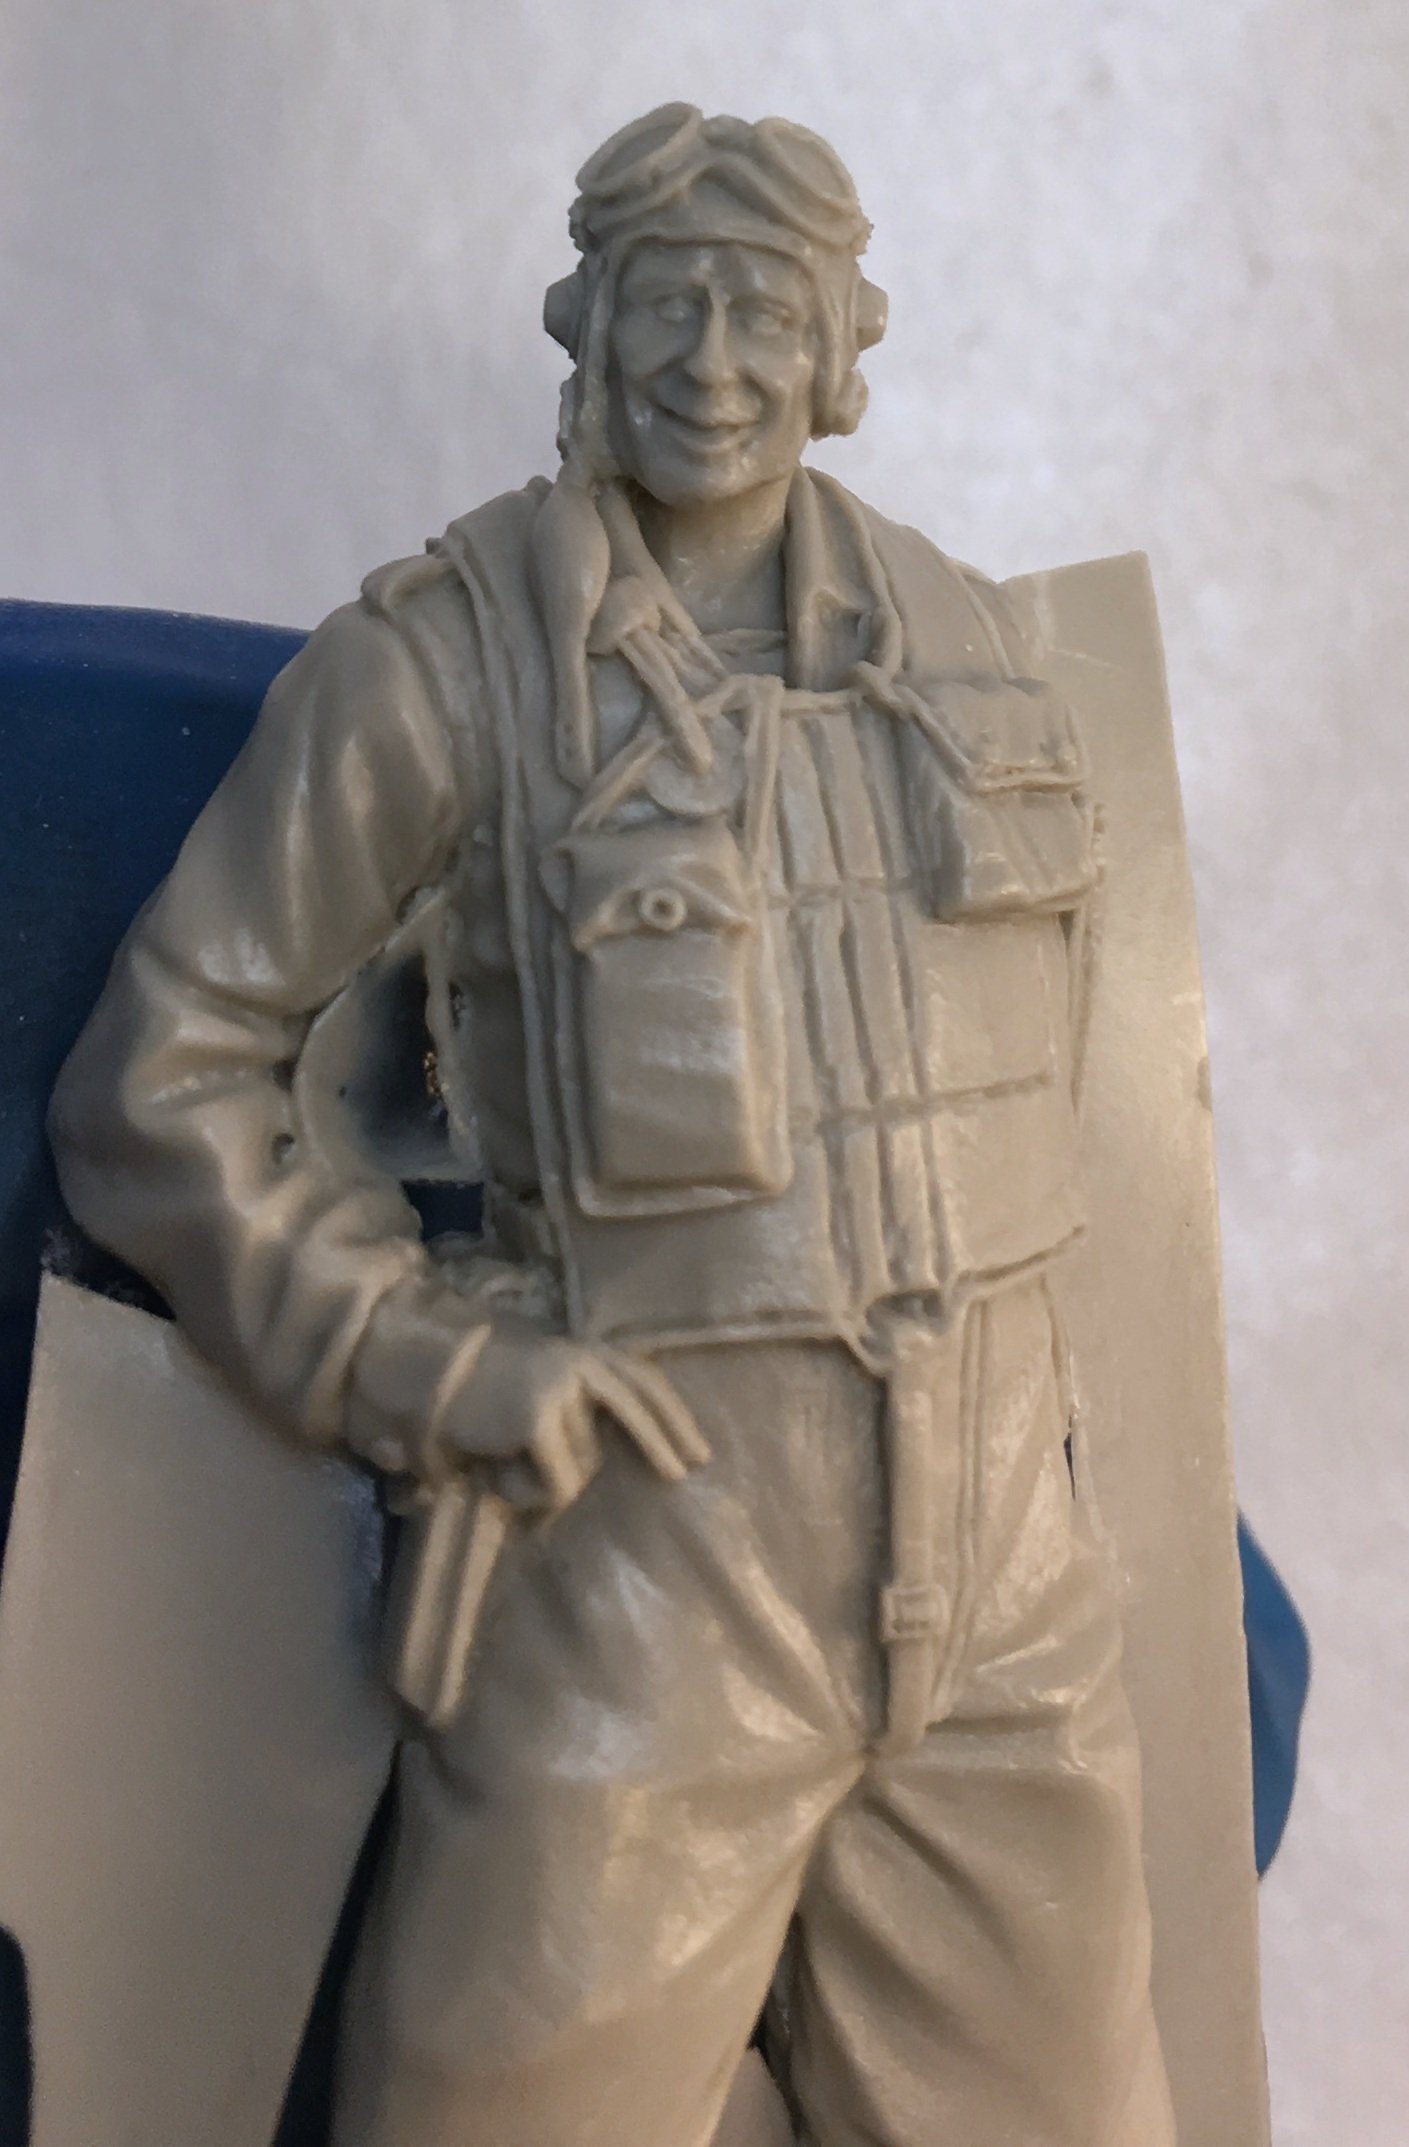
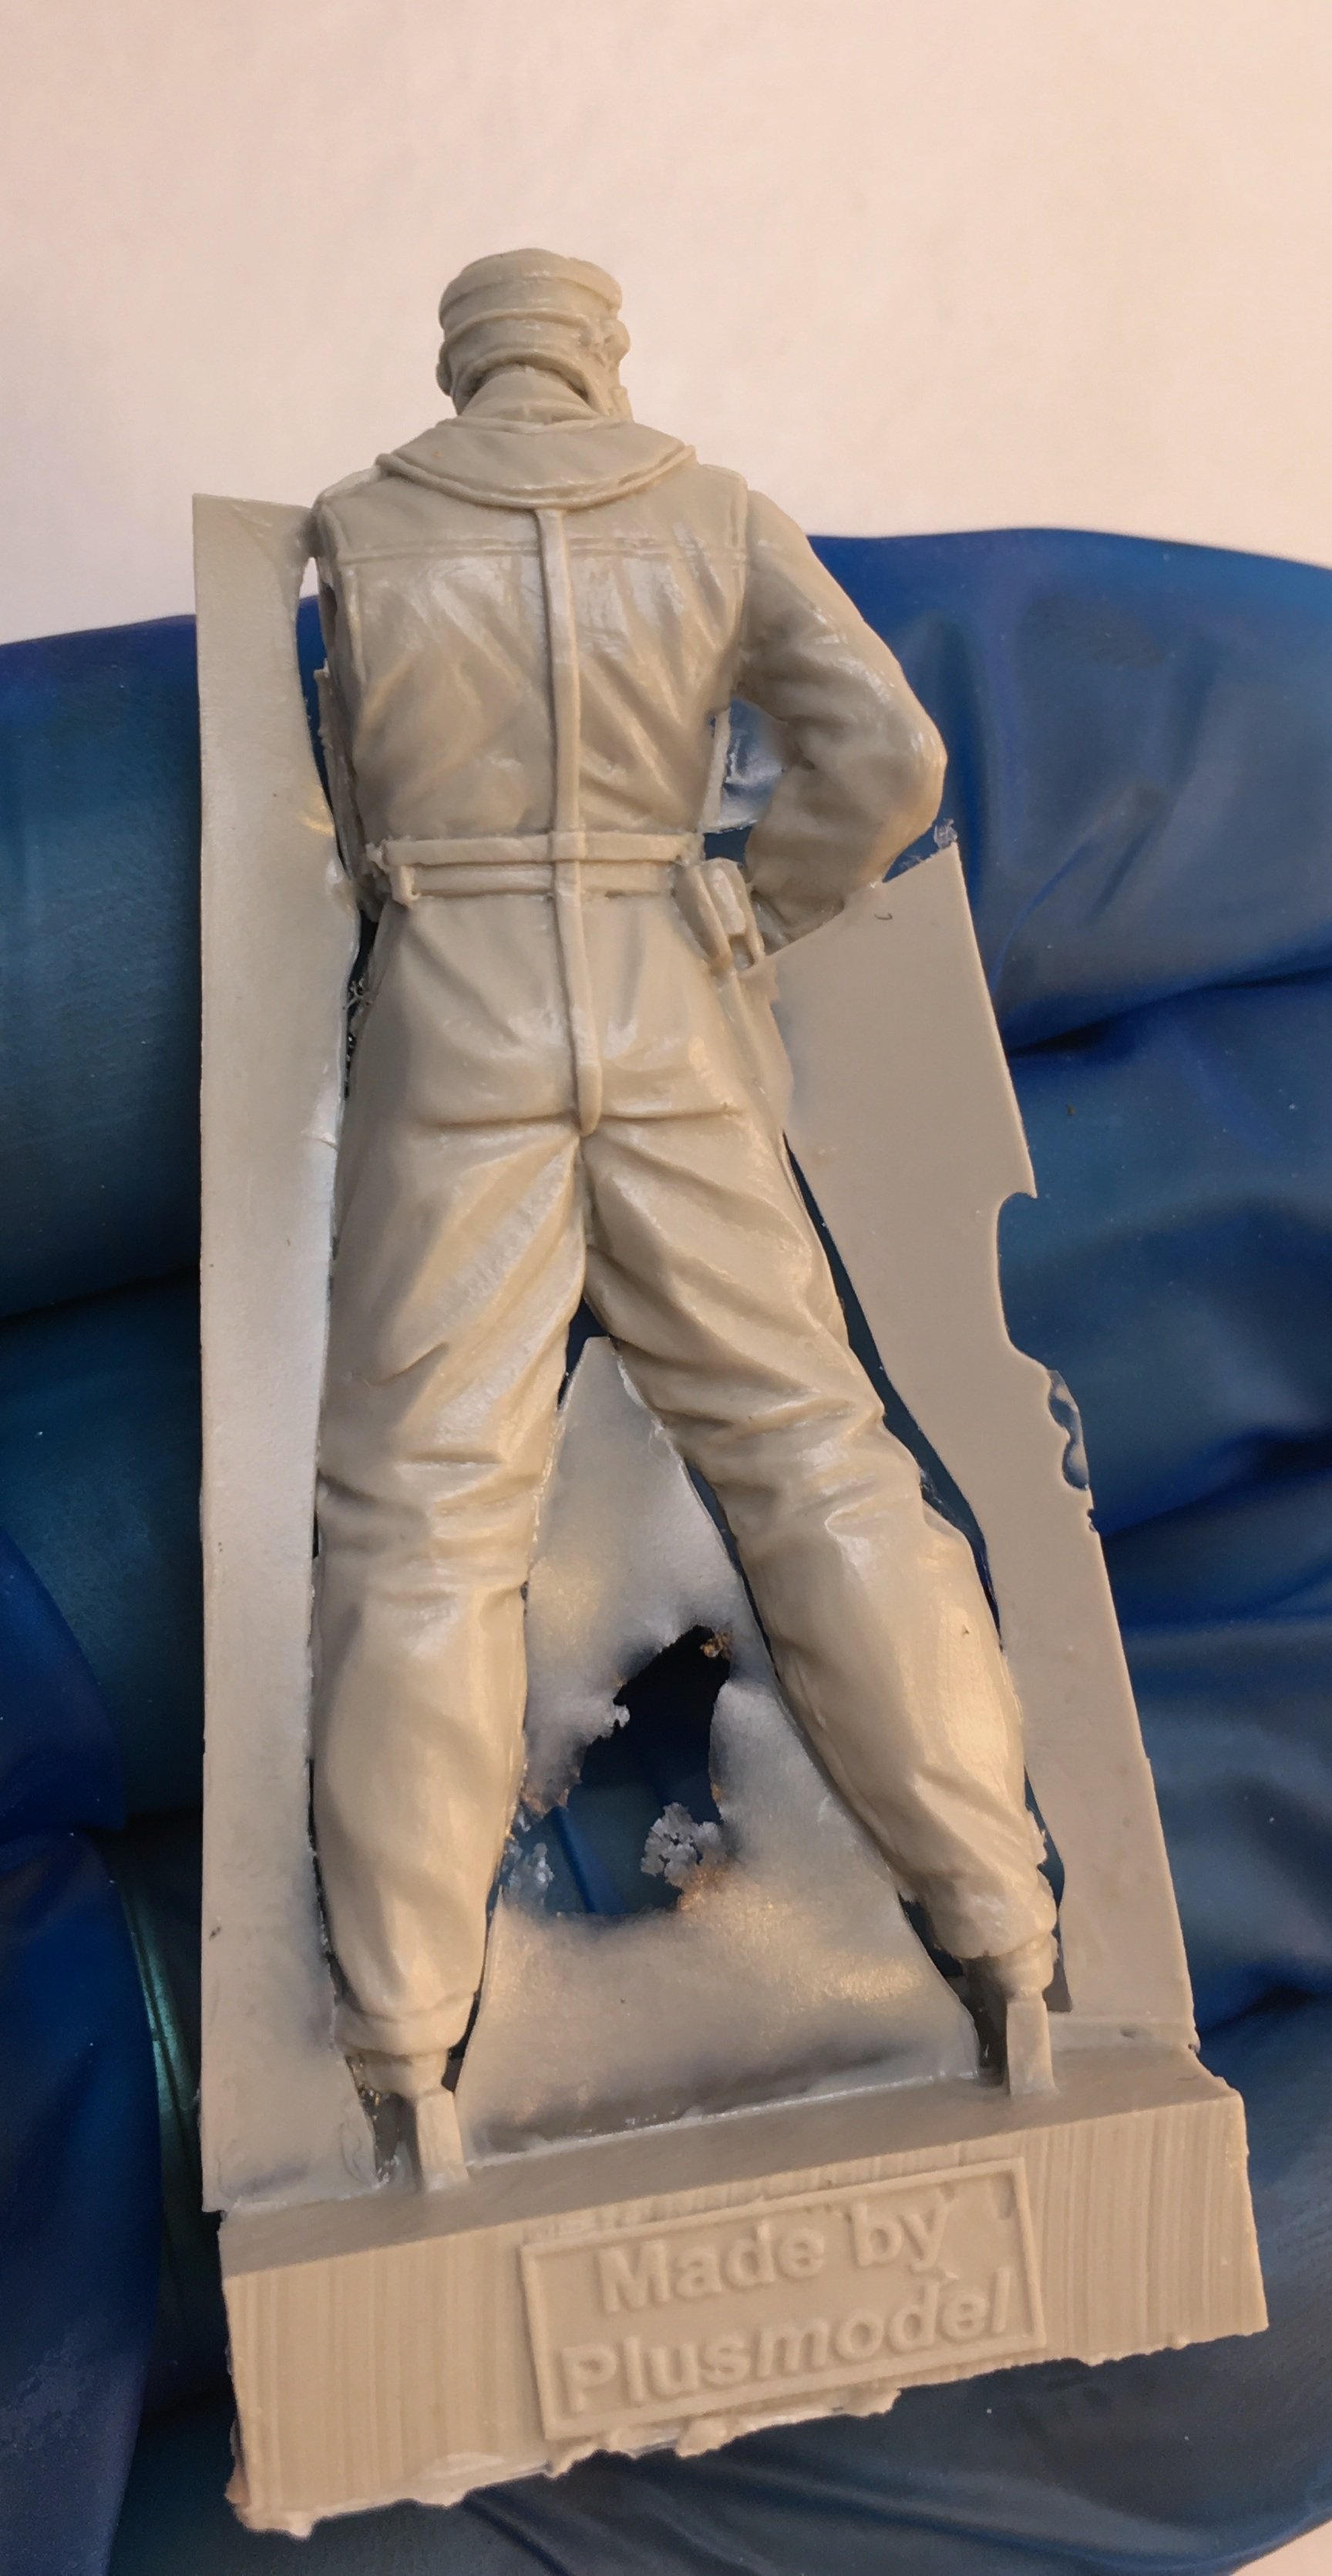
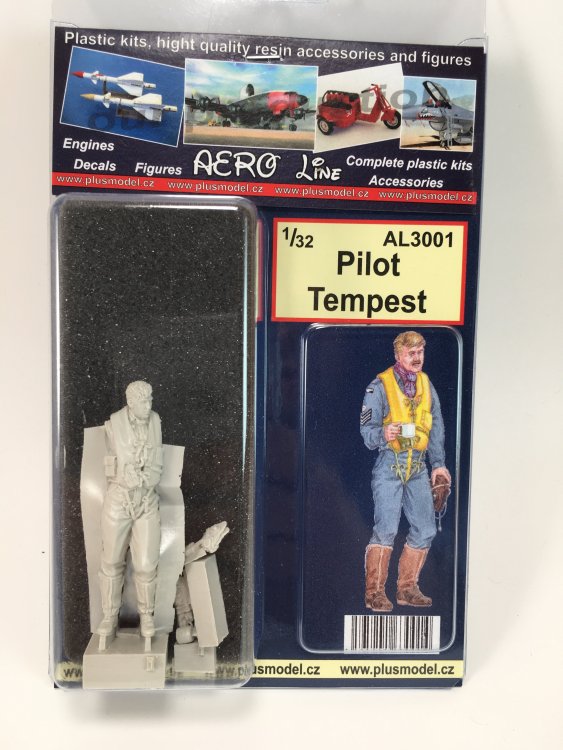
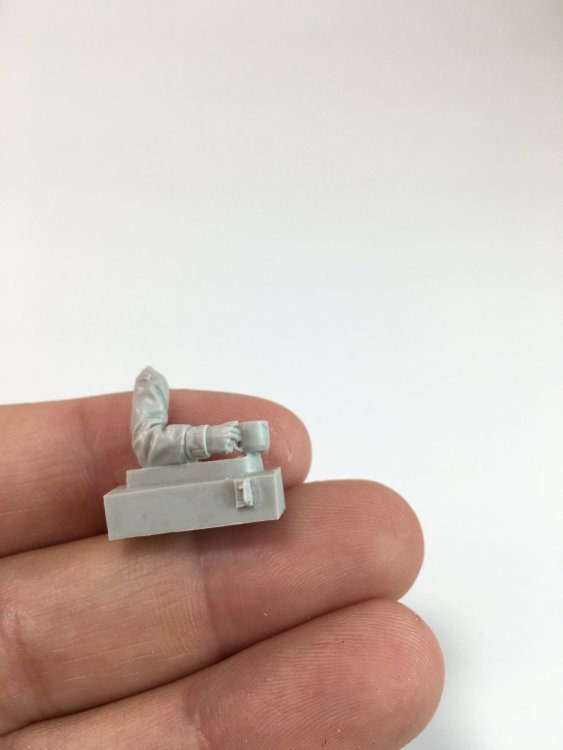
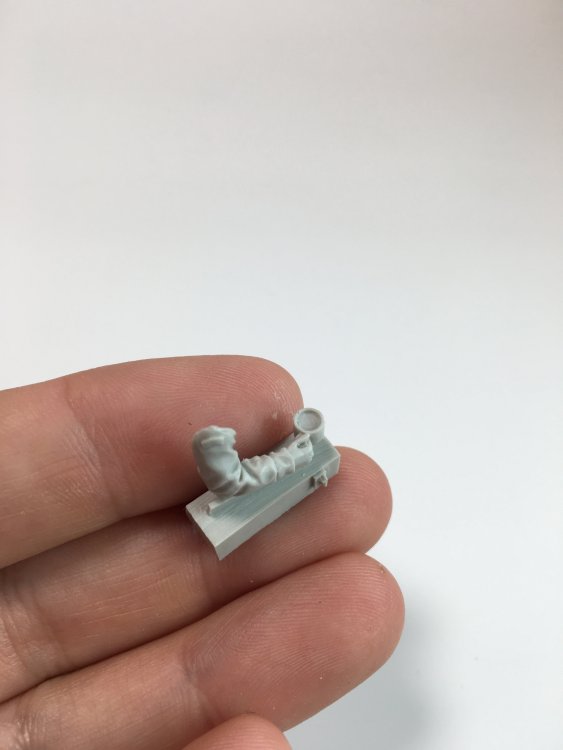
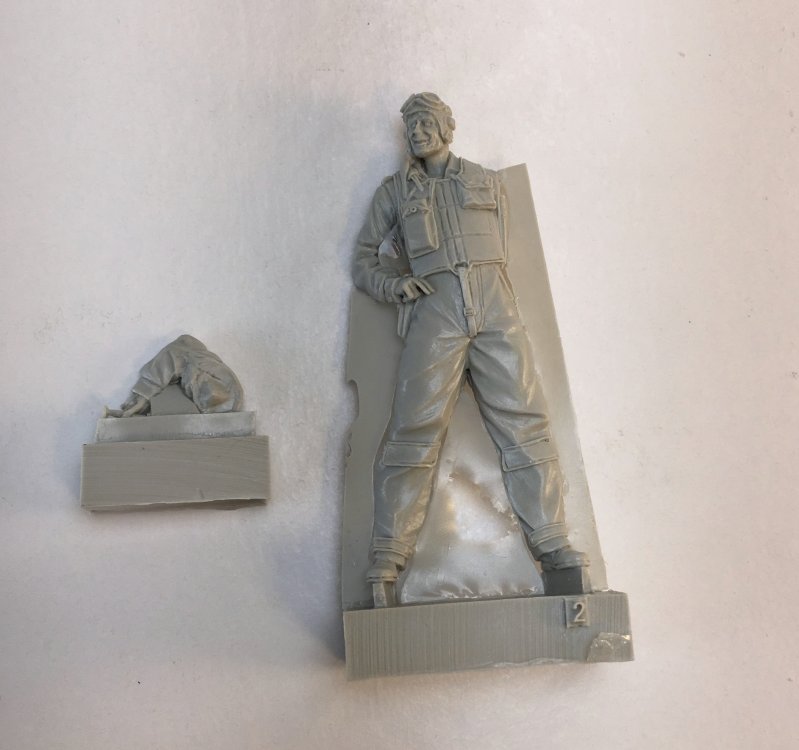
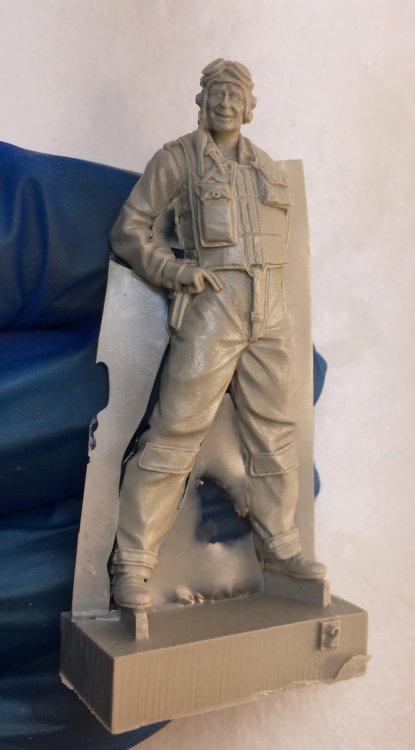
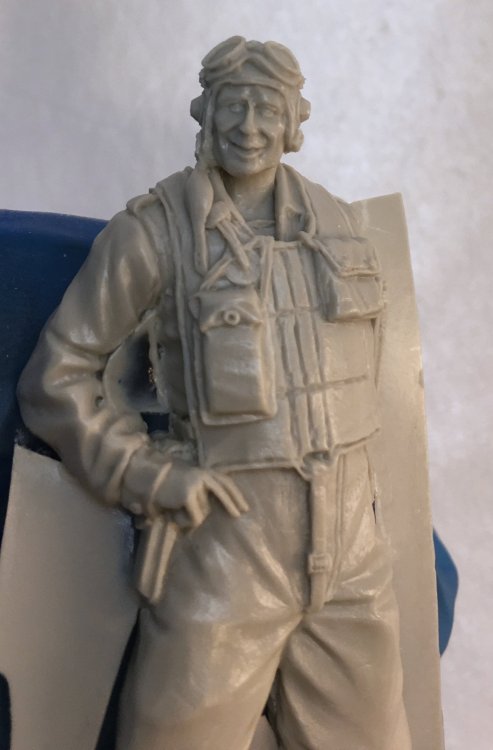
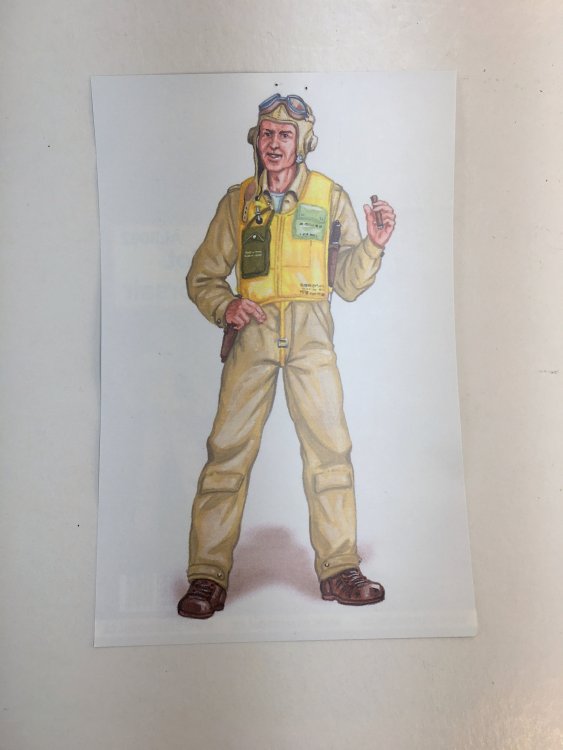
PLUSMODEL AERO line 1:32 Tempest Pilot Catalogue number - AL3001 Price tag: $23,90/€16,80 Available from Plusmodel Another pilot on this Easter day and once again from Plus Model A couple of years now, Plusmodel was a new line called “AeroLine” with figures, details sets and others accessories for aircraft and here on Lage Scale Modeller we have the honor of review almost every item of this line. Let´s see the box. The usual clear plastic box, shows what you get, three resin pieces containing a 1:32 representation of a WW2 Tempest pilot in a relaxed pose, retaining one hand a cup of coffee or more probably, a cup of tea and another the helmet. This figure comes in three pieces with both arms separate from the main body (Head, Torso, and legs). The main body, cast in a single piece, with sharp details in the cloths. The detail is really awesome and just continues to prove that Plusmodel knows what is doing. The sculptor did a hell of a job on this (love the relaxed look and the cup of tea!!) and Plusmodel did a fantastic casting of it. The figure of the pilot has a good attitude and a great facial expression. For painting instruction, the label’s back is printed with a large full-color draw of the figure. Conclusion: The figure is spectacular with a very cool look and full and genuine details making it a must have to be right at SP 1:32 Tempest. Undoubtedly, a great figure with a great style that will look great next to a 1:32 Tempest. Very Highly recommended. Our thanks to Plusmodel for the review samples and all the support given. To purchase this directly, click THIS link


-
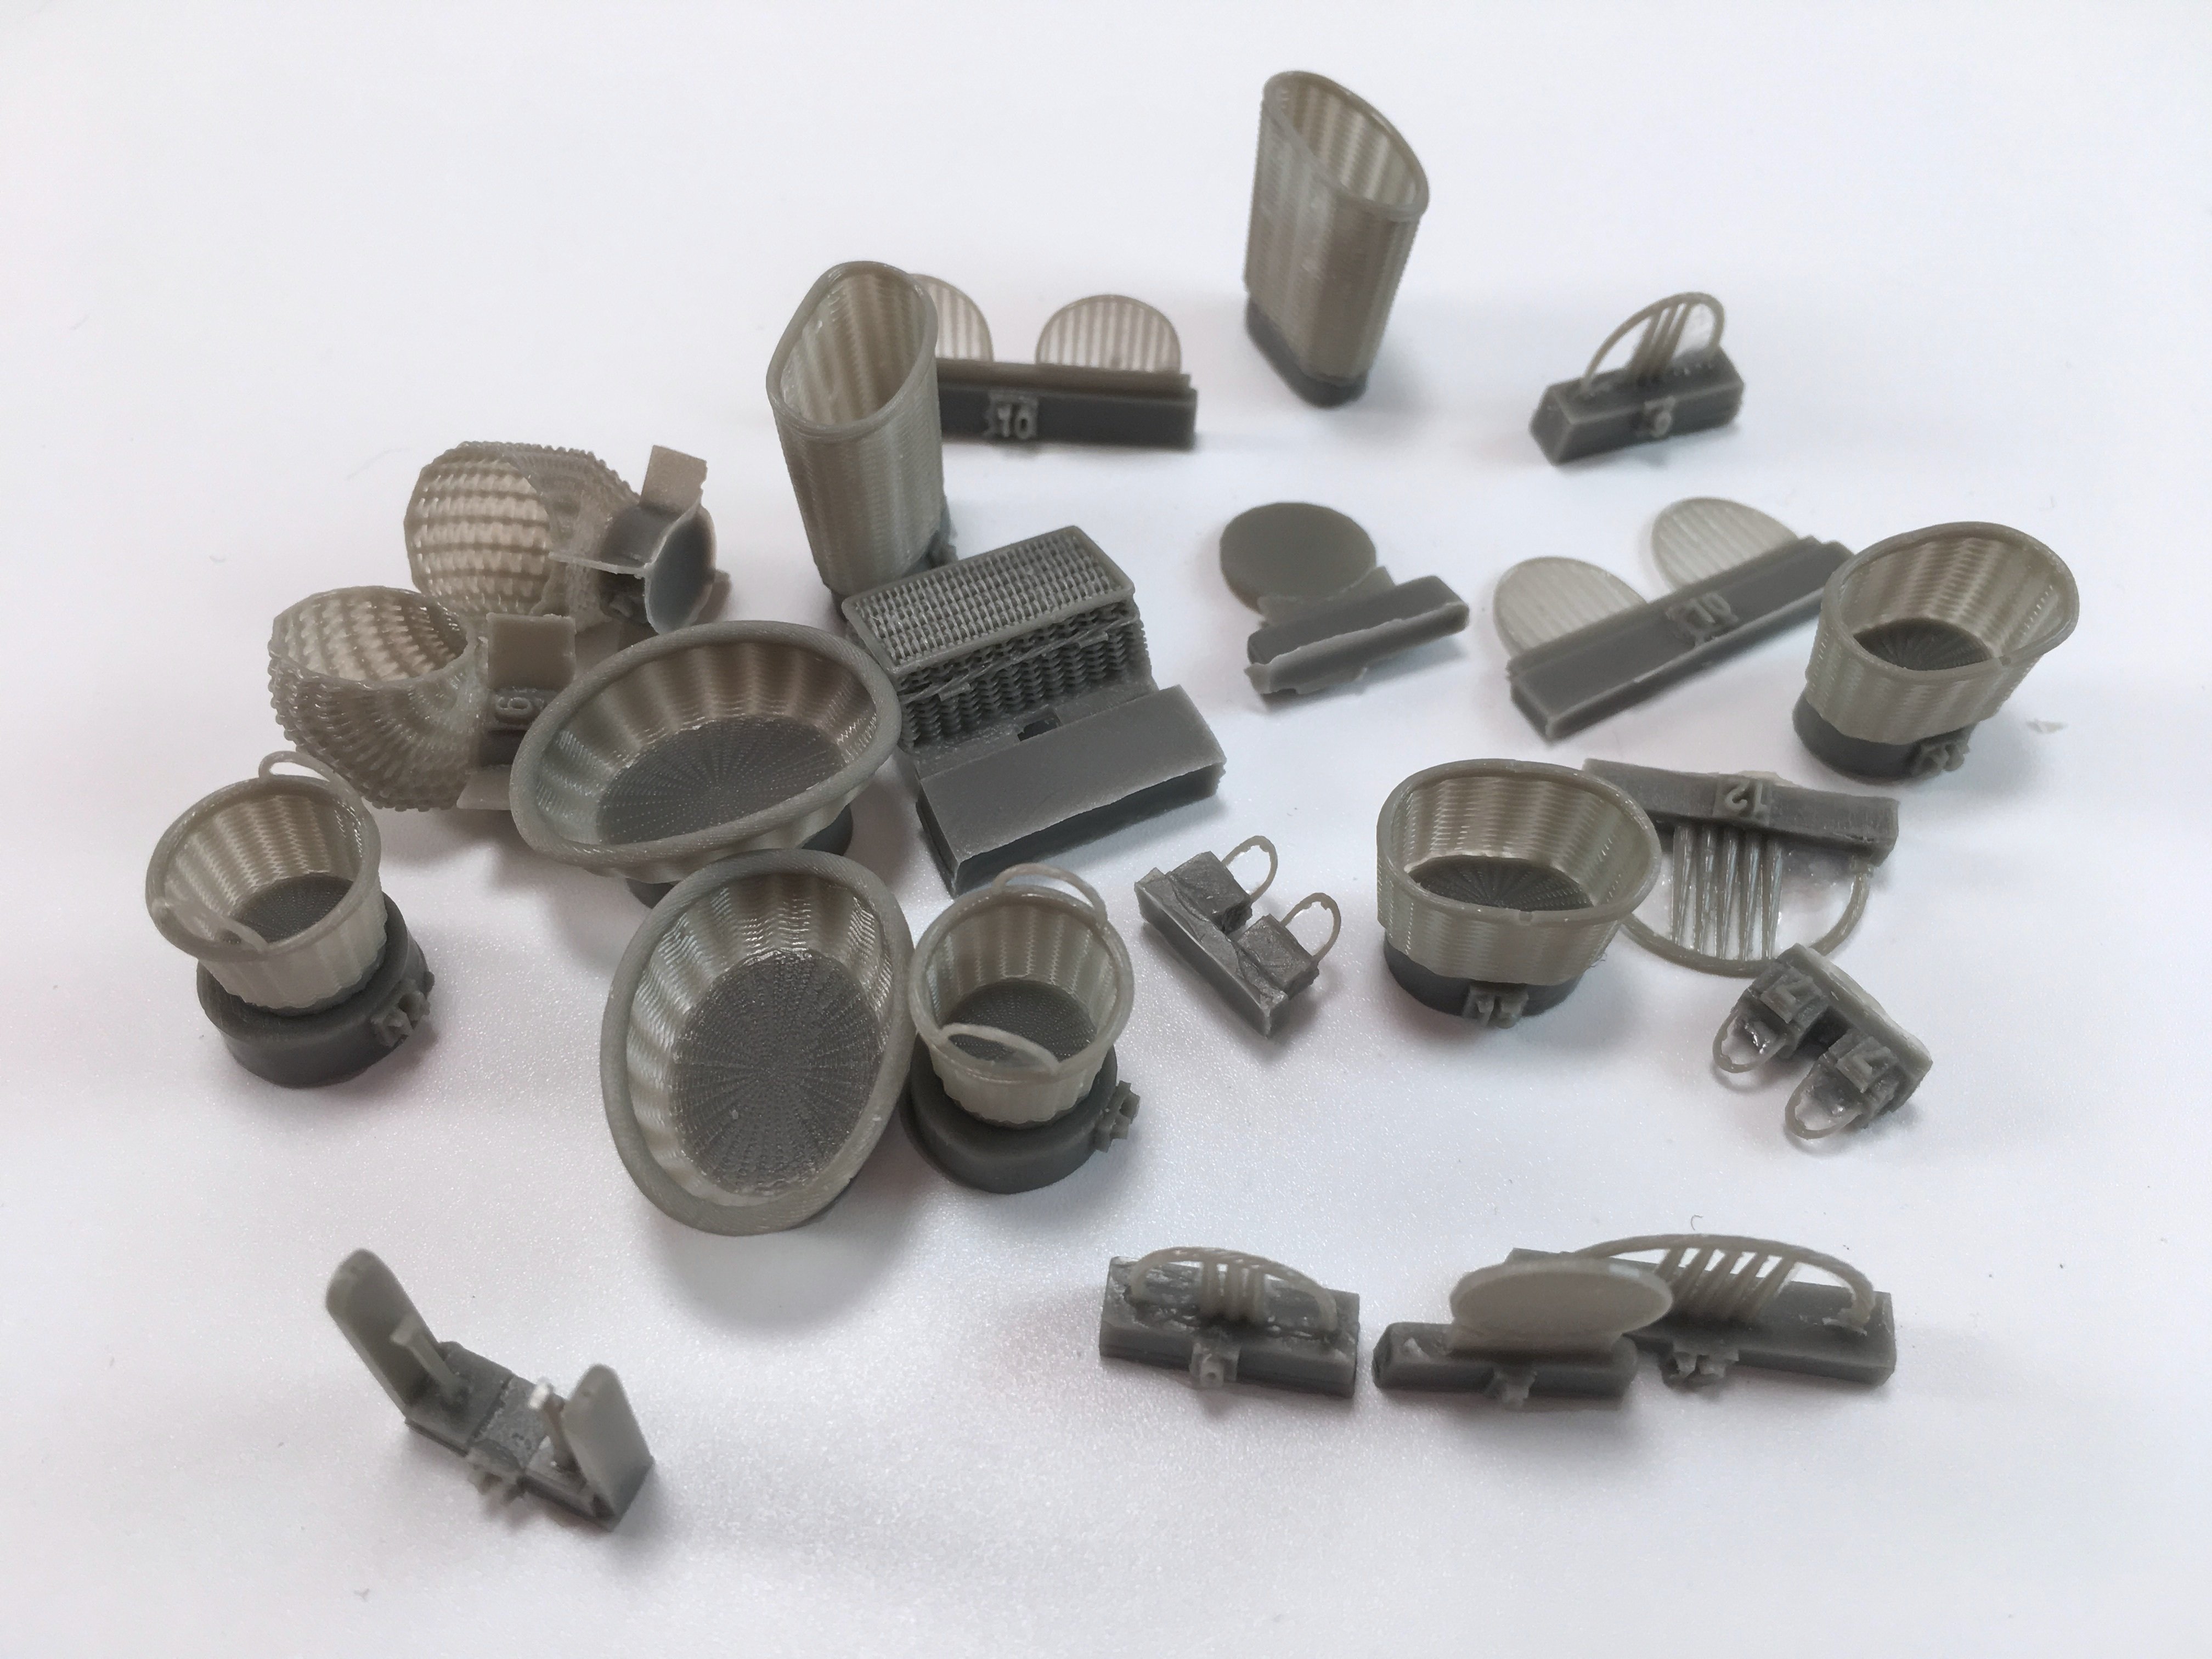
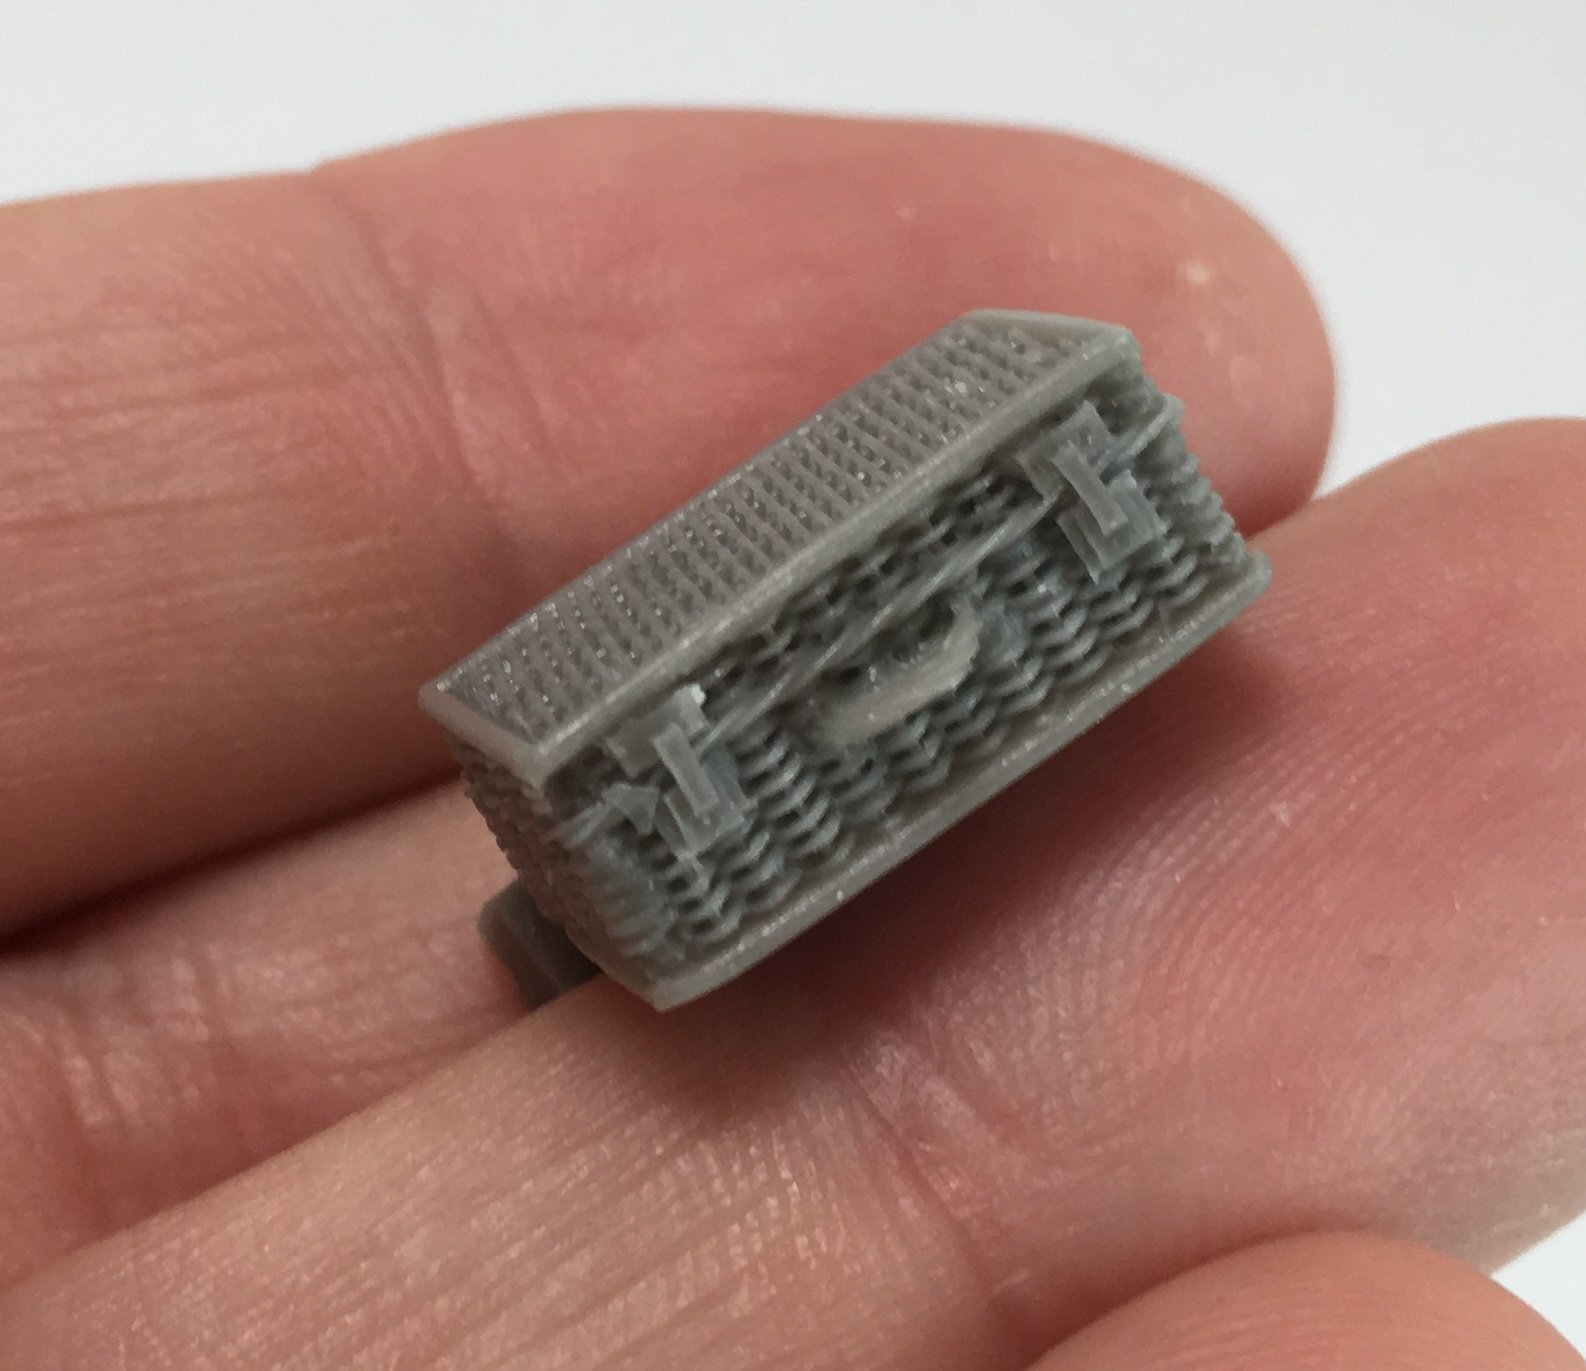
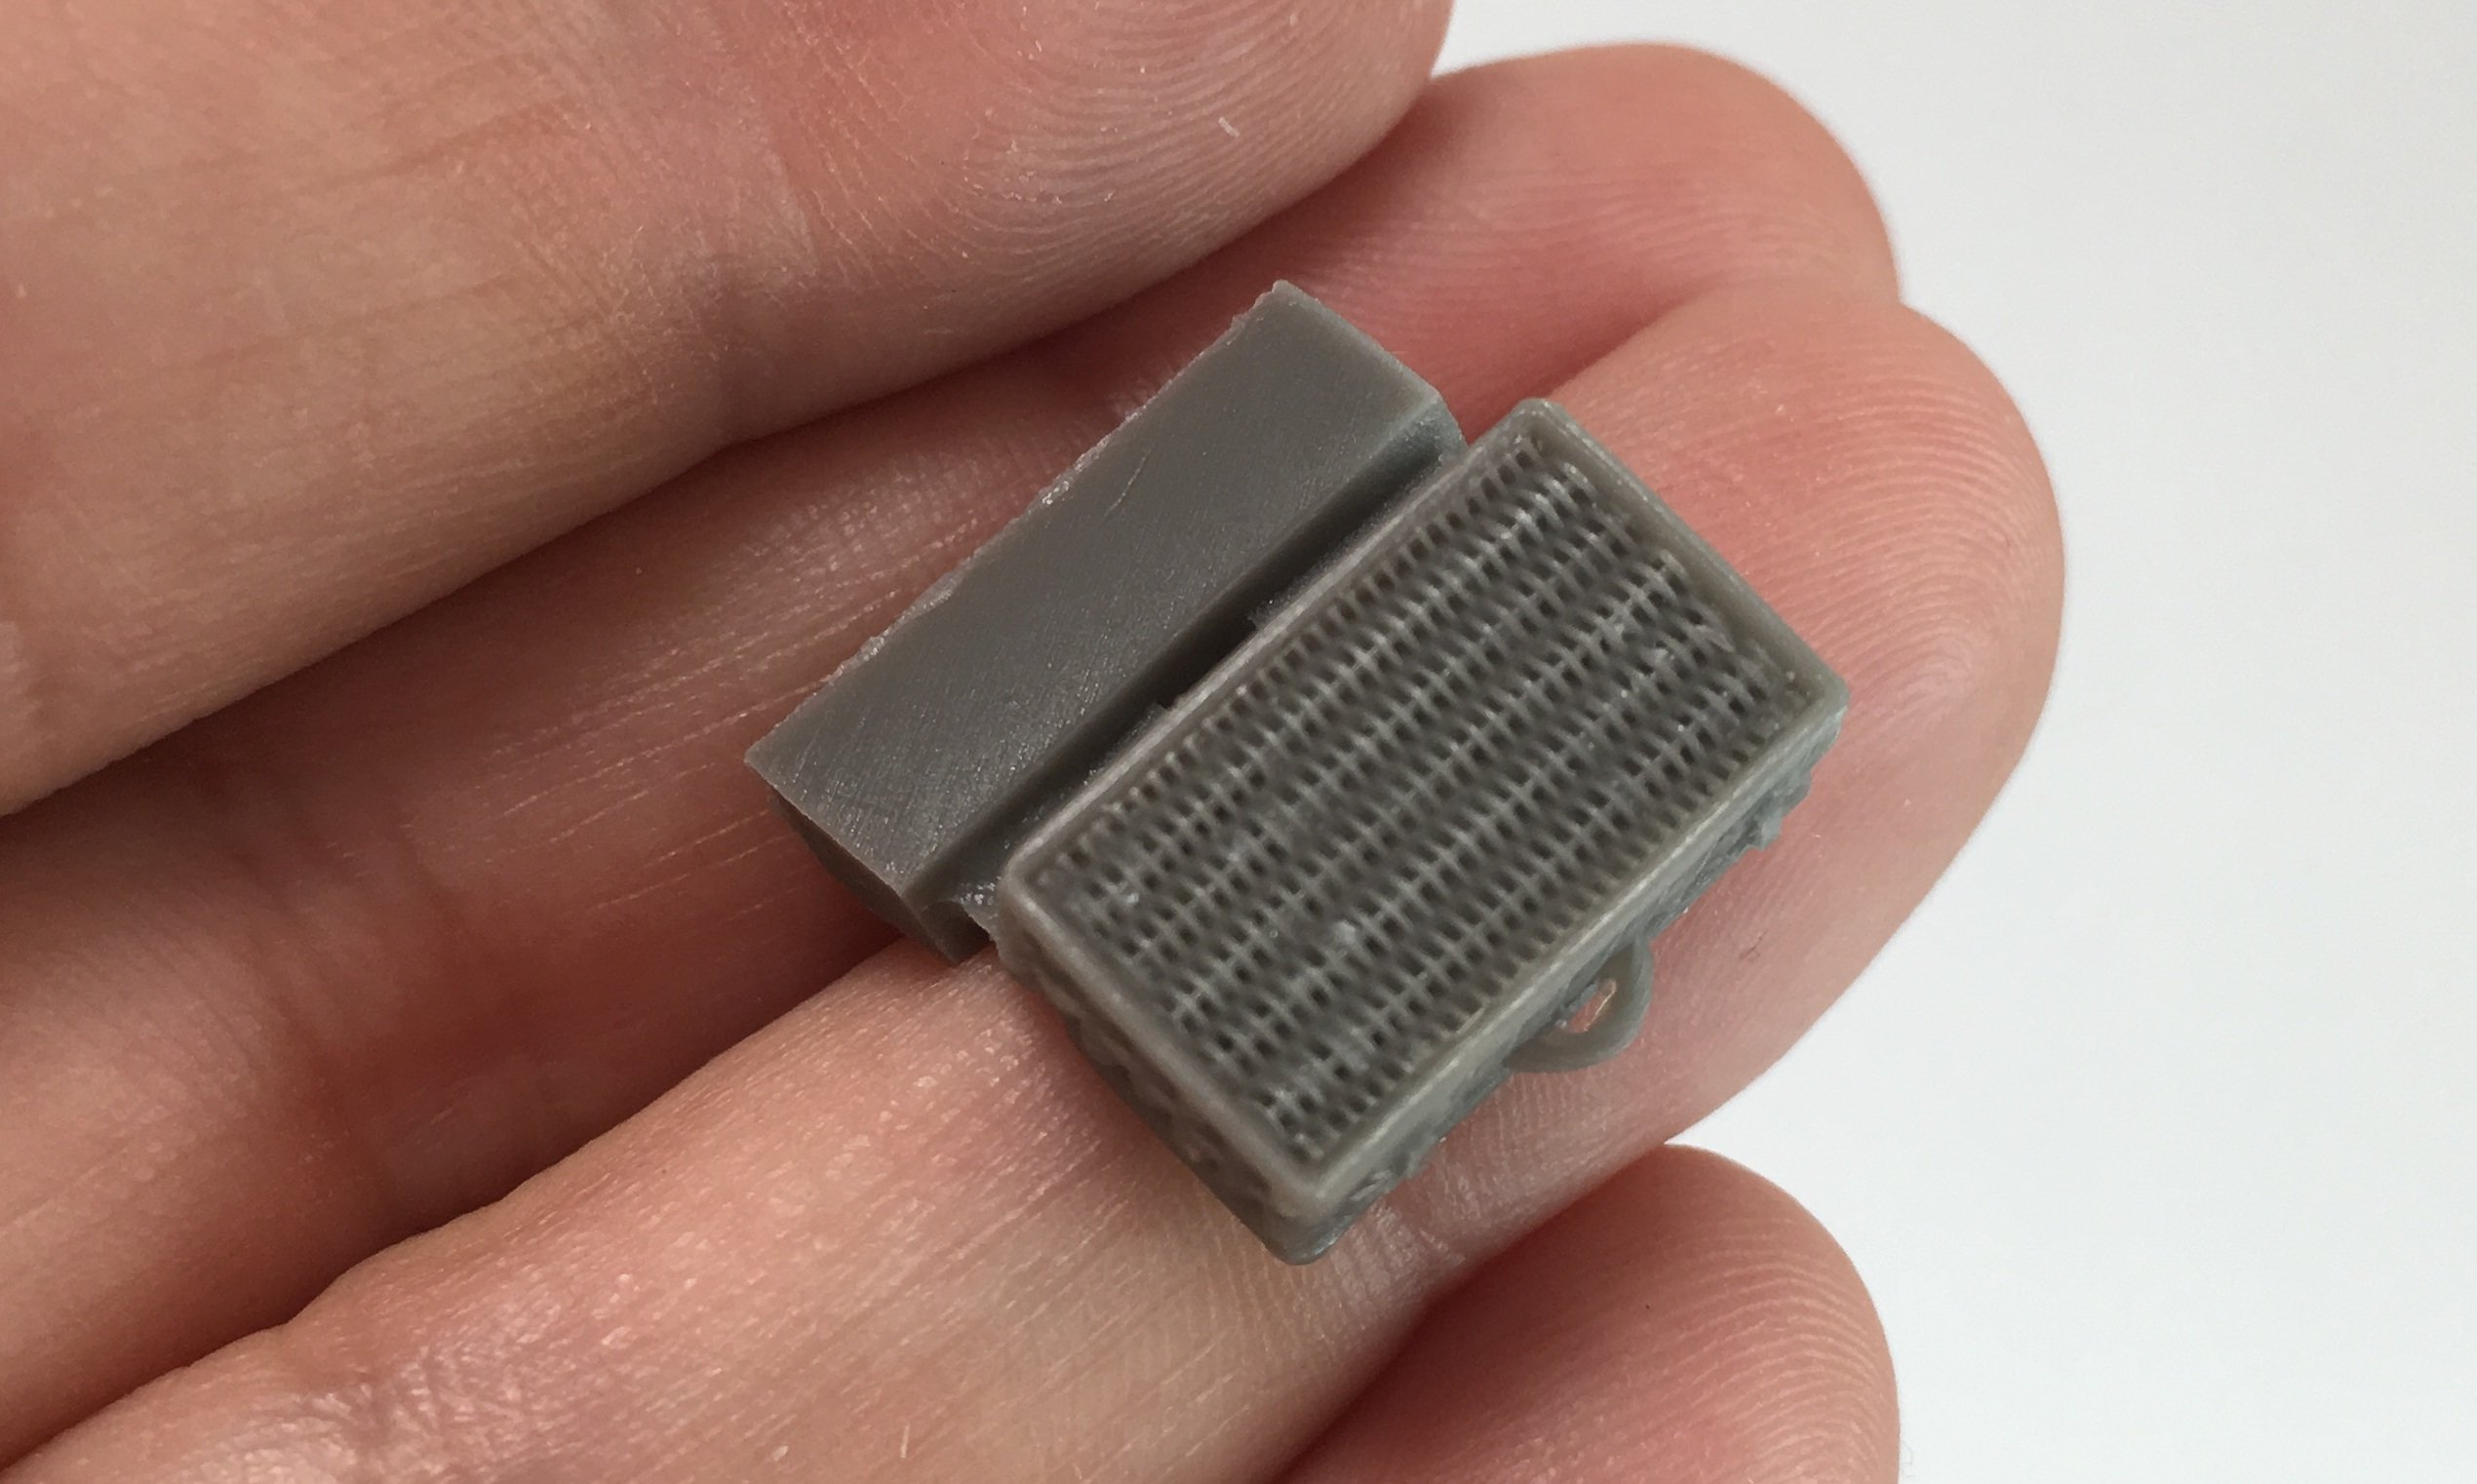
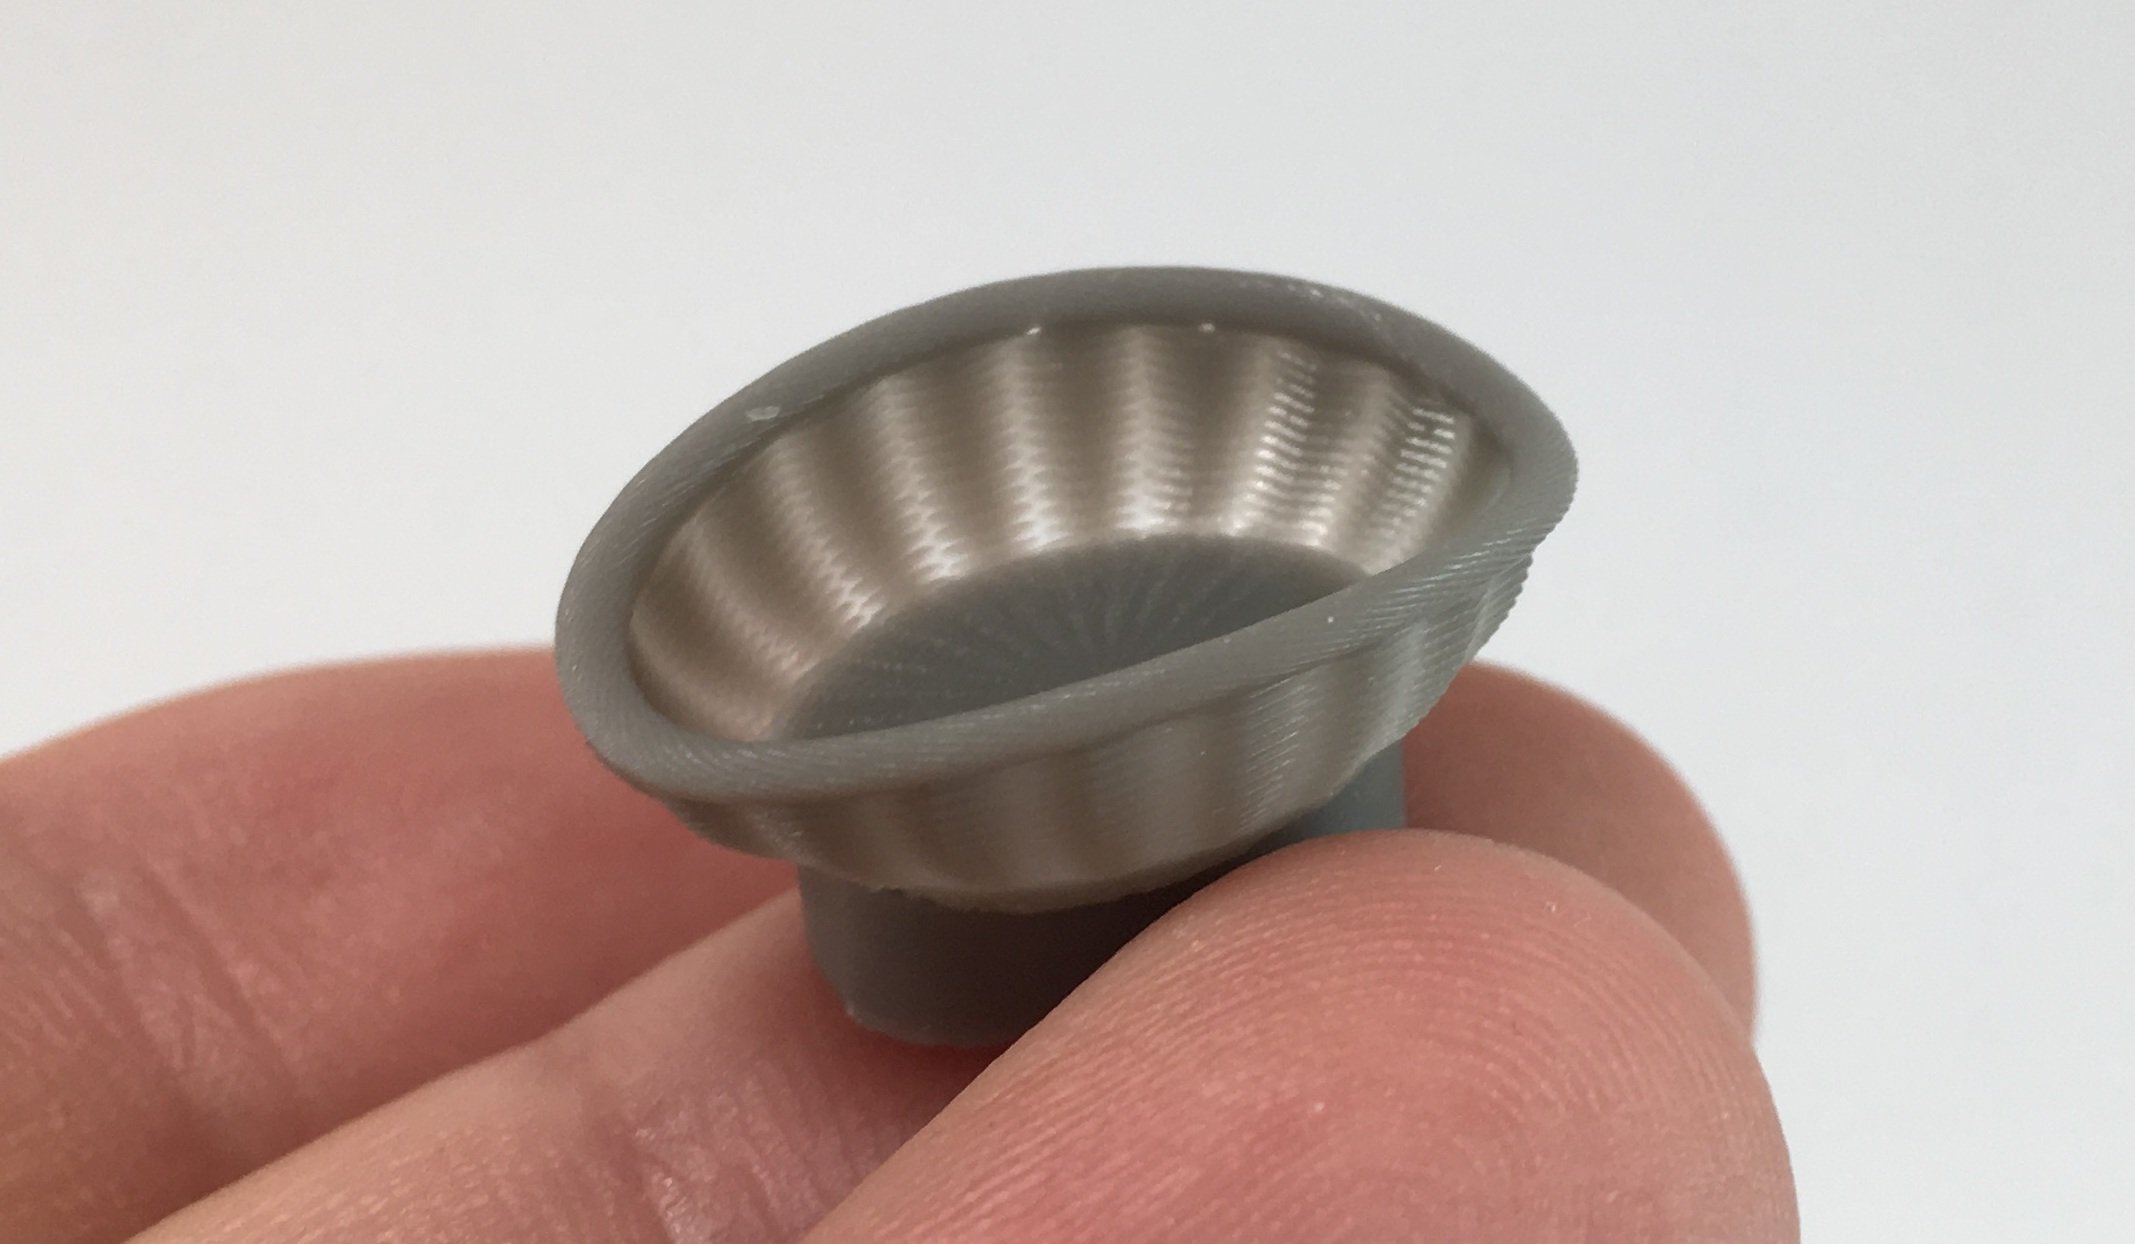
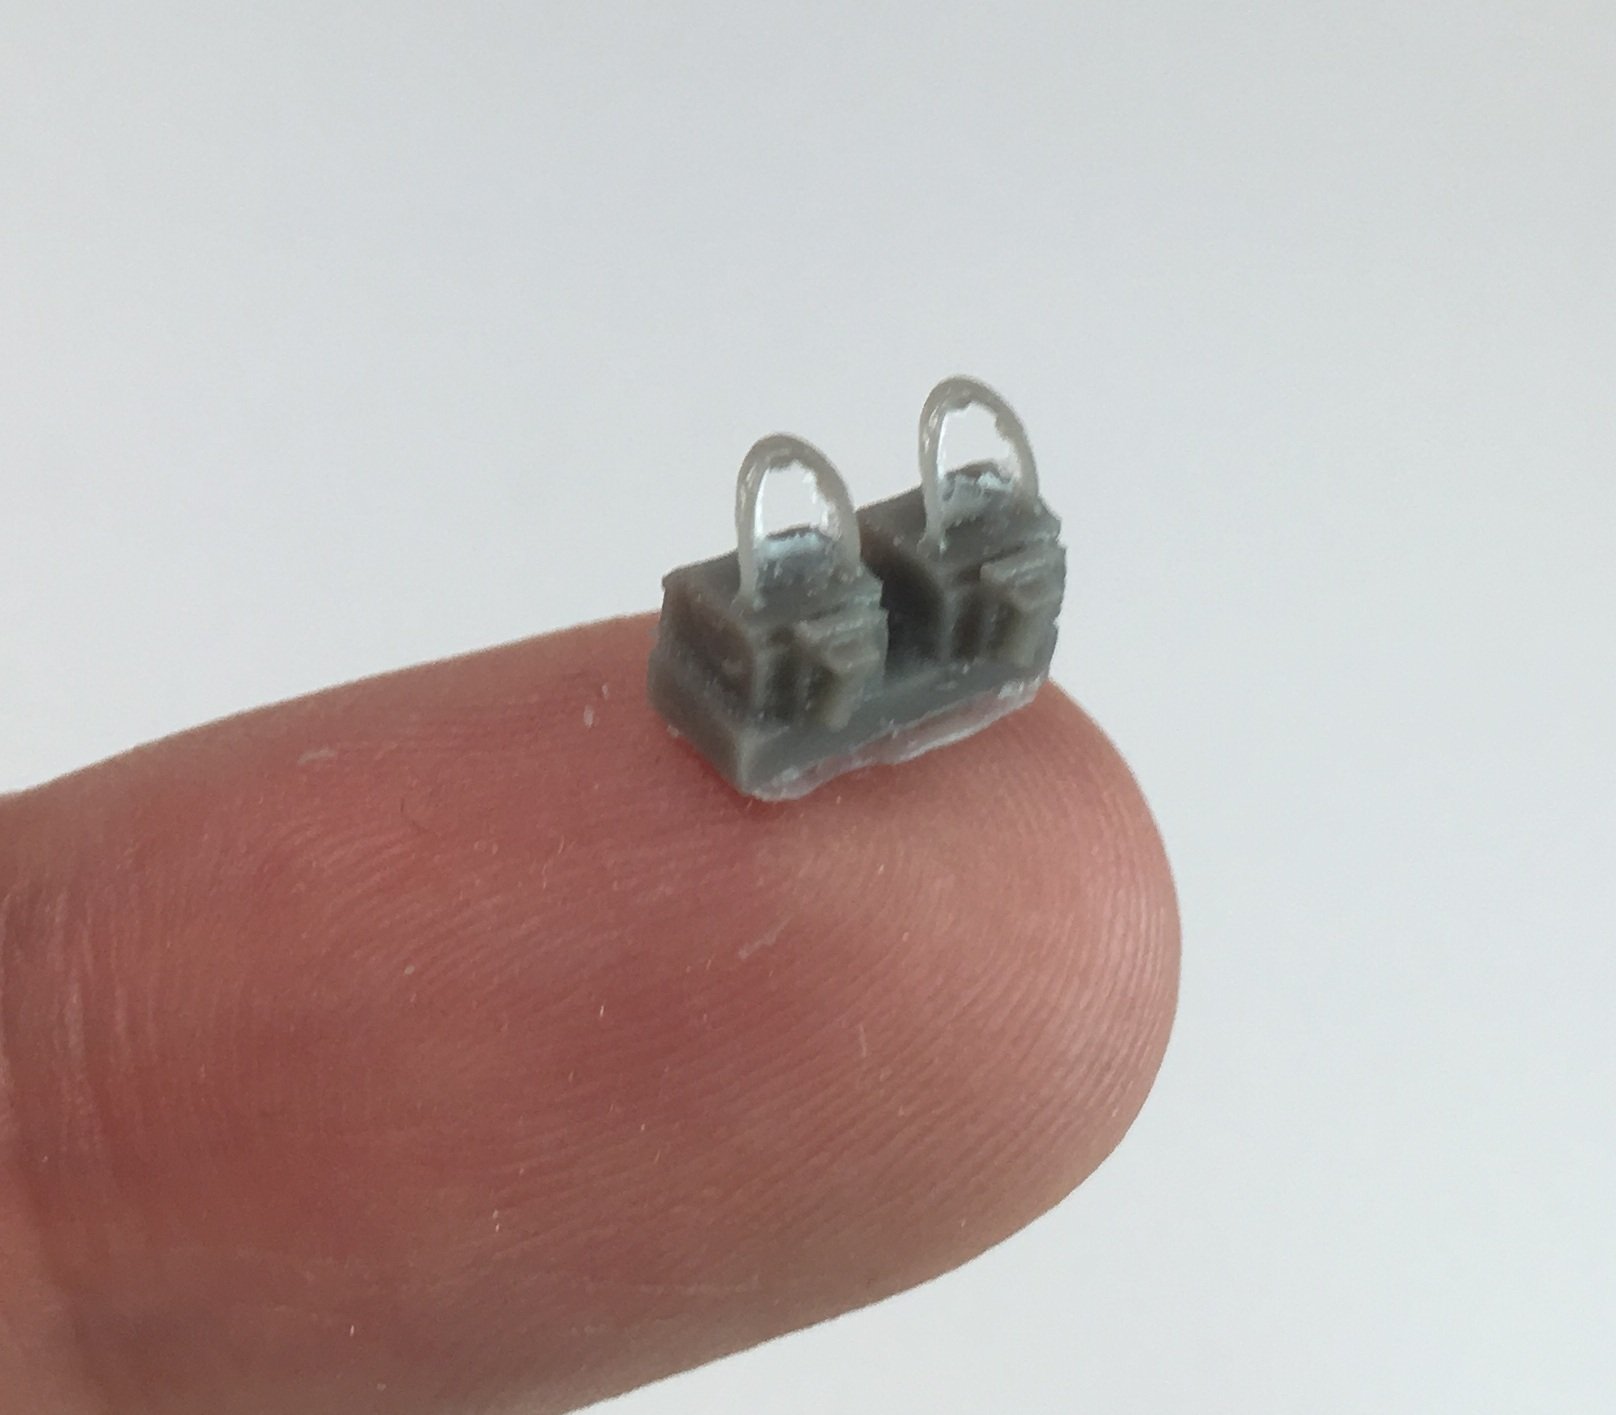
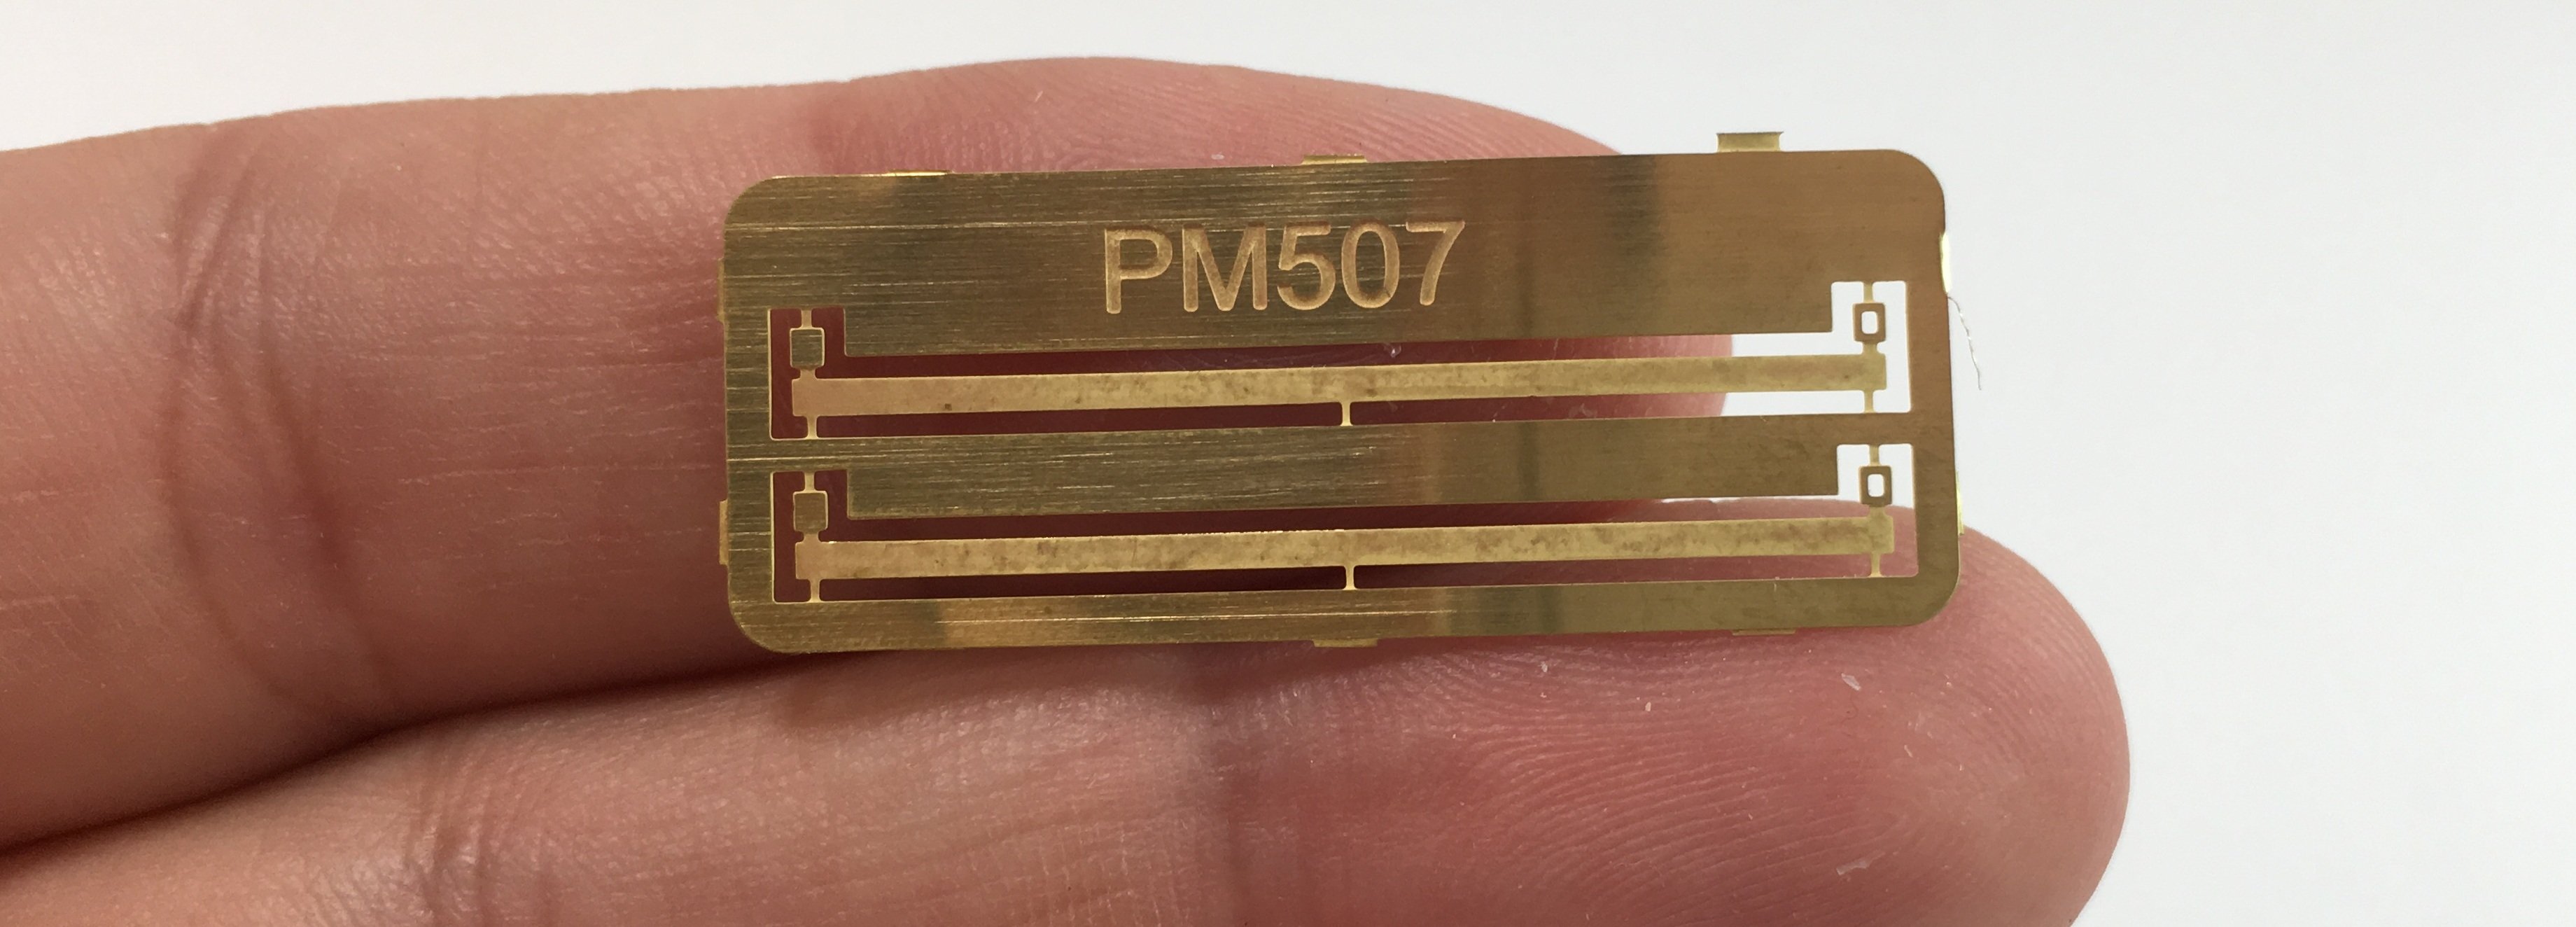
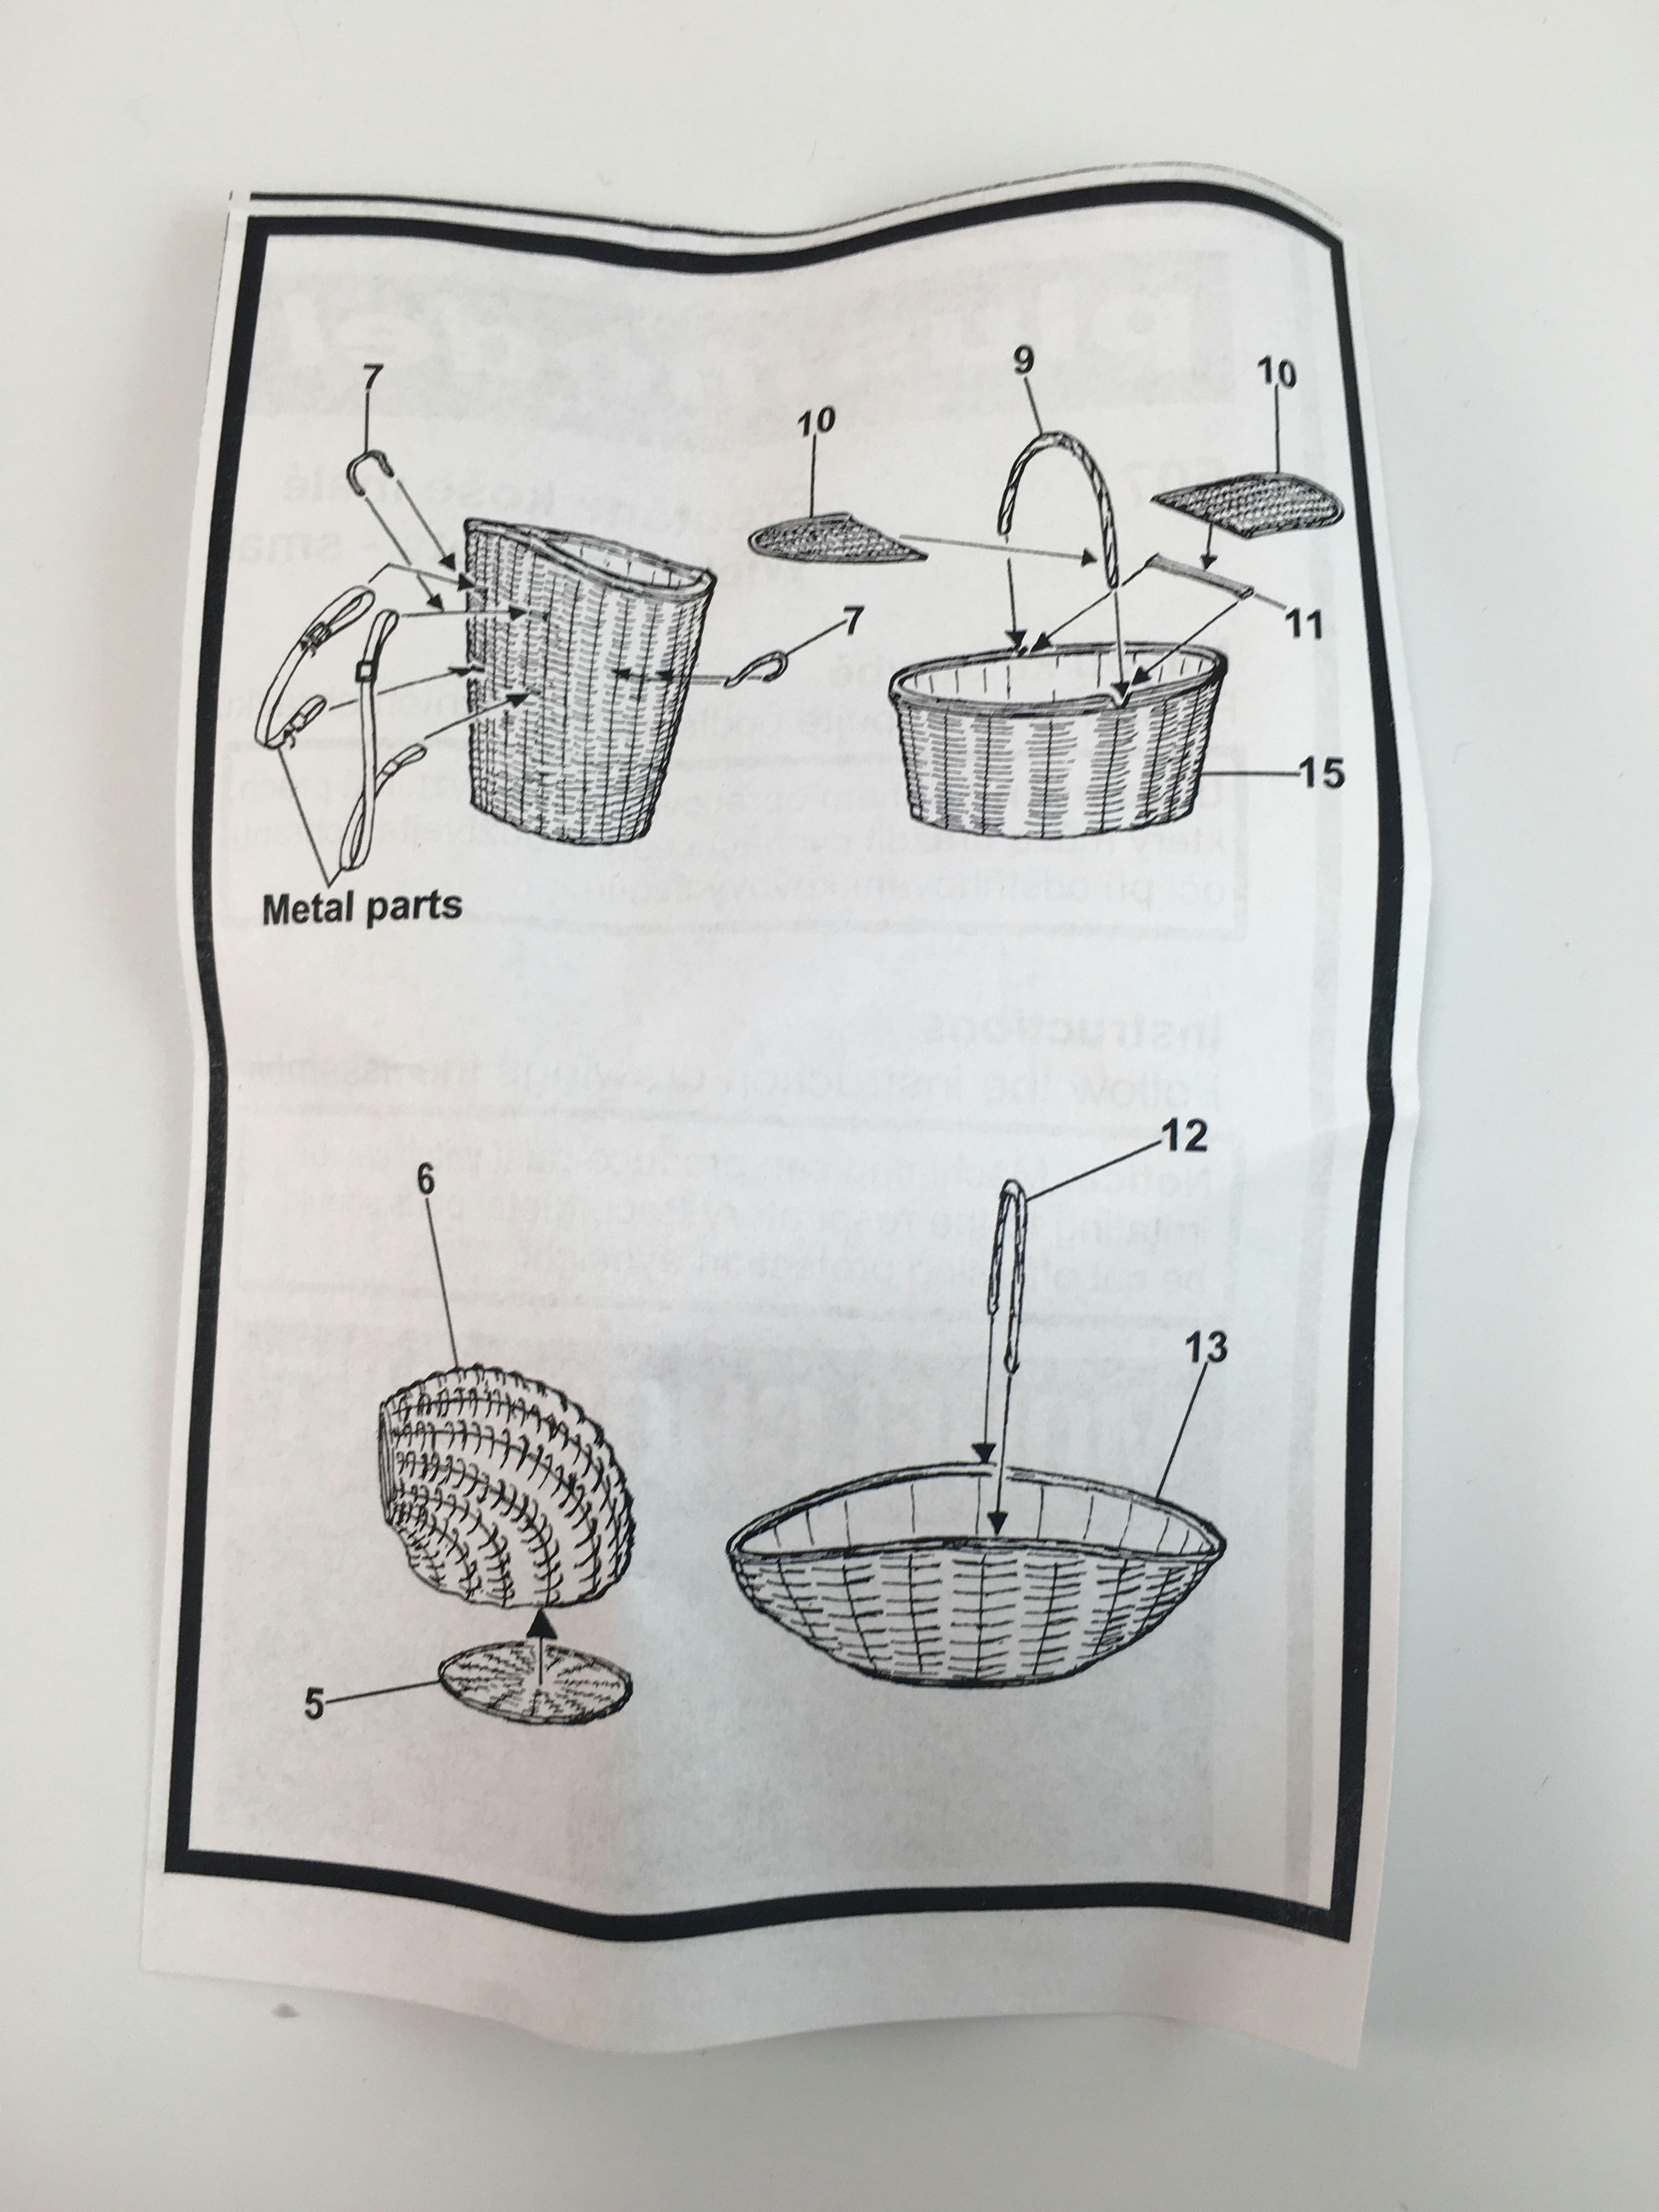
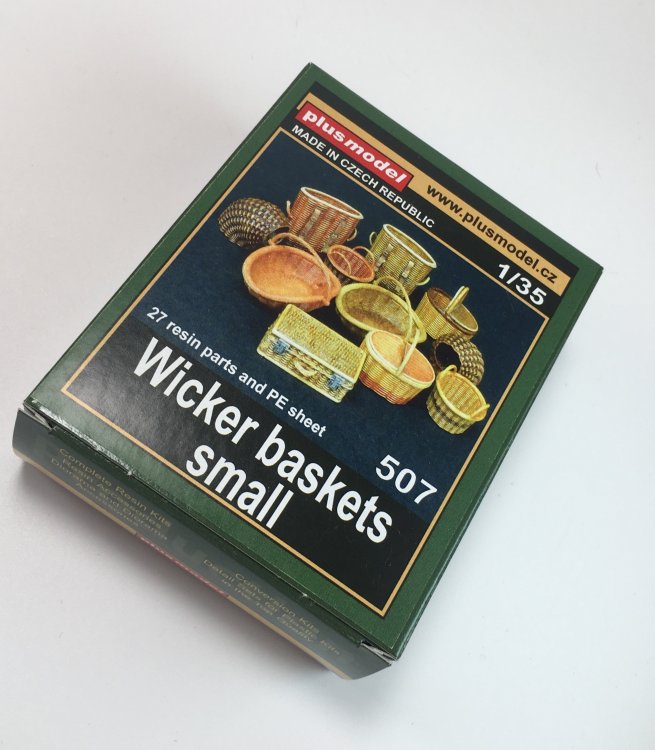
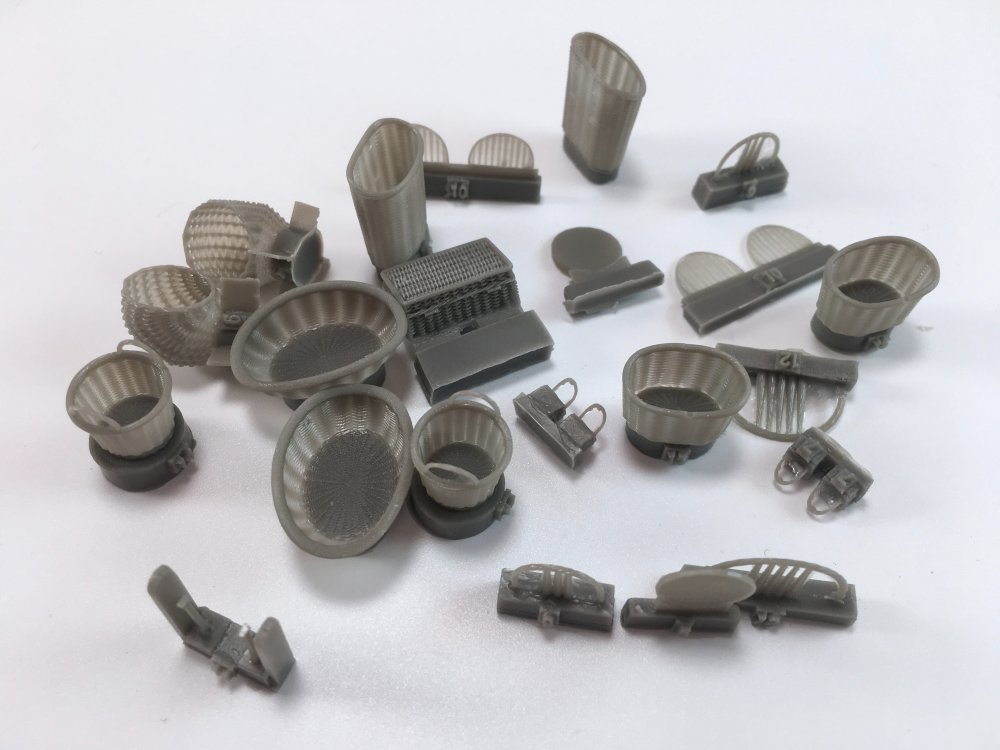
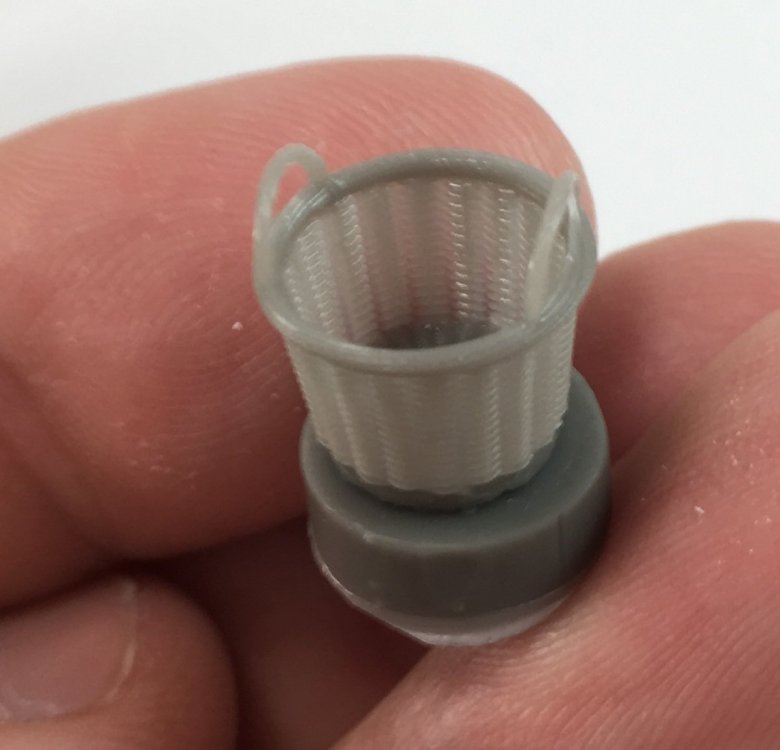
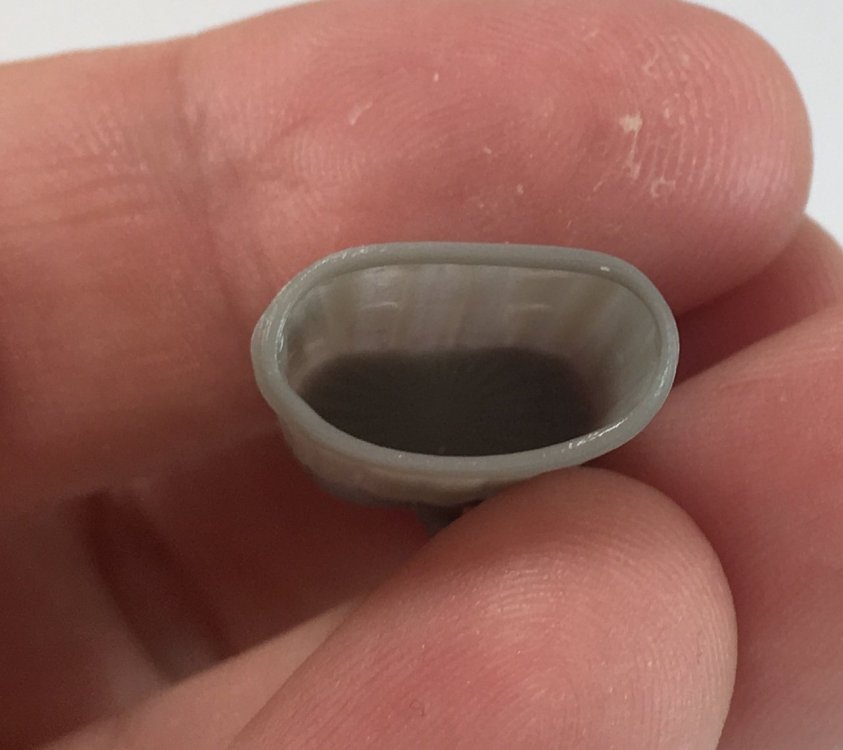
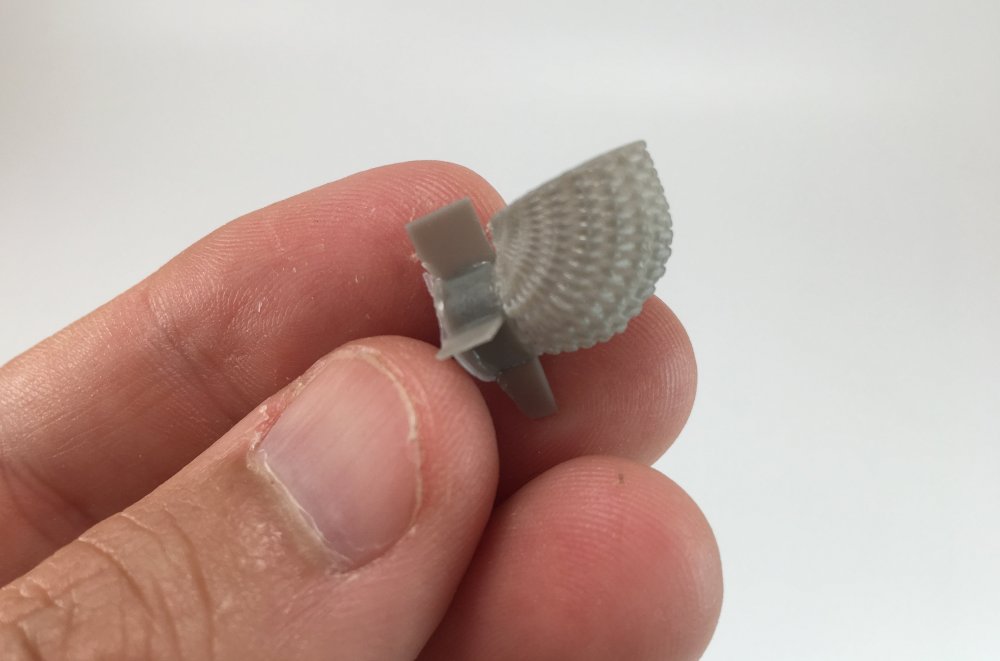
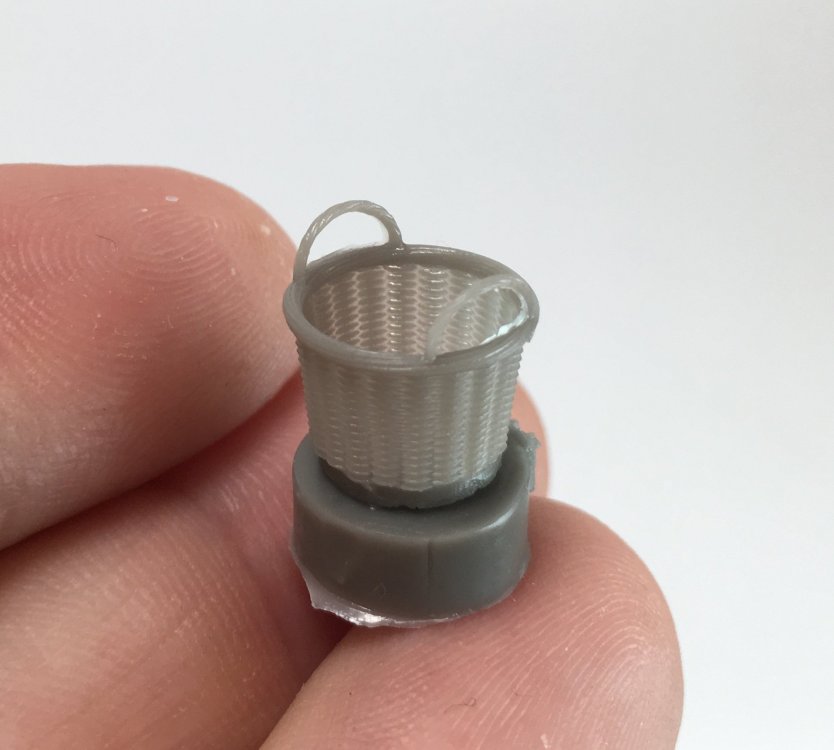
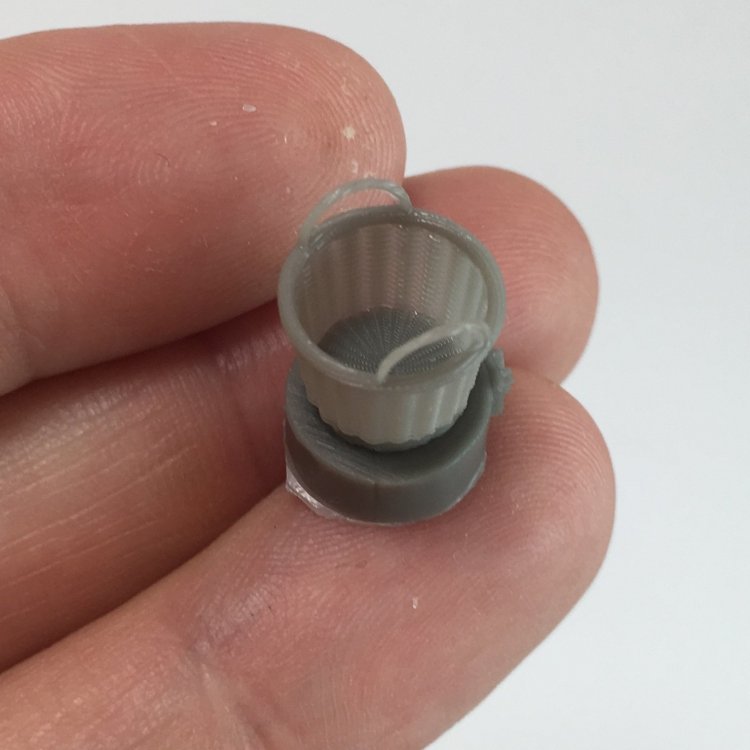
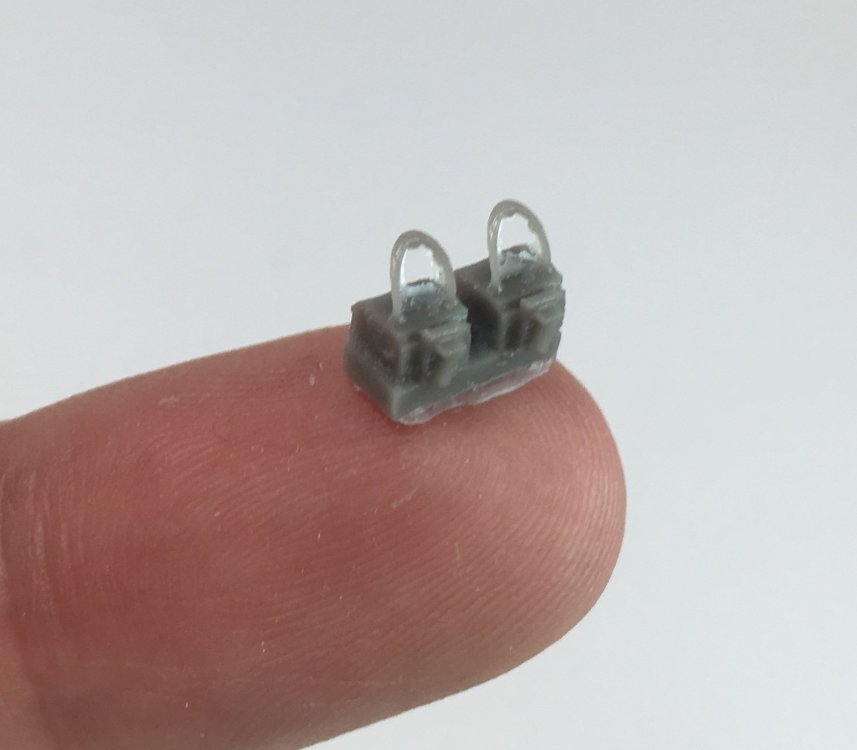
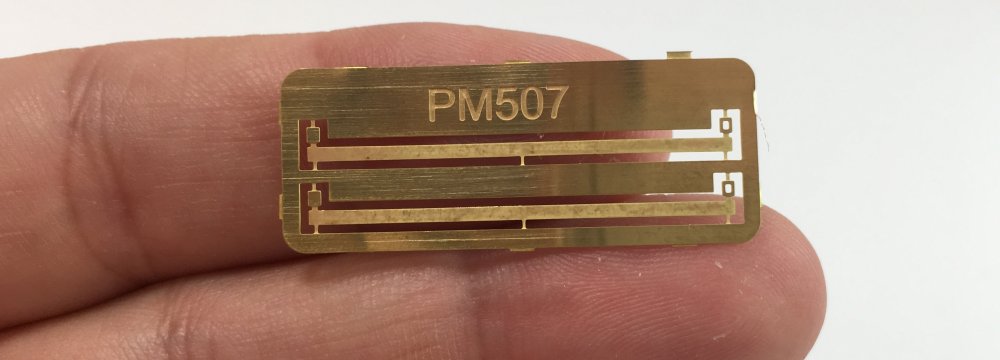
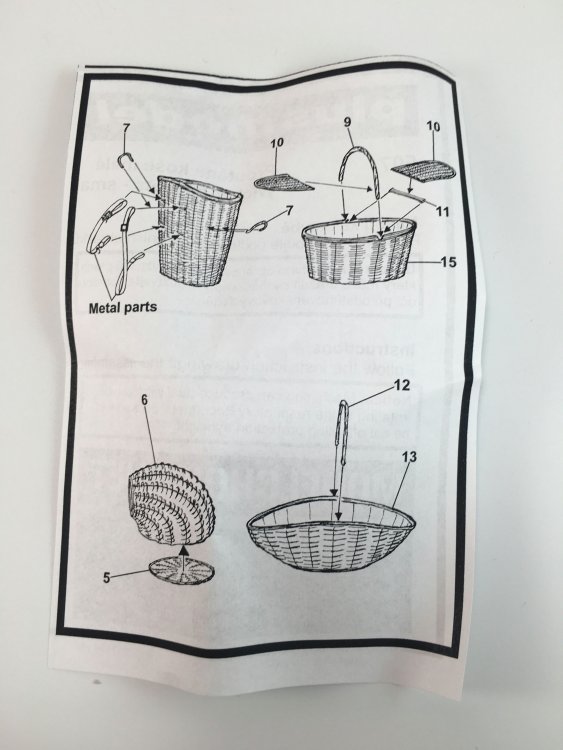
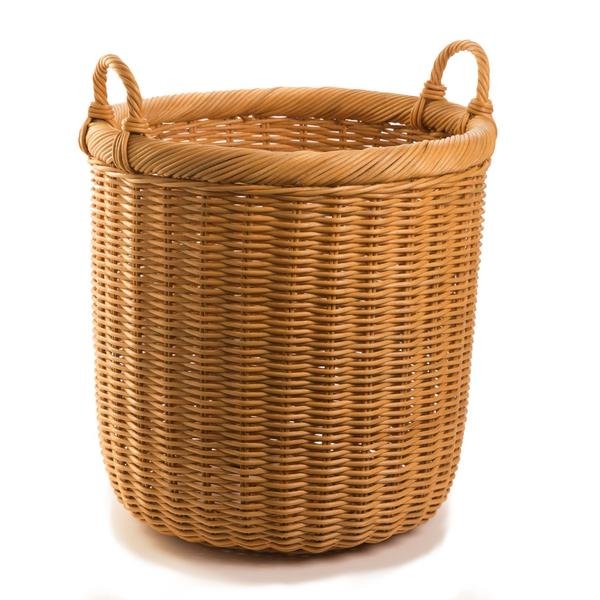
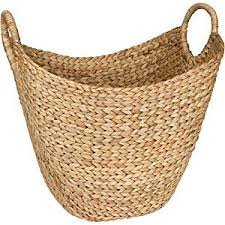
PLUSMODEL Wicker Baskets (27 resin pieces and one small PE sheet) Catalogue n.º 507 Price tag: $27,30/€19,10 – directly from Plusmodel Plusmodel is my favorite diorama accessories manufacture in the modeling world as they do allied quality with originality. If your project is a vignette or a diorama, then Plusmodel is your solution. Wicker Baskets are used in everywhere in the world and for a very long time, so you can use this in an XVIII diorama, a WWI or WWII or even a Vietnam diorama. So you practically can use it everywhere. All the parts come with the usual packing, in small paper boxes with the parts wrap in bubbles plastic. In the box, you find 5 different types of wickers baskets, two of each and one wicker box. The detail is such outstanding… I really don’t have words to express how amazed I was when I saw them. So I will just let here the pics. The small details as handles and lid are cast in separate parts, which is quite good as it gives the modeler much more display options. The Pe sheet is just for straps for one wicker. The instructions are a simple paper sheet with an assembly diagram of some of the baskets. Conclusion I`m afraid that I becoming quite annoying about Plusmodel quality but is their fault. This set is just jaw-dropping. I know it´s simple set but the detail finesse and real look of the wicker is too good to be true. What do you want more? VERY VERY HIGHLY RECOMMEND Our truly thanks to Plusmodel for the review sample.


-
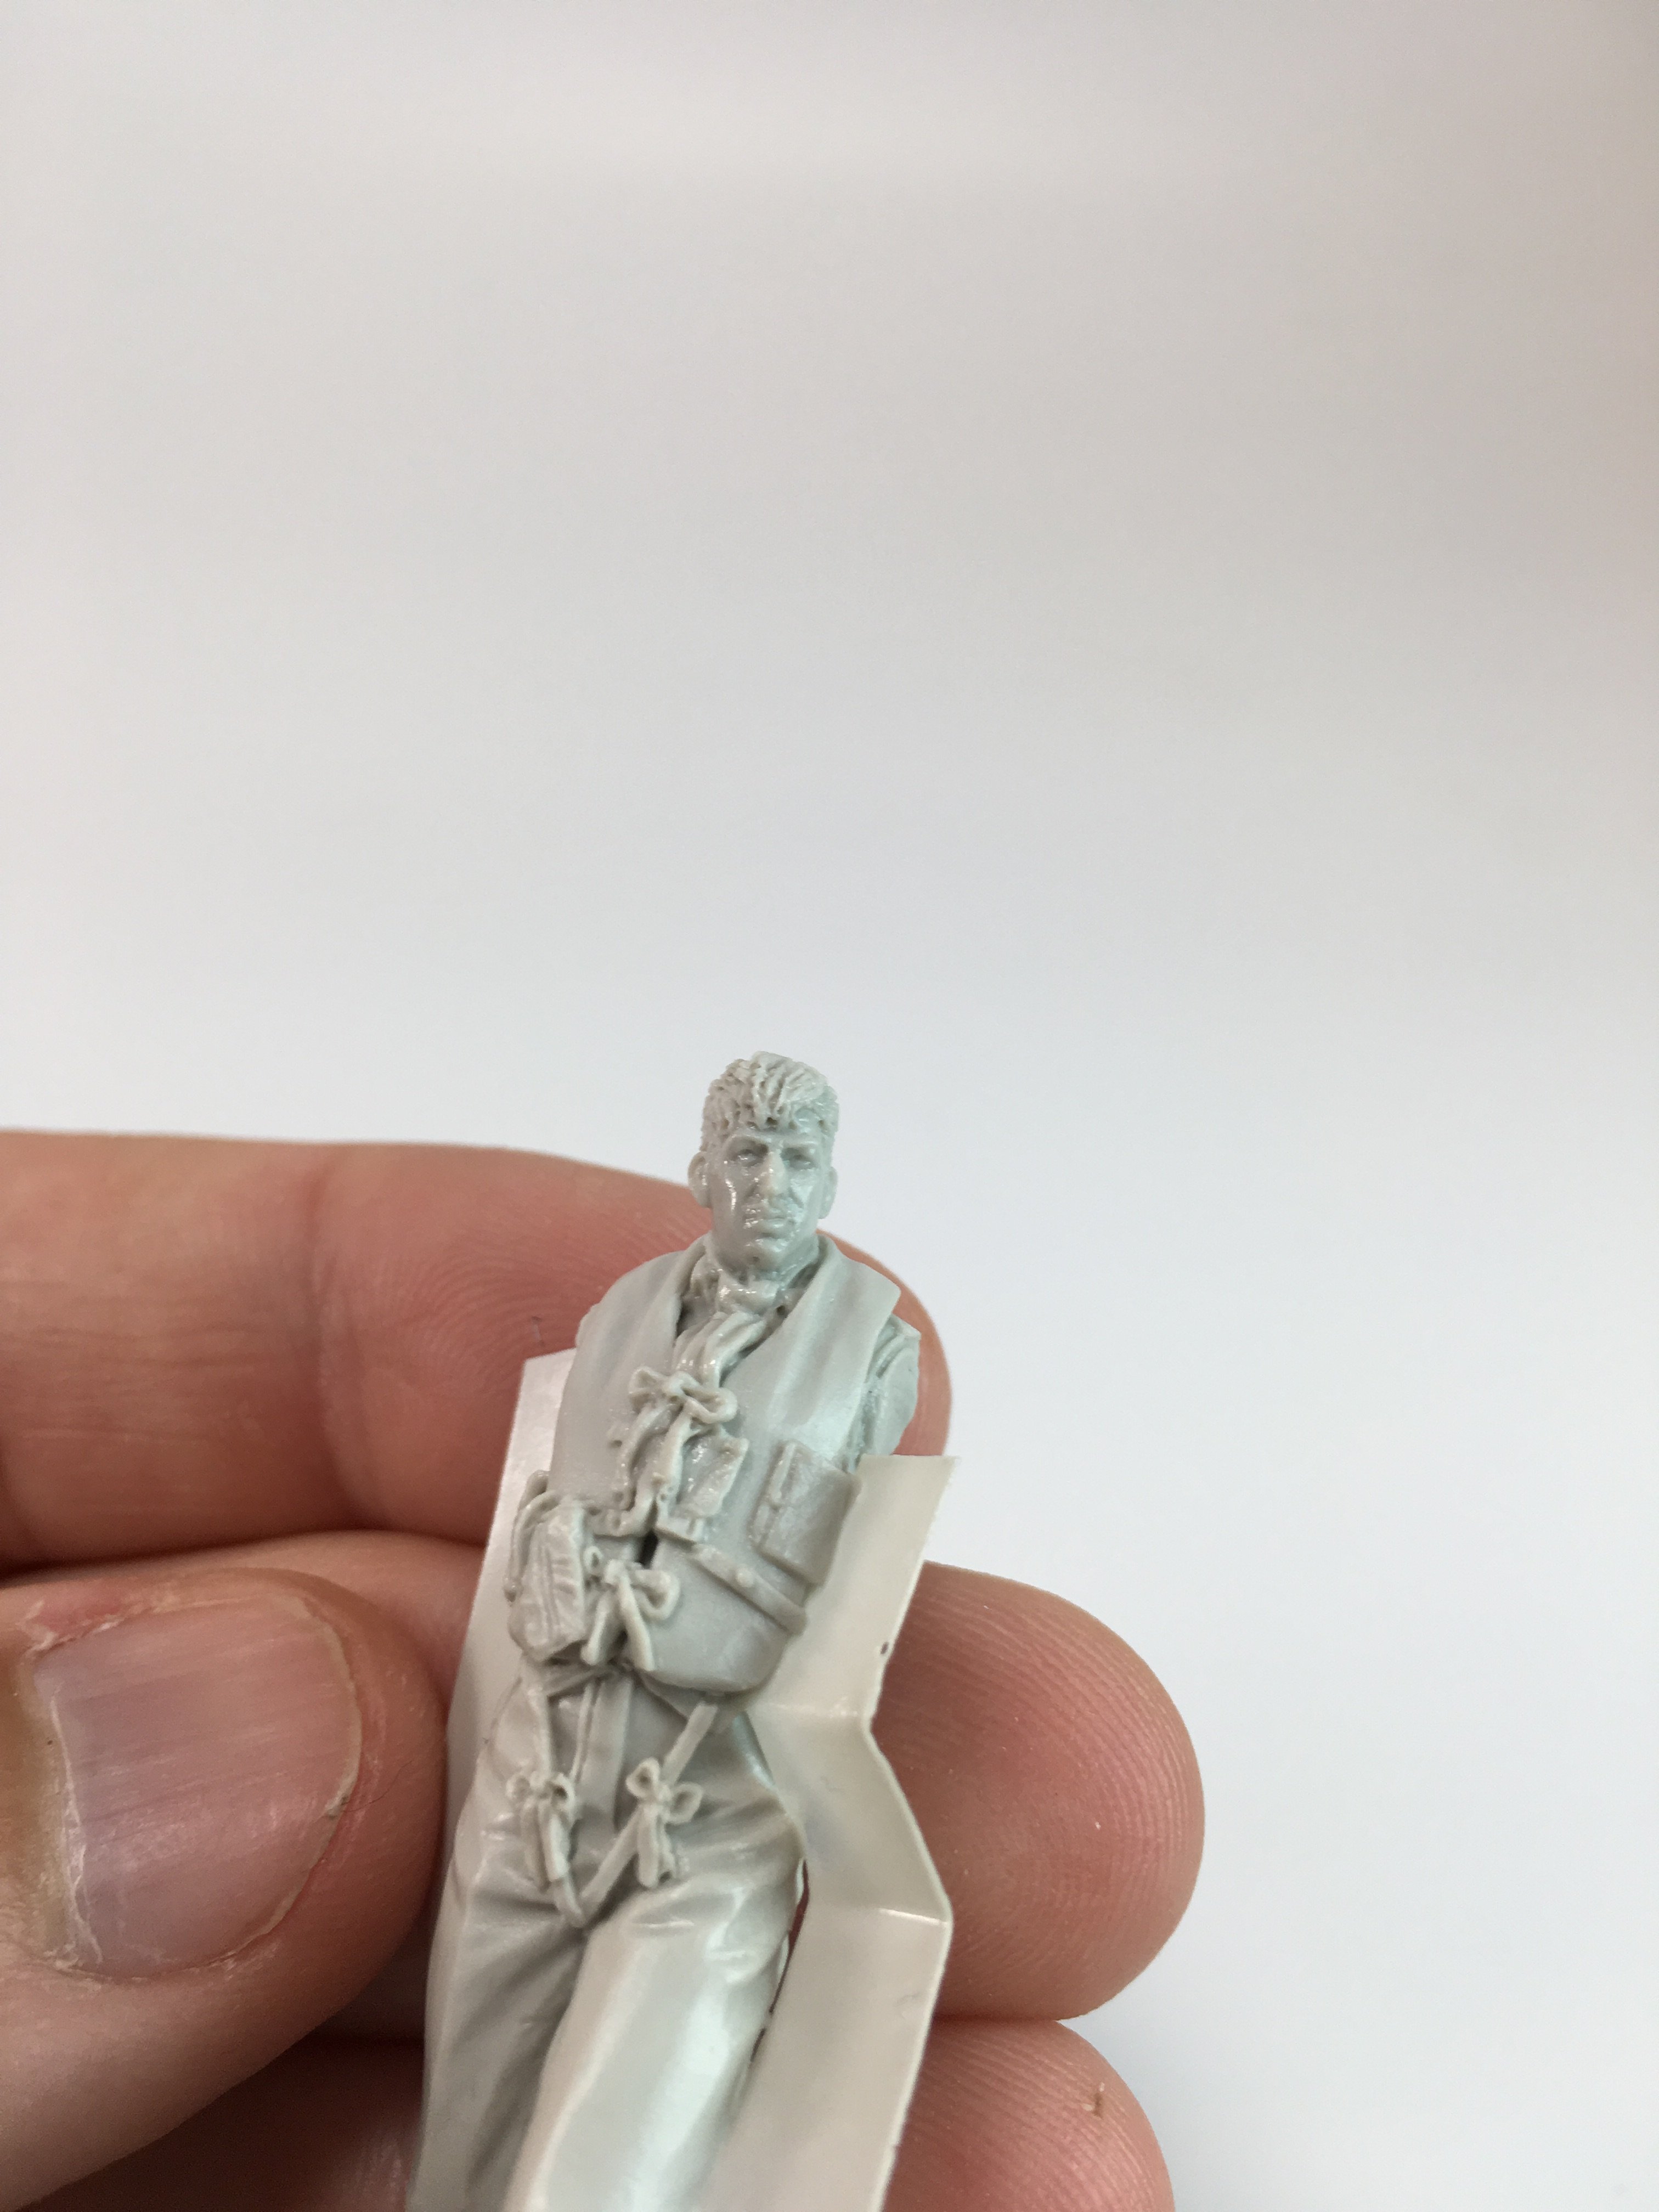
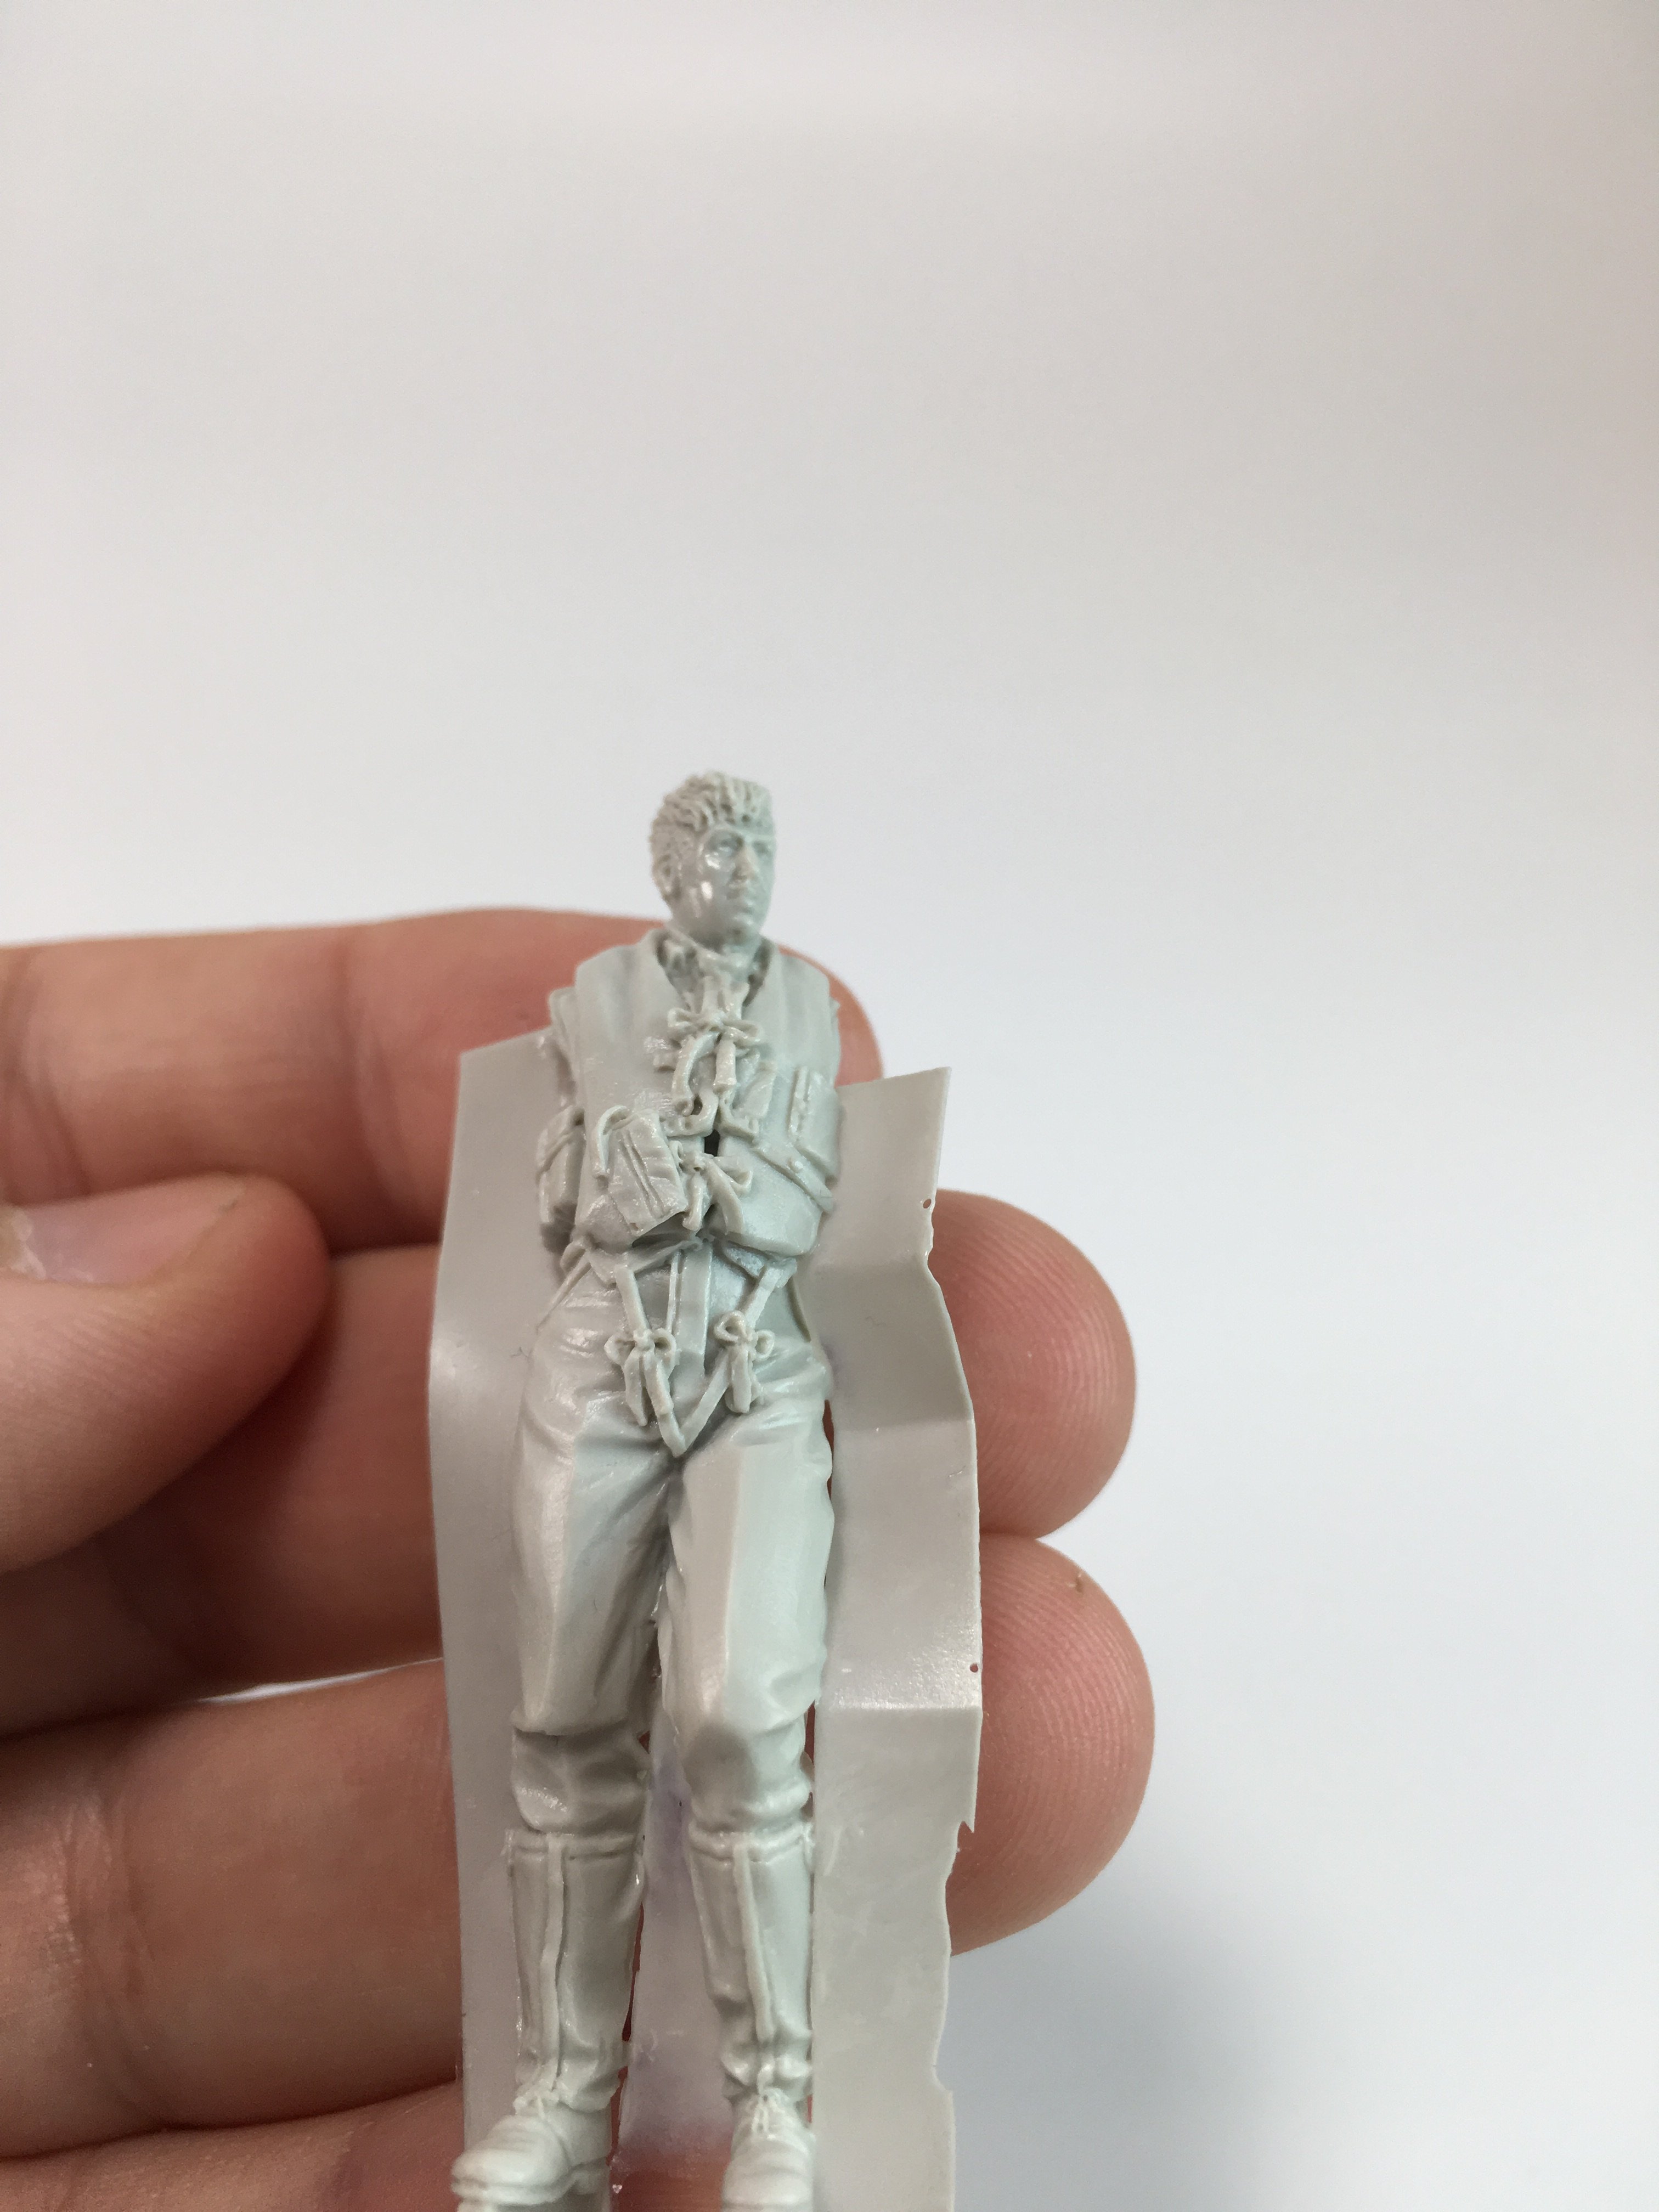
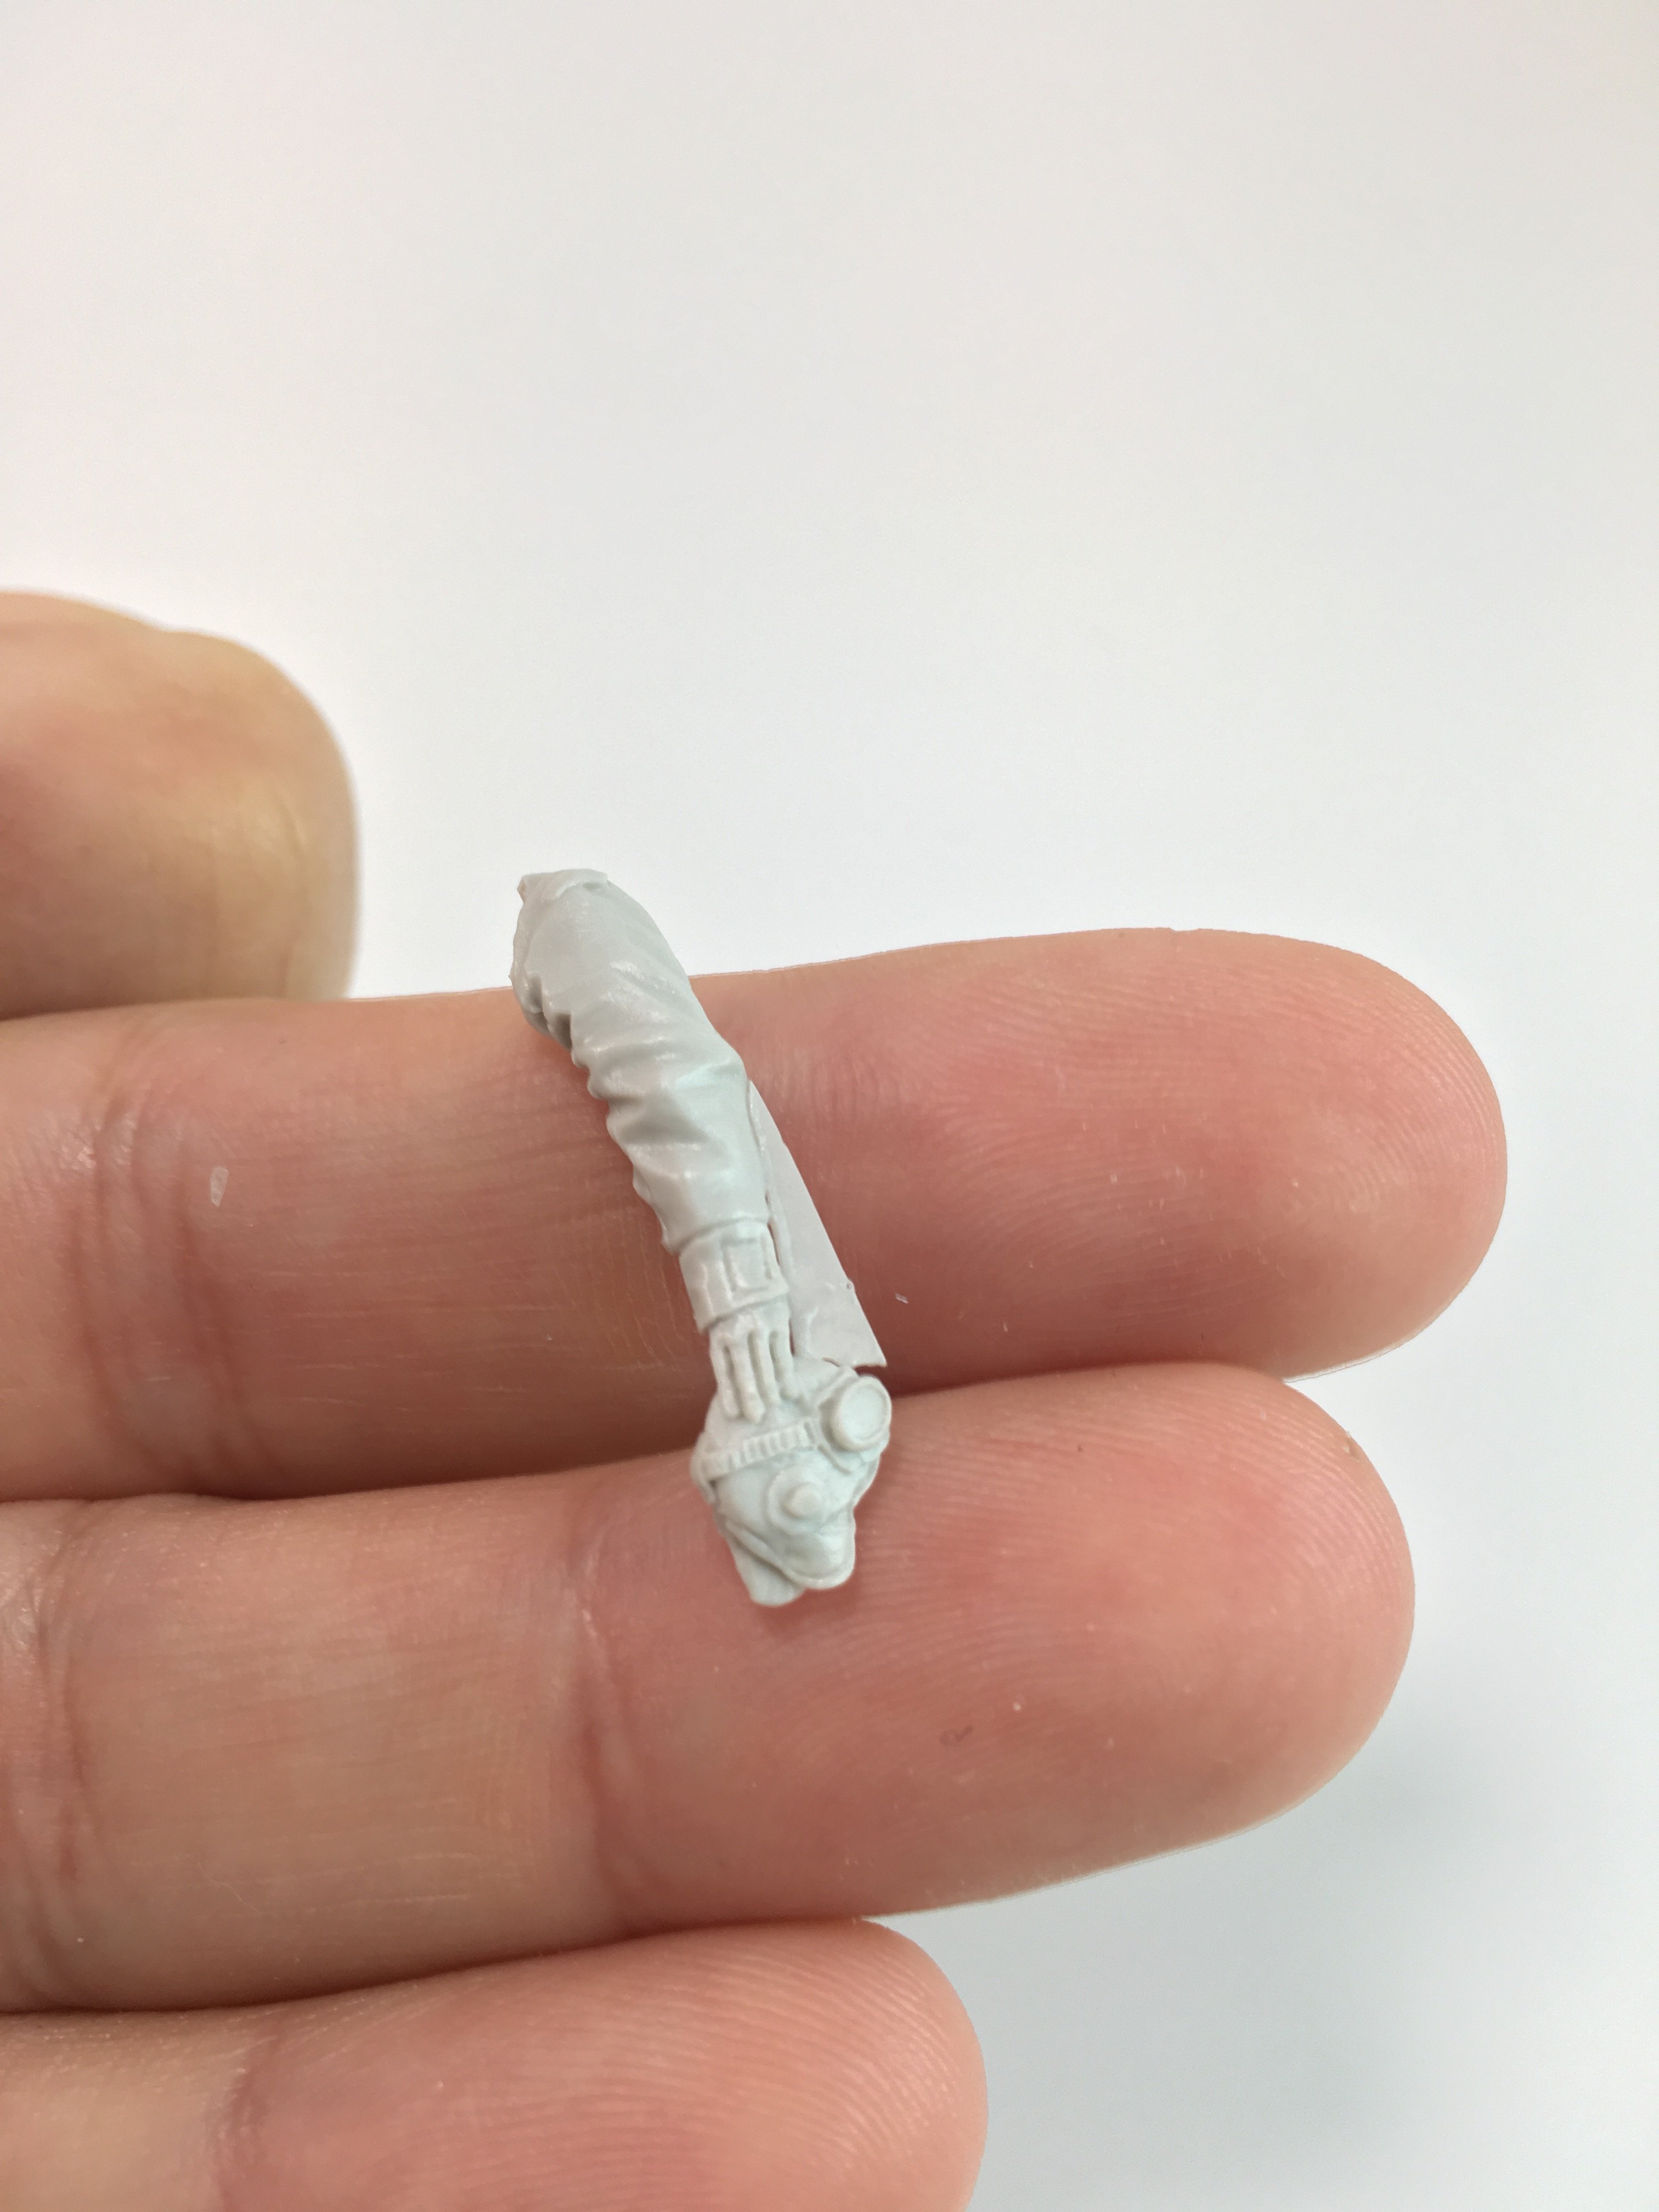
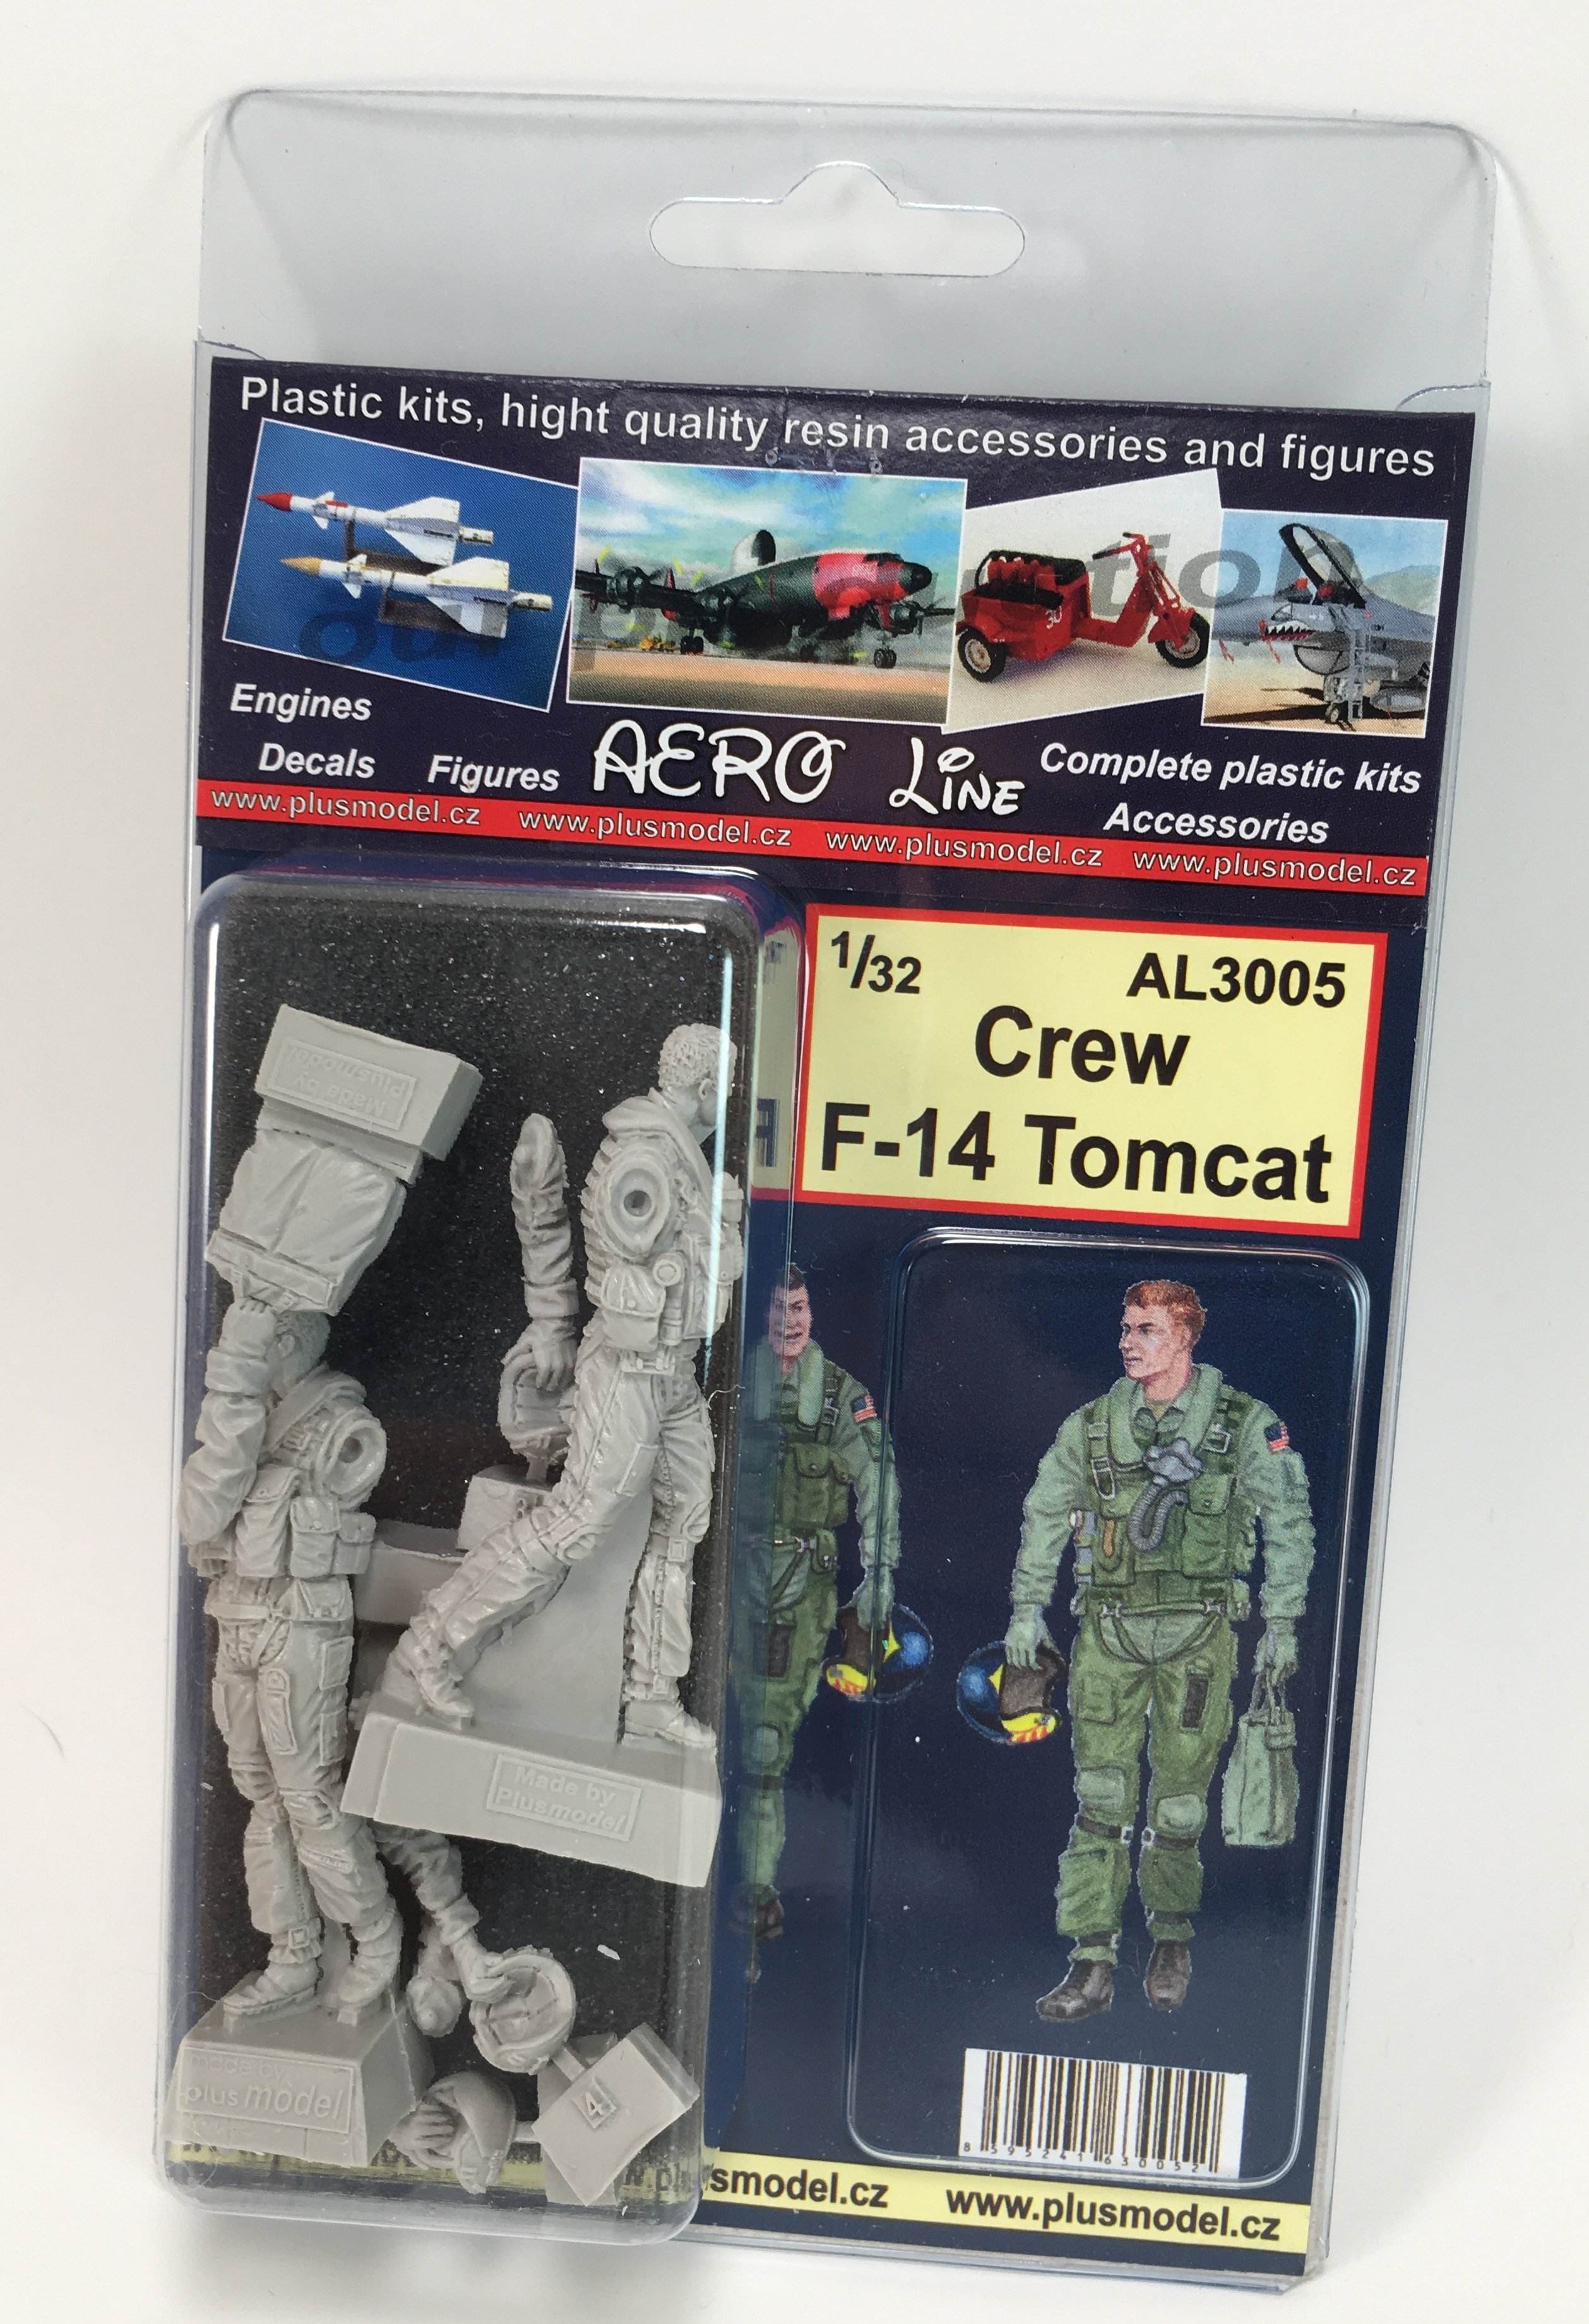
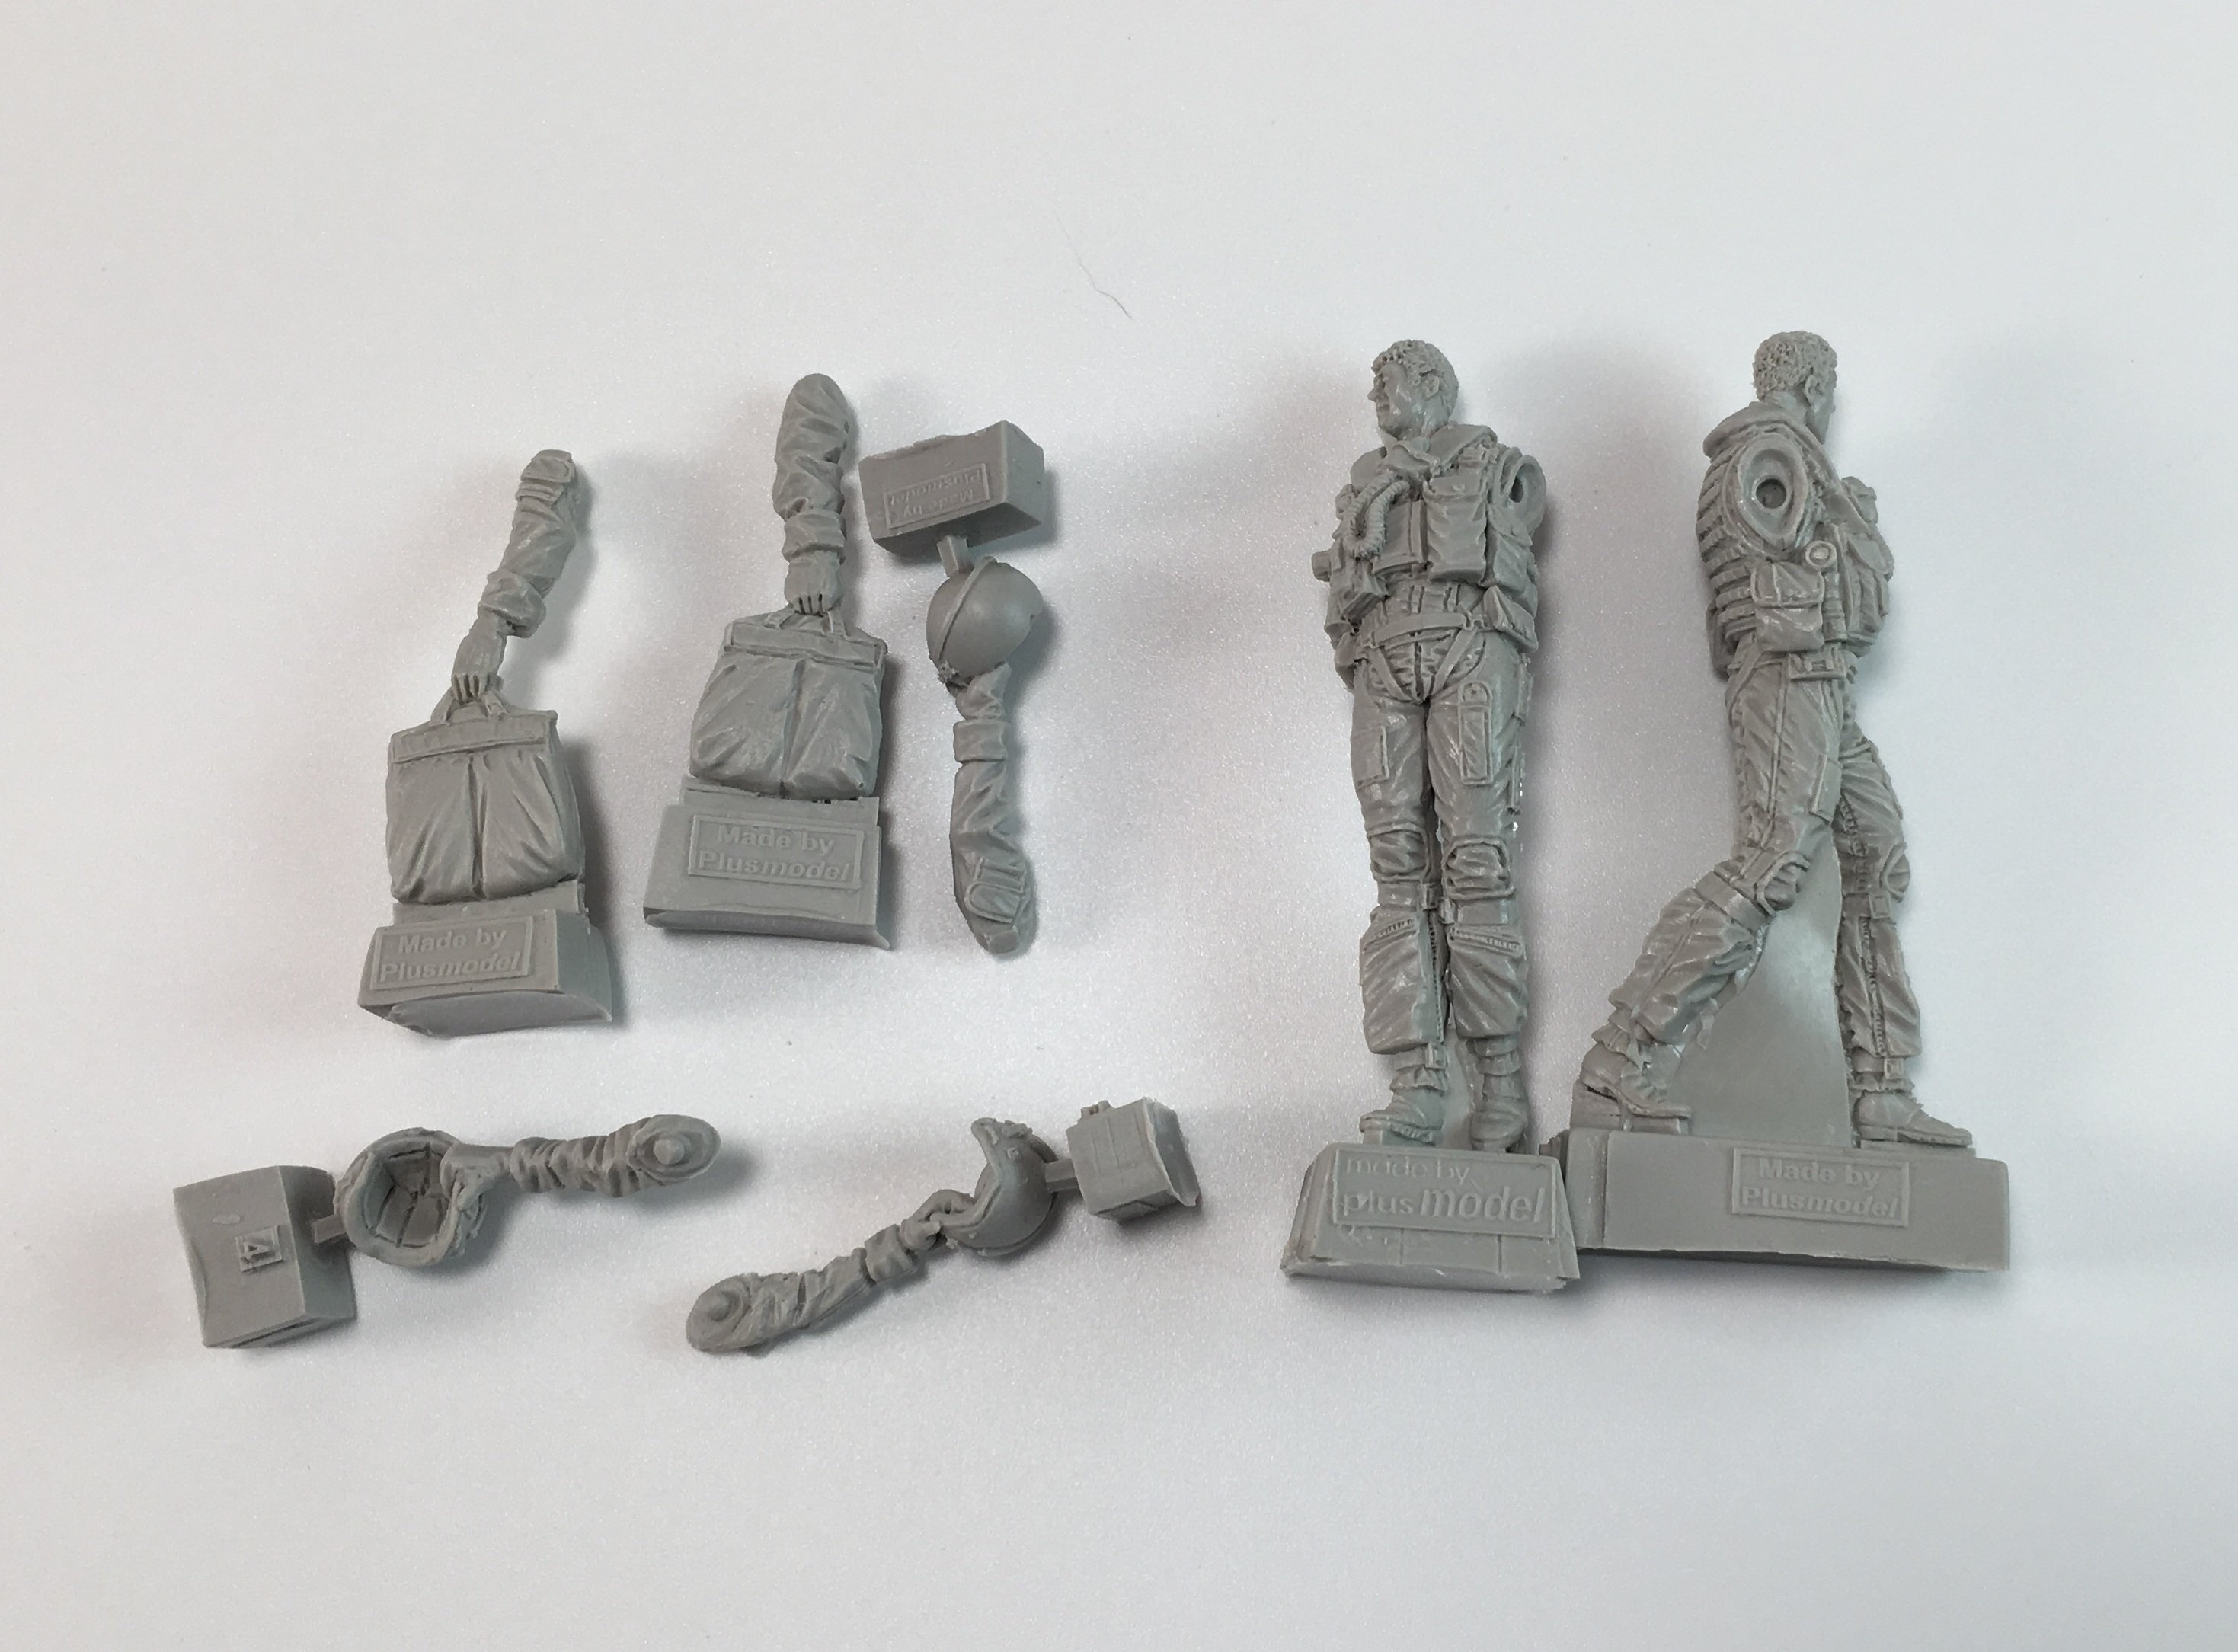
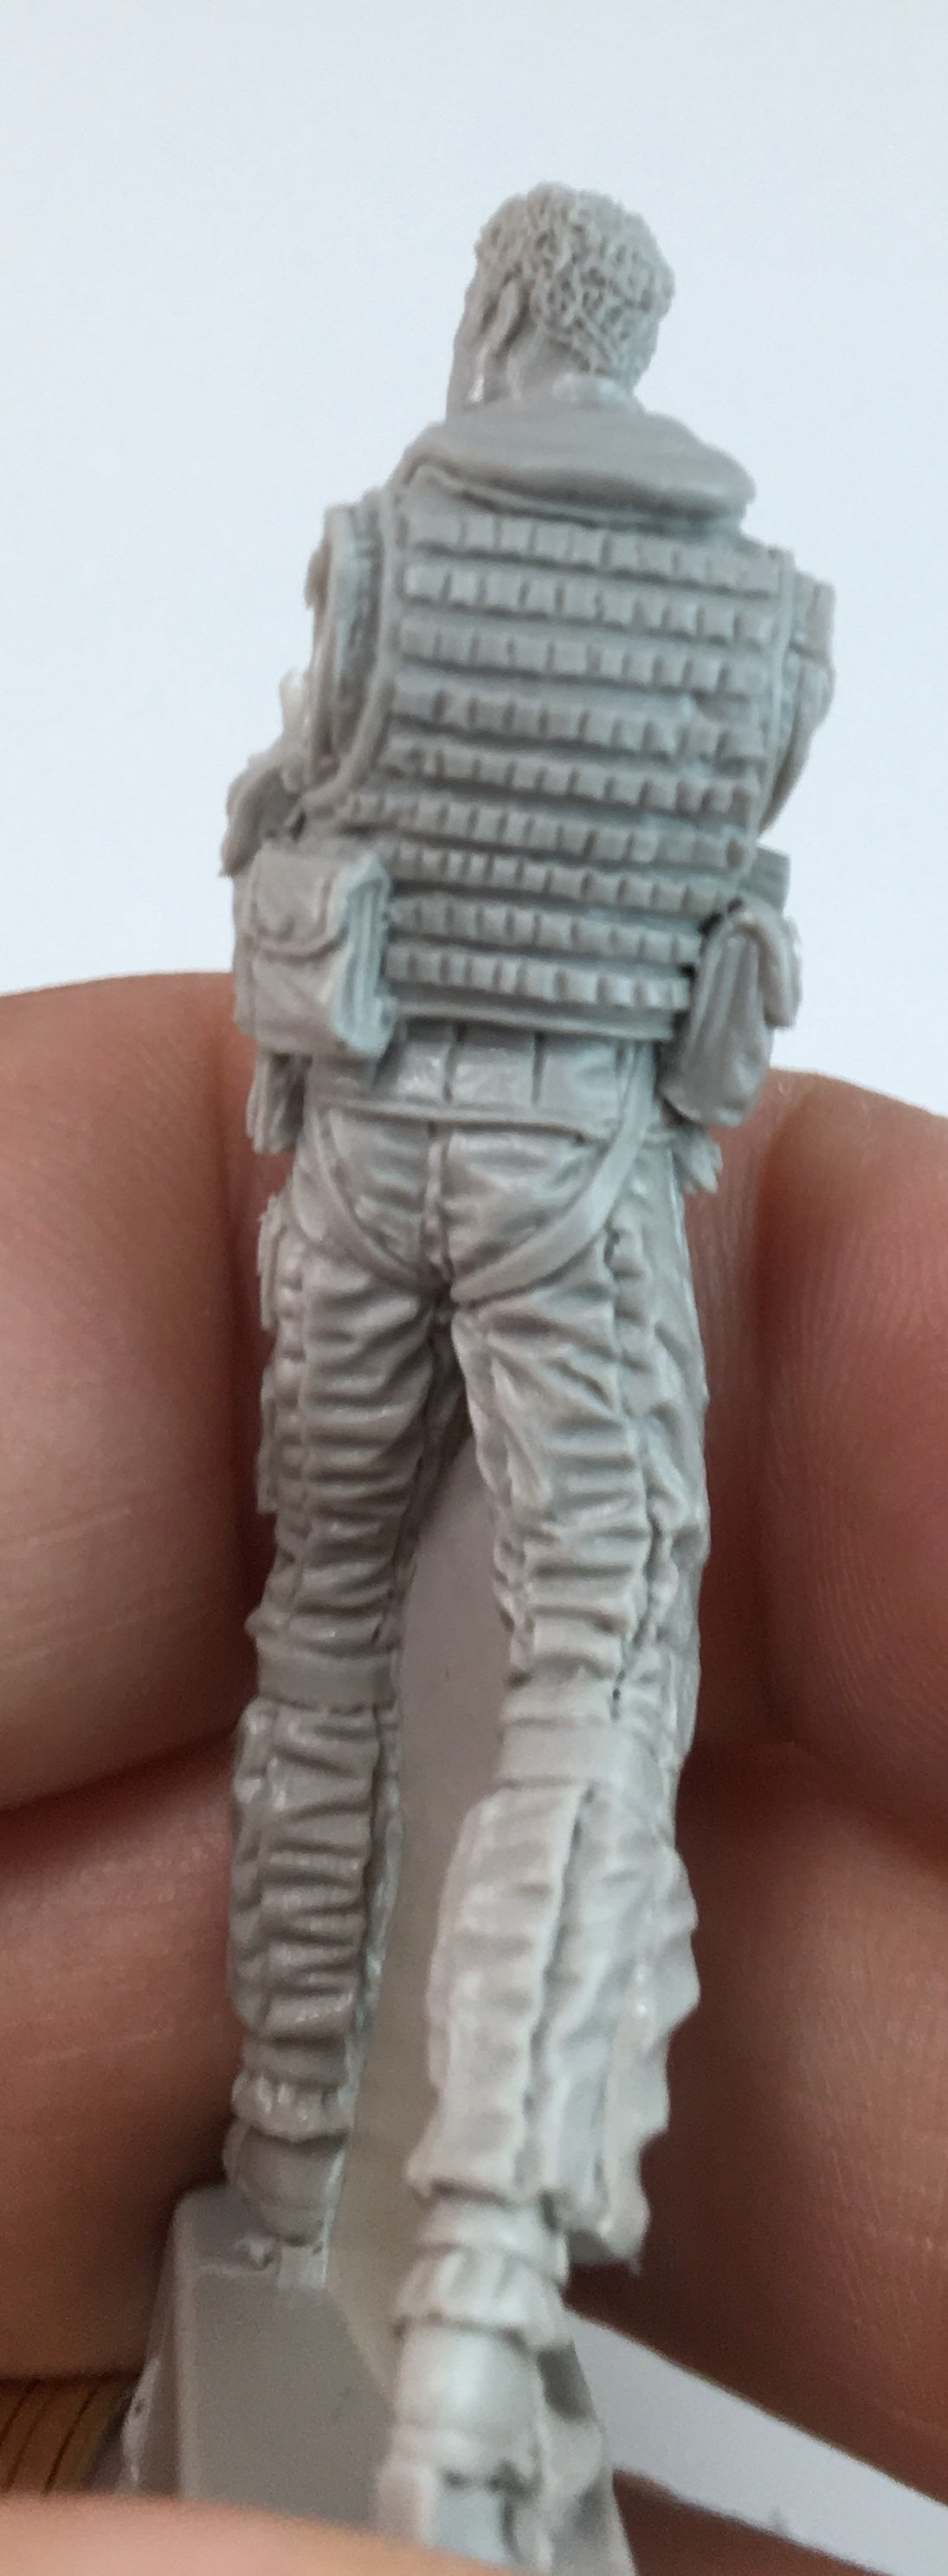
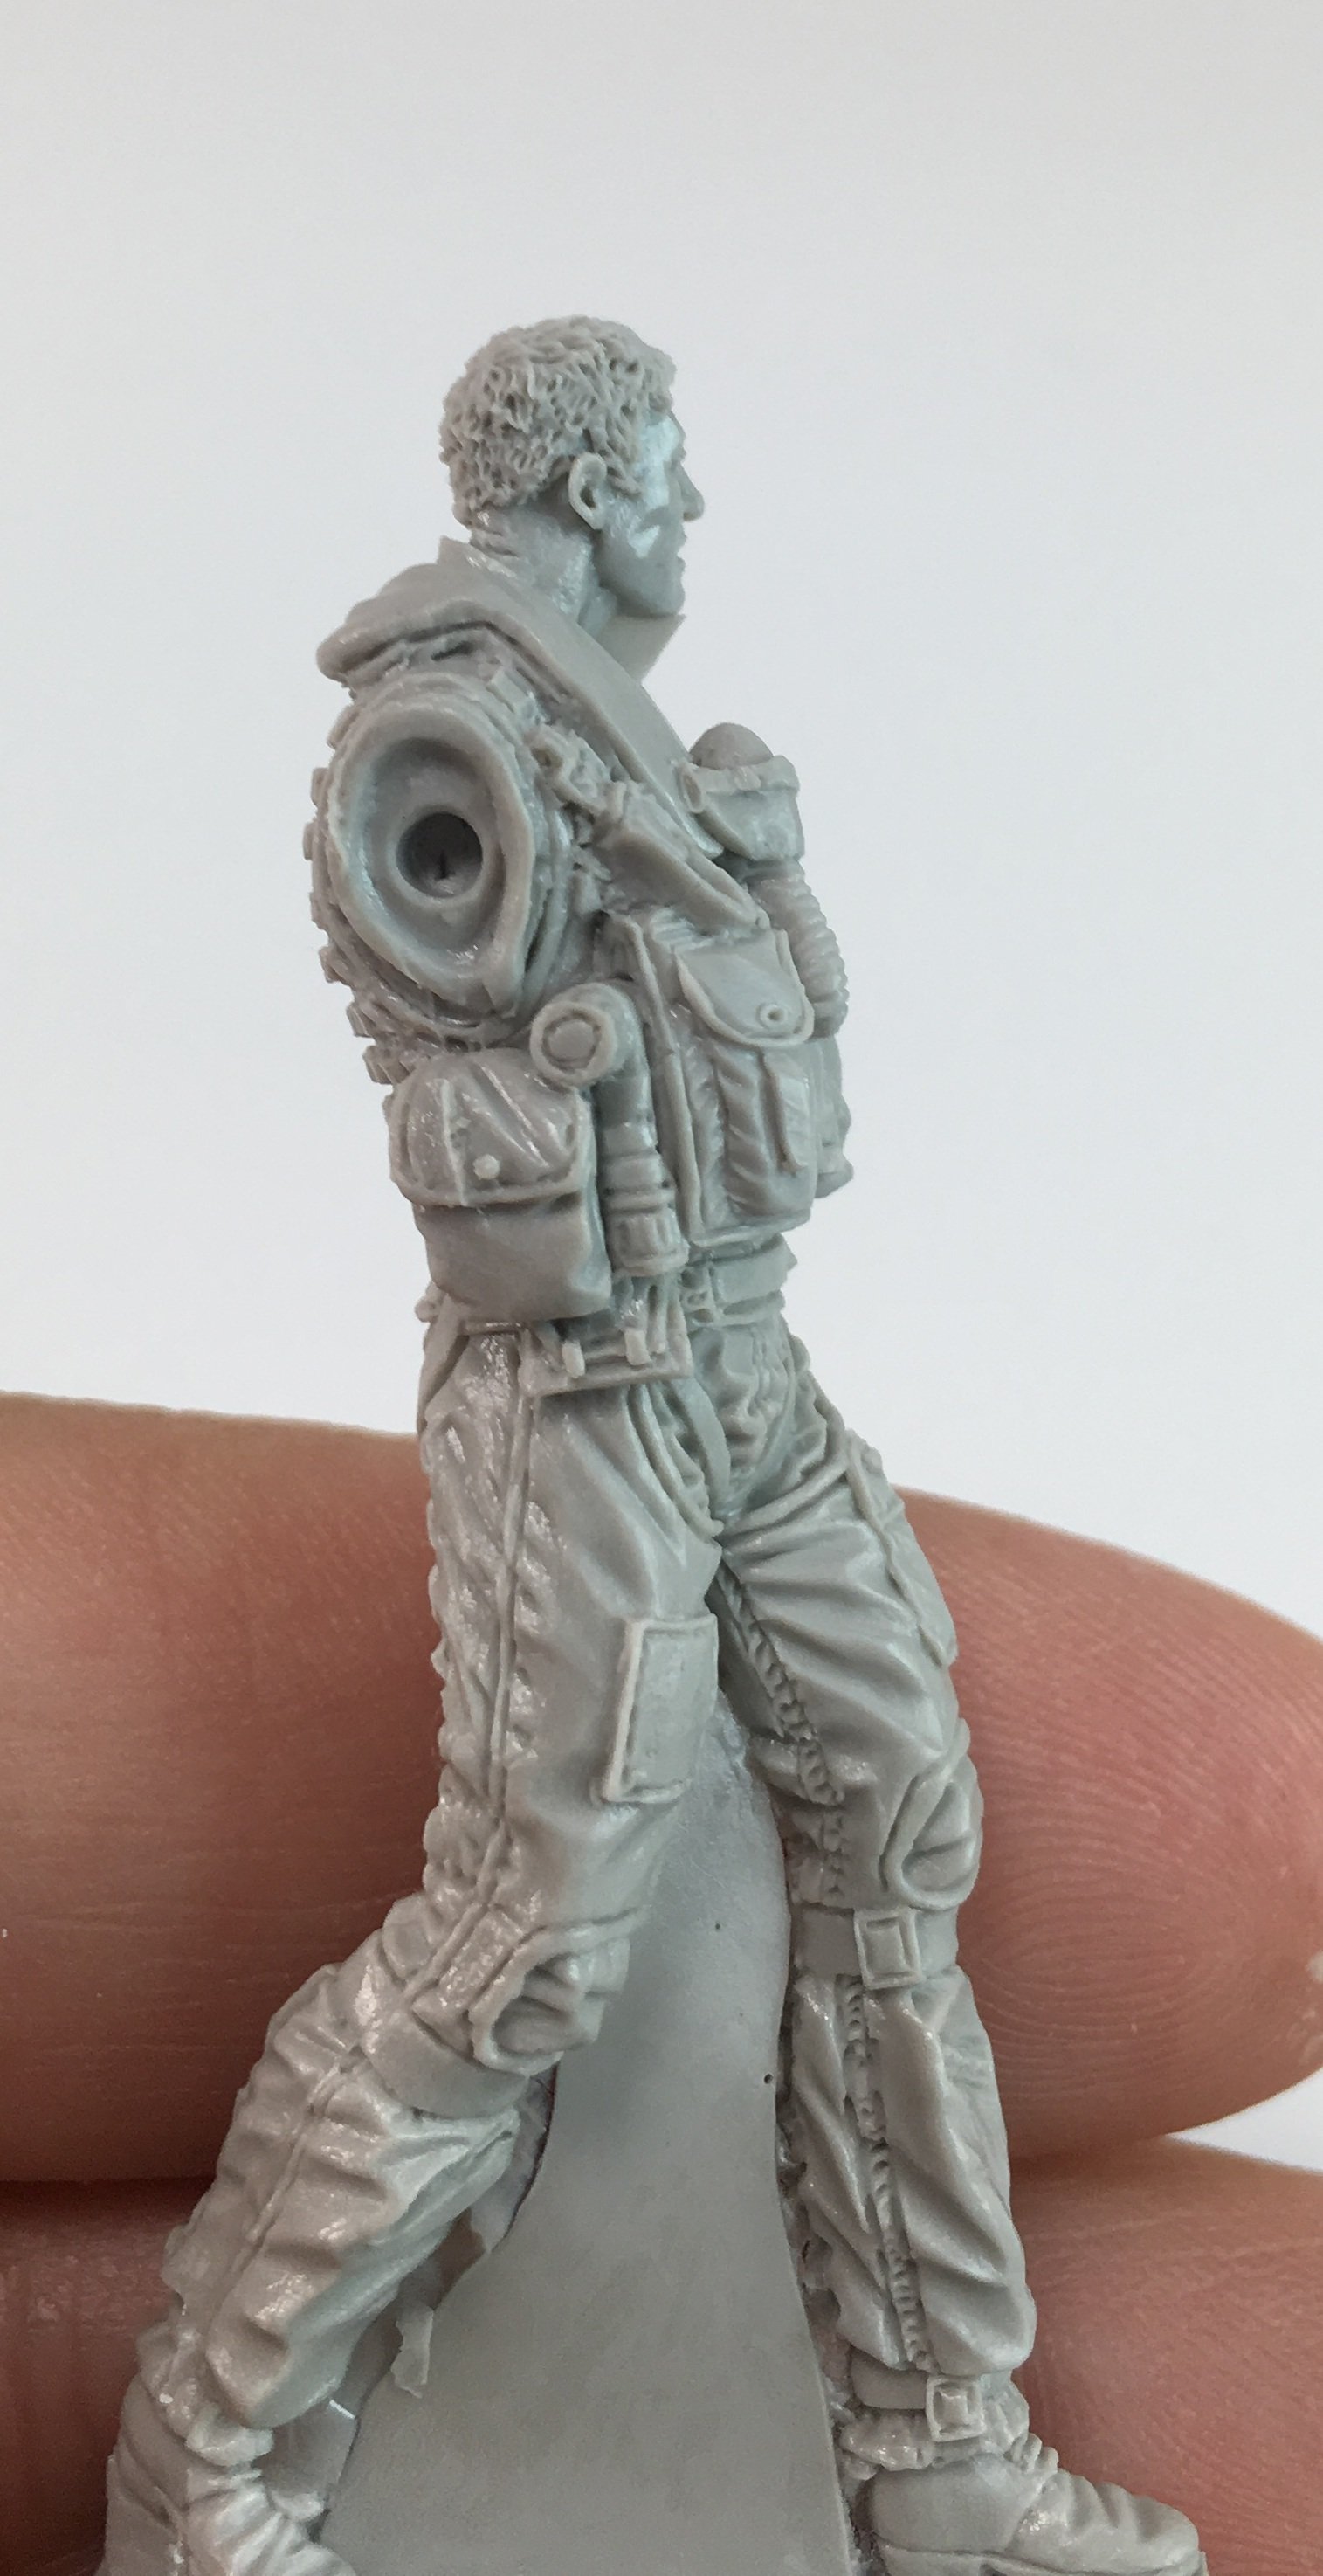
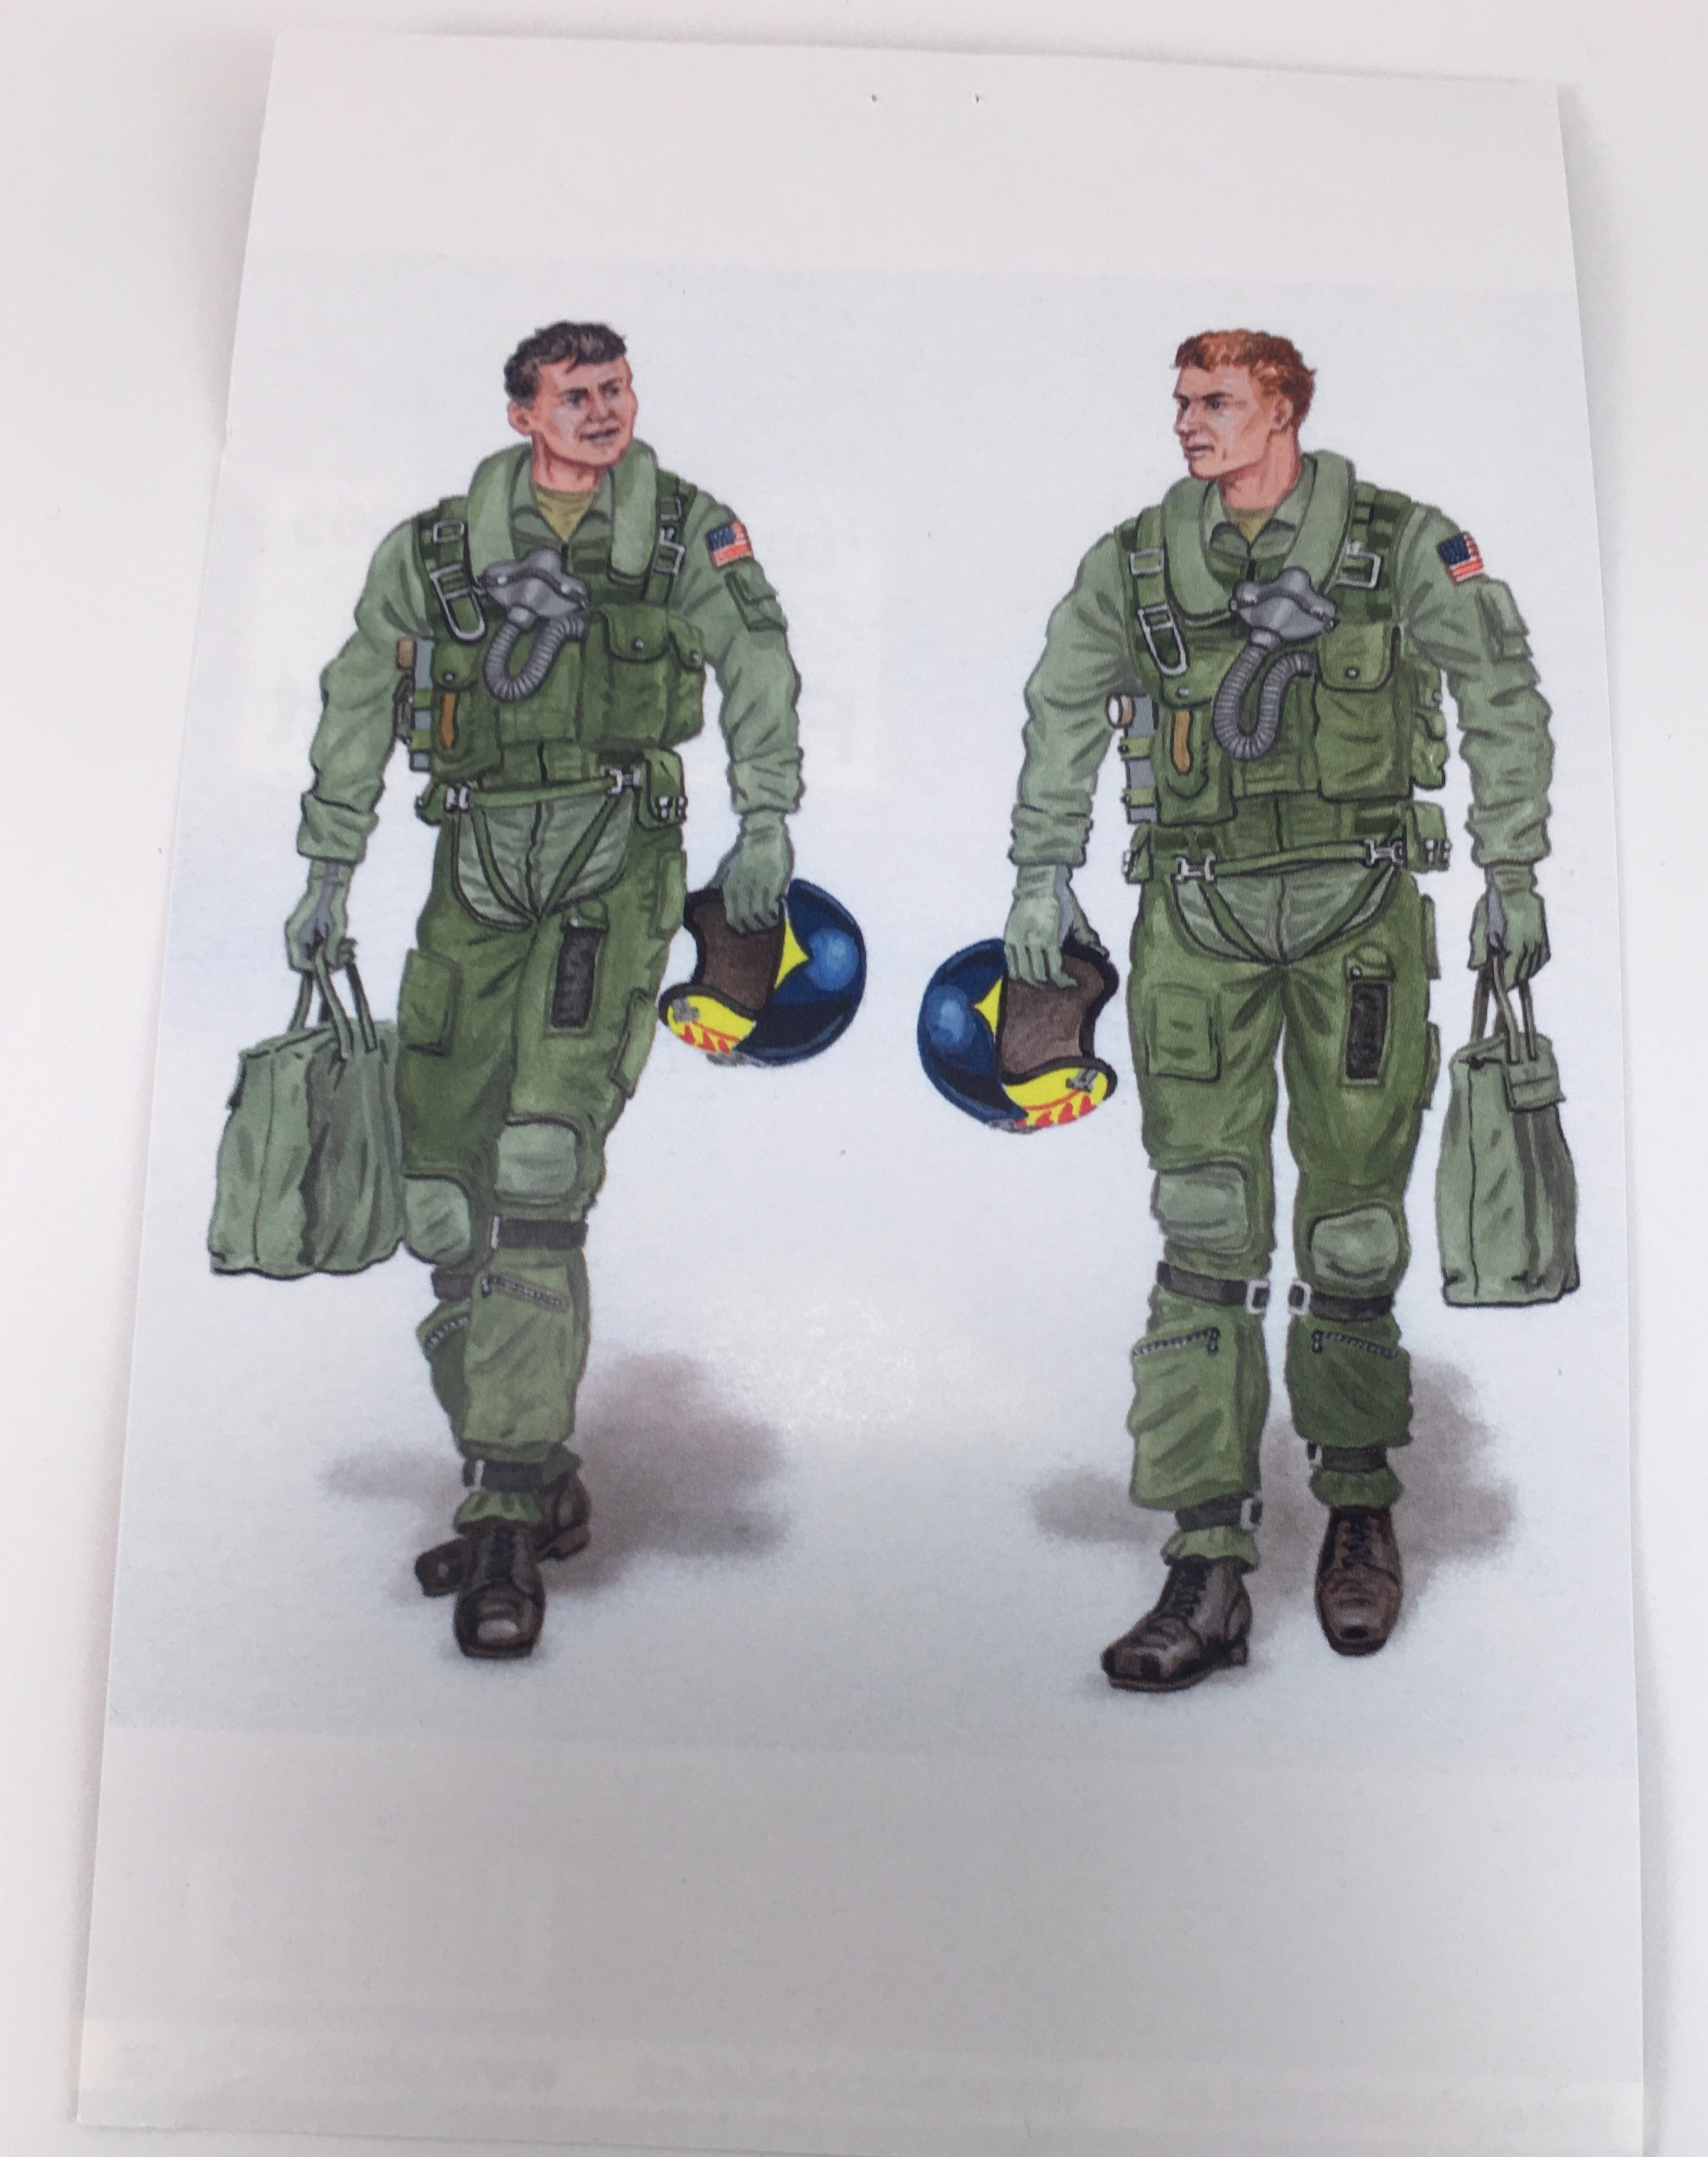
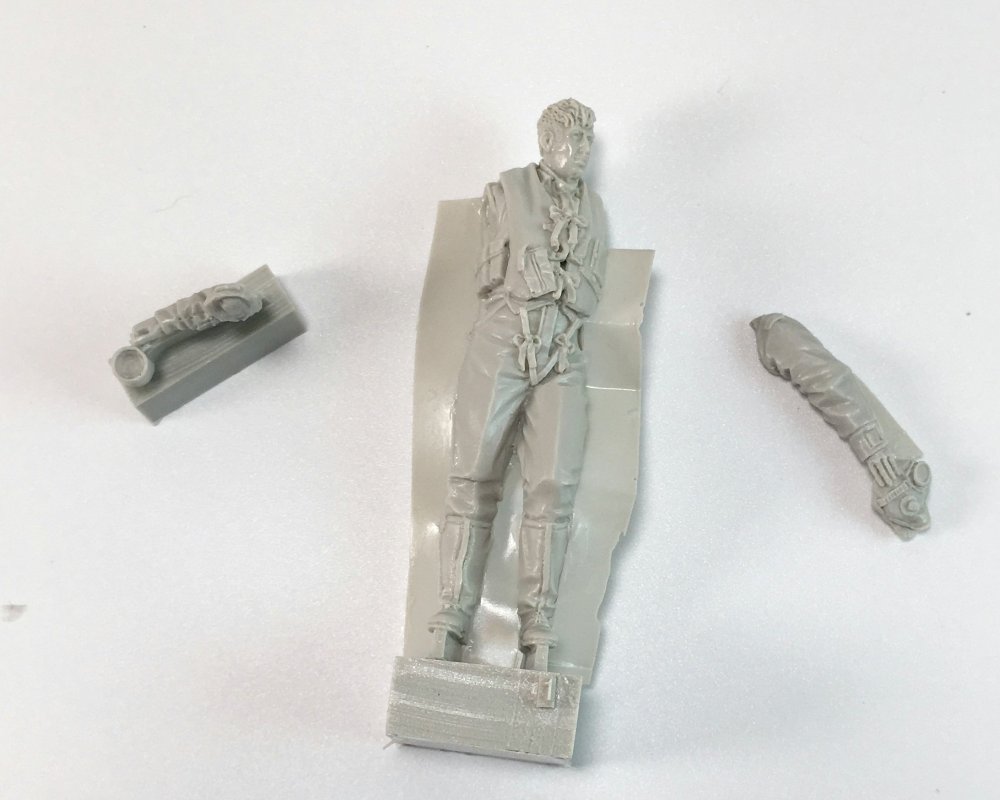
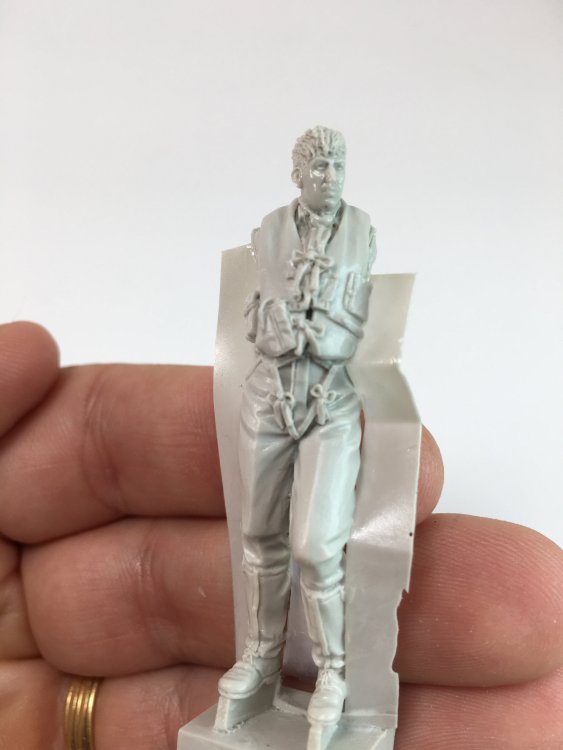
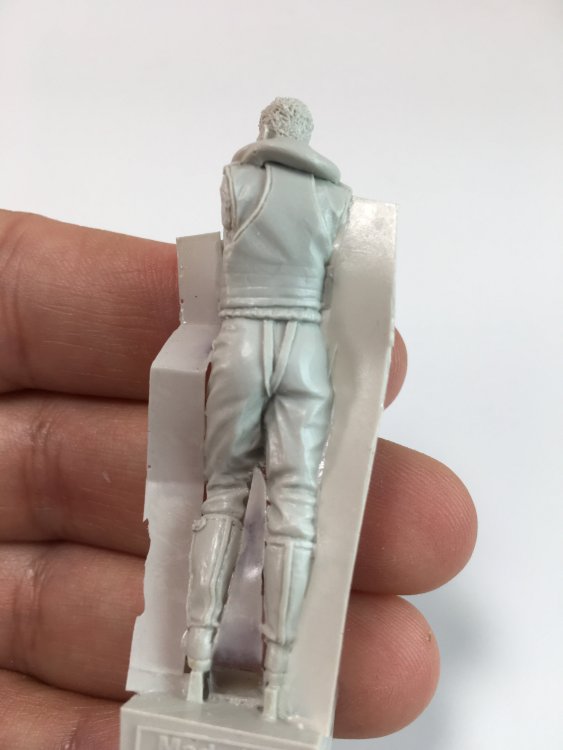
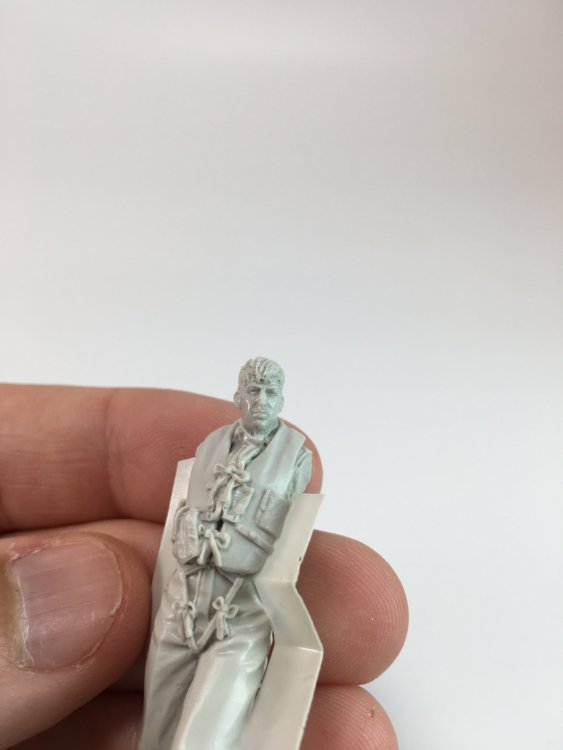
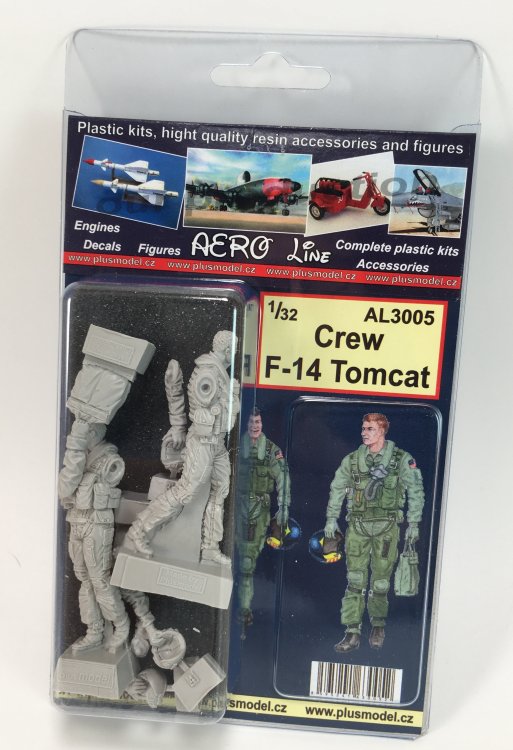
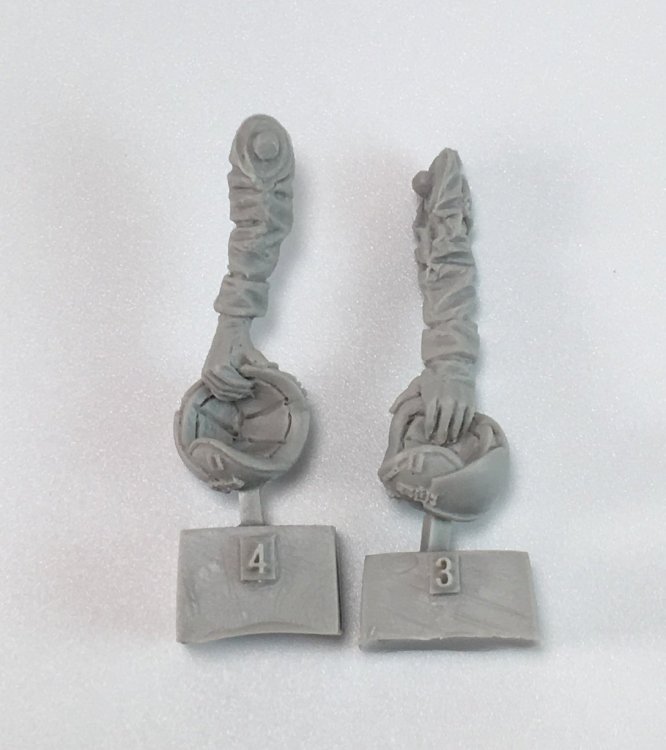
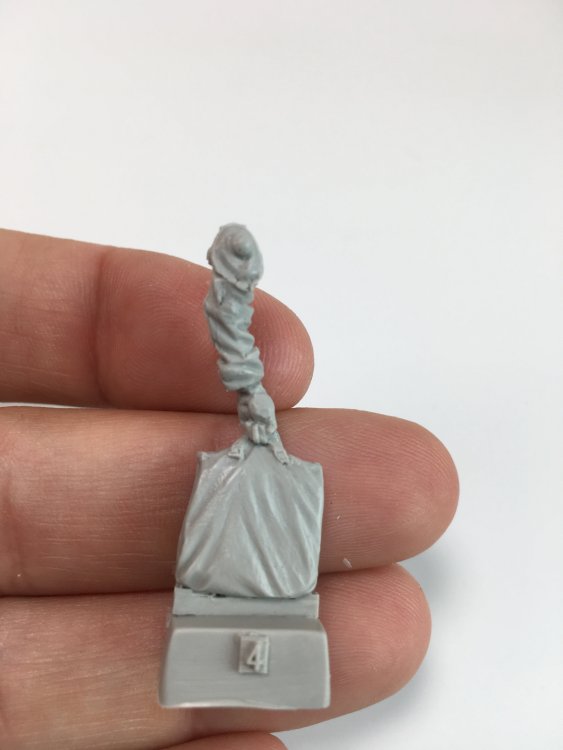
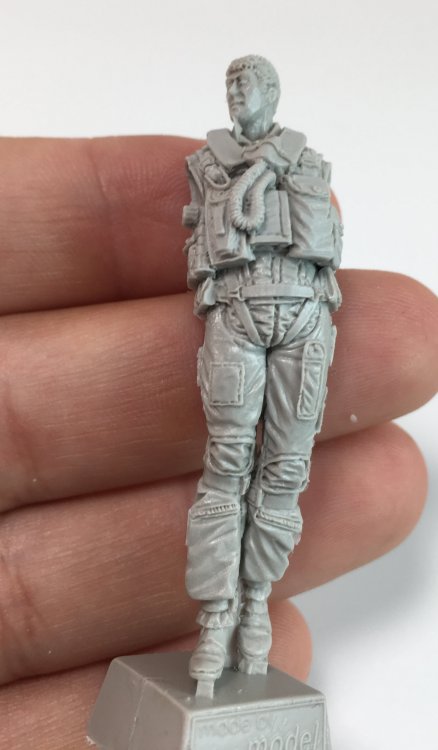
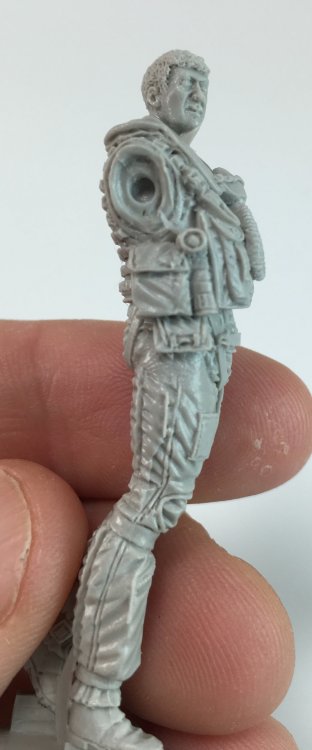
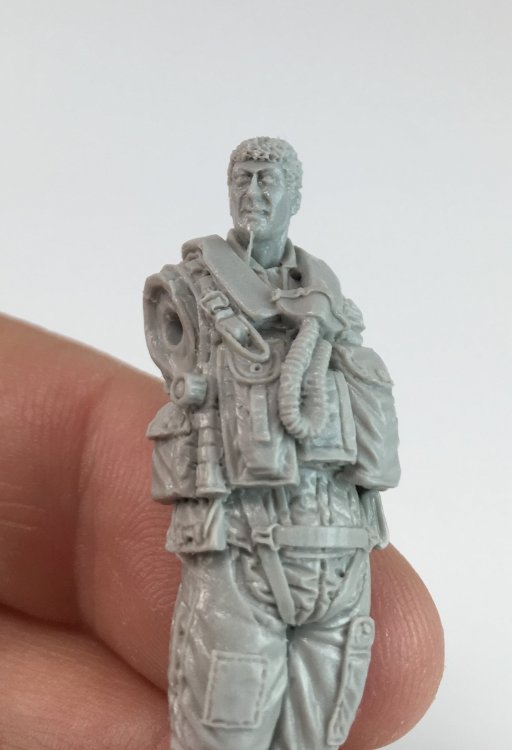
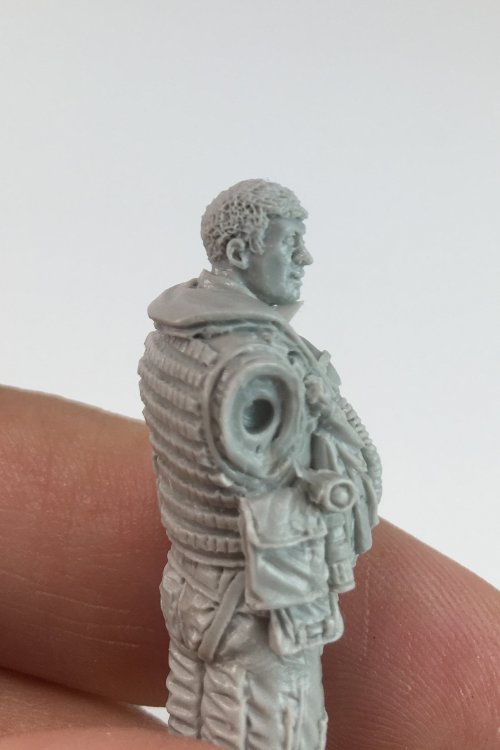
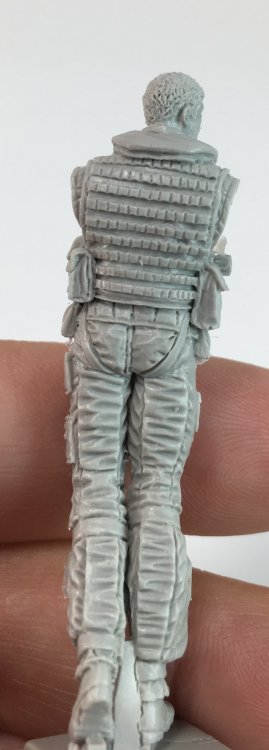
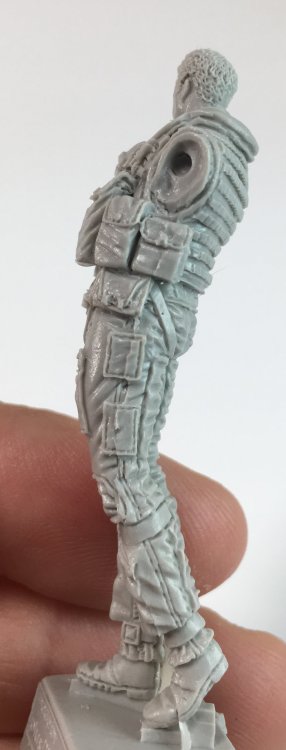
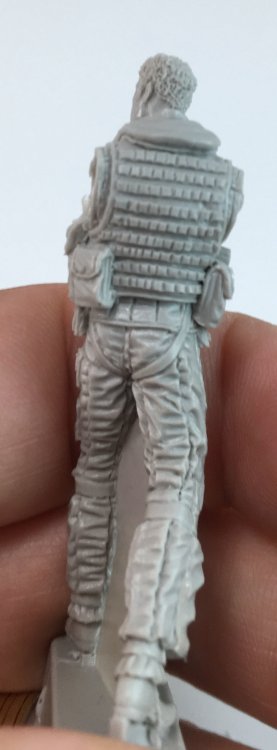
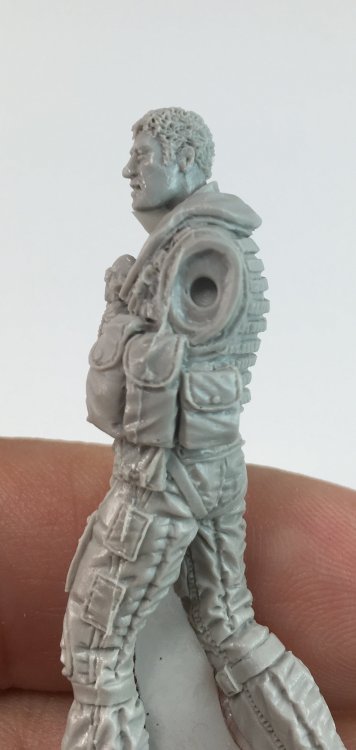
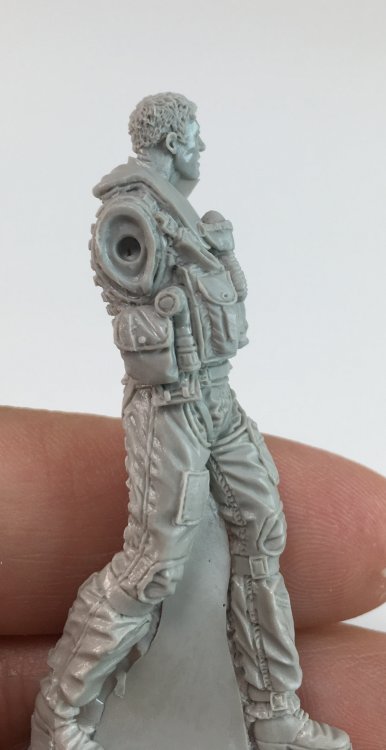
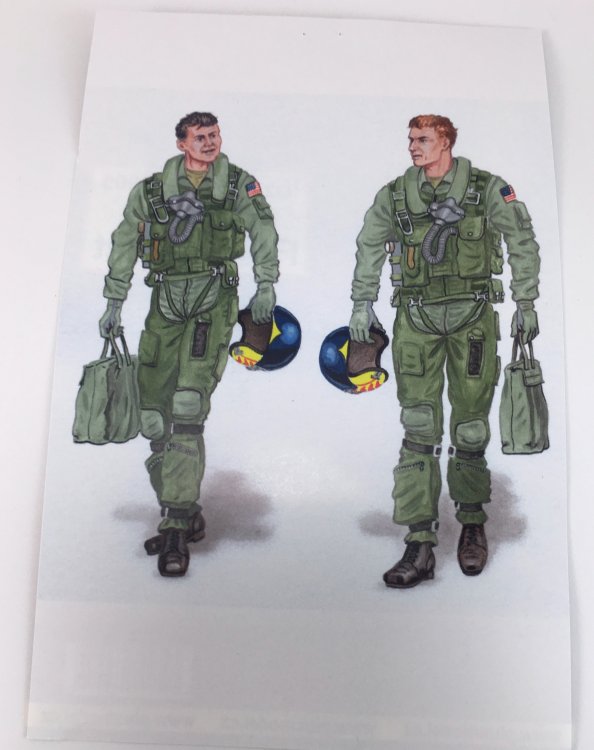
PLUSMODEL 1:32 F-14 Tomcat Crew (6 resin pieces) Catalog n.º AL3005 Price tag: $38,20/€26,80 – directly from Plusmodel. Plus Model was established in 1990 in the Czech Republic. Their product range is comprised primarily of 1/35th scale resin kits, conversion sets, and accessories which are vacuum cast from polyurethane plastic. For many years up to today that Plusmodel was creating in a clear and serene form, their own space in modeling, especially for 1/35 scale with fantastic resin kits and accessories for dioramas. A few years ago, Plusmodel started a new line: AERO line. The new line work in all 3 main scales: 1:72, 1:48 and 1:32. Today we are going to take a look into 1:32 F-14 crew. The clear plastic box, typical in AERO line, shows what you get, six resin piece containing a 1:32 representation of an F-14 Tomcat crew, walking away for their plane or going to the mission. My first impression is that they are walking away after the mission but after close looking, I do have my doubts because of their facial expression. Checking closely, you will get two main bodies, only without arms. On my sample, I did get an extra arm. The body part has the flight suit and G-suit, LPU, survival vest, combat boots, and torso harness. I do like body posture and balance, giving the correct proportional to the figures. My reserves are on the facial expression and in the head. They look almost alike… the facial expression is almost the same and they have the same hair. I would like to have a different type of hair and distinct facial. The arms look like to have a good fitting, and both have on both hand the helmet and parachute. All the parts are very well casted and the details are very sharp and really awesome and just continues to prove that Plusmodel knows what is doing. The detail inside the helmet is quite outstanding and a really stand up. However, I do love the detail and the final posture of the figure. There`s no indication of colors to use but Plusmodel joins a painting (similar to "boxart" but bigger) as a guideline. However, understand that the indication of colors is actually unnecessary because of the dozens of good references in countless books and on the internet. Conclusion: A 1:32 F-14 Tomcat is a quite impressive and large bird but in a base and the set of crew it´s just the perfect combination. I do have some reservation about the facial and head of both figures, not of their quality but of their similarity. Probably it’s a minor thing because a proper paint job will get it a great result and distinct looks. As for the product, the quality is of the highest level, with castings at most higher standard and detail is one of the best in the modeling world, as resin concern. Very Highly recommended. With my sincere thanks to Plusmodel for this review sample. To purchase directly, click this link. Francisco Guedes


-
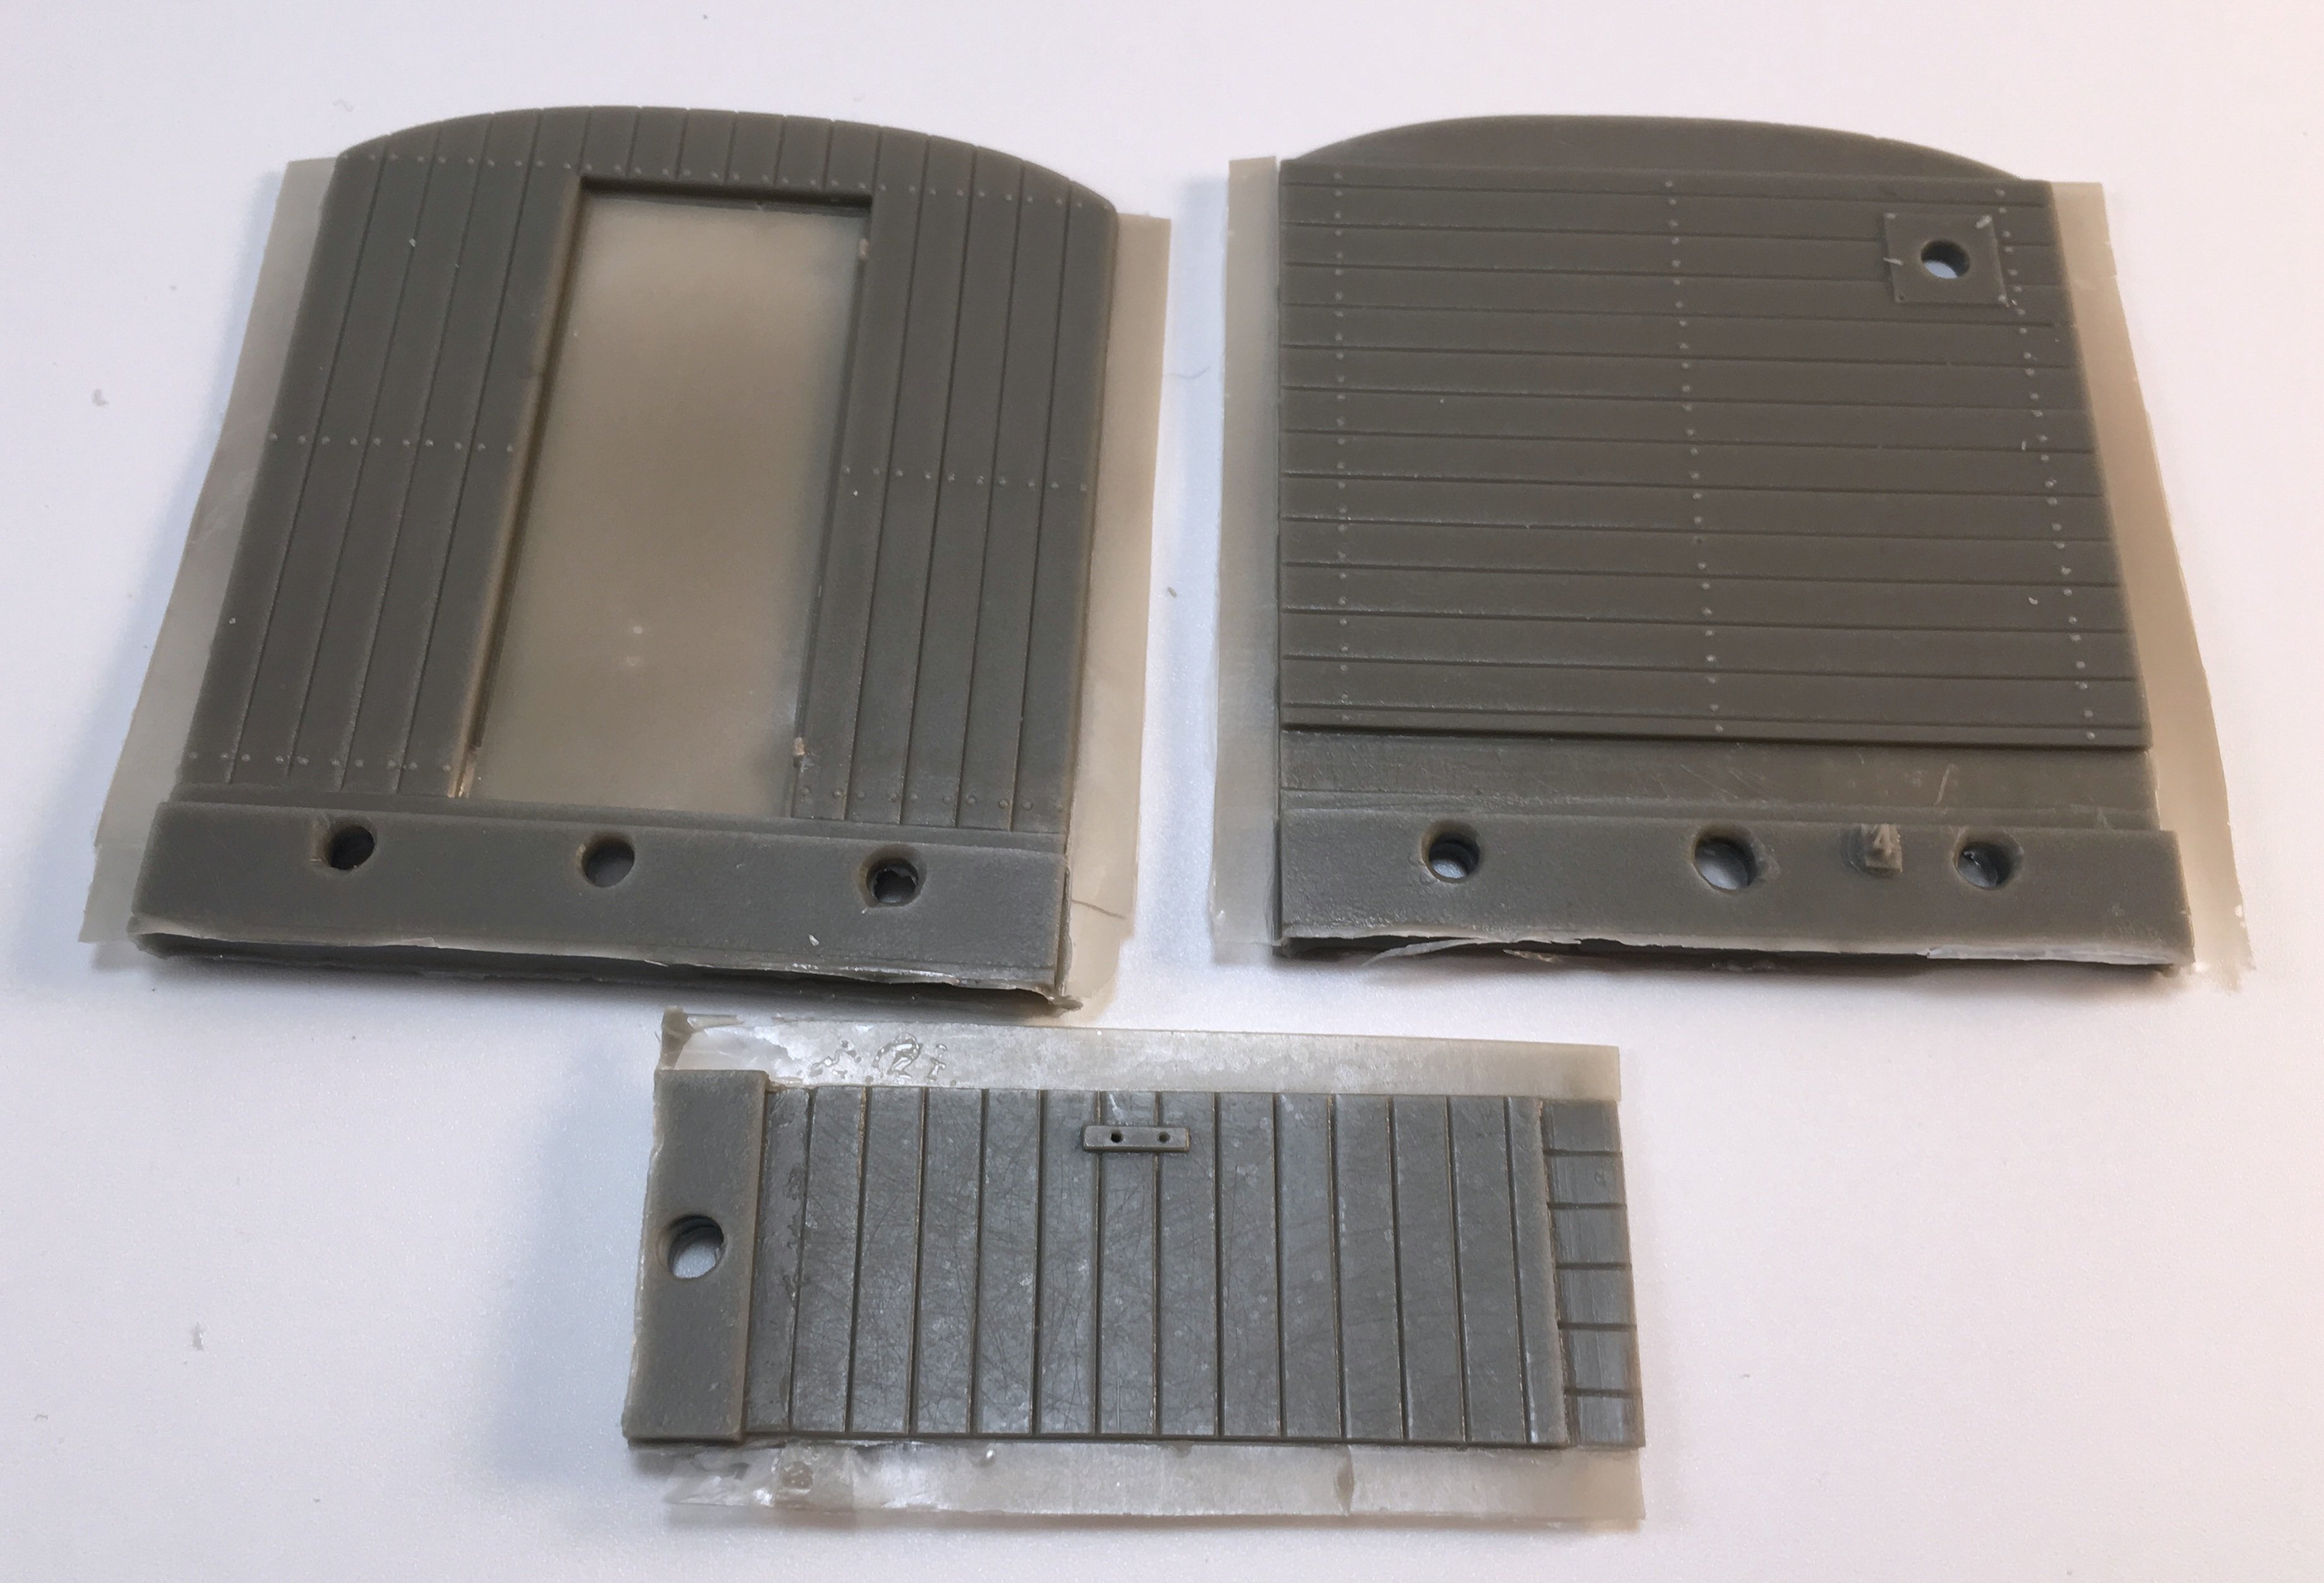
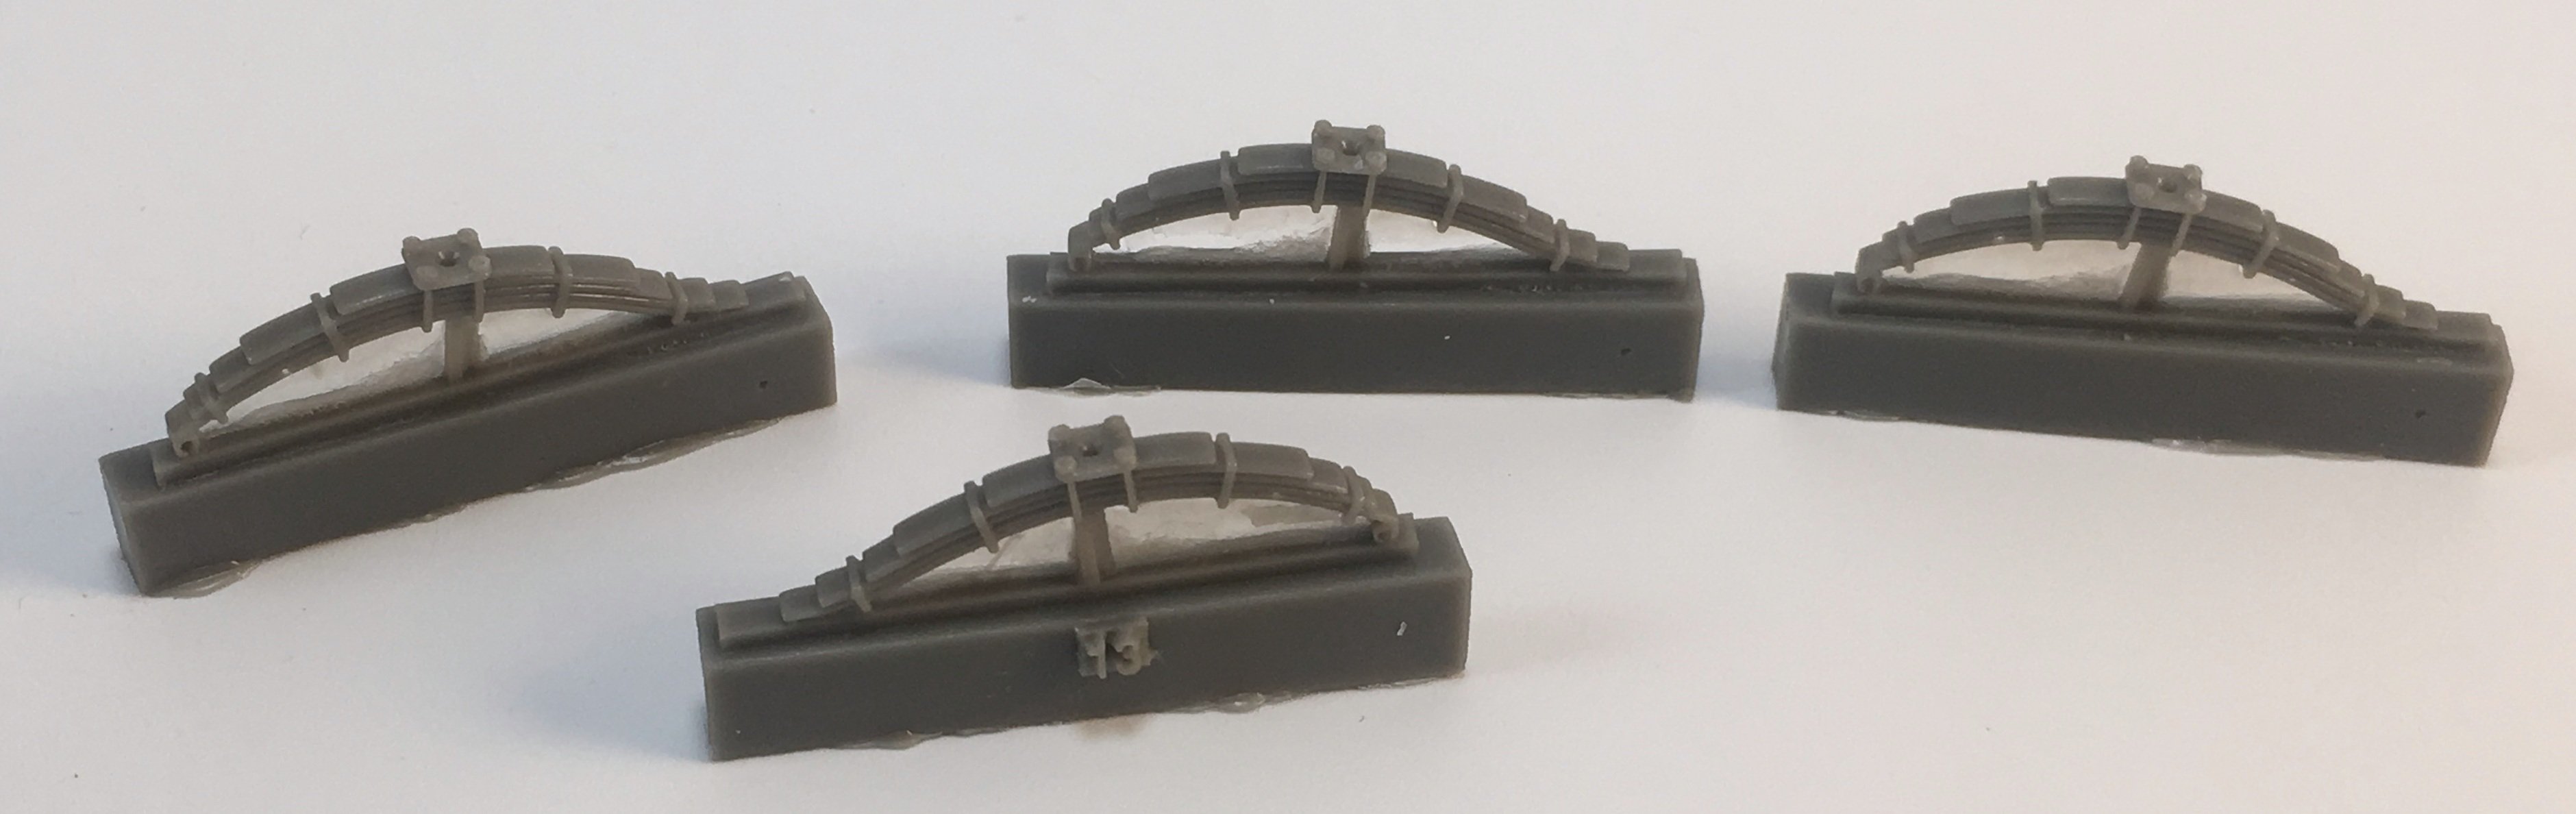
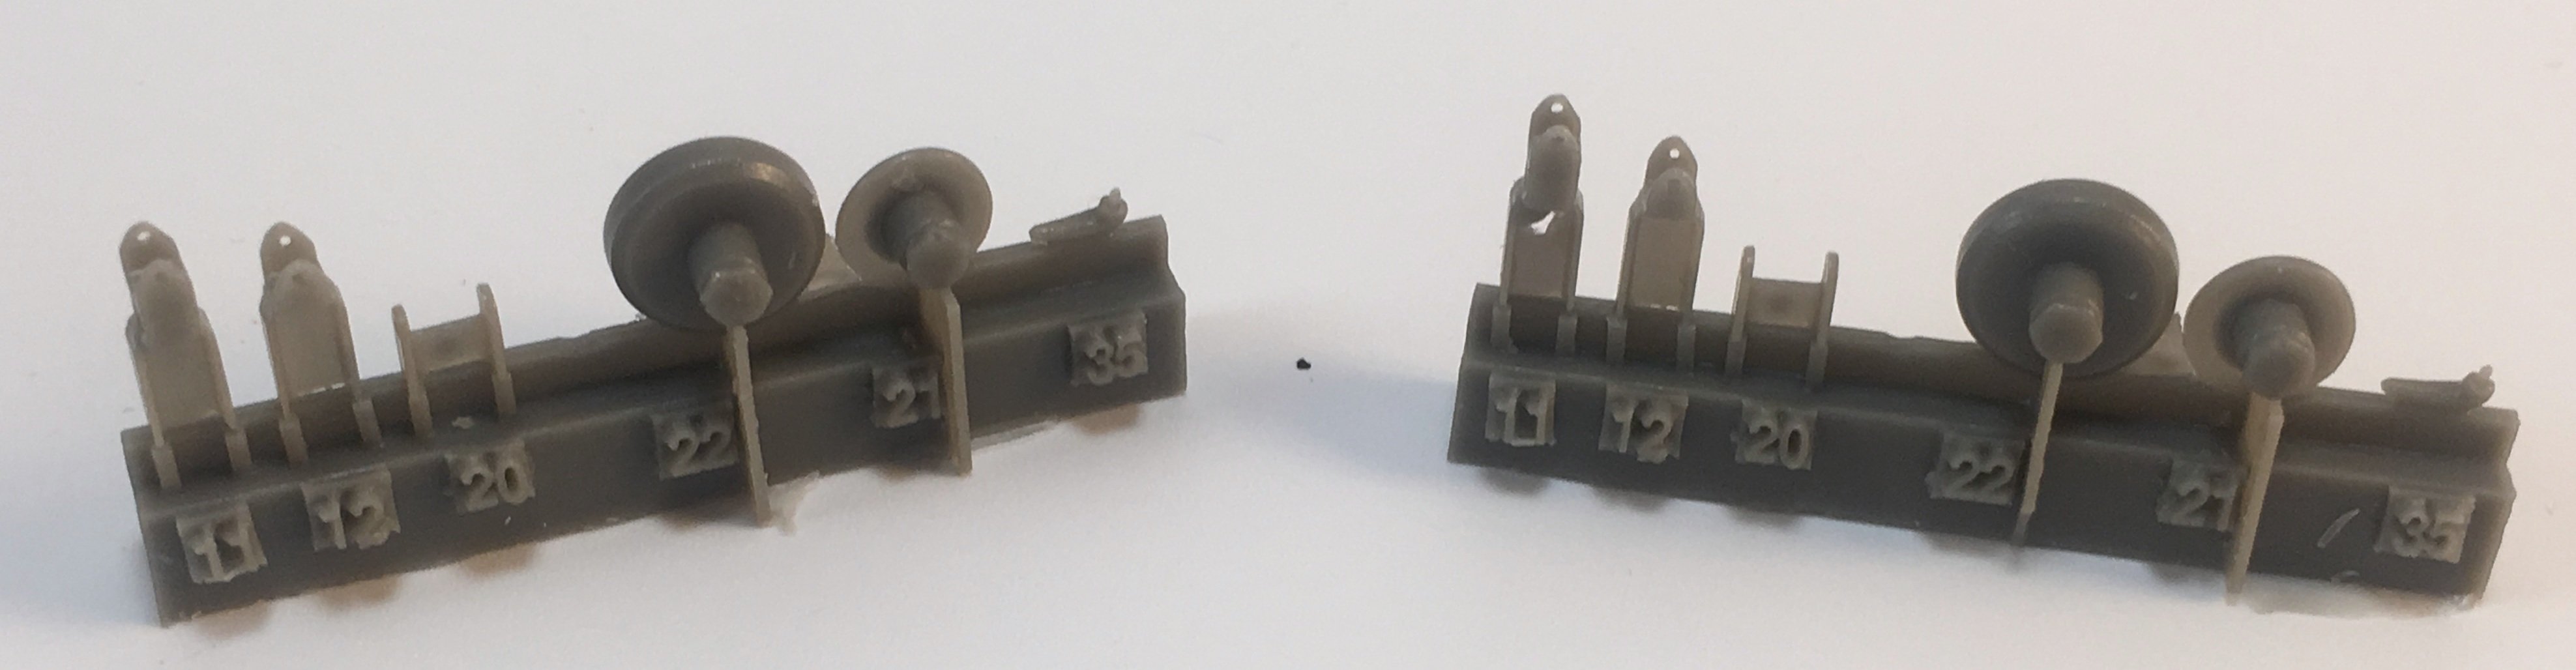
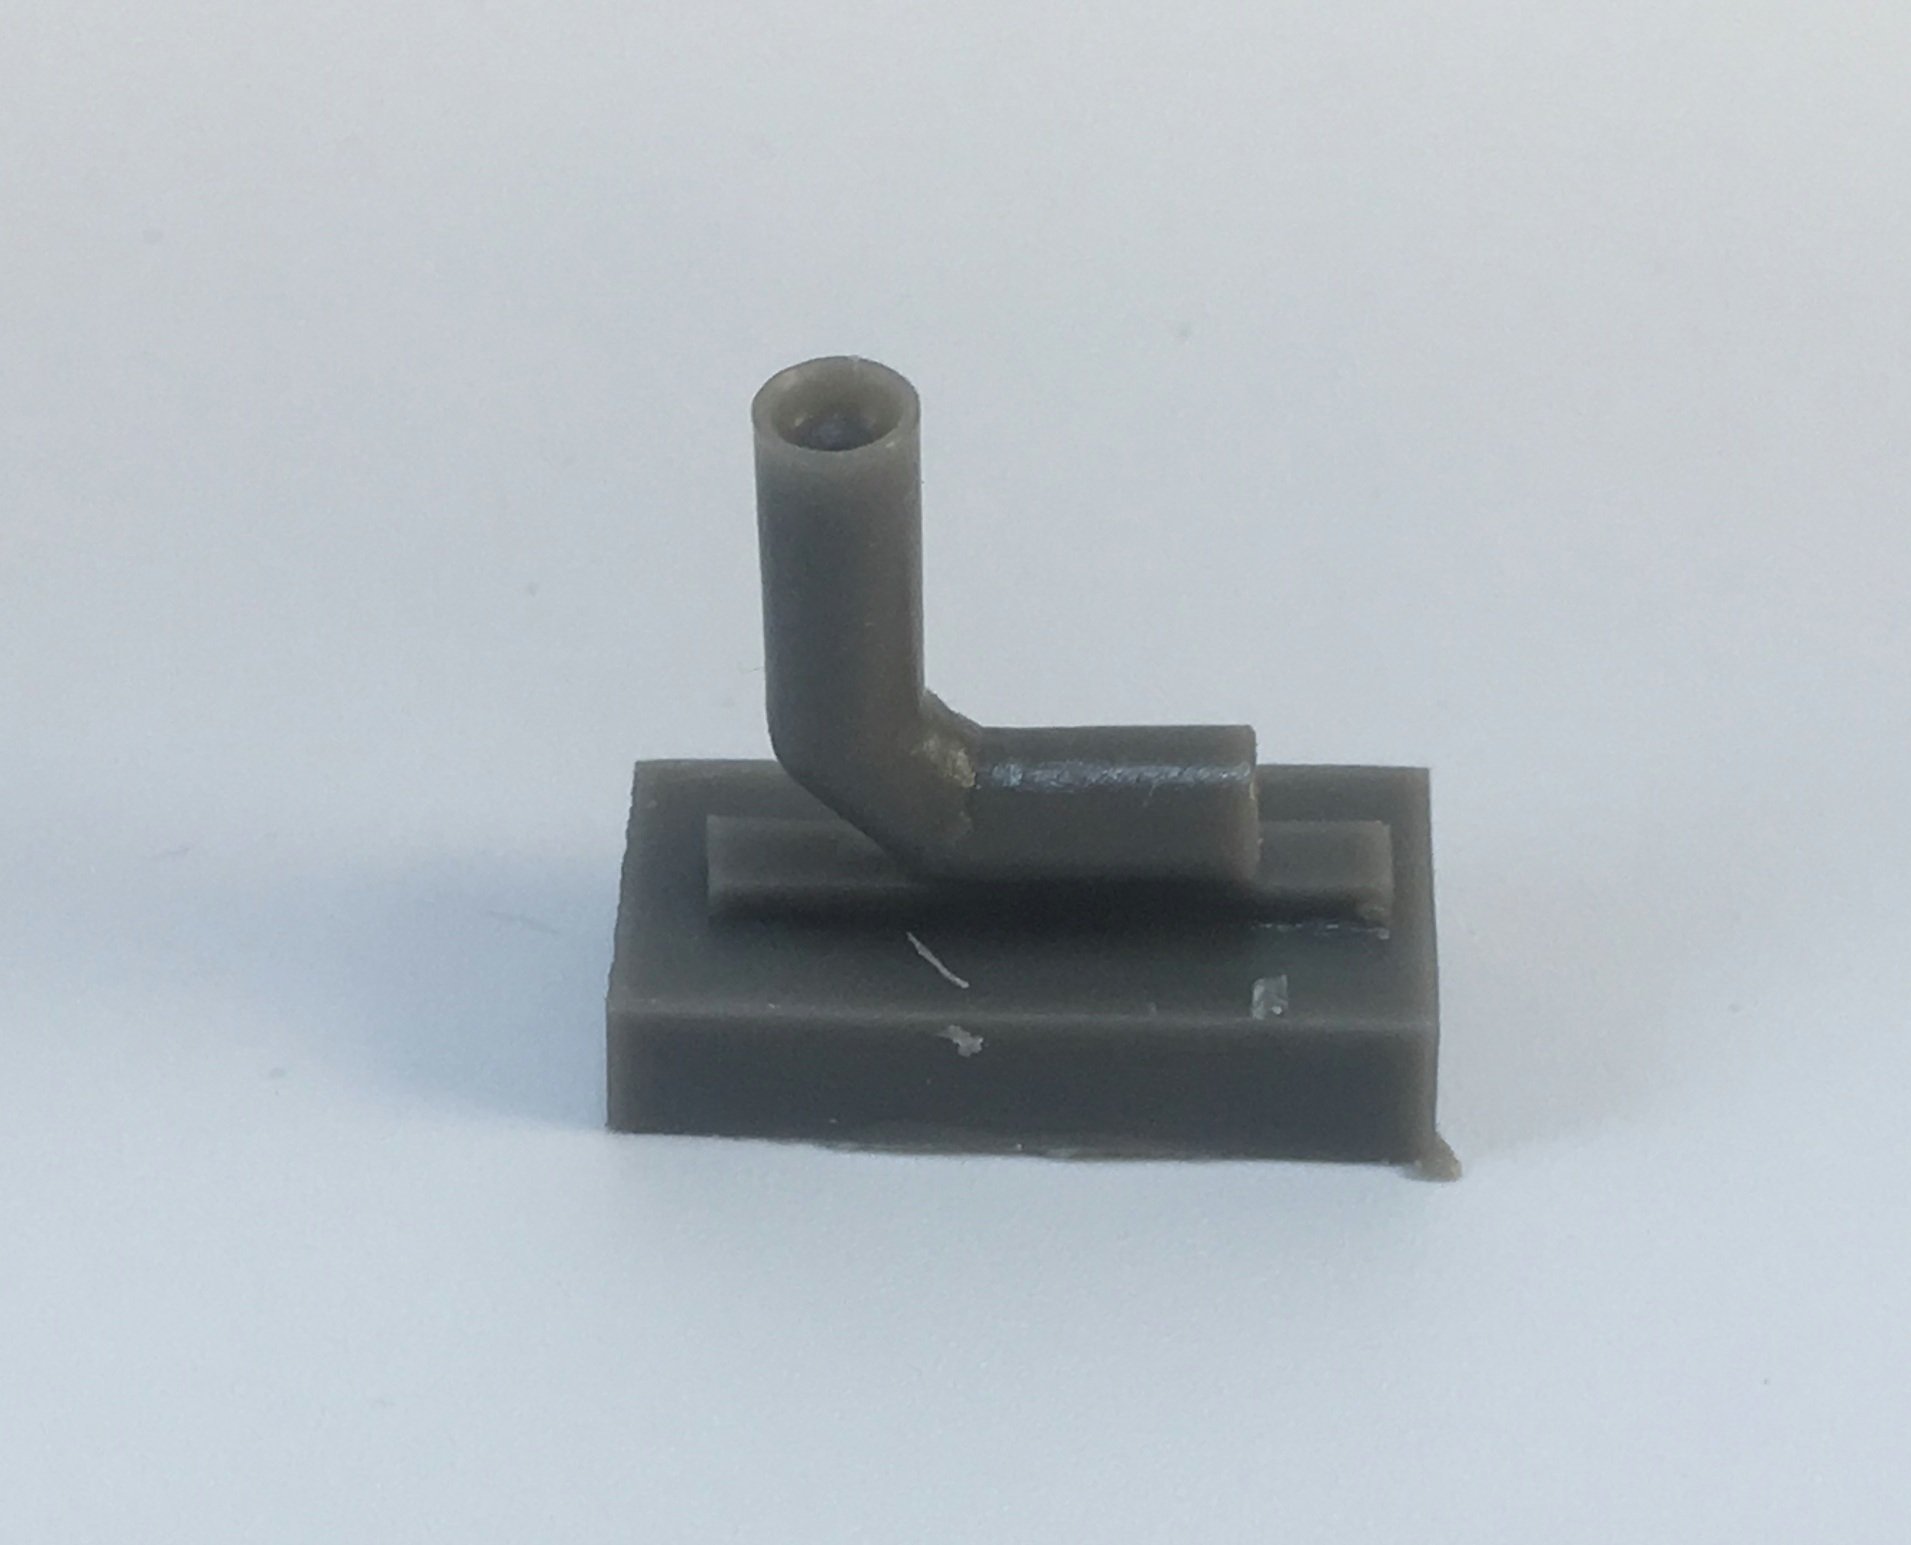
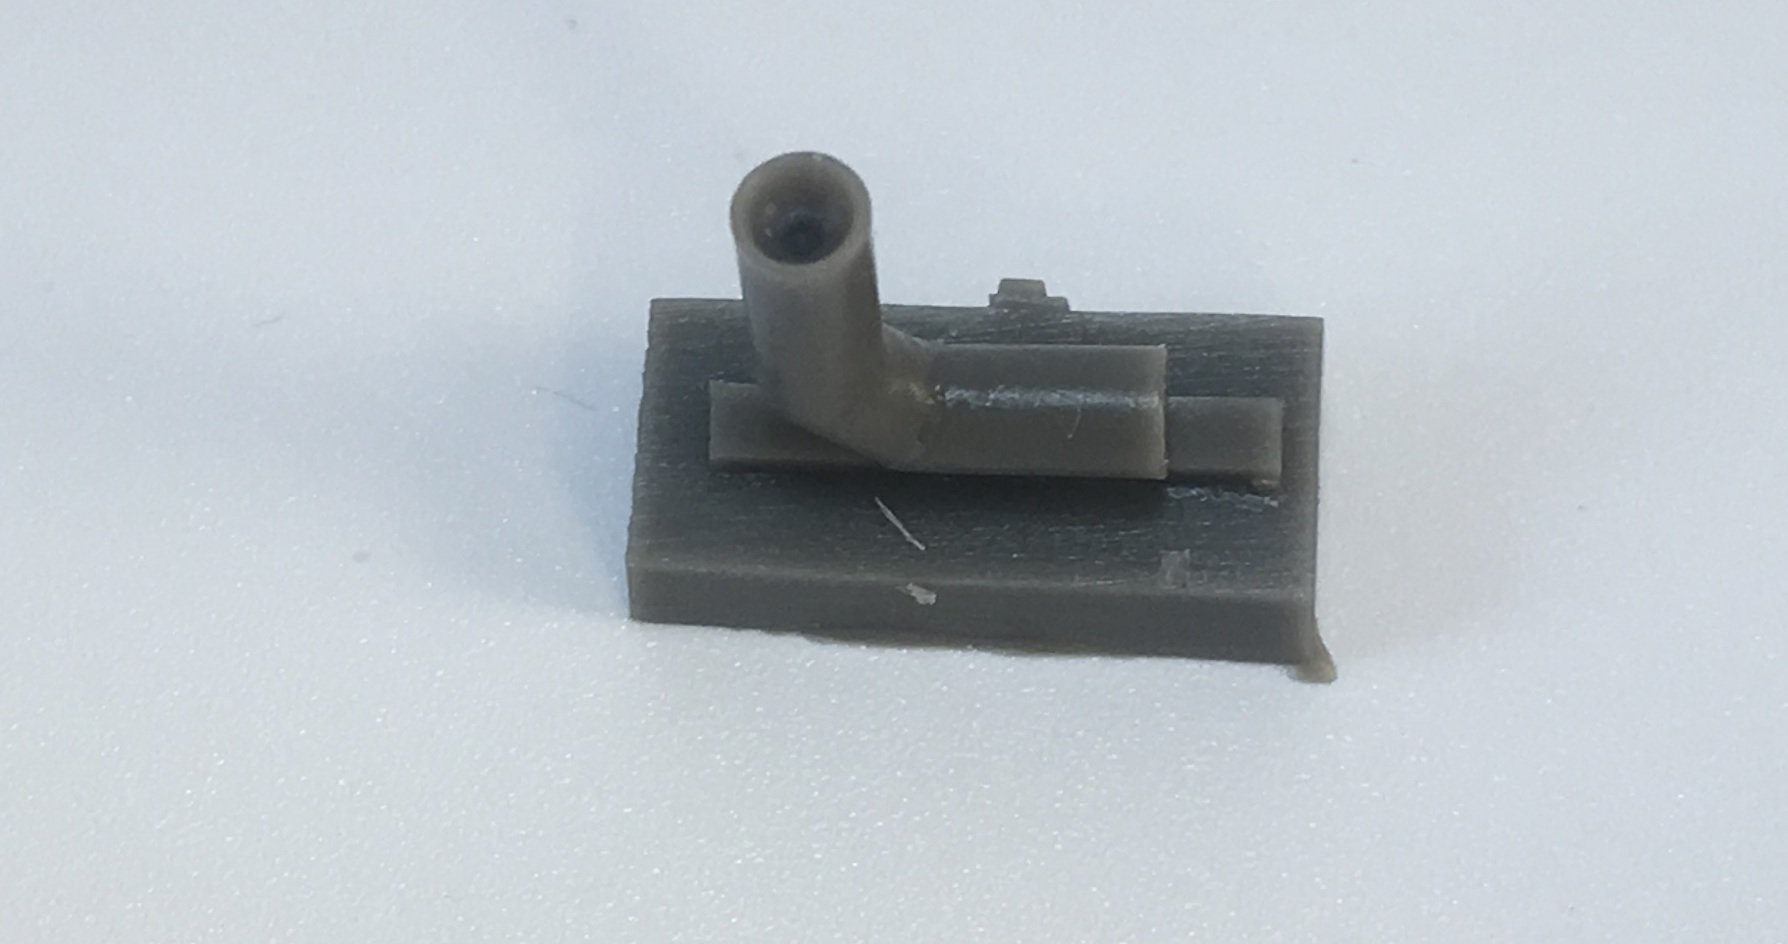
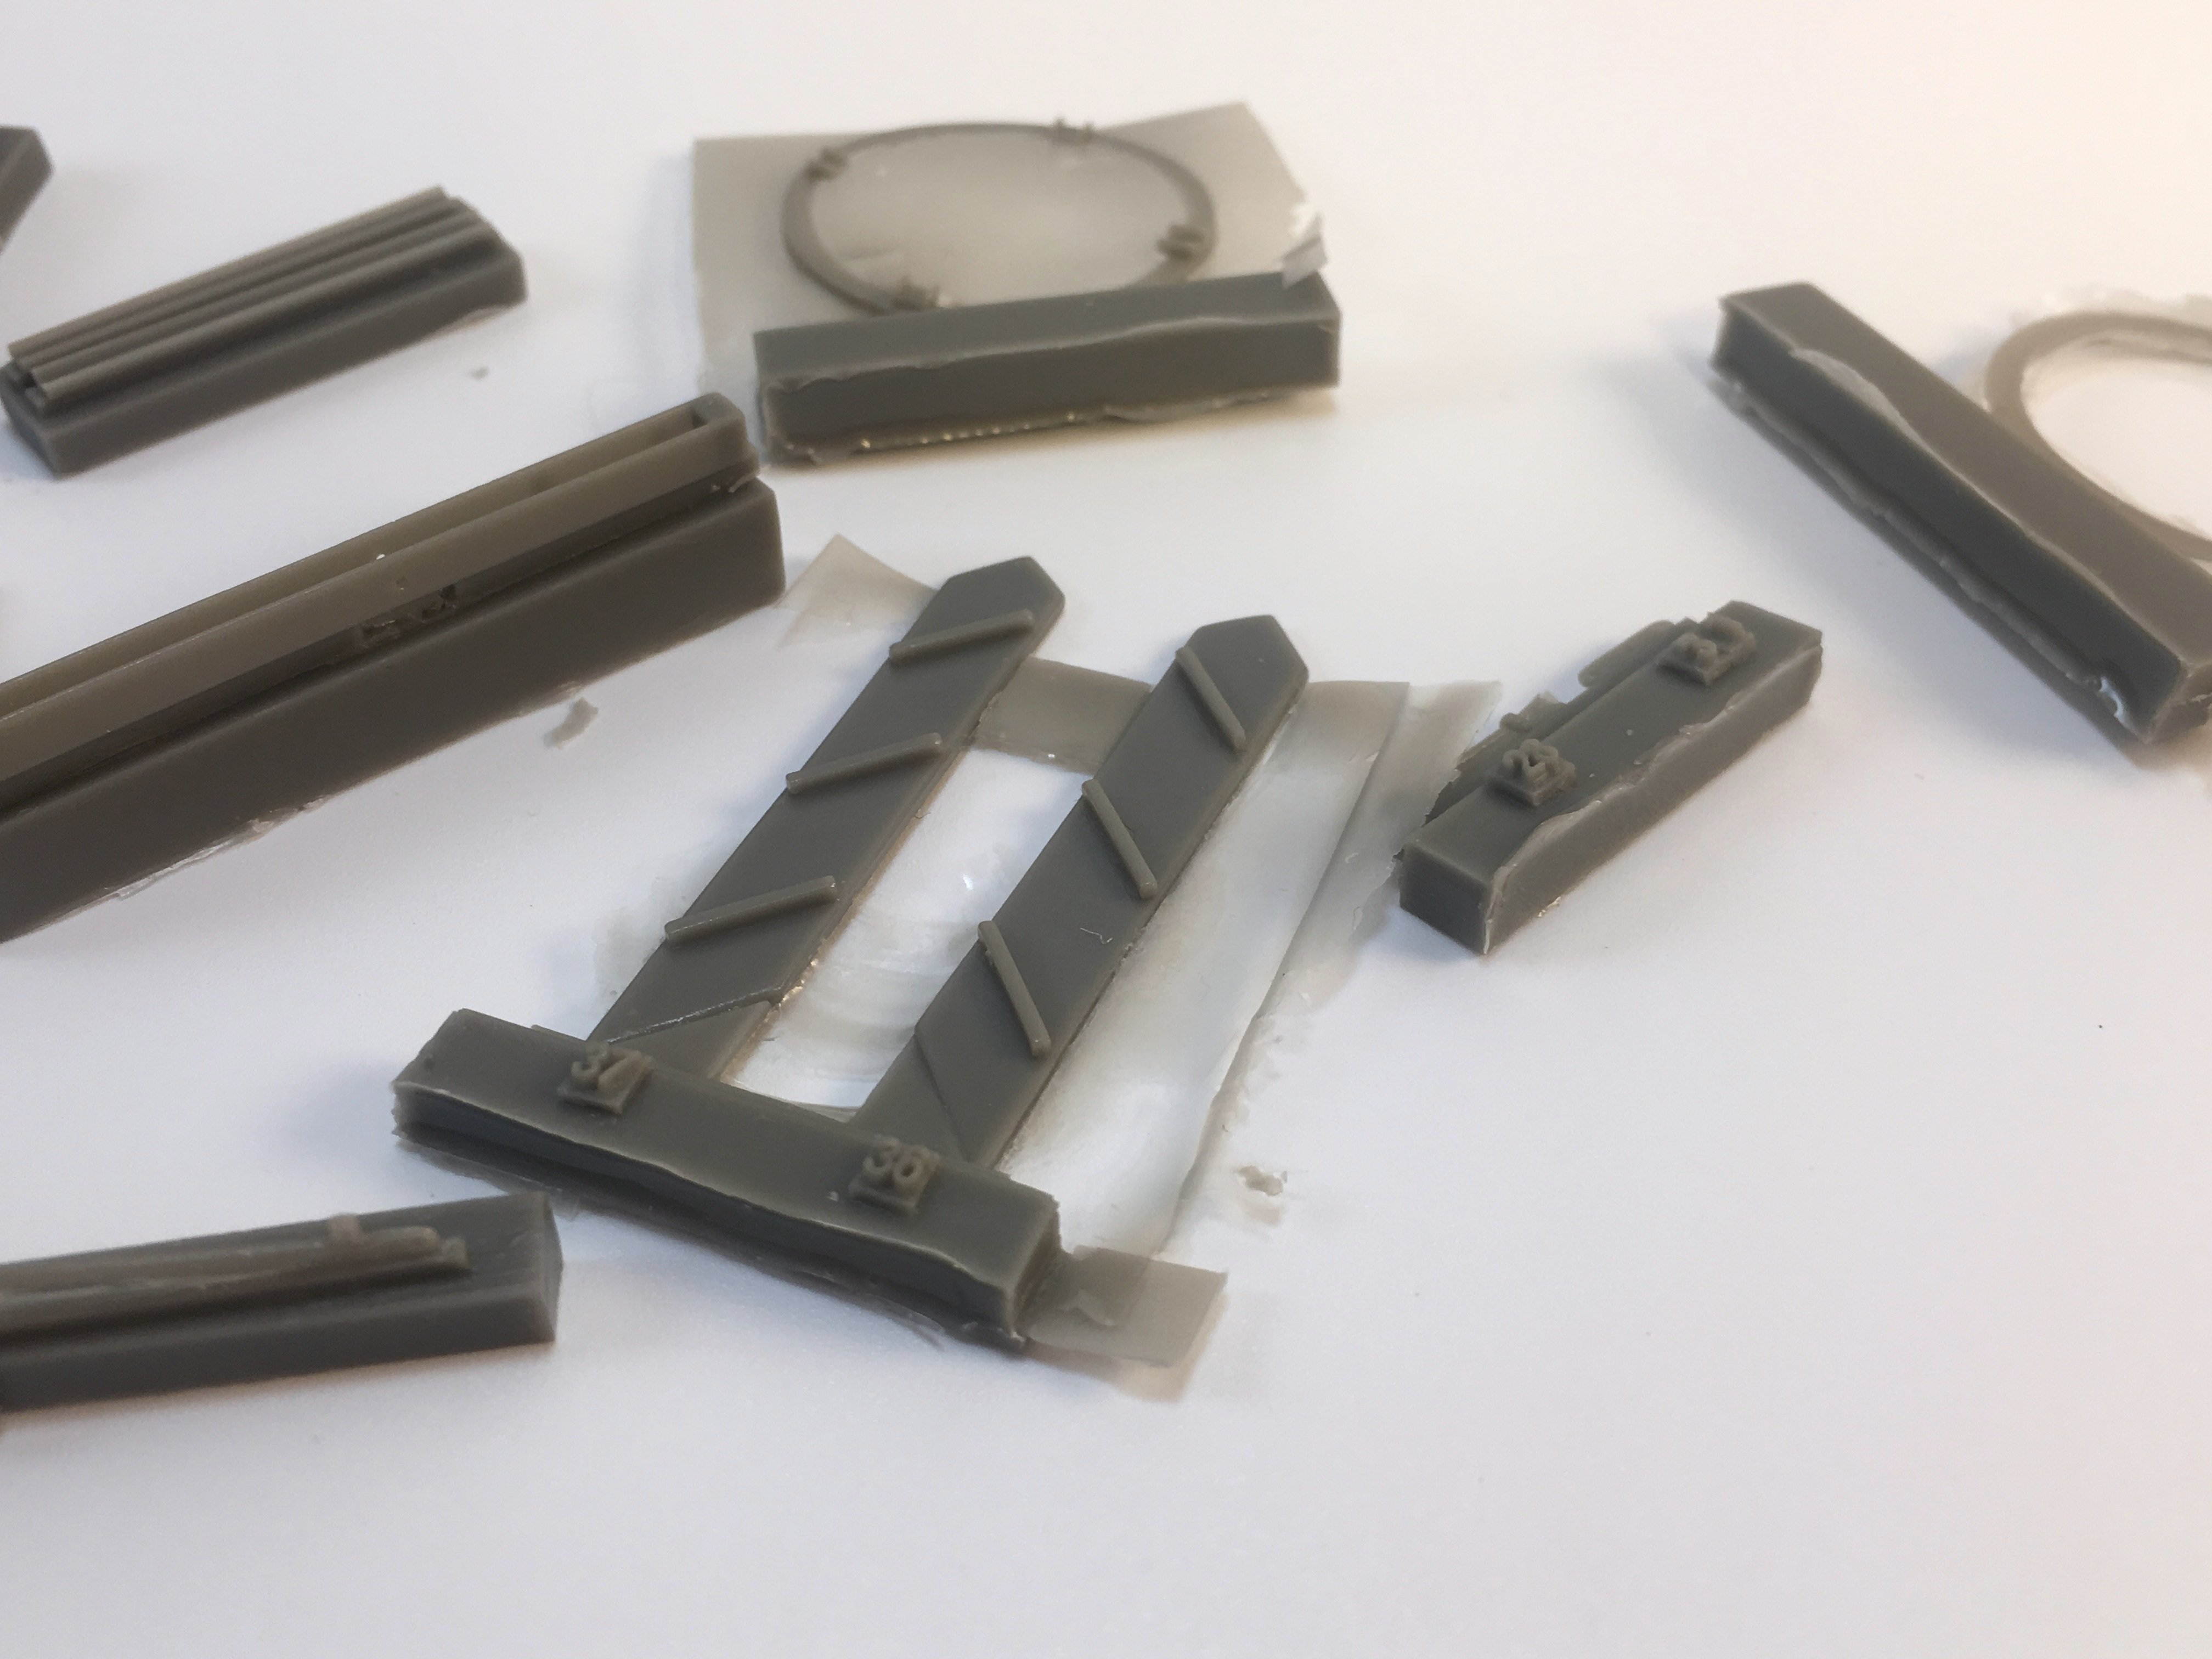
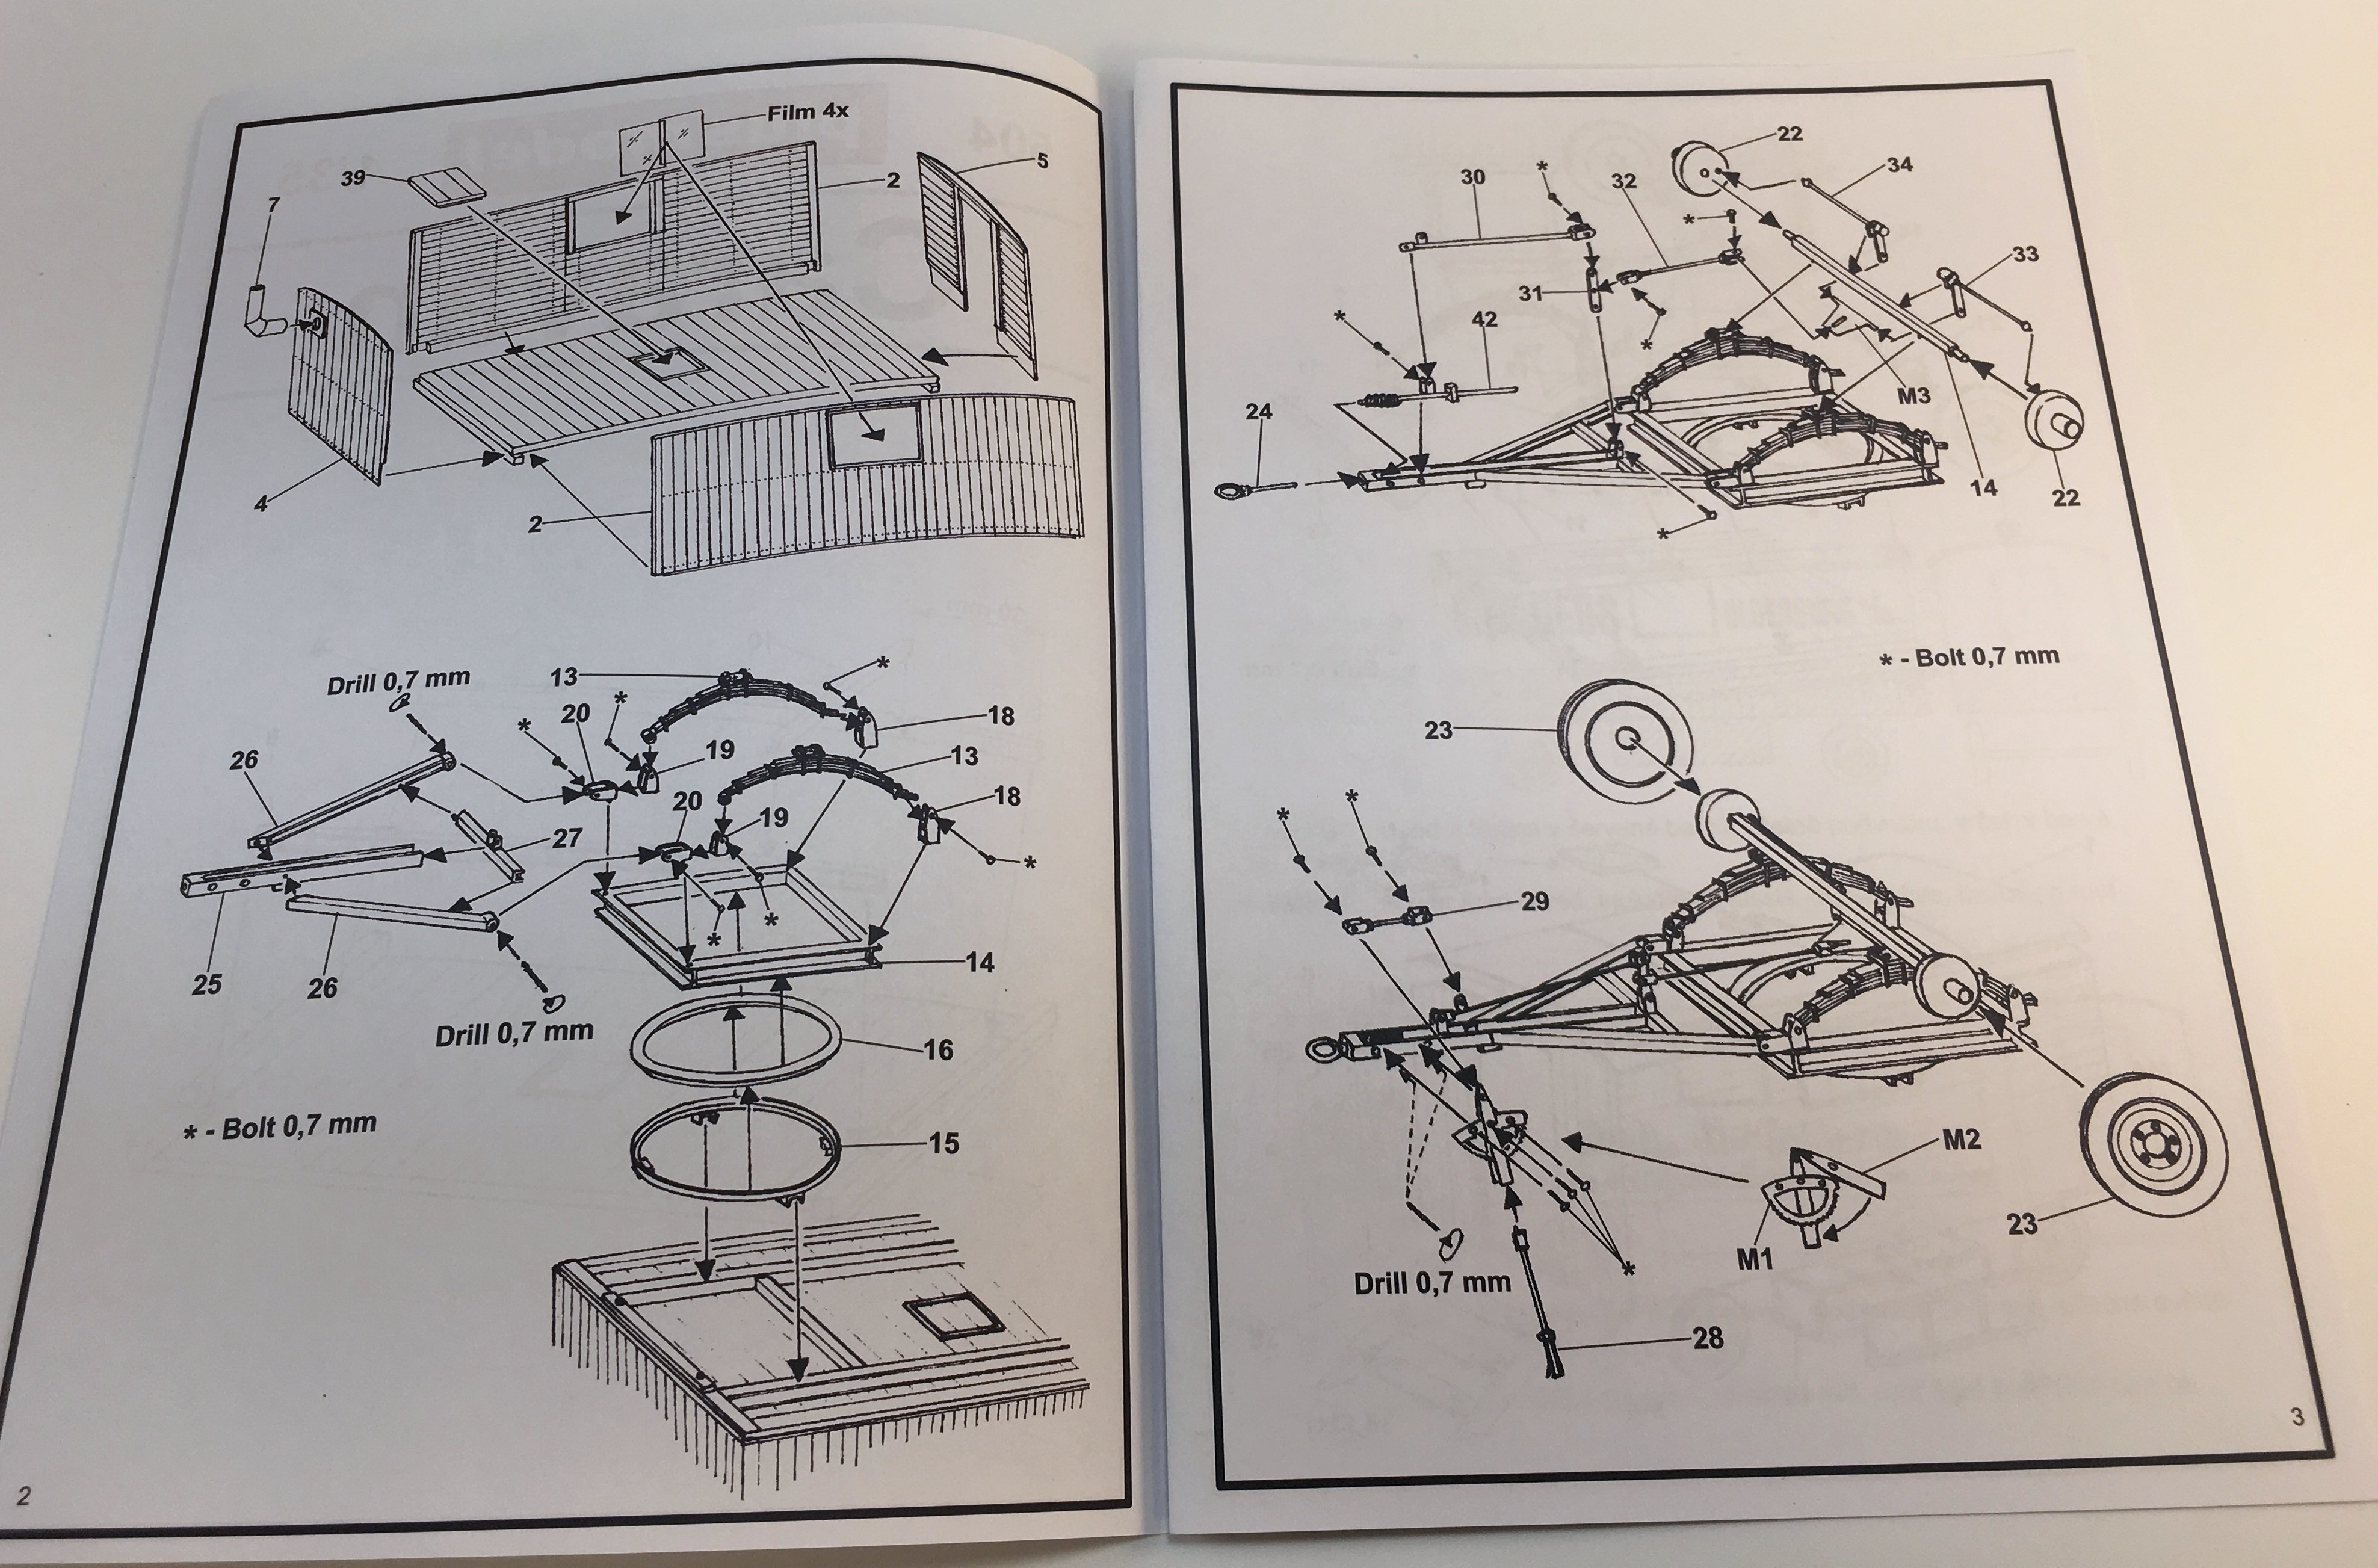
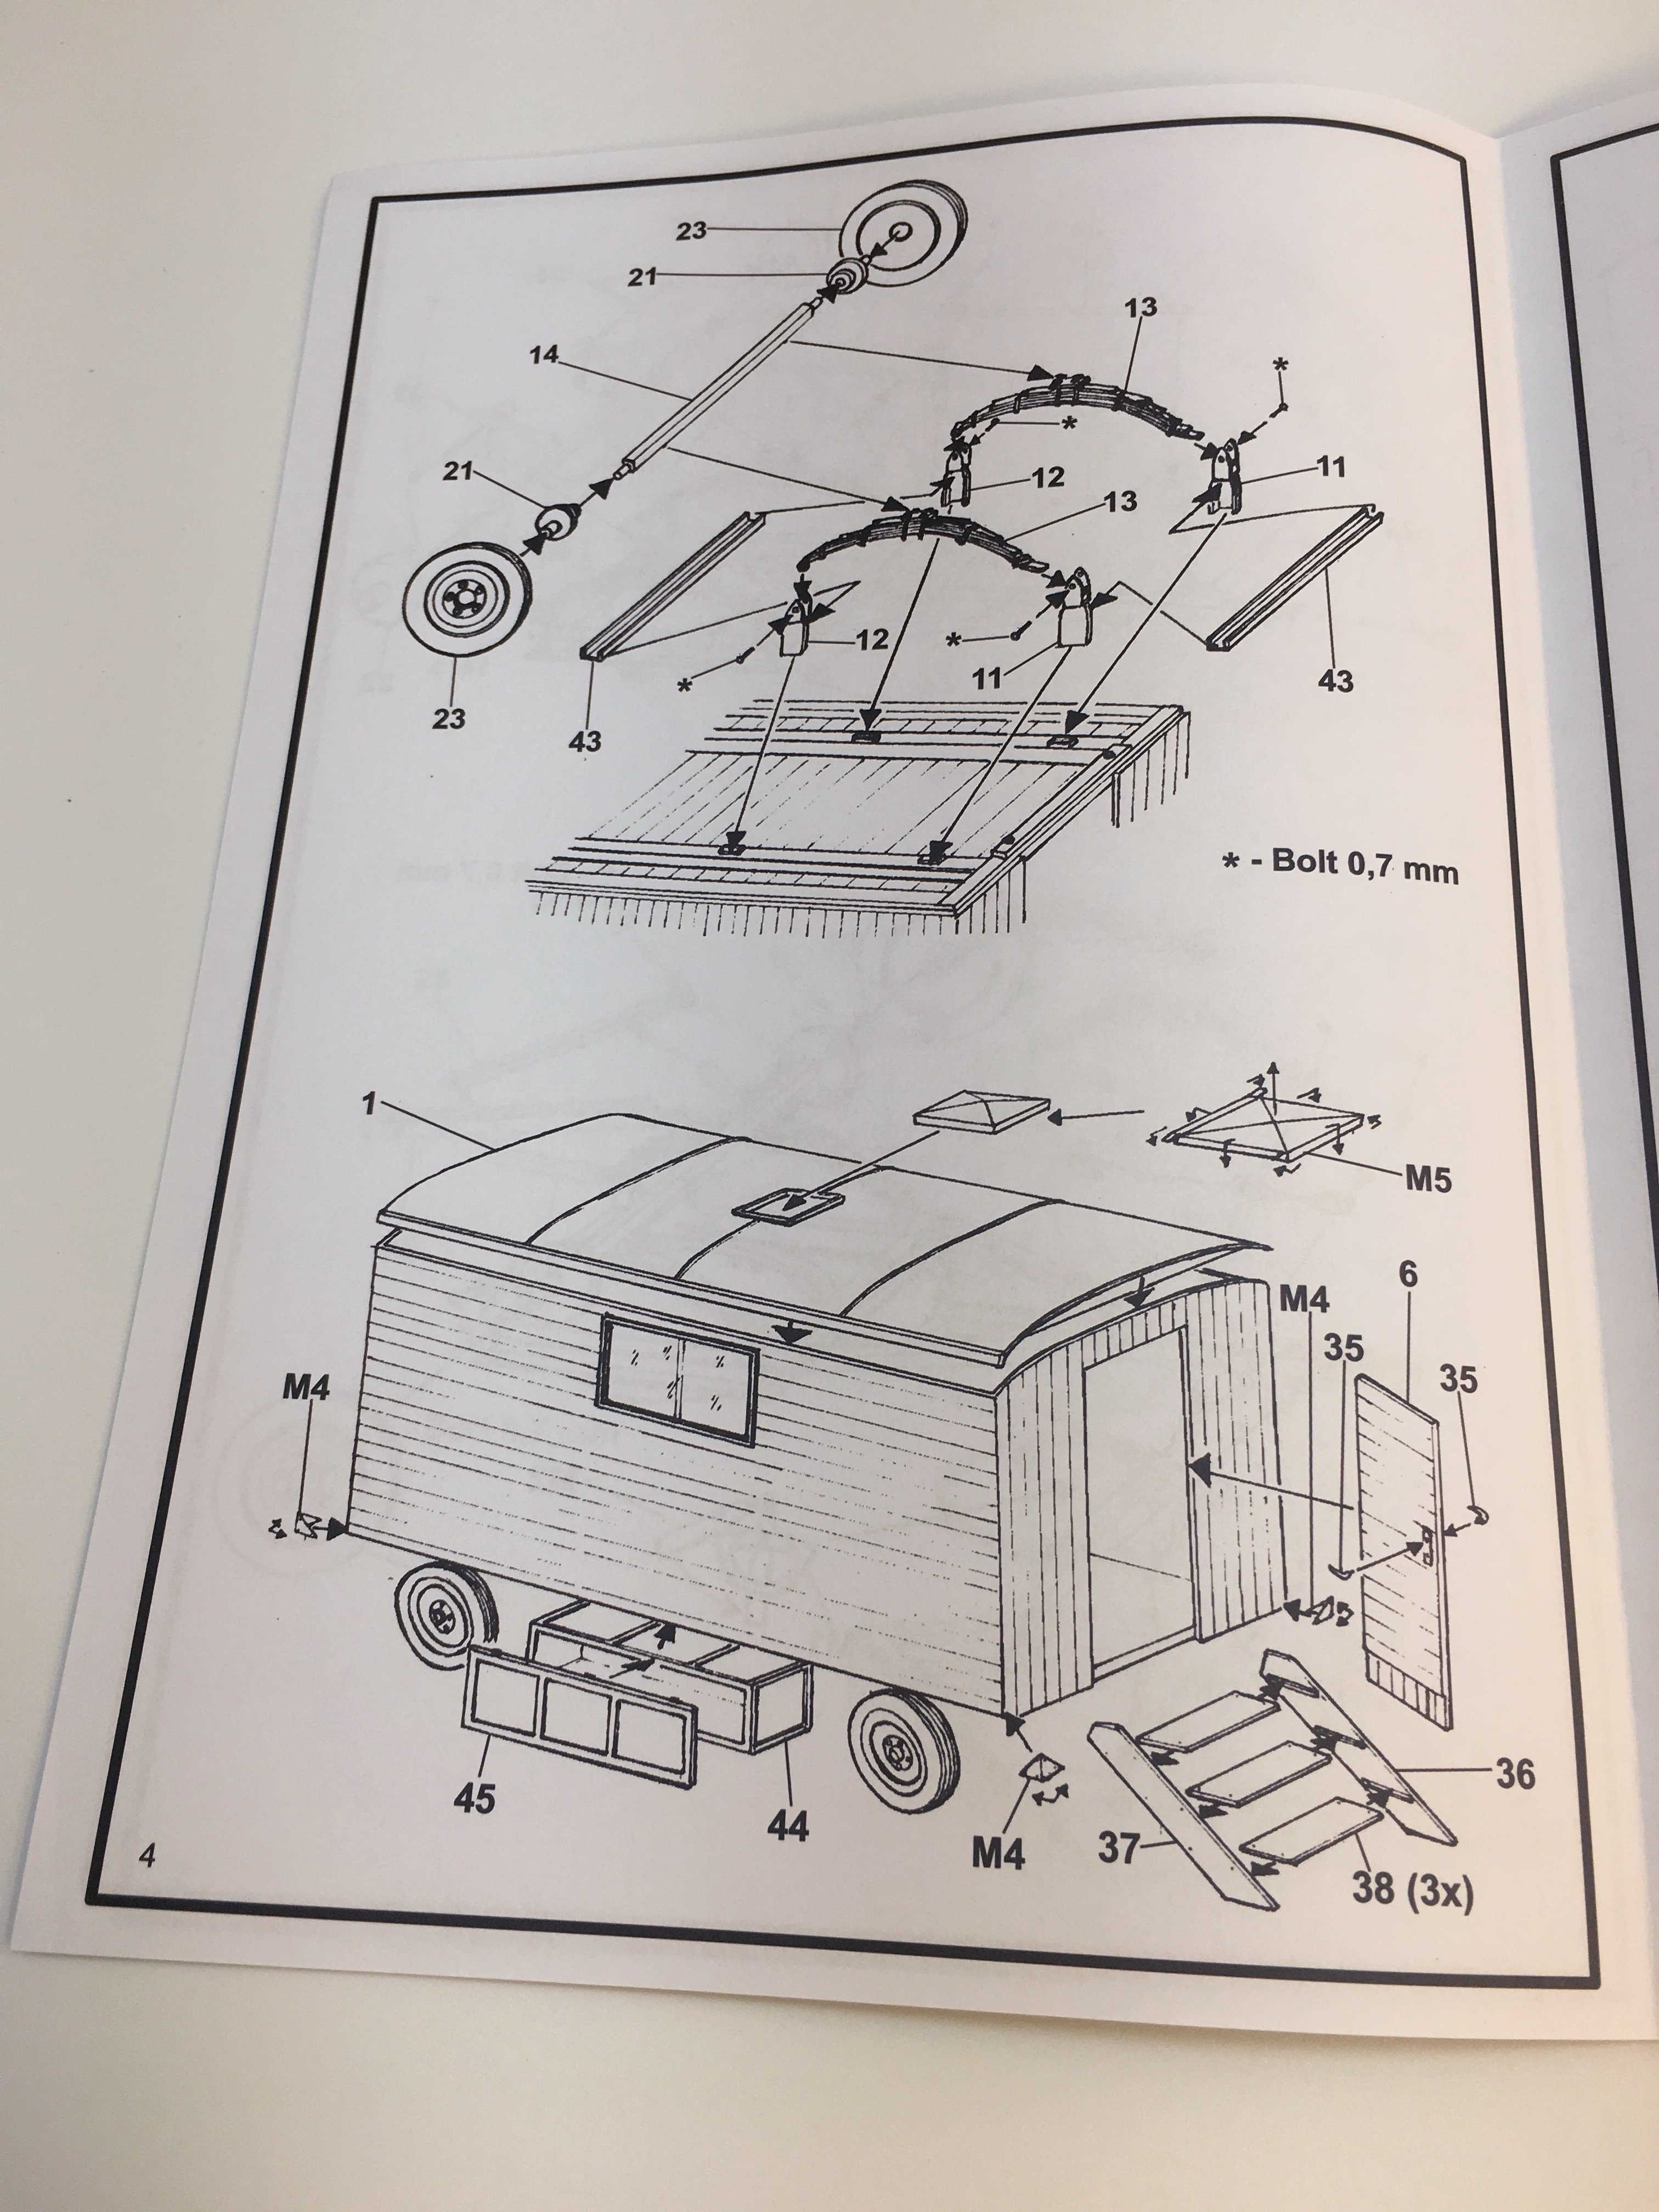
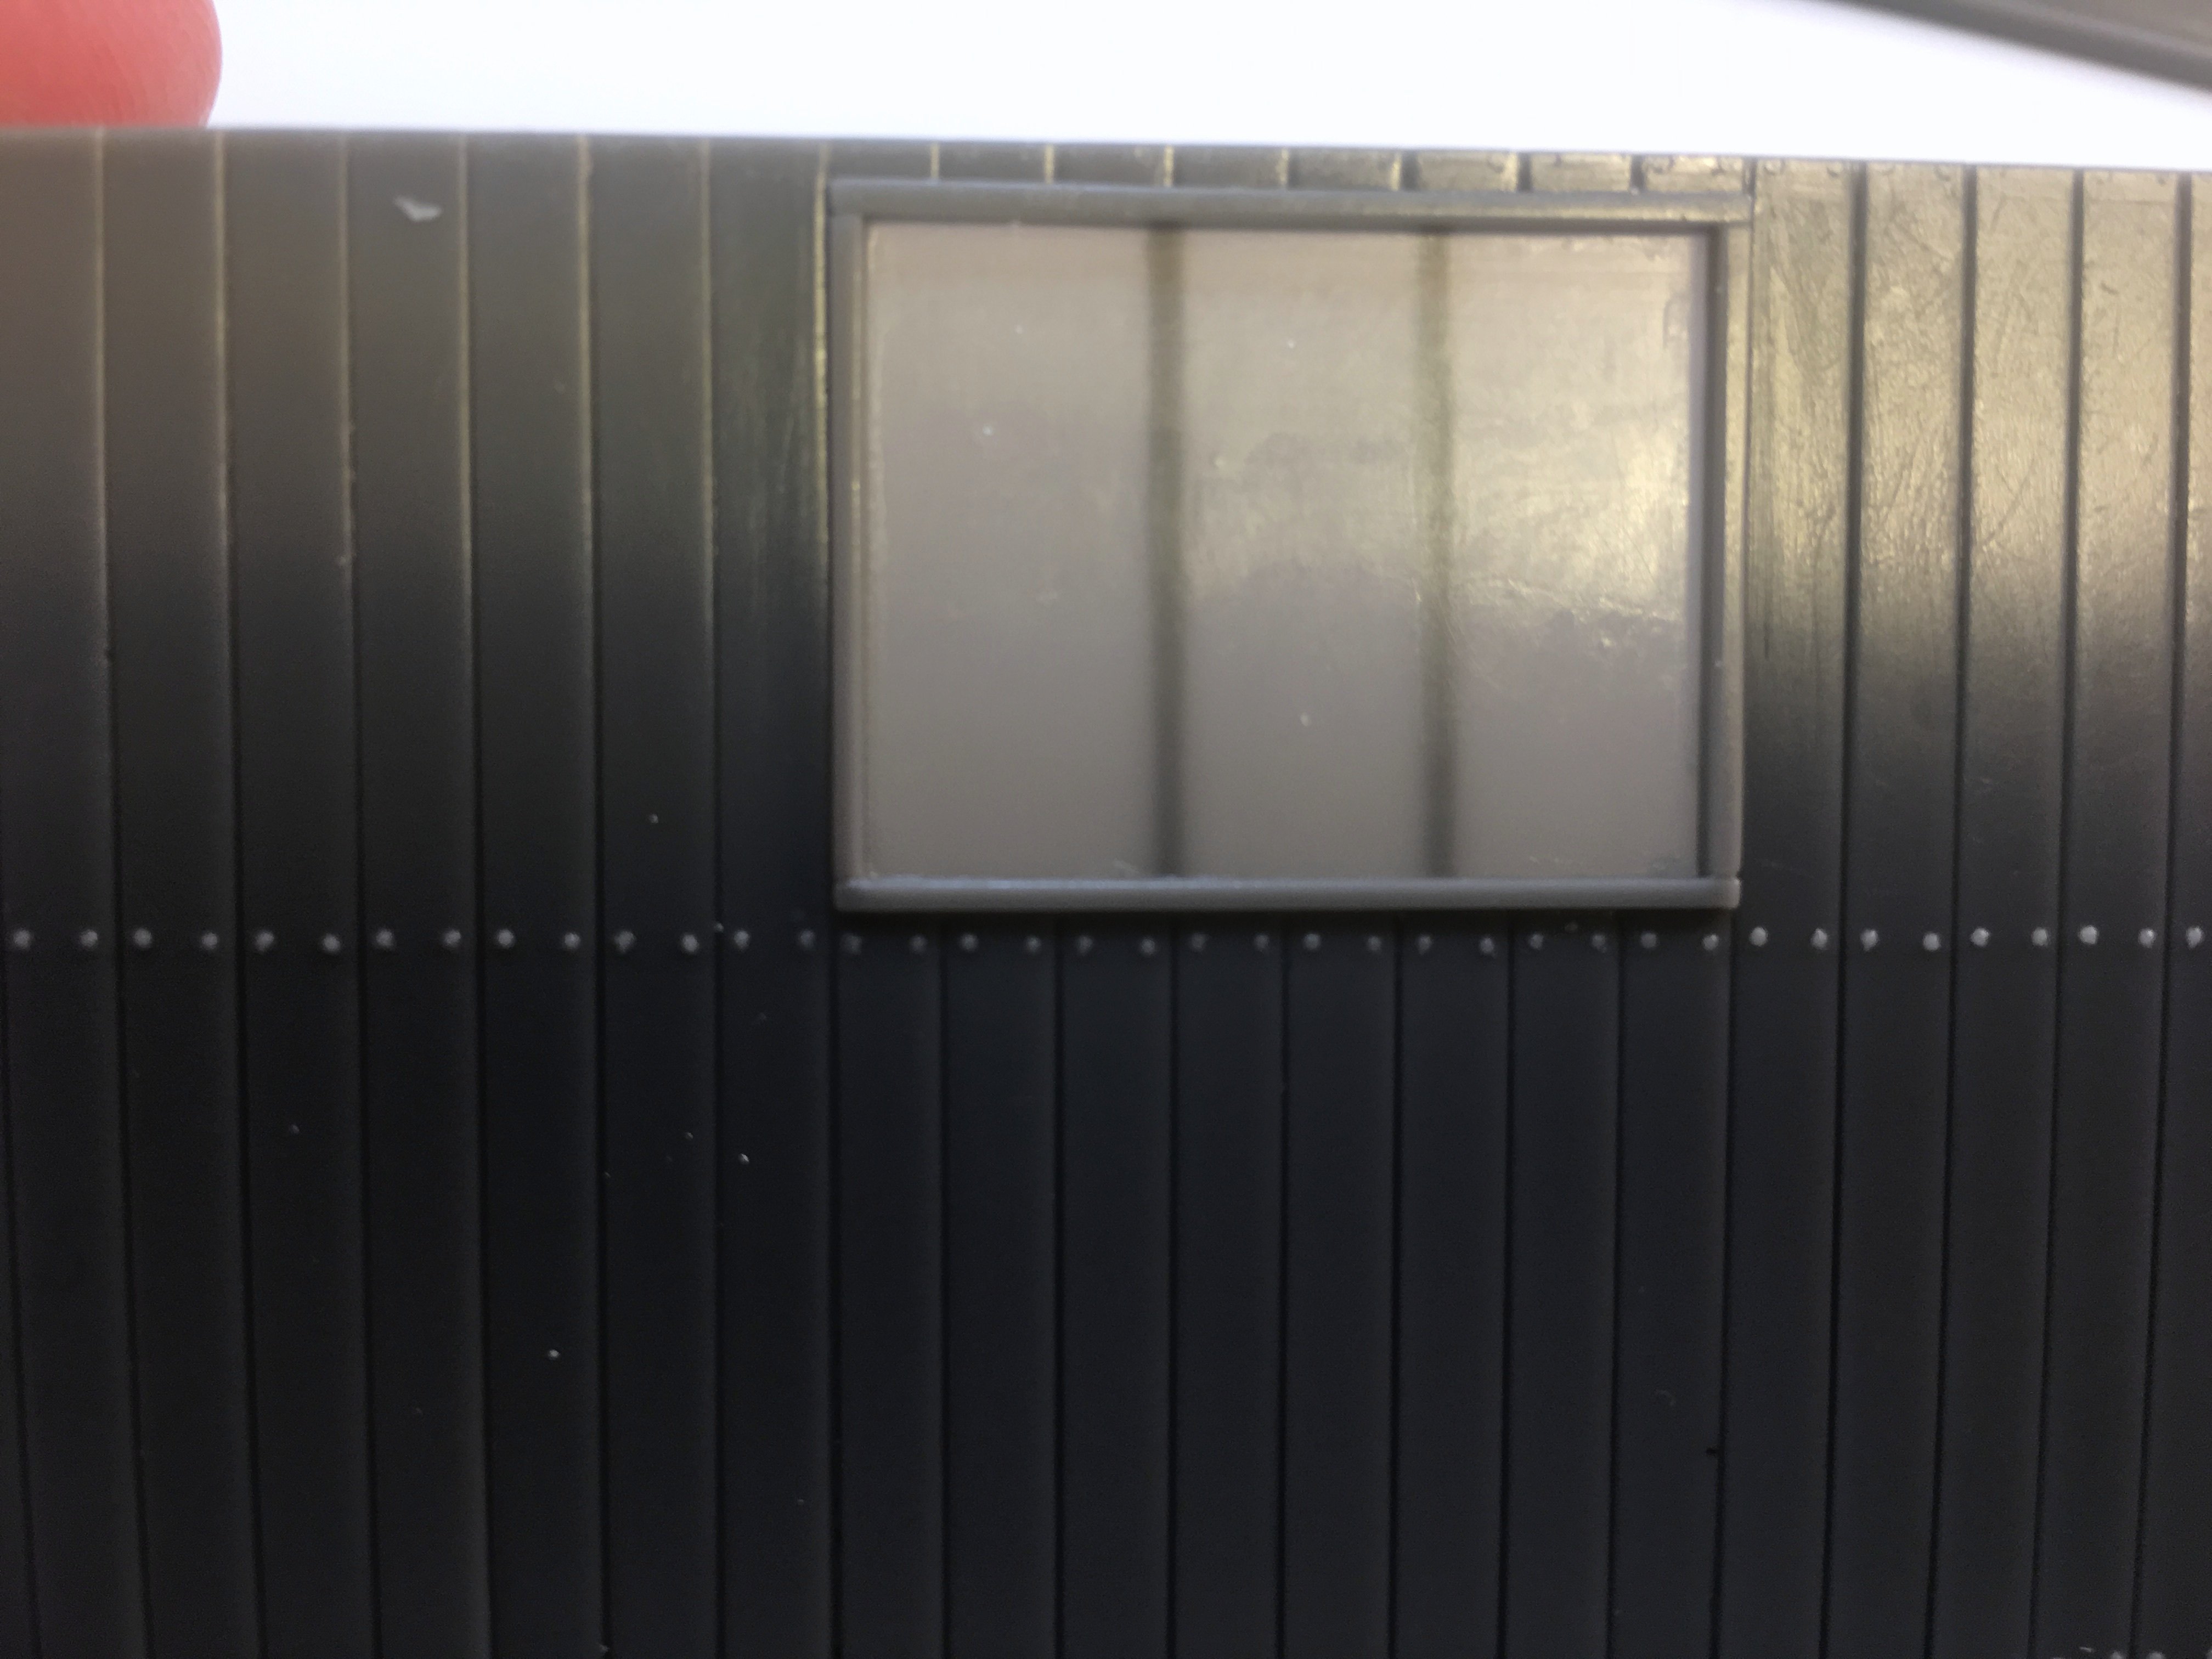
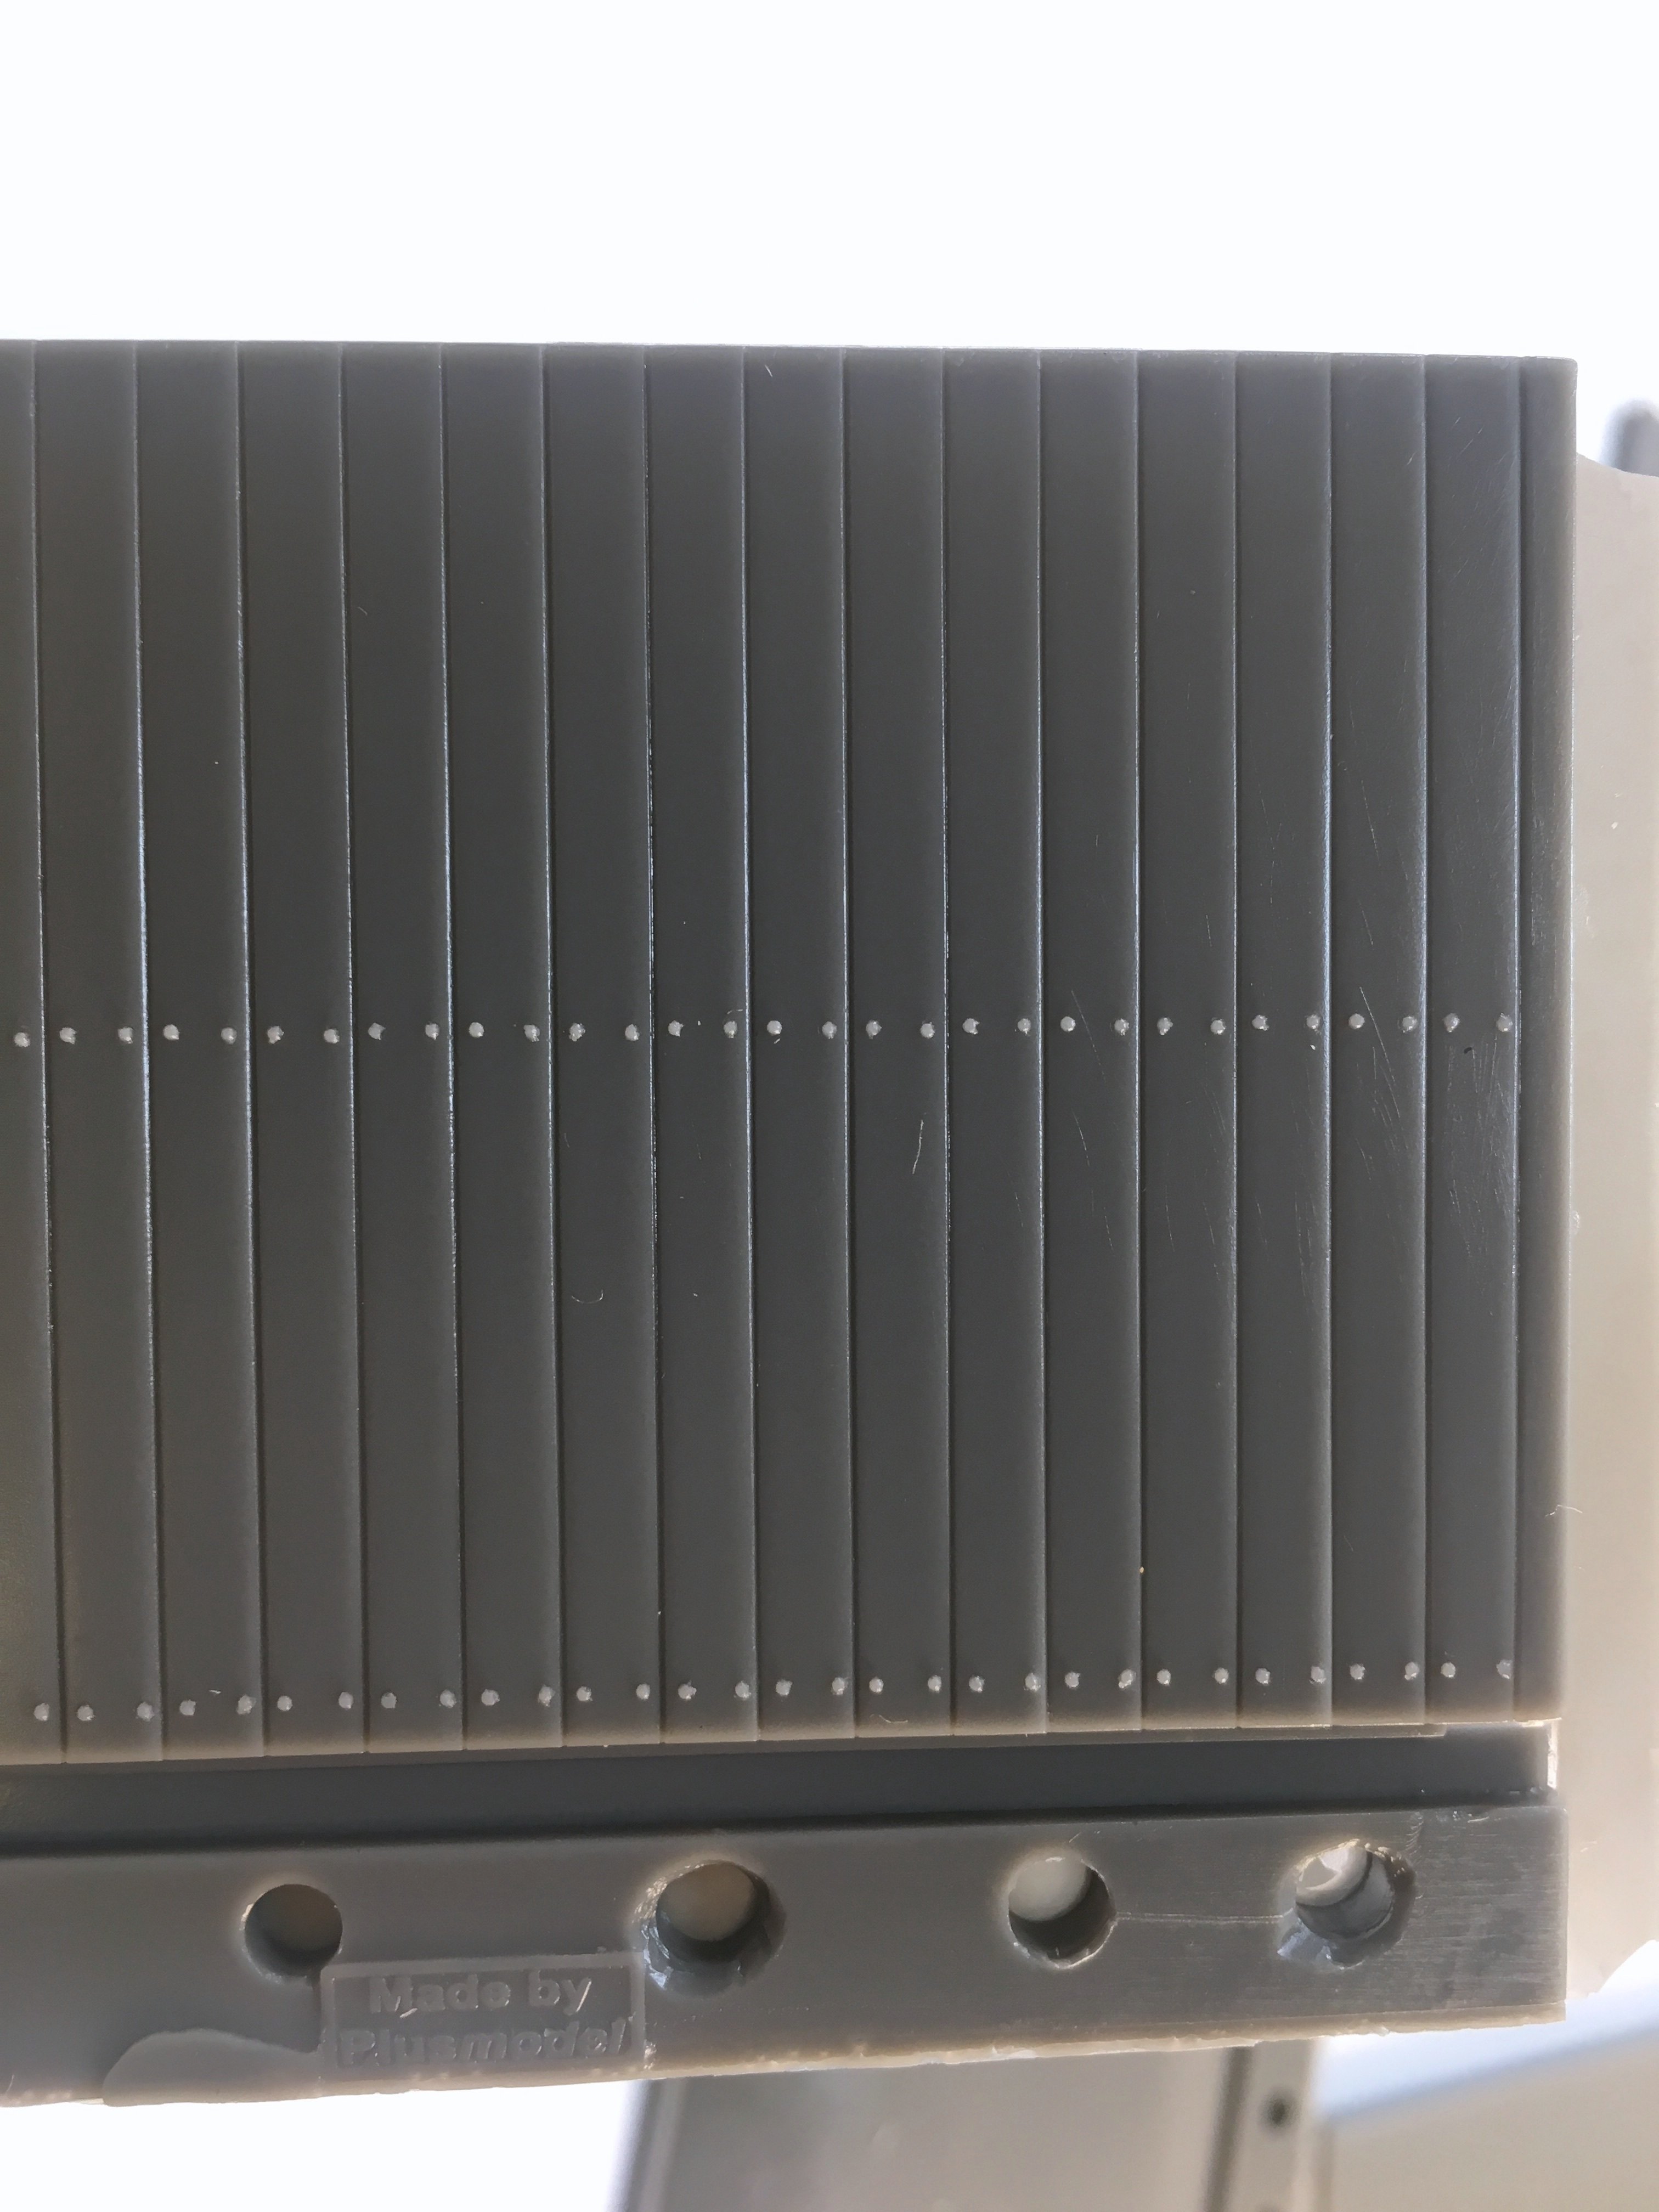
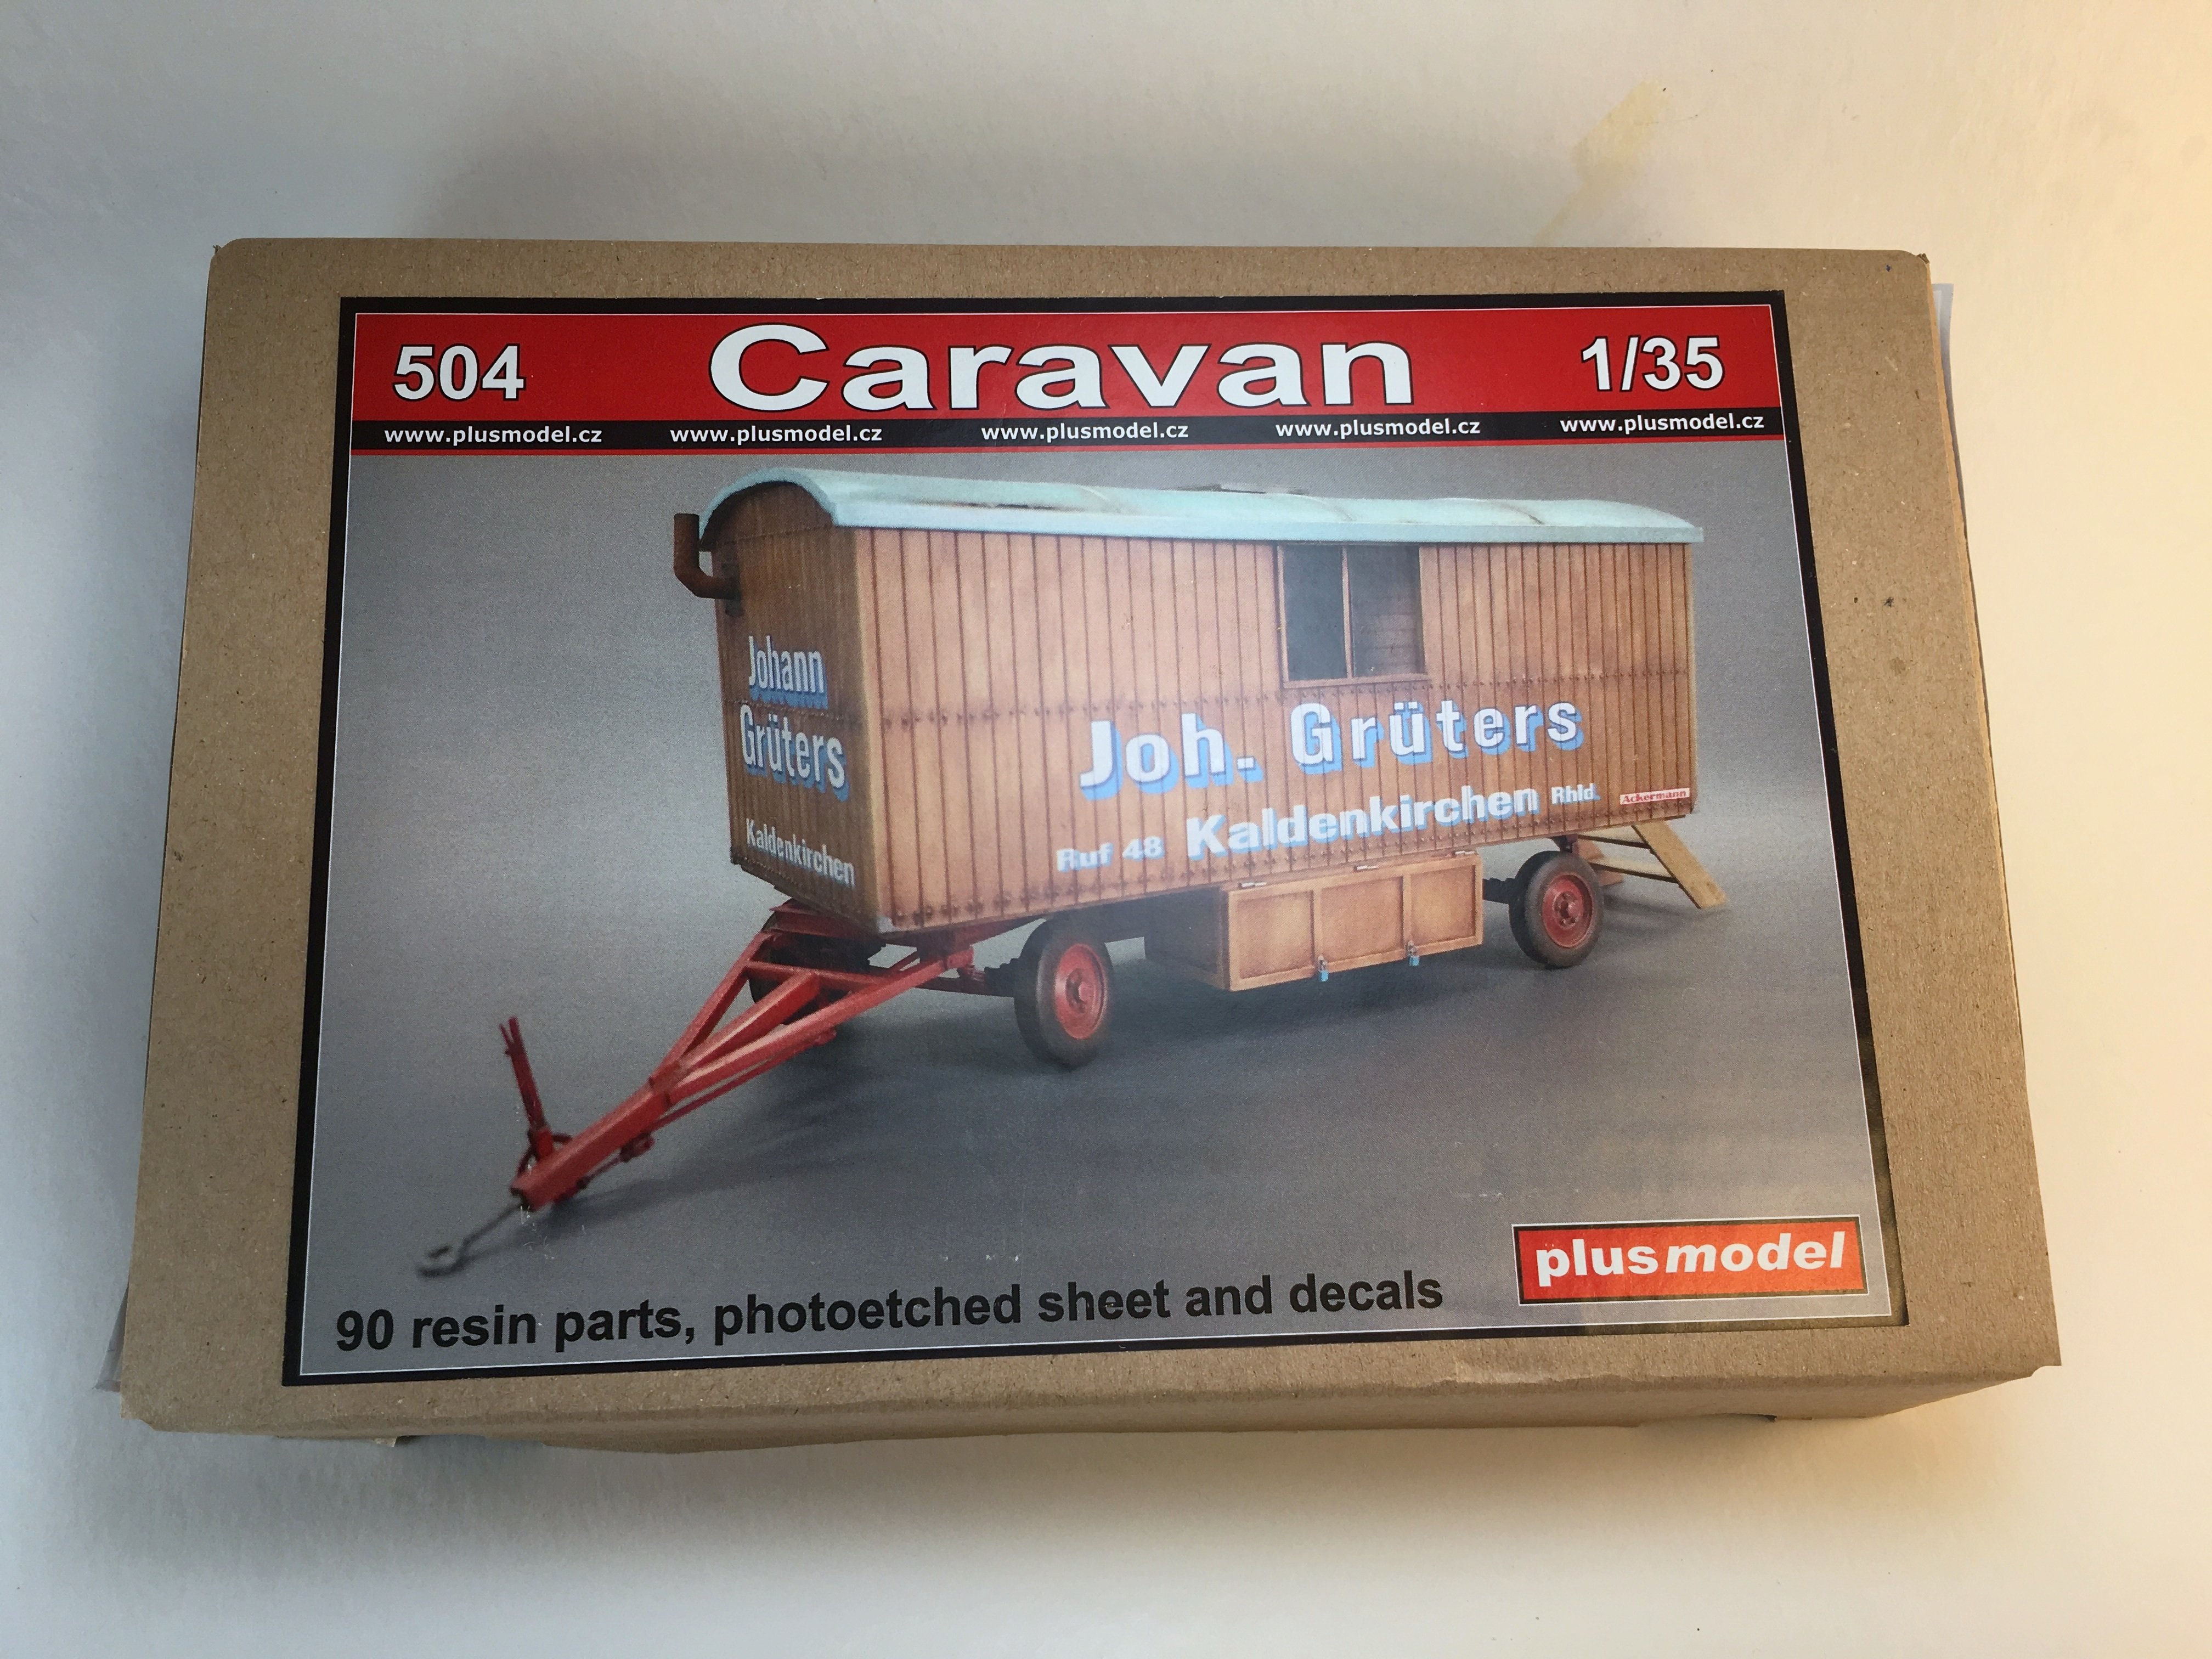
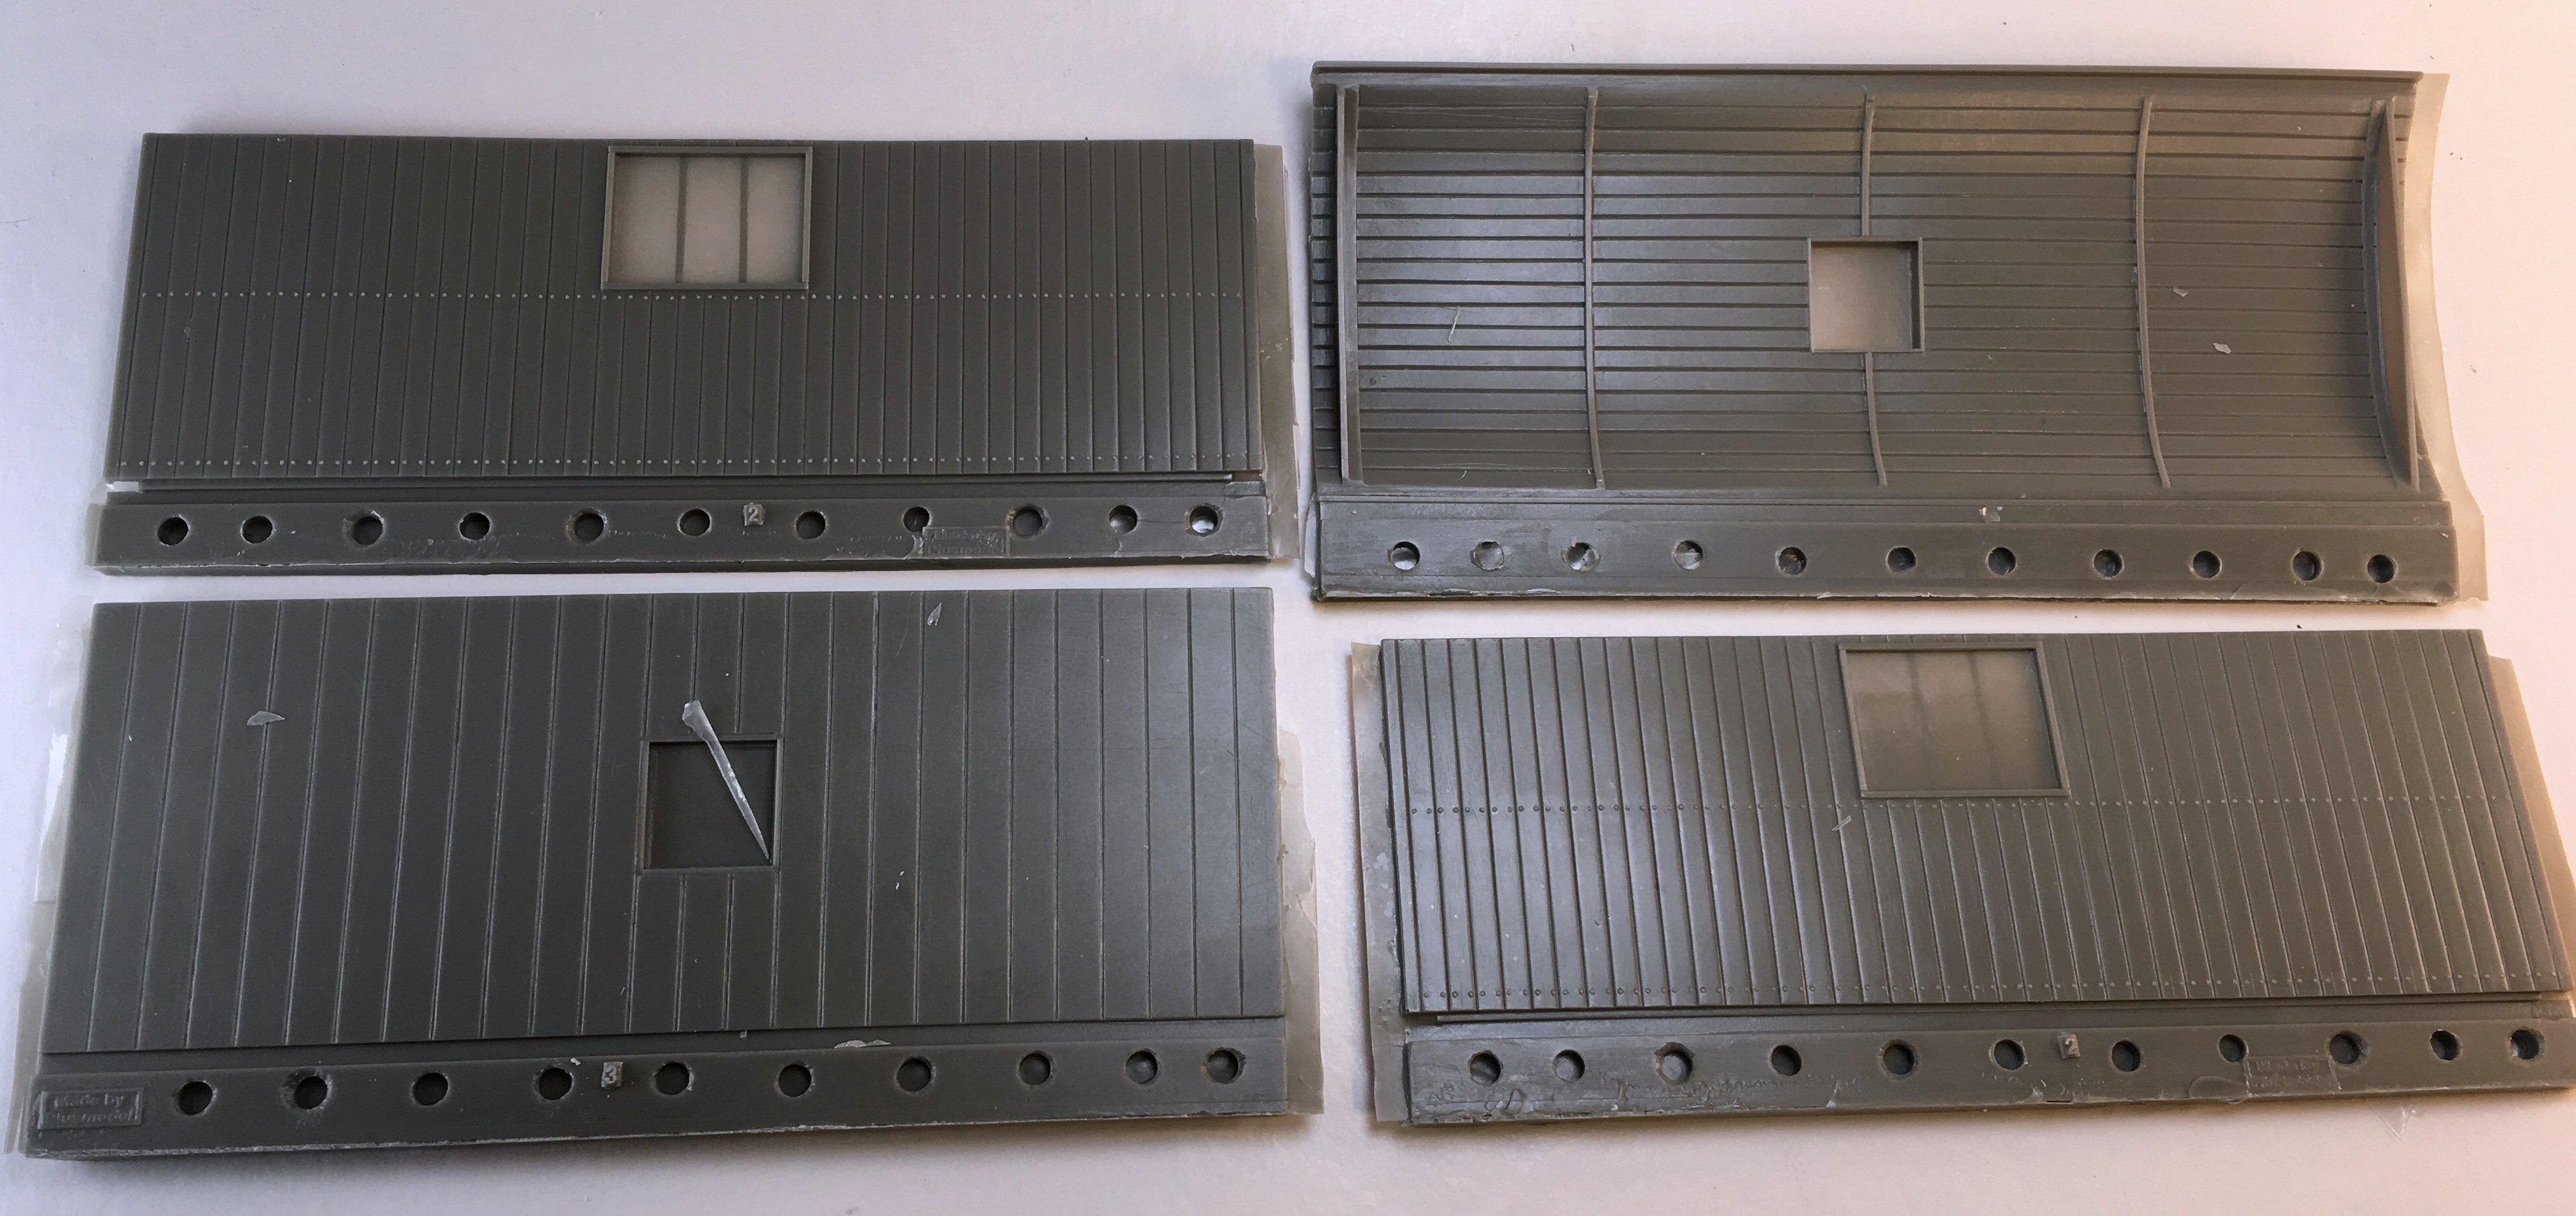
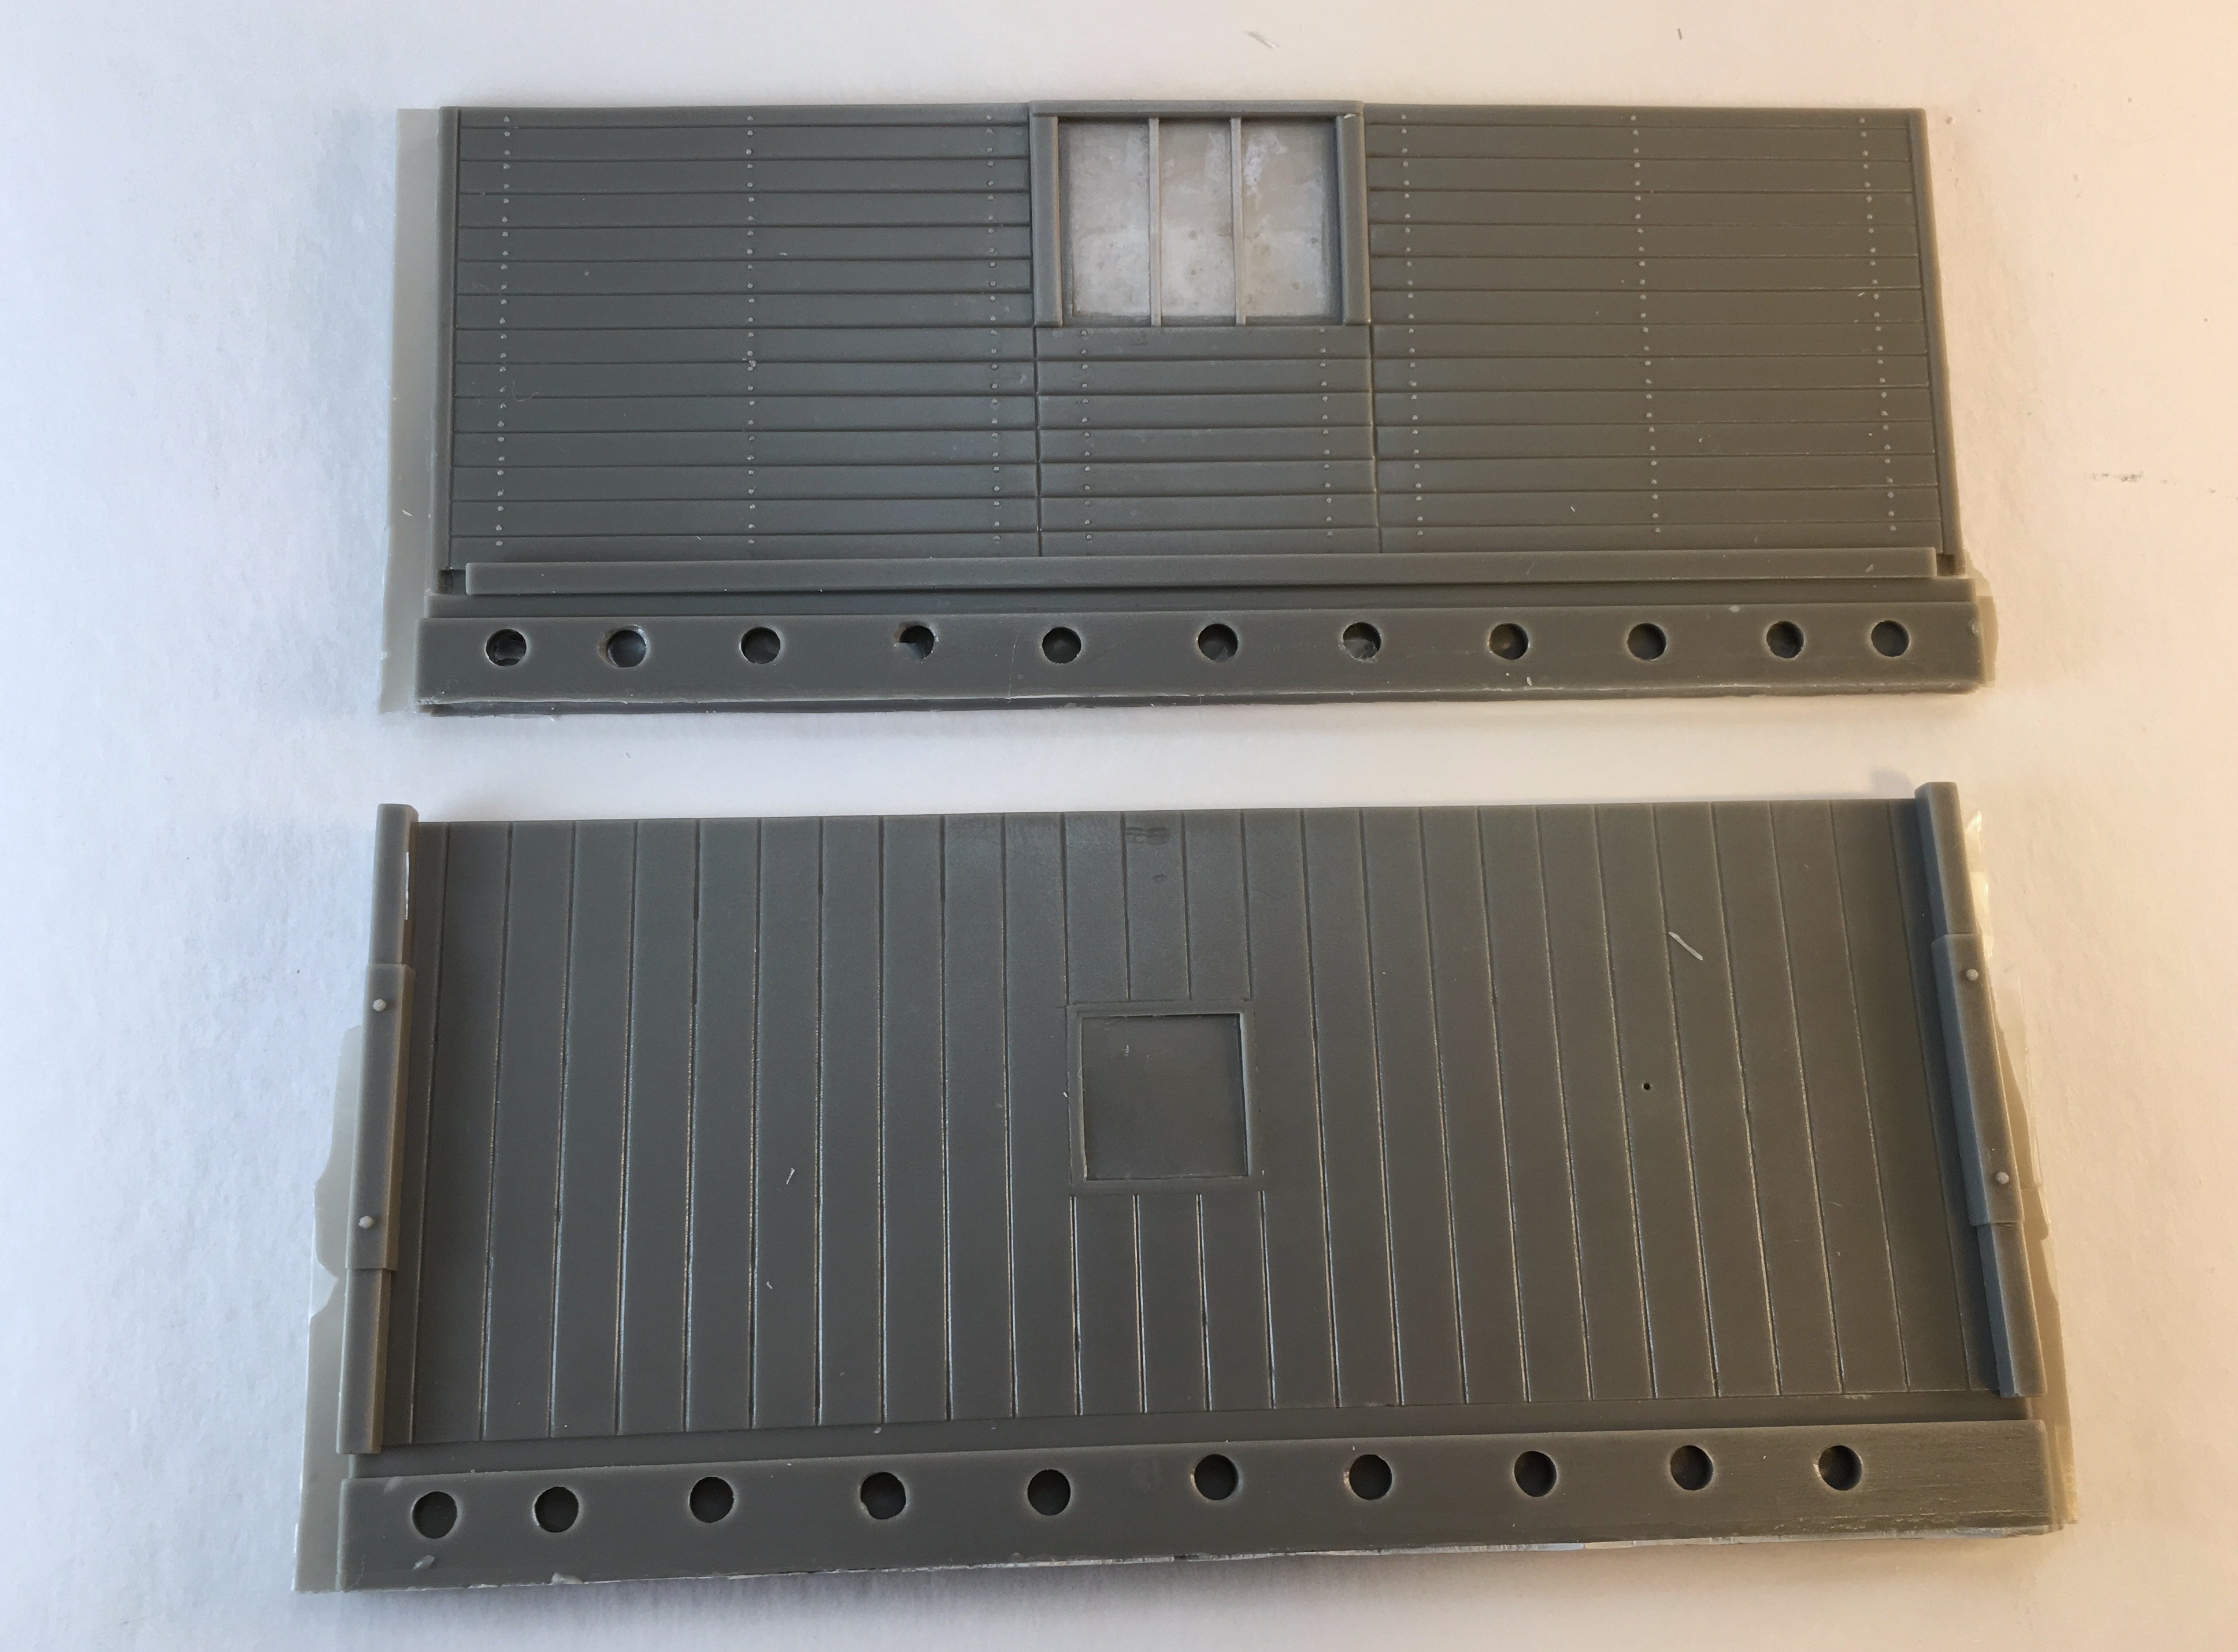
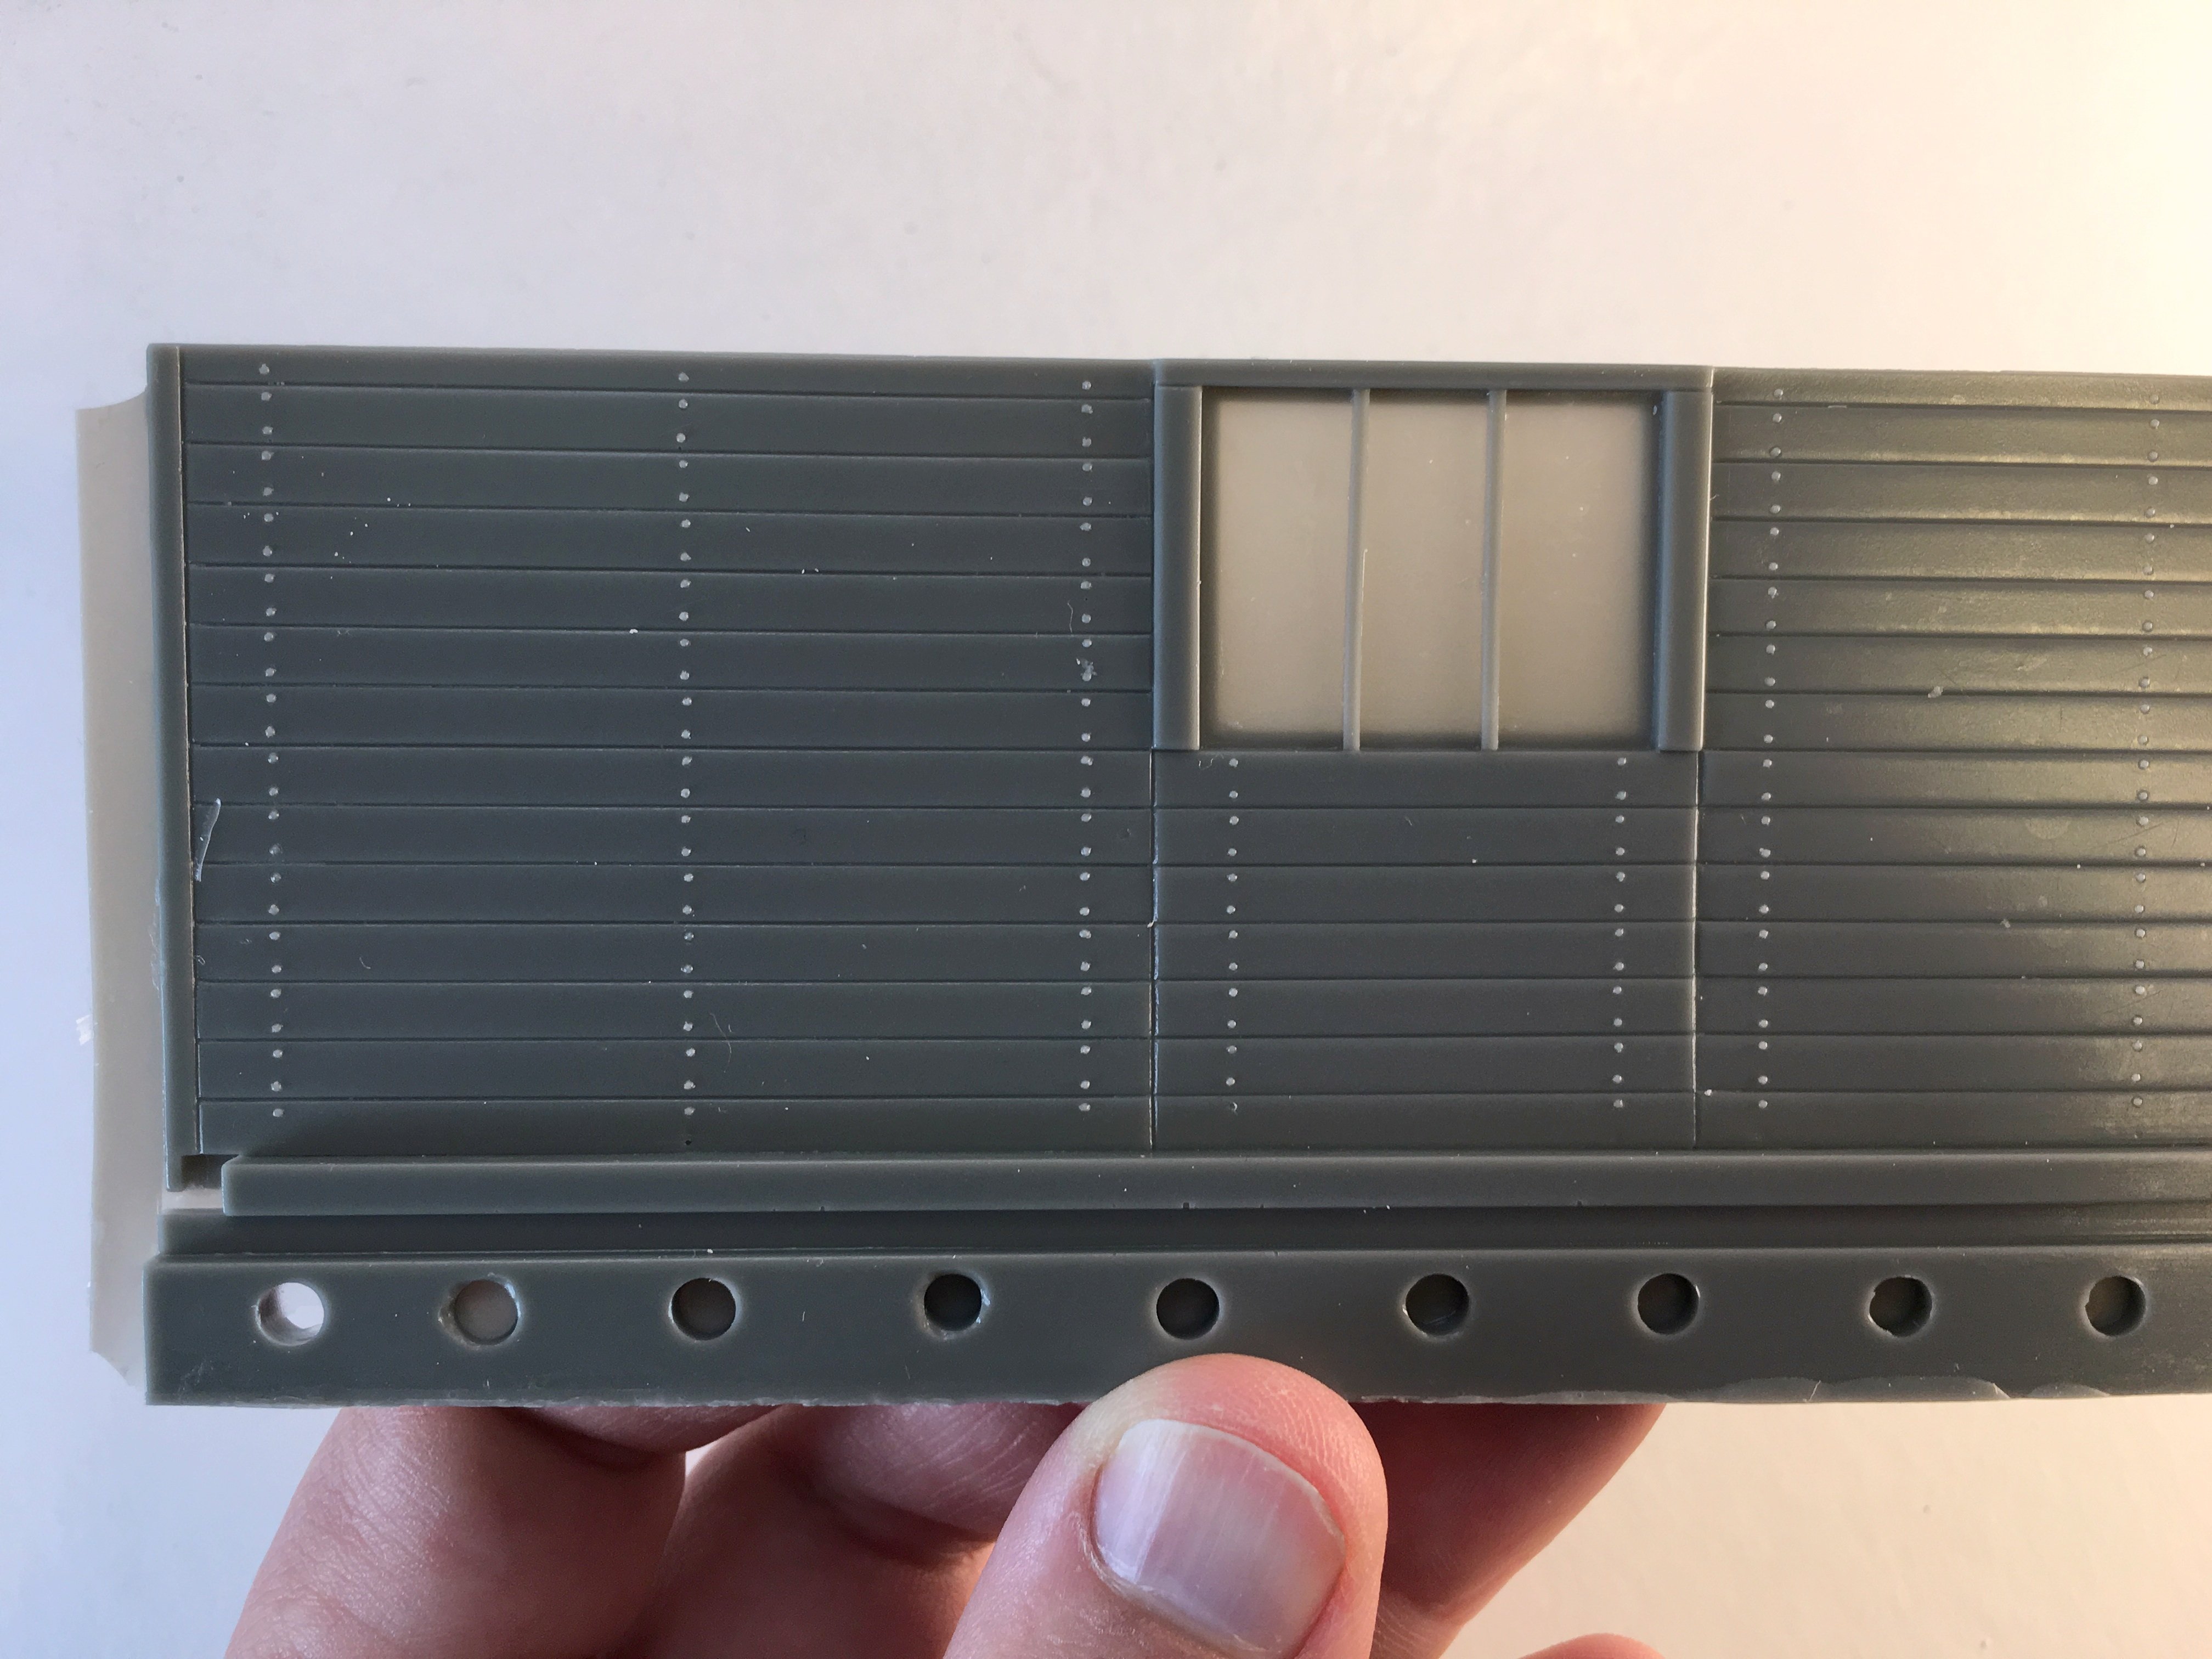
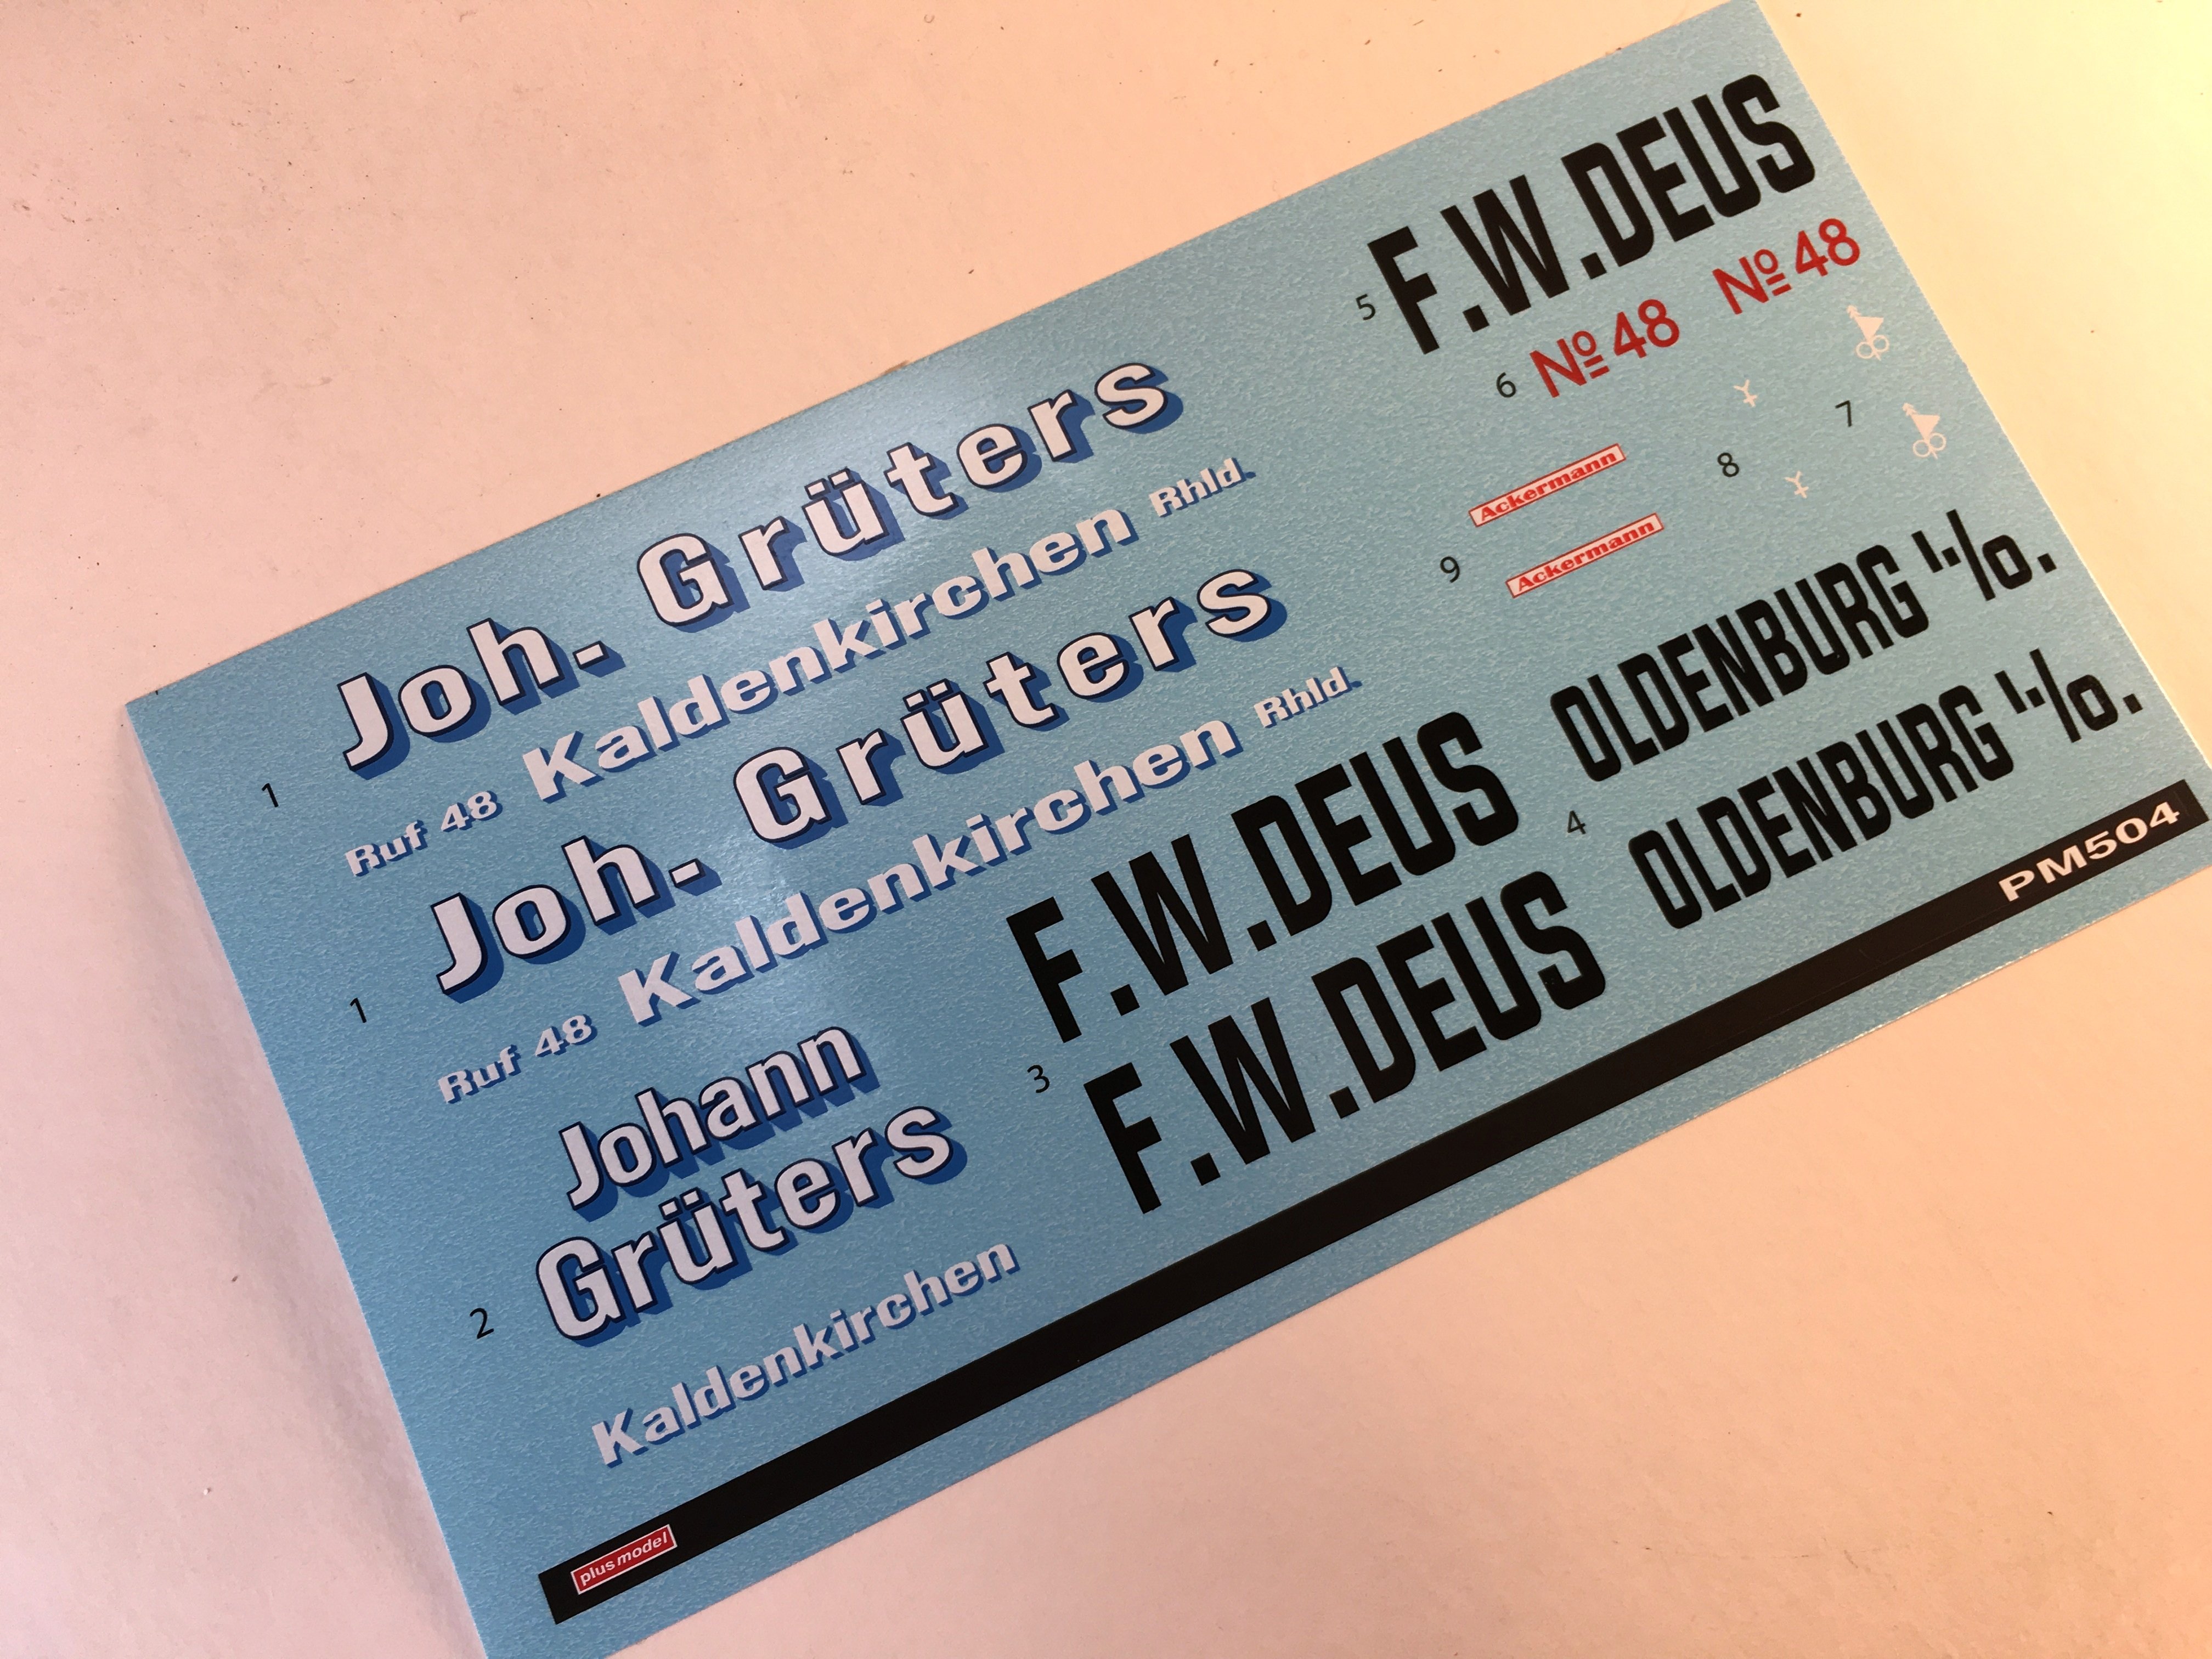
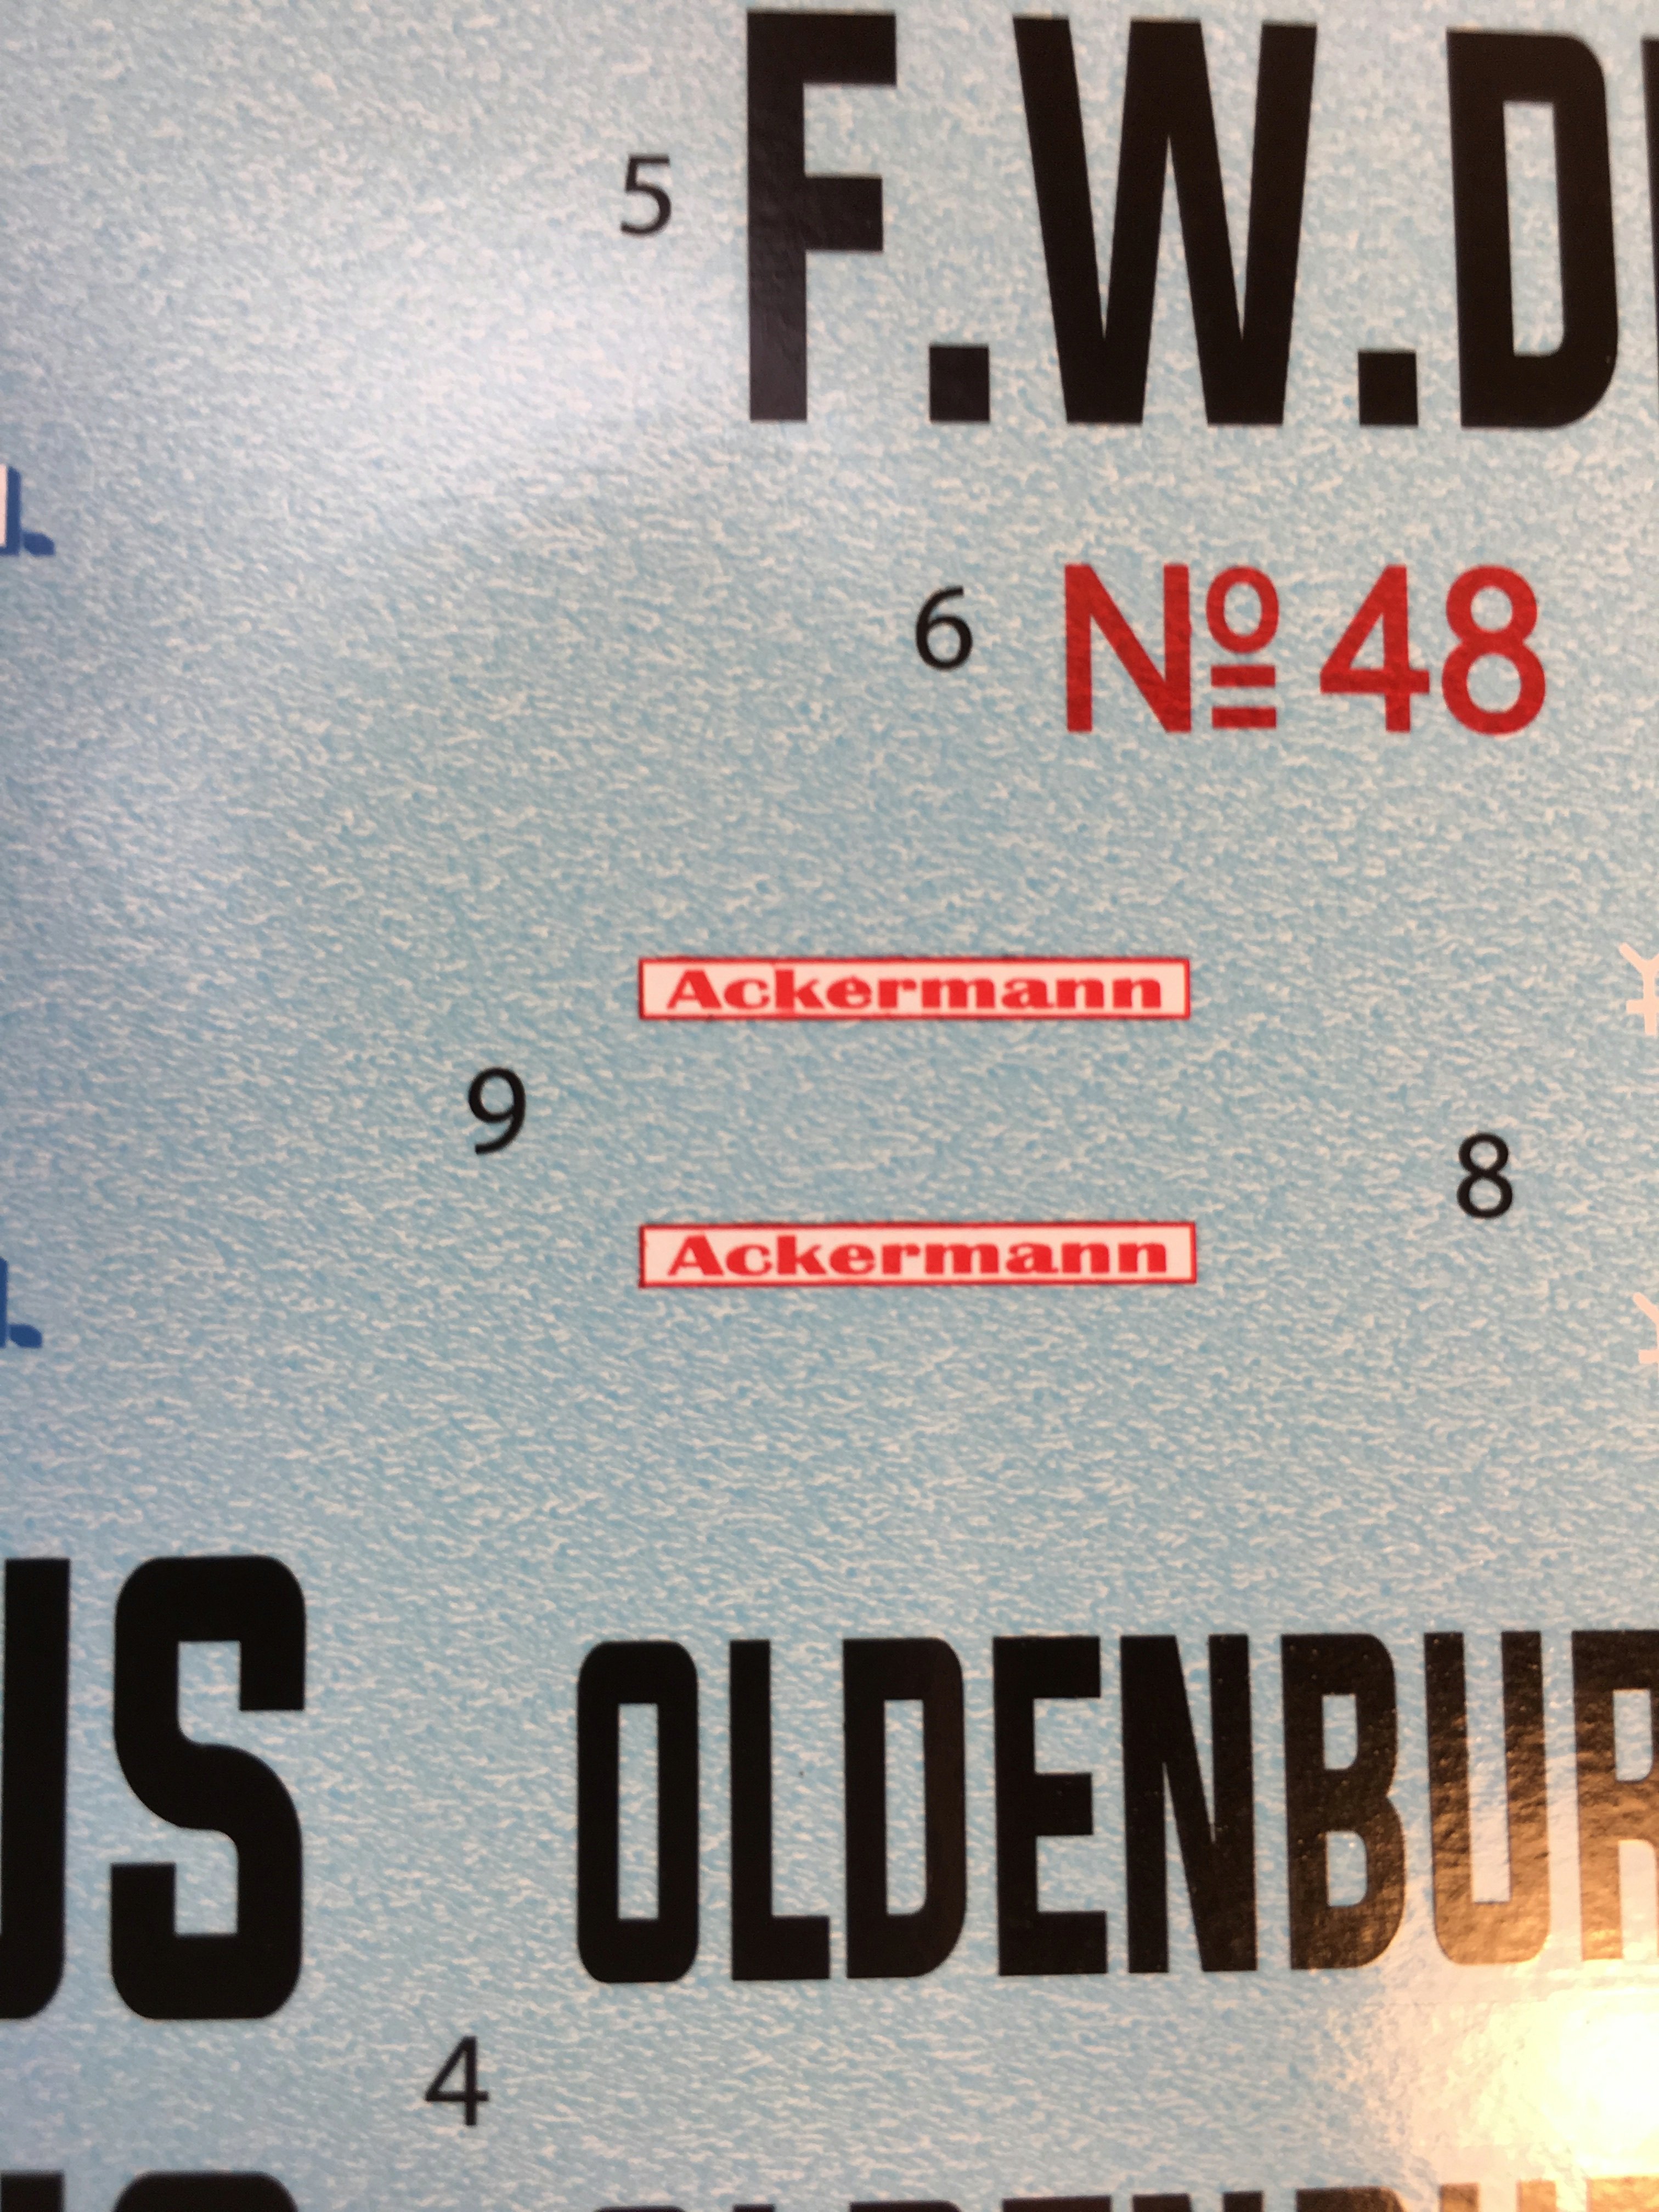
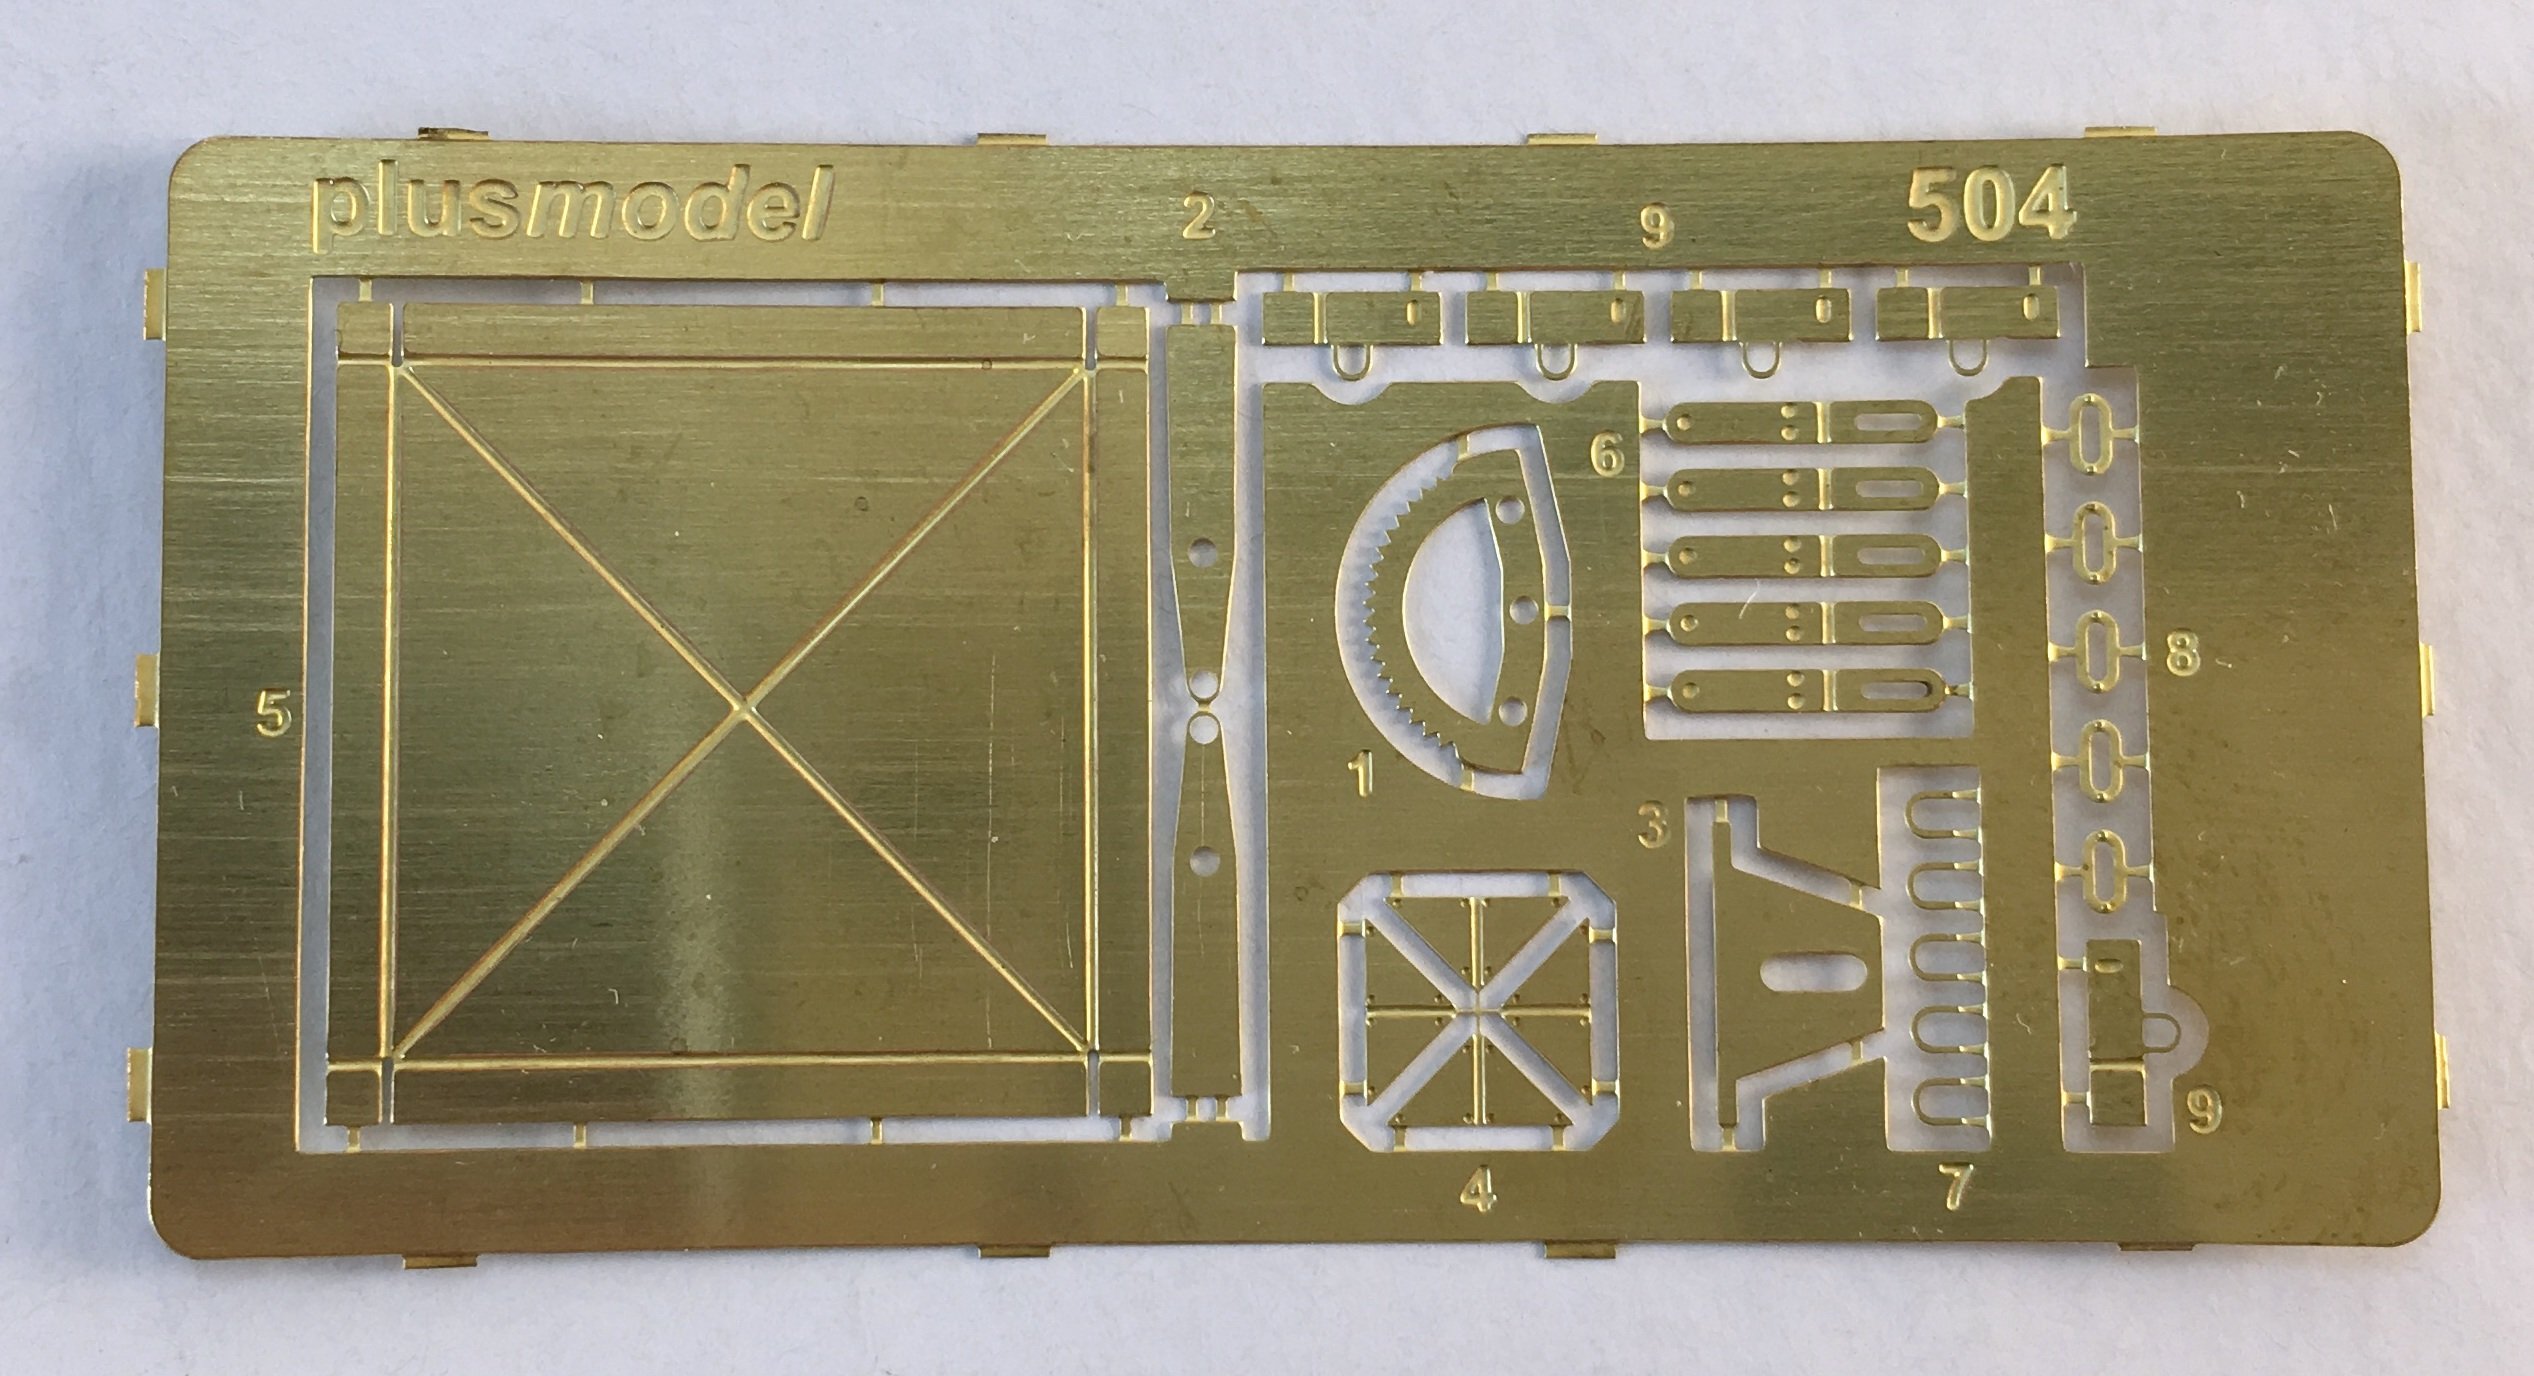
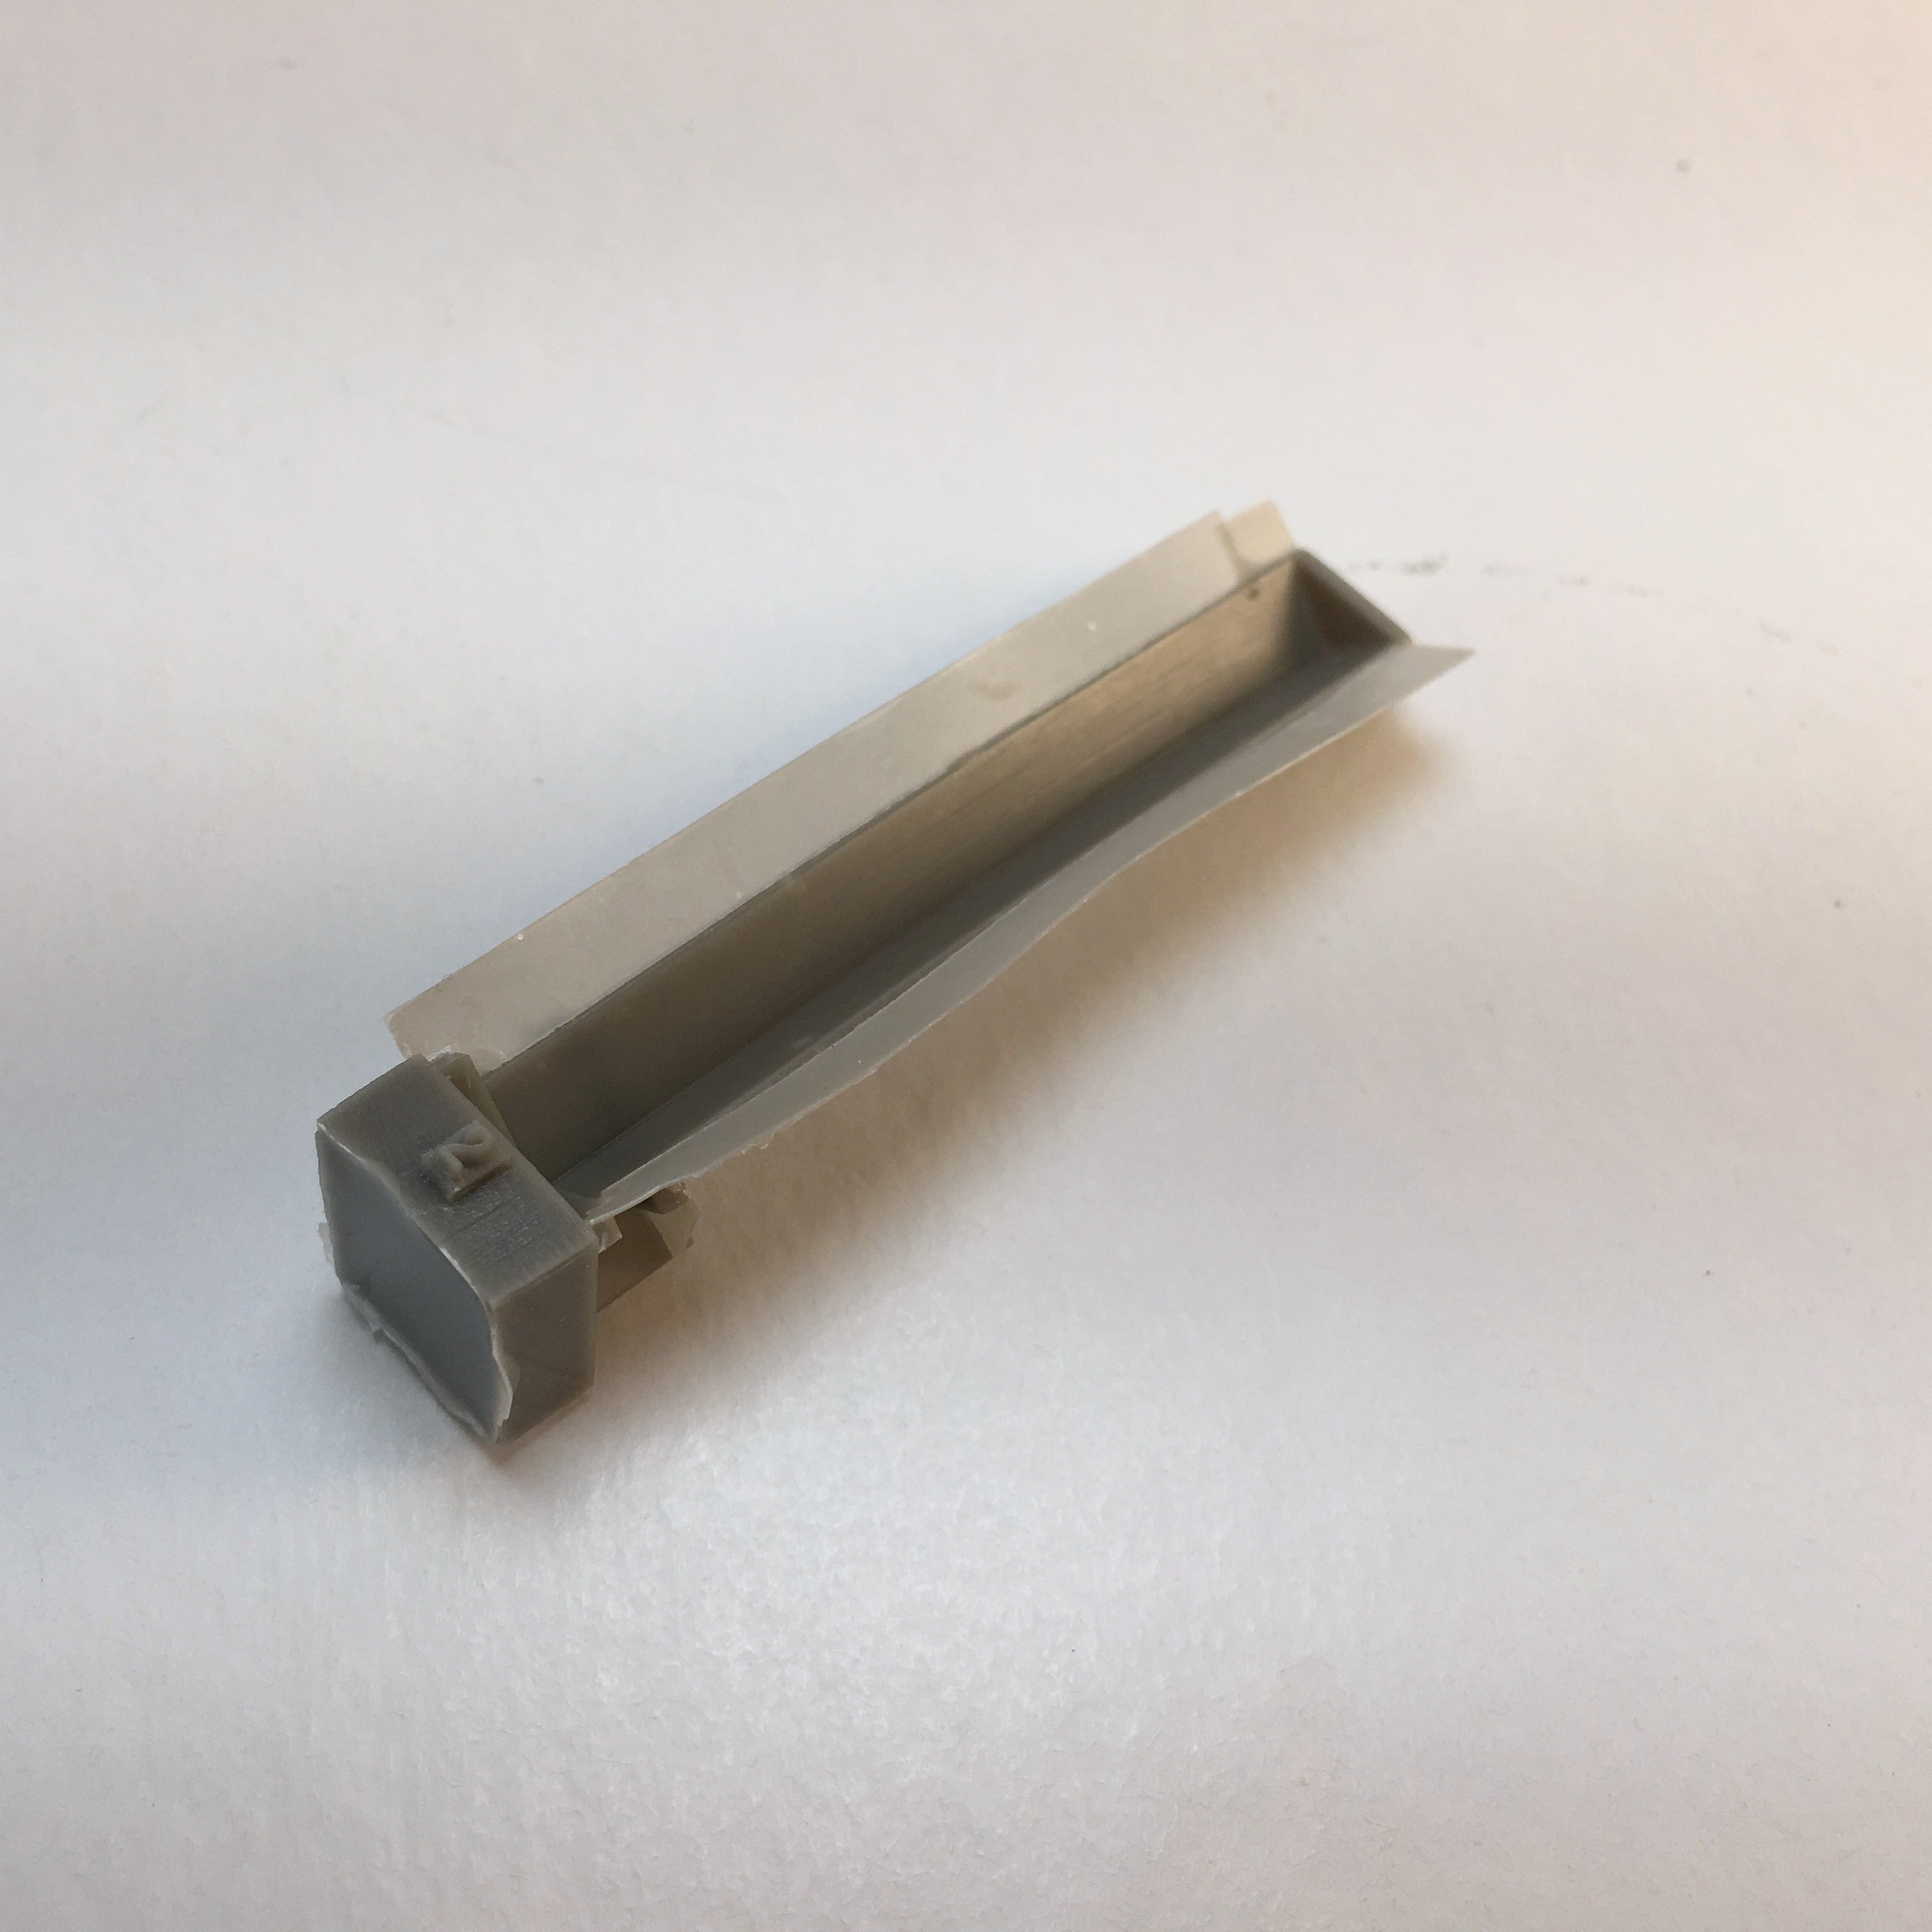
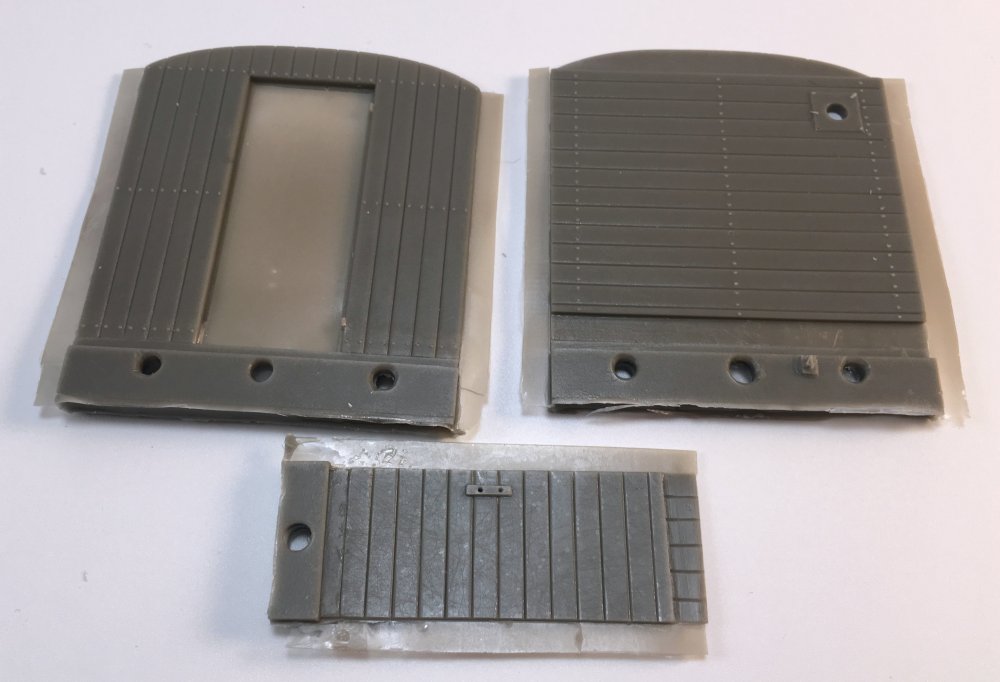
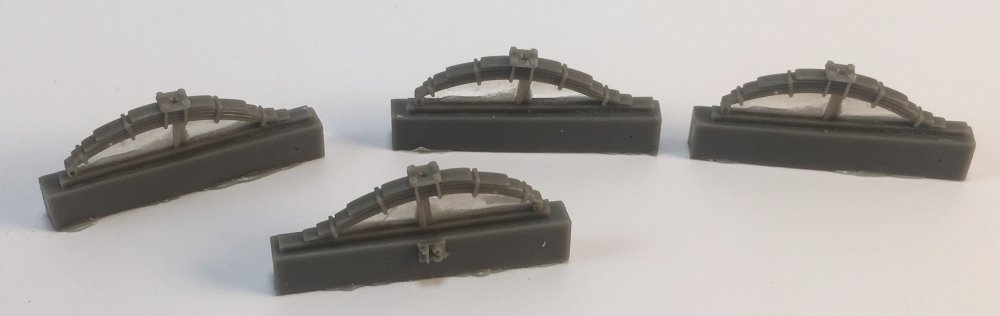
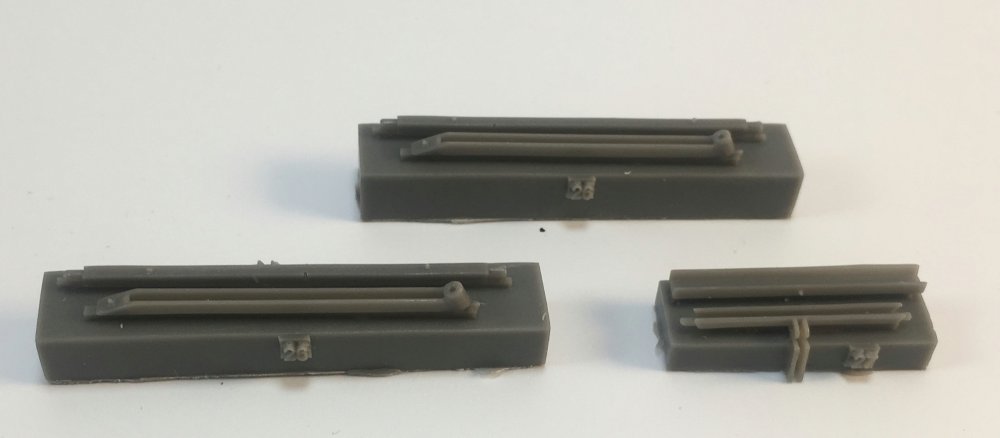
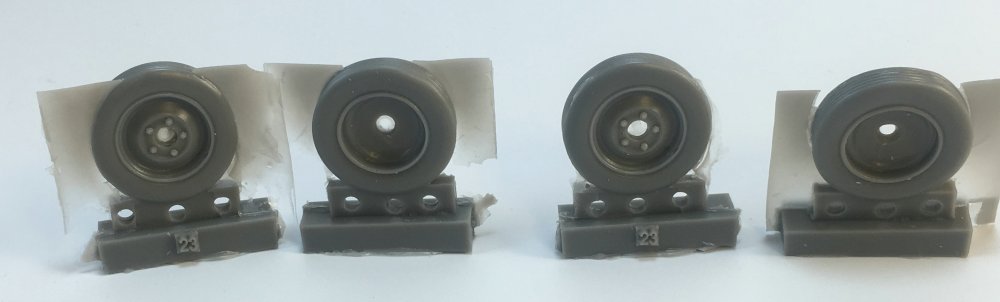
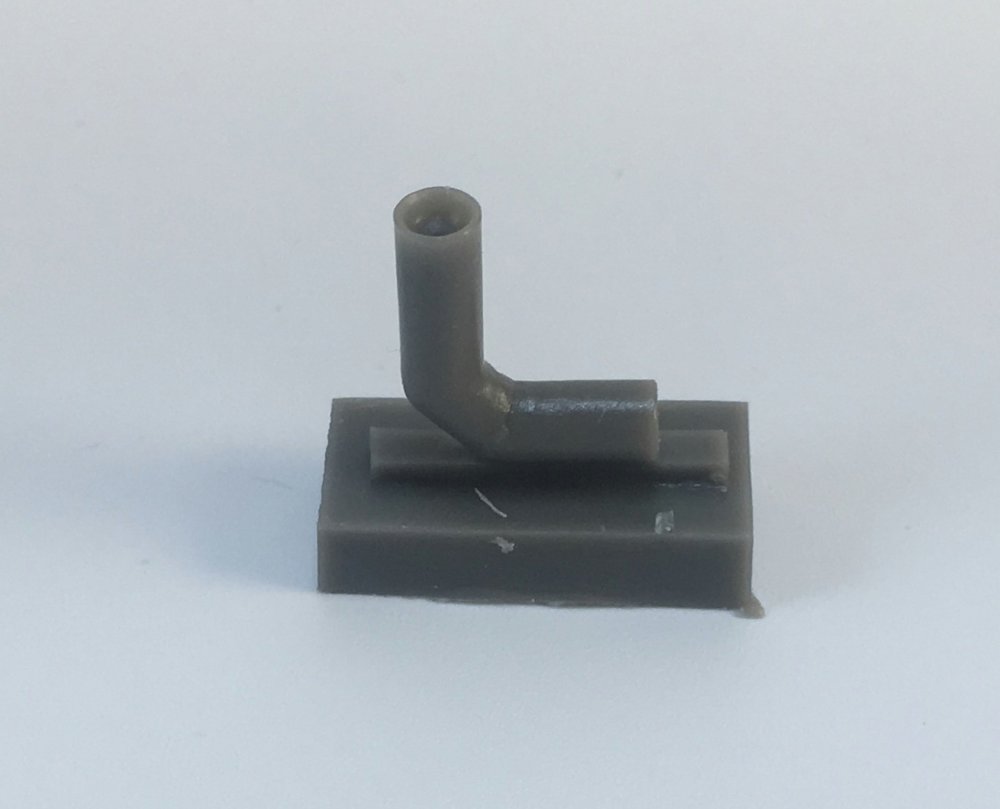
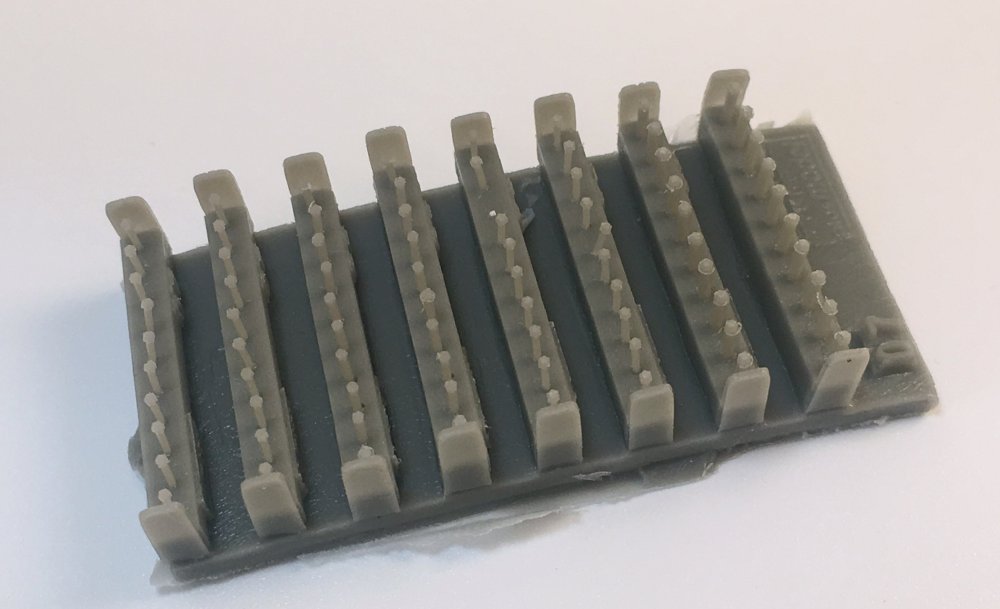
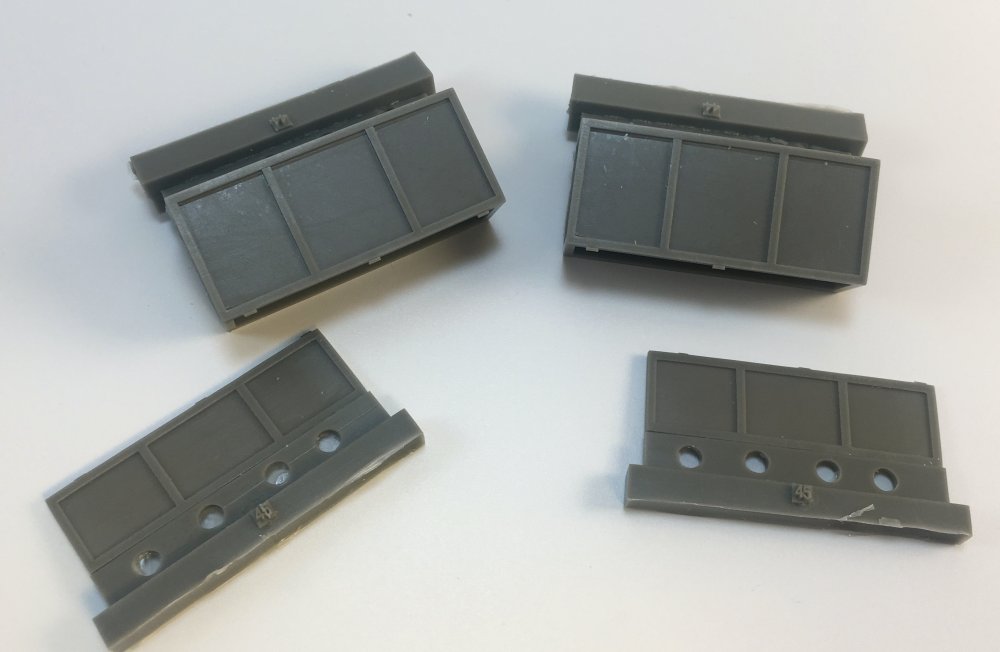
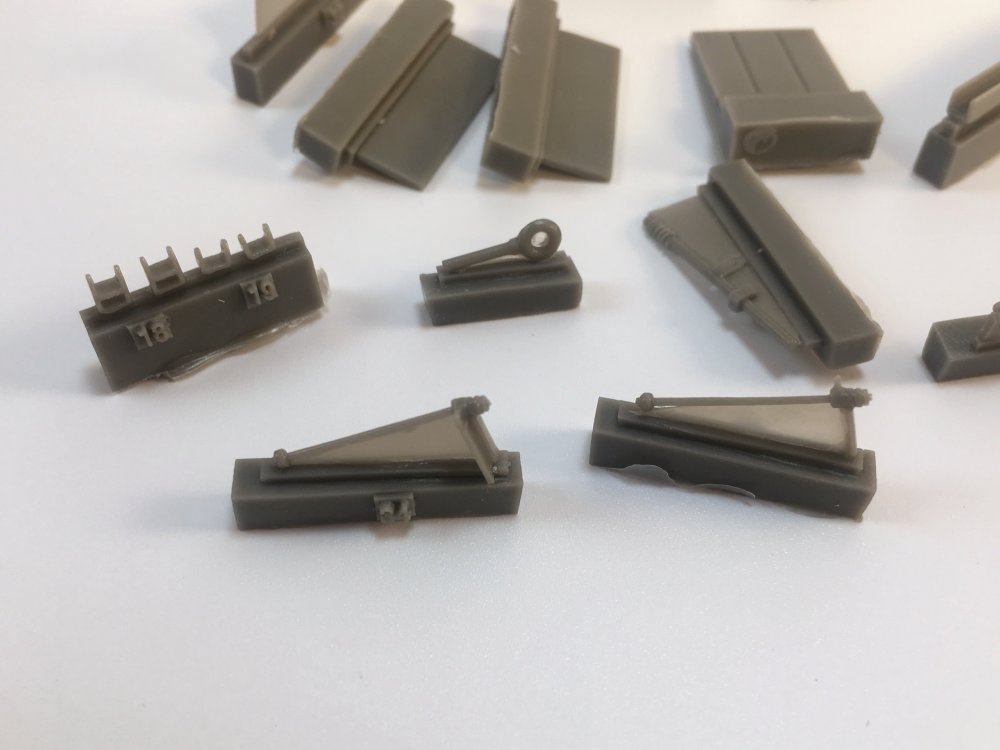
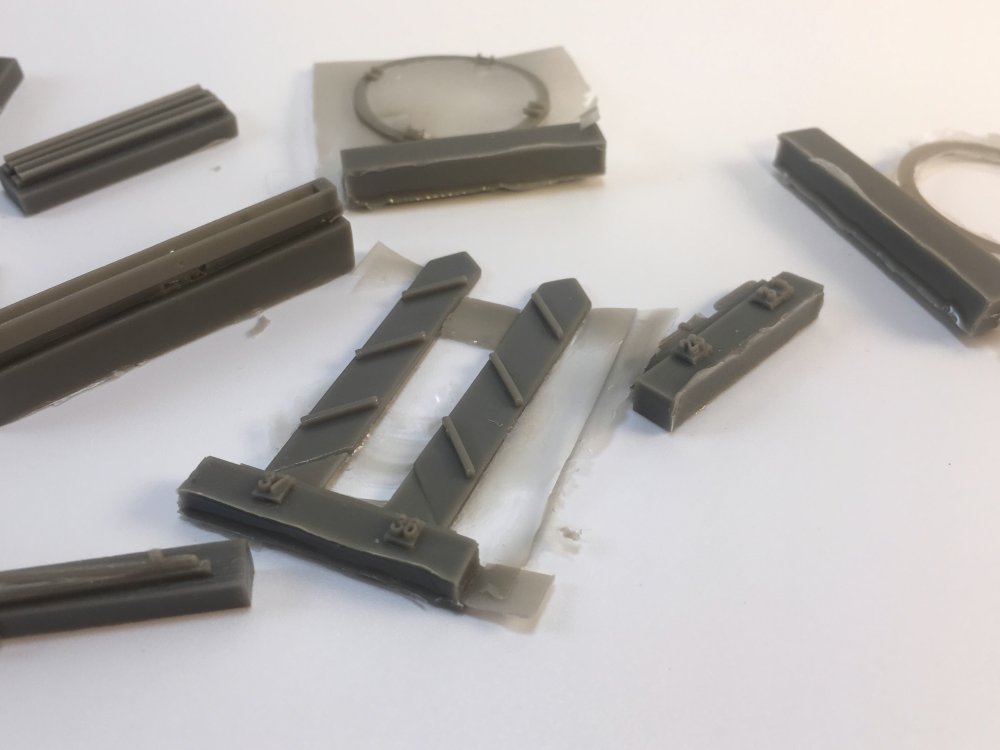
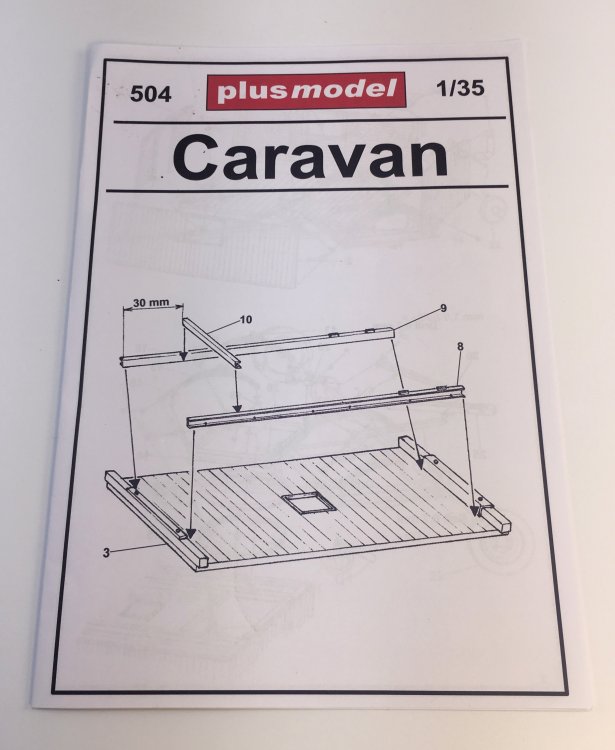
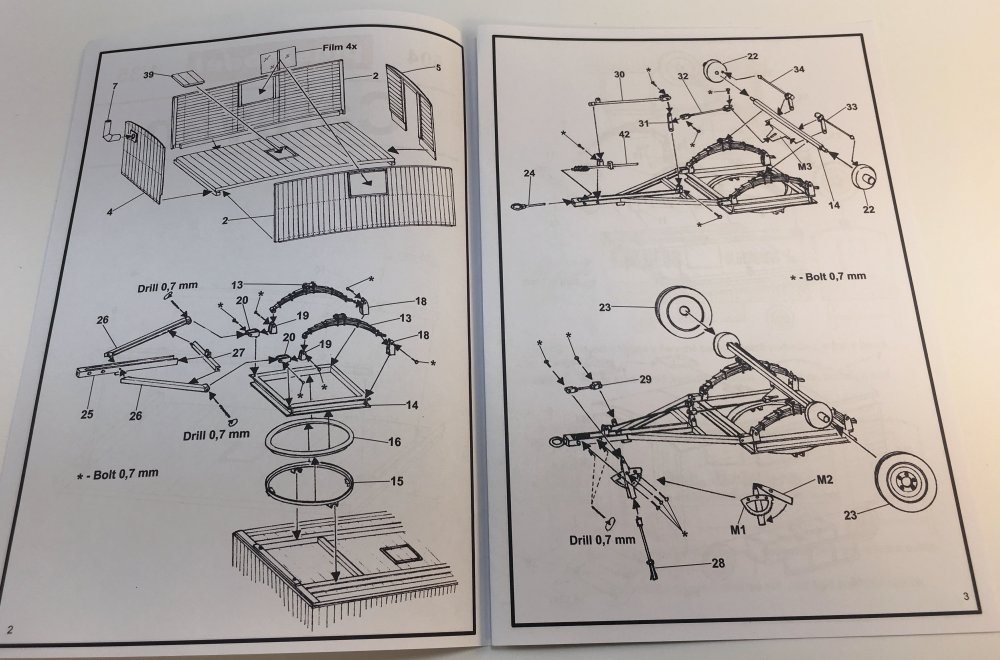
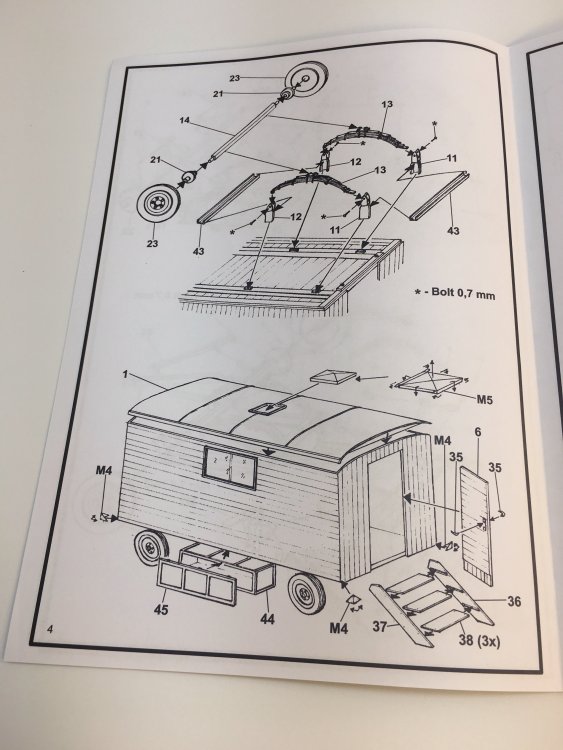
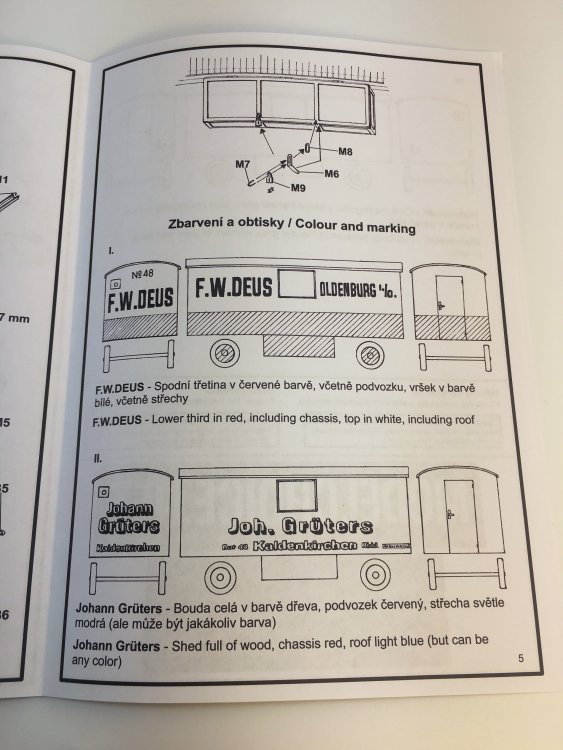
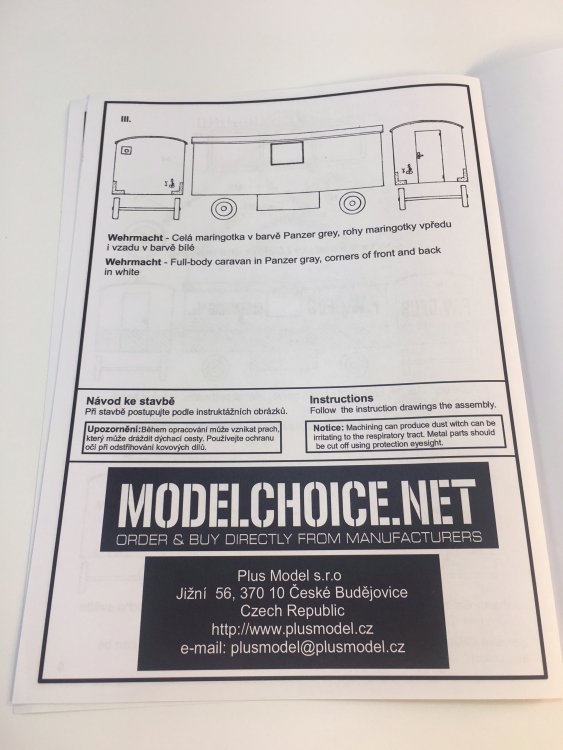
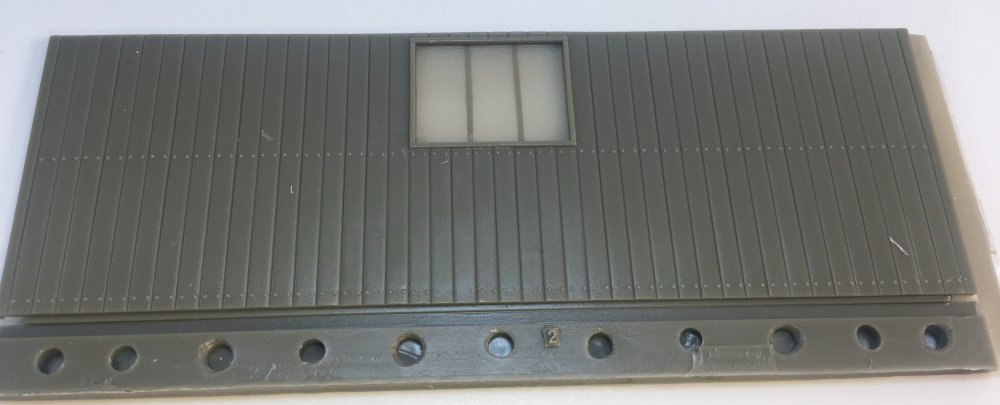
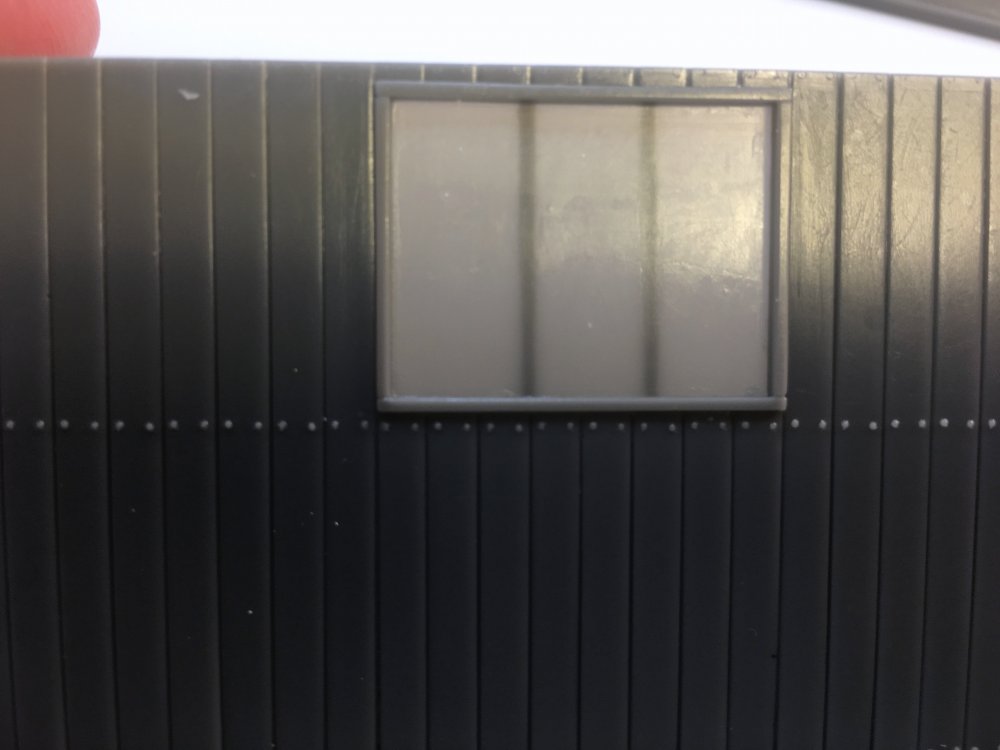
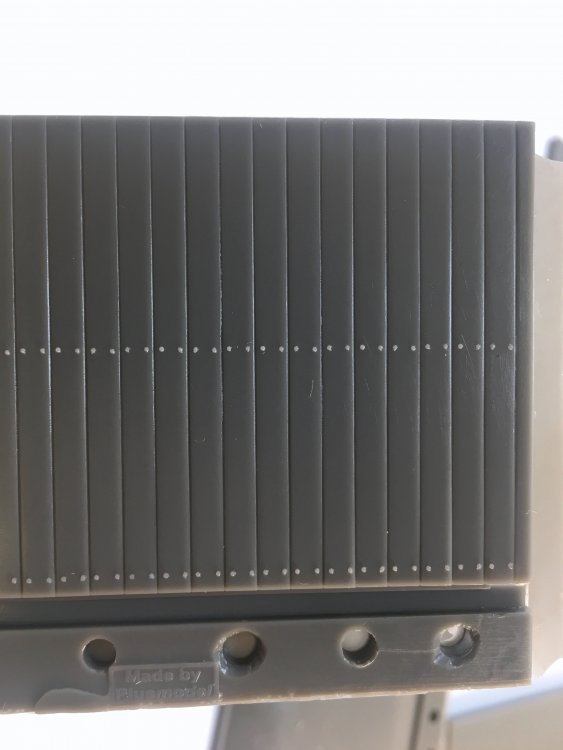
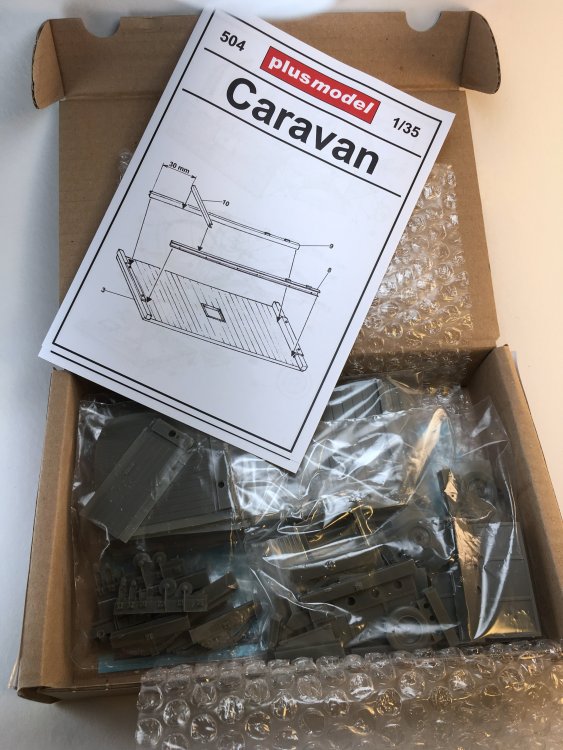
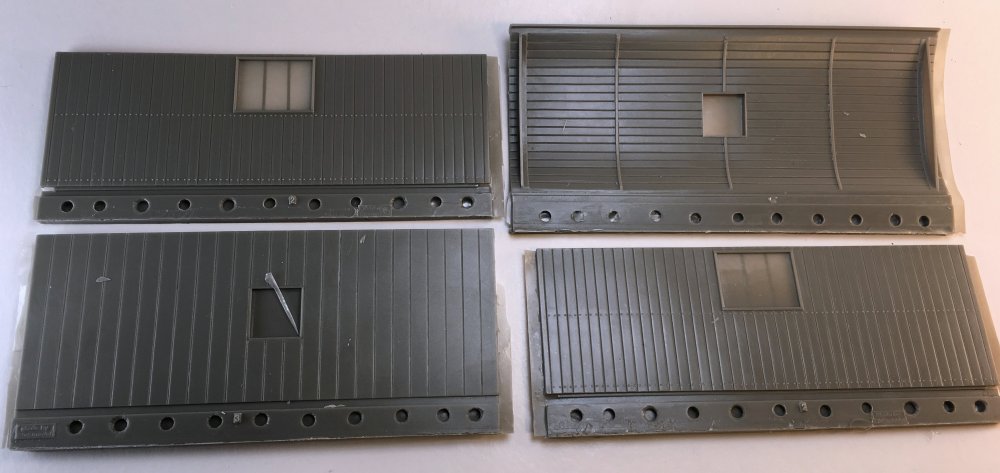
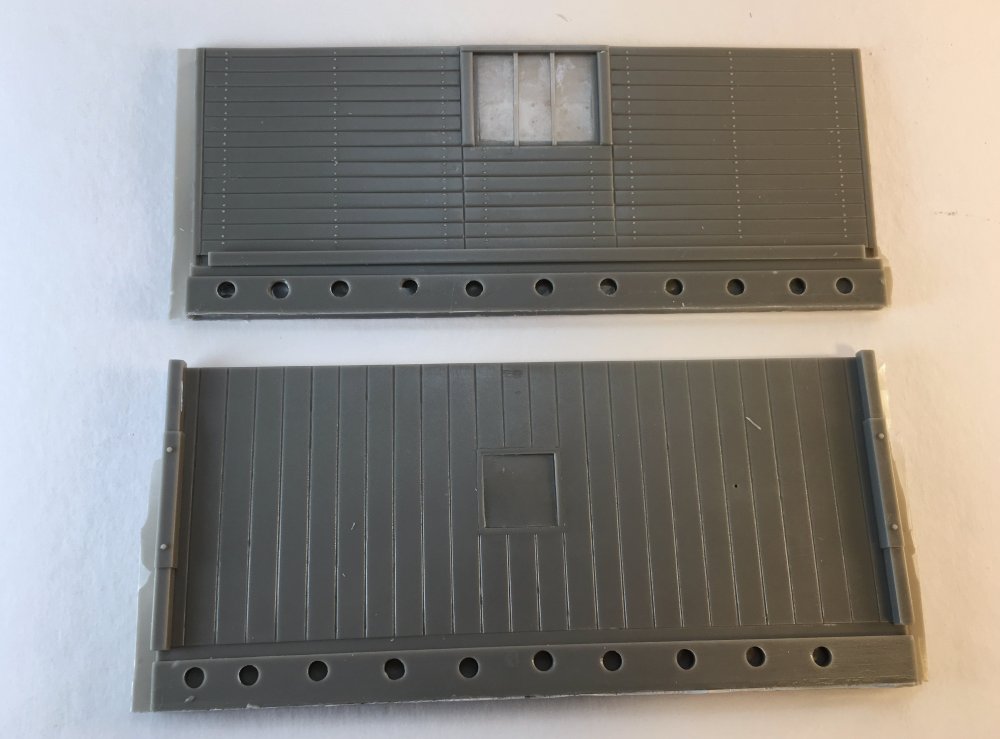
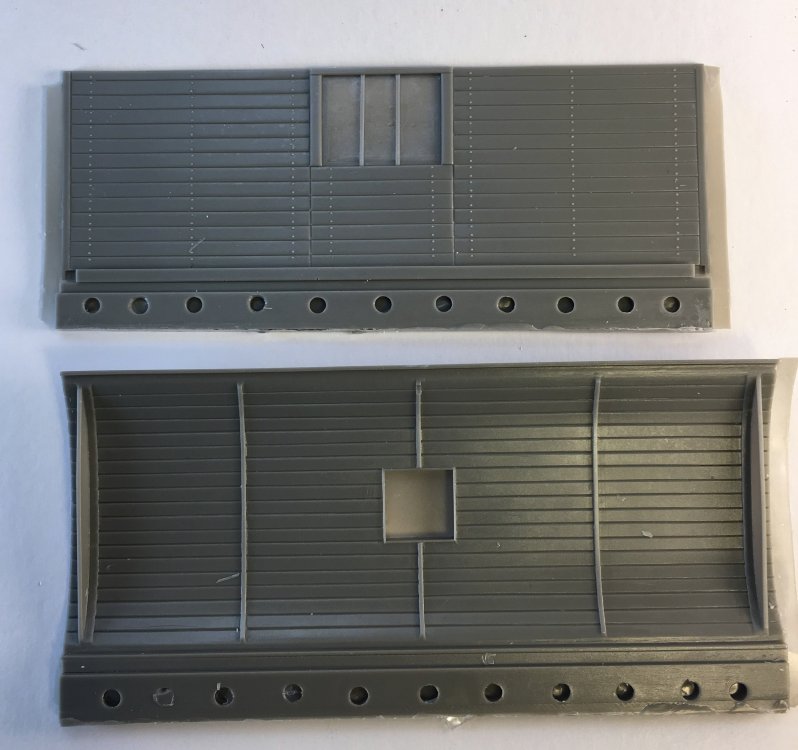
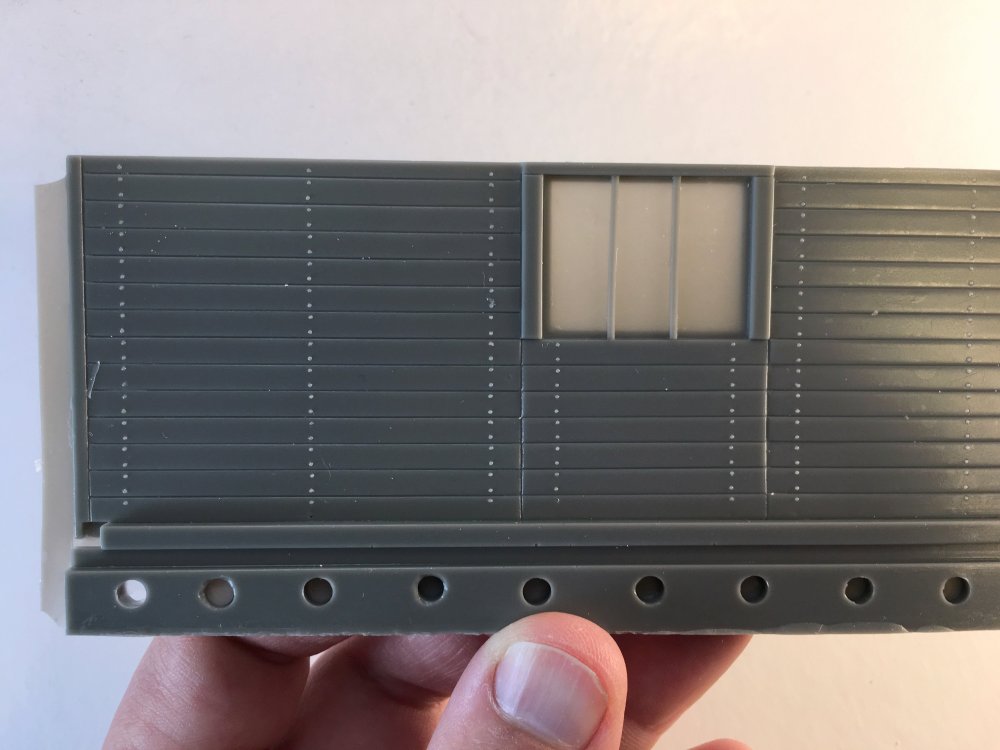
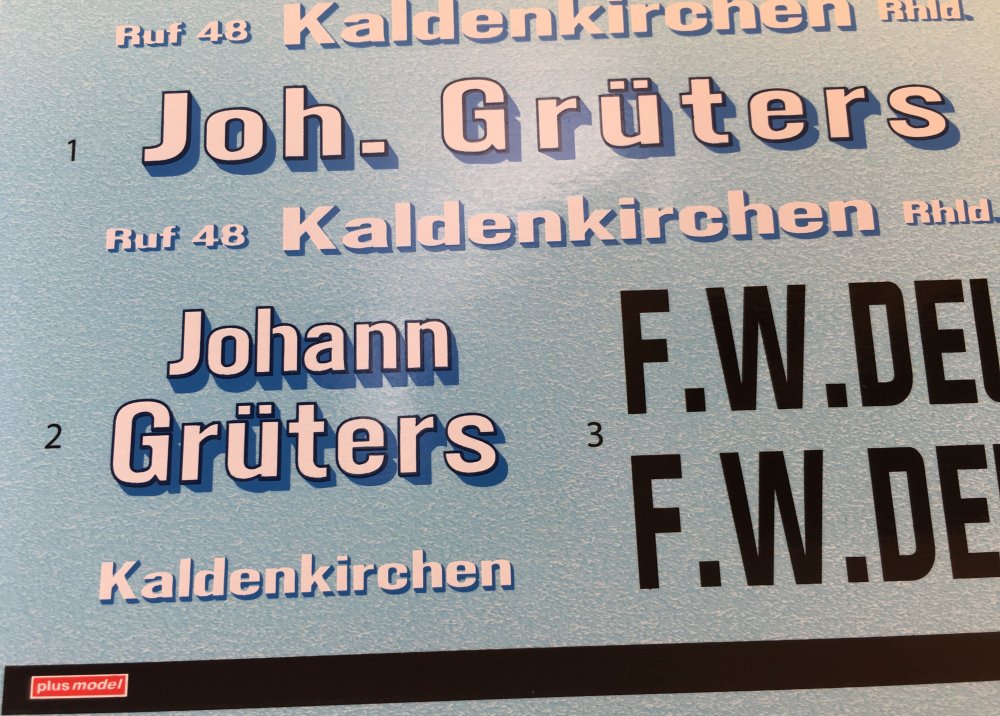
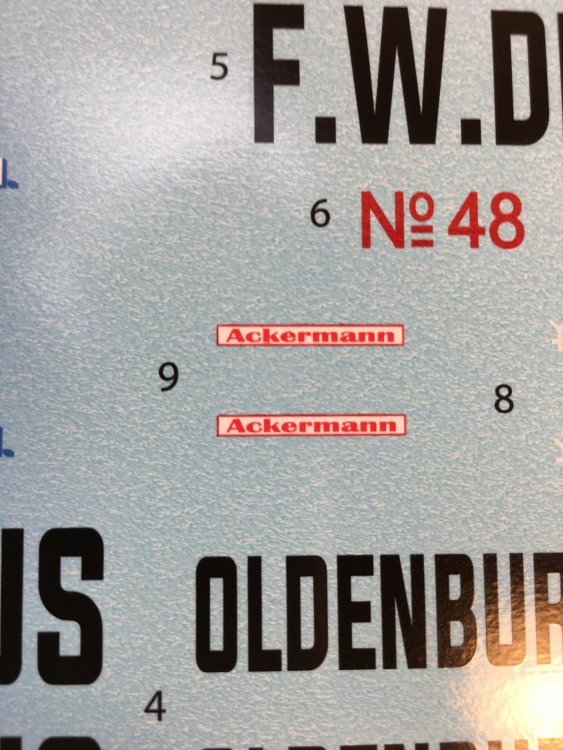
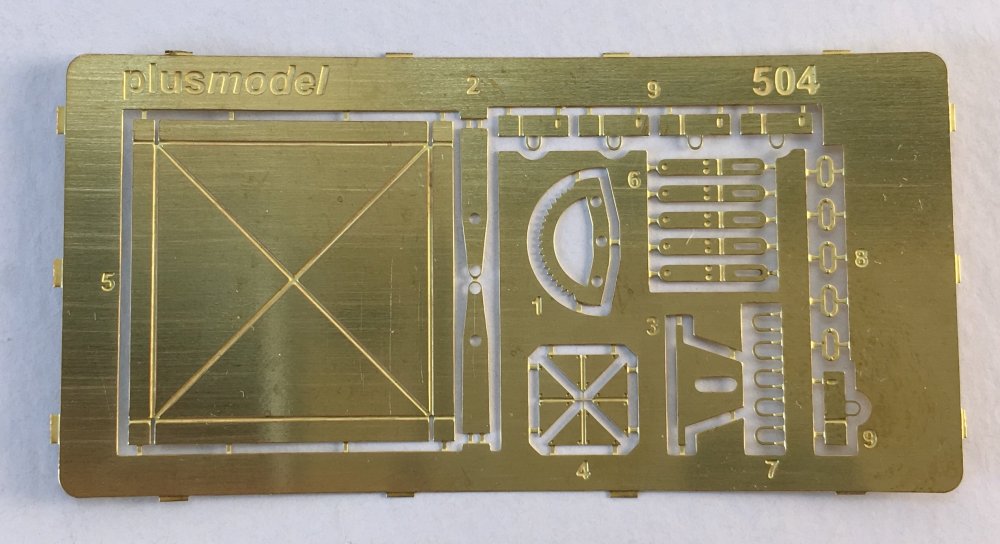
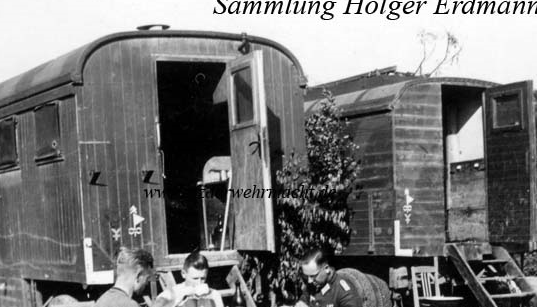
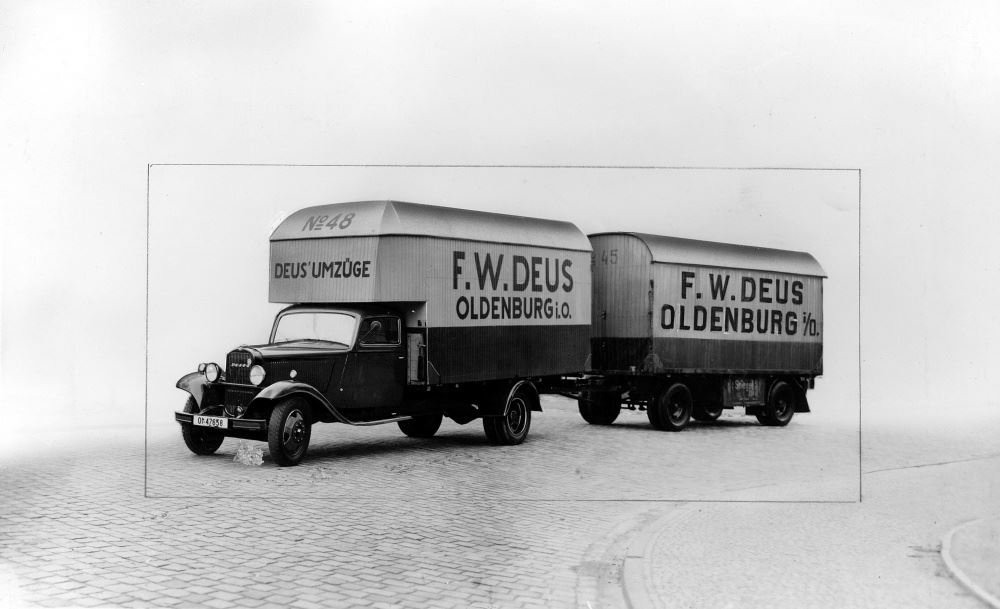
PLUSMODEL 1:35 Caravan (90 resin pieces and photo-etched set and one decals sheet to 3 version) Catalogue n.º 504 Price tag: 118,20$ (83€) – directly from Plusmodel. Plus Model was established in 1990 in the Czech Republic. Their product range is comprised primarily of 1/35th scale resin kits, conversion sets, and accessories which are vacuum cast from polyurathane plastic. For many years up to today that Plusmodel was creating in a clear and serene form, their own space in modeling, especially for 1/35 scale with fantastic resin kits and accessories for dioramas. If you want something different and it will stand out in your diorama or vignette, Plusmodel is the answer. Once again, now we do have an item that will stand for itself in any work, as a unique and original item: 1:35 Caravan. As far I could get some intro for this. I have failed miserably. I had no references for this caravan, in use in the Wehrmacht or those marking that I will show later on this review. I asked even to some expertise friends and still nothing. I did get some pictures, directly from Plusmodel, that kindly given permission to publish them here. So back to the box, you get a usual sturdy box in an open top. It`s very well packaged, with all the parts coming inside of a bubble bag. The dark gray resin is perfectly molded and you well may struggle to see bubbles in the 90 resin parts as they will see not a single one. Outstanding casting as it was expected by Plusmodel. All resin parts come in a plastic bag and in a smaller plastic bag, the decals and photo-etched. The box art is very attractive and is not more than the fully built and painted model which highlights the quality of Plusmodel. But let's get to it: All the resin pieces are easy to work out and quite simple to clean the flash and the resin blocks. All the undercarriage is very well detailed and presumably, it`s quite well reproduced. All the springs, axles, suspension system, tabs, etc is represented given the modeler the possibility to put in upside down or even turn over. Checking up the caravan itself, it’s constituted for 4 sturdy resin walls that don’t show with any distortion or bubbles which is quite outstanding considering the size of those parts. The surface detail is very good. The two end parts are in the same quality casting with a door in one of then, just you can just leave it open. The caravan as no interior but it as doors and windows so it’s up to the modeler to create the interior… some sleeping bed, war machinery (radios, shelves, chairs, etc). The wheels are well cast, with detail and no bubbles and raised details very well achieved. Plusmodel gives the modeler every detail possible in resin like a small chimney, bolts and side boxes. The small photo-etched sheet contains some small parts for the suspension and trailer itself and a skylight hatch. These small details (as hinges, handles and tubes) give a realistic touch to the model. The decal sheet has a good color registration, made usually by Plusmodel itself. The color and letters look fine by me but I have no reference at all of the options given. The civil options are totally unknown for me, but I googled “OldenBurg” or “F.W. DEUS” or “Joh. Grüters” and nothing, zero… Was quite frustrating… As I already said, the only pictures I have were, generously given by Plusmodel. The instructions are quite noticeable, with simple comprehension without any difficulty to the modeler with the parts numbers very well identified and the place where to, being quite easy to follow to the intermediate modeler. Conclusion: This caravan is possible to be almost every theather in WWII… I confess that I didn’t found anything about it on the internet, really nothing, but the pictures given by Plusmodel are just great. In this kind of subjects, more obscure ones, I think Plusmodel could put some history in the instruction and even a link to some pictures where they had their inspiration. As for the product, the quality is of the highest level, with castings at most higher standard and detail is one of the best in modeling world, as resin concern. Very Highly recommended. With my sincere thanks to Plusmodel for this review sample. To purchase directly, click this link. Francisco Guedes


-
Hobby Boss 1/32 Northop P-61
Fran replied to Nat Wale Plaia's topic in LSM 1/35 and Larger Work In Progress
Great start on that cockpit!! Love it! -
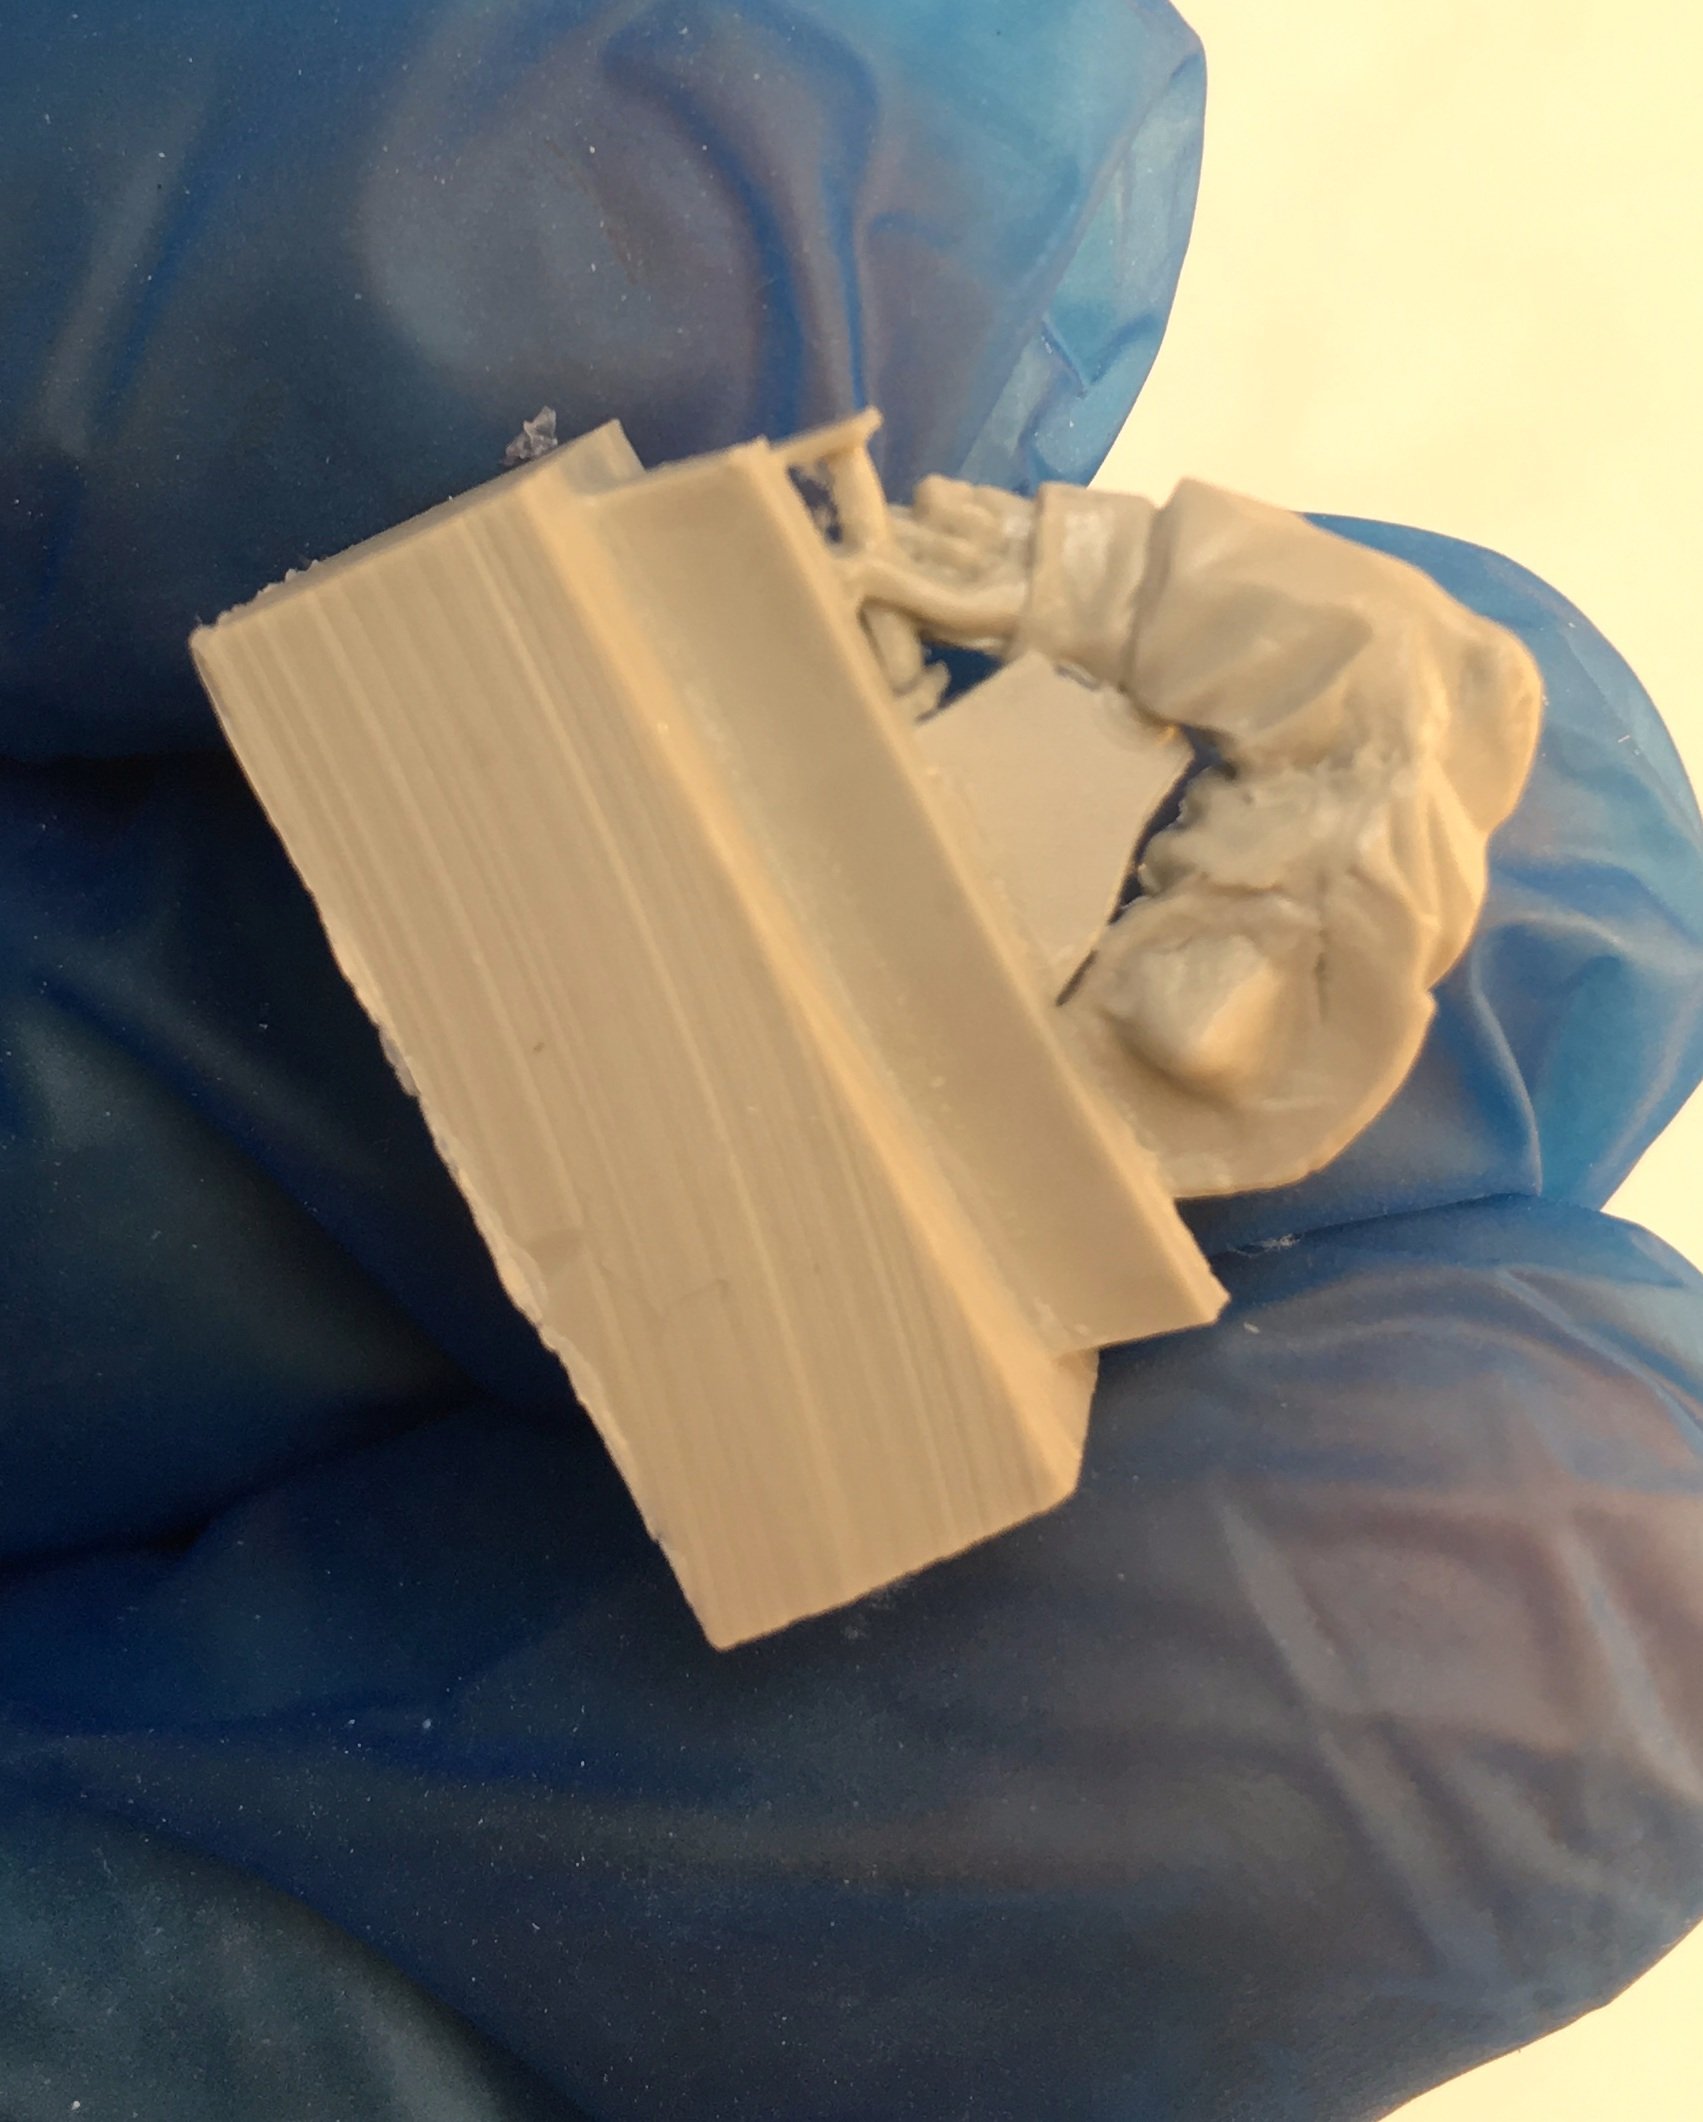
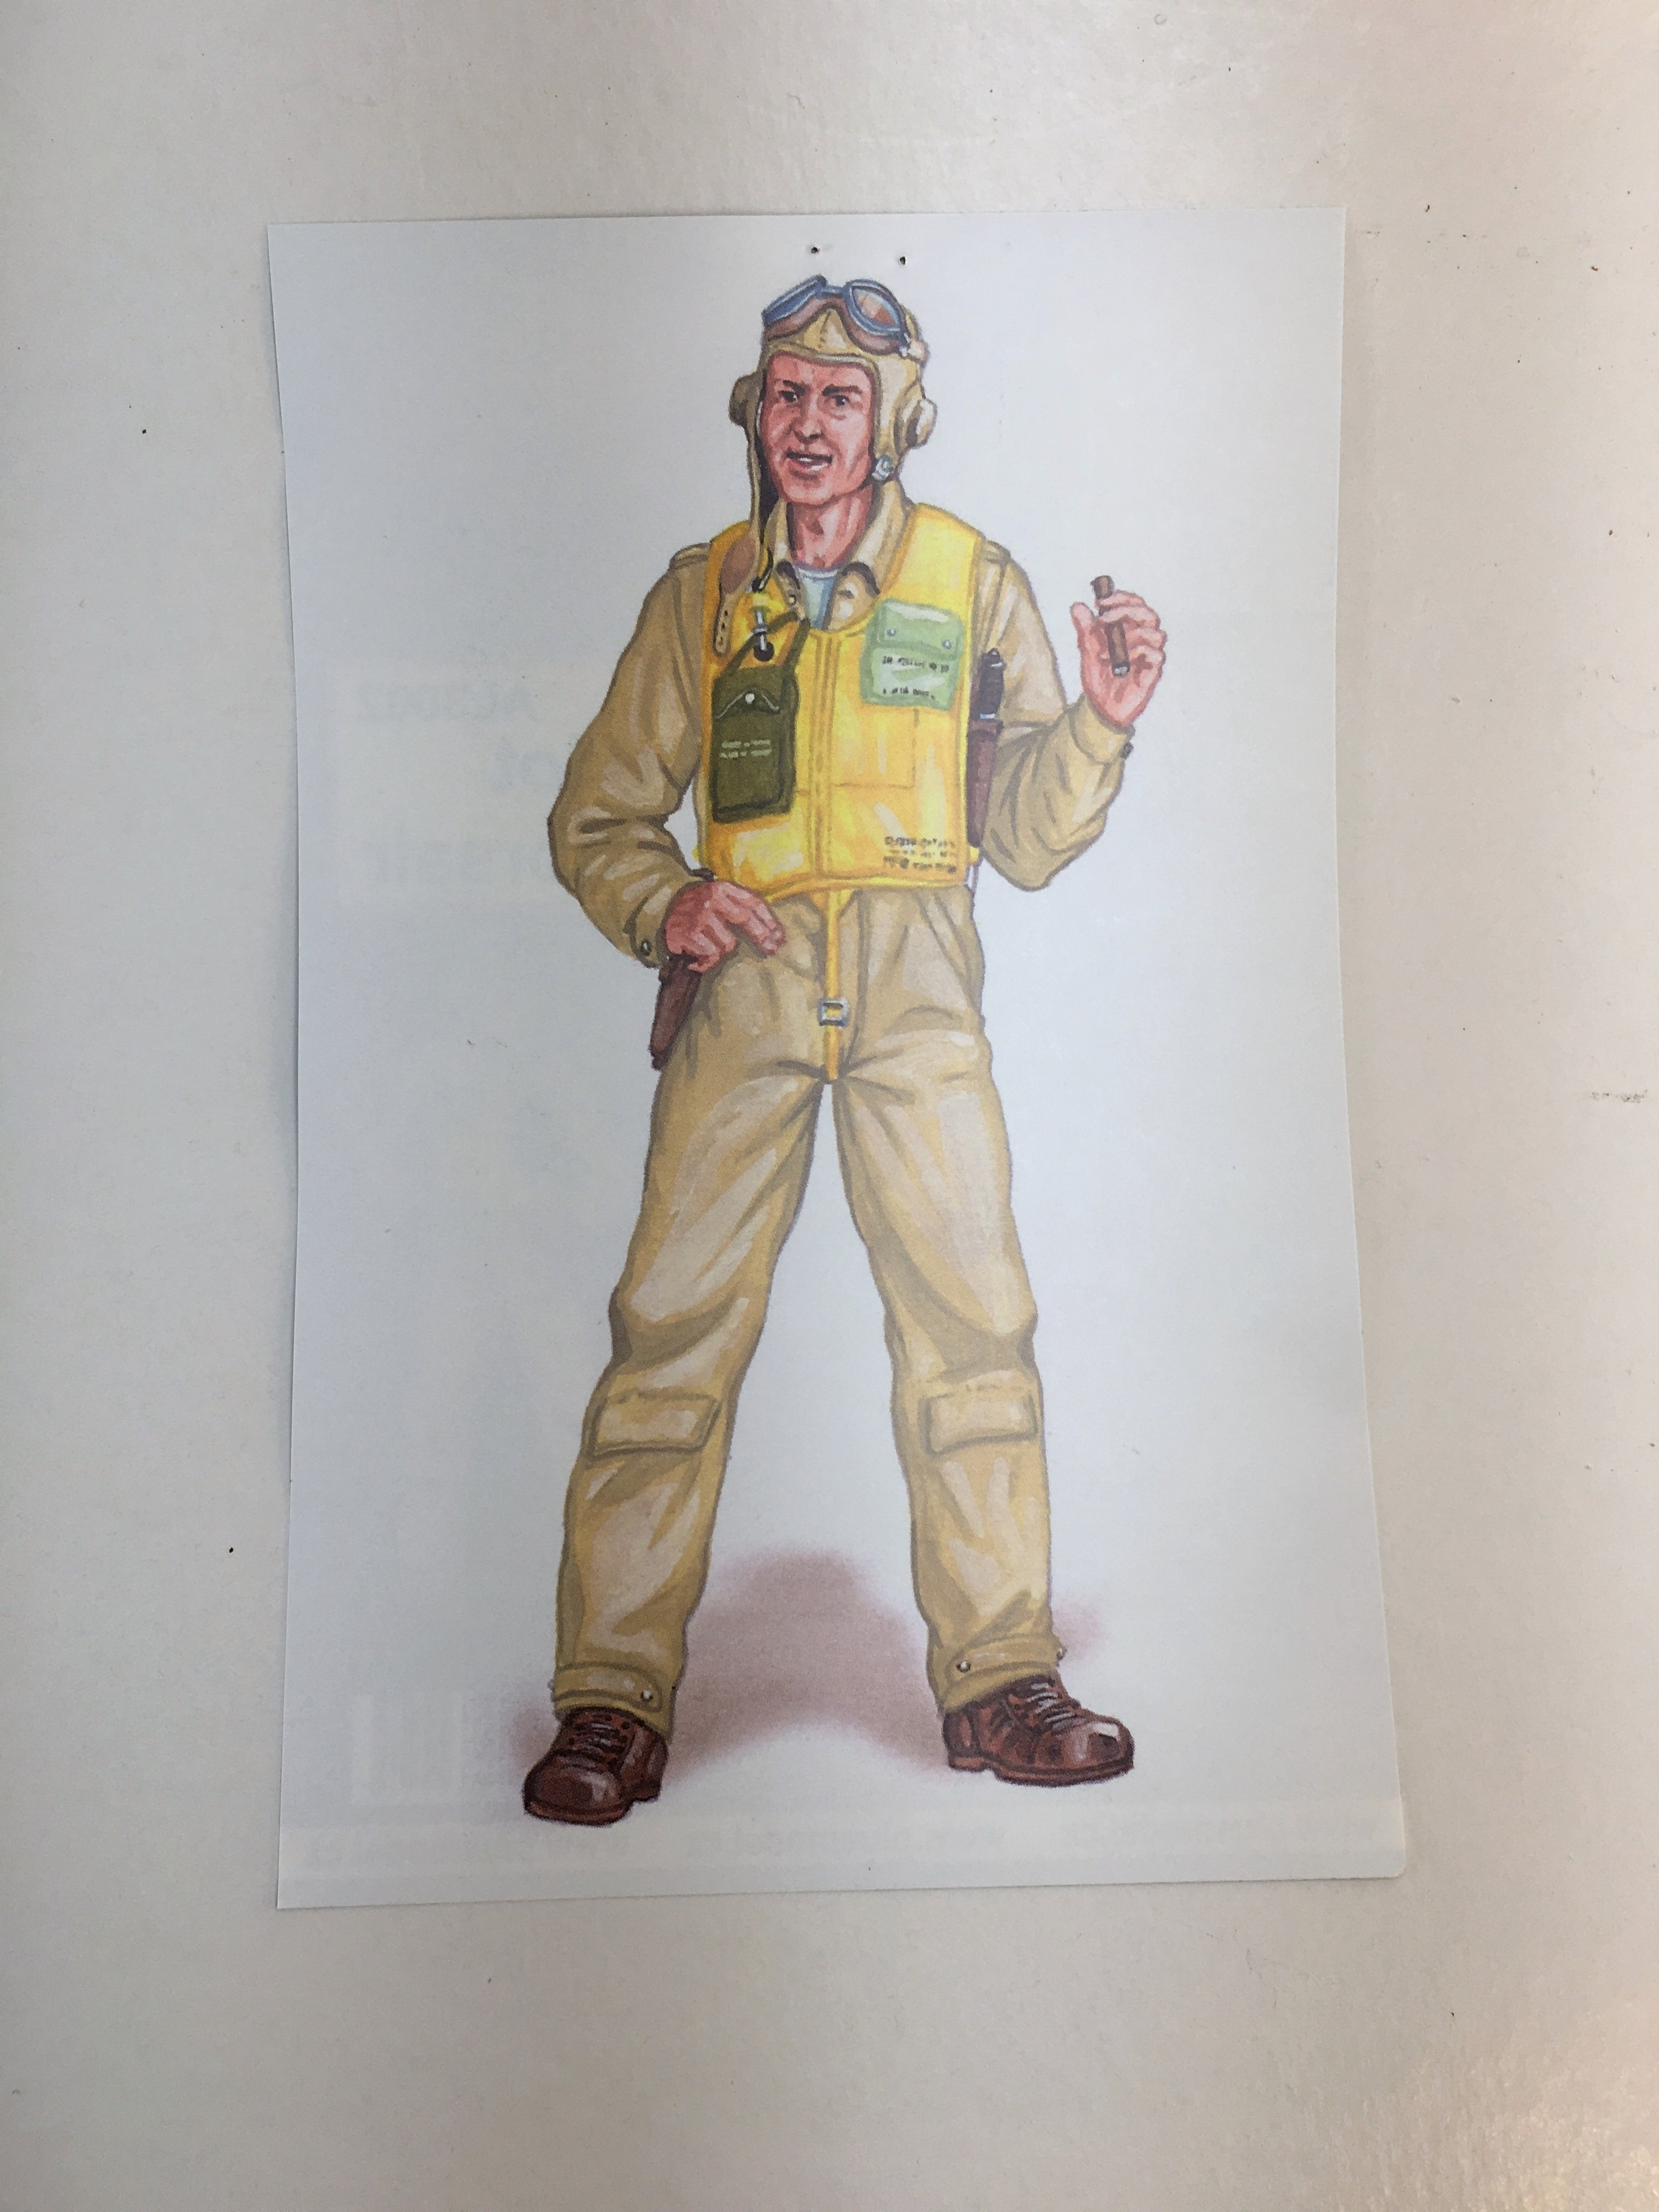
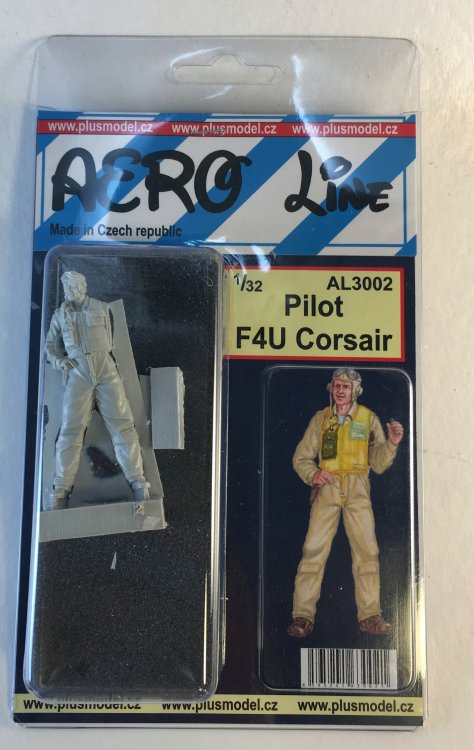
PLUSMODEL AERO line 1:32 F4U Corsair Pilot Catalogue number - AL3002 Price tag: $23,90/€16,80 Available from Plusmodel for the prices indicated below on the text Plus Model was established in 1990 in the Czech Republic. Their product range is comprised primarily of 1/35th scale resin kits, conversion sets, and accessories which are vacuum cast from polyurathane plastic (Plusmodel web introduction) A couple years now, Plusmodel was a new line called “AeroLine” with figures, details sets and others accessories for aircrafts. Let´s see the box. The clear plastic box, shows what you get, one resin piece containing a 1:32 representation of a WW2 Corsair pilot in a relax pose, retaining one hand on the hip and another one nice a big cigar. He`s celebrating another victory. This figure comes in two pieces with the left arm (the one with the cigar) as part n.º 2. All the rest of the boy is cast in a single piece, with sharp details in the cloths. The detail is really awesome and just continues to prove that Plusmodel knows what is doing. The sculptor did a hell of job and Plusmodel did a fantastic casting of it. The figure of the pilot has a good attitude and a great facial expression. It is a figure with great detail in clothes and face. Despite no painting guide is supplied, the label’s back is printed with a large full color draw of the figure. Lots of inspiration on this subject through a quick internet search using your favorite search engine. However, understand that the indication of colors is actually unnecessary because of the dozens of good references in countless books and on the internet. Undoubtedly, a great figure with a great style that will look great next to a 1:32 F4U Corsair. Conclusion: The figure is spectacular with a very cool look and full and genuine details making it a must have to any 1:32 WWII Corsair out there! A simple base with the bird and pilot is always a perfect duet. Very Highly recommended. Our thanks to Plusmodel for the review samples and all the support given. To purchase this directly, click THIS link


-
wow!!! I totally miss it!
-
I´m sorry for the missing pictures but is a Photobucket consequence! However if you need any picture in particular just let me know. Fran
-
Mike mate, is 1:72 not the new one from Hobbyboss!
-
Ohhh... some many plans, so little time. I would like to finish some SOD: 1 - WnW Fokker DVII (alb) 2 - WnW Junkers J.I 3 - Brach Model Renault R40 4 - Meng Tortoise and new ones: 5 - Hasegawa B-24D 6 - WnW Halberstadt ClII Early 7 - WnW AEG Late Type I only can hope....
-
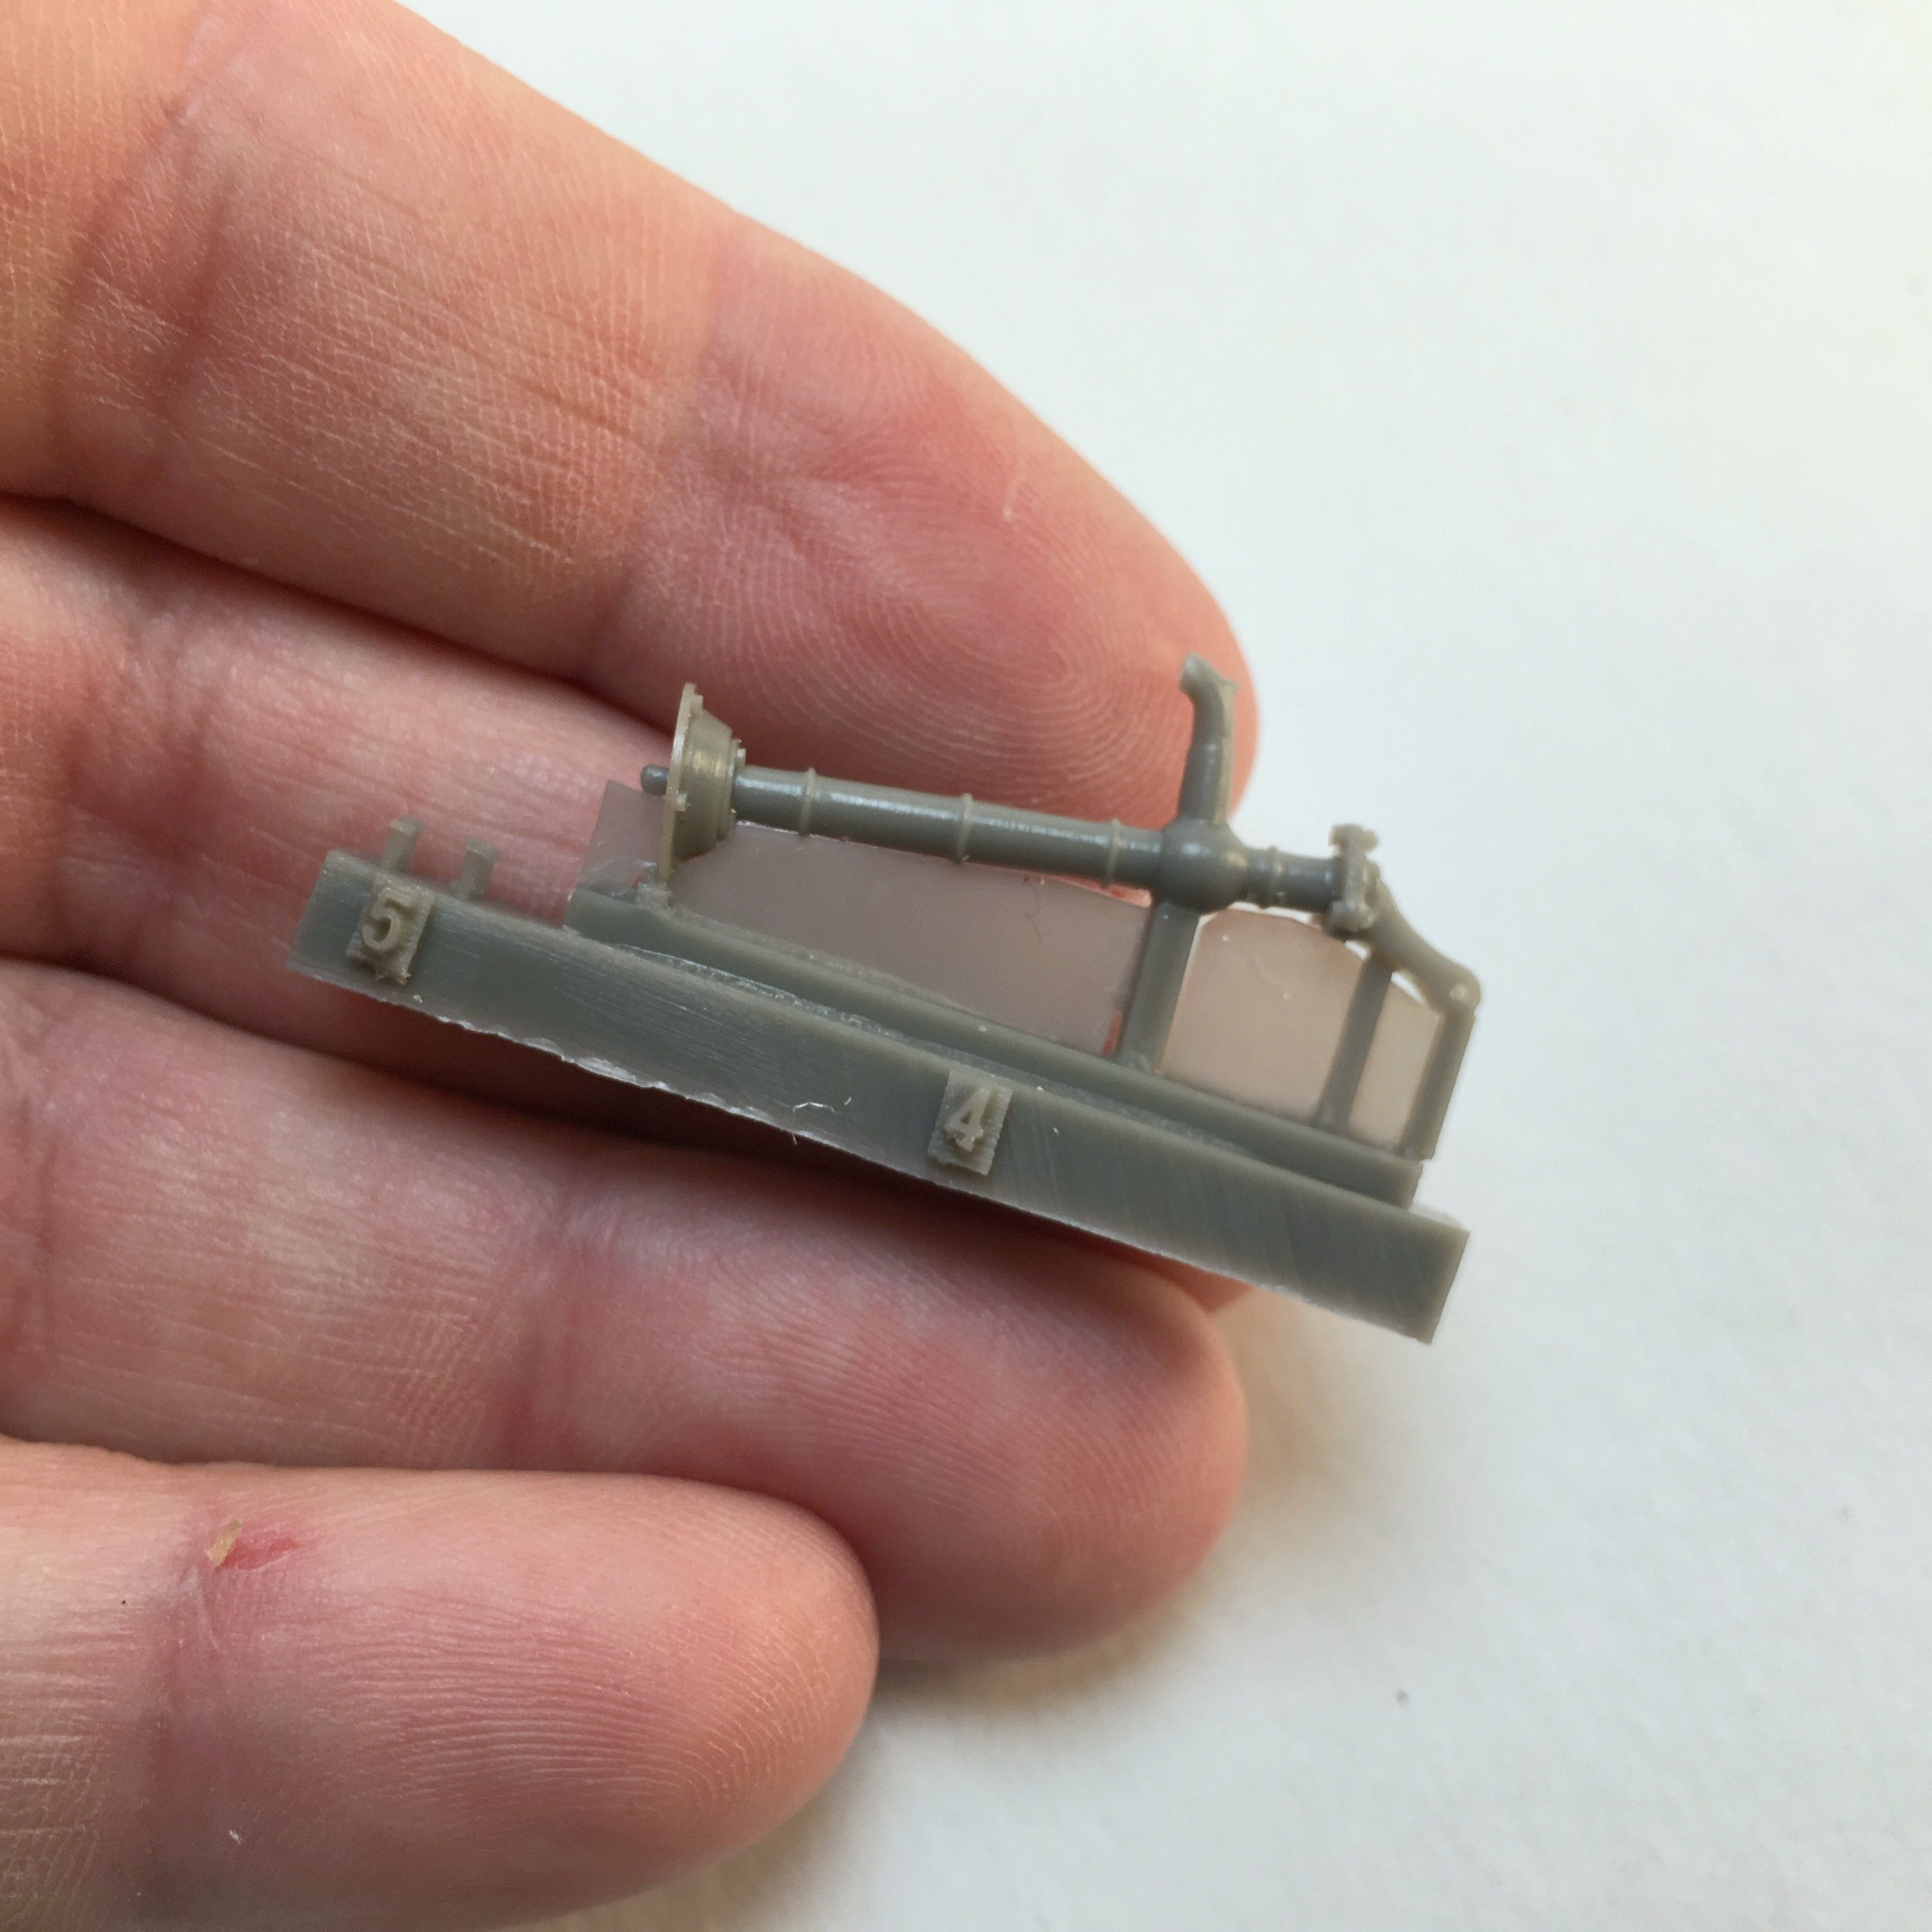
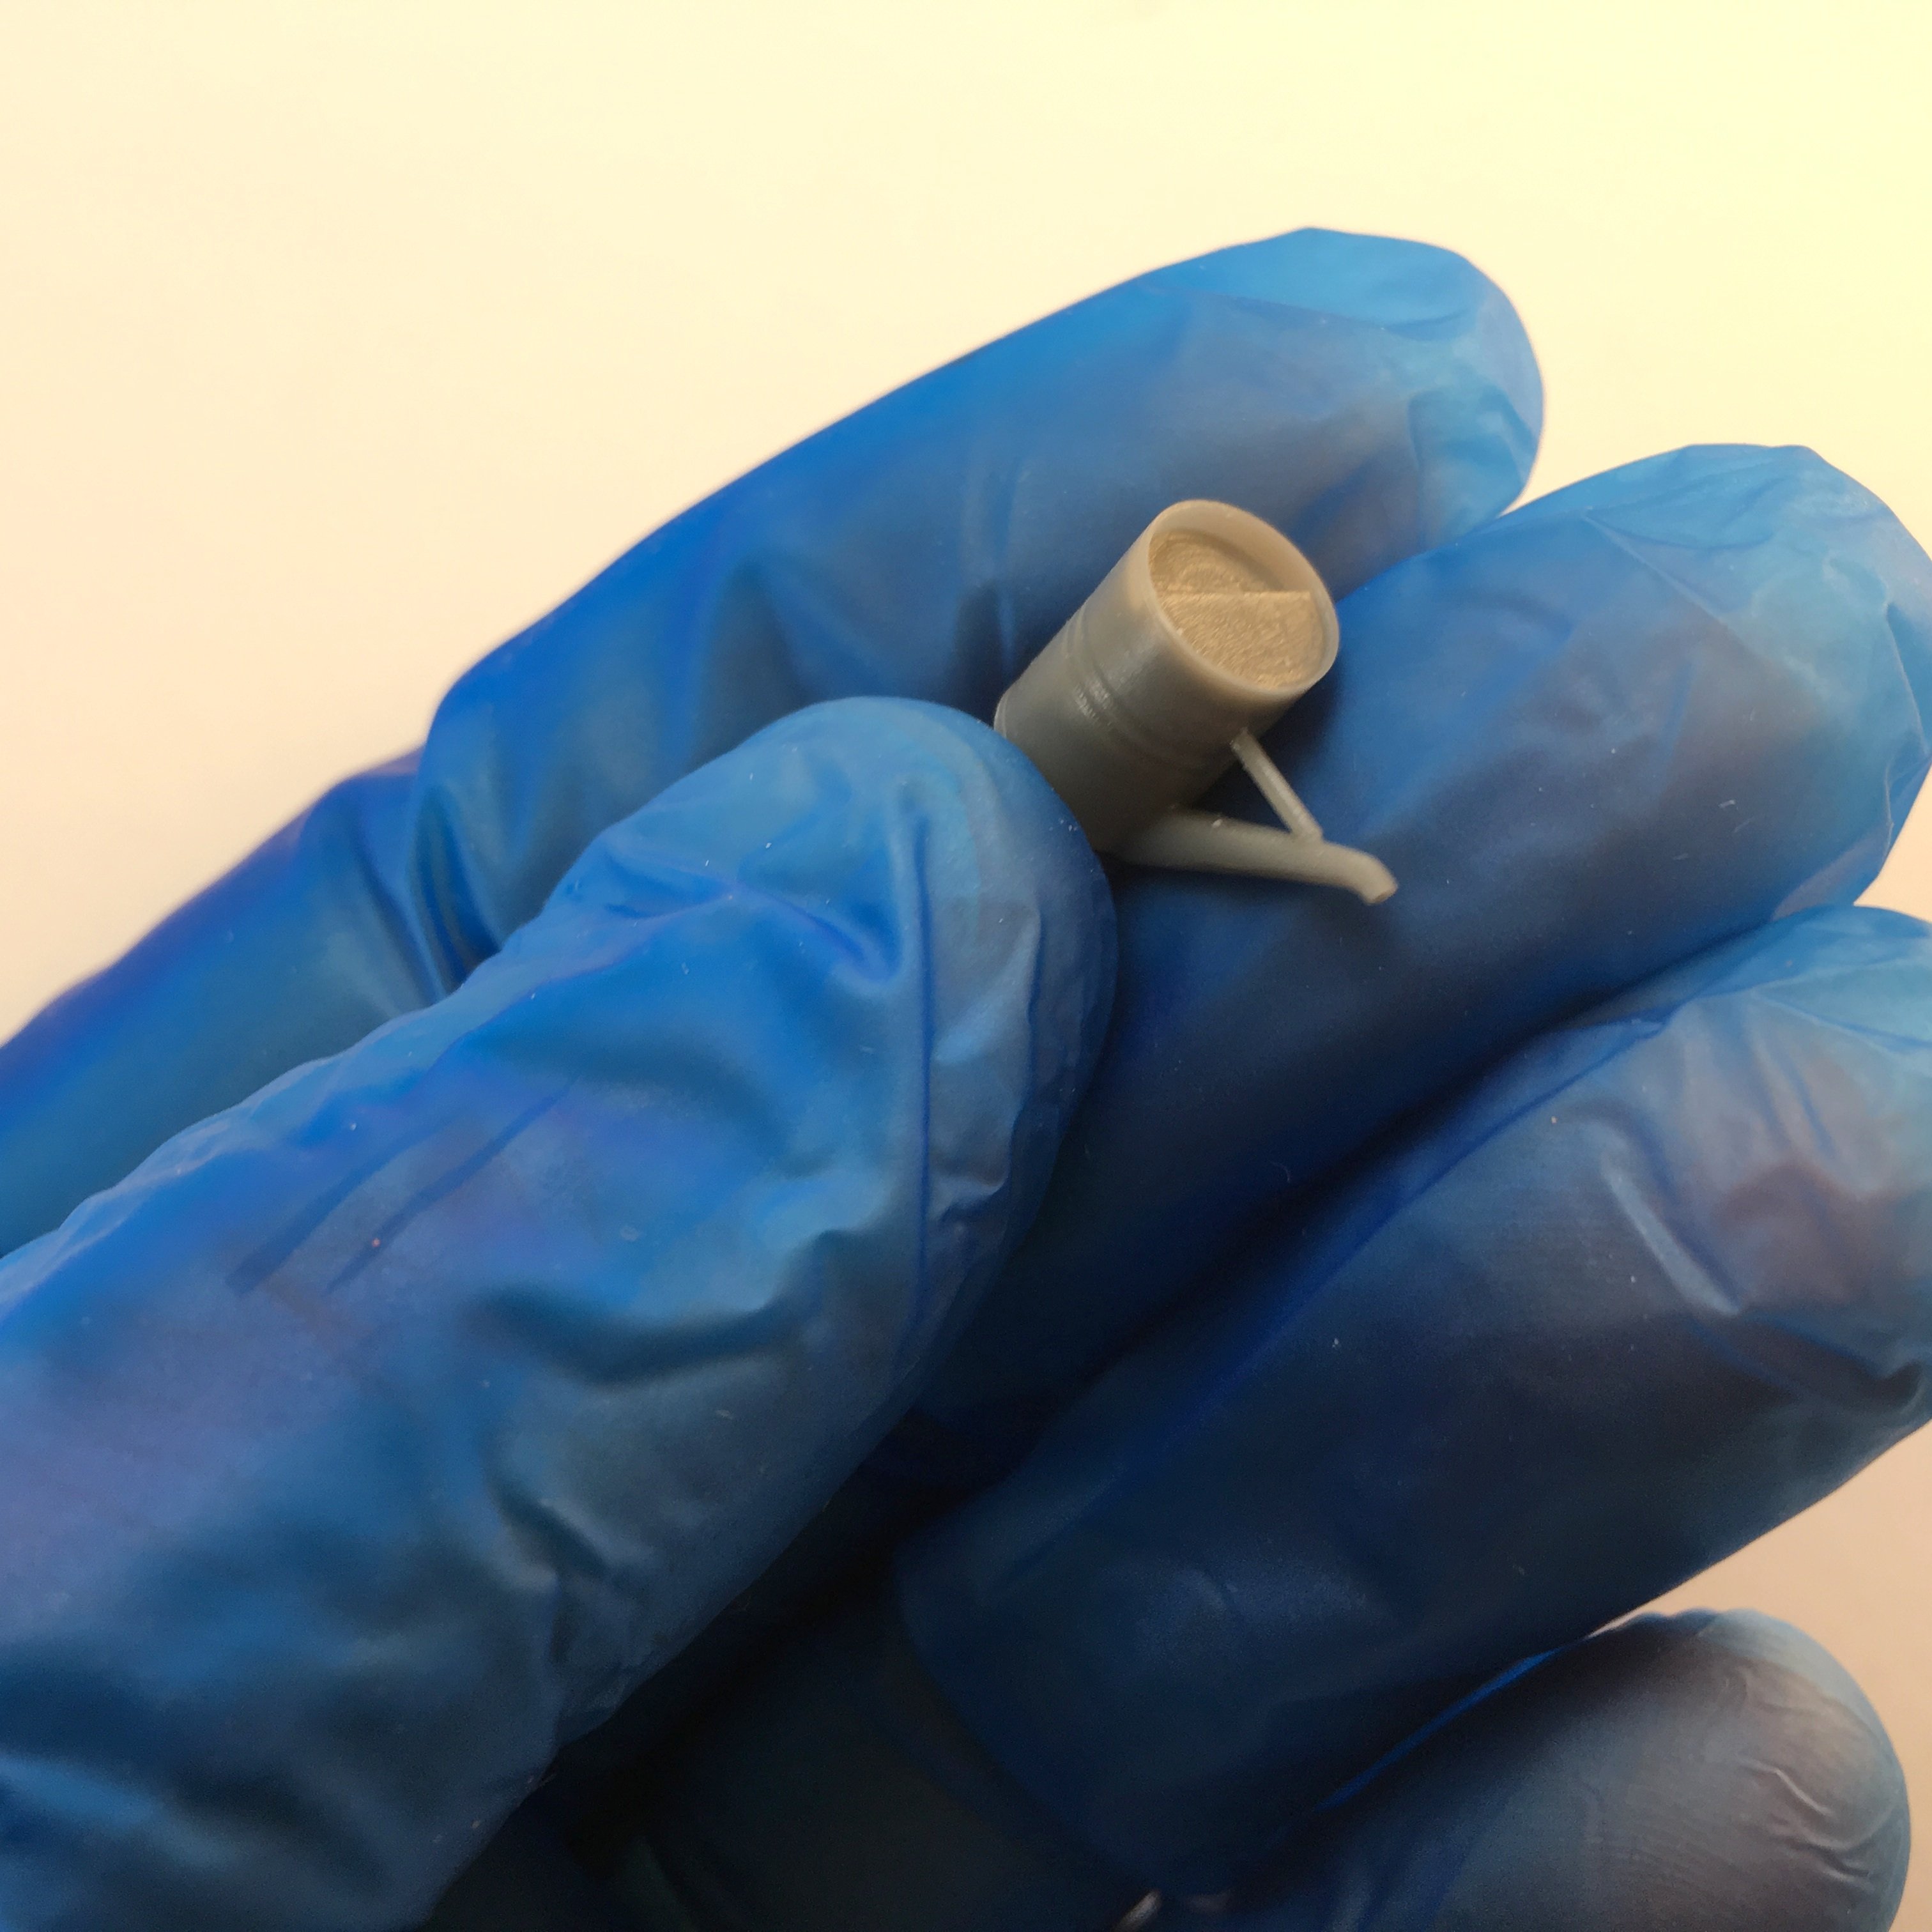
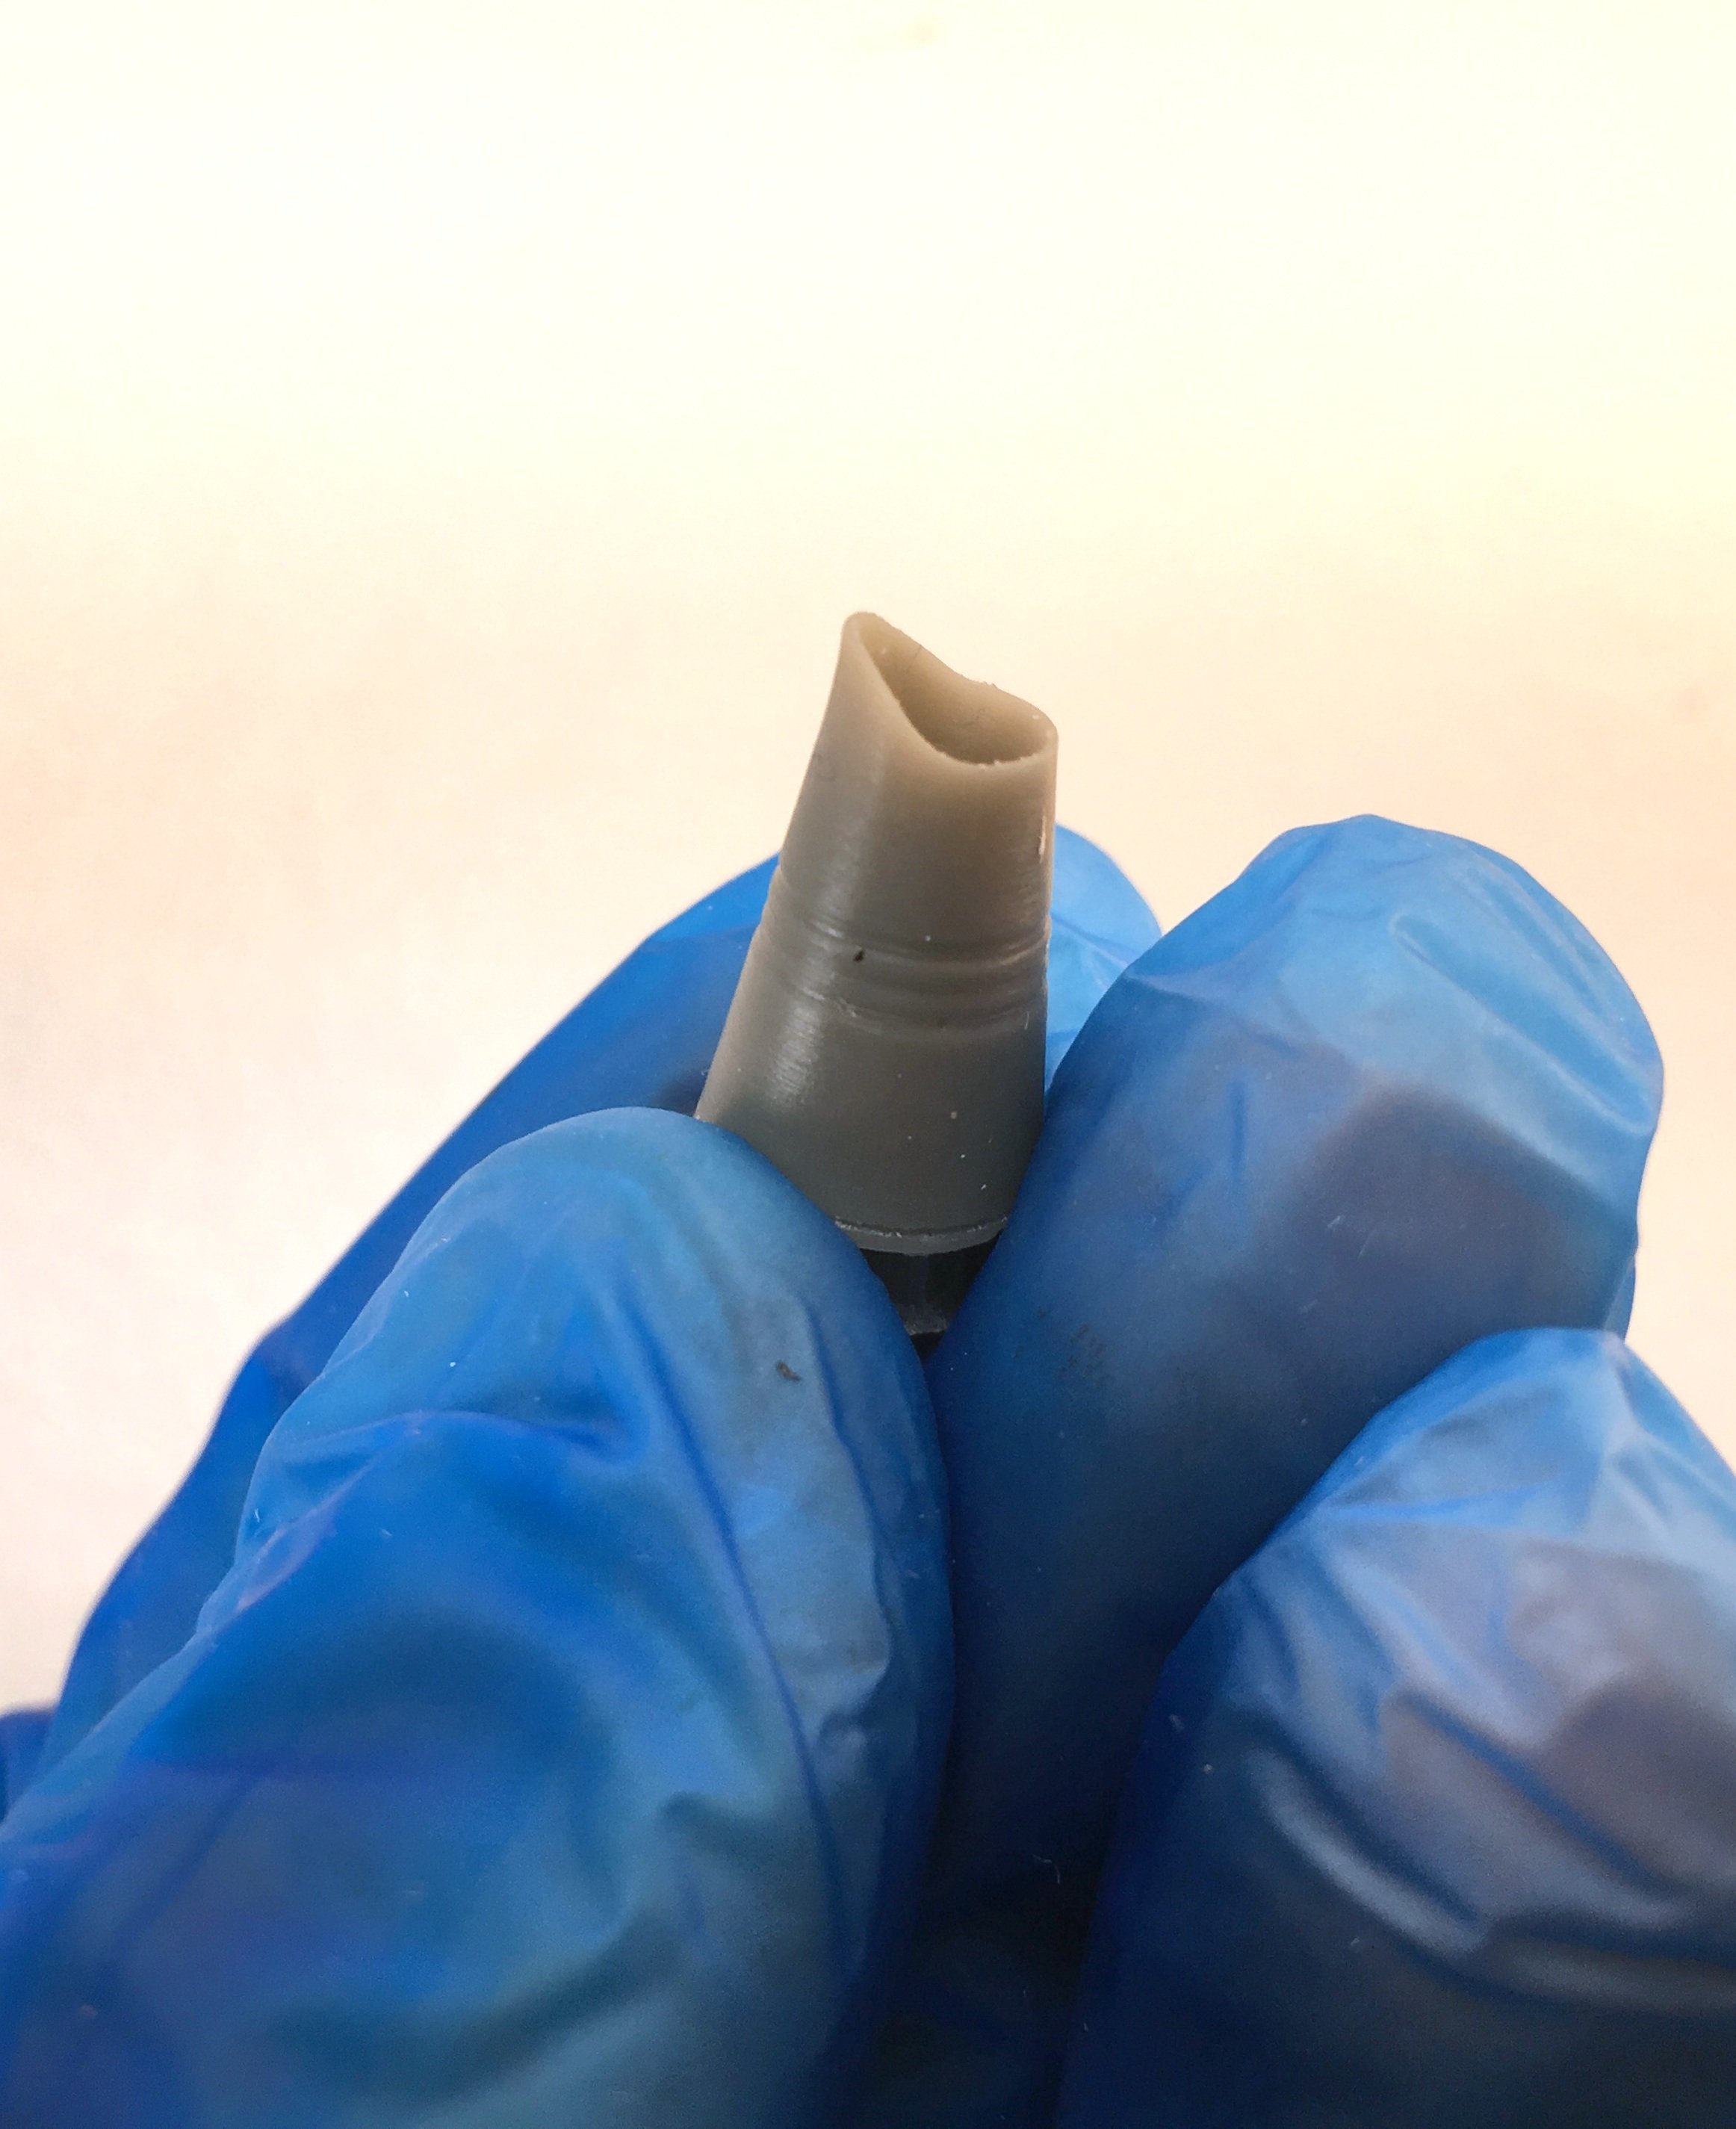
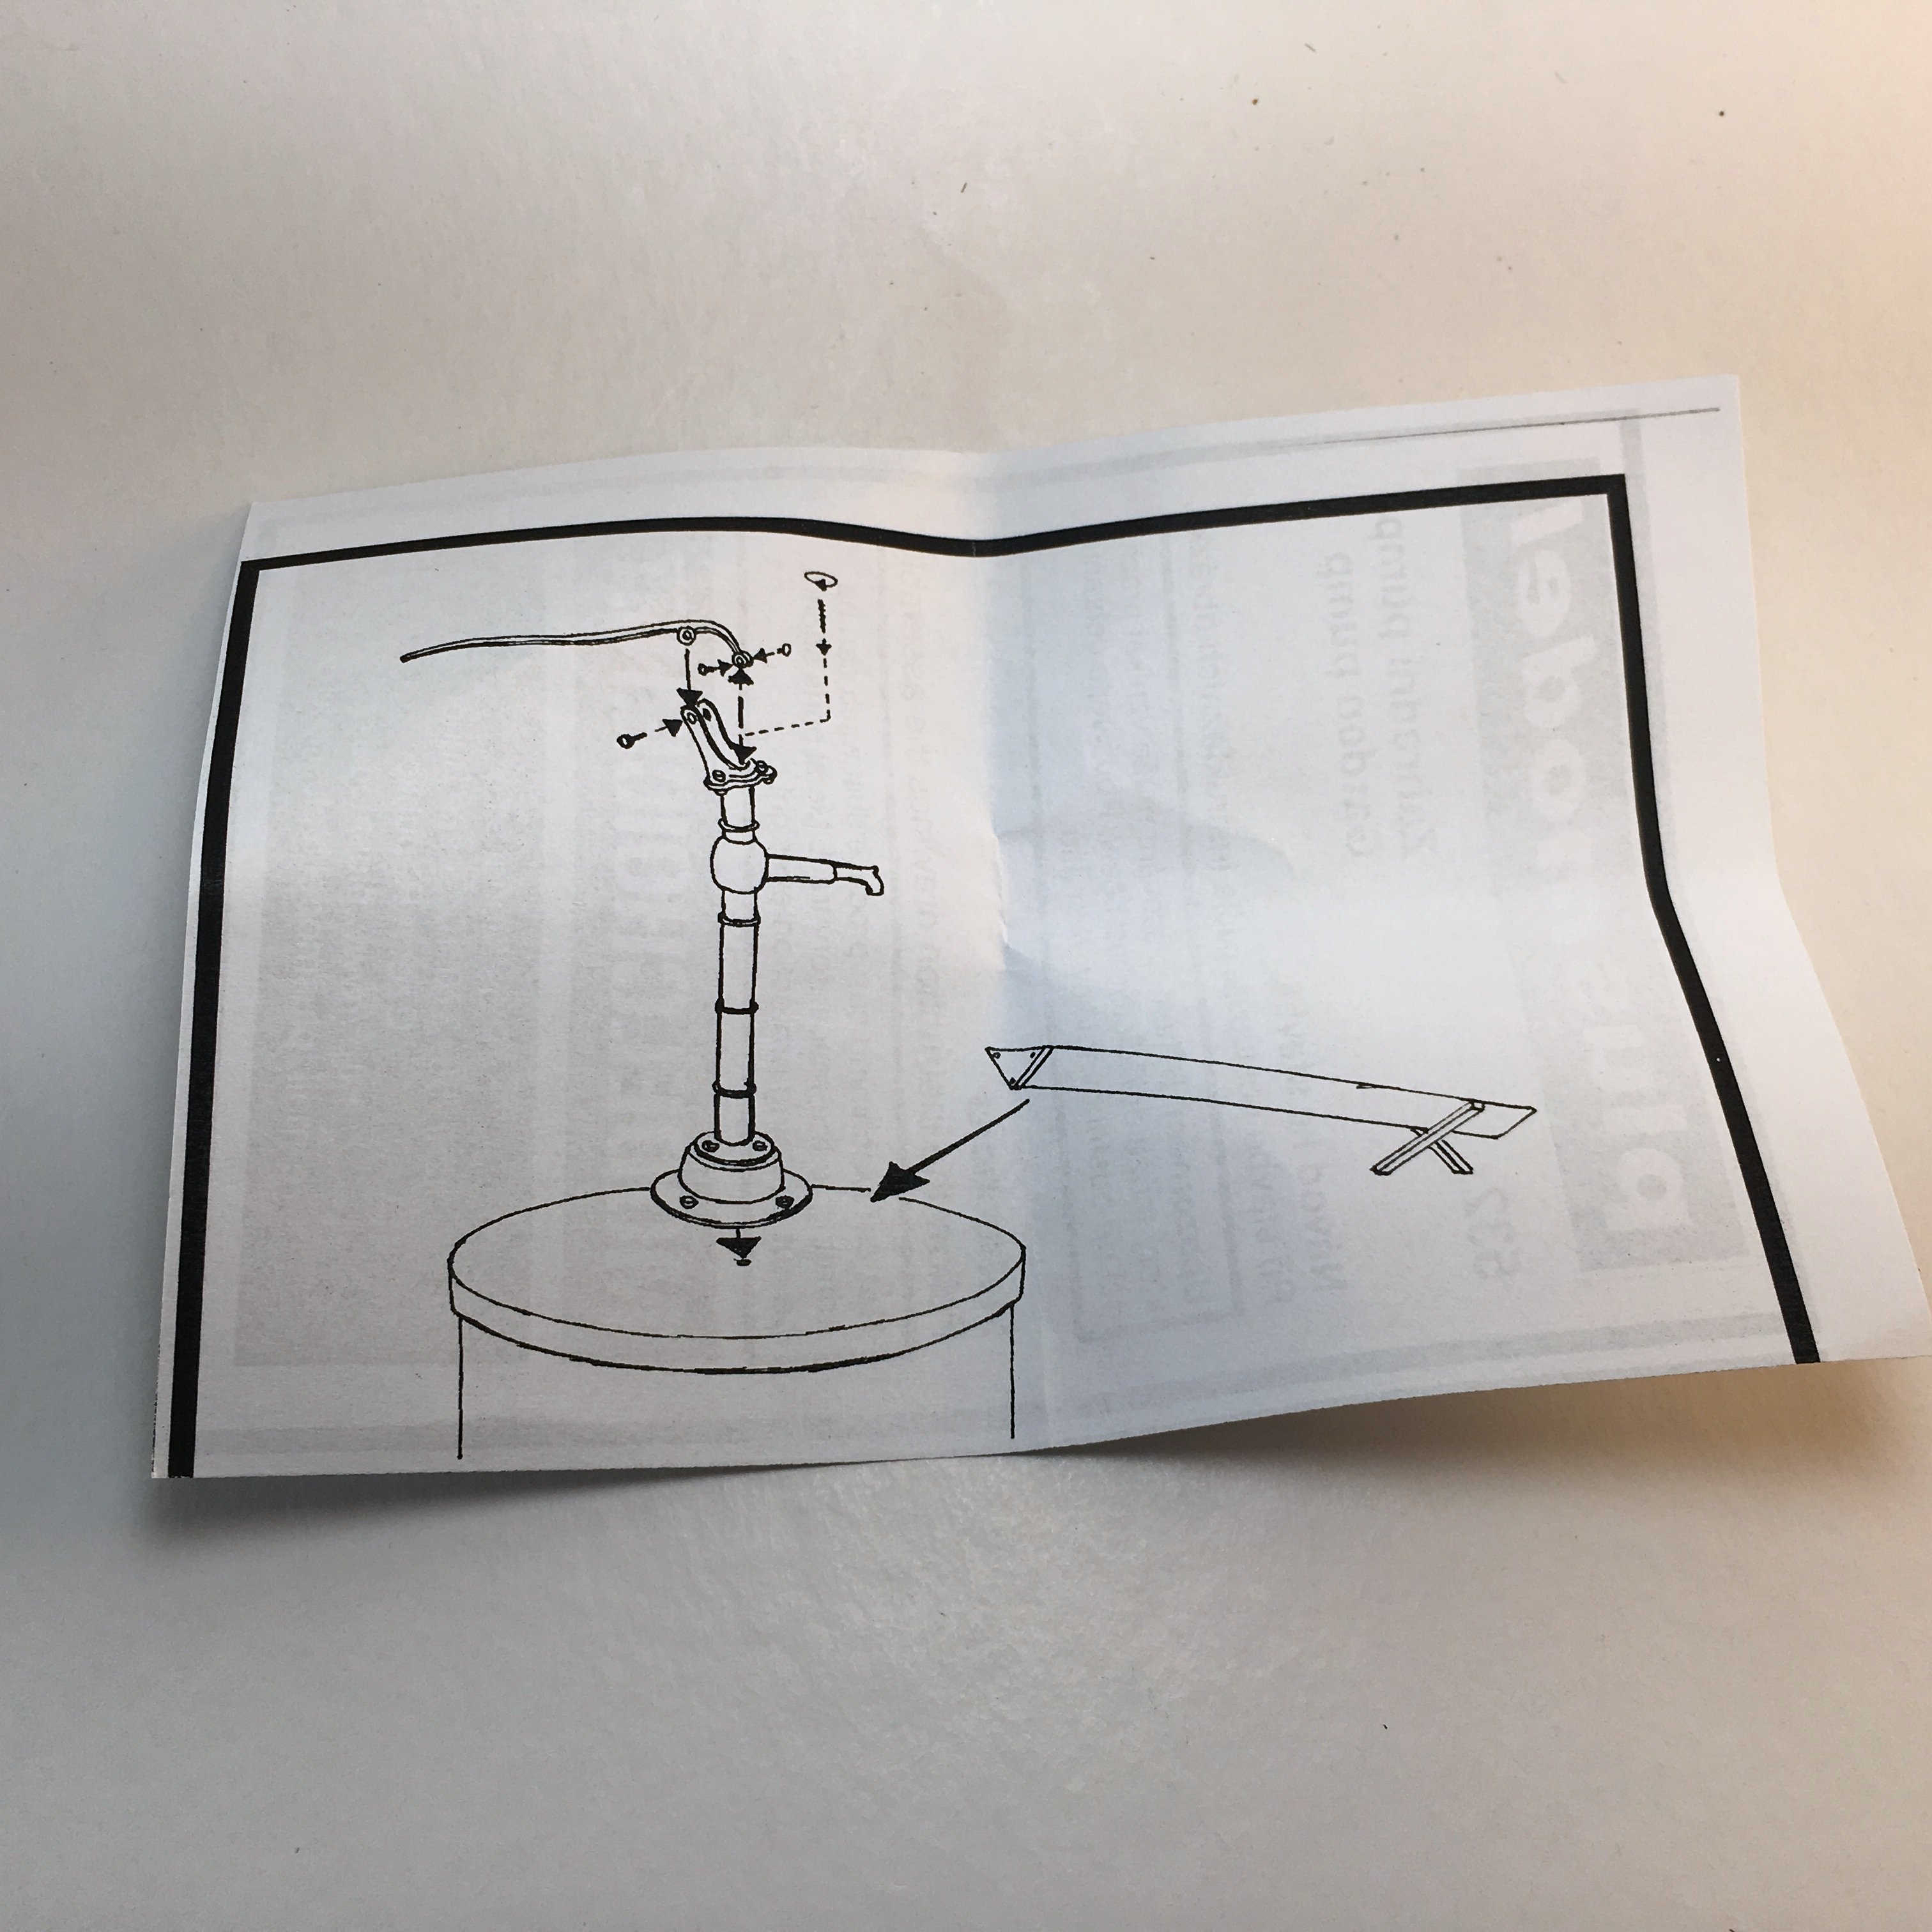
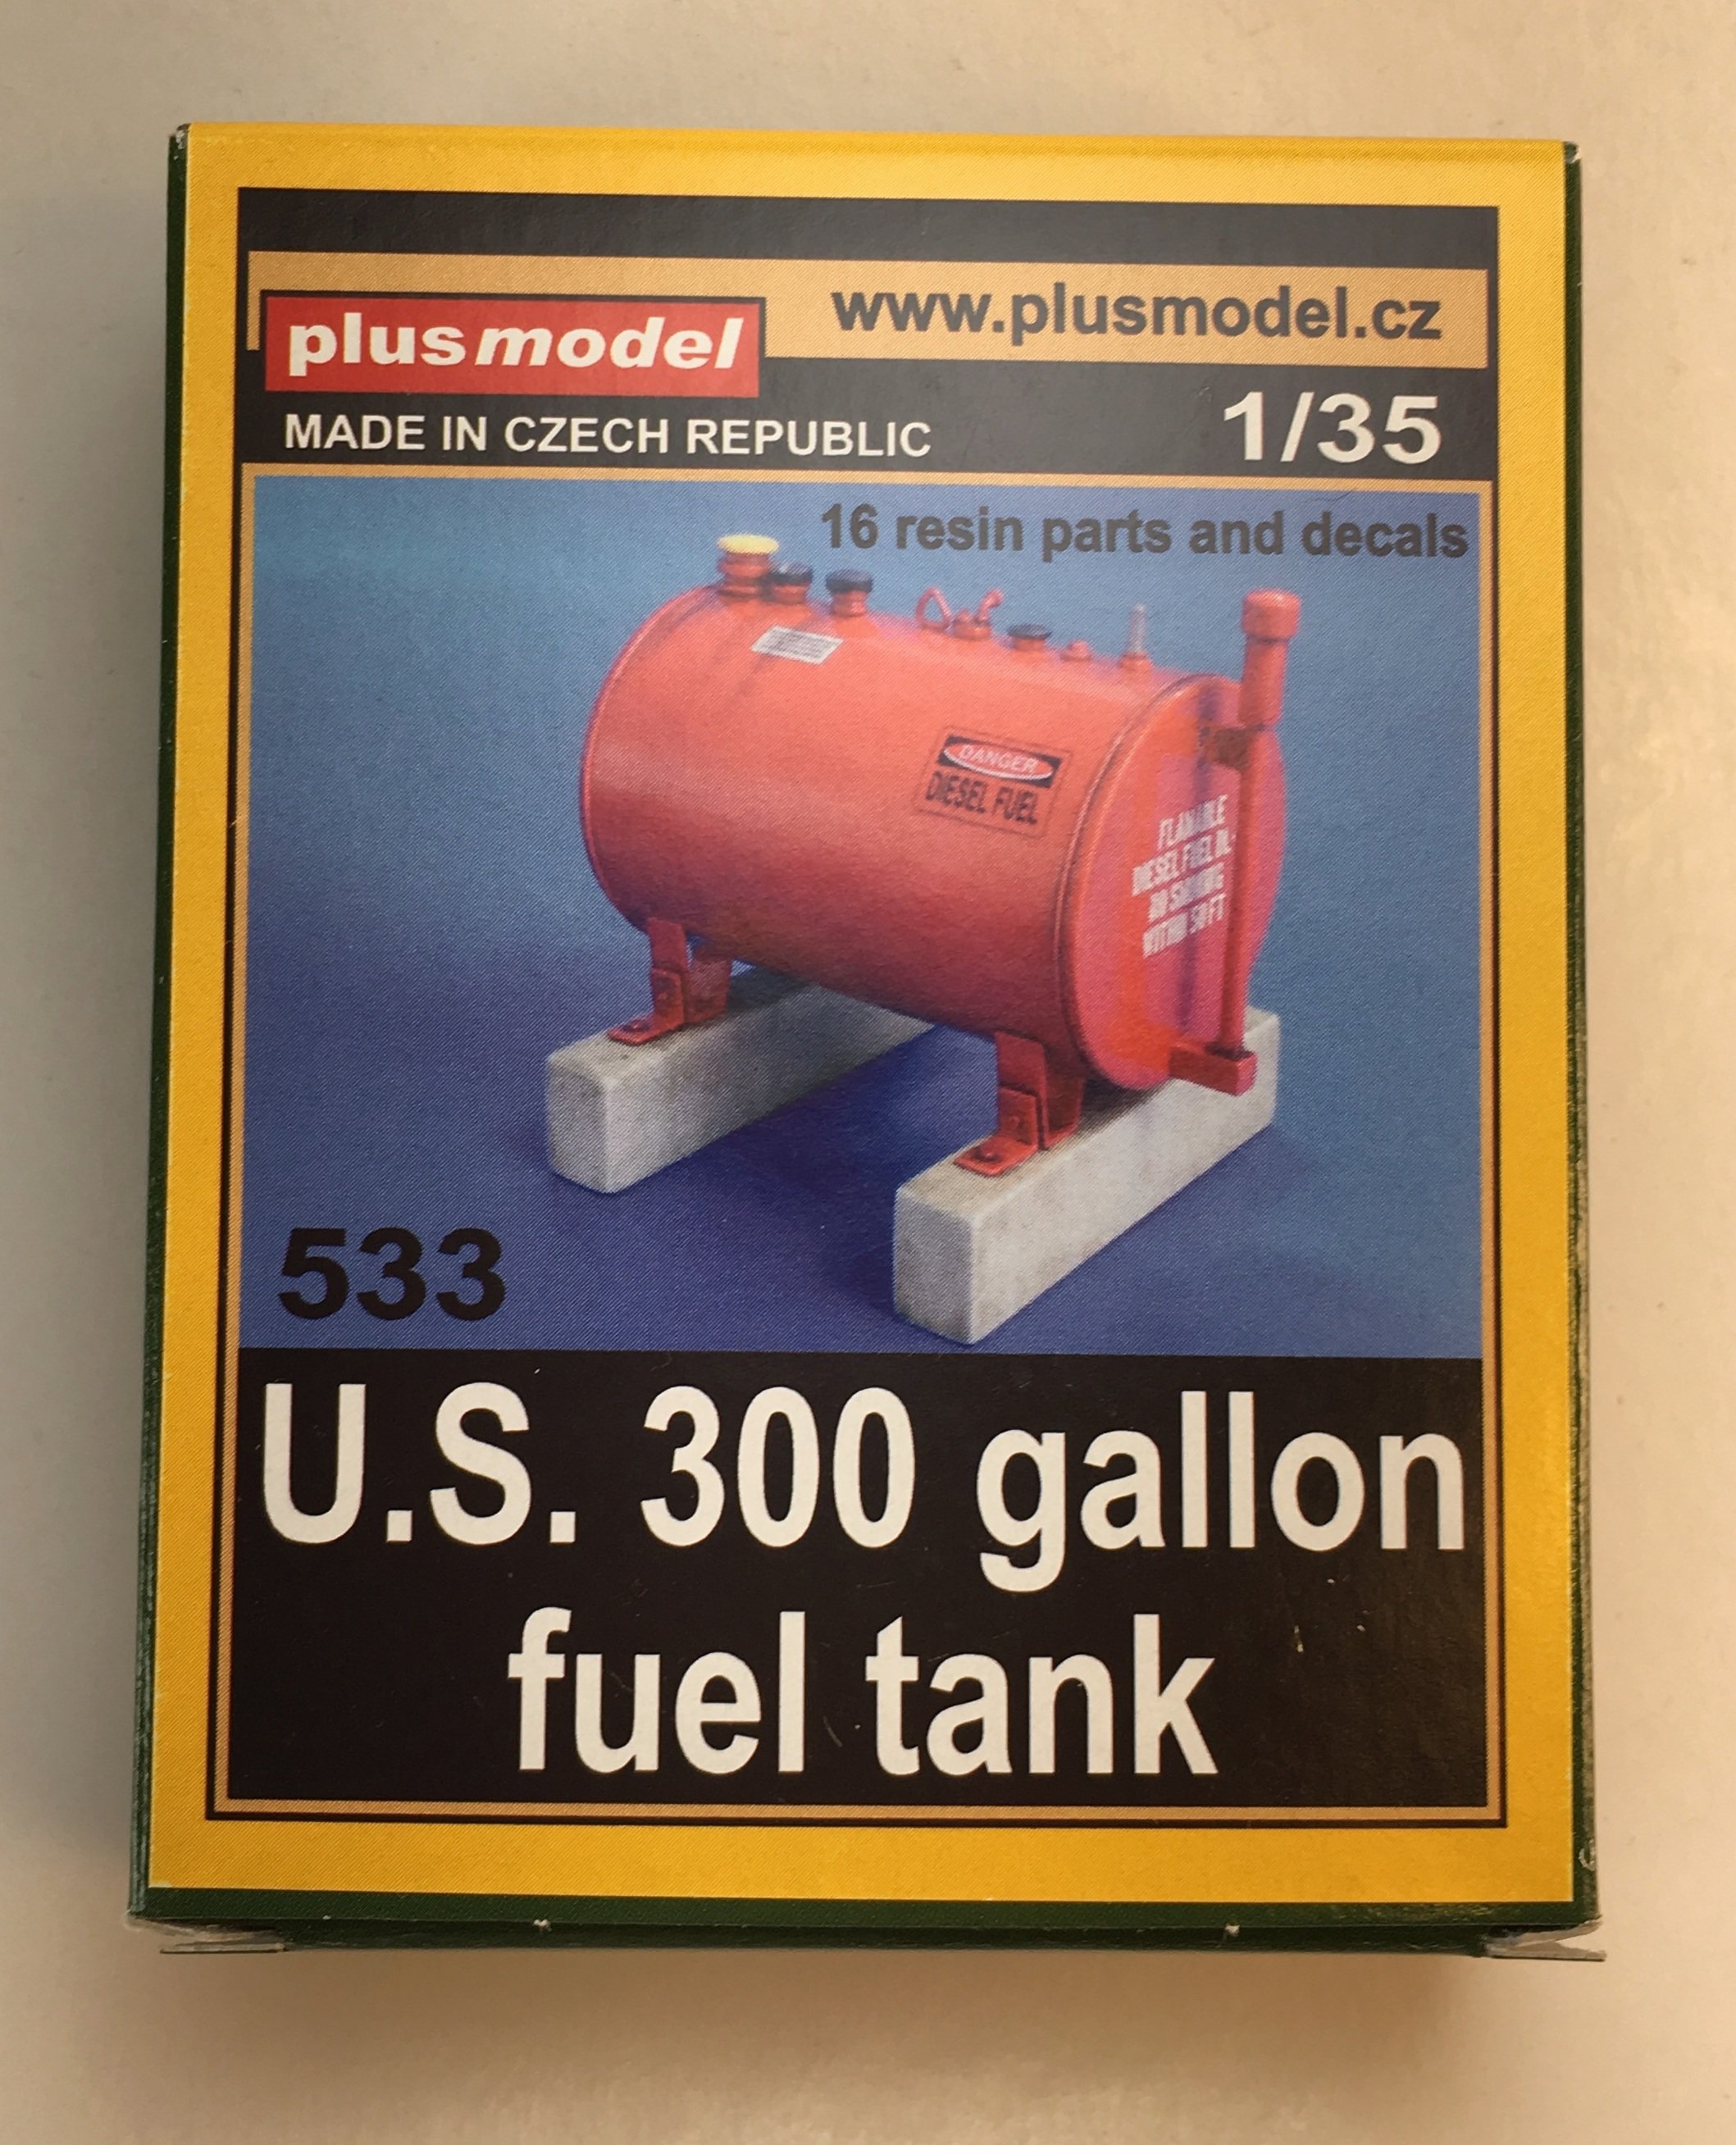
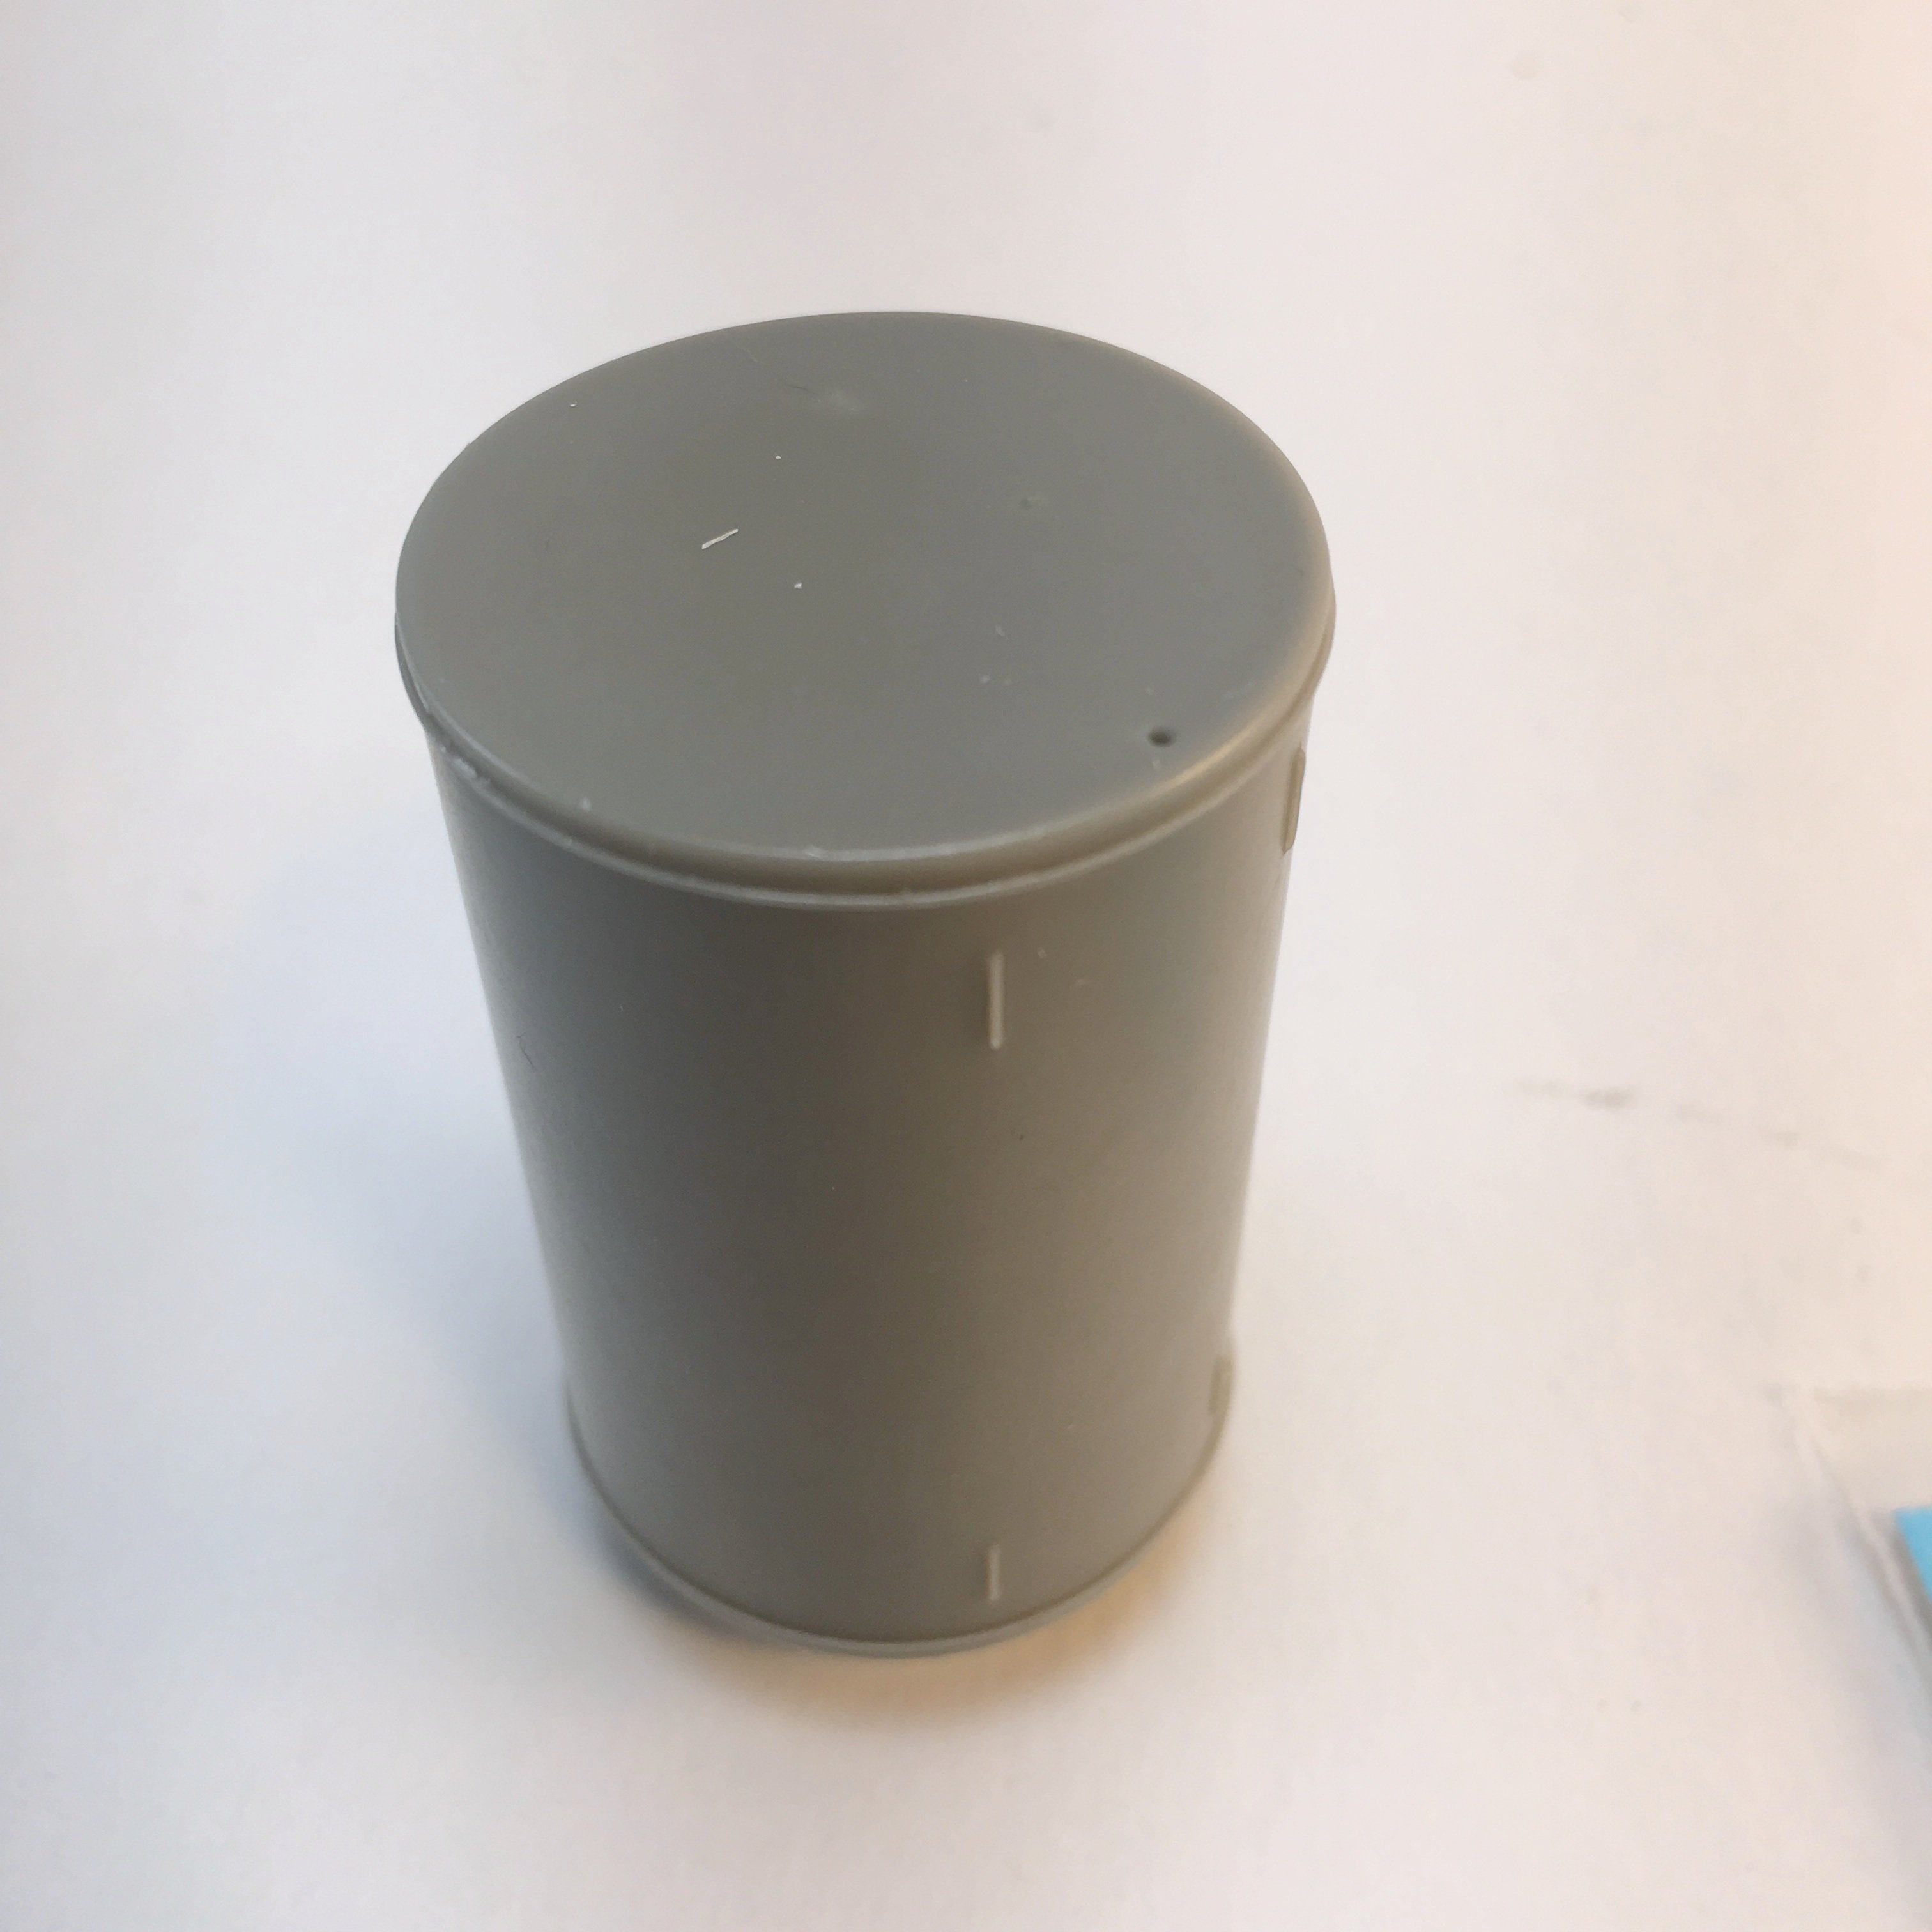
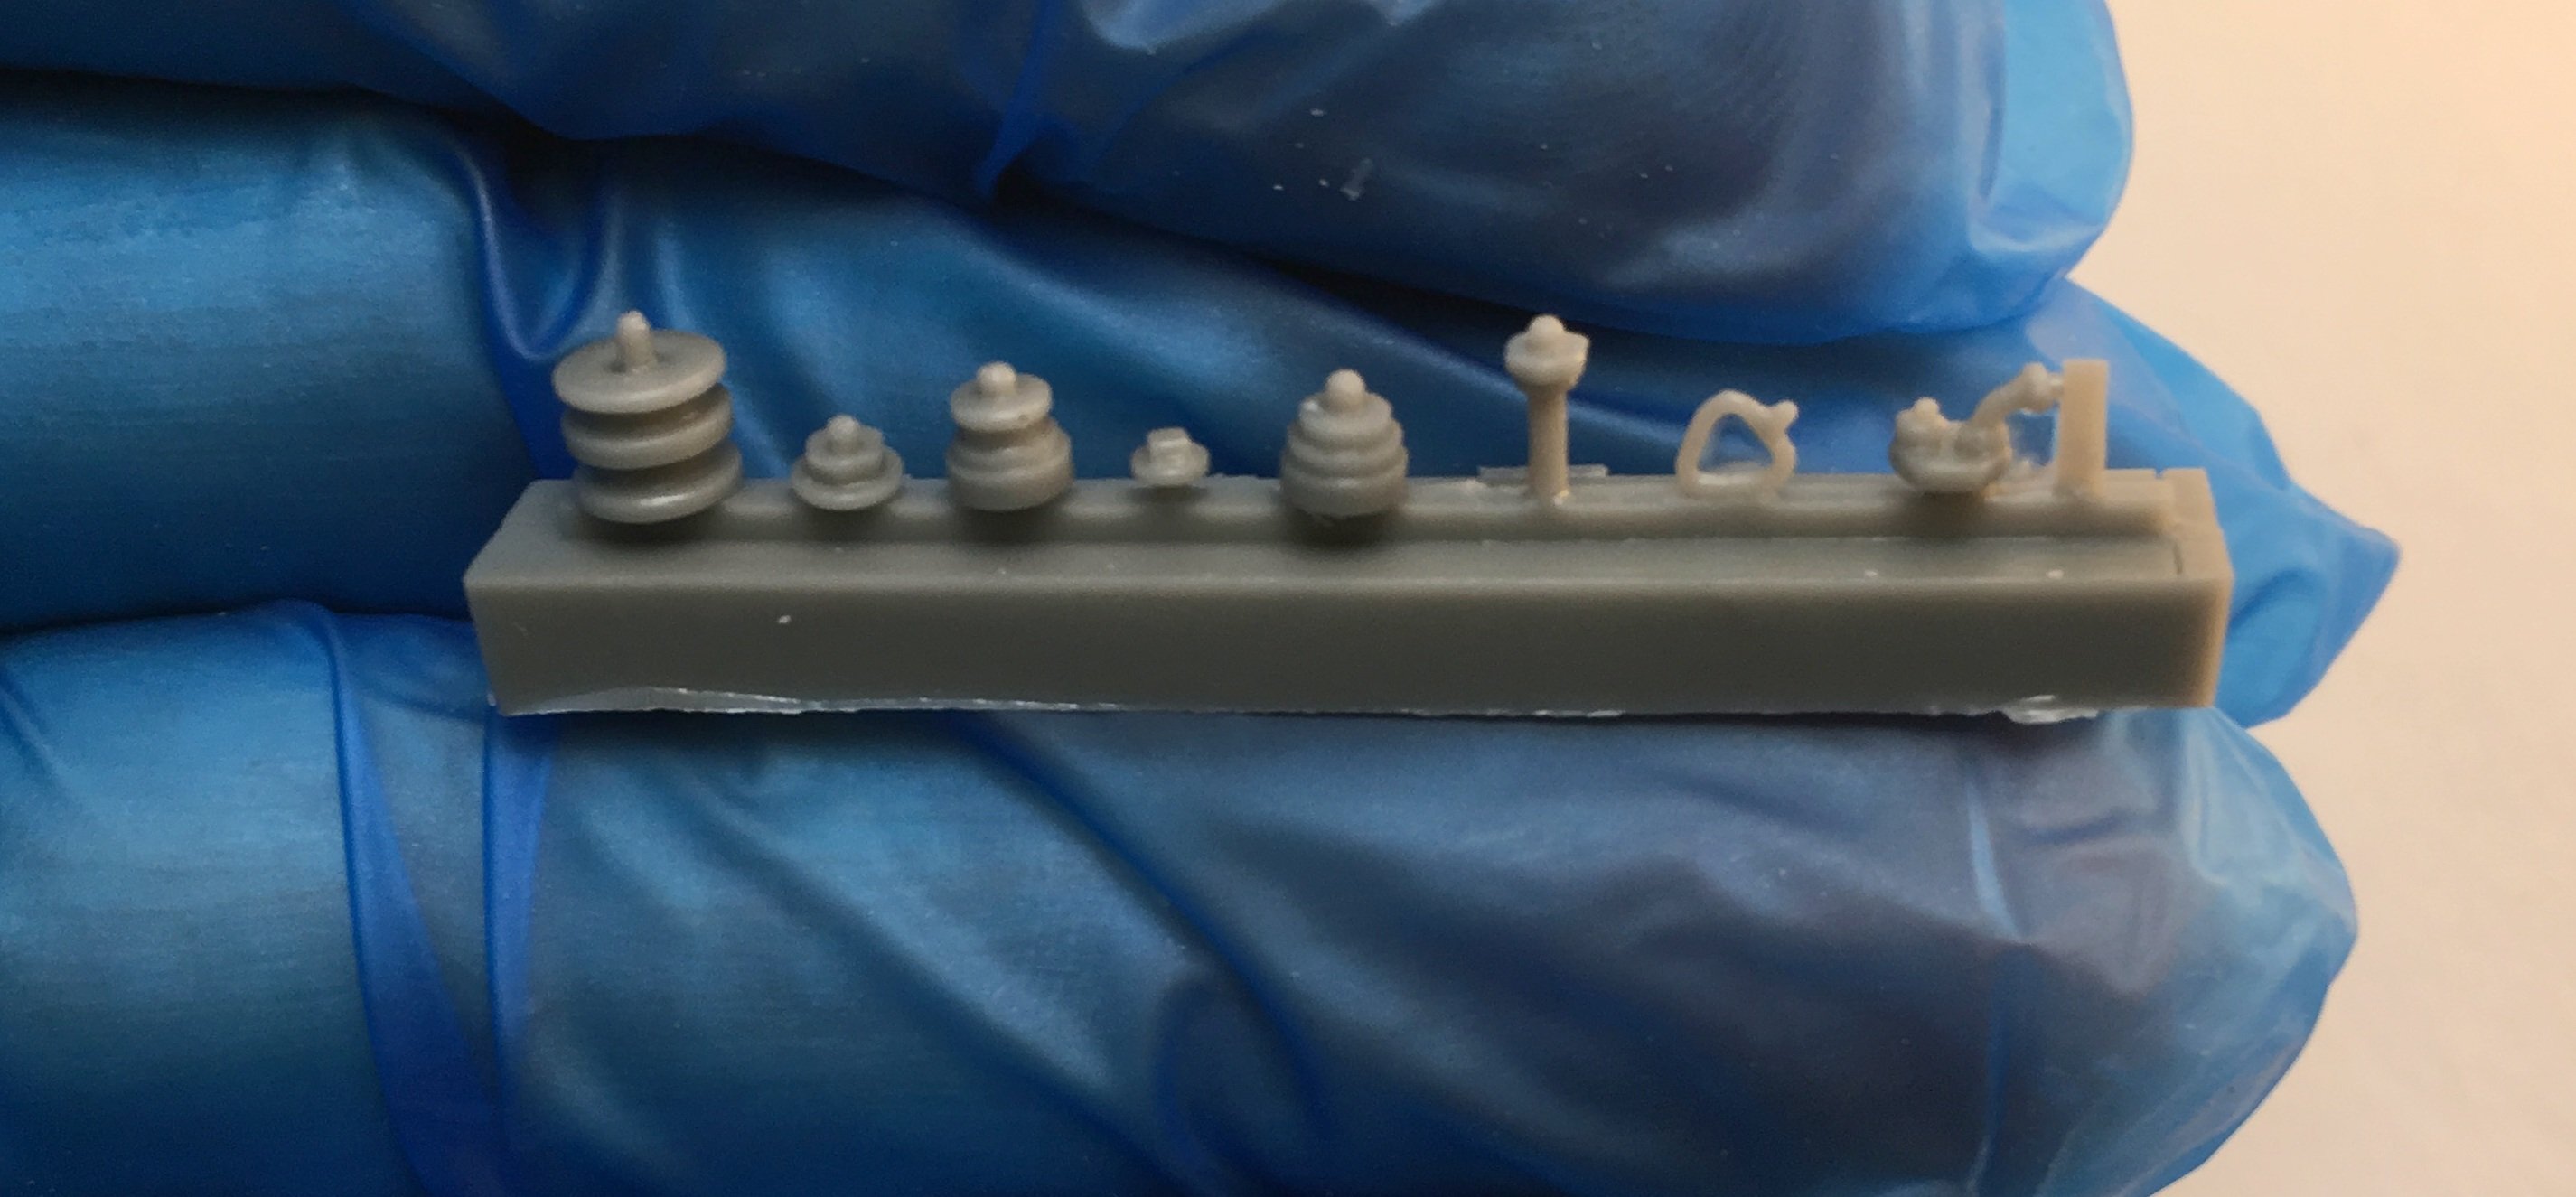
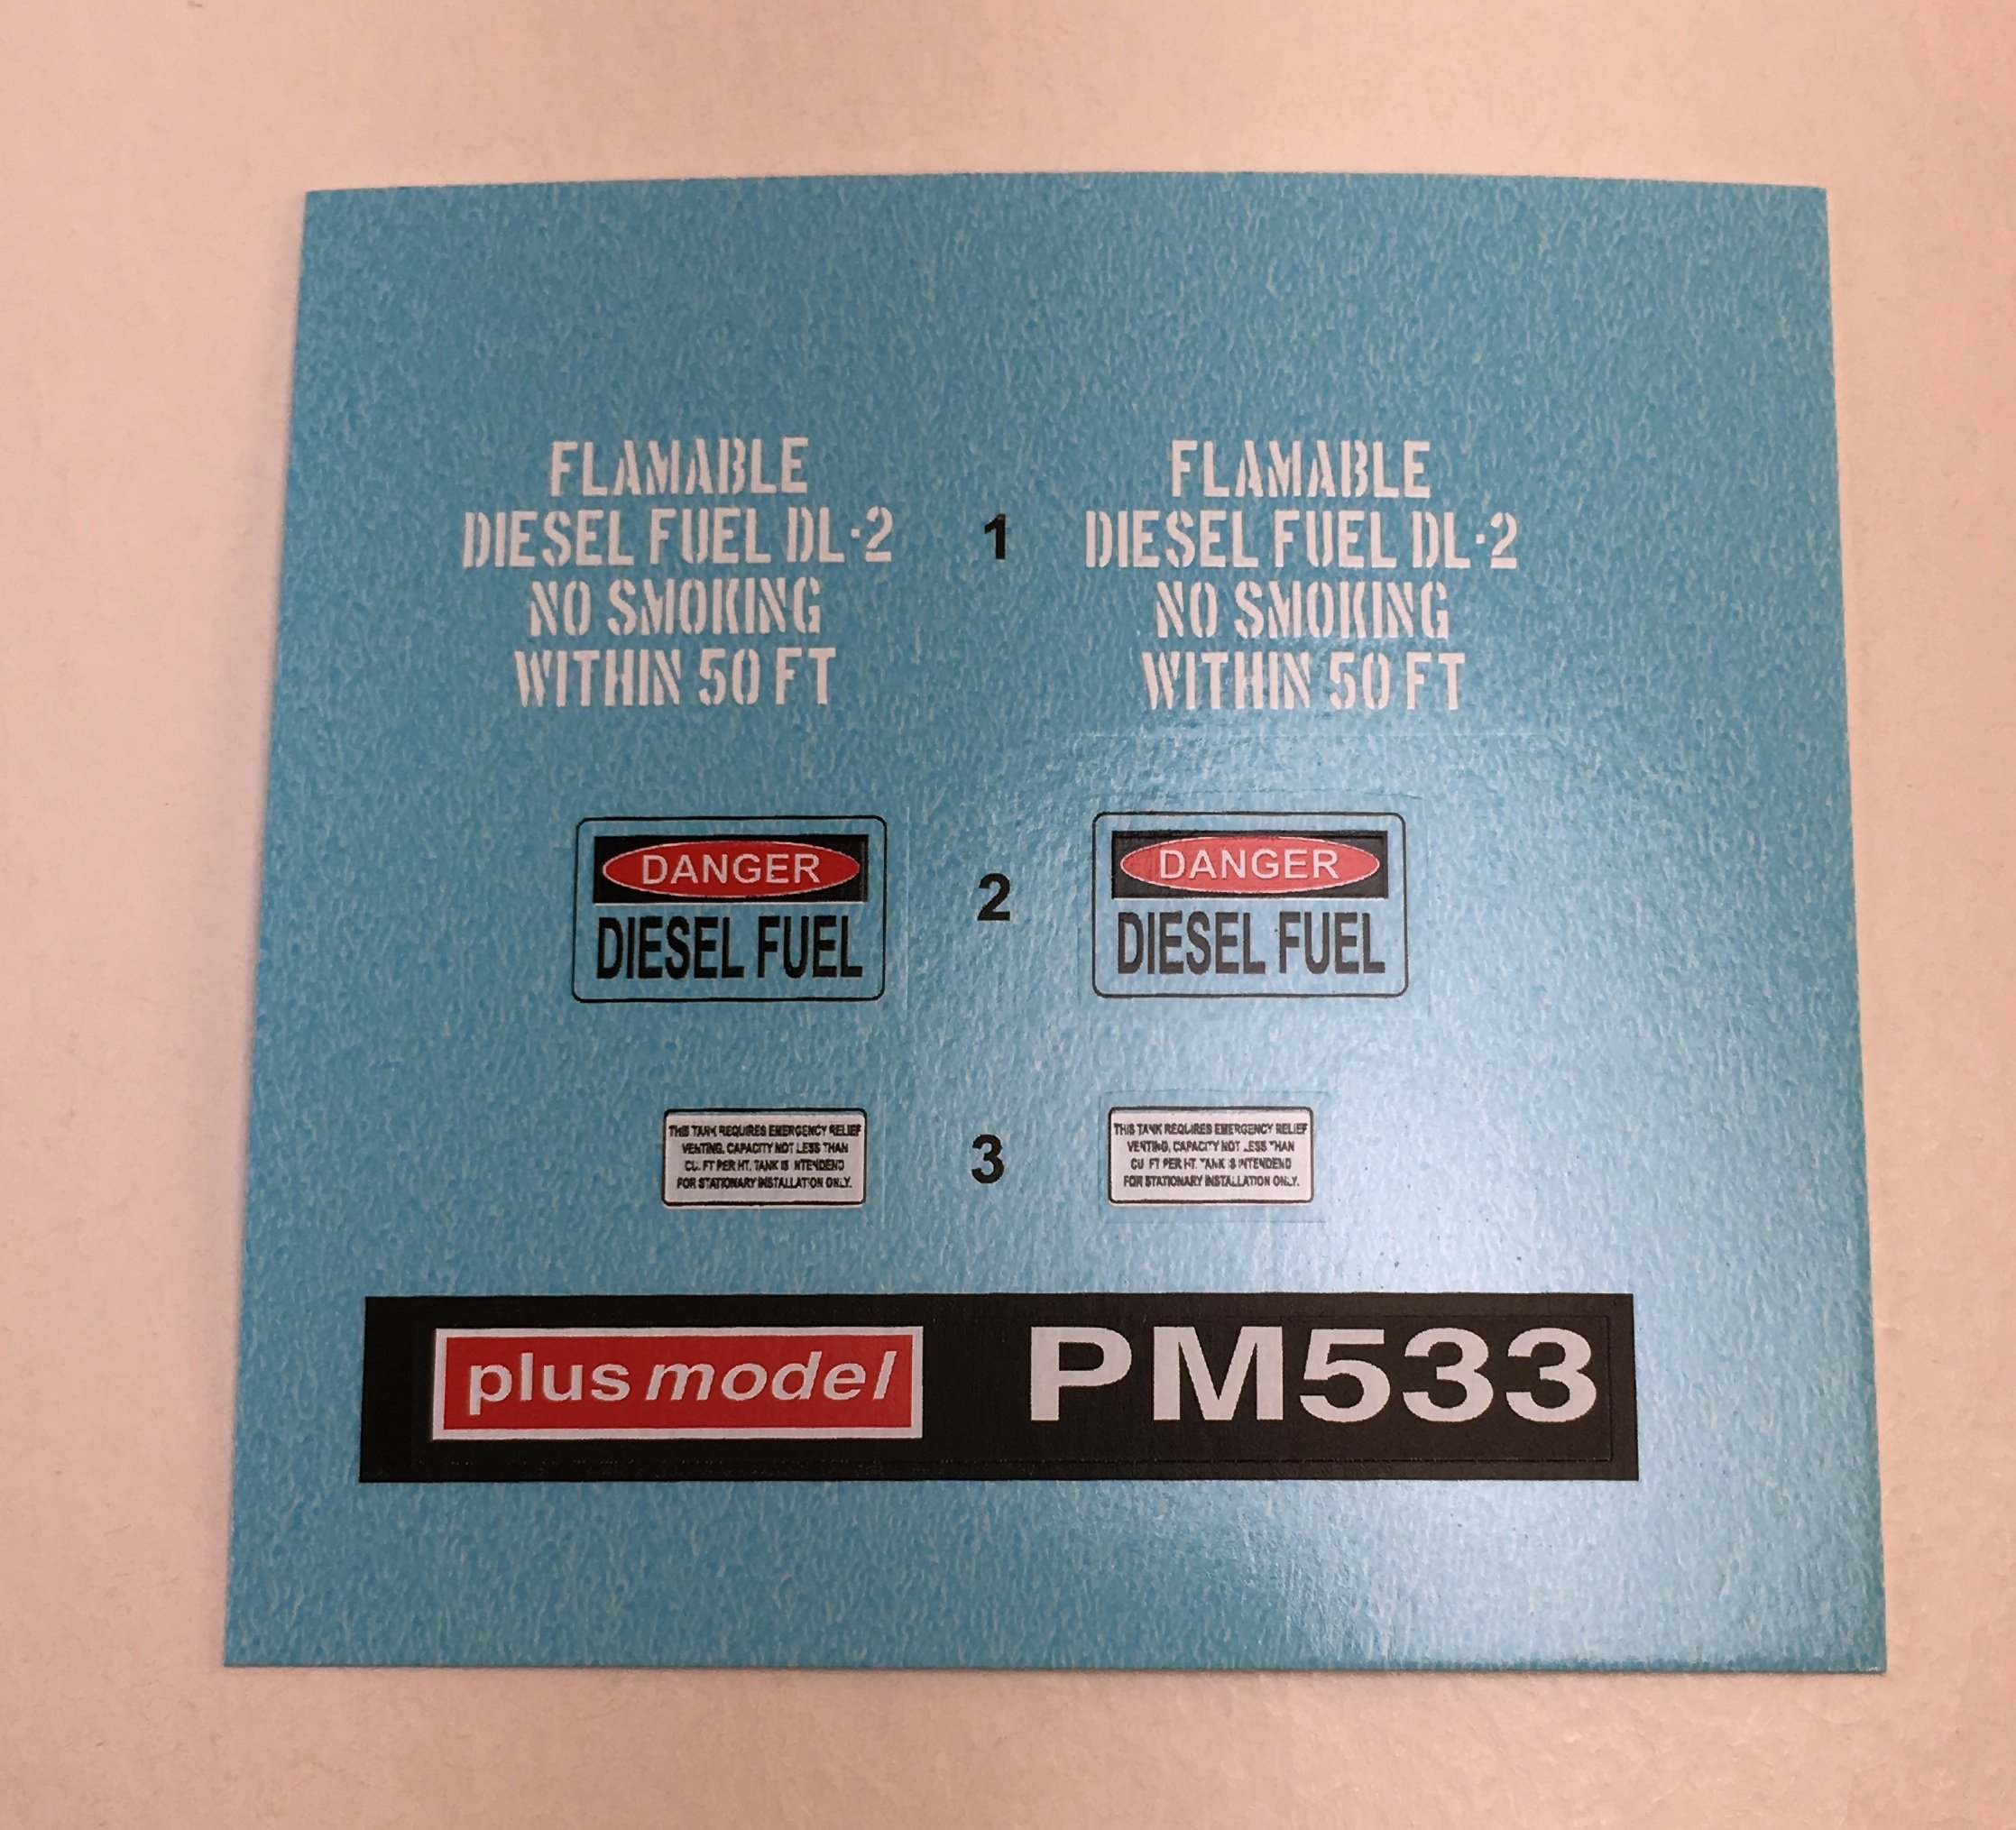
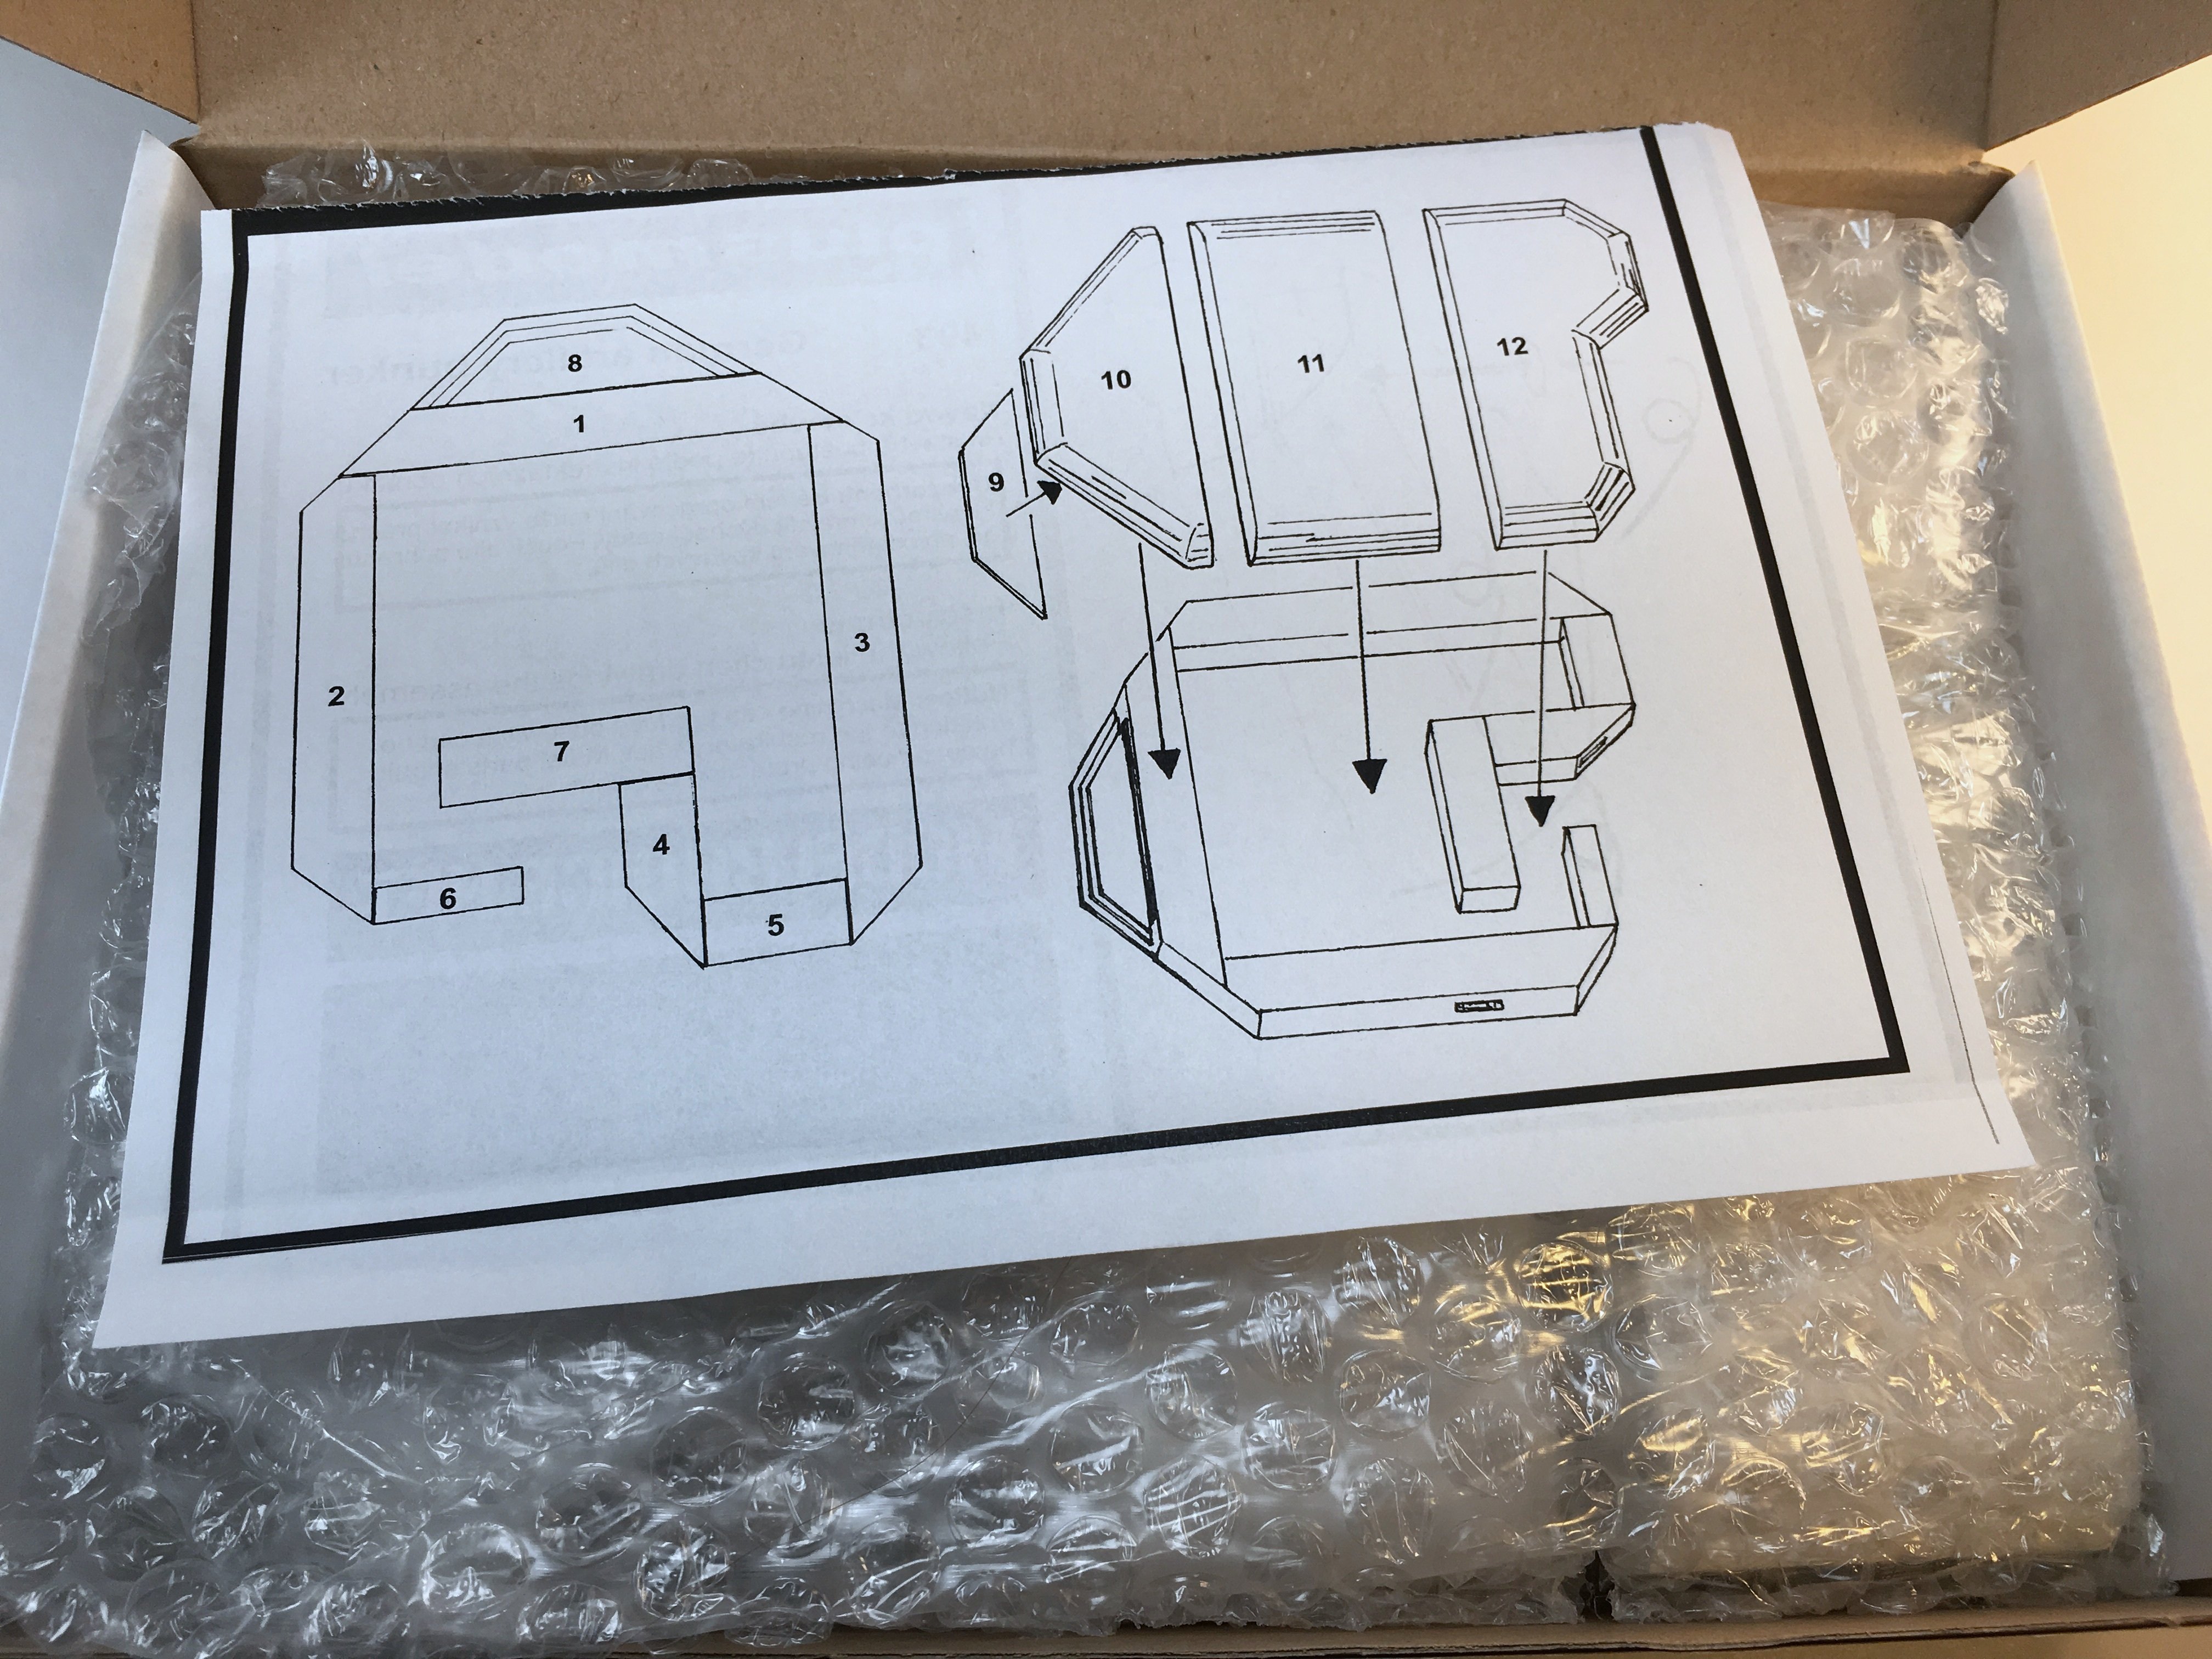
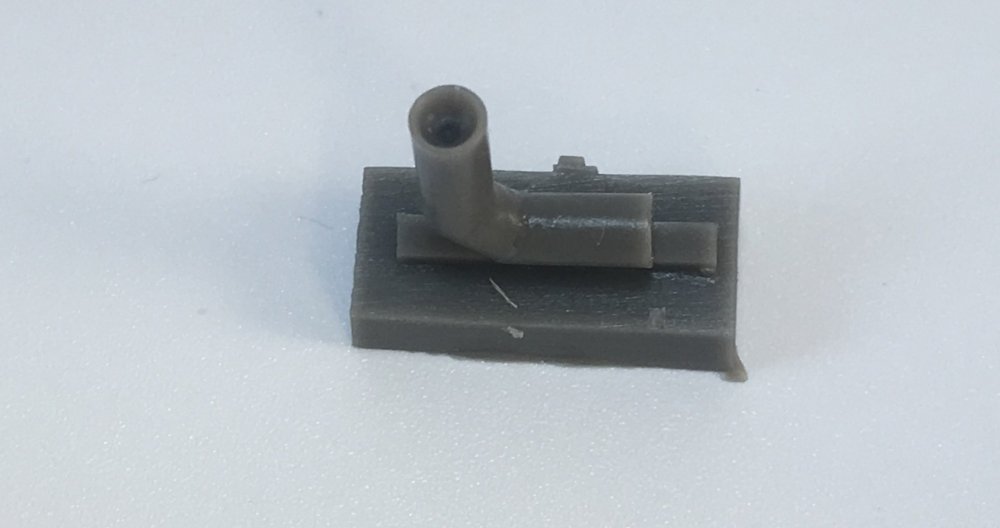
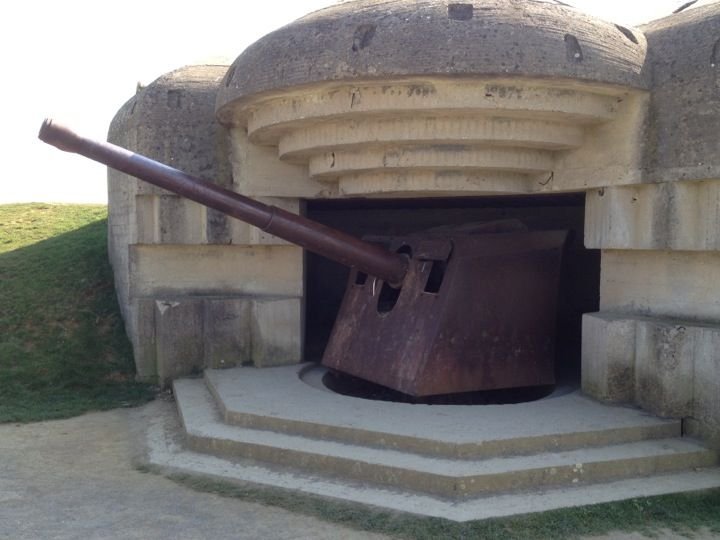
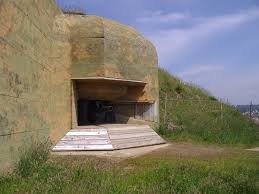
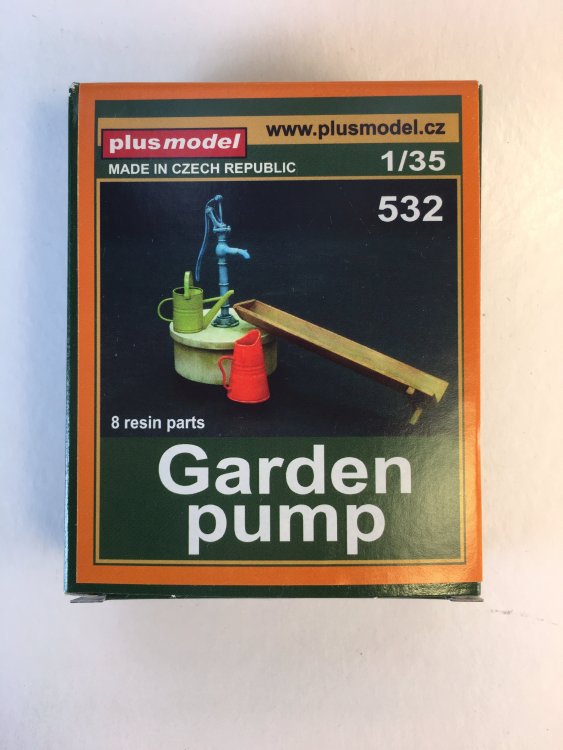
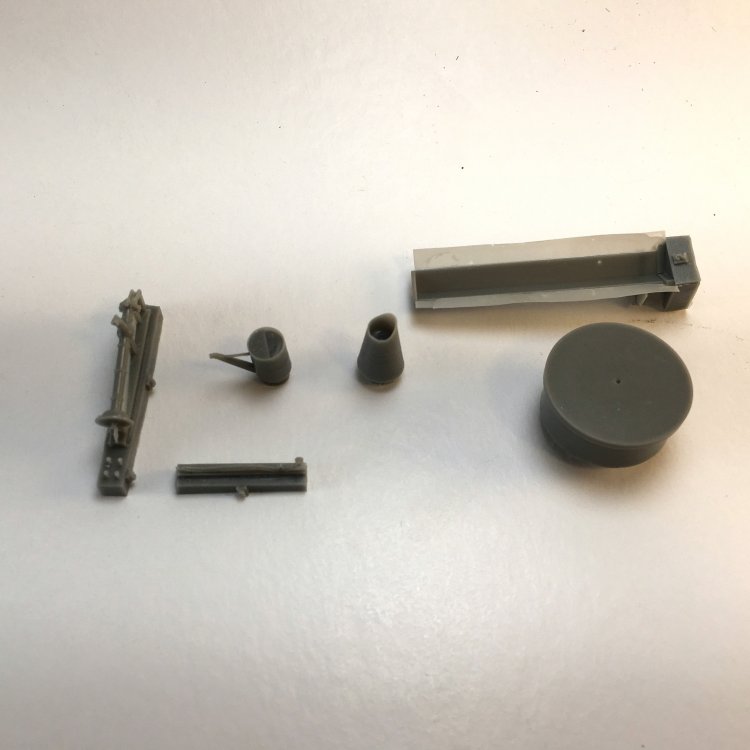
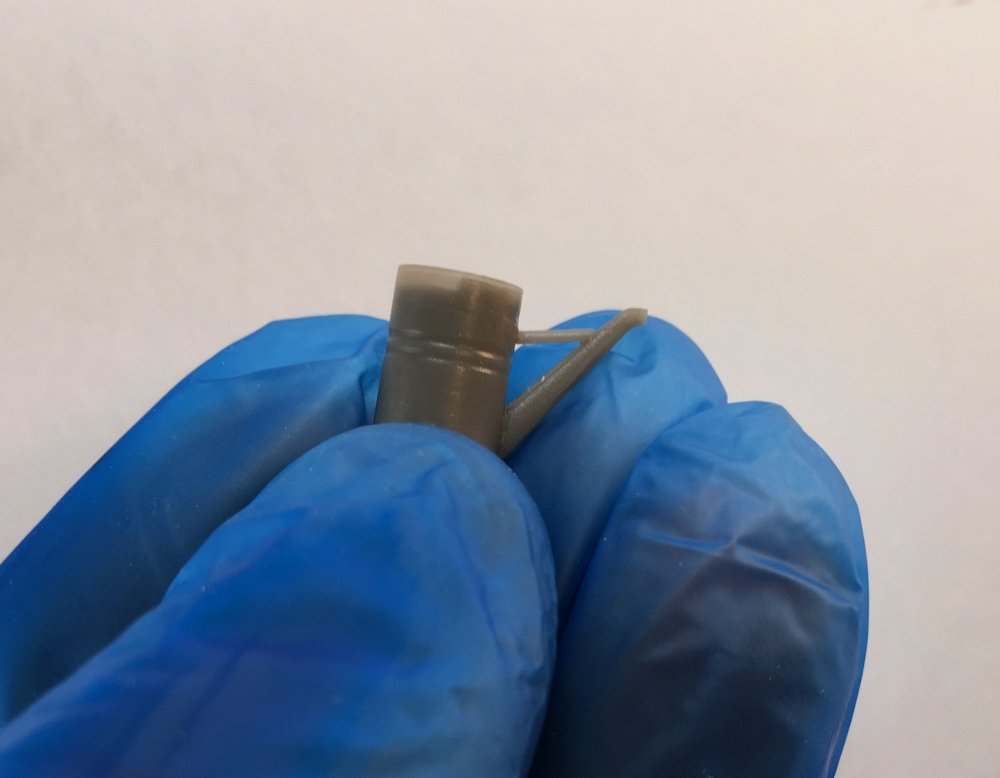
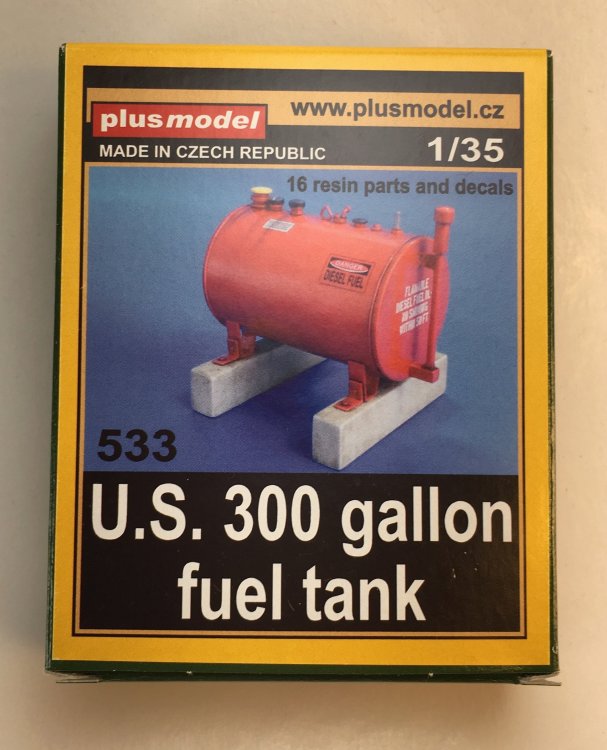
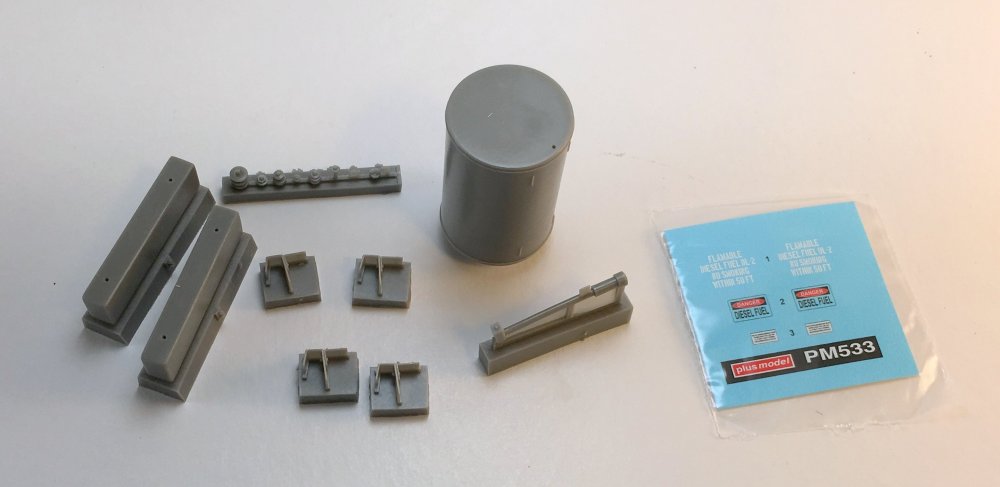
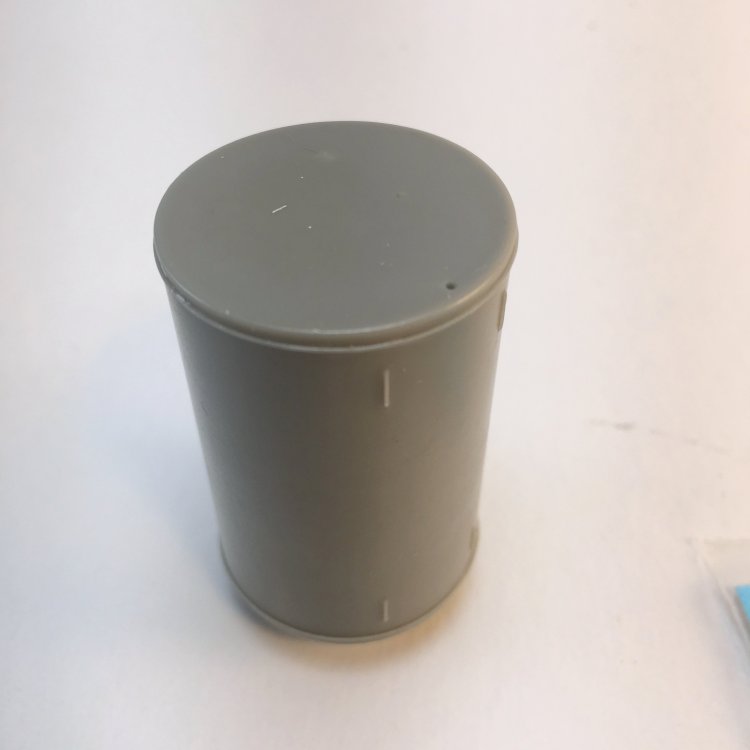
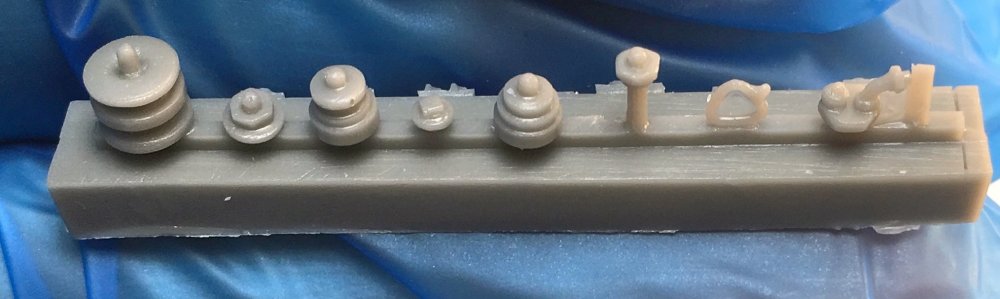
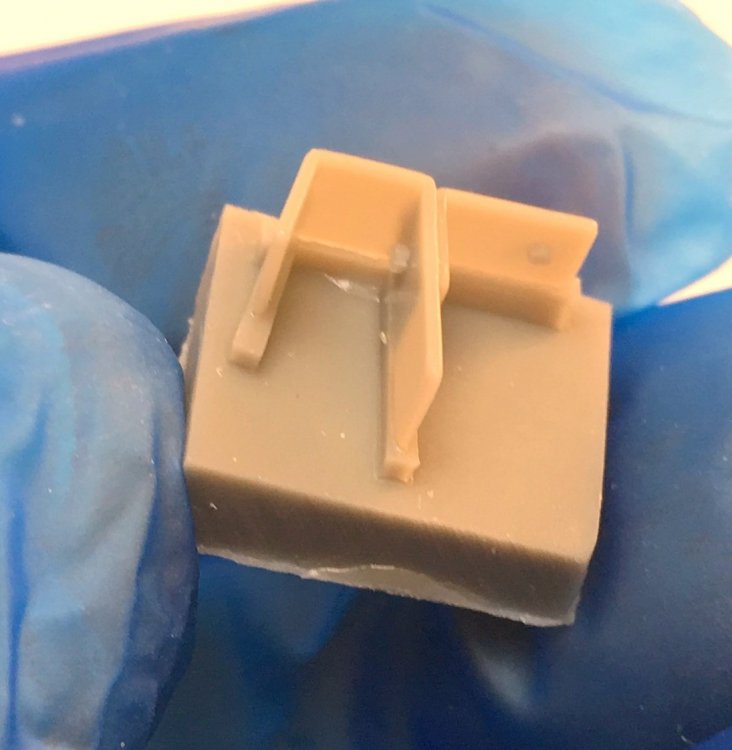
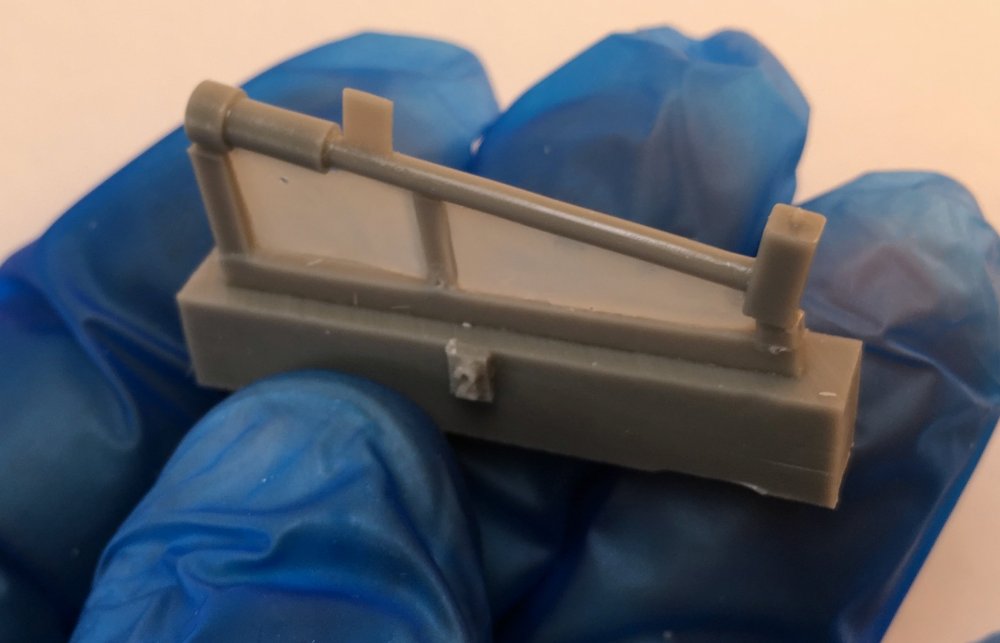
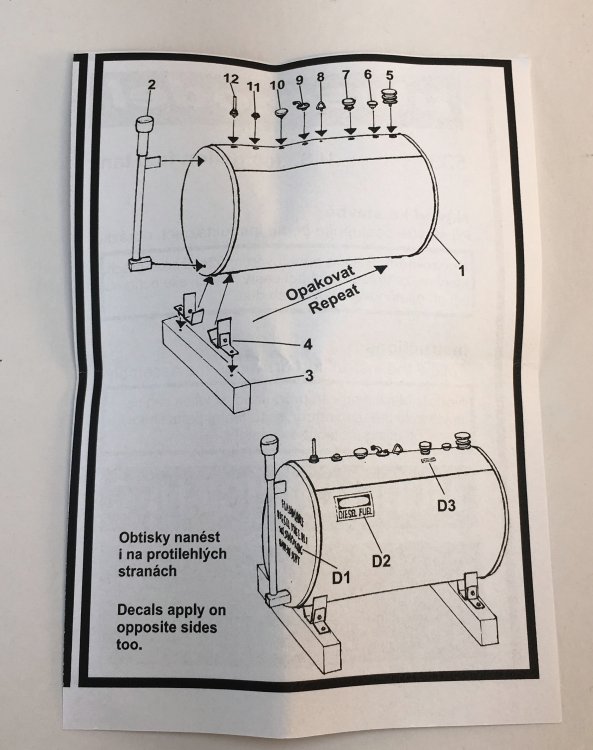
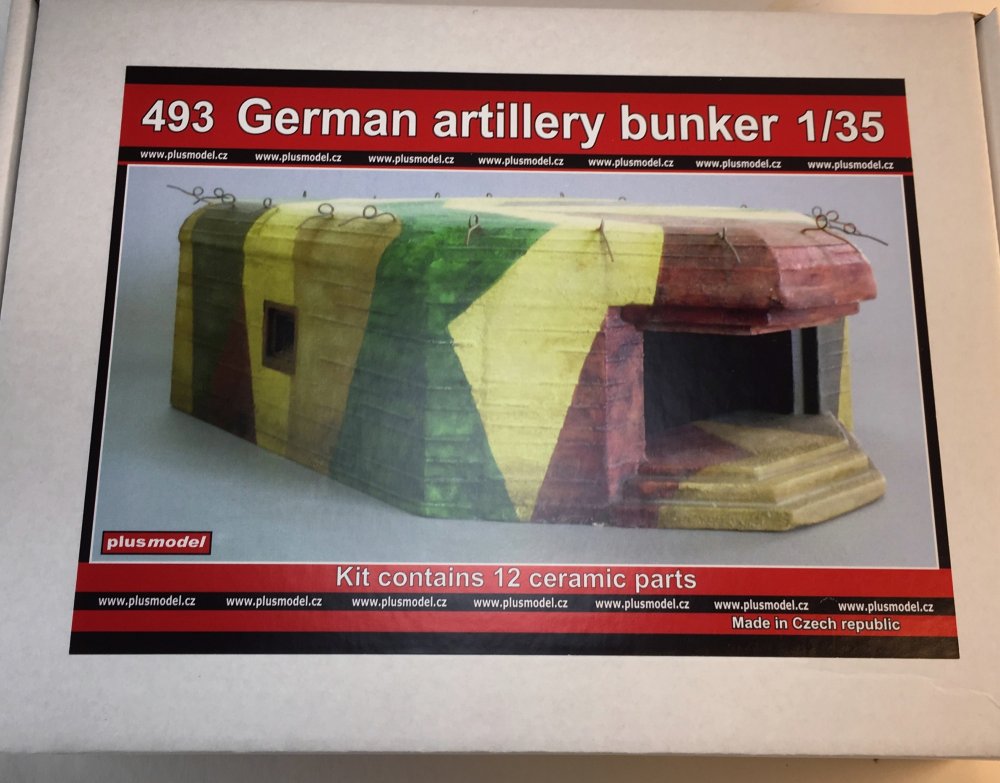
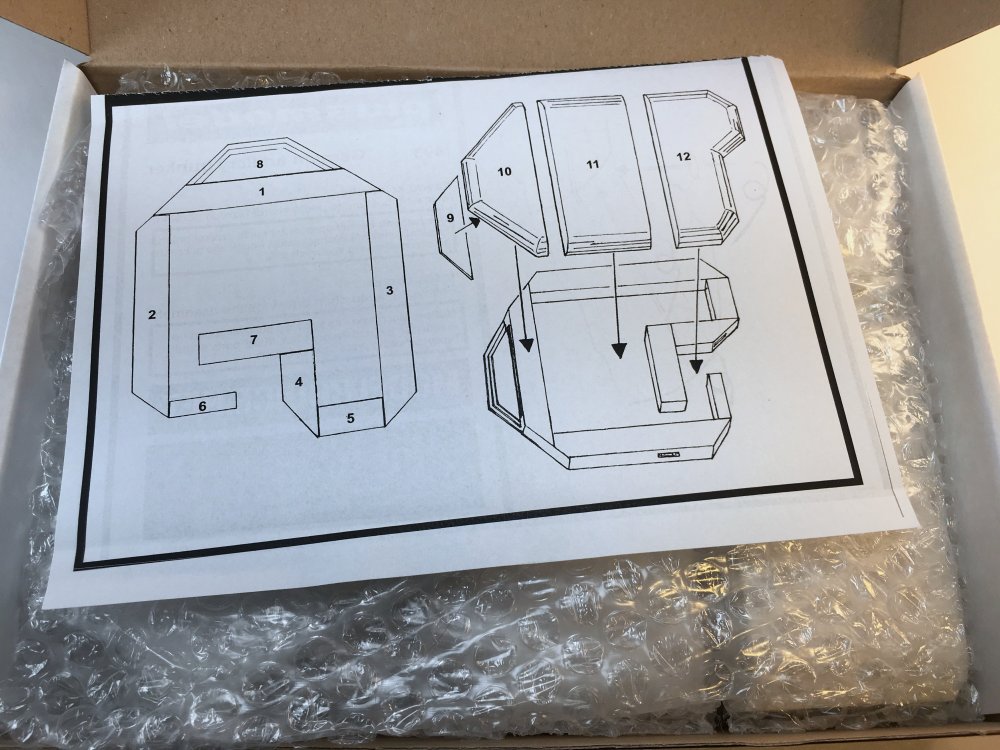
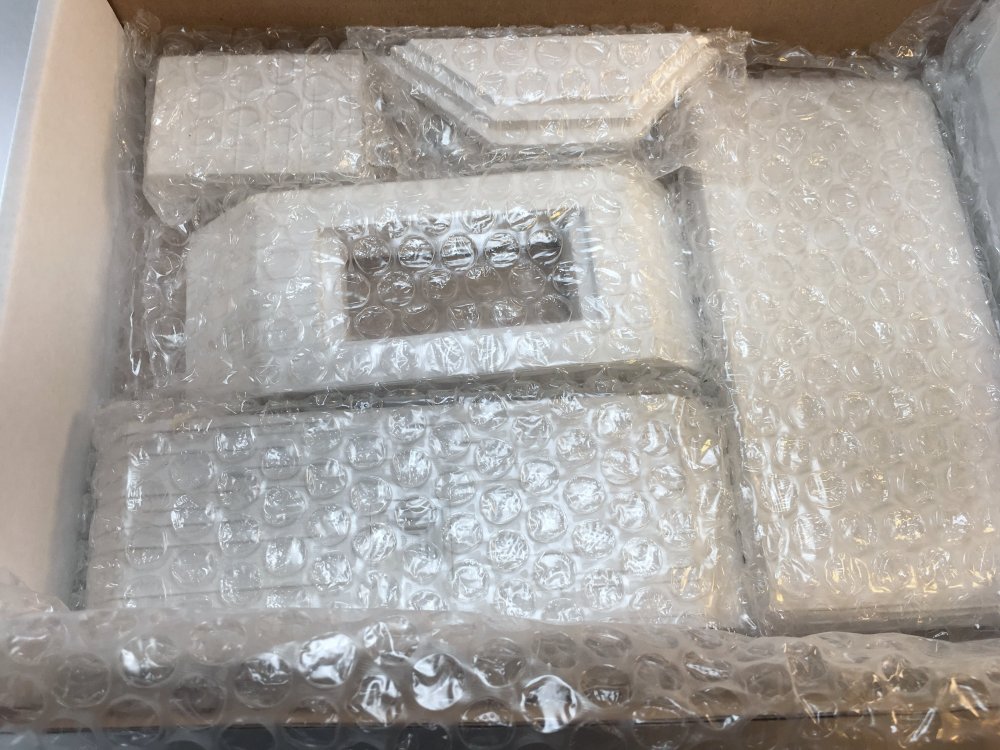
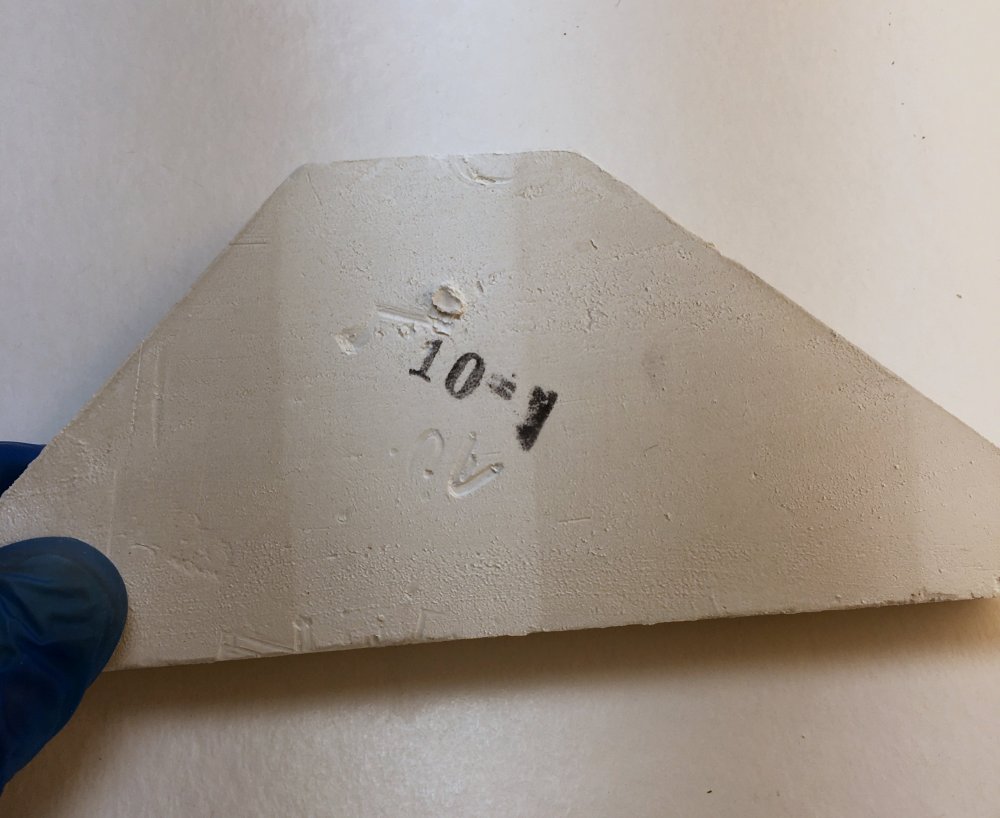
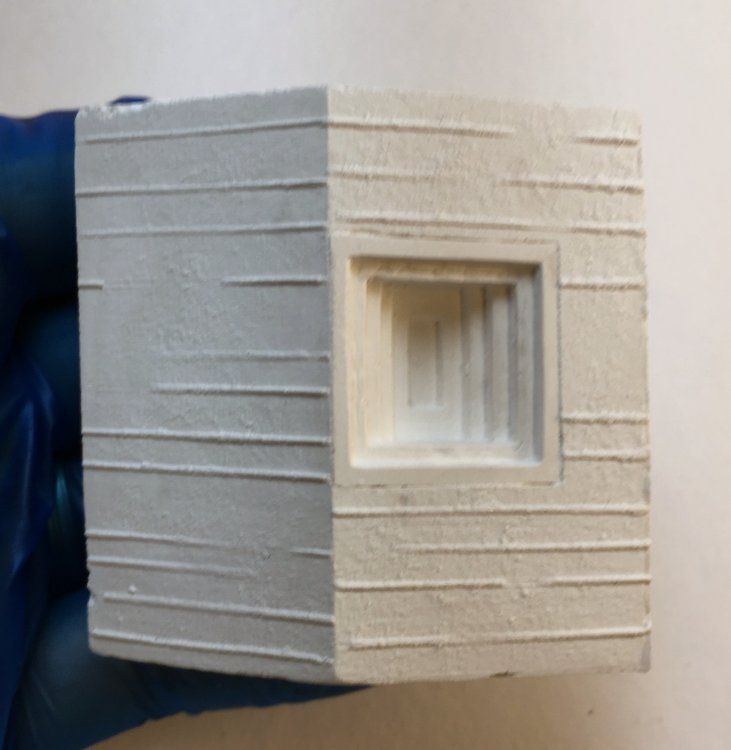
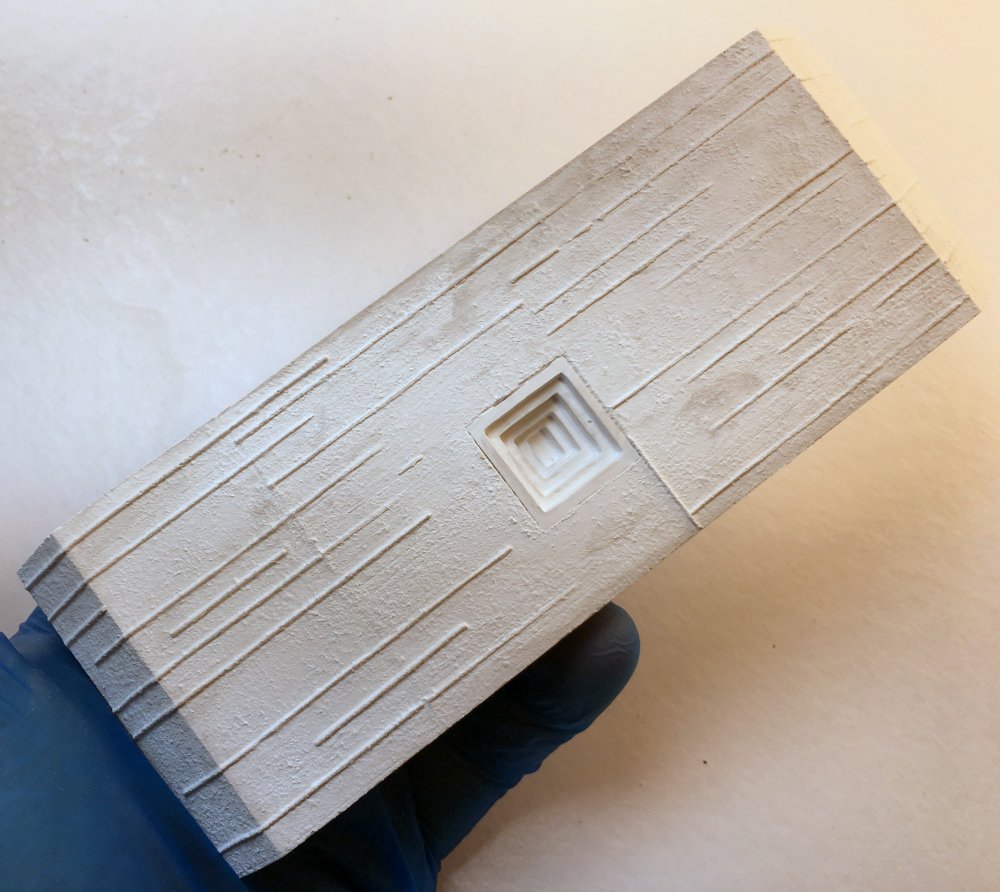
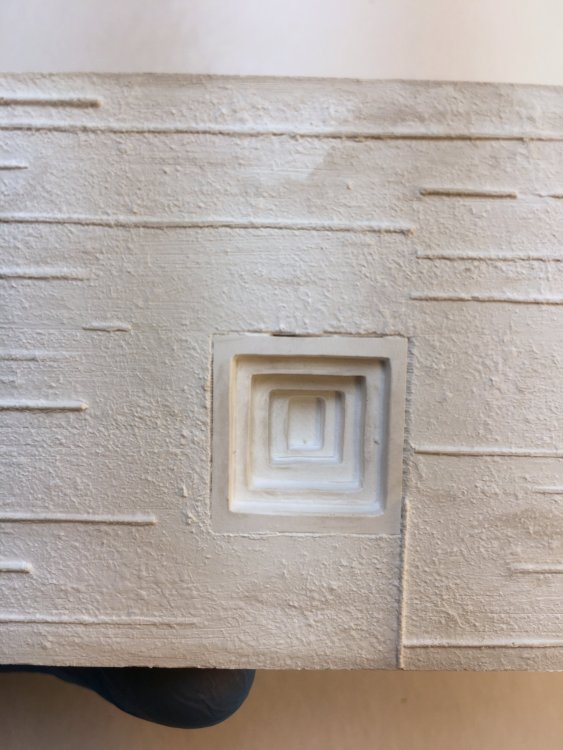
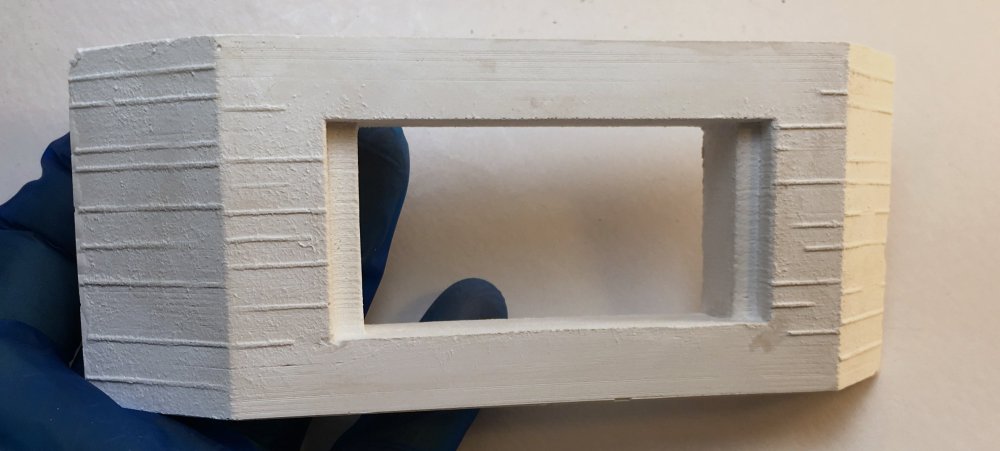
PLUSMODEL Diorama Accessories Sets and a Bunker (Garden Pump; U.S.300 gallon fuel tank and German Artillery Bunker”) Available from Plusmodel for the prices indicated below on the text Plusmodel is my favourite diorama accessories manufacture in modelling world as they do allied quality with originality. If your project is a vignette or a diorama, then Plusmodel is your solutions. All the samples come with the usual packing, in small paper boxes with the parts wrap in bubbles plastic. Garden Pump Catalogue n.º 532 Prize tag: 19.70$/13.80€ In a diorama, the small details are the ones that give live to your work. This garden pump is a complete set with base, a slide, pump and two watering cans. The pump is well cast in a single and delicate with good detail. The watering cans are in two sizes and are semi-hollow, allowing the modeller to add the water. The slide is in a single piece, well cast and quite fine simulating the real structure. U.S. 300 gallon fuel tank Catalogue n.º 533 Price Tag: $22.40/€15.70 Now a set for modern subject, not really small but with not many parts, only 18 resin and a small decal sheet. All the parts are cast in light gray resin and no warps or casting imperfections. The decal sheet, as all others, looks like Plusmodel own production, with very good registration, color pigmentation and very thin carrier film. The fuel tank is support in two cement beans, giving the modellers a good details on the fuel tank structure. The fuel tank itself has lots of upper details with all gauges and valves, 8 to be precise. The instructions are a simple paper sheet with an assembly diagram, decal placement directions. Nothing to report on this one, as they are clear to follow in the construction and decal guidance. No color guide is given as it's up to anyone imagination, as practically it's up to your imagination and probably your imagination will not match the reality. German Artillery Bunker Catalog n.º 493 Price tag: $39.10/27.40€ This bunker has no resin, only plaster parts, but its big and imposing presence with 12 parts. The plaster parts are very well conceived and its quite easy to get it all together in no time. The parts don’t need any cleaning being ready to assemble and paint. The plaster texture is perfect to simulate concrete so do not soft the surface. Its rough tans its perfect like that. No decals sheet, and to be honest, none is necessary. The instructions are quite easy to follow and I believe that even with no instructions, this bunker is a shake´nd´bake. Conclusion I`m afraid that I becoming repetitive about Plusmodel quality but is their fault. These sets just have everything for your diorama: quality, easy to construct, originality and good prices. What do you want more? If these sets are what you need to enhance your diorama just do it and treat yourself and your work and project. VERY HIGHLY RECOMMEND Our truly thanks to Plusmodel for these review samples.


-
-
Fantastic review mate!! I ordered mine in Pre-order and its coming now!
-
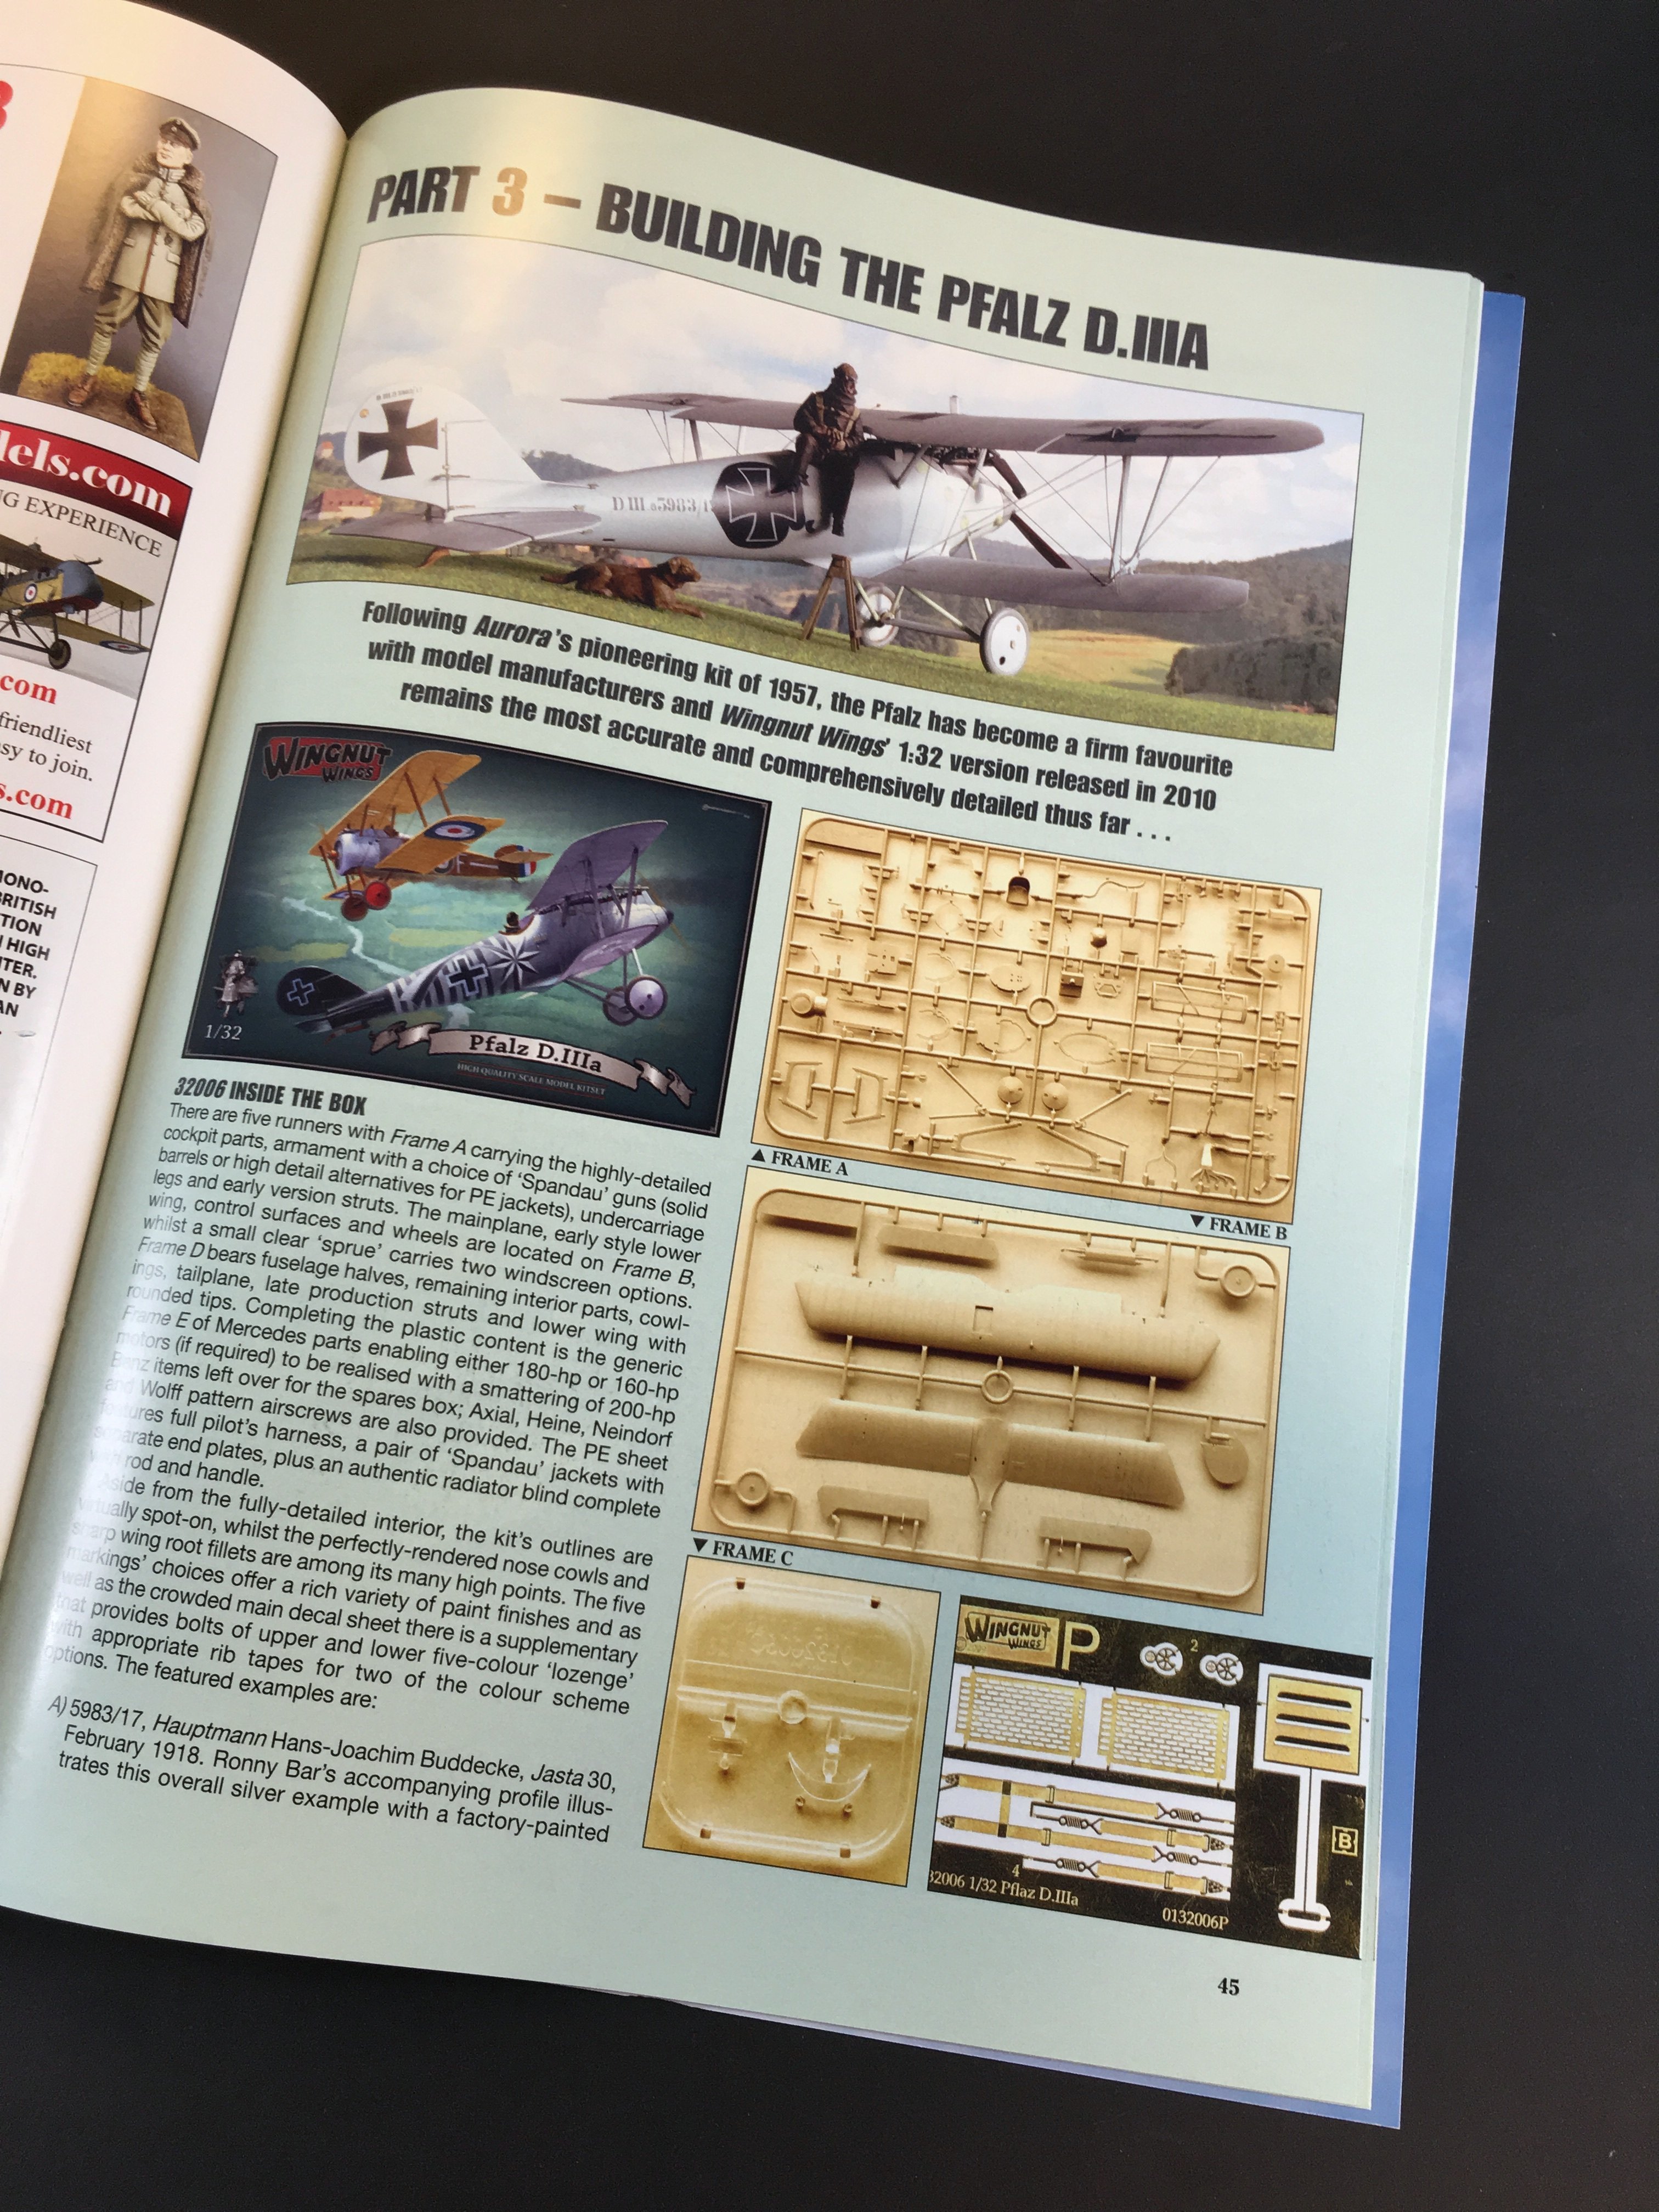
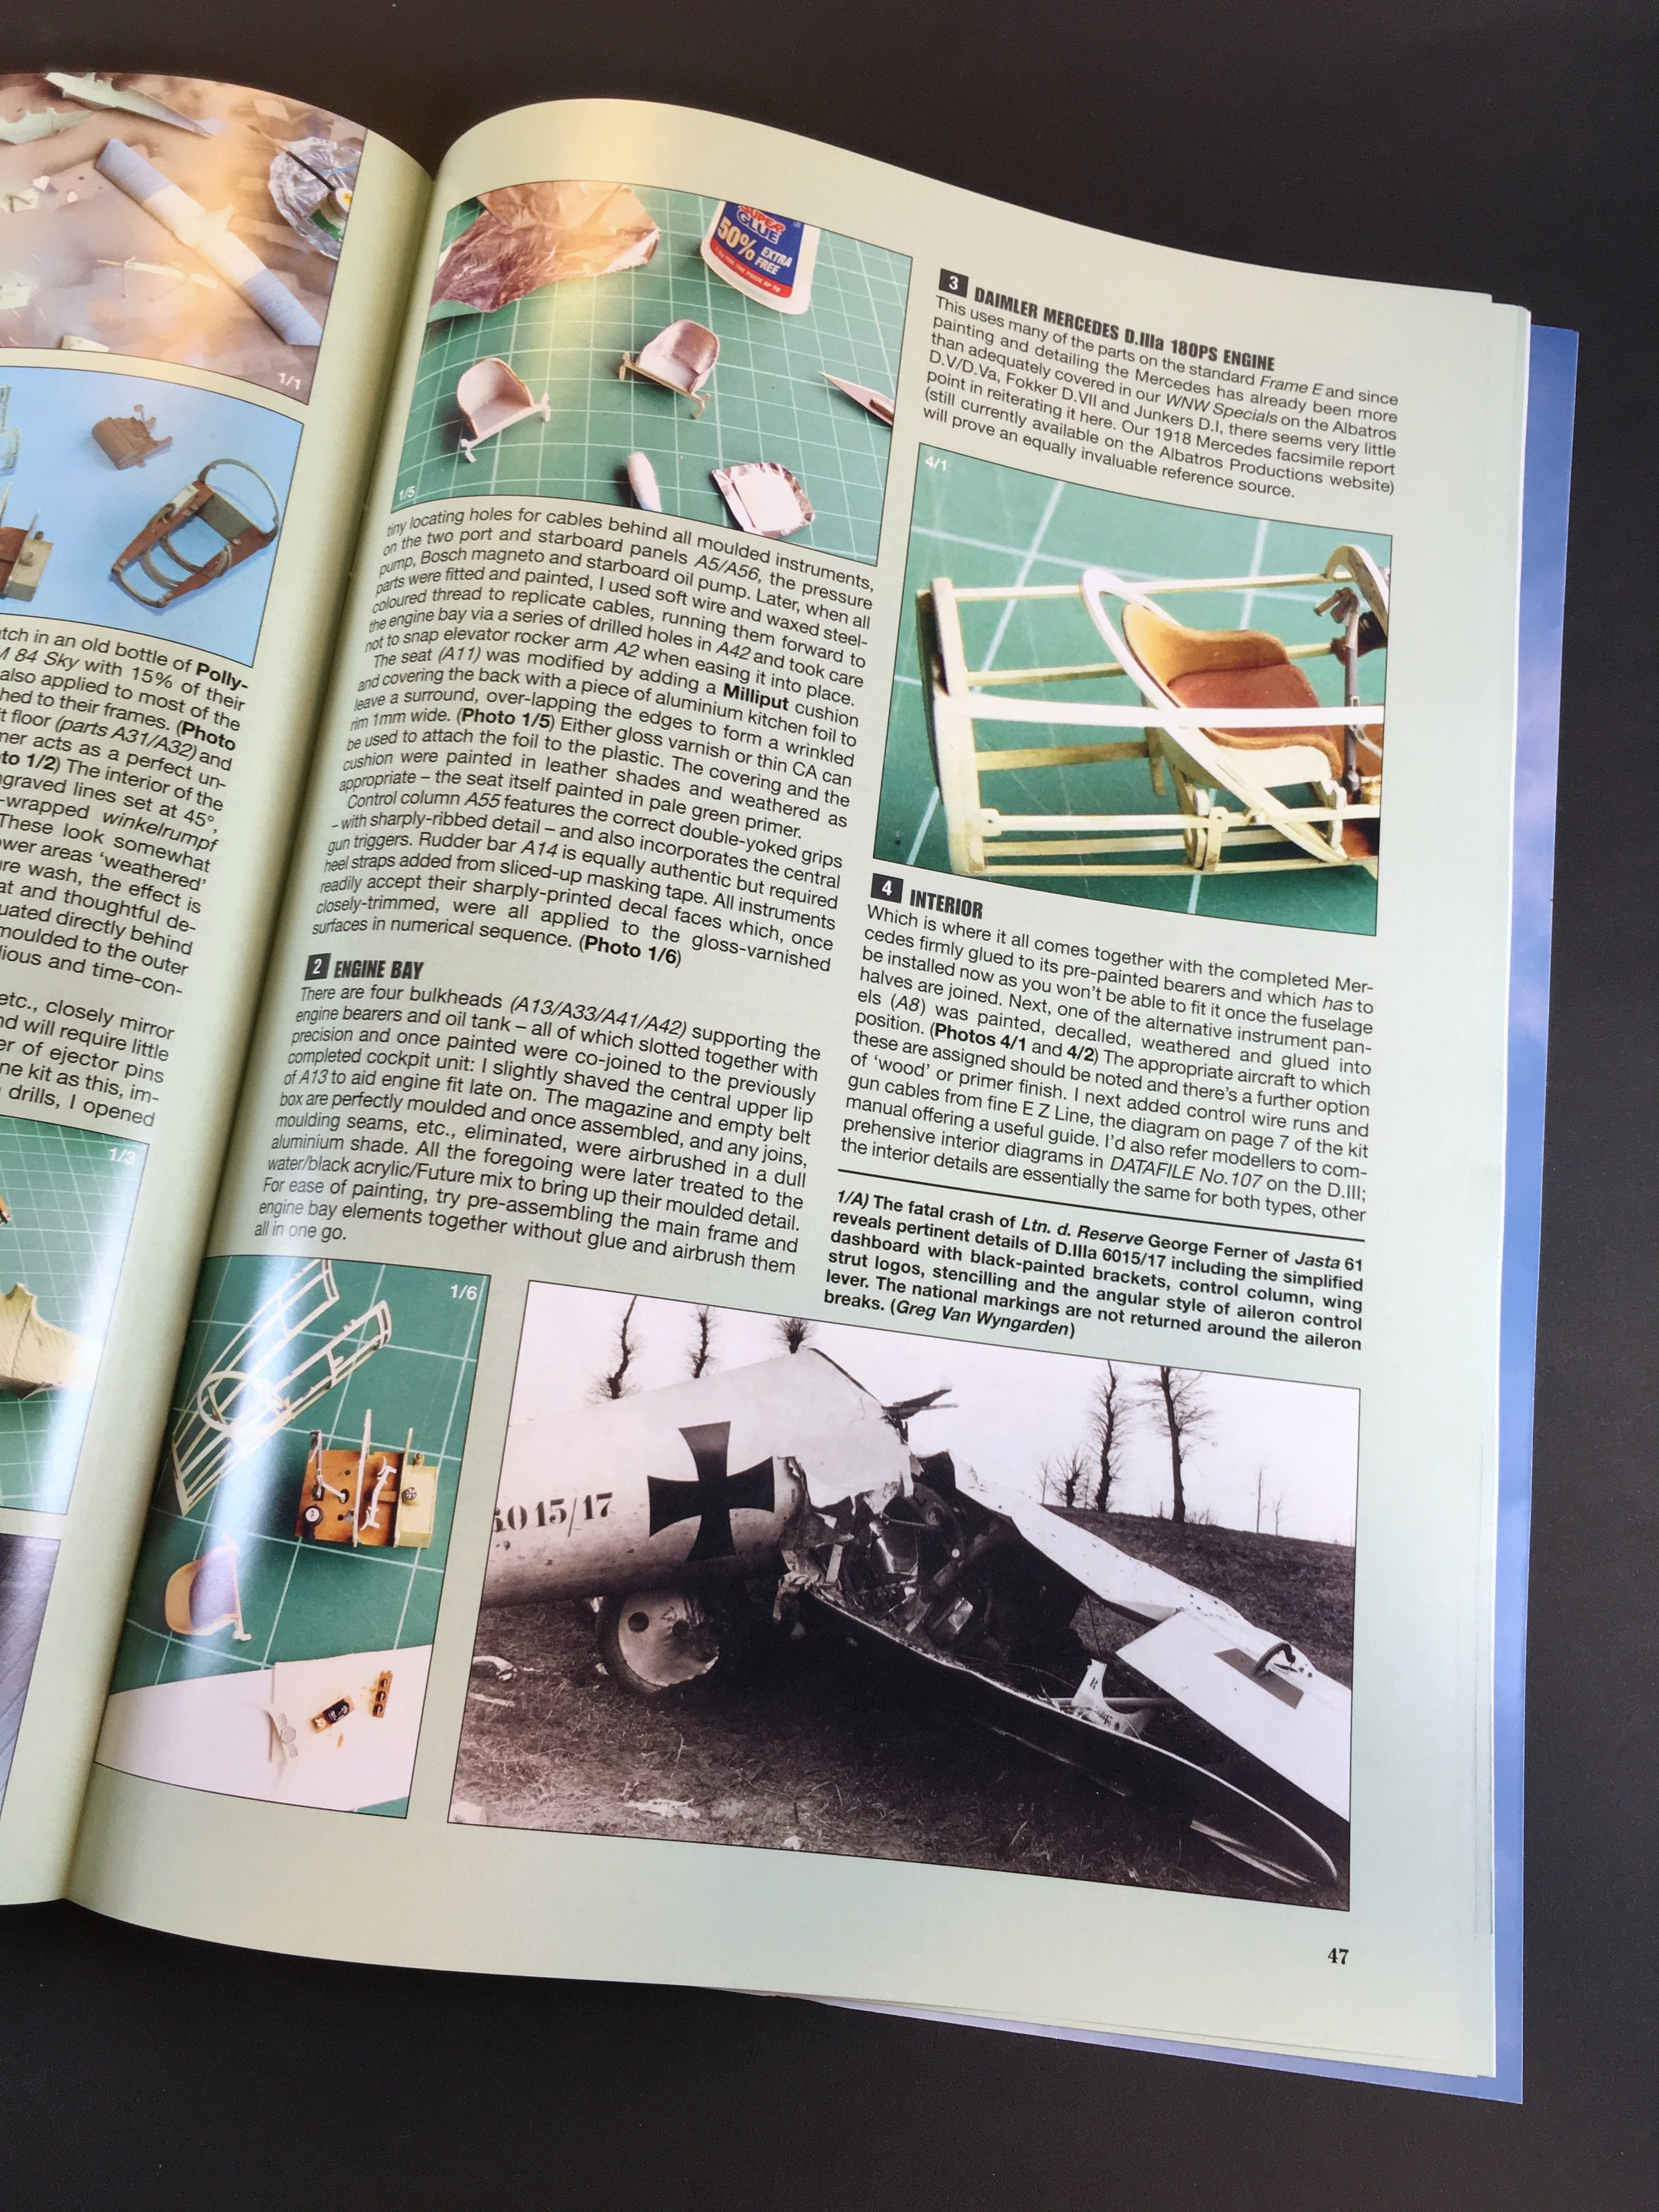
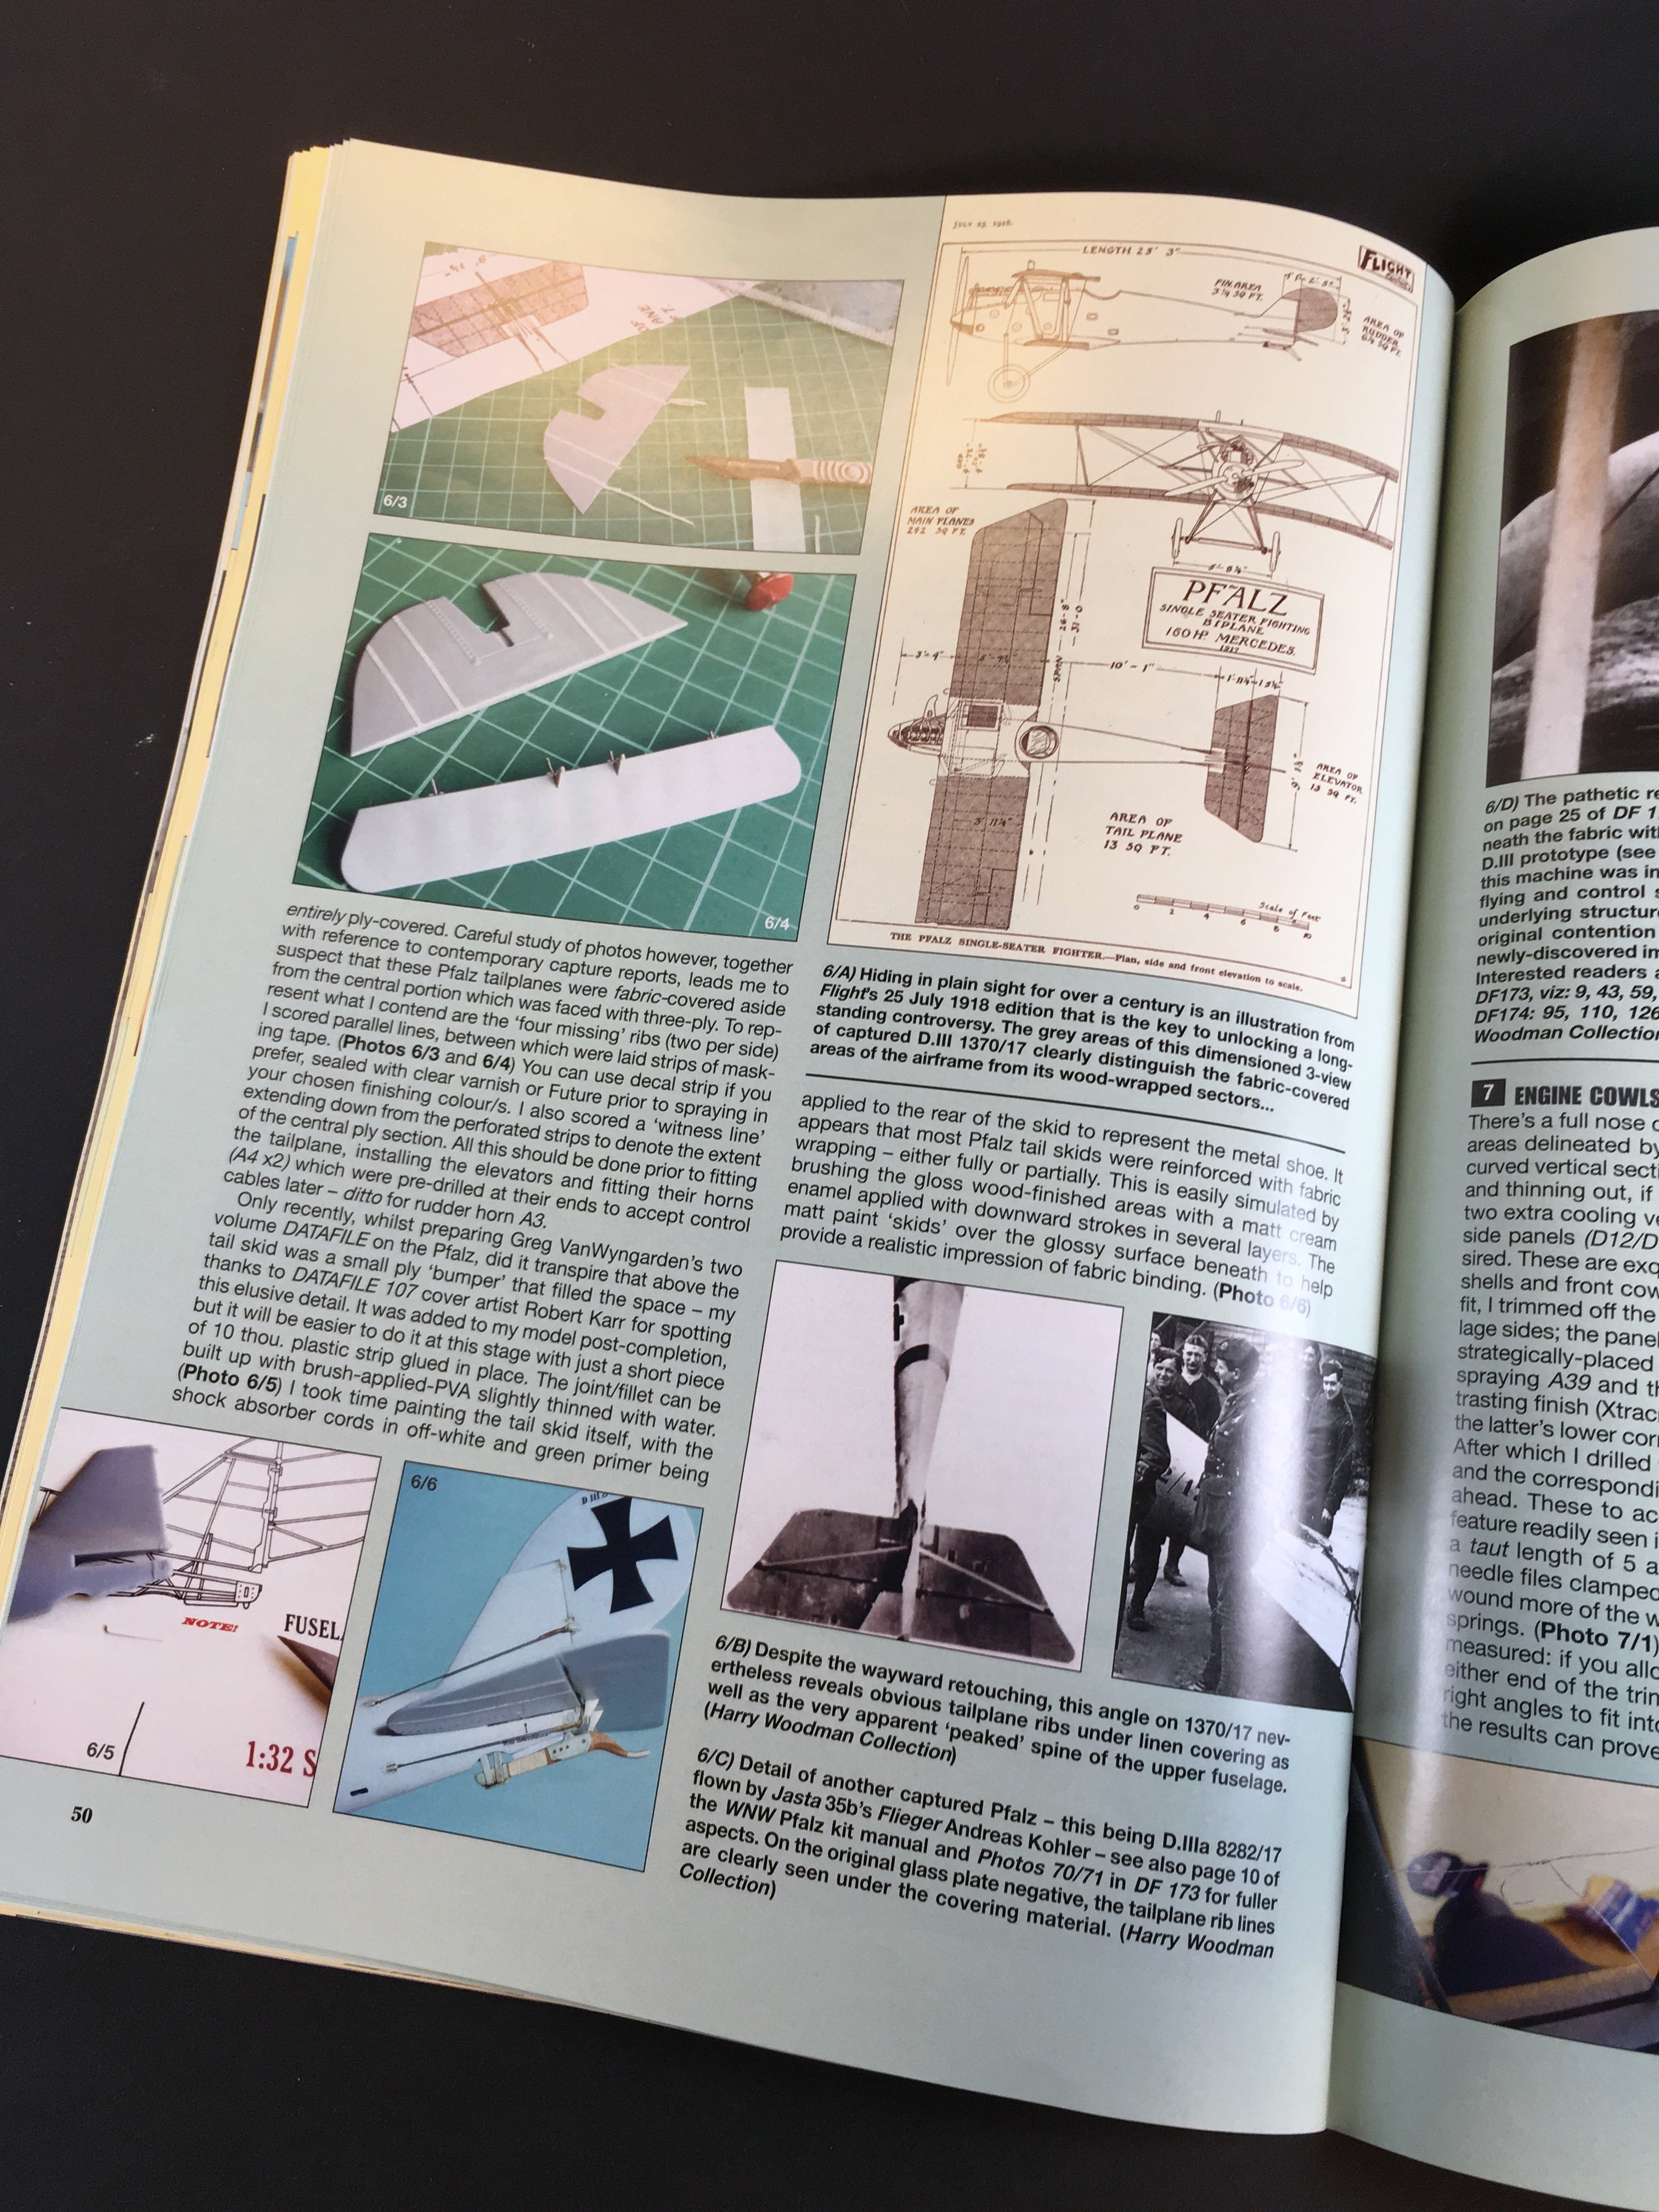
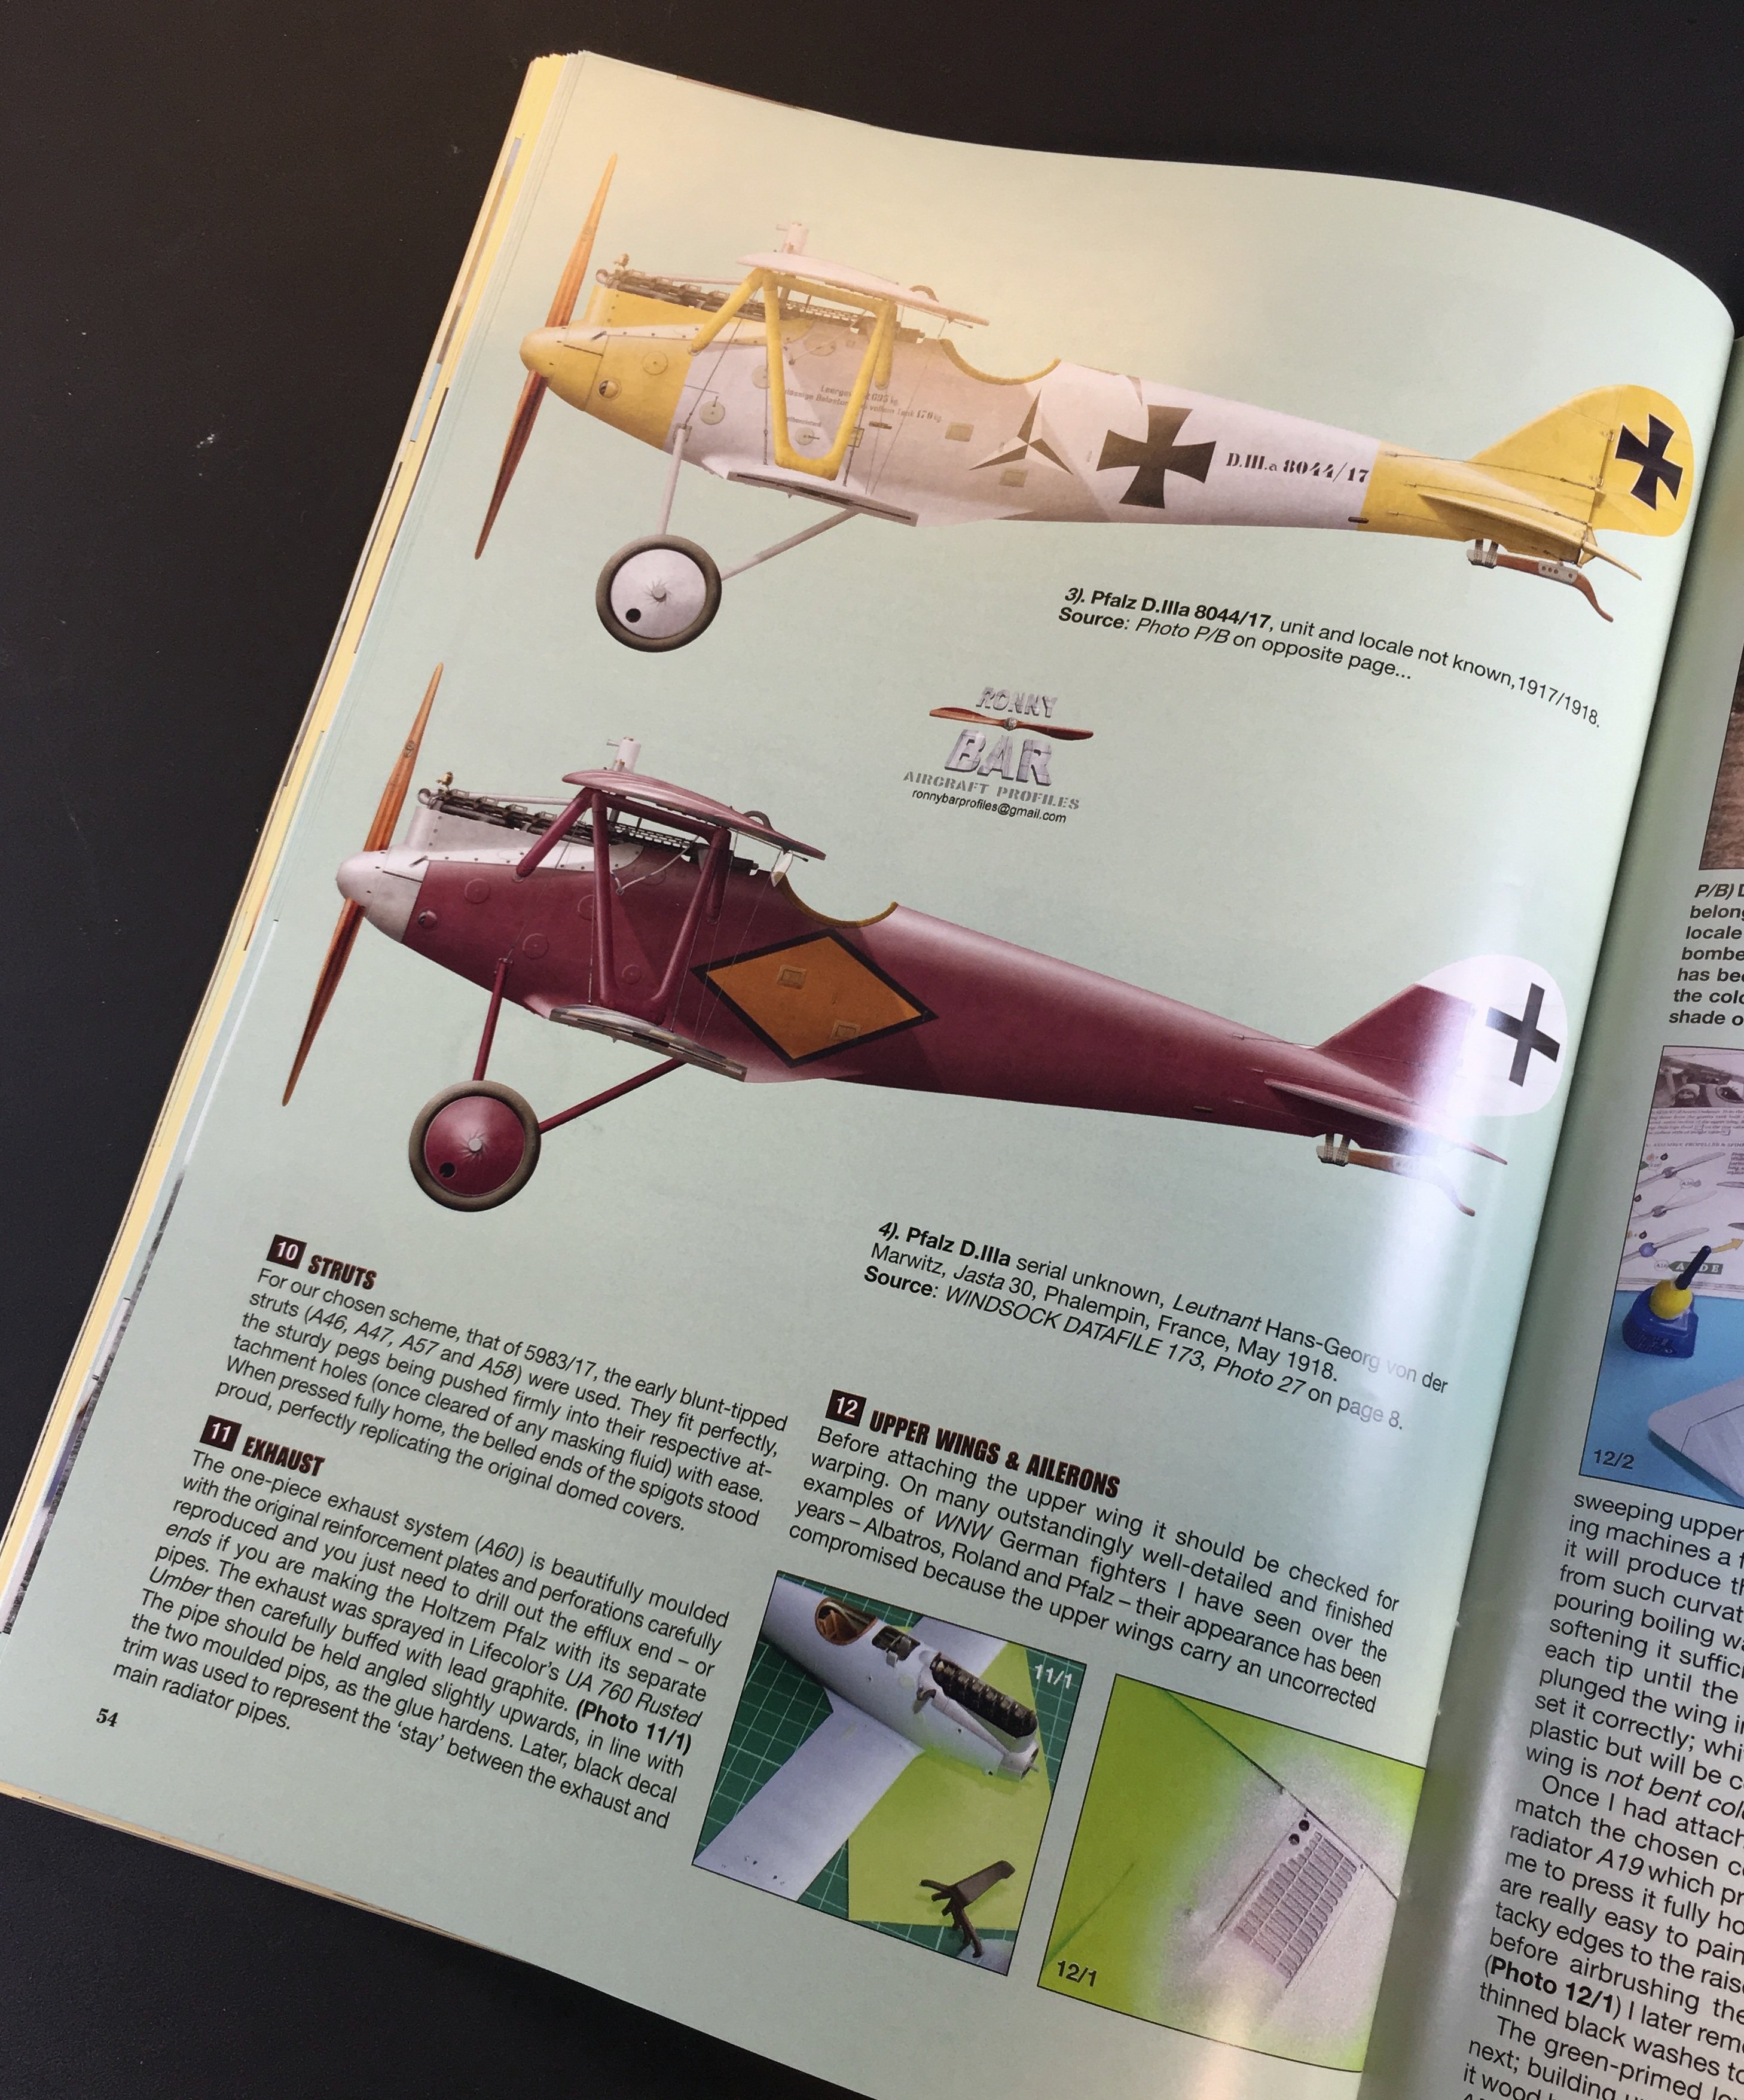
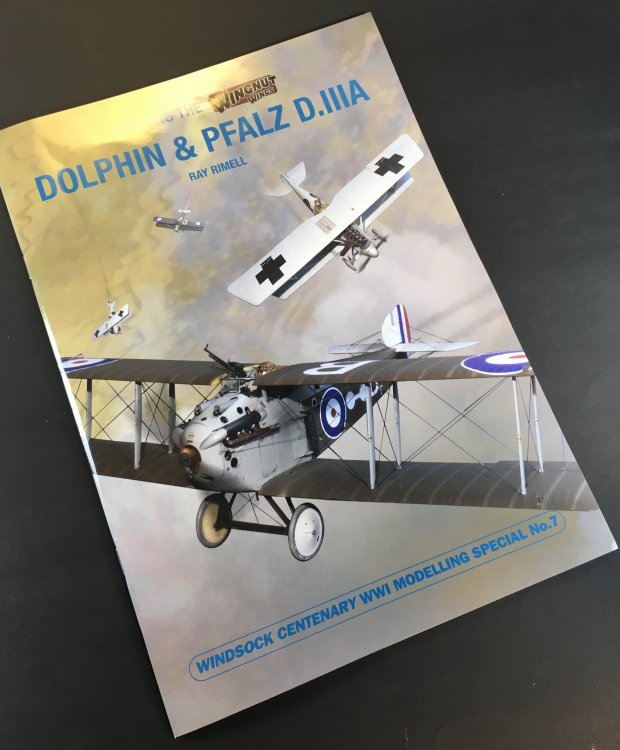
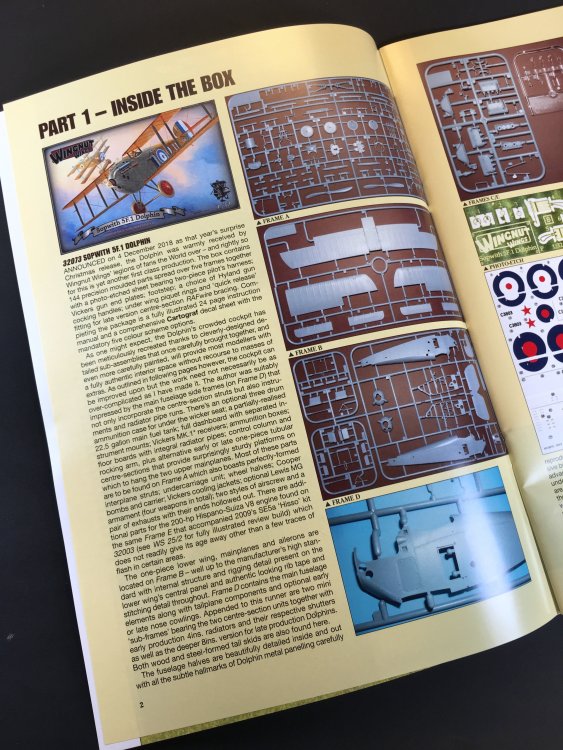
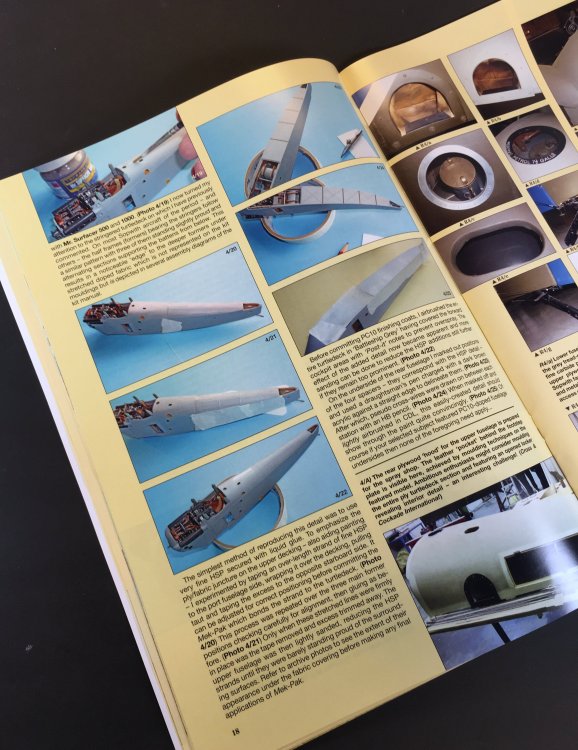
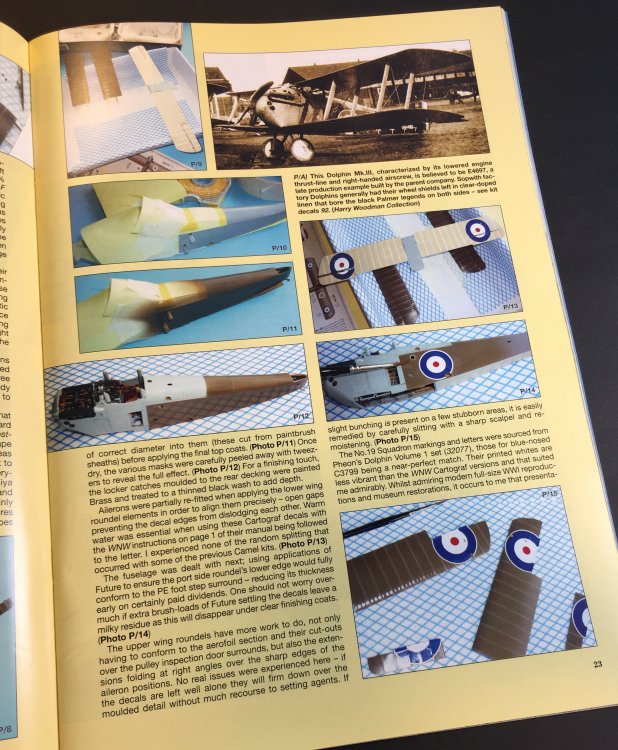
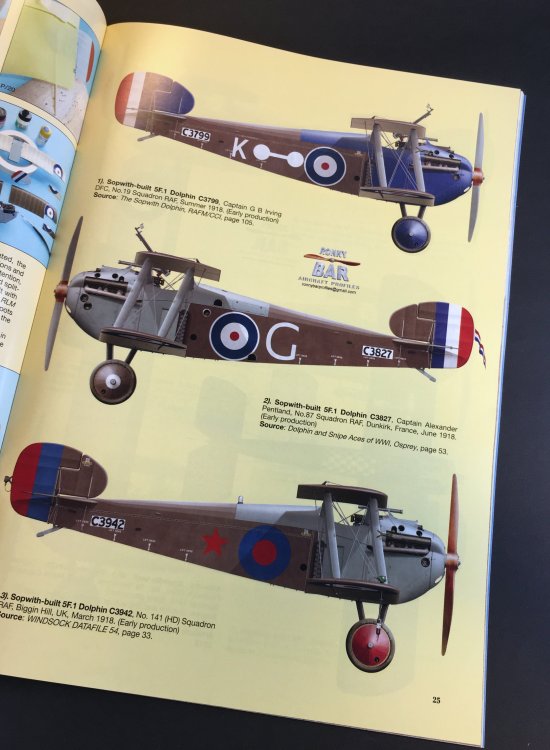
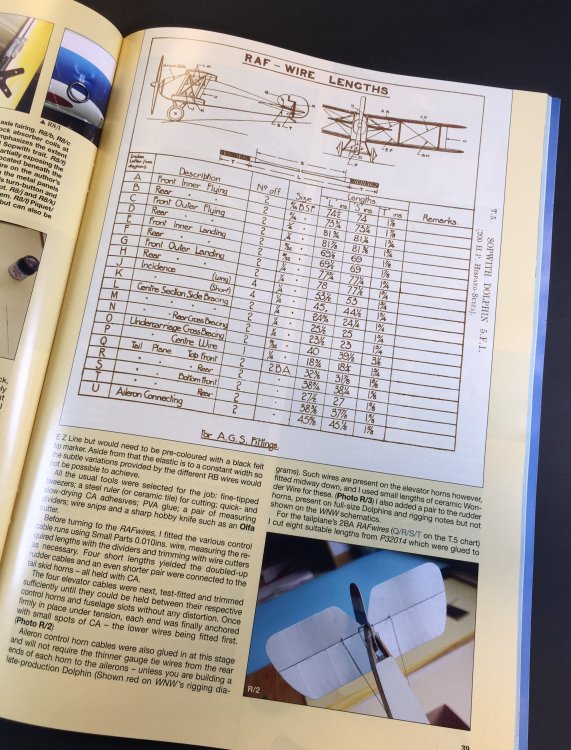
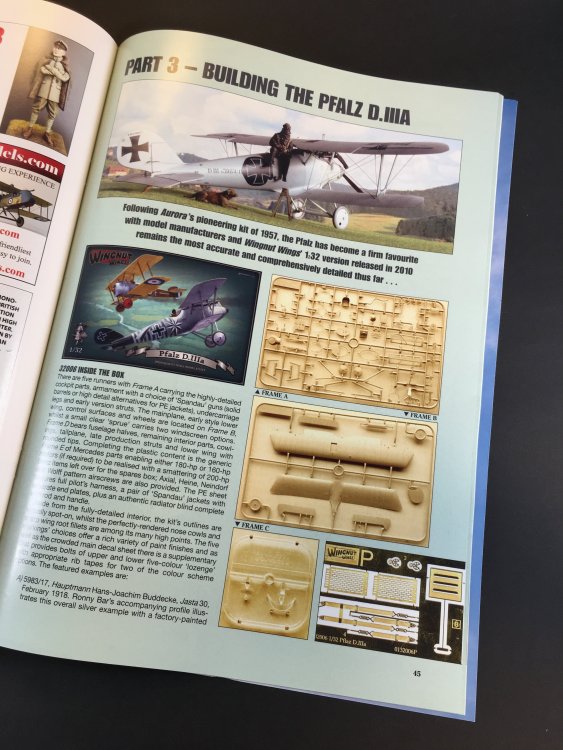
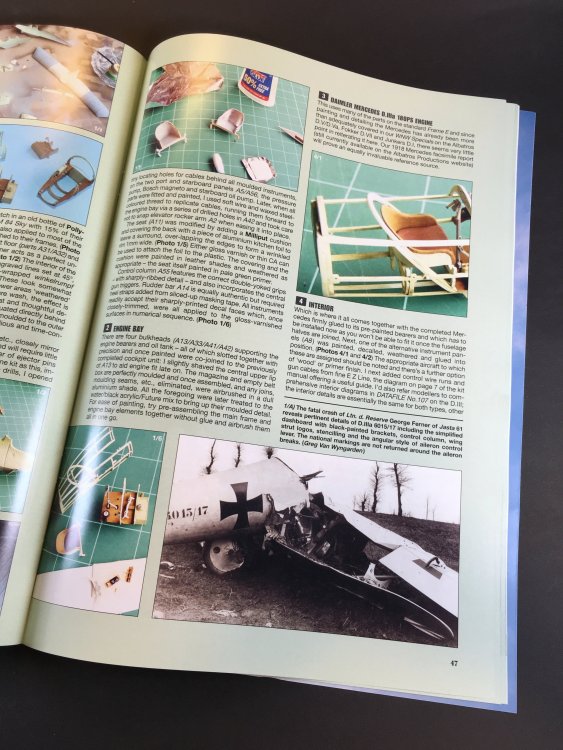
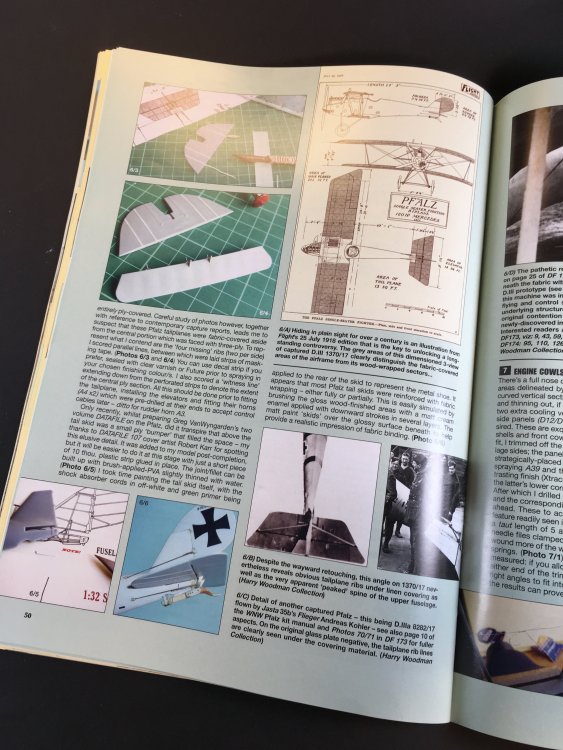
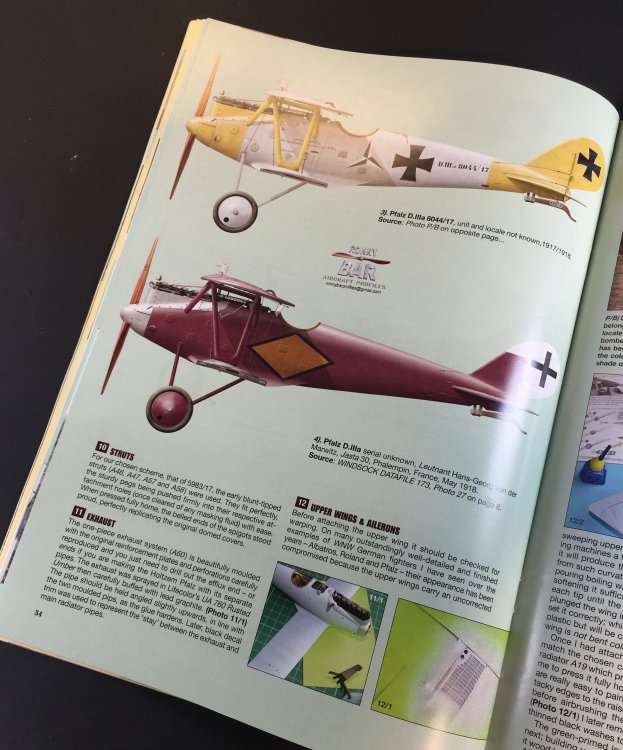
Building the Wingnut Wings Dolphin & PFALZ D.IIIa By Ray Rimell The "Building the Wingnut Wings" series is already a mark and a most to all WnW models. There were several titles already and all of them were and are a reference in the way you can build a WnW like a master modeler. This title is in the same editorial and design line as all others so you get lots of details and explicit text of how to do it all step of the build, accompanied with construction pics (which I would like that would be bigger) and some very nice detail shots of the real aircraft taken from various museum type, restorations/rebuilds/new builds. So, along 60 pages, Ray brings us five sections: Inside the Box Building the Sopwith Dolphin 5F,1 Dolphin Building the Pfalz D.IIIA Aftermarket Accessories and Decals Appendices Being the new model the largest portion is dedicated to the Dolphin build, covering 43 pages in total. The other 17 pages are for the Pfalz D.IIIA, with the same structure: good self-explanation WIP pictures and excellent shots details of the Pfalz. So along Dolphin and Pfalz builds, very helpful close-up pics (excellent photos) are given alongside the construction. So when the author is tackling the cockpit, along with the text, constructions images, you got also real aircraft close-up pictures of the cockpit. And the same is made with all other segments, like the engine, wings, rigging etc. Also, some beautiful Ronny Bar profiles illustrate this volume which is the numerous excellent color profiles, 11 in total (7 Dolphin and 4 Pfalz). On page 59, in a closing note, a well-deserved tribute is made to Des Delatorre, who recently got wings to fly into blue skies. A fantastic recognition to whom made so many for WWI modeling CONCLUSION: The title is not a surprise for any WWI aviation modeler, and the quality still up high as we already are used to from Ray Rimmel and Albatros Publication. The text, with the close up pictures along with the model constructions pics is all you need to take your Dolphin and Pfalz to another level. On top of that, the Ronny Bar profiles are always welcome and this title “only” gives you 11 of them. So, once again, another must have to all WWI modeler aviation, especially for any Wingnutter. Review copy compliments of Ray Rimell at Albatros Publication.


-
- 3
-

-
- albatros publications
- windsock
- (and 2 more)
-
Happy Birthday Baby face!!
-
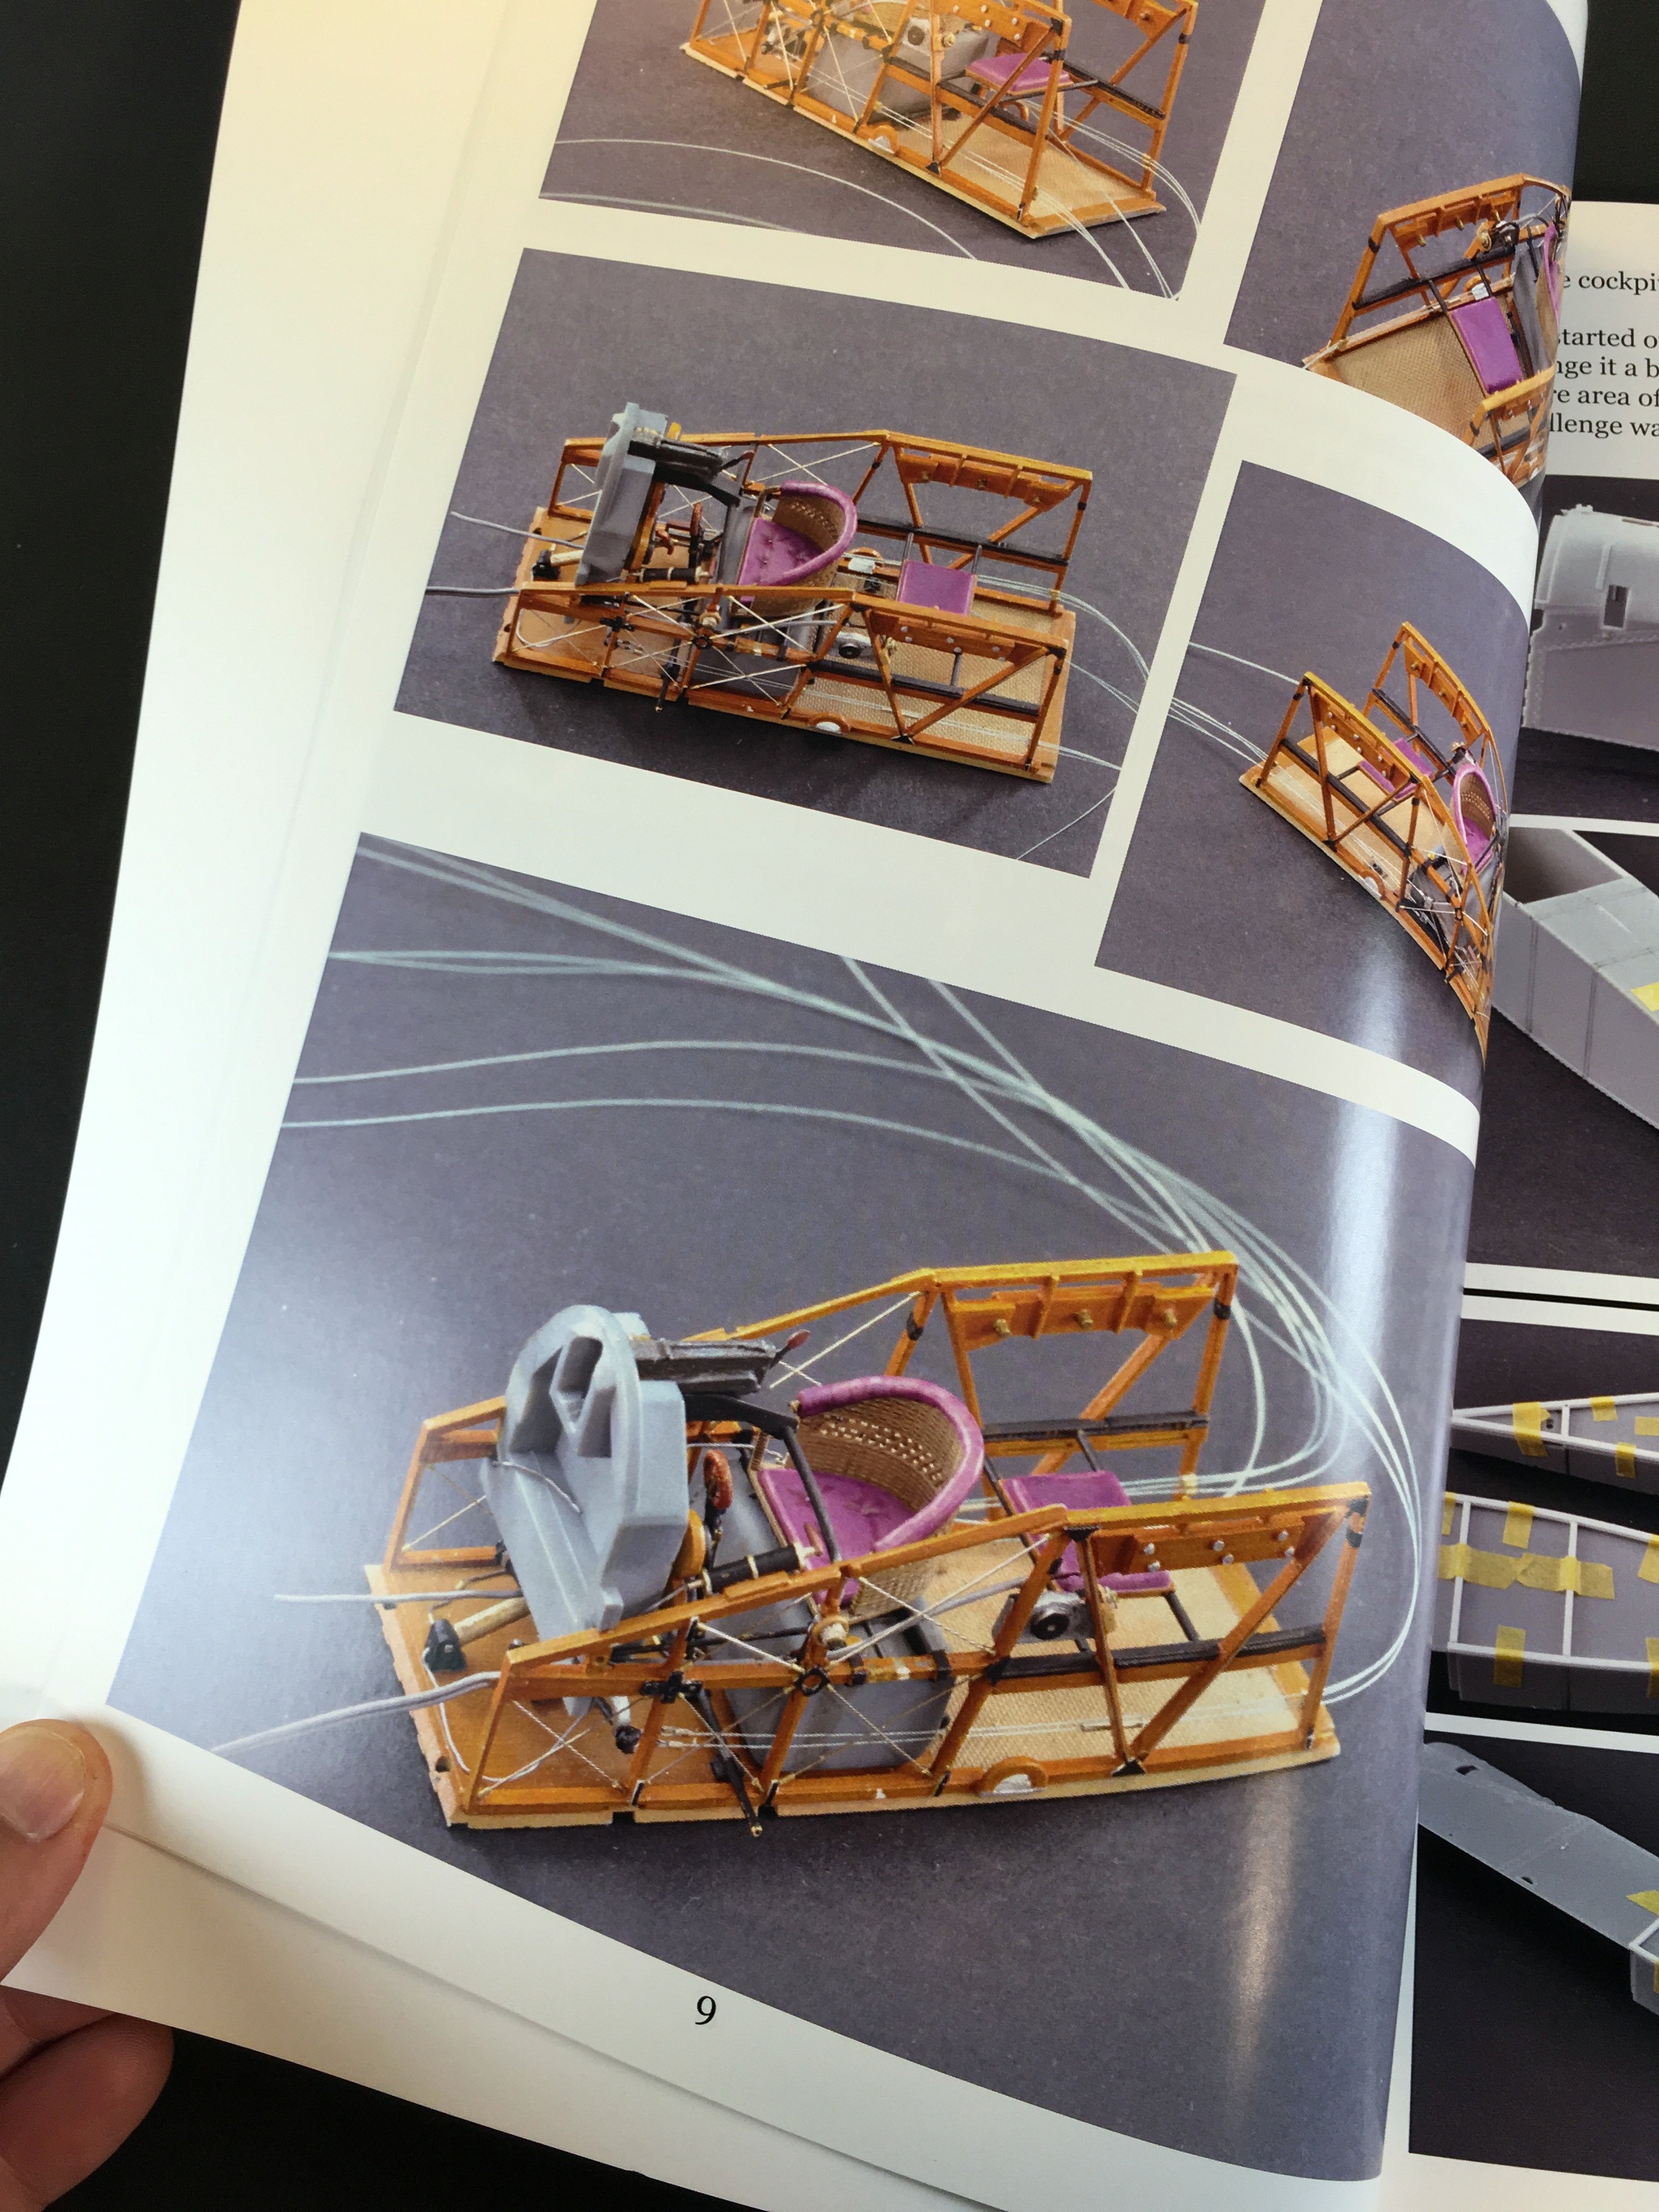
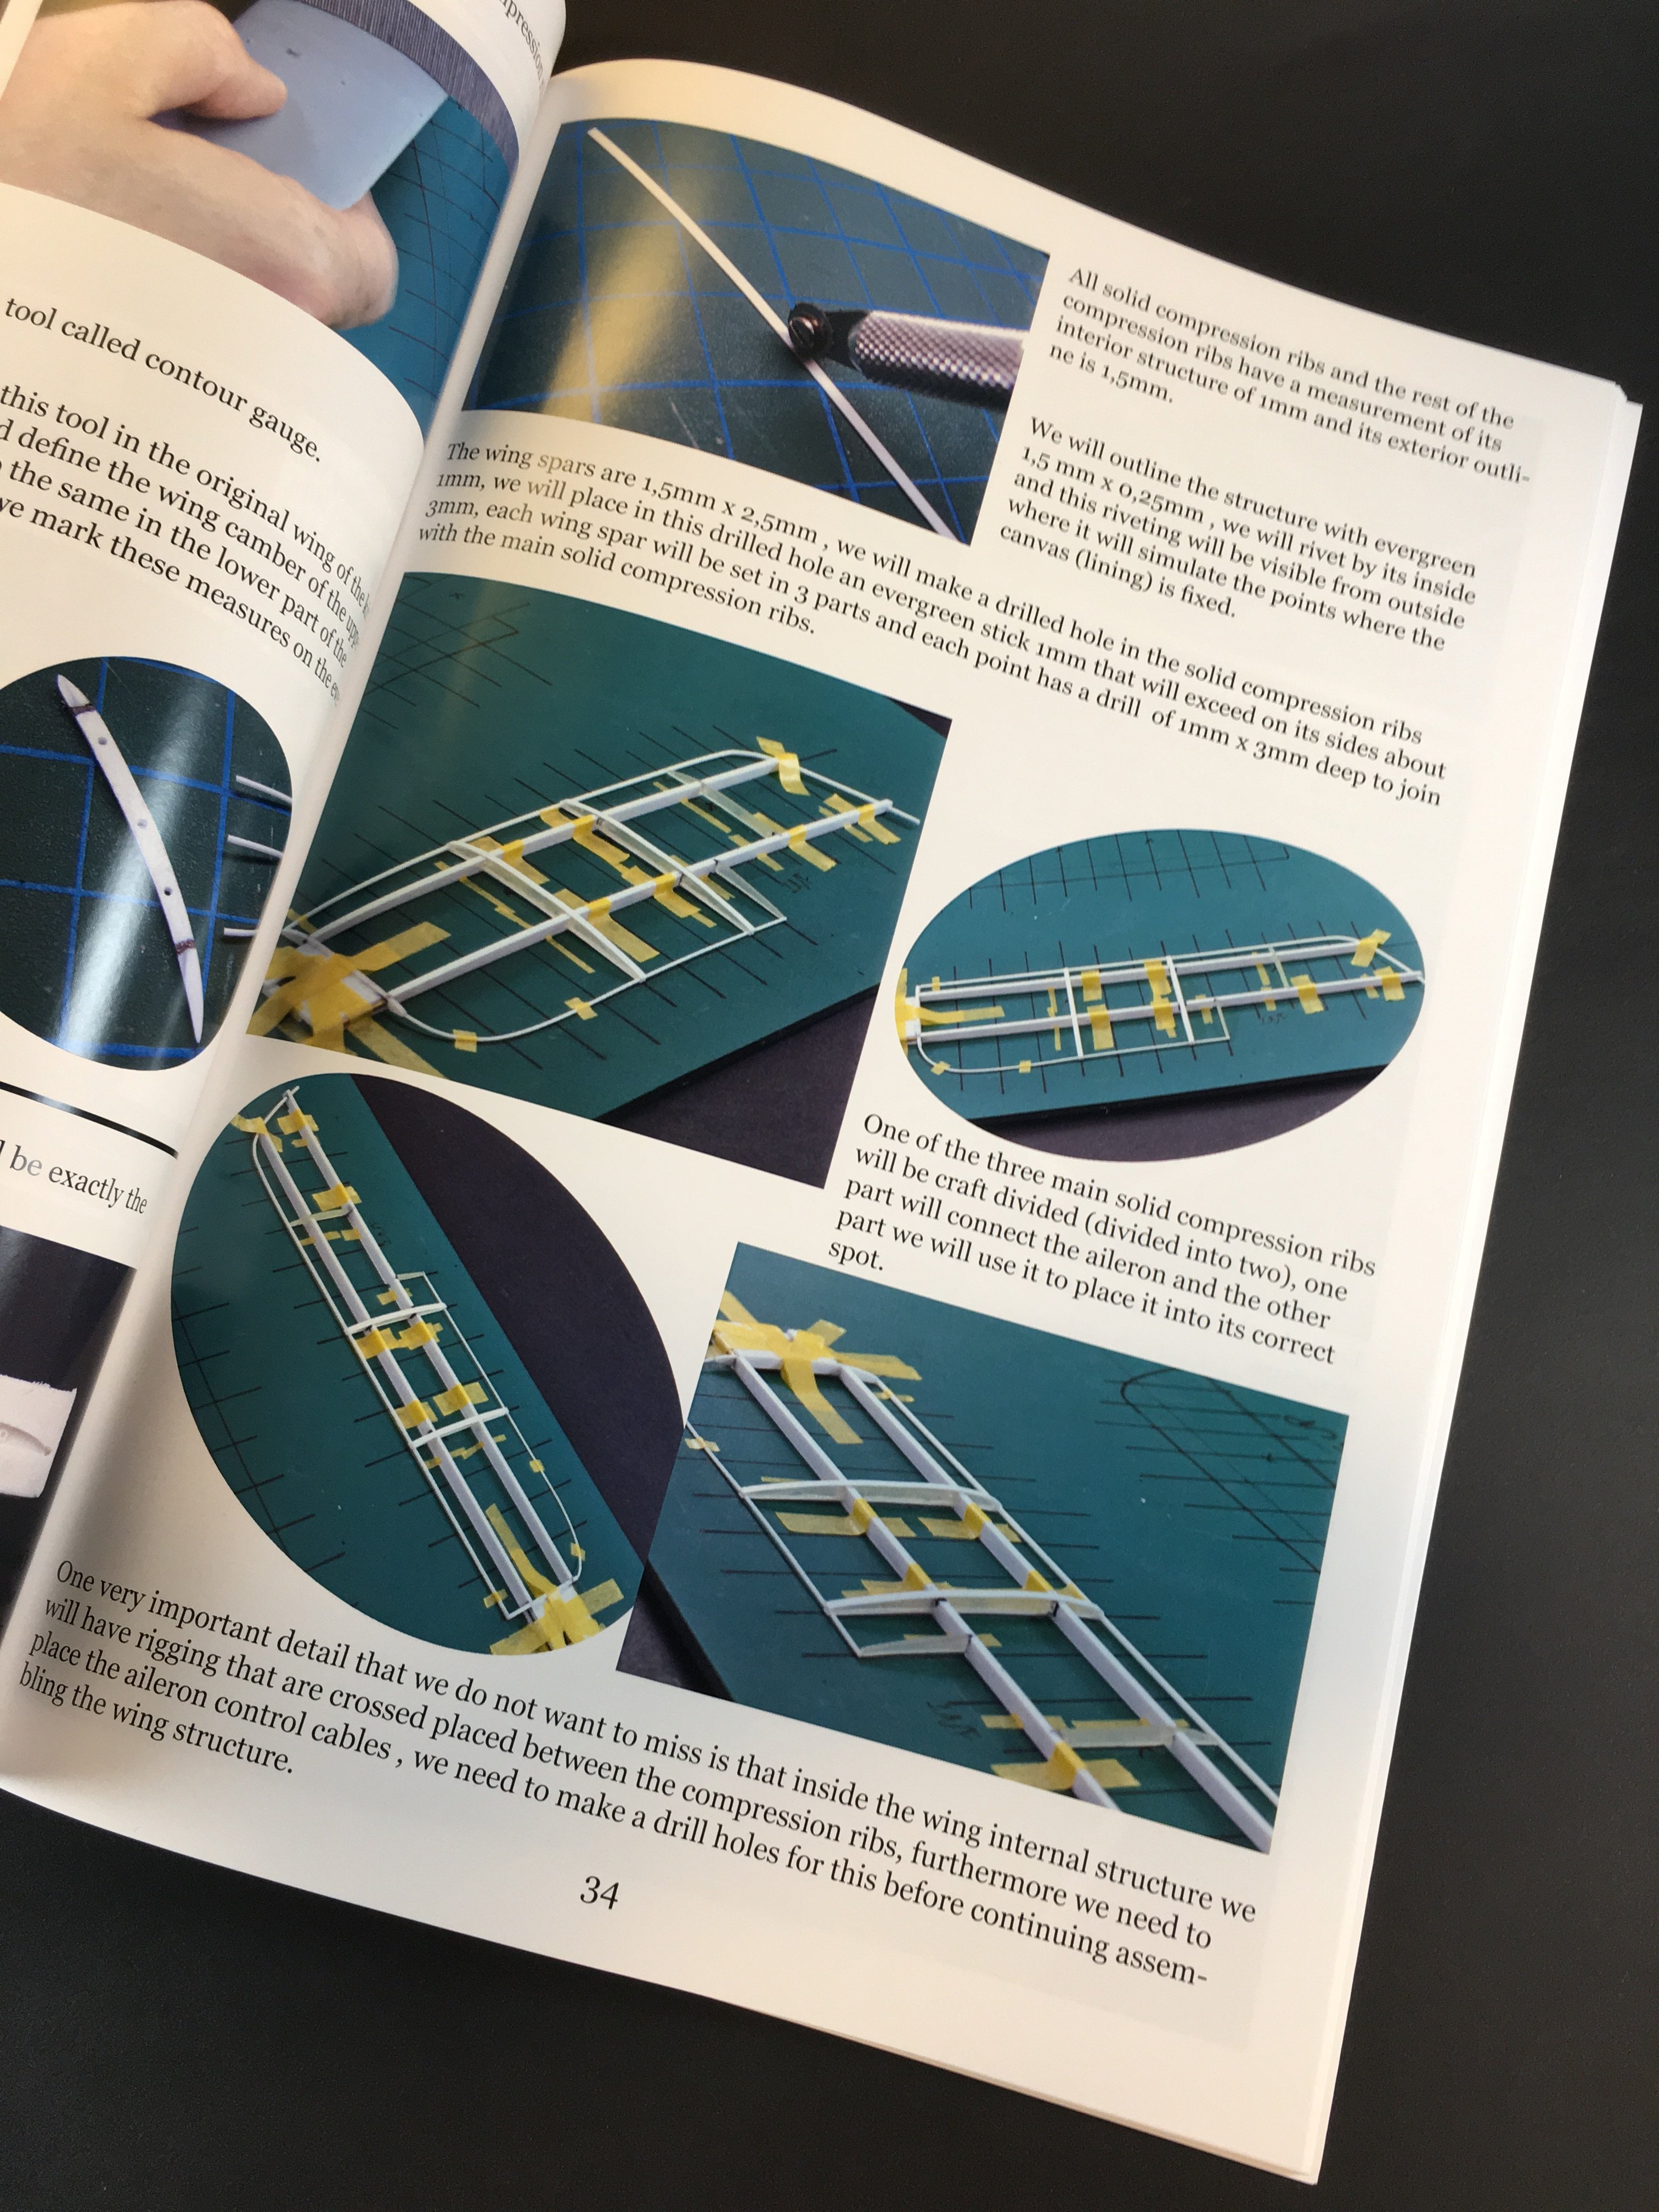
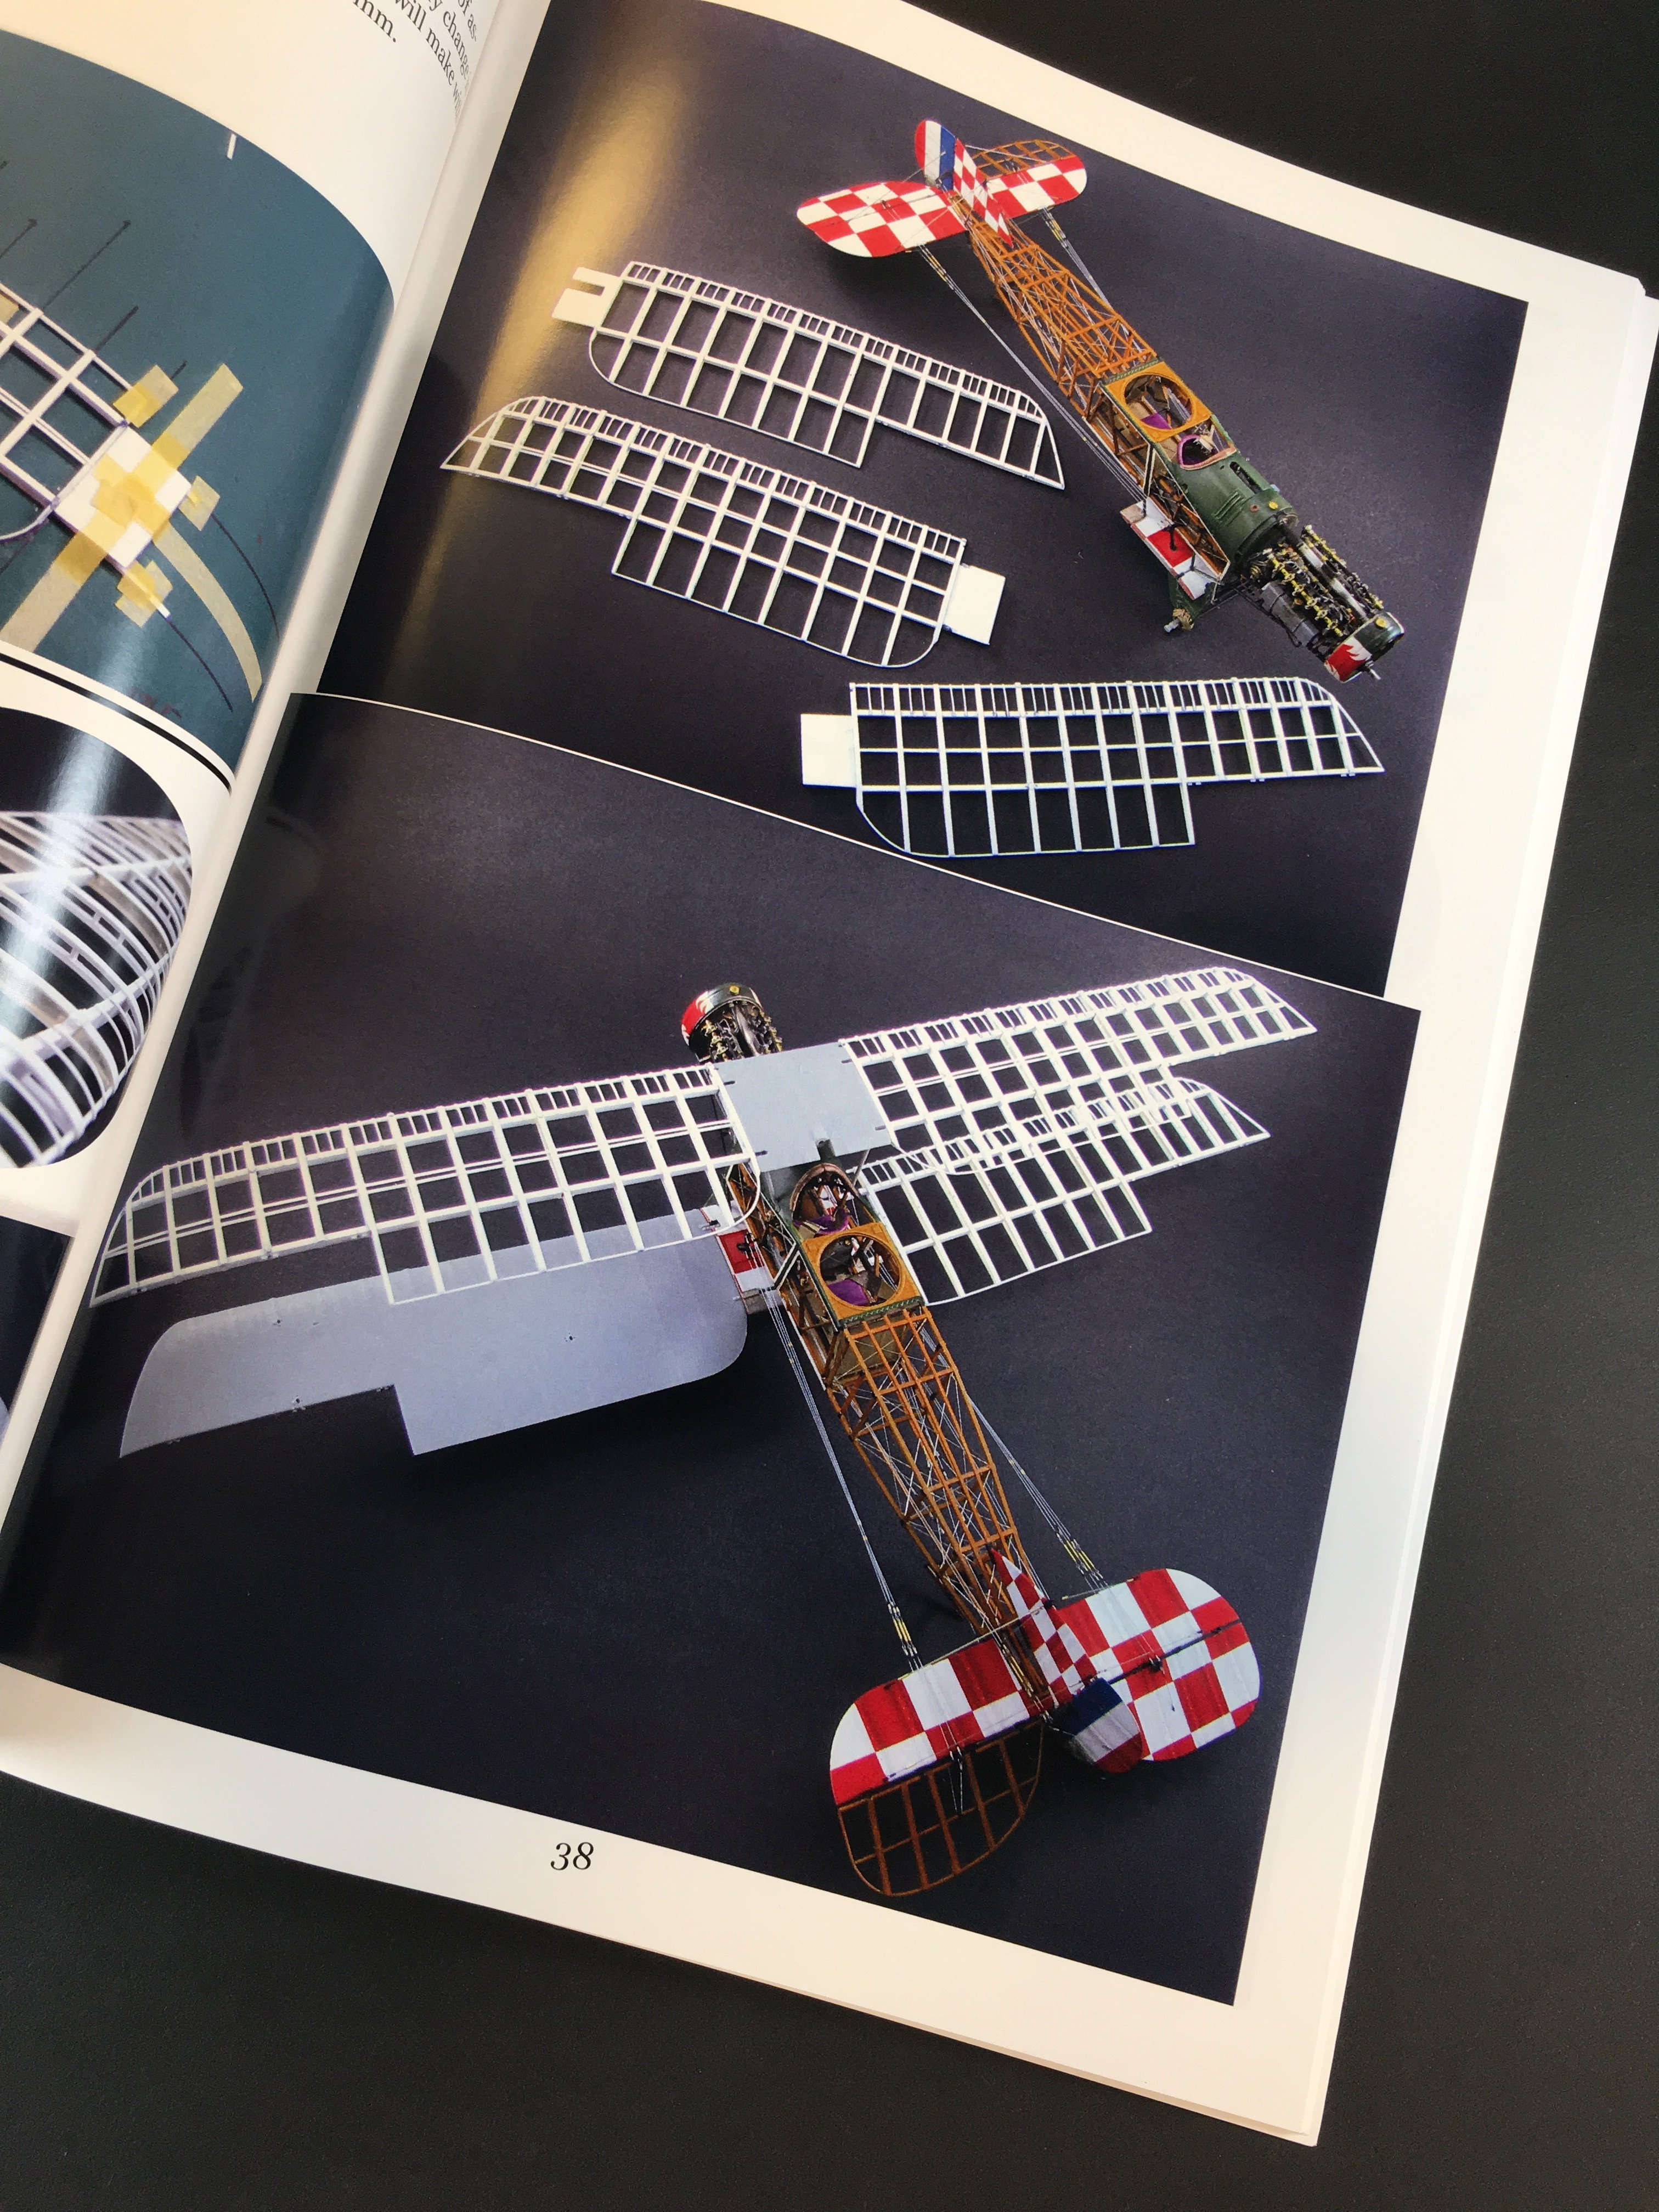
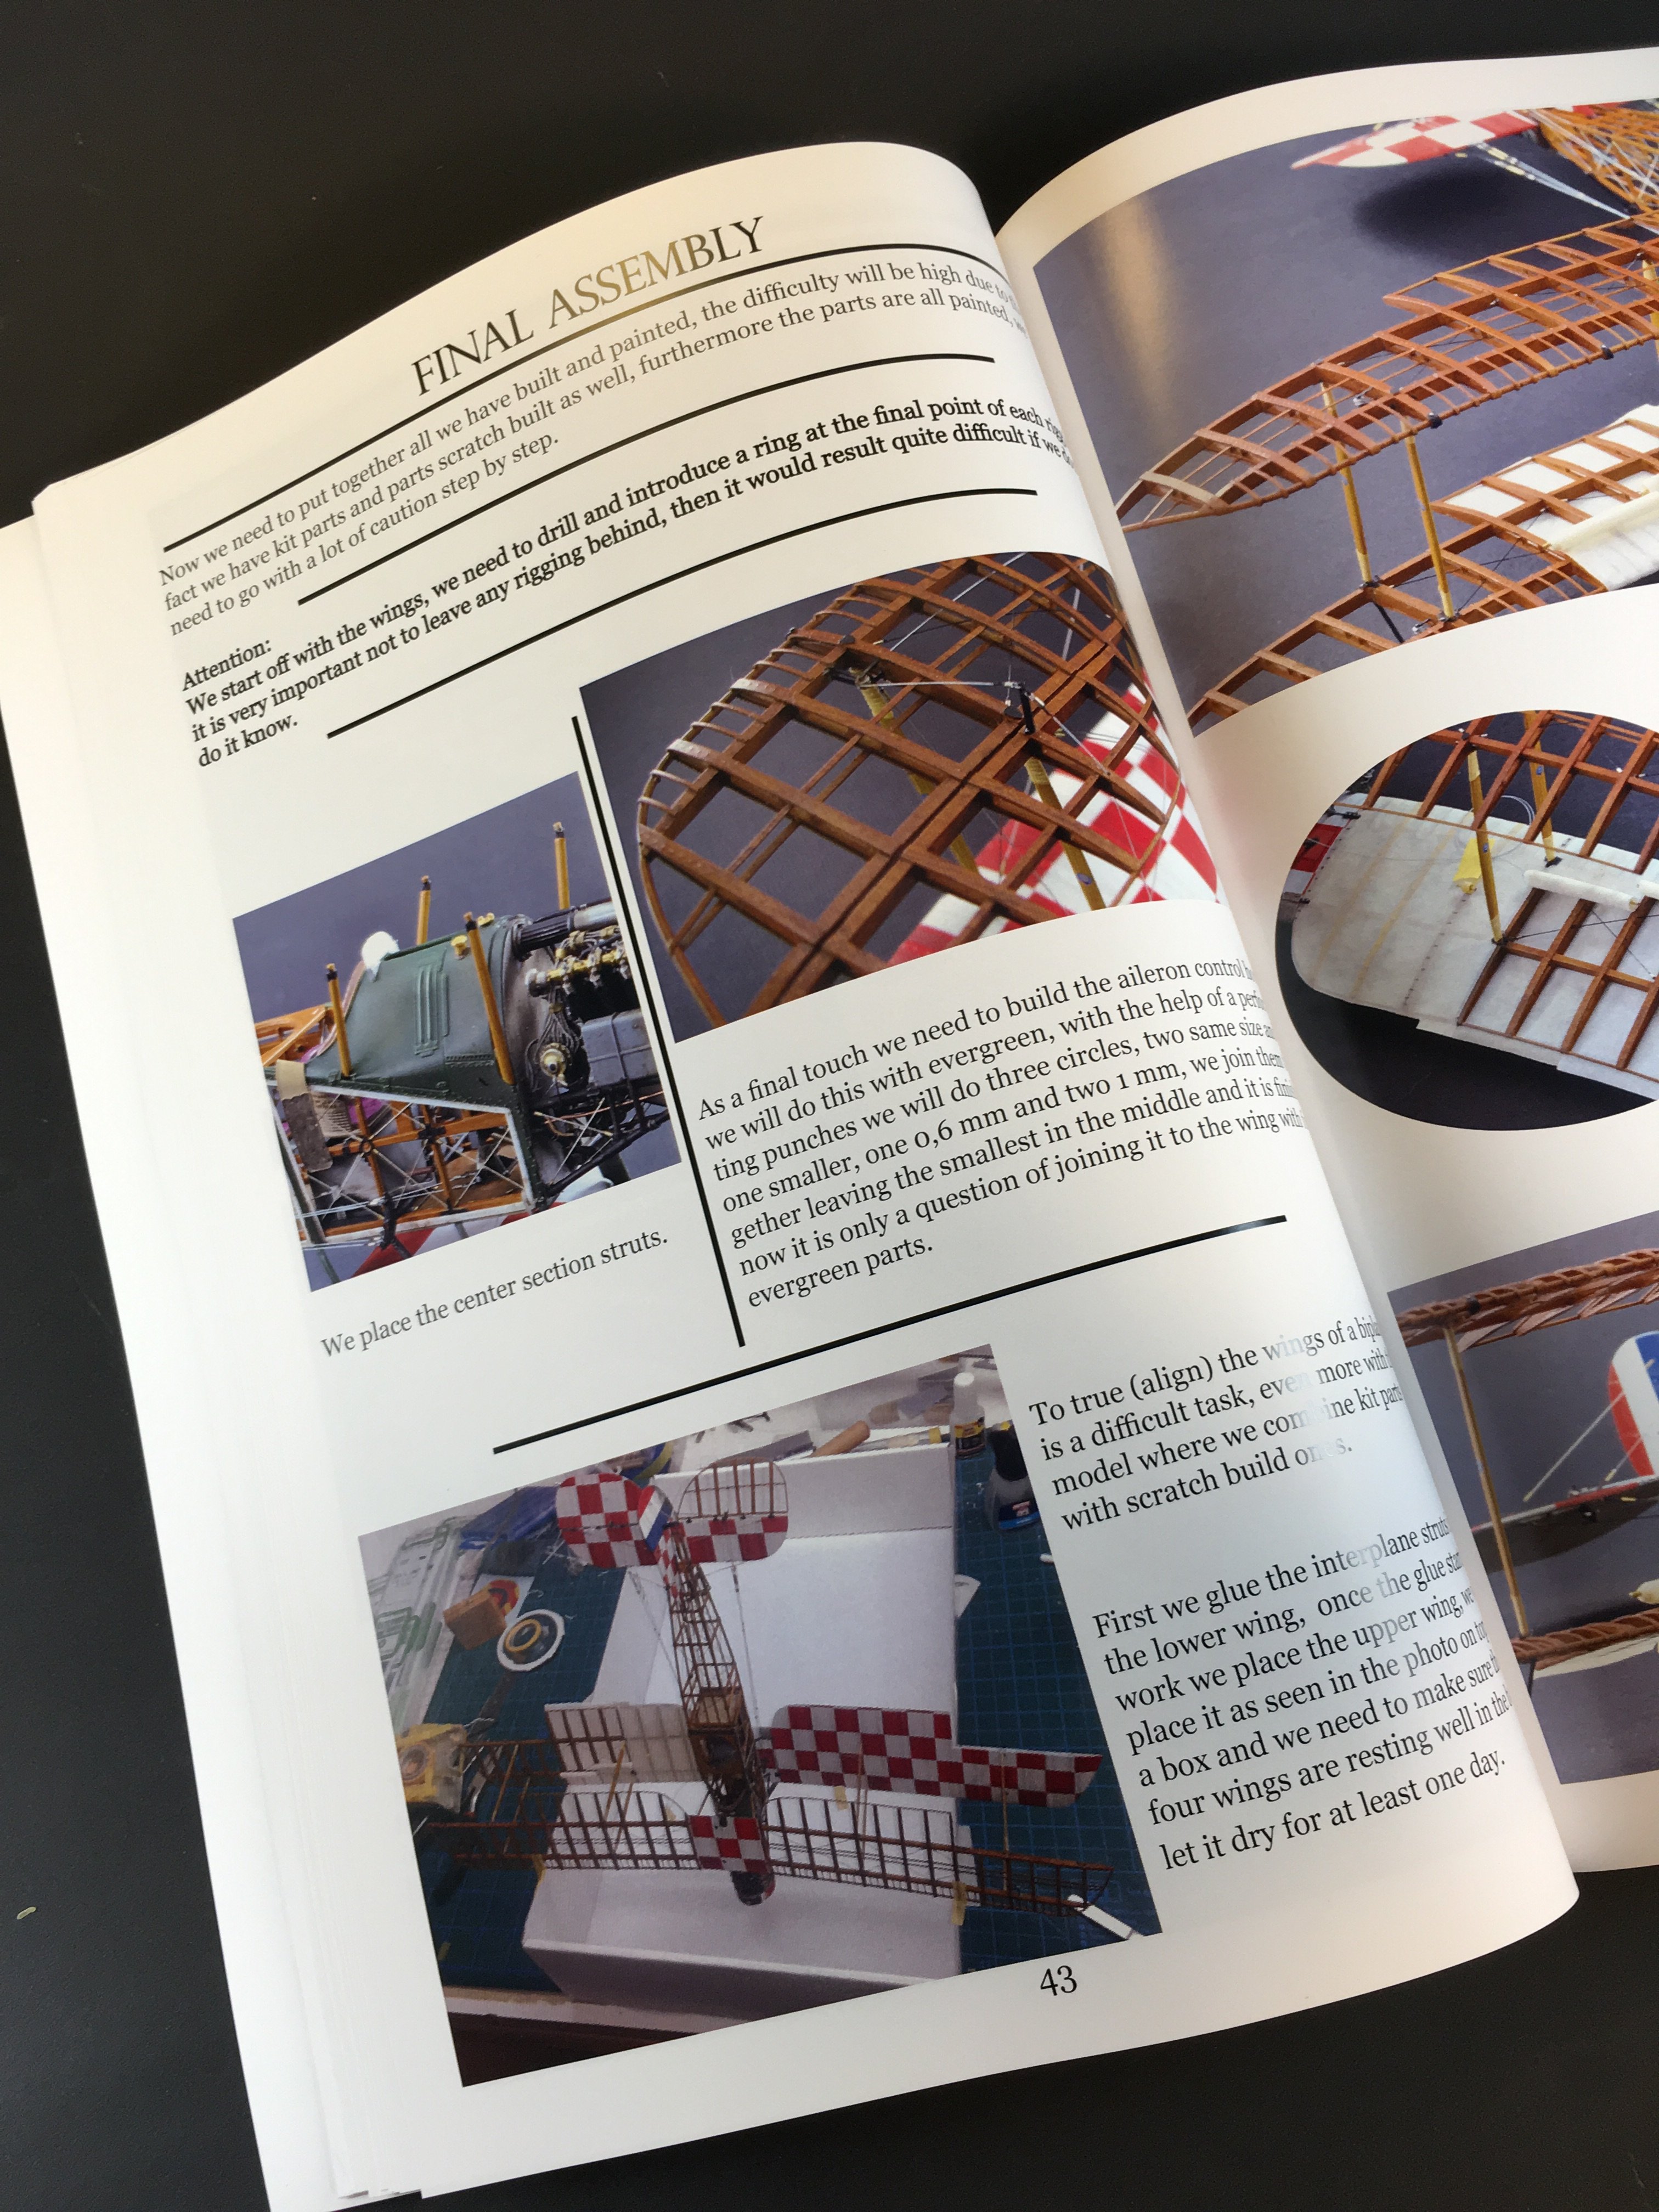
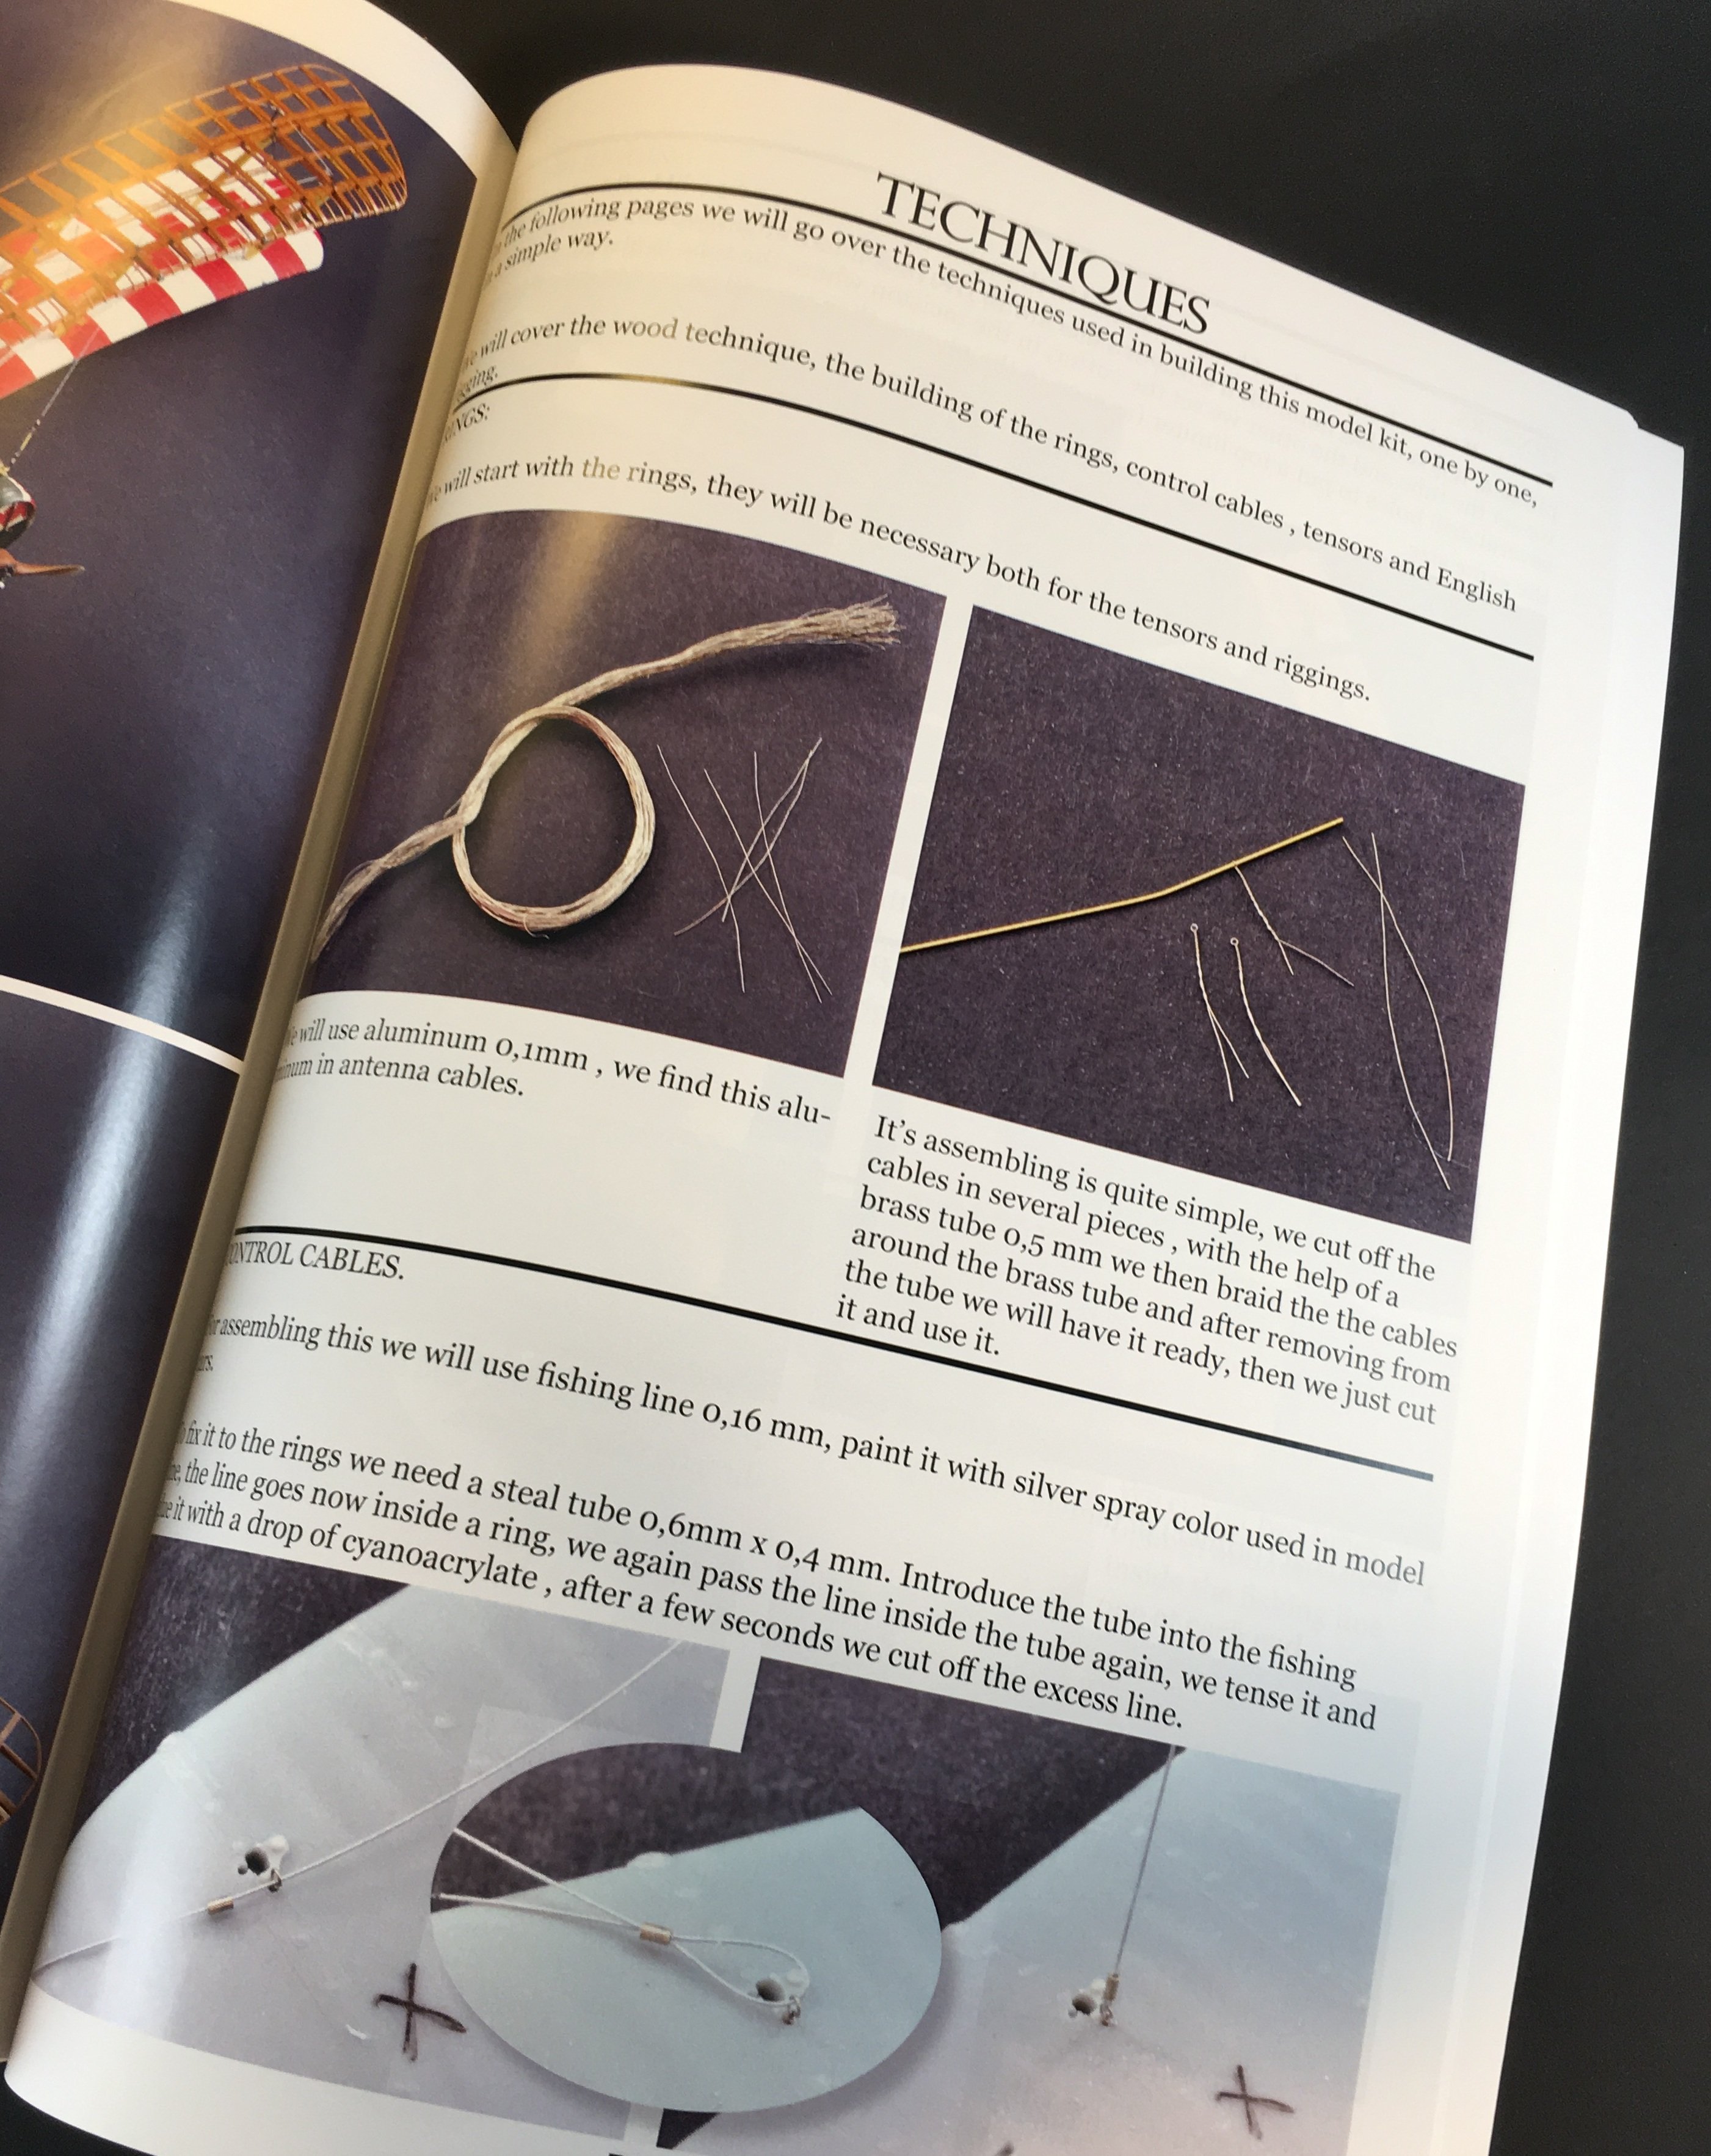
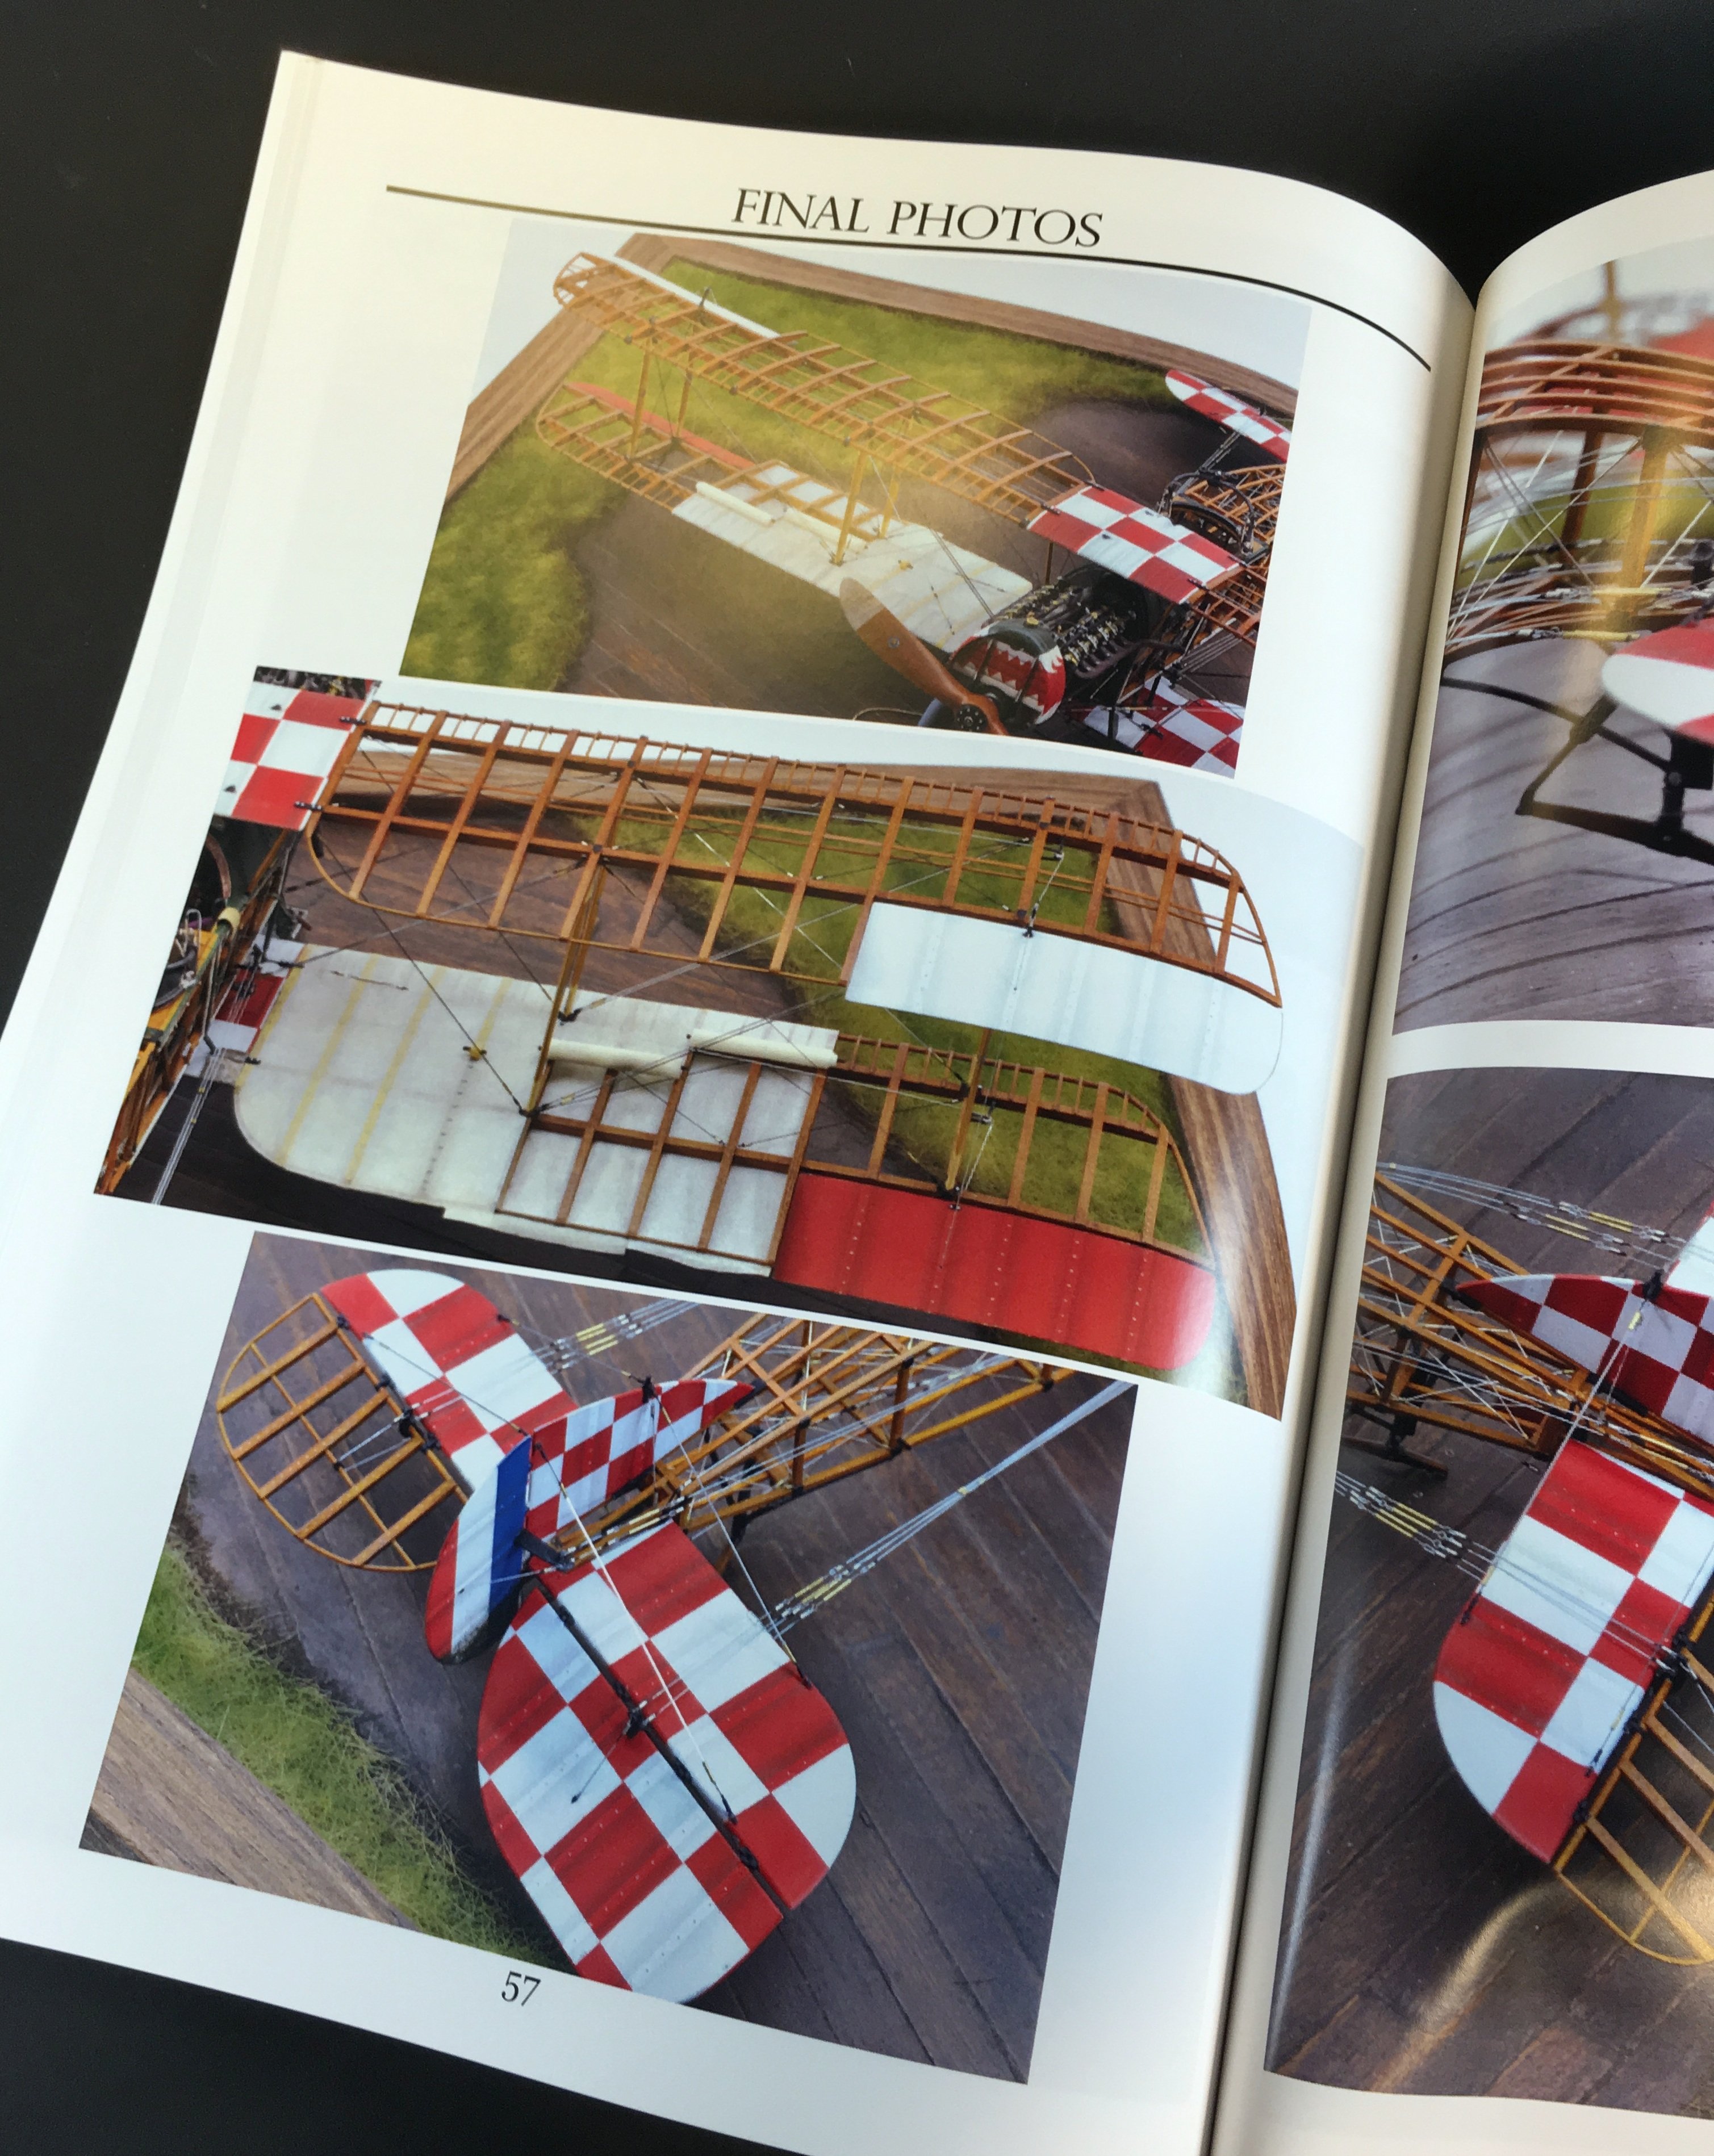
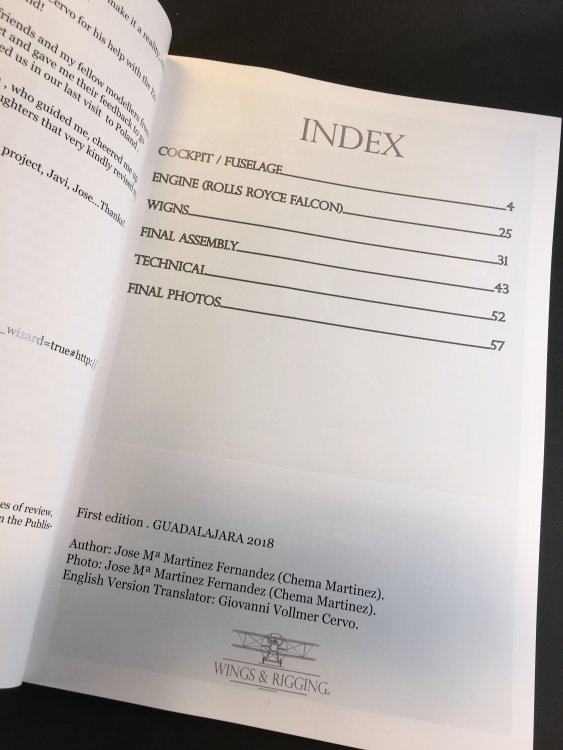
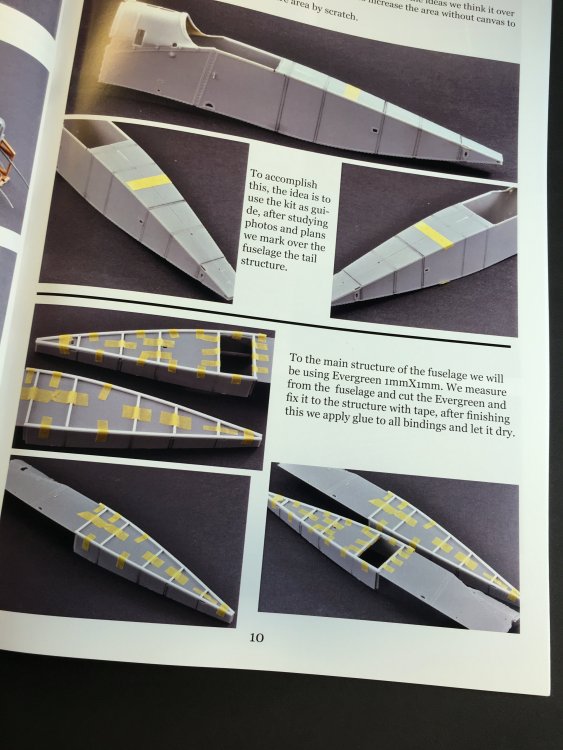
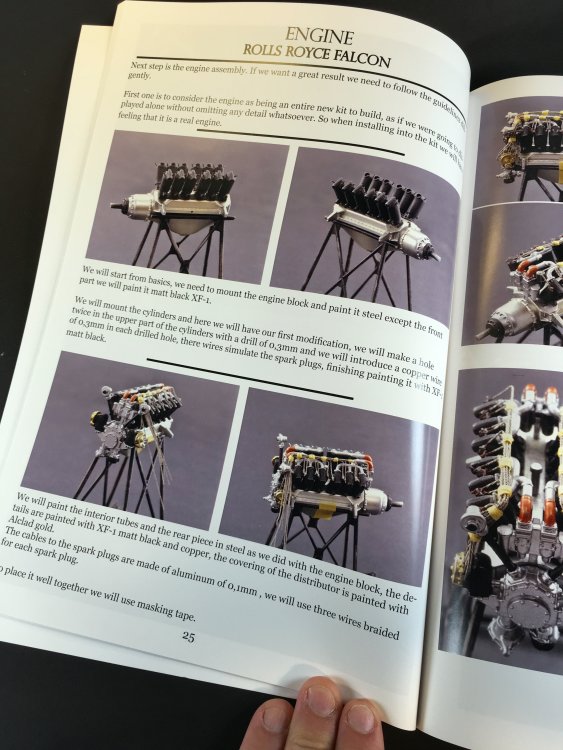
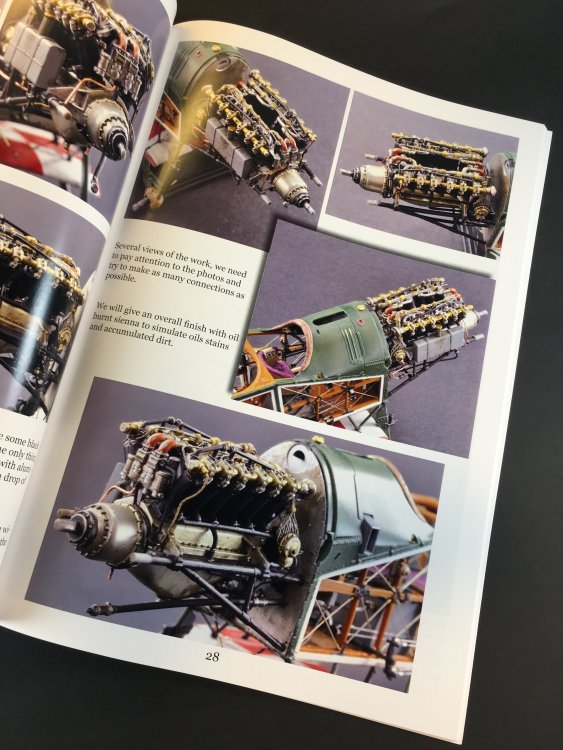
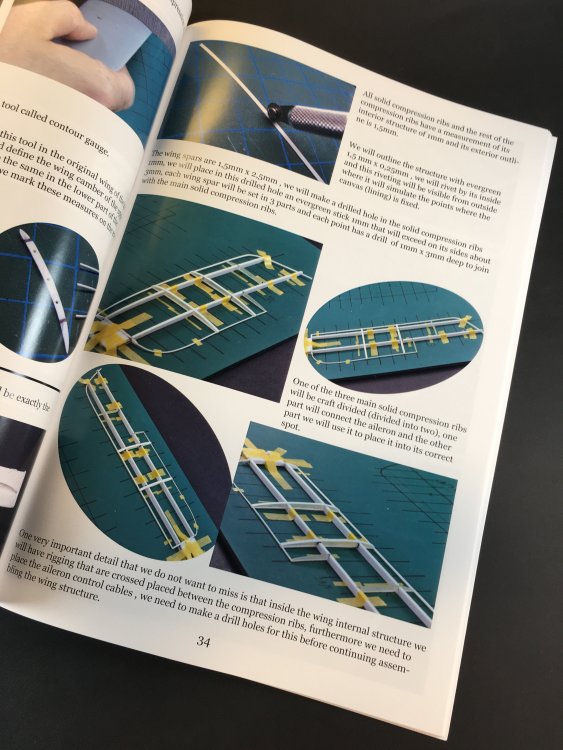
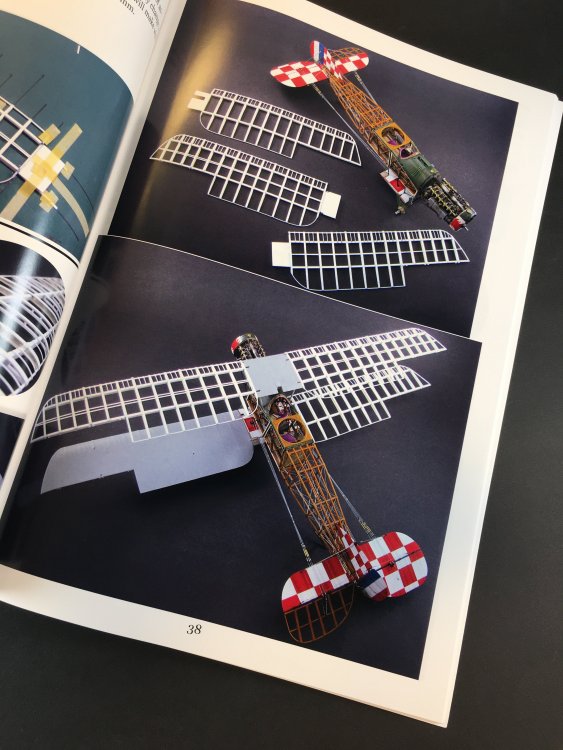
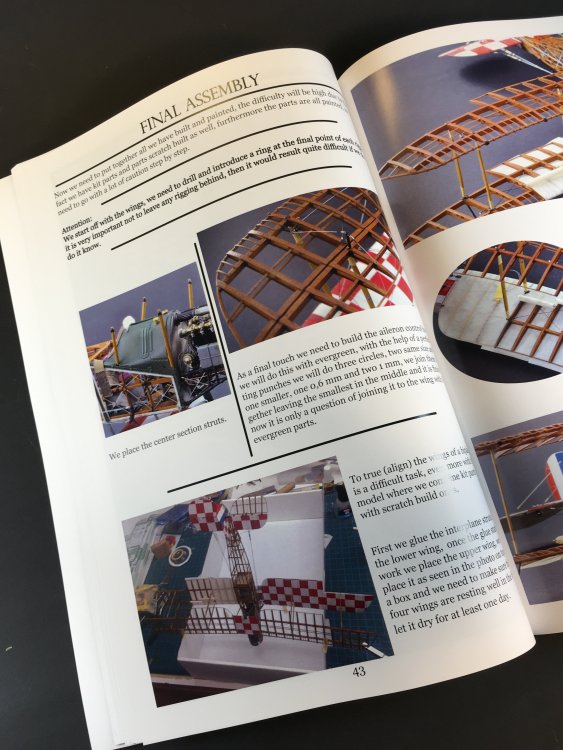
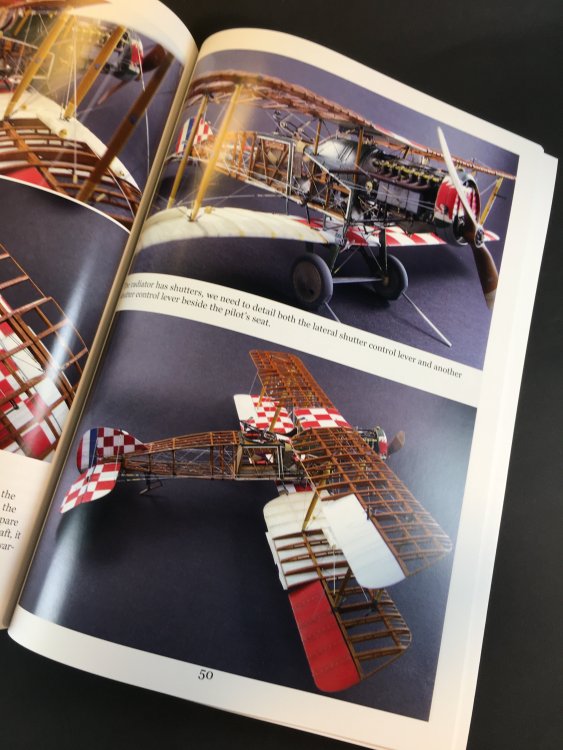
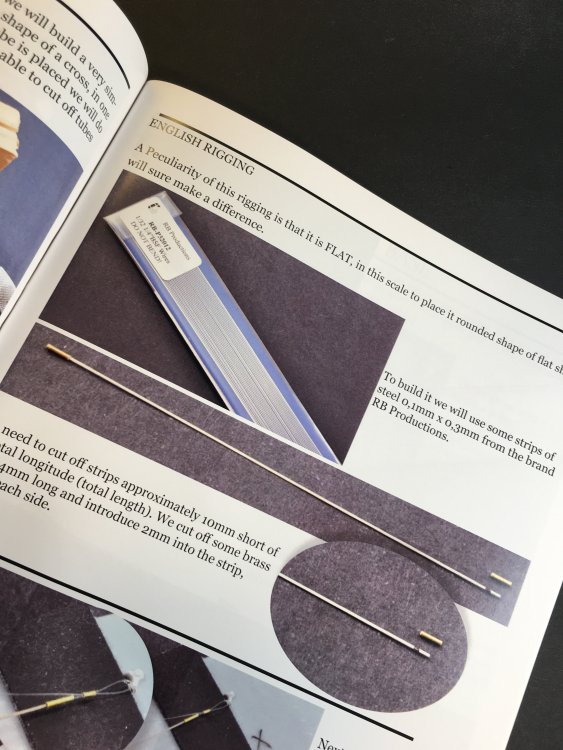
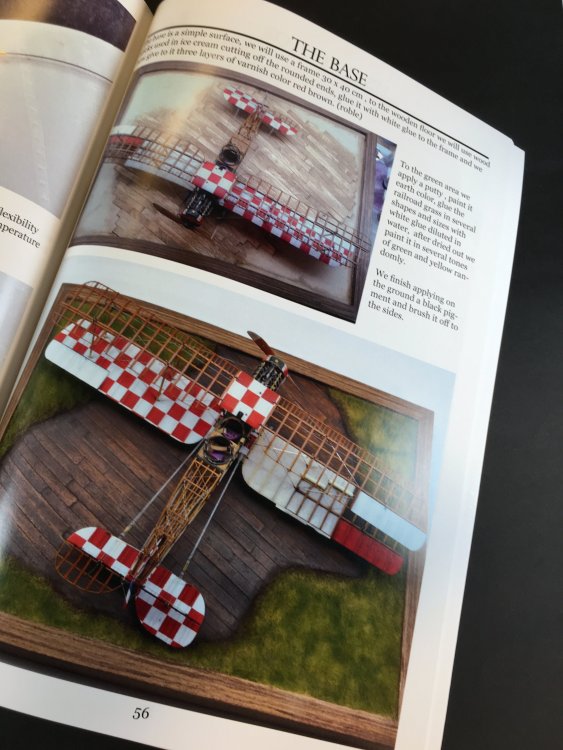
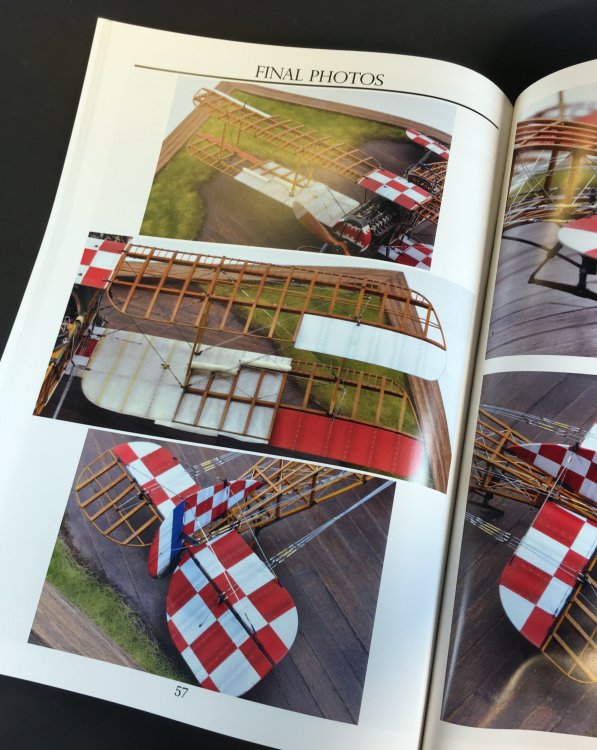
Bristol F.2B “The Crocodile” By Jose Mª Martinez Fernández Publication: Wings & Rigging Price tag: 30€(plus shipping) When I was in the WnW meet and greet in Telford this year, I got this review samples directly from the hands of a very talent modeler and the author himself: my good friend Chema Martinez. This book was one of his goal and it gives the modeler the secrets behind the fabulous Bristol F.2B “The Crocodile”. So the only subject of the book is a step-by-step of it. The book is in A4 size, with soft cover and satin finish pages with some very good printing and color densification. You will get 66 pages divided into six chapters: - Cockpit/Fuselage; - Engine (Rolls Royce Falcon); - Wings; - Final Assembly; - Technical; - Final Photos; But before all that, an introduction where the author gives a small history about the Bristol and the birth of an idea that brought this book to life. So, along 66 pages, Chema brings us the finest modeling work in the world. So in the cockpit area, lots of scratch and building tip. The scratchbuild fuselage looks a tremendous and hard work but checks the tips and Chema works it looks like a piece of cake.. .yeah but I sure that is not! The fuselage chapter shows all the steps since the basic skeleton to all the finish tail with paint, tail paint job and of course, all the interior rigging. The engine chapter is one of the most impressive with the step by step of super detailing the Rolls Royce engine. Well, but we think that the previous chapter is impressive, the wings in no less impressive… It's amazing to see the step by step and all the tips behind a full scratch wing, or even better, 3 scratch wings. On this chapter there`s a sub-chapter: “Painting the wing fabric covering” and so actual fabric covering. Wow!! The final assembly is where we can see large and detail pictures of this masterpiece. Then a very useful chapter, with all the techniques in one place with some simple tips for rings, control cables, tensors, wood techniques, english rigging. Finally, just before the gallery, how to do a little base for the jewel. CONCLUSION: The talent of Chema Martinez its well know worldwide and here you can see this talent in action with several tips along the way, to help you go a little futher with your builds or just to get inspired to go to the bench and build your WnW. So must have to all WWI modeler aviation, specially for any Wingnutter. Review copy compliments of my friend Chema Martinez. To order just go to Wing & Rigging facebook page and sent a message asking for a copy. Paypal is accepted.


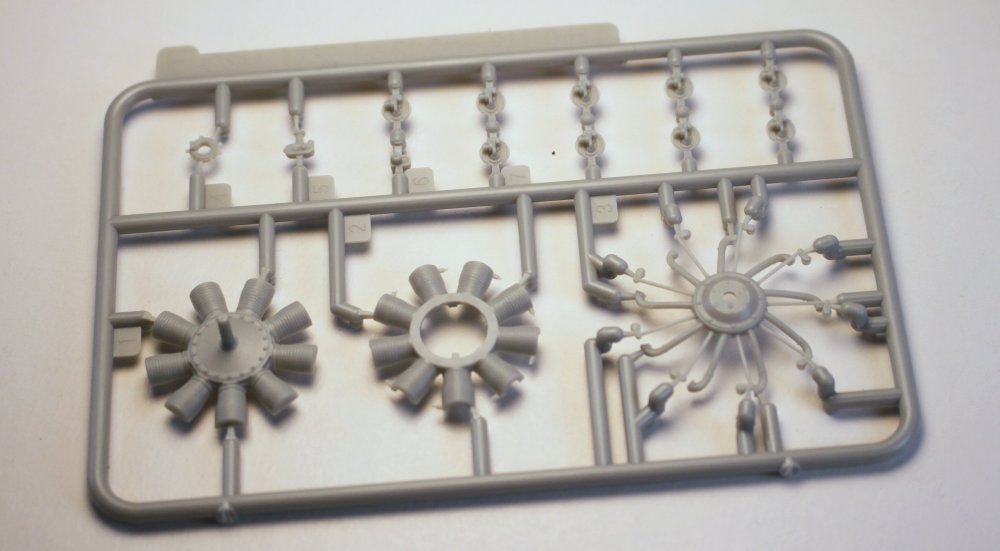
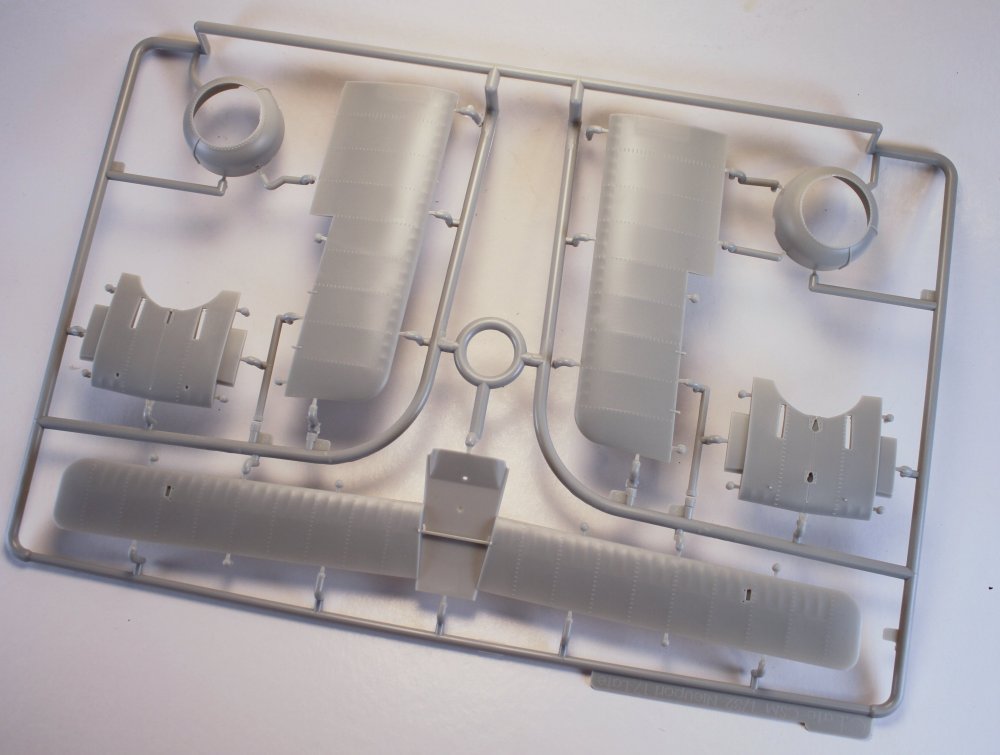
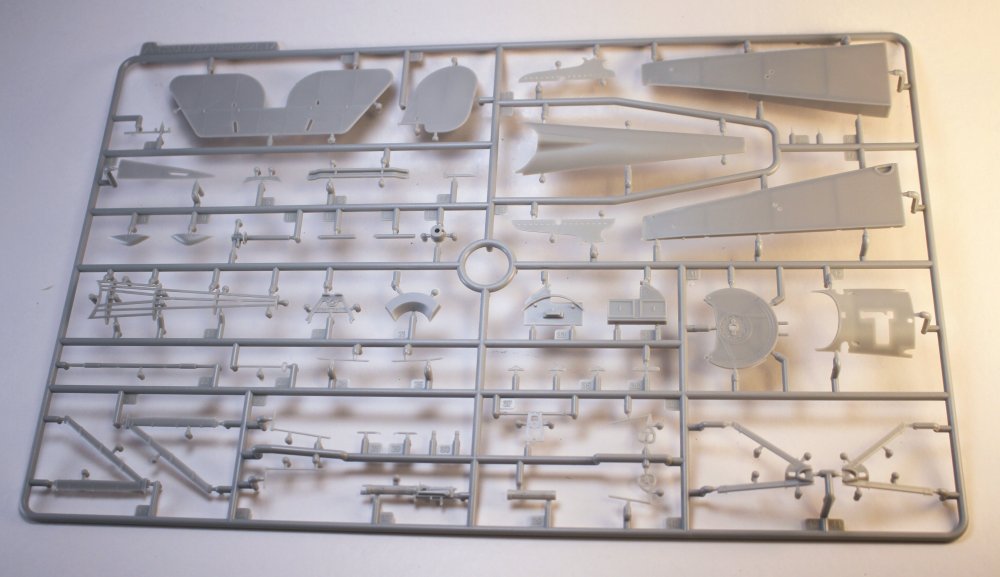
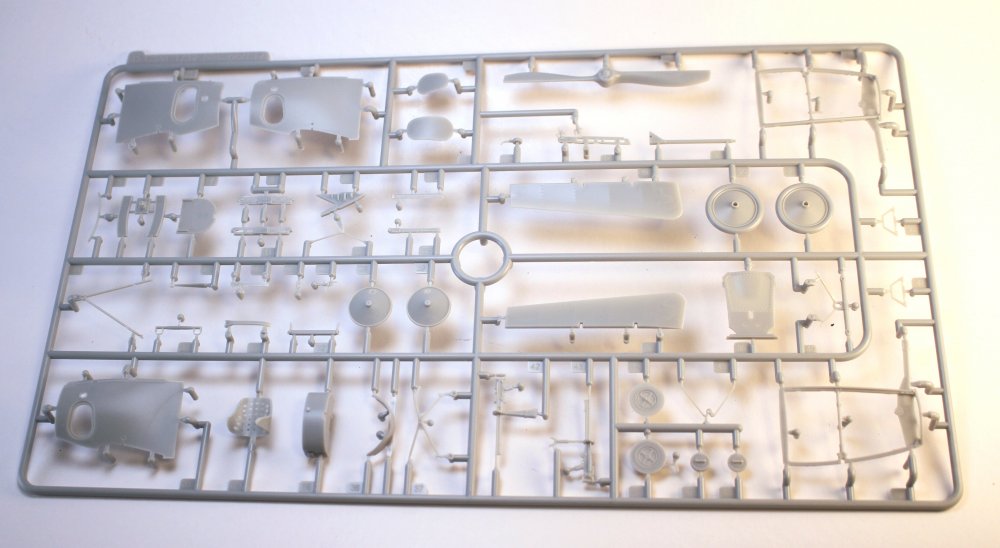
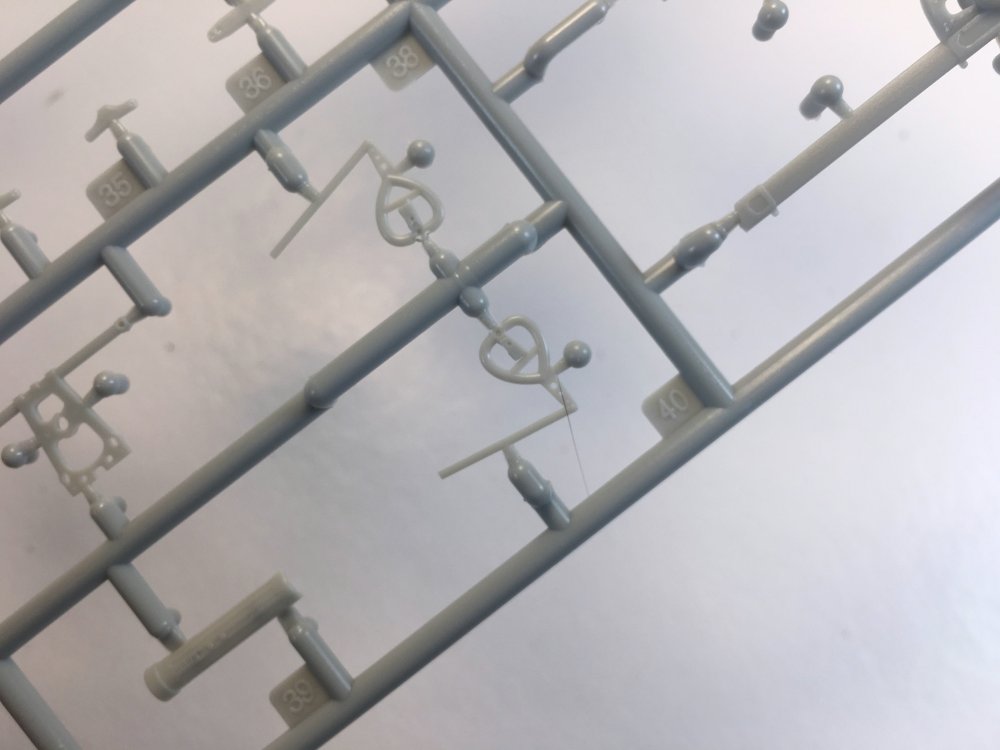
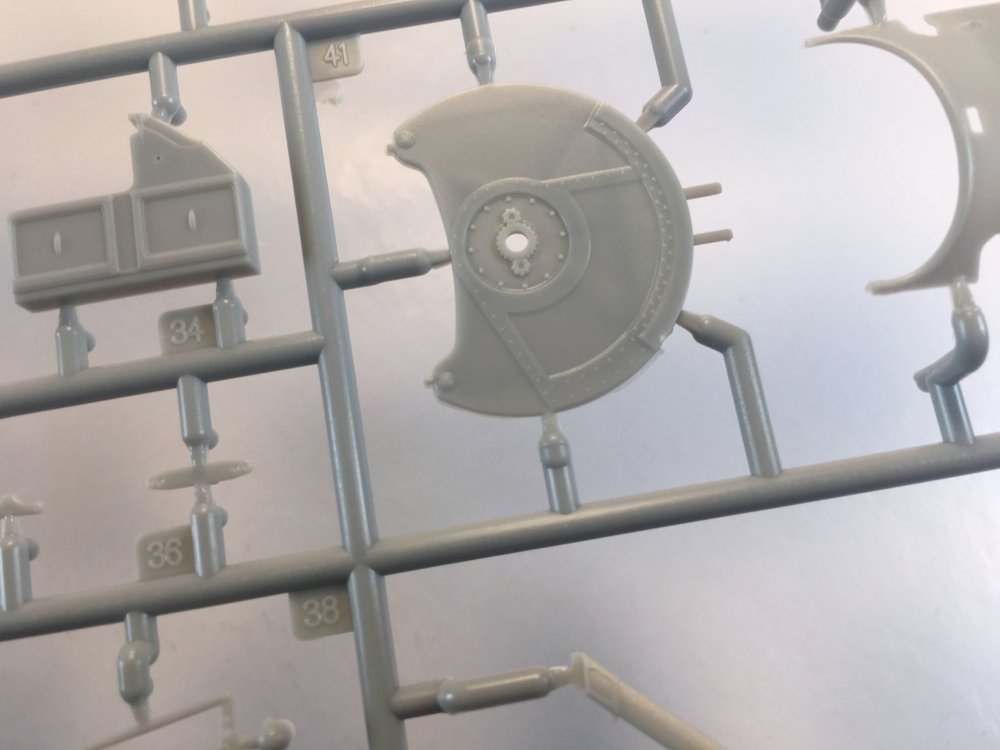
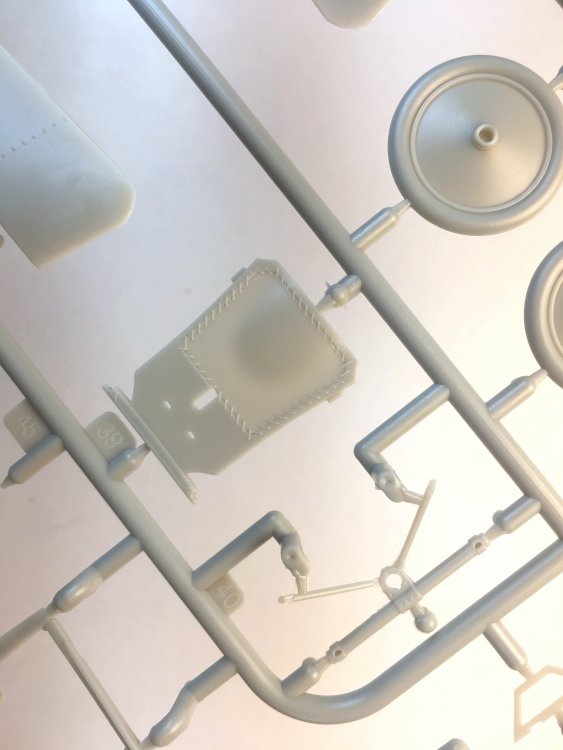
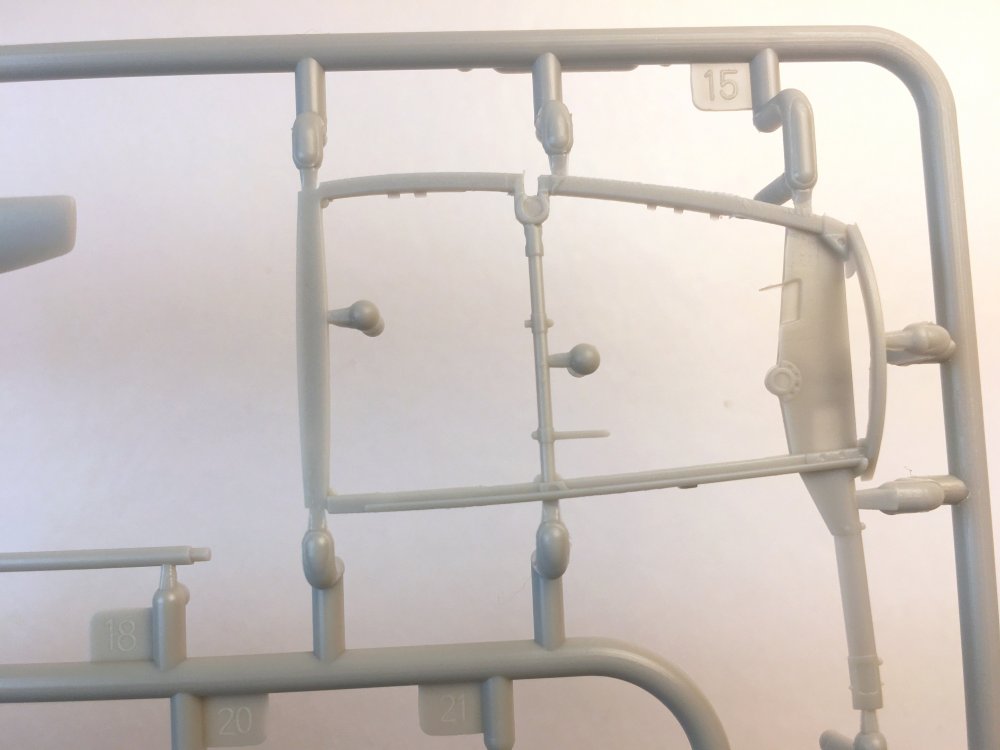
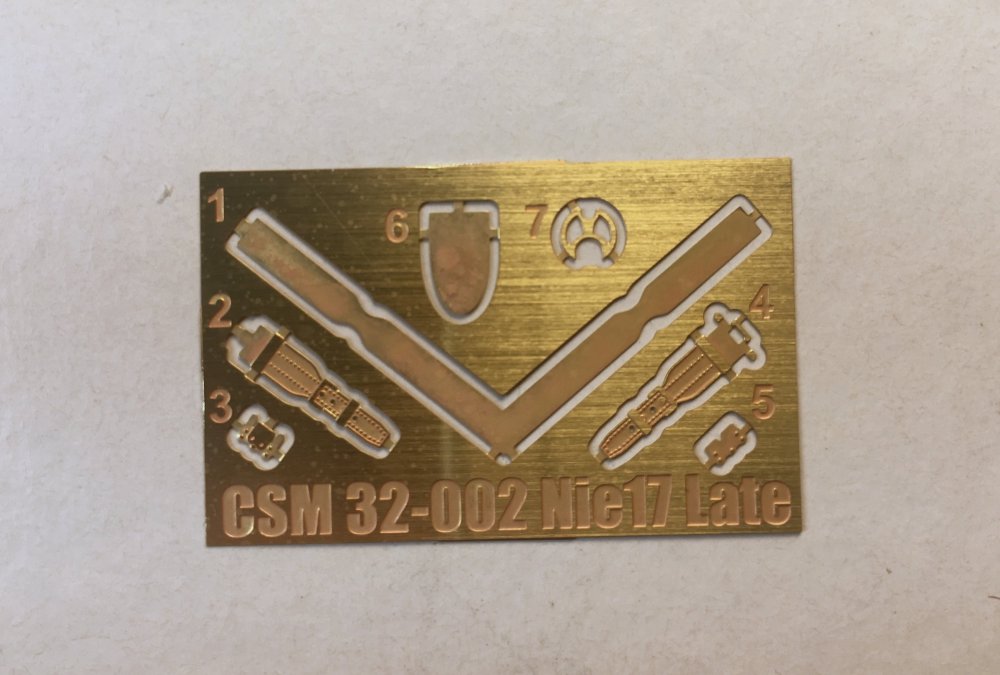
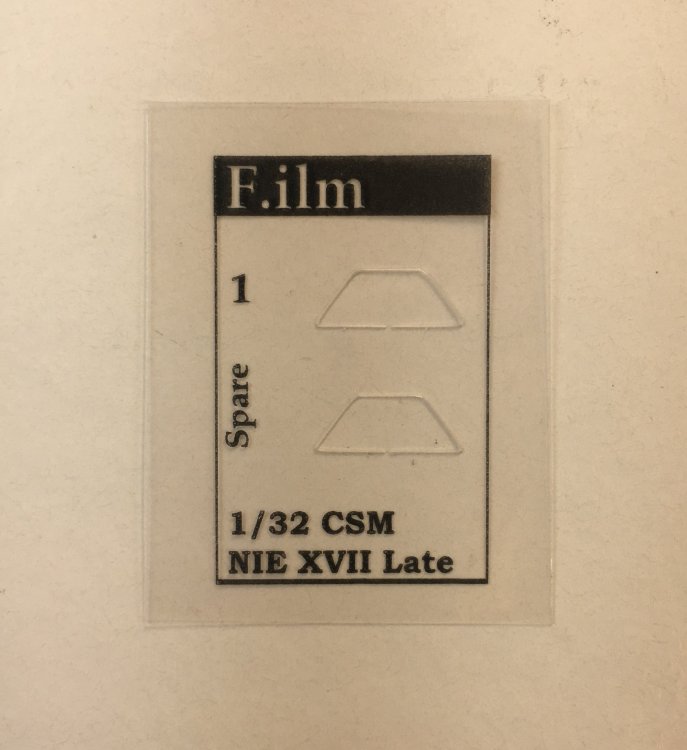
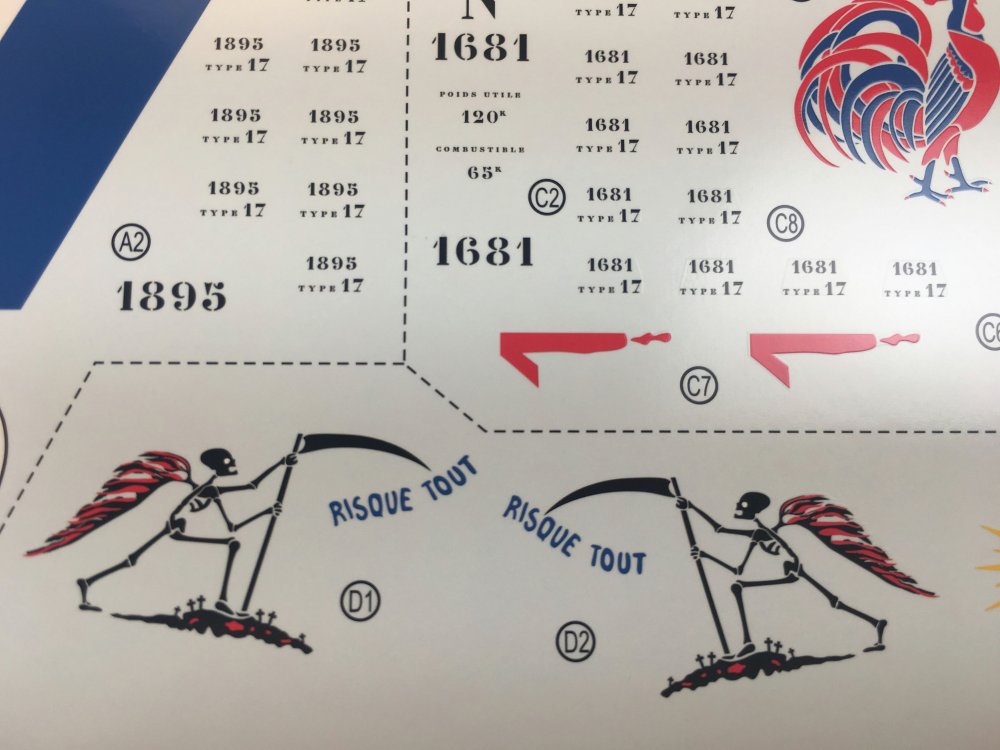
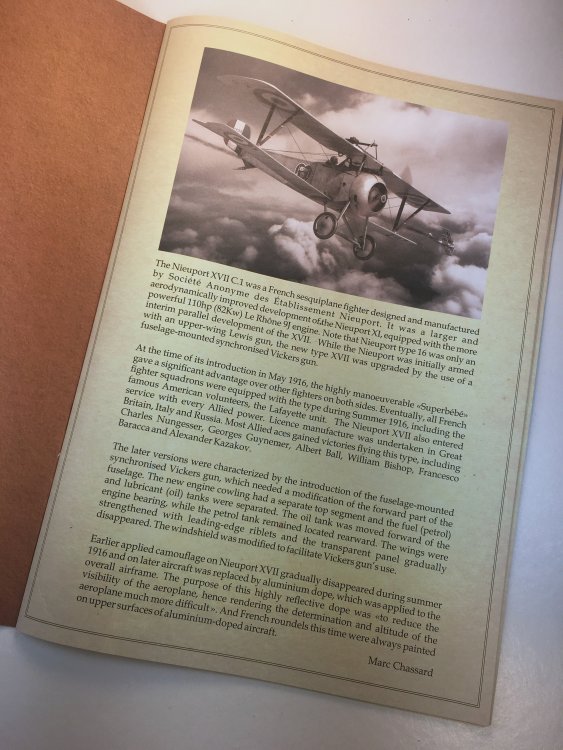
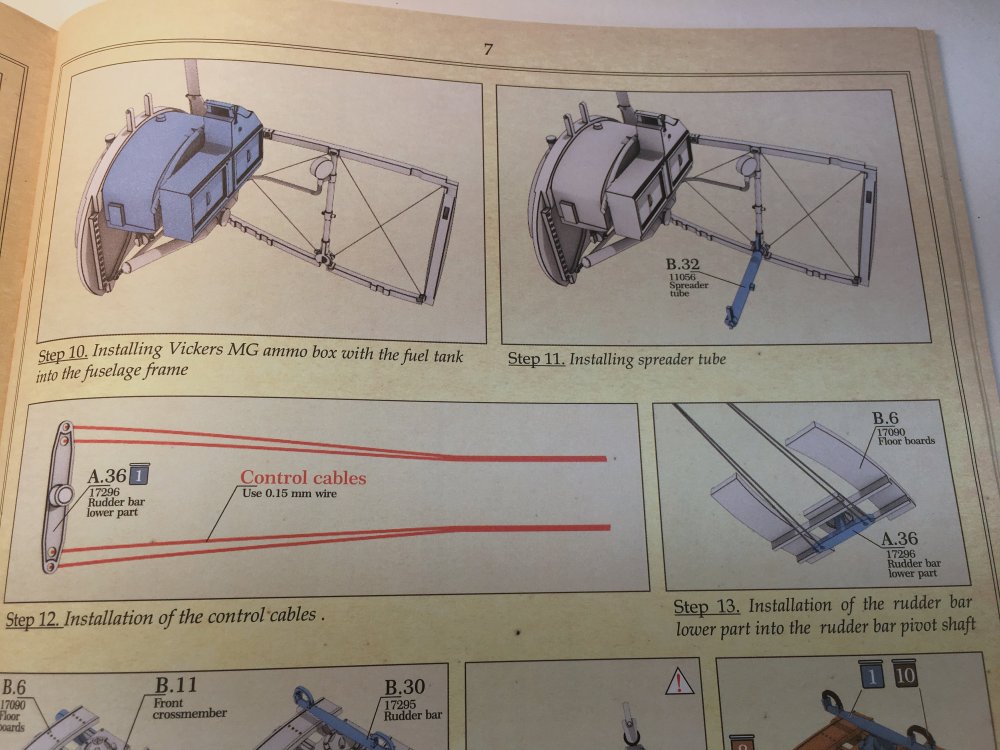
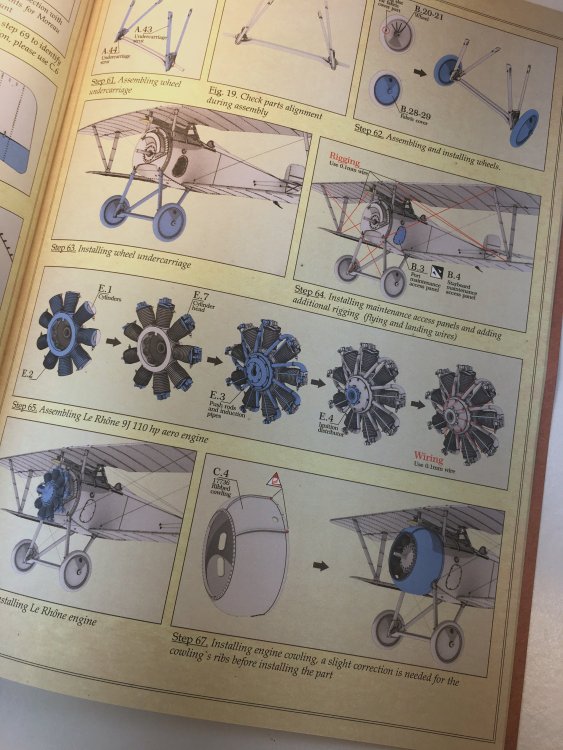
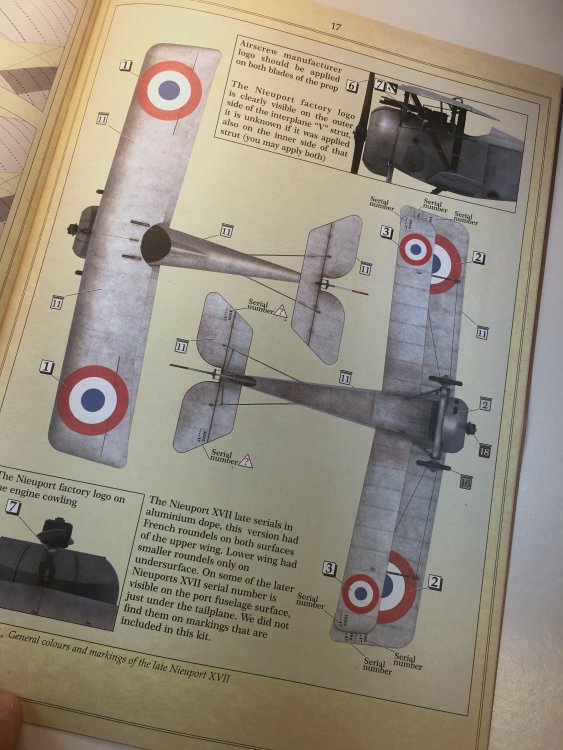
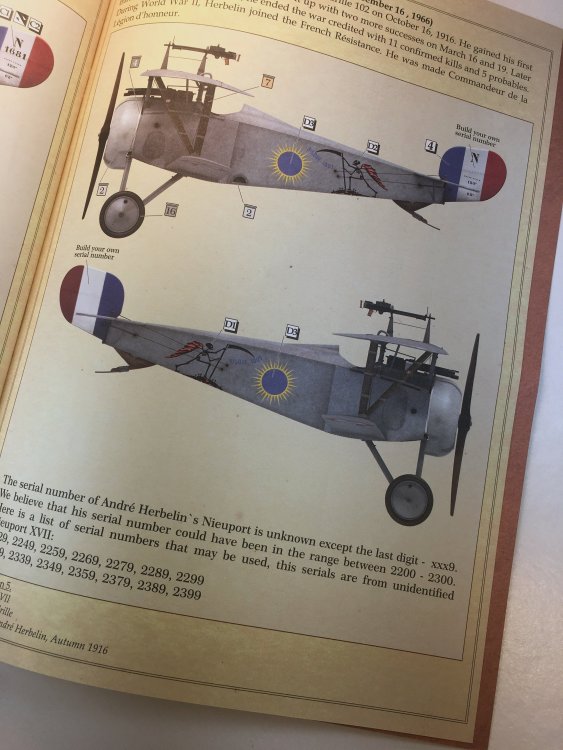
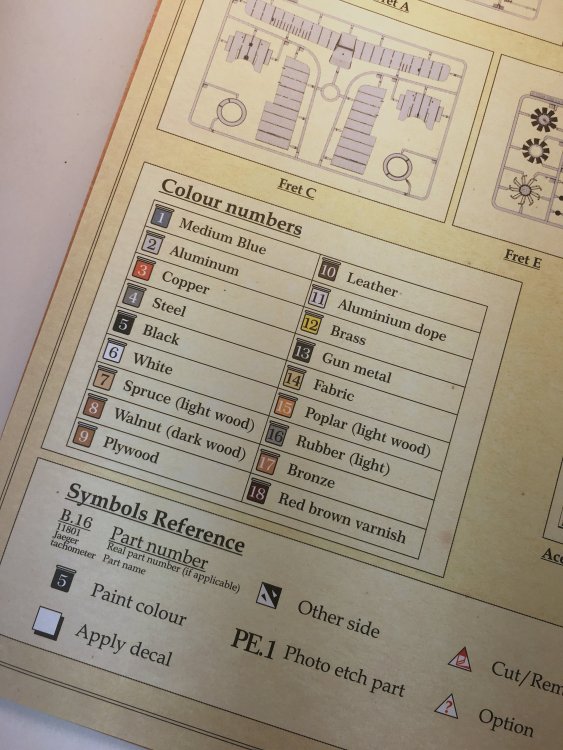
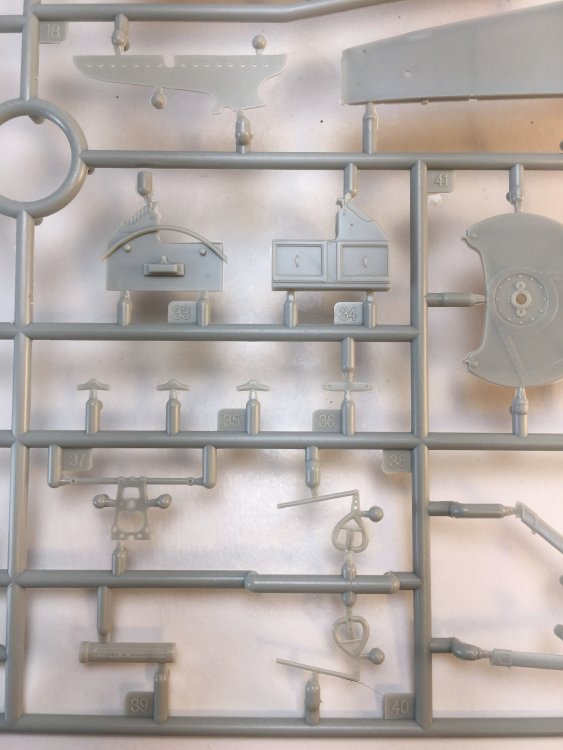
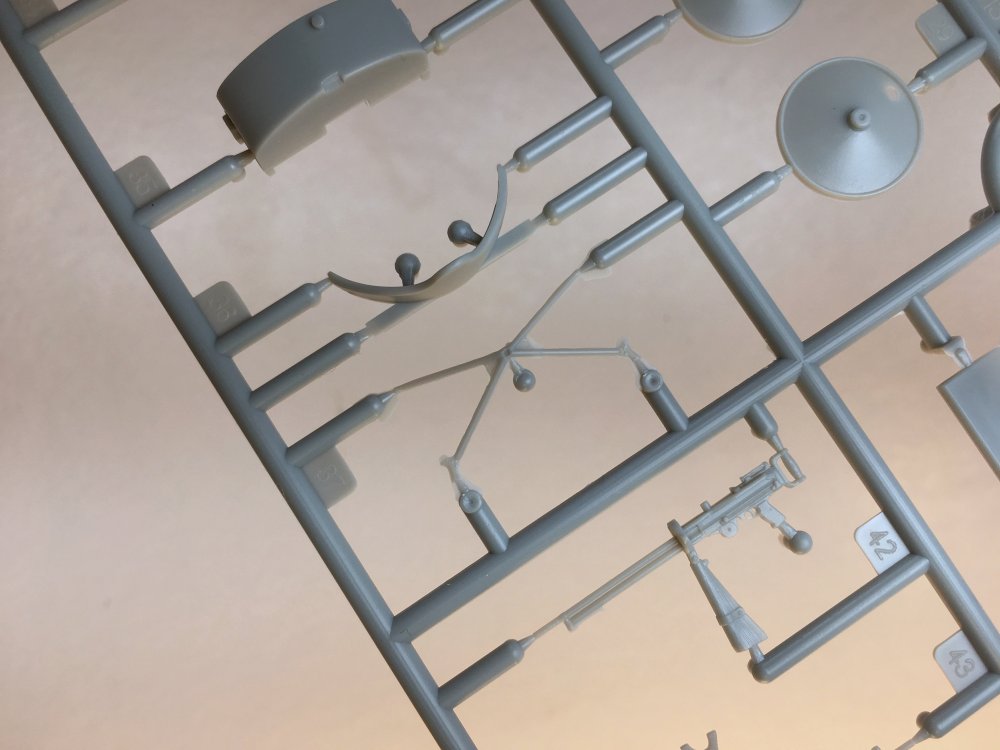
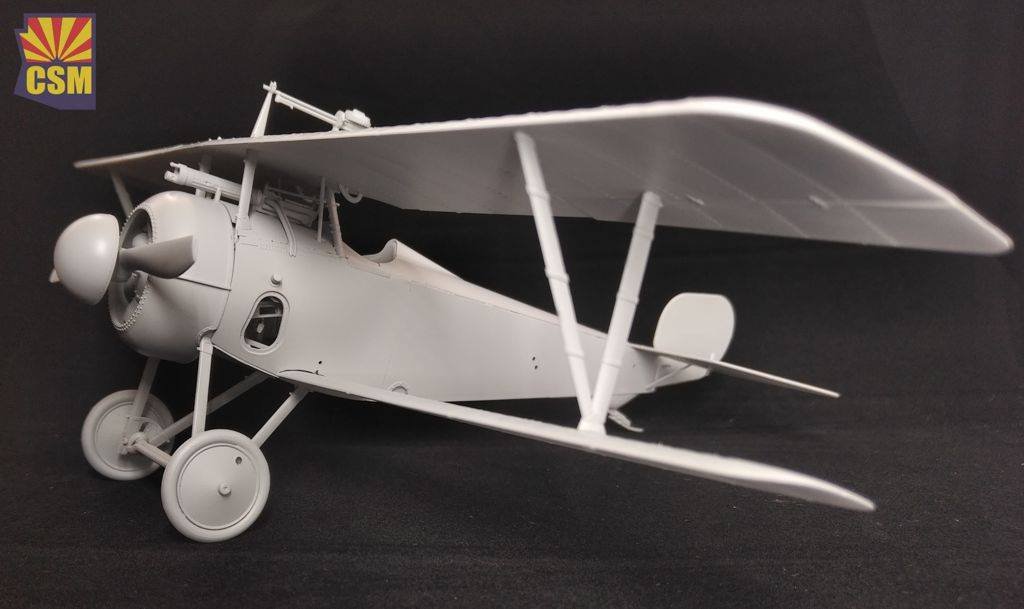
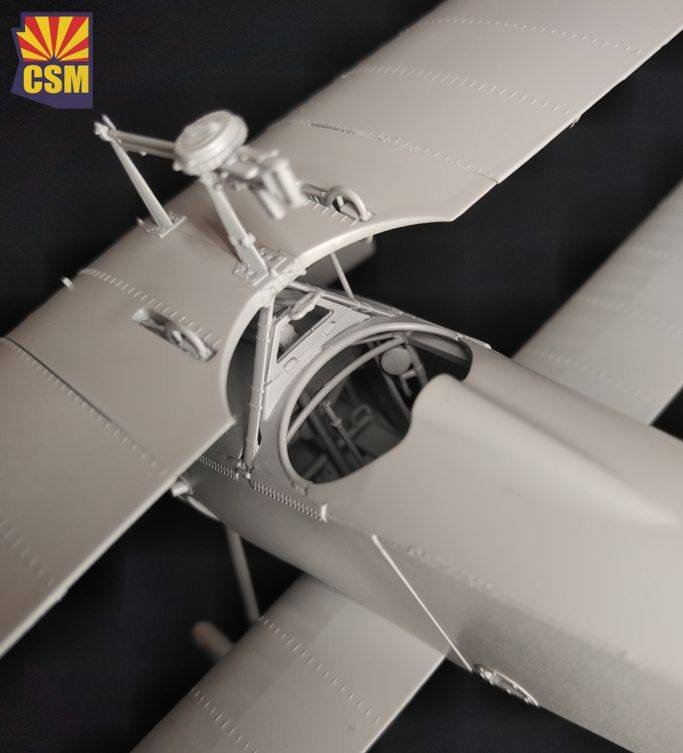
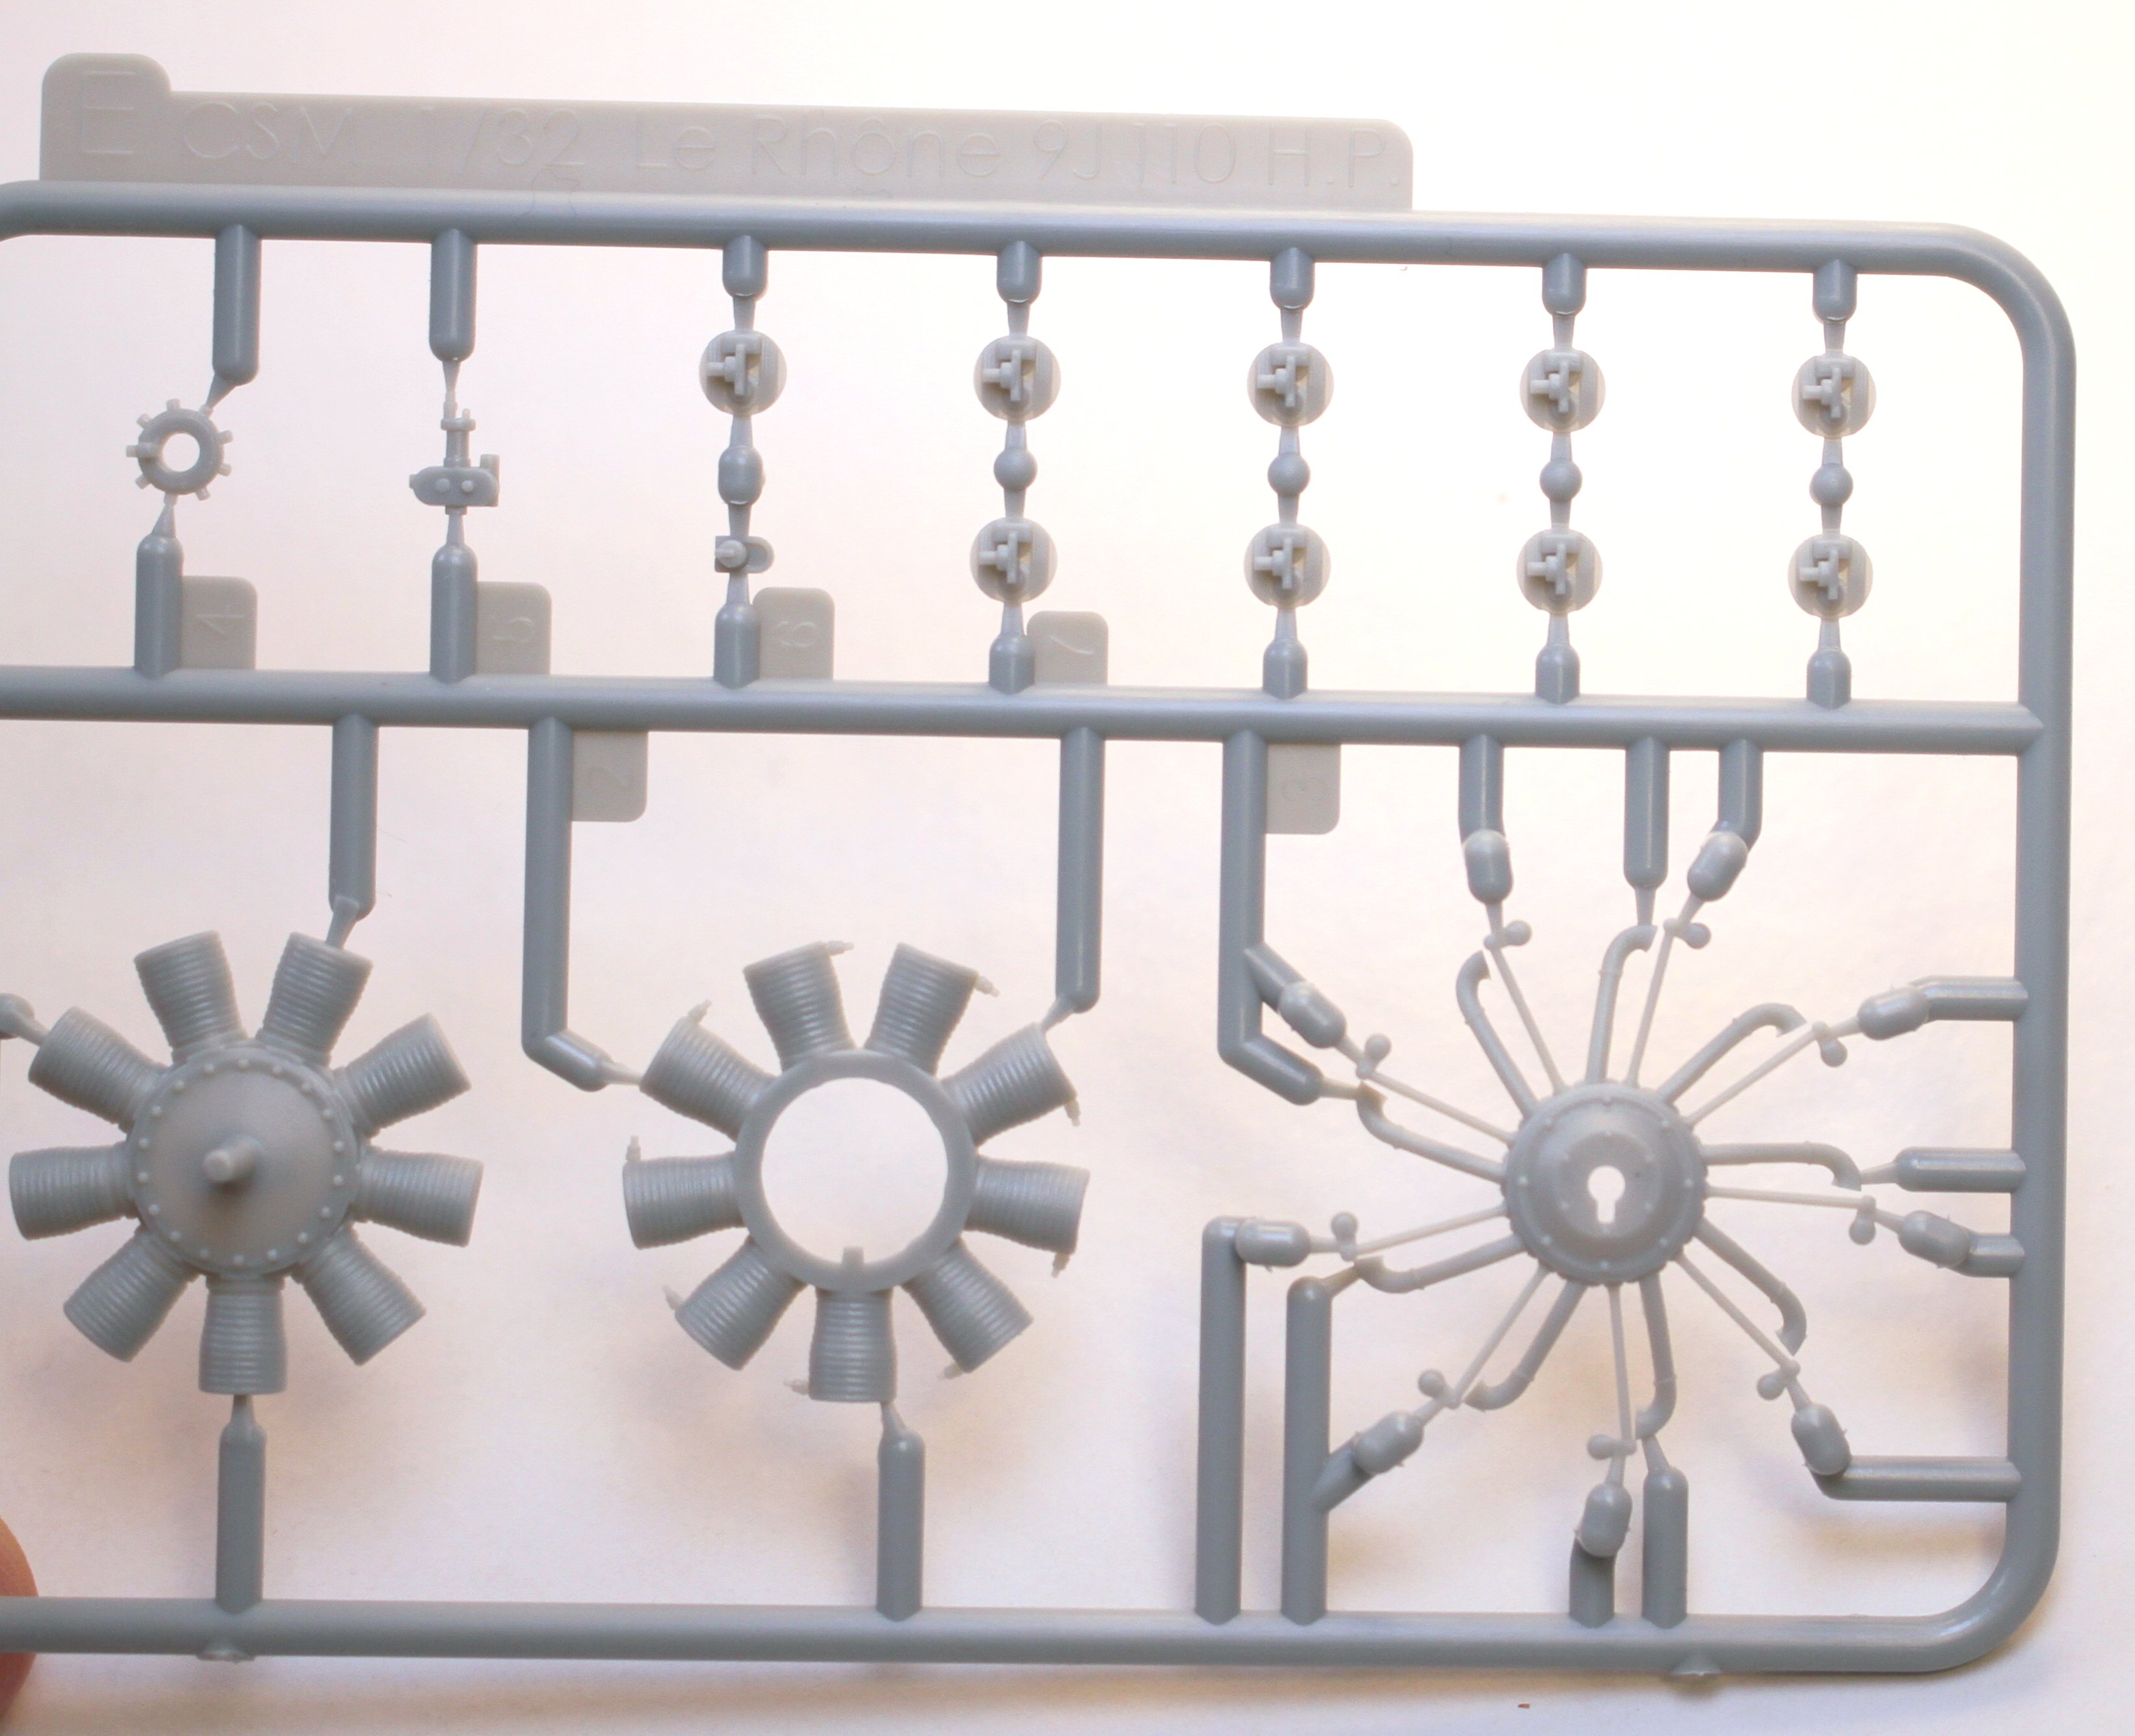
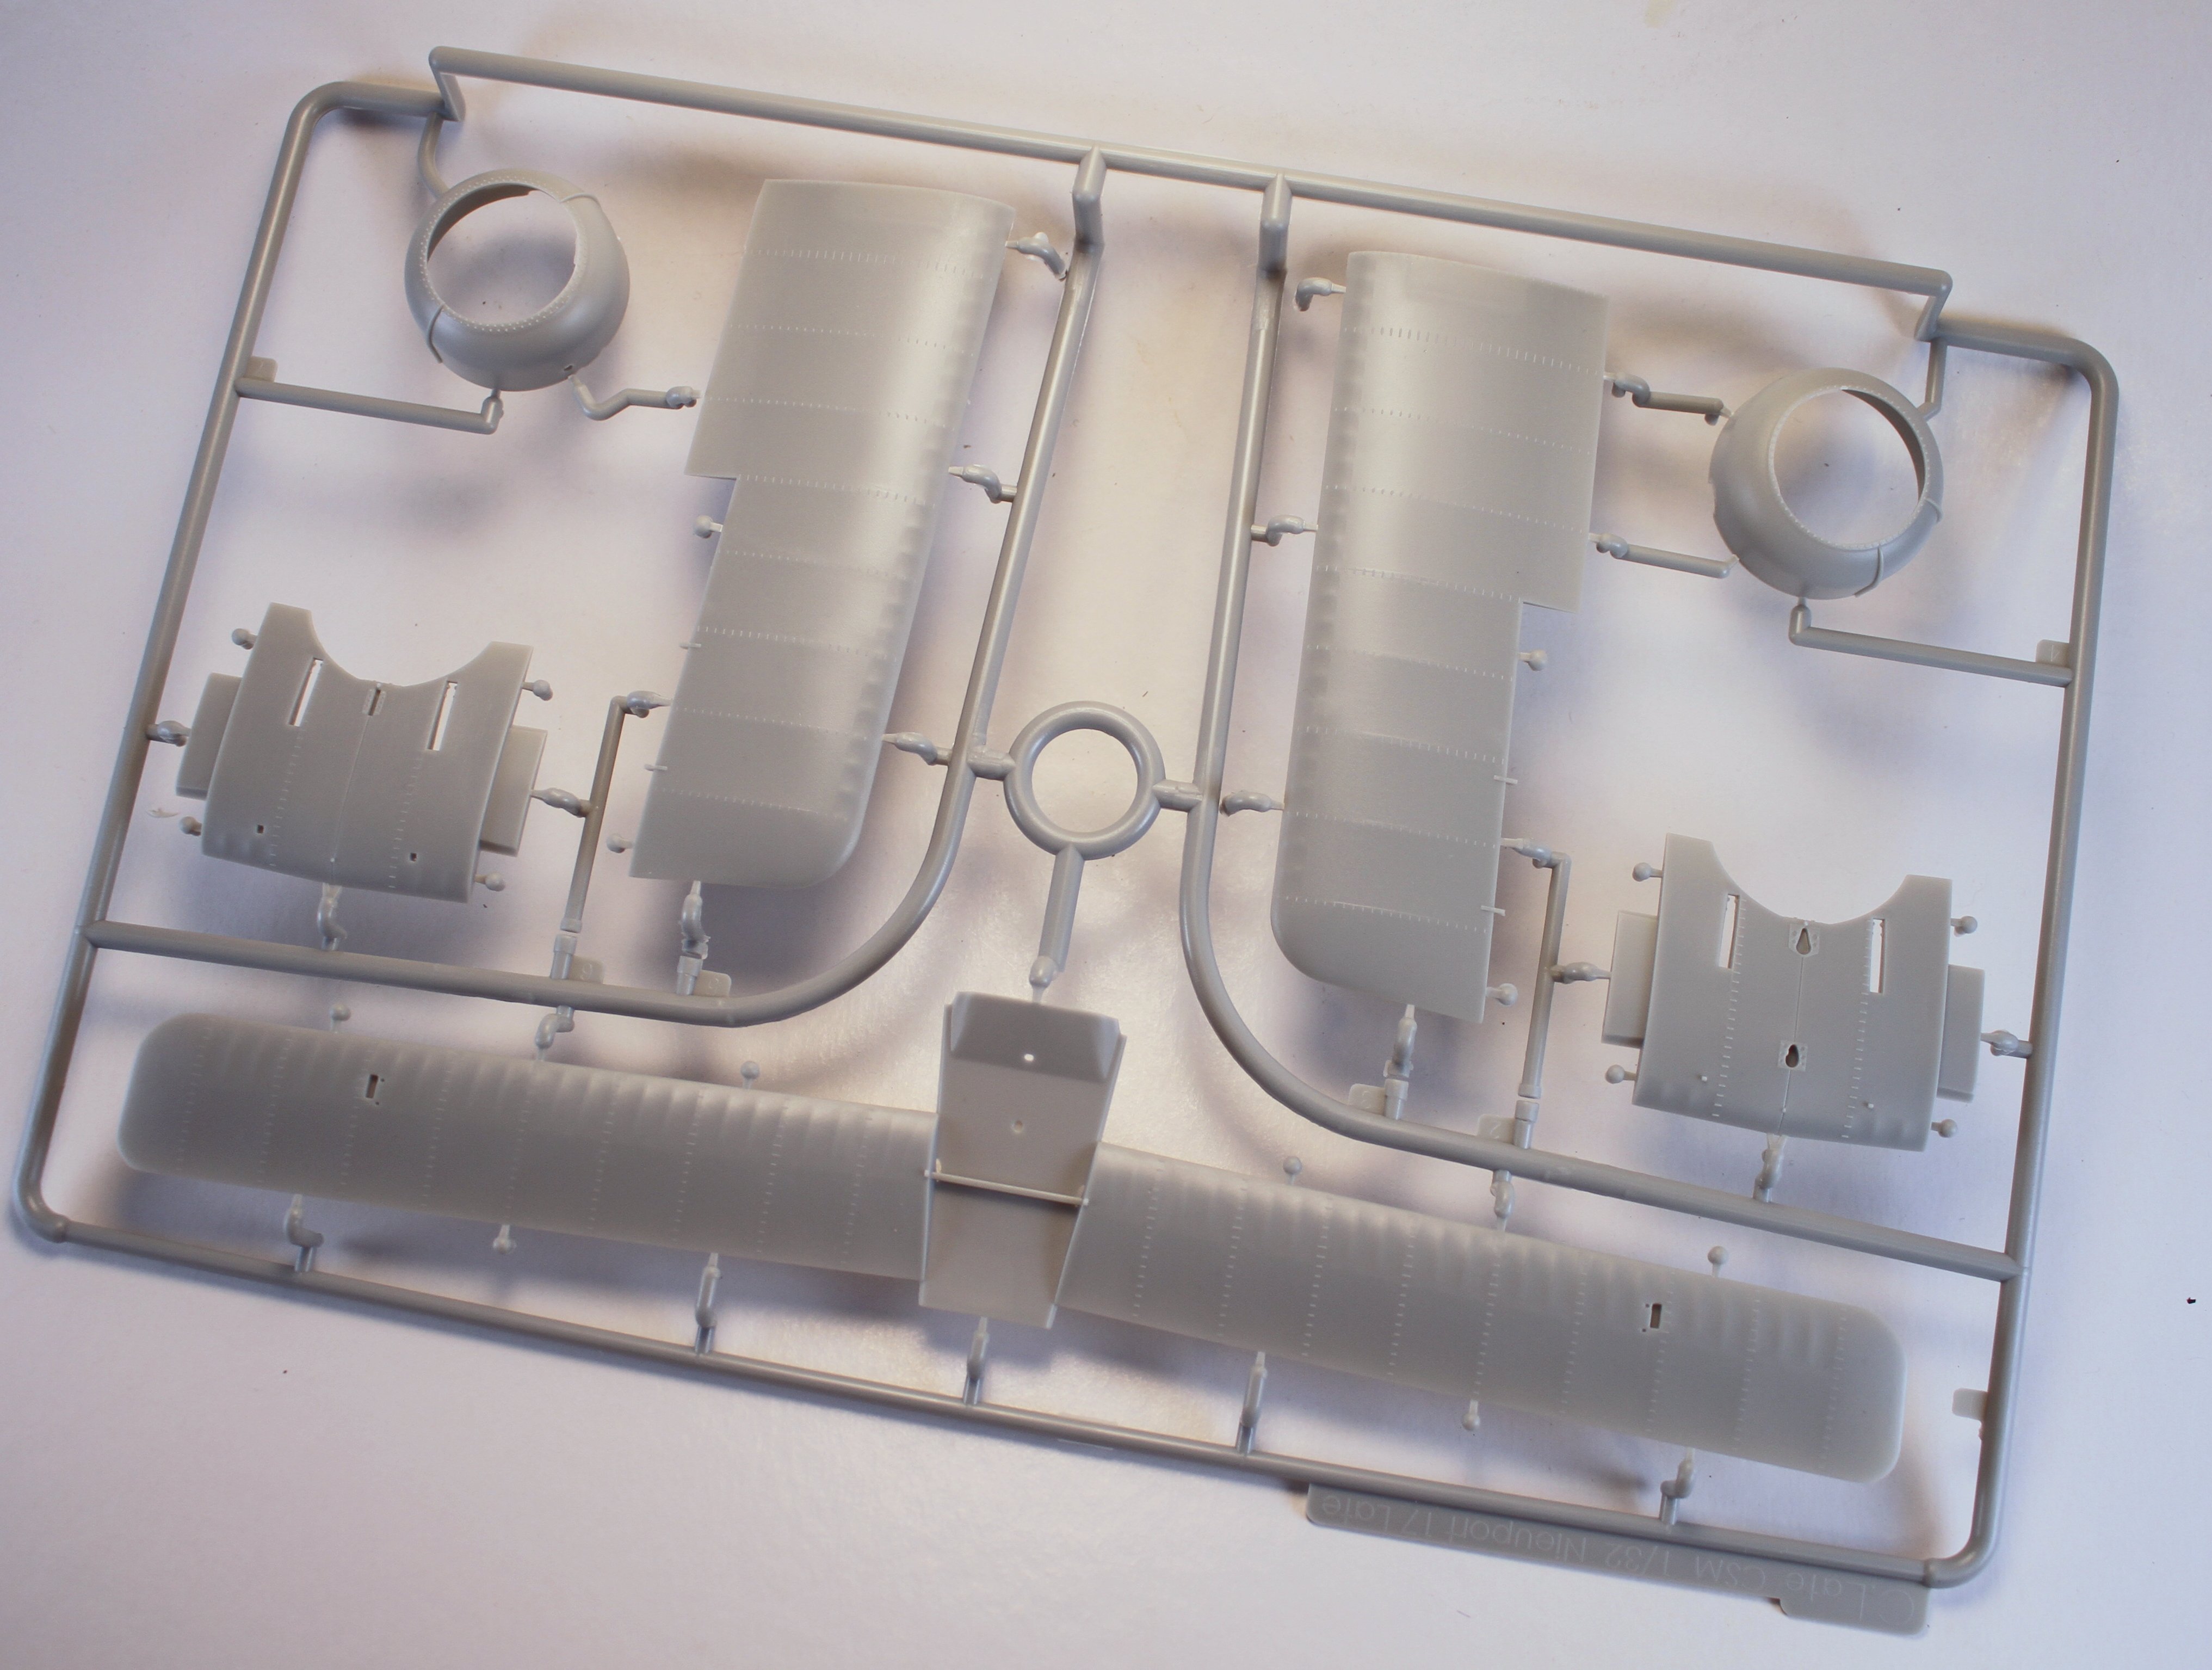
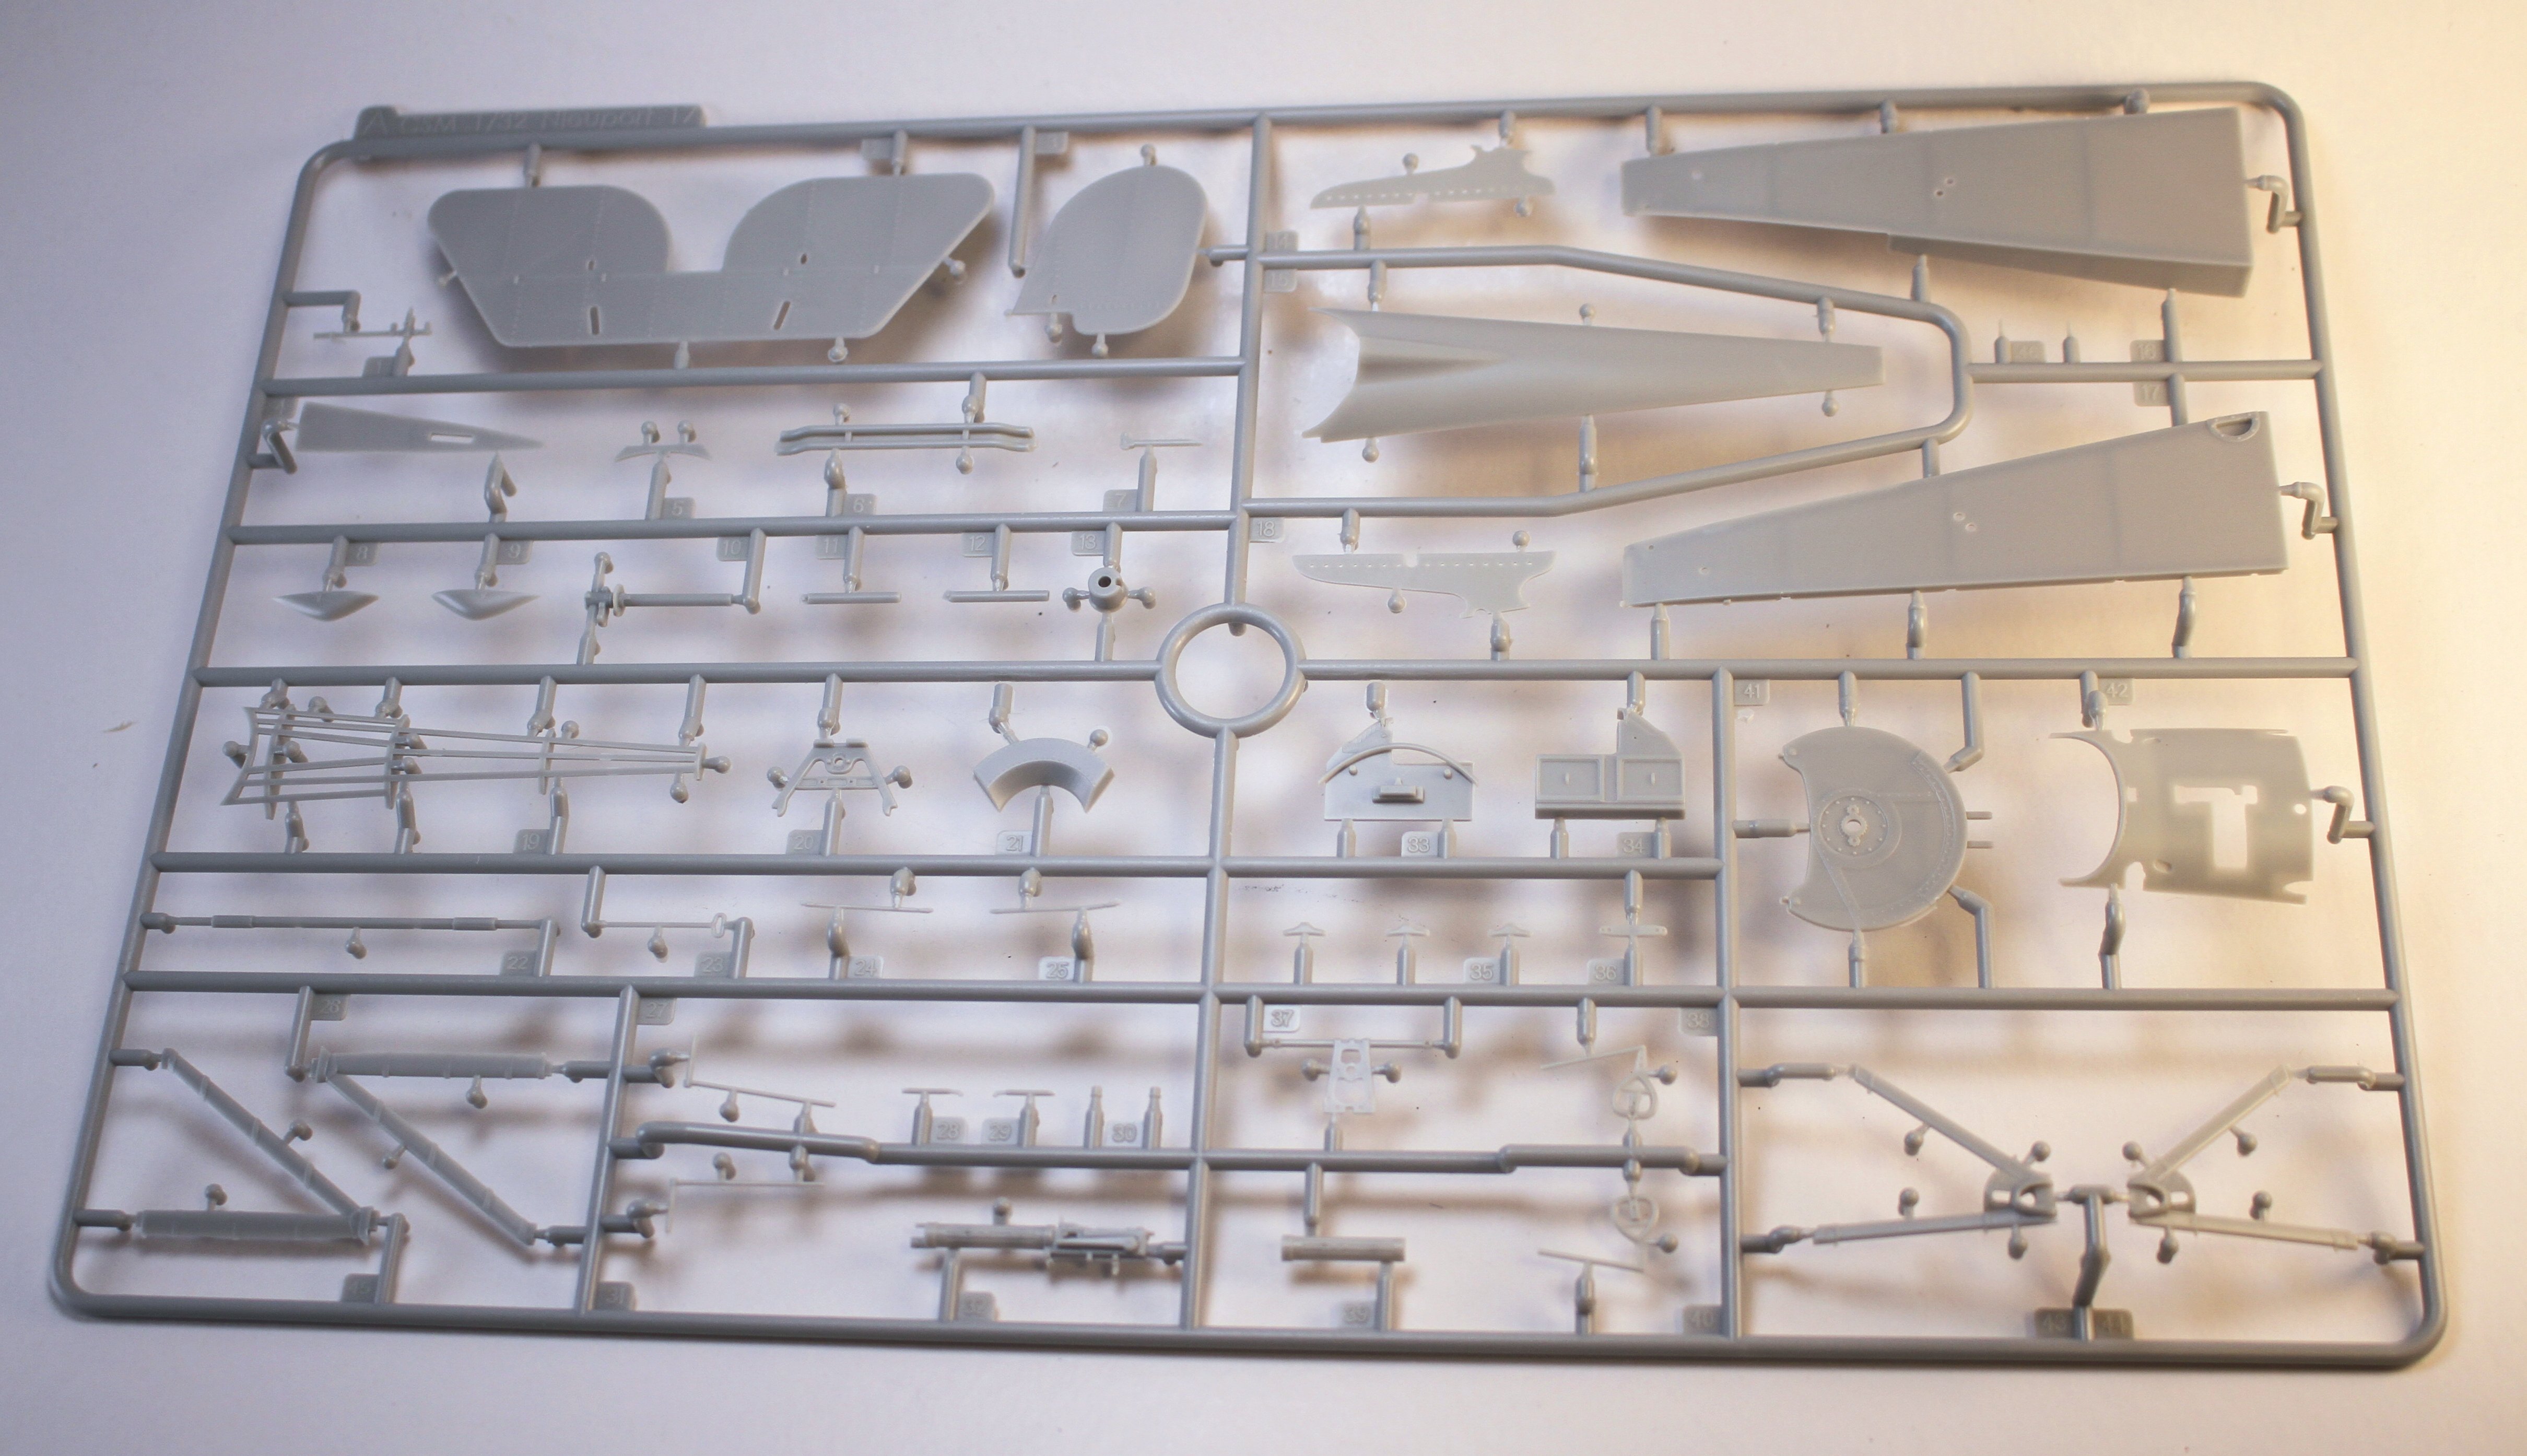
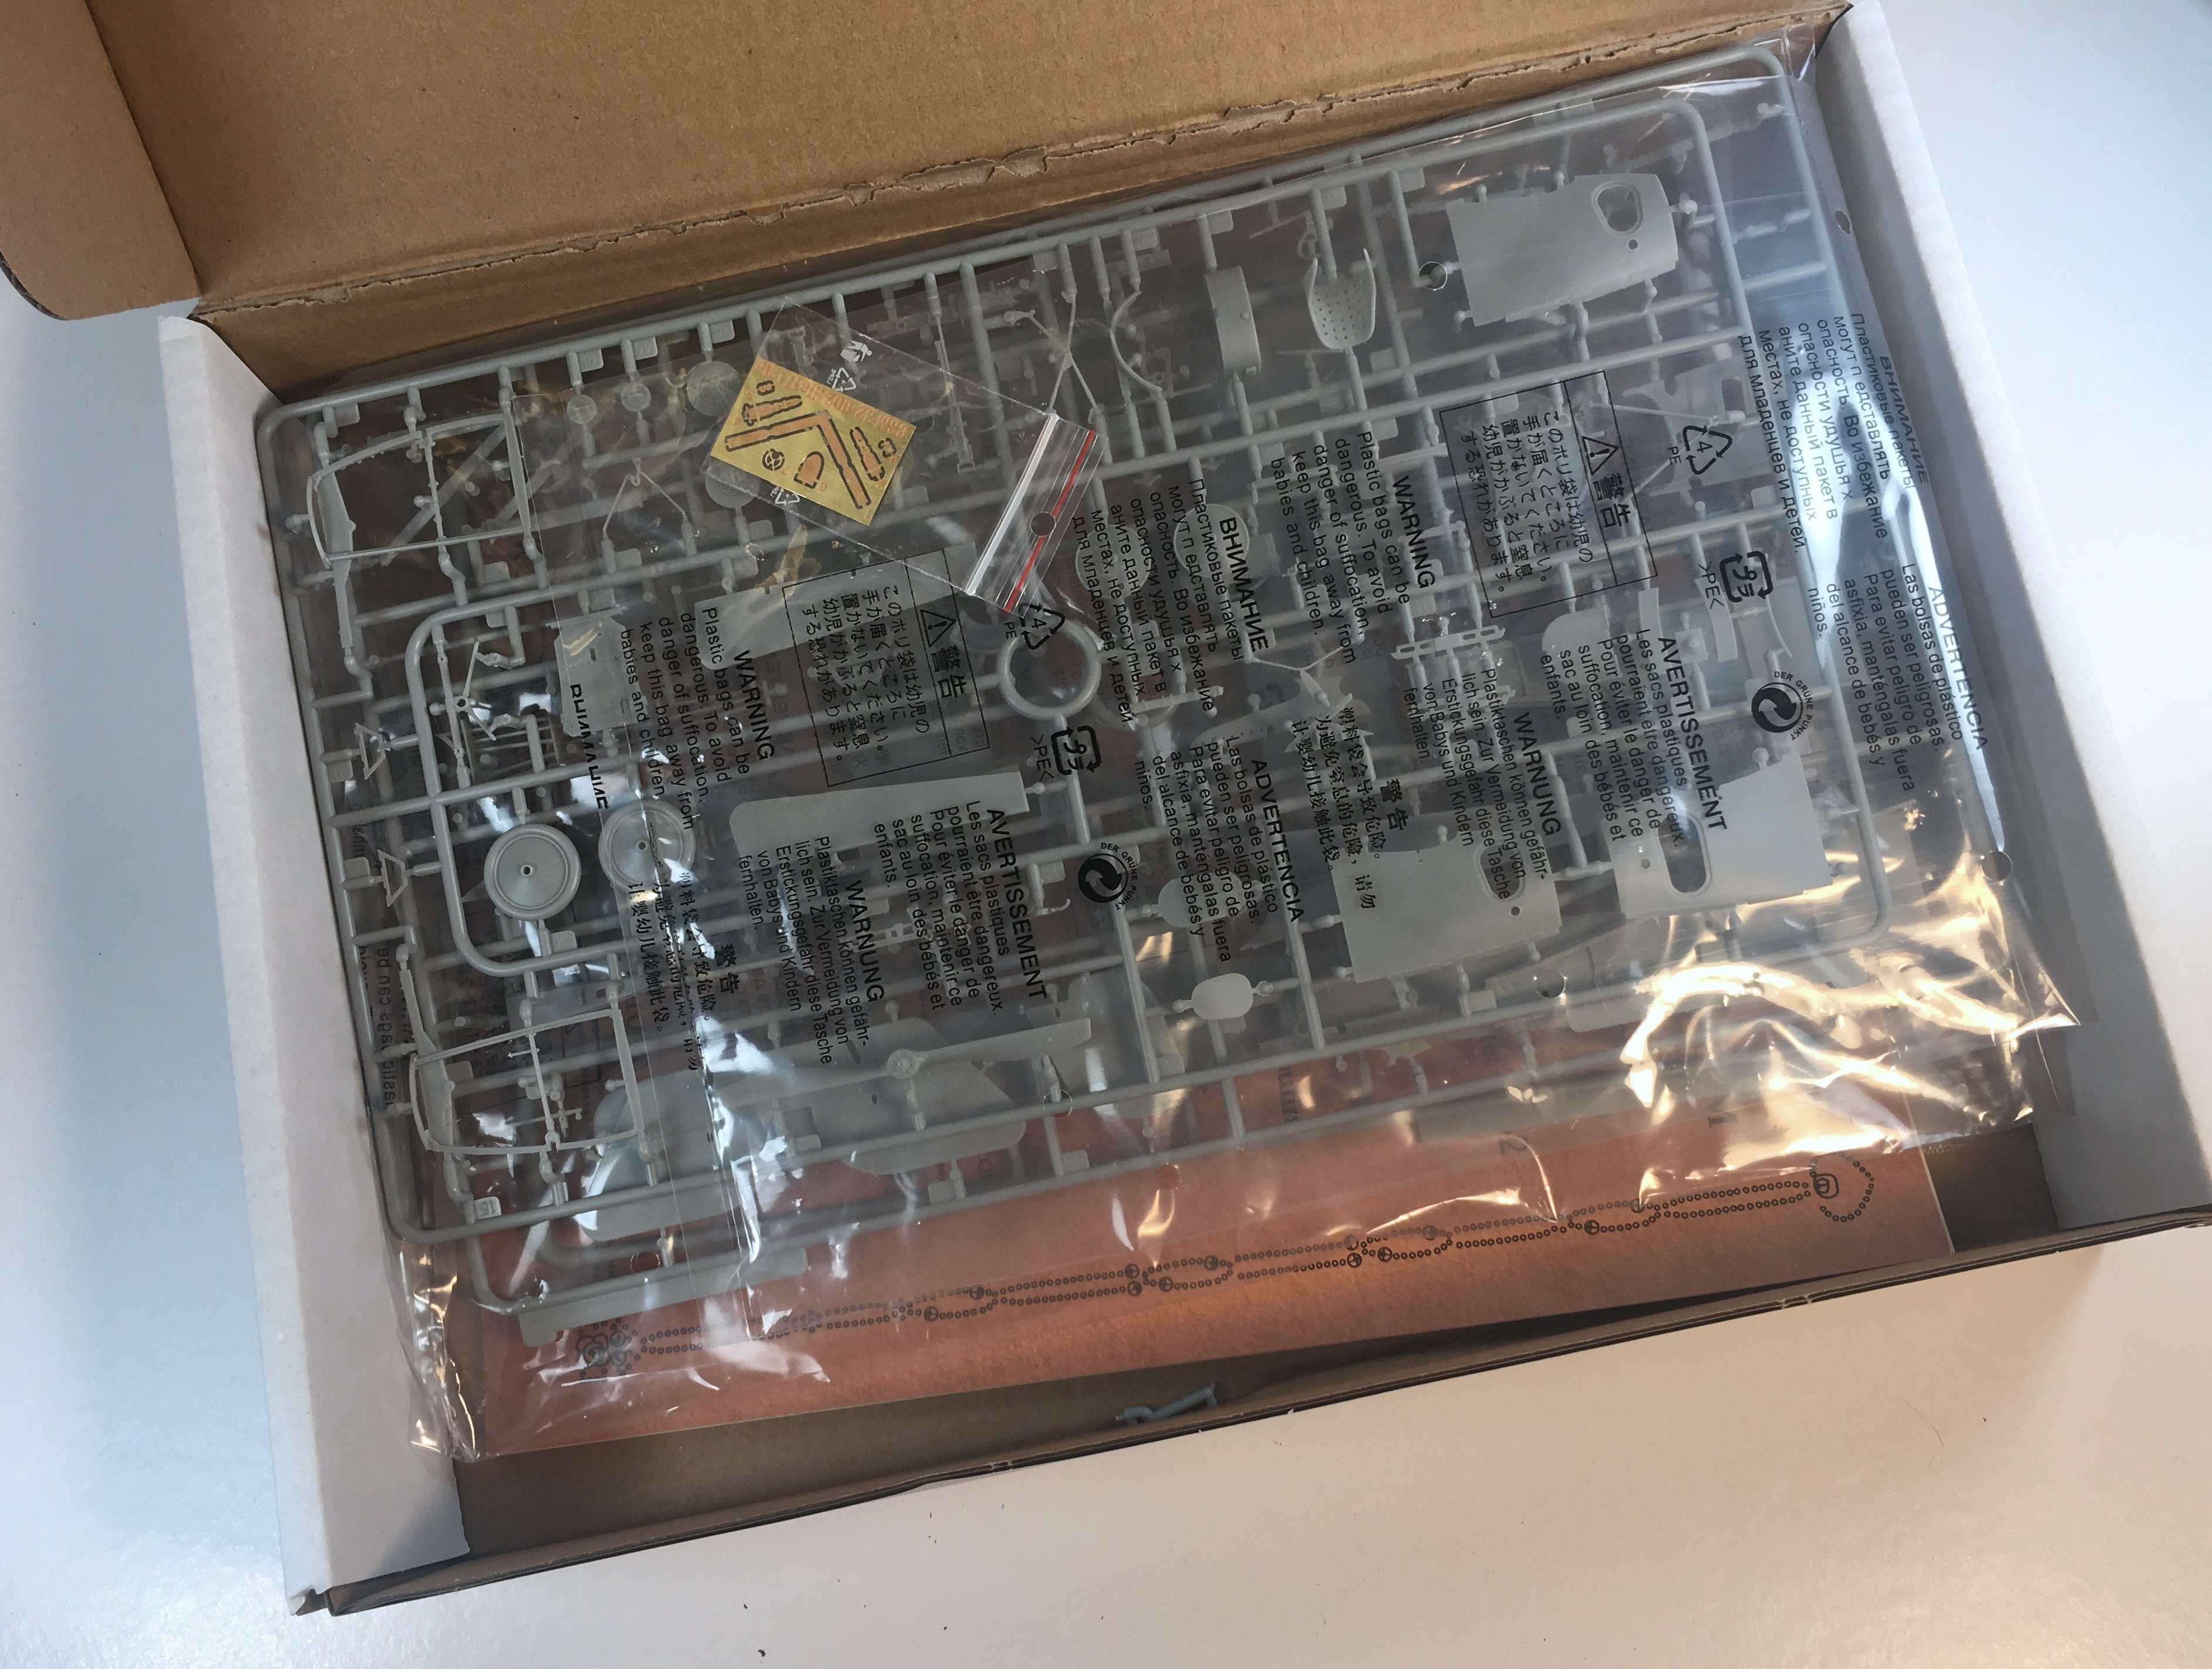
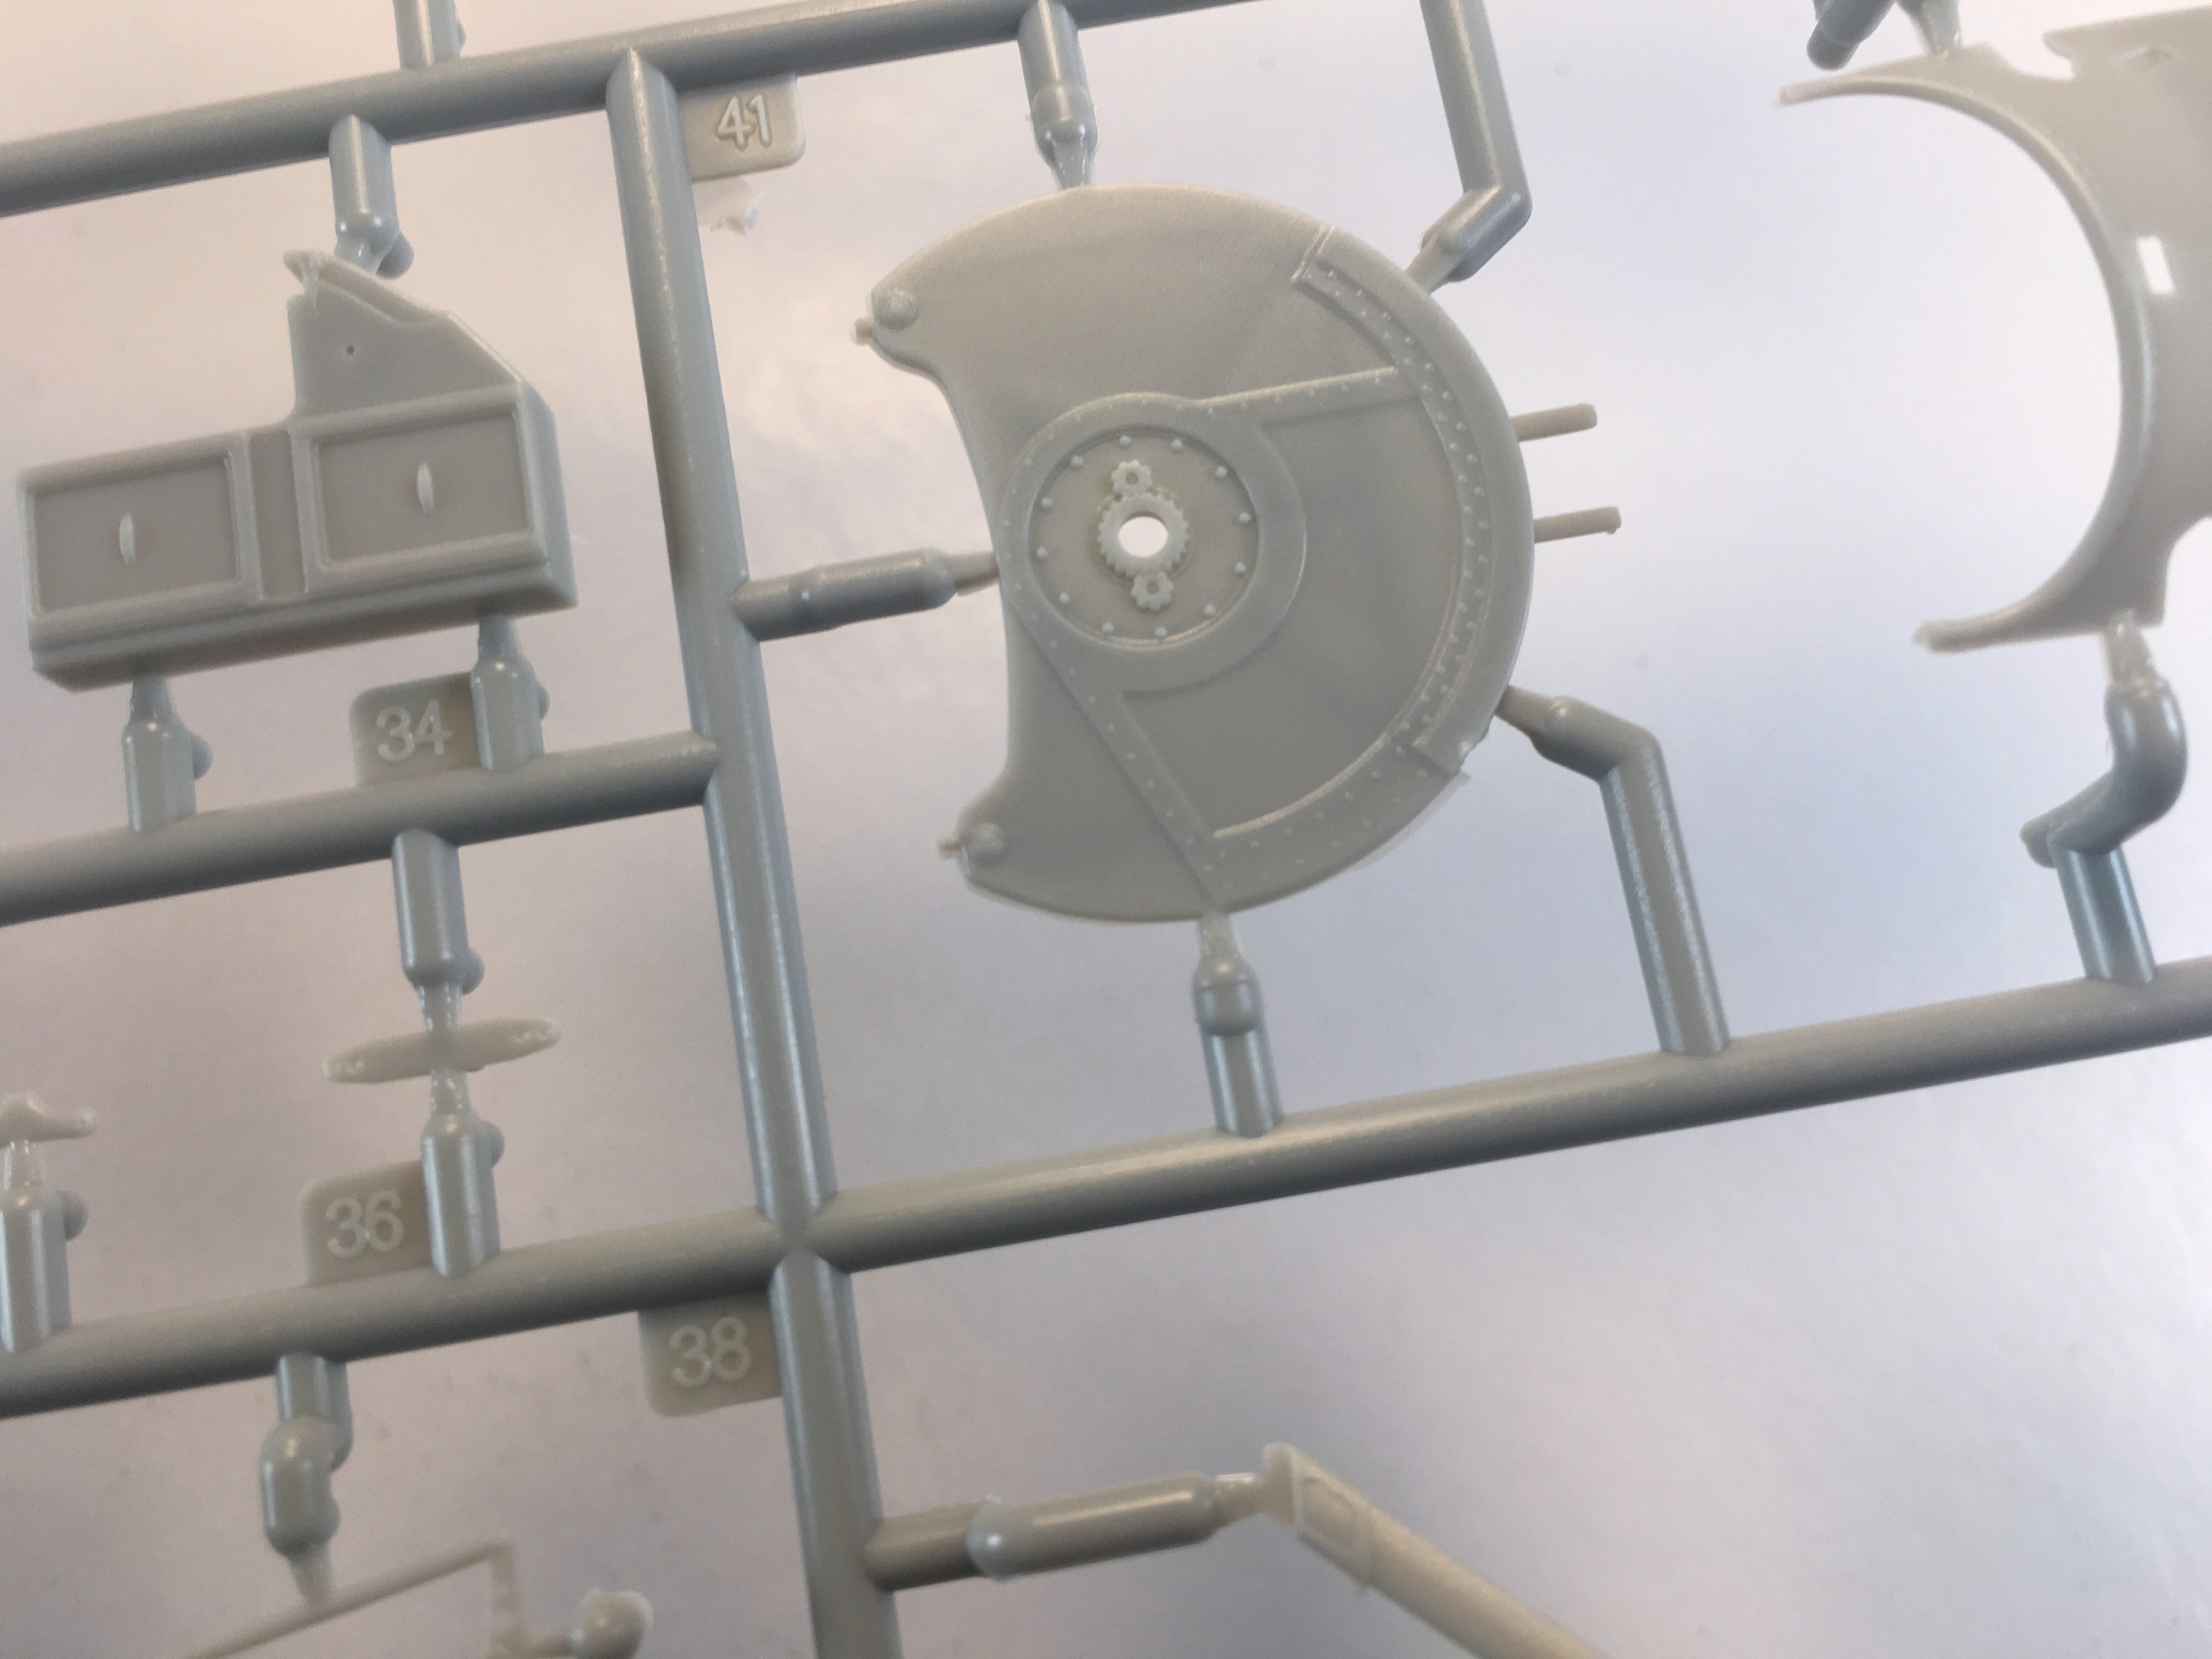
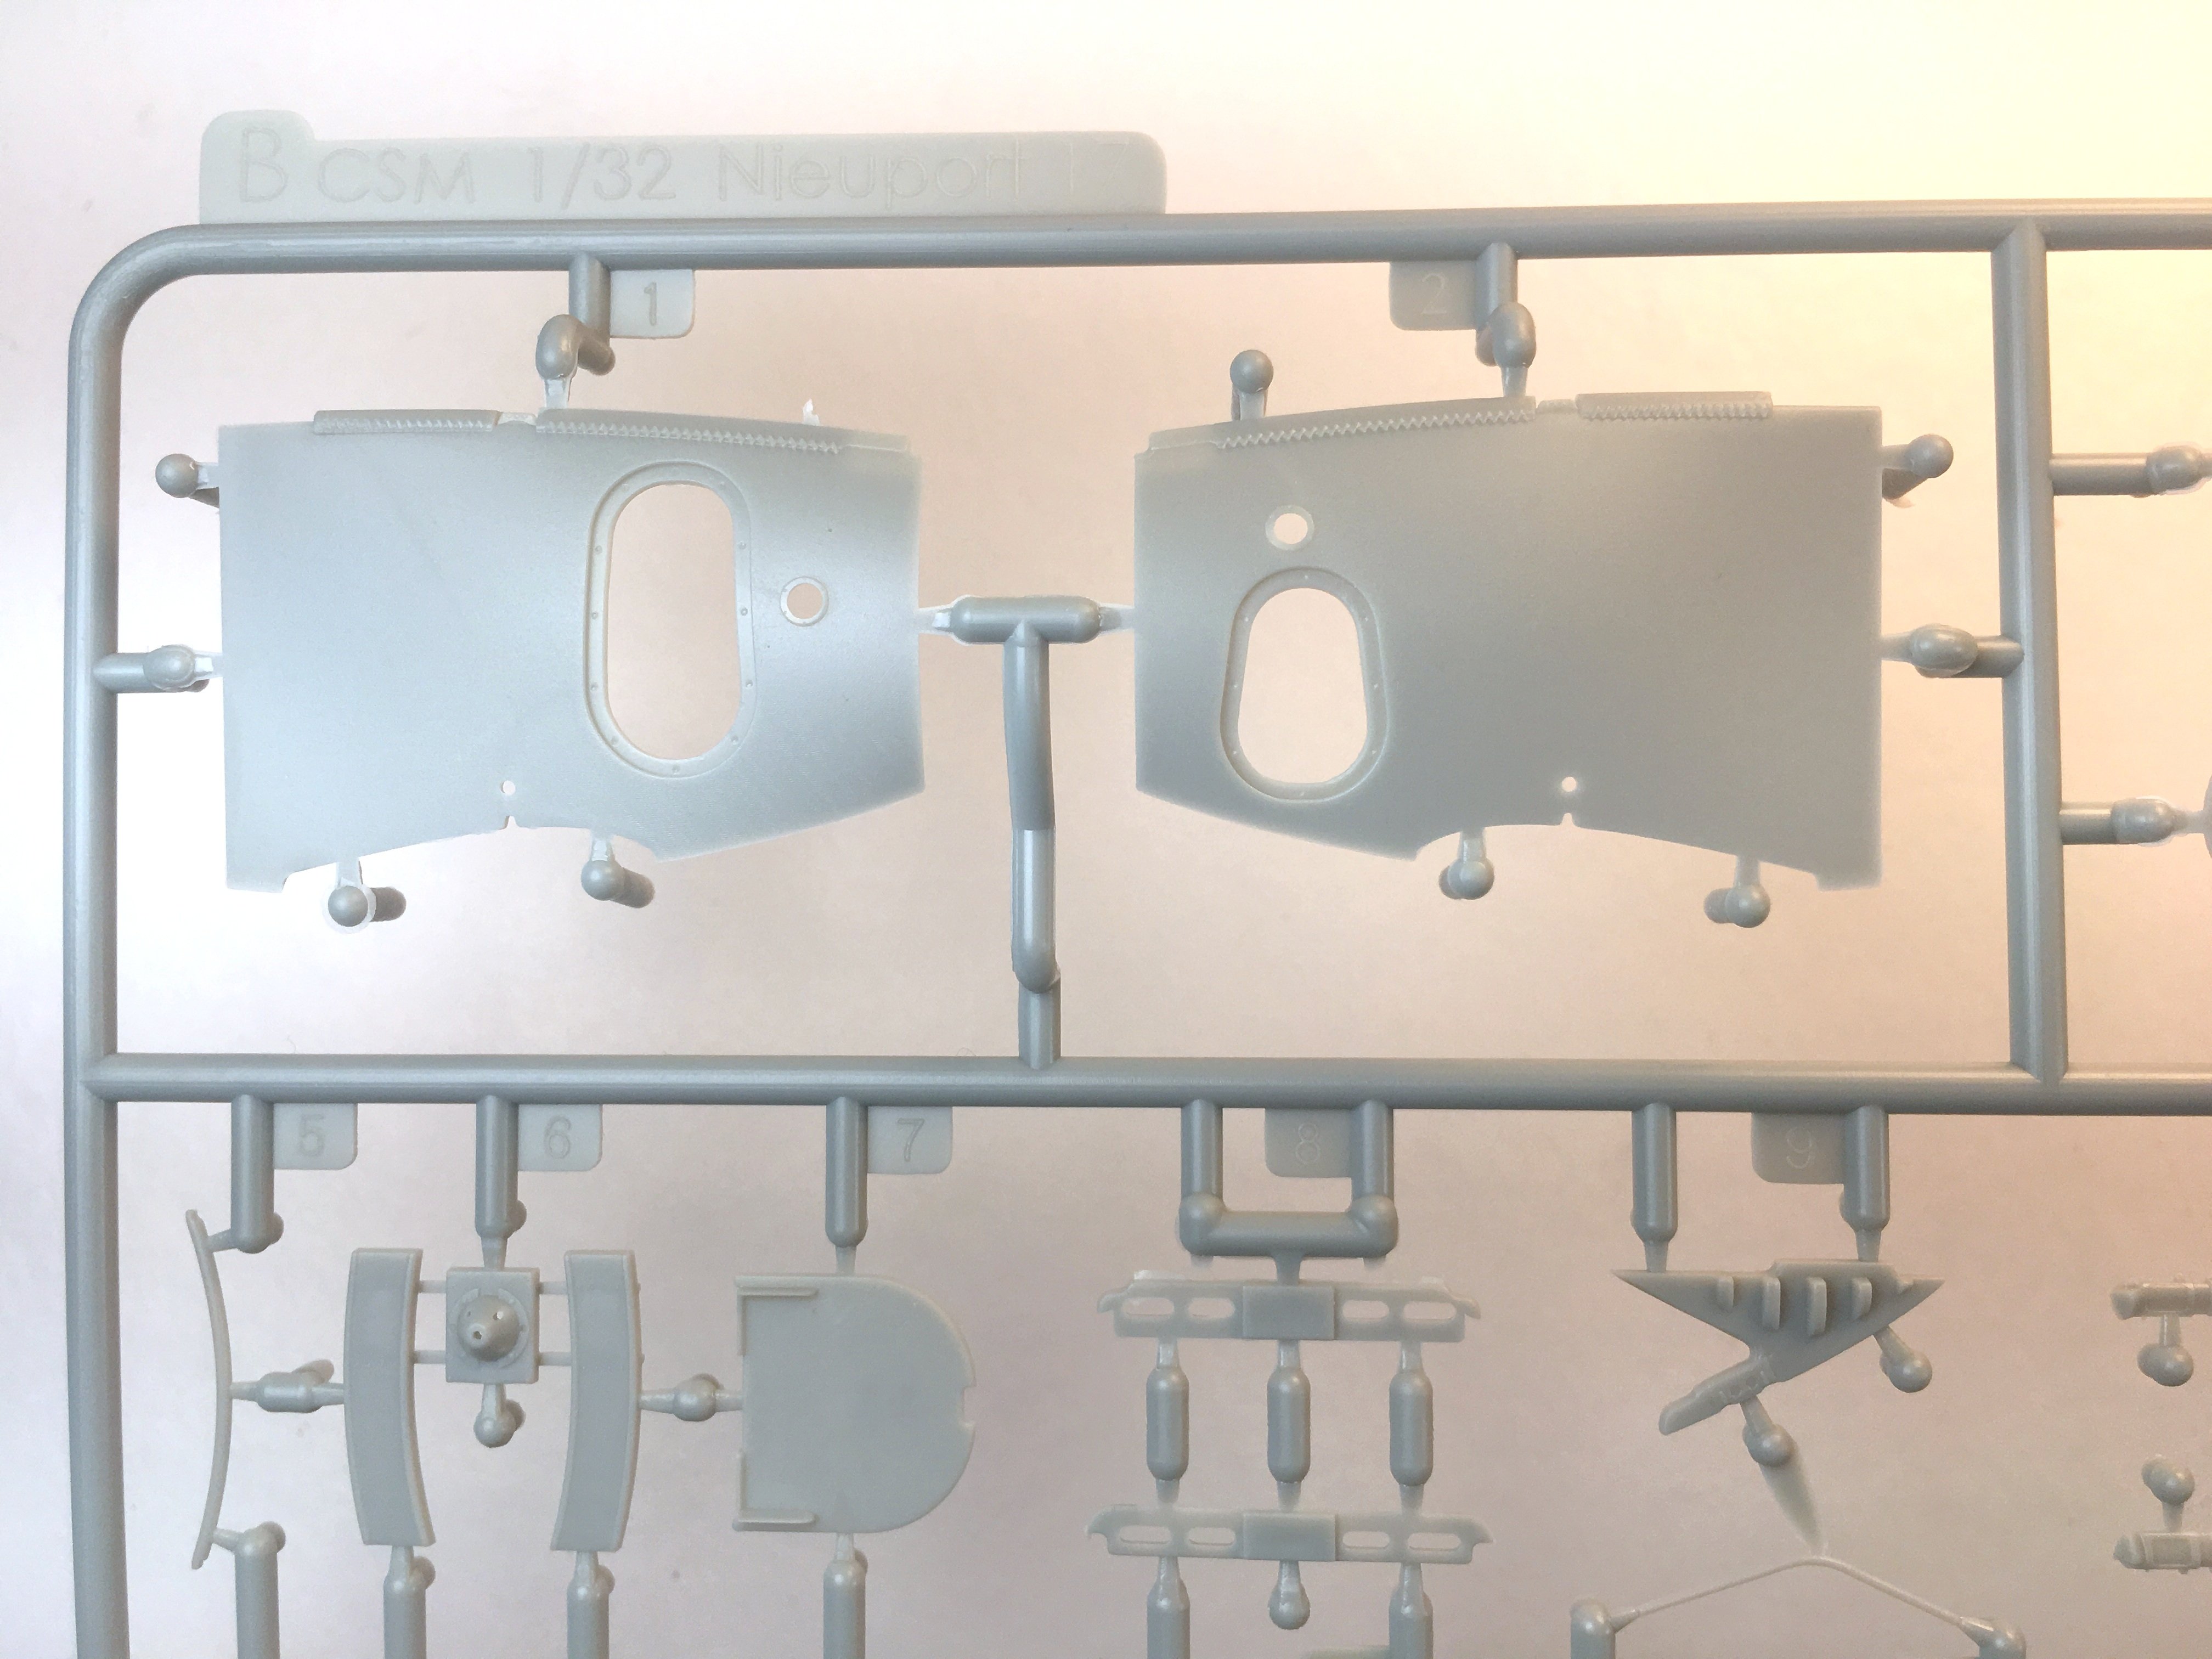
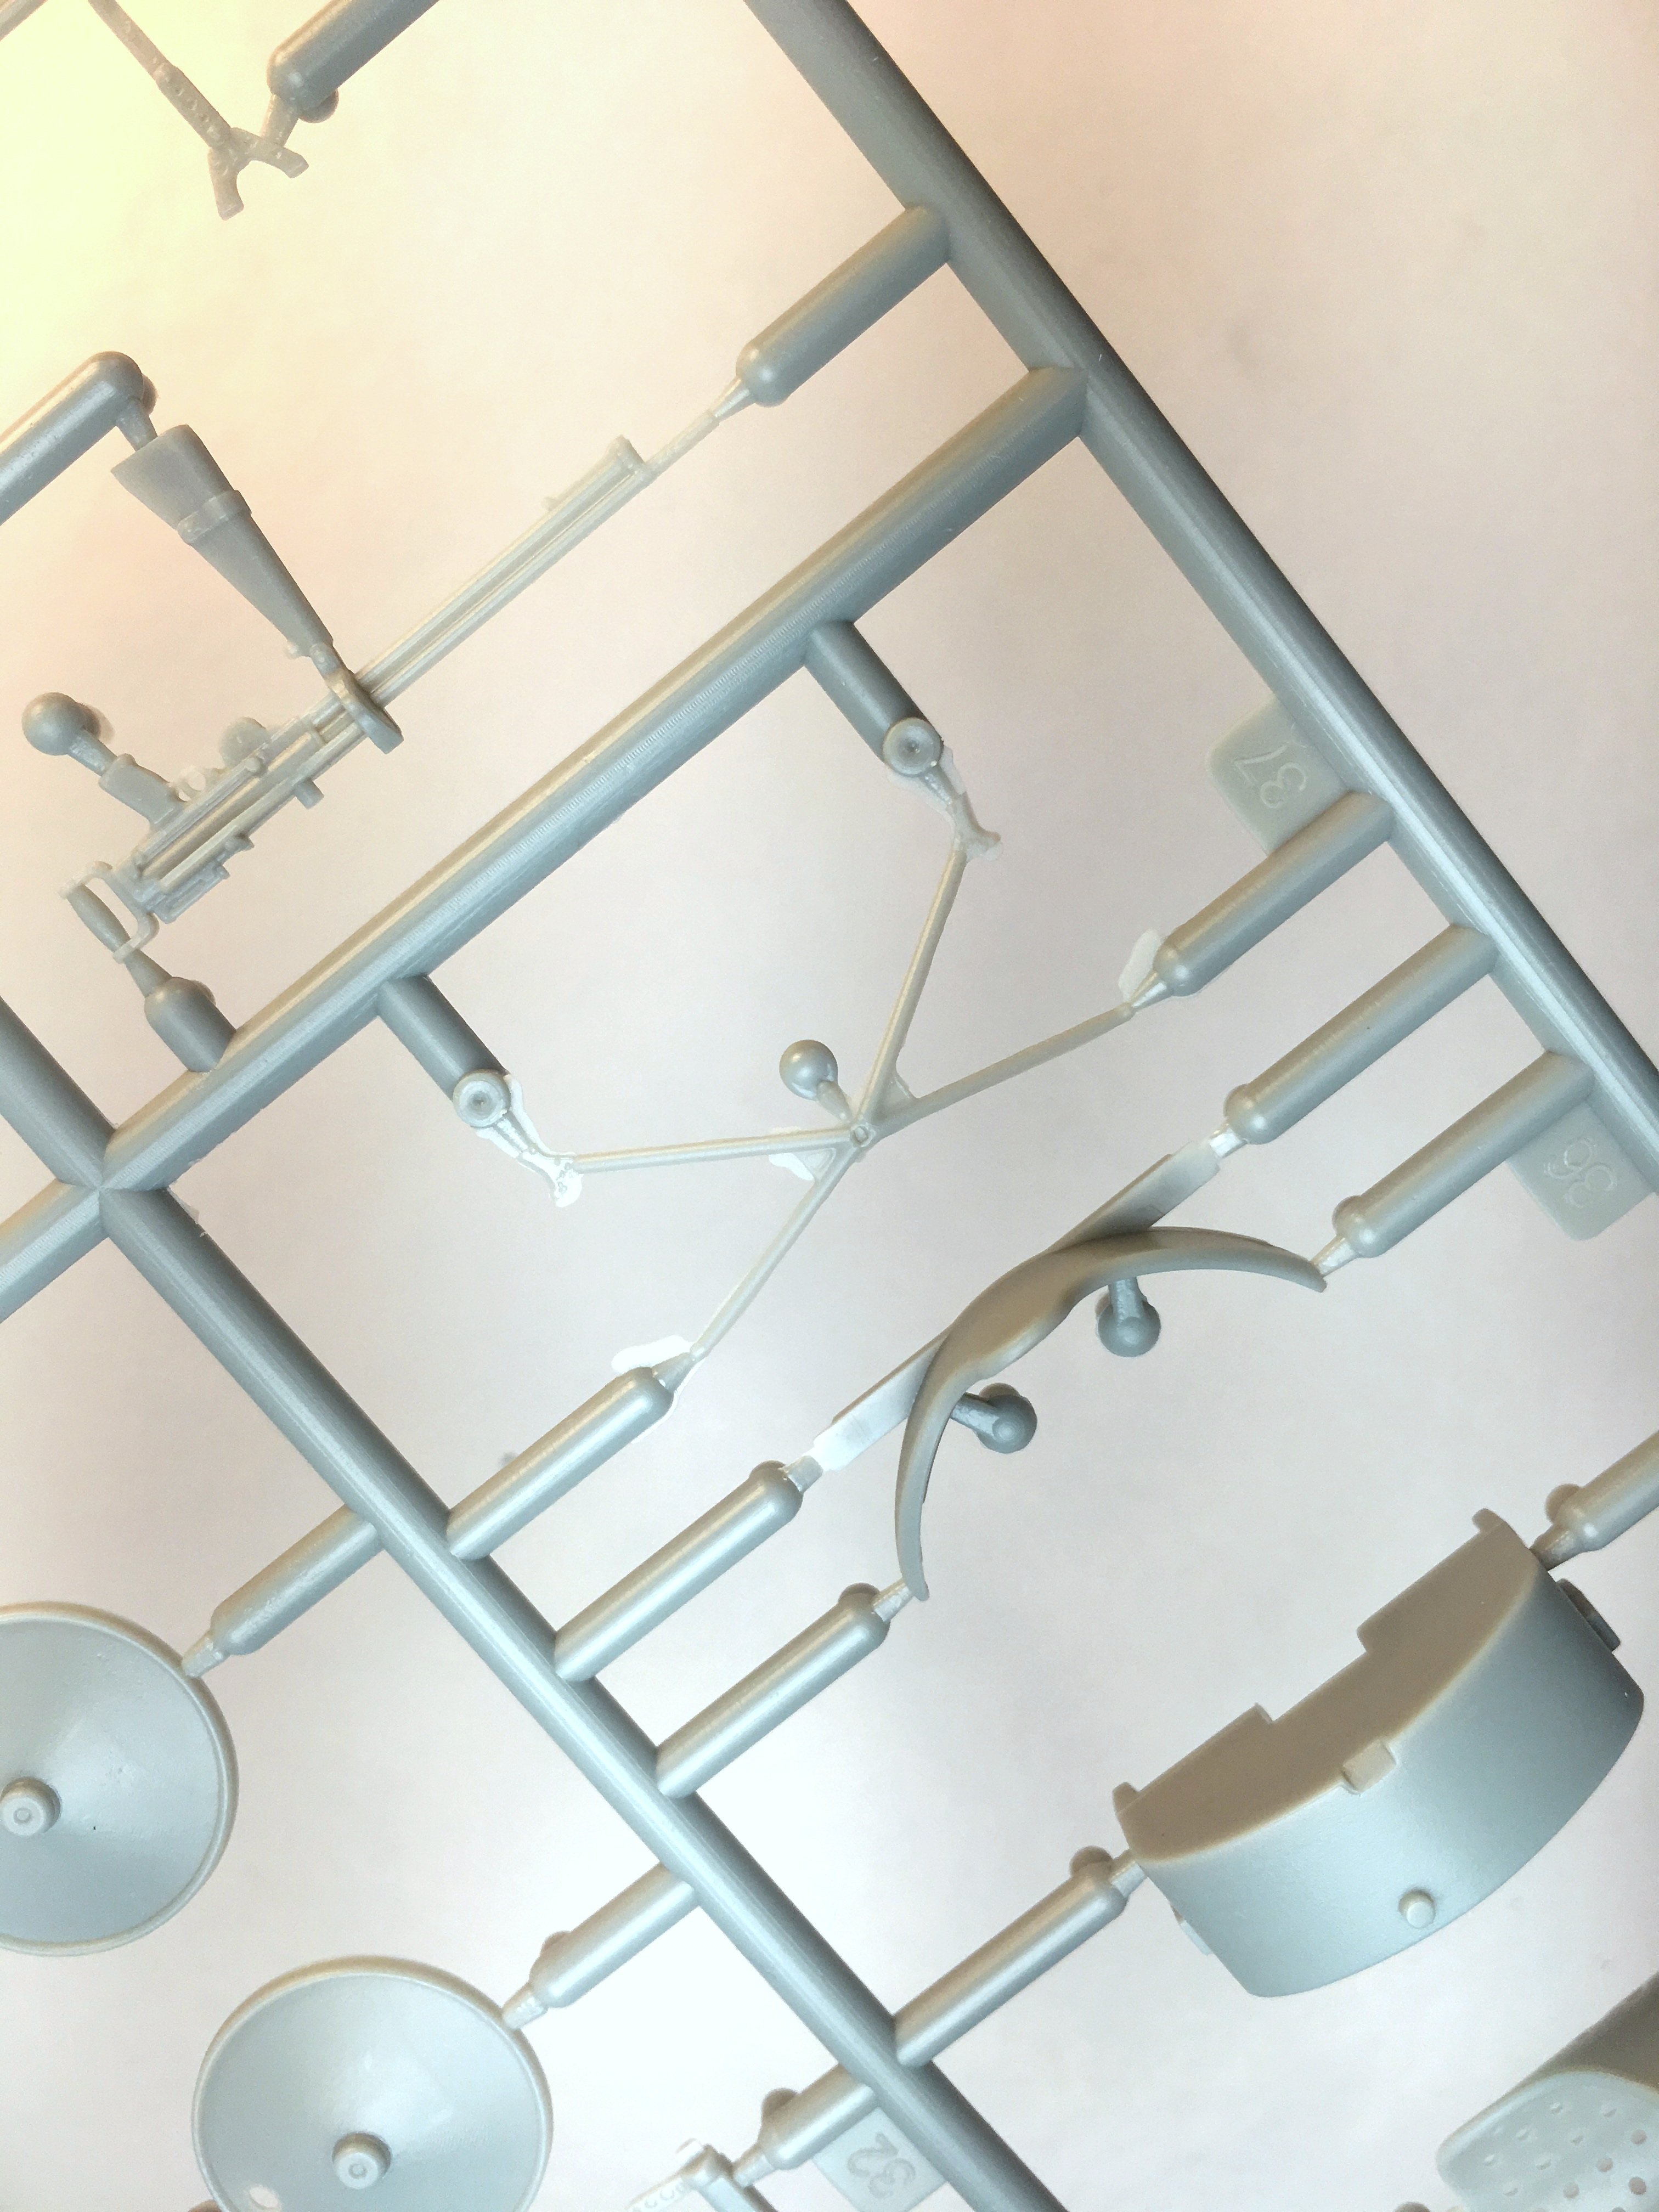
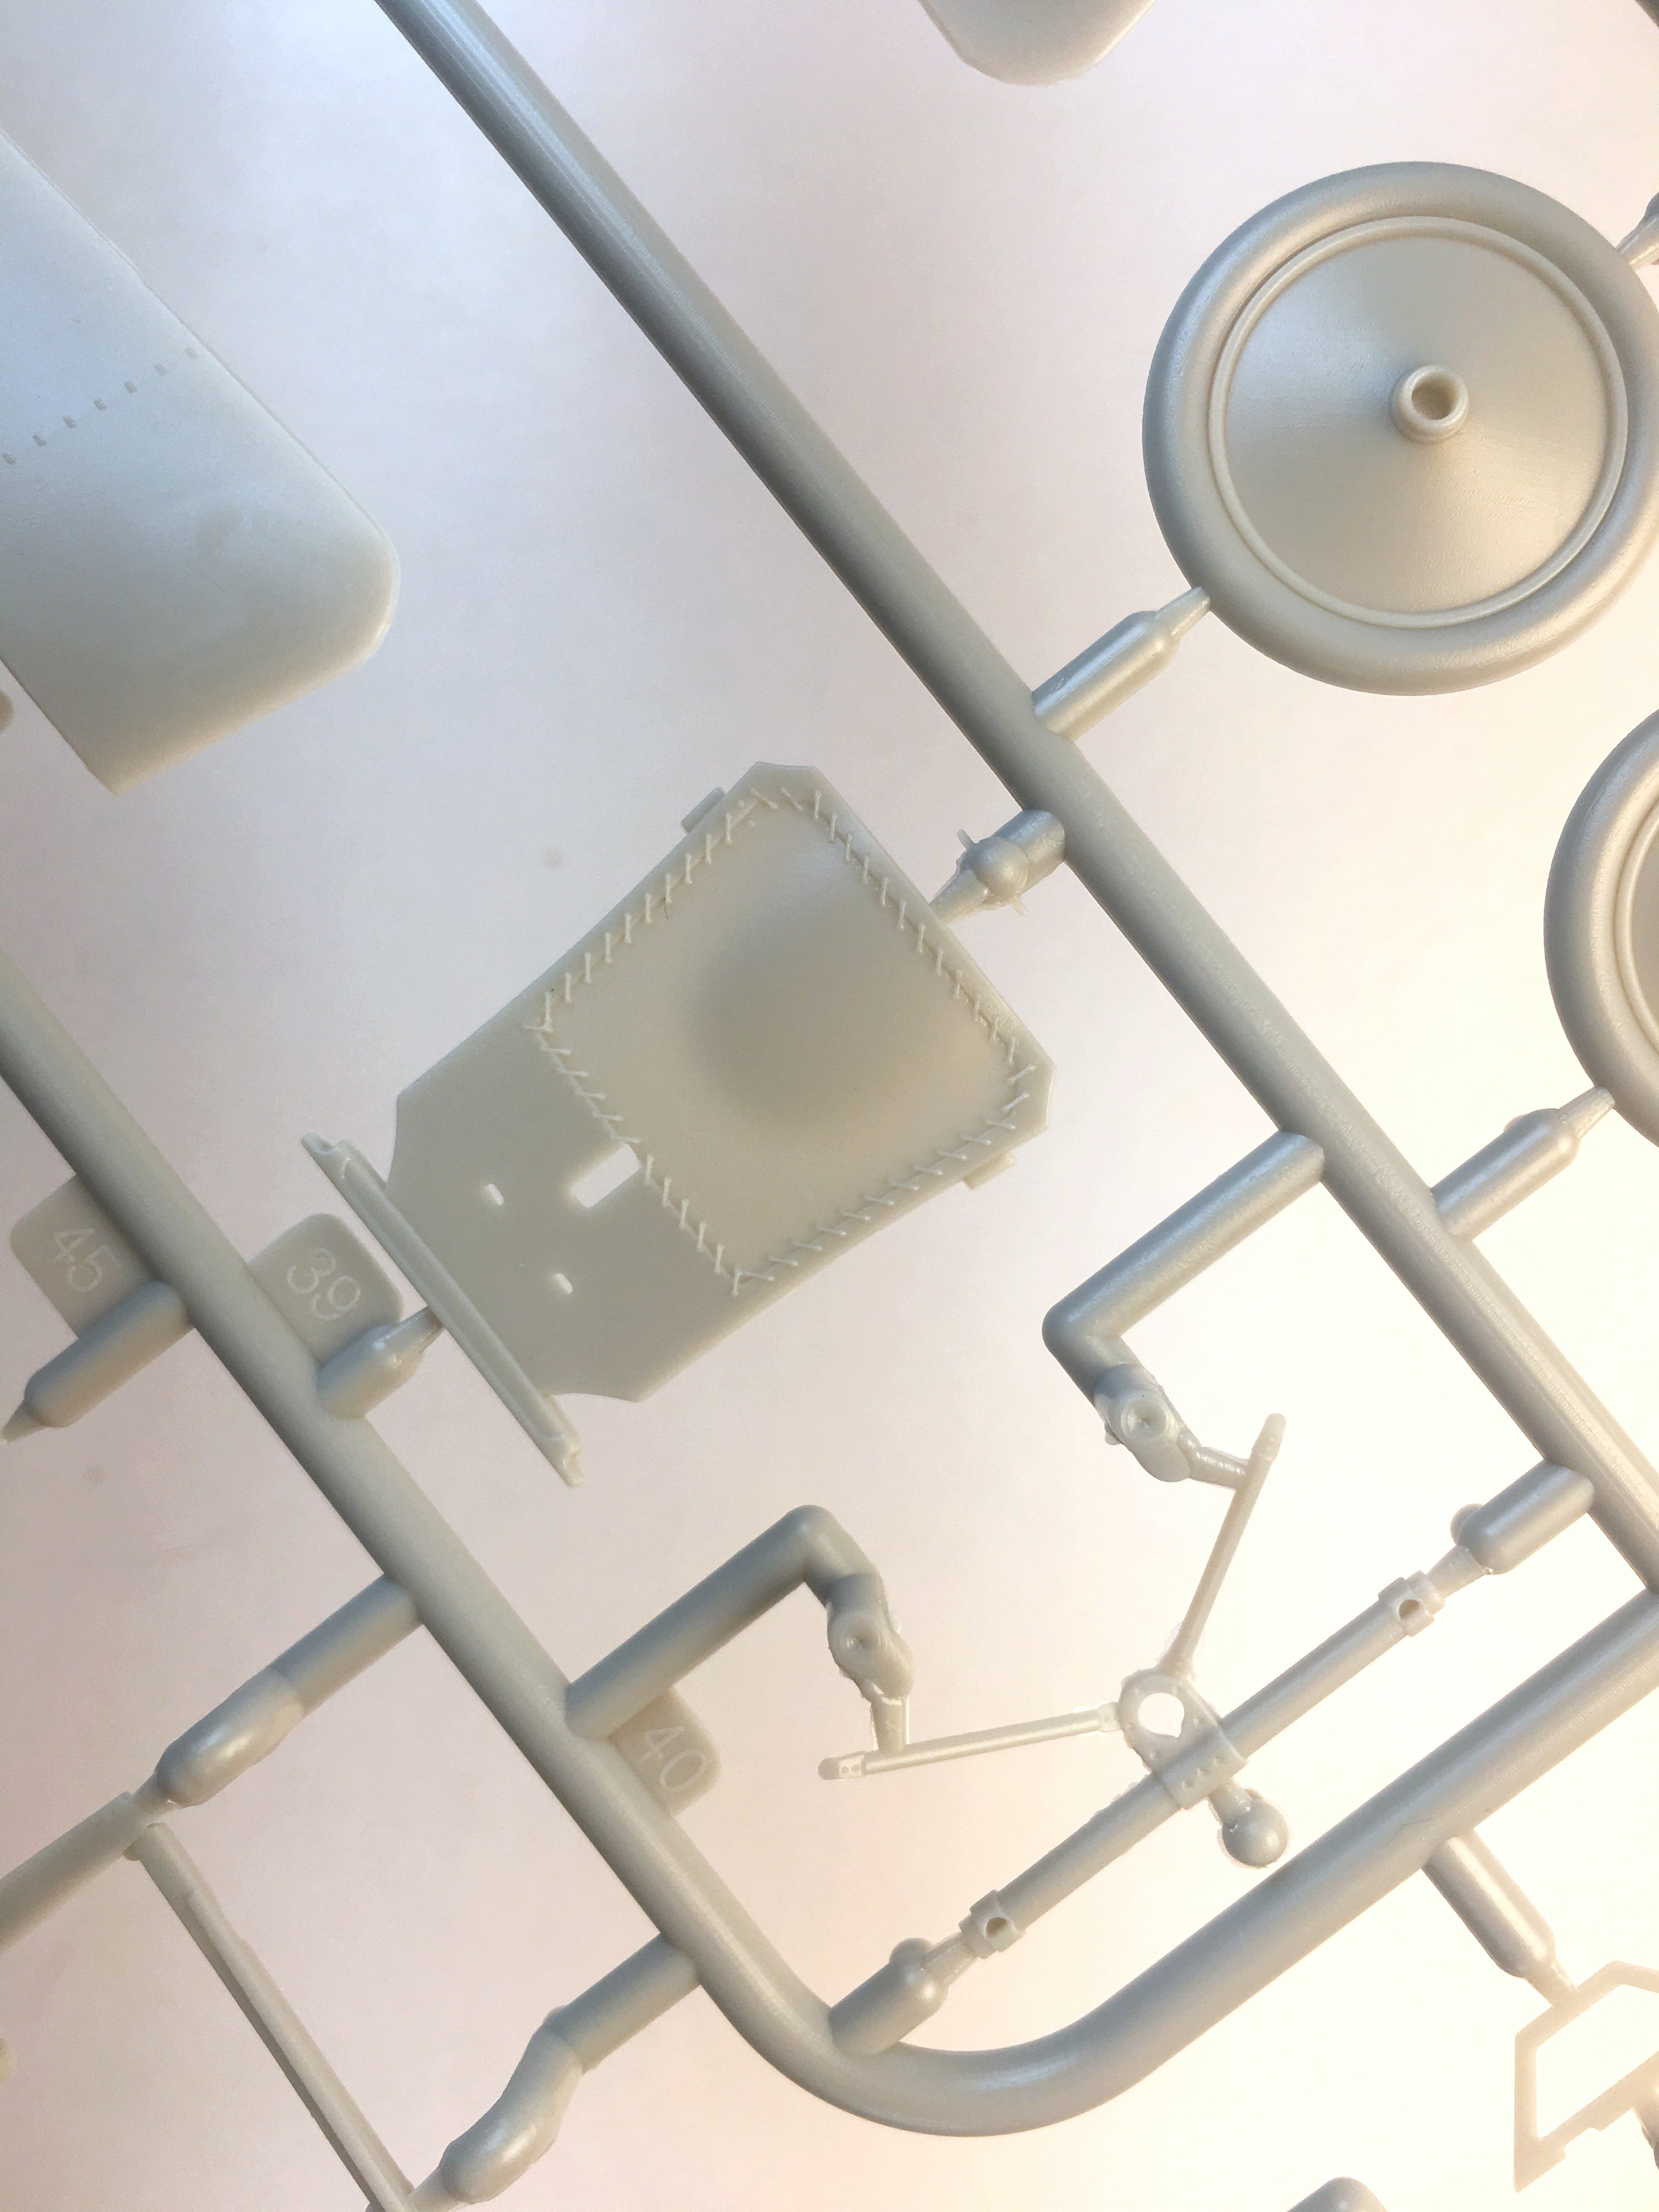
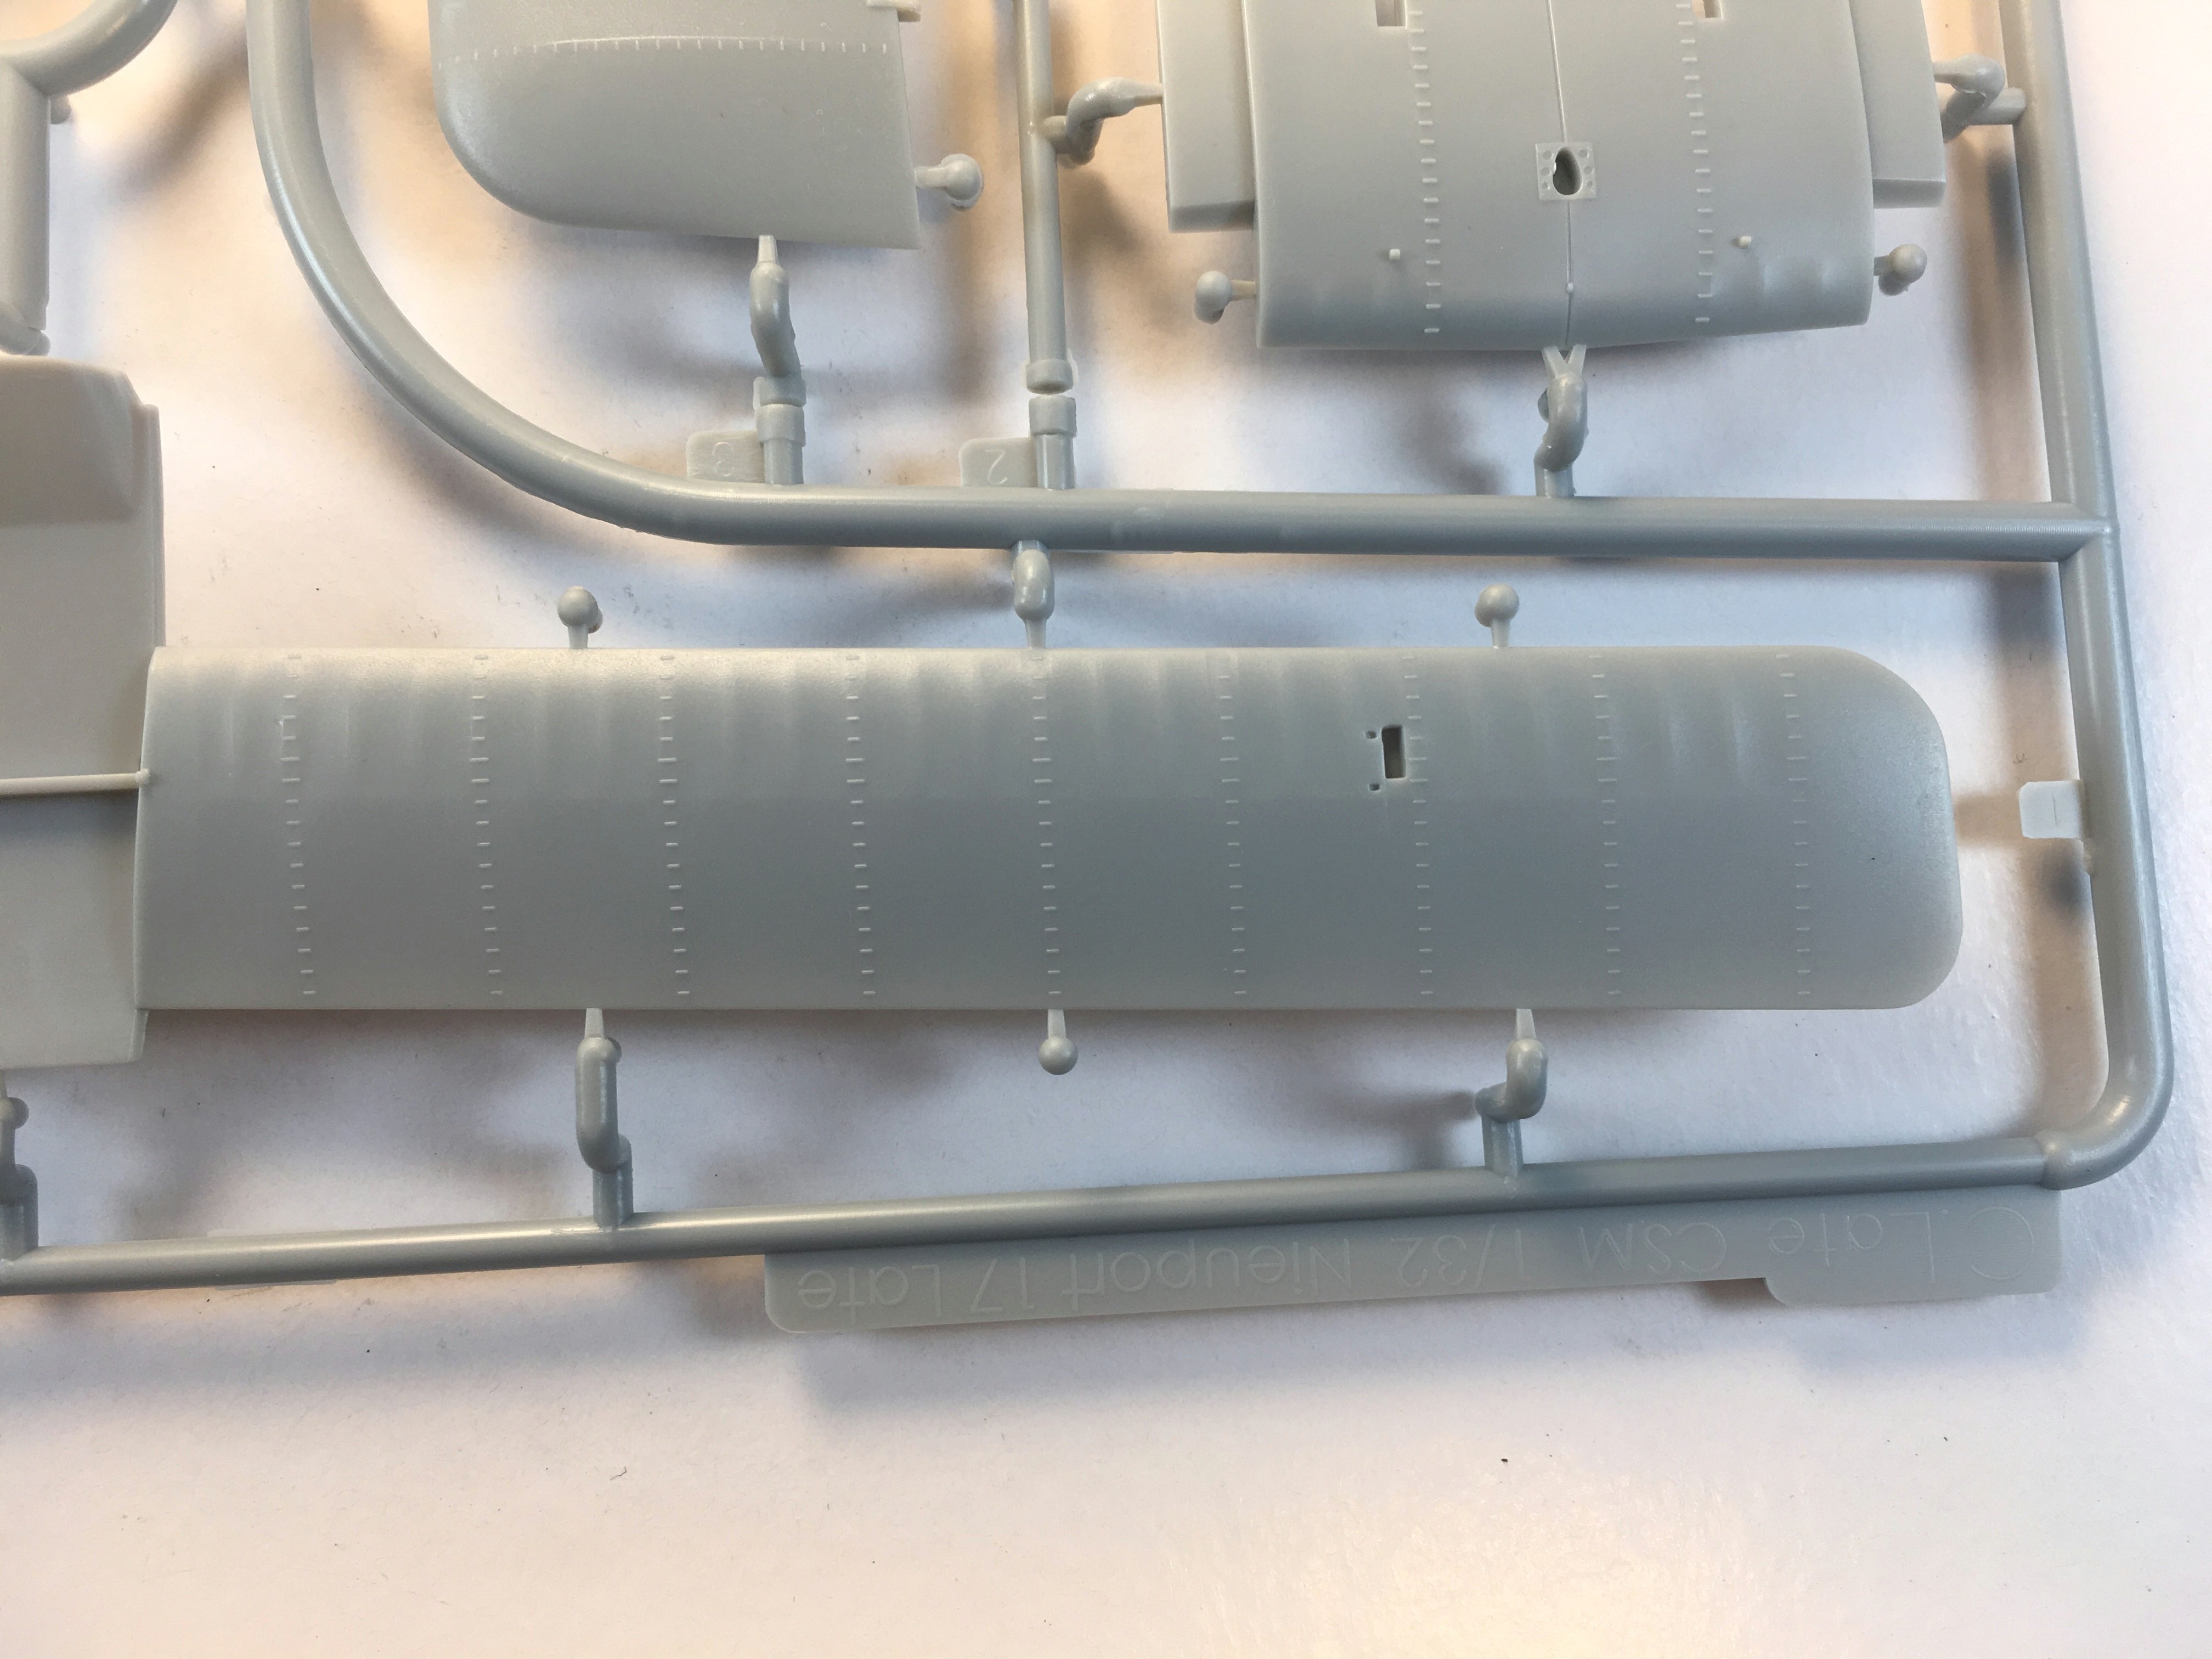
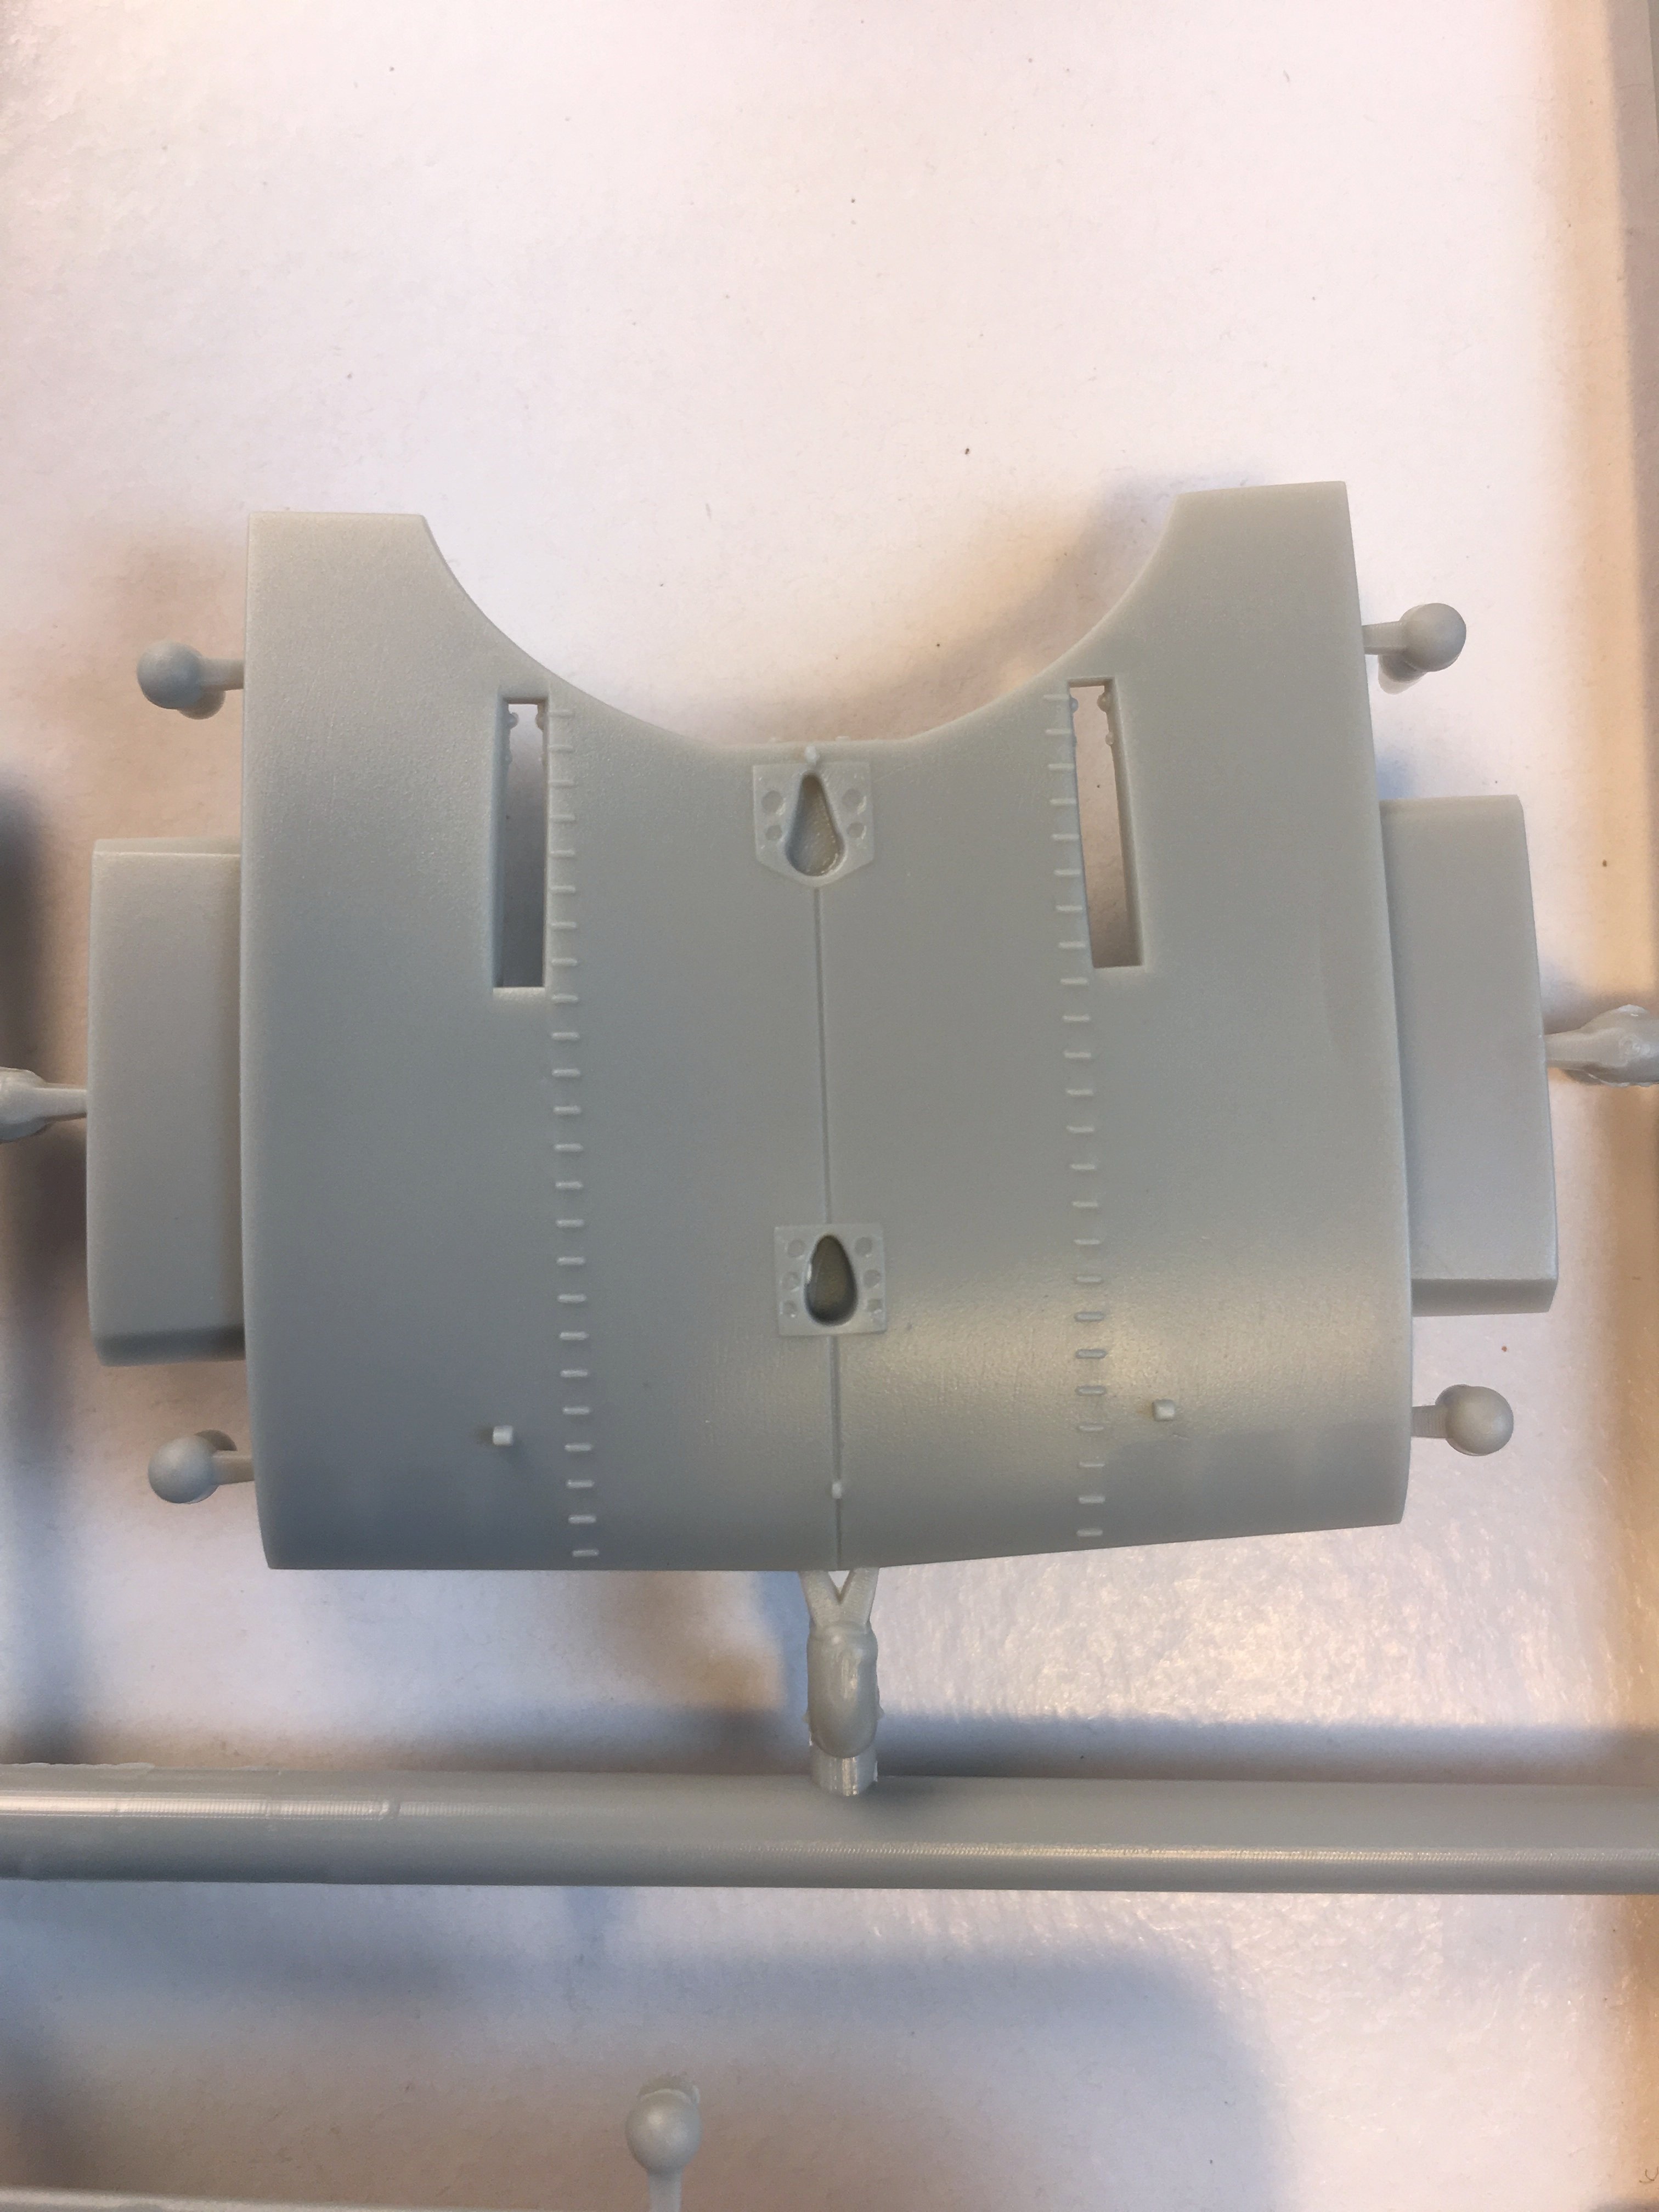
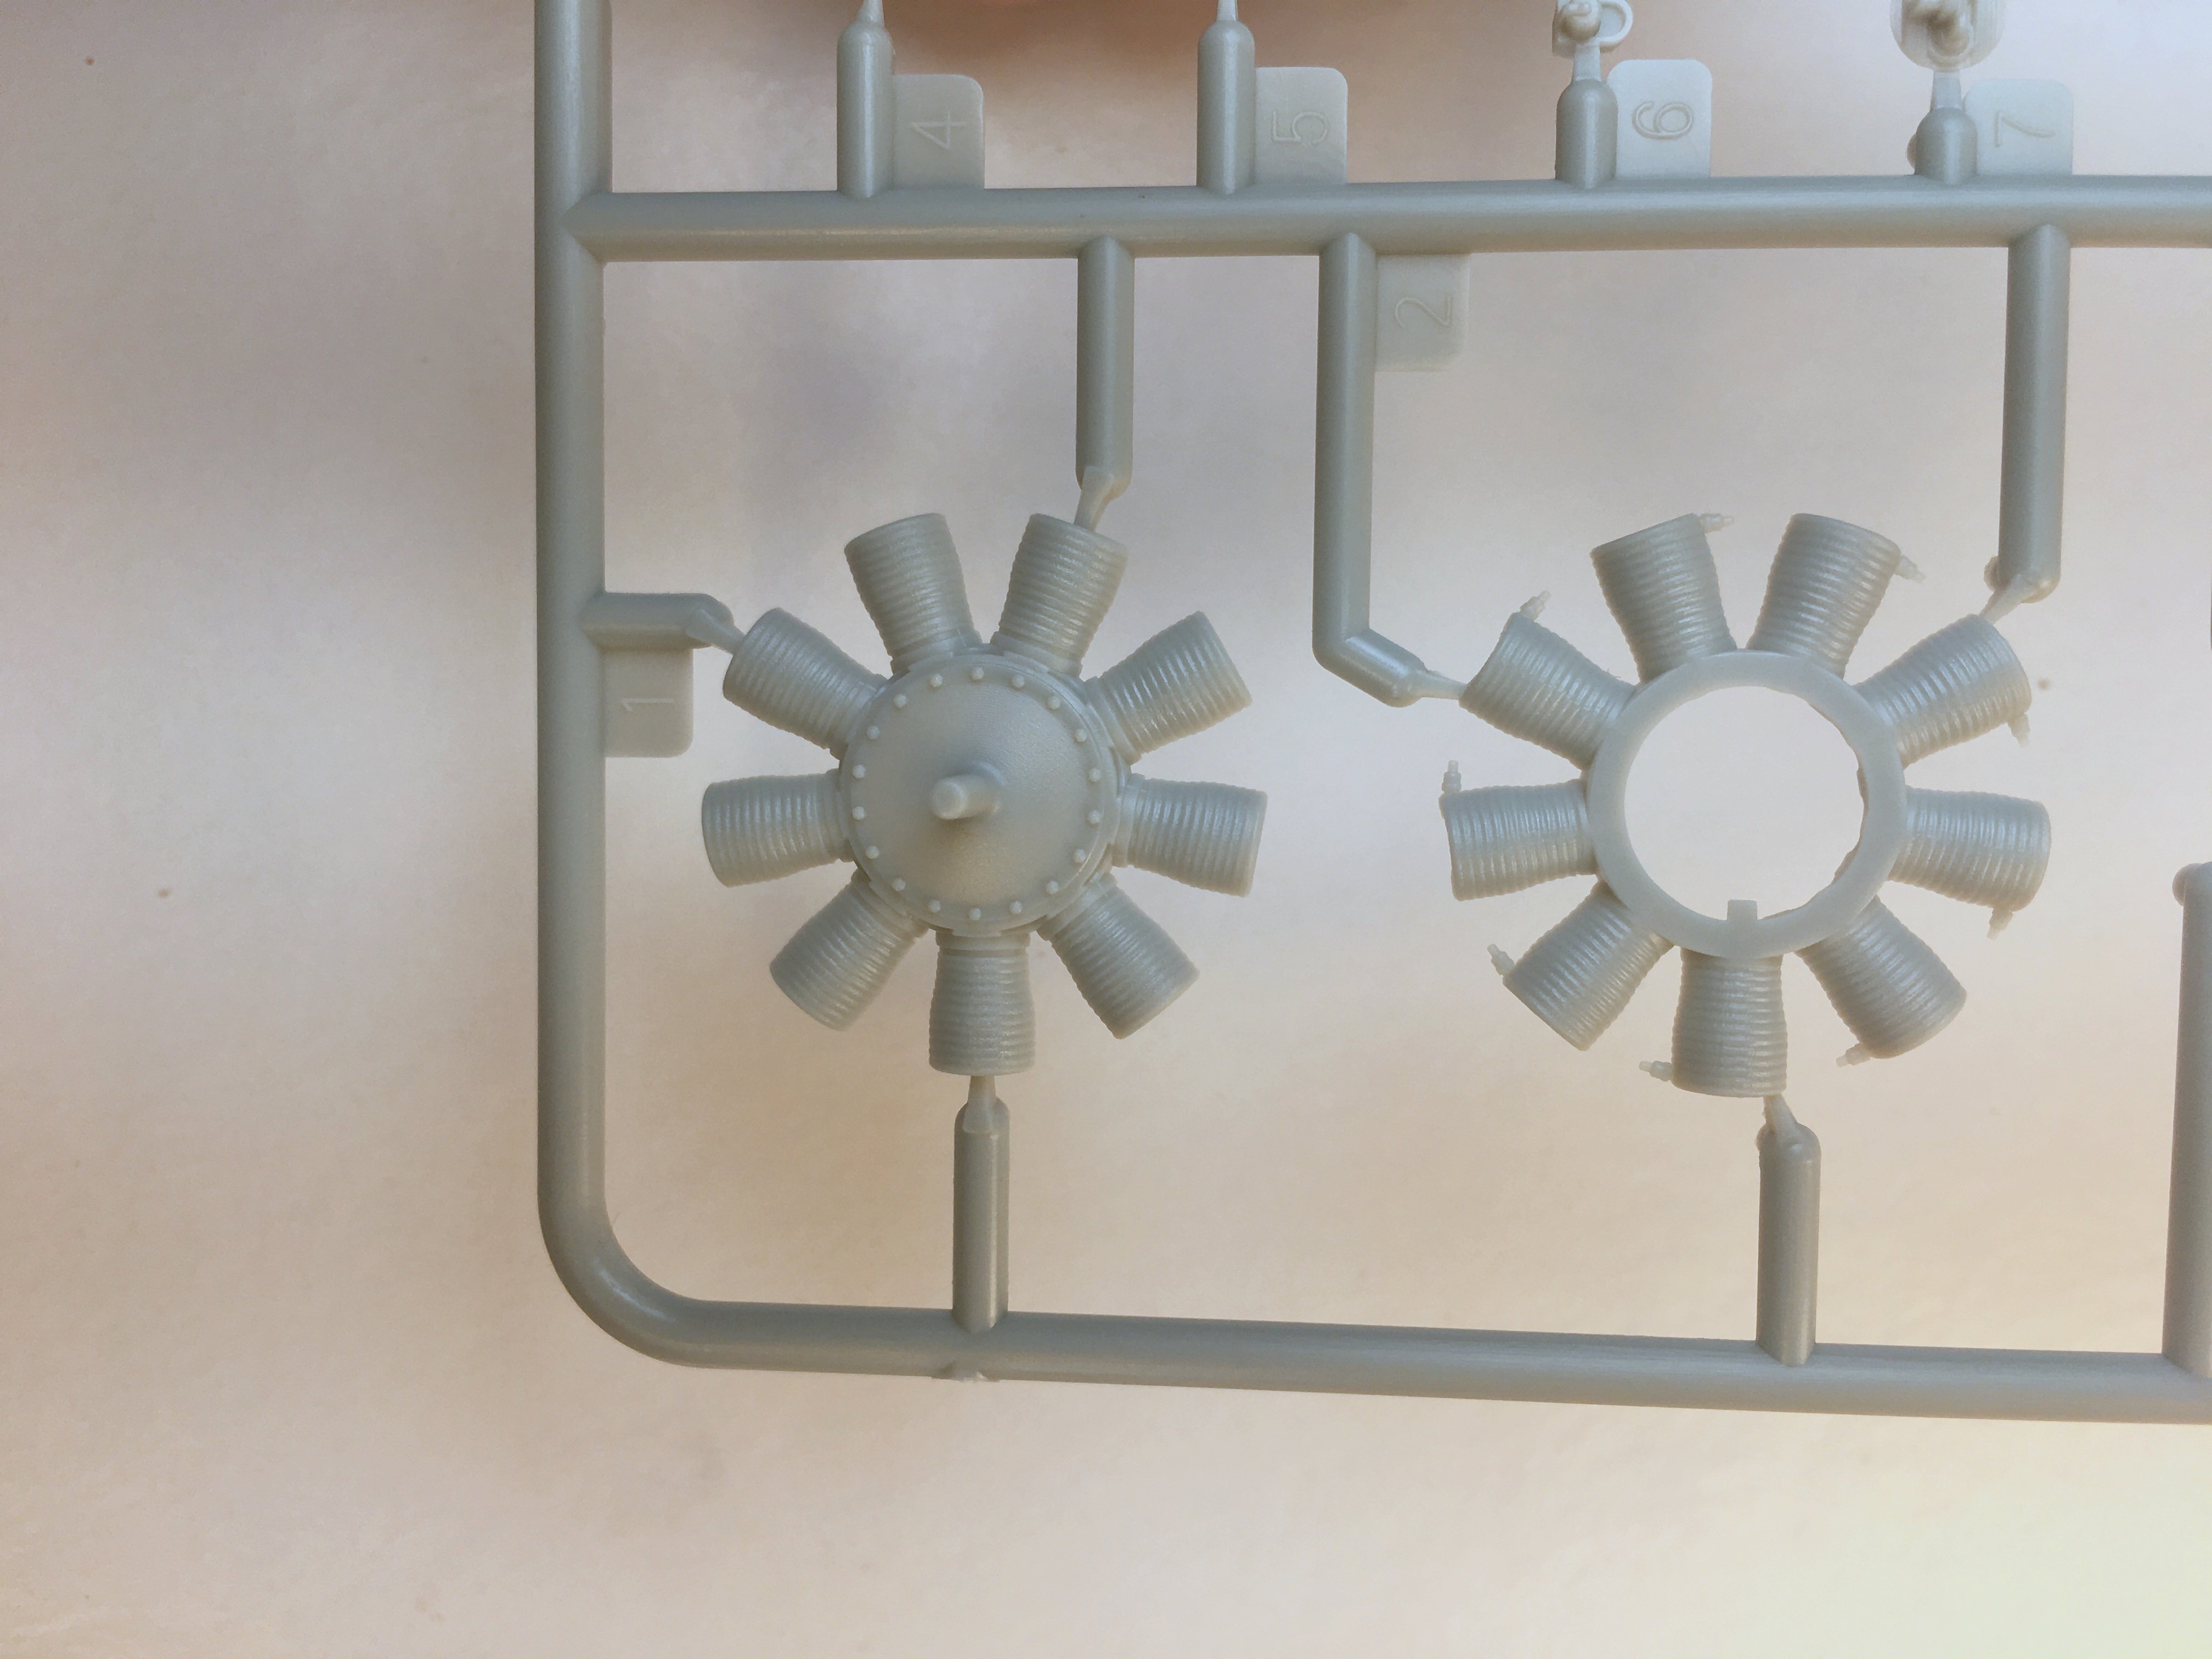
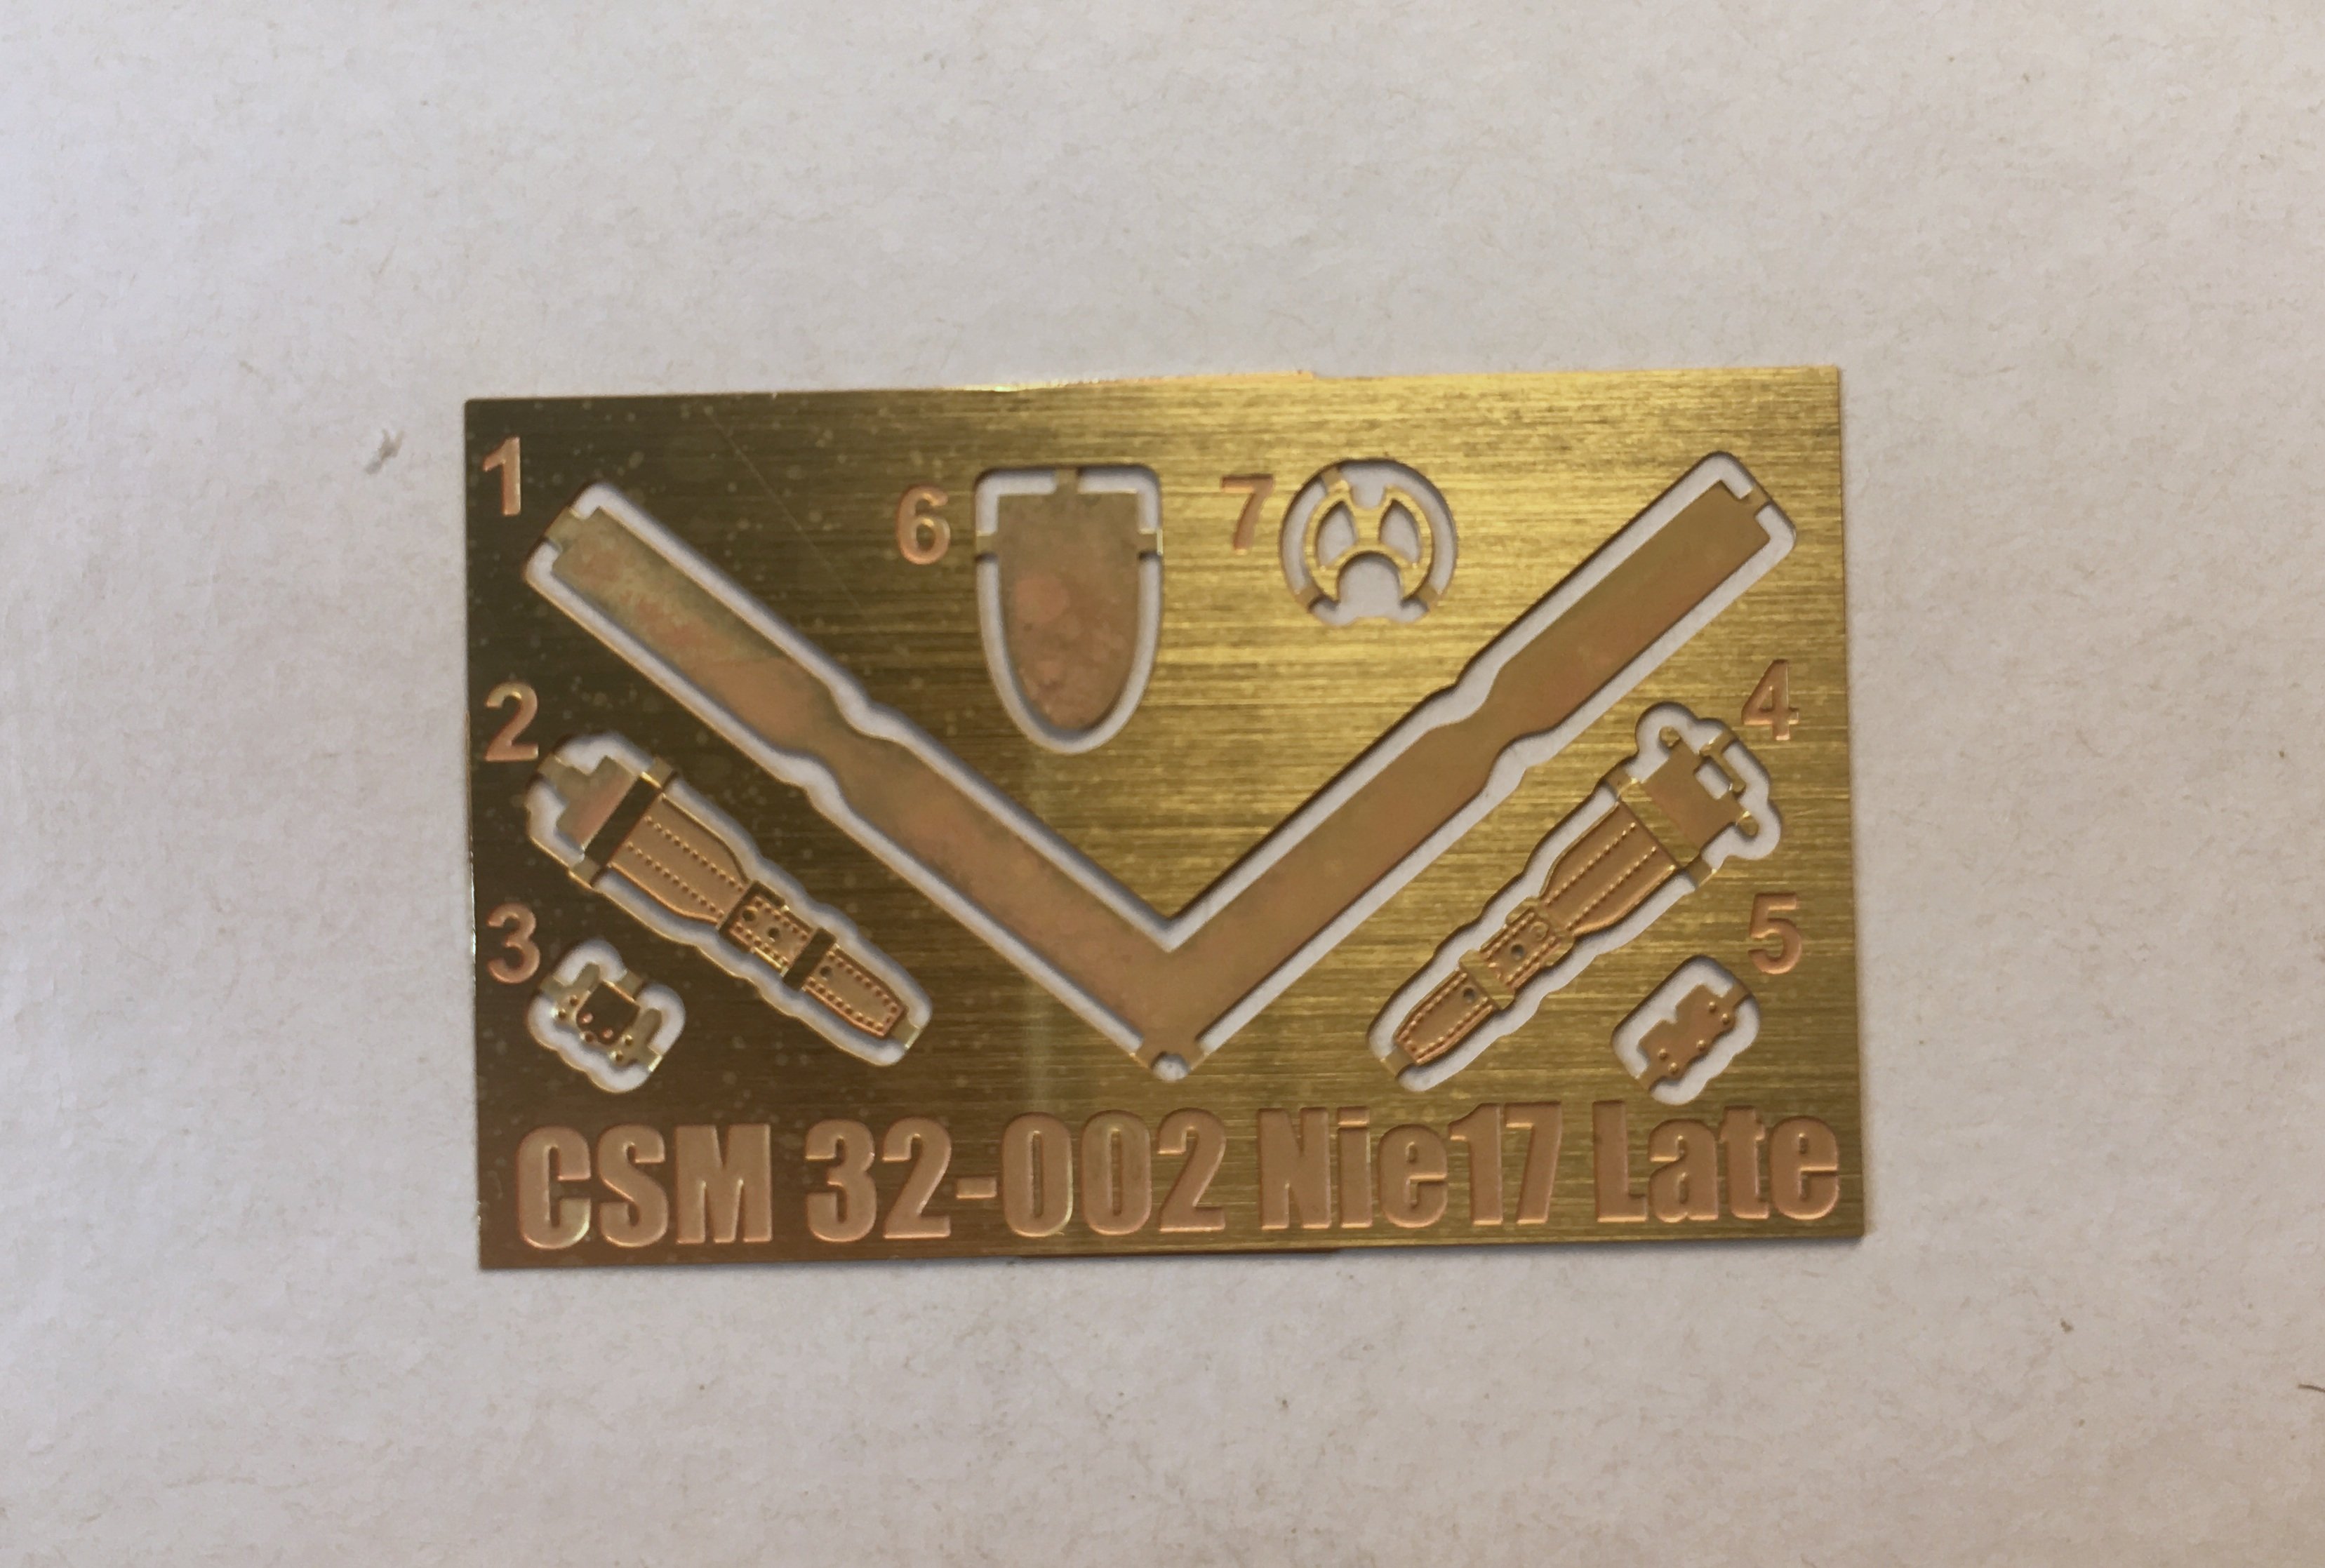
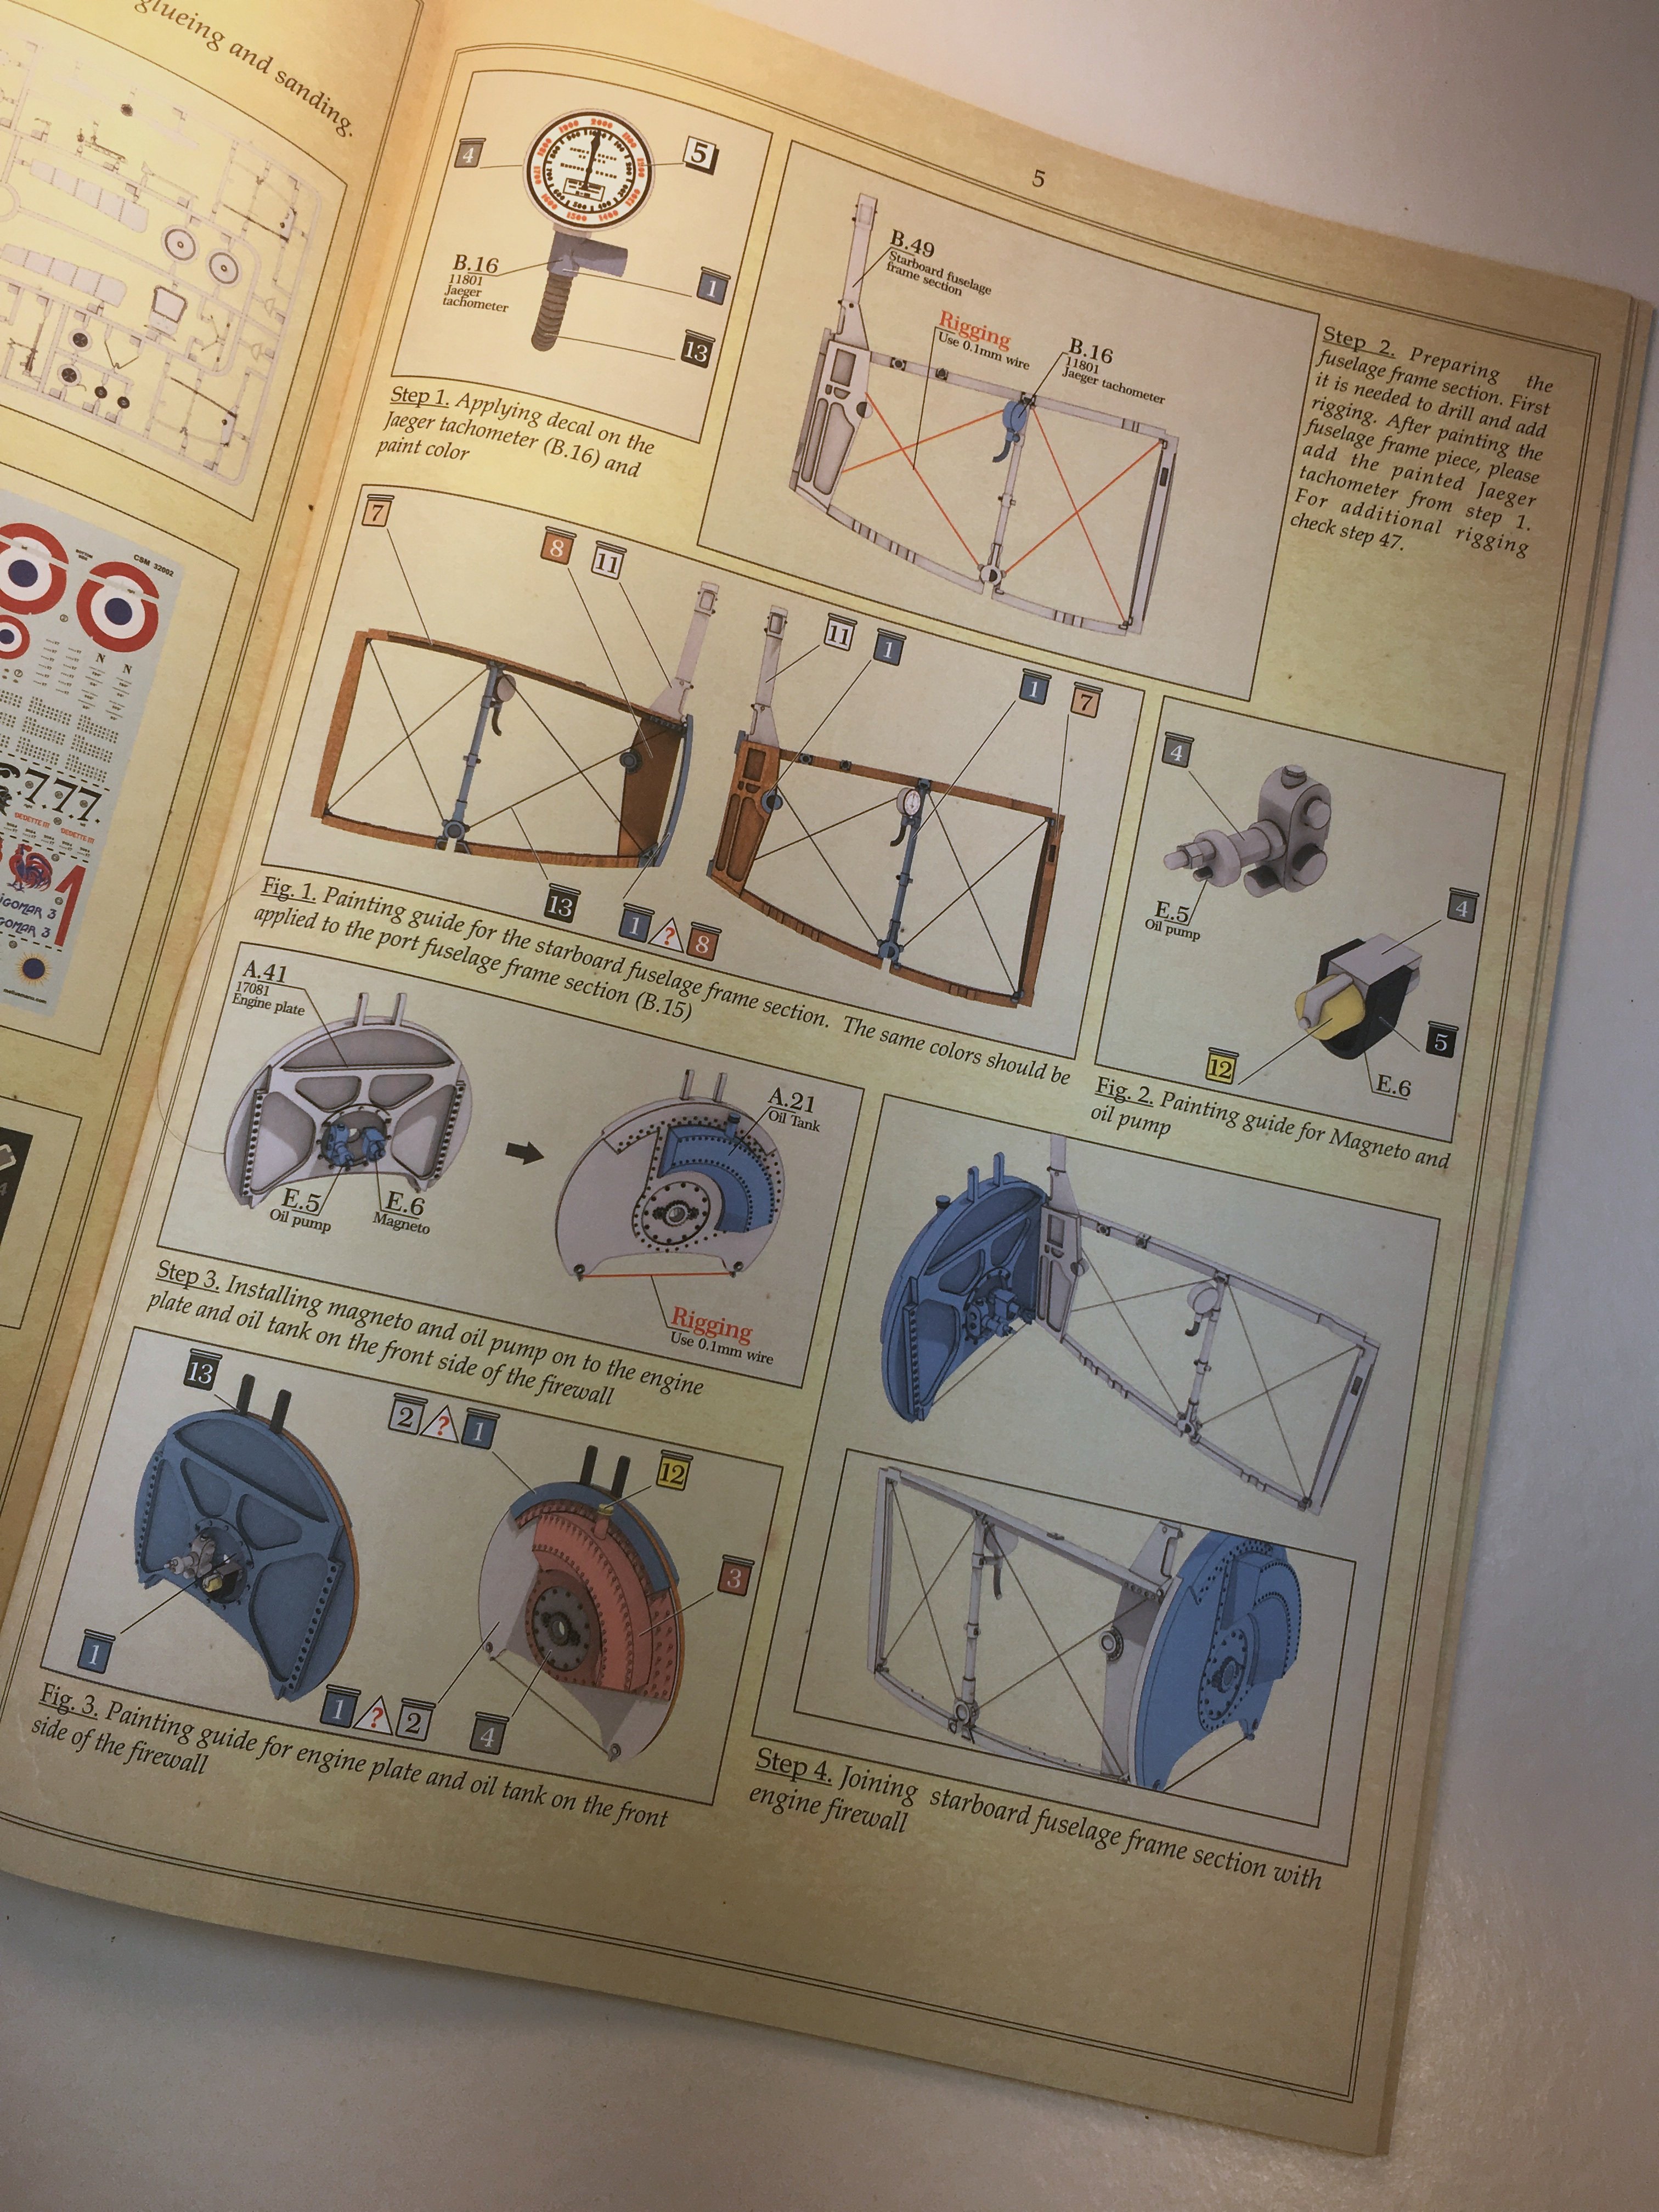
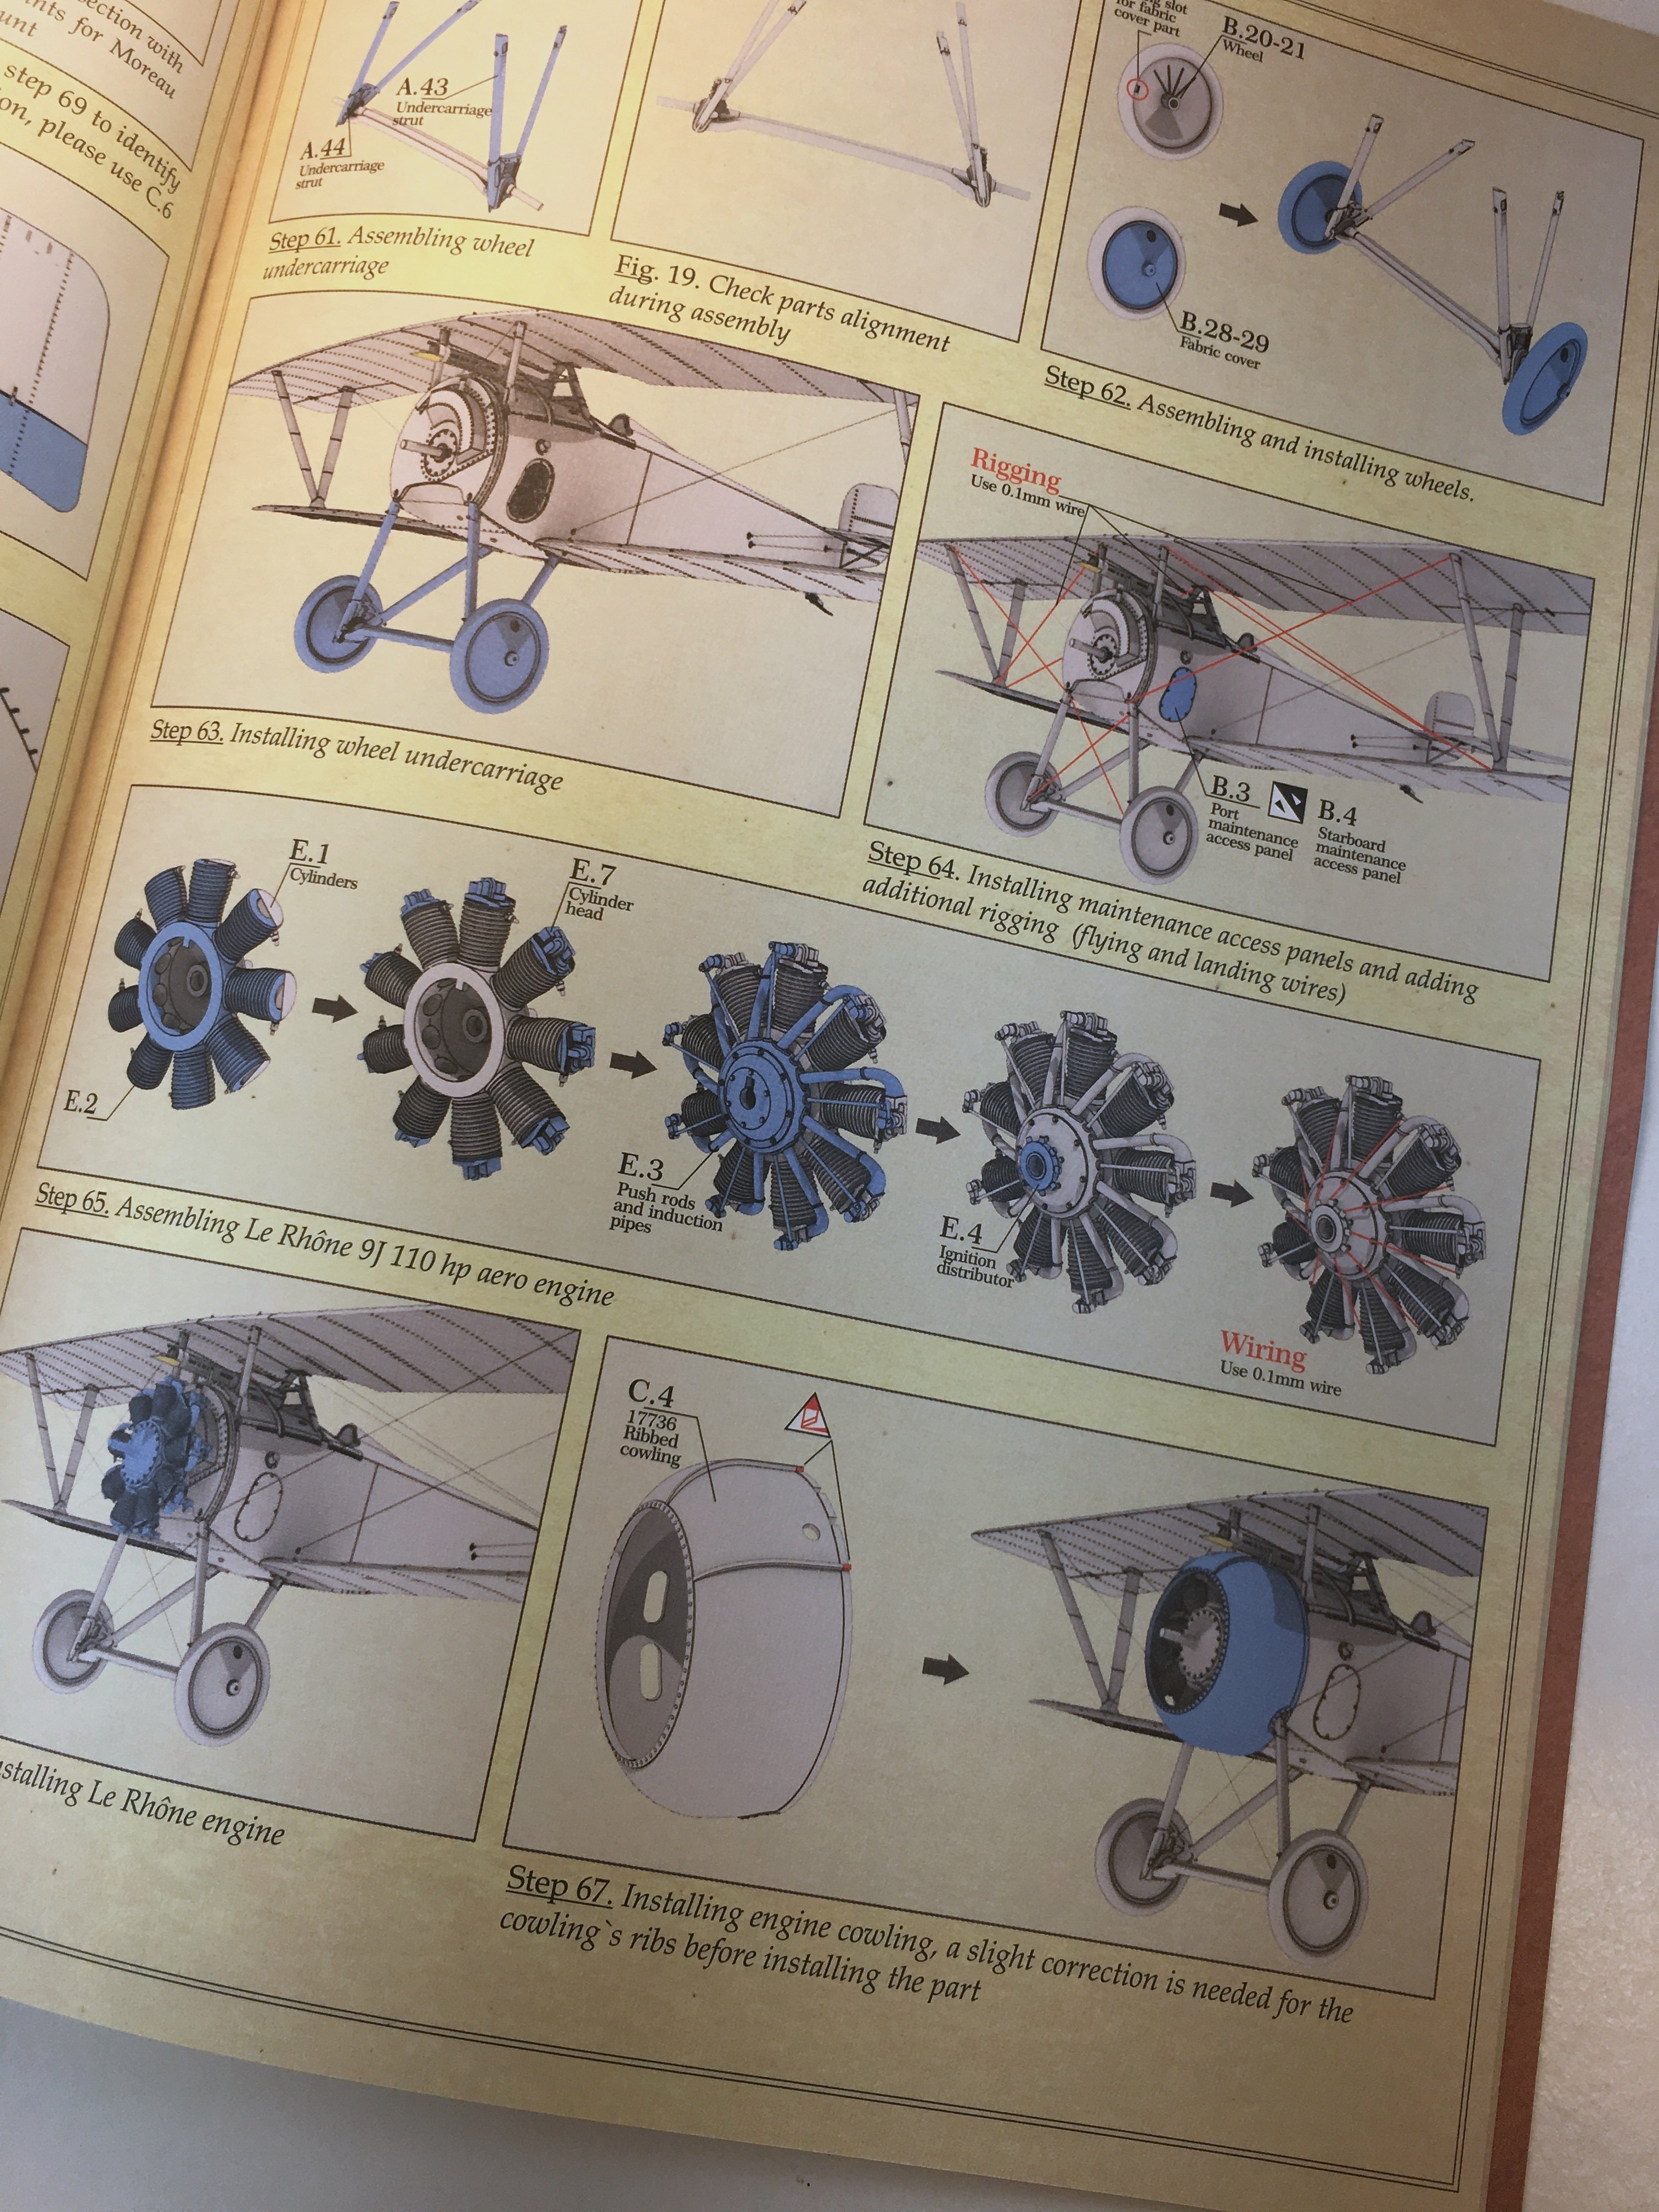
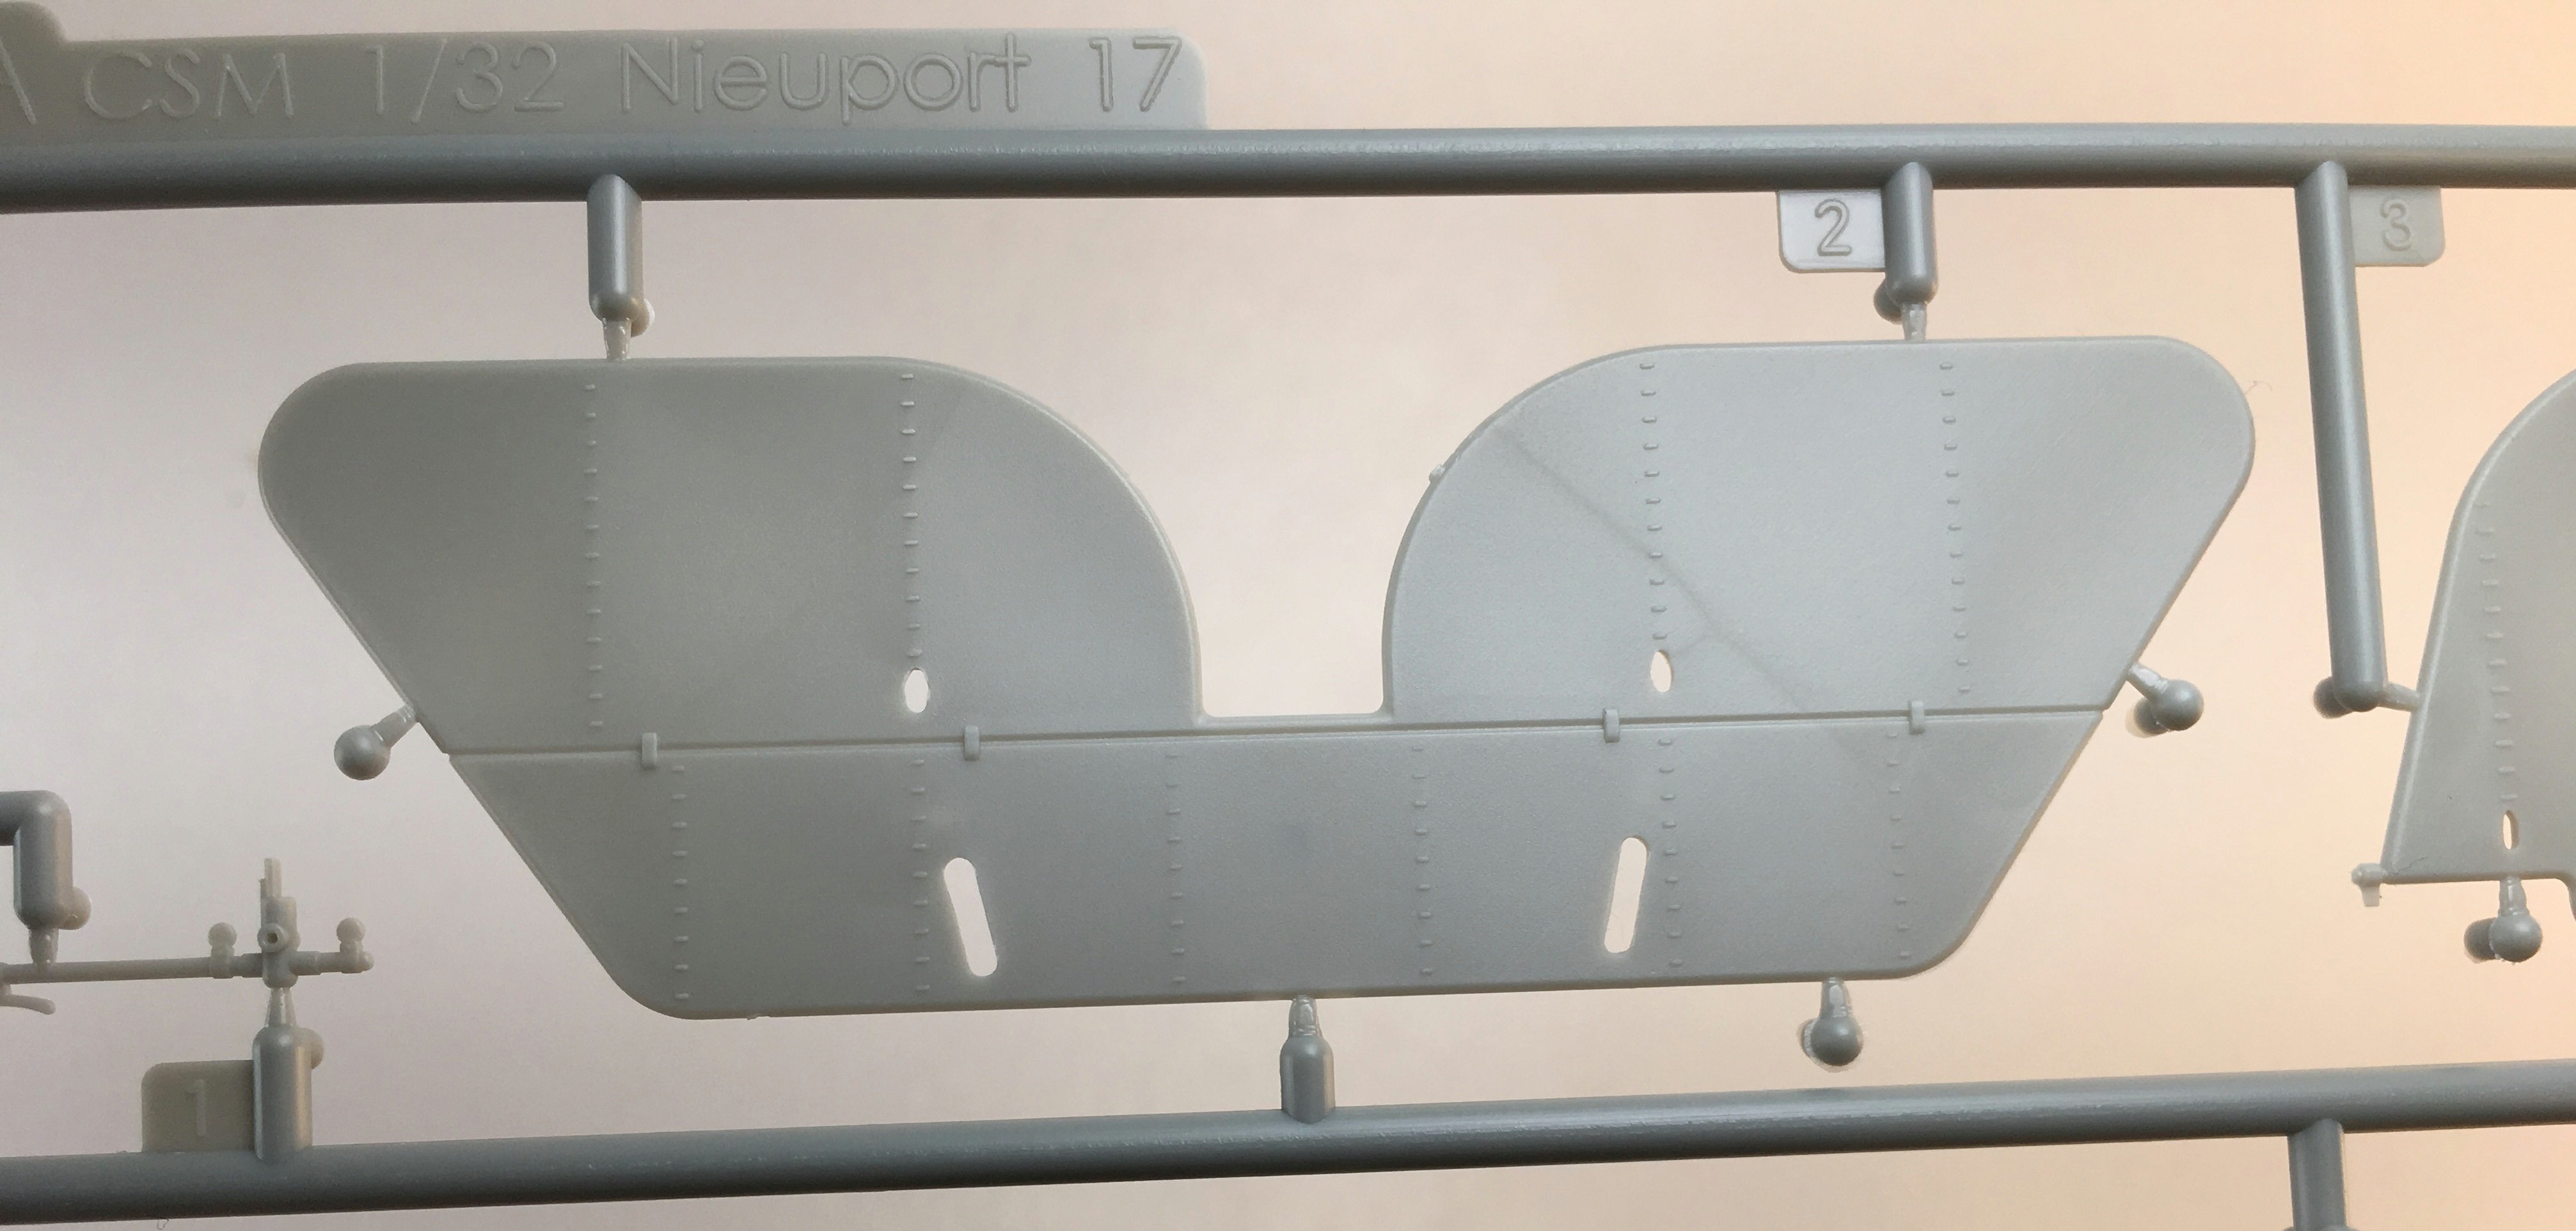
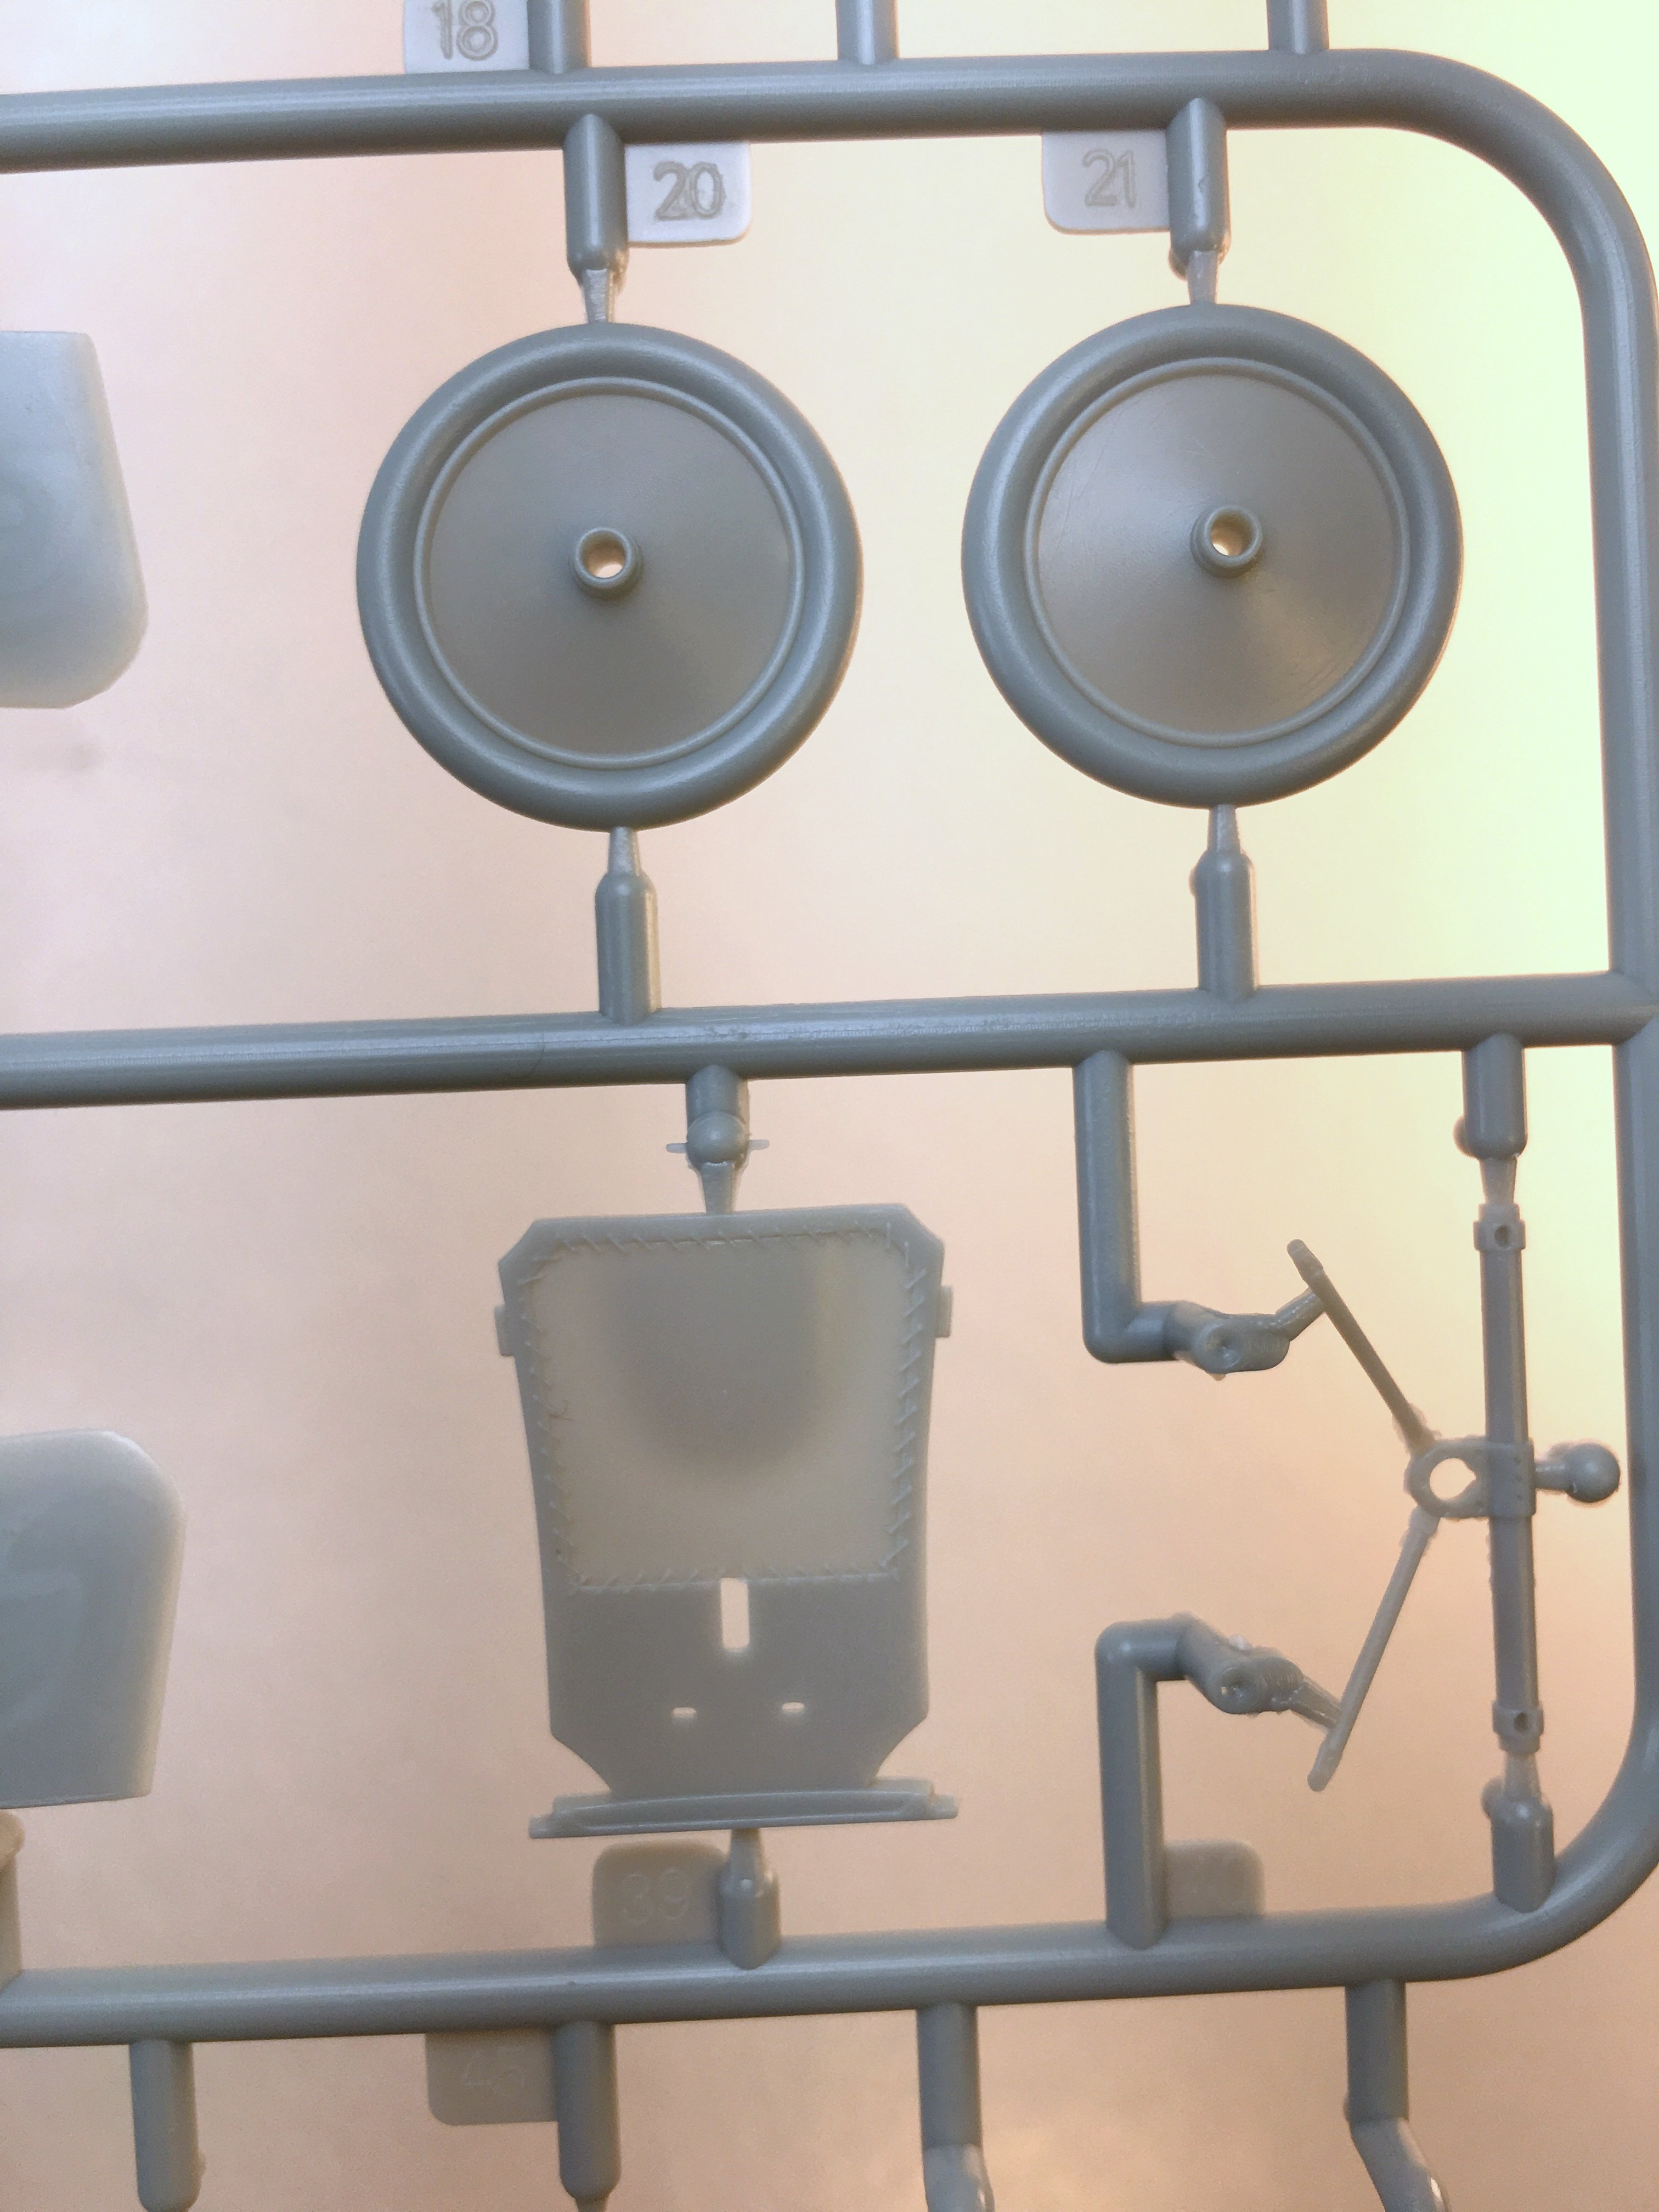
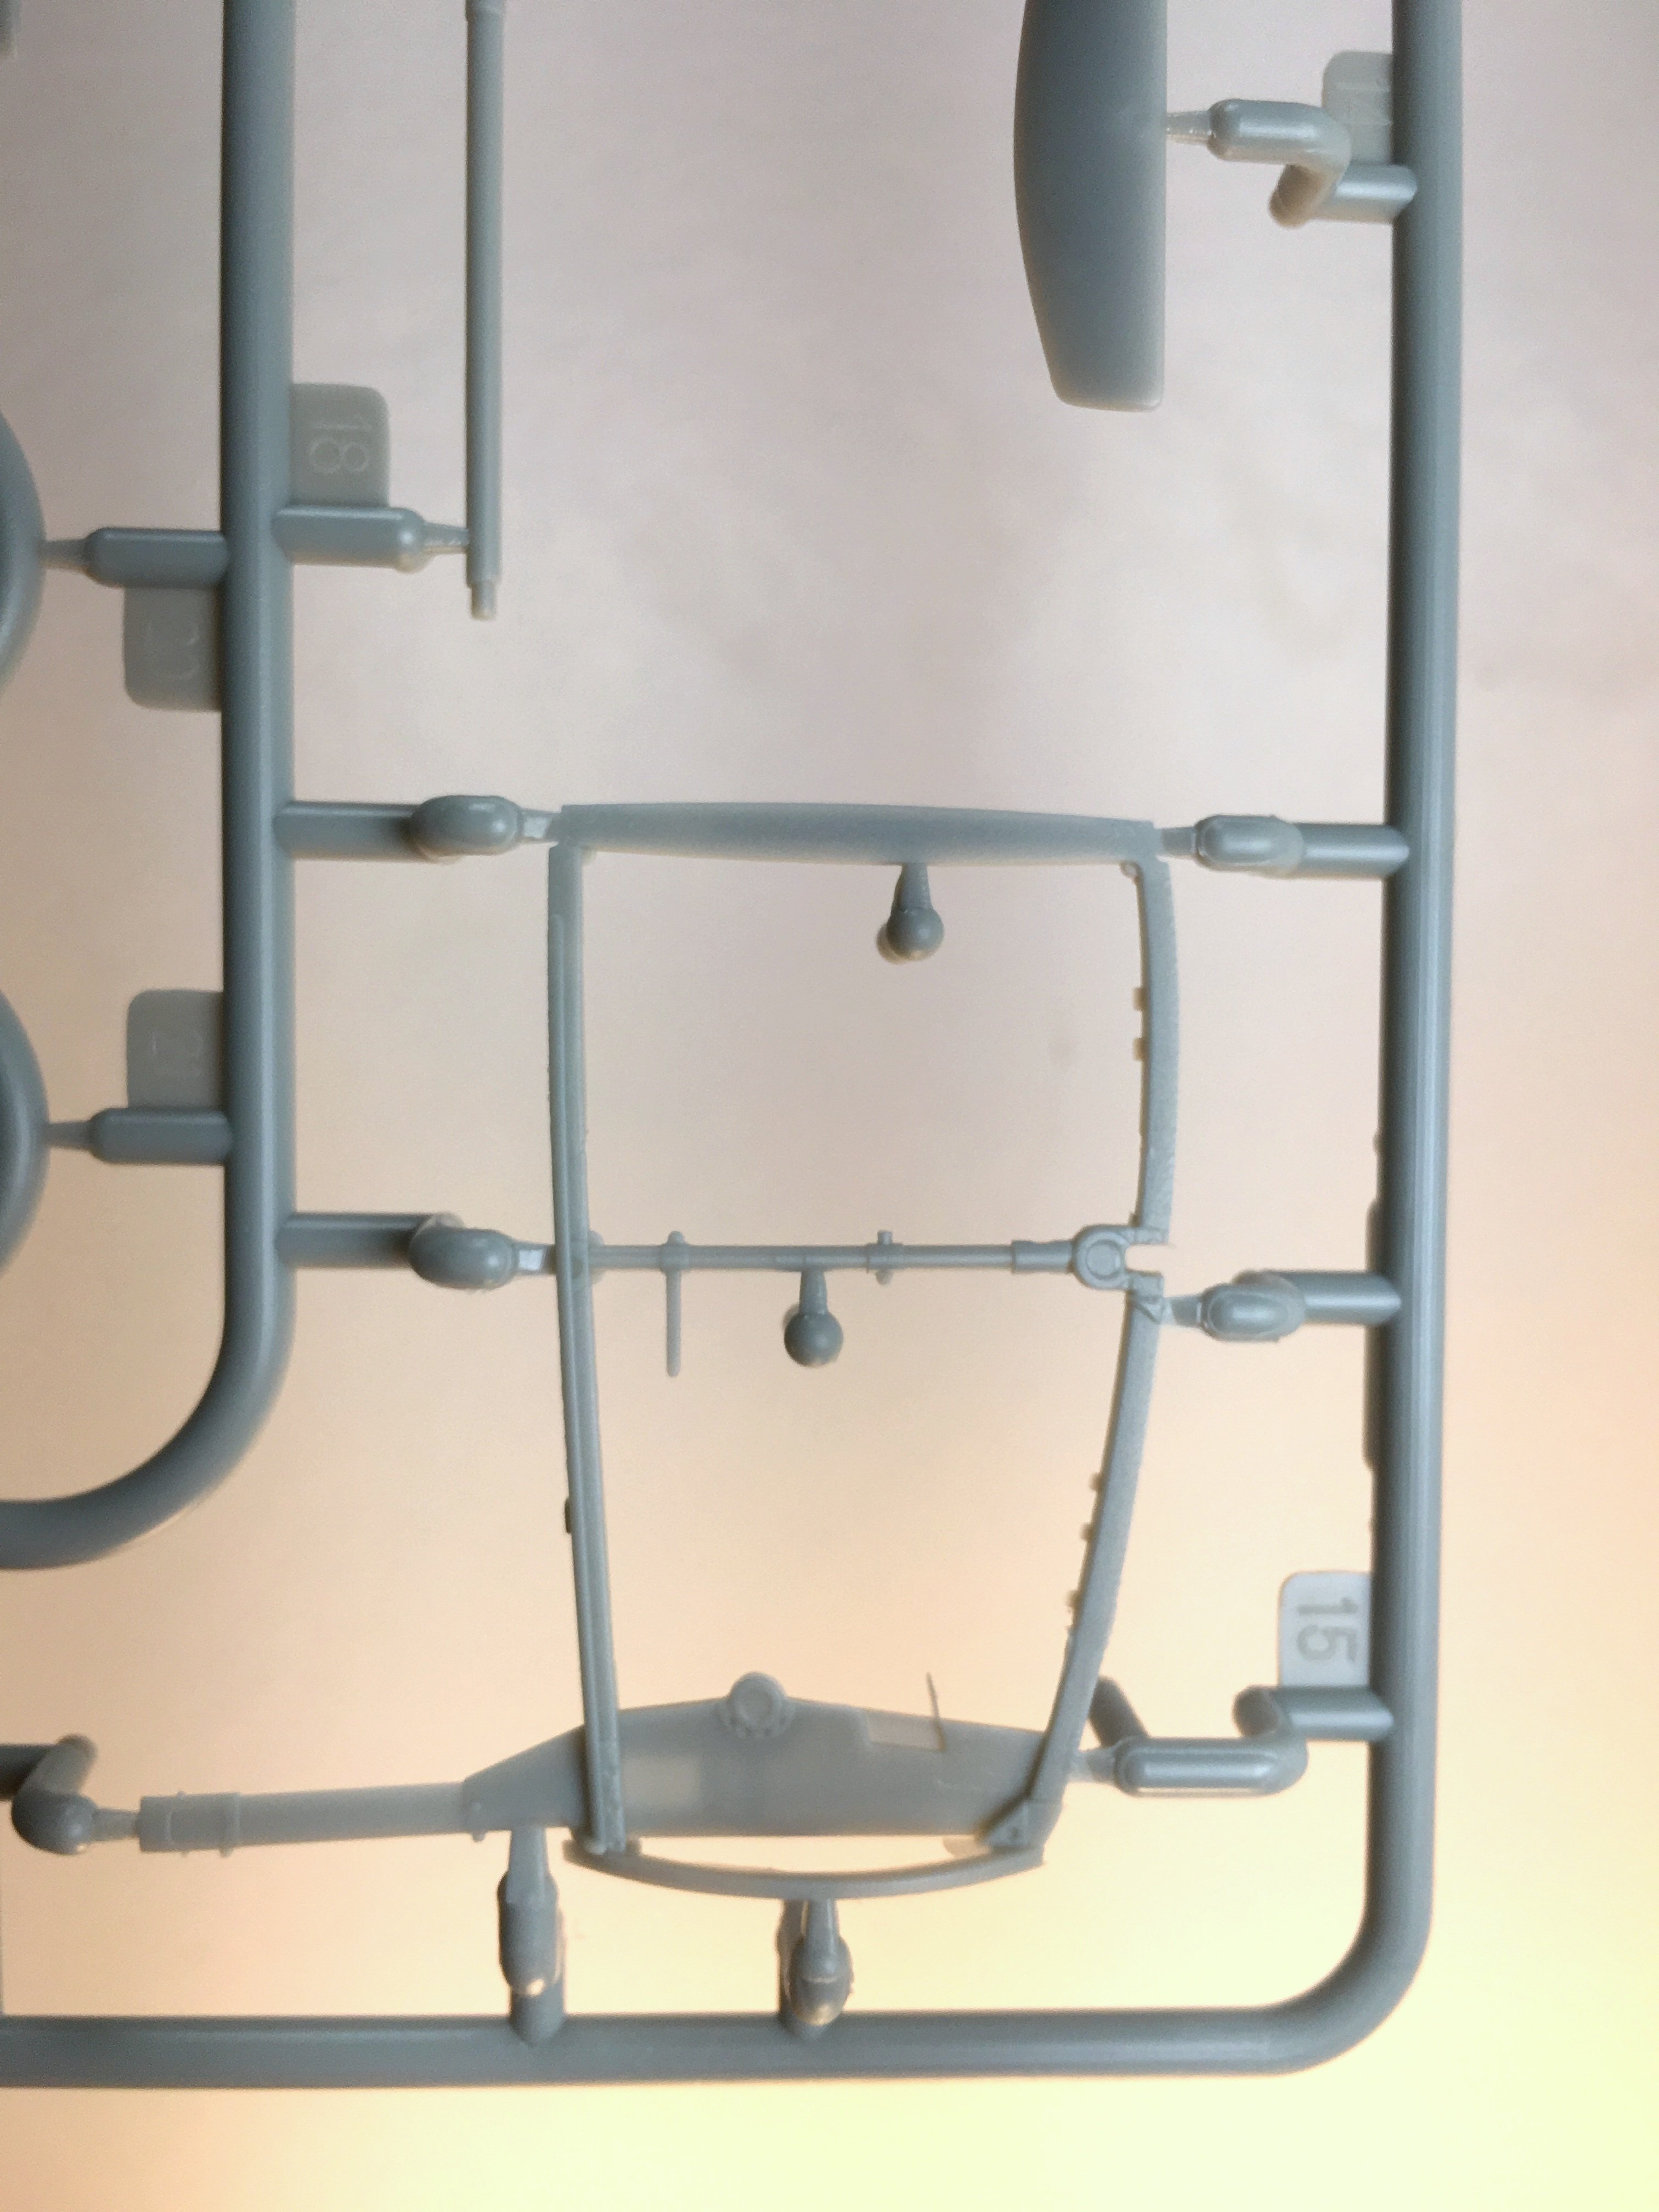
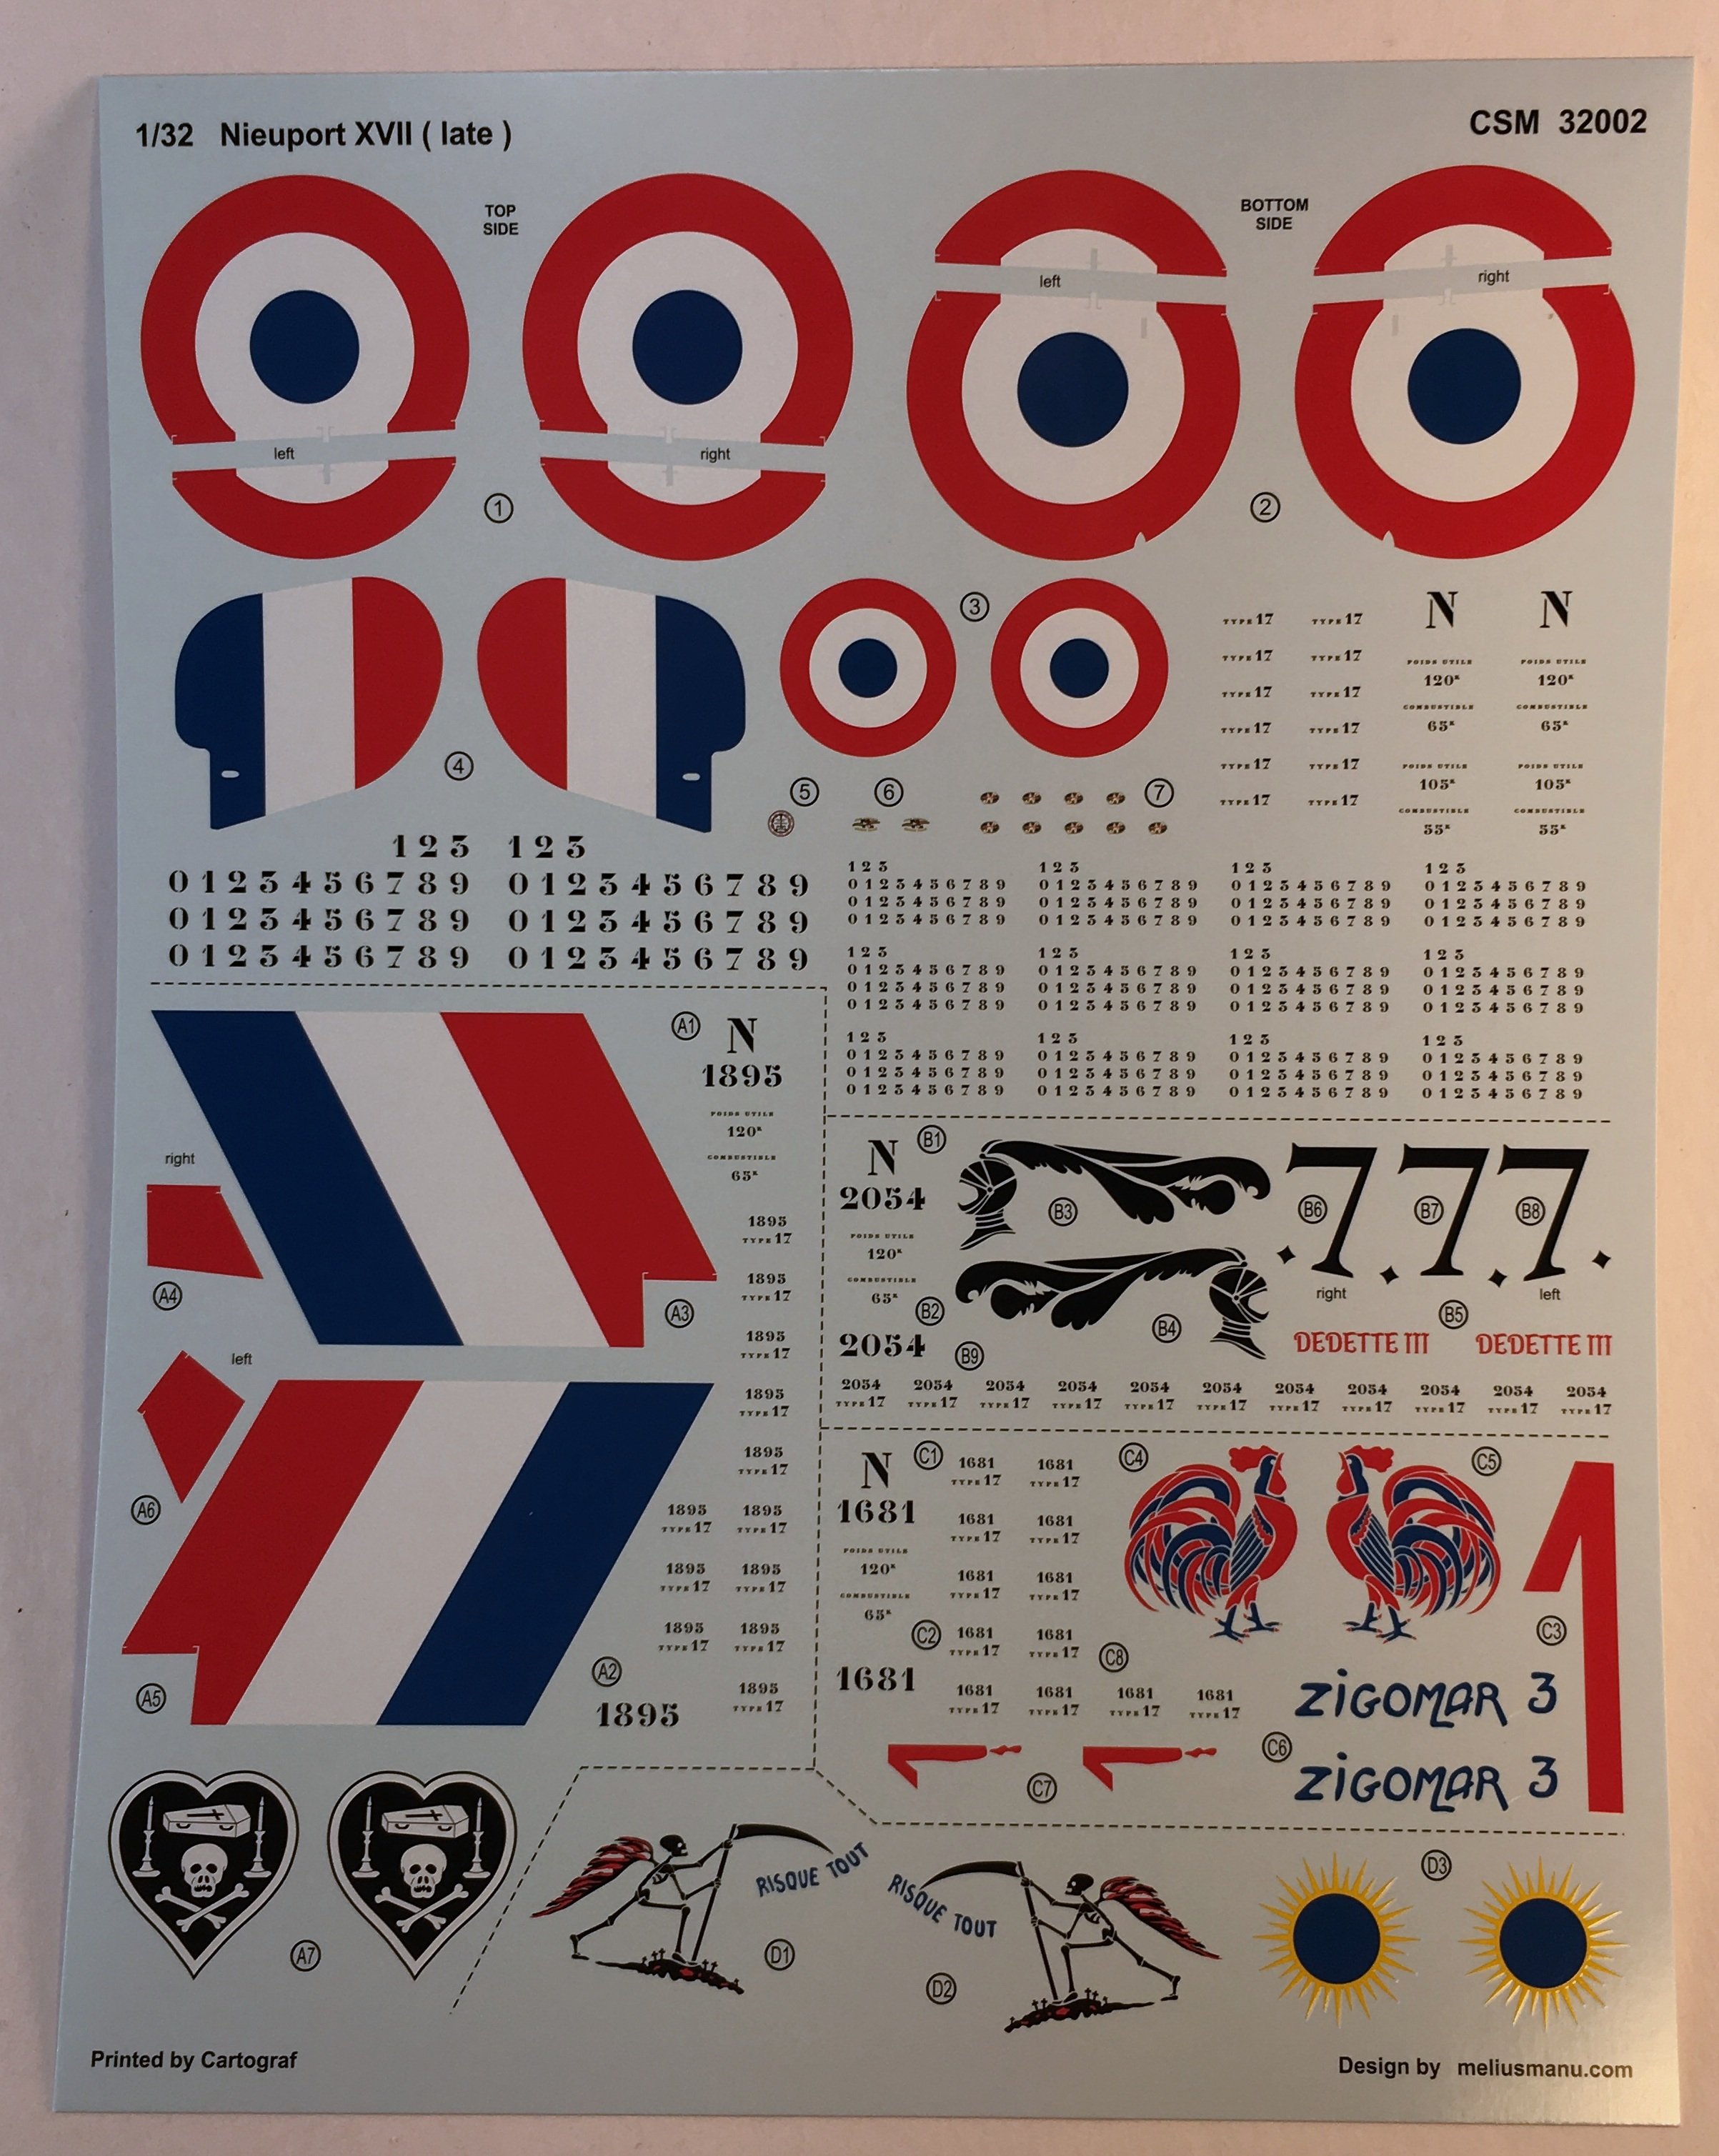
-
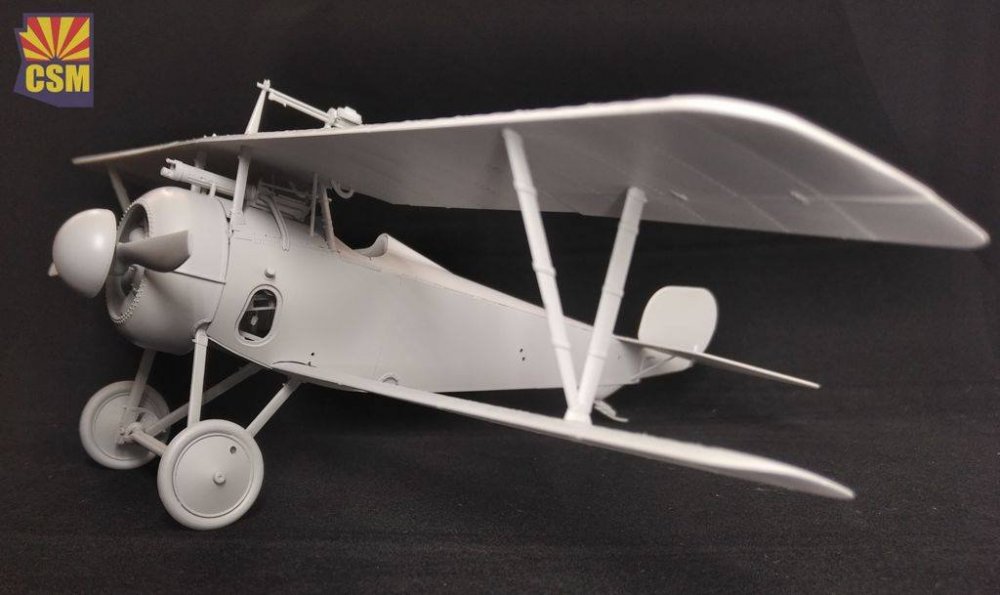
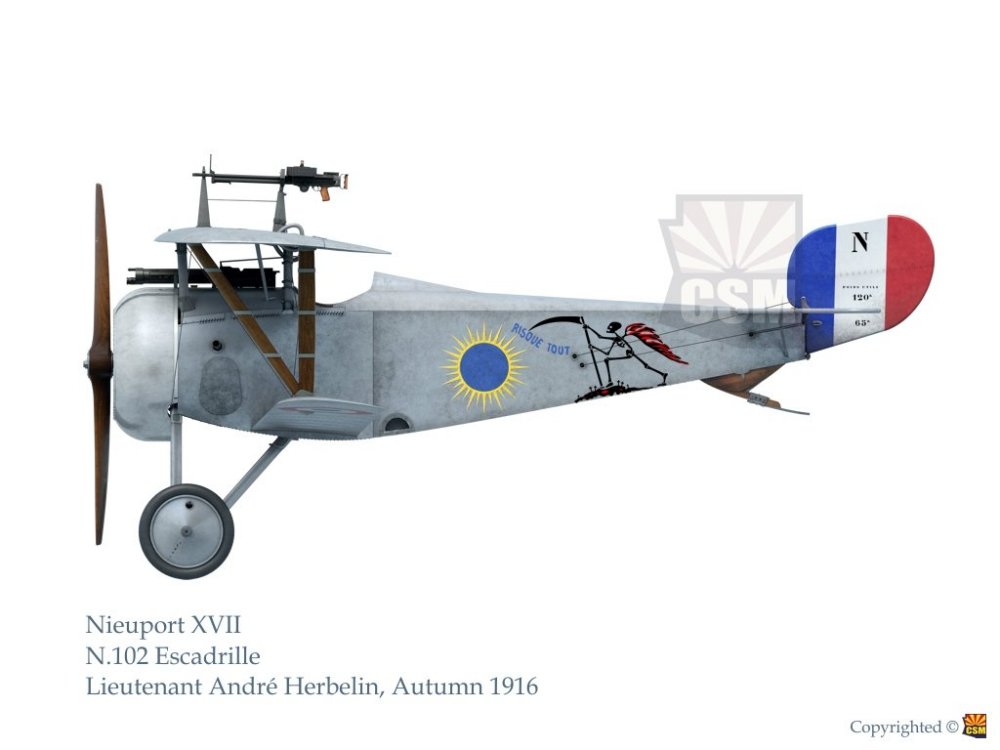
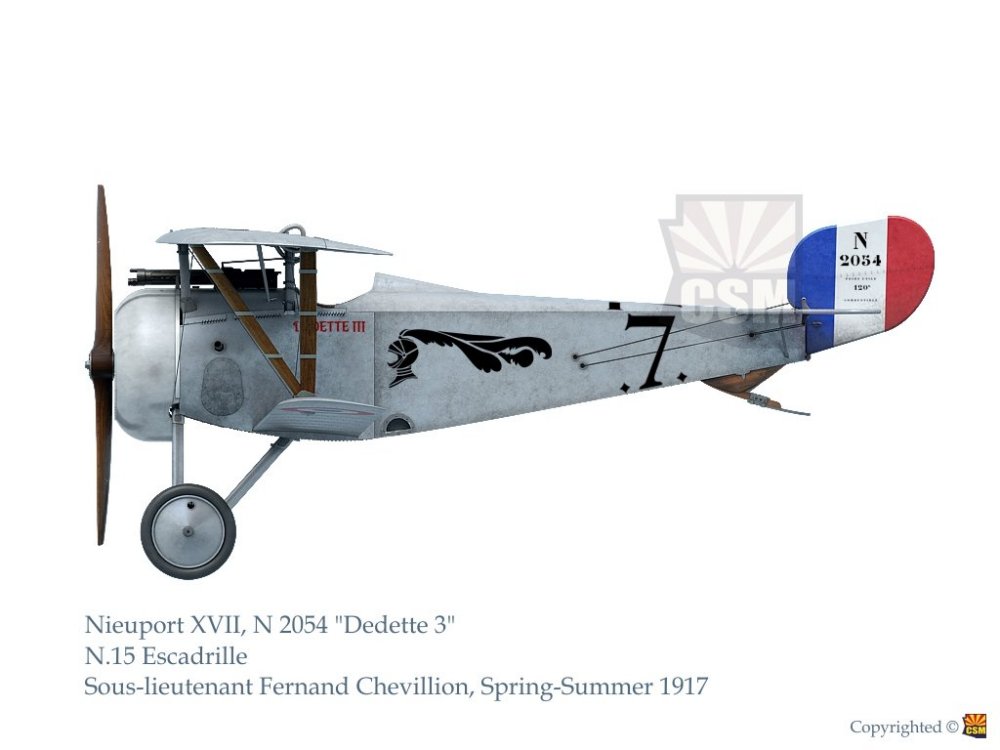
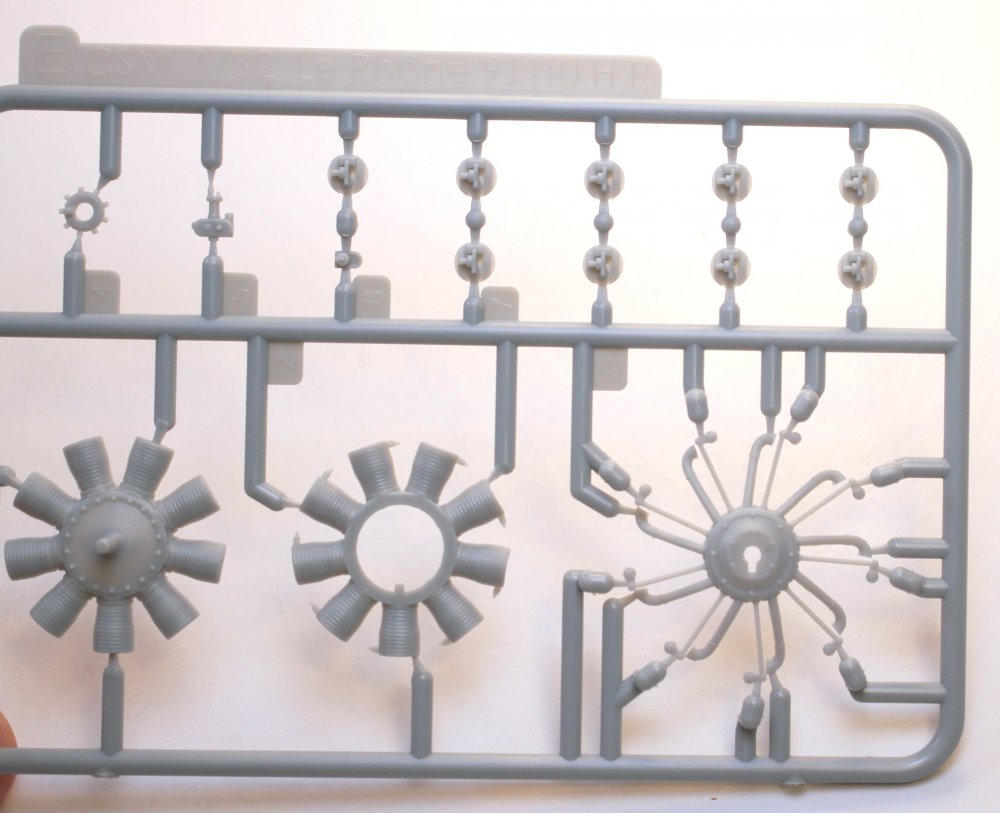
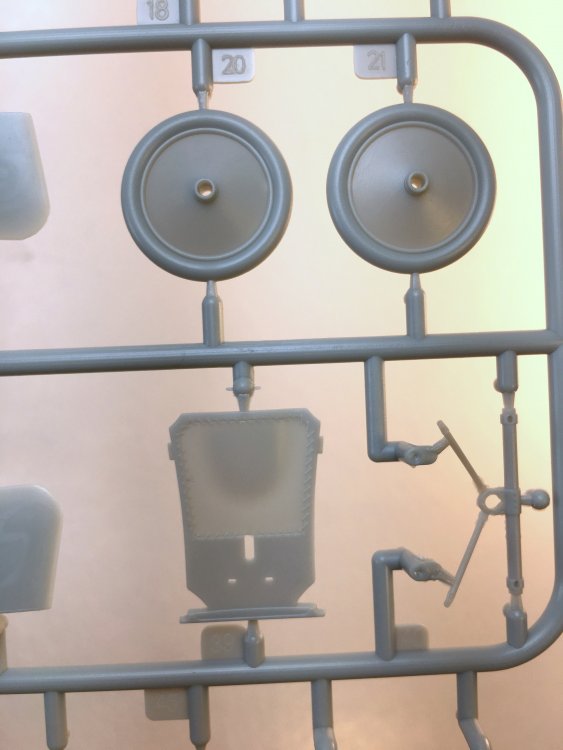
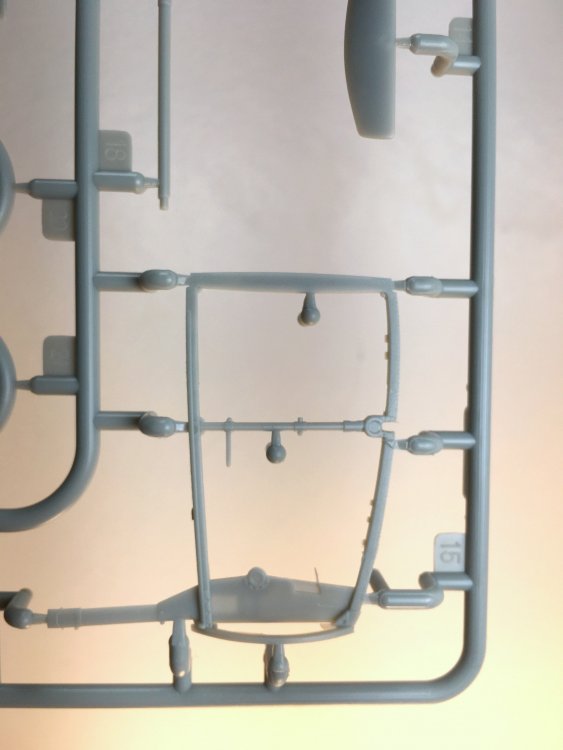
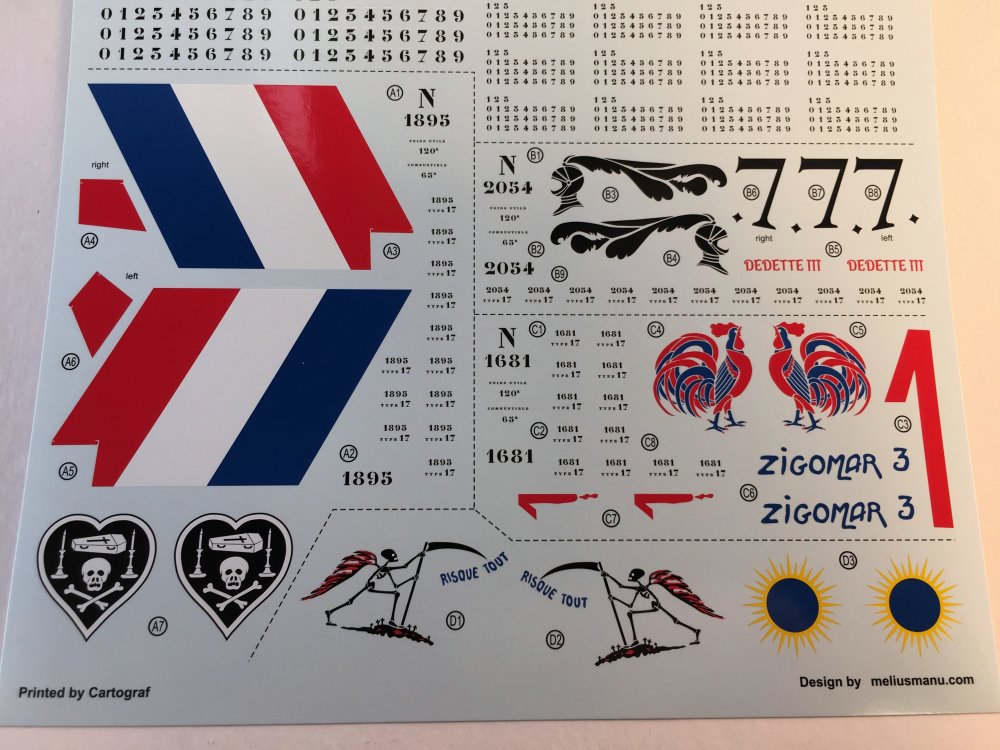
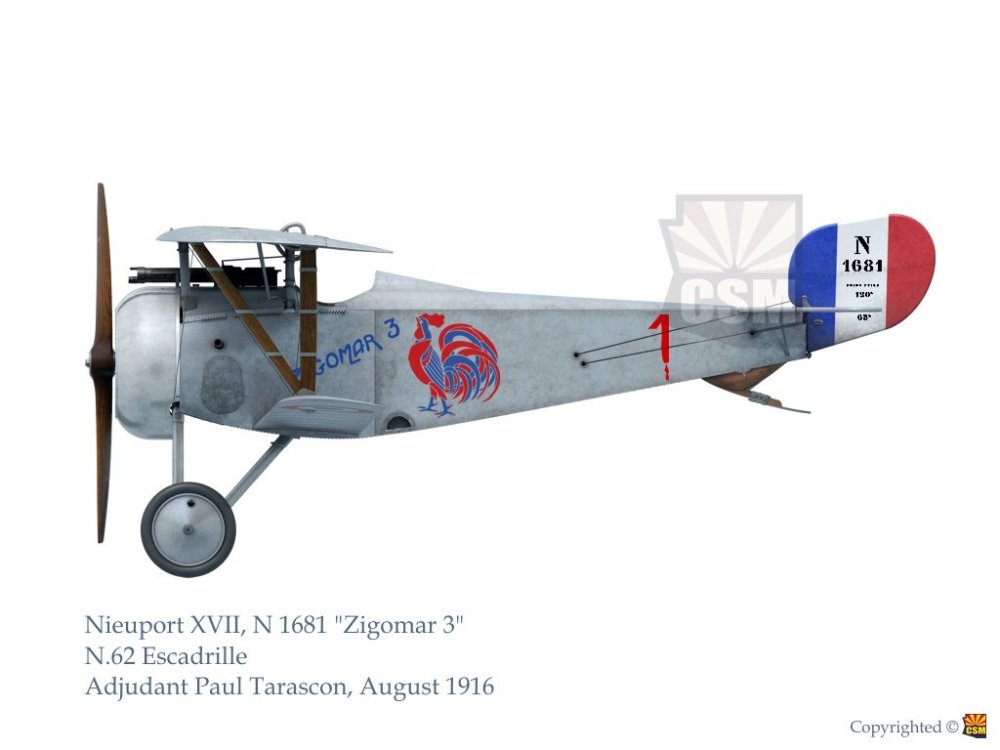
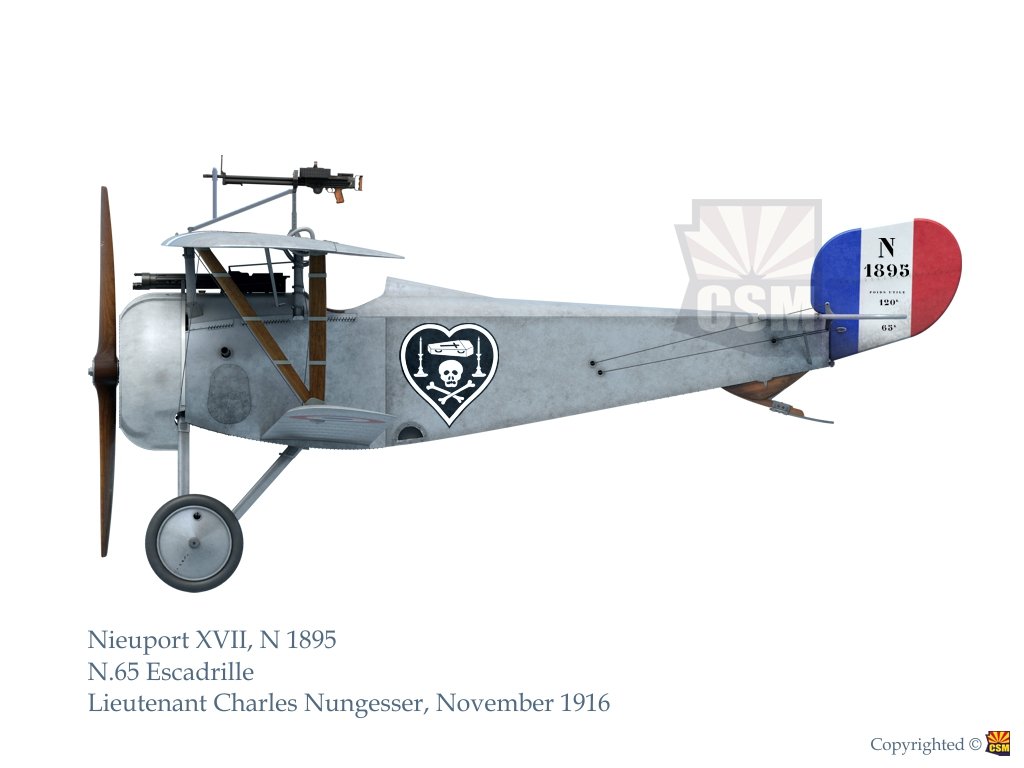
1:32 Nieuport XVII Copper State Models Catalogue n.º CSM32-002. Price tag: 75€ Gustave Delage's appointment as Nieuport's chief designer in January 1914 was followed by a series of sesquiplane designs. Nieuport had been famous for their wire-braced monoplanes, however a series of crashes involving similar designs thought (erroneously) to be due to structural failure in both France and Britain, led to an official distaste for monoplanes. In fact, due to the shorter wires used and less acute angles possible, a biplane structure can be made stronger than that of a monoplane. The sesquiplane configuration was adopted by Delage as a compromise between the low drag of a monoplane and the superior strength of a biplane configuration. The first of Delage's sesquiplanes was the two seat Nieuport 10 in 1914, which was followed the next year by the Nieuport 11. This was quickly supplemented by the Nieuport 16, basically, an N.11 with a larger engine. The N.16, especially when armed with a synchronised Vickers gun, suffered from nose-heaviness and had a higher wing loading. The result was a slightly larger development, trimmed properly for the heavier powerplant and with longer wings and improved aerodynamic form. It was at first fitted with the 110 hp (82 kW) Le Rhône 9J engine, though later examples used uprated 120 horsepower (89 kilowatts) engines. The Nieuport 17 was a sesquiplane (literally "one-and-a-half plane"), featuring a narrow, single-spar lower wing that was considerably smaller than the upper wing. This arrangement provided several benefits. As well as an improvement in downward visibility for the pilot, there were aerodynamic gains resulting from the reduction in area of the lower wing, which on a biplane produces far less lift than the upper wing but still produces as much drag or more. Reducing its size reduced the induced drag and weight while providing a more efficient wing with a thicker section and a higher aspect ratio. The heavier components of the fighter, such as the rotary engine, the armament and the fuel and oil tanks were concentrated well forward which was a contributing factor to the 17's high level of manoeuvrability and climb rate. The fuselage of the 17 was a trapezoid-section girder, featuring diagonal wire bracing, steel tubes and plate joints, which were built up around a series of wooden longerons. Towards the rear of the fuselage, the base narrowed as it took on a trapezoidal shape, while the upper surface behind the pilot's position was faired with light formers and longitudinal stringers; a faired headrest was also provided for the comfort of the pilot. The engine was supported by a thick-gauge steel sheet as wide as the fuselage, to which the engine was mounted. The cowling was made of aluminium, and had strengthened ribs and a pair of inset holes to provide ventilation and egress for the engine's exhaust on the underside. It was smoothly faired with the forward fuselage via molded side fairings. Fabric covered the majority of the fuselage aft of the cockpit. The wings of the 17 used a relatively common structure, containing widely spaced spars that gave a good angle for load carrying towards the leading edge and resulted in a high degree of stagger. The ribs, composed of ash flanges and limewood webs, featured cut-outs along their length to lighten them; the ailerons, which were fitted on the top wing only, increased their chord towards the wingtips for improved stall response. Elevator and rudder controls were provided via conventional cables and pulleys, while the ailerons were actuated by a series of push-pull rods attached to the control column in the cockpit.[5] The angle of incidence could be adjusted by ground crew via a single pivot joint arrangement, this was originally intended to allow the lower wing to be rotated for low speed flight but was never used on the military aircraft. The Alkan-Hamy synchronization gear installed in a Nieuport 17 While the single spar lower wing has been credited with helping to give the type its impressive climb rate, at very high speeds it was also prone to flutter,[note 2] an aerodynamic phenomenon that was not fully understood at the time. Many British Nieuports were modified at No 2 Aeroplane Supply Depot in an effort to alleviate this problem;[6] In later French service, some N.17s had their lower wings replaced with spares taken from newer Nieuport 24s. Production of the new Alkan-Hamy synchronization gear had permitted the wing-mounted Lewis gun of the 11 and 16 to be replaced with a synchronised Vickers gun, which was mounted on the fuselage to fire through the propeller arc without striking the blades.[2] However, the standard Royal Flying Corps (RFC) synchroniser, the Vickers-Challenger gear, was not available in sufficient numbers and in British service the over-wing Lewis gun was retained. The Lewis gun was installed on the newly-developed Foster mounting, a curved metal rail which allowed the pilot to slide the gun back to change ammunition drums and to clear jams; it also had the advantage of allowing pilots to aim the gun upwards to shoot into the underside of enemy fighters flying above, not an easy tactic, but used to good effect by several ace pilots. During March 1916, the new Nieuport 17 reached the French front and began to replace the earlier Nieuport 11 and 16 fighters that had been instrumental in ending the Fokker Scourge of 1915. On 2 May 1916, Escadrille N.57 became the first unit entirely equipped with the new model. During the latter part of 1916 and into 1917, the Nieuport 17 equipped every fighter squadron of the Aéronautique Militaire. Almost all of the top French aces flew the nimble Nieuport during their flying careers, including Georges Guynemer, Charles Nungesser, Maurice Boyau, Armand Pinsard, René Dorme, Gabriel Guerin and Alfred Duellin. The type was also used by American volunteers of the Escadrille Lafayette, who transitioned to it from their earlier Nieuport 11s and 16s. The Nieuport 17 was also ordered by the Royal Flying Corps and Royal Naval Air Service, as it was markedly superior to any of the British fighters available at this time. British units that used the type include Nos 1, 29, 32, 40 and 60 squadrons of the Royal Flying Corps and No 6 of the Royal Naval Air Service - for a time, other units had a few on charge to escort other aircraft. Many British Empire air aces flew Nieuport fighters, including the top Canadian ace Billy Bishop, who received a Victoria Cross while flying it, and Albert Ball, V.C. who often hunted alone in his Nieuport. 'Mick' Mannock VC flew Nieuports early in his career with No 40 Squadron. His VC award reflected his whole combat career – including his time on Nieuports. The top-scoring Nieuport ace was Captain Phillip Fletcher Fullard of No.1 Squadron RFC, who scored 40 kills between May and October 1917, before breaking his leg in a football match. Numerous Italian aces, such as Francesco Baracca, Silvio Scaroni and Pier Piccio, all achieved victories while flying Nieuport fighters. In Belgium, the 1st and 5th Belgian escadrilles were equipped with the Nieuport 17 and 23. Belgian aces flying the type included Andre de Meulemeester, Edmond Thieffry and Jan Olieslagers. The Imperial Russian Air Service operated large numbers of Nieuports of all types, including the Nieuport 17, 21 and 23. Being largely reliant on aircraft procured directly from France, there was pressure within Russia to establish and grow a capacity to support the domestic manufacture of such fighters as well. Accordingly, efforts were made to produce the type under licence in Russia; however the venture struggled due to a lack of experience in the limited availability of experts to assist. Nonetheless, many of these were operated not only during the Eastern Front of the conflict, but continued to be flown for a time following the Russian Revolution that resulted in the creation of the Soviet Union. Russian Nieuport aces include Alexander Kazakov, who flew the type against the Germans and later against the Bolsheviks as well. By mid-1917, the Nieuport fighters were losing their superiority to German types such as the new Albatros D.III. In response, the 150 hp (110 kW) SPAD S.VII had begun to replace the Nieuport fighters in French front line squadrons. The British continued to operate their Nieuports until early 1918 until enough newer types such as the Roya l Aircraft Factory S.E.5s were available to replace them. Like the other Nieuport types, during its later life the 17 was operated in large numbers as an advanced trainer. The American Expeditionary Forces purchased 75 Nieuport 17s for training purposes, while the French also operated large numbers as trainers. The French Aviation Maritime operated a single Nieuport 21, which was used for carrier training during 1920 and 1921 aboard the Bapaume, pending the delivery of dedicated carrier aircraft such as the Nieuport-Delage NiD.32RH – historical introduction, wikipédia courtesy. https://www.youtube.com/watch?v=GLpZET6_wxA The box art art is a very beautiful painting with a action scene. The environment and the setting is quite good so it’s a quite attractive The box contents: The box art is remove and you see there´s another box, an inner box. A nice touch for sturdy box and protection of the sprues. At first glance you see a not very fill up box as the little gem only have 4 plastic sprue, one PE sheet, one small acetate film sheet and one large decal sheet. Let´s start looking at the plastic sprues. Sprues: Sprue A This sprue contains the fuselage halves, tail and rudder, and all the wings structs. The tail, like the wings, has some good surface detail. Also, the engine plate and top cowl alongside with small others tails are represented in this sprue. The small parts are nicely injected with no flash (very little flash in some parts) and a quite good surface detail. Sprue B Like the A one, this sprue is also quite busy with the all the cockpit (like the fuselage frame section, floor boards, fuel tank, seat, wheels, propeller). Mostly of the cockpit is in this sprue. It´s also where are present the smallest parts of this build and some quite clean detail. A bit of flash, I could only found in one piece: B37 – machine gun support. It`s a bit odd that all sprue is ok with no flash and good detail and one part does have a little flash, but nothing much. Sprue C Here we got wings, central wing and engine cowling. The lower wing is in a single piece with very good surface detail like the ribs and stitching. These have good surface detail is extended to upper wings and central wing section. I really like the surface detail of the rivets on the bottom (right below the cockpit). The upper wings are made in 3 parts as usual in WWI model kit in 1:32. The only cowling used in this version is the C4 part. A found a little flash on one upper wing and on the cowling but was very little indeed and a 2 minutes work. Sprue E This sprue is exclusive for the engine. So you get 15 pieces to make a good “Le Rhône J9” with 110 HP. The details are quite good and the construction its quite straightforward as the cylinders are in two parts (that can bring some little problems if the fit its not perfect) and the cylinder head are individual. After that only need to add the push rods and induction pipes and that’s almost it. So at the end you get lots of parts, some are quite small so the modeler will have to be careful removing parts from the sprues and some fine clean-up of mold seams will be required. Decals The decals have everything to be top quality. Design by melliusmanu and printed by Cartograf and are just superb, as usual. They are thin, with perfect color registration, with high pigmentation (the white will not be a problem, trust me) and a very slim carrier film around the decal The options are all in aluminium dope with some striking markings. 1. Lieutenant Charles Eugène Jules Marie Nungesser (March 15, 1892 – around May, 8, 1927) - Nieuport XVII, N 1895, N.º 65 Escadrille 2. Sous-Lieutenant Fernand Francis Chevillion (Januart 10, 1889 – September, 28, 1947) - Nieuport XVII, N 2054, “Dedette 3”, N.º 15 Escadrille 3. Paul Albert Pierre Tarascon (December 8, 1882 – June 11, 1977) - Nieuport XVII, N 1681 “Zigomar 3” N.º 62 Escadrille 4. André René Celestin Herbelin (December 9, 1889 – December 16, 1966) - Nieuport XVII, N.º 102 Escadrille PE Sheet A quite small photo-etched sheet give us some nice seatbelts. The PE looks quite thin and easy to handle. The windshield is acetate to be frame between two plastic windframes Instructions: Finally the instructions. From the past years, modellers are more and more demanding for some extra good instructions. And CSM showed with this release that they are up for the challenge. The booklet in A4 format with 22 colored pages with a highly detailed and clear step by step easy to follow. A small historical information is given. Checking the inside of the booklet, some very nice drawings appear with. very clear instructions with some innovation: they give you not only the number part but also the names of parts that represent in real life. Nice touch. Another thing that caught my attention is the fact that there`s no rigging diagram, as the rigging instructions just made their way in all the constructions. It’s a method that only building it I can tell is I like better this way or the other way around. The thing I really didn`t like it, was the paint indication: the names are pretty basic and it difficult to get which color specific is CSM talking about. Example: Spruce (light wood) and Poplar (light wood) with two small color square. Ok they have different color but CSM leave to the modeler the need to find the most suitable paint. The same thing with the color “fabric” . So please CSM in the next release, included some number color of any brand (Vallejo or Tamiya or any other so that can turn the modeler job easier and most of all, faster). Conclusion: What a debut in 1:32 injection model aircraft did make CSM! It’s a great start with an eagerly waited Ni 17. The plastic looks quite good to work, with some fine surface detail (with some very little flash in some parts, at least in my review sample, that can be handled very easy). Schemes options are very well chosen, with Cartograf decal sheet to guarantee the top quality. So just treat yourself this X-mas and get yourself one of these from Copper State Models. You will not regret! I know that mine is going to the “to do soon” pile! My truly thanks to Edgar and CSM team for the work and the support and for this review sample. Finish model from CSM model site: