CANicoll
-
Posts
1,927 -
Joined
-
Last visited
Content Type
Profiles
Forums
Events
Gallery
Everything posted by CANicoll
-

McLaren MP4/6 Ayrton Senna Fujimi 1/20
CANicoll replied to DocRob's topic in LSM 1/35 and Larger Work In Progress
Rob, Several of us seem to have been hitting roadblocks on our builds lately which is a shame. Your work is too good to be wasted on projects that are not well enough engineered from the manufacturer. -
Special Hobby F-80C saved from SOD
CANicoll replied to JohnB's topic in LSM 1/35 and Larger Work In Progress
John, Sometimes you get a build that just fights you every step of the way. Fully understand the desire to bin it. -
Amazing work with all of that brass. Wow. Looks terrific.
-
1/32 Hawker Tempest
CANicoll replied to JeroenPeters's topic in LSM 1/35 and Larger Work In Progress
I didn't know Moskit was still making the metal exhausts - I used them on some P-39 and P-51 builds maybe 15 years ago! How do you keep everything aligned given all of the small pieces? And especially with all of the bits on the engine? Definitely not a kit for the inexperienced. And even the experienced! -
Special Hobby F-80C saved from SOD
CANicoll replied to JohnB's topic in LSM 1/35 and Larger Work In Progress
Wow, so much simpler controls, knobs and switches compared to the F-4! But your IP looks terrific. -
Definitely looks the part, Peter. Your washes bring out the detail nicely (and a reminder to do the same on my F-4!). Spitfire cockpits are always loaded with detail and you brought it out beautifully. Disappointing about the Quinta Sutton Harness should not have fought you that hard but it looks like you got it sorted.
-
Have to hit the pause button on this build as this coming week is going to be busy. Moving my 88-year-old mother into a senior living facility nearby this week. Lots of work left to do on the stencils, markings, Sidewinders, attaching the wheels to the landing gear (and any suggestions on how to attach resin wheels to the landing gear using screws?) not to mention some touch up and details to be added including the nose probe. Probably a couple of week's worth or work left (don't hold me to that!)
-
T-28 rework RFI
CANicoll replied to JohnB's topic in LSM 1/32 and Larger Aircraft Ready for Inspection
Excellent work! Those canopies just shine - nicely done, John! -
Is there a 'Better Late than Never" category in this build?
-
McLaren MP4/6 Ayrton Senna Fujimi 1/20
CANicoll replied to DocRob's topic in LSM 1/35 and Larger Work In Progress
Rob, Nice job on the tub, but especially on the exhaust - the pipes look terrific. I keep forgetting to use the hairdryer on hard-to-conform decals but your CF pieces look the part. The Brembo calipers look like the real thing - you captured the gold perfectly. Nice work! -
I cannot even IMAGINE doing these with masks... Torture, for sure! Thank you, Carl. Seriously, is it even possible to do stencils like this in 1/48? You must have a strong magnifying glass!
-
Looks awesome!! Thanks for all of the detailed pictures. Nice work.
-
Thanks, Peter. Have to agree with you. Spending hours upon hours just doing stencils is sapping my will. Trying to alternate working on other parts - which does help. I wish I would have started this build a month sooner, however. Not sure I would tackle the stencils again in 1/32 scale although I cannot imagine doing them on a 1/48 build. And it is amazing how they look on the aircraft. I did screw up a few stencils, mostly folded over and I could not correct, and I tore them. One wonderful aspect of the stencils is they are very thin. It only takes a few second in the water to loosen them. And I got the colors wrong on some - white on the brown and black on the green which I mostly corrected. The stencil sheet diagrams are fairly generic as the diagrams do not match the wing/fuselage configuration I have so where the stencil sheet called for stencils to be placed on certain panels/access ports, some of those don't exist on my aircraft. Also, the stencils in white are extremely hard to see and the number call-outs are not always clearly placed. It takes a while to see exactly where the decal is, and then CAREFULLY cut it out. On some of the stencils there is not a lot of room between them. Something else I learned, some of the decals are fairly long, and better cut into 2 or more pieces. I guess what I'm saying is that in addition to the sheer number of stencils, it is a bit of a chore to 1. find the right one, 2. ensure the proper color, 3. cut it out, 4. put it in place. Time consuming so I've taken to get three or four ready at a time Put another 30 or so on the wings and started on the right side of the nose... I really want to get to those Sidewinders!! Hope you and Diane are doing well.
-
Art, Congrats on the progress on the house! This is awesome and thanks for sharing - very cool to see your house coming together.
-
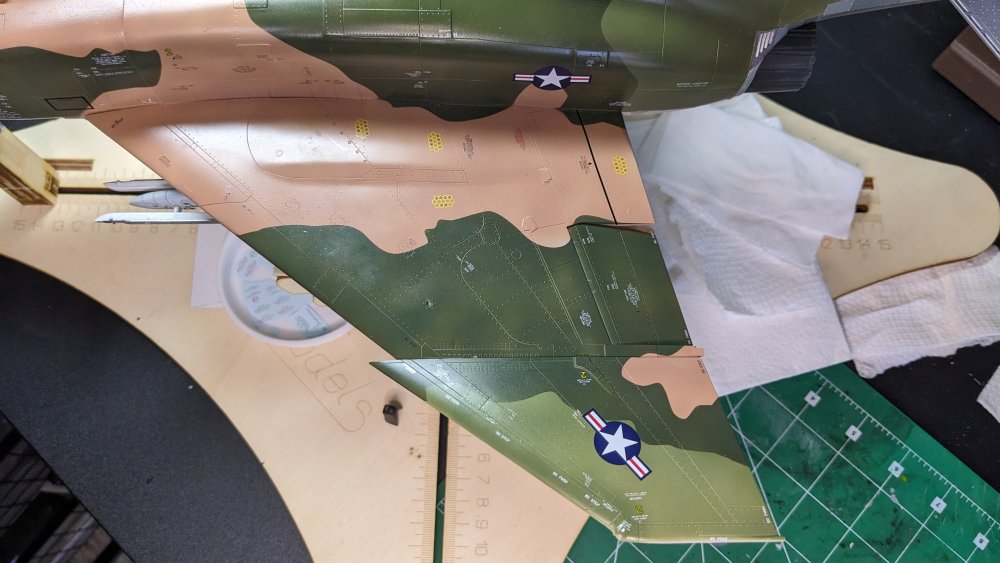
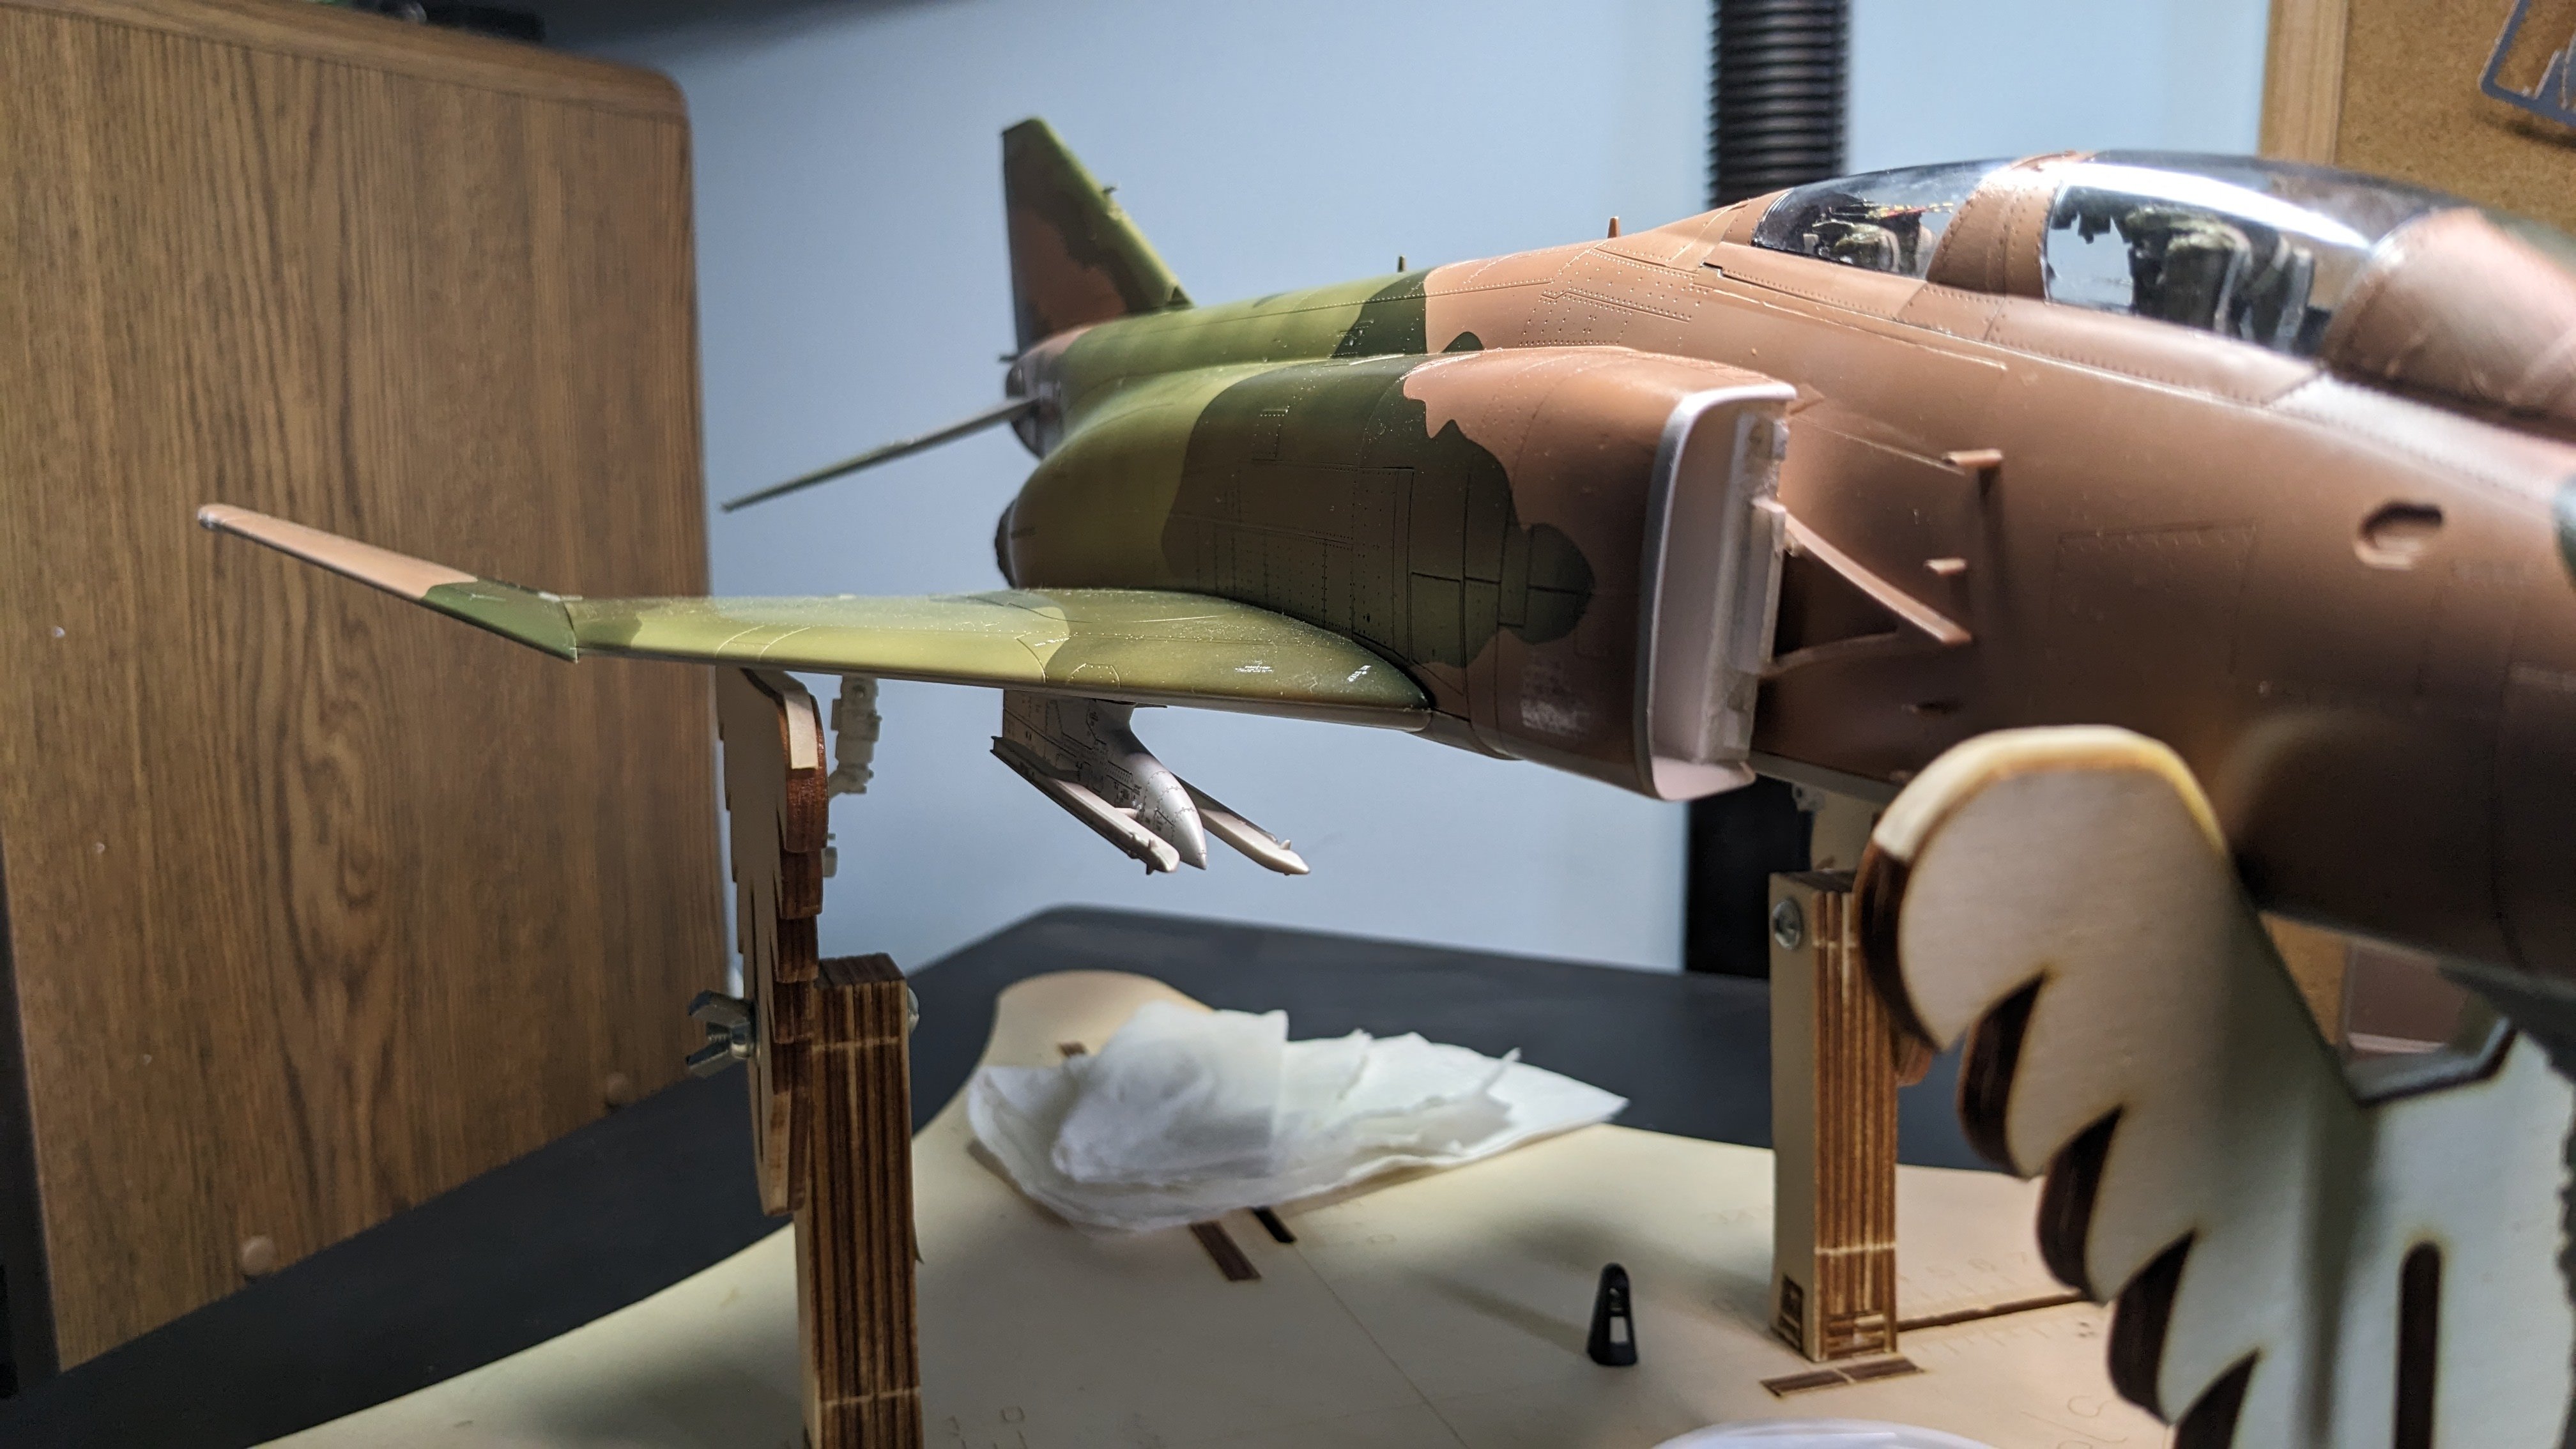
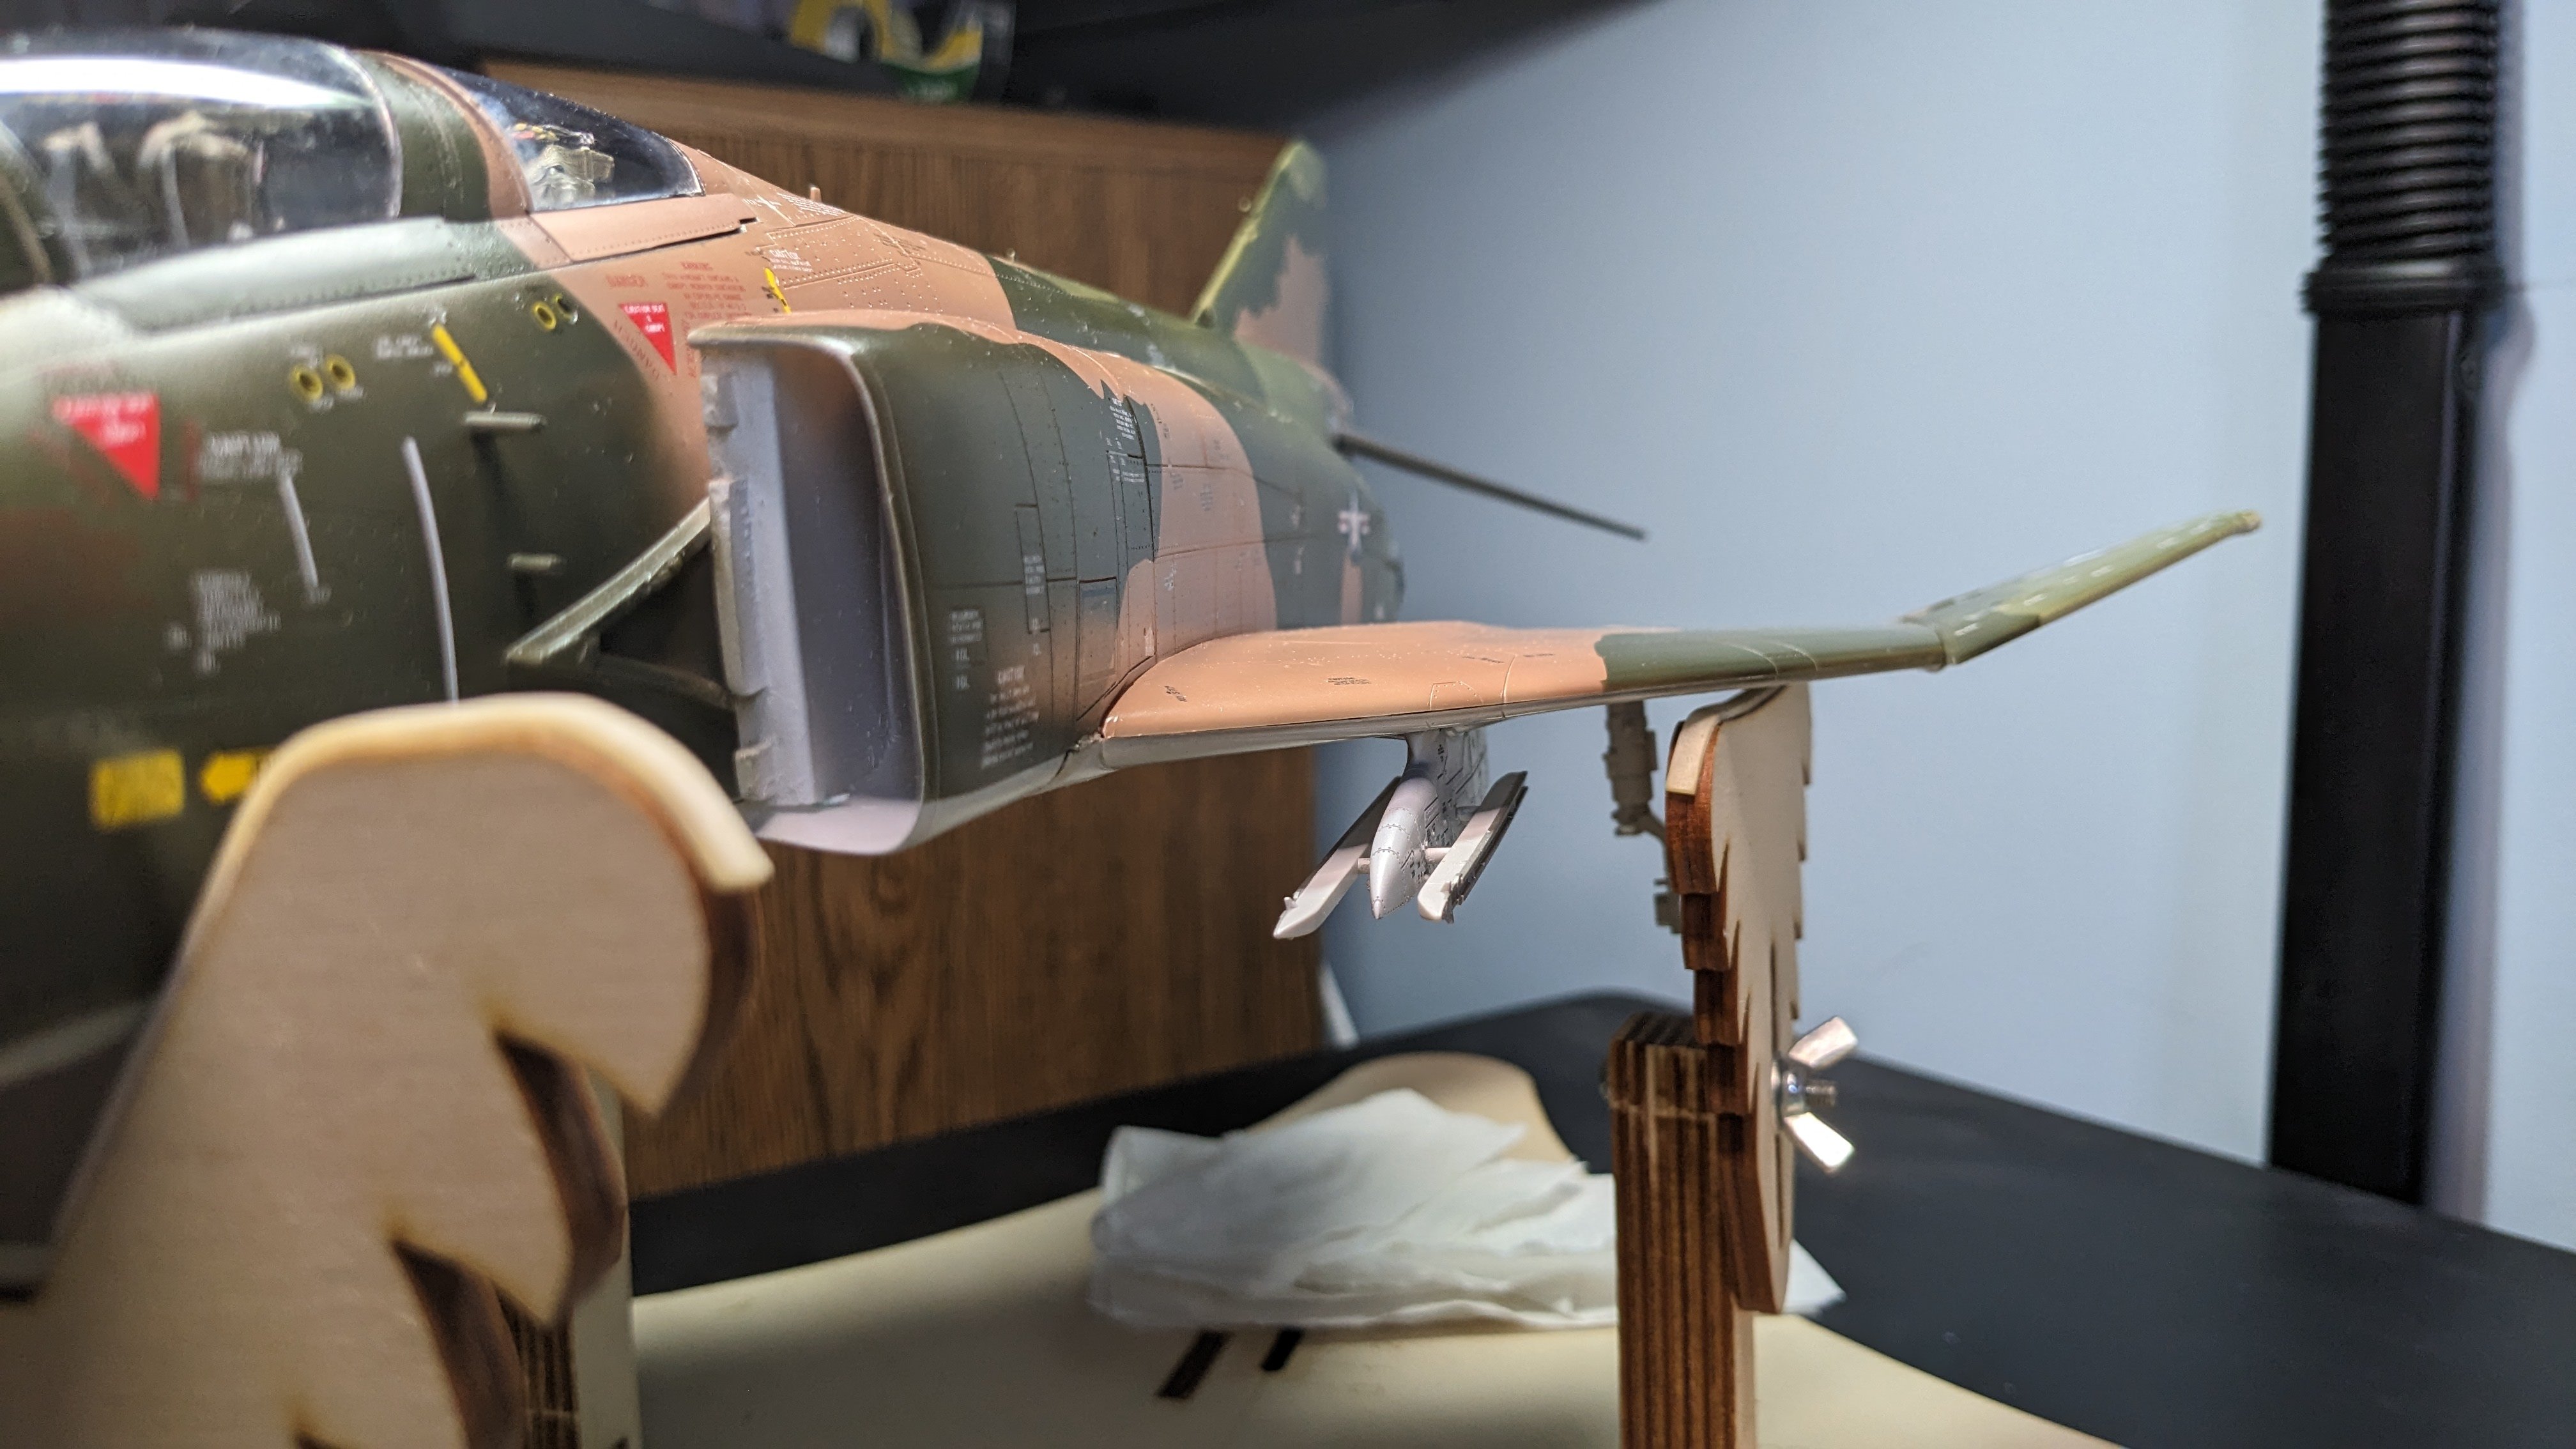
Making progress on the stencils and other wrap-up details. Stencil count is nearly 100 at this point. Got the wings to approximate the 12-degree angle but they are dry fitted at the moment. Wrapping up the left side stencils before moving over to tackle the other side. The bottom may just have to wait. Still need to assemble the sidewinders. Each only needs the front four fins attached, but the attachment point is small so they have to be attached carefully. Won't be fun... Seats are in (just placed) but looks like there is sufficient clearance for the canopy to be closed - but the canopies will be open - and the windscreen to cover the HUD. More to come!


-
Thanks Peter! You are always good with an encouraging word!!
-
Great start, Peter! The cockpit is looking terrific, those small details are amazing.
-
Hey Peter, Yeah, I know I was going to miss the July 3 deadline, but I'm going to keep going. The stencils are a build onto themselves. I have applied 61 stencils on the left side of the fuselage alone, and I messed up 3; I still have a few more to do. Thinking about just doing the one side and calling it a day. Plus, the wings, etc. Starting with the AN/ALQ. The fit is good (just sitting there here). You don't see the seam at the bottom of the intake. (Ugly, gotta fix that). And on to the stencils. Canopy is just fitted - will be displayed open but it doesn't stay that way on its own. BTW, Carl's suggestion to use the Gundam markers on the canopy was spot on. Made a huge difference doing the edges before attaching to the frames. Have not applied a clear coat over the decals yet.

-
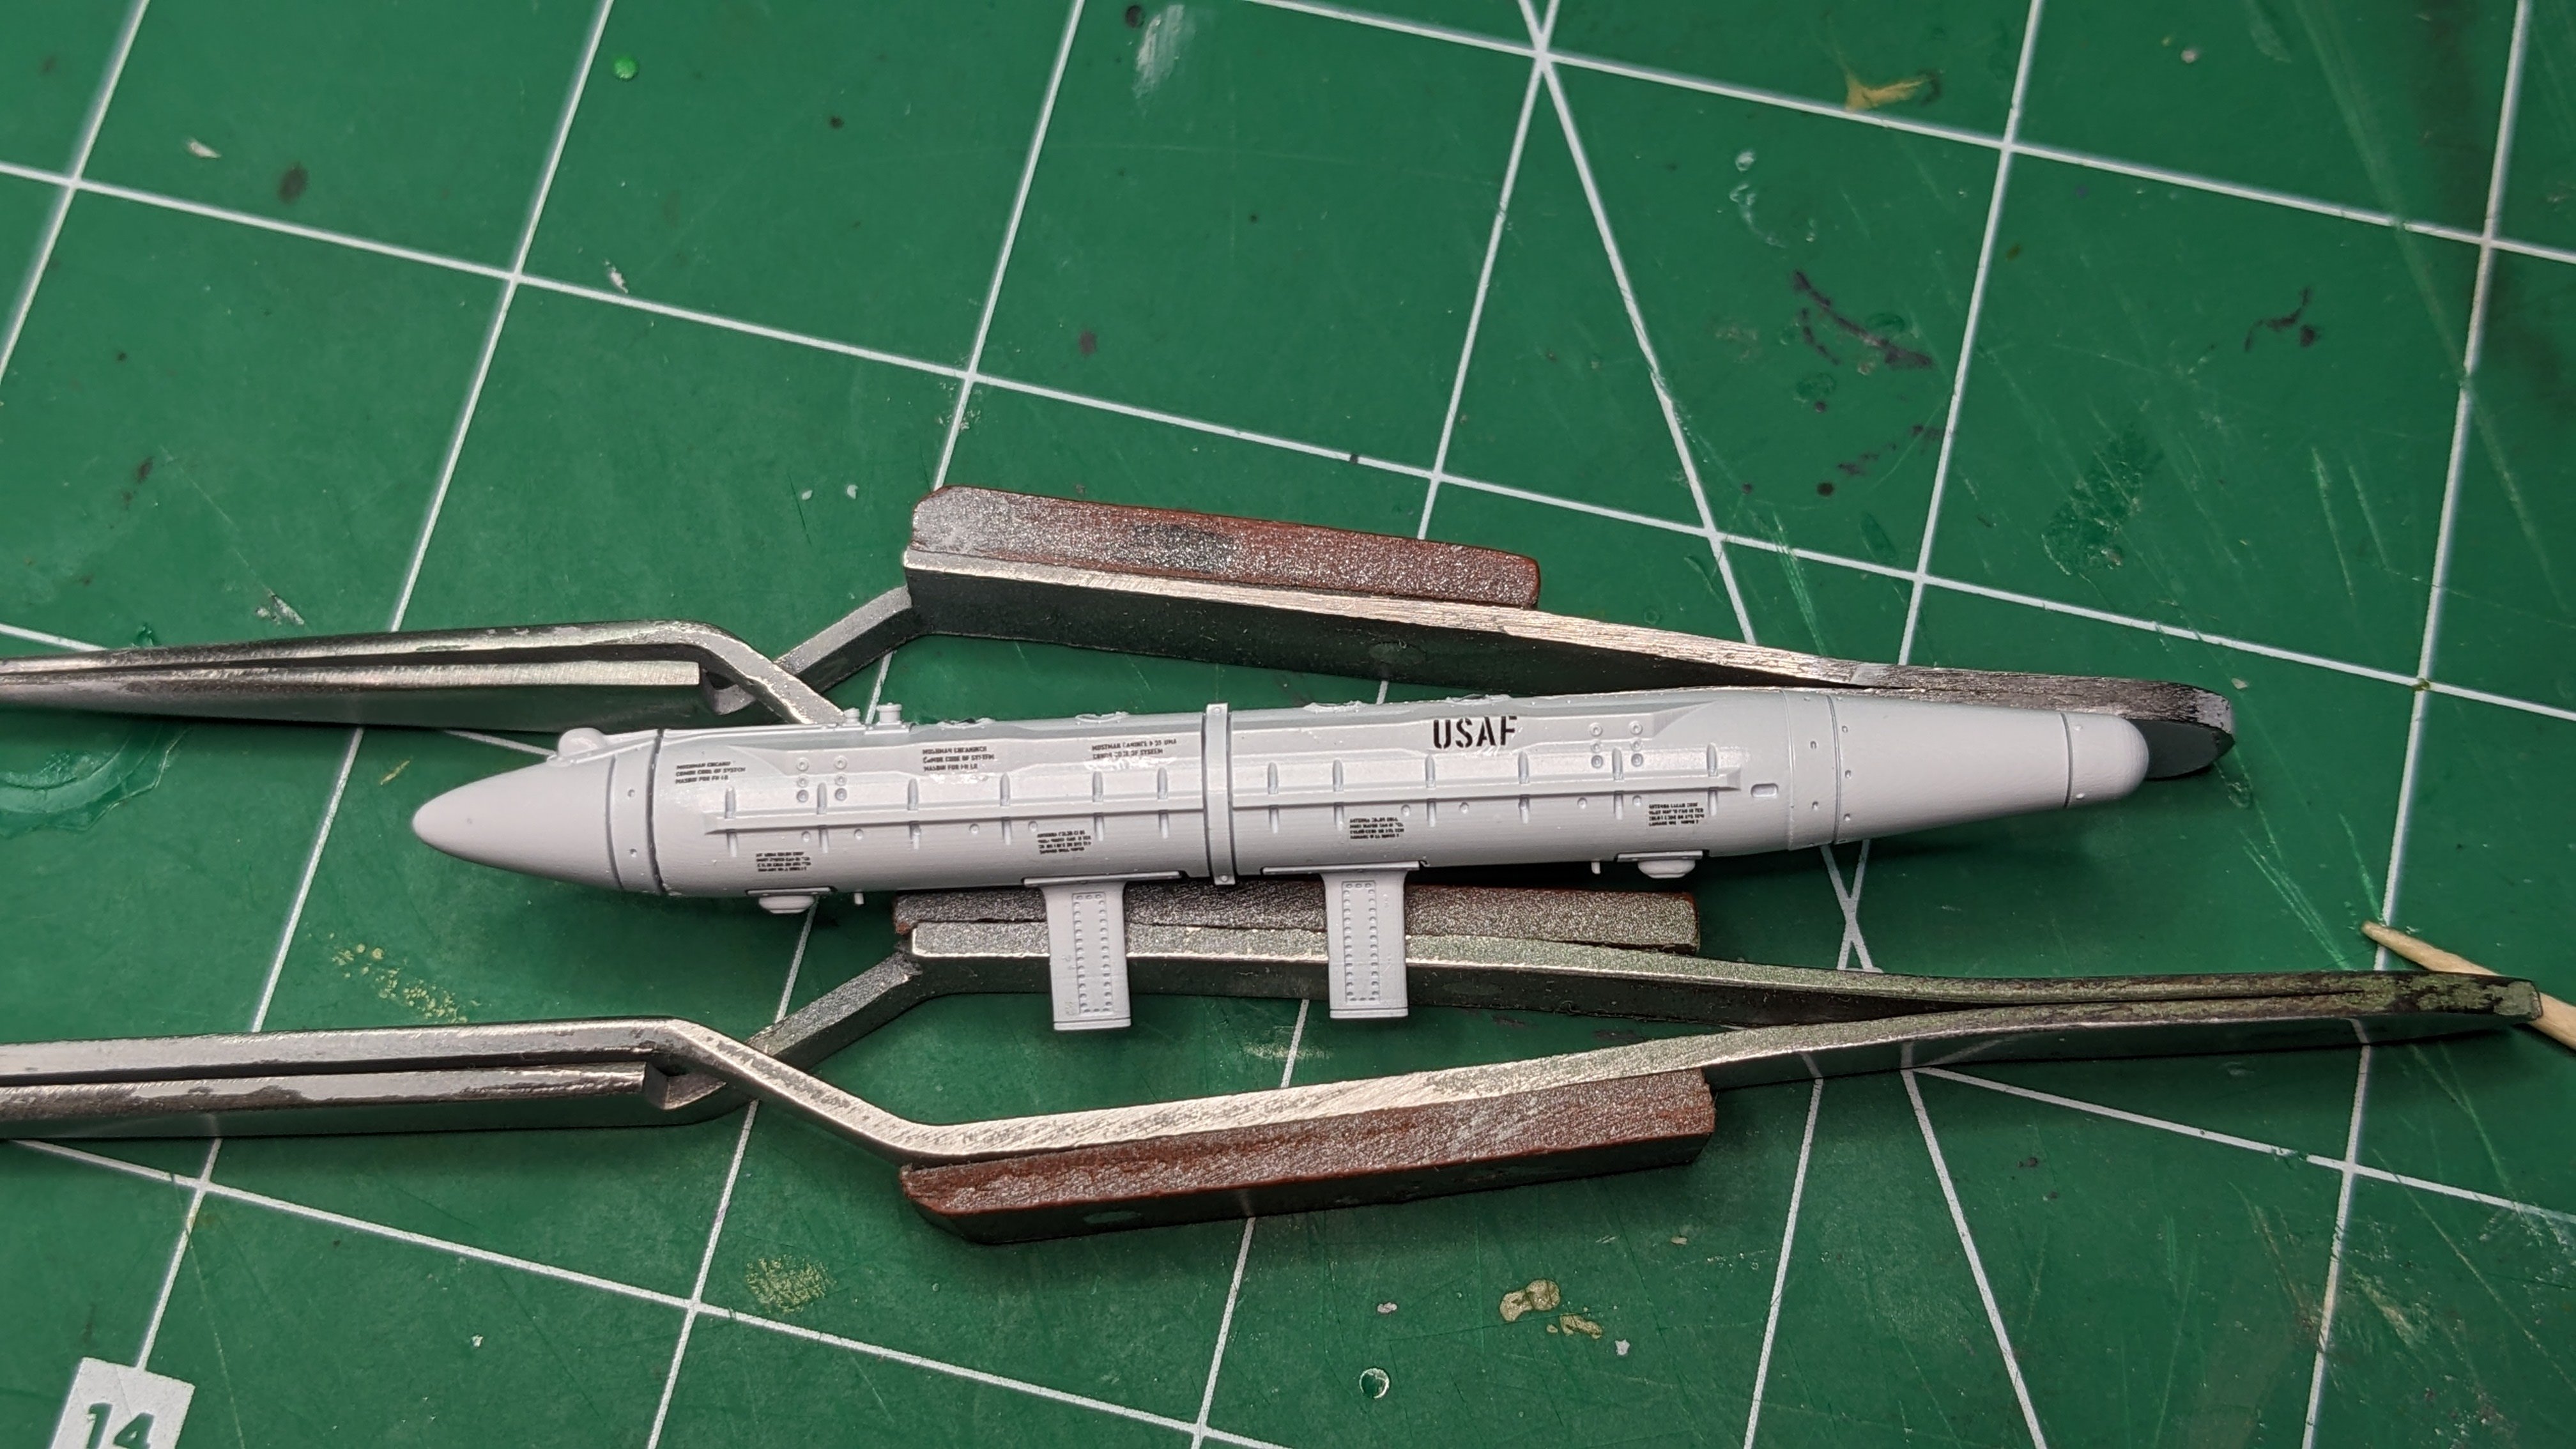
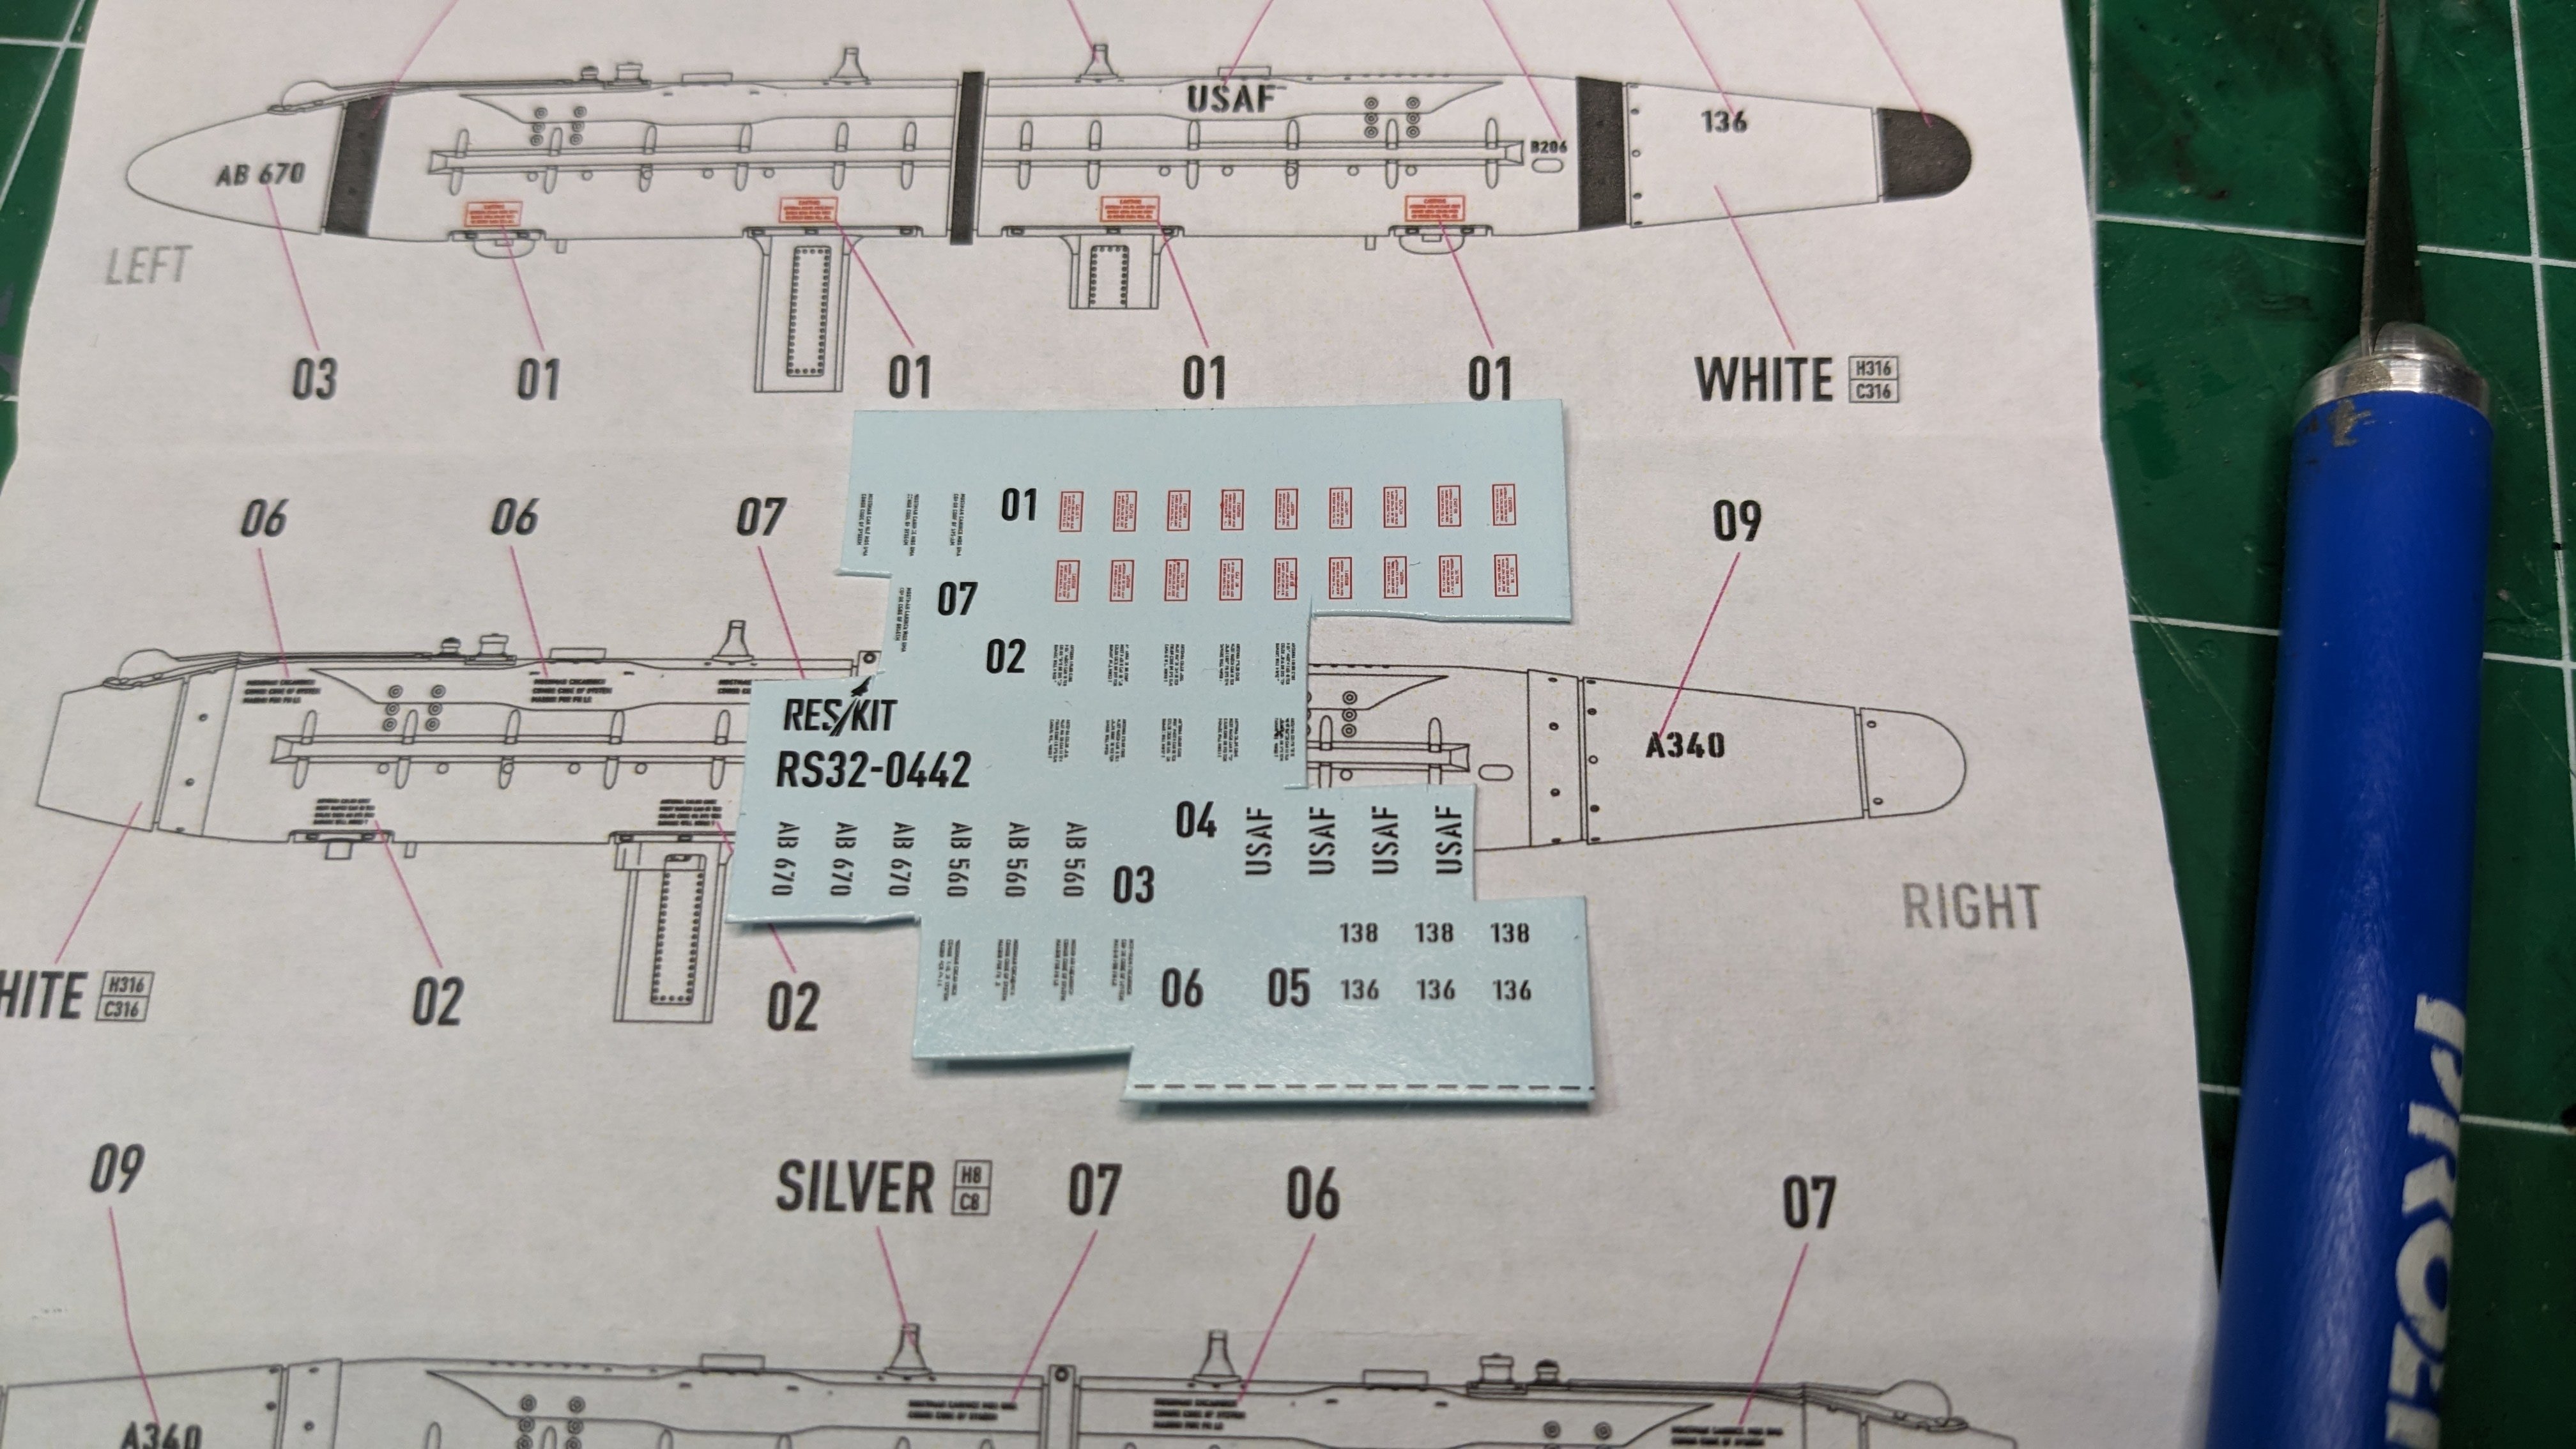
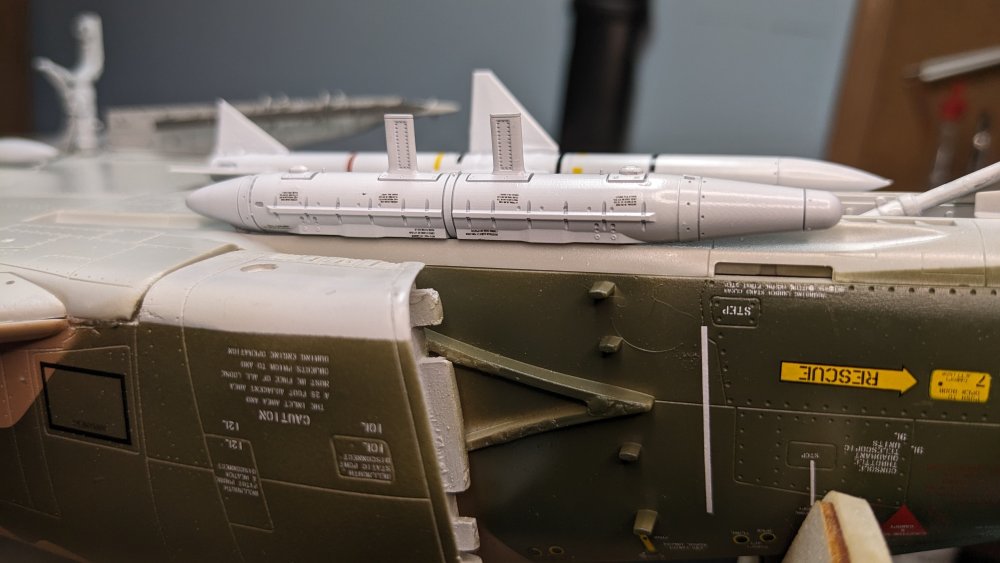
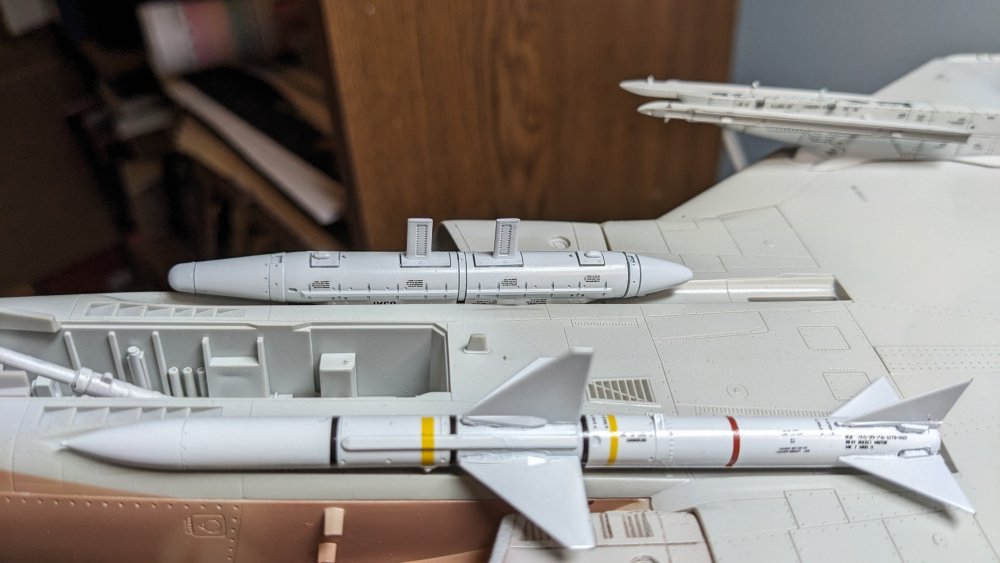
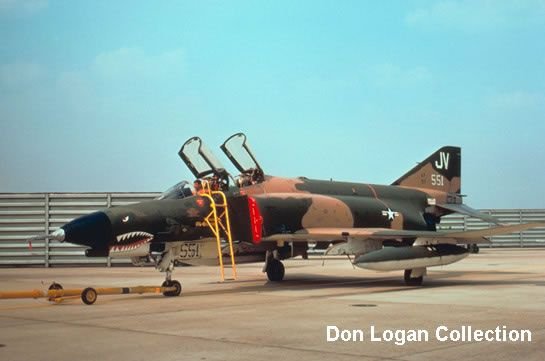
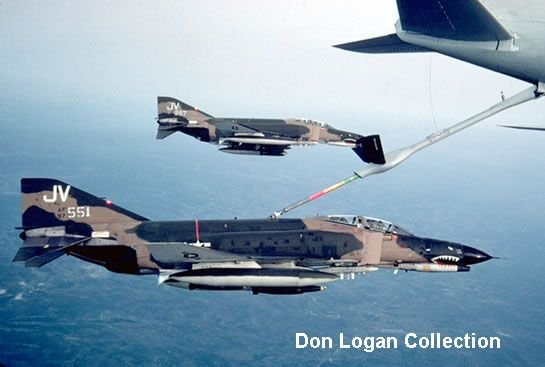
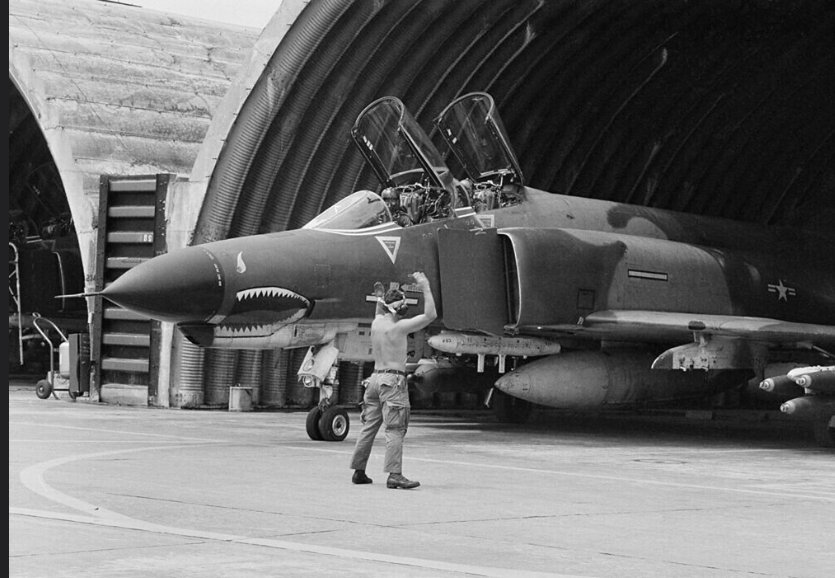
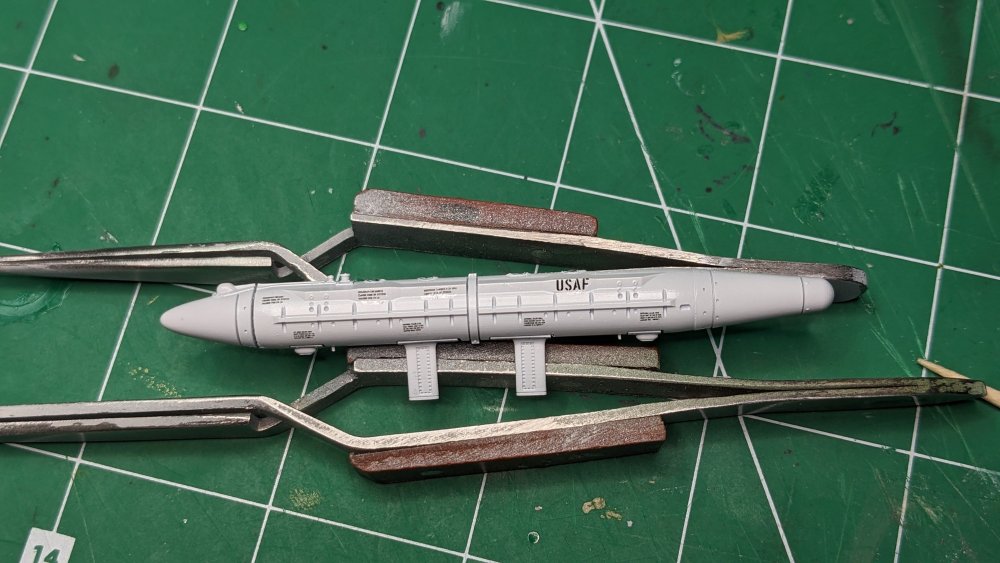
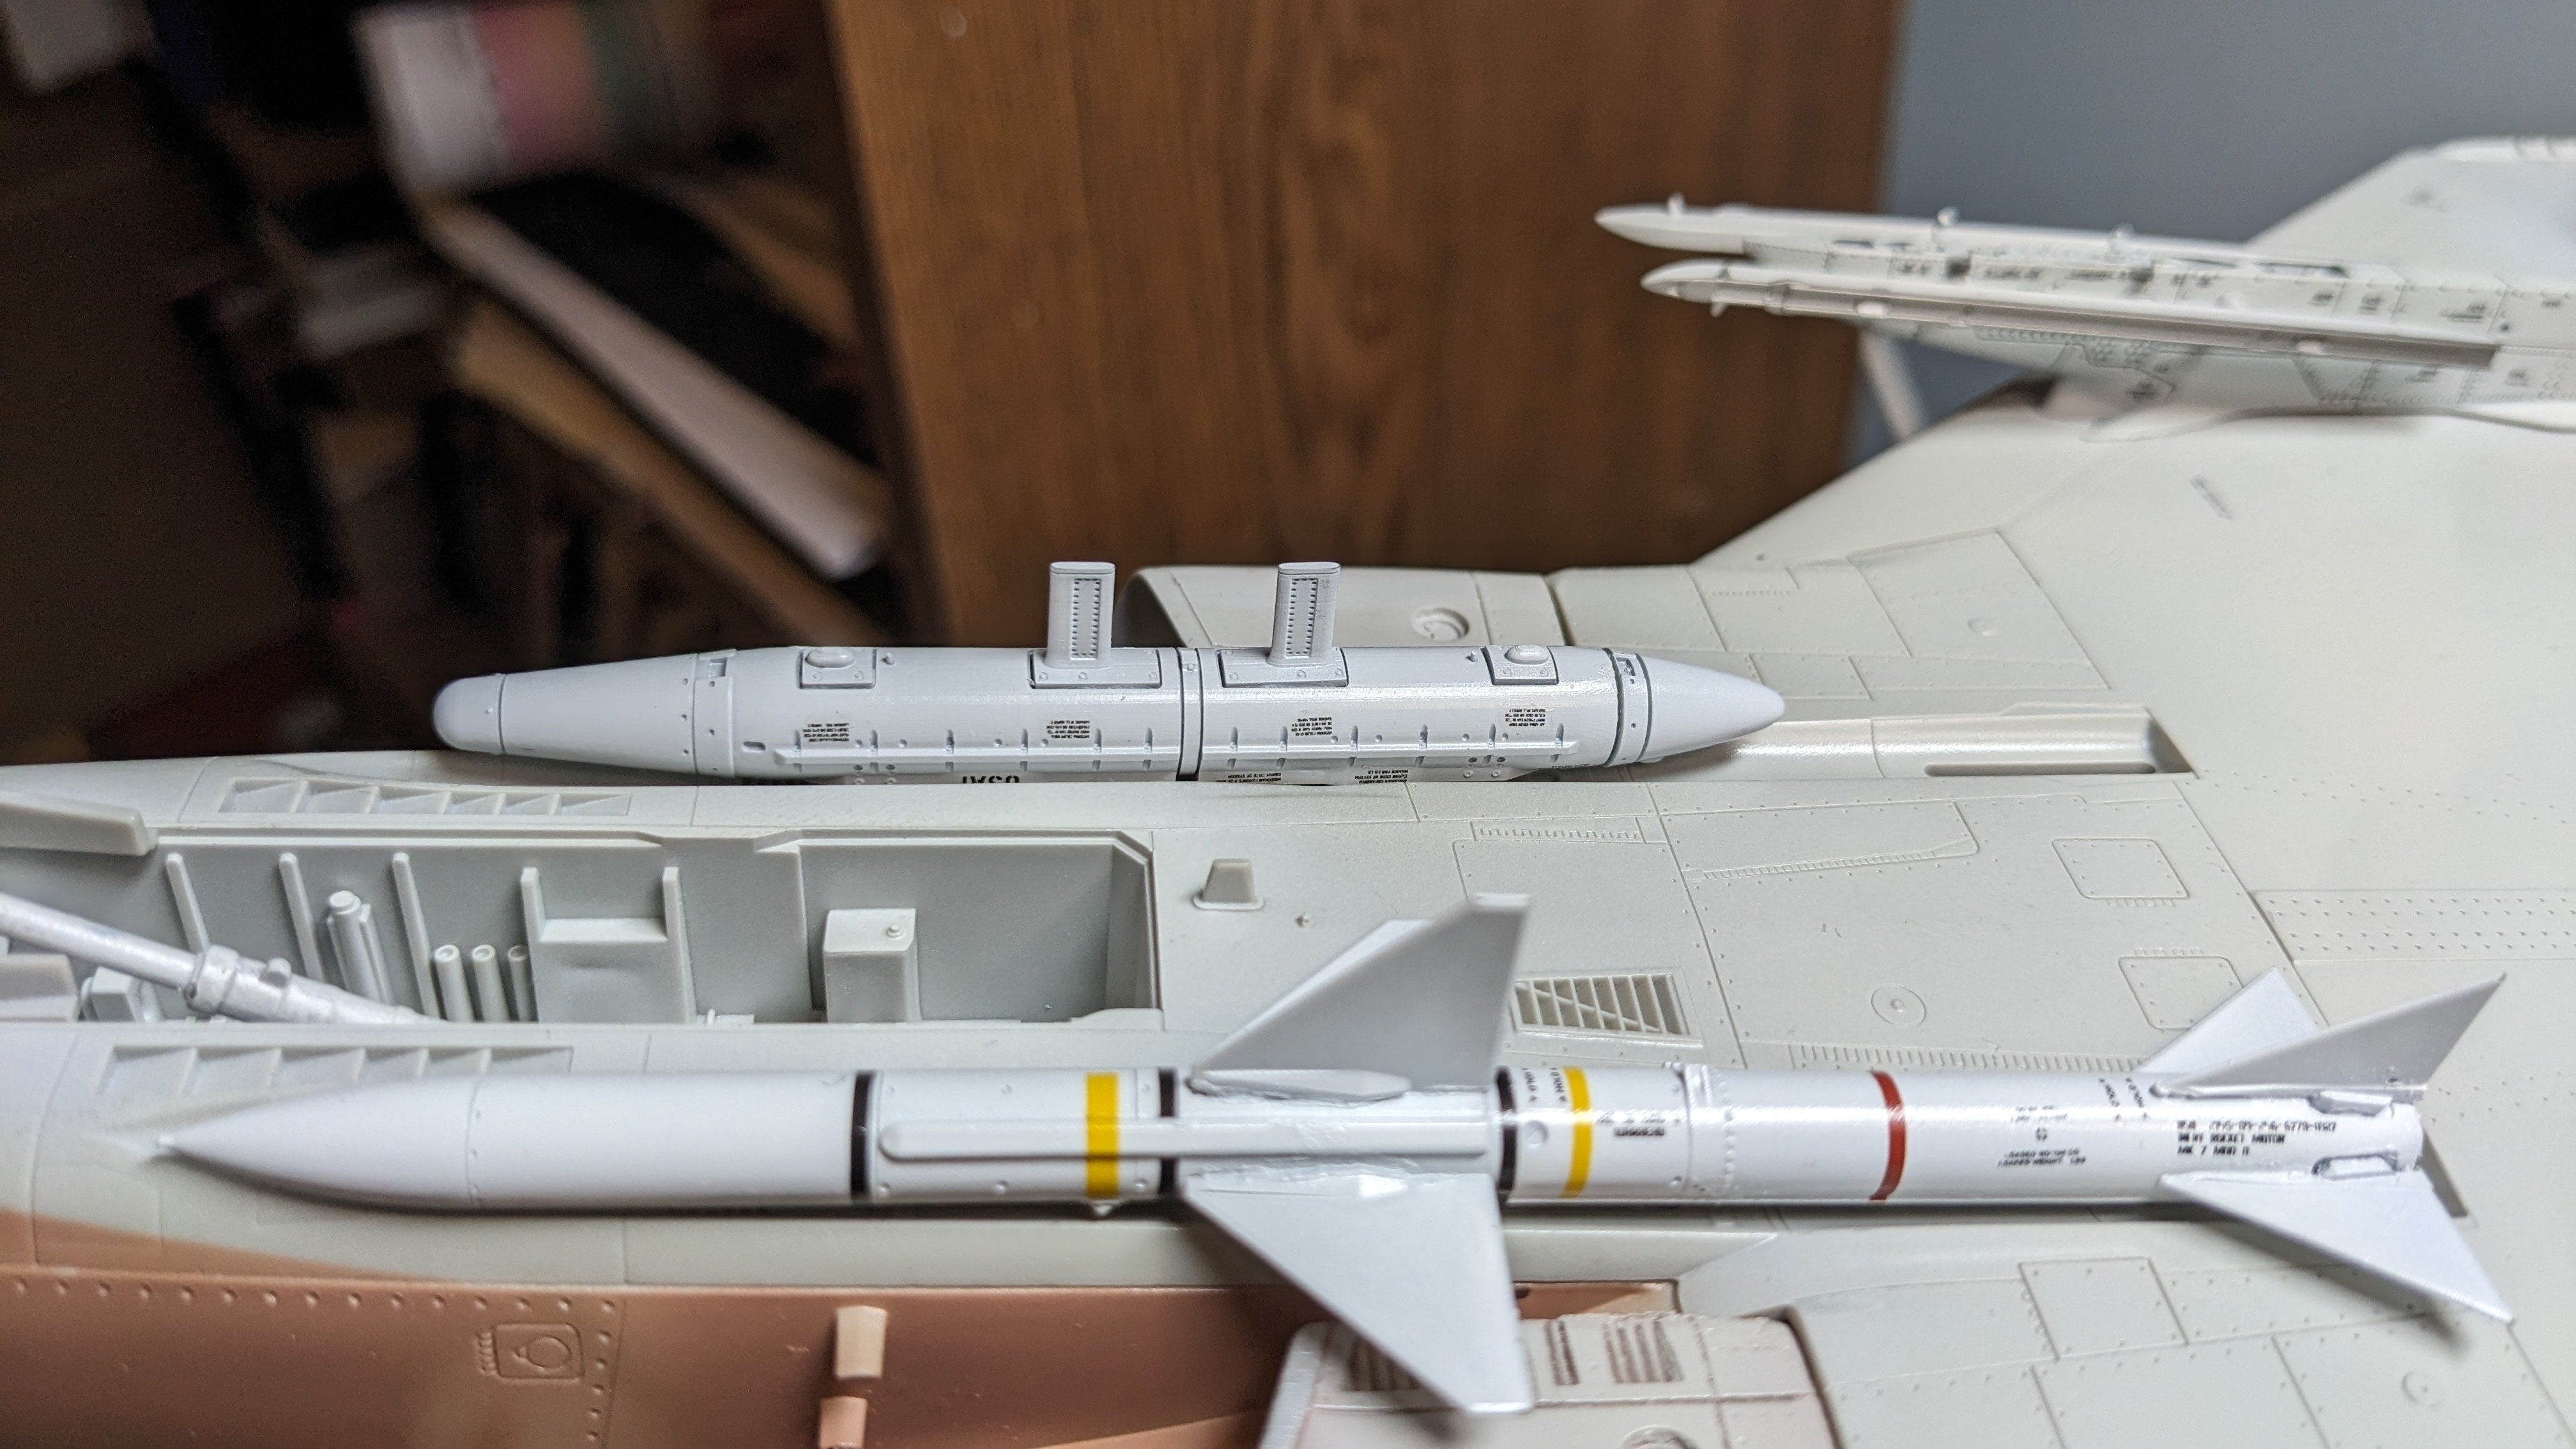
Minor update for tonight, but should make a lot of progress over the weekend. Got the AN/ALQ-87 ECM pod assembled/painted and stenciled. The mounting to the aircraft is not exactly clear but based on a few photographs it looks like it was winched pretty tight against the fuselage, or tight enough, see JV551 below. Also noted that the JV aircraft did not carry the 'Slime' formation lights: This was found on a posting at the other website. It was noted that application was highly variable and many F-4E's did not have them. Engineering Change Proposal 852S1 (T.O. 1F-4-776) introduced the so-called slime lights as a production feature with Block 45 (and subsequent) F-4E models. First fielded between mid-1970 and 1971. First Phantom II with production slime lights: F-4E-45-MC, 69-7579. Notice No slime lights above, but they are on the aircraft below: Also how tight the AN/ALQ is attached to the airframe. The Reskit AN/ALQ-87 ECM pod is very detailed however I did find one minor issue: The instructions call out decal #9 to go on the long nose cone. Except on the decal sheet, there are no #8 or #9 decals, something I did not notice until I was at the end of decaling. I emailed Reskit and within 12 hours had a response that they had caught the error and current kits have the correct decal sheet. They are posting one to me as well. Super customer service! Fixed my earlier miss: More to come!
.thumb.jpg.01f7c69ee42b96ae32409be189d0ef49.jpg)
.thumb.jpg.5ee1401a620973de7f6522c0a07932a0.jpg)
.thumb.jpg.cde4c5ee1afe613e8fe939ee88921491.jpg)

-
Thanks Peter! There are still SOO MANY to go.I've hit the pause button on the stencils for a bit so I could work on finishing the cockpit/canopy, the resin tires, the AN/ALQ, getting the right angle on the wing tips and started looking at the Sidewinders. This group builds end July 3, 2025, right?
-
Martin, Happy Birthday! Good to have you here and thanks for working for us. Many happy bdays to come!
-
I received a note from Debbi Corley this morning saying that AAA Hobbies is closing and she is in the process of shutting down the website. Sounds like all of her husband's products are no longer available. She is trying to find a buyer for all of his equipment, molds, etc.
-
Carl, thank you but I'm going to keep up with the kit one for now. I appreciate the offer. If it was more noticeable I'd jump at your offer. For the life of me I can't think of how the scratch got there but oh well! I just looked at the canopy after a second Future dip and while I see the scratch there, I don't think I'm going to mess with it, as Rob suggested. Part of it will be covered by painting. Like you, I may display with the canopy up, but may display it down as the canopies are pretty clear.
-
F-15DJ Kai or Eagle Plus- Finished!
CANicoll replied to BlrwestSiR's topic in The Great Twins Broup Bluild
Carl, The Canards are an inspired choice and definitely add to the uniqueness of the aircraft. Nice job on the missiles - I'm looking forward to seeing how you finish them. The canopy fit is frustrating as that is so much a focal point of the aircraft but you did a terrific job on the sprue attachment and the polishing. The seats look terrific, especially how the belts sit differently on each seat. The molded-in seat belts on the plastic or resin seats just doesn't look right. -
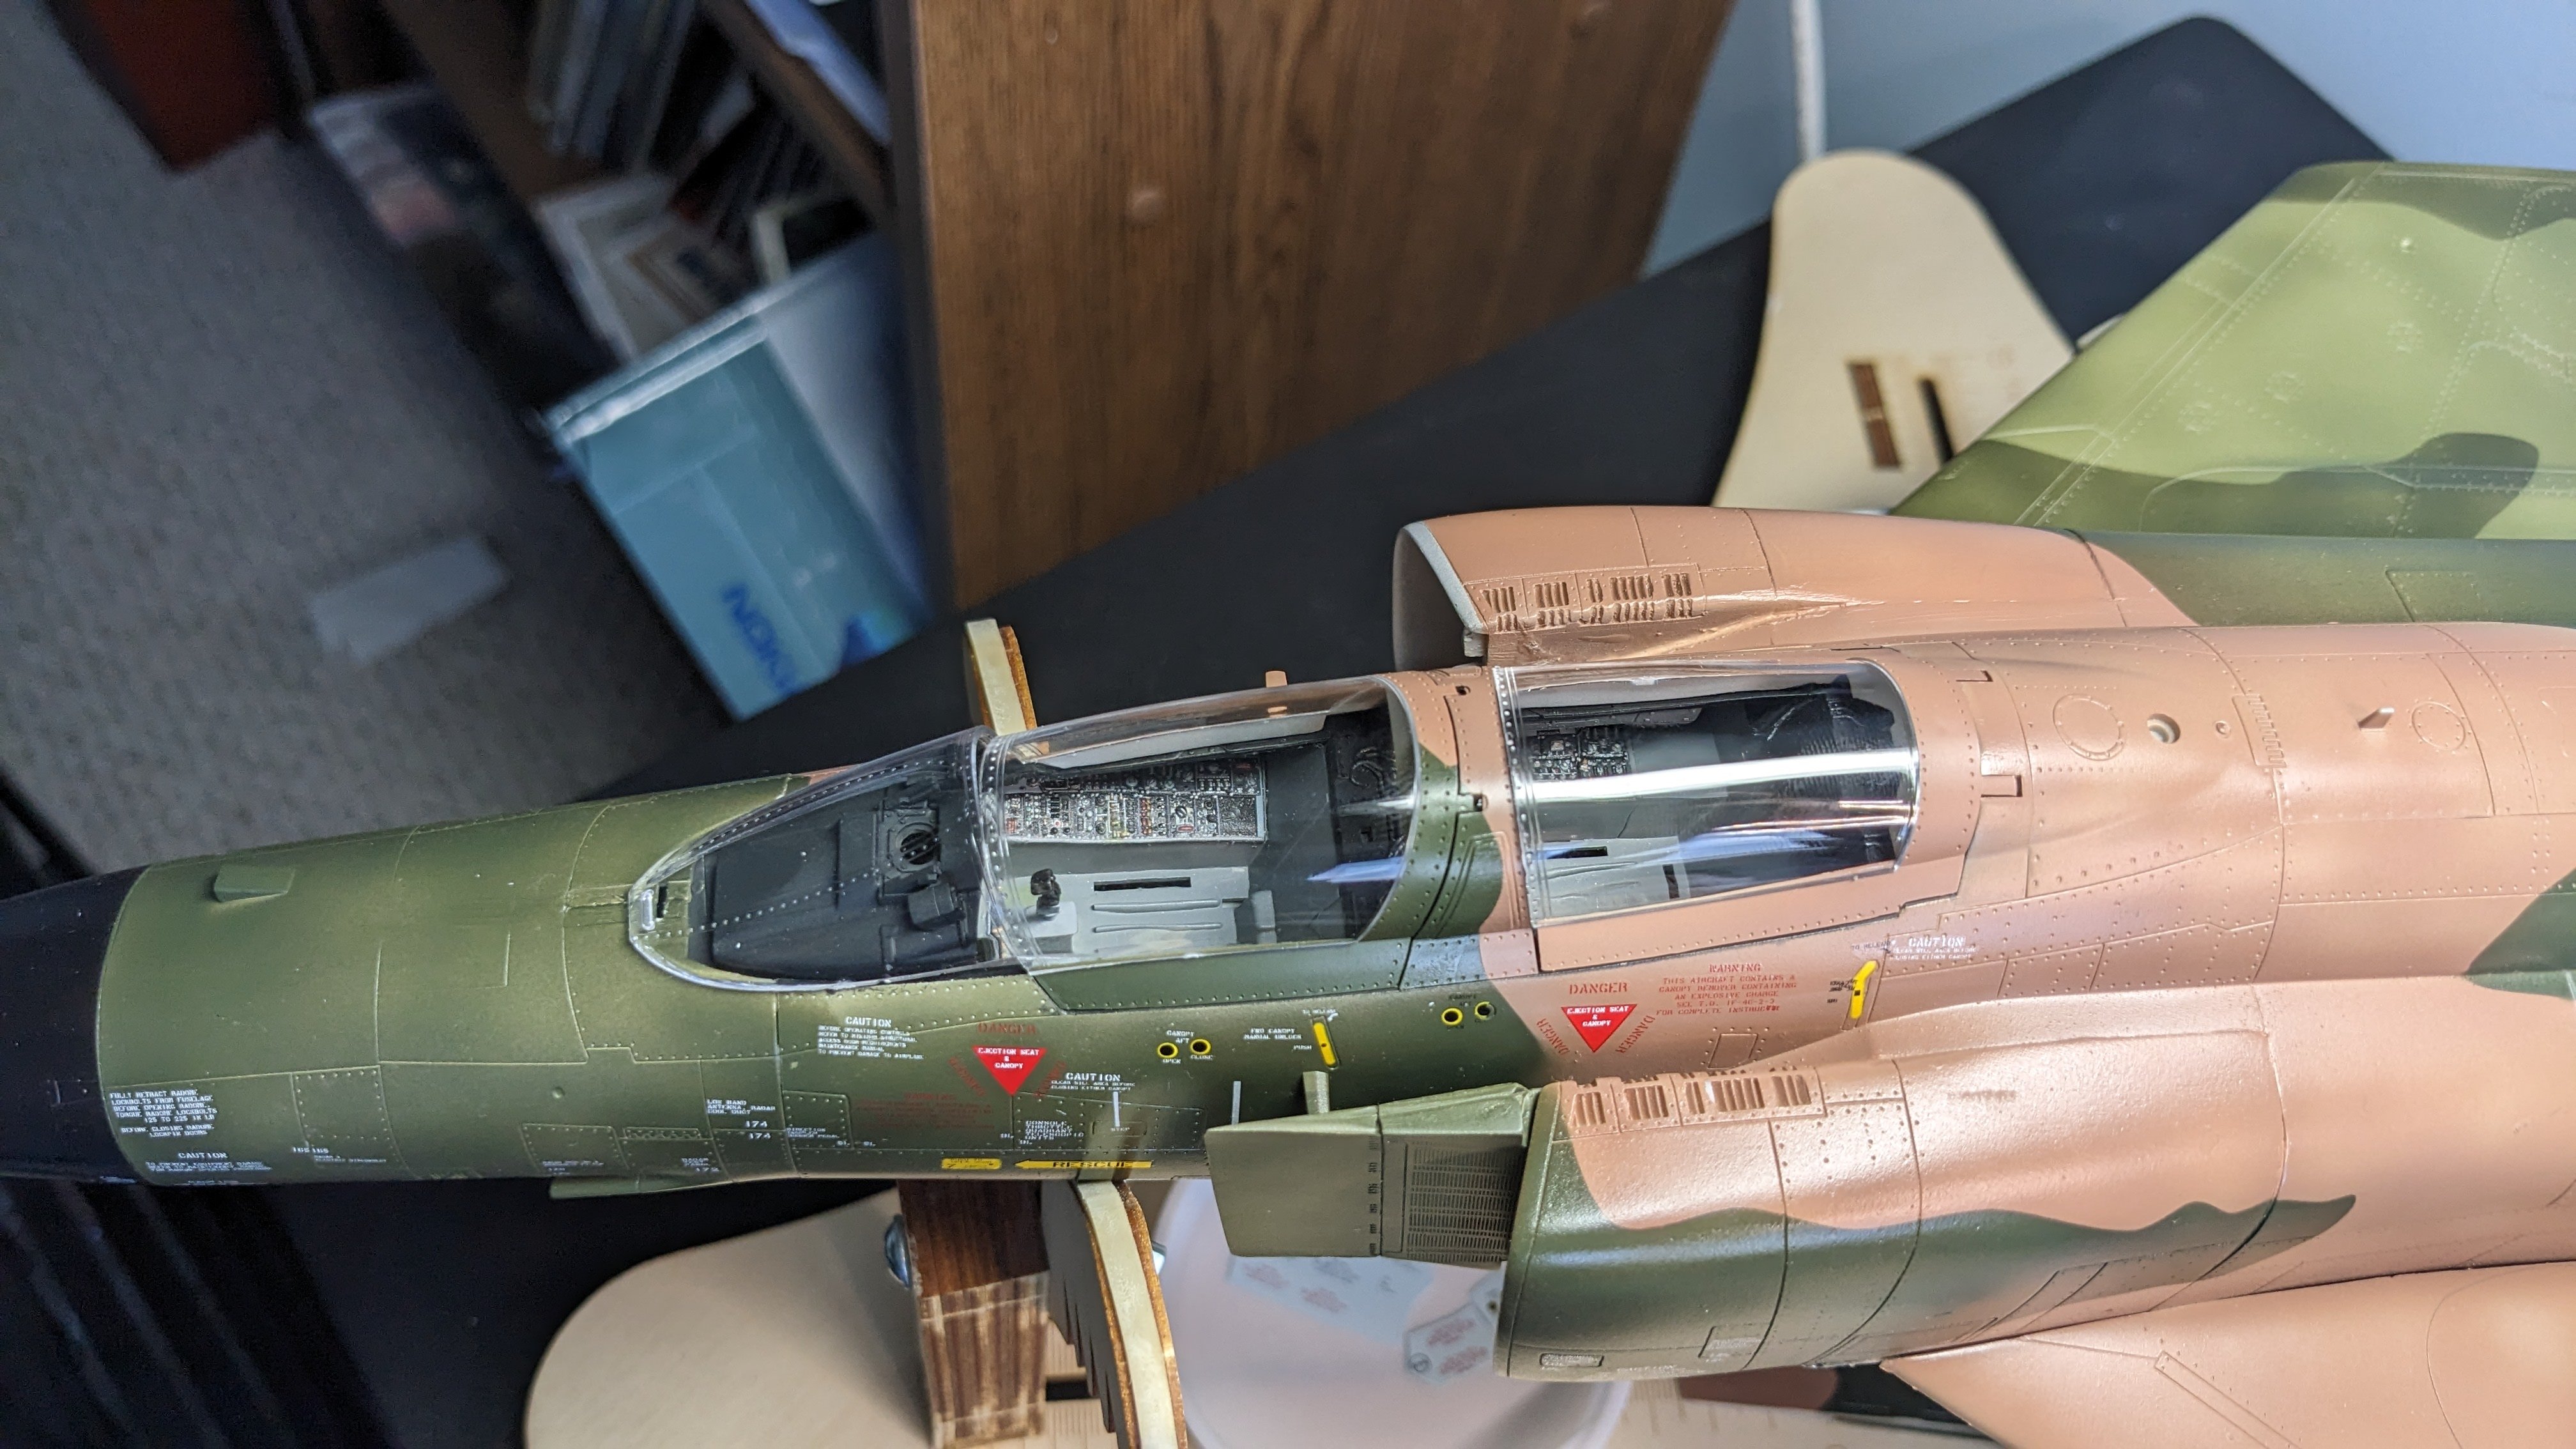
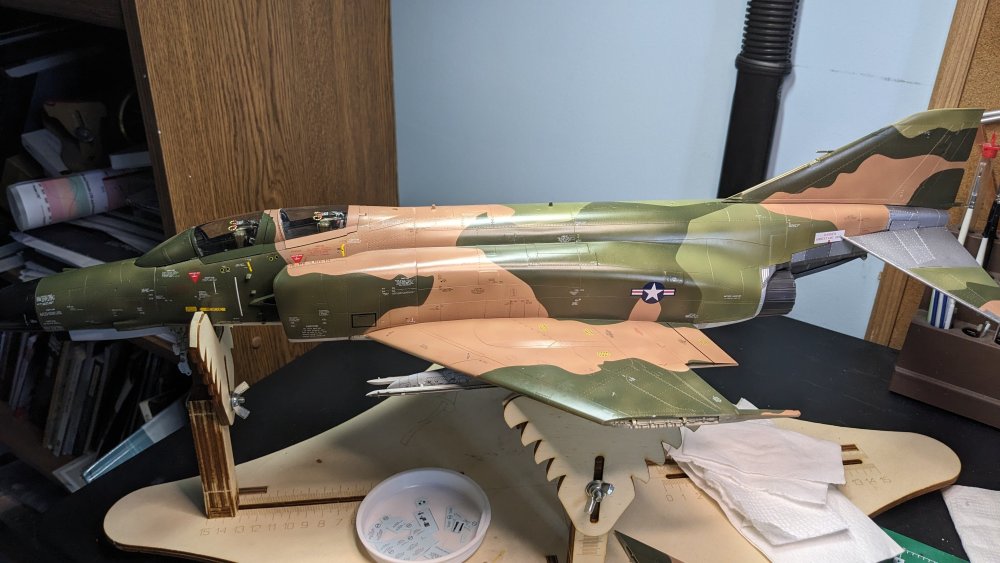
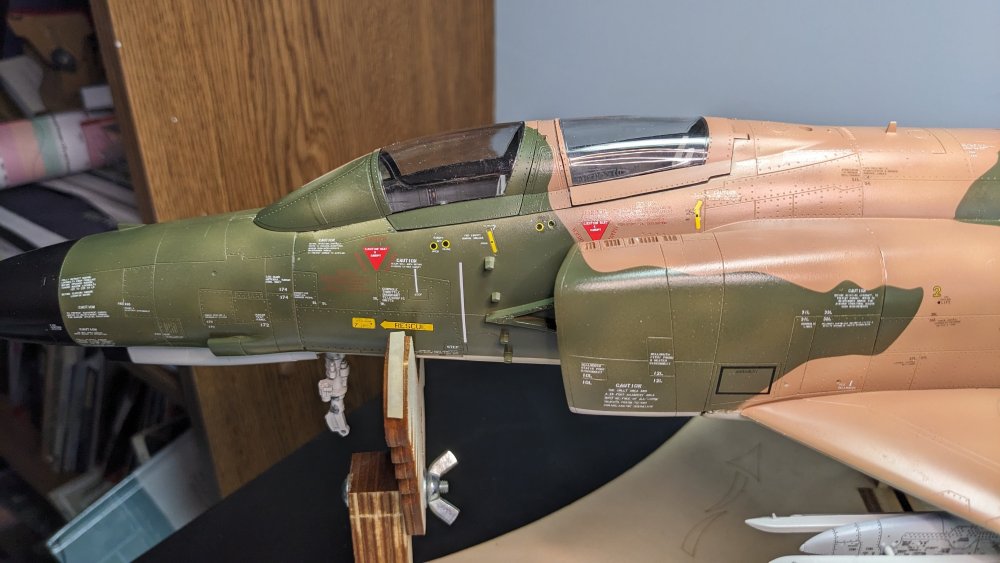
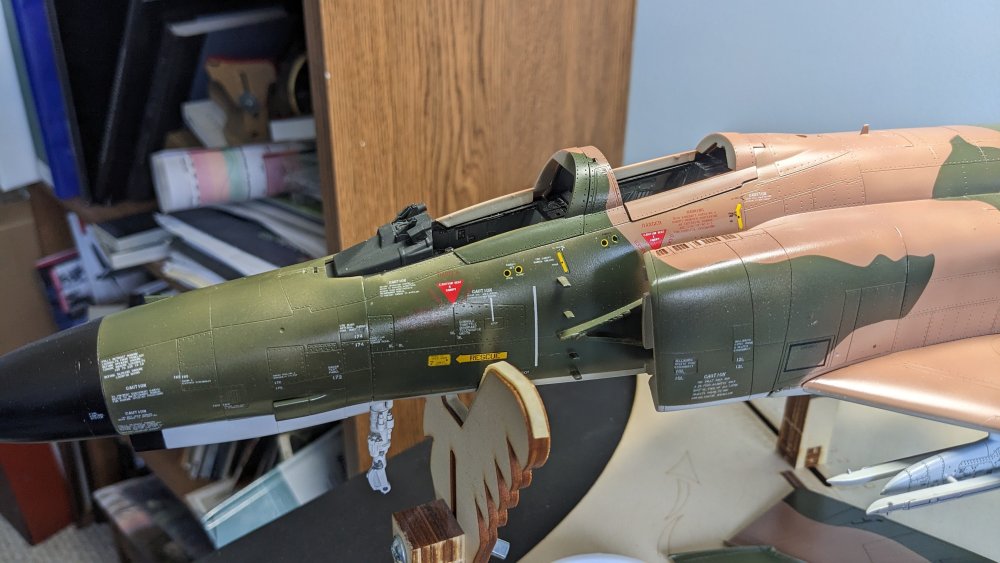
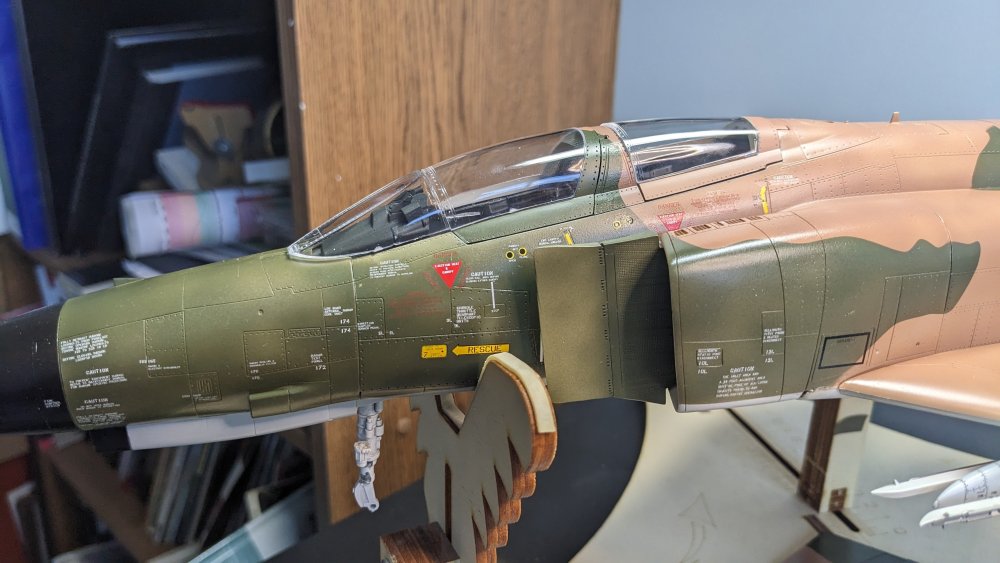
Made a bit more progress on the nose stencils (over 30 of them just on the left side!!) as well as touching up the canopy framing and matching the fuselage camo pattern. With the canopy piece in place and I notice there is a huge scratch on the side of the front canopy - lower left corner. Dipped it in Future again and it looks better but will see how it turn out when the future dries. Overhead view. These are the kit pieces after an initial Future dip are extremely clear. I may have an errant stencil in there - white stencils are for green backgrounds. Black is for tan/brown backgrounds.


.jpg.159ba6116ada01151841472a5a81ec35.jpg)
.jpg.cd49d644764967329ab2027364501afd.jpg)
.jpg.29482eea75ee8189ecccaa82731a65c6.jpg)