nmayhew
-
Posts
1,154 -
Joined
-
Last visited
Content Type
Profiles
Forums
Events
Gallery
Everything posted by nmayhew
-
Kotare Bf 109K-4 with AIMS decals
nmayhew replied to denders's topic in LSM 1/35 and Larger Work In Progress
Looking good I wouldn’t sweat the ‘no RLM77 from MRP’ btw - they do about a million different greys so there will be at least a few that fit bill -
What is on your bench right now ? Share a picture :)
nmayhew replied to Martinnfb's topic in Modelling Discussion
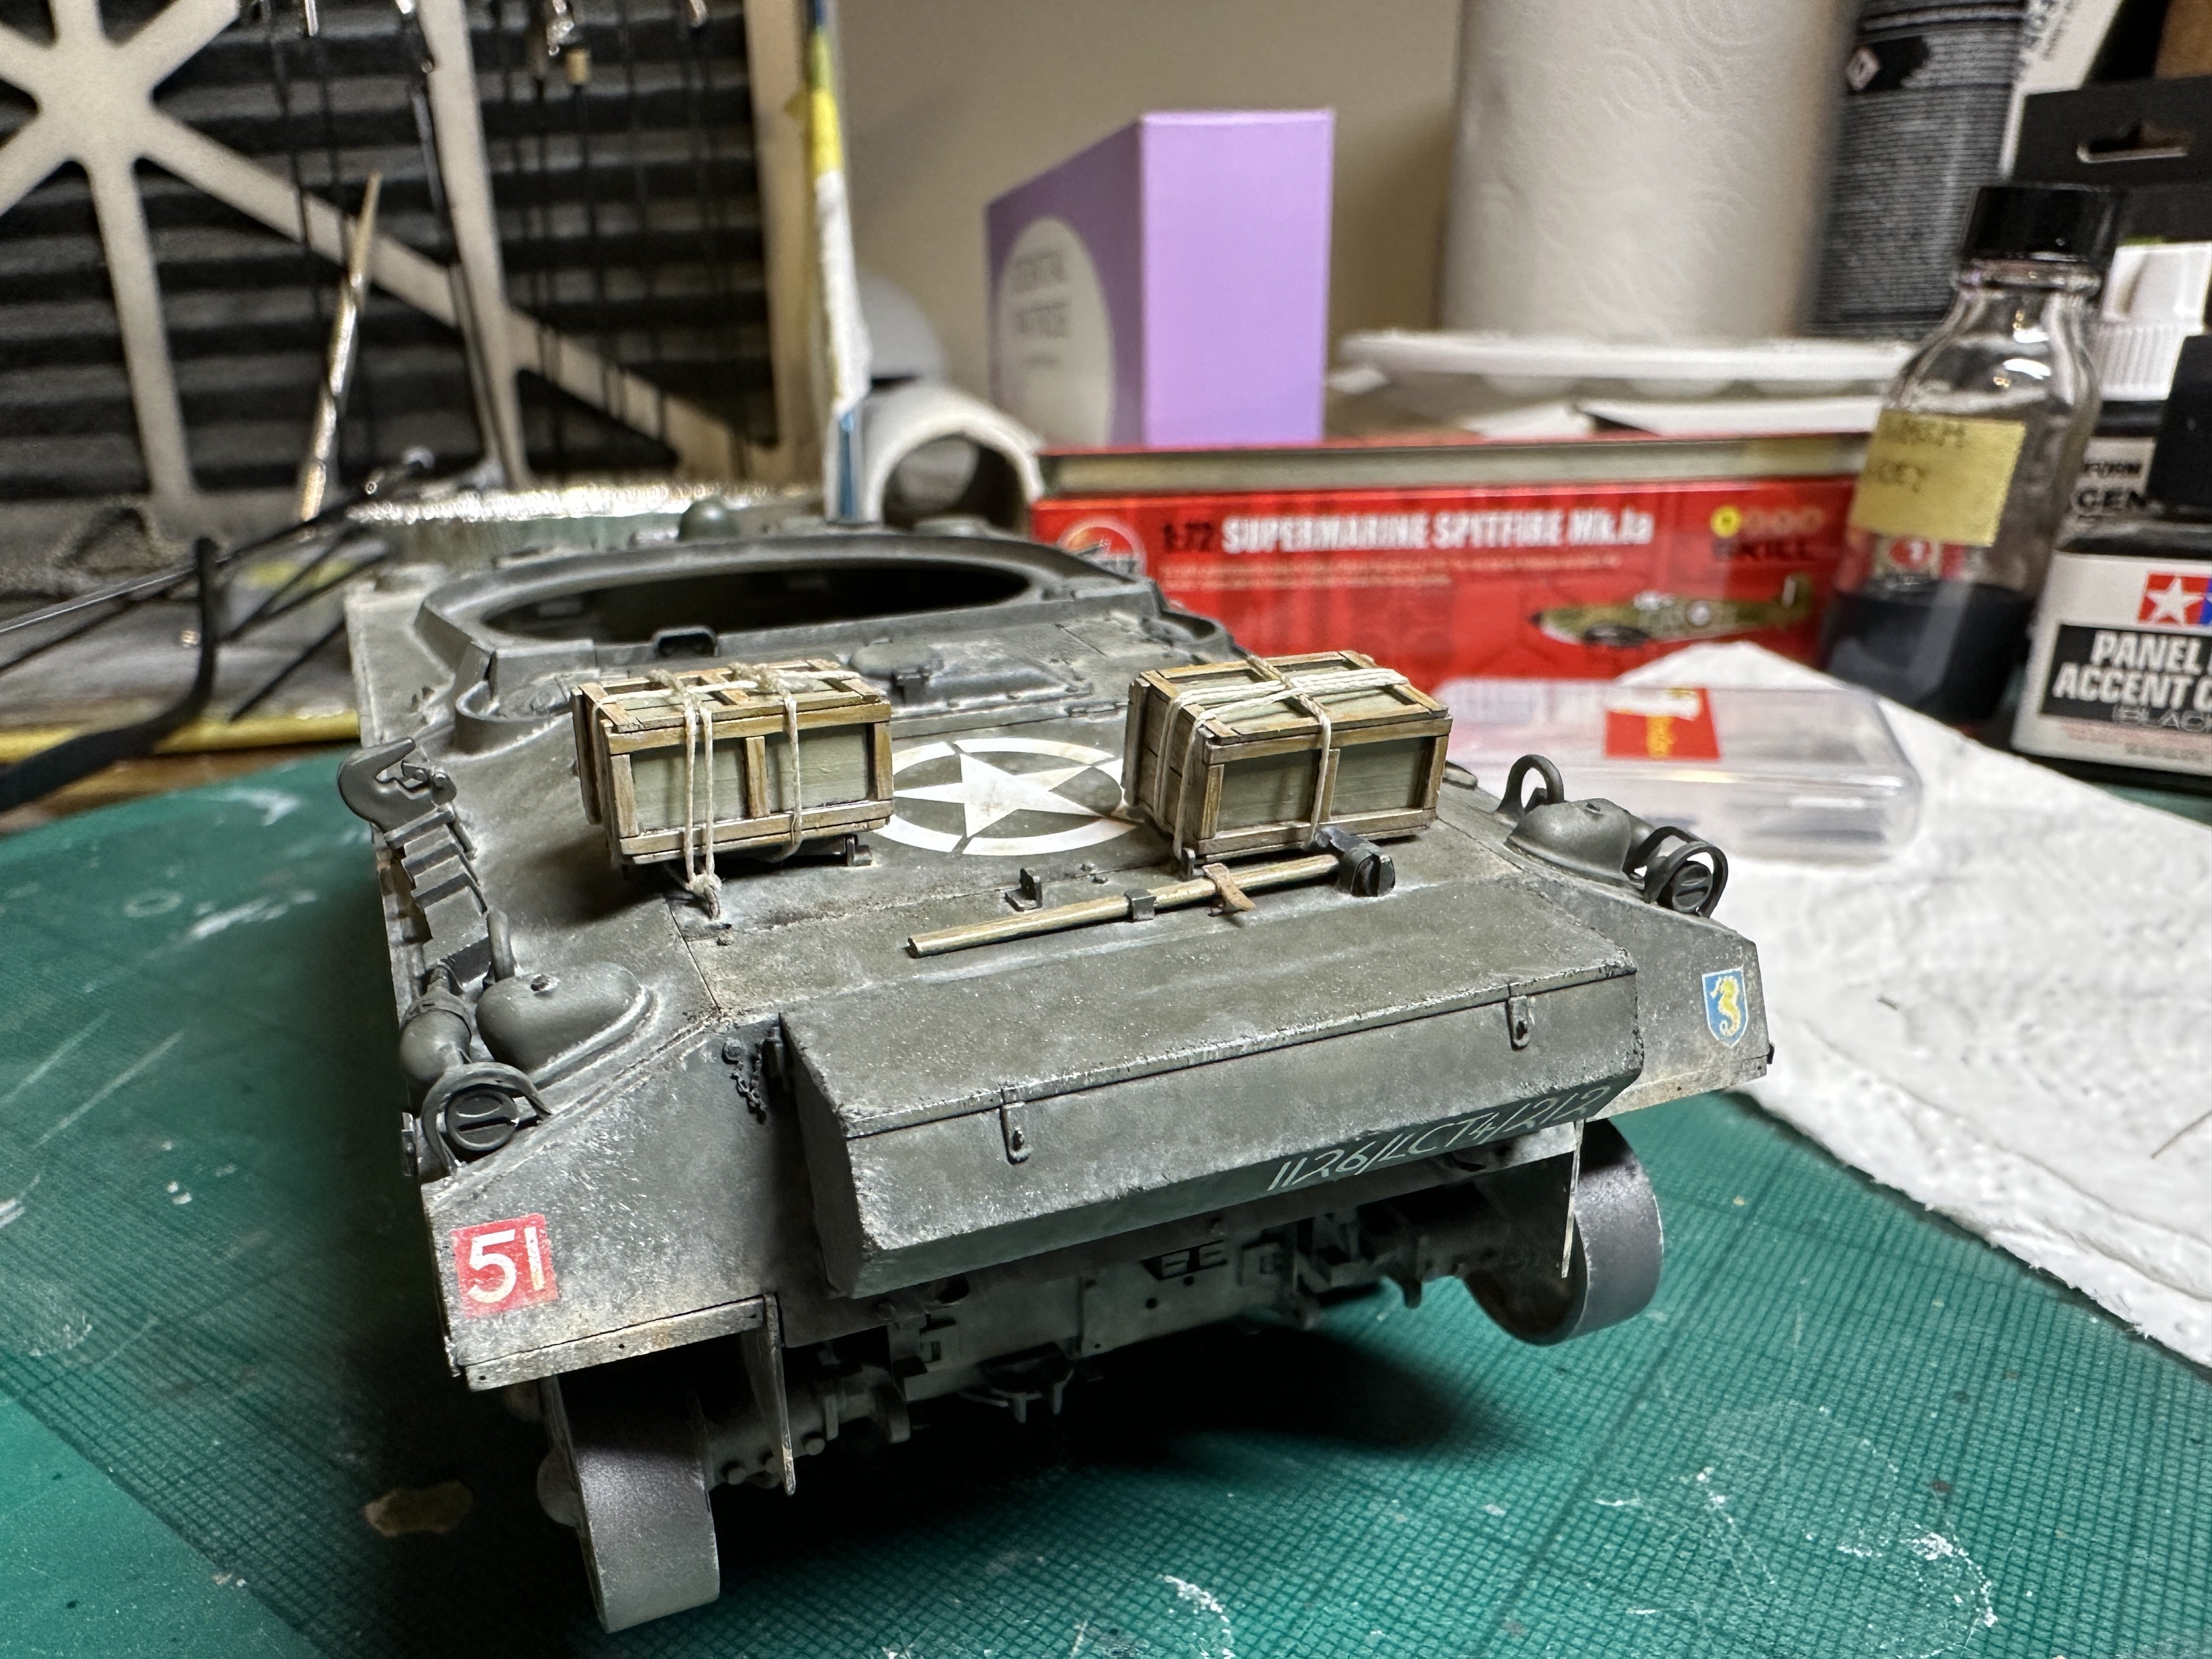
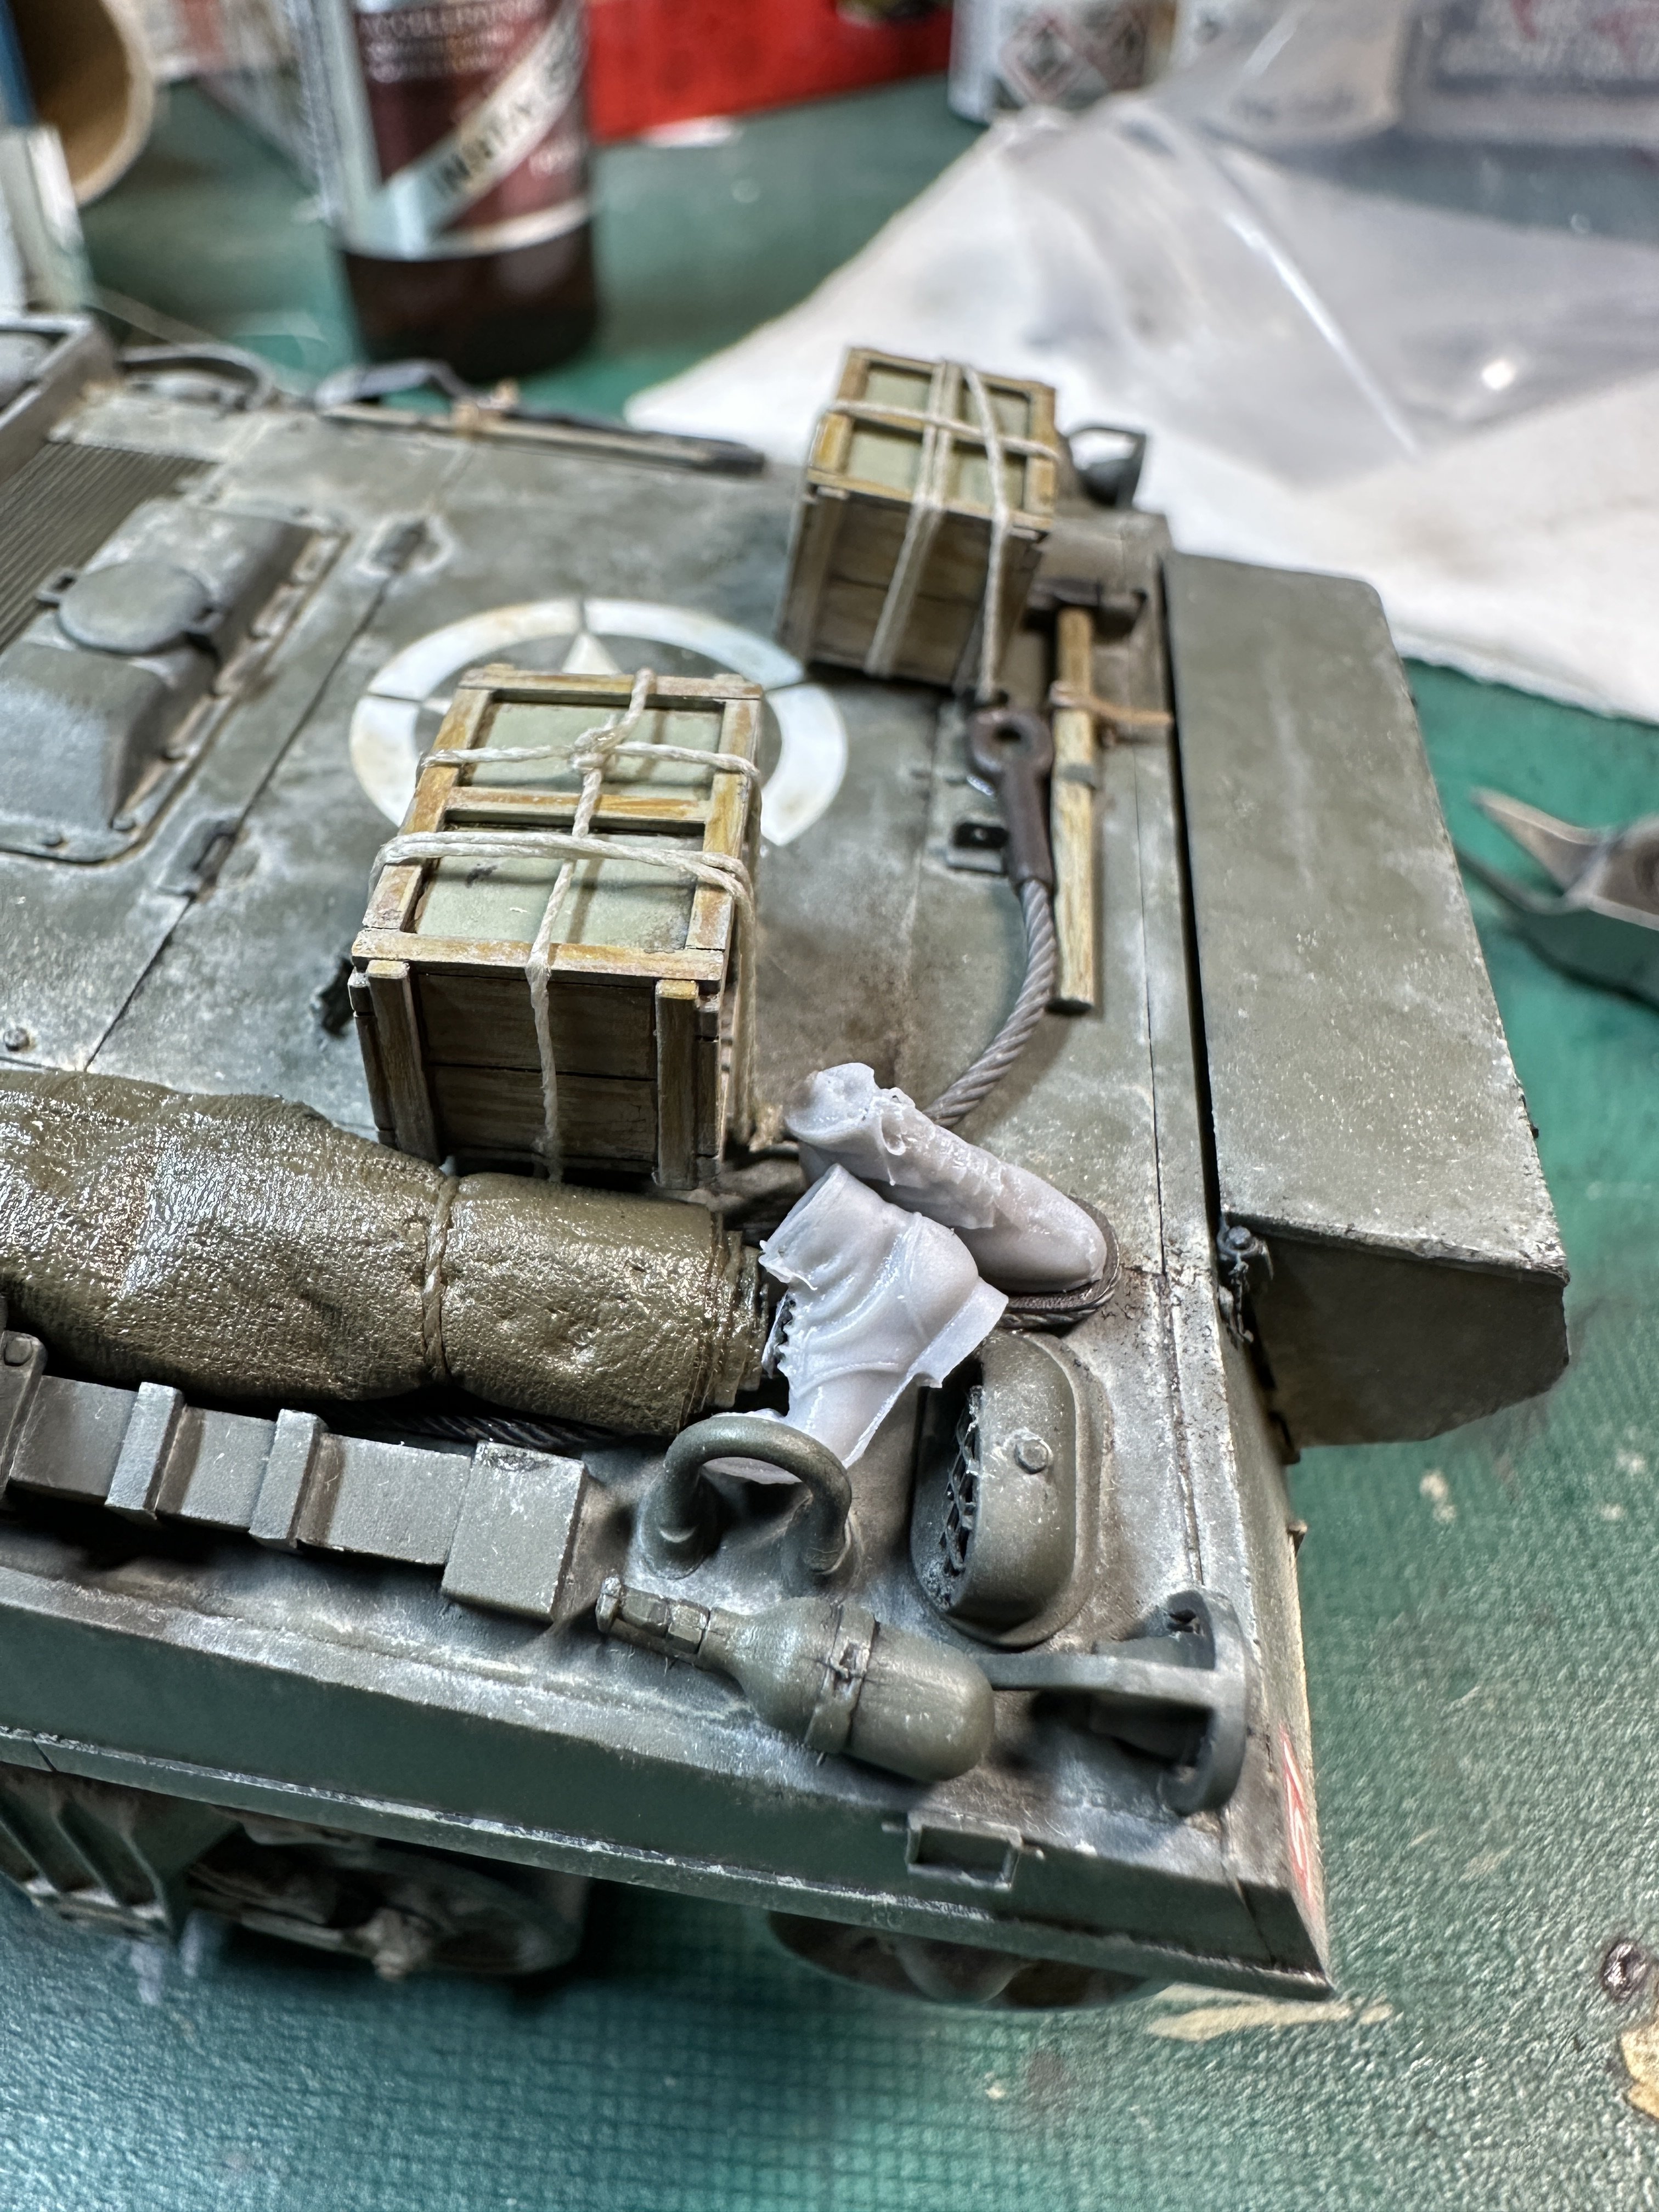
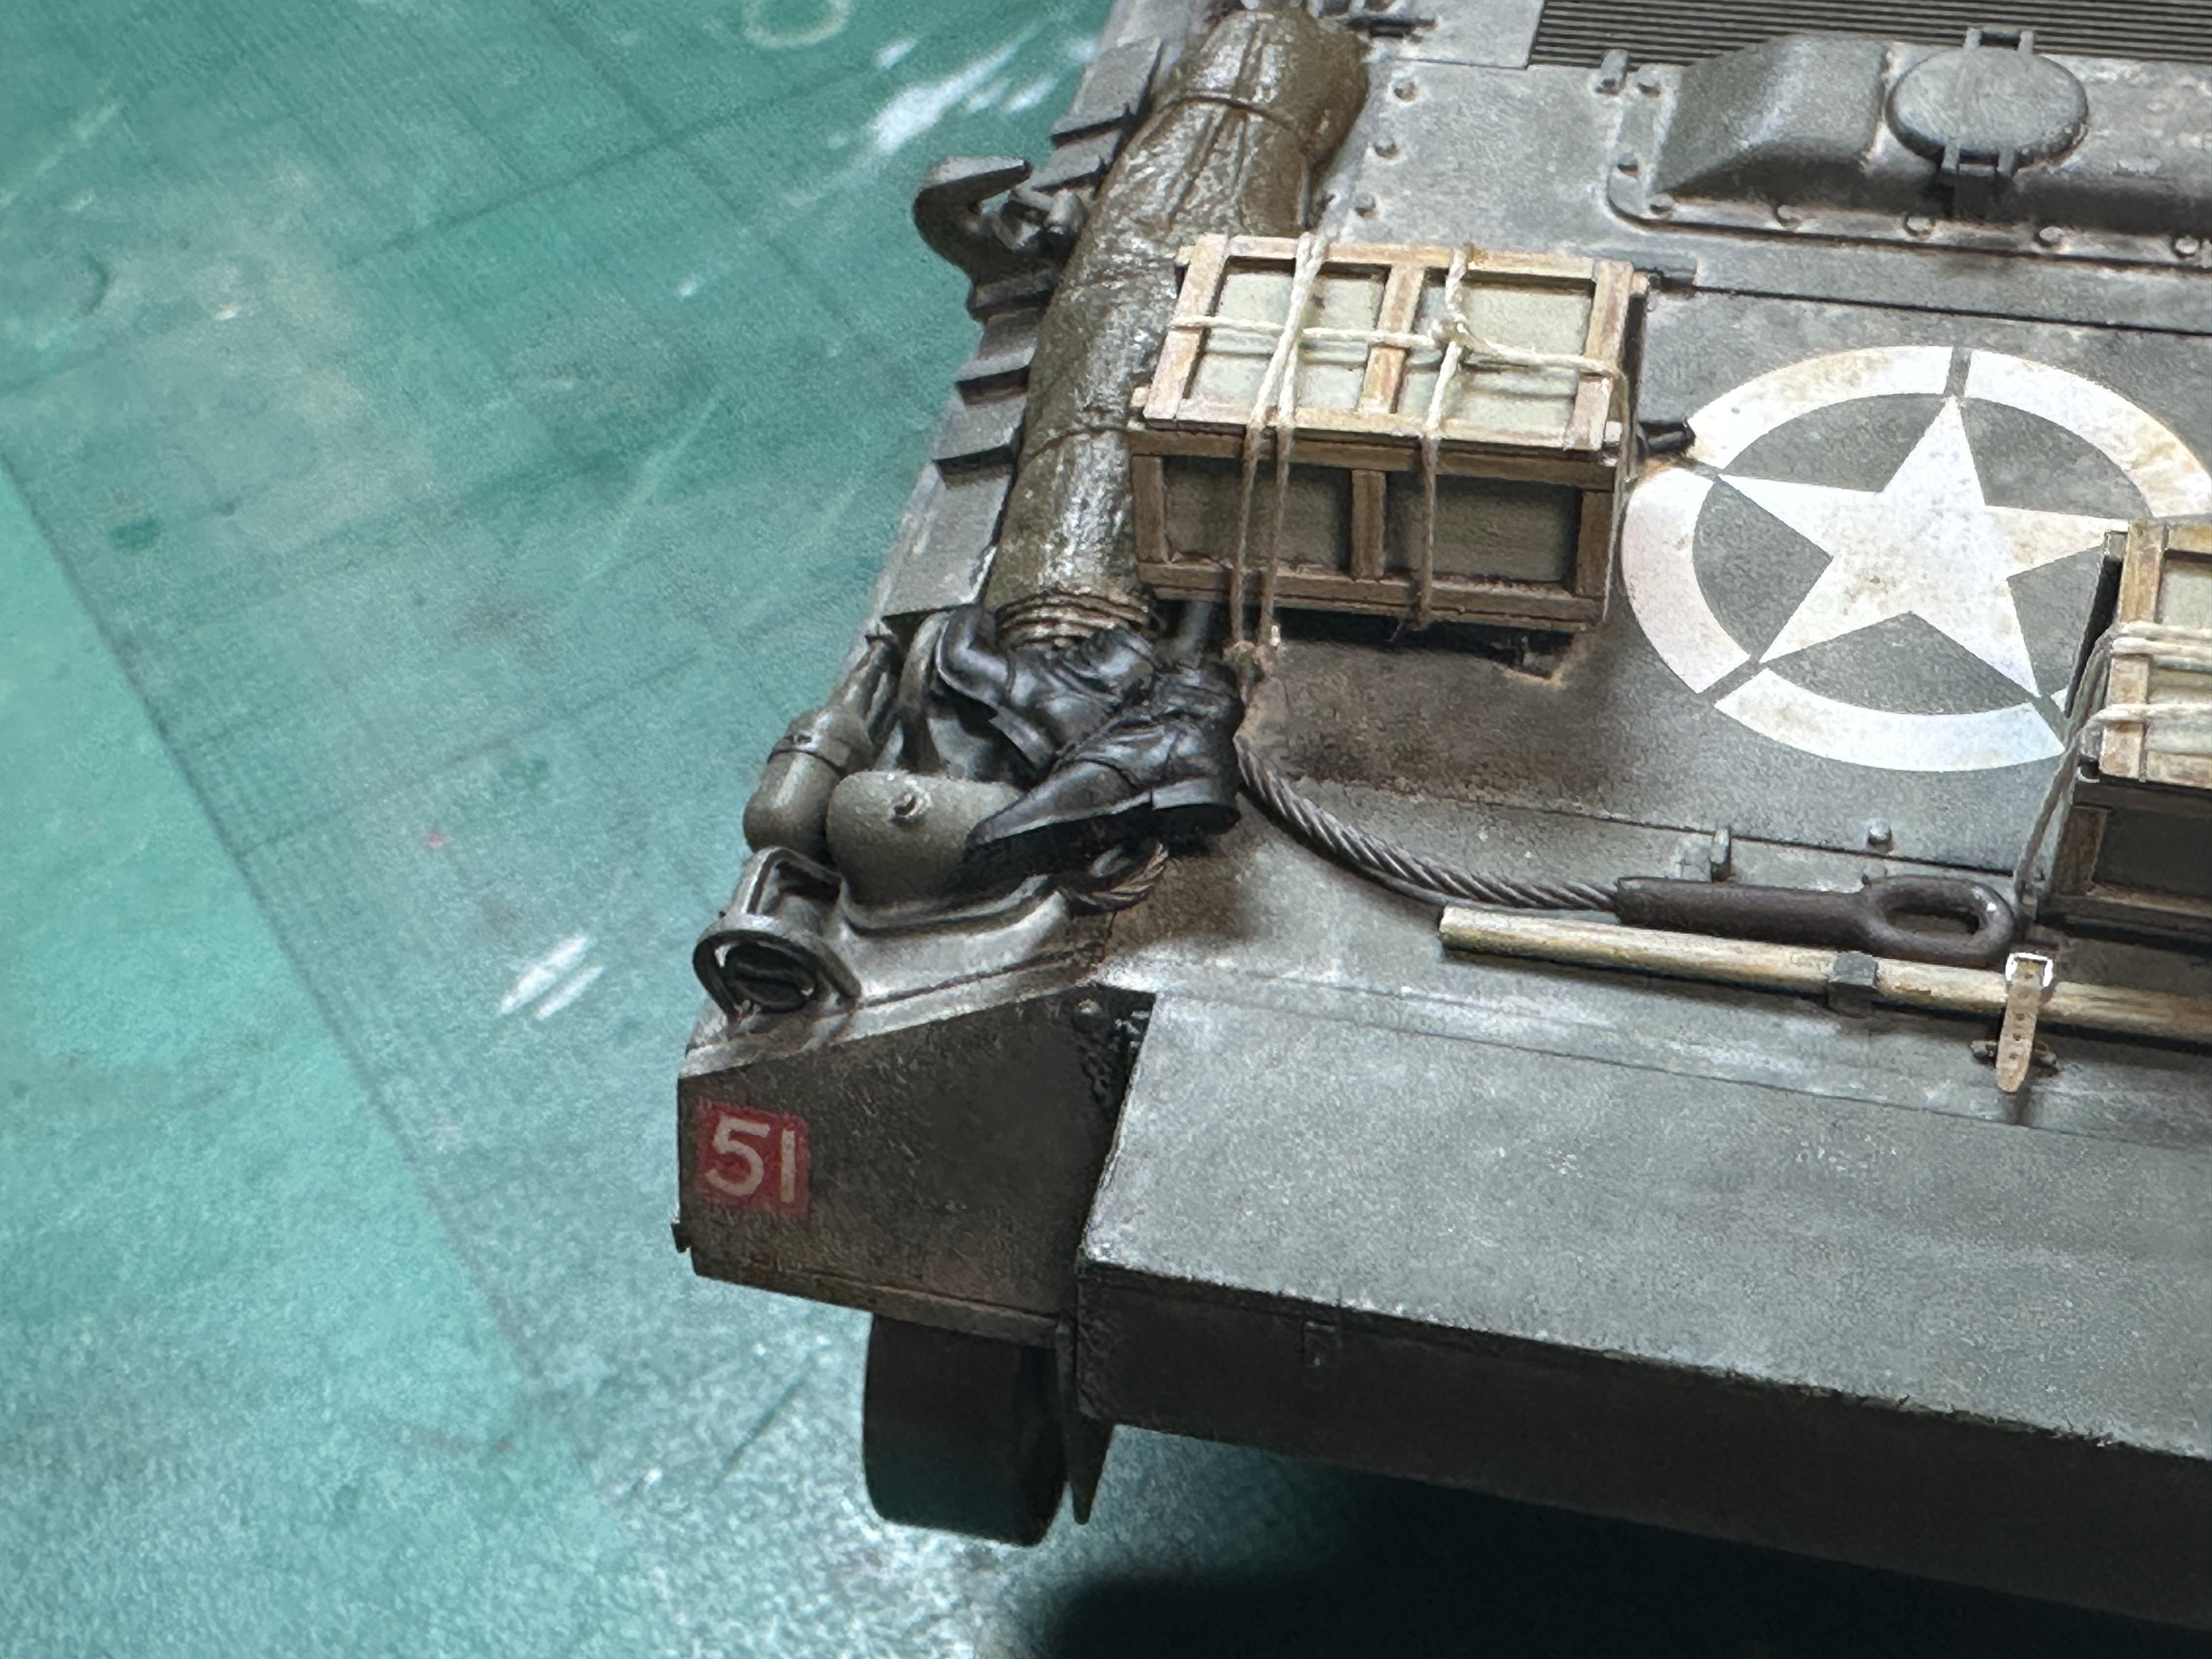
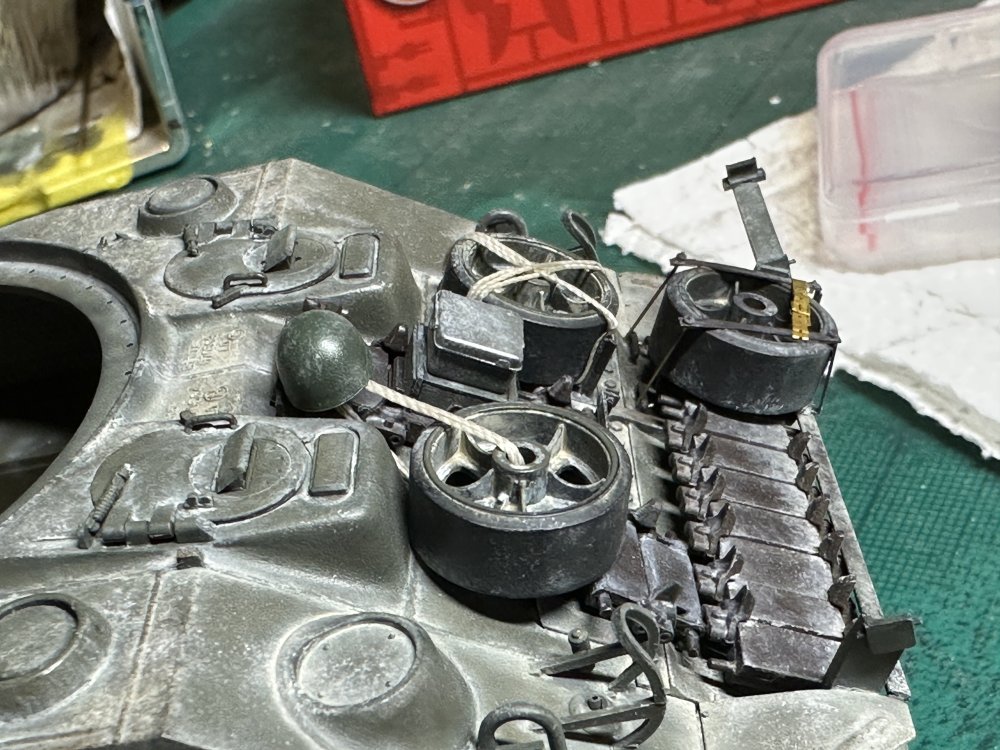
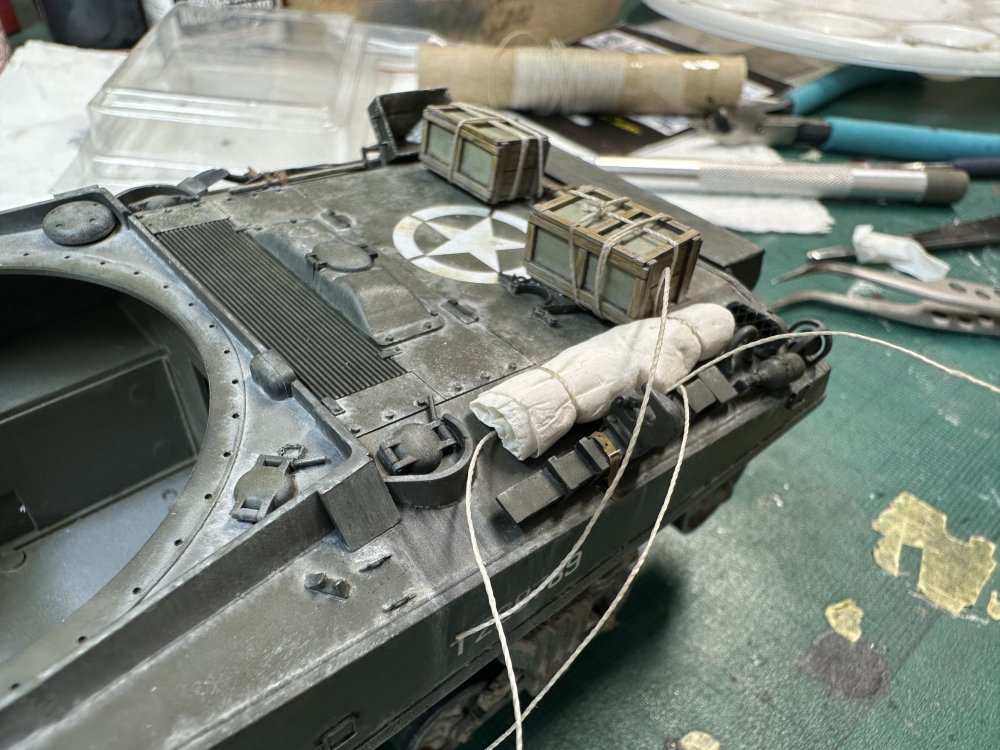
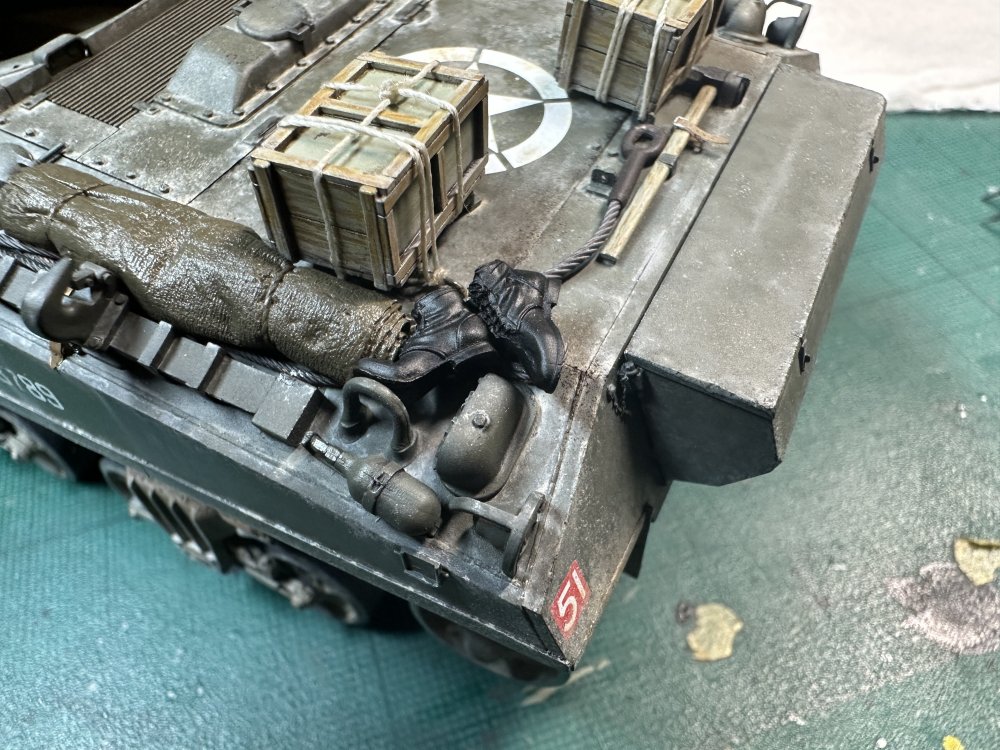
Still soldiering on with my Firefly ‘Carole’, but the end is in sight! crappy iPhone pics at this stage which have distorted the colours somewhat, but fairly pleased with I’ve done so far.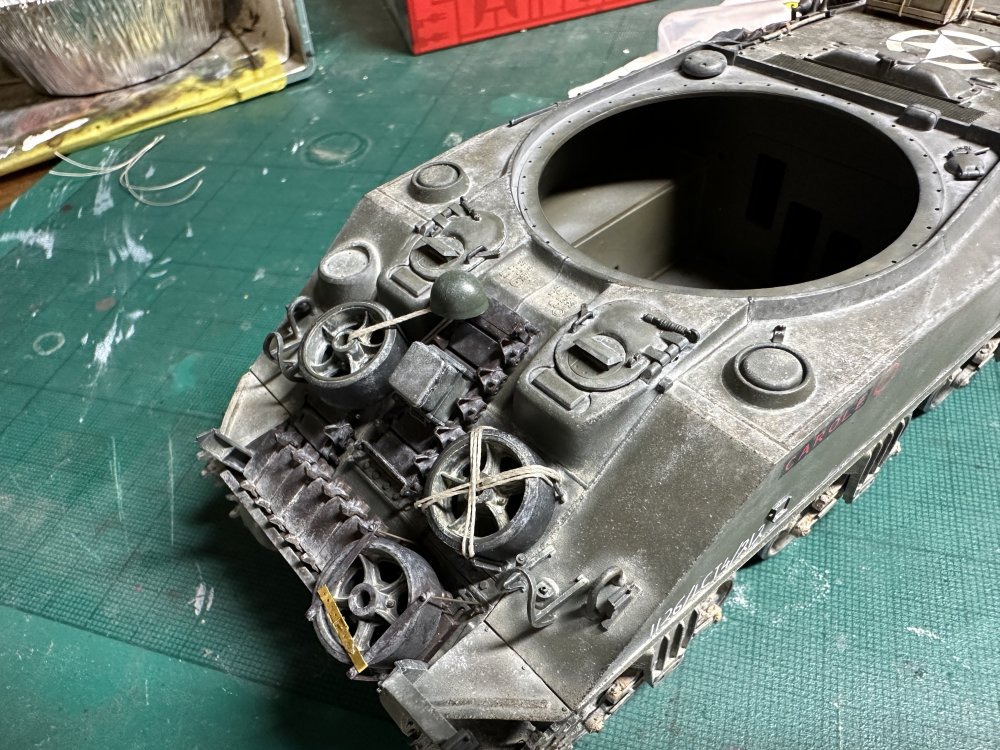


-
Battle of Sidi Bou Zid, 1/35
nmayhew replied to Nikola Topalov's topic in LSM 1/35 and Larger Work In Progress
Yes related to change in UK legislation apparently well done us yet again -
i think the difference with the Lanc is that looked ground-breakingly different / better than a) any other Lanc (yes I know there was 'just' the HKM in 1/32), but also b) arguably better than *any* other aircraft kit in any scale, ever; the cockpit looked (and still looks) like you have the best Aires resin detail set for sidewalls etc, and it's all injection moulded, and we know the engineering was at the time the best in the business being ex-WNW I'm no Phantom SME, so I just look at surface detail, and if the first word that comes into my head is 'Italeri', then Houston we have a problem; in addition, I'm still seeing drop tanks moulded in halves, sprue attachment points on the surface of the part that 'shows' and therefore needs clean up etc, rather than hidden on the back side etc (I realise most companies still persist with this) I think unless the final model's finish is significantly better than what we have seen so far then this will have an extremely narrow audience I build almost exclusively WWII armour and aircraft in 1/35 and 1/32, but if - for instance - Kotare did a Phantom (and it's the Vietnam B as well as Brit later models for me) then I would jump at one; this however has little appeal
-
What is on your bench right now ? Share a picture :)
nmayhew replied to Martinnfb's topic in Modelling Discussion
it would seem their quality control matches their research... -
Revell 1/32 Messerschmitt Bf 109G-6 (Early and Late)
nmayhew replied to Mikester's topic in Aircraft Reviews
hey guys just mulling G-6s and G-14s and whether to flog my Zoukei-mura Hartmann G-14 and came back to this review... STILL one of the best reviews ever, even with most of the photos missing I hope @Mikester you got over your health issues and @Matt_ your presence here and at LSP is greatly missed, hope you are well. Happy 2025 and happy modelling -
just revisited a thread on BritModeller and a Czech member there said it definitely will *not* be 2025 - he quoted Mr Sulc saying as much I think - so we are looking / hoping for 2026 I guess... or that the Zoukei-mura will beat them to it?
-
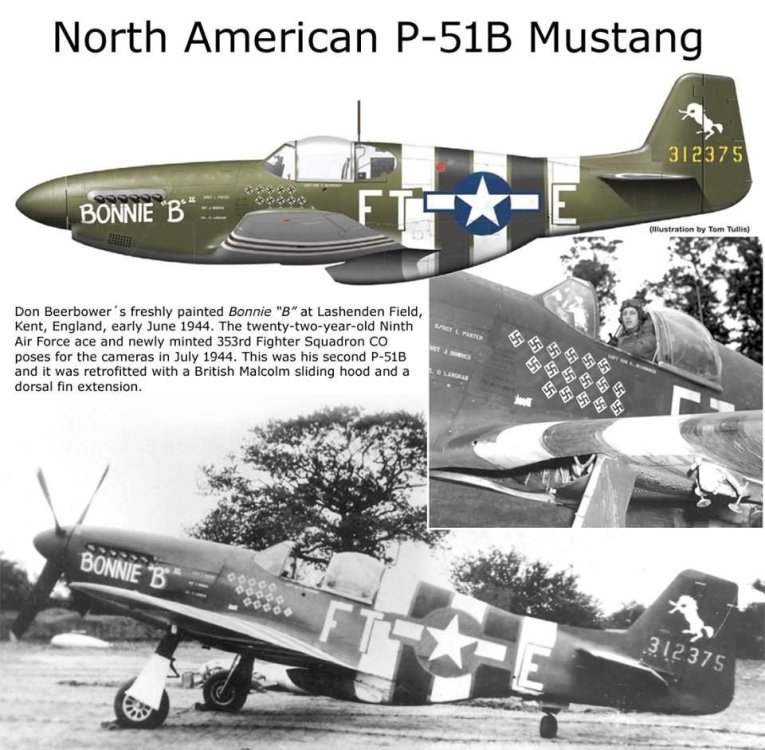
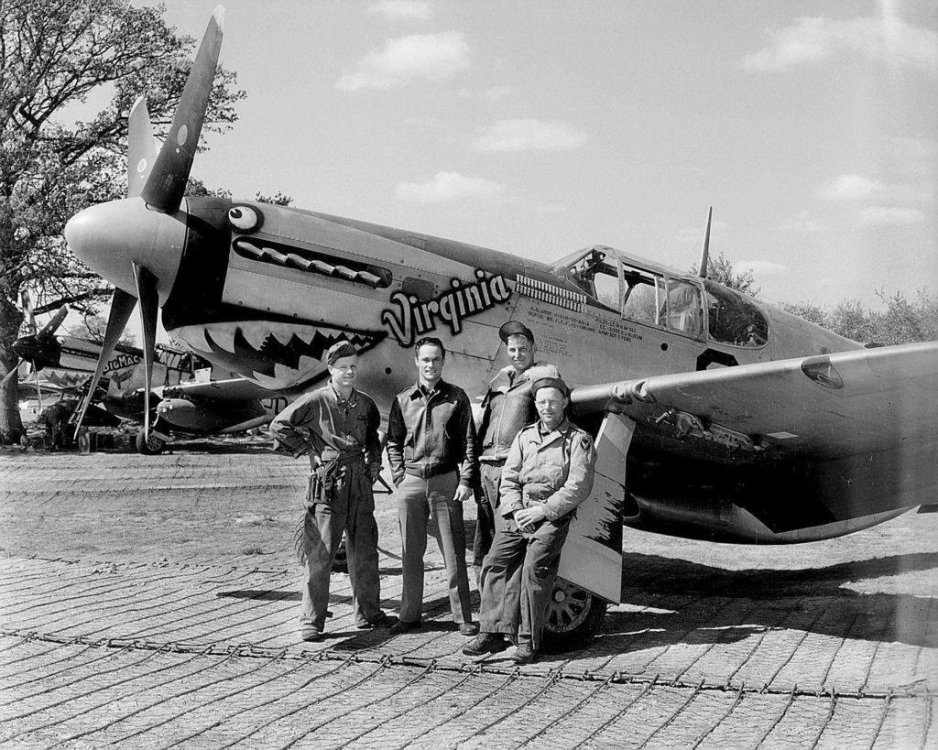
is that directed at me? 363FG for Big Mac Junior and Virginia; 354FG for Bonnie B
-
as much as i want more (good) kits in this scale, i can see that for a given amount of resource, you are going to make more money in 1/72 and 1/48 than you are in 1/32... 1/32 is a much smaller market, and a MUCH tougher crowd; stuff you can get away with in 1/48 just doesn't fly in 1/32. so once you consider this, it's quite a big jump for Eduard I just hope they have been looking at Tamiya and especially Kotare - who have really raised the bar in terms of engineering and fit - rather than thinking they can get away with just scaling up their own stuff from 1/48. I have seen enough builds of their P-51s in 1/48 to know that's not just good enough in manscale. I have zero interest in adding shims in wingroots and teeny weeny locating joints for main landing gear. on the other hand, commercially it makes sense in that there is no decent kit of this marque and - if comments translate into sales - it's the one variant of the one plane that everyone has been clamouring for in this scale I wish them well with it and if it's decent will probably be in for a couple - finally get to do these birds which flew just a couple of miles from me... I wonder if someone makes a 1/32 oast house lol?

-
What is on your bench right now ? Share a picture :)
nmayhew replied to Martinnfb's topic in Modelling Discussion
Spent most of the day tweaking these masks in silhouette studio…getting there!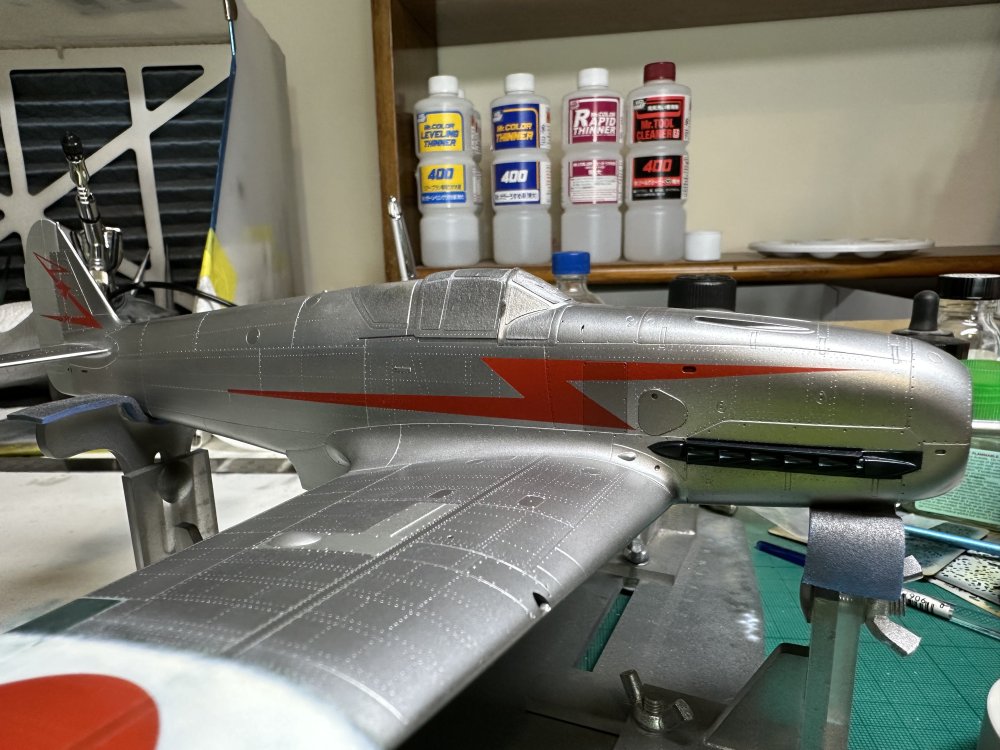

-
Glad you are persevering! And I’d love that file for the Love Bug too if you can share (I have a cutter).
-
rose of york Hong Kong Model 1:32 B-17 G “Rose of York” Limited Edition
nmayhew replied to Fran's topic in Aircraft Reviews
Apologies if I have missed the obvious, but the review fails to mention perhaps the crucial differences that this release has compared to the original G?? If I am not mistaken, this kit allows one to model - to use a non-technical term - an “early G” yes? In other words, whilst it has the chin turret, it has the early tail gunner position and - crucially - waist gunner windows which are in line and not staggered as in later models. So for the first time, you can model “A Bit O’ Lace” right?? I have not reviewed the sprues, nor am I a B-17 expert, so would appreciate those more knowledgeable than myself confirming / refuting the above. Cheers Nick -
Hang in there Harv Here’s me on holiday in Austria in the Summer - our favourite holiday destination

-
What is on your bench right now ? Share a picture :)
nmayhew replied to Martinnfb's topic in Modelling Discussion
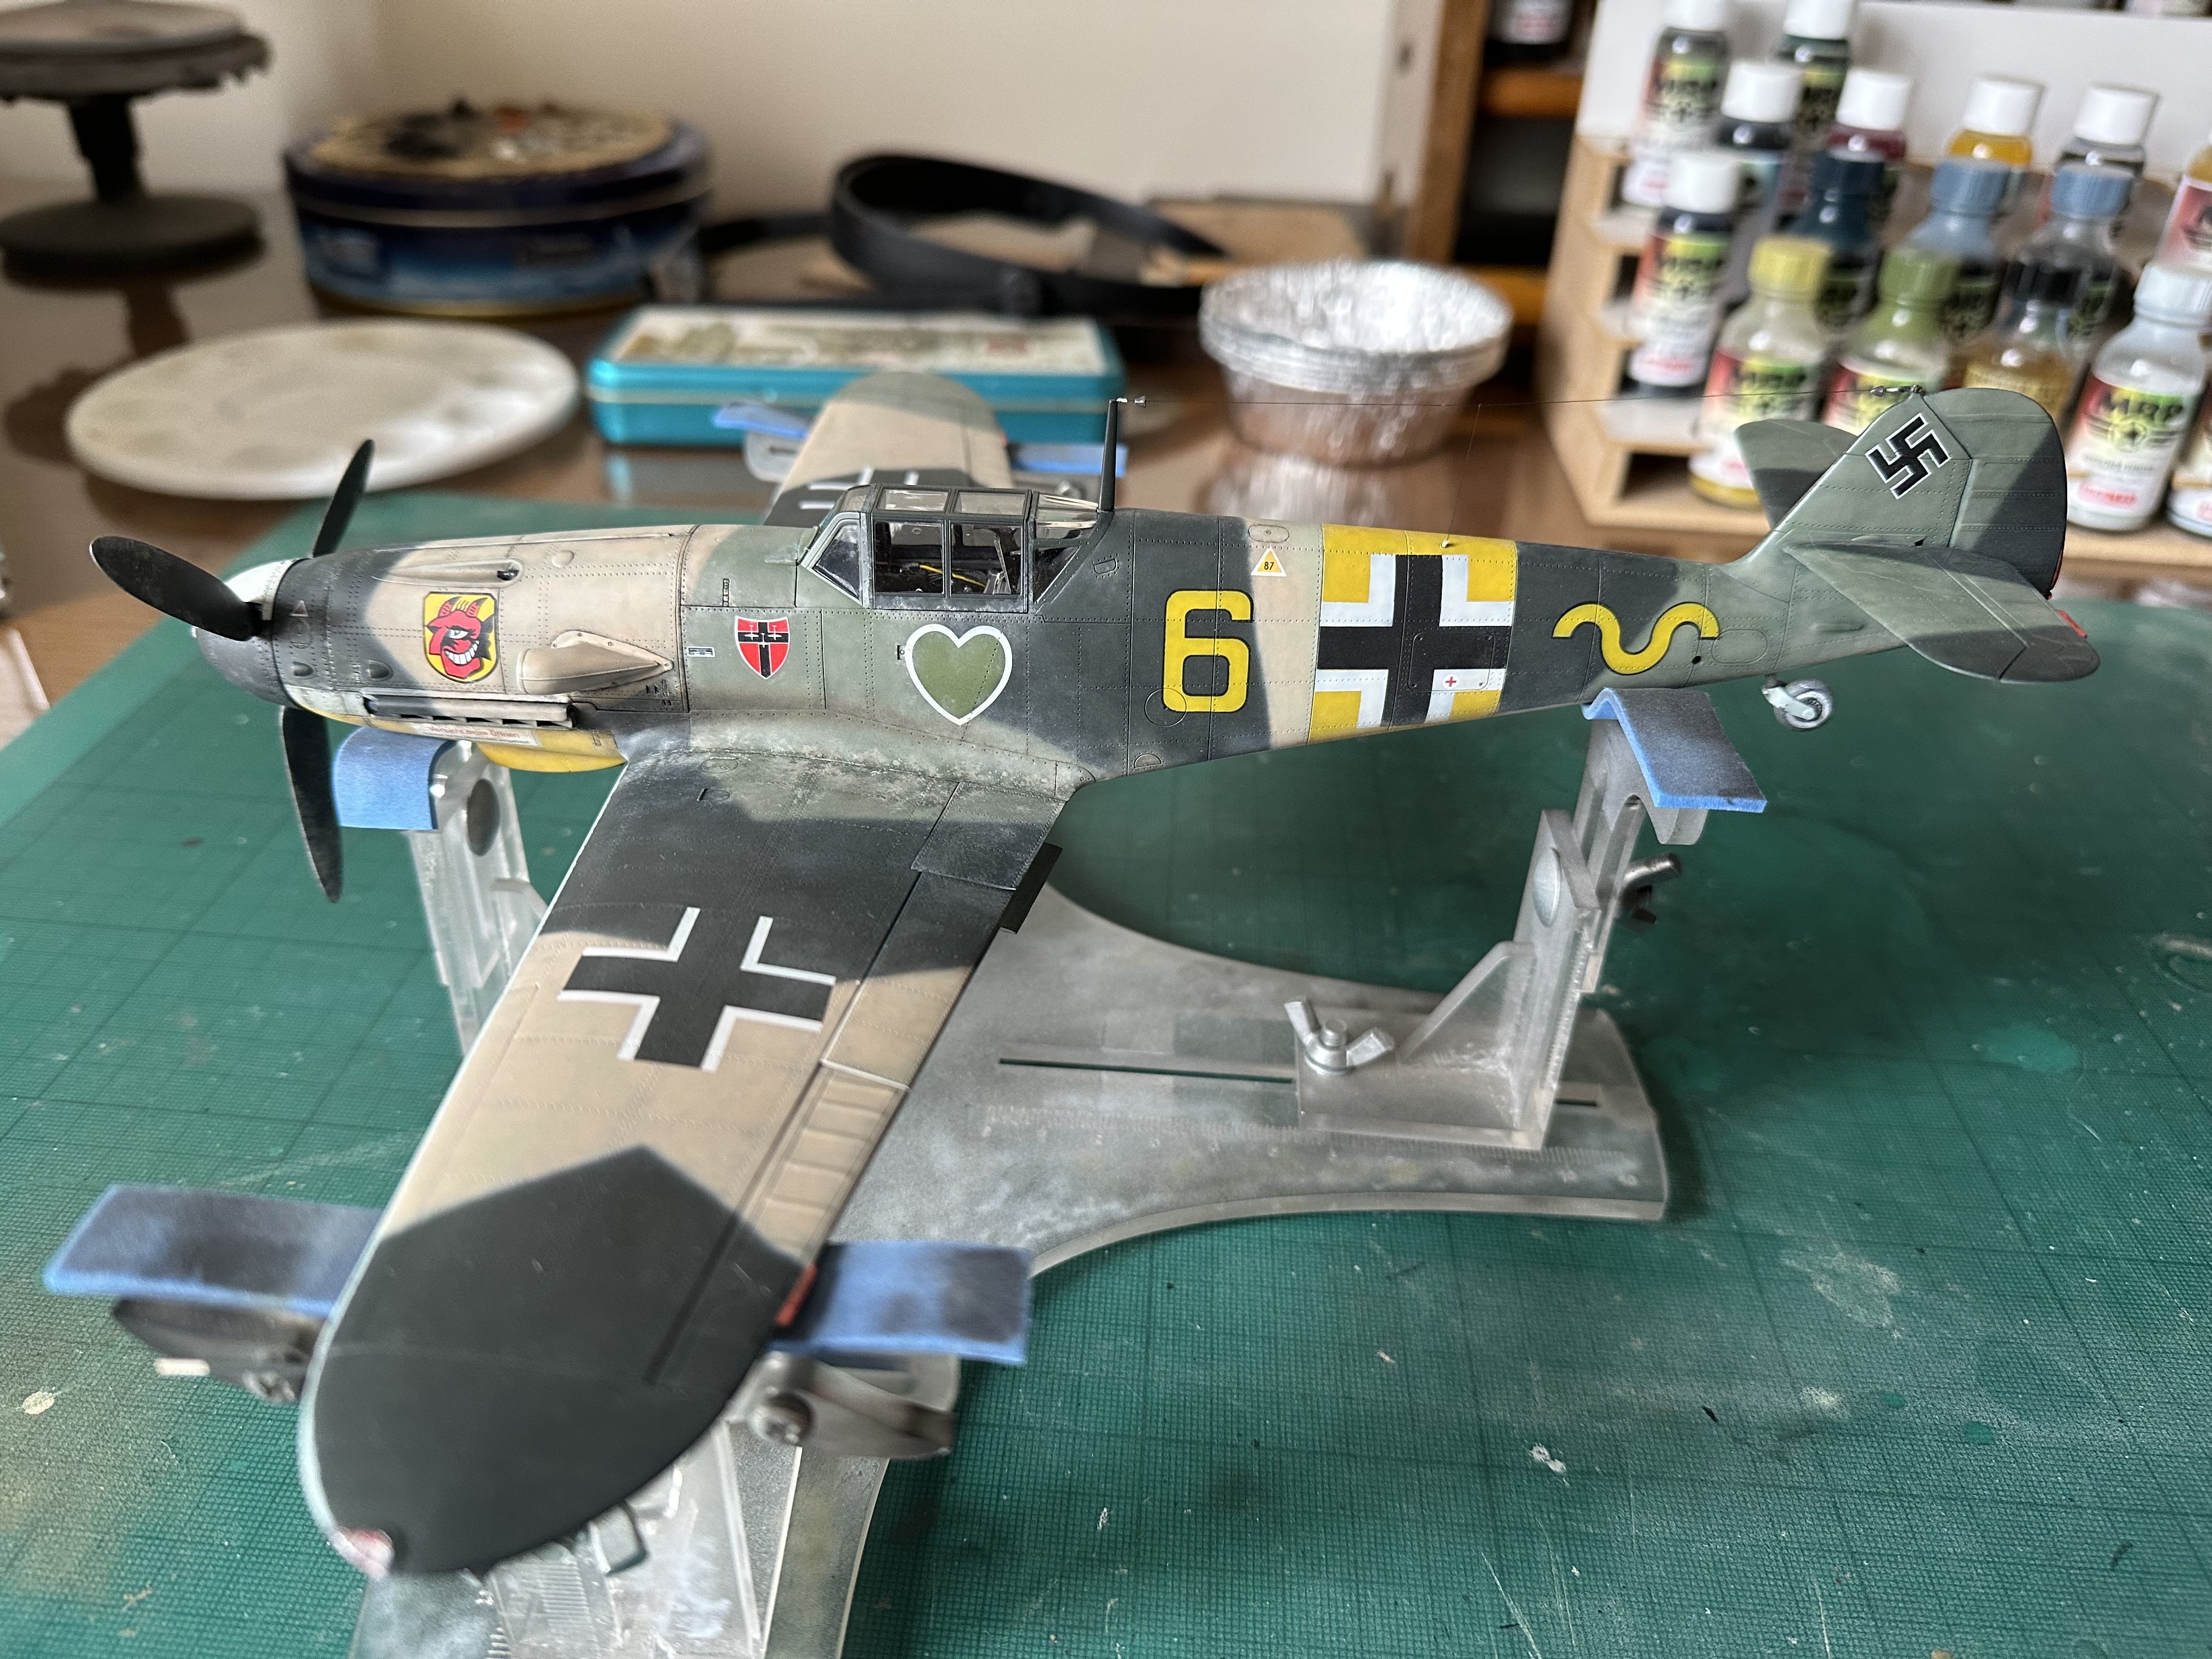
This is on my bench right now, but shortly to be leaving it as it’s basically done. I’ll try to get some better shots in the near future. Needs small mat coat around insulators on aerial wires and where the wire meets the fuselage but otherwise I’m f*cking done with this! after building one (my first) Trumpeter kit my thoughts are a) I will be building the Revell one as my next early G, and not sure I will build another Trumpy 109 and b) *this* is why you build Tamiya!! (And Kotare)


-
What is on your bench right now ? Share a picture :)
nmayhew replied to Martinnfb's topic in Modelling Discussion
PS if you f8ck any bit up, just wipe with Sansodor and start again; MRP paints are impervious to it; -
What is on your bench right now ? Share a picture :)
nmayhew replied to Martinnfb's topic in Modelling Discussion
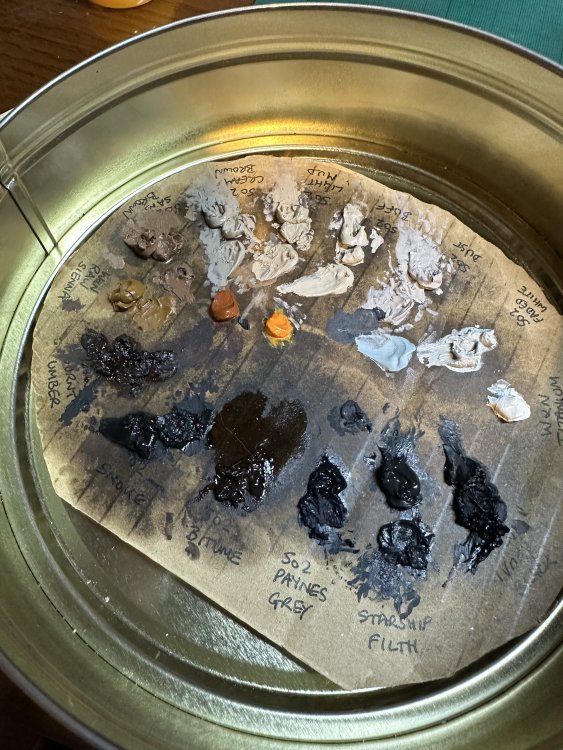
Hey guys thanks for the kind words I think I have done some how to’s on here in WIP for my P-40 (search ‘Neville Duke’ and I’m sure it will come up) but very quickly … firstly and most importantly there’s no voodoo - you just need to be willing to give stuff a go, and not let yourself be convinced “I prefer my models with that clean look” when really it’s because you are a bit scared - I know because I was that person for years lol primed with MFS1500 Black; all paints are MRP; I use spatter templates where surfaces are flat enough and if fiddly compound curves will airbrush lots of little mottle randomly in various colours to build up depth; check Doogs Models YouTube for Blackbasing technique if you are not familiar oils should go on full or semi matt; if on gloss you’ll just be pushing them round and it will be a mess i don’t use oil dot technique; afaik that’s just random dots of random colour; I try to think about what weathering will occur and where. I don’t use pin wash - certainly not as slather it all over in every panel line etc and wipe off excess approach; that’s a bit clumsy and just makes things look even more like a model in my view; some do like the look, but it’s not for me. Check out Mike Rinaldi on YouTube - his short technique vids, not the 3hr live streams - too much waffle on those - he is THE MASTER and originator of OPR afaik for armour, check John Spud Murphy on Facebook - lots of great guys but he has lots of simple mini bits of how to and technique anyway… oils are on cardboard but I do dive straight in; I have Sansodor in a small palette by side; you can get away with just a few brushes - a couple of smallish ones (but can be a 2), just with a nice point, and maybe a bigger filbert type oils on cardboard are kept in a tin - fridge them ideally - and they will keep for a week plus; dab some Sansodor on them to revive if they start to get too dry work light to dark colours tiny amount of thinner and dab into oil paint (here I differ from MR - follow him not me, but since people asked…), take most of paint off on paper towel; apply to model; then with clean brush with a tiny TINY amount of thinner, work the oil to where you want and blend; then with bigger fry brush continue the blend; then if you want multiple colours over same area, USE HAIR DRIER - just cheap sh*t travel one - quick blow and then good to go again for a more industrial strength protection I spray MRP clear which dries in seconds and then can go at same area with any aggression necessary for spatter I will use Mac valve and maybe brush flick - have yet to get round to that hope this is of use; happy Sunday -
What is on your bench right now ? Share a picture :)
nmayhew replied to Martinnfb's topic in Modelling Discussion
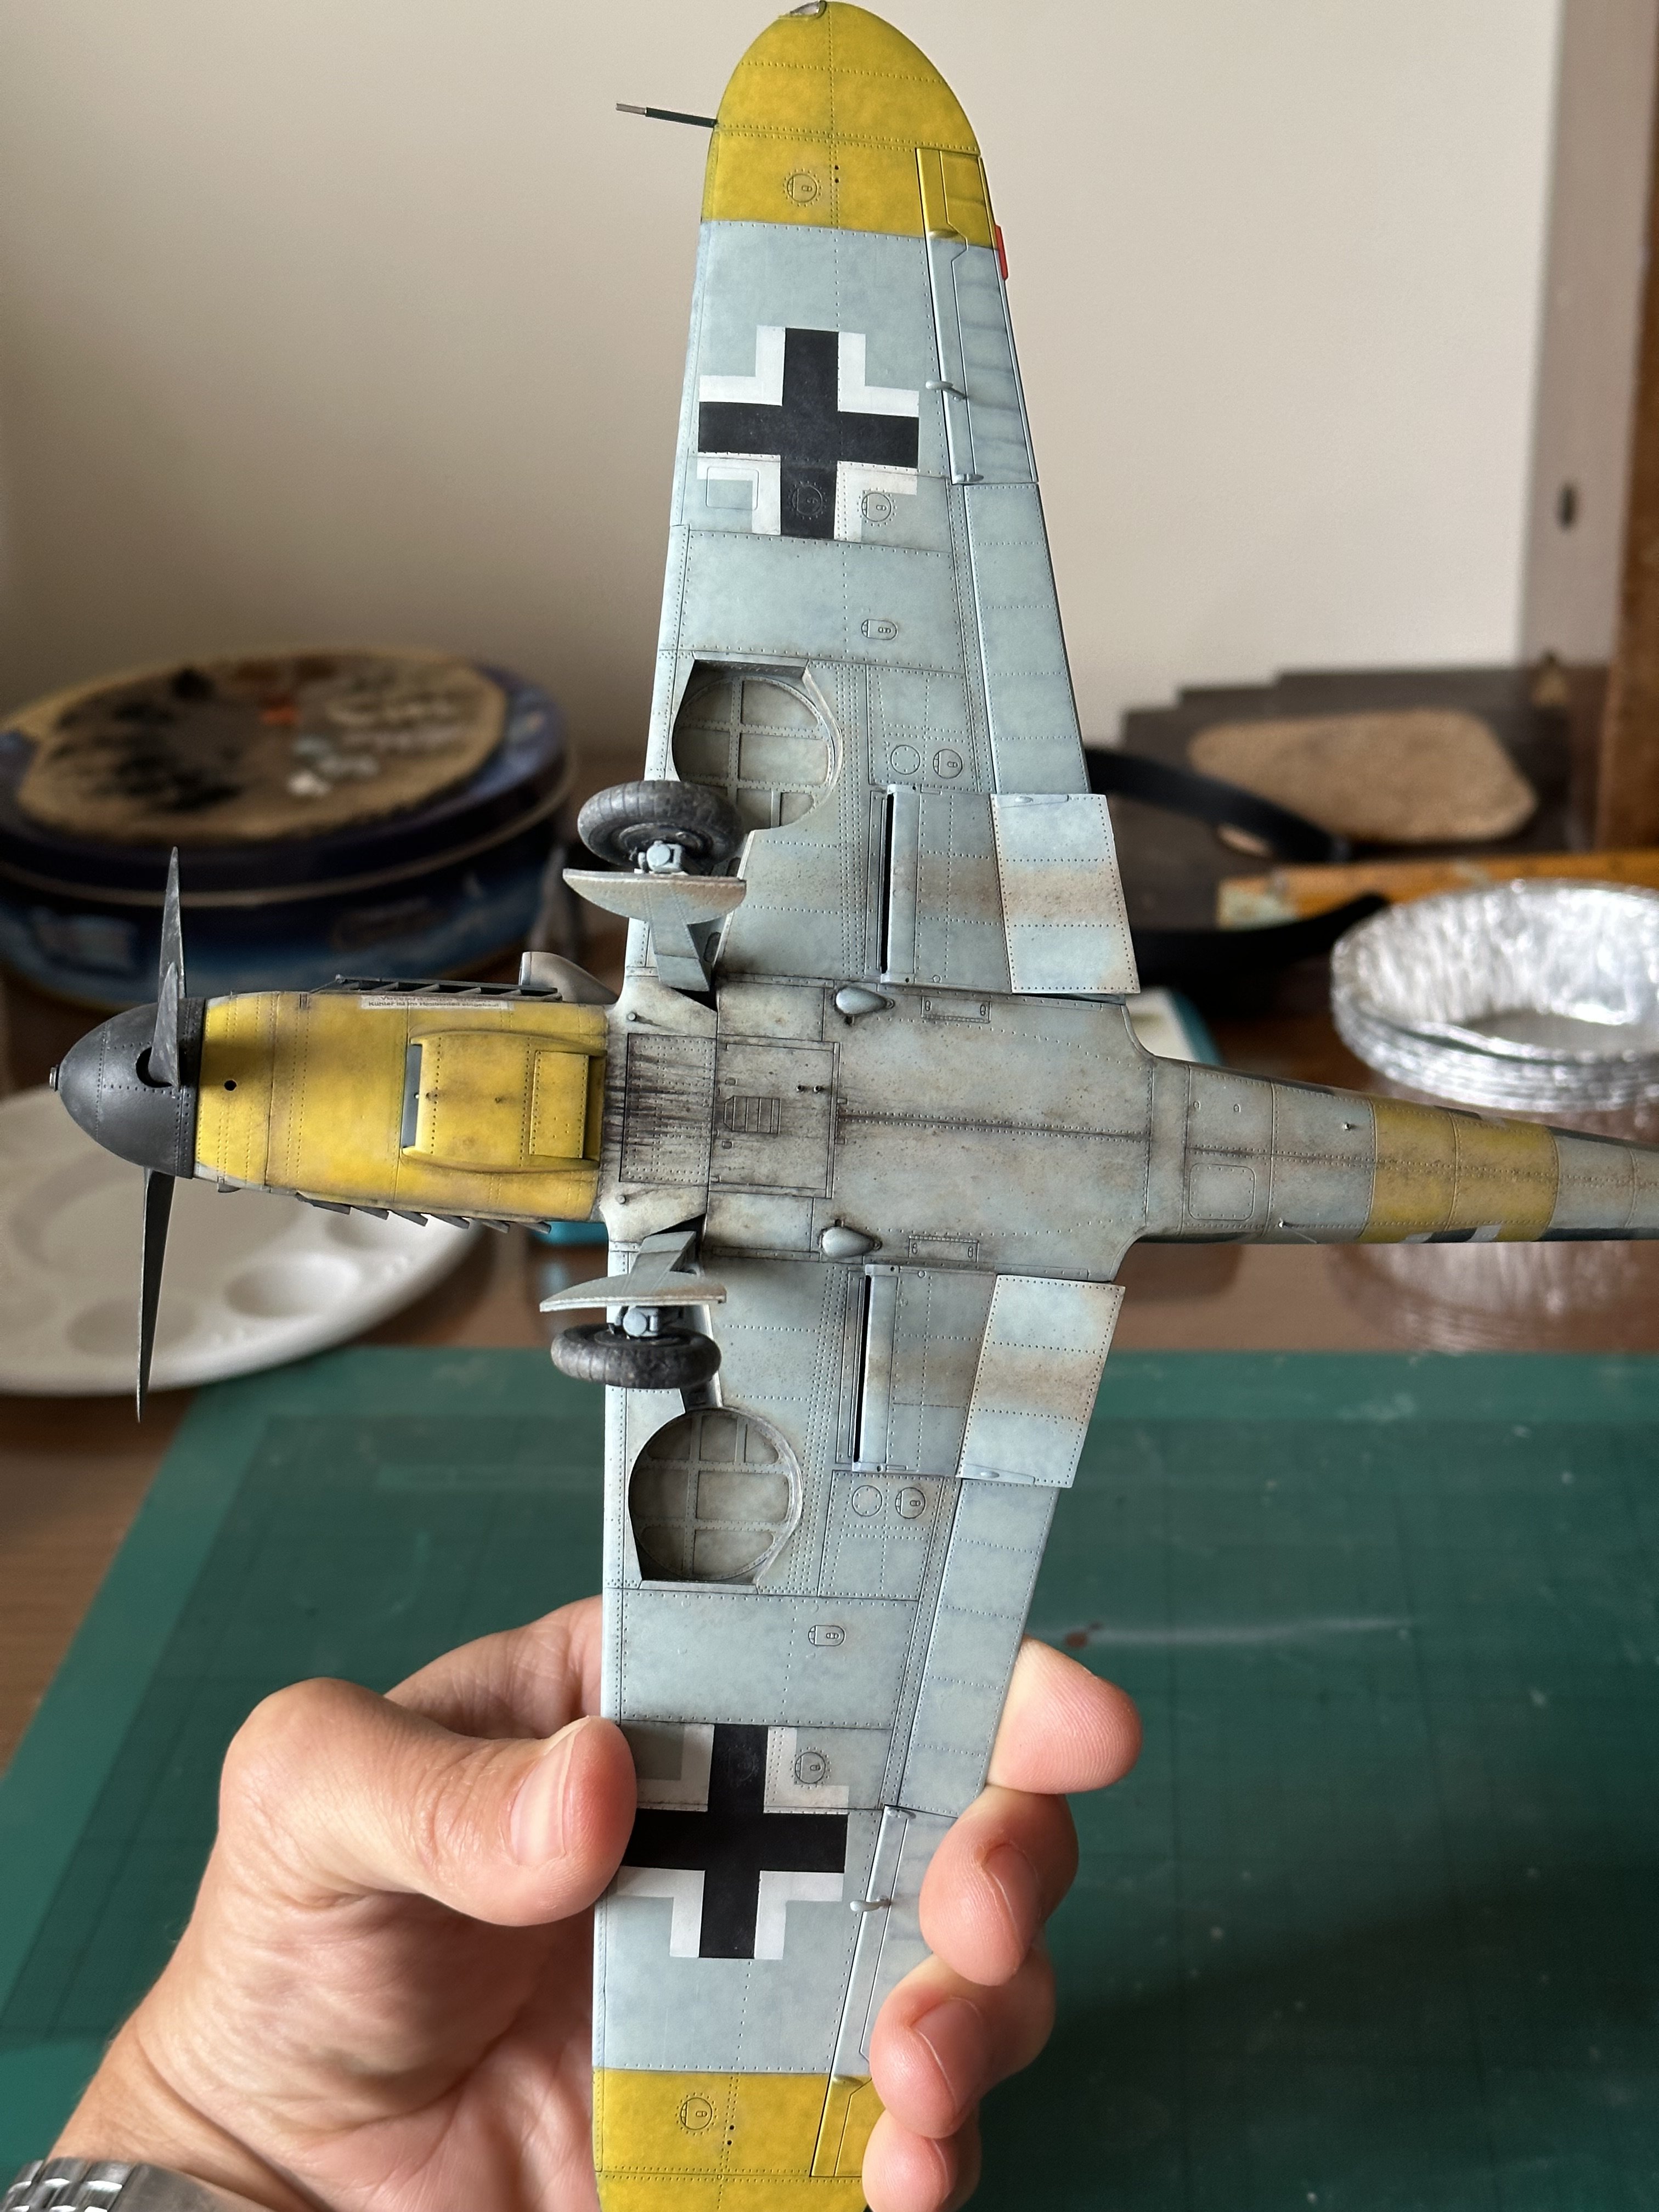
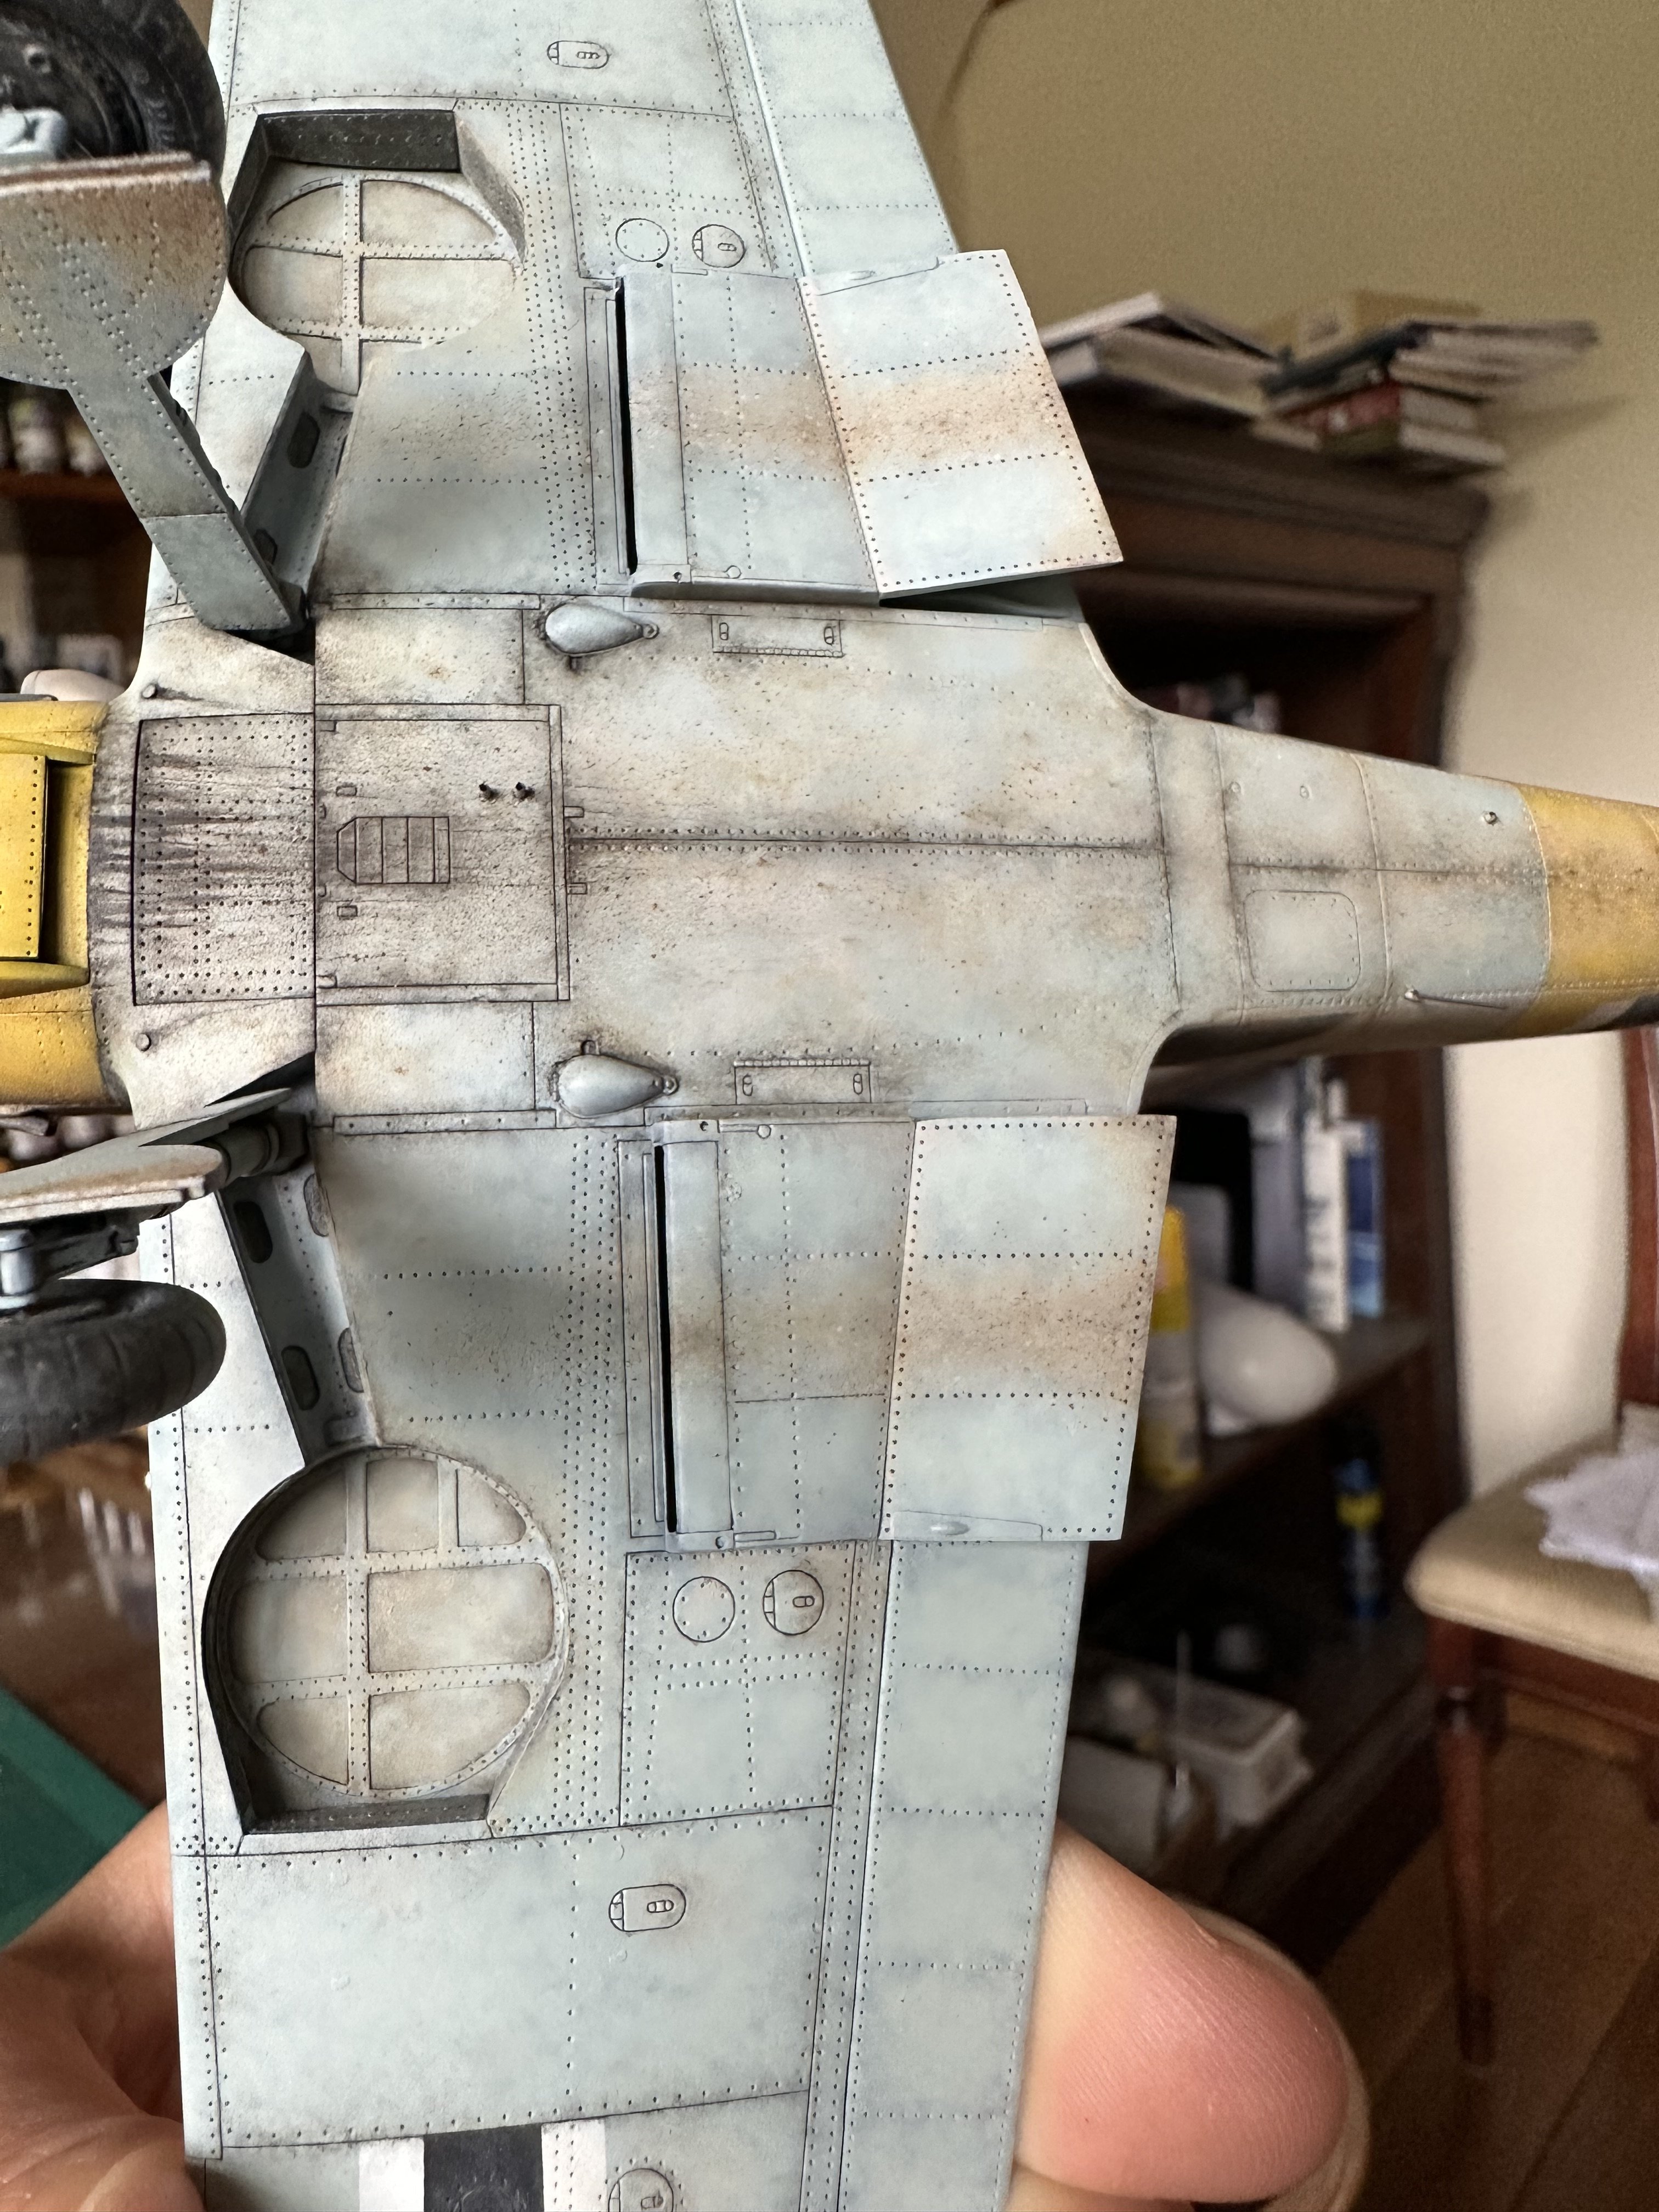
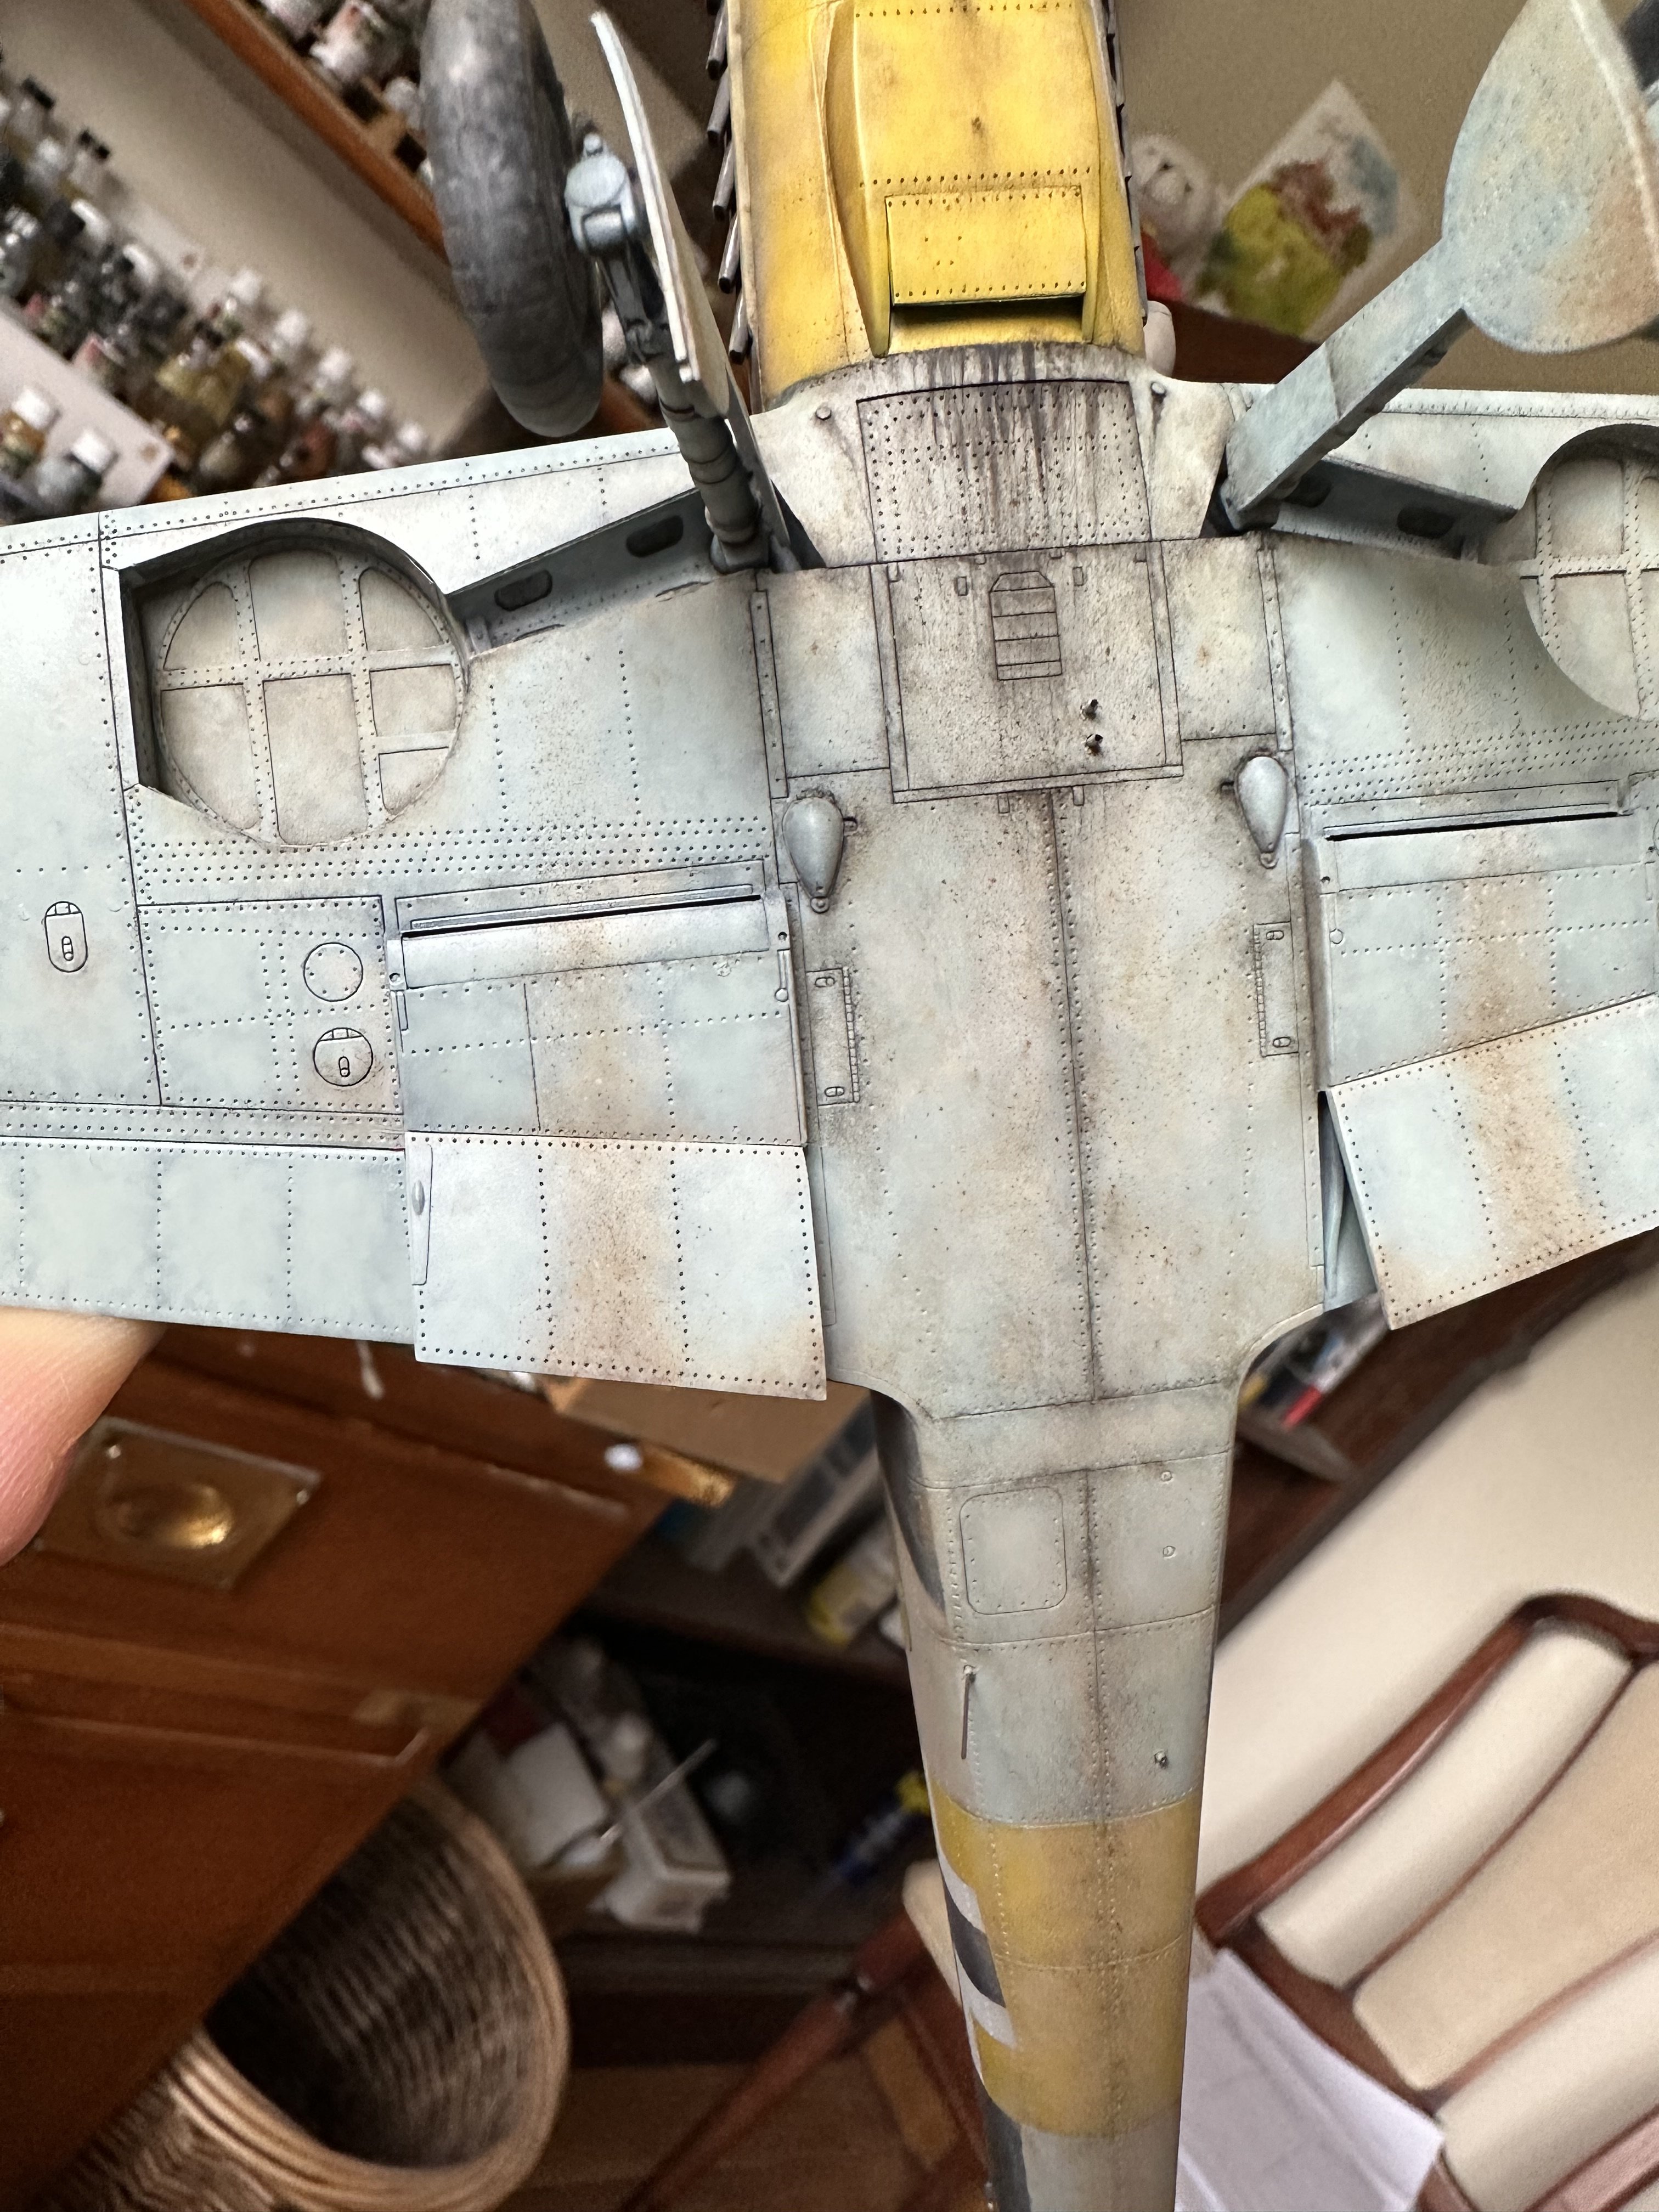
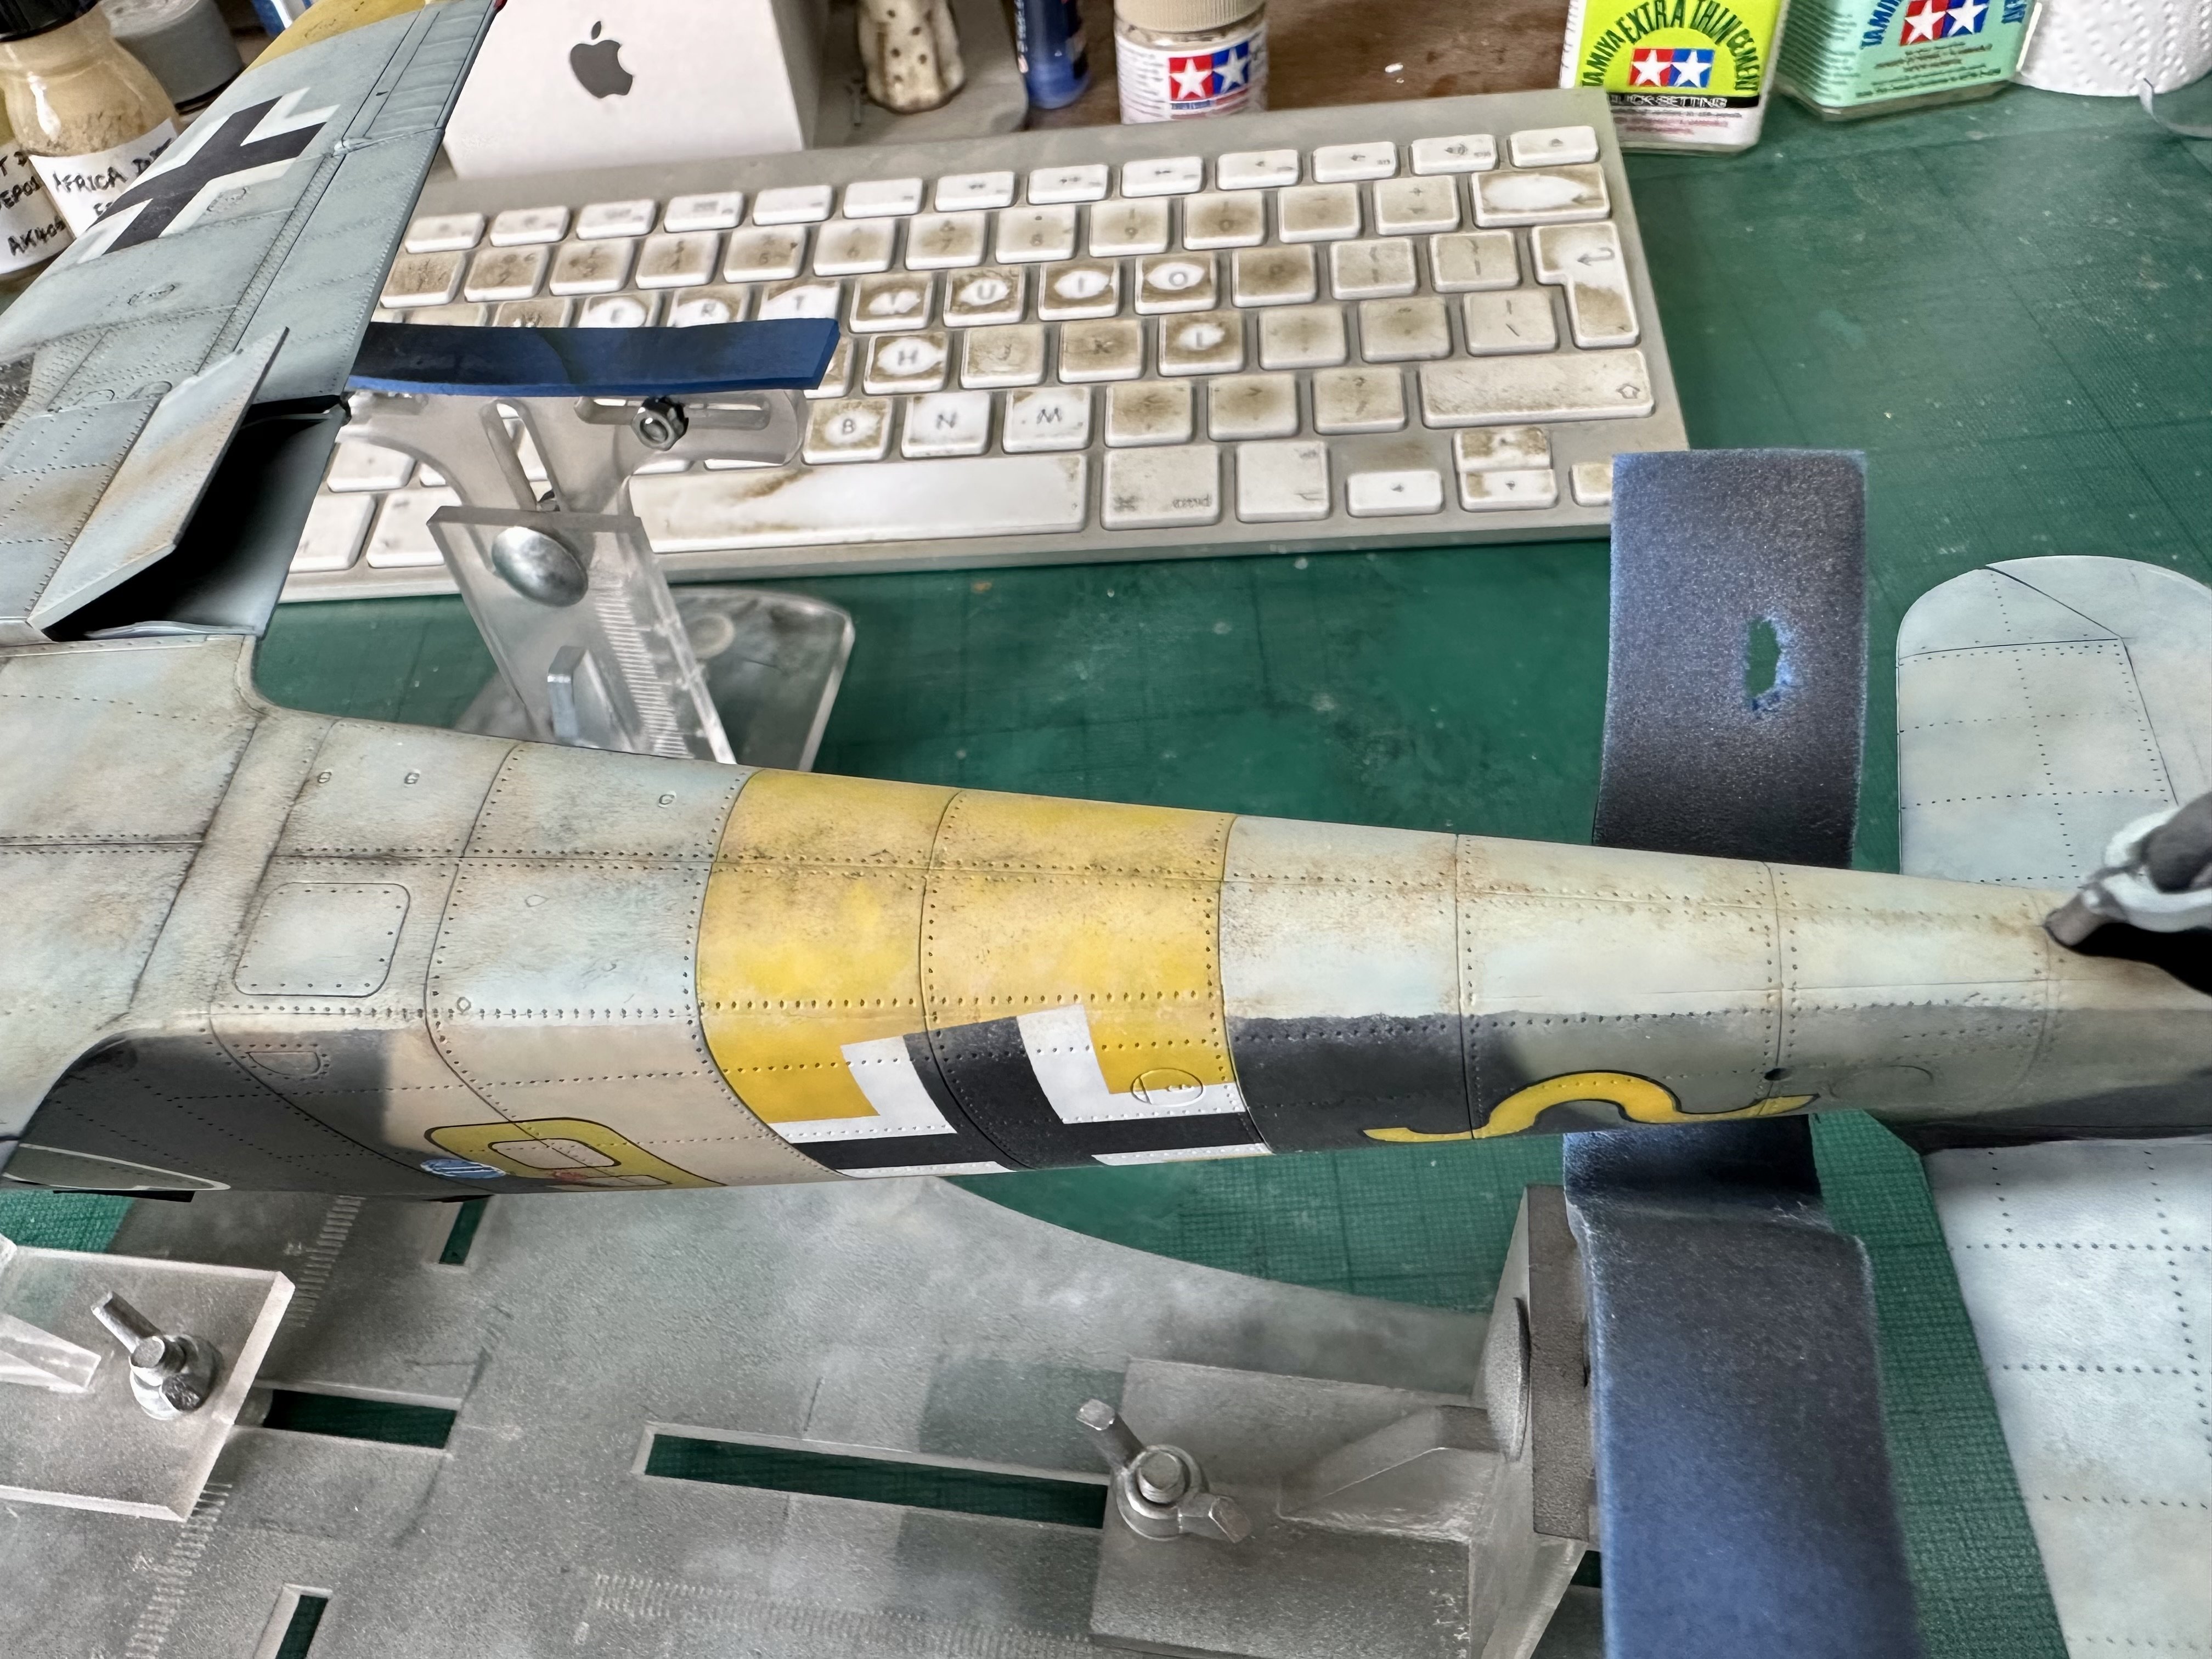
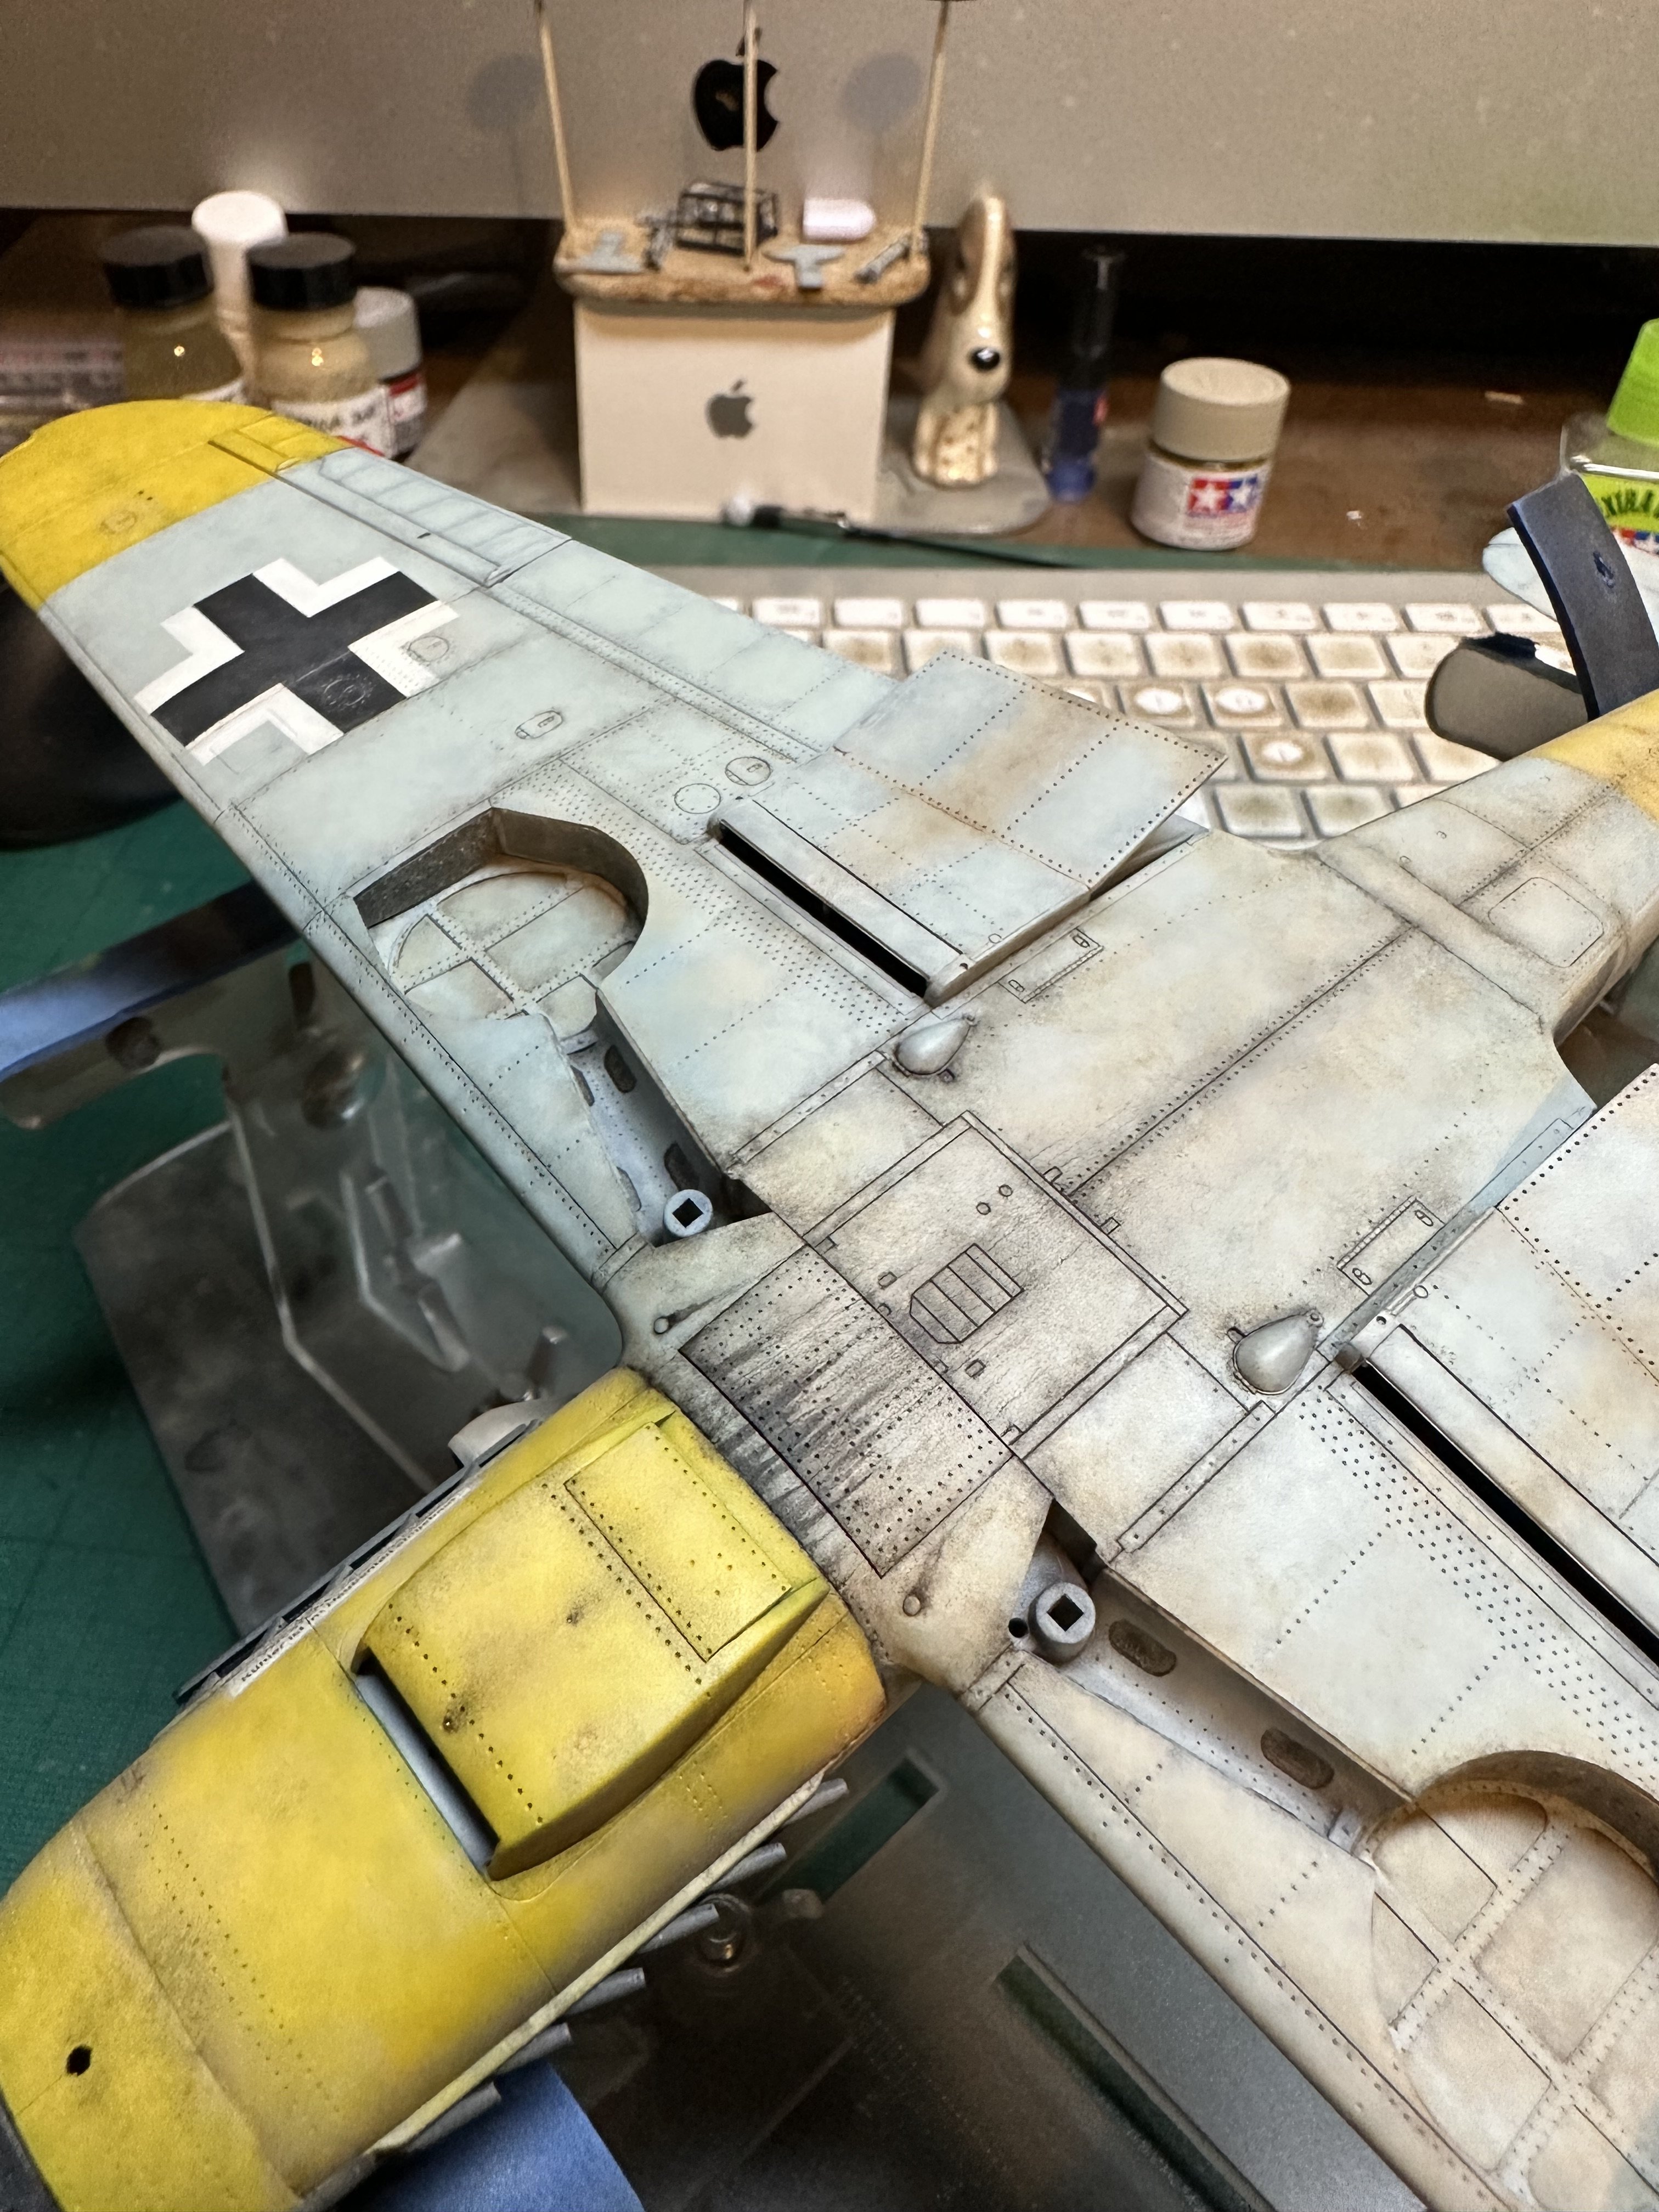
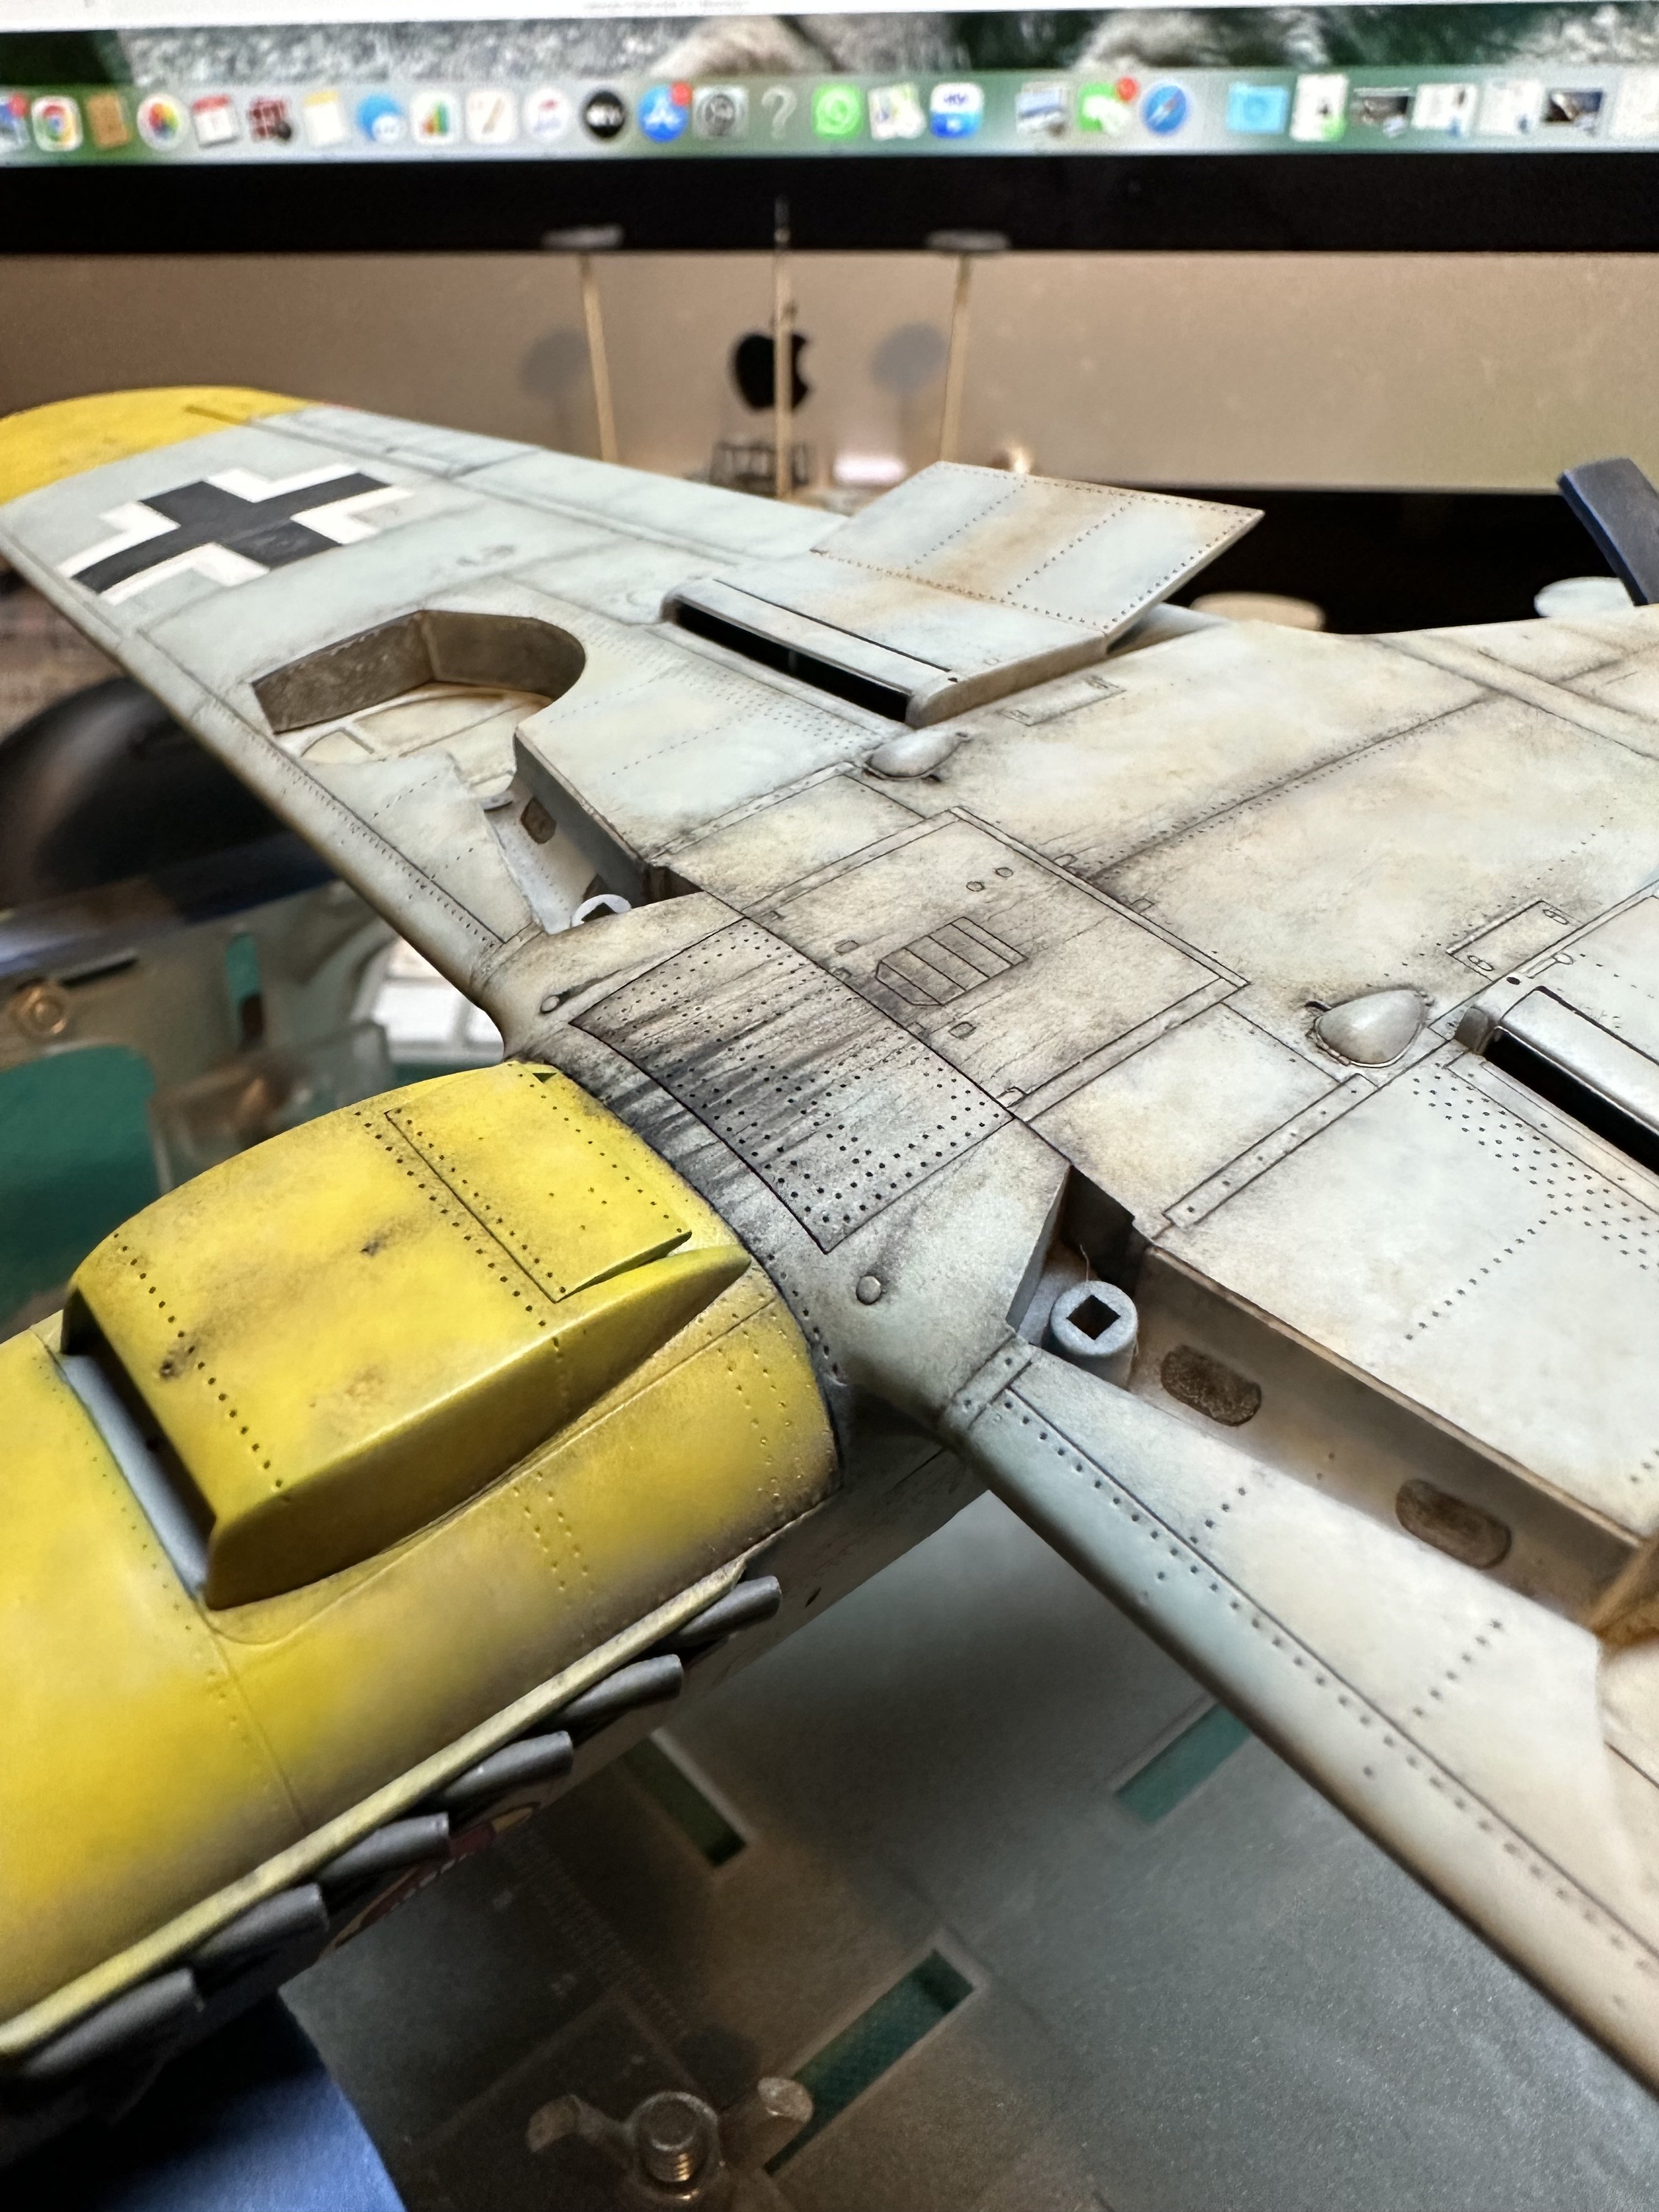
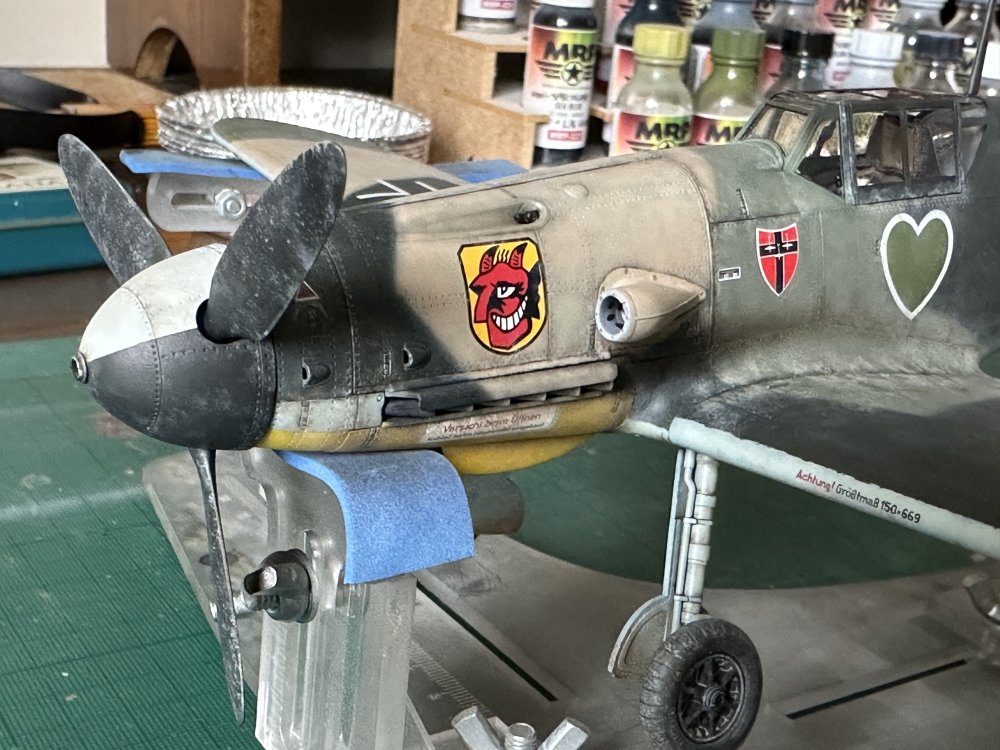
Trumpeter’s 109 G-2 (1/32 of course)… a reminder of just how good Tamiya (and Kotare now) are; definitely in the ‘looks like a…to me’ category but hey ho. just starting oils topside; bottom is mostly complete apart from spatter marks.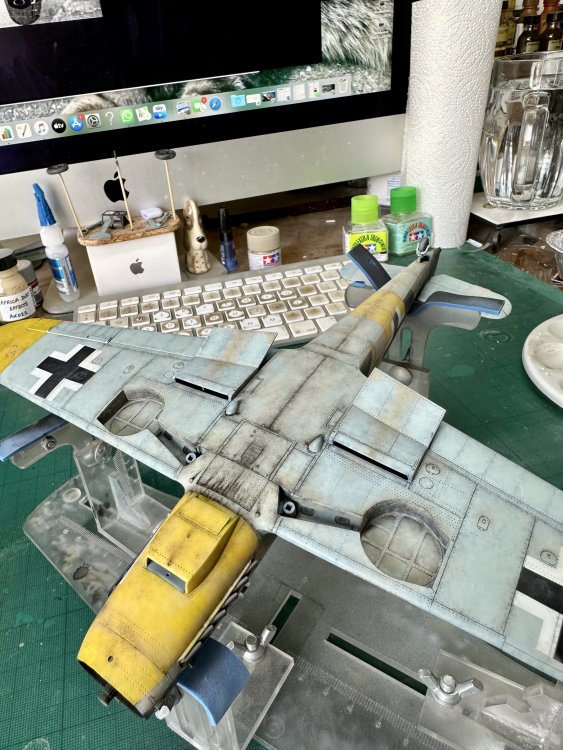


-
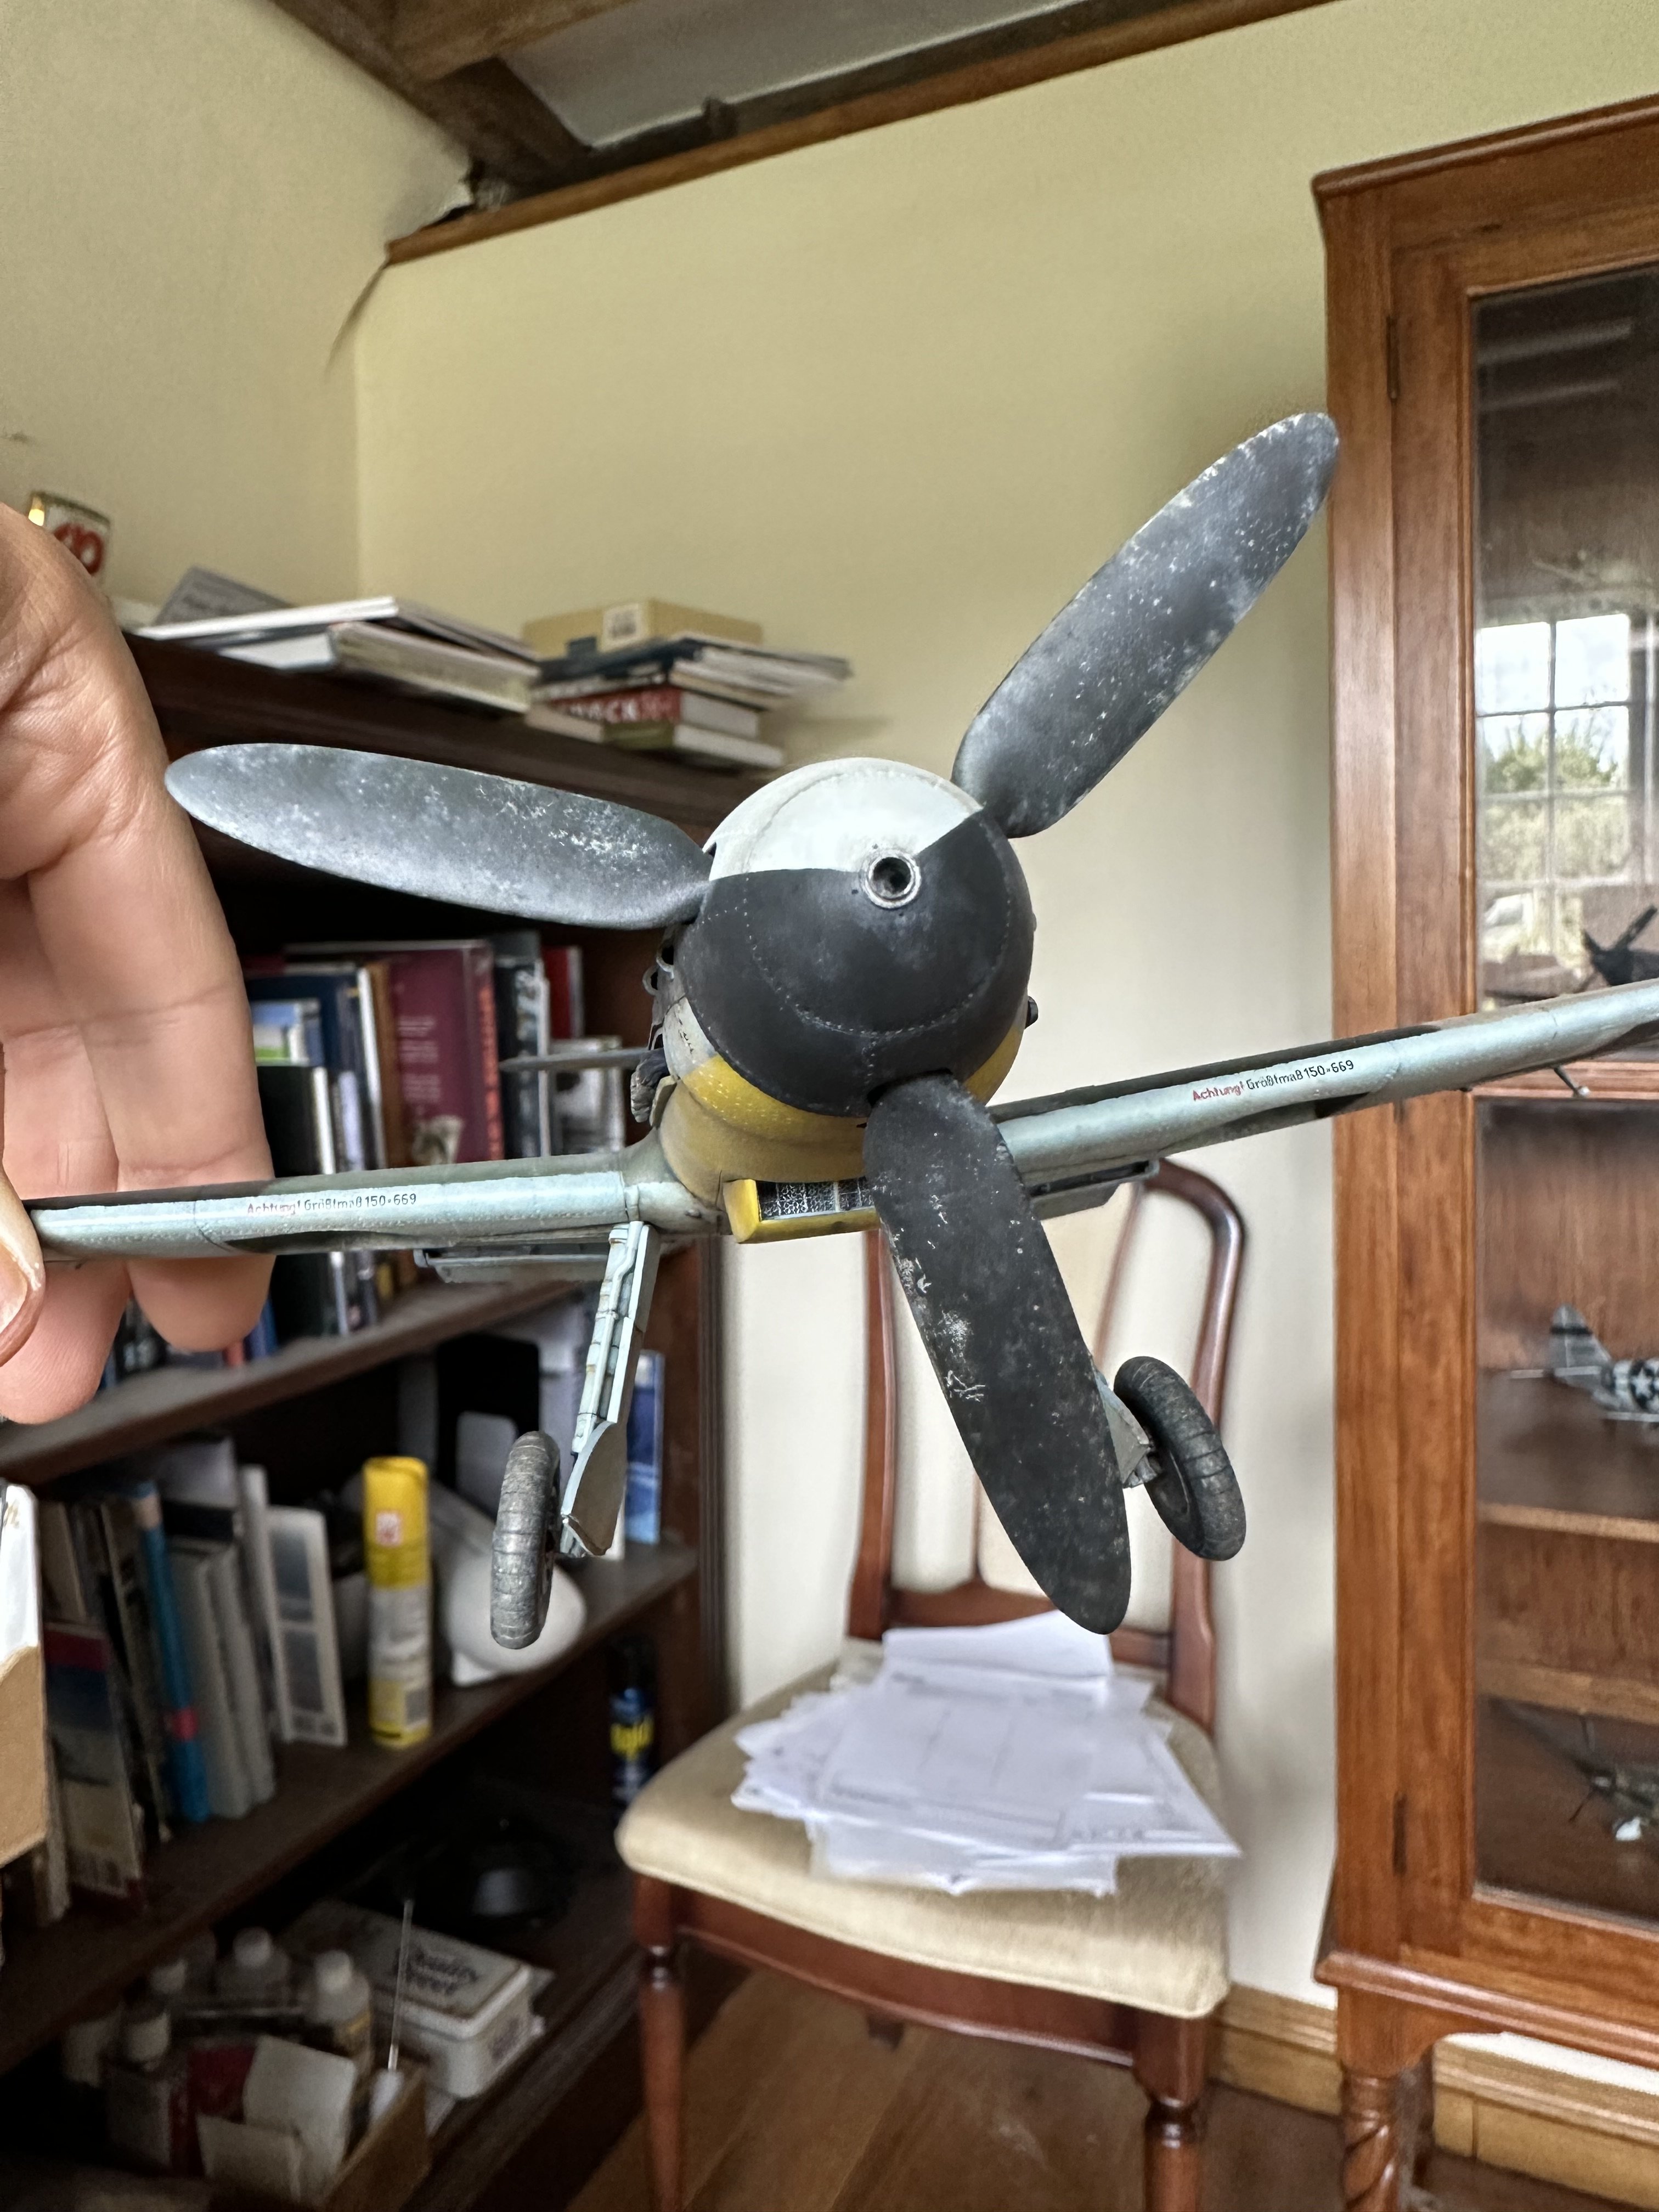
Thanks Gazza! On reflection i am with you on there not being a third colour on the spinner. As to the RLM70 / Russian paint thing - that does indeed sound eminently plausible; at least some of the JG54 birds show a dark colour that really is very dark indeed. Progress is currently paused whilst i order new wheels - the ResKit early Gs were lovely but a pain to remove the resin from inside the tyre - on the last chunk of the second wheel i goofed and sliced the tyre...instantly f*cked. I am ordering a second set, and also the Eduard set which i think are single resin piece, so no ballsing around matching hubs to tyres; I swear the next aircraft build i do i am doing the wheels first, just to get that sh*t over and done with.
-
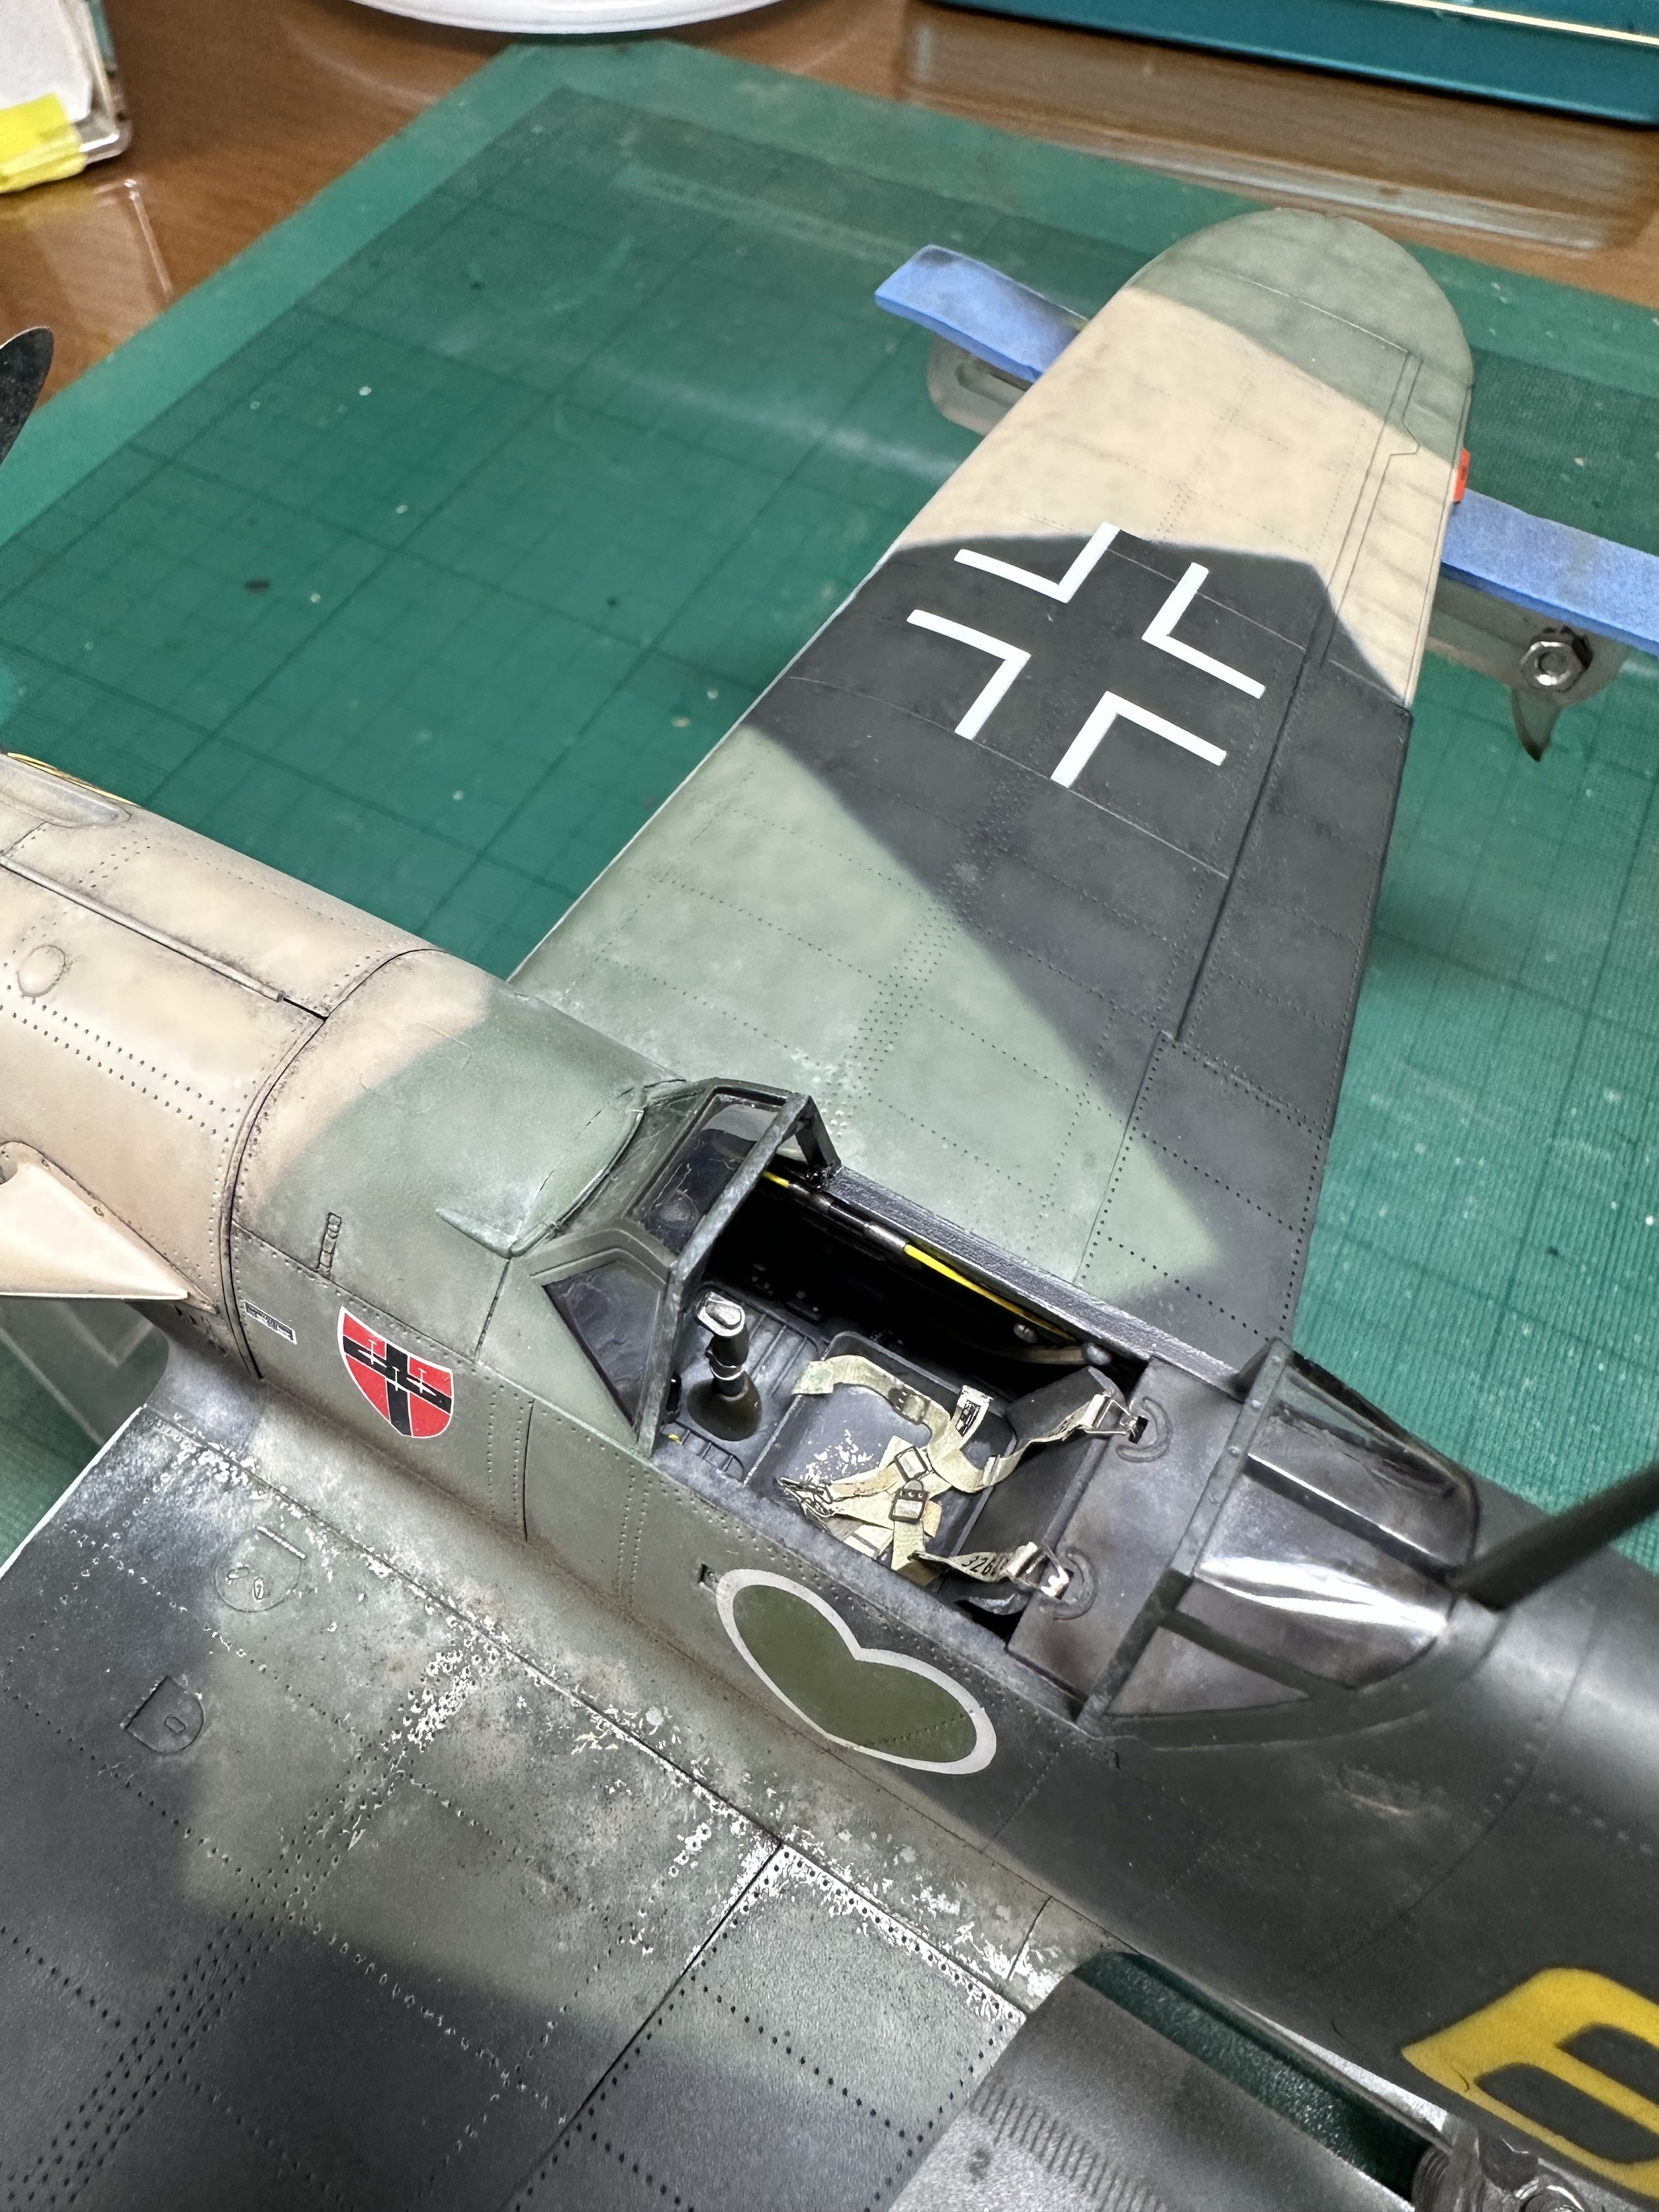
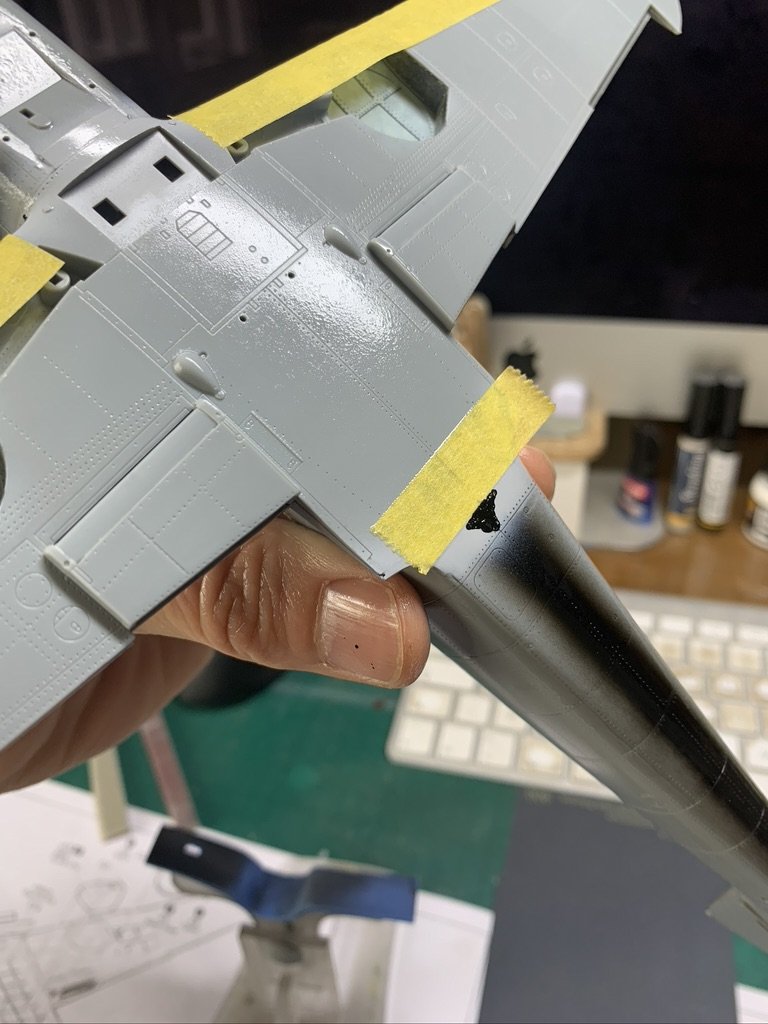
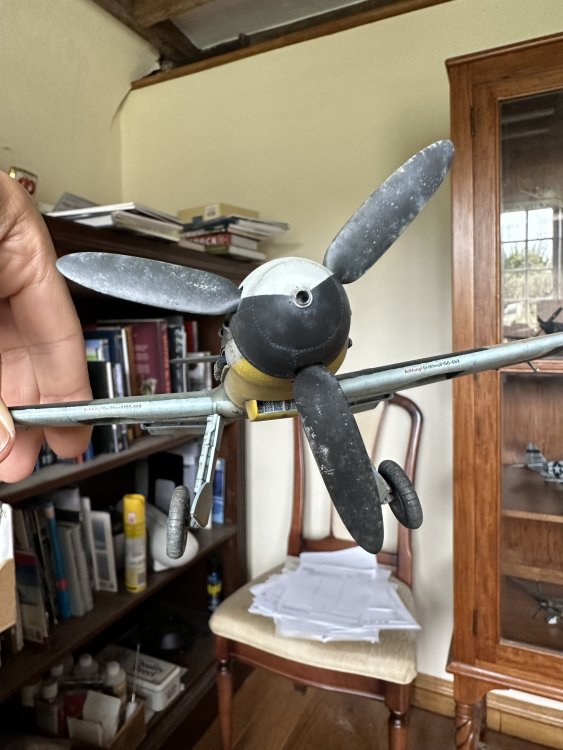
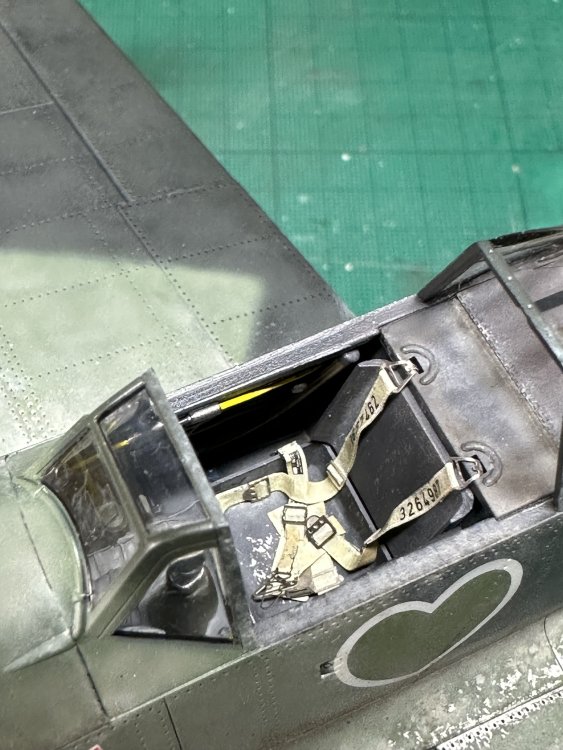
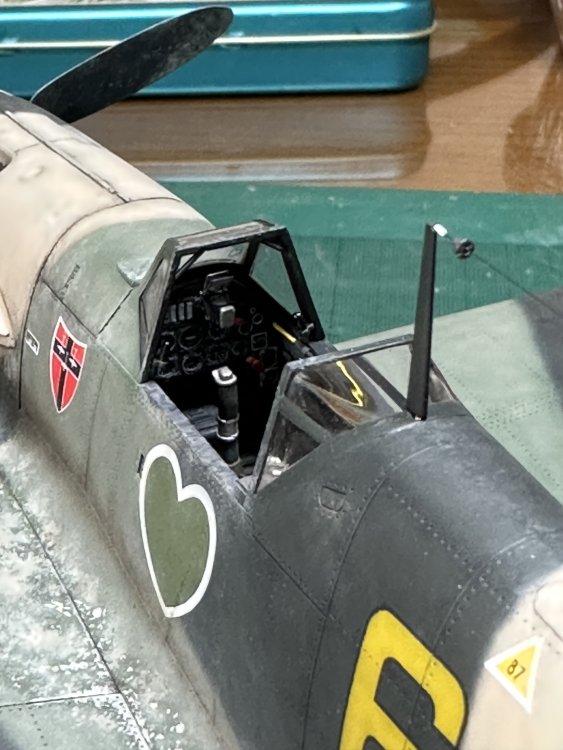
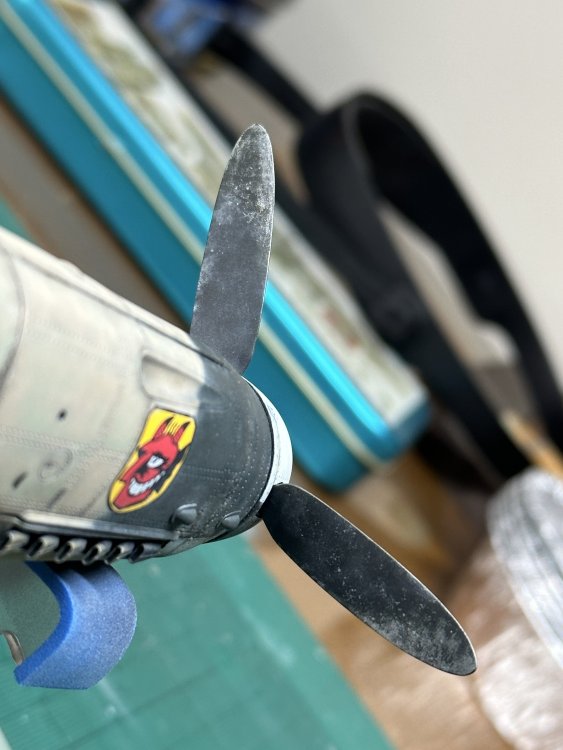
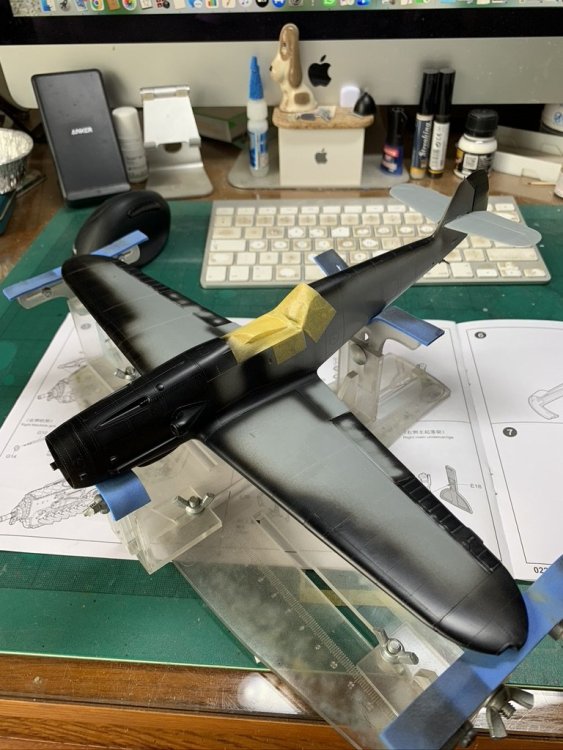
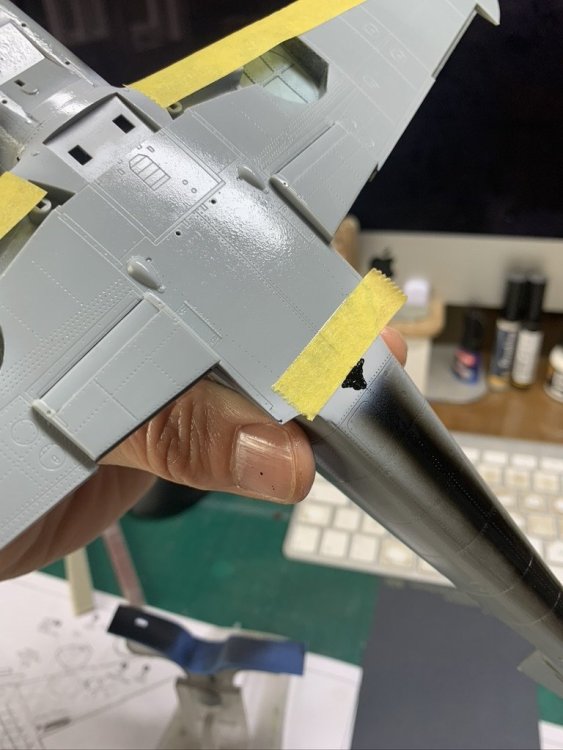
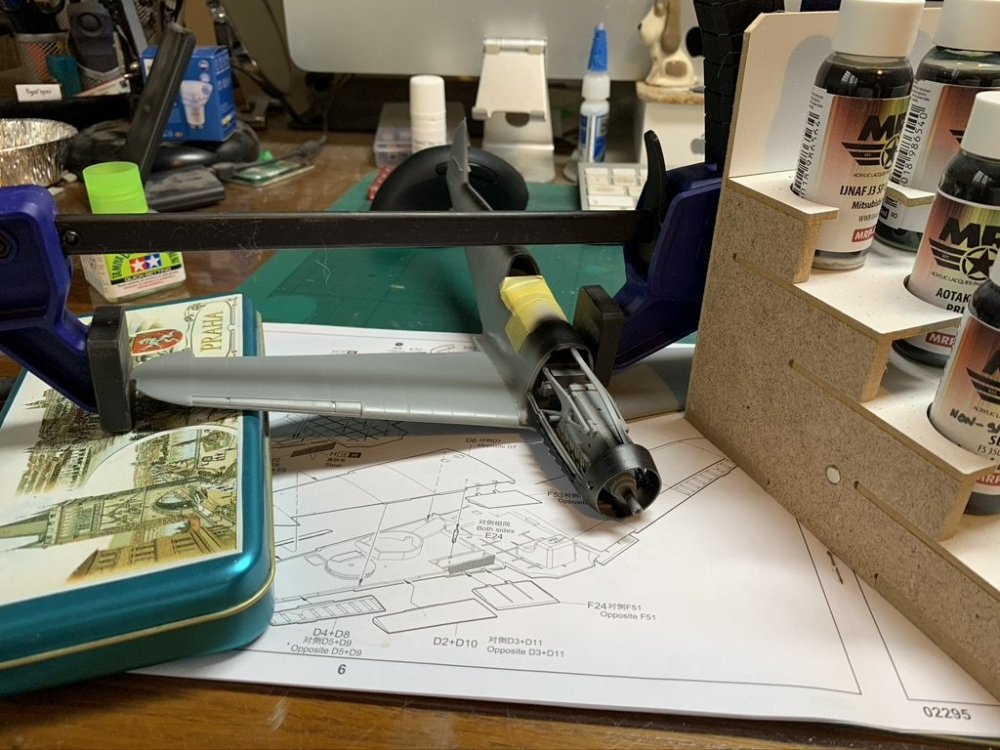
Obviously I haven't done any kind of WIP but here is where we are so far... This is my first Trumpeter 109 but I have built the Trumpy P-47 (Bubbletop) before. The 109 has far more finesse generally in the parts; the rivet detail will be too much for some, but for the most part it is pretty sharp. I will pose the canopy closed, but probably keep it loose (my preferred MO) so you can remove it and peek inside; cockpit was standard with just a couple of wire added, and HGW belts added. Construction notes: - the cockpit is not glued to the fuselage; it was glued per instructions to the engine bearers and firewall, but then just layed in and fuselage closed up - fuselage goes together well overall, but filler needed underneath where it meets the wing section; fille used throughout was AK Black Widow (a black CA) with accelerator then sprayed on; it's instantly sandable, and has really helped me speed things along - also used this technique for the cowling panel just ahead of cockpit which in reality has no panel line - i tried to do all filling and sanding and rescribing of rivets in discrete sections such that i would not destroy adjacent detail; wing roots were actually a very good join, but a panel line needed removing at front which was challenging but doable; note i did not attach the cowling pieces until this process was complete - exhausts: these will be woefully recessed if you use them as part of the provided engine assembly; I used aftermarket ones glued from the inside; looked like a hatchet job, and they are very much eye balled in terms of location but the result is good enough for this kit - cowling MG troughs are wrong; you can't fix these so you either try to use say an AIMS cowling part from G-2 or G-4 conversion meant for the Revell G-6 (I know, I know), or just make your peace; i chose the latter - fuselage was closed up and then wings were attached - I had per instructions glued top and bottom together first and then glued the whole thing to the fuselage, but only after quite a bit of dry fitting; lower section was glued to fuselage, then wing root join glued second - the dihedral needed some attention due to this method of construction - this was the one bit I did not enjoy; what you see below was repeated for each side, with the clamp pullling the wing root tight, then TET QS used; to my relief little / no sanding required after this - MGs are Aber or Master (I forget) stubs, just glued into the cowl pieces; i did not construct the full gun deck bits as provided - the cowls were ok, but required a small shim on one side - again this is because i chose to instal these last (pick your battles etc) - spinner and blades: using Barracuda; it is very slightly too large, but i am going with it; the Trumpy kit fits like a glove, but is just the wrong shape for me So that's where we are now... Next up is landing gear and the lovely Reskit early G wheels; main seat belts (which could only be installed once cockpit tub was installed and mated with the rear bulkhead - no big deal); then get the canopy masked and on Will try to provide a few more updates but overall this is better in terms of fit and finesse than Revell's MkII Spitfire (low bar I know),if that helps you trying to decide whether this or the Revell G-2. PS I used Quickboost rudder as well - needed some sanding and persuading to match the airframe, but a definite improvement
-
don't go to too much trouble... I have the LuGa JG54 book, and a fair bit of 109 stuff in my library i guess main areas of focus are trying to complete the camouflage and markings (for either bird) given they are incomplete views but yes, any help gratefully received i feel like i have another week of clean up before i can start looking at camo patterns in anger!
-
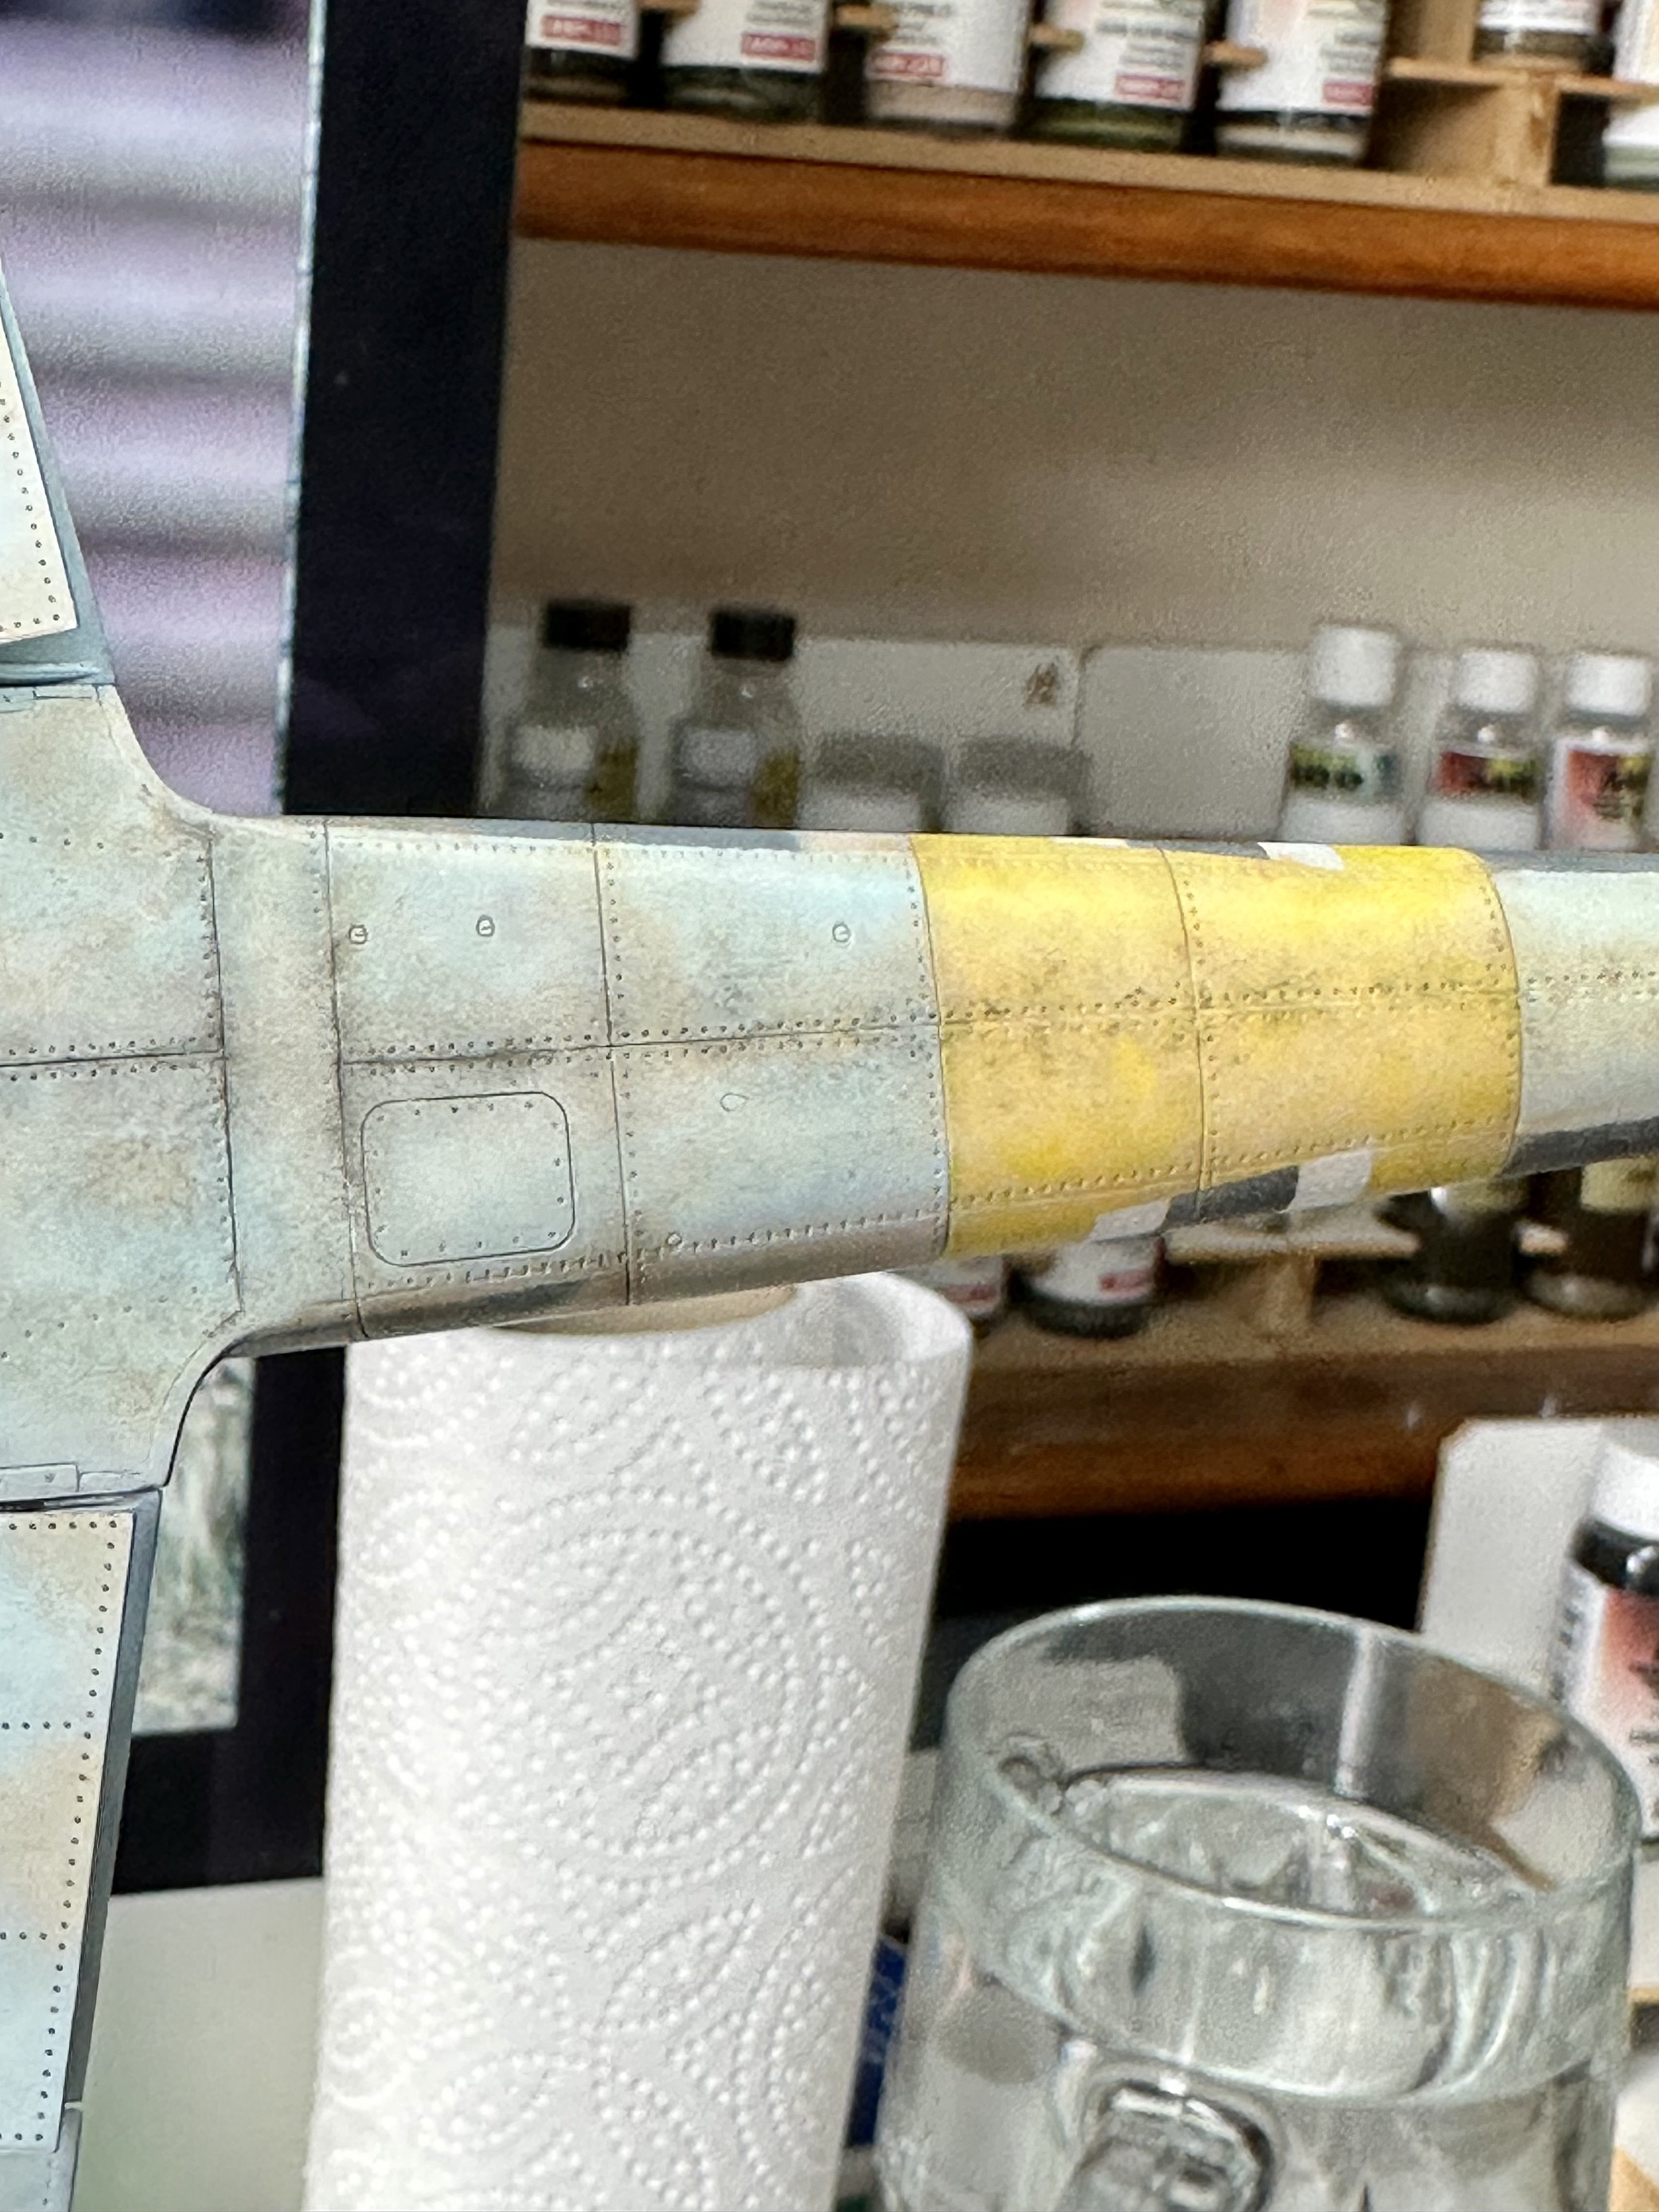
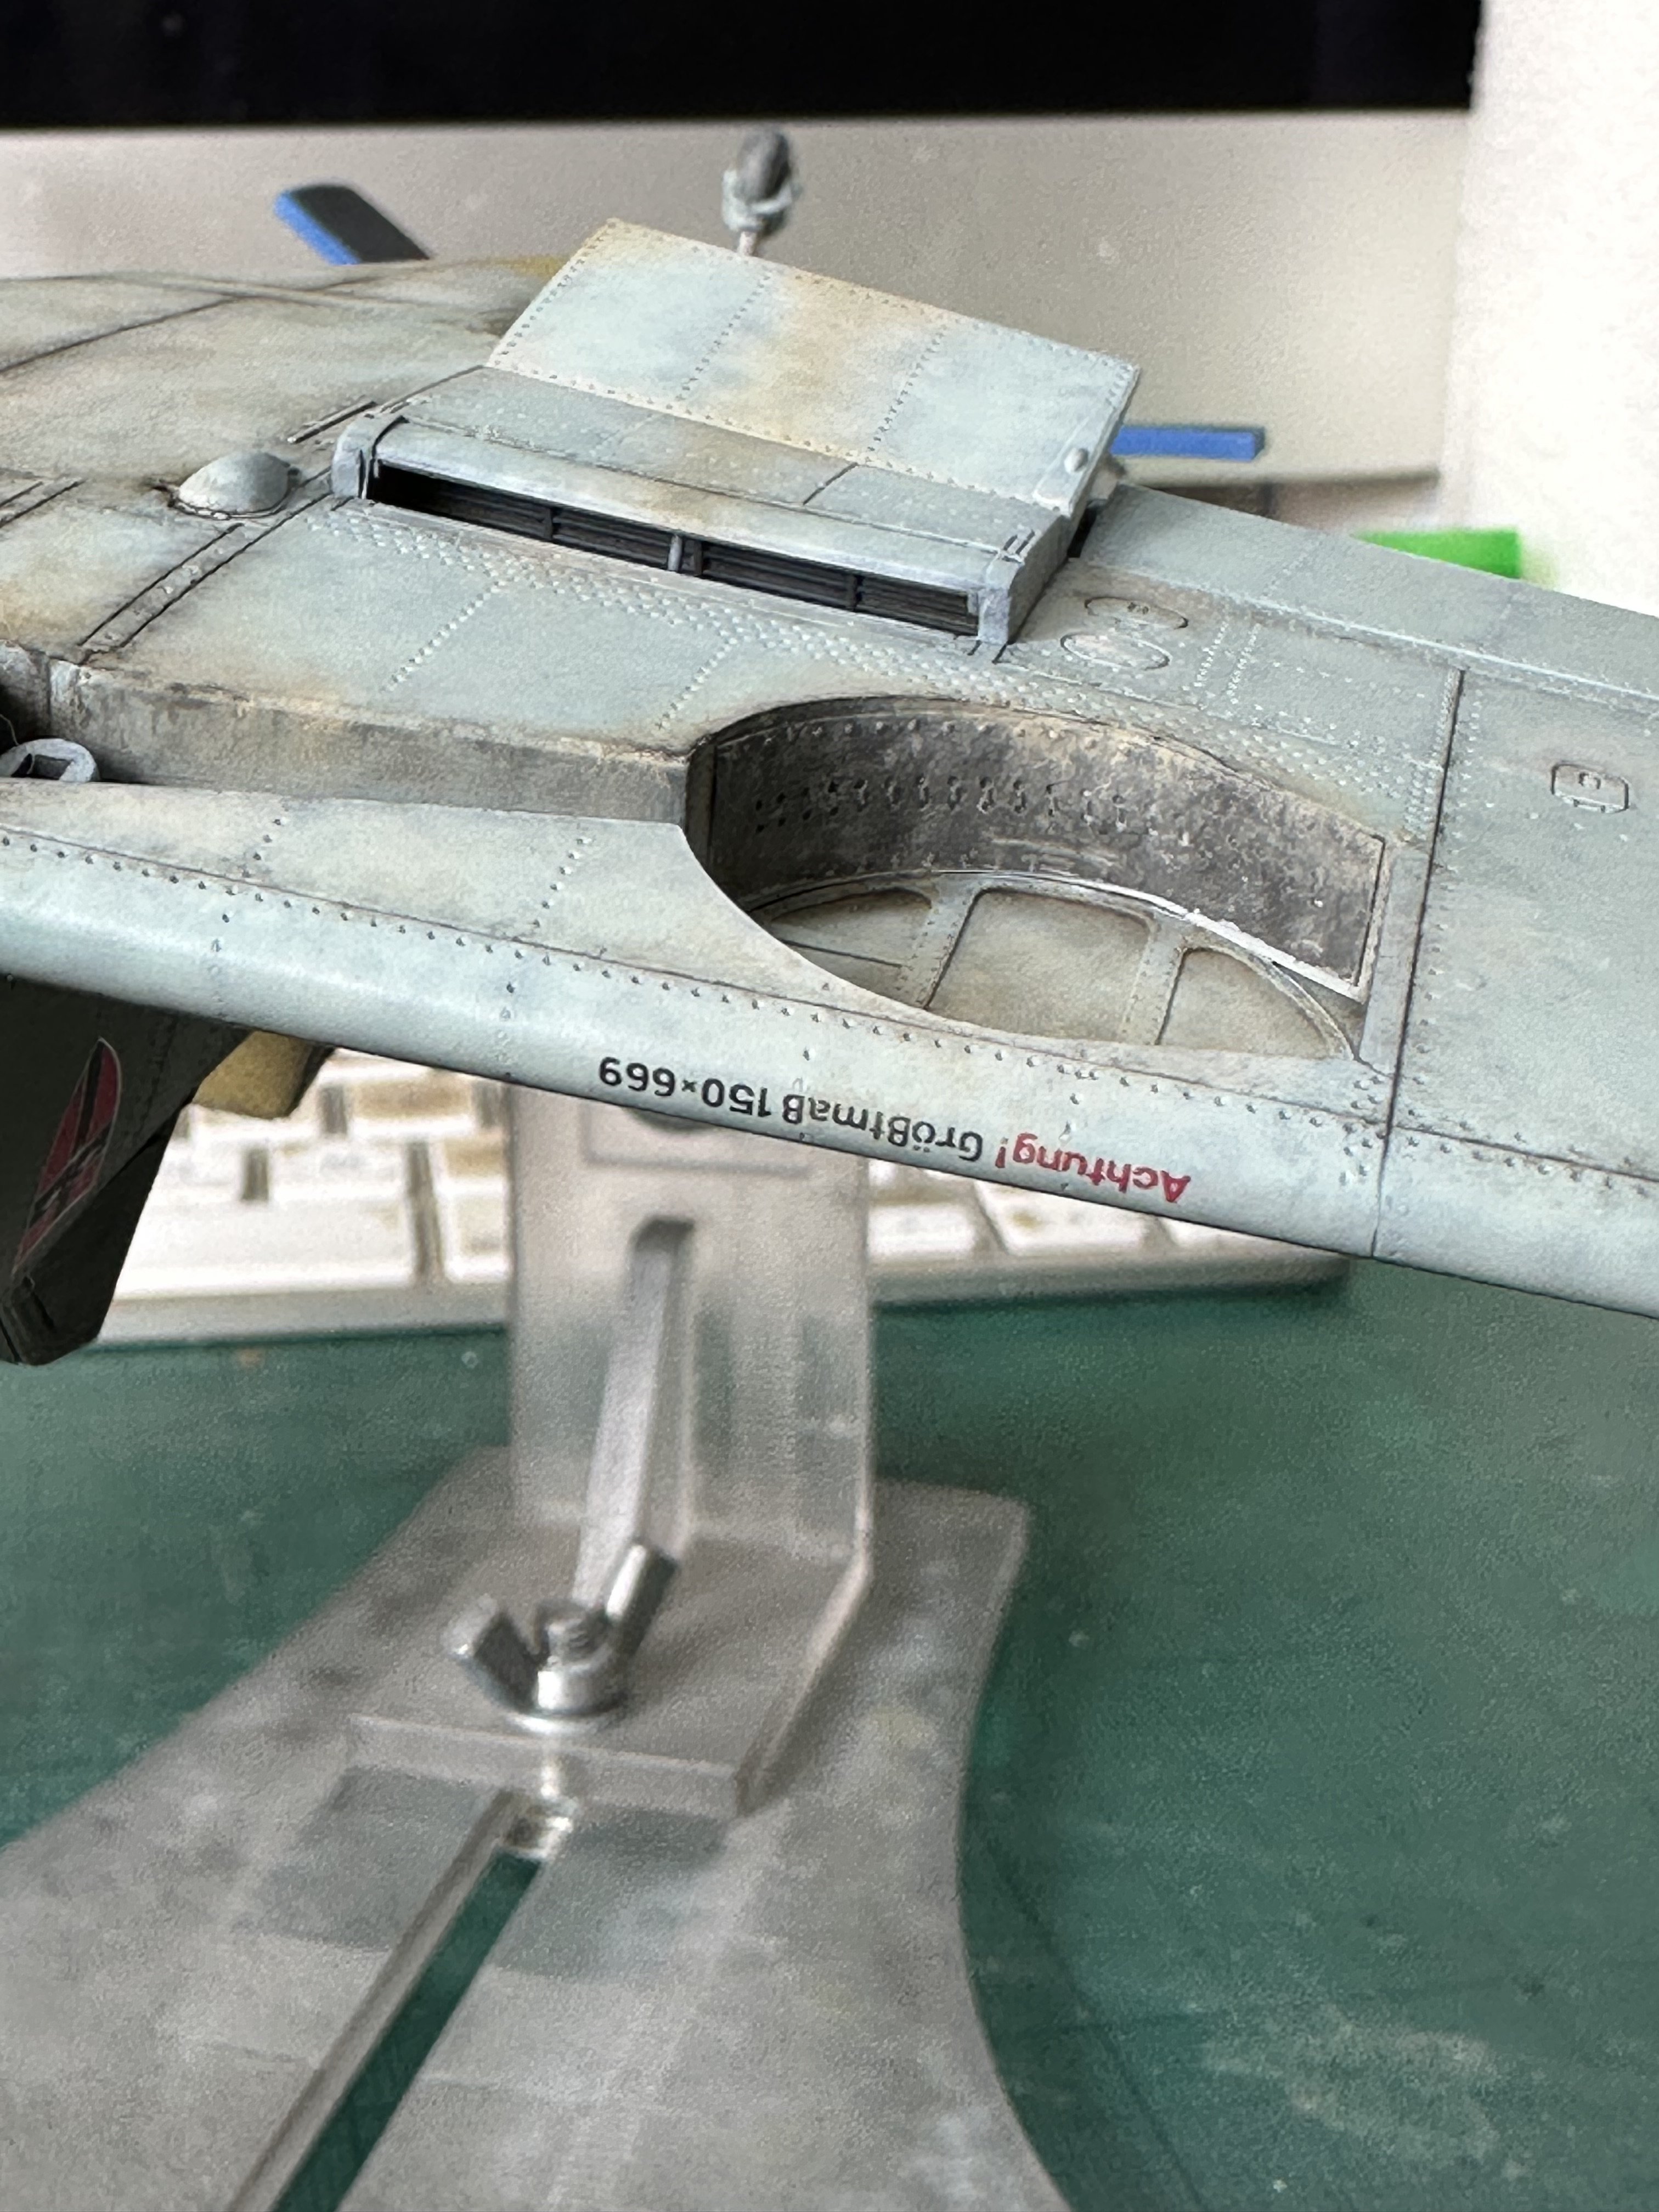
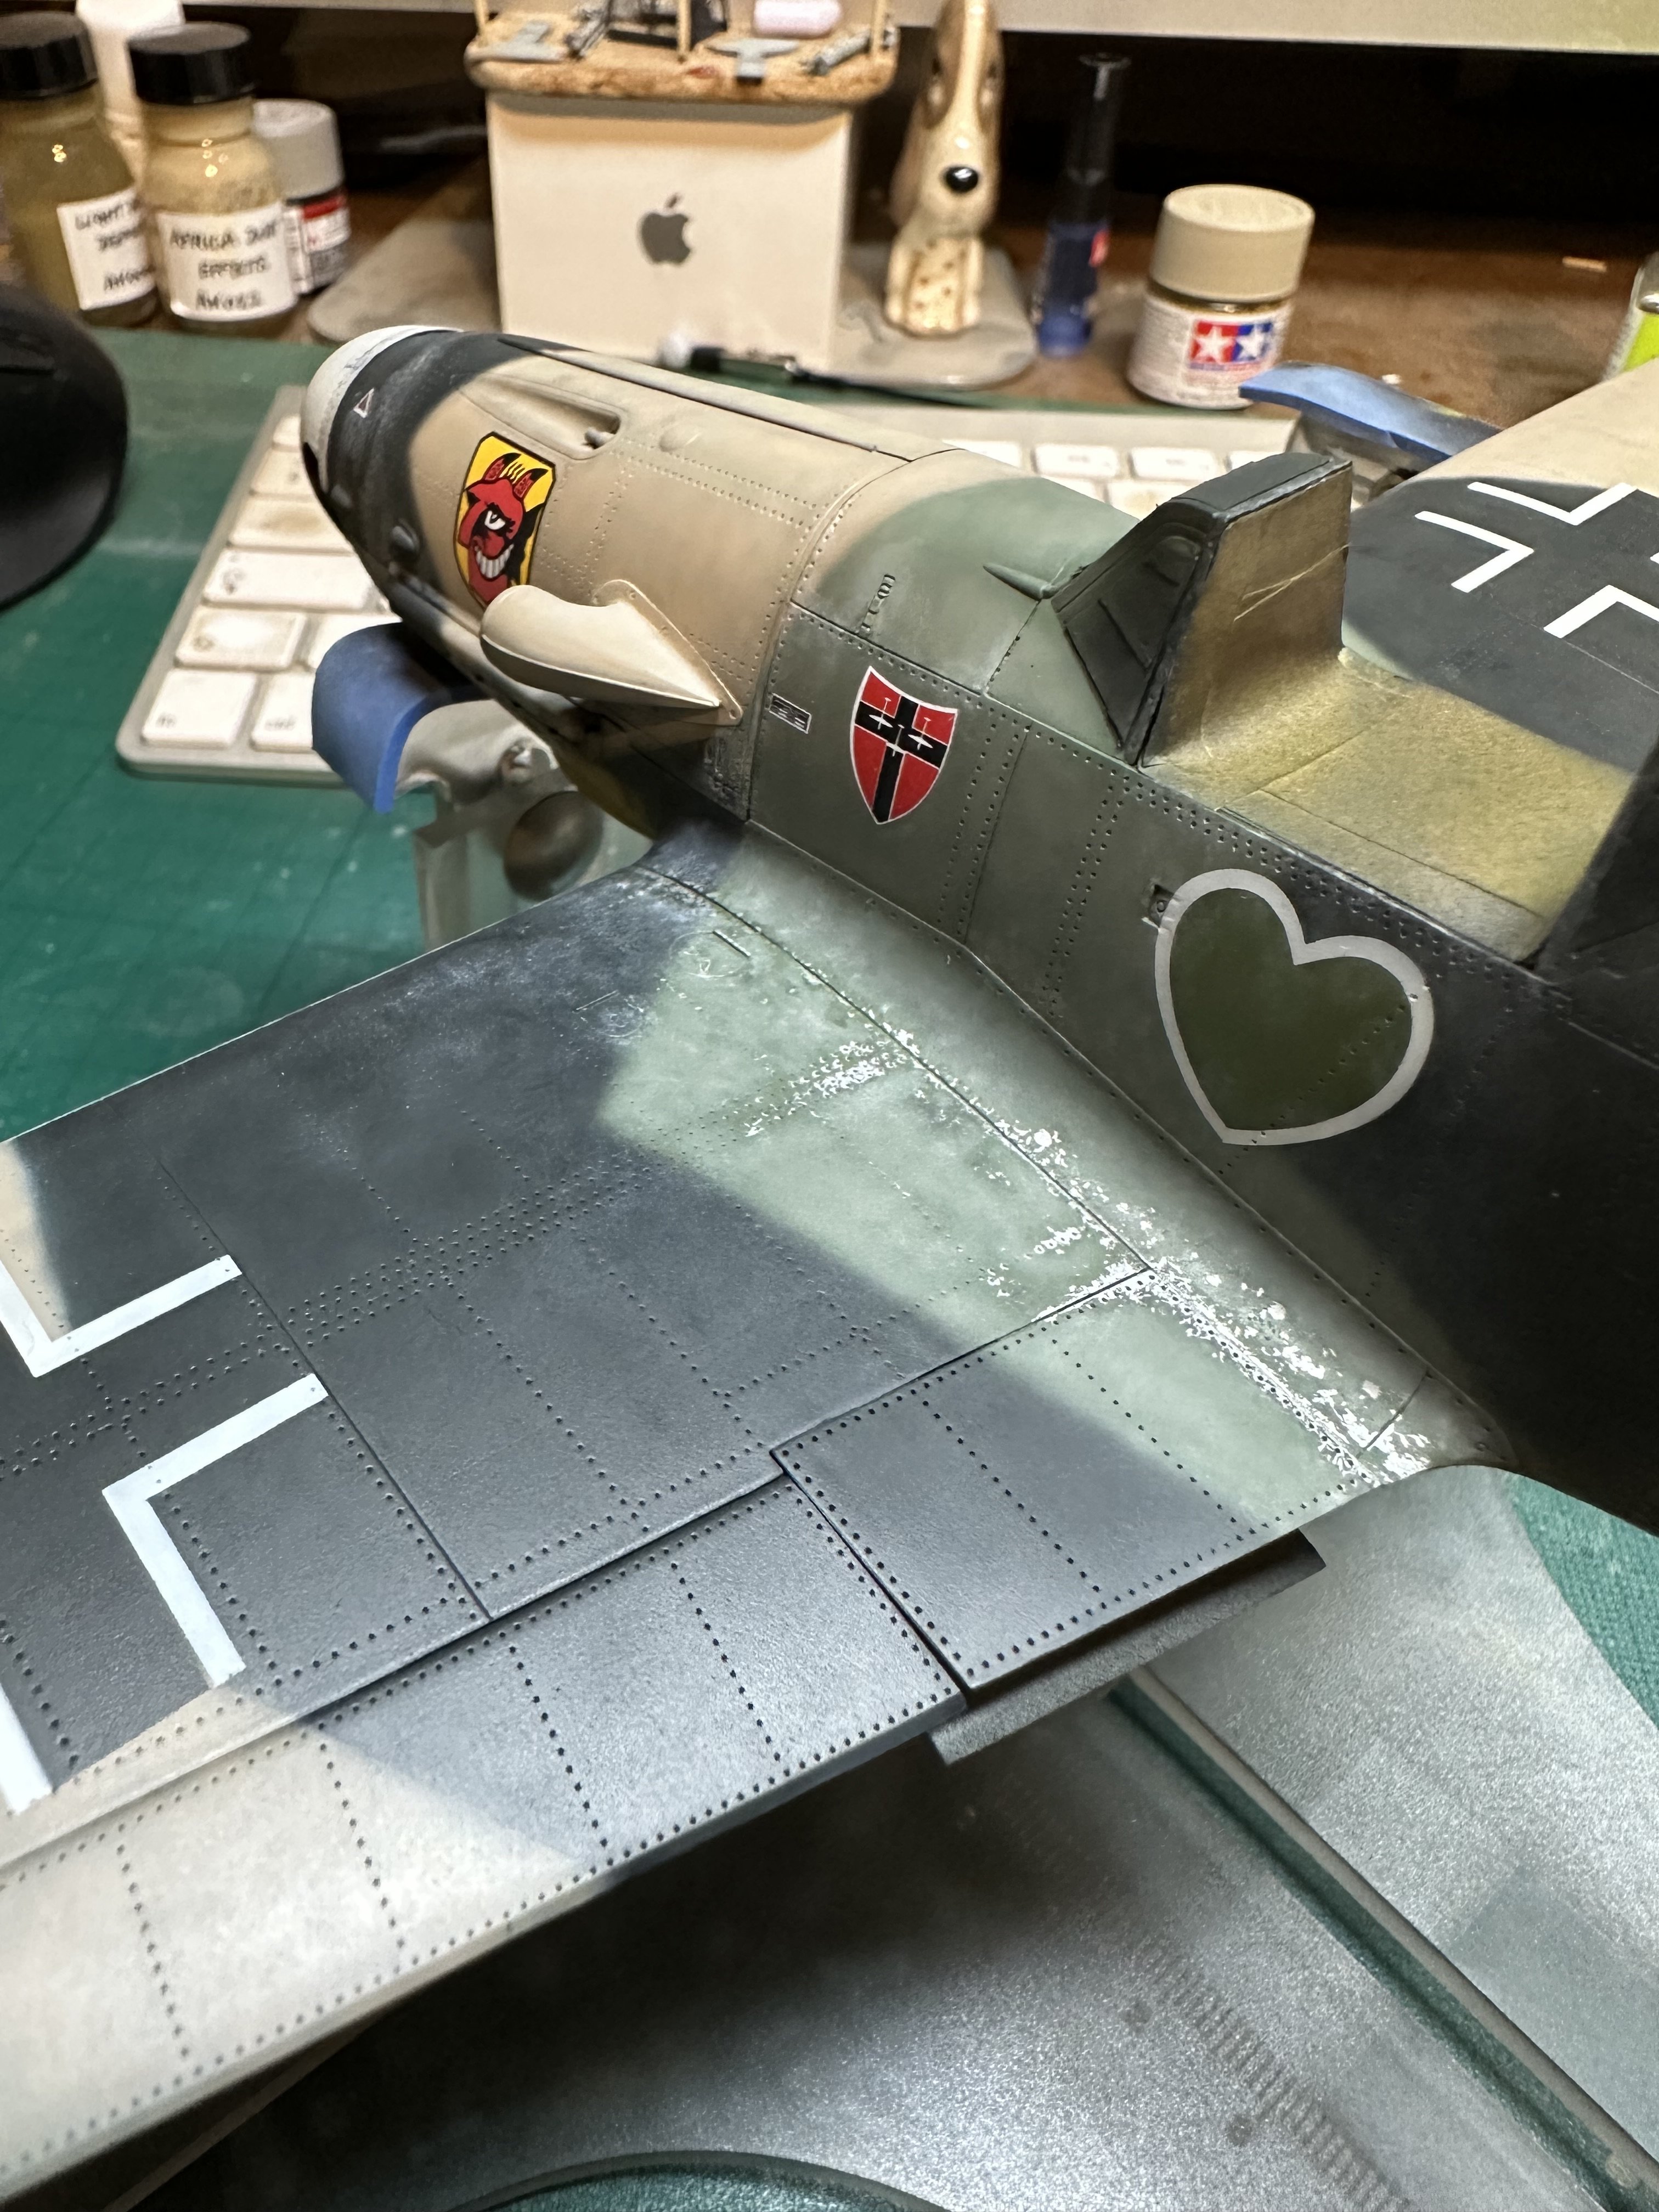
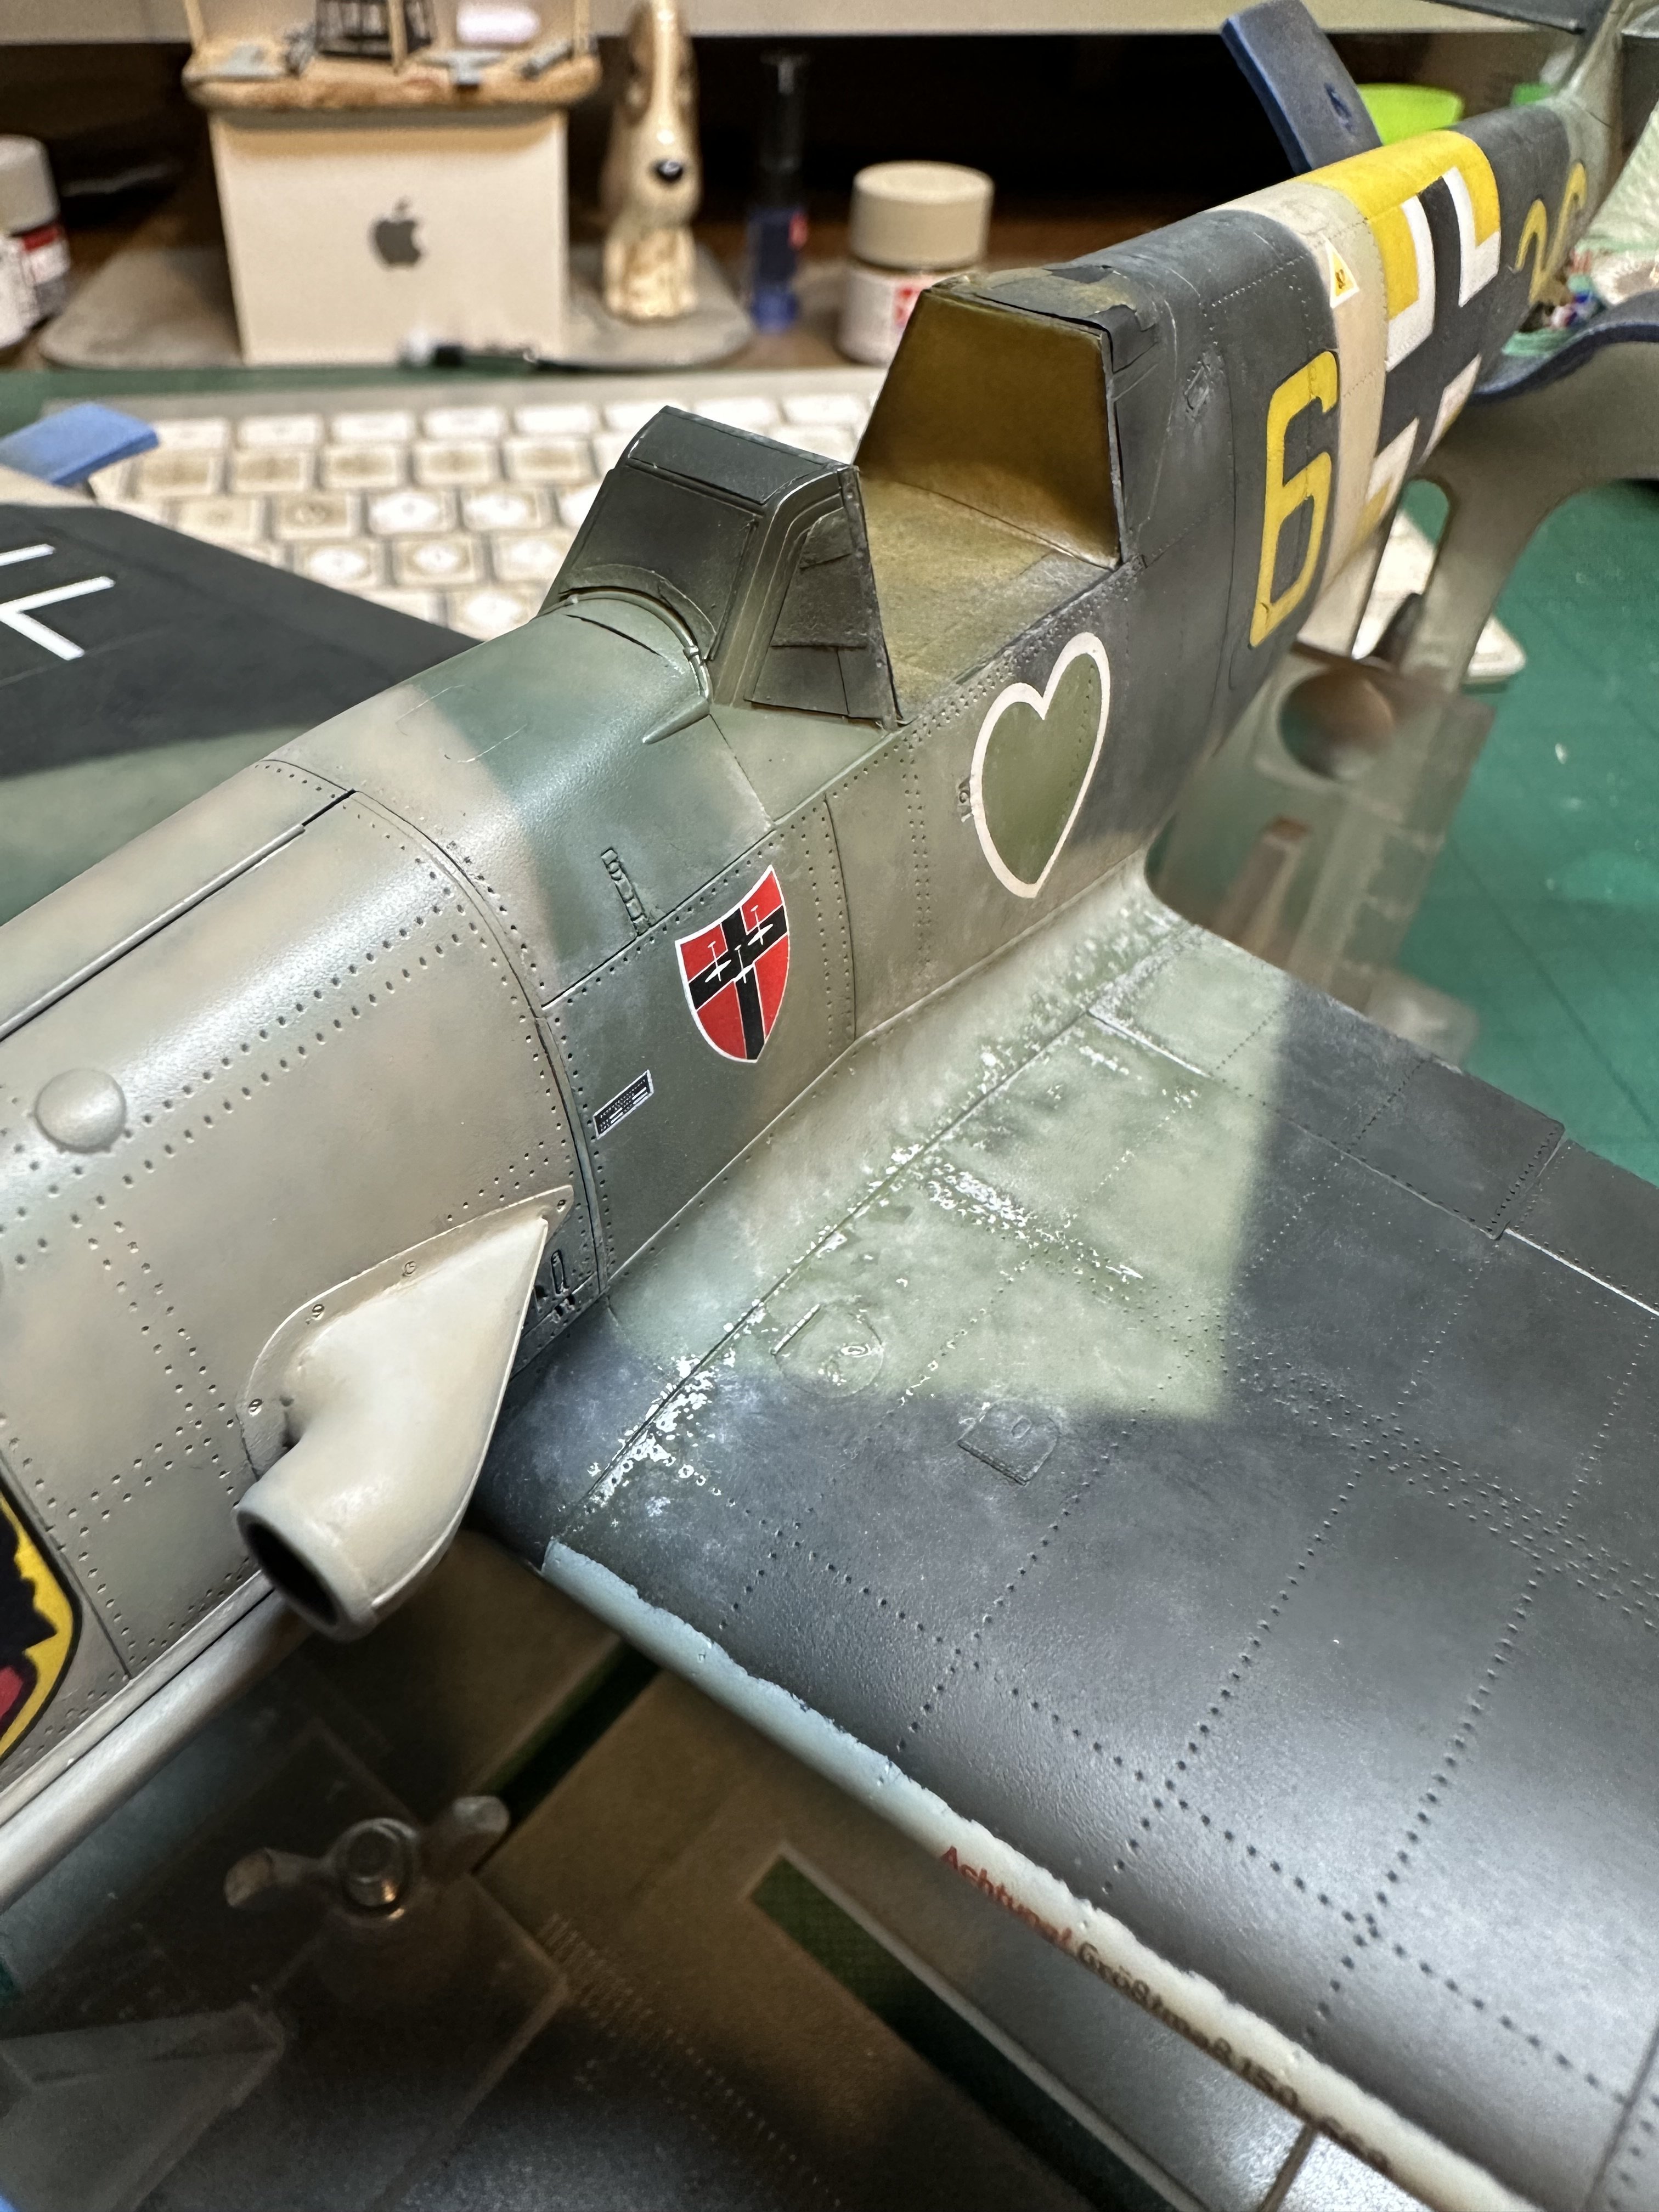
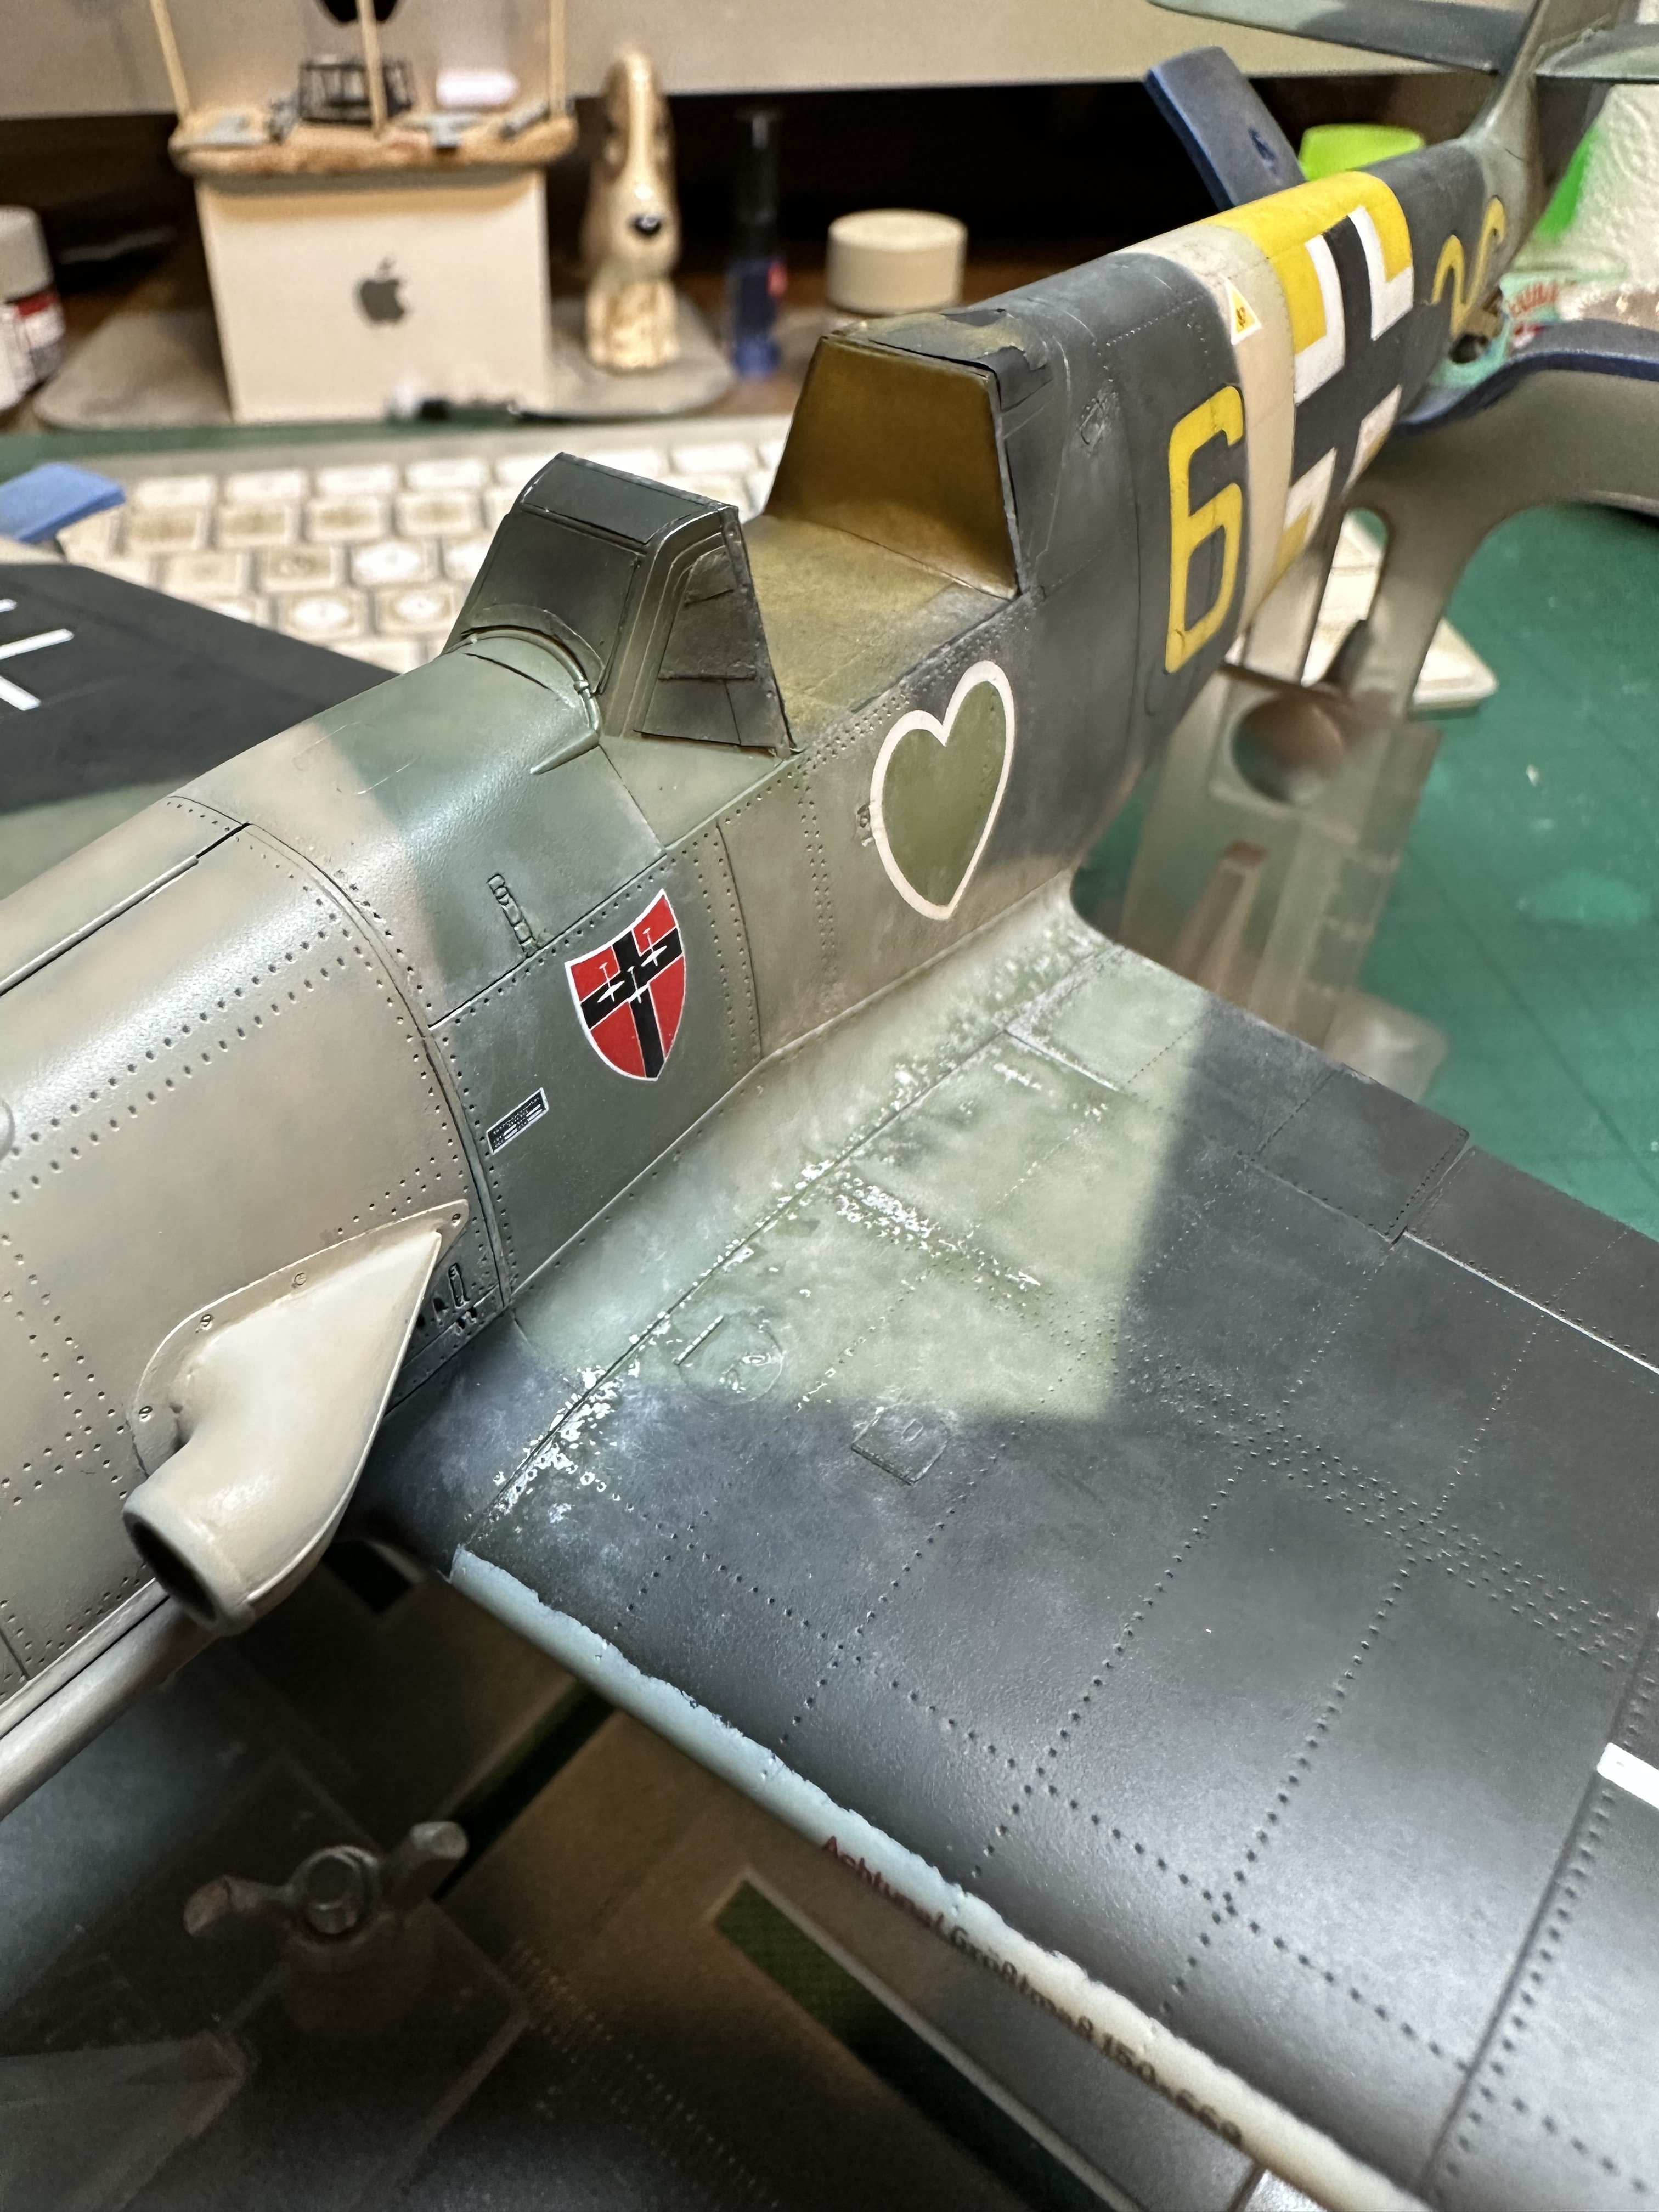
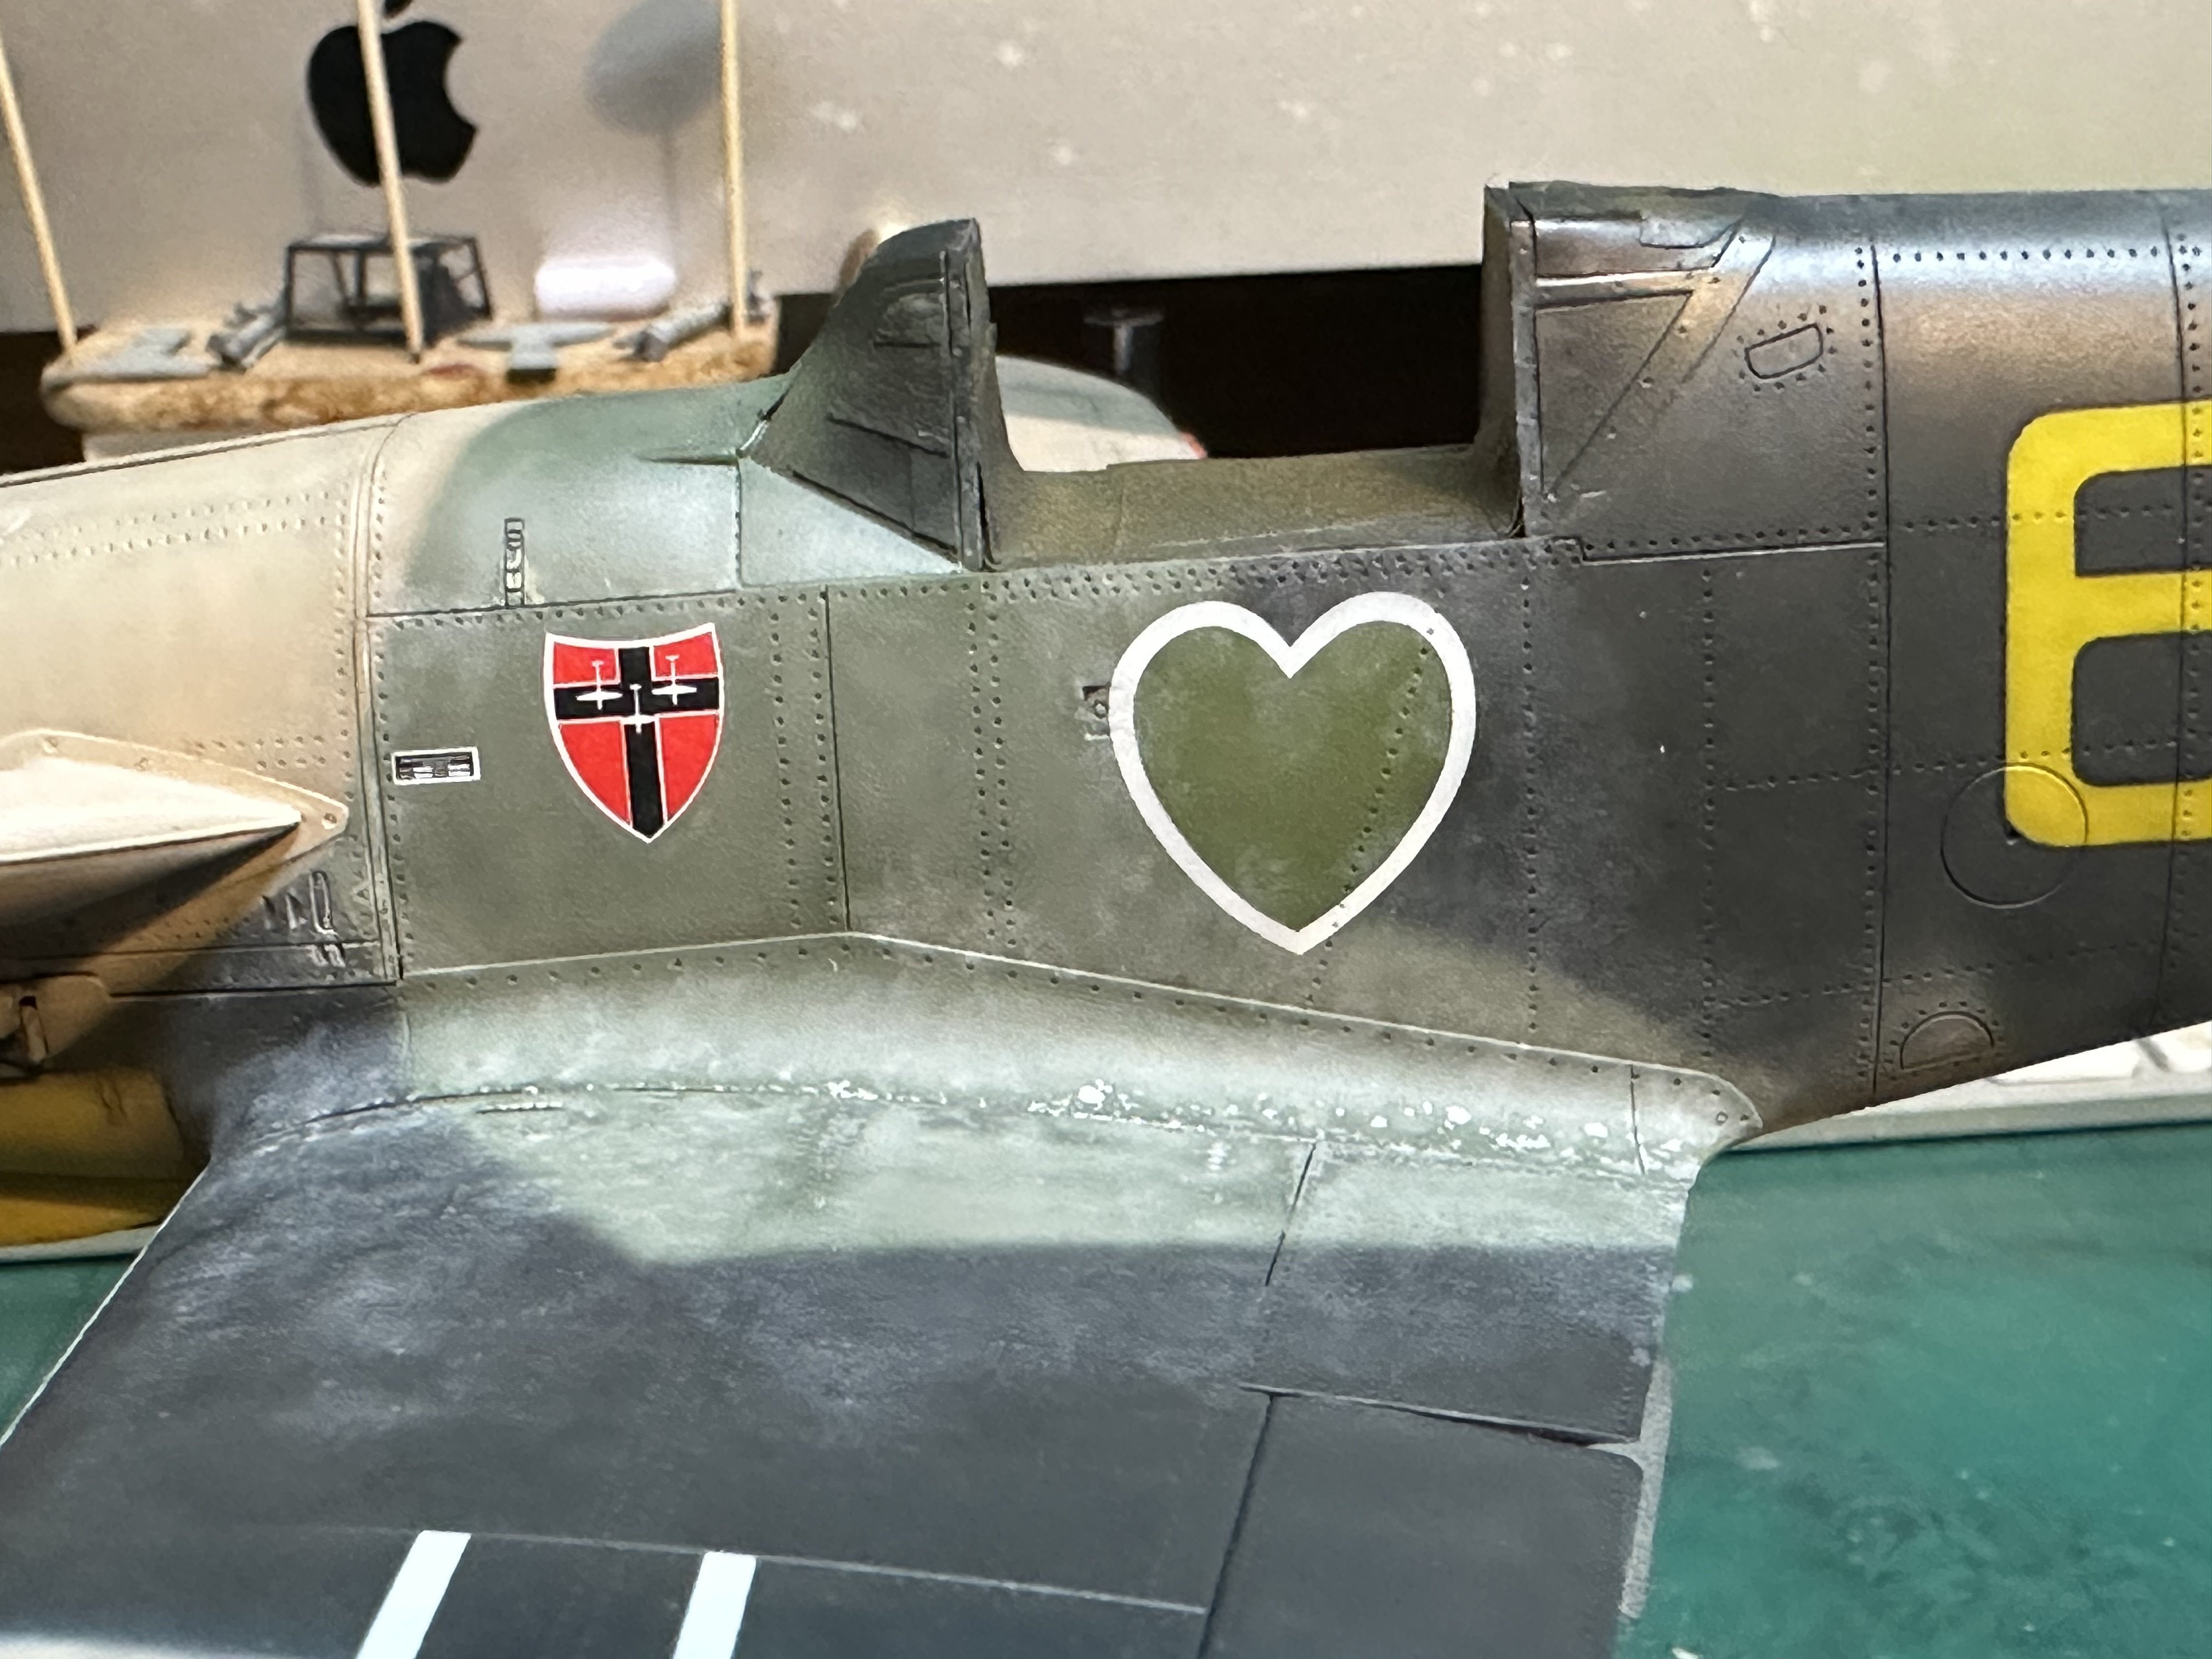
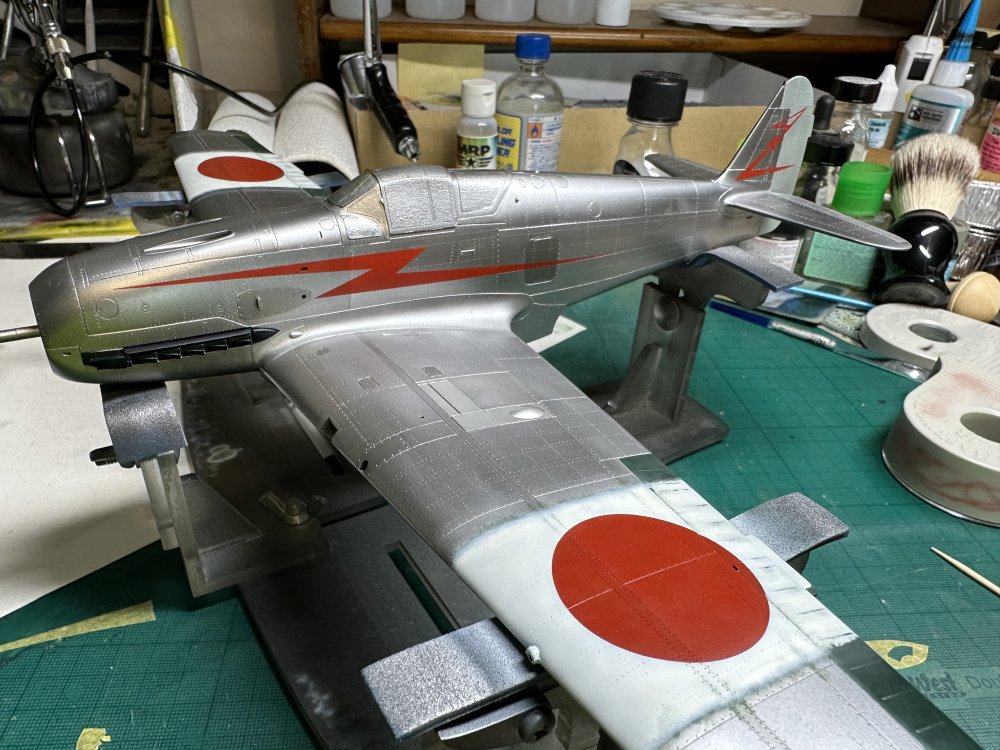
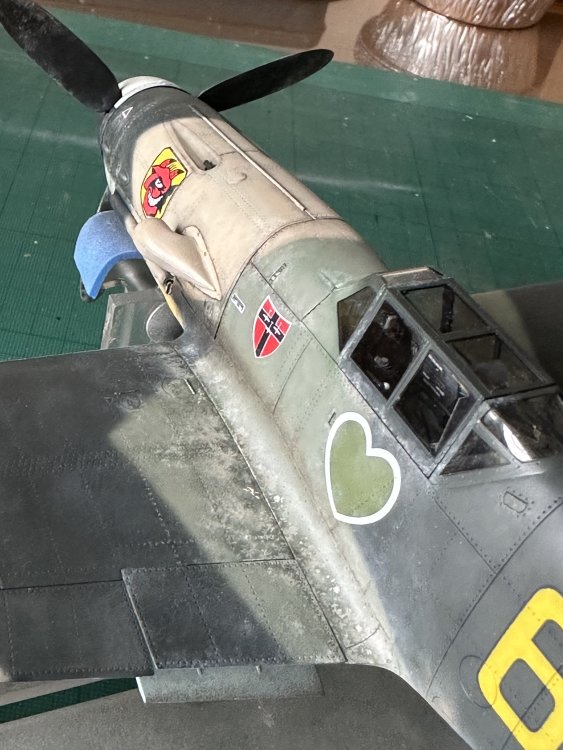
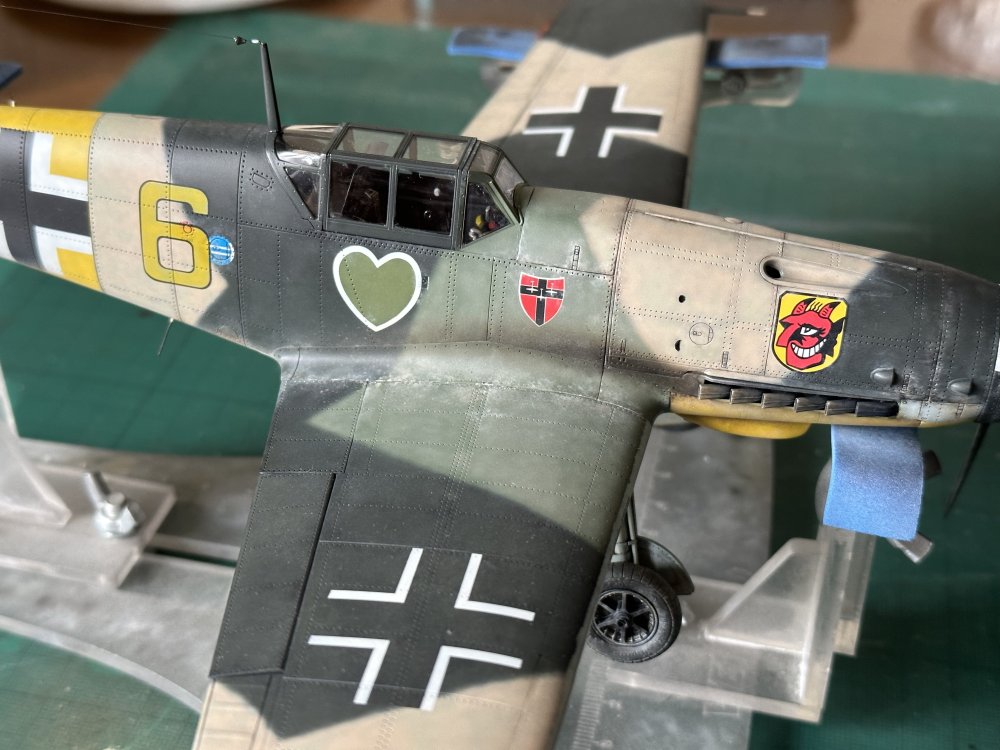
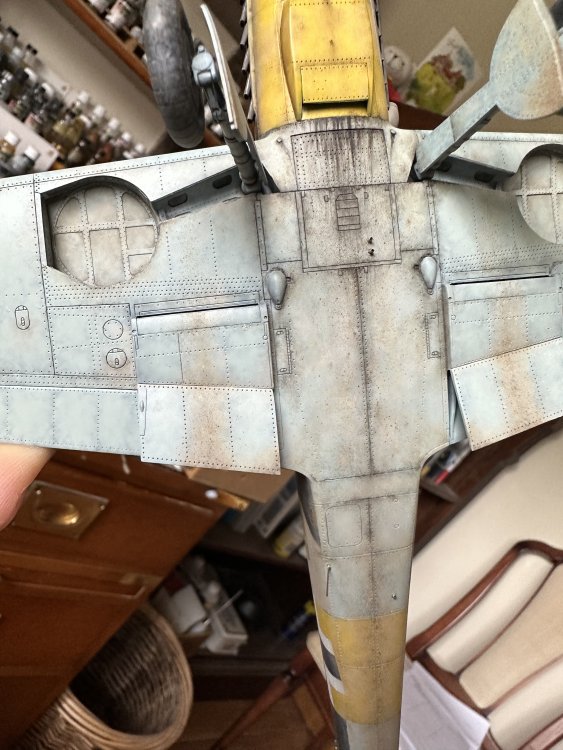
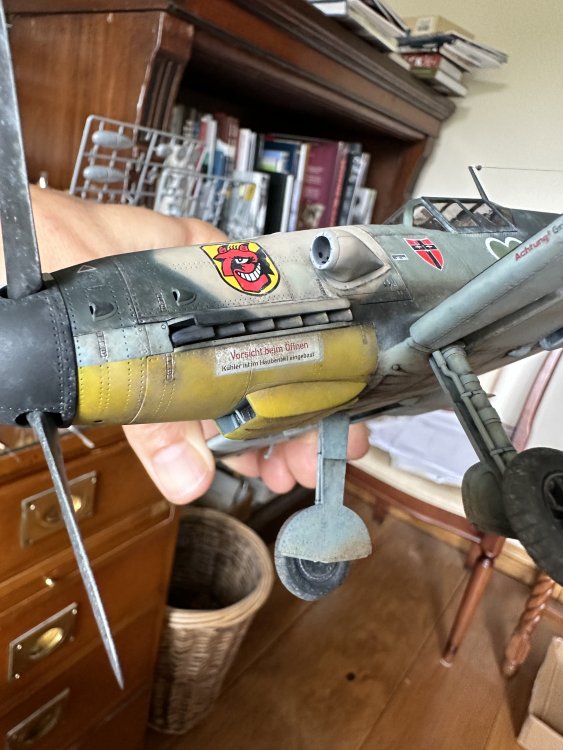
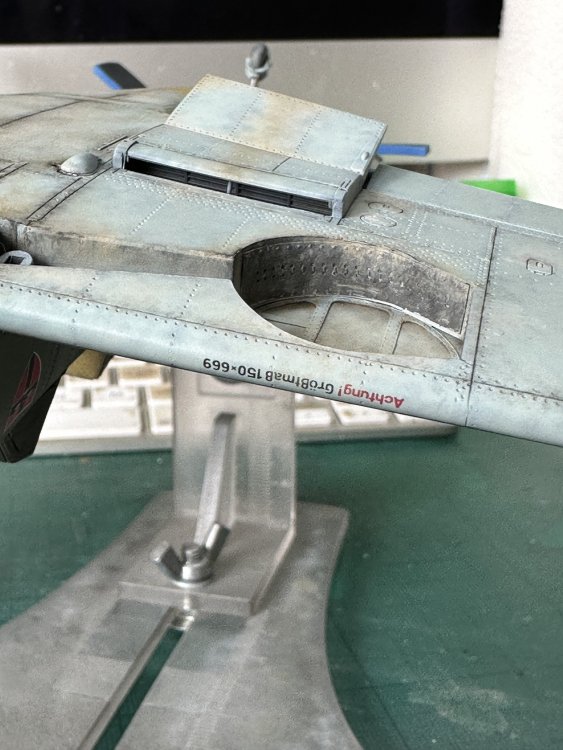
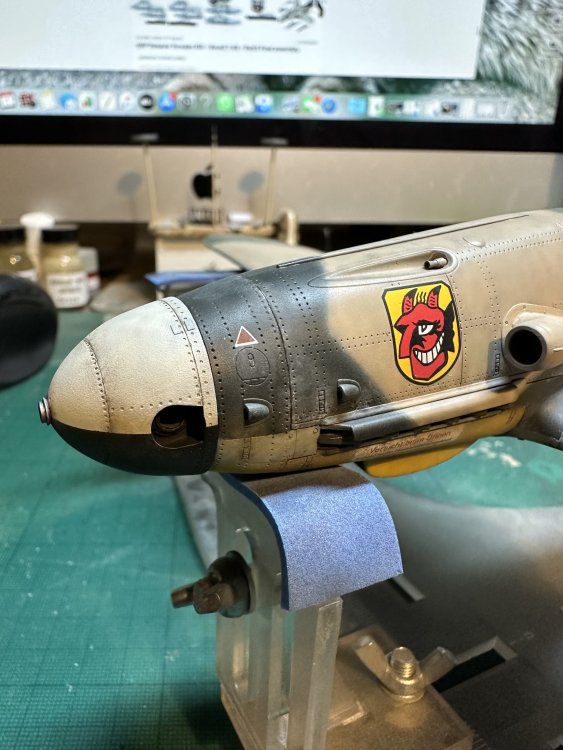
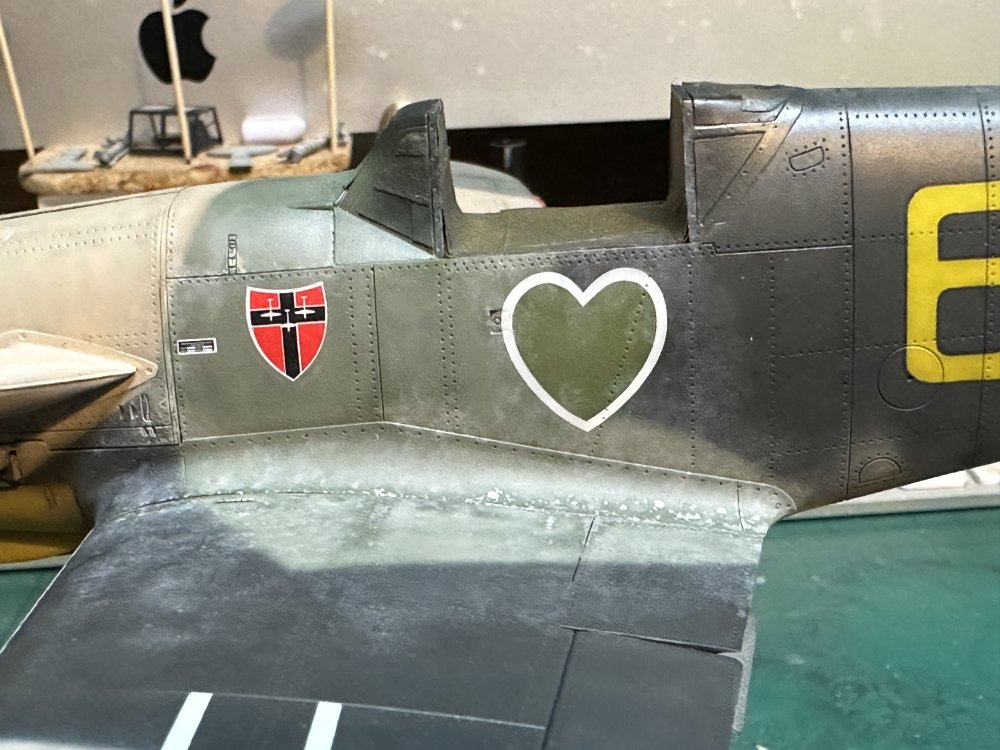
hi guys, i am approaching the paint stage on Trumpy's early Gustav which I am building as a G-2 from JG54 and would like some thoughts and advice on colours, or at least your best guess / interpretation thereof... i am split between Yellow 3 and Yellow 6 Yellow 3 airframe points to note - def a Gustav and not a Friedrich (location of fuel port, different canopy frame etc) - not a Trop variant (no holders for sunshade) - not a G-4: no small bulges on wings; tyres therefore 150x660 ie dimensions same as Emil, but the spoke design on hub was heavier / lacked lightening holes - absence of ventilation airscoop just under windscreen side panel? colours / markings points to note - non factory standard 2 tone green scheme: my take is RLM70 and a n other light green - rear canopy frame: in same colour as the lighter green, or badly colourised but actually in RLM 75? I have a pic which clearly shows wing walk lines were not overpainted and left in either RLM74 or RLM75, so maybe this was also too fiddly to paint?? - fuselage cross lacks black outline - wing cross - does this have the black outline or not? - spinner: white and black segmentation is clear, but is there a third colour on the front most section? I have seen these in red on other JG54 machines, so this is plausible. unsure if this is colourised as i have seen a few versions knocking around the other photo which i think is the same airframe - the diagonal camo line running back from the cowling is match, and i can see no positive differences and now Yellow 6 airframe points to note - def a Gustav and not a Friedrich (location of fuel port - triangle just visible behind number 6, different canopy frame etc) - not a Trop variant (no holders for sunshade) - likely a G-2: tyre data warning on wing leading edge shows 150x660 (i have seen close ups of different airframes that show this as 669?) - absence of ventilation airscoop just under windscreen side panel? colours / markings points to note - non factory standard 3 tone green scheme: my take is RLM70, a n other light green; it's the third colour that is bugging me... I am torn between something like RLM02 and some sort of tan colour - I am presuming this is Yellow 6 + ~ - spinner: white and black - cowling, just behind spinner: the repaint stops, and shows RLM76 before we get to the RLM04 underneath - RLM04 painted around RLM76 to keep stencil warning above radiator - underwing wing cross lacks black outline - yellow wingtips underneath - white wall on tail wheel - swastika is white outline only (I can't recall whether that is standard for this timeframe) the below image is from Luftwaffe im Focus magazine - this particular grab is from the net, shown only for the purposes of research / discussion hopefully there is enough to peak some interest here, any thoughts and observations would be most welcome! Nick
-
Got a link to the thread that caused the aggro?
-
Sprue goo is a definite thing - not particularly new mind, but probably not found much in the old school / I’ve done it this way and see no reason to change circles… the idea is that, especially for sanding and scribing, you are filling any gaps with ‘like for like’, which means that sanding is much more even, scribing more predictable etc. for the gap filling itself, it should shrink much *much* less than any lacquer based fillers. things to watch are - using it before it has ‘settled’ / all the bubbles have gone - using plastic which does not match the model (we all know different manufacturers use different plastic, some we like, some we don’t etc) - using Evergreen plastic for sprue goo - just don’t, it’s shit - suggestion: purest styrene is clear, so use sprues from clear parts, and just add a dash of say red lacquer paint so you can easily see it. as to CA, some of the black ones are much more friendly to sand as they have some sort of rubber compound added making them more flexible; and of course it’s a pretty much instant solution. all in all, I’m not sure there is one filler for every use / every requirement hth
-
My Great Uncle served on these and for a year or two he came to live with my Nan and I when I would have been about 10 or so (we're talking ~1982). I remember he had *lots* of war stories which I would listen to with eyes wide, mouth open amazement; he also had a large box of medals, but sadly like so much I didn't record our conversations (never thought to) and now it has disappeared in the mists of time. My Mother bought me this kit on release (the first one I had asked for as an adult) and to my shame it still resides in my stash - my guilt accentuated because she died a few years ago before I got round to building it...Anyway, enough of my reminiscing... I'll be following this closely! Which boat will you be doing? I have a few references and researched them quite a bit some years back but I confess I've forgotten it all now and would be starting from scratch. Despite that, seeing this build has prompted me to resolve this will be one of my next builds. Wishing you smooth progress with the kit and a Happy New Year. Nick
-
F4U-1A Corsair Tamiya 1/32
nmayhew replied to DocRob's topic in LSM 1/35 and Larger Work In Progress
Looking good! i don't think it looks harsh at all, but if it's not too late i do think you need quite a bit more closer to wing root and further forward; this is both relative to what you have further back and on the flaps, but also just generally from what i have seen in pics - these machines got beat to sh*t