crazypoet
-
Posts
826 -
Joined
-
Last visited
Content Type
Profiles
Forums
Events
Gallery
Everything posted by crazypoet
-

Ho229 at the Udvar-Hazy Center
crazypoet replied to JeroenPeters's topic in LSM 1/35 and Larger Work In Progress
This is another build i’m just now getting caught up on - phenomenal work as always! i love watching the masters at work - you inspire me to stretch! -
Gawds - this is epic! I’m finally getting caught up on all the builds i’ve missed while my bench was idle, and this is a standout!
-
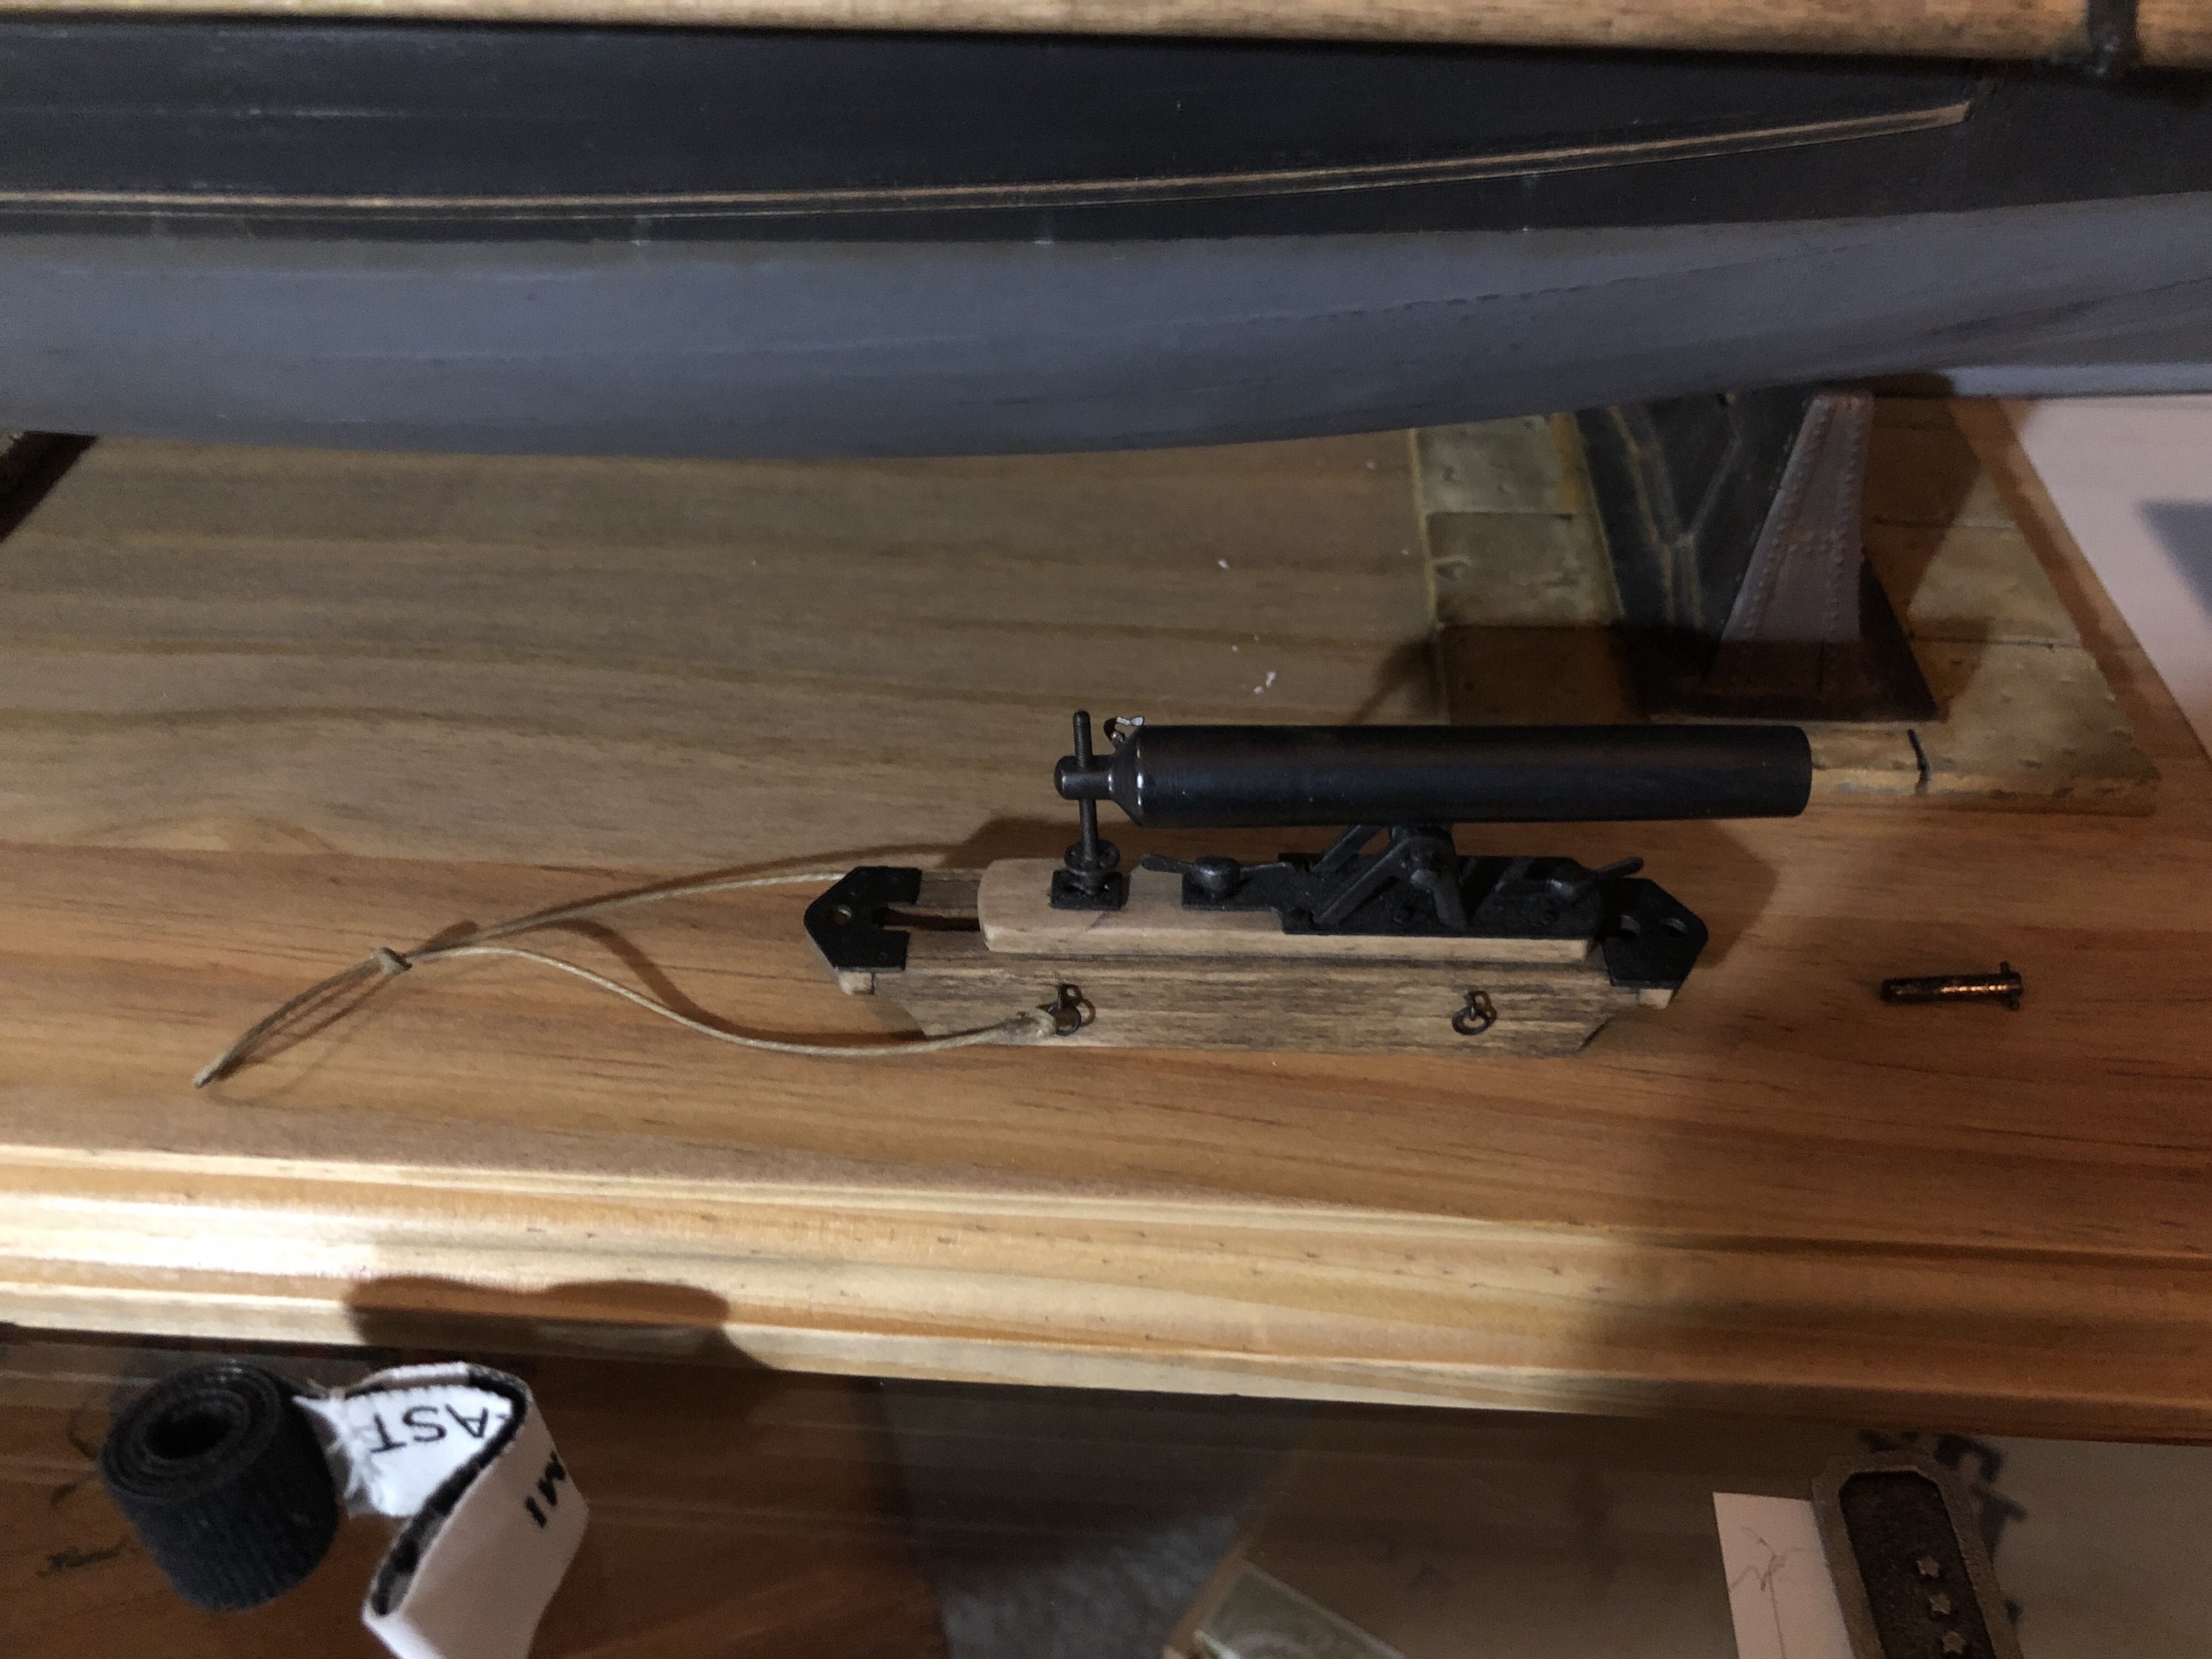
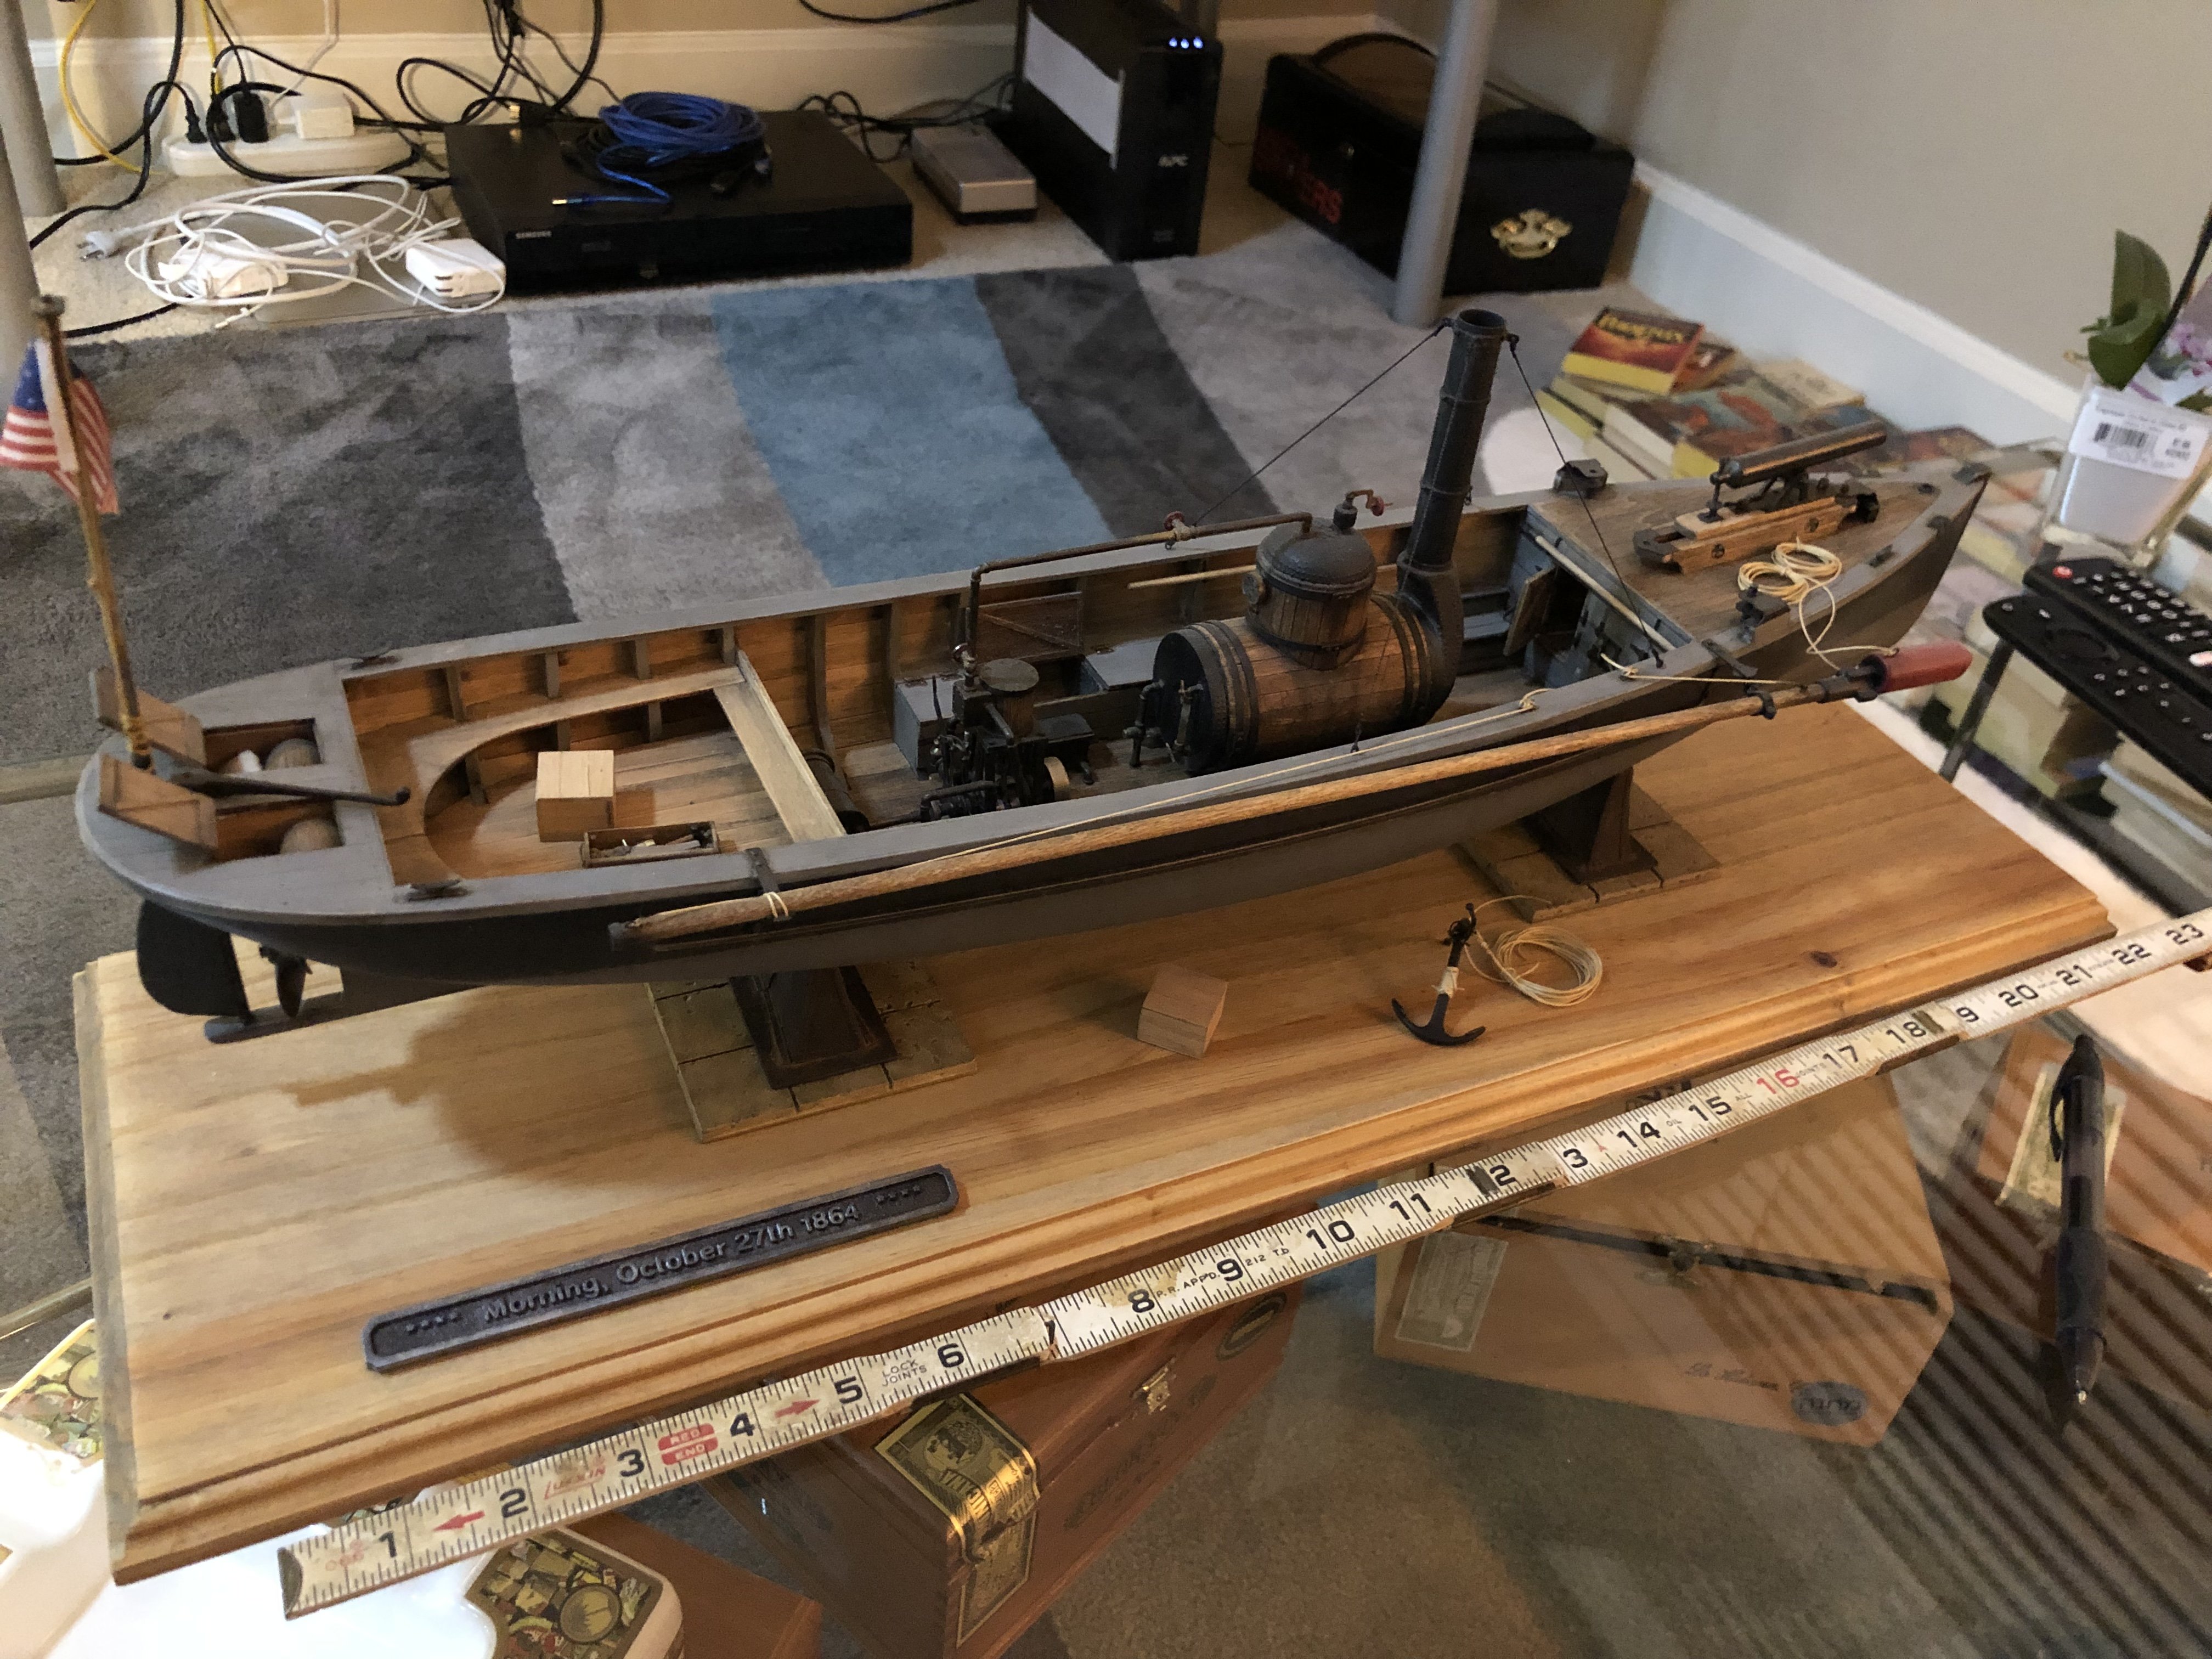
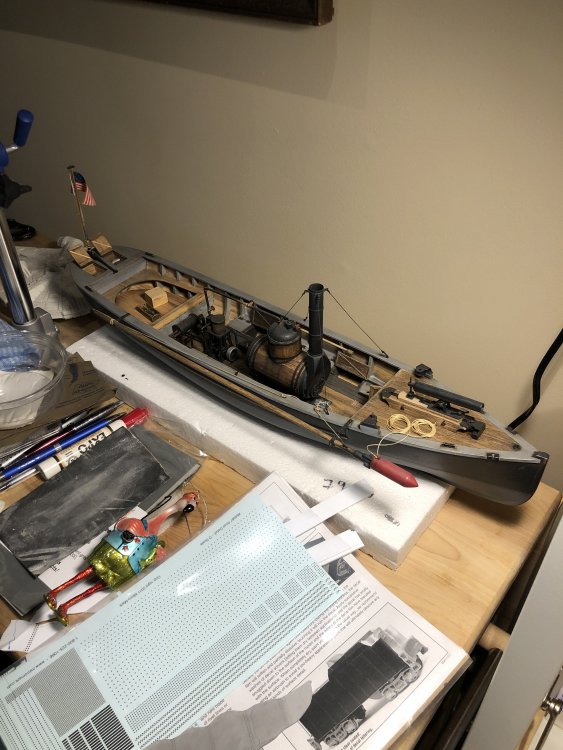
So it seems that the 12-pound boat howitzer was rigged with a “training line” for the designated crewman to use to point the thing, and to help swivel the mount to it’s various pivot points. cool. except, well, there seems to be no place - even in period ordnance manuals - with a description of how the damned thing was done. sooooo... i’m Back to making things up. I think I have an approach that’s at least defensible. We’ll see who screams and points accusing fingers when I get it out on display finally! I also finally figured out what I was doing wrong with my dry-transfer decal paper, so I can finish the base and the ammo chests... wheee!

-
Ooooooo.... B-47 in NMF.... that would be a hell of a project!
-
Yah - cutting fiberglass isn't fun, and would mean a TON of scratchbuilding. I can sorta see why they want to keep those wings as simple as possible from a manufacturing perspective, but flaps seem sorta basic, at least from the outside looking in. I fell in love with the B-52 as a kid - my dad worked for a company that built components for the thing, so I had some *biased* early exposure. I don't always agree with the way it's been used, but it's a magnificent bird in its own right - doubly so when you consider that it's on its 6th Decade of front-line service... I love their work - but it's expensive enough that I have to plan my purchases carefully. Fortunately, there's a bit of time to make a case for either the PBY or B-52 as a Christmas gift to myself... And the A-20 in 1:32 isn't due out until "sometime next year" - so I have time to plan for that one as well.. Wheee!
-
What are your thoughts on the B-36? That’s another impressive bird!
-
Just catching up on this - great job on those turrets, and the AA mount PE build is gorgeous! i have been a bit fun-shy on tackling this kind of build as the parts are SO SMALL... yikes! but you’ve given me some inspiration. Somewhere along the line i’d Like to do the USS Arizona and USS Missouri to book-end the WWII Pacific Campaign
-
The HPH B-52 is scheduled for limited release in 2-3 months, per an email I received today. is anyone here planning to pick one up? They are accepting pre-orders now. This bird is huge even in 1:72; A 1:48 version is going to dominate any space it occupies i can *hope* for a future 1:32 release, but I suspect that 1:48 is going to be as good as it gets. i have a pair of 1:72 kits that I plan to build as “bookends” for the B-52 - one from the Linebacker II campaign during the Vietnam war and the second from the early days of the first Gulf War i’m at least re-evaluating my approach based on the HPH version... that would be an impressive centerpiece in my “look what I did” space!
-
Getting there - laying out the base before I do the last bit of rigging and the lettering on the ammo cases The ropes all need a bit of aging to make them look appropriately worn. I still need to finalize the rigging on the gun. Since it was designed to be “portable” (a hernia-inducing carry in two pieces by six men) and was also meant to swivel around three different mounts, it would not have had the more complex run-in/run-out rigging of larger shipboard guns. Short ropes on each of the four rings on the carriage both make sense and align well with existing documentation.

-
I'm not going to be able to attend the whole thing, but I'm hoping to make it to at least some of the stuff on Friday and Saturday. I'm in Atlanta, so I have zero excuse not to attend - it's less than 3 hours from my humble abode by car. I'd love to catch up with any/all of the crew - perhaps a Friday night pub-crawl?
-
Convert Eduard Limited Edition SBD-5 Dauntless to SBD-3?
crazypoet replied to crazypoet's topic in Modelling Discussion
Ah-Ha! Accurate Miniatures had an SBD-3 kit a while back. I could pick one up and use the cowl and prop/spinner from that. Thanks!!! The cowl on the -5 was 4" deeper and had different inlets and prop spinner. Most everything else was the same... -
Amazing Abrams bridgelayer made from Lego
crazypoet replied to [CAT]CplSlade's topic in Non LSM 'WIP
That is BEAUTIFUL! I somehow suspect that there's not a standard Legos kit for this one? -
Greetings all! I have, sitting on my bench and waiting more or less patiently, the beautiful Eduard limited Edition SBD-5 Dauntless Dive Bomber. Of course, the version I actually *want* to build is the SBD-3, as was used at the Battle of Midway. Do any of you know of a conversion set for this? I've not seen one, but that doesn't mean it doesn't exist somewhere out in the ether...
-
This ship is iconic - and I love the version you’re building. I recall first learning about these back in the ‘80’s - there was more than a bit of institutional doubt at the time about the ability of the Cobras and front-line AA to deal effectively with them, should the balloon go up before the Apaches were field-ready this takes me back!
-
Cees - this is a beautiful build, and it gives me hope to see that there are projects here with even longer lifecycles than my own! Besides which, watching this evolve is something akin to a master course in conversions.
-
Hmmm... have to see how to post pics from my phone now! And... success! Now I don’t need to give photobucket any more $$$ sweeeet!
-
Step by slow step - trying to mimic the grayish/yellowish/reddish sandstone from around the Chesapeake for the stone tiles that the iron stands will rest on... I 3D printed the stone tiles (thank you Thingiverse!) and am working through layers of color to get it right. The reddish one on top is close, I think, so i’m doing the second to match. And with one of the iron stands... in parallel, i’m Wrapping up the (also 3D printed) nameplate for the whole assemblage...
-
Well, ok, it’s been three moves since I last got any work done on this, but it’s finally moving. i finished the main part of the stands tonight. These will sit on some 3D printed stone tiles, which will then sit on the wood base Hopefully, now that i’m Working again, I can wrap up the base, do some final rope-work on the gun carriage and put this behind me. I never, in my most fevered nightmares, would have dreamt that this would be such a long-term project!
-
It's been a very long and trying year and a half, but I'm finally in a position to dust off the workbench and will be moving this project from "In progress" to "Complete" in the next month or so. Wow - has it really been four years? Yikes!!! Thought for this day? "Life is what actually happens while you're busy making other plans!" :D
-
After a long delay caused by relocating to a new living space, I'm finally getting my working space functional again - look for updates to this over the next few weeks. I'm also looking at PhotoBucket to see why my pics aren't displaying - I upgraded my account some time ago
-
Nice! What are you using for the hose?
-
1/32 Tripod Jack (RAF) ready for ordering
crazypoet replied to JeroenPeters's topic in Modelling Discussion
Gorgeous! Thats a ton of work, getting the design to render so beautifully -
There's a whole world of hoses and fittings to get lost in, down there! Just remember to come up for air every now and then...
-
Damn - nice!!!
- 28 replies
-
- 1
-

-
- 1:48
- mosquito pr mk.iv
- (and 1 more)
-
Nice!