

crazypoet
-
Posts
826 -
Joined
-
Last visited
Content Type
Profiles
Forums
Events
Gallery
Everything posted by crazypoet
-
There's not been much happening that's photo-worthy, though I'm continuing to make progress on the base and stands. in the interim, I finished up the title plate today. I had it done at Shapeways, based on an HO-scale building sign... The finish is Tamiya fine filler/primer, graphite, Uschi iron and steel powders, rust wash and more iron and steel powders to tie it all together.
-

King Tiger build in an Army tent
crazypoet replied to Padubon's topic in LSM 1/35 and Larger Work In Progress
Looks fine as-is! Have fun with it -
Iconicair Supermarine Spiteful
crazypoet replied to JeroenPeters's topic in LSM 1/35 and Larger Work In Progress
I'm all ears to hear how you approach this...! err, well, given that this is all words on a screen and such... make that I'm all *eyes* -
The wood blocks make tons of sense as they provide solid support for everything around them. I also like the jig you made for gluing up the base of the tank - you're giving all of us a great tutorial here!
-
I'm delighted to see it there safe and sound - I hope your folk enjoy building that beautiful bird
-
I completely understand the desire to make it accurate even when the details are all but invisible. I *also* understand the need for a good celebratory beverage afterwards!
-
King Tiger build in an Army tent
crazypoet replied to Padubon's topic in LSM 1/35 and Larger Work In Progress
Looks like a fun break! I should have thought of something like that waaaay back when... -
Here's the tracking number: USPS Conf Number: CJ533359673US you can look it up at http://www.usps.com
-
According to USPS, there's a hold on delivery for "Payment of Charges". are they trying to impose an import Tax? Let me know - I'll happily cover any such fees via a matching donation.
-
Profimodeller Fi103 V1
crazypoet replied to JeroenPeters's topic in LSM 1/35 and Larger Work In Progress
Nice!!! -
i just checked my package and it shows that it's sitting in Customs in London
-
MH 60 s Knighthawk Academy 1/35
crazypoet replied to shark64's topic in LSM 1/35 and Larger Work In Progress
Agreed - nice job on both the CAD work and the design of the components/assembly -
A day in the life... Starting to cut out ironclad armor plating for the top half of the base, and laying out deck planking for the bottom... An hour of cutting Styrene sheet... And starting to lay lay out the pieces... All this because I needed a break from applying rivets to the second Boat stand... hmmmm... I'm thinking this base idea was a bit ambitious! It will be really nice when it's done, though, and will help to put the Picket Boat into context...
-
Good Gawd I'll be watching over your shoulder...
-
WEIMAR T174-2 "Fortschritt" - 1/35 by Balaton Modell
crazypoet replied to elmarriachi's topic in Non LSM 'WIP
You are all over the place with your builds - I enjoy both the variety of subjects and your impeccable execution -
STAR WARS "Millennium Falcon" - 1/72 by Revell Master Series
crazypoet replied to elmarriachi's topic in Non LSM 'WIP
She's beautiful! -
Profimodeller Fi103 V1
crazypoet replied to JeroenPeters's topic in LSM 1/35 and Larger Work In Progress
Take a deep breath and don't rush! -
Bam-aLam!
-
I like the powders though I do wish they were a bit more opaque. Still, the results are every bit of what I wanted to see. This was my first try with them. For the second Boat stand (after all the rivets are done - they take about a week, given my current pace) I'll go with black primer first with a red oxide primer wash over that followed by the powders. What I'm wanting to get is just a *peek* of red rust coming through where the powders are thinnest and where they can't reach.
-
I've not been completely idle these last few weeks... well, *mostly* idle, but not completely so... i'm nearly finished with the first of two Boat stands. A bit more work on the rust and it's there... i'm experimenting with some new techniques which is an utter blast - and I like the results so far. What you see here is red oxide primer followed by graphite followed by Ueschi powders in both iron and steel followed by Vallejo rust wash. I still need to do a bit of blending and streaking, but it's getting close to the look I want.
-
The "PIKE" S077 - ex-Seehund - Bronco 1:35
crazypoet replied to Pepper-Mint's topic in LSM 1/35 and Larger Work In Progress
That weathering is *stunning* can't wait to see the rest of it! -
Packing the B-17 at the UPS store as we speak it will go USPS international - they say 6-10 business days USPS Conf Number: CJ533359673US
-
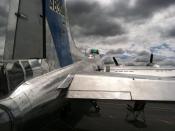
Impressive work on that canopy framing! I also agree about the PE vs kit parts - it's a huge difference!
- 28 replies
-
- 1
-

-
- 1:48
- mosquito pr mk.iv
- (and 1 more)
-
Saffie Spit
crazypoet replied to ophthoidoug's topic in LSM 1/32 and Larger Aircraft Ready for Inspection
That's a seriously beautiful bird!