Jeff
-
Posts
3,706 -
Joined
-
Last visited
Content Type
Profiles
Forums
Events
Gallery
Everything posted by Jeff
-
Sure is fun tinkering. New iron these days precludes that fun. Personally I’m not a bike guy ( no balls and way too many idiots in cars trying to kill bikers ) but I can sure appreciate them and respect the guys who ride them. Old school is the way to fly. The new ones have obscene power, even the dirt bikes , very cool to see the old school workings… ride safe PW ! Jeff
- 2,036 replies
-
- 5
-

-
- car related stuff
- anything about cars
- (and 6 more)
-
We are dragging you over to the dark side. Once there you will be hooked. 🤭🤣🤣
-
AMT 1/24 Mack Superliner II day cab
Jeff replied to CrankyCrafstman's topic in LSM 1/35 and Larger Work In Progress
Awesome plumbing my friend. Looks really good and you’re hitting all the marks !! Lovin this. Jeff -
Outstanding !!!
-
AMT 1/24 Mack Superliner II day cab
Jeff replied to CrankyCrafstman's topic in LSM 1/35 and Larger Work In Progress
Ron…… here in the Great White North the ‘A’ you lost wud be “ I lost the ‘eh’ today” 🤣🤣🤣🤣🤣🤣🤣🤣🤣 -
AMT 1/24 Mack Superliner II day cab
Jeff replied to CrankyCrafstman's topic in LSM 1/35 and Larger Work In Progress
Ron, your engineering and scratch building skills are superior. So many small details you captured that are dead accurate but may not be seen. The hood framing is brilliant ! A Real Mack frame. Awesome. Looking for the next update , Bud … Jeff -
AEG G.IV - Creature of the Night - WNW 1/32
Jeff replied to DocRob's topic in The Great Twins Broup Bluild
This is still so cool. Miles ahead if my skill set and the results are fabulous. This is museum quality work , Rob. A very enjoyable thread for me, I really like how this is working out. Jeff -
Autocar 9964 B conversion to heavy haul...
Jeff replied to Jeff's topic in LSM 1/35 and Larger Work In Progress
Thanks , pal.... I will if you will......- 56 replies
-
- 2
-
-

-
- hevy haul off road tractor
- b.c. logging
- (and 1 more)
-
Autocar 9964 B conversion to heavy haul...
Jeff replied to Jeff's topic in LSM 1/35 and Larger Work In Progress
Thanks, Phil..... I really appreciate your kind words, and thoughts... Jeff- 56 replies
-
- 1
-
-
- hevy haul off road tractor
- b.c. logging
- (and 1 more)
-
Autocar 9964 B conversion to heavy haul...
Jeff replied to Jeff's topic in LSM 1/35 and Larger Work In Progress
Thanks, Rob, I am always more than willing to pass on what I have learned over the years, and also as a side bar, it may give a little idea of what goes on with operating a large truck, and when one is out driving their small car, and give an understanding of whats going on, and why they do what they do.... Jeff- 56 replies
-
- 2
-
-
- hevy haul off road tractor
- b.c. logging
- (and 1 more)
-
Well, that sucks !
-
This whole build is just jaw dropping !
-
Zoukei-Mura P51D Mustang SWS No 4.
Jeff replied to Bomber_County's topic in LSM 1/35 and Larger Work In Progress
Geez, Phil, this is beautiful.... outstanding job... I love this ! Take a bow! Jeff -
Autocar 9964 B conversion to heavy haul...
Jeff replied to Jeff's topic in LSM 1/35 and Larger Work In Progress
Thanks Martin passing this stuff along is what I live for I am more than willing to pass along anything I have learned to help others interested. I was the driver evaluator and part time instructor and air brake guy where I worked. It was very enjoyable and lots of fun. Part of the job I enjoyed immensely. Jeff- 56 replies
-
- 1
-
-
- hevy haul off road tractor
- b.c. logging
- (and 1 more)
-
Autocar 9964 B conversion to heavy haul...
Jeff replied to Jeff's topic in LSM 1/35 and Larger Work In Progress
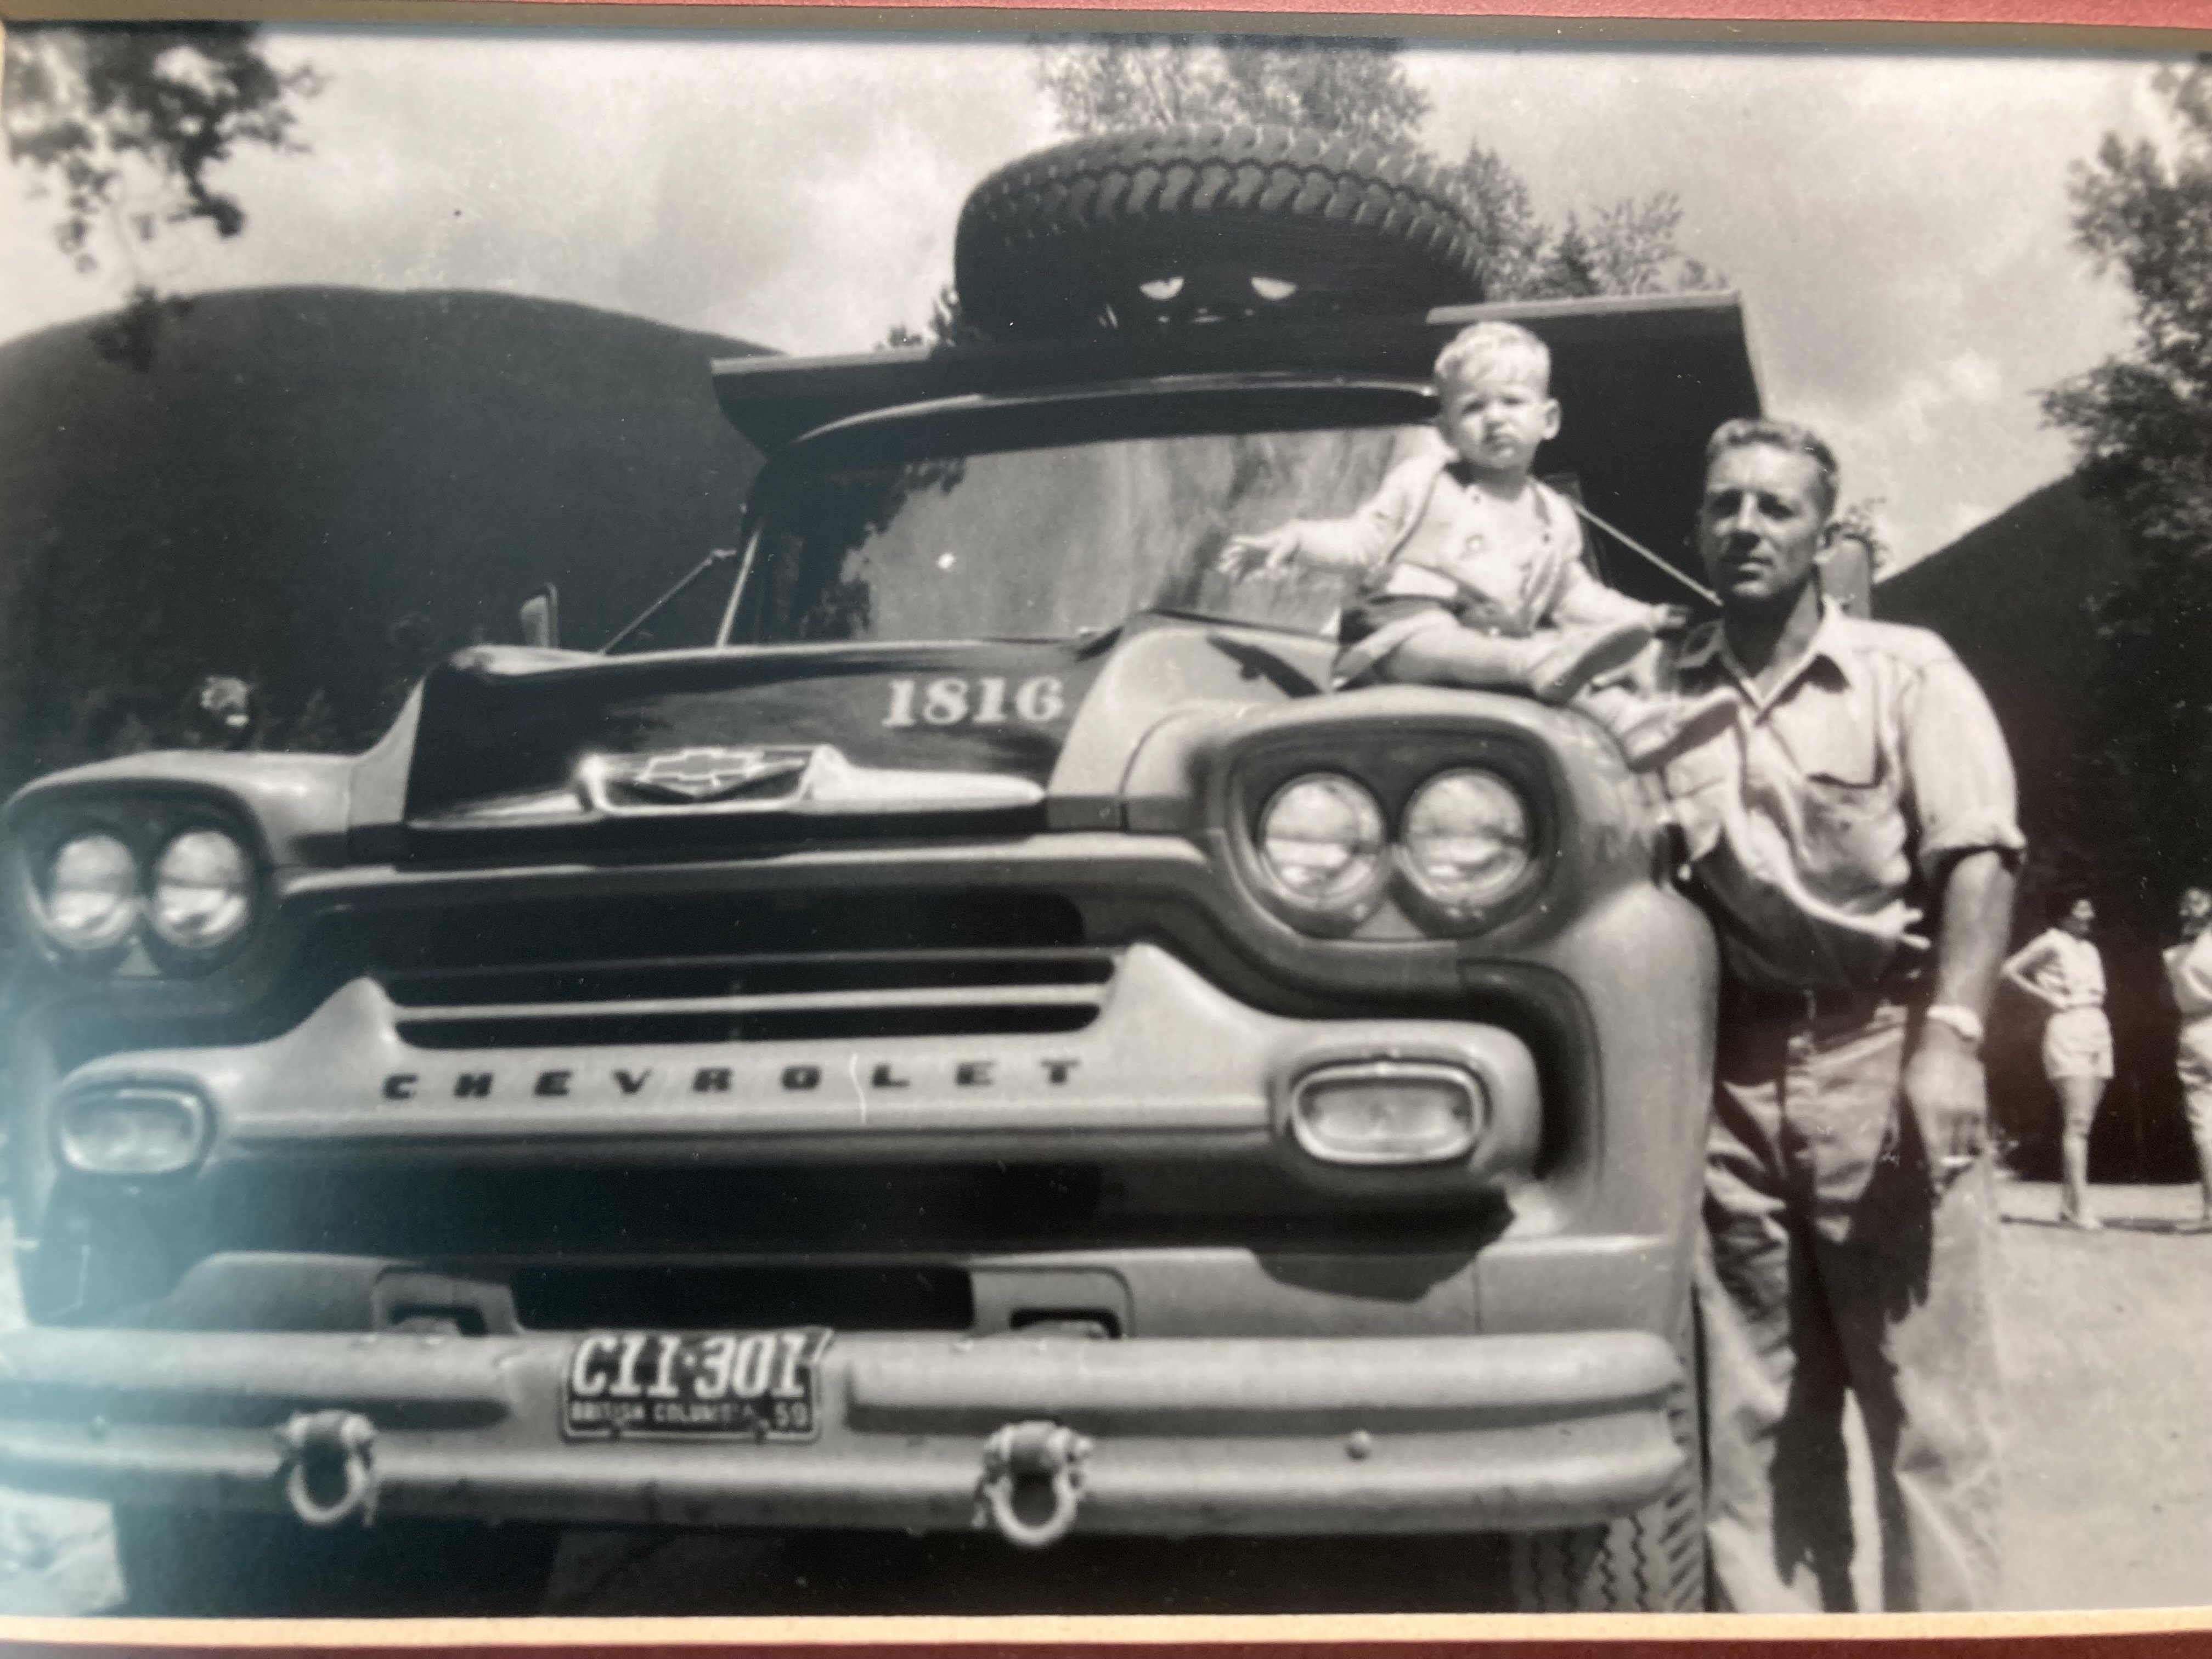
So here is a little history…. My late father and ME. I’m the cute little dude on the front fender. Taken in 1959. The truck is a 1958 Chevy with a 348 gas engine, 5 speed with a 2 speed electric rear end. So I have been ‘trucking ever since…. Matchbox trucks, then Corgi Trucks, Tonka trucks, scale model trucks then the real trucks….. aren’t I cute ??🤭😇
- 56 replies
-
- 4
-
-

-
- hevy haul off road tractor
- b.c. logging
- (and 1 more)
-
Autocar 9964 B conversion to heavy haul...
Jeff replied to Jeff's topic in LSM 1/35 and Larger Work In Progress
THANKS Mark ! I really appreciate your kind words, I love big iron, I wish more guys would post their works as well, makes a real nice variety of models to look at... Jeff- 56 replies
-
- 1
-
-
- hevy haul off road tractor
- b.c. logging
- (and 1 more)
-
Autocar 9964 B conversion to heavy haul...
Jeff replied to Jeff's topic in LSM 1/35 and Larger Work In Progress

- 56 replies
-
- 4
-
-
- hevy haul off road tractor
- b.c. logging
- (and 1 more)
-
Autocar 9964 B conversion to heavy haul...
Jeff replied to Jeff's topic in LSM 1/35 and Larger Work In Progress
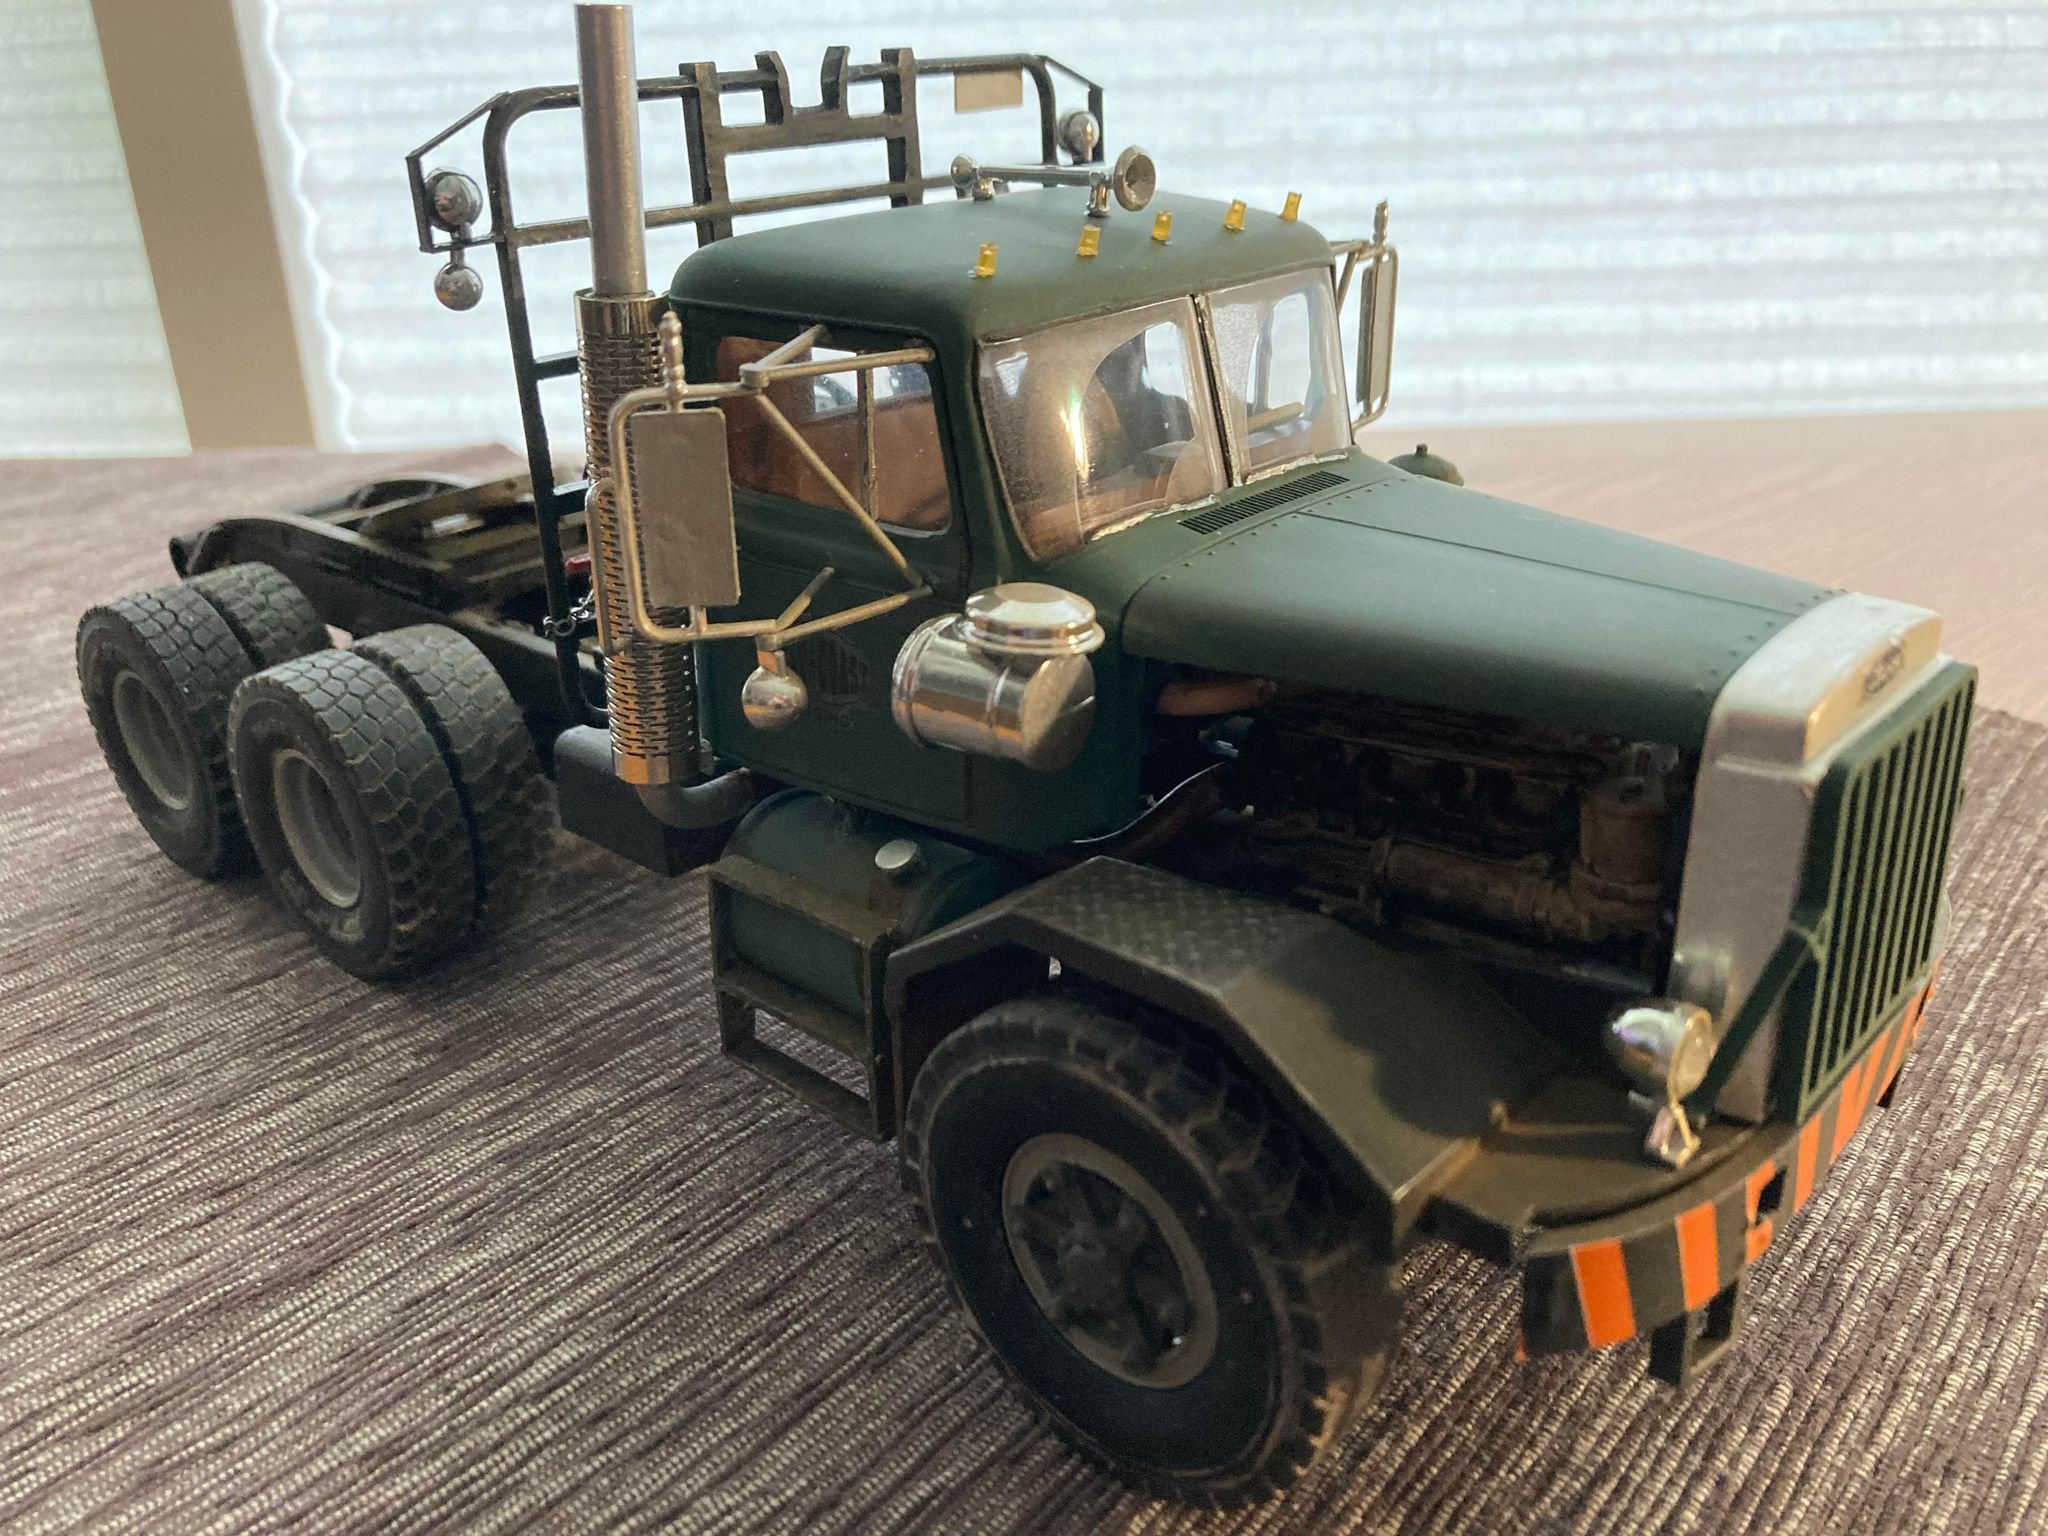
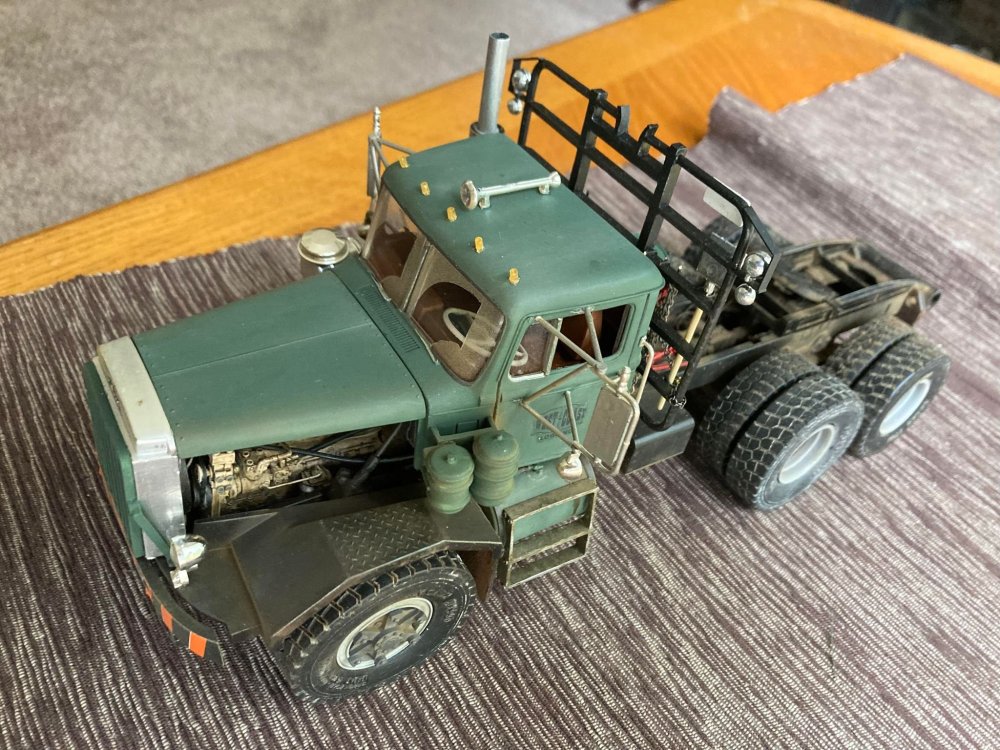
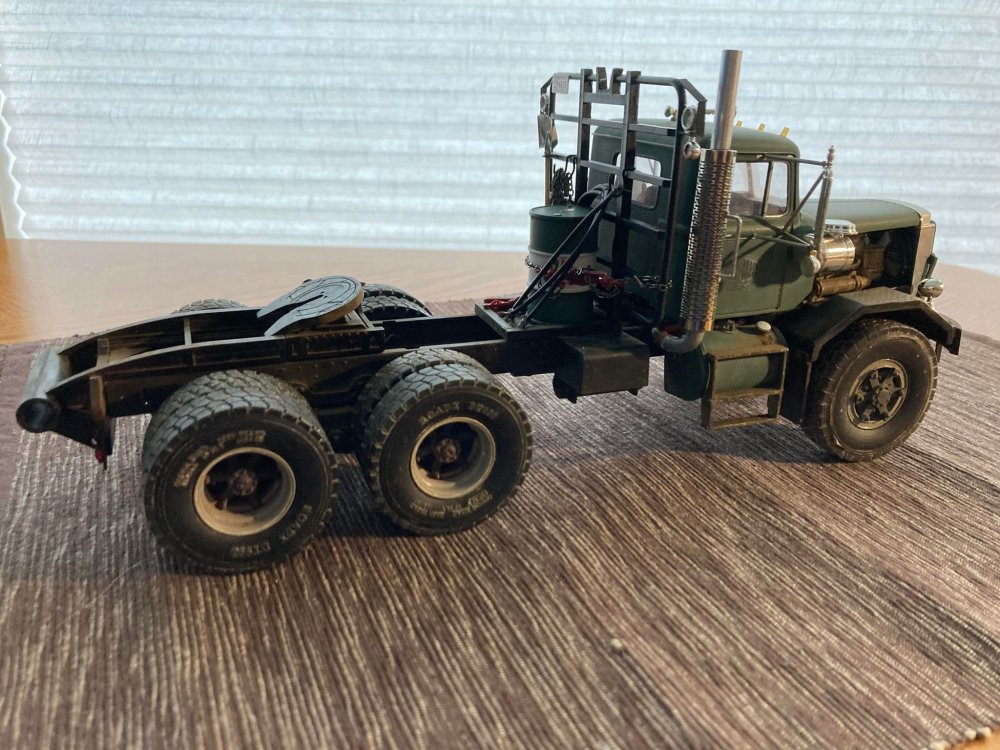
So I guess that about covers it, I have a list of 34 changes and mods on this build, and will post it IF anyone is interested. Like I said earlier, these older AMT kits can be a challenge to build, but with a little love and patience can turn out to be an interesting subject. Also mentioned this kit started as the AMT Autocar Dump truck kit now modified to a Heavy haul logging company tractor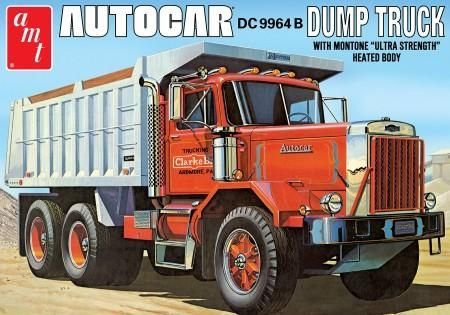

- 56 replies
-
- 4
-
-
- hevy haul off road tractor
- b.c. logging
- (and 1 more)
-
Autocar 9964 B conversion to heavy haul...
Jeff replied to Jeff's topic in LSM 1/35 and Larger Work In Progress
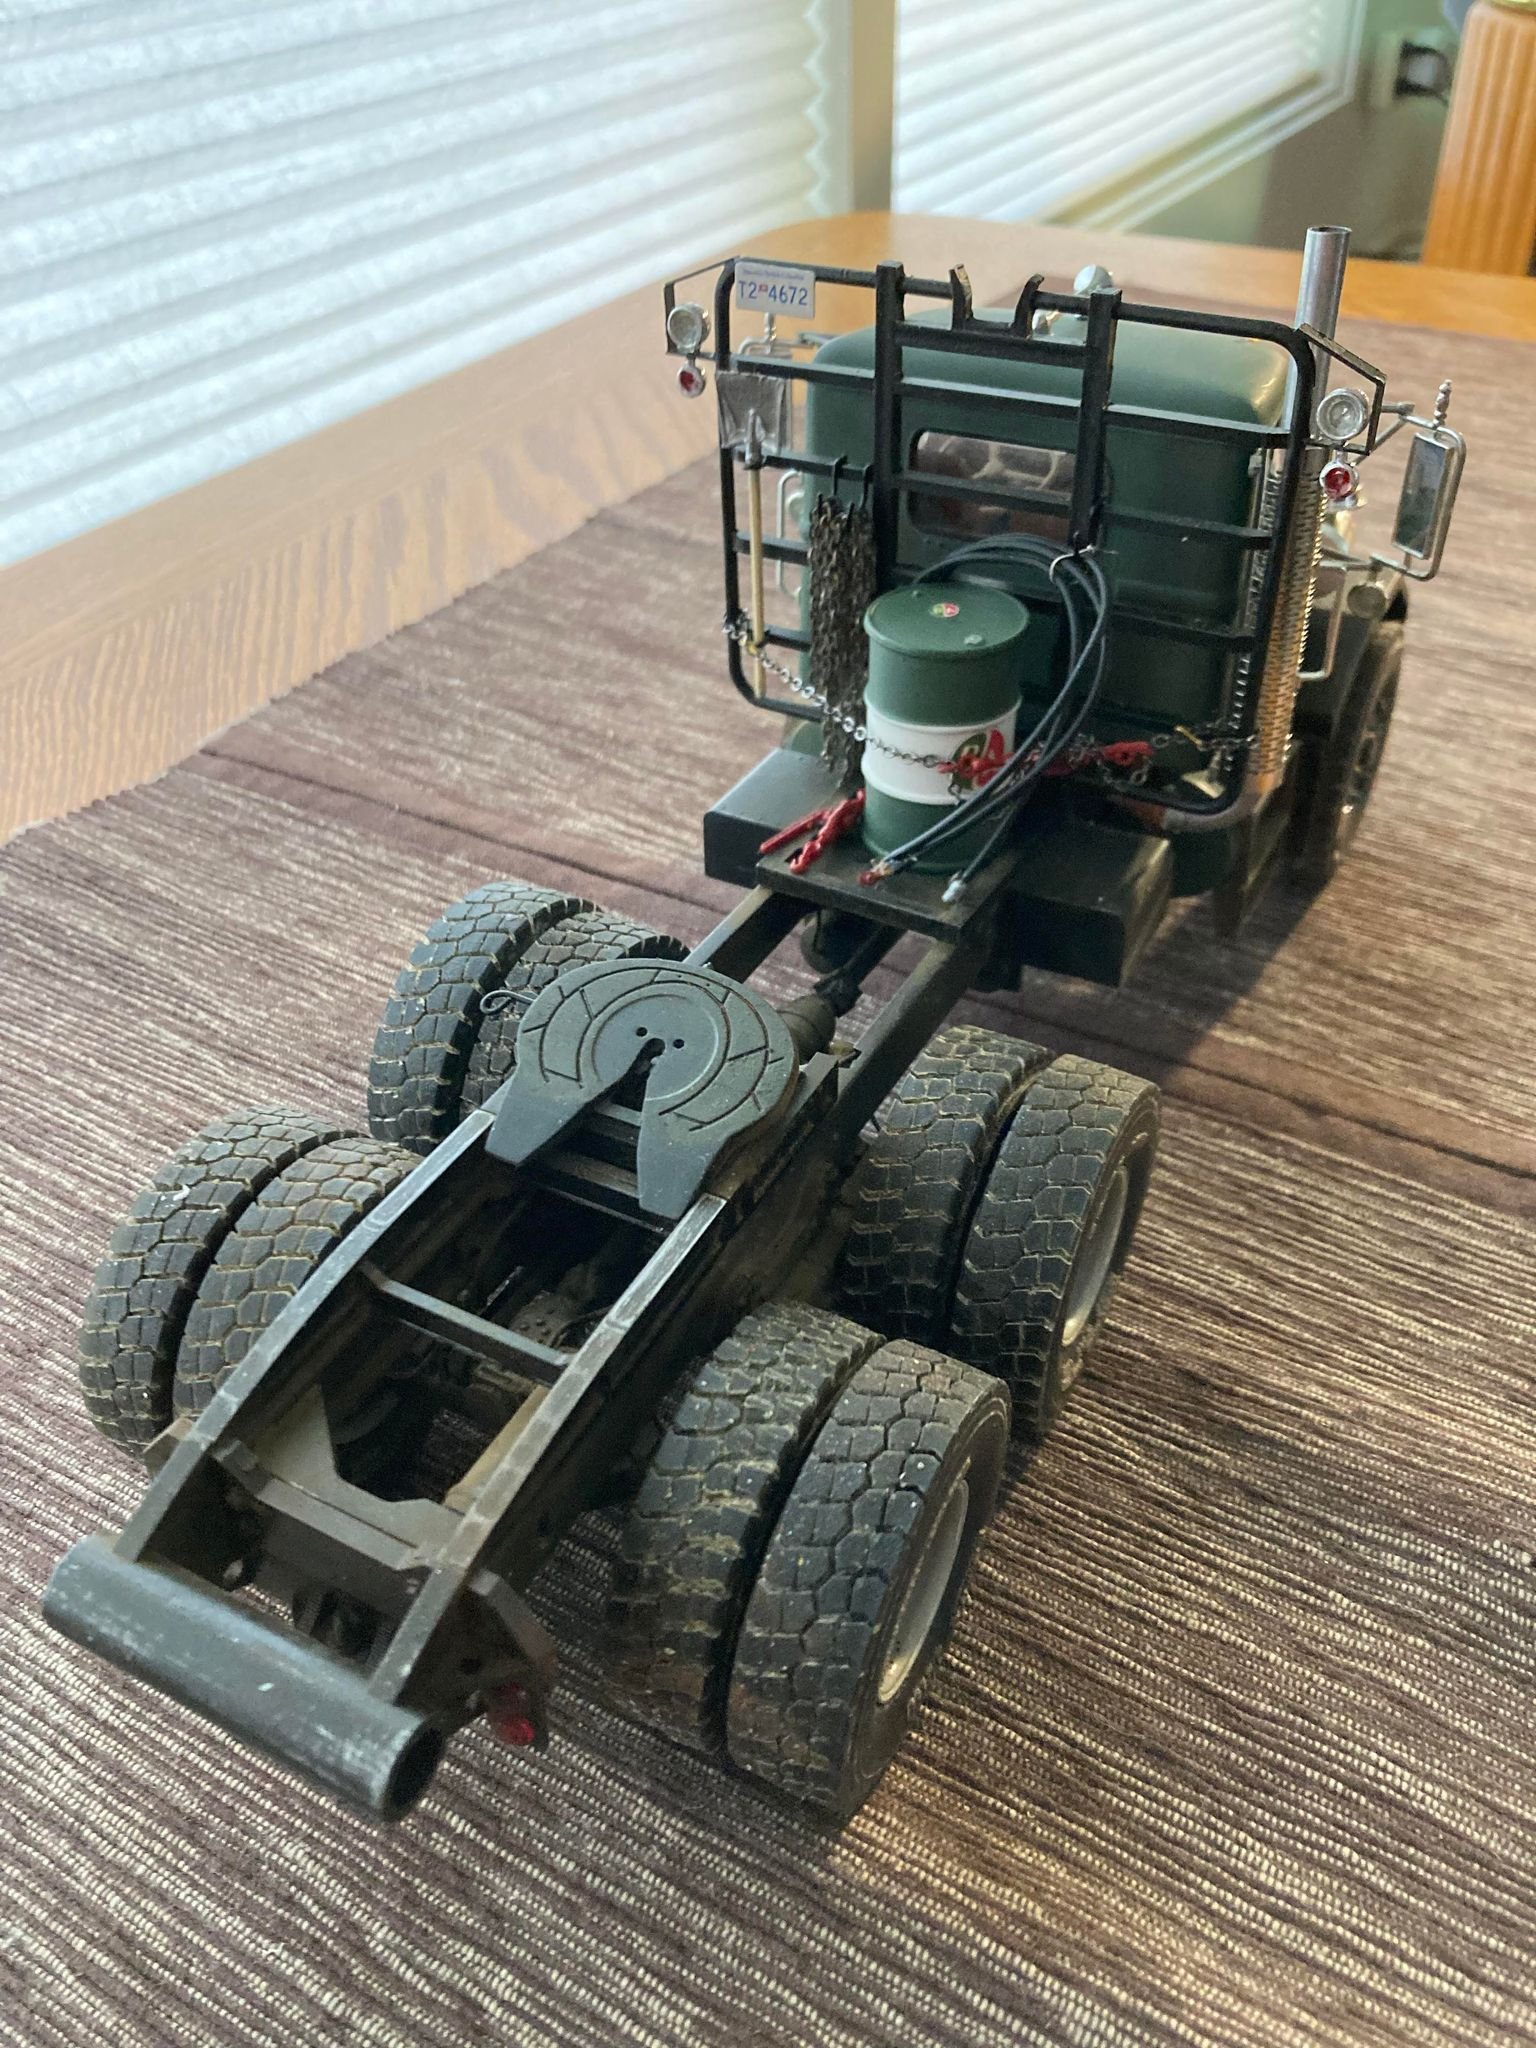
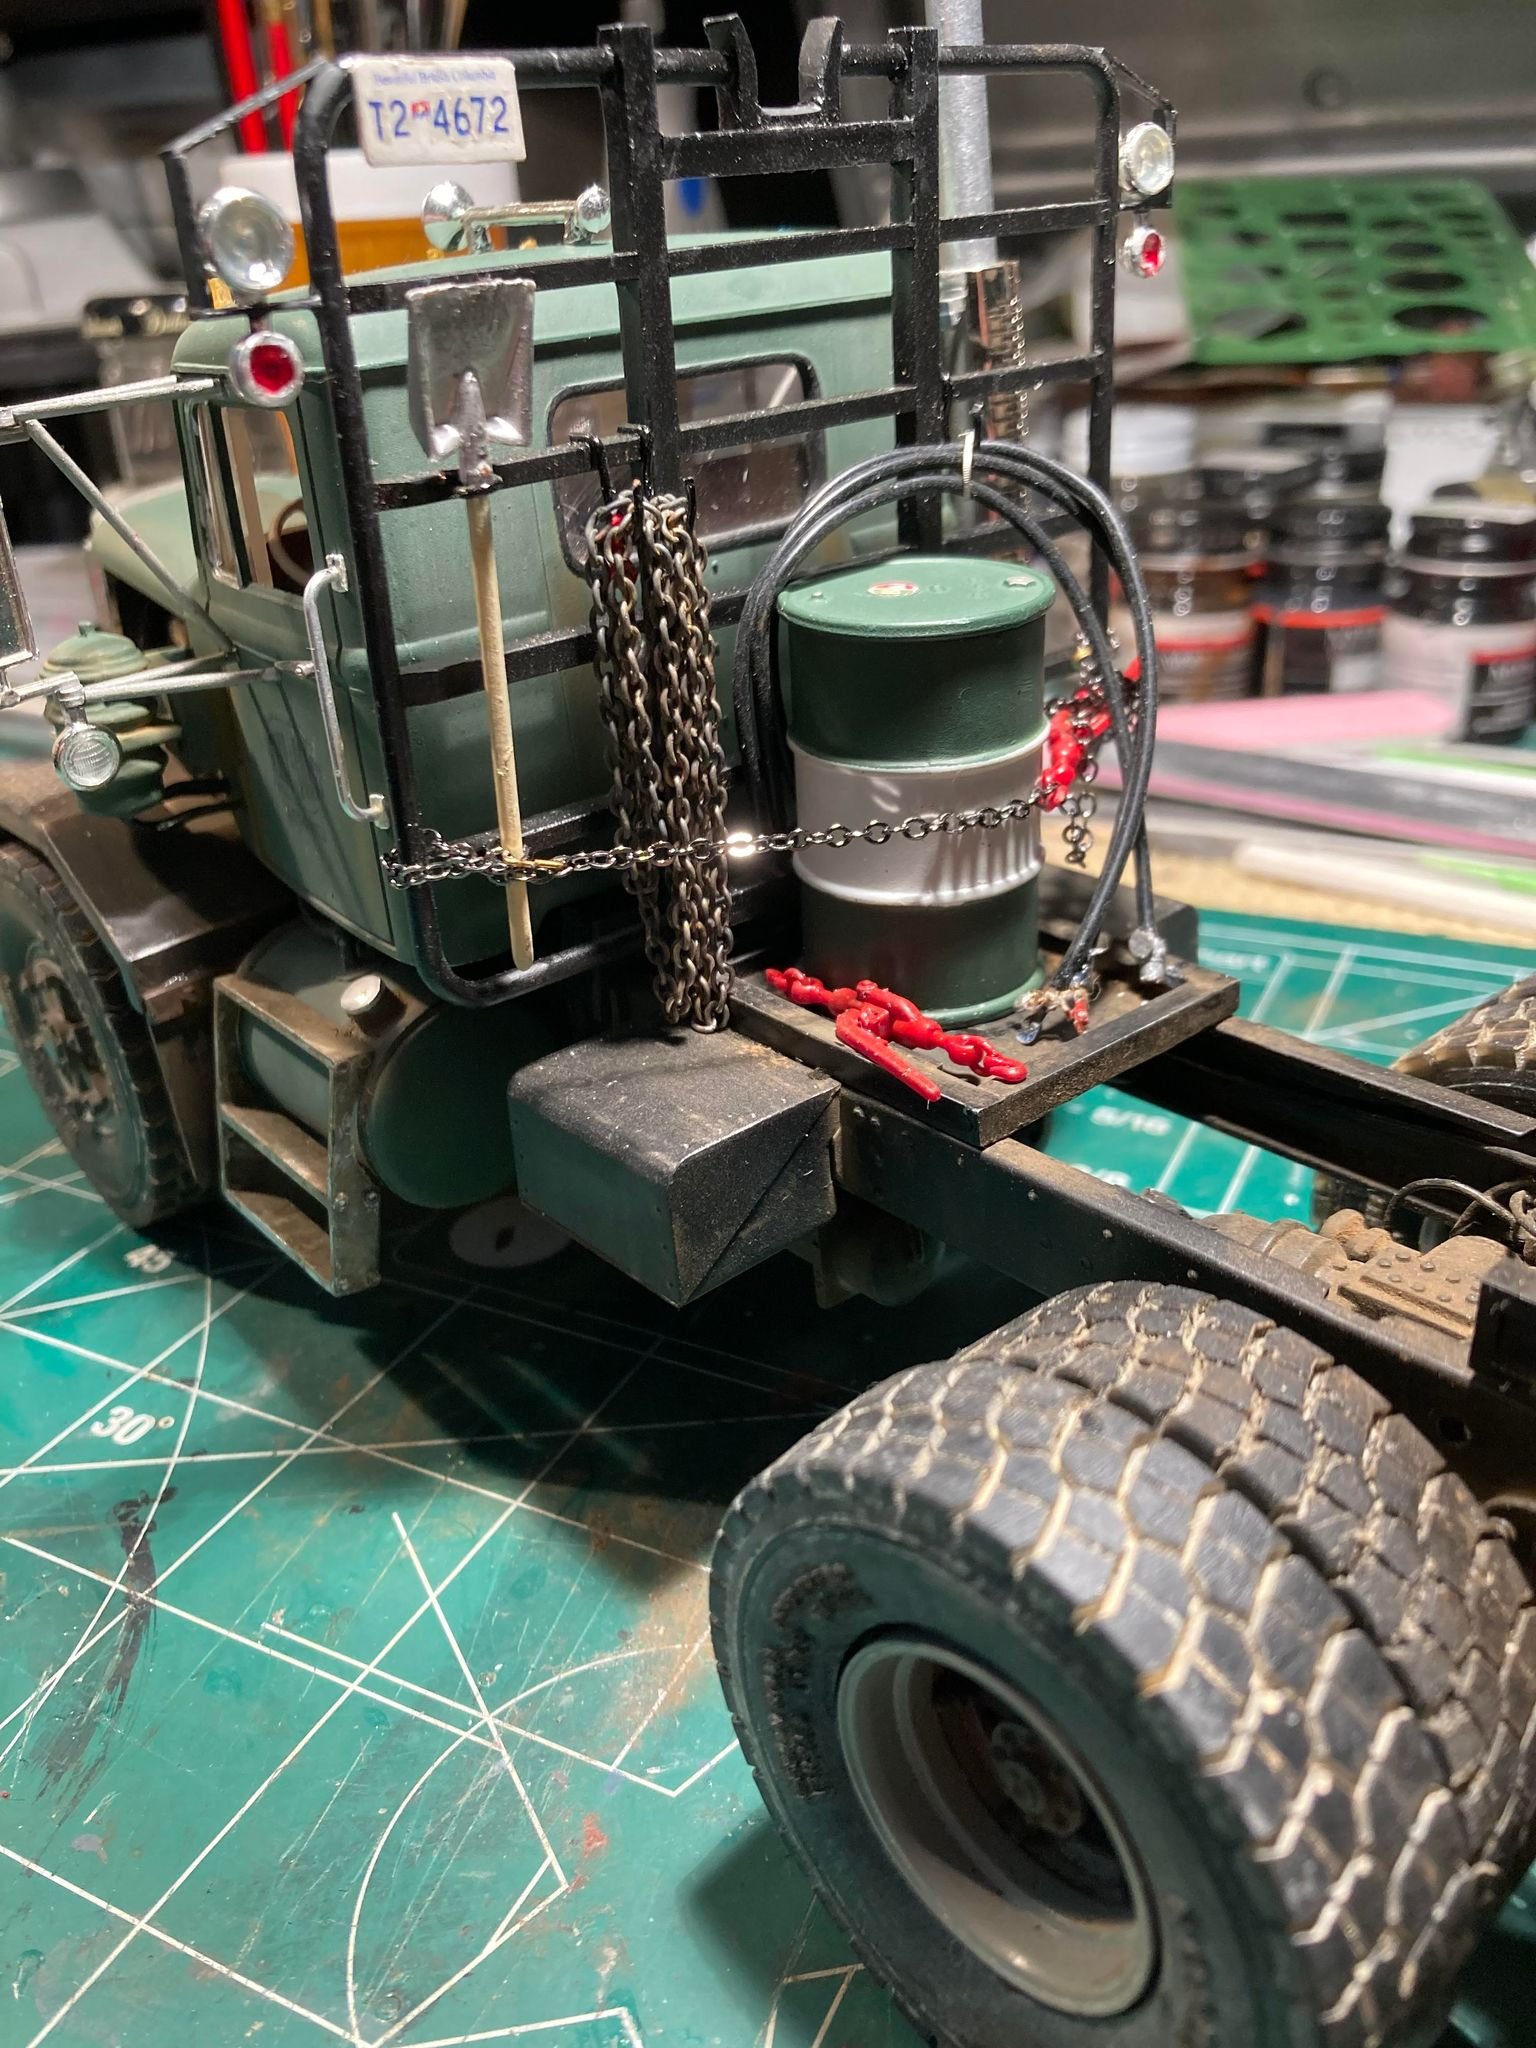
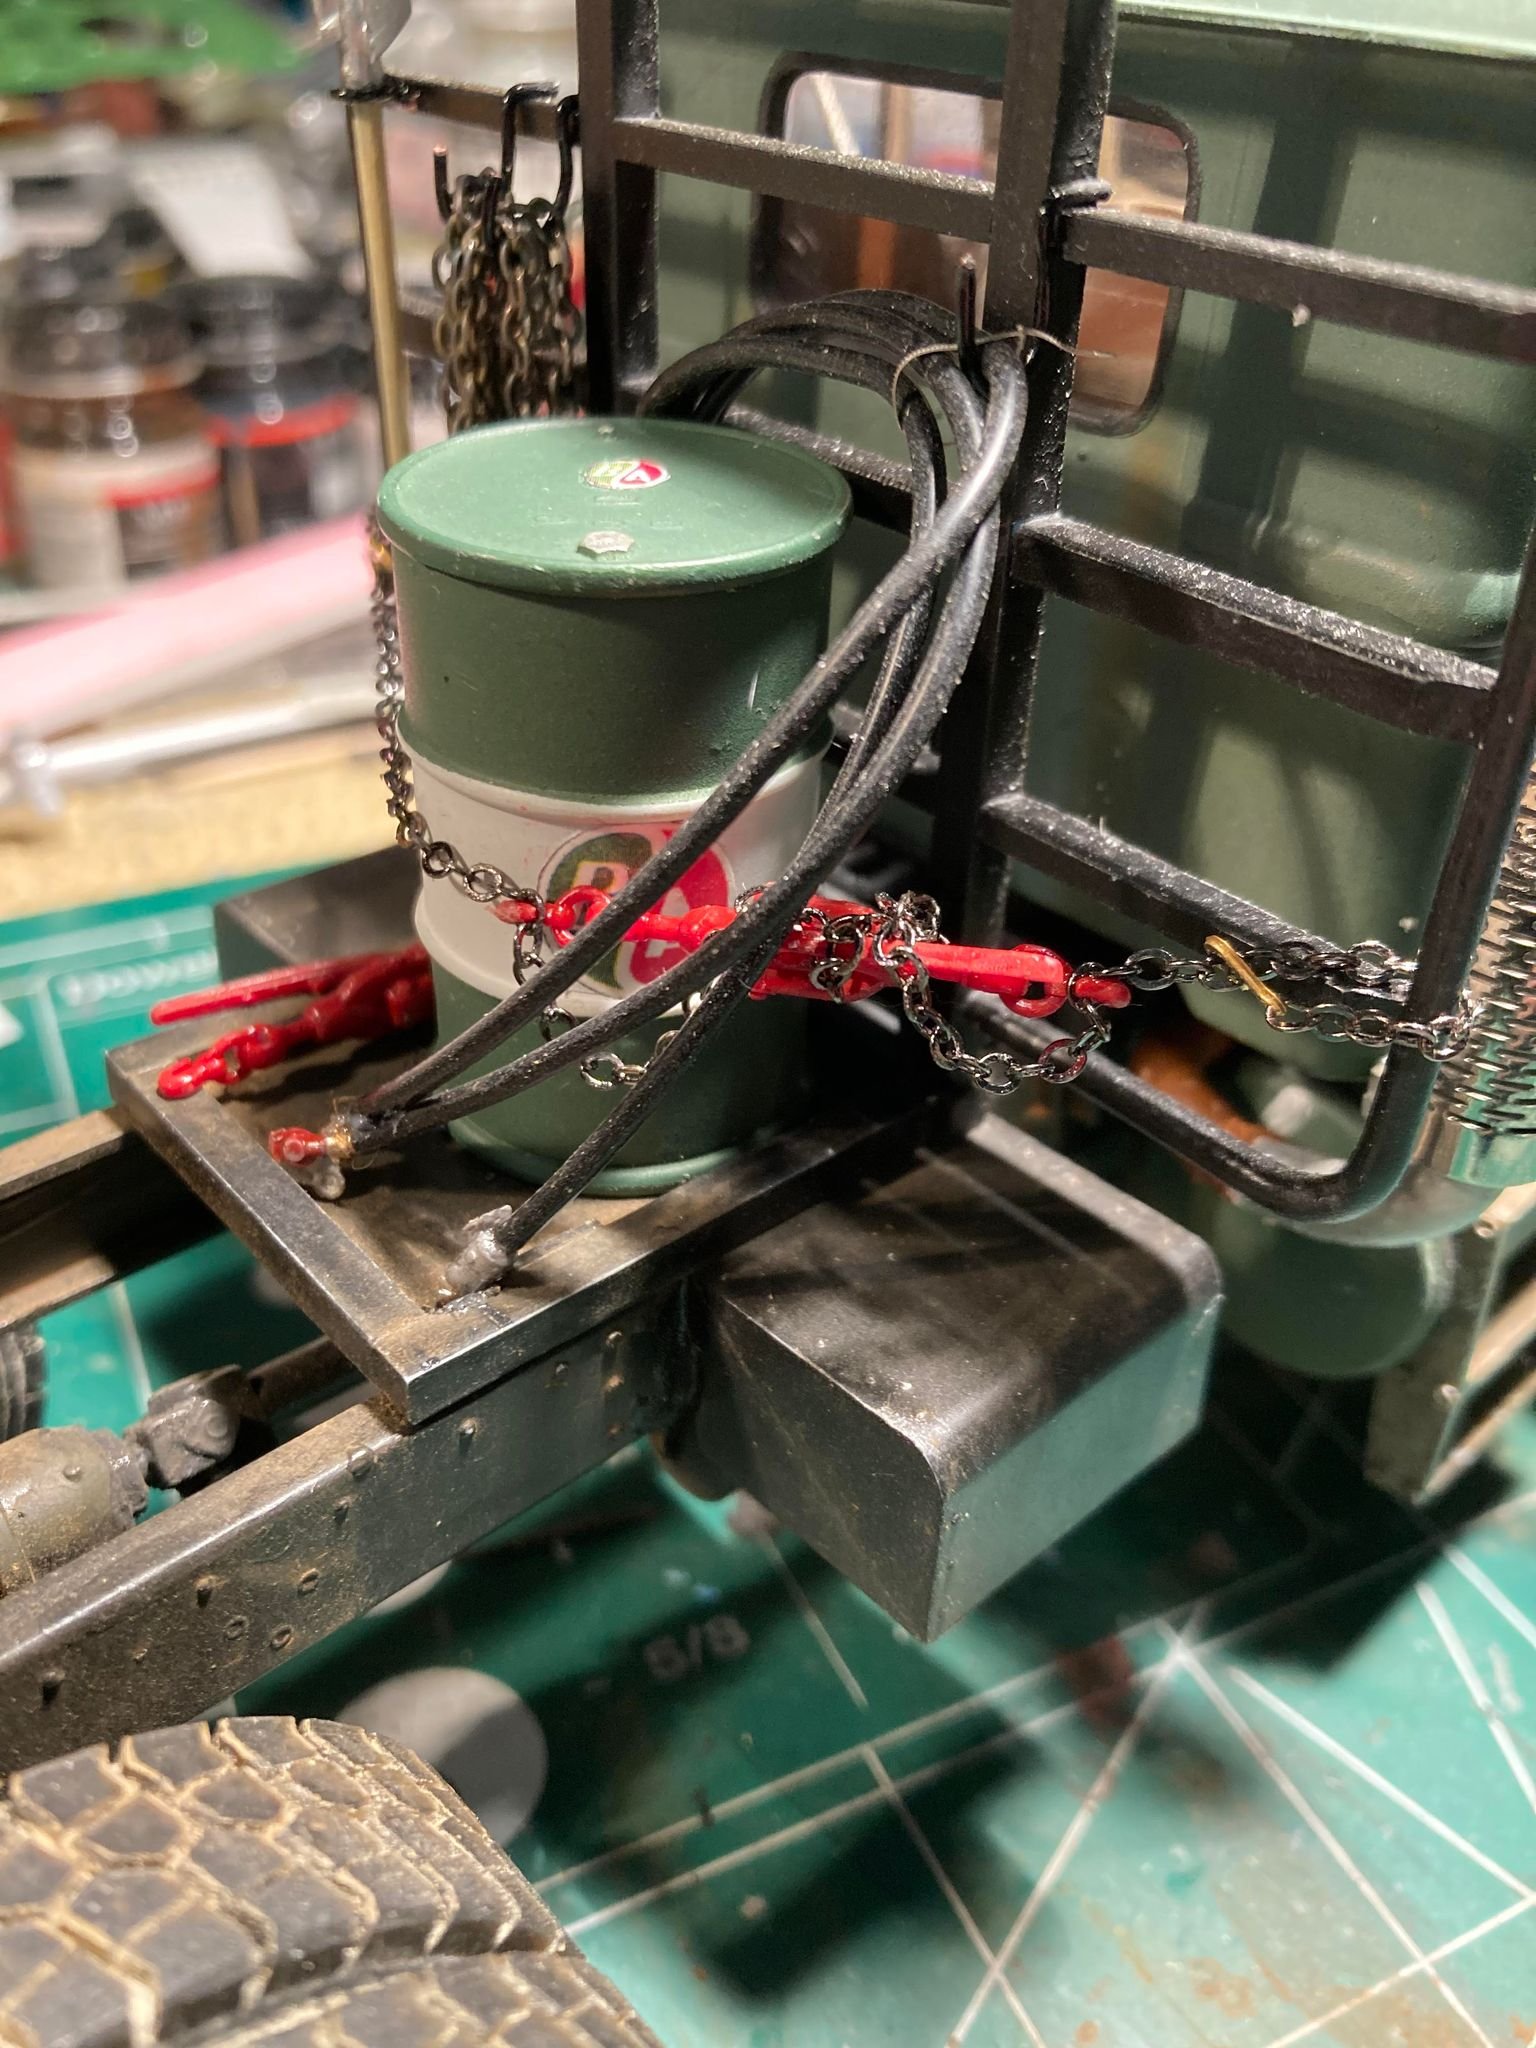
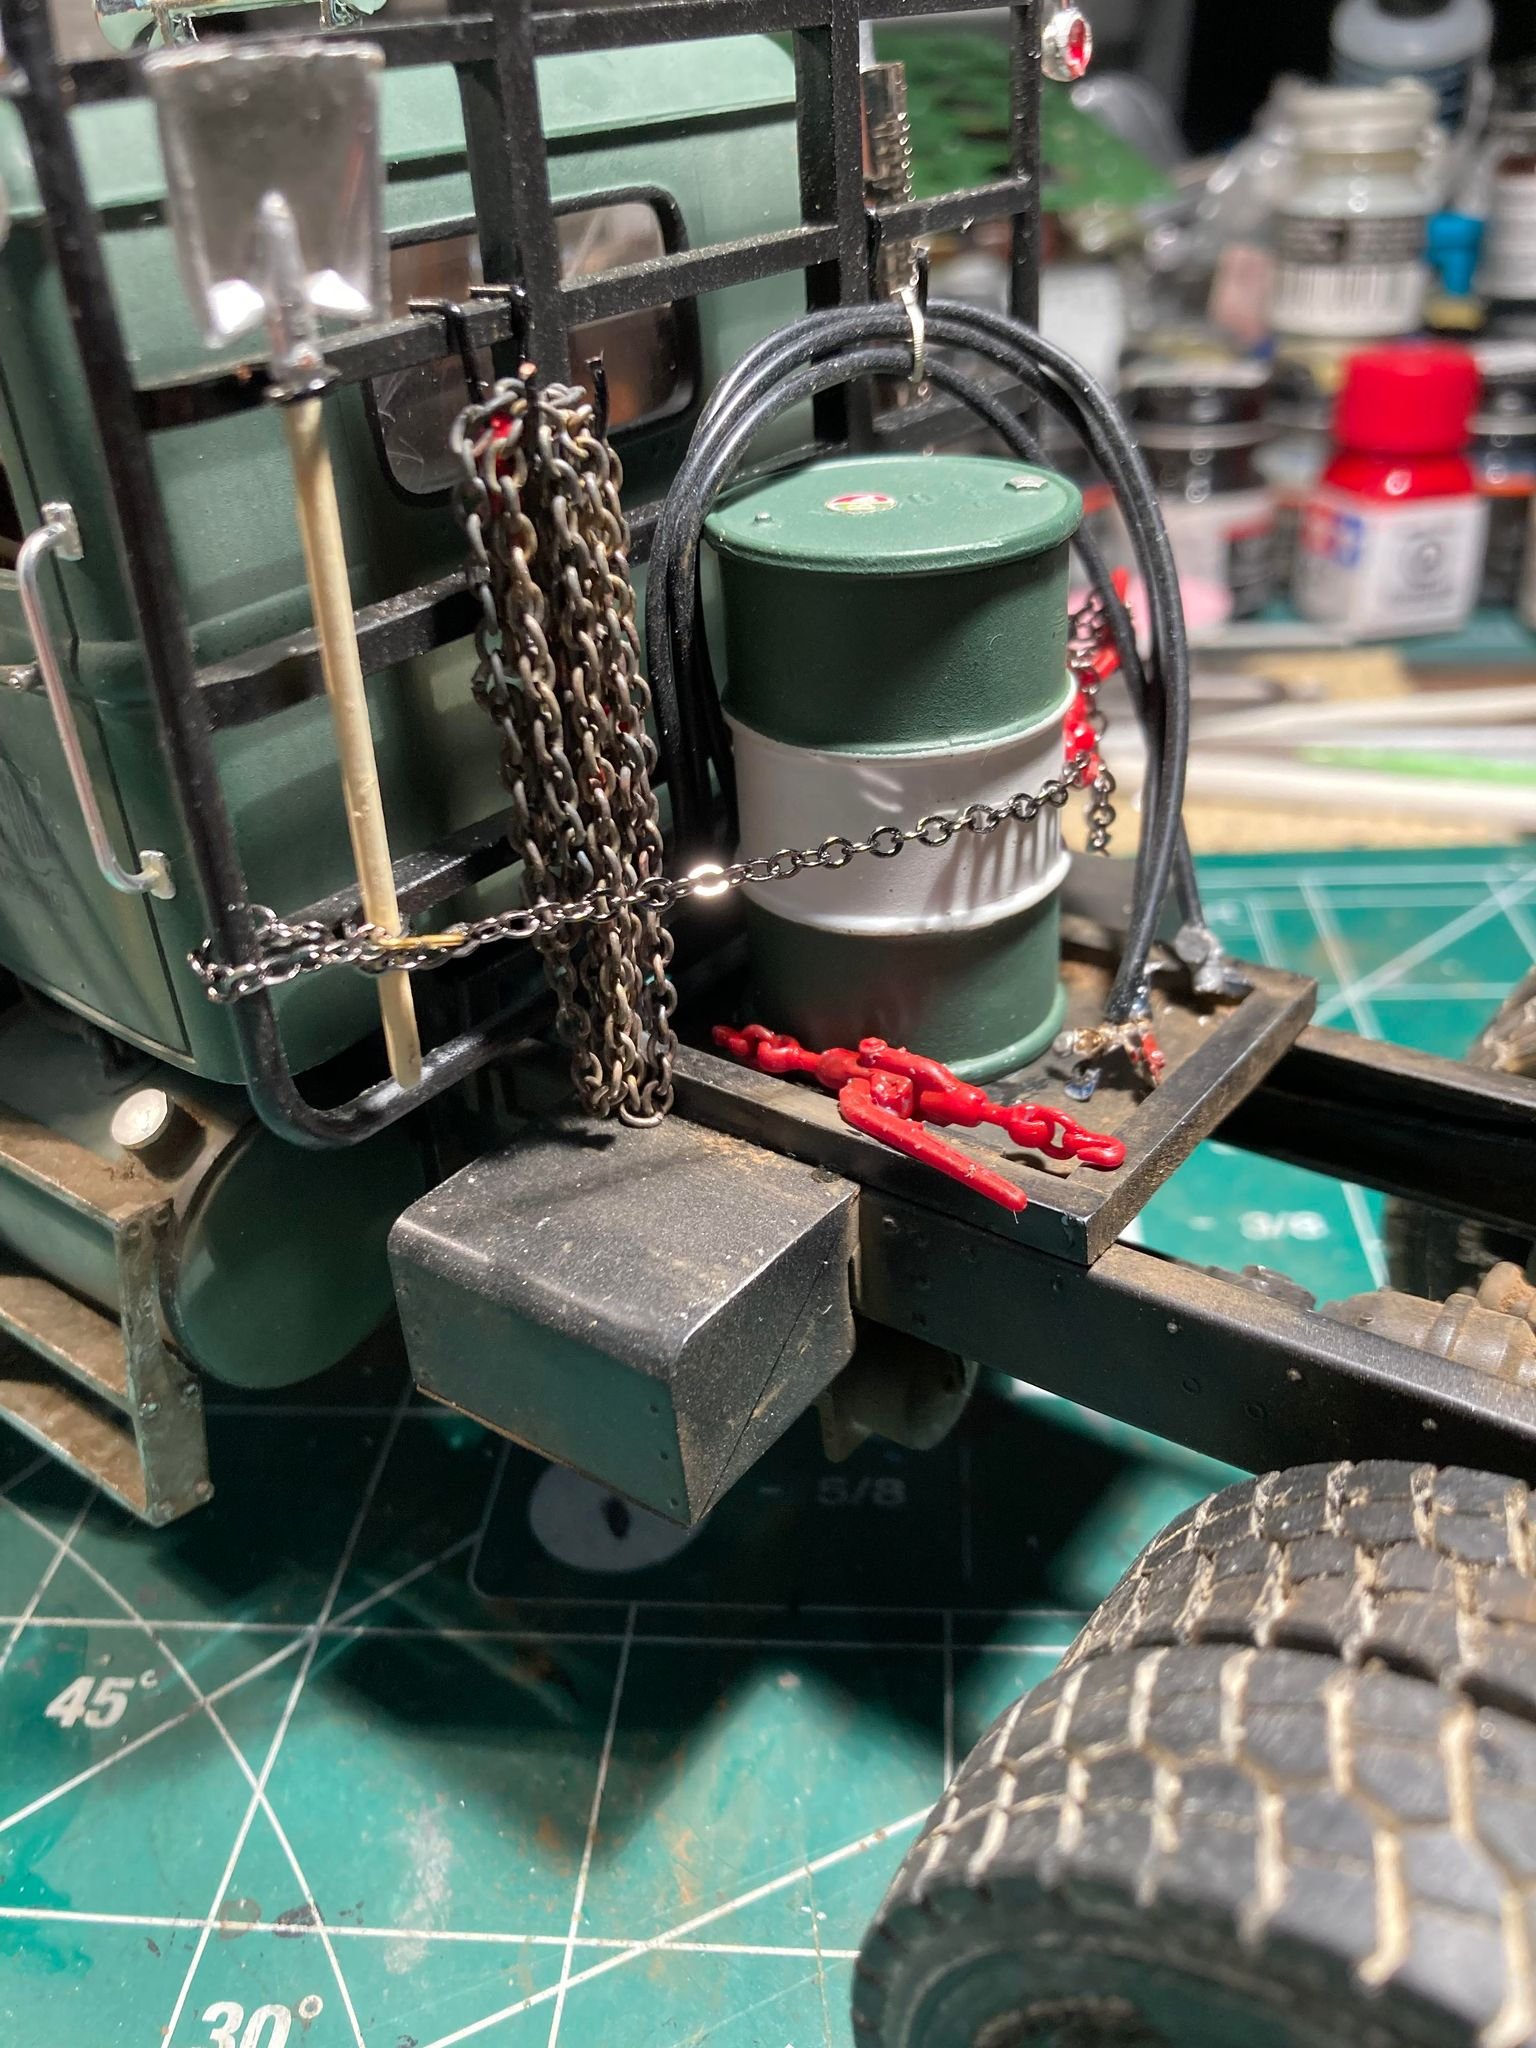
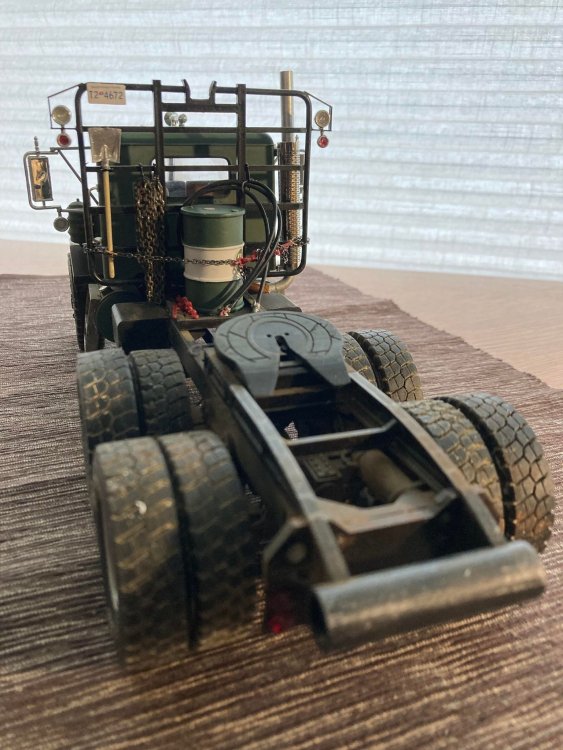
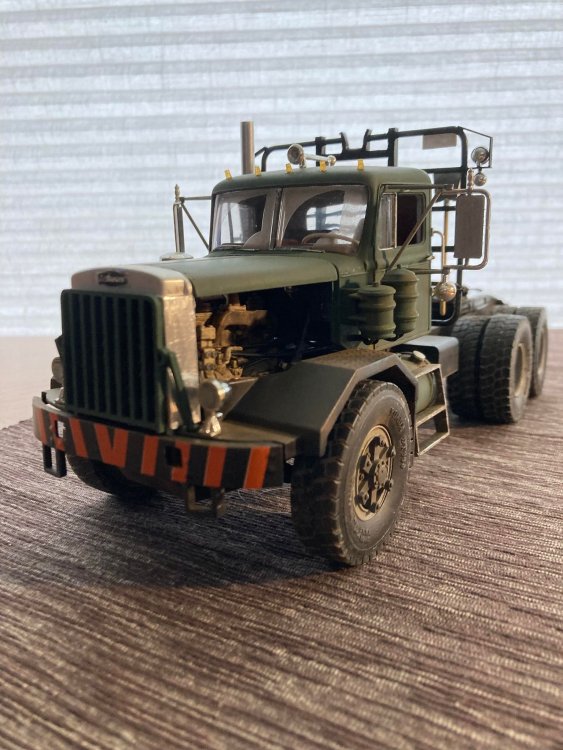
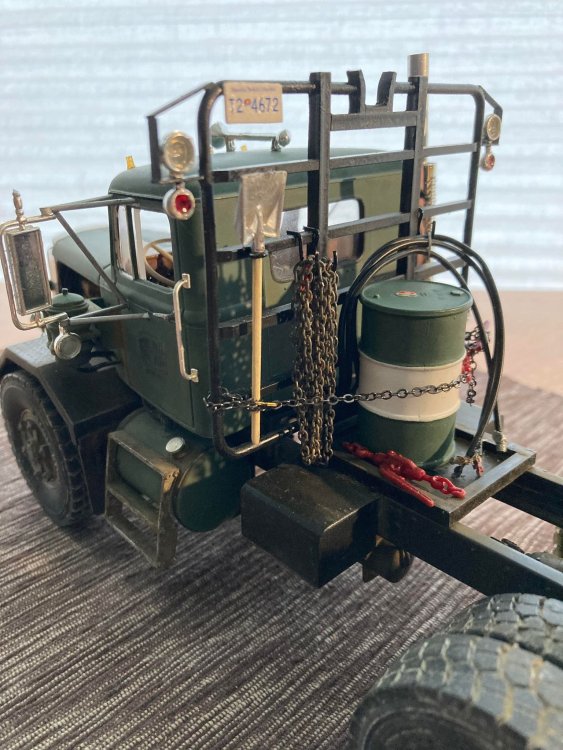
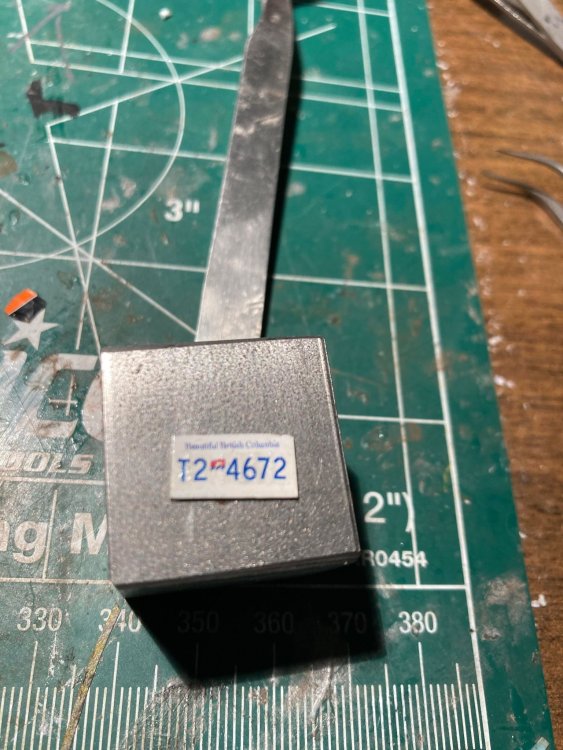
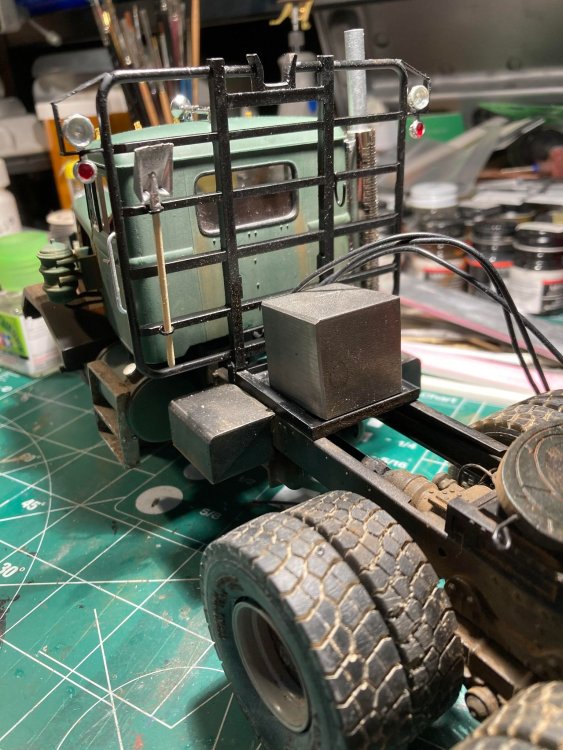
Now that the headache rack is mounted, it is time to add a little life to it.... so a shovel was added ( always a good tool to have handy) extra tie down chains, and extra synch or two is a must, and for a little bit of flair , I added a drum of hydraulic fluid, as if one gets way back in the bush I'm talking could be a 100 miles or more ( some of our local logging ops are usually at least 70 miles plus back into the mountains) the last thing that you need is a until with a leak and no Hyd. juice... most machines will not move with out hydraulic fluid.... always good to have some just in case... so I also wanted it somewhat period correct, and made the drum an old school B/A which I thought was kind of cool... oh and one last detail, I had to custom make a license plate.... in British Columbia, we have different commercial plates, this is a "T" Plate and designated for logging trucks, I may back date the plate as I have some older style of plates coming in the post.... just that last detail....

- 56 replies
-
- 4
-
-
- hevy haul off road tractor
- b.c. logging
- (and 1 more)
-
Autocar 9964 B conversion to heavy haul...
Jeff replied to Jeff's topic in LSM 1/35 and Larger Work In Progress
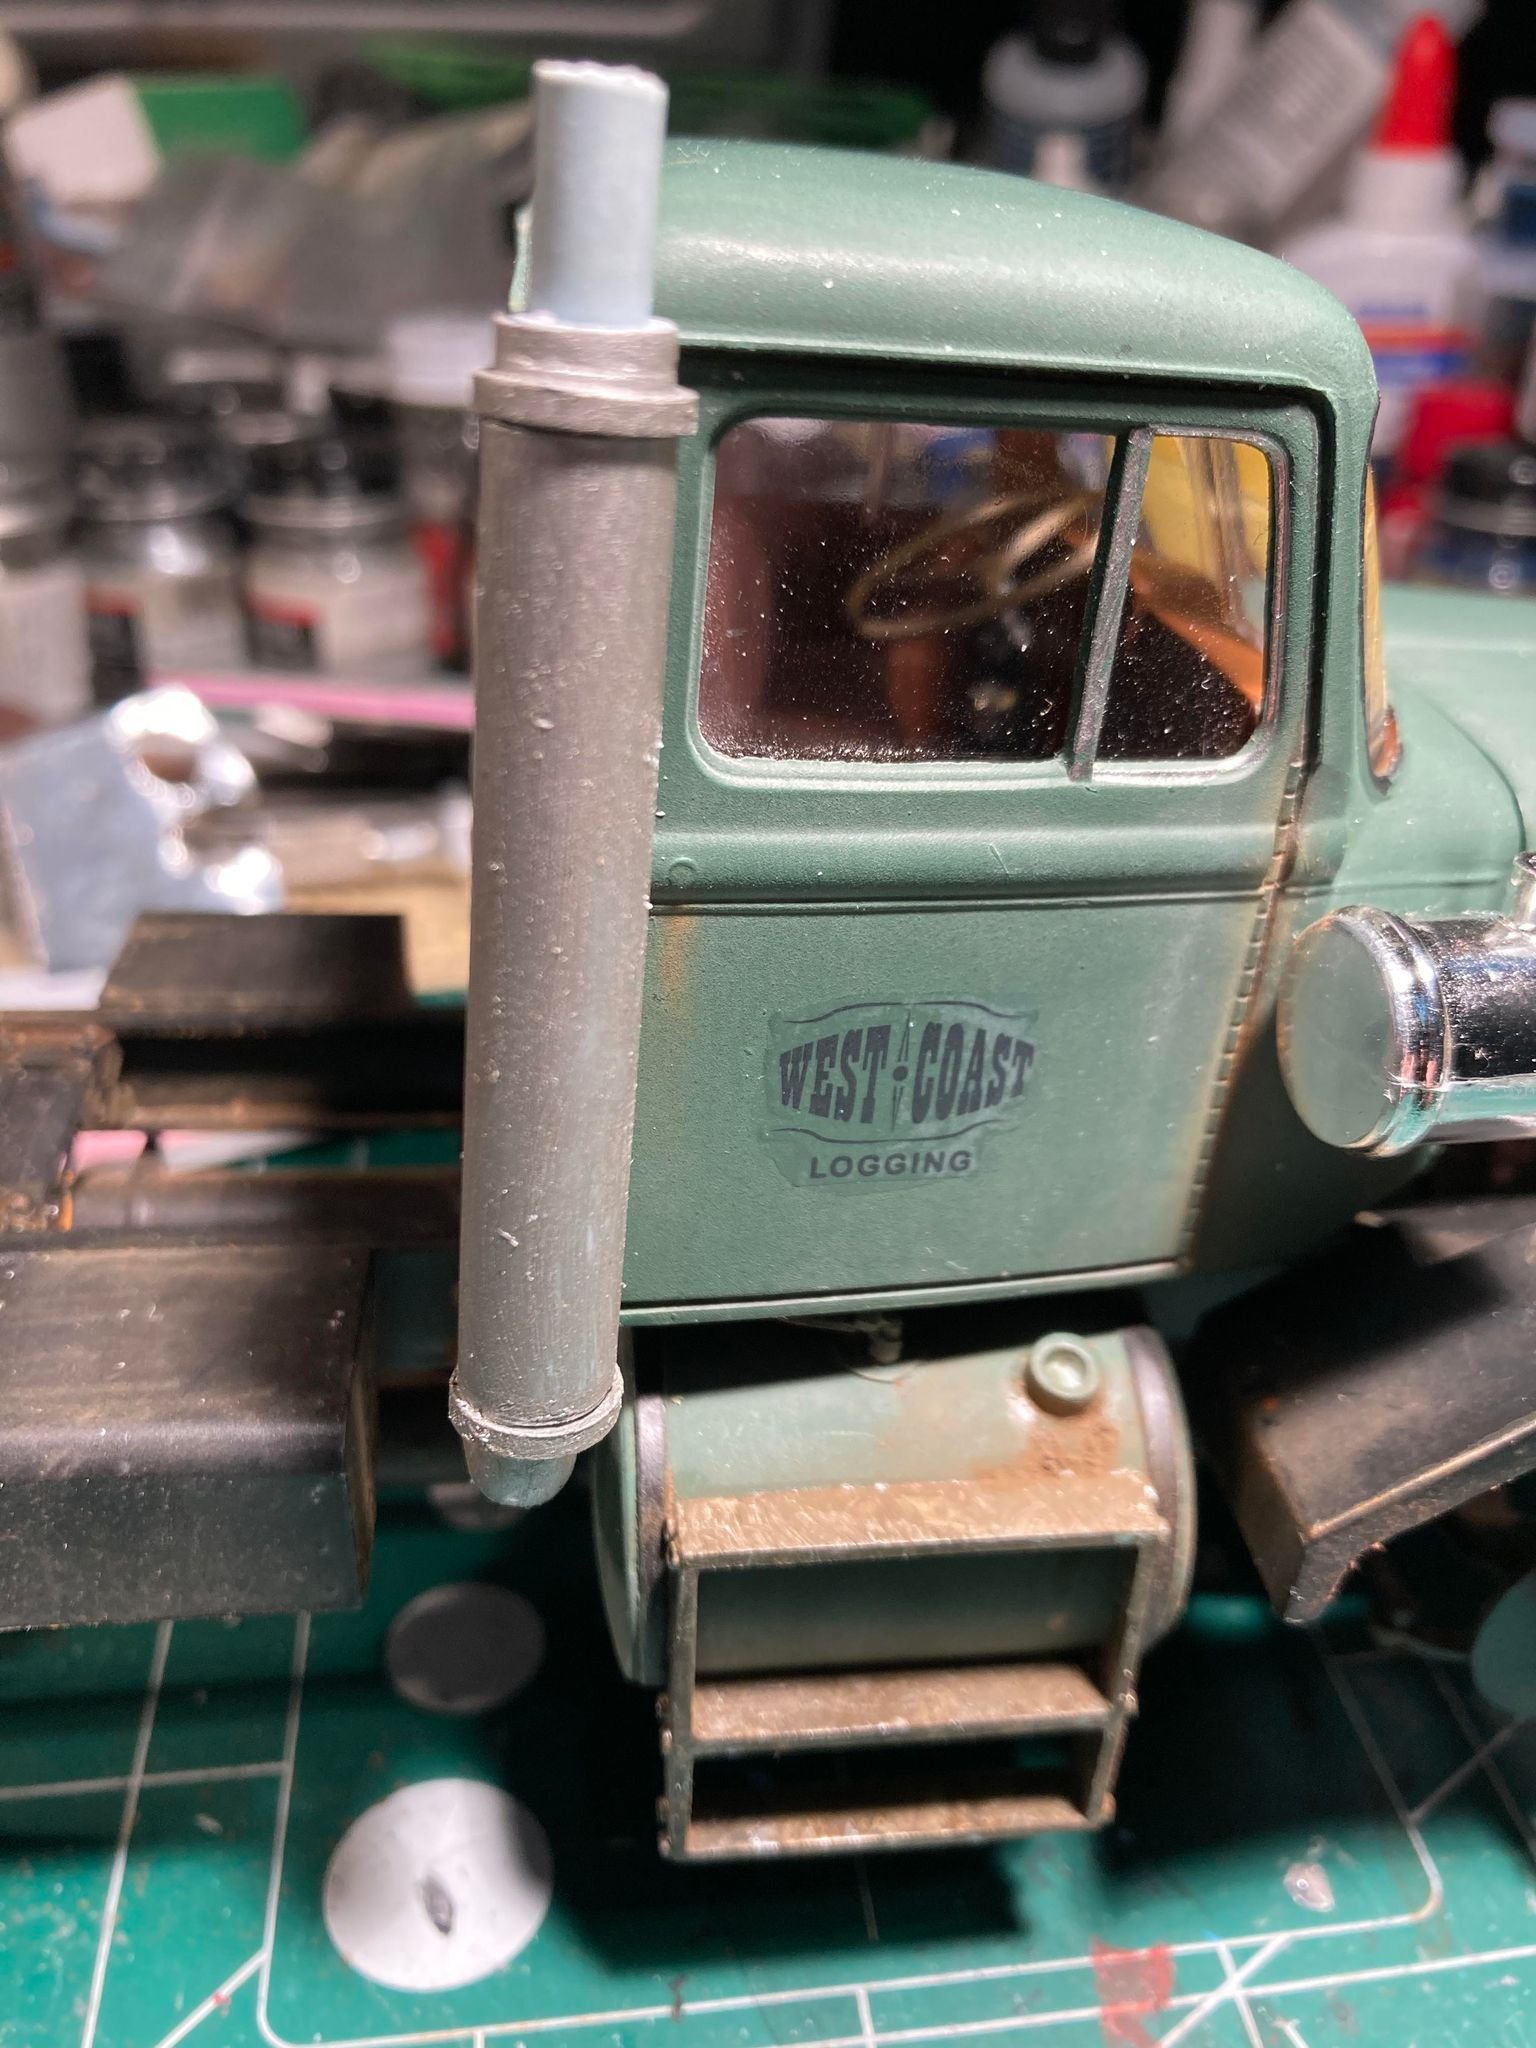
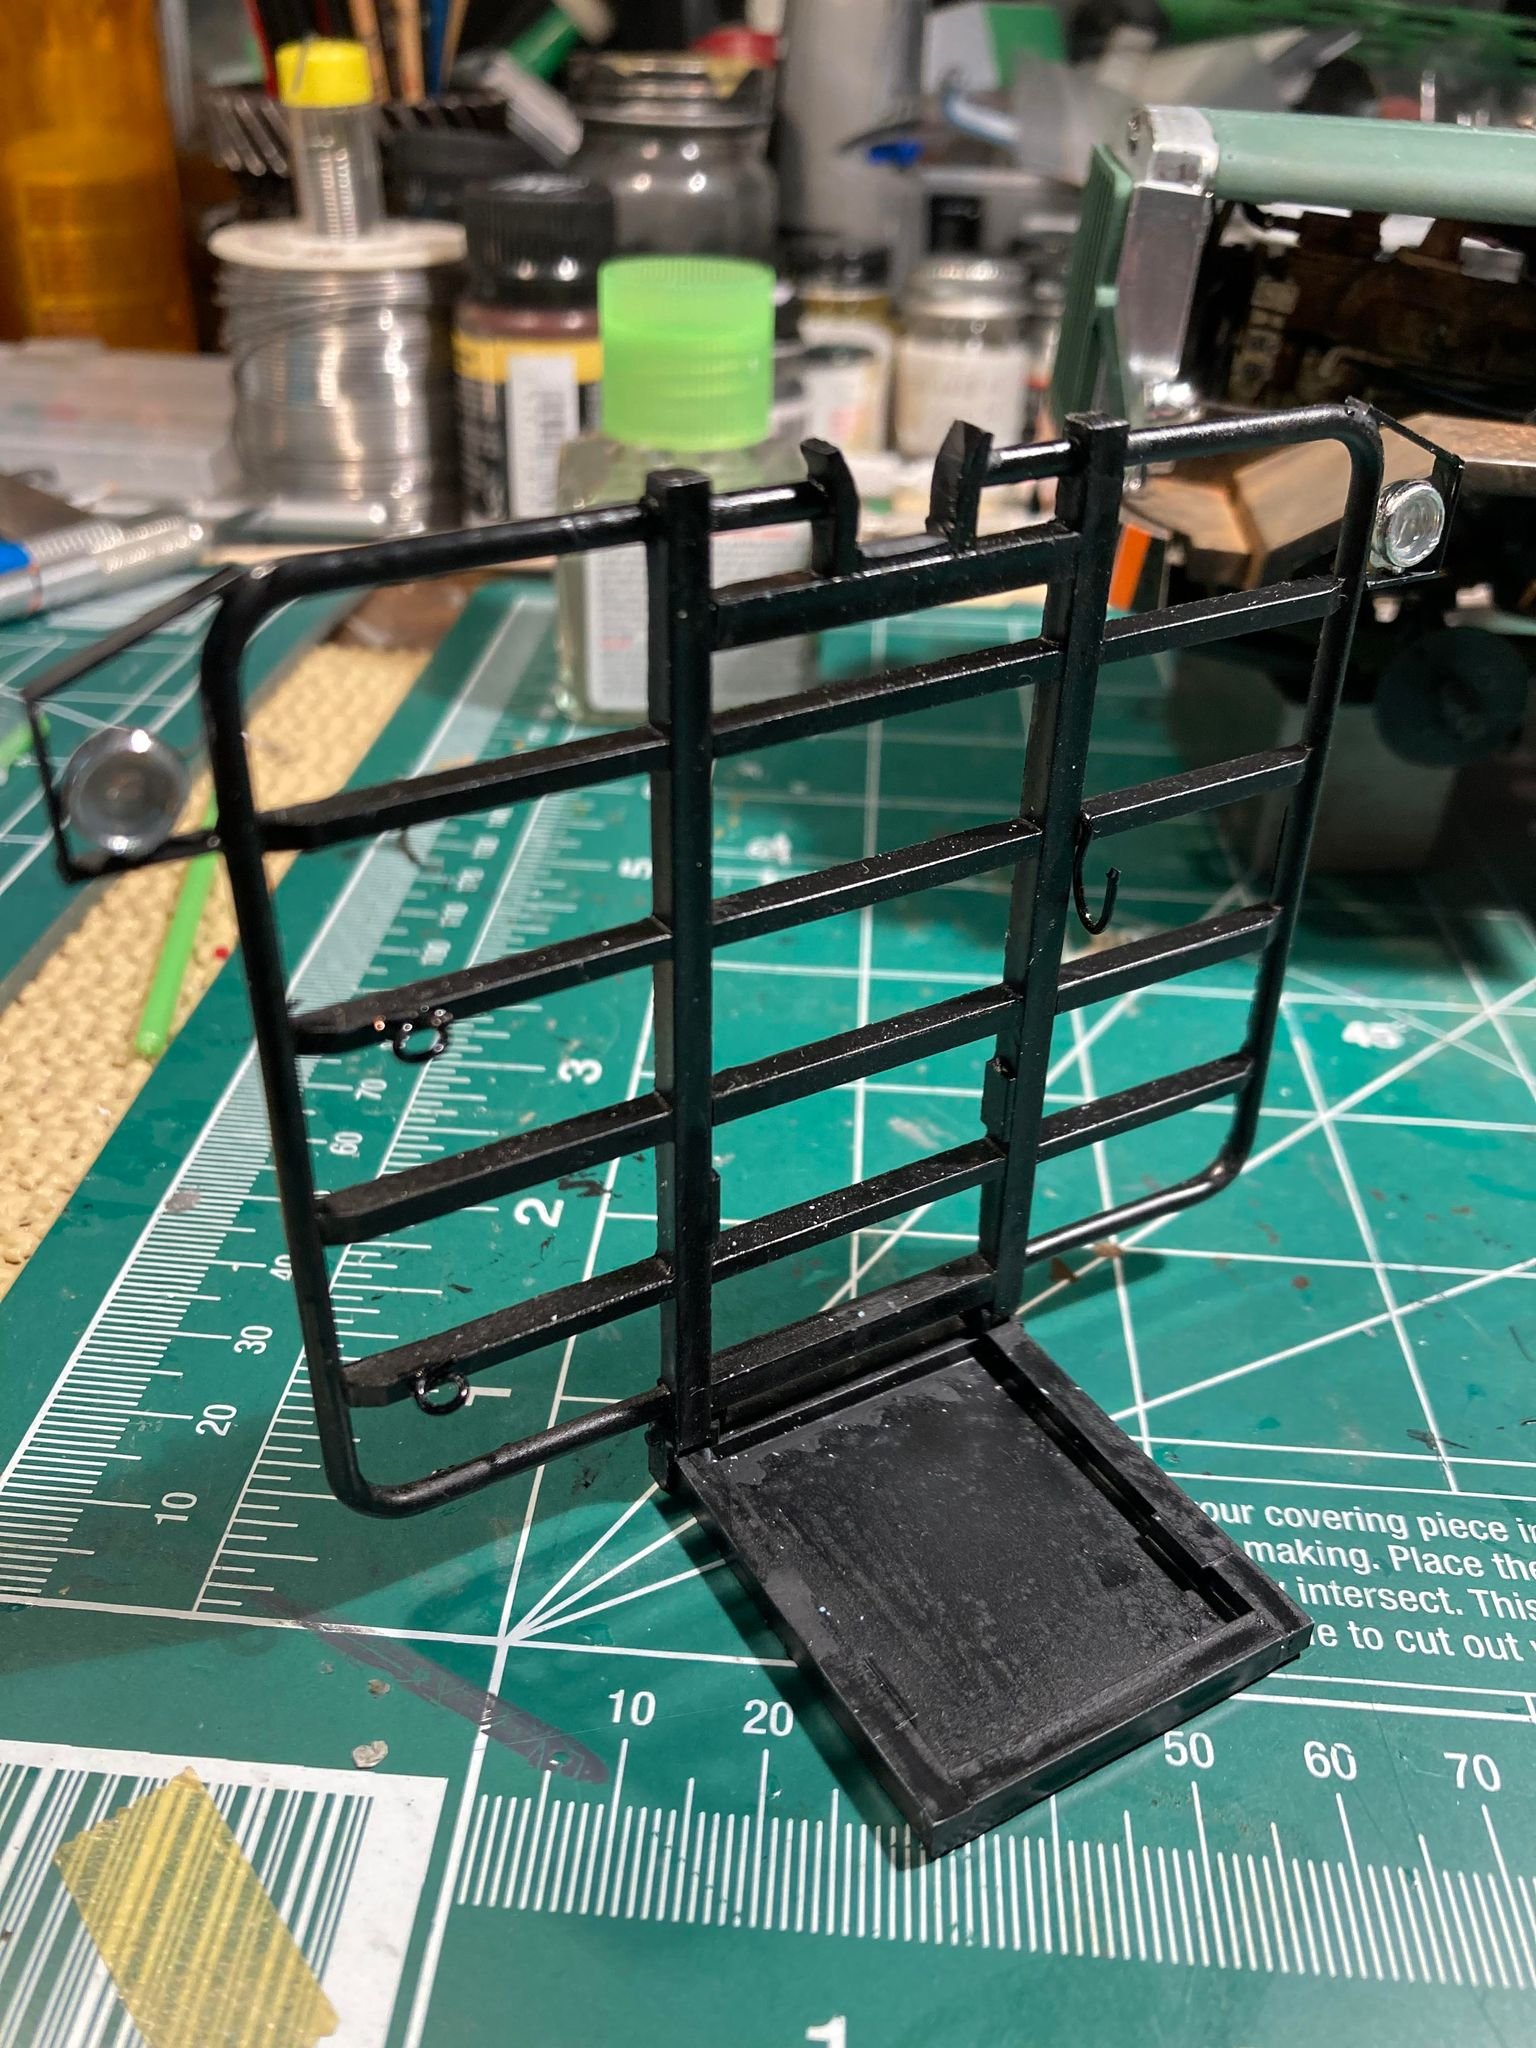
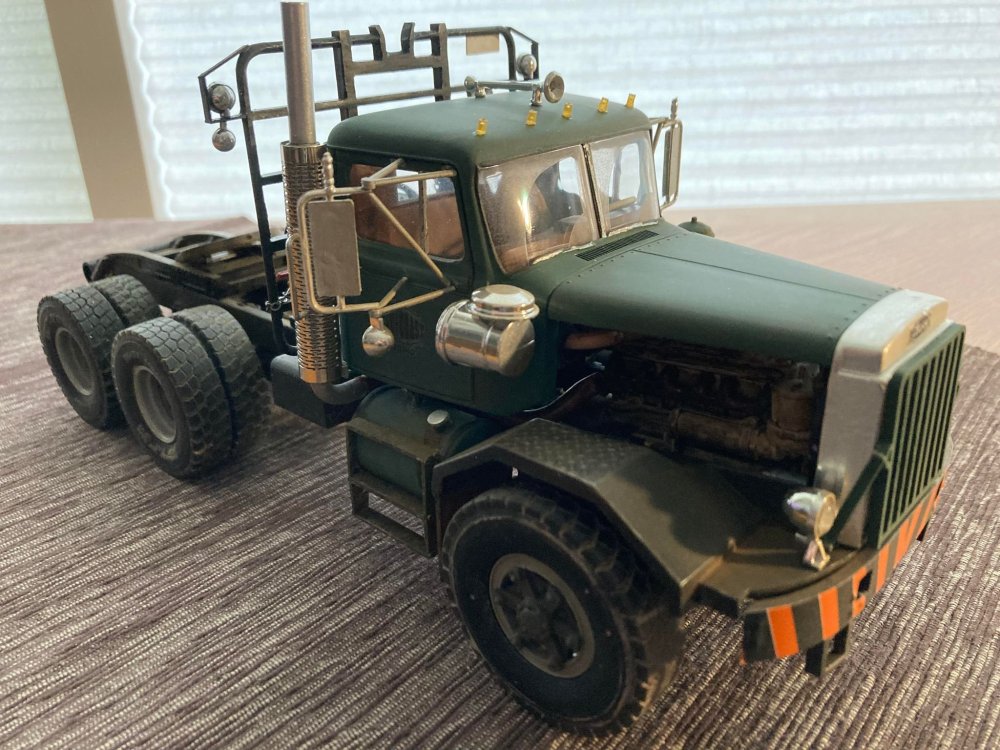
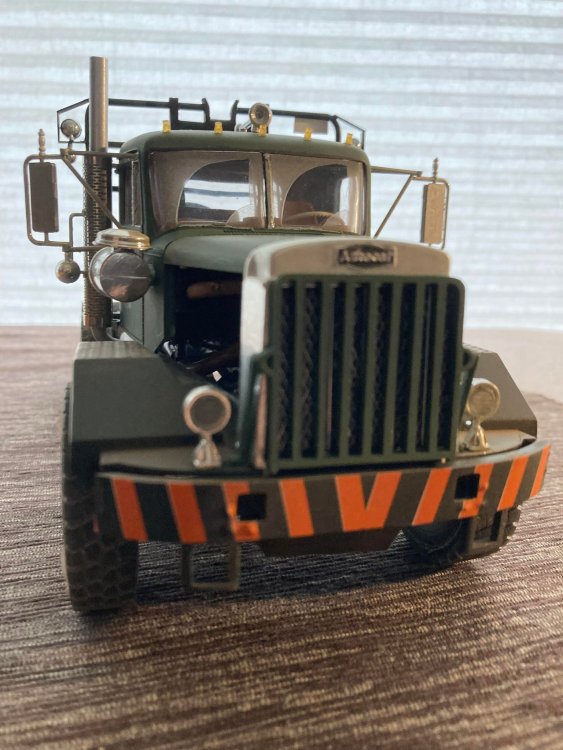
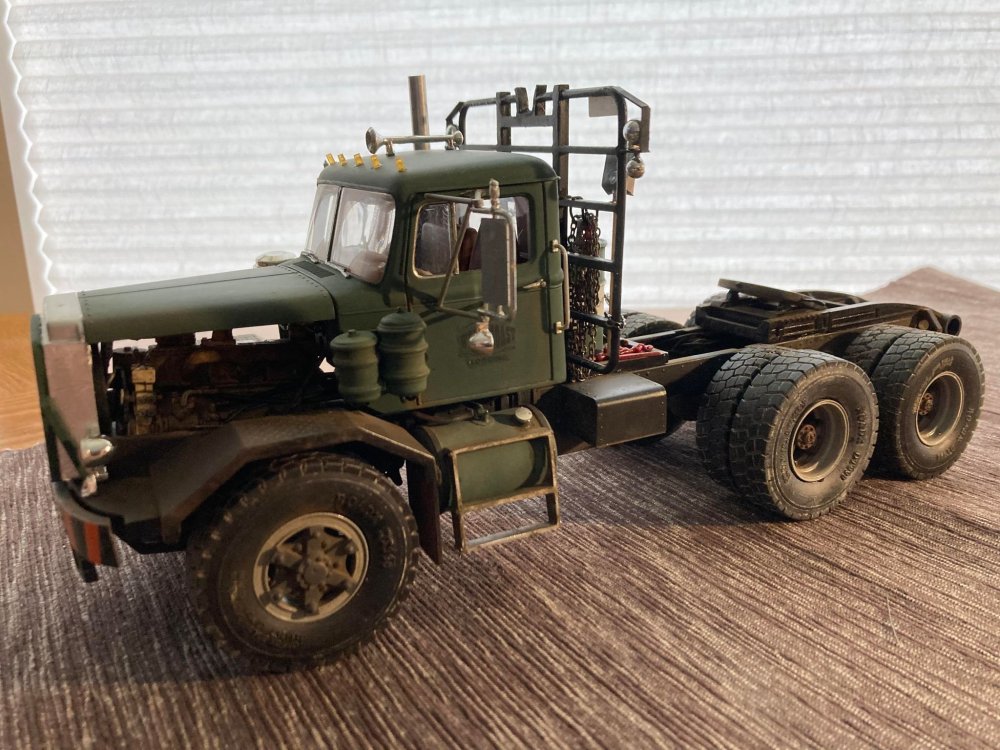
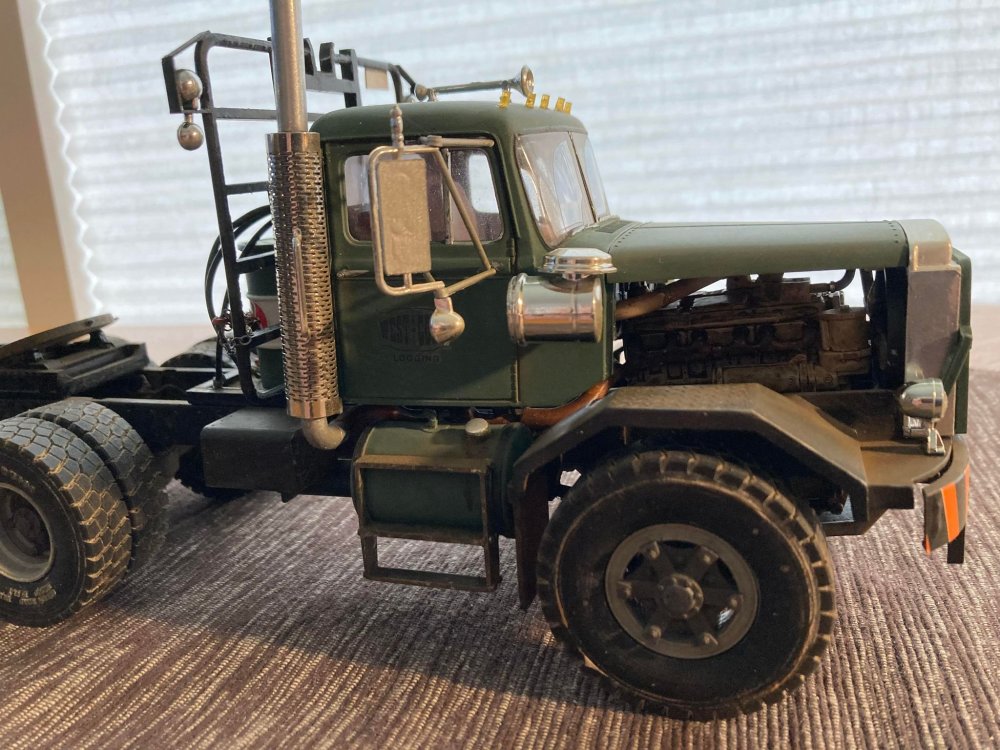
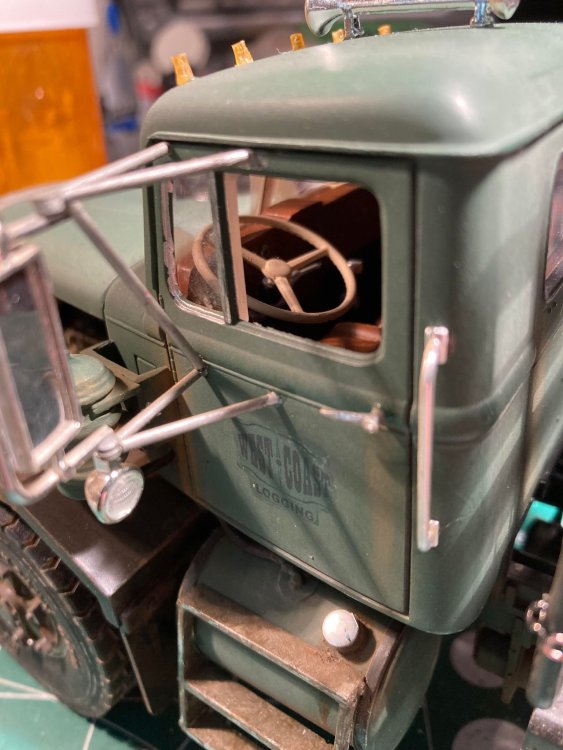
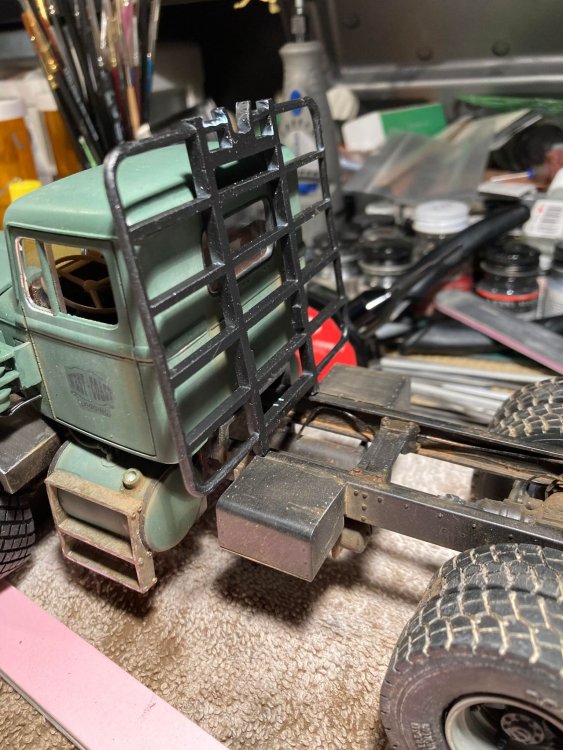
Well, we are getting there... had to run some air lines from the cab back to hook to the trailer , plus the electrical line....so two airlines, Supply and emergency ... blue glad hand is supply and red is emergency.... then the installation of the headache rack, it was MUCH easier to install the airlines before the rack, as there would have been fitment issues... as in the real deal.... and I also installed an aftermarket exhaust system, and tried my hand at 'scratch building' and scratched the mirror brackets, as the kit ones were way too out of scale... and installed the headache rack.....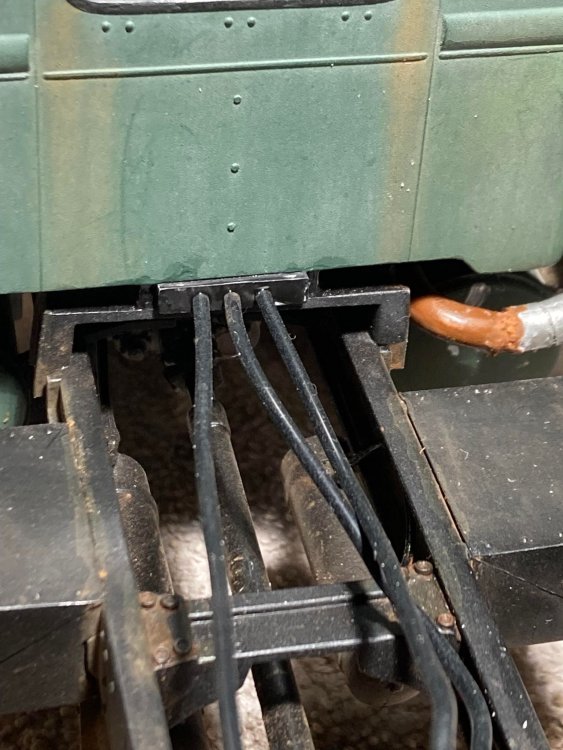


- 56 replies
-
- 4
-
-
- hevy haul off road tractor
- b.c. logging
- (and 1 more)