DocRob
-
Posts
7,082 -
Joined
-
Last visited
Content Type
Profiles
Forums
Events
Gallery
Everything posted by DocRob
-
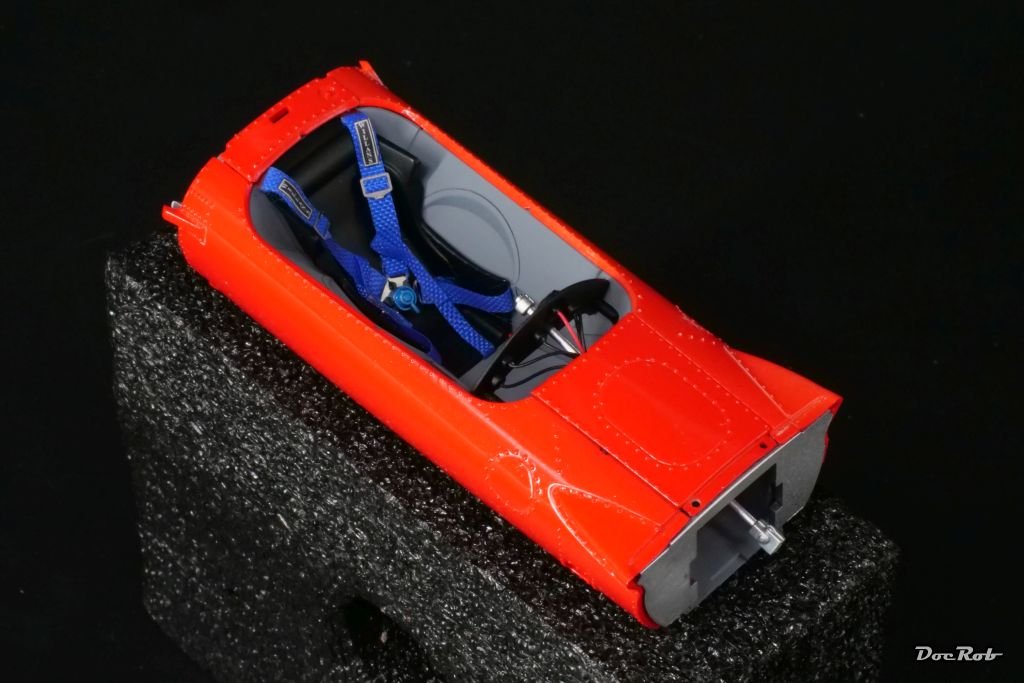
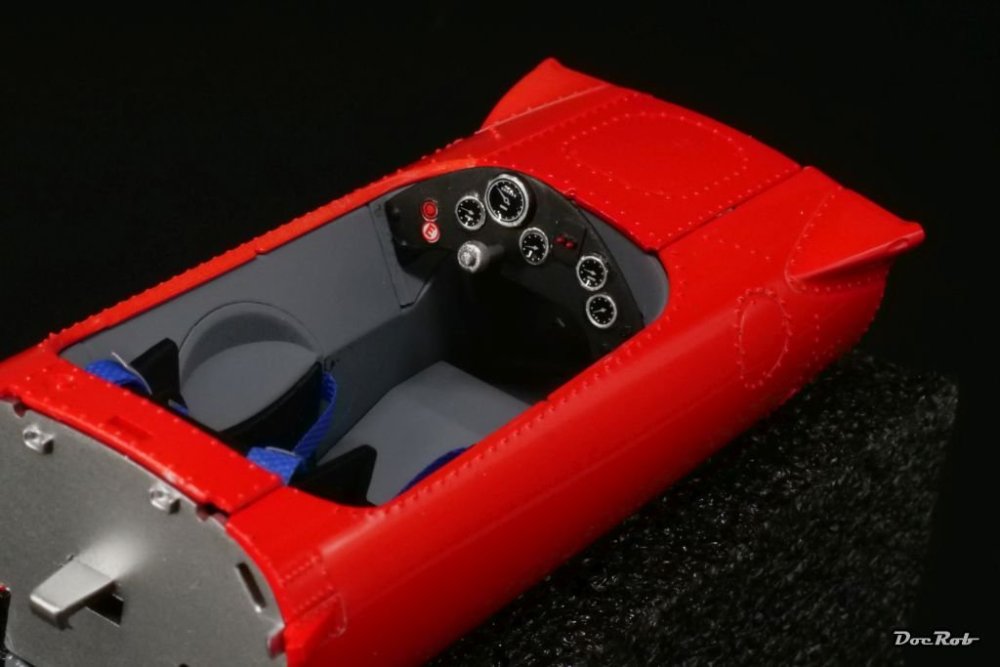
I test fitted the red airbrushed and gloss coated body parts around the tub and to my surprise the fit was very good. The instrument panel received the supplied decals for the dials, which were than sealed with a drop of Pledge for a better glass appearance. The later visible backside got the instrument housings drilled with a 0,5 mm bit and I added some 0,4 mm black and red cables for further detailing. Cheers Rob

-
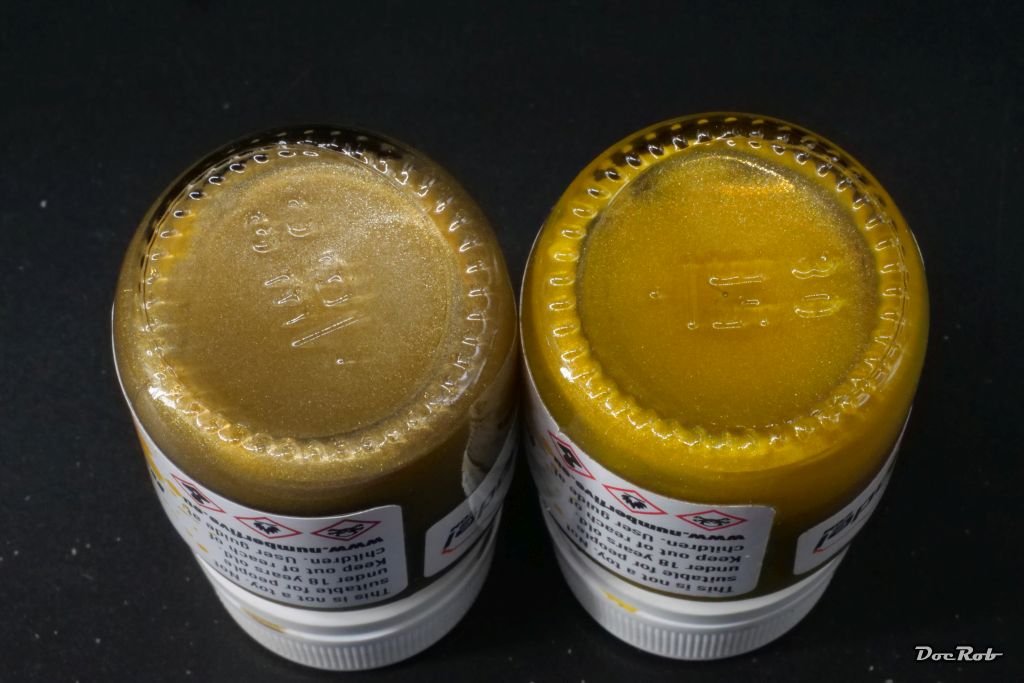
Next were the body parts, which I initially wanted to paint red and use the supplied decals for the white and gold trims. The parts were primed with pink Mr. Surfacer 1500, a good base, then followed by Number 5 Lotus red, which sprayed beautifully, thinned with Mr. Leveling thinner. The wing parts were left on the sprue, which I rarely do, but it would have been difficult to hold the parts during the painting stage Pink Red You may noticed, I also sprayed the front wings and little spoiler with Number 5 Lotus 49C gold, but the hue looked completely off and was completely different from the color of the decals. I then rummaged through my car color stash and found some Wolf Racing gold from the same brand, which fitted almost perfectly. Wolf gold left, the completely off Lotus 49C gold right. Cheers Rob


-
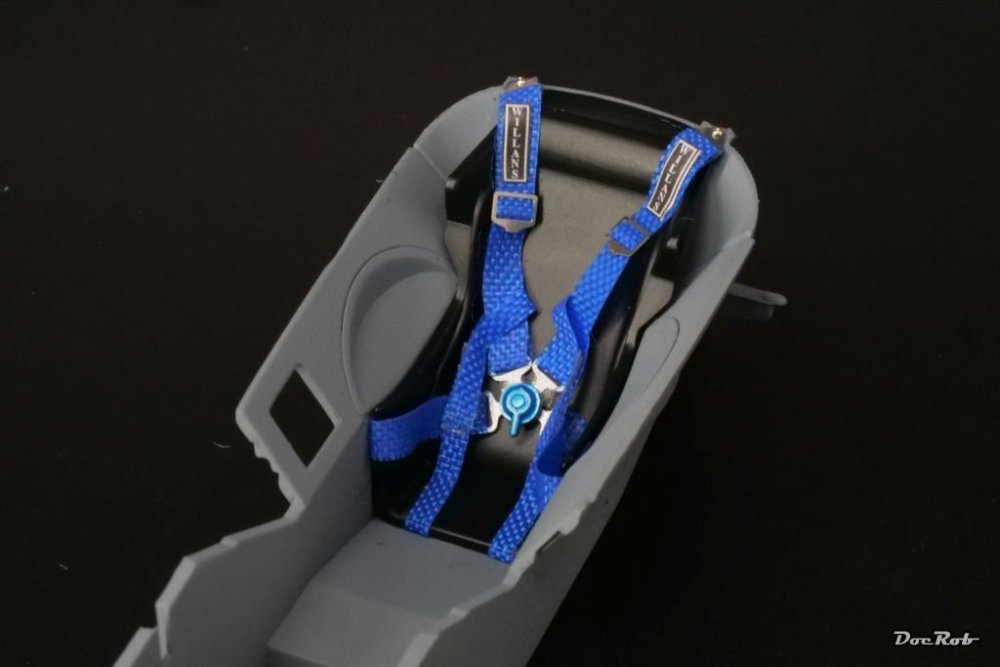
I started with the cockpit, which was a straight forward construction. The light grey tub receives the seat and some spars, gear shifter and of course the instrument panel. The kit supplied decals for the seat belts are not my cup of tea in this scale and I substituted them with fabric ones from MFH. Fiddly to build, but they look way better. You have to cut the fabric to length and add the buckles and then glue the fabric with supplied double sided adhesive tape, which I also used to hold the belts in place. I like that solution, because you don´t have to mess (literally) with CA Cheers Rob
-
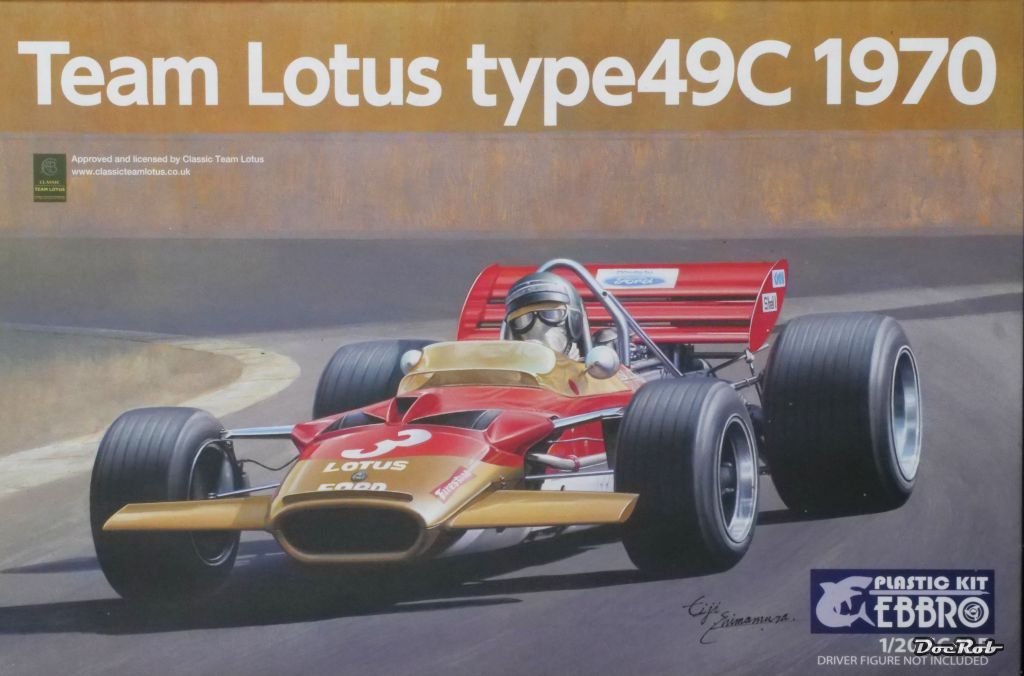
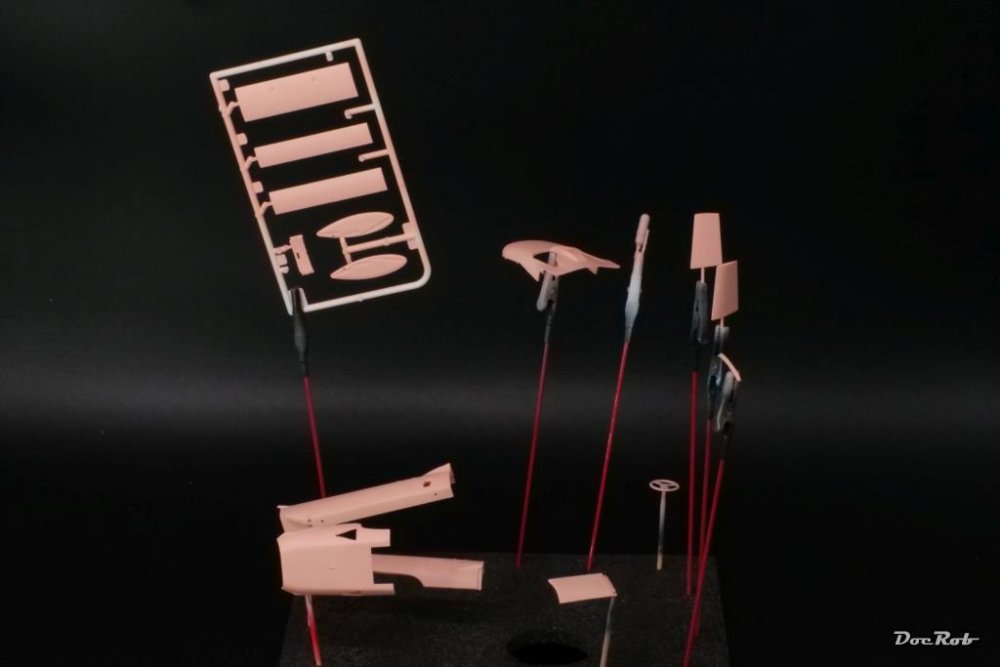
I was not sure, if I should WIP this build, but hey, there are not so many car builds around here. Ebbro the producing company is unfortunately not longer existing and we modelers lost a great source for 1/20 historic F1 cars. The Lotus 49 started it´s career in 1967 in the green and yellow Lotus livery. The later 49B and 49C models, were the first to sport full sponsorship brand colors, in red white and gold. My build will show the 49C as Jochen Rindt´s, who won the Monaco Grand Prix in 1970. By that time the 49´s where replaced by the Lotus 72, but Rindt disliked the later type. The kit itself is nicely designed with black, grey, white and chrome sprues, along a yellow tinted clear sprue for the windshield. The tyres have the branding and stripes already printed on, nice. The manual sports some similarities with Tamiya´s. I will add some extra detailing for the engine with Model Factory Hiro details and fabric seat belts from the same company and some piping and wiring. Cheers Rob

-
Looking good FA, Isn´t it fun, toying with different metallics? Cheers Rob
-
Nice, a hairdryer often works better for me than the usual suspects like Micro Sol. Cheers Rob
-
That is how Ford invented mass production, Carl . Good to see you are on the Revell 190 as well. Bummer with the resin. I have lots of Brassin stuff for mine as well, but I won´t pull it out now. Cheers Rob
-
Nice Carl, interesting, how lighting can change everything. On the "wrong" 190, the RLM 02 looks to dark, albeit it´s the same. Cheers Rob
-
Nice, I´m in. Cheers Rob
-
For a lost motivation build, it looks absolutely fantastic, Gus. I sometimes like the folded wings, but never built them. I may do it with the Gannet, as there is no way to get that thing uglier than it is. Good that you pulled through and finished this rarely seen beauty. Cheers Rob
-
Thanks Carl, the Revell doesn‘t look too shabby either. I have two of the Revell ones and very special ideas for both, decal Wise and for one, I have the full Brassin galore. Cheers Rob
-

What is on your bench right now ? Share a picture :)
DocRob replied to Martinnfb's topic in Modelling Discussion
I started weathering the Trotzky-mobil, Schneider tank and got heavily bored, I needed some fiddly and challenging stuff, so I started with the 1/20 Ebbro Lotus 49C. I will use a load of extras, like aluminum funnels, rivets and fabric seatbelts. The kit has only a decal for the belts, that´s why I chose a set from MFH. They were indeed fiddly to assemble, but way better looking than a decal. Getting the 0,5 mm rivet into the top fasteners was nerve wrecking, but in the end, the driver's safety was ensured. I may start a WIP, when I´m back from Portugal Cheers Rob

-
Very nice, PW, I like the paintjob and the net and vegetation add a catchy little extra. Cheers Rob
-
Thank you, it was an easy build, but I was always tempted to do this Spanish version, when I saw the decals set. Cheers Rob
-
Thanks Carl, that was the look, I was hoping for. The FC-ModelTrend decals were a bit on the fragile side, but do look good. The manual claims, there is photo evidence of one side of the Schneider, the other is fictional. Cheers Rob
-
The Scharnhorst 1/200 by Trumpter-Operation Paderborn
DocRob replied to KevinM's topic in Non LSM 'WIP
Well, that´s a lot of rigging for a ship without sails, Kevin. Tons of work, but it adds a lot detail wise. Cheers Rob -
Nice start Carl, would be interesting to see, how the ZM kit compares to the Revell offering. I know, these are later models but anyway. +1 for the winter camo. Cheers Rob
-
What is on your bench right now ? Share a picture :)
DocRob replied to Martinnfb's topic in Modelling Discussion
Nice to see something different, Kevin. I think you did a great job on the iron man. Cheers Rob -
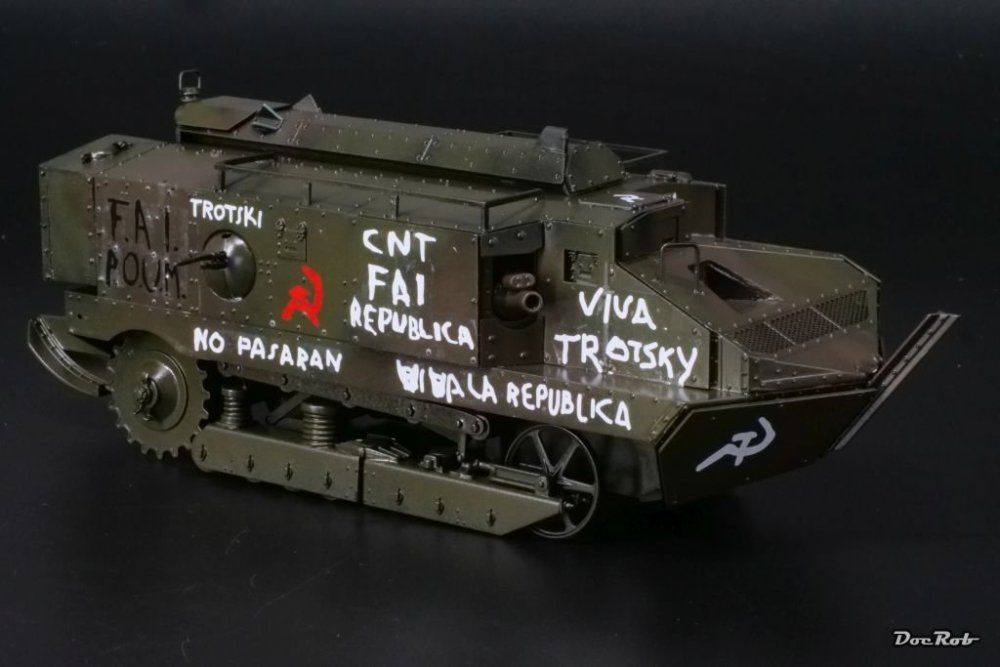
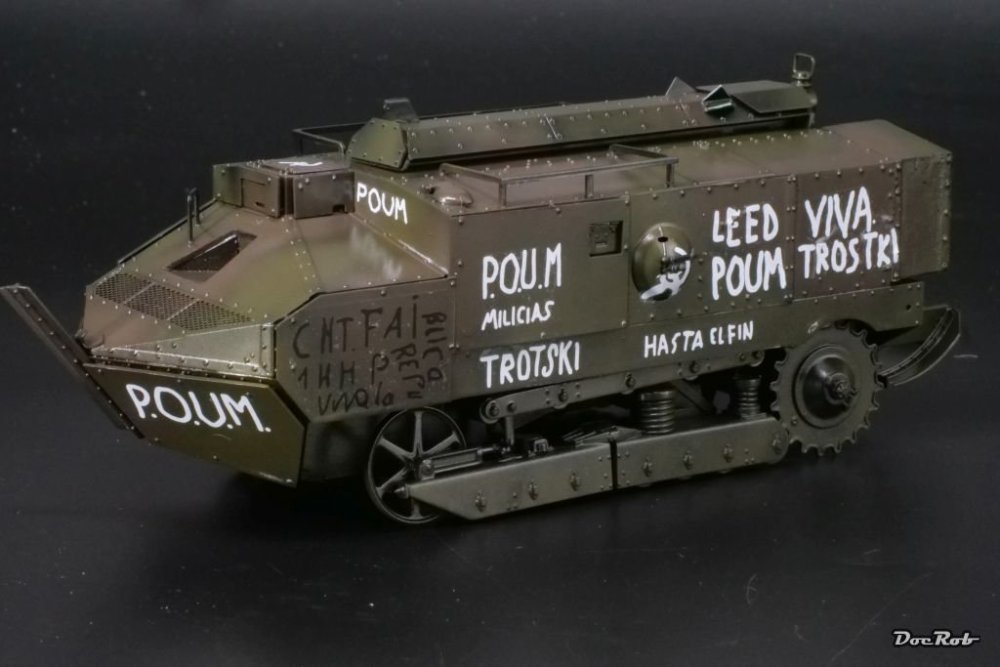
What would be a tank used by Spanish Anarcosindicalistas without a little agit prop . Decals were very thin and most were good to work with, but some disintegrated and needed to be repaired. Cheers Rob
-
The IP and cockpit look beautiful, makes me want to open the box of mine. Cheers Rob
-
Thanks Mike, but wait for the decals, definitely not Mad Max, but different. Cheers Rob
-
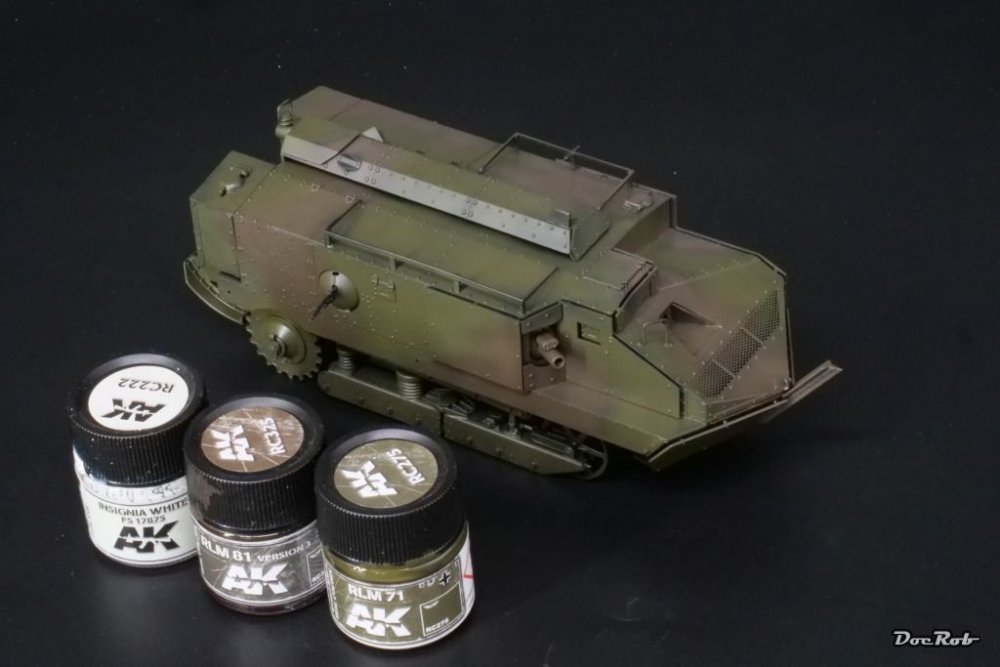
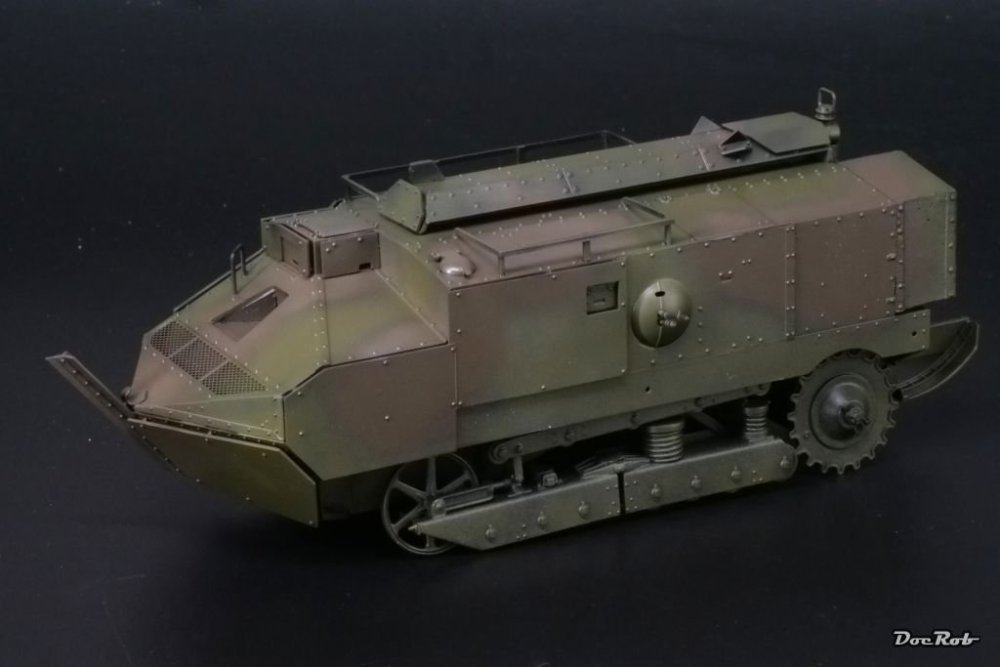
As I mentioned above, the twist with this build will be, that this outdated fossil from 1916 was still in use in 1936 in the Spanish Civil war with the Republican forces against Franco´s Nationalists. I guess, over their period of duty, the six? Spanish tanks served in Maroc and with their age, I assume, their state of maintenance not to be the best. I will try to show this appearance through the camo paintjob, which was sprayed translucent and freehand over the black primer, with heavily thinned AK Real colors. I made a second pass with both colors, adding a drop of Insignia White and tried to work a bit with highlight, shadow and modulation, which is not easy with a non-monochrome body. Anyway, that will be the starting point for further painting and weathering stages and of course for decals. Cheers Rob
-
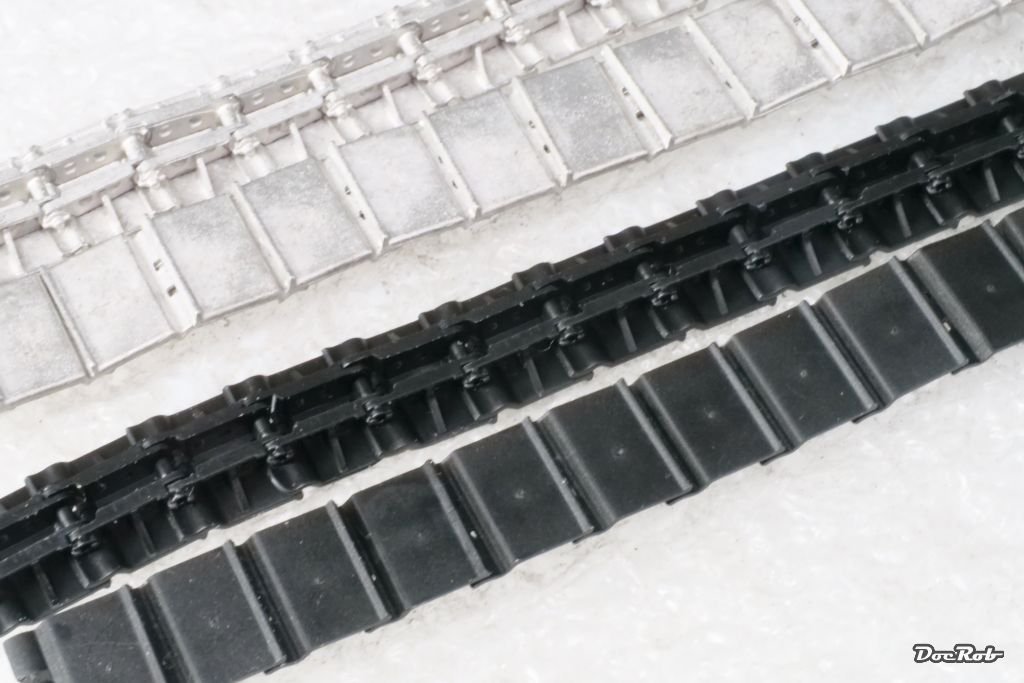
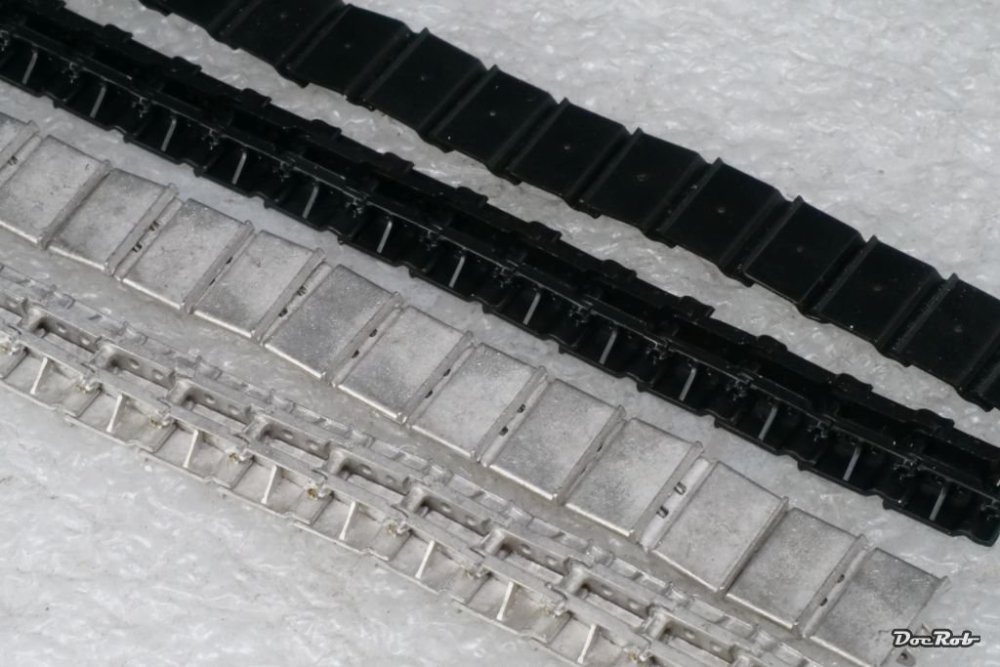
After Paul @belugawhaleman mentioned it, I opened the Meng FT 17 box and found the tracks to be ready cut and easy click and after 10 minutes, I had two with the suggested length of 32 links per side. There are some spare links as well. They don´t look bad and I may use the Meng plastic ones for the Schneider, where they are not so visible. Meanwhile the Schneider itself got black primed with Mr. Surfacer 1000. Cheers Rob

-
What is on your bench right now ? Share a picture :)
DocRob replied to Martinnfb's topic in Modelling Discussion
You are on a Zoukei roll, Carl. Bring it on and clutter your bench. Cheers Rob -
I just checked the box of my Meng FT 17 and found the easy click together tracks in it. I may use them for the Schneider, where they are less visible than with the FT 17. I will make a test fit later and then decide. Cheers Rob