DocRob
-
Posts
7,082 -
Joined
-
Last visited
Content Type
Profiles
Forums
Events
Gallery
Everything posted by DocRob
-
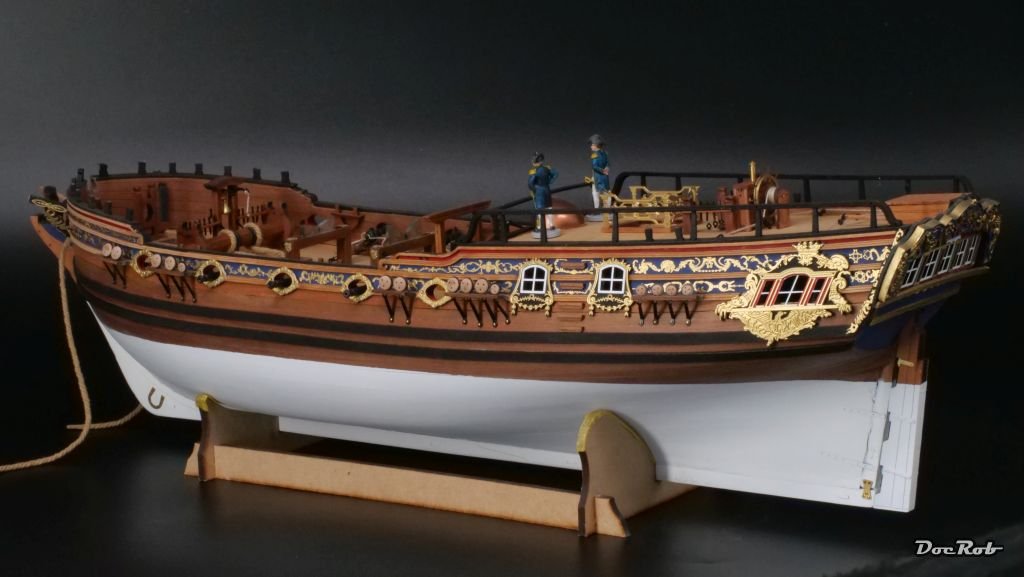
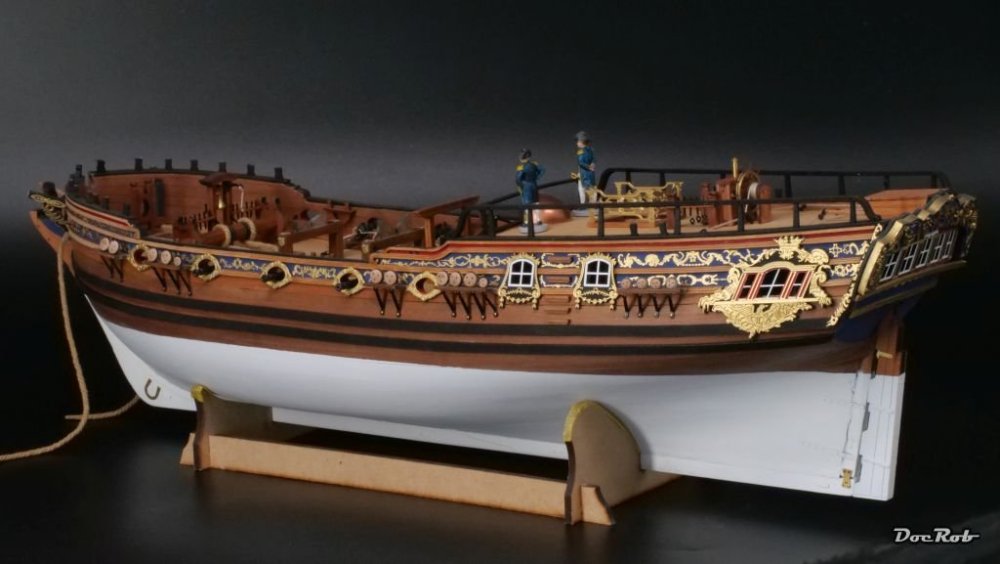
H. Spoke about CA gluing PE parts, that was what I was referring to. I double planked a complete wooden sailing boat, using CA. I know, wooden ship modelers often dislike CA and you have to be really careful using it, to not stain the visible side, but it works good and superfast. This is the hull, I made, there are no stains, even after finishing the wood with varnish. The golden ornate PE is also glued on with CA. Cheers Rob
-
Beautiful looking decks, H. I wonder about the CA though. For the decks white glue might be a god option, but for small PE parts? I think the white glue can´t take any strains. I use Colle 21 CA by the gallon for my metal MFH kits and used it with ships PE as well with no complaints. Cheers Rob
-

Brabham BT45 - Model Factory Hiro - 1/12
DocRob replied to DocRob's topic in LSM 1/35 and Larger Work In Progress
Thank you Paul, it took some elbow grease to get there. The downside with car finishes is, there are always some bad spots, at least with mine. I have one piece of dust on one of the side intakes and on the other, there lifted the decal during sanding with the clear coat on. I can only guess, there was something under the decal not adhering well, but it was invisible before sanding, no bubble no nothing. It´s not bad enough to redo everything and try to get a new decal sheet, but it seems to happen always. Cheers Rob -
Another friend of heavy metal, welcome to LSM. Good to see you building the big Leo as the first one here. Cheers Rob
-
We need the "wow" smiley, like they have over on MSW. Fantastic detail work. Cheers Rob
-
The Scharnhorst 1/200 by Trumpter-Operation Paderborn
DocRob replied to KevinM's topic in Non LSM 'WIP
Indeed Kevin, lots of great detail to watch. Ships are not easy to capture on pics entirely thanks to their geometry. Cheers Rob -
Fantastic result with your E100, which is accordingly to your avatar. Paintjob and weathering are super bueno. Cheers Rob
-
Brabham BT45 - Model Factory Hiro - 1/12
DocRob replied to DocRob's topic in LSM 1/35 and Larger Work In Progress
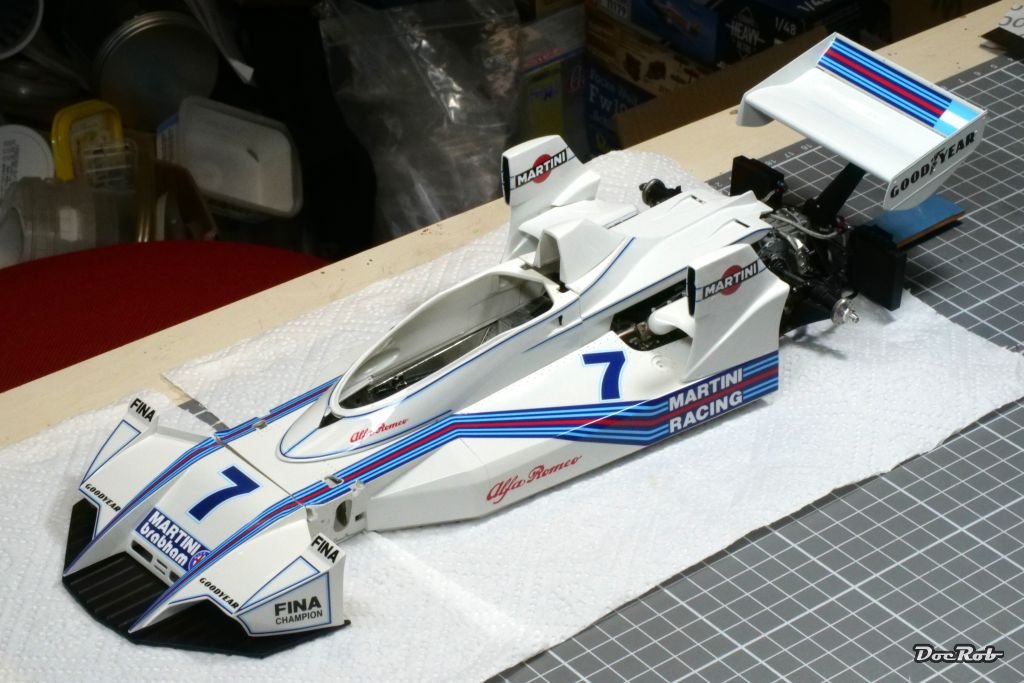
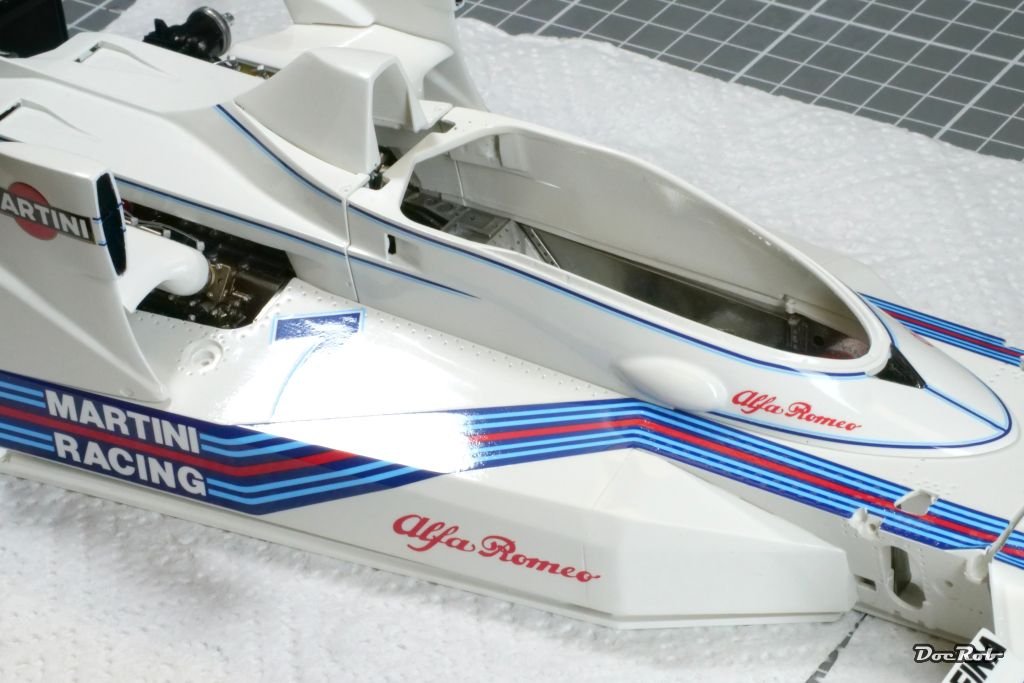
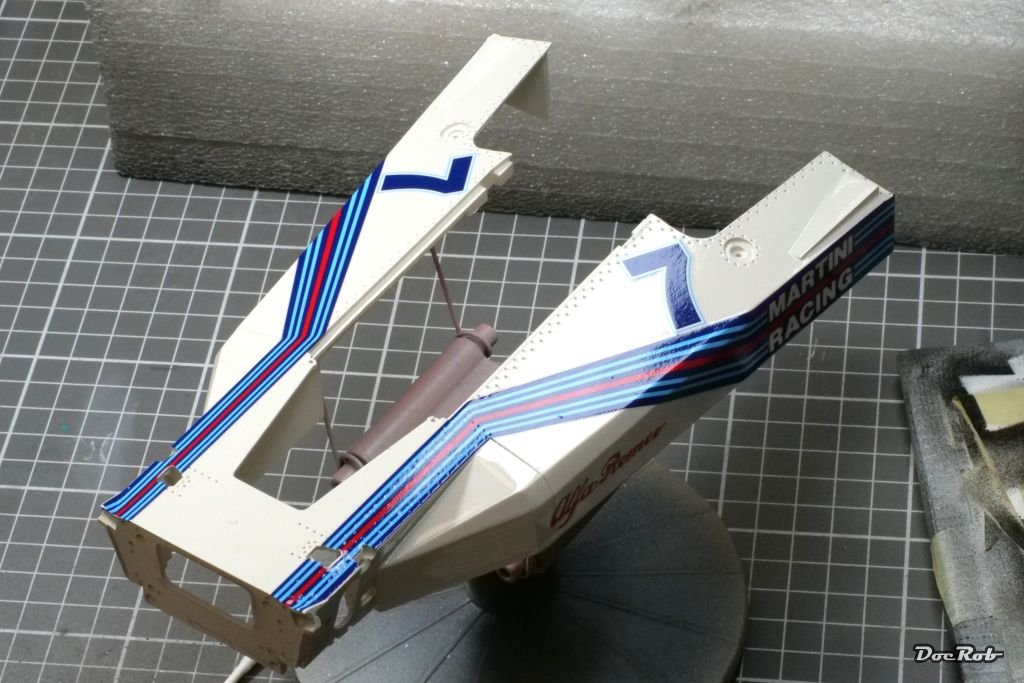
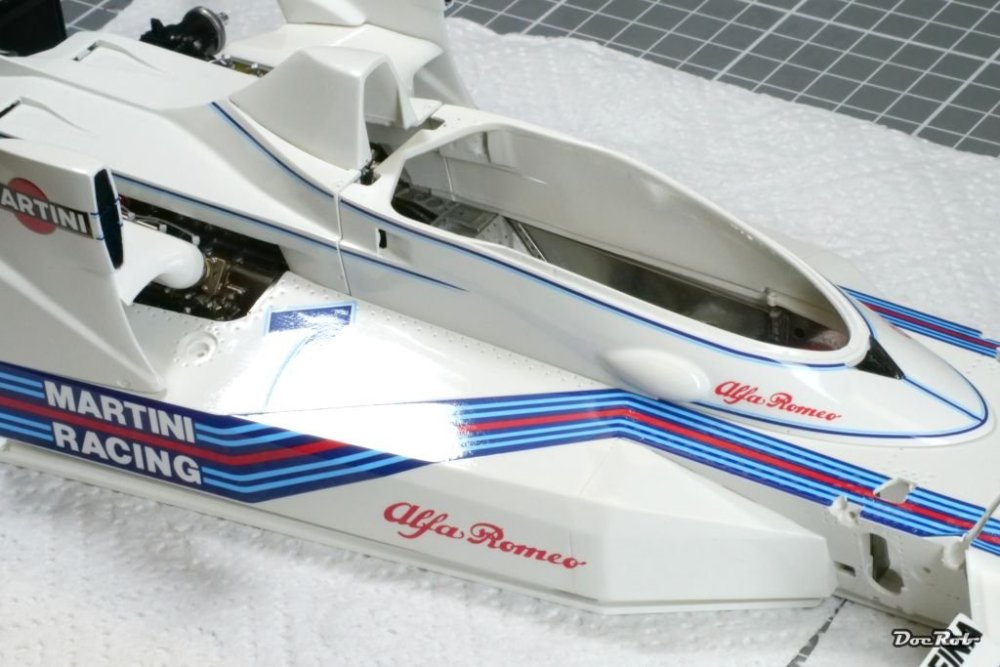
There are few steps more rewarding in modeling than to finish a car body to a high shine surface. All the work going into took a while, but I love doing the polishing as a last step. I used Tamiya´s polishing compounds starting with coarse, then fine, followed by finish. I didn´t apply wax now, because there are still many parts to add to the body, so this will be kept to the finish. The coarse polishing is by far the most important and also time consuming one to my eye, as you remove all the tiny imperfections, check against the light and continue until all looks good, always taking care not to polish through the clear coat. I couldn´t resist a little workbench mock up. Cheers Rob


-
A beautiful Albatros you built here, especially in that tiny scale. Congratulations on the result and having the balls to rig in 1/72. Cheers Rob
-
The Scharnhorst 1/200 by Trumpter-Operation Paderborn
DocRob replied to KevinM's topic in Non LSM 'WIP
Are we witness of a continuation of the Scharnhorst build, Kevin? Would be great, you are by far a better model builder than cameraman . Cheers Rob -
Brabham BT45 - Model Factory Hiro - 1/12
DocRob replied to DocRob's topic in LSM 1/35 and Larger Work In Progress
Clear coating went very well. I used Zero Paints lacquer clear, which did a fantastic job on my Cobra Coupe. My approach is similar to the application of the base coat and it works for me. First, I spray a thin un-thinned layer, which dries very quickly with the help of the airbrush blow, to hinder the aggressive lacquers to attack the decals. The second layer after about 15 minutes consists of about 25%-30% leveling thinner and is applied "wet" After again 15 minutes of drying and leveling time, I applied the third layer, this time with 50%-60% of levelling thinner, this time very "wet". The brief drying time leads to later layers "melting into the layers applied before and give a better surface. I may could push my luck with the application of pure leveling thinner as a fourth coat, but I fear running paint. The result looks far better to the real eye than on the pictures, but I learnt through other builds, that´s always the case with high shine finishes. Anyway, today or tomorrow I will slightly sand and polish the surfaces. Cheers Rob

-
Brabham BT45 - Model Factory Hiro - 1/12
DocRob replied to DocRob's topic in LSM 1/35 and Larger Work In Progress
Thank you Kevin, it´s always a pleasure to admire the fine work of other gifted car modelers. I which there were more here on LSM. Cheers Rob -
Great progress with that fiddly area of the plane, Gus. The exhaust look super bueno. Cheers Rob
-
The weathering with your typical FullArmor style rocks again. Cheers Rob
-
Brabham BT45 - Model Factory Hiro - 1/12
DocRob replied to DocRob's topic in LSM 1/35 and Larger Work In Progress
Thank you Mike, I had never much static with resin, other than MFH´s white resin. After a bit of sanding, it´s a real dust magnet and it´s not easy to get rid of the dust. Soap water helps a lot. Cheers Rob -
Brabham BT45 - Model Factory Hiro - 1/12
DocRob replied to DocRob's topic in LSM 1/35 and Larger Work In Progress
Thank you Gus, luckily the BT45 has not many curved surfaces and is very angular. Cheers Rob -
Brabham BT45 - Model Factory Hiro - 1/12
DocRob replied to DocRob's topic in LSM 1/35 and Larger Work In Progress
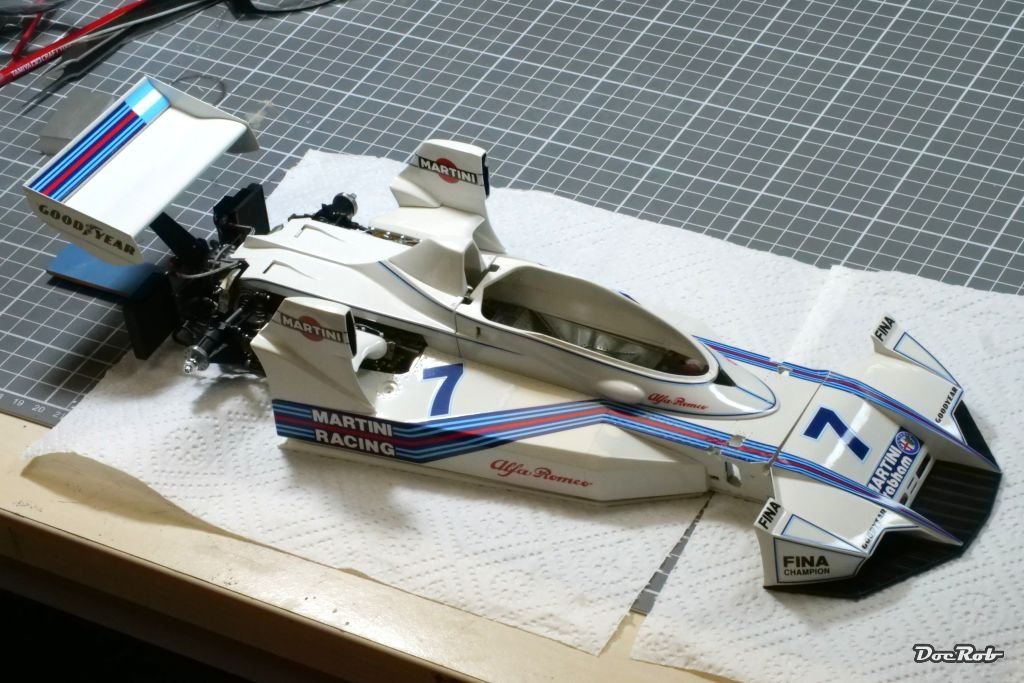
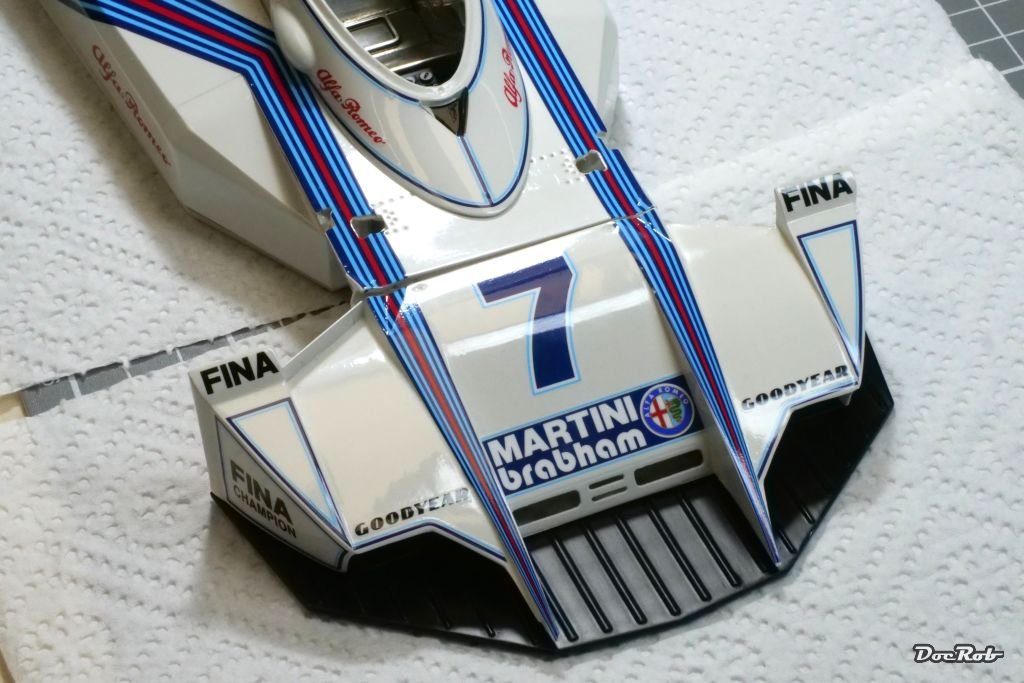
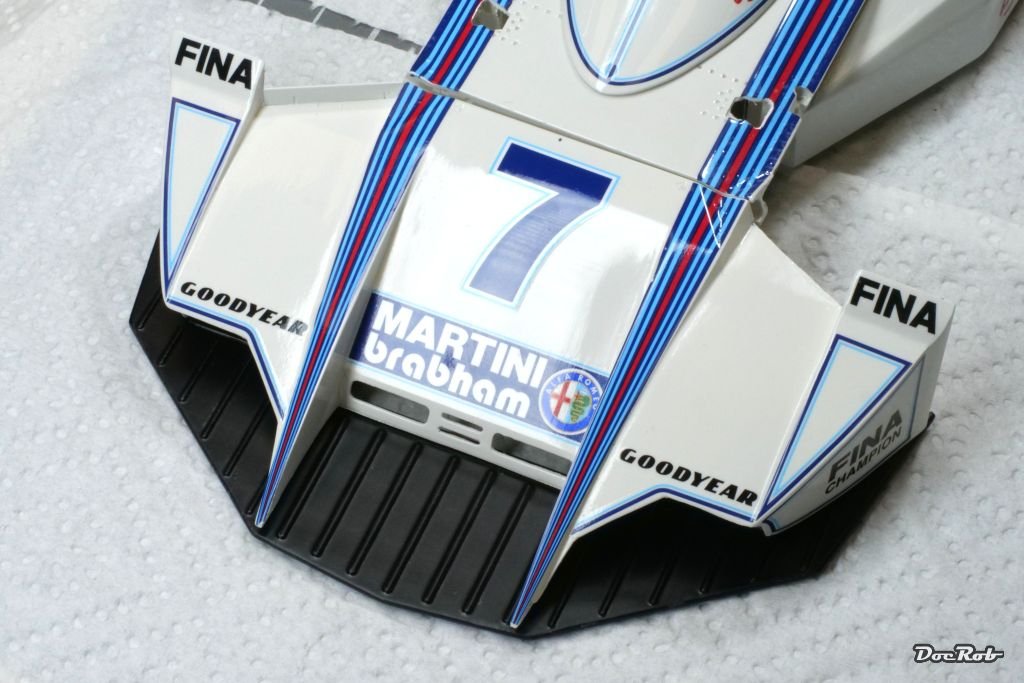
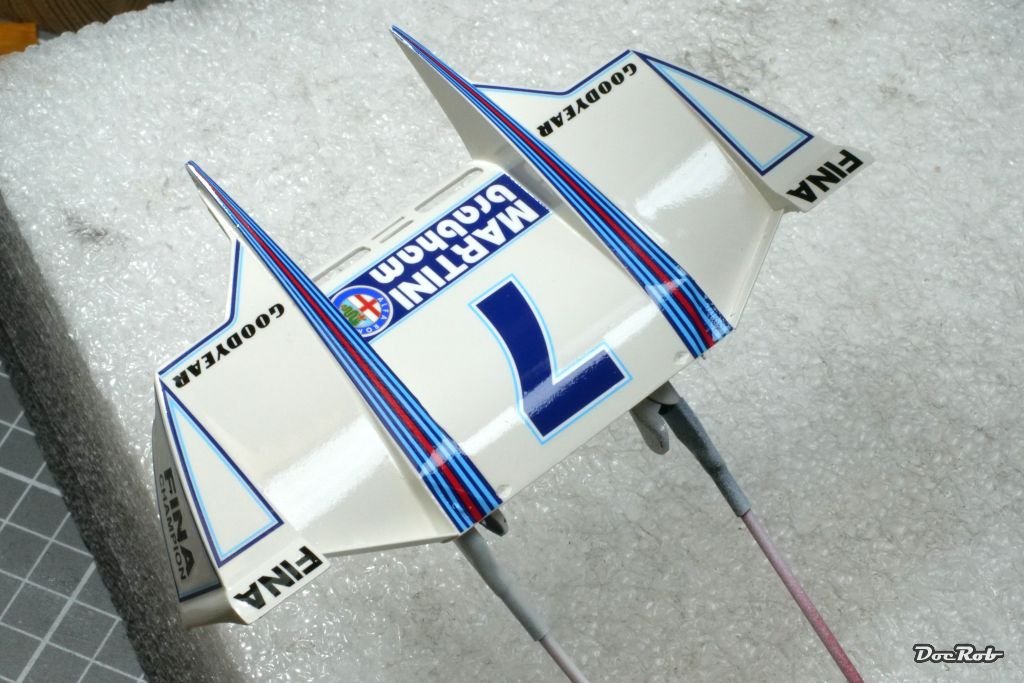
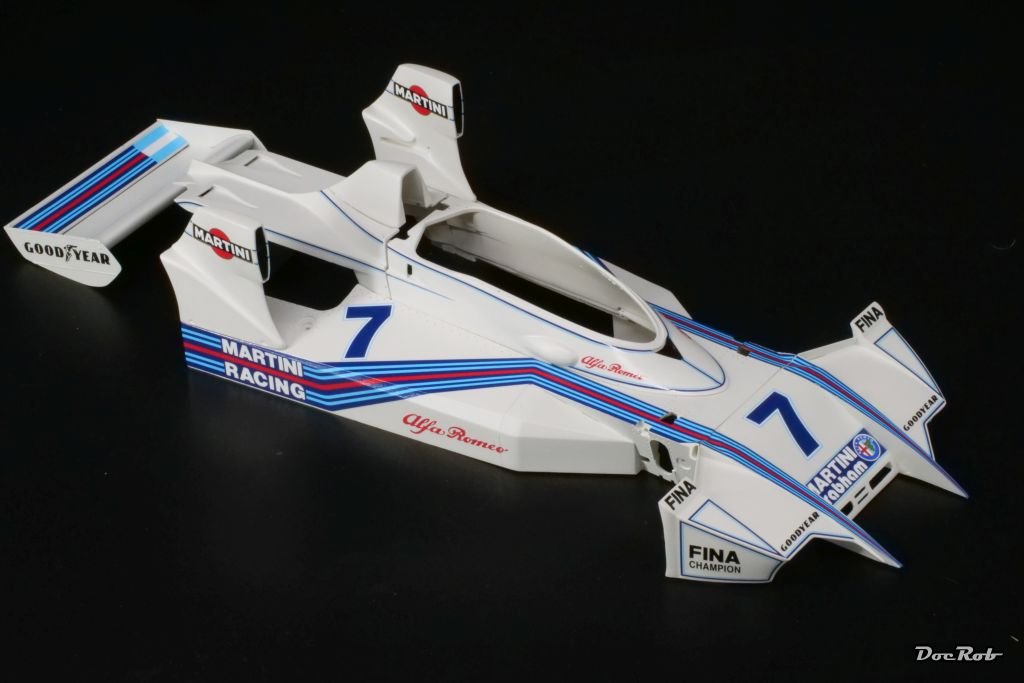
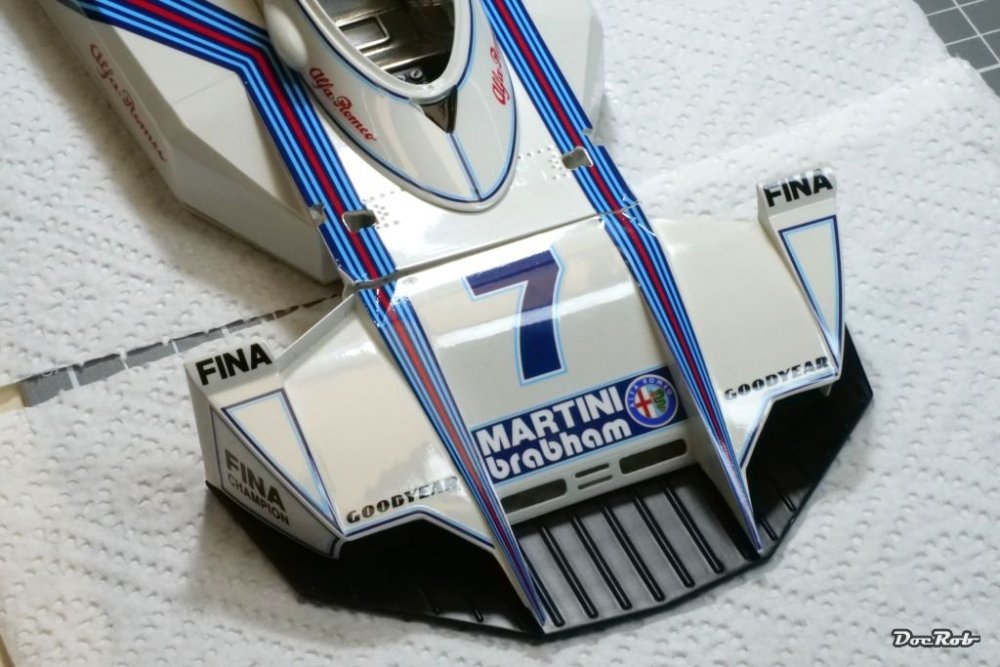
Finally some serious progress. I finished decaling the body parts, after a long period of prep work. My usual method is read the manual, understand the manual, drill all needed holes, fill and sand where needed, sand all resin surfaces carefully with 4000 grit, clean all the parts first in soap water (helps to reduce the static, these resin parts possess, which makes them like dust magnets) and wipe it with alcohol. Next was Mr. Color 1500 white primer, which sprayed fantastic like always. After a day of drying time, I checked the surfaces again and then applied the body color, in this case Number Five´s Brabham BT44 white, which is a tiny bit off white. I sprayed the first layer un thinned, let it cure for some minutes, followed with a mix of about 25 % leveling thinner and paint and let dry for some more minutes. The last layer was applied with about 50 % of thinner and the relatively short drying times helped, that the later layers "soaked" into the base layer. There was extremely minimal orange peel, which completely vanished after half an hour of drying. I have to say, these Number Five colors are fantastic to work with an give the best possible surface results. I used them for the Cobra Coupe as well. I feared decaling a bit with the thin pinstripes and huge decal bands slung around the body. I didn´t need to worry, the decals were fantastic to work with and were applied using warm soapy water only. One word of warning though, MFH decals are covered with a very thin very transparent plastic sheet which slightly adheres. Take care, you remove it before applying the decal, because it sticks to the foil much better than to the backing paper after soaking and you have to carefully peel the decal off the foil with a scalpel blade, which is really no fun. I only missed to remove the foil with two decals, but man, was I sweating. Cheers Rob
- 119 replies
-
- 10
-

-

-
Like FA said, it´s good to see some nice ship building here. I will follow and am eager to see more. Cheers Rob
-
1:32nd scale Caudron G.3 (Anzani engine)
DocRob replied to sandbagger's topic in LSM 1/35 and Larger Work In Progress
Like Hubert said, but it would have haunted you forever, if you had left it with a visible difference. Well, put in 20% for my future WWI builds, because Mike made it look so good and I couldn´t resist. Cheers Rob -
Brabham BT45 - Model Factory Hiro - 1/12
DocRob replied to DocRob's topic in LSM 1/35 and Larger Work In Progress
You put that right Martin, but you forgot to mention the fun to do so . Cheers Rob -
Brabham BT45 - Model Factory Hiro - 1/12
DocRob replied to DocRob's topic in LSM 1/35 and Larger Work In Progress
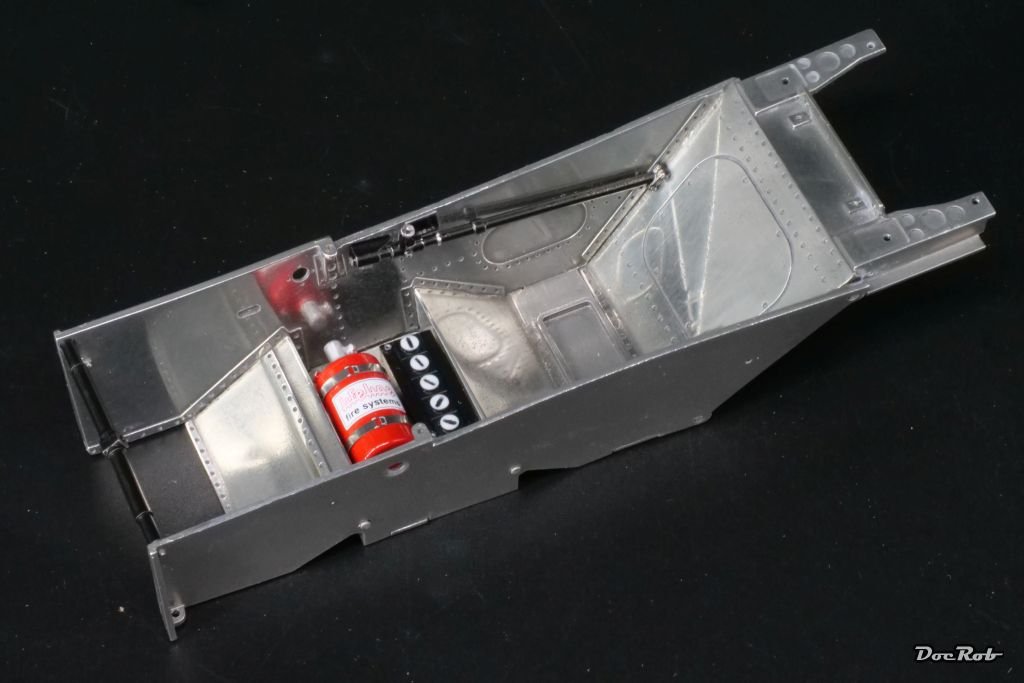
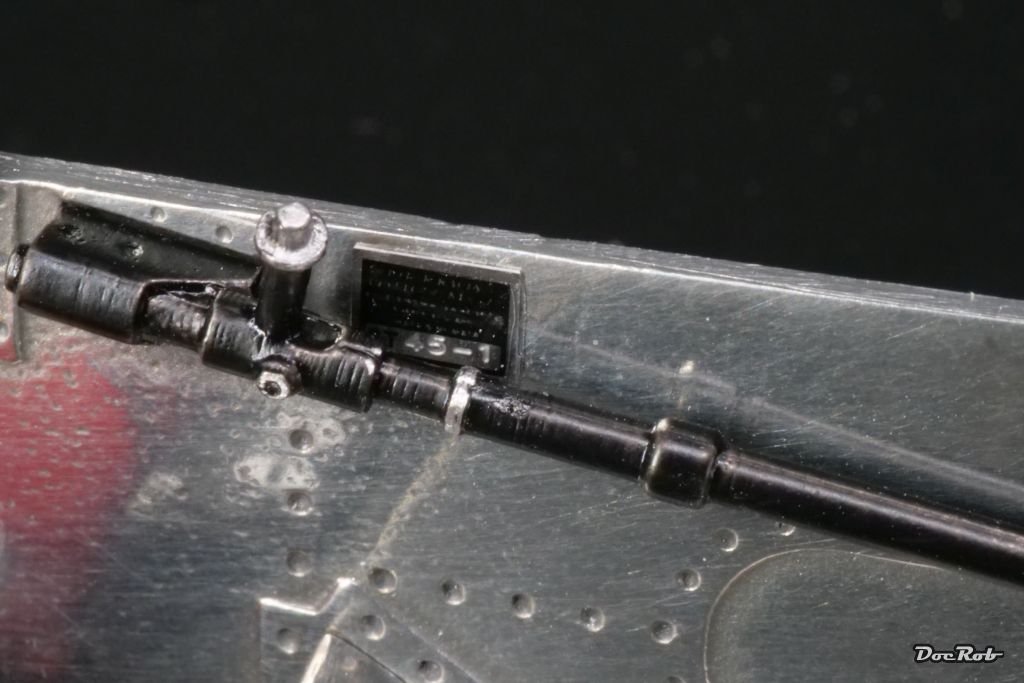
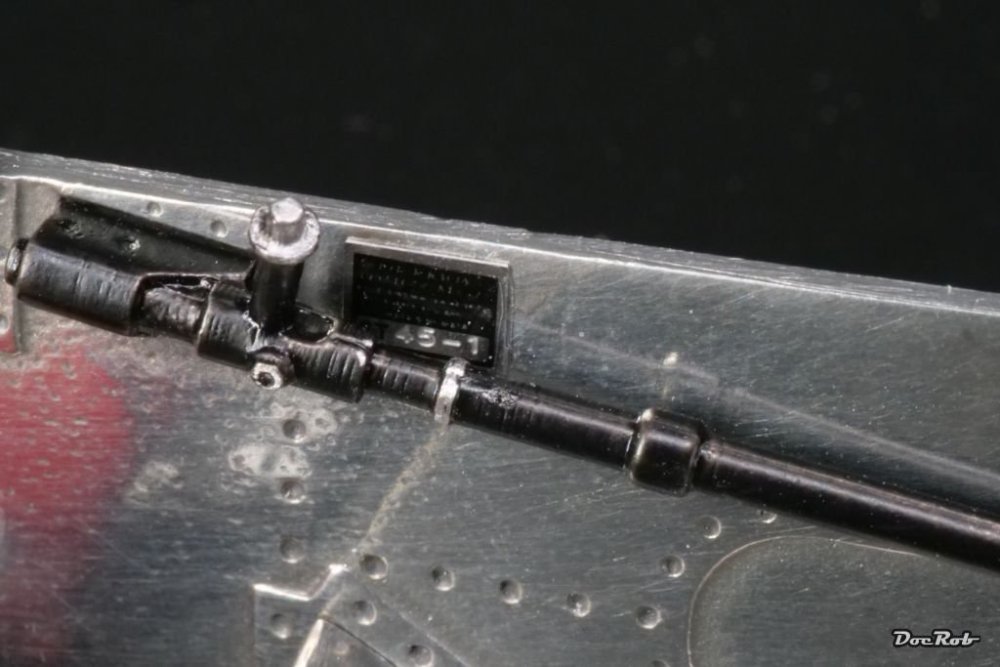
The preparation of the resin and metal parts for all body and the front suspension is quite time consuming, but the fit is overall very good. All body parts got cleaned up, surface sanded, washed in soap water, swiped with an alcohol soaked cotton rag and finally primed with Mr Surfacer 1500 whit primer, which laid down beautifully. In the meanwhile, I glued together the polished cockpit tub and added some accessories. The battery and fire extinguisher will be hidden under the seat later. One beautiful detail is the number plate of the chassis. It has an etched part as a base, with the chassis number etched in. Onto that, you apply a transparent and black decal with the labeling, a bit hard to see on the pic. Cheers Rob
-
The KV came out nicely, I like the mud and the color modulation. Cheers Rob
- 1 reply
-
- 1
-
-
Lukgraph J2F-5 Grumman Duck
DocRob replied to ScottsGT's topic in LSM 1/35 and Larger Work In Progress
This will be interesting Scott, it´s always a pleasure seeing someone putting together a grail kit and in your case to learn a lot through your build, how to handle 3D printed parts not only as accessoires. Cheers Rob -
Spitfire Mk-VIII by Tamyia-Close to Finish
DocRob replied to KevinM's topic in LSM 1/35 and Larger Work In Progress
Looking good on the top side Kevin, but a bit heavy on the underside. Hopefully the Future will do it´s job. On chalks, it does a soothing job, reducing the contrasts. Cheers Rob -
Brabham BT45 - Model Factory Hiro - 1/12
DocRob replied to DocRob's topic in LSM 1/35 and Larger Work In Progress
Until now everything seems fine Mike, the kit seems to be easier to build than the Cobra Coupe. Fit and engineering is very good so far. There are only these damned coil springs for the exhausts, which I couldn´t attach and that is nagging me. I may try to insert a wire into the spring coil for easier bending. Cheers Rob