DocRob
-
Posts
7,082 -
Joined
-
Last visited
Content Type
Profiles
Forums
Events
Gallery
Everything posted by DocRob
-

Brabham BT45 - Model Factory Hiro - 1/12
DocRob replied to DocRob's topic in LSM 1/35 and Larger Work In Progress
There is not too much to show at the moment, as I´m preparing all the resin parts and some of the metal parts for the next steps. Test fitting is time consuming, but helps to recognize, where everything fits and how. During this test fitting period, I made a mock up workbench build up. Cheers Rob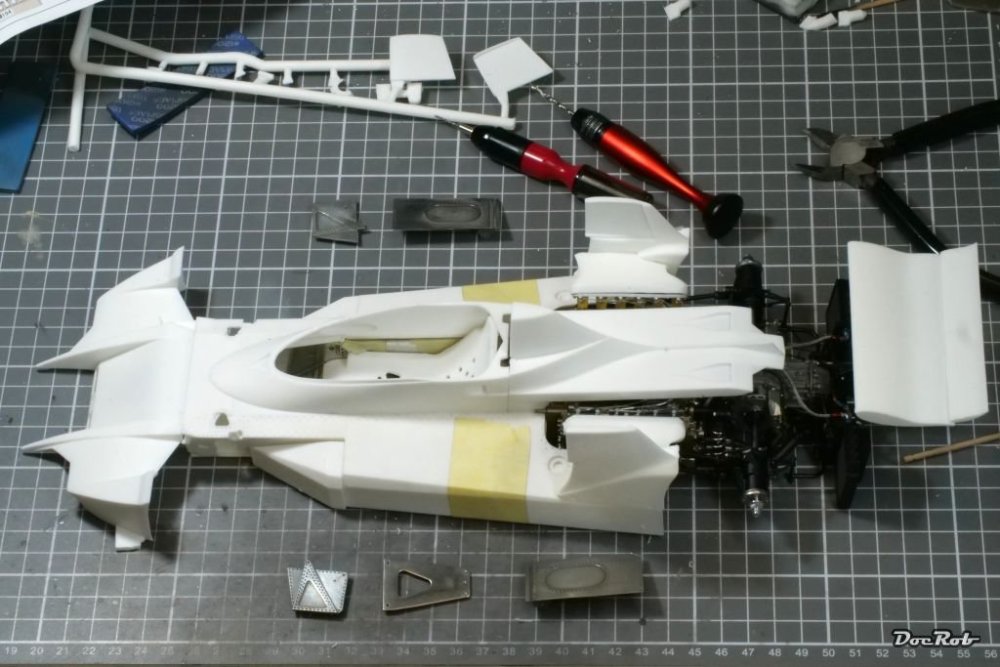
-
I can only guess, but I think they should have been made from rolled steel. Cheers Rob
-
Brabham BT45 - Model Factory Hiro - 1/12
DocRob replied to DocRob's topic in LSM 1/35 and Larger Work In Progress
It was a trap, Hubert and you fell in . I knew, somebody would bite and I guessed it might be you or Martin. I was about to link a Mano Negra video myself, but thought it to be funnier that way. Cheers Rob -
Brabham BT45 - Model Factory Hiro - 1/12
DocRob replied to DocRob's topic in LSM 1/35 and Larger Work In Progress
Thank you Paul, about tarnishing, I don´t know, but I guess, very little so. These kind of metals are not overly reactive. My Crocker motorcycle with many polished surfaces looks completely unchanged after about a year. Cheers Rob -
Brabham BT45 - Model Factory Hiro - 1/12
DocRob replied to DocRob's topic in LSM 1/35 and Larger Work In Progress
Thank you Mike, the white metal polishes really easy in fact. I did a lot of polishing with my Crocker motorcycle build as well. The only problem are slight superficial imperfections due to the casting process, which need to be removed first. This can be quite tedious, as it is not easy to sand the parts without losing detail and not all areas are reachable for proper sanding. I don´t know about other metal polishing pastes, but Autosol is a classic and it works perfect for me. Cheers Rob -
Brabham BT45 - Model Factory Hiro - 1/12
DocRob replied to DocRob's topic in LSM 1/35 and Larger Work In Progress
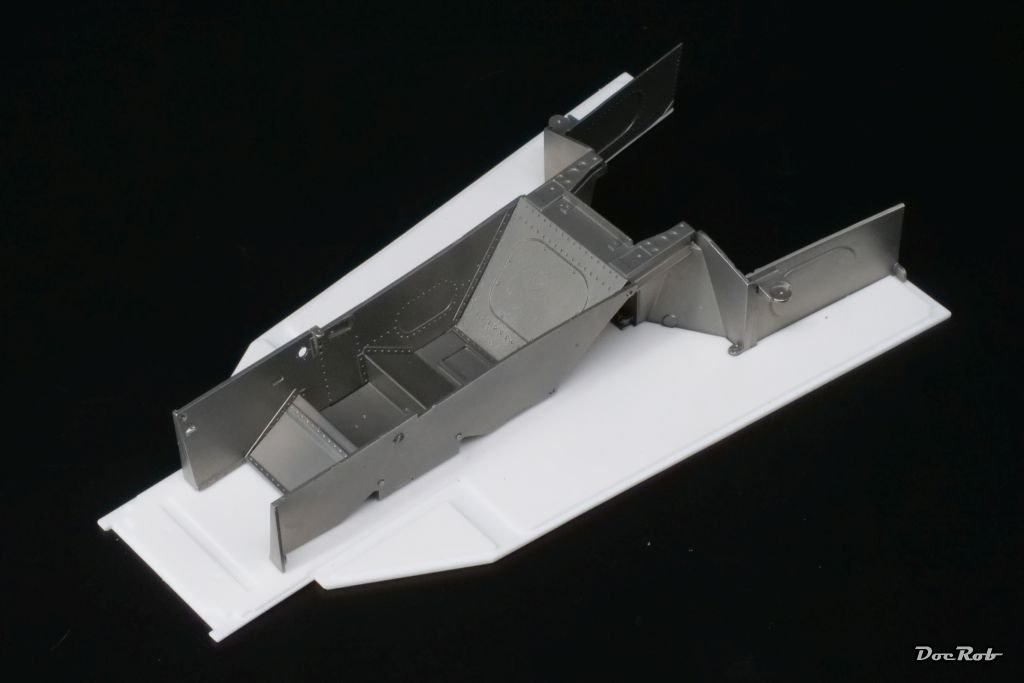
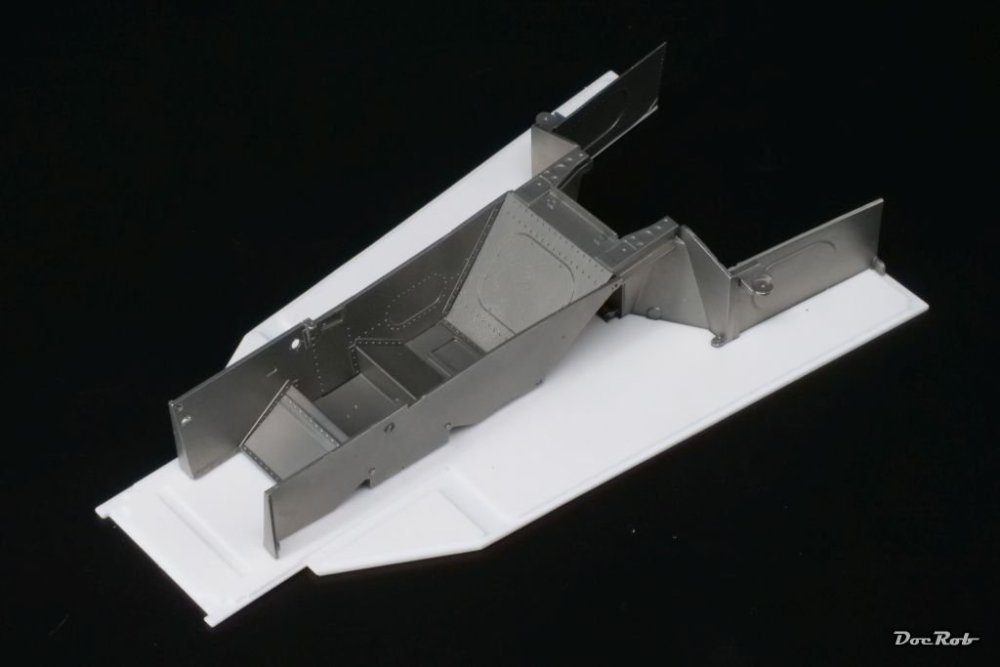
Yesterday was the day of mano negra, the black hand . Polishing white metal makes your fingers black with the metal residues, but despite the dirt, it is fun. I used sanding sponges of 1200 to 6000 grit, to get rid off the cast imperfections, then it was about polishing with a cotton swab and Autosol metal polishing paste with works really well. I like the shiny look a lot and it could pass for polished aluminum to my eye. Today, i test fitted for some hours, as now is the decisive step, where the tub has to fit into the body, along all the mating parts. Cheers Rob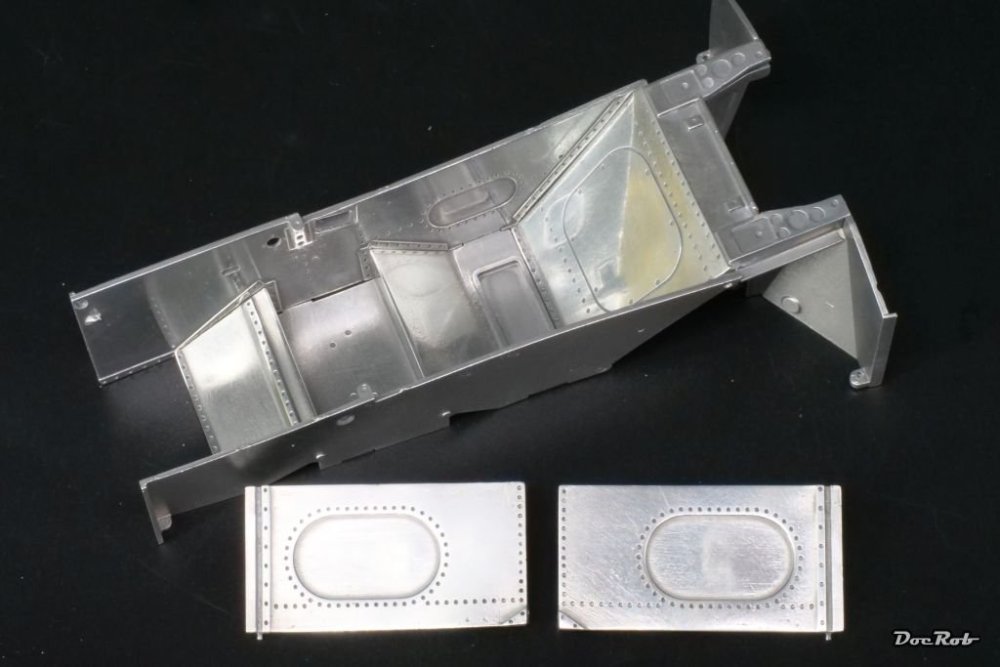
-
Brabham BT45 - Model Factory Hiro - 1/12
DocRob replied to DocRob's topic in LSM 1/35 and Larger Work In Progress
Thank you Mike, I enjoyed the Valencia trip a lot, fine weather, good food, wine, art, science and beautiful architecture in a very relaxed city. The flat 12 engine was one of the reasons, why I chose the BT45. I was very close before buying a McLaren M19 instead, but it had the same Cosworth CSV engine like my Lotus 77, my Brabham BT44b and others in 1/20, yawn. Cheers Rob -
Indeed, some great models, thanks for showing. Cheers Rob
-
What is on your bench right now ? Share a picture :)
DocRob replied to Martinnfb's topic in Modelling Discussion
Will there be folded wings Carl? Cheers Rob -
Brabham BT45 - Model Factory Hiro - 1/12
DocRob replied to DocRob's topic in LSM 1/35 and Larger Work In Progress
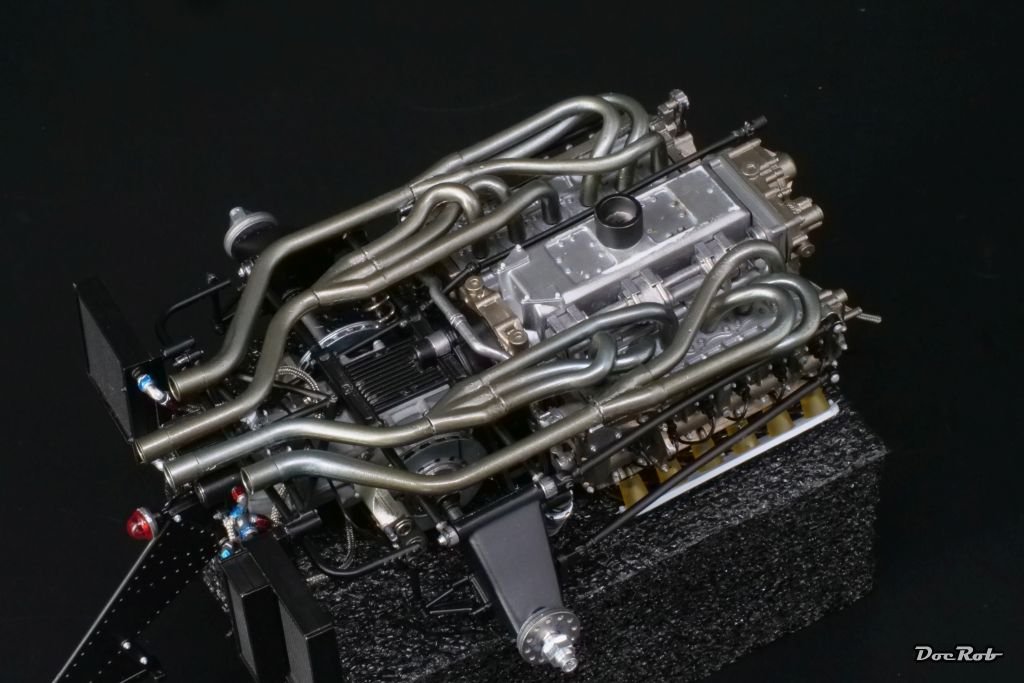
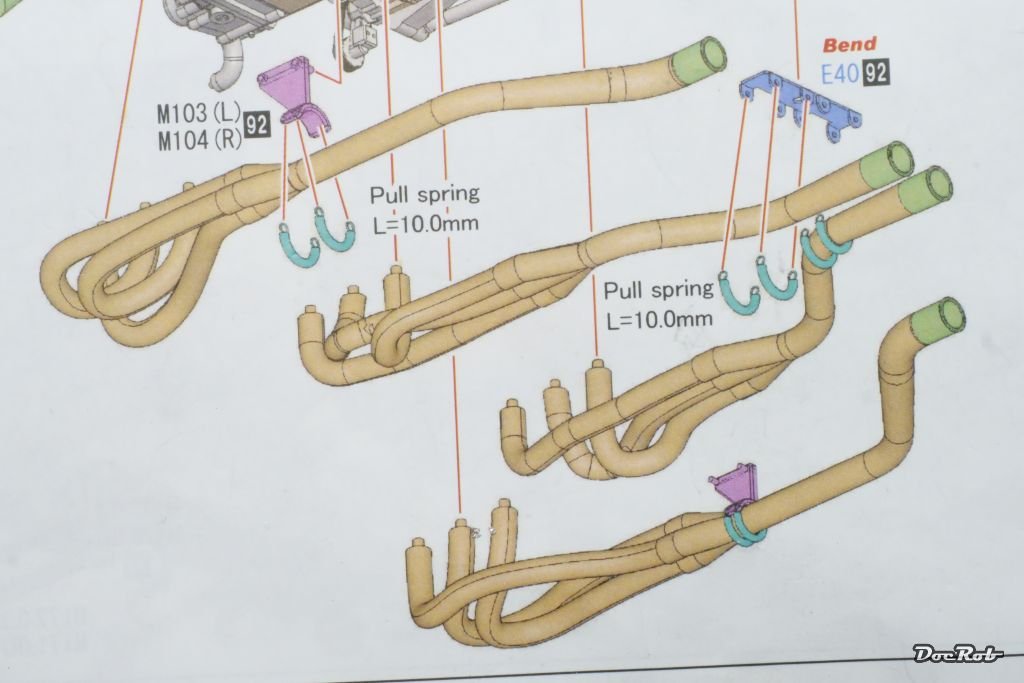
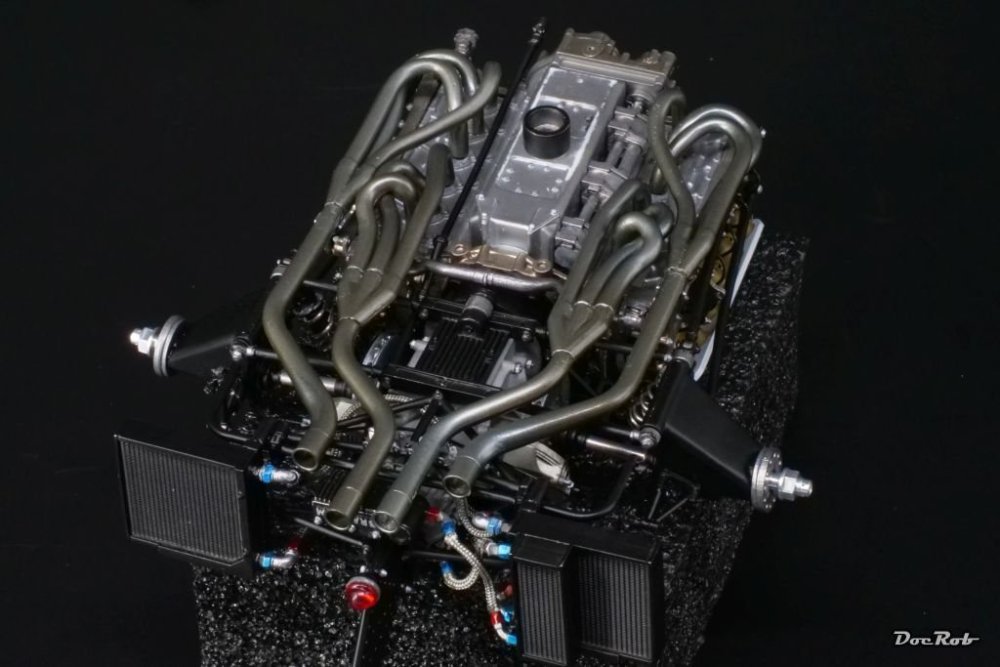
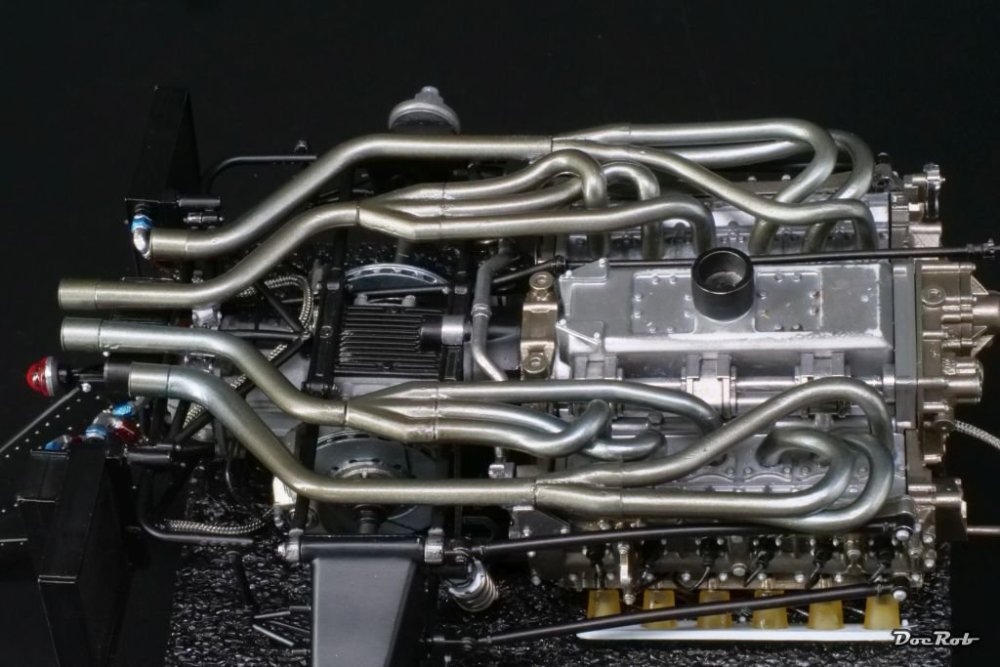
After a little pause, caused by one of my birthday presents, a week trip to the beautiful town of Valencia, I continue with the Brabham. I left the kit with the prep work for the exhausts just started and dreaded continuation, as F1 car exhausts can be a nightmare to build up. I cleaned all the parts and grouped them, followed by drilling all needed connecting holes. I then test fit the manifolds and glued the parts together with CA. MFH claims silver for the exhausts, but what I saw on pictures led me to think of brownish stainless steel. I used metal etch primer, followed by AK´s exhaust manifold and accentuated it with metallic blue for heat staining. While assembling, I tried to install the always dreaded coil springs before ore after inserting the exhaust, but failed. If I have a good idea, how to install these, I do it later or improvise somehow. As a preview, I started to prepare the monocoque parts, which need to be finished in polished aluminum. I´m unsure, If I airbrush the aluminum or if I polish it, which will be difficult due to the shape of the parts. Cheers Rob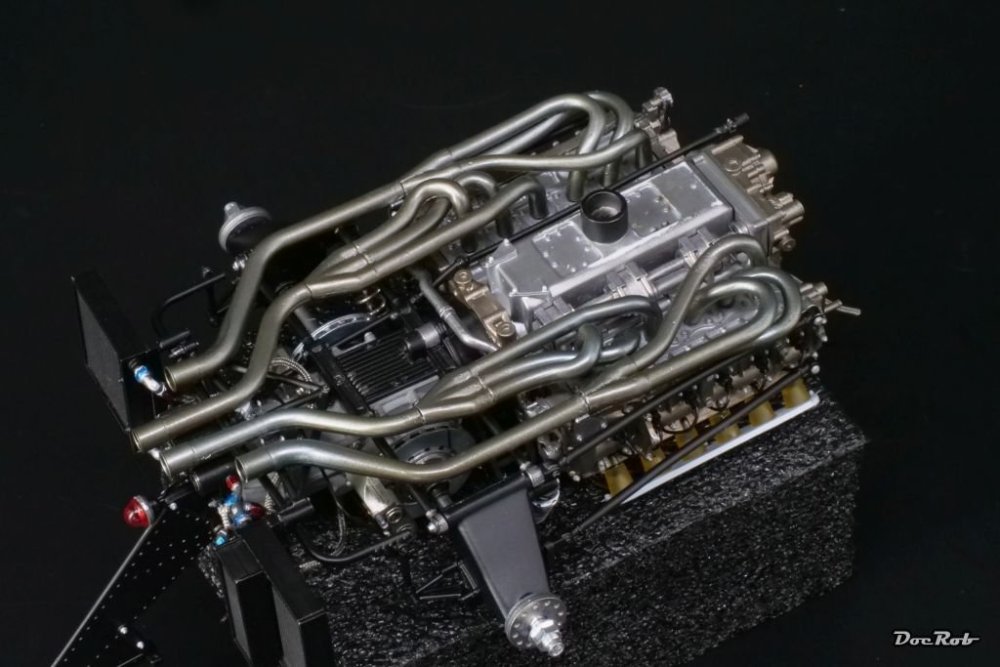

-
Some additional thoughts about the Giraldez edition. The trigger has changed and sports a kind of lip at the frontside, which may not be to everybodies taste. It is thought to move it more with the tip of the finger than normal. For me it works well though. The trigger went closer to the paint cup and descriptions said, it wouldn´t be possible to use the larger cup. I use it always, but it is very close to the trigger finger. Cheers Rob
-
Bad news, Gus. Airbrush recommendations are always a bit difficult, because of personal preferences, but I use H&S Infinity since many years and like them a lot. About two years ago, I bought the Infinity Giraldez edition, and this is my daily AB now. The trigger is better than the normal Infinity and it has the newer, better marked nozzles and needles, not to speak about the new precise collet for the needle. The nozzles seem to be more robust than my old Infinity ones. They are pricey, but for an almost everyday tool, it´s ok to me, as it comes with sturdiness, easy cleaning and good handling along perfect finish. Cheers Rob
-
Spitfire Mk-VIII by Tamyia-Close to Finish
DocRob replied to KevinM's topic in LSM 1/35 and Larger Work In Progress
Nice pattern Kevin, but on the pic, it looks very bright. A brown filter would blend the colors better and enrichen them somewhat. Cheers Rob -
What is on your bench right now ? Share a picture :)
DocRob replied to Martinnfb's topic in Modelling Discussion
Thank you Hubert, I didn´t dig deeper, but maybe, the cabin of the night fighter was planned to be pressurized. Sitting under the plexy canopy with one of these weird looking plexy helmets wouldn´t be helpful at night with all the reflections. While testing the Arado 234, the reflections proved to be a problem for the night fighter role, even without the helmets. Cheers Rob -
@belugawhaleman BTW: I don´t know, if your forum name has a meaning to you, but last week, I visited Valencia in Spain, as a present to my birthday and the huge aquarium there, in fact, the largest in Europe has a family of Belugas of about five meter size in a huge arctic aquarium. Fascinating animals. Cheers Rob
-
I have no experiences with soldering PR parts, Paul. I learned how to solder with a soldering iron and with a flame, but never used it in modelling. I may try it with a ship project, where extensive PE works are part of. I use CA from Colle 21 for my metal works, being it brass PE parts or cast white metal. Cheers Rob
-
I have a different rolling tool since years Paul and I use it regularly. Mine has a rubber backside, which also helps to roll PE parts to shape. Annealing makes rolling PE parts a lot easier, as it takes the springiness away from the brass. Heat the brass part over a flame, until it turns blueish. Don´t overheat and let the brass glow. Annealing takes away the tension in the kristalline structure of the metal. Cheers Rob
-
What is on your bench right now ? Share a picture :)
DocRob replied to Martinnfb's topic in Modelling Discussion
Kit is looking promising, Carl. I´m eying the two seater, as I have only the ZM kit. Are you sure, there should be a tub. After looking at some pics, I think there is only the tubing. Cheers Rob -
Looking good Gus, the folded wings will be another eye catcher. Cheers Rob
-
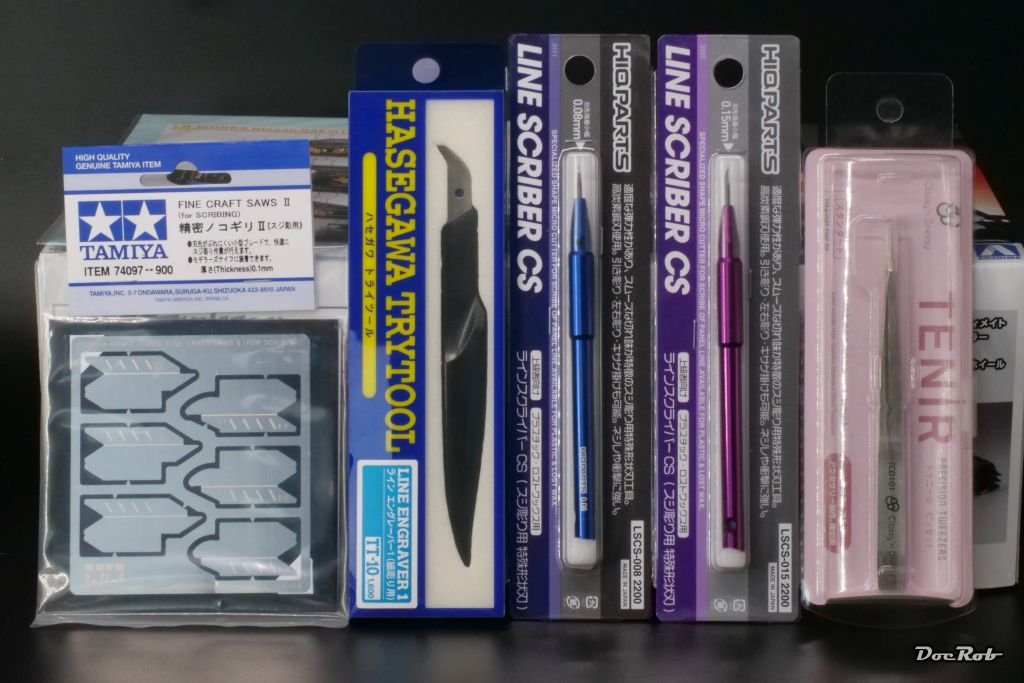
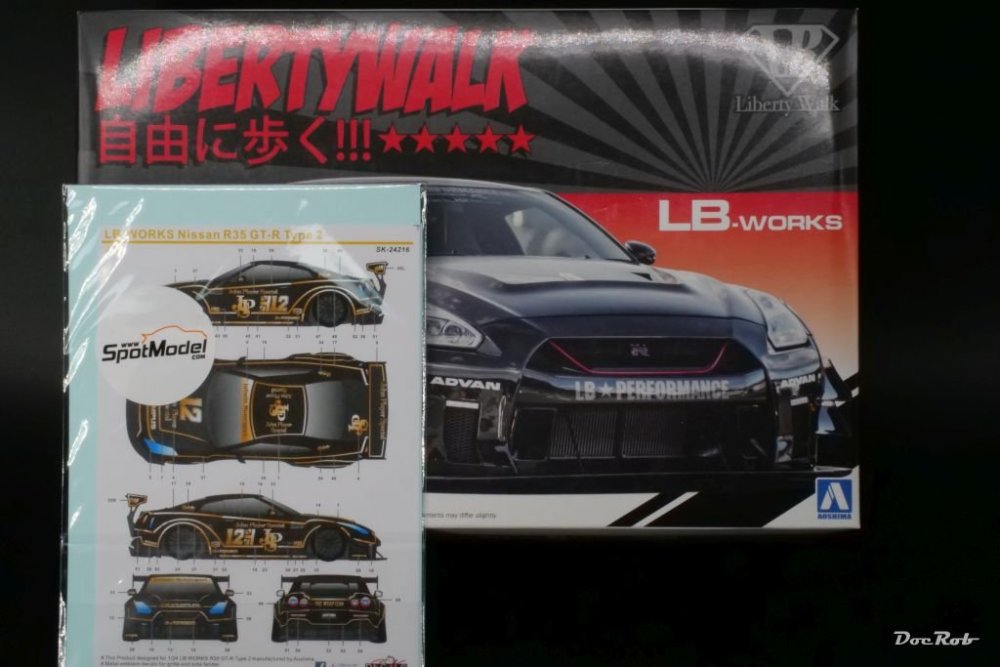
Another parcel from Plaza Japan arrived at my doorstep. The Aoshima Liberty Walk 1/24 Nissan R35 GT-R Type 2 Ver. 2 is a real Prollkarre (German vulgar slang for a painfully overdone car). I only bought it, because it was cheap and because I loved the purchased before decal set in chrome gold JPS fashion for that car. The real reason for the purchase were the tools, another pointed tweezer (you can´t have enough) two scribers with 0,8mm and 1,5mm blade from HQ Parts, a scribing tool from Hasegawa and some etched mini sawblades from Tamiya and not shown, a bunch of Kabuki refills. A quick test of the HQ Parts scribers on a 1/24 car body proved very promising. I prefer "cutting" scribers to pressing needle scribers, as you don´t have risen edges of the scribe line. I had only a 0,25 mm wide Tamiya scriber which was too wide and skipped out of the grove often. Cheers Rob

-
Brabham BT45 - Model Factory Hiro - 1/12
DocRob replied to DocRob's topic in LSM 1/35 and Larger Work In Progress
Thank you Carl, There are so many details on these engines, it´s easy to hide tiny hick ups . In fact, there is a little touch up work to do later on. Cheers Rob -
Brabham BT45 - Model Factory Hiro - 1/12
DocRob replied to DocRob's topic in LSM 1/35 and Larger Work In Progress
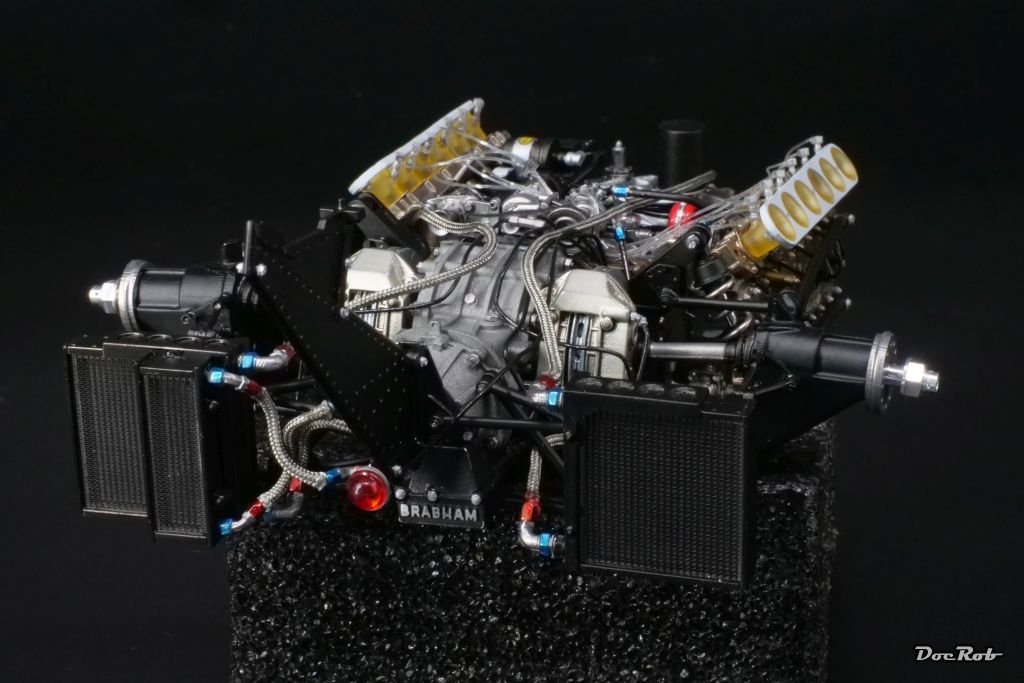
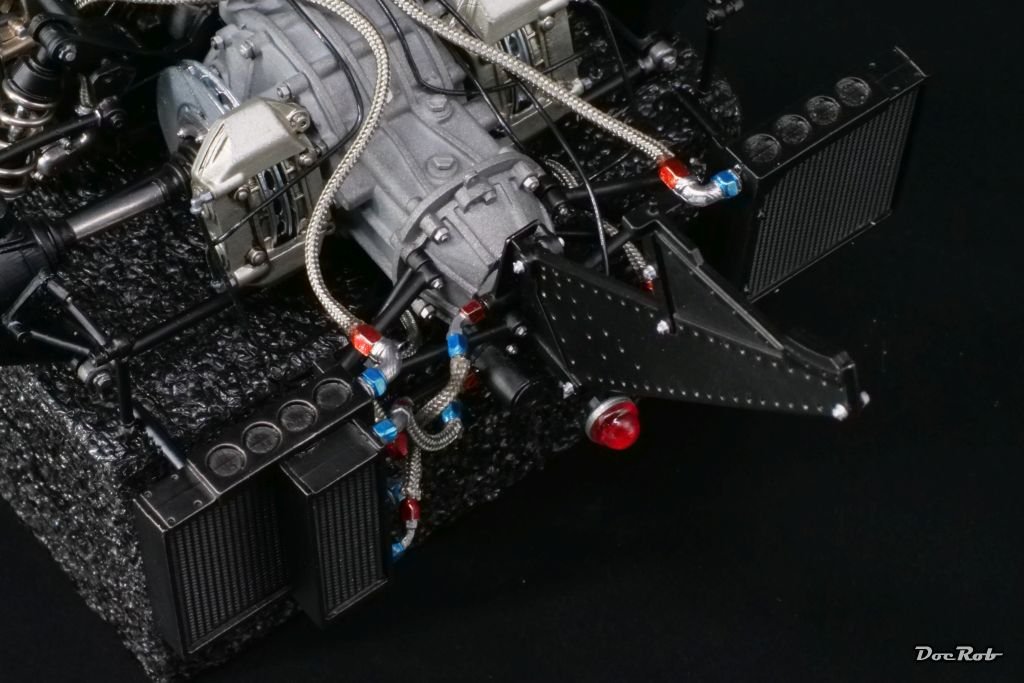
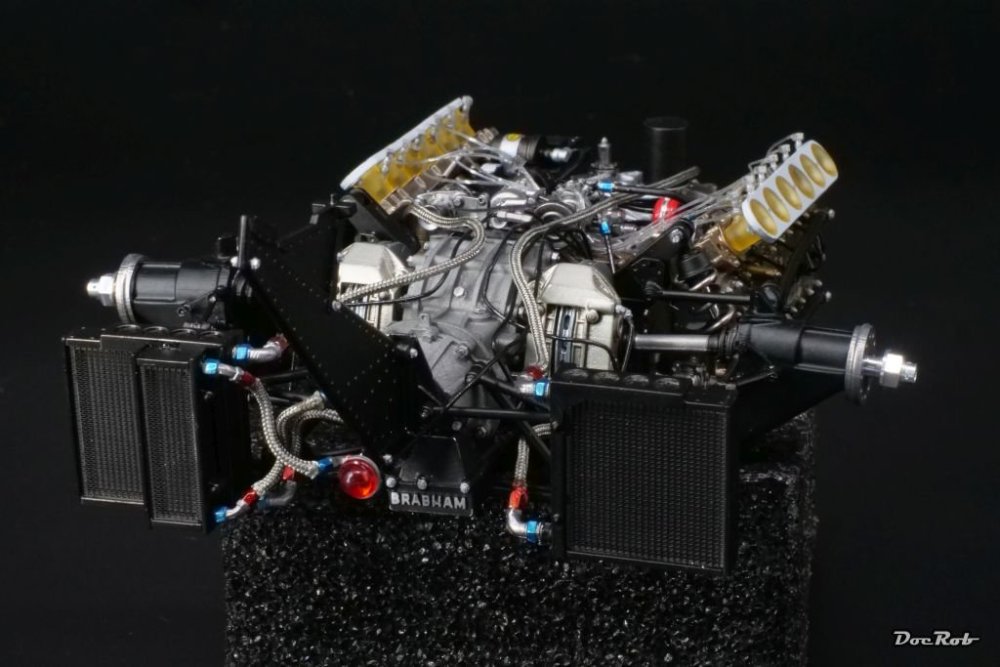
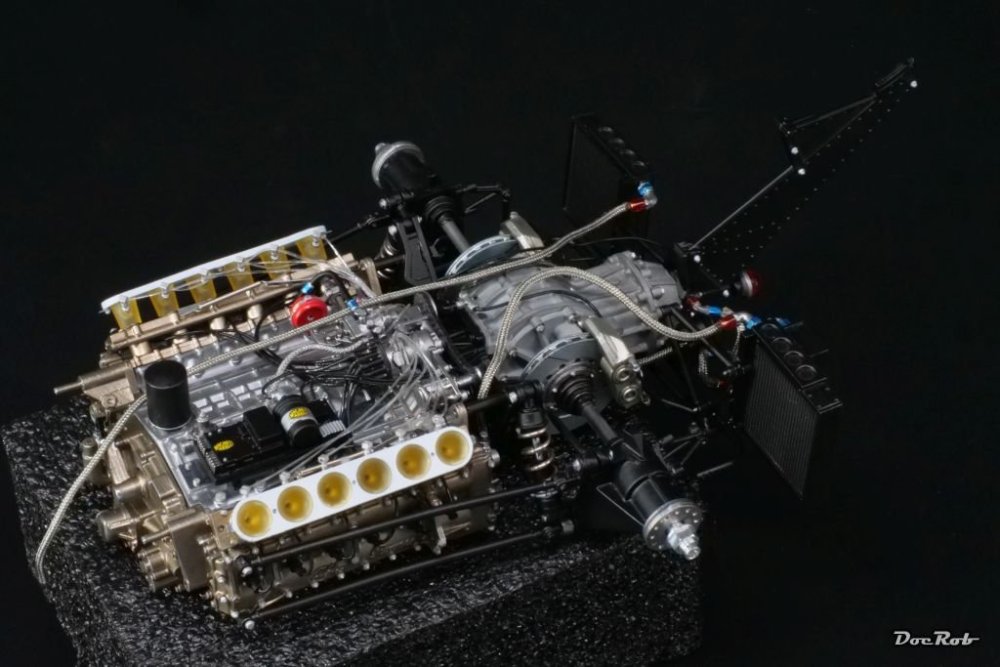
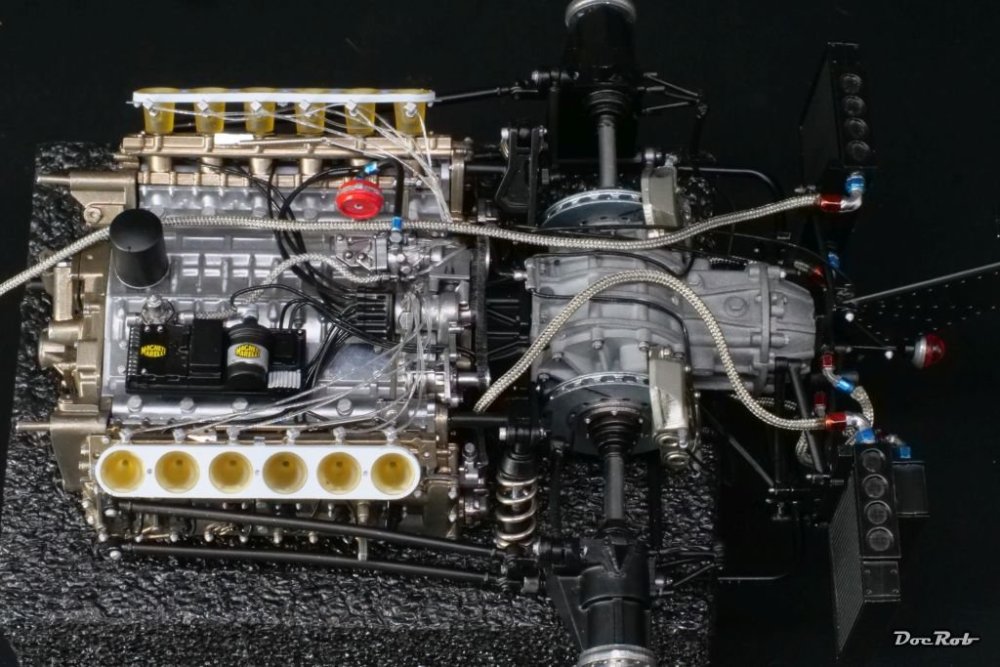
Chapter 9 of 20 in the manual is done and the rear section got finished sans the wing. Connecting the gearbox with the engine proved a little tricky due to numerous connection points, there is the suspension with adjustment bars, side rods and a shaft to connect all at the same time, trying to insert the screws for fixing everything. In the end it worked. Another annoying part were the brake lines. The angled tube fittings provided by MFH were badly cast and I used resin ones from the spare box, but two of them broke and needed to be drilled out again. I also substituted the white cast braided lines from MFH with braided textile hoses from Top Studio, which were far easier to work with. The cast ones need to be lengthened and bent, then drilled out with a 0,5 mm drill bit at the ends, to accept the fittings. Needless to say, that wiggling some of them in is nerve testing. The textile Top Studio stuff only needs to to be lengthened and then stuck on the 0,5 mm rods of the fittings with a drop of CA. Even my relatively liquid go to CA doesn´t soak and darken the braided hose. Cheers Rob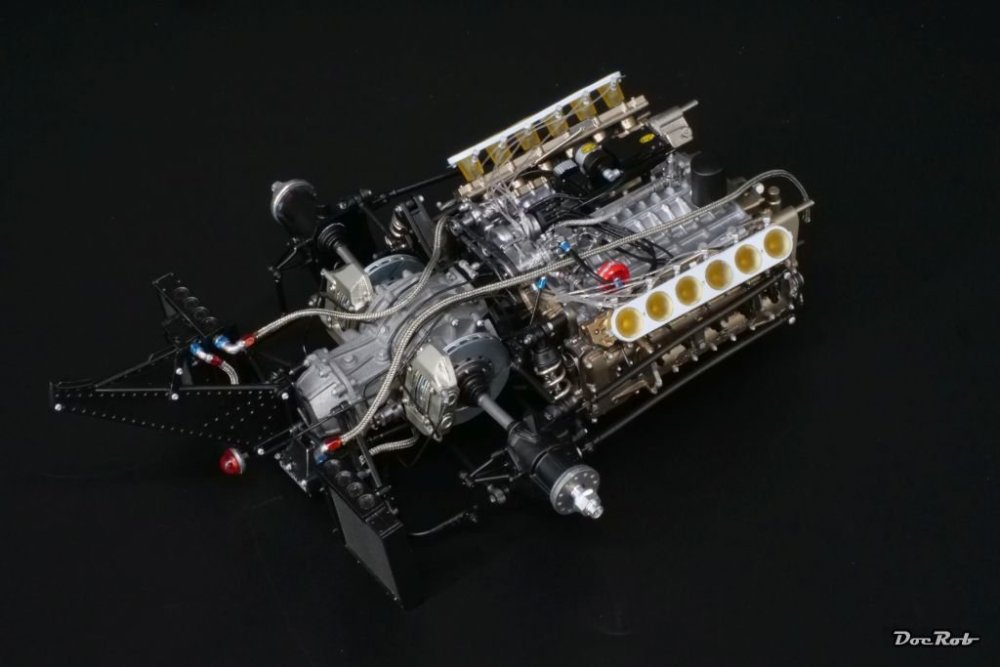

-
Brabham BT45 - Model Factory Hiro - 1/12
DocRob replied to DocRob's topic in LSM 1/35 and Larger Work In Progress
Thank you Mark, I think, I remember your McLaren build. Would be great to see it progressing and finished. There was also a Ferrari, you beautifully built, was it a 330 P4. Cheers Rob -
The driver seems to be the same, riding my Tamiya Wild Willy RC-car, when I was a teenager. Cheers Rob
-
Yup Cheers Rob