DocRob
-
Posts
7,082 -
Joined
-
Last visited
Content Type
Profiles
Forums
Events
Gallery
Everything posted by DocRob
-
 I went the same way with my steel wheel Panther about fifteen years ago, as my first kit re-entering the hobby. Cheers Rob
 -
Thank you Paul, the tracks are indeed made for the FT 17. I have a Meng FT 17 kit in my stash and have to check the tracks of this one, Maybe I will order another set.. Cheers Rob
-
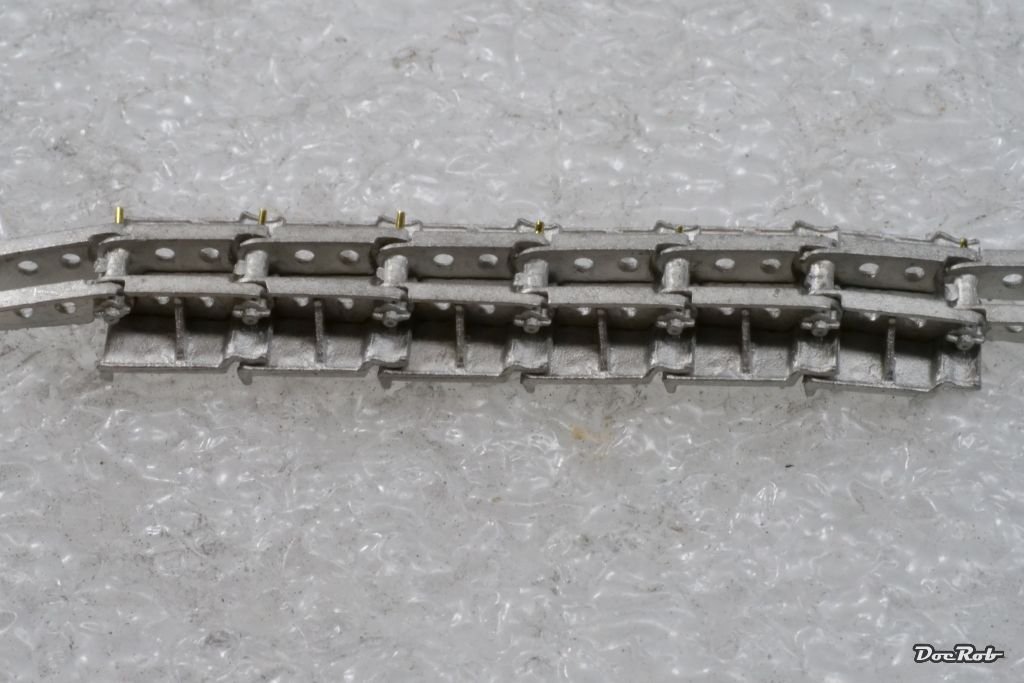
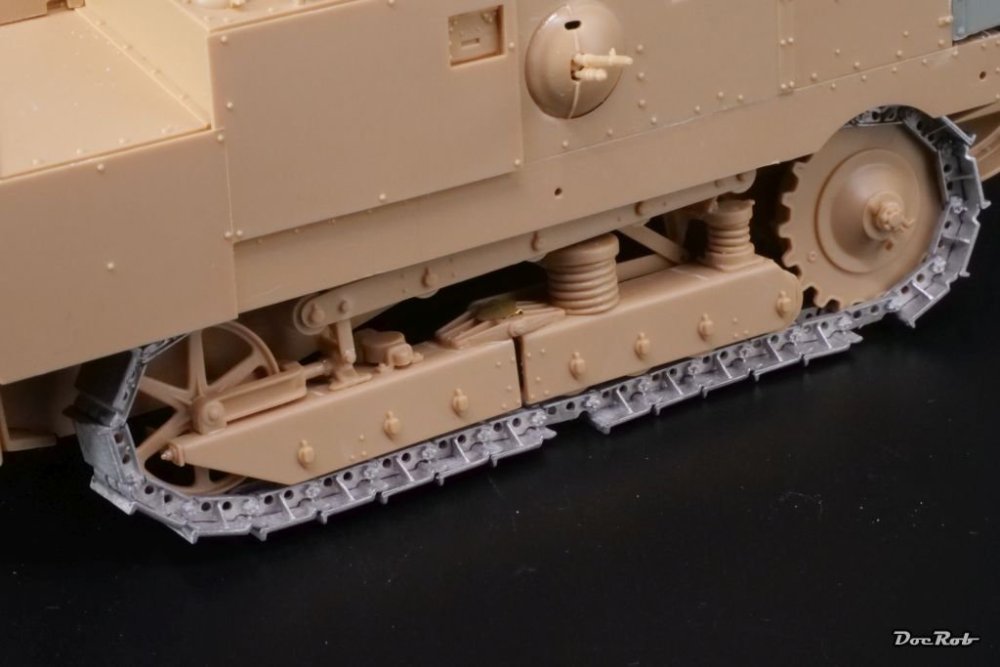
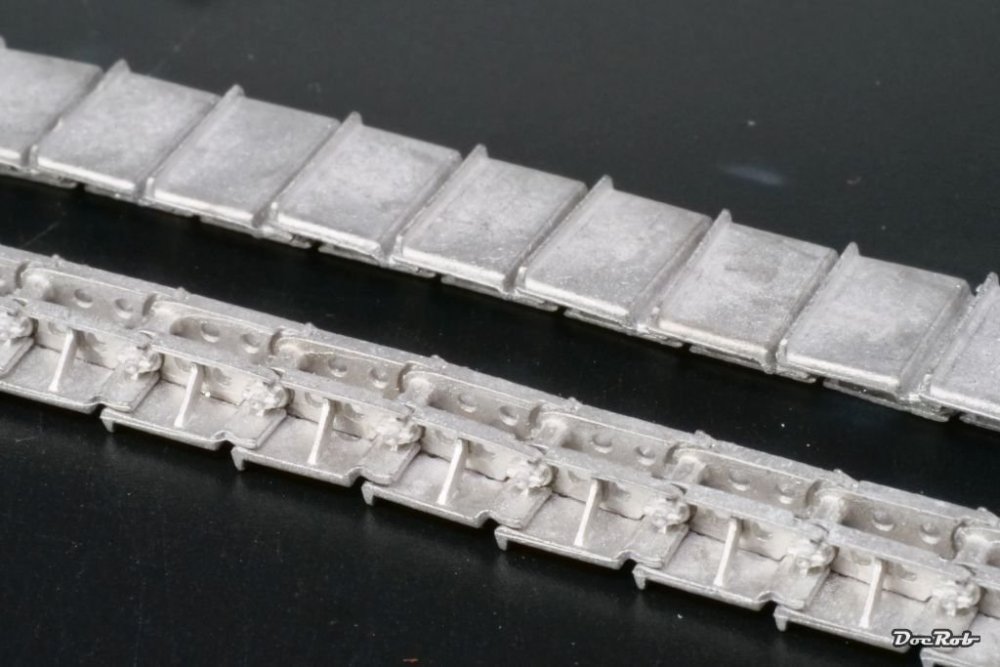
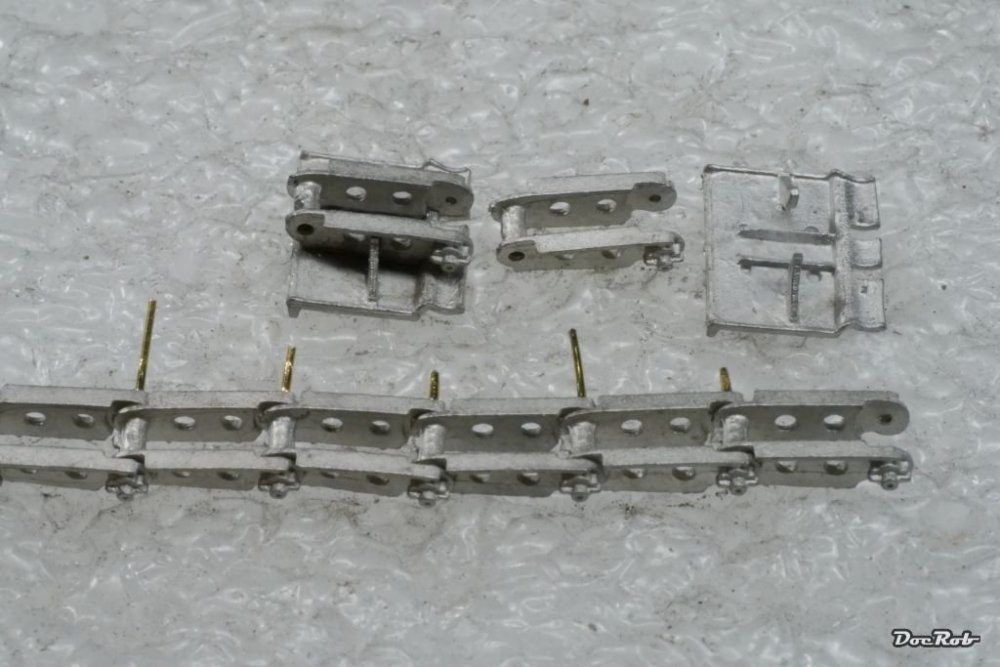
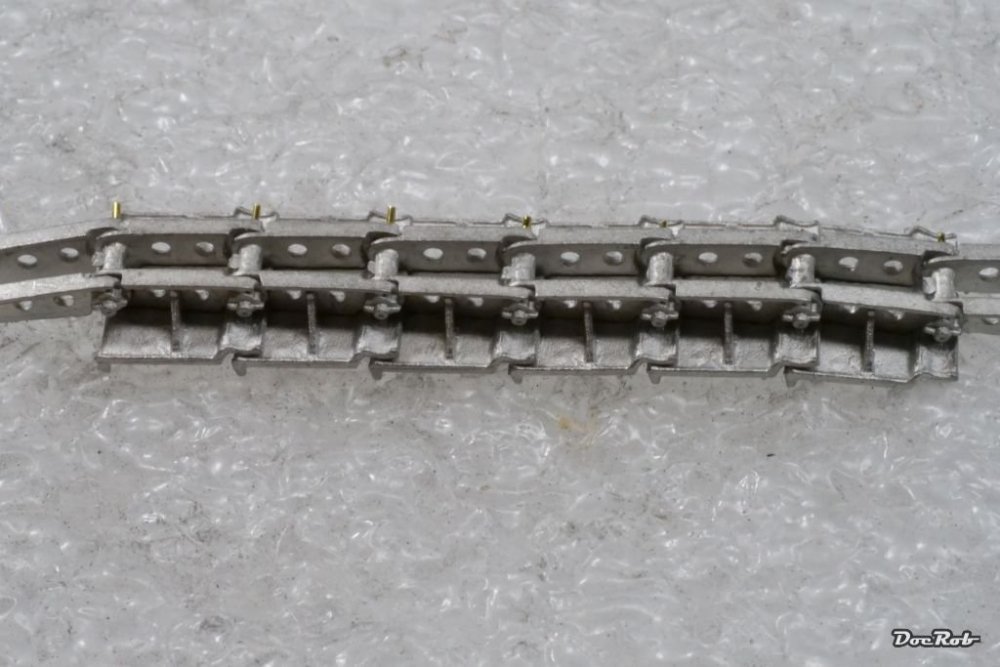
I got the tracks done, thanks to my established second effort, it went rather quick. It is much faster to build a chain of the inner track links and then the track pads drop in place with a bit of CA. Building up every track link from two parts and then connect them would have extremely more time consuming. I needed 34 links per side, which results in a loose fit, but there are no half links . The manual suggests 32 per side, but the plastic ones may be different. I will blacken the tracks later with a burnishing fluid. Unfortunately my black CA glue dried up, which will lead to non blackened areas, where there are CA residues. One pad fell off and is reglued now. The closing link remains without pad until I finally mount them. Cheers Rob
-
Yeah, the St. Chamond, I guess, it was more about psychological effect than truly effective.
-
Whoever Hachecka is, I need that little thingy. Thanks for showing Fran. Cheers Rob
-
The Schneider won´t win any beauty contests, Mike, but I have a weakness for quirky designs. The Spanish Republican livery will not add beauty wise. Cheers Rob
-
Interesting pictures, thanks for that PW. The one on your pictures seems to have additional tanks beside the back doors, which normally weren´t there with the French Schneiders of WWI. Mine has even larger tanks, that were added later in Spain, I guess as a substitute for the dangerous overhead tanks of the original construction. Cheers Rob
-
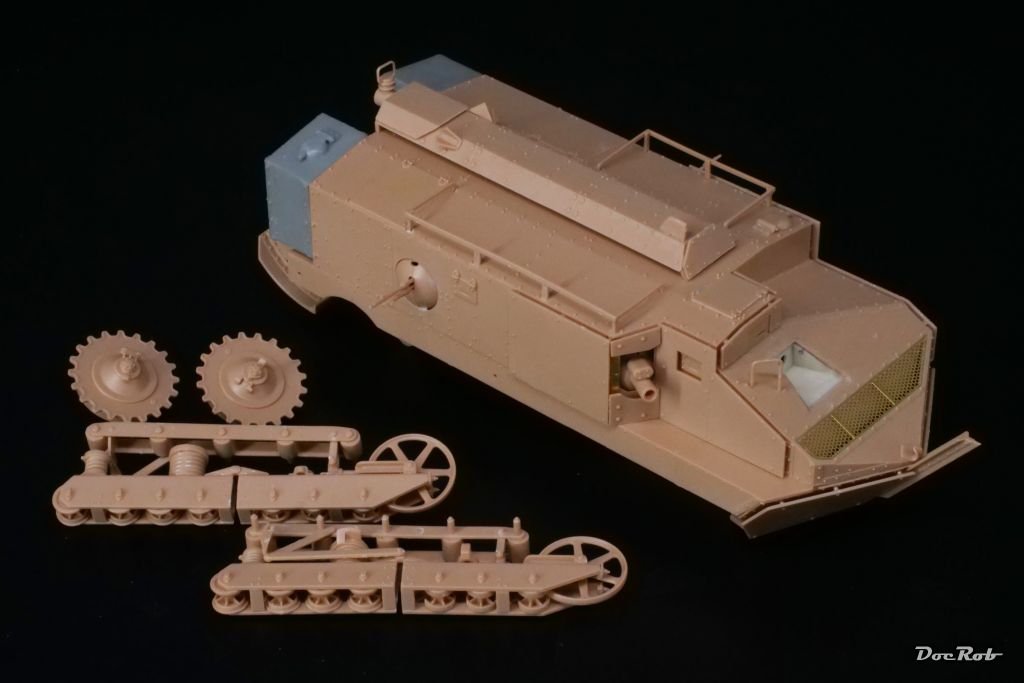
While preparing the track construction, I realized, I needed to add the running gear to the hull, to be able to determine the length of the tracks. I would have liked to add them after painting, but that wouldn´t be a big problem. The spoked rear wheel is still movable and not glued in place, because with it´s eccentric arm, it can be used to tighten the track. Then I started with the tracks. Every link consist from two parts, which need to be drilled out with a 0,5 mm bit and then glued together with CA. It proved to be very difficult and time consuming to put the links together and then connect them with the next link, that´s why I leaned back and thought about another way, to simplify the construction. I found it much easier to connect the inner link parts with wire and secure them with CA and then finally add the running pads, which fell in place and were glued with CA. The HobbyBoss manual suggests 32 links per side, but I will need 34, possibly 33, but that might be millimeter too short. Cheers Rob

-
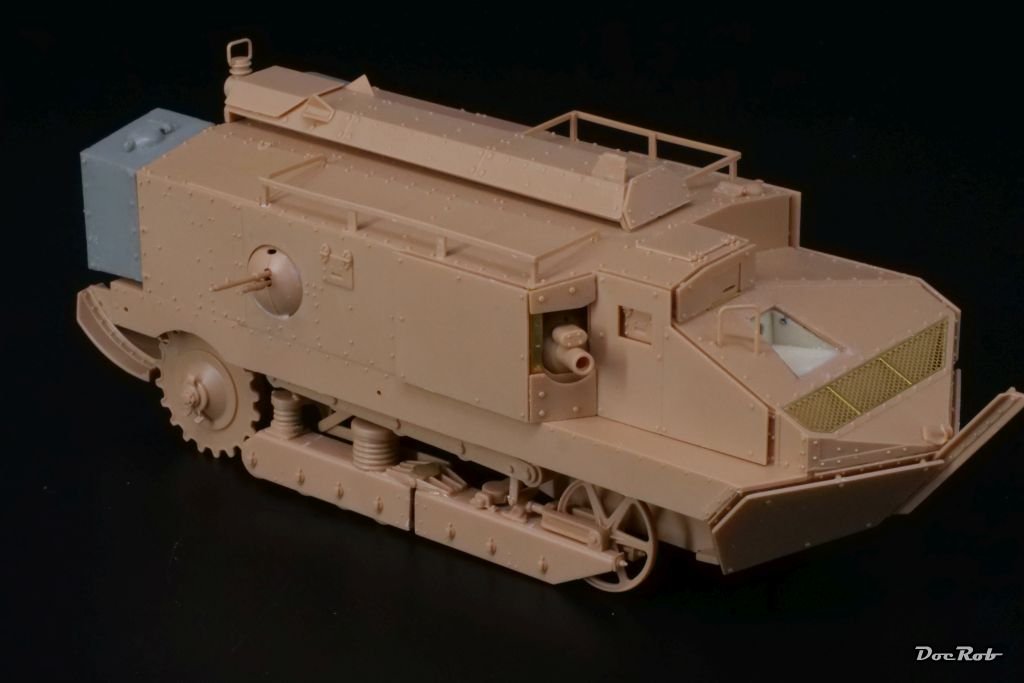
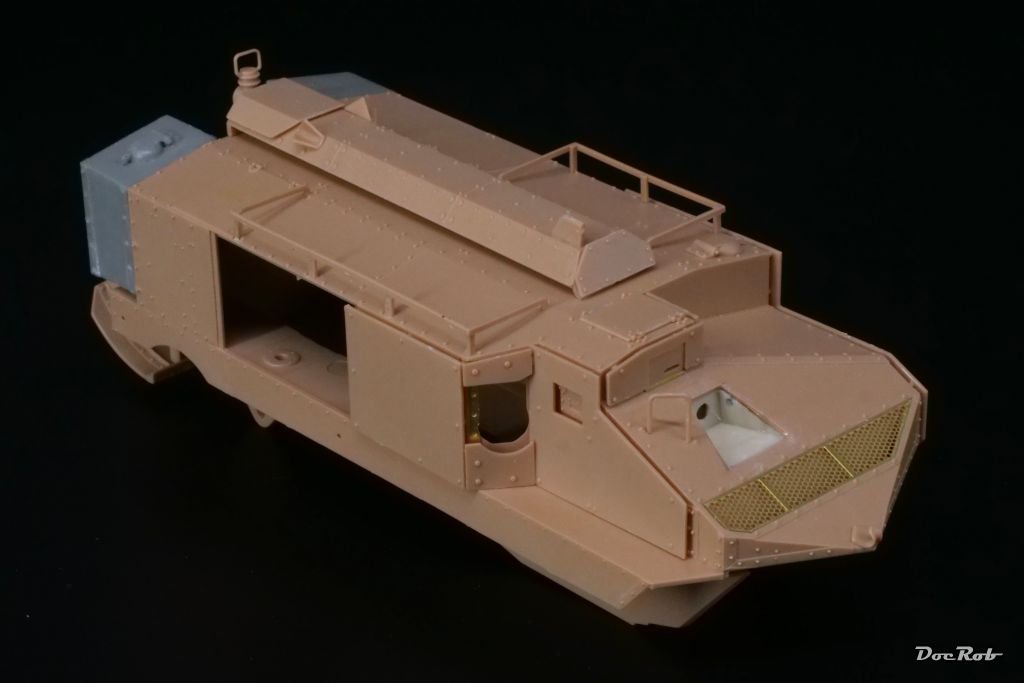
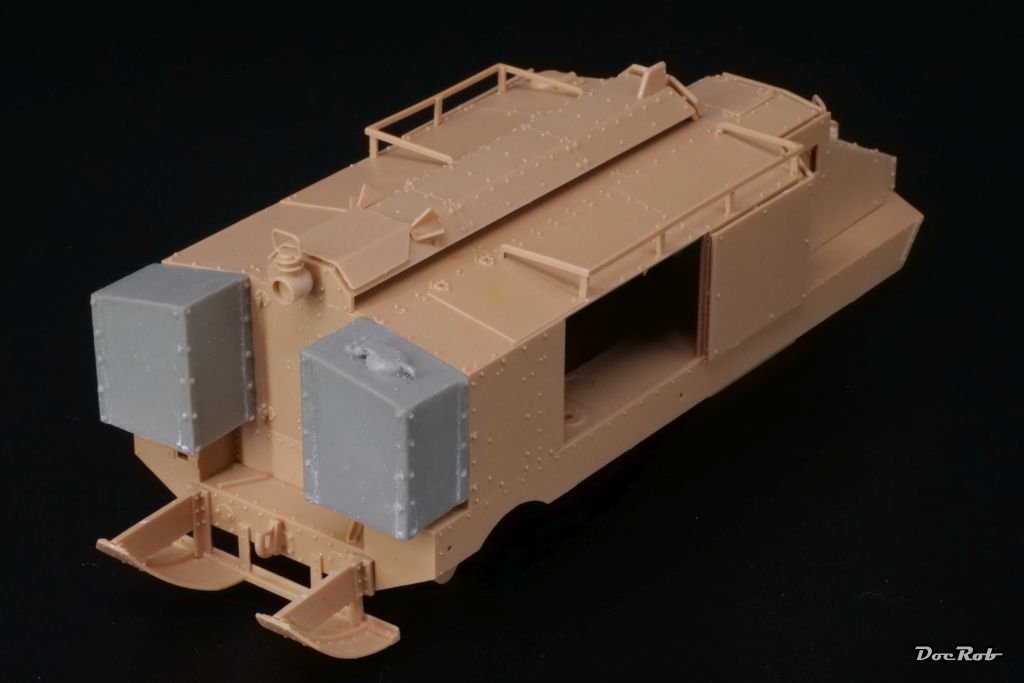
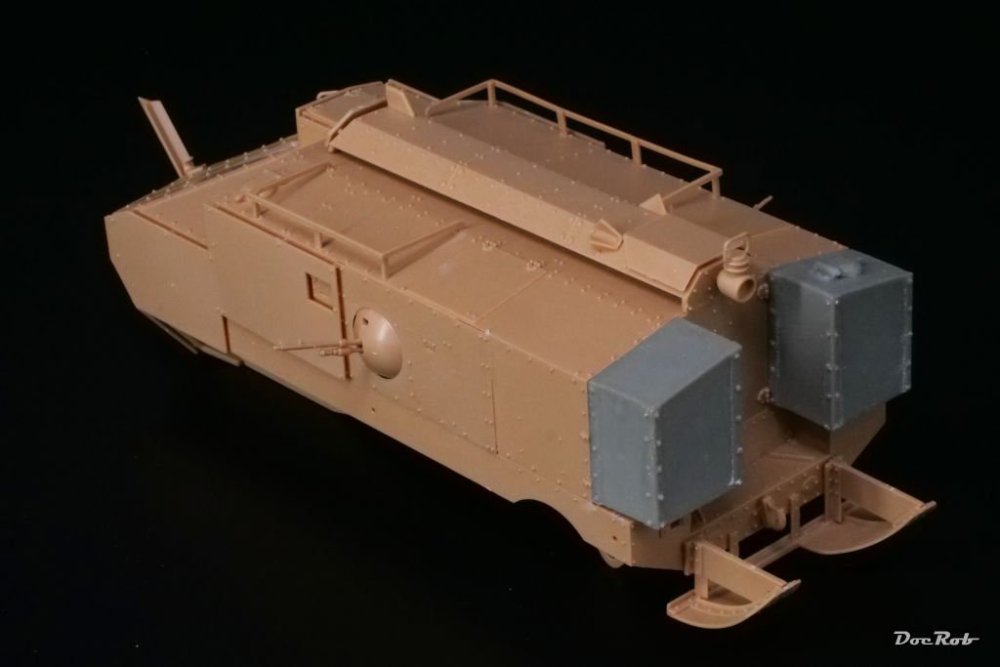
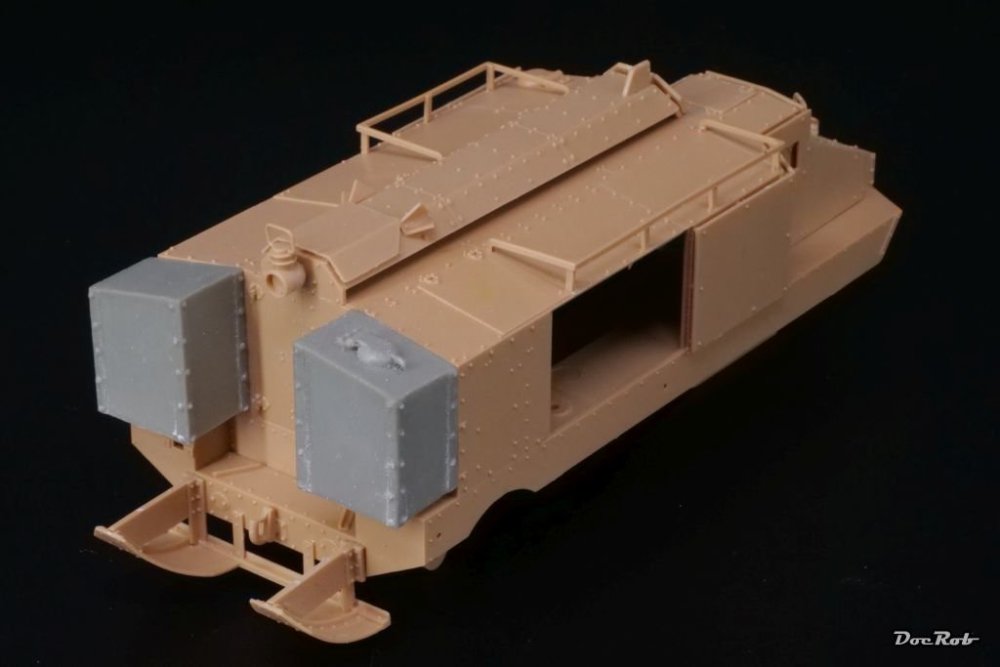
Today, I finished building the Schneider minus the tracks. Almost everything worked like a breeze and the fit of the body parts was very good. The manual suggests to add the side MG´s with their gun carriage glued to the base of the tub and then add the sidewalls with the fitting hole on. That was somehow impossible to achieve and I suggest to cut away the lower part of the gun carriage and glue the ball mount direct to the side wall hole.

-
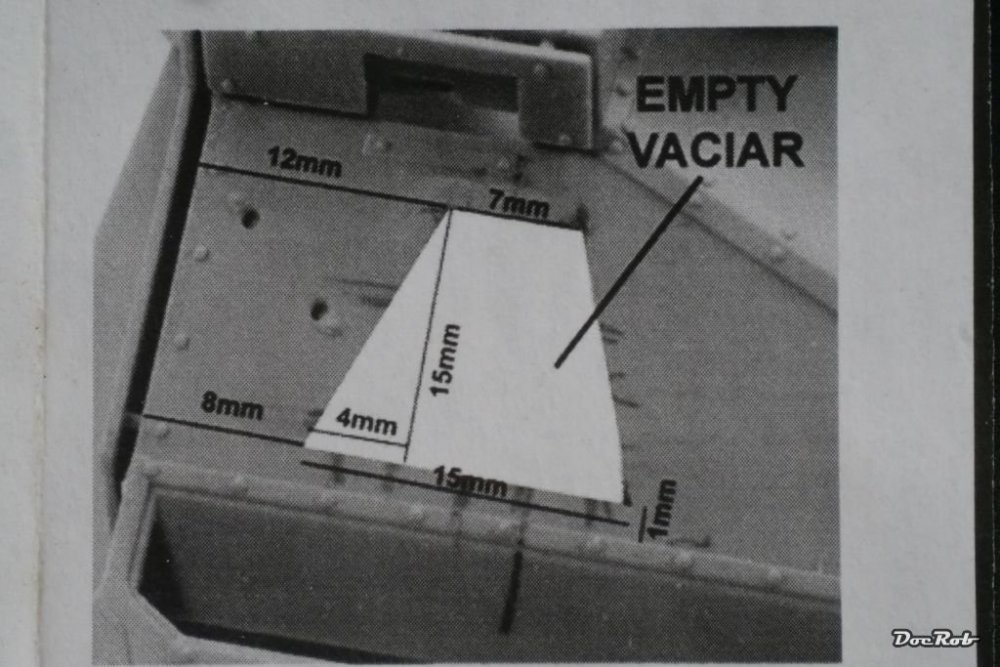
No template Paul, but exact measurements. I transferred some points onto the kit and connected them with a pencil, a sharp blade did the rest. Cheers Rob
-
You got it wrong Carl, the others are different, as it was one of the first . The build is definitely easy done. Let´s see, how the Friuls will go together. Cheers Rob
-
Let´s see Mike, in fact, there are no upfront challenges or new techniques to explore with this build, which kind of bores me. I never actually liked gluing plastic together, it´s the part of a project, which turns me off, mostly. I hope painting and weathering will be more interesting, but I like these very early quirky tank designs. Cheers Rob
-
It seems, FC Model Tips was an earlier incarnation of FC Model Trend. The modification is quite simple, cutting away a trapezoid in the front for the gunport and sawing away the huge cast blocks of the fuel tanks. There is a corrected version of the front grill present as well, but it was not looking good and I opted for the kit supplied PE. The Spanish Republican version was an easy choice, as it looks cool and I´m living in Spain. Cheers Rob
-
Definitely interested in a build log Martin, but wasn´t it a pre-Saab, at least it looks like a Tunnan? Cheers Rob
-
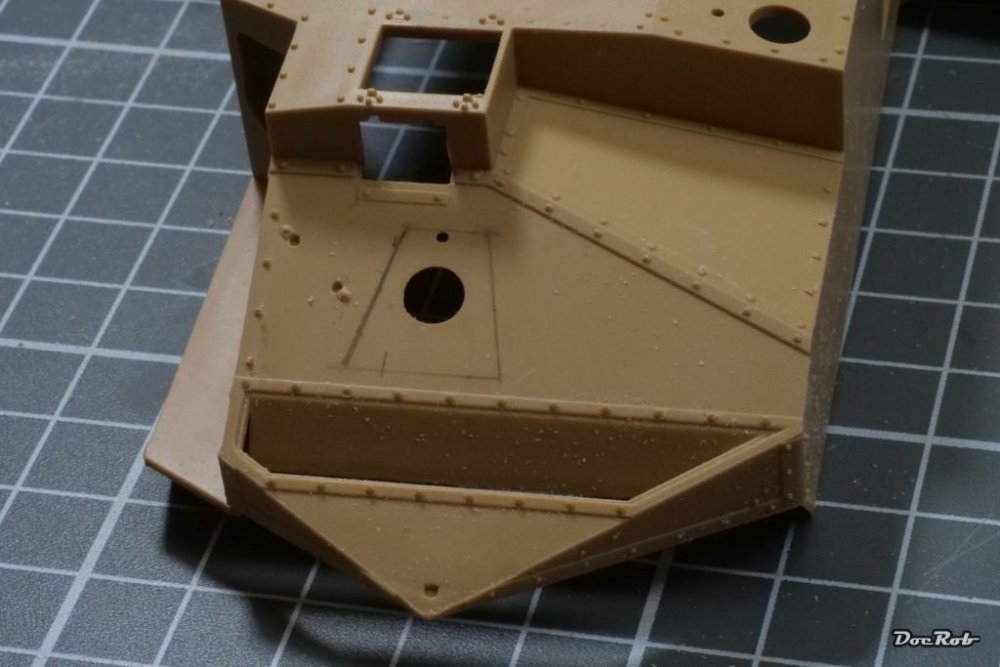
I have the feeling, this will be a short build log, I´m not used to put something together in only a few hours. I started with the under carriage, which consists on maybe half the parts count. It´s a bit fragile during construction, but in the end, it´s robust enough. Some parts like the coil springs look a bit toyish, but there will be dust and mud, so I didn´t bother. Fit was good, engineering was - hmmh - hobbybossish. Next was the boxy body, which luckily is build up from a one piece tub. I needed to make some surgery, to add the front gun port, which only had some of the Spanish vehicles. Here the position is shown, clearly measured in the manual. I added the gun port in front and the huge external tanks at the back. The cabin built up straight forward without issues. In contrast to the early version of the tank, this one was up-armored with additional steel plates, riveted on top of the body. Cheers Rob


-
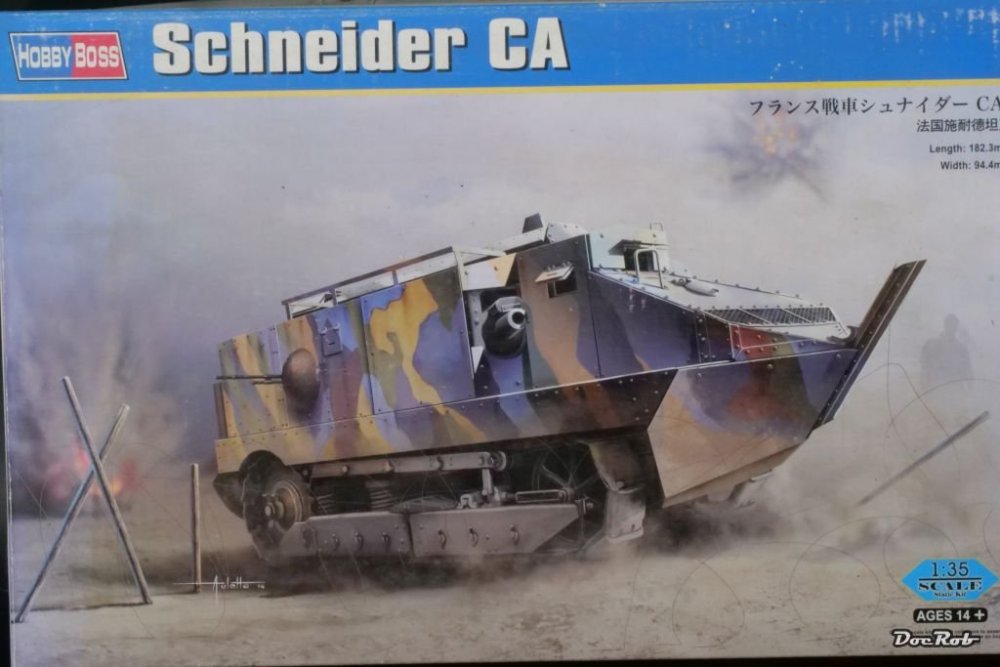
I´m in a midsummer modelling funk right now, I opened many boxes, but got no motivation to build the kits. My latest projects had been demanding long term builds and I felt bored by the idea of simply snipping plastic from a sprue. The Schneider CA was sleeping in my stash since some years and now I pulled it out, as a simple in between travel, swimming, surfing, biking, barbecuing and whatever else comes to mind build. The Schneider CA was the first operational French tank, first used in 1916. The off road capabilities were limited and it had another serious design flaw. The petrol tanks were positioned on the roof and could be hit easily, which gave the tank the nickname "Rolling Crematory". 400 of these were built and 6 were sold to Spain, where they were used in Maroc in 1922 and lastly by Spanish Republican forces in the Spanish Civil War in 1936, which lead to my title, because by then, it was an obsolete design. The kit is from Hobby Boss and represents the up armored late model, needed for the FC Model Tips conversion. The kit is of relatively high quality, but some parts could be more refined. Sprue attachment points seem to be placed at random and some parts have prominent parting lines. There are also some errors in the manual and some placements are only shown vaguely. In all, it´s an easy build with a fiddly three piece per link track, which I will substitute with a set of Friul white metal tracks. The FC Model Tips conversion set contains some resin parts, which address the changes made from the late model, mainly the new rear tanks, a gunport in the front hull section, a manhole cover as extra armor and a few bits and pieces. A decal sheet for all the Spanish tanks is supplied, be it the 1922 Maroc version or the later 1936 Madrid version. The resin is of relatively bad quality, with imperfections and bubbles and huge cast blocks, but nothing, that couldn´t be overcome. Cheers Rob
-
Well, to be honest, not so much. How would these ropes hinder the load to move while going up- or downhill. I may have tried to use U-formed brass wire buckles on the loading platform, with the tips of the U drilled into the plastic and would have made belt like straps from Kabuki tape, but I can see, it´s difficult to apply now.
-
Tamiya 1/32 F4U-1 Corsair
DocRob replied to Nikola Topalov's topic in LSM 1/32 and Larger Aircraft Ready for Inspection
Love the looks and weathering. I have built two of these, one birdcage and one later model. These Tamiya kits are the perfect canvas to paint and weather. Wear and tear are great with your Corsair. Cheers Rob -
RFI ICM 1/48 Ju88 A5 Norway 1941
DocRob replied to PanzerWomble's topic in LSM 1/48 Aircraft Ready for Inspection
Despite the obstacles, your Ju-88 looks beautiful, PW. I have not build any ICM kits, but have some in stash and they look good in the box. Do you press the masks on on the borders? I always use a wooden toothpick, tracing the edges of canopy maskings. Cheers Rob -
I love the result FA, and like always your signature weathering approach. I don´t think that your finished builds look too dark. If you want, you can always lighten them up a tiny bit wit a matt varnish sprayed on wit a bit of sand or light grey color mixed in, but judging from the pics, I wouldn´t do so. The load under the oily? tarp, well, I´m with PW here, but at least, this kind of load should be secured with ropes. I wouldn´t like to have the heavy crate slipping onto the equally unsecured mines. Cheers Rob
-
I have the -B variant with the single float along a HGW clear resin cockpit, but haven´t come around to building it. Cheers Rob
-
It´s a re-pop, PW, they are even cheaper here on the European mainland. Cheers Rob
-
Tamiya 1/48 Heinkel He 219 A-7 UHU
DocRob replied to Nikola Topalov's topic in LSM 1/48 Aircraft Ready for Inspection
Well done, as for the photos, spot metering is your friend, when it comes to harsh contrasts. The white background and black underside are indeed a challenge. Cheers Rob -
Revell 1/32 P-51D-5NA Mustang
DocRob replied to Nikola Topalov's topic in LSM 1/32 and Larger Aircraft Ready for Inspection
Welcome to LSM Nikola. Your Mustang looks very beautiful. I like the olive drab finish. Cheers Rob -
Kotare 1/32 Spitfire Mk Ia mid
DocRob replied to Merad's topic in LSM 1/35 and Larger Work In Progress
Sponge chipping is simple and effective, but what is not natural about it, is that you add layers instead of removing them. It can be done very good, but I like sponge chipping only as a quick method. I prefer the hairspray method, spraying first the bare metal aluminum color, followed by hairspray, then primer color, again hairspray and finally the camouflage. When you dampen the area to chip, you can use varying tools to do the actual chipping, tweezers, toothpicks, stiff brushes, fiber pencils and even sandpaper. If done carefully you will achieve a very realistic worn look, where more chips went through to the primer and some even deeper onto the metal surface. It works like the real thing abrasing through the different layers. I once built a Tamiya F4-U, utilizing that method. I the WIP, the process is described more detailed. Cheers Rob