DocRob
-
Posts
7,082 -
Joined
-
Last visited
Content Type
Profiles
Forums
Events
Gallery
Everything posted by DocRob
-
It got you addicted FA, you should change your forum name . No more heavy weathered, grimy tanks, but highly polished bikes and cars. Believe me, I know the feeling . The Honda came out nice and you can´t go wrong with Tamiya´s bikes. There is always room to improve, I think, your metallic works finishes could be better. In some areas, the metal looks metal, in others not so much. It´s fun to replicate all the different "modern" metals on bike kits, but it needs a bit of training and a close look at the real ones. That´s not at all meant to be offending, your Honda looks fine overall, but there are areas which could be refined a little. Cheers Rob
-

Trumpeter P-47D Razorback
DocRob replied to crazypoet's topic in LSM 1/35 and Larger Work In Progress
You may consider very thin strips of silver or blackened silver painted Kabuki tape. It may not be correct, but given the scale... Cheers Rob -
What is on your bench right now ? Share a picture :)
DocRob replied to Martinnfb's topic in Modelling Discussion
Down to the bone . I love absurd dios, but have no idea how to pair your FW 190´s with that bony predator, Carl. Cheers Rob -
Trumpeter P-47D Razorback
DocRob replied to crazypoet's topic in LSM 1/35 and Larger Work In Progress
I know, how you feel, I life under similar circumstances since years. No thinner, rattle can or paint jar exceeding 30ml got shipped to my place if any. It´s complicated and the customs situation makes it even worse. Best case is two weeks of waiting, worst case, you pay everything, fill in the forms for customs and pay them later on, only to hear that your parcel got returned after a month of delivery time, pure horror. Luckily, there are some vendors on the Spanish mainland, who don´t care and just send the stuff. Love their smuggeling service . We don´t even have your kind of president Cheers Rob -
Indeed, very nice, the idea with the masking tape with diluted PVA is registered, thanks for that. Cheers Rob
-
1:32nd scale Fokker D.VII (OAW)
DocRob replied to sandbagger's topic in WNW and WW1 Ready for Inspection'
Thanks for the kind offer, Mike. I think, I have an appropriate Mercedes engine in my stash, good idea with the Aviattic panels though, I have to check them. Cheers Rob -
1:32nd scale Fokker D.VII (OAW)
DocRob replied to sandbagger's topic in WNW and WW1 Ready for Inspection'
I always wanted to build this one, but have only two BMW powered D.VII. Maybe I will bite at Ghotaforce or live it through your build. Cheers Rob -
Dedicated 1/72 catagory? Maybe, maybe not.......
DocRob replied to JohnB's topic in Problems? Suggestions? Tell us!
There´s a spelling error, PW, It should be called: RÄDER MÜSSEN.... not RÜDER MÜSSEN... RÄDER is German for wheels. Cheers Rob -
Nice work Carl and good to see, that ZM got the fit of the numerous fuselage panels right. That was not always the case with their TA-152, I built many moons ago. The internal detail maybe is a bit over the top, but at least, it doesn´t look toyish anymore, like with the TA-152. Cheers Rob
-
I have worked with 1manarmy masks mentioned by Paul on two builds, They are fantastic to work with, very precise cut and have a well researched placing guide. Even the tiniest lettered stencils are perfectly readable. Cheers Rob
-
At least, you identified it as a Ford branding, so there is hope for my meagre painting skills with that logo . Cheers Rob
-
The best decal solution to my eye is a hairdryer. Even the most rigid carbon fiber decals settled around the wildest contours using one with the addition of decal softeners. Cheers Rob
-
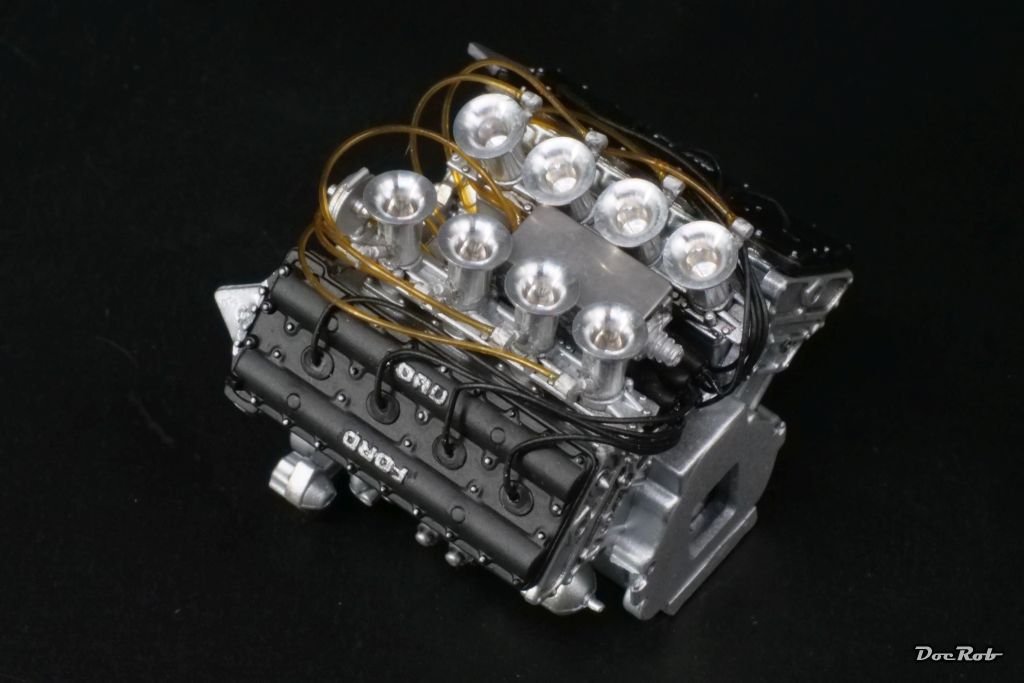
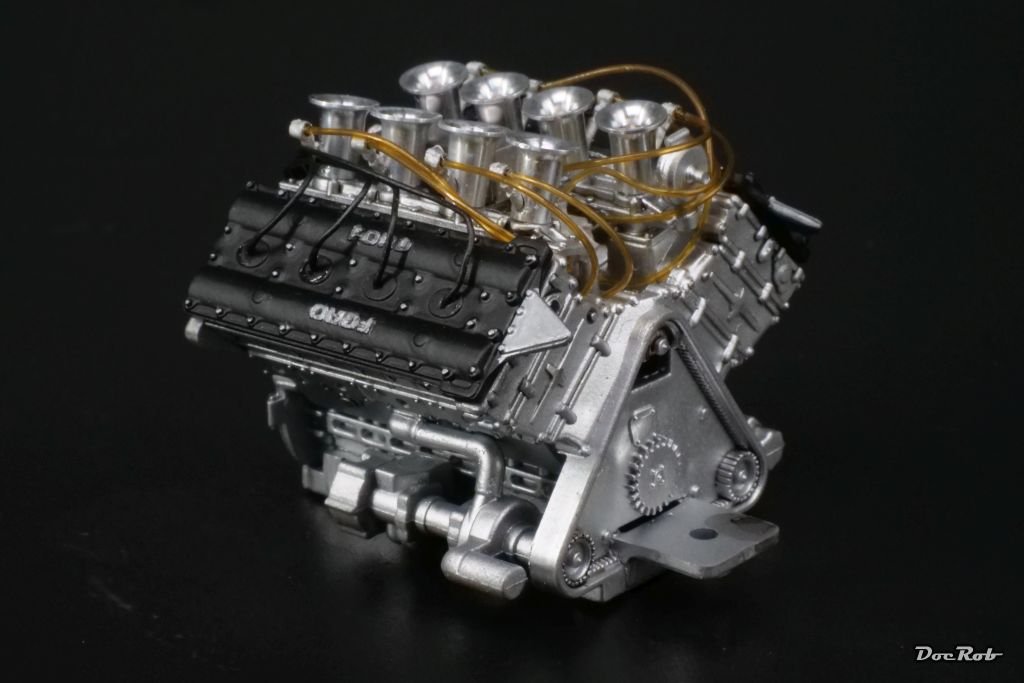
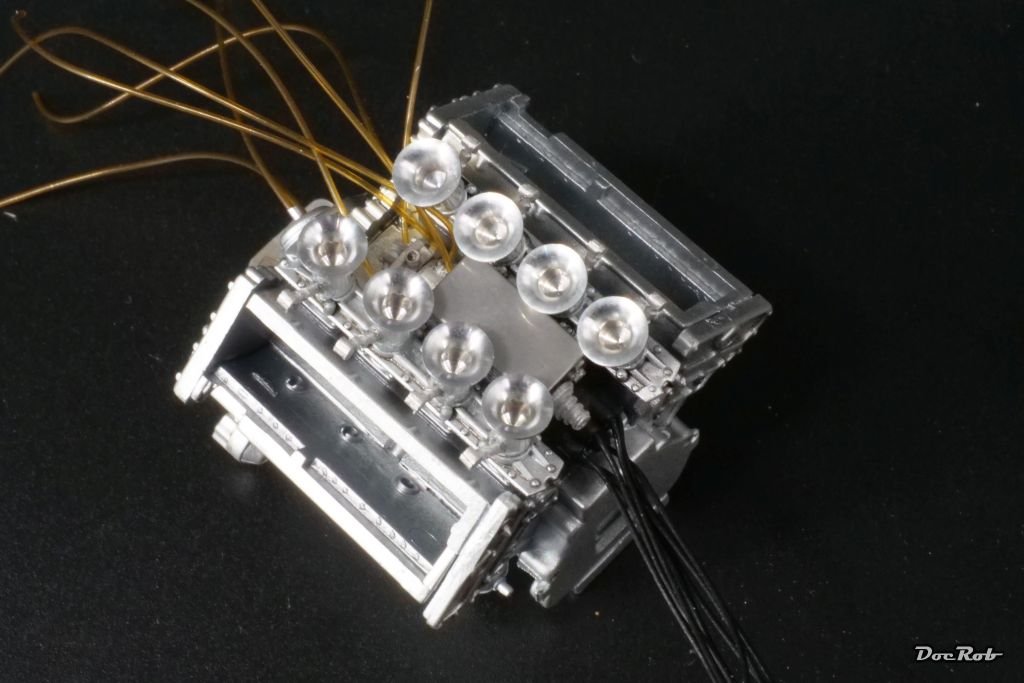
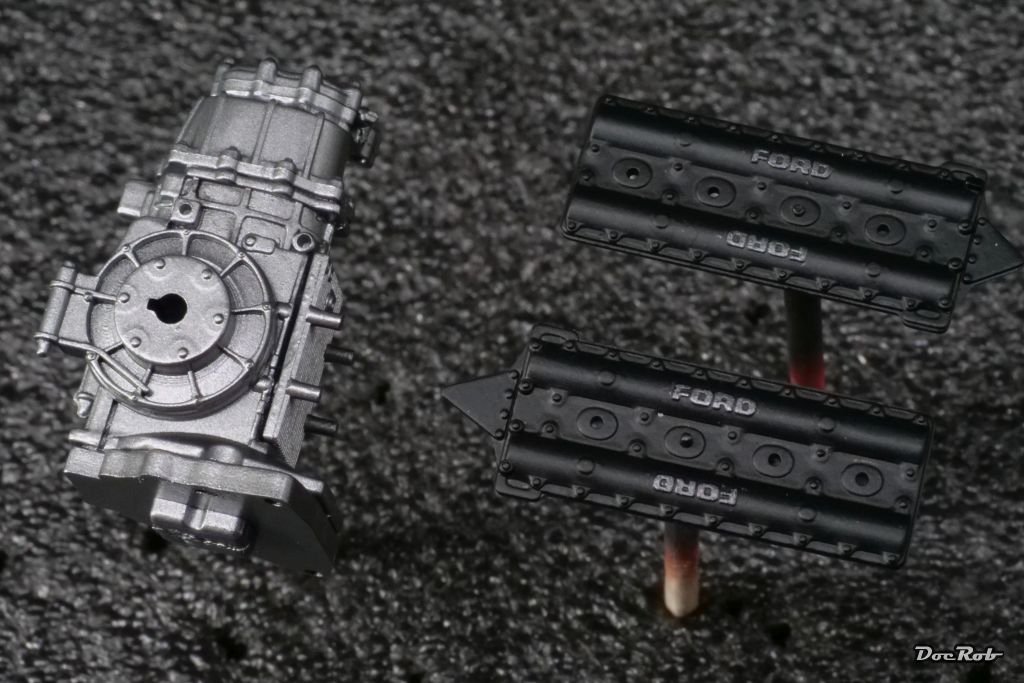
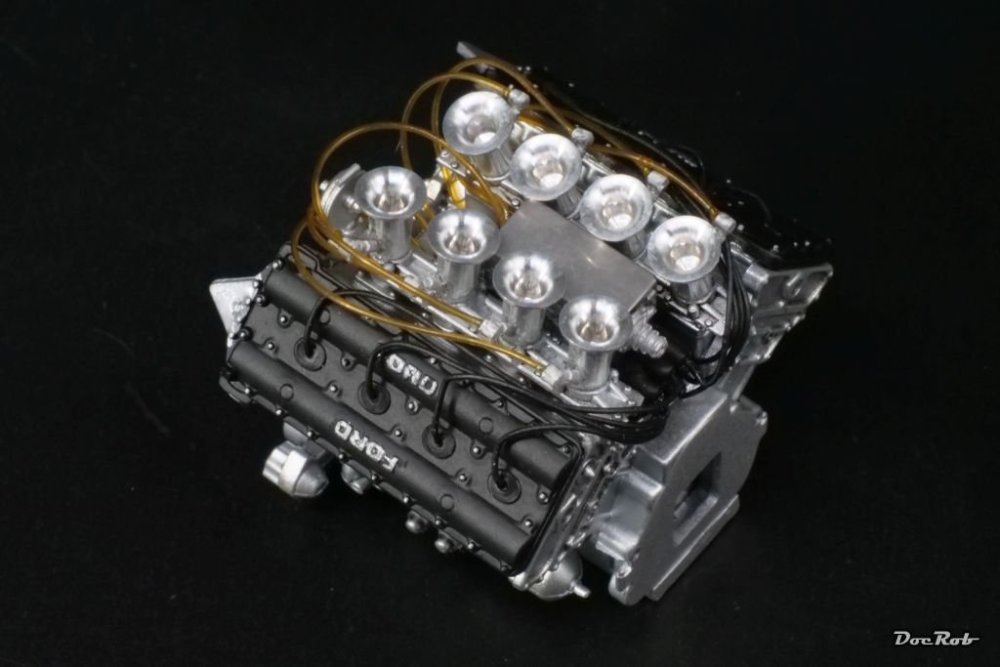
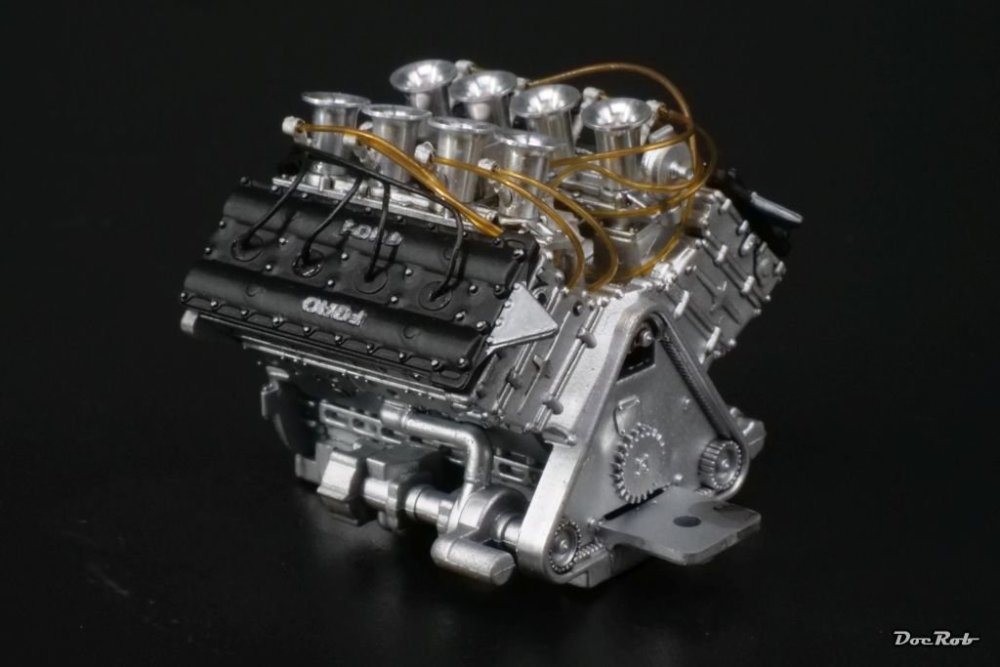
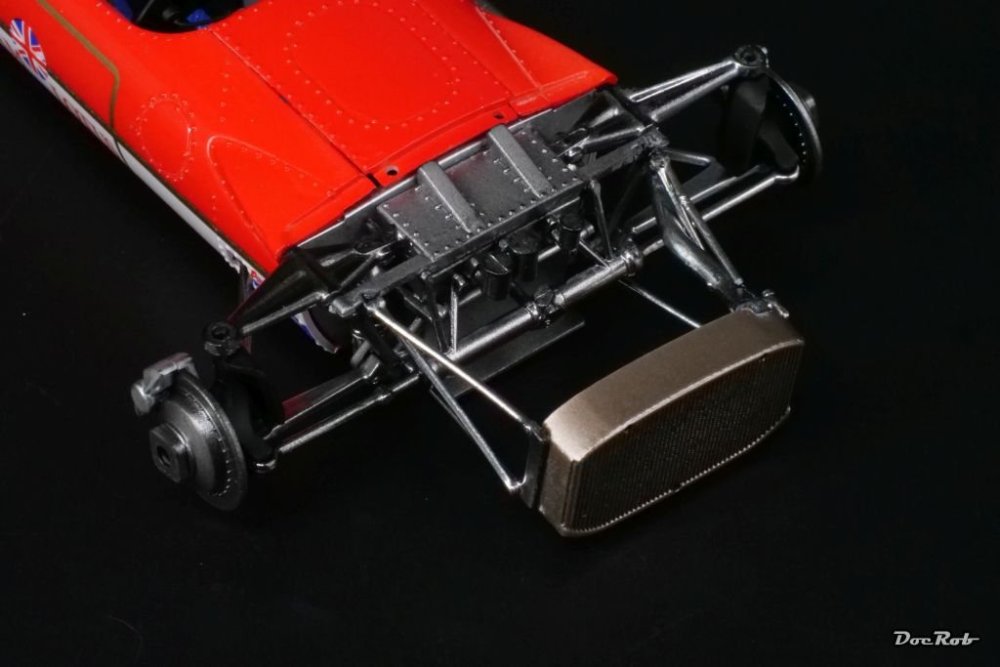
Finally, I got the wild hairdo of the engine straightened out. I combed and parted the fuel lines and ignition wires and glued them into place with CA. It wasn´t that terrible a task than thought, but needed a steady hand. My hand was less steady, when I tried to refine the Ford brandings with a brush and paint. I will rework it, when I have a completely unmoving hand, but today, I exhausted myself with swimming and running, not the best combo for painting these only slightly protruding buggers. The worst about macro photos, you can´t hide anything, the engine is tiny and looks better to the real eye. Cheers Rob
-
Trumpeter P-47D Razorback
DocRob replied to crazypoet's topic in LSM 1/35 and Larger Work In Progress
Well, there is always the question of sanity due to rum consumption or close the panels over the gun bays and stay sober . You obviously chose the first option, maybe because of the self promised rum intoxication . I like the work you have done and am astonished, how difficult it seems to be to find decent pics of these gun bays. Maybe that´s why the AM producers got it all wrong. I only built one Jug a long time ago, but that was a buttoned up Eduard boxing of the Hasegawa kit, so no inspiration to get from me. Cheers Rob -
You are right, it´s a demanding task, but very rewarding as well. Sometimes, it is a bit like meditation, until a drill bit breaks and sticks into the white metal part . I guess, you know both kinds of feelings with your fine plumbing on the P47´s landing gear. Cheers Rob
-
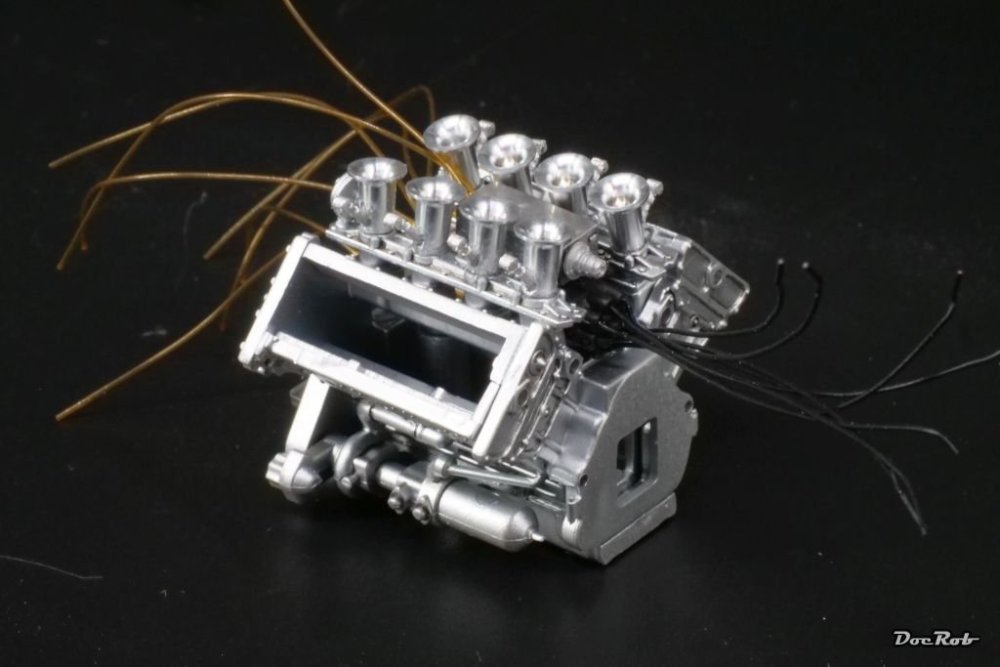
I have seven or eight kits with the legendary Ford / Cosworth DFV engine implemented and this is the firs time I build one. Actually the Lotus 49 was the first car in a long row using this engine, which proved to be the most victorious F1 engine of all time and for years set a kind of standard in F1 racing until it got finally replaced in 1983. I decided to give the kit engine some extra love and added a MFH set with turned funnels and fuel and ignition distributors. The engine will be very visible, so a bit extra detailing will improve the looks. I glued the yellow transparent fuel lines to the distributor with CA and then did the same with the ignition wiring, made from black 0,4 mm cable. Drilling the numerous 0,4 mm holes was delicate and gluing everything in place after shortening the tubes and wires will be equally difficult. I also assembled the gear box and sprayed it gun metal. I decided against the texturized color from Zero paints for that task, because I think in 1/20 scale the texture might be a tad too much. The valve covers were sprayed firs aluminum, followed by semi mate black, which I planned to carefully erase with a toothpick on the Ford logos. It didn´t work that way, so out with the AK Aluminum pencil, which also wasn´t successful due to the grainy application. It had to be the good old soft pencil, not perfect, but good enough for me. Cheers Rob


-
It depends, Mike. For lets say engine parts, I use only one coat, sometimes even without primer. I mostly paint these with Tamiya LP colors, sometimes with X or XF. With car bodies, I prefer multiple layers, with only one layer, it´s easier to sand/polish through, but I tend to spray only two layers with less hot colors, one for the color coverage and one for the surface finish, obviously heavier thinned. It´s always about how can I achieve the desired finish with as less coats as possible. I don´t want to loose detail with amounting layers, but the coatings have to be robust. Cheers Rob
-
Thank you Carl, the surgery was relatively simple, once the decision was made. I damaged some chrome surfaces while working on the body, but this was corrected with an AK chrome marker luckily. The AK Extreme Metals chrome was very fragile to the touch. Cheers Rob
-
Welcome back Chris, what a monster, but isn´t it LSM ? You´d need to rent another house for a B52 in 1/32 scale. What AK colors do you refer to. The AK Real Colors I have used thin perfectly with Mr. Leveling Thinner and spray beautifully. Cheers Rob
-
Thank you Mike, I indeed use the same multiple coat process for paint and clear coat. One reason is, the later added layer levels the layers applied before with the higher thinner ratio, when sprayed after only 10 to 20 minutes of curing time between the layers (for the usual suspect colors from Zero Paint or Number 5 for car bodies). The other reason is, these colors are very hot. When I sprayed my McLaren MP4/6, the white color ate through the primer and into the plastic, which caused a lot of sanding and respraying. The first, relatively less thinned color layer is sprayed thin and got dried with the airbrush and is a protective barrier for the later coats. Cheers Rob
-
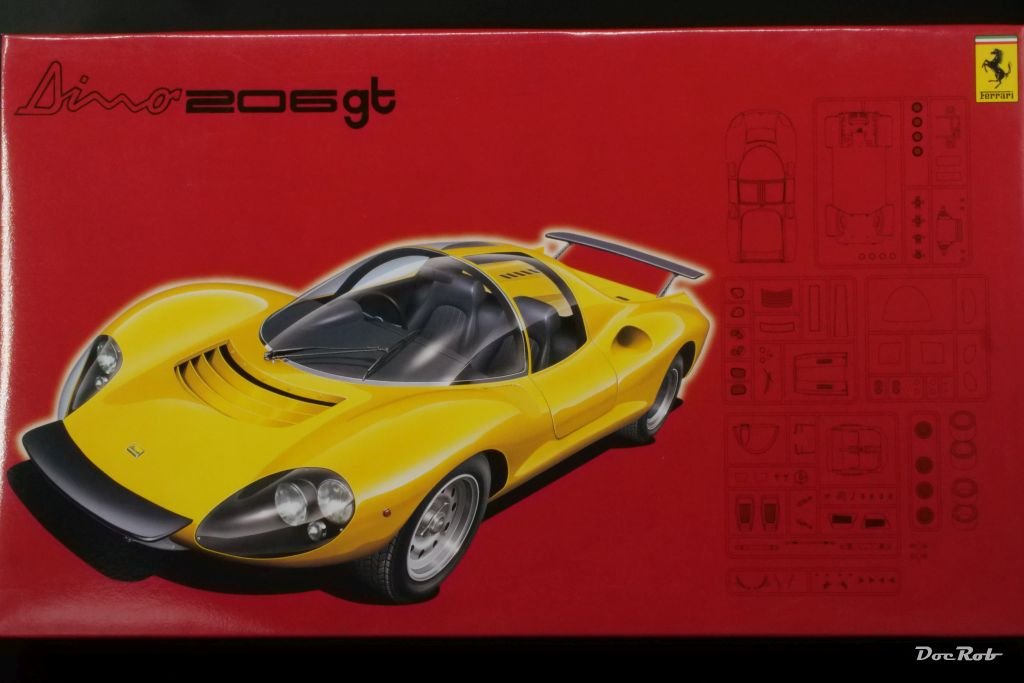
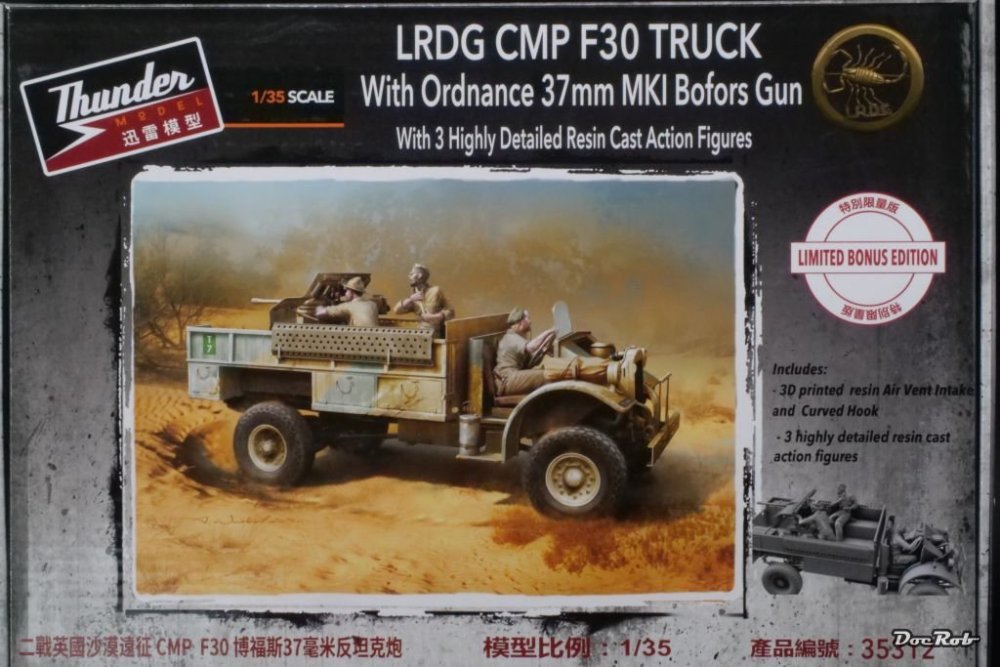
Some new car kits arrived today, a spaceship shaped Ferrari Dino and the exact opposite, a clunky F30 LRDG truck. The Ferrari Dino seems to be a little difficult to buy, lately, but I found it for a good price. It is a simple kit, but I really like the car´s design. The Ford F30 LRDG truck has a 37mm Bofors gun installed and come with three great resin figures, nice resin wheels and some 3D printed goodies. Not shown, as all was bought from AK, I added some markers, like their phenomenal chrome marker (my Molotow´s are a complete disaster), a bottle of Ak´s Super Chrome and Real Colors for the Caunter scheme of the LRDG truck. Cheers Rob

-
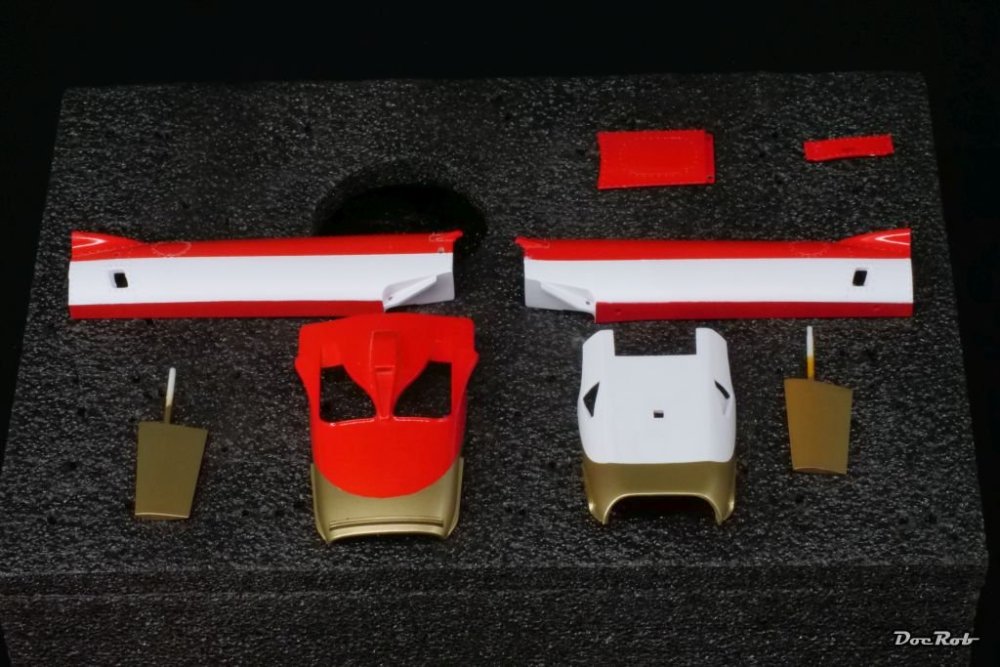
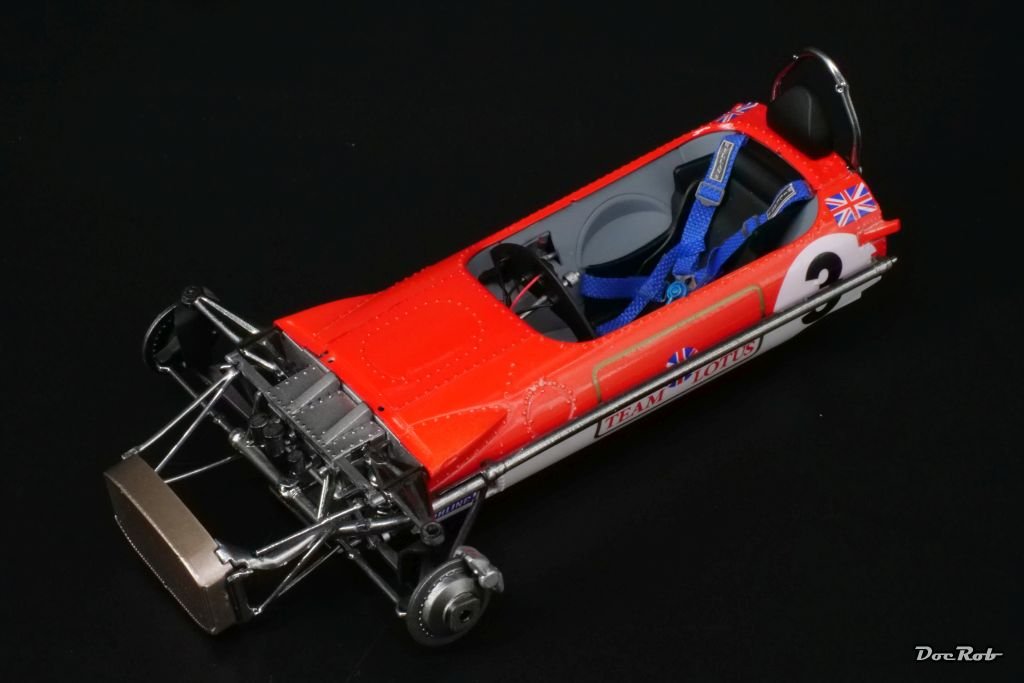
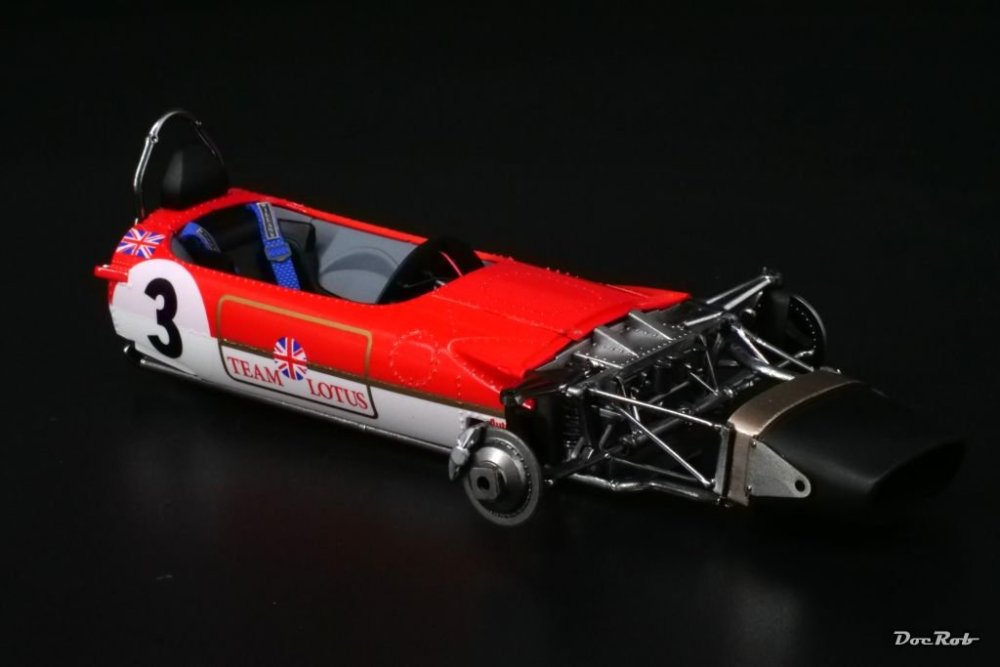
Next was the assembly of the front section and around the cockpit tub. While the red and white body parts fitted well, the front suspension and radiator proved to be difficult to get together. I had to widen many holes with drill bits to and did some cutting to accept the fitting parts. My expectations were a bit higher fit wise, but I was wrong, which showed when I added the front body parts and found out, that there is no way to glue them in the correct position. Here is how it looked inside the nose with suspension and radiator in place After half an hour of carefully detecting the culprits, it was clear, the radiator was too far to the front for about two millimeters and I have no idea, where I made a mistake. I then decided to cut the radiator framing and cooling hoses and glue the radiator directly into the front cone. All the struts are completely hidden in the body, so no harm done other than a wounded ego. Now the front body parts went on easily and I added the wings as last step before the engine will get build. Cheers Rob

-
Nice, but I guess most will be hidden under the fairing. BTW: I think, some more yellow and a bit less blue temper color would be more realistic. The colors show the temperature which the gases inside have in certain areas, tighter passages are hotter and therefore have a different color ranging from blue over red to yellow. Cheers Rob
-
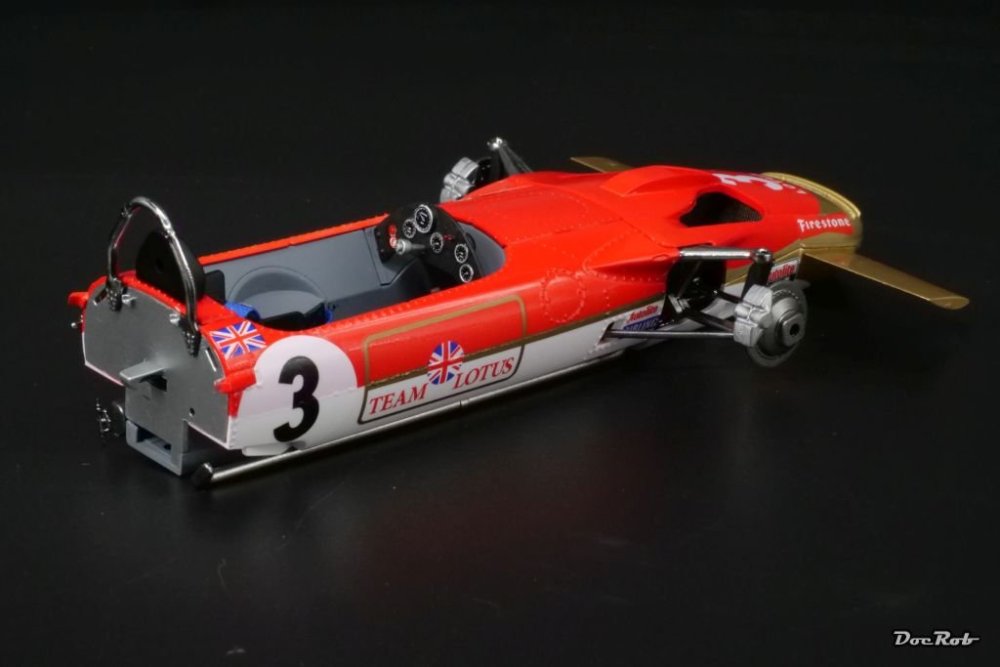
Thank you Carl, I think you can´t get away with decal belts in an open racer in 1/20 scale. Cheers Rob
-
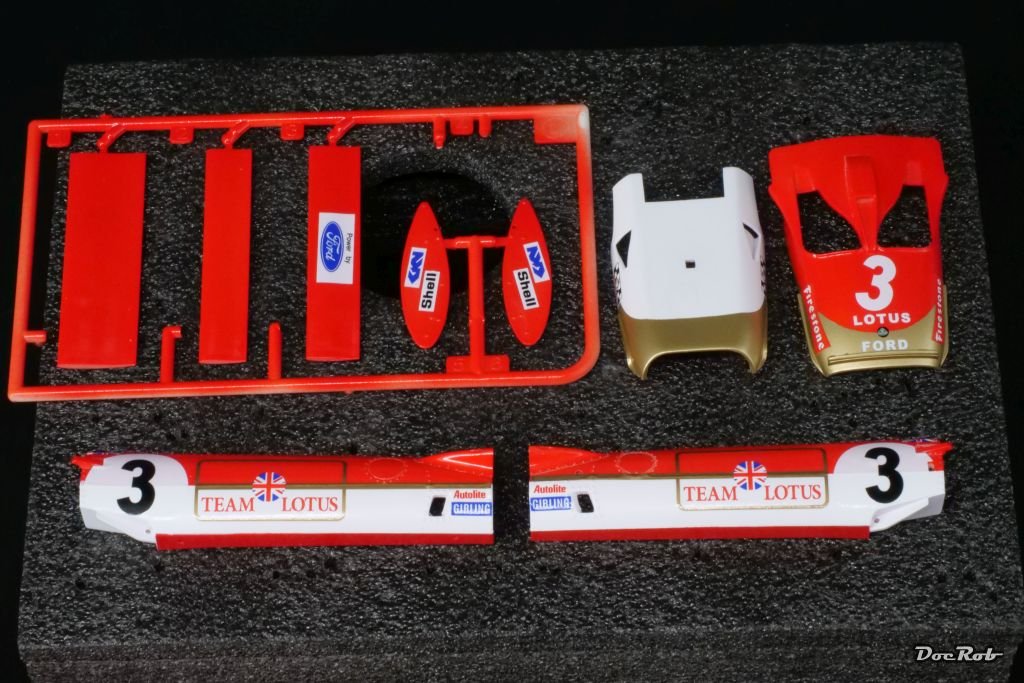
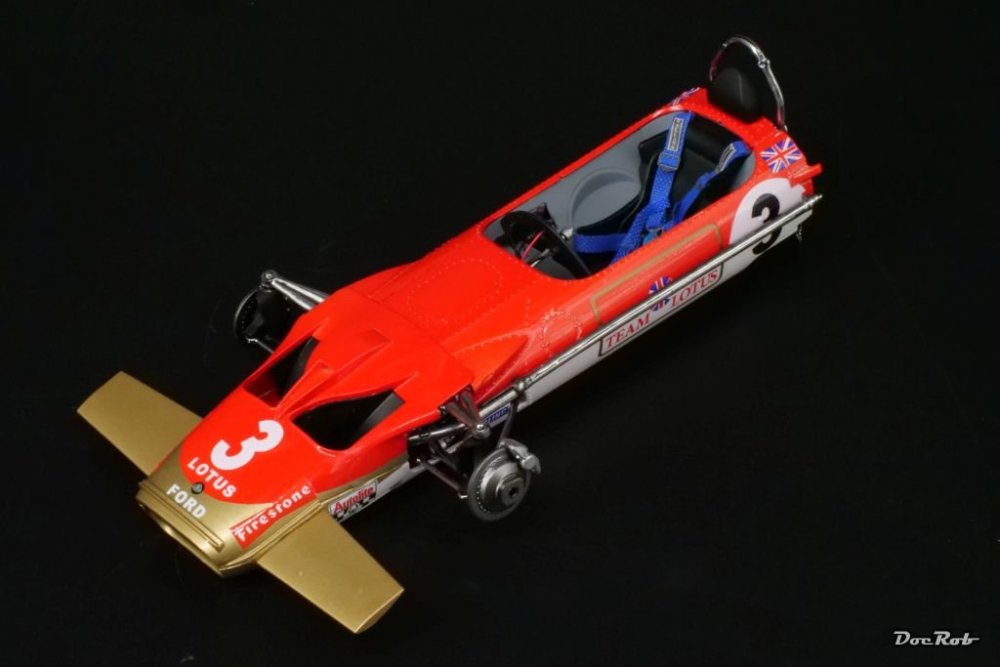
My initial plan of decaling the white and gold livery with the supplied decals went wrong, I had some tiny crinkles, which I may could have solved with a hairdryer and some decal fluid, but I misaligned one decal and was not too keen of cutting all the edges of the decal with a sharp blade. Luckily I made copies of the decals as backup, to use them as templates for masks. After removing the decals, I masked everything with Kabuki tape and sprayed the white and gold onto the red. Then I applied the decals, which were ok but not great quality wise. Some colors are a bit strange and there is a slight offset for example on the Union Jack´s. They needed some Micro Sol to get them settled over the rivets. Meanwhile, the parts are gloss coated with Zero Paints Lacquer clear, which sprays extremely well. I usually spray three to four layers per color or clear coat for car bodies. I thin the paint or clear with Mr. Leveling thinner. It has proved best for me, to start with a first coat of color with about 30 to 40% thinner only misted on. This thin coat dries super fast and the risk of damaging the plastic or decals with the hot paints and thinners is reduced. The next coat is applied a bit heavier and possibly thinned with another 10% of thinner. The third coat has 50 to 60% thinner, which let it level very easy and the surface is very shiny. The last coat, if necessary is thinned with about 80% of thinner, which levels even better, but care has to be taken not to produce color runs. The first coat needs to dry properly, as it works as a protective shield for the plastic and decals, the others are applied with only some minutes of drying time, which causes the following heavier thinned coat to eat into the one before and level better Cheers Rob