DocRob
-
Posts
7,127 -
Joined
-
Last visited
Content Type
Profiles
Forums
Events
Gallery
Everything posted by DocRob
-
Thank you for the review of this interesting vehicle. I wanted to build a Puma and therefore, I was pleased to see the AK reissue. I have the Dragon kit 6786, which is the open topped variant with the 7,5 cm KWK. I thought it's the same base kit, but while I checked the box, I found some differences. In my kit there are PE covers for the already opened fender compartments and mine has pre bent metal brackets for the suspension. The better manual, decals and color chart is definitely a plus for the AK issue. Cheers Rob
-
Great finish on the foiled Mig, Gary, the shine is outstanding. Love to see, what you do with the figures, it's 48 scale, right... . Cheers Rob
-
I hope he will fully recover and have a good live with your family Gary. Cheers Rob
-
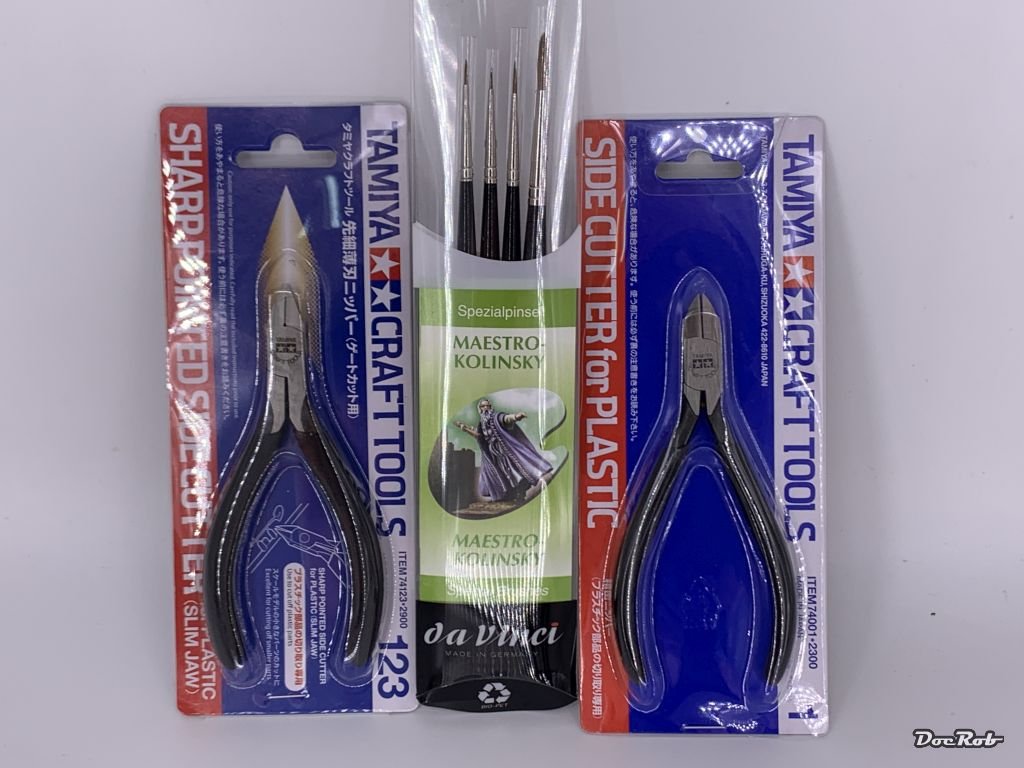
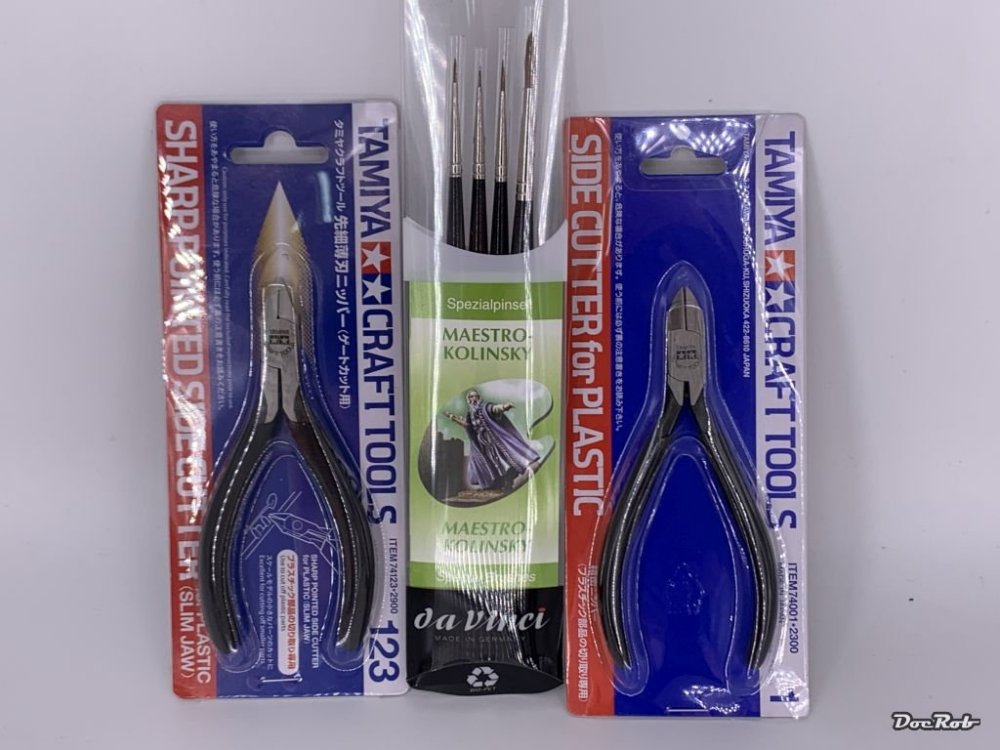
Thank you Peter, I used some sable brushes in the past, which were ok but not great. The greatest problem was to maintain a proper point. My last set is from AK (the ones with the red handle) and they disappoint (literally ). I used soap brush for cleaning and used them carefully. I thought about buying a set of W&N Series 7 but read, there are quality problems recently and that they have a leading middle hair, which is stiffer. As I have no HS options to buy quality brushes, I have to rely to the big A in this case. W&N was only available from a marketplace in UK, which often means, the good never arrives, but the money is always returned luckily. The Da Vinci brushes look and feel superb and first tests tend to show top quality, with a good reliable tip and good color holding capacity. The bad thing, I can't blame the brushes anymore for my lame figure painting abilities. Cheers Rob
-
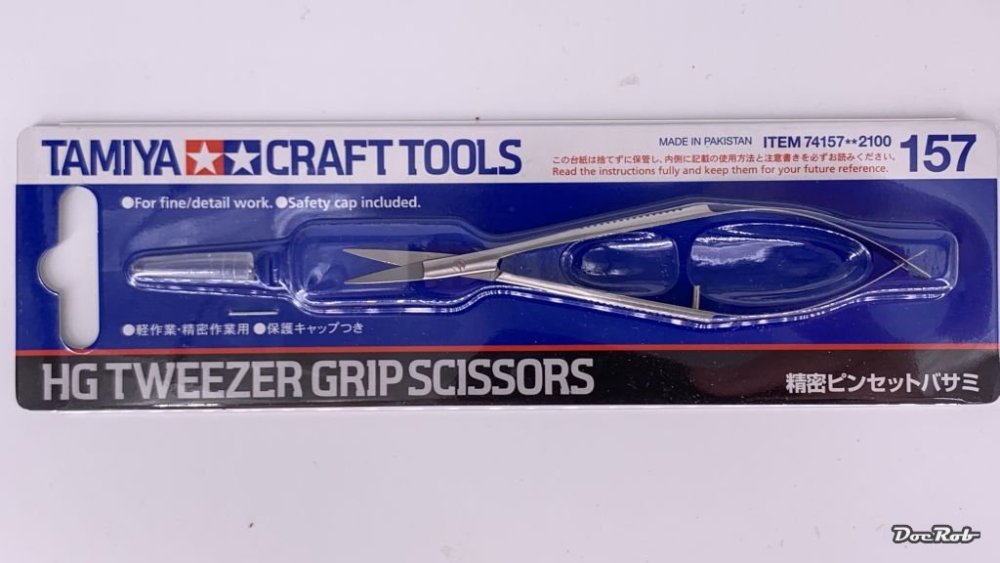
I haven't tried the scissors in depth, but will do soon and report. Cheers Rob
-
... as if there was nothing im my stash before, Phil . I bought the DSPIAE cutter, because I thought to upgrade from my trusty old Tamiya cutter (It's the same robust model on the right side of my pic above). I read lots of good stuff about the DSPIAE, but never liked it. The working process is different from other cutters, as there is a blunt side and a sharp blade. The result is, the cuts are more or less of the same quality as the Tamiya, but the blade tends to stick into the plastic, which is annoying, specially with fragile parts. I will test the new Tamiya 123 cutter (the left one on the pic), and hope it's worth the money. I recently checked some cutting tools for rigging threads over on MSW and the DSPIAE was also inferior to the old Tamiya cutter in this discipline. Best was a Victorinox nail clipper . Because cutters are so important for modelling, I will observe my old and new ones for a while and then will report about the good, the bad and the uglies. Cheers Rob
-
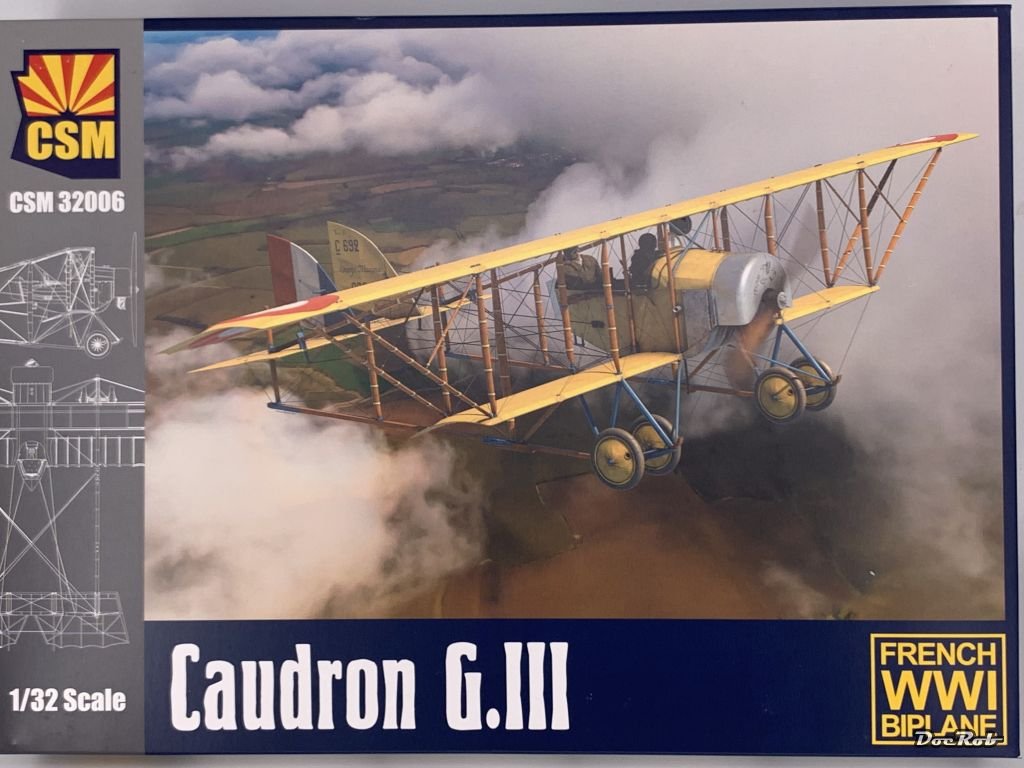
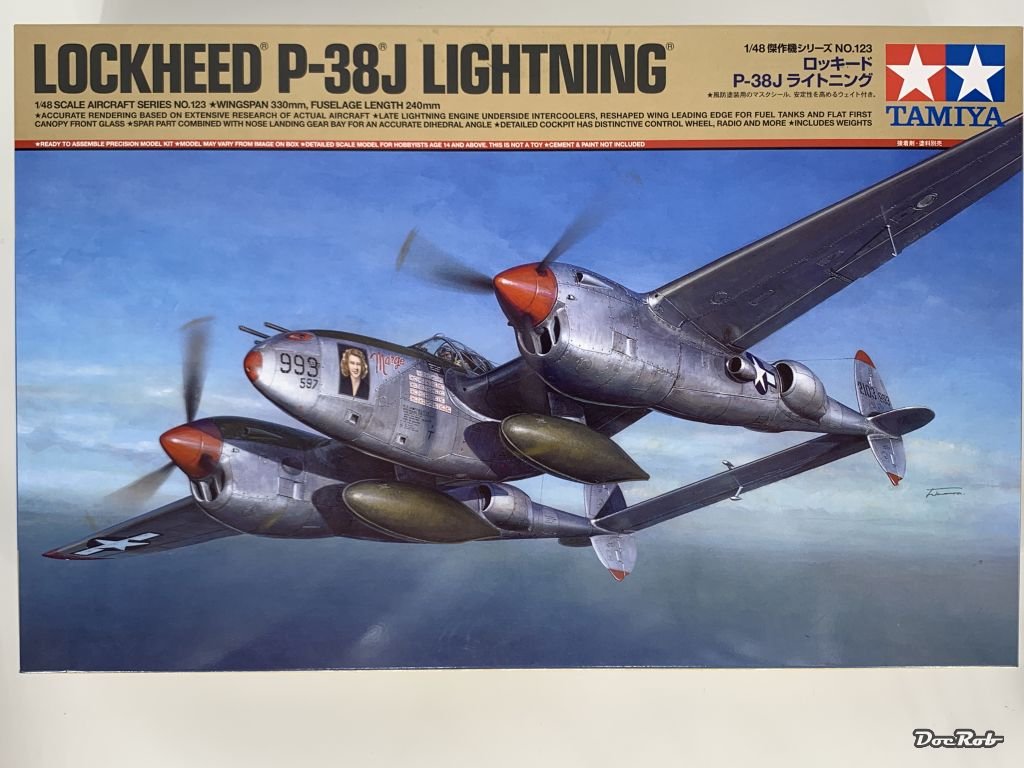
It seems to be impossible to get to building in the moment. There are so many distractions, I only managed to do some unworthy figure painting exercises. Hope that changes soon, because my fingers are itching and new stuff rolled in. Umpteen times, I said to myself, can't do, won't do, shouldn't do, but I couldn't let my fingers off that spider web plane, if not only for the courage by CSM to release it. It will be build before my WNW FE.2b, but with simplified rigging, meaning complete web, but no turnbuckles. I have the P-38G/H in stash, but this is my favorite version of the Lightning Some new cutters have arrived too, on a bit more fragile, the other a bit more robust. The robust one is my go to sprue cutter, as I really dislike my DSPIAE cutter and don't like to use it anymore. My old Tamiya had a dent from steel rod cutting . The brushes are to push me more into figure painting. It's a set of Da Vinci's Kolinsky Series 10. I bought some Kolinsky brushes from AK lately and found the quality very bad. First tests showed, these are good ones and definitely recommended to figure painters. Last but not least a little scissor in tweezer style. It seems to be sharp, but I have to see, how it performs. All the cutting tools are also bought, because I start with rigging of my wooden ship soon and you definitely need a reliable cutter for the threads. Cheers Rob


-
Fantastic job on the camo Mark, the Viggen looks wow. Cheers Rob
-

Tamiya Spitfire MK XVIe
DocRob replied to Peterpools's topic in LSM 1/35 and Larger Work In Progress
Sorry to hear about these issues Peter. Decaling is one of my most feared tasks in modelling for a reason, but I never had issues like this with Tamiya decals. I sometimes used masks, only because I found the decal colors not fitting and used Maketar masks, which worked great. They are Kabuki masks, precise cut and they have a dedicated set for your Spitfire. 1:32 Supermarine Spitfire Mk.XVIe for Tamiya kit 60321 (maketar.com) I hope you will solve the issues of this trouble riddled build and have a satisfying result in the end. Cheers Rob -
Sorry multiple post, caused by connection lag. Cheers Rob
-
Keep your gun loaded, now that it's public, they will come for you. And the scalpers won't take the cars . Cheers Rob
-
RCAF Liberator GR Mk VI
DocRob replied to BlrwestSiR's topic in LSM 1/35 and Larger Work In Progress
Great work on the big bird, Carl, I just love these North Atlantic schemes and your mask and airbrush work is absolutely fantastic. Cheers Rob -
Happy Birthday Carl and all the best wishes for you and your family. Cheers Rob
-
Pz.Kpfw.I Ausf A - Dragon 6356 - 1/35
DocRob replied to Bomber_County's topic in LSM 1/35 and Larger Work In Progress
Copy Gary in all aspects. Cheers Rob -
Nice toes by the way Bill . I use the Flory washes since two years and really like them. I found Tamiya's panel liner to aggressive sometimes, especially with Future / Klear / Pledge. I liked the effect on my WWI builds a lot, where I used Aviattic decals, which have a hint of a woven structure. Perfect Plastic Putty worked well for me in the last years too, it dries up fast and is good to sand. Cheers Rob
-
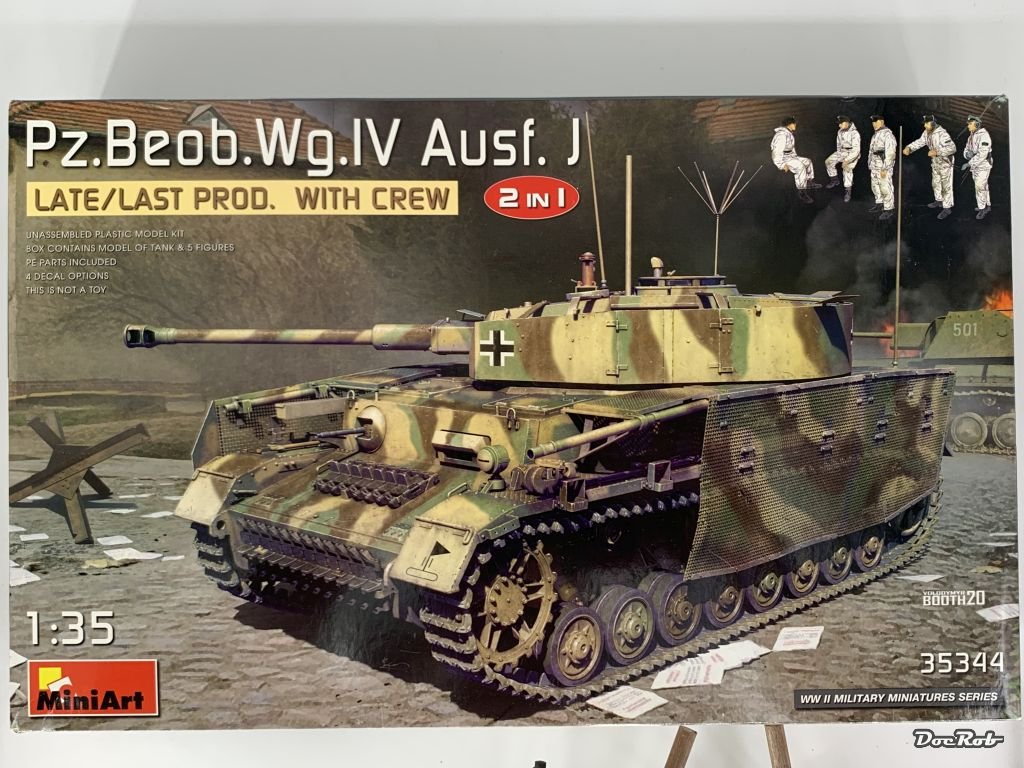
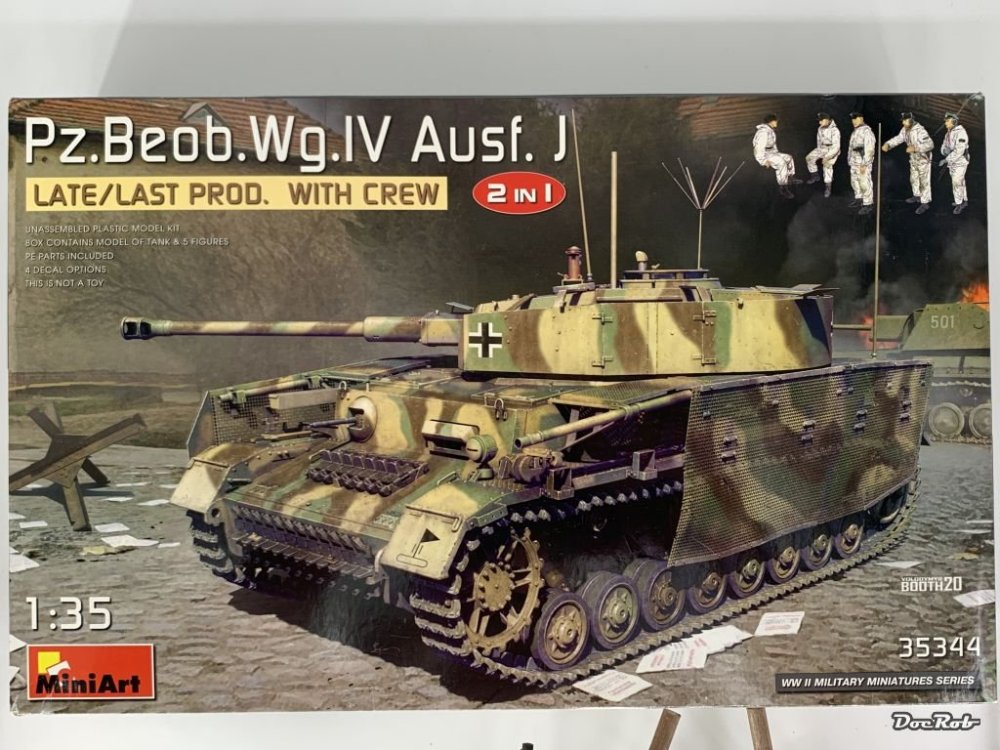
Just received this one, a very late PZ. IV. with Thoma Schürzen and winter clad crew from Miniart. The box is crammed full with parts and there is a lot to like about the kit. Workable tracks, extensive PE sheets, a one piece barrel and the crew. No need for extras on first sight. Cheers Rob
-
AH-1G Cobra 1969
DocRob replied to Rod Bettencourt's topic in LSM 1/32 and Larger Aircraft Ready for Inspection
Great build, great paintjob and weathering and like the others say, the outdoor pics look so real. A deep point of shoot helps a lot for realism. Congratulations on that beauty. Cheers Rob -
Very nice Lanc Mark, an out of the bi´+ox build of a well designed kit can be balm for the nerves after demanding builds with PE-warfare and tons of resin dust. Cheers Rob
-
Wrong questions Gary, does the paper thin fragile construction of modern cars take the recoil? Are your wipers able to clear the spent shells? Cheers Rob
- 2,036 replies
-
- 6
-

-
- car related stuff
- anything about cars
- (and 6 more)
-
I'm using my Japanese grindstone to re sharpen my blades. One side for grinding and one for honing. After that, the blades are sharper than factory fresh. Cheers Rob
-
BTW, I read in February in the Modellbaukönig blog (a very large German HS, normally well informed), that Bronco models stopped / 'paused' their production. Is that confirmed? Clearance Sale – Bronco Models (modellbau-koenig.de) Cheers Rob
-
Revell is releasing a new variant of their Me BF-109 G series in 1/32. This time it's the G2/G4 version. Messerschmitt Bf109 G-2/4, Revell 03829 (2022) (scalemates.com) Cheers Rob
-
I do, earning money, I guess . I am not so well informed, but had a slight interest into the Puma and the Dragon ones are hard to find, at least in hobby stores. For the Panzer IV, I don't know, if they are available from Dragon. They have better painting guides, more painting variants and new decals as a bonus. Cheers Rob
-
Another interesting kit from Border Models is announced in 35 scale. I guess, they made it only to have their BF-109 kit for a flyover diorama Salt into wounds modus off Image only for demonstration, source ModellingNews The Modelling News: Preview: Border Model's new 1/35th scale DKM Type VII-C U-boat conning tower & deck Cheers Rob
-
Tamiya Spitfire MK XVIe
DocRob replied to Peterpools's topic in LSM 1/35 and Larger Work In Progress
I used the stuff(at least I guess it is the same) called Panzer Putty on different occasions. I liked the controllable application, which even works with tiny details added to the surface. I tried it on my T-90 some years ago and was pleased. With a camo on a plane, I was a little dissatisfied, because the stuff is running with gravity. Worse so, but completely logical, differently with the varying thickness of application. The stuff is useful, but you have to work fast and not in the summer heat. Cheers Rob