DocRob
-
Posts
7,122 -
Joined
-
Last visited
Content Type
Profiles
Forums
Events
Gallery
Everything posted by DocRob
-

Duchess of Kingston - Beauty of the Seas - Wooden Sailing Ship 1/64
DocRob replied to DocRob's topic in Non LSM 'WIP
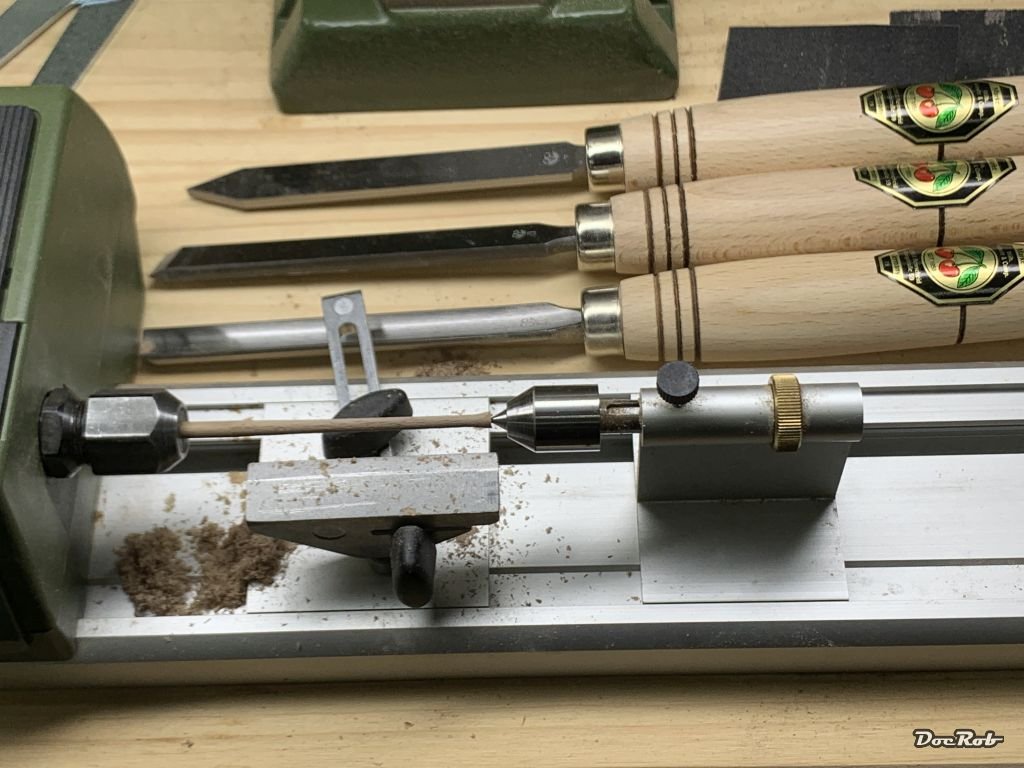
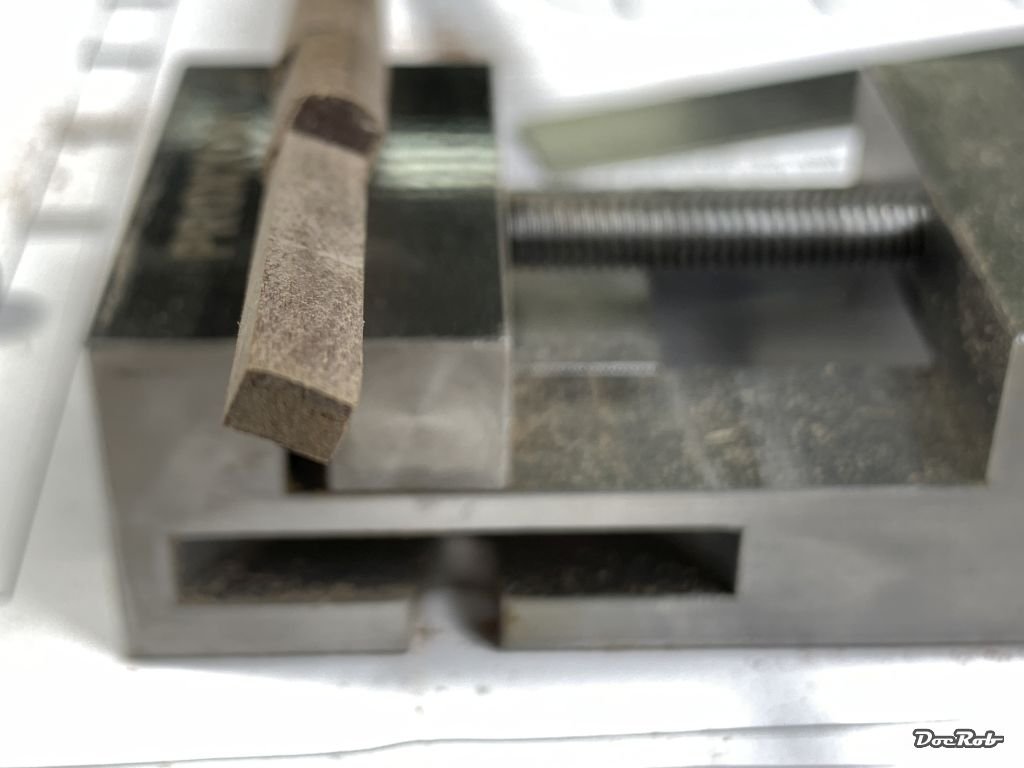
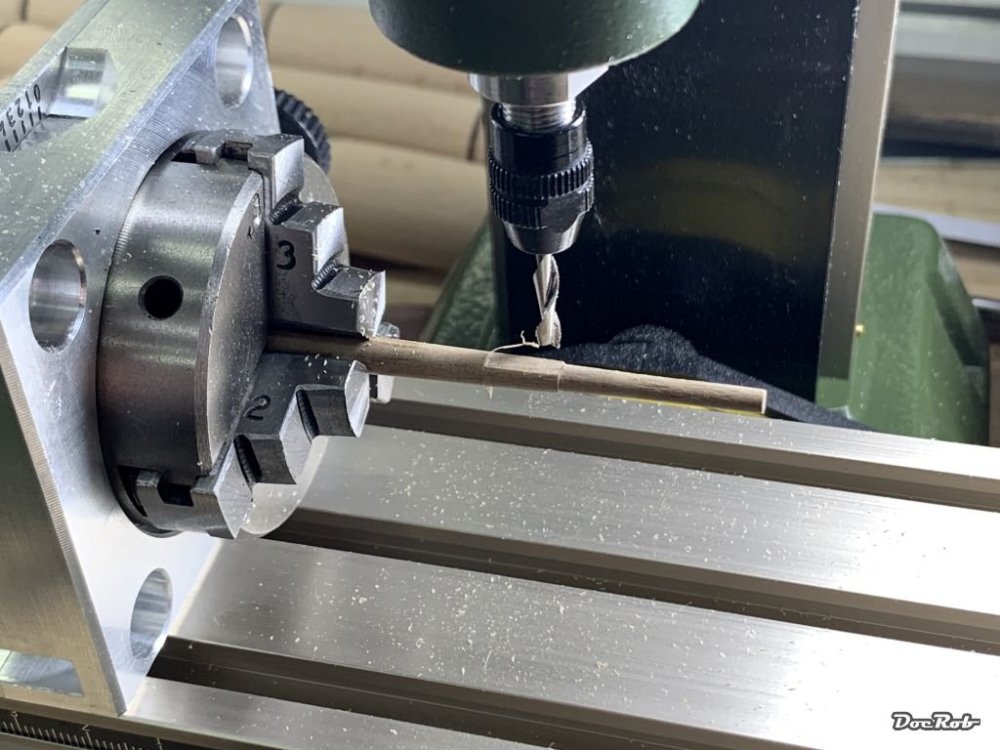
I checked everything concerning my setup today and found that the cutting tool seemed not to be totally tight in the collet. Maybe because of the high frequent vibrations, the tool itself moved in the collet. It's my only explanation for the issue. Cheers Rob -
Duchess of Kingston - Beauty of the Seas - Wooden Sailing Ship 1/64
DocRob replied to DocRob's topic in Non LSM 'WIP
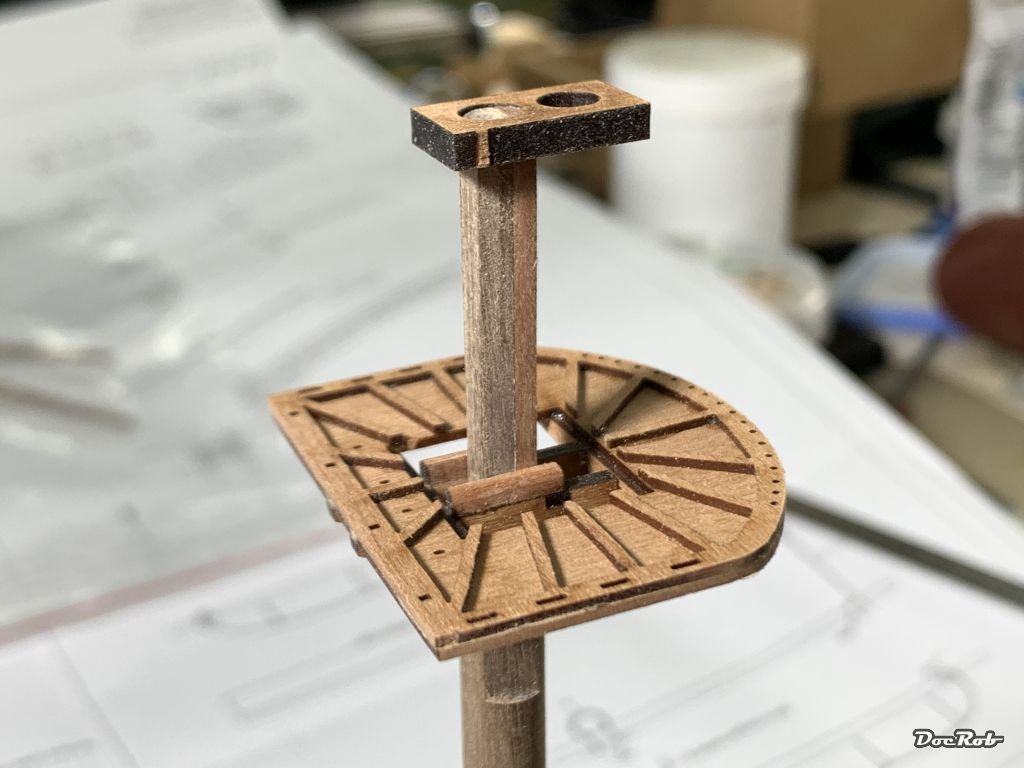
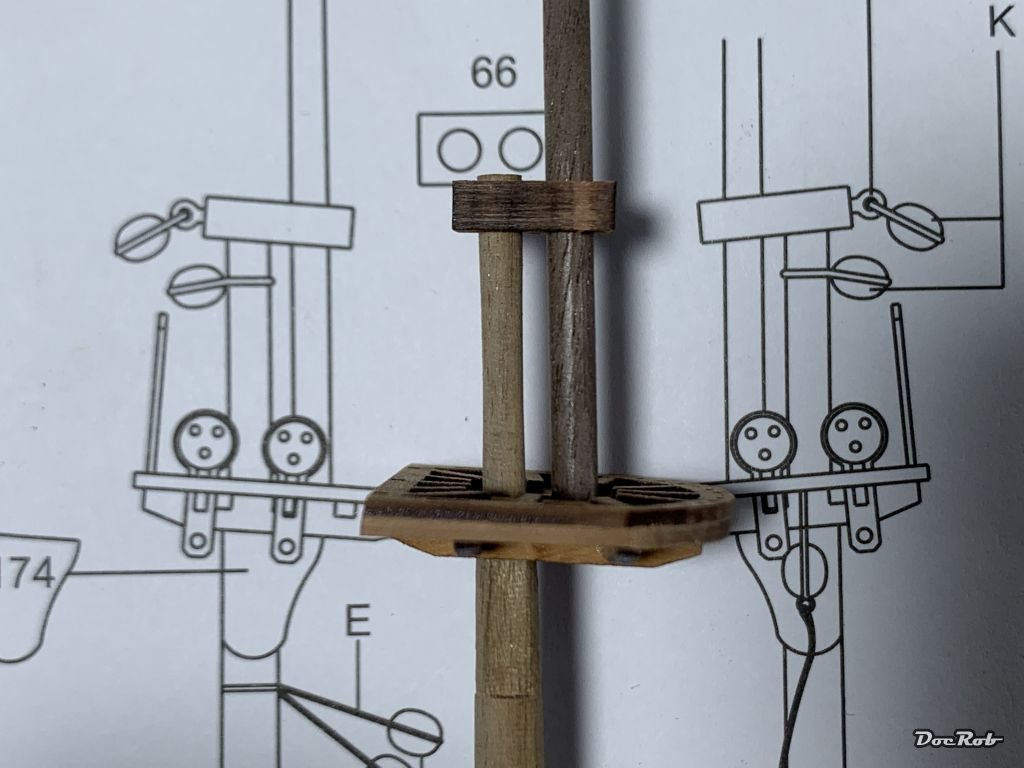
Today, I put the patched mast into the lathe and turned the upper square part round, where it meets connecting parts and nothing flew away, phew. The picture shows, how it looks now, but nothing is glued. This area of the mast will be painted black, which will hide the patched part. I milled some more square areas onto the middle segment of the mainmast without issues today. It takes time, but I'm seeing an end to preparing mast and yards. Cheers Rob
-
Duchess of Kingston - Beauty of the Seas - Wooden Sailing Ship 1/64
DocRob replied to DocRob's topic in Non LSM 'WIP
Many might not be the right term, at least from me . Wooden ship models are even more time consuming than plastic models. HMS Sphinx is very special to me as I always wanted my own frigate and it was a present from my wife, the first model related one. Cheers Rob -
Duchess of Kingston - Beauty of the Seas - Wooden Sailing Ship 1/64
DocRob replied to DocRob's topic in Non LSM 'WIP
Thanks Kevin, I will look for the displays over there on MSW, where I'm a member now too. As I have no special display in mind, I will ponder about that when time comes. Cheers Rob -
Duchess of Kingston - Beauty of the Seas - Wooden Sailing Ship 1/64
DocRob replied to DocRob's topic in Non LSM 'WIP
Poco a poco, step bay step, like we say here in Spain. We will find a place for the Duchess, WHEN she is finished . BTW.: HMS sphinx is lurking on my shelf. I wanted to have a frigate all my live, this will be the jewel at last. But I like the DoK nearly as much, it is just a gorgeous ship. Cheers Rob -
Duchess of Kingston - Beauty of the Seas - Wooden Sailing Ship 1/64
DocRob replied to DocRob's topic in Non LSM 'WIP
It's a long way to the finish and this part of the build gives me the creeps more than building up hull and decks, but yeah, once it's done it will feel special and The Duchess will be the only kit accepted by my wife in the living area. Cheers Rob -
Duchess of Kingston - Beauty of the Seas - Wooden Sailing Ship 1/64
DocRob replied to DocRob's topic in Non LSM 'WIP
I'm afraid, but nope. I know what you mean, but I've fixed the mast in the chuck of the dividing device and it was perfectly aligned, milled the two flattened parts and then milled the square part with only turning the dividing head for 90° each time. The setting of the Z-axis remained locked the same all the time and the mast part was never unchucked through the process. It's a mystery to me . Cheers Rob -
Duchess of Kingston - Beauty of the Seas - Wooden Sailing Ship 1/64
DocRob replied to DocRob's topic in Non LSM 'WIP
Thank you Gentlemen, it's not only a new language, it's a delicate process of learning and re-learning. When I was young, I was an engineer for Scientific institutes, working with all kind of machinery on a very advanced level, but this is different. First off all, it's wood and second, as it's cave work, it's not about all around professional equipment, it's about how to achieve things, with what's there. It's a time consuming process and even with proper preparation not error free (I still have no idea what happened to my square on my mill ) Cheers Rob -
One Month Challenge: COMPLETED
DocRob replied to GazzaS's topic in LSM 1/35 and Larger Work In Progress
Wow, you are experimenting a lot in your last builds Gary, specially with the figure painting and now sculpting. I never liked or built artillery, but it's enjoyable and inspiring to read your WIP, with the techniques executed by you. Cheers Rob -
Duchess of Kingston - Beauty of the Seas - Wooden Sailing Ship 1/64
DocRob replied to DocRob's topic in Non LSM 'WIP
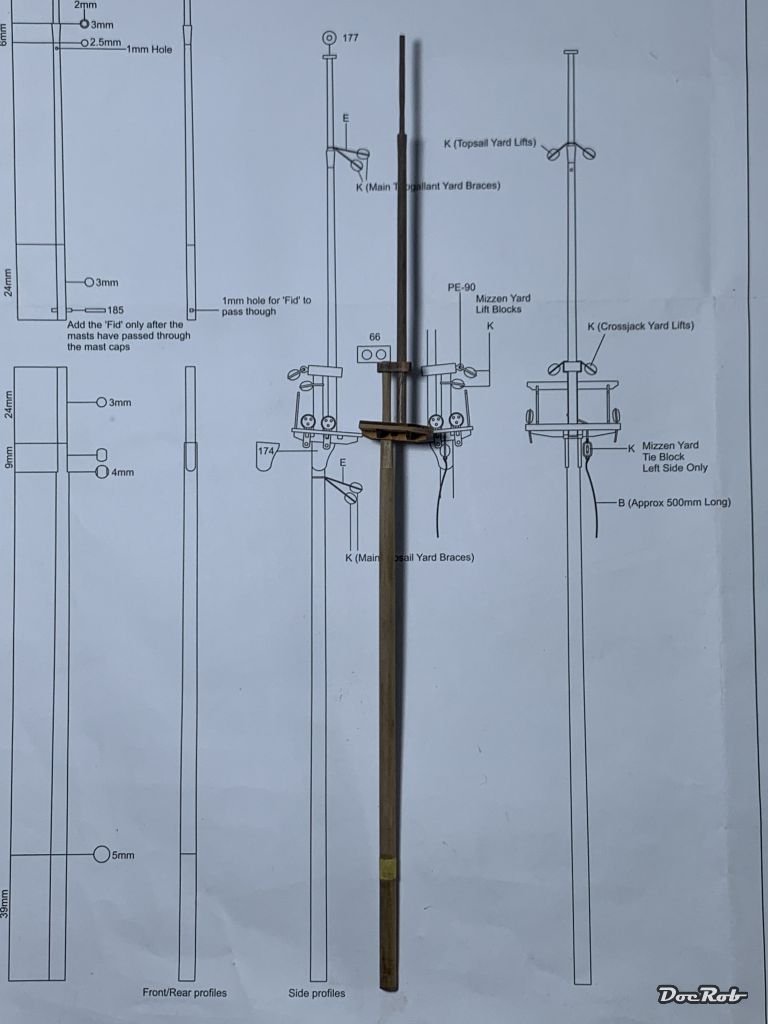
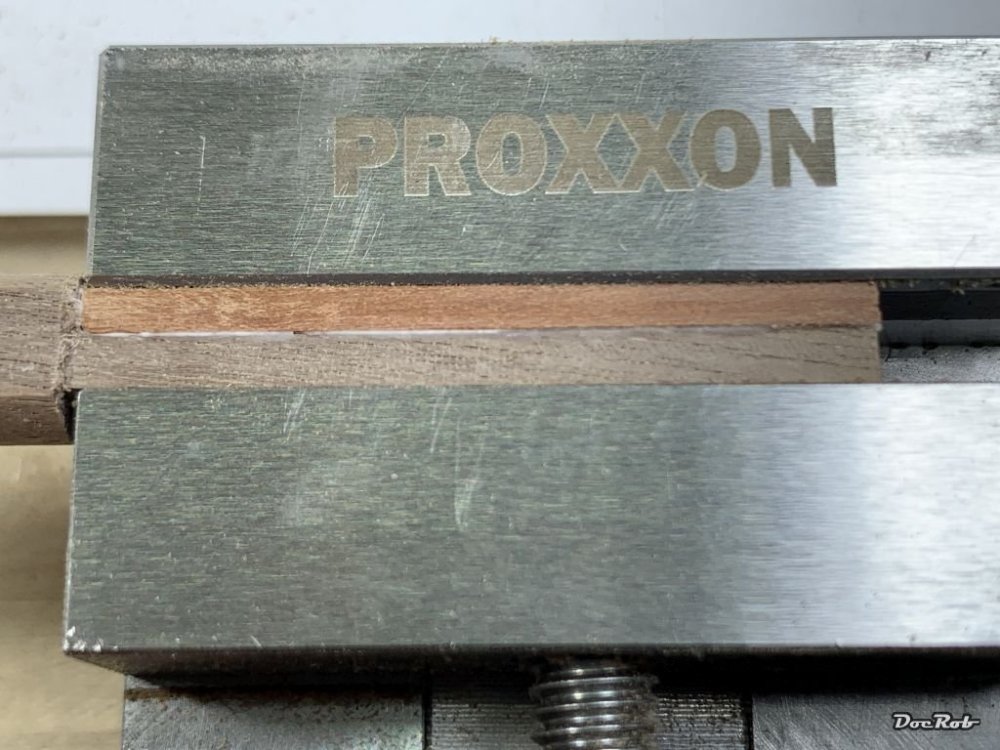
Puh, it was a long, but busy time since the last update, but in the moment our houses interior get painted and that causes a lot of work and distraction from modelling. The other obstacle is more modelling related and is about learning, how to work best with the lathe and the mill, something I never tried before, at least with wood. I prepared all the yards on the lathe either with chisels or sanding paper to their designated conical shape. Then it was time to turn the mast tops on the lathe, which have a bit more complicated shape. The Kirschen chisels I bought, seemed a bit big for the mini lathe, but they are sharp and of good quality and did the job. Now it was time to start with the lathe onto the mast parts. These are mostly slightly conical and have flattened and/or squared ends in different sizes in the area of the mastheads. I started with the relatively simple mizzen mast to establish a good workflow and have now prepared the mizzen mast parts completely. While working on the lower part of the main mast, disaster struck. The flattened parts were milled with the dividing head and then I made the 5 mm square part, which worked great on three sides, thanks to the dividing head. On the fourth side, somehow the cutting tool went too deep into the material, which was difficult to see for me. I can't explain, why that happened as the tool was fixed, as was the mast chucked. I stopped where I was and filed the part to 3 mm depth and decided to add a 2 mm strip as a substitute and glued it on. I hope this will hold up on the lathe, where I have to turn some millimeters round on the end of the square part. Not perfectly square Resquared Cheers Rob


-
Duchess of Kingston - Beauty of the Seas - Wooden Sailing Ship 1/64
DocRob replied to DocRob's topic in Non LSM 'WIP
Thank you Kevin, it would be great to see some pics of your SS America, ready or not. Cheers Rob -
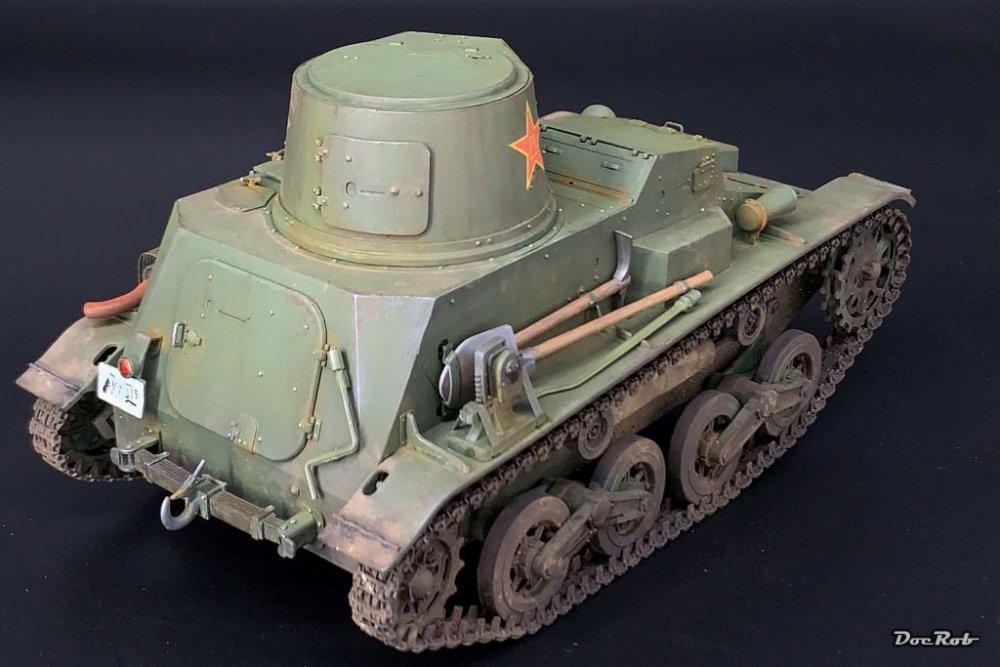
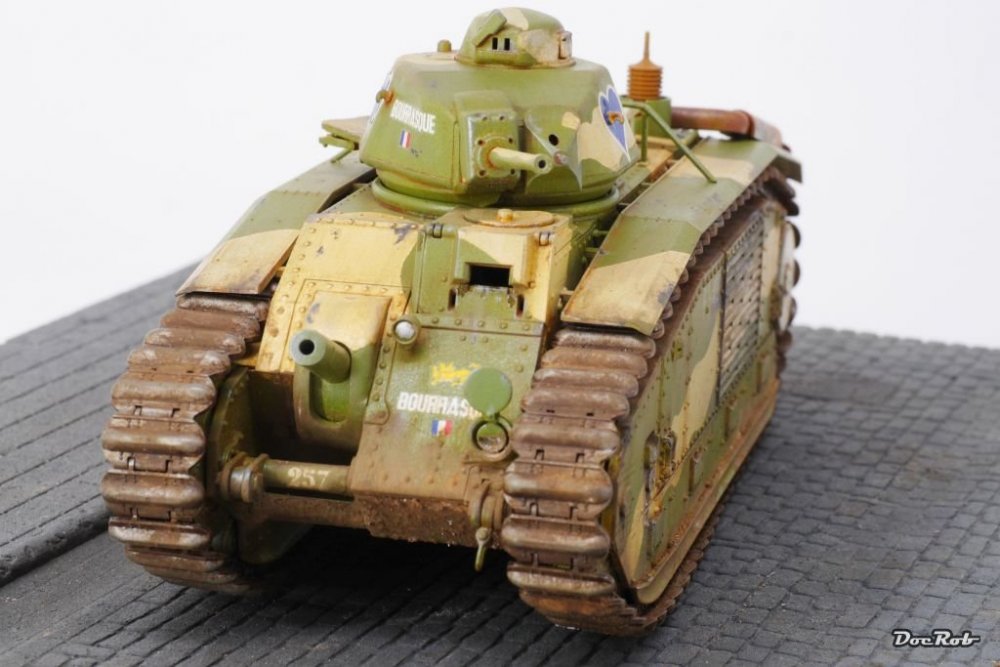
I think you mean the Tankette build, but there is no real wet mud and I can't remember, which products I used. I can only quote myself from an older post. Thanks Phil, I build up residues with mud / earth washes, with added pigments in different earth shades. I start with the darkest and as a last step, everything got blended with mineral spirit. This way the impression of build up residues becomes more 'real', as it flows more into the corners and hidden places, where dirt will always accumulates. On this on, used the same technique Cheers Rob

-
Yes Bill, the mill uses collets from diameter 1 mm up to 3,2 mm, so you need a few passes for larger areas with the biggest cutting tool having a diameter of 3 mm. It will work fine for the square areas of my wooden masts, combined with the dividing head, i received today along with a small chuck. I will show these later due to an ongoing renovation of my house. I will buy a small indicator along with a small precise angle, to help align everything right and to know, how precise the machine works. Cheers Rob
-
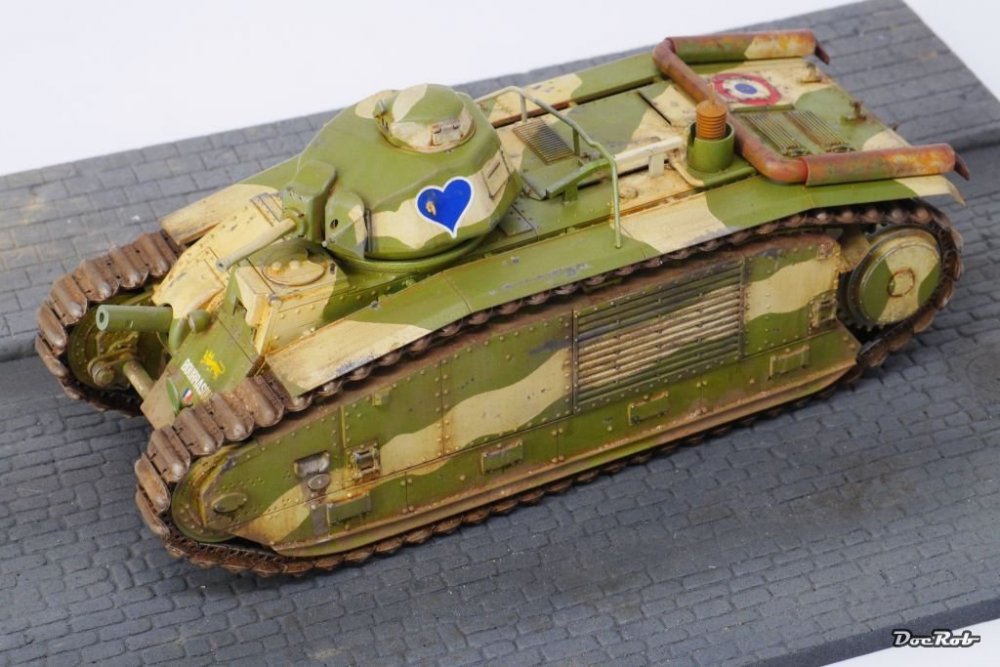
I like a mix of both best, surely depending a dio setting. Wet mud for the tracks and some on the wheels after the application of dry caked mud onto the running gear. Cheers Rob
-
You could avoid cleanup through heave weathering with mud, Phil . Cheers Rob
-
Tamiya Spitfire MK XVIe
DocRob replied to Peterpools's topic in LSM 1/35 and Larger Work In Progress
Great work on the Spitfire Peter. The engine looks splendid and it's always a tough decision to display it or not. Generally, I prefer an iconic plane to be shown in it's flight ready shape, closed up, but I like the detail and eye catching abilities of a plane sans cowlings as well. Your momentarily approach, to open the sides will keep the maximum of the Spitfires shape, so maybe it's a good compromise. Cheers Rob -
Never knew, it was meant like this by the Talking Heads Cheers Rob
- 2,036 replies
-
- 7
-

-

-
- car related stuff
- anything about cars
- (and 6 more)
-
Dragon Jagdpanzer IV 70 (A) Kit 6015 with Panzer Art figures
DocRob replied to GazzaS's topic in LSM Armour Finished Work
Great build, great presentation Gary. The Jagdpanzer looks fantastic, with all the tiny bits and pieces and the figures are super cool (in the words sense) I like te mix of light shadow, dirt and abrasion on them, perfect Cheers Rob -
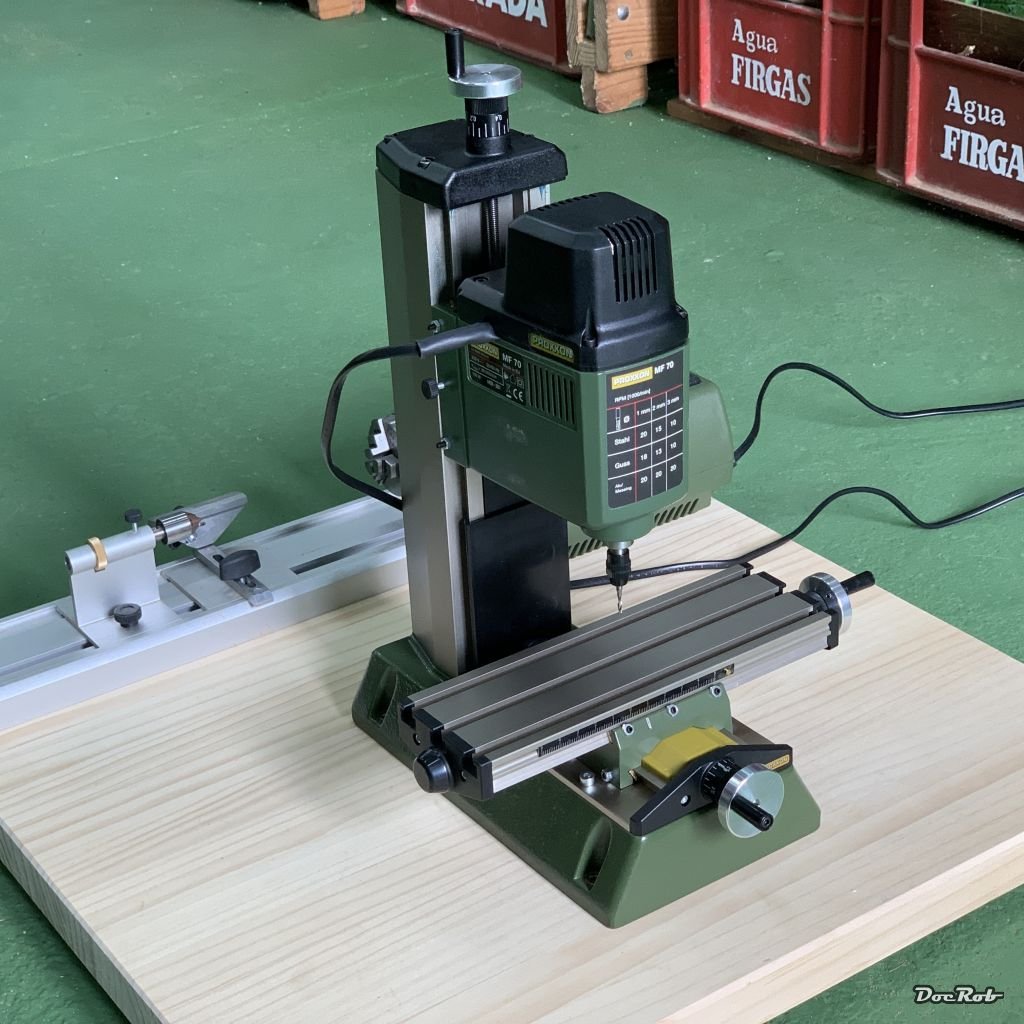
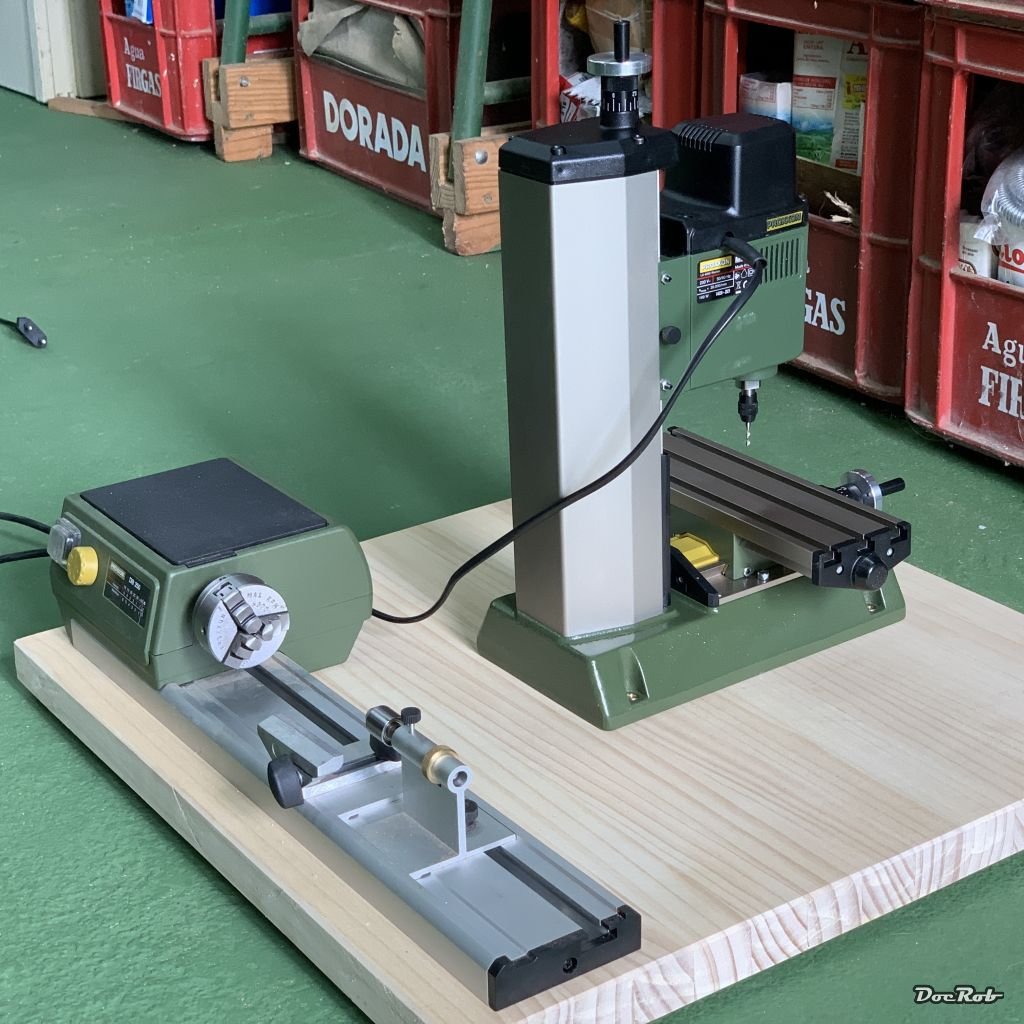
Today my Proxxon mini mill arrived and it is MINI, I dare say it's a cute little thingy. You have only to mount the table with four screws and you are ready to go, if you purchased the milling cutters, which are not included. I did that with the help of a engineers square, because I don't own a dial test indicator. The first look and feel is promising, the clearance seems ok. Now I have to wait for my dividing apparatus and my mini vice to arrive and then I will continue with the Duchess of Kingstons masts, which will be milled and turned. As an immediate action, I cut a 3 cm thick wood panel with 500 x 500 mm size and added some rubber feet and screwed the mill and the woodworking lathe onto it. Cheers Rob


-
The Lanc is coming together nicely, great progress Marc. Do you paint the wings separately? Cheers Rob
-
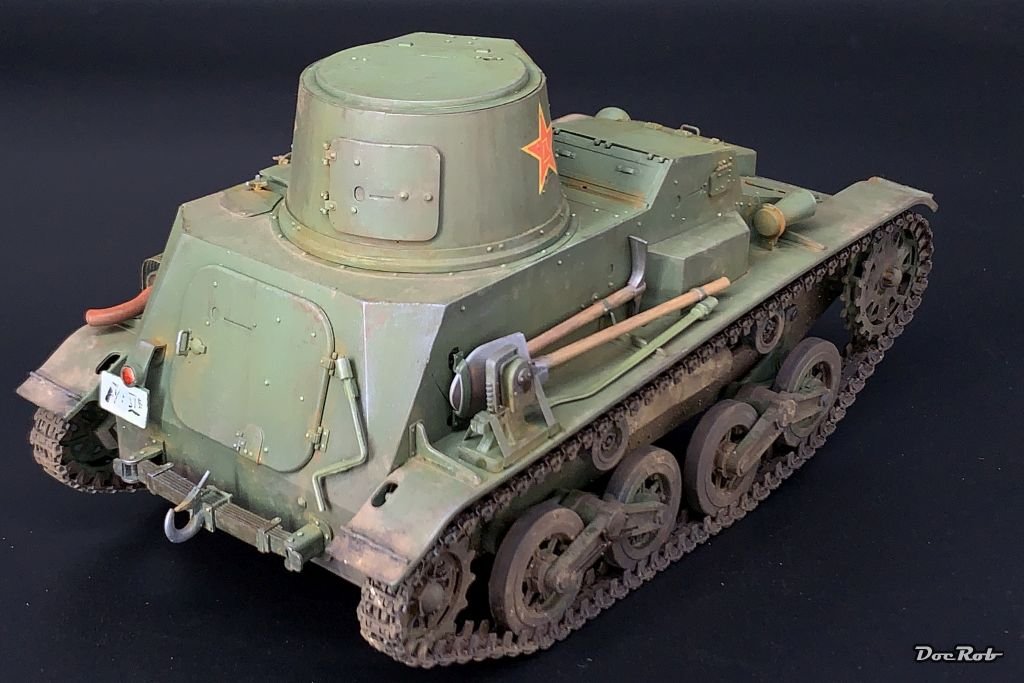
Very nice build Sasha. Painting and weathering are very convincing and I like the Chinese livery. Cheers Rob
-
Big Yellow Distraction from my B-24
DocRob replied to BlrwestSiR's topic in LSM 1/35 and Larger Work In Progress
Nice to see this one started Carl, I won't buckle in, too confined space for my liking, but will be a spector all the way. If I only could lay my hand one one of the regular boxings. Cheers Rob -
And I thought you were talking filler or putty, You can't eat that stuff, or am I wrong? Cheers Rob
-
LeO C.30A Early Production MiniArt 1/35 -Finished
DocRob replied to KevinM's topic in LSM 1/35 and Larger Work In Progress
Very nice Kevin, I really like the color scheme. I'm about to buy the Spanish Republican version, triggered by your build. I read in two different sources, that the supplied motor of your kit is wrong. The seven cylinder engine should have nine, being built by Salmson. Cheers Rob -
A red brown pin wash would enhance the contrasts dramatically without being weathering . It's more an artificial shadow. Cheers Rob