DocRob
-
Posts
7,045 -
Joined
-
Last visited
Content Type
Profiles
Forums
Events
Gallery
Everything posted by DocRob
-
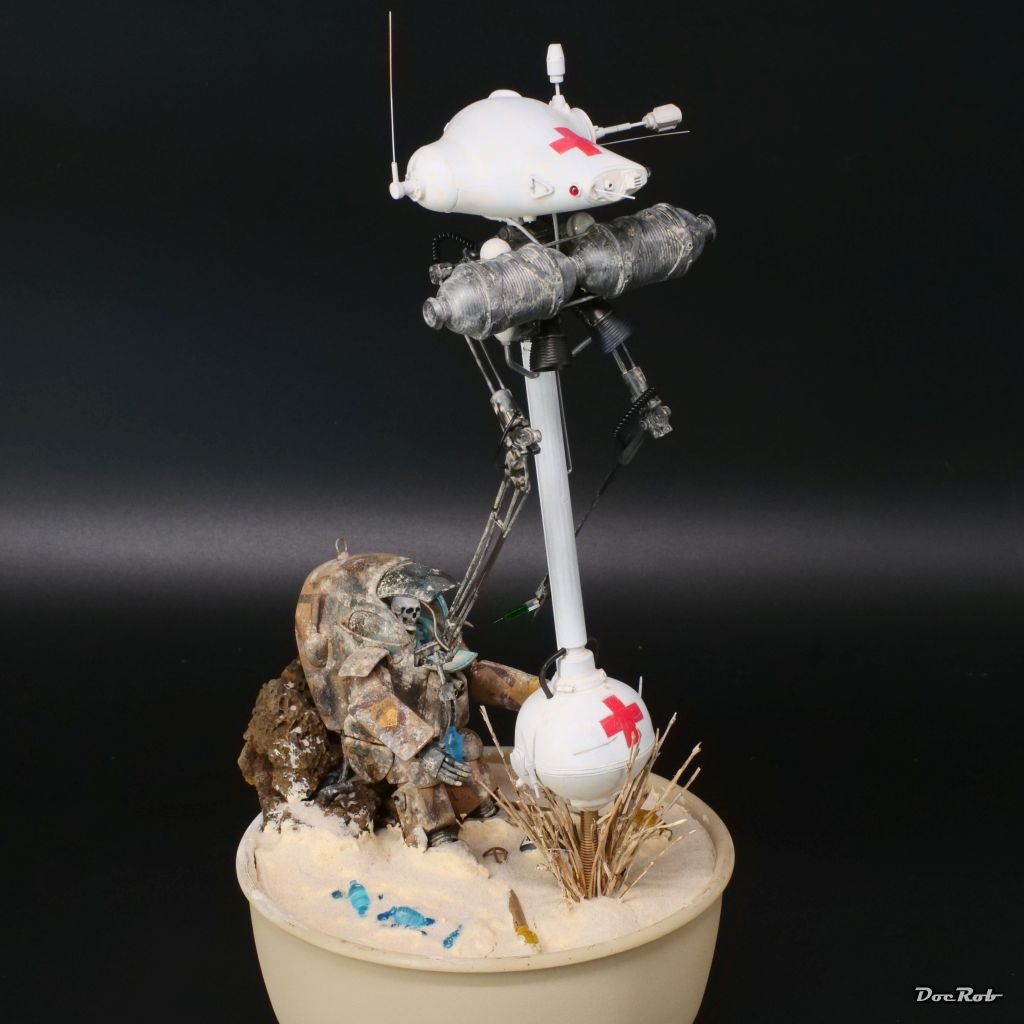
 Thank you Hubert and Martin. Initially I was very unhappy with the sandbox theme, but when I got the idea for my dio, I was a bit happier. Now that it´s done, I kind of like the result, because it represents my thoughts from the concept phase and the implementation worked. Cheers Rob
 -
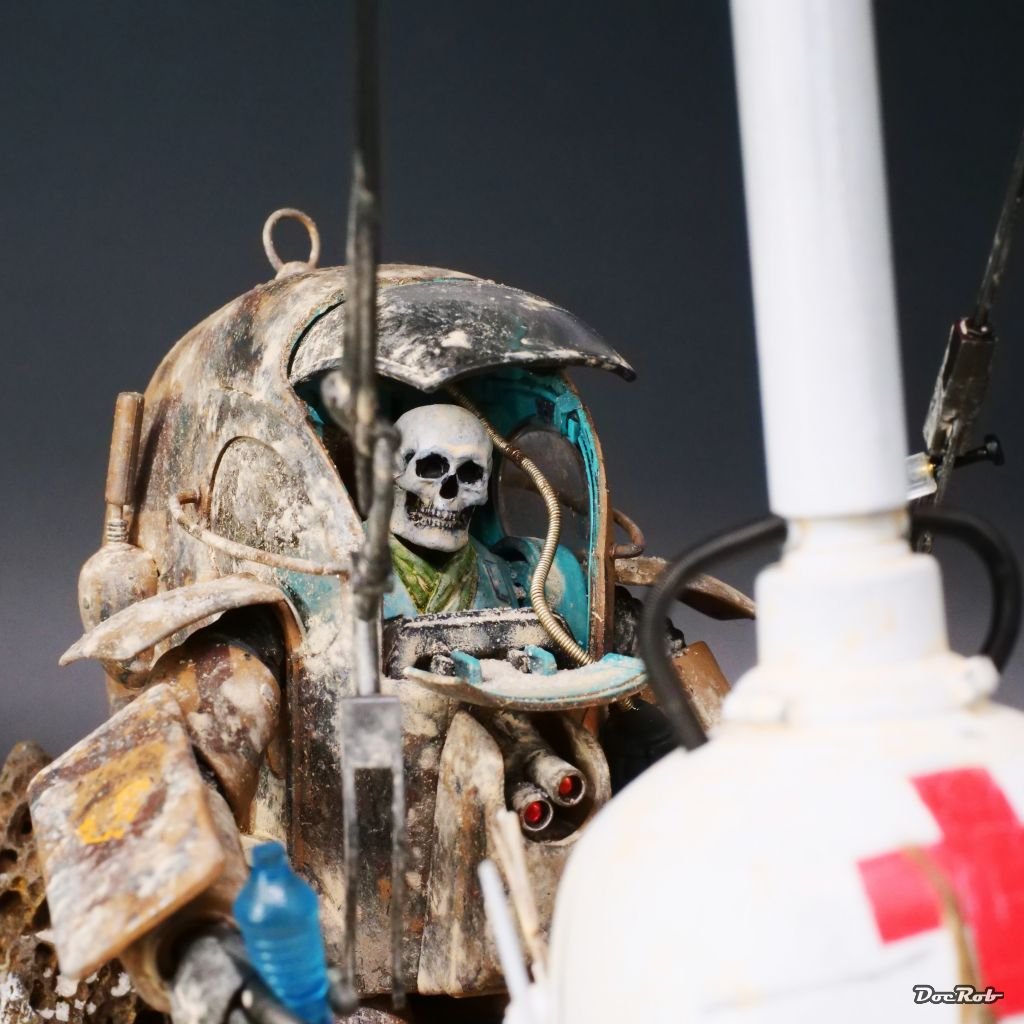
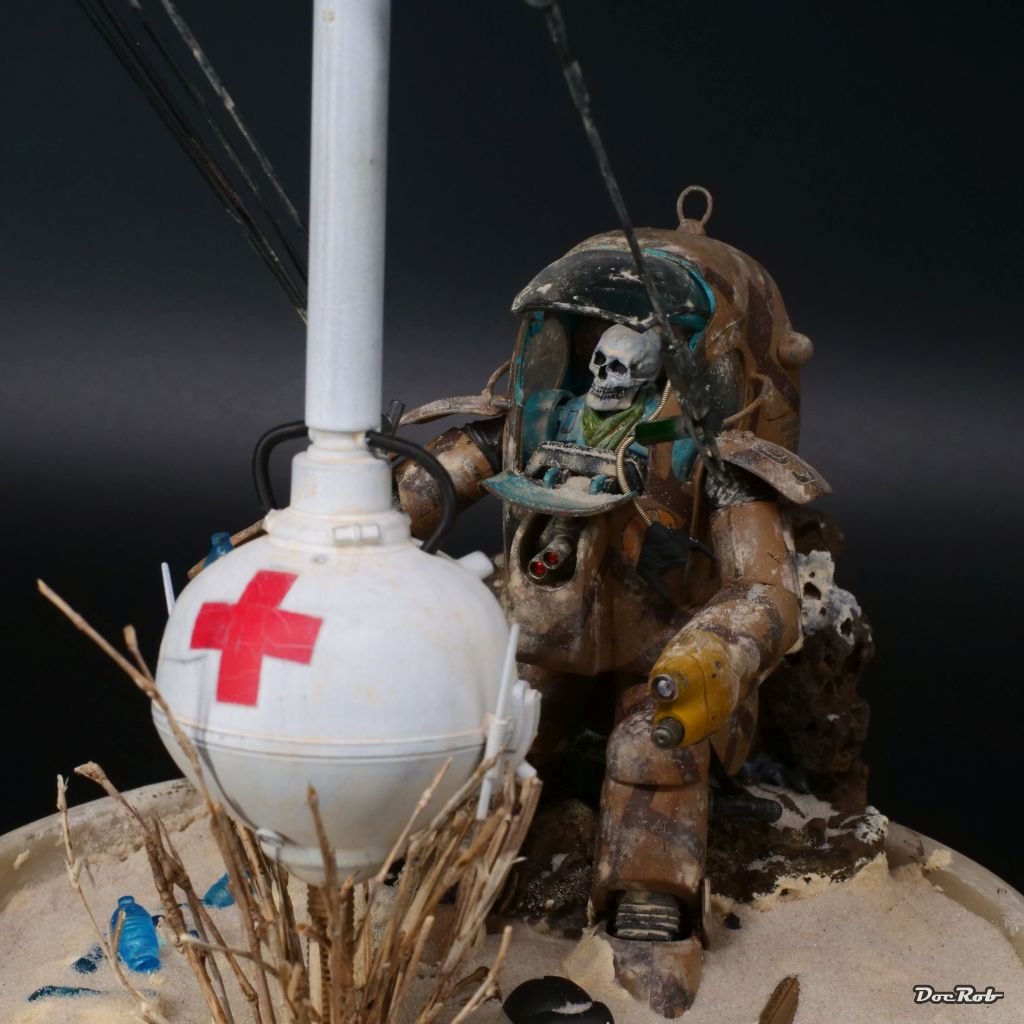
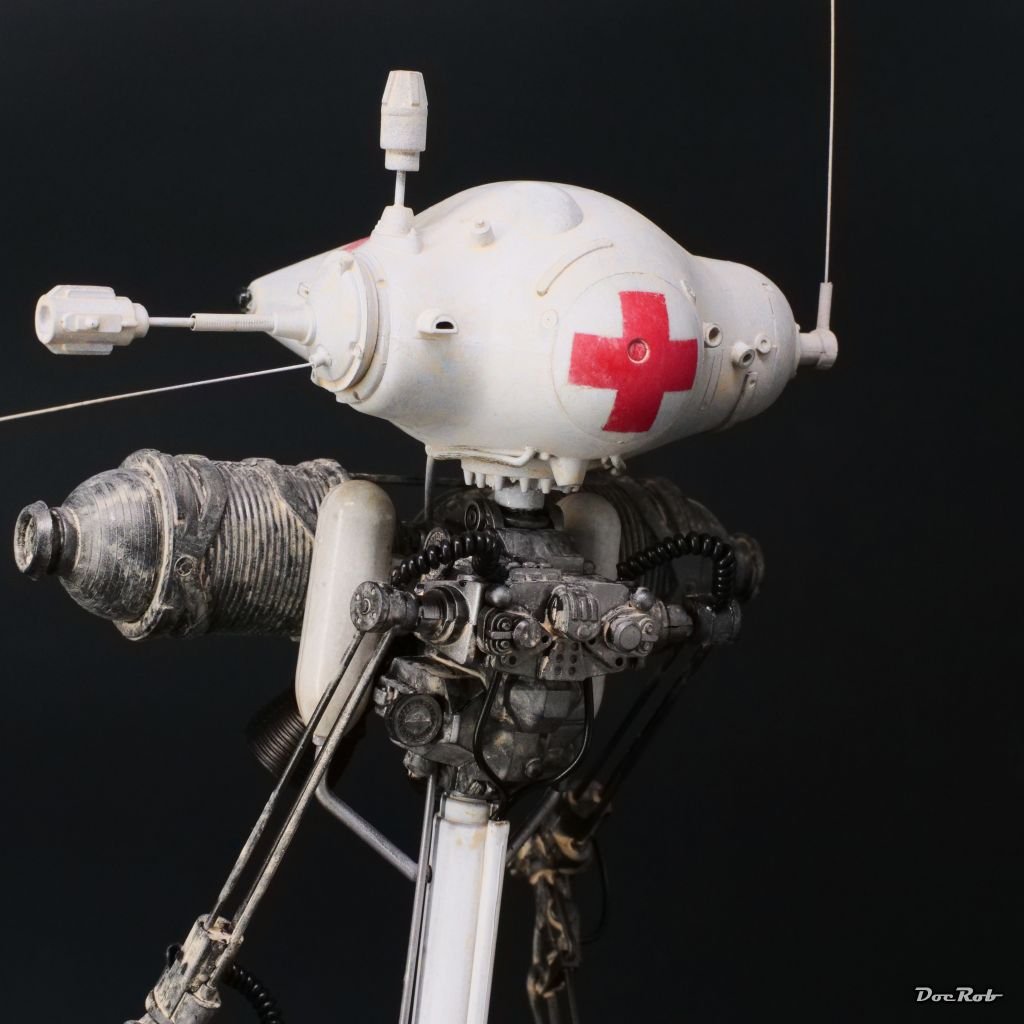
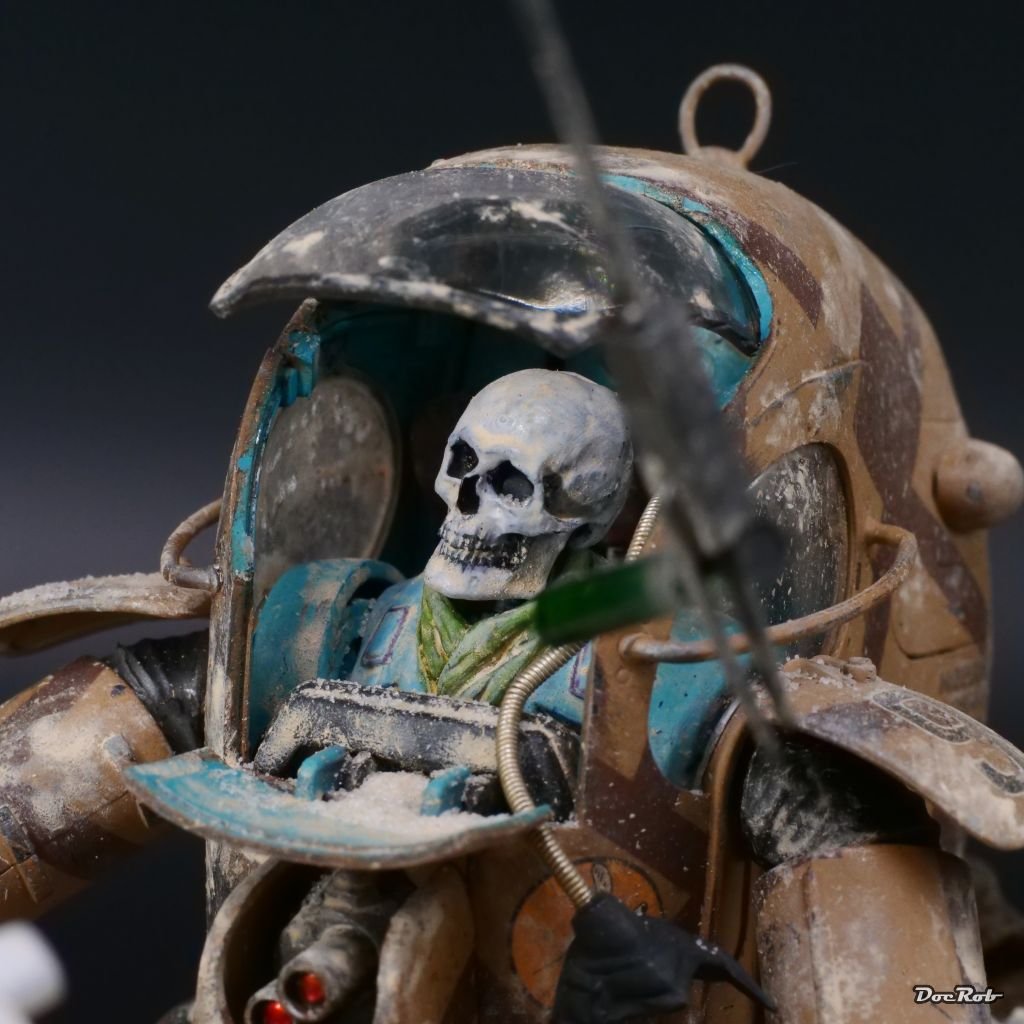
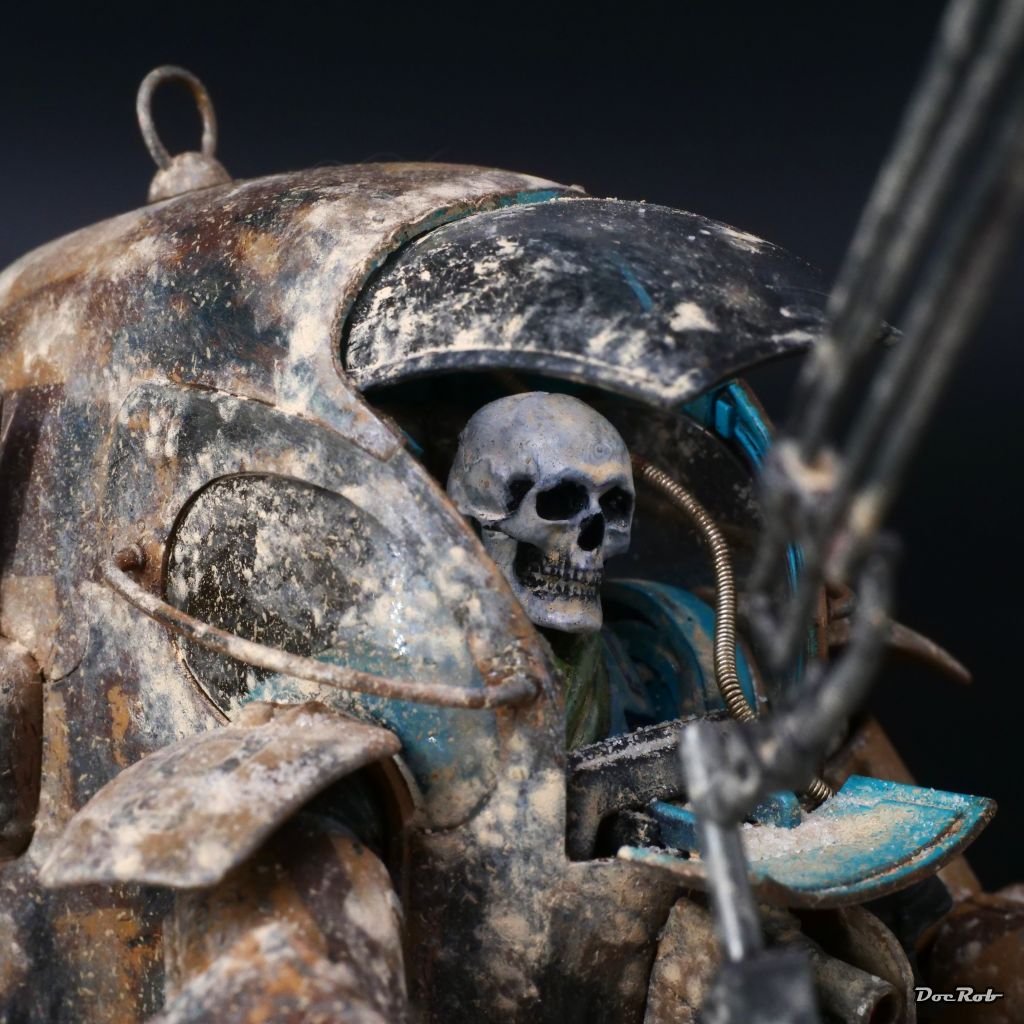
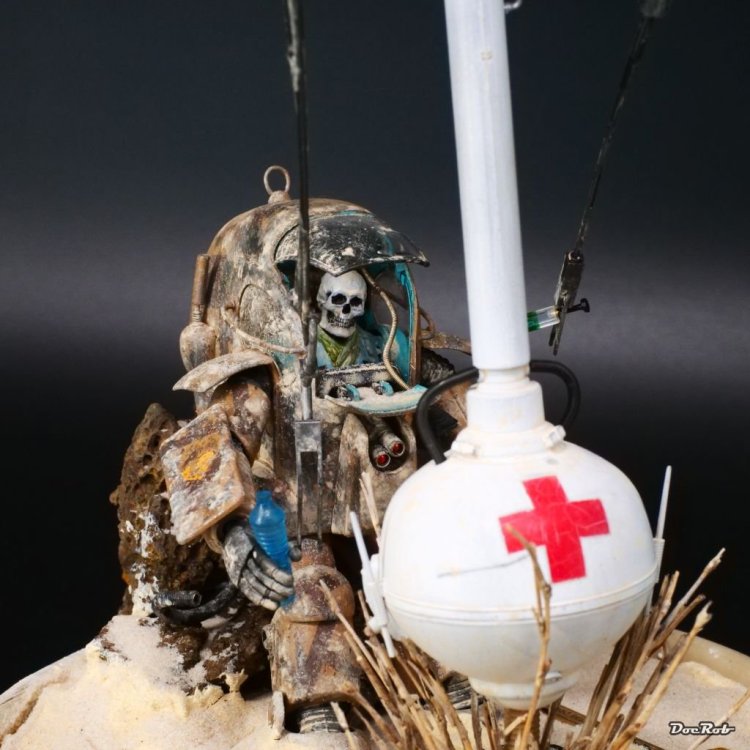
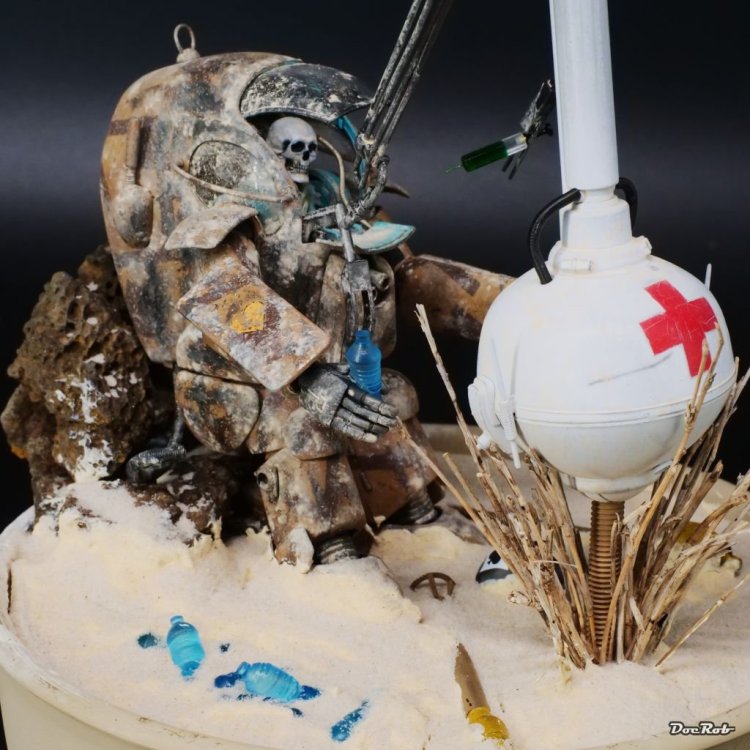
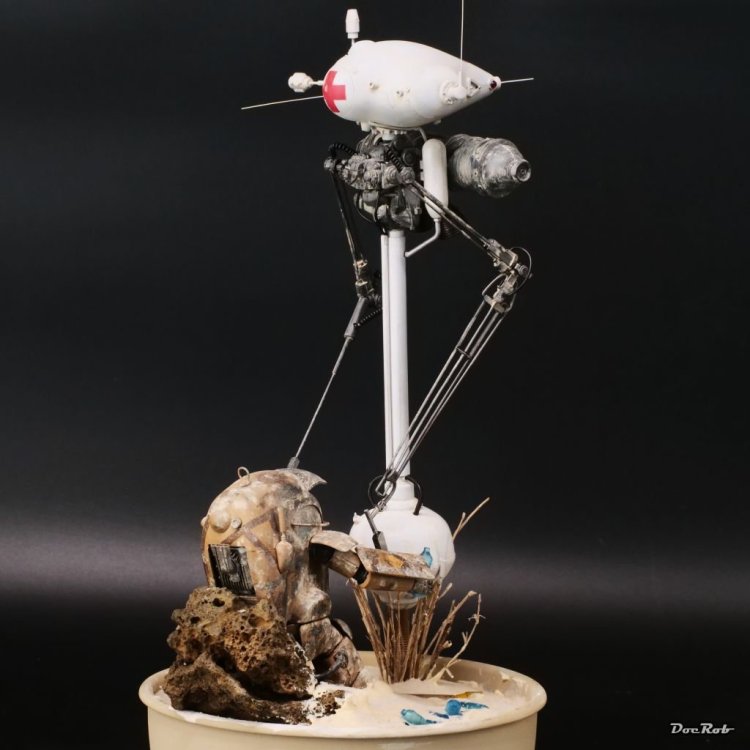
The Kampfanzug´s pilot has bitten the dust and the medical Neuspotter drone can´t help it. My Sanbox GB entry is buried under the sand now. I wanted to do something different and when I found the MaK Friedrich battle suit in my stash, I formed a picture of a pilot tormented by a sandstorm and died for thirst, after all his PE bottles were empty. The Neuspotter drone was added later to the scenario with it´s sinister looks and I wanted a bit of black humor seeping out of my little dio. The AI driven drone was probably smart enough to wait for the storm to cease, where the high tech equipped pilot died, because there was not enough water left for him. Some final pics, this time in my photo box with better lighting. Cheers Rob


-
On a side note, I wiggle a lot with the MFH Cobra Coupe at the moment and it´s not easy to get the doors and bonnet aligned perfectly. There is a lot of test fitting, sanding, routing and scraping involved and that´s maybe the main reason, why I let the Alfa pass. Cheers Rob
-
Nothing wrong with a bit of number magic, but what will be the 44 car? I hope not this one: Cheers Rob
-
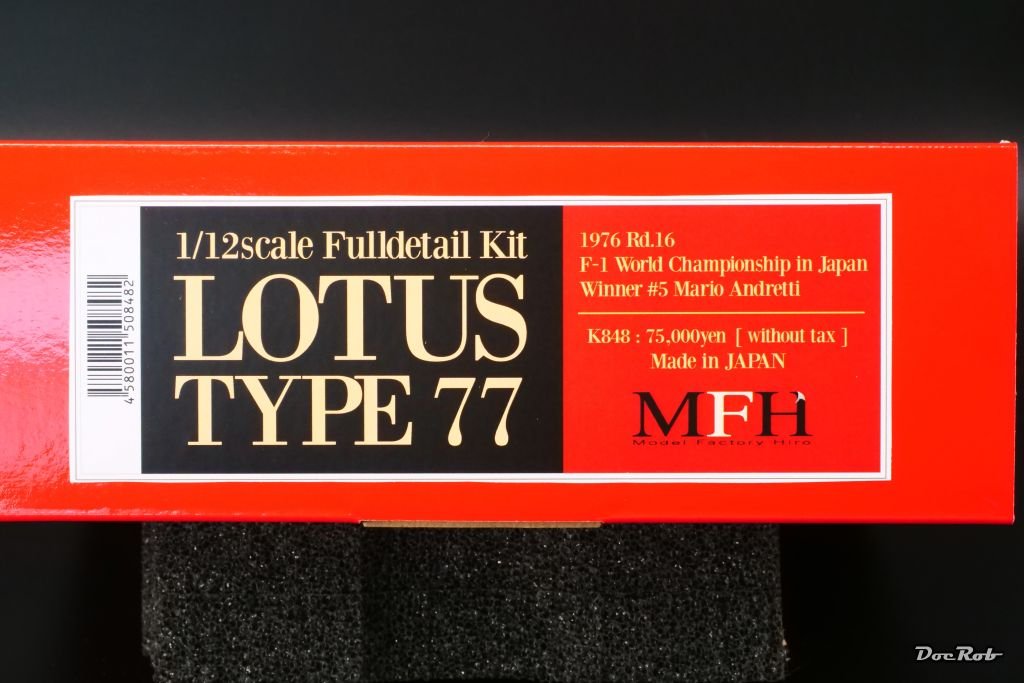
Another self Christmas present reached my doorstep, but in fact, it´s also a story about being a coward. I always wanted to build one of the famous black and gold Lotus racers and therefore, the new released Lotus Type 77 was an obvious choice. At the day, I ordered, MFH had a message up on their website, that they will re-release a short batch of Alfa Romeo Tipo 33 Stradale kits in January. That was a car, I always wanted to build. It came so close to what I "designed" when I was in my late teens and I had a knack for car design. It had all the ingredients, the shape, the visible cylinder funnels, large air intakes, plexi covered front lights ... , so I was more than tempted by that re-release, which could mean, it´s gone forever afterwards. I searched for build logs and only found one, a double build on YouTube and both builds, by a resourceful modeler showed gaps in the rear bonnet at the end. I couldn´t live with that and the swinging doors with tiny hinges also gave me the creeps and I CHICKENED OUT . Gone is the car of my dreams and a bit of self esteem. Anyway, I´m happy with the Lotus and the parts count and being without carbon fiber decals seems to indicate a relatively easy build. I borrowed this picture from the MFH homepage, to show the car. This would have been the Tipo33, only to have a picture of it. Cheers Rob

-
I will always remember the furry pics of your beloved carpet monster, Carl. Sad news, equal the age, she was a family member. Cheers Rob
-
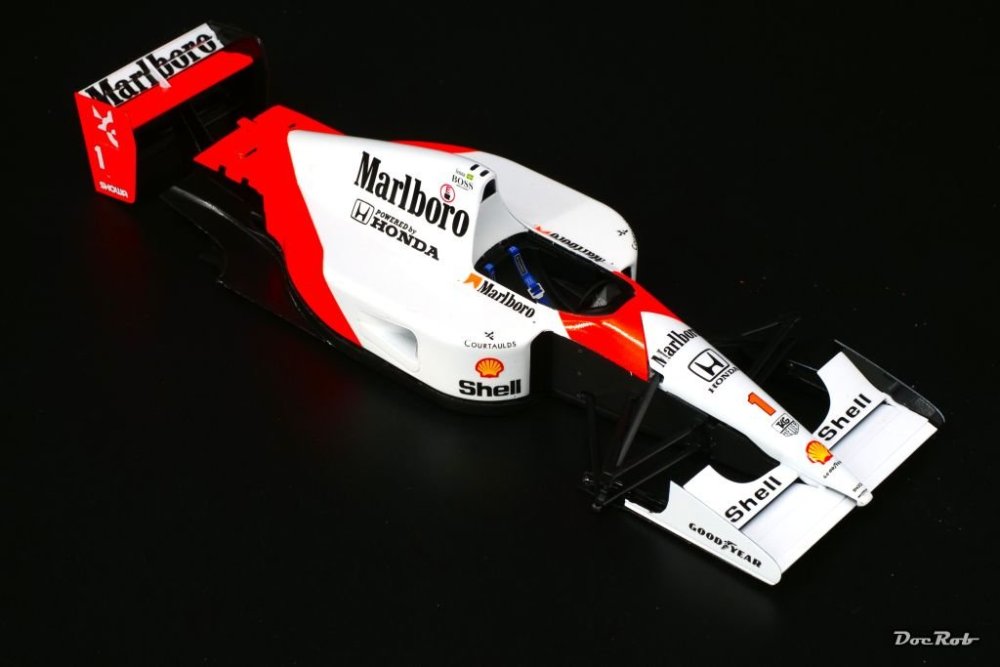
McLaren MP4/6 Ayrton Senna Fujimi 1/20
DocRob replied to DocRob's topic in LSM 1/35 and Larger Work In Progress
Thank you Carl, I´d like to see your McLaren, but are even mor intrigued by your Stratos. I think, I will continue with the Cobra Coupe now or maybe another rapid car build. Cheers Rob -
McLaren MP4/6 Ayrton Senna Fujimi 1/20
DocRob replied to DocRob's topic in LSM 1/35 and Larger Work In Progress
Absolutely Hubert and if you do a full build with all the components shown, there is nearly nothing hidden with a F1 car. The construction is somewhat inside out. Cheers Rob -
McLaren MP4/6 Ayrton Senna Fujimi 1/20
DocRob replied to DocRob's topic in LSM 1/35 and Larger Work In Progress
Thank you Chris, I don´t dare to open the body again, at least for now. I don´t know, if it is a kit flaw, or my doing, but it is impossible to fit all the components under the body shell. I can´t see any misalignments, but it´s the nature of these F1 cars, that there is a maximum of technology under a body as tiny as possible. Cheers Rob -
McLaren MP4/6 Ayrton Senna Fujimi 1/20
DocRob replied to DocRob's topic in LSM 1/35 and Larger Work In Progress
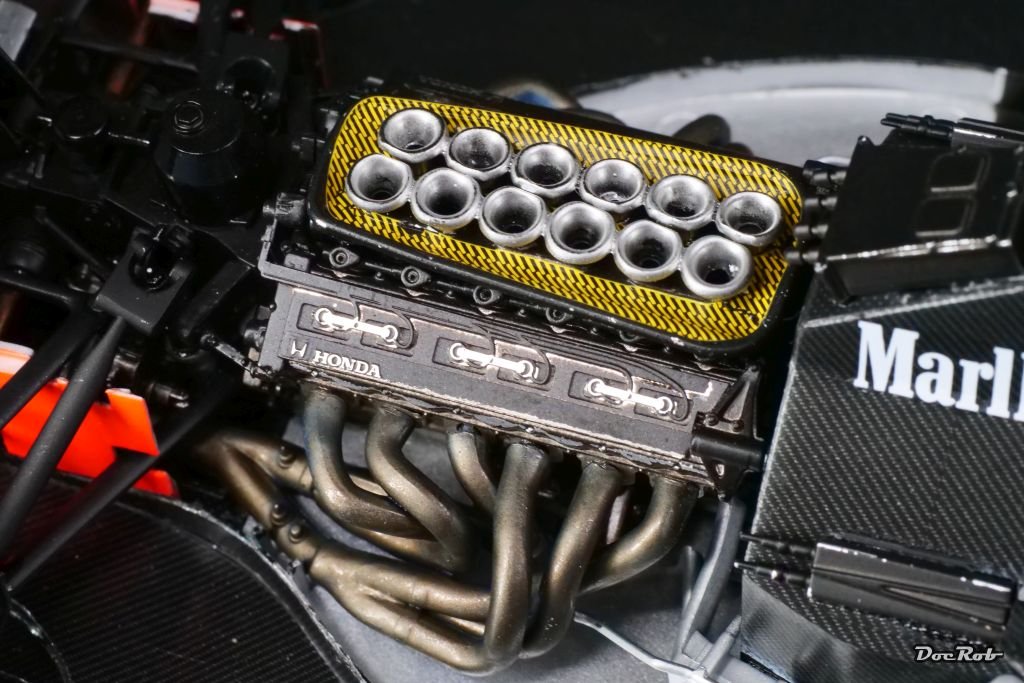
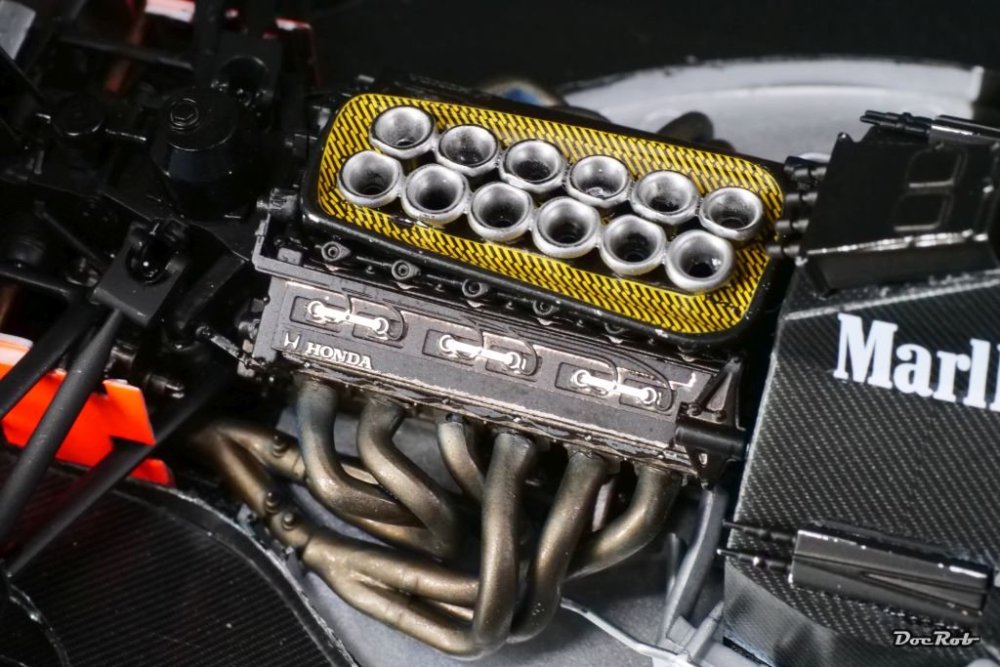
Thank you Hubert and Kevin. The difficulties were leading to two SOD visits of the McLaren. Some issues were self induced, some were strange decisions with the kit design, like the plated engine parts, which wouldn´t fit properly, because of the plating. Other issues of the McLaren had only black plastic for the engine and the engine block of the real one is black. The carbon fiber decals didn´t help my cause, but in the end they looked ok. The build was a bit complicated at times, because I had five different manuals plus photo reference on my desk, because of my chosen AM, completely my fault, naturally. Anyway, I´m happy that the MP4/6 is finished and looks relatively good in my display case. Cheers Rob -
Nothing better than a little side project from time to time, to reignite the mojo flow. I never heard of the Quickie (Quirky), but like it, especially with your careful treatment. The Shirt is fantastic. Cheers Rob
-
McLaren MP4/6 Ayrton Senna Fujimi 1/20
DocRob replied to DocRob's topic in LSM 1/35 and Larger Work In Progress
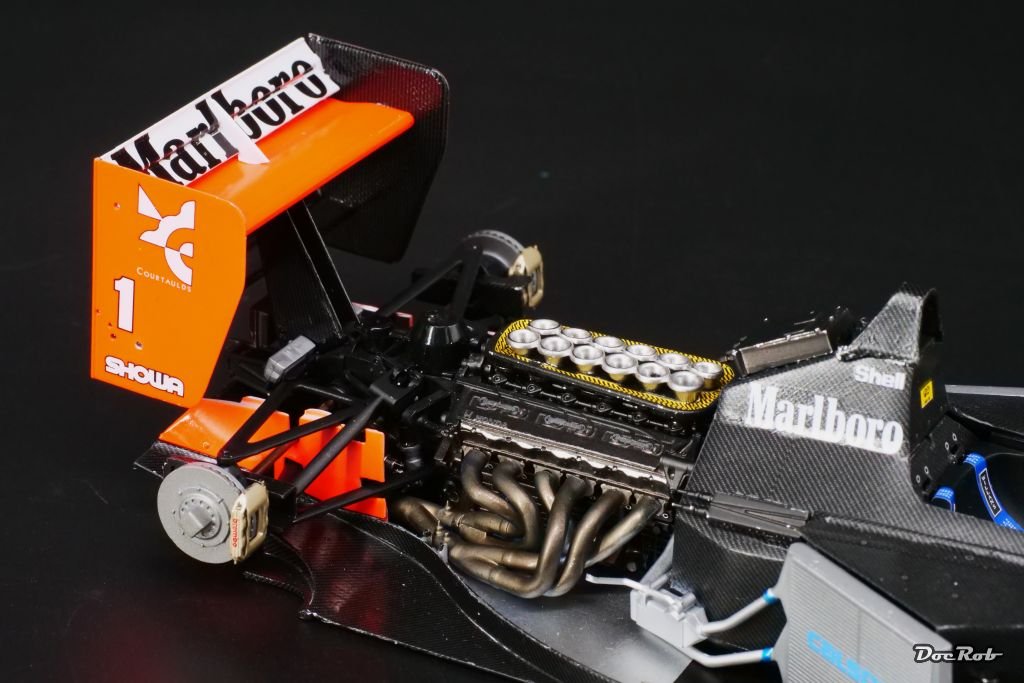
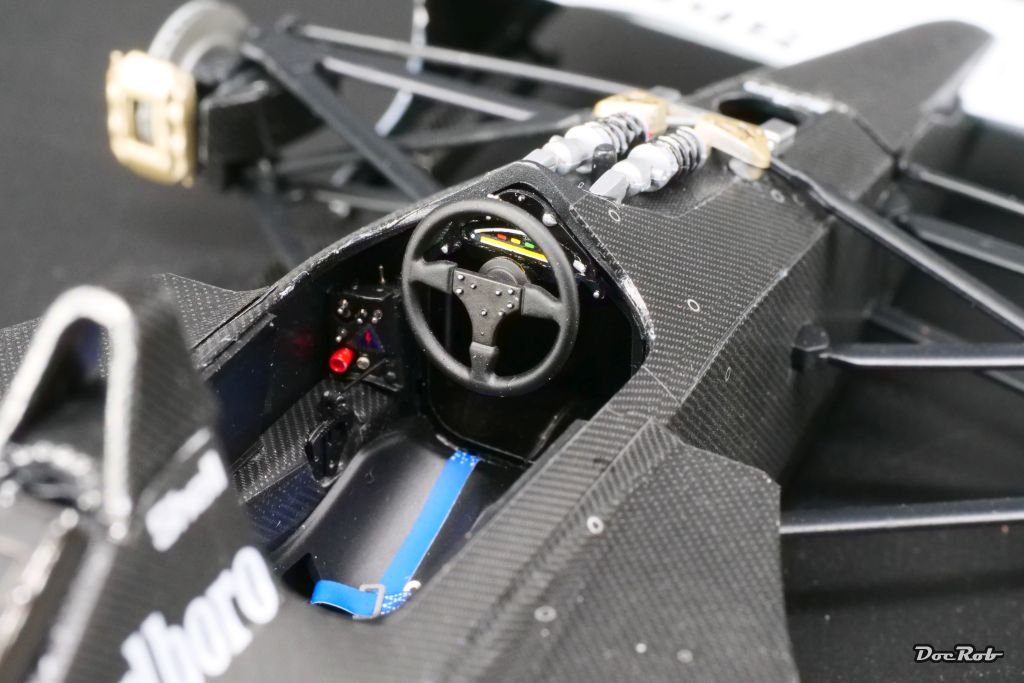
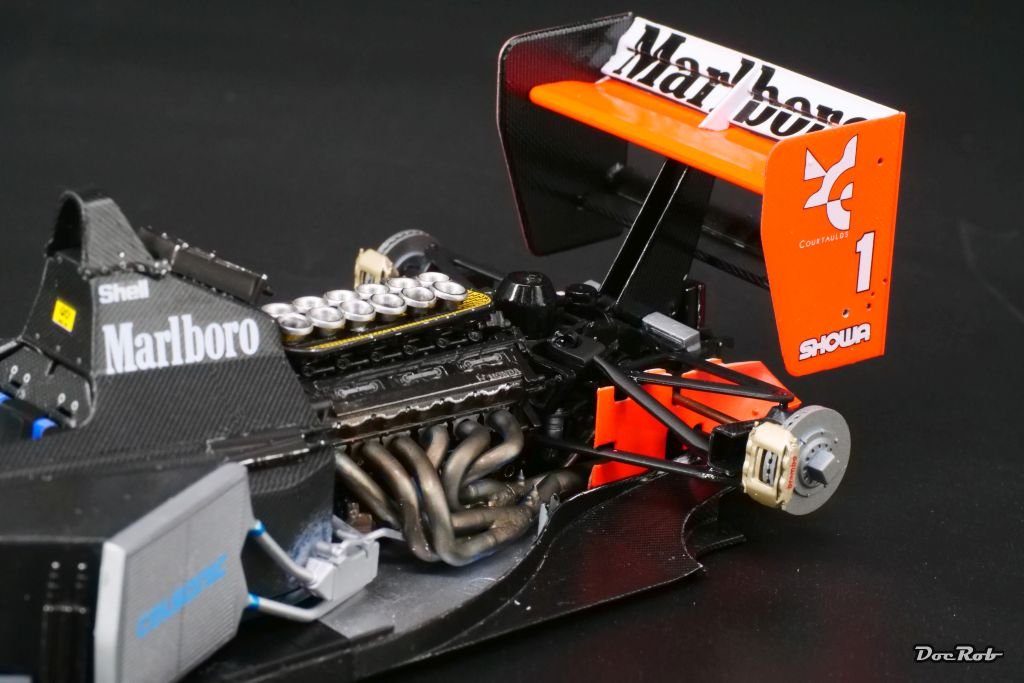
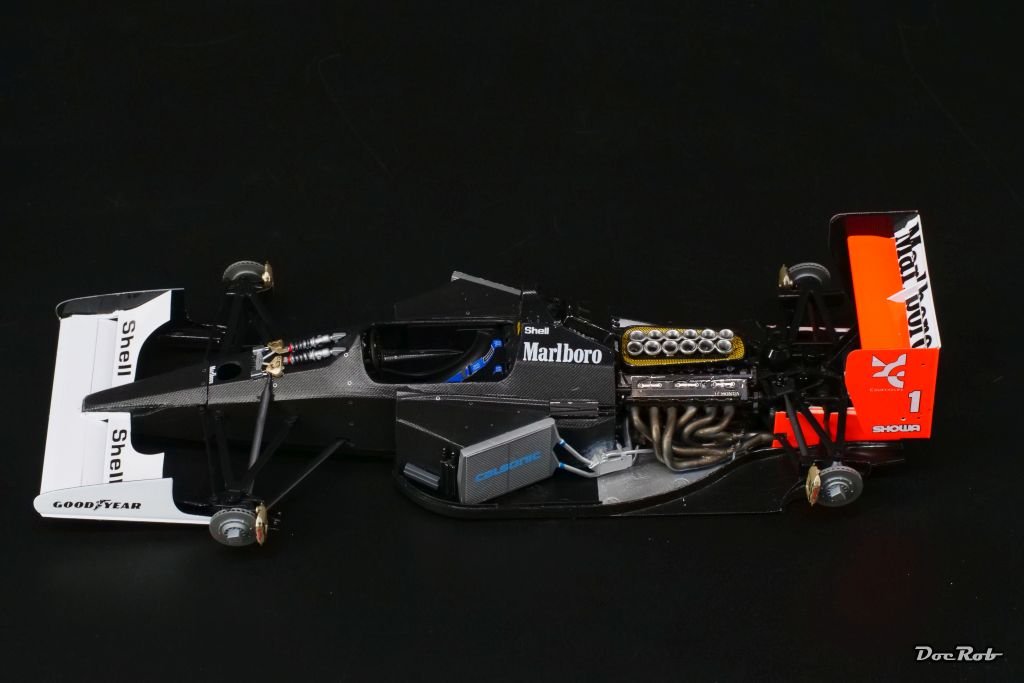
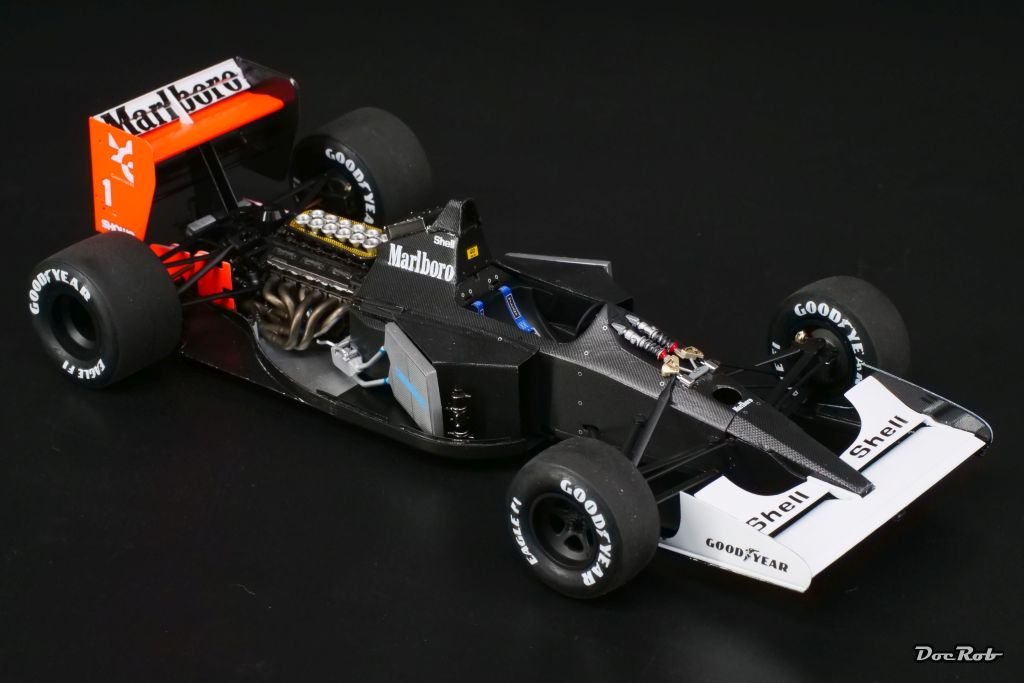
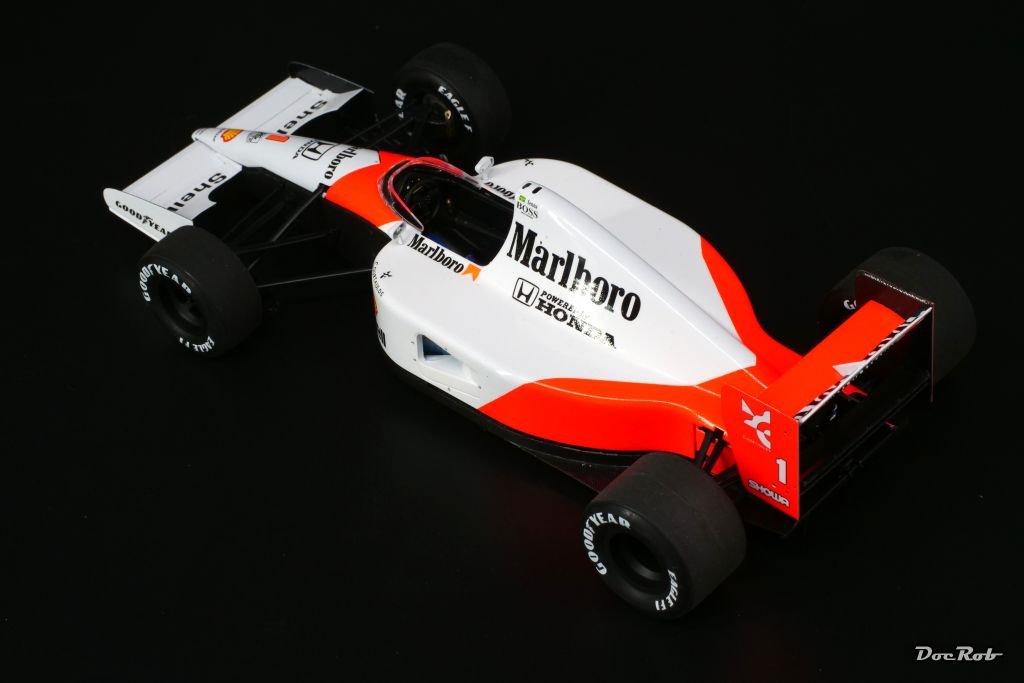
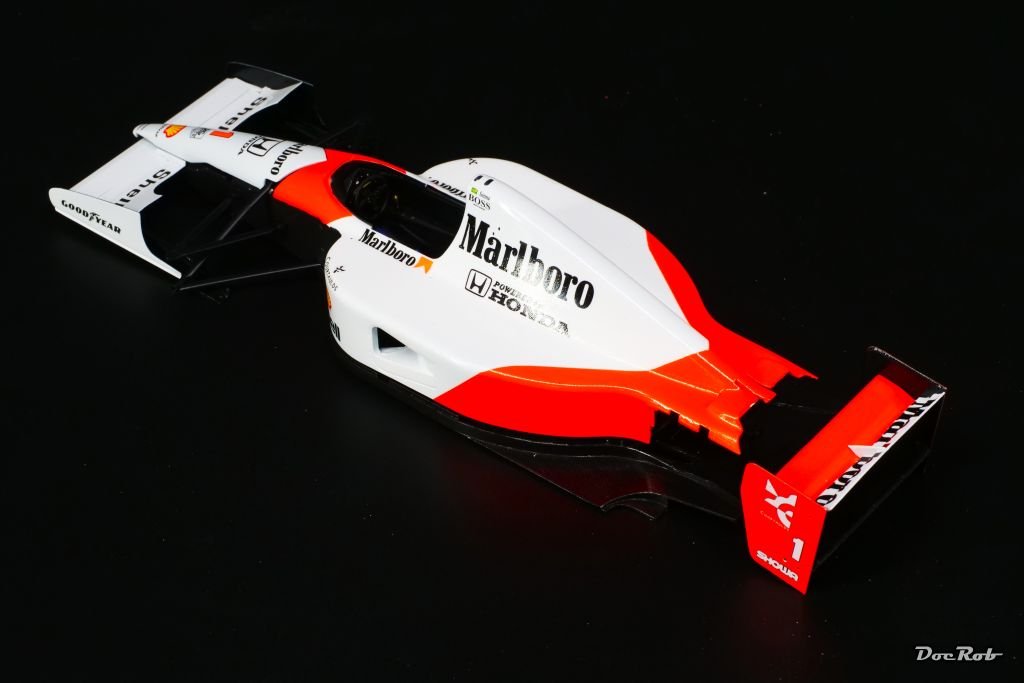
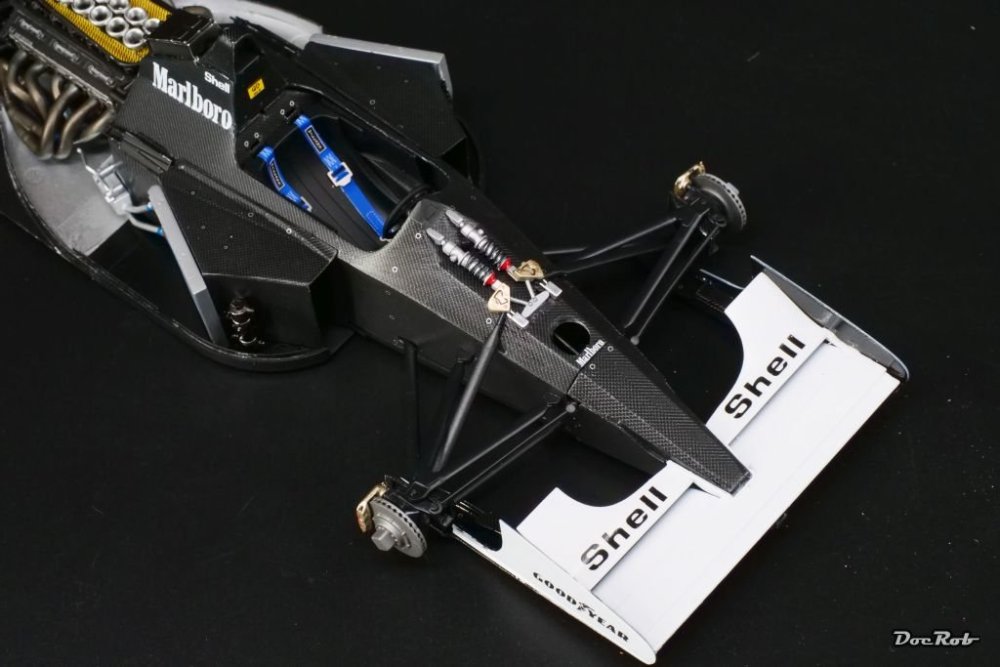
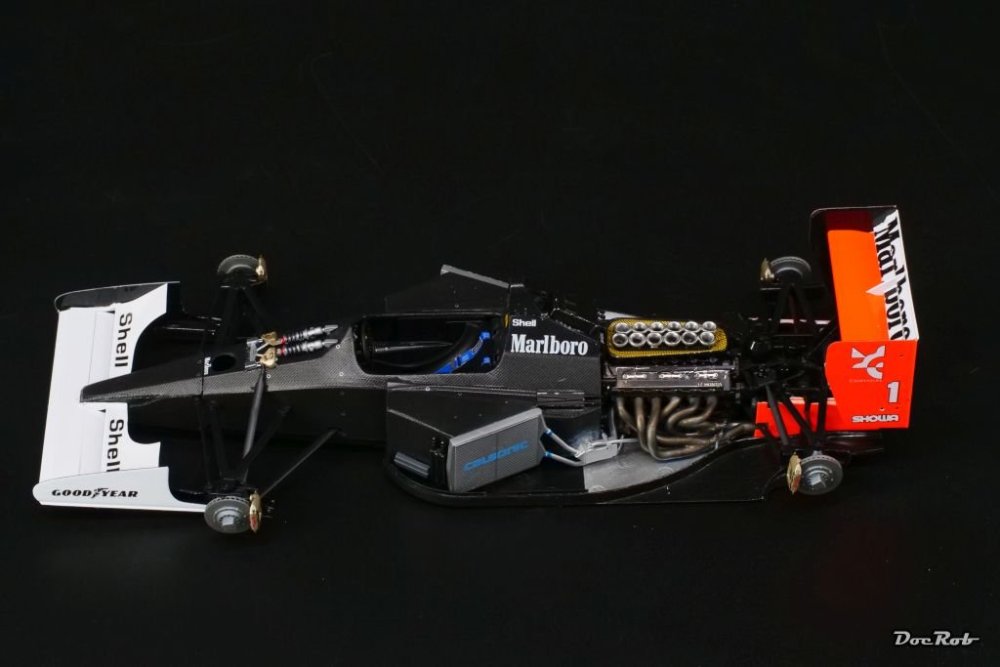
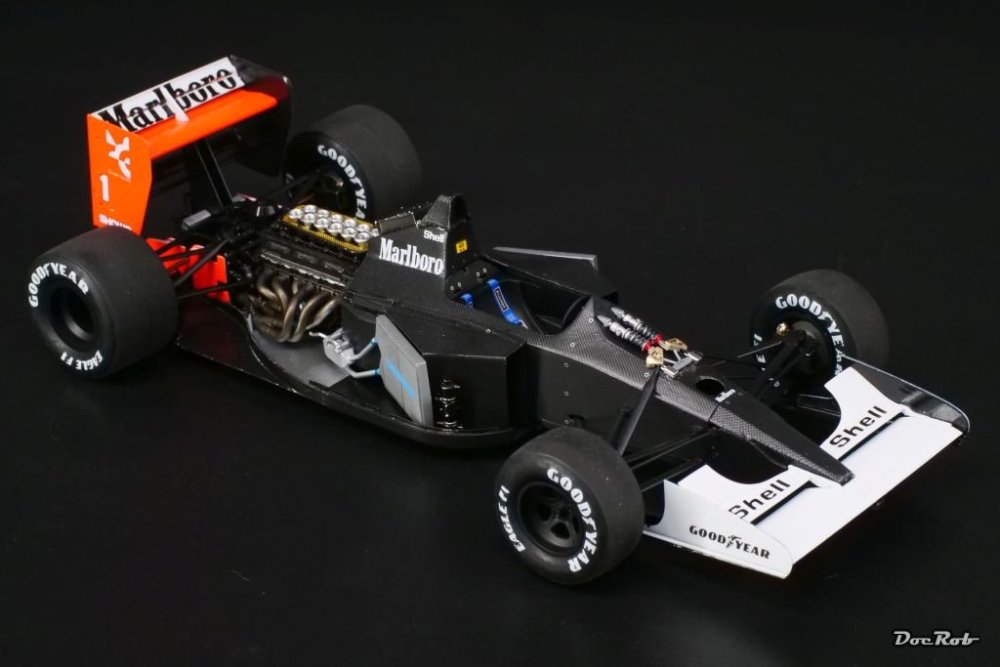
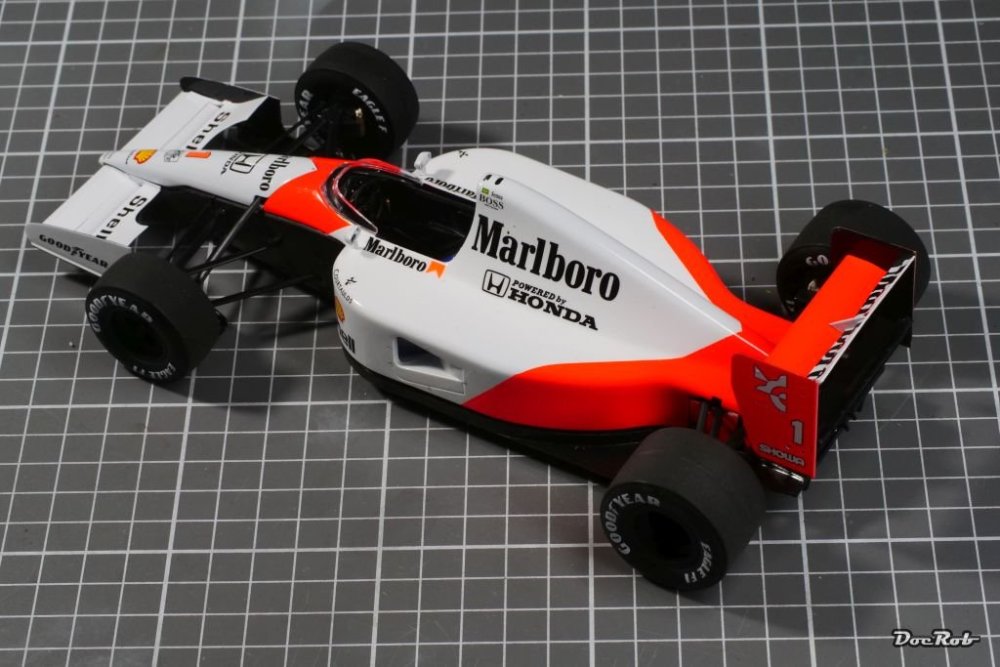
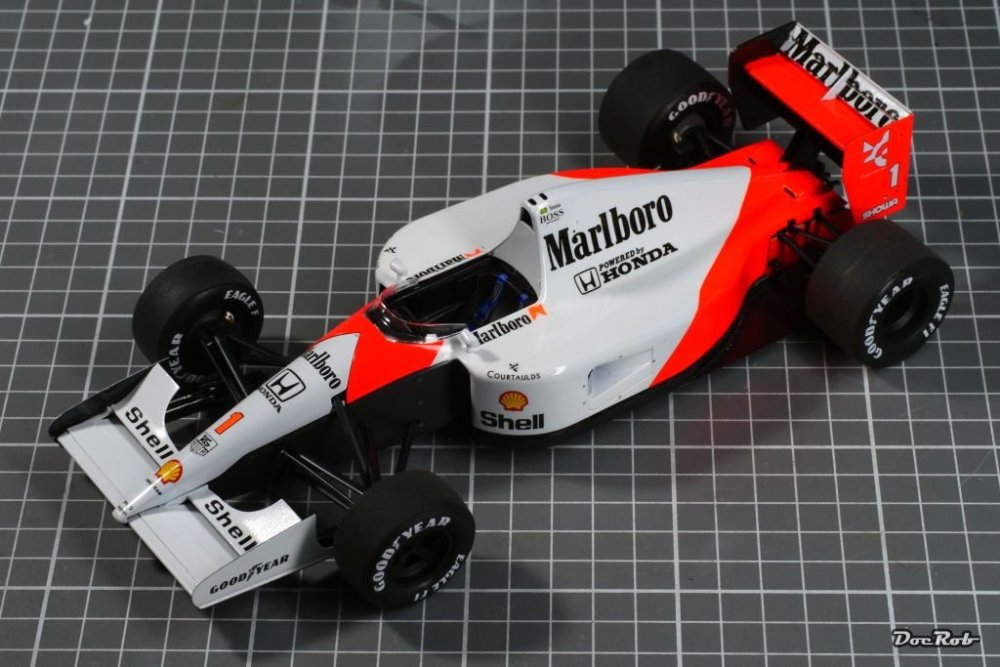
I call the McLaren done. The build got me some grieve, in fact, more than expected, but from the distance, the vibrant paintjob hides some shortcomings . Assembly of all the components was not so easy due to the fragile character of the subassemblies, paired with the also fragile carbon fiber decals. I used mainly CA glue for the job, as it doesn´t attack the decals. The Goodyear branding of the tyres was a bit different, as they were "negative" decals. You had to peel away a protective sheet, than the decal from the base layer and place it on the rubber. Then, a wet cotton swab was used to loose the backing layer and the decals were tattooed on. I brush painted the tyre walls with acrylic matte, to hide carrier film residues. I also sanded the tyres, to get rid of the moulding seam. I don´t dare to re-open the body, as I suspect, there will be some loose parts. Anyway, I made some photos without the body in the final stage. With wheels ....And finished Cheers Rob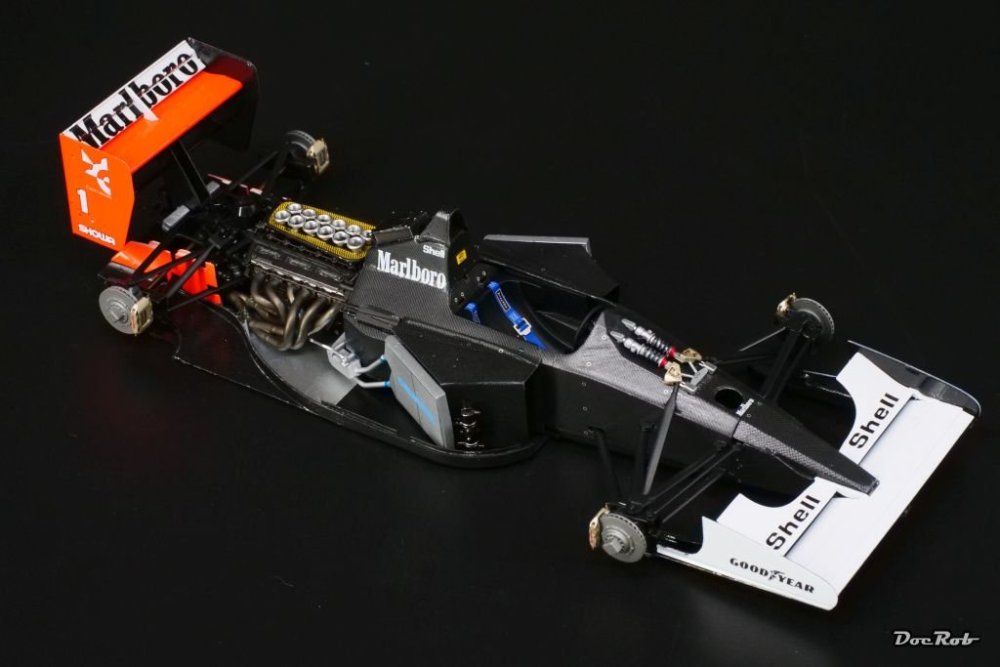


-
1/32 Curtiss SC-1 Seahawk
DocRob replied to BlrwestSiR's topic in LSM 1/35 and Larger Work In Progress
Looks fantastic, Carl and seems to be a nice kit. Cheers Rob -
Yup, looks perfect Cheers Rob
-
McLaren MP4/6 Ayrton Senna Fujimi 1/20
DocRob replied to DocRob's topic in LSM 1/35 and Larger Work In Progress
It´s 95% ok, which is better than the rest of the kit and therefore sufficient . I like the Zero lacquer clear, which is great to spray and levels good with added leveling thinner. It didn´t attack my decals luckily, but the first coats were only misted and dried rapidly. Strangely, the finish looks always worse in my photo box. The numerous LED lights let the body finish look like orange peel. You can see it on the last pic. Cheers Rob -
McLaren MP4/6 Ayrton Senna Fujimi 1/20
DocRob replied to DocRob's topic in LSM 1/35 and Larger Work In Progress
It seems, there is/was such a thing. I couldn´t find a shop, but Scalemates has one listed from New Scratch. Not my pair of shoes, I stay with the classics . Red Bull RB19, NewScratch 20F23N111Rd05 (2023) -
McLaren MP4/6 Ayrton Senna Fujimi 1/20
DocRob replied to DocRob's topic in LSM 1/35 and Larger Work In Progress
You have to take care, not to sand through the clear coat and damage decals and base colors. I recommend some layers of clear. Cheers Rob -
McLaren MP4/6 Ayrton Senna Fujimi 1/20
DocRob replied to DocRob's topic in LSM 1/35 and Larger Work In Progress
Thank you Kevin and Chris. Dust is always an enemy with clear coats, specially with high shine car bodies. I will try to source a plastic container for the future. Cheers Rob -
McLaren MP4/6 Ayrton Senna Fujimi 1/20
DocRob replied to DocRob's topic in LSM 1/35 and Larger Work In Progress
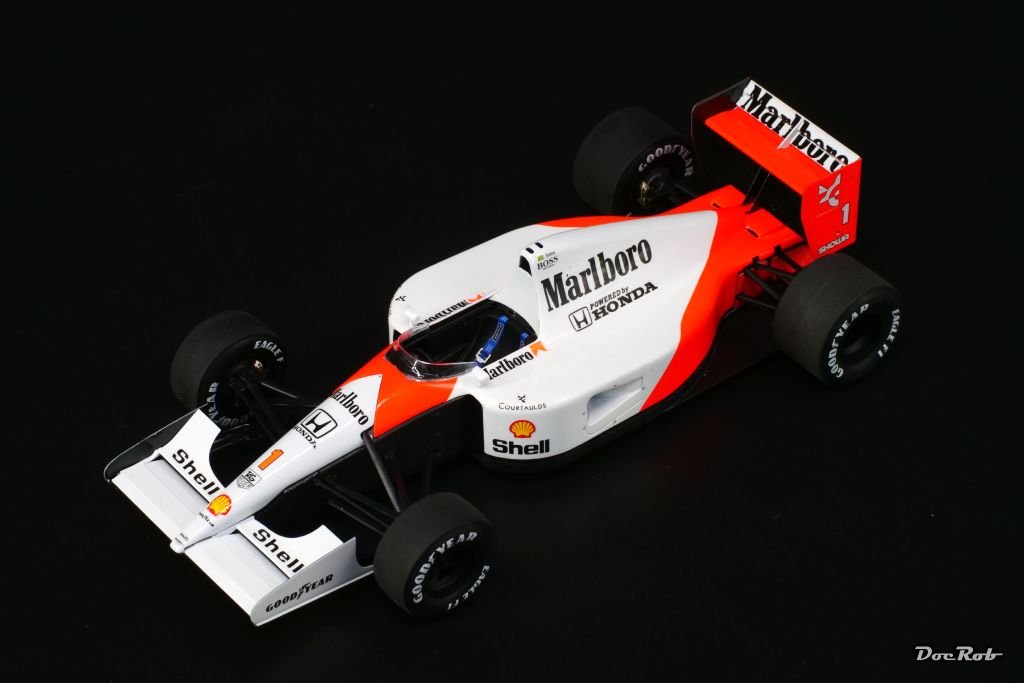
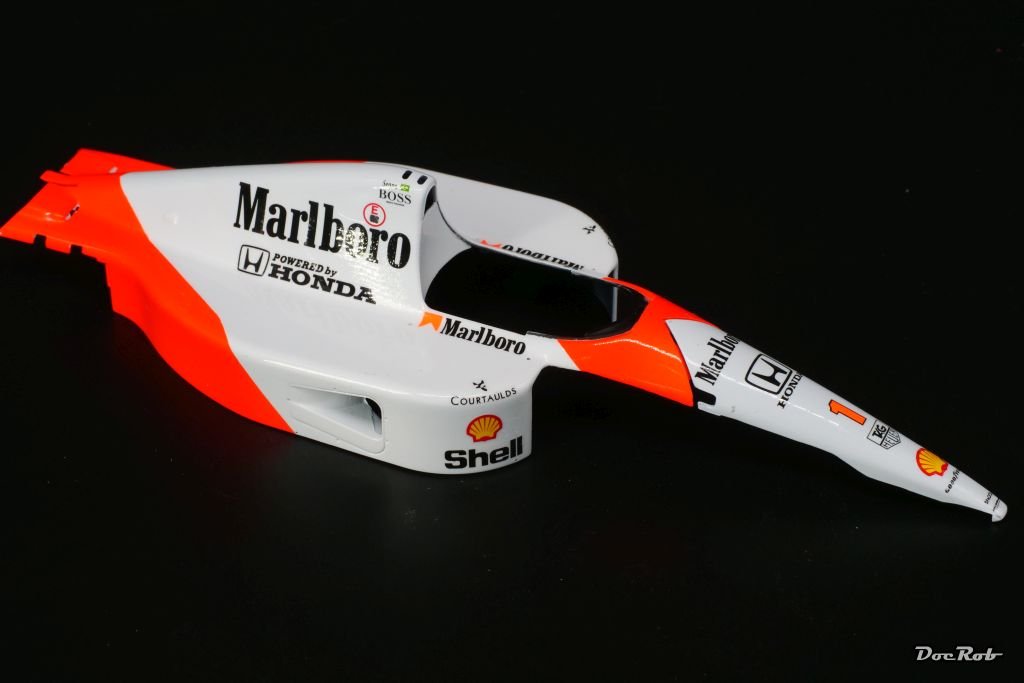
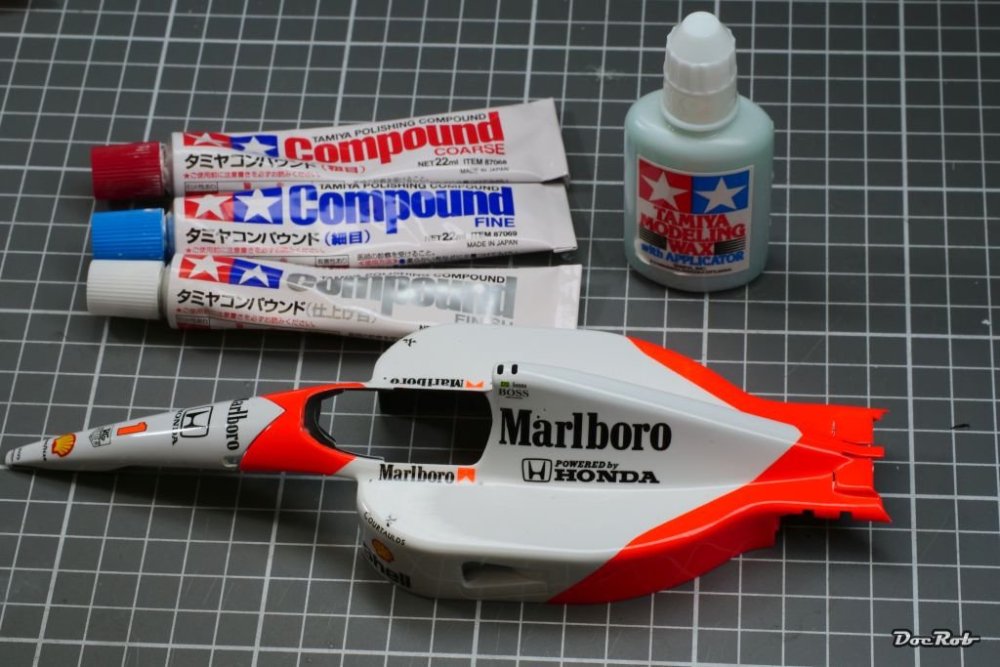
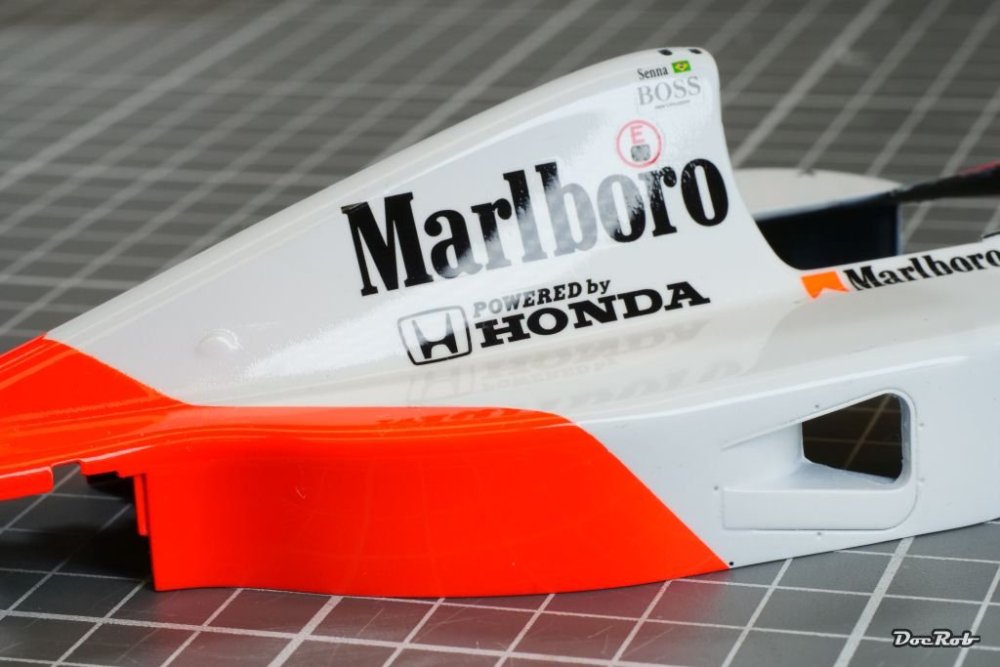
After some elbow grease, I call the body done and I´m 95 percent satisfied with the outcome. There are tiny imperfections, but they are barely visible to the human eye. I wet sanded the body parts with 6000 grit, followed by 8000 grit and then worked my way through the Tamiya polishing compounds from coarse to finish and finally used the Tamiya modeling wax. I could have gone further, but the McLaren will not be perfect in any way, so I took the easy way and tried to learn as much as possible. I didn´t polish the rear wing due to it´s fragile character and I didn´t want too much contrast between the wings and body also. Lessons learned: I should have added one or two more wet coats of clear, even heavier thinned with leveling thinner and use a plastic container for the drying time, as there are some tiny dust particles in the clear. Cheers Rob
-
McLaren MP4/6 Ayrton Senna Fujimi 1/20
DocRob replied to DocRob's topic in LSM 1/35 and Larger Work In Progress
Thank you Hubert and Carl, now I have to polish the body parts and then, I´m nearly done with this unruly build. @HubertB, if you are getting older and balder and ask yourself, why the hell do I possess a hairdryer................. Cheers Rob -
De nada, Hubert and you are absolutely right, it´s fun to just take part in a GB with some buddies and has to ponder about a given theme. Your rendition couldn´t be more sandy and the figures tie everything together to my eye. Verdict: Balls or no balls, the camel has to stay and the Arabian guy as well . They complete the story, supplying the Potez with precious fuel. Cheers Rob
-
Indeed Carl, what an icon. I haven´t realized, its for sale now. Please do a WIP Cheers Rob
-
A sure GB winner, i would say Hubert. I love the Potez, looking fantastic and the setting as well, somehow you managed to let it look like a snapshot. The dio could have easily gone south with it´s relatively widely spaced items, but the composition is great and tells a story of a wide desert area and the windsock adds to the real feeling. Cheers Rob
-
McLaren MP4/6 Ayrton Senna Fujimi 1/20
DocRob replied to DocRob's topic in LSM 1/35 and Larger Work In Progress
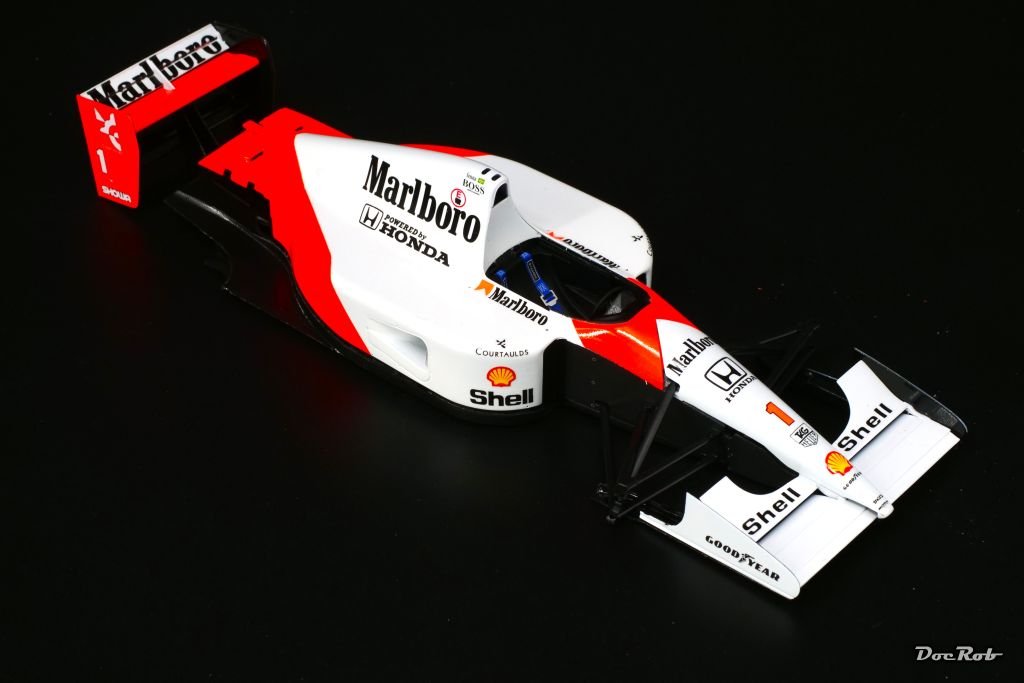
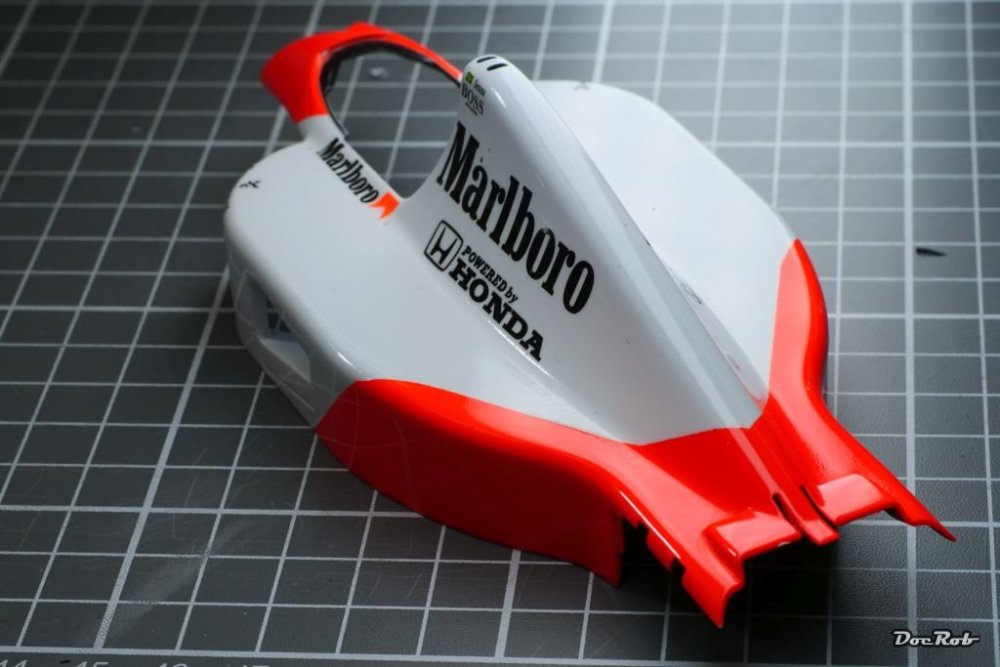
Some little mock up shots after decaling and clear coating, but before that, it was necessary to assemble the wings. The rear wing gave me some resistance, as it was very difficult to glue all parts together, without destroying carbon fiber surfaces. All assemblies of painted parts were done with CA glue. I didn´t want to destroy my finish or decals with plastic cement. Clear coating was done with two misted coats of pure Zero lacquer clear, with about 2,0 bar air pressure and a 0,4 mm nozzle. This was only to seal the decals without harming them with a heavy coat of clear. I tested the process on a paint and decal mule, prepared with exactly the same sequence of steps. Then, after a drying time of about half an hour between coats, I sprayed two heavier "wet" coats on, which had about thirty percent of leveling thinner added for a better finish. Cheers Rob