DocRob
-
Posts
7,045 -
Joined
-
Last visited
Content Type
Profiles
Forums
Events
Gallery
Everything posted by DocRob
-

Cobra Coupe - Le Mans - Model Factory Hiro 1/12
DocRob replied to DocRob's topic in LSM 1/35 and Larger Work In Progress
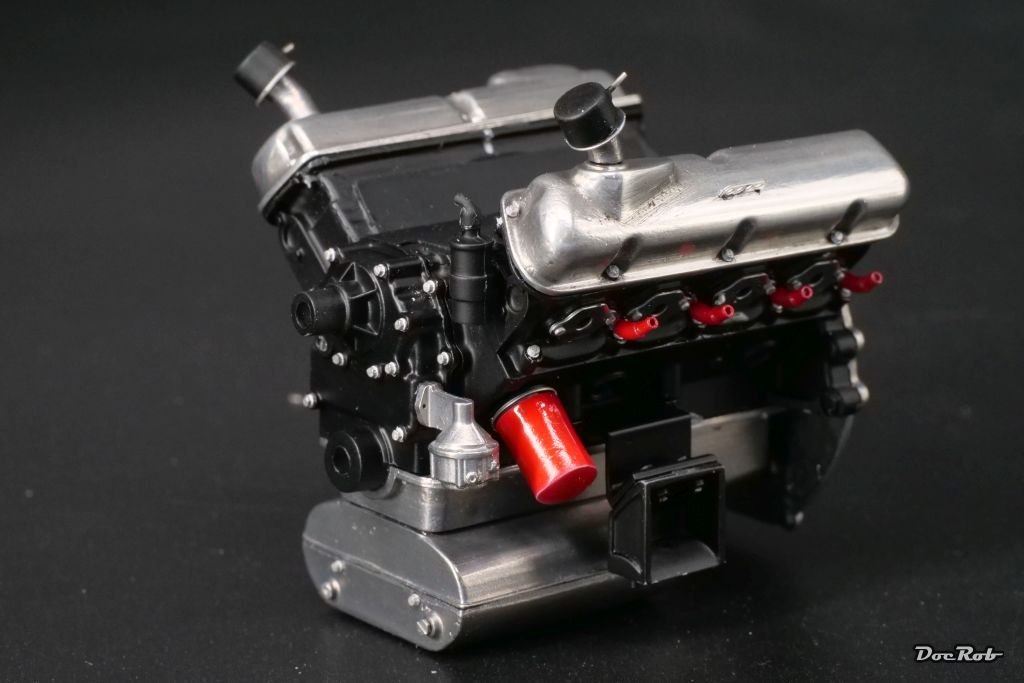
Thank you Scott, yup, this engine looks very similar to mine. I found pictures of exactly my car with slightly matte covers and black engine block. Cheers Rob -
sorry for the multiple post, my system wasn´t responding and showed the post as not saved. Cheers Rob
-
Sorry to be the fire starter, Hubert . The 917 is indeed a true icon and somehow a statement of a past era. Personally, I prefer the short tail versions, but that´s only shape wise, without any historical or sentimental reason. @BlrwestSiR Carl mentioned yesterday in my Cobra Coupe build log a company producing 3D-printed car kits in large scale. They also have a 917 in 1/12 scale available. Maybe it´s an option for you as well. Modelparts for Sale! - mezzo-mix-models-modeling (jimdo.com) Cheers Rob
-
Cobra Coupe - Le Mans - Model Factory Hiro 1/12
DocRob replied to DocRob's topic in LSM 1/35 and Larger Work In Progress
Thank you Carl, exactly those gaskets (ah, that´s the correct terminology ) gave me a bit of struggle. The holes for the bolts were to small and had to redrill them. Aligning the PE to the holes in the block and inserting the bolts, without causing a CA mess was not so easy and the too small holes were very un-MFH. Thank you for showing the Mezzo-Mix site. The Escort would be my choice as well, but I have one from Belkits in 1/24. The kits look absolutely fantastic and if they build up well, they would be a good representation of the originals. 1/8 Porsches, geez. Like you said, the pricing seems very reasonable for what is on offer. Cheers Rob -
Cobra Coupe - Le Mans - Model Factory Hiro 1/12
DocRob replied to DocRob's topic in LSM 1/35 and Larger Work In Progress
Thank you Chris and yup, each bolt. With MFH kits your drill bits are your best friends. I use three different pin vises, only, because I don´t want to change the bits every minute. Cheers Rob -
Cobra Coupe - Le Mans - Model Factory Hiro 1/12
DocRob replied to DocRob's topic in LSM 1/35 and Larger Work In Progress
Wohowww, now it starts, what I feared since the beginning of this build, Scott. Friends of American low tech heavy metal, dwelling deep in nostalgia . I´ve seen a Cobra Coupe build, where the engine block was painted blue, but pics of my ride along the manual suggest black. The covers seem not to be polished, but that´s what I call artificial liberties. Cheers Rob -
It´s more a question of preference, Chris. I like the panel lines as they are now, but scale wise it might be a bit too much. I always believed that effects like this can´t be exactly rendered down to scale, because of many factors like lighting, condition of the aircraft and others. So it´s up to you to decide, but I would leave it as is. The benefit of using oils for PLW´s is, I have many different shades to choose from. In case of your Phantom, I would have chosen a brownish tone, which has enough contrast for the panel lines and on the other hand unifies the camo colors. I once used a very light grey panel liner on a German TA-152, because I wanted to simulate panel lines in harsh winter conditions, the only, the plane flew in. I found it fitting. Cheers Rob
-
Cobra Coupe - Le Mans - Model Factory Hiro 1/12
DocRob replied to DocRob's topic in LSM 1/35 and Larger Work In Progress
Thank you Phil and Peter, the weight is indeed something, which separates the MFH kits from others. Quality wise, I felt, the casting of the Crocker bike was a bit better, but nothing what can´t be solved arose until now. What you get for free with MHH kits is bleeding fingers , as you have to hold small parts during drilling, sanding and polishing. Cheers Rob -
Looking bueno Chris with the teeth applied. I´m sorry to read about your ongoing difficulties with the decals. I never tried or even own Sovaset. My strongest solution being Tamiya´s Mark Fit Strong. I use to try some heat of a hairdryer over the softened decal, which usually works. I haven´t tried AK´s panel liner, but use Tamiya´s products on regular base, but not anymore as my to go panel wash, because removing residues can be a bit difficult and the needed chemicals a bit too aggressive. I often use oil colors mixed with matte thinner, easier to clean and runs down the details very good too. Cheers Rob
-
Big Tank Crocker - Model Factory Hiro - 1/9
DocRob replied to DocRob's topic in LSM Armour Finished Work
Absolutely Peter, fast and reliable, albeit not cheap, but that´s mostly due to shipping costs. Cheers Rob -
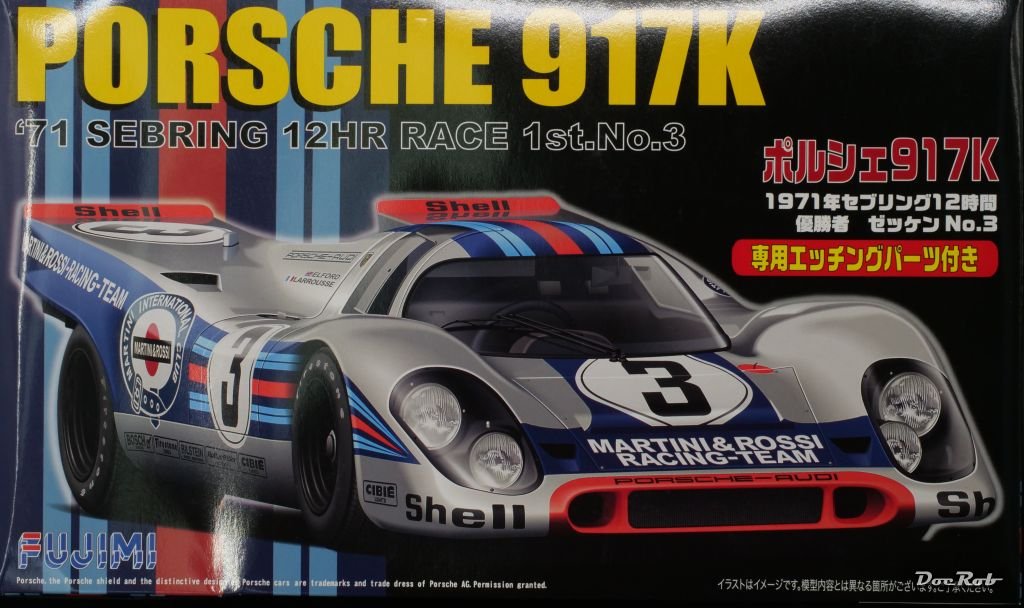
Got a new car kit, which I couldn´t let pass and a lot of tools from Plaza Japan for great prizes. The legendary Porsche 917 in it´s finest livery to my taste, has a sheet of PE included, luckily, so there is no need for a lot of AM. Having killed one of my Tamiya cutters, I ordered a substitute. This is my favorite all purpose cutter. I have the sharper ones as well, but like them only for special occasions. The larger cutter is labeled for plastic and soft metal, lets see, how it works with MFH´s whit metal. You can´t have enough types of tweezers, so I added some shapes missing. Not shown are a heap of drill bits with atypical diameters, which are needed for the MFH kits. Cheers Rob


-
Cobra Coupe - Le Mans - Model Factory Hiro 1/12
DocRob replied to DocRob's topic in LSM 1/35 and Larger Work In Progress
The last days, there was not a lot of bench time to have with my dog being seriously ill and an actual heat wave, but I managed to work a bit on the engine. What you see on the picture consists of about 70 parts. All screws and rivets need to be drilled and glued in. I gave the rocker covers another work intensive go and grinded and sanded, until I was halfway satisfied and then polished the parts with Autosol metal polish. Somehow, my camera struggles to capture high shine finishes, but the rocker covers look ok now. The PE exhaust seals were a bit of a pain, because the holes needed to be drilled out for the fitting `screws´ which are in fact bolts. I would have preferred to have the whole engine in metal. The resin parts needed a lot of work to make them fit. Cheers Rob
- 418 replies
-
- 11
-

-
Cobra Coupe - Le Mans - Model Factory Hiro 1/12
DocRob replied to DocRob's topic in LSM 1/35 and Larger Work In Progress
Thank you Carl, he hasn´t eaten for two weeks, without an obvious reason. He is very weak now, but this morning, he ate a tiny bit, so there is hope. I´m more than a bit curious about your plan B, but it seems you are not willing to share it. In August MFH releases a Ferrari 250P and 275P kit. Beauties both of them, but I have my Ferrari 250 TRI already, which I prefer, design wise and with it´s beautiful engine. Cheers Rob -
Cobra Coupe - Le Mans - Model Factory Hiro 1/12
DocRob replied to DocRob's topic in LSM 1/35 and Larger Work In Progress
Thank you Chris that is very great offer, but similar stuff seems to be available here, but I went the hard way, sanding, grinding and polishing and now it looks good enough. Cheers Rob -
Big Tank Crocker - Model Factory Hiro - 1/9
DocRob replied to DocRob's topic in LSM Armour Finished Work
Thanks Peter, fun fact, I found the part which flew away during polishing, now after having received the spares from MFH. It flew half a mile and was found only by accident . Cheers Rob -
What is on your bench right now ? Share a picture :)
DocRob replied to Martinnfb's topic in Modelling Discussion
You are absolutely right about the casting quality relating to the possible painting quality, Hubert. Simply sculpted figures are terrible to paint and with the better ones, hmmh, it´s up to your skills. Mine are not very developed and as much as I like to do better figure jobs, as much I dread the task. I didn´t even know, that Preiser did 1/32 figures, but with the plane and the base, it looks fitting and good. There is a semi civilian in the Aviattic.co.uk shop: ATTL 02 Anthony Fokker and there is also a fitting camera available: ATTRES030 WW1 1/32 Tripod movie camera. Cheers Rob -
Merlin or not, she will be a beauty, Peter. I like the shape of the Spitfire as well unobstructed. I have two Eduard 1/48 MK XVI in stash and one will be build closed and gear up, the other with the full Brassin galore, engine, cockpit, ... . The Kotare Spit will naturally be closed up and maybe hit the bench soon. Cheers Rob
-
Nice haul, Paul, I also eyed the Swordfish from Plaza Japan, but have so many plane kits in stash, but maybe one day... . I like the rustical Swordfish and would build her heavily weathered with pilots in. Have you bought the additional Tamiya PE set with the flat bracing wires included. I would do so for mine. Cheers Rob
-
Fiat 500/600 build Topic
DocRob replied to FullArmor's topic in LSM 1/35 and Larger Work In Progress
I´d like to have an espresso somewhere in Rome and hear the sound of the Cinquecento´s. Your build has all the right ingredients for that feeling. Nicely done. Cheers Rob -
Cobra Coupe - Le Mans - Model Factory Hiro 1/12
DocRob replied to DocRob's topic in LSM 1/35 and Larger Work In Progress
Thank you Chris and Peter for your best wishes, we also hope the best for our dog, but until now, his condition hasn´t changed. I never heard about the liquid metal and have to check if this stuff is available here. Cheers Rob -
Cobra Coupe - Le Mans - Model Factory Hiro 1/12
DocRob replied to DocRob's topic in LSM 1/35 and Larger Work In Progress
Thank you Scott, unfortunately the Cobra Coupe kit is sold out, but maybe some retailer out there still have one. The kits are expensive, but if you are really interested, it might be an option or in case of the Cobra Coupe the only option, at least in 1/12 scale. Like all the holes of the kit, the positions are only marked and you have to drill them yourself. Building a MFH kit means drilling a lot, in fact some hundred holes, in this case 0,5 mm to accept the PE fitting for mounting the ignition wiring. You see, the level of detail and the way it is engineered is outstanding. If you grab one of the god ole Tamiya 1/12 formula one kits, which most sell for crazy prizes right now and add all the Top Studio galore in PE and resin, you may have to pay more than for a MFH kit, with the detail level even, at best. Cheers Rob -
Cobra Coupe - Le Mans - Model Factory Hiro 1/12
DocRob replied to DocRob's topic in LSM 1/35 and Larger Work In Progress
Thank you Chris and Pater, good to have you around for the ride. It will be a bit bumpy, at least for me, as my beloved dog is seriously ill at the moment and I have to take care on him, seeing doctors and all that. The rocker covers are much worse than other white metal parts of the kit, I guess due to their shape. There is a lot of pitting and it was even more without me putting a lot of elbow grease in it. Unfortunately they are very prominent and filler is not an option, as I like to have them in polished metal finish. Back to the bench for them and sanding some more... Cheers Rob -
Big Tank Crocker - Model Factory Hiro - 1/9
DocRob replied to DocRob's topic in LSM Armour Finished Work
Thank you Peter and good to have you onboard for the Cobra Coupe ride. I´m expecting a bit more of problematic areas with the Cobra, but lets wait and see. Cheers Rob -
Like others mentioned, check the needle and nozzle with a magnifier. I had slightly bent needles, which was barely visible with the bare eye and once I had a tiny split in the nozzle front. I hone my needles from time to time with a very fine Japanese sanding stone. Another reason for spitting can be a change of temperature, humidity or air pressure changes of the compressor, which lead to pigments drying on the tip of the needle and cause spitting. Thinning or reducing the air pressure may help here. Cheers Rob
-
Is there liquid into the bubbles or just air, Chris? Is it possibly a reaction of the clear coat wit the decal? I usually mist a very thin layer of clear lacquer over the decals and let it dry for some minutes, before seriously sealing them in with a proper layer. It may help to apply a bit of heat from a hairdryer, but carefully. Cheers Rob