DocRob
-
Posts
7,045 -
Joined
-
Last visited
Content Type
Profiles
Forums
Events
Gallery
Everything posted by DocRob
-
 Thank you Carl and Peter, it´s indeed annoying. I´m nearly done with the kit and this is some kind of a sour ending, but totally my fault. I sent an email to MFH and hope they will answer soon. Cheers Rob
 -
F-15DJ Kai or Eagle Plus- Finished!
DocRob replied to BlrwestSiR's topic in The Great Twins Broup Bluild
looking very good, the decals crept beautifully into the panel lines, the shape and quality issues with the canopy are strange though. Cheers Rob -
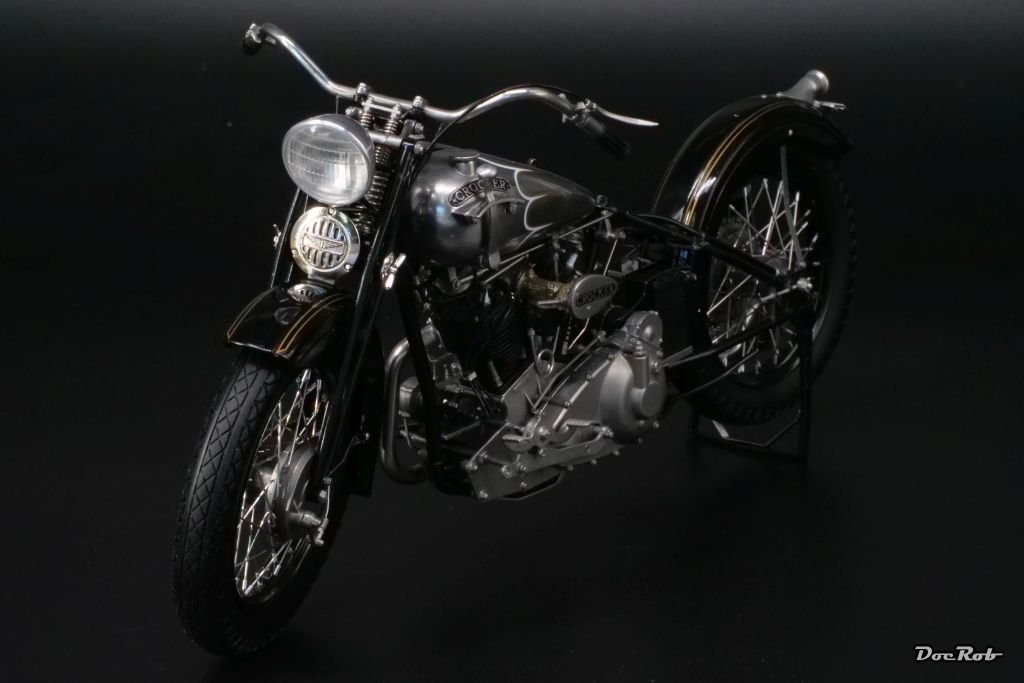
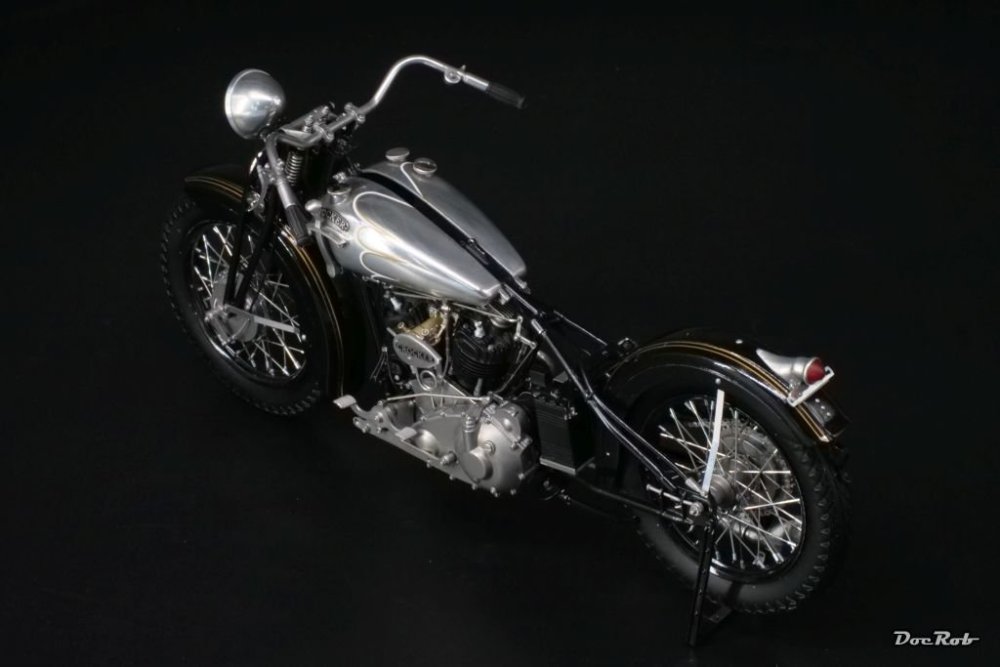
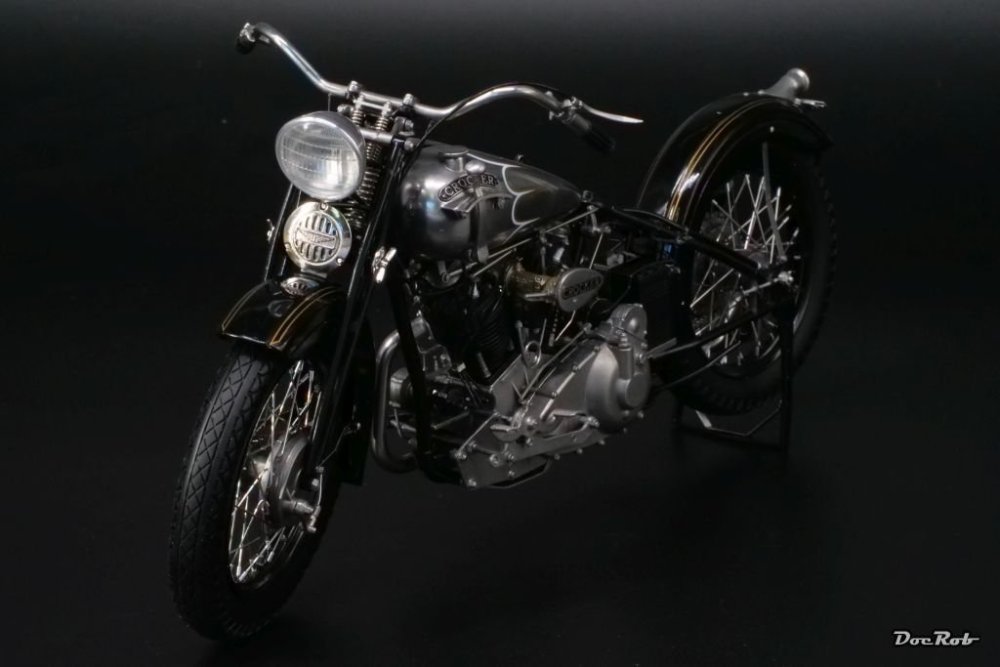
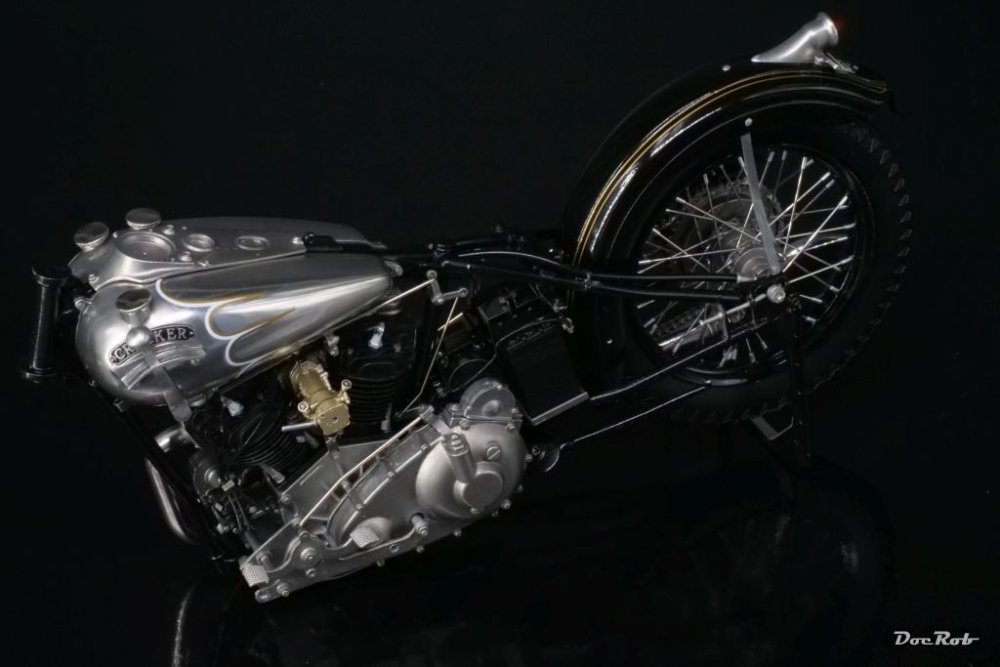
Despite some progress, today was kickback time. In the morning it dawned to me, that I haven´t seen the round clear acetate instrument glazings for a while and after a very long search it was confirmed, they were gone . After that, I installed various bits and pieces around the handlebar. Among them the very prominent finely engraved and polished large head nut, which seems to pre-tension the fork suspension. When wanted to glue it in place, I saw a tiny dot of CA, which was left by my fingerprint. Back to polishing, but guess what, the part flew away, never to be seen again . I heard it hit somewhere in my shelf and searched for more than two hours without finding it, browsing through all the tools and boxes there. I´m pretty frustrated now and will reach out to MFH, to ask for spares to purchase and drown my bad mood with some Manhattan´s Anyhow, that´s how the Crocker looks now. Cheers Rob
-
Some of the works are a bit delicate, but besides the chain, everything is flowing and pure joy. It´s somehow like a TamiWingnut kit in metal . Cheers Rob
-
It comes close Carl, these MFH bike kits are a pleasure to work with. Still the best alternative, than buying an original one, which is the most expansive bike in the world. Cheers Rob
-
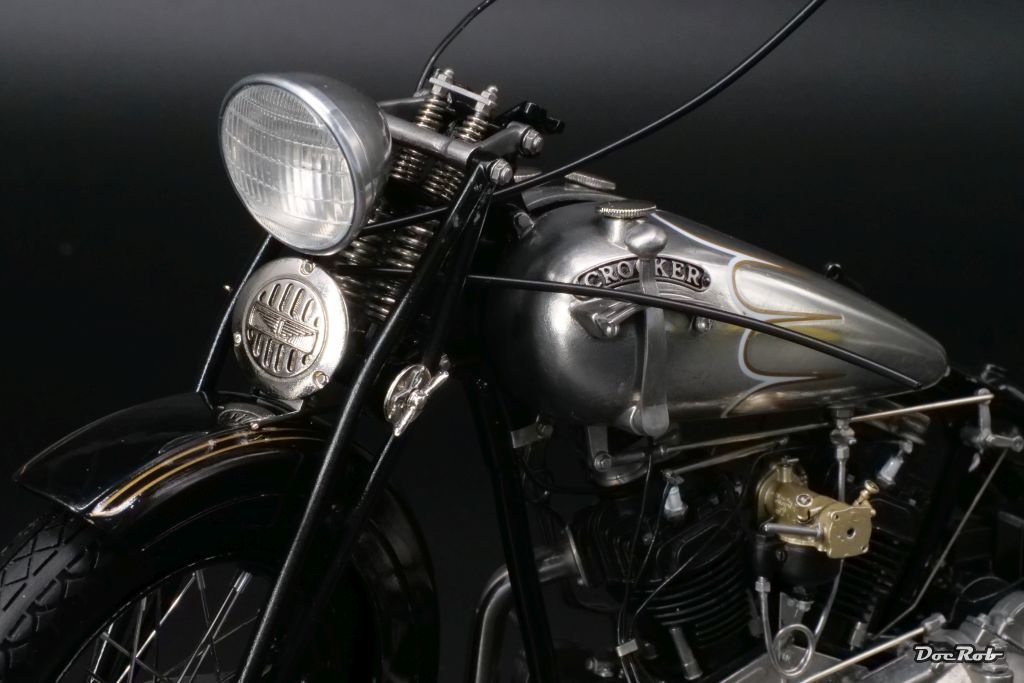
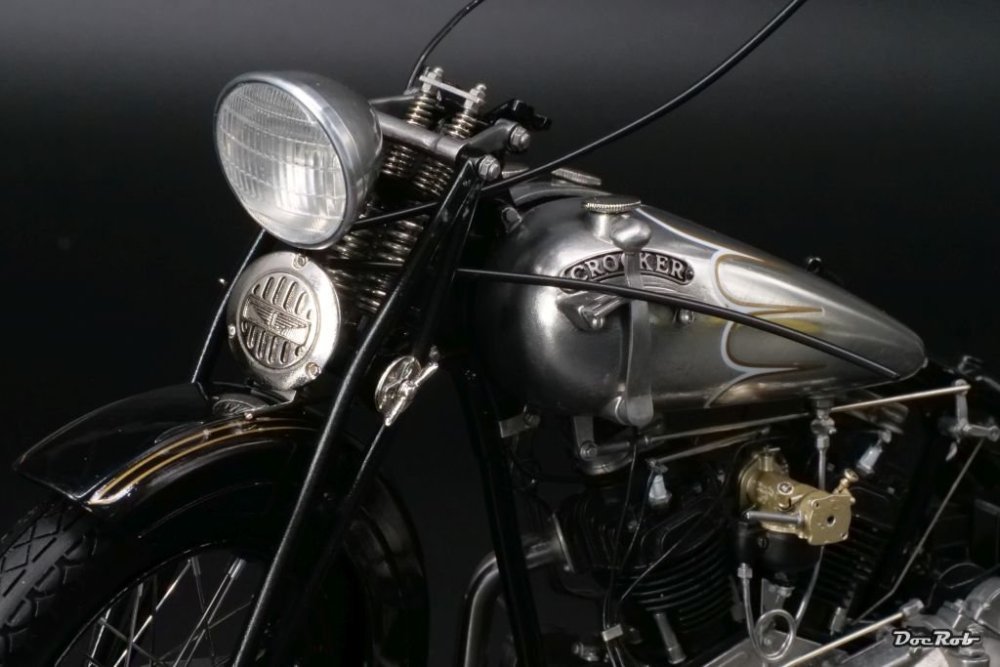
Thank you Peter, I may be on track, to add the Crocker to the Twin GB , just joking. I like the headlight too, but it seems, it was mostly painted and not polished on the real bike, but as it only has to please me, I took the freedom. The wiring was a bit delicate. It called for un isolating 0,3 mm wire and then wiggle the bare part, a hair thin around the tiny connection pegs, which have a diameter of 0,5 mm or 0,6 mm and finally glued into place. Not with my clumsy hands . Drilling through the connector pegs was enough of delicacy for me. Cheers Rob
-
Looks like a flying cross for the moment Peter, a rare sight. Some modeling companies out there seem to completely rely onto cad systems, for designing the kit, as well, as for producing the manual. Generally these kits look great on the sprues, like your A-10, but I guess, they were never build by a real person with the manual at hand. Knowledge about how to put something into CAD doesn´t lead to a good result, without the knowledge what is necessary for a thorough kit design. I hope you fight your way through this one and not without fun, doing so. Cheers Rob
-
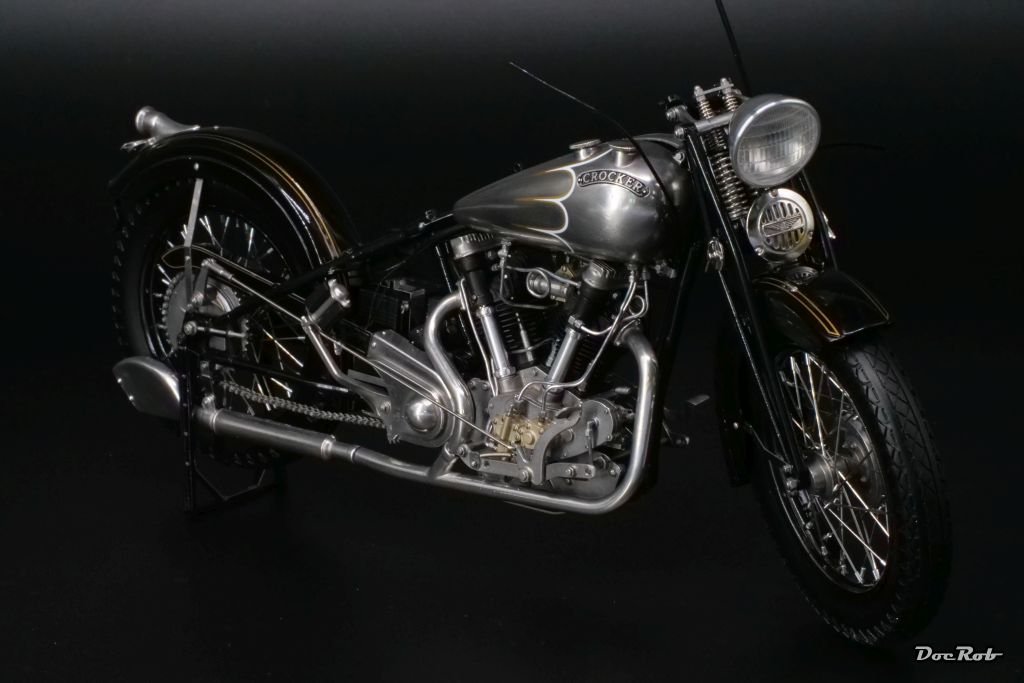
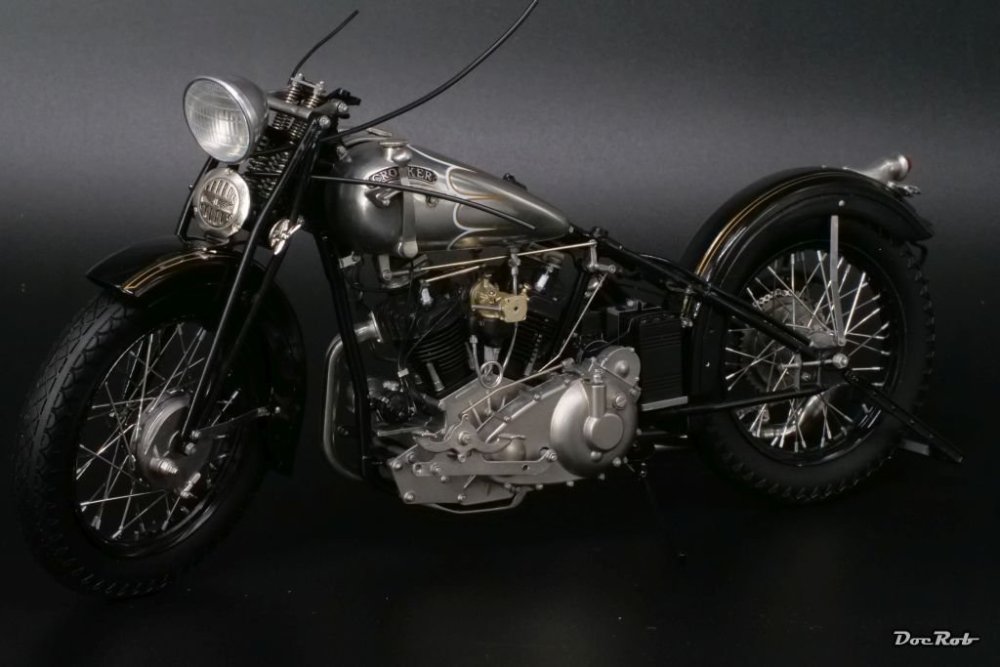
Some major steps got done, as I married the ready assembled fork with the rest of the bike. Alignment of the various parts connecting the fork struts was a bit fiddly, as you had to join a dozen tiny pegs into their holes, while adding CA glue all at the same time. The electric wires for the horn and headlight should be wrapped around tiny bolts, which I couldn´t do. I drilled three millimeter holes into said bolts and glued the wires in, after threading them through. The headlight got polished, as is the reflector for a nice and bright appearance. Cheers Rob


-
I think, there may be different types of print material which are more or less brittle. I found the Eduard Brassin prints to be slightly flexible. Cheers Rob
-
Fiat 500/600 build Topic
DocRob replied to FullArmor's topic in LSM 1/35 and Larger Work In Progress
The tiny engine looks good, FA, albeit, I never paint parts on a sprue, but that´s just how different tastes are. Cheers Rob -
Their main business are cars and bikes with only a bit of ships and armor. New releases are sold very fast often and then gone forever or until a re-release, so it´s better to be fast if you like a subject. I guess, the type of kits and the prices call for relatively small production batches. Not all the kits are full detailed, some are called proportional kits are a bit simpler made for a faster build. I have four more MFH kits in my stash, beside the Crocker and they all look gorgeous. The Crocker is my first venture in this direction, but I found the build so far relatively straight forward, with no real problem areas, besides the fragile chain. The quality of the parts and engineering are in a league of their own. Cheers Rob
-
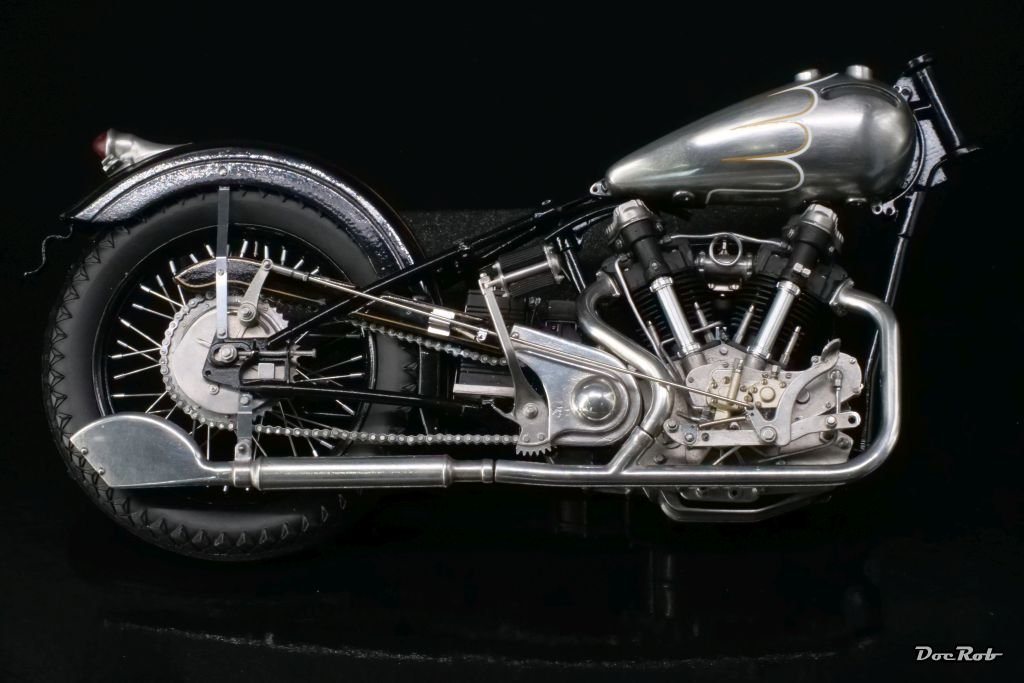
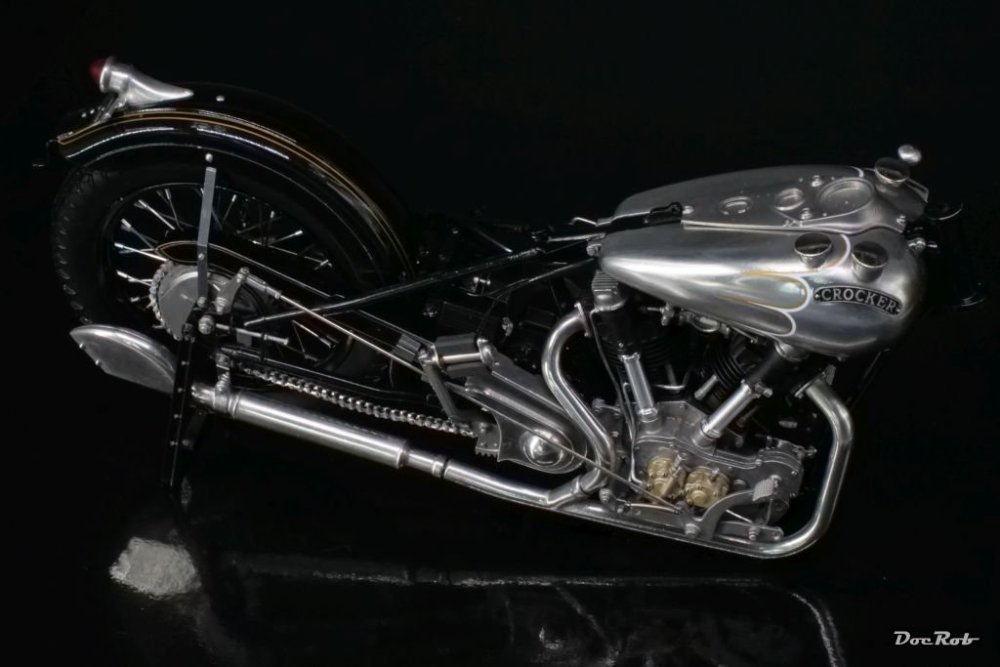
Muchas gracias, after the chain obstacle, I start to get in overdrive again with the Crocker. I finished the plumbing for the engine with all the metal tubes connected and I´m lucky that I did it now, rather than earlier in the build, like the manual suggested. I also polished various parts, like the headlamp, steering bar and started to build up the steering head and front suspension. @Bomber_County : I don´t think so, what´s needed is proper planning of all the steps and very good parts preparation. The chain was a beast to tackle, but most of the rest went together beautifully. It´s my first MFH kit and I would have thought it to be more difficult. In fact, it´s more fun than building plastic models, somehow. Cheers Rob
-
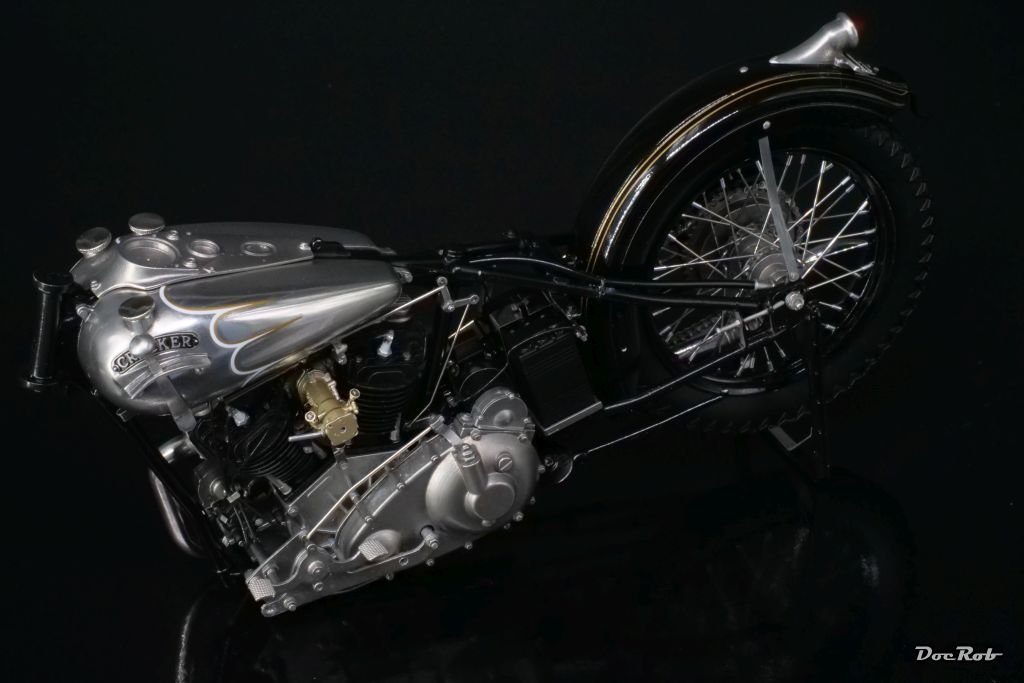
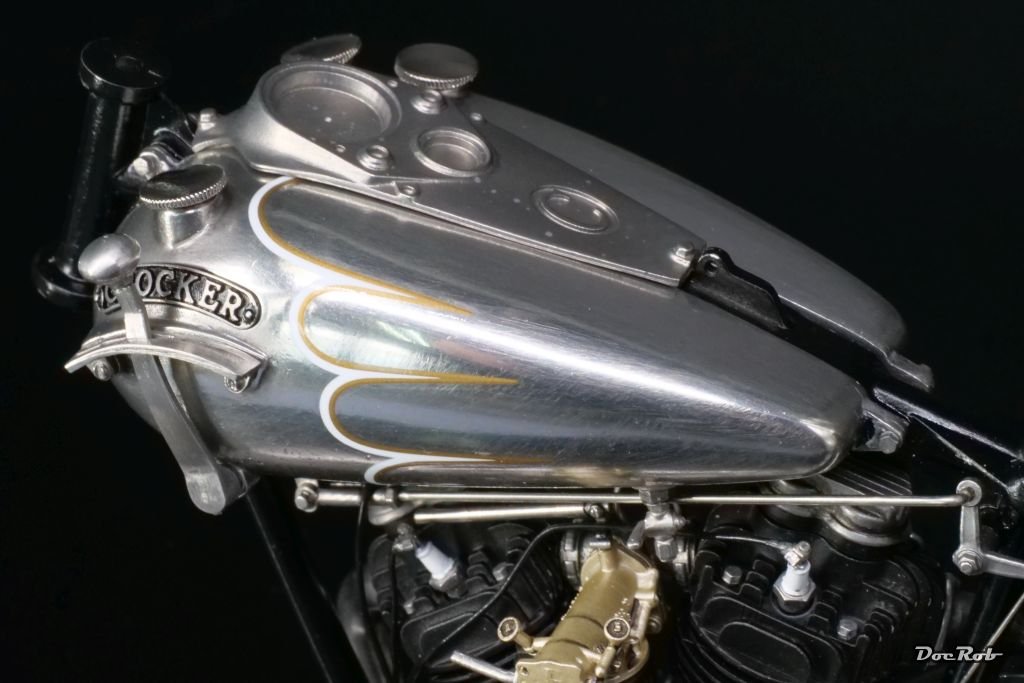
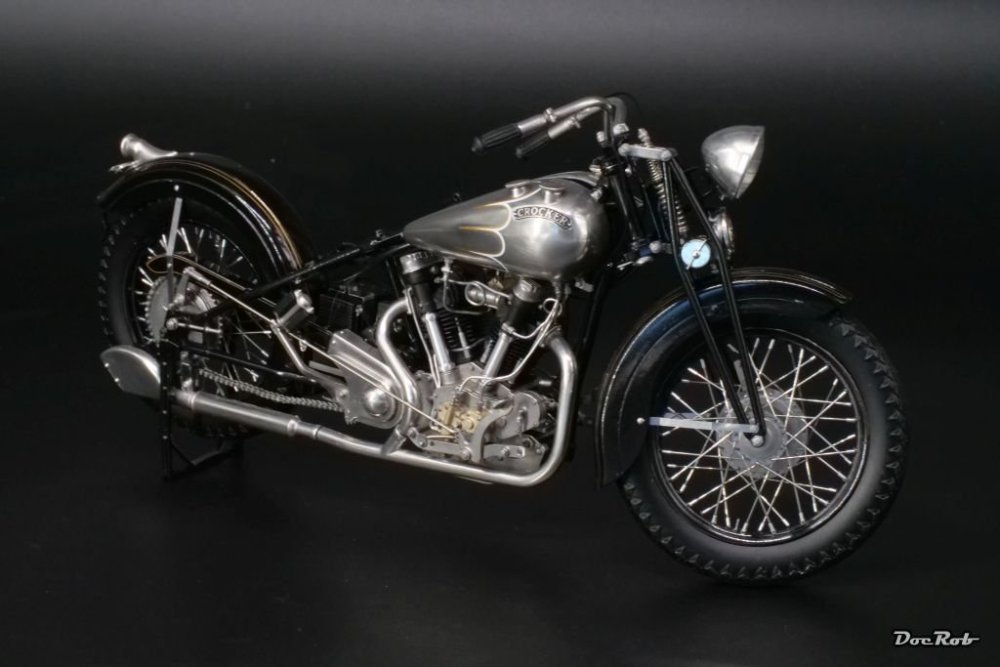
I added more of the crockeristics, beginning with the stands. There is one for the rear end and a side stand, which are both movable. I will see, If the side stand will hold the bike, when ready, as it feels pretty heavy now. It is also becoming difficult to handle, with all those parts added. For the stands, 1,4 diameter mm screws were used. I drilled 1,2 mm holes into the white metal and used a 1,5 mm drill bit to drill a cone into the opening. With a good fitting screw driver, it´s now possible to screw direct into the relatively soft metal. The tank, with it´s various fittings was added. The fuel tank caps were made from chrome plated white metal, which didn´t look too good, having marks in the surface, so I polished them. The shifting lever got it´s counterpart below the tank connected with a shifting rod. The mid section with the instruments is only added loosely as a guide for now. Next is some plumbing, connecting all the fuel lines and other wiring, before I will turn to the front fork. Cheers Rob

-
My experiences with 3D-printed parts are limited, but I never had breakages, even with the tiniest details, like the 1/350 gun carriages of the AA guns of USS Arizona, which included printed railings. I have some printed chain sets for my 1/12 motorcycle kits and they seem sturdy enough. I will tell, after I tried them . Cheers Rob
-
All the troubles were about the chain, Peter, the manual is very good with only some tiny mistakes, most of them obvious. Having that behind me now, I´m coming into a flow again, like with most parts of the build. A drive chain in this scale is fragile no matterer what and I have no idea, how to produce a better one in metal. I would wish for a 3d-printed option though. Cheers Rob
-
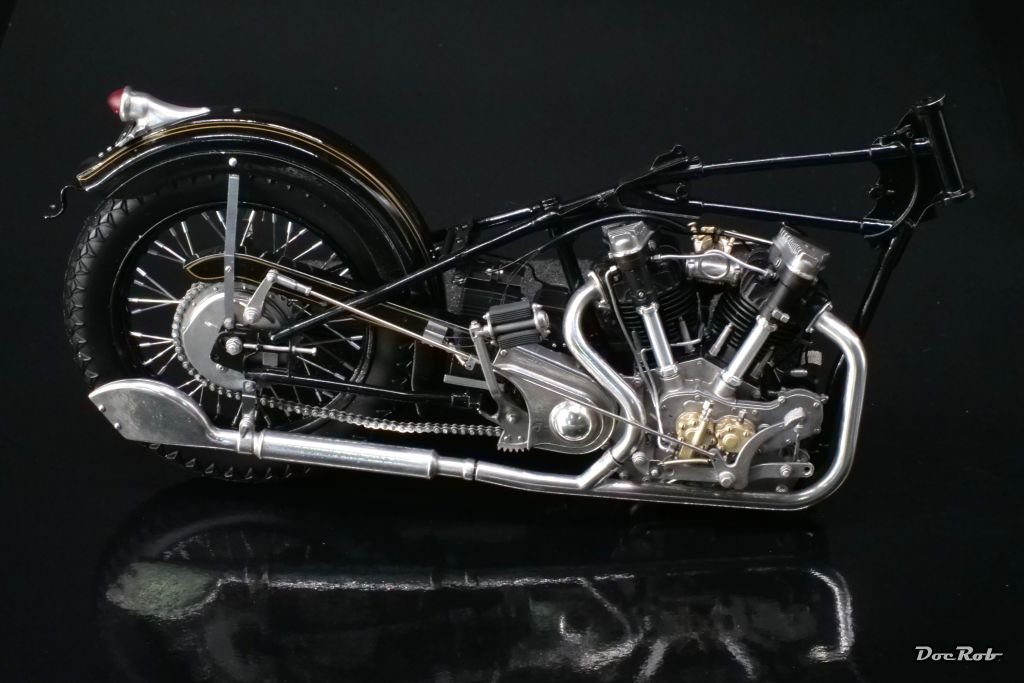
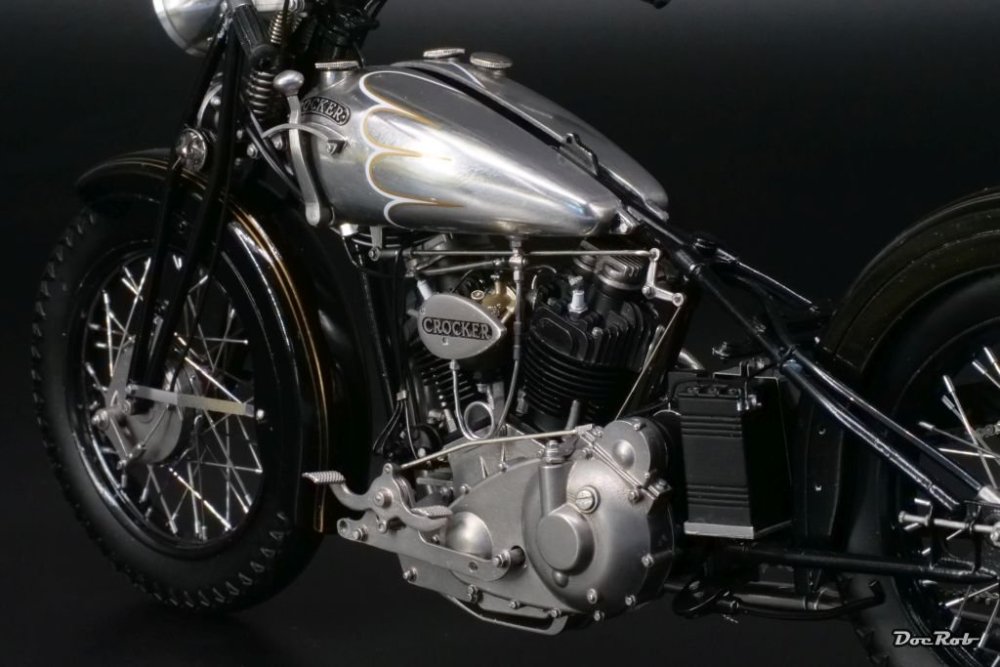
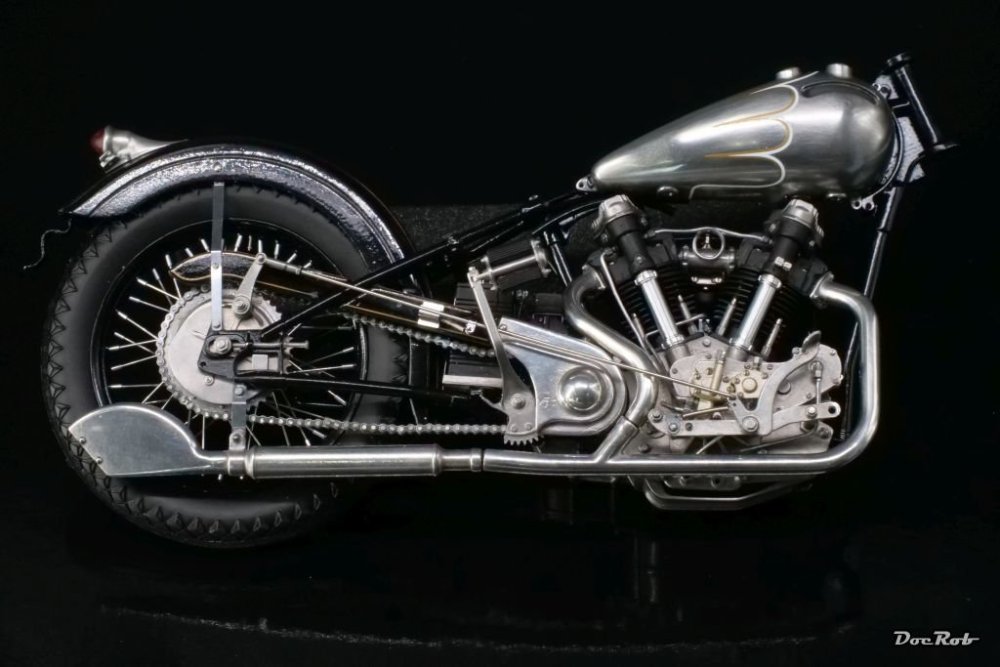
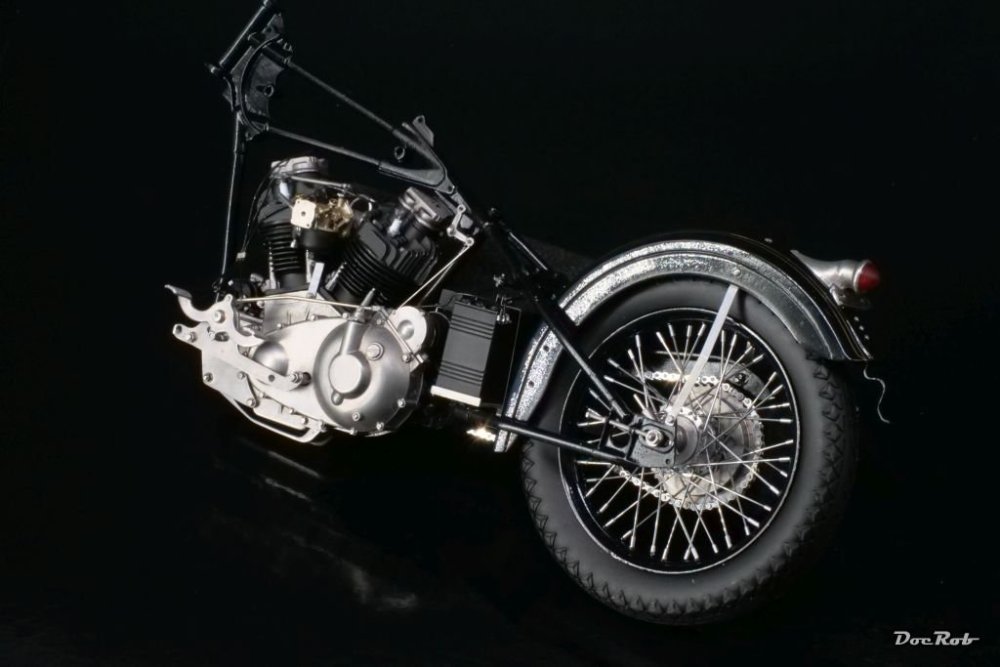
The chain haunted me again, when I fitted the polished sprocket housing. This part connects three principal areas of the bike and only the slightest bending or misalignment leads to not fitting exactly, where it belongs. To correct this, I pried the chain loose from the sprocket and cut away some more links to enhance the wiggle room for the cover and glued it in place finally, hiding the missing chain links. Next were the exhausts parts, which were also polished before. For this, I used the green side of a sponge first, followed by very fine steel wool and finally a cotton rotating tool on my Proxxon with Autosol polishing paste. The fitting was very good and a relief after the chain. Finally, I added some more wires leading from the chain guard to the fuel tank, the braking wire with it´s delicate to install return spring and last, the starter with it´s real rubber pads. Here is another shot, with the fuel tank loosely added: Cheers Rob

-
Thank you Peter, I actually had some more issues with the chain, as it protrudes a bit to far around the sprocket. I had to pry it loose again and cut off some links for the housing to be placed correctly. Cheers Rob
-
What is on your bench right now ? Share a picture :)
DocRob replied to Martinnfb's topic in Modelling Discussion
I will follow you and your girlfriends build closely, an interesting project, which would never work with my wife. She dislikes modeling, but I guess, she would be good at it as an engineer with good hands and ideas. Luckily my wife accepts, that modeling to me is an important hobby, but that´s about it. I will start the hillclimber Fiat 500 later, I don´t even possess the conversion kit as of now, only the base kit and my soon to build schedule is already completely booked out . Cheers Rob -
F-15DJ Kai or Eagle Plus- Finished!
DocRob replied to BlrwestSiR's topic in The Great Twins Broup Bluild
How to loose friends . If you haven´t anyone anymore, you can post your troubles in the Car thread and we will help debating . The ejection seats are looking good, Carl. Cheers Rob -
What is on your bench right now ? Share a picture :)
DocRob replied to Martinnfb's topic in Modelling Discussion
I would be in, as I have the same kit, but seemingly different plans with it. Mine will be a hillclimber with this KMP conversion. Cheers Rob -
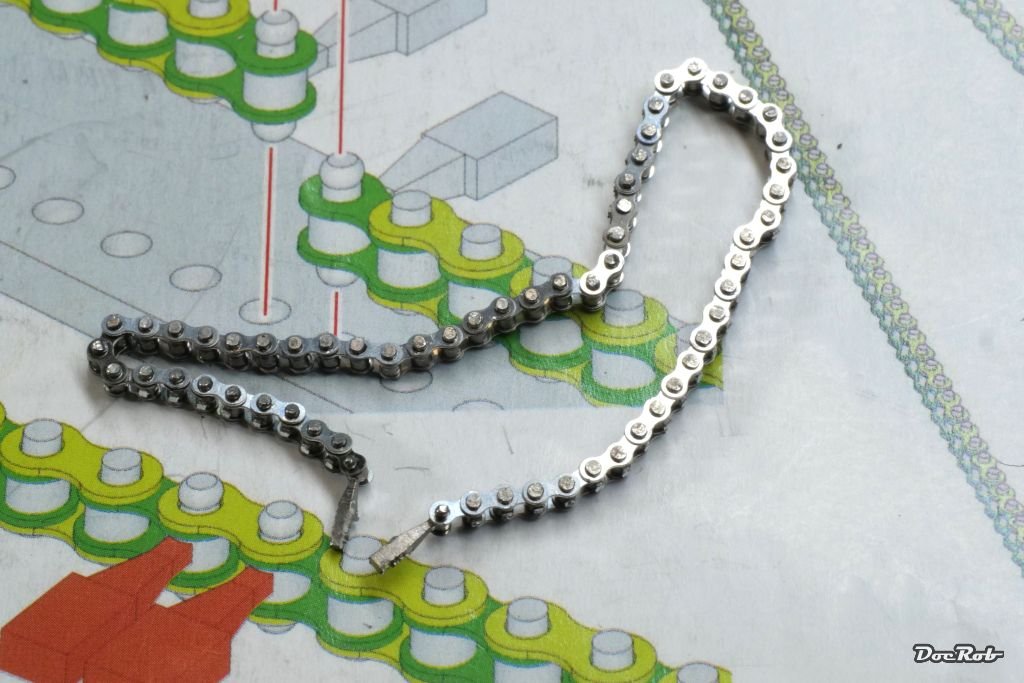
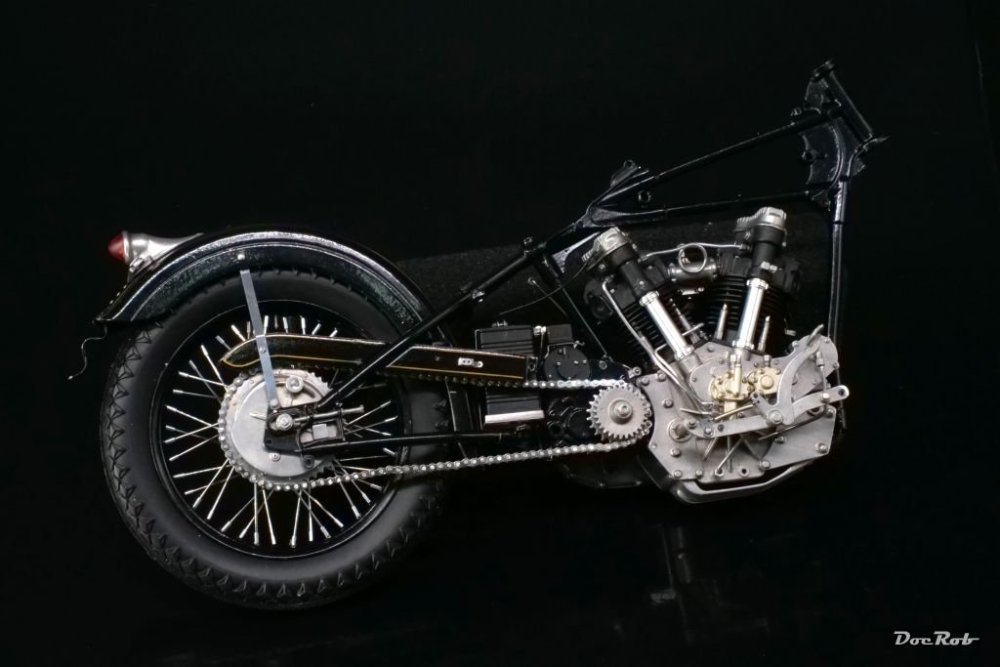
I finished the chain, which almost finished me beforehand . It was a challenge and test of patience and I would wish a resin chain for future bike kits. Building the four strings of chain into the jig proved to be not a big problem, but connecting these strings proved very difficult. In the process of trying, I broke the chain on another place, true nightmare, because it was already flat bolted by that time. After a lot of trying and careful sanding, I glued the link together with CA. After I somehow assembled the full length of the chain miraculously, I didn´t had it in me to join the chain without a jig and glued it to the sprocket, as it´s not supposed to turn in any case. The good news, the chain link count in the manual is exactly correct, a thing rarely seen with tank tracks in kits. The side of the fenders looks terribly on the pics, but that must be the lighting. Cheers Rob
-
Thank you Peter, Tamiya´s bikes are very good kits and finely detailed, specially the elater ones, like the Ducati, I built some years ago. The MFH bikes are way ahead of that, not only detail wise, but the weight of the metal makes it feel more real. Cheers Rob
-
Thank you Carl, I never made the ping test with the spokes, but for a kit, the wheels are pretty sturdy. I never spoked more than single ones into my bicycles wheels and centered everything again. The Crocker bein my first full spoking job, I can´t tell about the layout other than claiming, I followed the manual step by step. Cheers Rob
-
Thank you Hubert, I will continue tomorrow, as I have a terrible hey fewer today and a sneeze at the wrong moment... . The chain is only missing the seals and some grease . Cheers Rob
-
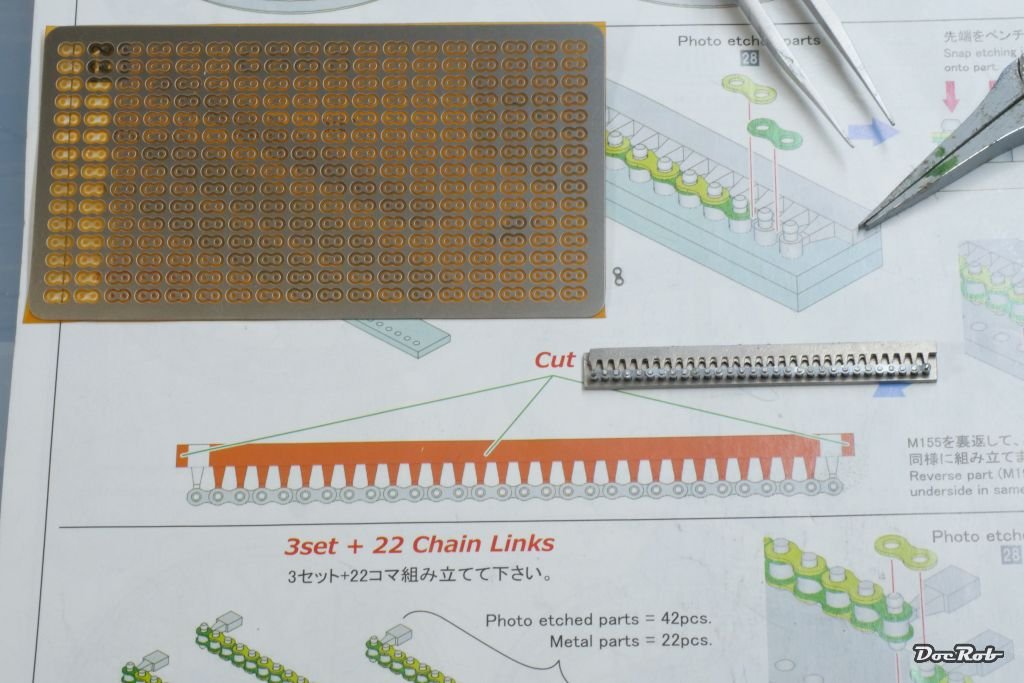
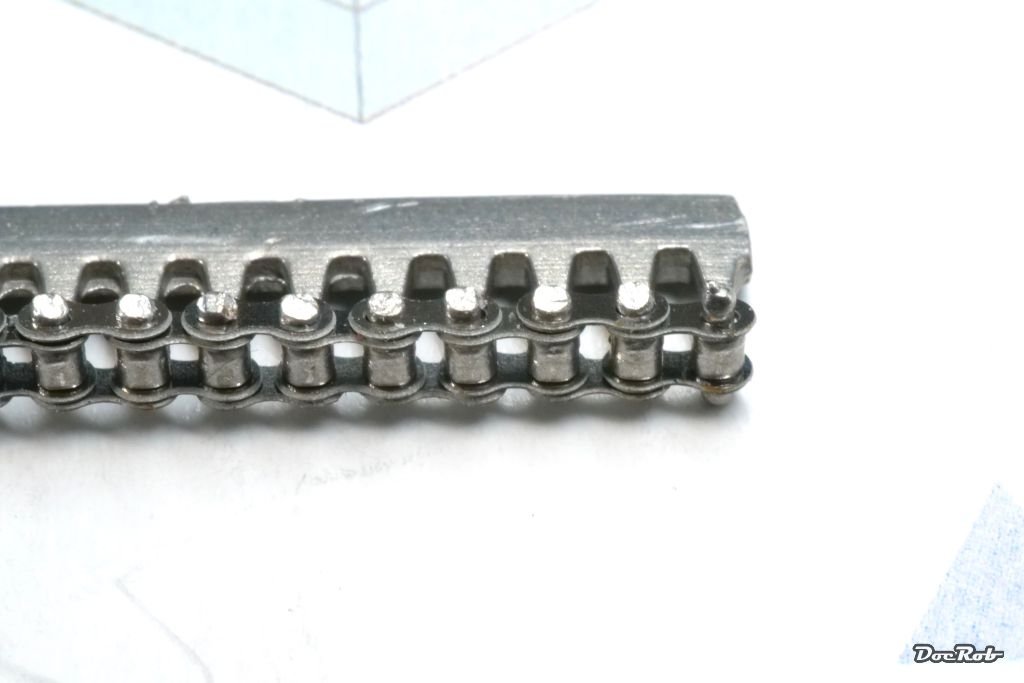
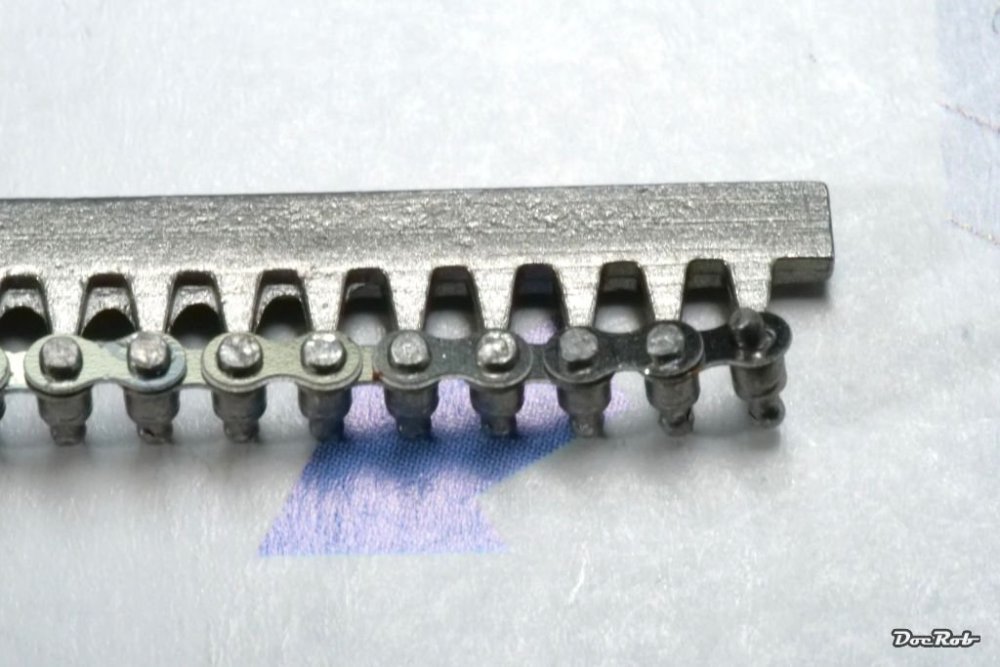
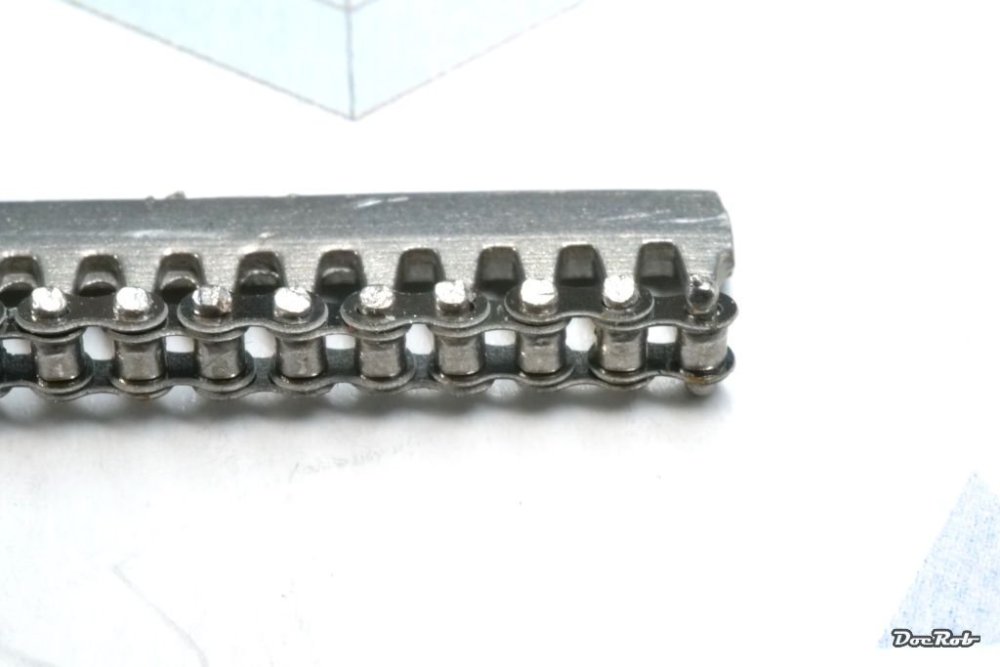
Today, I assembled more than half of the chain. Again the design by MFH helps a lot, but the work is eye straining and tedious. The last links felt more difficult, a clear sign of fatigue. Thirty chain white metal chain axles, connected by a cast sprue will be set into a pre drilled jig. Then you add the intersecting PE links, which are luckily only adhesive fixed to the foil and dosen´t need to be cut from the PE fret. When one side is finished, the heads of the bolts are pressed flat with a pair of pliers. One side done: The chain will be flipped over in the jig and the second side gets mounted like the first. Here are both sides done. Then you cut the white metal sprue away with a sharp nipper and you have 30links made. The last pic shows two sets of 30 joined together in the jig. Cheers Rob


- 157 replies
-
- 11
-