DocRob
-
Posts
7,043 -
Joined
-
Last visited
Content Type
Profiles
Forums
Events
Gallery
Everything posted by DocRob
-
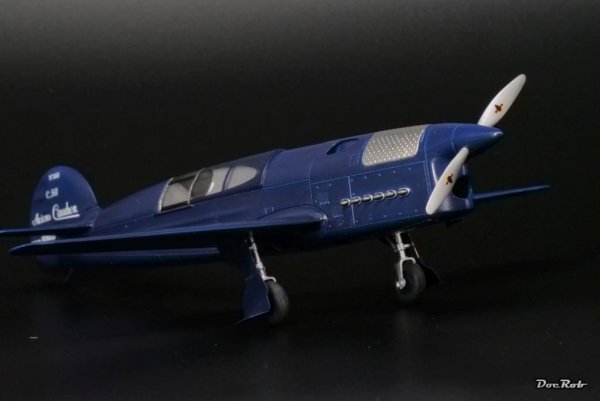
From the album: Caudron C.561
-
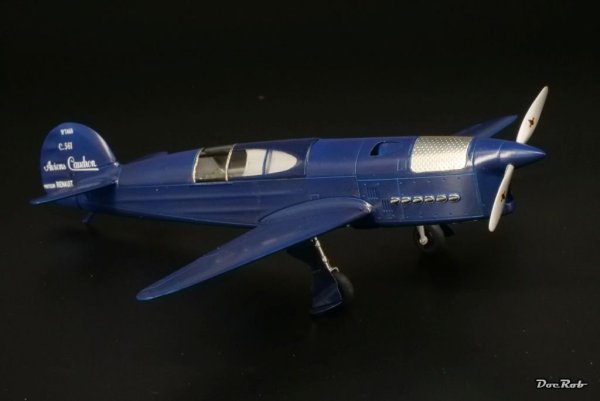
From the album: Caudron C.561
-
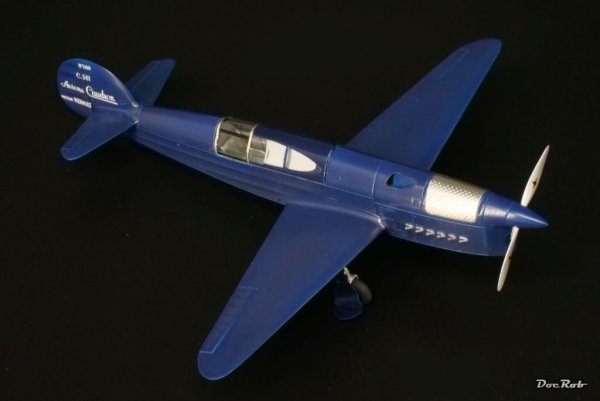
From the album: Caudron C.561
-
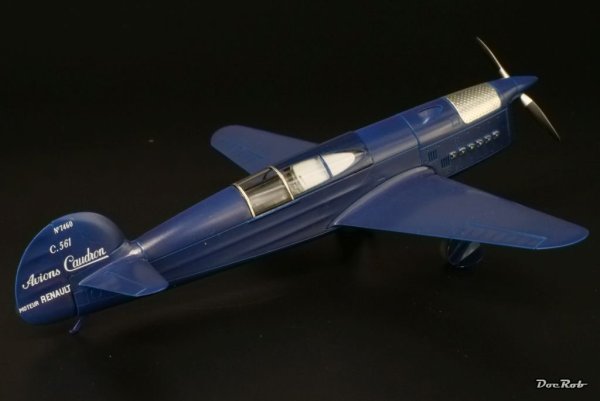
From the album: Caudron C.561
-

Arado 234 Nachtigall on Speed
DocRob replied to DocRob's topic in LSM 1/35 and Larger Work In Progress
Thank you Gary, I didn't know about the landing accidents, but the canopy was one of the shortcomings for the night fighter role. Everything, explosions, the guns, search lights, reflected multiple times in the glazing and there was no protection for the pilot. You also wouldn't want to fire the guns from the pod with extended front landing gear . Cheers Rob -
Arado 234 Nachtigall on Speed
DocRob replied to DocRob's topic in LSM 1/35 and Larger Work In Progress
Thank you Peter and Carl, I'm really happy to have reached this point of the build, but have to say in a way the build was demanding and motivating, but never really frustrating. That's how I like difficult builds. Cheers Rob -
Revell/SH Hawker Tempest in 1/32-Finished
DocRob replied to KevinM's topic in LSM 1/35 and Larger Work In Progress
How cool she's lookin' Cheers Rob -
Italeri 1/35 Elco 80' Torpedo Boat PT-596 - Complete.
DocRob replied to Bomber_County's topic in Archived GB's Sub Forum
Wow Phil, what a great last second entry. Your PT-Boat looks fantastic and there is so much detail to please the eye. I hear you on the Italeri quality, a company I normally avoid, but I have the Vosper boat in my stash along lots of goodies. I hope you'll add figures later, these boats cry for it to add some life. Cheers Rob -
Arado 234 Nachtigall on Speed
DocRob replied to DocRob's topic in LSM 1/35 and Larger Work In Progress
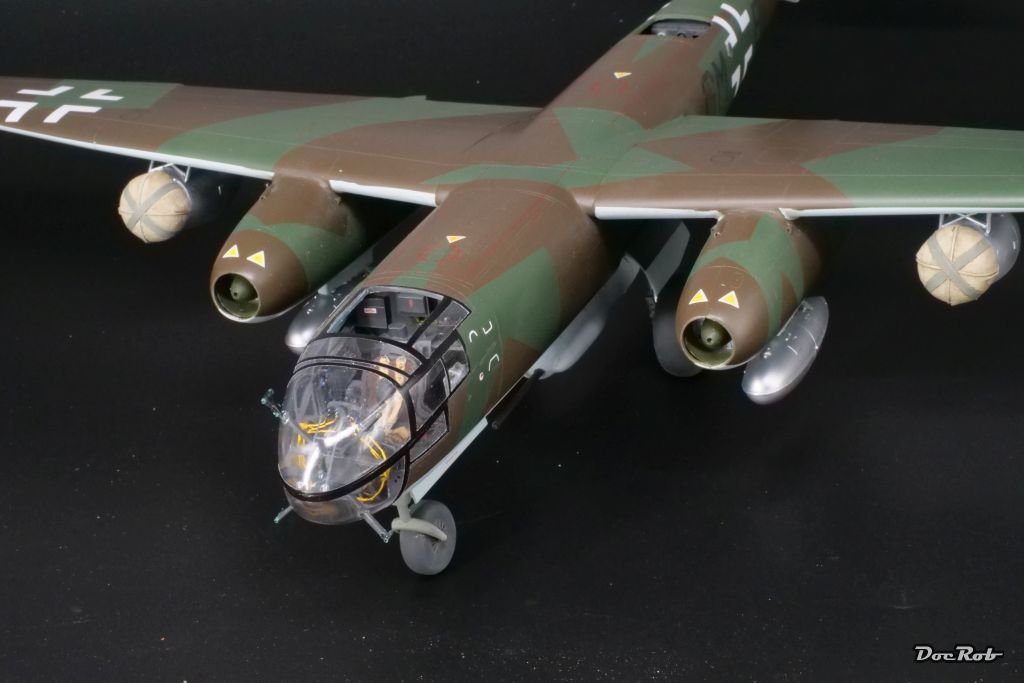
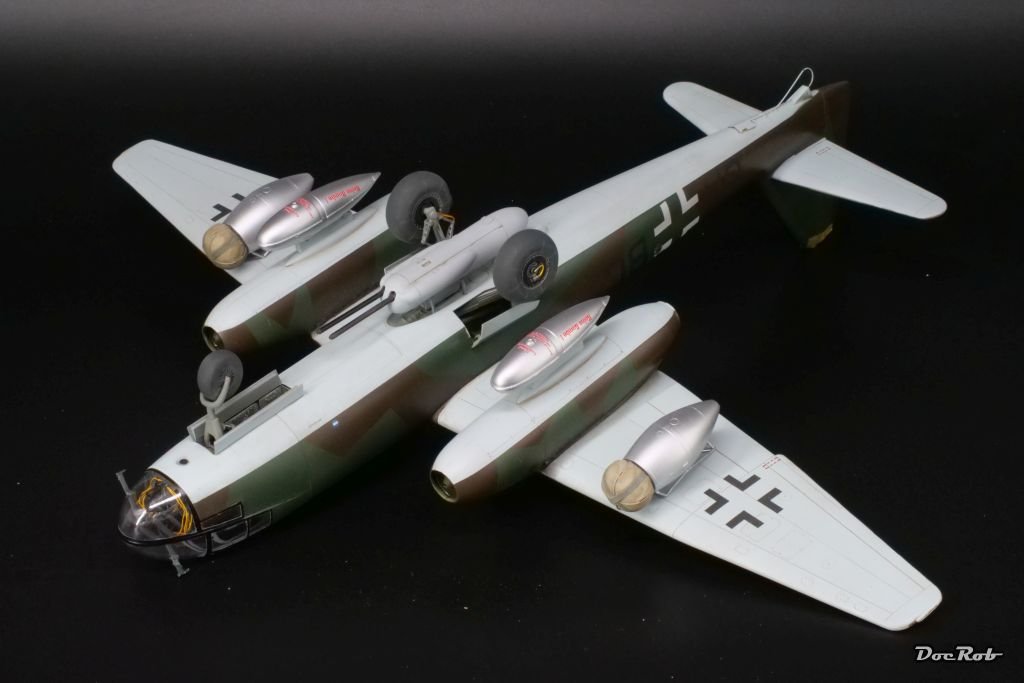
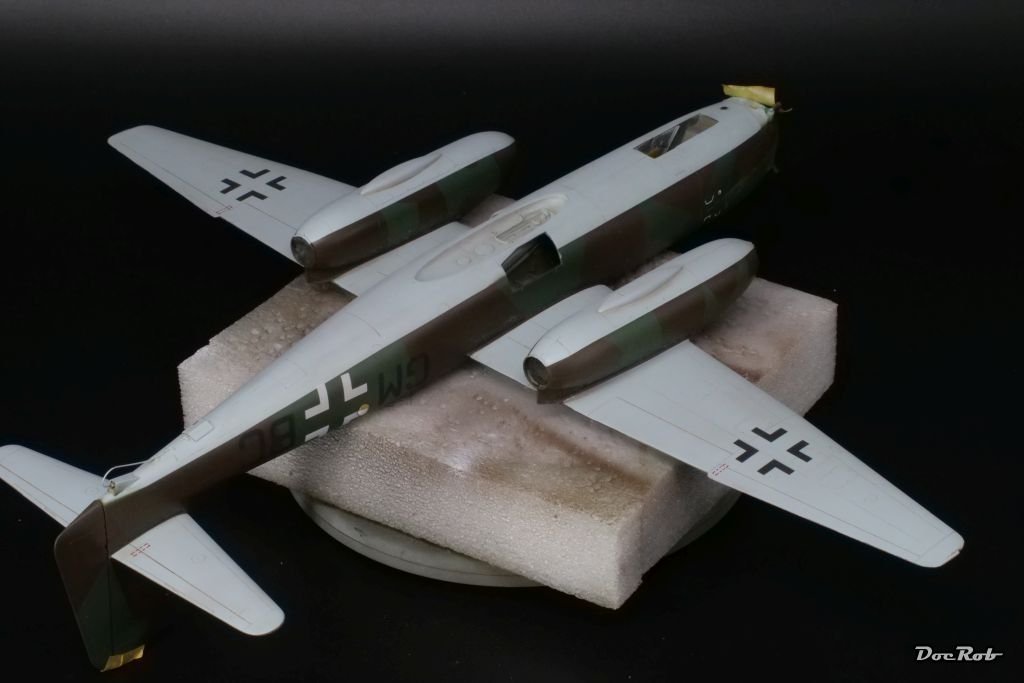
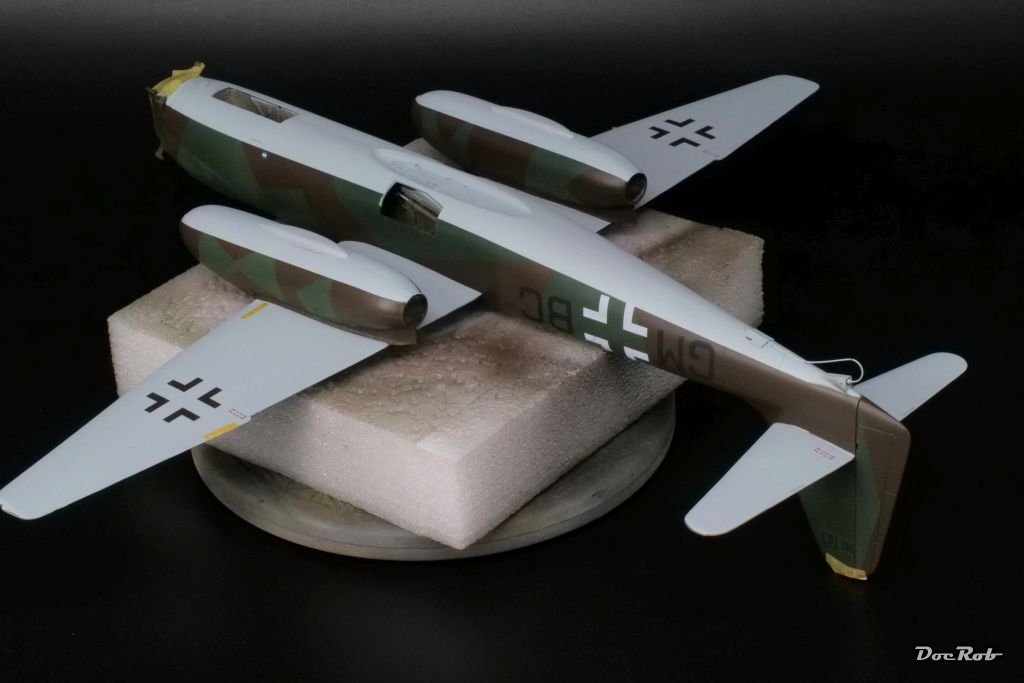
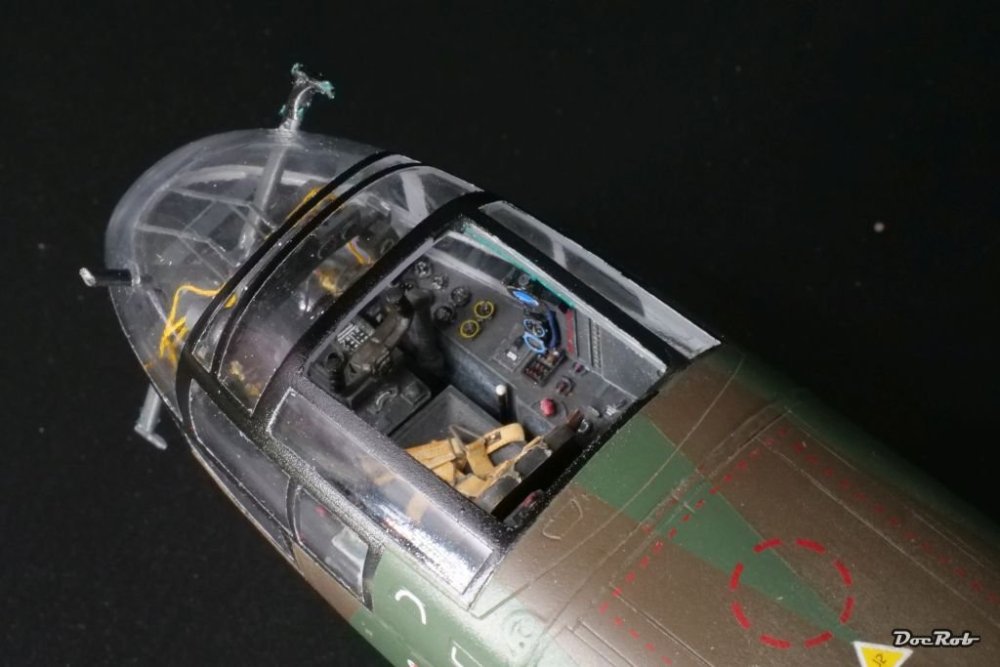
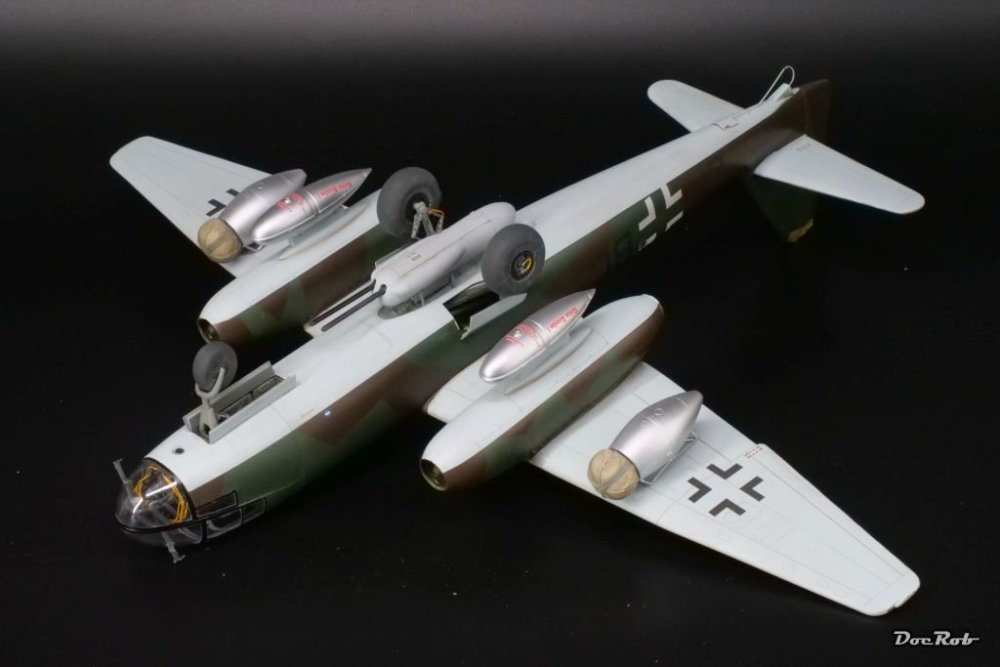
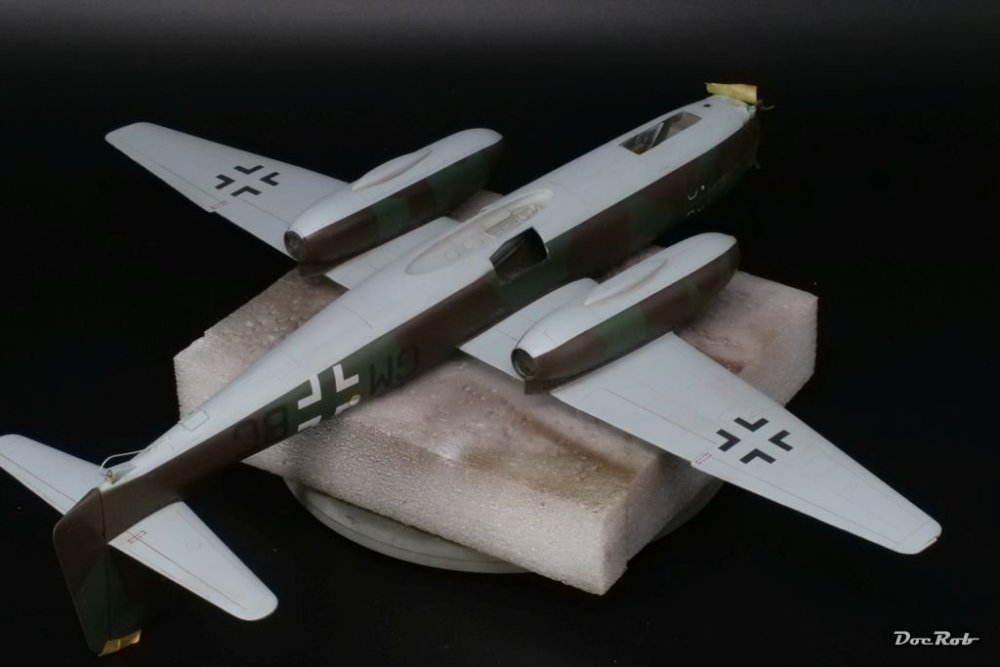
I can't tell you how happy I am, to have reached this point. The Nachtigall is not done, there is a lot do do until she is finished, but adding the subassemblies to the underside and remove the masks from the canopy was a major step. The canopy had some staining on the glass, where I'm not sure, where they came from. Luckily, could rub them carefully away with a cut toothpick. The framing needs to be decaled with rivets, the black color is only the base level. I hope the landing gear holds up, as the Arado is a really heavy bird with all the heavy resin bits inside and the heavy nose weight as well. Cheers Rob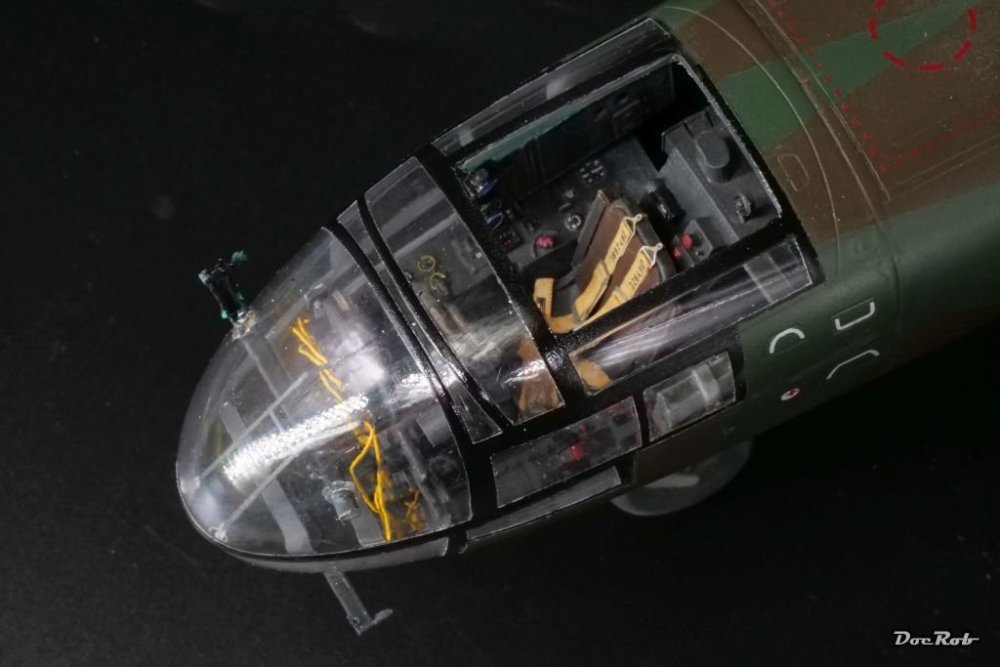


-
Arado 234 Nachtigall on Speed
DocRob replied to DocRob's topic in LSM 1/35 and Larger Work In Progress
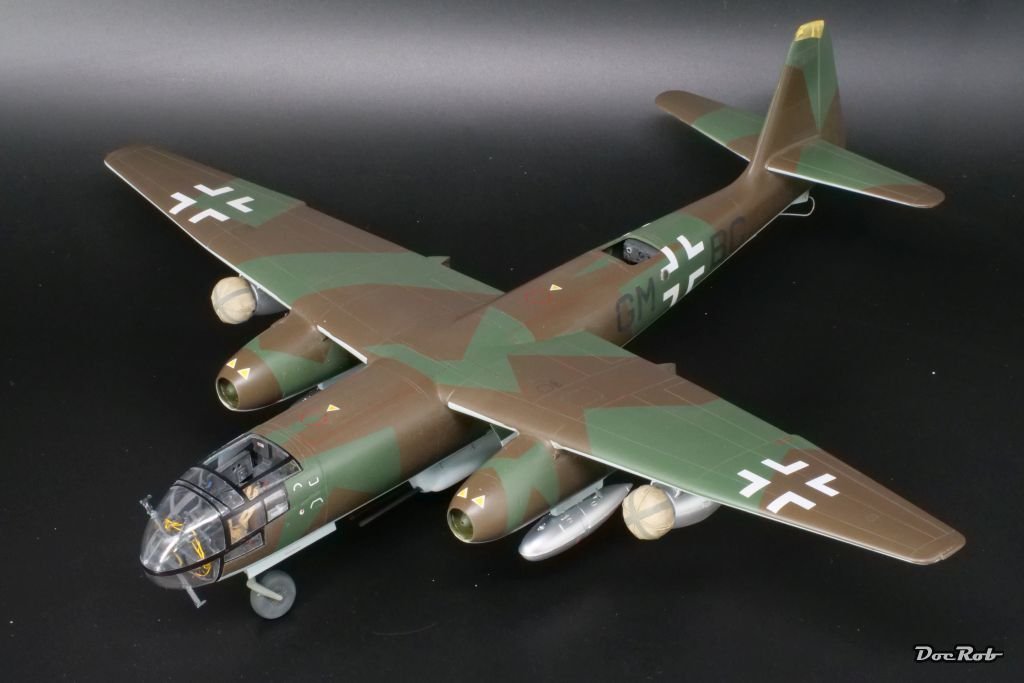
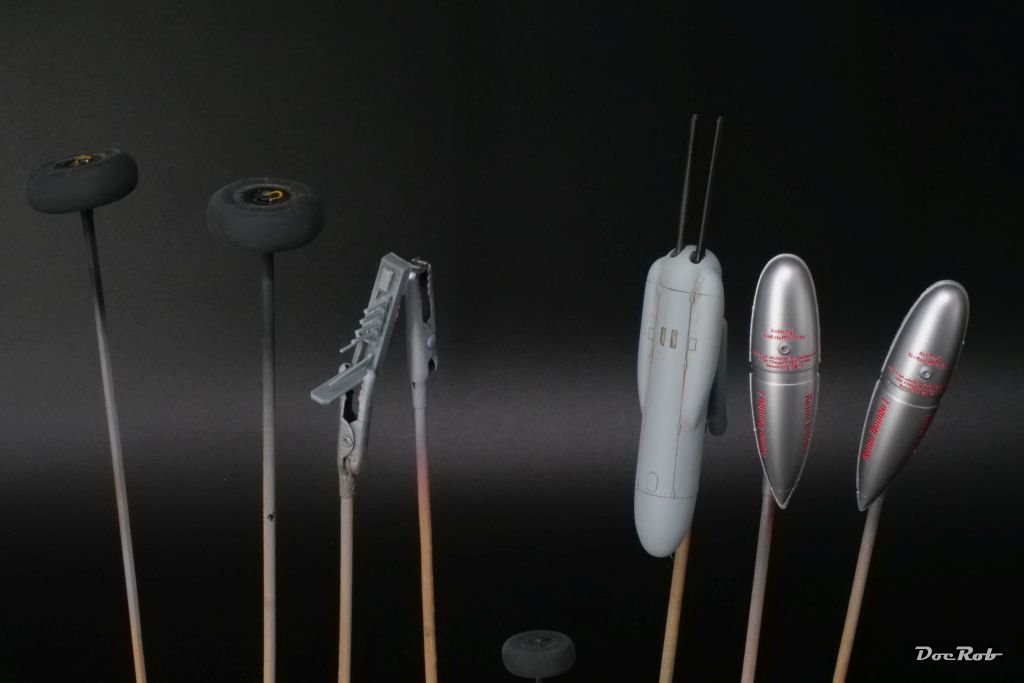
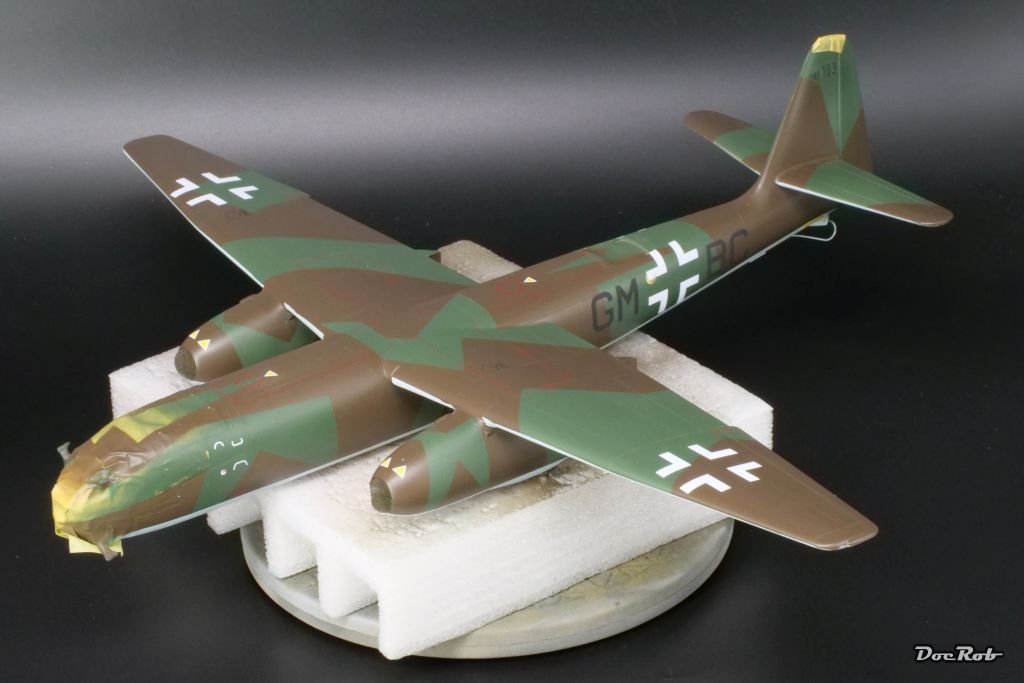
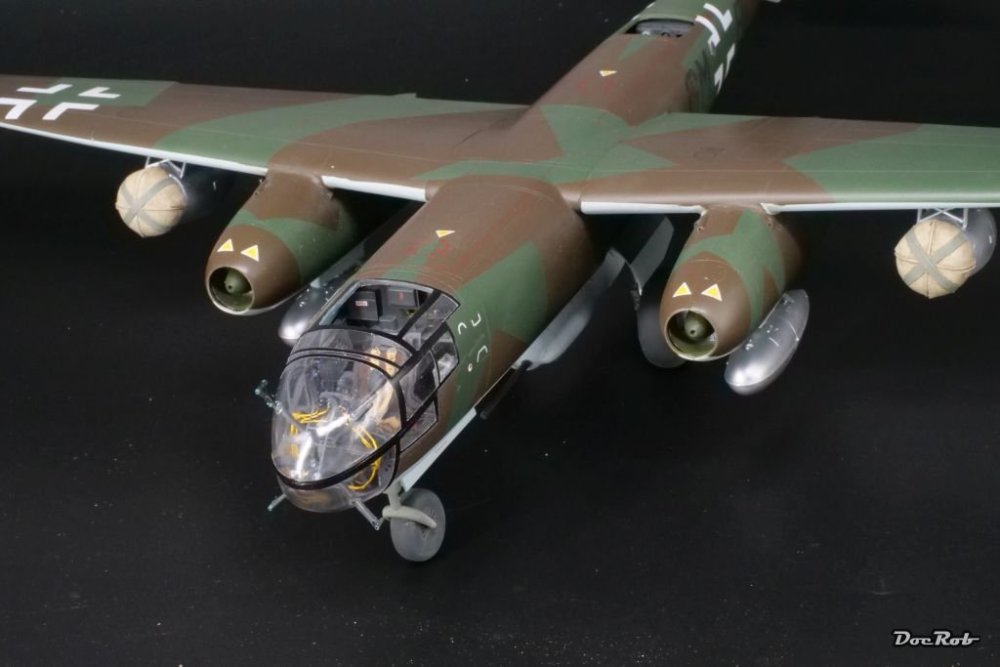
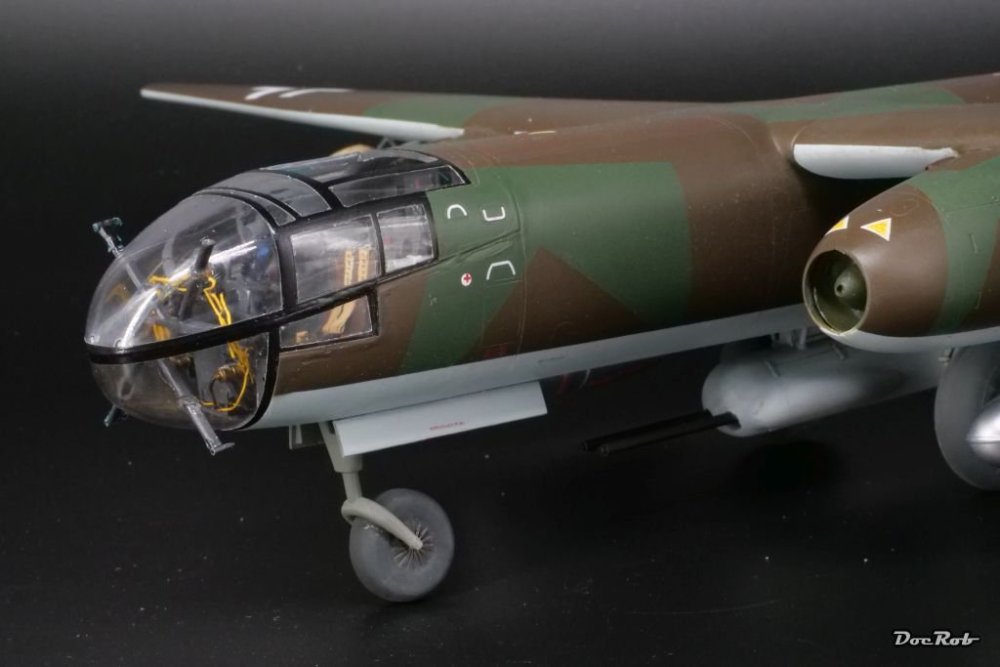
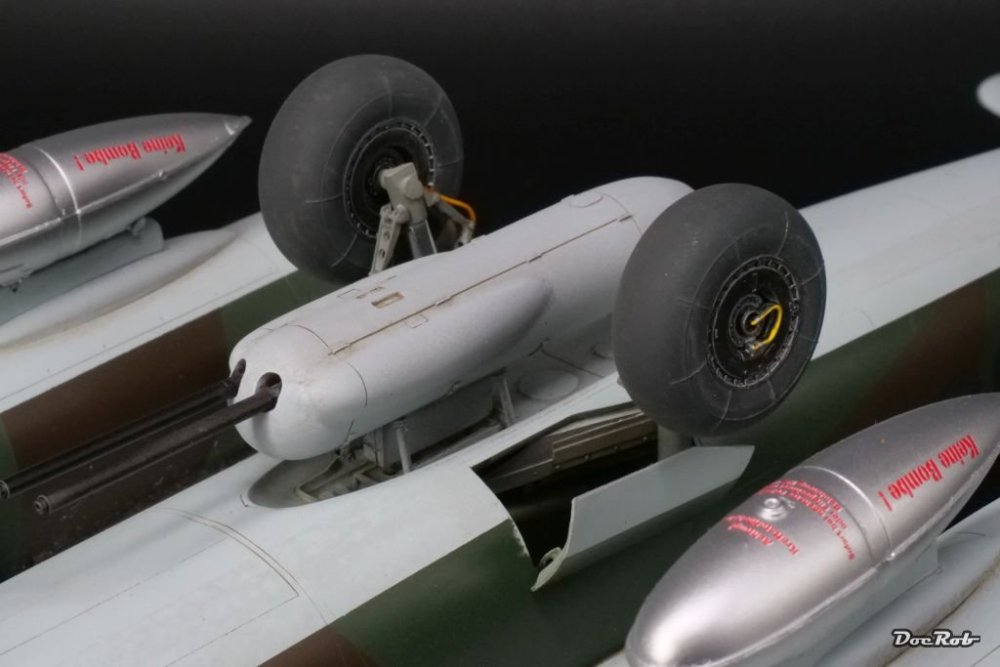
To subdue the camo contrasts a bit and to enhance the visibility of the panel lines, I applied Flory clay wash dirt type onto the whole airplane and wiped the excess away with damp kitchen towel and cotton buds. It's more visible on the underside naturally, but it ties the paintjob together. I will not apply more weathering, as I think, the service time of these night fighters was brief. I resprayed and decaled the external tanks along the Rato rocket packs (not shown). There are no masks for the Ratos stencils provided by 1ManArmy. The gun pod was treated with clay wash as well and got it's resin barrels inserted. Now there are only some small works to do until final assembly, which I will start from the underside up, beginning with the wheel struts. Cheers Rob

-
Arado 234 Nachtigall on Speed
DocRob replied to DocRob's topic in LSM 1/35 and Larger Work In Progress
Me too, Gary, I had the idea to build my Tamiya Mossie in Australian livery in NMF, using these masks for the stencils. Not so much more, I guess. Cheers Rob -
Arado 234 Nachtigall on Speed
DocRob replied to DocRob's topic in LSM 1/35 and Larger Work In Progress
Seems like we are in the same boat with these issues Gus. I used Maketar Kabuki masks on different occasions and never had complaints. I can't remember, if I used them on Extreme Metals though. Cheers Rob -
Arado 234 Nachtigall on Speed
DocRob replied to DocRob's topic in LSM 1/35 and Larger Work In Progress
Thank you Peter, sometime it's about “A man's got to do what a man's got to do.” . Where would be the fun in modelling, a completely time and effort wasting hobby, when the spent effort wouldn't be maximized with unnecessary tasks. There is no way to explain what we do to an outsider, it's only us nerds, modelling is important to, so let's keep this little island afloat with some self flagellation. Other than you, I have very mixed results with decals and permanently look for other possibilities. Wet transfers have their pros and look similar to masked stencils filled with the airbrush, but the process is error prone and my results were always ranging from perfect to unusable in the same build. Masking is even more time consuming, but until the tanks, I had no other issues than that. Decaling, well, I hate to see a silvered model, close before the finish line. I had some good experiences, like Aviattic decals and ZM's decals for the Kai-Phantom, but many others, even Cartograph printed ones. As I don't see me using masks with all my future builds, I should prepare myself, to maximize the decal results with even better preparation and dedication. I'm still eager to see, how your new Eduard decals work on the P-51, my efforts in peeling off the carrier film on my USS Arizona build, were unsuccessful and the decals with carrier film on looked horrible. Better test with some spares. Cheers Rob -
Arado 234 Nachtigall on Speed
DocRob replied to DocRob's topic in LSM 1/35 and Larger Work In Progress
Thank you Carl, luckily only the tanks were affected. I would have blindly used the 1ManArmy masks with Extreme Metals as a base, given my experiences with both, color and masks. Now I'm forewarned, luckily. The tanks were painted some weeks ago and have cured properly. I never had any issues with these colors other than noticing, Titanium is less durable than the others. Matte aluminum, I have used in every thinkable situation. Cheers Rob -
Arado 234 Nachtigall on Speed
DocRob replied to DocRob's topic in LSM 1/35 and Larger Work In Progress
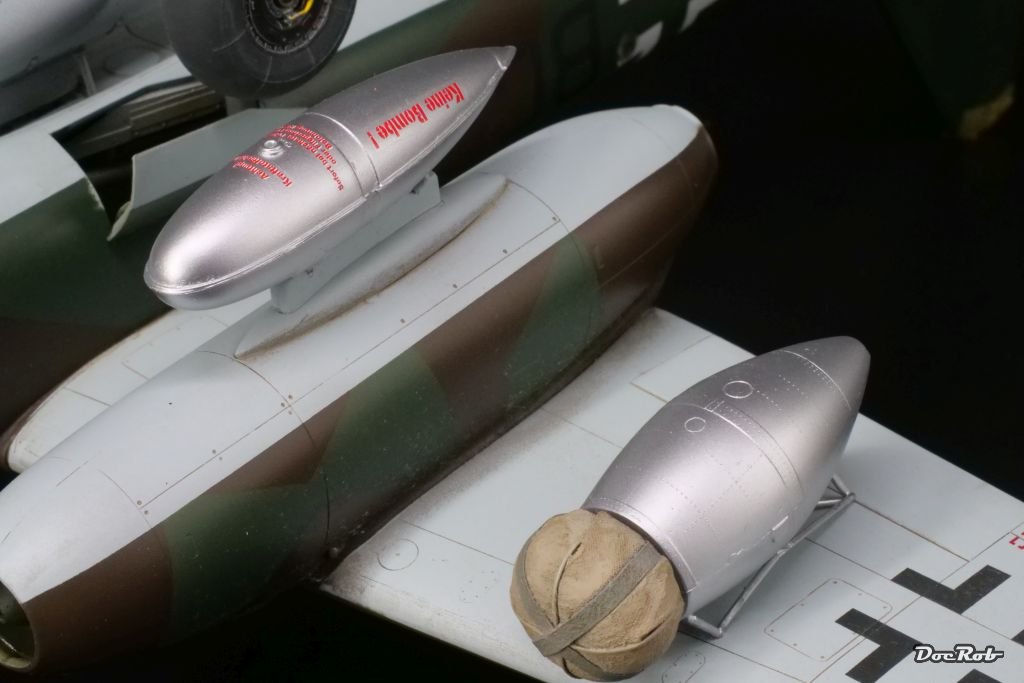
Stripping off the masks revealed, that there are some touch ups needed here and there but nothing mayor, like paint running under masks or other gruesome incidents. The de-masking took about four hours in a sleepless night. The masks behaved perfect, adhered well and were removable residue free, at least here... For black markings and crosses, I used a mix of two thirds flat black and one third Nato black, the white got a tiny drop of sand added and was only sprayed 90% opaque. Super fine markings, heavily macroed: With the last step of de-masking, I experienced something unexpected. While removing the masks of the external tanks, I found, that the 1ManArmy stencil masks were nearly impossible to remove, completely contrary than on the airframe and left they sticky residues onto the surface. First I suspected the red color to be the culprit, but it was the same Tamiya XF flat red, I used onto the plane, thinned with Mr. Levelling Thinner, where it worked flawless. When I removed more masks made from my stock Kabuki tape without issues, it became clear, that somehow the adhesive from the 1ManArmy masks must have been reacted with the base layer of Matte Aluminum from AK's Extreme Metal range. Normally these behave absolutely perfect and it was not the aluminum color which was affected. The masks were only for some hours on the tanks. Warning be careful, if you plan to use 1ManArmy masks over AK's Extreme metals for a NMF paintjob possibly. I would recommend some testing on a dummy. This is how the tanks looked after nearly half an hour of peeling. I couldn't remove the residues any further manually. I tried an alcohol/aqua dest mix, which was not hot enough and a rub with IPA removed the red color completely. Now it's deep cleaning, respraying and decals . Cheers Rob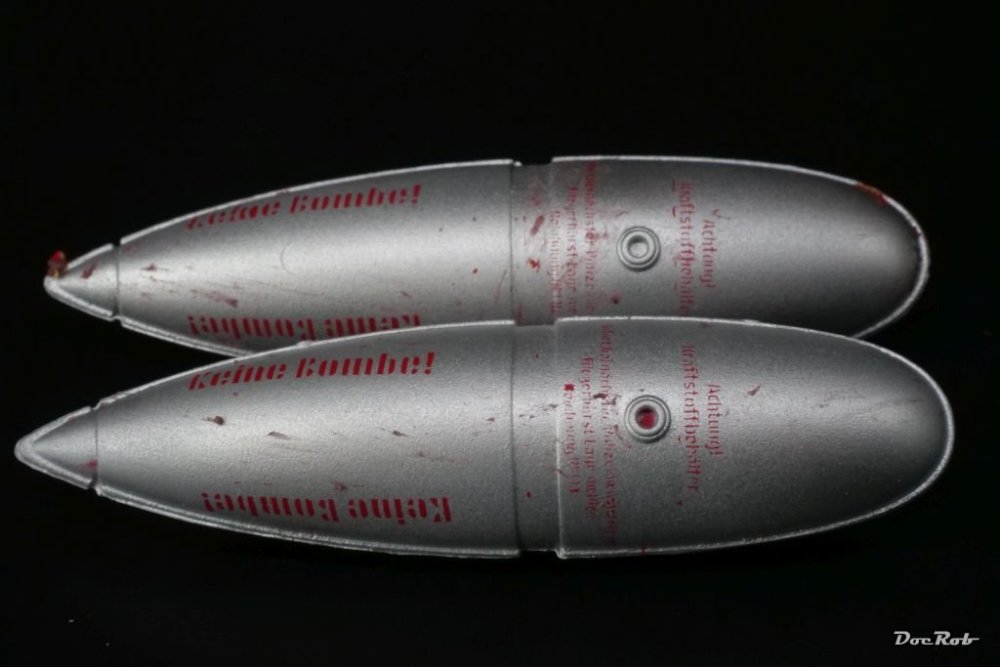


-
Arado 234 Nachtigall on Speed
DocRob replied to DocRob's topic in LSM 1/35 and Larger Work In Progress
Thanks Peter, I can't tell you if it was a wise decision, maybe I should have given the decals a better prepared try with polished gloss coating, to hinder silvering. They behaved absolutely fantastic besides the silvering issue. Cheers Rob -
It will probably be one of my next builds, Chris. Your Gulf Porsche 917K shouldn't be too hard to find. I know, because I thought about buying one for example here in Spain: Fujimi 126166: Car scale model kit 1/24 scale - Porsche 917K John Wyer Automotive Team sponsored by Gulf #2 - Jackie Oliver (GB) + Pedro Rodriguez (MX) - 1000 Kms Monza 1971 (ref. FJ126166) | SpotModel Or in Japan: Porsche 917K '71 Monza 1000km Winner | HLJ.com Cheers Rob
-
I amen that, to nearly all HGW products, I ever used. Wet transfers, masks and sometimes even the seatbelts need adjustment, special care and whatever it takes, but it's easy to bust with their products, like the wet transfers. I guess, the process is the same with the rivets, having a carrier film, later to be removed. To finish my rant about HGW-products, their masks rarely fit and some detail sets, I bought were partly unusable, like the paper wood inserts for the Hansa Brandenburg or their wood decals . The seatbelts, I do like mostly, but some needed extra trimming of the width for fiddling them through the buckles. I don't understand it with HGW, they do have a very interesting portfolio, but a bit more of testing would help to improve their quality. Sorry for the rant Gary, your riveting job looks absolutely fantastic and I can't wait to see it under paint and maybe slightly sanded. I have no idea, how the Eduard rivets behave, which I have for my P-38. They may be produced by HGW too. I will give them a try soon. Cheers Rob
-
Arado 234 Nachtigall on Speed
DocRob replied to DocRob's topic in LSM 1/35 and Larger Work In Progress
Thank you Carl, I hope so. There is no telling, before lifting all that tape. I hope, I don't glue myself to the floor, doing so. Similar, than your approach was mine with the Corsair. With the Arado it is more complicated, because of multi colored stencils (total of five colors) and of the places the markings are on. There are long walkway lines on the fuselage and wings, surrounded by stencils of various colors. Then there are the engine nacelles, it's easier to spray stencils on a Corsair or Phantom. My only built F-4 was a ZM -J model with excellent Cartograph decals. I would never attempt a full stenciling job on a F-4, equal which scale. Cheers Rob -
Arado 234 Nachtigall on Speed
DocRob replied to DocRob's topic in LSM 1/35 and Larger Work In Progress
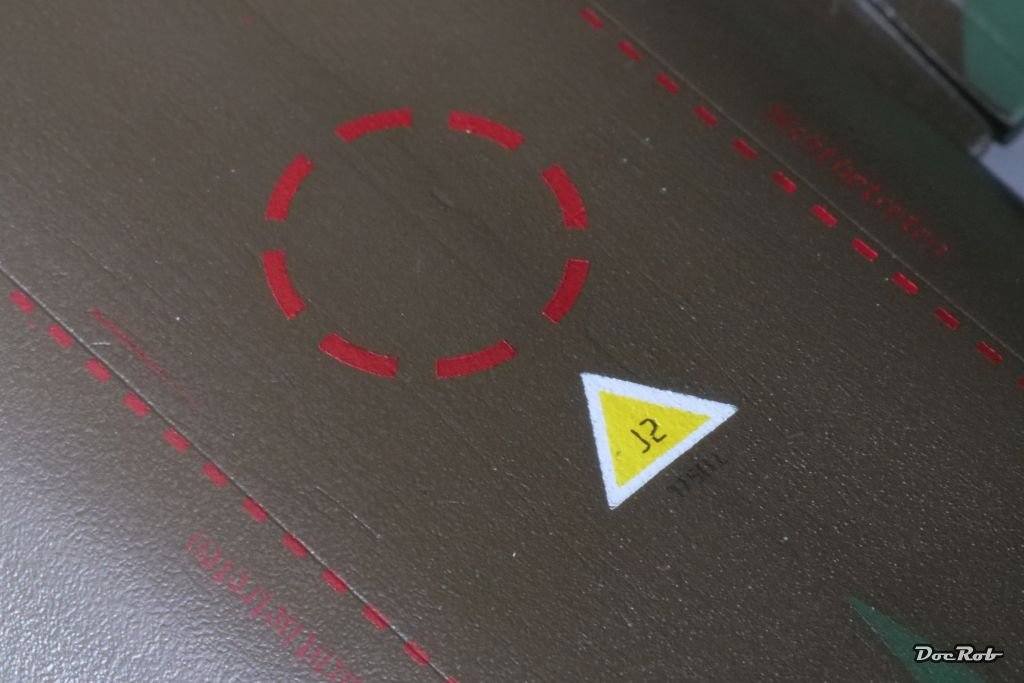
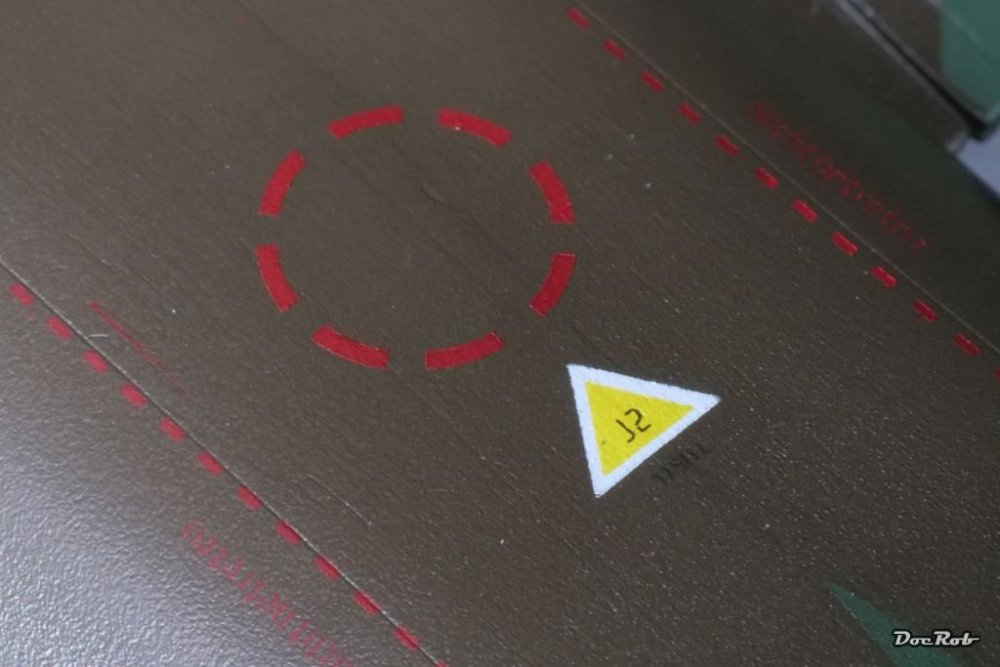
More plane bondage. It doesn't look like much, but I finished the basic masking all over, including the external tanks and sprayed the crosses and whit markings first, then the yellow triangles on top and finally a dot of blue for the oxygen inlet stencil. All these steps include permanent over- and remasking . My next build will be Kabuki free. Cheers Rob
-
Arado 234 Nachtigall on Speed
DocRob replied to DocRob's topic in LSM 1/35 and Larger Work In Progress
Thanks for your sympathy, guys. I've never made something like this before, I definitely need a relaxed build soon and something to show with the finished Arado, to rectify the expense. Cheers Rob -
GB Award for modeling greatness decided
DocRob replied to Clunkmeister's topic in Let’s Get Wet Group Build.
Indeed, very generous Ernie, that will motivate for a last week run for some near finished builds . The more the better. Cheers Rob -
Summer project Kawasaki KI-61, Tamiya 1/48
DocRob replied to DocRob's topic in LSM 1/48 Work in Progress
Thank you Chris, I think you used decals right? I used the wet transfers, which behave differently. They are perfect when everything works. If not you have a pre-chipped model . Cheers Rob -
Nice progress Gary and thanks for the tip about the dark primer as a preparation for riveting. I will keep it in mind for my riveted NMF P-38. Gloss black will be a good base for the NMF and the rivets. Cheers Rob
-
Arado 234 Nachtigall on Speed
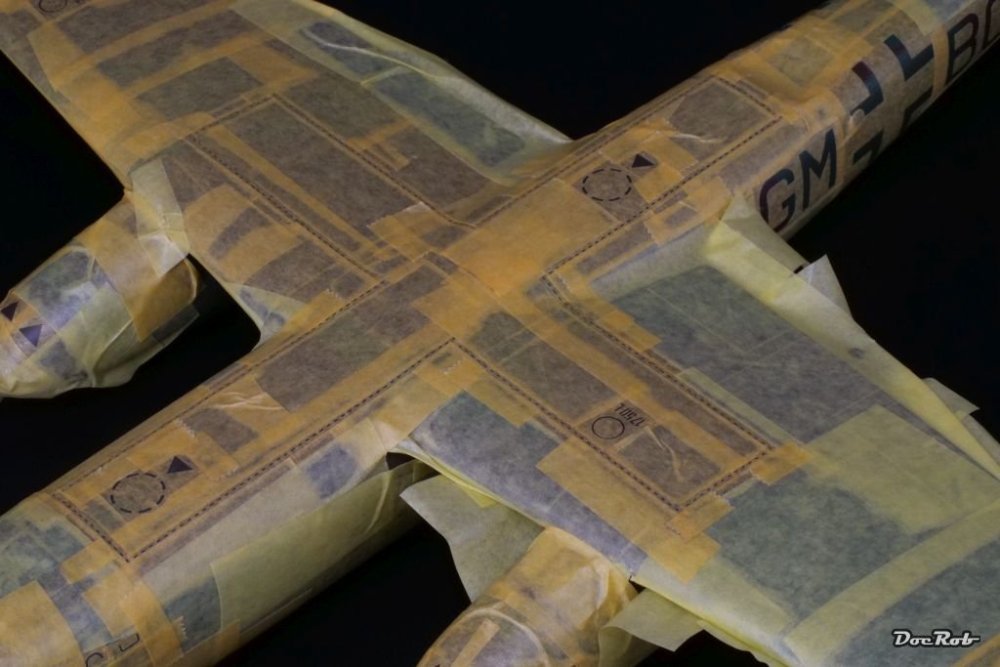
DocRob replied to DocRob's topic in LSM 1/35 and Larger Work In Progress
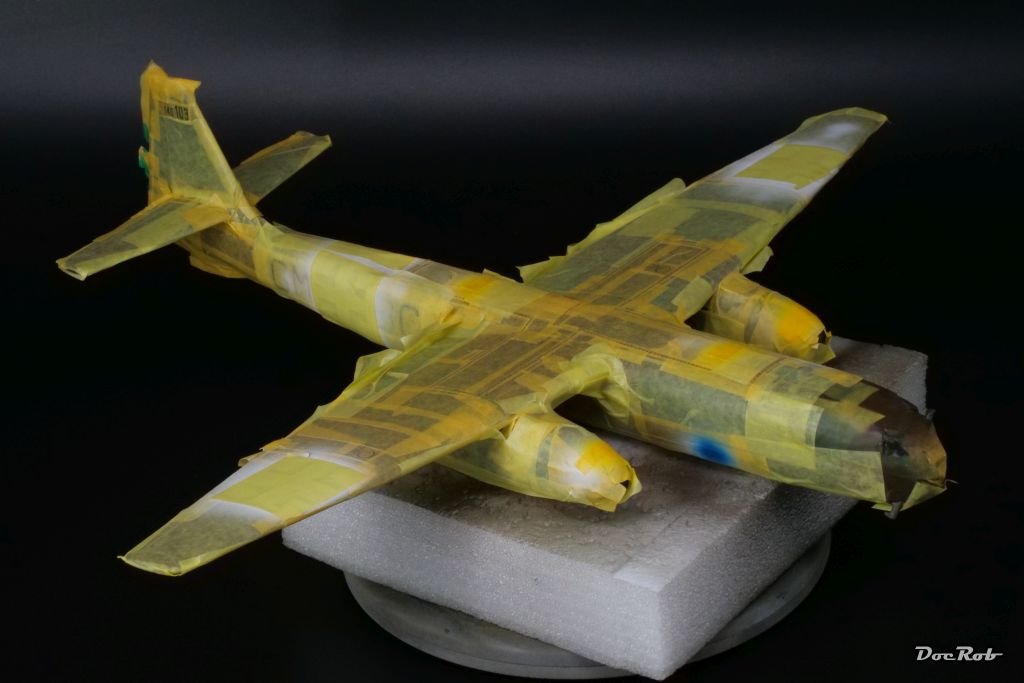
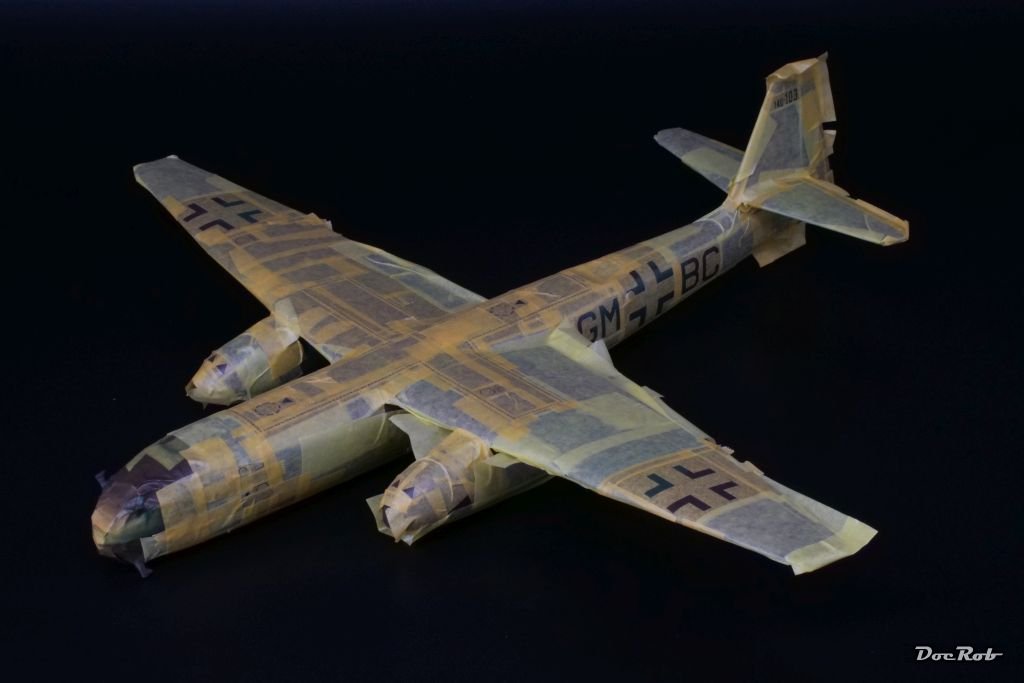
This is getting out of hand. I'm running out of masking tape and patience. Because there are stencils everywhere, you have to mask around them, which actually means, covering the whole plane in Kabuki. And that's not all, after finishing masking around the stencils, some of them need to be covered, because different colors will be used. It's really hard to make no mistakes and leave a spot uncovered or for example the tiny number of each stencil. I needed two exhausting bench days to get to this point and I'm not ready yet. By this time I cut a zillion patches of Kabuki tape and my eyes are hurting from placement work. Are these masks great, yes they are definitely, would I use them on a bird like the Arado again, NOOOO. I used 1ManArmy masks for my Corsair build and this was way easier done due to the placement of the stencils and the used colors. Cheers Rob