DocRob
-
Posts
7,043 -
Joined
-
Last visited
Content Type
Profiles
Forums
Events
Gallery
Everything posted by DocRob
-
Well done Sasha, the 109 came out beautifully. I really like the slightly faded paintjob. Cheers Rob
-

what's on your to buy list for 2023 (newly released kits only)
DocRob replied to npb748r's topic in Modelling Discussion
Well, normally I don't plan on future purchases, Mostly, I see a kit and if my mind starts to render images of the built kit, I'm sold. There are some temptations though. CSM's Bristol Scout, the still available WNW Felixstowe, Master Korabels 1/48 wooden 42 ft launch of Twelve Apostles, maybe the new tool 1/24 Mini Cooper from Hasegawa with some extras. I almost forgot, there is the 1/24 Spitfire from Airfix sending 'buy me' signals. You'll know it, when it's there . Cheers Rob -
Air Sea Rescue MH-60T Coast Guard helo
DocRob replied to Pete Fleischmann's topic in LSM 1/35 and Larger Work In Progress
Fantastic work, water and figure look absolutely great. Can't wait to see the heli hovering. Cheers Rob -
Arado 234 Nachtigall on Speed
DocRob replied to DocRob's topic in LSM 1/35 and Larger Work In Progress
Muchas gracias amigos, it's a milestone indeed, with most of the difficult areas of the build addressed. Now it's straight towards painting, but I haven't finally decided which scheme I use. Brown and green like the manual suggested or grey mottled nightfighter scheme. I will wait for the 1ManArmy stencil masks to arrive, as they often include markings for a special plane and decide then. For green and brown, I have a mask set and I somehow like the scheme. @Bomber_County Phil, you forgot to mention luck . Cheers Rob -
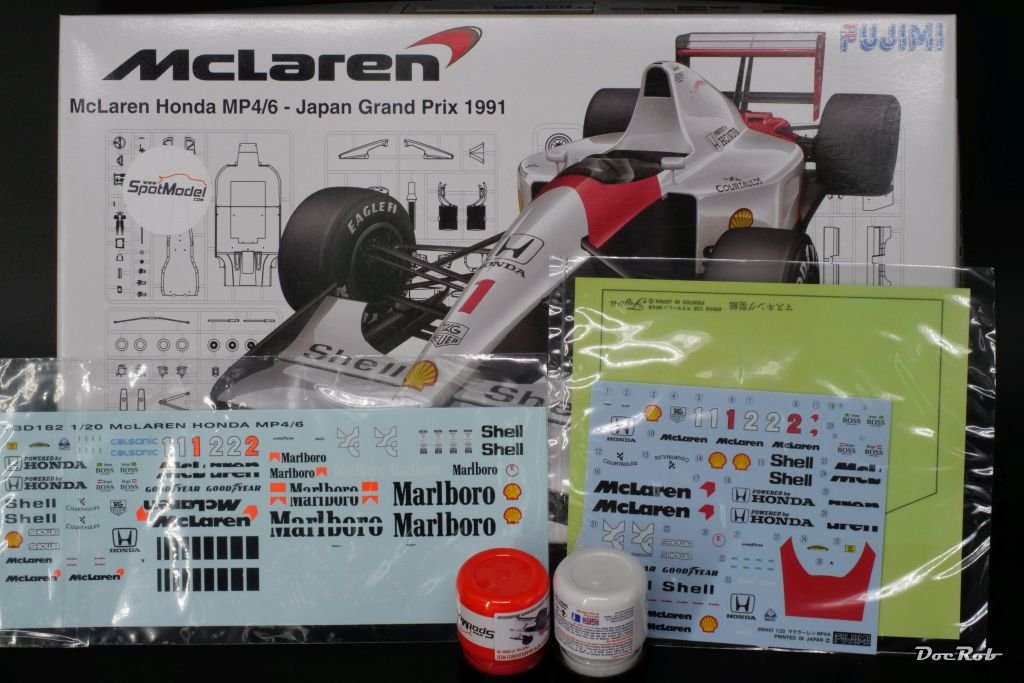
Yesterday, I received decals for my McLaren made by the Italian company TB Decals, including tabaco ads. Interesting though is the different interpretation of the bright red color. TB Decals to the left seems to orientate on the Zero Paint red in the middle. The Fujimi decals on the right are somewhat darker. Not being an expert, but evaluating photos, the truth would have been between them with a slight bias towards Zero Paints. Cheers Rob

-
Arado 234 Nachtigall on Speed
DocRob replied to DocRob's topic in LSM 1/35 and Larger Work In Progress
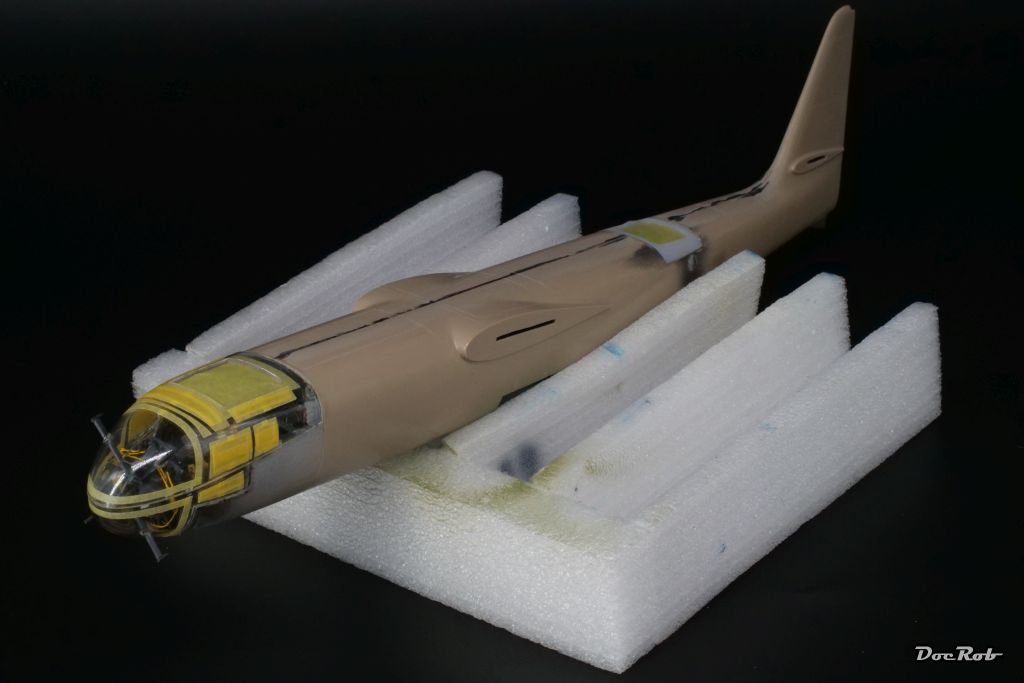
The thing got wings finally and it's tail. Fit is good so far, but a little filling will be needed at the wingroots. The Arado is a big kite and one of the main goals until the finish is not to knock off the protruding FUG antenna posts. She will not be a tail sitter, my glued in weight was sufficient. Cheers Rob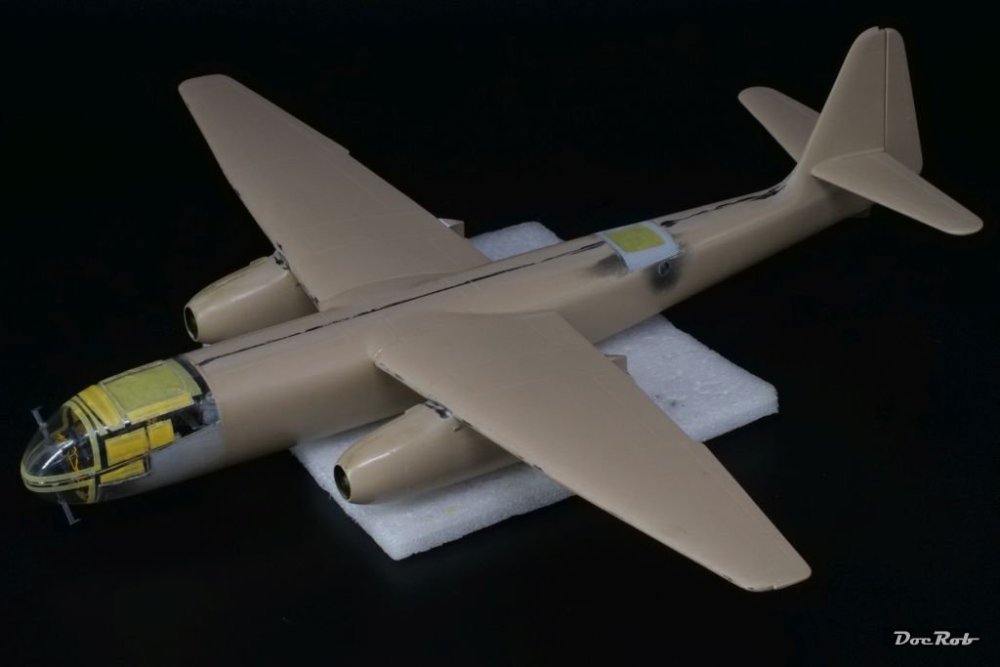
-
Arado 234 Nachtigall on Speed
DocRob replied to DocRob's topic in LSM 1/35 and Larger Work In Progress
Thank you Peter, ZM will be more buildable for sure. Detail wise the Fly kit is a mixed bag. The plastic is so-so, but the resin parts for the Cockpits and other areas will be hard to surpass. Cheers Rob -
Arado 234 Nachtigall on Speed
DocRob replied to DocRob's topic in LSM 1/35 and Larger Work In Progress
Thank you Carl, most went on ok but my error from the very firs day of building the Nachtigall shows. The lower antenna posts are in front of the upper ones. I somehow mis measured the holes in the top canopy and there is nothing realistic, I can do about it. In late 2019, when I started the build, I mentioned a possible upcoming AR-234 from ZM, but it hasn't materialized until now. Portfolio wise, the Arado would fit though for ZM. The Fly kits seem to become sparse, like you said. There is Artscale in Czechoslovakia claiming to have the night fighter available. Cheers Rob -
Arado 234 Nachtigall on Speed
DocRob replied to DocRob's topic in LSM 1/35 and Larger Work In Progress
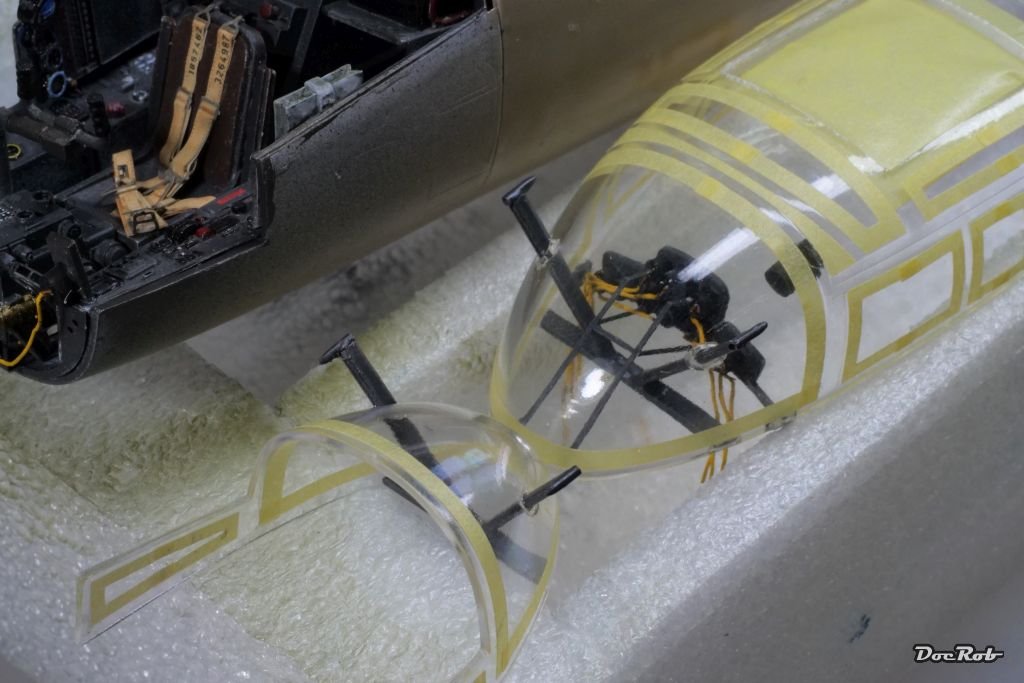
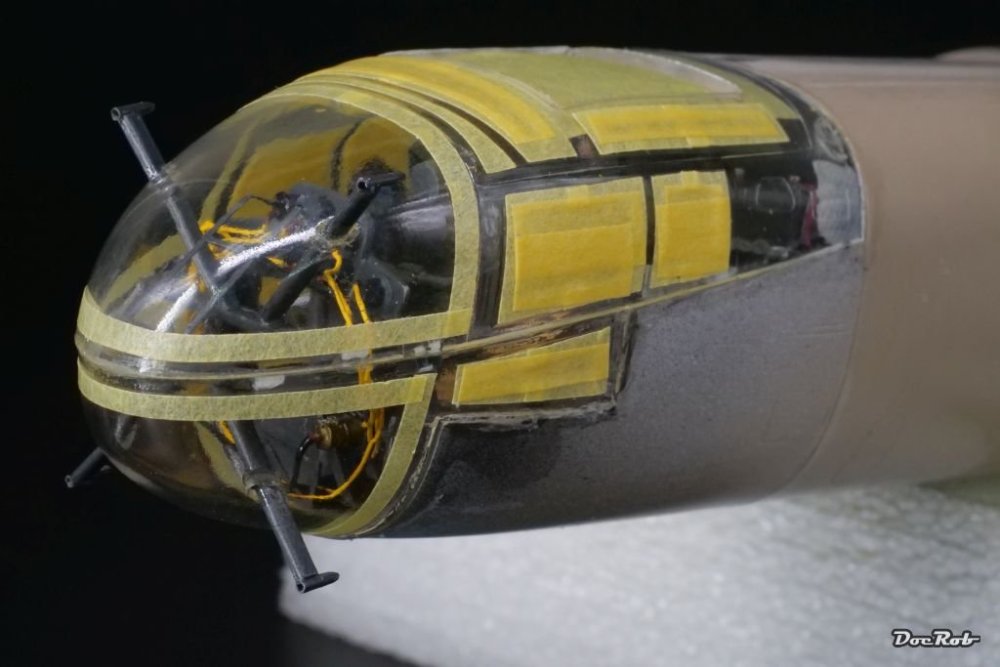
I took all my guts and glued the canopy shut, first the lower half, followed bey the upper glasshouse. I used Tamiya cement and after the glue had settled, ran Revell Contacta Clear over the seams three times for filling and sealing. The radio operator compartment was closed as well and received the same treatment. Cheers Rob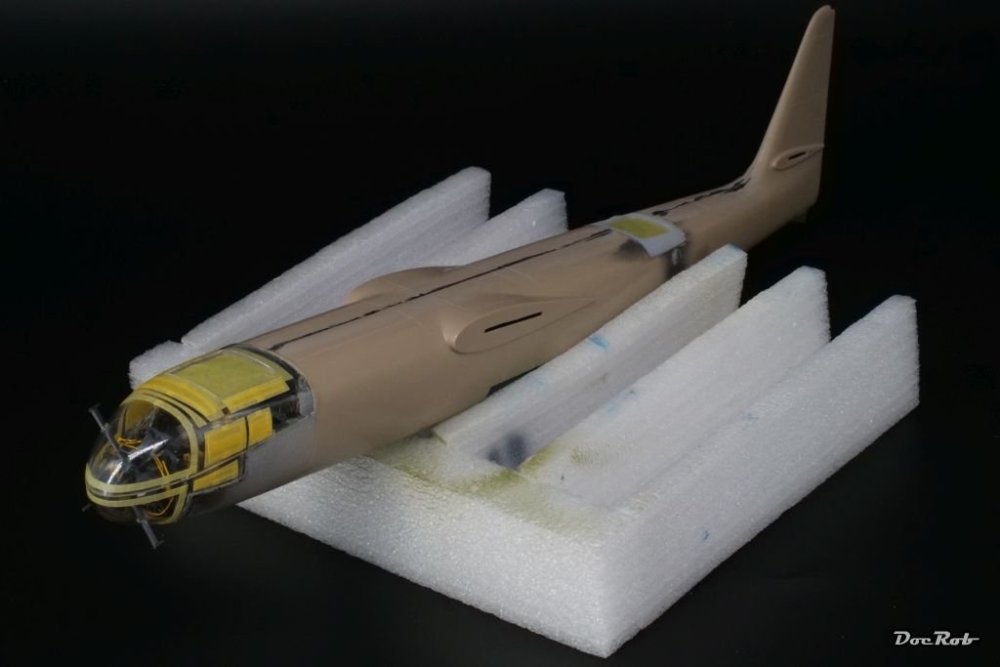
-
These wheel wells look fantastic Peter, more and more details along the great engineering of the kit. The tail assembly seems perfect. My original thinking was for my future P-38 build, to do it along a second P-38 from Academy. I'm not so sure anymore . Cheers Rob
-
Arado 234 Nachtigall on Speed
DocRob replied to DocRob's topic in LSM 1/35 and Larger Work In Progress
Thank you Gentlemen, these clear parts are by far the most touched and handled ever in my builds. I hope, I can keep them unharmed with so many things going in and on there. Yesterday, I realized, that my process to add the upper canopy first wouldn't work, because the lower side has trapezoid 'fins' fitting between fuselage and upper canopy. This way, it's impossible to adjust the IP wiring after closing the canopy, bummer. I prepared everything that the wires will bend to shape, while gluing on the upper half of the glasshouse. Cheers Rob -
I have the Romfell in my stash and thought about a steam punk conversion. Not sure, but it's a maybe. Cheers Rob
-
Arado 234 Nachtigall on Speed
DocRob replied to DocRob's topic in LSM 1/35 and Larger Work In Progress
Slowly progressing with the cockpit. After finally gluing in the instrument panels struts, I added the struts for the FUG antennas and hope they are more or less correct aligned. Not an easy job, because the cockpit is slightly tilted to the front and you have only the curved canopy shapes for orientation. I finally made some touchups and let some Pledge run around the drilled holes in the clear cockpit parts. Next will be final masking and then the canopy will be glued in place, first the upper half, then stowing the cables and then the lower half. Cheers Rob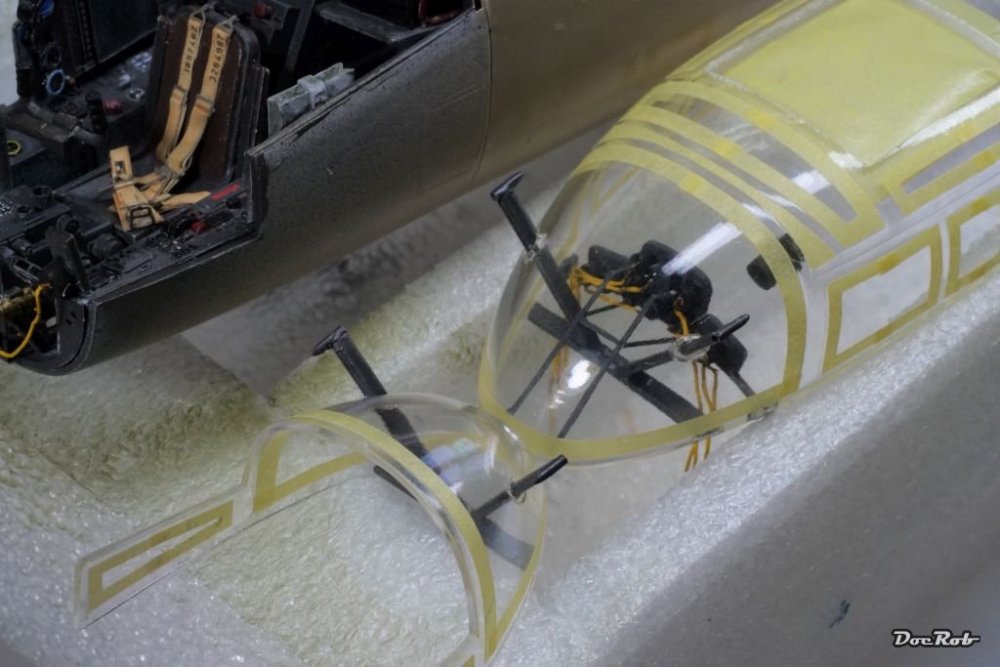
-
Arado 234 Nachtigall on Speed
DocRob replied to DocRob's topic in LSM 1/35 and Larger Work In Progress
Two times yes, Carl. Please do another 234, it would be gold in your hands. Even with the difficulties, this build throws at me, I consider building a second Arado, but only a single seater. And yes, it's the toughest part of the build, not made easier with the added night fighter equipment. Cheers Rob -
Arado 234 Nachtigall on Speed
DocRob replied to DocRob's topic in LSM 1/35 and Larger Work In Progress
As I don't have UV gel, I will use PVA. I have a bottle of relatively thick PVA for woodworks and hope it will work. I need a self leveling solution, because I don't want to sand the clear parts. Cheers Rob -
Fantastic result Gus, she's a beauty with the slightly faded and weathered surfaces, contrasting the nicely blended decals. Are these the kit supplied ones? Cheers Rob
-
Arado 234 Nachtigall on Speed
DocRob replied to DocRob's topic in LSM 1/35 and Larger Work In Progress
Thanks Peter, I hope to close the canopy soon and forever . Where the two canopy halves meet, I will try to use white glue as a filler, let's see, how this works out. Cheers Rob -
Arado 234 Nachtigall on Speed
DocRob replied to DocRob's topic in LSM 1/35 and Larger Work In Progress
I managed to get some of the hard stuff done. I'm never to keen about gluing parts into canopies, but here it's a bit more than the odd rearview mirror and it's a mix of materials, plastic, resin and PE. The canopy was bathed in Pledge before masking, a long time ago and my recent glue tests showed, that there is no fogging with my CA and Tamiya cement. I somehow fiddled in the IP and the IP framing, after I installed the base strips for the antler struts. It was not easy to align the parts without smearing glue somewhere on the inside of the canopy, but I think, I got it done. The IP got two shim parts made from styrene, where they meet the canopy for a larger gluing surface. Now I let that dry until tomorrow and then will attach the lower struts of the IP framing and make some touch ups. Cheers Rob
-
Arado 234 Nachtigall on Speed
DocRob replied to DocRob's topic in LSM 1/35 and Larger Work In Progress
Thank you Peter, the next steps will show the fate, the Nachtigall will meet. Yesterday, I worked on the canopy and there showed the big mistake I made right to the beginning (I knew about it since then, but wanted to address it when time comes). The holes in the upper canopy half, which take the FUG posts are to far to the rear. Somehow, I measured wrong, when drilling them. There is no way of correcting this, but to hopefully align them as good as possible and to say, the setup is a development from the first B2-N model. Easy to assert, with the sparse documentation of the Nachtigall. Yesterday, I performed some glue testing on the inner back of the clear parts, to avoid fogging. I tested my go to CA and Tamiya plastic glue. Let's see, how this worked. Cheers Rob -
Arado 234 Nachtigall on Speed
DocRob replied to DocRob's topic in LSM 1/35 and Larger Work In Progress
Indeed Phil, I'm a bit of a coward, when it comes to the canopy. You have to add structural parts, IP and IP framing, the antennae posts and some levers and instruments into the clear parts. Yesterday, I did a bit of test fitting and after some minutes, there was a bunch of parts cluttered on my desk, ready to be puzzled again. Cheers Rob -
Great work on the engine and cockpit parts, everything looks crisp and clean. For wiring, I use lead wire, which you can purchase from different companies, like PlusModel or Ask. I have an assortment of different diameters and they are supersoft and good to glue with CA. Cheers Rob
-
C'mon Hubert, it's nearly done . I like the looks of your pit a lot, well detailed and lived in, but personally, I can't wait for you tackling the weird outside looks of this interesting bird. Cheers Rob
-
...and what a beauty it is, congratulations. I hope your precious PZL can trigger Hubert to follow through with his. Cheers Rob
-
Tamiya Mosquito FB Mk VI 60326 - 1/32
DocRob replied to Bomber_County's topic in LSM 1/35 and Larger Work In Progress
Poco a poco Phil, the Mossie is a demanding project. Your cockpit looks great and you finished the fiddly bets, which add a lot of reality. Is there a reason, why the cockpit floor is still on the sprue? Cheers Rob -
Welcome to the forum Collin, nice Job on your Mitchell. I really like the faded OD paint job and the beautiful in flight display. Cheers Rob