JohnB
-
Posts
7,256 -
Joined
-
Last visited
Content Type
Profiles
Forums
Events
Gallery
Everything posted by JohnB
-

Tamiya Spitfire VIII converted to a VII
JohnB replied to denders's topic in LSM 1/35 and Larger Work In Progress
A bit out of the usual! Should good! 🙂 -
I look forward to seeing the finished bird! 🙂
-
HK 1/32 B-25J strafer done
JohnB replied to JohnB's topic in LSM 1/32 and Larger Aircraft Ready for Inspection
Thanks Carl. A little bit different for sure. That's one thing that decided me on building this particular bird. Thanks again. 🙂 -
Thank you Chris! All done now! Go here: https://forum.largescalemodeller.com/topic/20905-hk-132-b-25j-strafer-done/
-
HK 1/32 B-25J strafer done
JohnB posted a topic in LSM 1/32 and Larger Aircraft Ready for Inspection
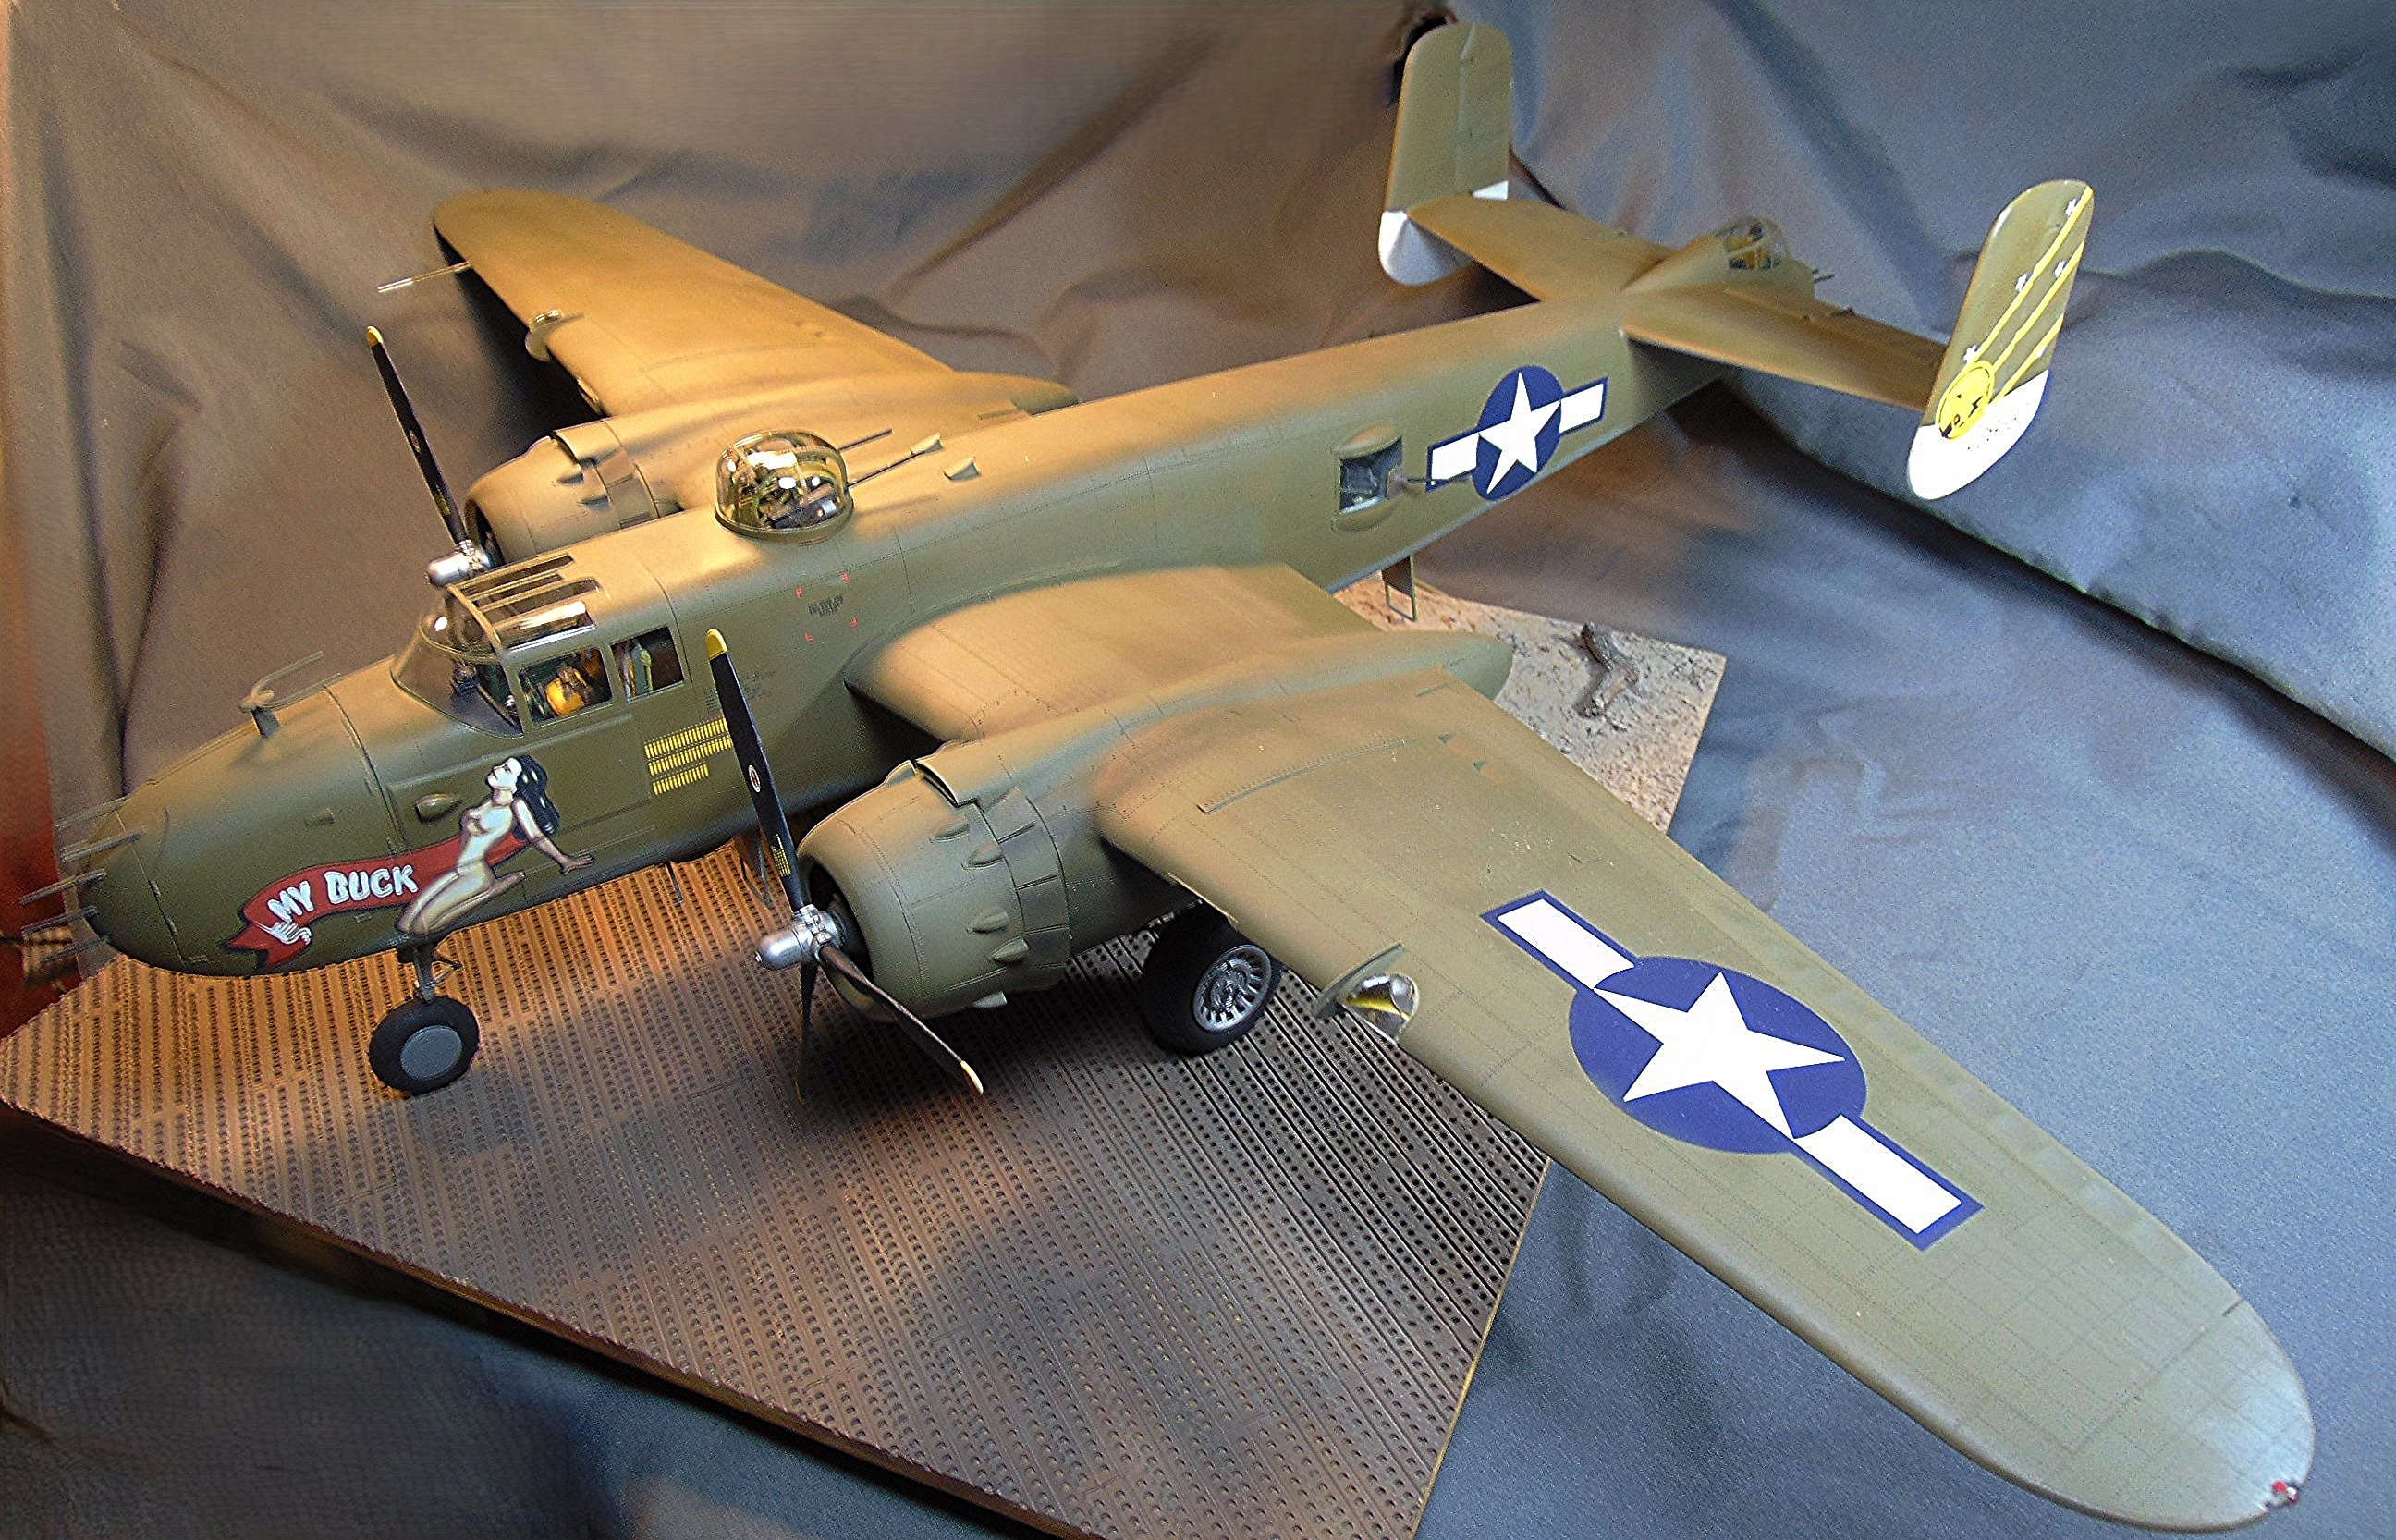
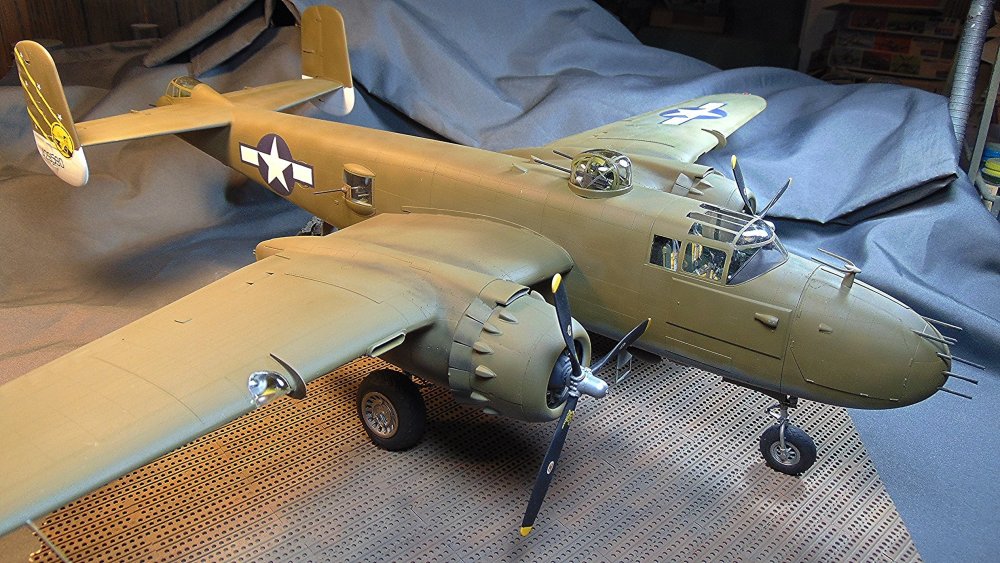
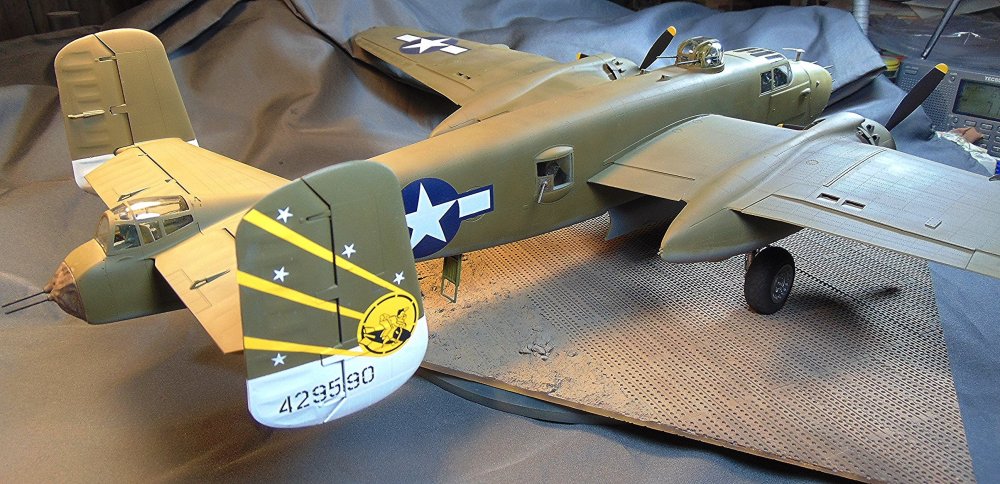
I'm calling this one DONE! OOB except for belts on pilot and copilot seats plus the home-made seat cushions (putty). It's a nice kit but does have some fit problems although most of them were self inflicted! I've always liked those vertical tail markings and that's what got me to build this kit since they are included with the kit. Painted with Testor's OD and Colourcoats grey. I have to say I'm VERY glad to be done with this build due to the before mentioned self inflicted fit problems PLUS the damn thing is just too big for my work space! I kept bumping it into things! I hope you like it.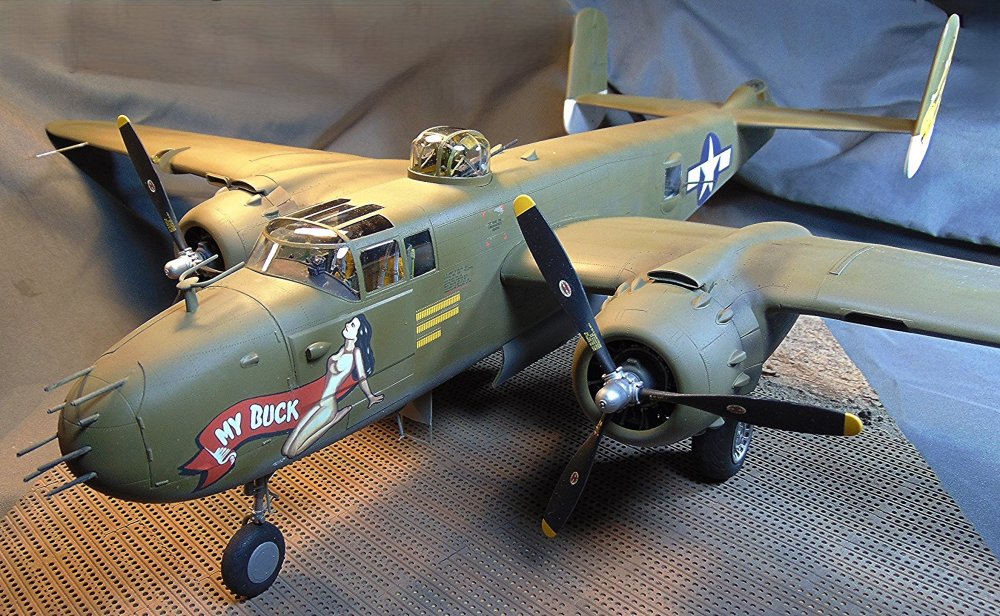

- 5 replies
-
- 10
-

-
Thanks Carl.
-
Enjoy the Holidays and family Kevin. 🙂 I plan to have this thing finished in a day or two.
-
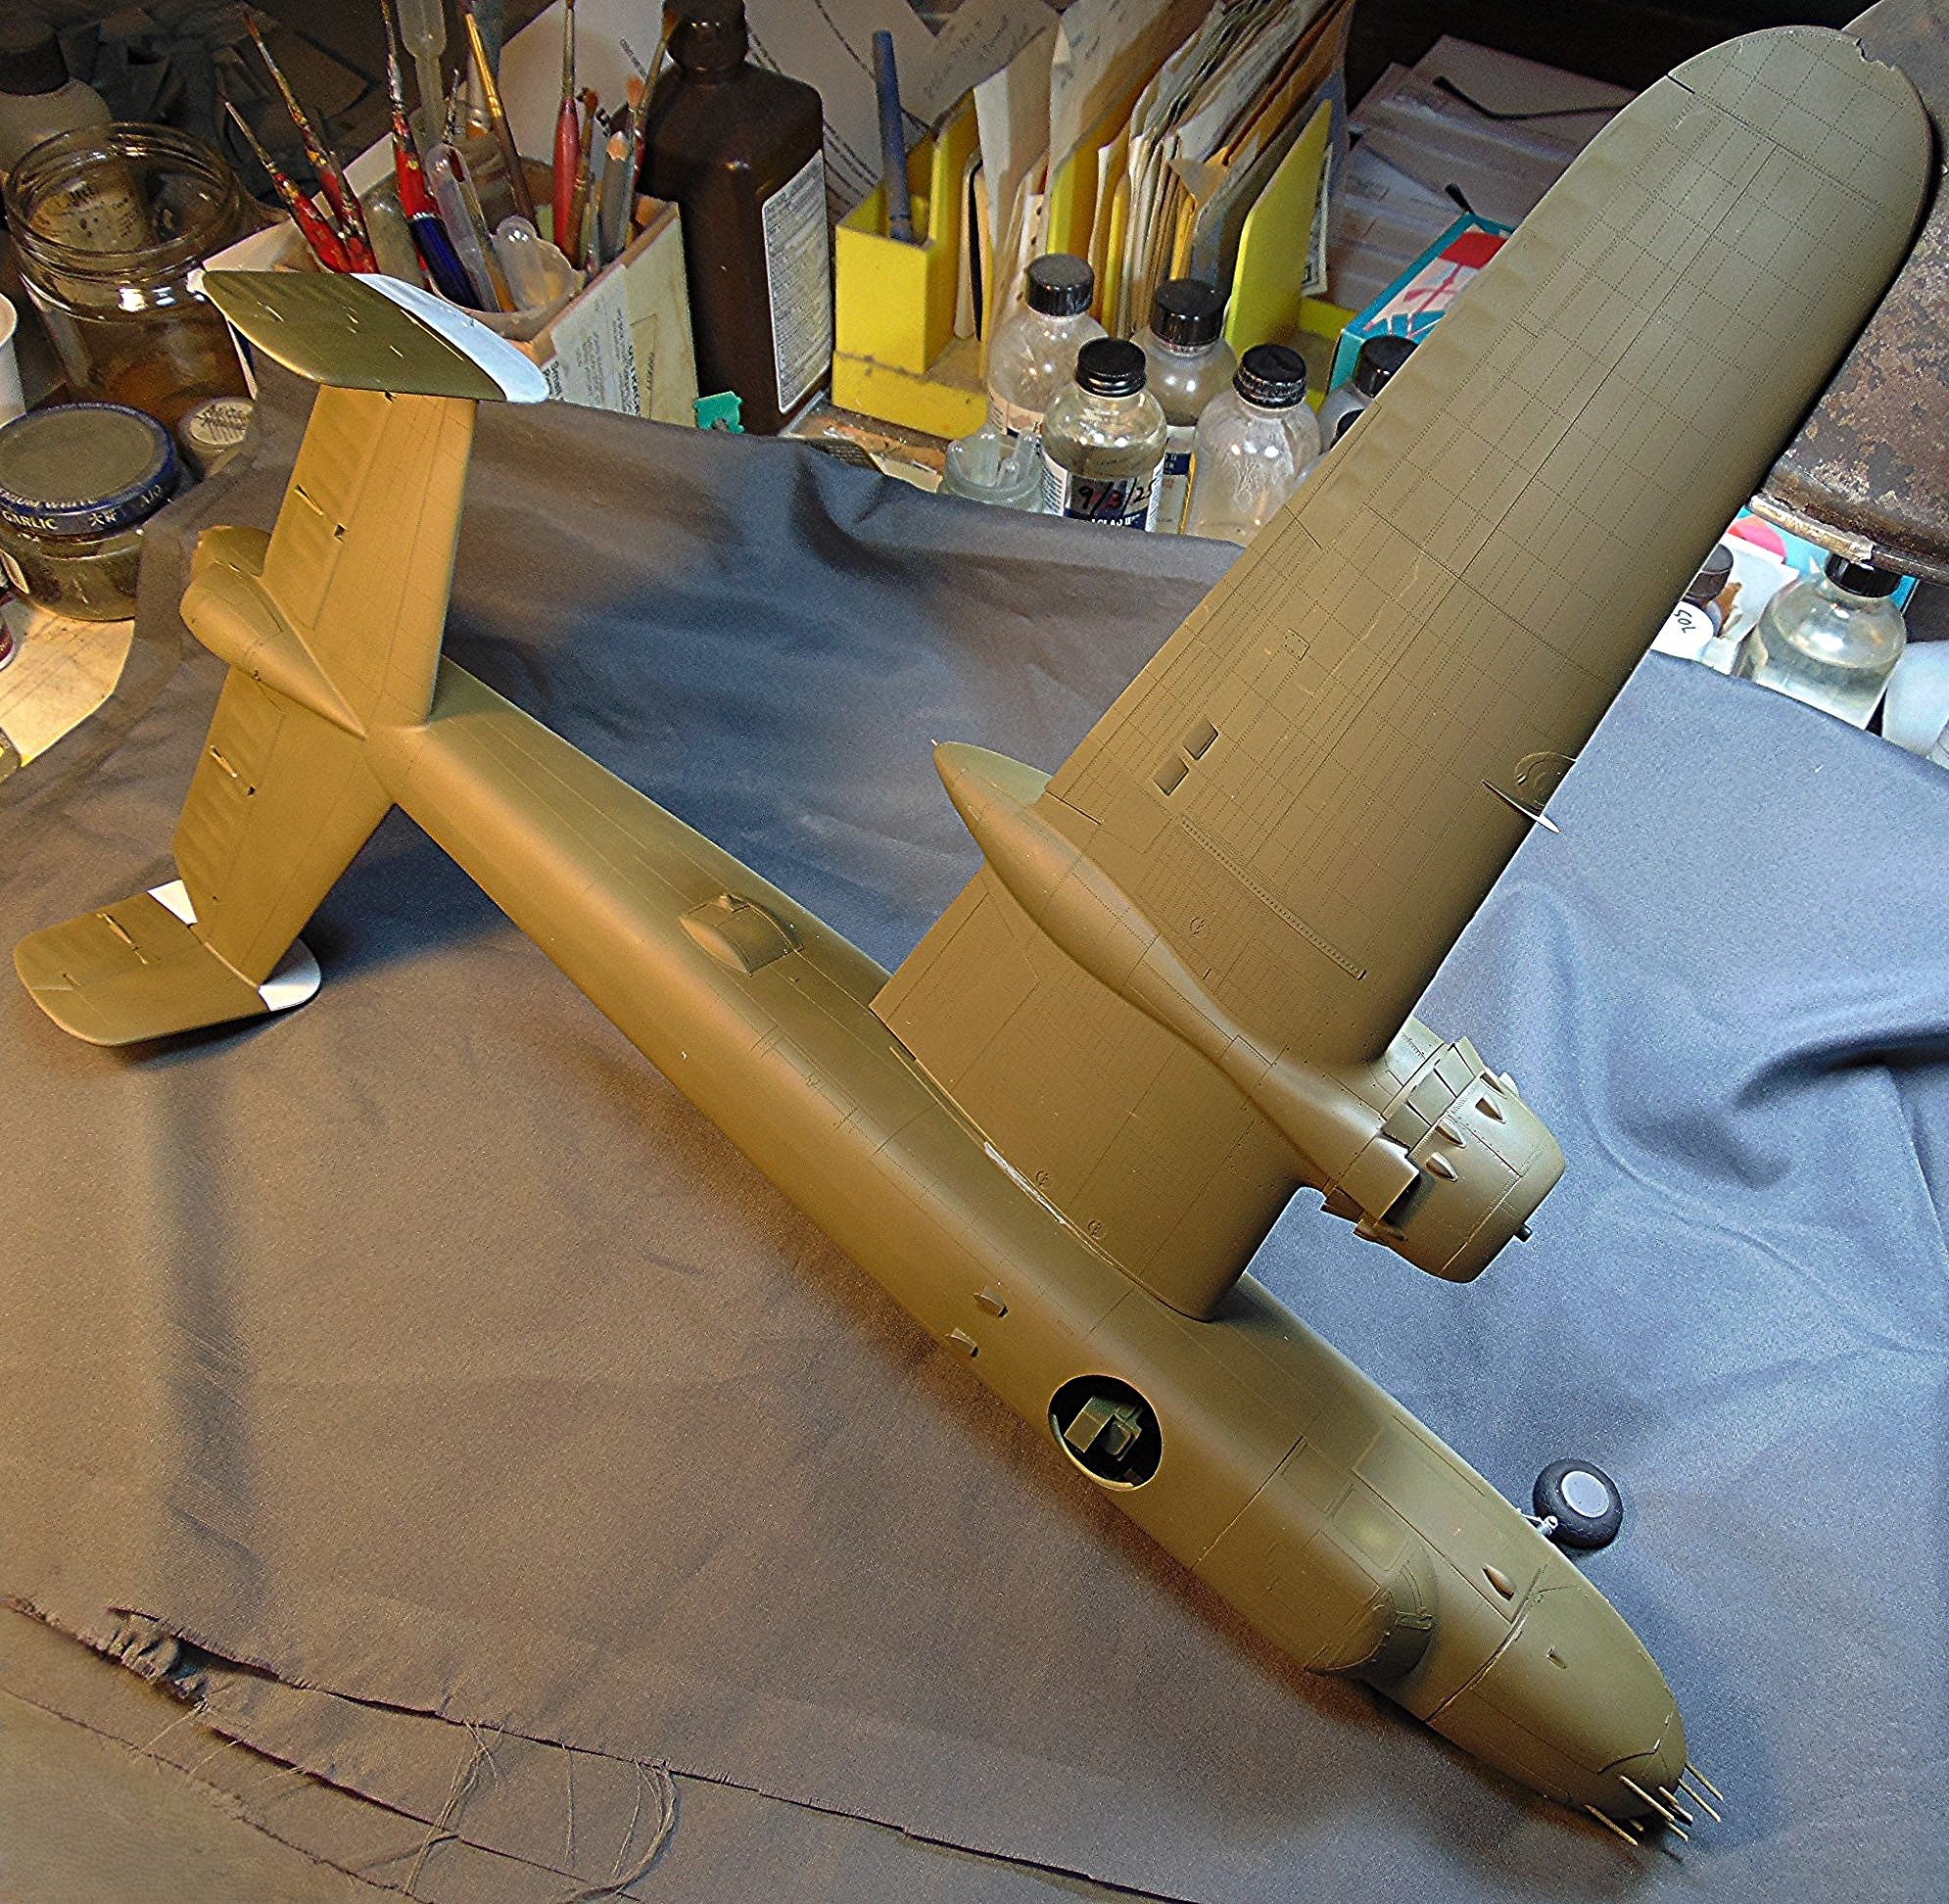
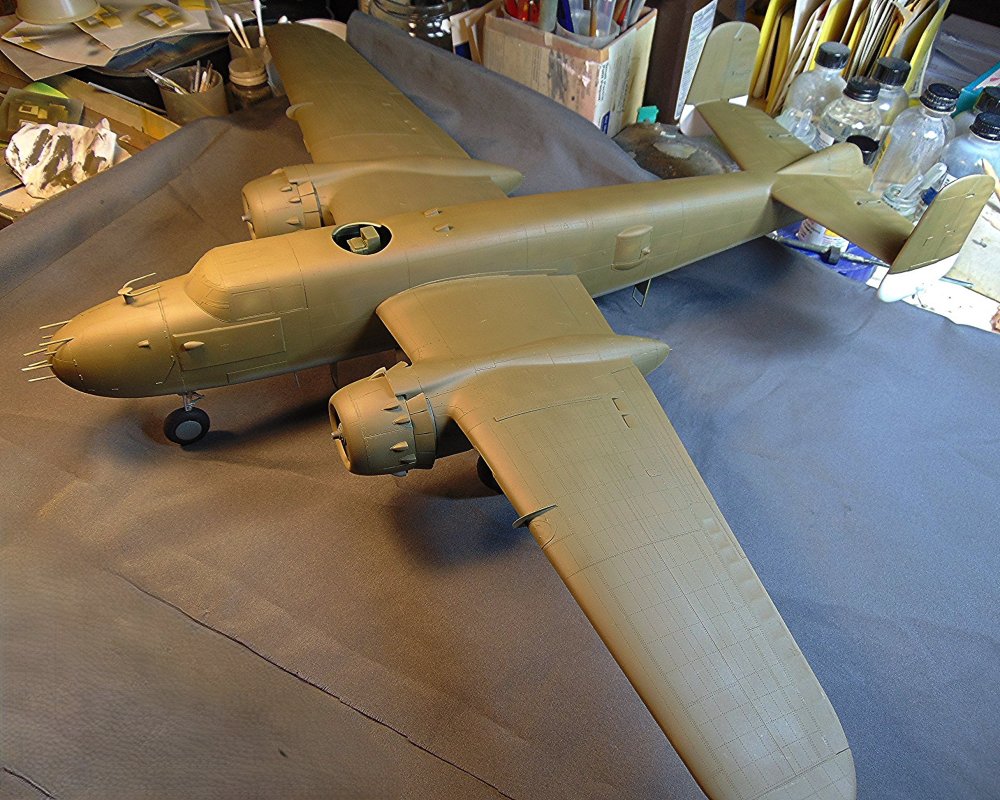
Wings attached and painting, other than weathering, complete.
-
Thanks Martin. Unfortunately it's not as snug as it looks. I turned the model over to attach the other wing and it came off. I had to re-do attaching it and now I think it will stay put (fingers crossed).
-
Painting, except for many touch ups, is complete. I'm working on attaching the wings and other odds and ins now. 🙂

-
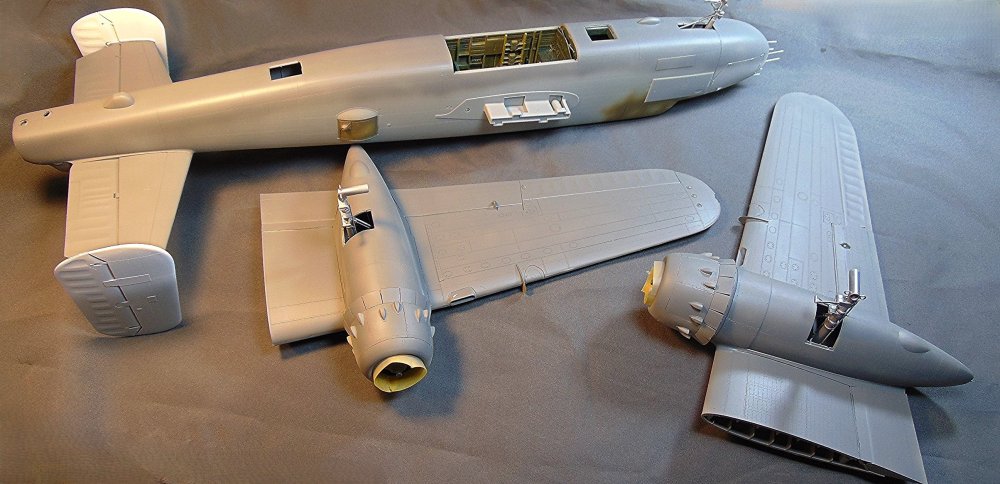
Since this is such a large model I decided to paint in sections. Wing and fuselage undersides first. The OD uppers will be next then I'll see about joining the wings to the fuselage.
-
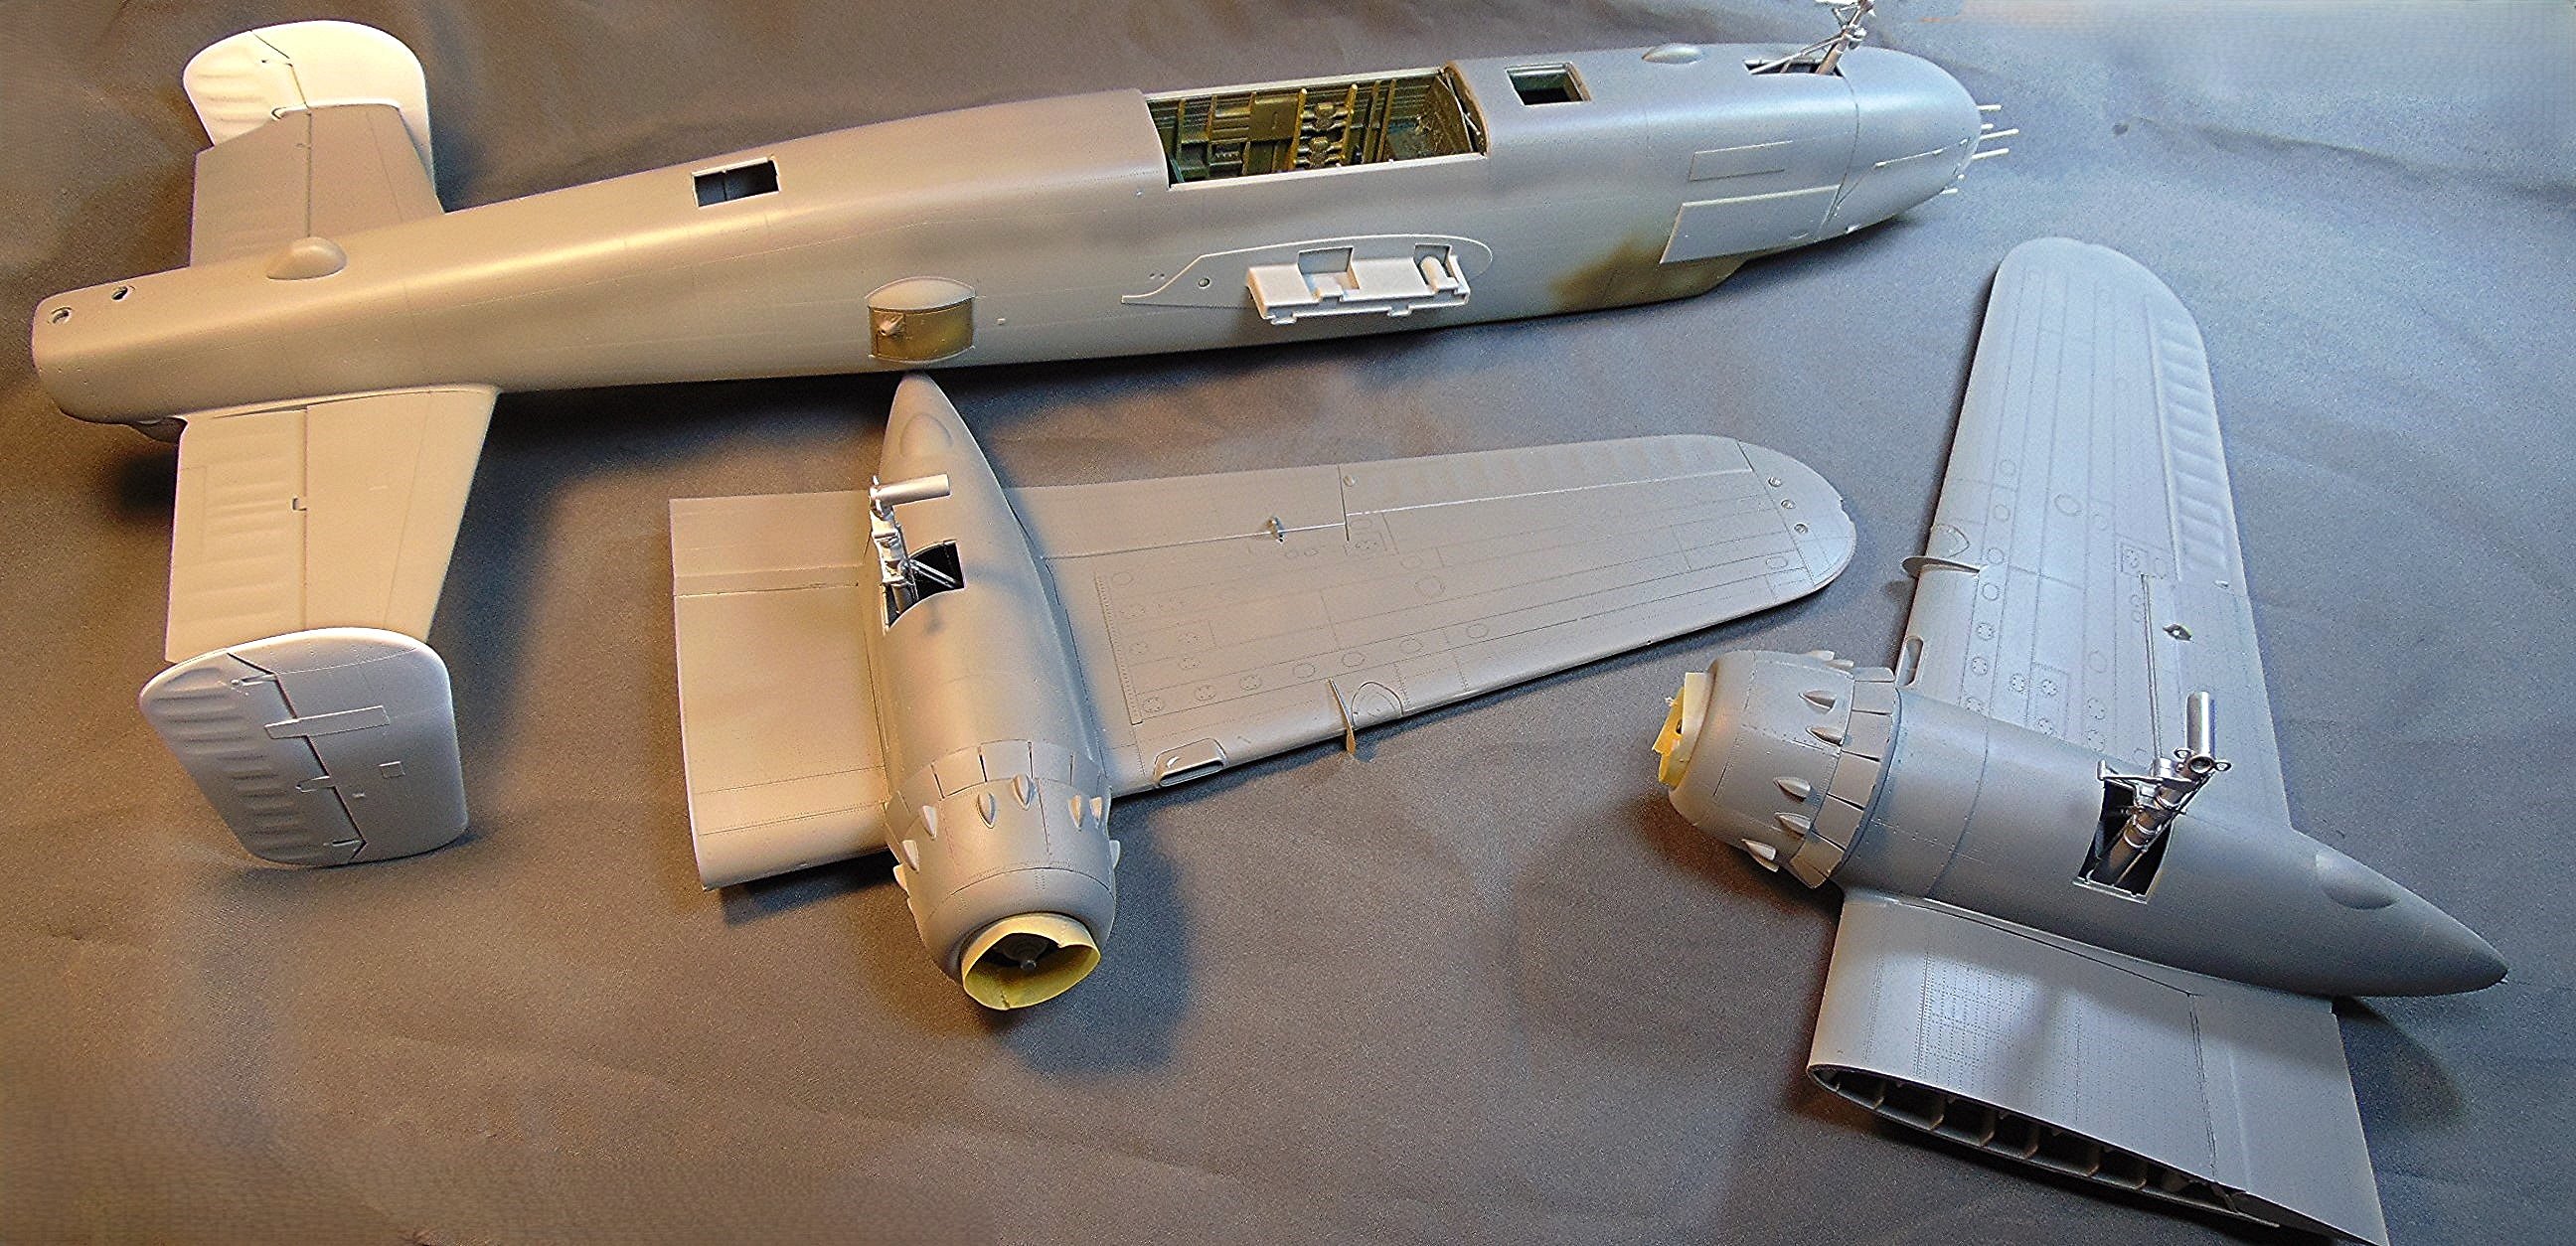
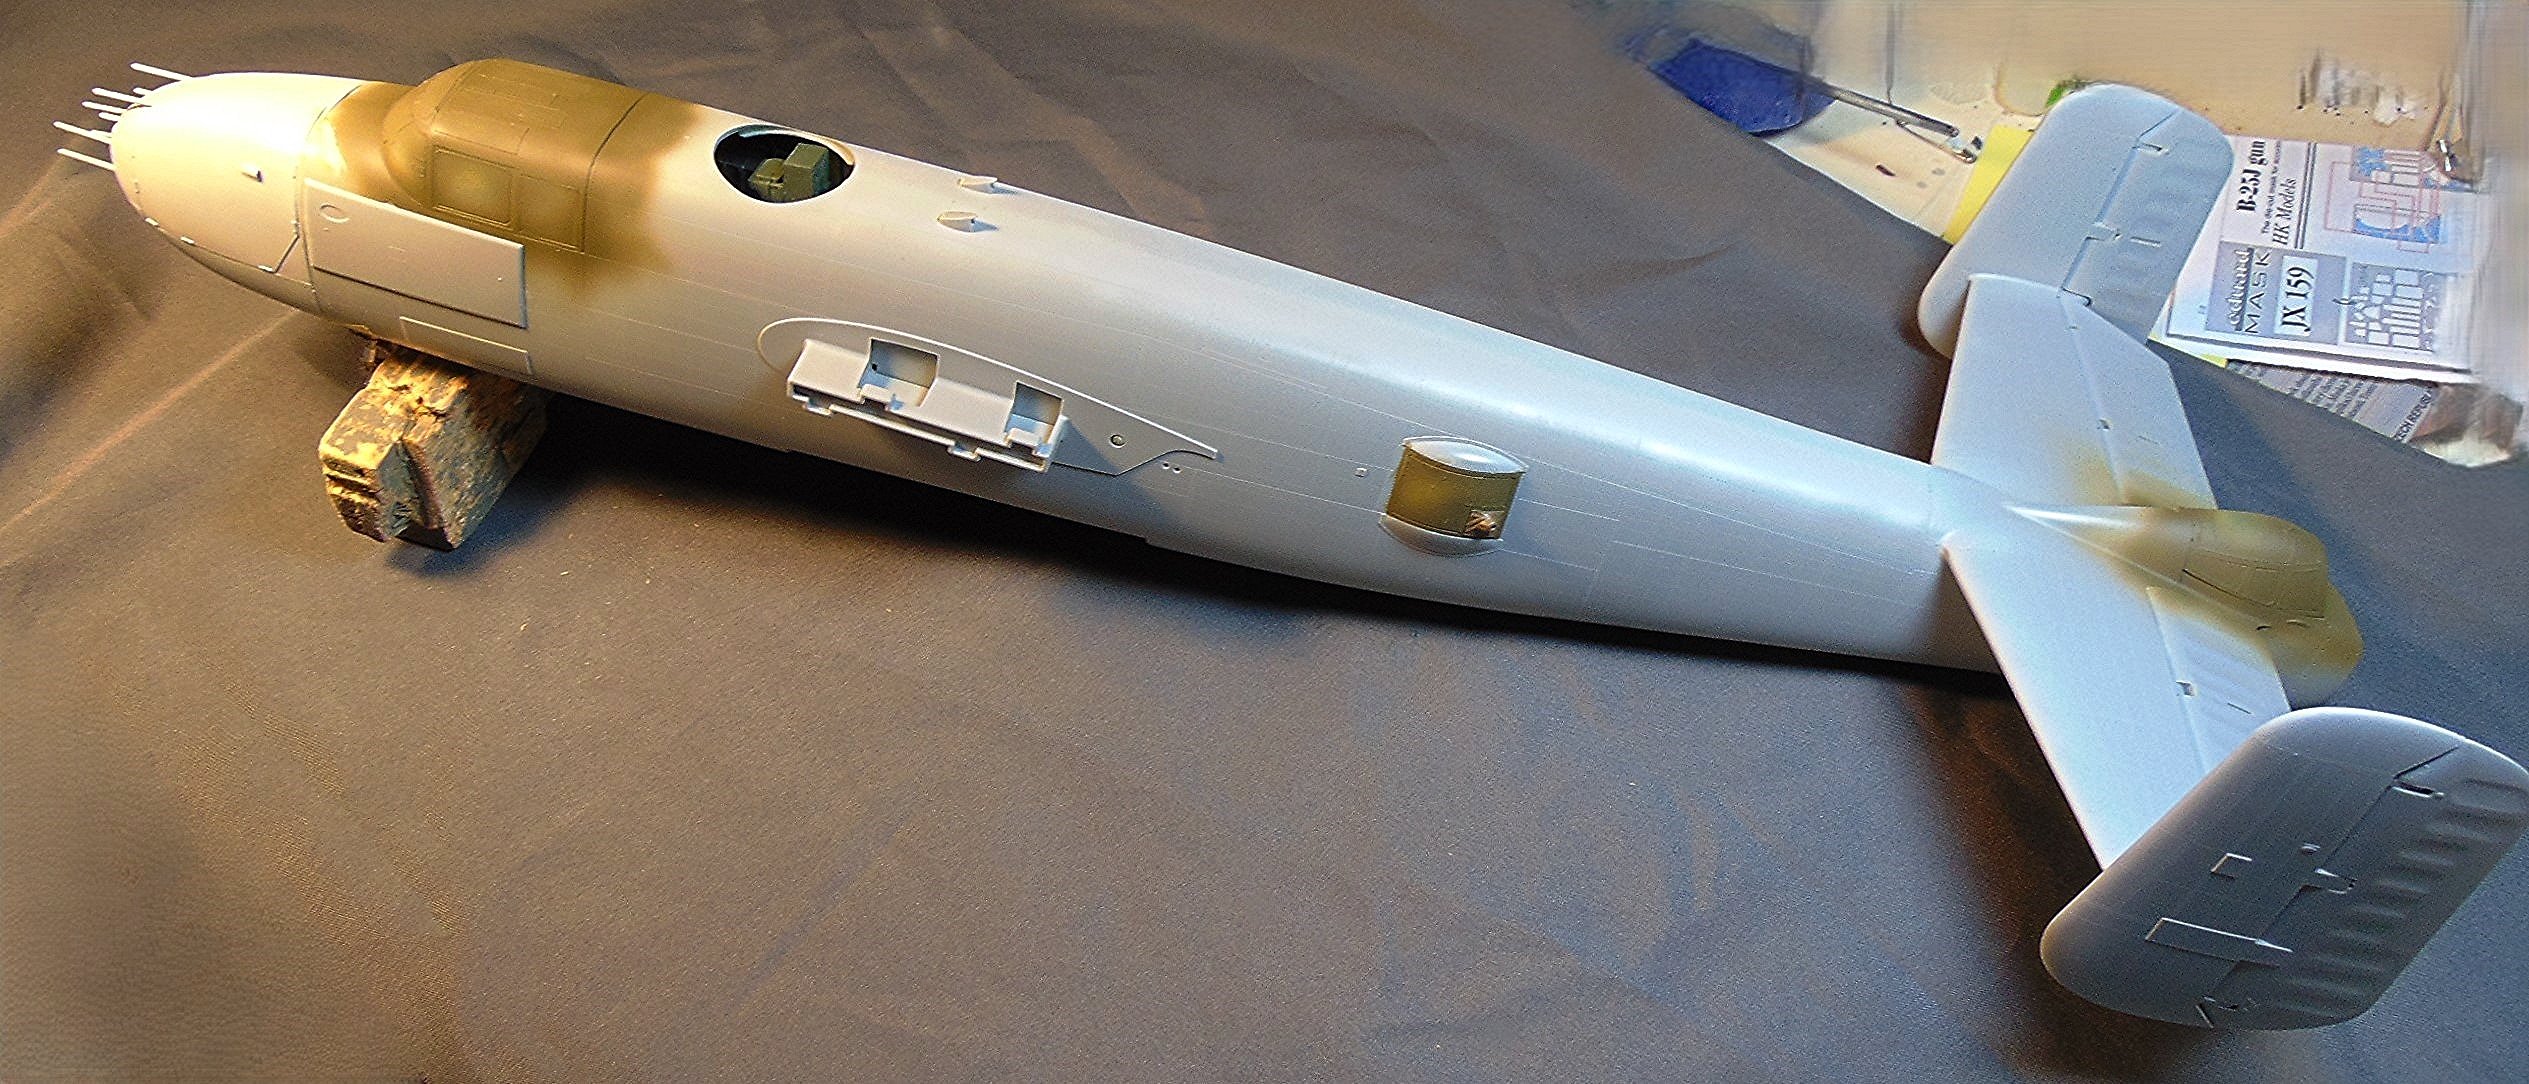
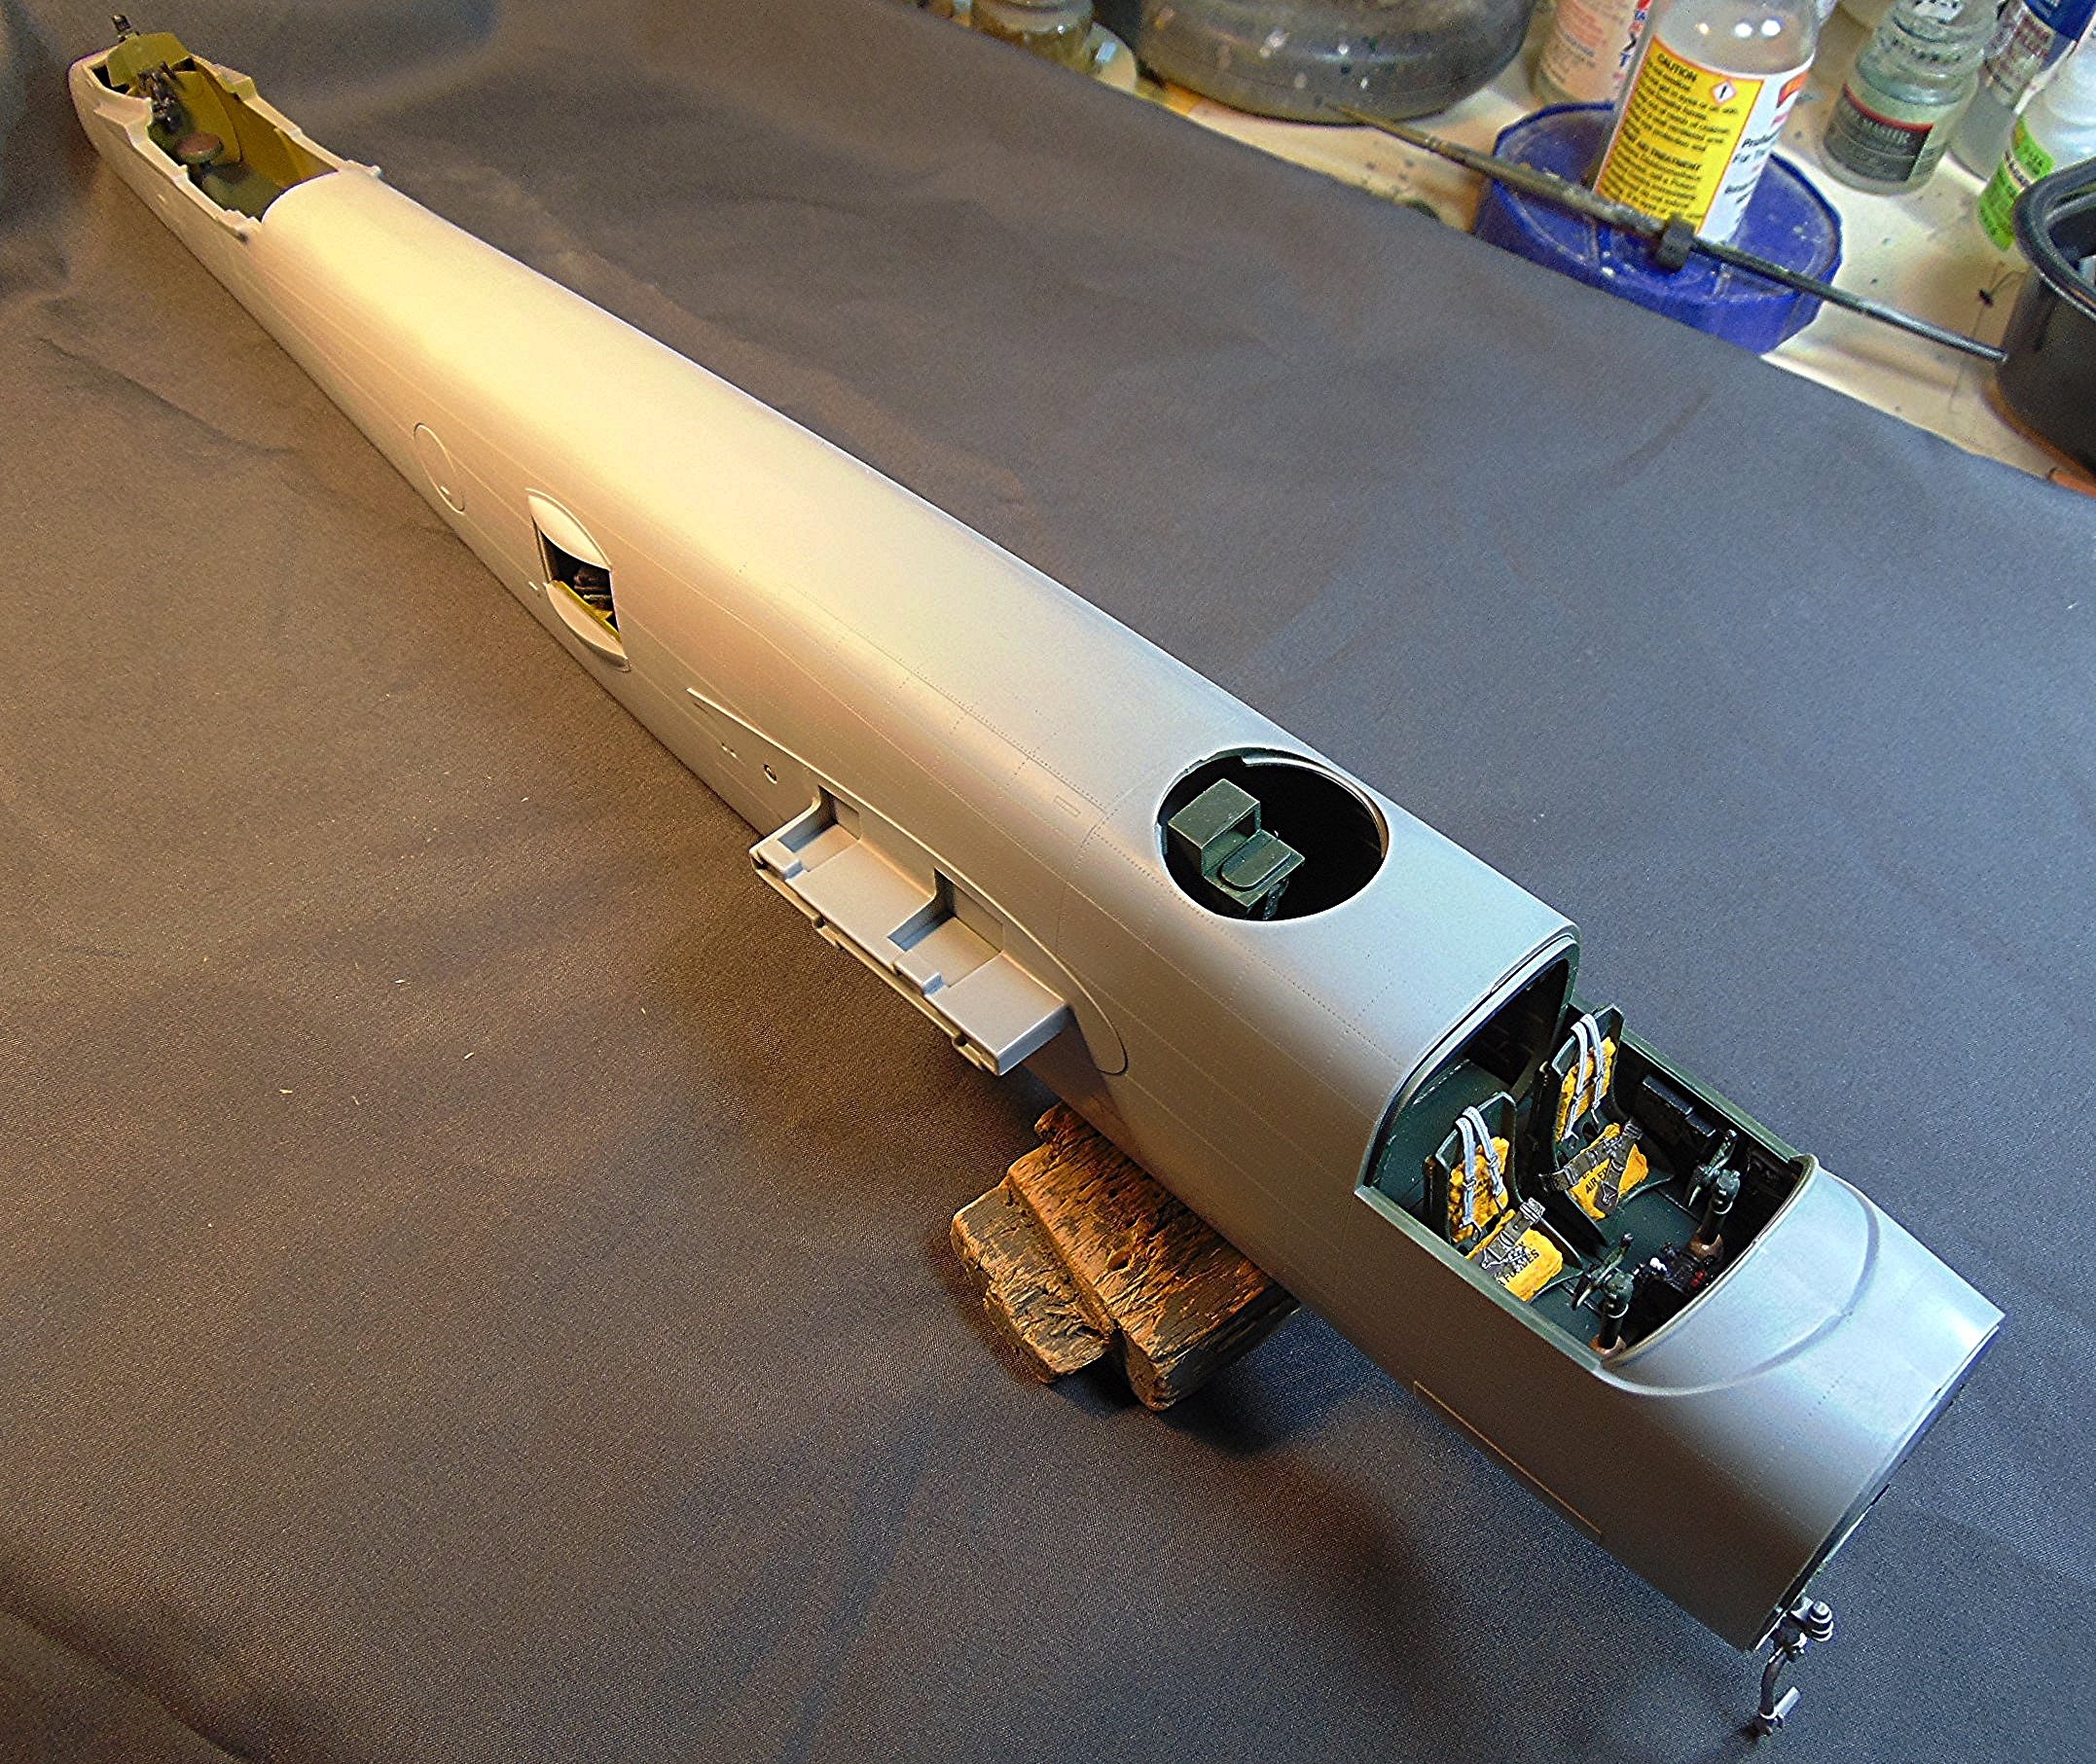
I decided to close up the nose section this time. The guns would be vulnerable to breakage so I'll rig some kind of "collar" around the nose to protect them. (I'll straighten them out later on.)

-
Hmmmm...I always apply the thinned paint with a brush. It works for me. 🙄
-
I assume you want to tint some clear pieces. My technique is to thin the tint color until it is opaque. Then, after some experimentation, apply a light coat on the inside of whatever I want to tint. 🙂I hope this helps.
-
Thanks Paul! 🙂
-
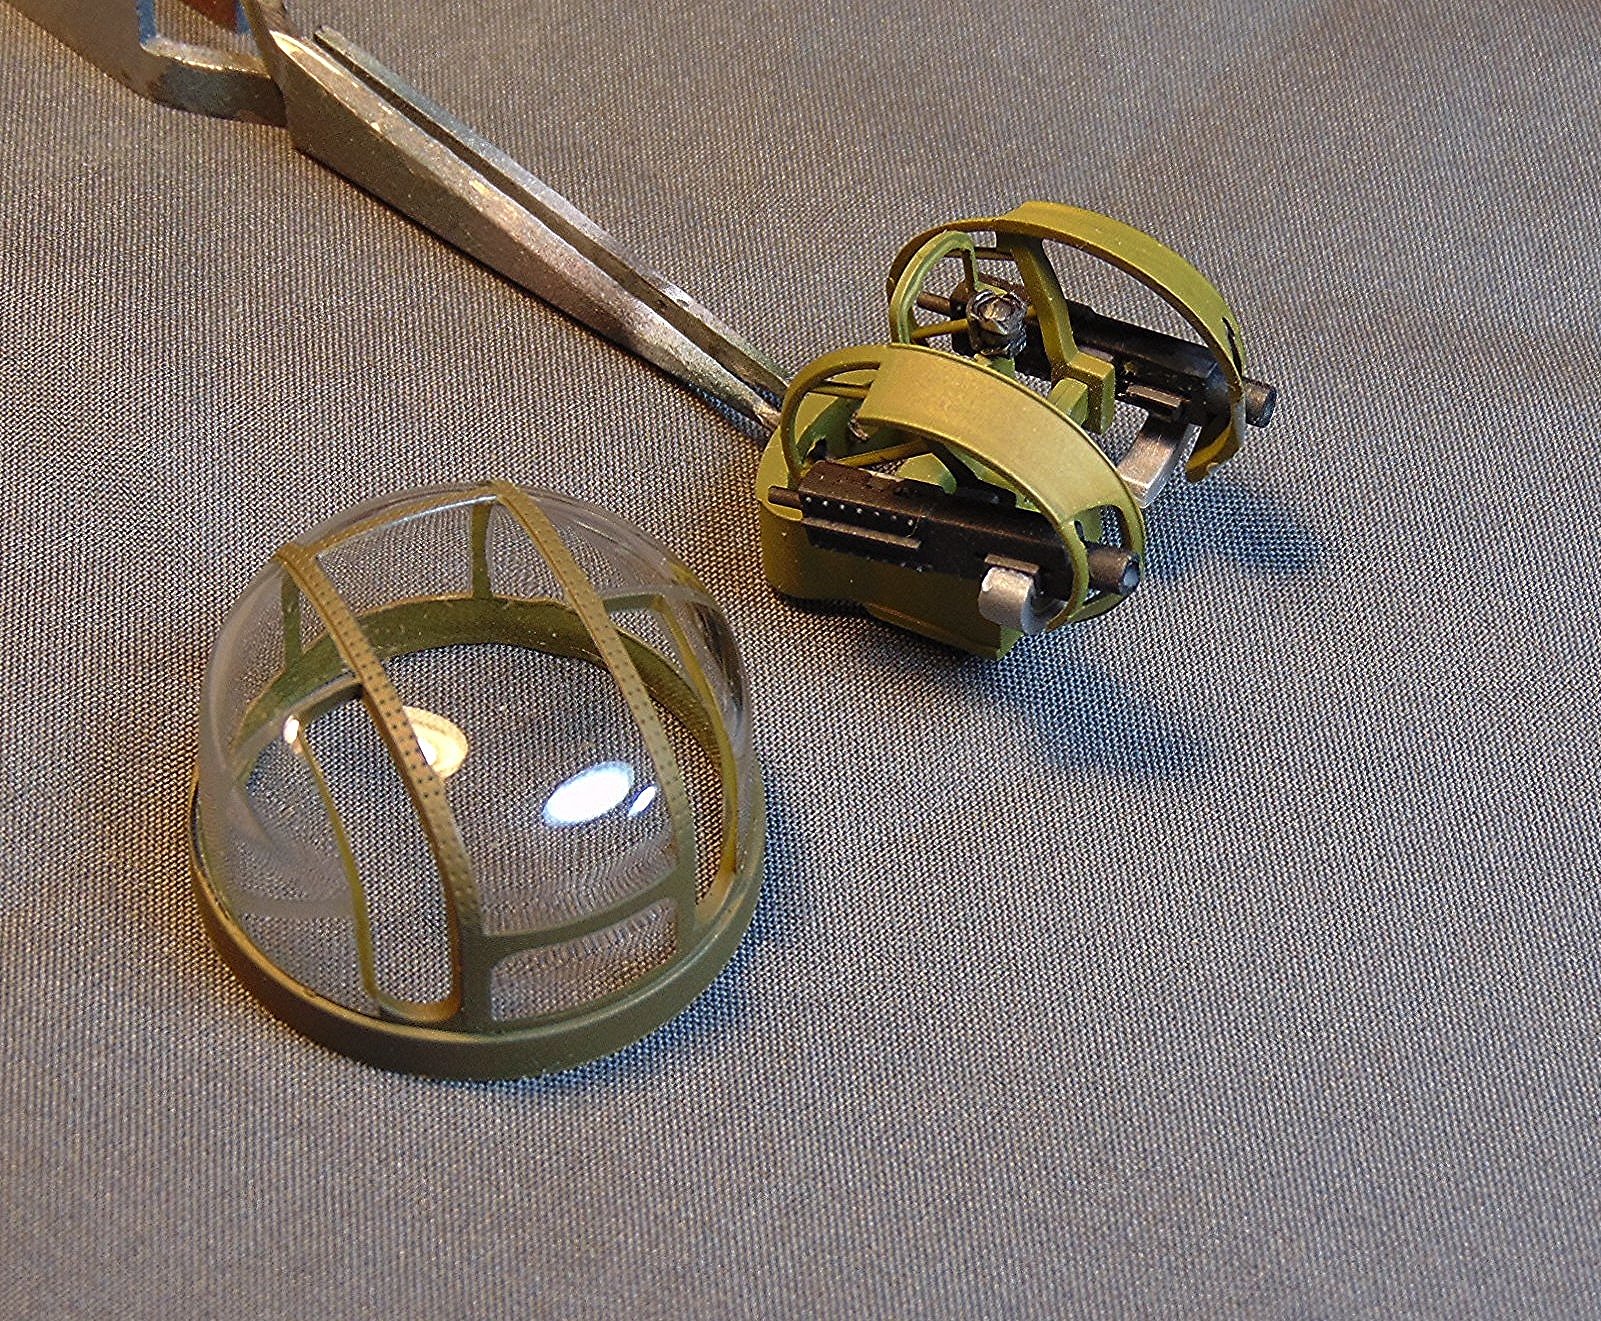
Thanks Carl. That turret was one fiddly little piece! I'm please with the way it turned out though. Thanks again. 🙂
-
Thank you!
-
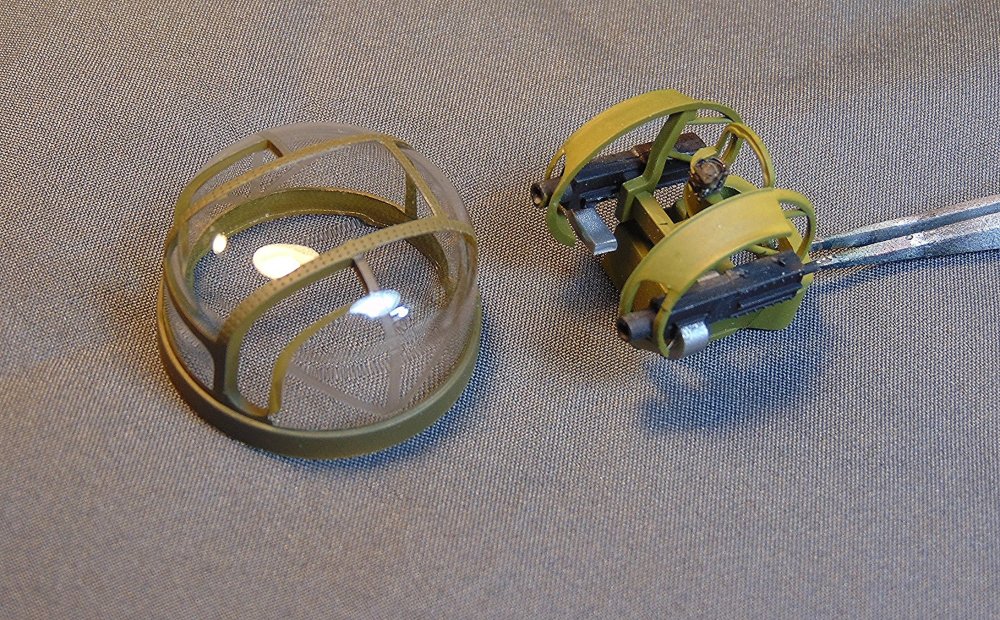
Top turret ready for install. A very delicate assembly! 🙂

-
Thanks Martin. It's coming along well! 🙂
-
Thanks Chris! I appreciate the nice comments! 🙂
-
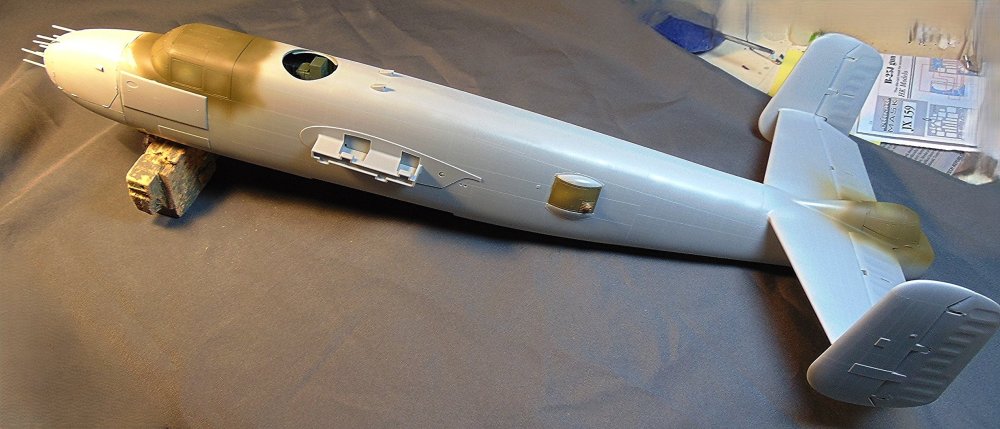
Got the fuselage halves together. The top side has been sanded, smoothed out, and primed with Alclad Grey Primer. Undersides are next.

-
Thanks Kevin. Just about ready to join the fuselage halves. 🙂
-
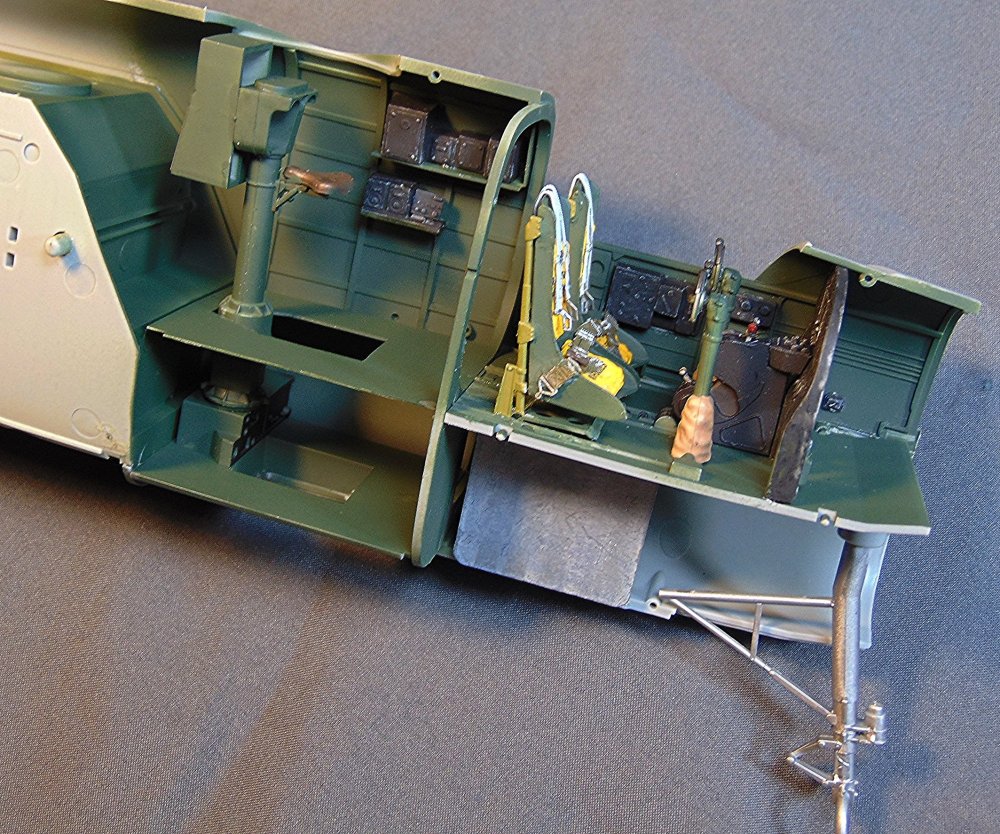
Cockpit, etc 'bout done. Seat cushions made with putty, belts are FineMolds. I added a sheet plastic "floor" behind the cockpit plus the strip plastic ribs and the "black boxes". 🙂
-
I hate to hear that Carl! I did this on my 1st build with no problems and expect this one to go okay also. Fingers crossed.
-
I decided to add some strip plastic and some "black boxes" since none of these details are included in the kit.